
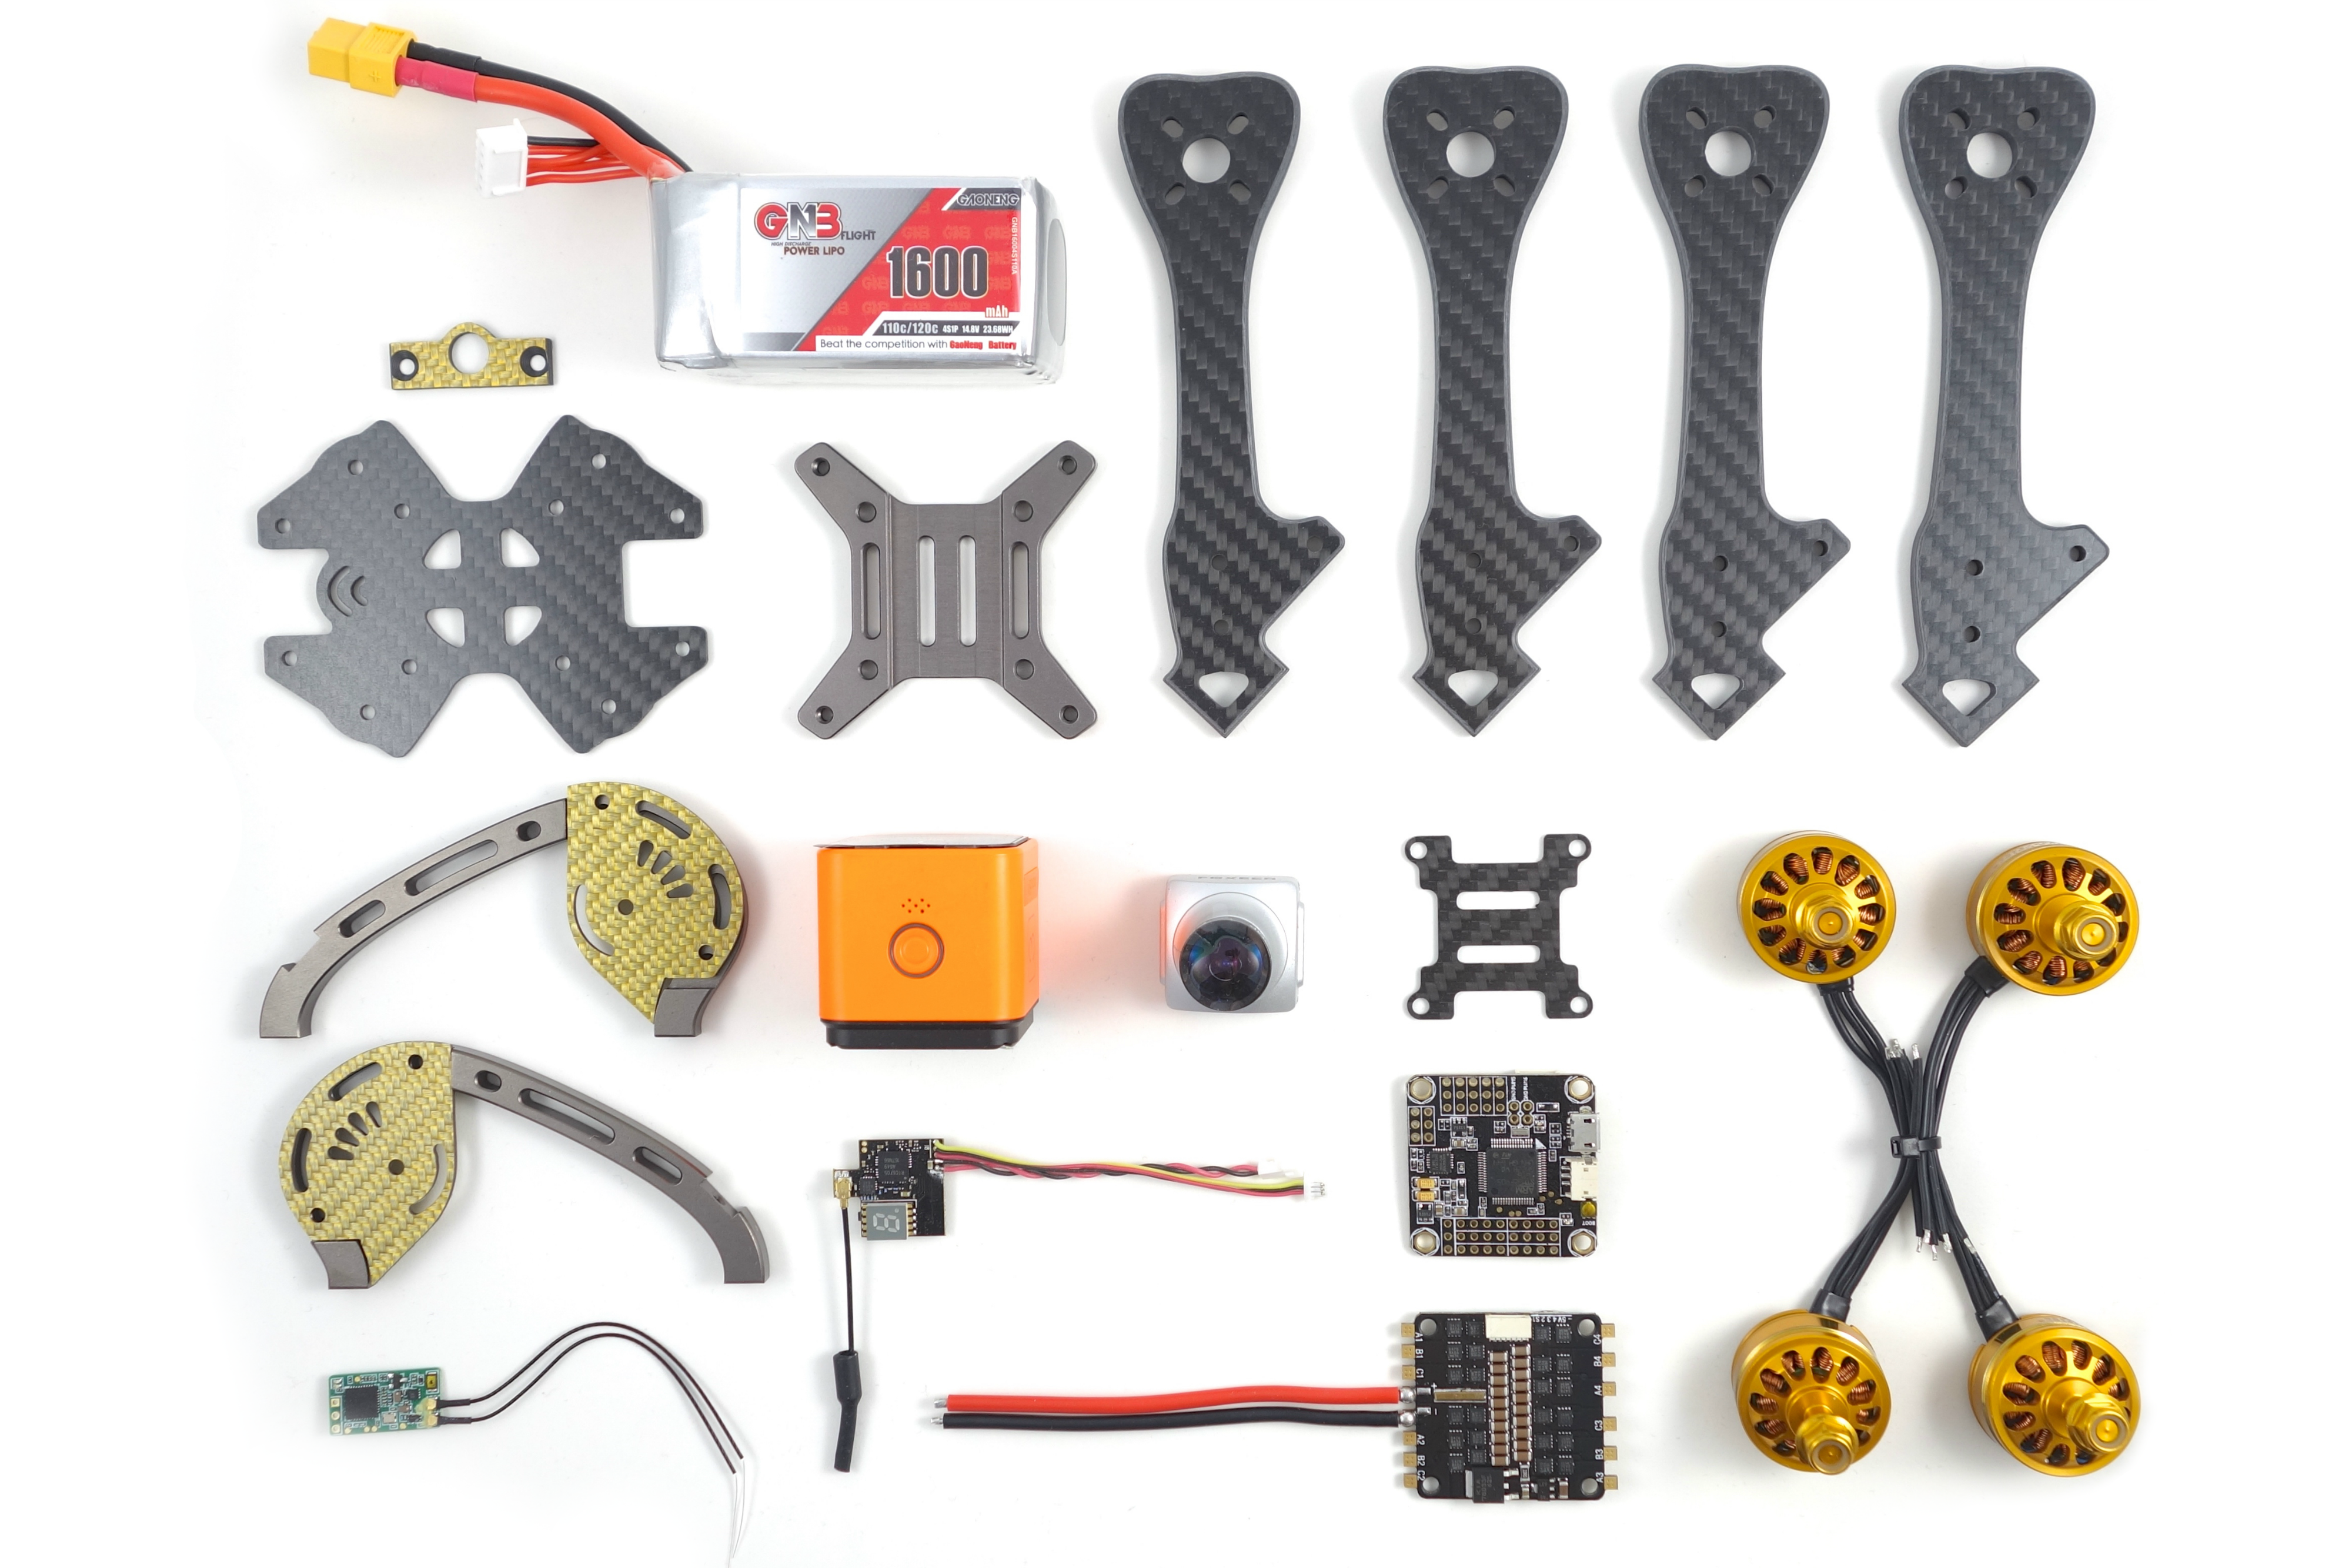
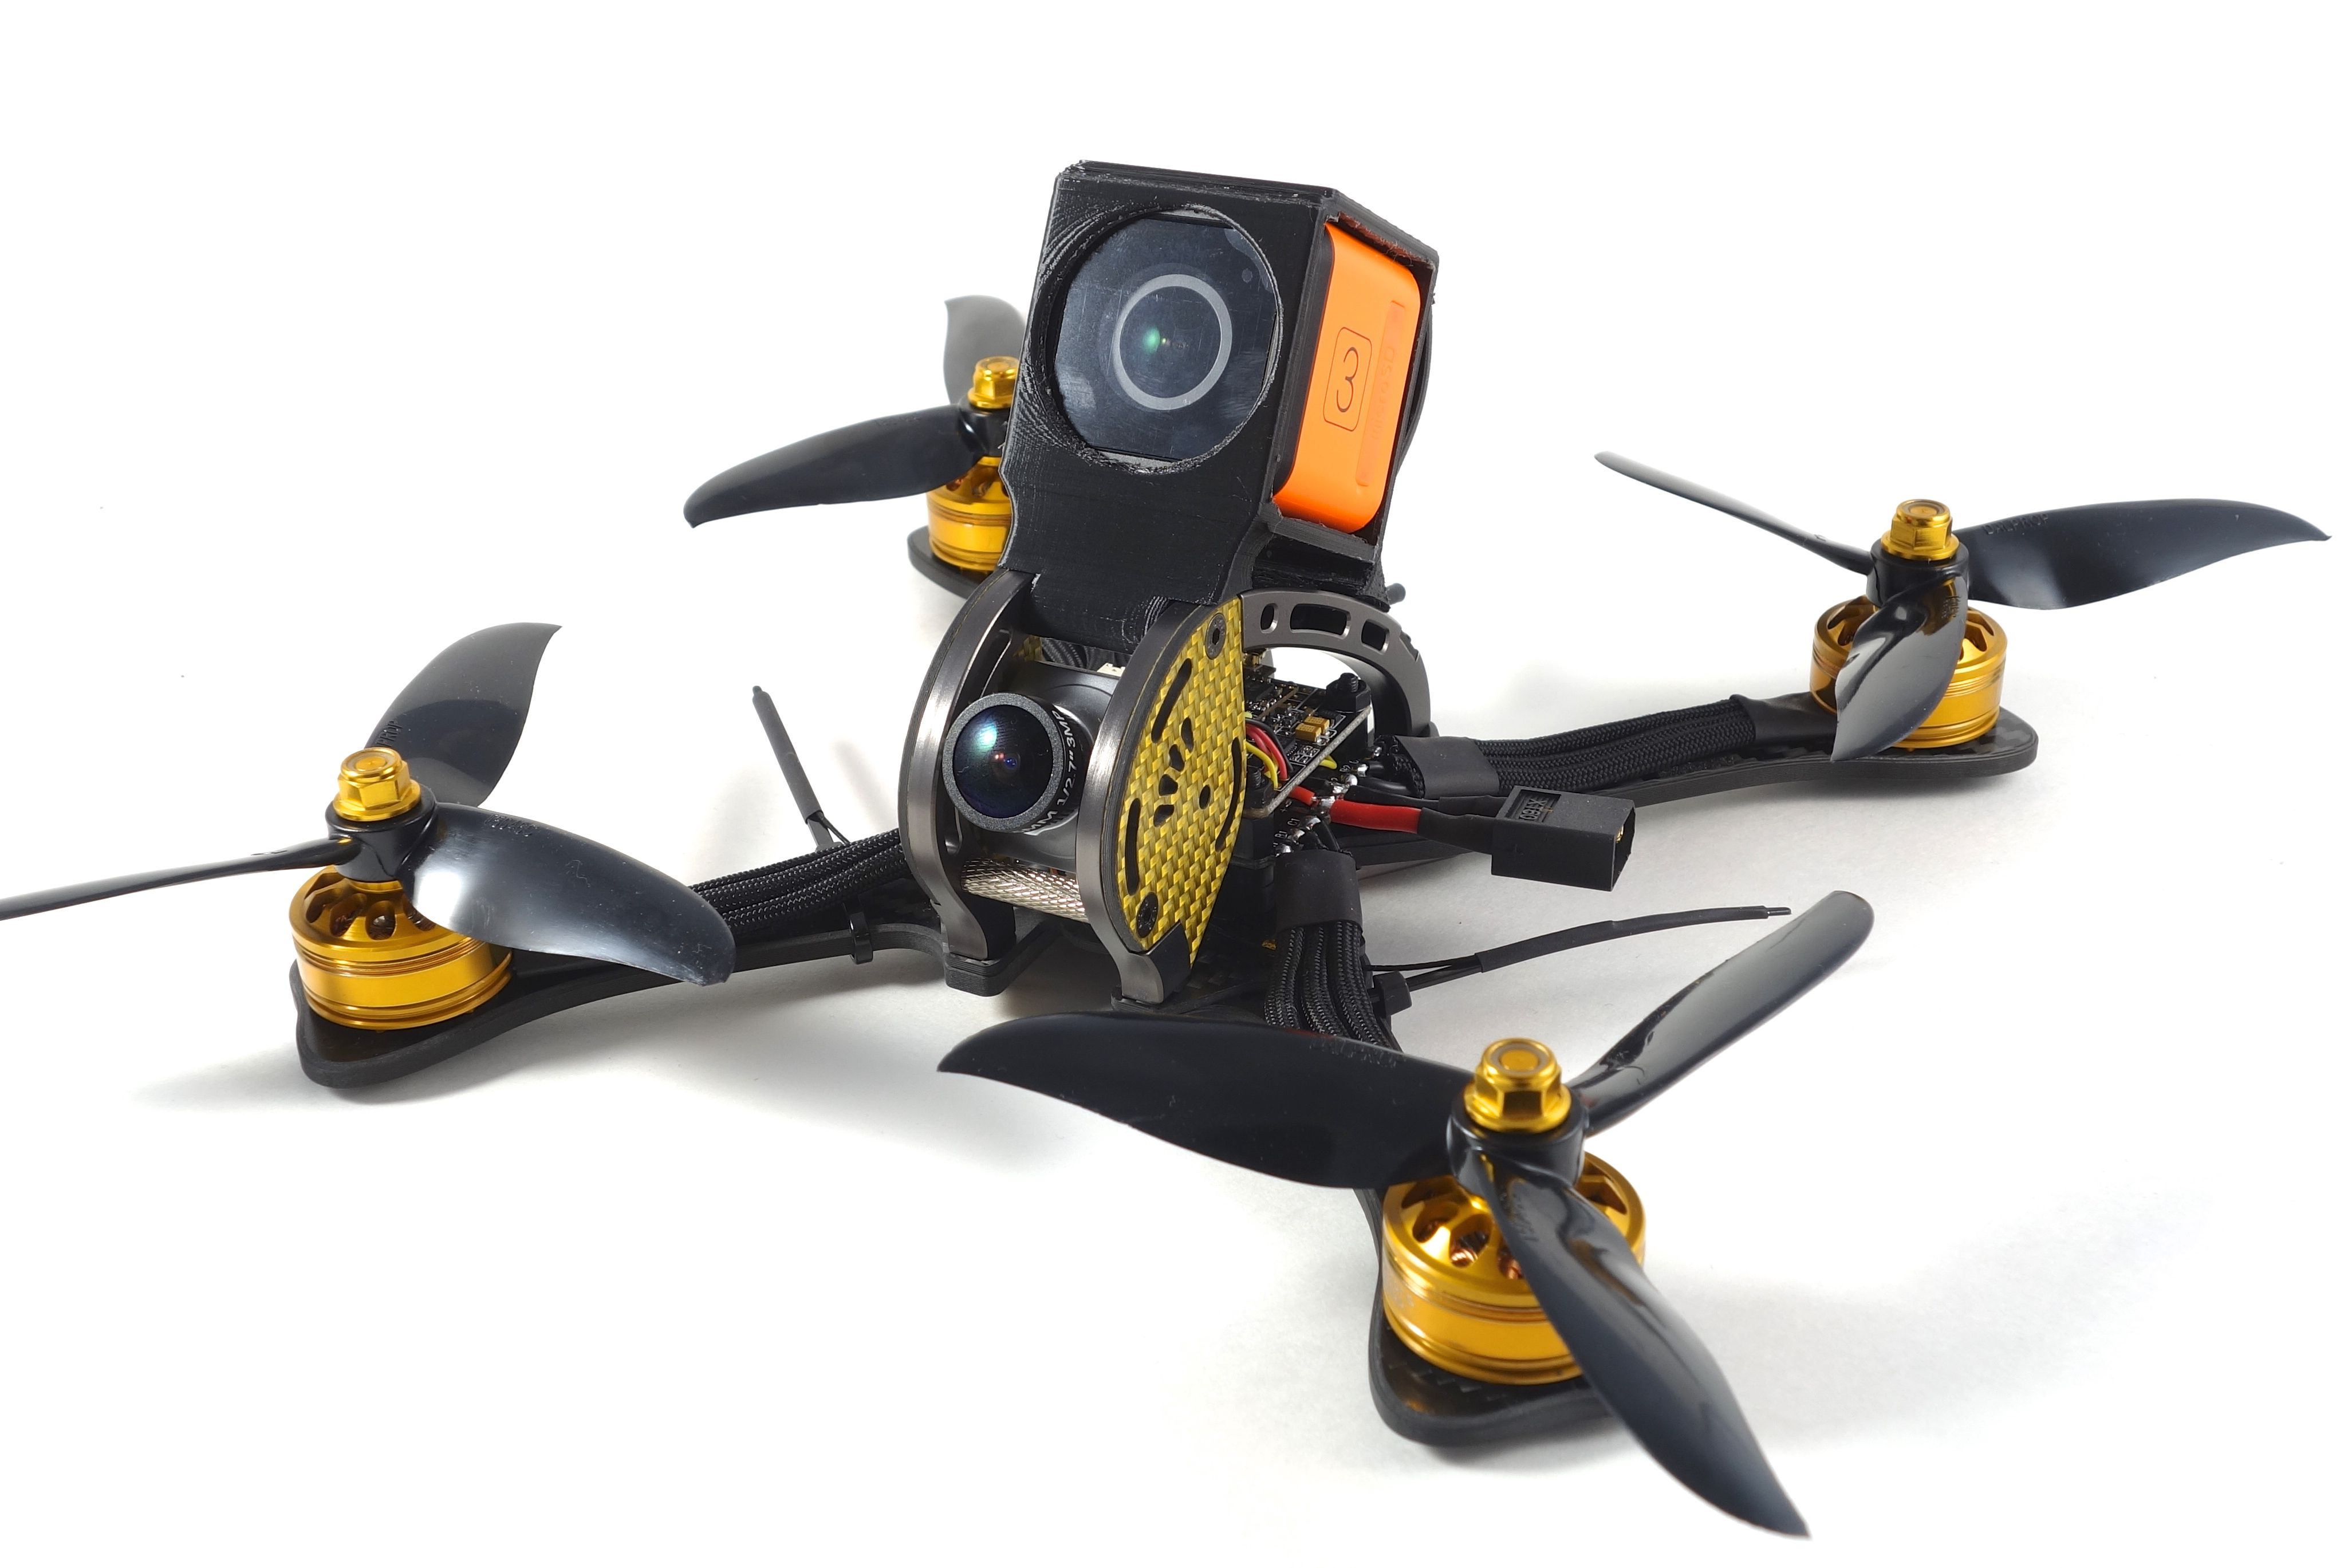
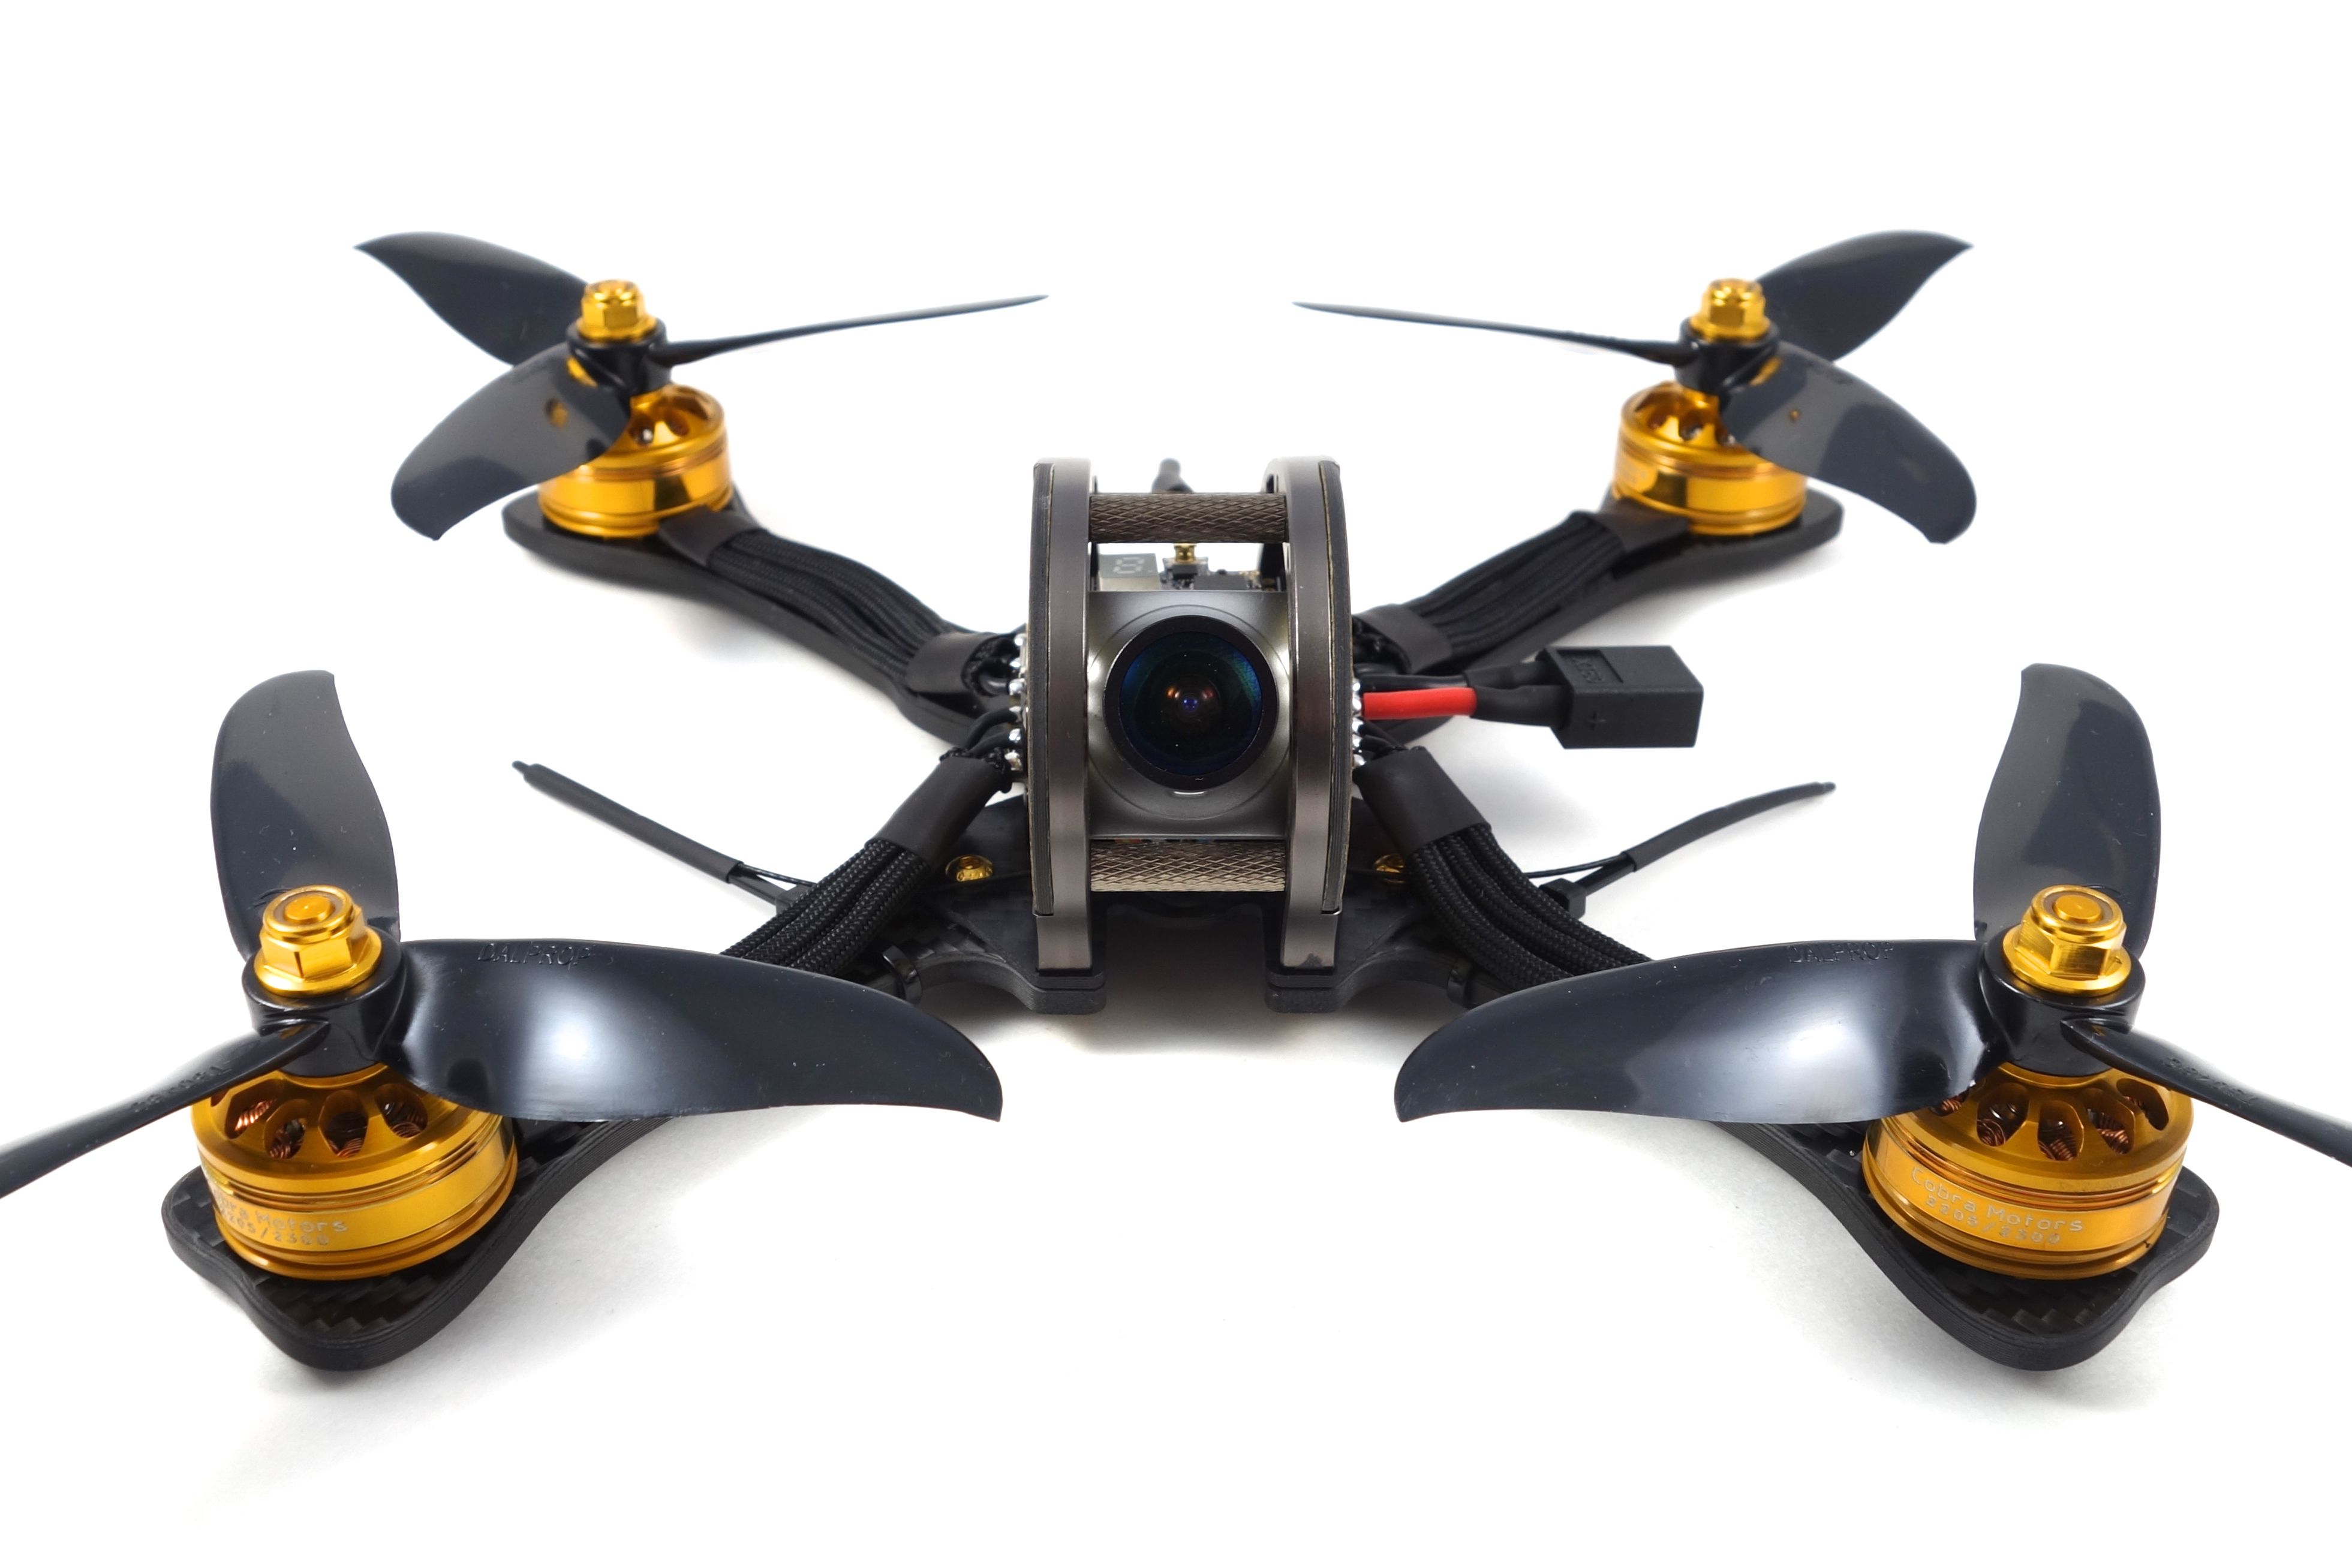
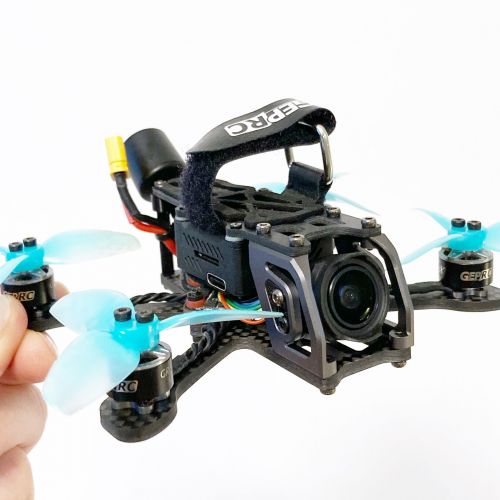
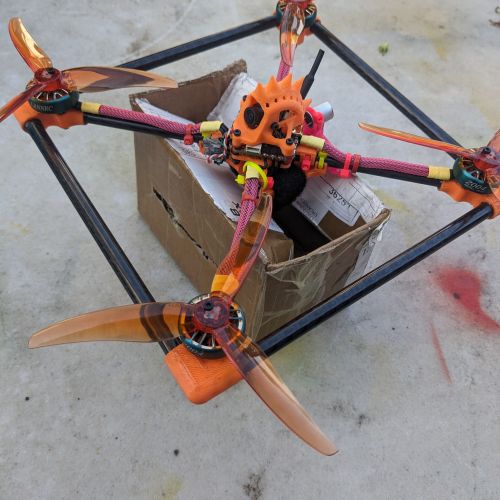
I've been very impressed with the quality of the GEPRC frames, so despite the fact that it's a clone I just had to give this one a try. This isn't a lightweight frame, but it's not a brick either. It should hold up to a fair bit of abuse. Both the flight controller and 4-in-1 ESC are the same ones I used on my Race Frog build. They work well together and are a proven combination.
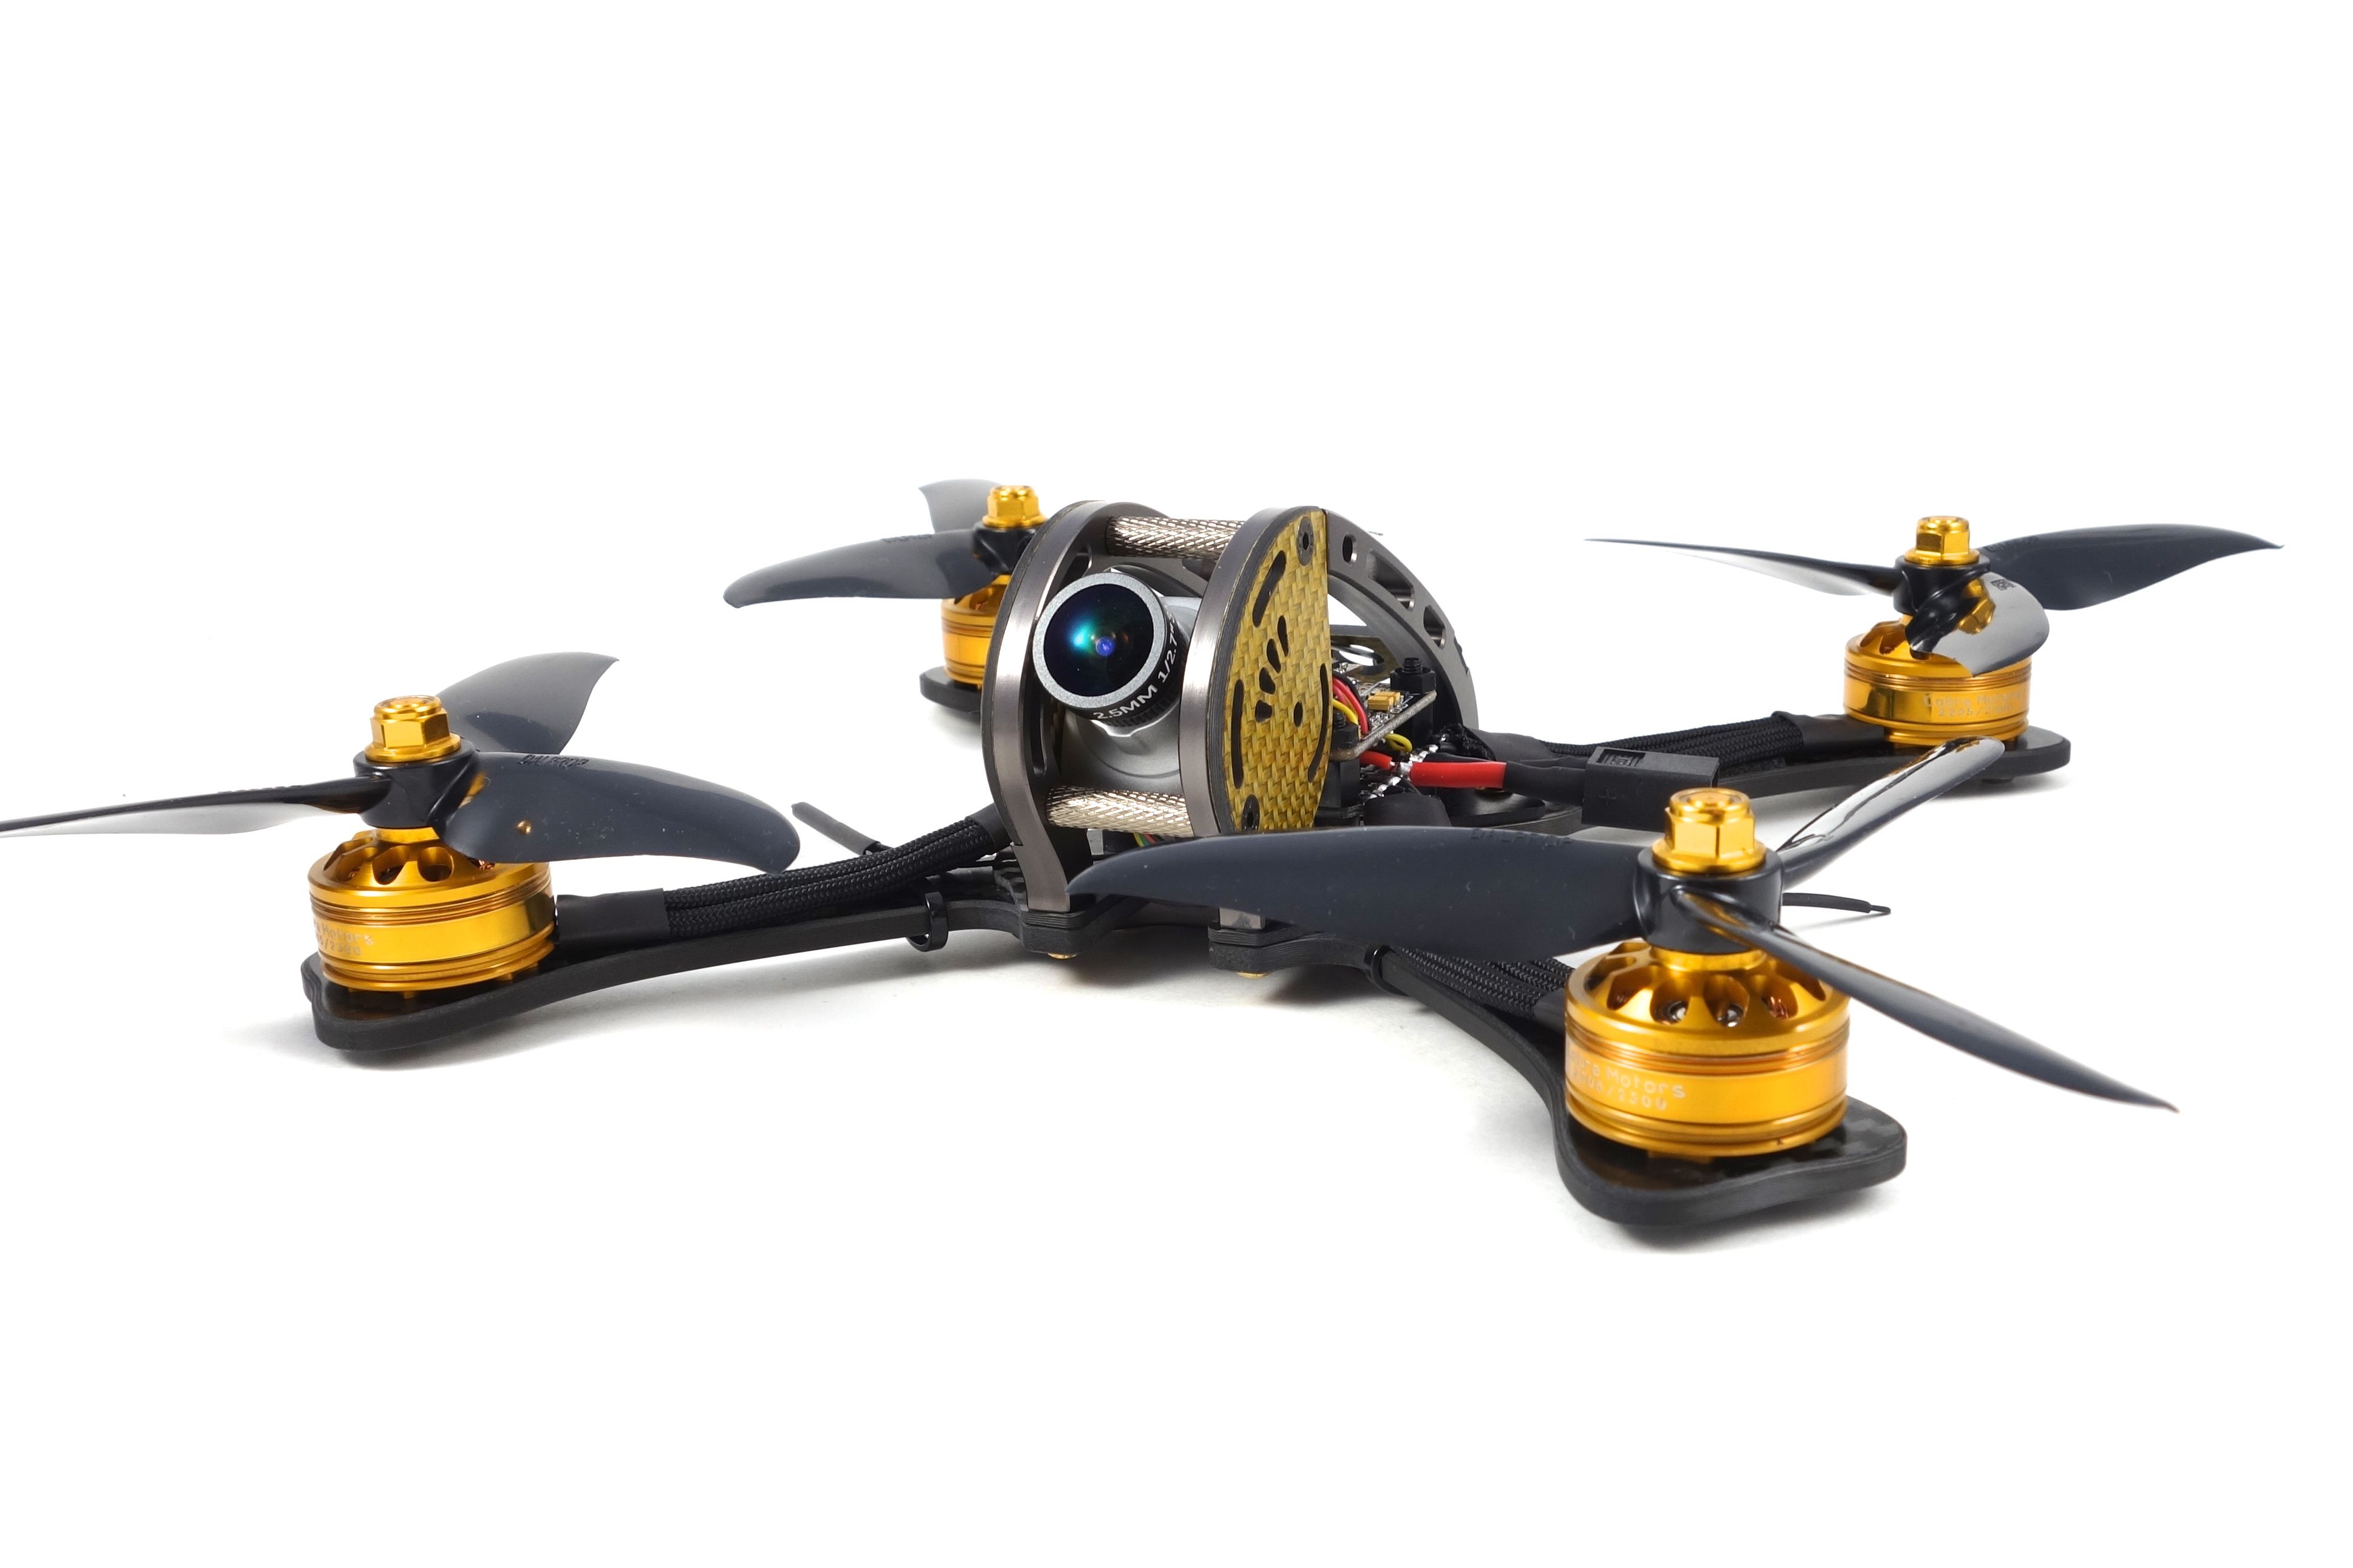
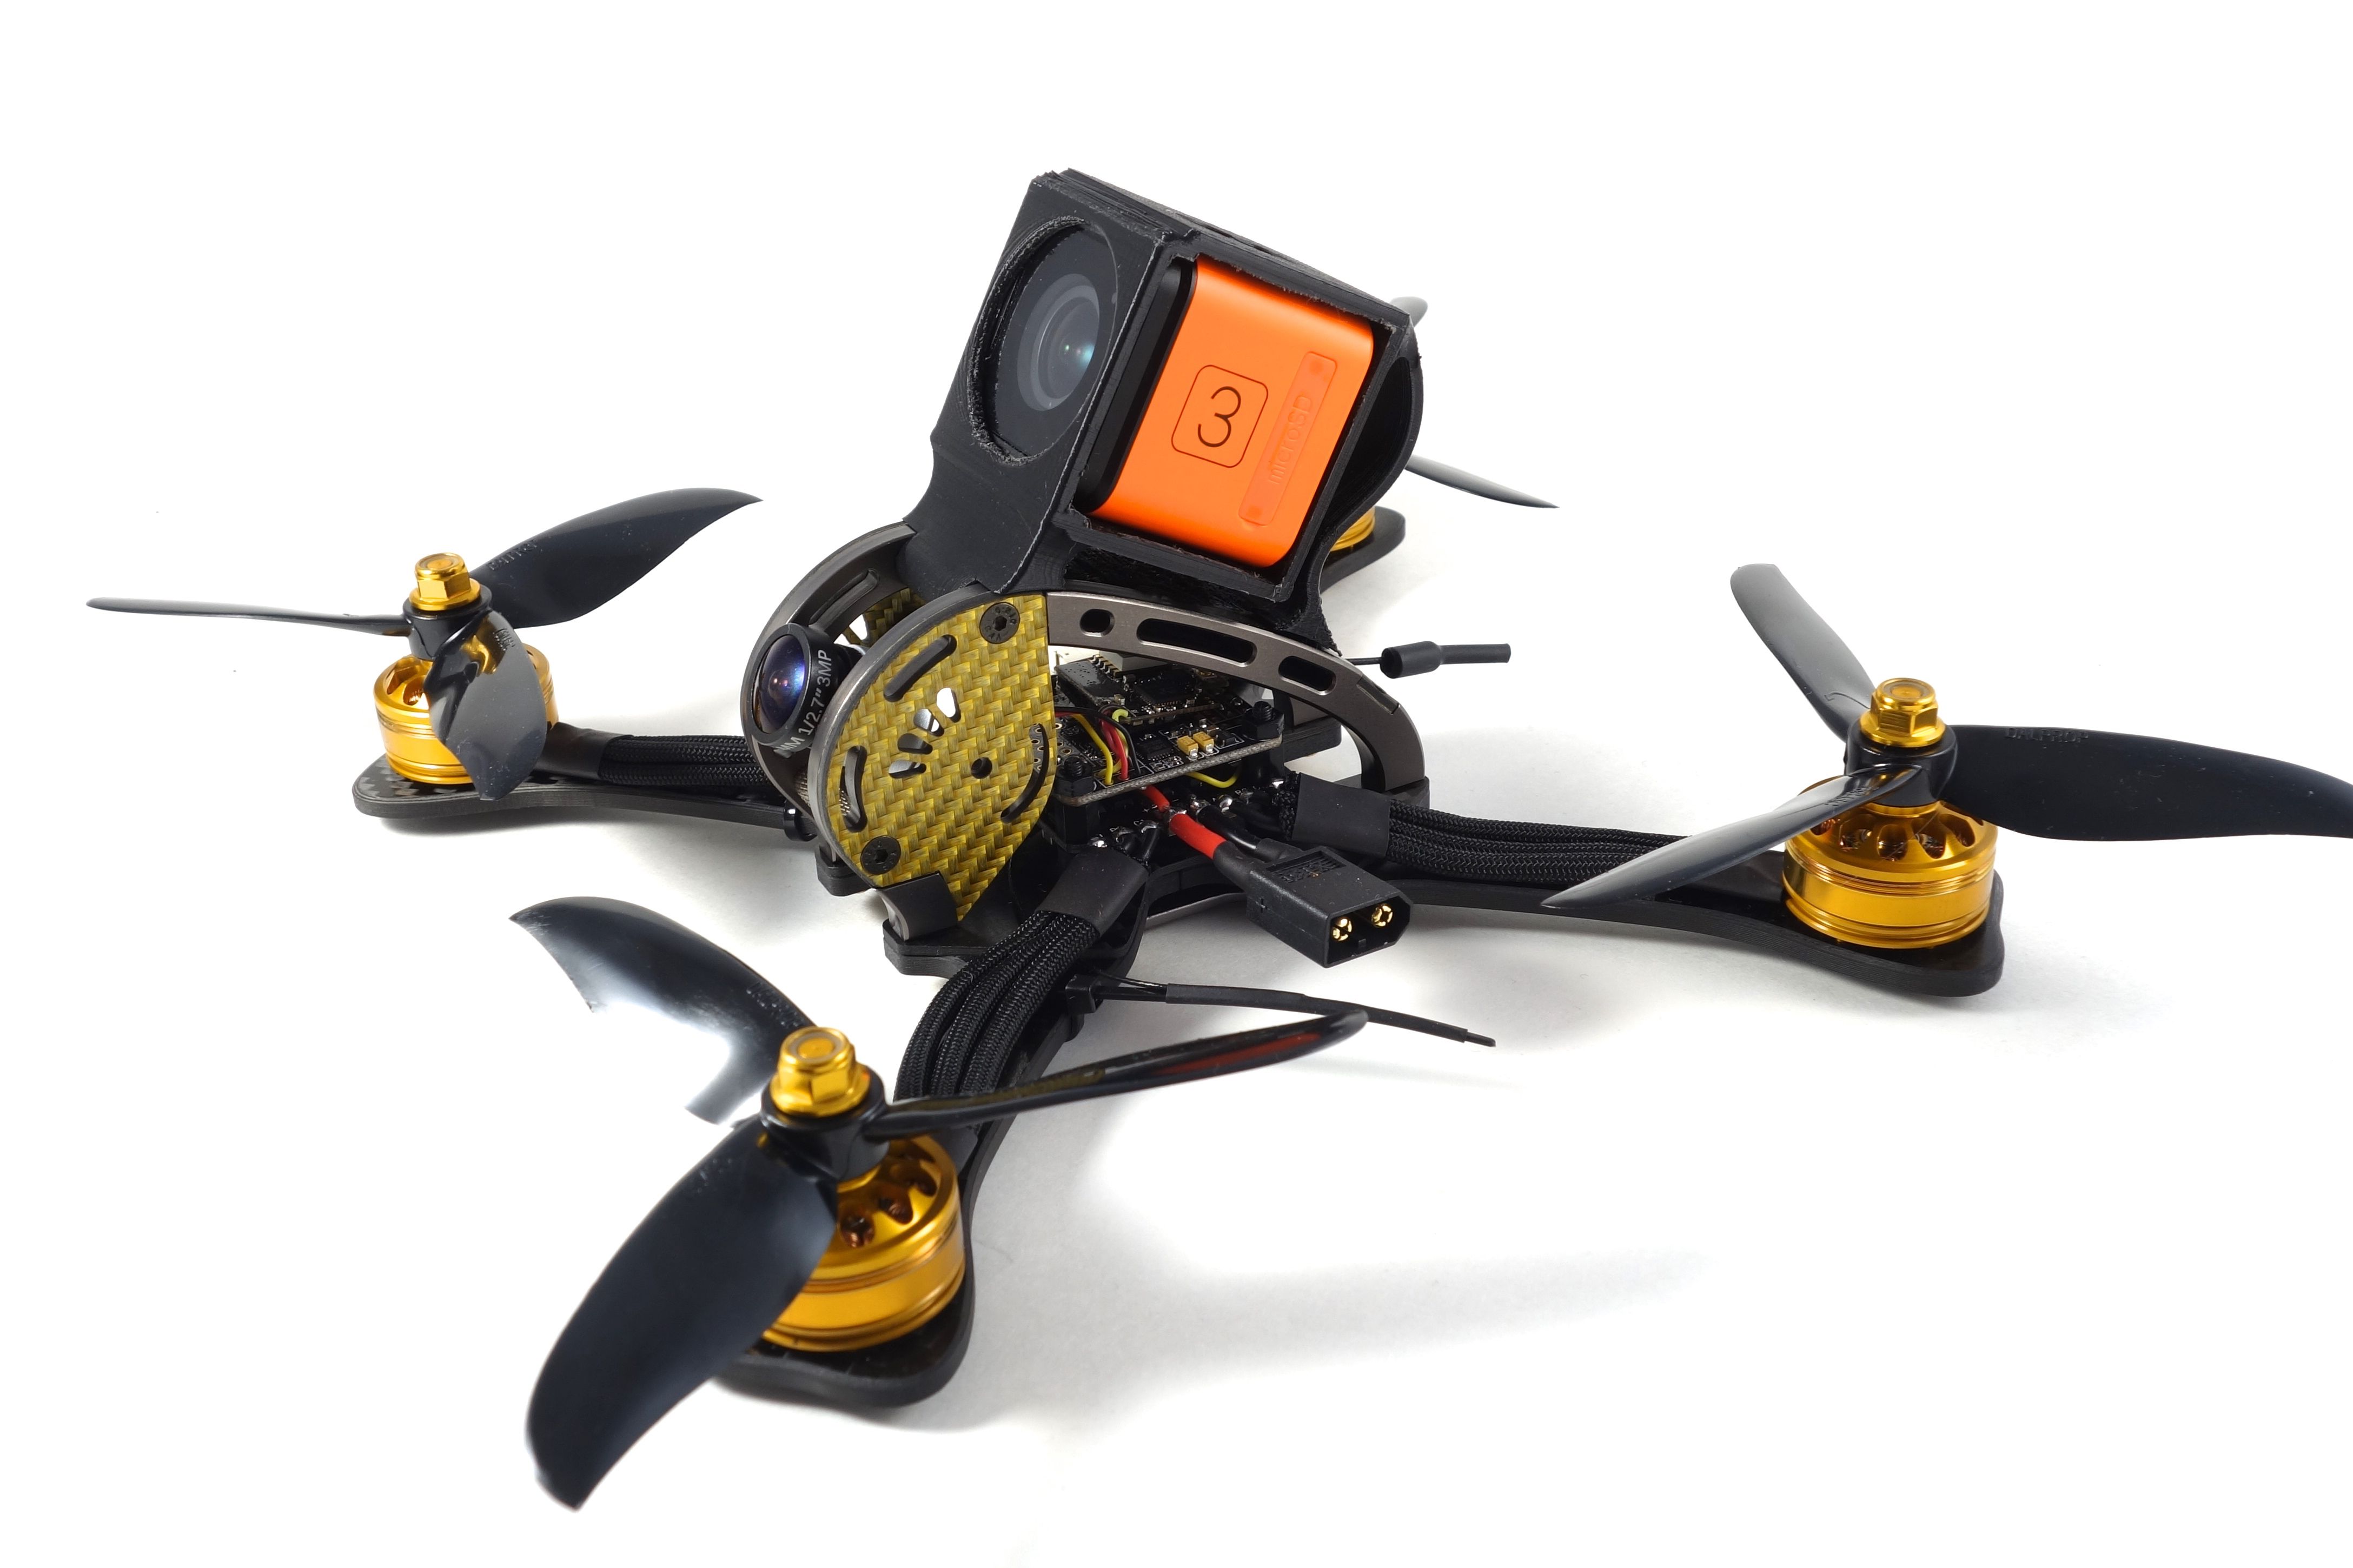
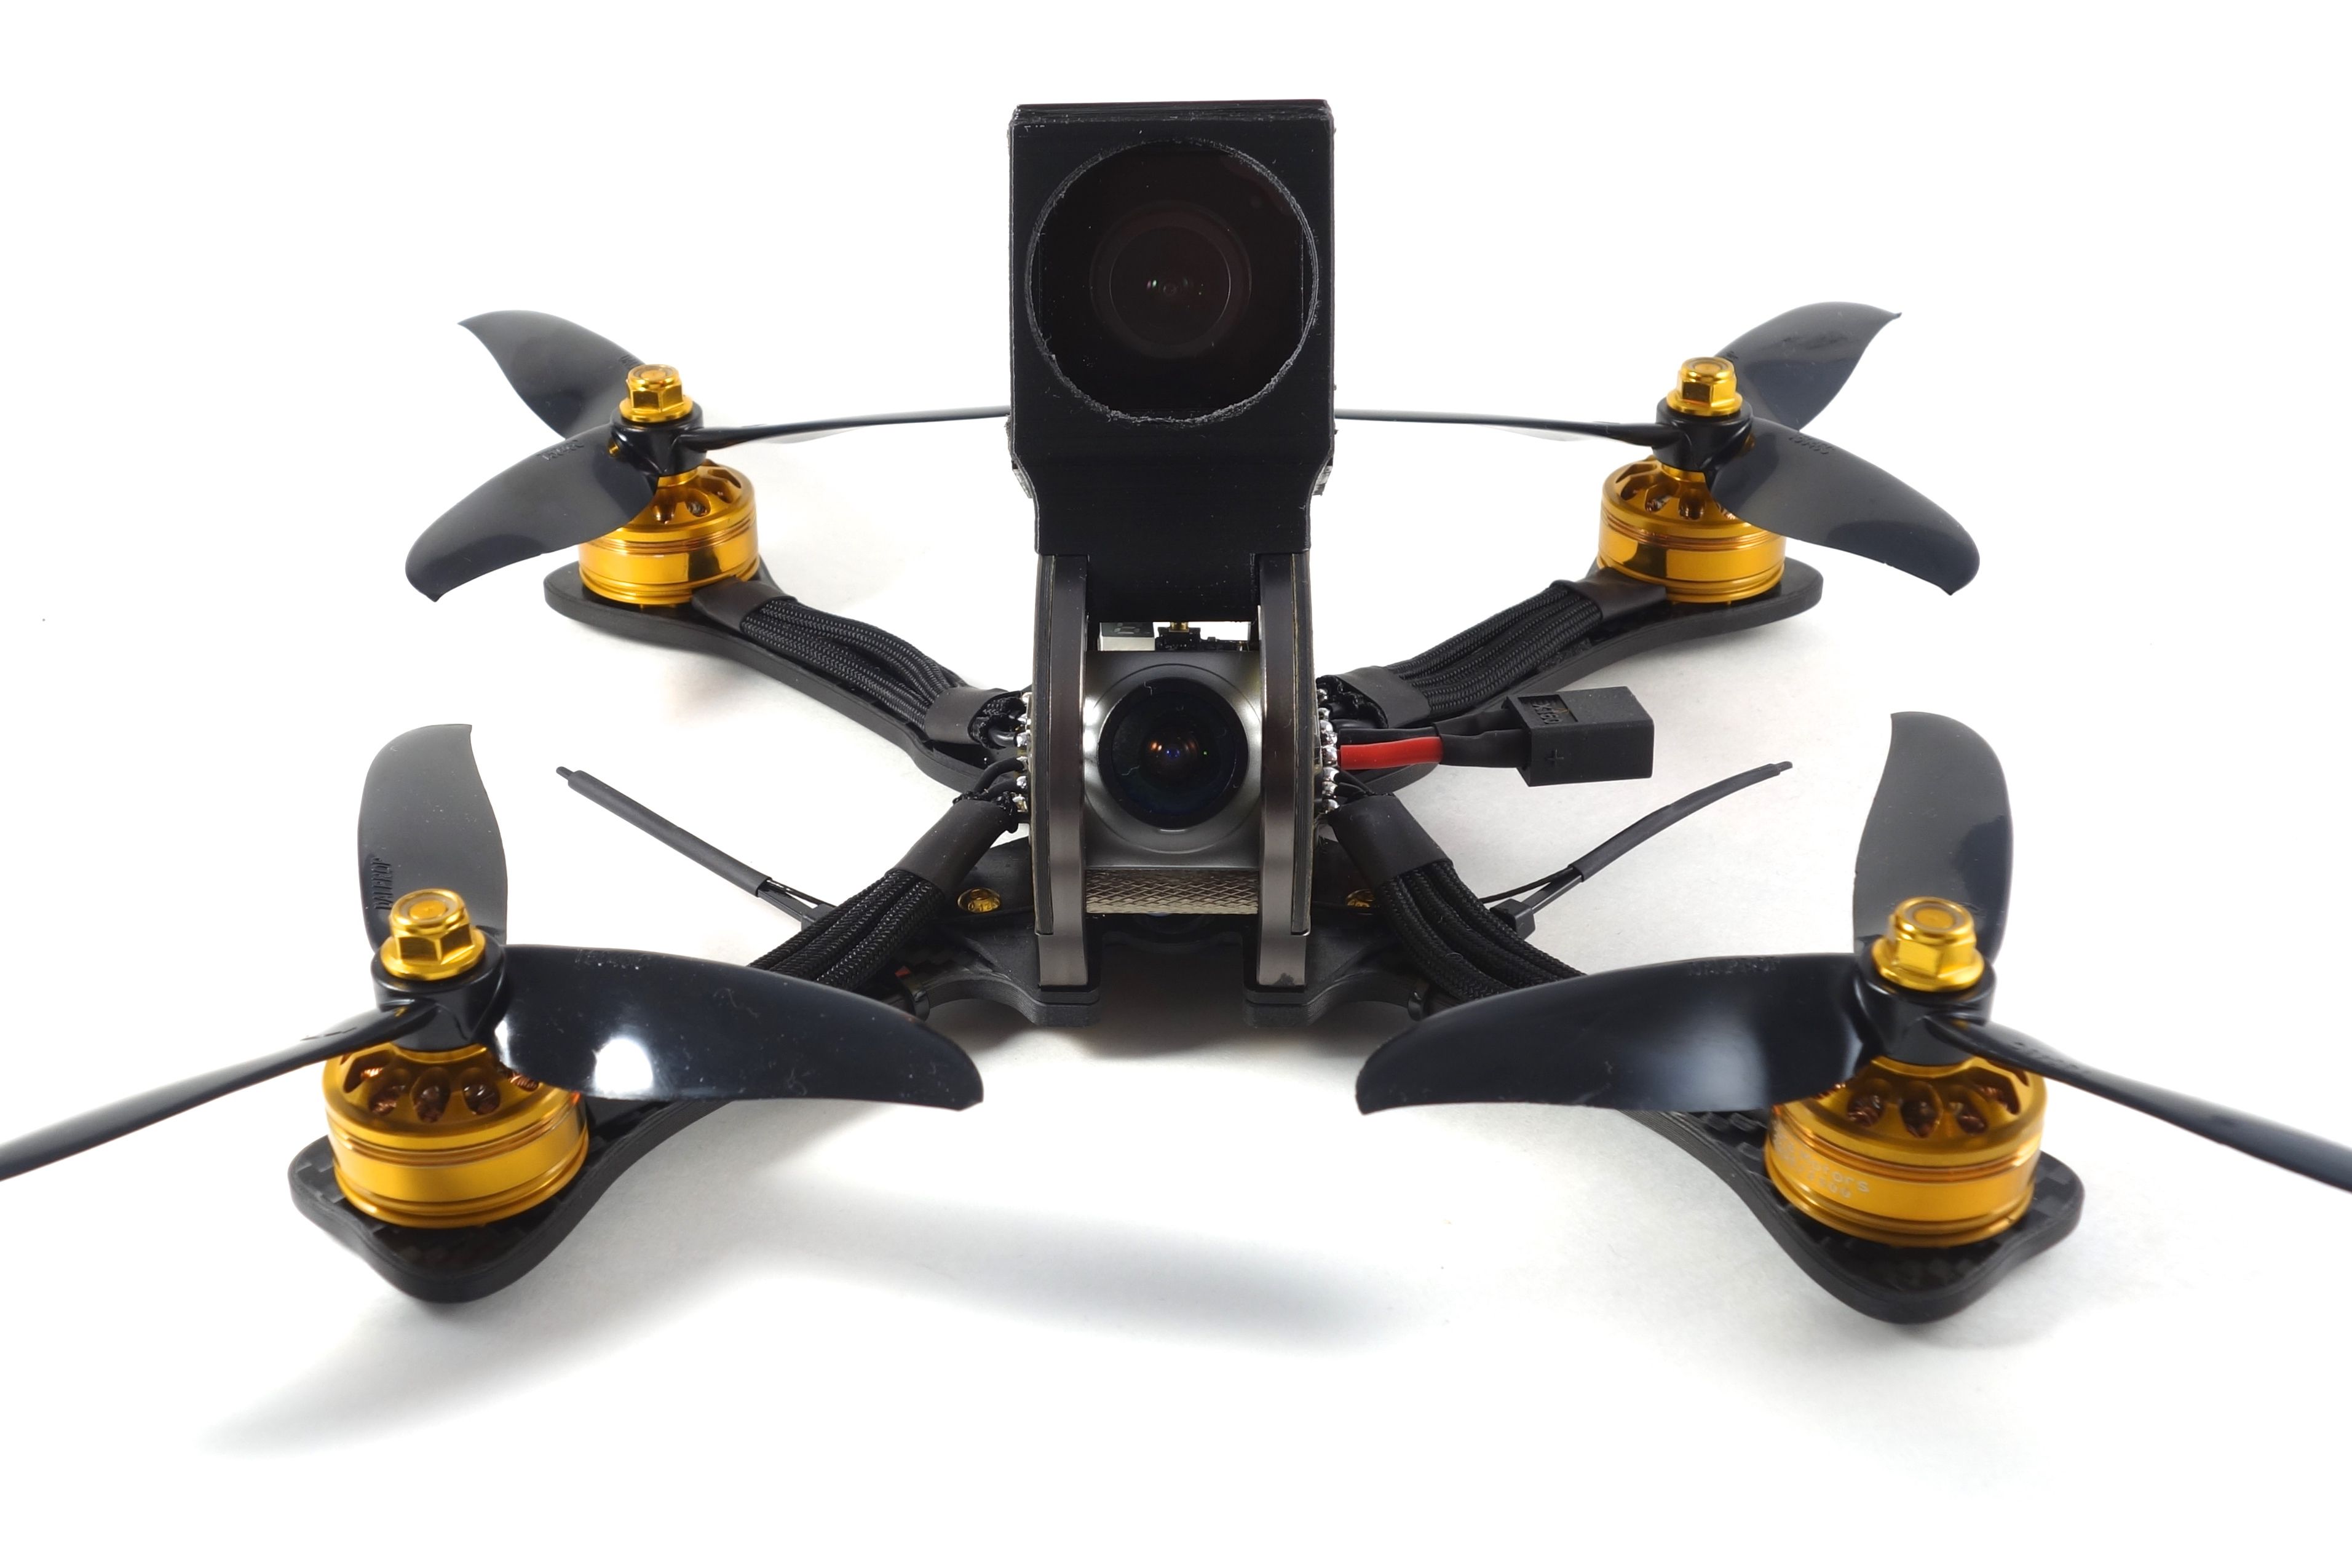
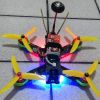
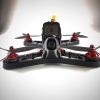
The quad weighs 329g bare and nearly 400g with the Runcam 3.
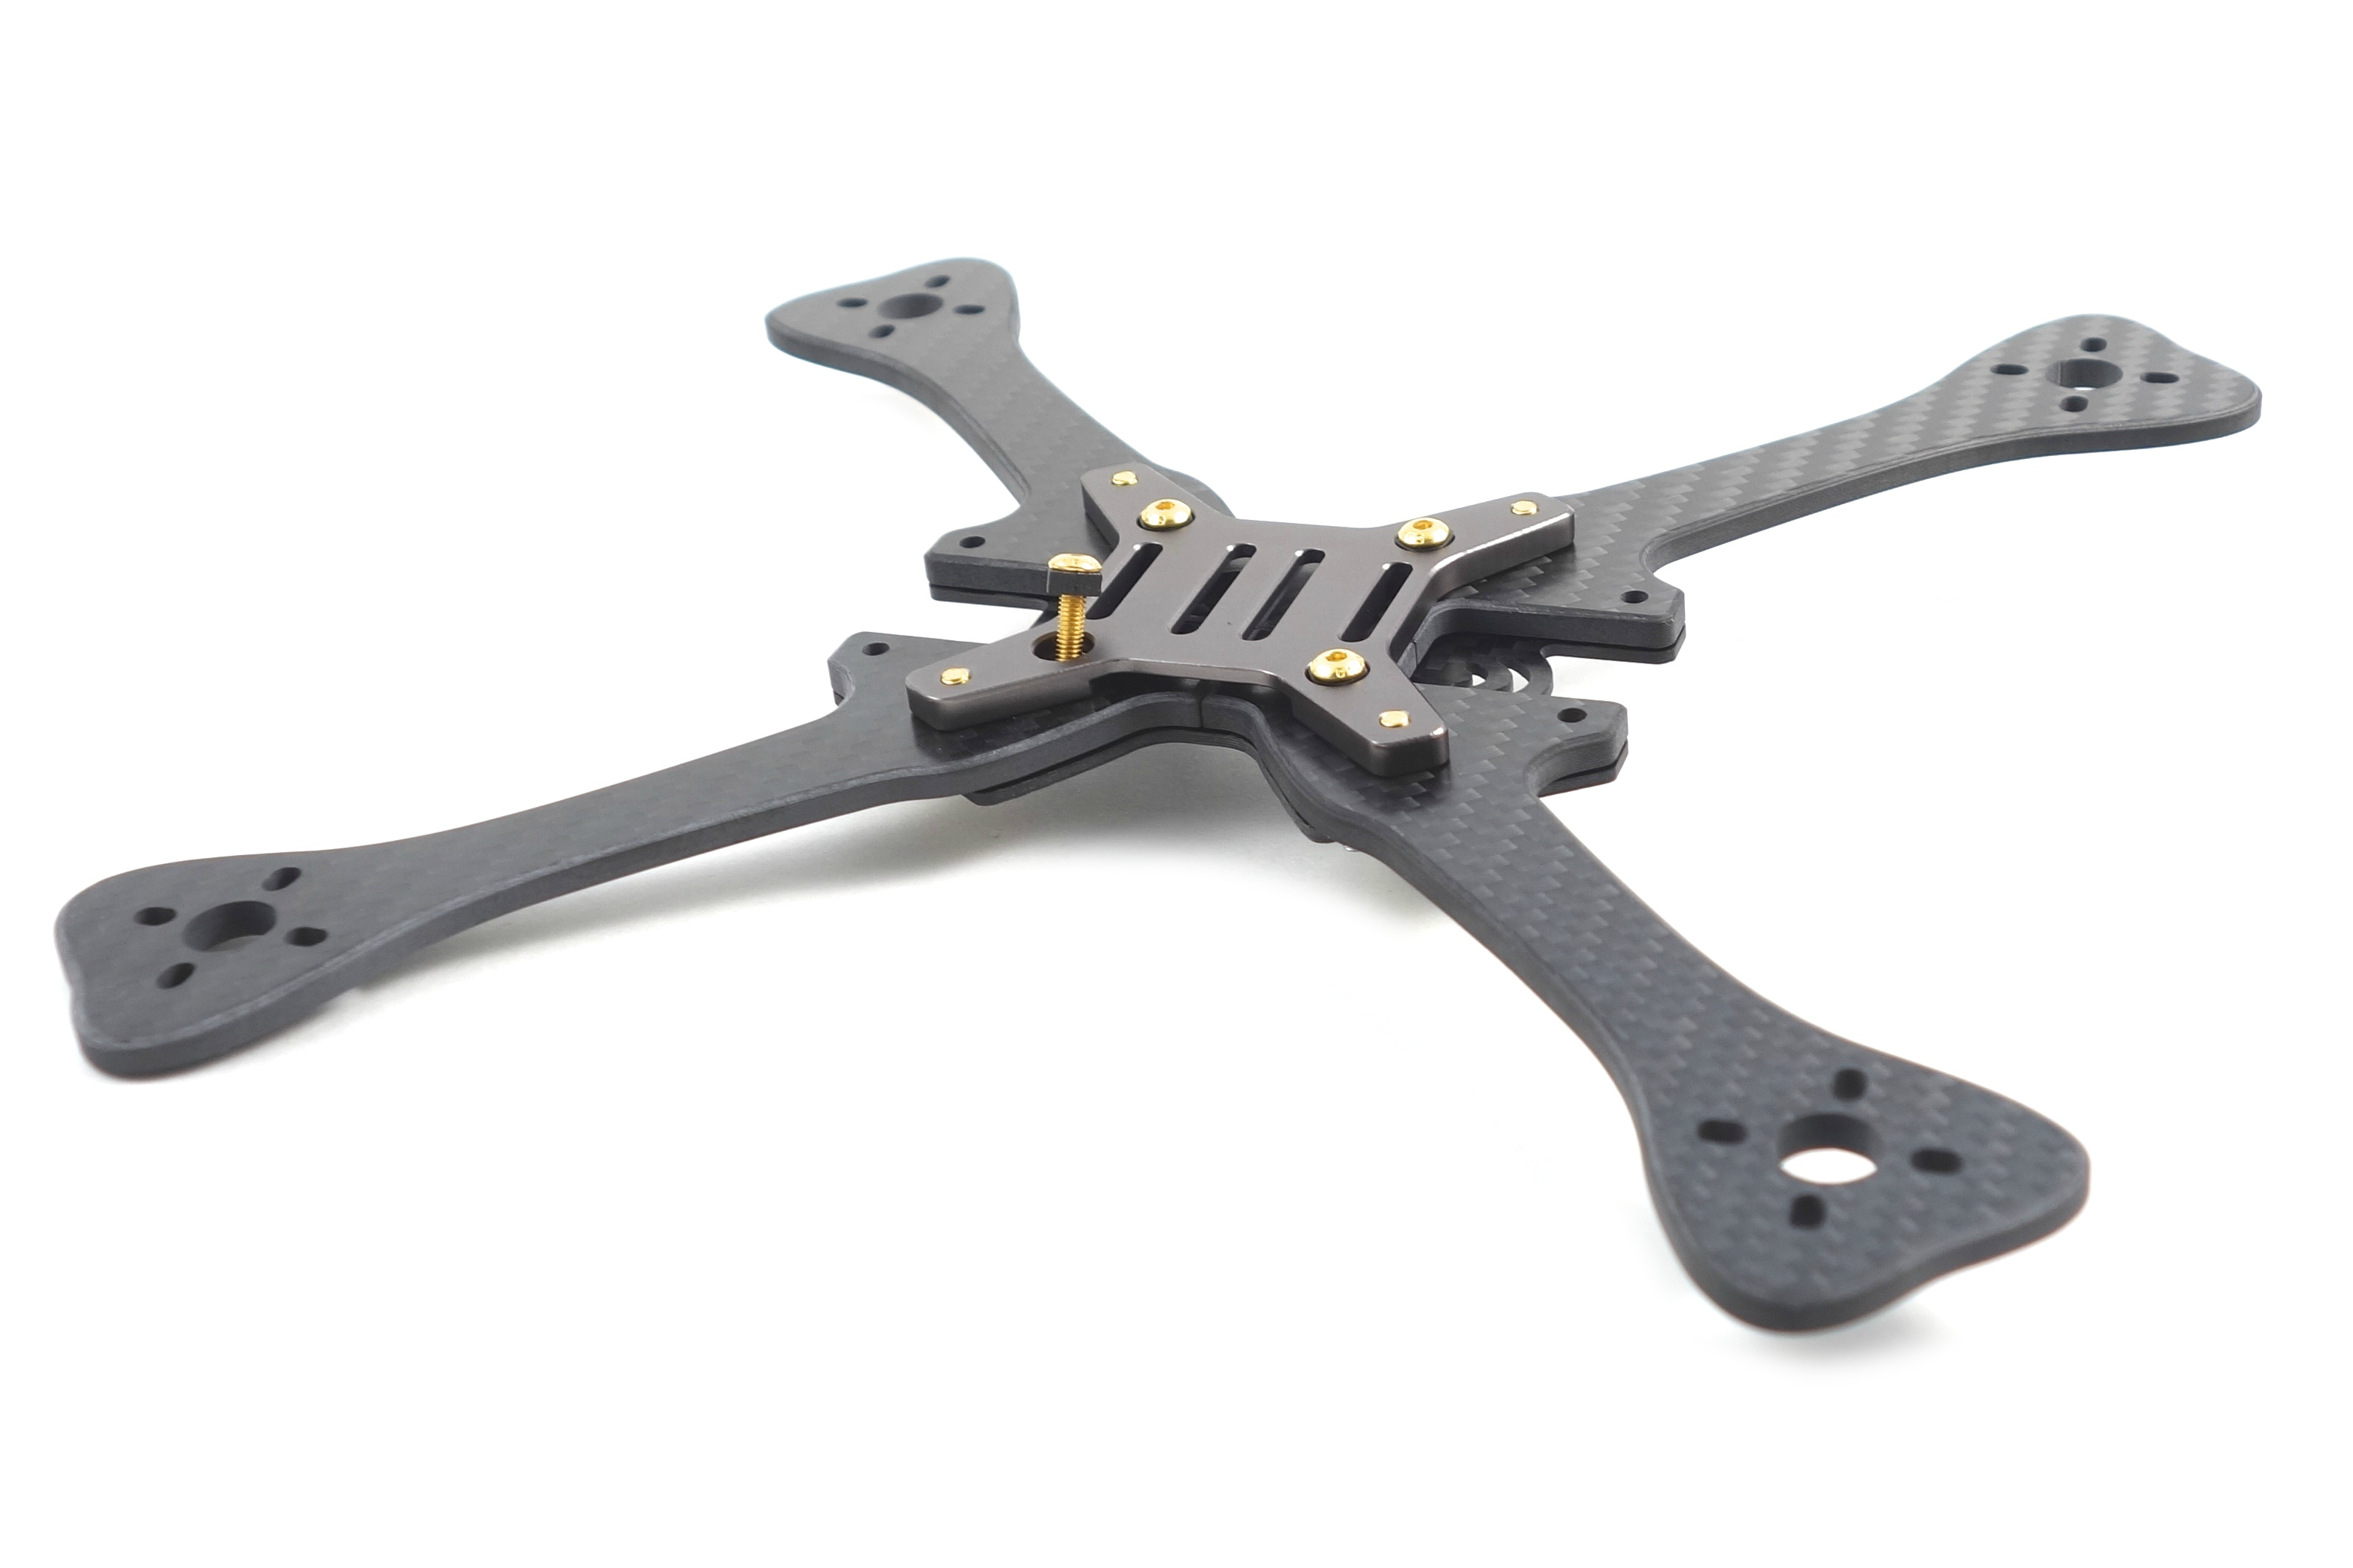
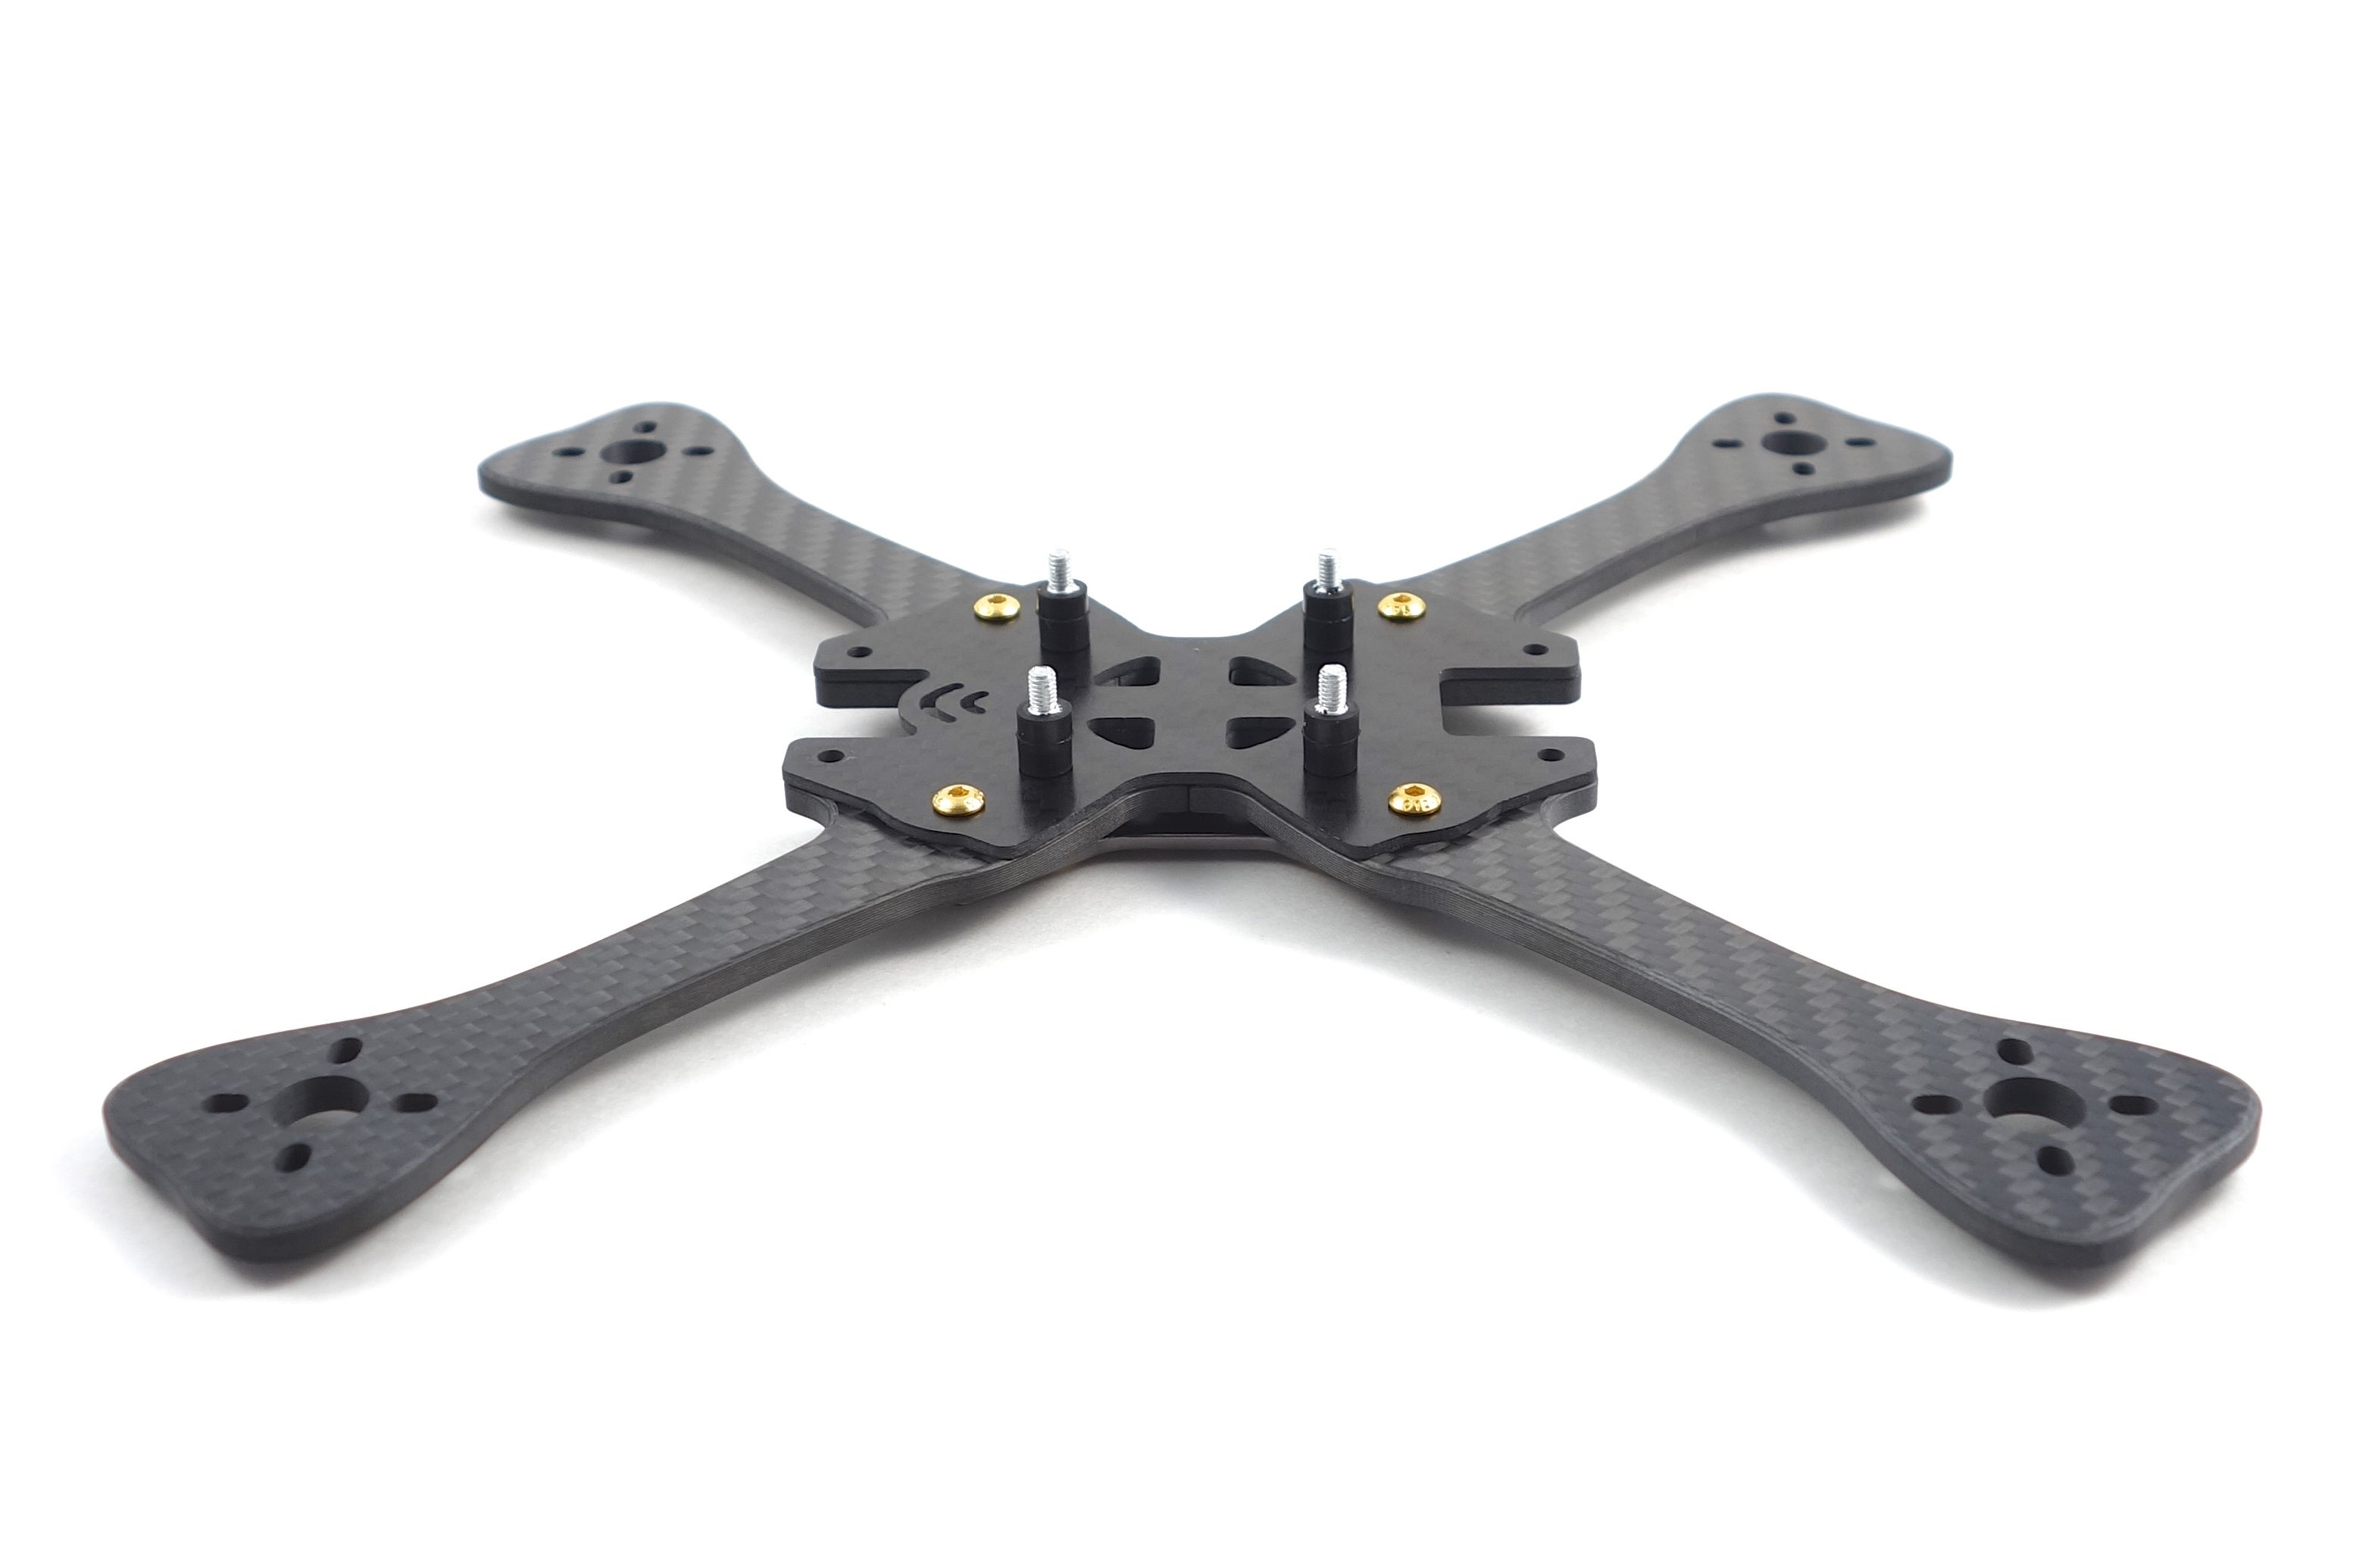
Frame & Stack Assembly
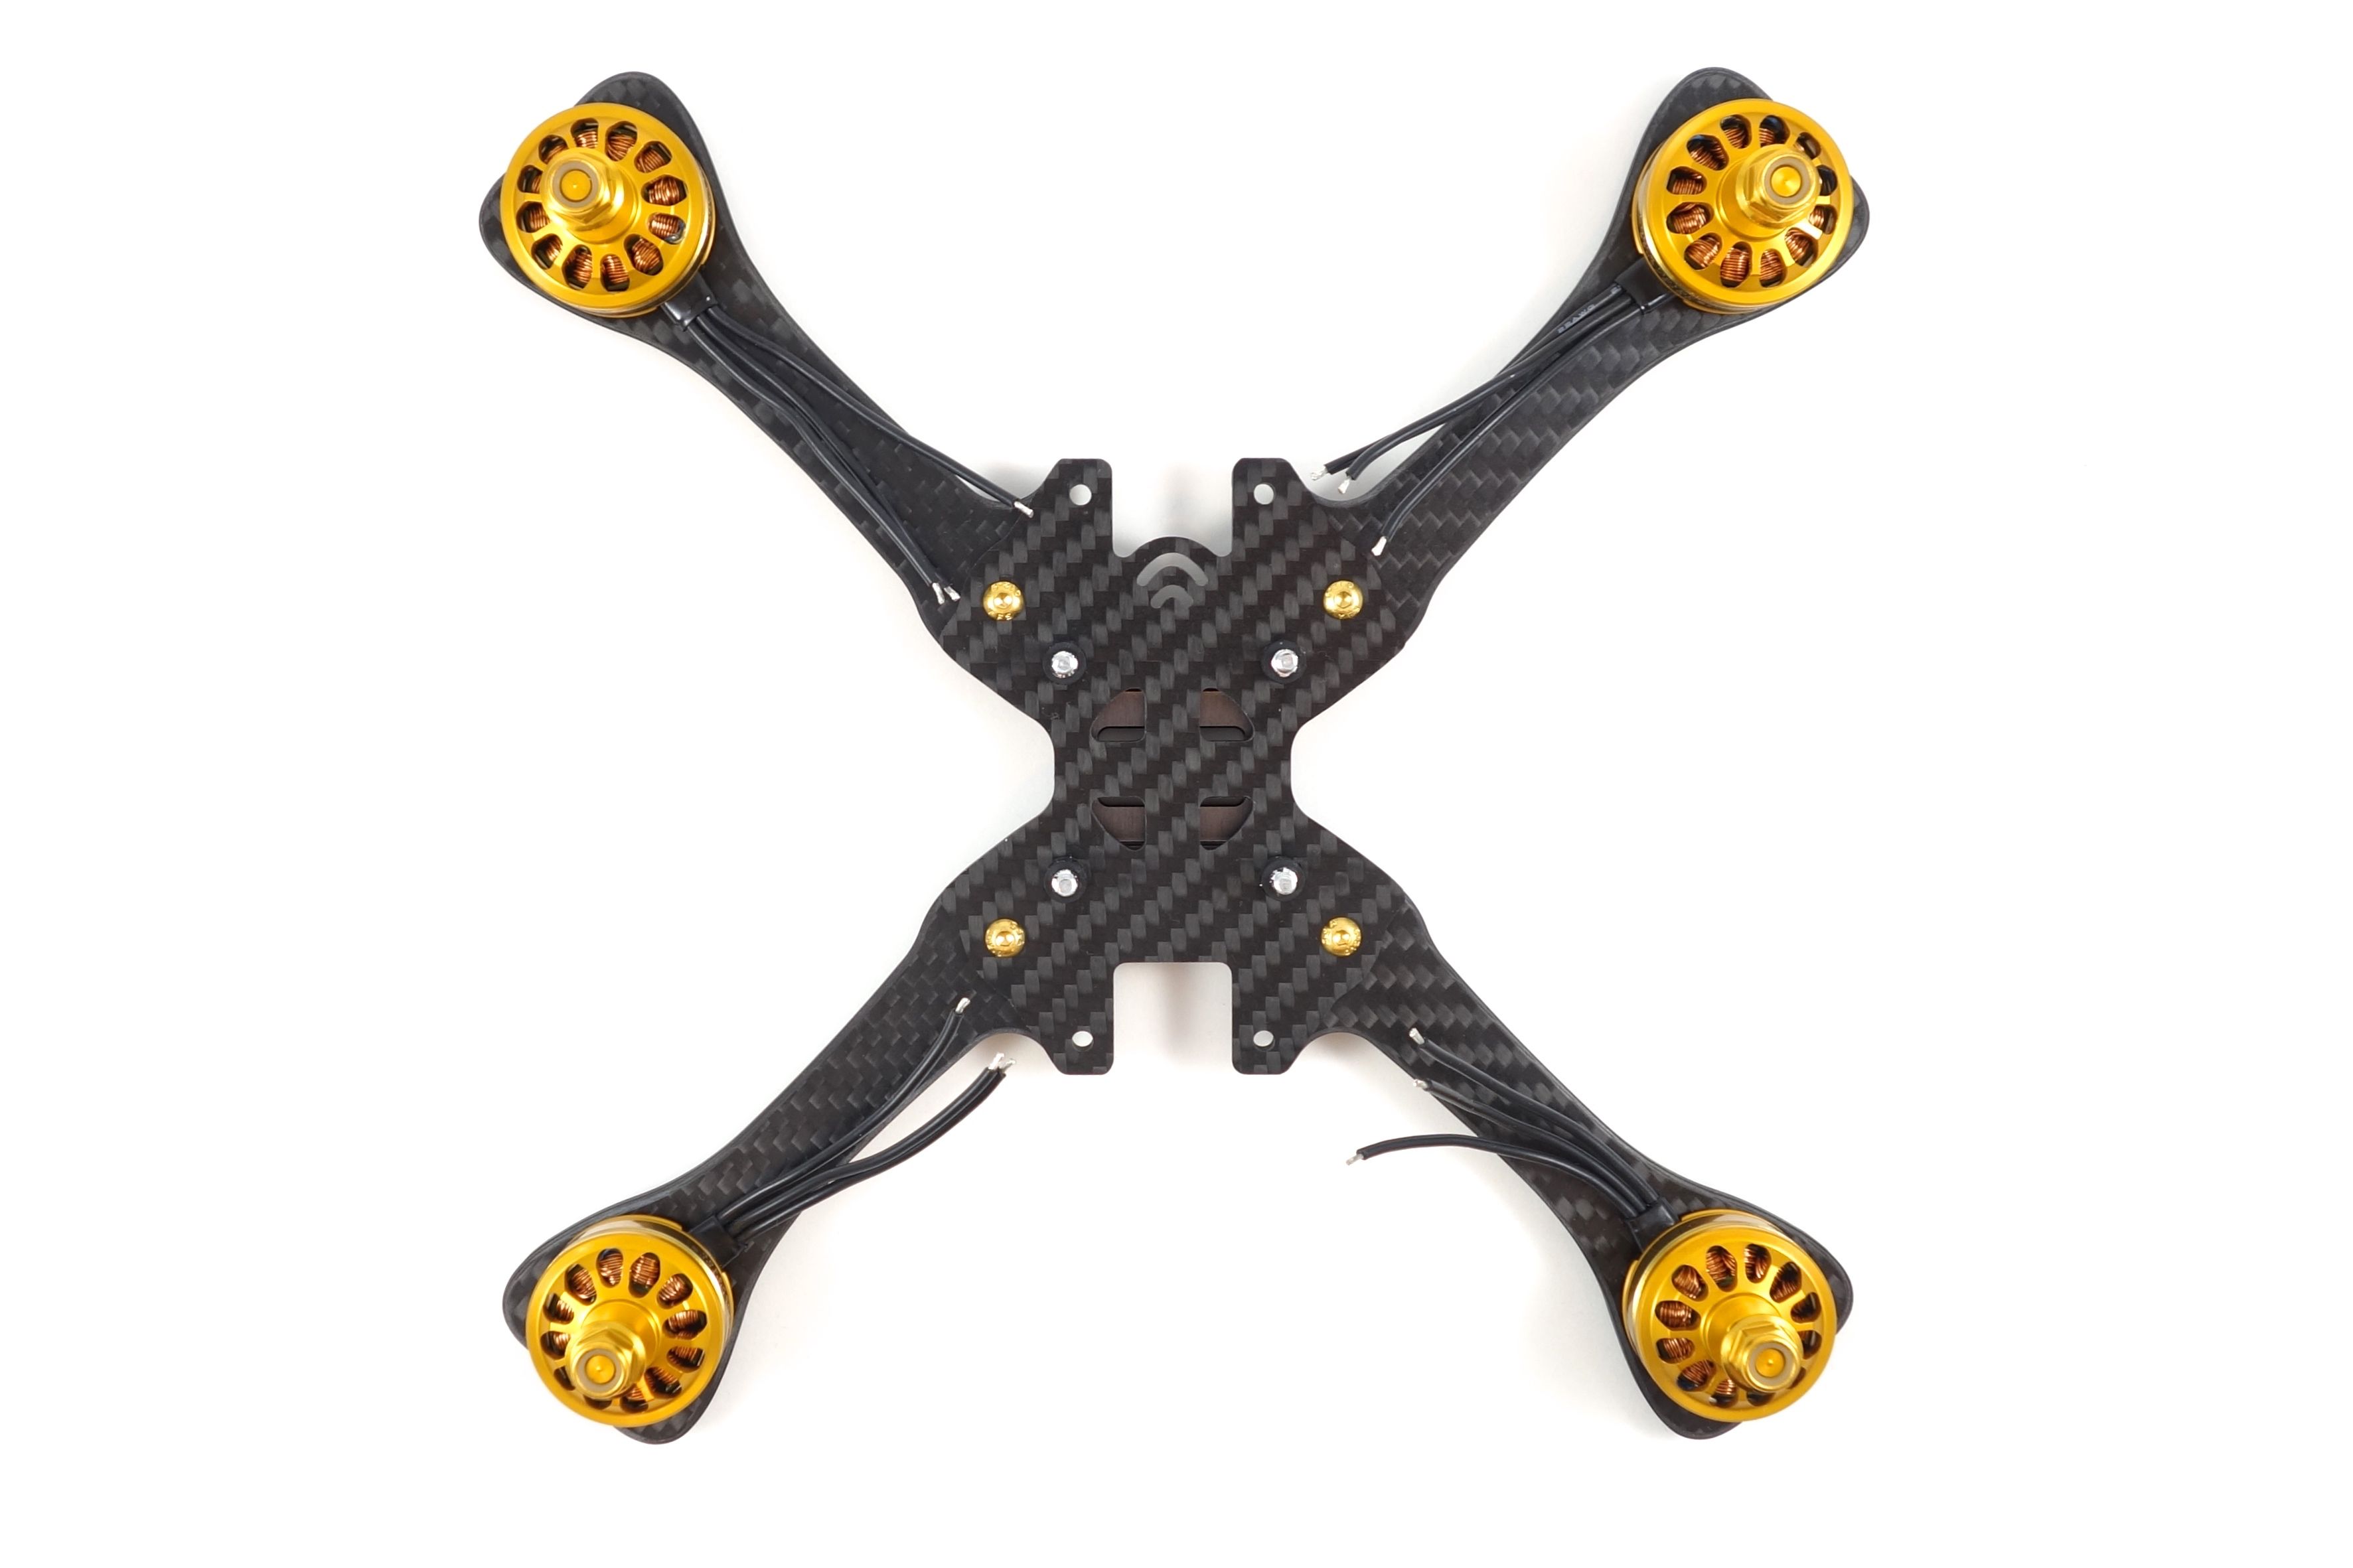
The frame is rather straightforward to assemble, but keep the instructions handy. Pay close attention to the length of each gold screw as they all have a particular place. I opted not to use the gold standoffs in the stack and used vibration dampening spacers and nylon standoffs instead. The gold bits just won't work well with these boards. Another thing to pay attention to is the sunken screw holes on the gold plates for the camera. Be sure to mount those with the sunken parts out. This kit includes two sets of side plates with different screw hole positions. I believe one will mount your camera in a single centered position while the other lets you sink the camera further back in to protect it from impact.
I don't know why they always include such tall standoffs with these kits, so it's a good idea to invest in some 6mm M3 nylon standoffs. You'll never need anything taller than that. If you follow the included instructions you won't have enough clearance below the 4-in-1, so I had to get creative. I started the stack with the vibration dampening bobbins, but due to their shallow screw holes I had to shorten the base screw by adding nuts to the underside of the frame.

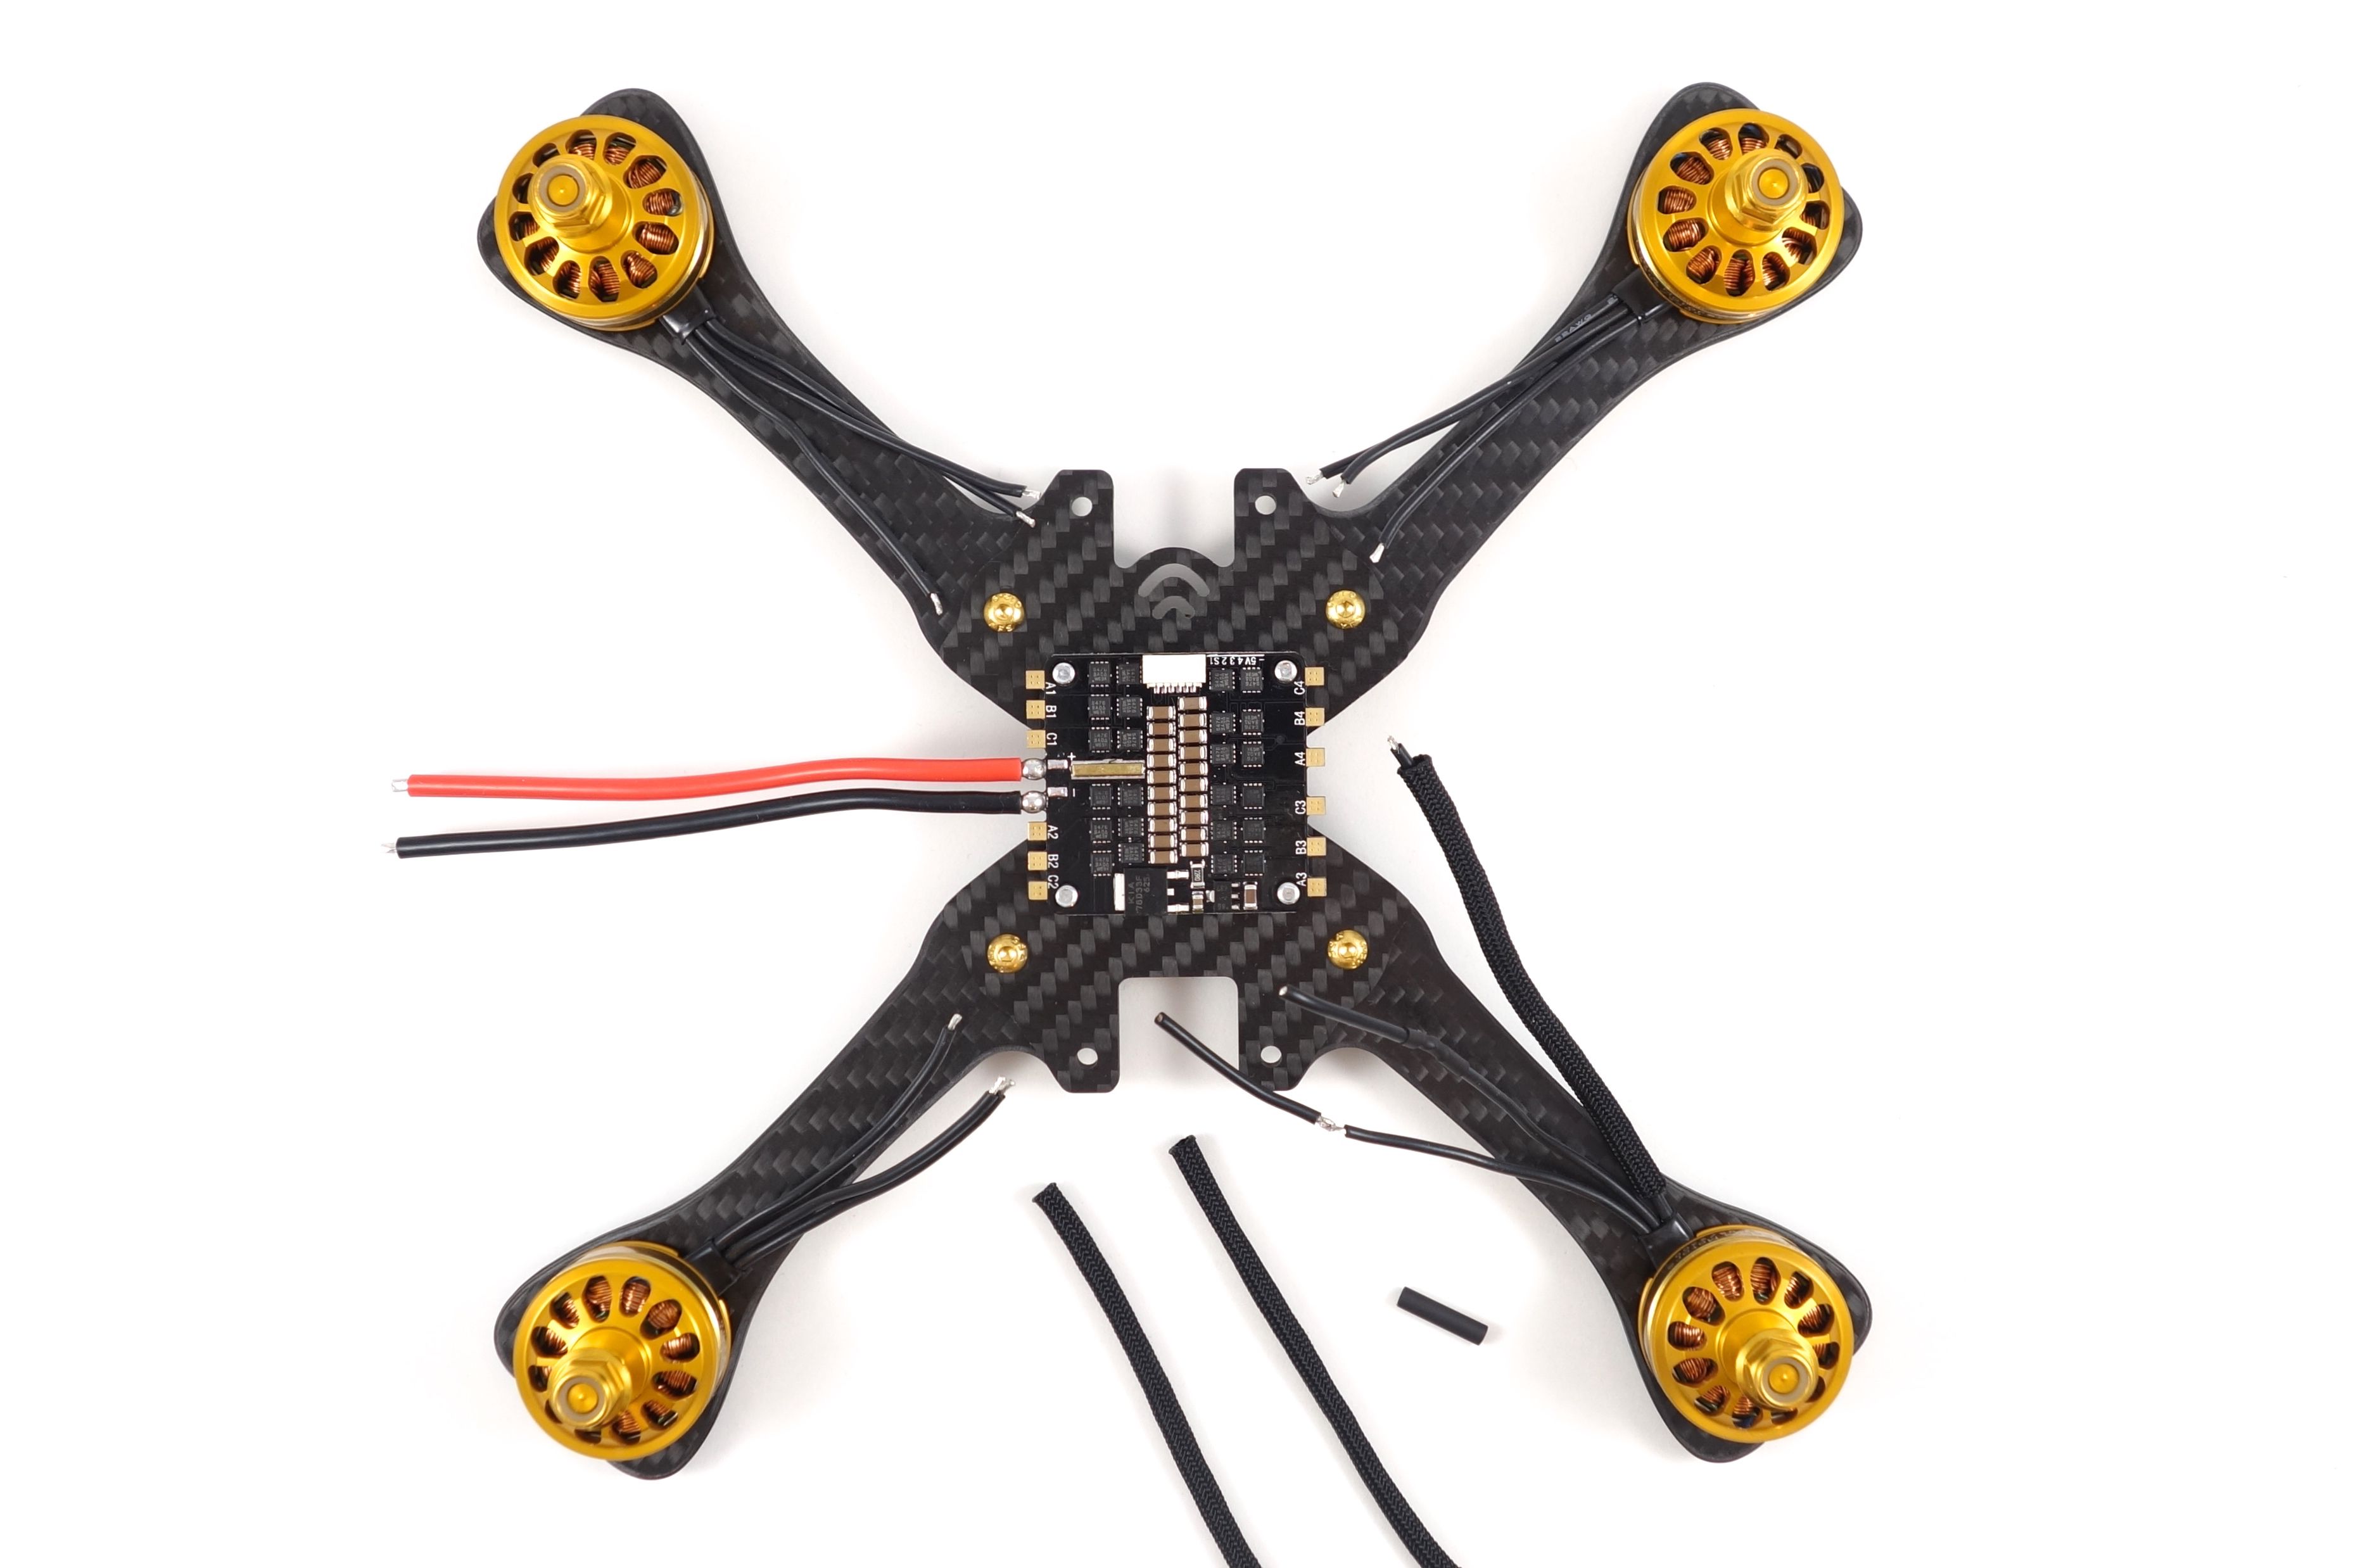
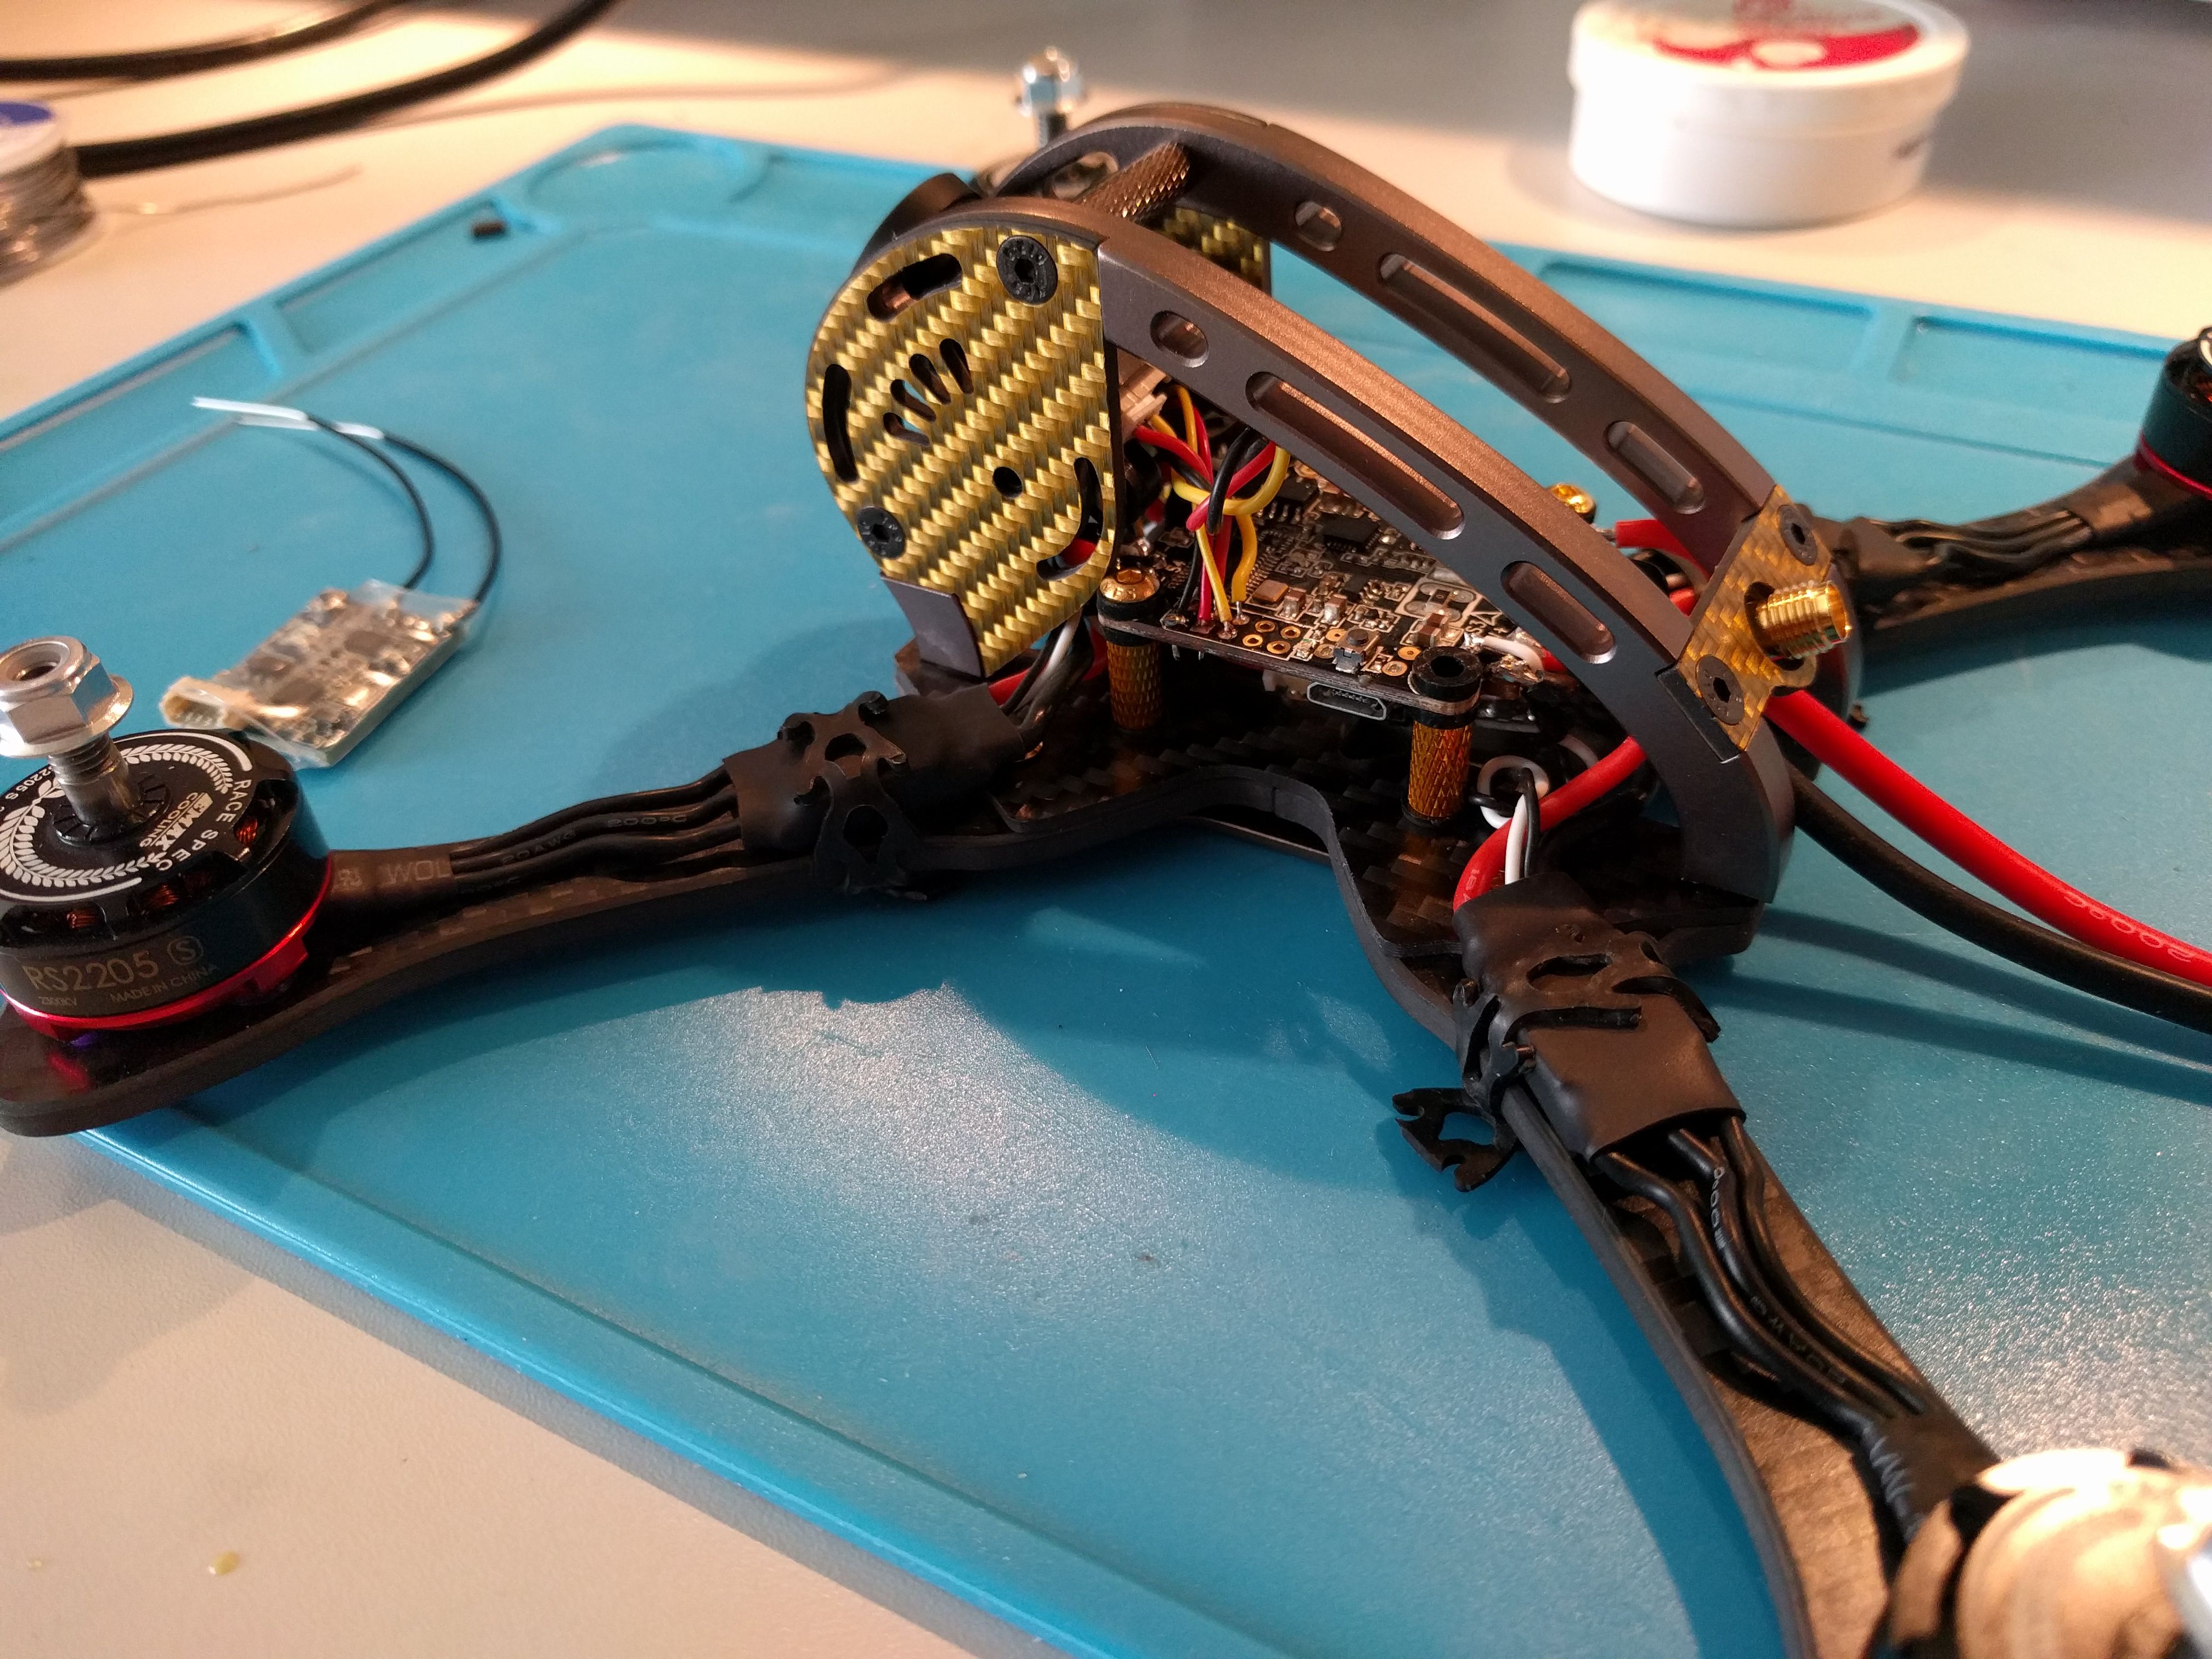
Wiring the Motors and ESCs
The first thing you'll want to do is mount the motors. It's always a good idea to use some blue Loctite on the screws to prevent them from vibrating loose. Now for the most tedious part of the build: extending and wiring up the motors. While using a 4-in-1 ESC is a huge time saver, the motor manufacturers haven't quite caught on and continue to make motors with short leads. I hope this trend changes, but it's good practice joining the wire bits together. You'll need some spare 20awg wire to extend these, so dig through your stash or buy some beforehand. I use 550 black Paracord to protect the wires, but this is entirely optional. You'll also need some shrink tubing to cover your joints.
Powering the Flight Controller
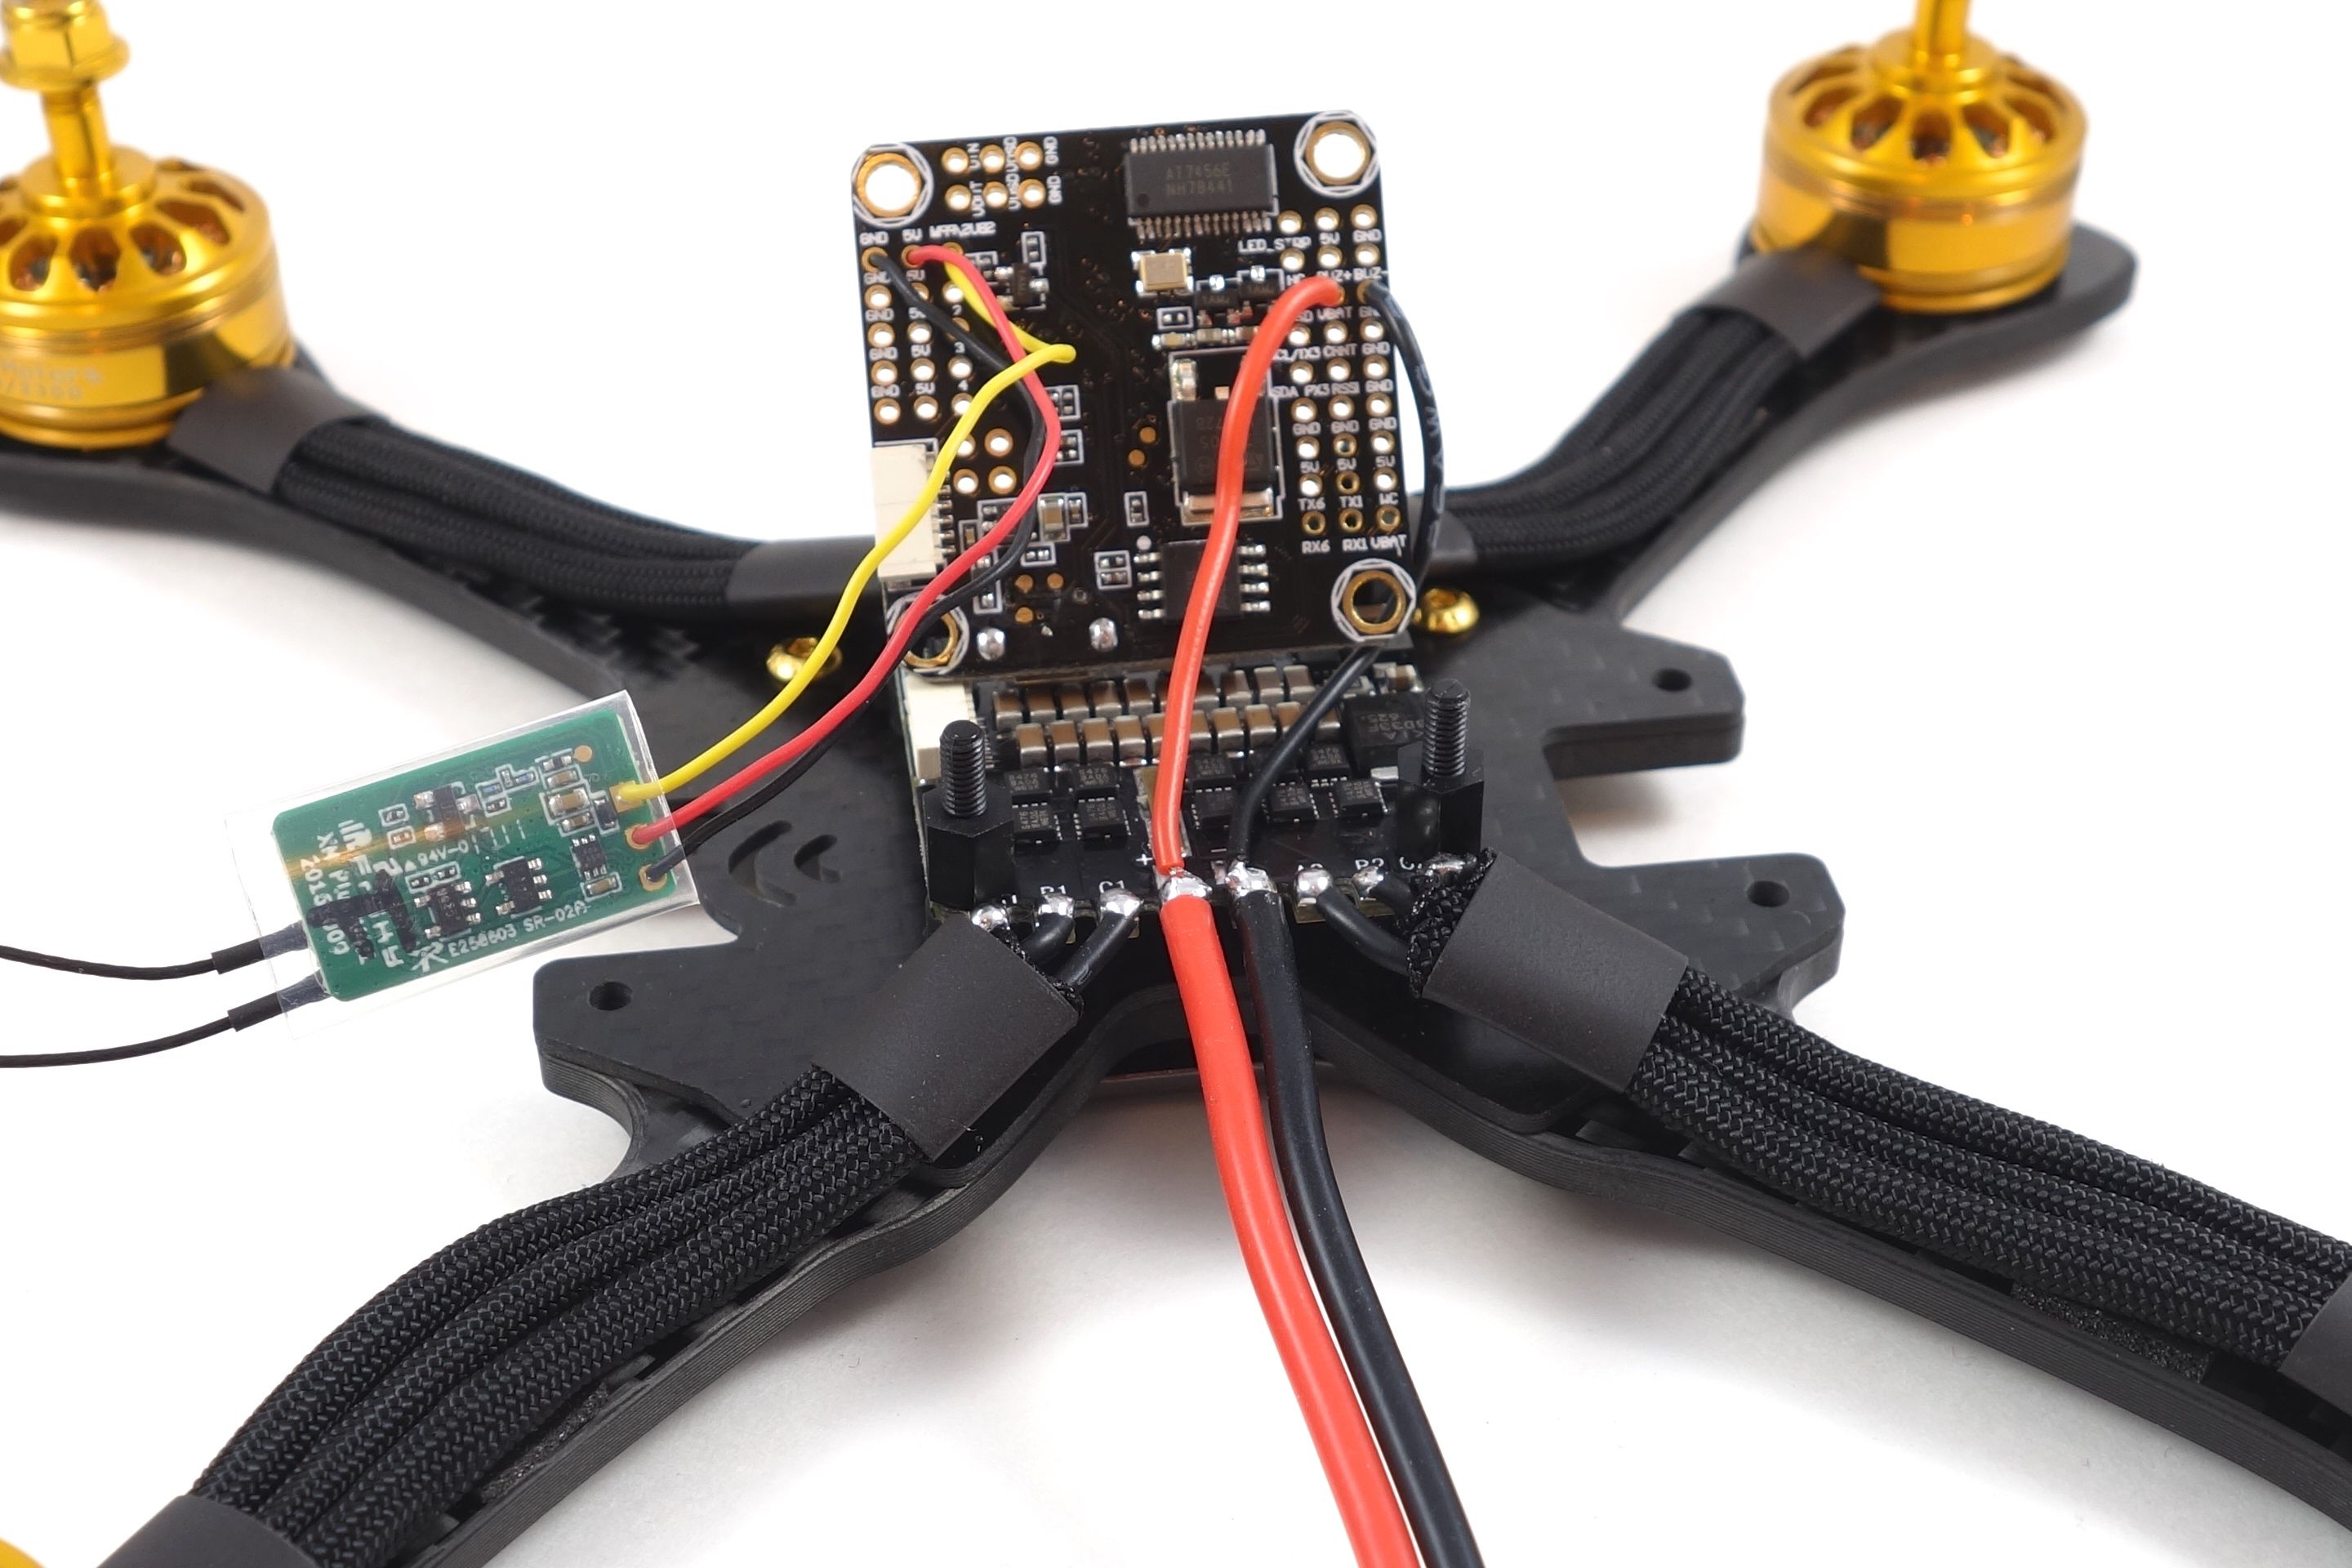
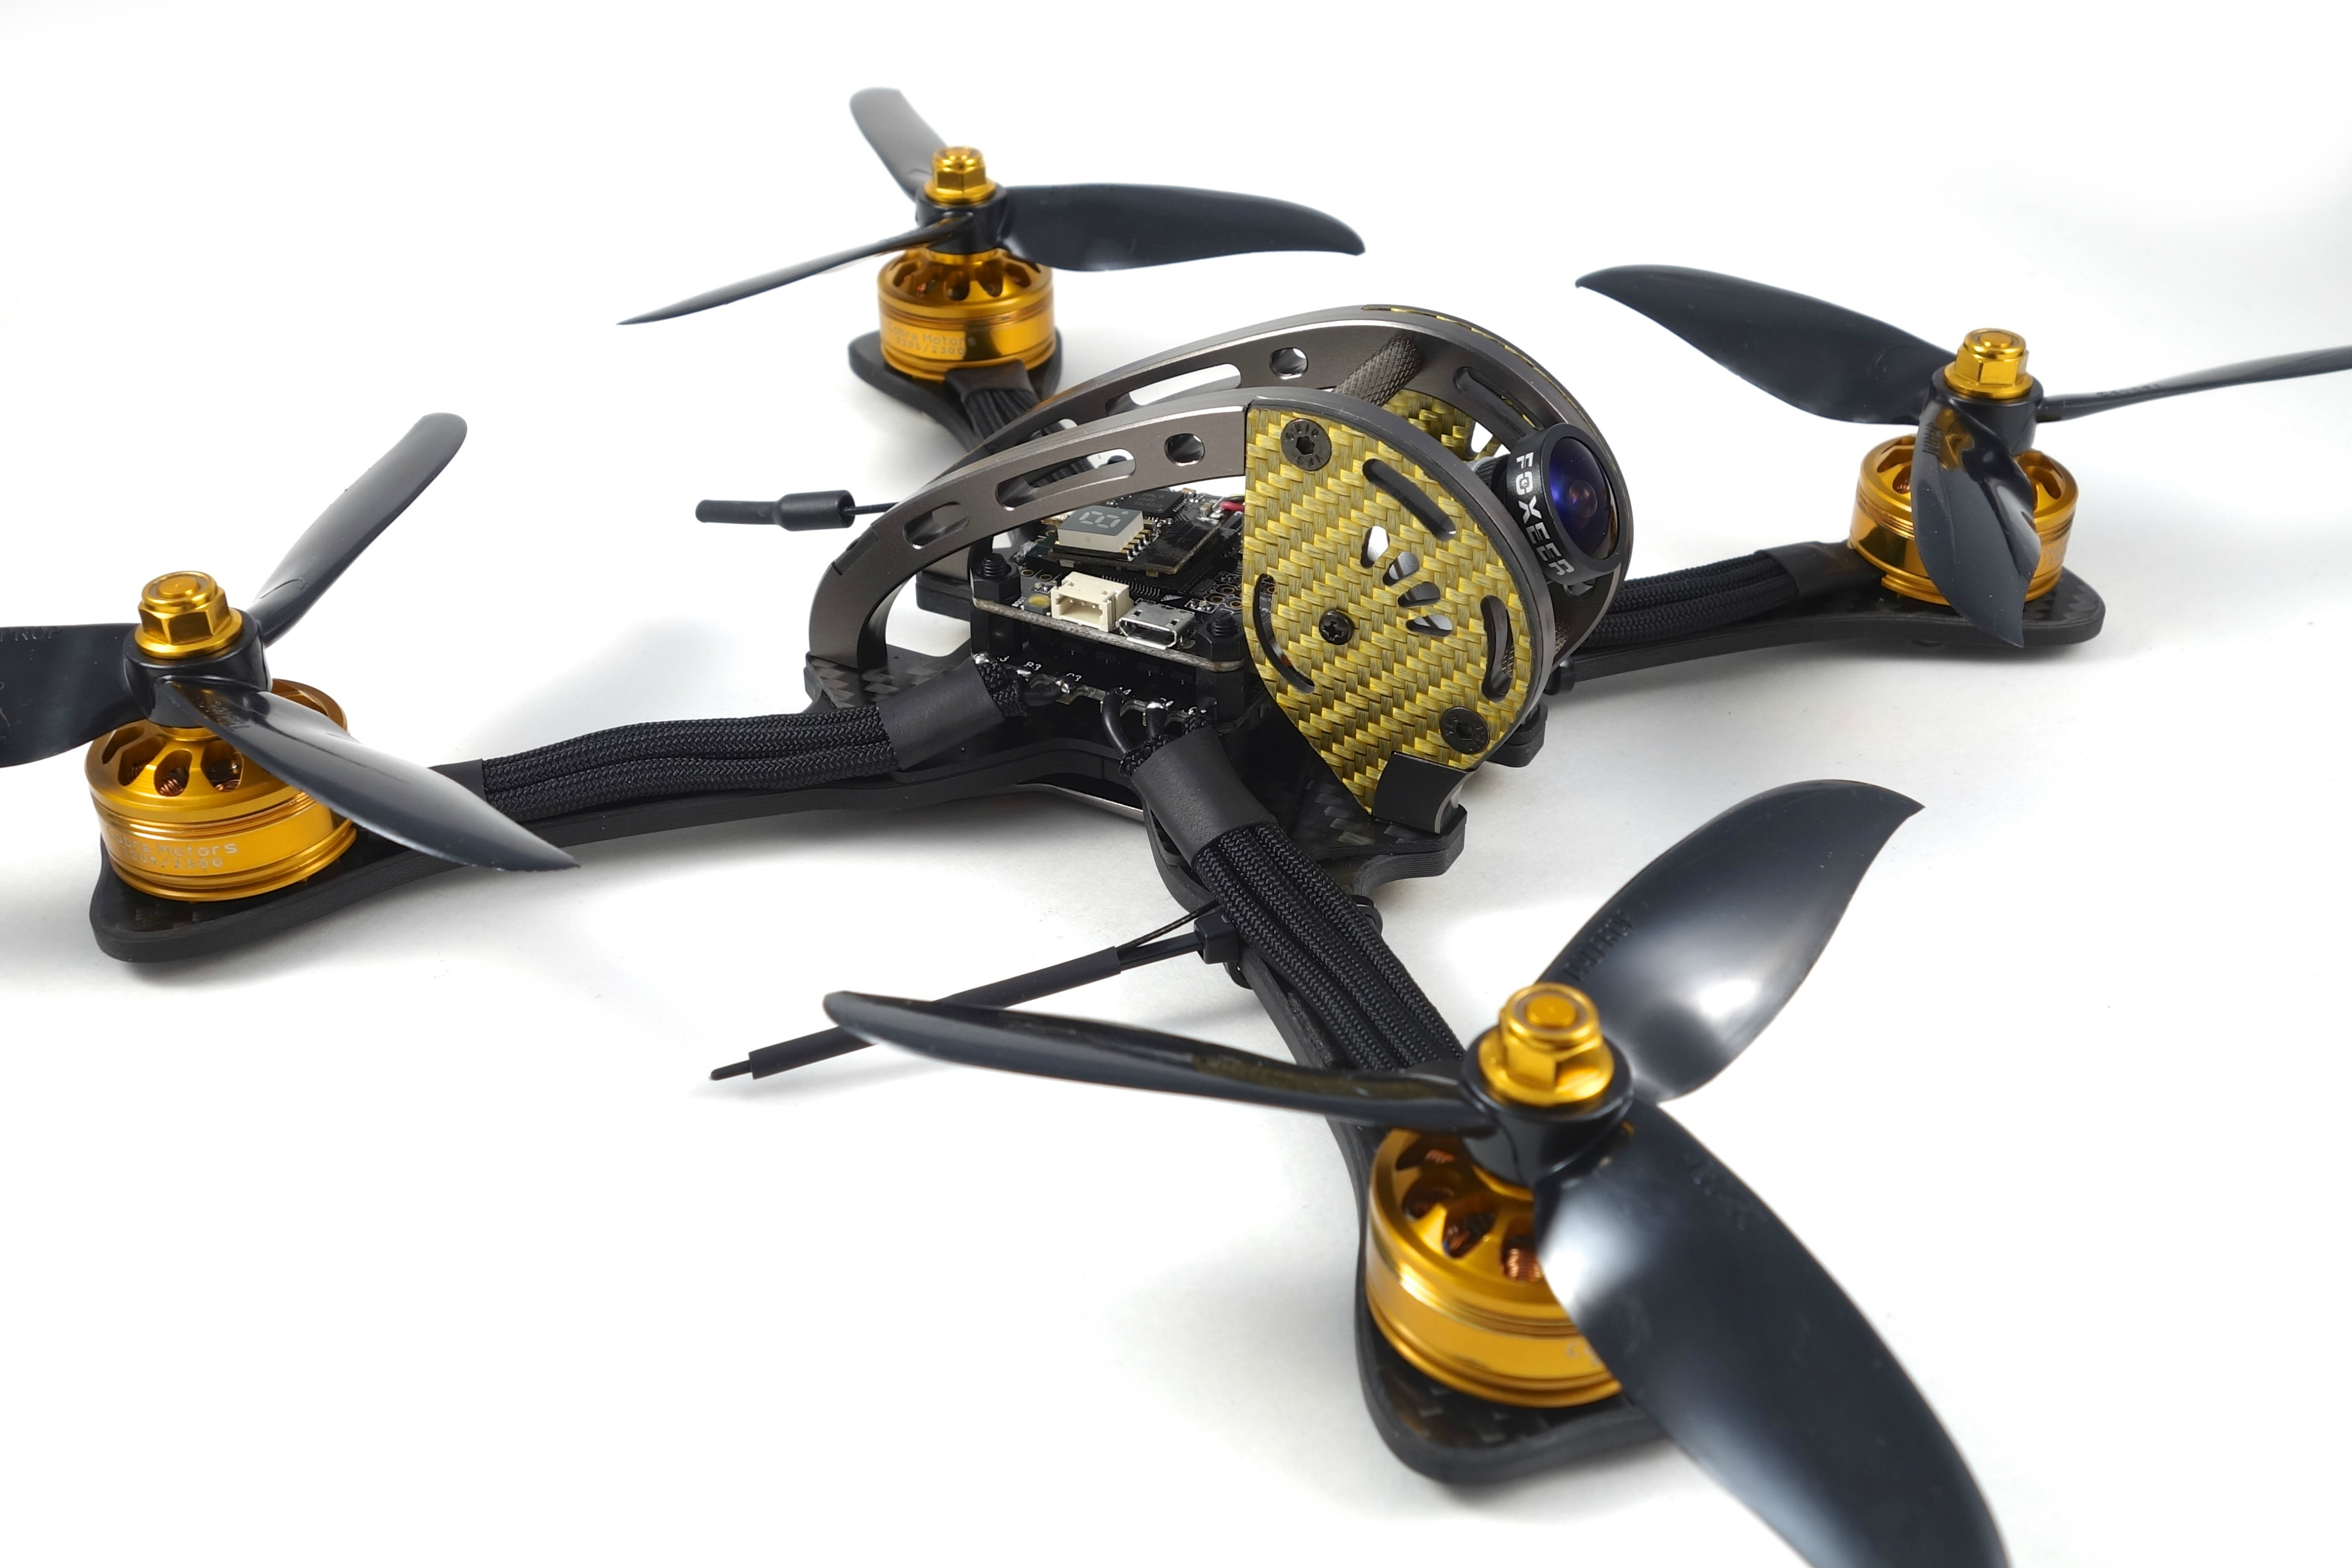
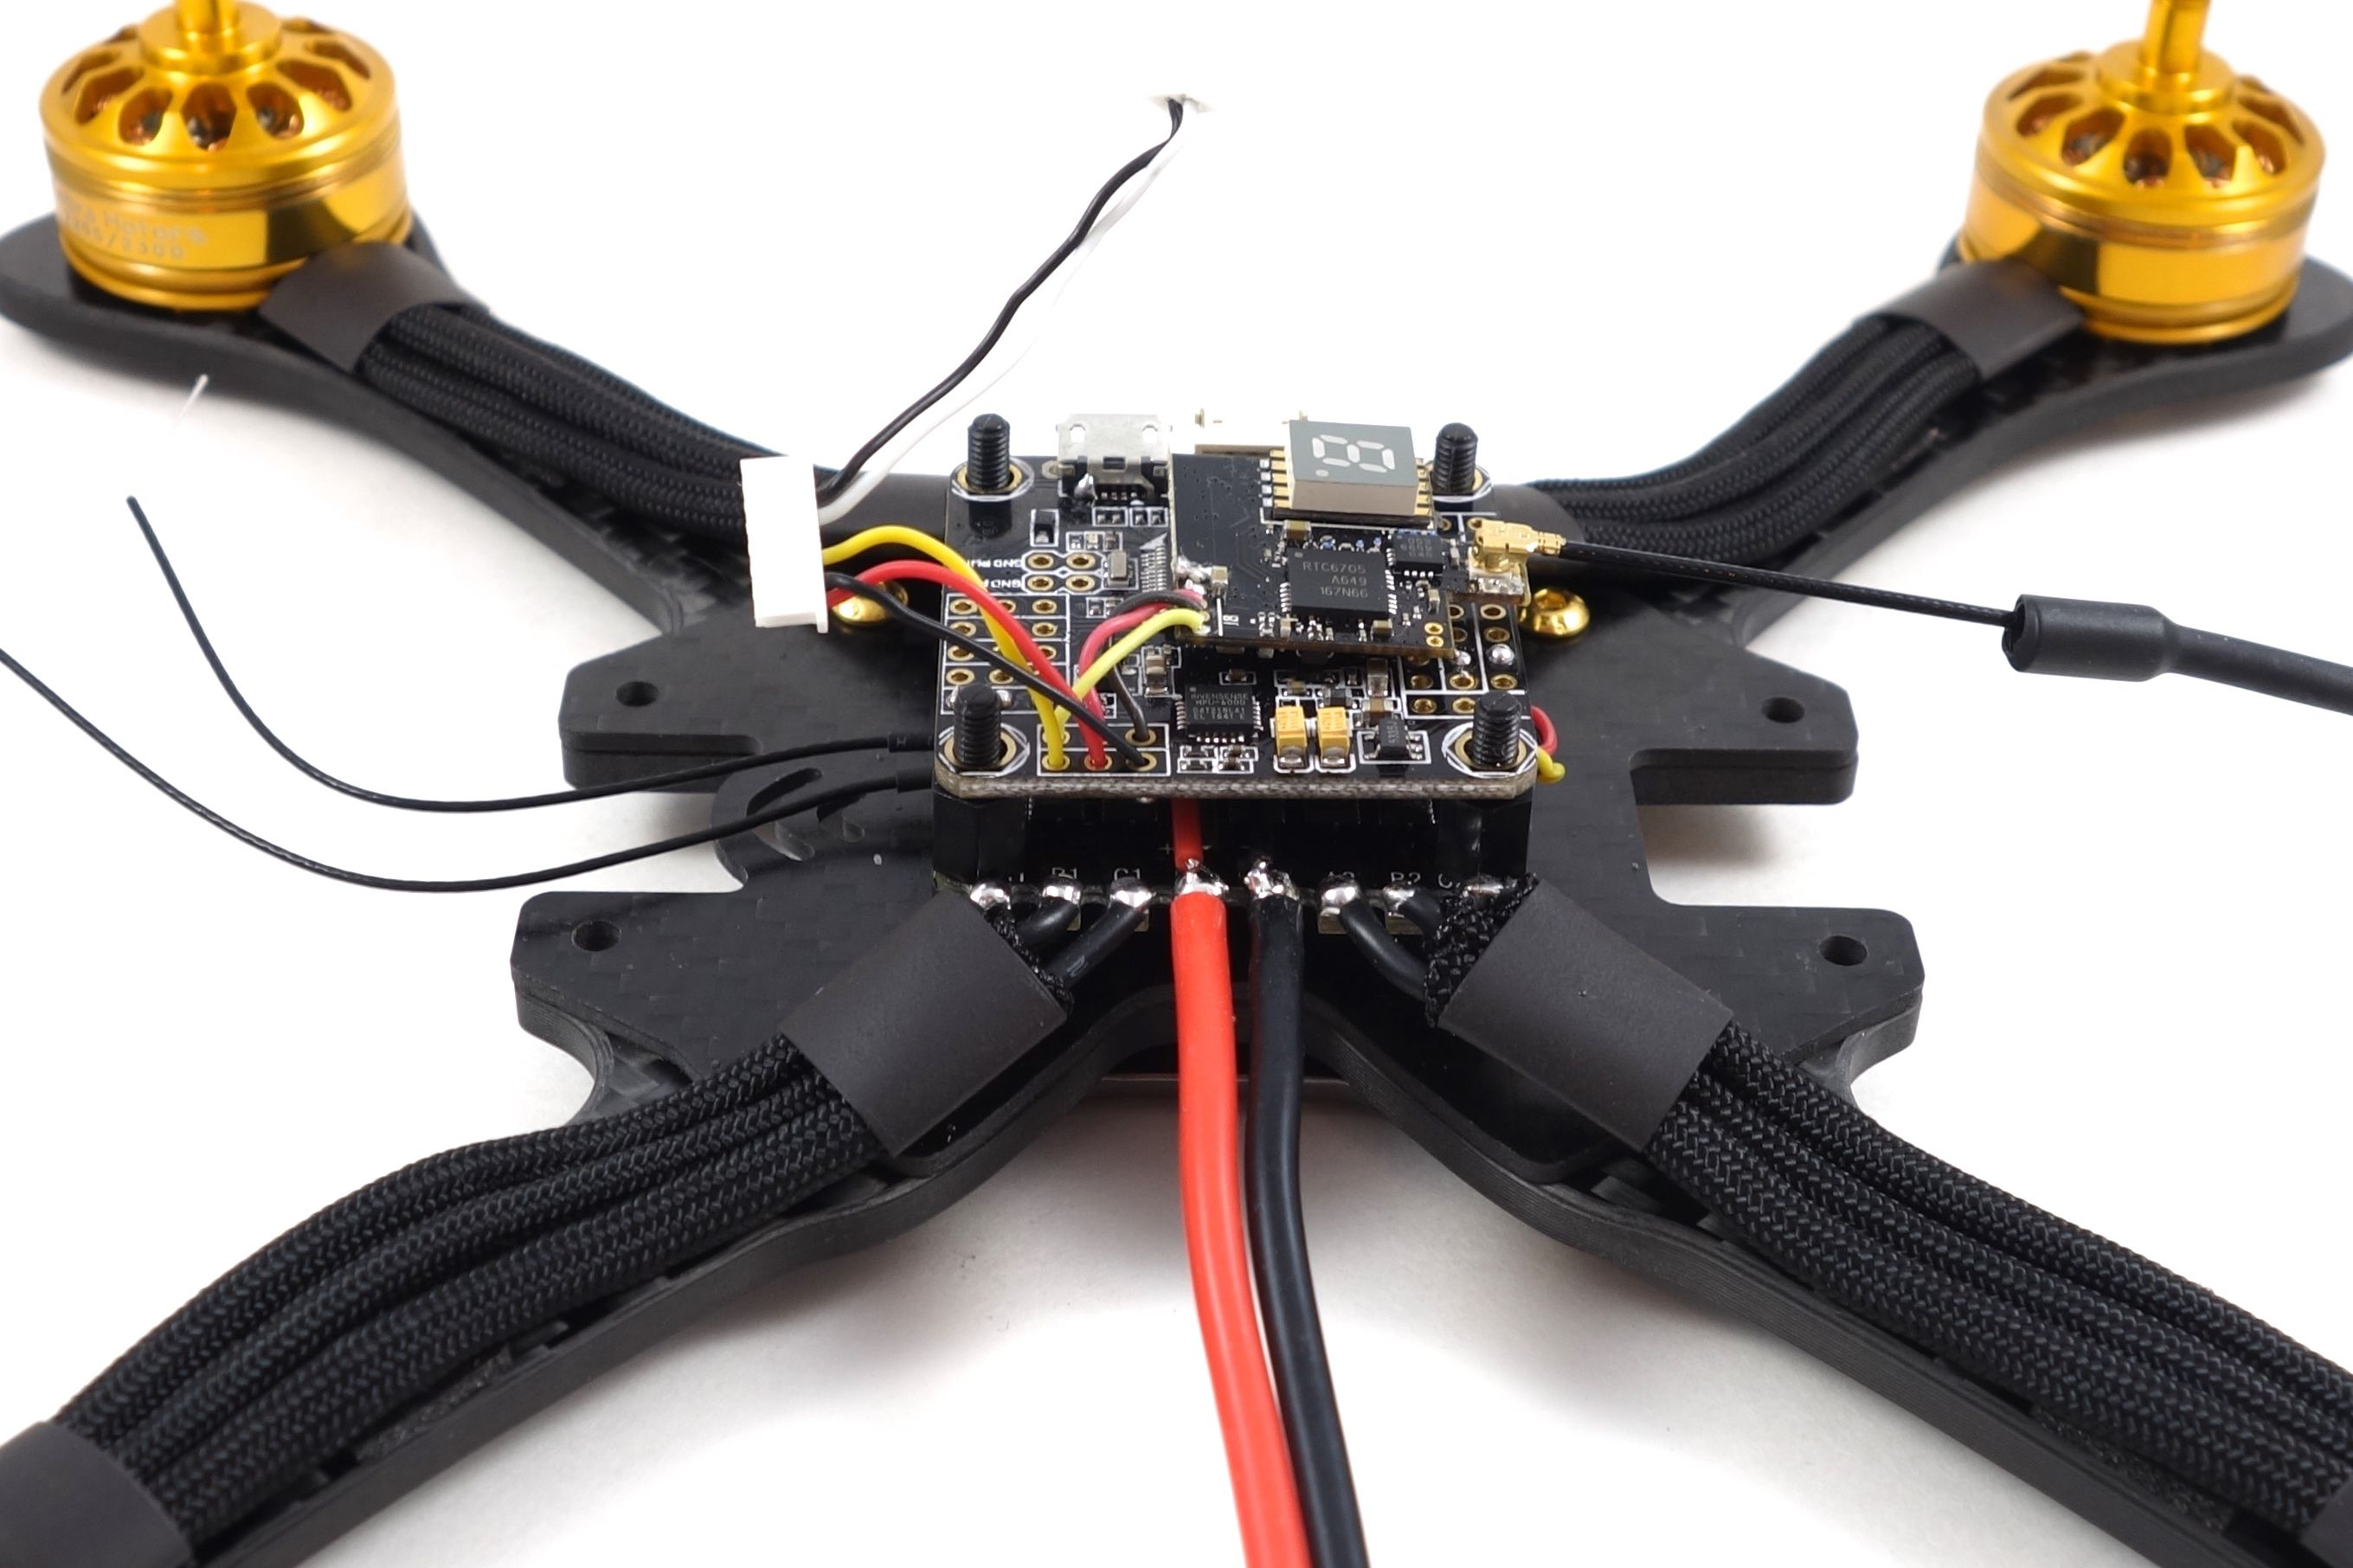
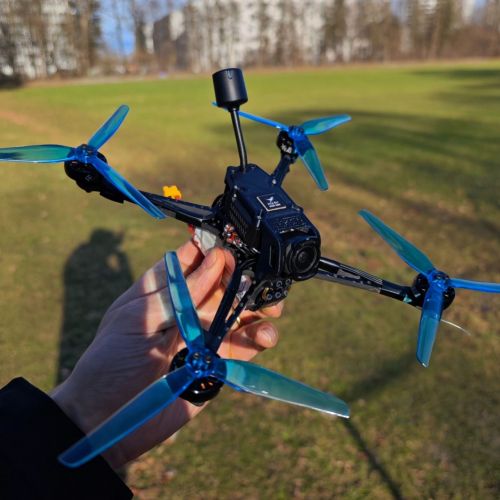
So you've got a little flexibility here with the Foxeer Arrow V3. This camera has an OSD that will report the battery voltage back to your headset. Normally you'd run power from the battery to the vbat pad of the flight controller to monitor voltage over Betaflight OSD. The problem with that is the 5v linear regulator on the flight controller will produce a lot of heat. There are two ways to avoid this: physically disable the linear regulator by removing it from the circuit or avoid feeding vbat to the flight controller in the first place.

Since this build uses the 5v regulator of the 4-in-1 ESC to power everything you don't need the 5v regulator on the flight controller. What I did was pass power to vbat and physically disable the on-board linear regulator. That way I can monitor voltage with Betaflight OSD without any excess heat. It's done by snipping the connectors of the regulator itself as shown here. If you're hesitant to snip your flight controller you don't need to feed power to vbat and instead power your camera from the battery. You'll still want to use BetaFlight OSD for tuning, so you'll have overlapping OSDs. This is perfectly fine if you lay them out properly. Of course you don't need to disable the regulator. I've left it alone in the past and while the board does get hot it still functions properly. I'd just be careful flying on a hot day.
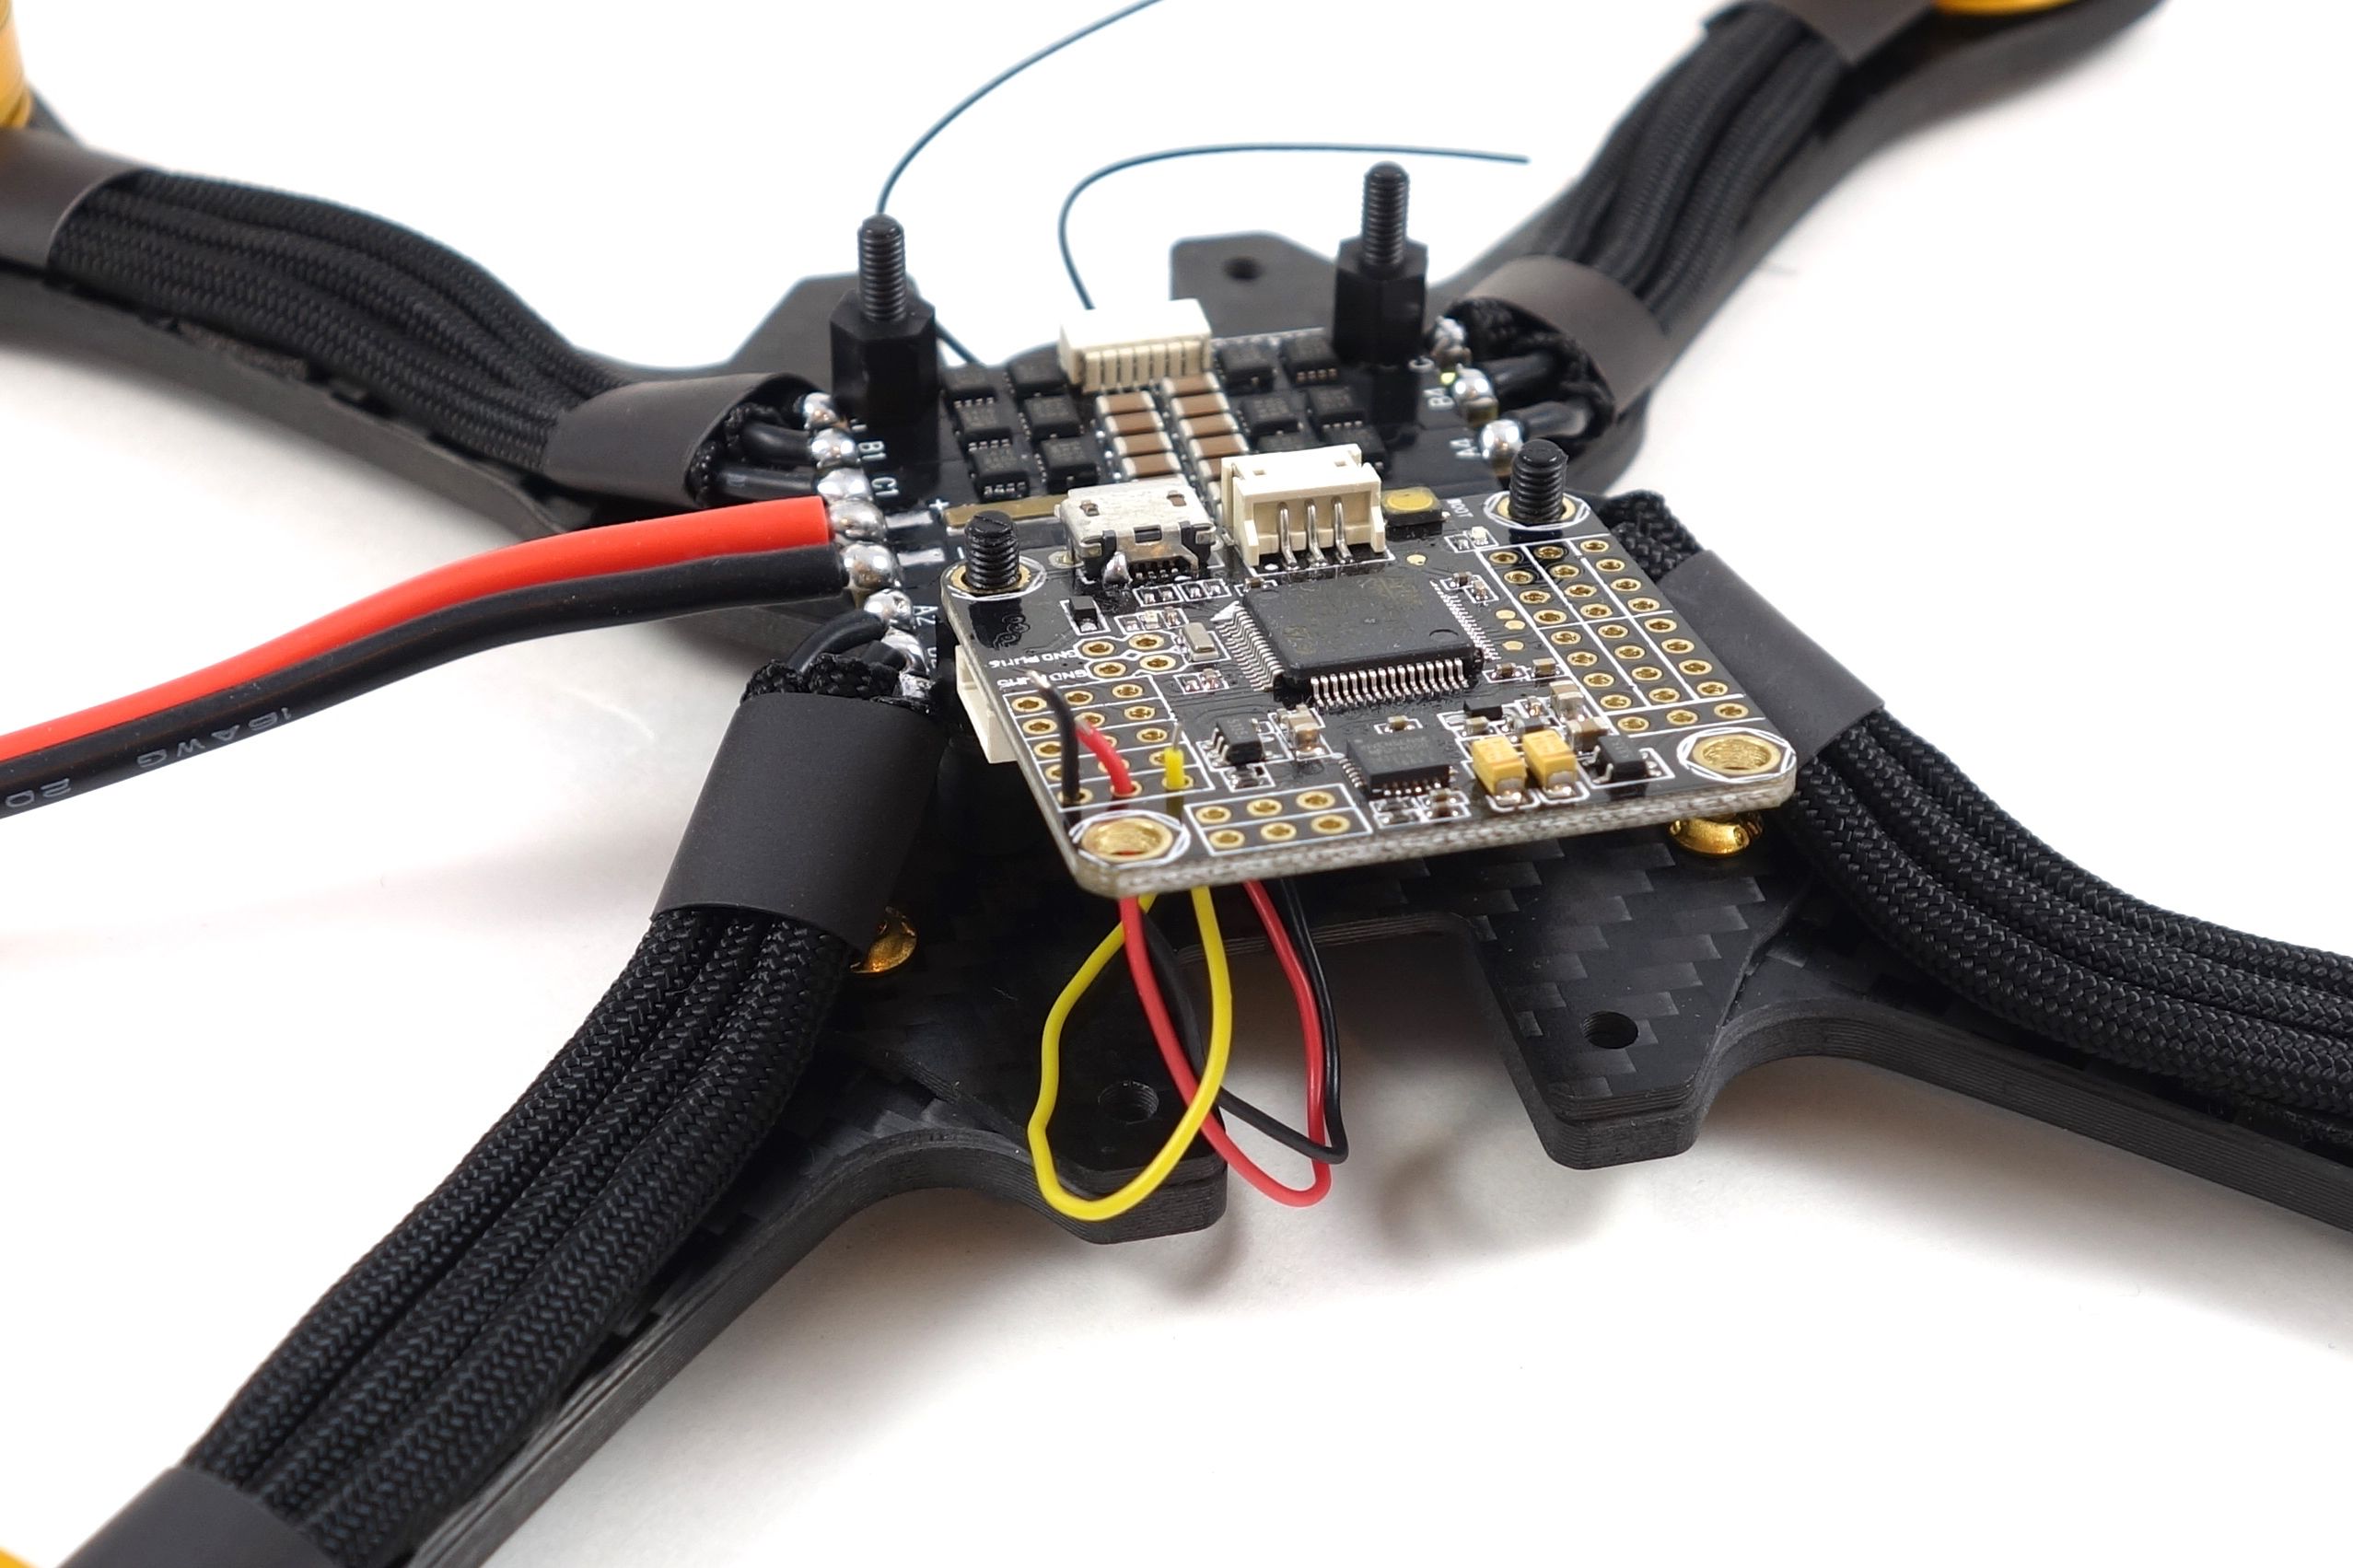
Wiring the Receiver
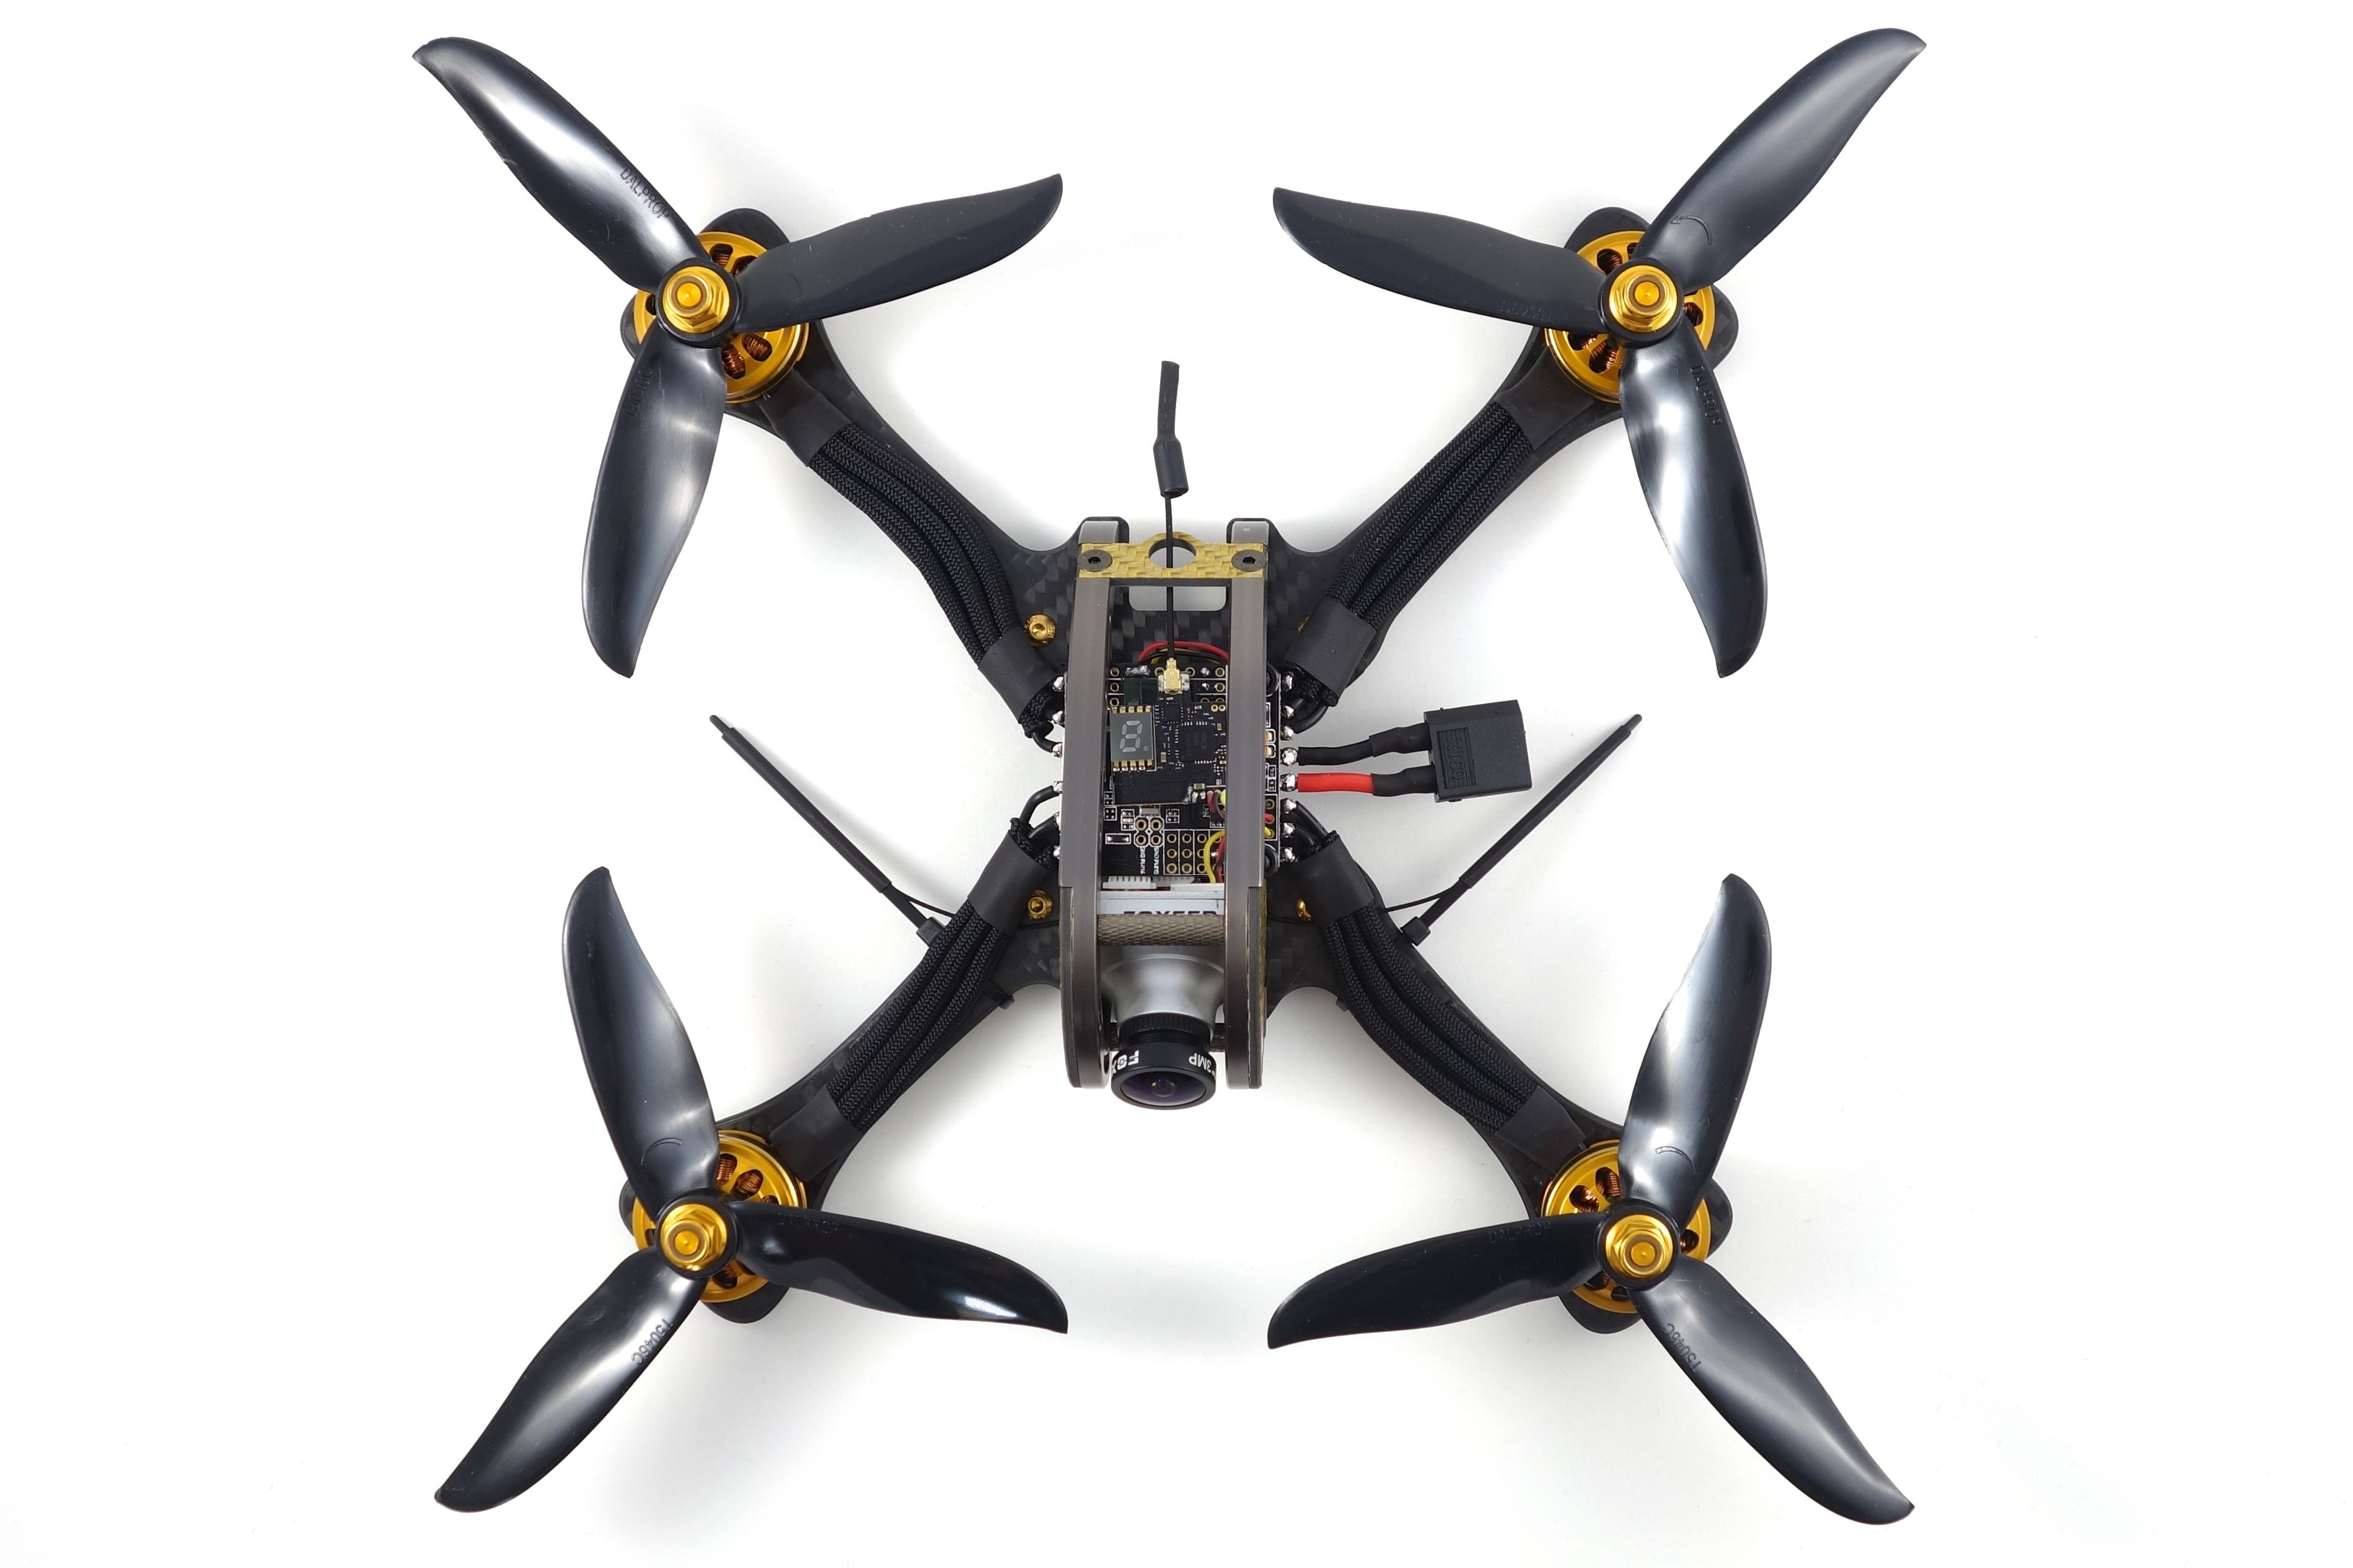
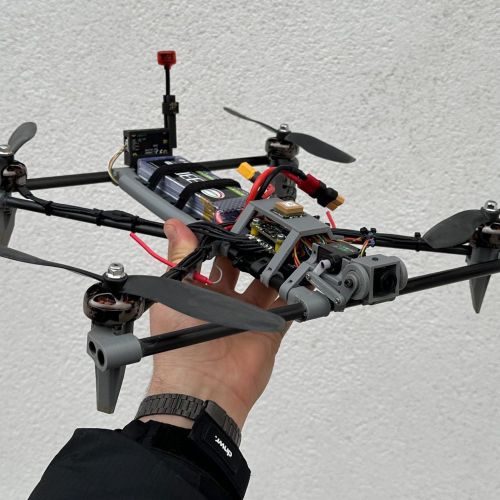
Next you'll want to wire up your receiver. I decided to tuck mine away under the 4-in-1 ESC. I ran just enough wire to reach around to the flight controller. Refer to the photos for the correct wire placement. One trick I like to use here is to pass the wires through the flight controller holes to hold them in place. Then I'll slide each one down until the tip of the wire rests within the hole as I solder. The antennas are mounted to zip-ties extended from the backs of the front arms. This keeps them well protected and doesn't diminish range at all.
Wiring the Camera & Video Transmitter
At this point the wiring is fairly straightforward. Everything is powered via the 5v wire of the 4-in-1 ESC wire harness. Unfortunately I didn't take any photos of this, but it's a short 4cm series of wires with a plug on both ends. It was included with the 4-in-1 ESC. This simply plugs into the front of both boards. The camera and VTX are powered by the VOSD pads of the flight controller. These pads aren't on the 5v circuit by default and you have a choice of feeding VBAT or 5V to these pads. We want to pass the 5V along. This is done by bridging the 5V and "MC" pads of the board. Look for the little loaf of solder in the photo to see how this is done.
Finally you need to solder the VTX and camera wires to the 6 pads along the side of the board. Be sure to refer to the wire diagrams of both the VTX and the camera to understand how the video passes through the FC to the VTX. You can optionally remove the mic or vbat wires from the camera wire harness by prying the little white tab with a tiny flathead screwdriver. You can leave the OSD configuration pigtail and tuck it away for future tweaking.
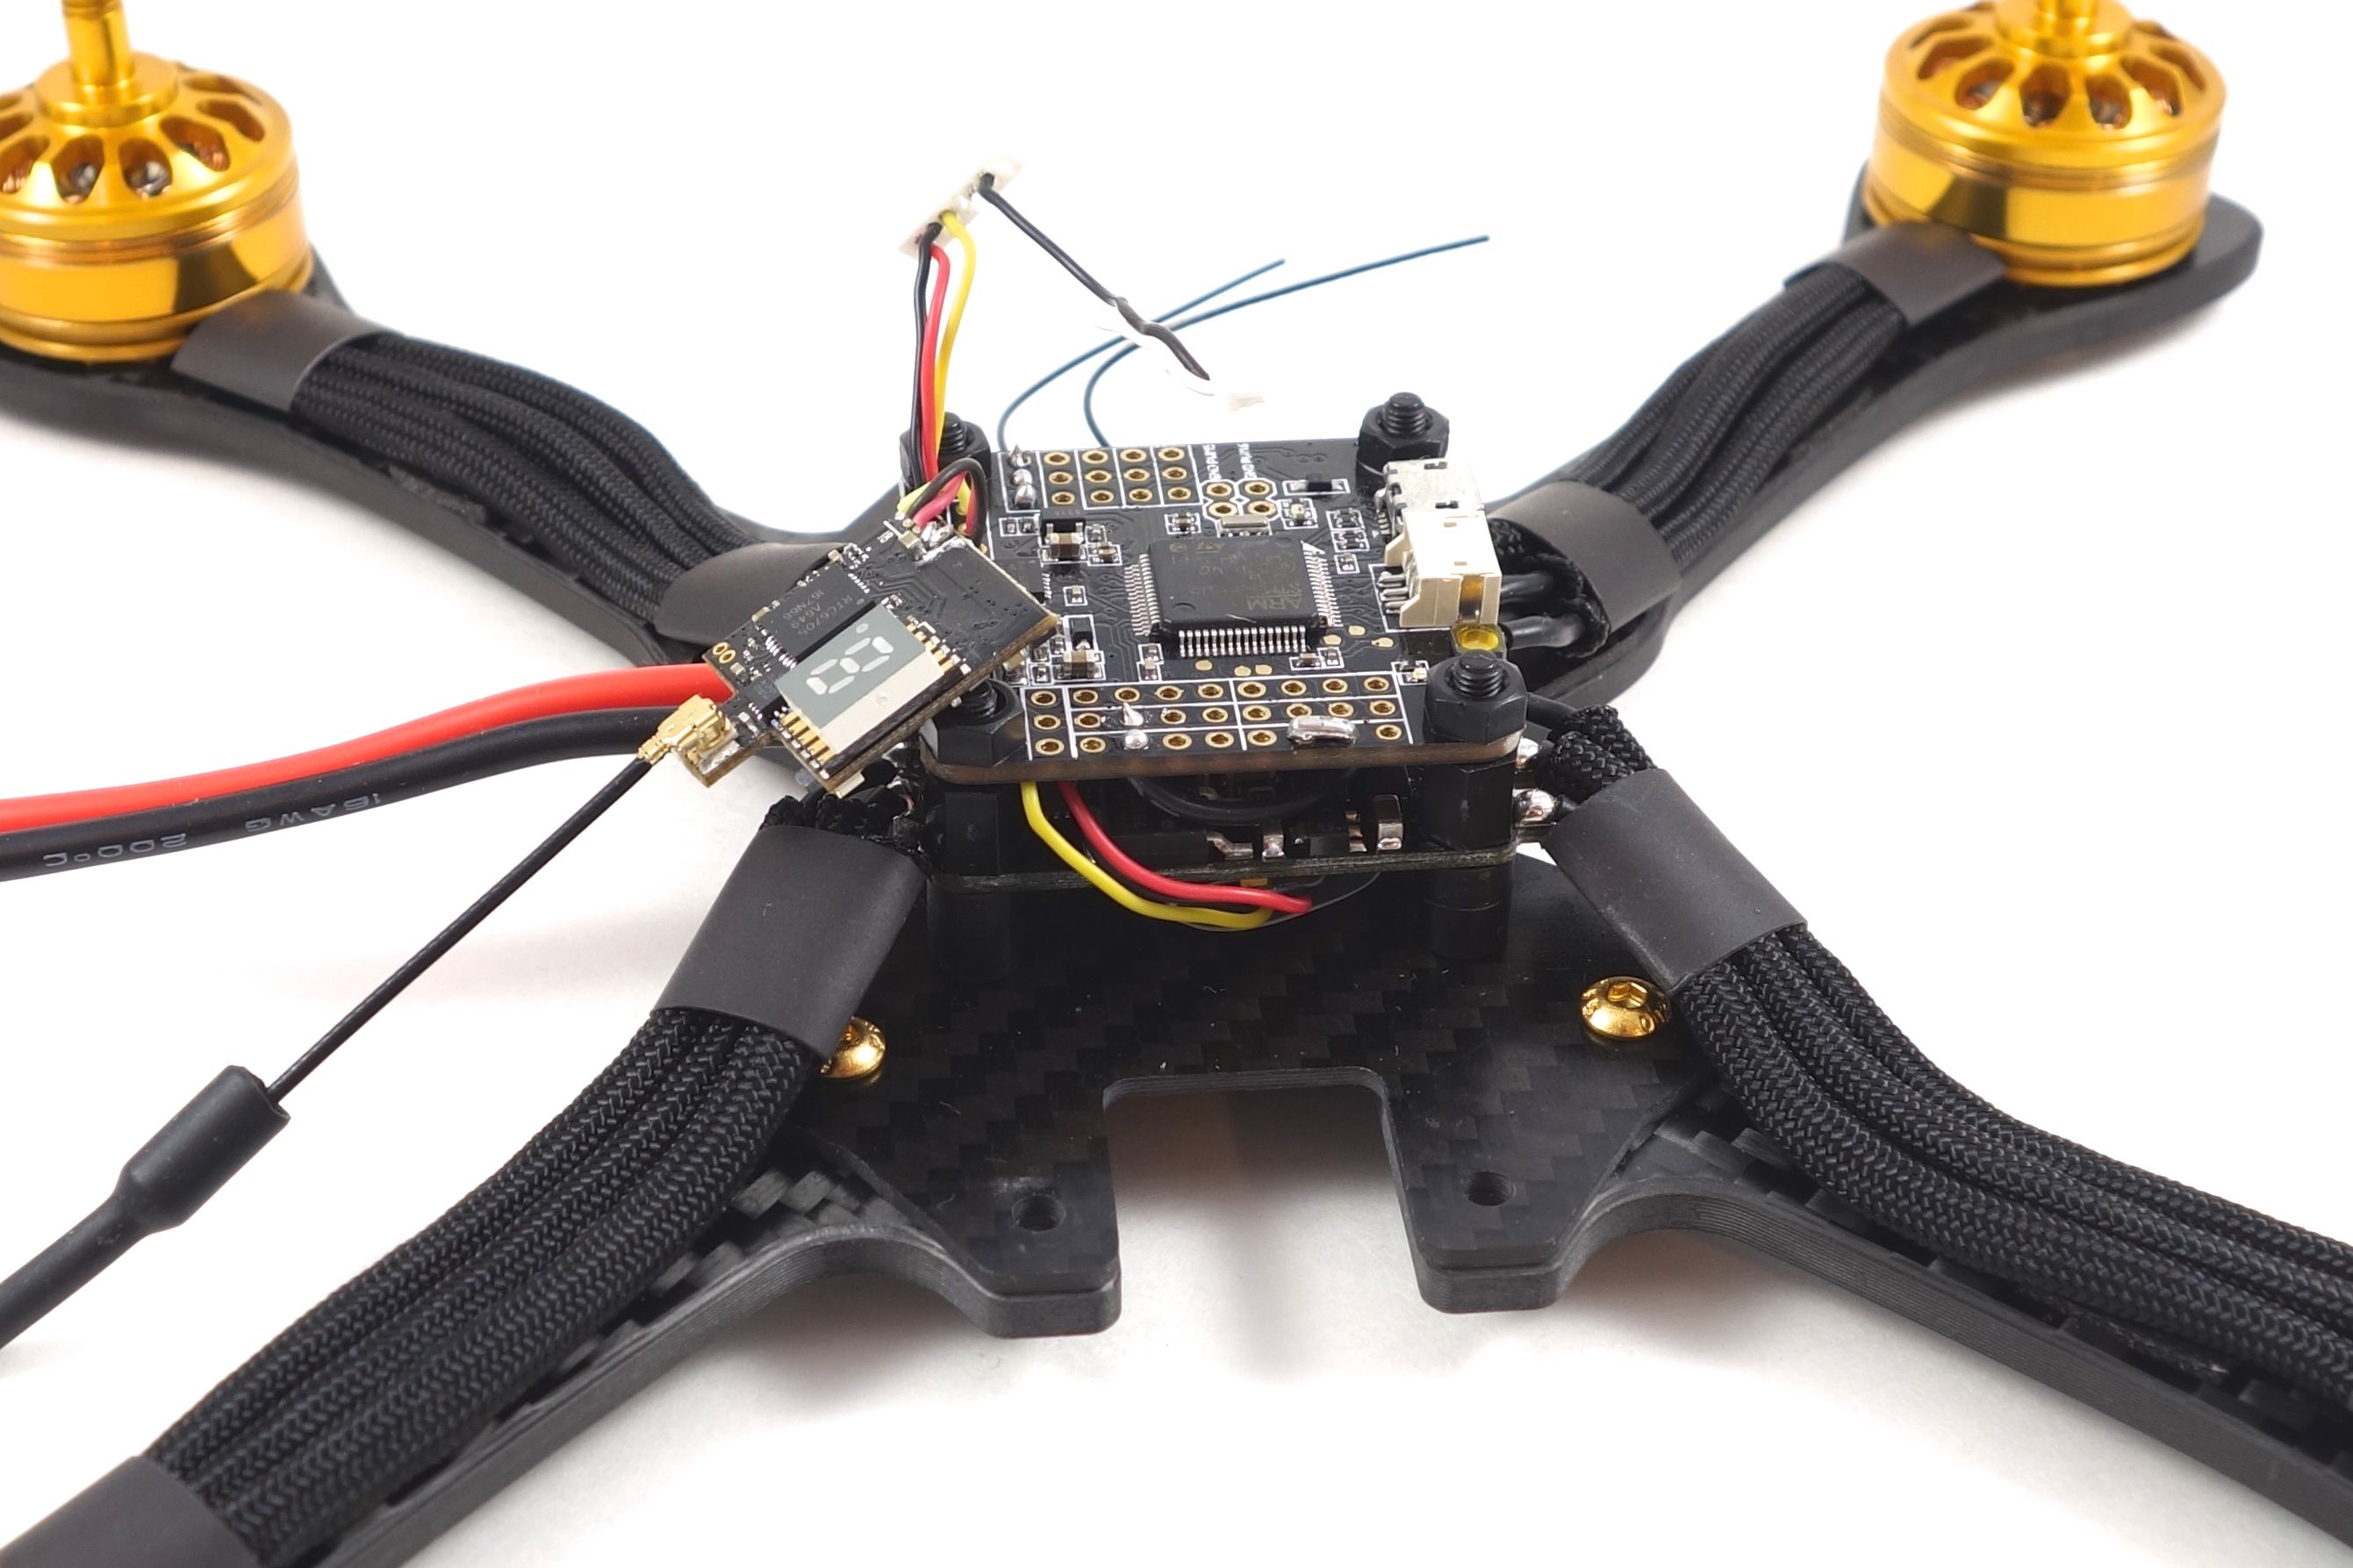

The VTX03 is mounted on a cushion of double sided foam tape to avoid any possible shorts.
BetaFlight Configuration
I won't get into the details of configuring this in Betaflight, but here is a general overview of what you'll need to accomplish:
- Flash firmware to the latest version of BF.
- Use resource commands to order the motors.
- Use BLHeli Configurator to set motor rotations.
- Bind TX/RX and set inputs and ranges.
- Set switches to arm and change modes.
- Configure OSD.
- Set your rates.
- Use camera OSD to adjust your camera settings
Final Thoughts
This build was one of the easiest I've done. The only adjustment I might make is to find motors with longer wires. Unfortunately you won't find any gold motors that fit the bill. It's not a huge burden to extend the wires, but it does add a little time. Also, be sure to pay close attention to the frame instructions as there are some details you might overlook such as which screws to use and where. As with any frame kit you have some flexibility in what parts you use, so don't feel that you need to use everything E.g. the gold standoffs. Another thing to consider is GEPRC makes a stretch version of this frame with blue side-panels, so you can go with a different color scheme and flight characteristics.

Photos


Part List
Show stores (3)
Very nice write and build. I am trying this one for my first build. Would the Racerstar Shot 30A ESC work as a replacement for the Racerstar RS30x4 30A since it seems to no longer be sold or what is your recommendation? Also, would you upgrade the Omnibus Betaflight F4 Flight Controller V1 to the Omnibus Betaflight F4 Flight Controller V3 or is there another recommendation. Thank you for doing these kinds of builds it make the jump in to building much simpler.

If you don't mind using a 5-in-1 I would suggest the StarF3S as it's a very good value. It does everything in a single board and is easy to wire. Check my Wizard Killer Mark II to see how to use it. The main difference between the Omnibus F4 V1 and V3 is the current sensor, but using an FC with a current sensor isn't as intuitive as a 4-in-1 ESC with a current sensor. If you want to use two separate boards you can try this 4-in-1 and the Omnibus F4 V1.
You think I could fit a runcam split board on top of an AIO fc and 4 in 1 esc?
Will do! Also, while I have your attention, I wouldn't mind a second opinion. Do see any reason these escs wouldn't work? Pretty much am just looking for dshot600 30a https://www.banggood.com/Flycolor-Raptor-BLS-Pro-BLHeli_S-30A-2-4S-DSHOT-Brushless-ESC-for-RC-multicopter-FPV-Racing-p-1131648.html?rmmds=cart_middle_products
After having this quad for a little while, is there anything you would change over the initial build?
This thing is awesome looking. Wanting to build one. Question for ya, what size did you end up building? They've got 3 available I noticed.
Amazing write-up! I just completed a very similar build a few weeks ago too but I already broke an arm and motor on it...
https://rotorbuilds.com/build/4559

Always love your builds - very inspiring!
Can you please add the source for the Runcam 3 mount?
Cheers!
Are those battery's seriously 110c? Because I am planing a build with emax 2306 2400kv motors and they draw alot of current with tri blades. So are those batterys accualy good and are they 110c?

What do you think about the range of this stock VTX antenna?

I had my maiden flight today and wow, those motors are smooth. I just love the sound of them. I wasn't flying very aggressively because I had a new friend following me.

Did your kit incluse the other camera side plates? I've build a LX5 before and it had 2 sets of sideplates: one for (I think) Runcam and one which suited my Foxeer Monster V2. Lost the drone and just received the LSX5 for my new build but it only had the sideplates for the Runcam. Curious if GEPRC took them out To sell separately or that it's a packaging fault...

Guides & Reviews

AirbladeUAV has done it again and this time they've brought long range to the 5" class! Based on the popular Transformer Mini, the new Transformer 5" Ultralight adopts a lot of the same design philosophies with larger props and more payload capacity. It can fly upwards of 20 minutes on a 4 cell Li-Ion battery pack and in ideal conditions it's got a range of over 4 to 5 miles. In this guide I'll walk..
Read more
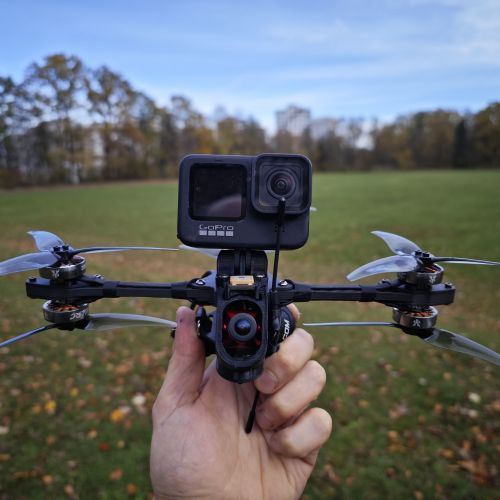
With the release of the DJI FPV Drone cinematic FPV has become a lot more accessible, but you certainly don't want to crash a $750 drone! The QAV-CINE Freybott is a compact, lightweight cinematic FPV drone that can take a hit and keep going. It's a lot safer to fly indoors and around people. With a naked GoPro or the SMO 4k you can capture some great stabilized footage. In this guide I'll show you..
Read more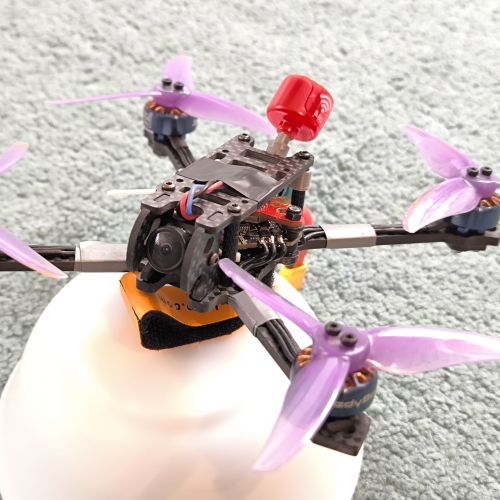

Loved the write up and build, have just order all the parts as my first self assembled drone (I have a few RTF ones).
Could not get hold of the ESC and Flight Controller at the time so have gone for a DYS F30A 4-in-1 ESC and DYS F4 Pro V2 Flight Controller which both seem popular, hopefully this will work out ok.
Anyhow thanks for sharing this.
Syn
My pleasure! It's a nice frame and a durable build. I hope it comes together smoothly!
Hi all, need some advice as to were to start with an issue I am having.
Just finished assembling my first drone (flown a few RTFs), but am experiencing some flight issues and I don't know where to start to resolve it. When I fire up the drone either on the bench or in flight (holding the bottom so it does not fly away) it seems to gradually want to compensate toward motor 3 as though there is some kind of imbalance that needs to be compensate for. It seems to gradually spool up larger and larger to the point where engines 1,2 and 4 are at 1500ish and engine 3 is sitting at around 1070, even thought he drone is perfectly balanced on the bench. I thought it might just be me, so I decided to let it go and see how it would fly....suffice to say I am glad I allocated Failsafe to Switch C!!!!
Am running Betaflight, have tried with and without Antigravity and air-mode, makes no difference.
post note: Blackblox indicates that engine 1, 2, and 4 at 15% engine 3 5%, by gyros all level.....
help.... :)
Are your sticks centering on the receiver tab? If the 3D model to the lower right is moving at all then they are not centered. Any input at all will cause the craft to try to adjust its angle. The spooling up is normal especially after you give it a little throttle on the bench. You should be able to wiggle the pitch and roll sticks (without props!) and see the craft rock back and forth according to your inputs. Just don't give it any throttle. Keep antigravity and airmode enabled.
Are all your ESCs on the same firmware? Did you update them to the latest version?
not sure what the issue was, reflashed everything and now its all ok.
frame is good, couple of crashed and not a scratch. Wish there was a touch more room for components in the middle, if you use a 4 in 1 ESC it gets a little tight, but keeps it all compact I suppose.
with T5046 blades its a bit of a monster, probably a bit to much for me at my career stage of FPV, but what the hell. Go big or go home (....or in my case go big and go home in pieces.....)
thanks :)