Dexter
 By RJFeddeler on Sep 28, 2016
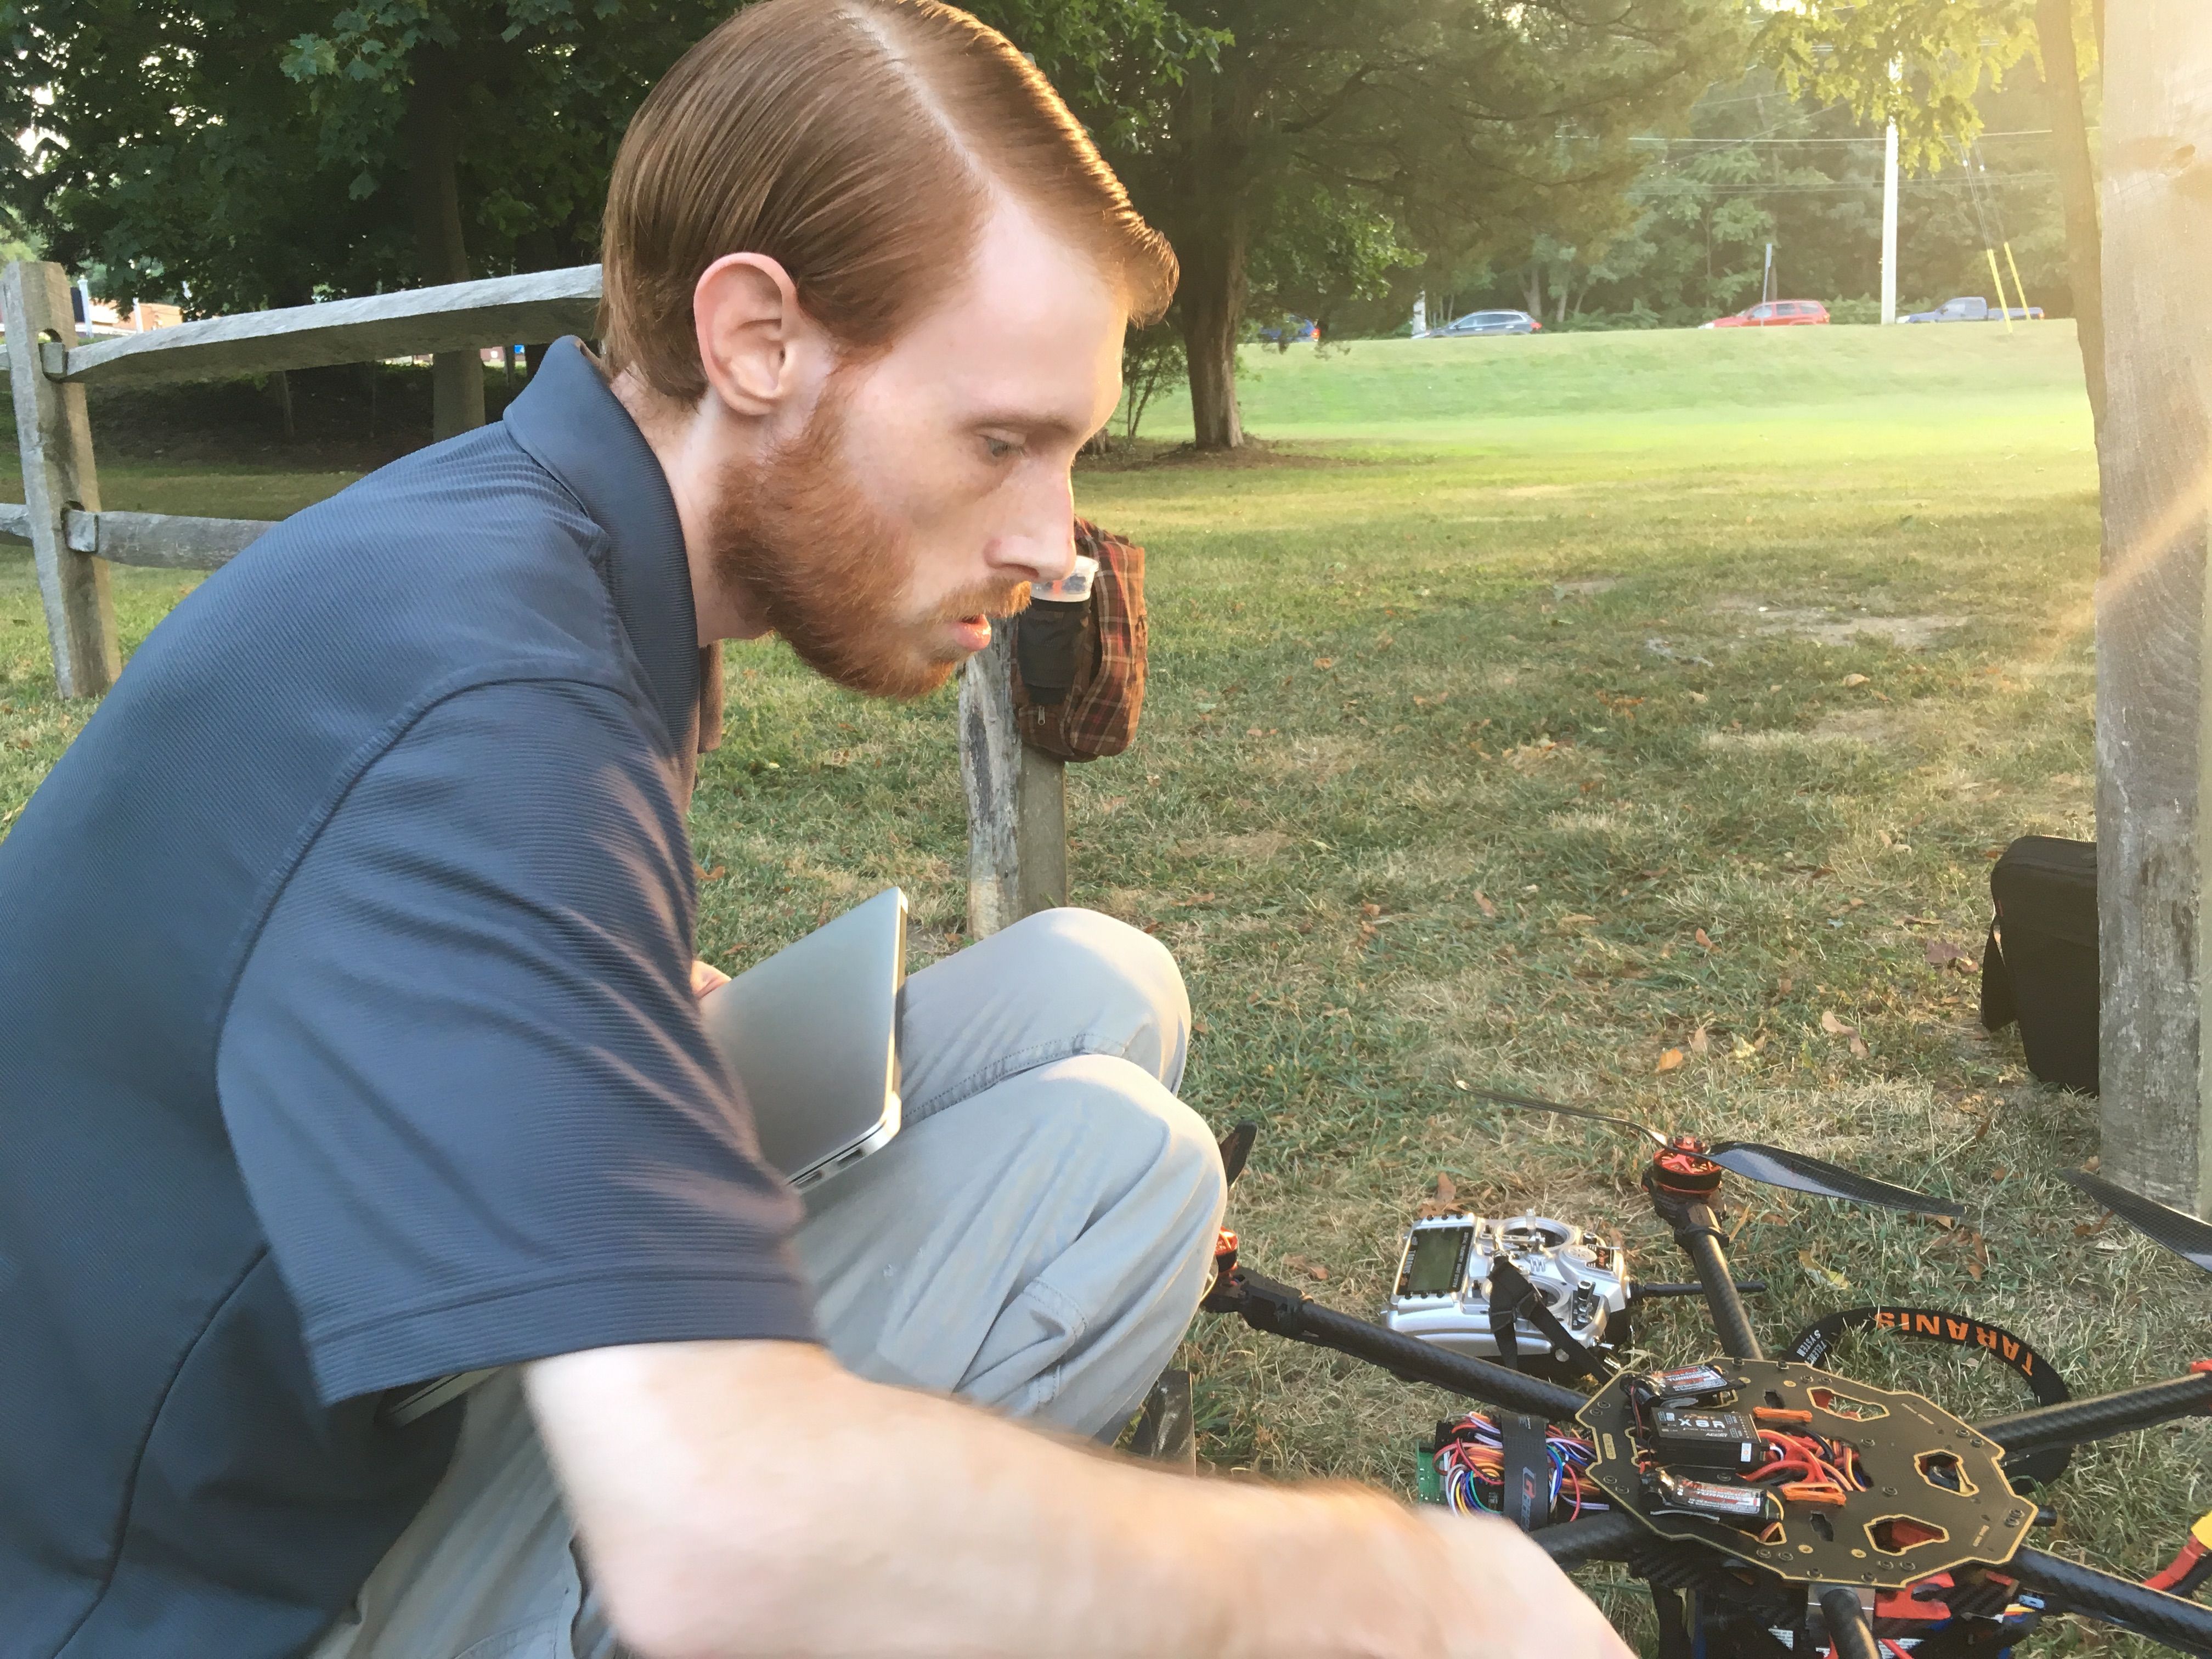
Quick backstory: My name is Rob. I'm 32 years old. I'm a Computer Science major (still 3 classes to go for my degree). Not only have I never built, or even flown, any type of multi-copter before, but I've also never coded a hardware electronics project either. So, of course I got the great idea of writing my own flight controller as a way to learn about two interests of mine at once, and all with a fun (robot... toy... destructive force... RESULT!) result in the end. I had very little idea of what I was getting myself into.
On May 28, 2015 I ordered my first parts to begin this epic project (at least it was epic in my mind), an Arduino Uno and a 10 Degree-of-Freedom (DOF) sensor board based on the MPU9250 with 3-axis gyroscope, 3-axis accelerometer, 3-axis magnetometer, and a pressure sensor. A week or two later when the parts arrived I started playing with the Arduino Uno immediately. I had downloaded all the software that I would need and was ready to dive right in.
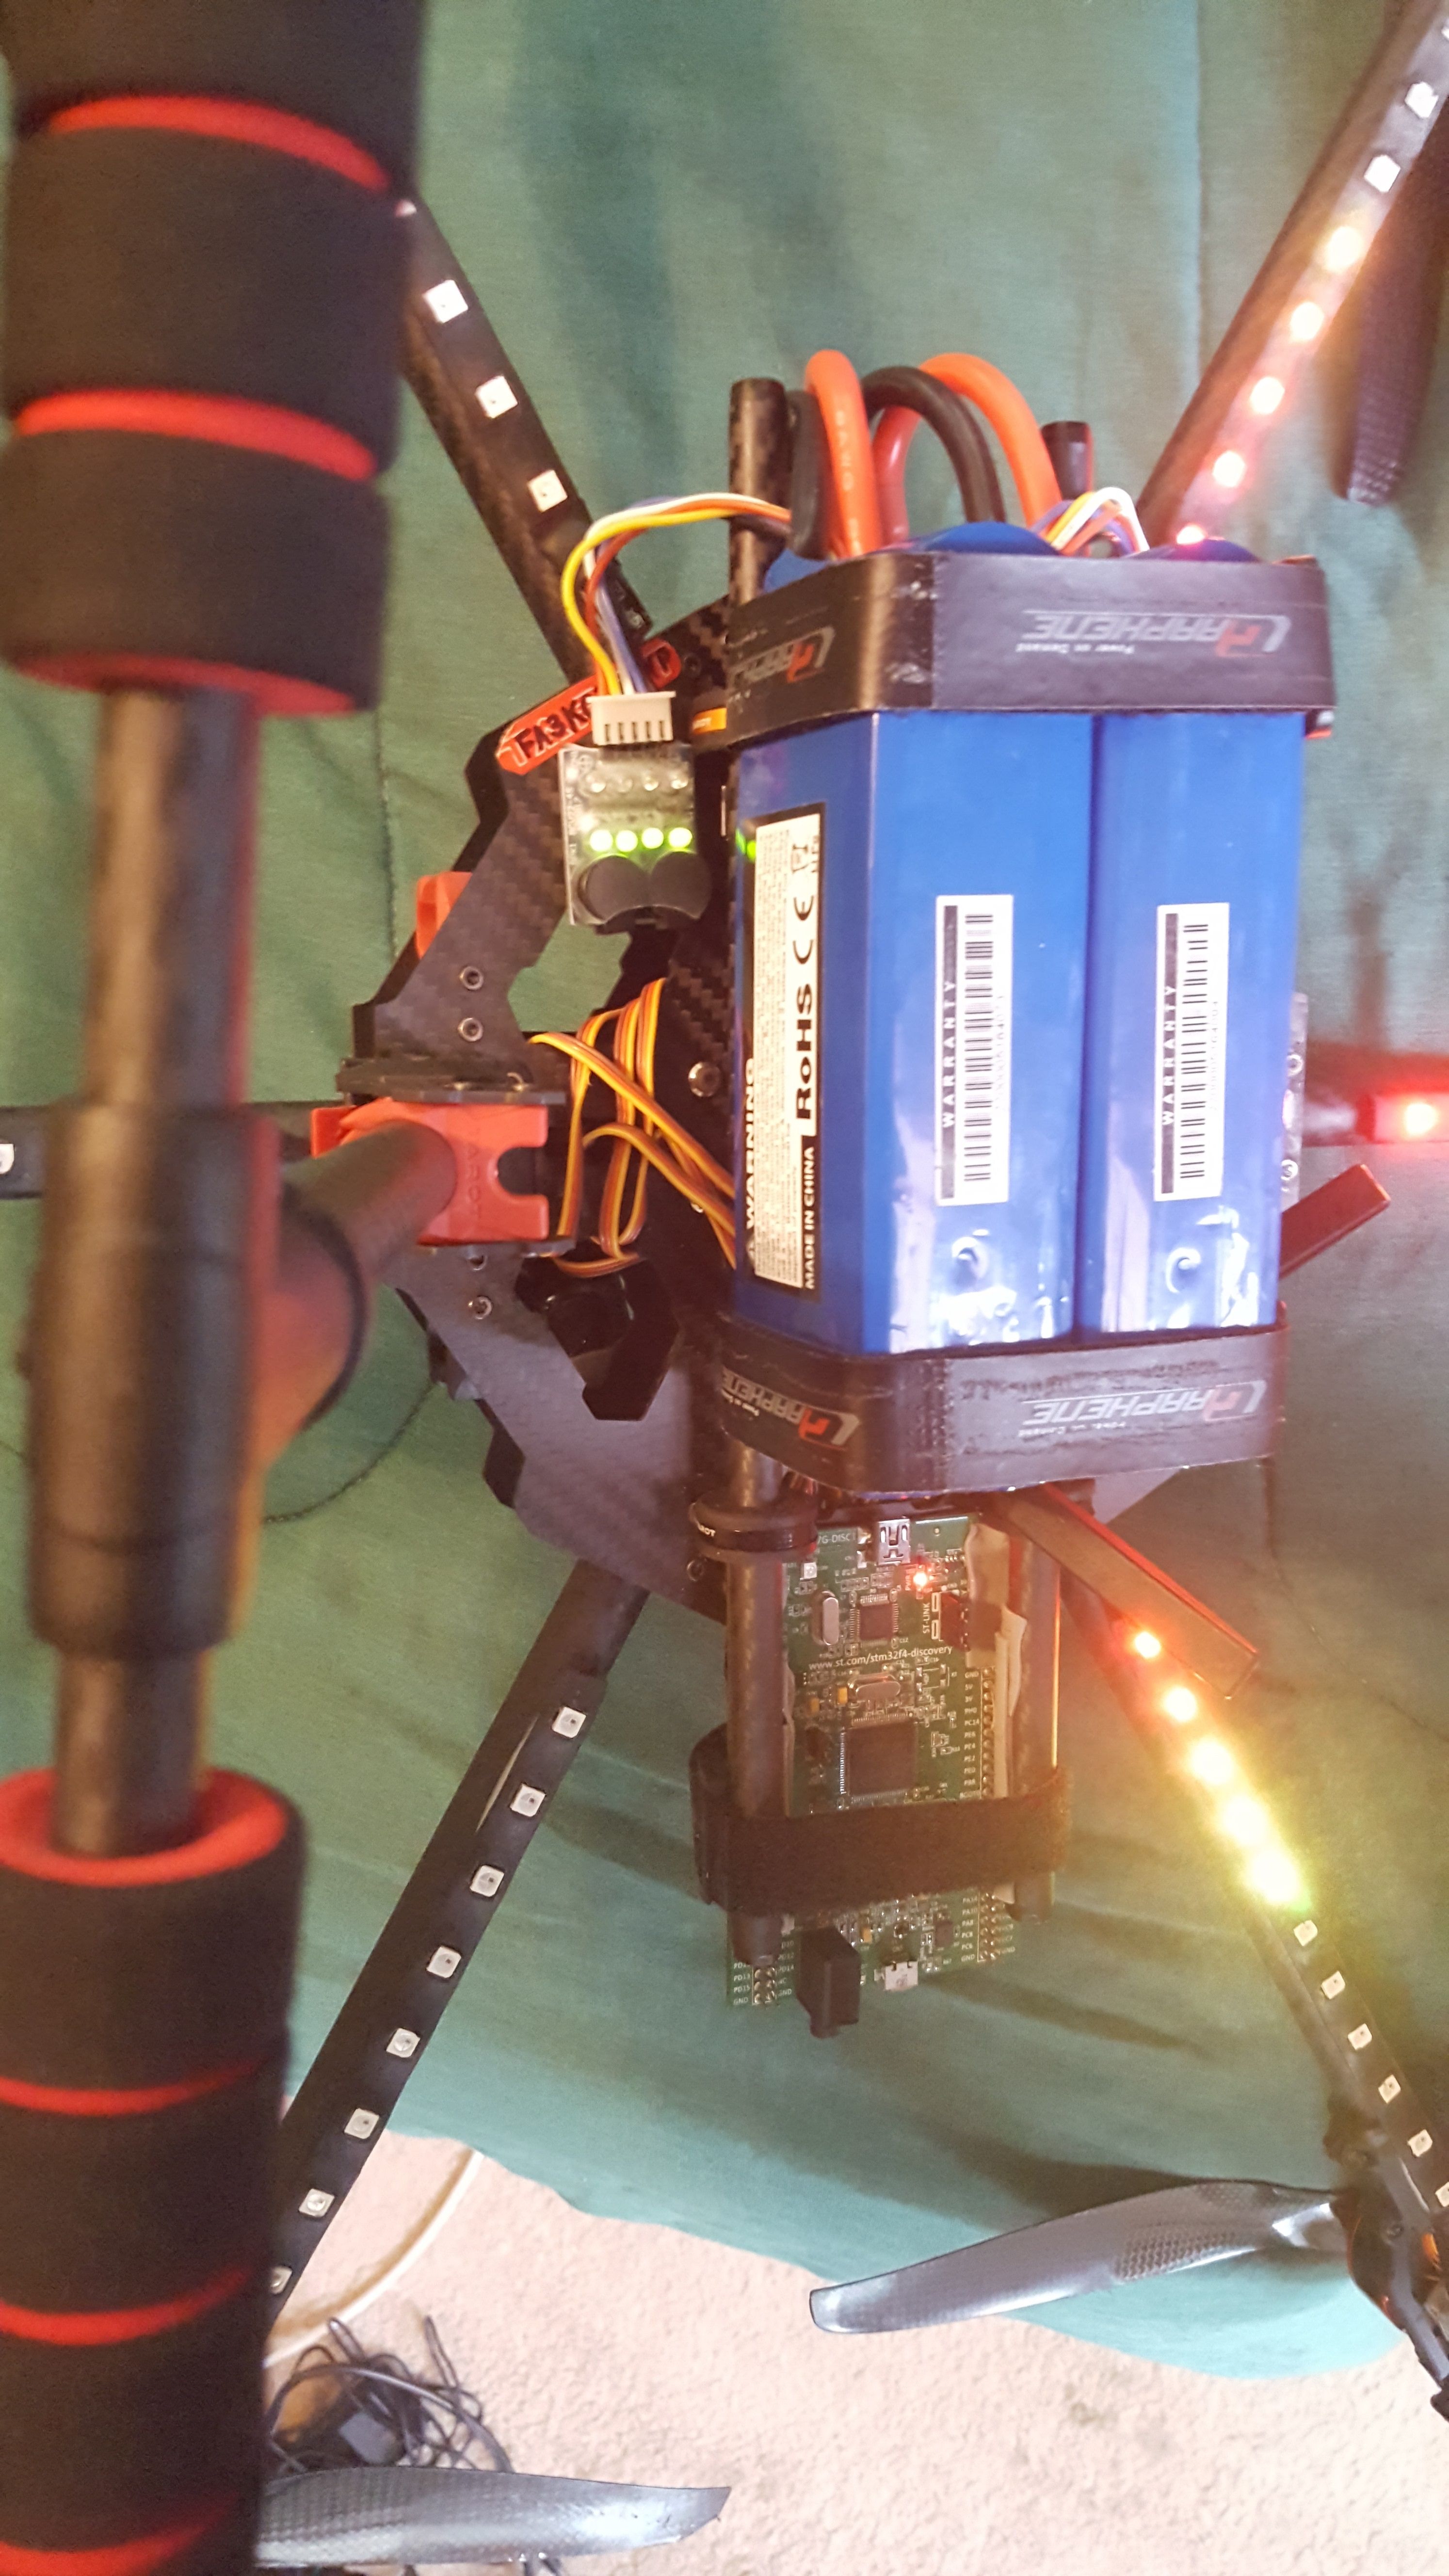
Of course you can't really dive right into a project like this with lack of previous knowledge. Over the next few months I spent sometimes obsessive amounts of time researching the basics and how to communicate with another device, such as the sensor module, through the Arduino Uno while also researching the inner workings of most open-source flight controller softwares and related articles. A couple months had passed and by the time I had done enough research and got my first full peripheral coded and working, the MPU9250 Inertial Measurement Unit (IMU), I had realized that what I wanted this flight controller to be able to achieve would require more power than the little Arduino Uno could give me. All this time spent figuring out how the basics work and how to communicate with a specific device through an Arduino Uno and now I had to start all over again. The thing was, I don't even think I was mad at the time. I was happy that I started with the Arduino platform and was now moving onto something more advanced. Every project has its own needs and I'm sure that Arduino will come in handy one day. I felt that I had not wasted my time and that I had just learned something else along the way, which happened to be a good stepping stone. So the decision was final and on October 19, 2015 I ordered a STM32F407 Discovery Board.
I was tired of working with the IMU sensor board at this point, so I started learning how to interface with other components of this project on this brand new (and scary) platform, known as ARM, with the STM32F4 disco board. It took a little while to figure out how STM32 development varied from Arduino as it is much more powerful and complex, but eventually I got the hang of it and most of the other parts of the flight controller were beginning to work, one by one. It was at this time that I decided to work on the MPU9250 IMU that I had avoided from the start. I did end up writing code for it, but I was having trouble with the magnetometer readings when correcting for tilt and was worried it had the potential to mess something up in-flight. This led me to purchase a BNO055 absolute orientation sensor which fuses the magnetometer along with the gyroscope and accelerometer that the MPU9250 fused. It turned out that this chip had the same behavior as my code with the MPU9250. The math gets funky when pitch or roll are greater than 45* in either direction. I decided to stick with the BNO055 anyway as it did all fusion calculations onboard as opposed to doing extra work on the main processor with the MPU2950.
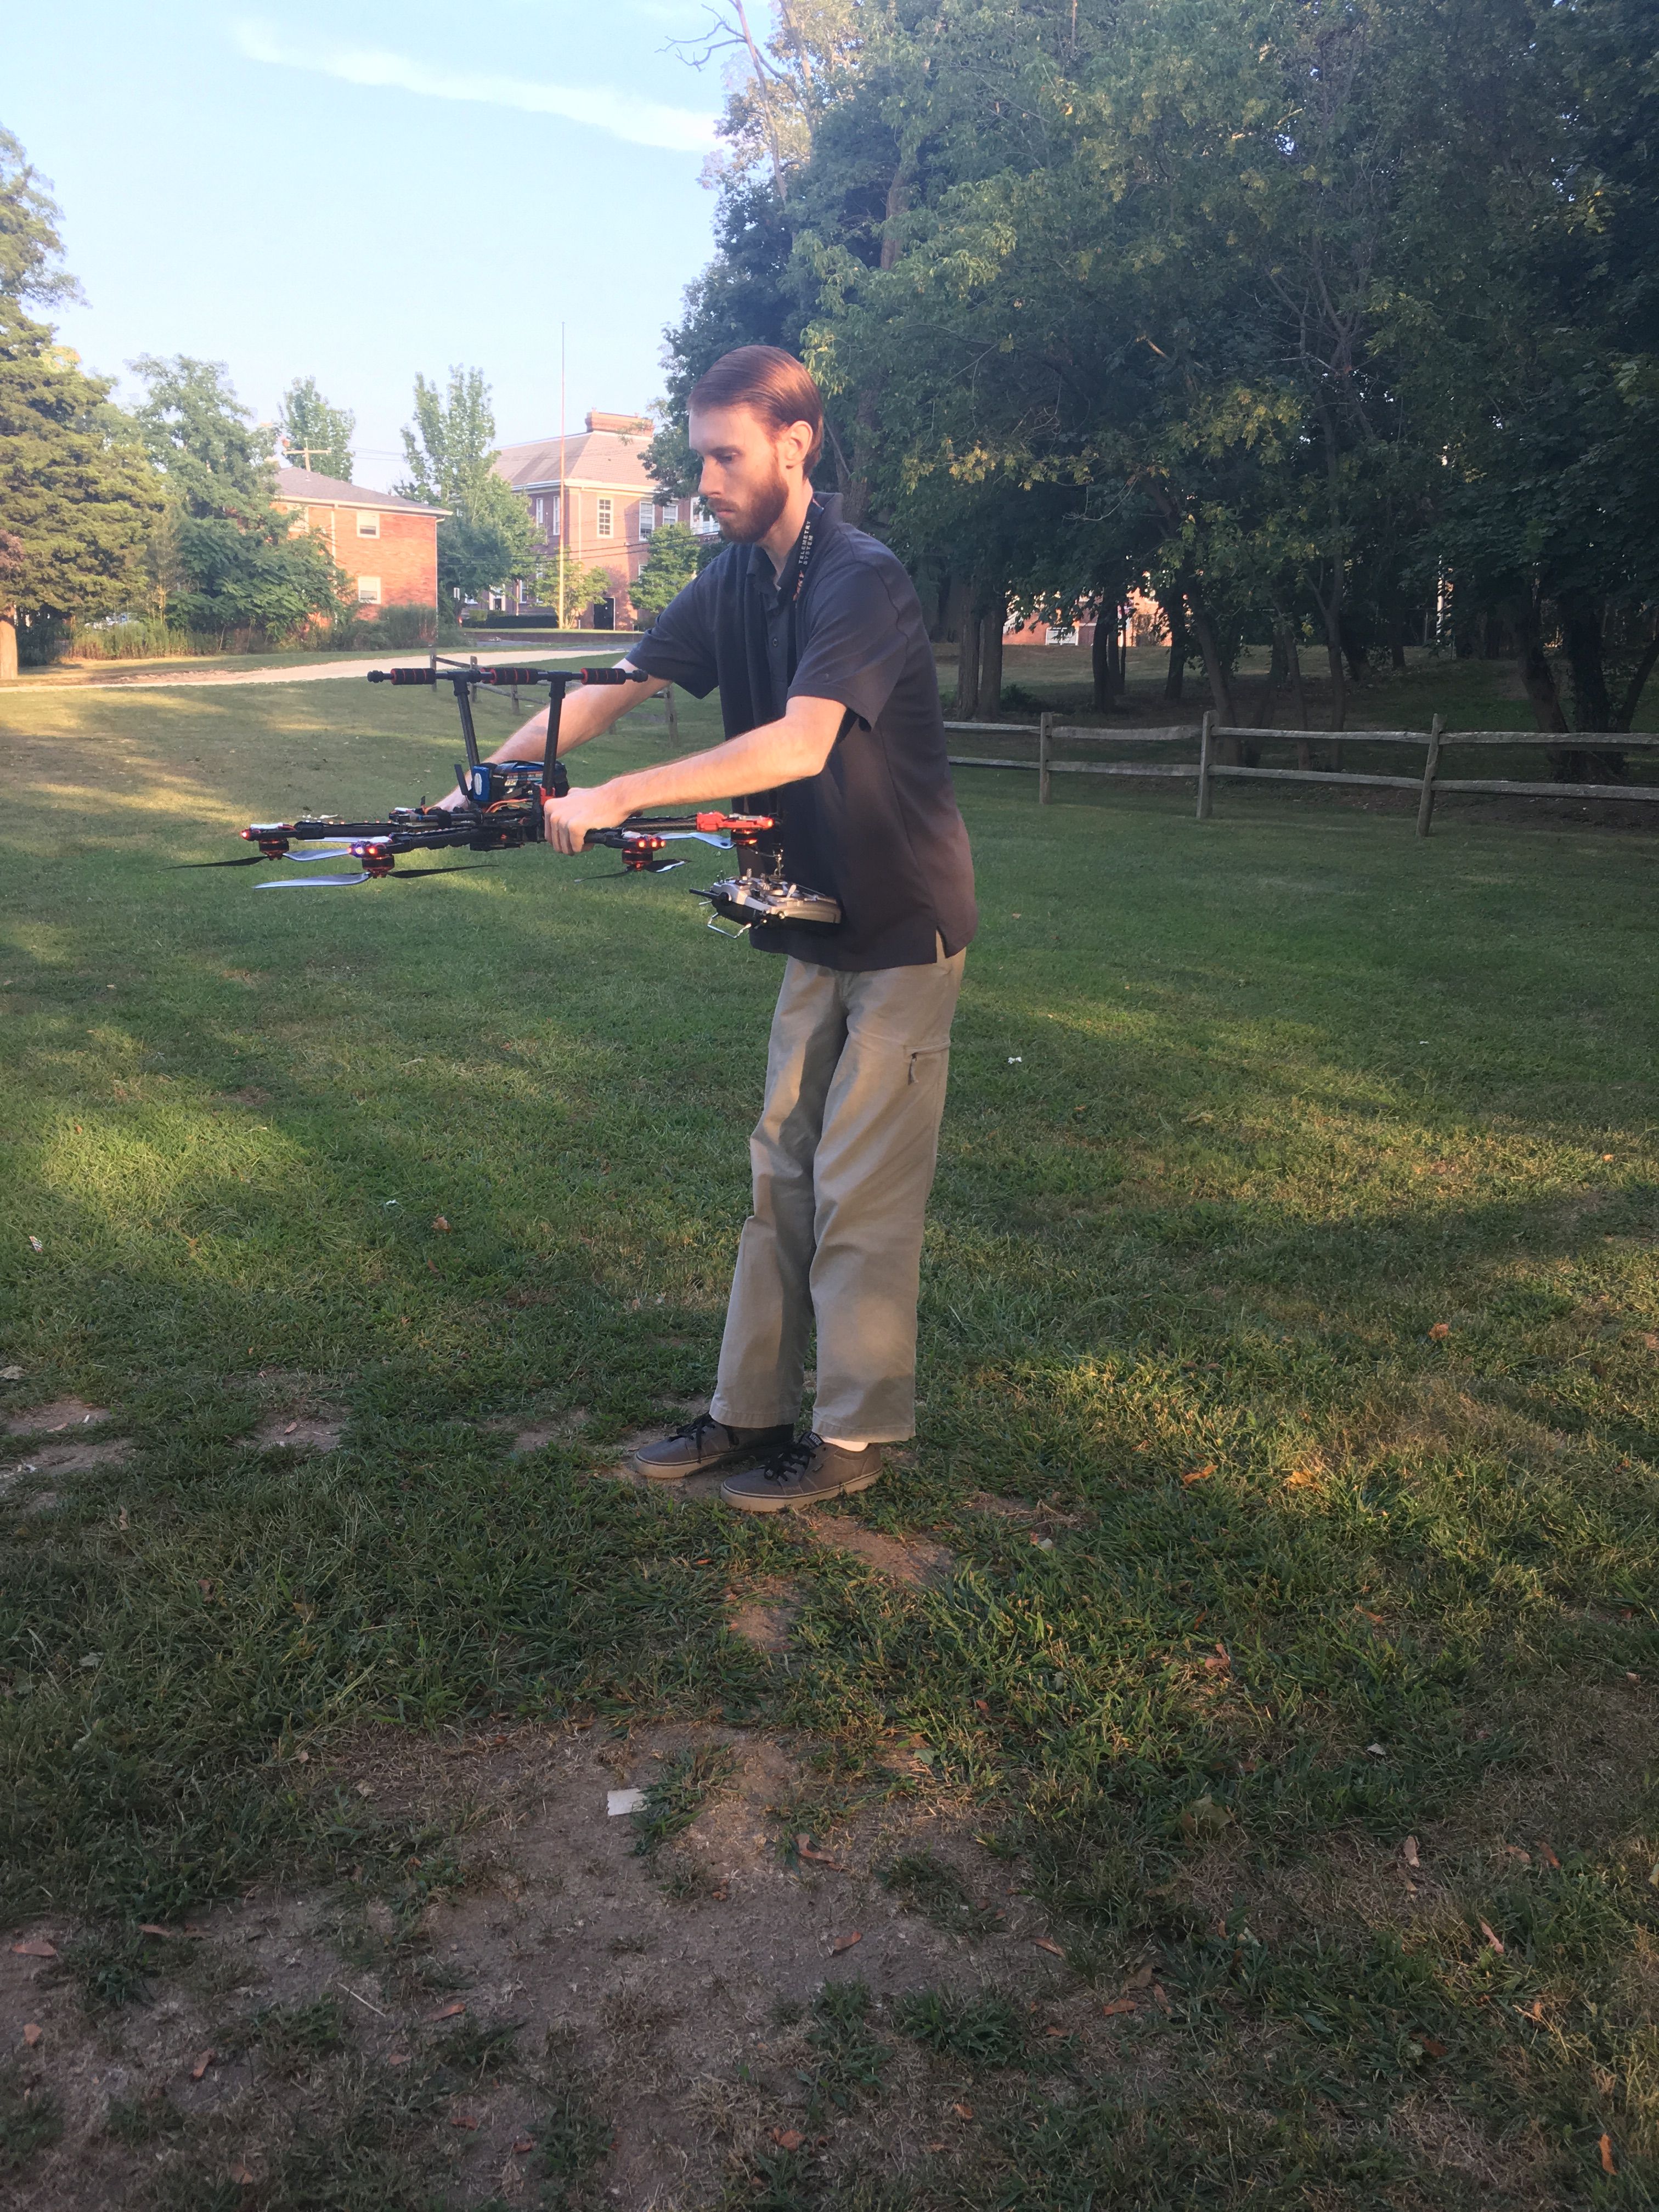
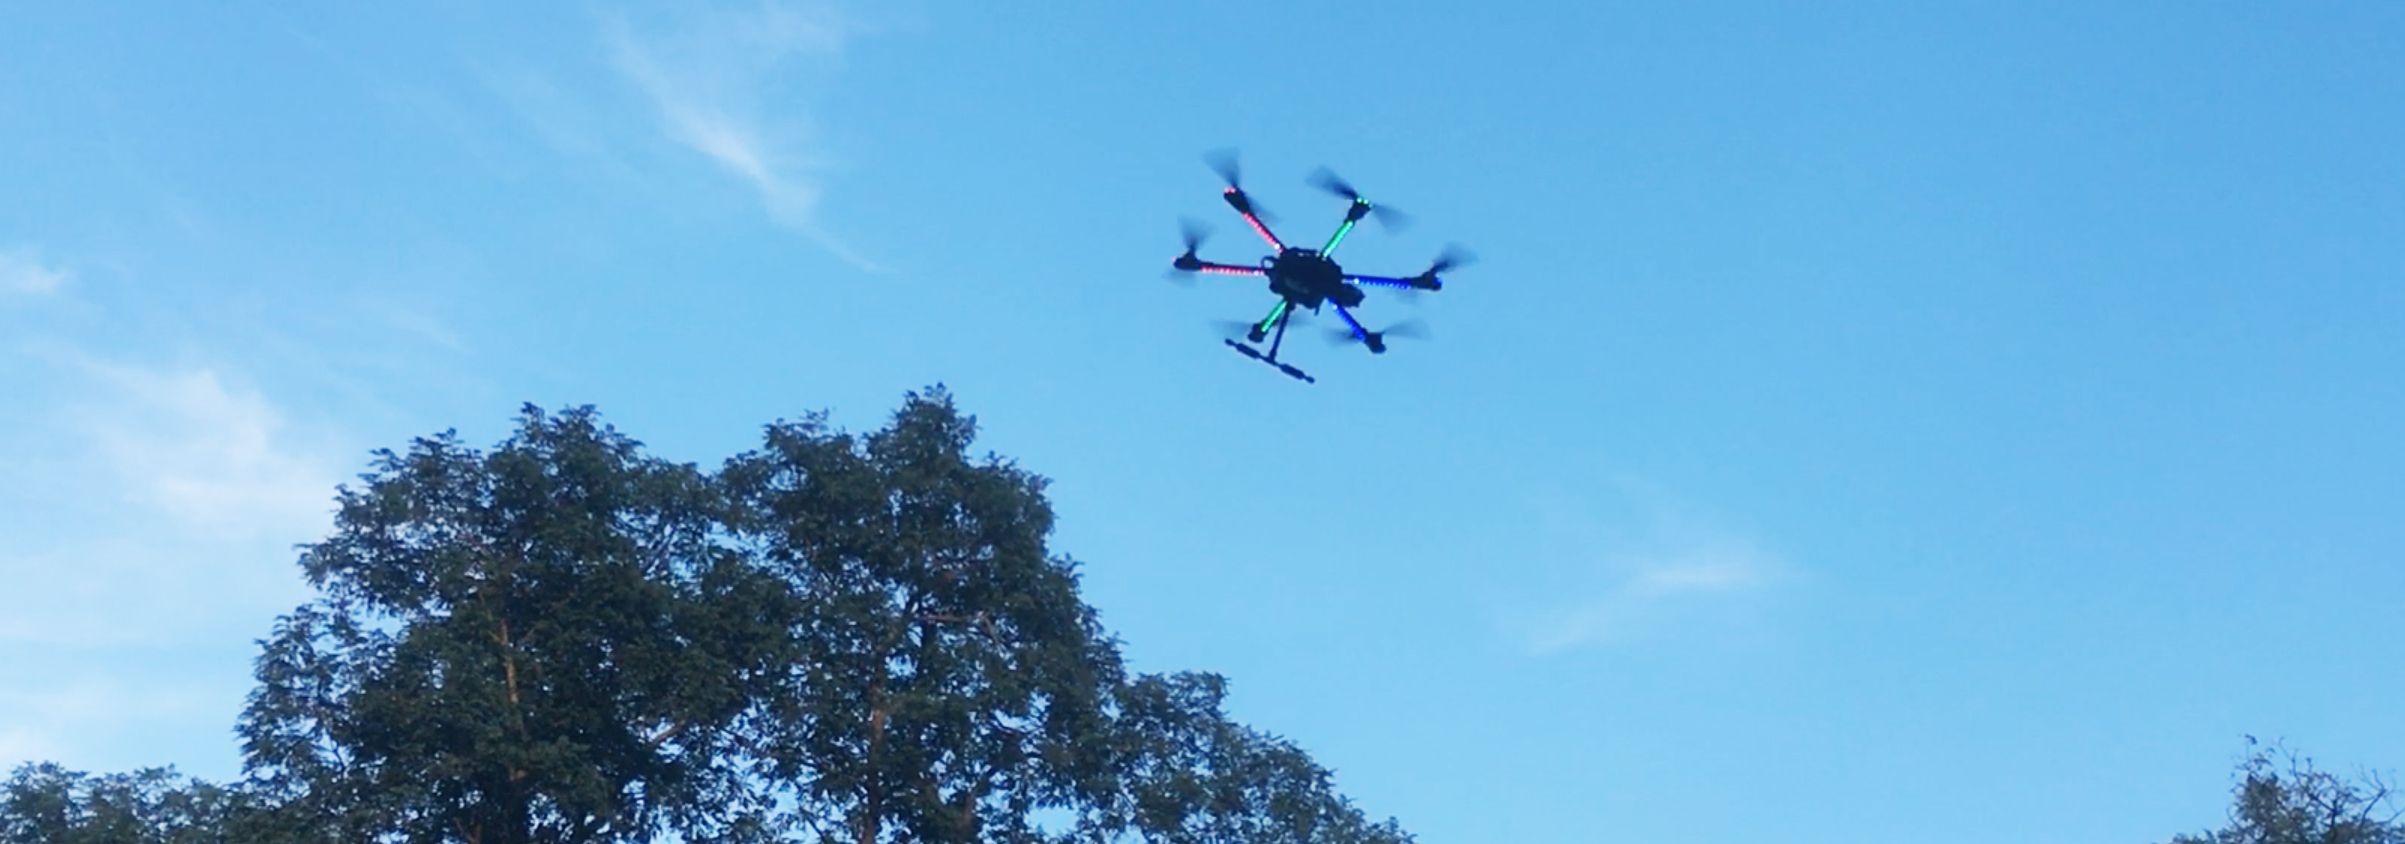
September 8, 2016 was the day of my first successful flight (after 2 other failed attempted days due to PID gains being set too low). The tuning needs some work still and some things need tweaking but I'm happy with where I am so far. I was trying to figure out how much time since the start I have spent on this project. I estimated that I took at least 6-9 months worth of breaks in the time period described here. So from ordering the Arduino Uno to first successful flight took about 9 months - I think that's a pretty good gestation period!
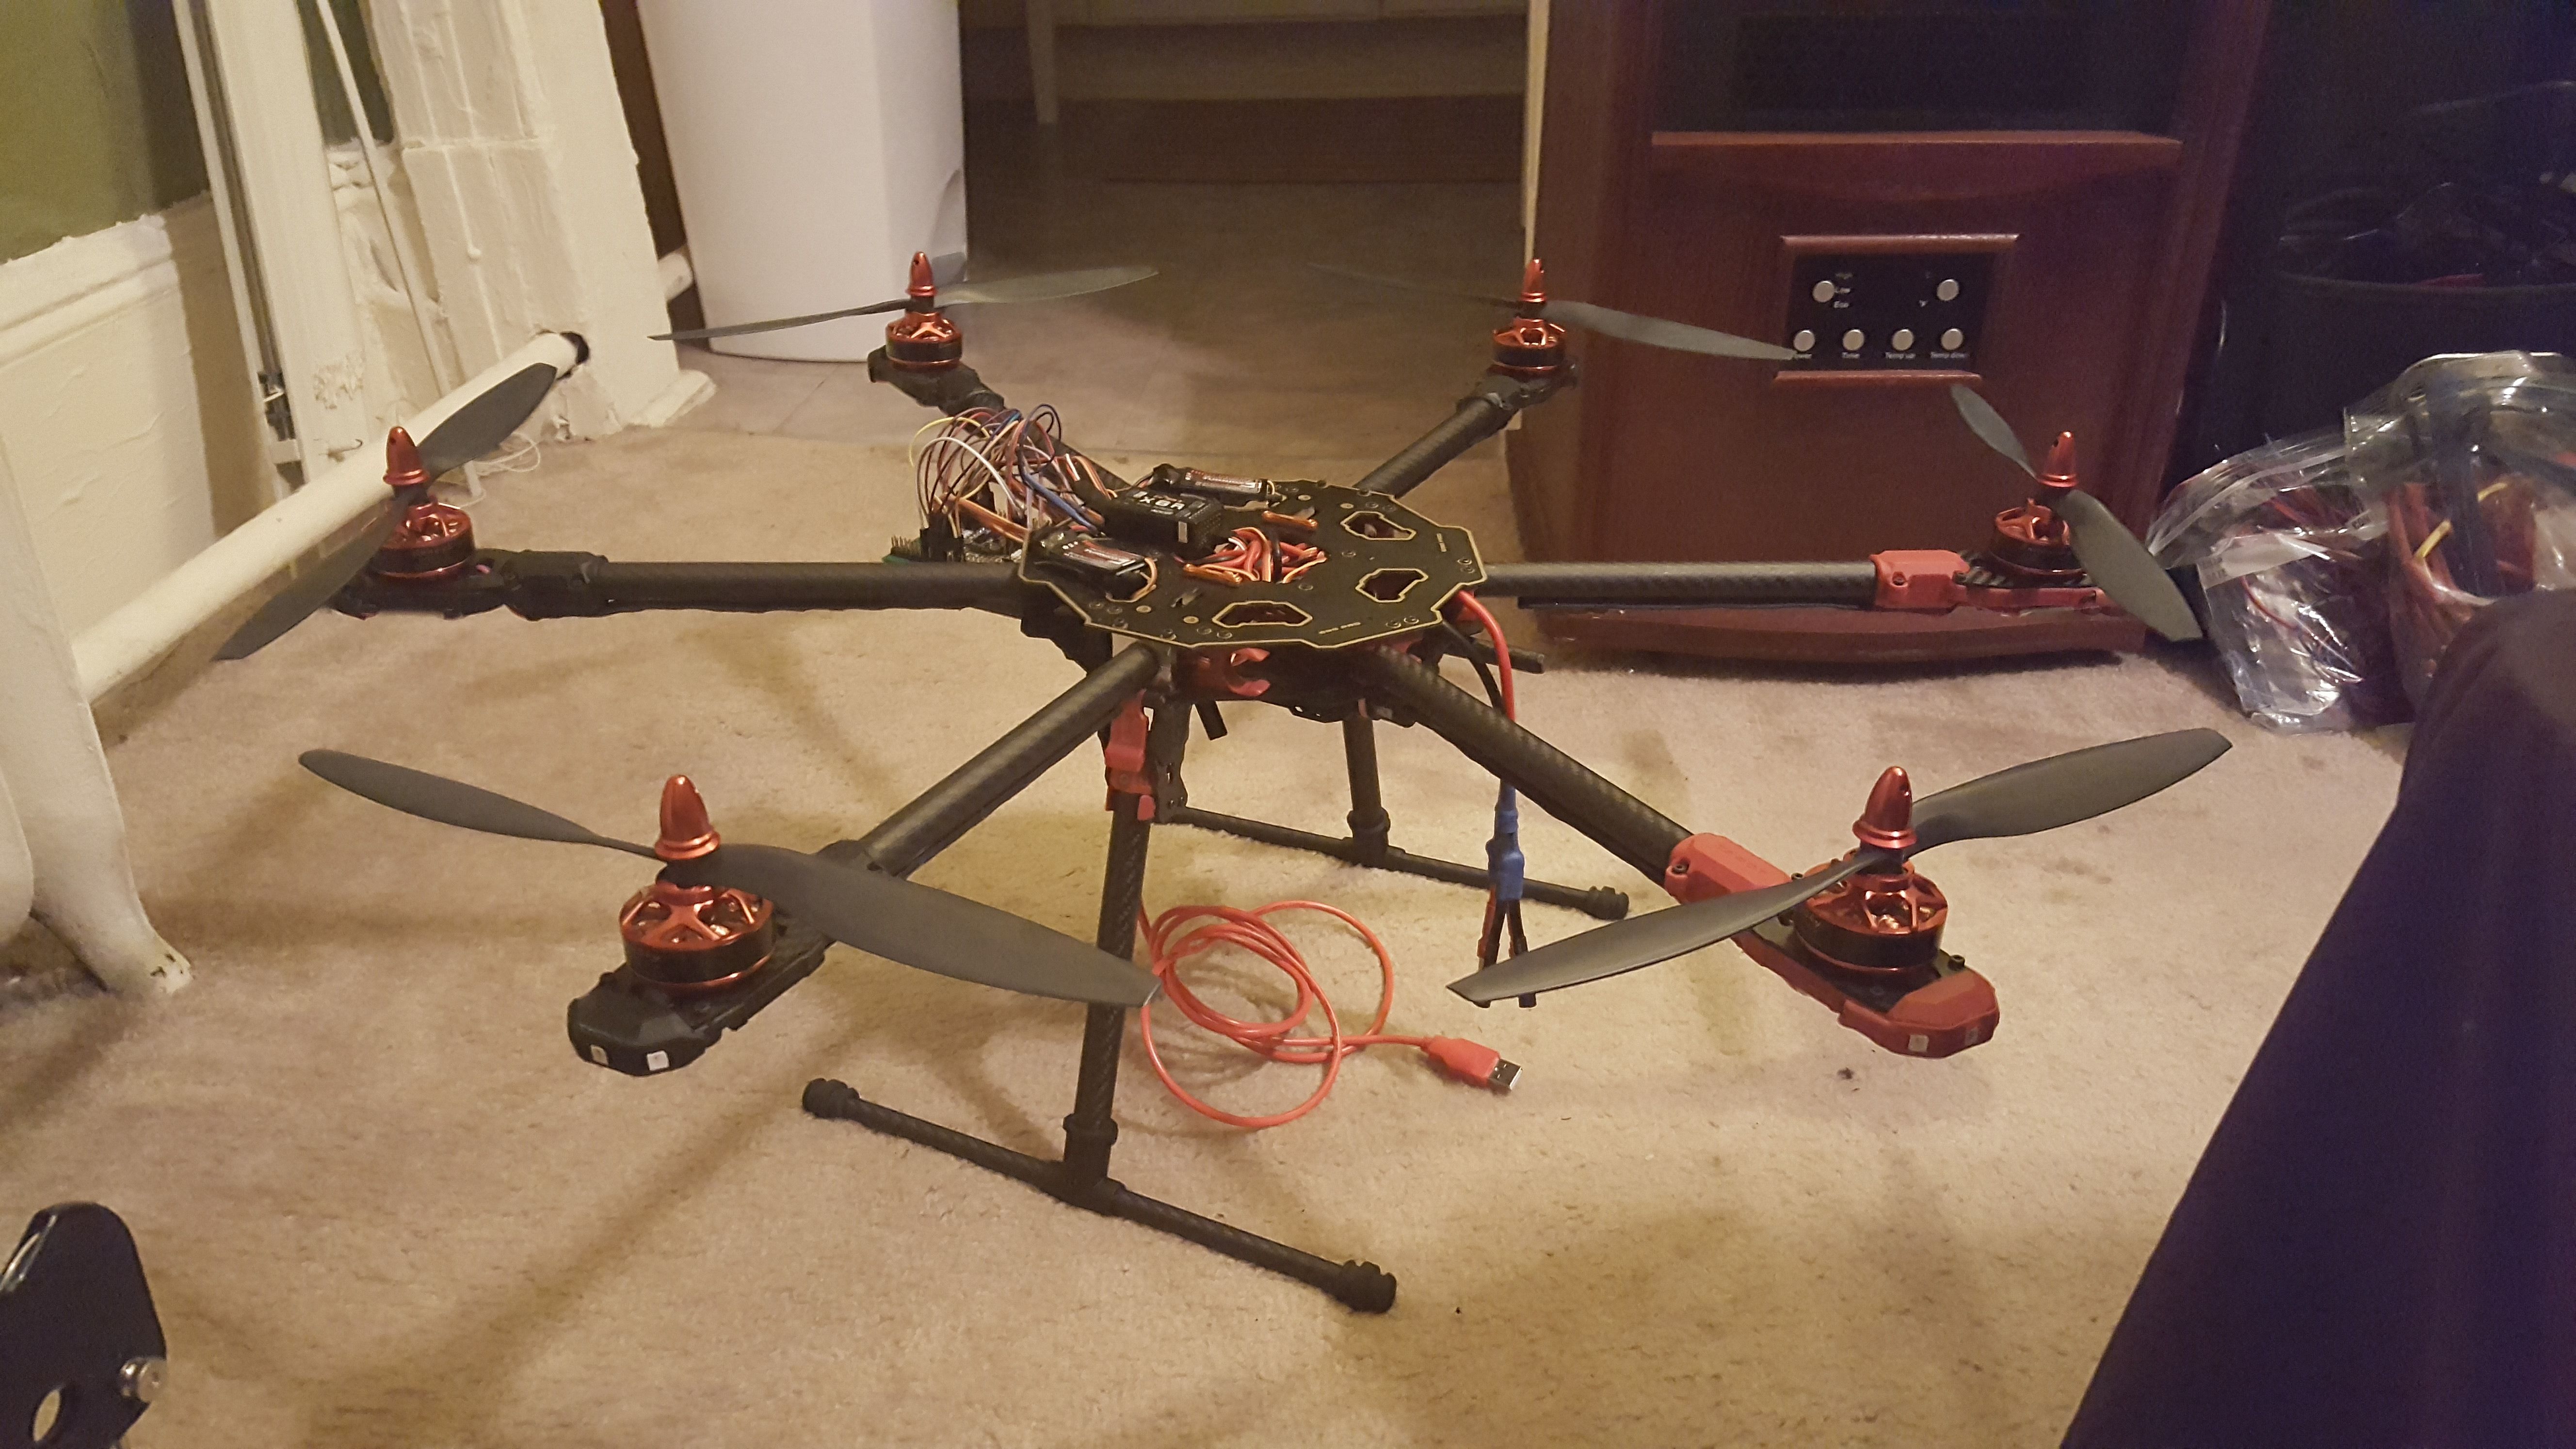
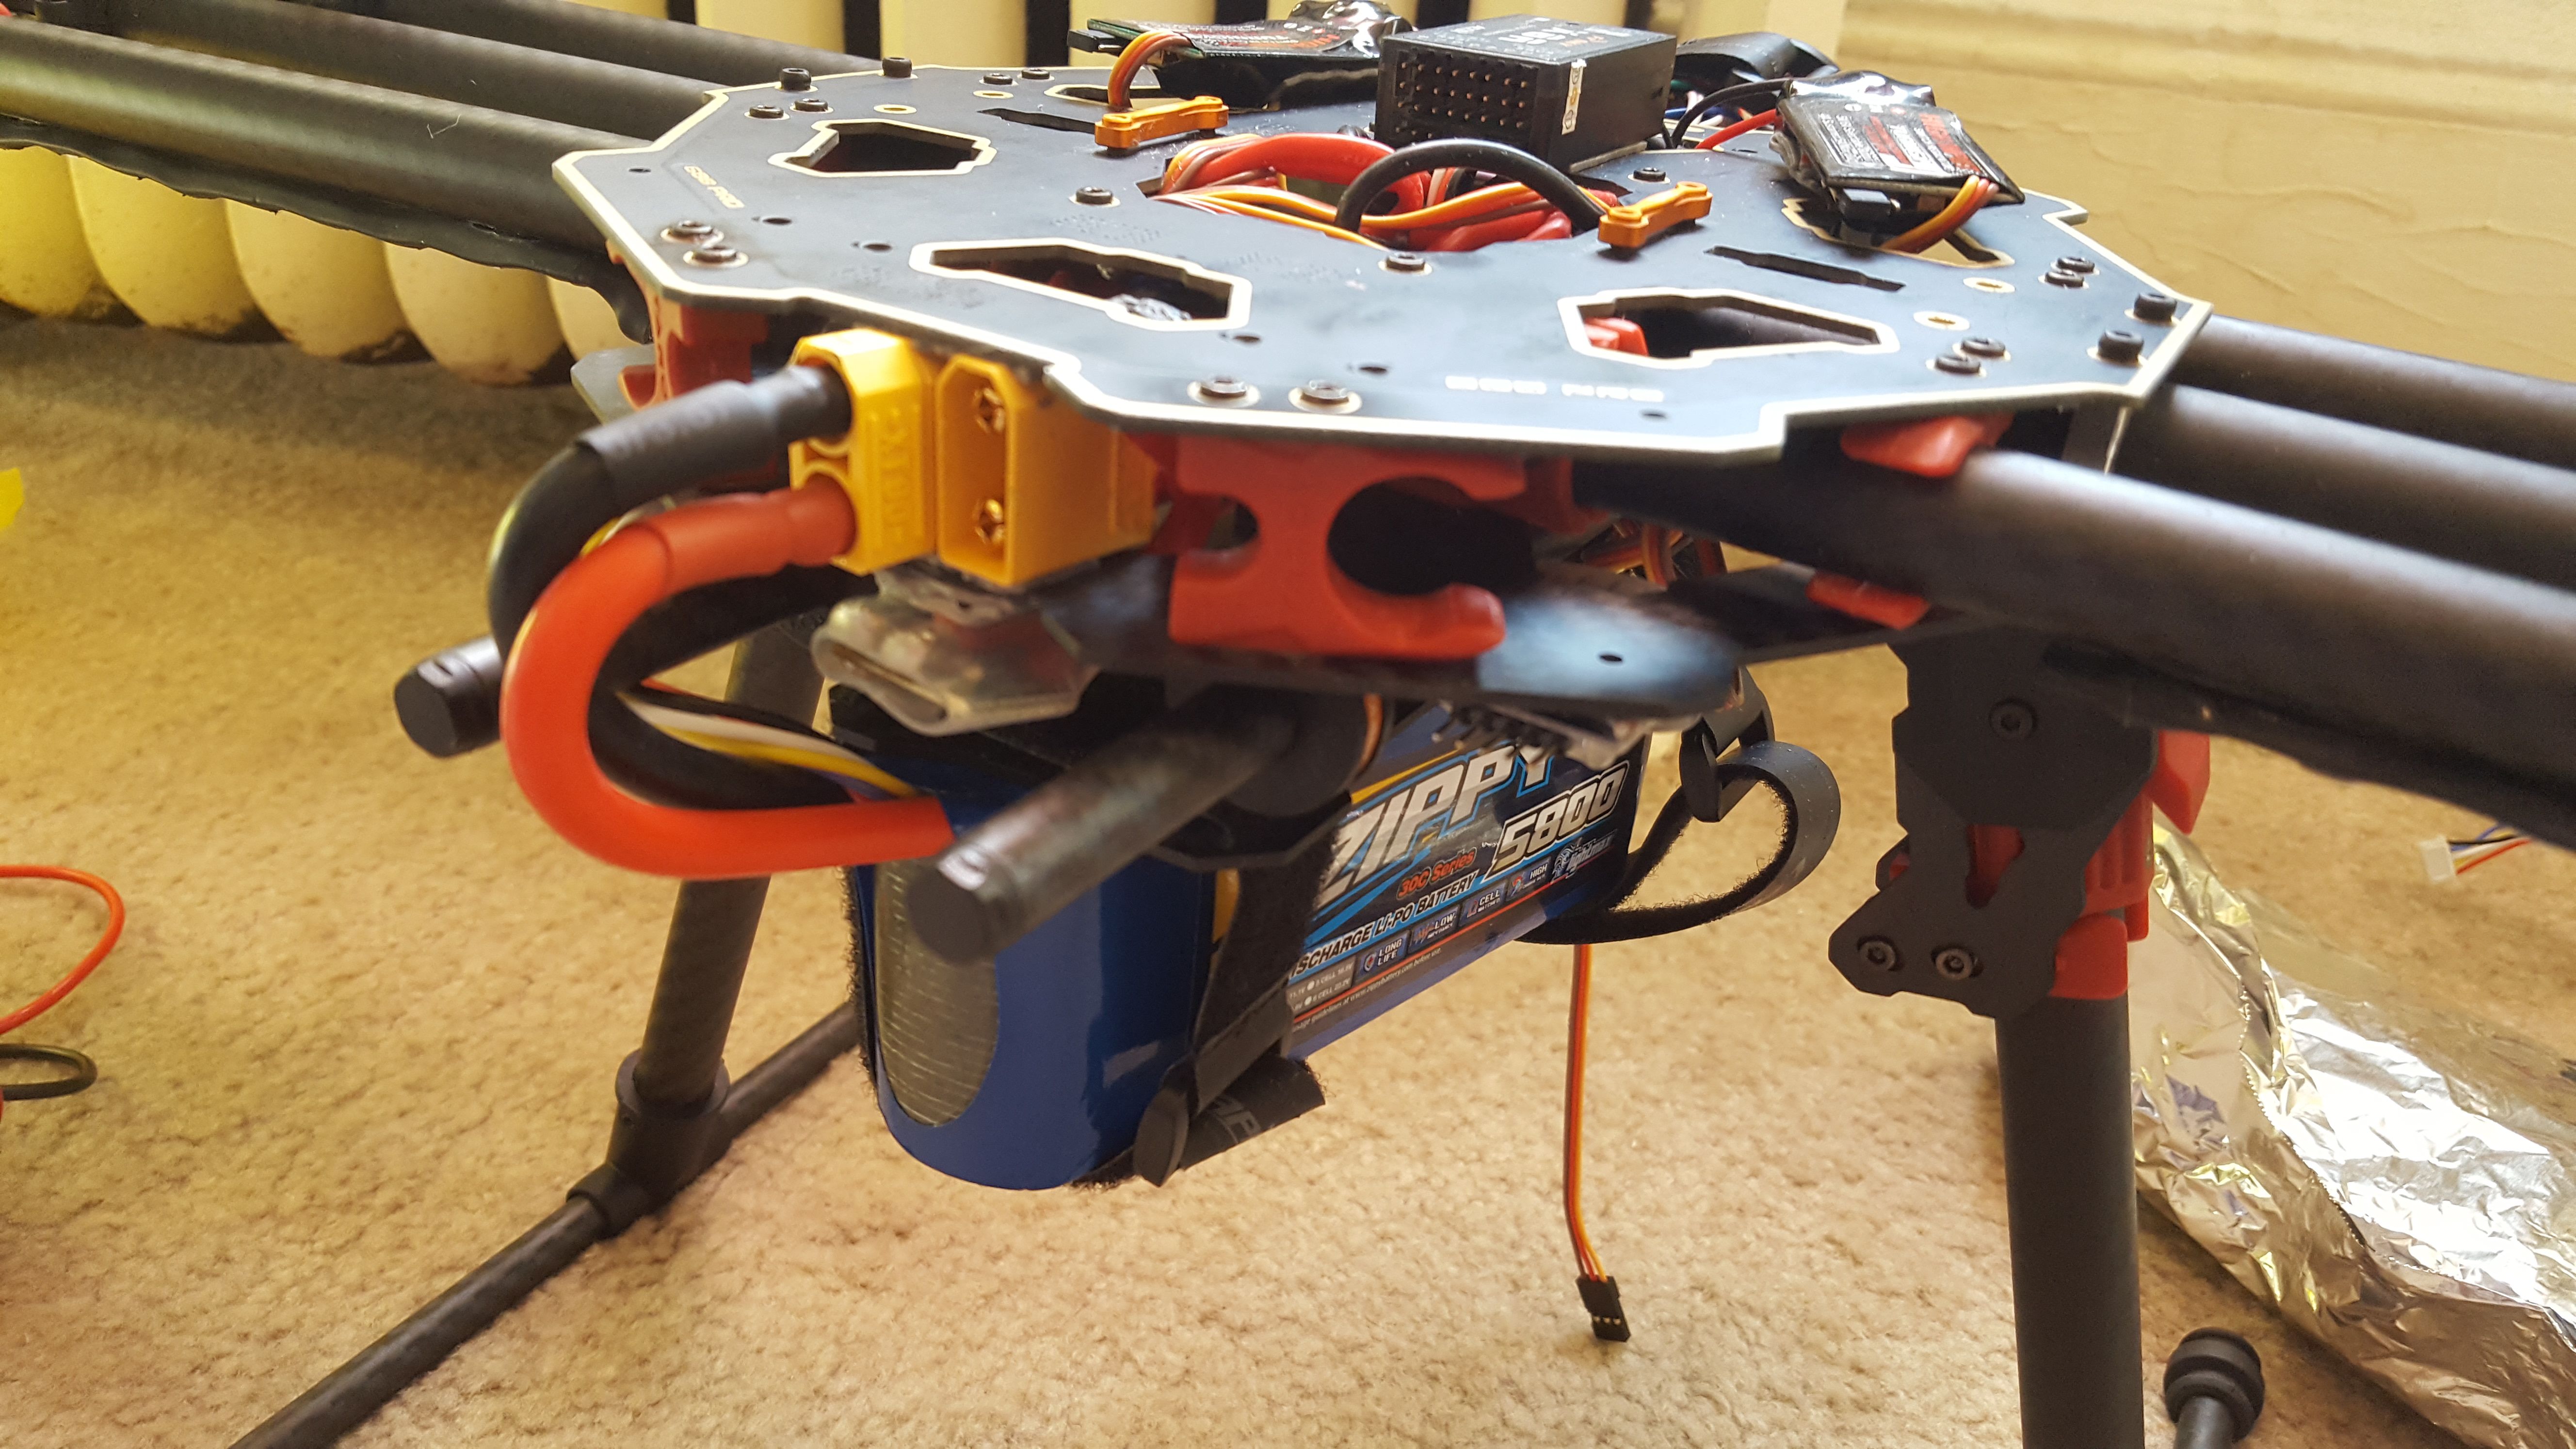
I also have code ready to read values from the GPS receiver, ultrasonic range sensor, and barometric pressure sensor although those values are not currently implemented in any control code yet. I would really like to design and have my own circuit board made to clean up a lot of the wiring also. There is a lot on the to-do list, however I am proud I made it this far to begin with. I have reached my goal of creating a flying robot :)
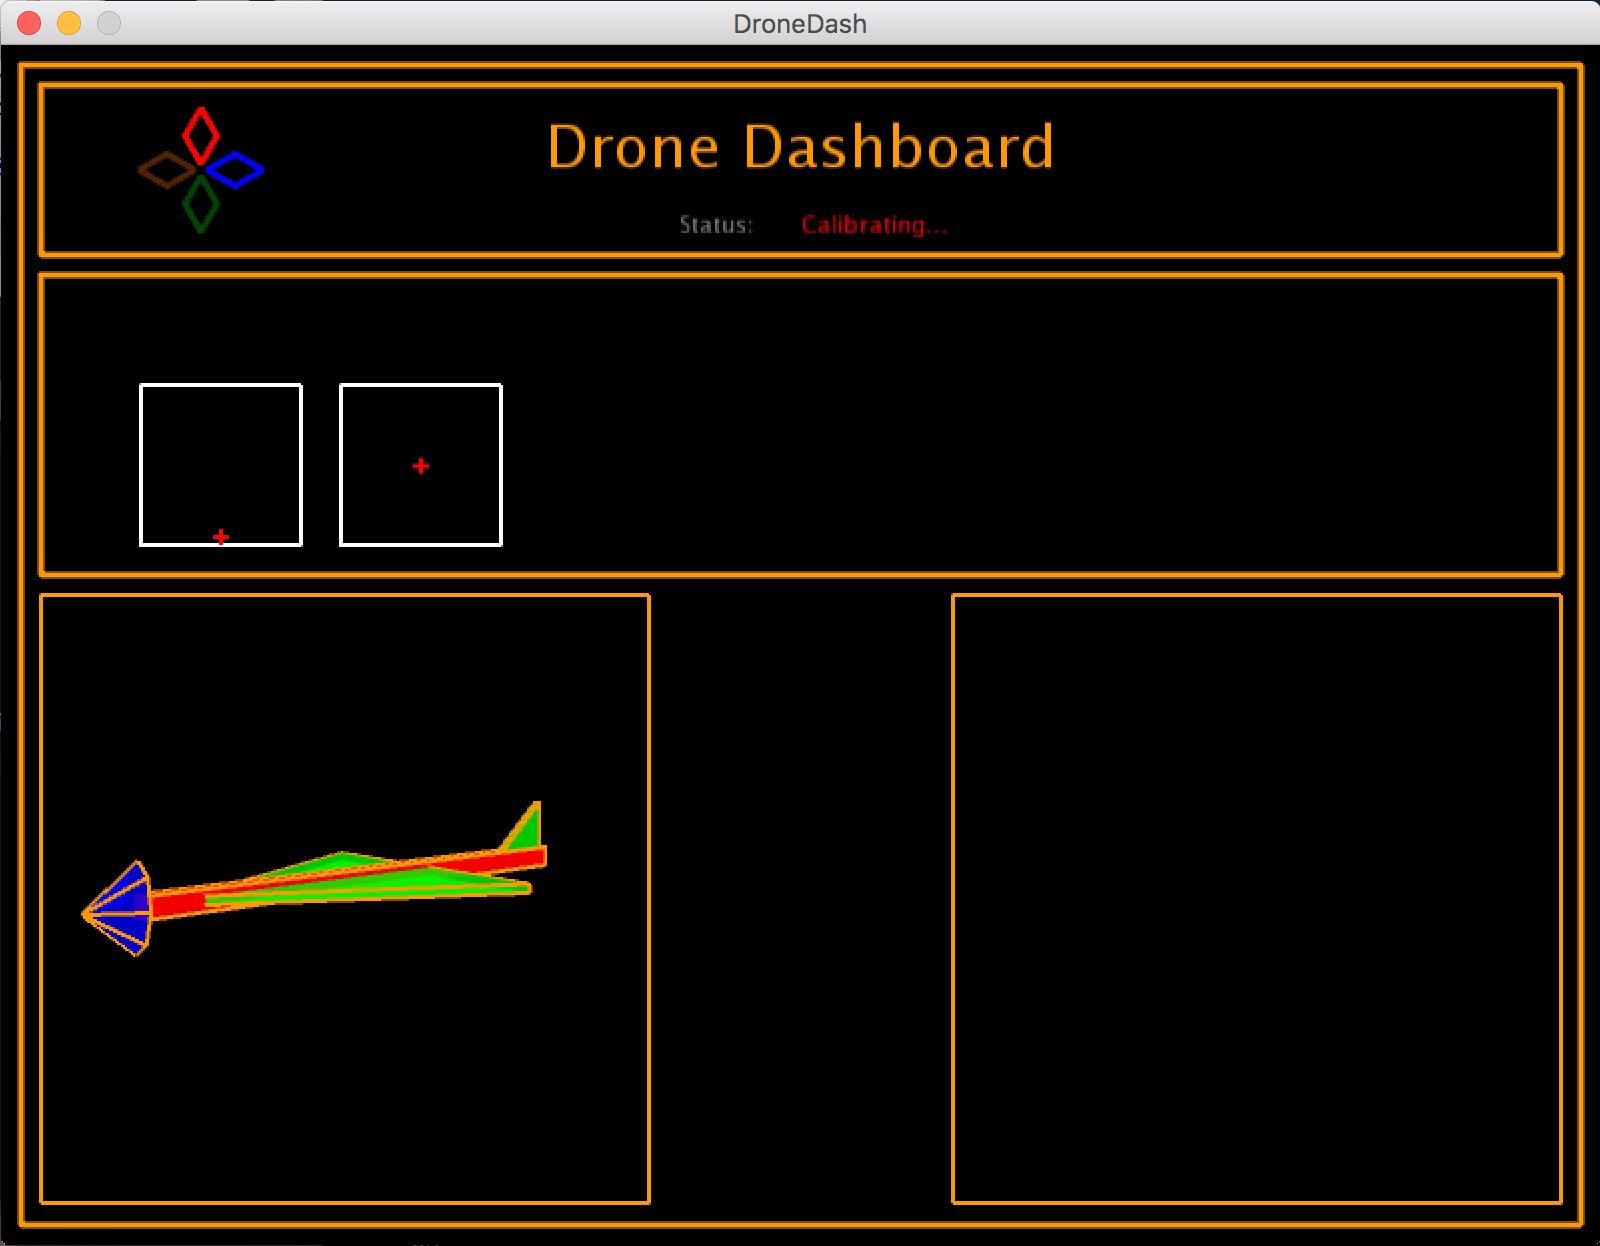
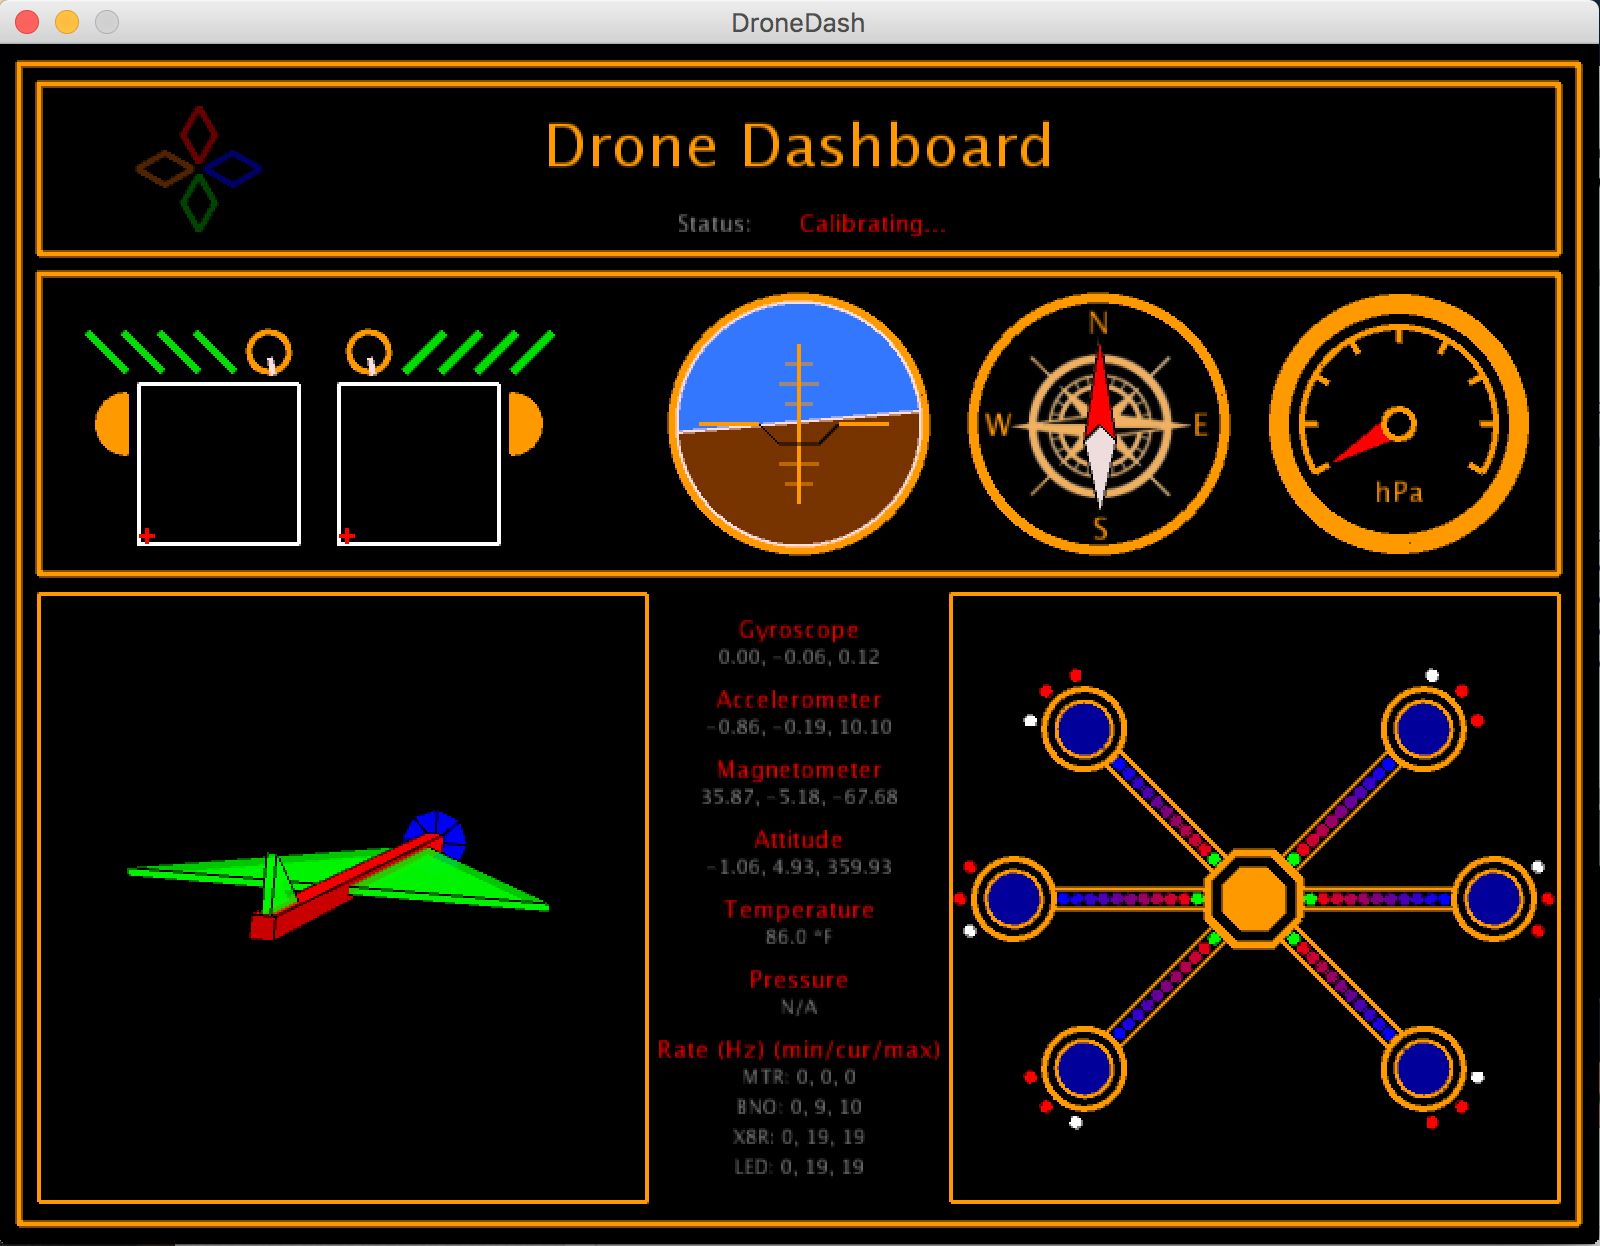
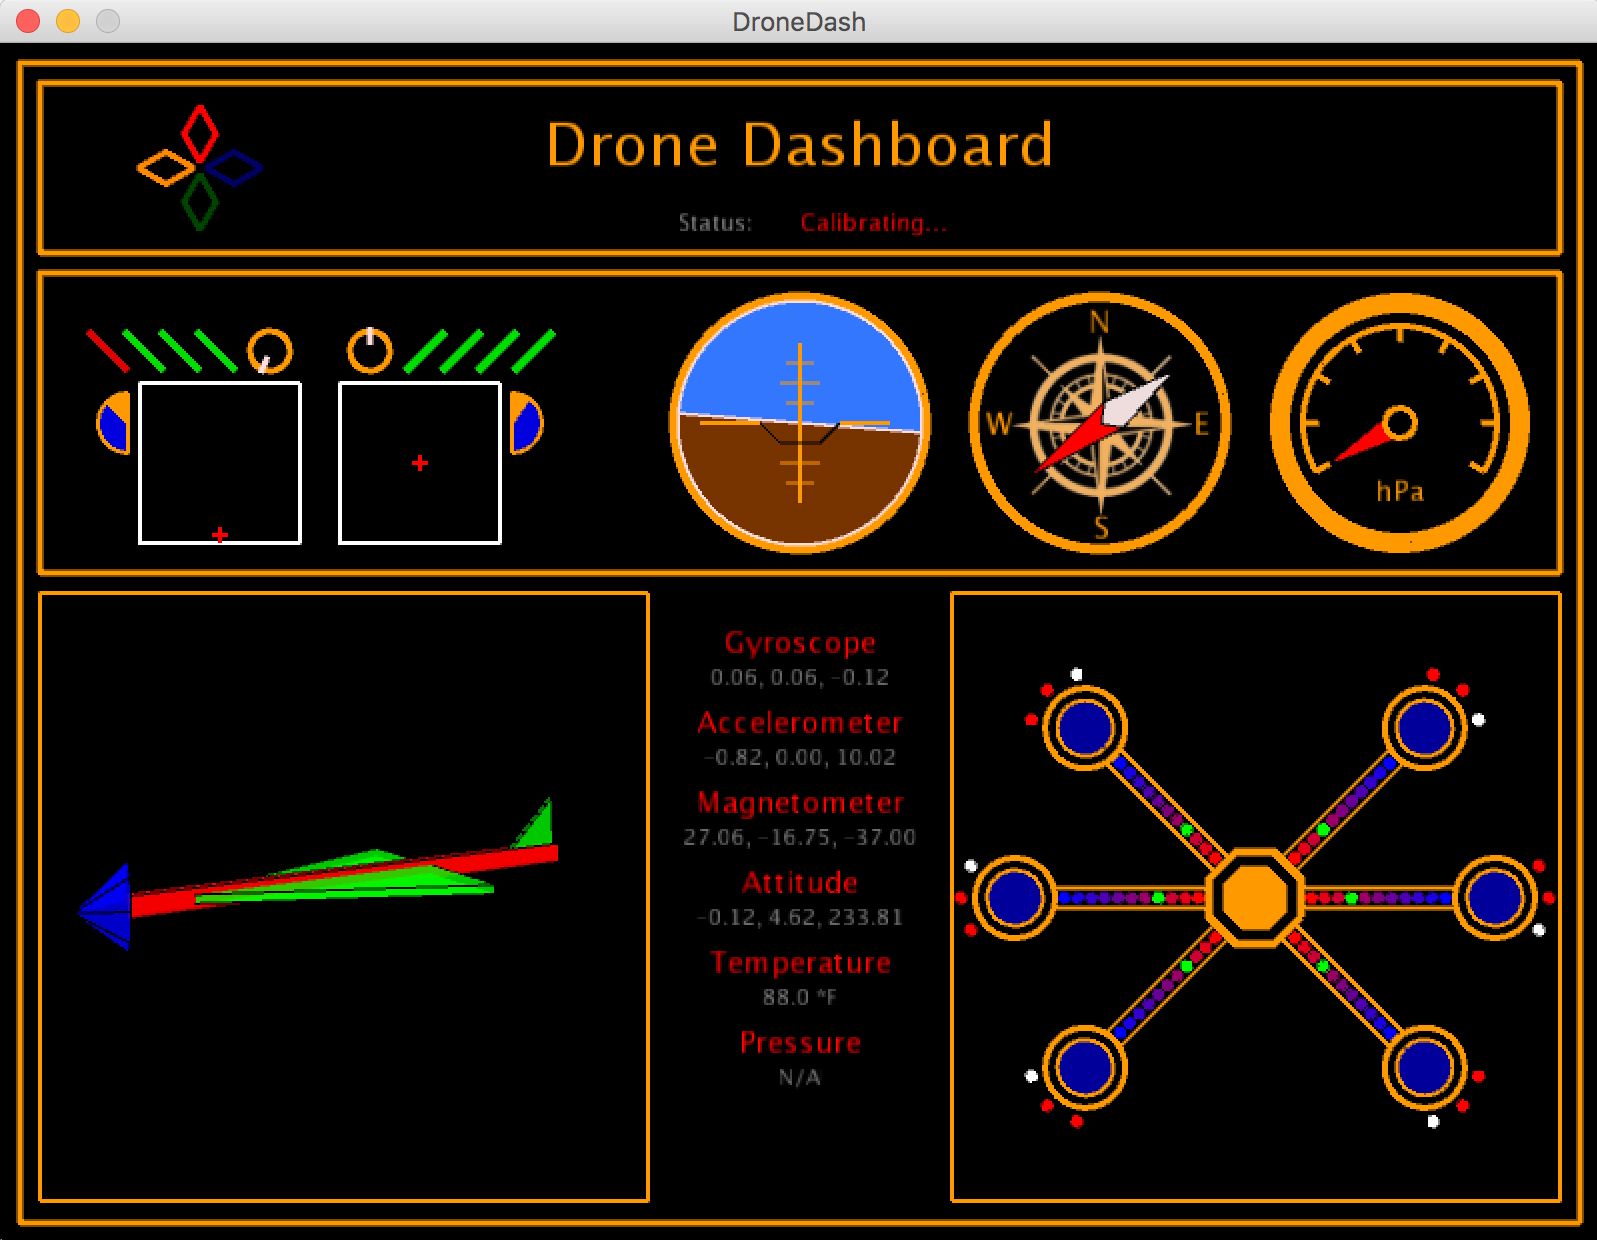
Technical Information
(Skip to videos below if bored already)
Arduino Uno Microcontroller (MCU I started with):
8-bit ATmega328P Processor running at 16 Mhz
32 kB Flash Memory, 2 kB of RAM, no FPU, and ~20 GPIO pins.
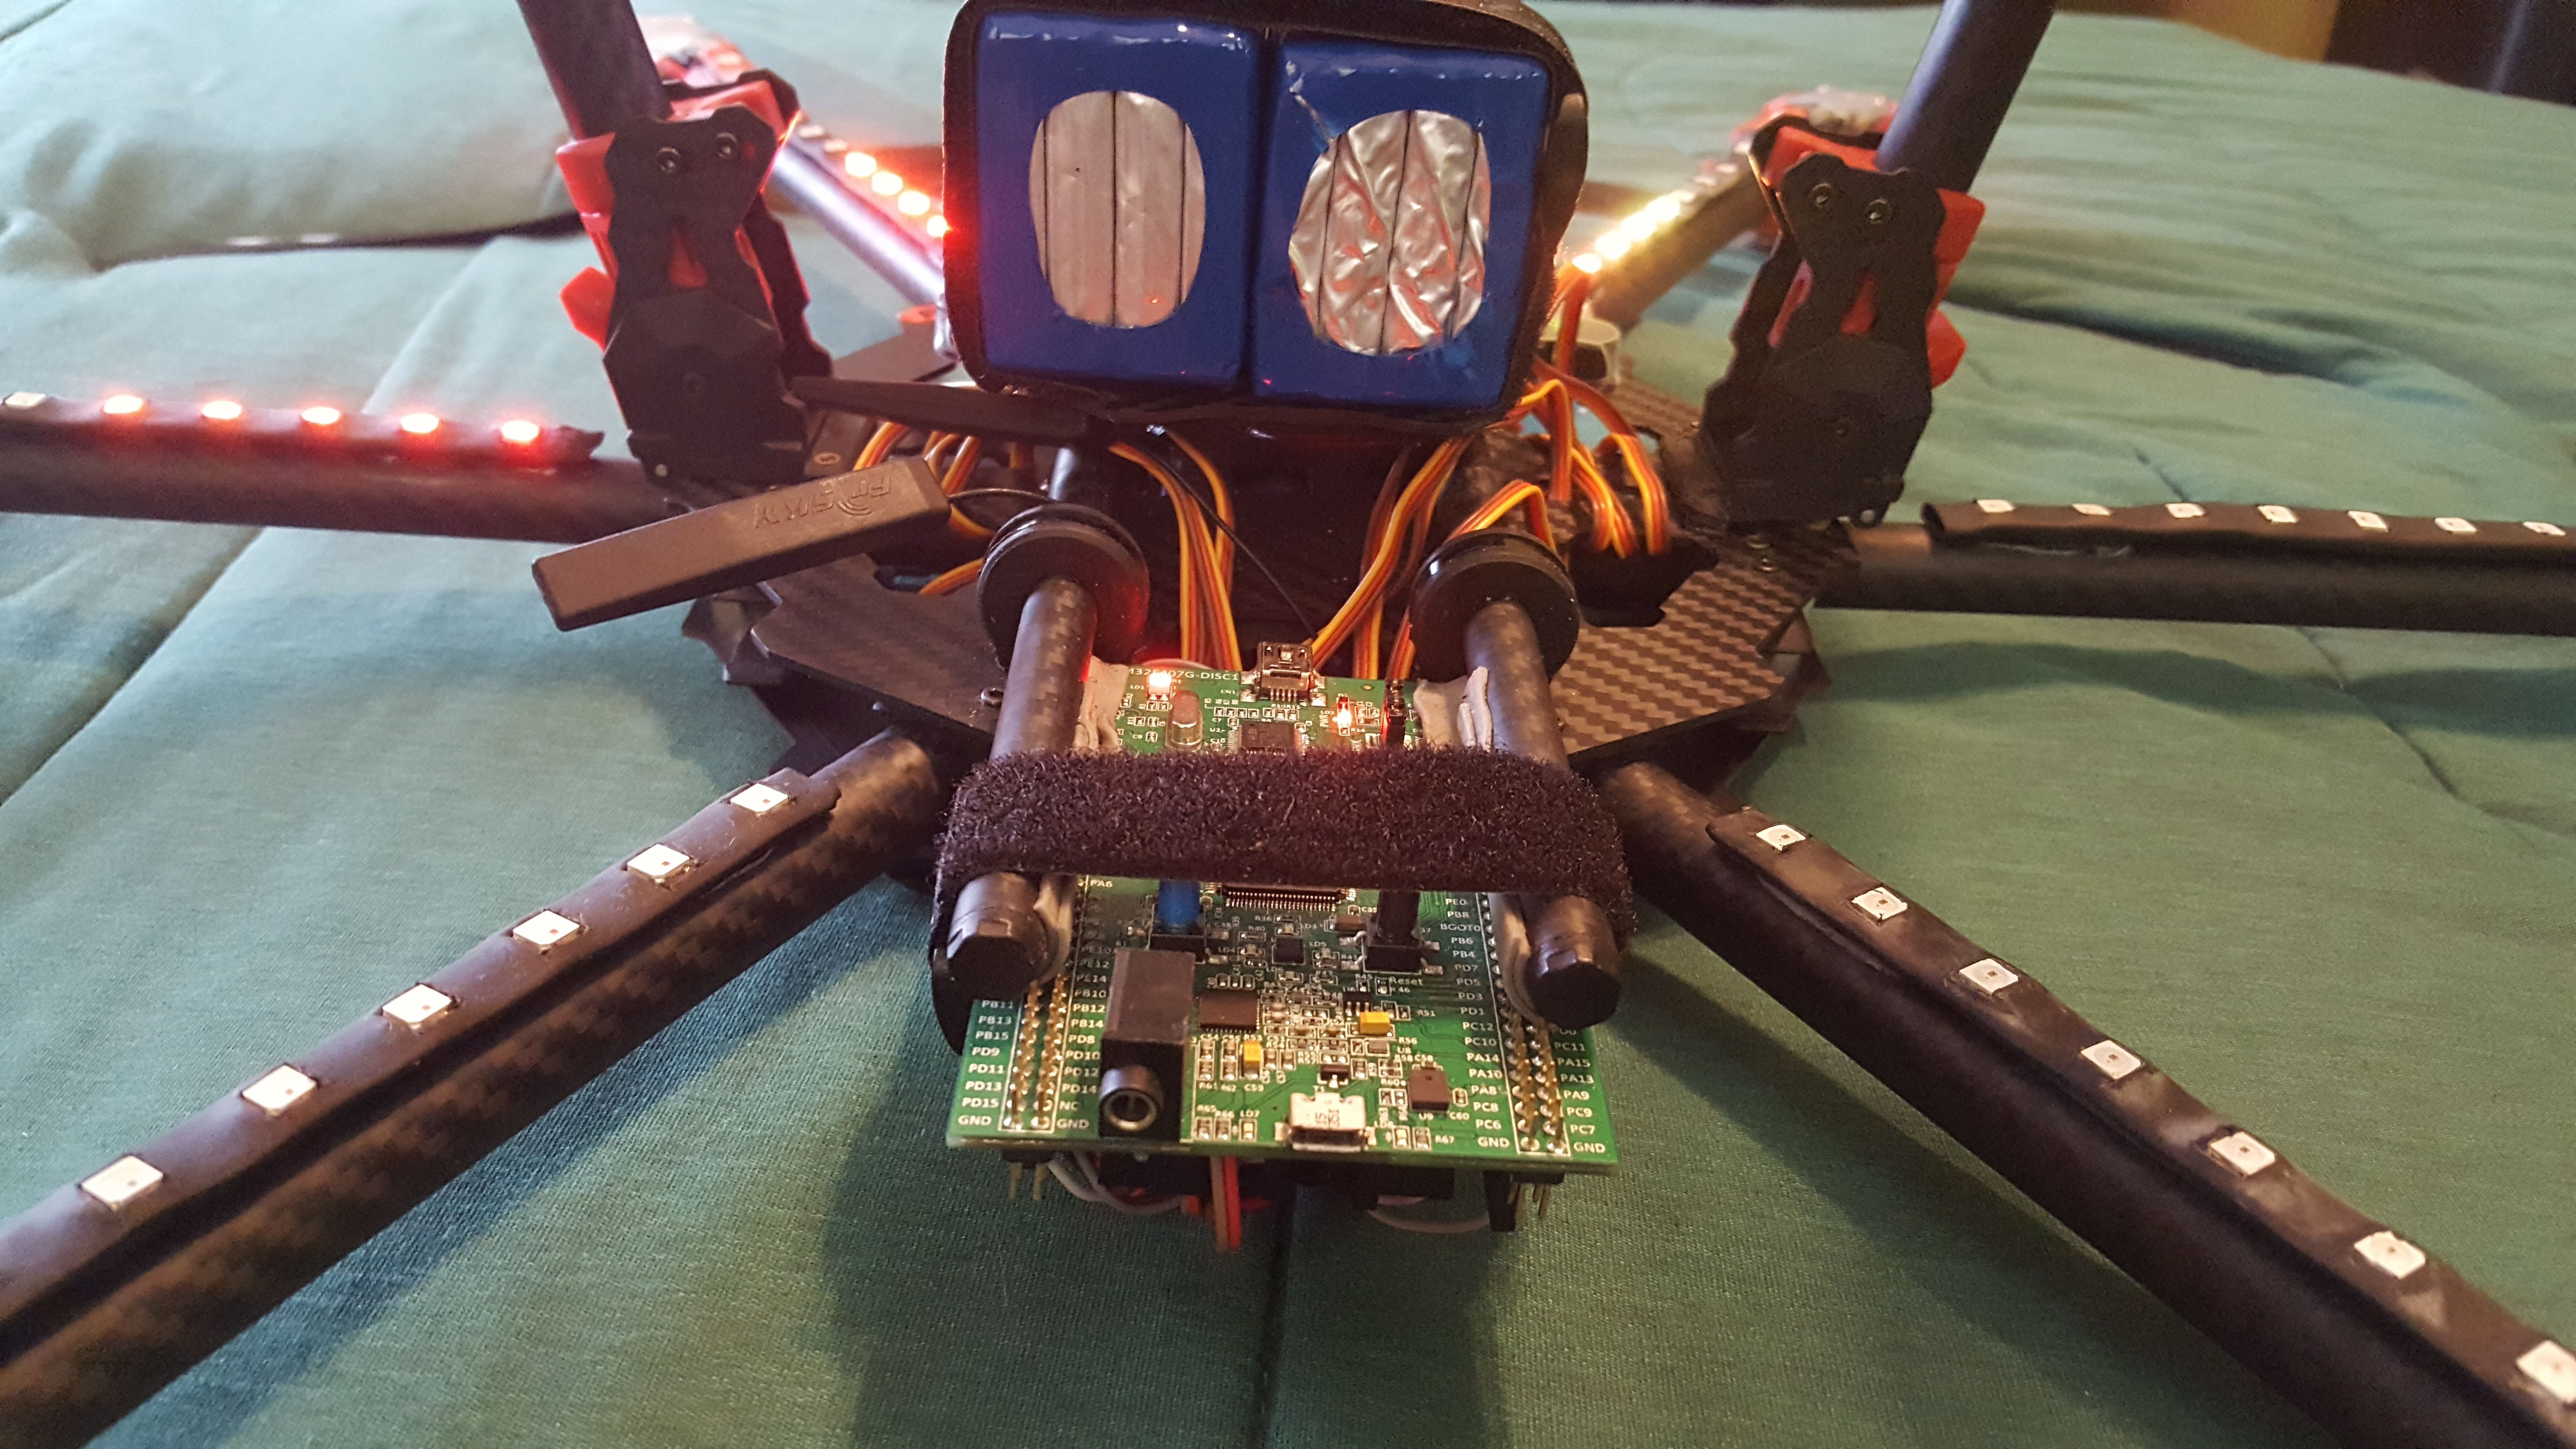
STM32F407 Discovery Board Microcontroller (Quite the upgrade):
32-bit ARM Cortex M4 Processor running at 168 Mhz
1 MB Flash Memory, 192 kB of RAM, Floating Point Unit, and ~80 GPIO pins.
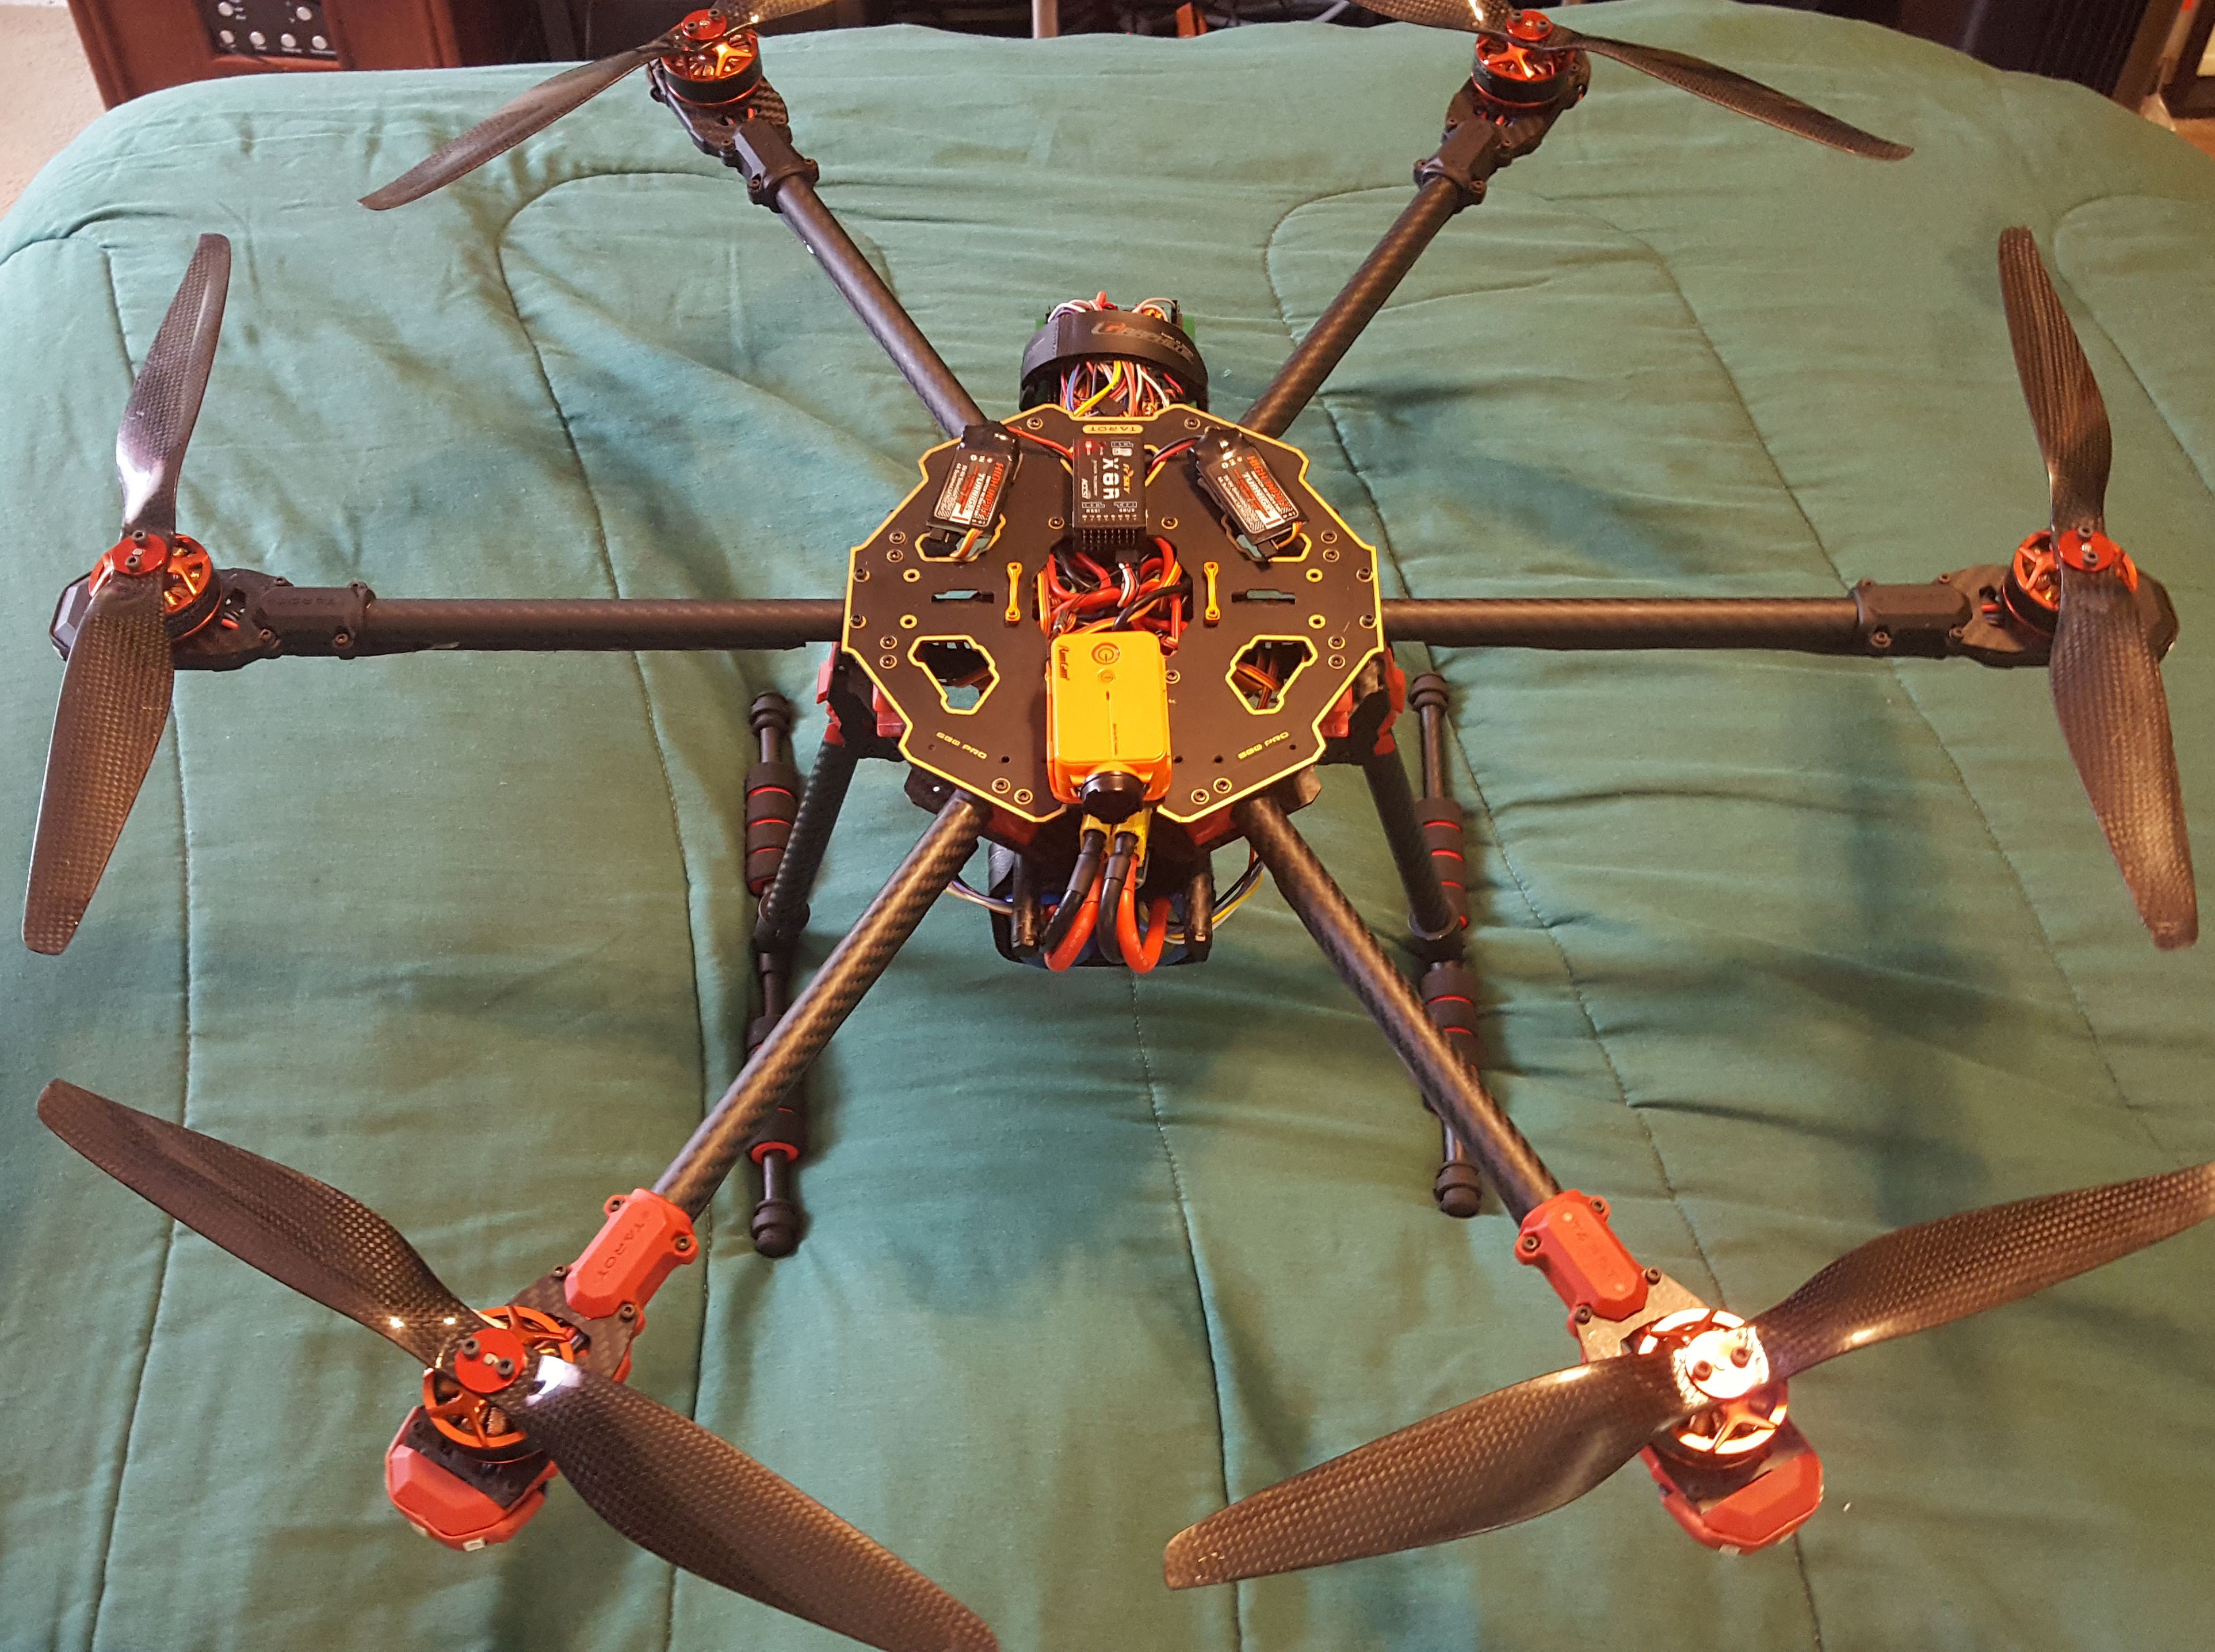
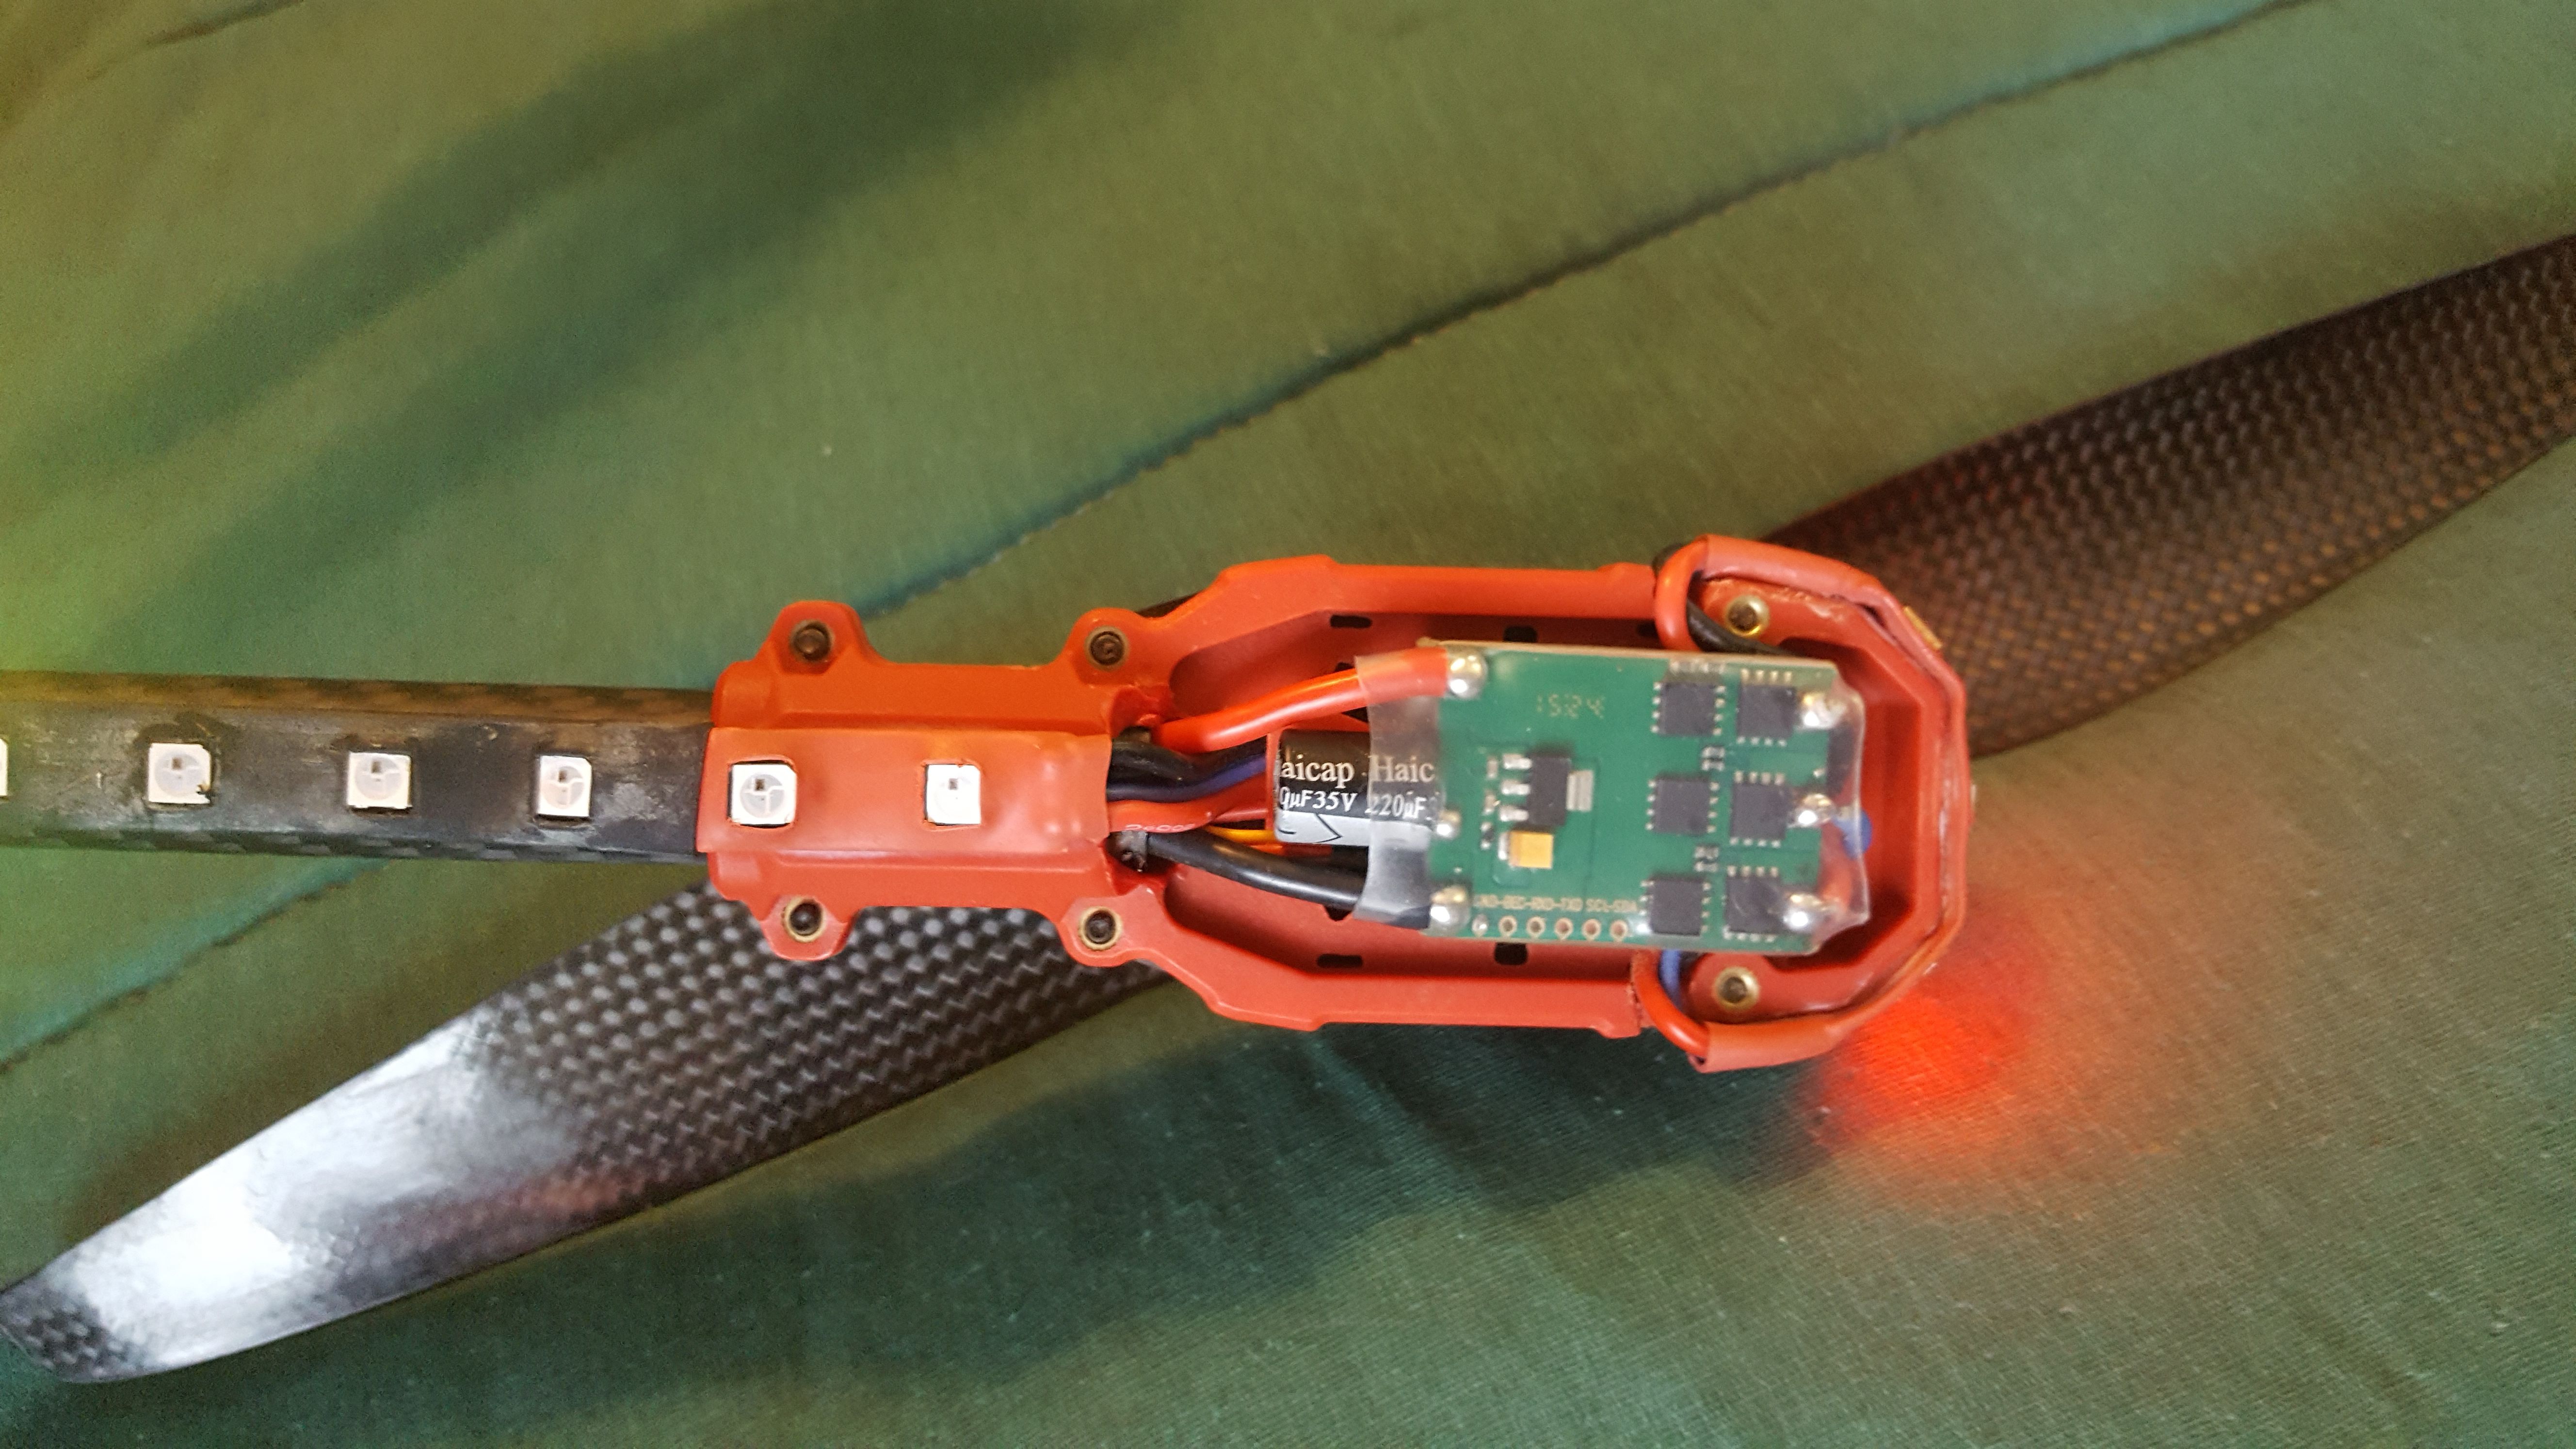
Motors:
Refresh Rate: 400 Hz (times per second).
Protocol: Send a signal to the electronic speed controllers (ESCs) between the valid range:
1068 microseconds (slowest) and 1868 microseconds (fastest)
Function: Using modes, sensors, and pilot input as data in a PID controlled system,
you find what speed to set each motor at to reach the desired position.
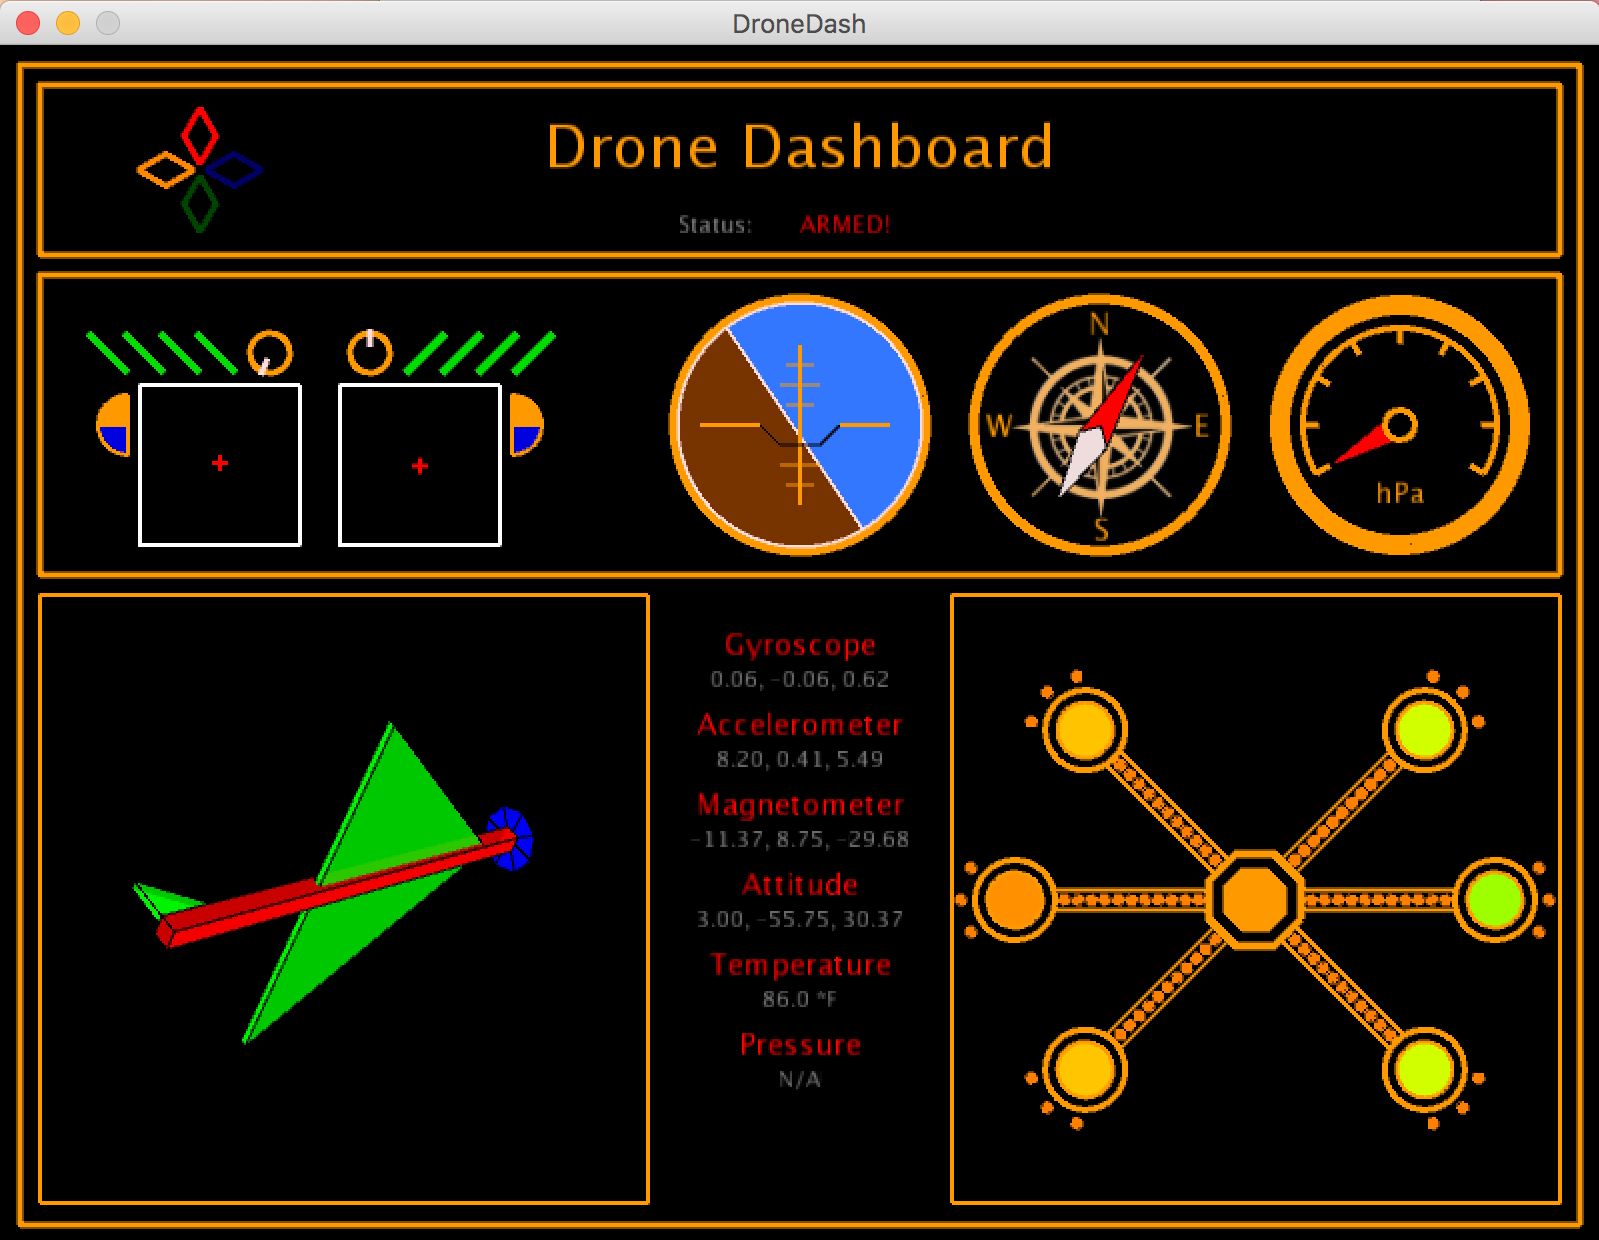
BNO055 Absolute Orientation Sensor:
Sample Rate: 100 Hz (times per second)
Protocol: I2C
Function: Outputs raw values of the gyroscope, accelerometer, magnetometer, and temperature.
Mathematically fuses raw data into information including:
Attitude in the form of: a quaternion and Euler angles.
Linear acceleration (gravity subtracted acceleration) and the gravity vector.
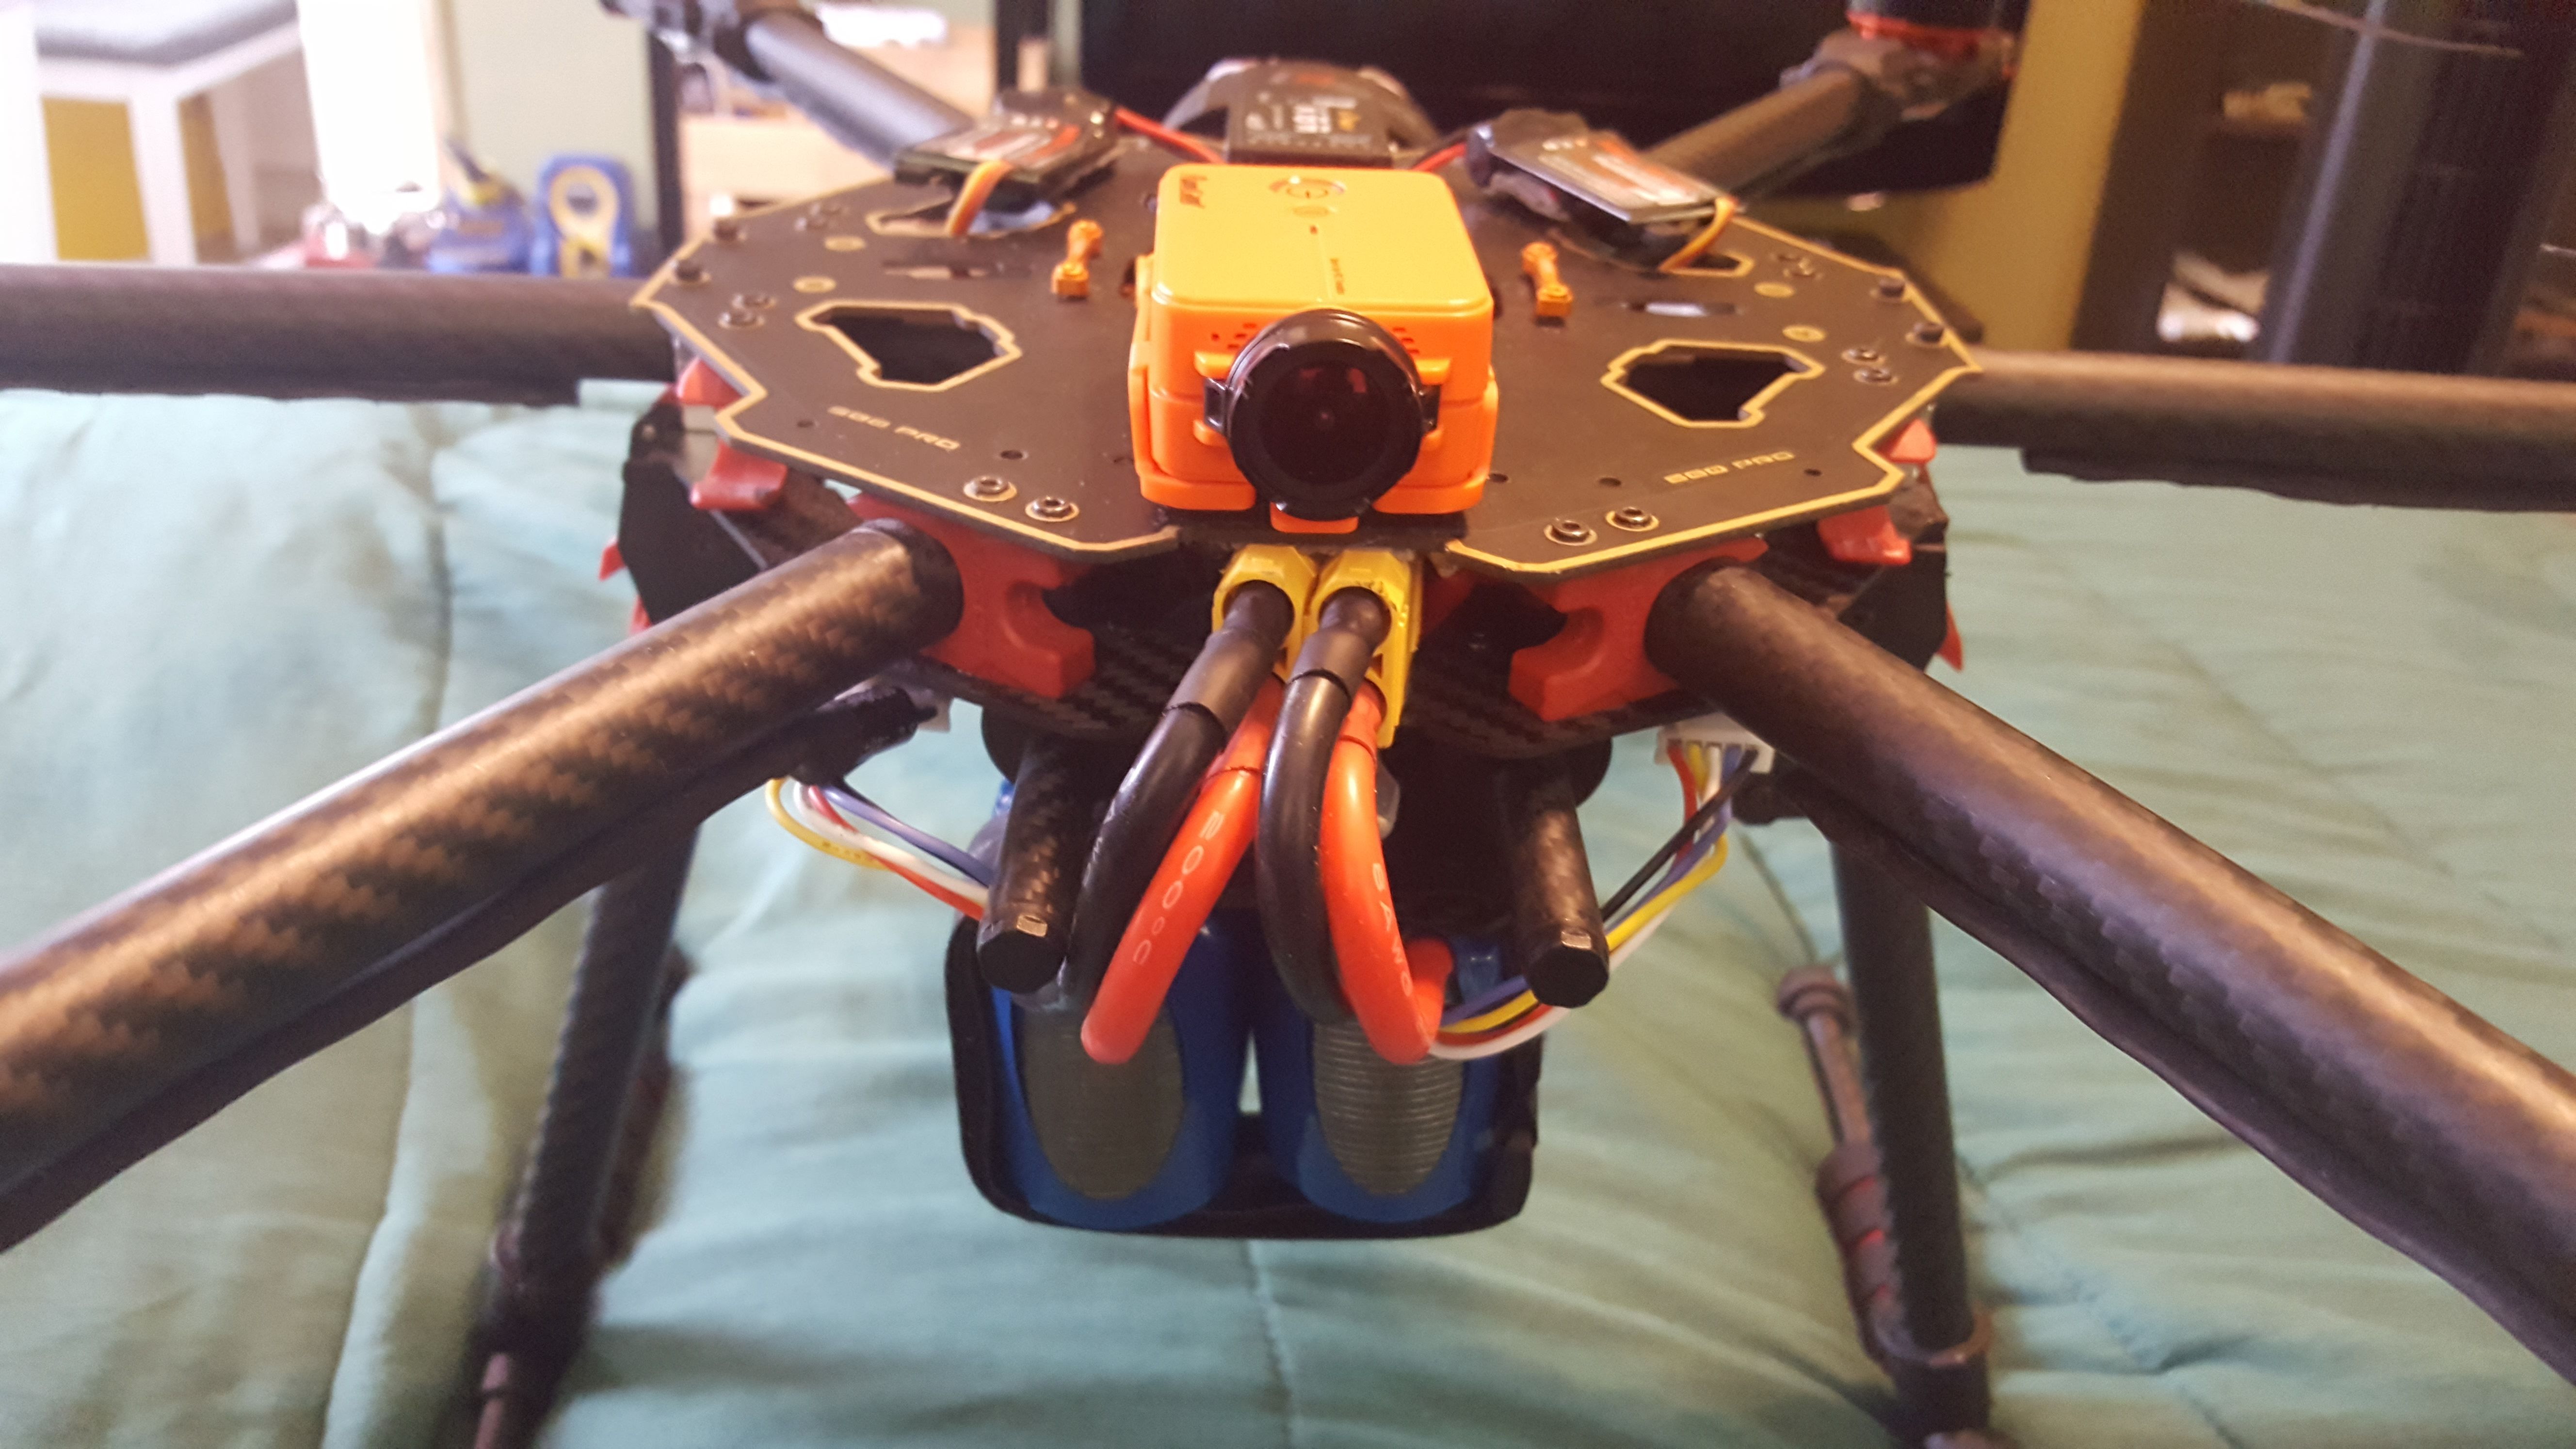
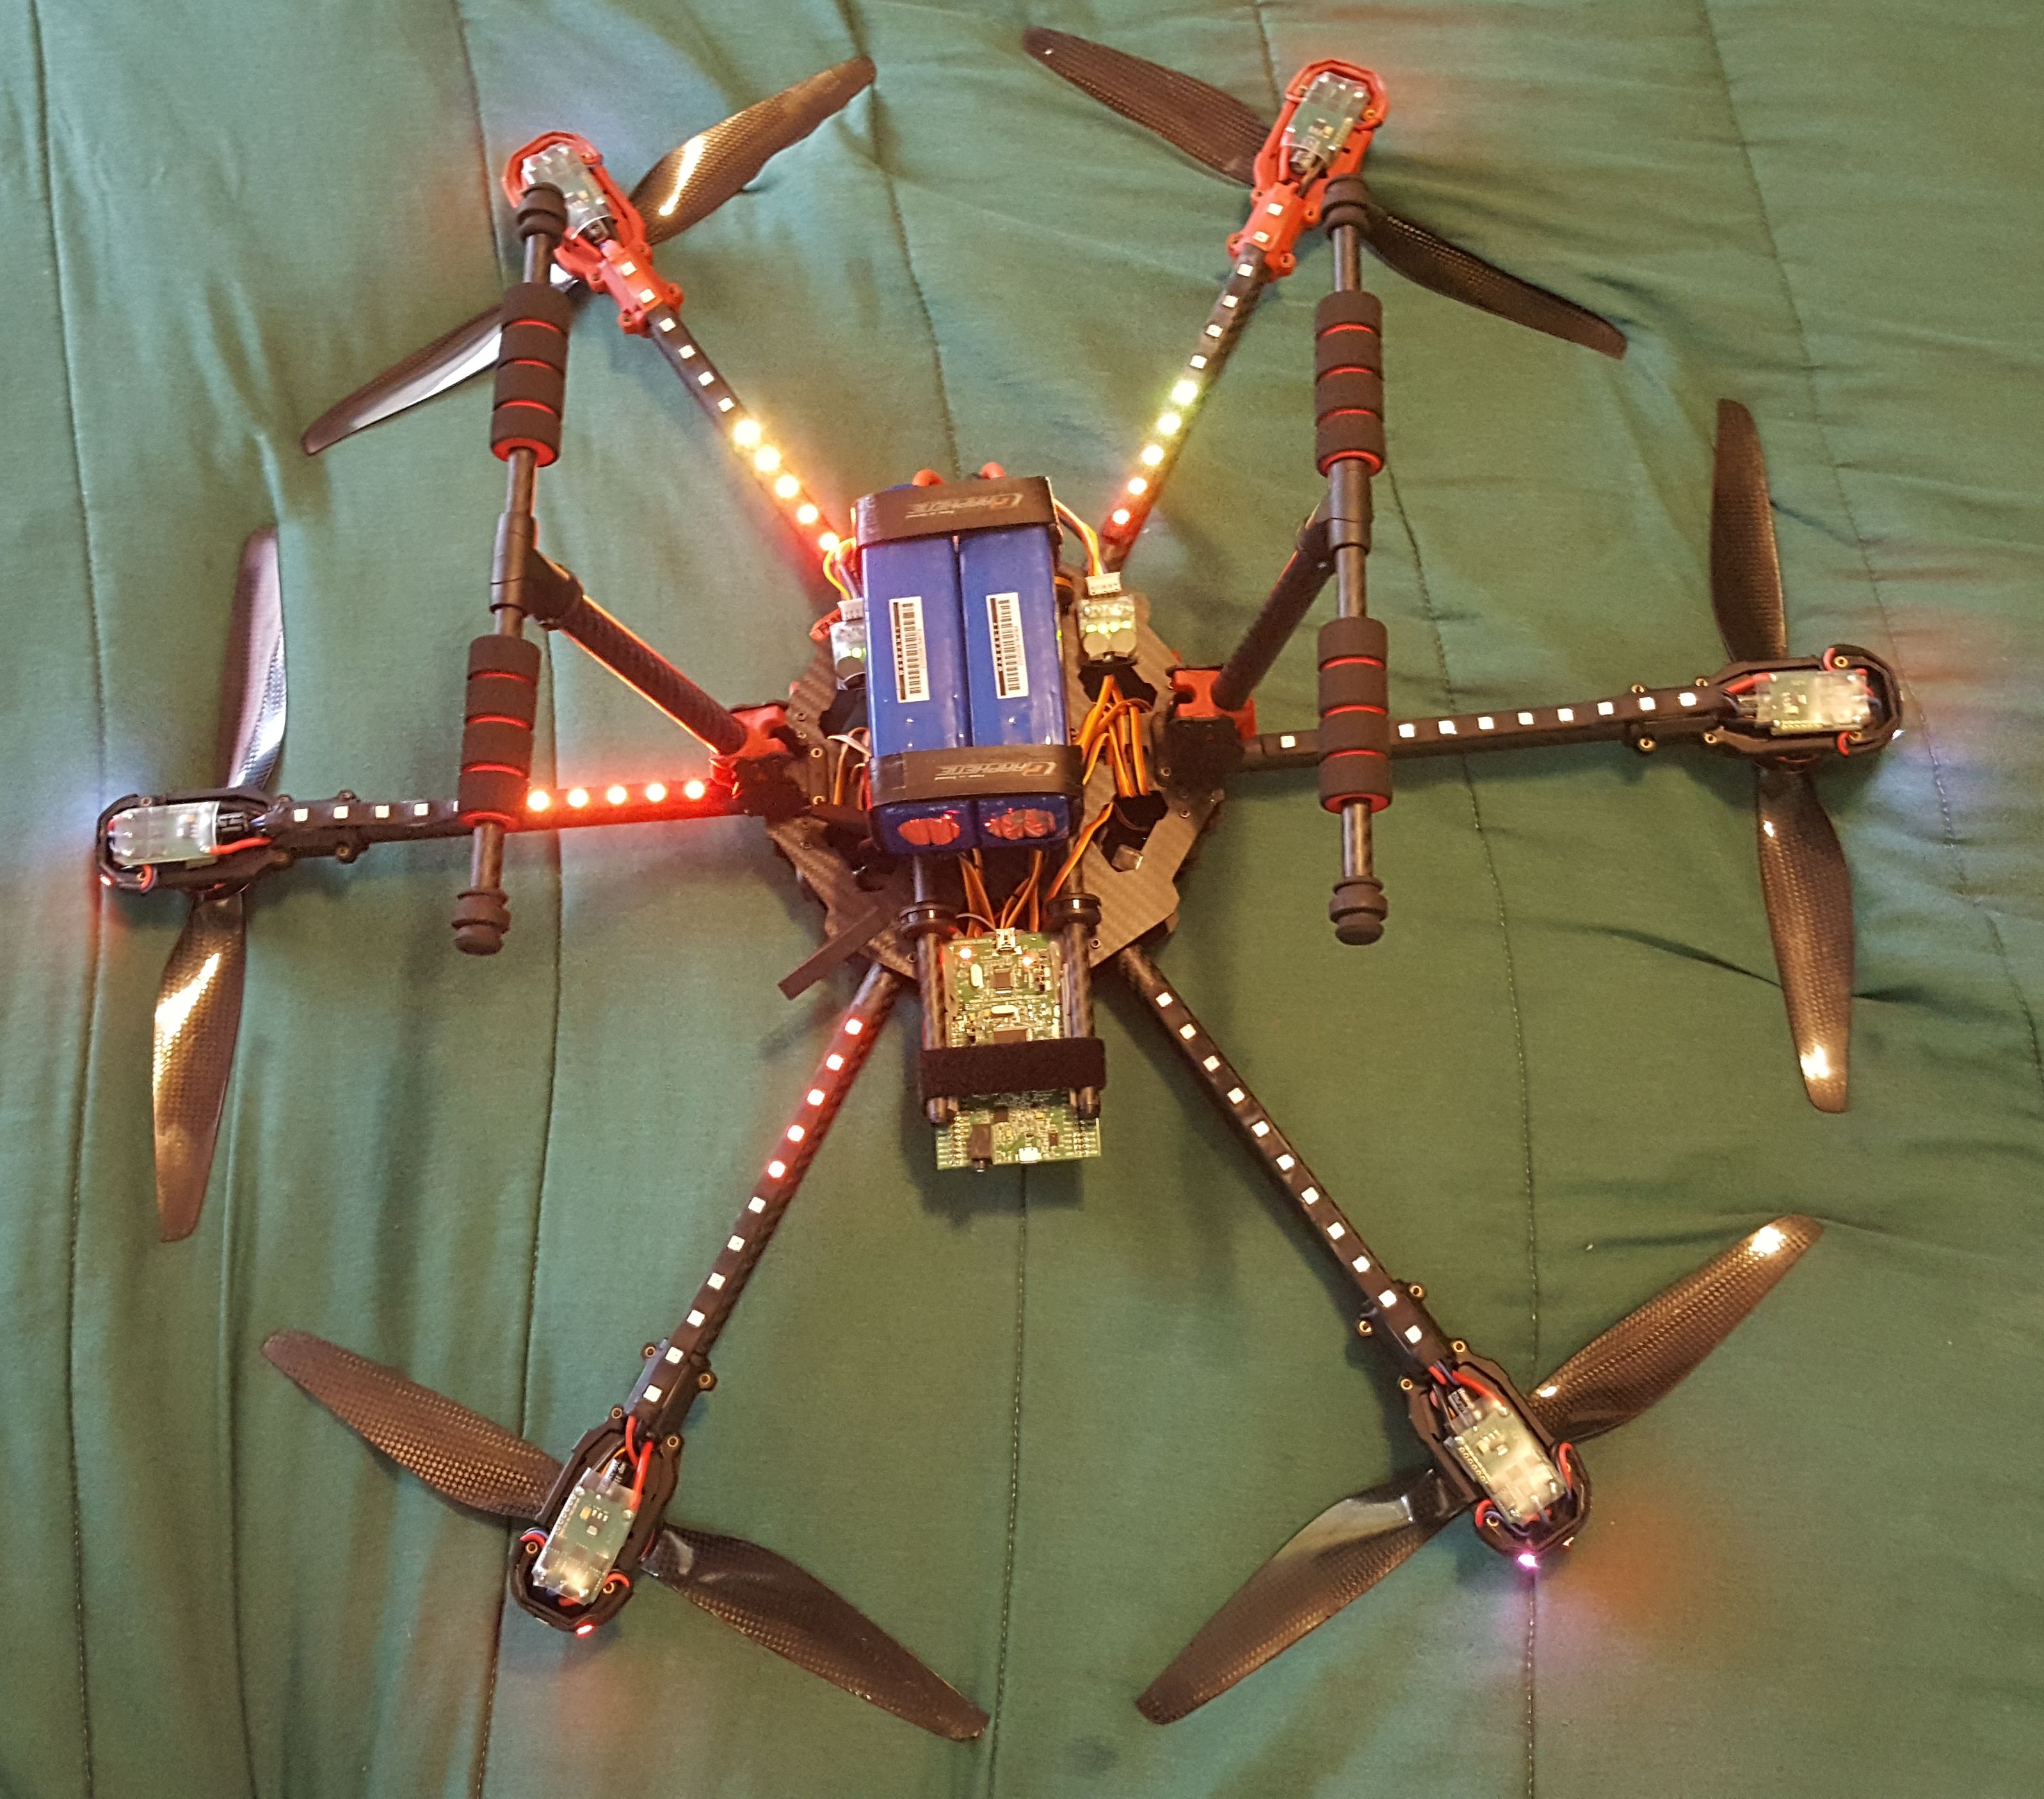
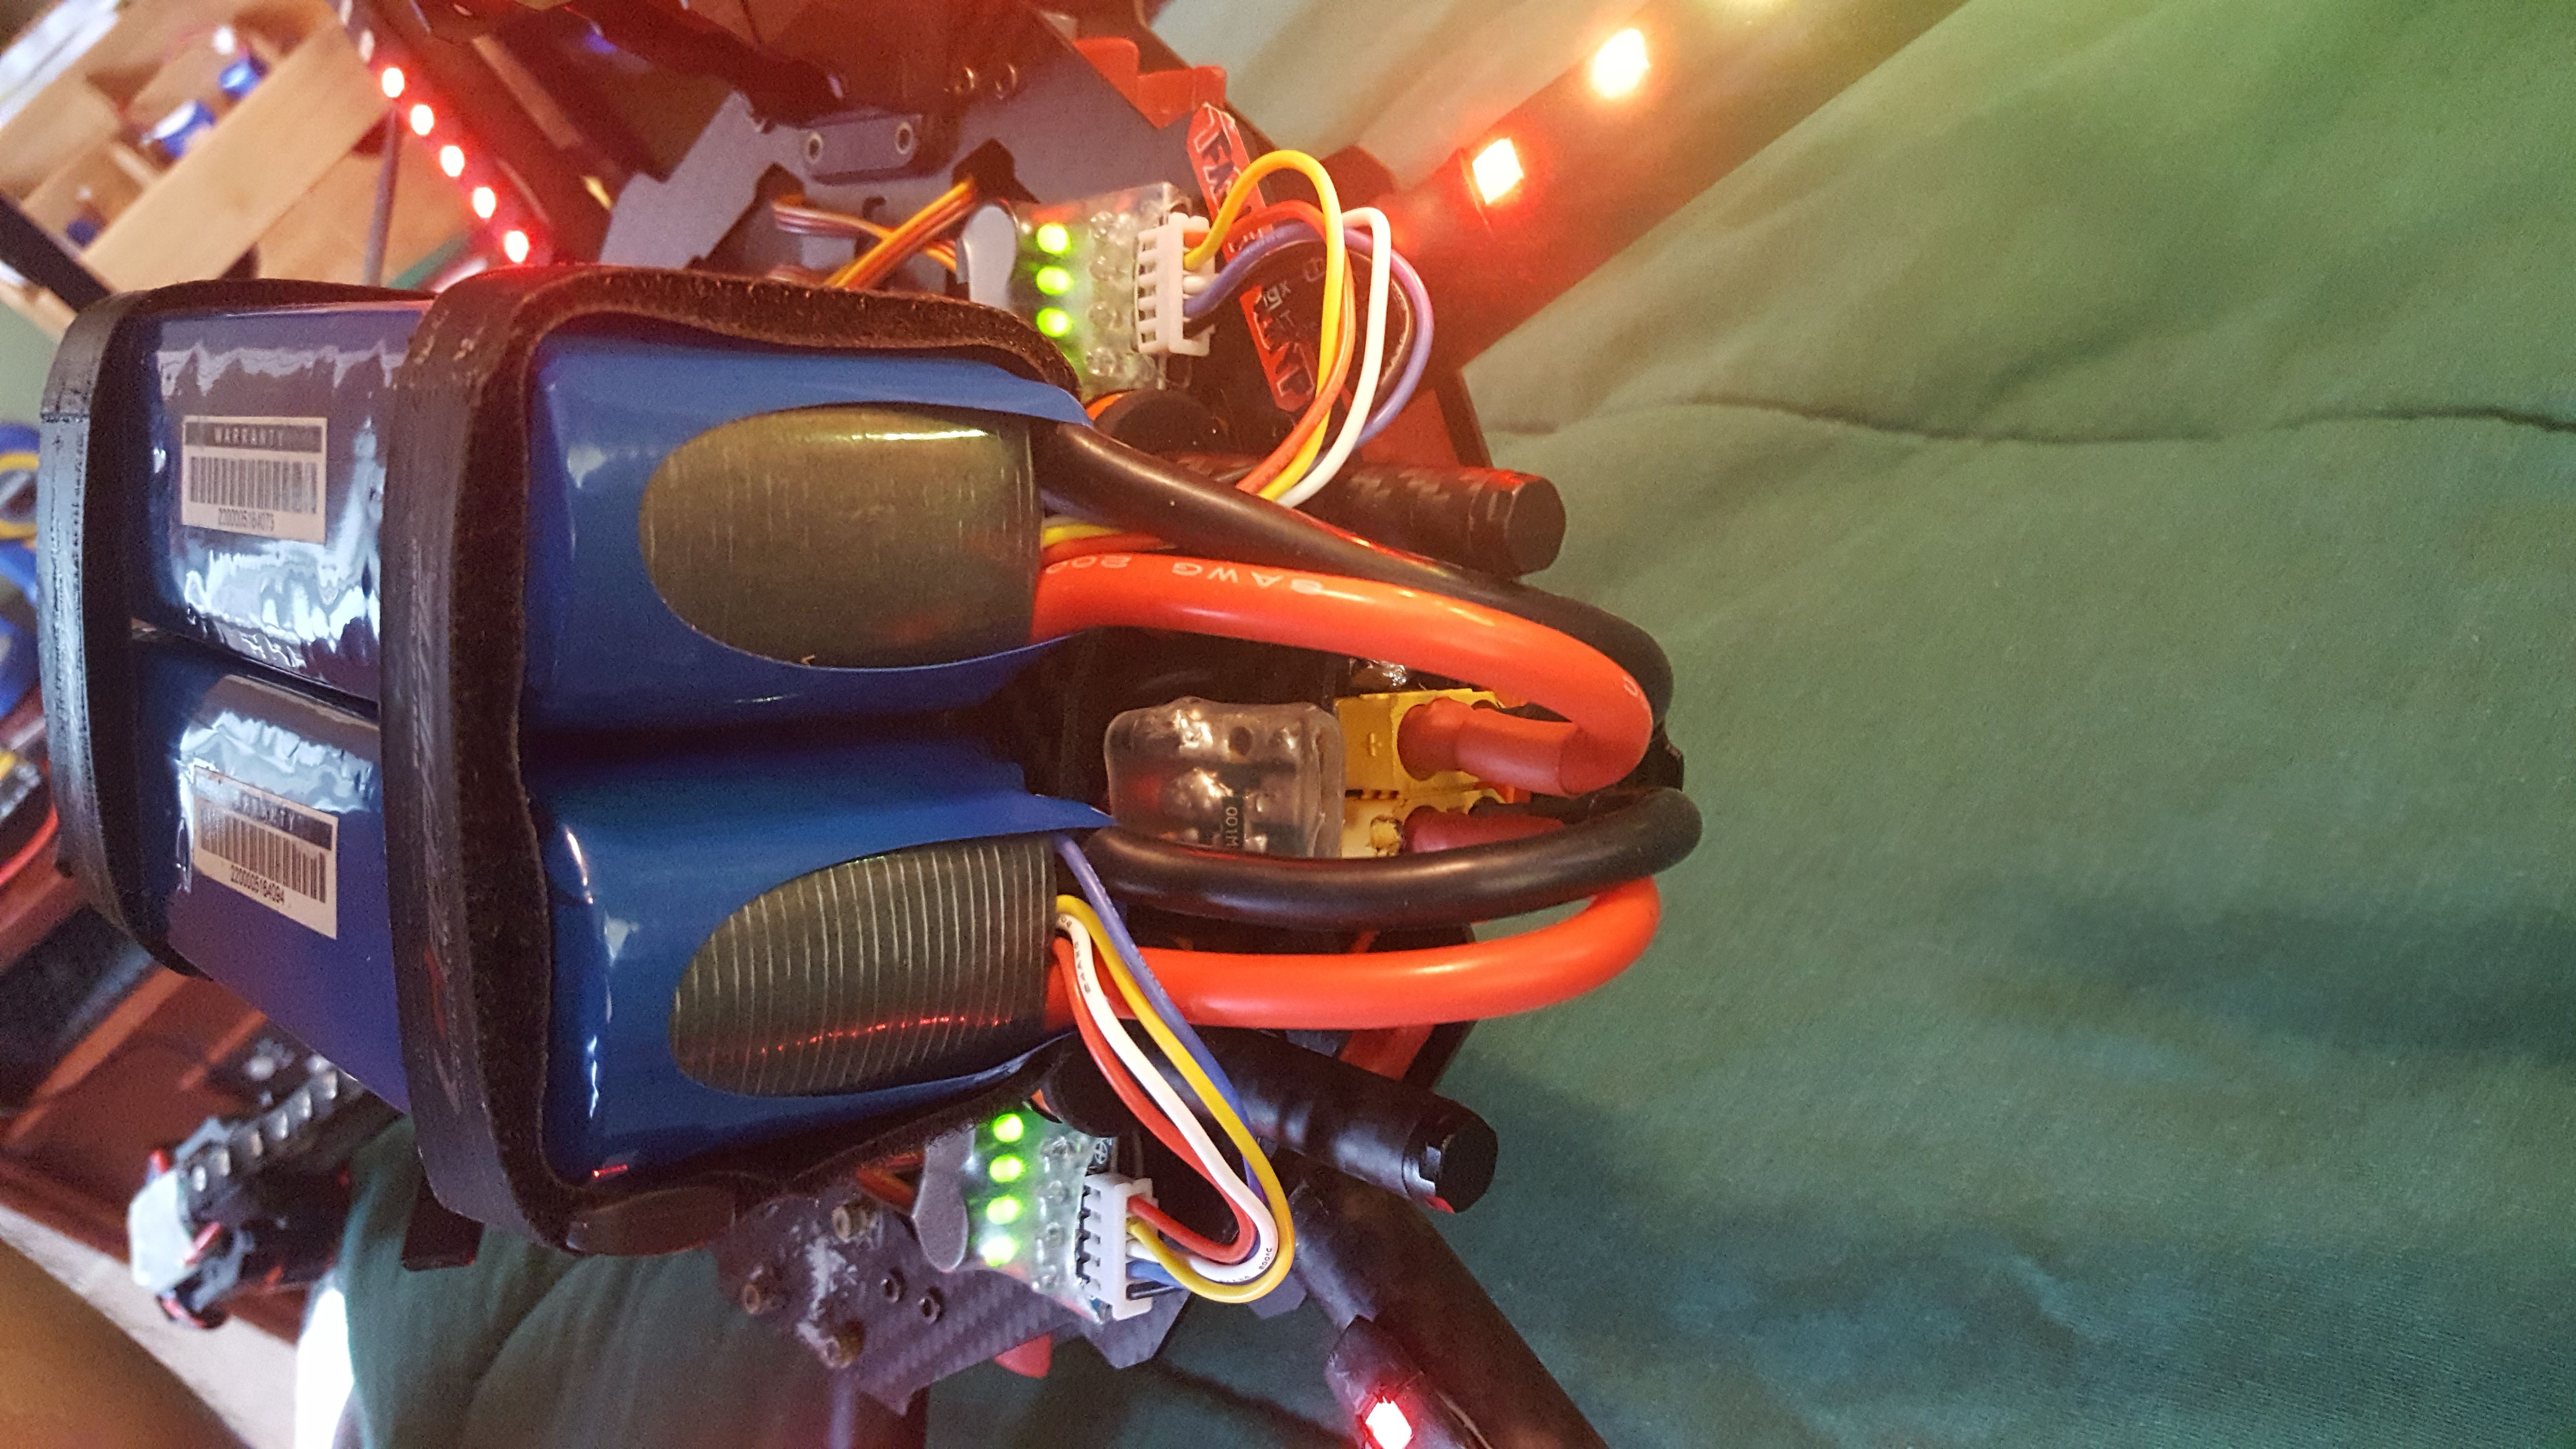
AttoPilot 180A Current/Voltage Sensor:
Sample Rate: 400 Hz (times per second) (Not set in stone)
Protocol: ADC
Function: Reads the current battery voltage level and how much current is being used at that time.
Quite useful in determining battery level, remaining flight time, and protection against damage.
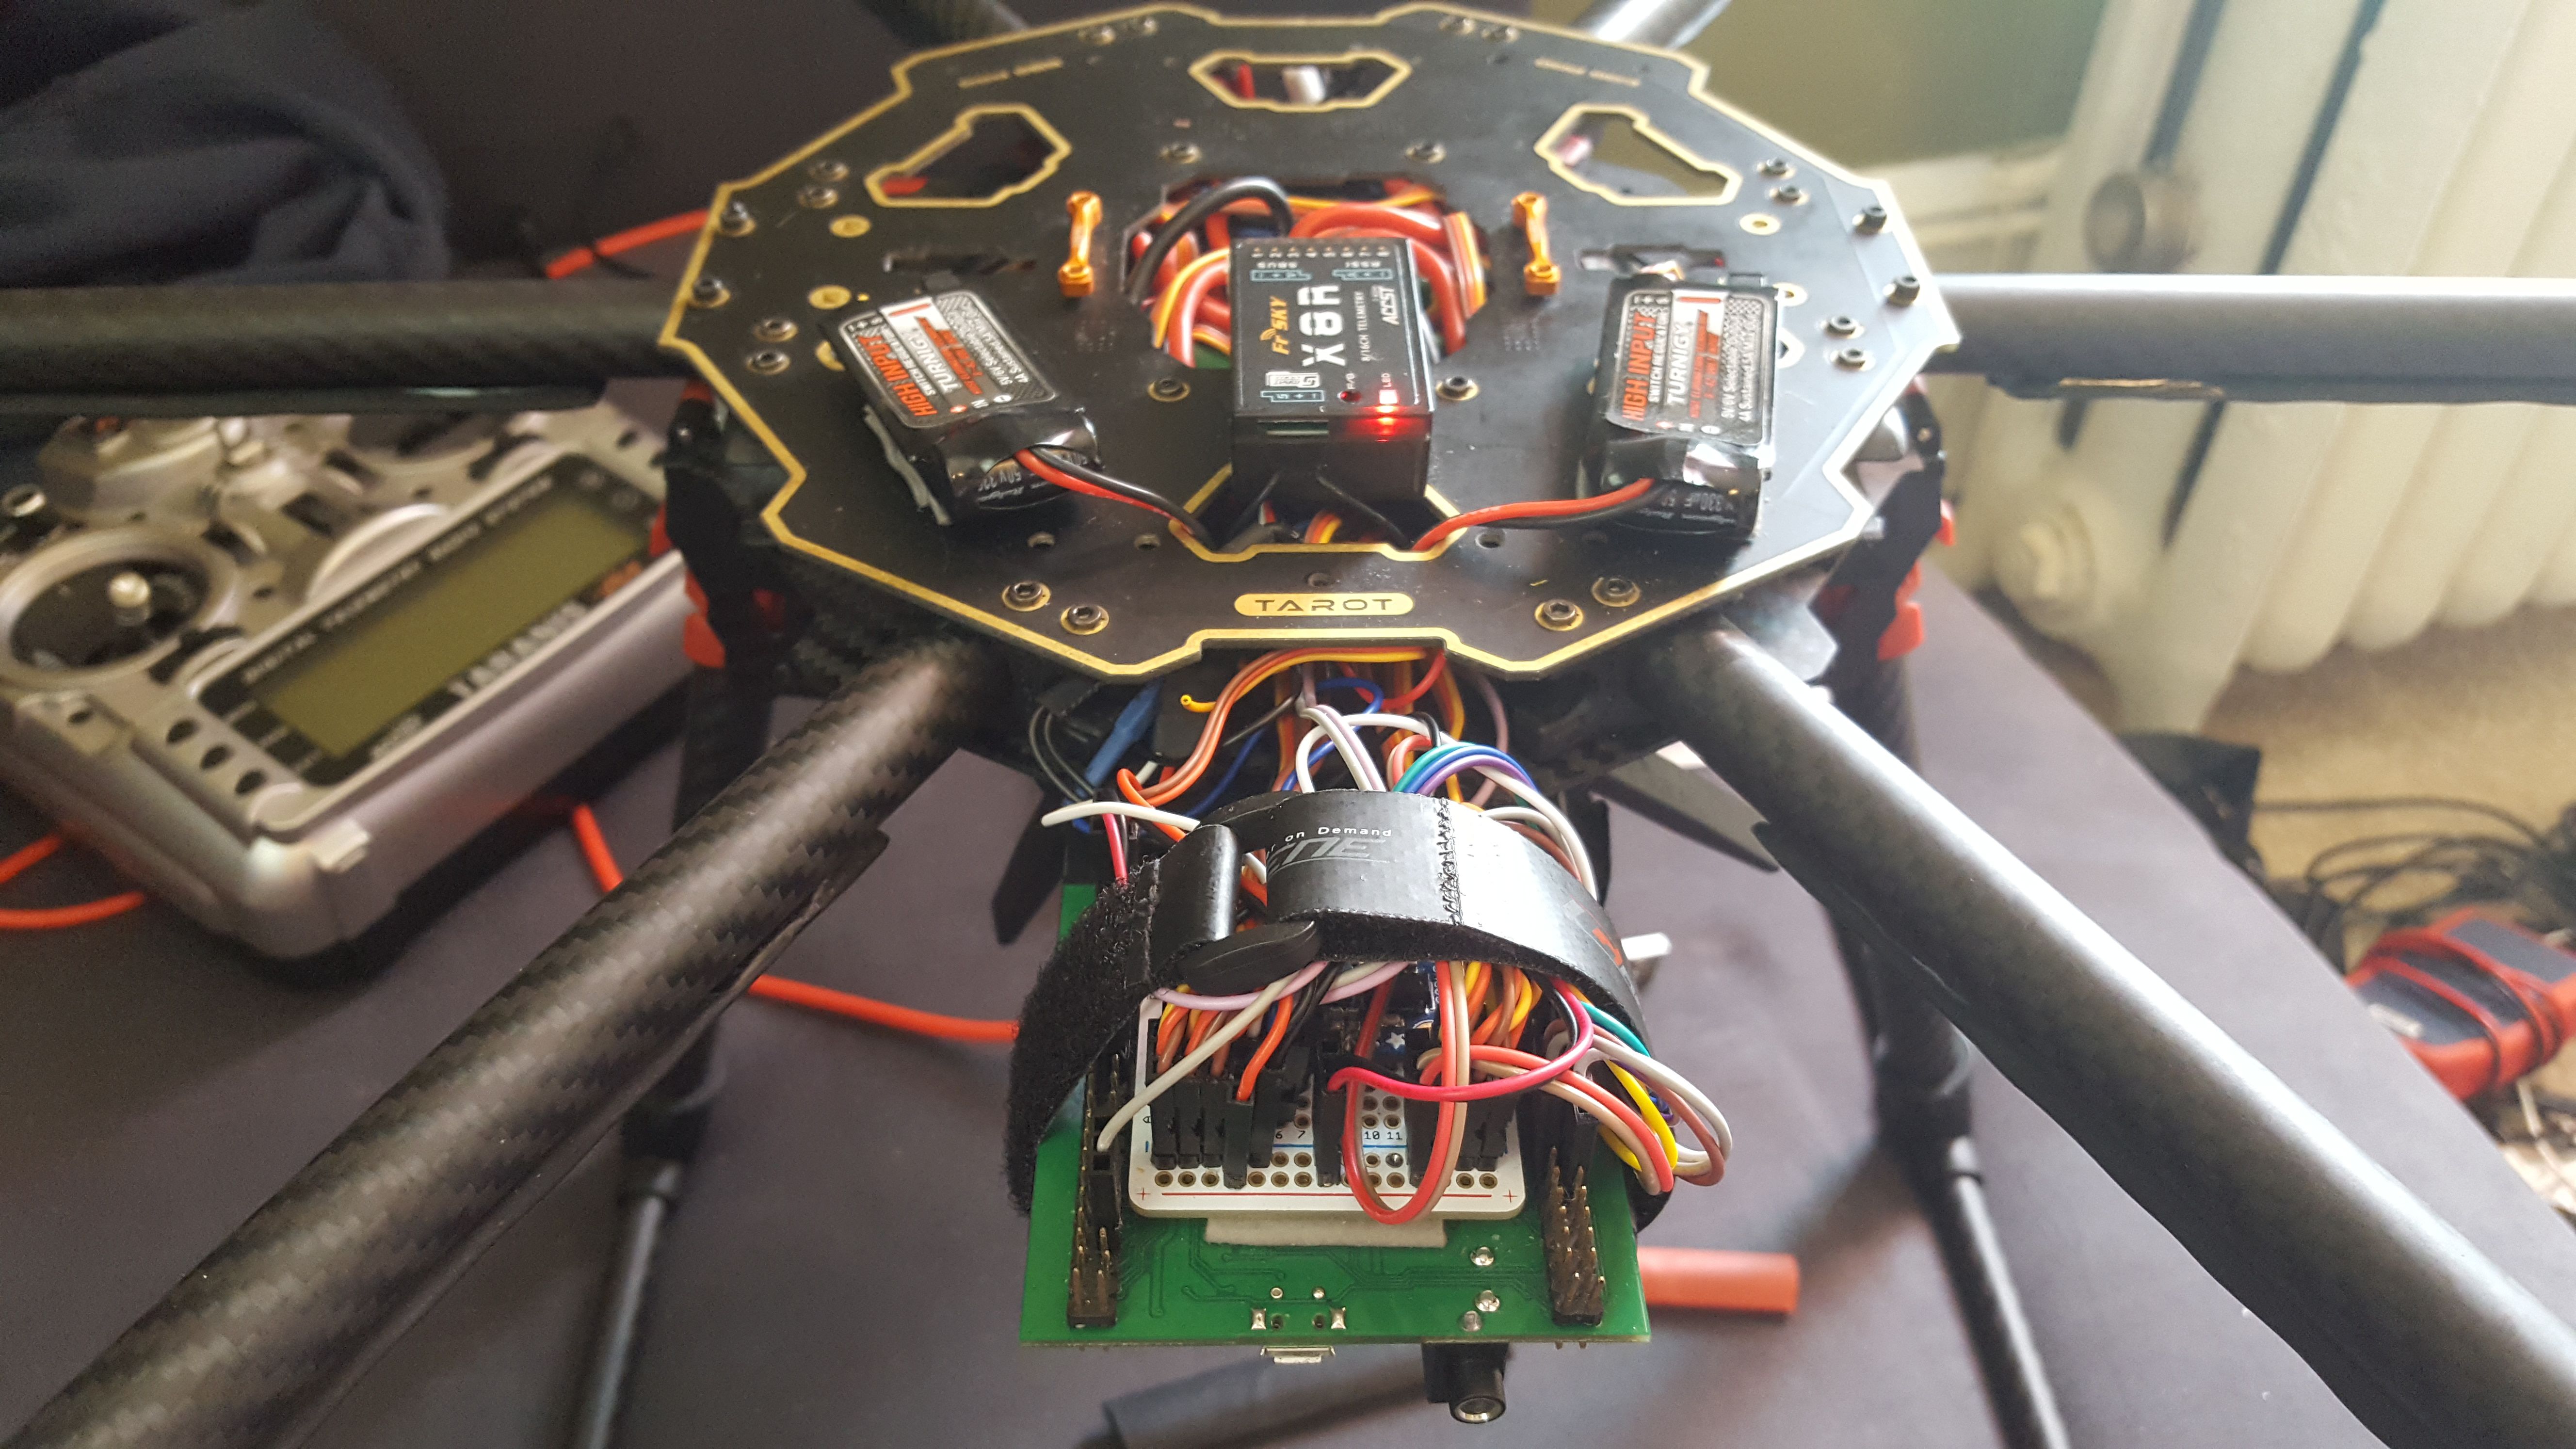
X8R Radio Receiver Module:
Sample Rate: ~100 Hz (times per second)
Protocol: SBUS (Inverted Serial UART) using DMA
Function: Read values of the 16 channels received from the radio controller transmitter including:
Throttle, rudder, aileron, and elevator joystick gimbal positions.
12 dials and switches (some 2-position, but mostly 3-position) used to change modes/settings.
BMP280 Barometric Pressure Sensor:
Sample Rate: 25 Hz (times per second)
Protocol: I2C
Function: Computes current pressure based on a a barometric pressure sensor and a temperature sensor.
This sensor is used to estimate altitude based on:
The change in pressure from the ground to its current value.
NEO-M8N GPS Receiver:
Sample Rate: 10 Hz (times per second)
Protocol: Serial UART using DMA
Function: Transmits chosen information about the GPS receiver over a serial interface. Information such as:
Latitude, longitude, altitude, number of connected satellites, estimated error, and other information.
HC-SR05 Ultrasonic Range Sensor:
Sample Rate: 25 Hz (times per second)
Protocol: Trigger a measurement by emitting an ultrasonic pulse and count how long it takes until it bounces back.
Distance (in cm) = ((elapsed time * sound velocity (340 m/s)) / 100 / 2).
Function: This sensor points toward the ground to determine how high up the hexacopter is.
It can only read up to 3-4 meters so its main purpose will be auto-landing.
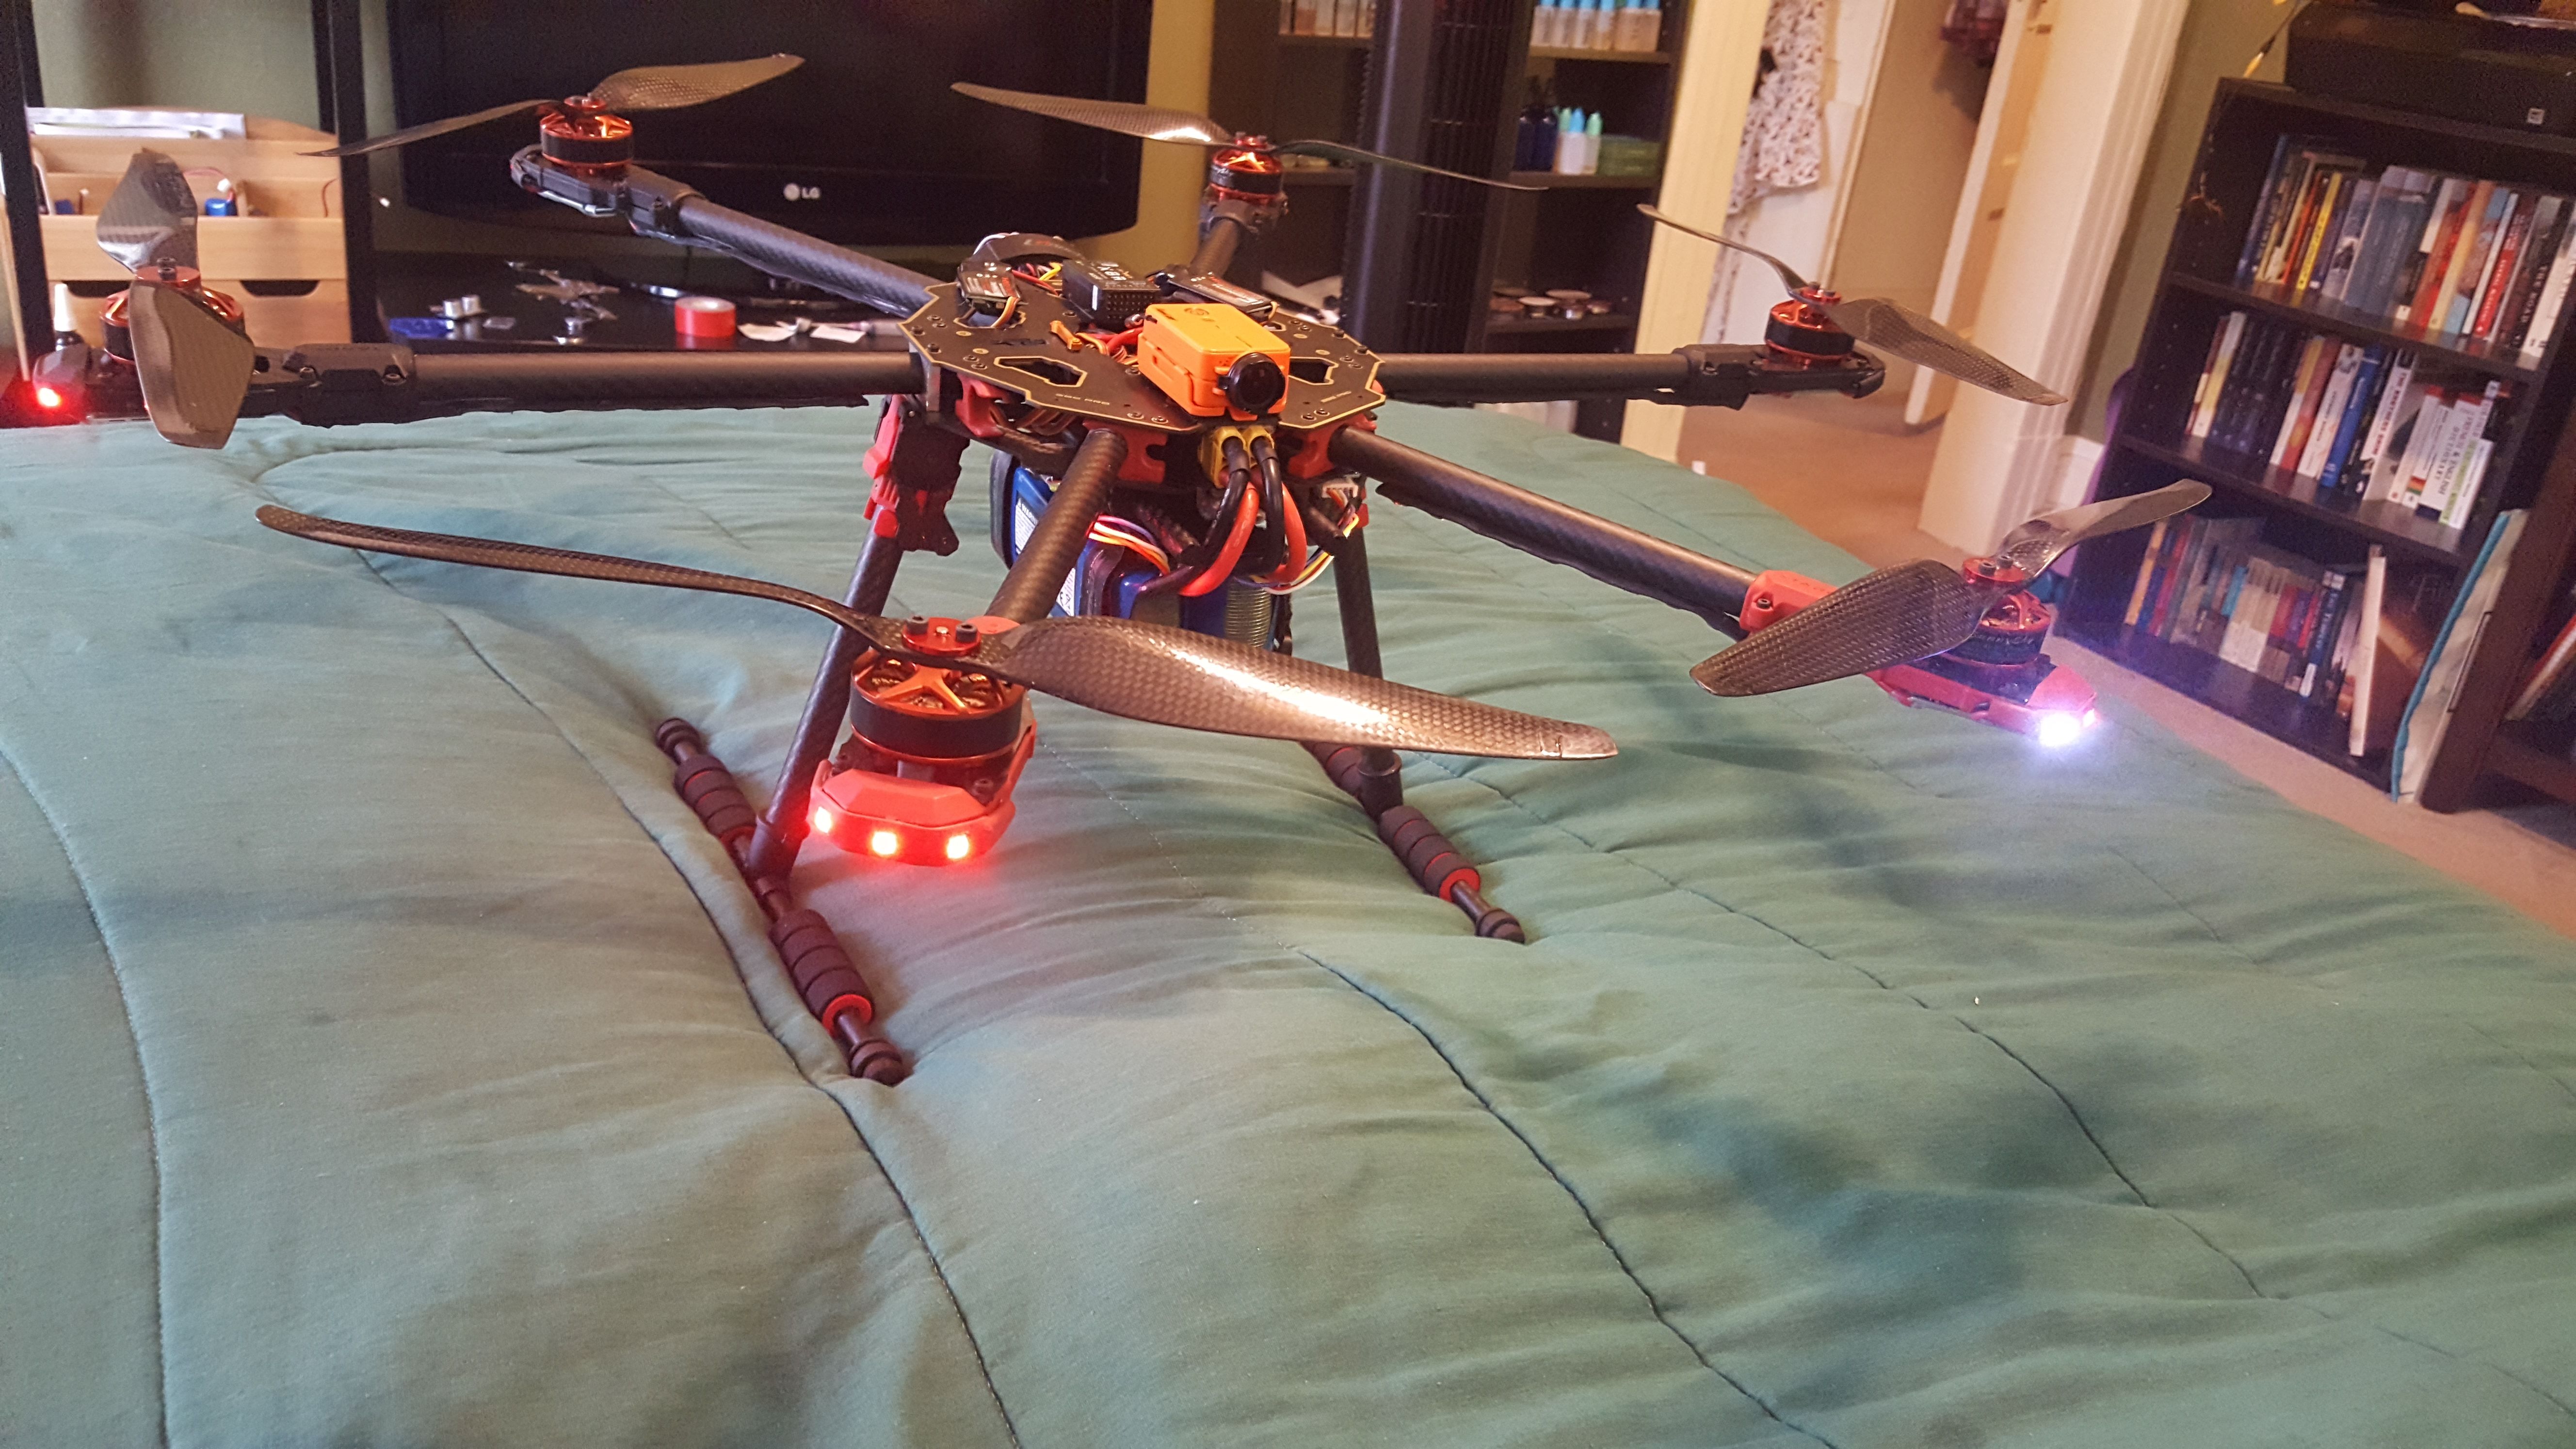
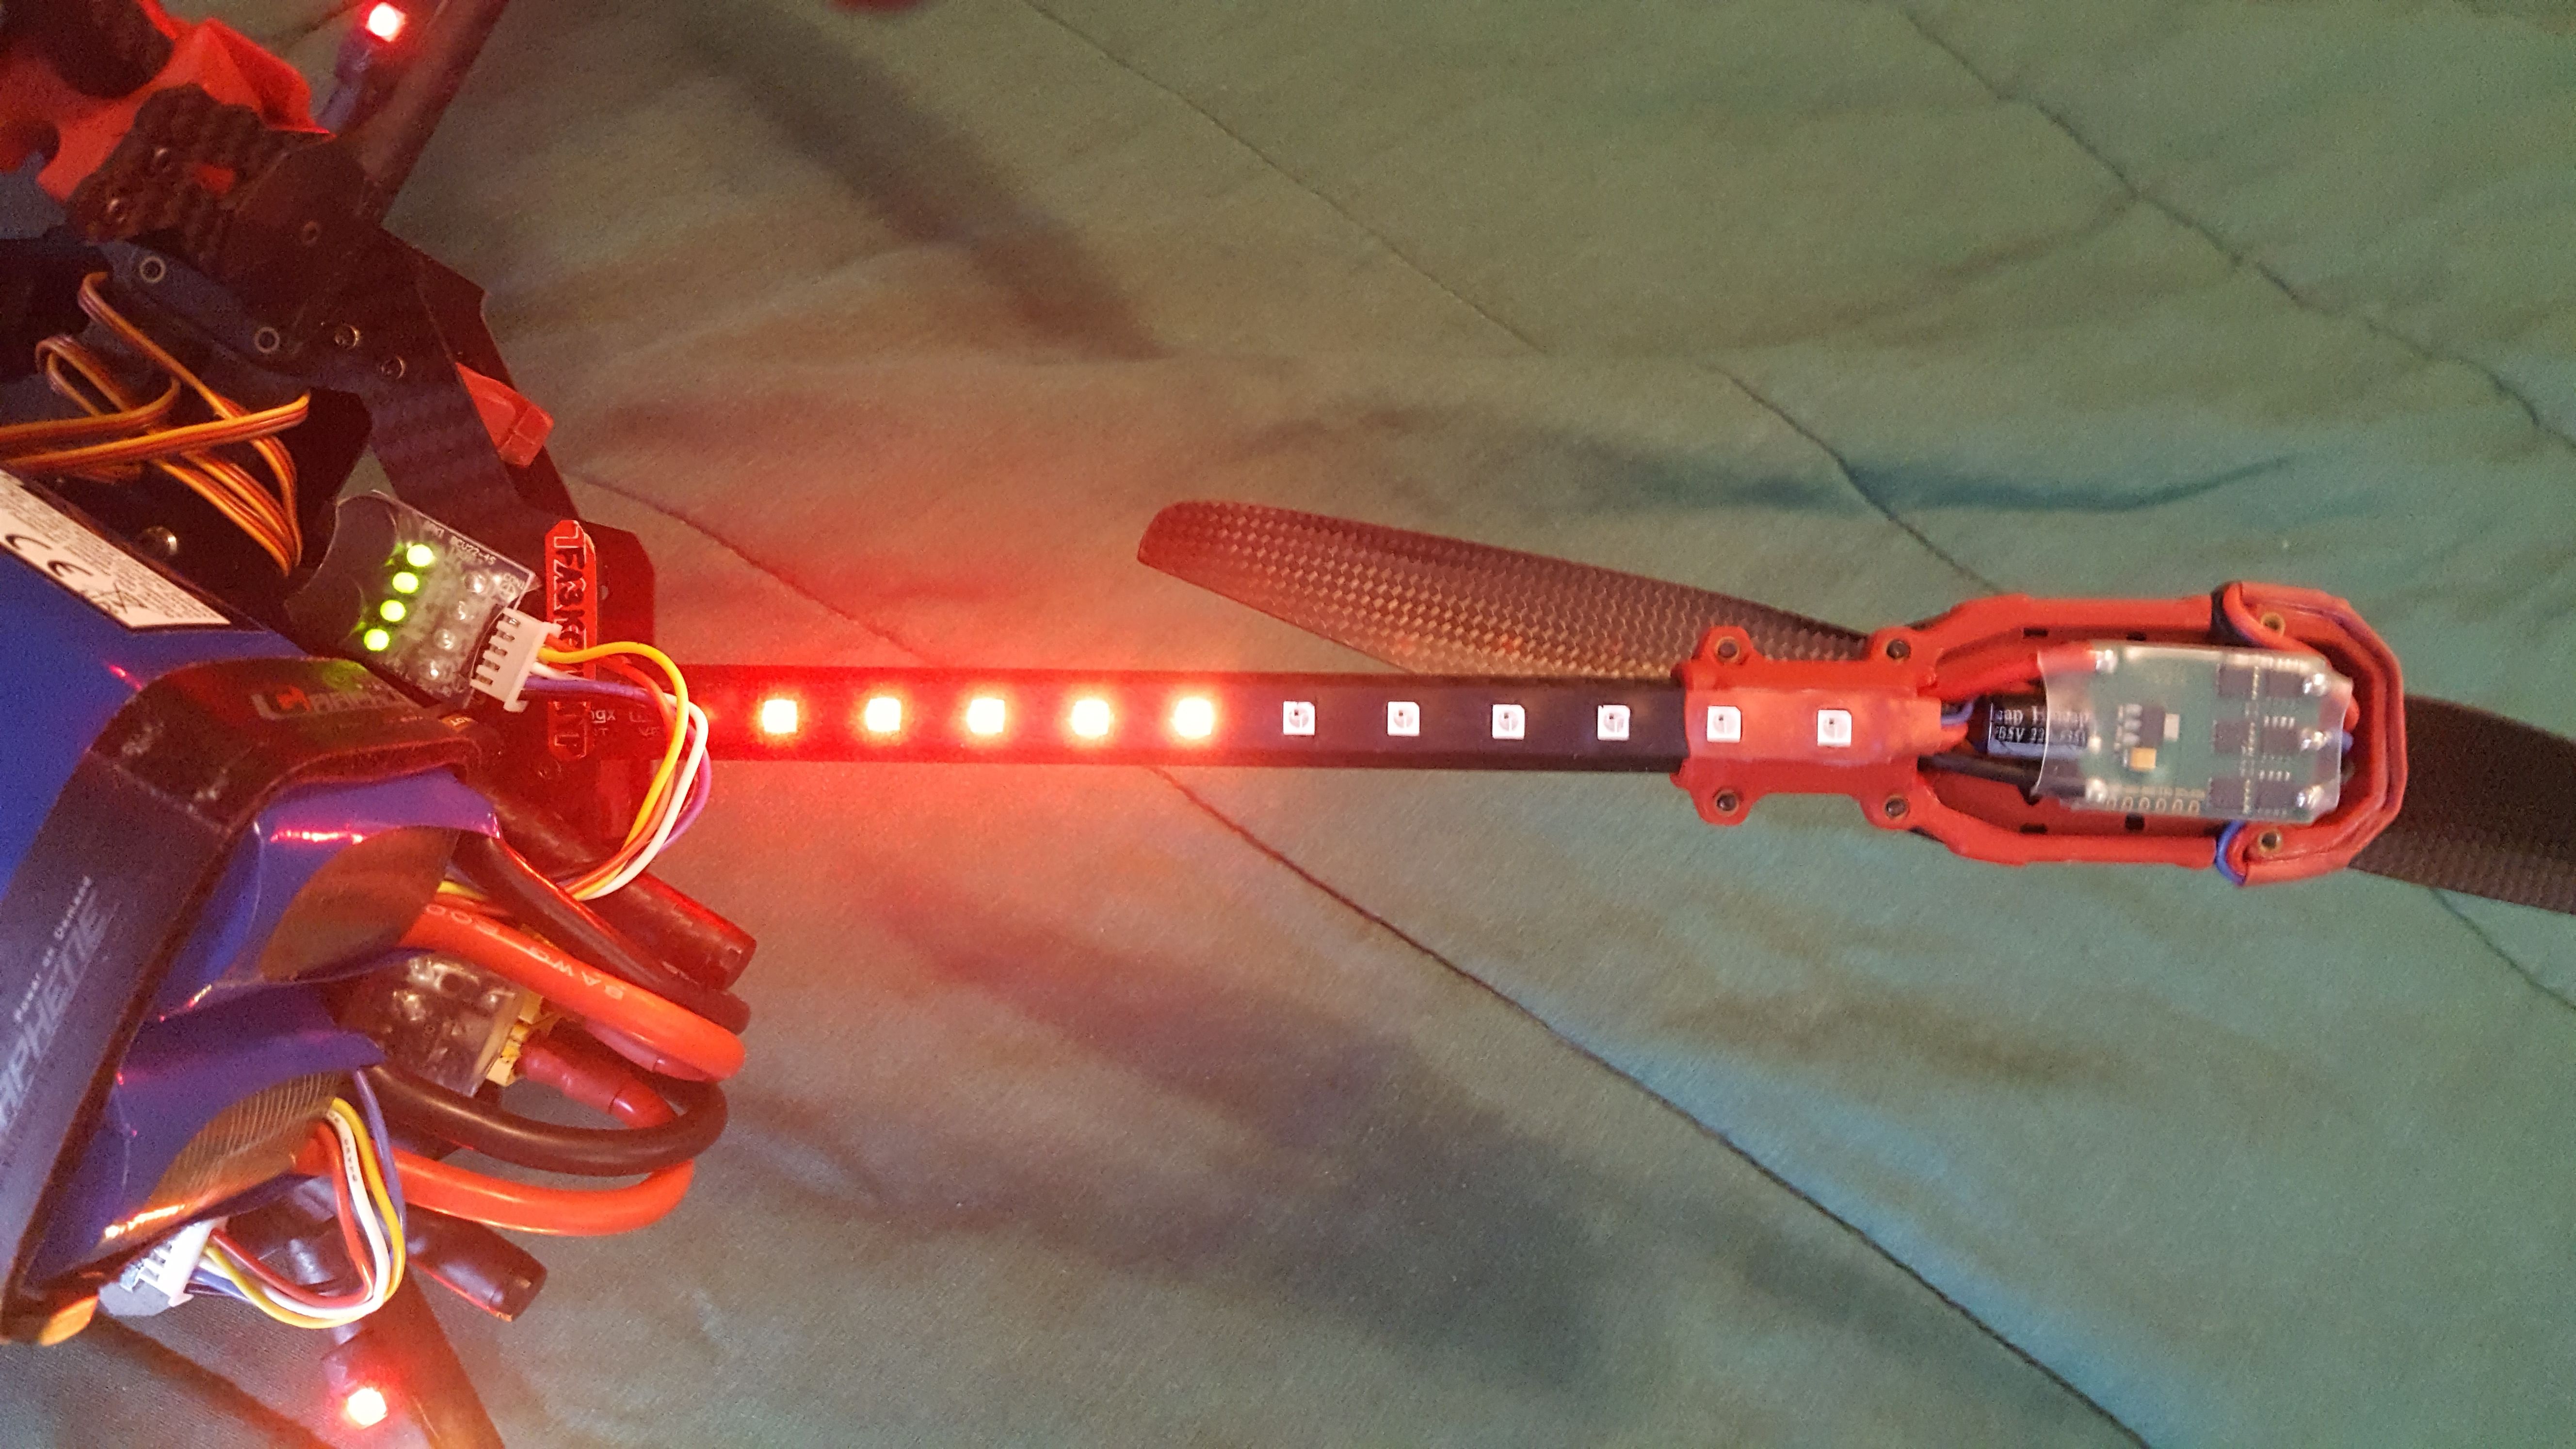
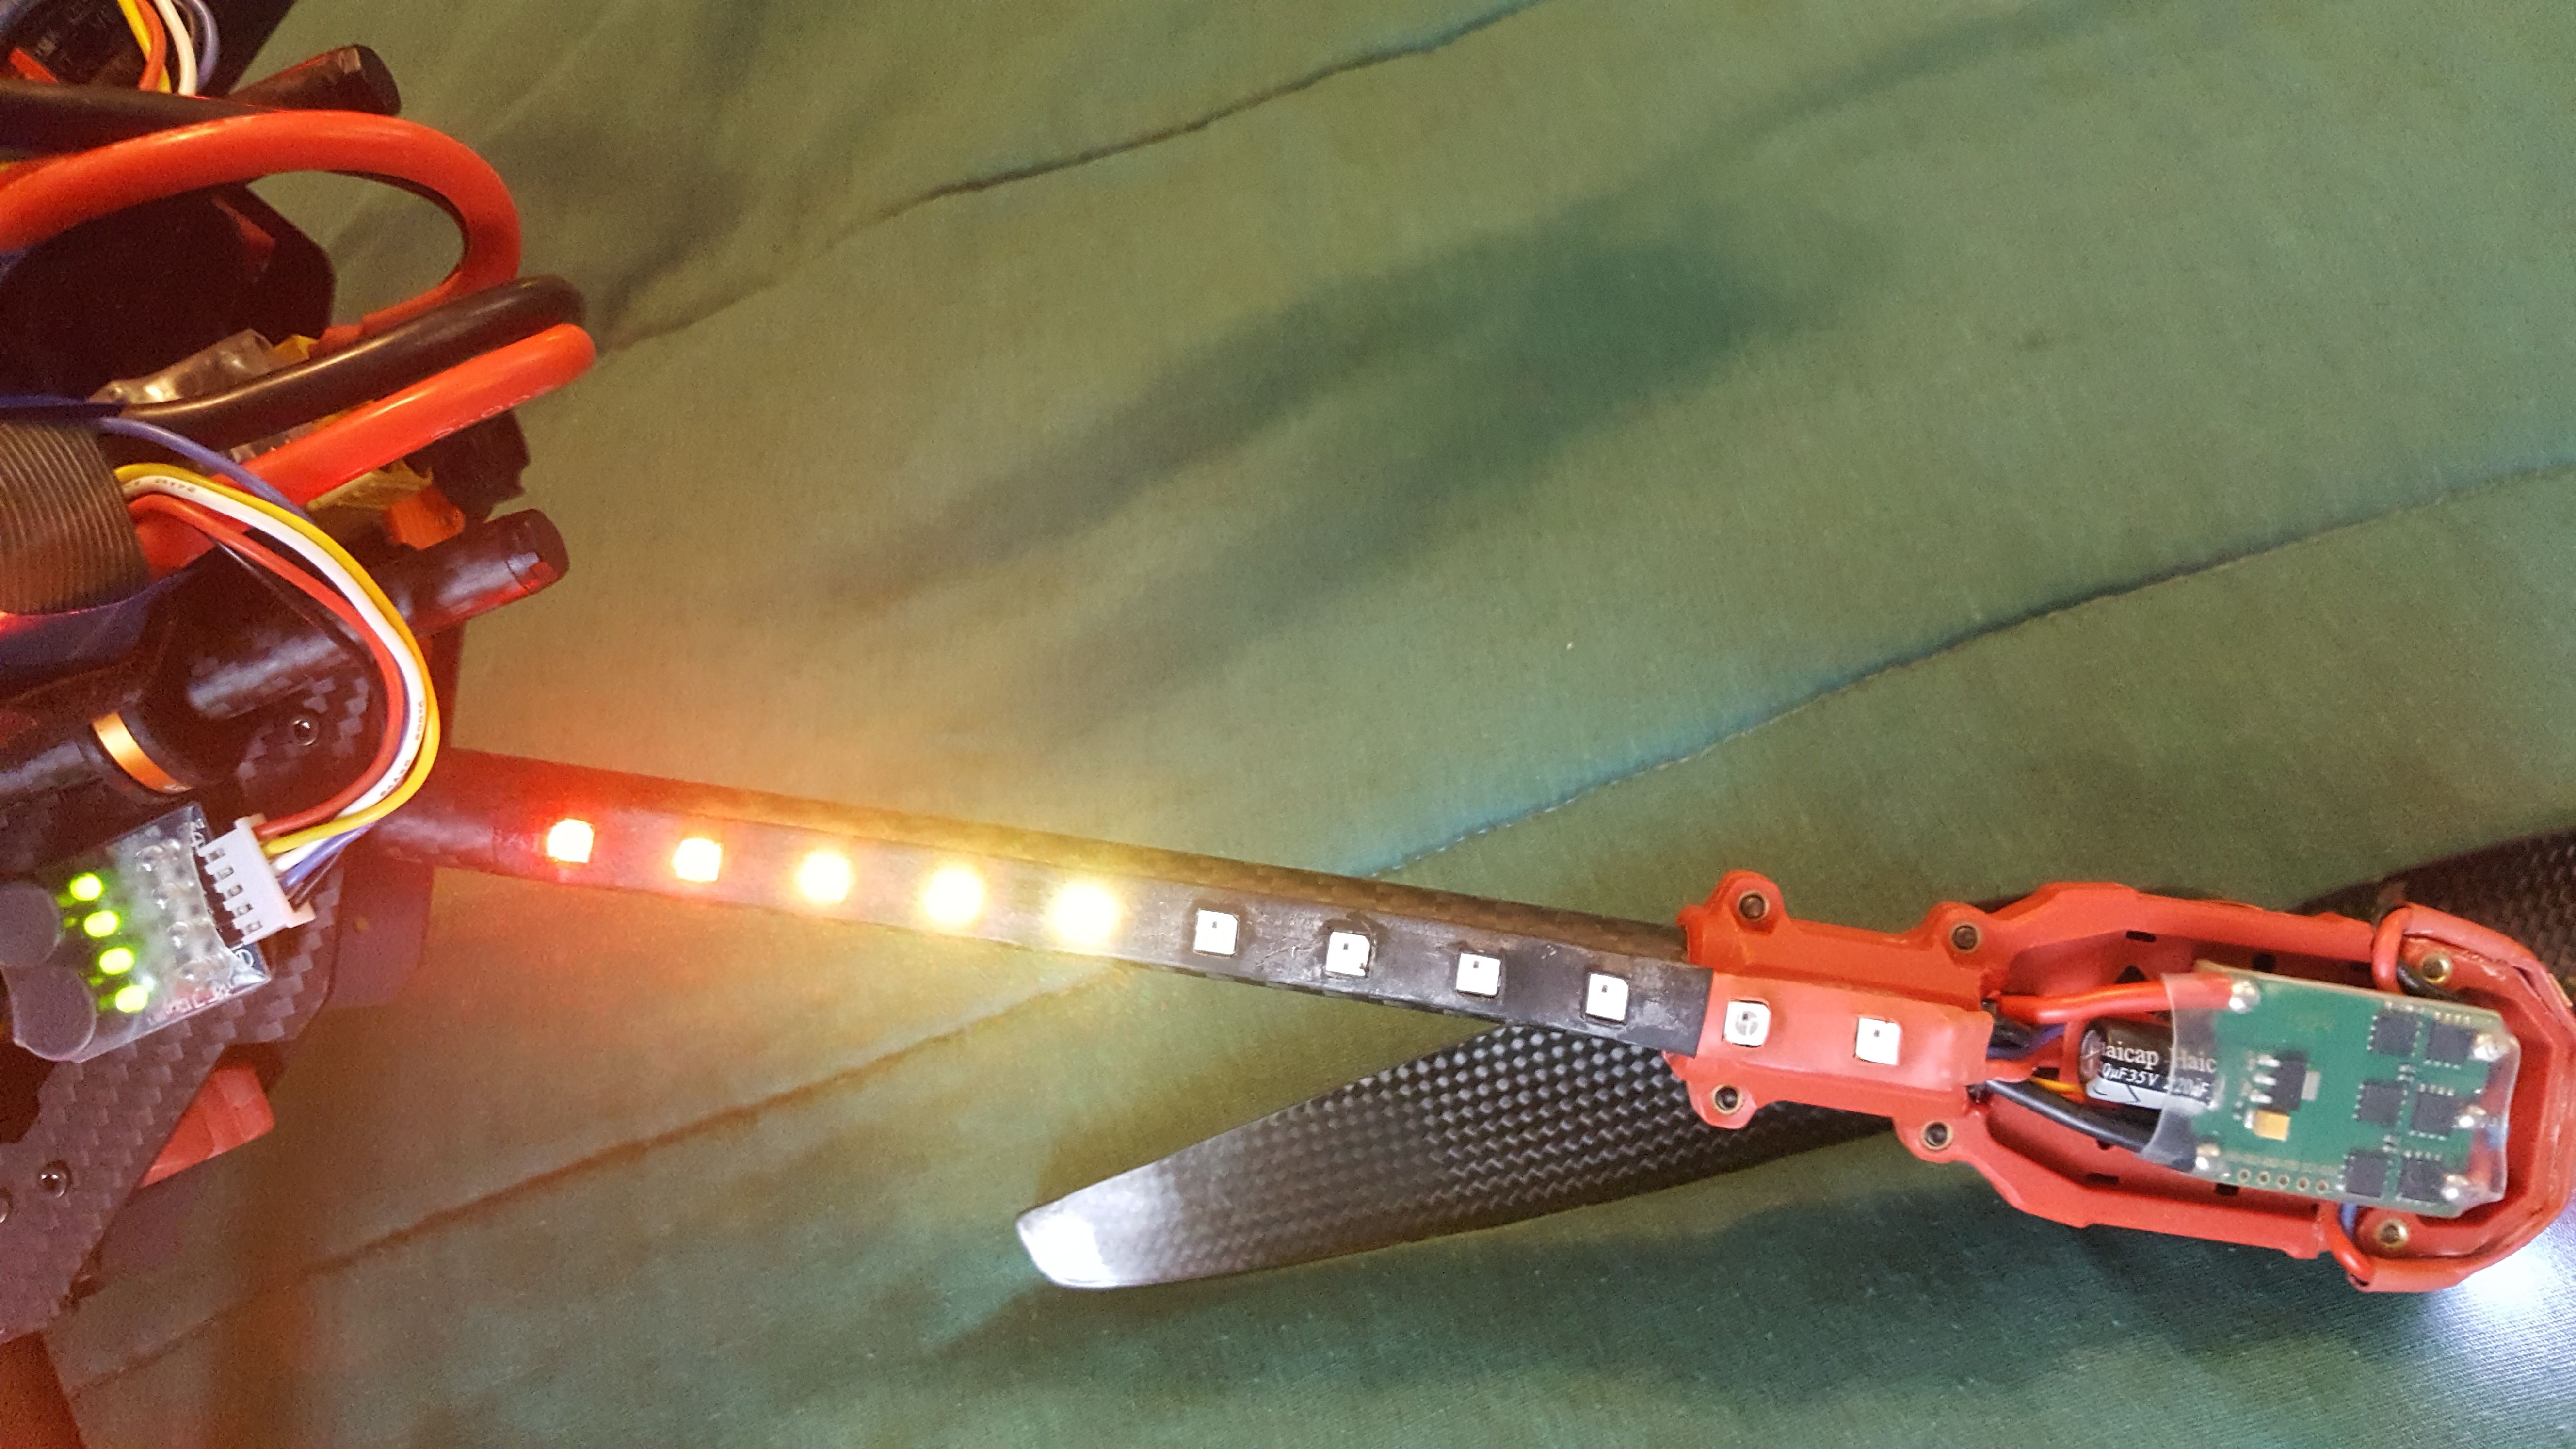
WS2812B Addressable RGB LED Strip:
Refresh Rate: Customizable (For both the motor mount LEDs and the under arm LEDs).
Protocol: Using DMA and timers, a square waveform is created that transmits the color information as 1s and 0s.
A 0 is signaled by a voltage present on the line for about 350 nanoseconds.
A 1 is signaled by a voltage present on the line for about 900 nanoseconds.
The total time for each bit (0 or 1) is 1250 nanoseconds (1.25 microseconds).
Sending color data to all 84 LEDs (11 under each arm and 3 on each motor mount) takes the DMA:
84 LEDS x 24 bits per LED = 2,016 (1s or 0s) x 1.25 microseconds per bit = 2.52 milliseconds.
Function: Aside from looking great, the LEDs serve as a signaling device to the operator in situations such as:
Calibration Mode: The LEDs serve as a progress bar denoting how far along calibration is.
Arming Mode: The LEDs flash red/white indicating to keep a safe distance while the motors turn on.
Idle/Armed Mode: Front arms red, middle arms green, back arms blue. Great for orientation.
The library is easily customizable to create complex, multi-layered, pattern based animations.
MicroSD Card Reader/Writer:
Data Rate: N/A
Protocol: SPI using DMA
Function: Mainly used as a data logger to be able to more easily find out why something may have gone wrong.
Save settings for future use of the hexacopter.
YouTube Videos:
Photos

Part List
Show stores (6)
Looks really good. Love the addition of the LED strips.

Thanks a lot. In the beginning they were more for show as I was just learning how to do hardware stuff and LEDs are a nice way of seeing progress in realtime. After my first flight though, I couldn't believe how helpful they were. I have no idea how people can keep track of orientation without something like this :) Maybe I'm just a noob haha, but thanks again!

Wow, I'm impressed! So you wrote the flight control software on an F4 board and created a GUI in processing? Have you had any thoughts to release your software to the open source community? While the flight controller software scene is a little crowded it seems like you're definitely on the right track with the hardware.
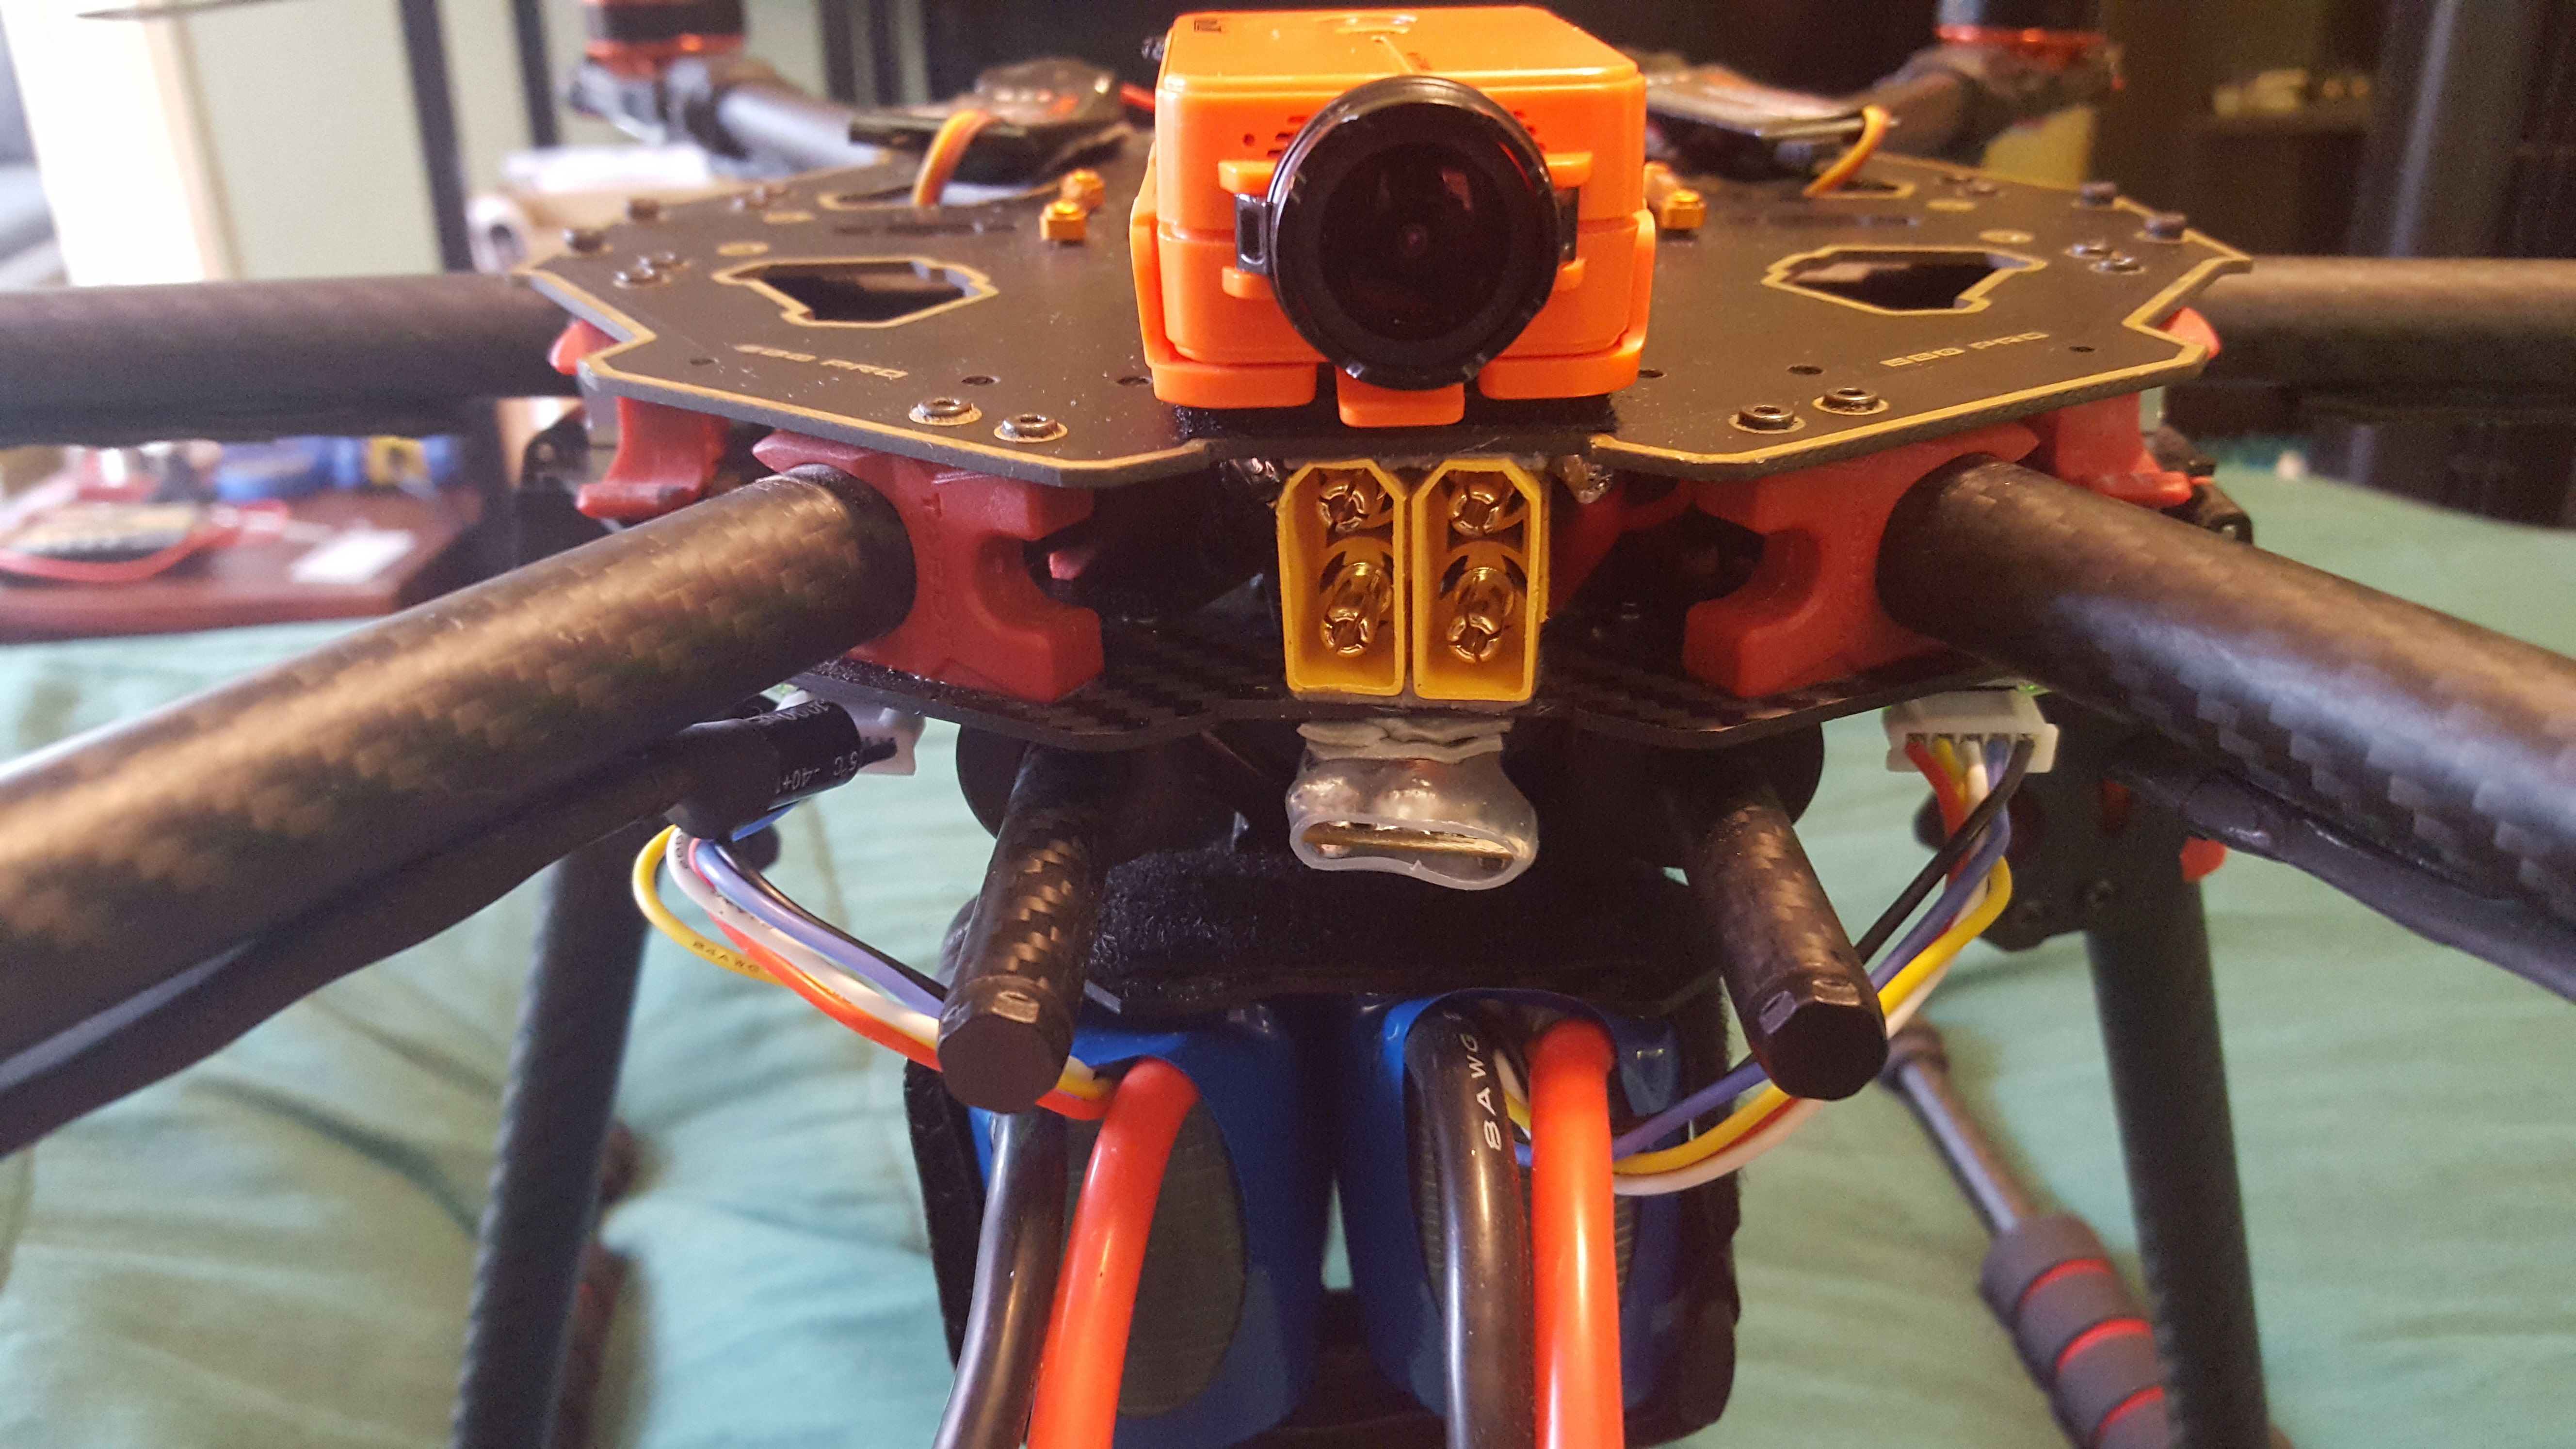
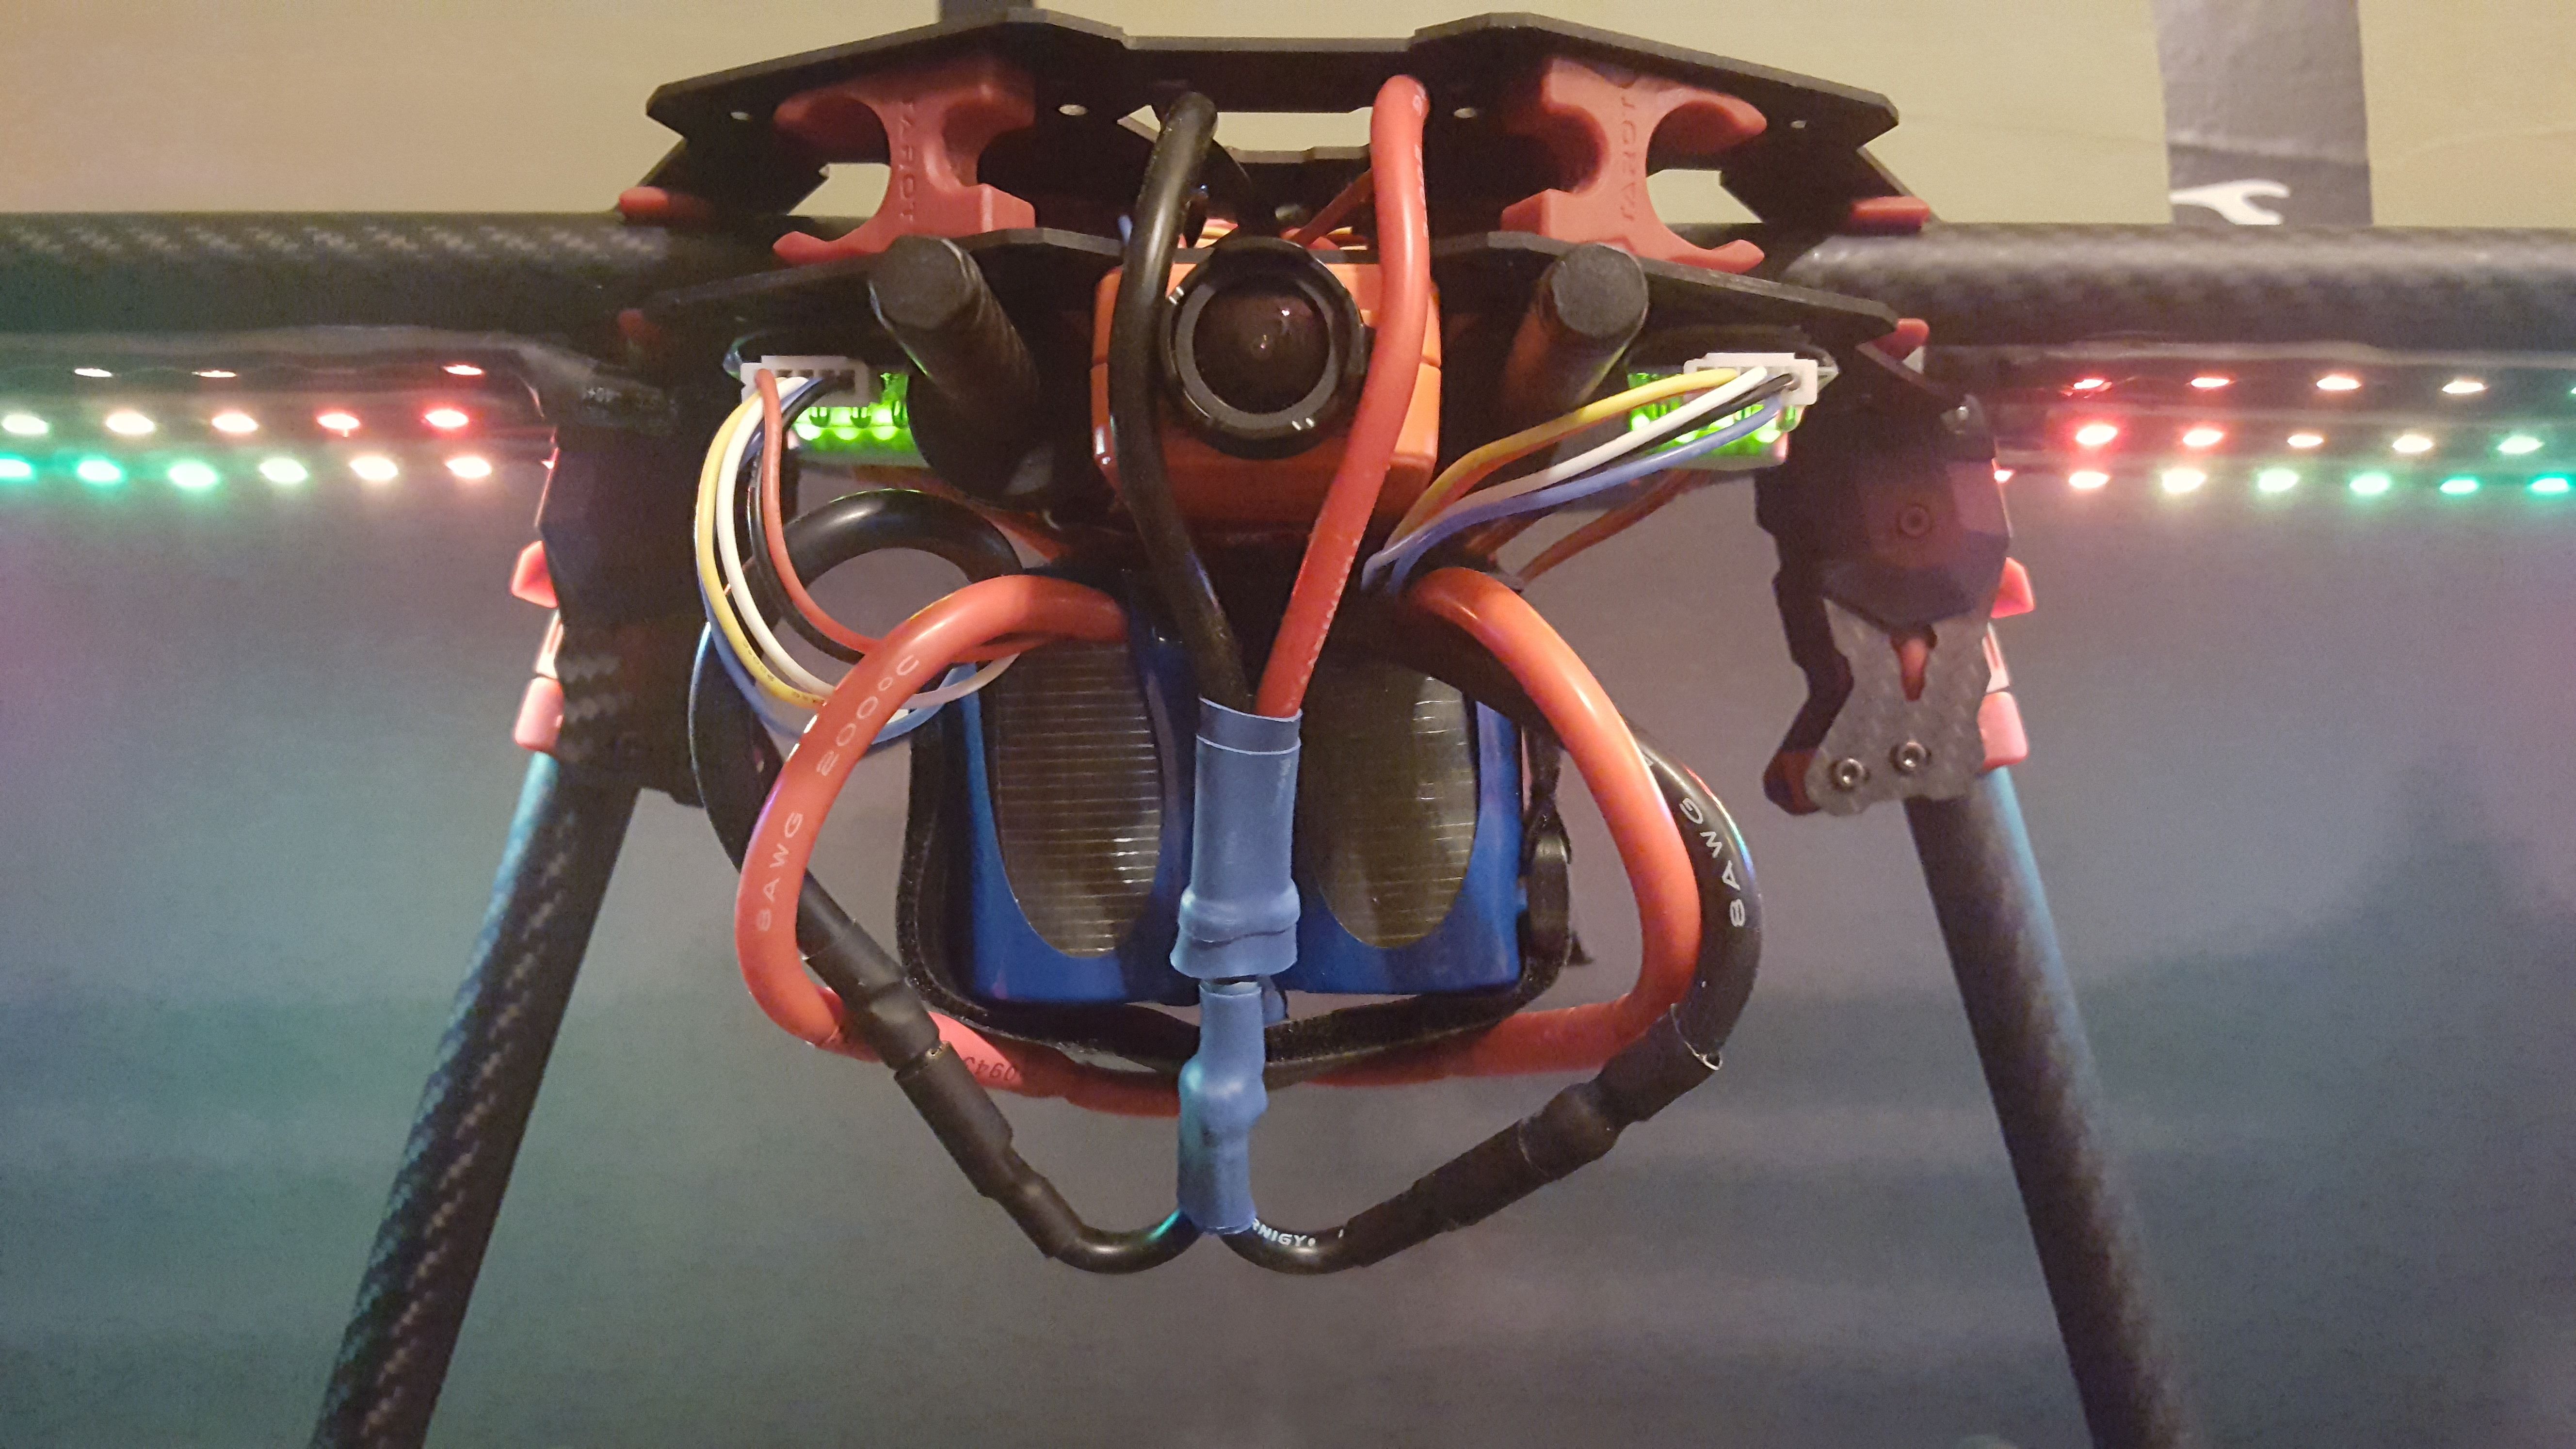
Hey, thanks a lot. I have been wanting to take some new pics of it since things keep changing around (like you can see I upgraded to XT90 connectors for the batteries). I have been thinking about putting all my code on github, but I want it working correctly before I make my final decision on that. I don't feel as though my code is really different enough from all the others, so that kind of plays a factor too. All the control theory and maths that I wasn't aware of, I basically just studied others' code until I understood it. So in that sense, is this still my own flight controller? I have been struggling with that question for a while now... Well that got a little deep haha thanks again!
Guides & Reviews

AirbladeUAV has done it again and this time they've brought long range to the 5" class! Based on the popular Transformer Mini, the new Transformer 5" Ultralight adopts a lot of the same design philosophies with larger props and more payload capacity. It can fly upwards of 20 minutes on a 4 cell Li-Ion battery pack and in ideal conditions it's got a range of over 4 to 5 miles. In this guide I'll walk..
Read more
With the release of the DJI FPV Drone cinematic FPV has become a lot more accessible, but you certainly don't want to crash a $750 drone! The QAV-CINE Freybott is a compact, lightweight cinematic FPV drone that can take a hit and keep going. It's a lot safer to fly indoors and around people. With a naked GoPro or the SMO 4k you can capture some great stabilized footage. In this guide I'll show you..
Read more


Mind blown. Amazing stuff here!
Thanks a lot man. It's nice hearing compliments on something that I've put so much time and effort into, especially on a first build.
Second that. I really enjoyed reading about your efforts. Congratulations on actually doing something that few would attempt.