Tubular 8 inch long range drone with 3D printed parts
 By moro.dynamics on Mar 17, 2024
Summary
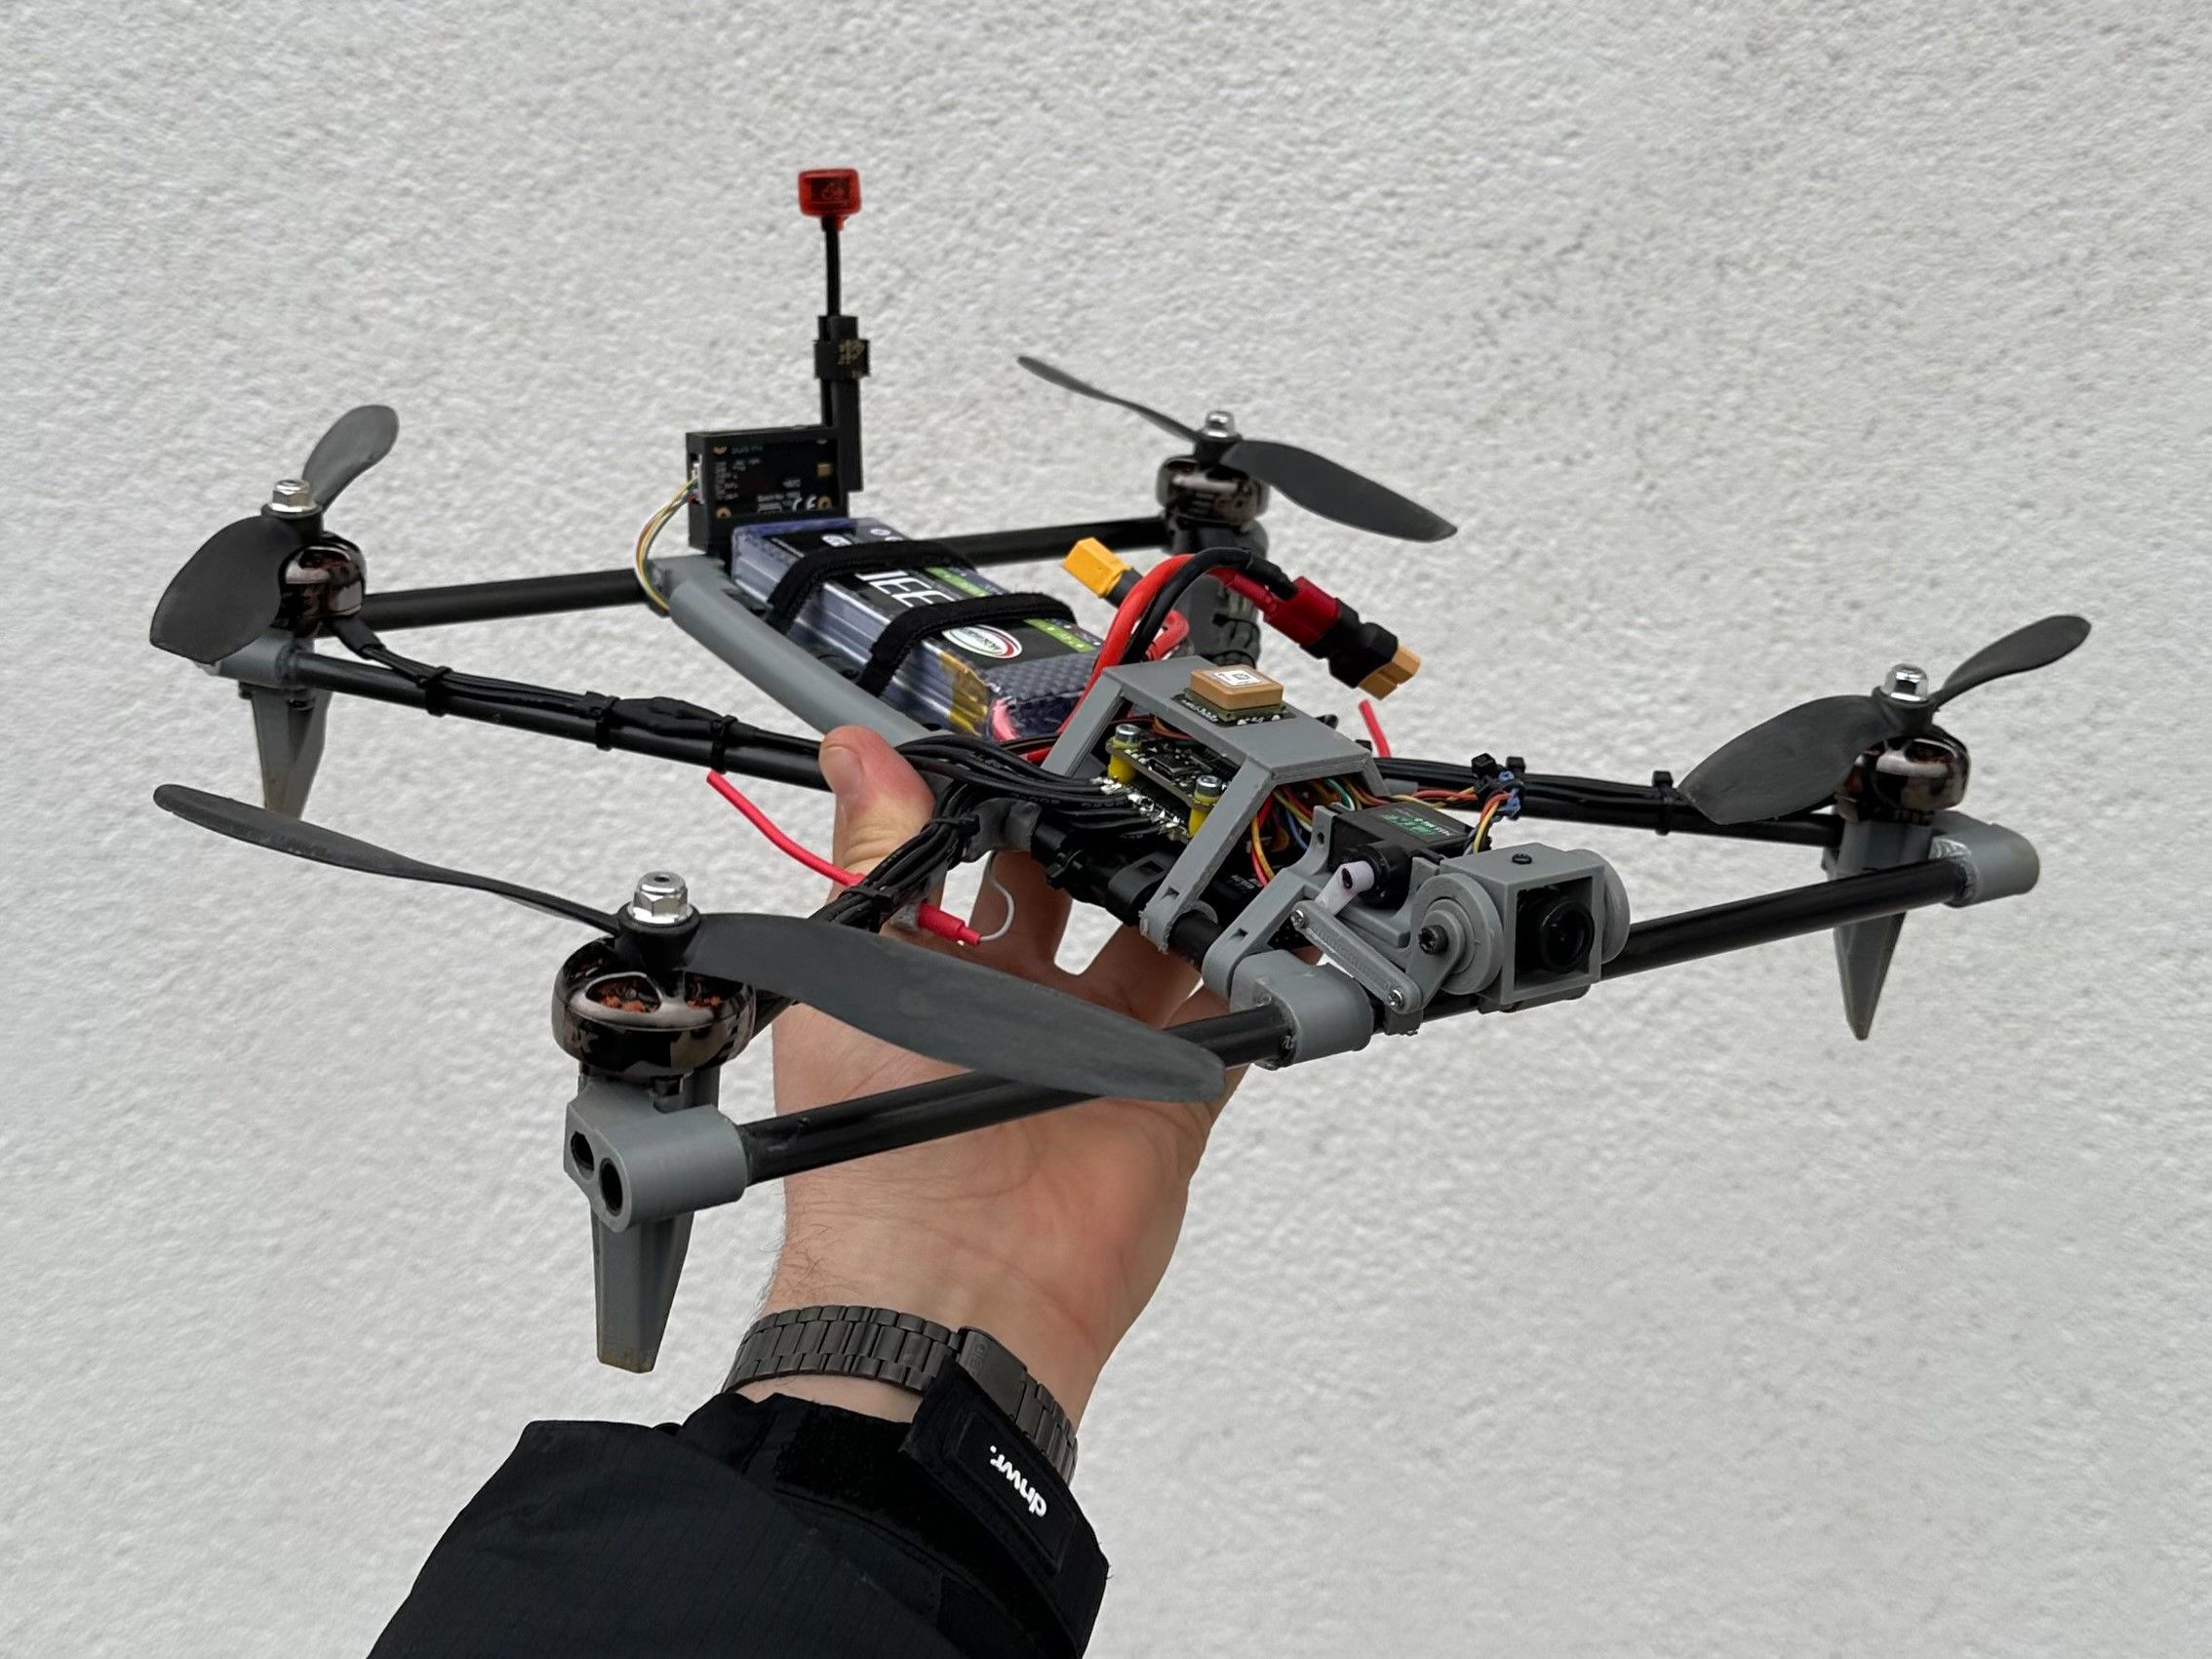
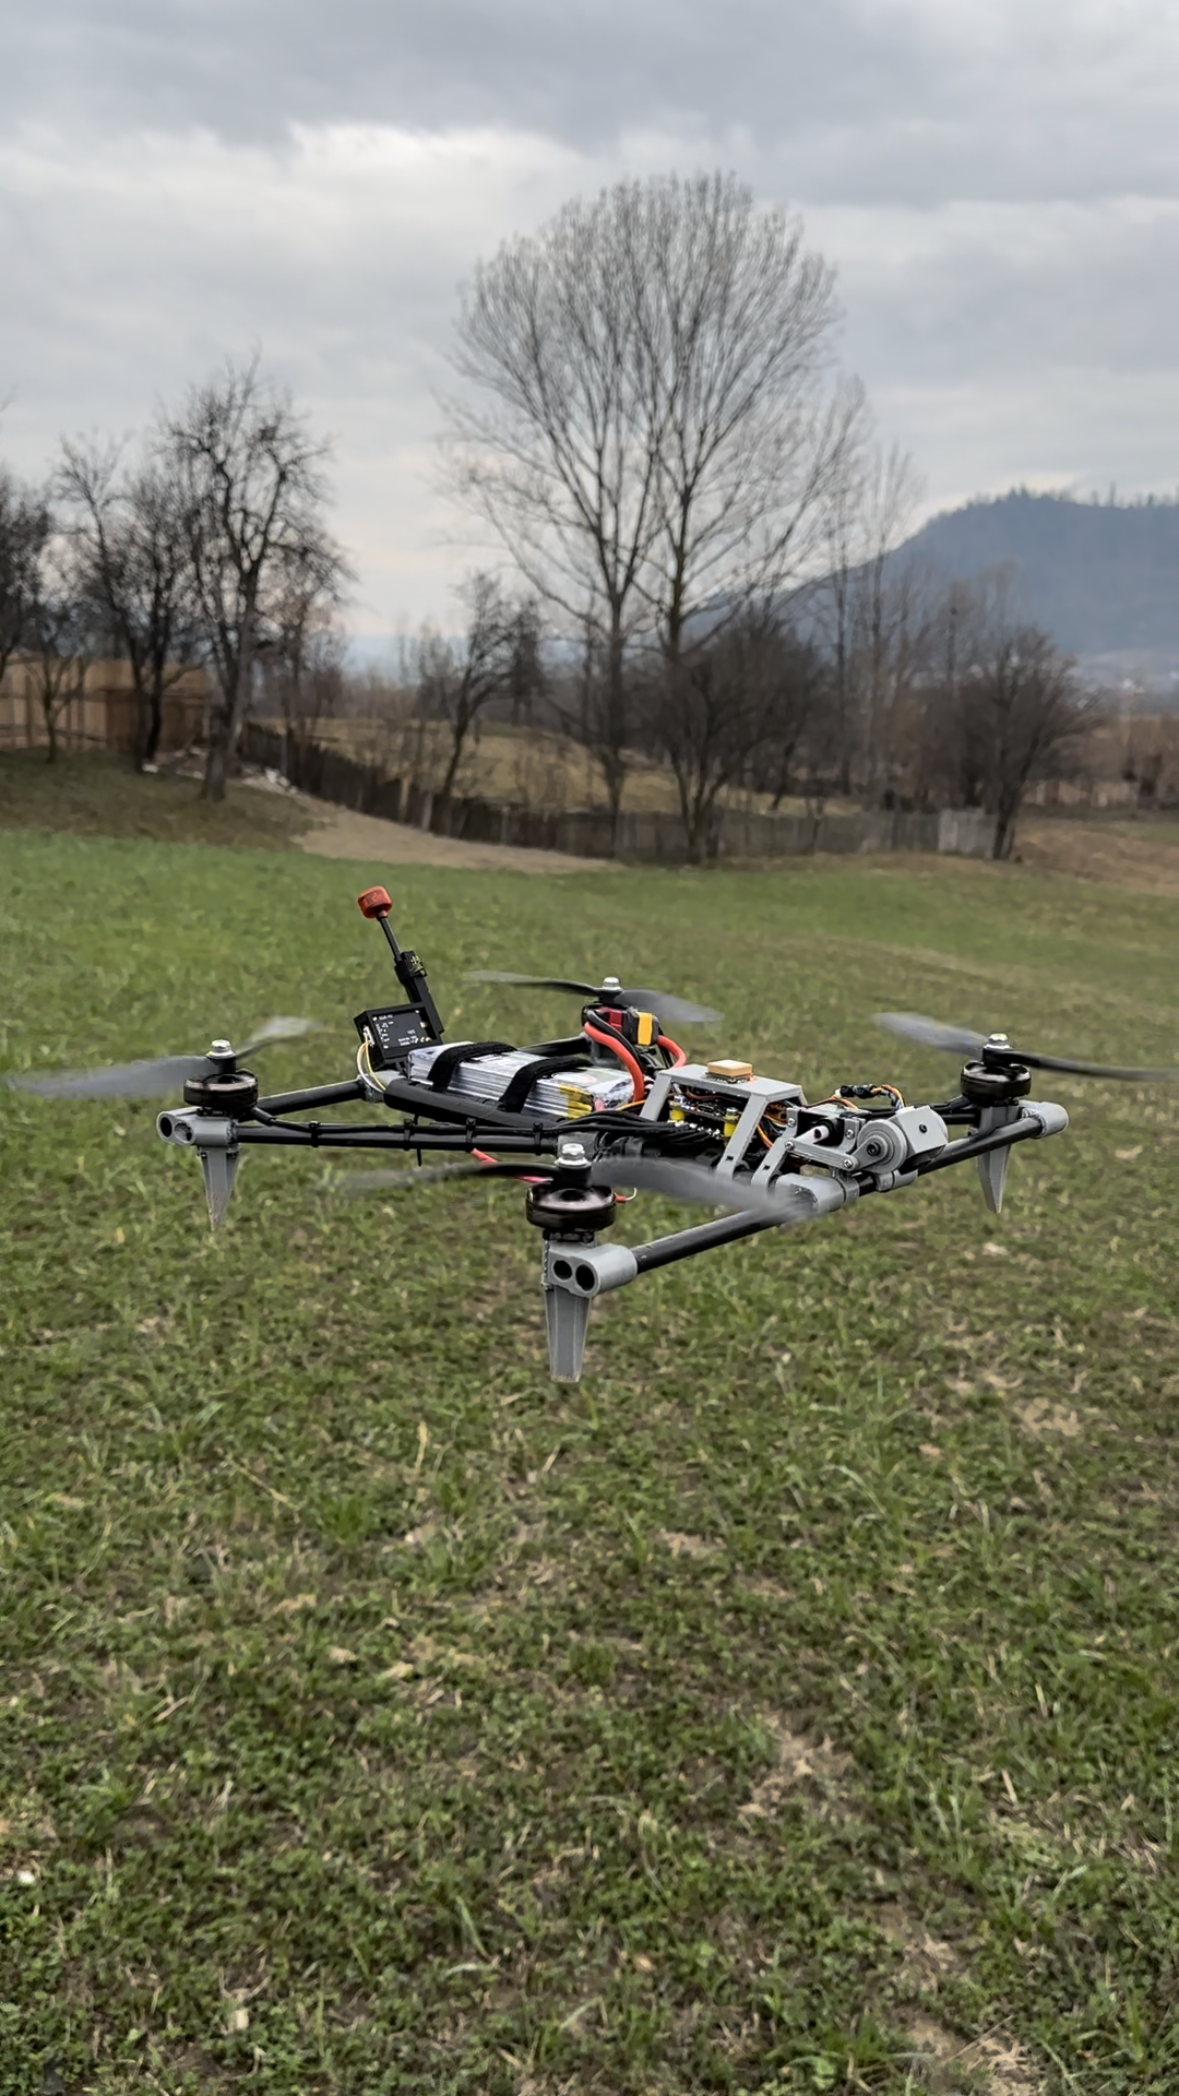
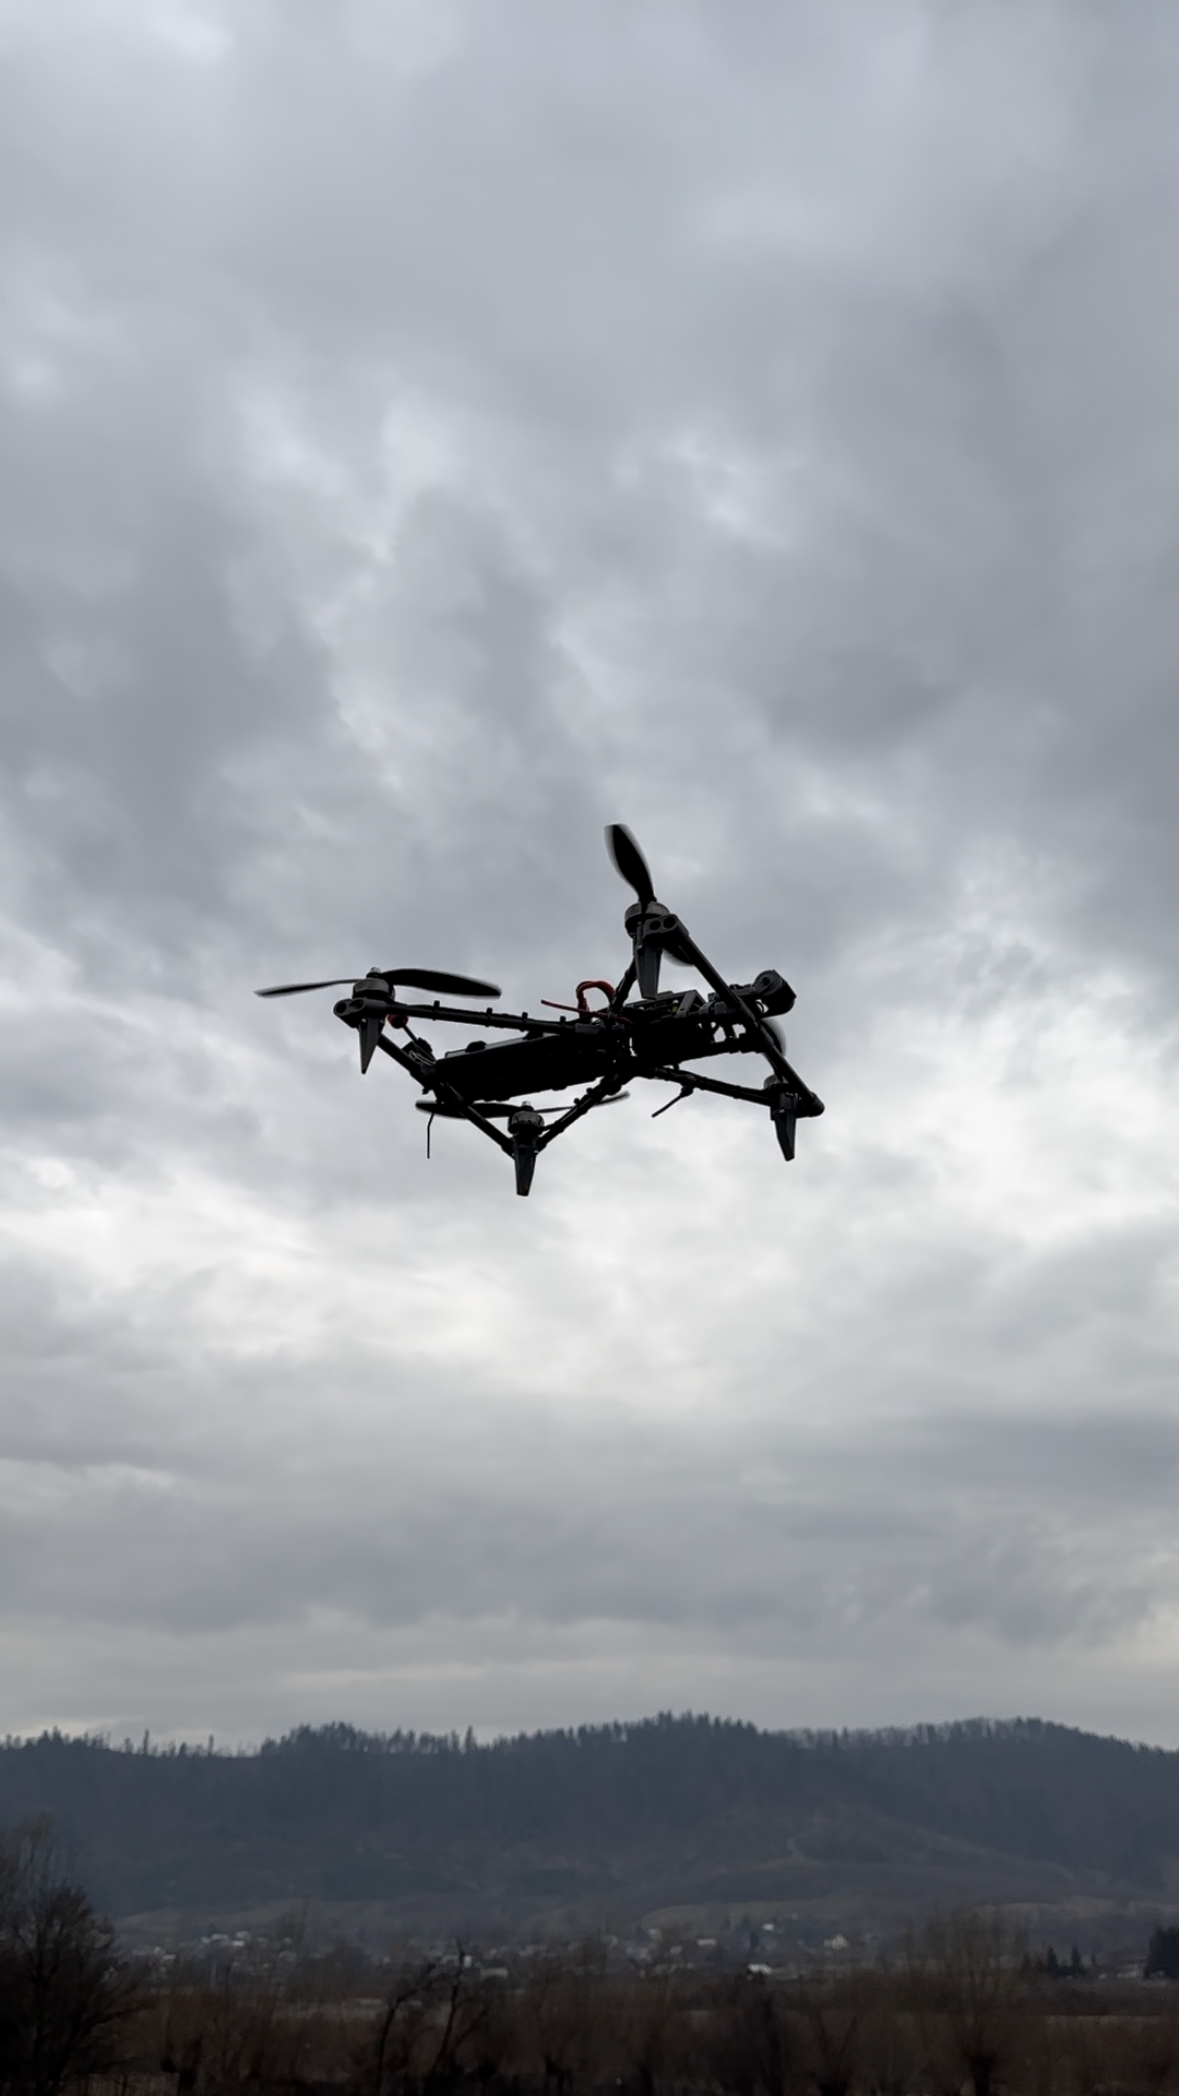
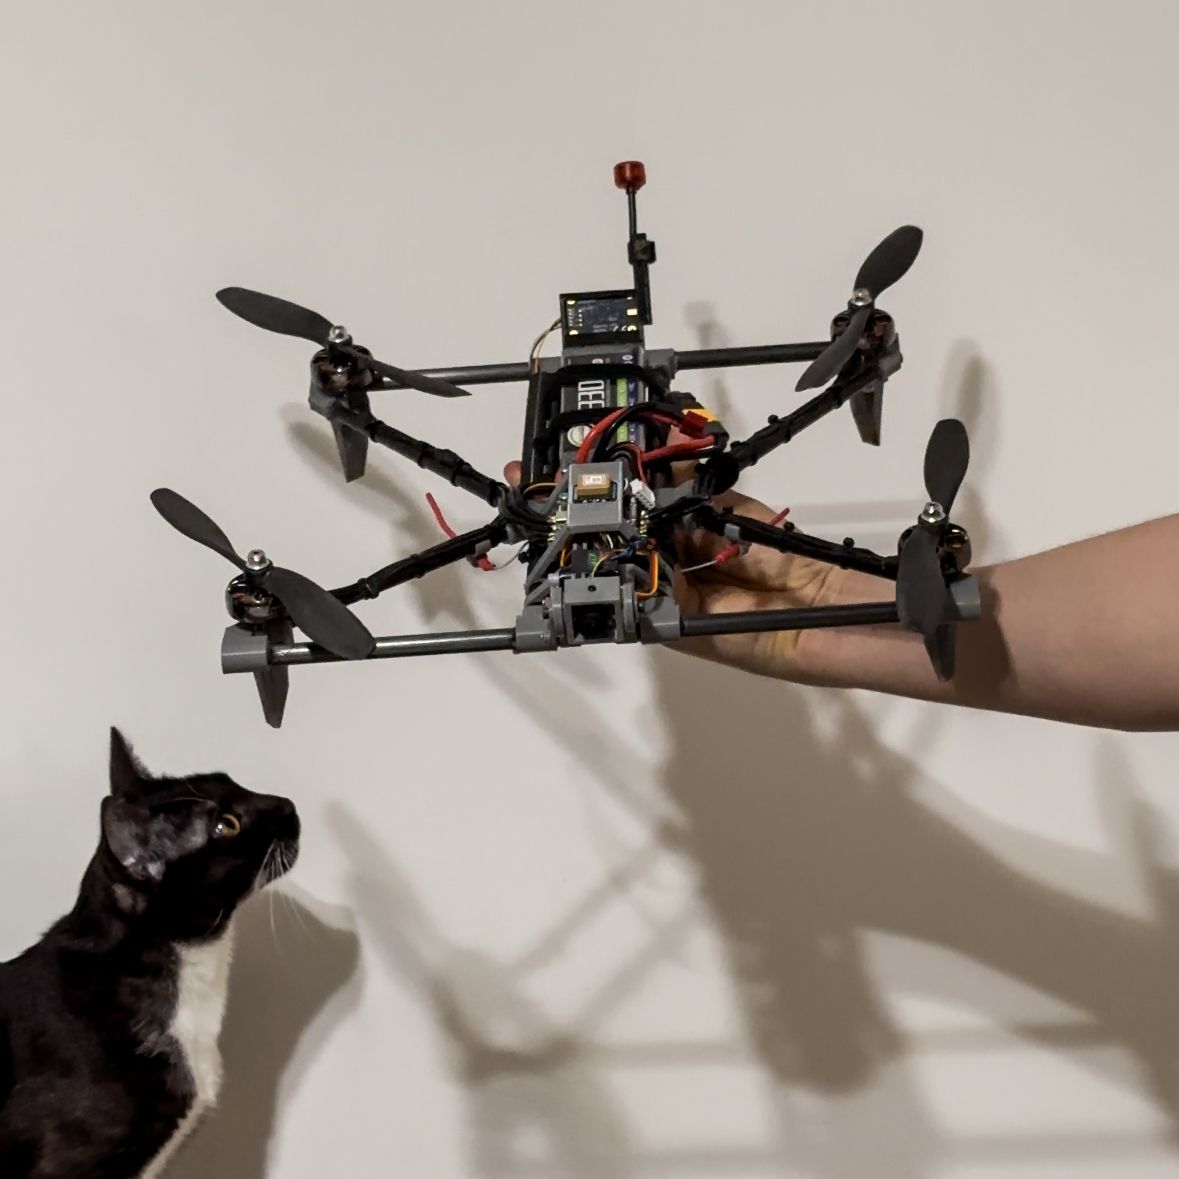
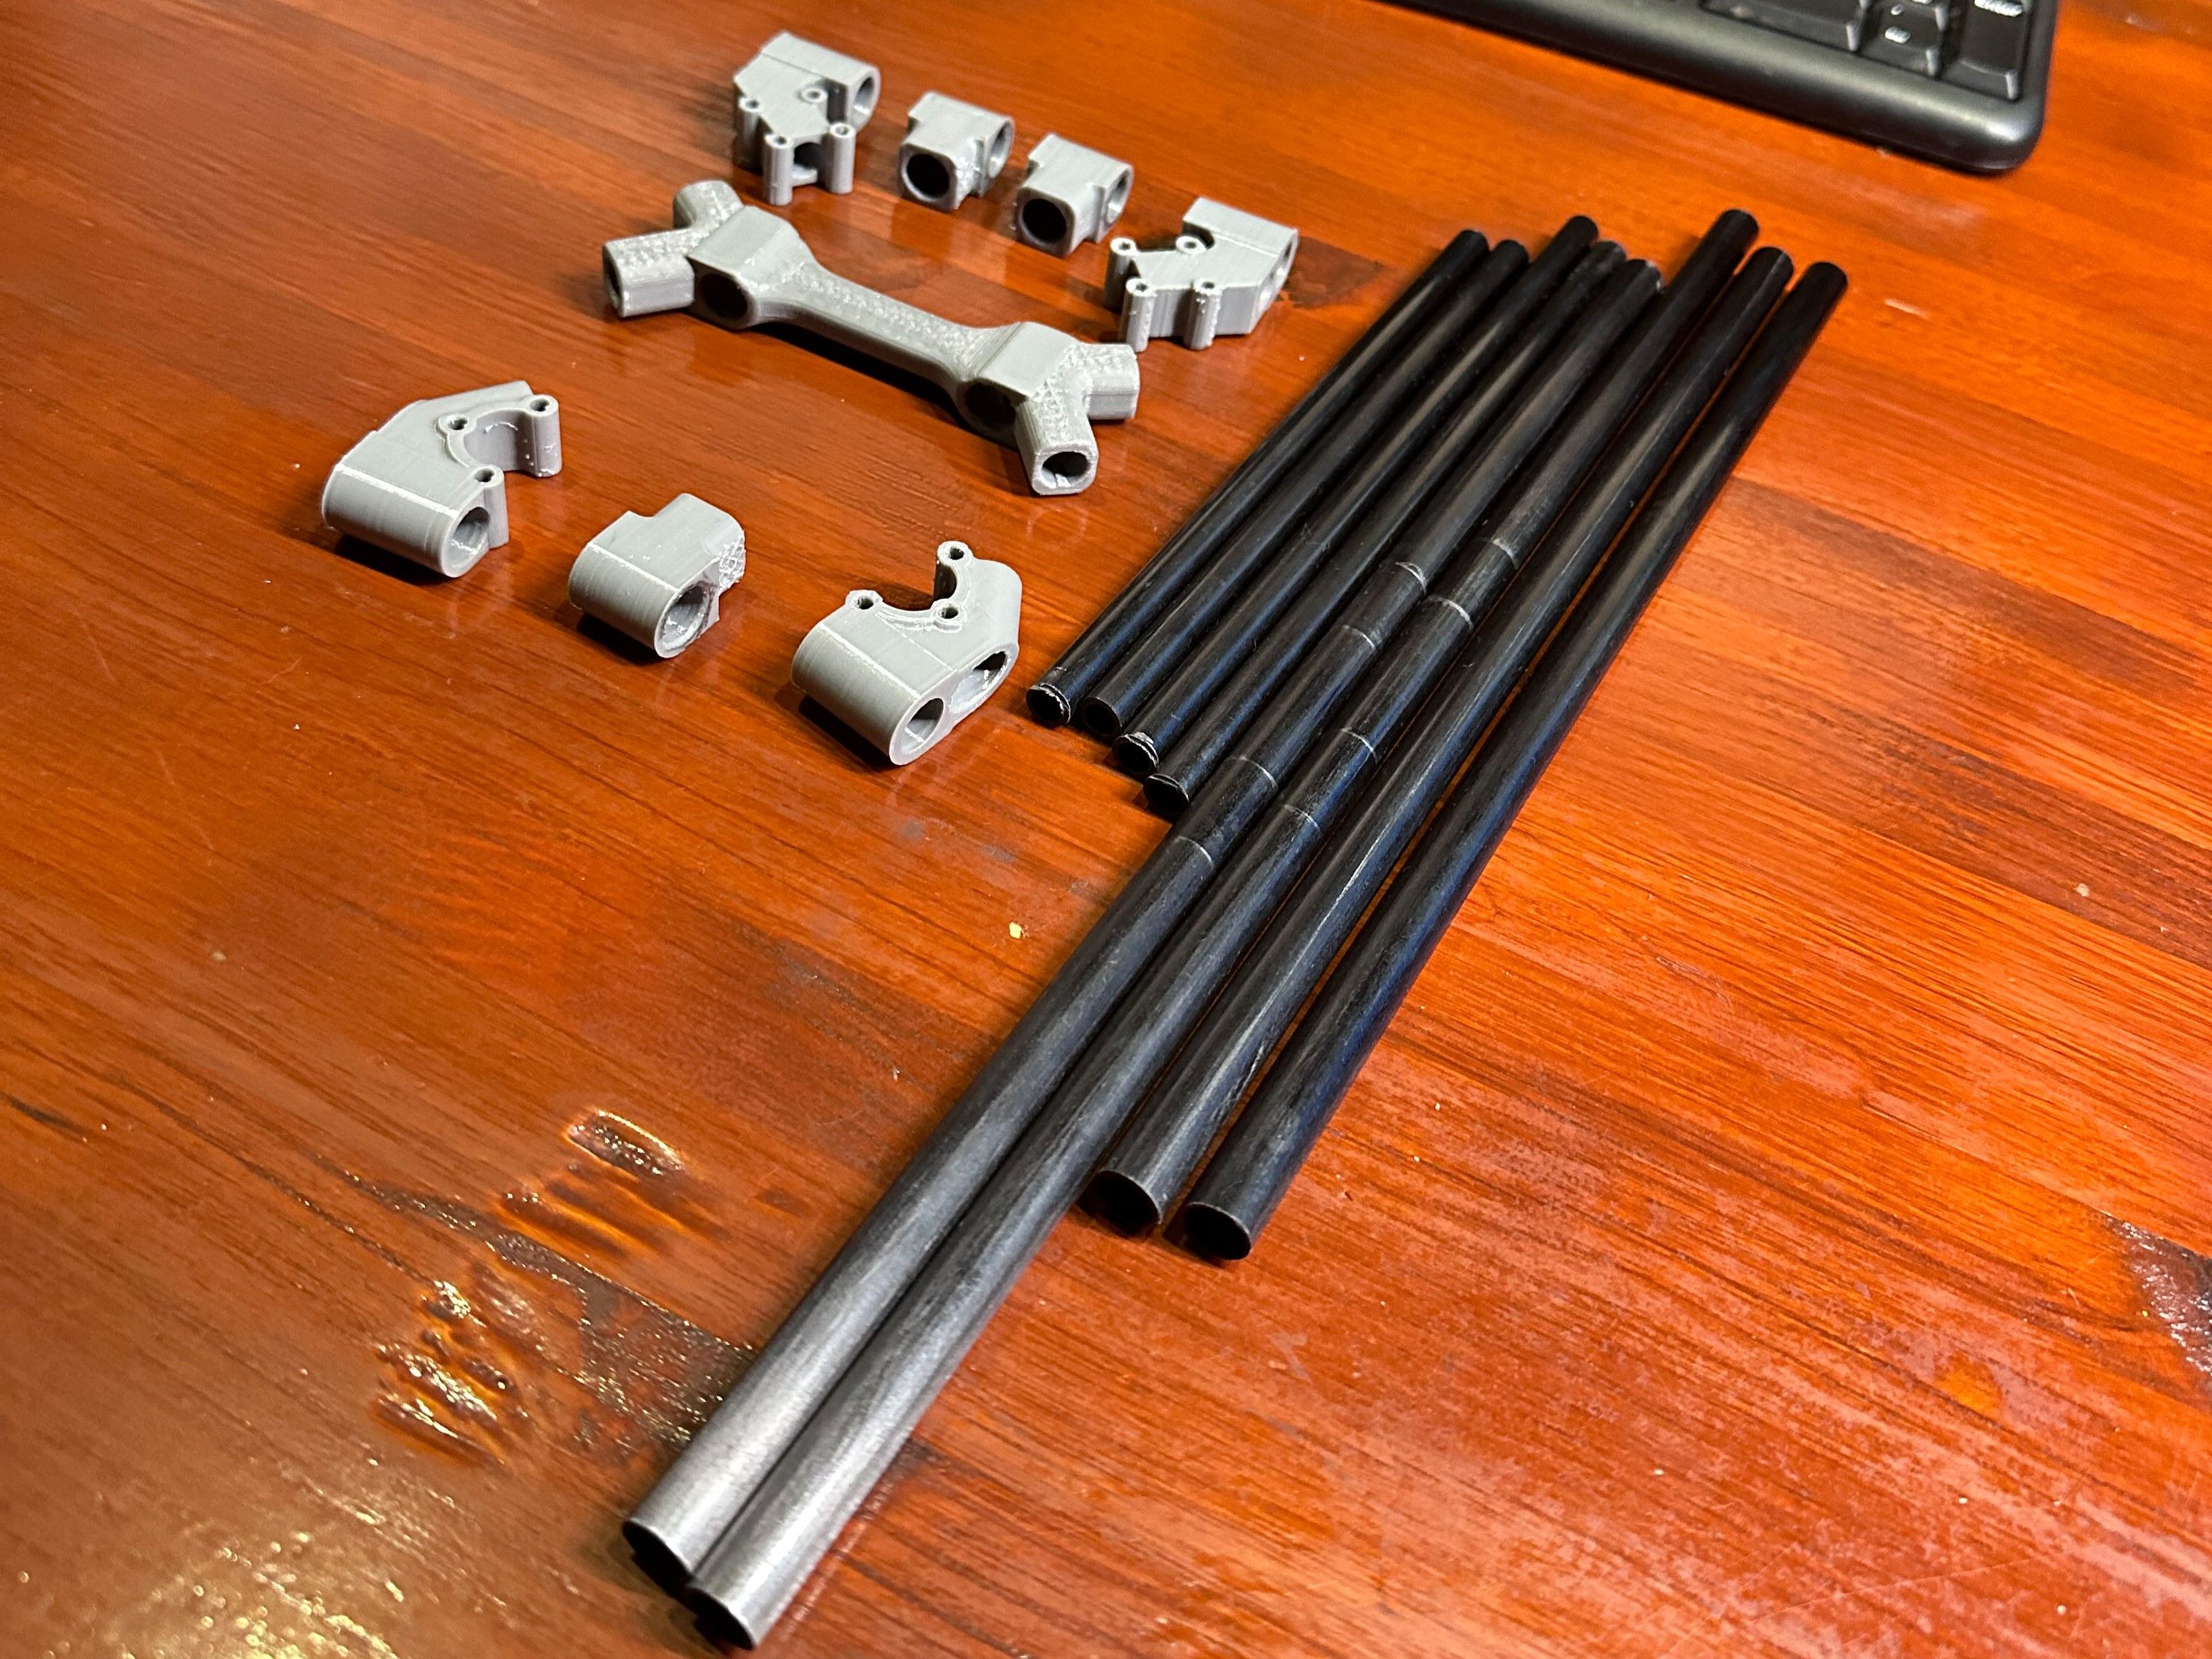
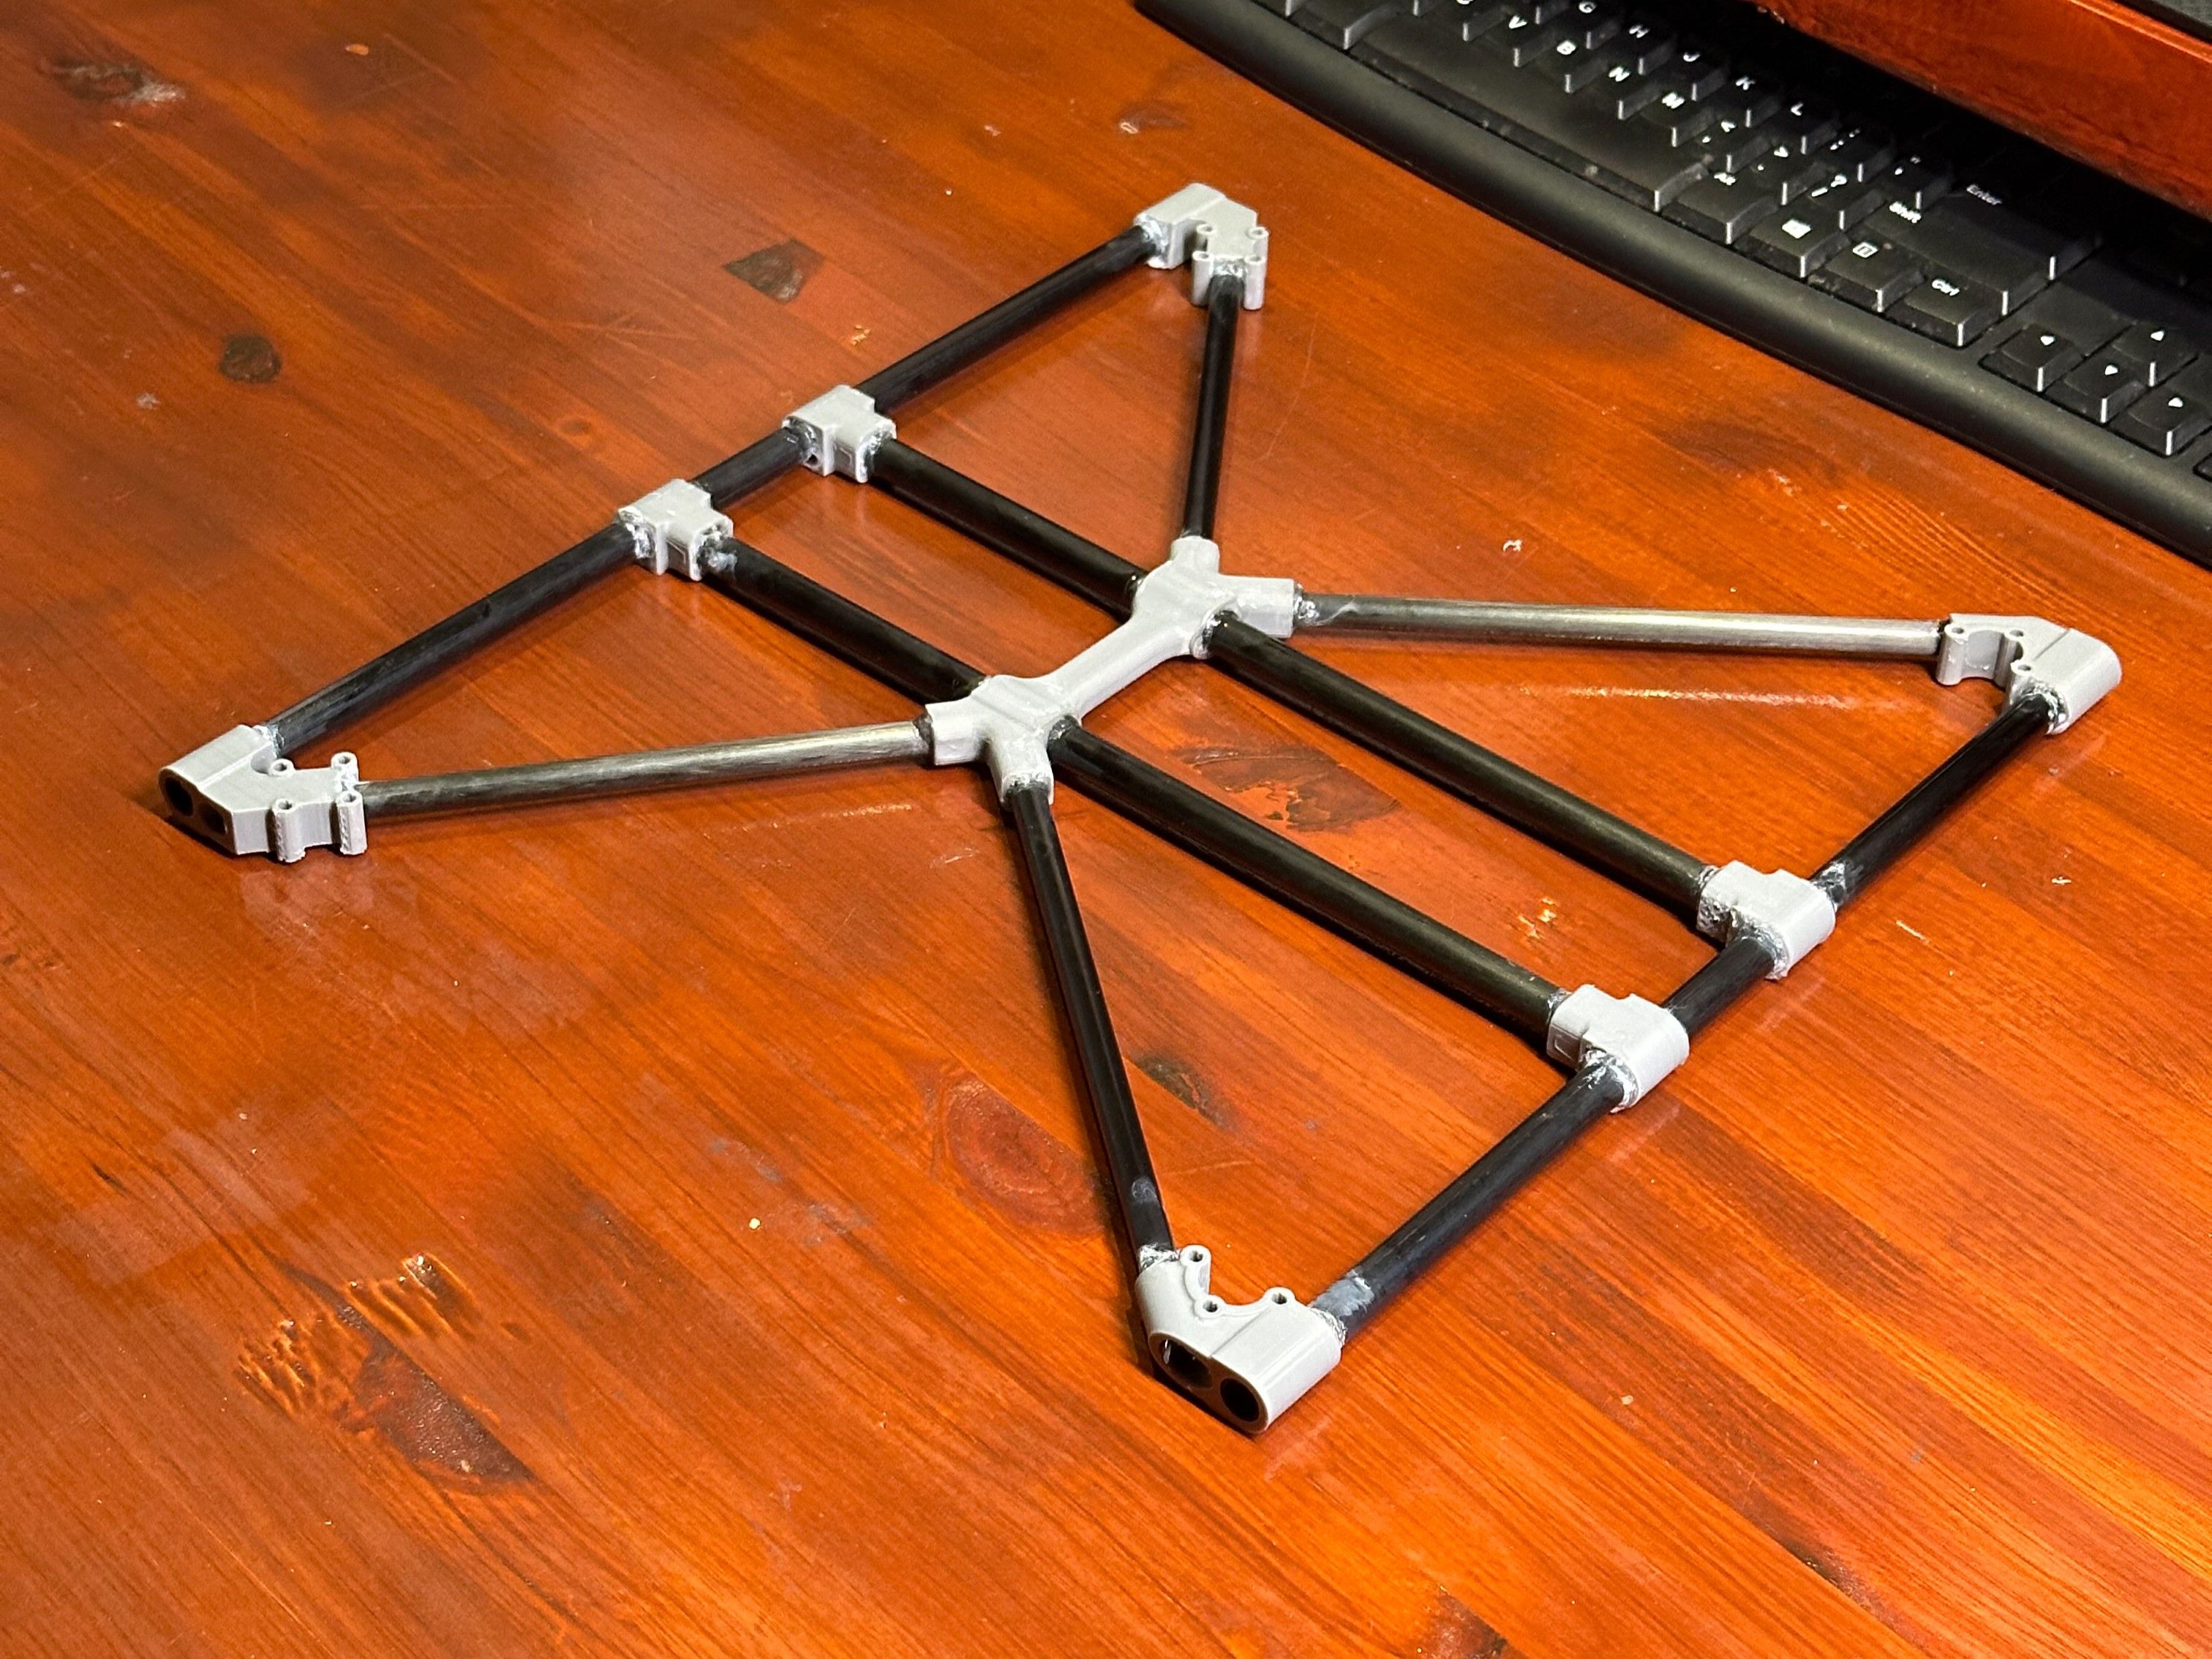
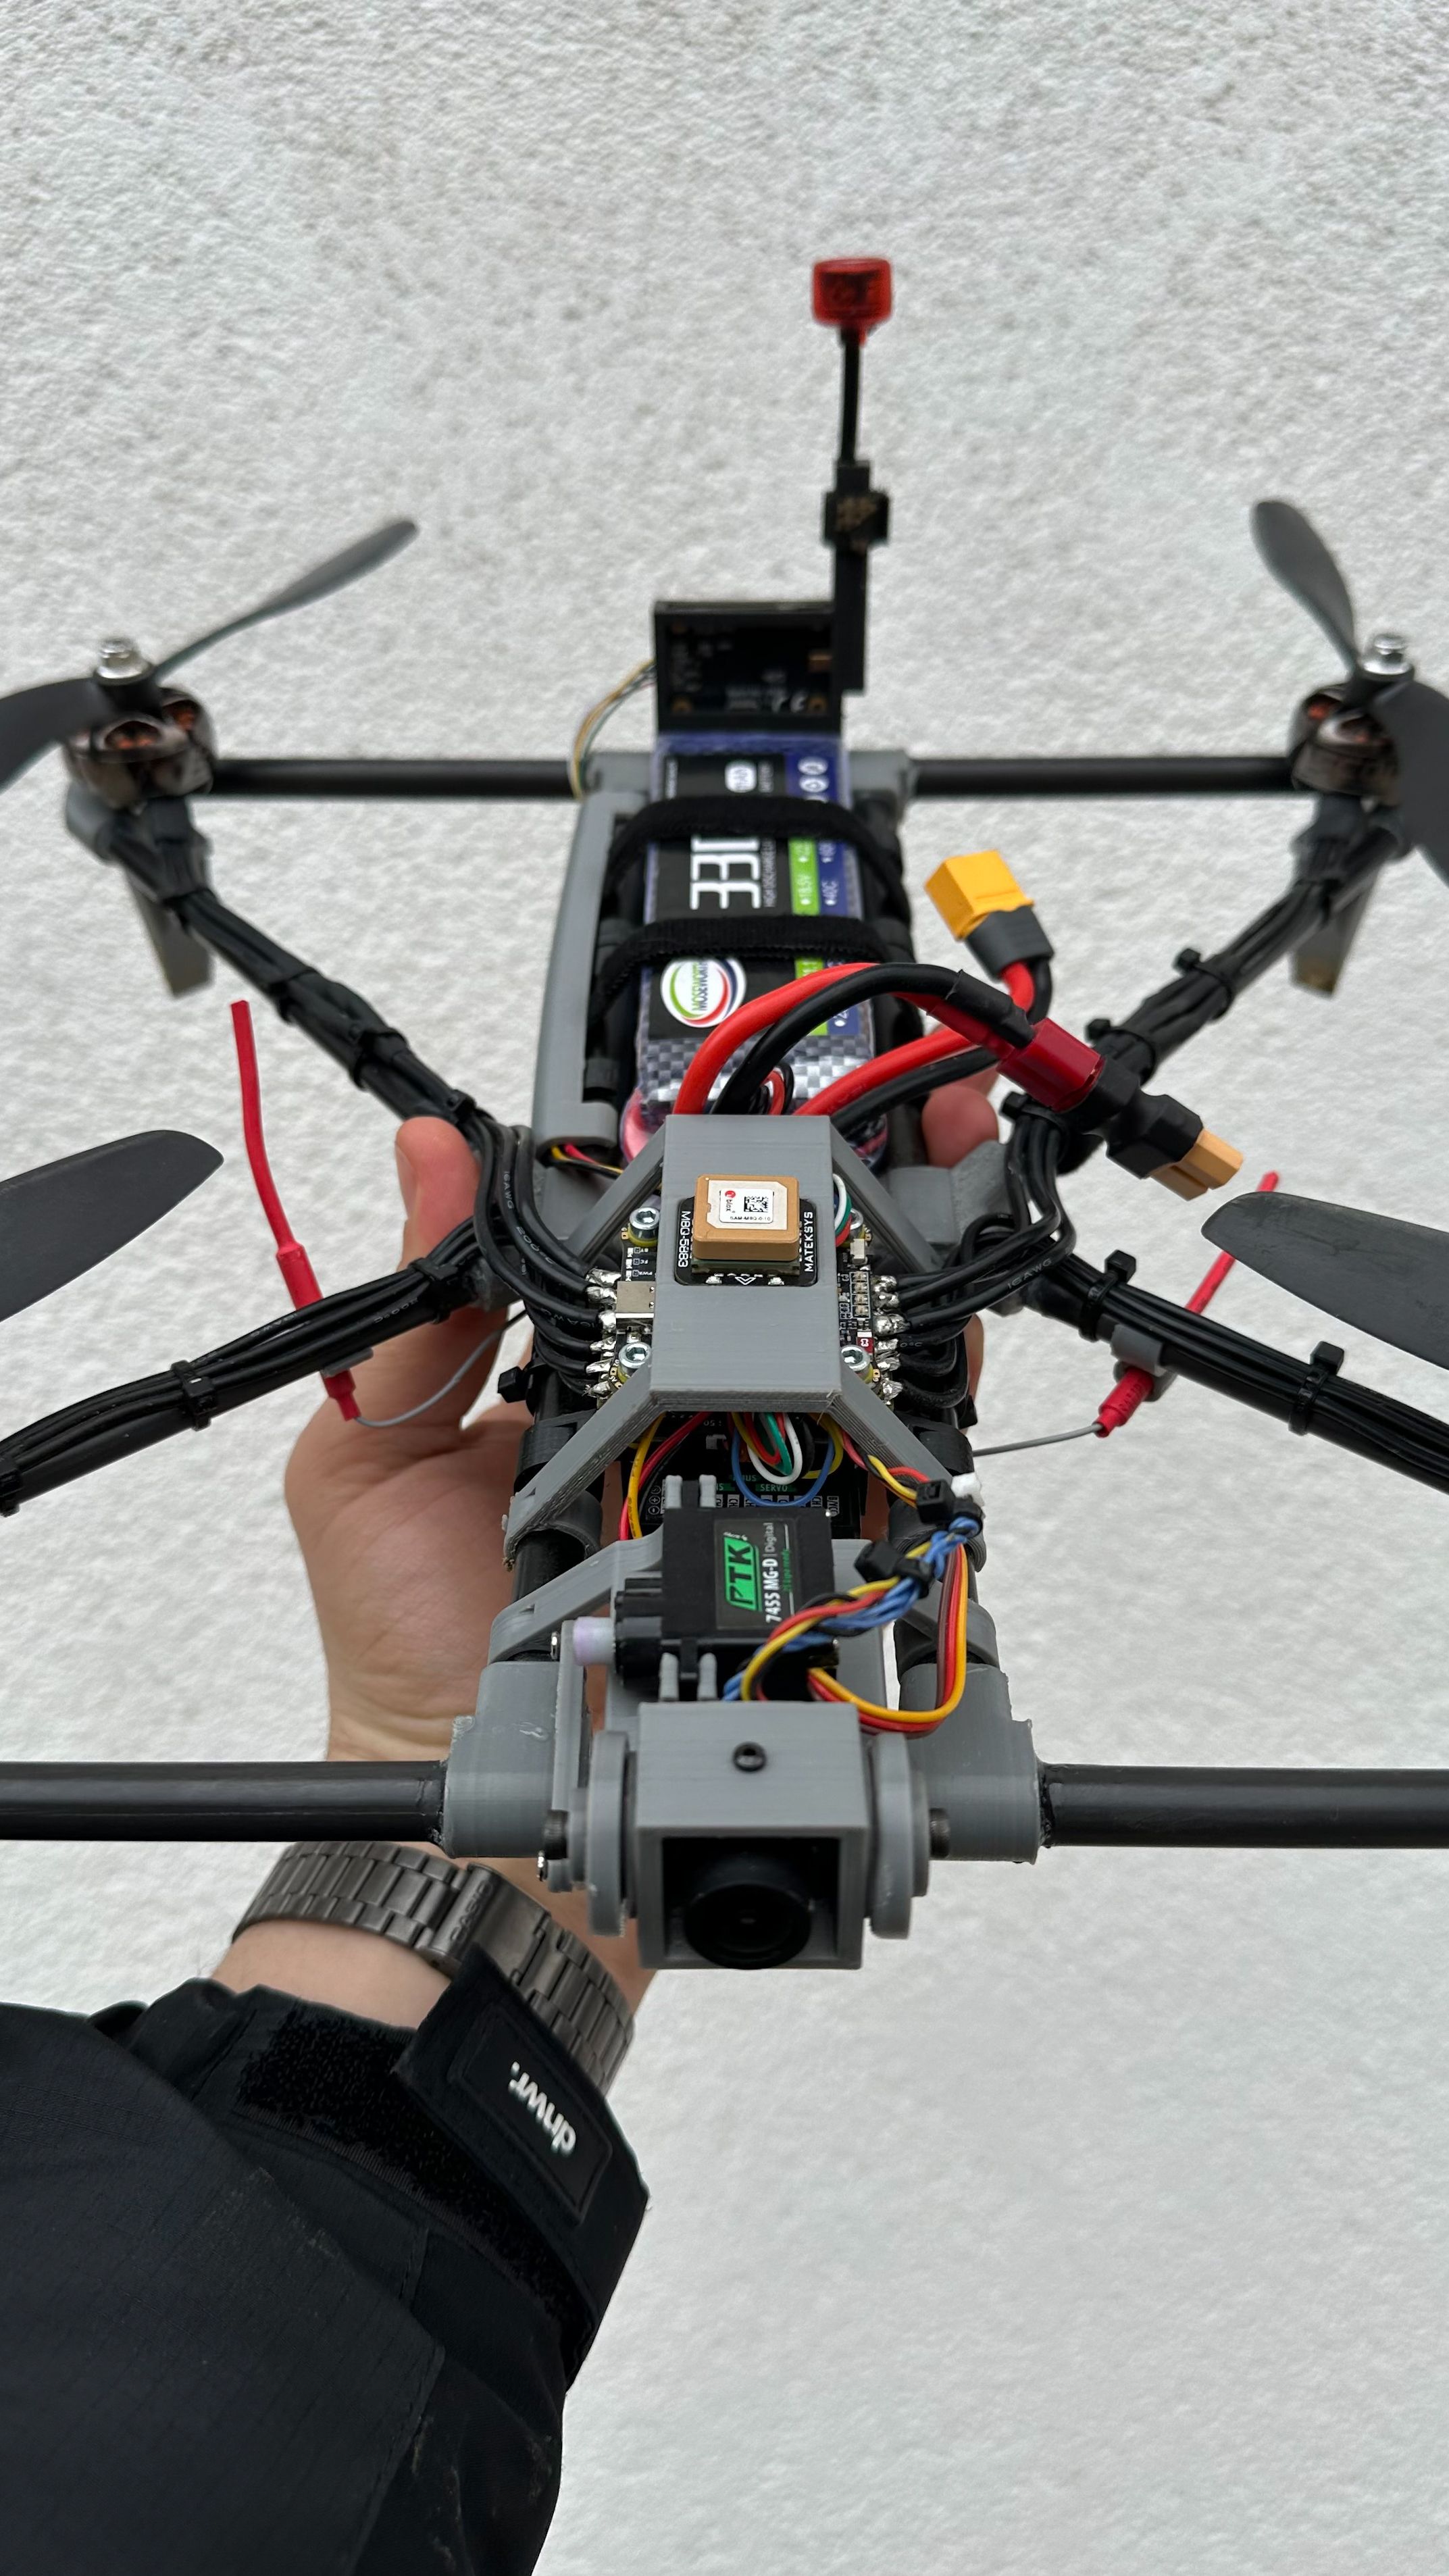
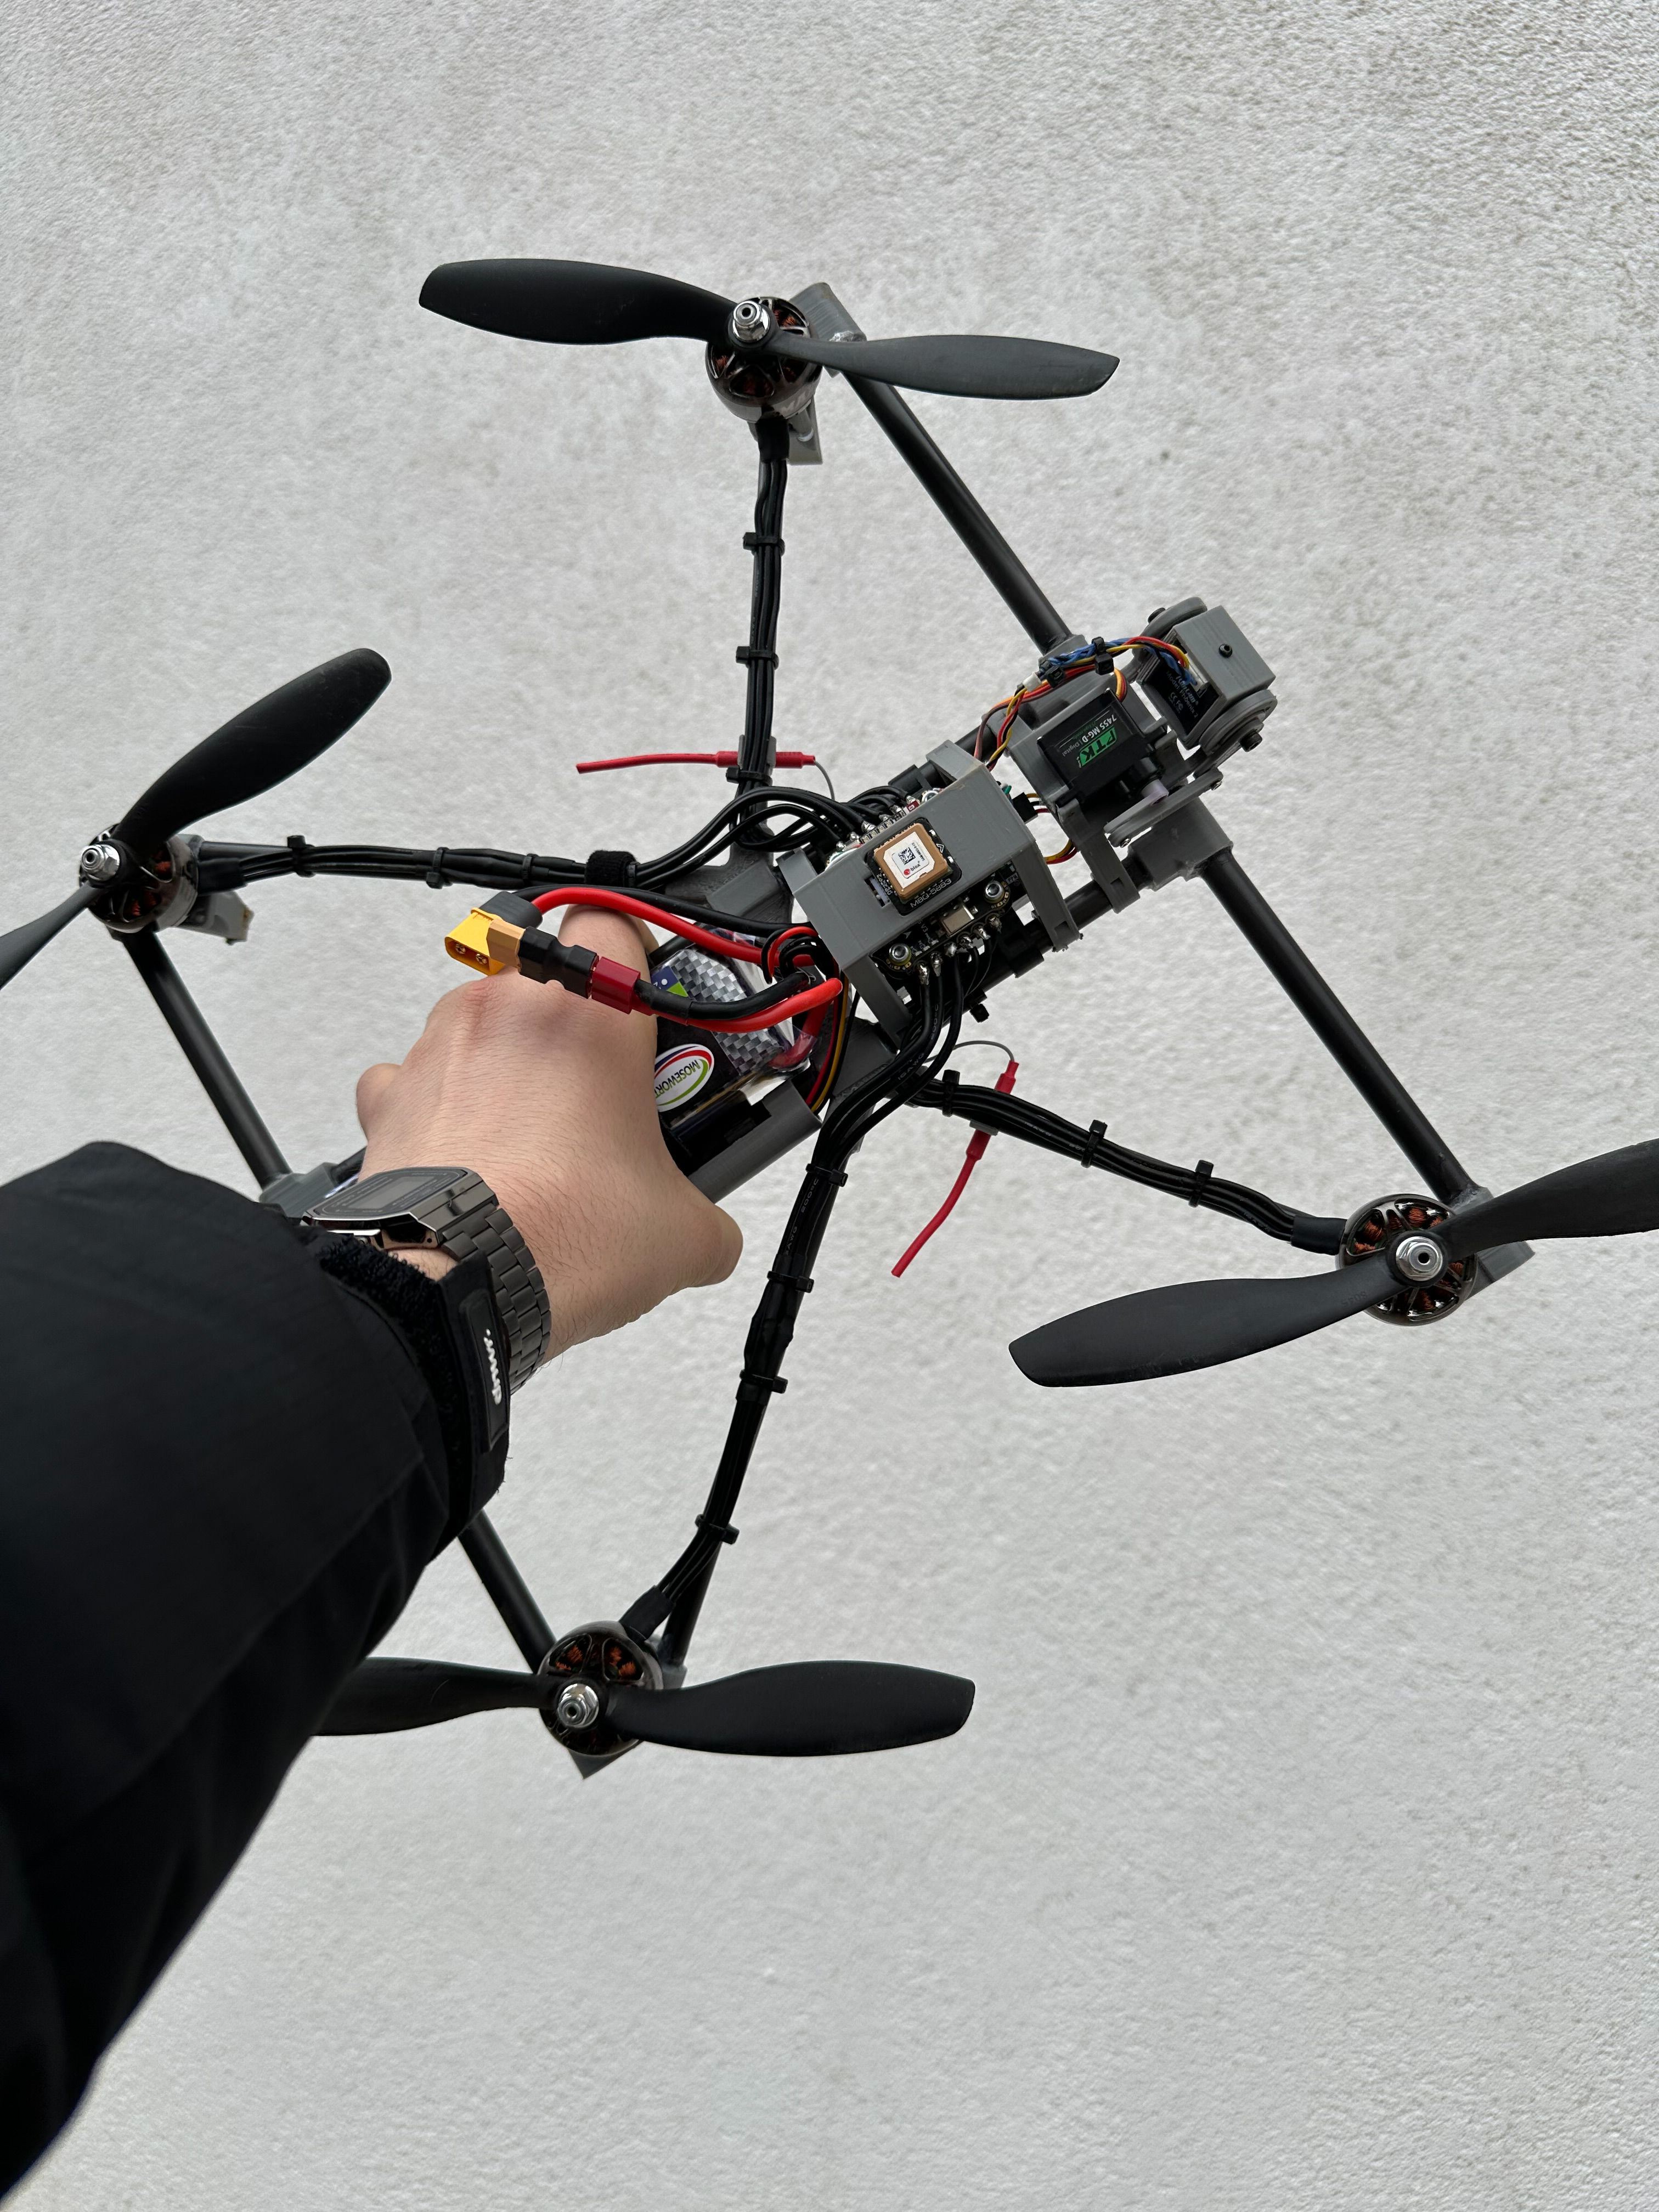
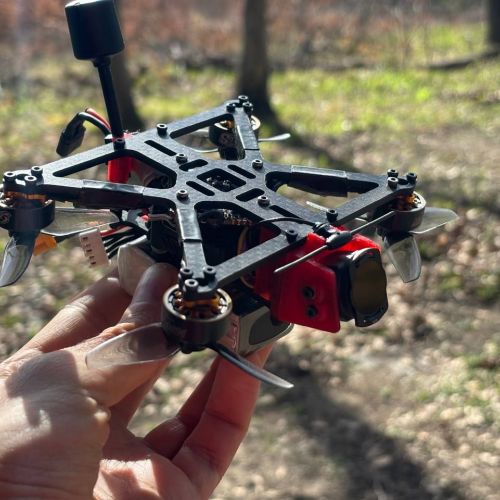
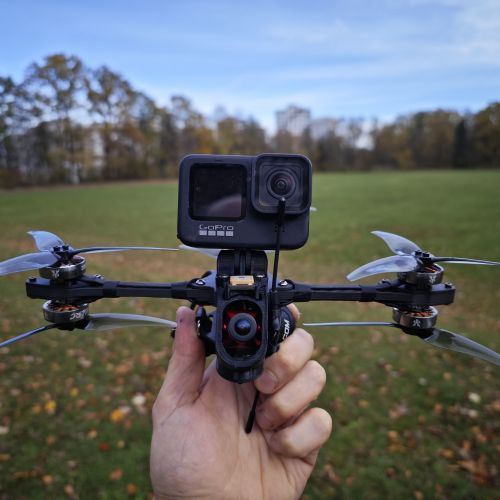
This is my custom 8 inch long range drone I've been working in the last months. The frame is based on the 8-inch frame designed by eyefly using carbon fibre tubes and 3d printed parts. I had to change some 3D prinded parts from the original design in order to fit bigger bolts. All my files are uploaded on my thingiverse profile as a remix Tubular 8inch LongRange frame.
Frame changes to the original version:
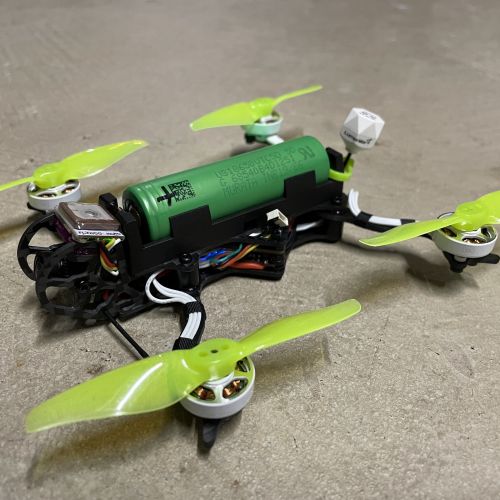
Clamp motor parts (front and back) were adjusted to be used using M3 bolts. I use the Emax ECO II Series and they came with M3 bolts. Clam motor holes for carbon fiber tubes were slightly extended to 10.2mm and 8.2mm. I had problems pushing the tubes inside without expanding the holes. You would need 14xM3 20mm bolts if you plan to use them with the clam motor legs (clamp_motors_leg.stl) or 14xM3 16mm without.
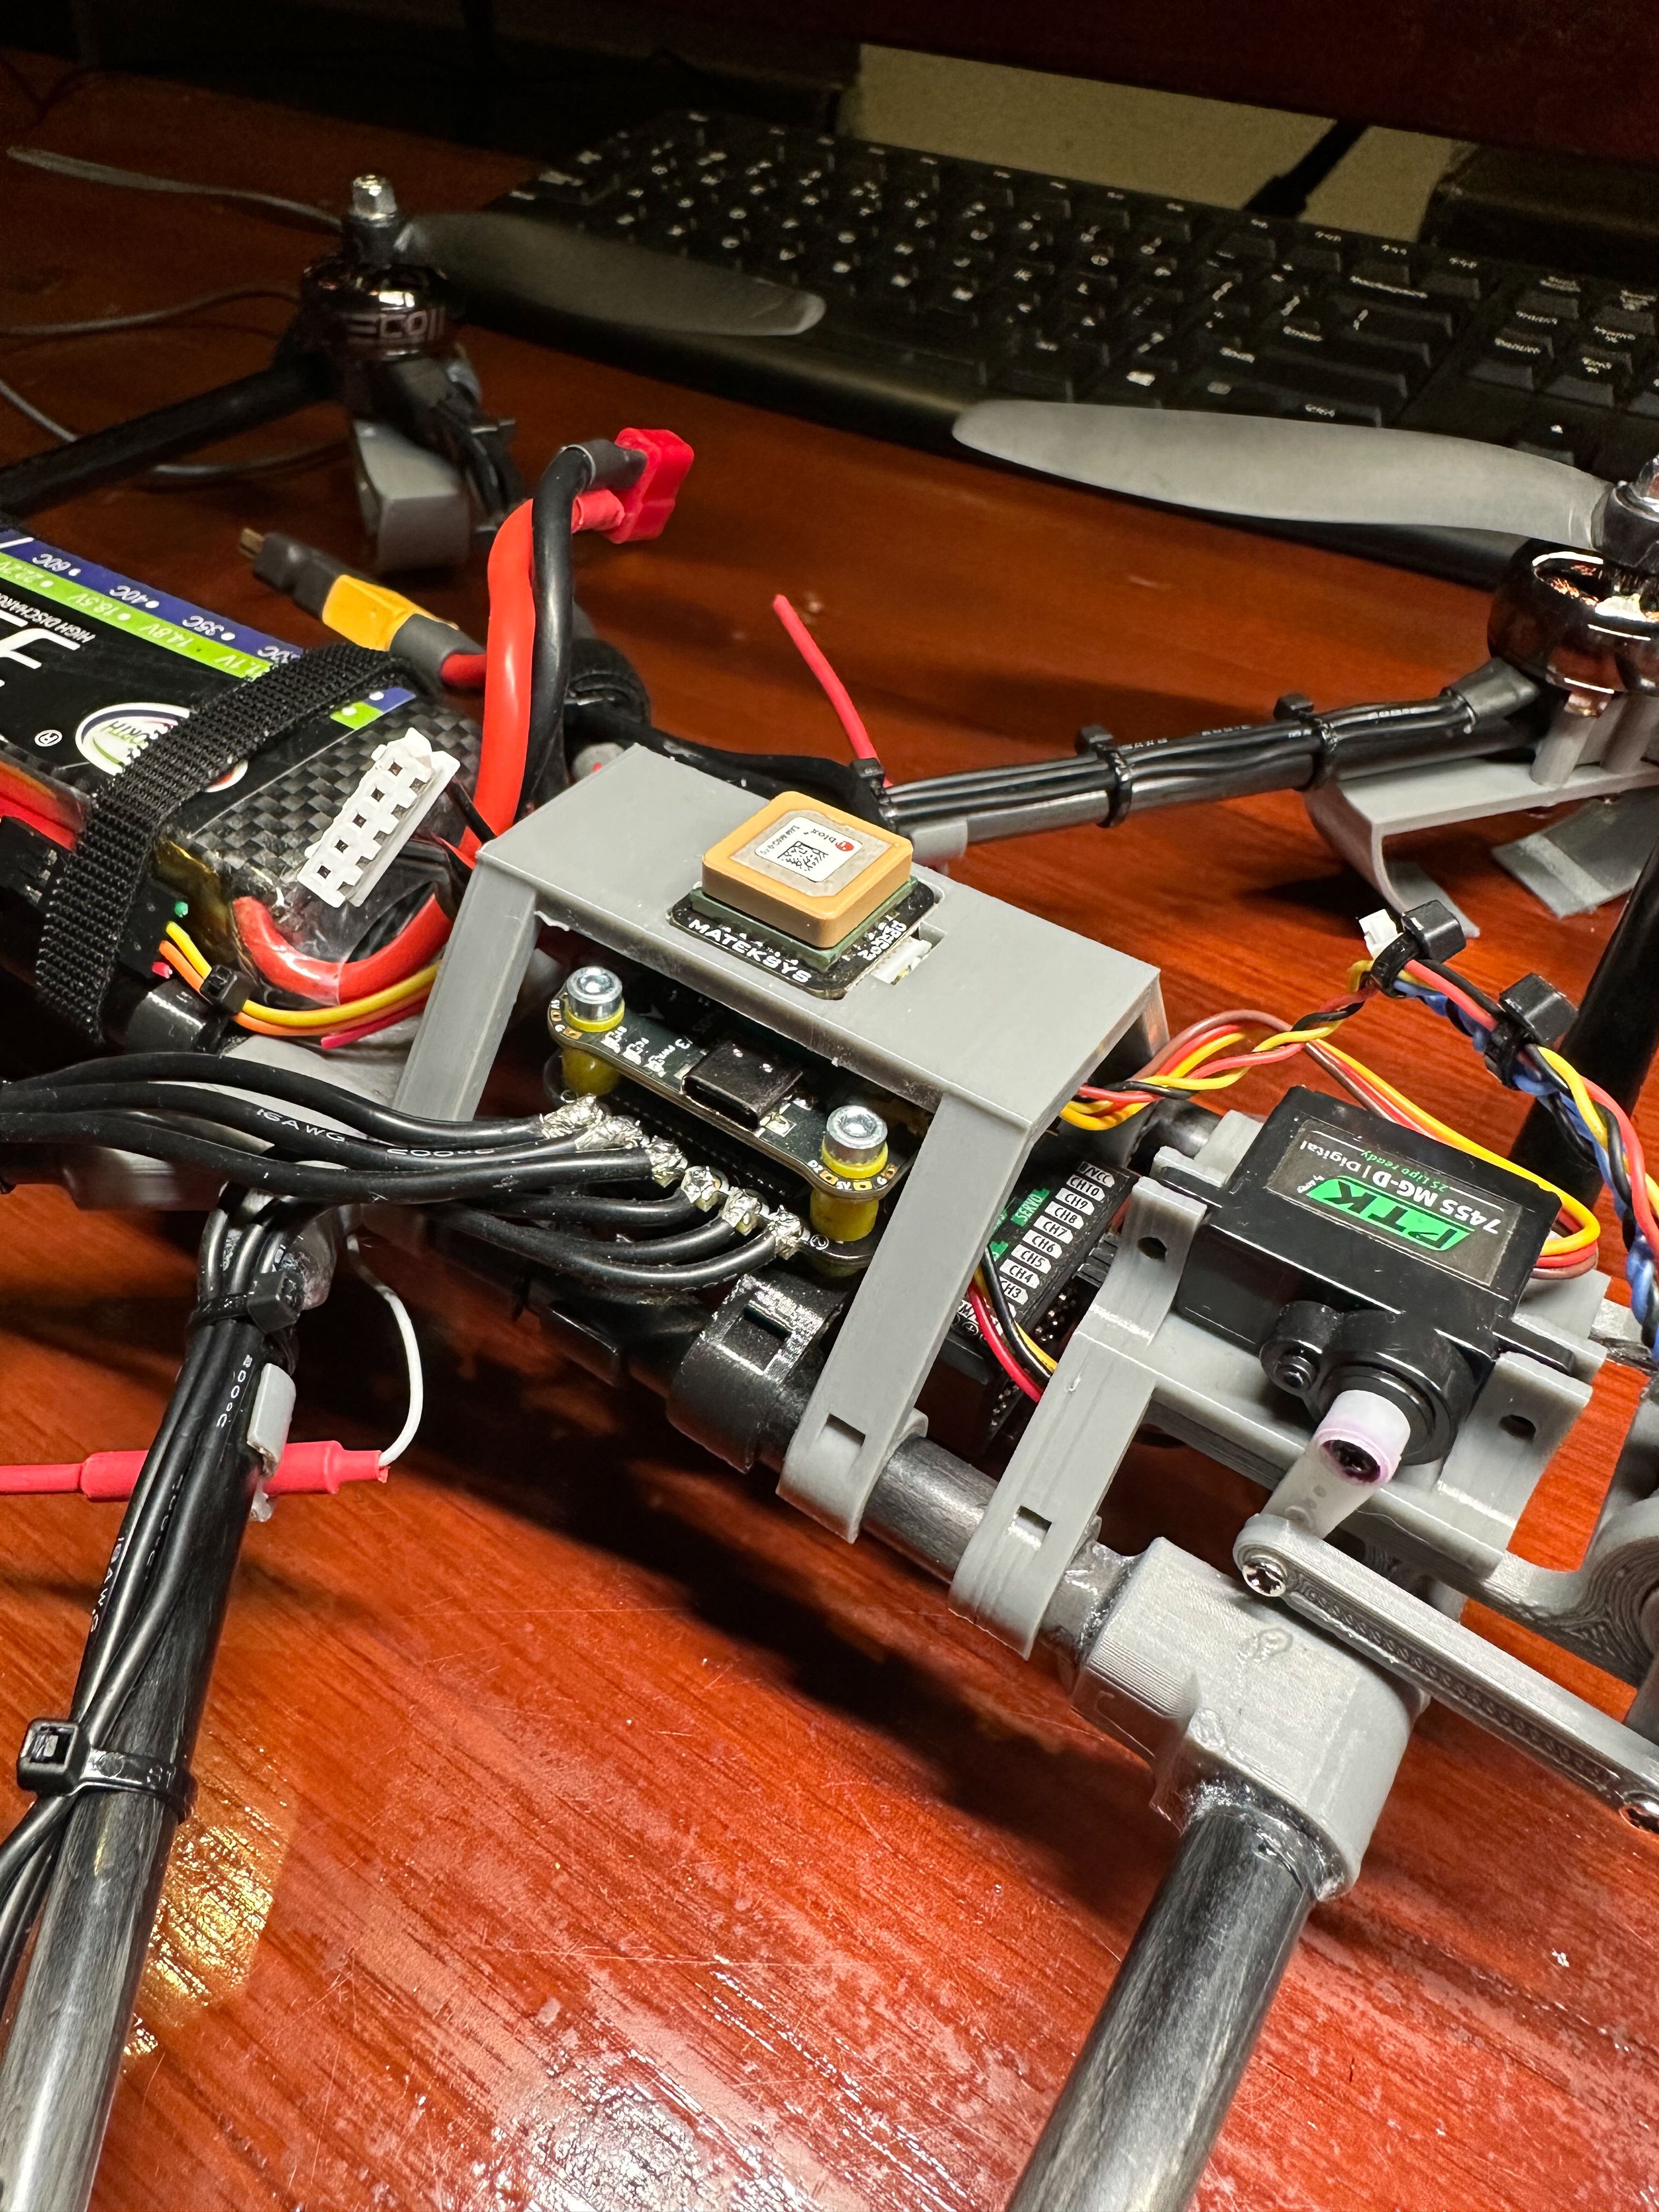
VTX mount
I designed a mount for my TBS Unify Pro32. It's placed at the back of my drone and the signal is good so far. You can also adjust the angle of the antenna.
Print vtx_tbs_unify_pro_32_mount.stl, and vtx_tbs_unify_pro_32_mount_holder.stl, then glue them together. No screws means less weight. Probably wondering not to lose the VTX, I can say it's safe, and CA glue is strong enough (there are also the cables that hold the VTX anyway).
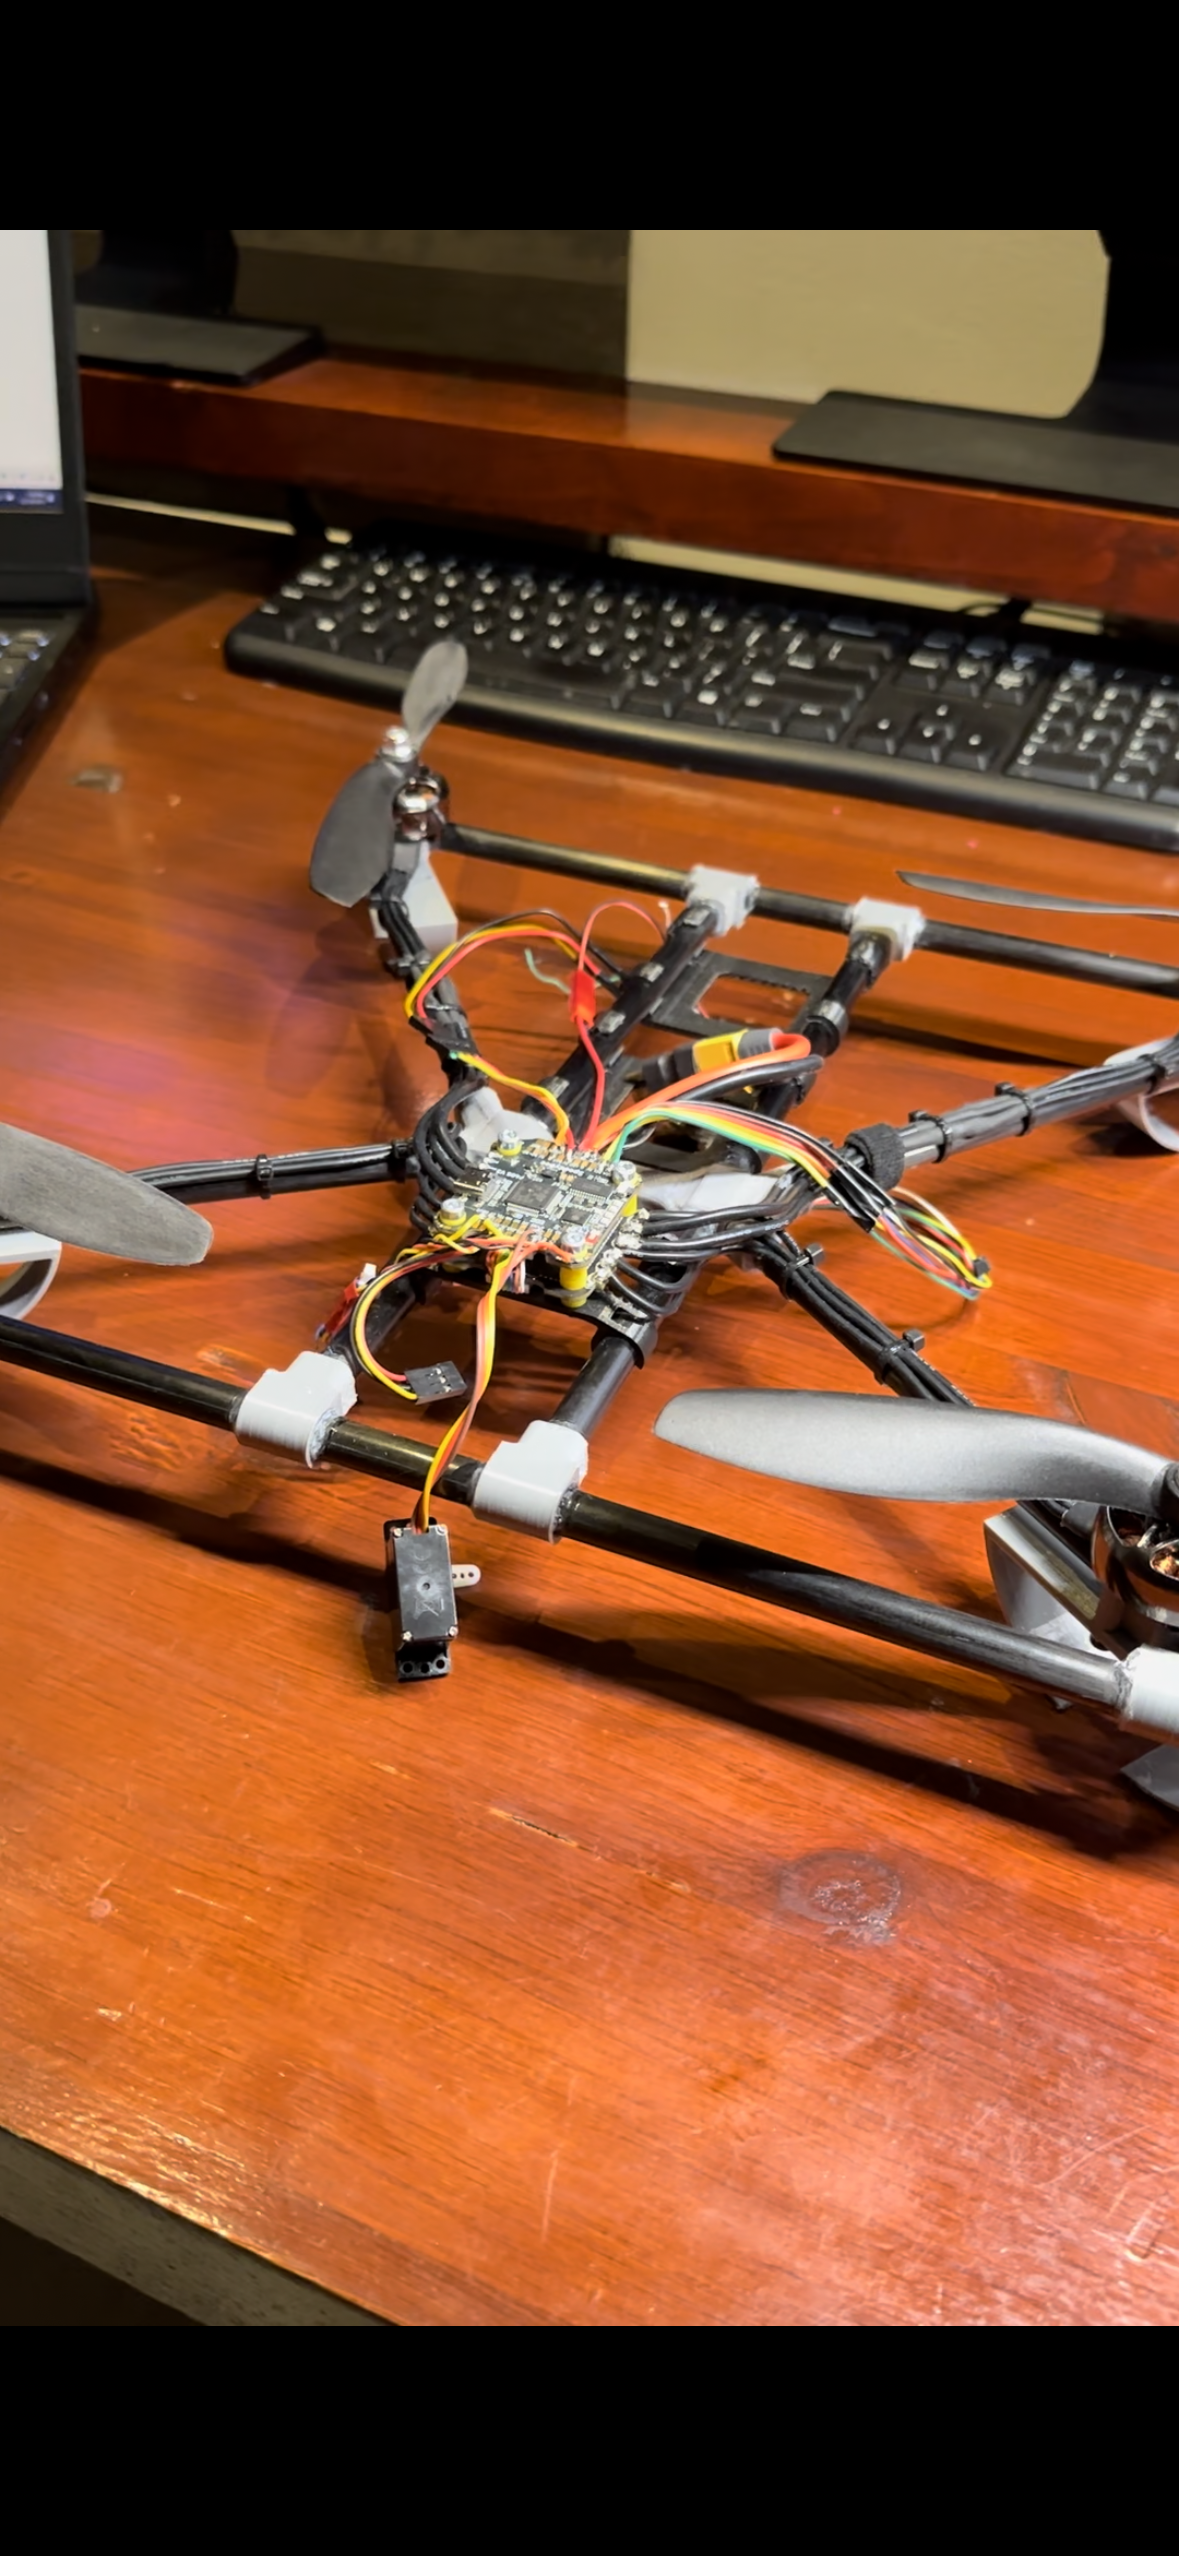
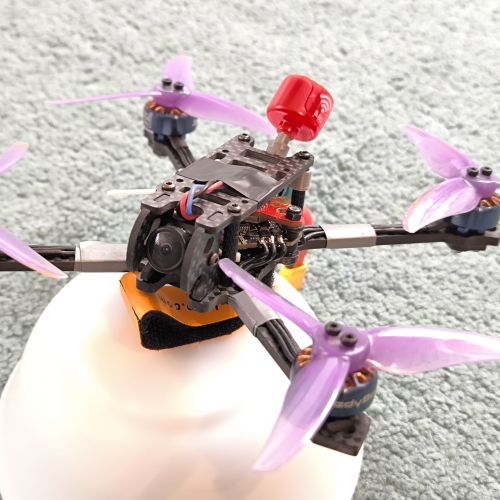
Flight controller mount
I use the Speedybee f405 v3 flight controller, so I had to extend the original fc_mount.stl to be used using M3 bolds.
Also, I designed a protective case (fc_protection_and_gps_mount.stl) that can also hold my Matek M8Q-5883 GPS unit. Even though it might seem too close to other electric components, the GPS signal is good and I never had any problems related to the signal (14+ satellites usually).
Camera and servo mount.
I wanted to adjust the camera angle at any time during the flight. Here's my 3d model designed for the RunCam Phoenix 2 camera. There are 7 3D printed parts. You need to use 2xM3 10mm bolts and 2xM3 nuts to tighten your parts together. I used the bolts that came with the motors. You can glue camera_frame_mount.stl and camera_servo_mount.stl together.
If you want to know more about the design or assembling guidelines, feel free to contact me on Instagram moro.dynamics
Photos

Part List
Show stores (12)

Guides & Reviews

AirbladeUAV has done it again and this time they've brought long range to the 5" class! Based on the popular Transformer Mini, the new Transformer 5" Ultralight adopts a lot of the same design philosophies with larger props and more payload capacity. It can fly upwards of 20 minutes on a 4 cell Li-Ion battery pack and in ideal conditions it's got a range of over 4 to 5 miles. In this guide I'll walk..
Read more
With the release of the DJI FPV Drone cinematic FPV has become a lot more accessible, but you certainly don't want to crash a $750 drone! The QAV-CINE Freybott is a compact, lightweight cinematic FPV drone that can take a hit and keep going. It's a lot safer to fly indoors and around people. With a naked GoPro or the SMO 4k you can capture some great stabilized footage. In this guide I'll show you..
Read more
excellent looking build sir! what would be the all up weight? can the present configuration of the tpu parts accommodate the caddx vista HD system?
Thank you! The build without LIPO battery weighs around 600 grams. With the 3300mAh battery weighs around 950 grams. Regarding to the camera system, you will need to modify/redesign the camera mount. It supports a 19mm x 19mm camera size but you will need to find a way to attach the VTX