
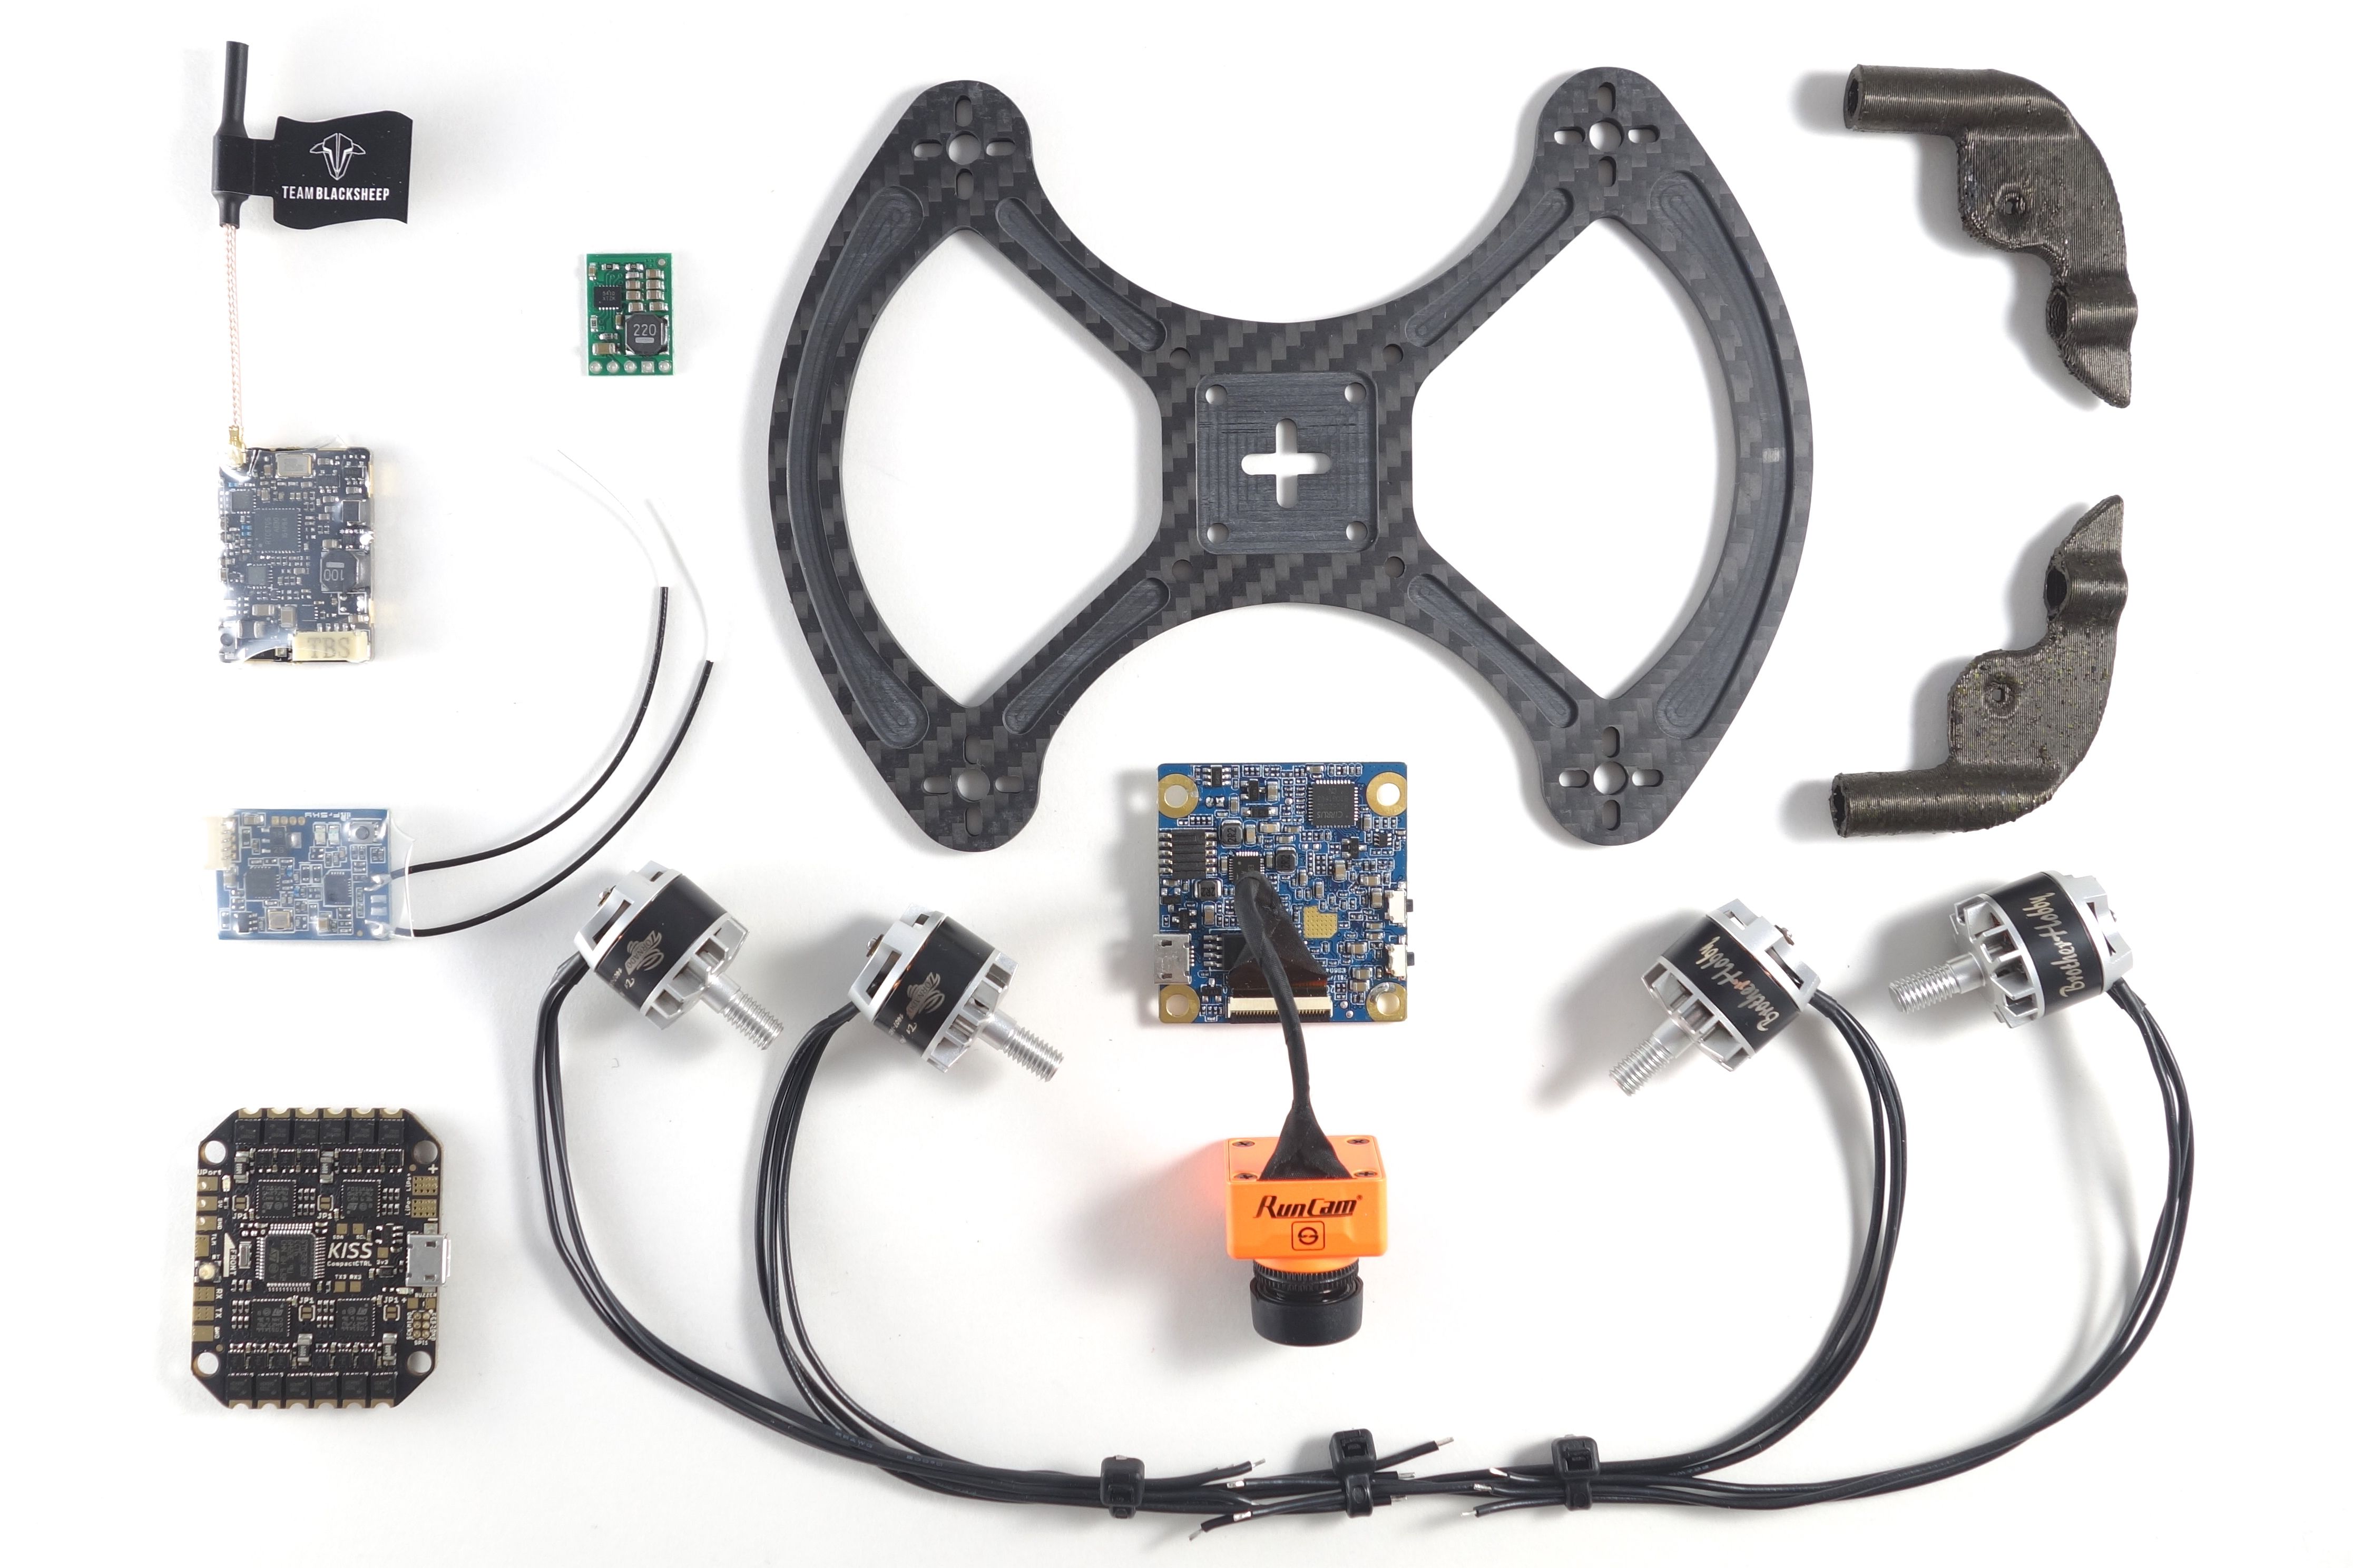
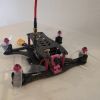
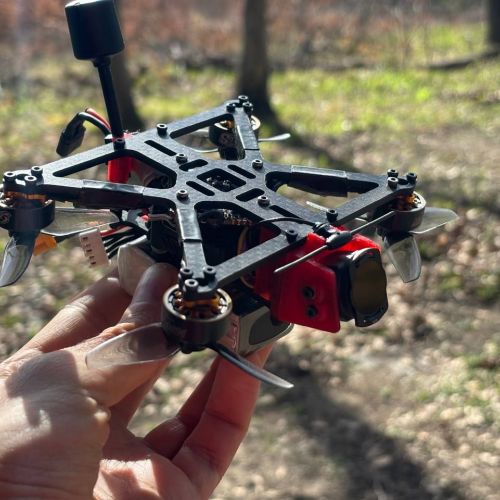
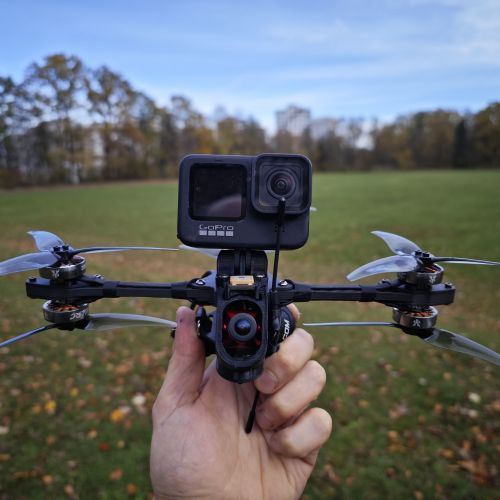
Introducing the Volcor Split! This little guy weighs less than 250g on 3S and records in 1080p HD. The dry weight with RotorX 3040t props is 162g. The goal here was to create a compact HD quad that can fly virtually anywhere. This is great for small backyards and parks and has plenty of oomph. The build difficulty is moderate, but the soldering is reduced due to the all-in-one flight controller/ESC board. This supports PID tuning and VTX channel switching over a Taranis making it great for racing.
Here are some items you'll need to get started:
- Zip ties
- Blue loctite
- Heatshrink of various sizes
- Paracord 550 (optional)
Flash the Firmware
Before you start you may want to flash the XSR firmware and bind it to your transmitter. It's better to bind now than after you've buried it in the stack. The reason you need to update the firmware is older versions have sensor connectivity issues with OpenTX 2.2. While you're at it, you may also want to flash your KISS CC to version 1.3 in order to support Smartaudio and software motor rotation reversal. If you aren't running OpenTX 2.2 yet, then you should follow this guide to prepare your transmitter for the Lua scripts.
Building the Stack
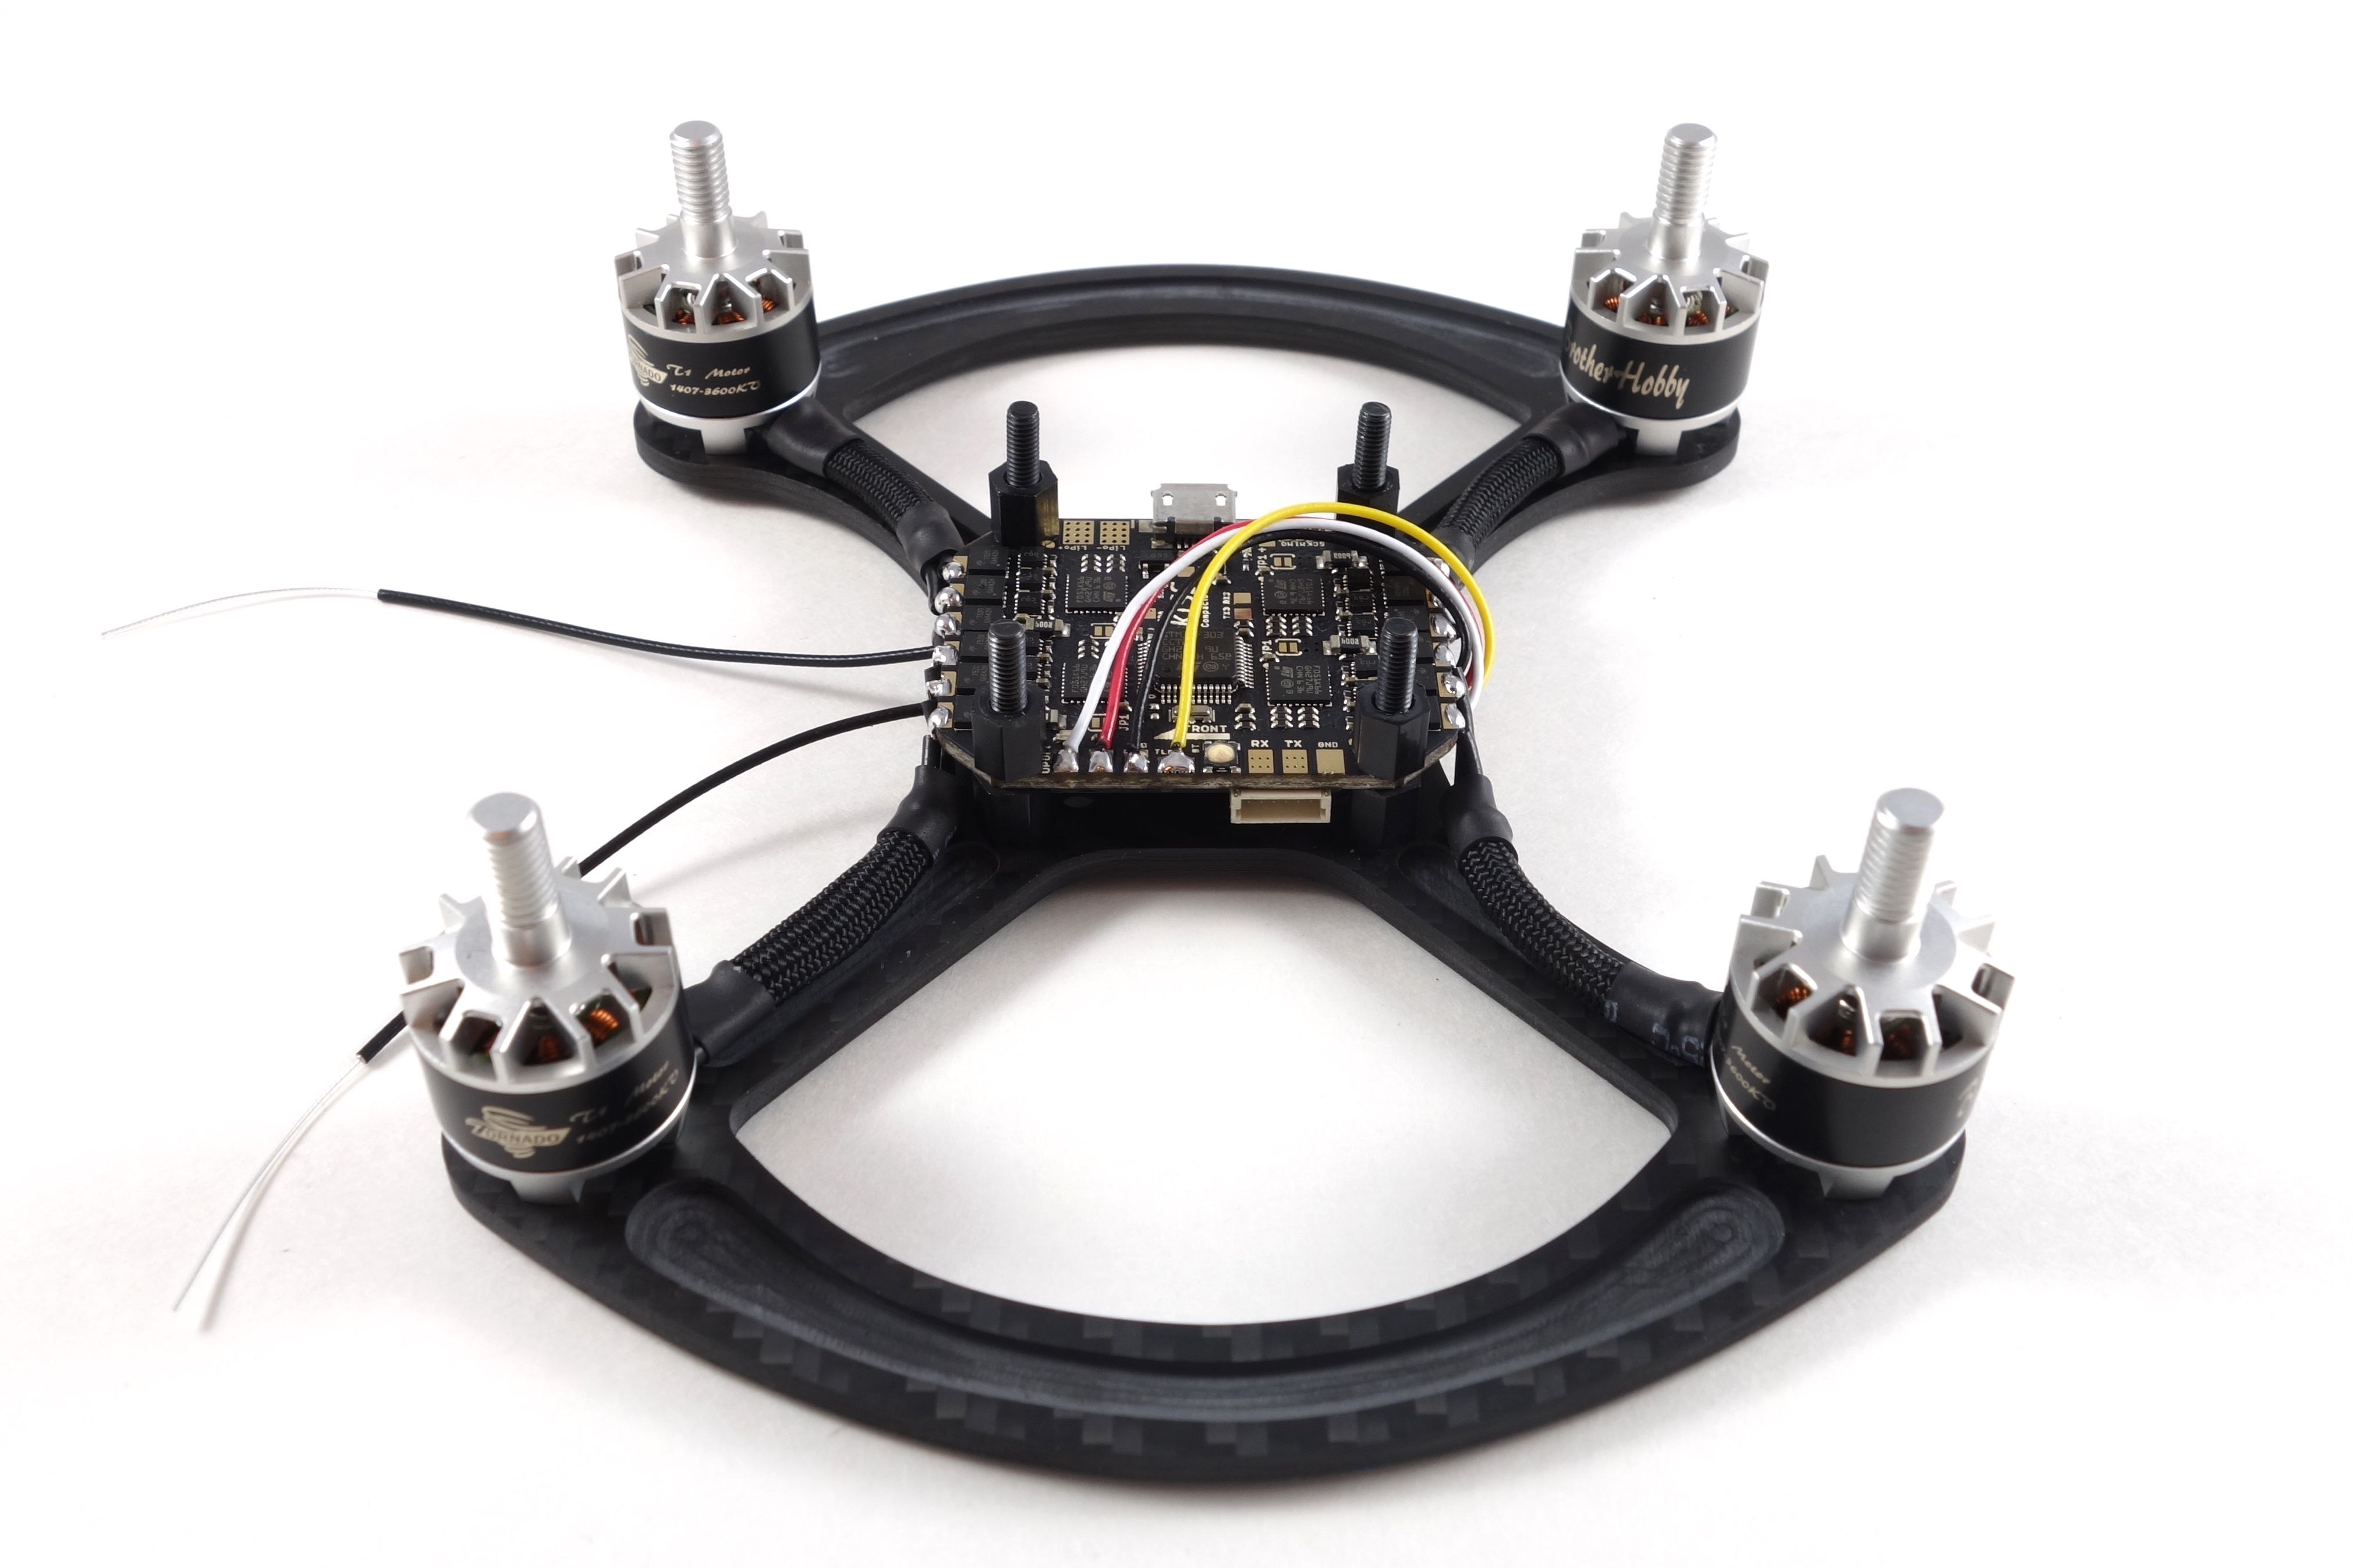
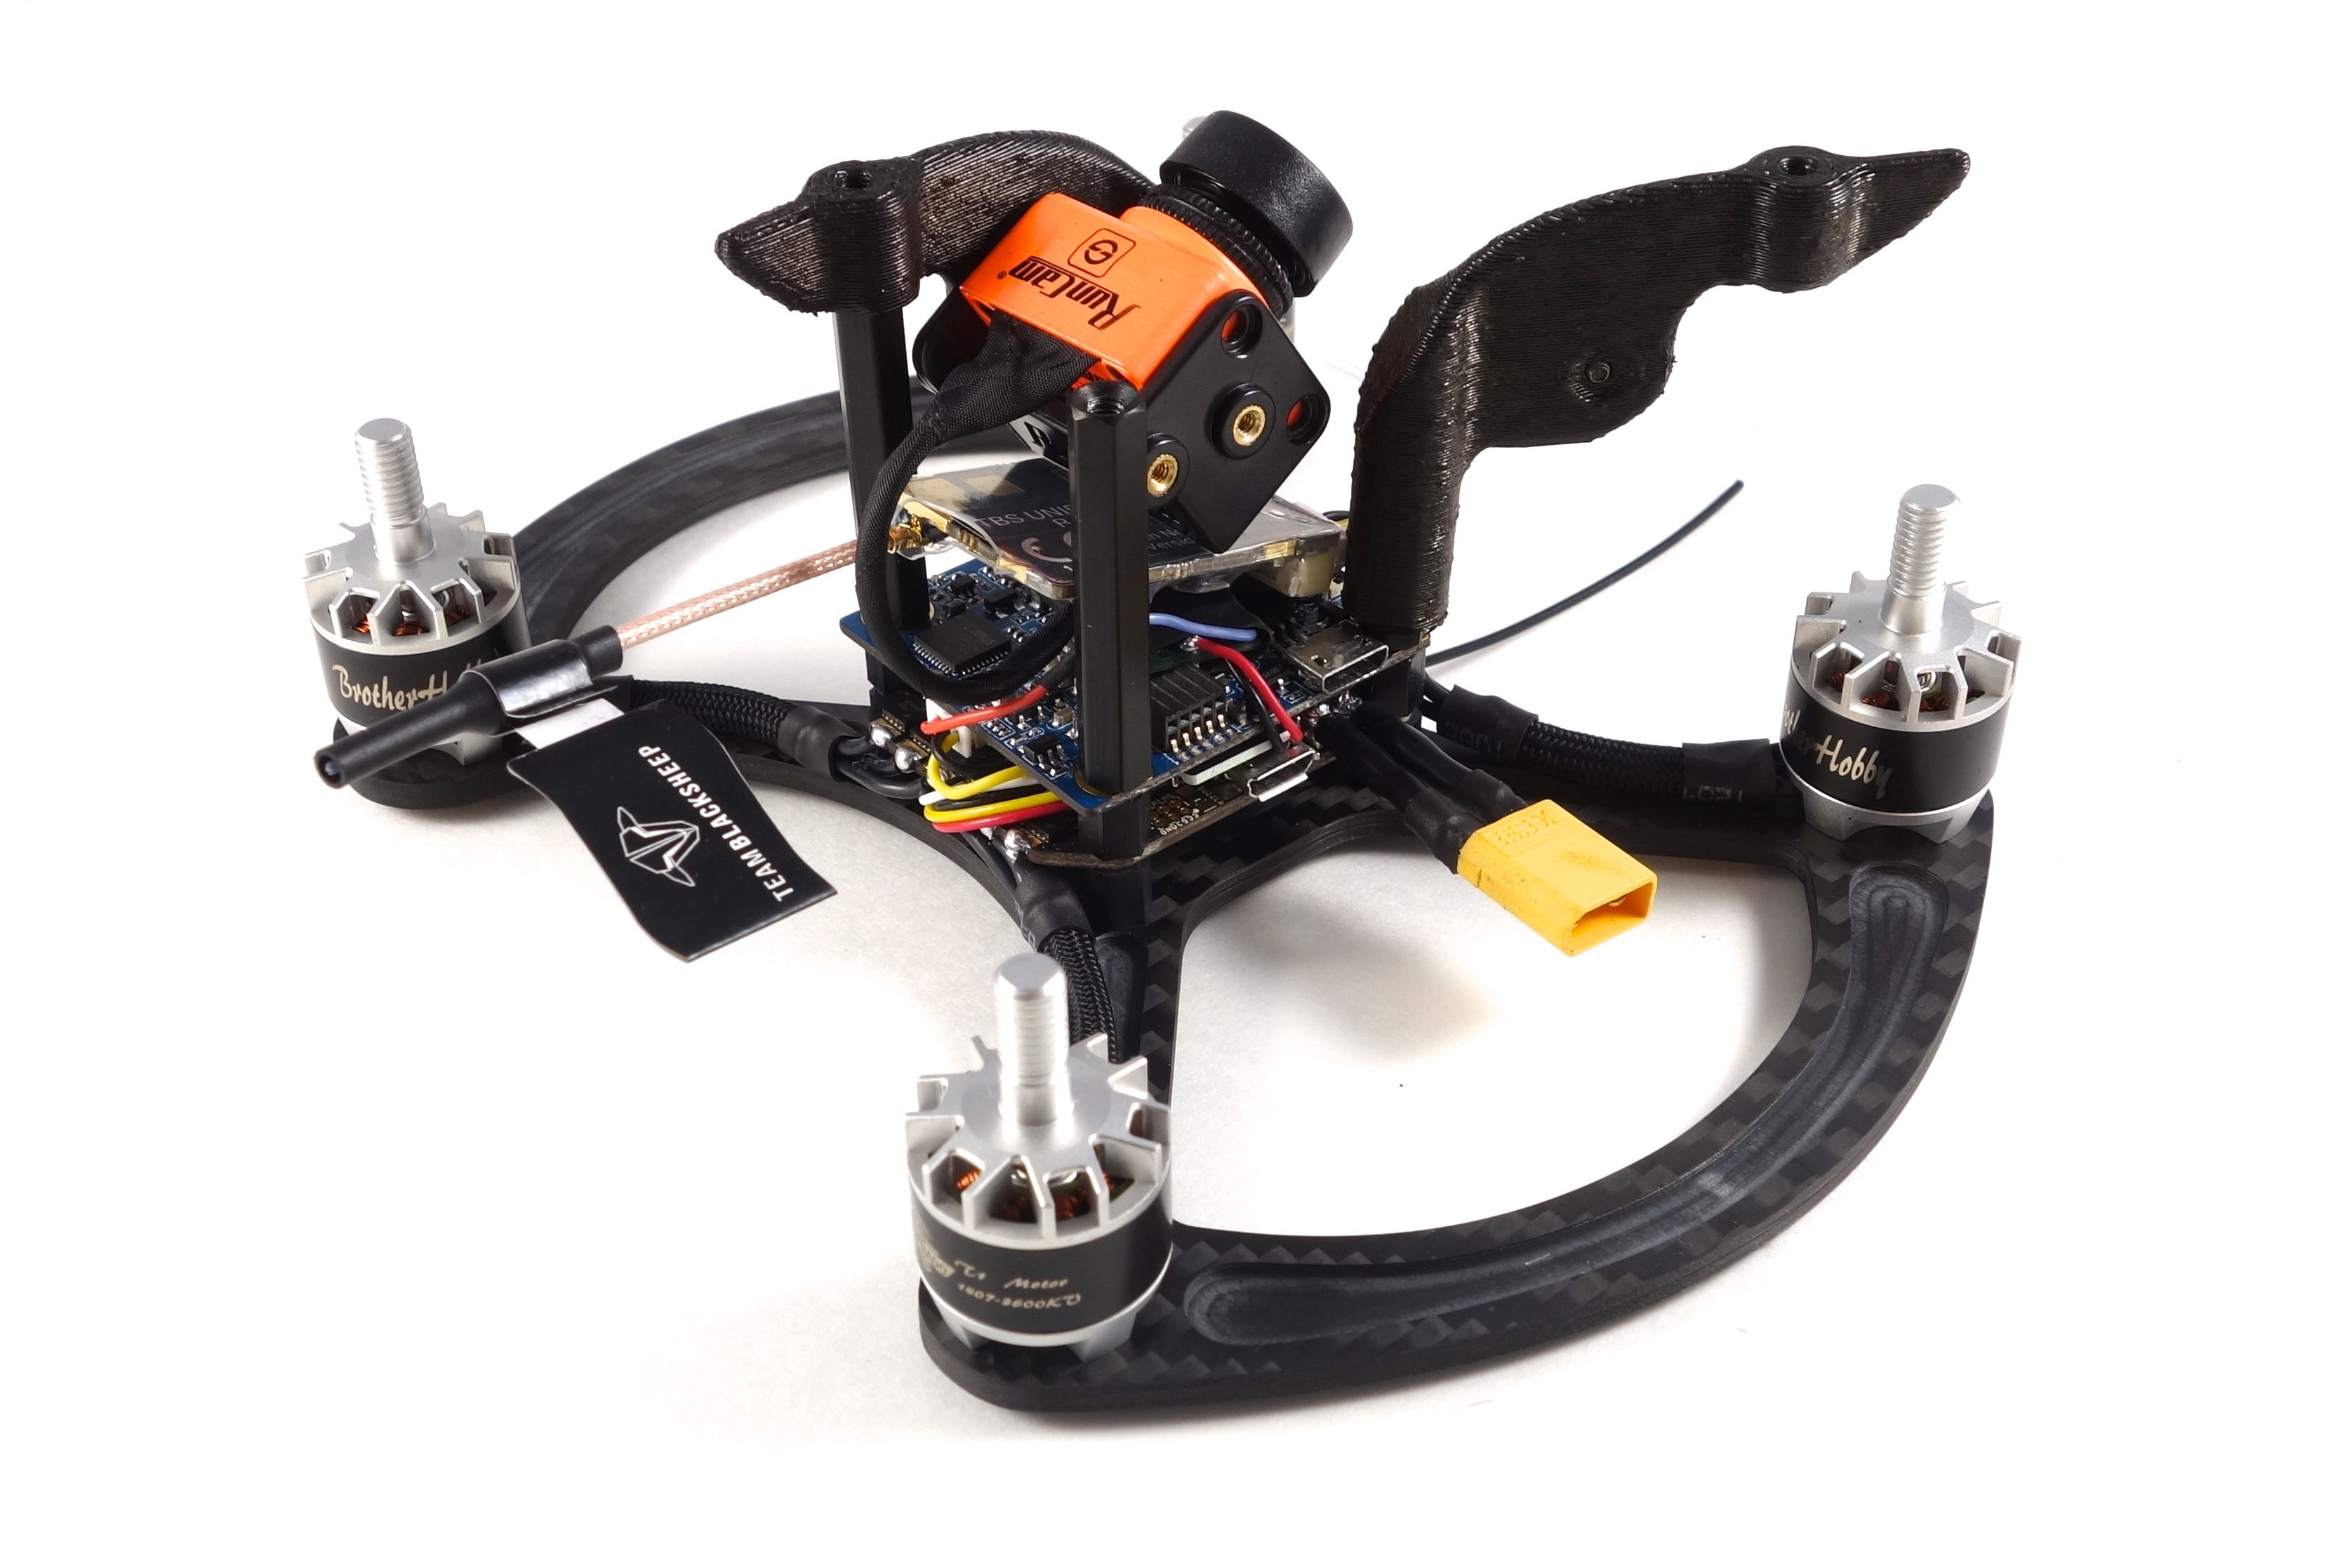
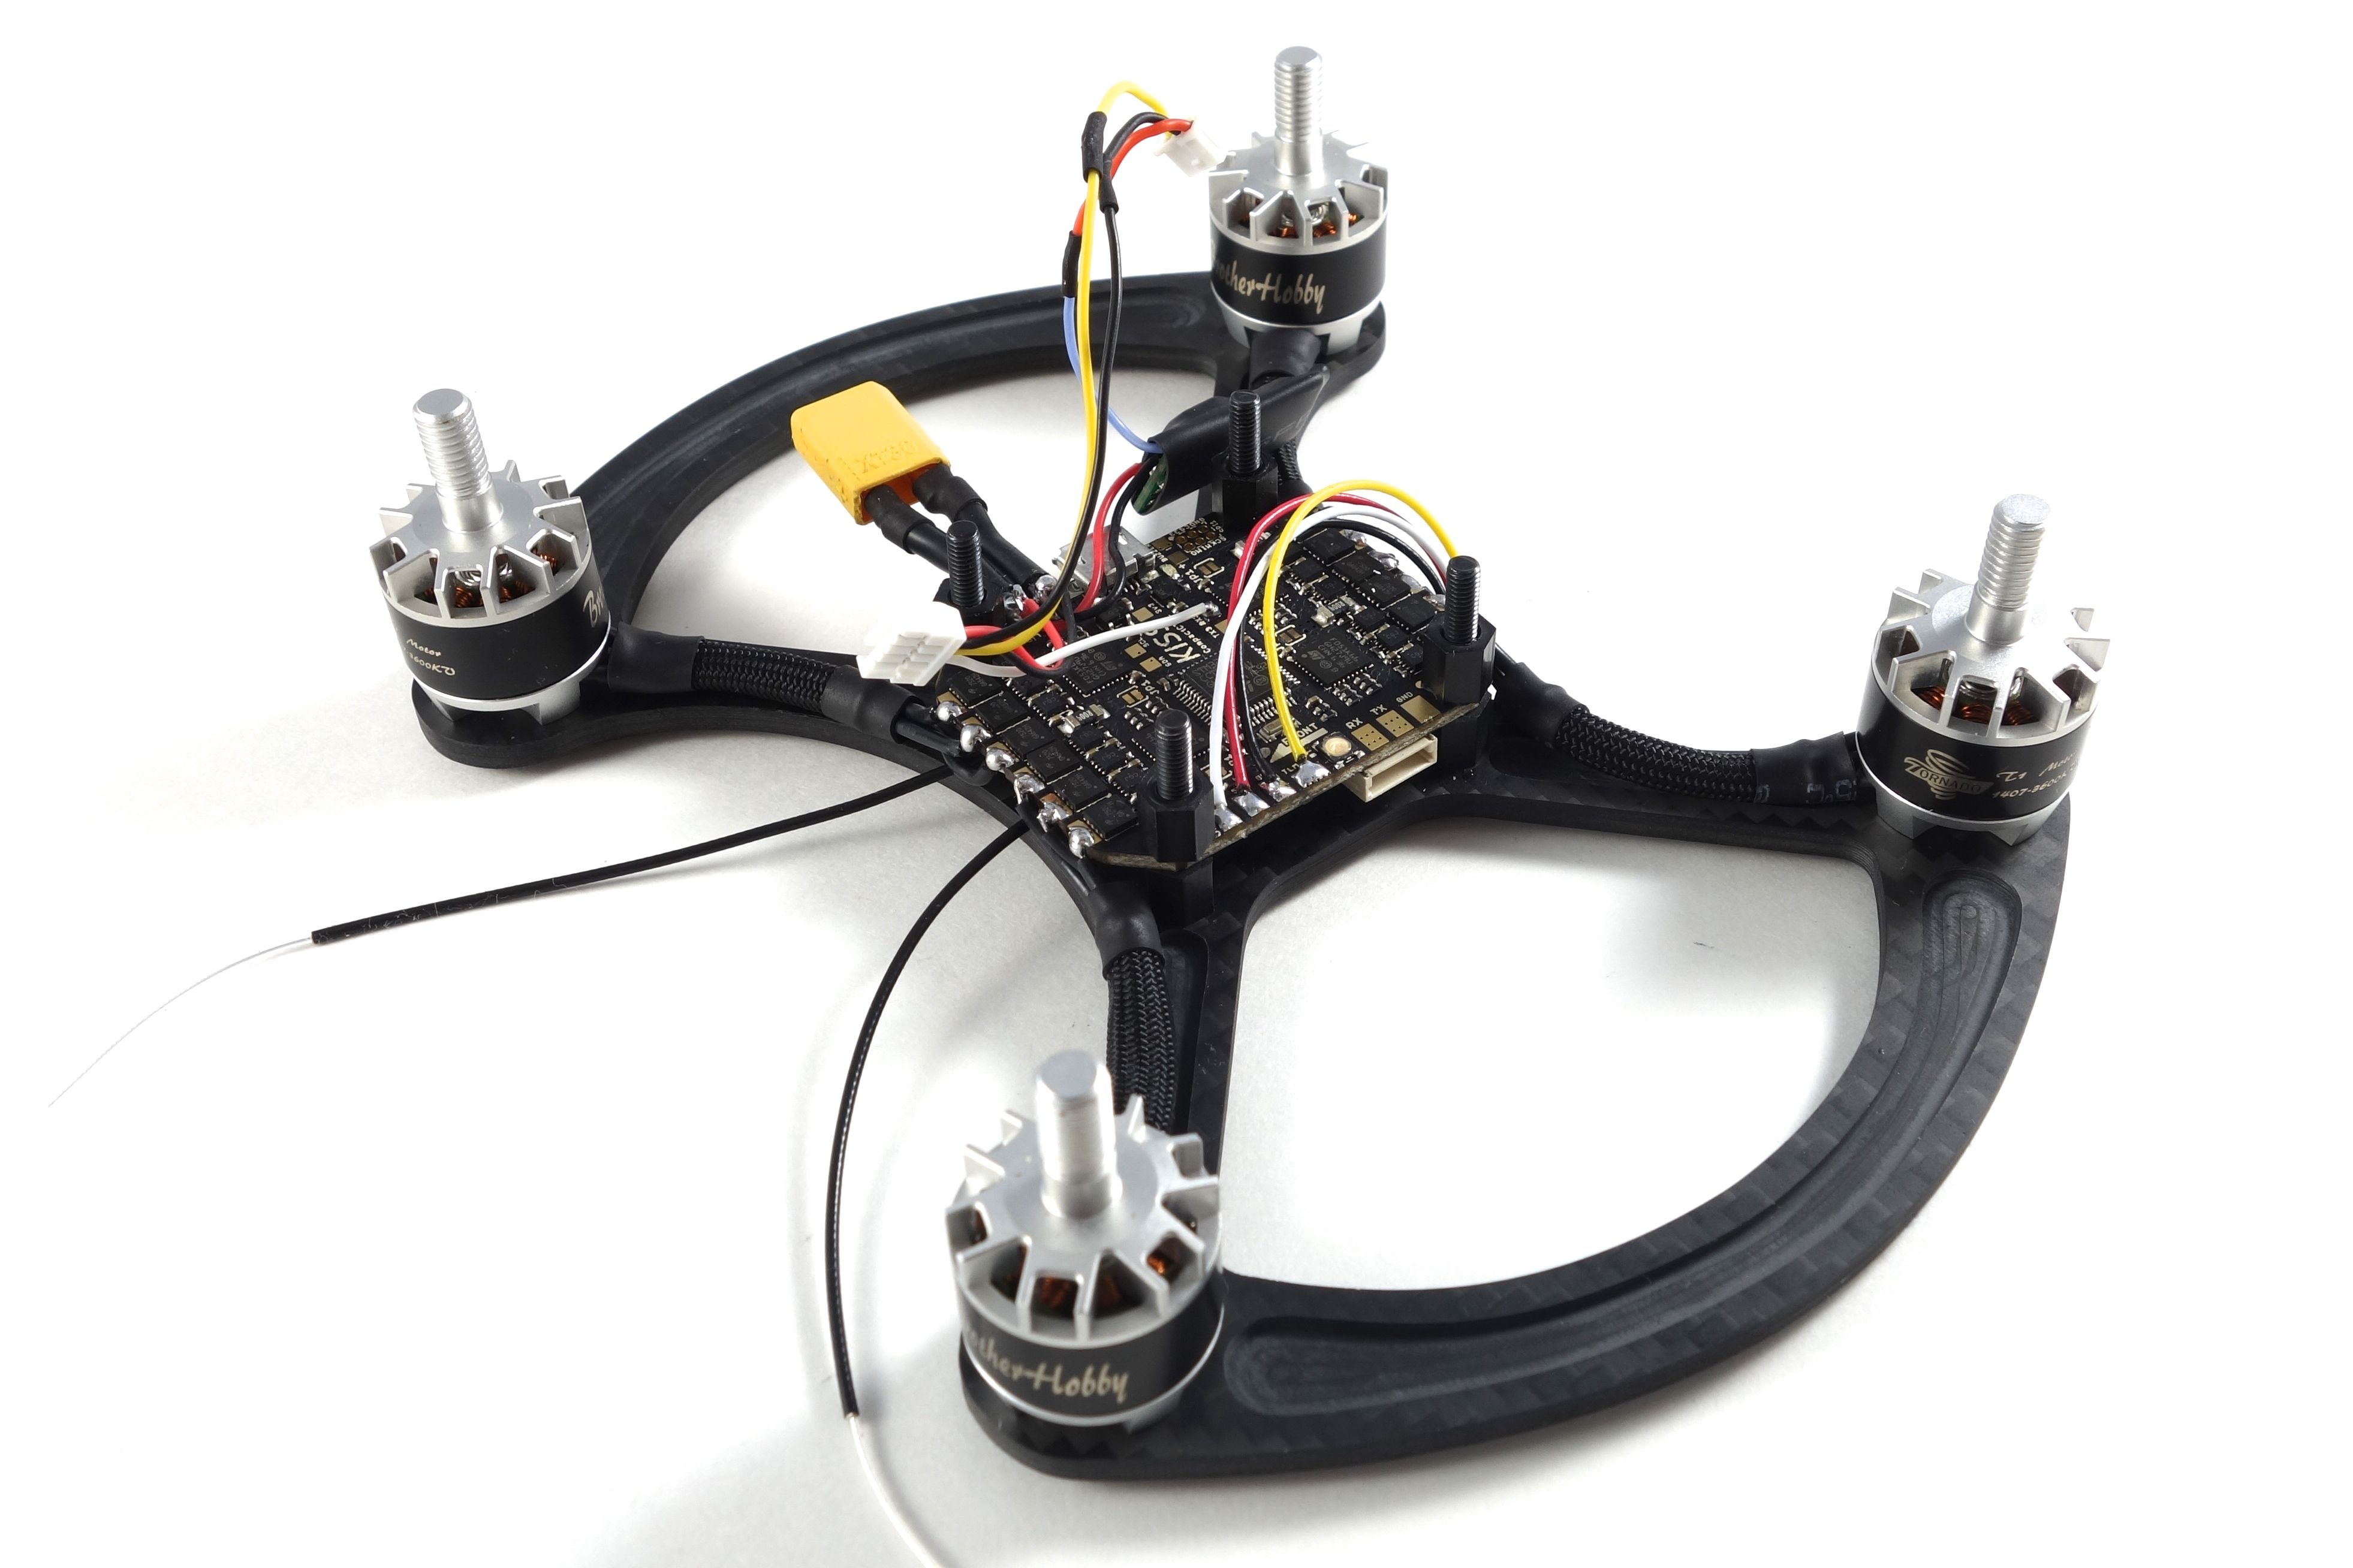
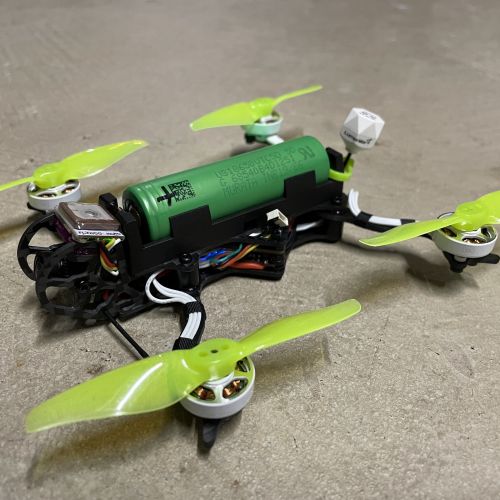
This is a really tight build, so every component needs to be carefully fit. First you'll want to put the long screws through the baseplate and tighten them down with the included nylon spacers. Next is a good time to add your battery strap followed by the XSR in such a way that the XSR plug can be depressed into the 20x20mm groove of the frame. You can also remove the green wire from the XSR plug by prying at the tiny plastic tab with a small screwdriver. We don't need CPPM. Send the antennas up front and plug the wire harness in. Now you can fit the KISS CC on top being careful not to damage any components on the underside. Once you feel good about how it fits you can affix the KISS CC with 4 more spacers to make everything nice and snug.
Wiring the Motors
Now you can screw the motors onto the arms. It's always recommended that you use blue Loctite to ensure the screws won't wiggle loose. You can trim the motor wires ensuring you've got enough slack to reach the ESC pads. I trimmed about 3" from each motor to make things a little easier. Now comes the tedious part. You'll want to tin all the ESC pads and start soldering one wire at a time. I started with the innermost wire and worked my way out. I like to give them just enough slack to bend the wire straight up into the ESC groove. Each wire will be cut to a different length so make sure they fit into their respective grooves before you cut. I used Paracord to protect the wires, but this is entirely optional. One trick I found was to sleeve the wires first then melt the ends of the Paracord to prevent fraying. If you do use it just be sure to add a couple bits of shrink tube before you start soldering the wires to cover up the ends.
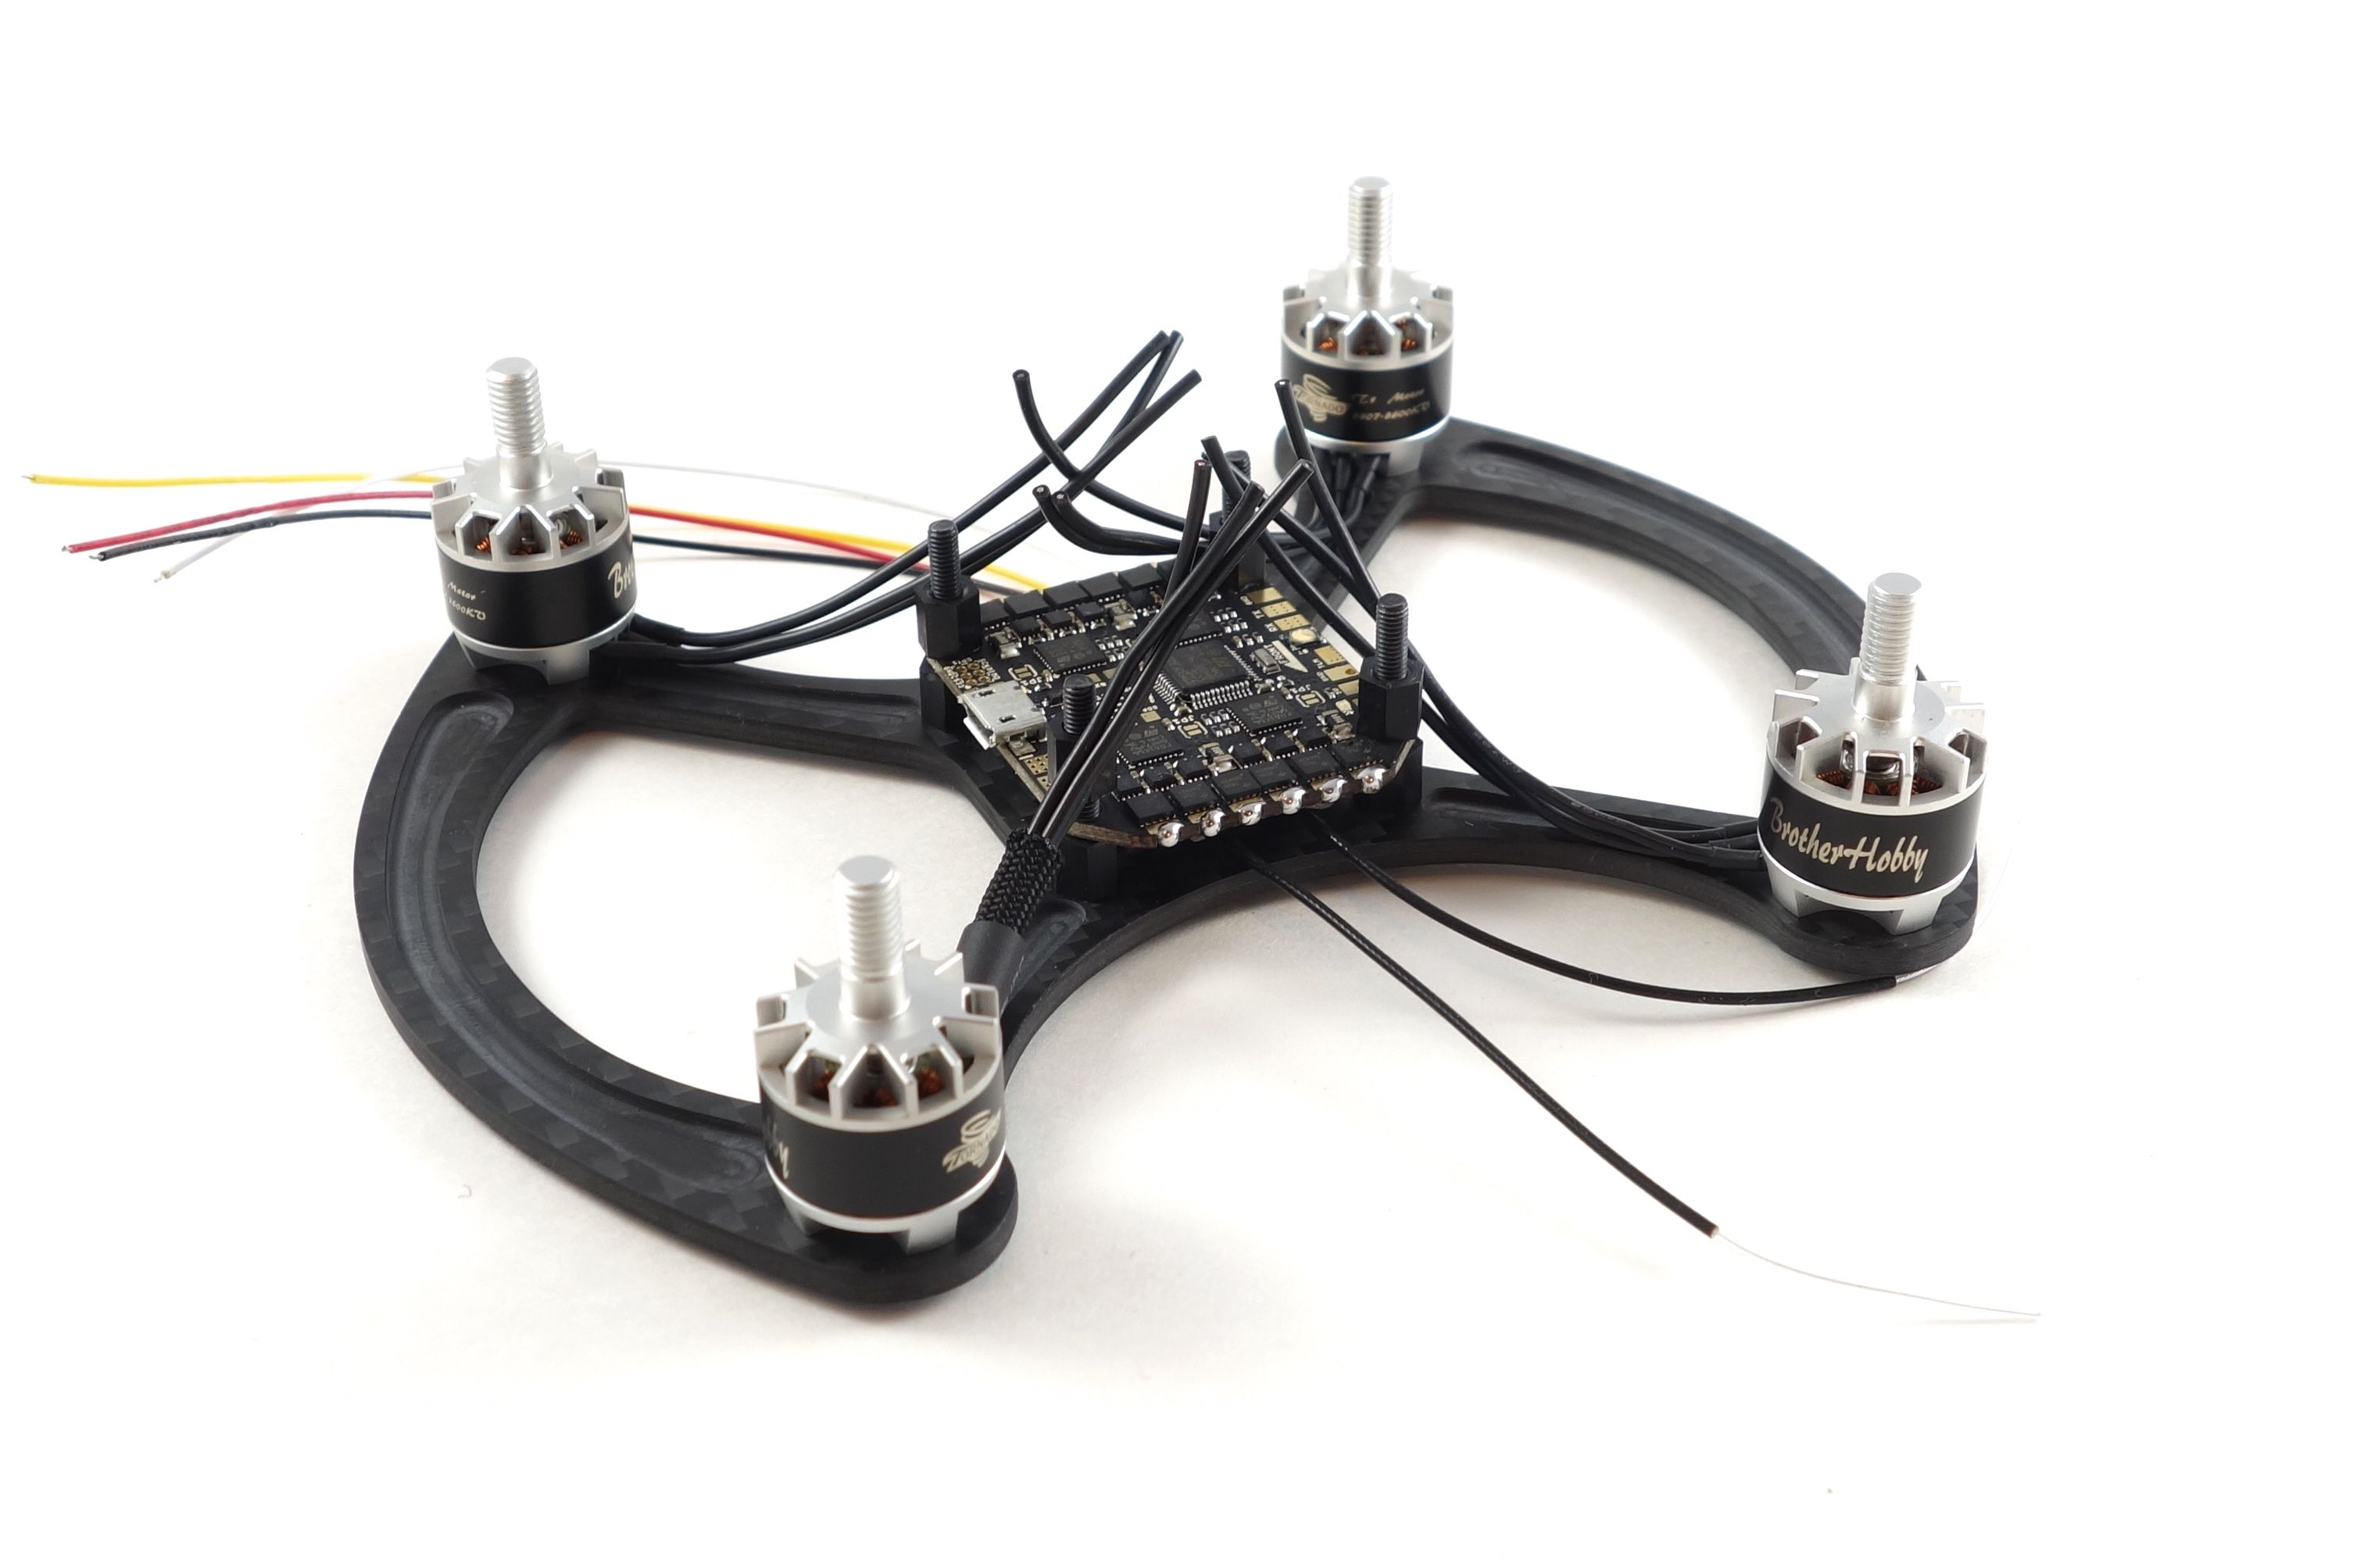

Wiring the Receiver and Battery Lead
Once you've finished wiring the motors you can move on to the receiver. This is pretty straightforward as long as you follow the photograph. Just solder one wire at a time leaving a little slack to make it easier to unplug. Next you'll want to solder the XT30 plug (or XT60 if you prefer) to the board. I used 16 AWG wire. It's easiest to solder the wires to the XT30 plug first, apply shrink tube and then solder both wires to the flight controller. Just be sure to cover those pads with a nice pillow of solder.
Now you can apply power and test the motors using the KISSFC app. You can use the ESC Flasher tab to change the motor directions, and you can even give it a hover test at this point.
Powering the Runcam Split
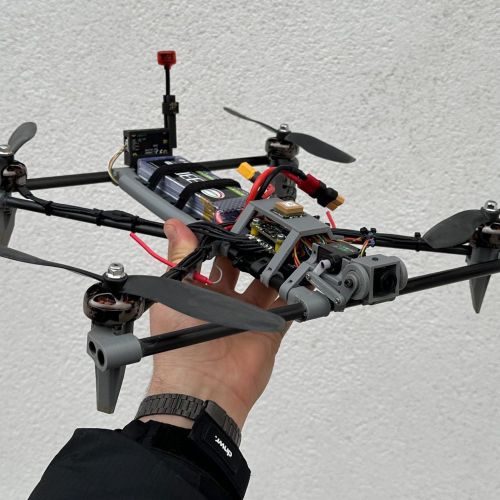
Since the Runcam Split requires 5v at 650mA of current, it's not the best idea to power it by either the FC or the VTX. While the FC advertises 1A of current it still needs to power itself and the receiver. The TBS Unify can put out 600mA, so that's a little short. For that reason I opted to use a 5v 1A Pololu. Add wires to the VOUT, GND and VIN pins and solder the VIN and GND wires to the main power leads. The VOUT wire needs to be joined to the Runcam Split power input.
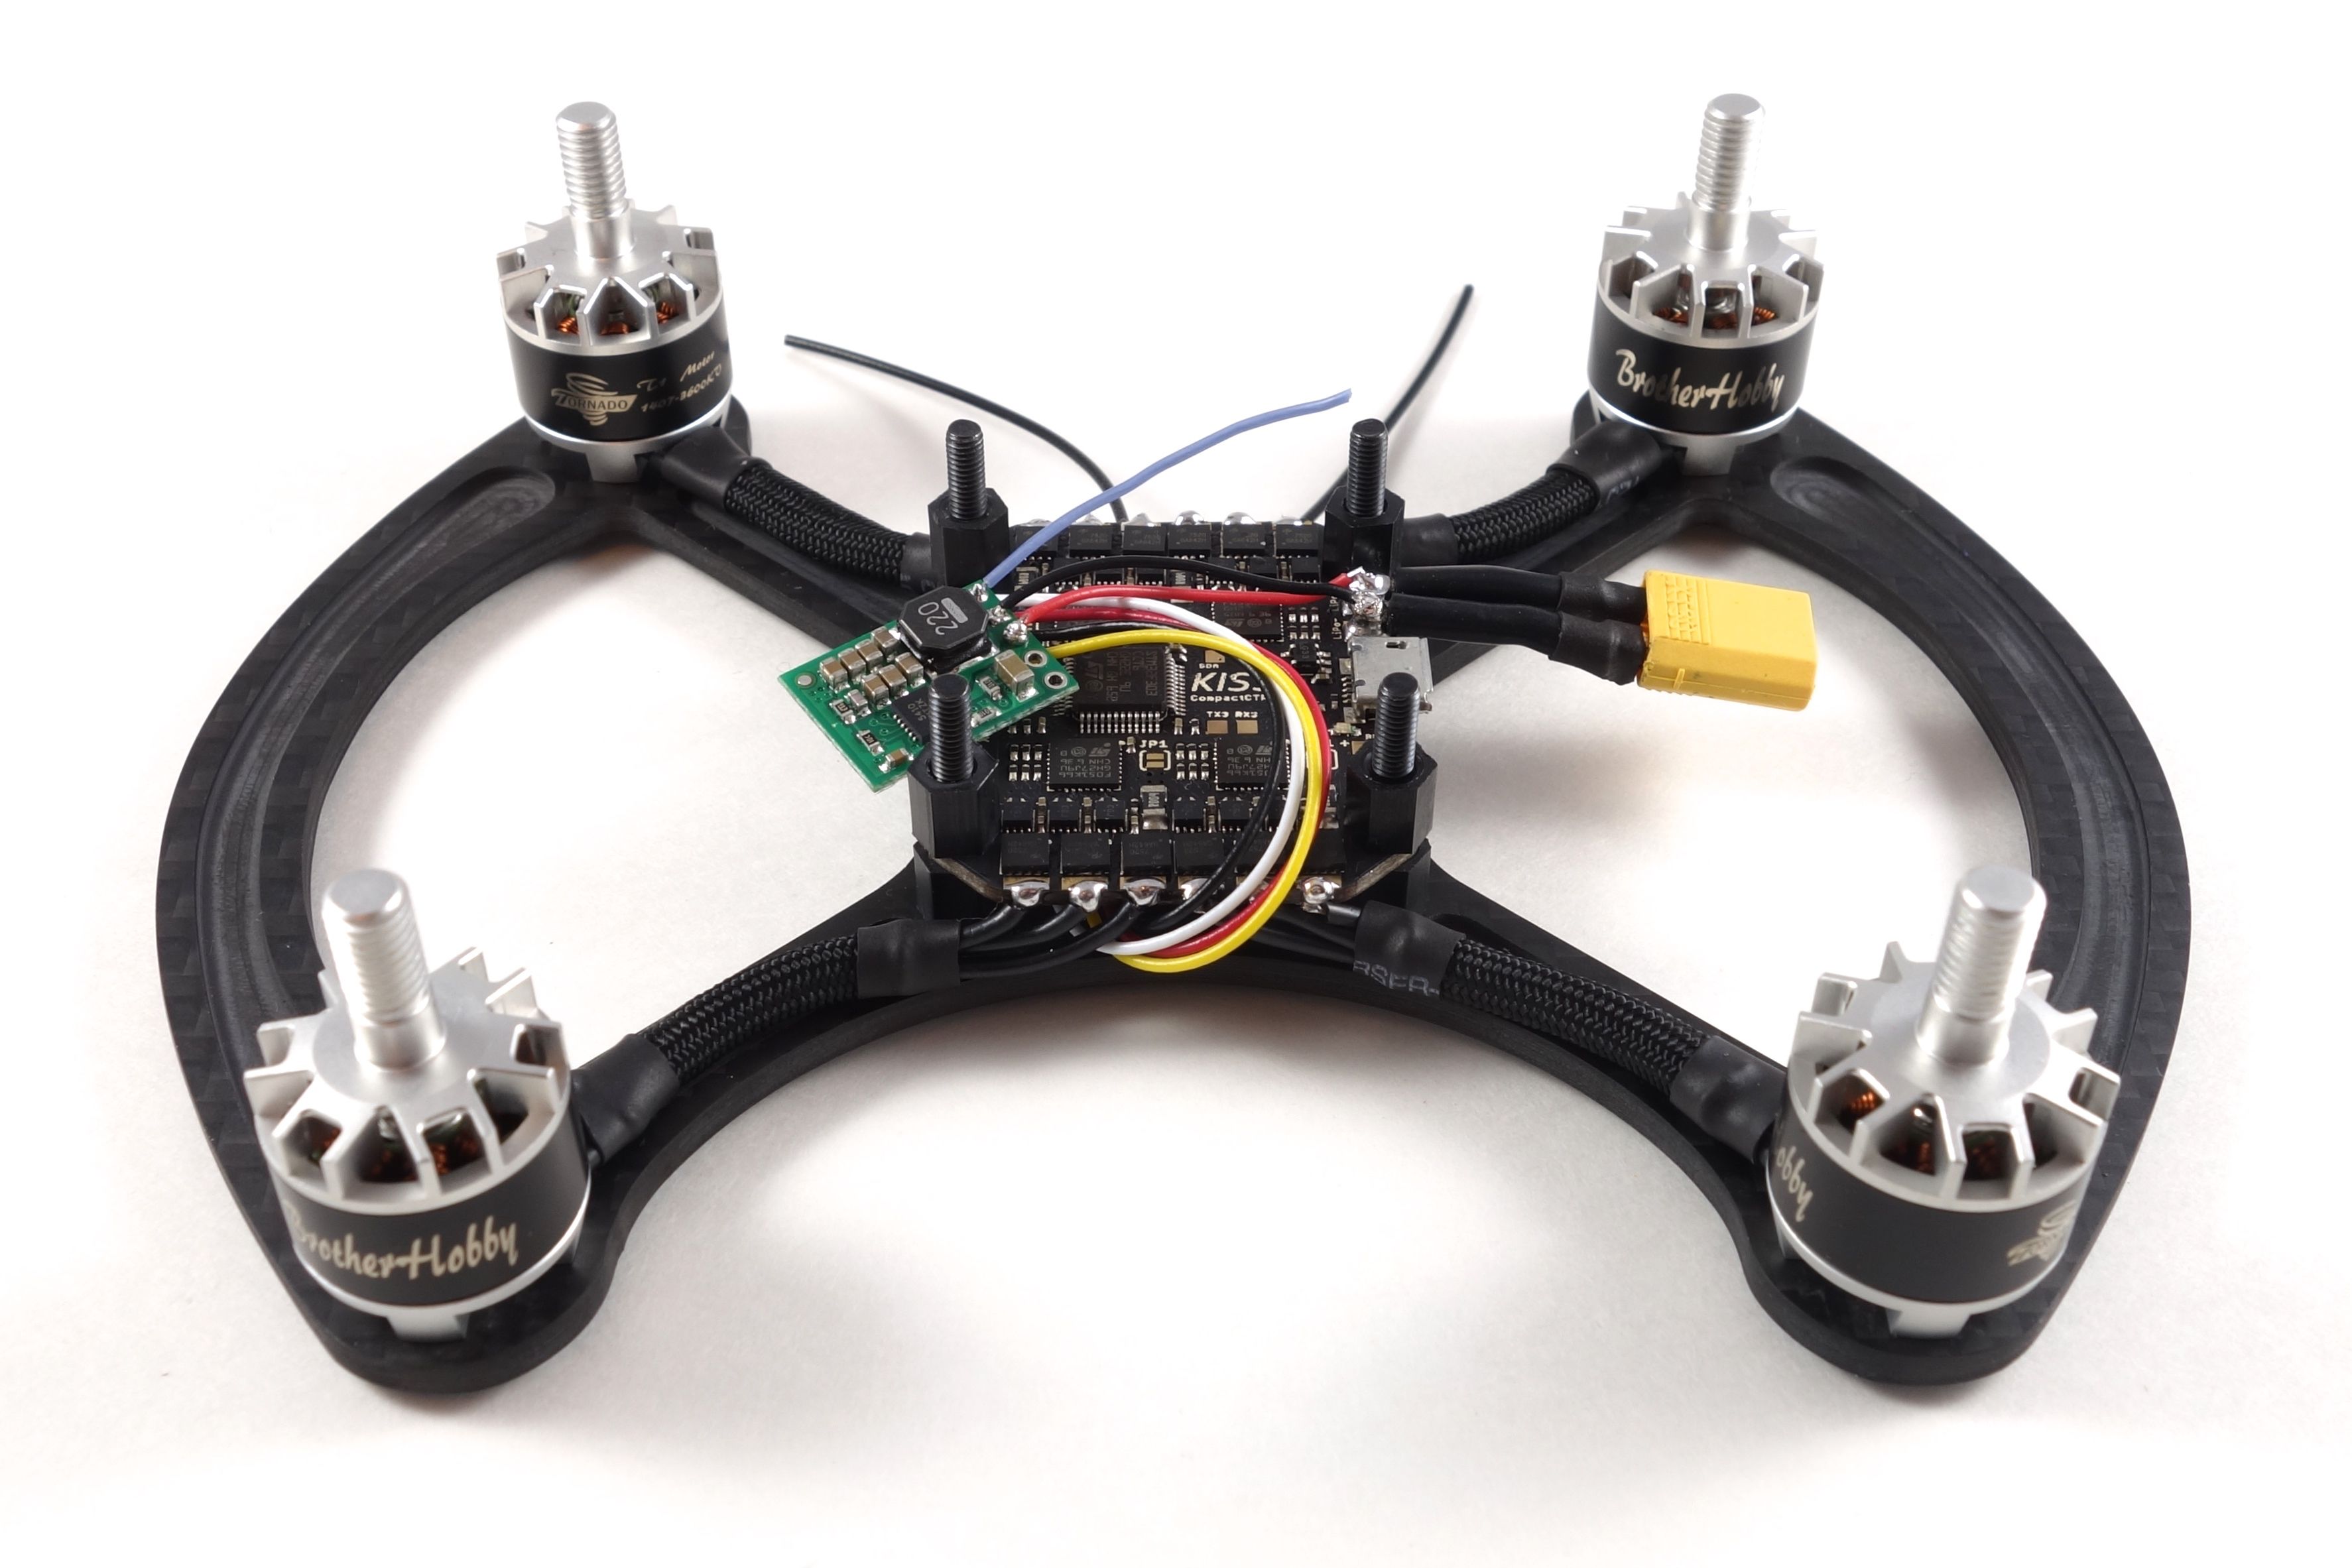
Powering the TBS Unify
The TBS Unify can take the full voltage of the battery, so solder the 7v-26v and GND wires to the main power leads directly on top of the VIN and GND wires of the Pololu. Remove the 5V out wire from the wire harness and solder the white audio wire to the RX3 pad of the KISS CC. This is for SmartAudio which allows you to change your video channel, band and power with your Taranis. If you don't plan to use SmartAudio you can remove the audio wire from the harness. Finally you just need to join the Video and the other GND wire to the Runcam Split plug. Refer to the photos for an acceptable wire length.

Final Assembly
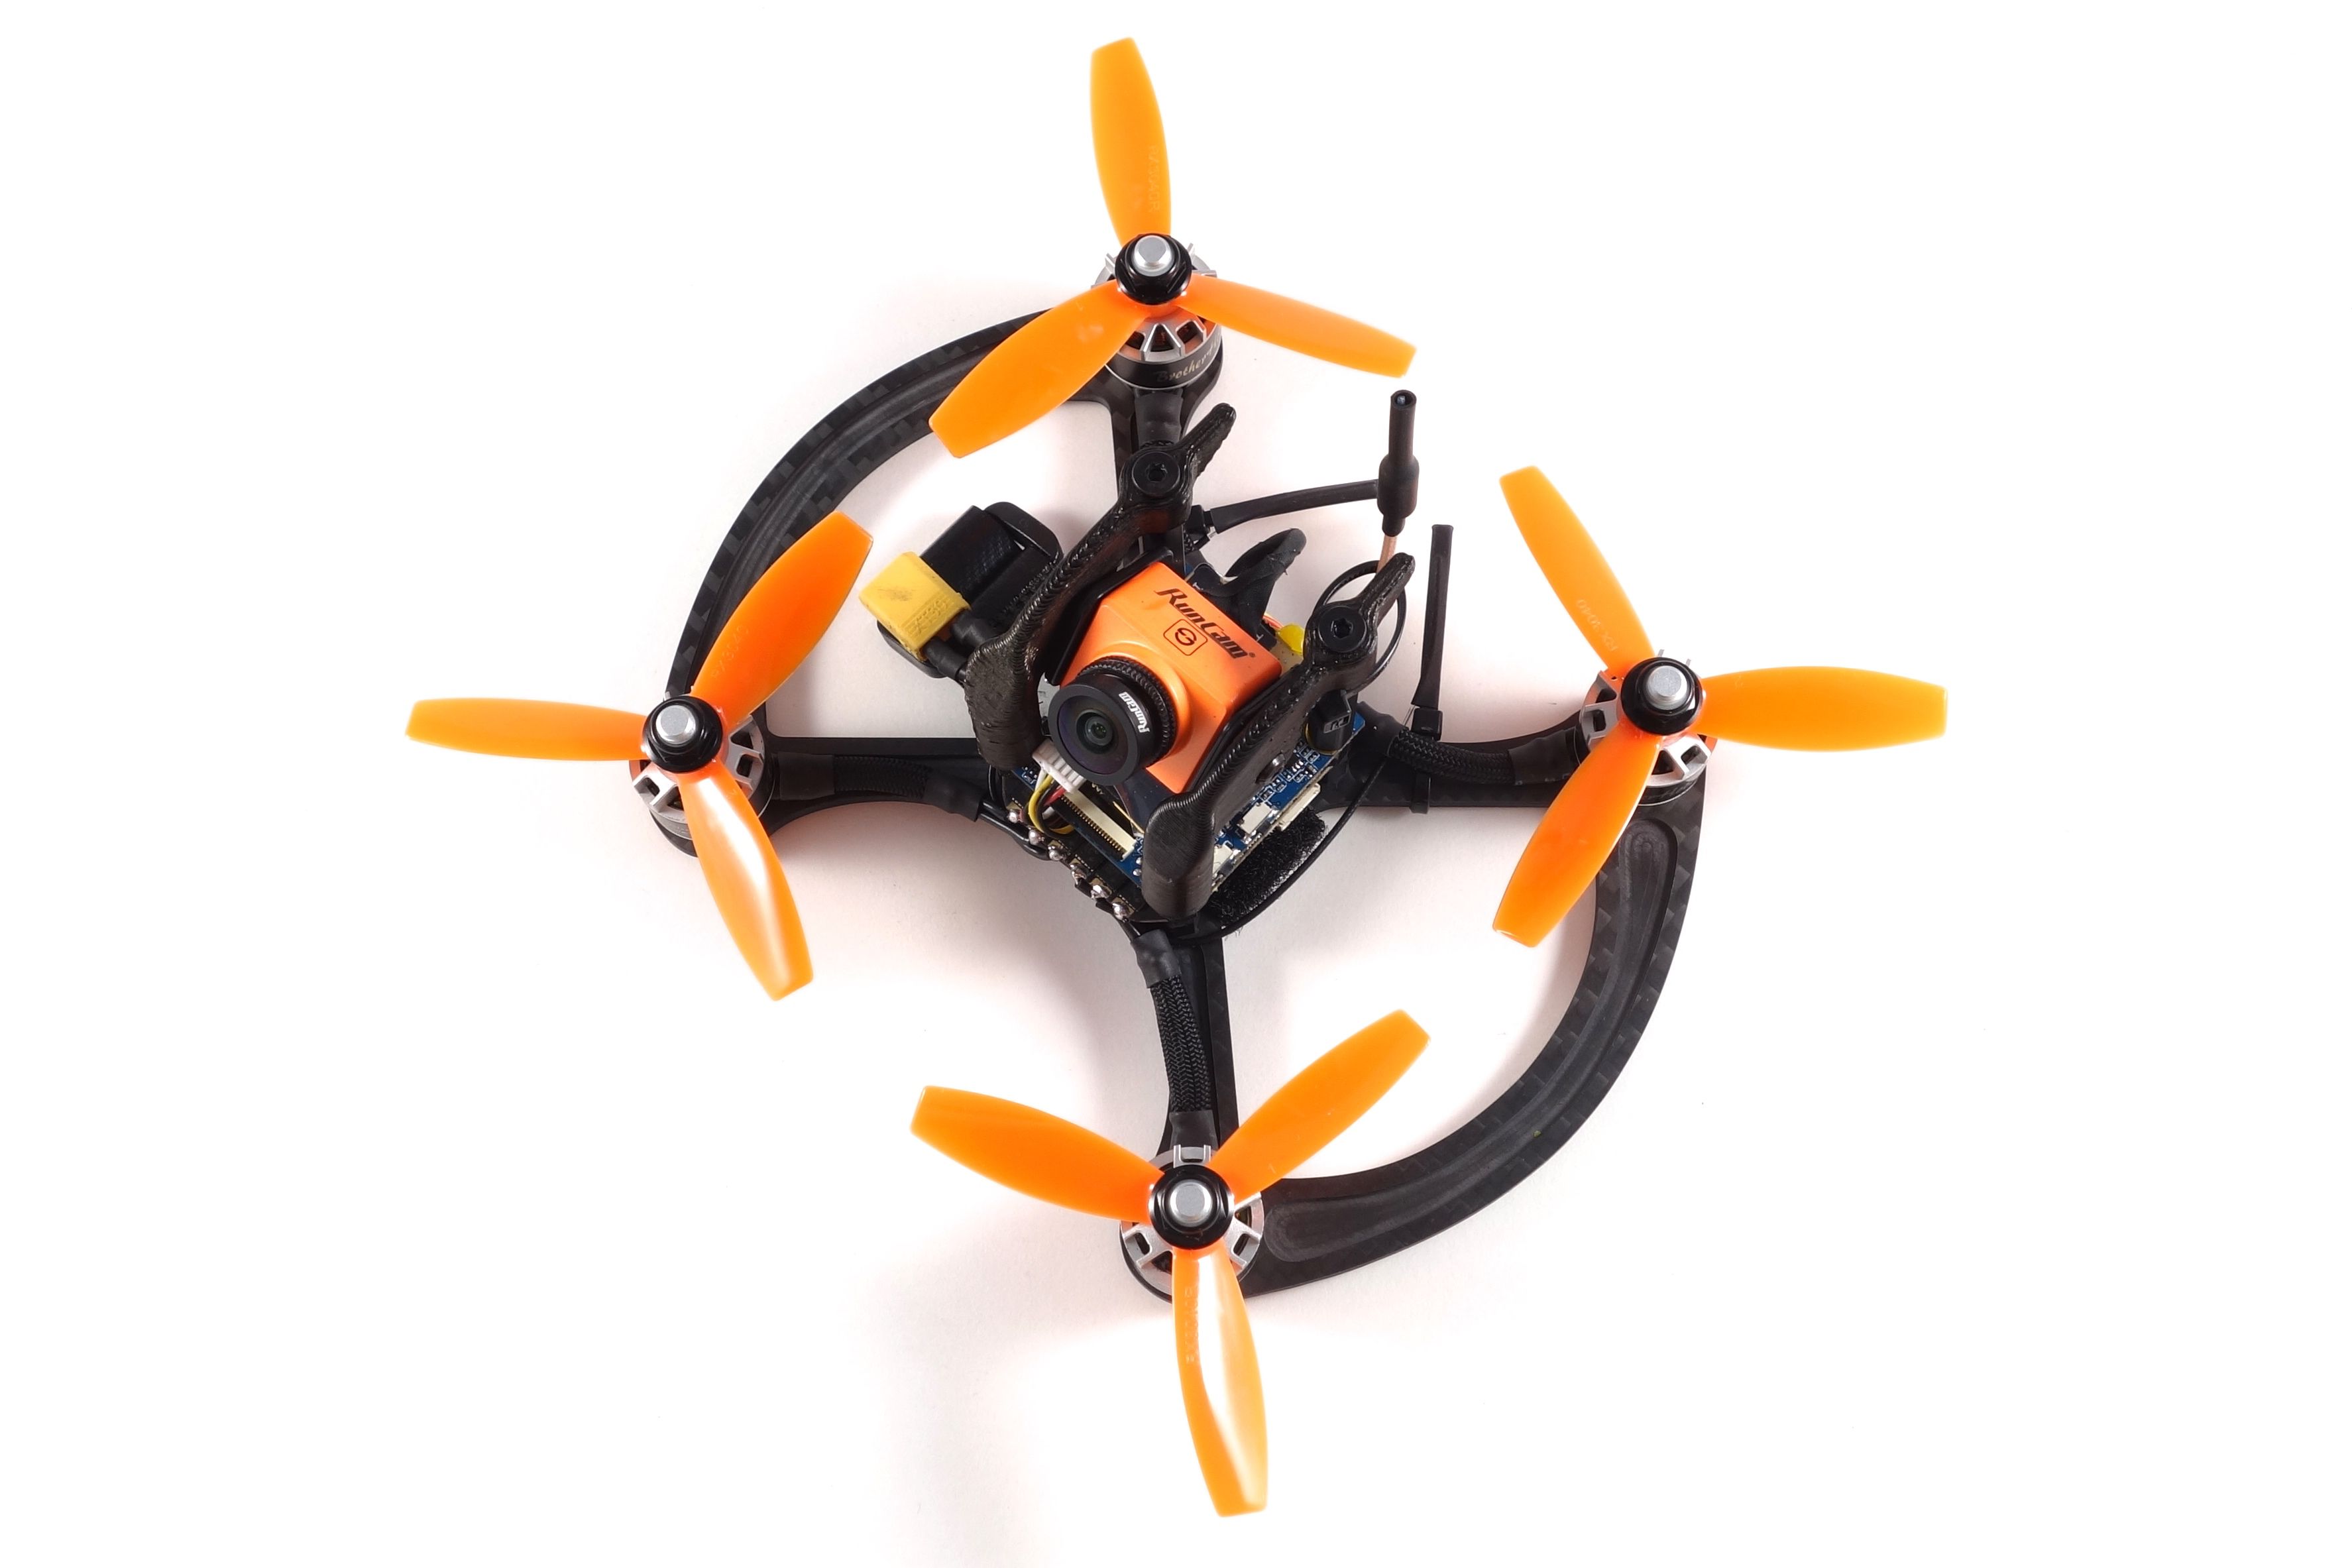
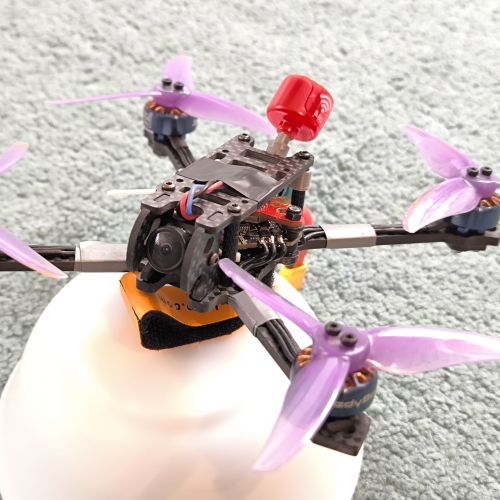
The wiring is complete! Now it's time to put it all together. The "winglets" are nylon and take dye quite well, so before you begin you may want to dye them with some Rit powder dye. The process takes about 30 minutes. Be sure to wash them afterward otherwise you'll stain your hands handling them. Once the winglets are ready you'll want to fit the standoffs into them. Make sure they slide in and out without getting stuck. You may need to take a file to the winglets to ensure the standoffs fit.
Now you need to put your microSD into the Runcam Split because it's not coming out unless you disassemble. Keeping the VTX wires up front and the Runcam Split wires in the back you can place the Runcam Split board on top and tighten it down with the tall and medium standoffs. They need to be removed from the winglets for this step, so that's why you needed a proper fit earlier. Now you can stack the Pololu and the TBS Unify on top of the Runcam Split and plug everything in. I placed the TBS Unify face down against the Runcam Split cable. Before you proceed you should apply power, set your TBS channel and band and unlock it. You should also test your FPV feed to ensure the camera is working properly. If you don't do this now you won't be able to reach the TBS button very easily.

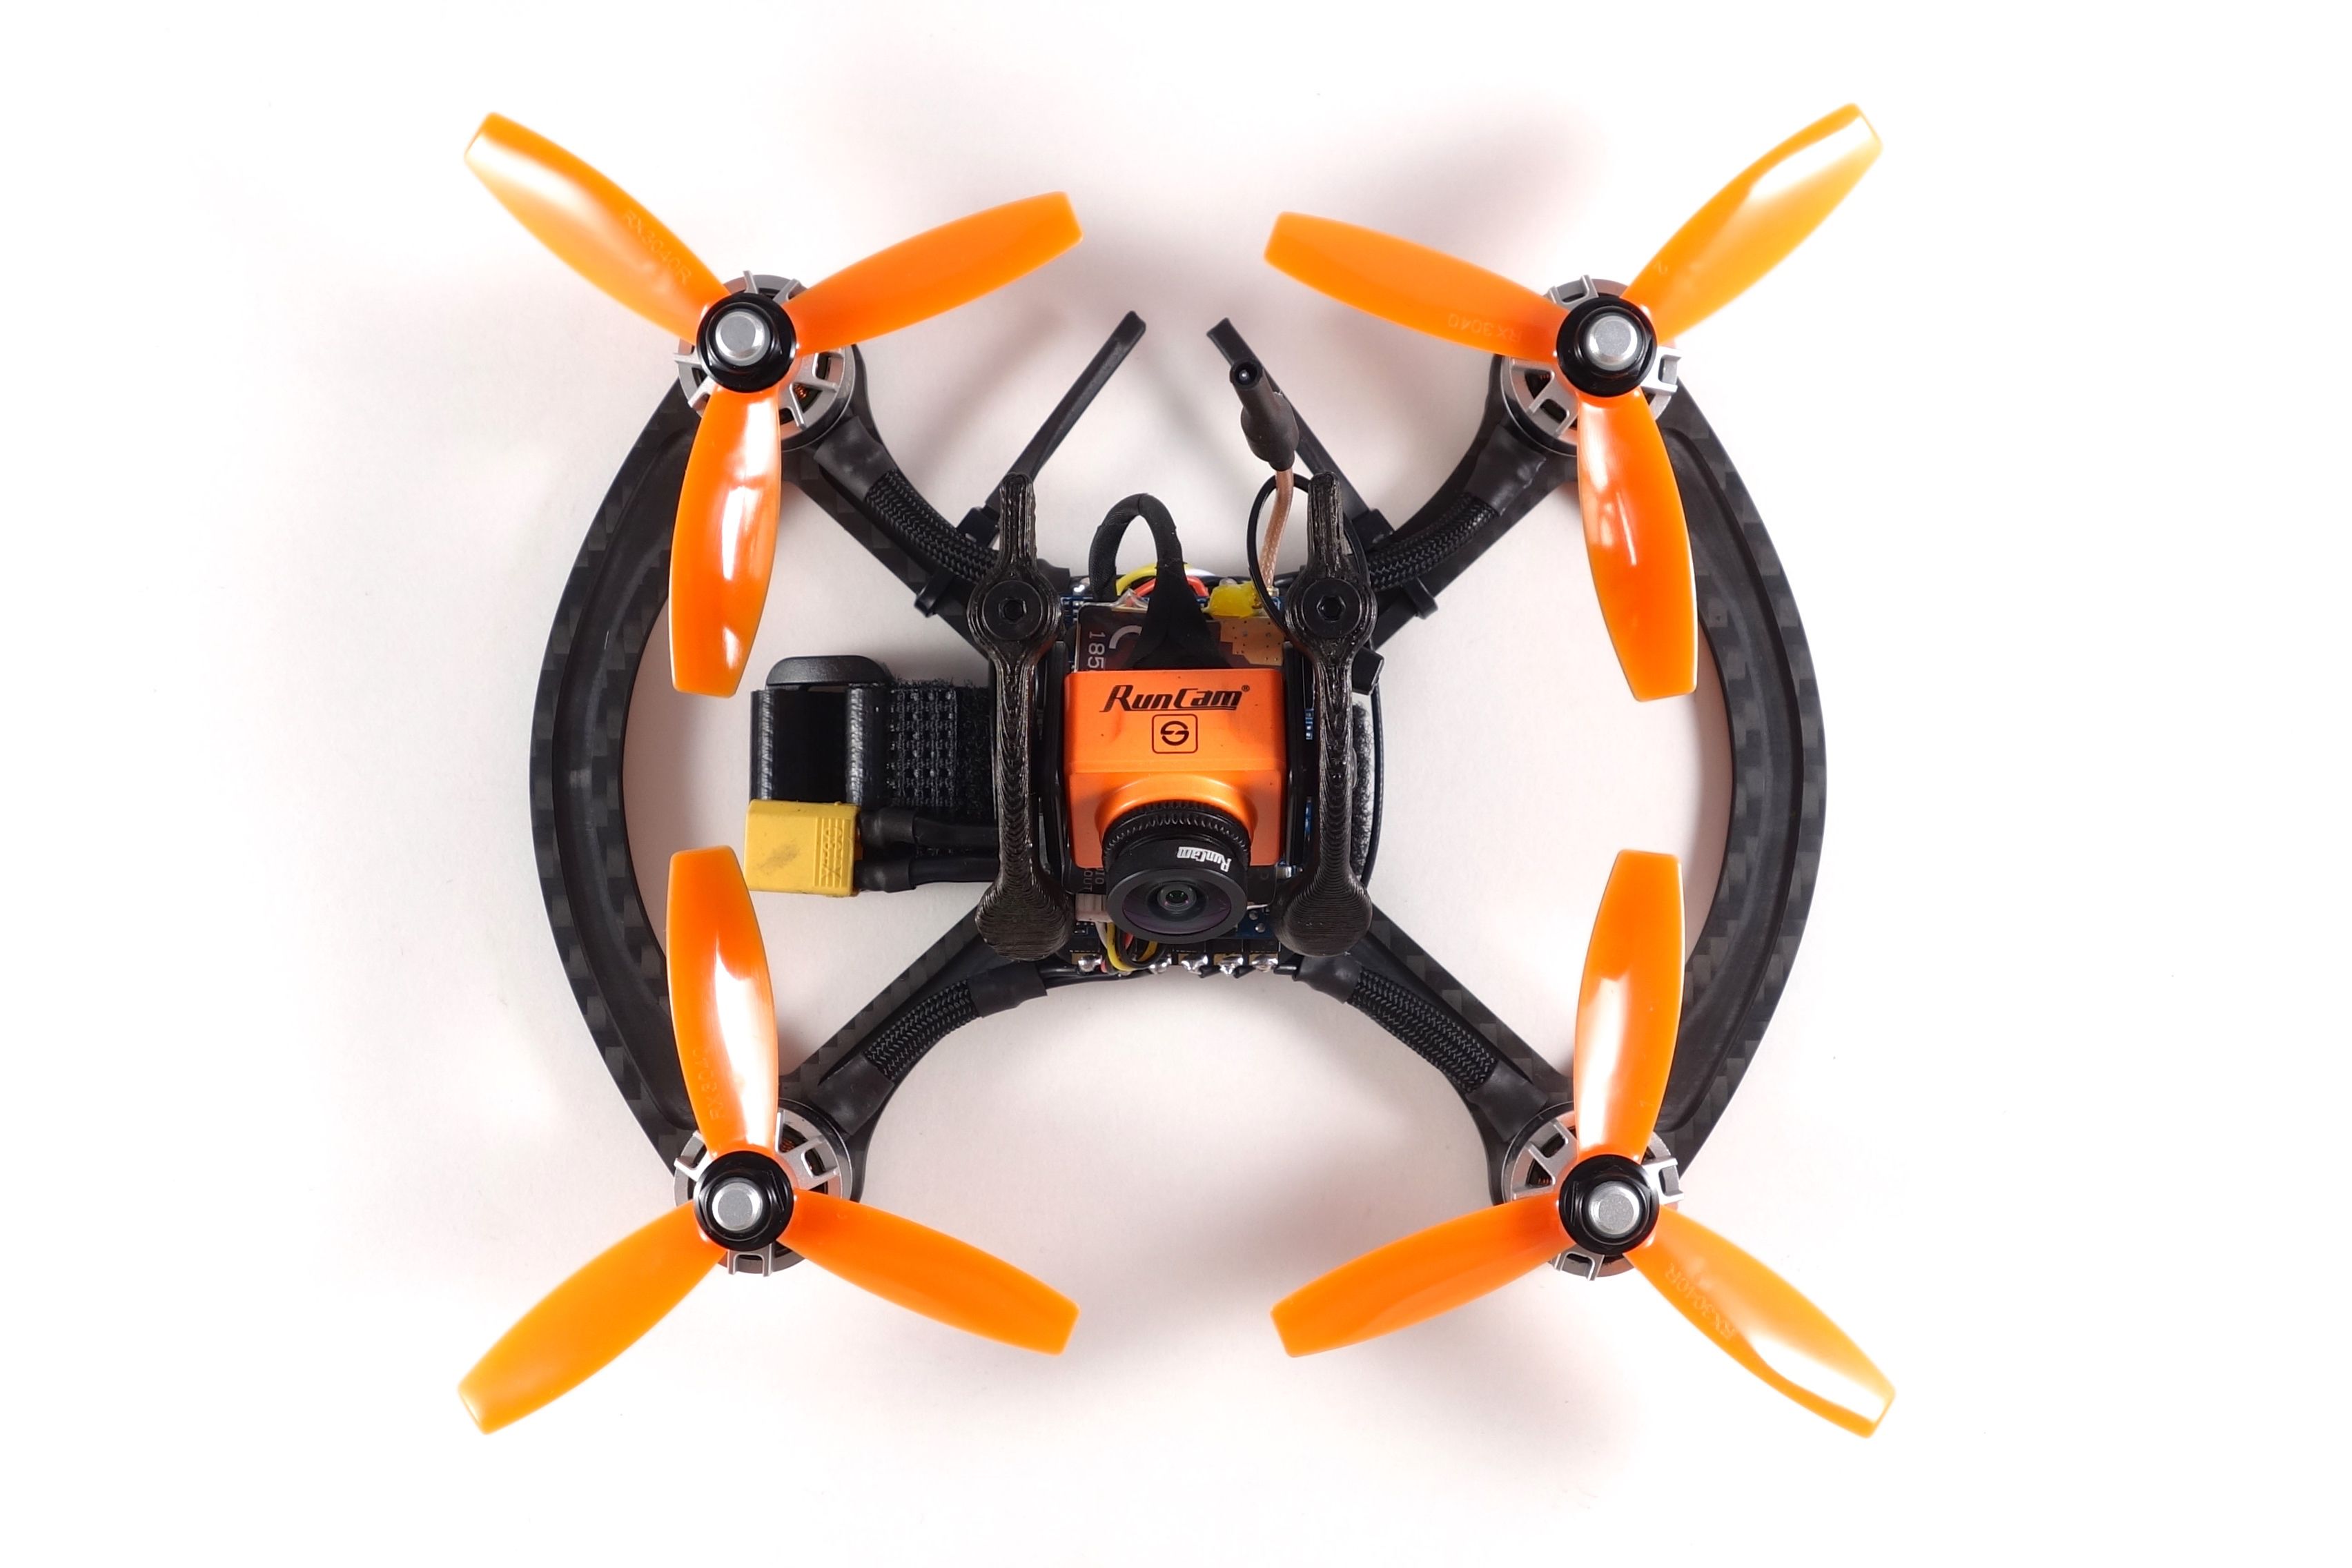
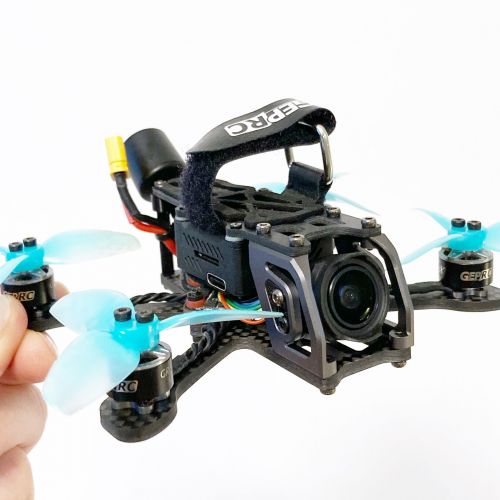
Fitting the Camera
The Runcam Split is more narrow than a traditional HS1177 camera, so you need to use the black plastic adapter that was included. The problem is that the included M2 screws bulge out too far. You simply can't use them. That's why I added some M2x4mm screws to the part list. These will give the adapter a flush mount between the winglets. Once you've attached the adapter to the camera you can slide a single winglet onto the standoffs, screw the camera to it, slide in the other winglet and screw the other side of the camera in. Finally, I used the long flat screws that came with the Runcam Split to secure the winglets to the tall standoffs.
Finishing it up
At this point you just need to secure your antennas. I opted for the dipole antenna for size and convenience, so you can simply replace the SMA pigtail and add some liquid tape to secure the U.fl connector. Once it's secure you can zip-tie the antenna to one of the standoffs to keep it away from the props. To mount the RX antennas I just diverted them back over the battery strap and under the rear motor wires. I attached a couple small zip ties to the back arms and shrink tubed the antennas to the zip ties. This should keep them safe.
Now you're ready to go! Be sure to set your rates, PIDs, switches and modes. You can follow the KISS Lua script guide to ensure your Taranis is talking to your flight controller as well as your VTX. Put some props on and get some HD footage!
I'd like to thank GetFPV for sponsoring this build as well Hyphy Multirotors for such a unique frame design!
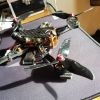
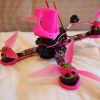
Photos


Part List
Frame |
Le Volcor by Adam Kobitz
(5 builds)
Hyphymultirotors.com
|
$34.99 |
Flight Controller |
KISS CompactCTRL CC All-in-One (FC + 16A ESC x4)
(42 builds)
Getfpv.com
|
$95.99 |
Motors |
4 x Brotherhobby Tornado T1 1407 3600KV
(193 builds)
Getfpv.com
|
$63.96 |
Propellers |
RotorX RX3040T Tri Prop 4 Pack - Orange
(6 builds)
Getfpv.com
|
$3.49 |
FPV Camera |
RunCam Split HD / FPV Camera
(17 builds)
Getfpv.com
|
$69.99 |
FPV Transmitter |
TBS Unify Pro HV 5G8 - Race (SMA)
(555 builds)
Getfpv.com
|
$29.99 |
Antenna |
TBS Unify Pro 5G8 Linear Antenna
(92 builds)
Team-blacksheep.com
|
$6.95 |
Receiver |
FrSky XSR 2.4GHz 16CH ACCST Receiver w/ S-Bus & CPPM
(481 builds)
Getfpv.com
|
See Site |
Power Distribution |
5V, 1A Step-Down Voltage Regulator
(3 builds)
Getfpv.com
|
$7.99 |
Misc Parts |
XT30 Power Connectors (5 Pair)
(3 builds)
Getfpv.com
|
$3.99 |
Misc Parts |
M2/M2.6 Black Oxide Phillips Cross Pan Head Machine Screw Bolt GB818
Ebay.com
|
$2.37 |
Misc Parts |
Silicone Wire 16awg (1mtr)
(3 builds)
Getfpv.com
|
$1.59 |

I just updated to KISS 1.3 RC25 and enabled the adaptive filter. It flies fairly well on stock PIDs, but I definitely need to tighten them up a bit.

Beautiful build and write up! quick question...how do you get the paracord over the wires? I've tried and the cord is just too narrow to easily slip over and the wires are not stiff enough to poke through without getting snagged inside the cord.


Guides & Reviews

AirbladeUAV has done it again and this time they've brought long range to the 5" class! Based on the popular Transformer Mini, the new Transformer 5" Ultralight adopts a lot of the same design philosophies with larger props and more payload capacity. It can fly upwards of 20 minutes on a 4 cell Li-Ion battery pack and in ideal conditions it's got a range of over 4 to 5 miles. In this guide I'll walk..
Read more
With the release of the DJI FPV Drone cinematic FPV has become a lot more accessible, but you certainly don't want to crash a $750 drone! The QAV-CINE Freybott is a compact, lightweight cinematic FPV drone that can take a hit and keep going. It's a lot safer to fly indoors and around people. With a naked GoPro or the SMO 4k you can capture some great stabilized footage. In this guide I'll show you..
Read more
So you're powering the runcam split directly off the 4s leads and through that polulu? and with no noise? Do you have a link what you used? I have a couple but I think they maybe too small for 4s, and I also need a solution to power the split. I looked up my comment history and it seems you helped me a year ago too! I love your builds! Thanks for the help.
Yes, that is correct. There is no noise as far as I can tell. The image is quite good. I added a link to the regulator above.