
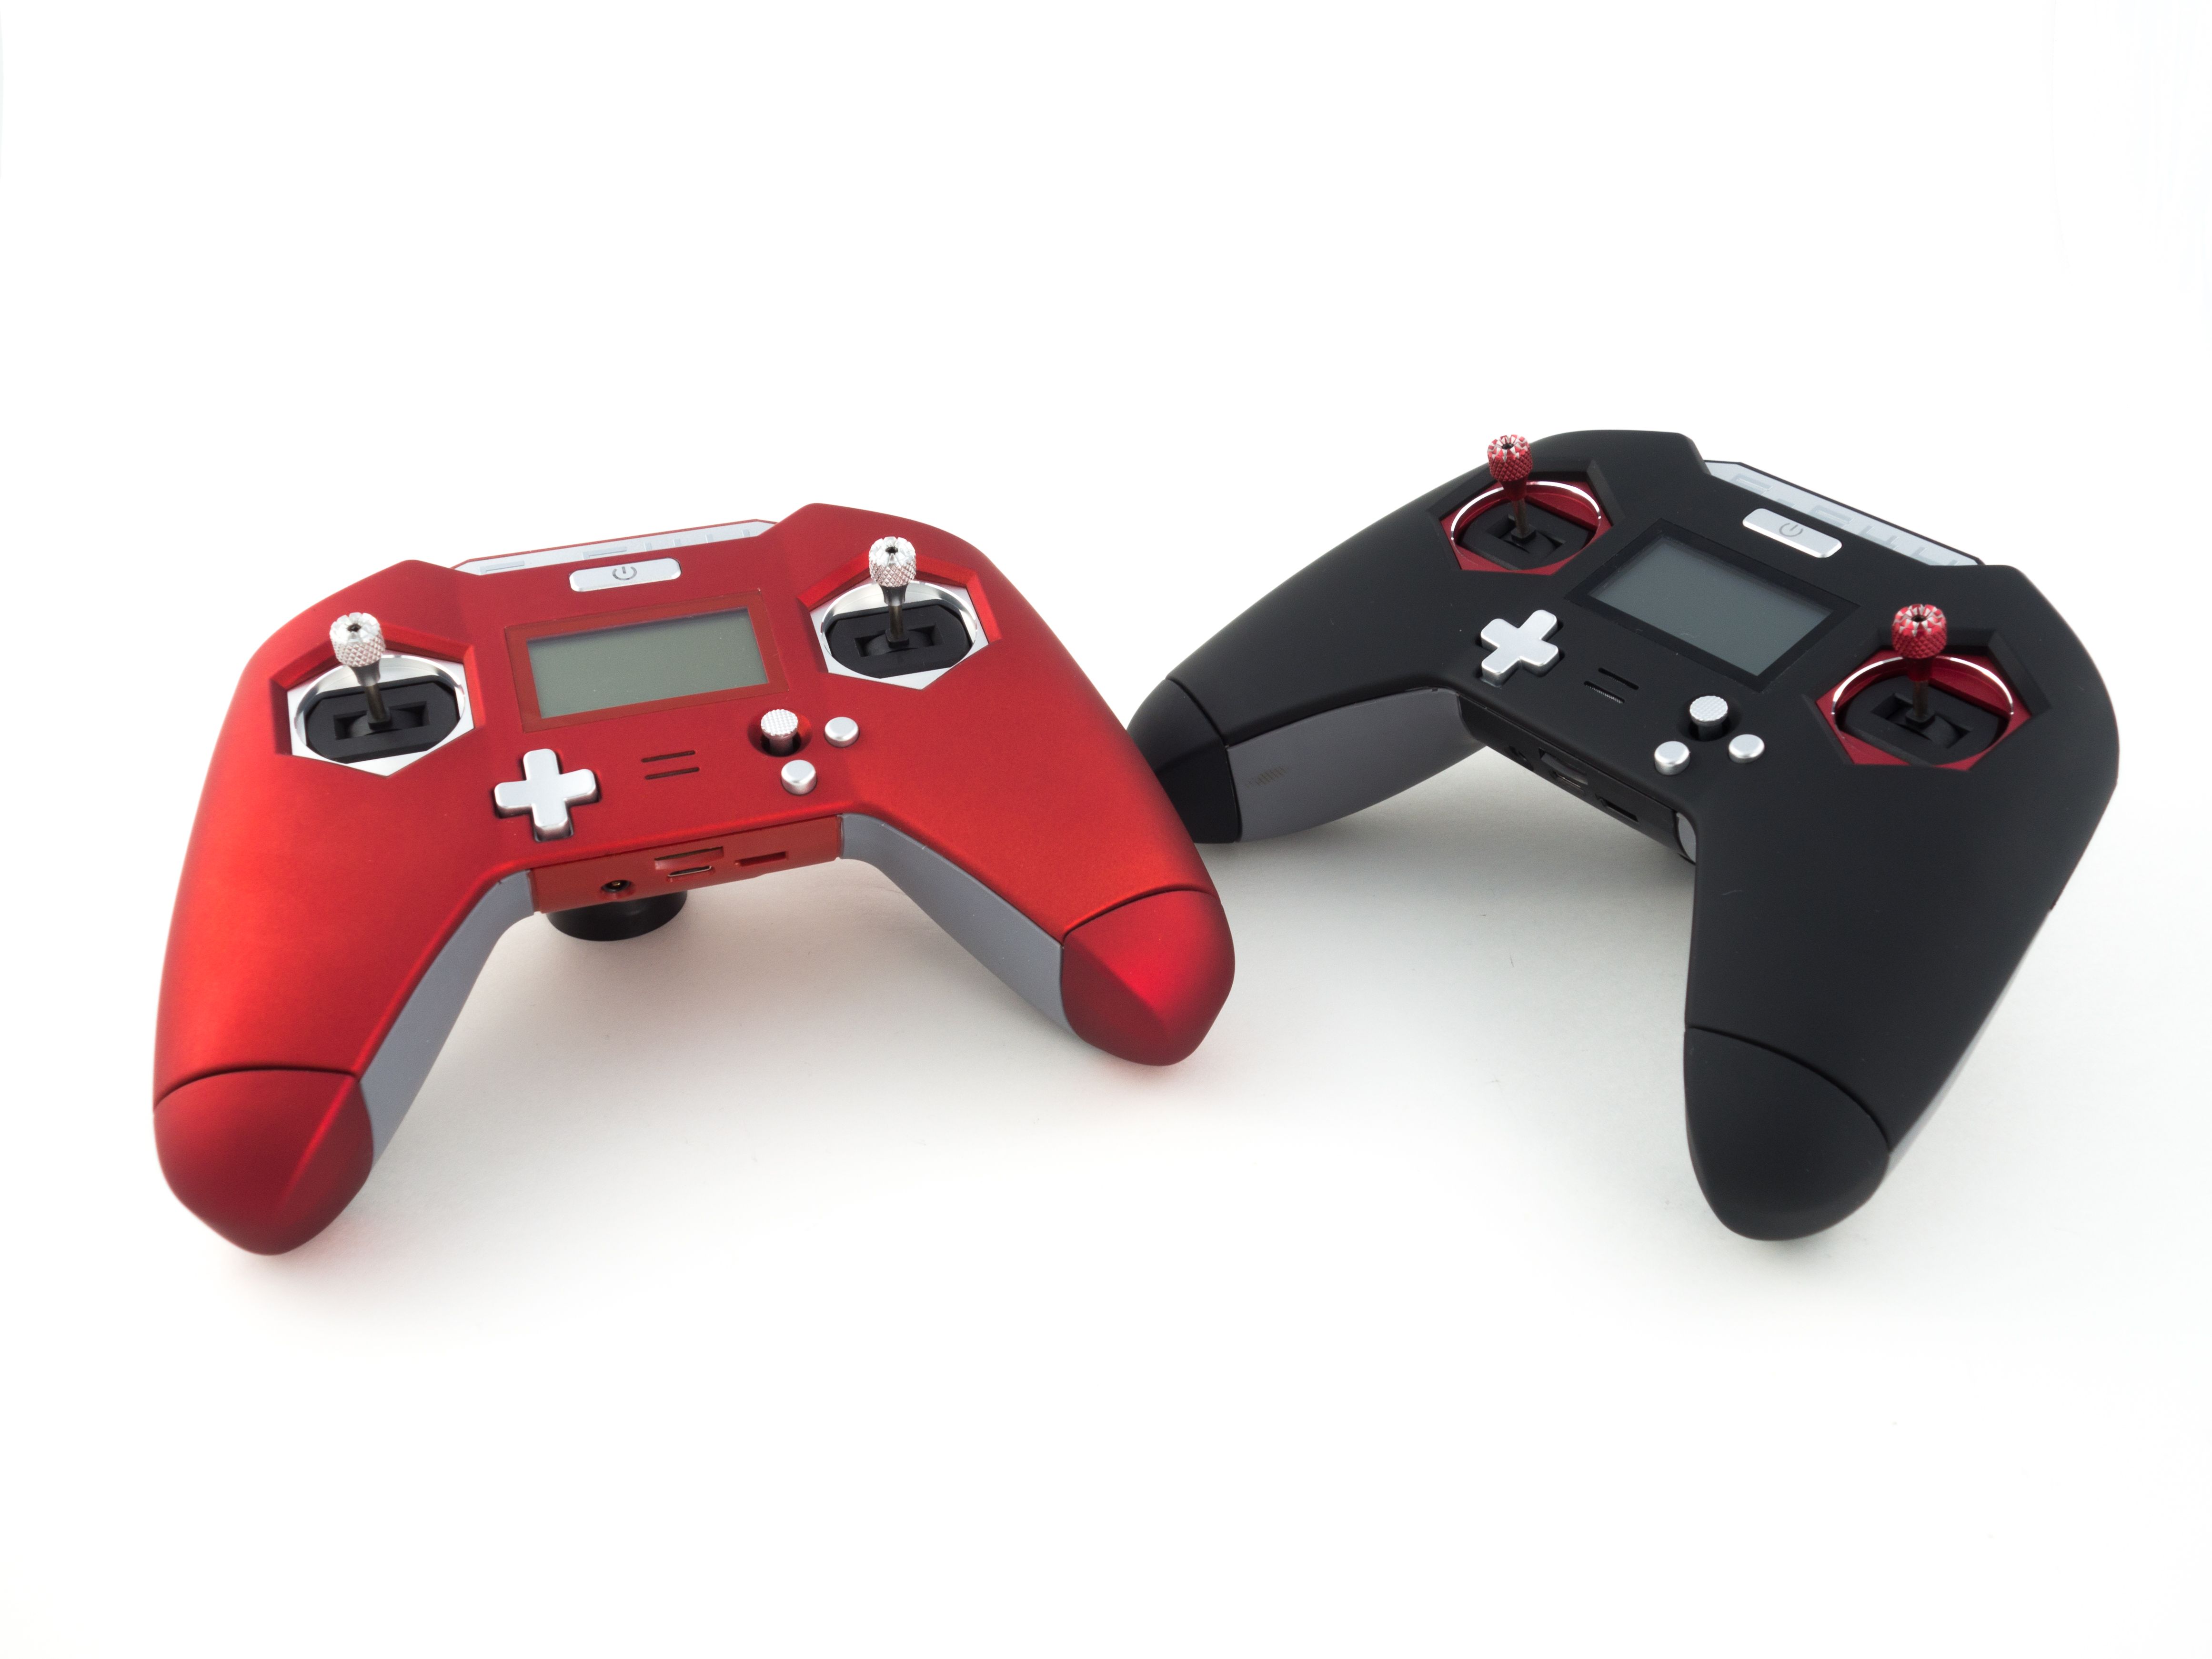
Before giving this a thorough review I thought I'd do a teardown to see what makes the Taranis X-Lite tick. Without getting into too much detail the X-Lite is a new FPV transmitter designed to be compact and ergonomic. It's shaped like a video game controller but has all of the functionality of a traditional transmitter like the Taranis Q X7 or the Taranis X9D. It features OpenTX and supports most anything you would expect from FrSky.
Let me start off by saying that most of you won't want to disassemble this. There doesn't appear to be any way to adjust the spring tension and FrSky added an handy mechanism to choose between Mode 1 and Mode 2. This is done by inserting screws into the back of the radio. You even have control over how much tension to put on the throttle.
Disassembly
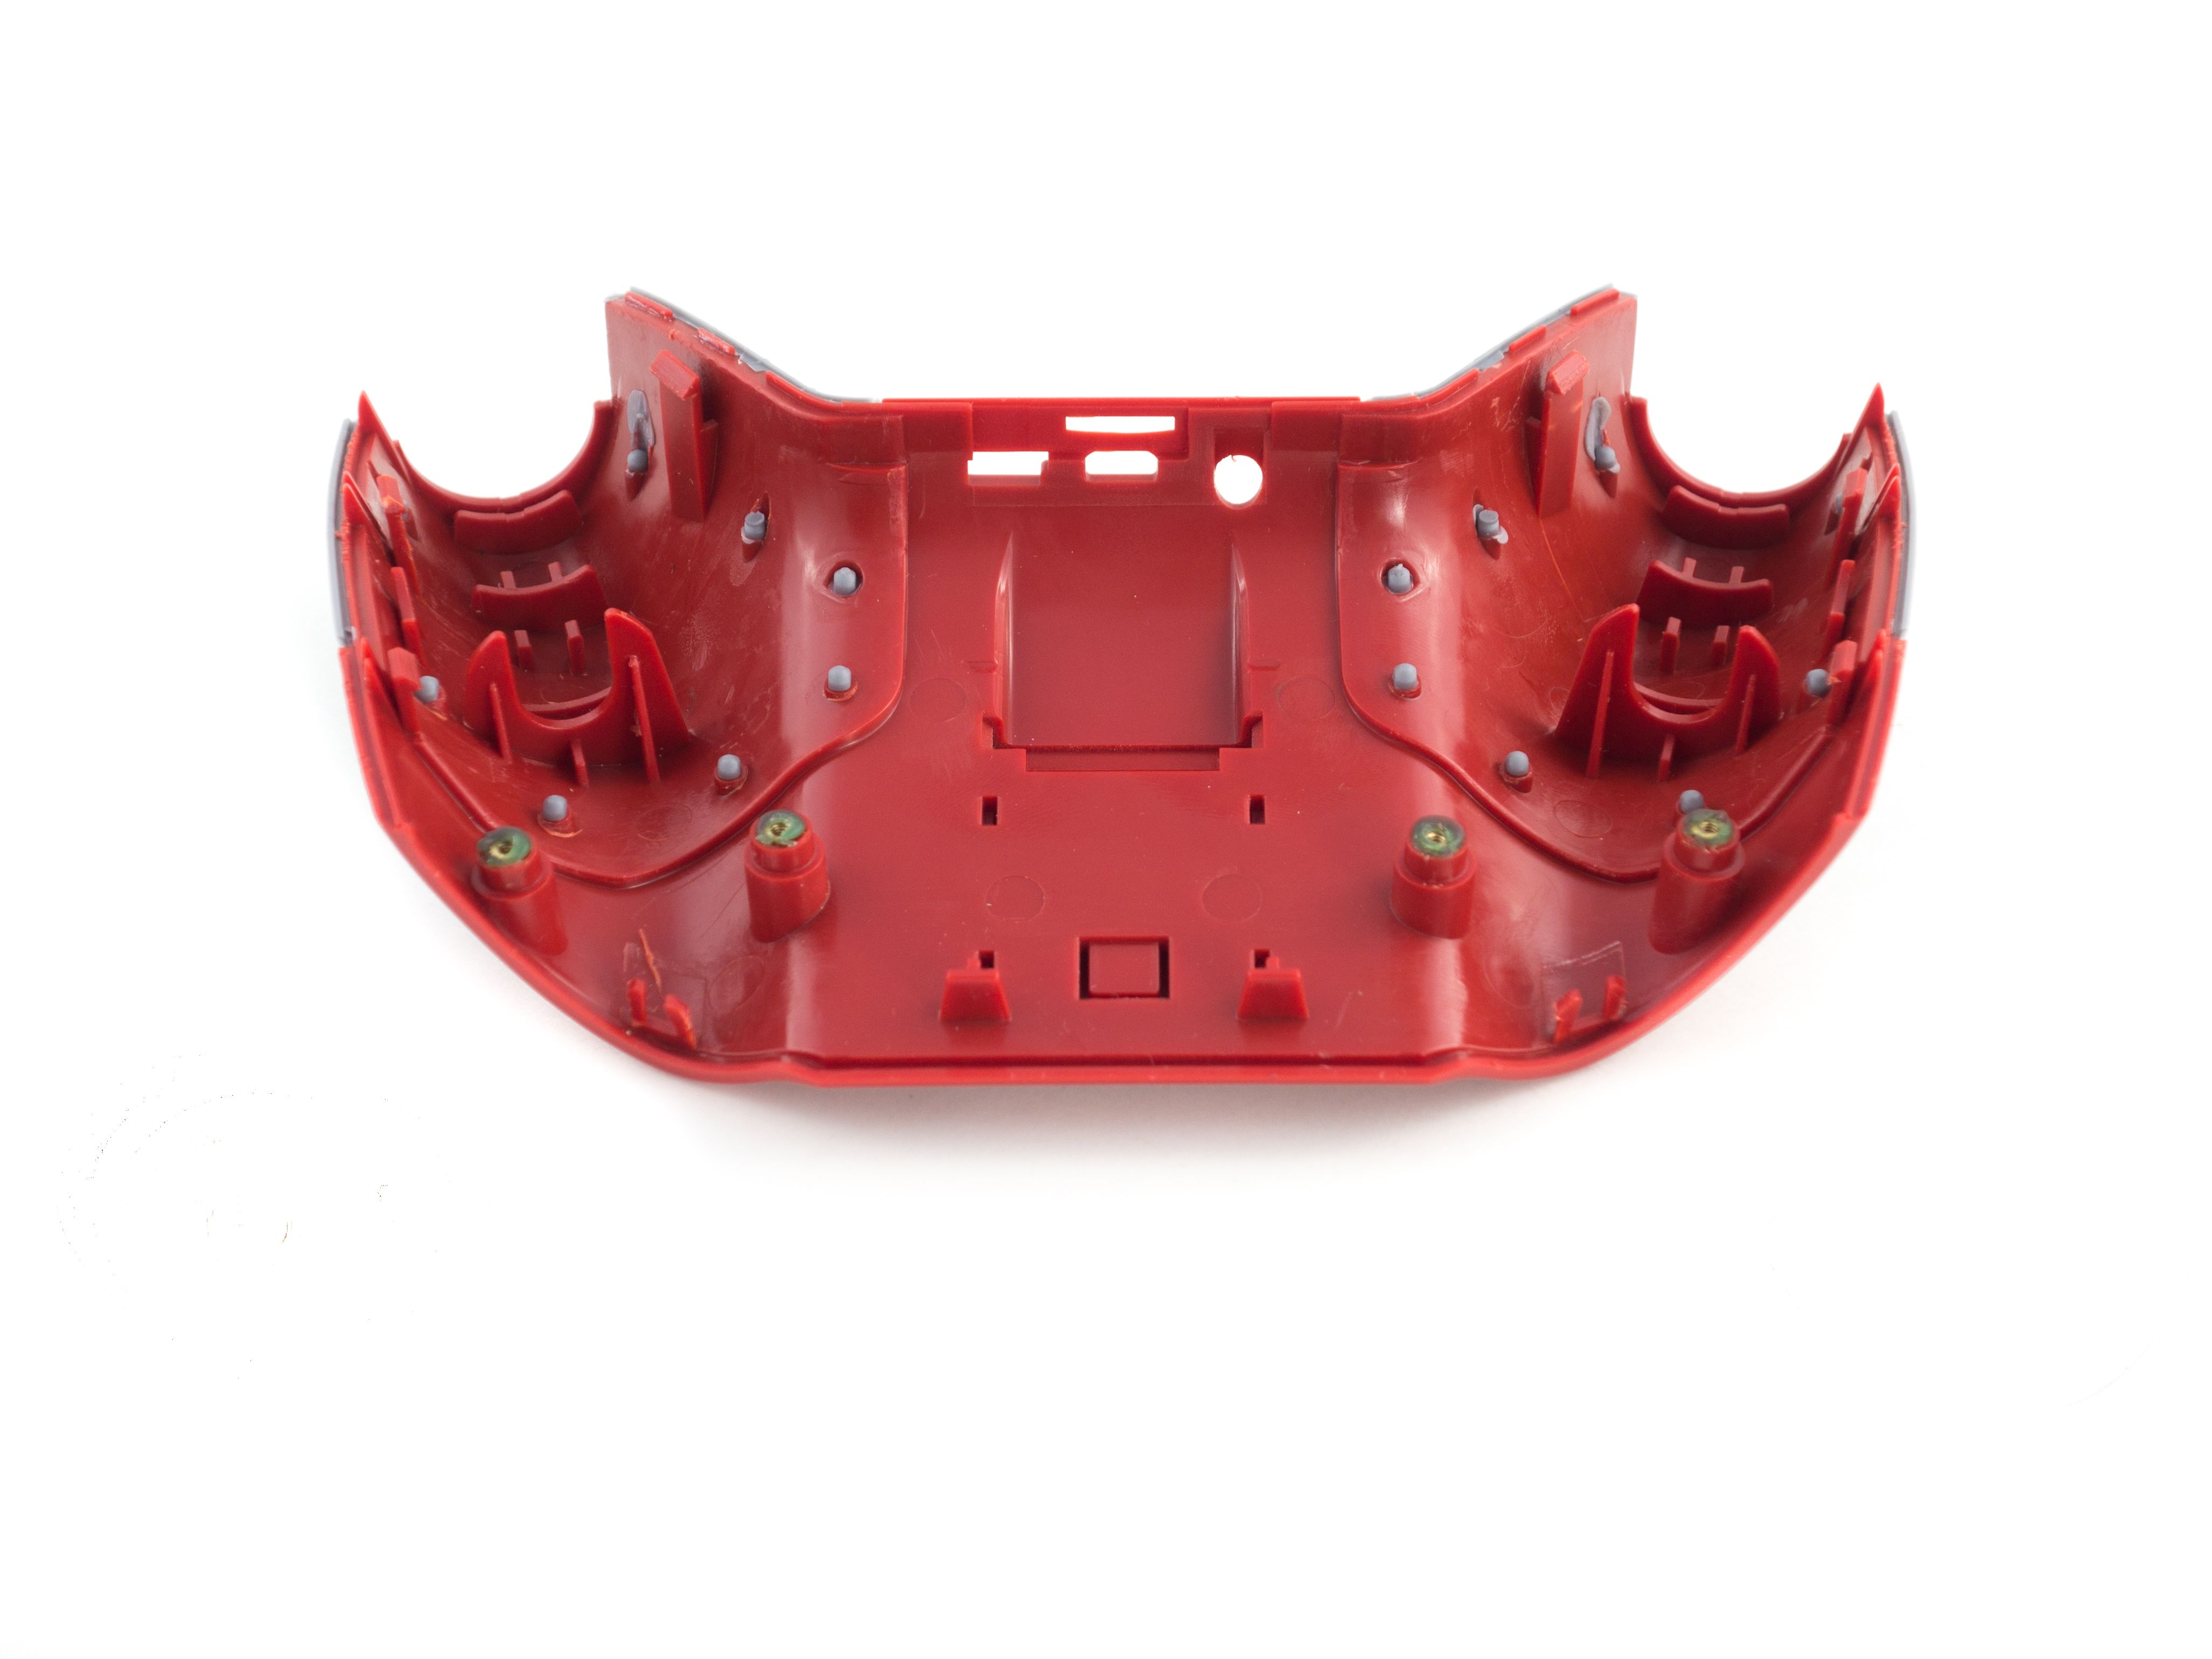
The most challenging part of of the disassembly process is removing the back cover. No screws were used to keep it together and instead there are a series of plastic clips along the edges. It's a good idea to use a flat plastic spudger, but if you're careful you can also use a small flat head screwdriver or flat head tweezers. Internally there are only two different types of screw, so it's very easy to keep them organized.
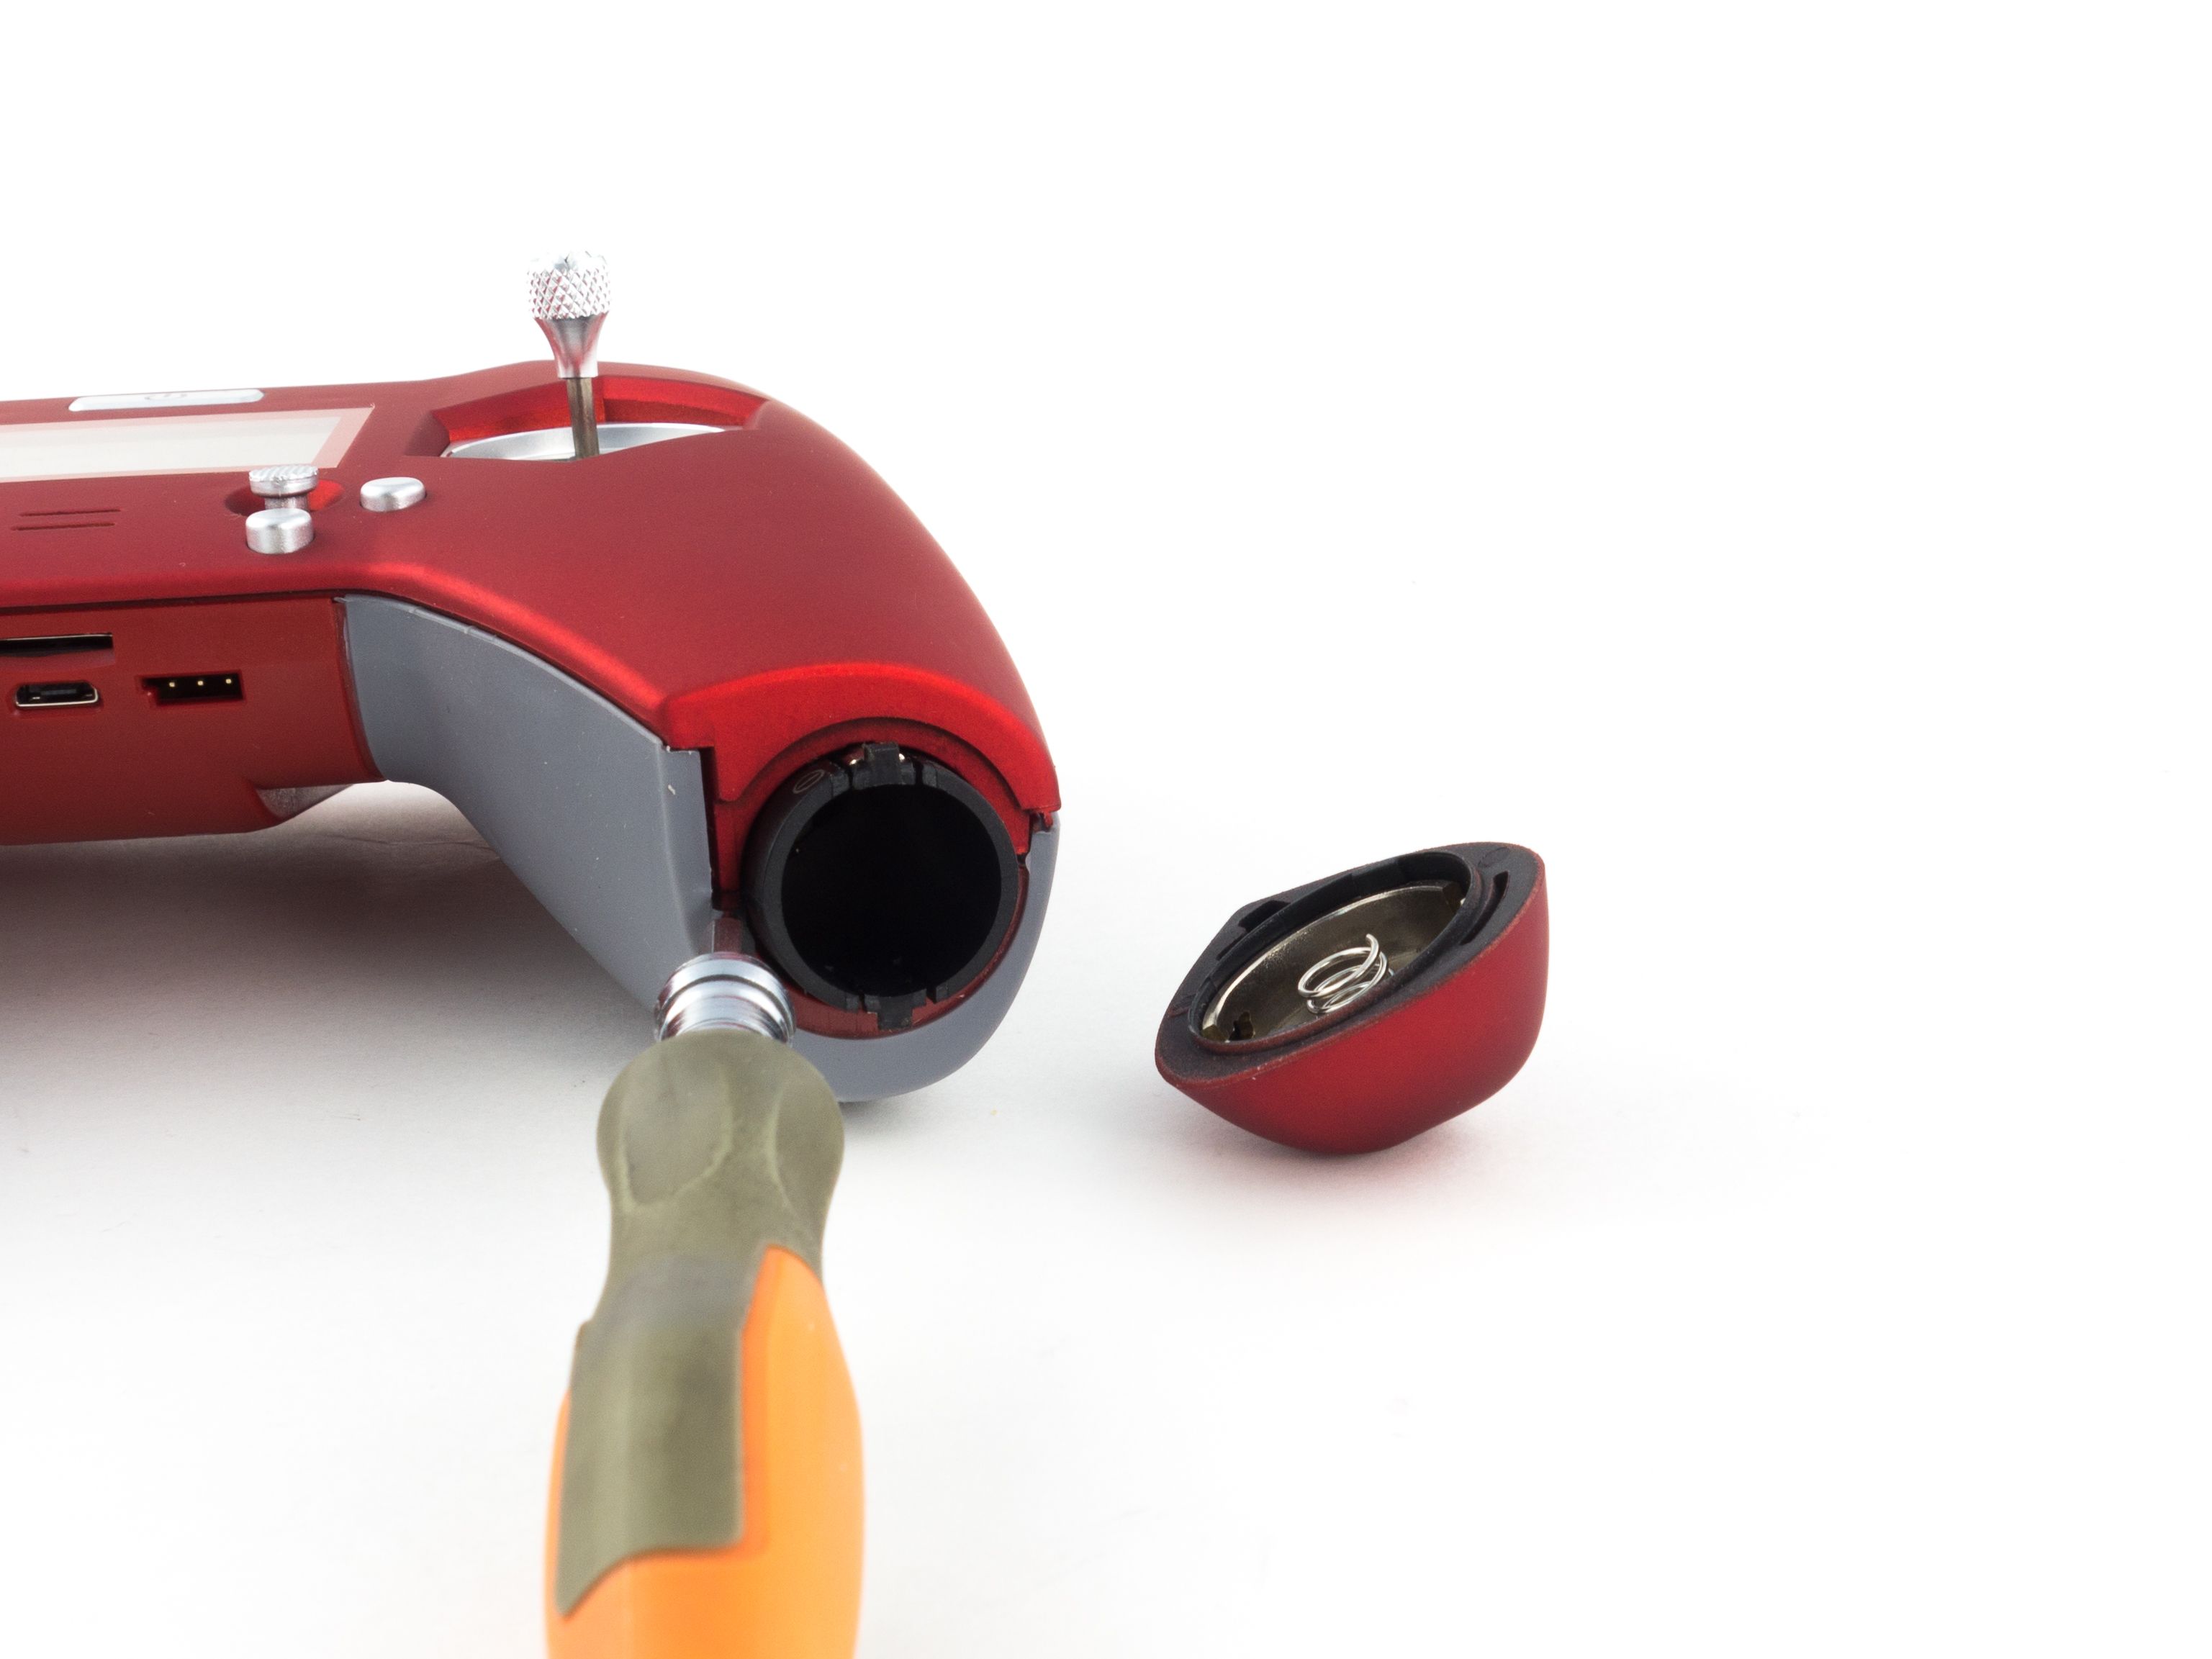
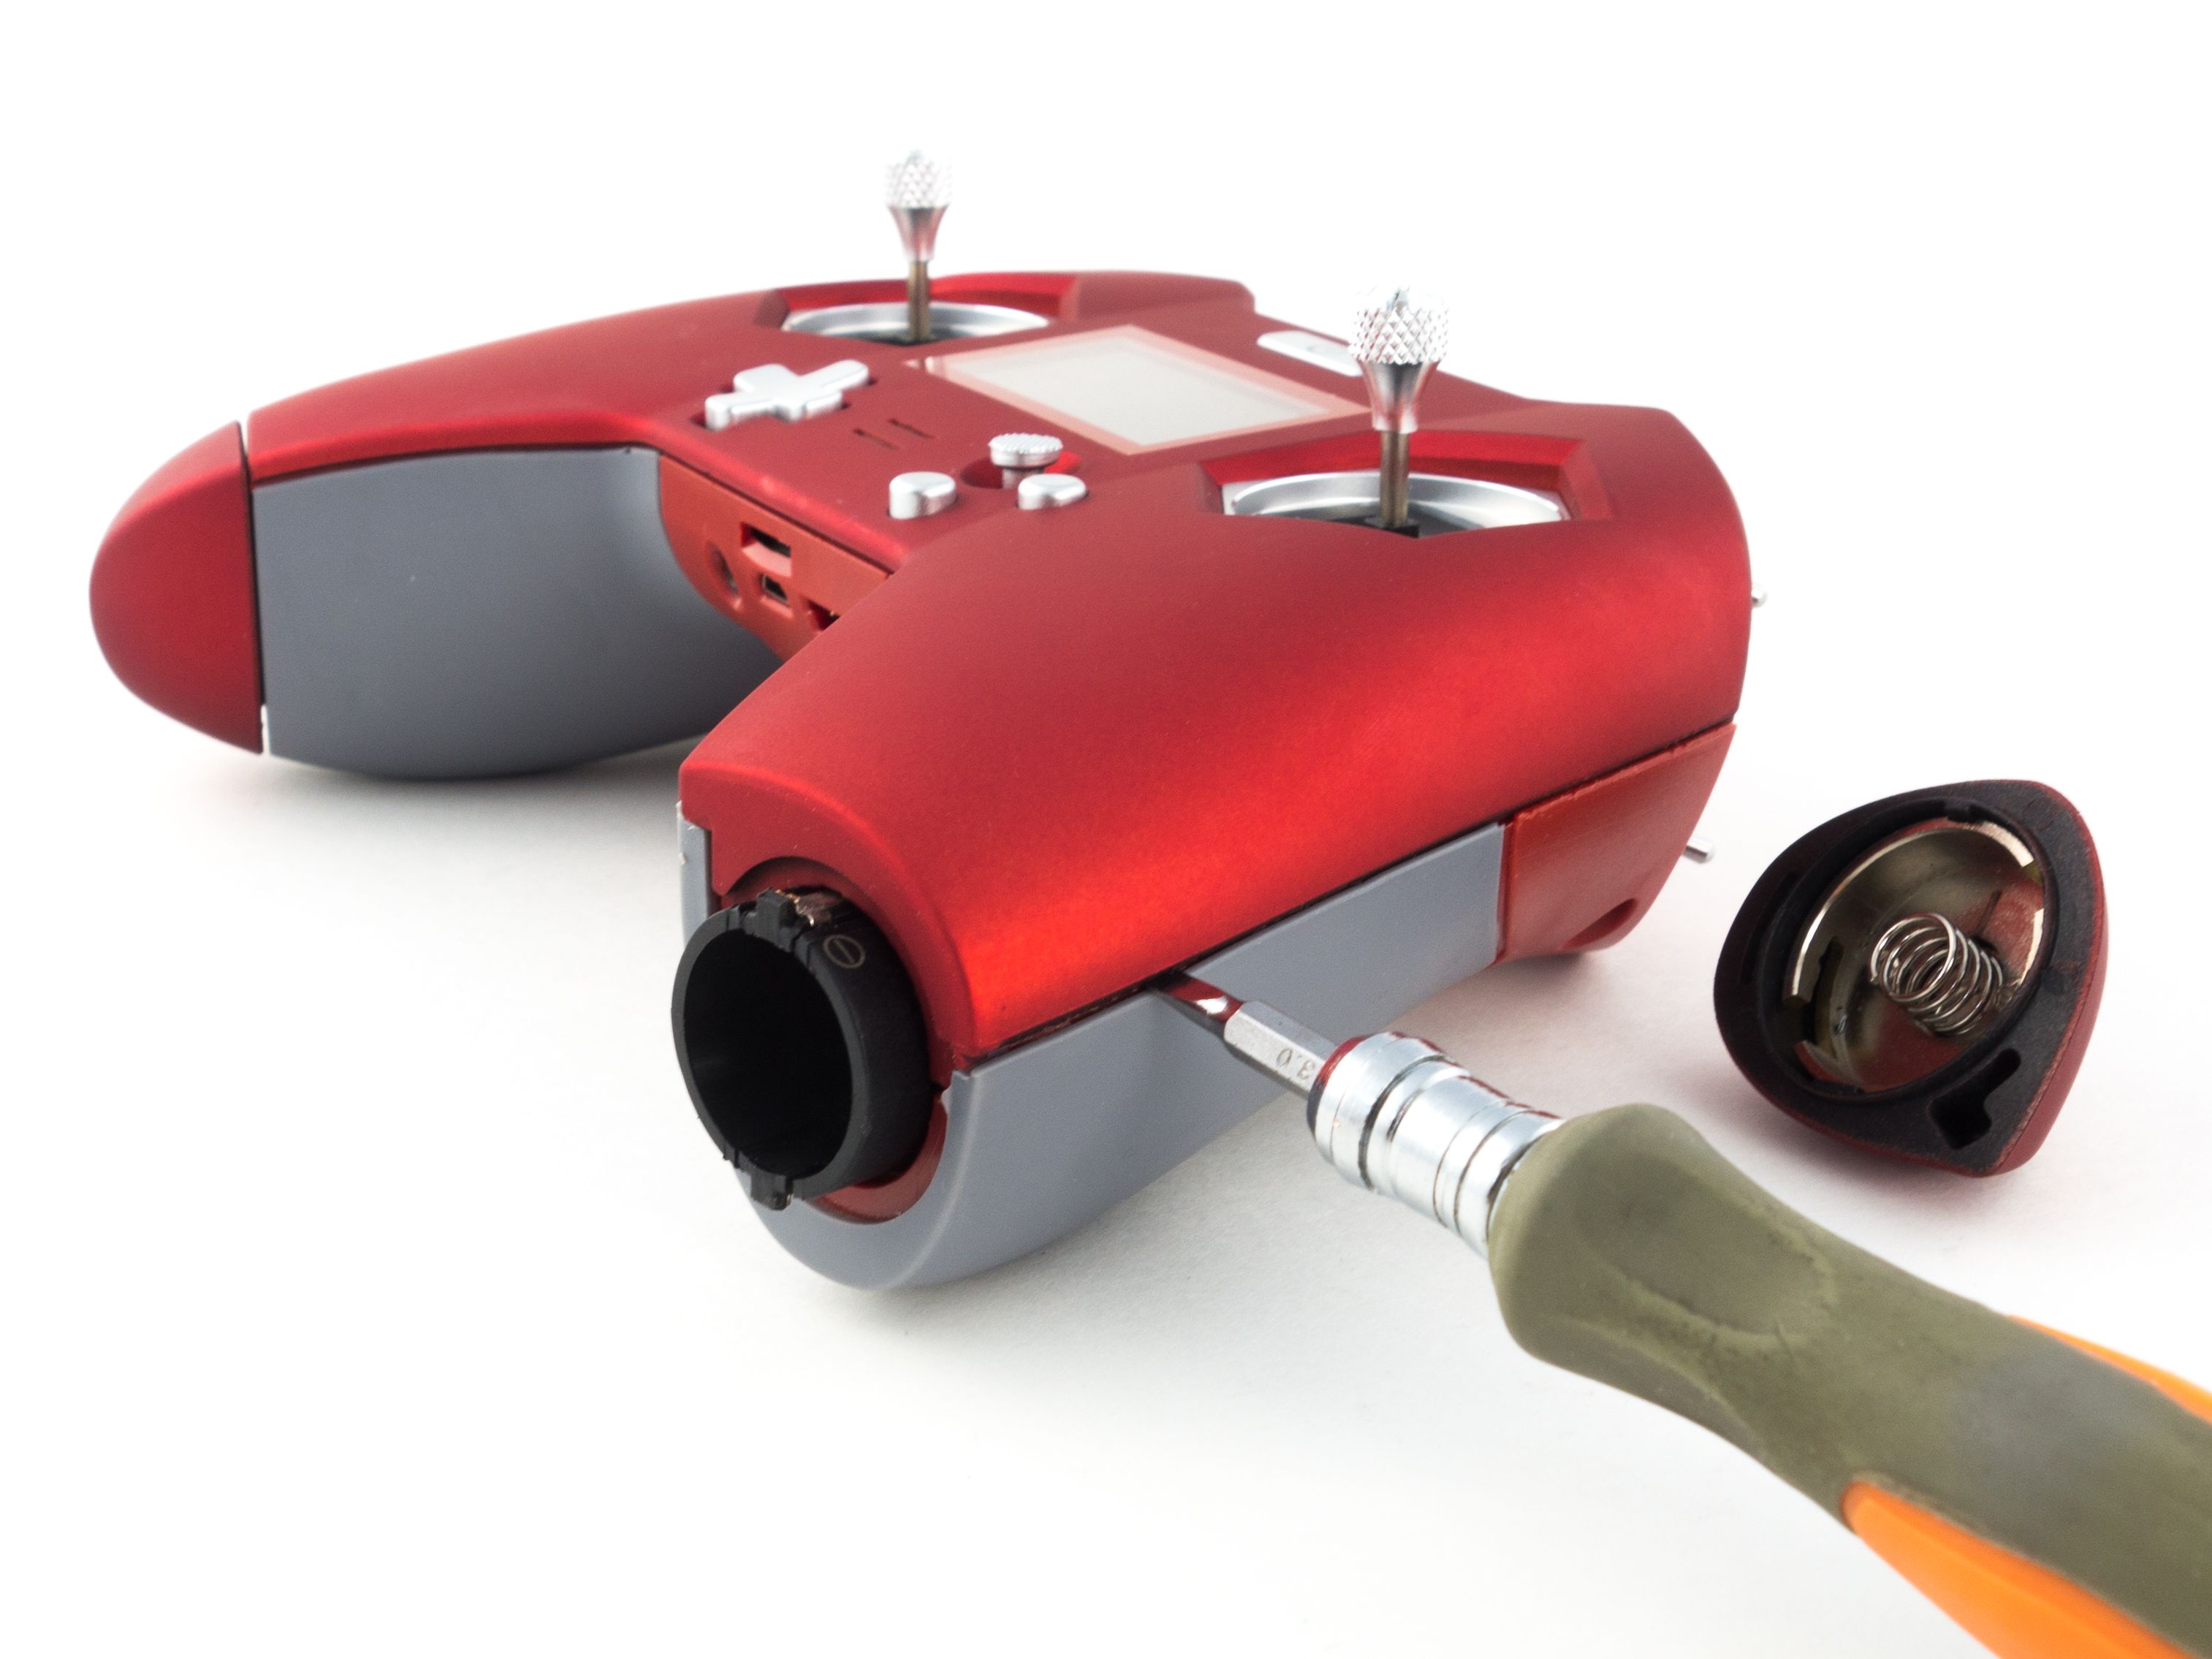
Start by removing the battery bay covers and very carefully pry the case apart where the two halves meet. There are two clips between the grips that will detatch rather easily. It just takes a careful twist of your tool.
Once you've separated the case between the grips you can work on either side of the transmitter. Start from within the battery bay and twist your tool to create a separation. Now with a second tool insert it into the gap created along the side. The first clip should un-snap and then you can insert another tool further up, twist and un-snap the second clip. That side should be freed up. Repeat this process on the other side and it should open right up.
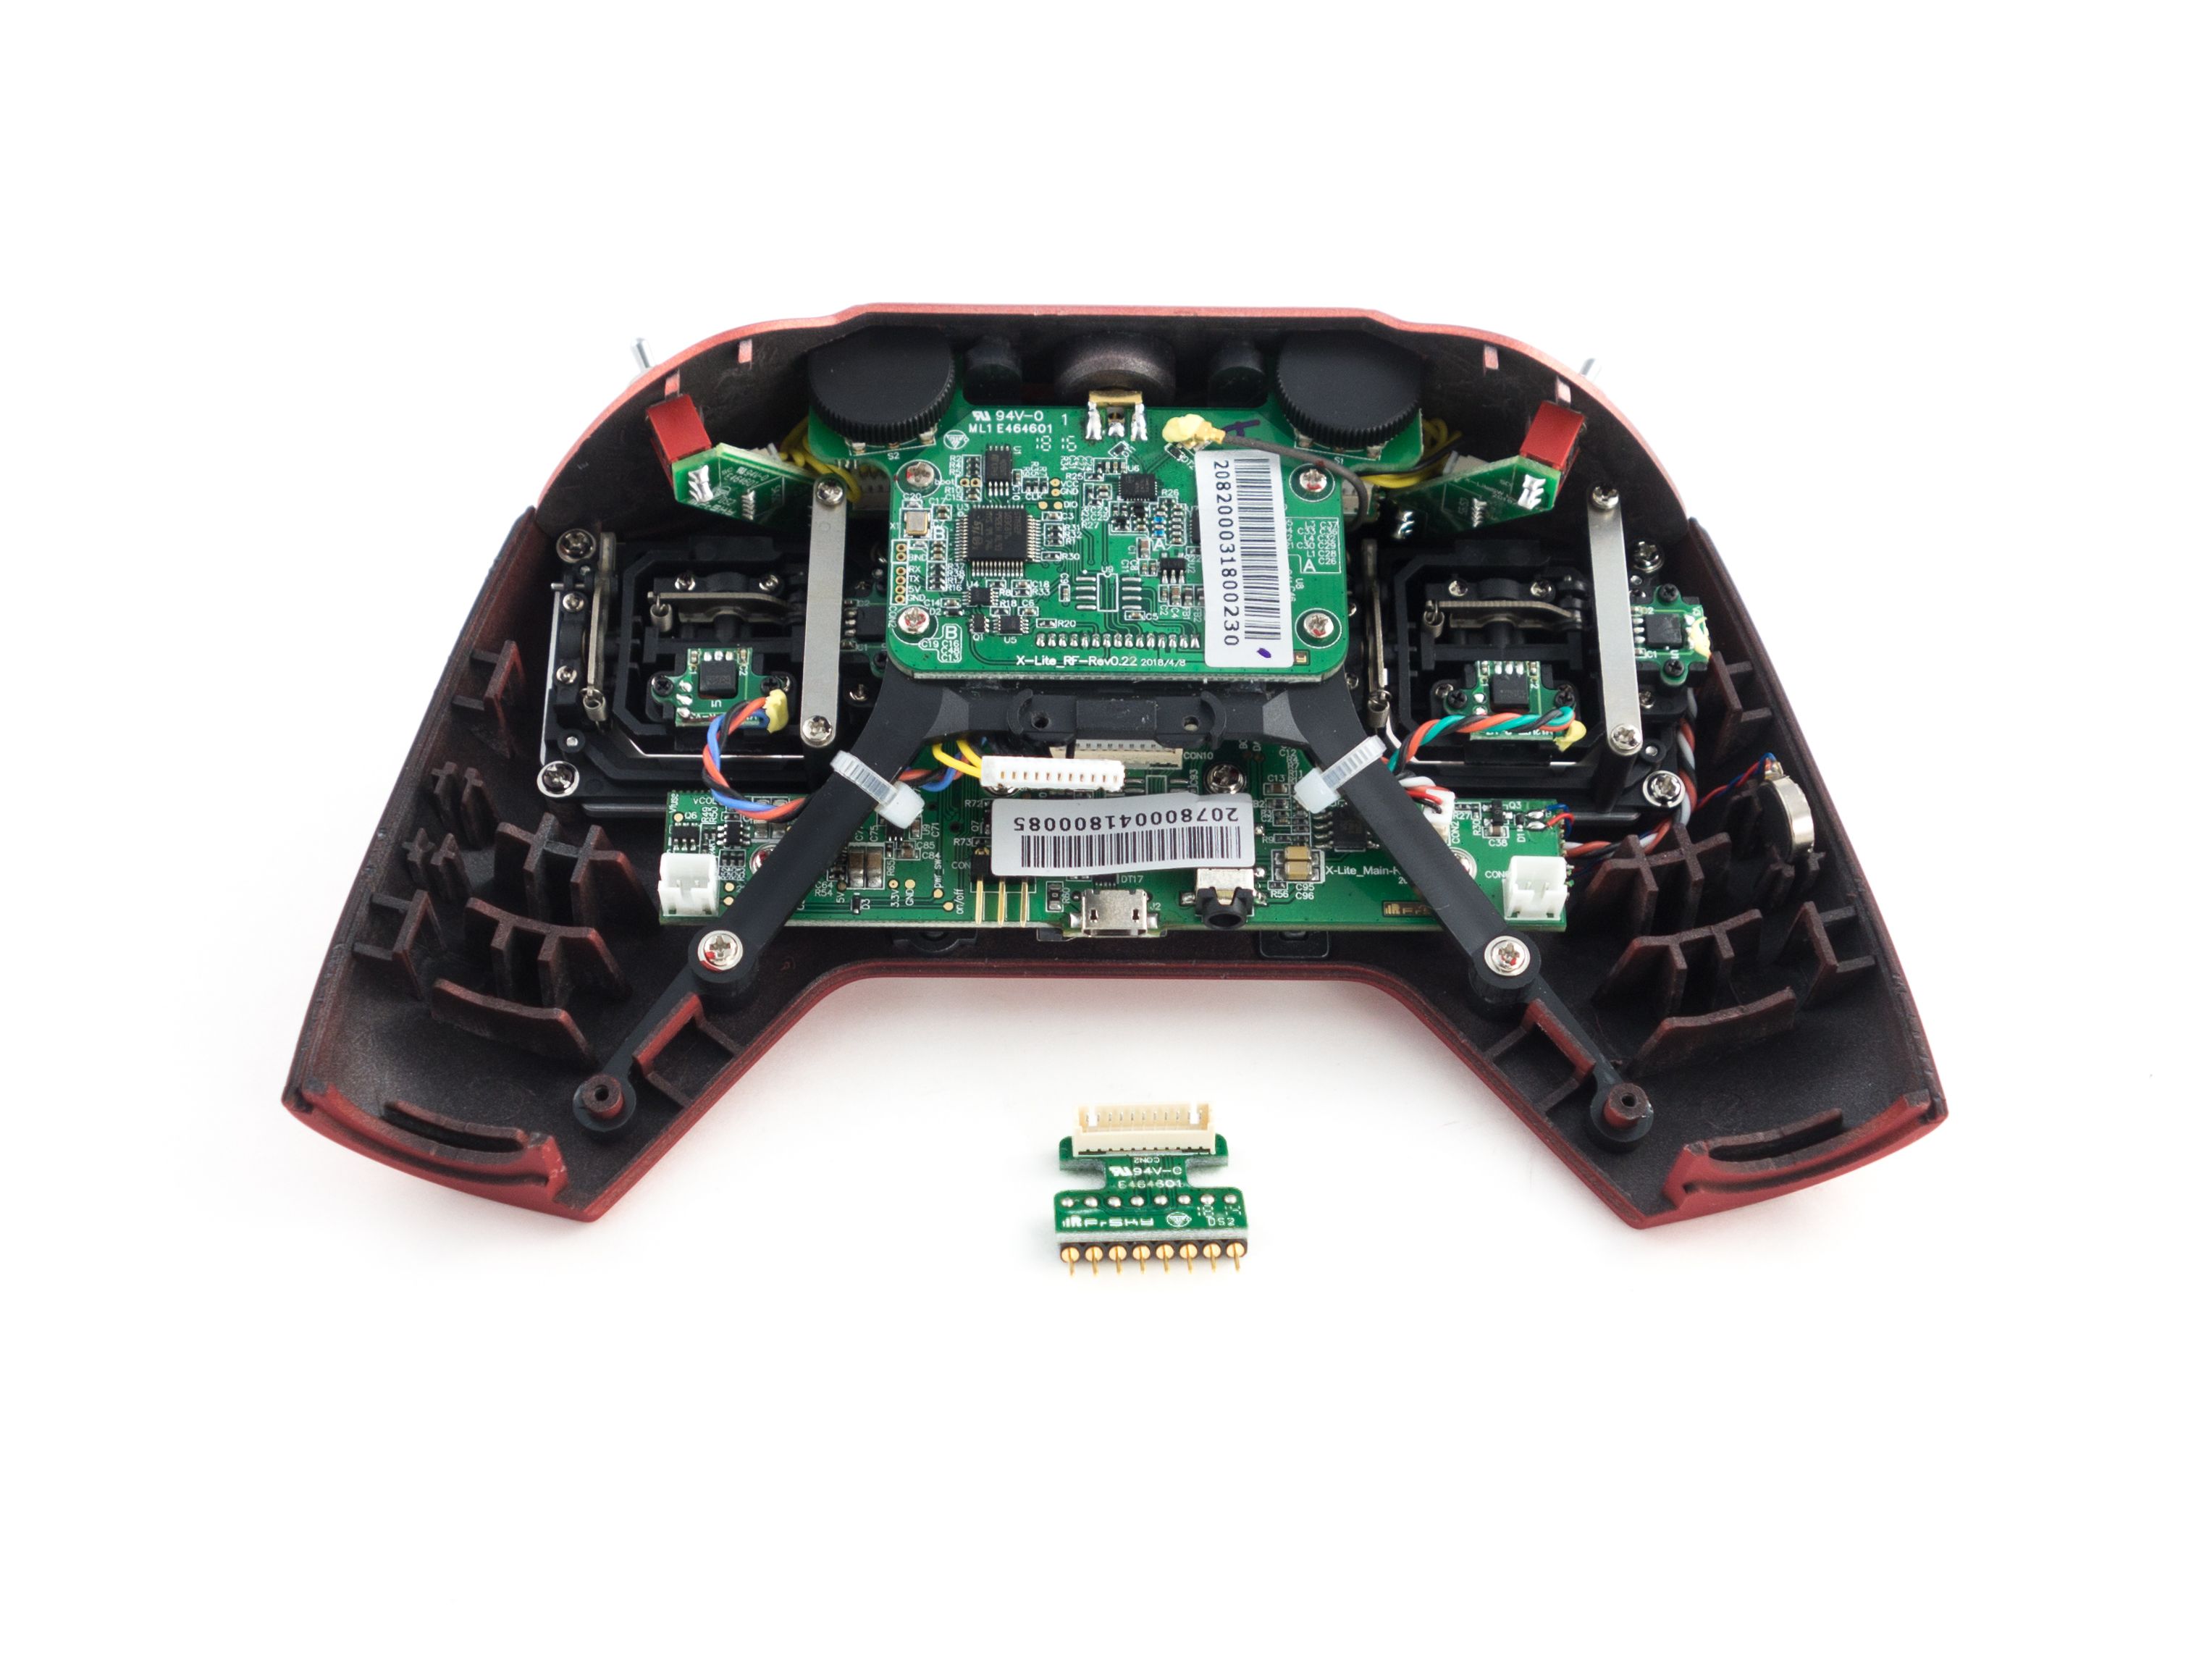
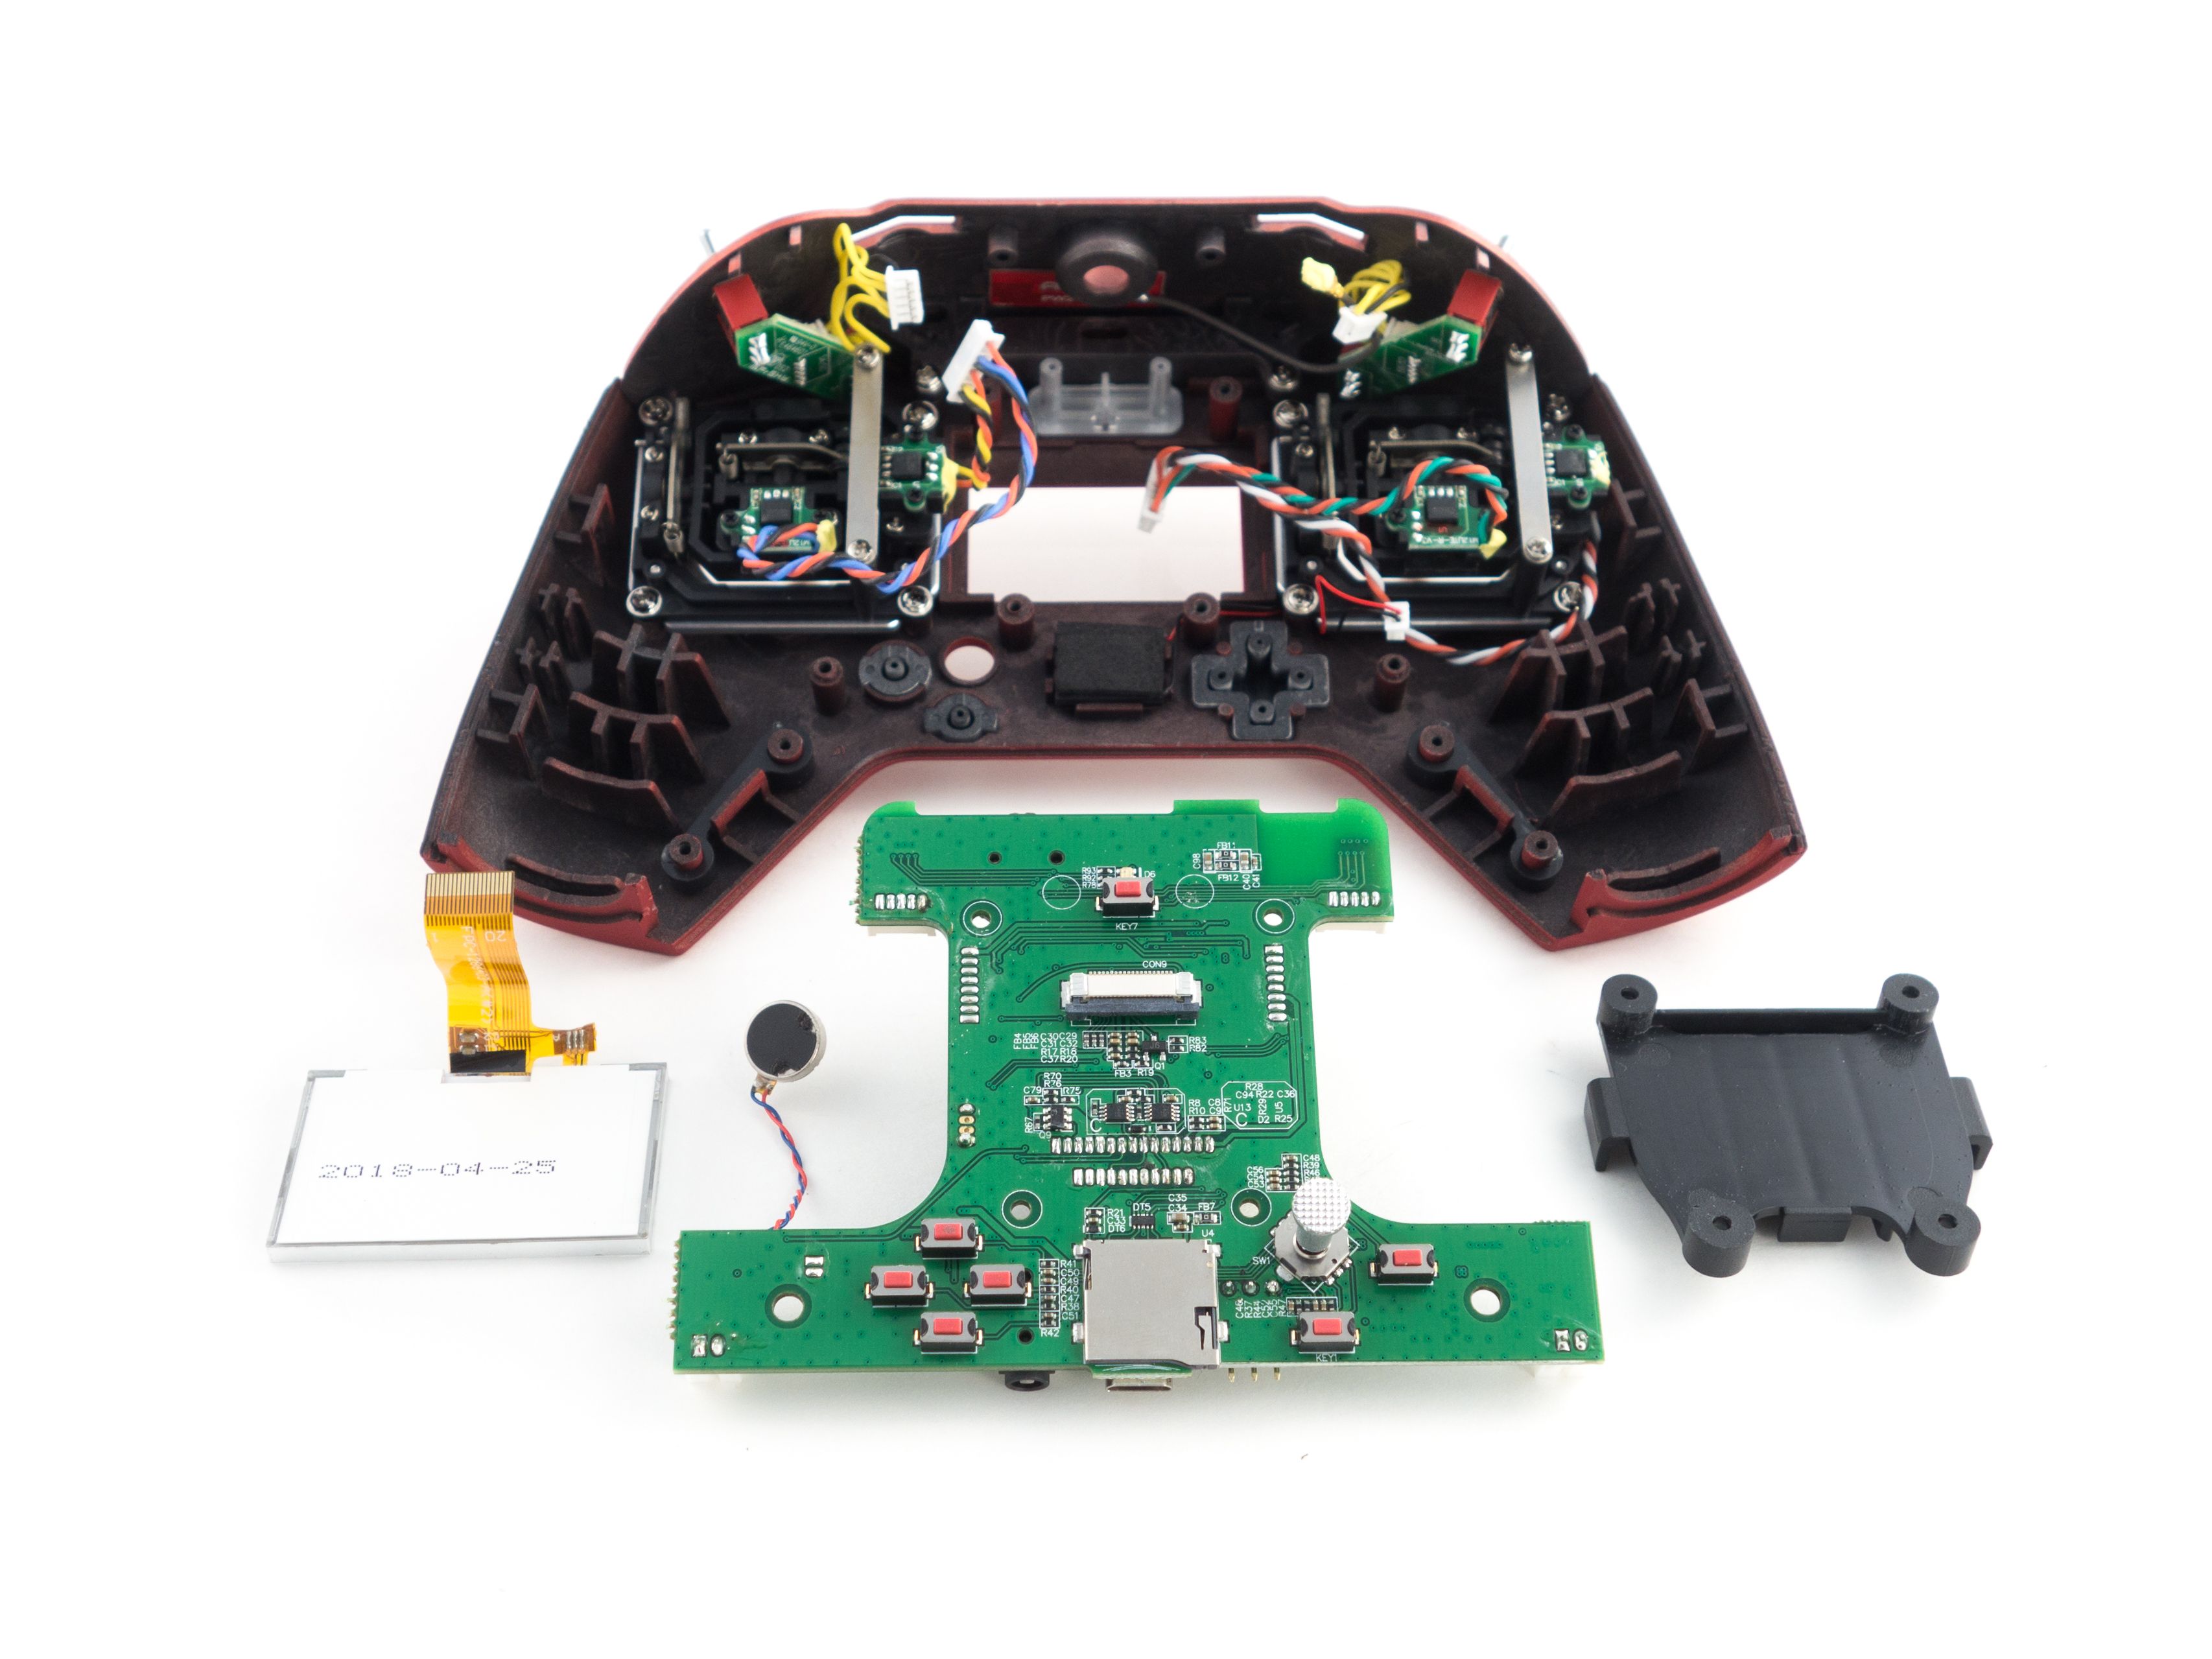
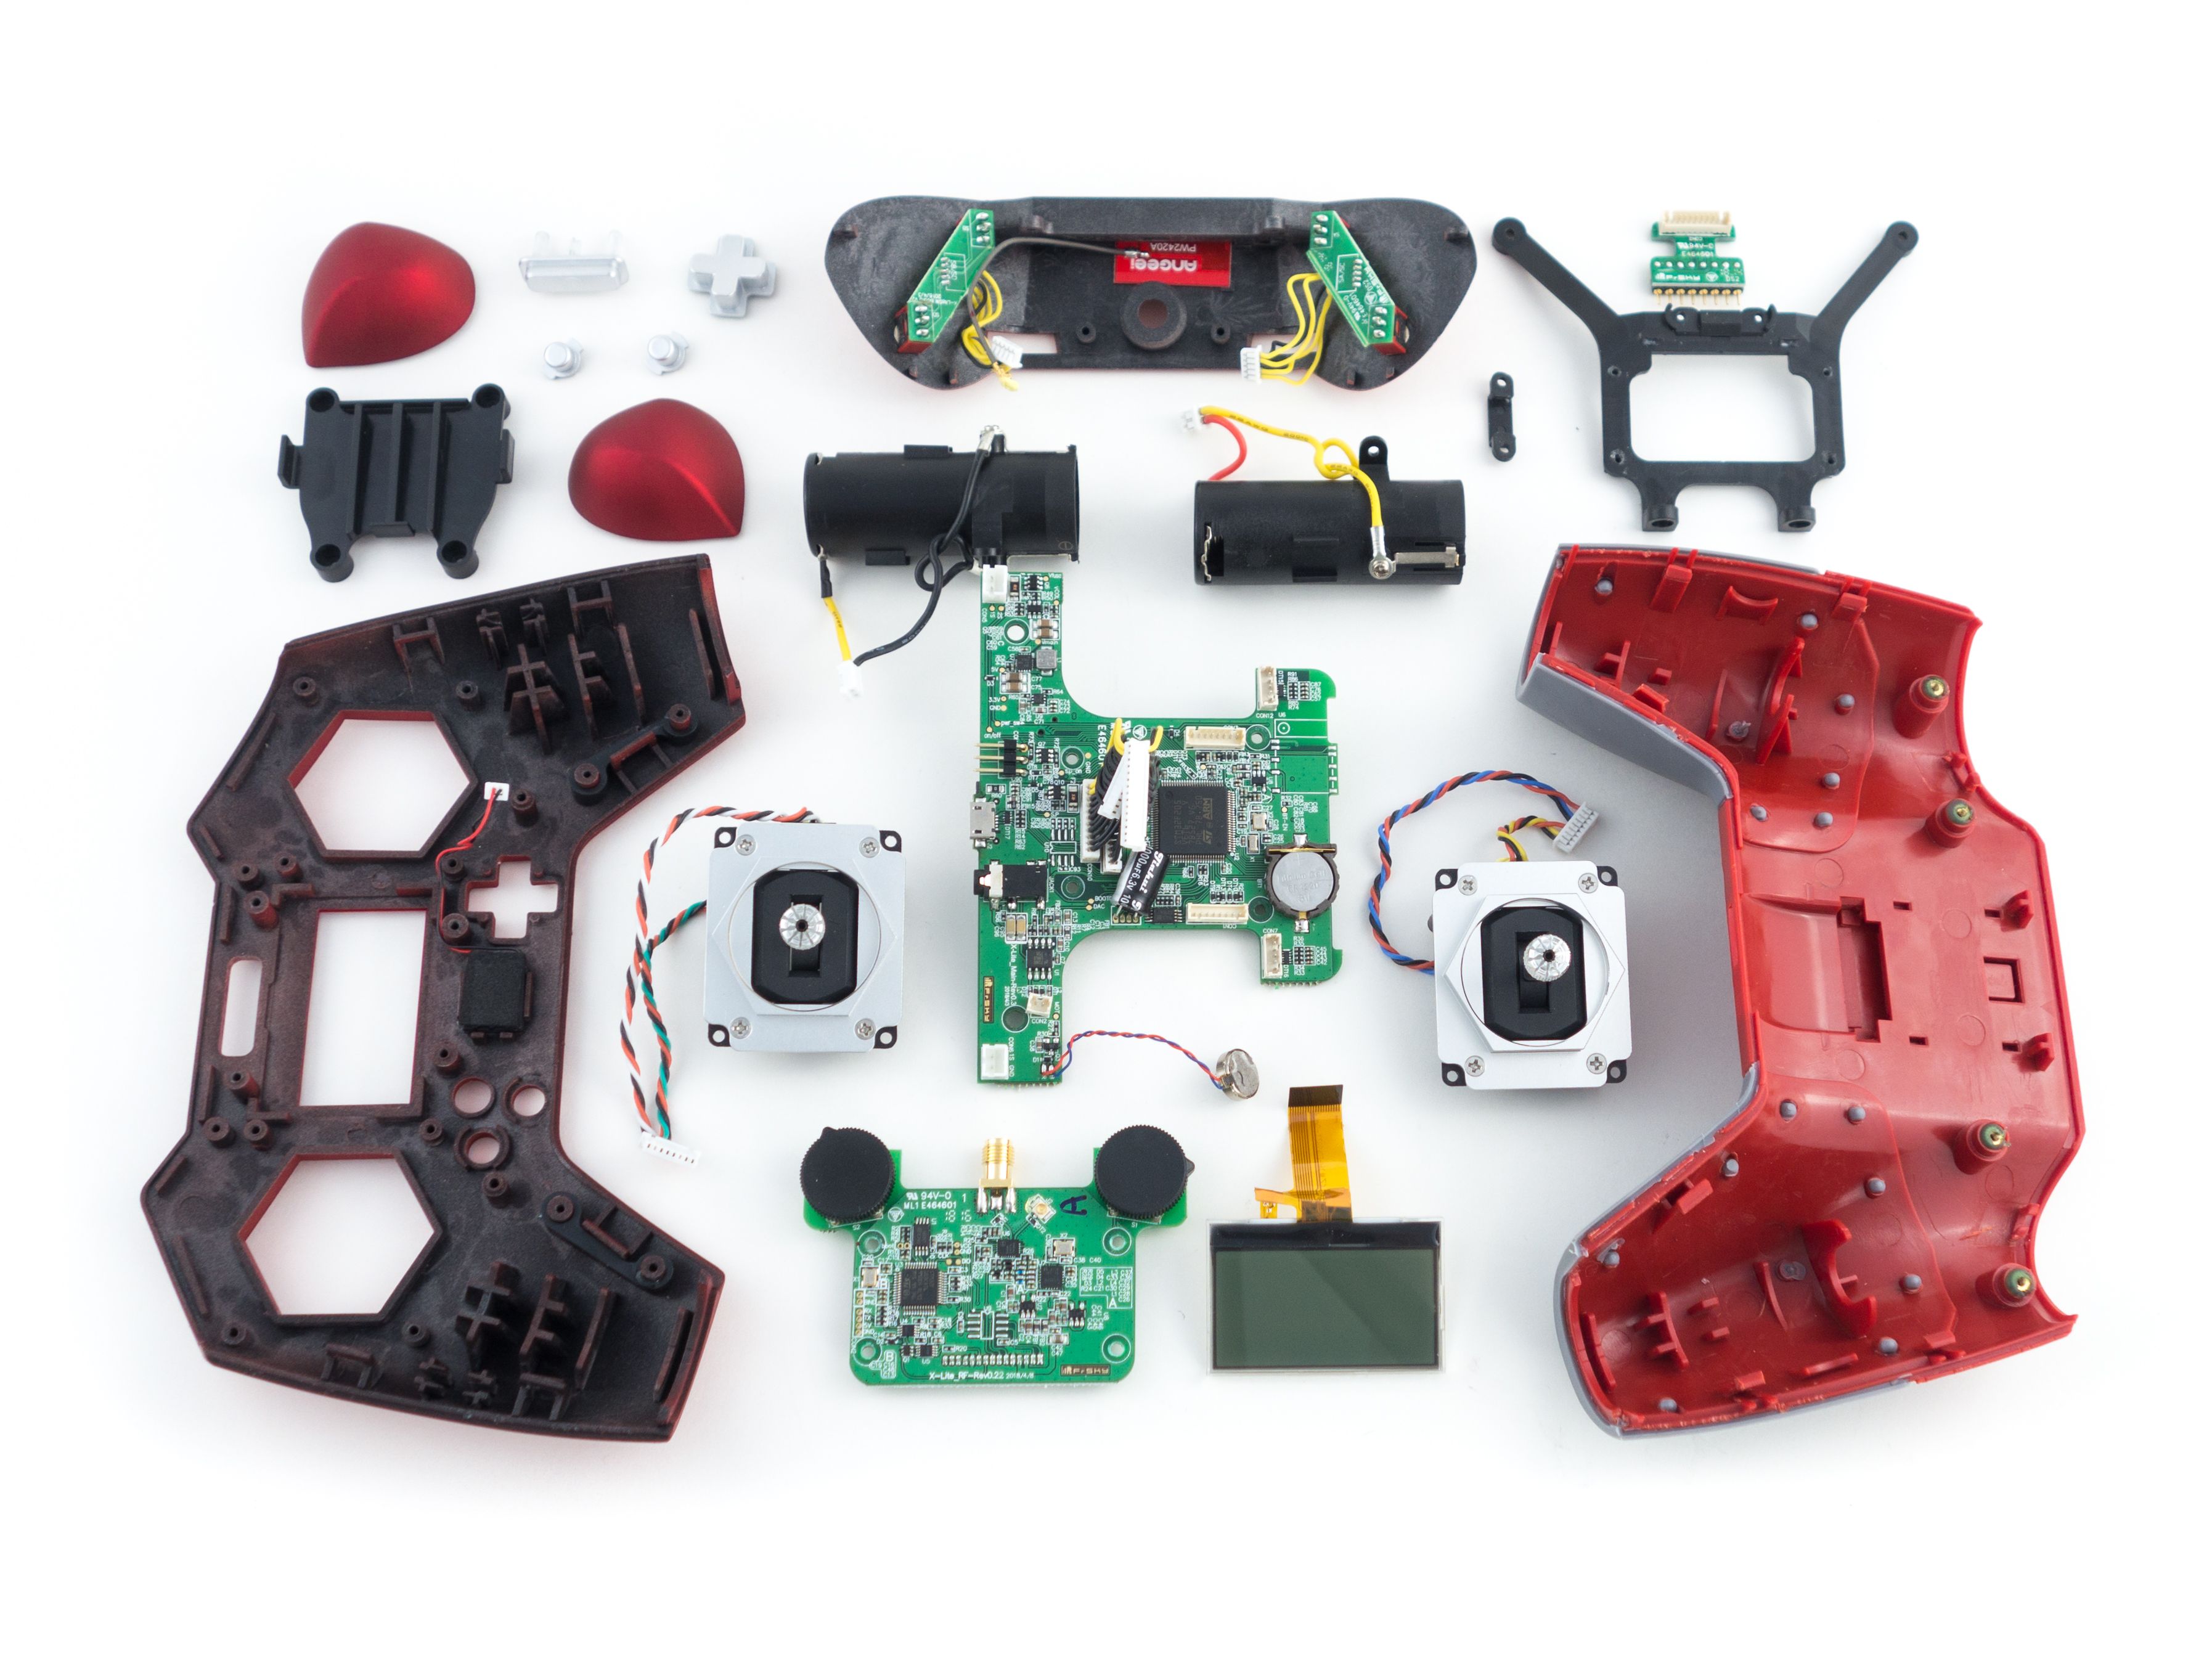
Once you're inside you can appreciate how densely packed this radio is. It uses two printed circuit boards (PCB) stacked with a plastic bracket. The gimbals are wafer thin and it's quite well engineered.
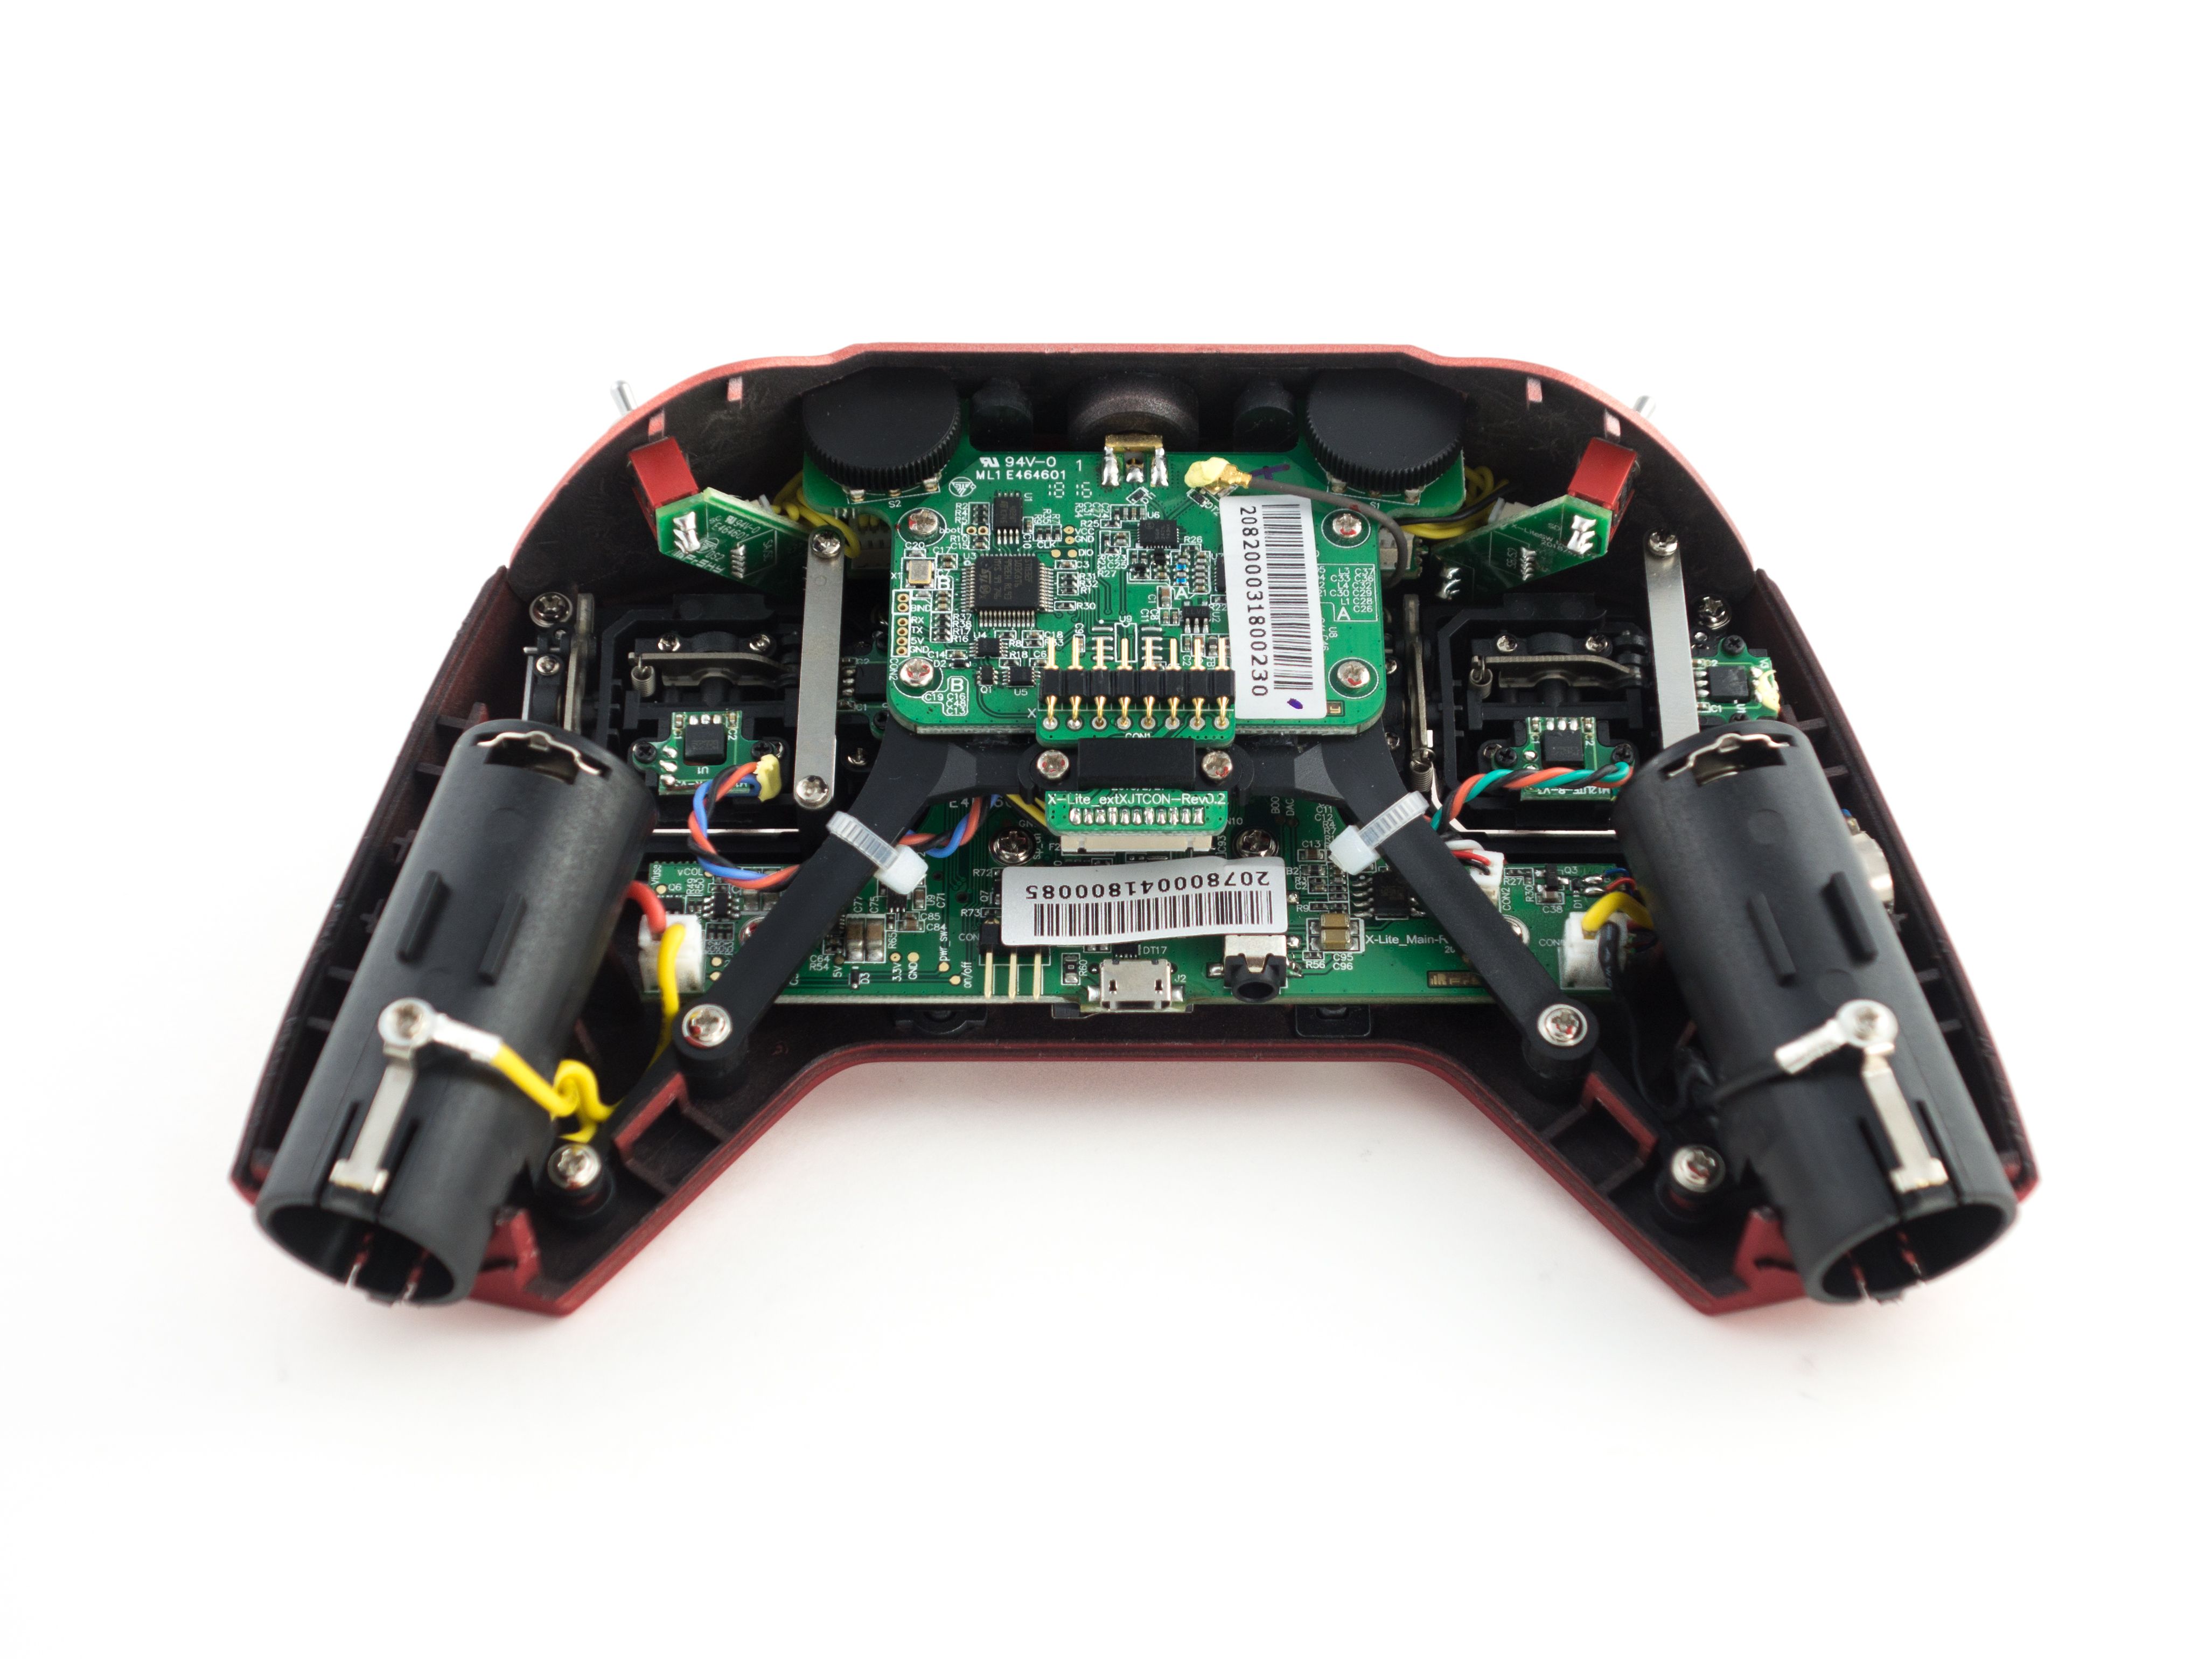
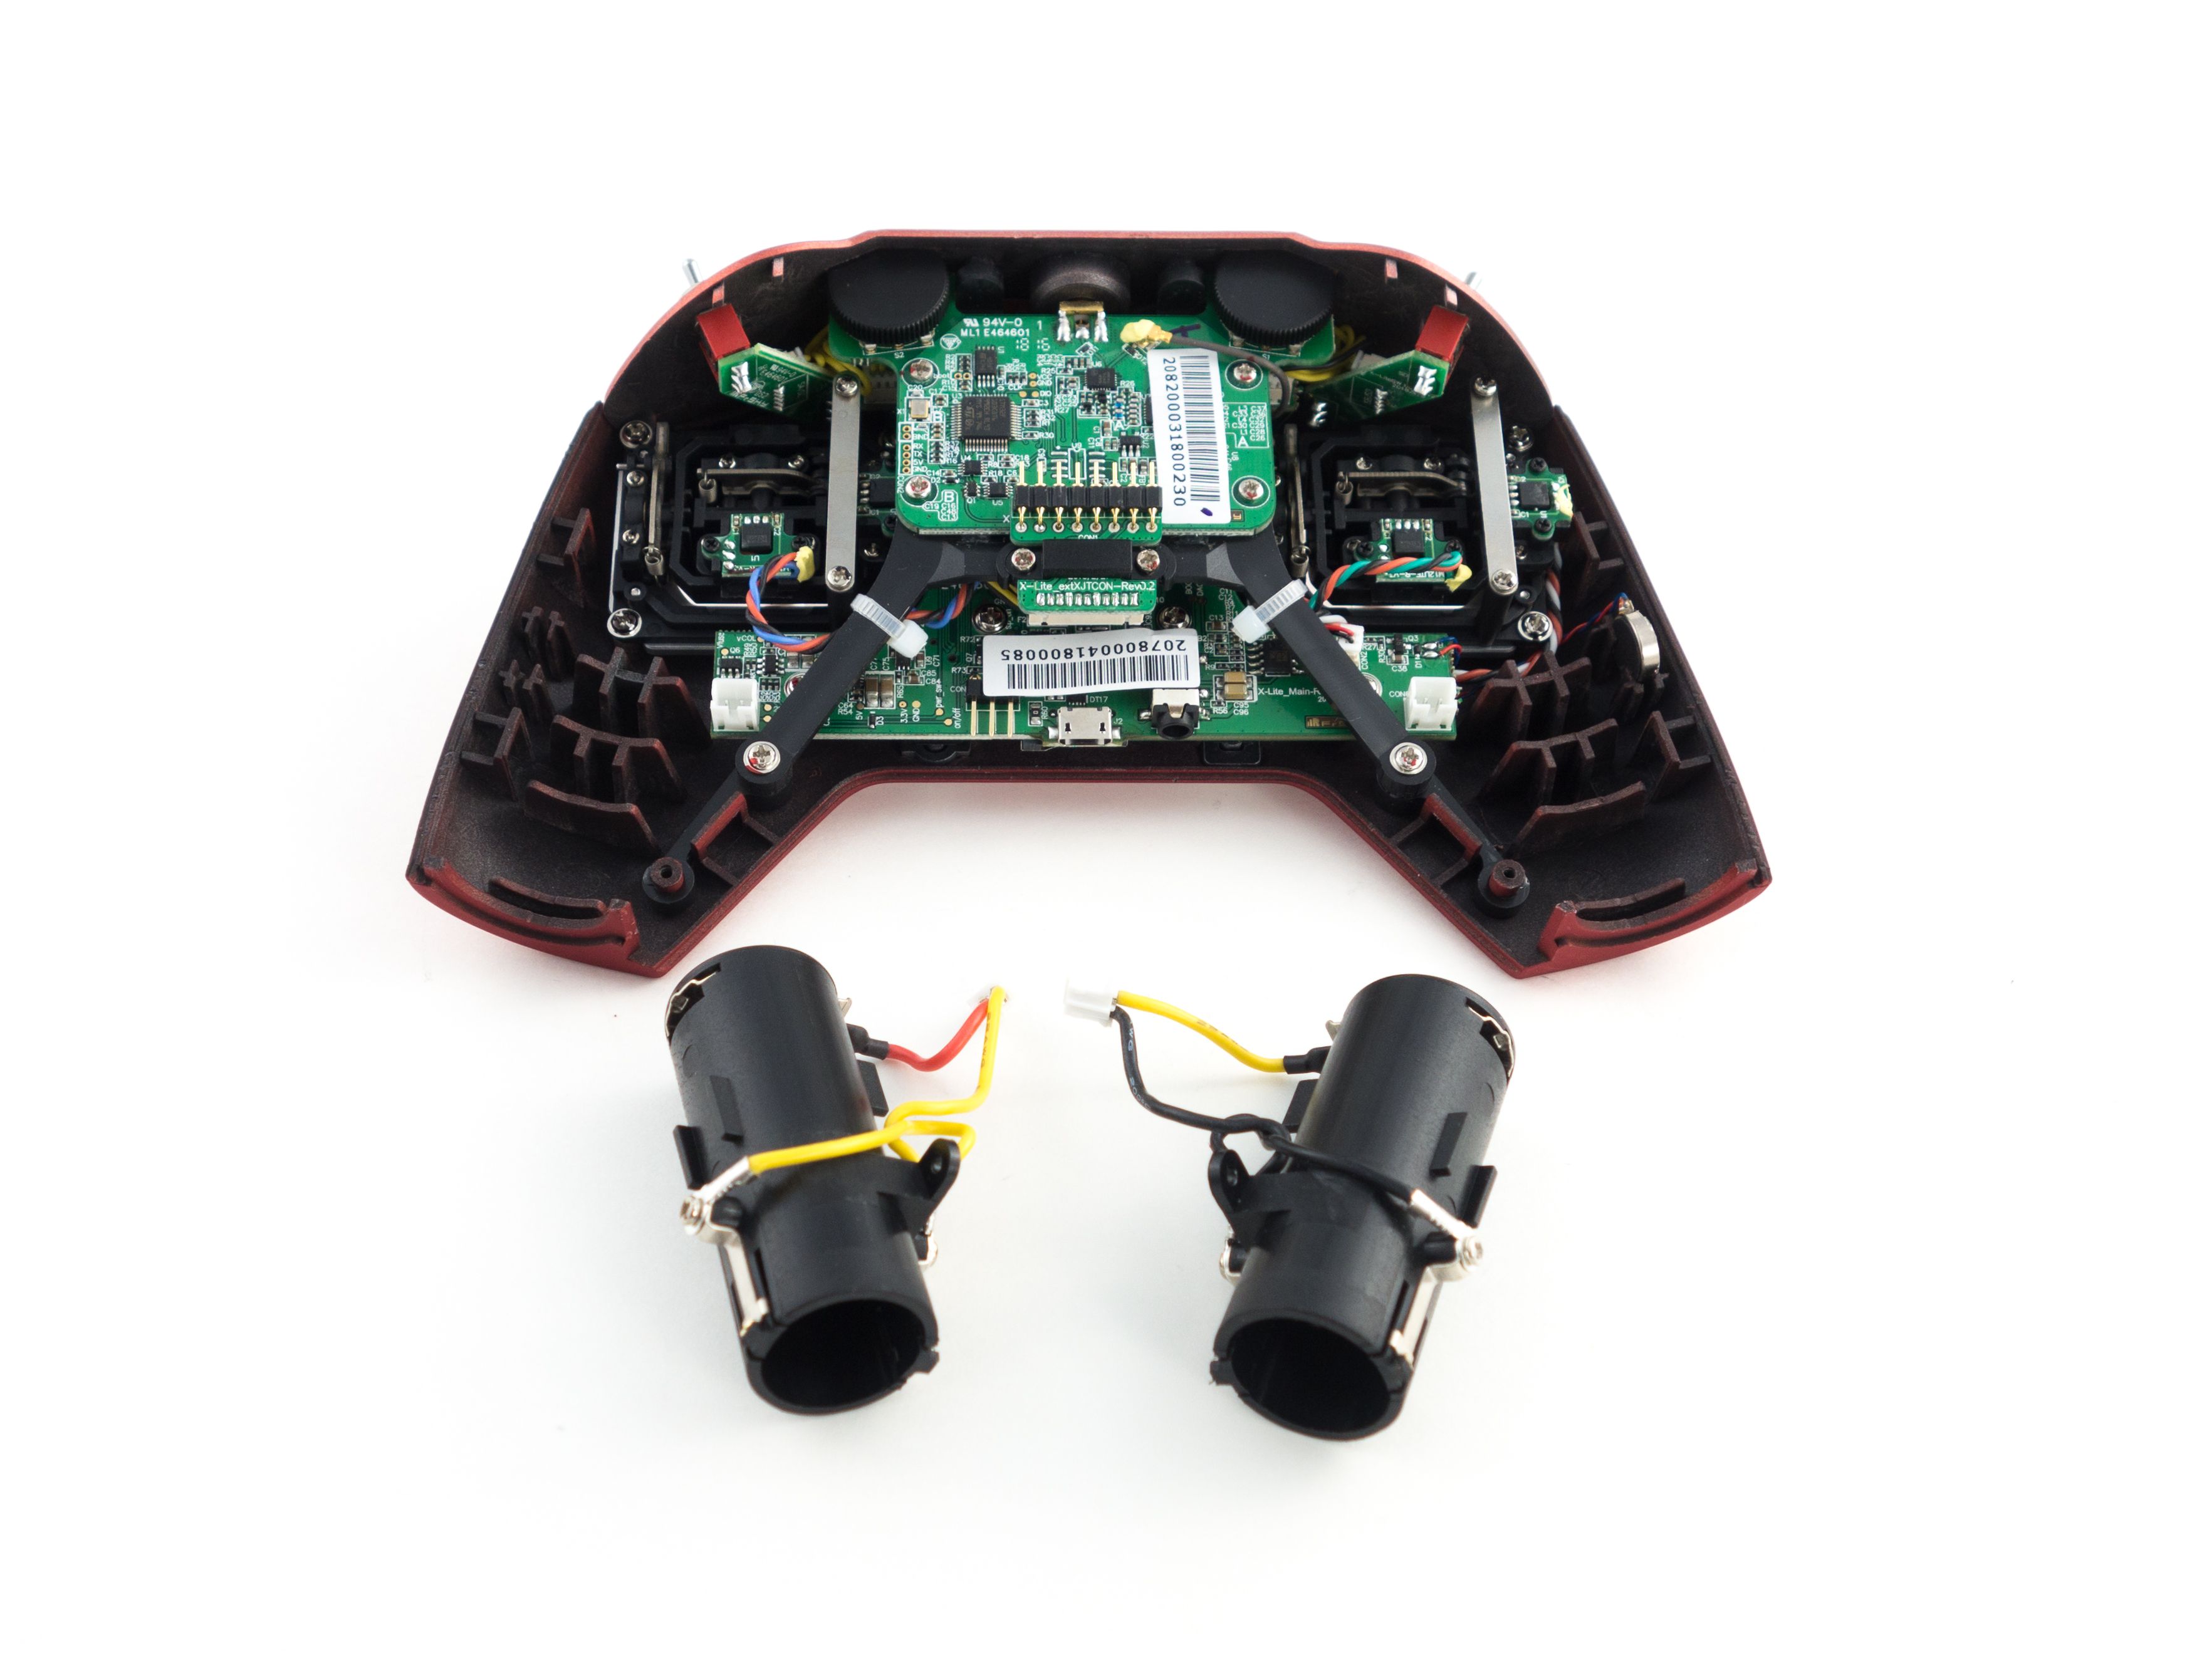
First you'll want to remove the 18500 battery cylinders. They're held in by a single screw each. Unplug them from the PCB and they're free. Now you can remove the external module connector. It's held in by a plastic clip and a pair of screws. After it's free you can unplug it.
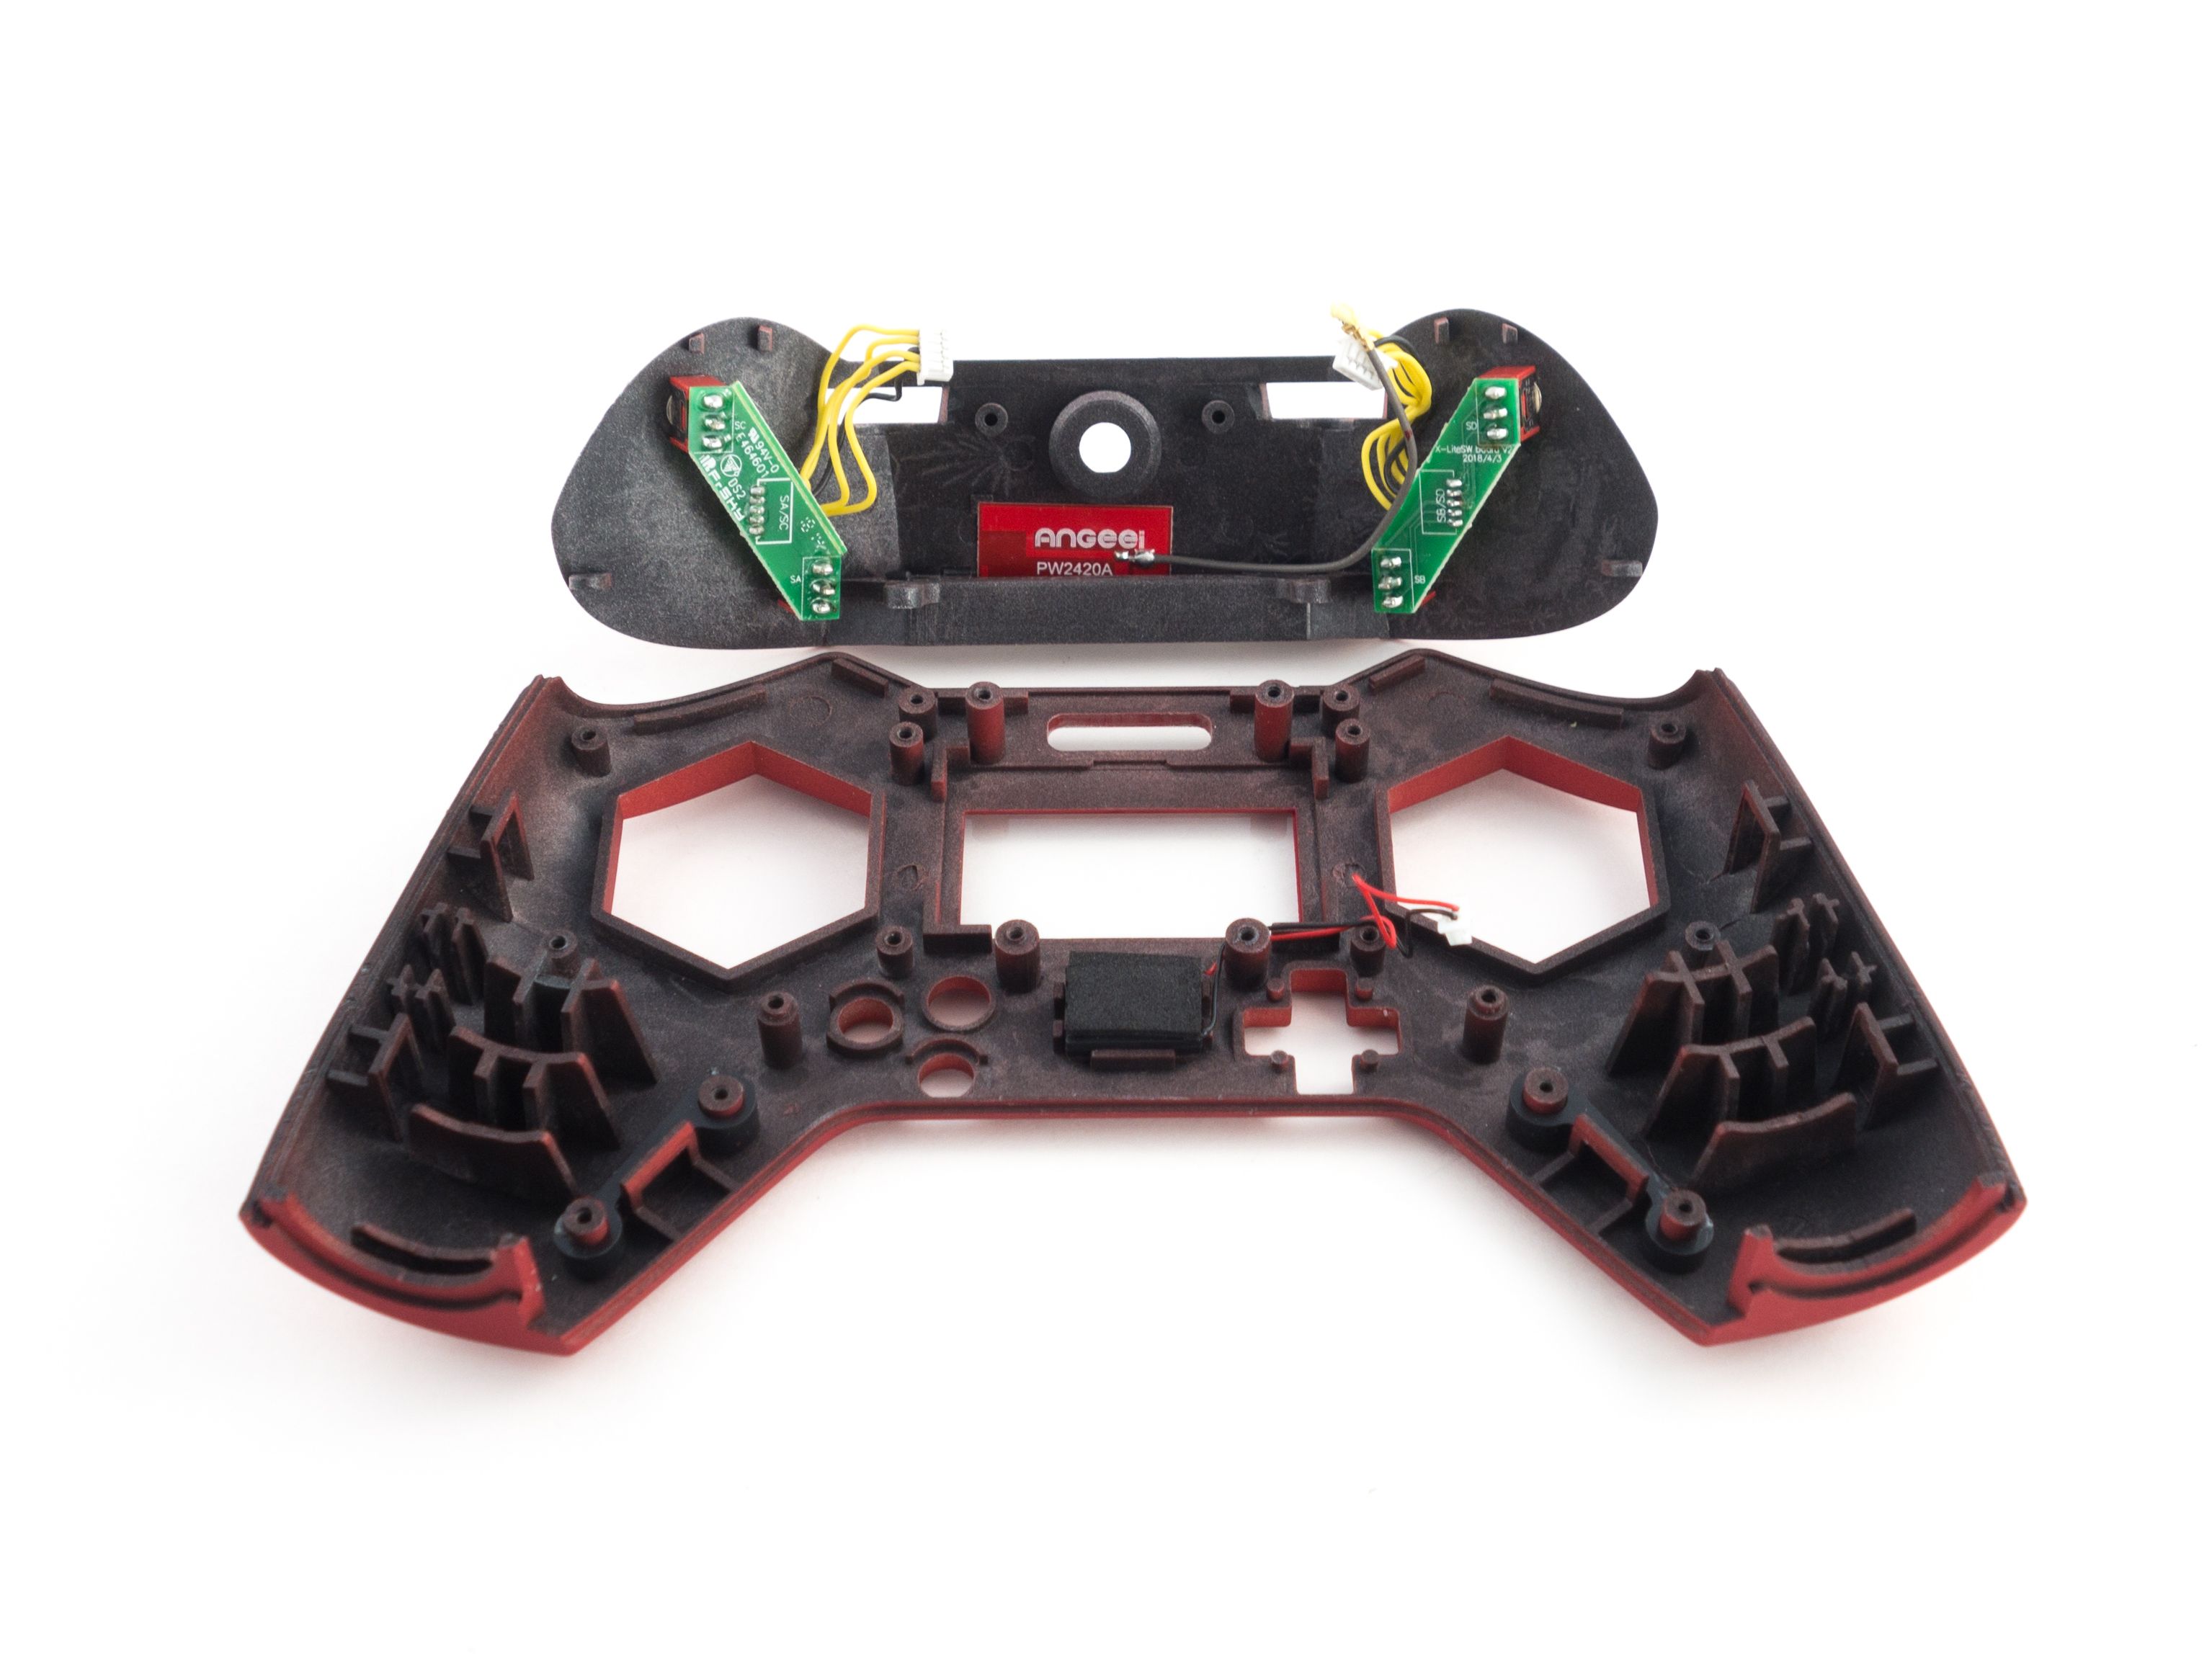
Before removing the top PCB be sure to unplug the U.Fl connector to the antenna toward the top. You don't necessarily need to remove the PCB from the plastic bracket. Just remove two screws at the ends of the legs and cut the zip ties to free the entire bracket including the PCB. Don't pull too hard because you still need to unplug the PCB from behind.
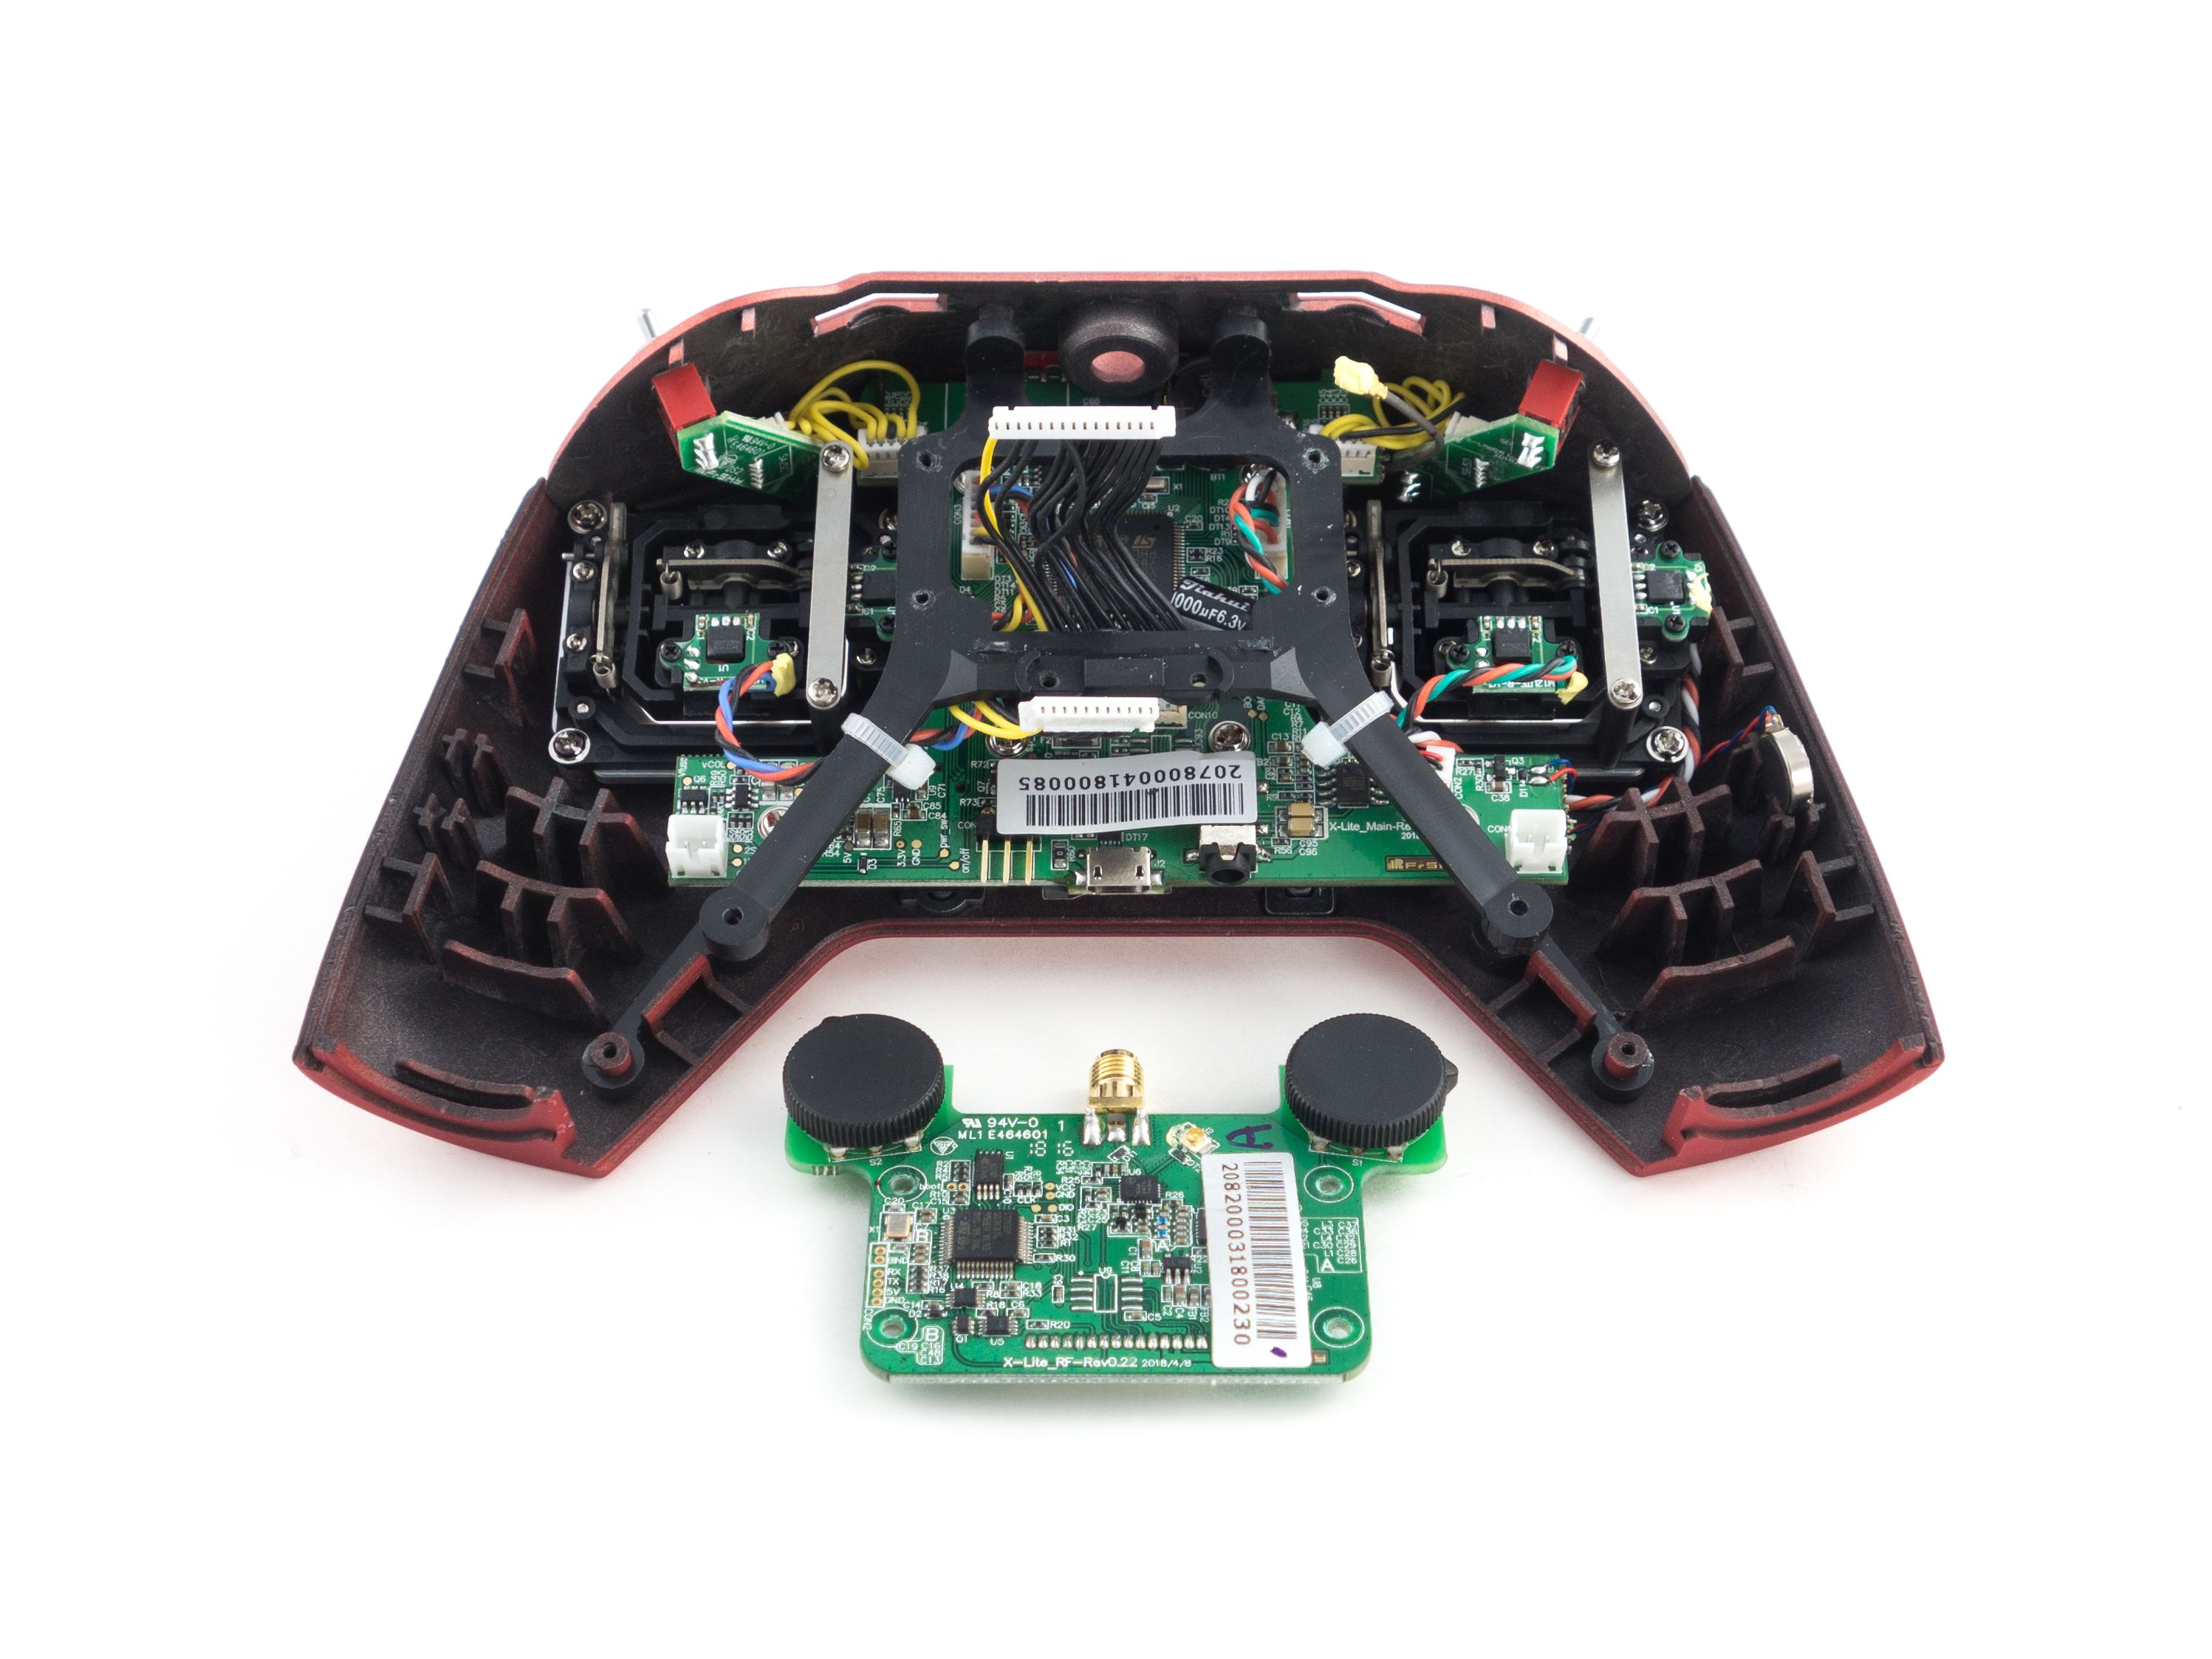
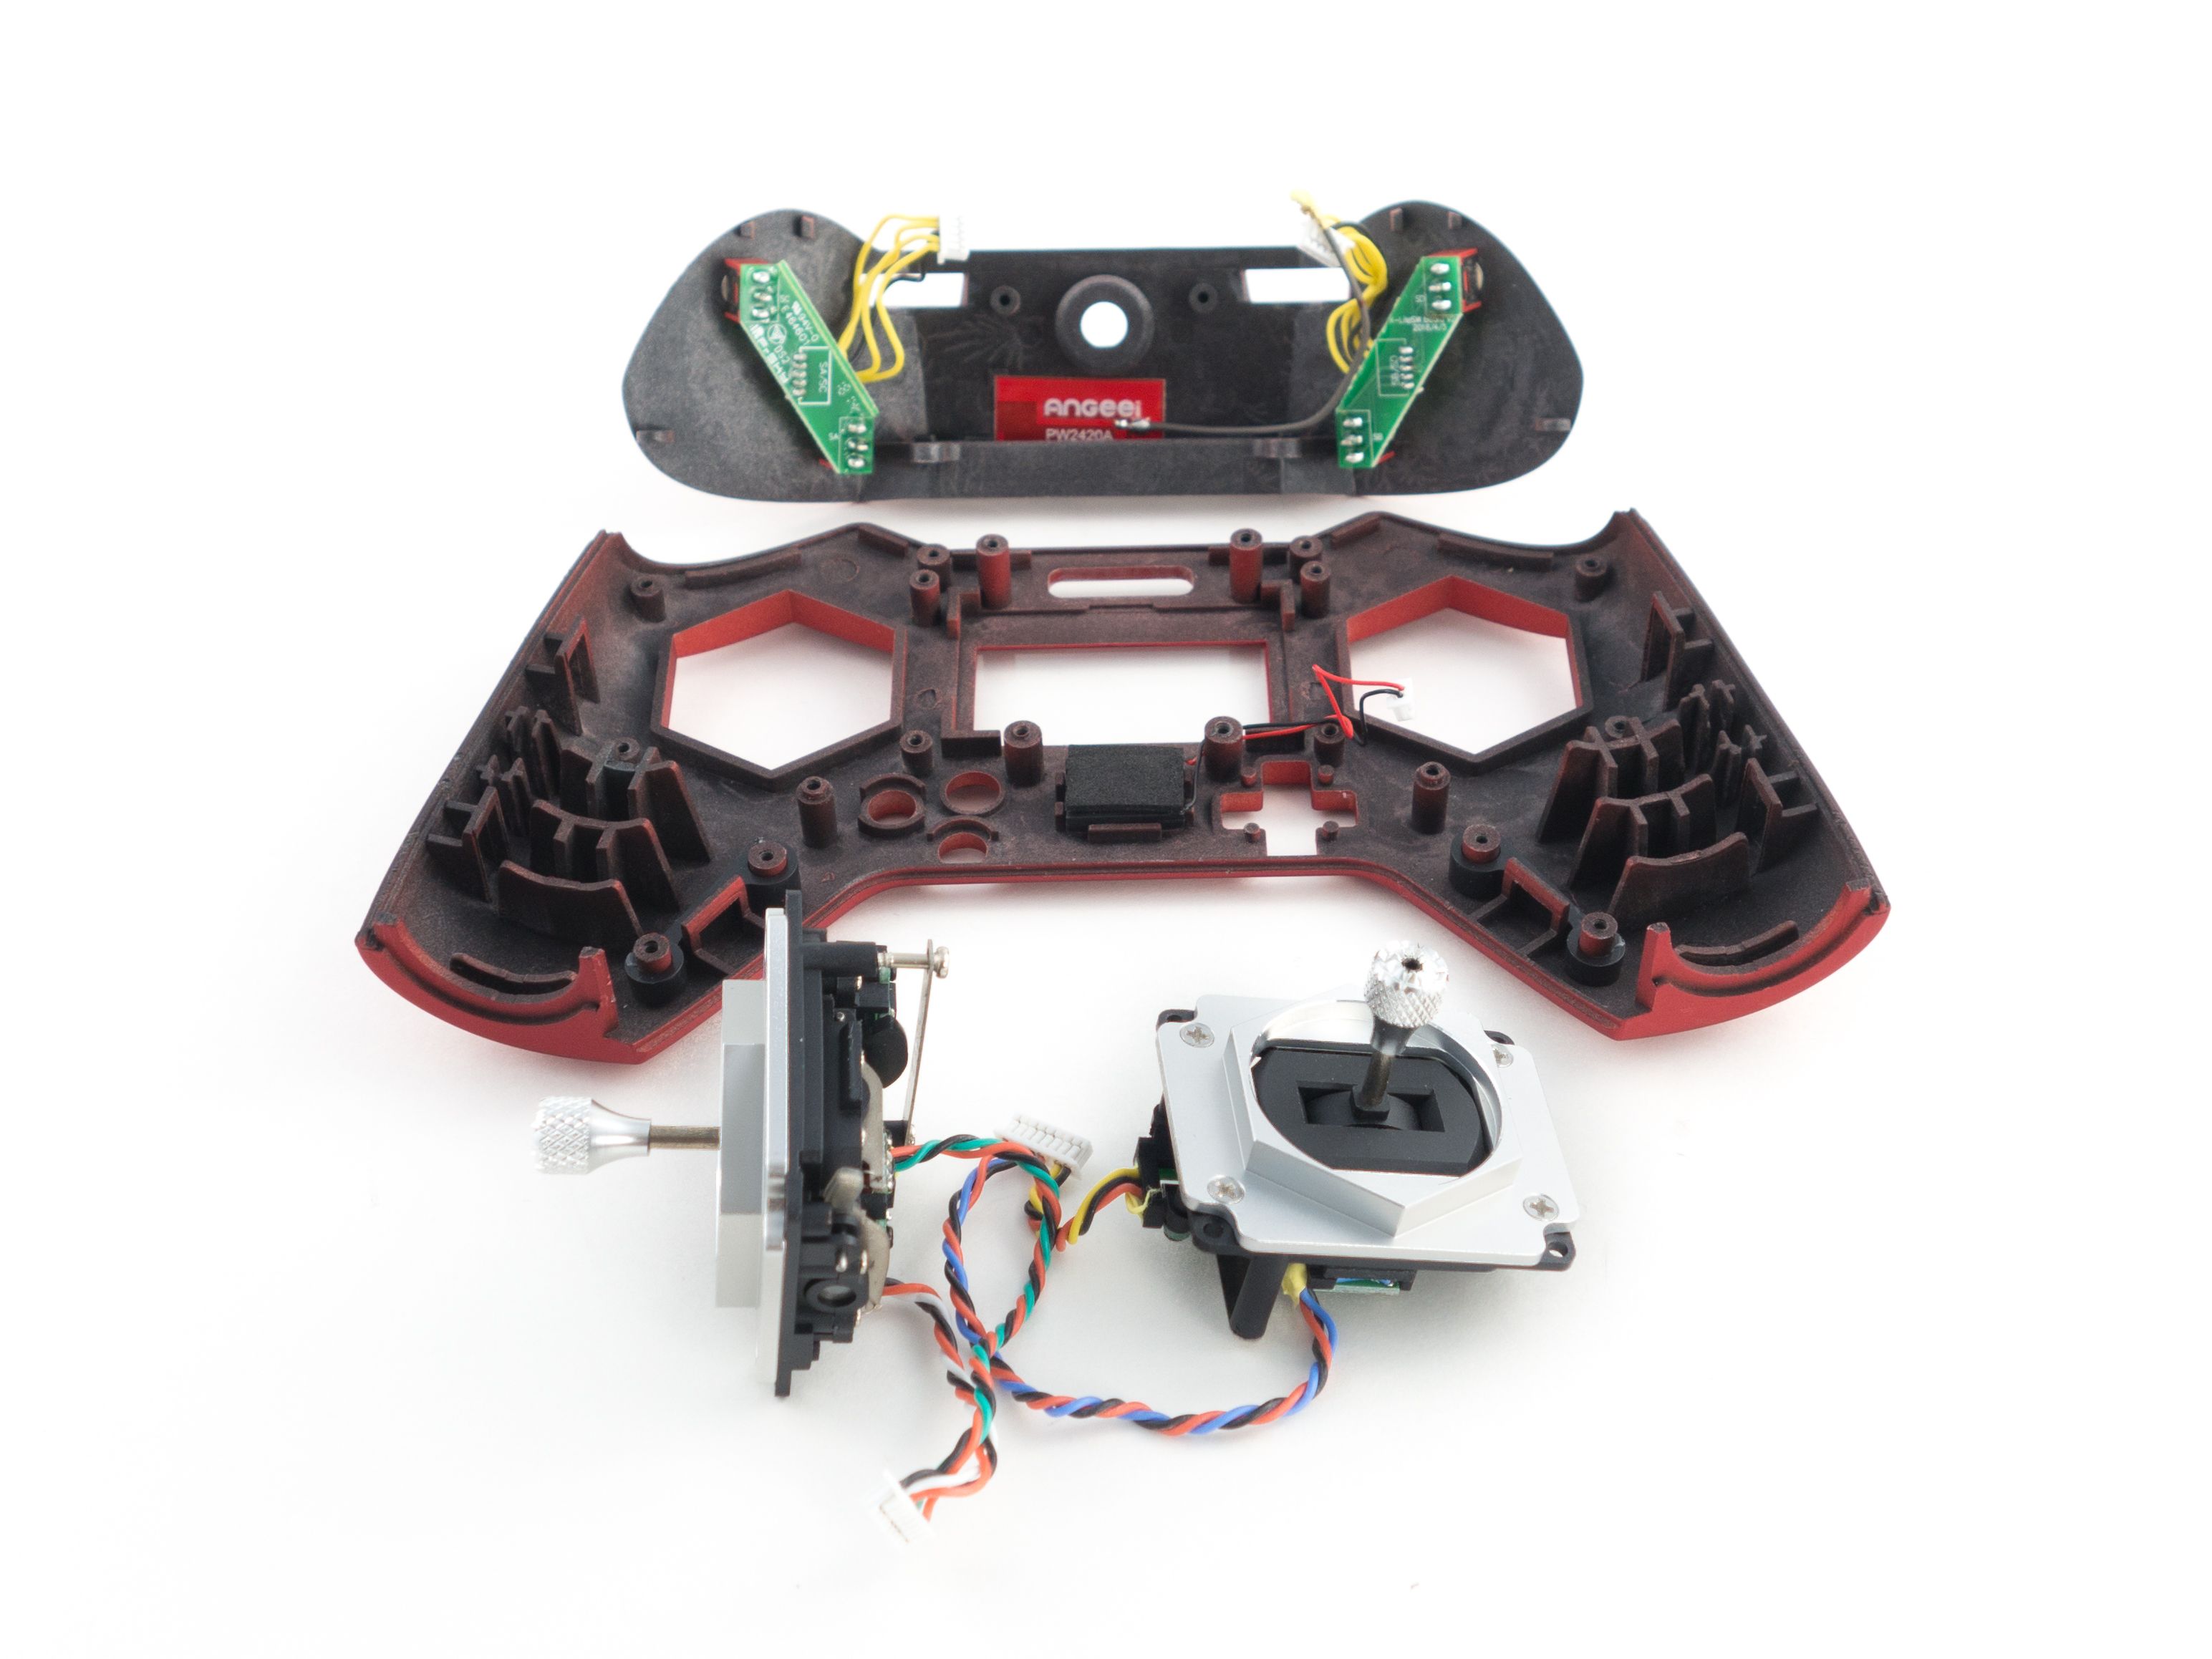
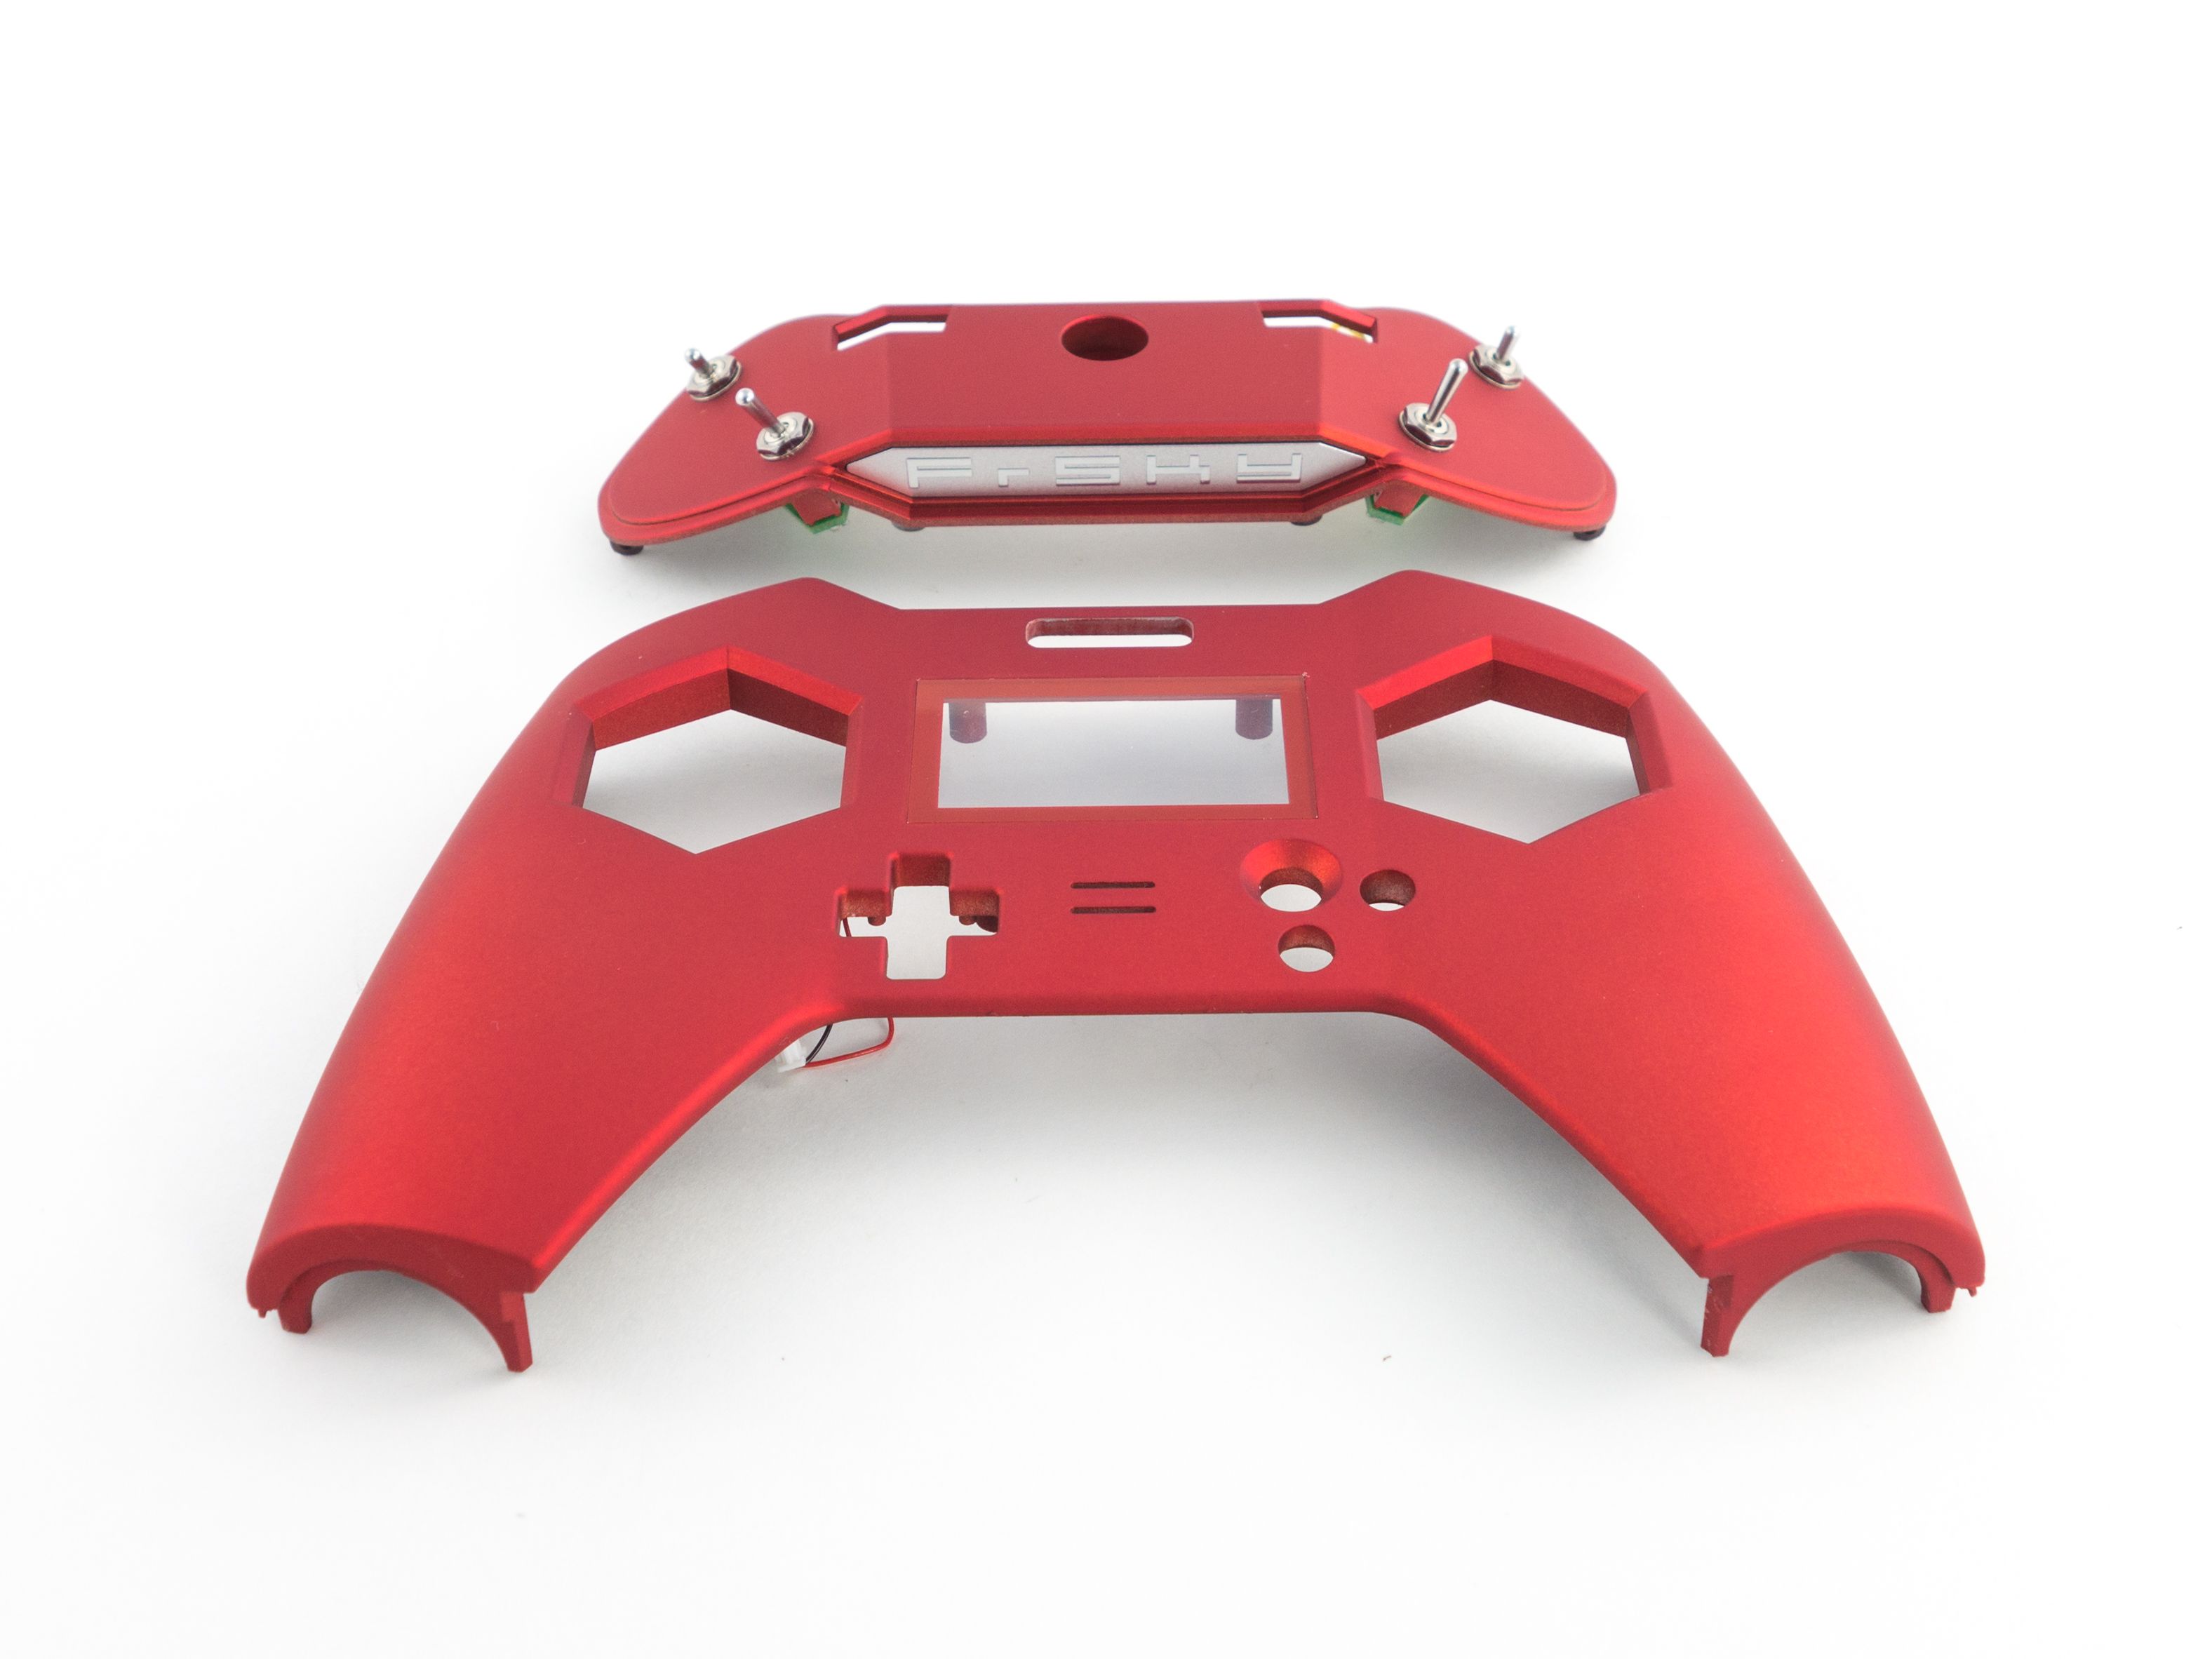
At this point you can access the gimbals. If your goal is to replace a gimbal then you don't need to remove the main board. Just unplug the gimbal from the main board and remove the 4 screws holding it in place. Keep in mind that one corner of the gimbal is sandwiched between the faceplate and the switch plate. It may be easier to remove the switch plate first. This is accomplished by removing 4 screws and unplugging the switches. After that it will slide out. Just be careful with the antenna connector.
If you'd like to remove the main board to gain access to the display carefully unplug each of the components including the gimbals, top switches, and speaker. Carefully remove the haptic motor from the face plate taking care not to break the solder points. Remove the 6 screws holding the board in place and you can carefully pull it out. The screen is attached by a ribbon cable and can be unplugged by sliding the black tab toward the ribbon cable. If you don't need to do this I don't recommend it. It's a challenge the re-insert the ribbon cable and re-seat the screen and bracket.

Reassembly
Reassembly is a bit more challenging, so here are a few tips to make the process go smoother.
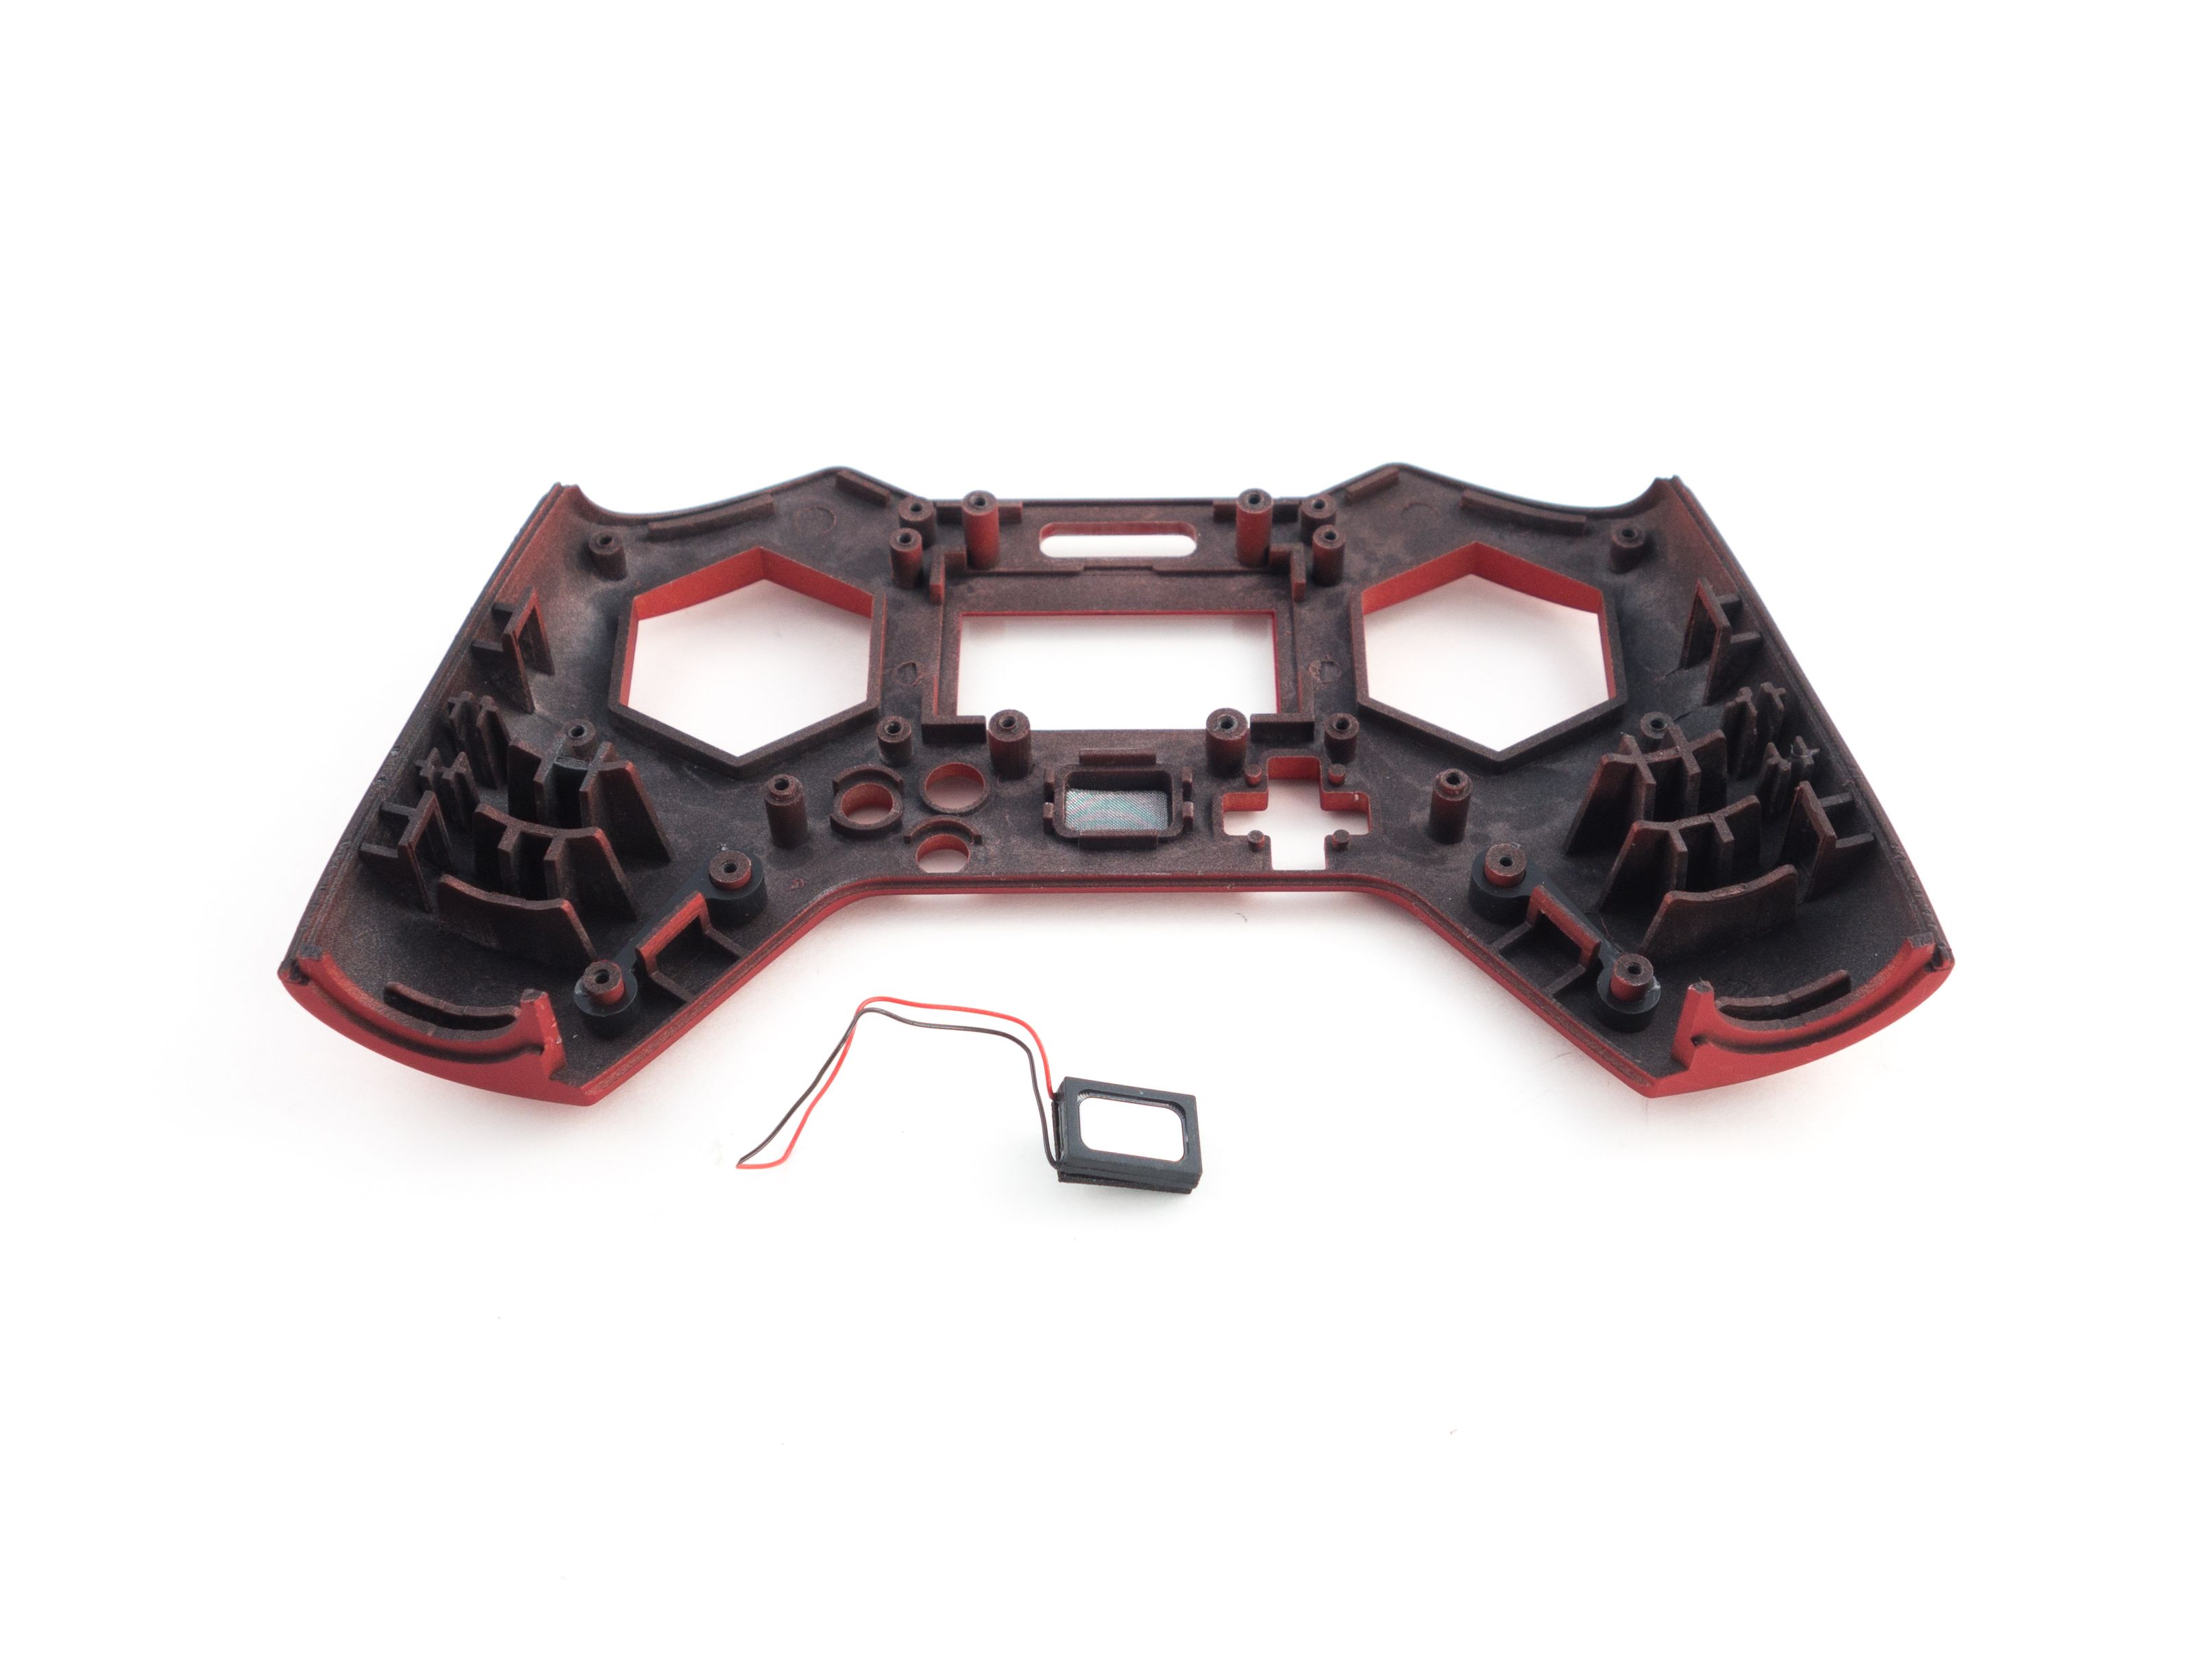
- If you removed the speaker make sure the wire is in the correct position under the corner of the gimbal.
- Put the gimbals back before the switch plate, but exclude the top corner screws until the switch plate is in place.
- Make sure the gimbal positions and orientations are correct.
- Before you put the main board back:
- Make sure no particles are between the display and the plastic cover.
- Make sure the antenna wire is in the proper position.
- Also make sure the speaker wires and gimbal wires are not under the main board.
- Make sure the power button, shift and exit buttons and D-Pad are in position.
- When inserting the main board keep in mind that the display needs to be seated properly while the joystick needs to feed through the face plate.
- Make sure the haptic motor wires and speaker wires are tucked away.
- Make sure the top PCB is attached to the plastic bracket before installation.
- Plug the battery holders into the main board before you screw them in.
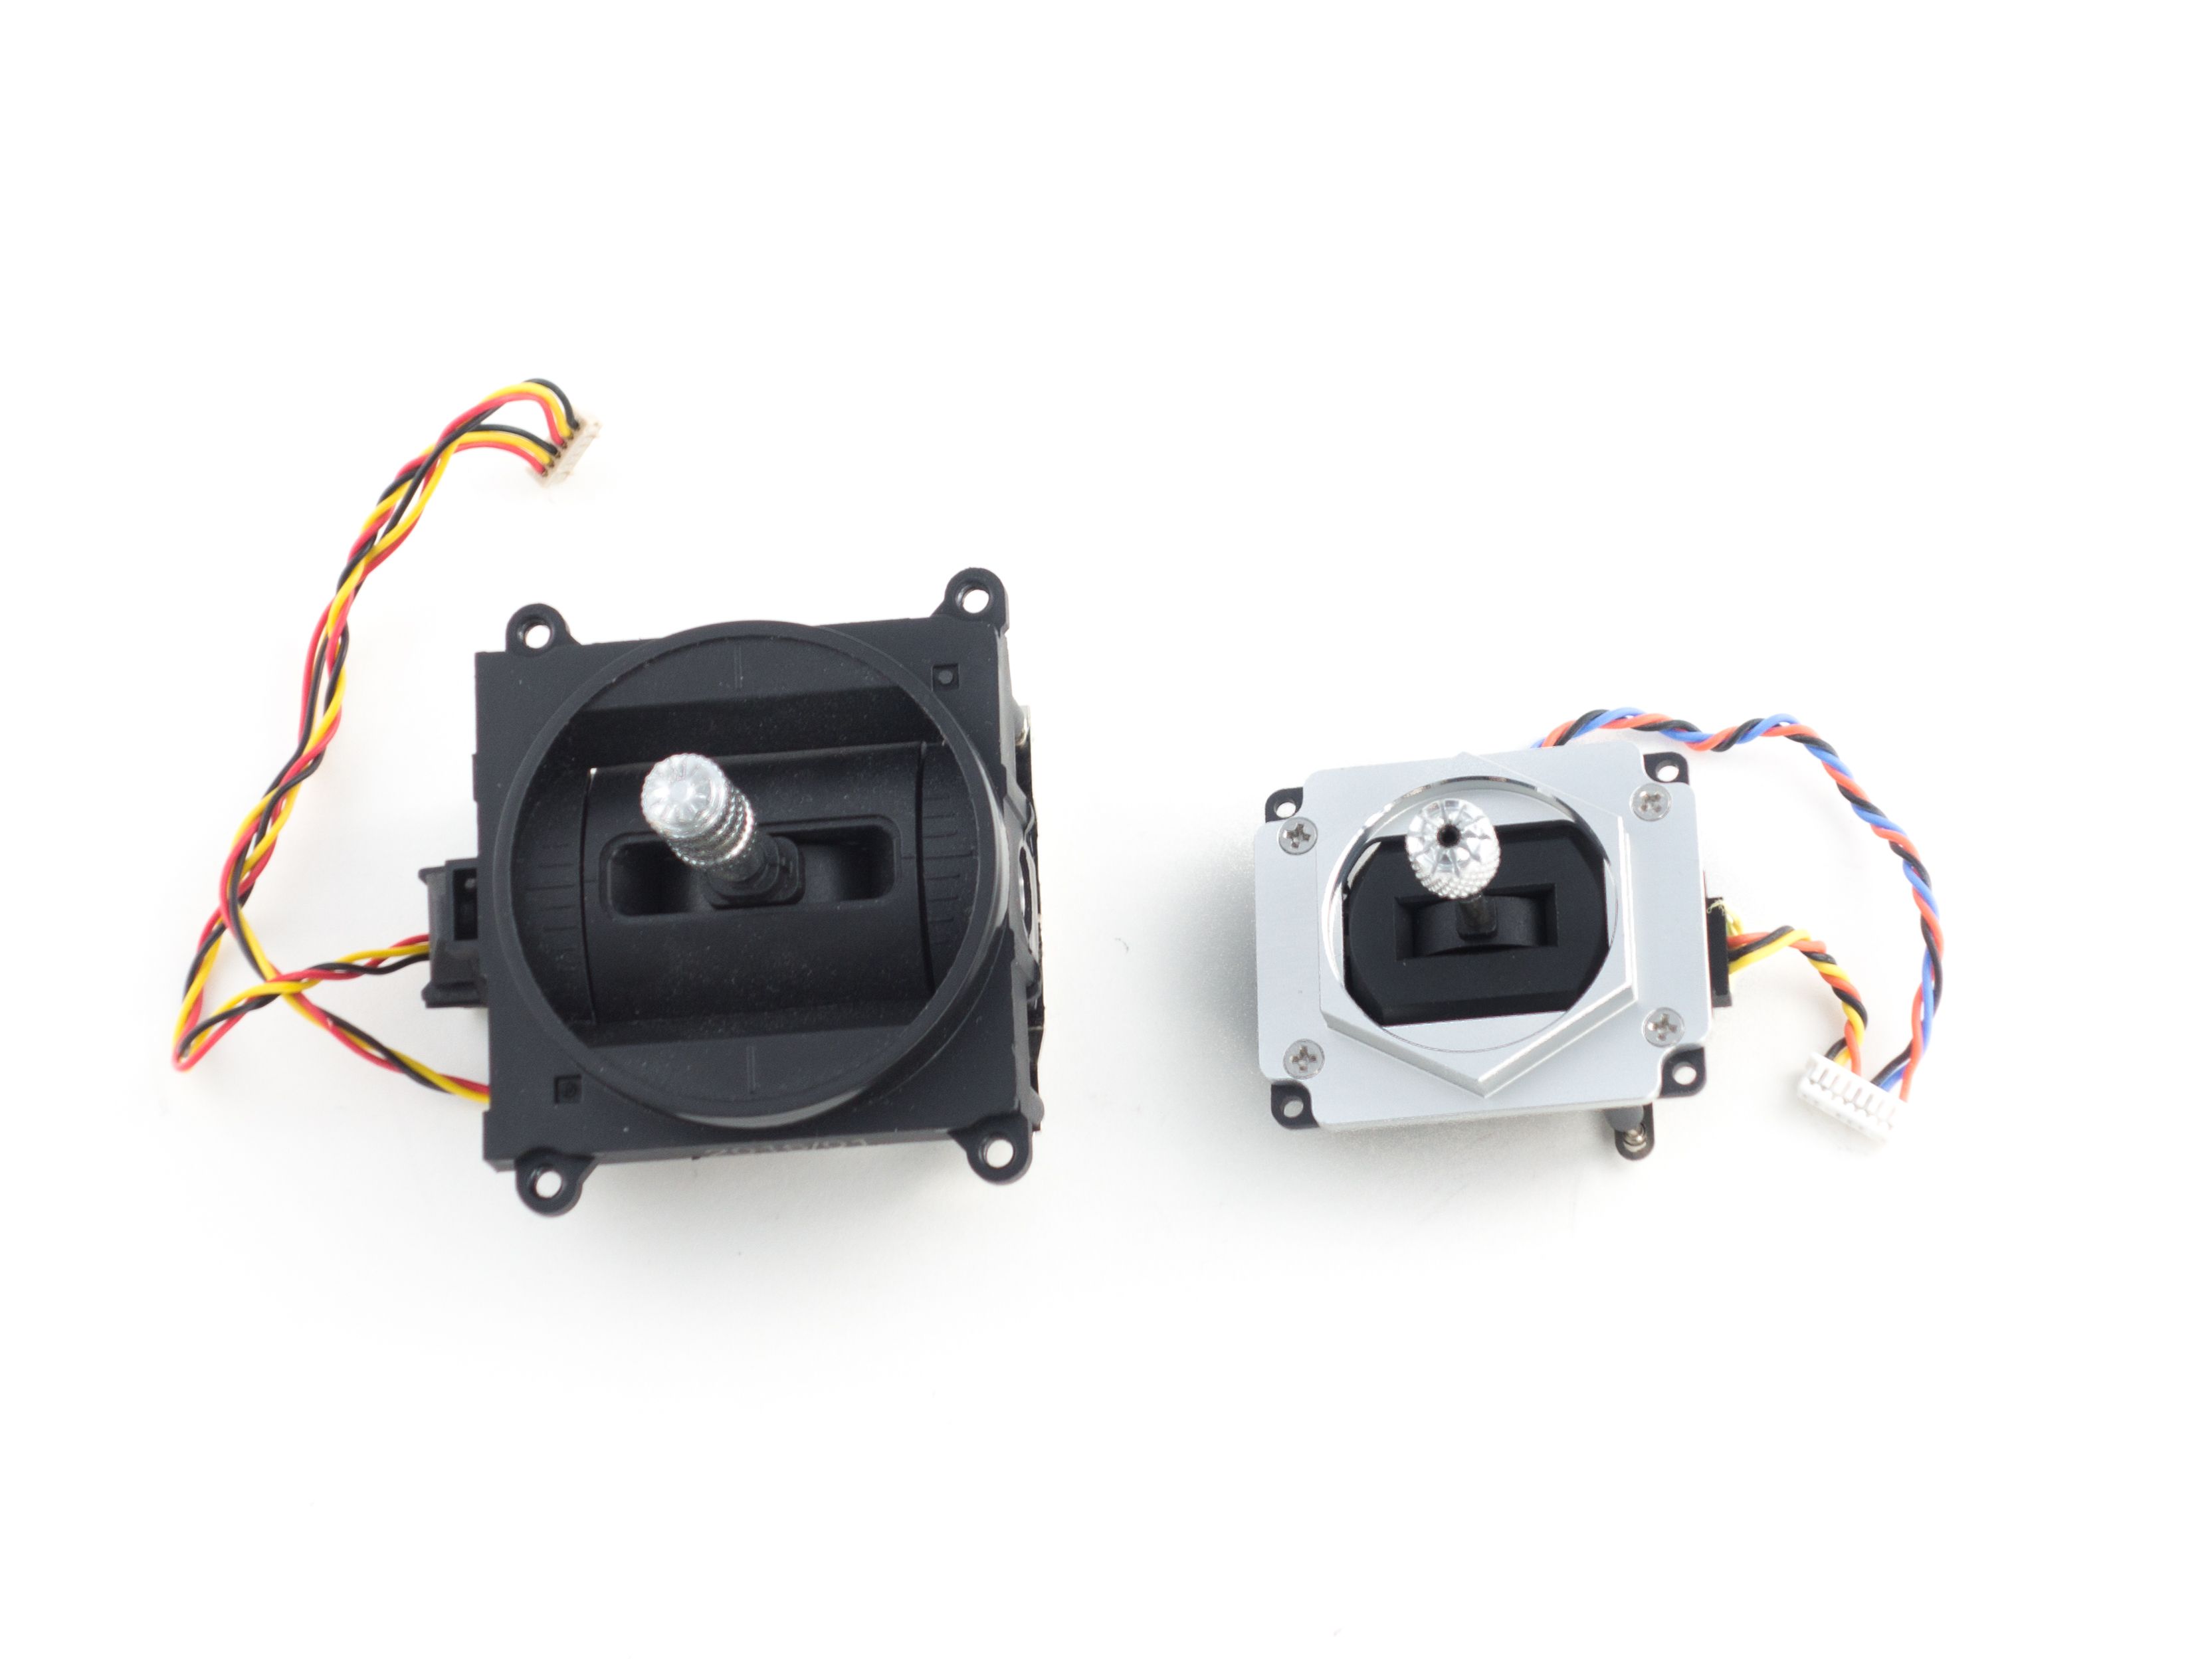
And there you have it! While this isn't the simplest transmitter to service, it's very doable with the proper tools. The components are excellent quality and I'm quite impressed with the transmitter overall. I also included a few photos comparing a QX7 gimbal to a new X-Lite gimbal. These new gimbals are impressively thin and have a premium feel to them. Great job FrSky!
Photos


Where to Buy
Radio |
Frsky ACCST Taranis X - Lite 2.4G 16CH Transmitter - $140.00 |GearBest.com
Gearbest.com
|
$140.00 |
Radio |
FrSky Taranis X-Lite 2.4GHz Radio Controller (Black)
(64 builds)
Amazon.com
|
$139.99 |
Radio |
FrSky Taranis X-Lite 2.4GHz Radio Controller Black and Red Color with Free 18650 Battery Black Caps
(64 builds)
Horusrc.com
|
$129.00 |
Radio |
FrSky X-Lite 2.4GHz Radio Controller (Red)
(64 builds)
Getfpv.com
|
$121.99 |
Radio |
FRSKY TARANIS X-LITE (BLACK) WITH FREE 18650 BATTERY BLACK CAPS
(64 builds)
Getfpv.com
|
See Site |
Radio |
Banggood.com
(15 builds)
Banggood.com
|
See Site |

Awesome write up whiffles this makes me think that the x-lite is possibly the perfect canidate to harvest screen and pcb's and rfboard and use in a build like the tarango.

does anyone know why my x lite has 6 screw instead of the 4 shown? I have a extra screw on each side next to the tensioning screw...

I am going to install a 2s usb charge balancer module in the X-lite. http://www.modmaker.co.uk/Micro-USB-2S-Balance-Charger
Installing this I can just charge it from the usb socket using any phone charger or usb socket.
To do so I need to hook upto the batteries, seems simple. But I also like to hook up to the 5v original USB connector, is the 5Vusb voltage somewhere easy to tap?
The usb socketon the module itself Iam not planning to use it.

X-Lite mod for the WIN!!!
Hi all... I hated my X-Lite initially because I was fighting the overly tight gimbals. I opened her up and stretched the gimbal springs. My flying improved BUT the sticks no longer centered.
Then I tried 6mm 6oz orthodontic rubber bands. I have never RIPPED my Whoop better. Total LOVE!!!
https://www.facebook.com/groups/tinywhoop/permalink/2277461305808205

Thank you very much! This is legit. I would love to see some more info about crossfire mods. So far this is the most in depth tutorial I have found, but I know people are out there doing it. https://blog.seidel-philipp.de/frsky-taranis-x-lite-remote-control/


I'm assuming all gimbal directions can be individually tensioned, not just the throttle?
I finally got myself an X-Lite, I cut the springs down on Roll and Yaw axis to increase tension as I find the sticks a little undersprung for my liking. I removed probably 3 coils from the spring and it feels exactly as I had my M9R gimbals in the X9D.
Generally feel of the radio is excellent, was like a duck to water for me as I prefer to make smaller movements on the sticks so having less travel brought sensitivity more in line with what I prefer.
For thumbers, this radio is far easier to handle than the more traditional large box style.

what does the ufl connector, for the internal RX, connect to?