DJI FPV Puda Chameleon drone
 By Cranstonfpv on May 23, 2021
Hello!
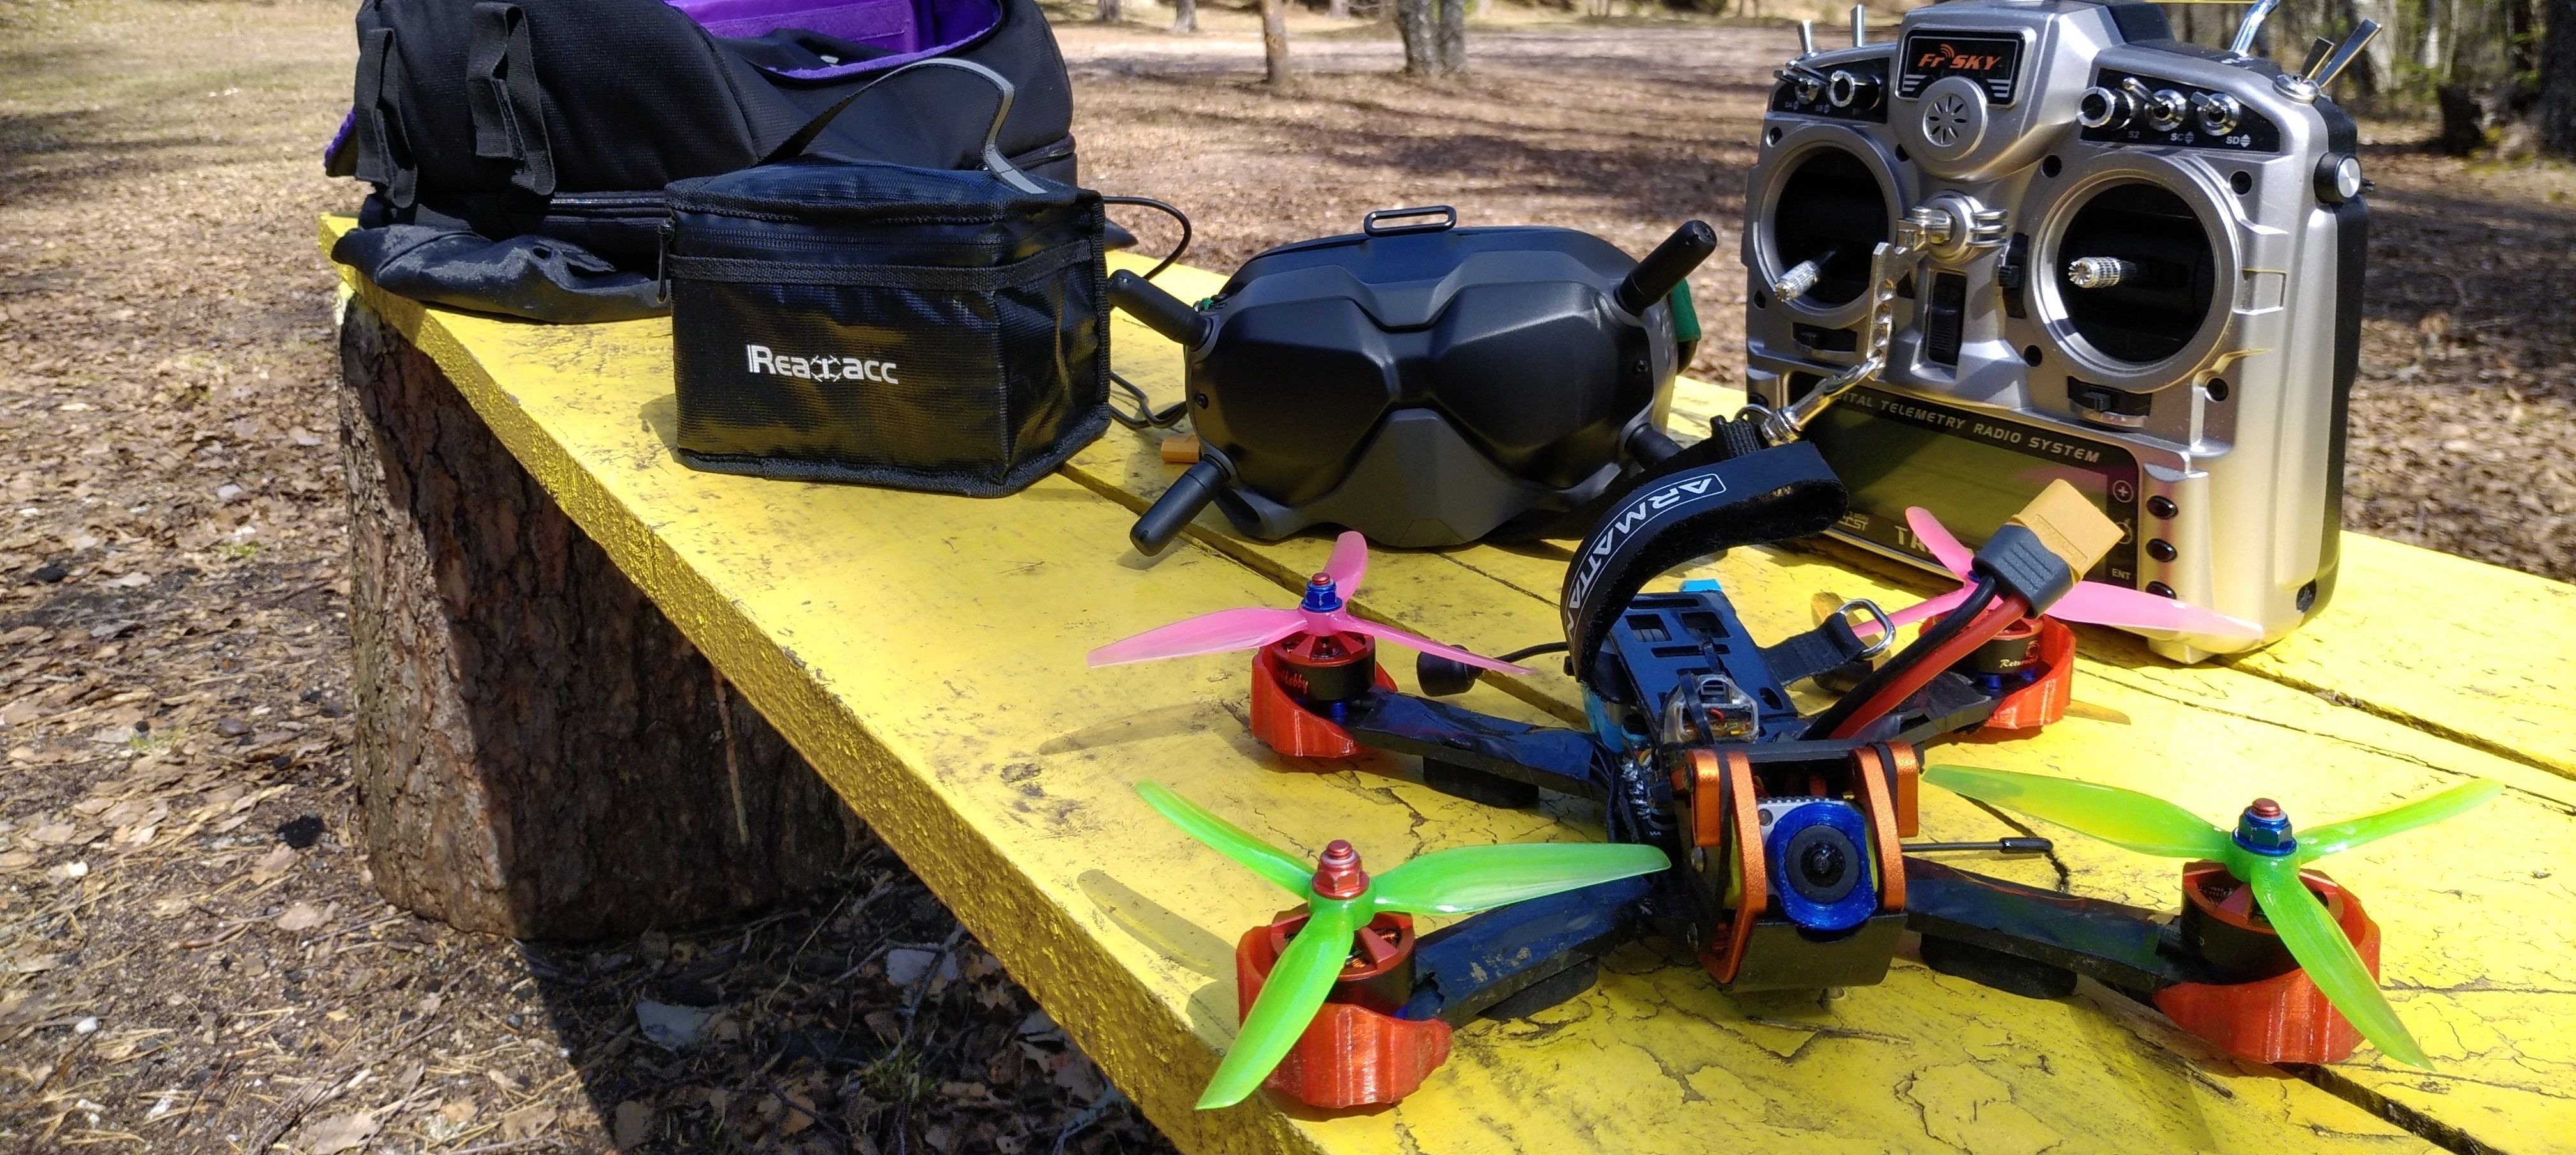
I would like to share with you how I build a DJI FPV drone with the Puda Chameleon frame (clone of Armattan Chameleon).
I decided to modify my Puda Chameleon frame (which is a pretty cheap frame, about 20$) to fit the DJI Air Unit. I didn't find a perfect Armattan Chameleon build with the DJI Air Unit on the rotorbuilds and Thingiverse websites and decided to take some ideas from many builds and integrate them all into my build. I want to say that wasn't easy and it took me some time to put all the things together. If you thinking of modifying your standard Chameleon frame into a DJI HD frame I would suggest you drop this idea and just buy theArmattan Marmotte frame because it will work better for you for sure.
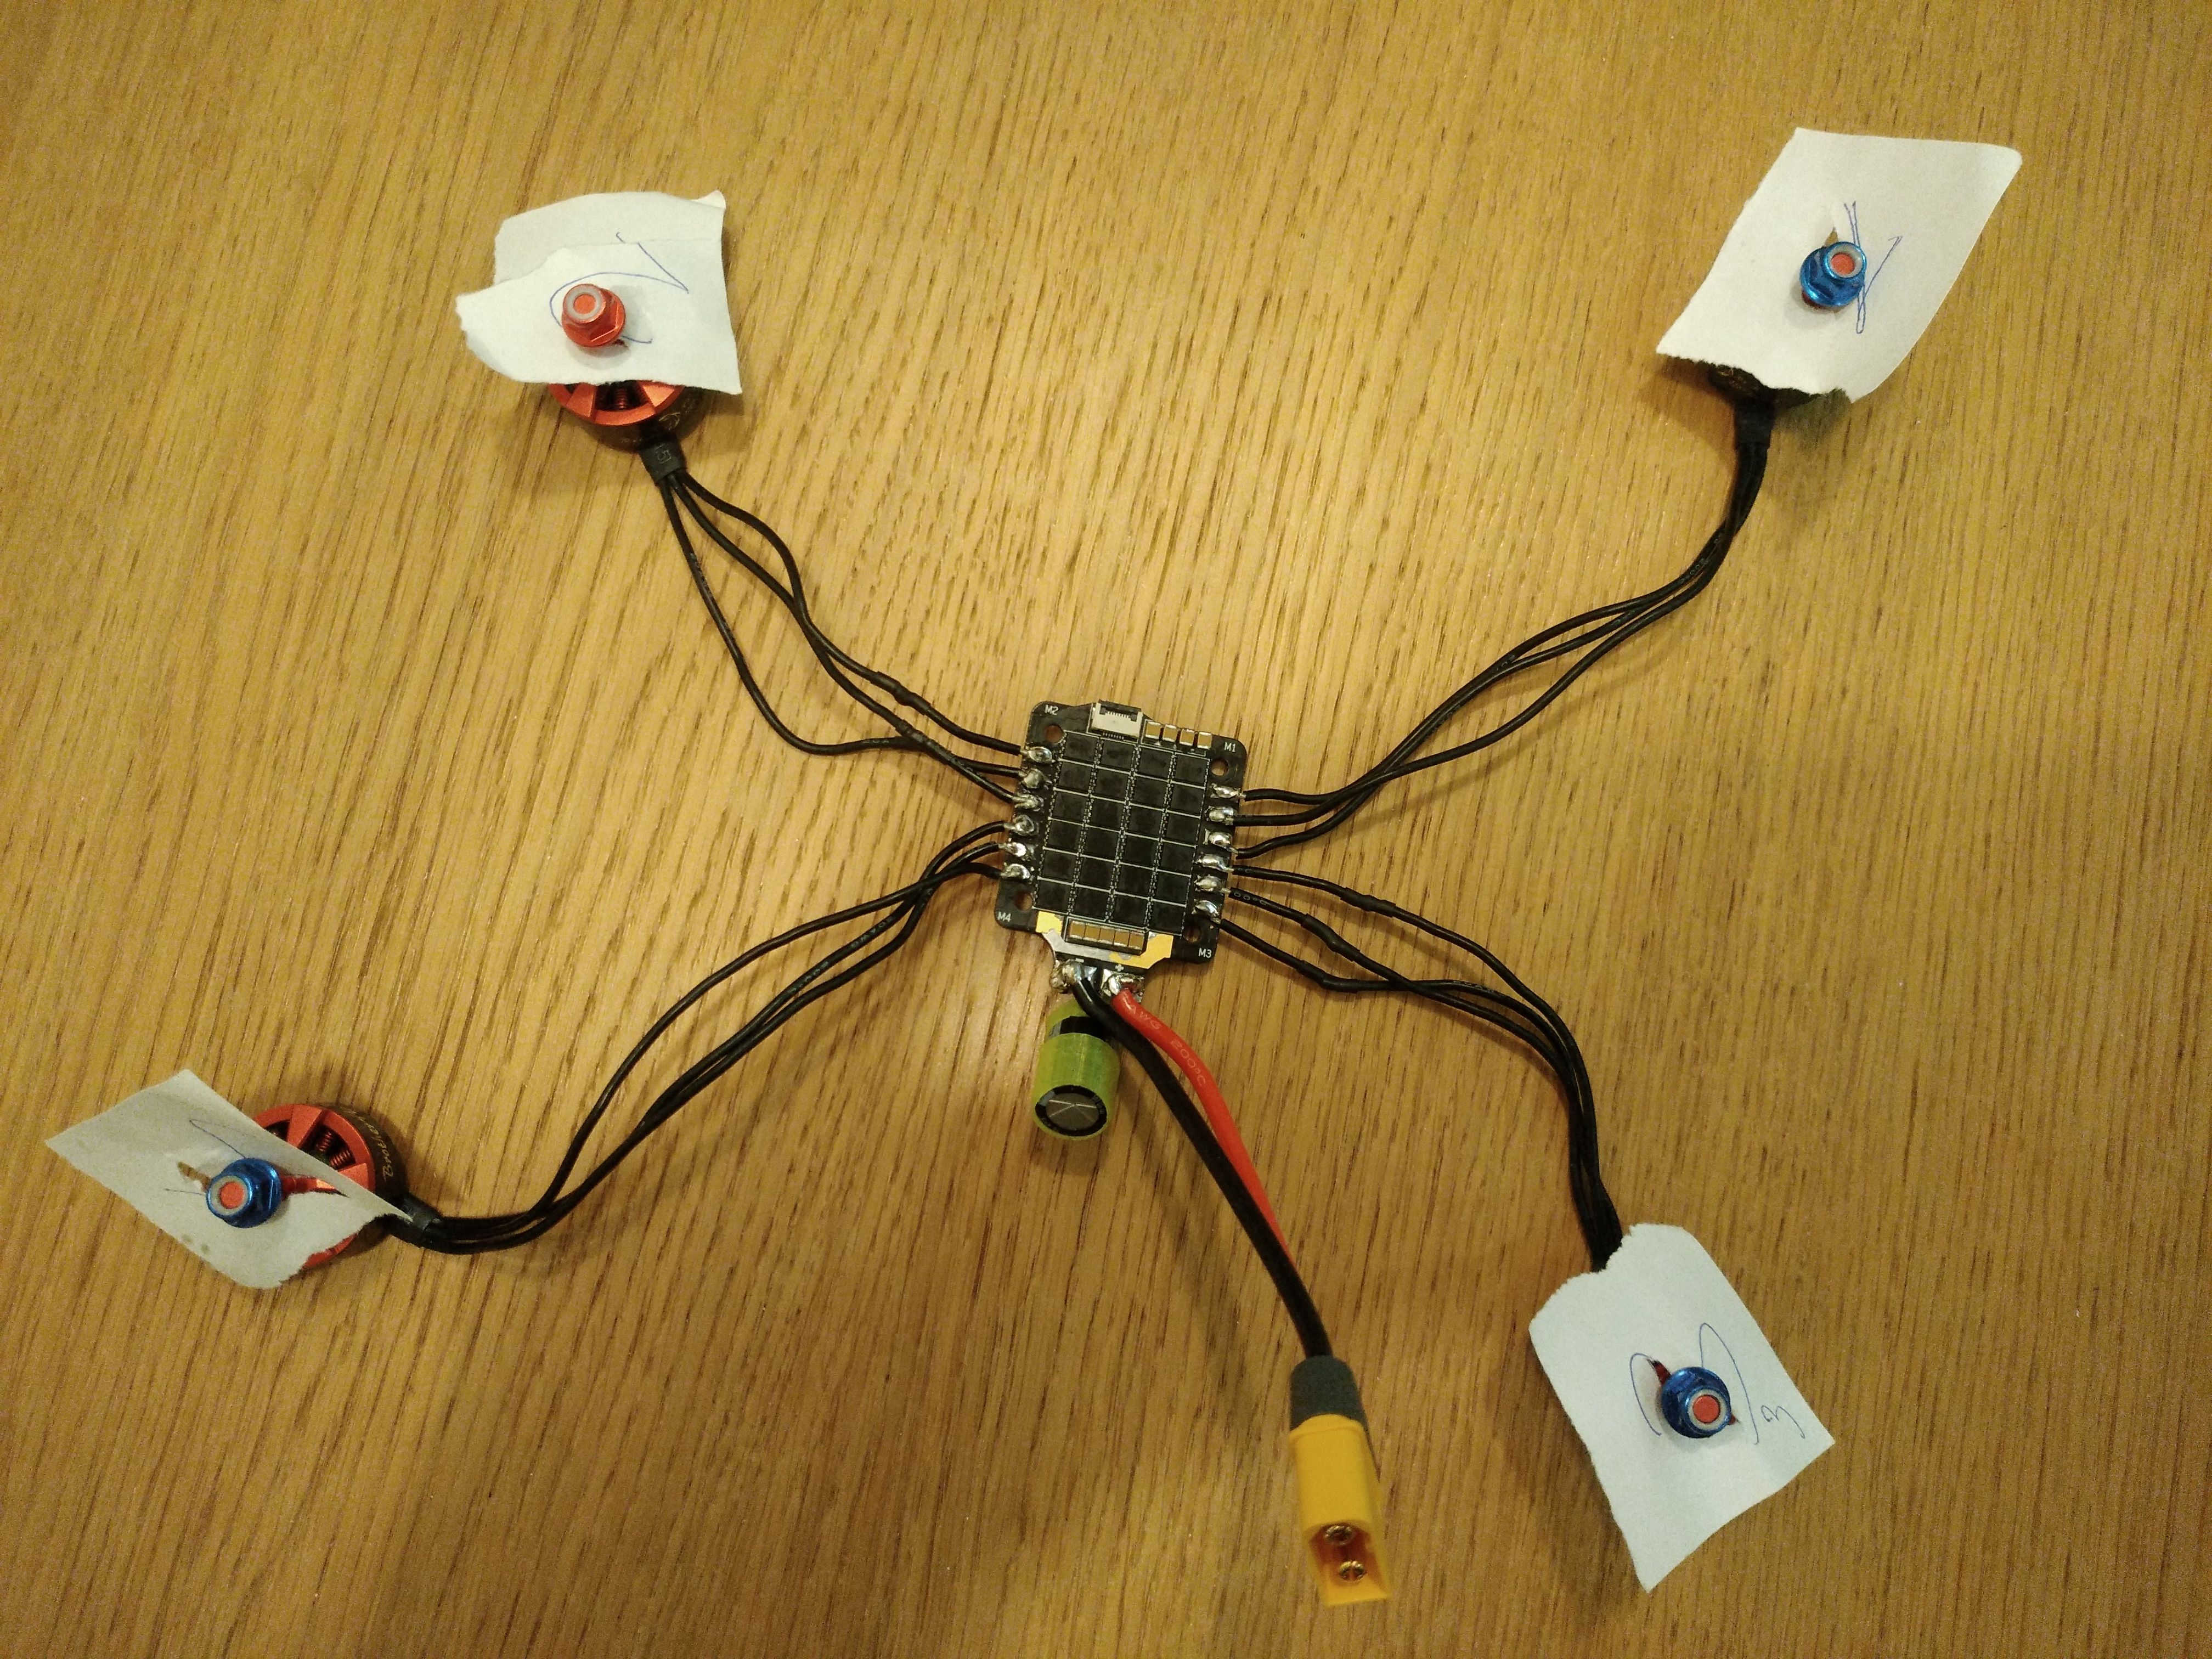
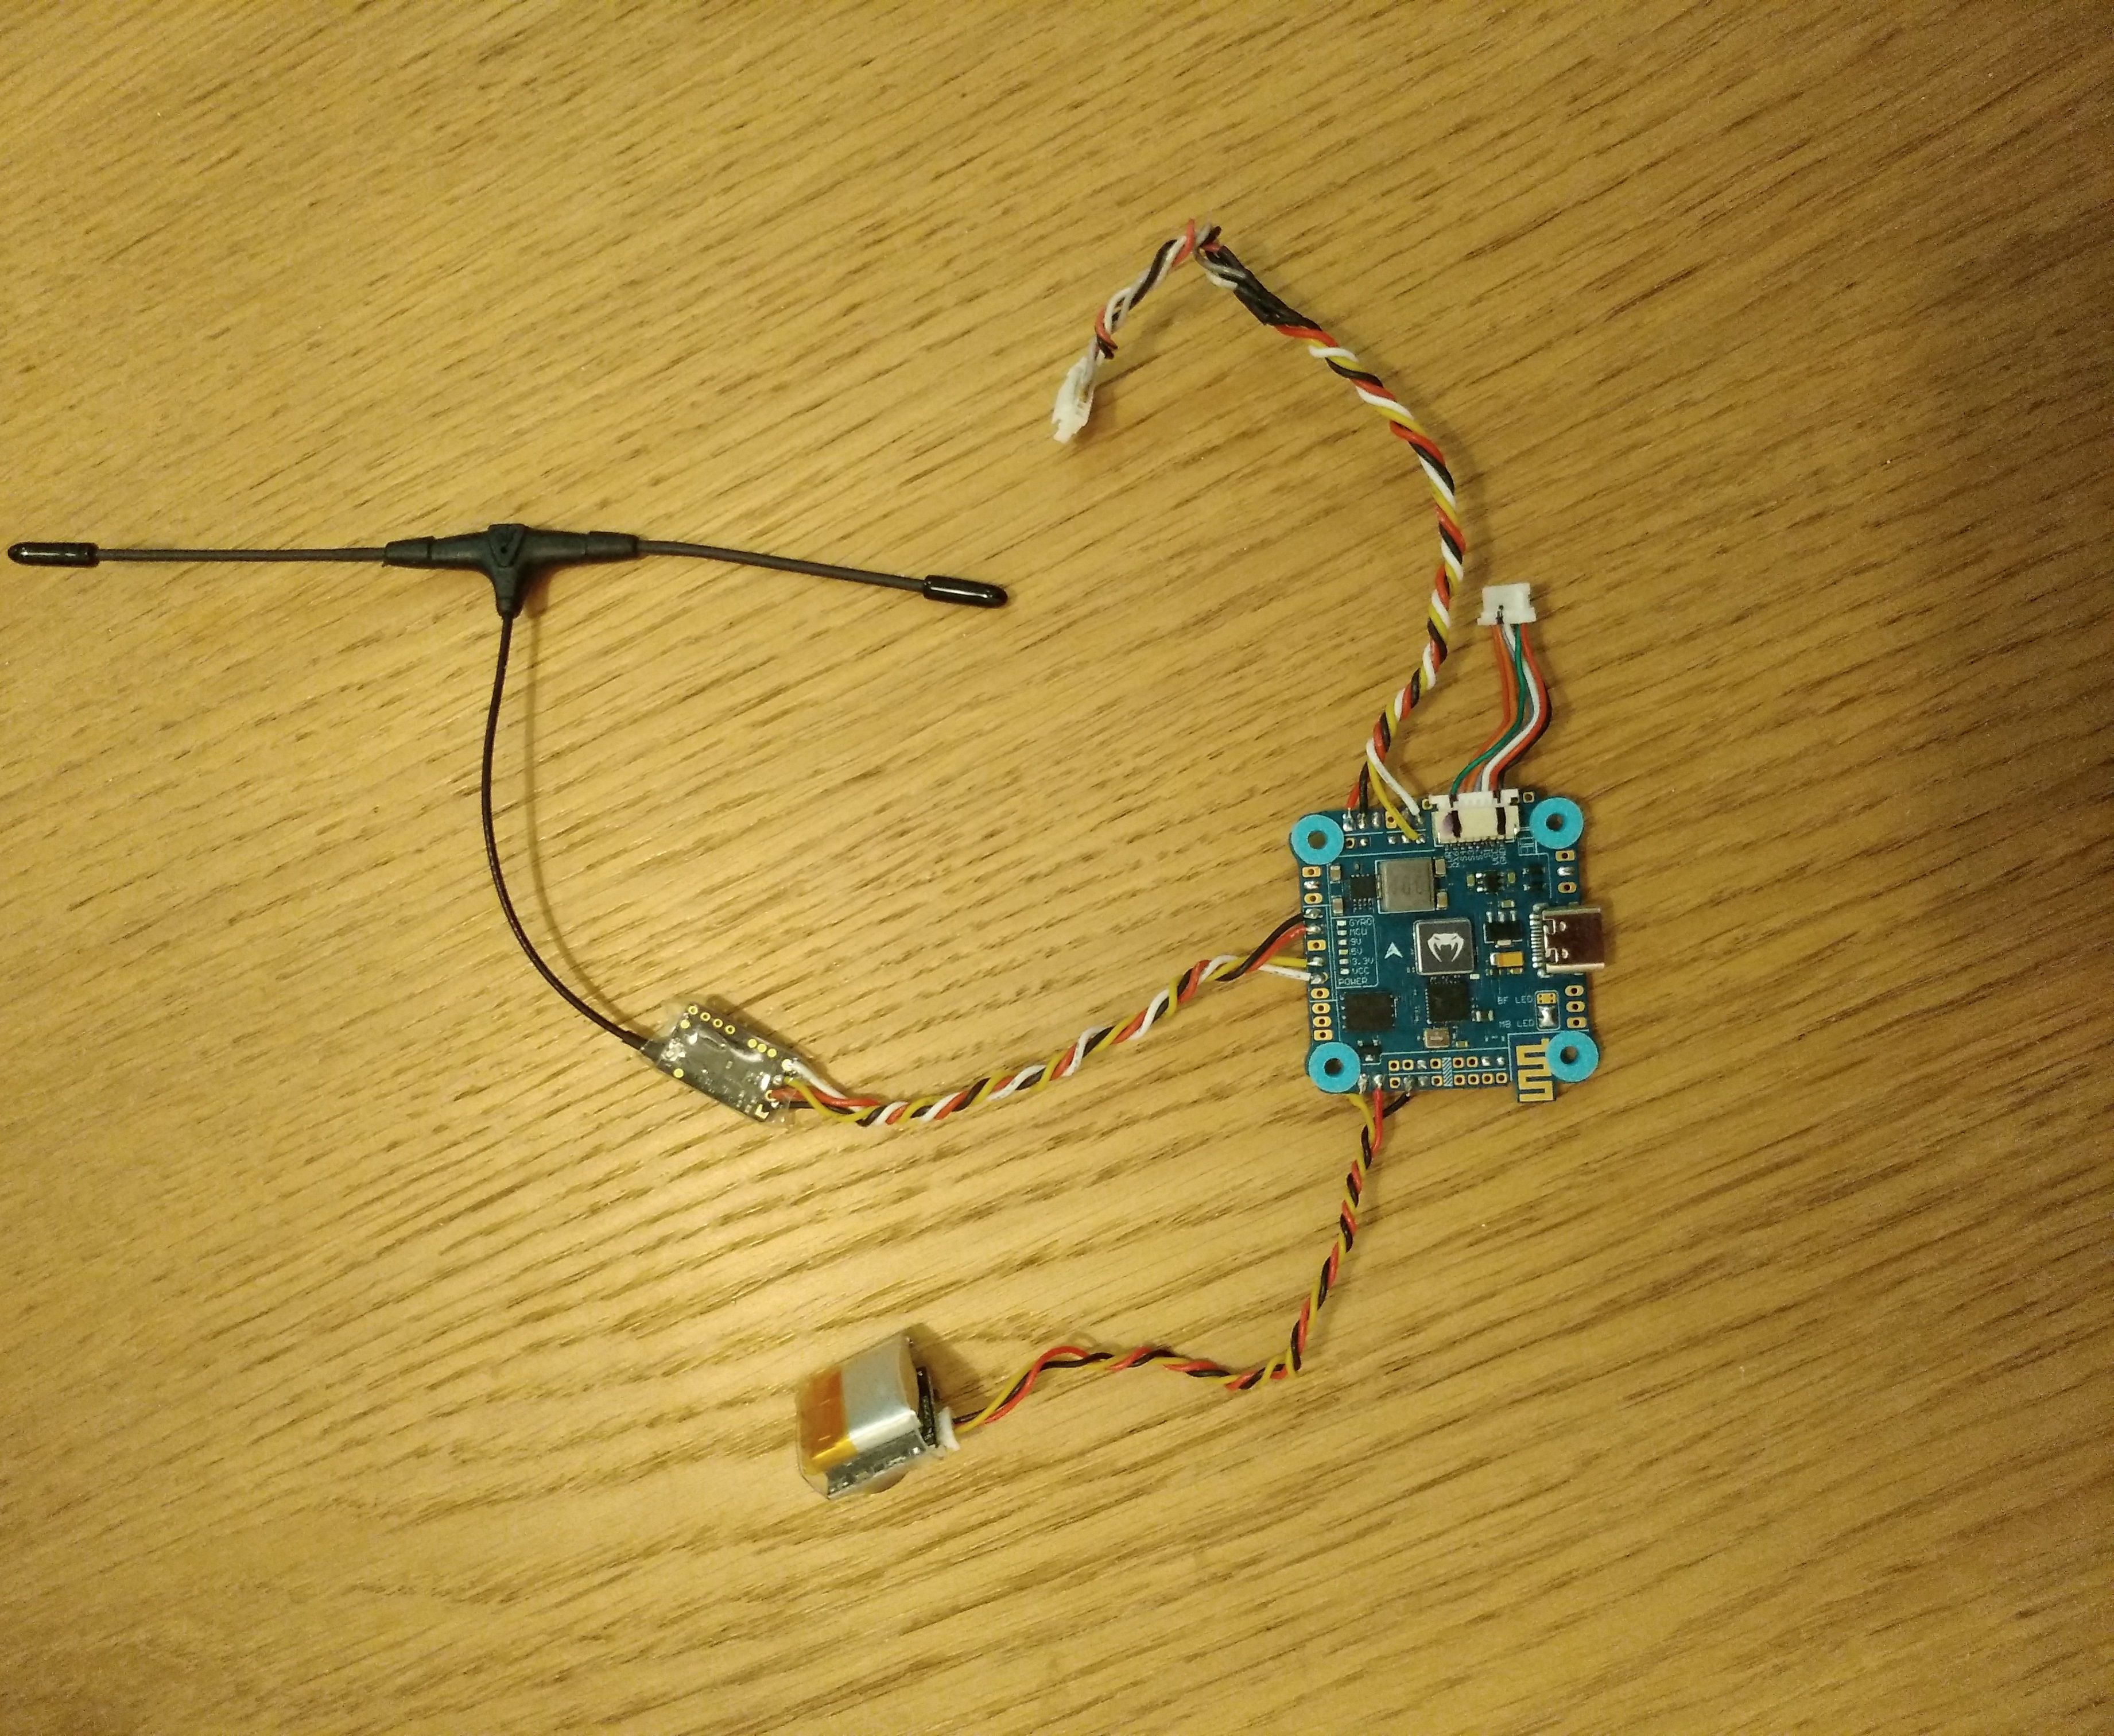
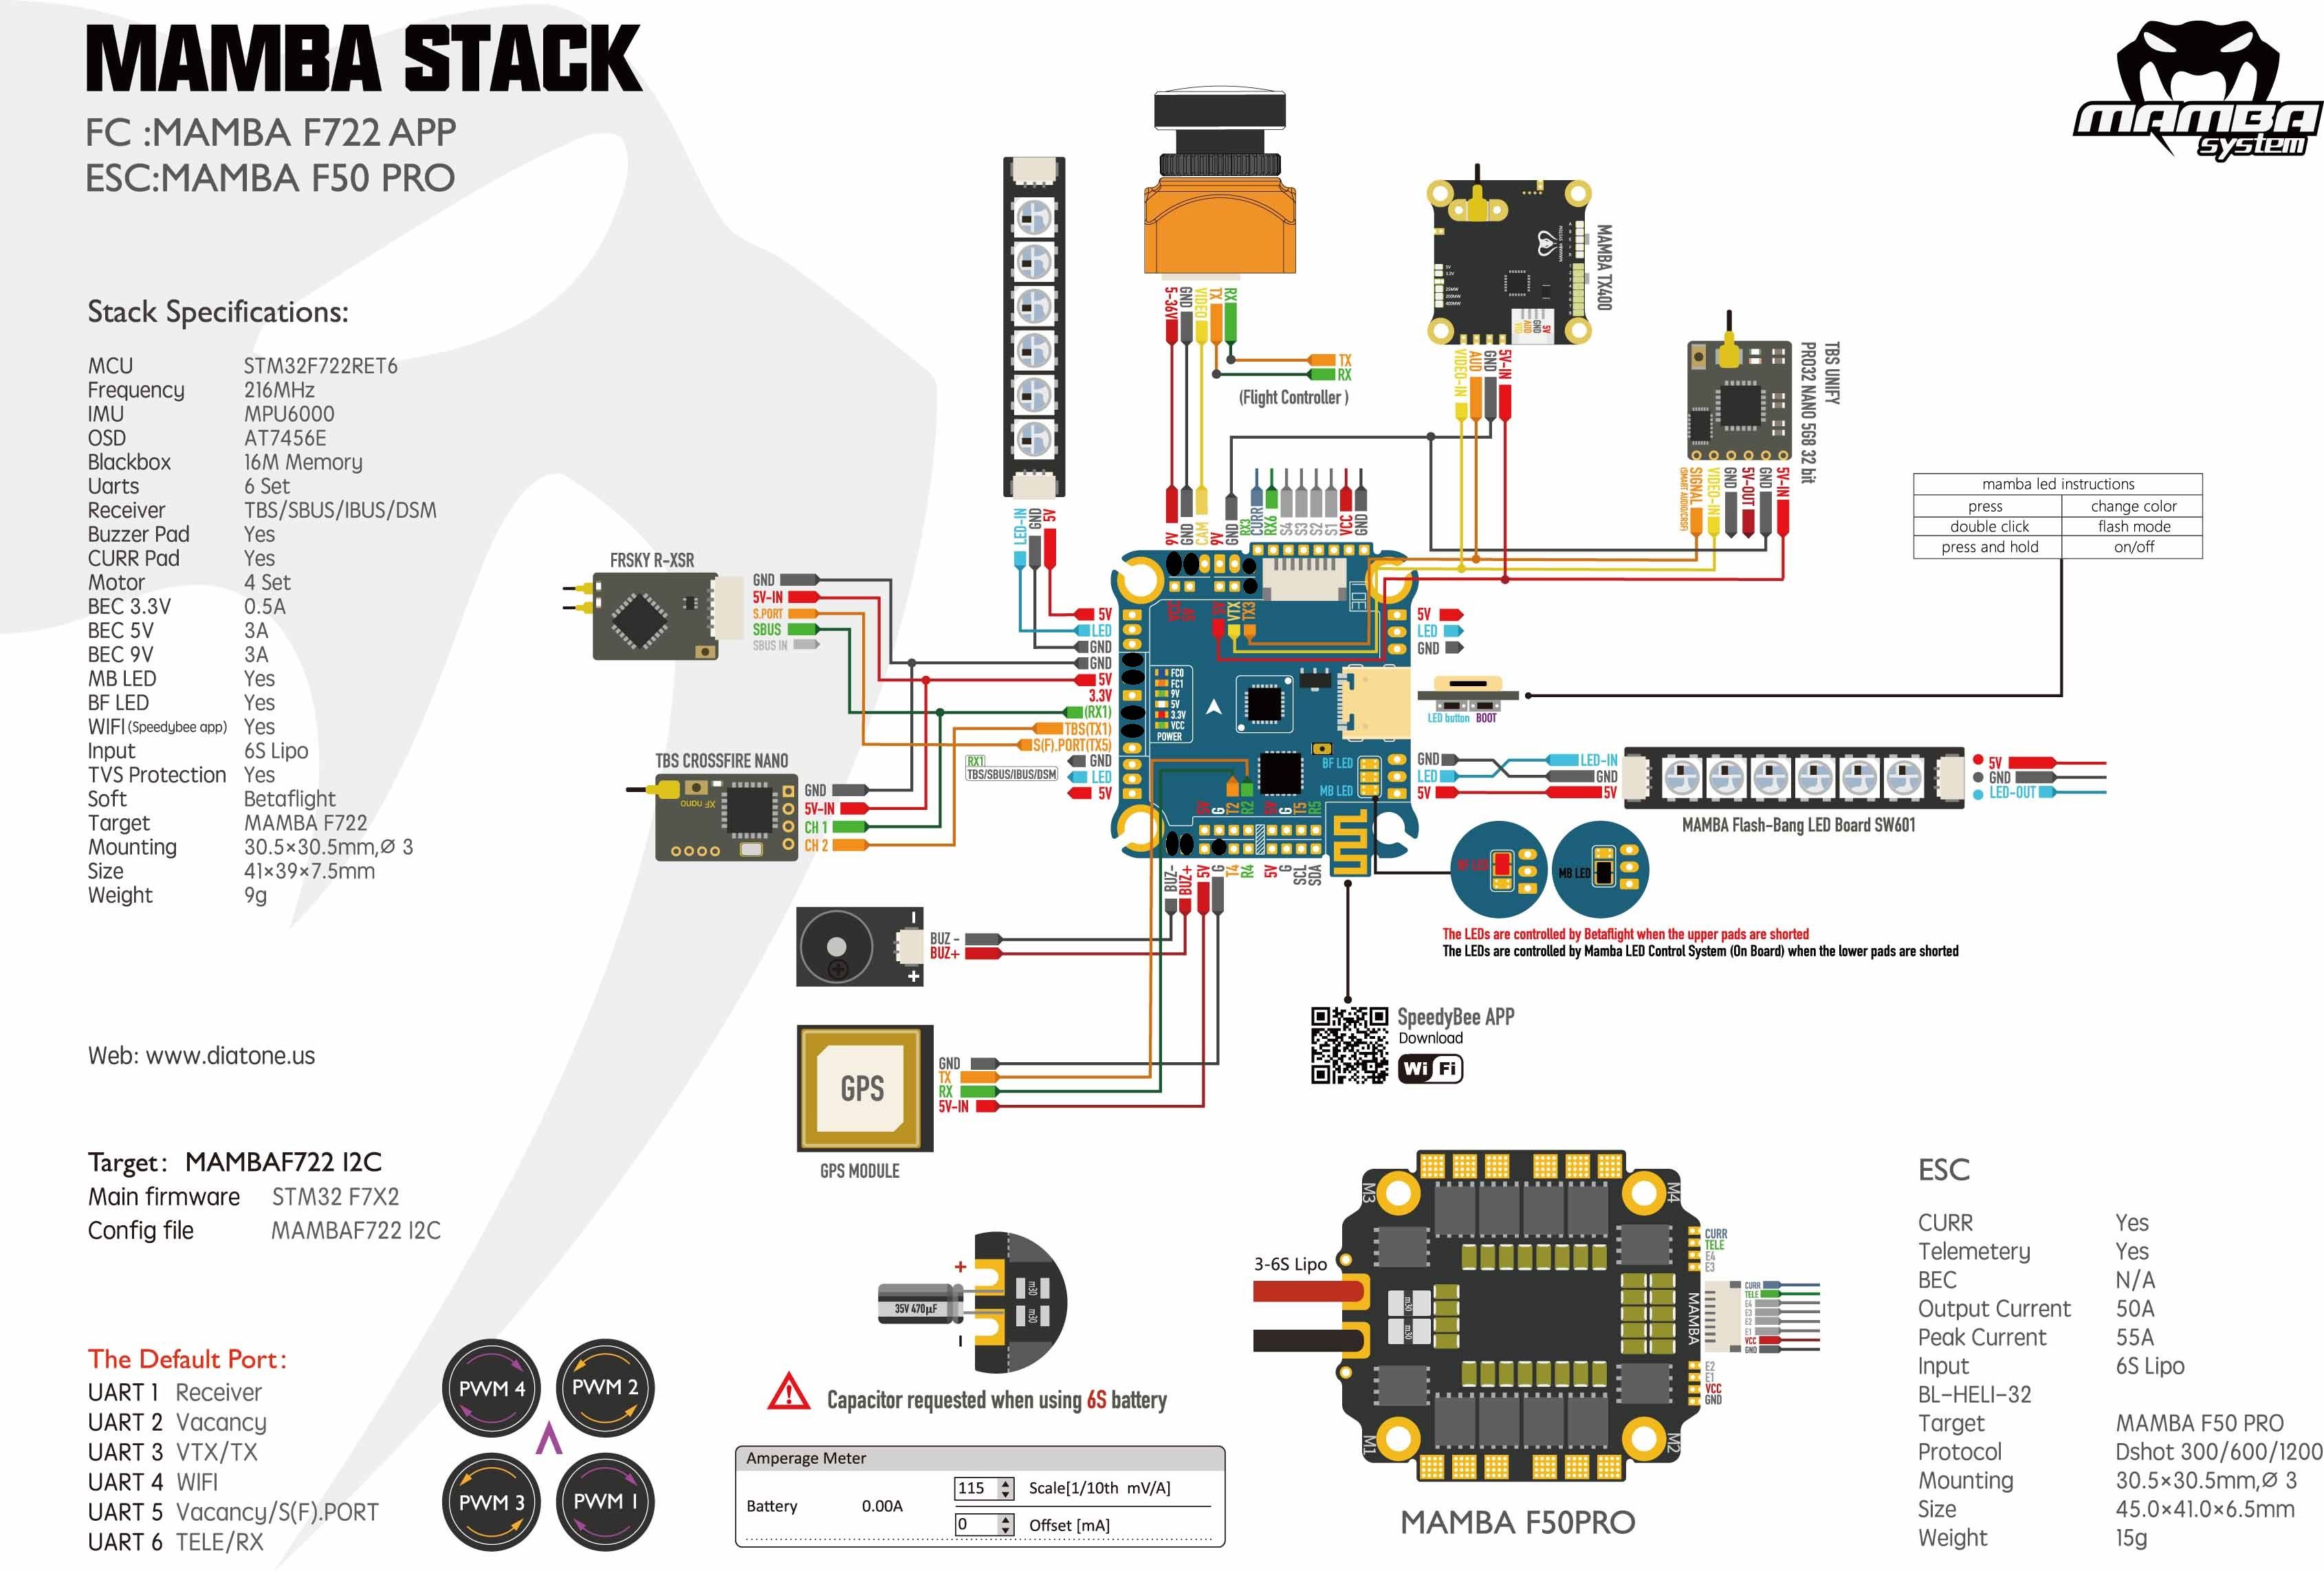
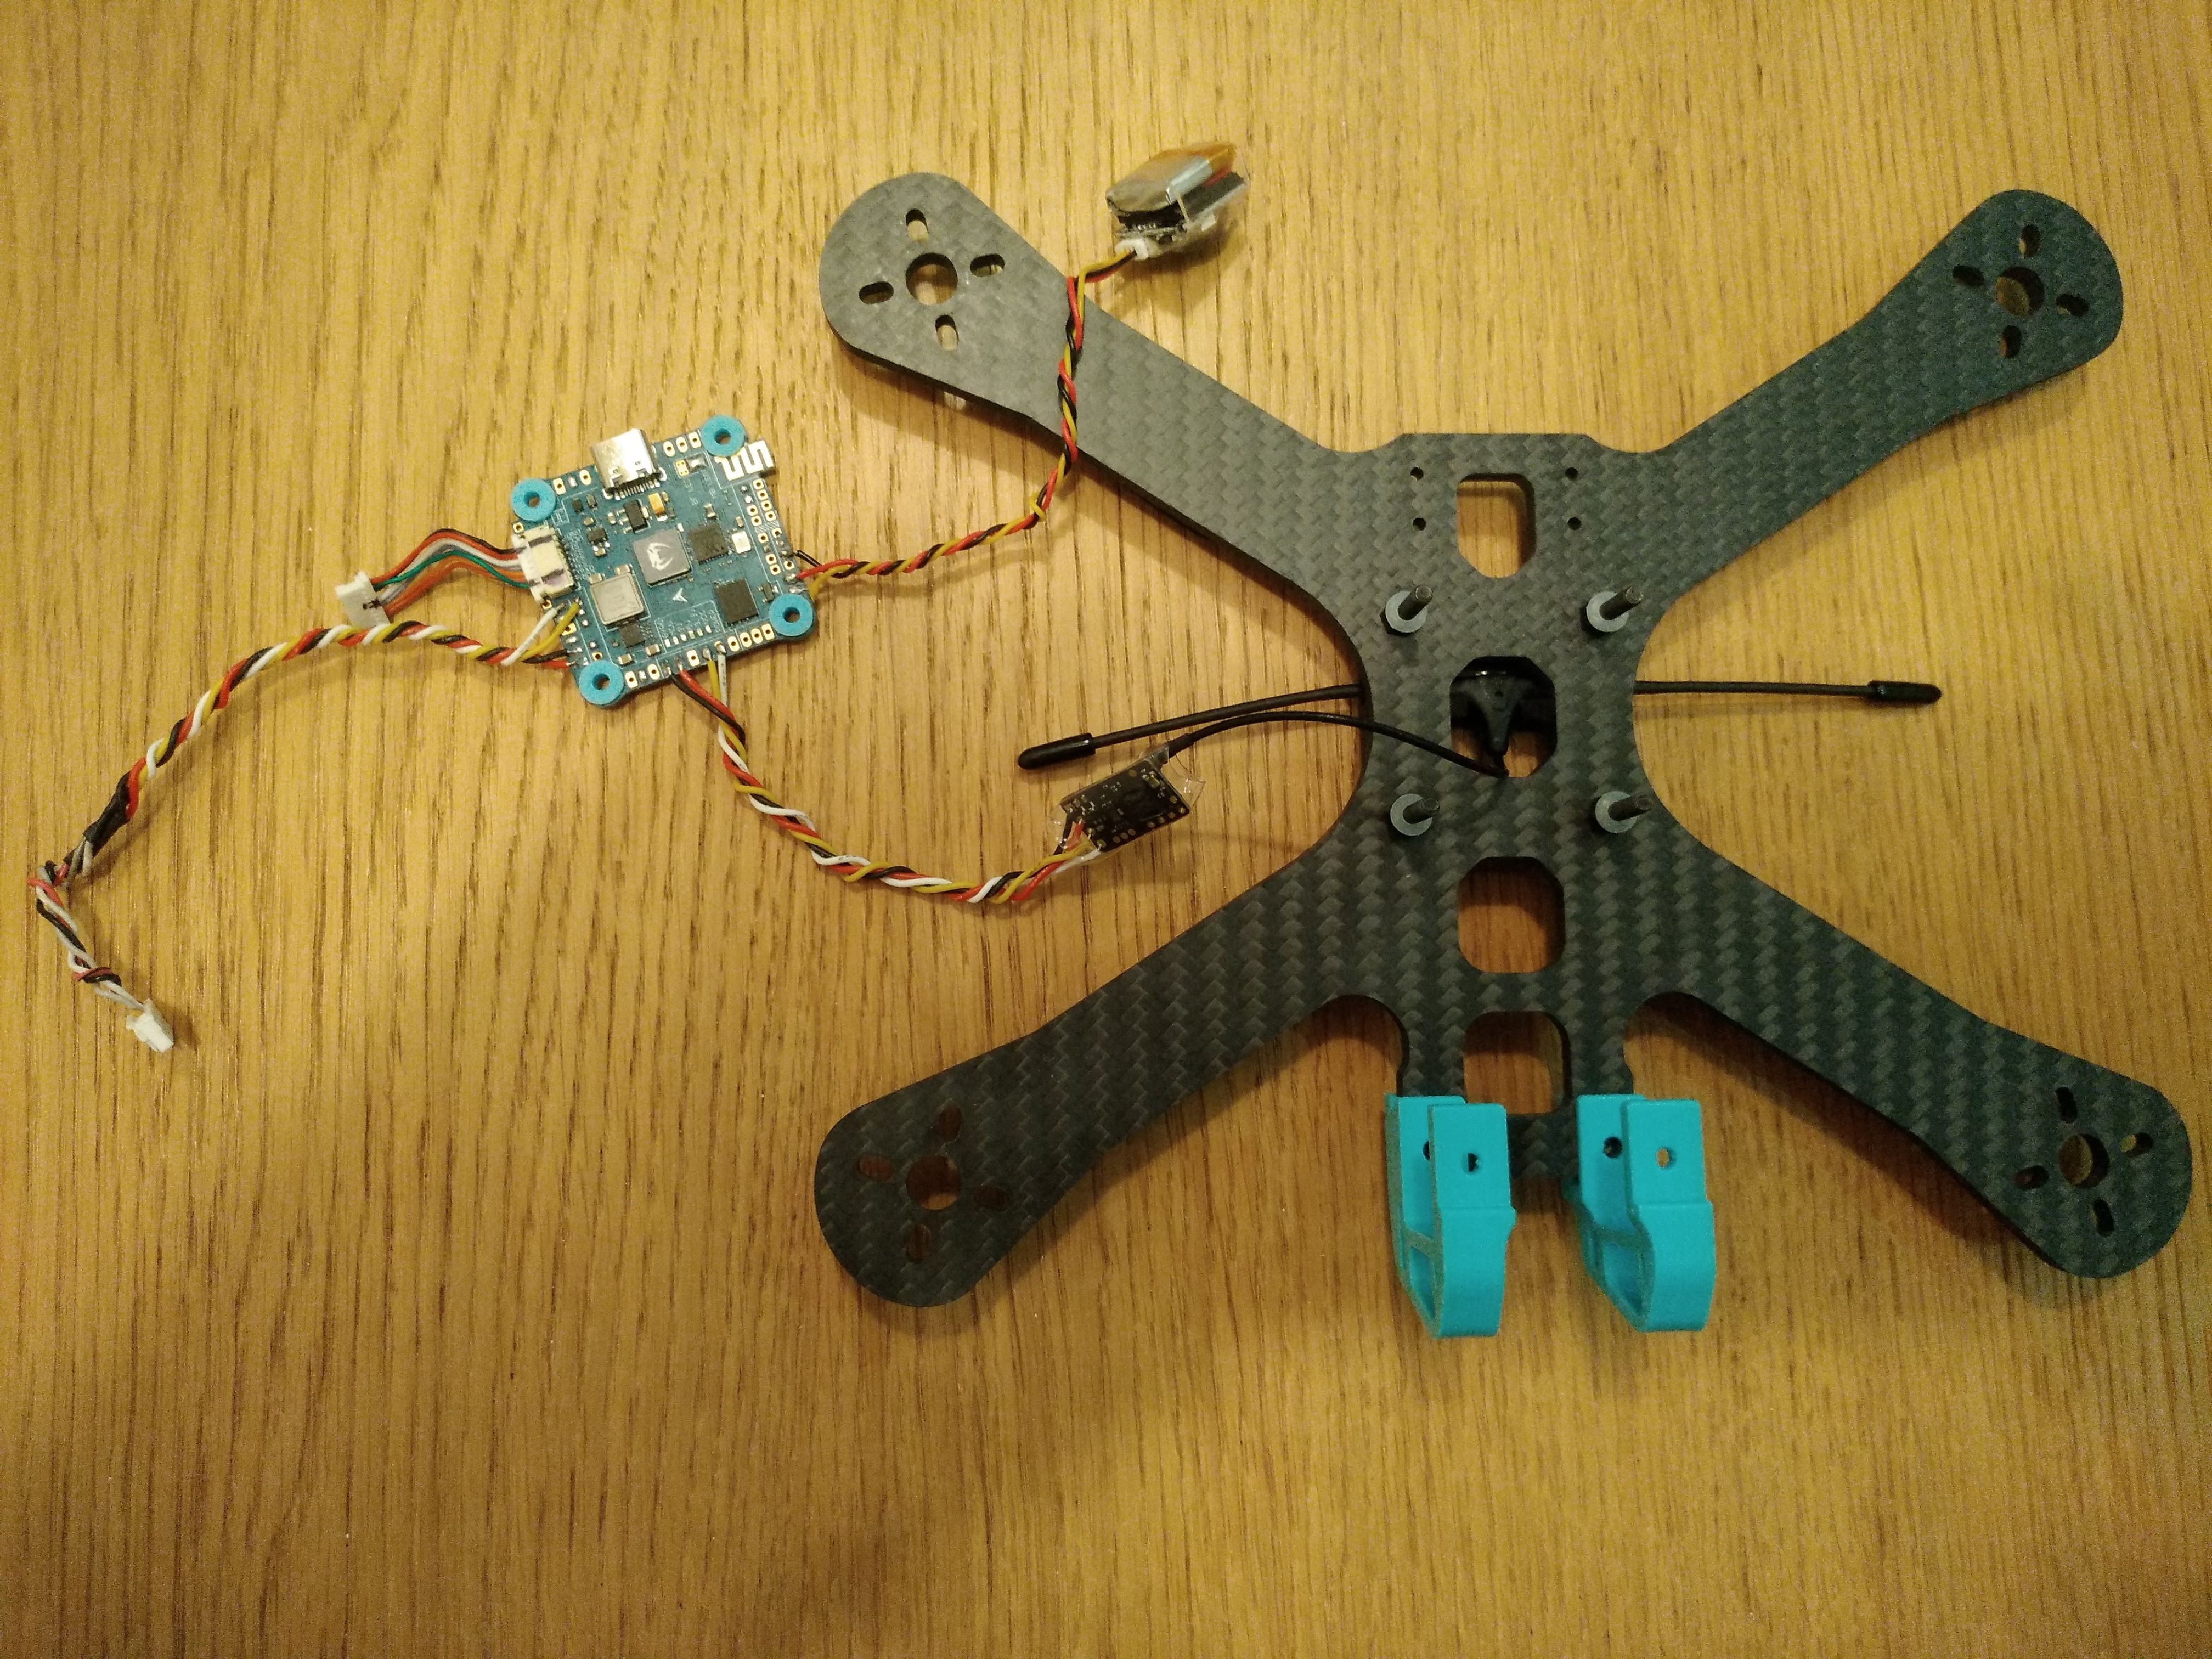
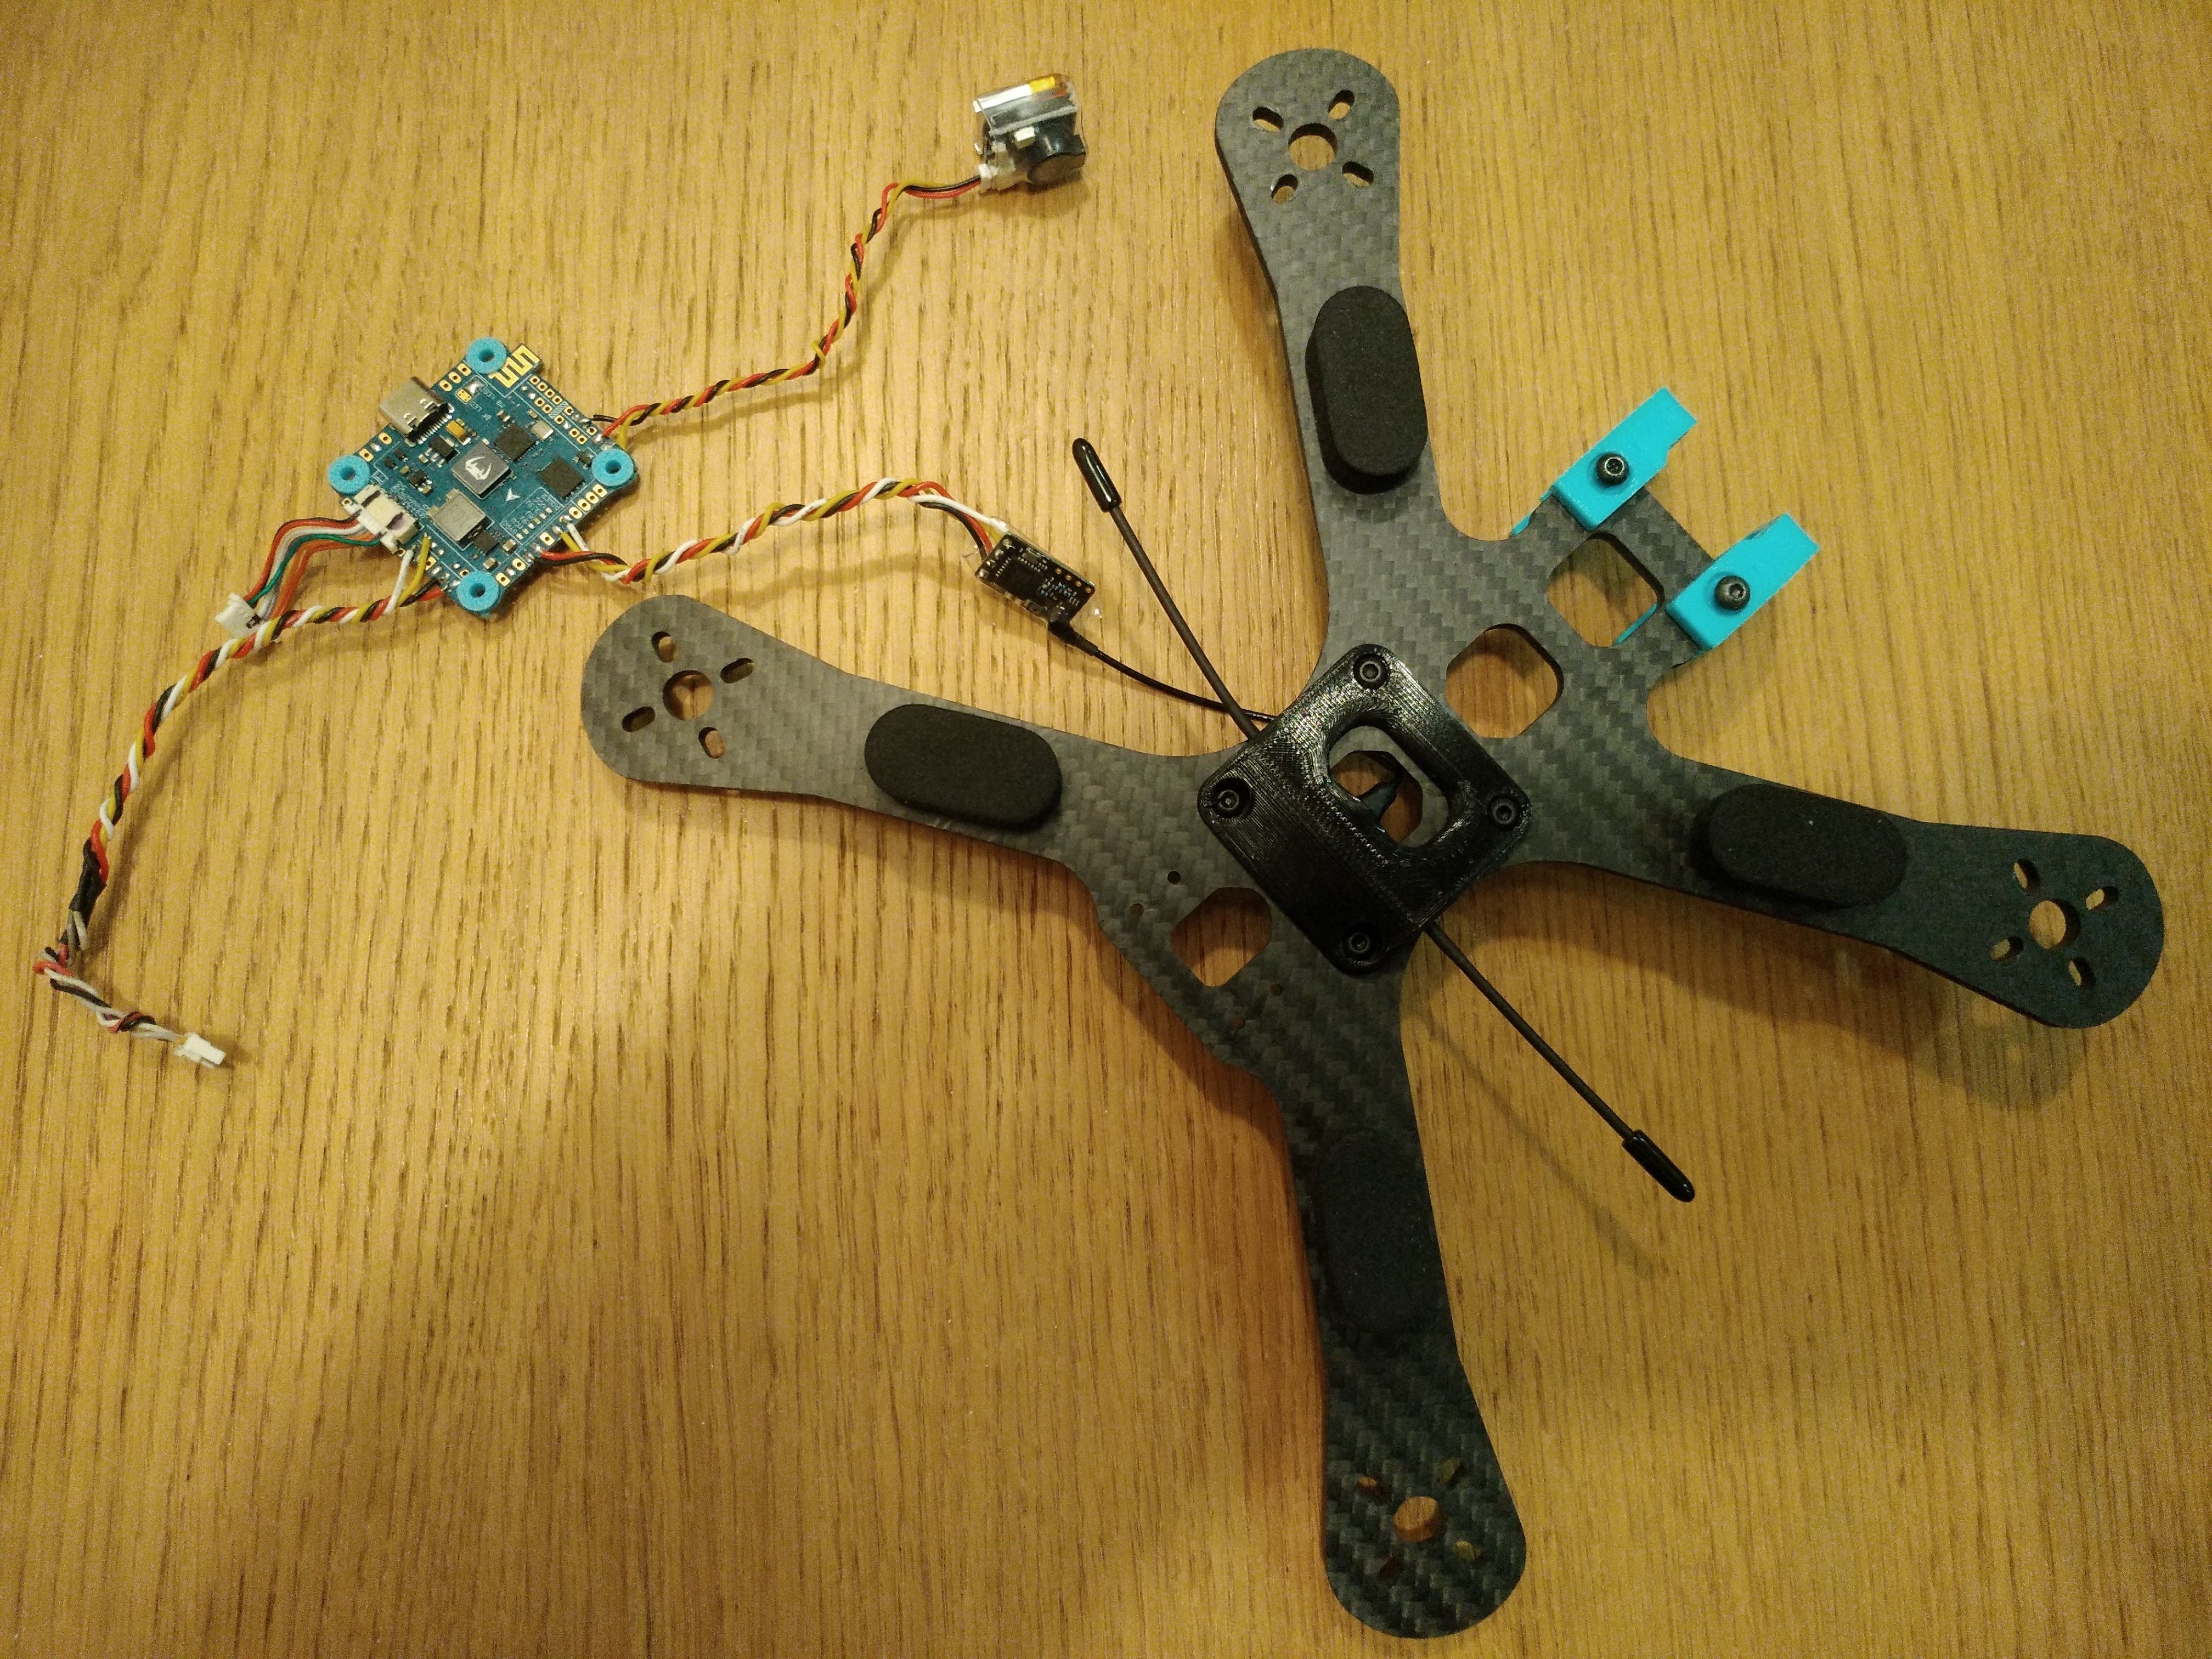
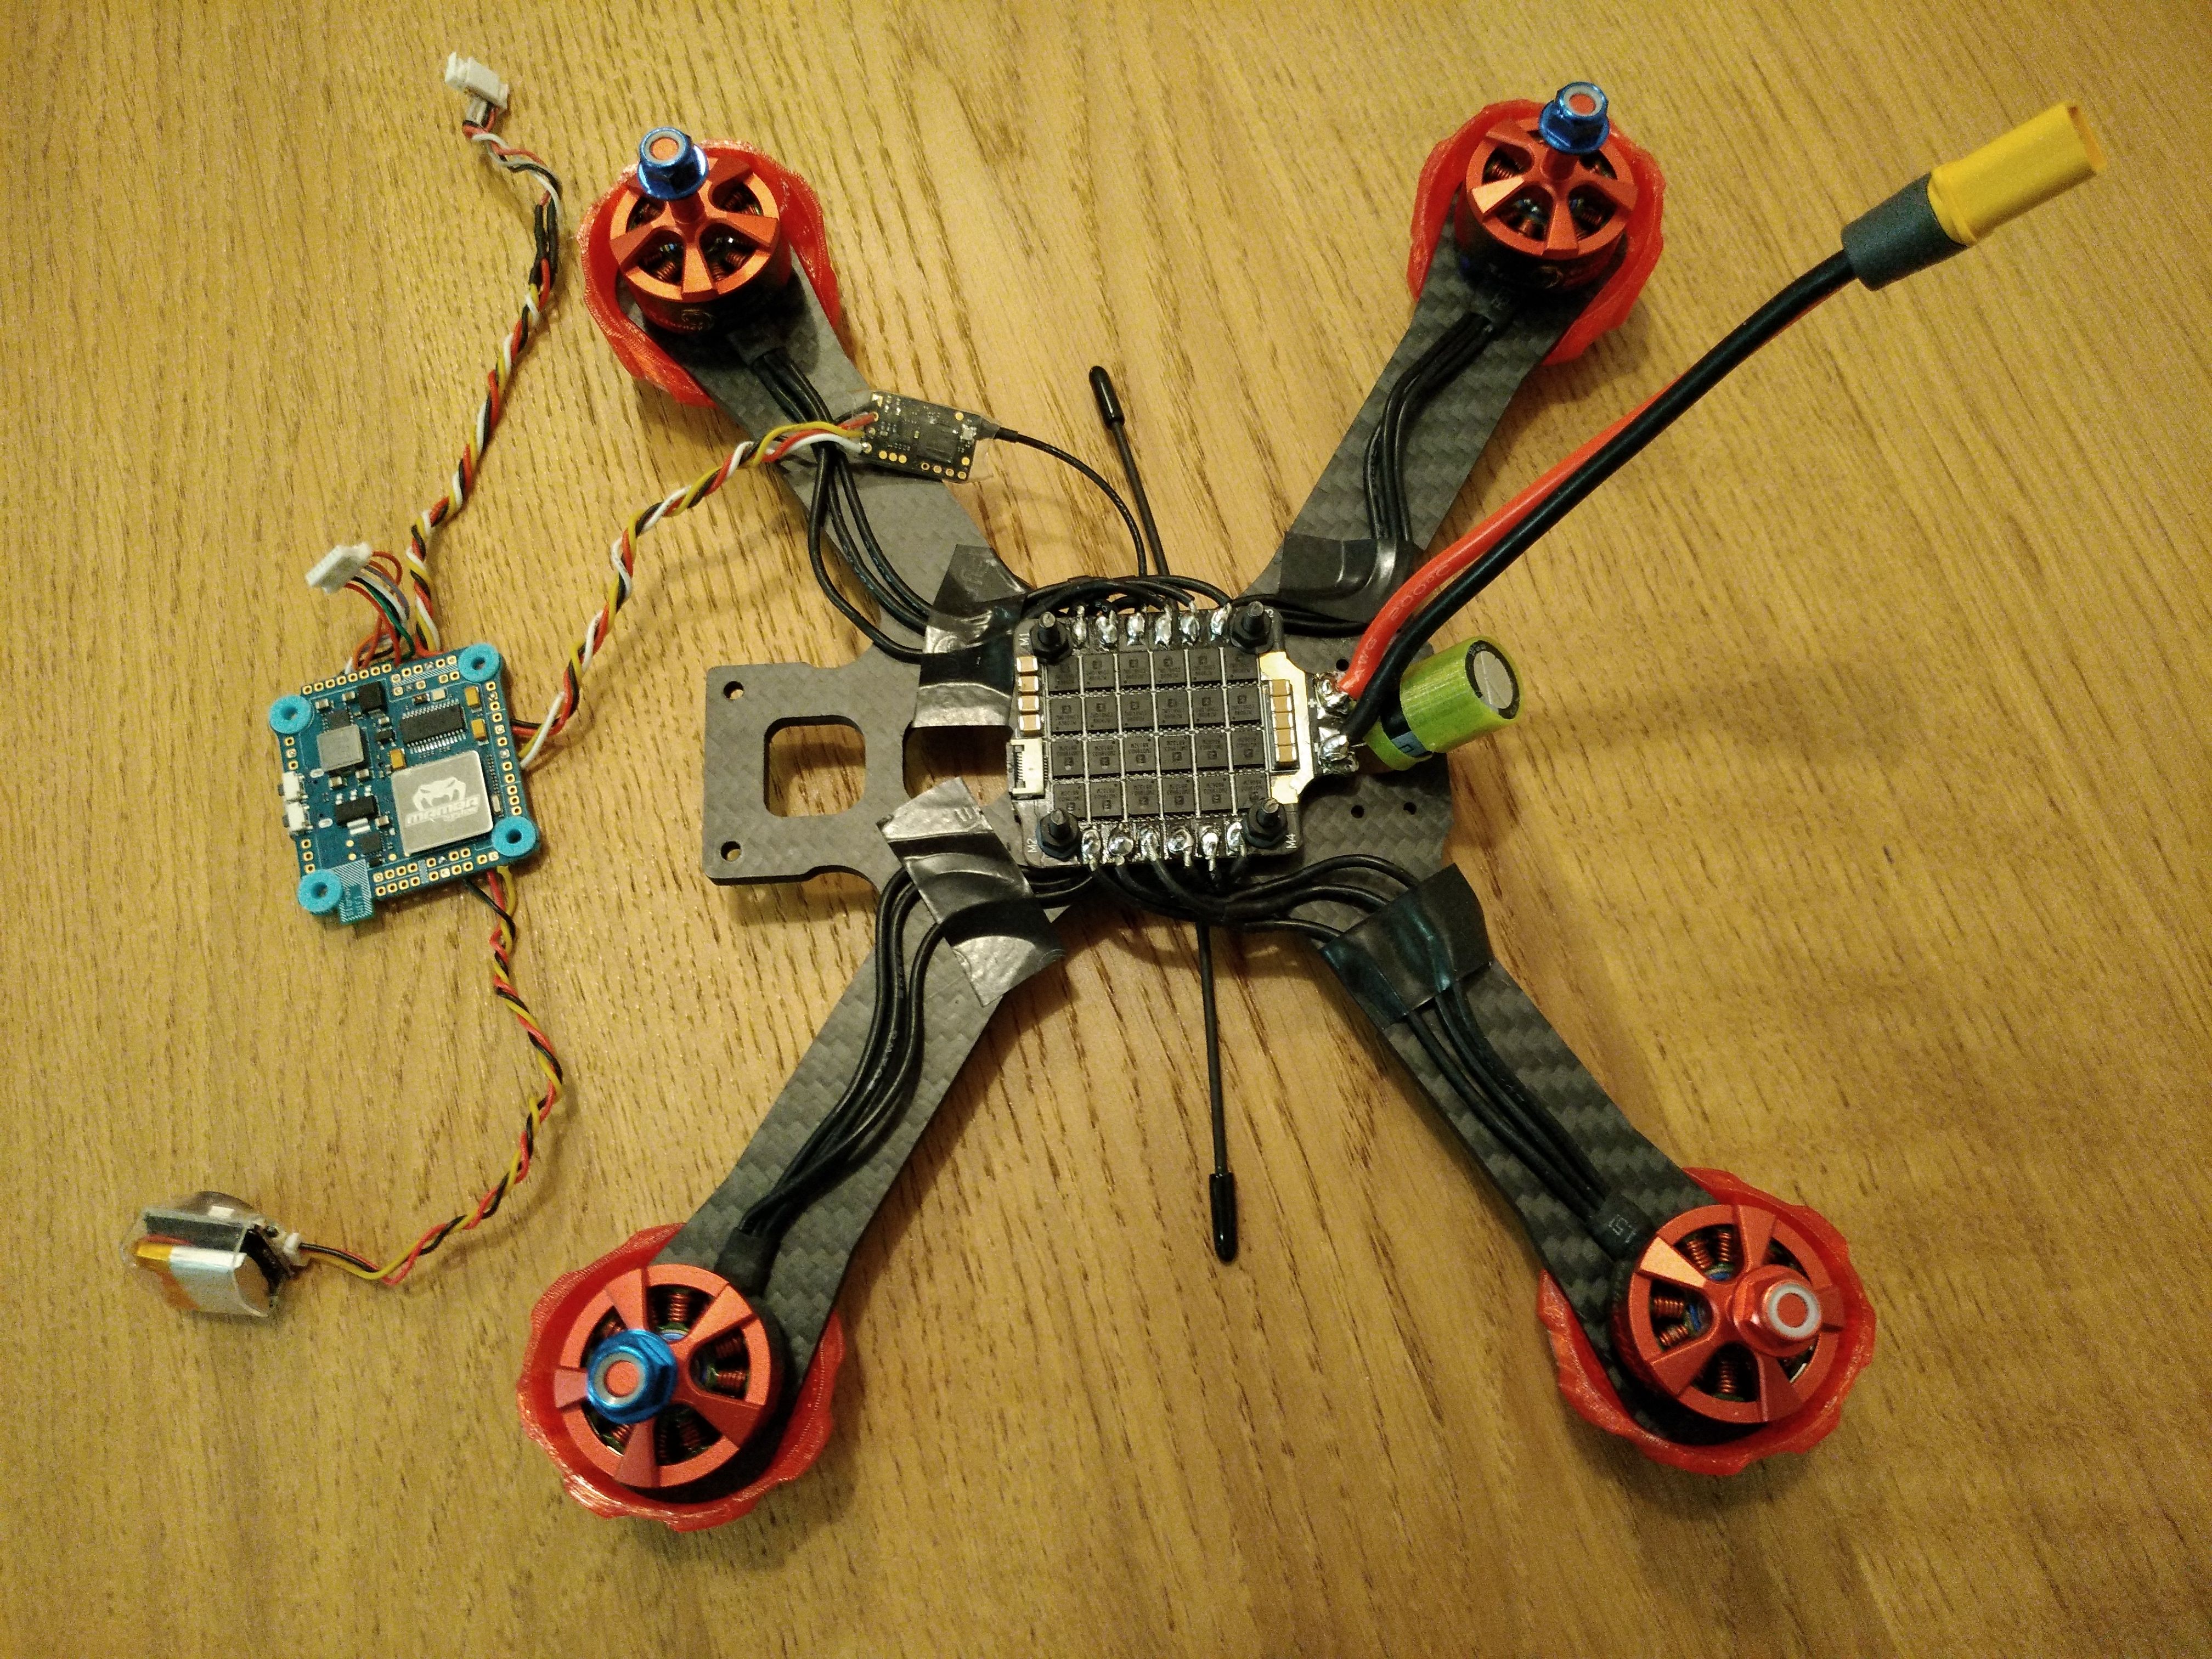
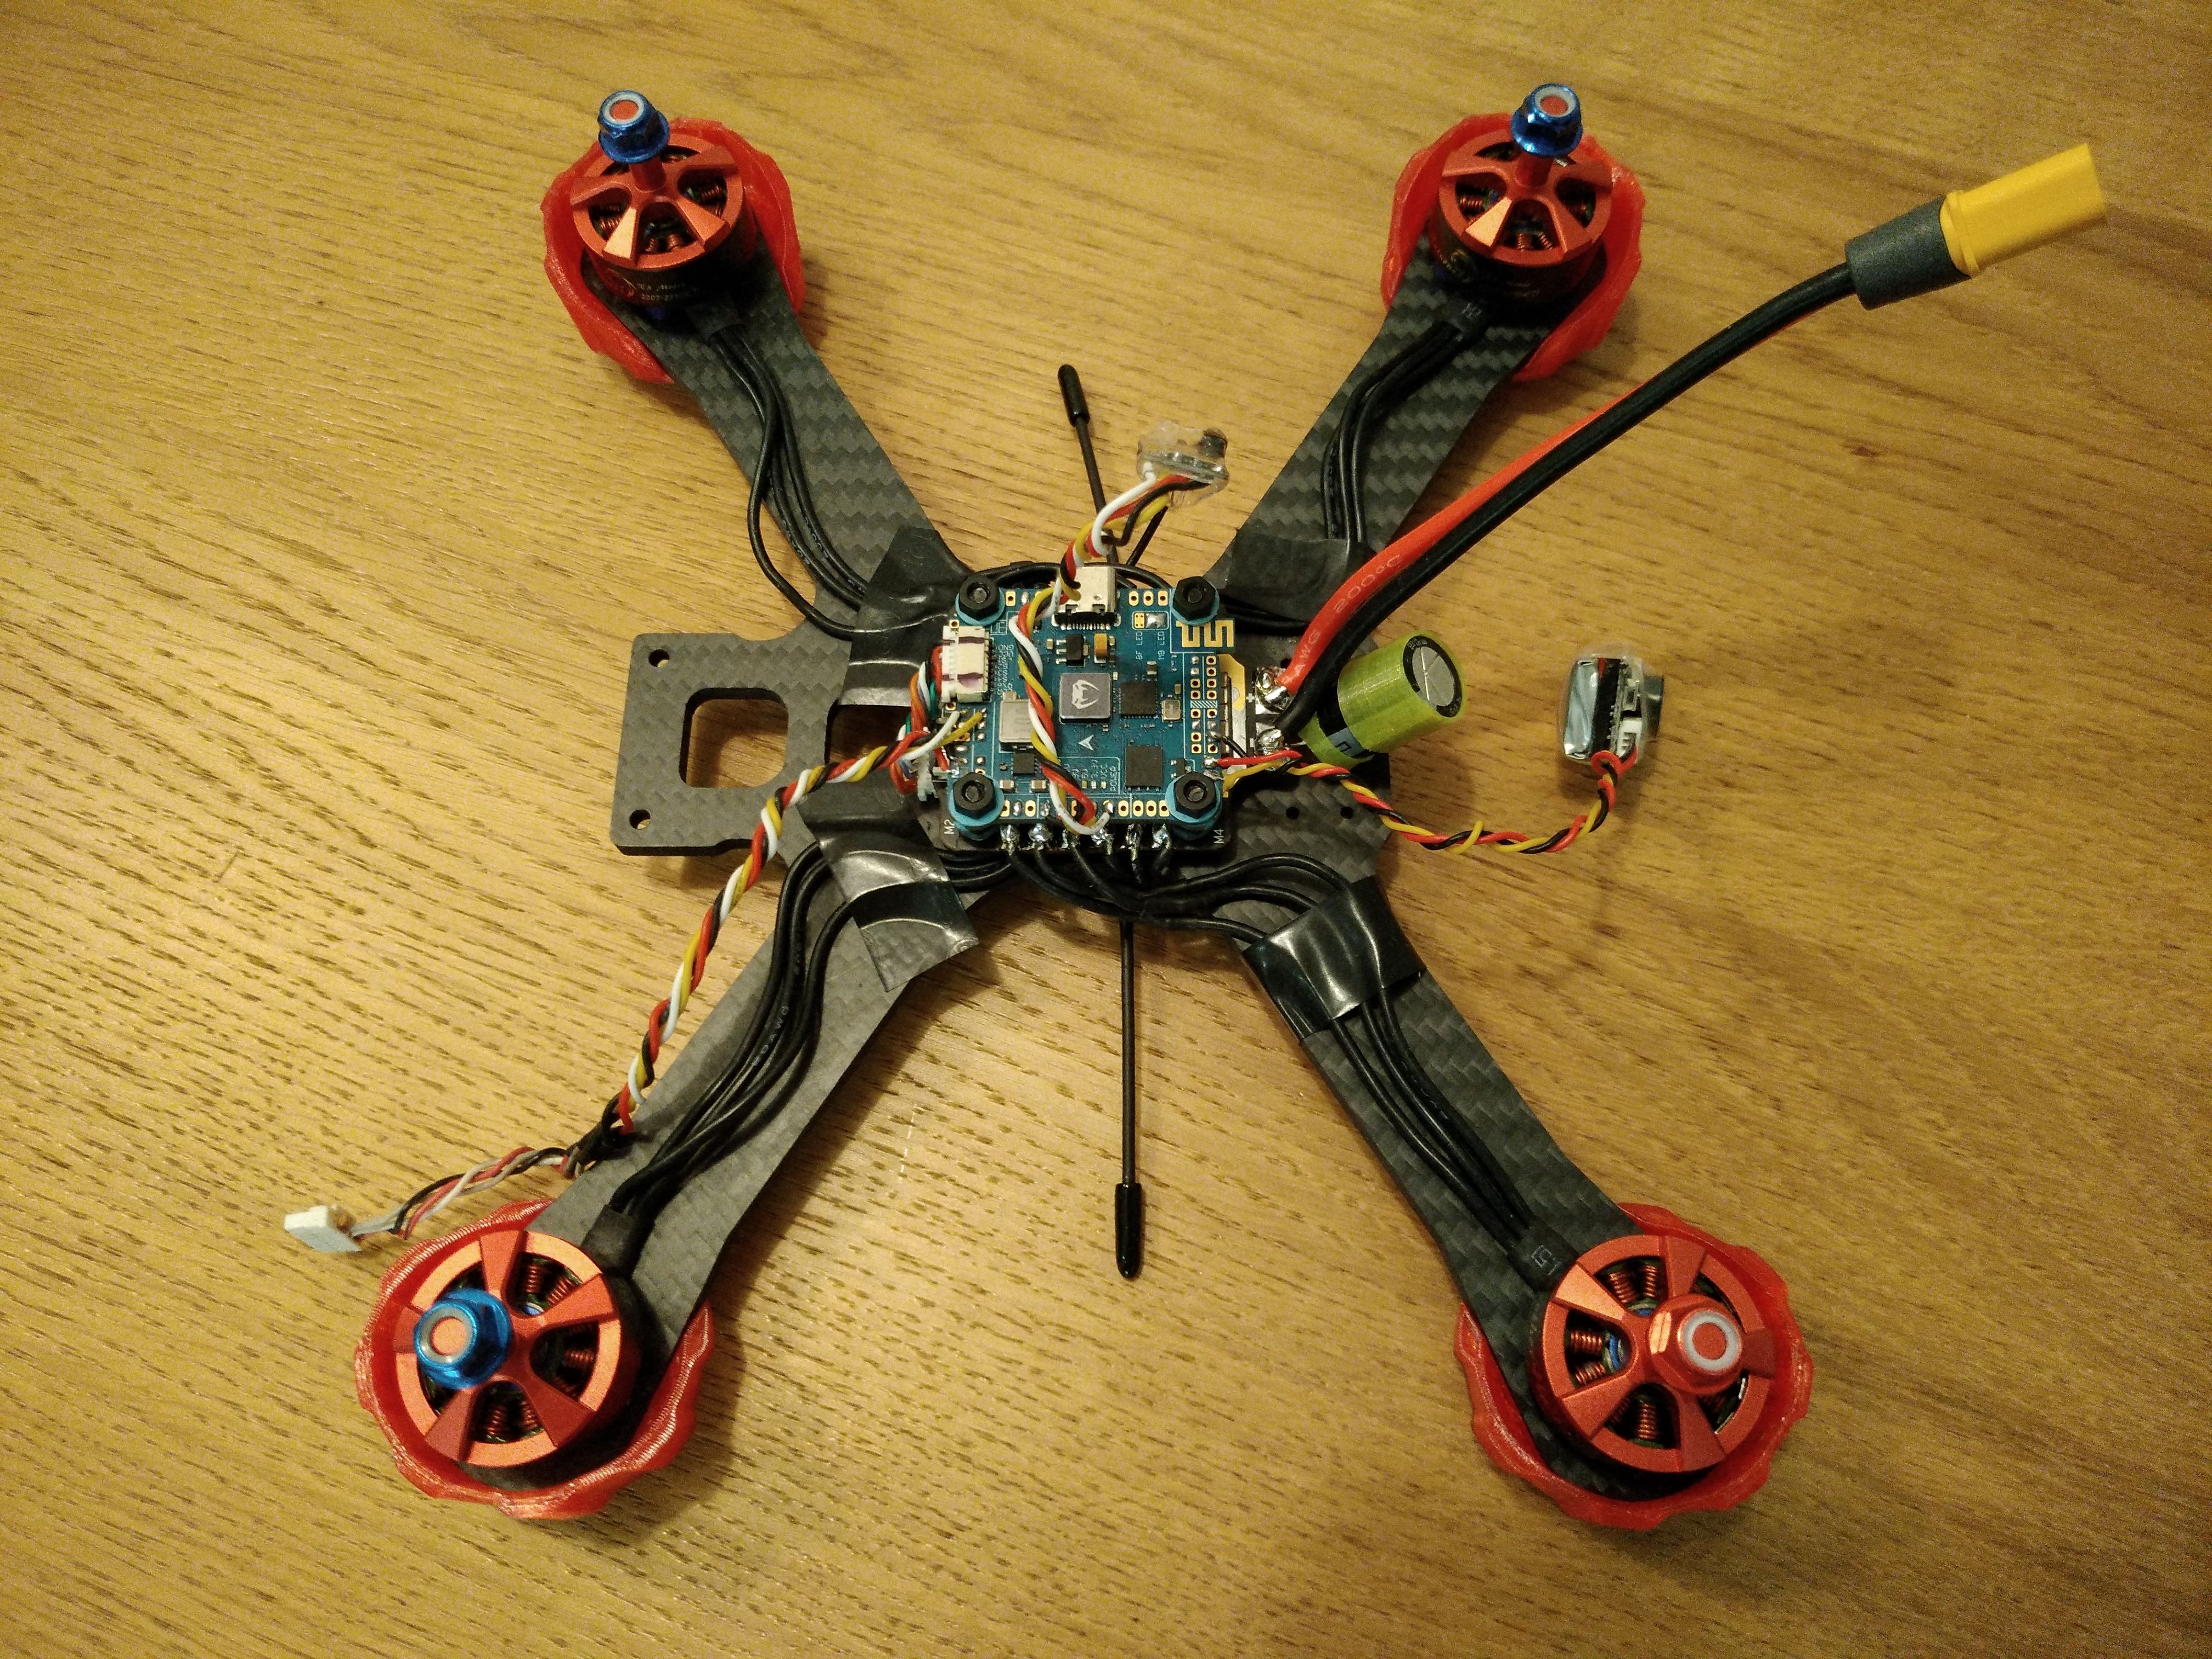
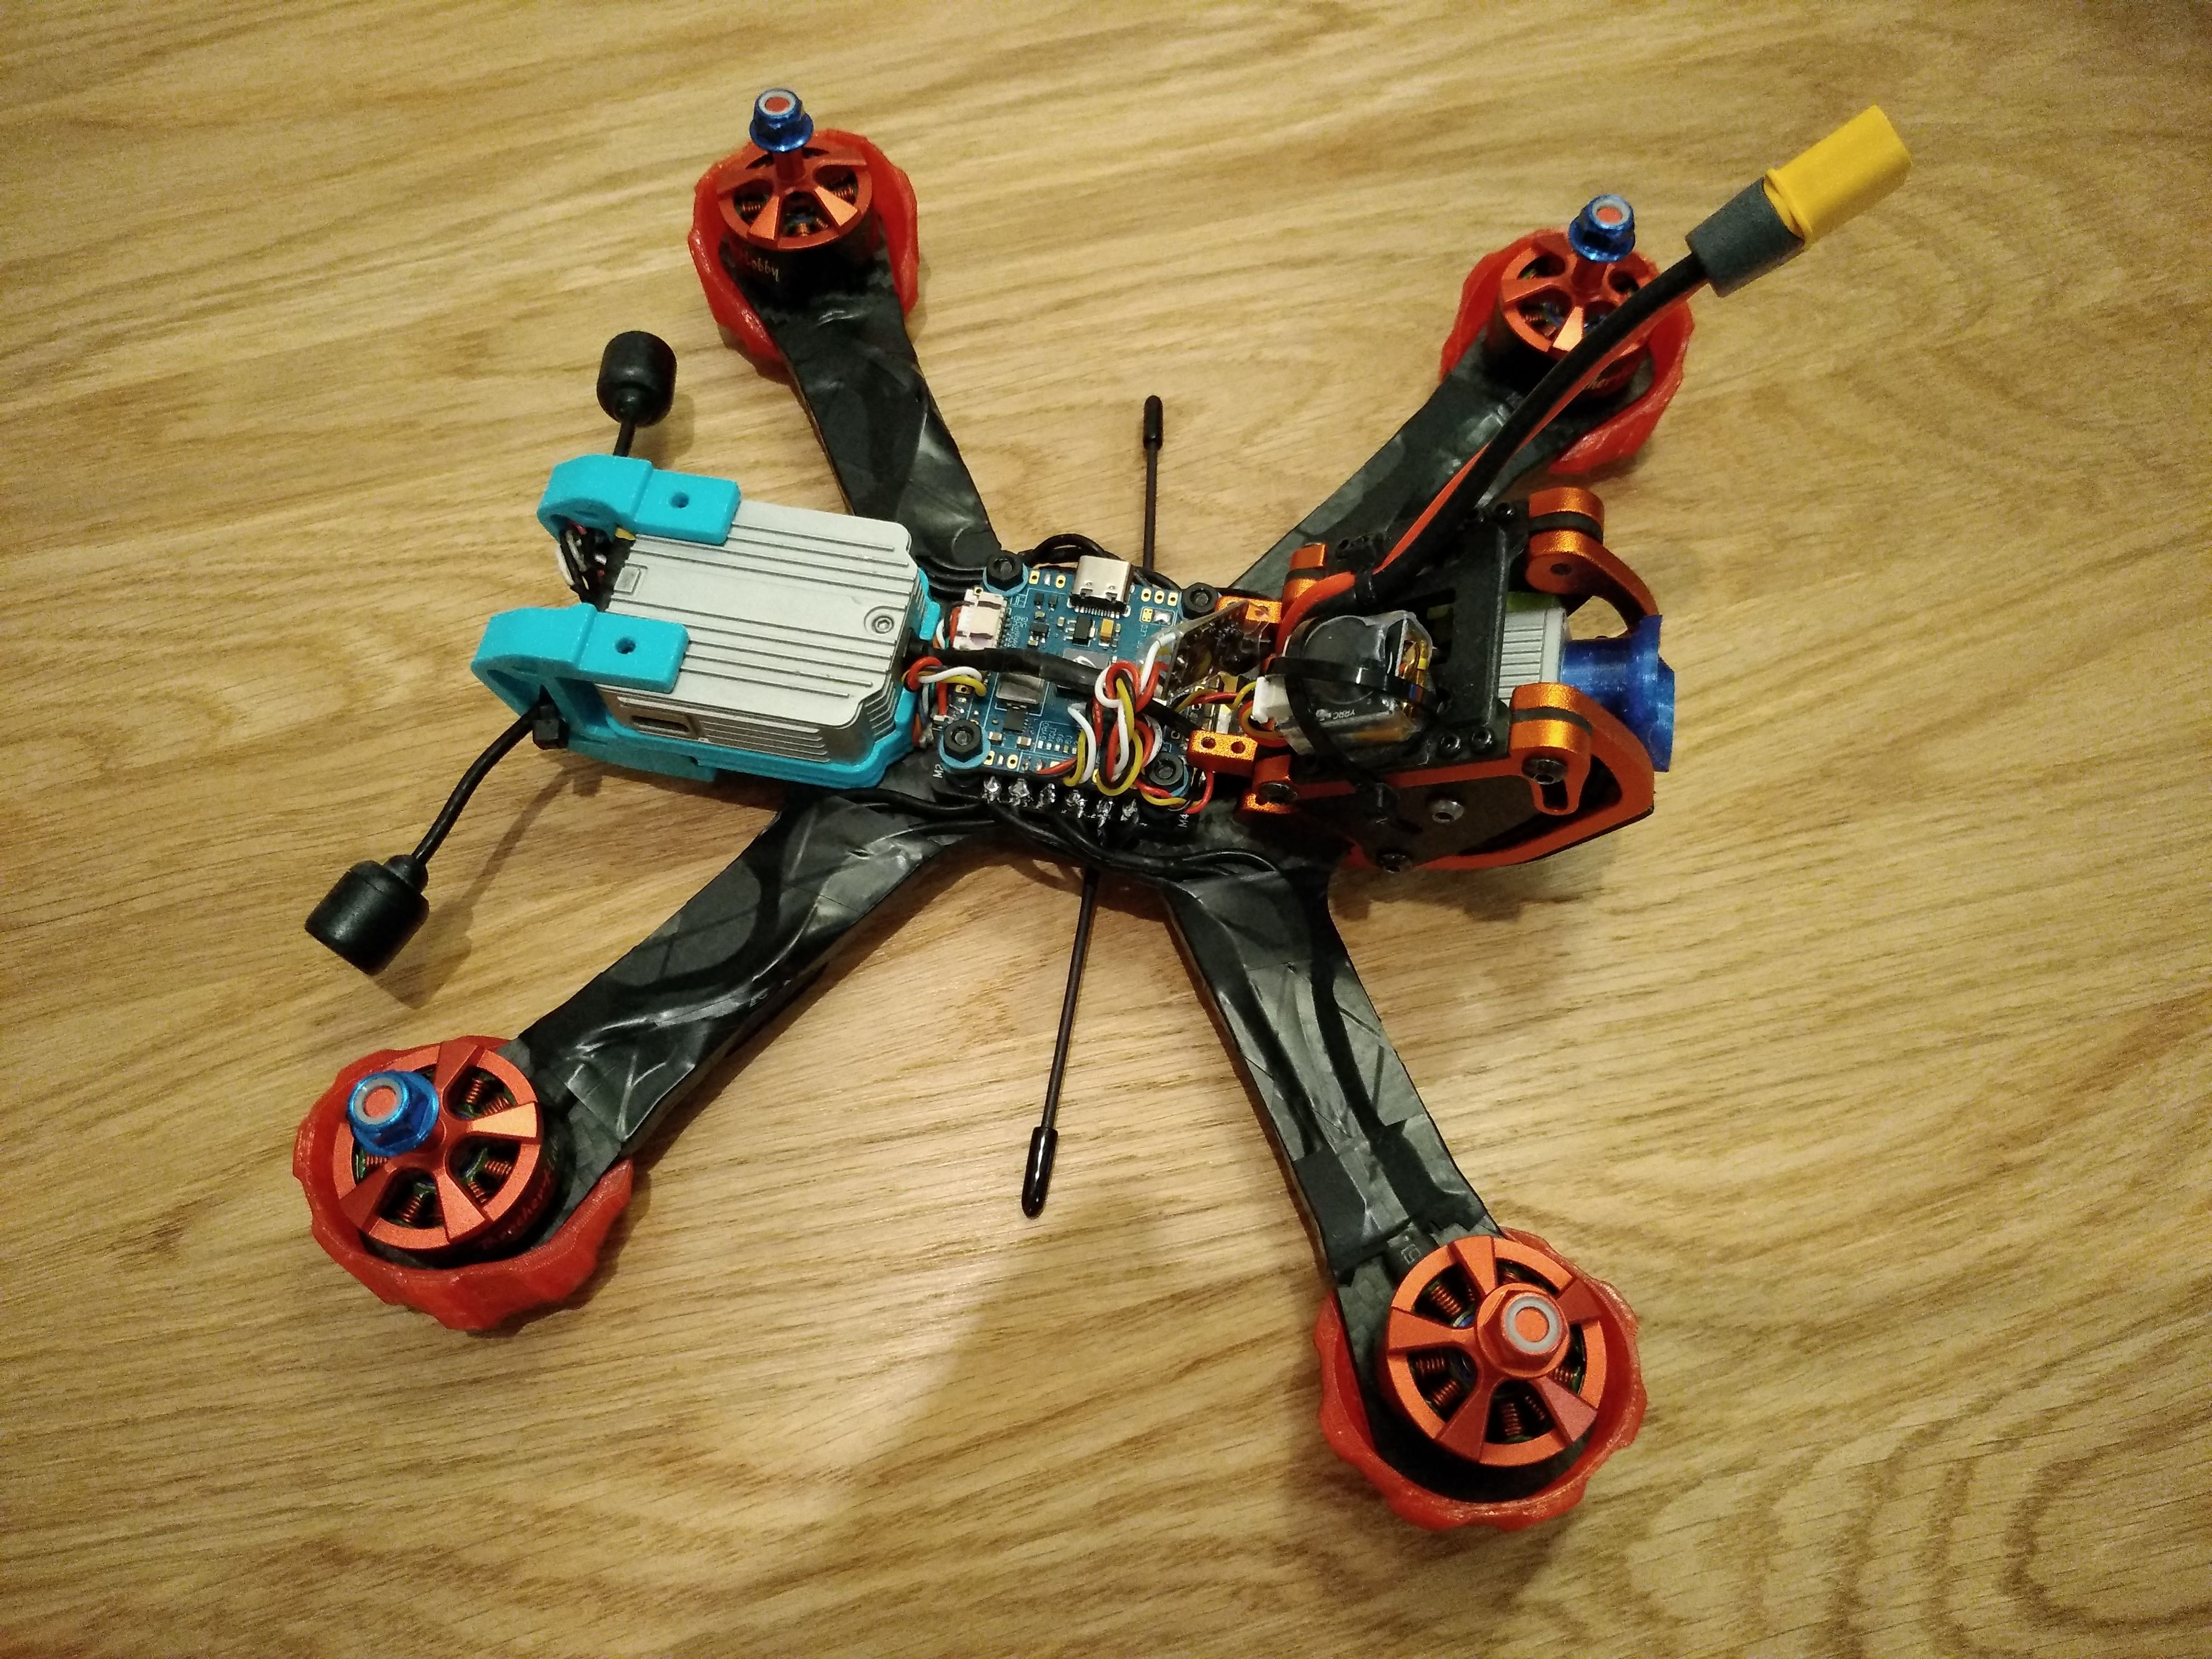
Anyway, here is how I made my build. I soldered the motors the regular way (see the first pic) to get the standard rotation (not reversed), but two motors didn't spin in the right direction and I had to change it in the BLHeliSuite32. You can find all the connections on the second photo and also on the wiring diagram. Make sure you connect DJI's TX to FC's RX3 and DJI's RX to FC's TX3 (or other RX/TX's) because at first I put RX to RX and the OSD in the DJI Goggles didn't work:)
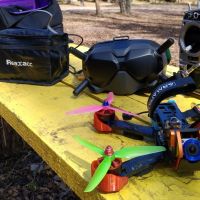
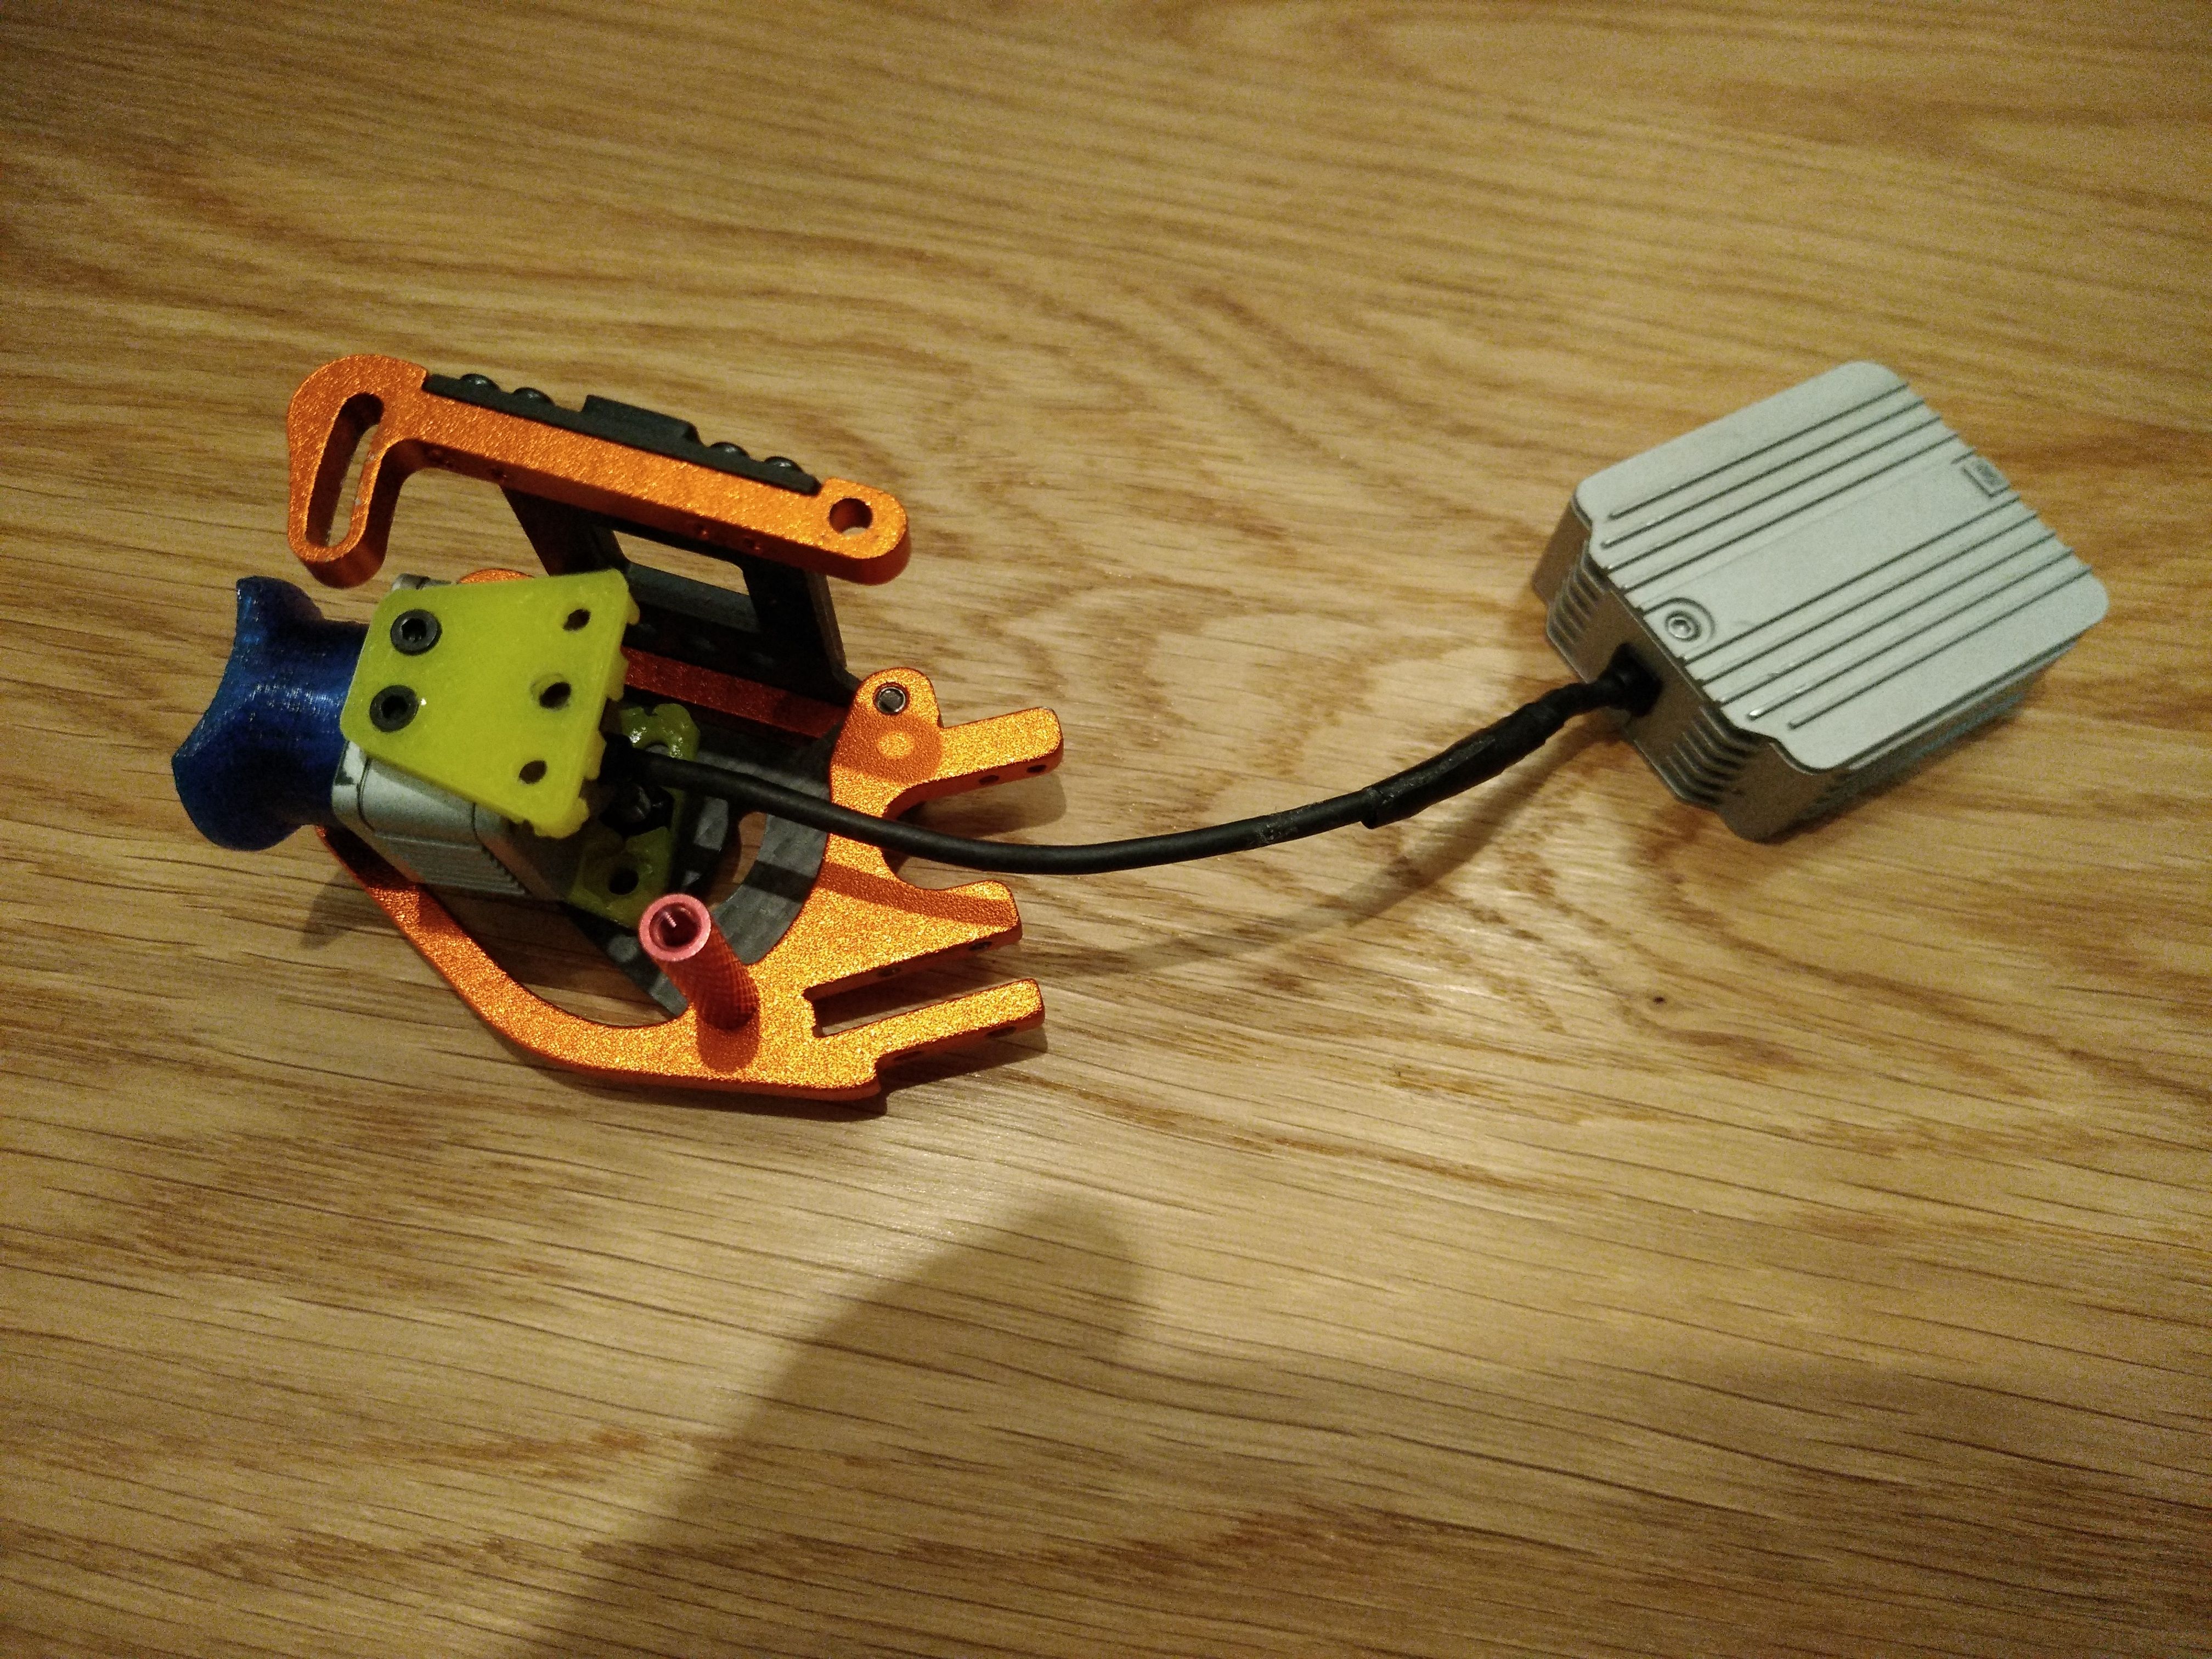
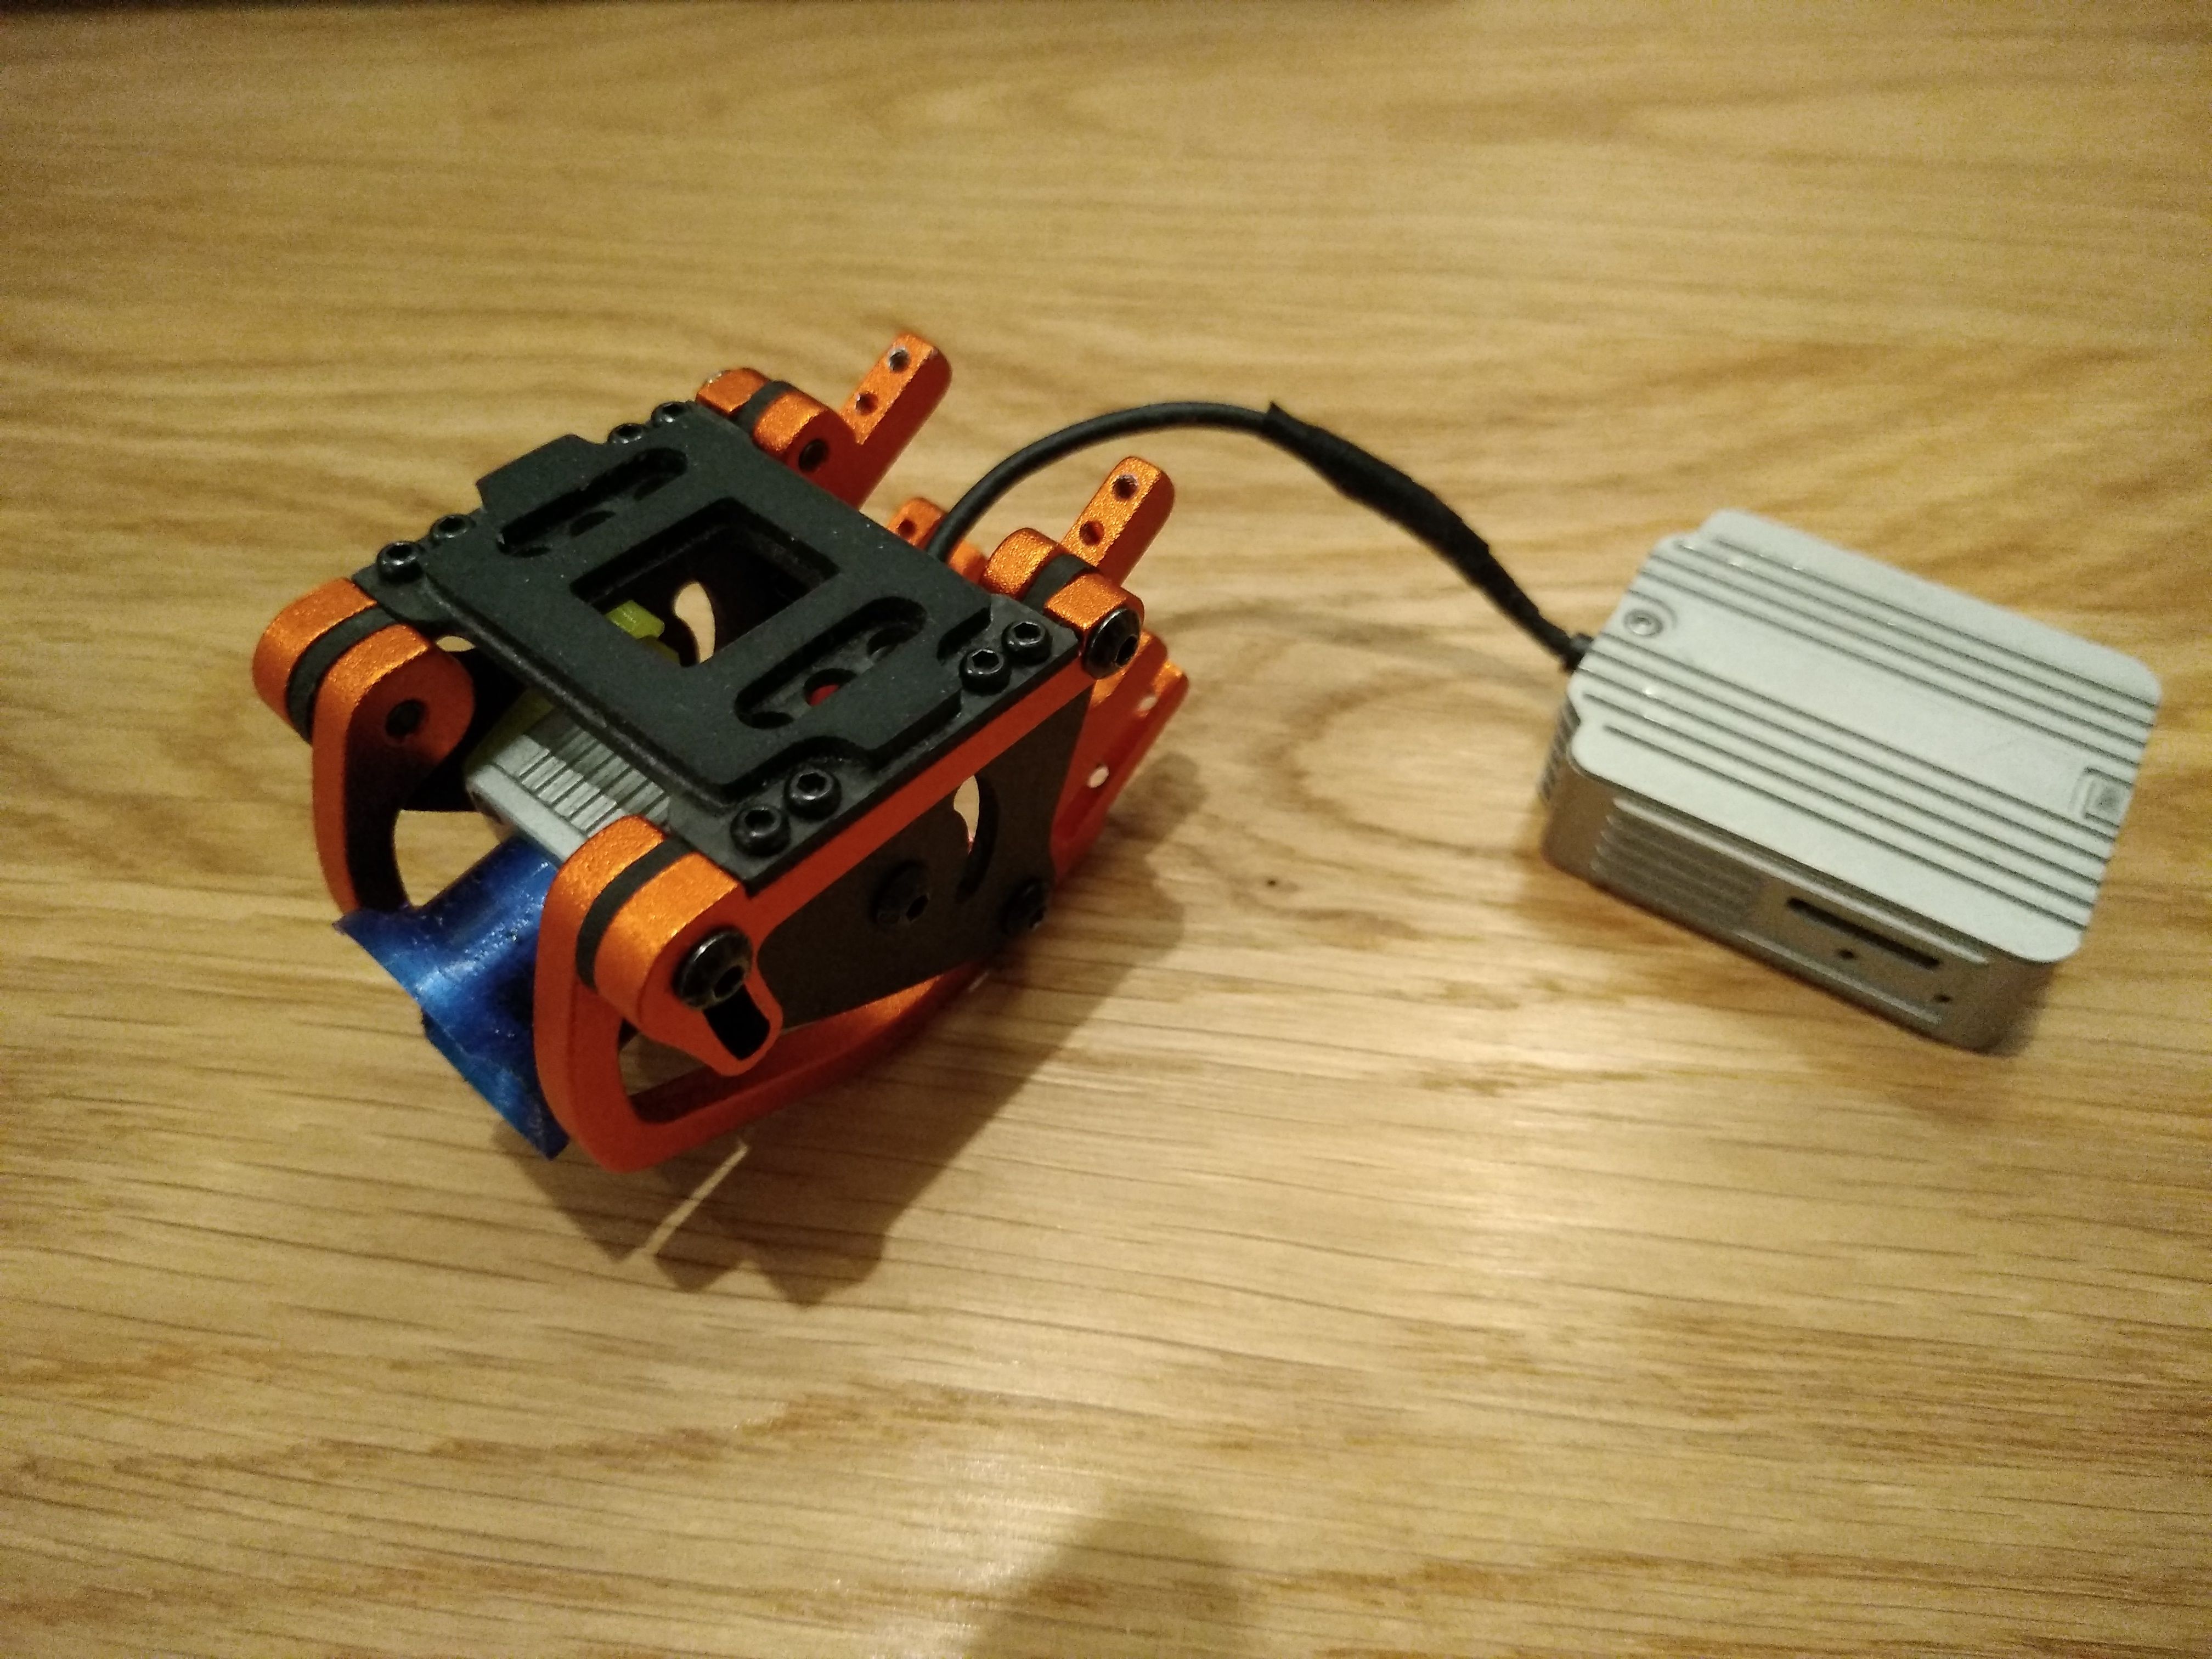
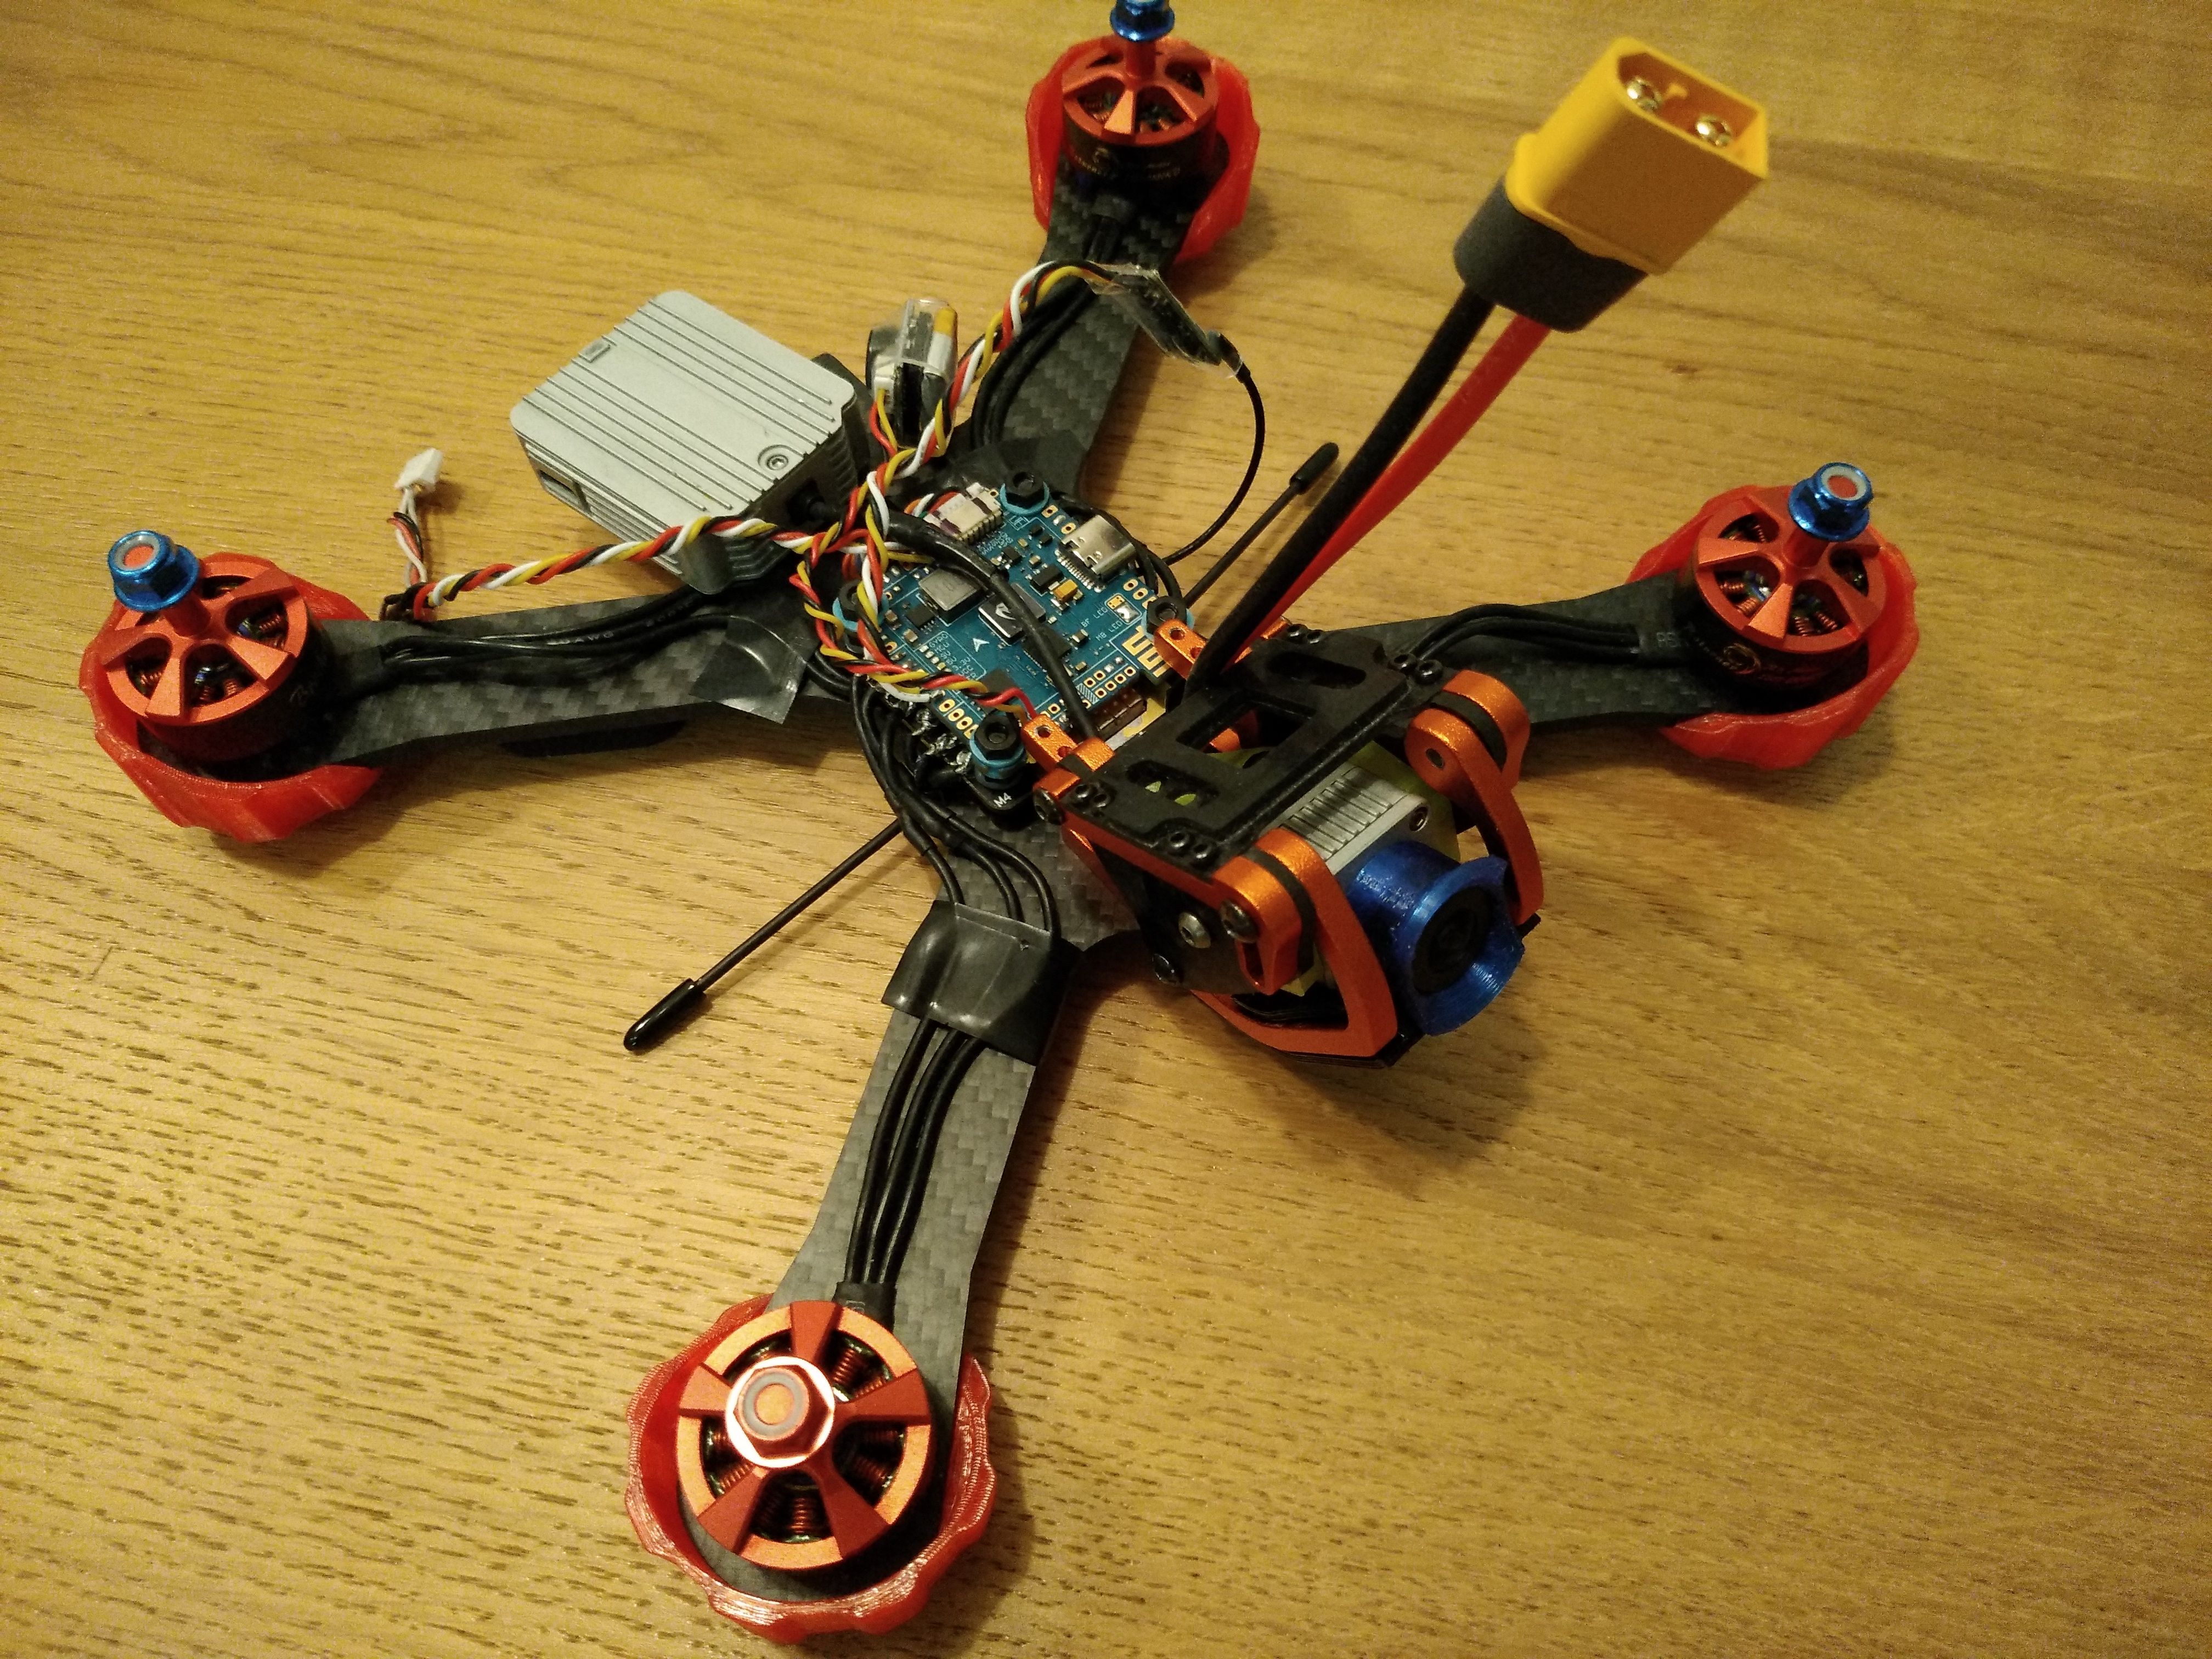
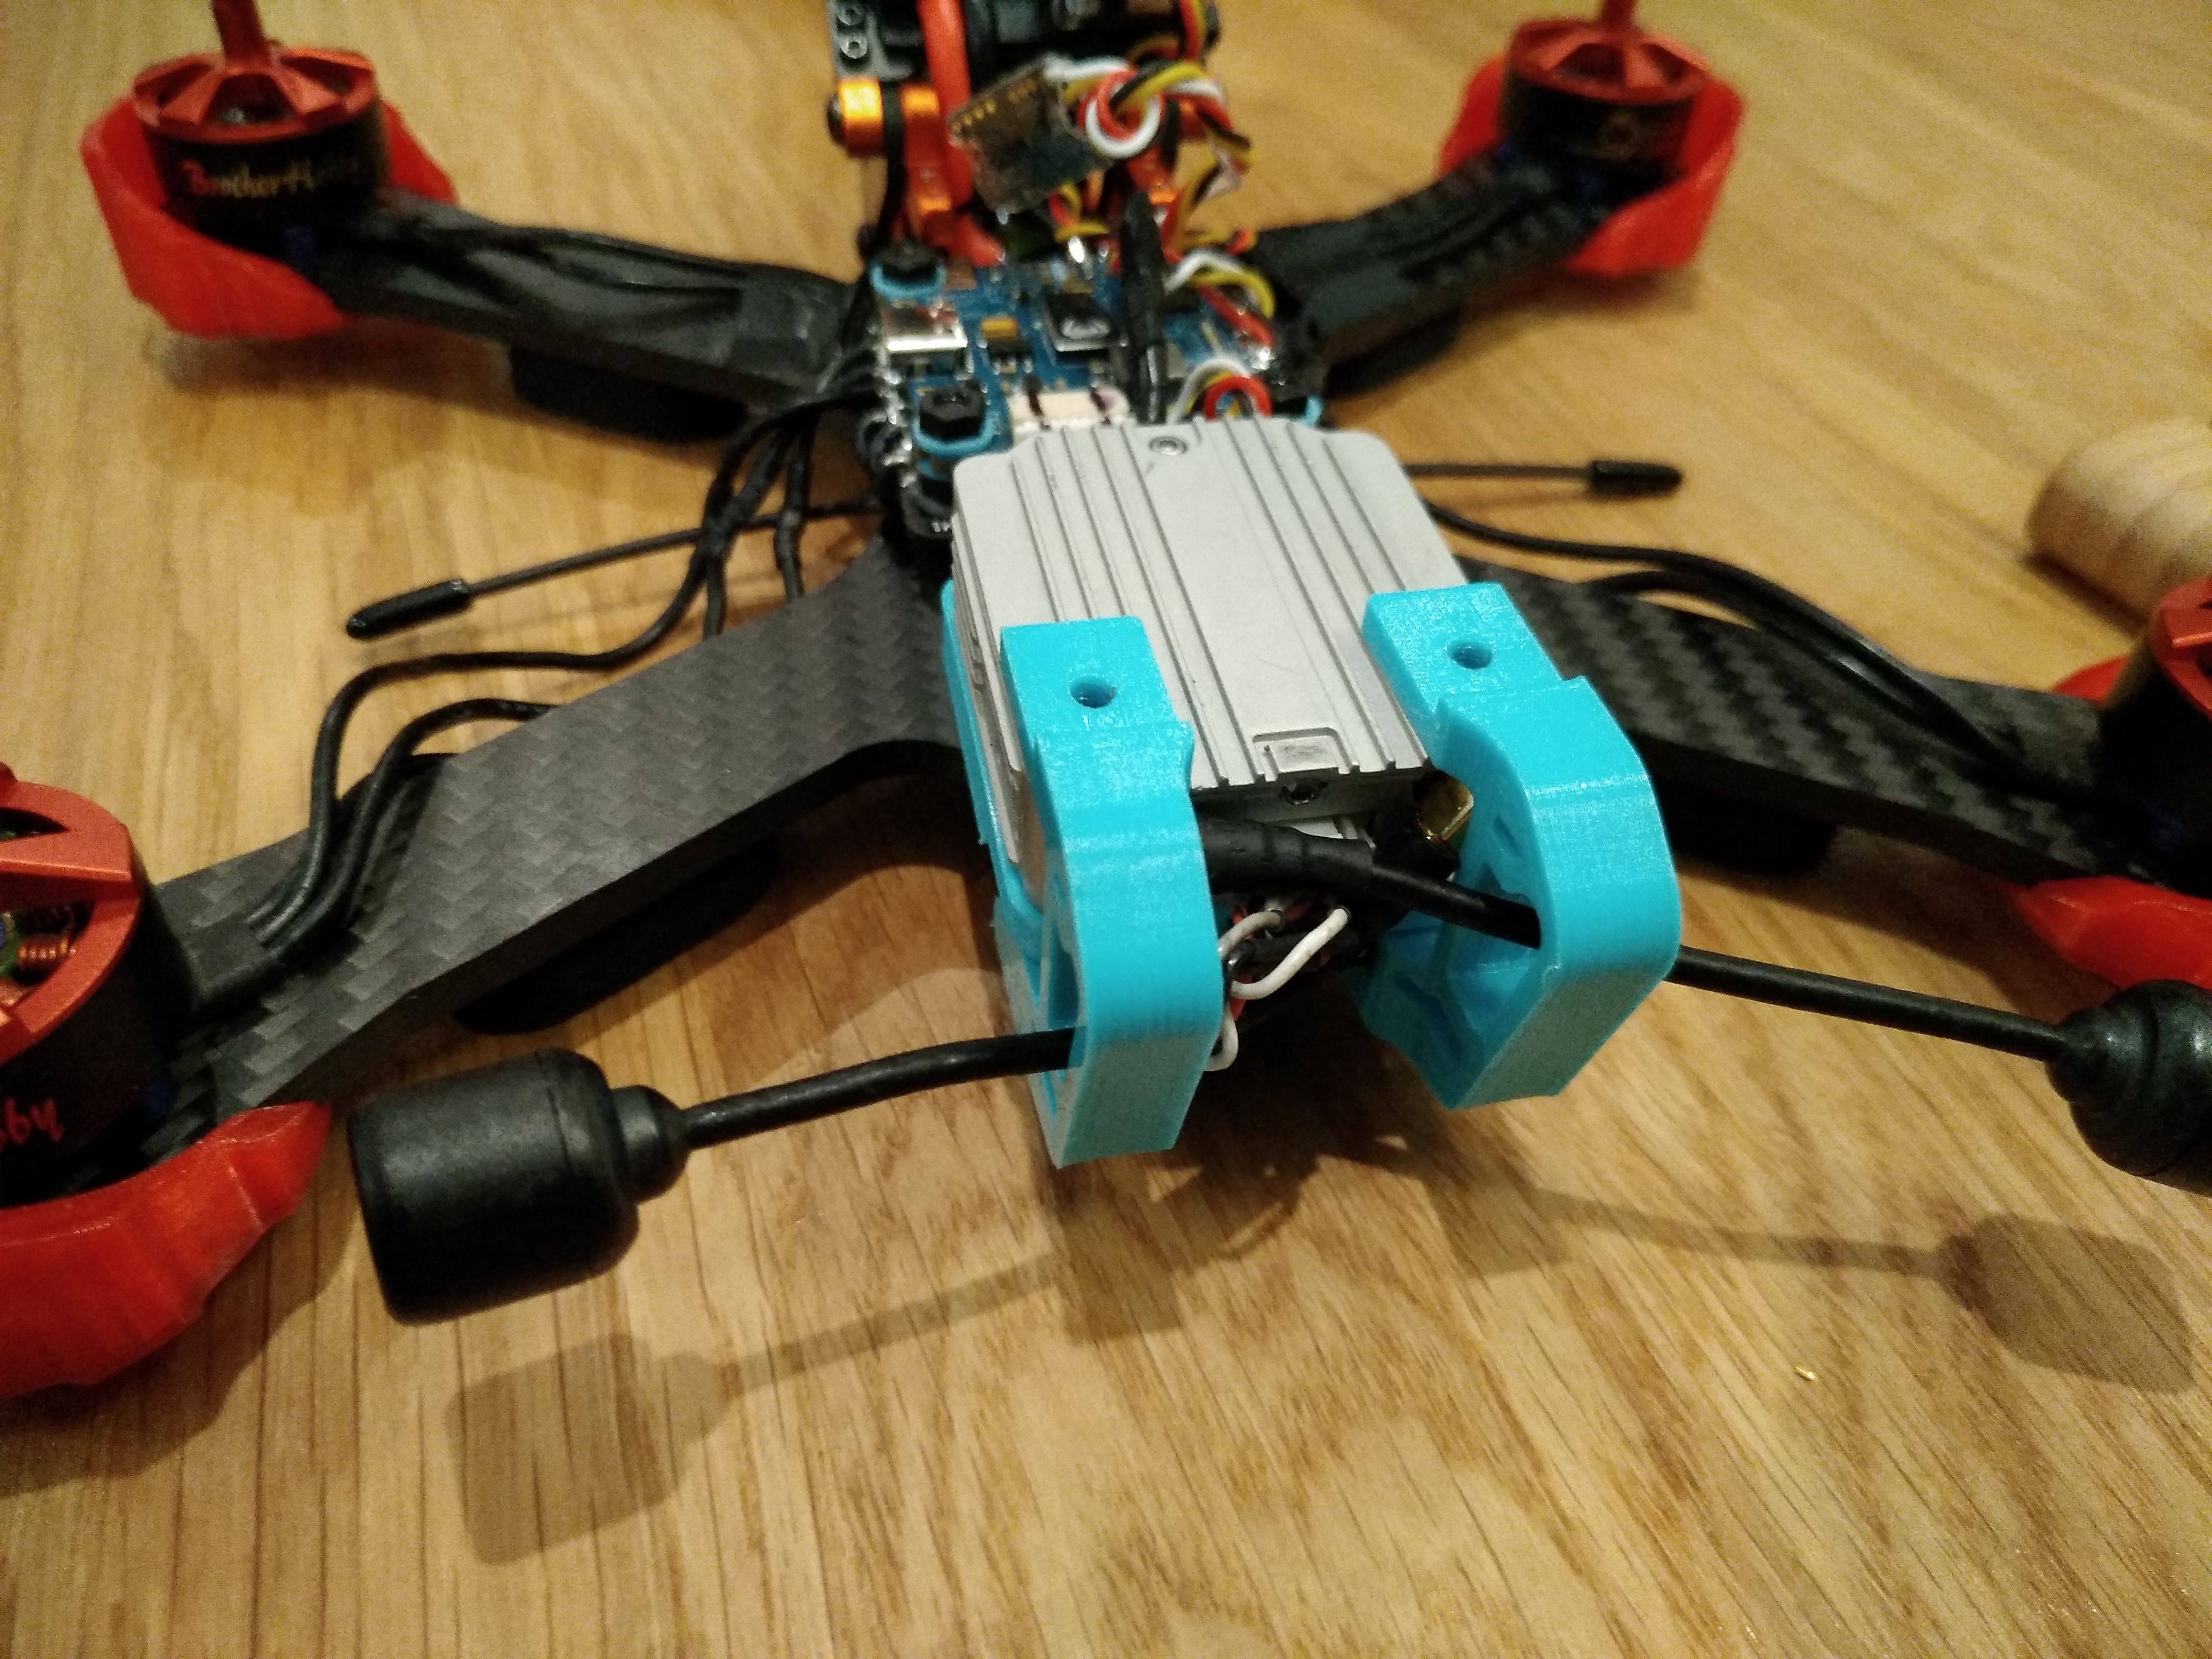
I decided to put the Immortal-T antenna on the bottom center and this worked just fine, I didn't have a failsafe yet. Then I assembled the whole frame head with the air unit camera. To fit the DJI camera I used two TPU adapters. I also added the TPU lens protector and the TPU bottom head protector. After that, I installed the motors, TPU motor guards, and the ESC with a 1000 uF condenser (with TPU cover) facing the front of the frame and then installed the FC. I used M3 nylon nuts and M3 silicon spacers between the frame/ESC and between the ESC/FC to maintain more space for better cooling.
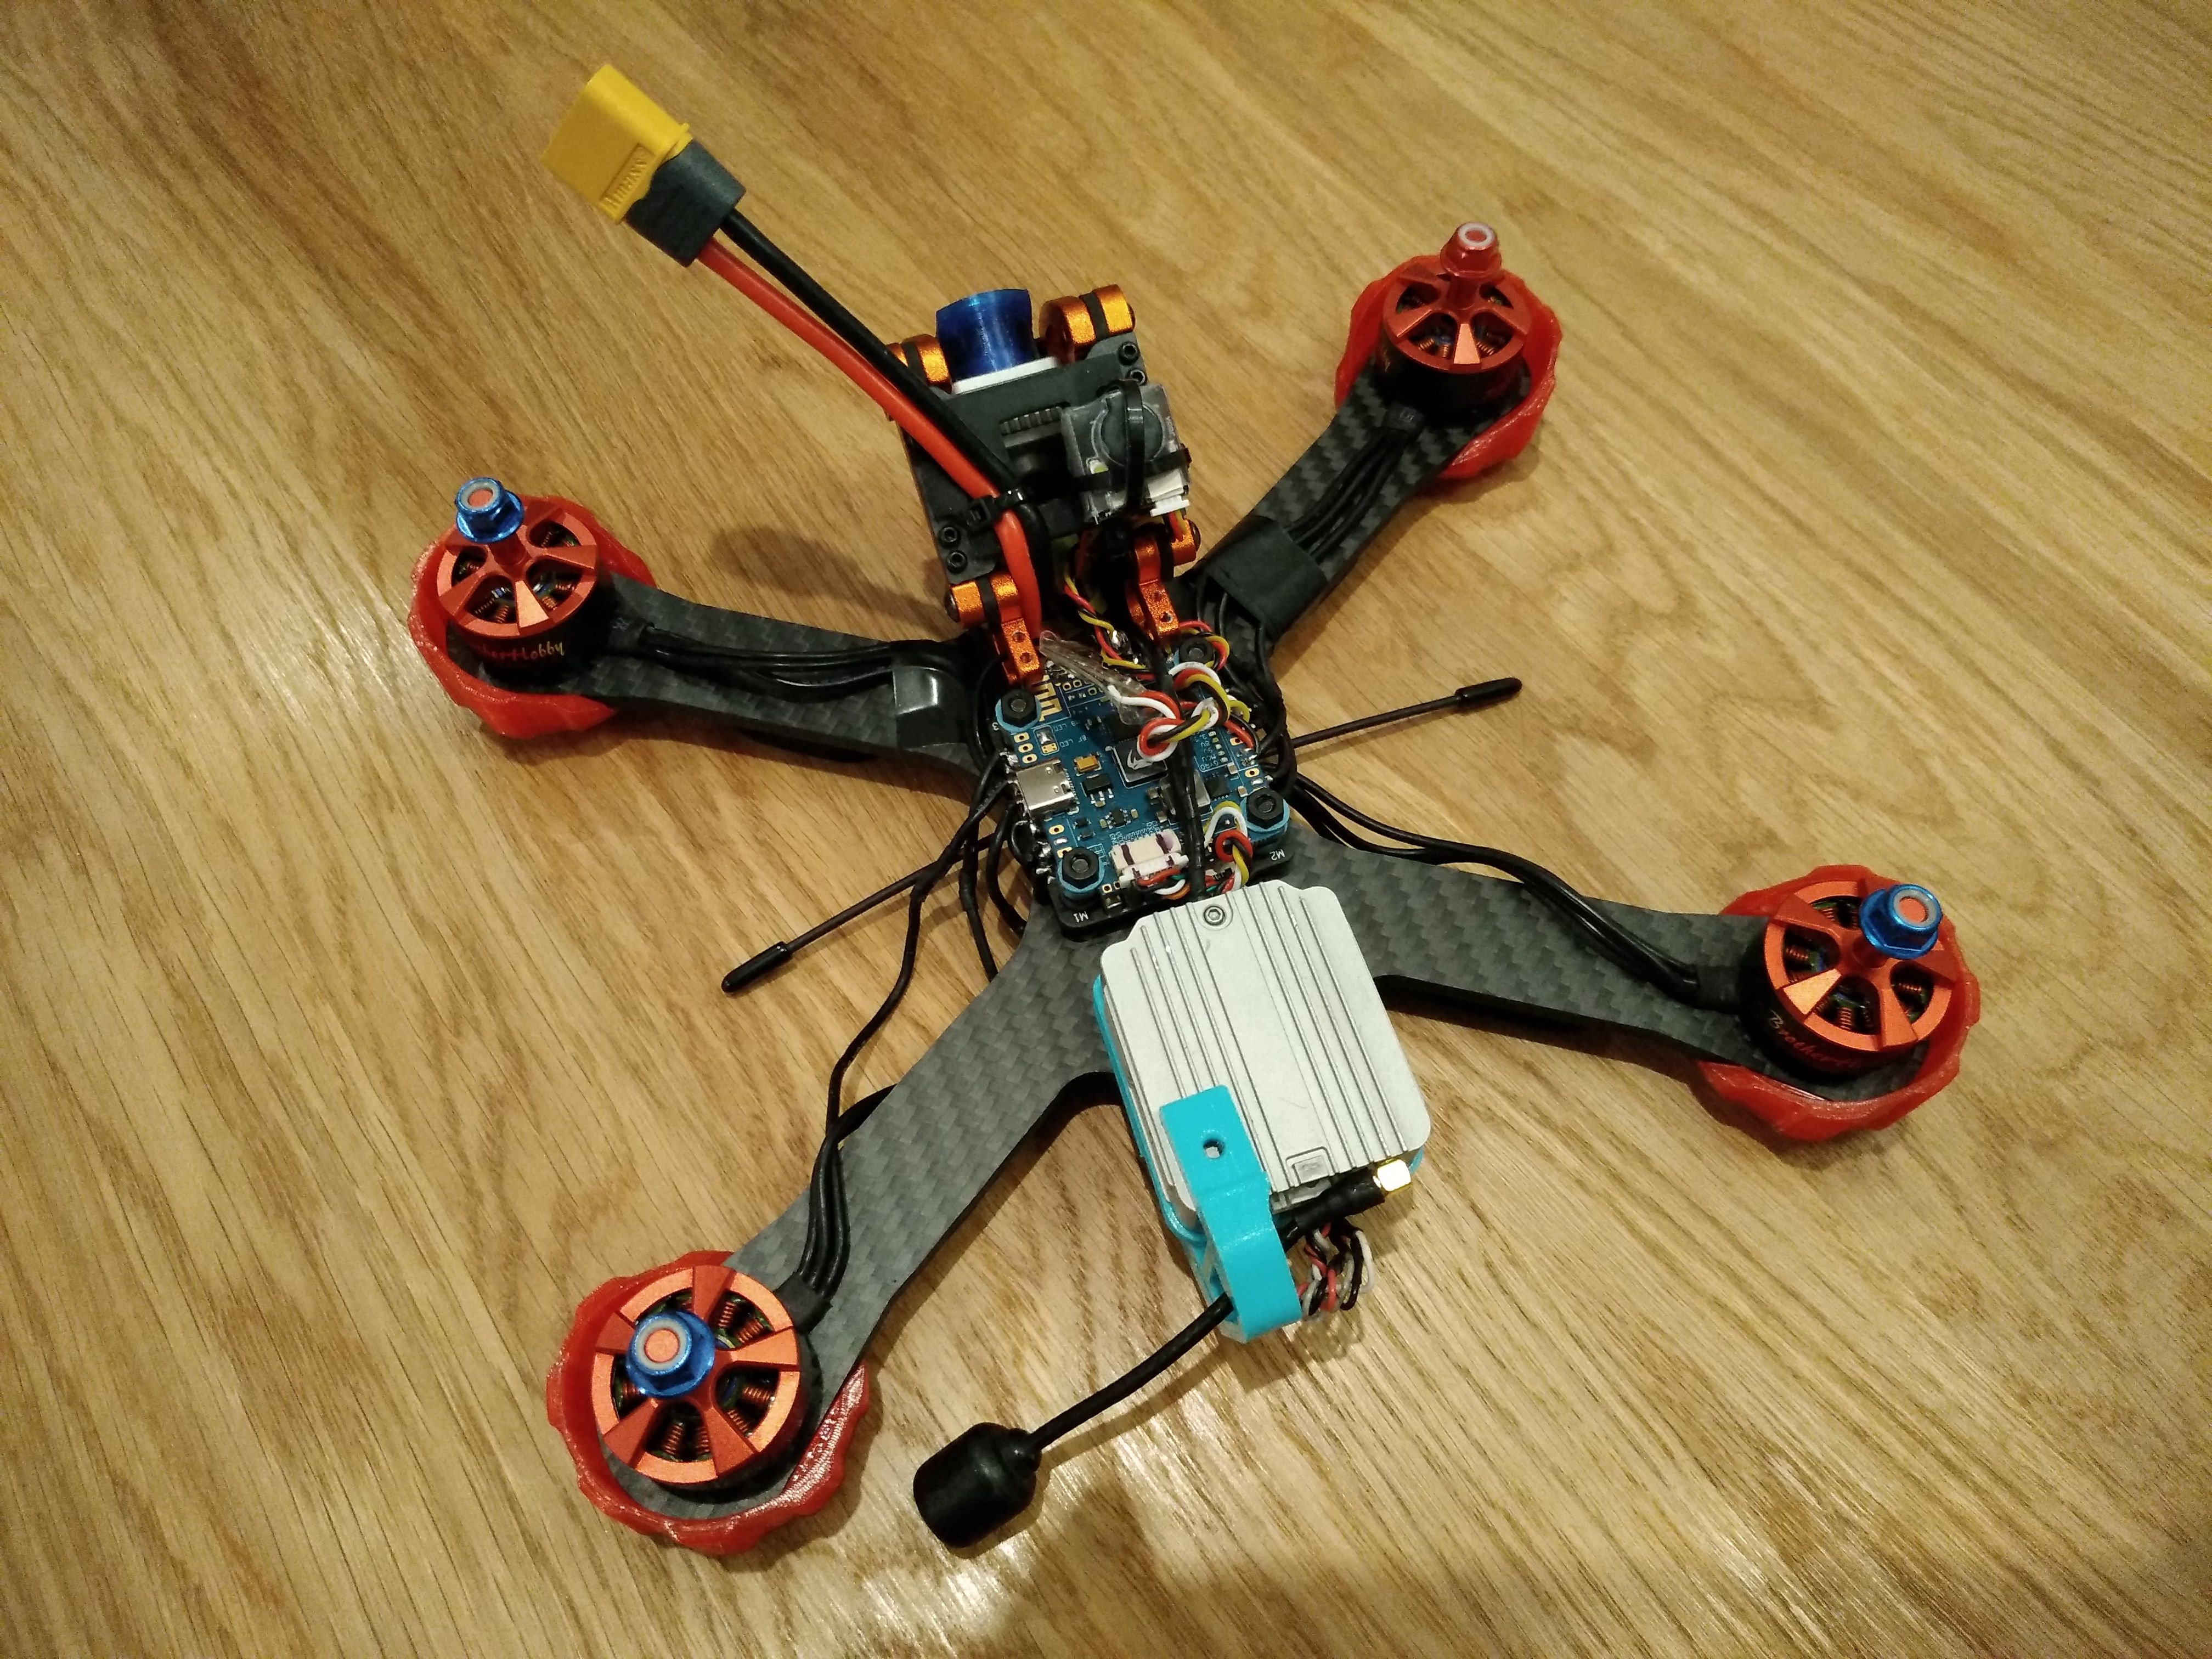
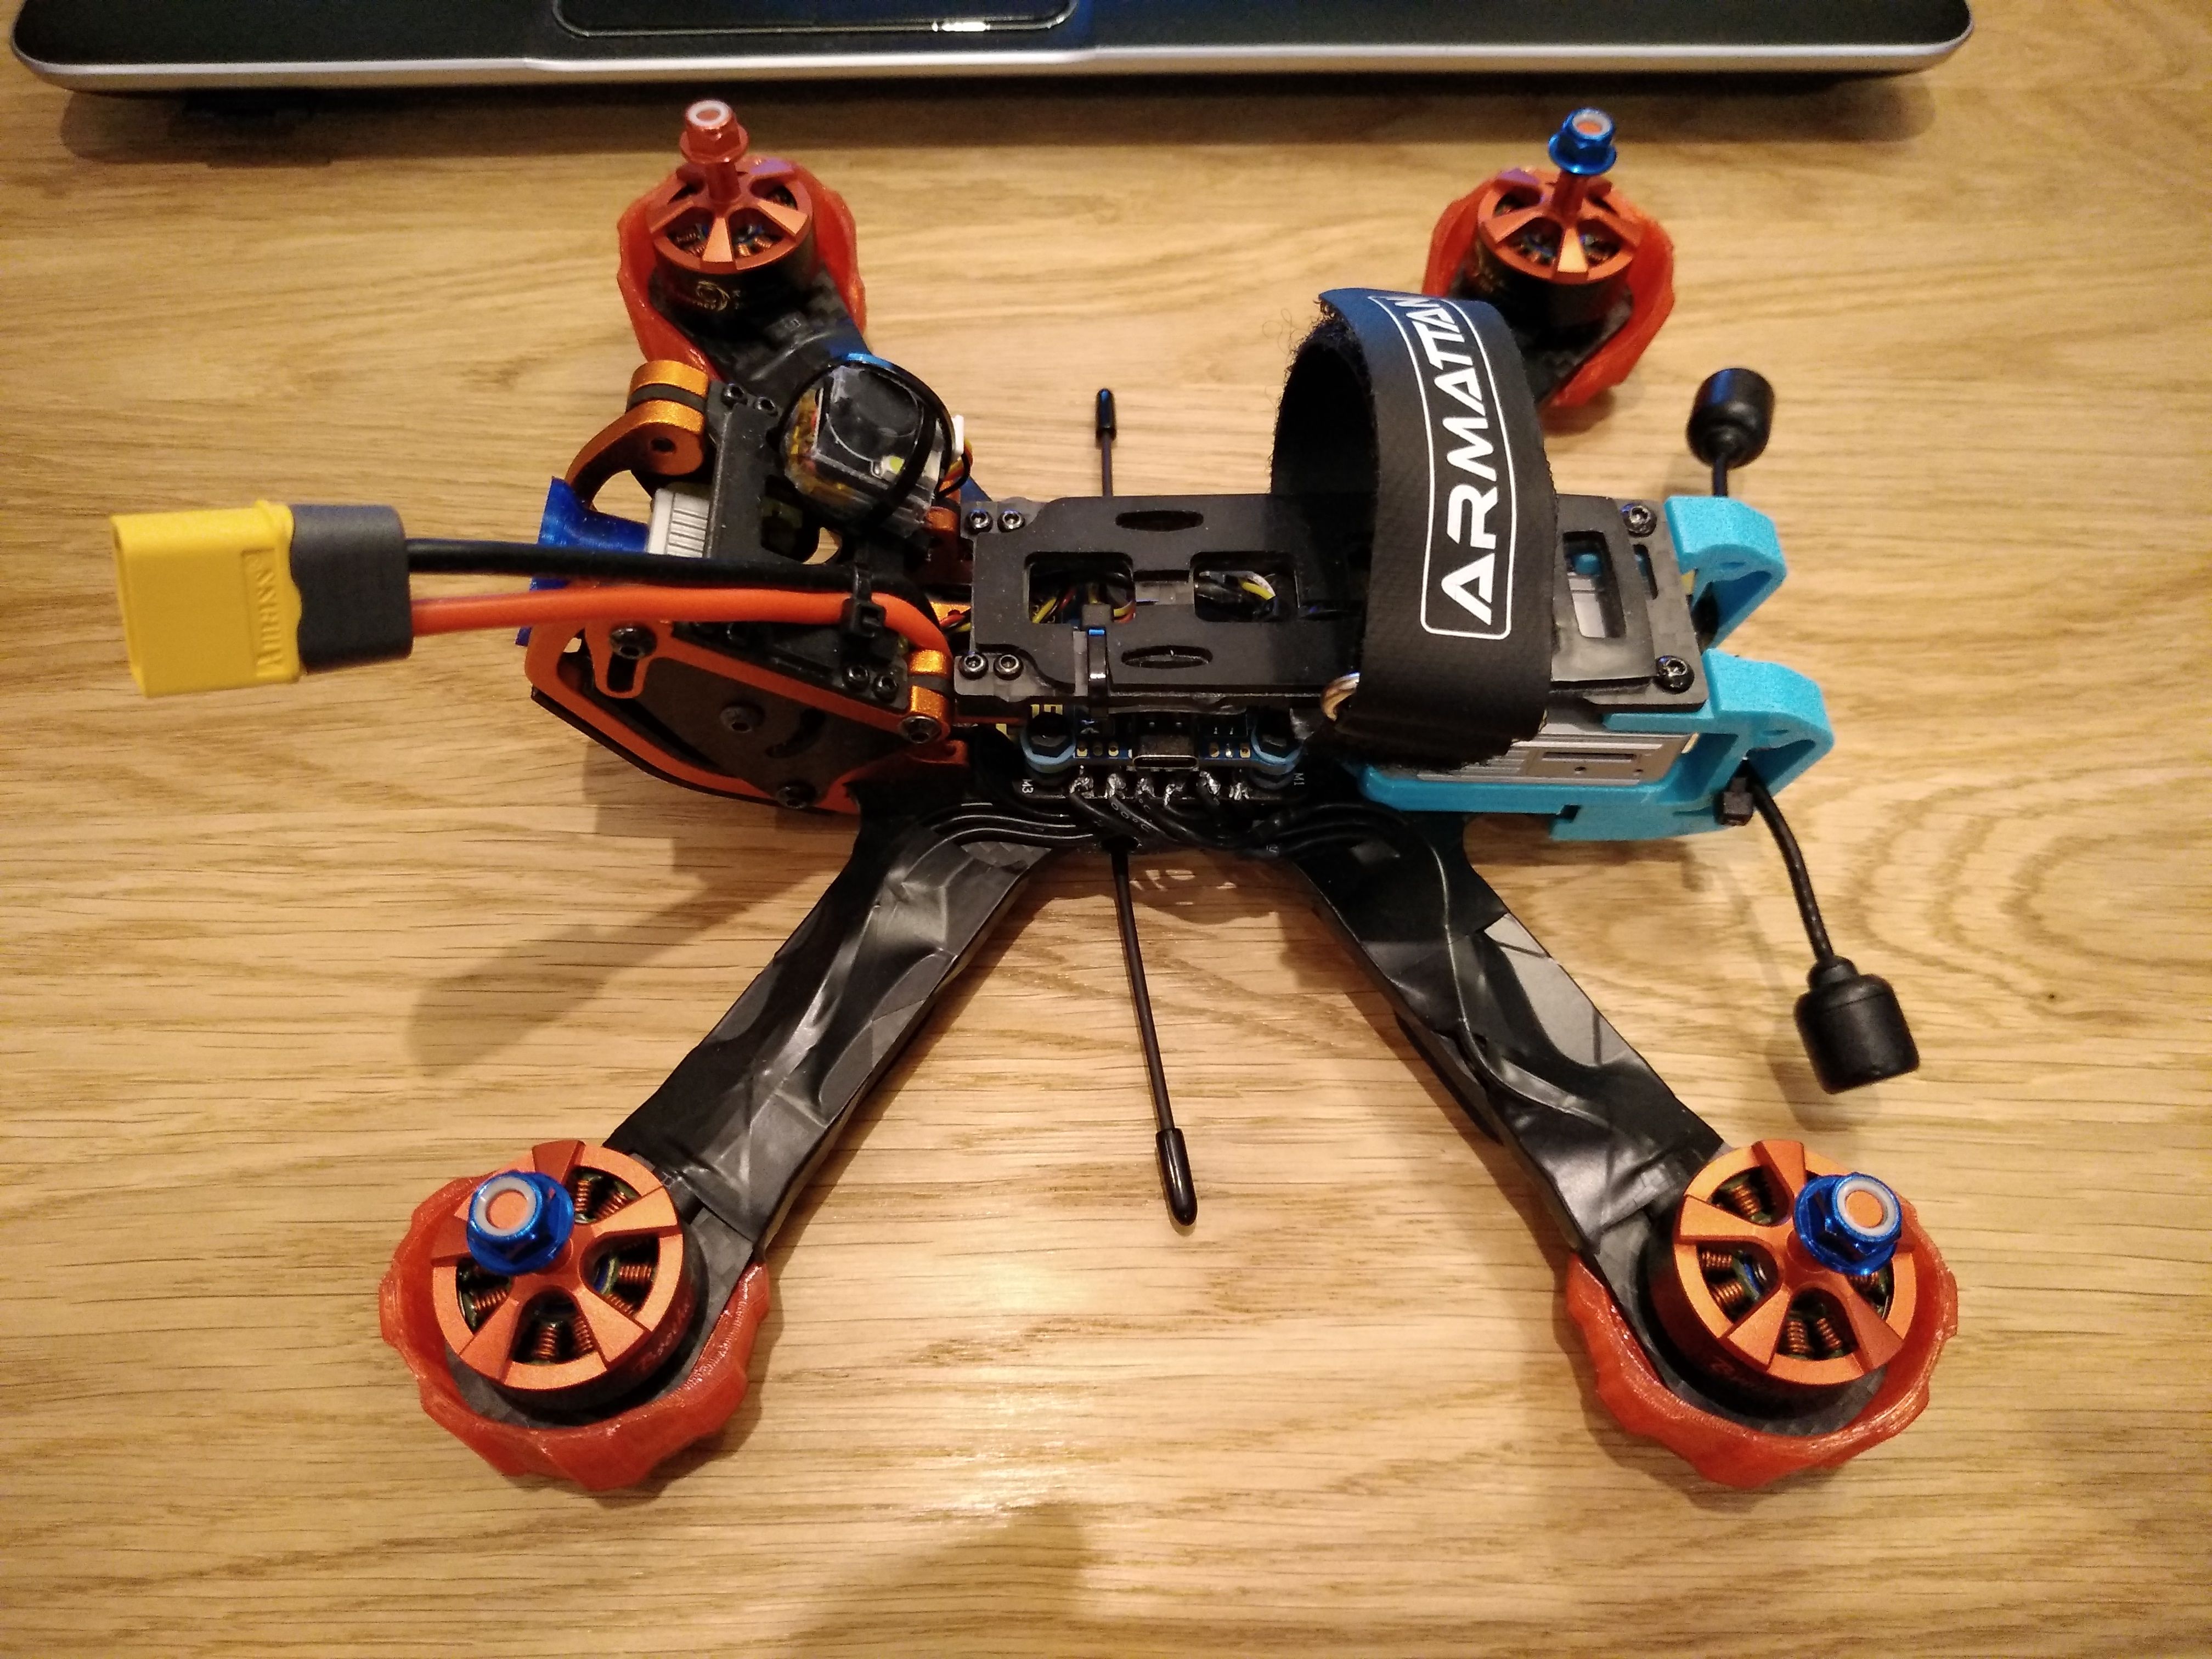
The next step was to install the frame head with the air unit. Then I attached the PETG air unit base to the air unit block and also the antennas with the PETG rearstandoffs. To avoid props hitting the antennas I secured them with nylon ties.
When you put the top frame plate on the rear standoffs you will see that the head is a bit low and hens you'll need a spacer to fit the top plate properly. After that, I secured the XT60 wires as well as the buzzer with nylon ties to the frame head. The crossfire receiver and the lipo strap I also secured with nylon ties but to the bottom of the top plate.
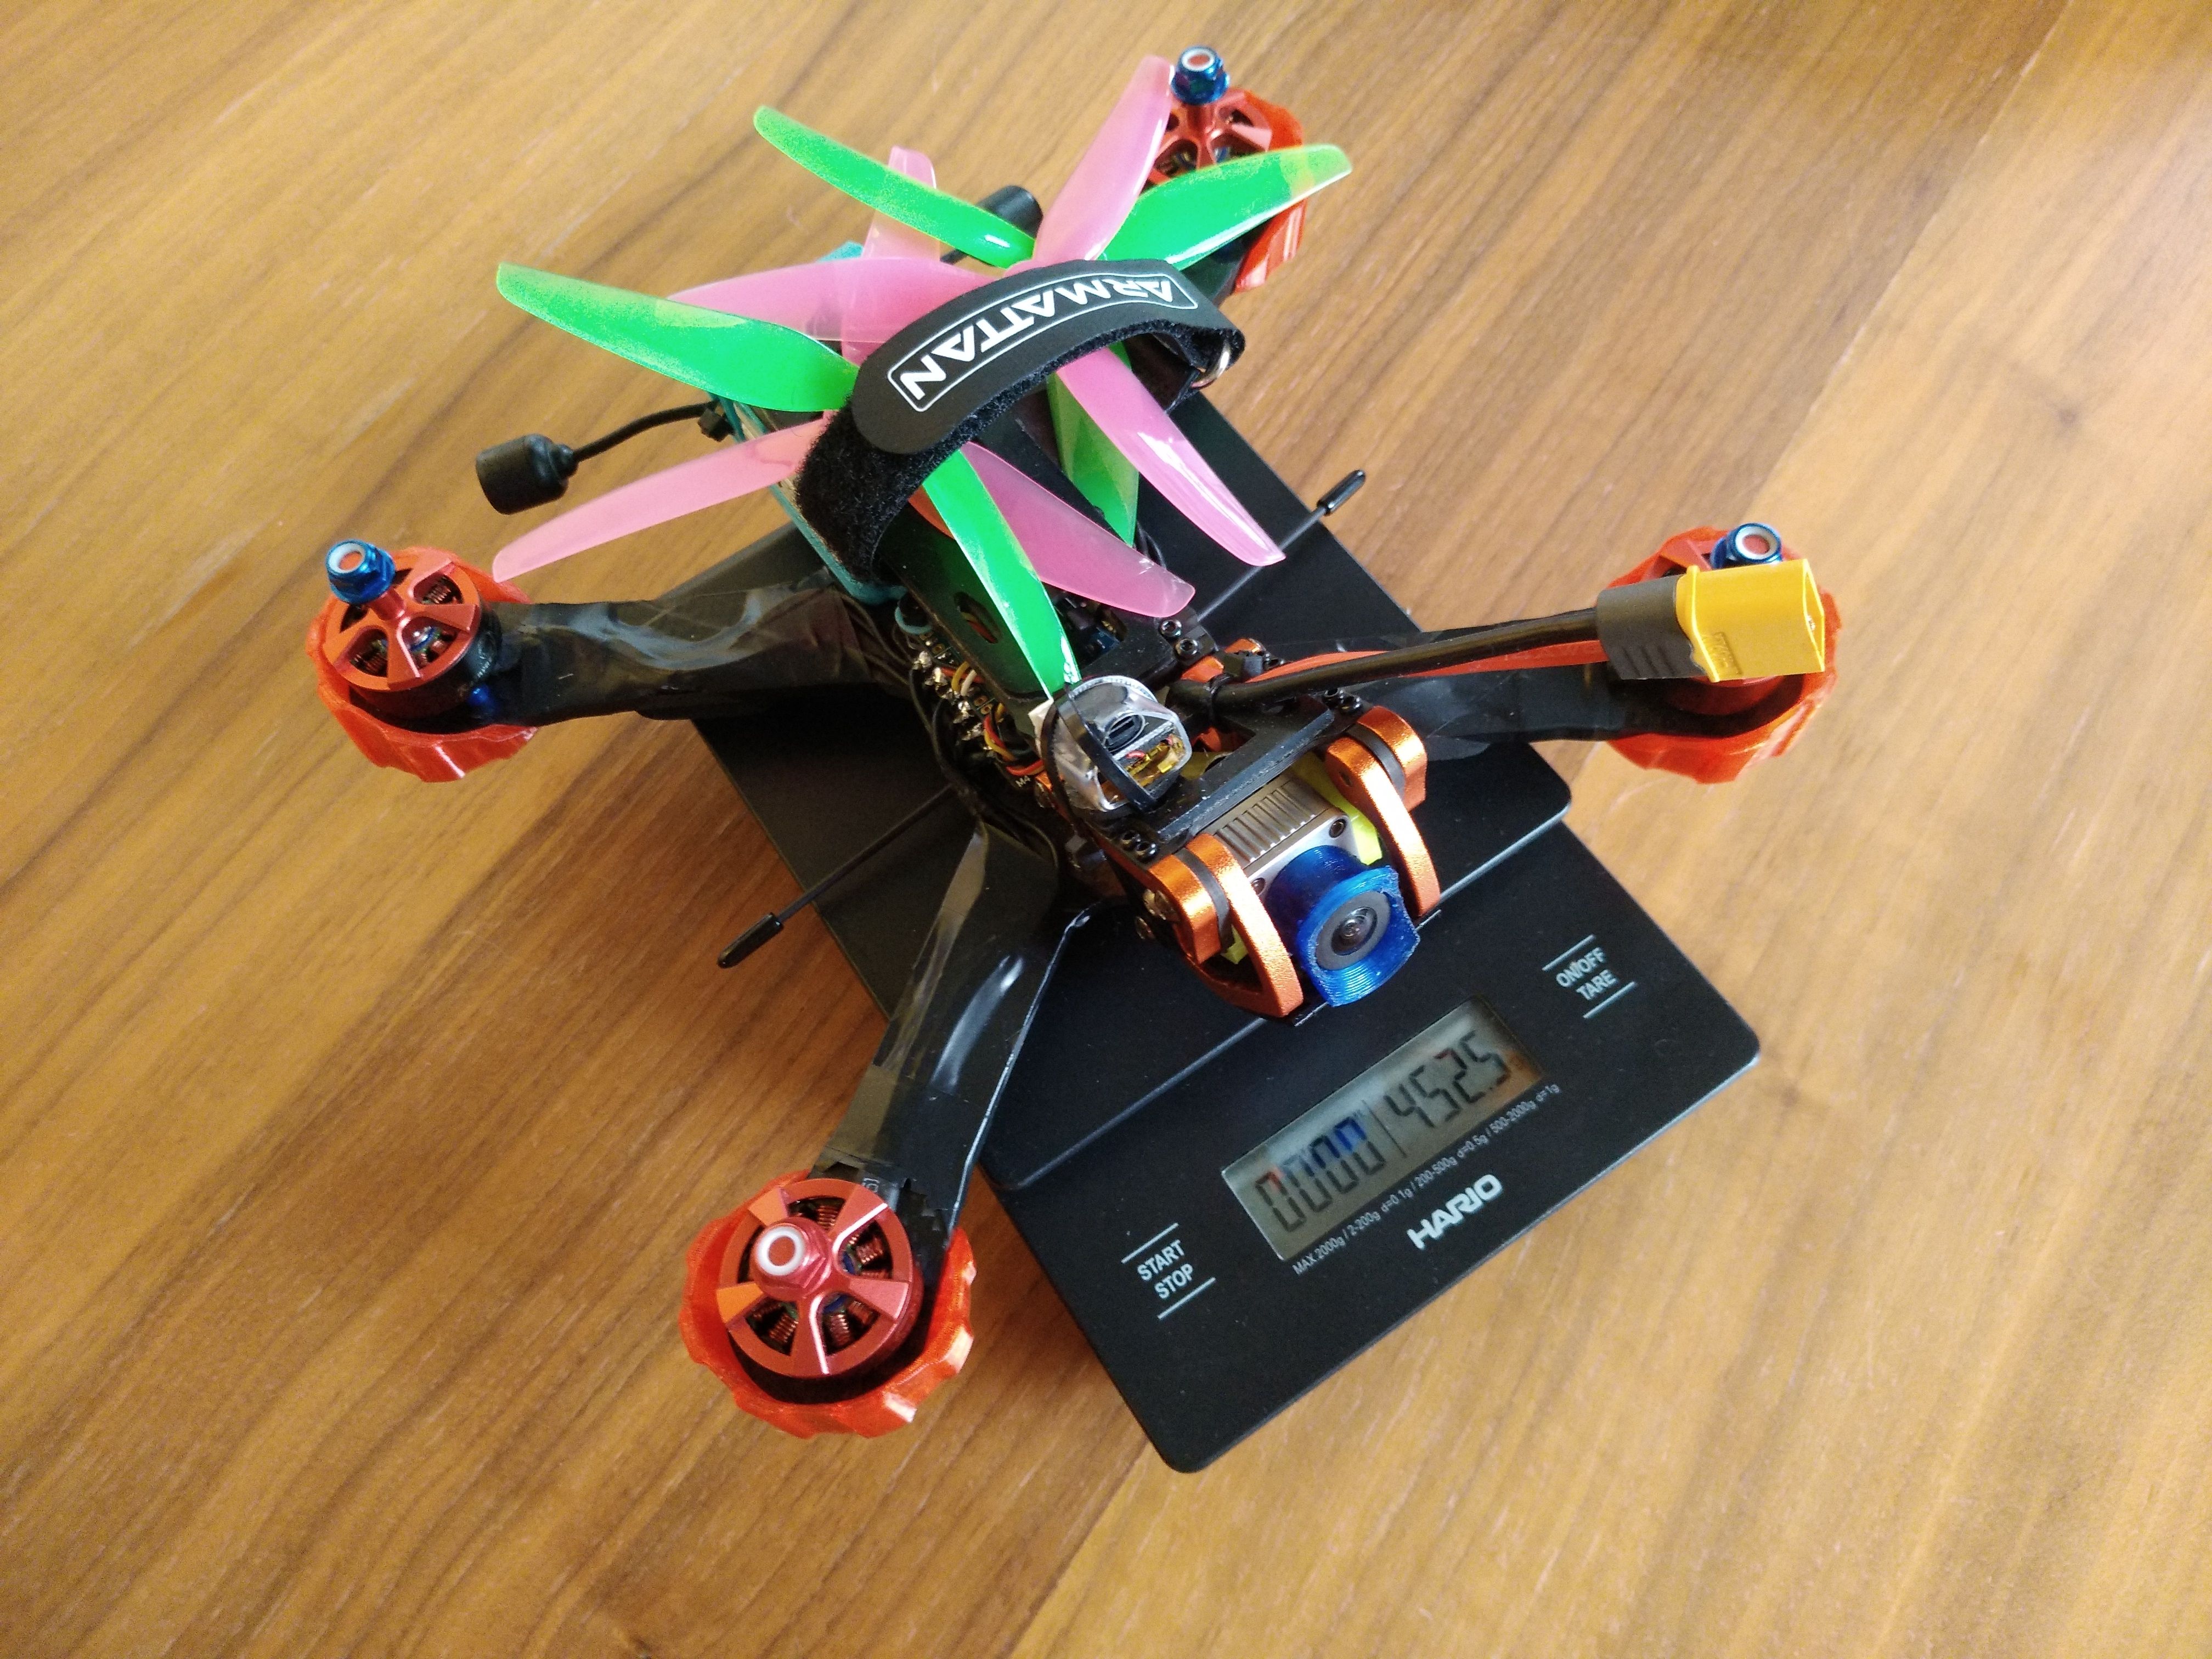
The weight of the drone with the props without battery was about 450 grams which is not too good, but not too bad either. The drone flies pretty good with 4S 1300mah 100-120c lipos onboard! The flight time I get is about 3.5-5 min depending on your flying skills.
This is pretty much it. I customized almost all of the 3D models from Thingiverse tomake them fit better to the Puda frame.
If you have any questions just send me a message or leave a comment down below. I would appreciate it if you subscribe to my youtube and Instagram channels - Cranstonfpv, where Iwill post videos on how this build flys.
Photos

Part List
Frame |
Карбоновая рама гоночного FPV квадрокоптера PUDA Chameleon
Xmodels.ru
|
See Site |
Flight Controller |
MAMBA APP(WIFI)F722 MK1 Flight Controller 30.5*30.5mm/M3
(3 builds)
Diatone.us
|
$49.99 |
ESCs |
Airbot Typhoon32 v2 4in1 ESC 4x35A BLheli32
Unmannedtechshop.co.uk
|
$29.11 |
Motors |
4 x Brotherhobby Returner R3 2207 2550kv Brushless Motor
(3 builds)
Getfpv.com
|
$79.16 |
Propellers |
Ethix S3 Watermelon Props
Team-blacksheep.com
|
$3.59 |
FPV Camera |
Caddx DJI Digital HD FPV Air Unit Kit
(294 builds)
Getfpv.com
|
See Site |
Receiver |
TBS CROSSFIRE NANO RX (SE) - FPV LONG RANGE DRONE RECEIVER
(412 builds)
Team-blacksheep.com
|
$29.95 |
3D Printed |
DJI Puda Chameleon FPV drone (Armattan clone) with the DJI Air Unit by cranstonfpv
Thingiverse.com
|
See Site |
Misc Parts |
JHE42B - S Mini Finder BB Buzzer with Automatic Rechargeable Batteries for F3 F4 F7 Flight Controller Racing Drone Accessory , P
Gearbest.com
|
$14.24 |


New Message for Cranstonfpv