CineLog 35 HD

By sidx64 on Feb 15, 2022

4  2,755  1

The basic idea

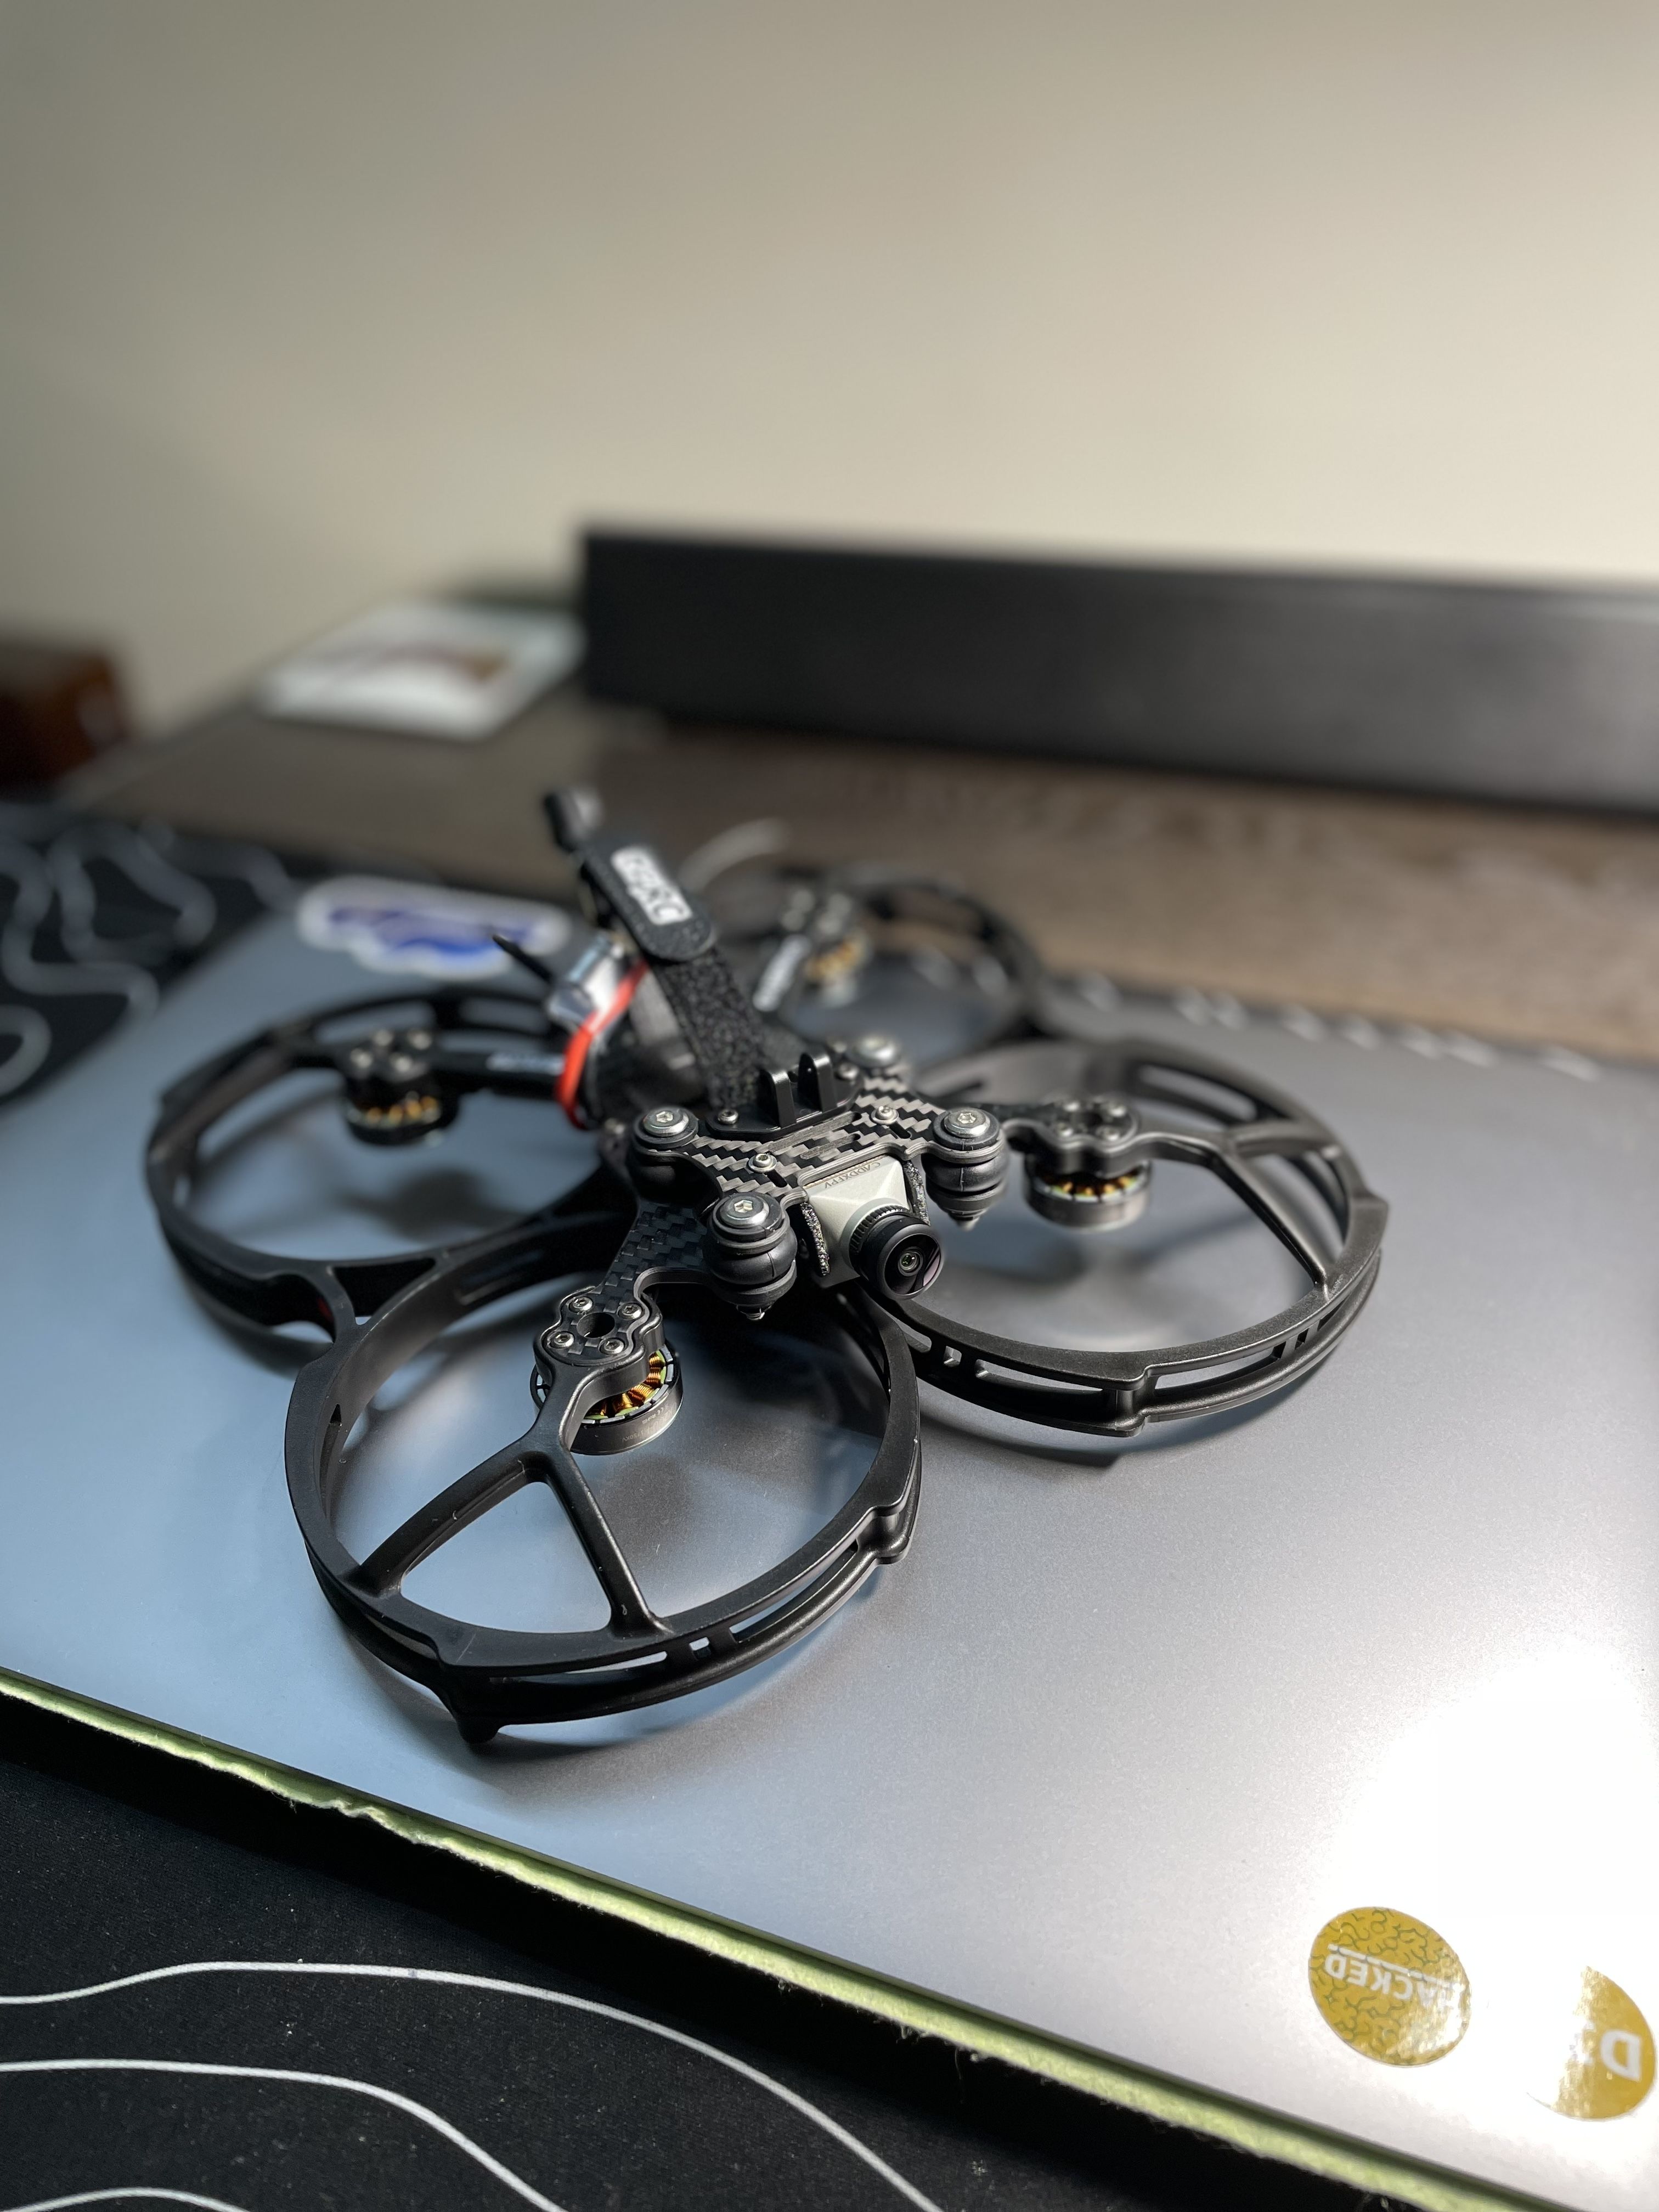
I’ve been planning on making a CineWhoop fora long time now, but so far, I’d always stuck to 5-inch builds. Eventually, an opportunity presented itself in the guise of a new GepRC product, and I decided to take the plunge.

All in all, it turned out to be a tricky, yet rewarding build.

Important pre-build info

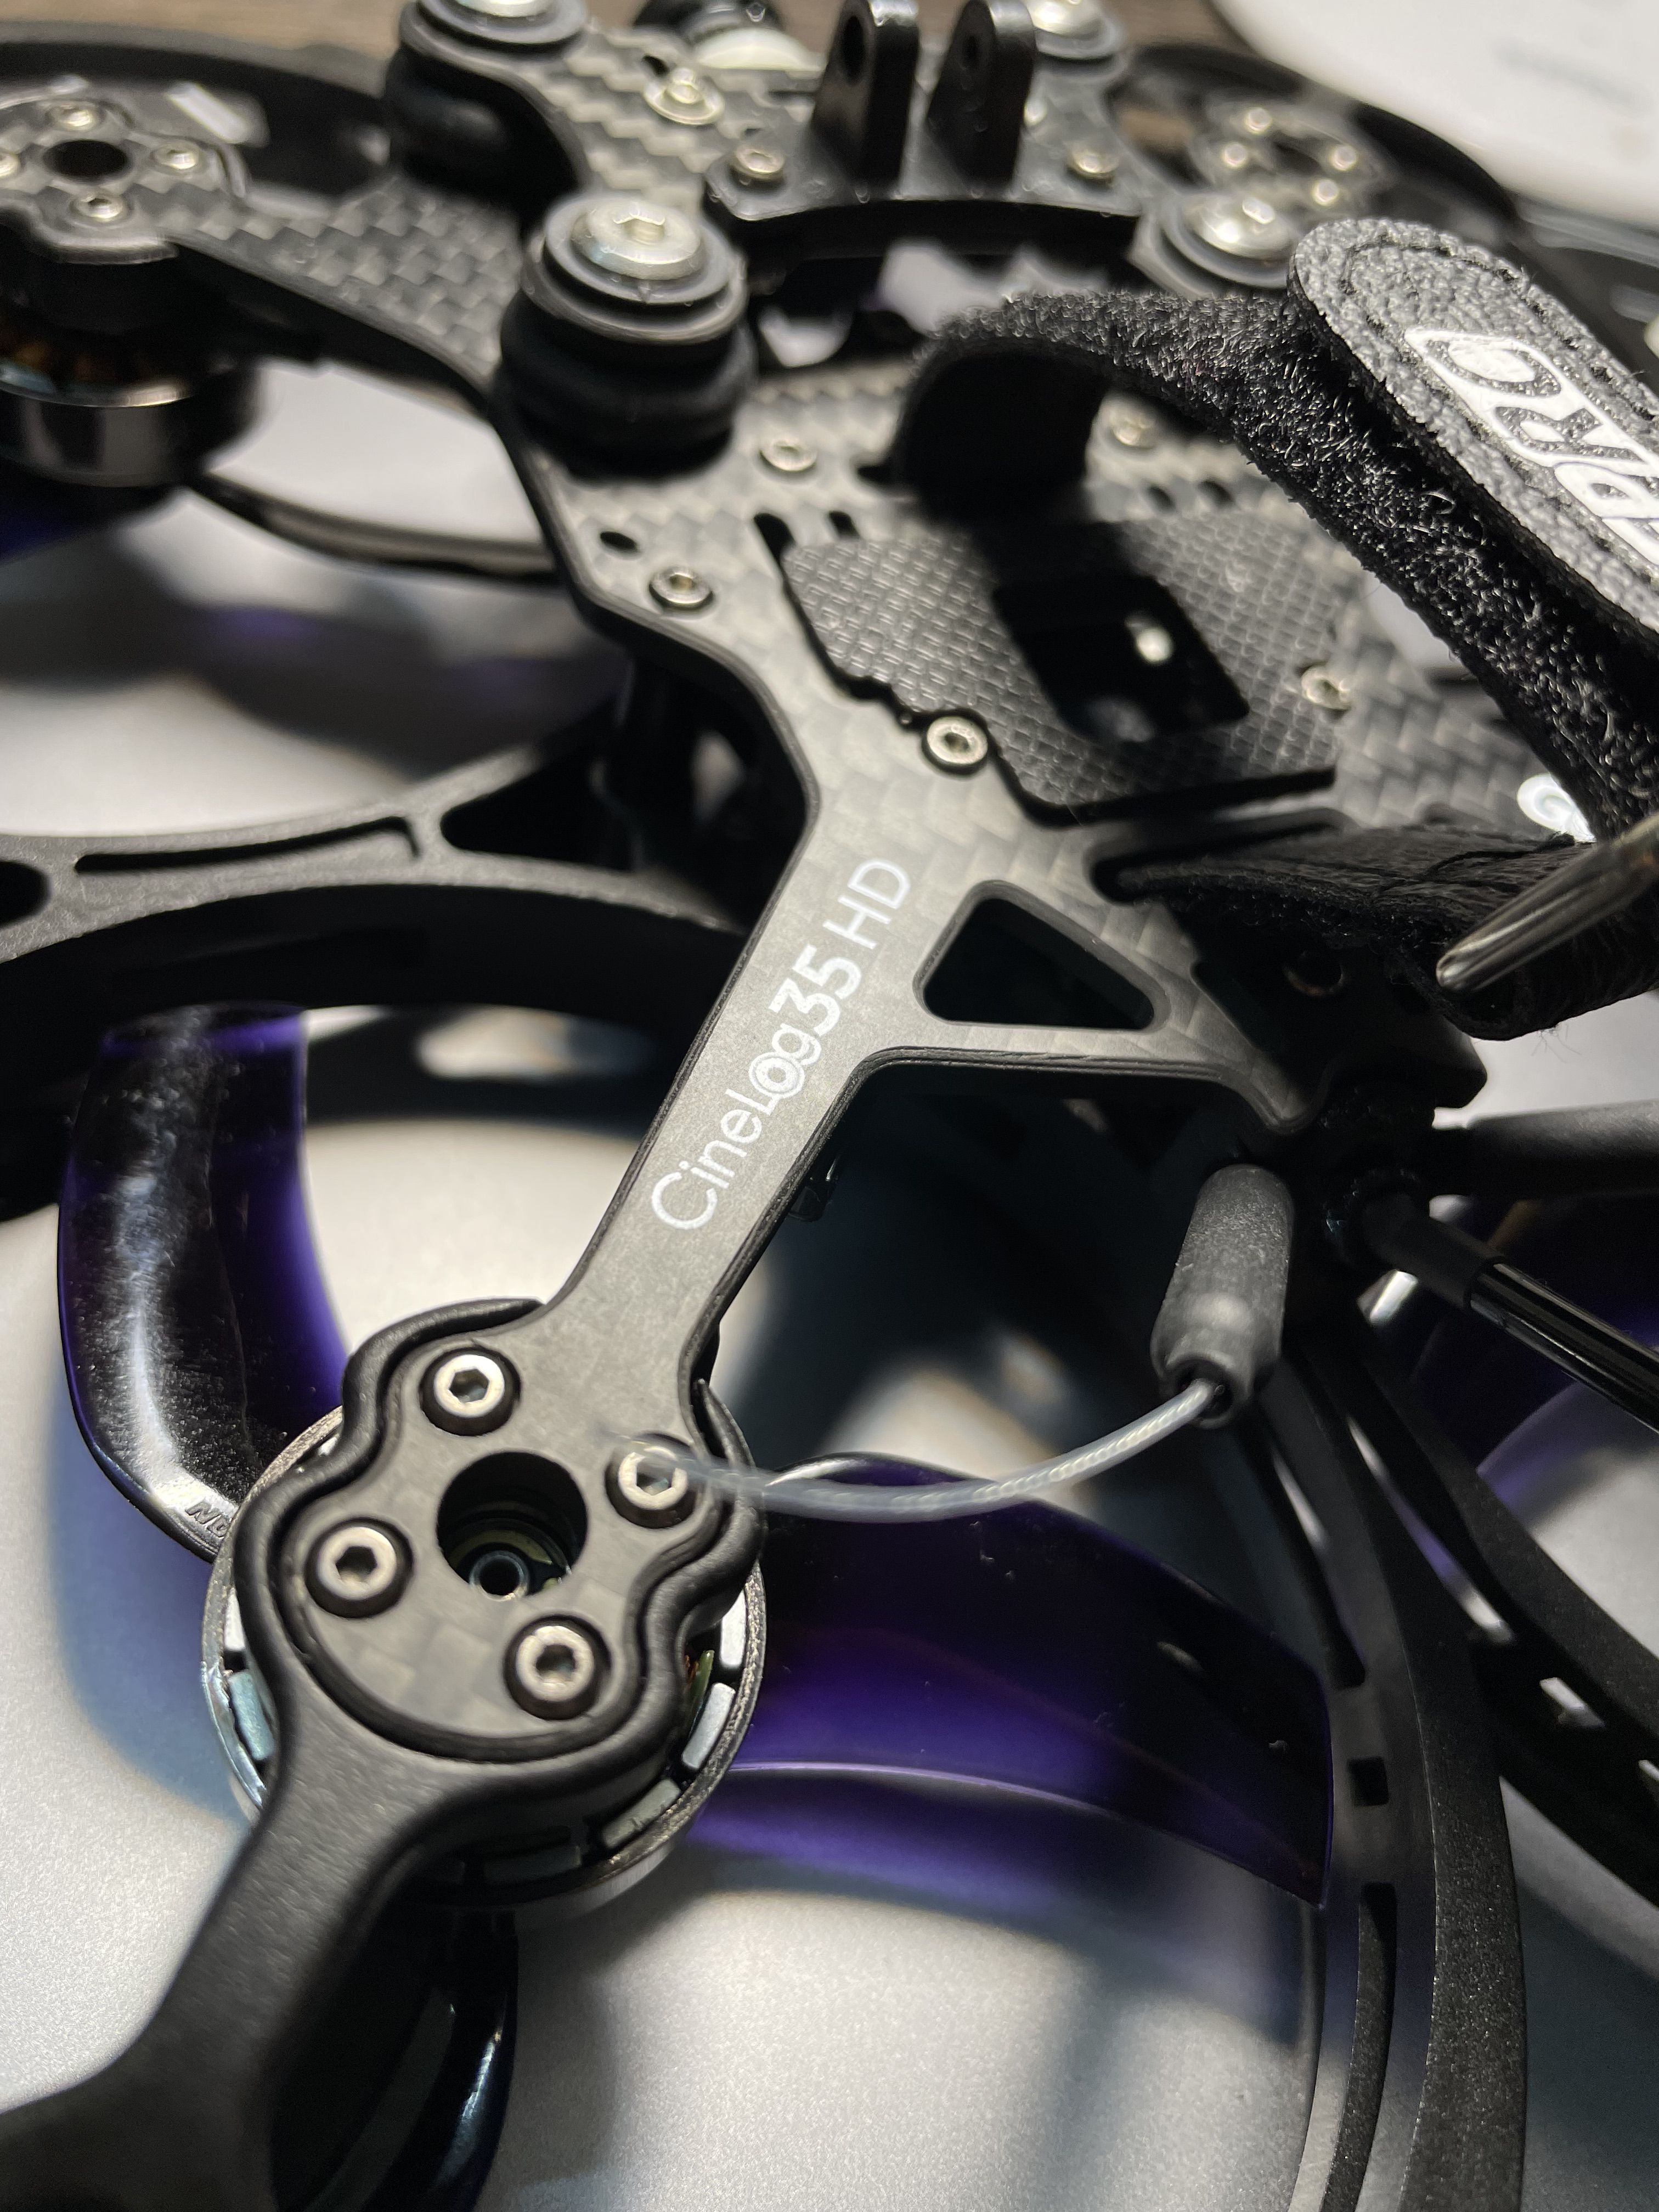
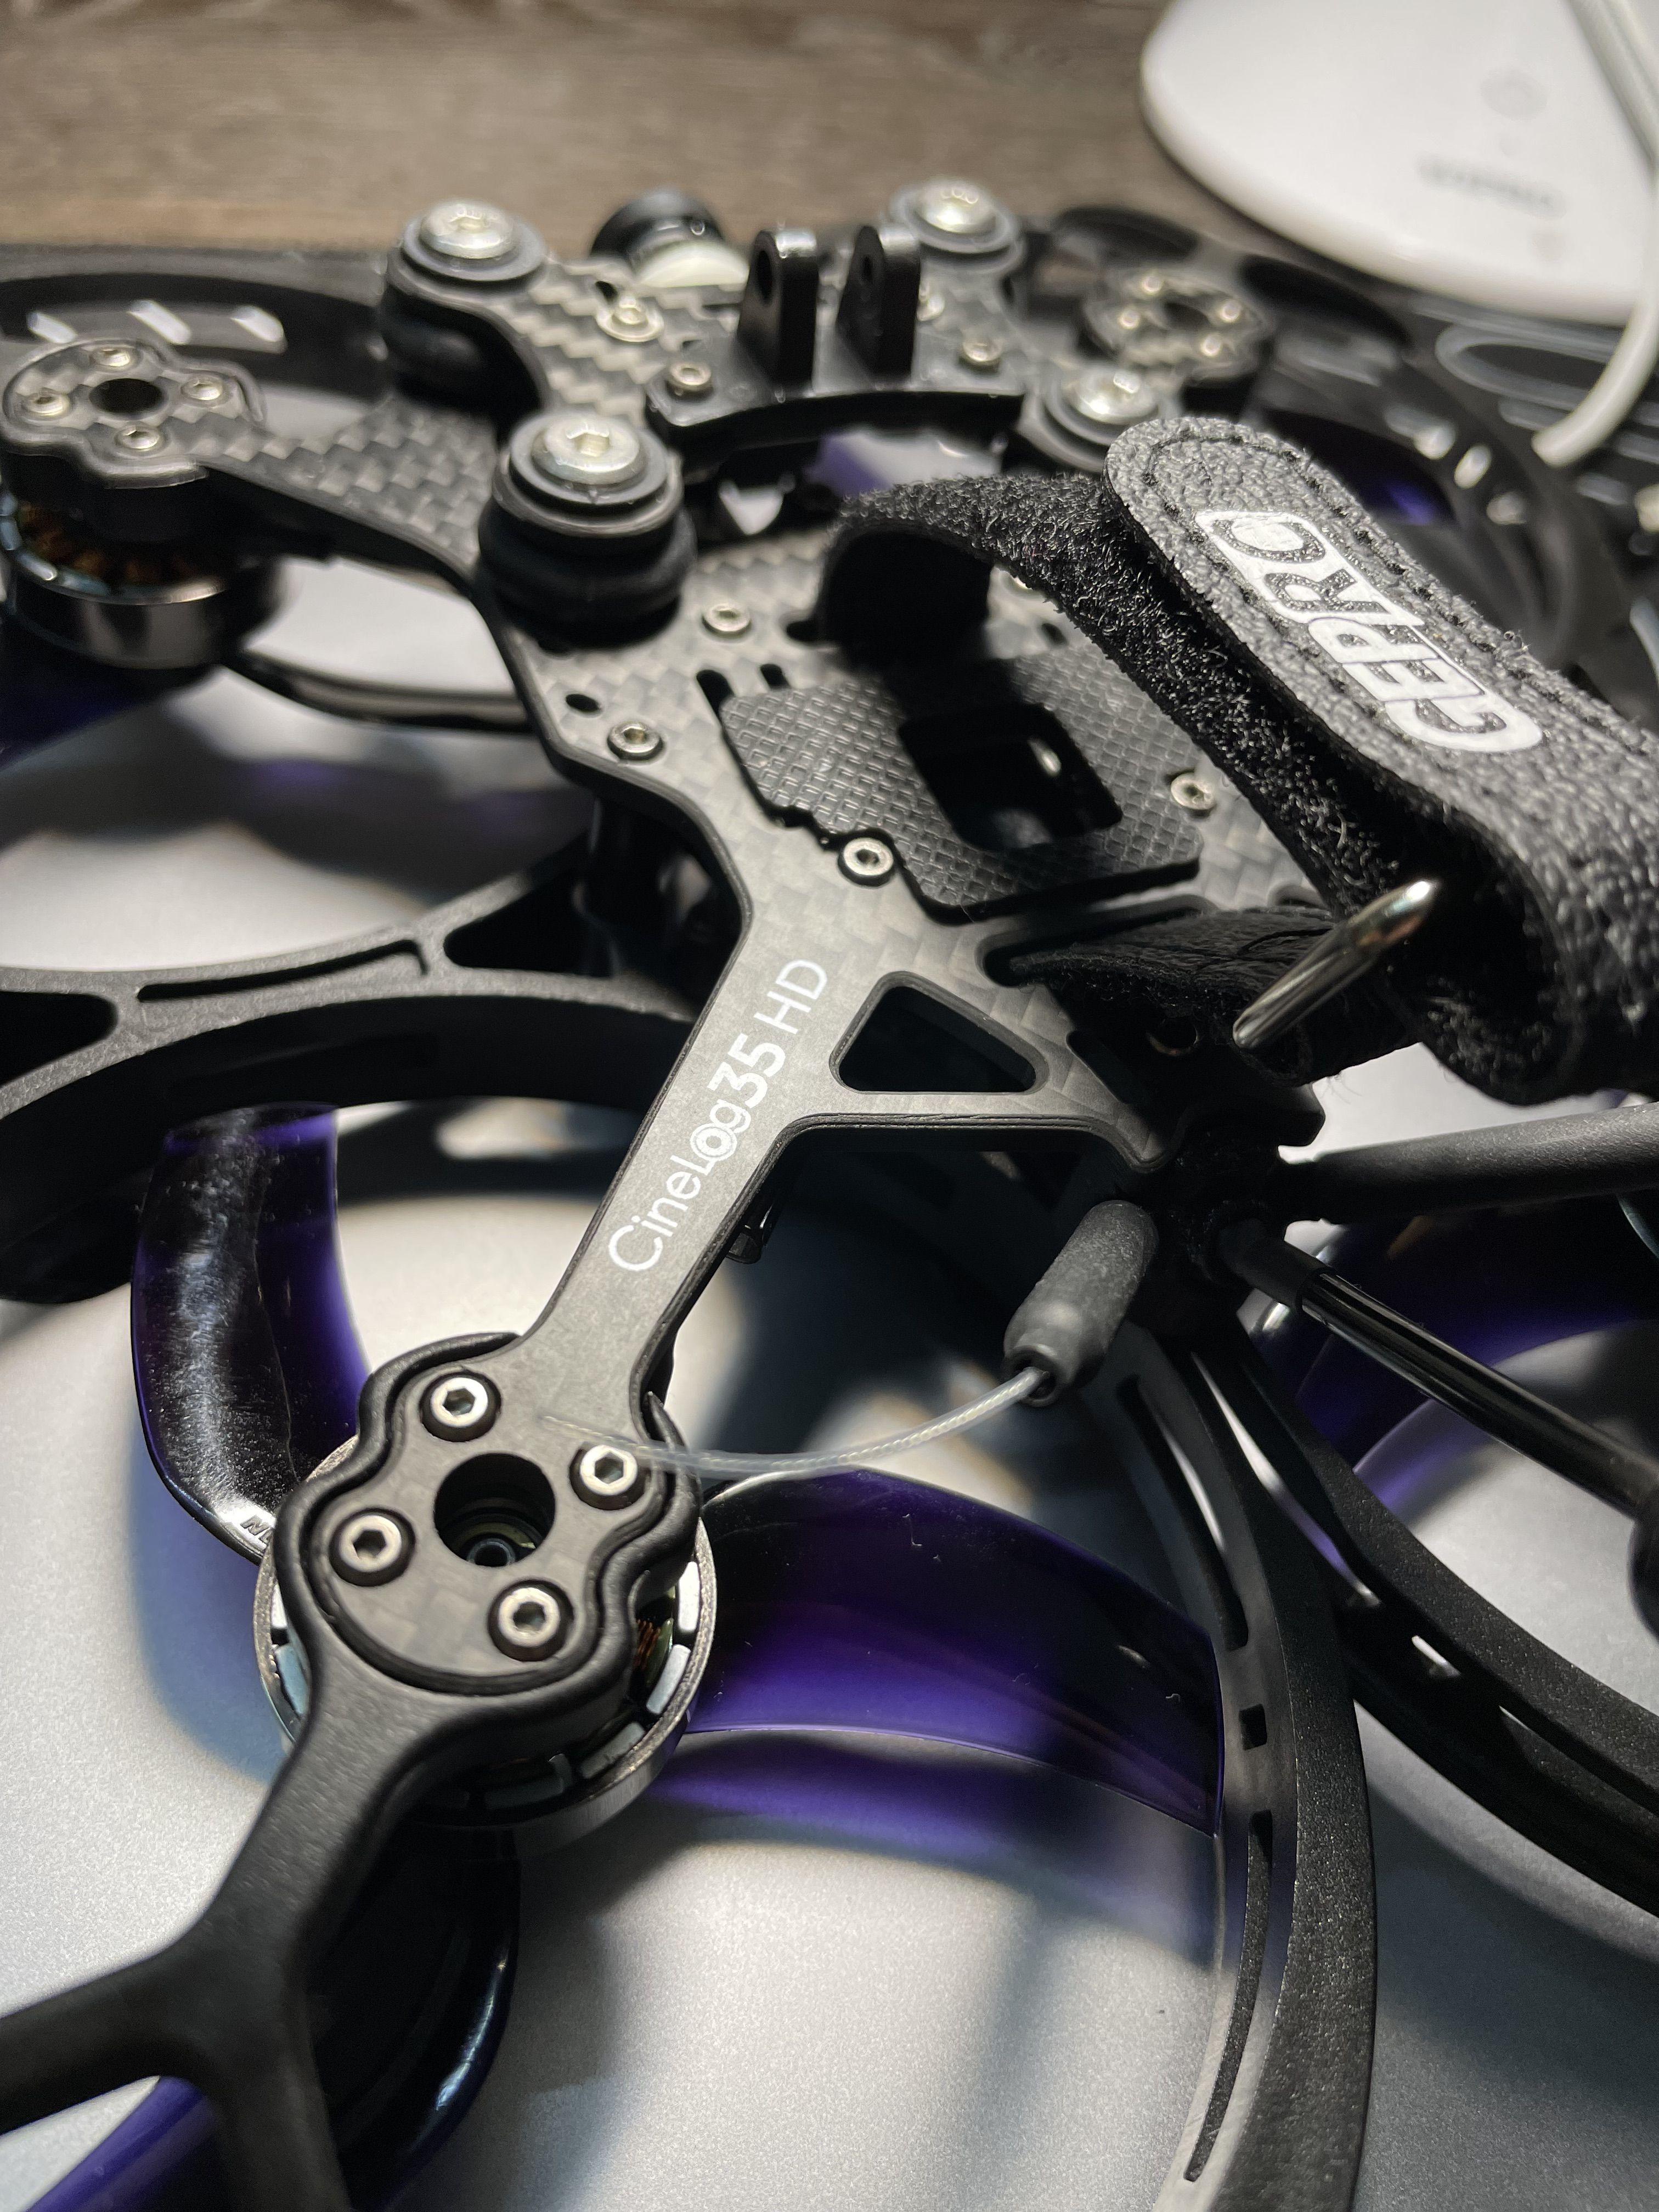
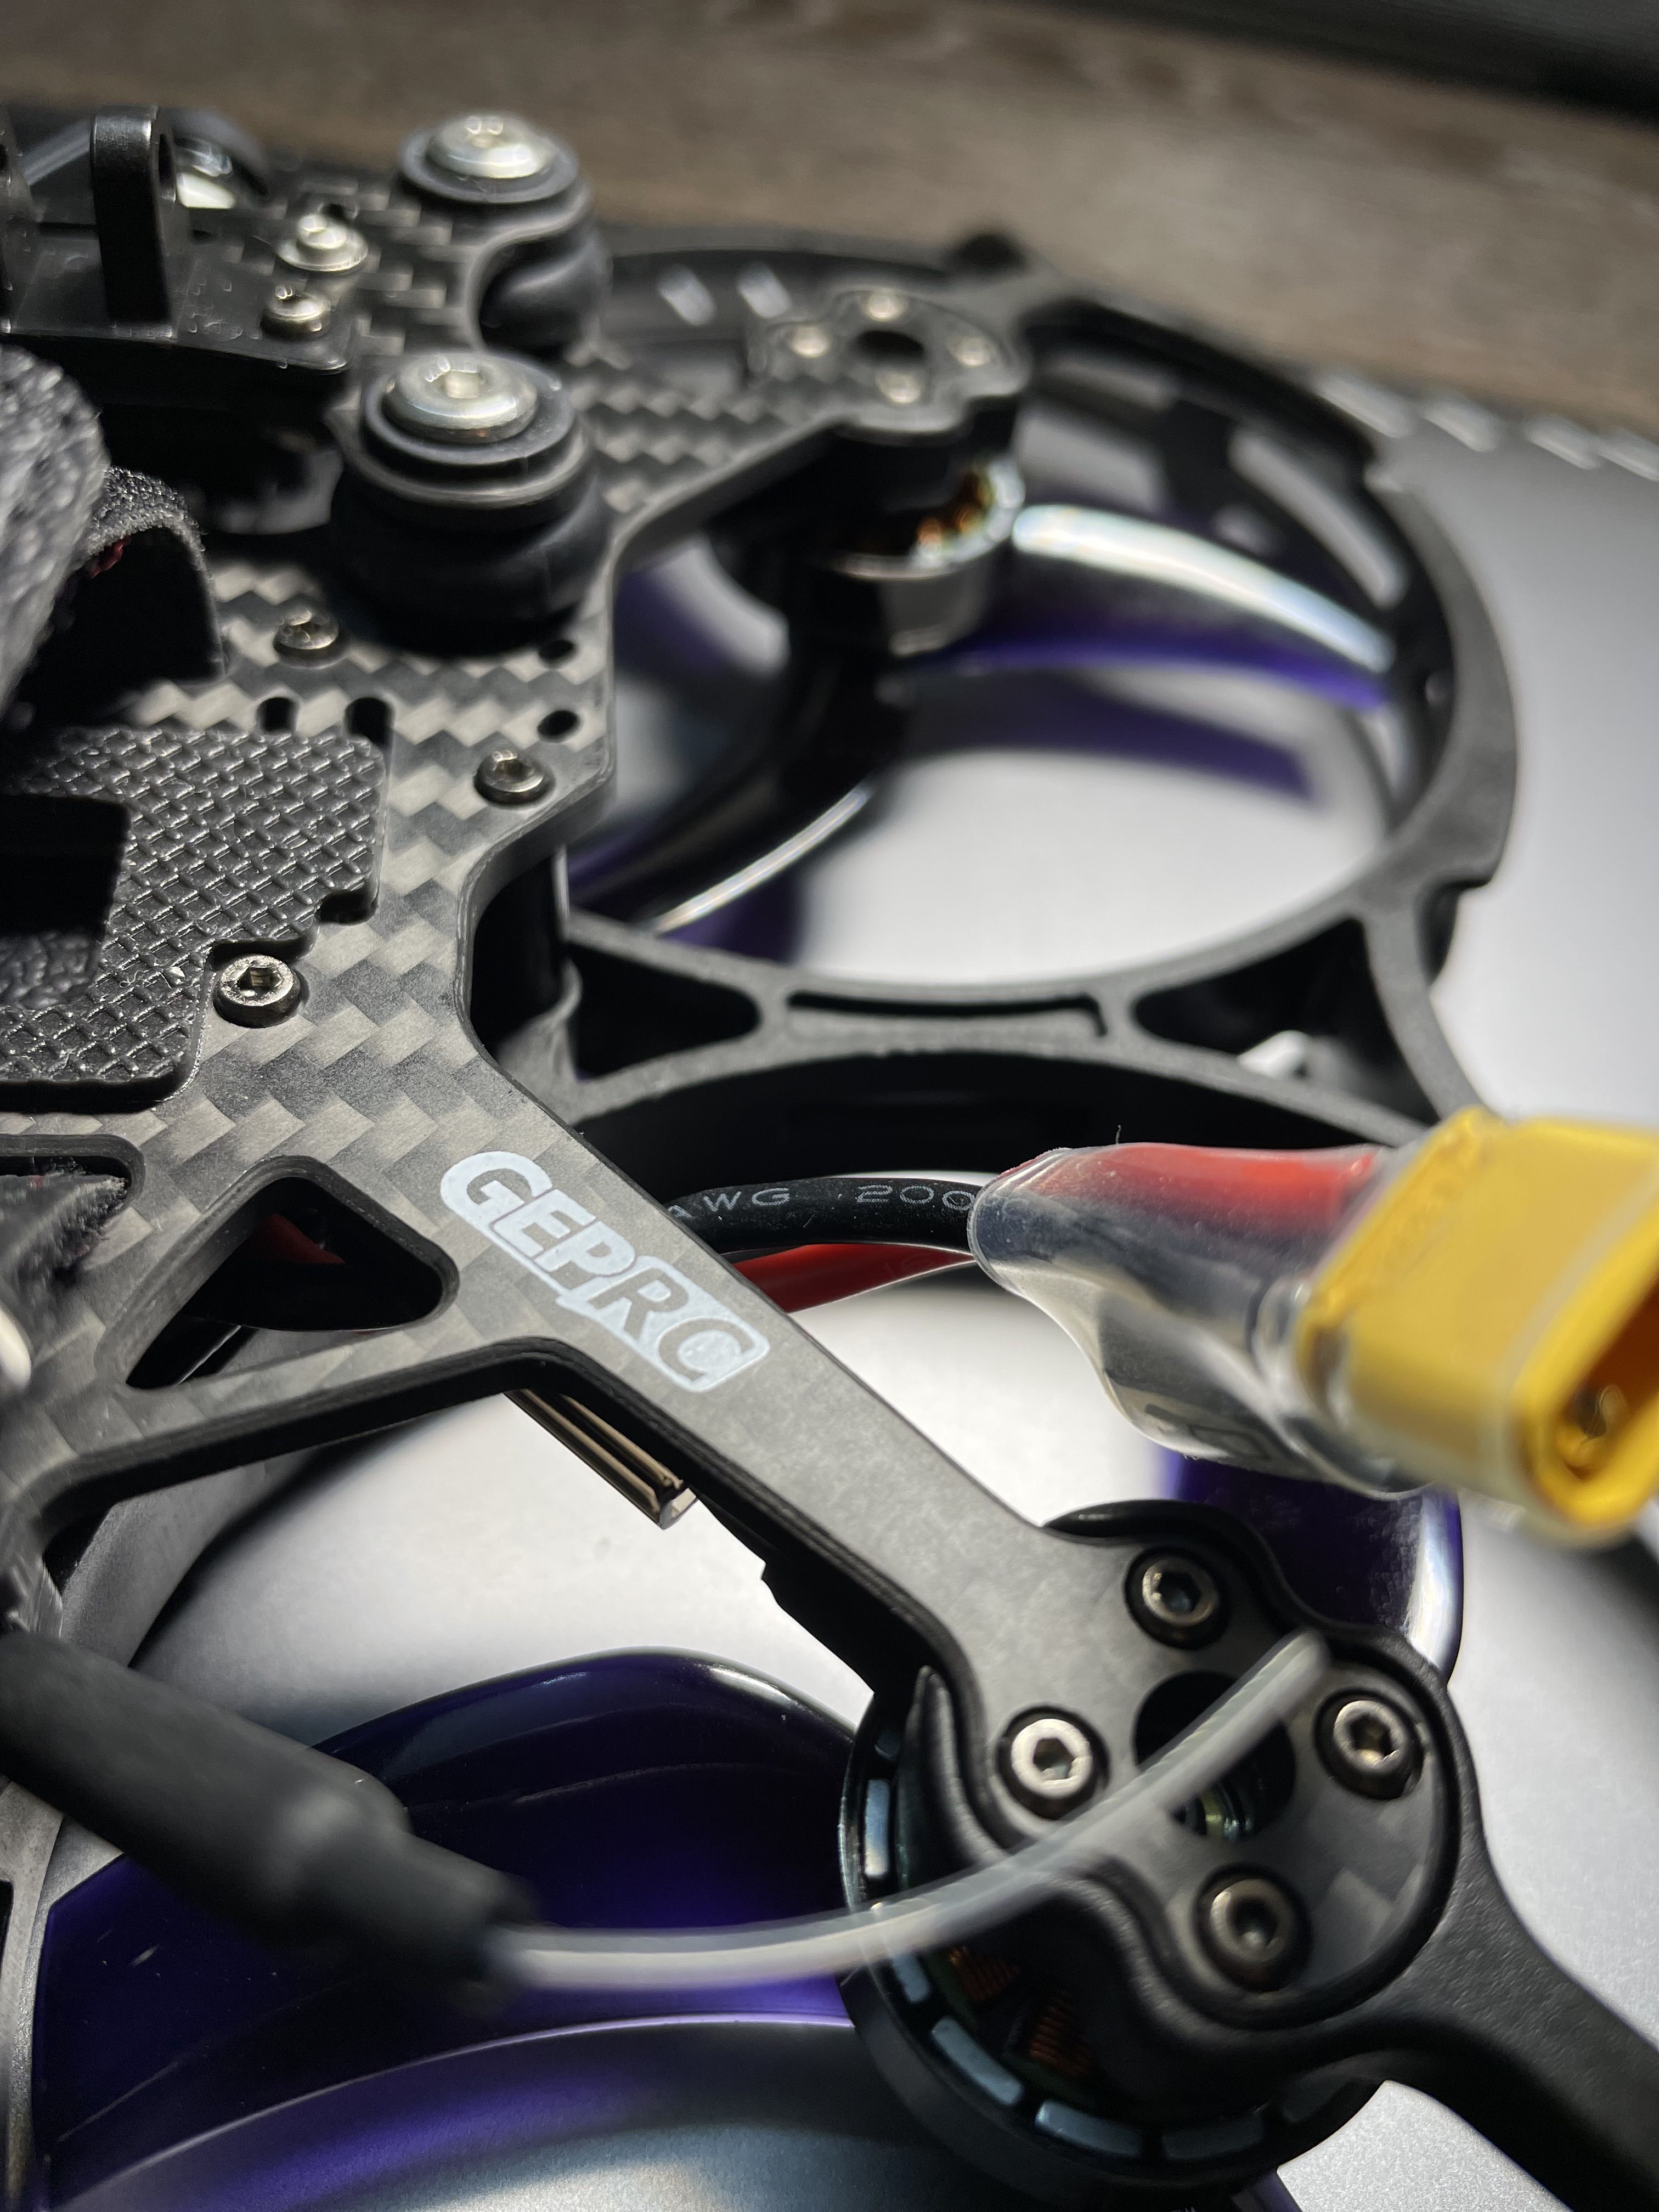
  • A GepRC CineLog 35 frame comes with a 26.5mm x 26.5mm mounting pattern. This is very important to note, as not all AIO boards come with this pattern (most come with the 25.5mm x 25.5mm pattern). Hence, it’s important to make sure you have the right board for the job.

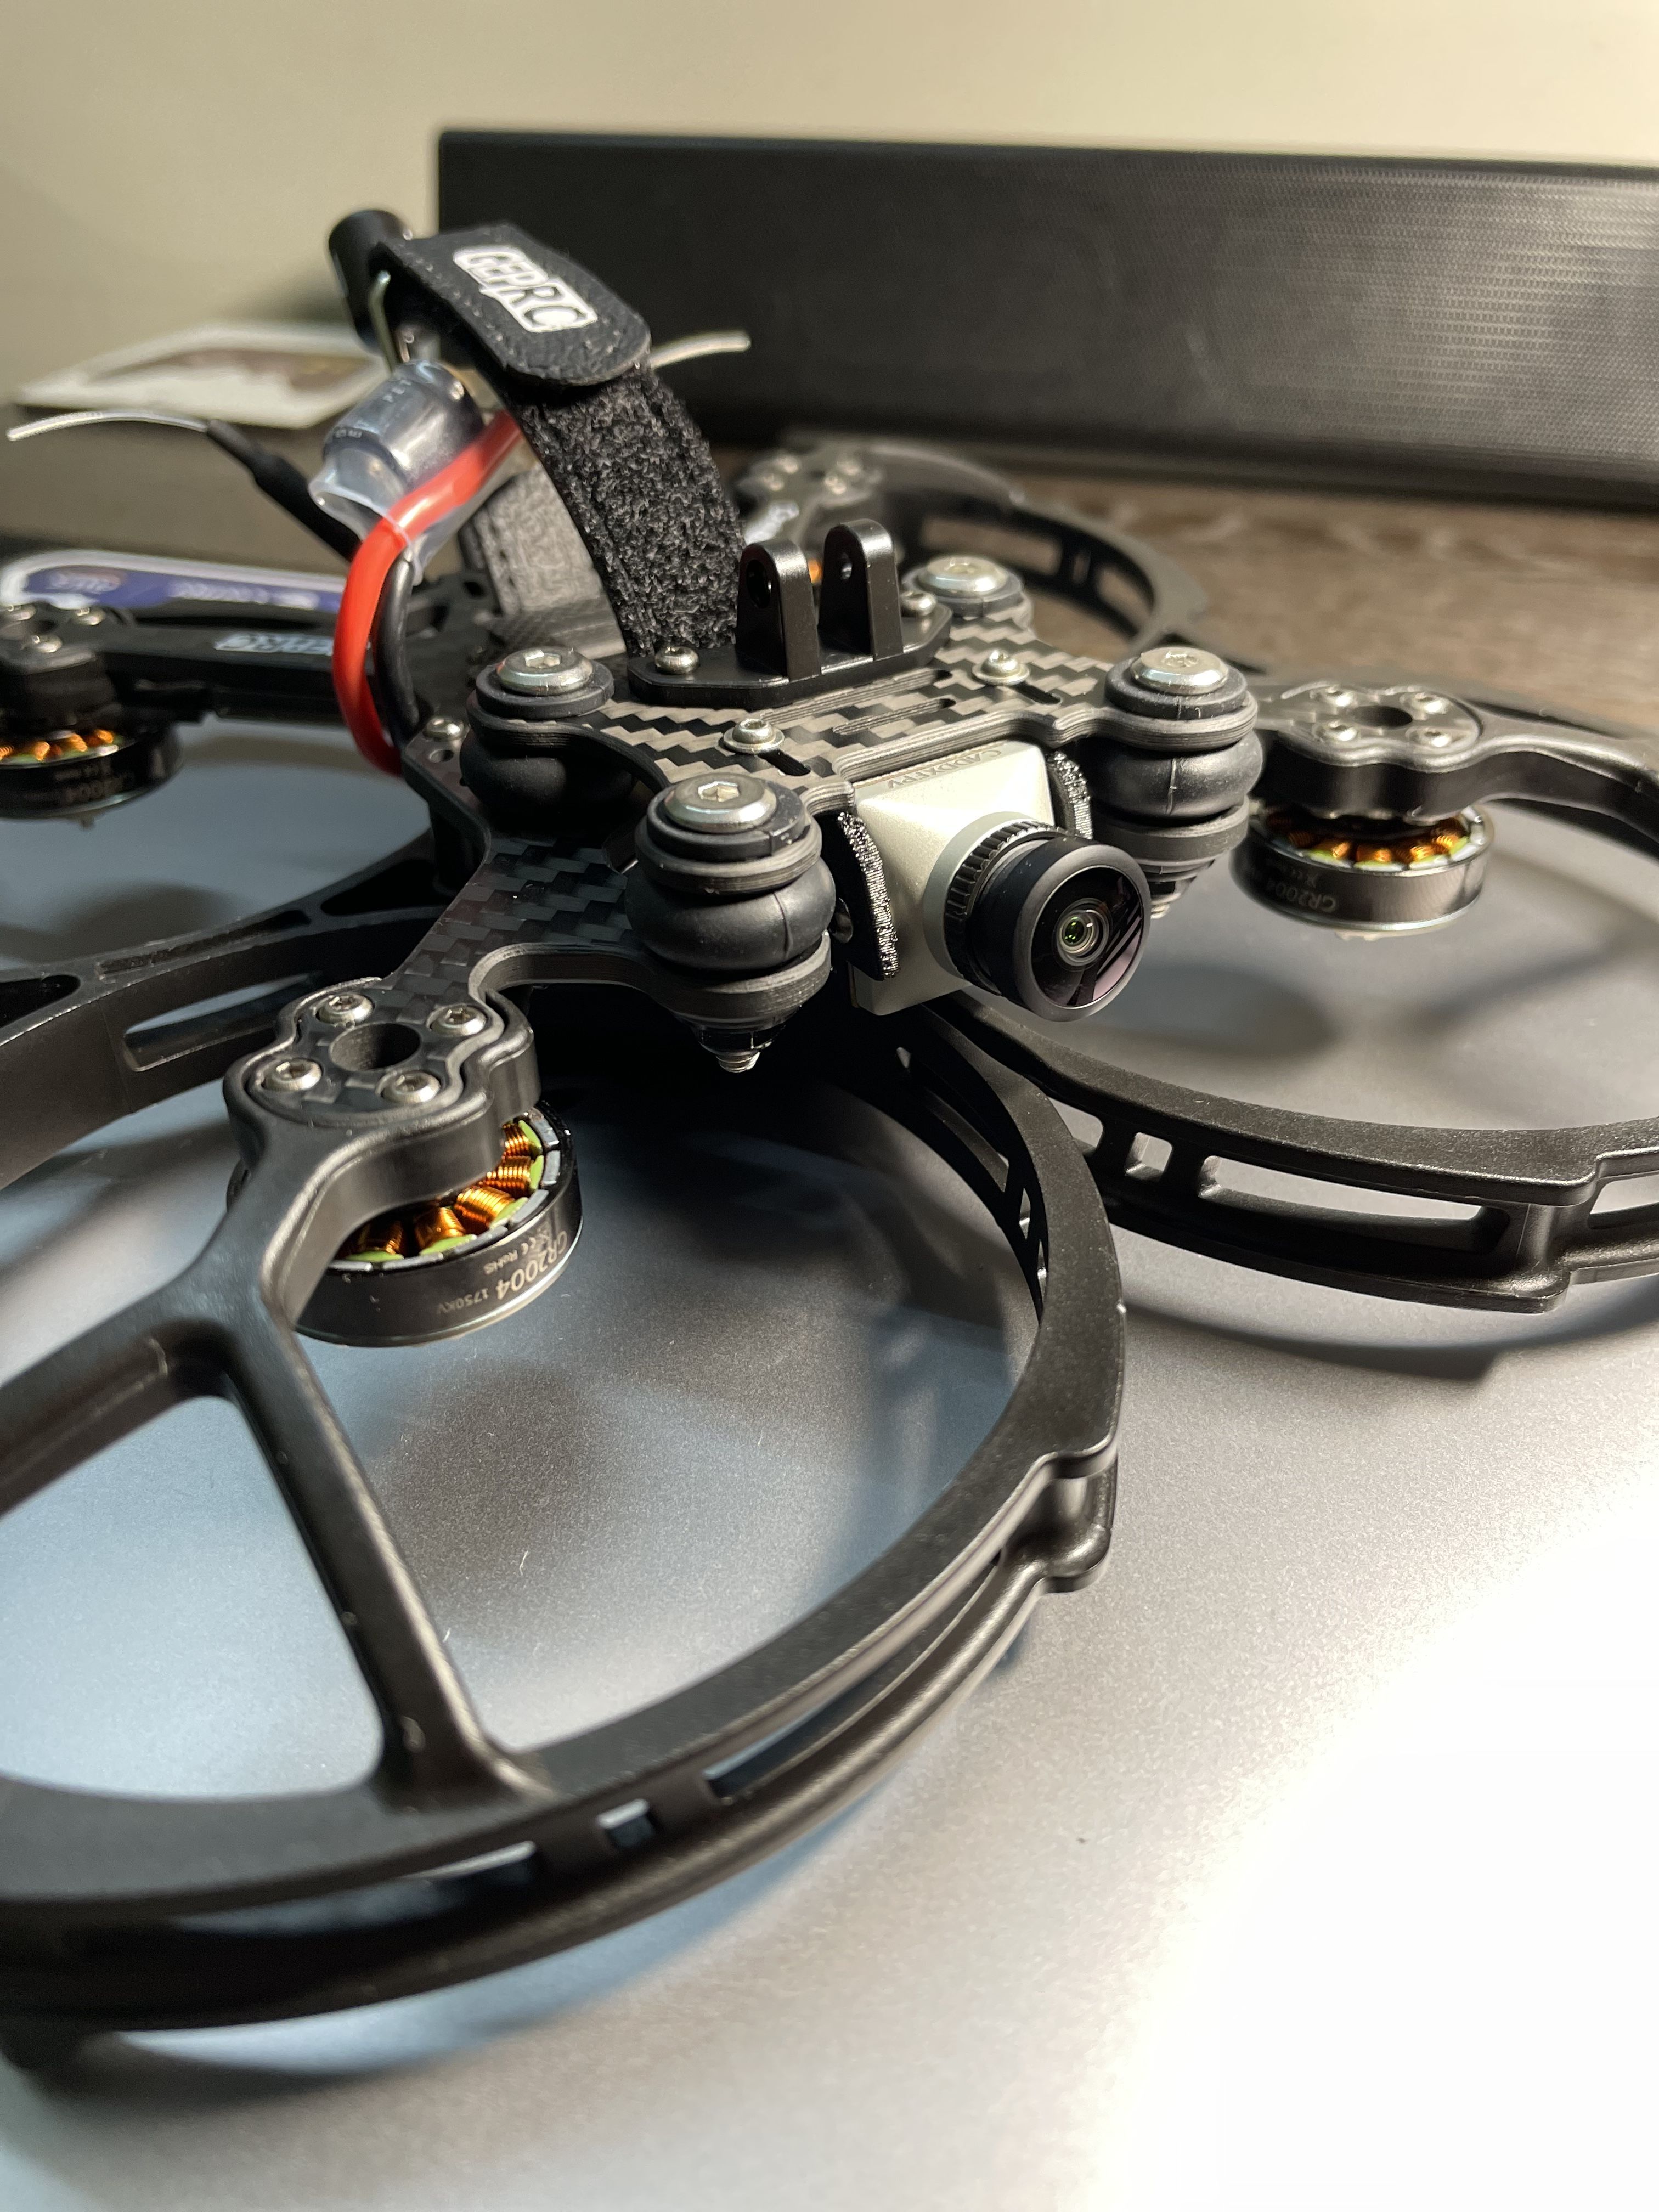
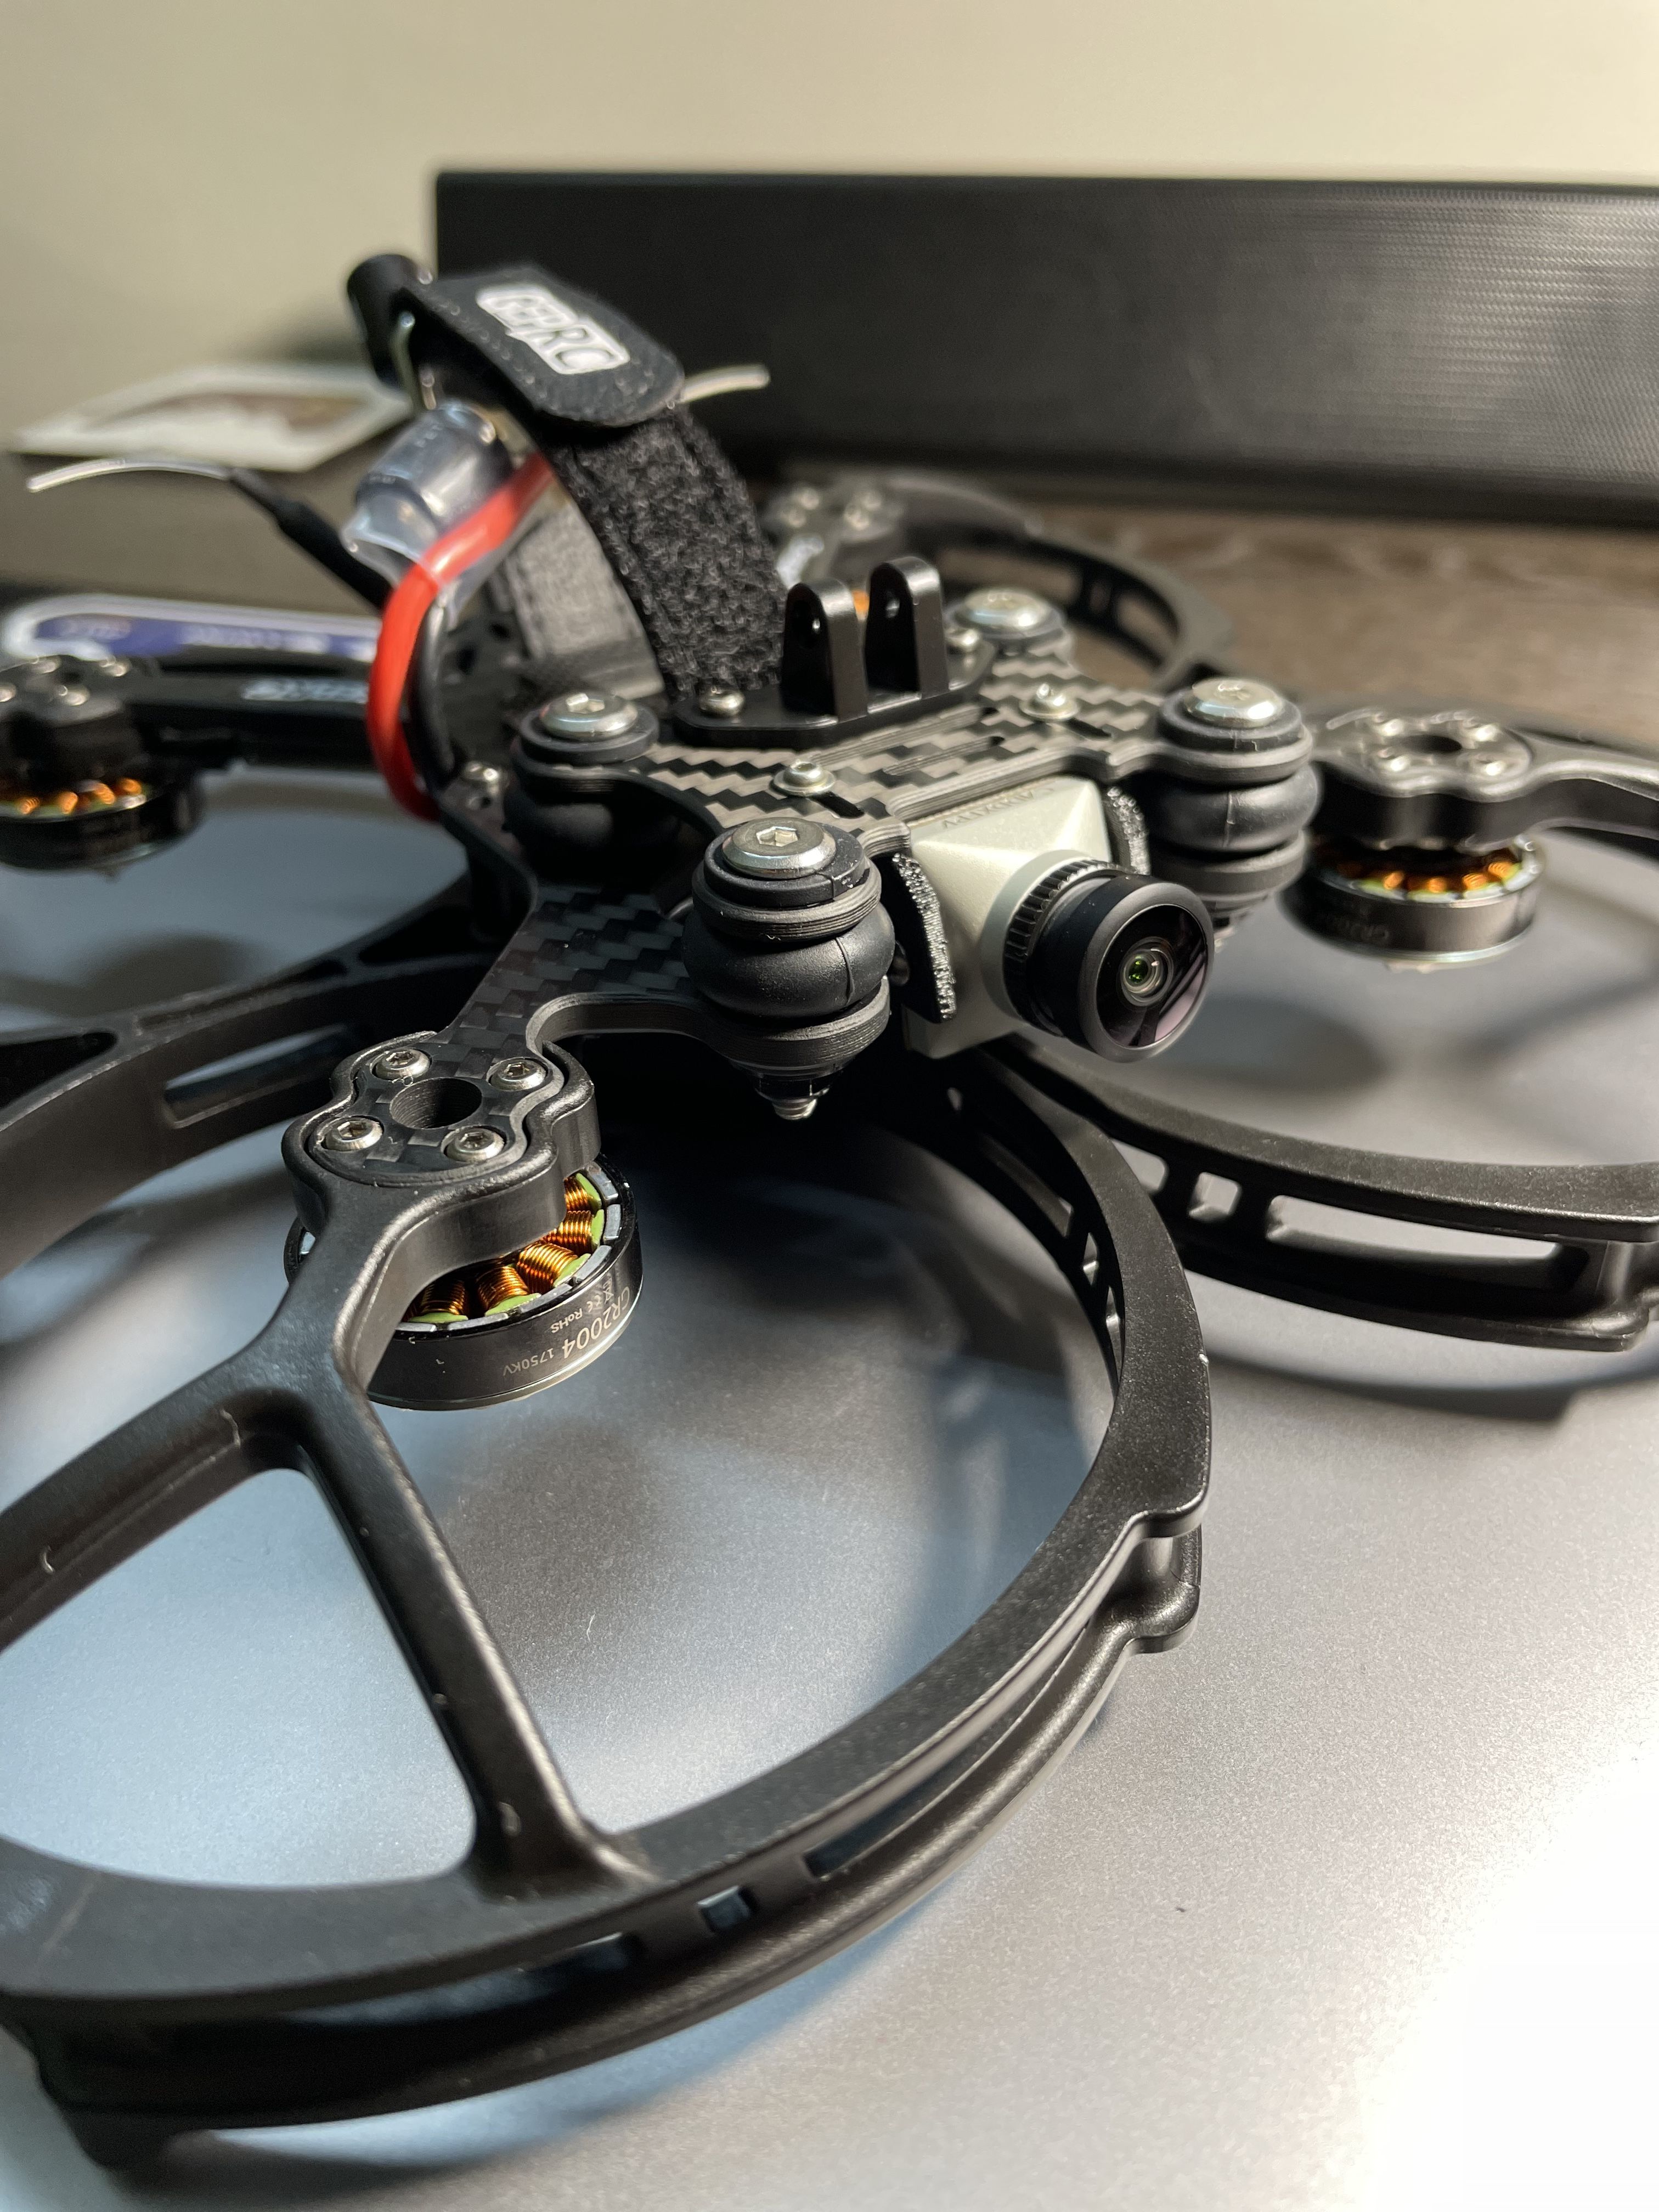
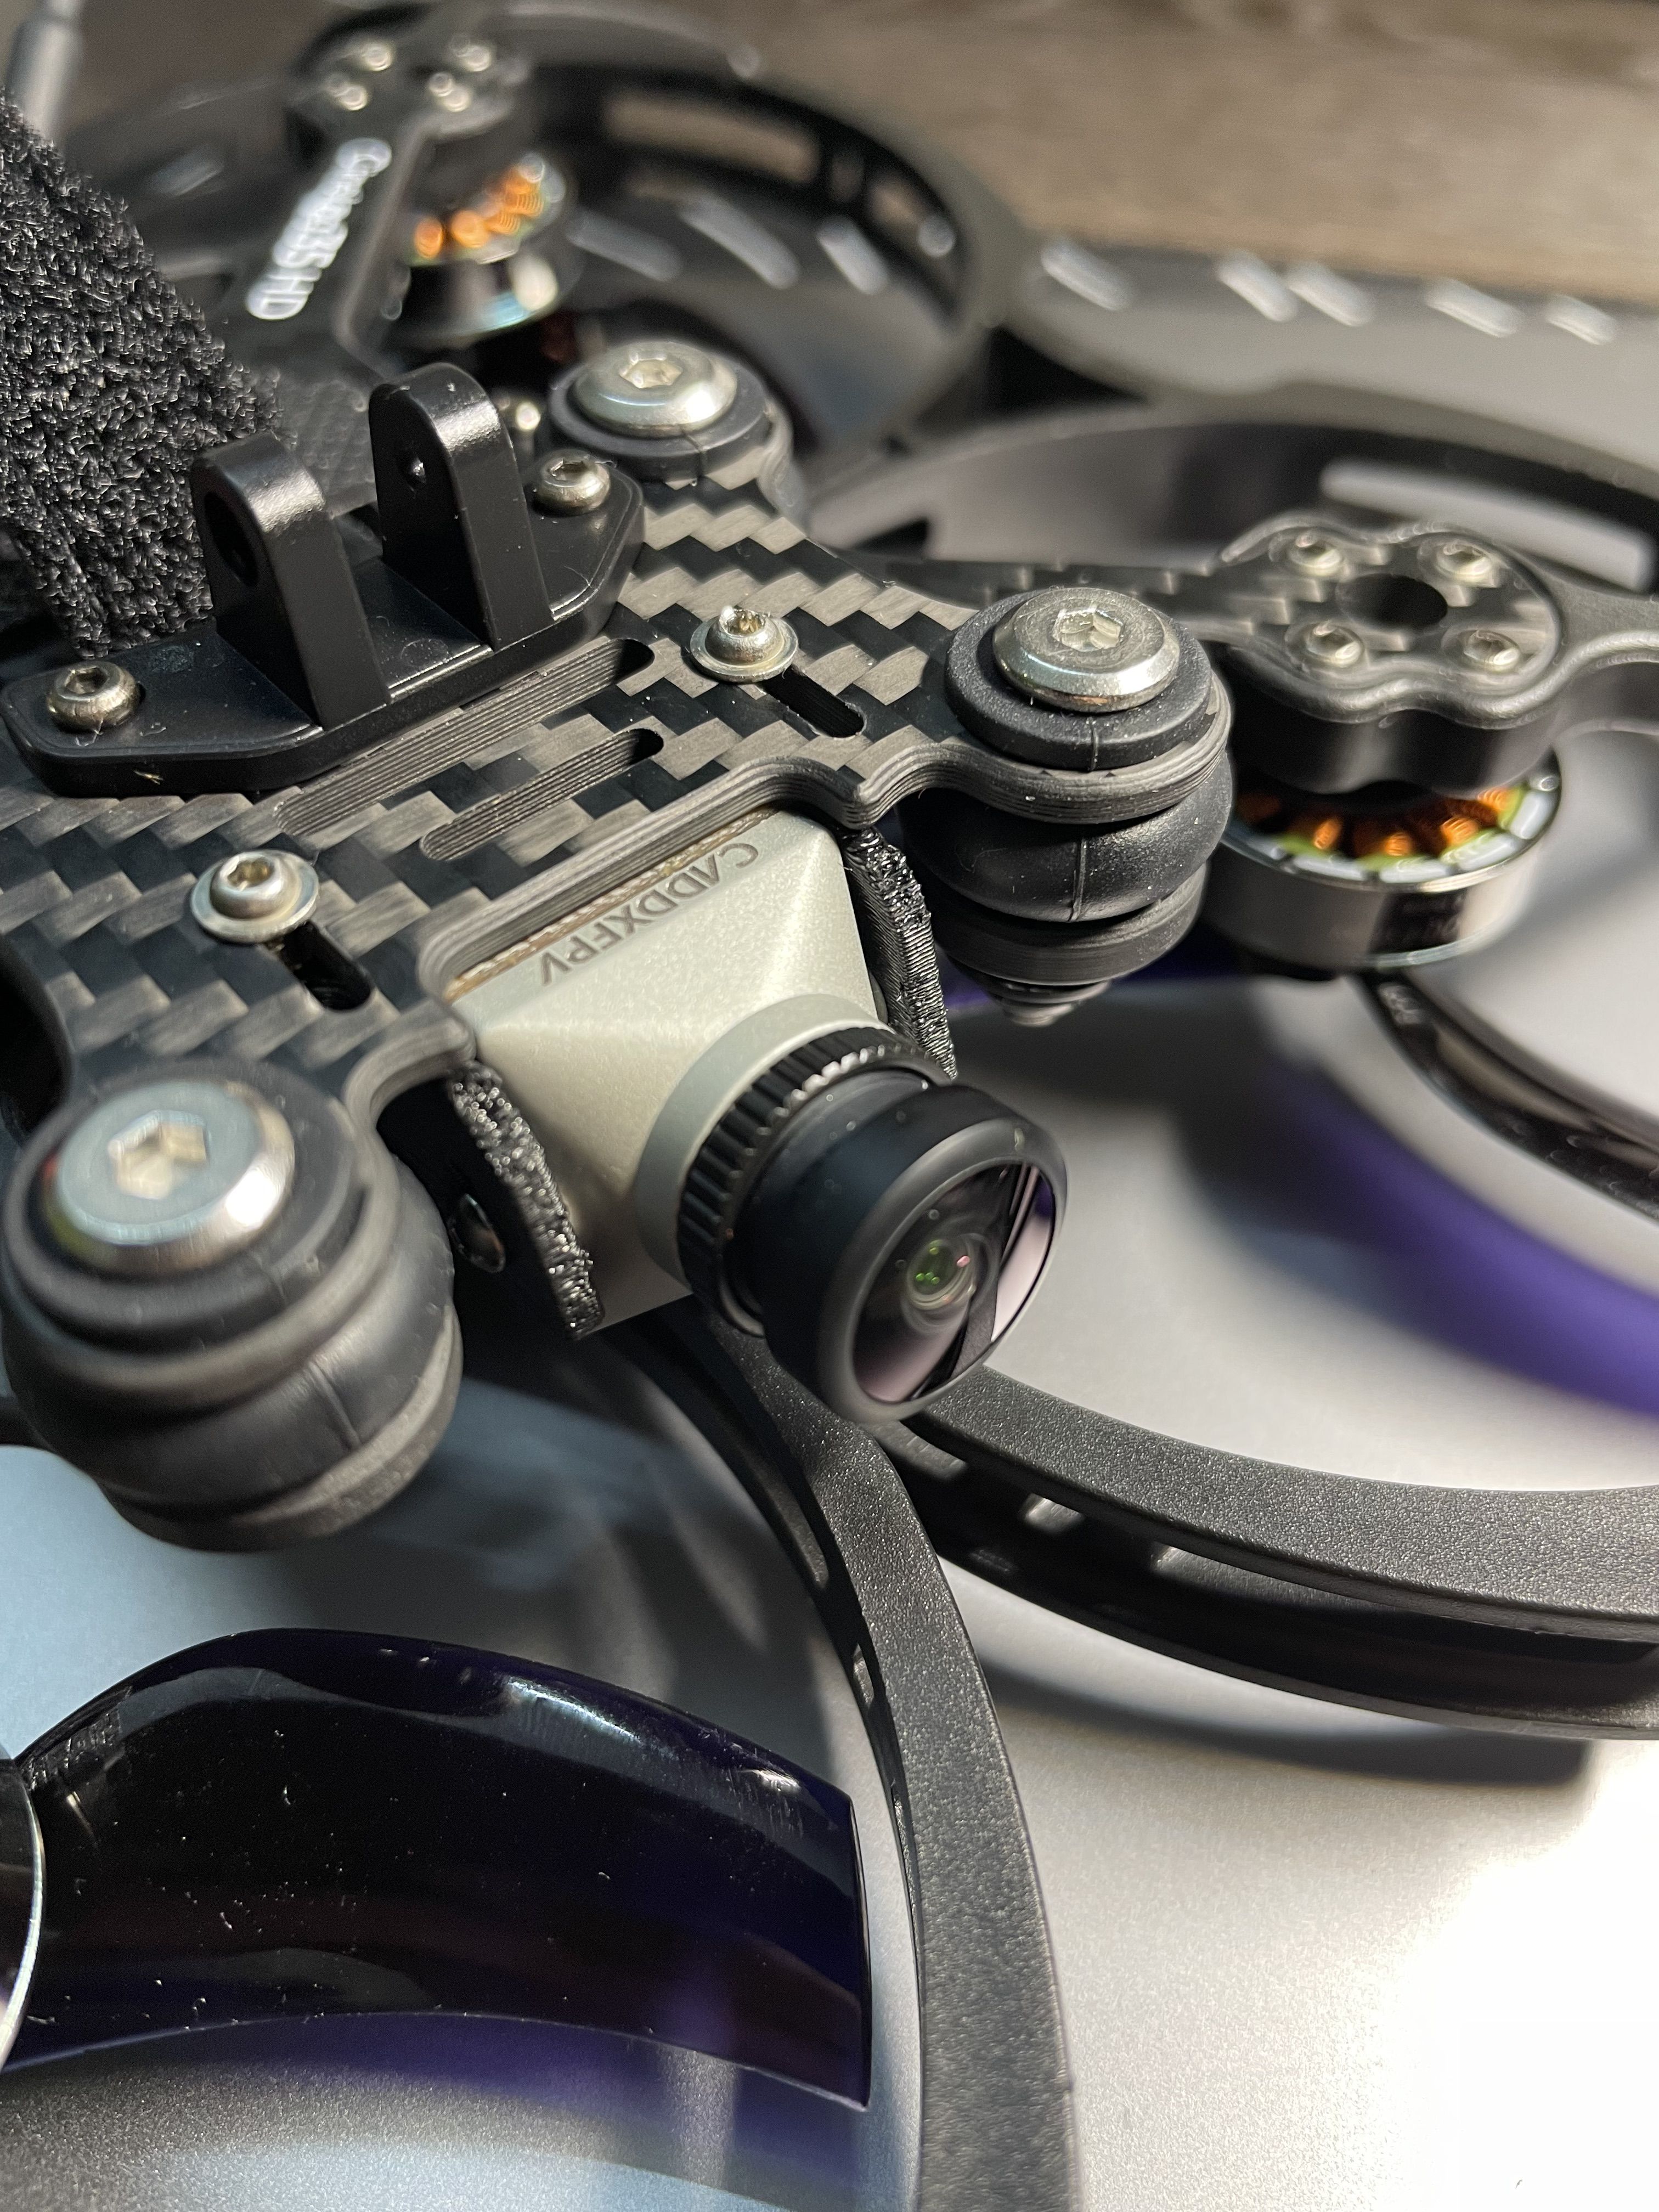
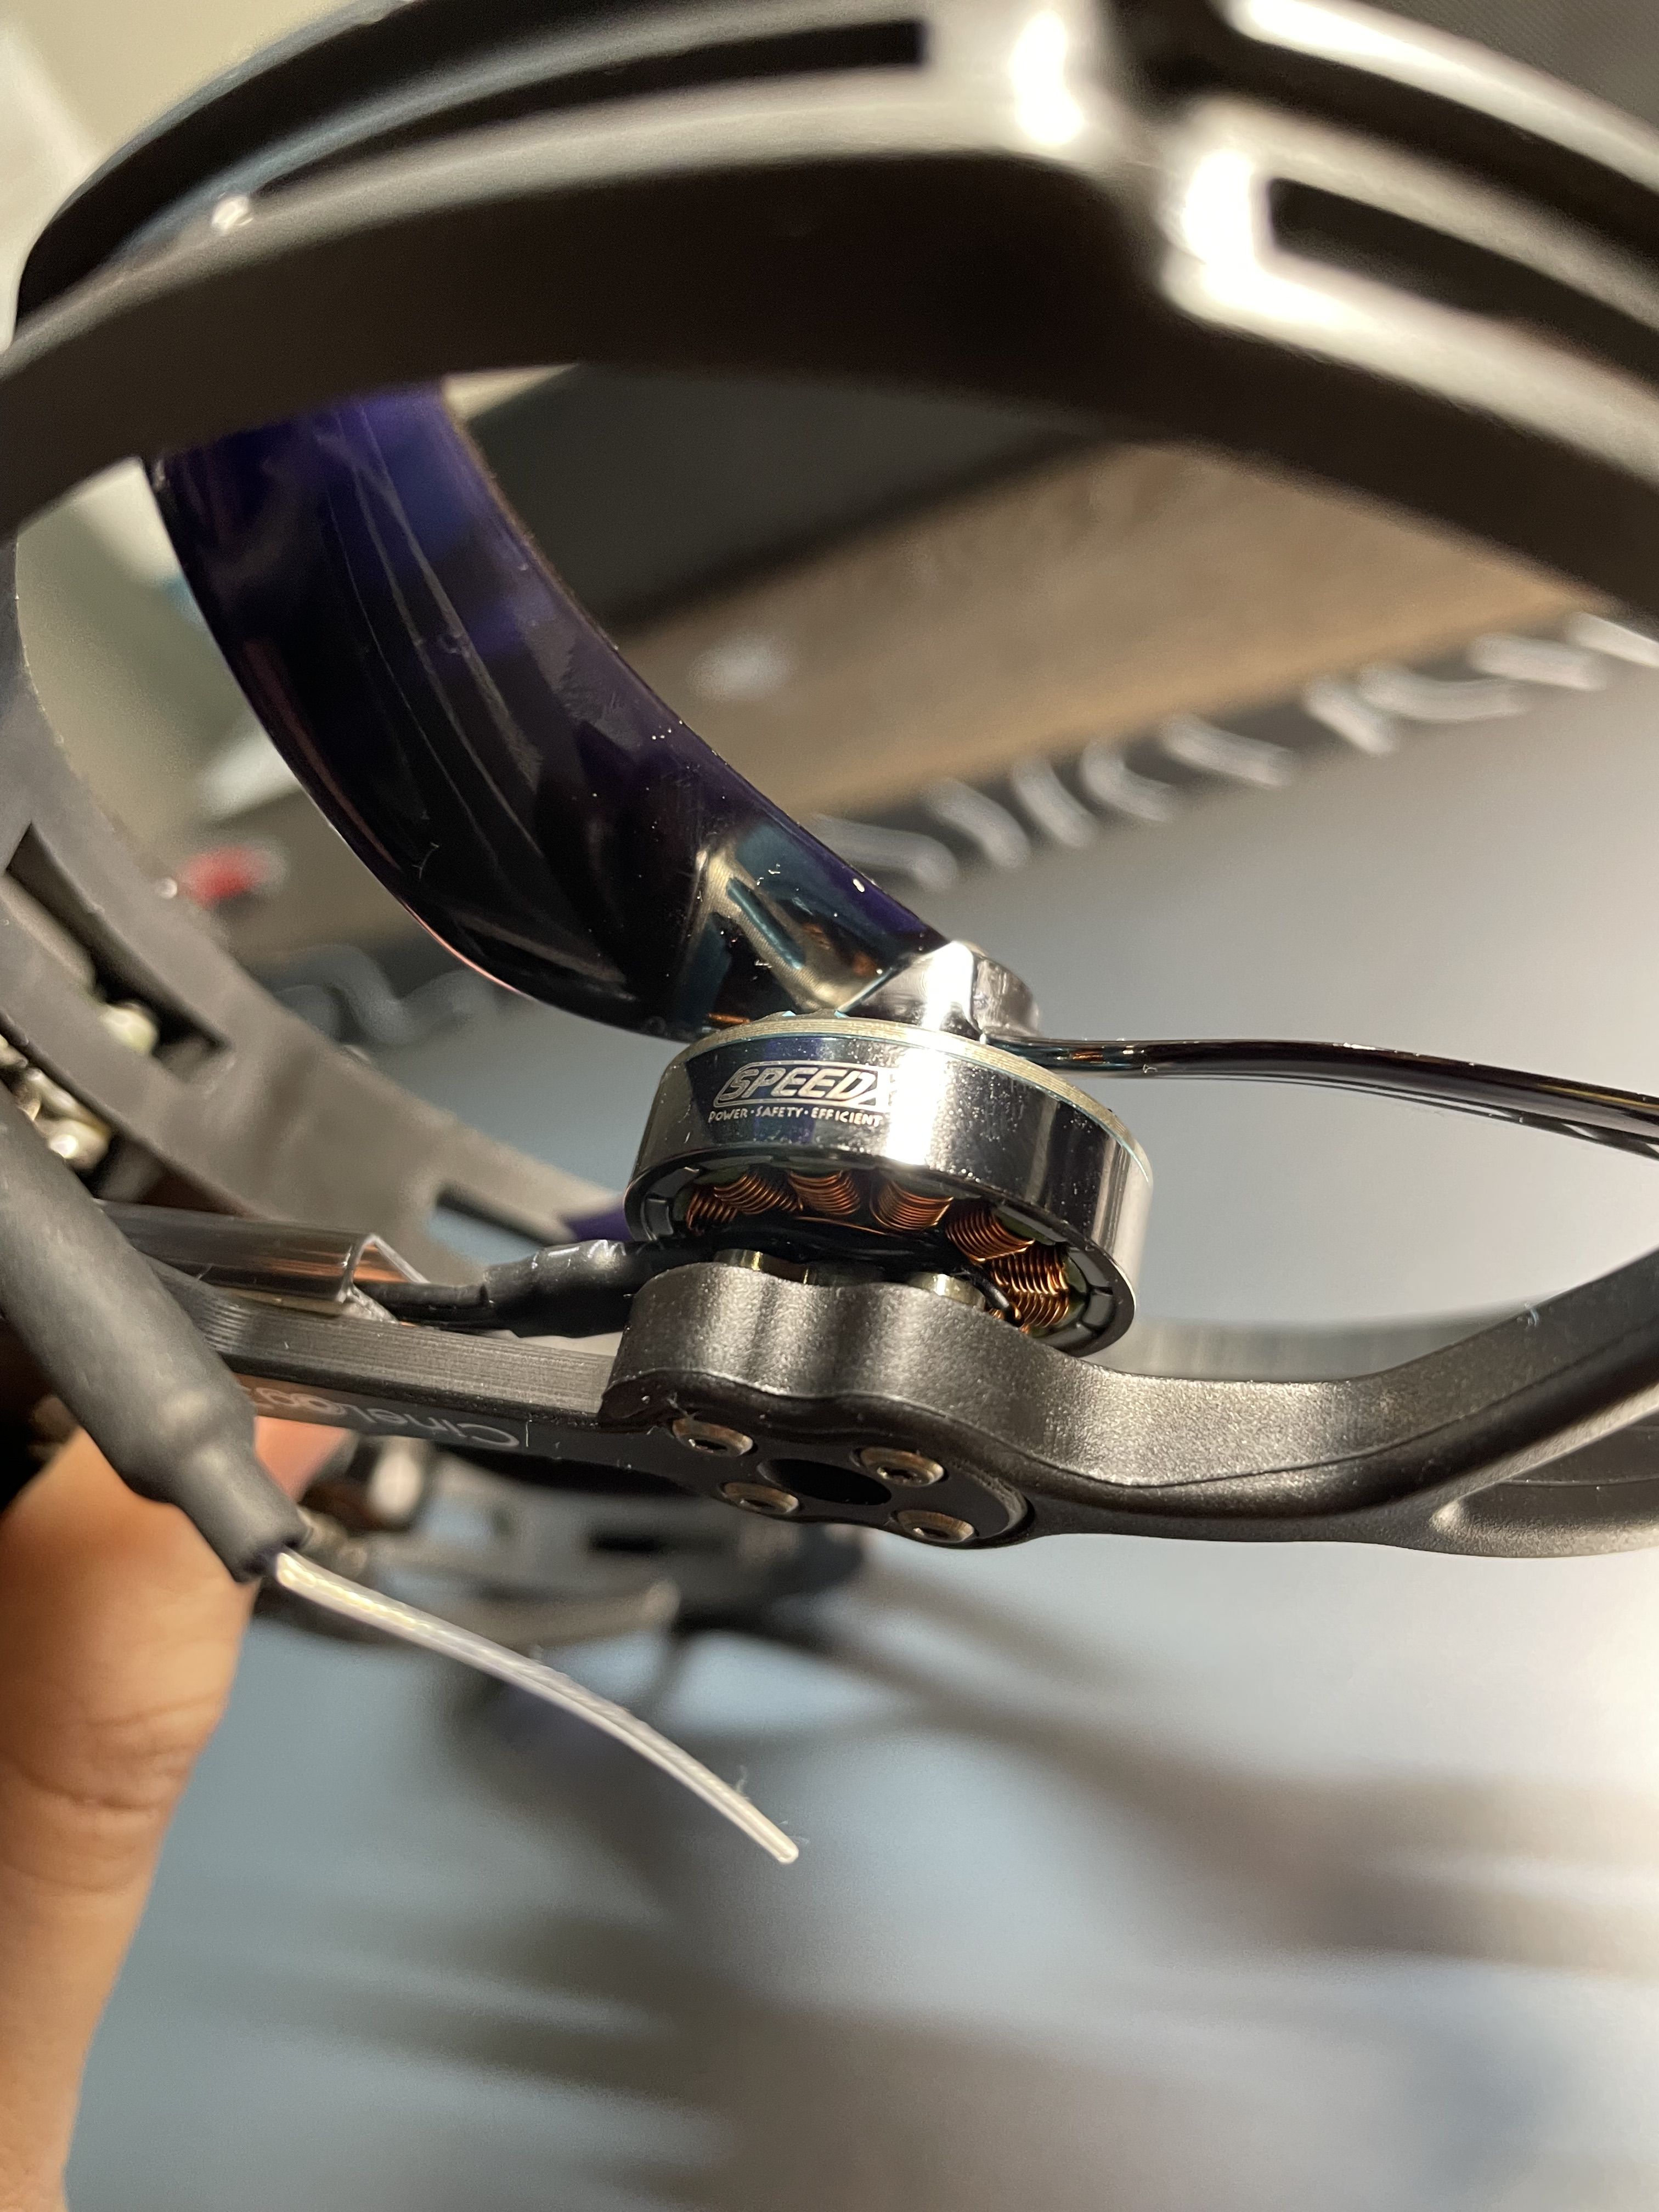
  • If the cinewhoop build will carry a GoPro Hero 9 or a larger action cam, go with the larger 2004 size motors (like I’ve done in this build).

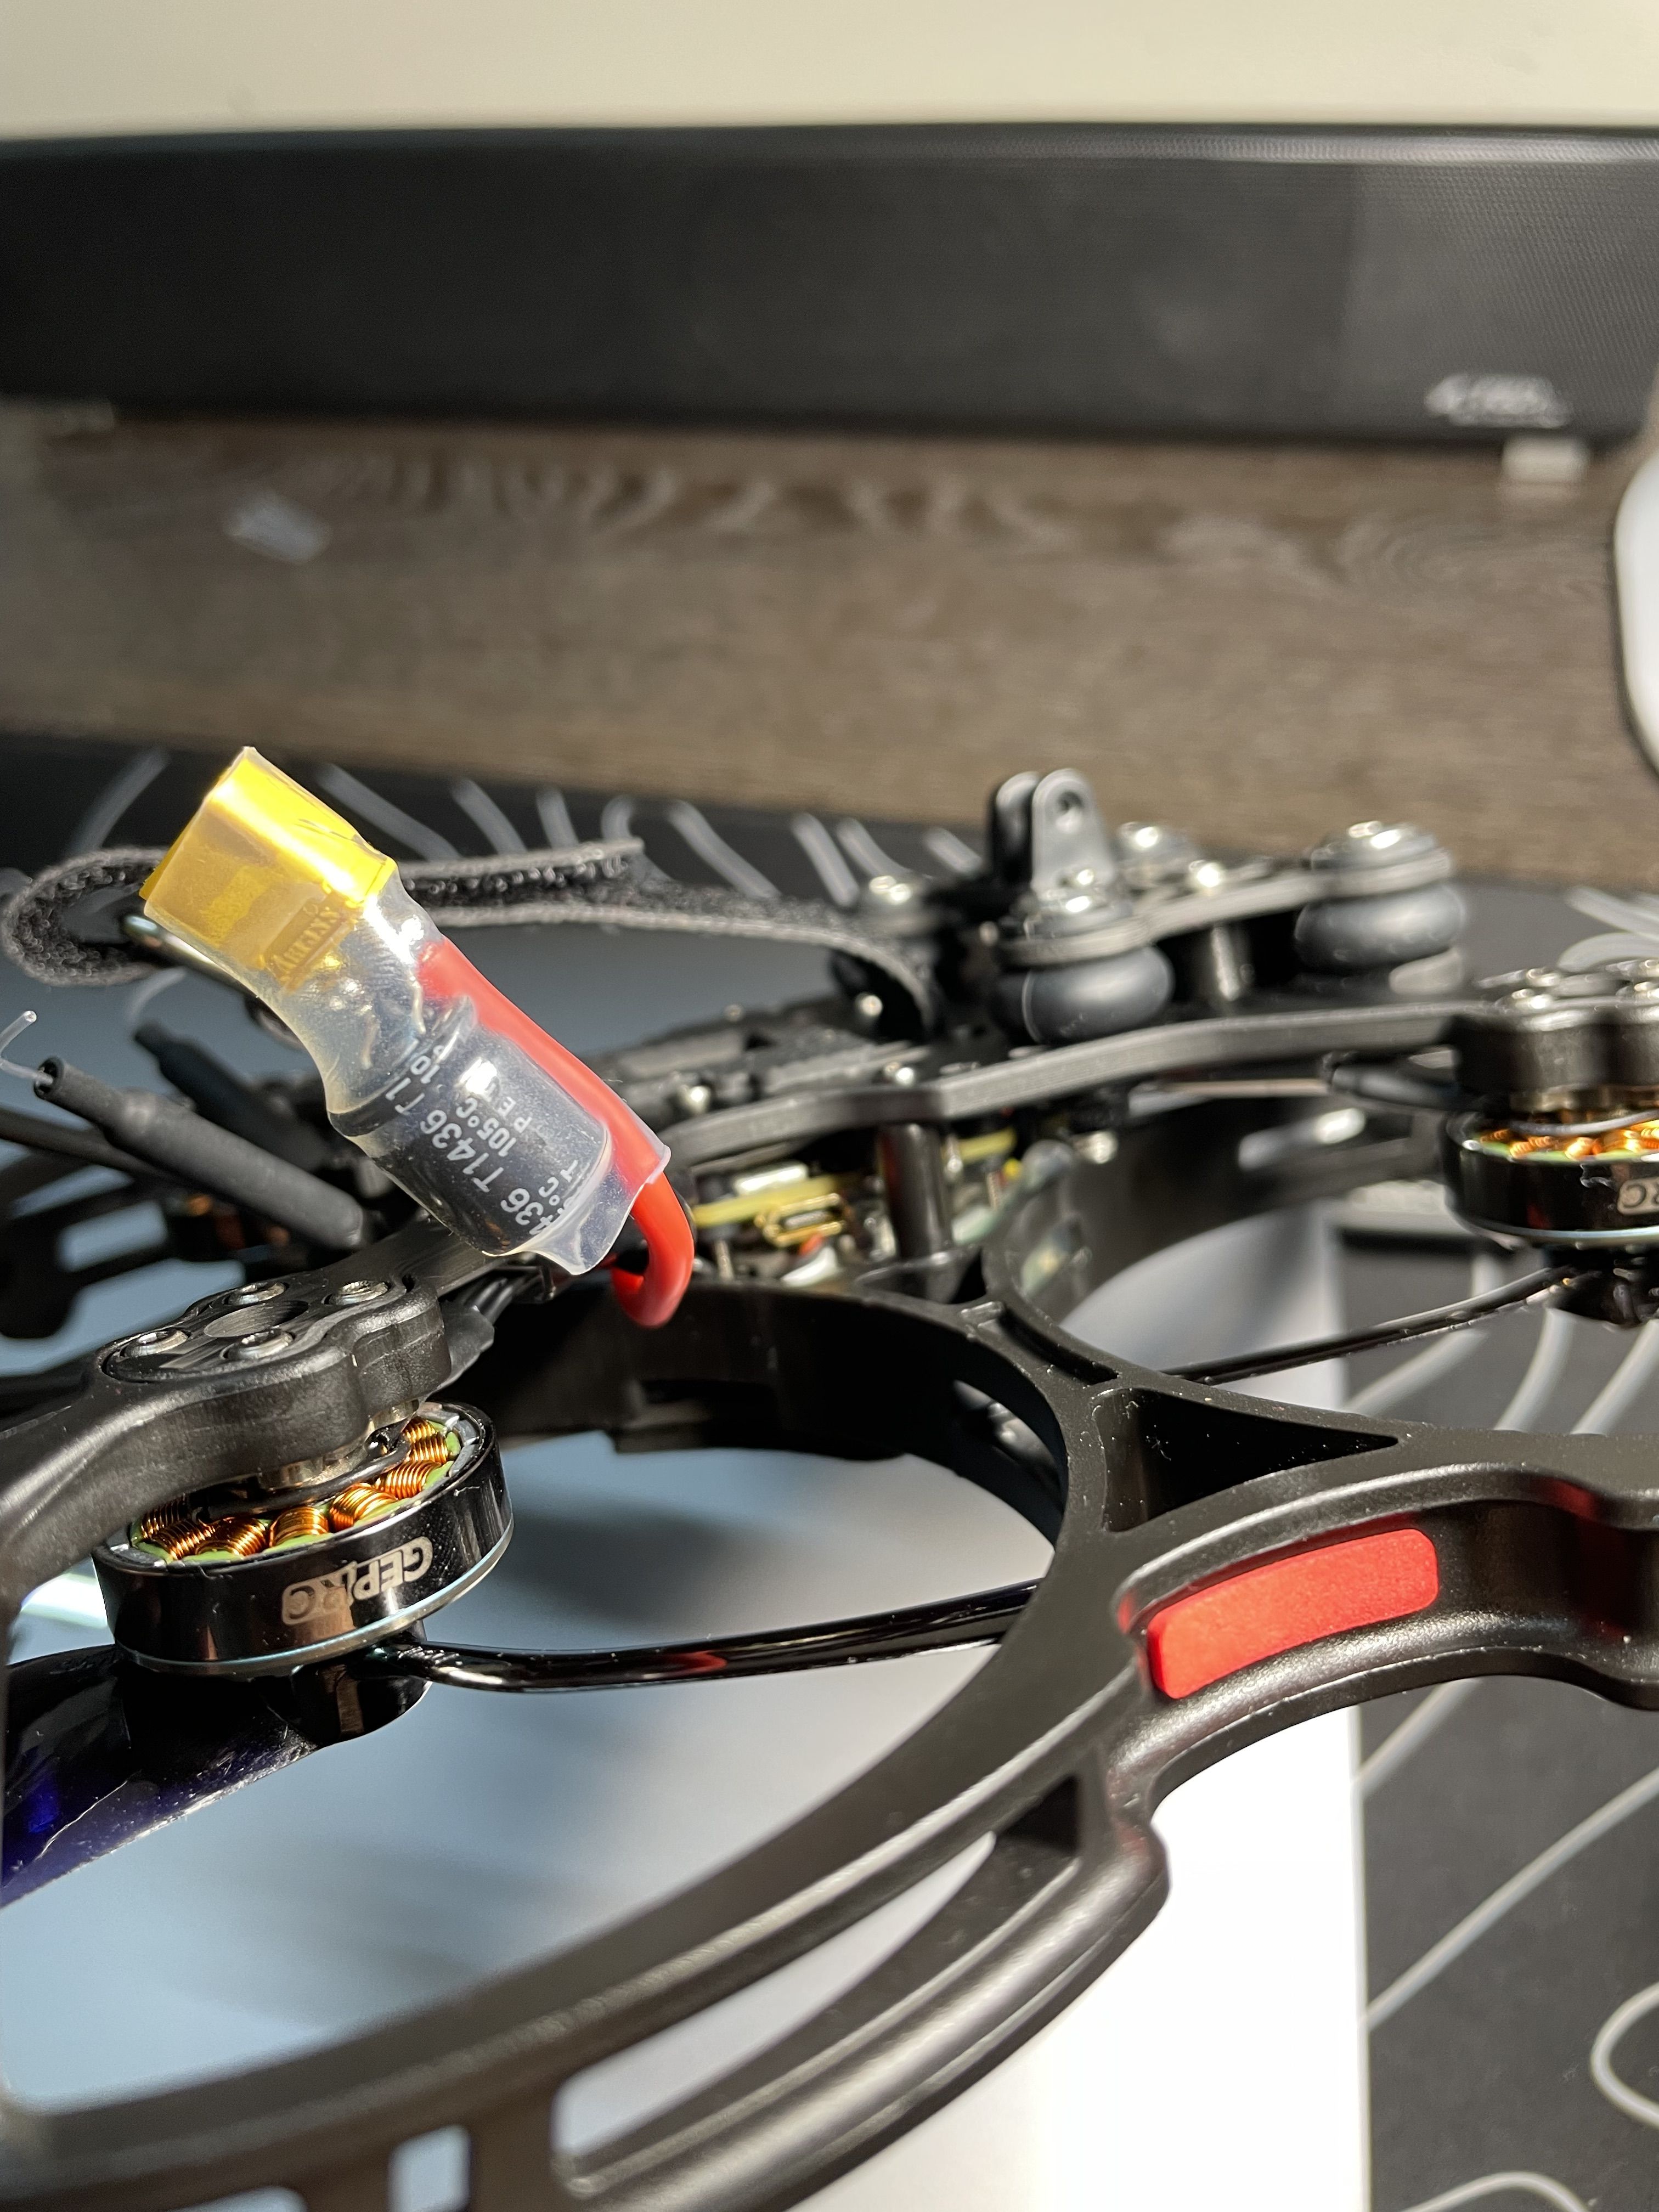
  • If, like mine, you intend to build a 6S version, make sure you use the battery pigtail wire that comes with the frame and not the one that comes with the FC, as the pigtail that comes with the frame already has a capacitor soldered to it.

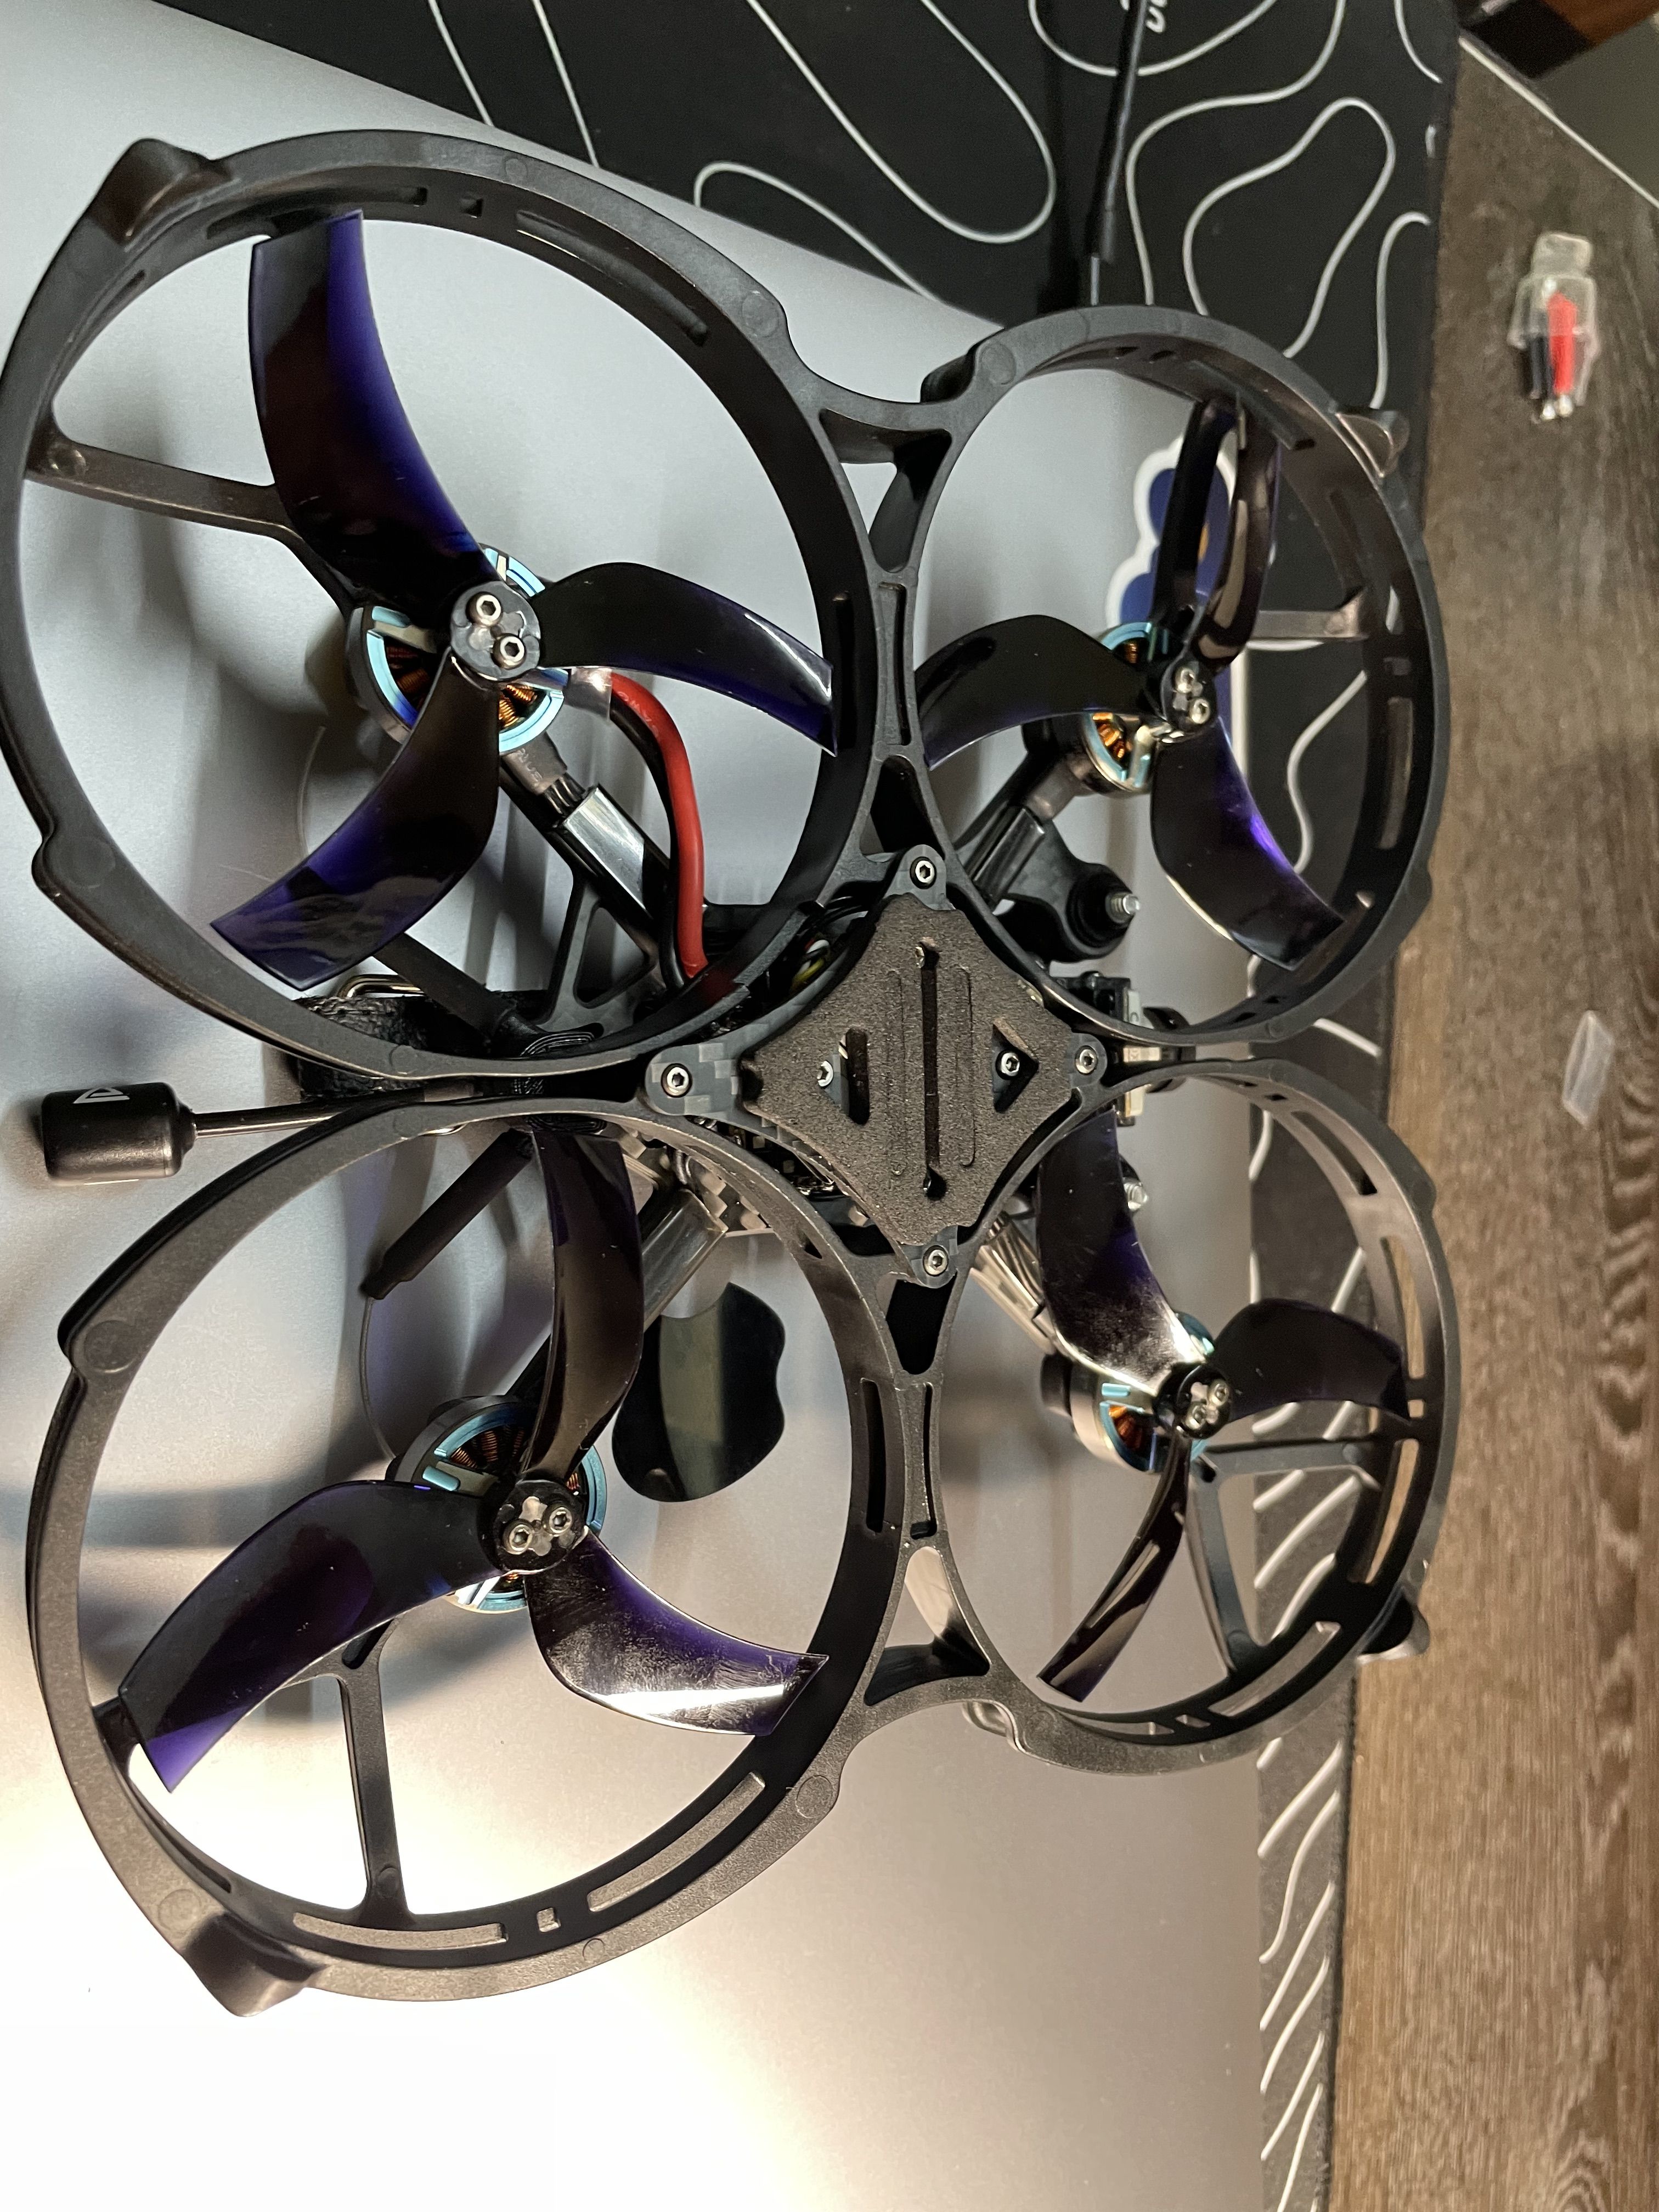
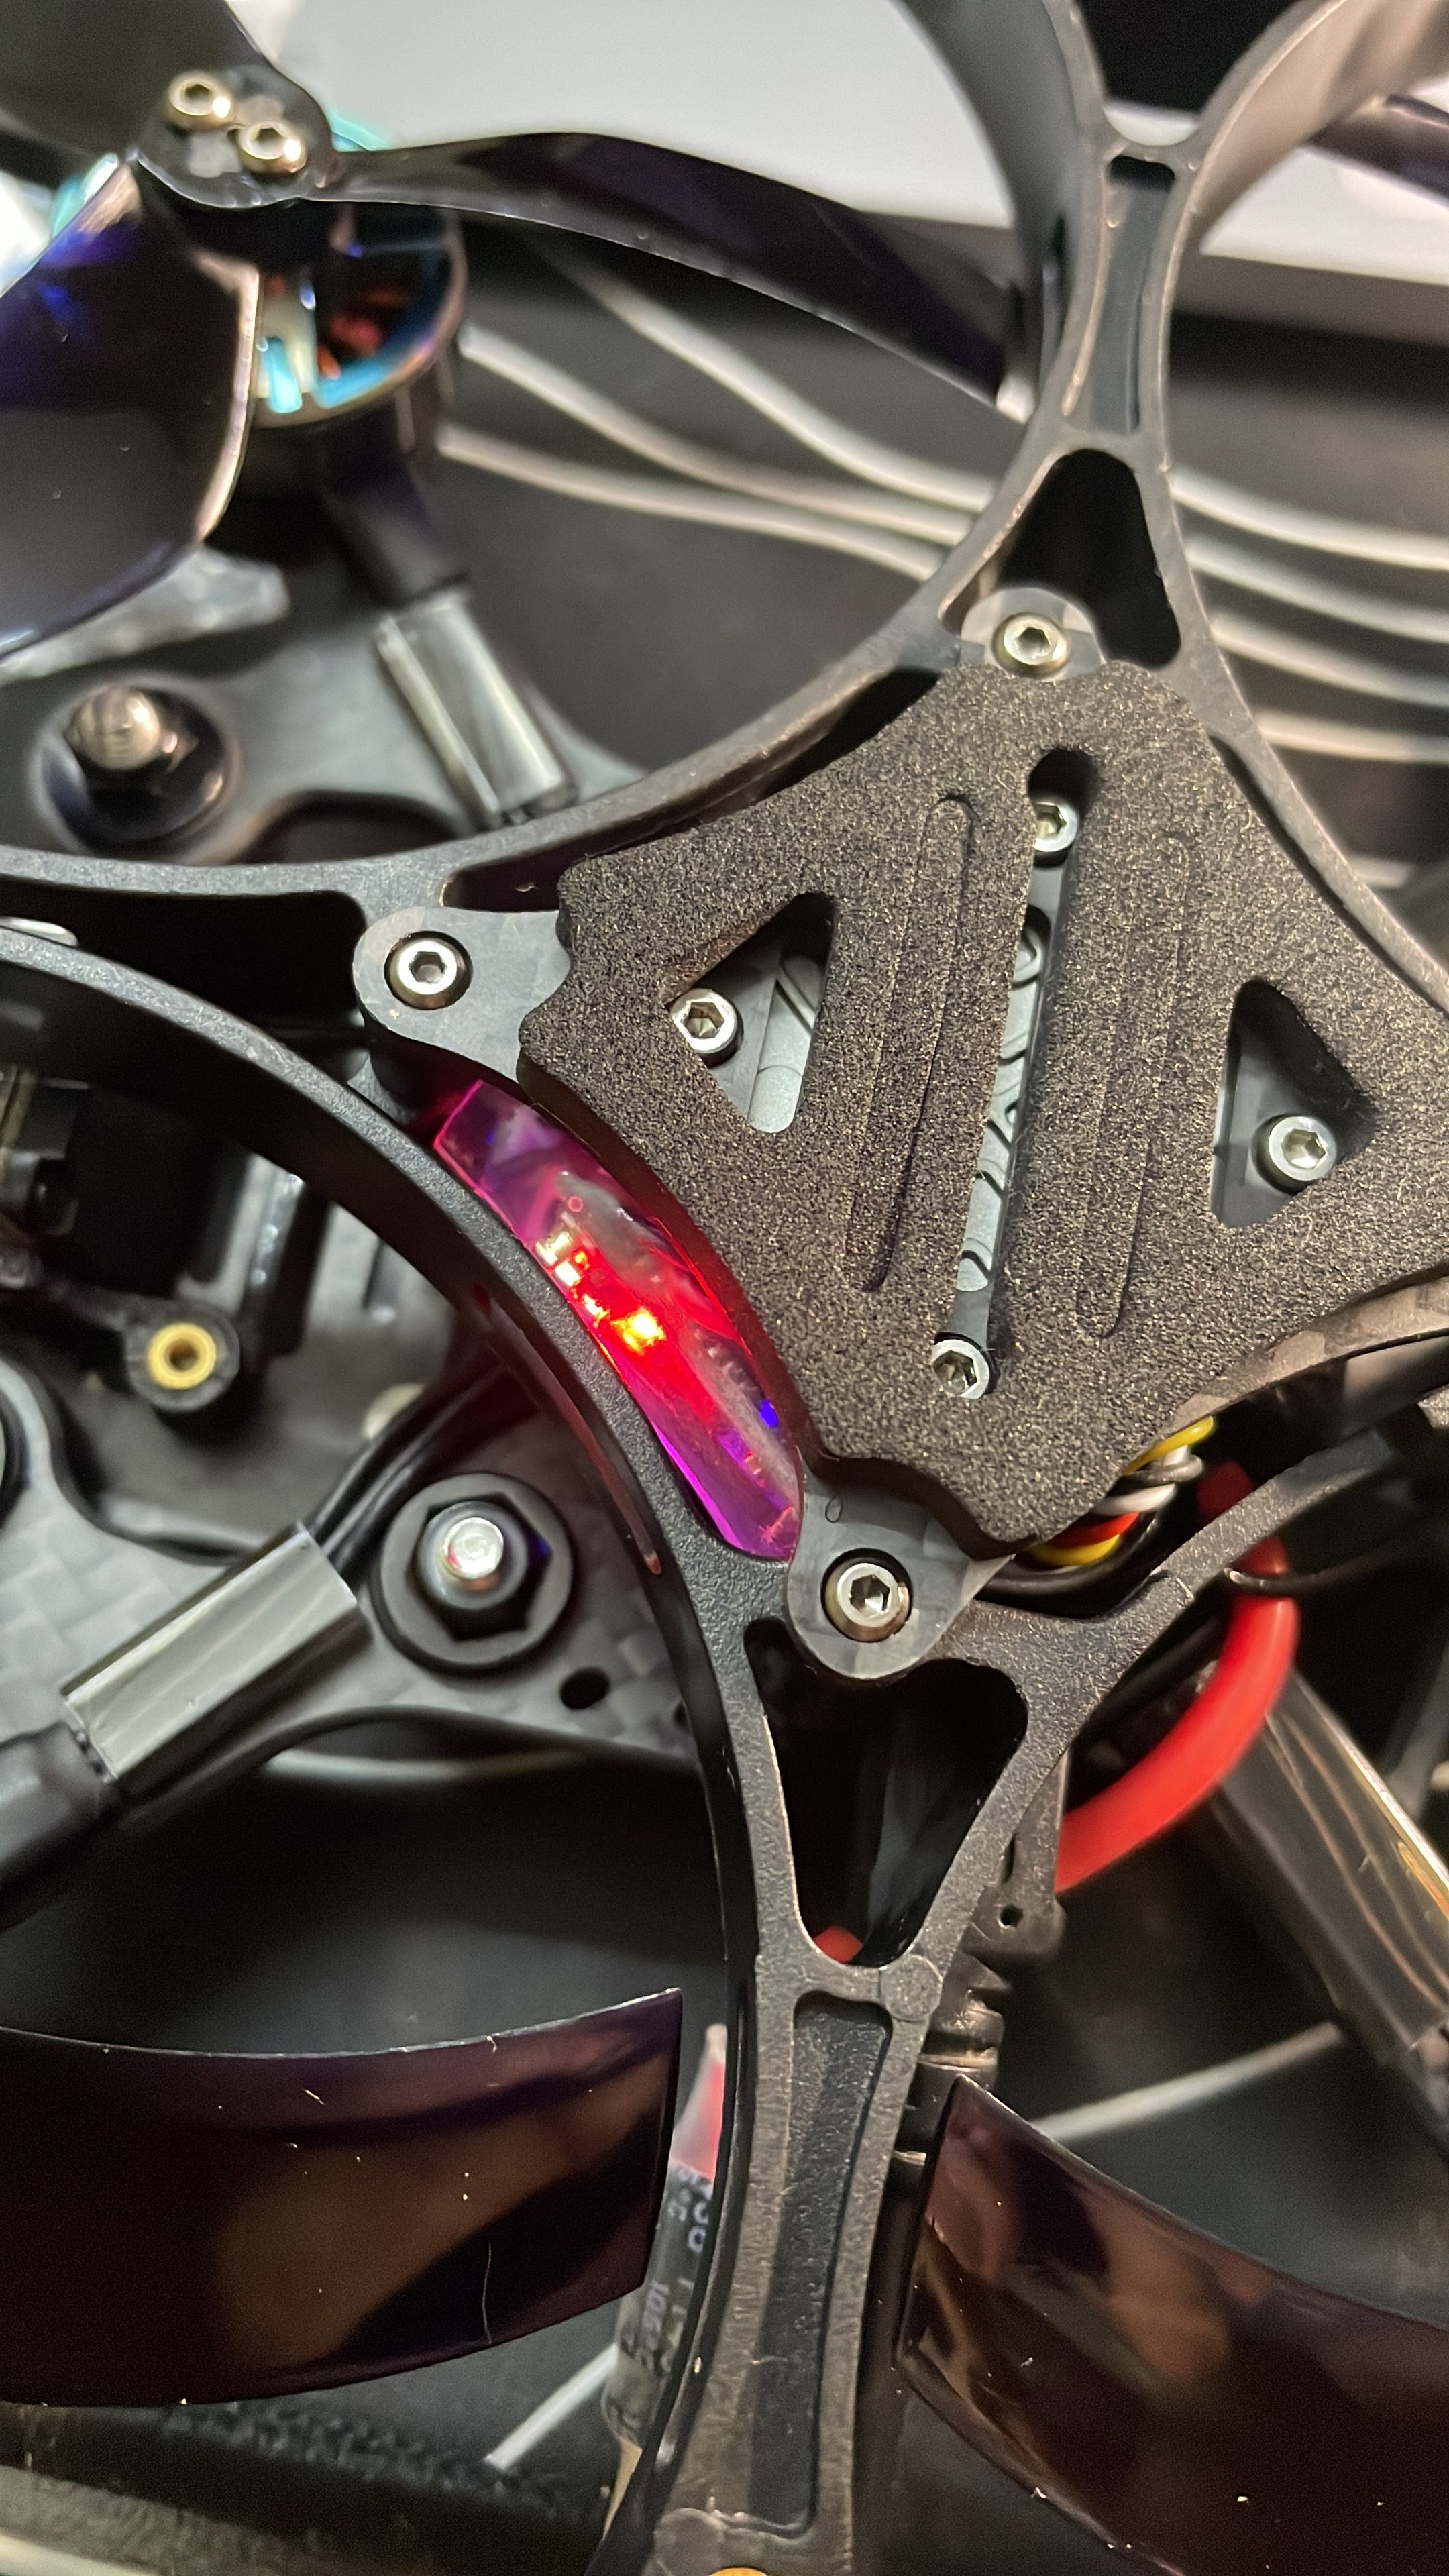
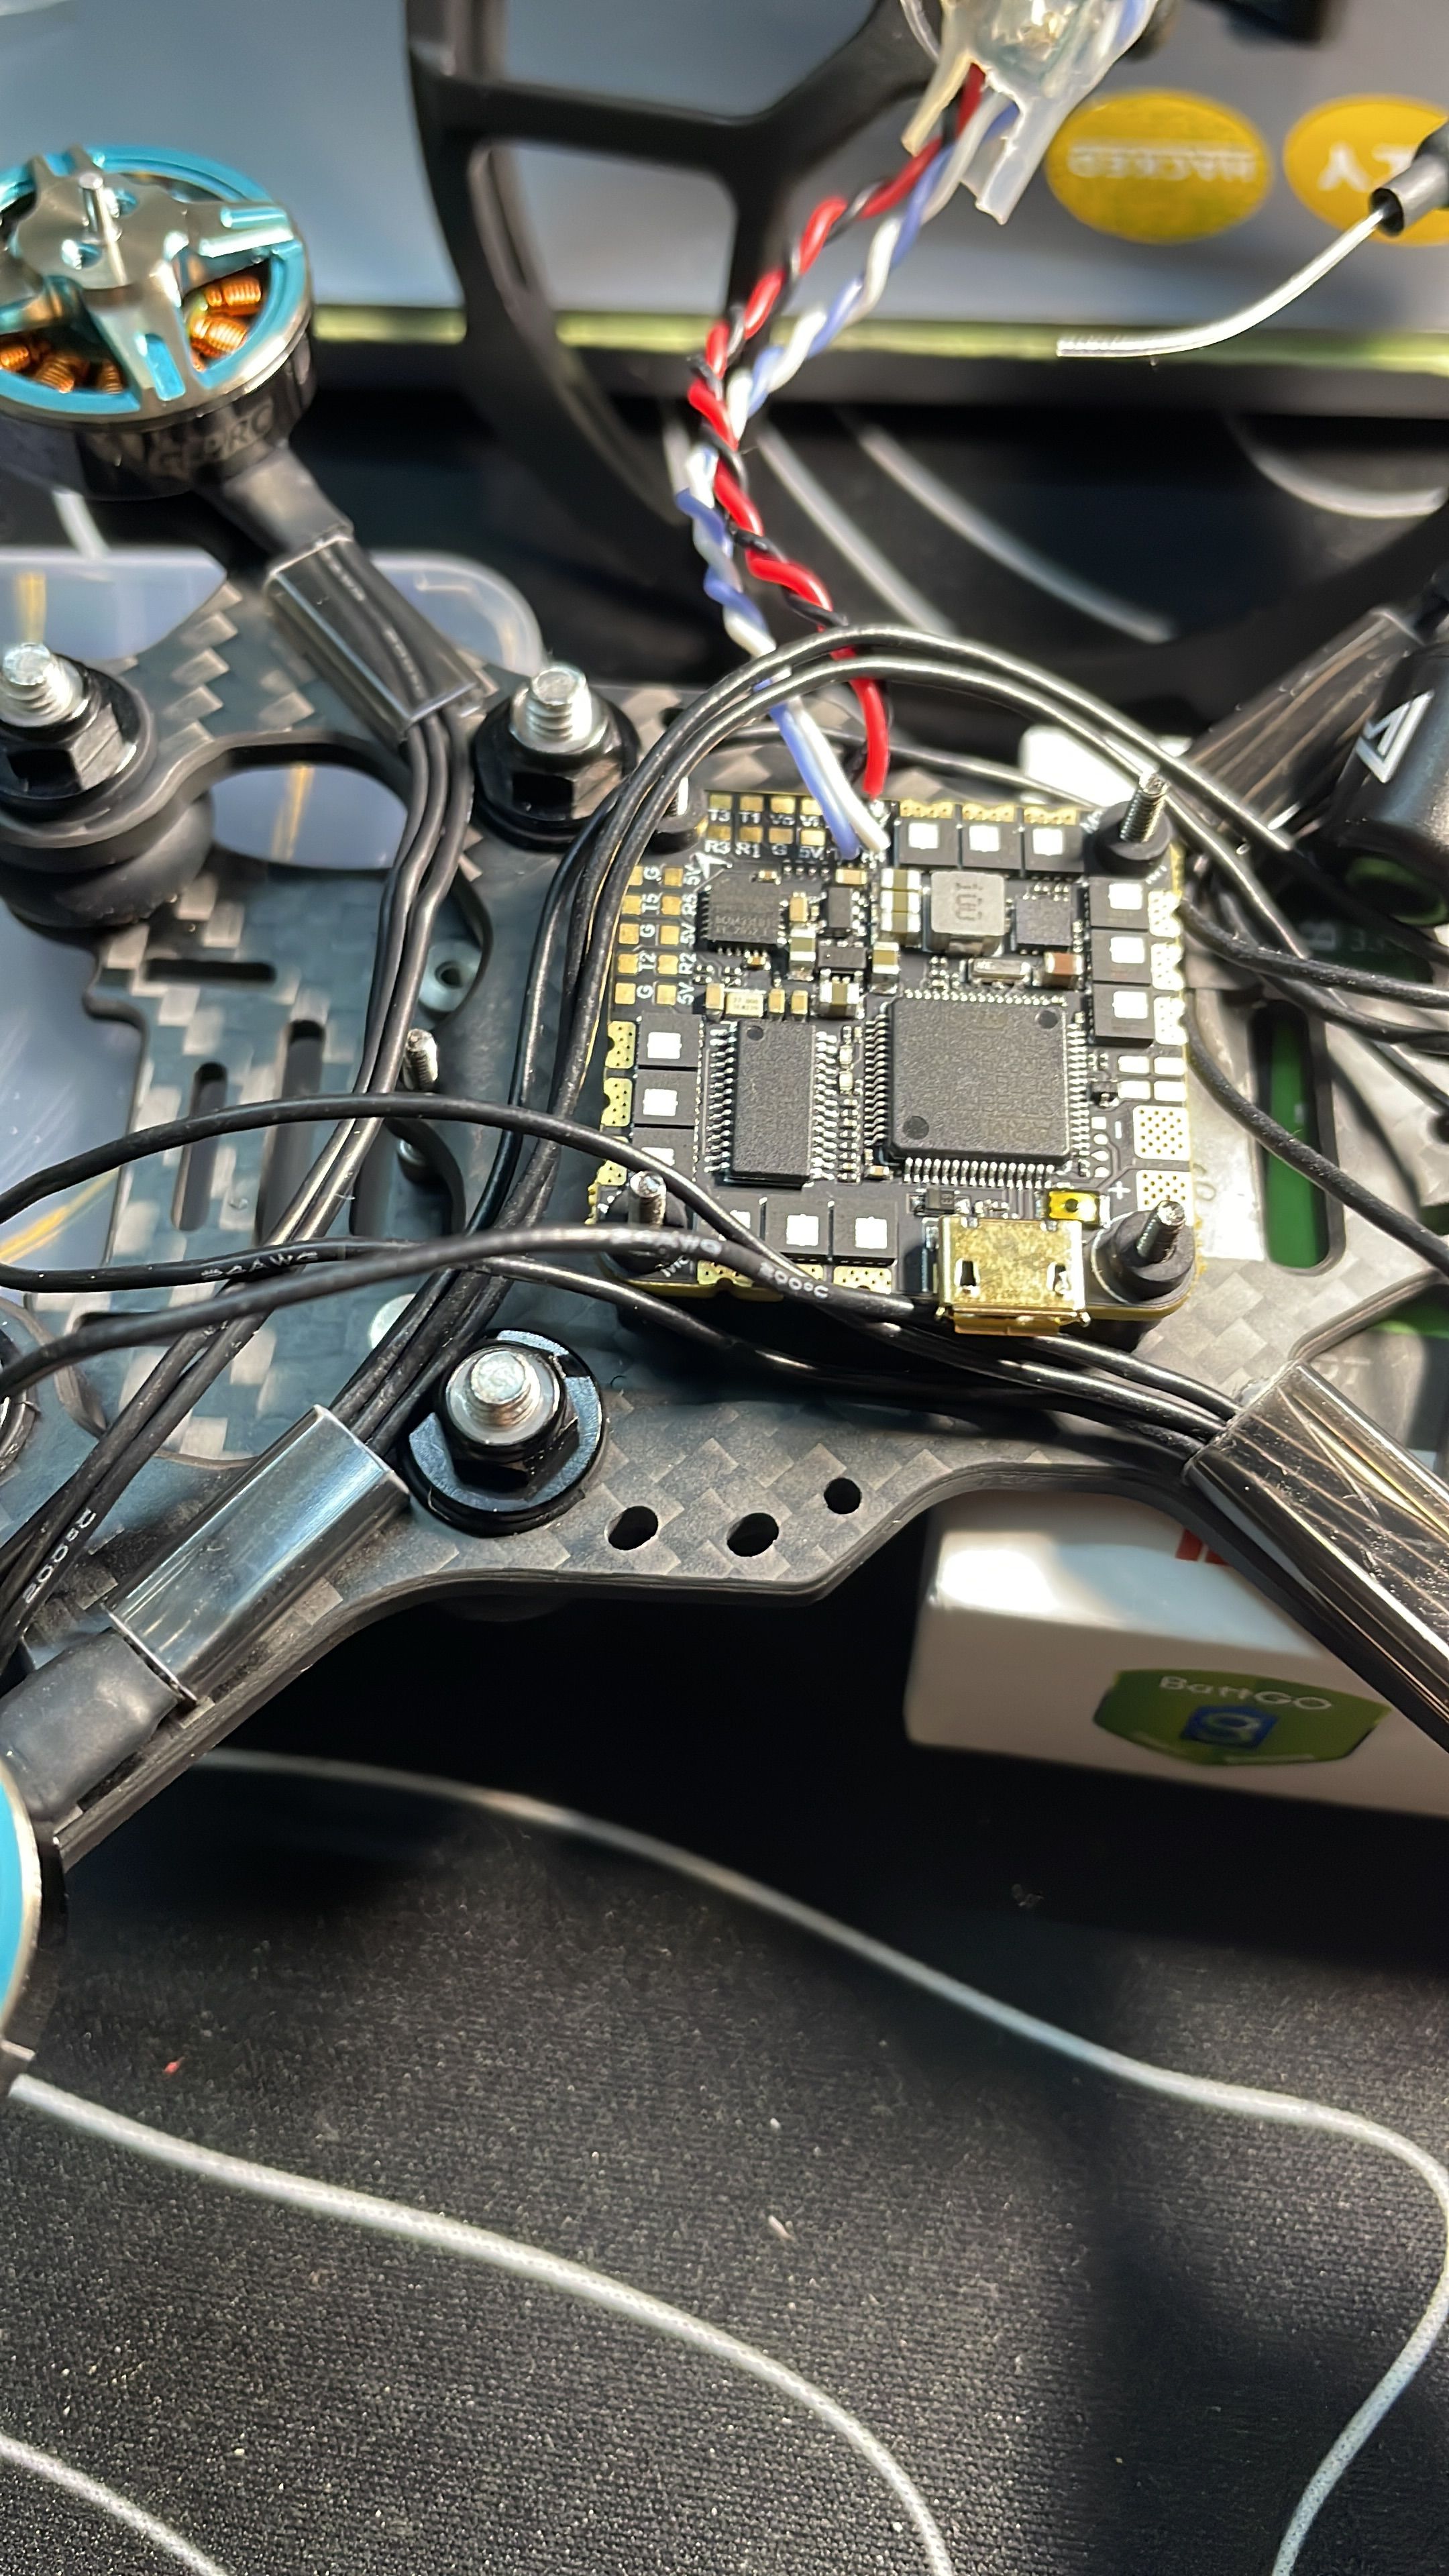
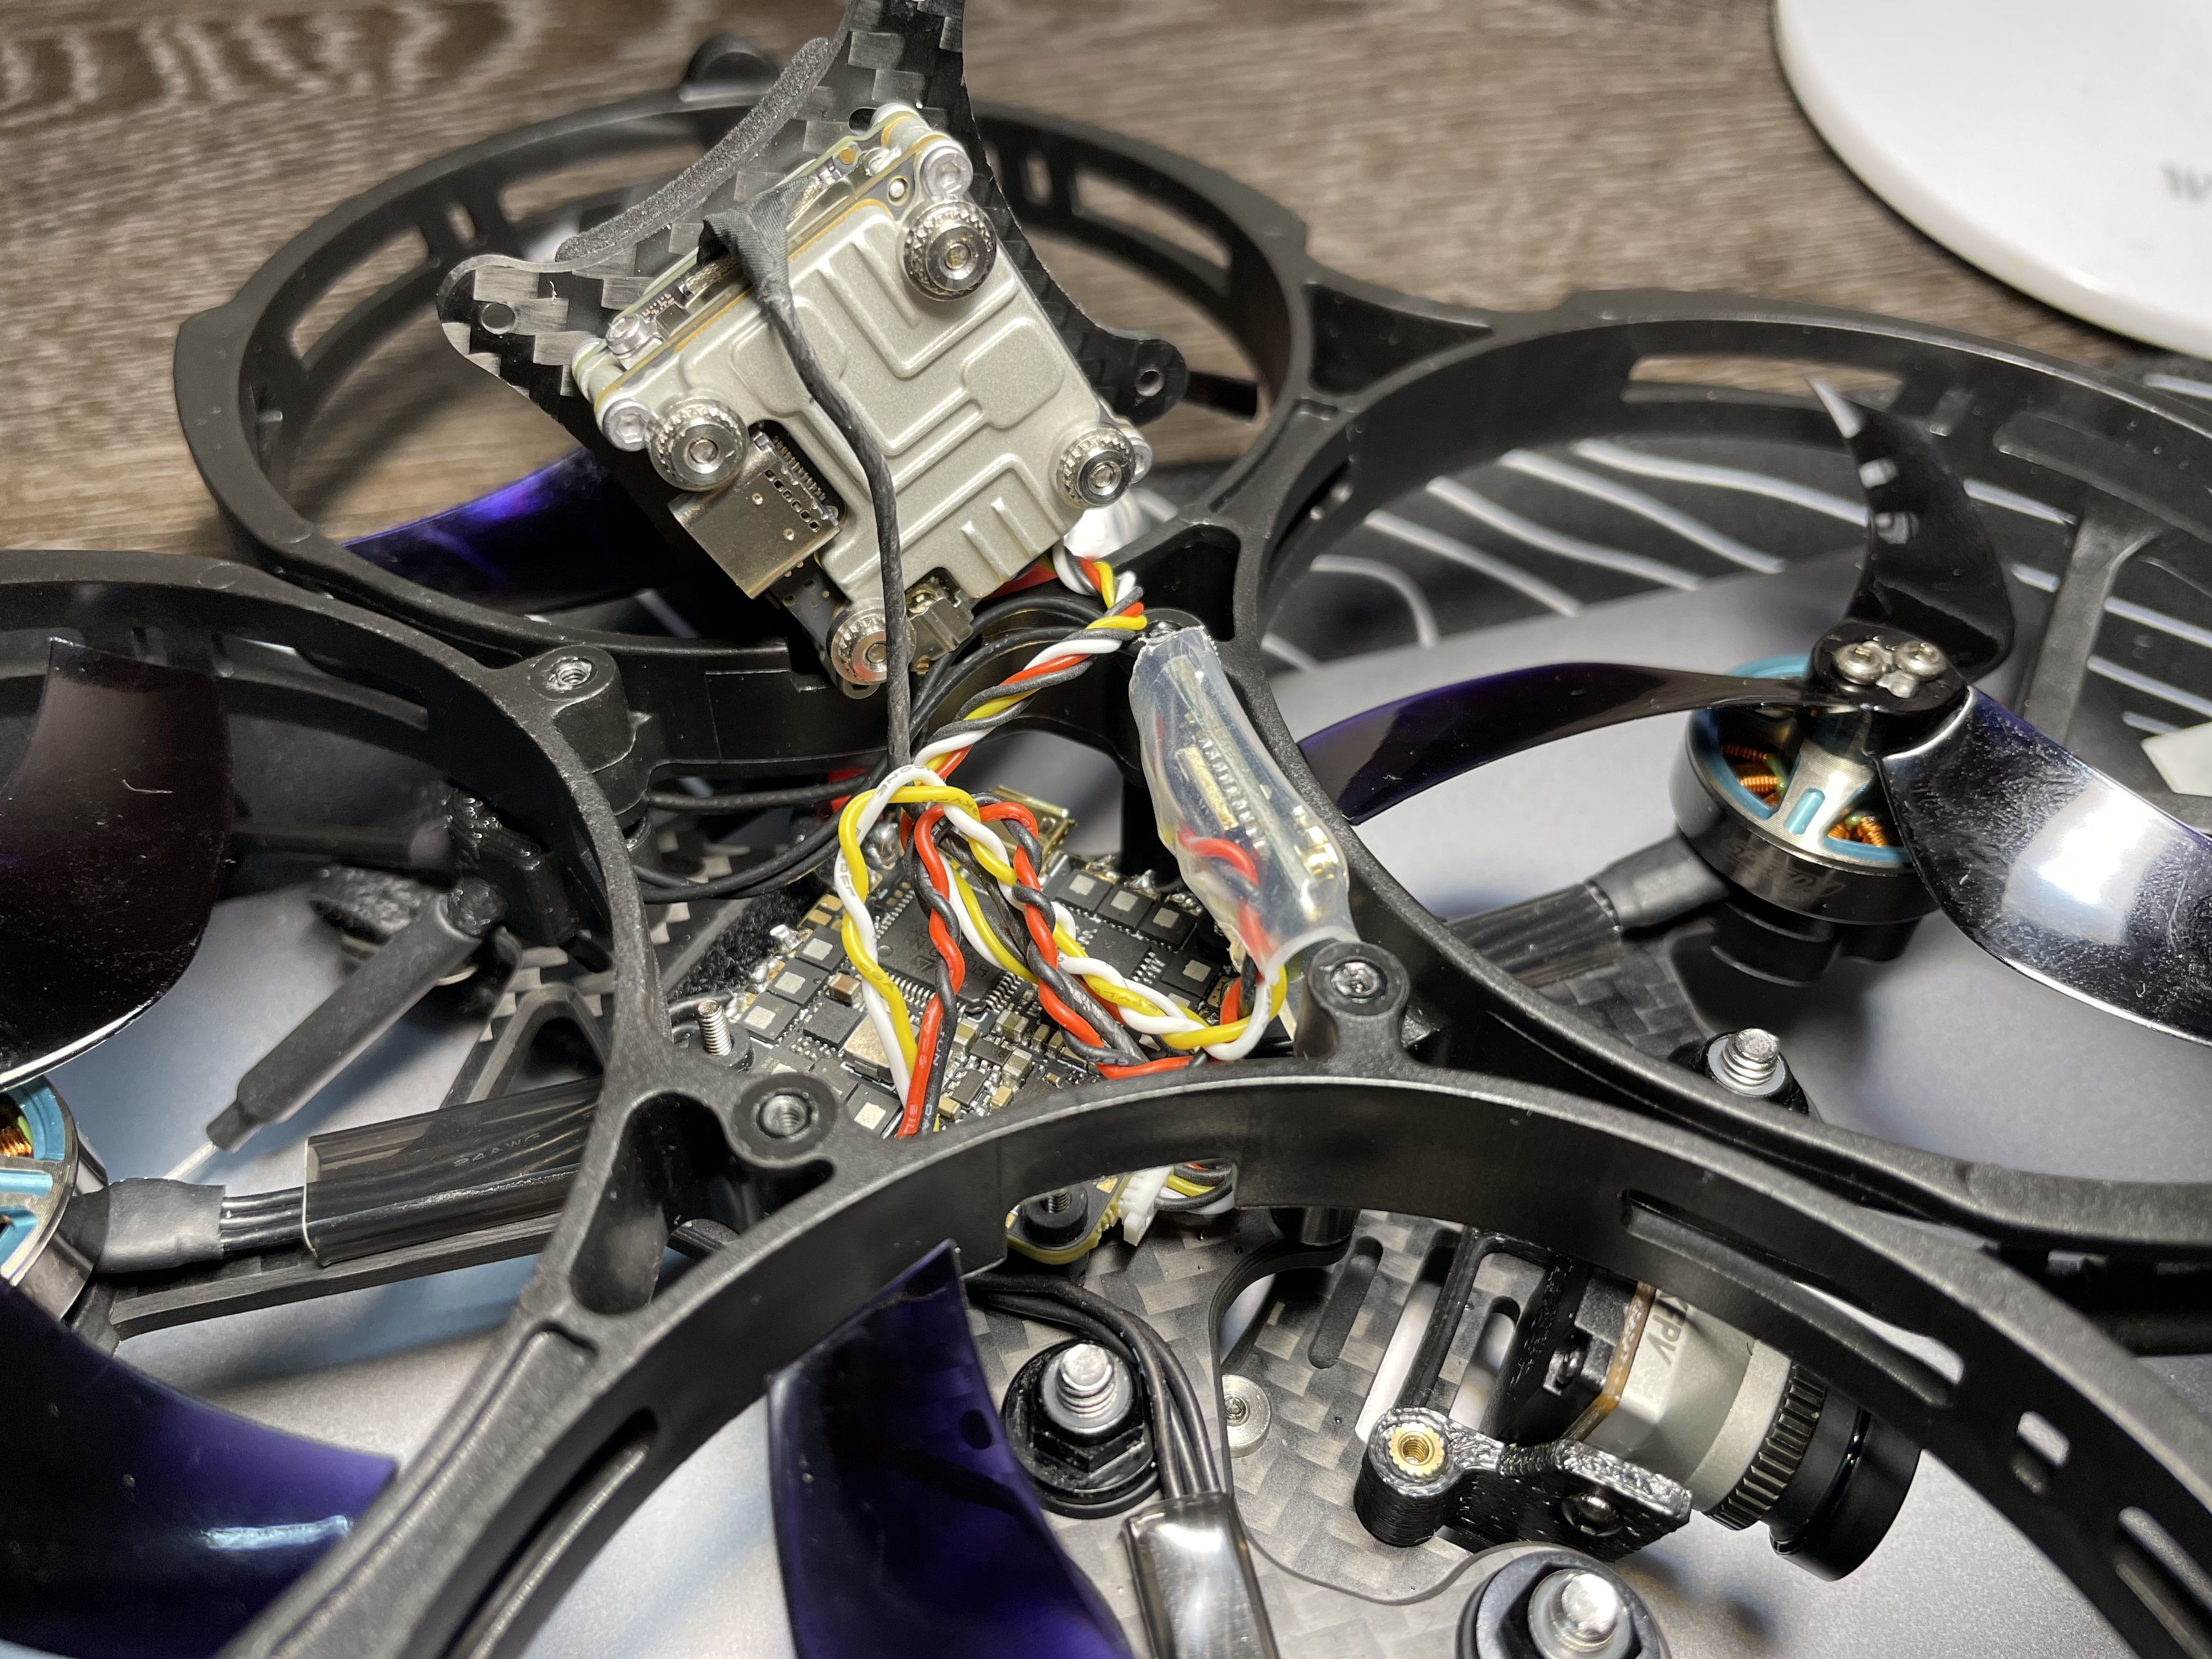
  • I mounted the AIO board upside down, and the board has its default front side 45 degrees to the right of the front side (edge of the board instead of the usual side - See the arrow)
    Alt Tag

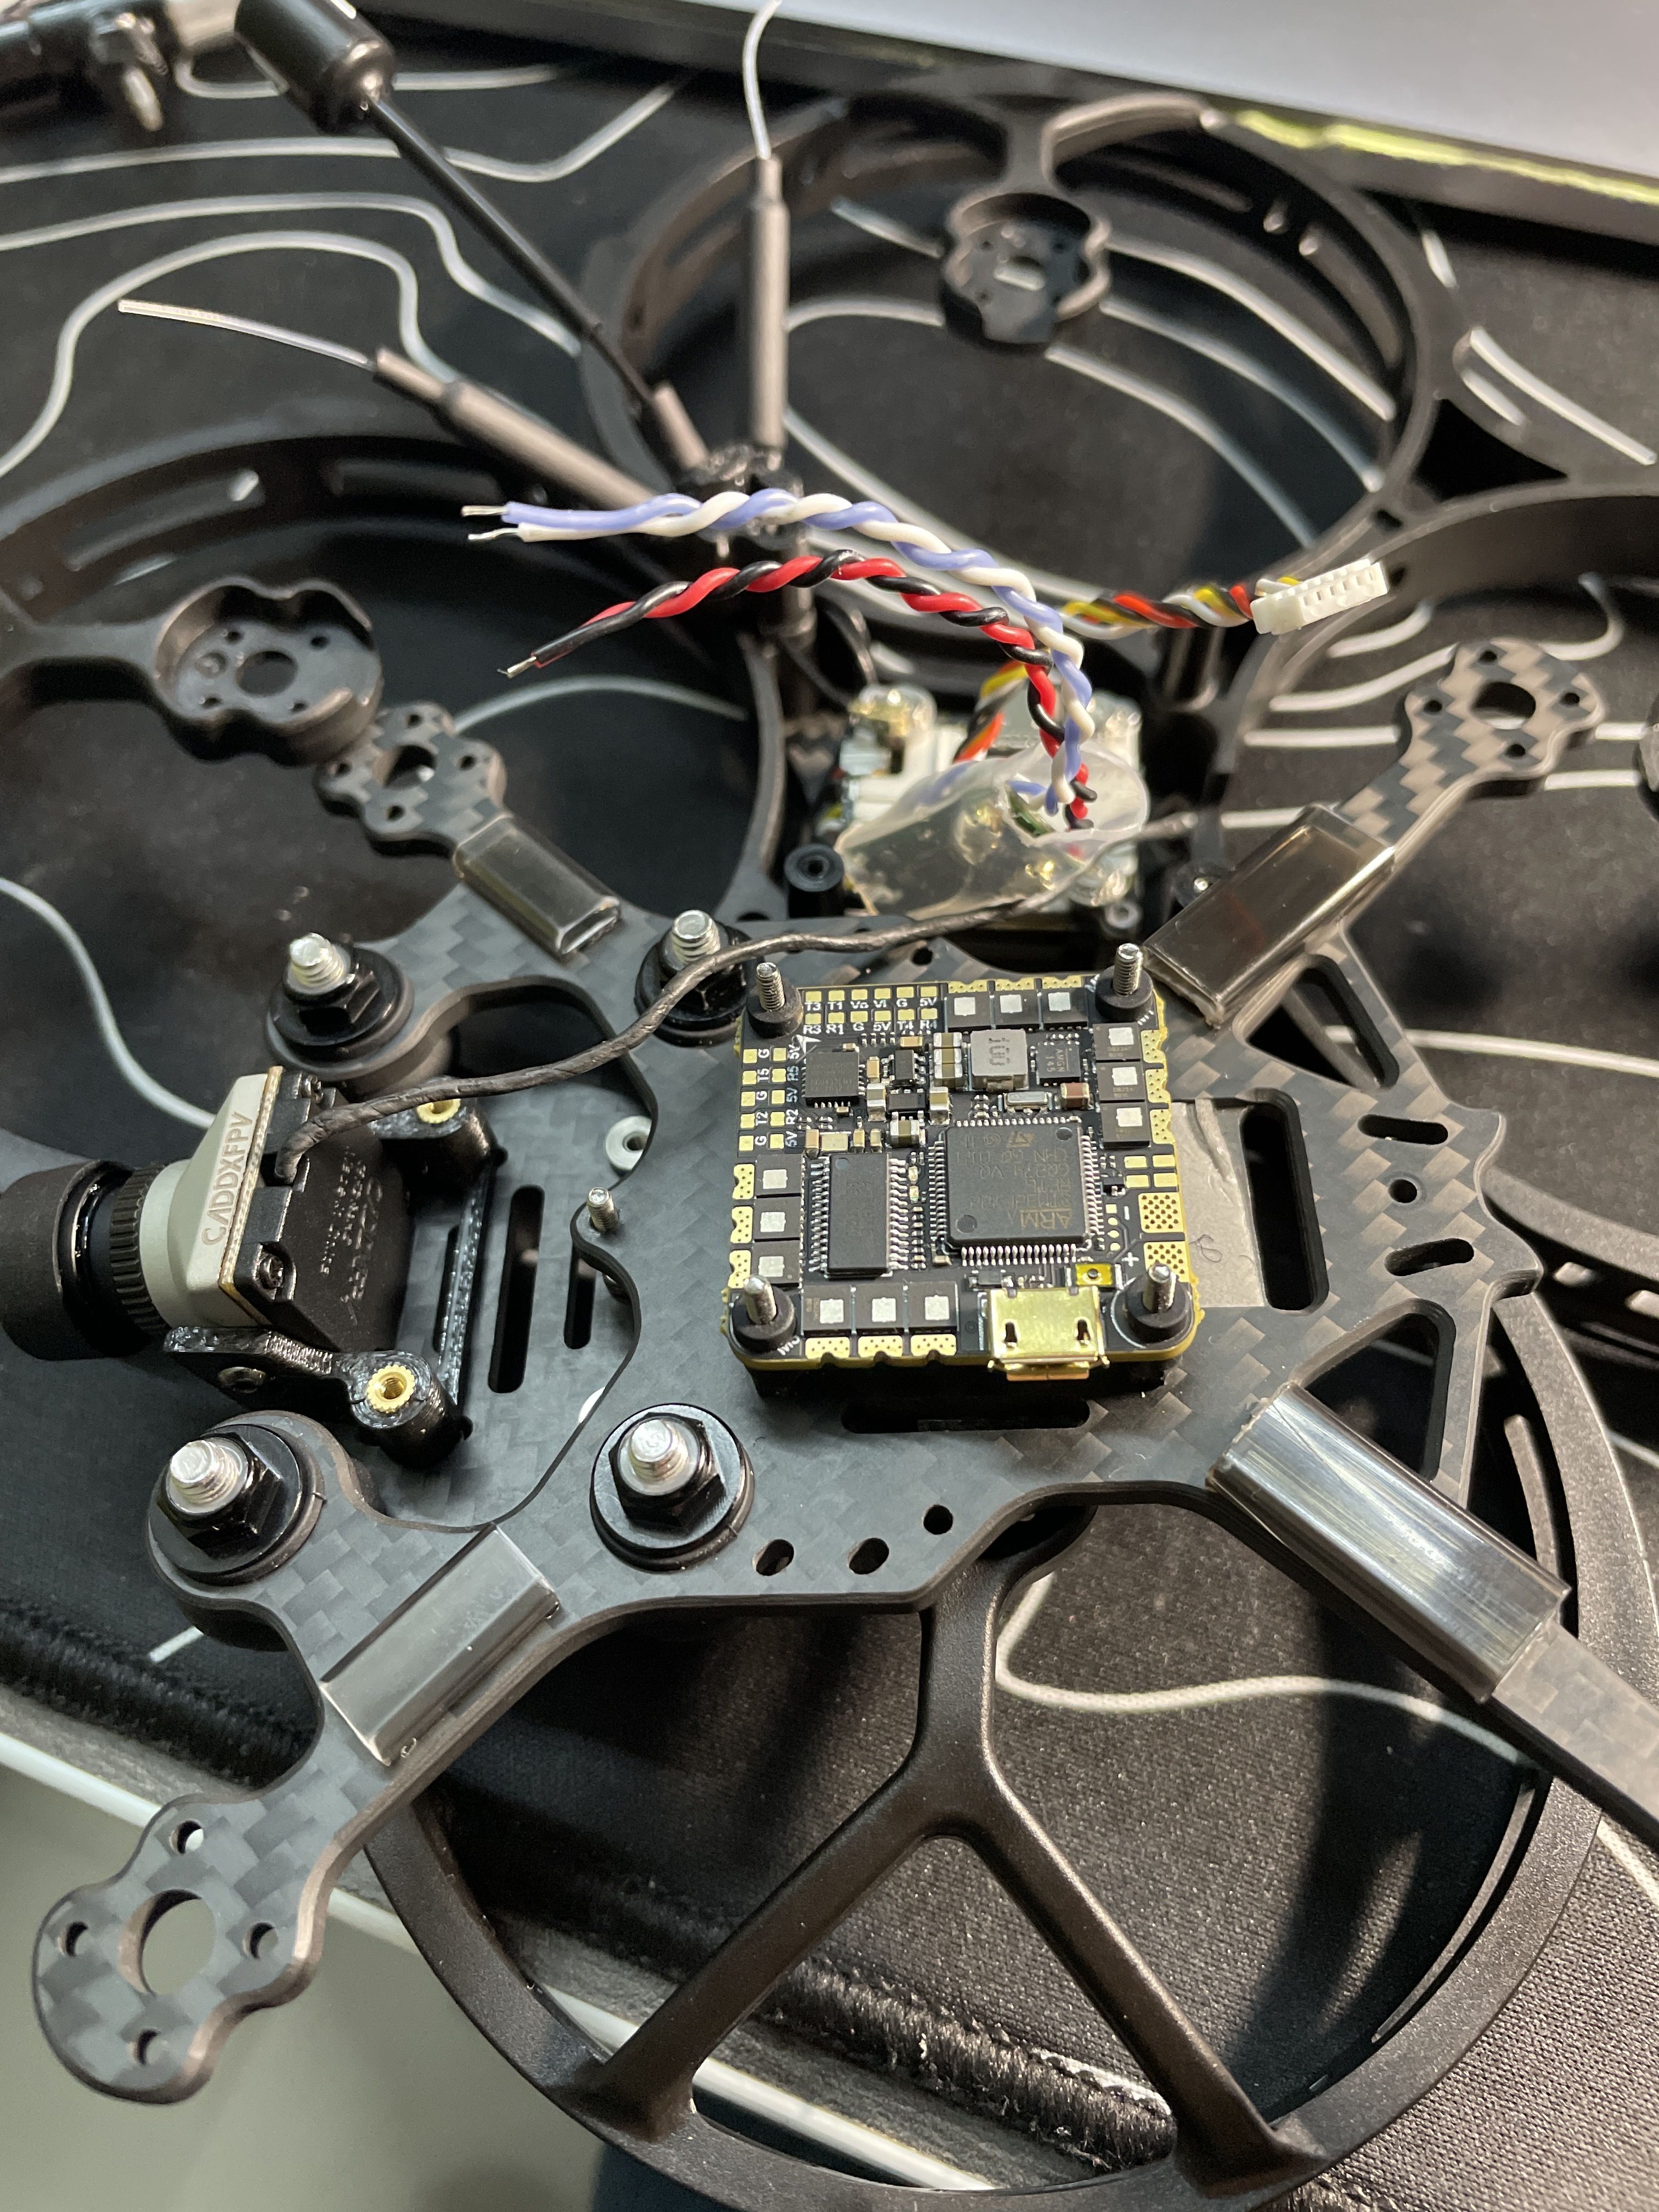
  • This meant that I had to make a couple of changes in BetaFlight to compensate for the FC alignment.
    Alt Tag

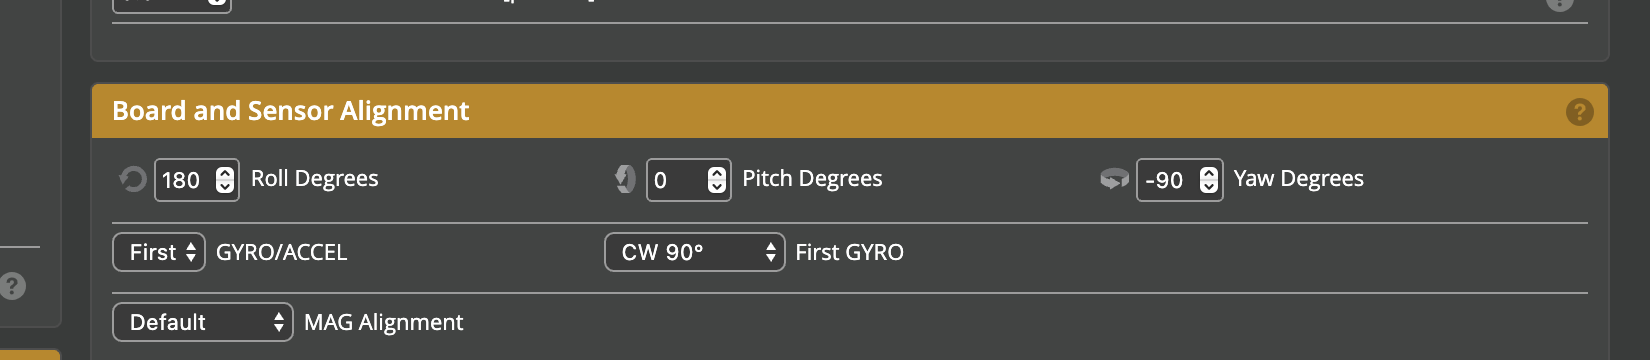
  • Motor alignment also needed to be changed to make sure that each motor is mapped correctly on Betaflight (M1 switched with M3, M2 switched with M4):

    DEFAULT CONFIG
    resource MOTOR 1 C09
    resource MOTOR 2 C08
    resource MOTOR 3 C07
    resource MOTOR 4 C06

    NEW CONFIG
    resource MOTOR 1 C07
    resource MOTOR 2 C06
    resource MOTOR 3 C09
    resource MOTOR 4 C08

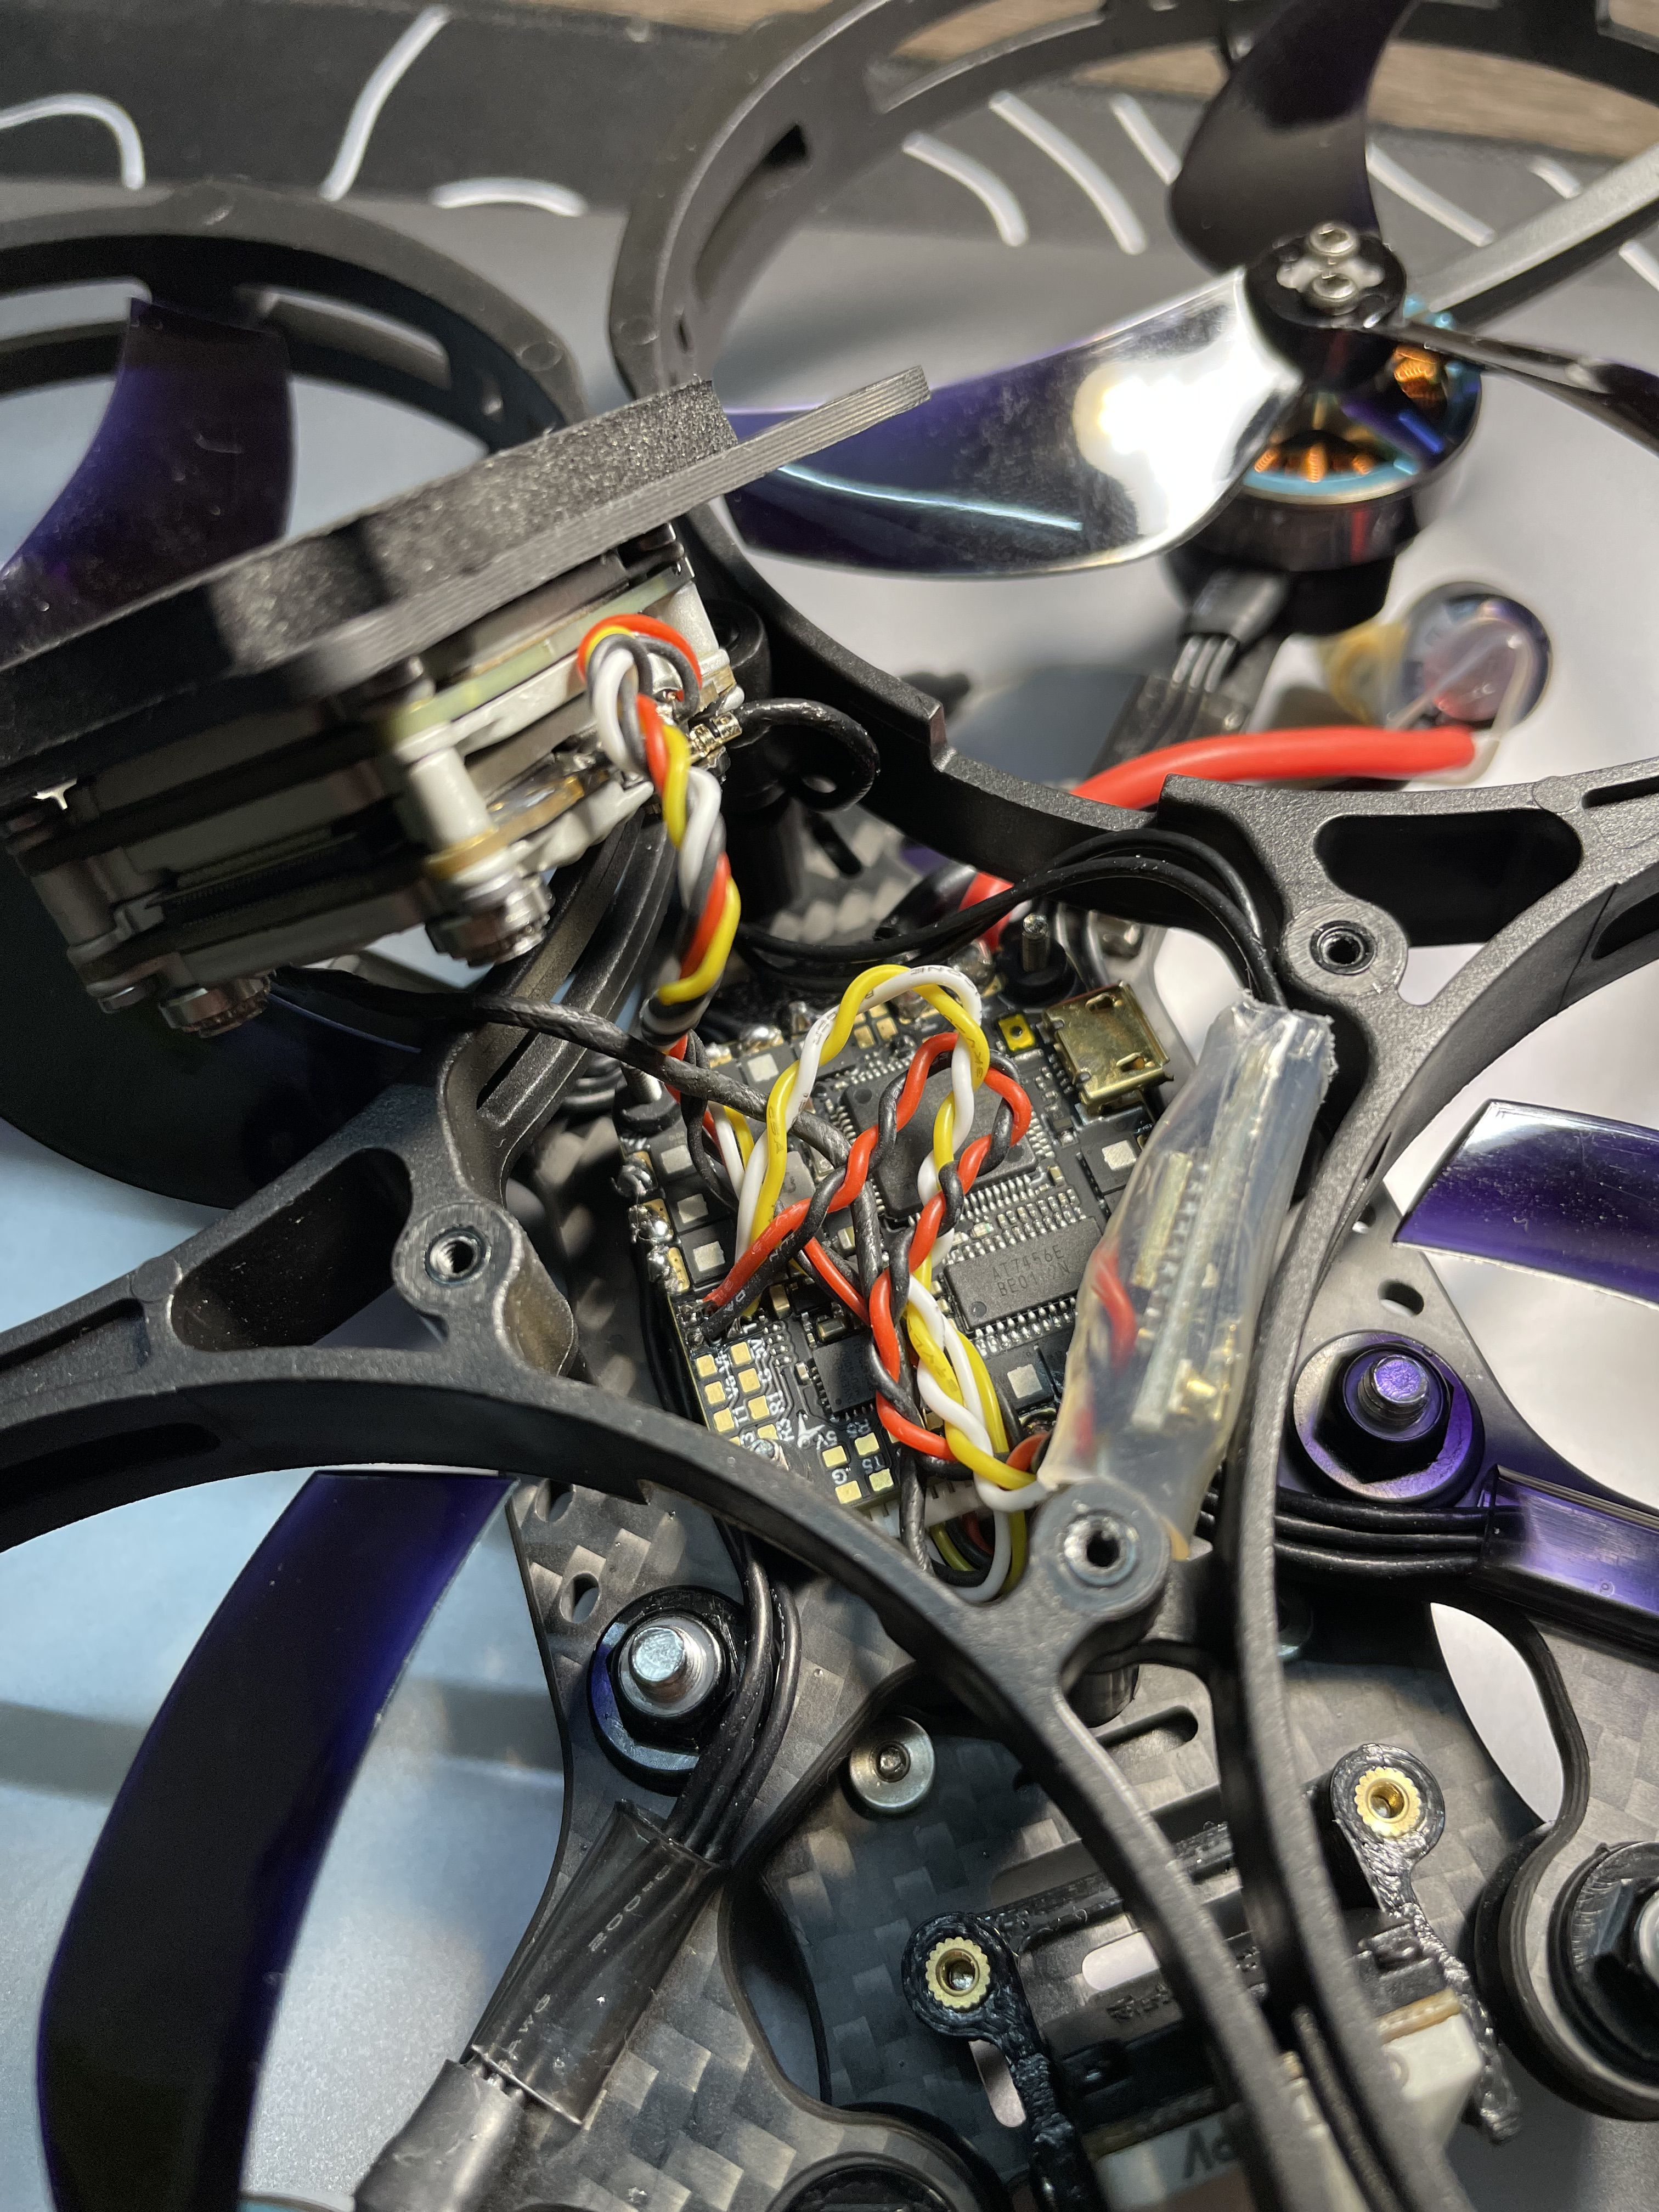
  • Ensure that the cables connecting the flight controller with the Vista and the RX are as long as possible. this will make opening up the build easier in the future, if required.

  • The order of the build is very important here as everything becomes easy if you do them in the right way. The best sequence will be:
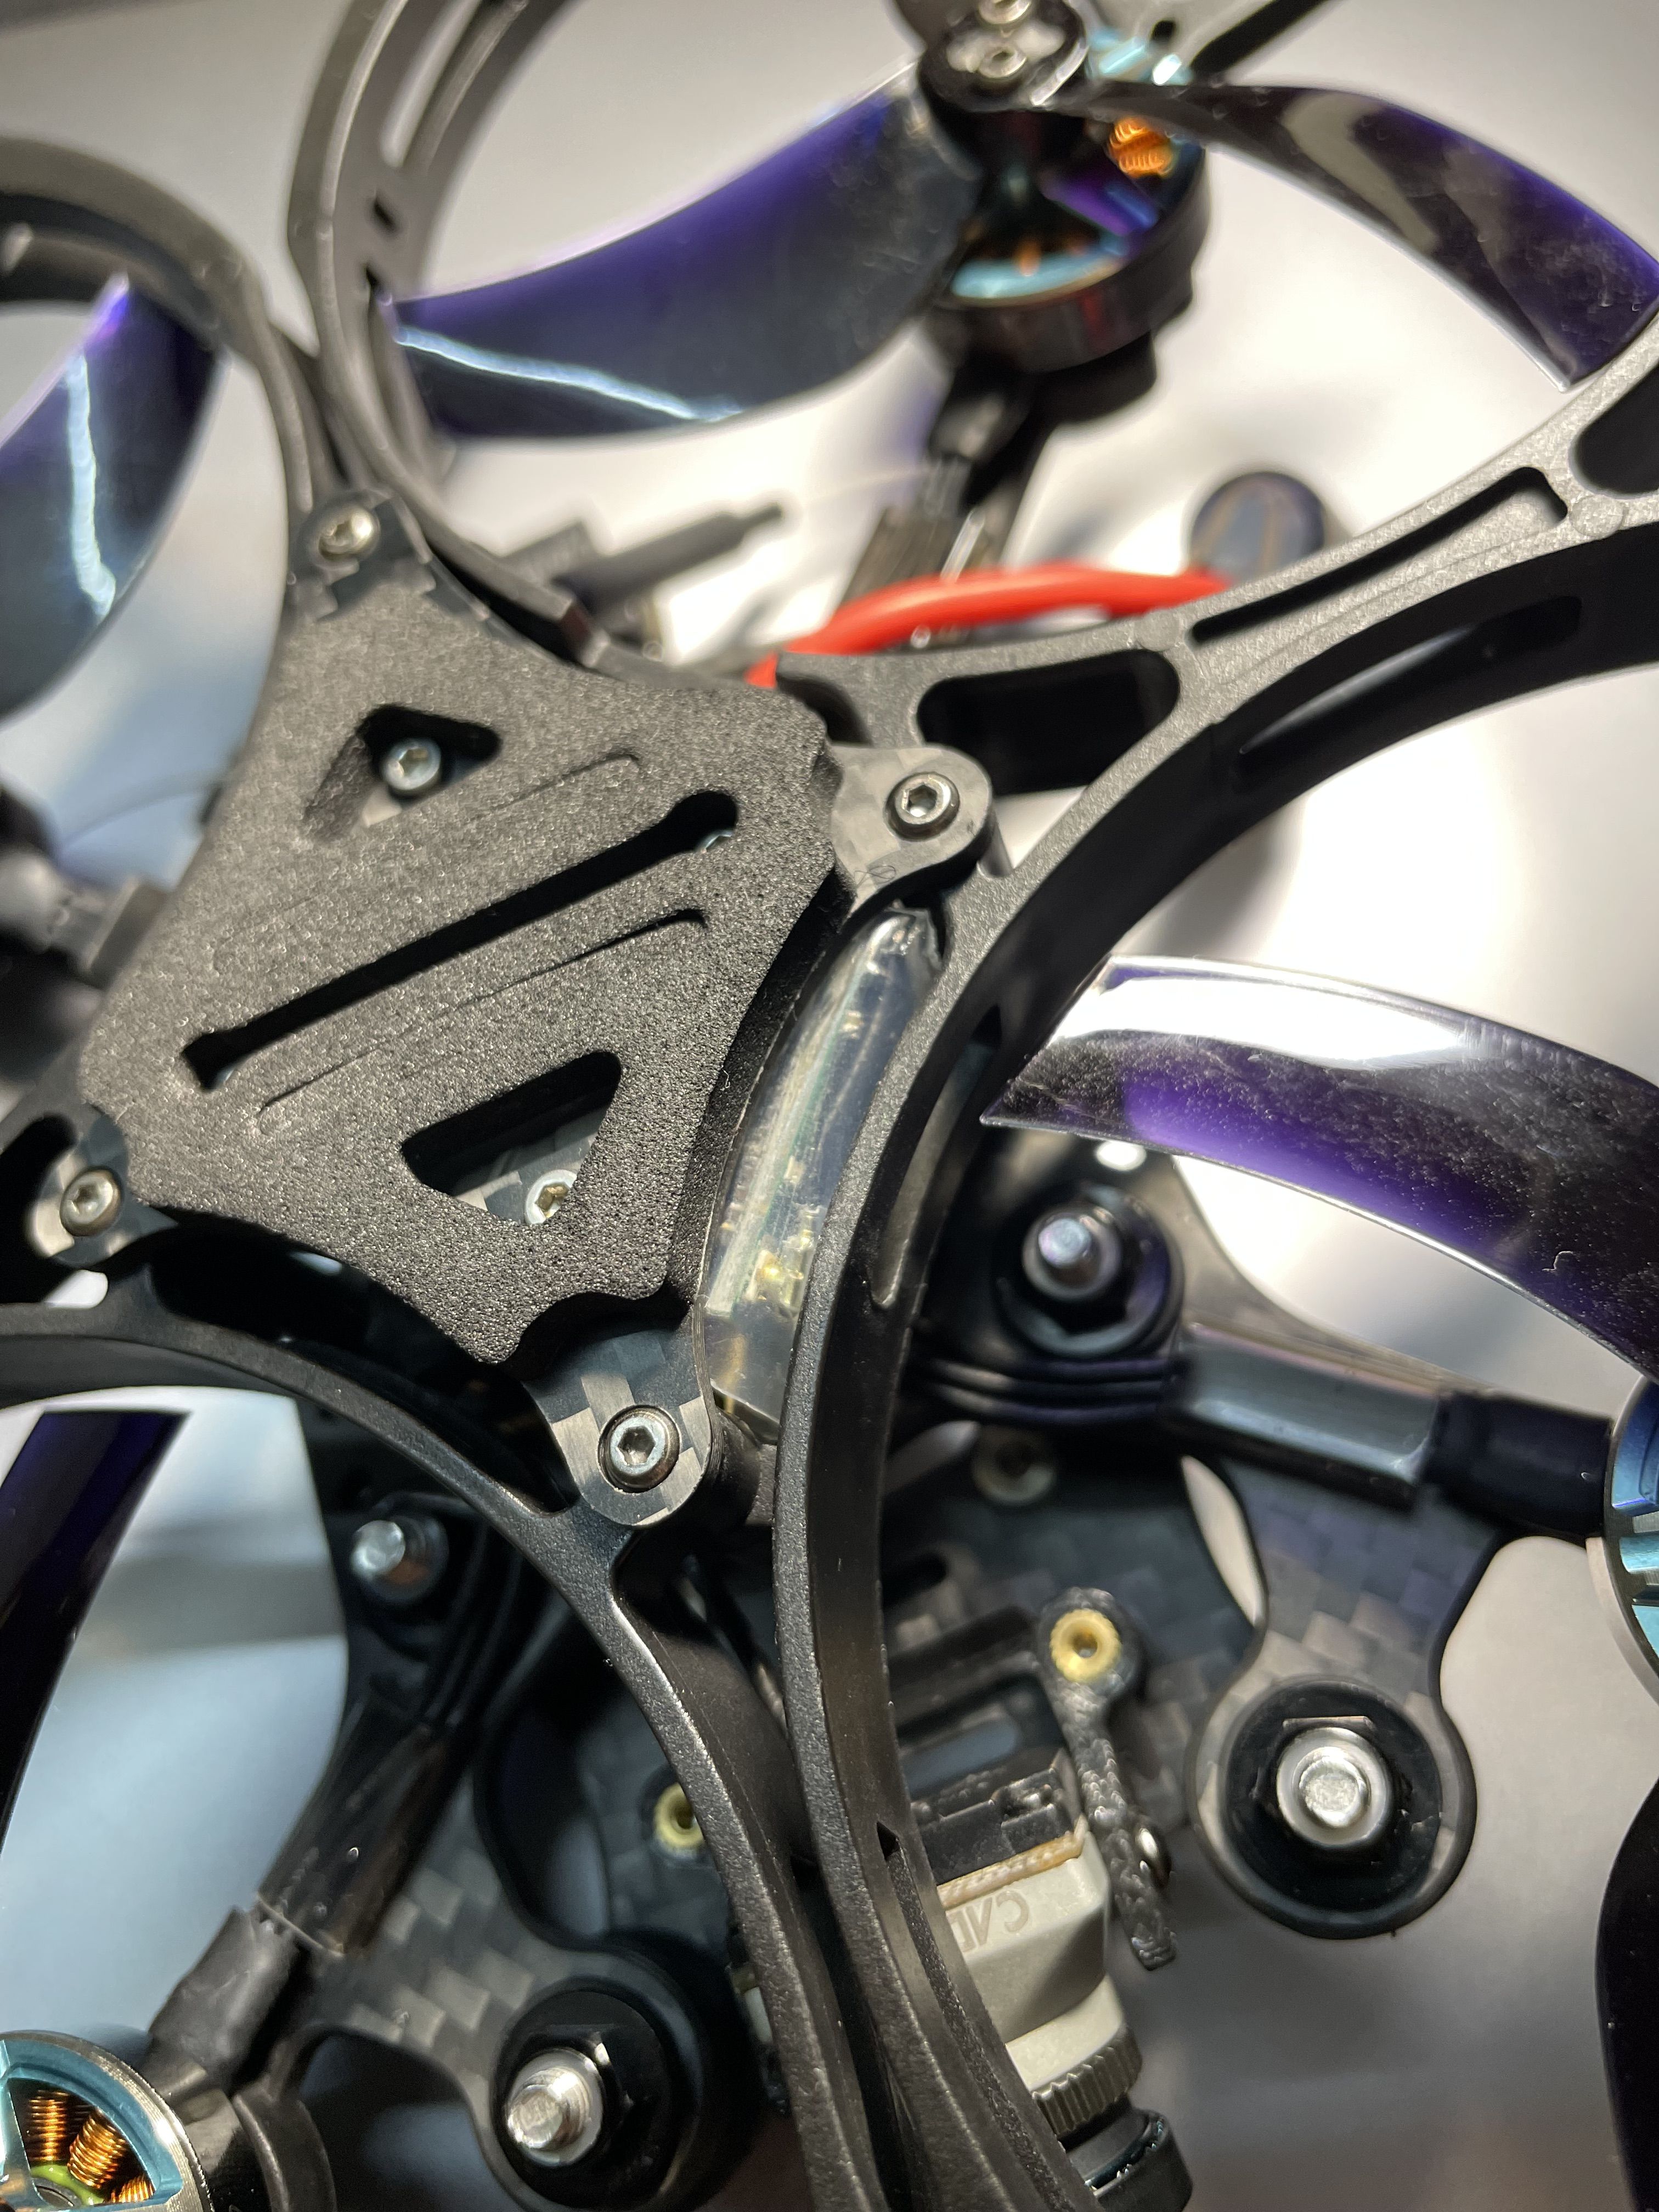
    • Assemble the frame
    • Solder wires to the RX
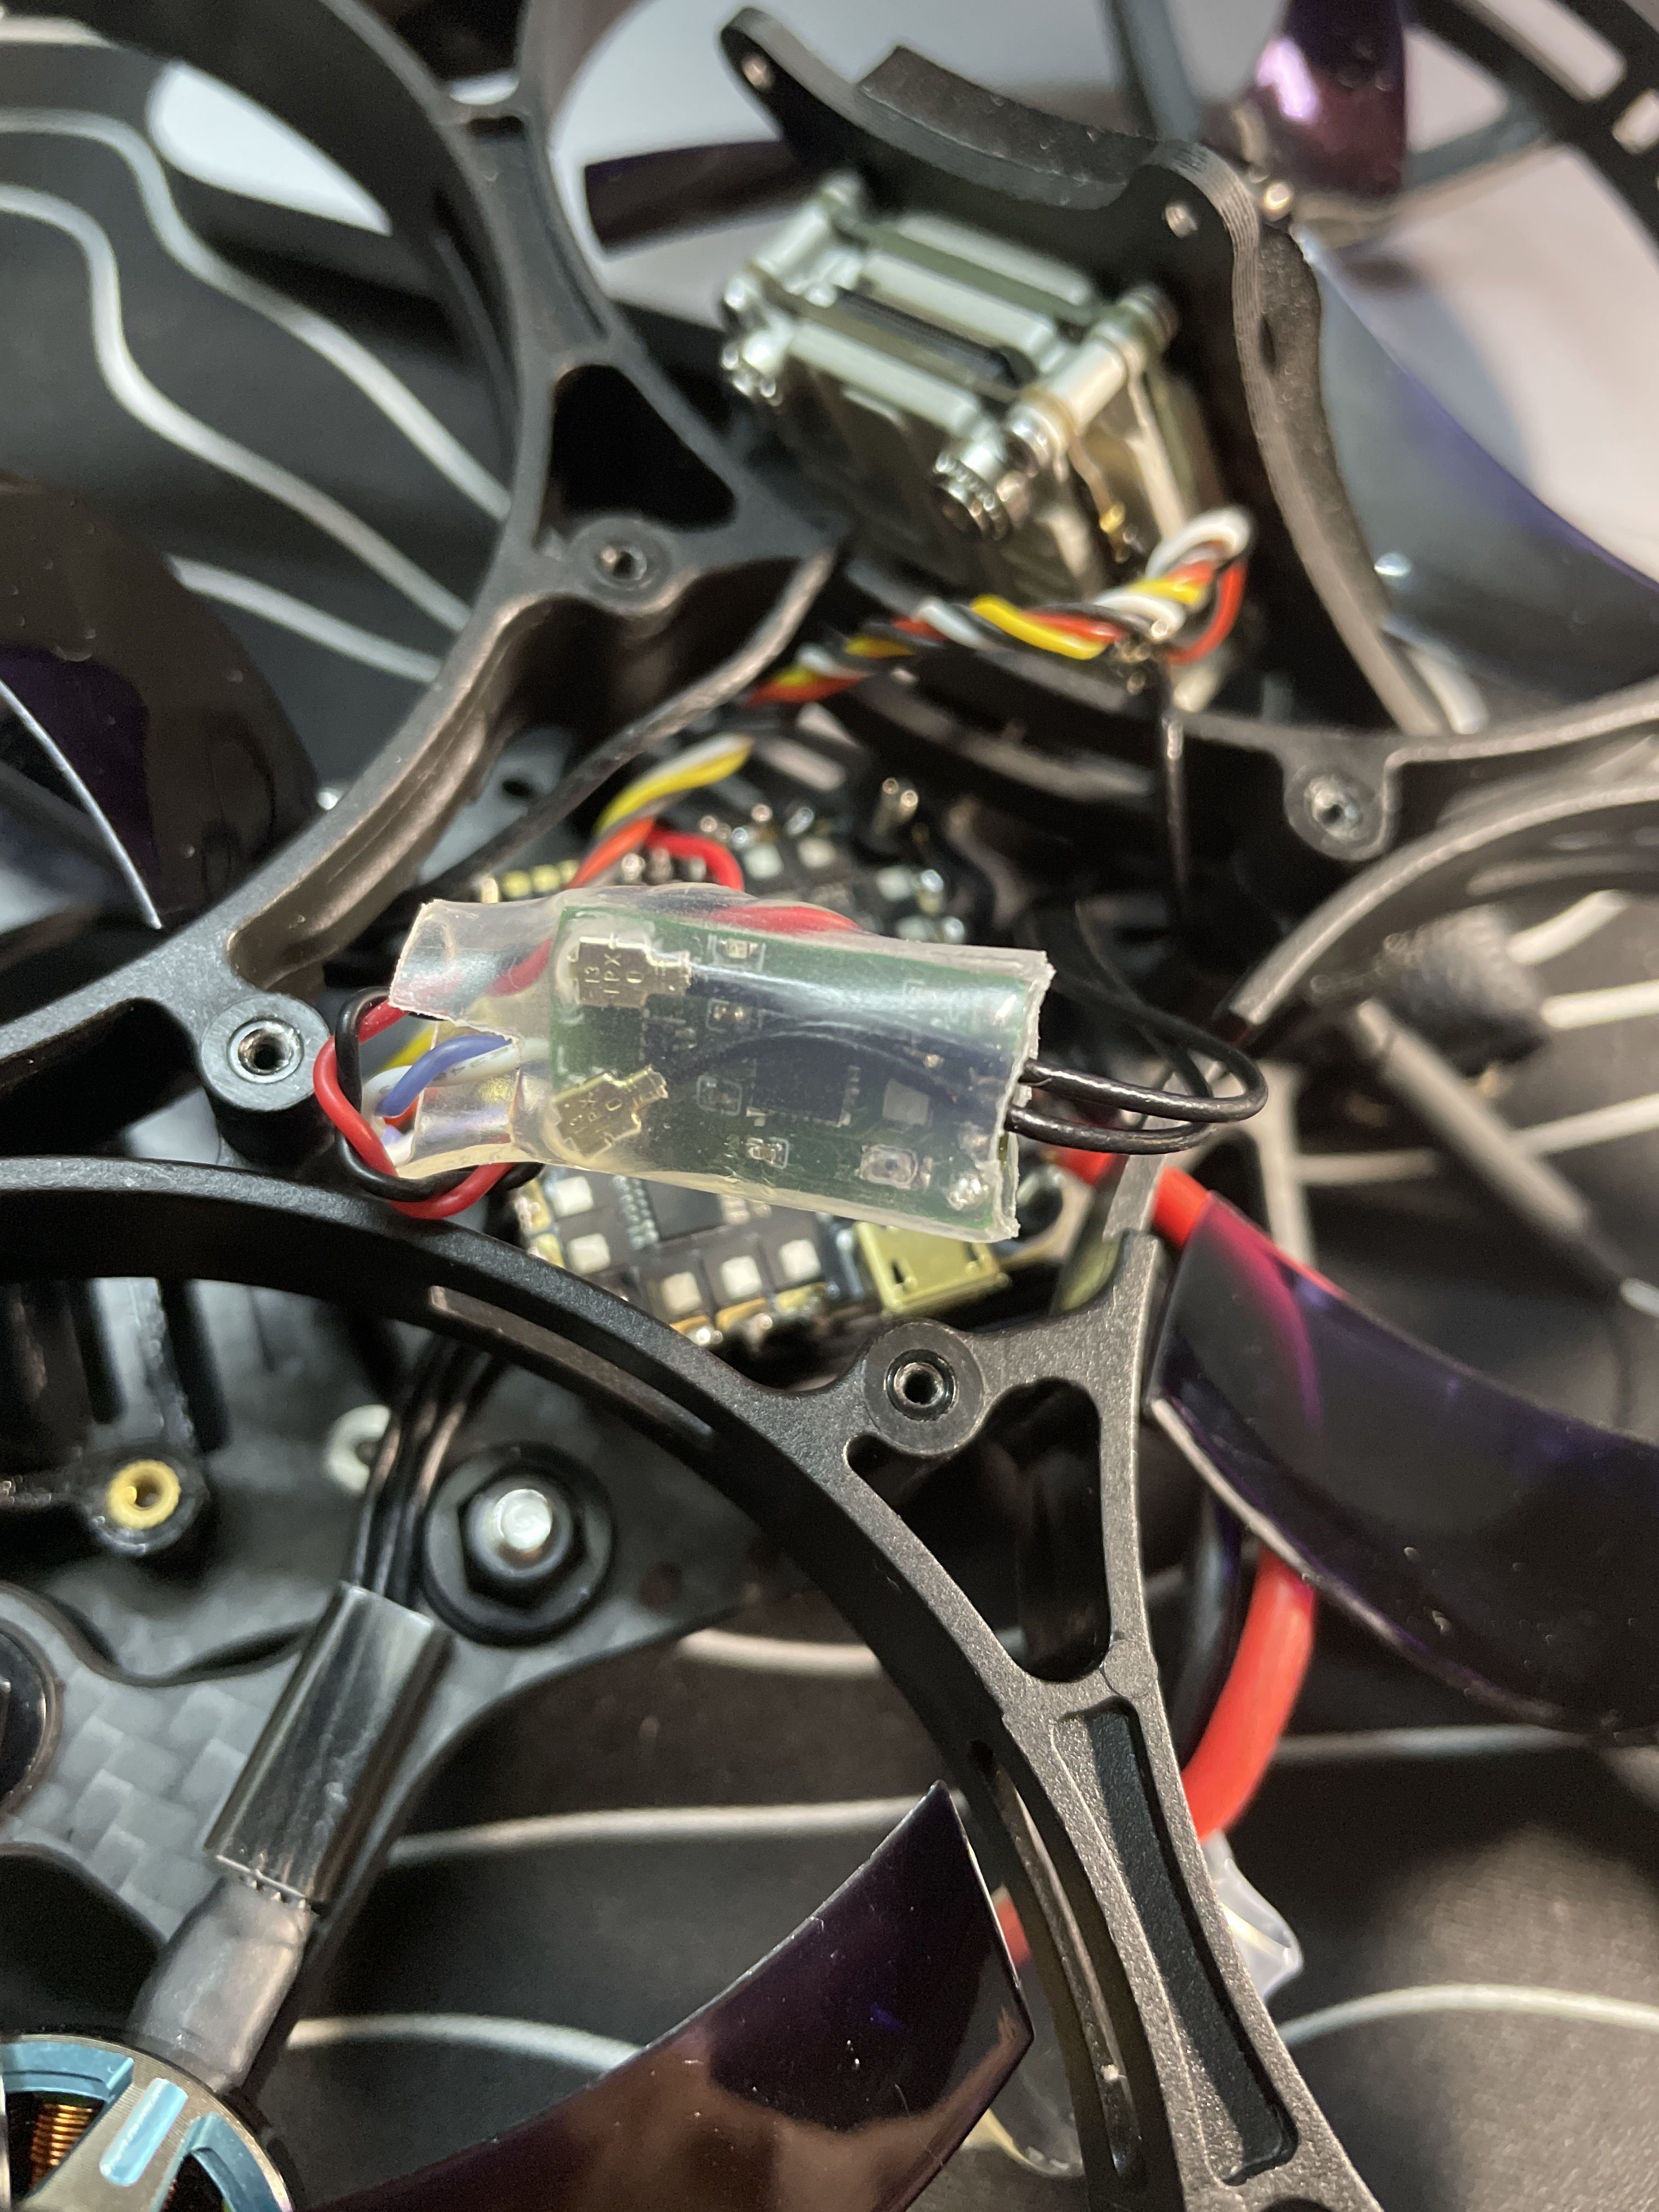
    • Solder wires to the Vista
    • Insert battery strap
    • Install AIO board
    • Install Vista
    • Solder RX wires to the FC
    • Install RX into the frame
    • Temporarily install motors without guard
    • Solder motor wires to FC
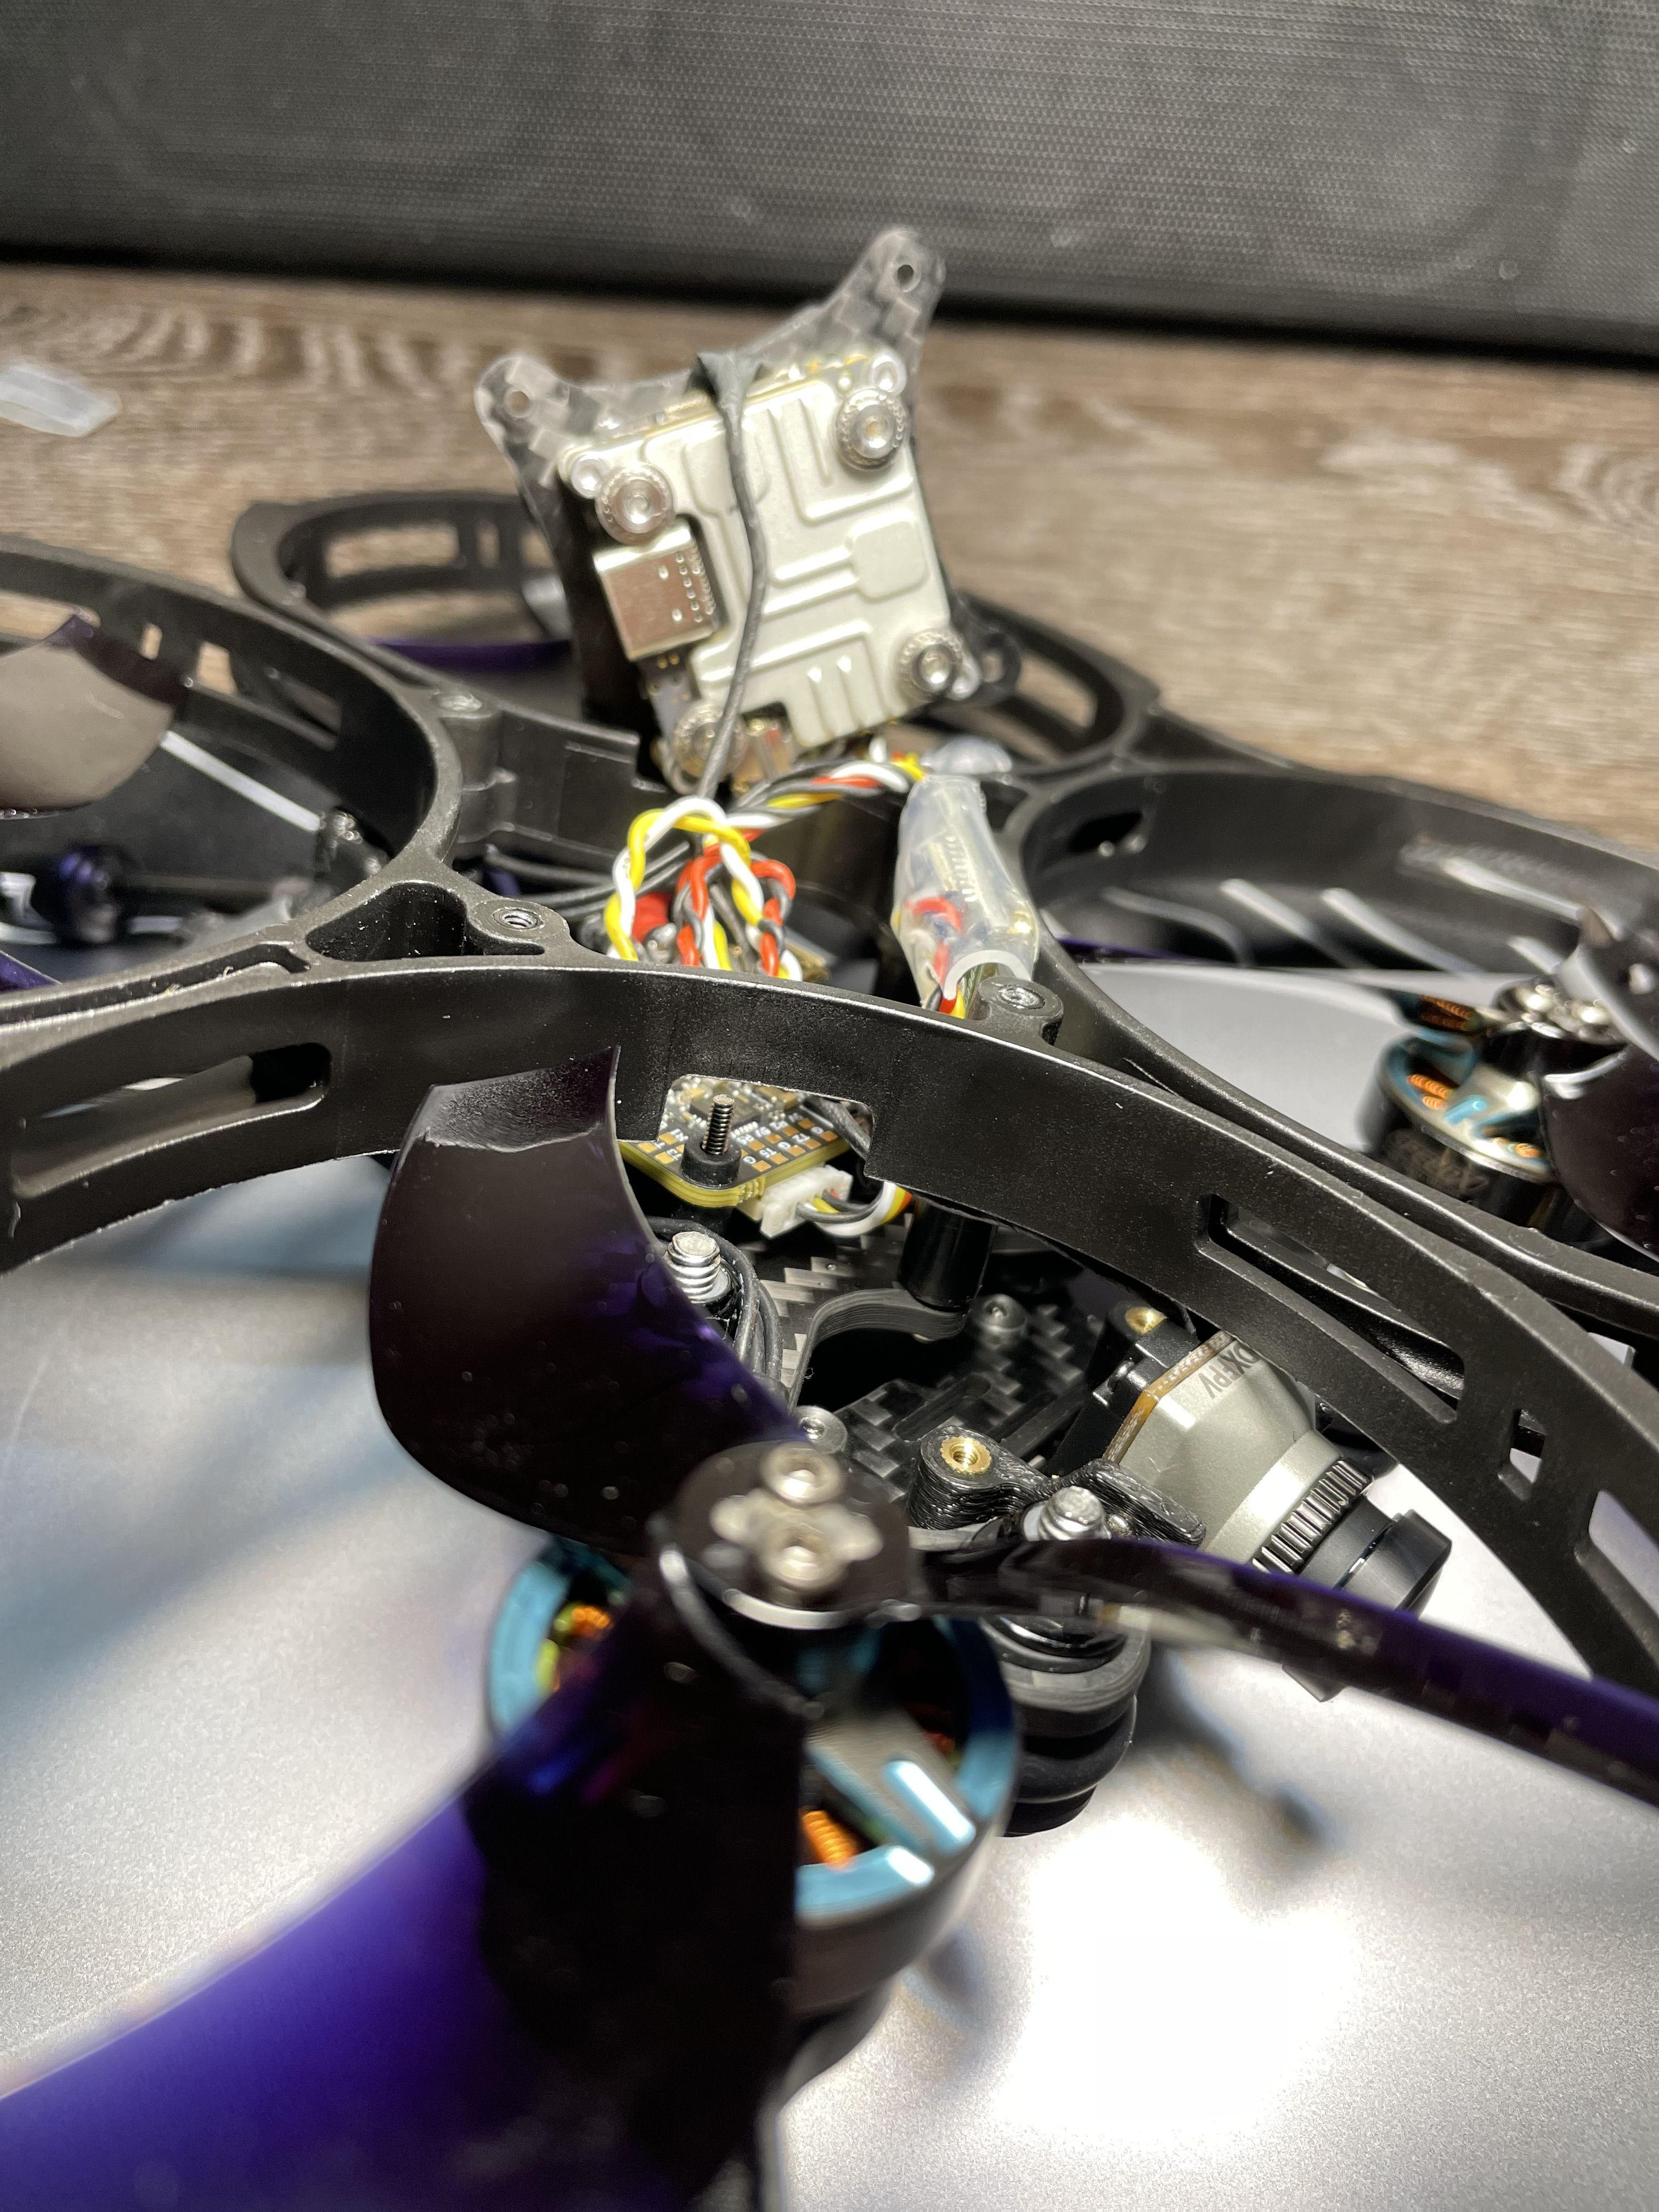
    • Unscrew motors and install prop guard
    • Install the antennas for Vista and RX
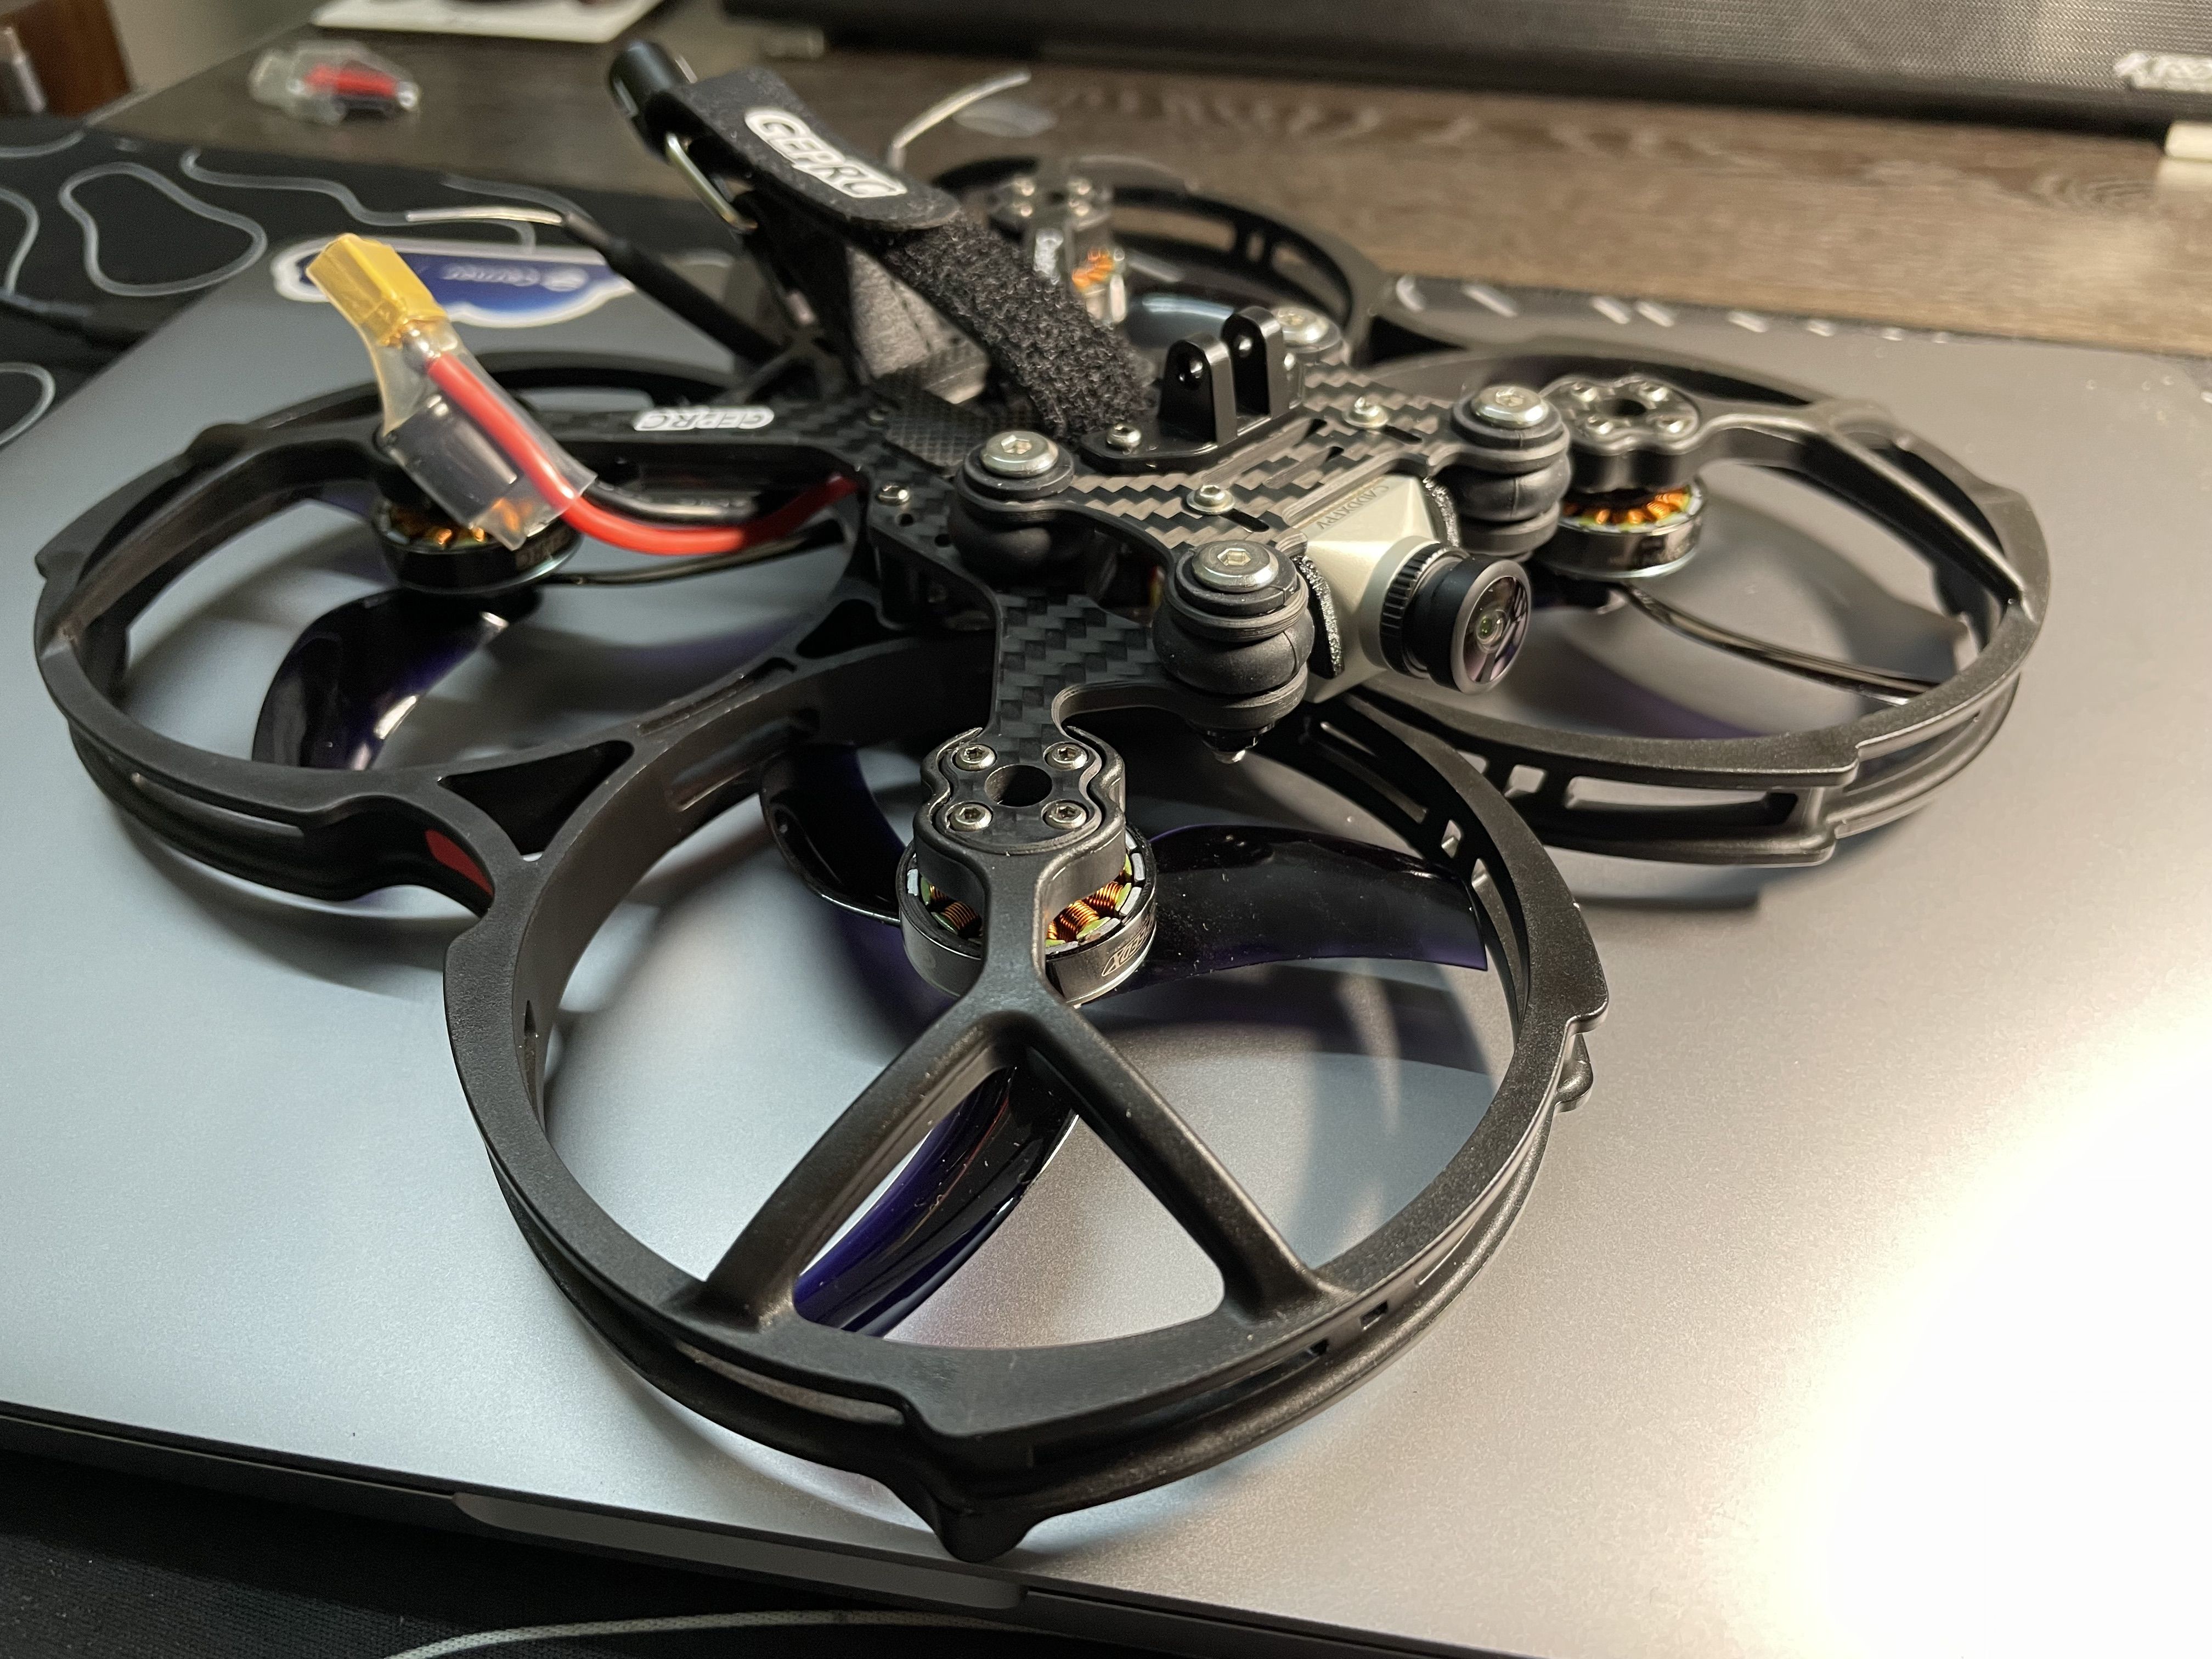
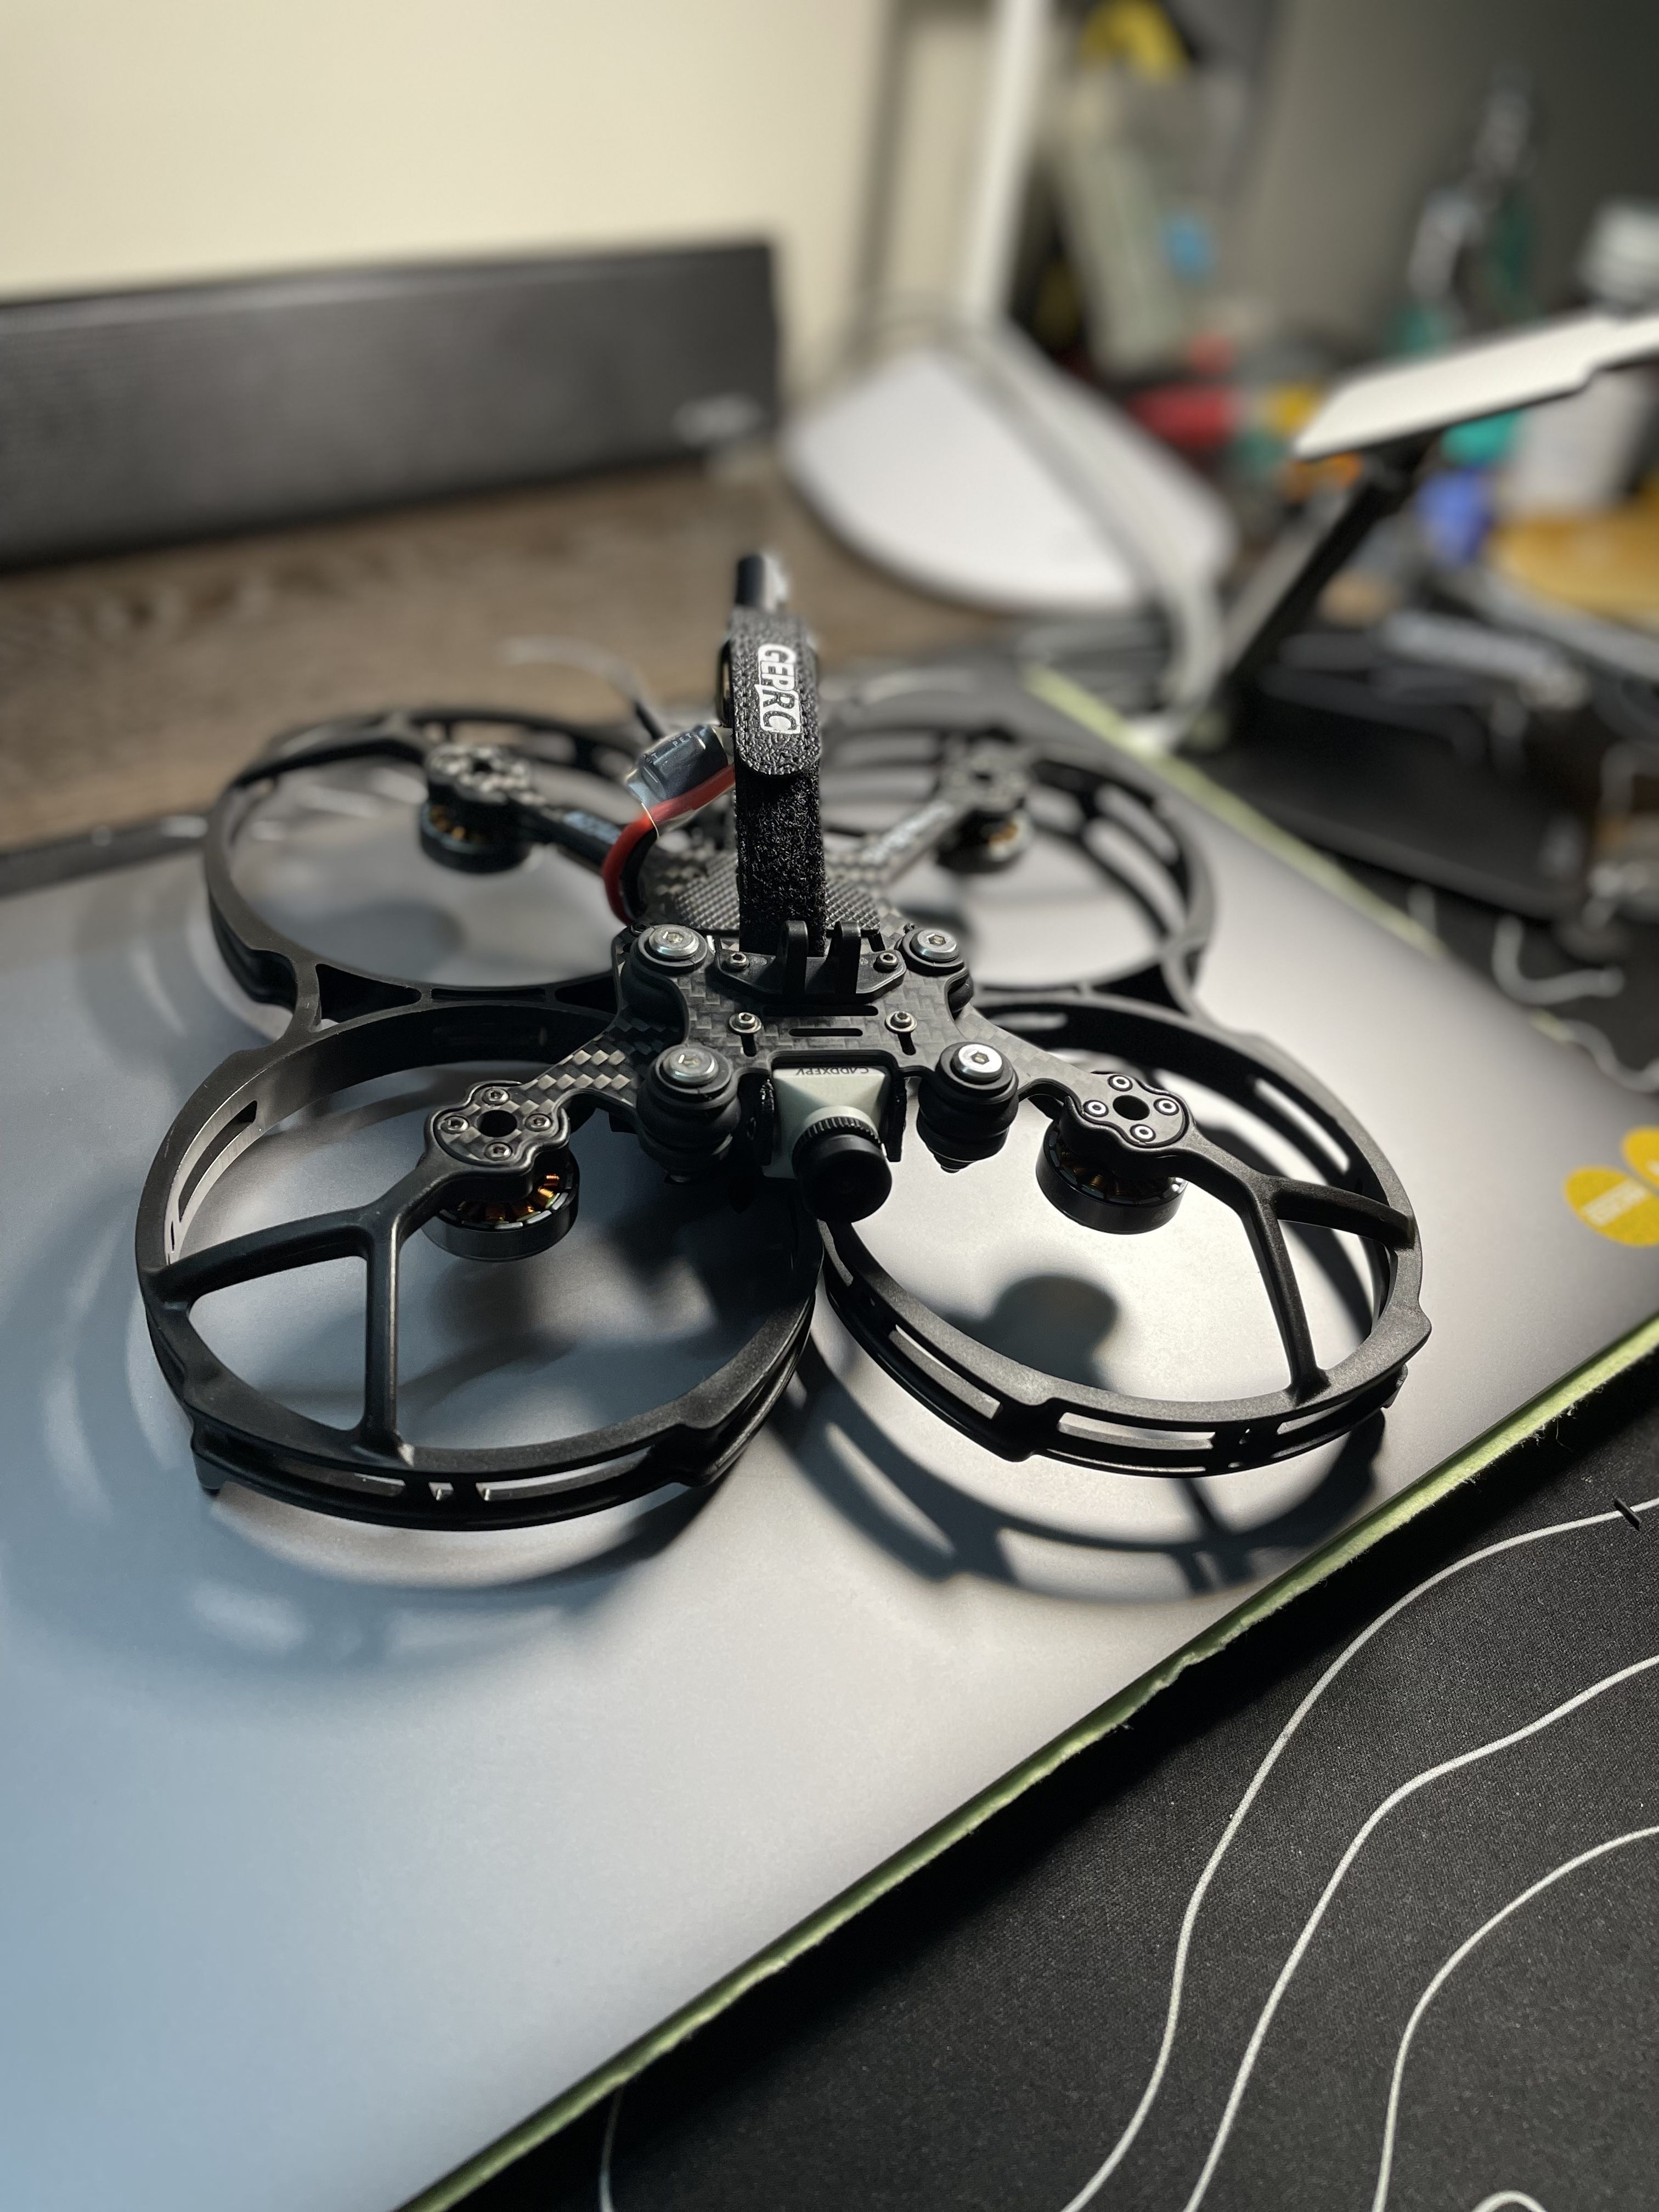
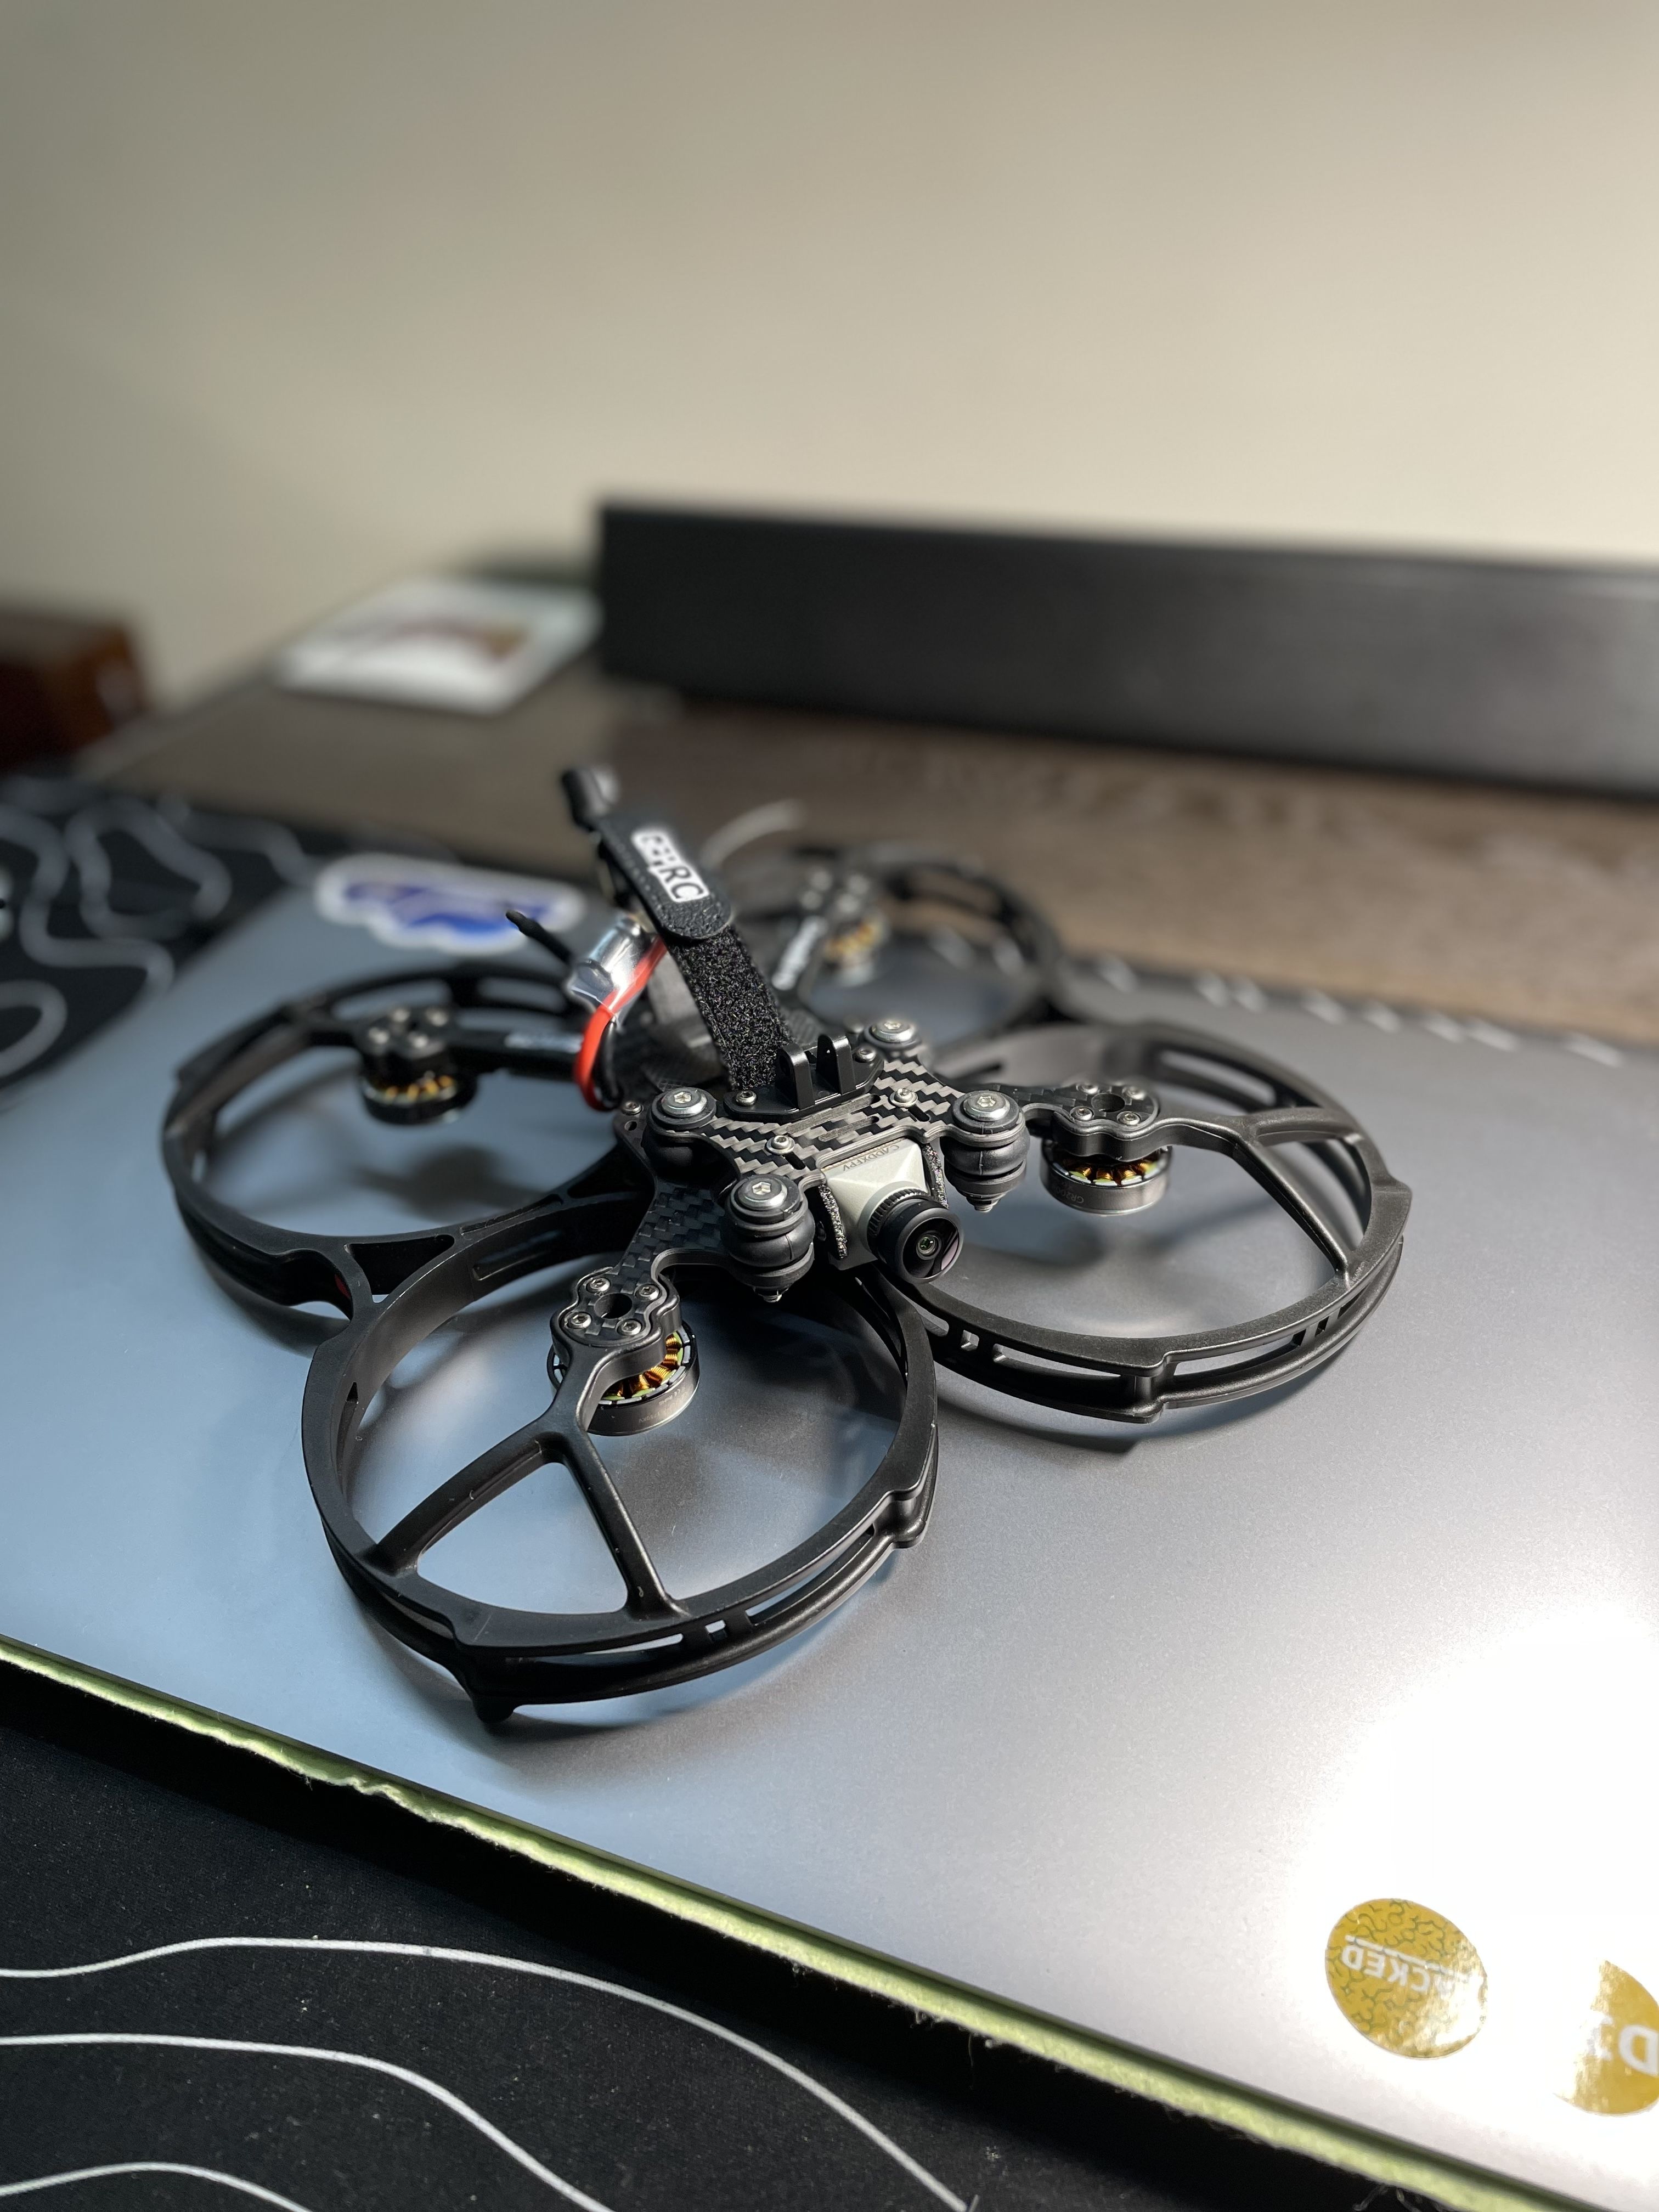
Photos

Part List

Frame

GEP-CL35 Frame - GEPRC (3 builds)
Geprc.com
$49.99

Flight Controller

GEPRC GEP-F722-45A AIO - GEPRC (2 builds)
Geprc.com
$109.99

Motors

4 x GEPRC GR2004 Motors - GEPRC (2 builds)
Geprc.com
$79.96

Propellers

Gemfan D90 90mm 3.5" 3-Blade Ducted Cinewhoop Propeller w/M5 Adapters - 1.5mm Shaft (Set of 4) (2 builds)
Getfpv.com
See Site

FPV Camera

Caddx Polar Nano Starlight Camera (6 builds)
Getfpv.com
See Site

FPV Transmitter

Caddx Vista Unit for DJI Digital HD FPV (No Camera) (92 builds)
Getfpv.com
See Site

Antenna

Polar Antenna For Vista (21 builds)
Caddxfpv.com
See Site

Receiver

QK Nano ELRS receiver with Diversity
Quadkopters.com
$1,450.00

Batteries

CNHL Black Series 22.2V 6S 1300mAh 100C LiPo Battery - XT60 (42 builds)
Racedayquads.com
$29.99

Radio

RadioMaster TX16S Multi-Protocol RF Module OpenTX 2.4GHz RC Transmitter w/ V3 Hall Gimbals (95 builds)
Racedayquads.com
$199.99

Goggles

Store.dji.com (235 builds)
Store.dji.com
See Site

HD Camera

GoPro HERO9 Black - Waterproof Action Camera with Front LCD and Touch Rear Screens, 5K Ultra HD Video, 20MP Photos, 1080p Live S (14 builds)
Amazon.com
$349.99

Radio Module

TBS Crossfire Transmitter (16 builds)
Defiancerc.com
$208.95

Battery Charger

ToolkitRC M6D 500W 15A High Power DC Dual Smart Charger Discharger for 1-6S Lipo LiHV Lion NiMh Pb Battery (19 builds)
Banggood.com
$64.99

Soldering Iron

SQ001 Upgraded 65W Soldering Iron Station Digital OLED Programmable Interface DC5525 Built-in STM32 Chip RC Car Parts (3 builds)
Banggood.com
$50.99

Tools

Ethix Tool Case (11 builds)
Customquads.com.au
$48.90

Backpack

TORVOL QUAD PITSTOP BACKPACK PRO (5 builds)
Risingsunfpv.com.au
$359.99
Show stores (11)

Discussion

Sign in to comment

Kingfisher   May 17, 2022  

doing a similar build. its is all together and have bind to my Radiomaster 16S Pro. however, i cant get it in the air. i have my flight control arrow to the the left of the camera whereas you have yours to the right. using betaflight, all motors spin the correct direction and are mounted in the correct location. this is my very first build. im 70 years old and and for the darn of me, i cant figure it out. you help would be greatly appreciated.
Thanks
Kingfisher

Guides & Reviews

Jun 21, 2021

AirbladeUAV has done it again and this time they've brought long range to the 5" class! Based on the popular Transformer Mini, the new Transformer 5" Ultralight adopts a lot of the same design philosophies with larger props and more payload capacity. It can fly upwards of 20 minutes on a 4 cell Li-Ion battery pack and in ideal conditions it's got a range of over 4 to 5 miles. In this guide I'll walk..

Read more
Mar 04, 2021

With the release of the DJI FPV Drone cinematic FPV has become a lot more accessible, but you certainly don't want to crash a $750 drone! The QAV-CINE Freybott is a compact, lightweight cinematic FPV drone that can take a hit and keep going. It's a lot safer to fly indoors and around people. With a naked GoPro or the SMO 4k you can capture some great stabilized footage. In this guide I'll show you..

Read more