
Check the latest revision, the Wizard Killer Mark III
Whether or not you're new to FPV quads, you've probably heard of the Eachine Wizard. While it's a great starter rig it has some shortcomings. This guide provides instructions on how to build a higher quality, comparable quad at nearly the same price. Some improvements include:
- F4 flight controller for faster loop times
- Dshot compatible 4-in-1 ESC
- CCD camera for a wider dynamic range
- OSD for real time voltage readings
- Blackbox for tuning
- A more solid frame and better quality motors
This is a fairly easy starter build as it doesn't require quite as many solder joints as a typical build. The 4-in-1 ESC saves about 16 joints. Also, this is a very roomy frame, so you've got lots of space for your RX as well as an HD camera. So let's get started!

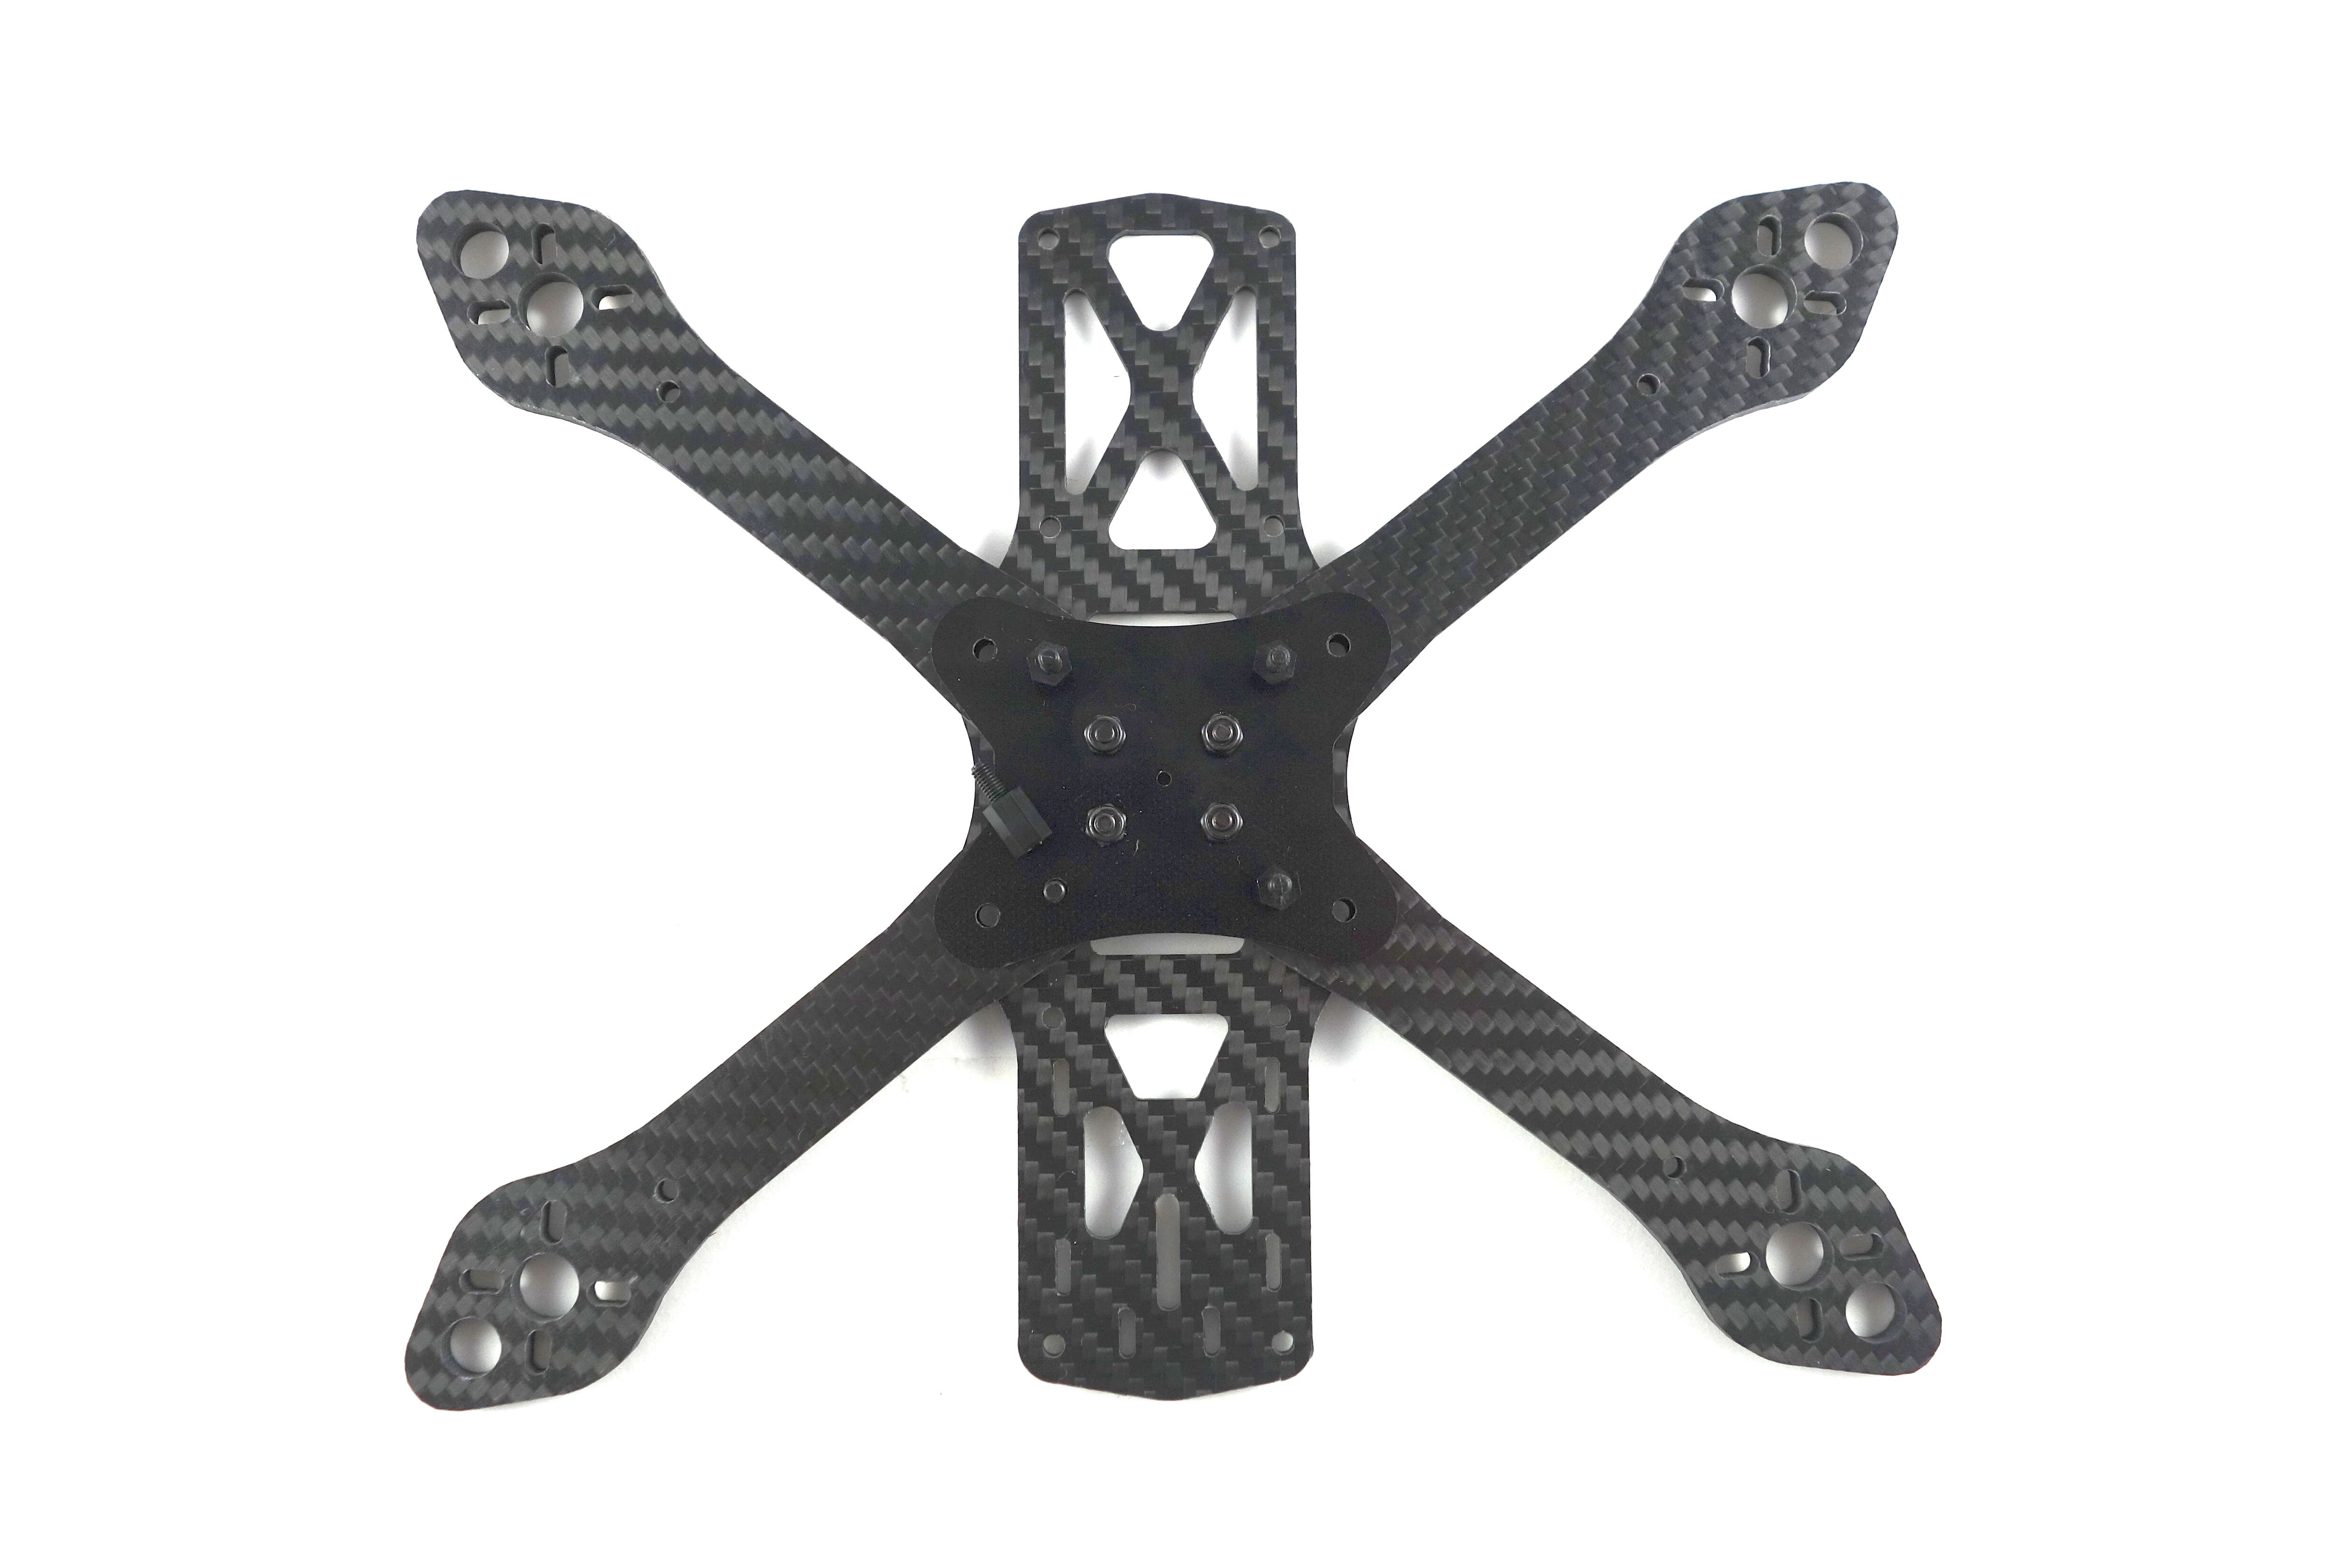
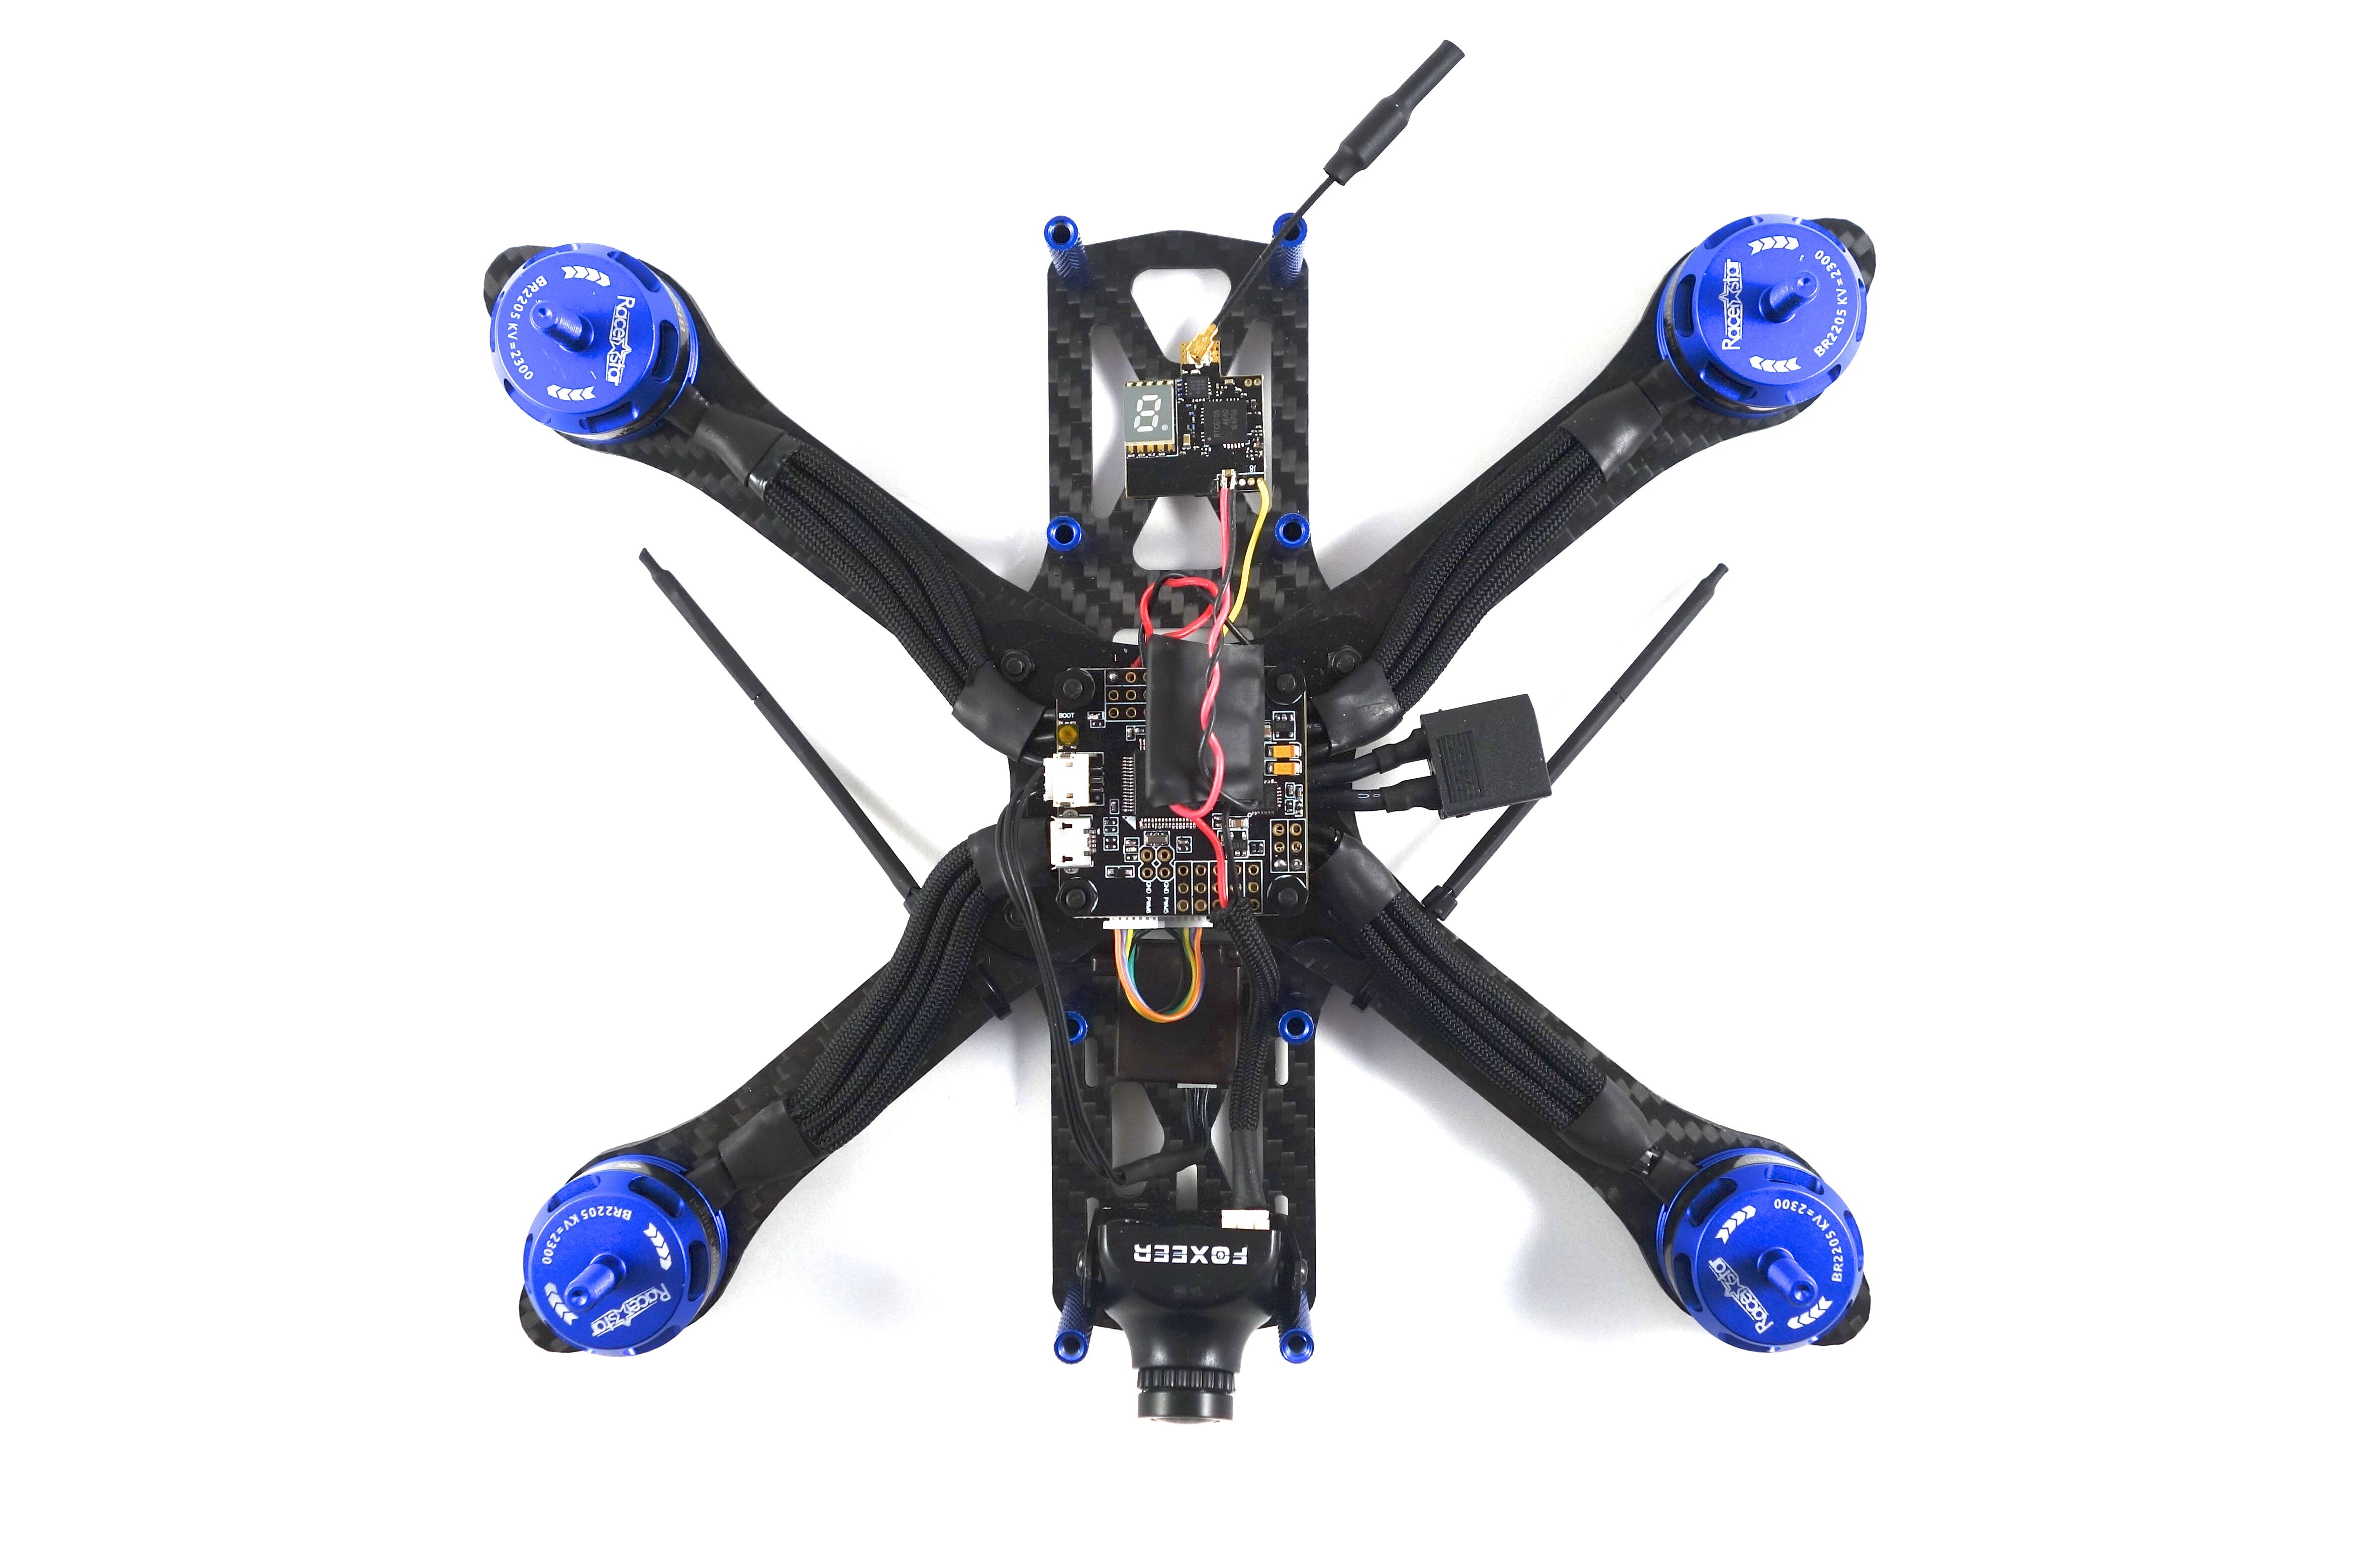
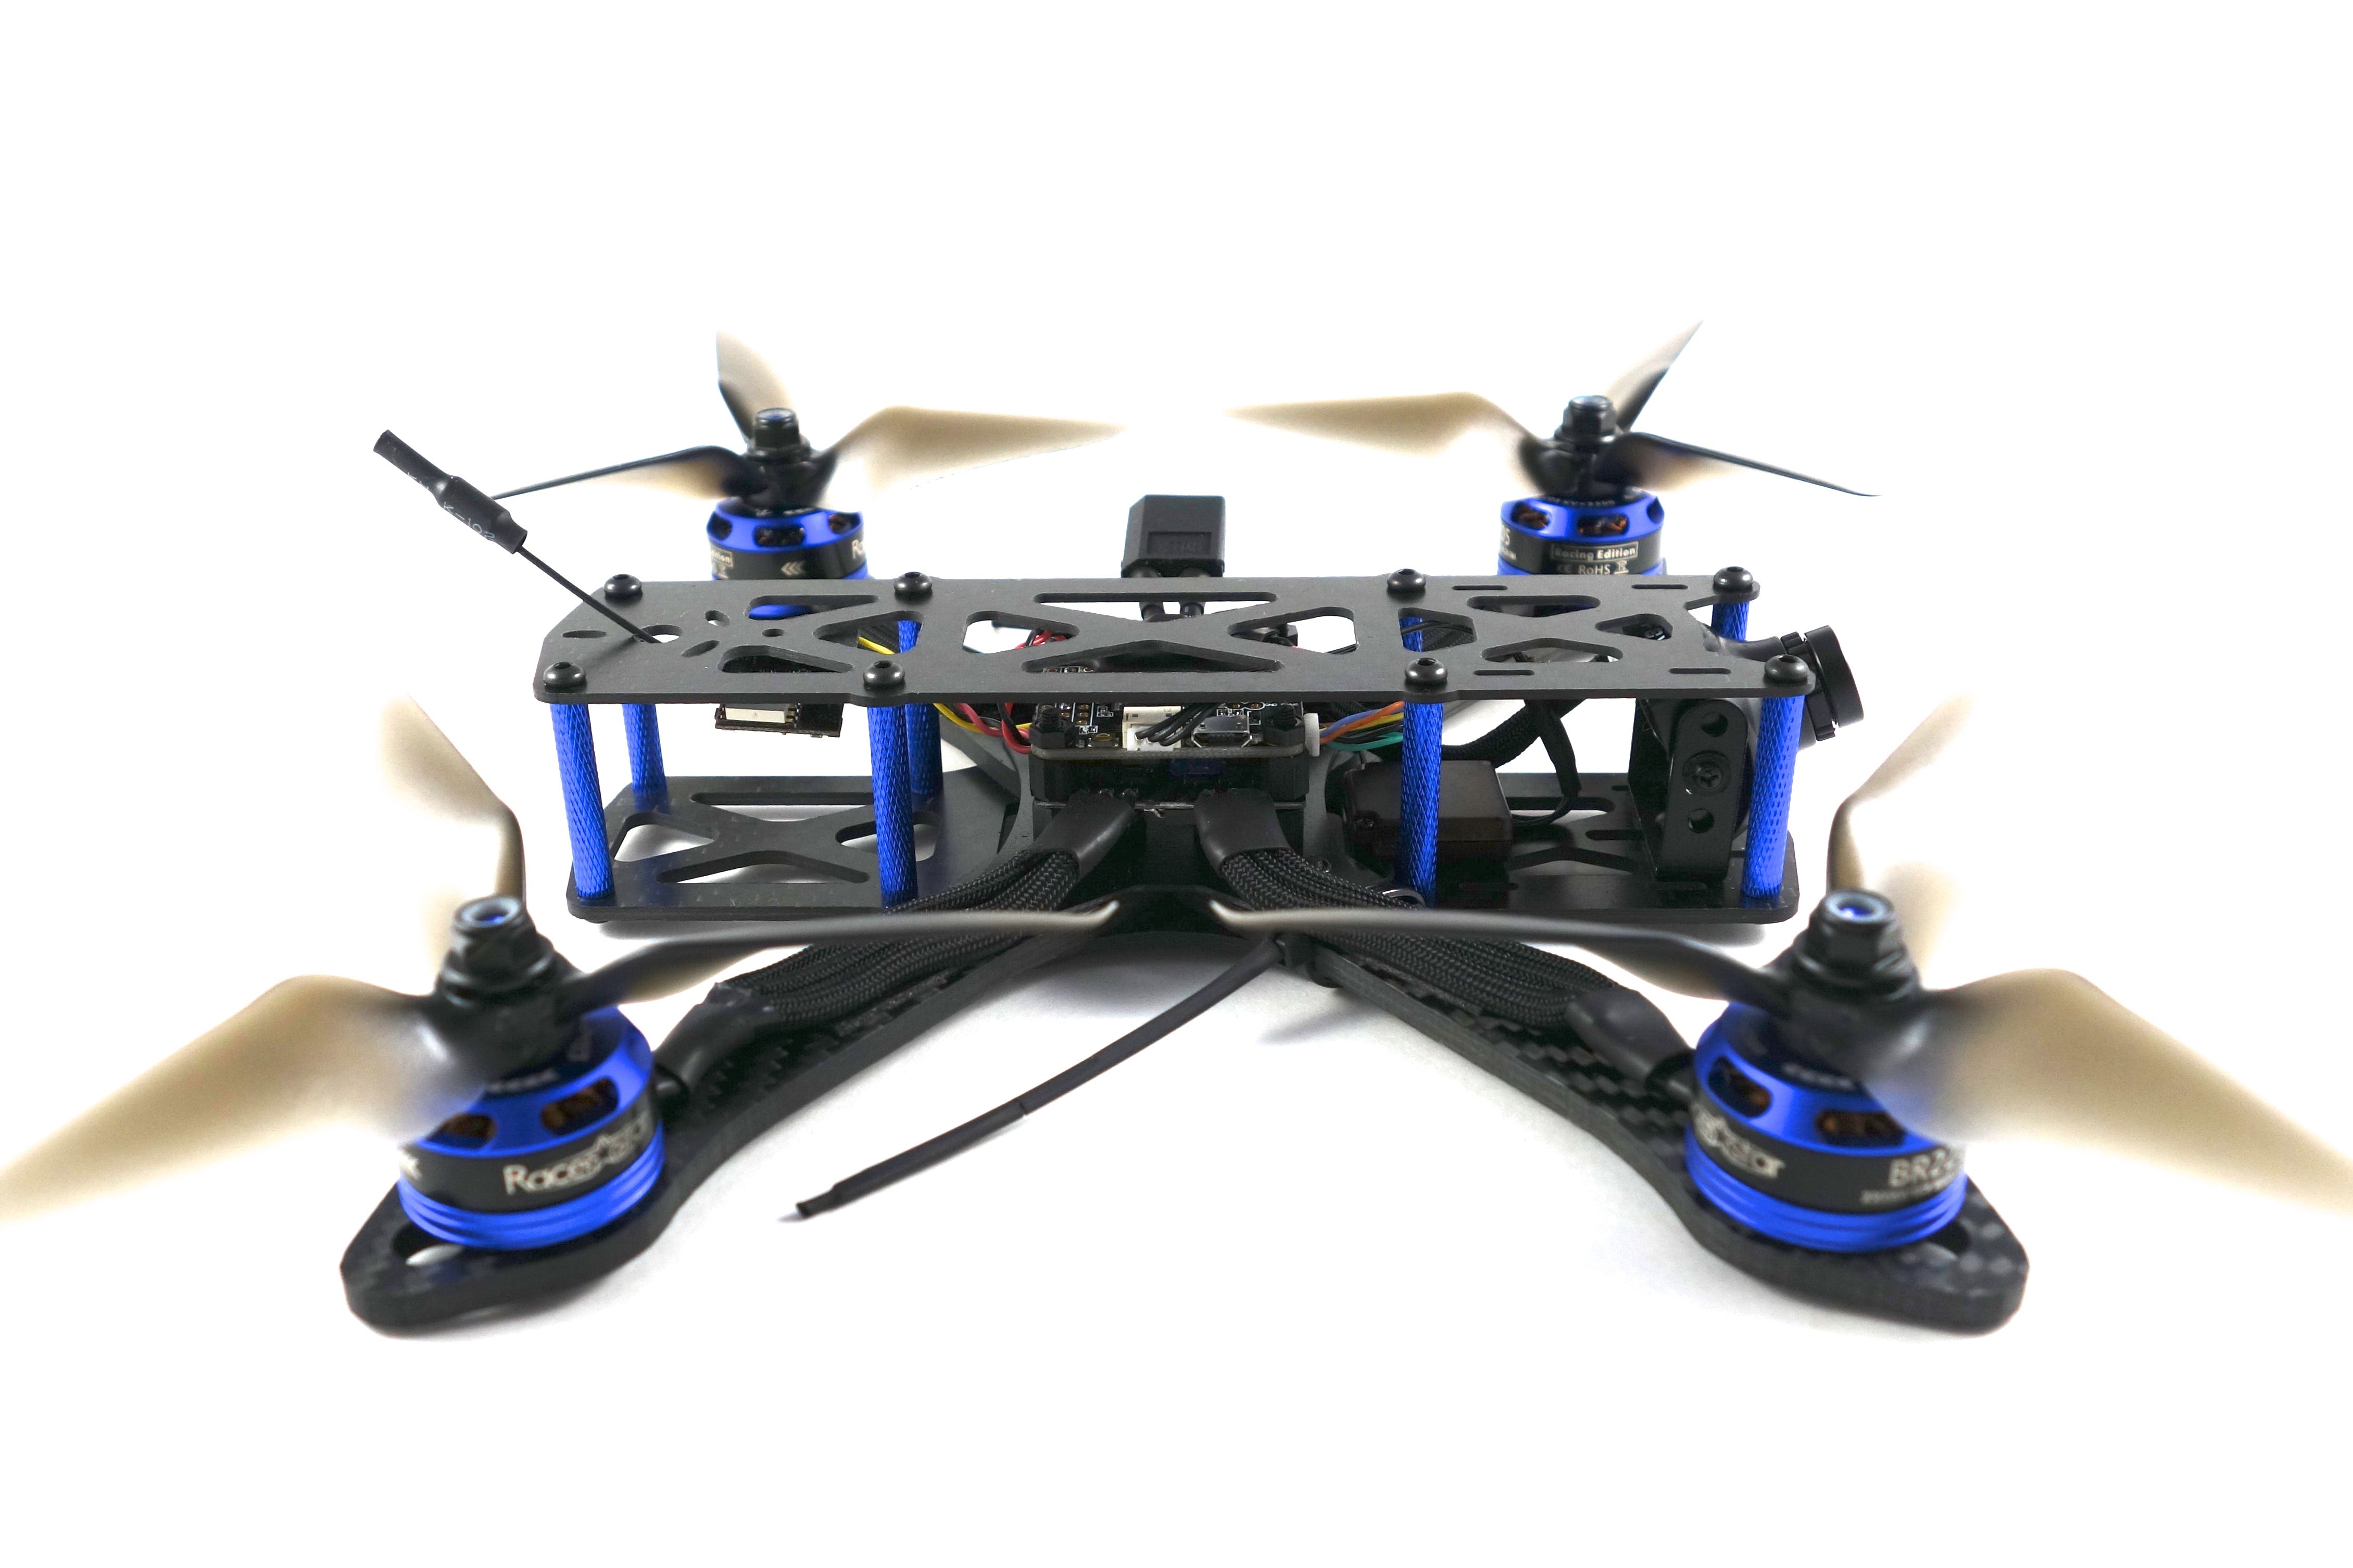
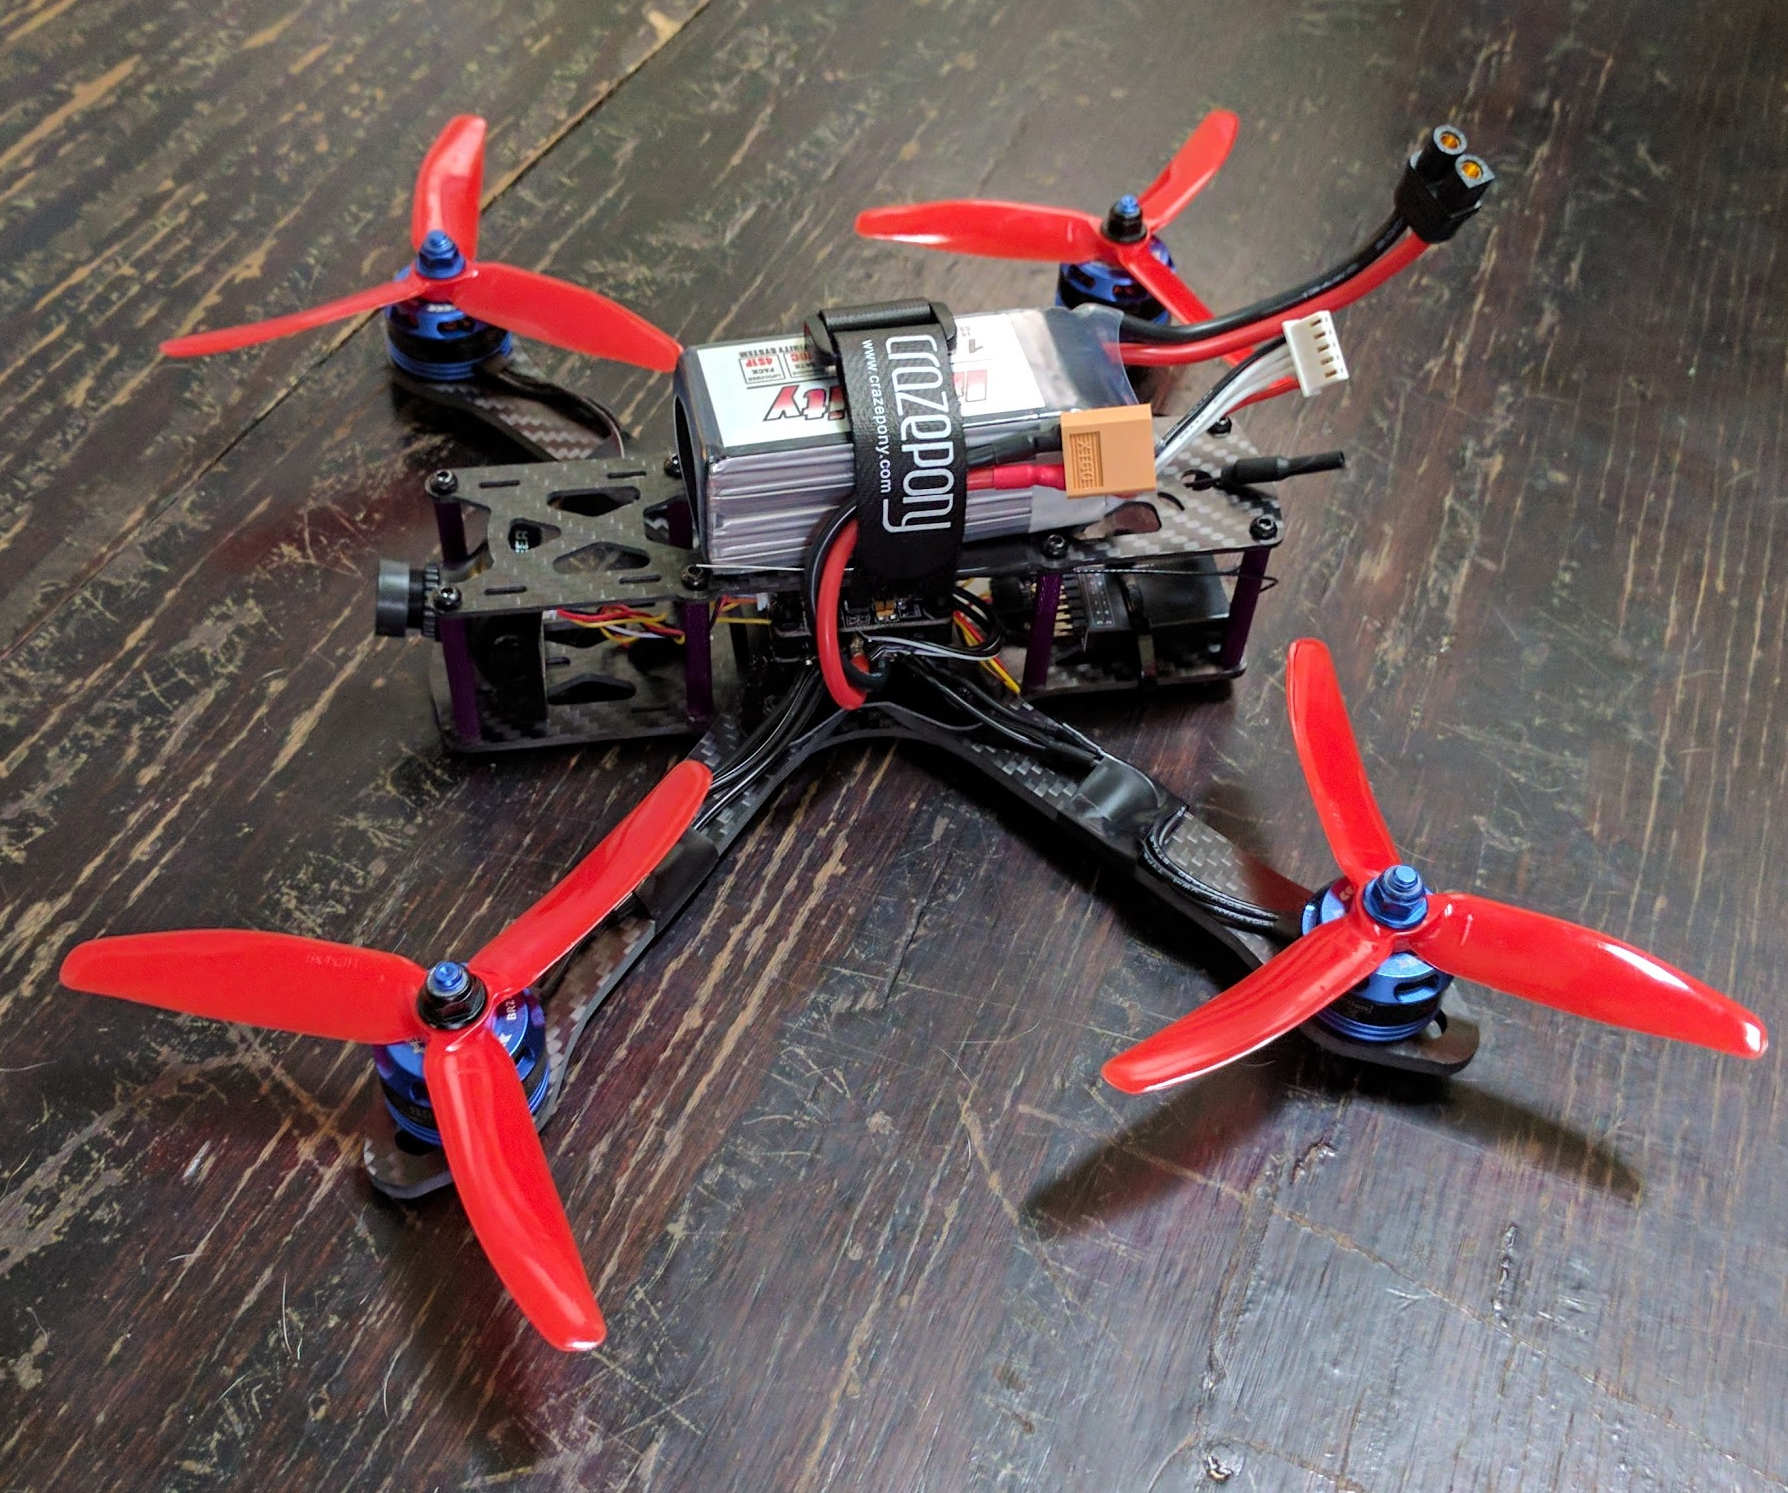
Frame Assembly
I had a few liberties with the kit, so I'll do my best to explain the build process. Most folks will screw the the frame together from the top. Instead, I excluded the red PDB and inserted the screws through the bottom. This offers a much more flush bottom face. To mount the stack I inserted the same screws through the bottom and screwed the standoffs into them as pictured:

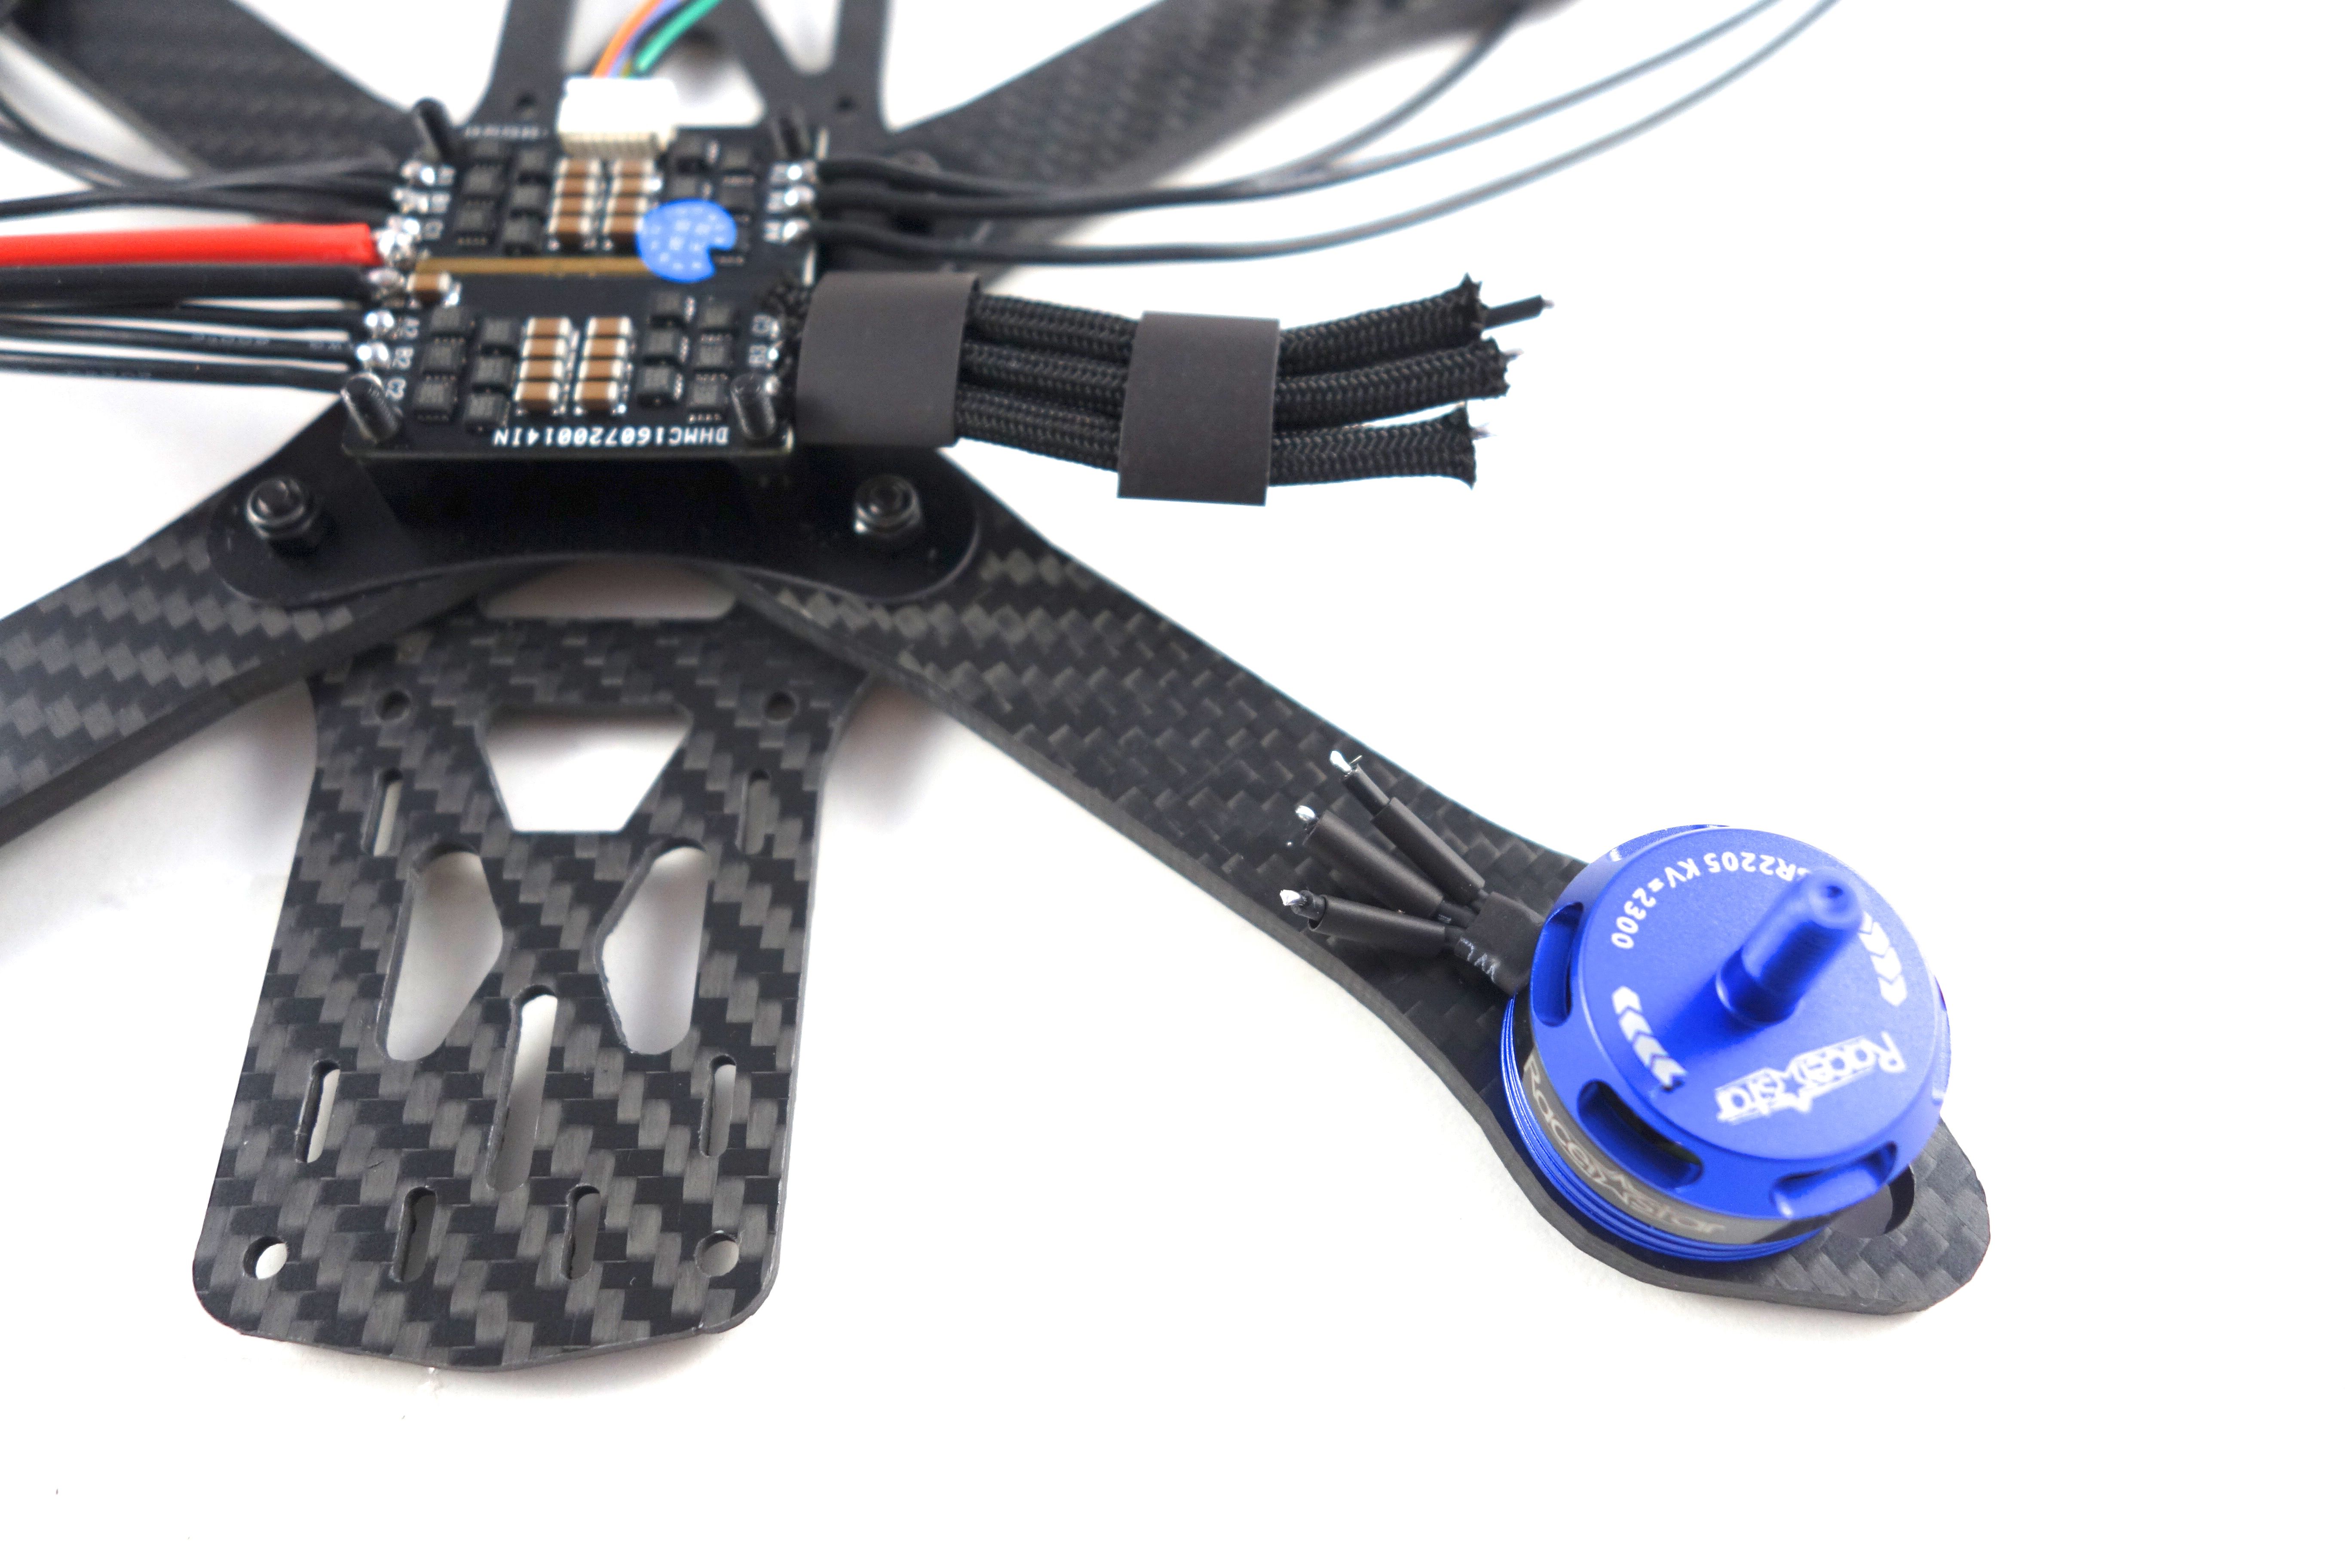
Wiring the Motors and ESCs
After securing all of the screws I mounted the motors and fitted the 4-in-1. This particular ESC requires a little finesse around one of the standoffs. If the standoff isn't at the proper orientation it'll bump part of the circuitry under the board. Just be sure it sits flush on top of all of the standoffs. You might want to consider some blue loctite to mount the motors as there's a small chance the motor screws can wiggle free over time. This is debatable, so it's really a suggestion rather than a requirement. Note: The bottom plate is backwards in the next couple pictures, so make sure the ESC FC plug is facing the front of the quad.
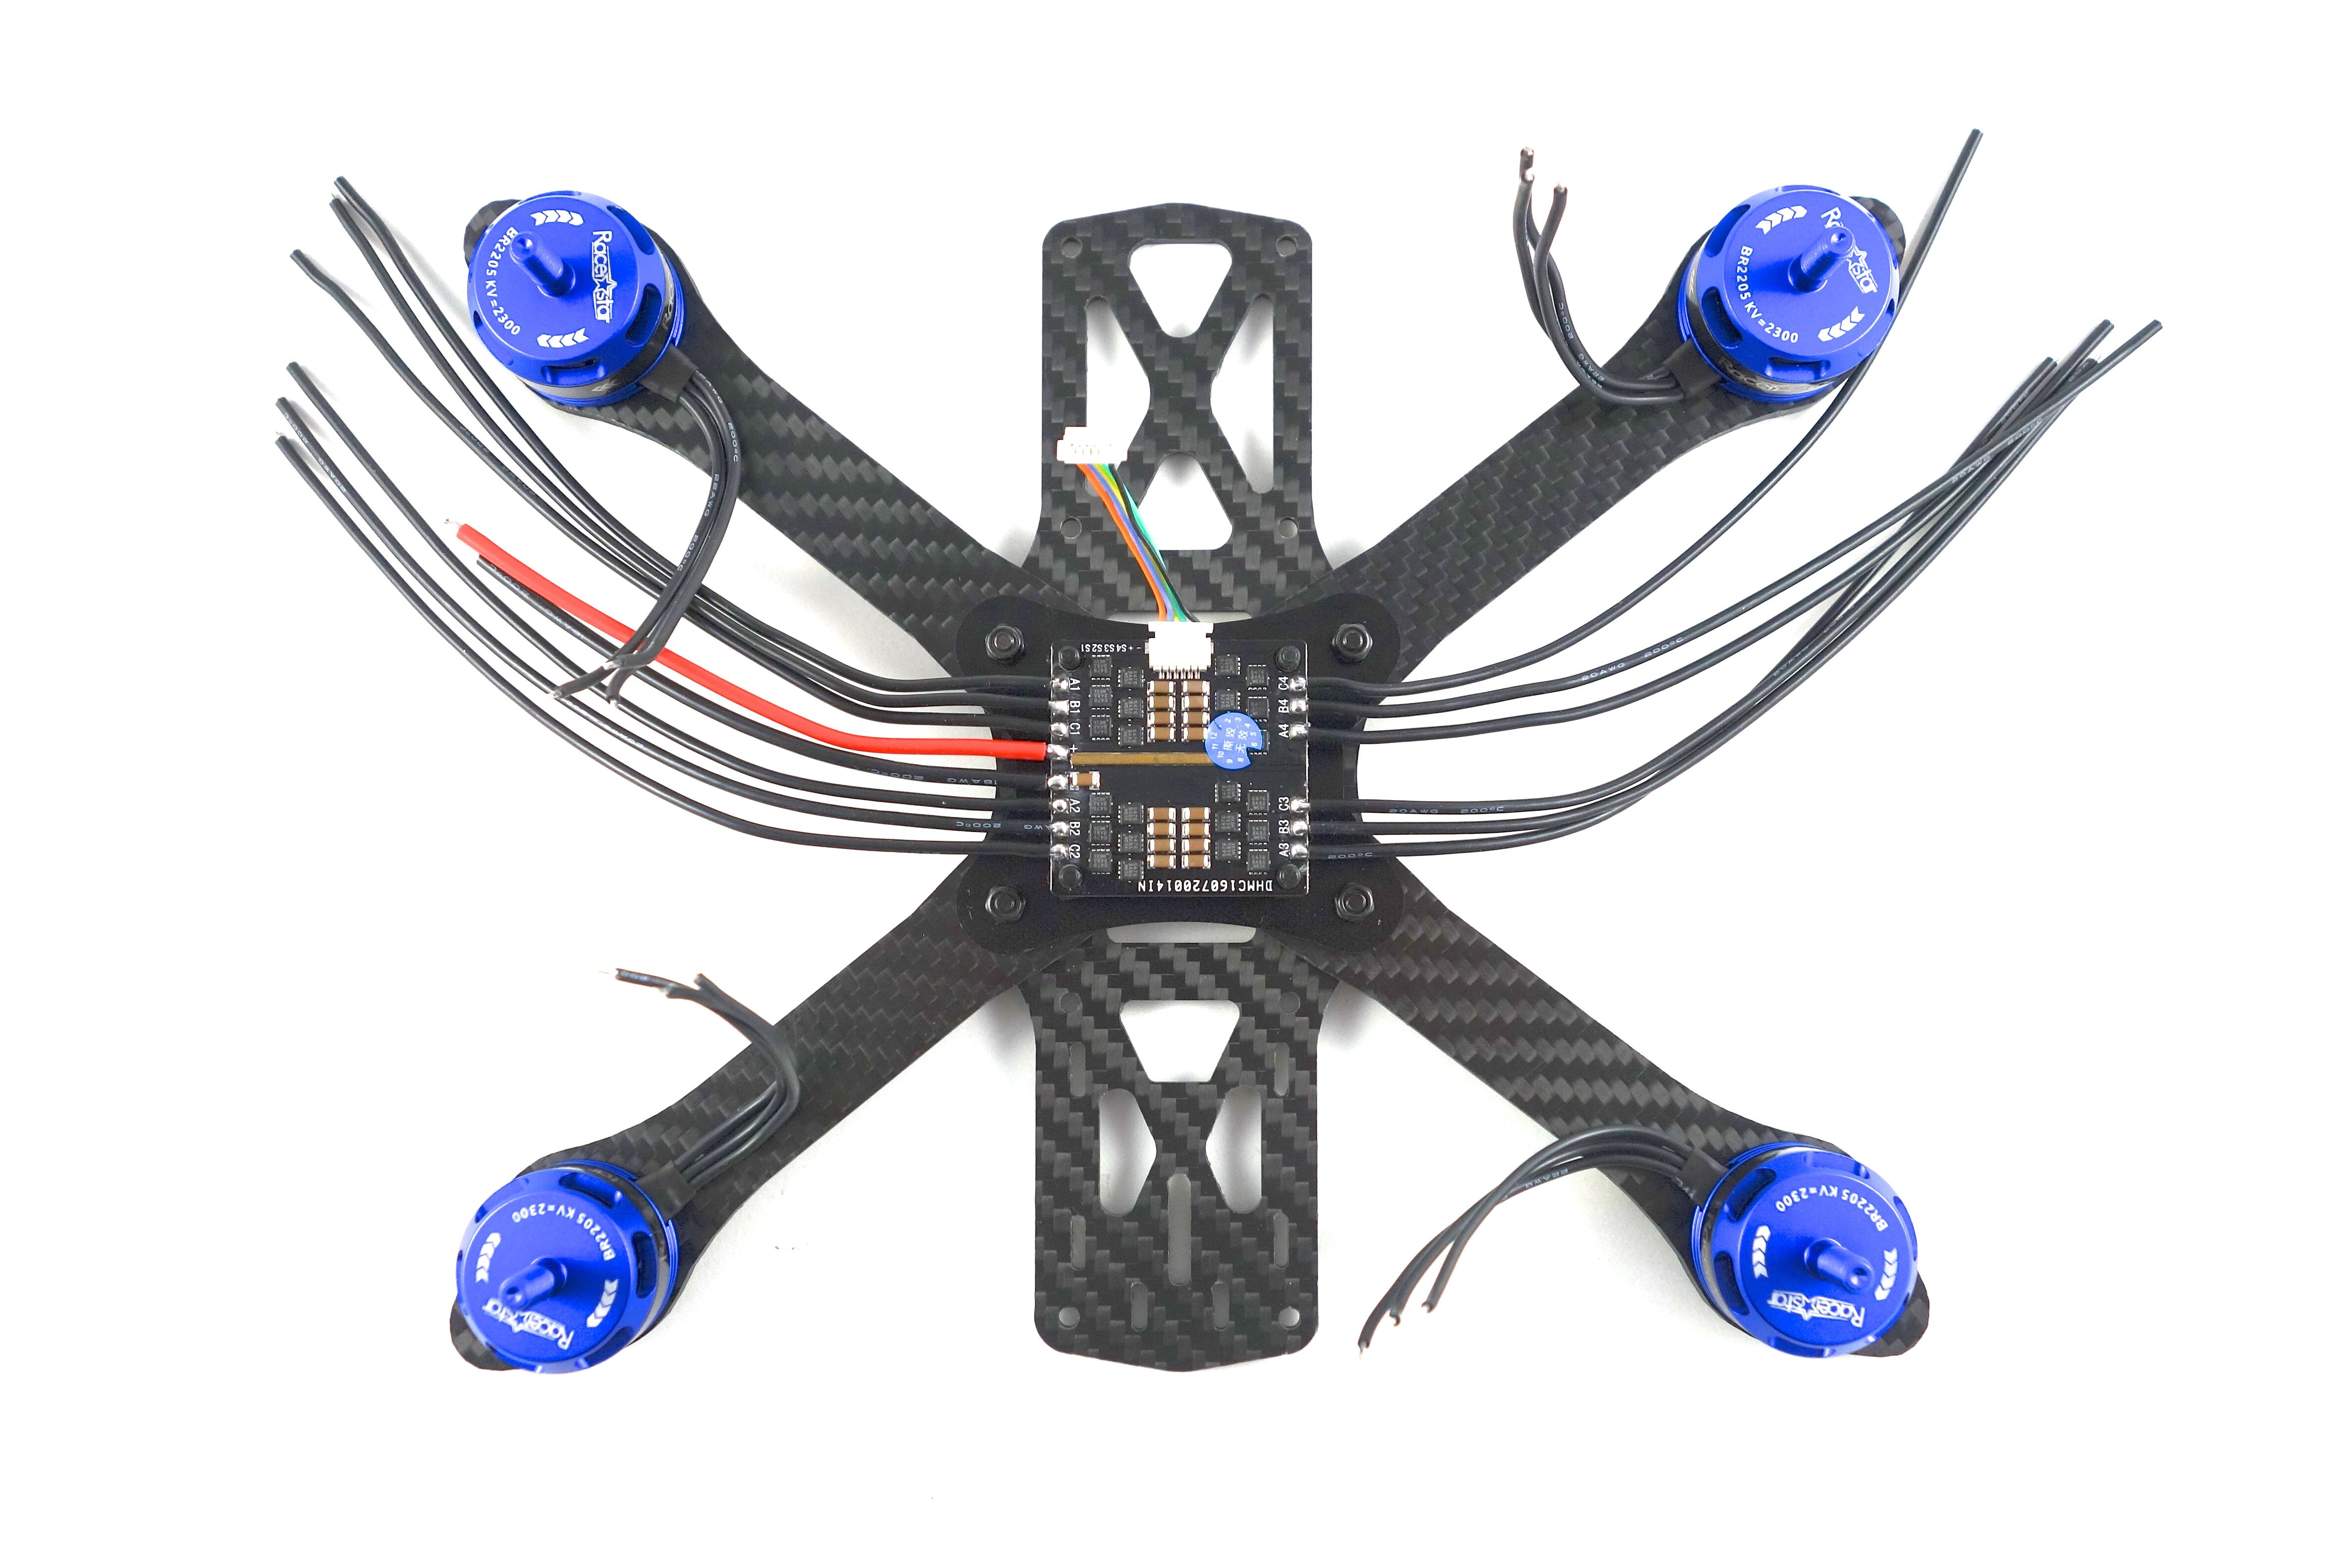
The first thing you want to do is replace the power leads. The wires they used were far too thin for a quad of this size. I used 16AWG which isn't ideal for a 4S build (14AWG would be better), but the pads were super tiny. It should be fine. Another problem is the motor wires are too short, so you need to join them to the pre-installed 4-in-1 wires. Ideally the motor wires should solder directly to the 4-in1 to reduce any potential point of failures.
Soo, I decided to get a little fancy with the wires. The paracord is entirely optional, but I've always wanted to give it a try. At the very least you need a little shrink tubing to cover the joints. I cut 3 pieces of paracord to 2.6 inches each and slid them over the wires. Then I cut a couple larger pieces of shrink tube to go over the paracord and 3 tiny pieces to go over each joint. You should tin the wires before adding any of the tubing to avoid melting it pre-maturely.

At this point you can solder the wires, but be careful not to melt the shrink tube before you sleeve the joints. Get in quick and get out quick. Once it's soldered up you can sleeve the joints and melt the tubing. Before you melt the larger tubing over the paracord it's a good idea to take a lighter to the ends to reduce the fraying.
I used a little double-sided tape to keep the wires down and here's how it turned out:
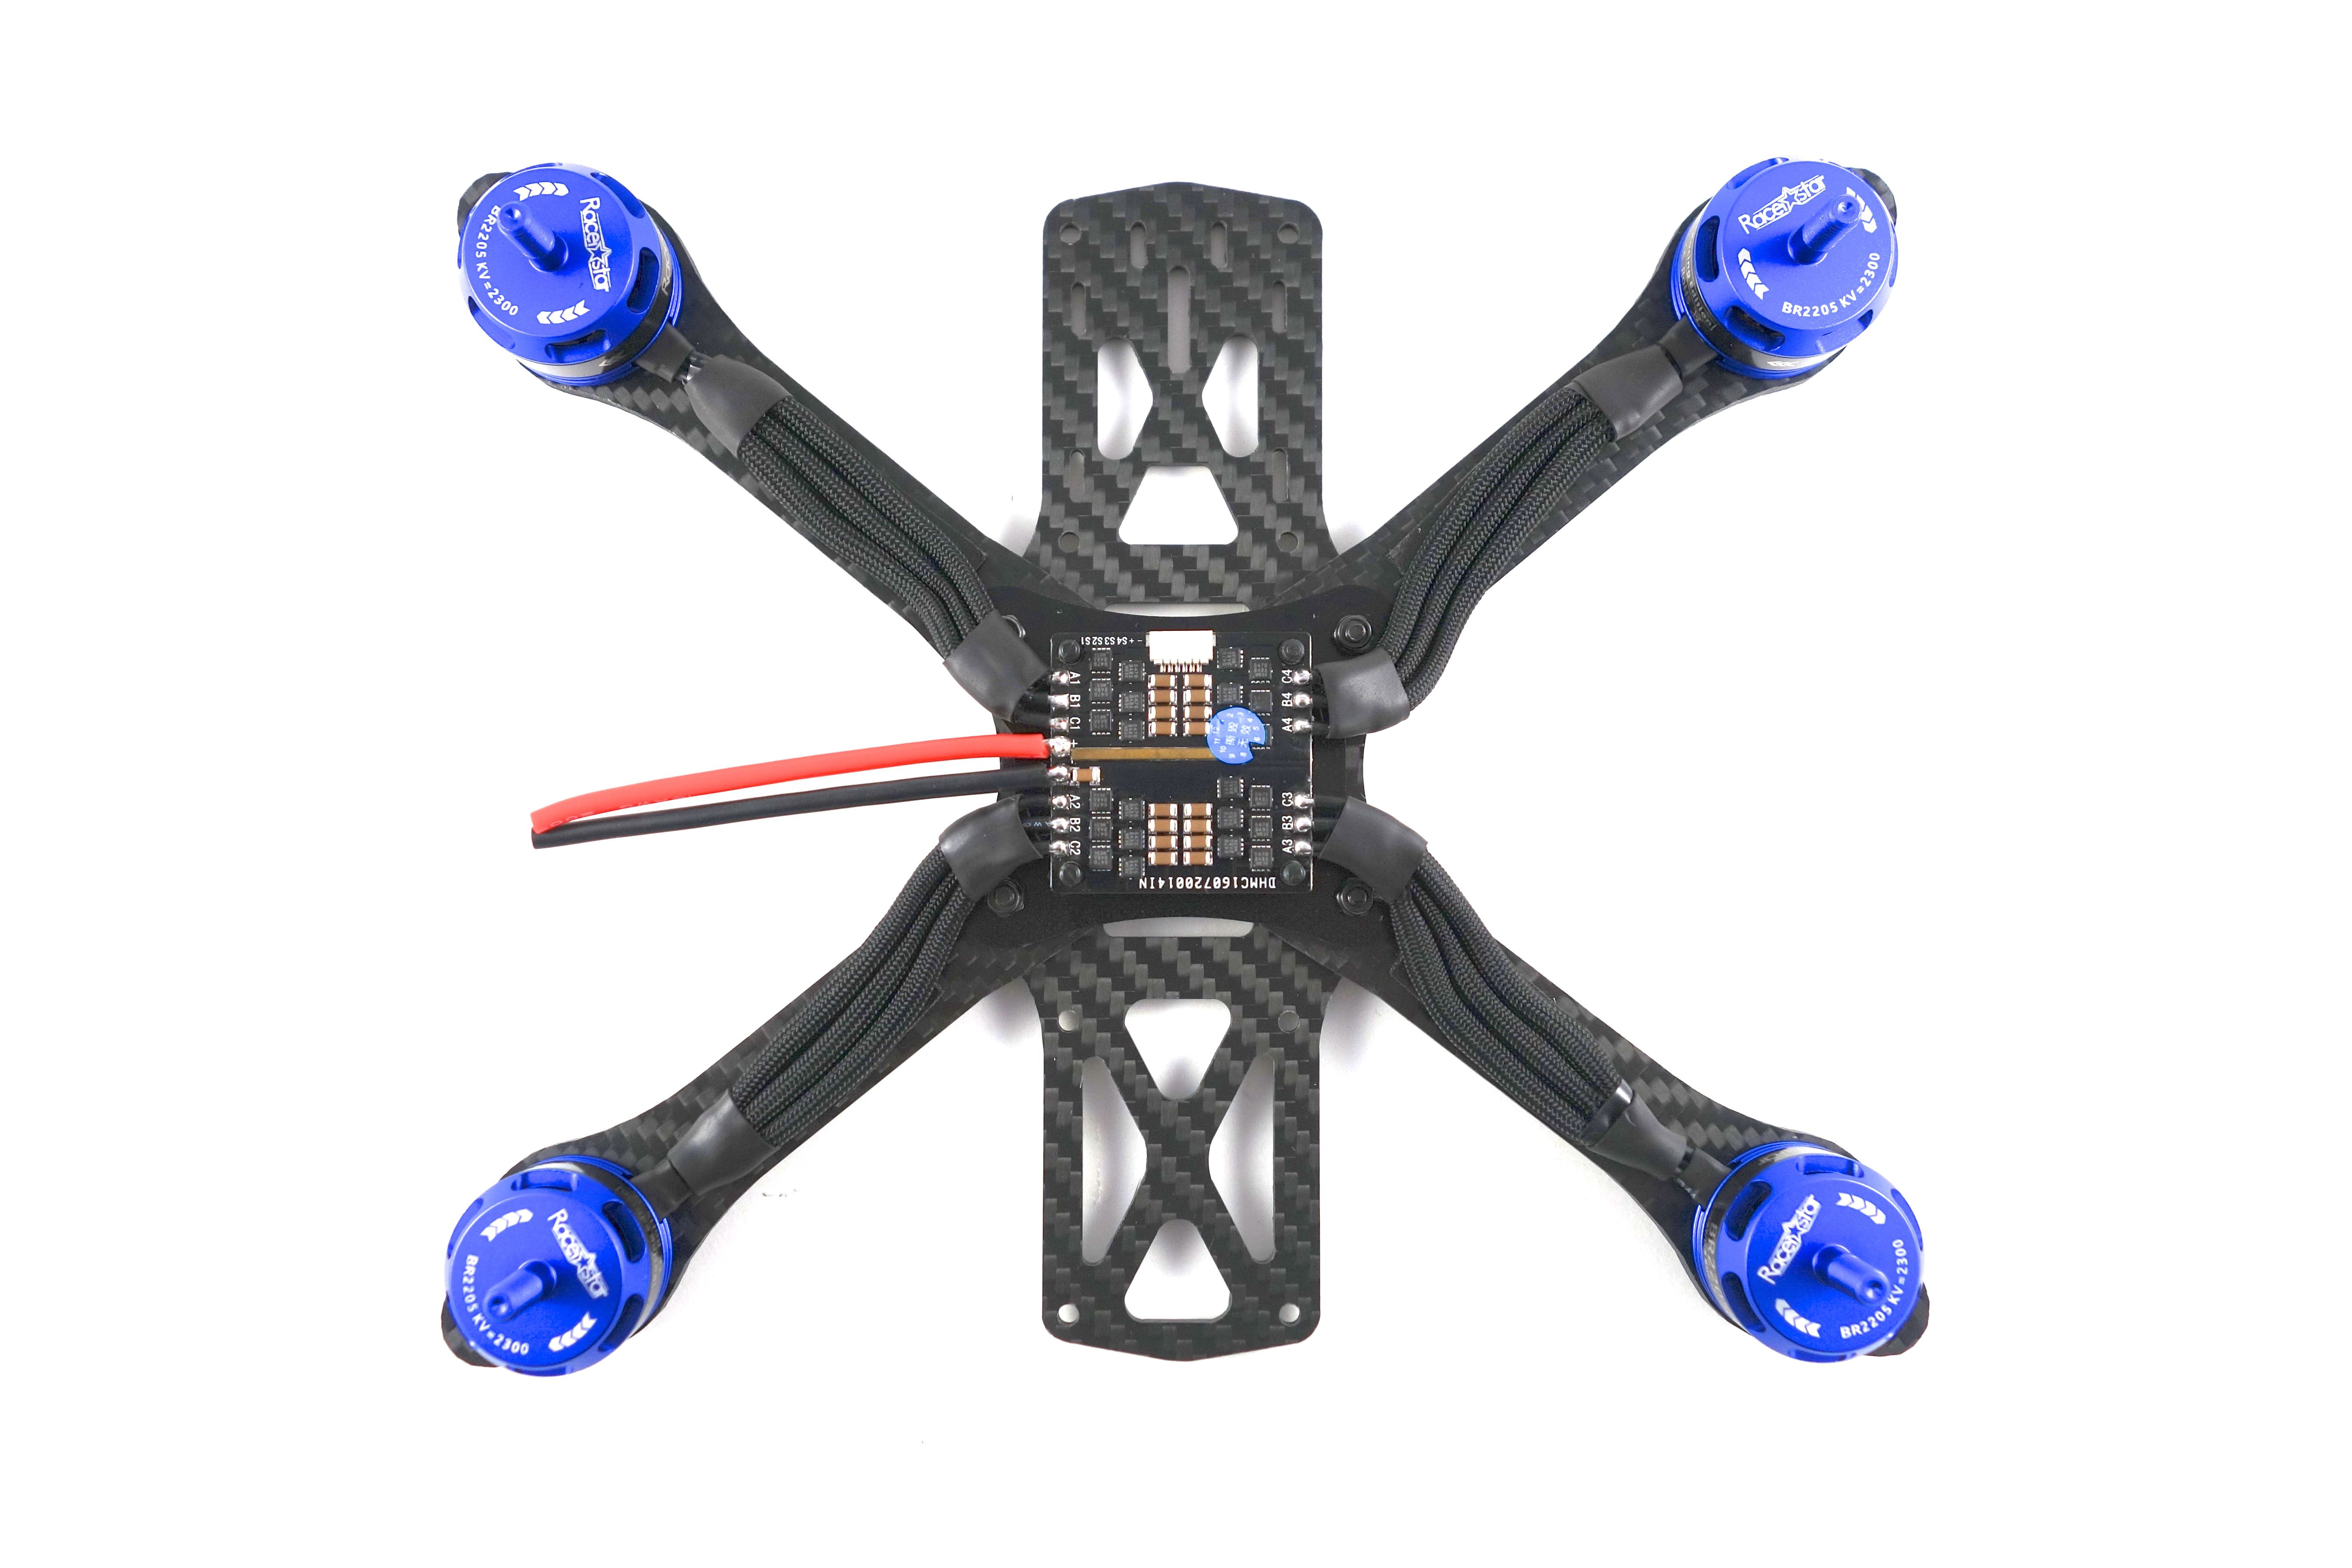
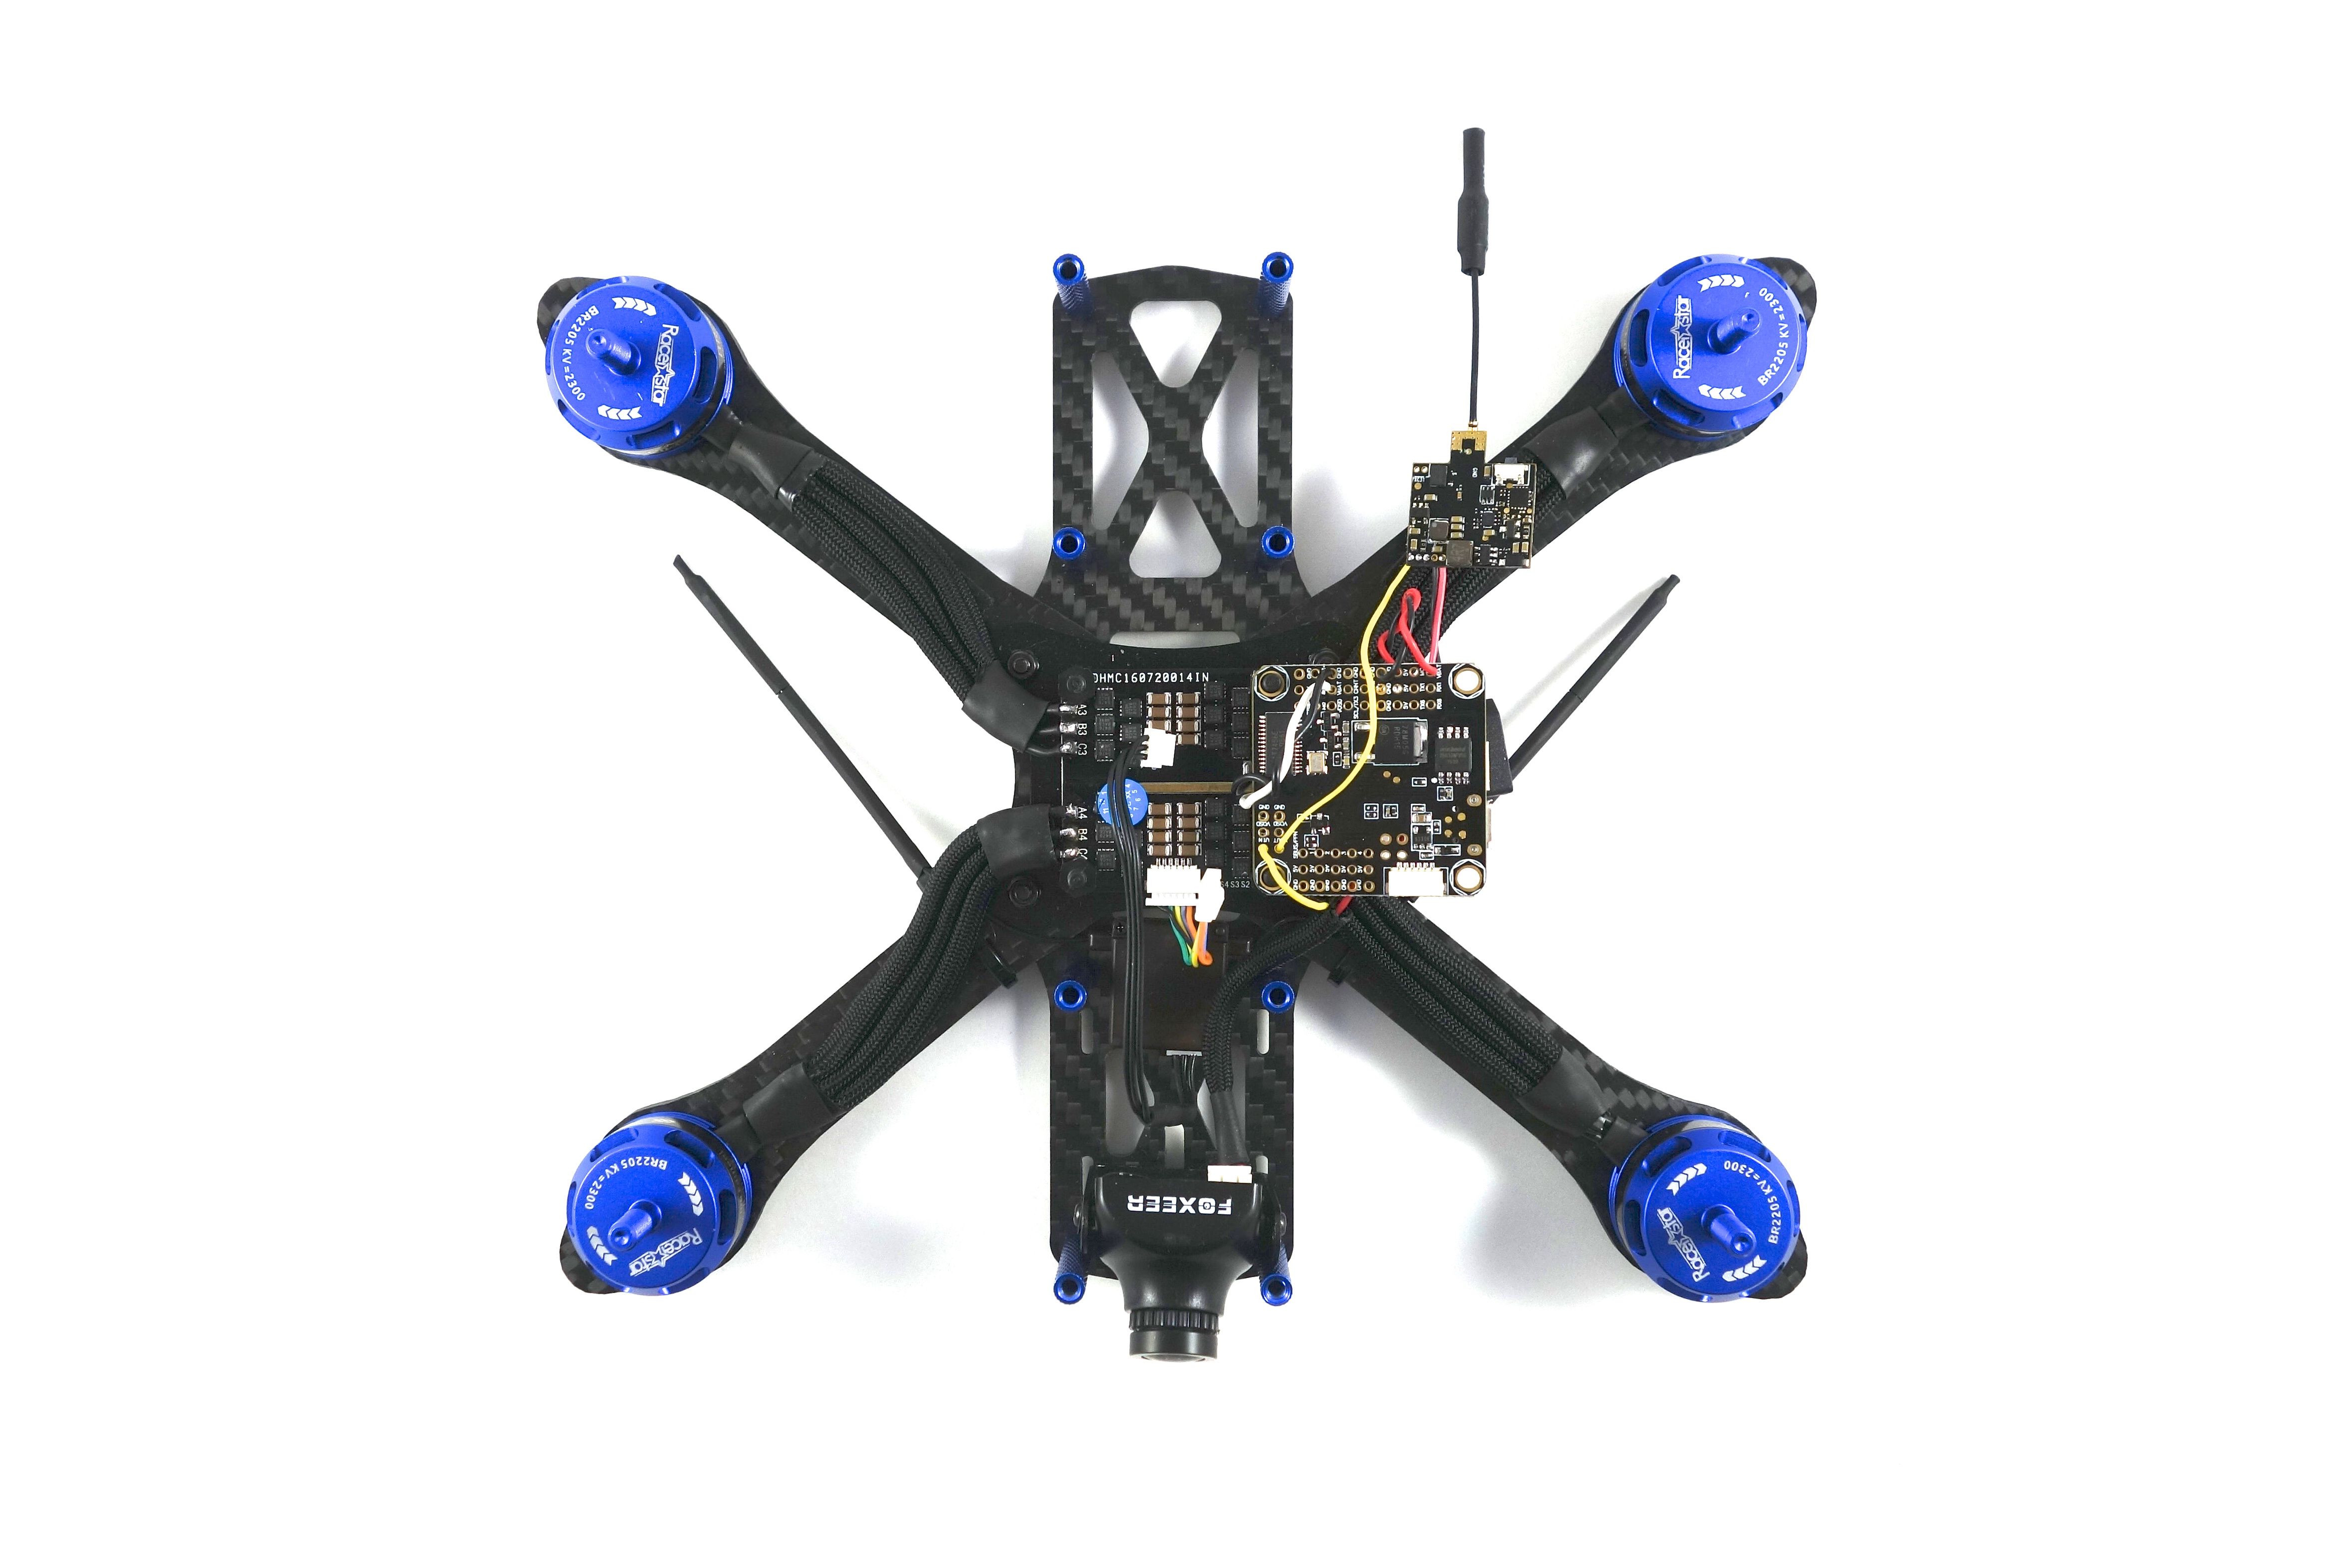
Wiring the Flight Controller
Now for the fun part! Wiring the FC and FPV gear can go really quick if you know where all the wires go. The first thing you need to do is send power to the board. These go to the vbat and ground pads.
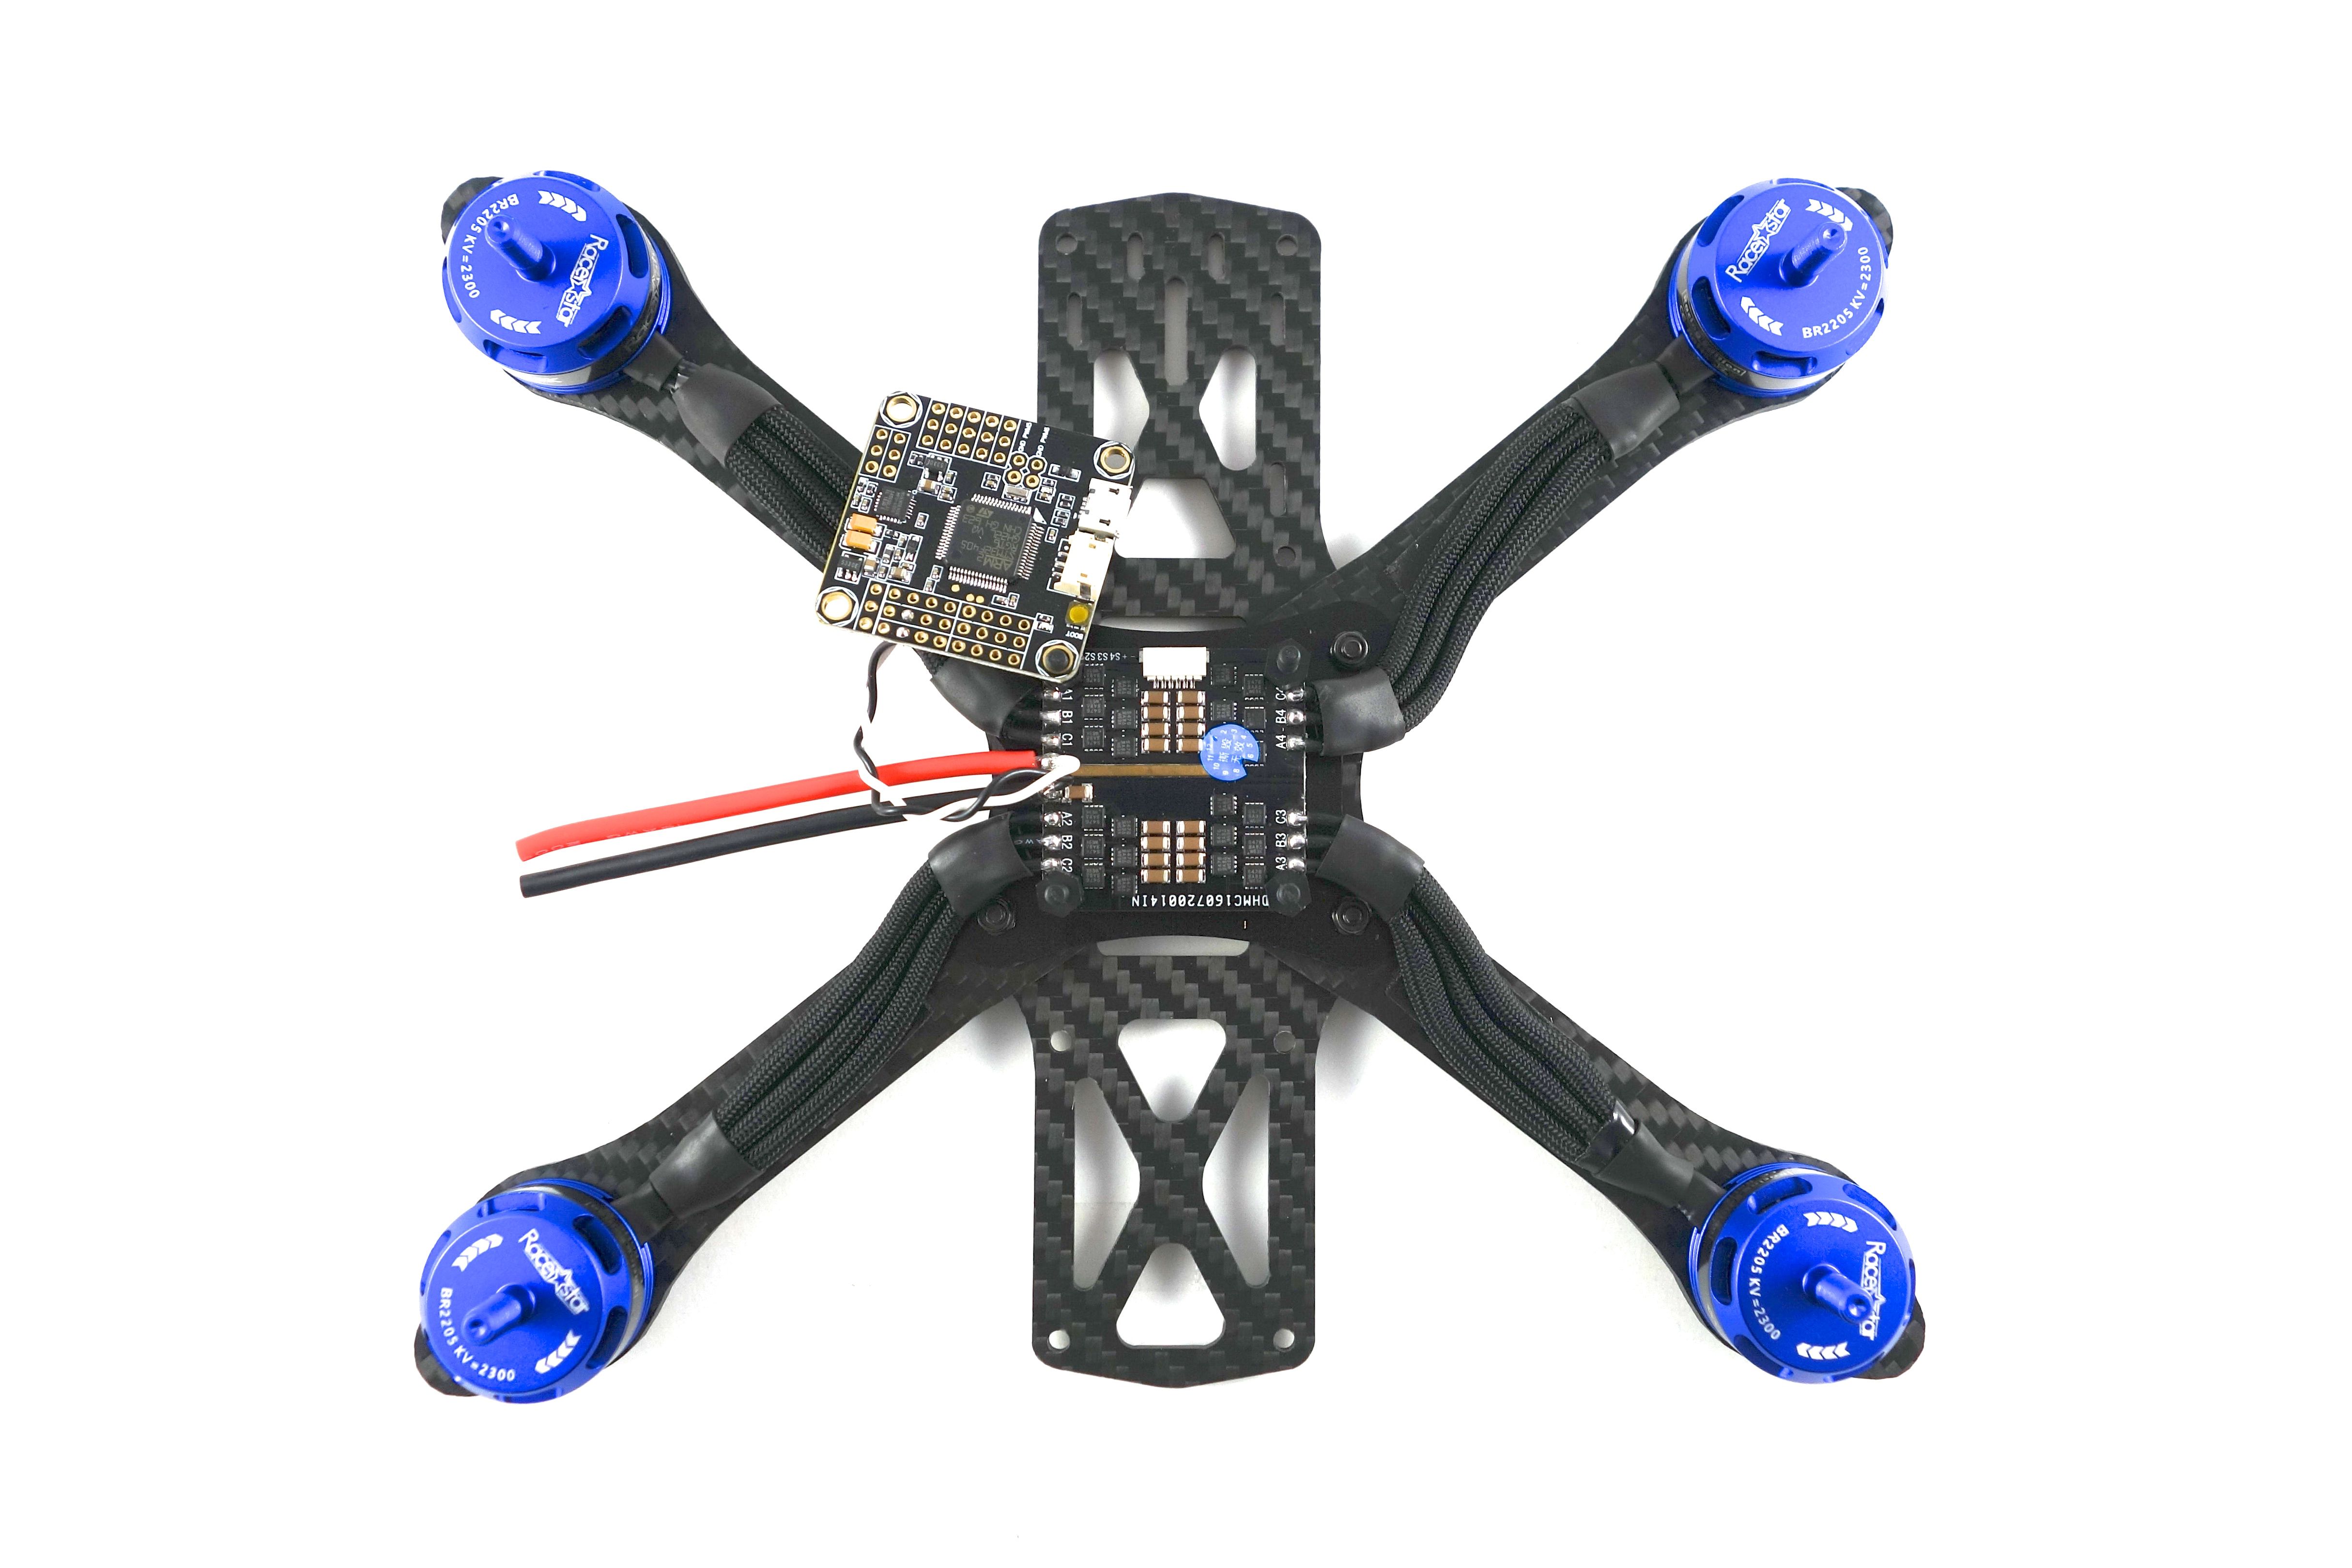
Now that your board has power you can work on your FPV/OSD. This flight controller has 5v out but I found that it isn't enough amperage to power either the VTX or the camera, so you'll have to use the 5V BEC listed in the part list. To prepare the BEC remove the shrink wrap and de-wire it. Make sure you've got some shrink tube wide enough to cover it up afterward, or you can just use some electrical tape. I passed the vbat straight from the flight control board to the BEC and then connected both the camera and VTX power leads to the BEC output. It has terminals for two sets of wire on the output end. While this BEC isn't as small as a pololu, it'll get the job done. Make be sure you buy the 5v BEC because 12v is too much for this little VTX.
Finally, solder the camera video to the FC OSD in and the VTX video to the FC OSD out. That's it for the FPV wiring.


Receiver and ESCs
Now for the finishing touches! Depending on what TX/RX you're using the RX wiring will vary. Since I use a DSMX radio, I used a LemonRX diversity satellite. A nice trick to protect your antennas is to wrap zip-ties around the front arms pointed back toward the motors. Then you can use some shrink tube to affix them to the zip-ties where they'll never be affected by prop strikes or upside down "landings". Finally, don't forget to connect your ESC board to the FC. Just use the short cable included in the package.
Configuration
Now you're ready to configure! As always, make sure your motors are in the proper positions and that they're spinning the proper directions. The first thing you need to do is flash to the latest stable release of BetaFlight. Keep in mind that this board uses the Omnibus F4 distribution. If you use the same components listed below you can re-arrange the motors with these CLI commands:
resource MOTOR 1 A03
resource MOTOR 2 A02
resource MOTOR 3 B01
resource MOTOR 4 B00
save
After that you'll want to reverse the motor direction through BLHeli Configurator. In my case I needed to reverse motors 2 and 3. This ESC supports DSHOT300, so be sure to toggle that. And since this is an F4 board you can run both your PID loop and Gyro at 8khz. Now the rest is up to you! You'll want to bind and map your receiver, set your modes (ARM, AIR MODE, HORIZON, etc.), and configure your OSD. One nice thing about dshot is you won't need to calibrate your ESCs.
Camera Settings
One important step that I usually take care of last is adjust the camera settings. You'll need to hook it up to an analog screen using the included wire harness. The power lead is perfect for a Fatshark battery, but if you don't have one you can just use a laptop power supply. Just make sure the voltage and polarity are correct. Here are some optimal FPV camera settings. If you set your camera according to that document you'll be all set!
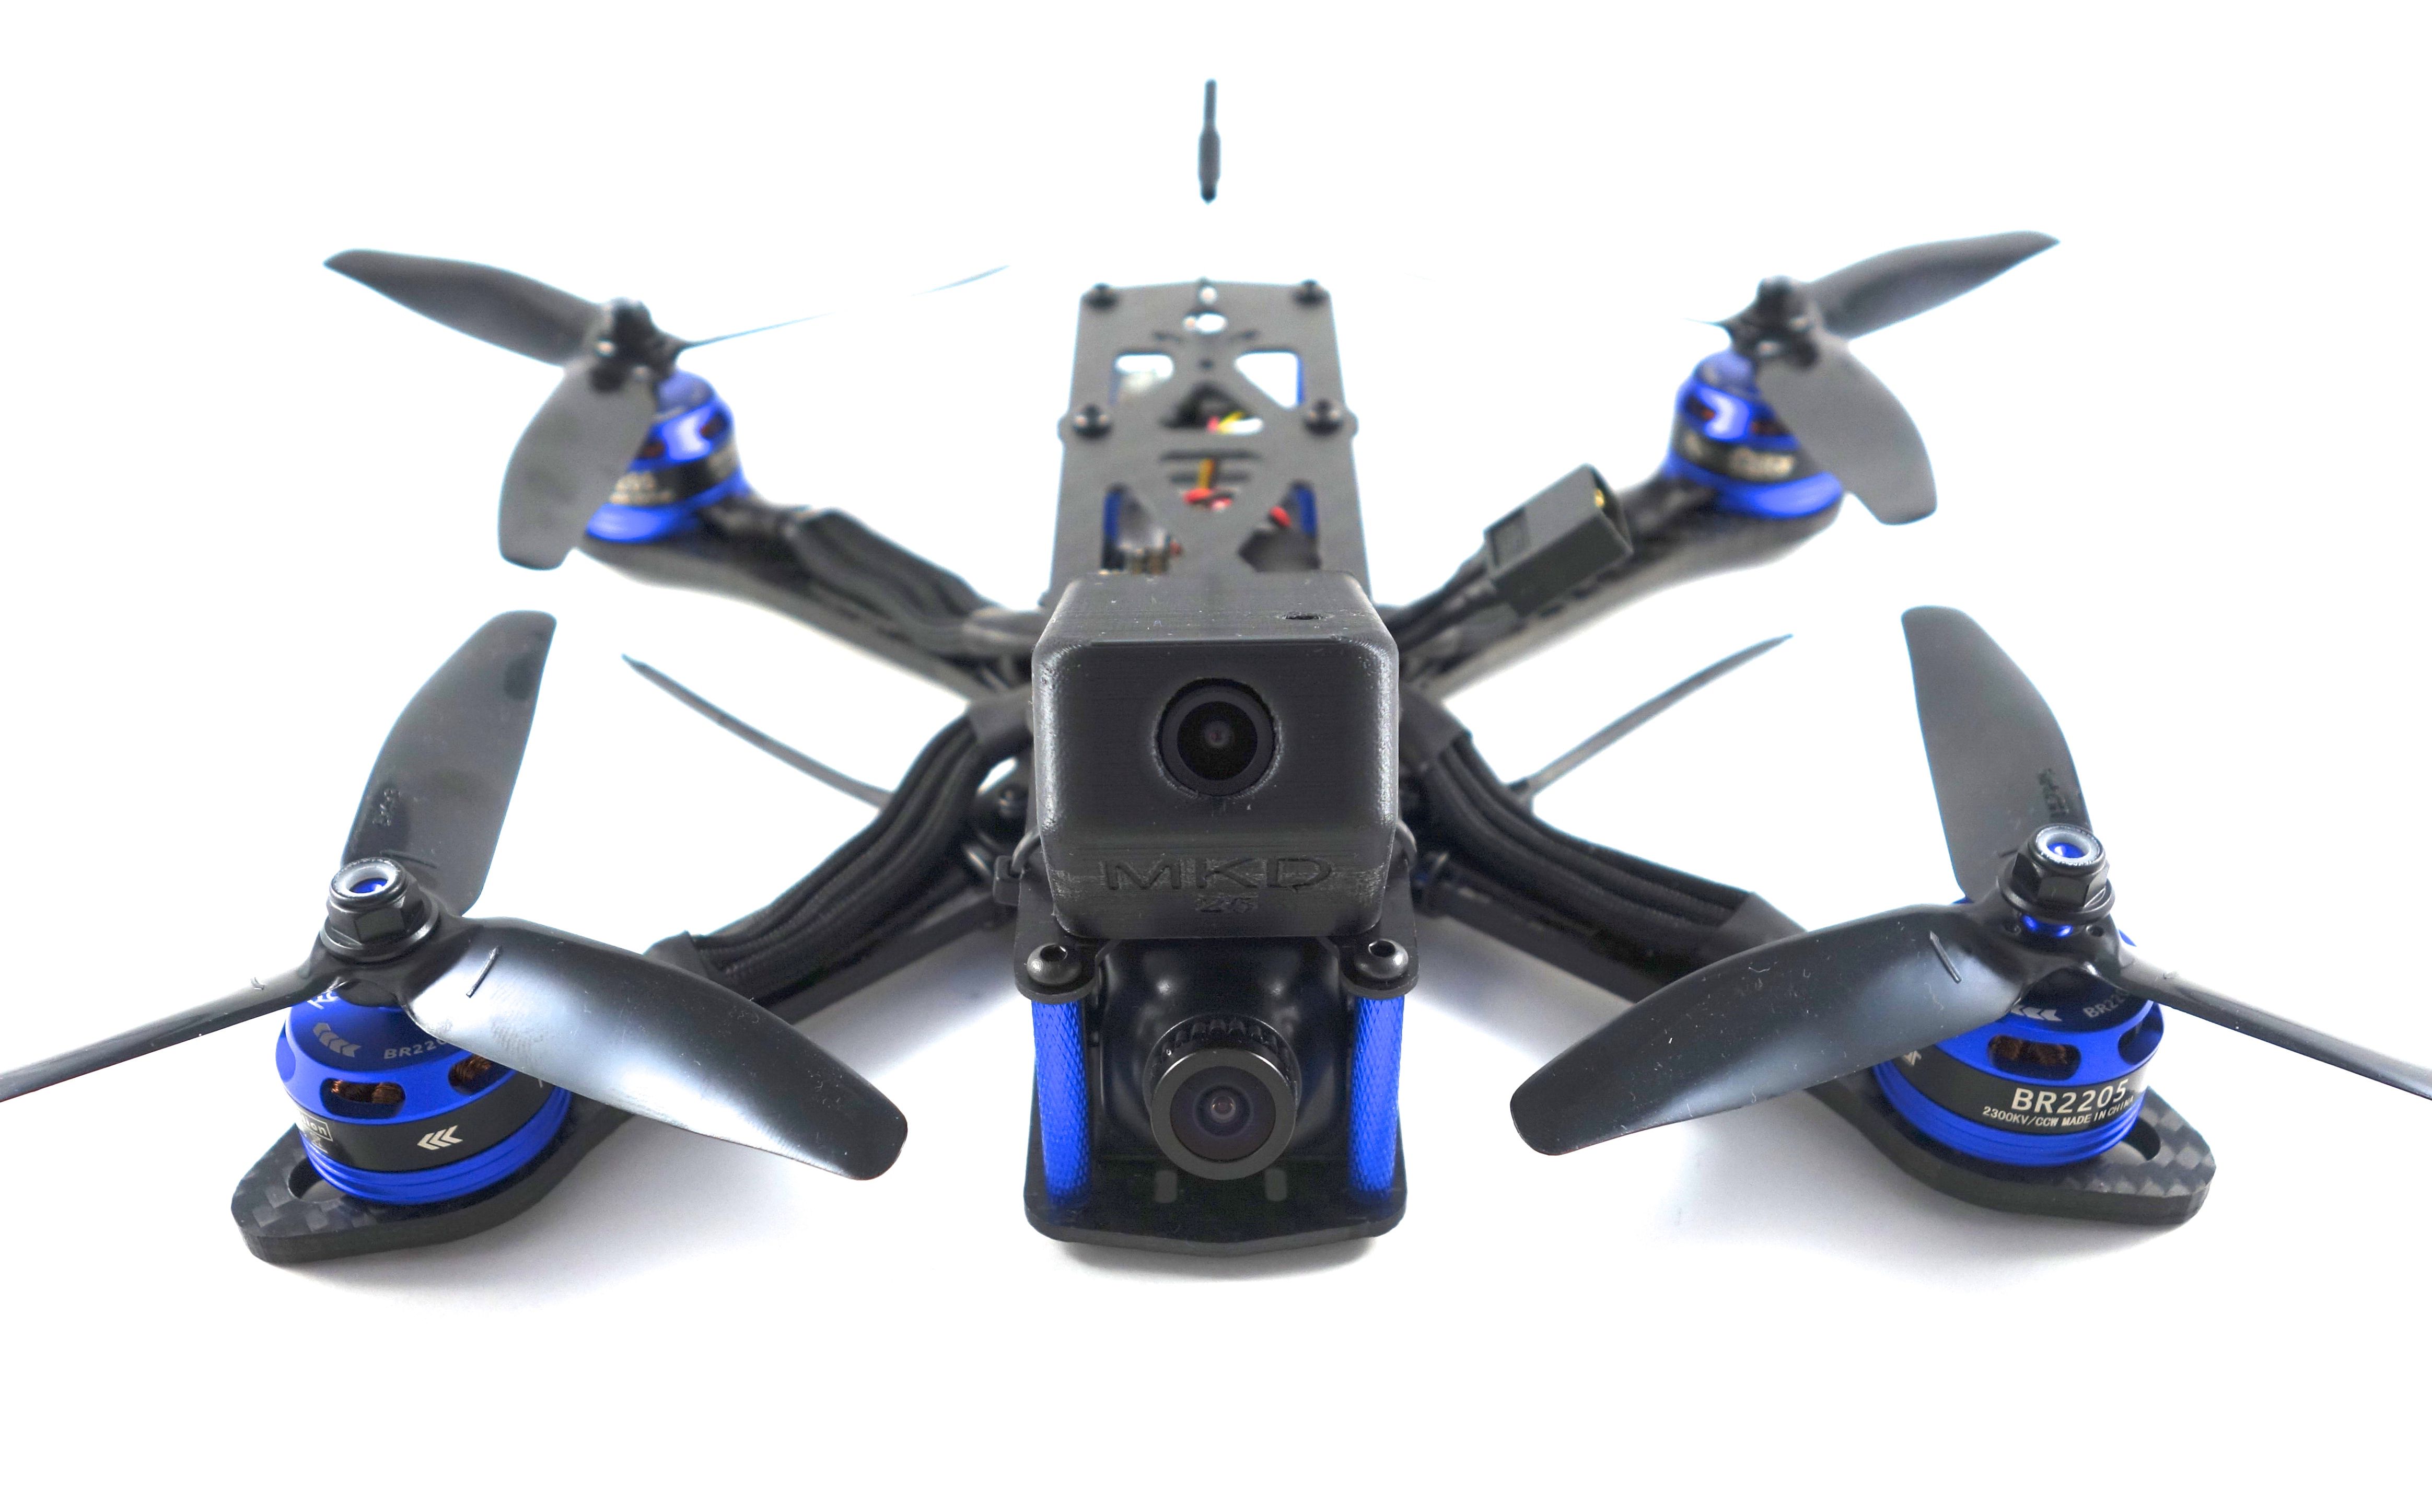
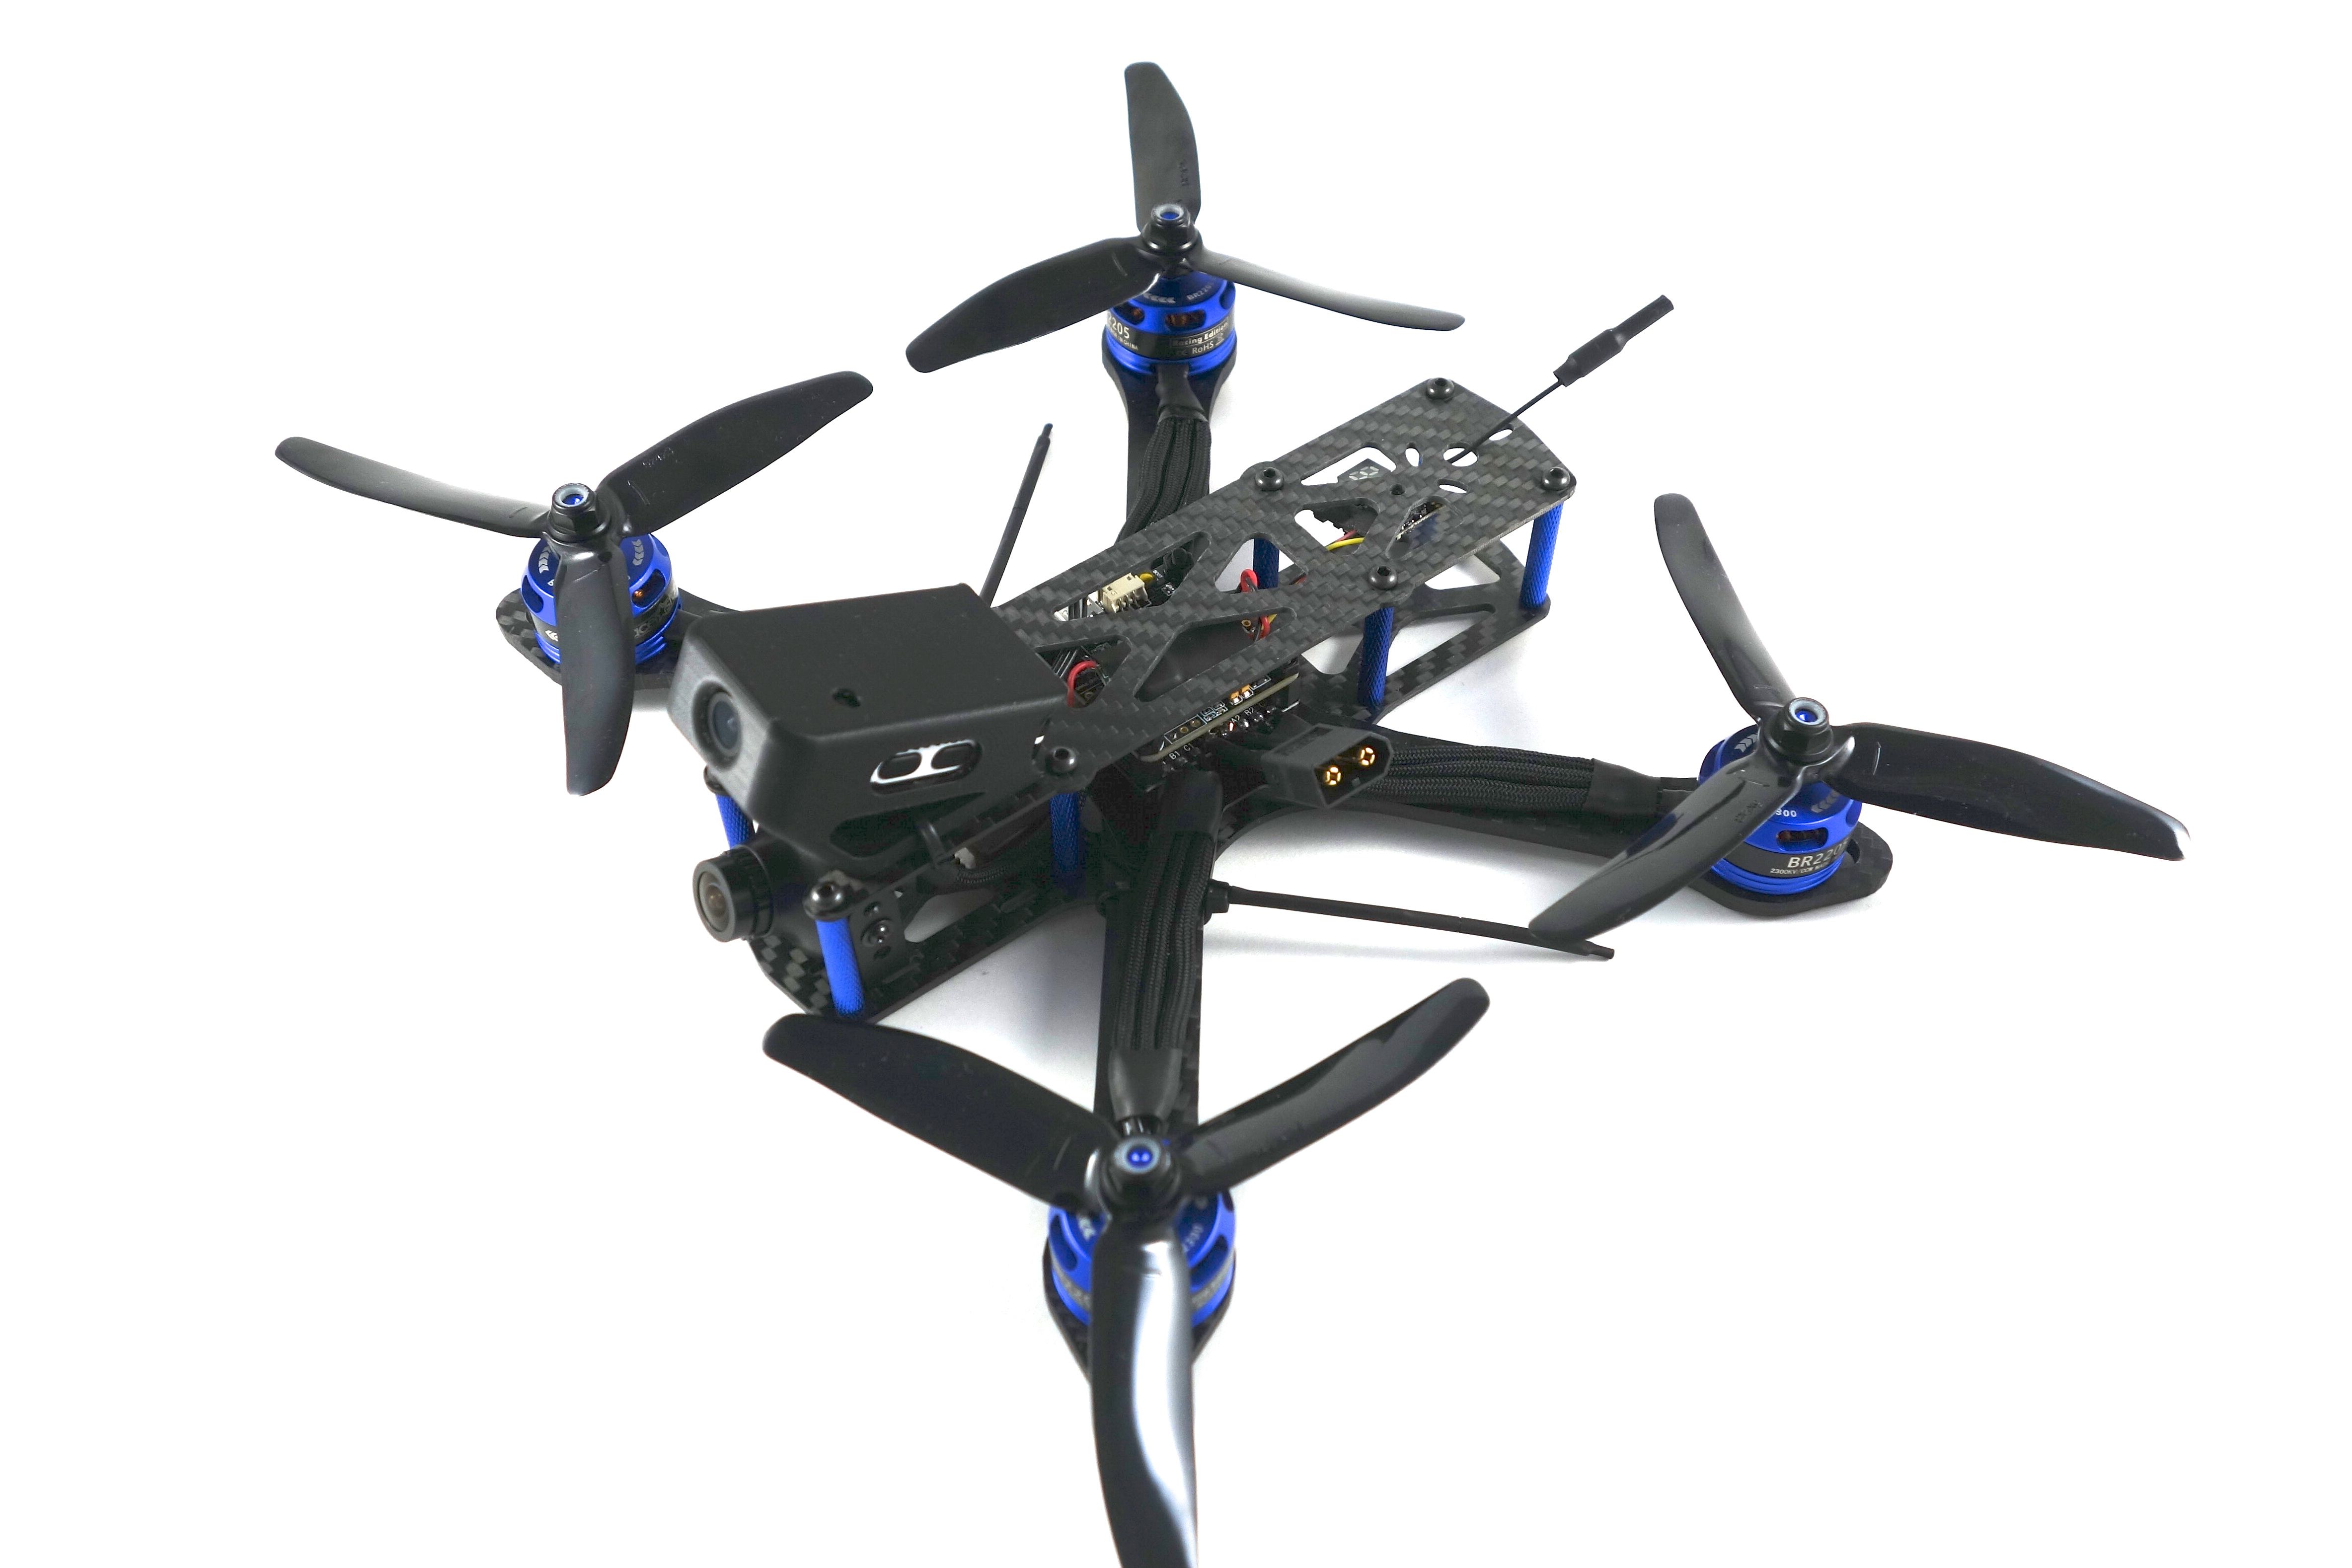
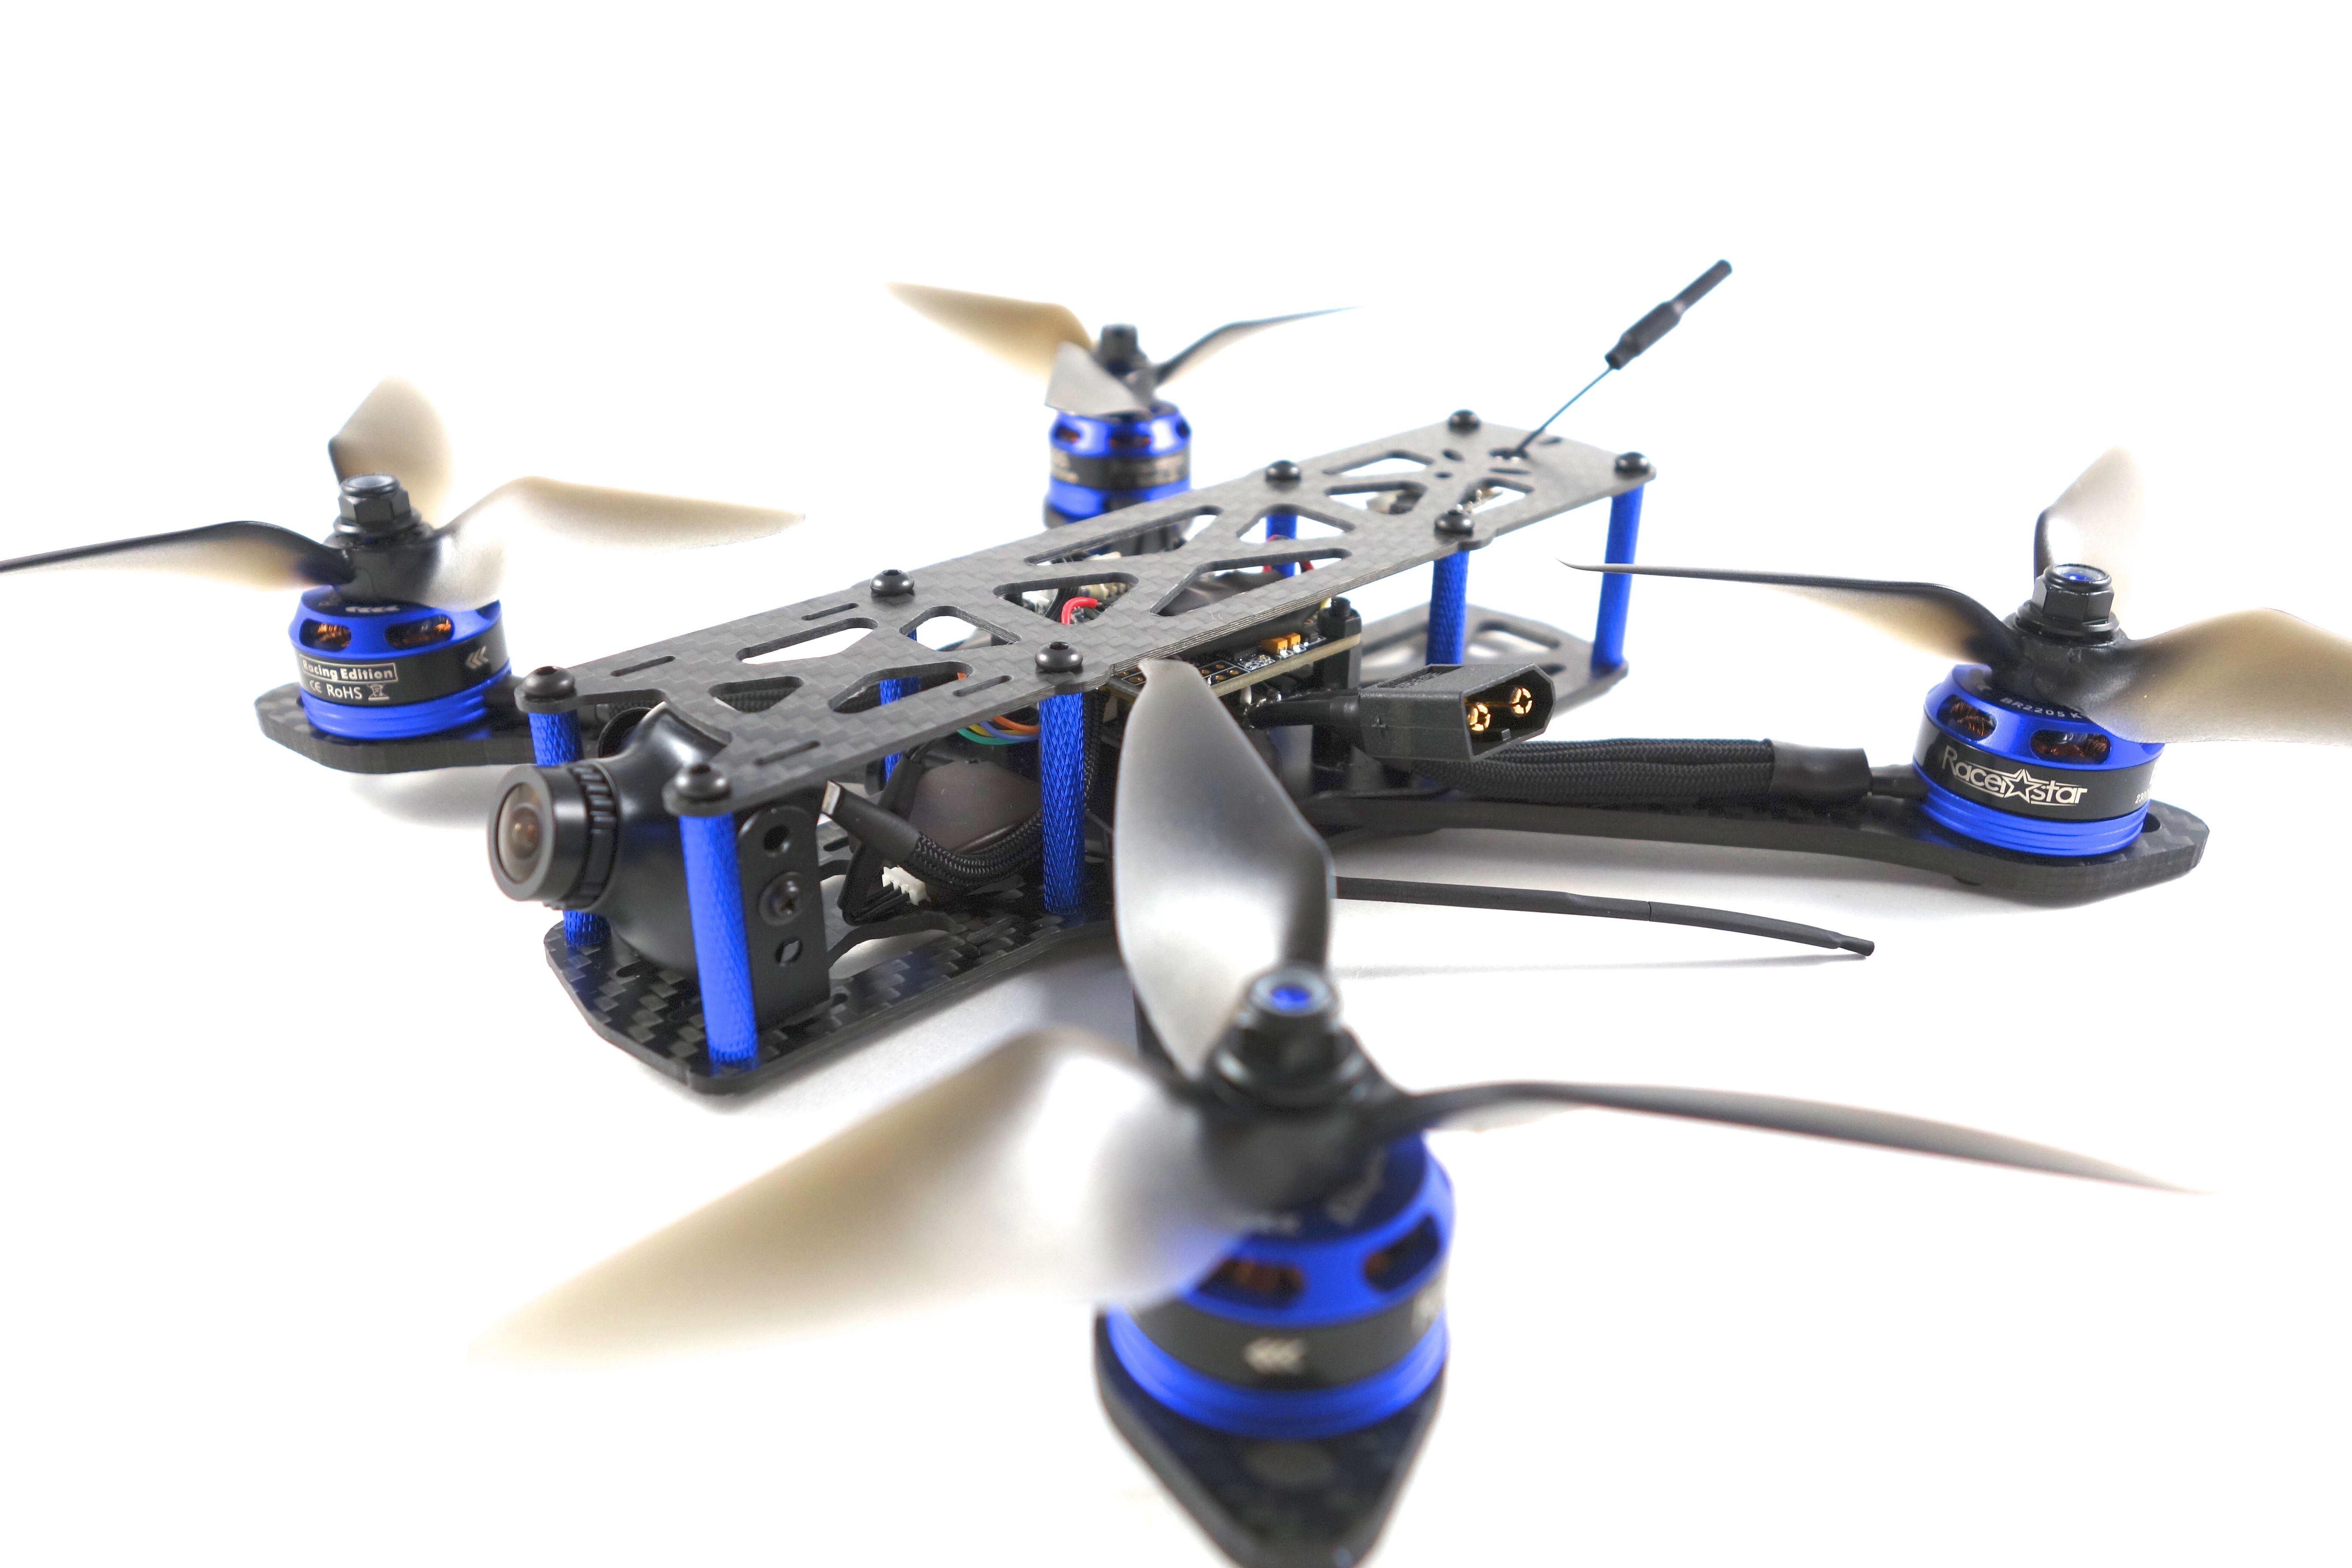
Final weight with Mobius Mini: 356g
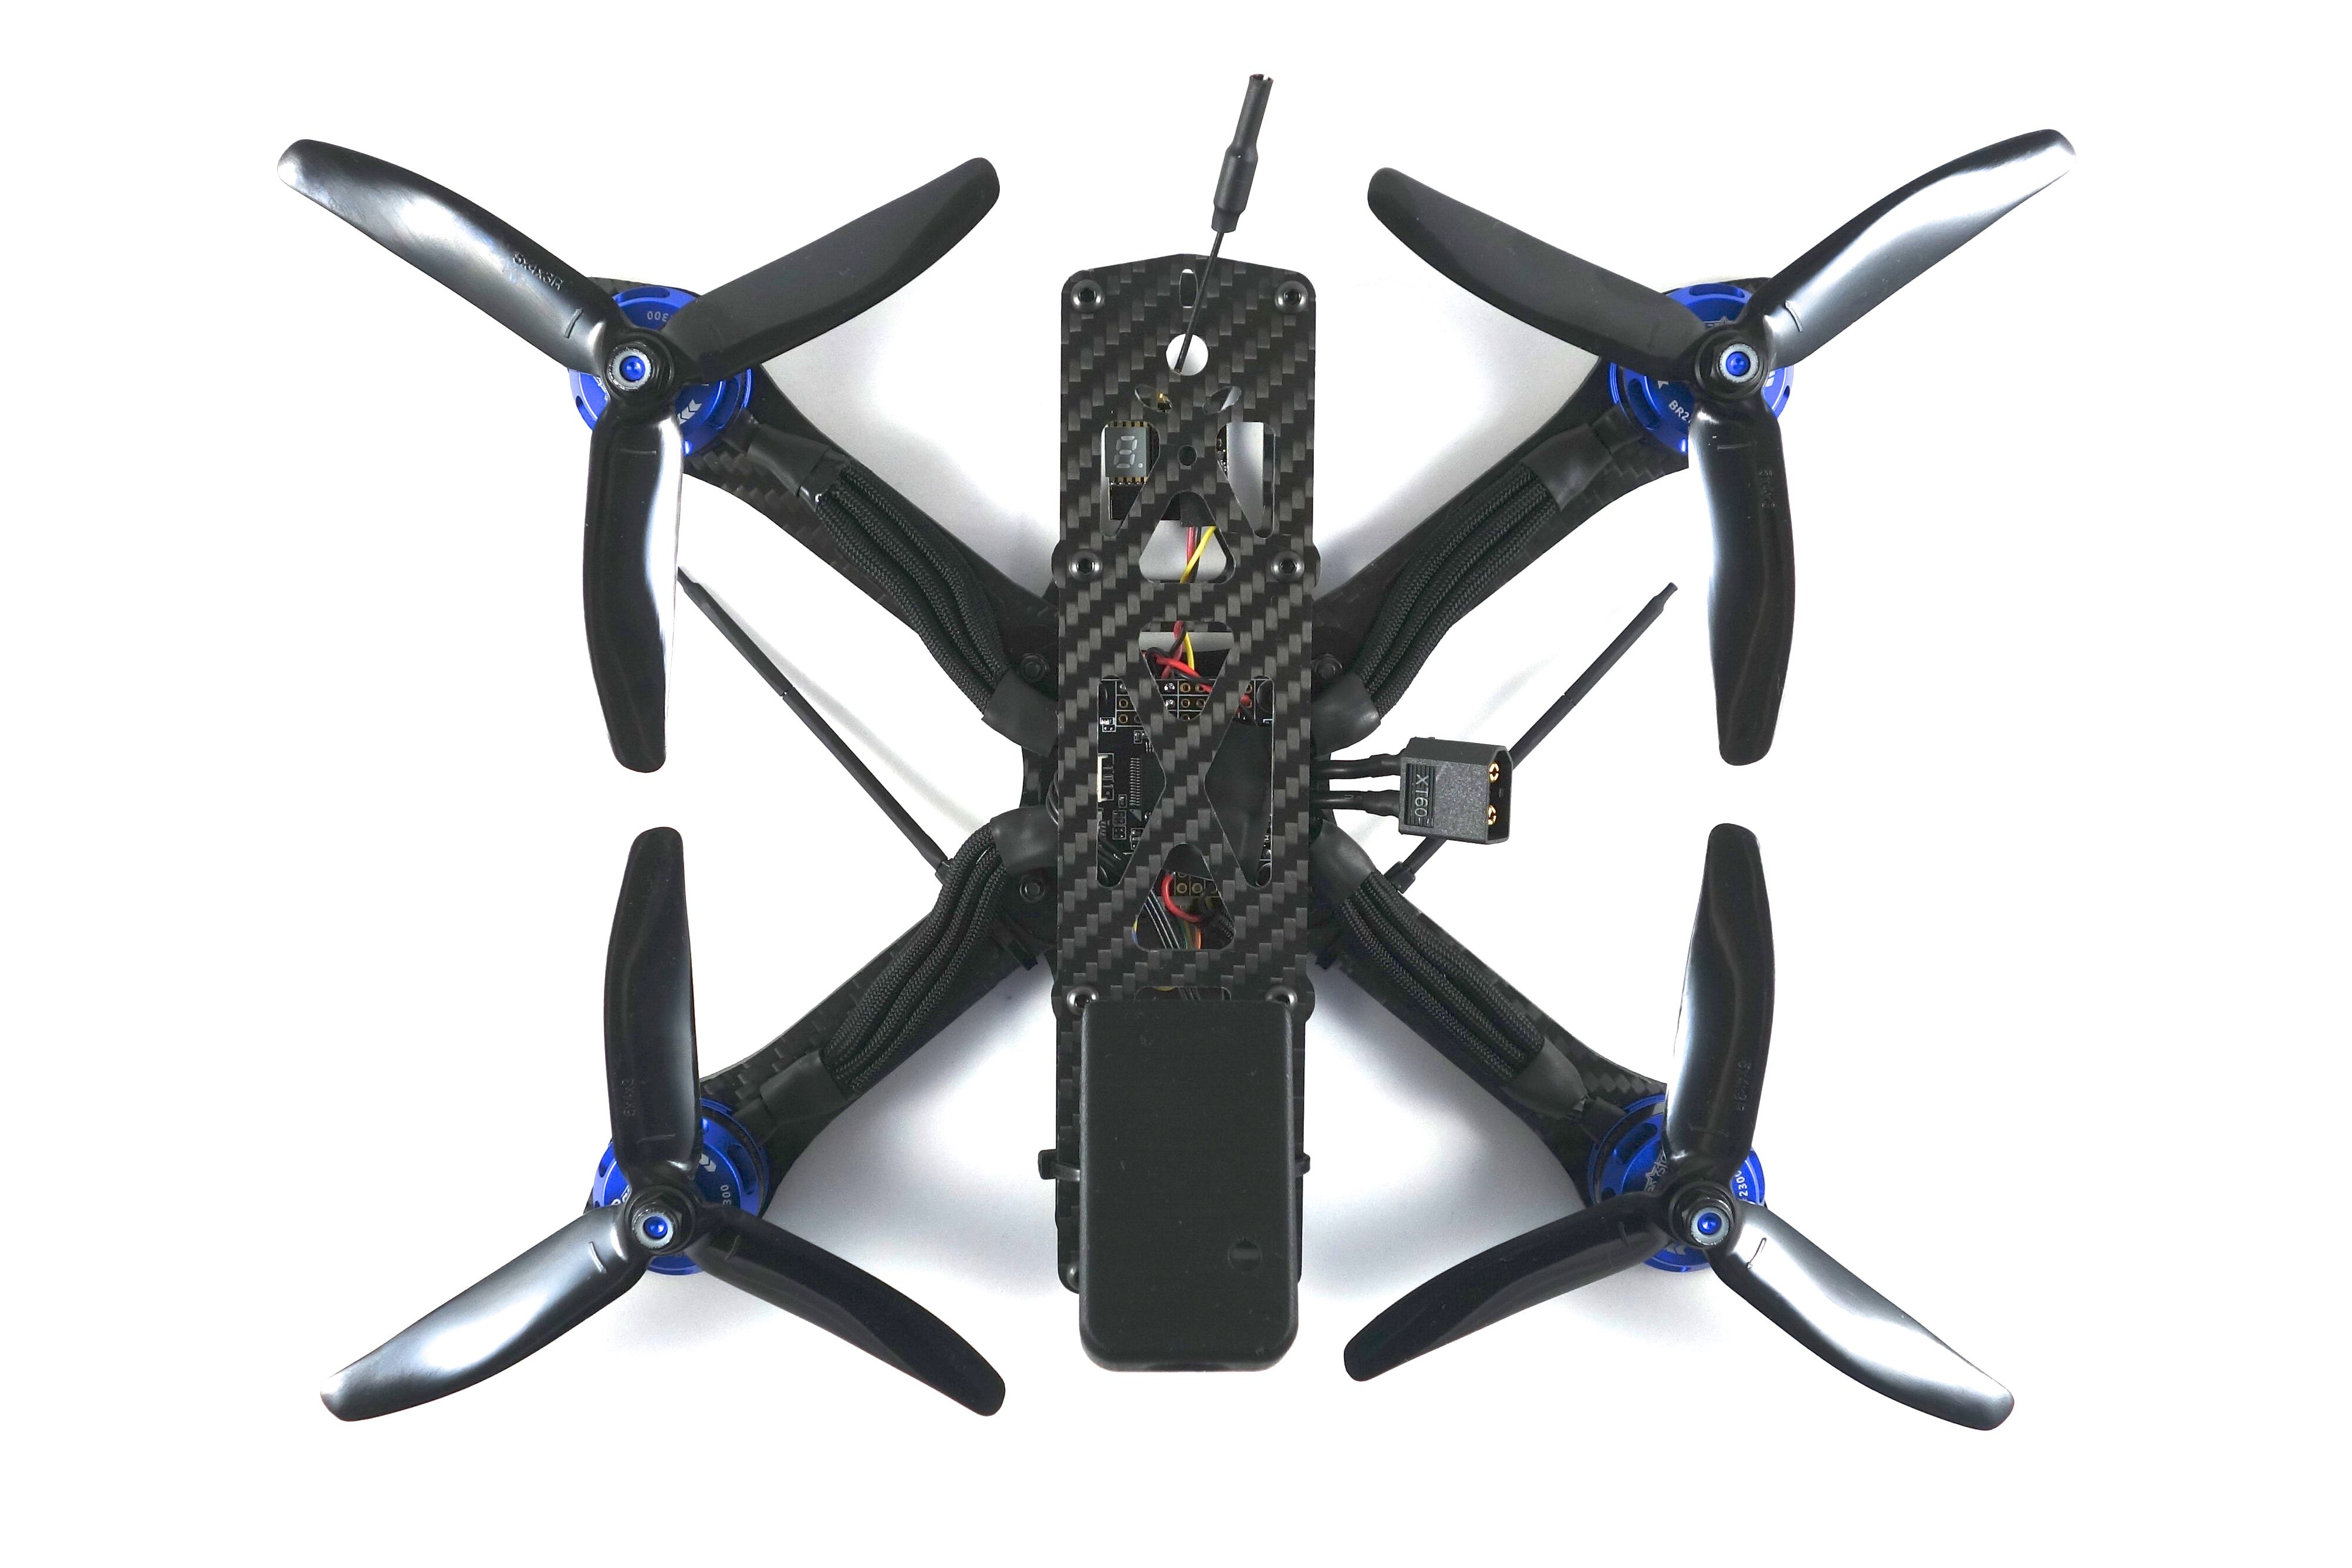
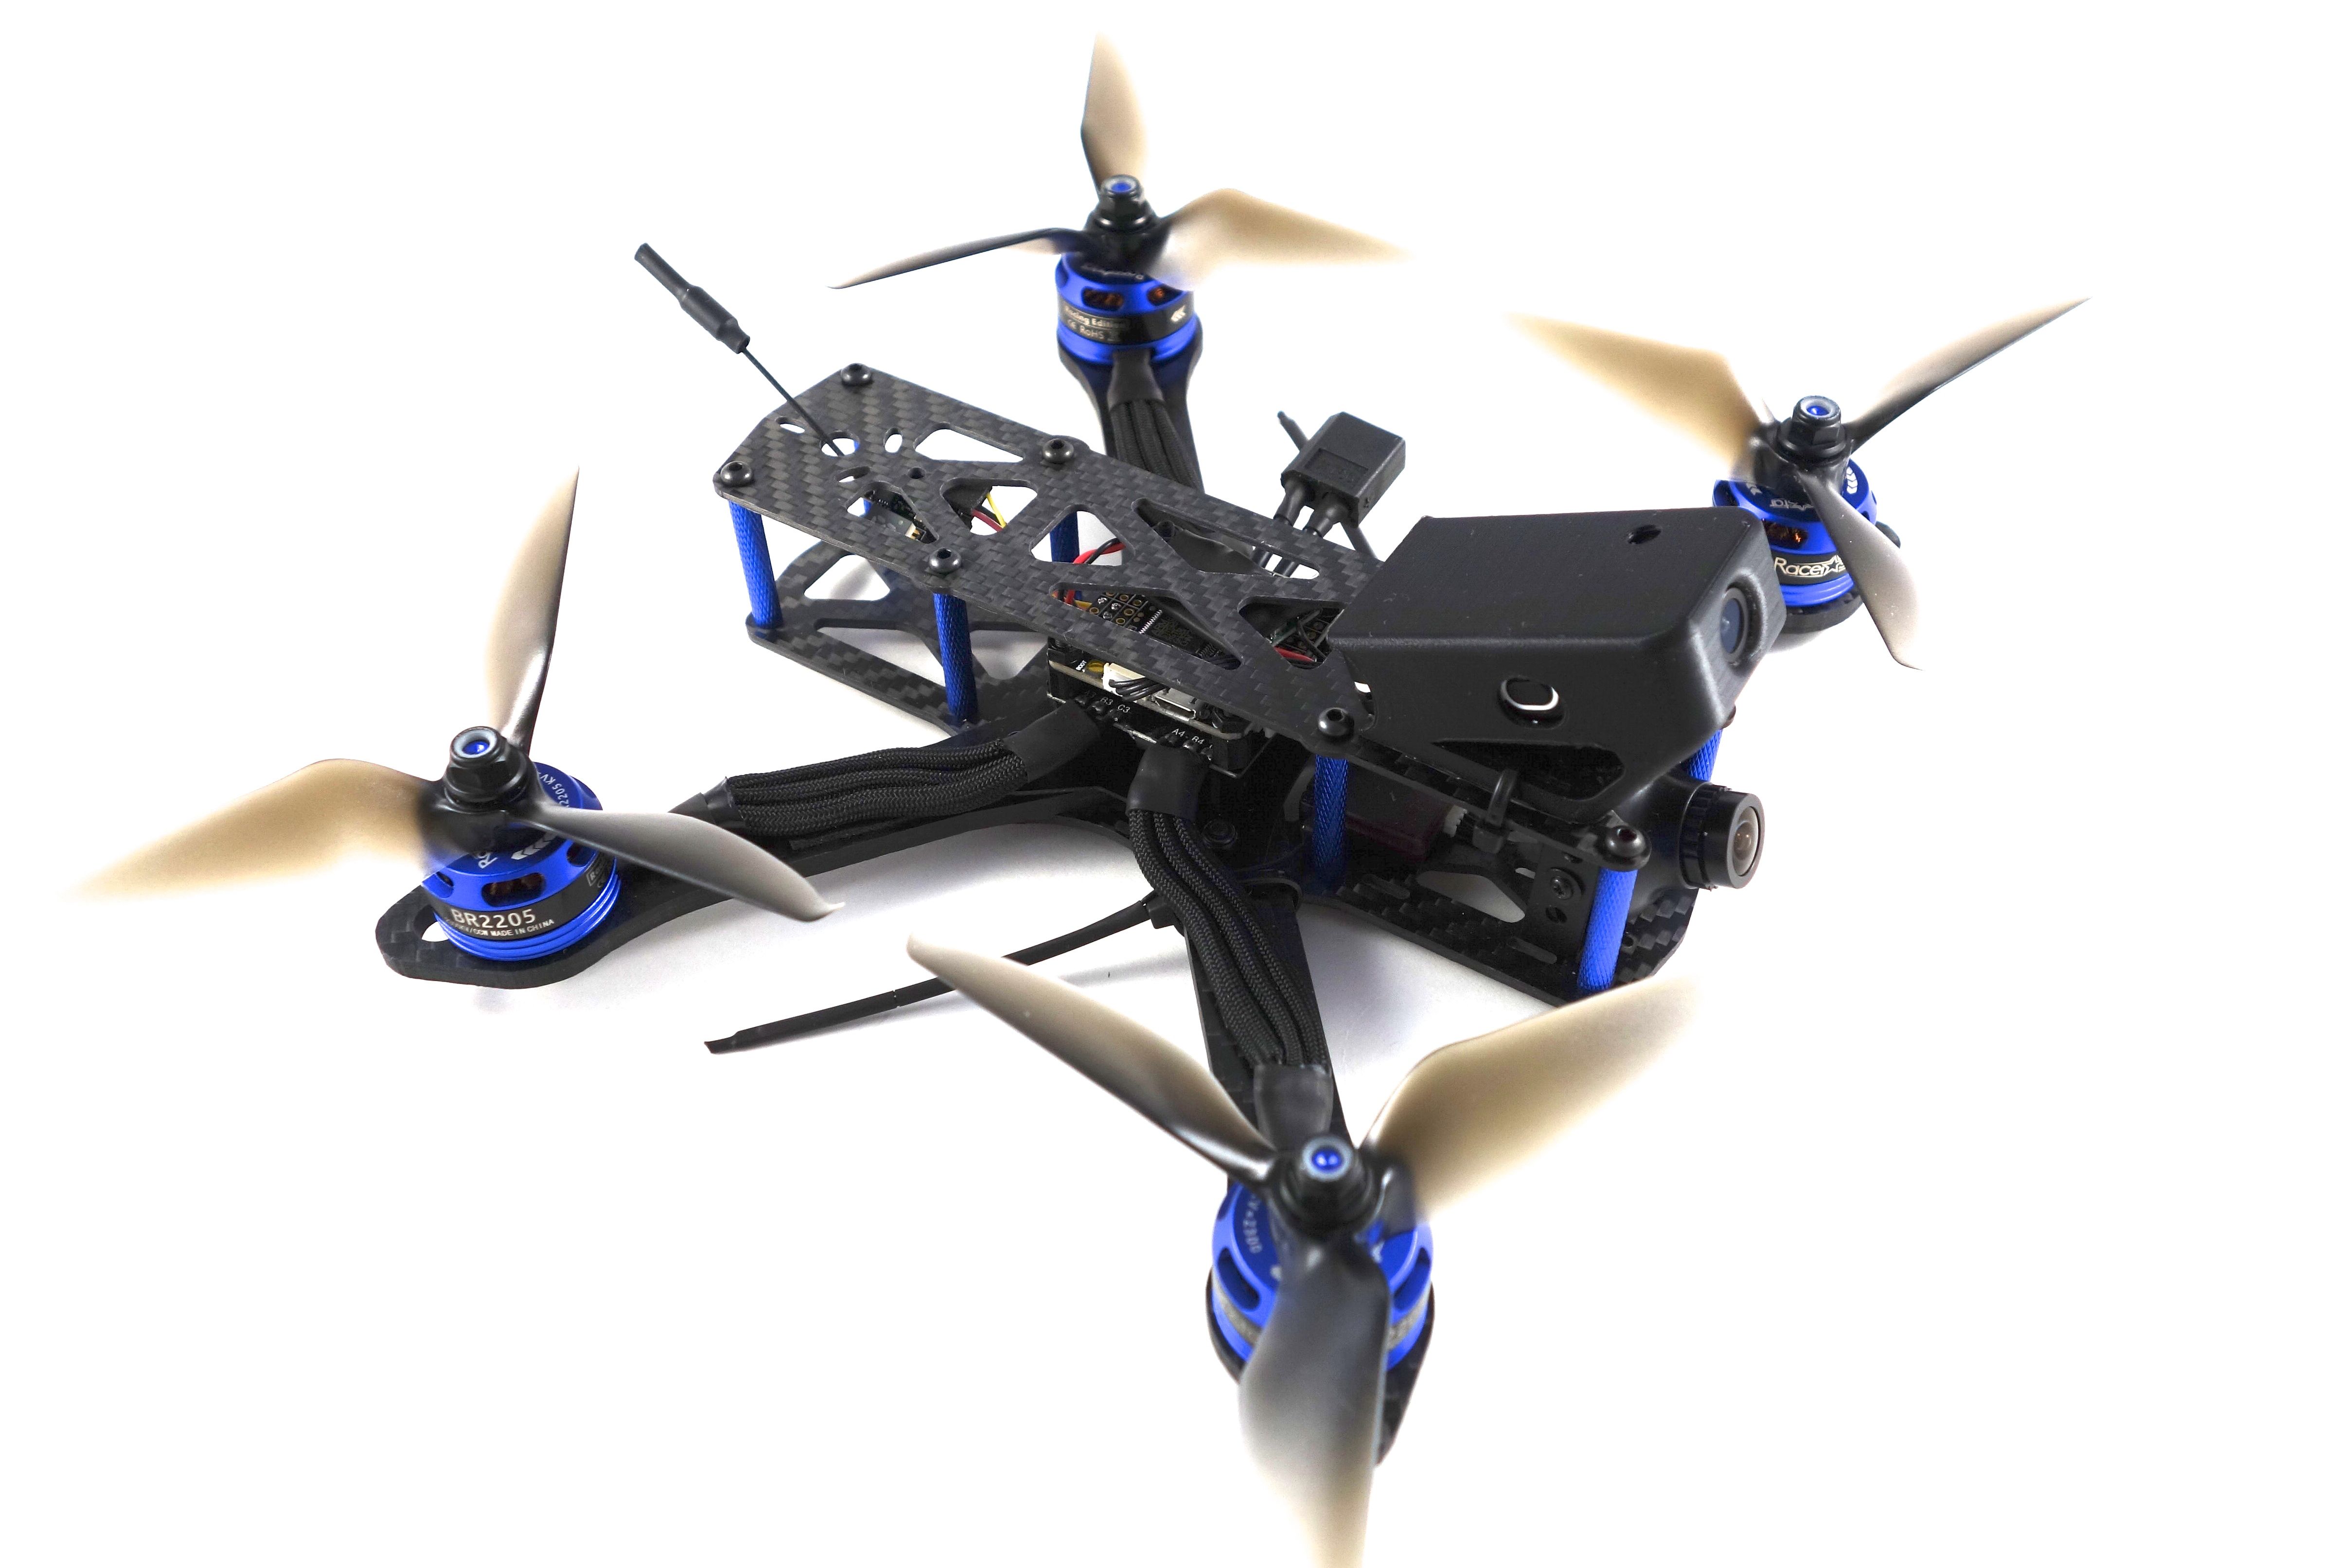
Photos
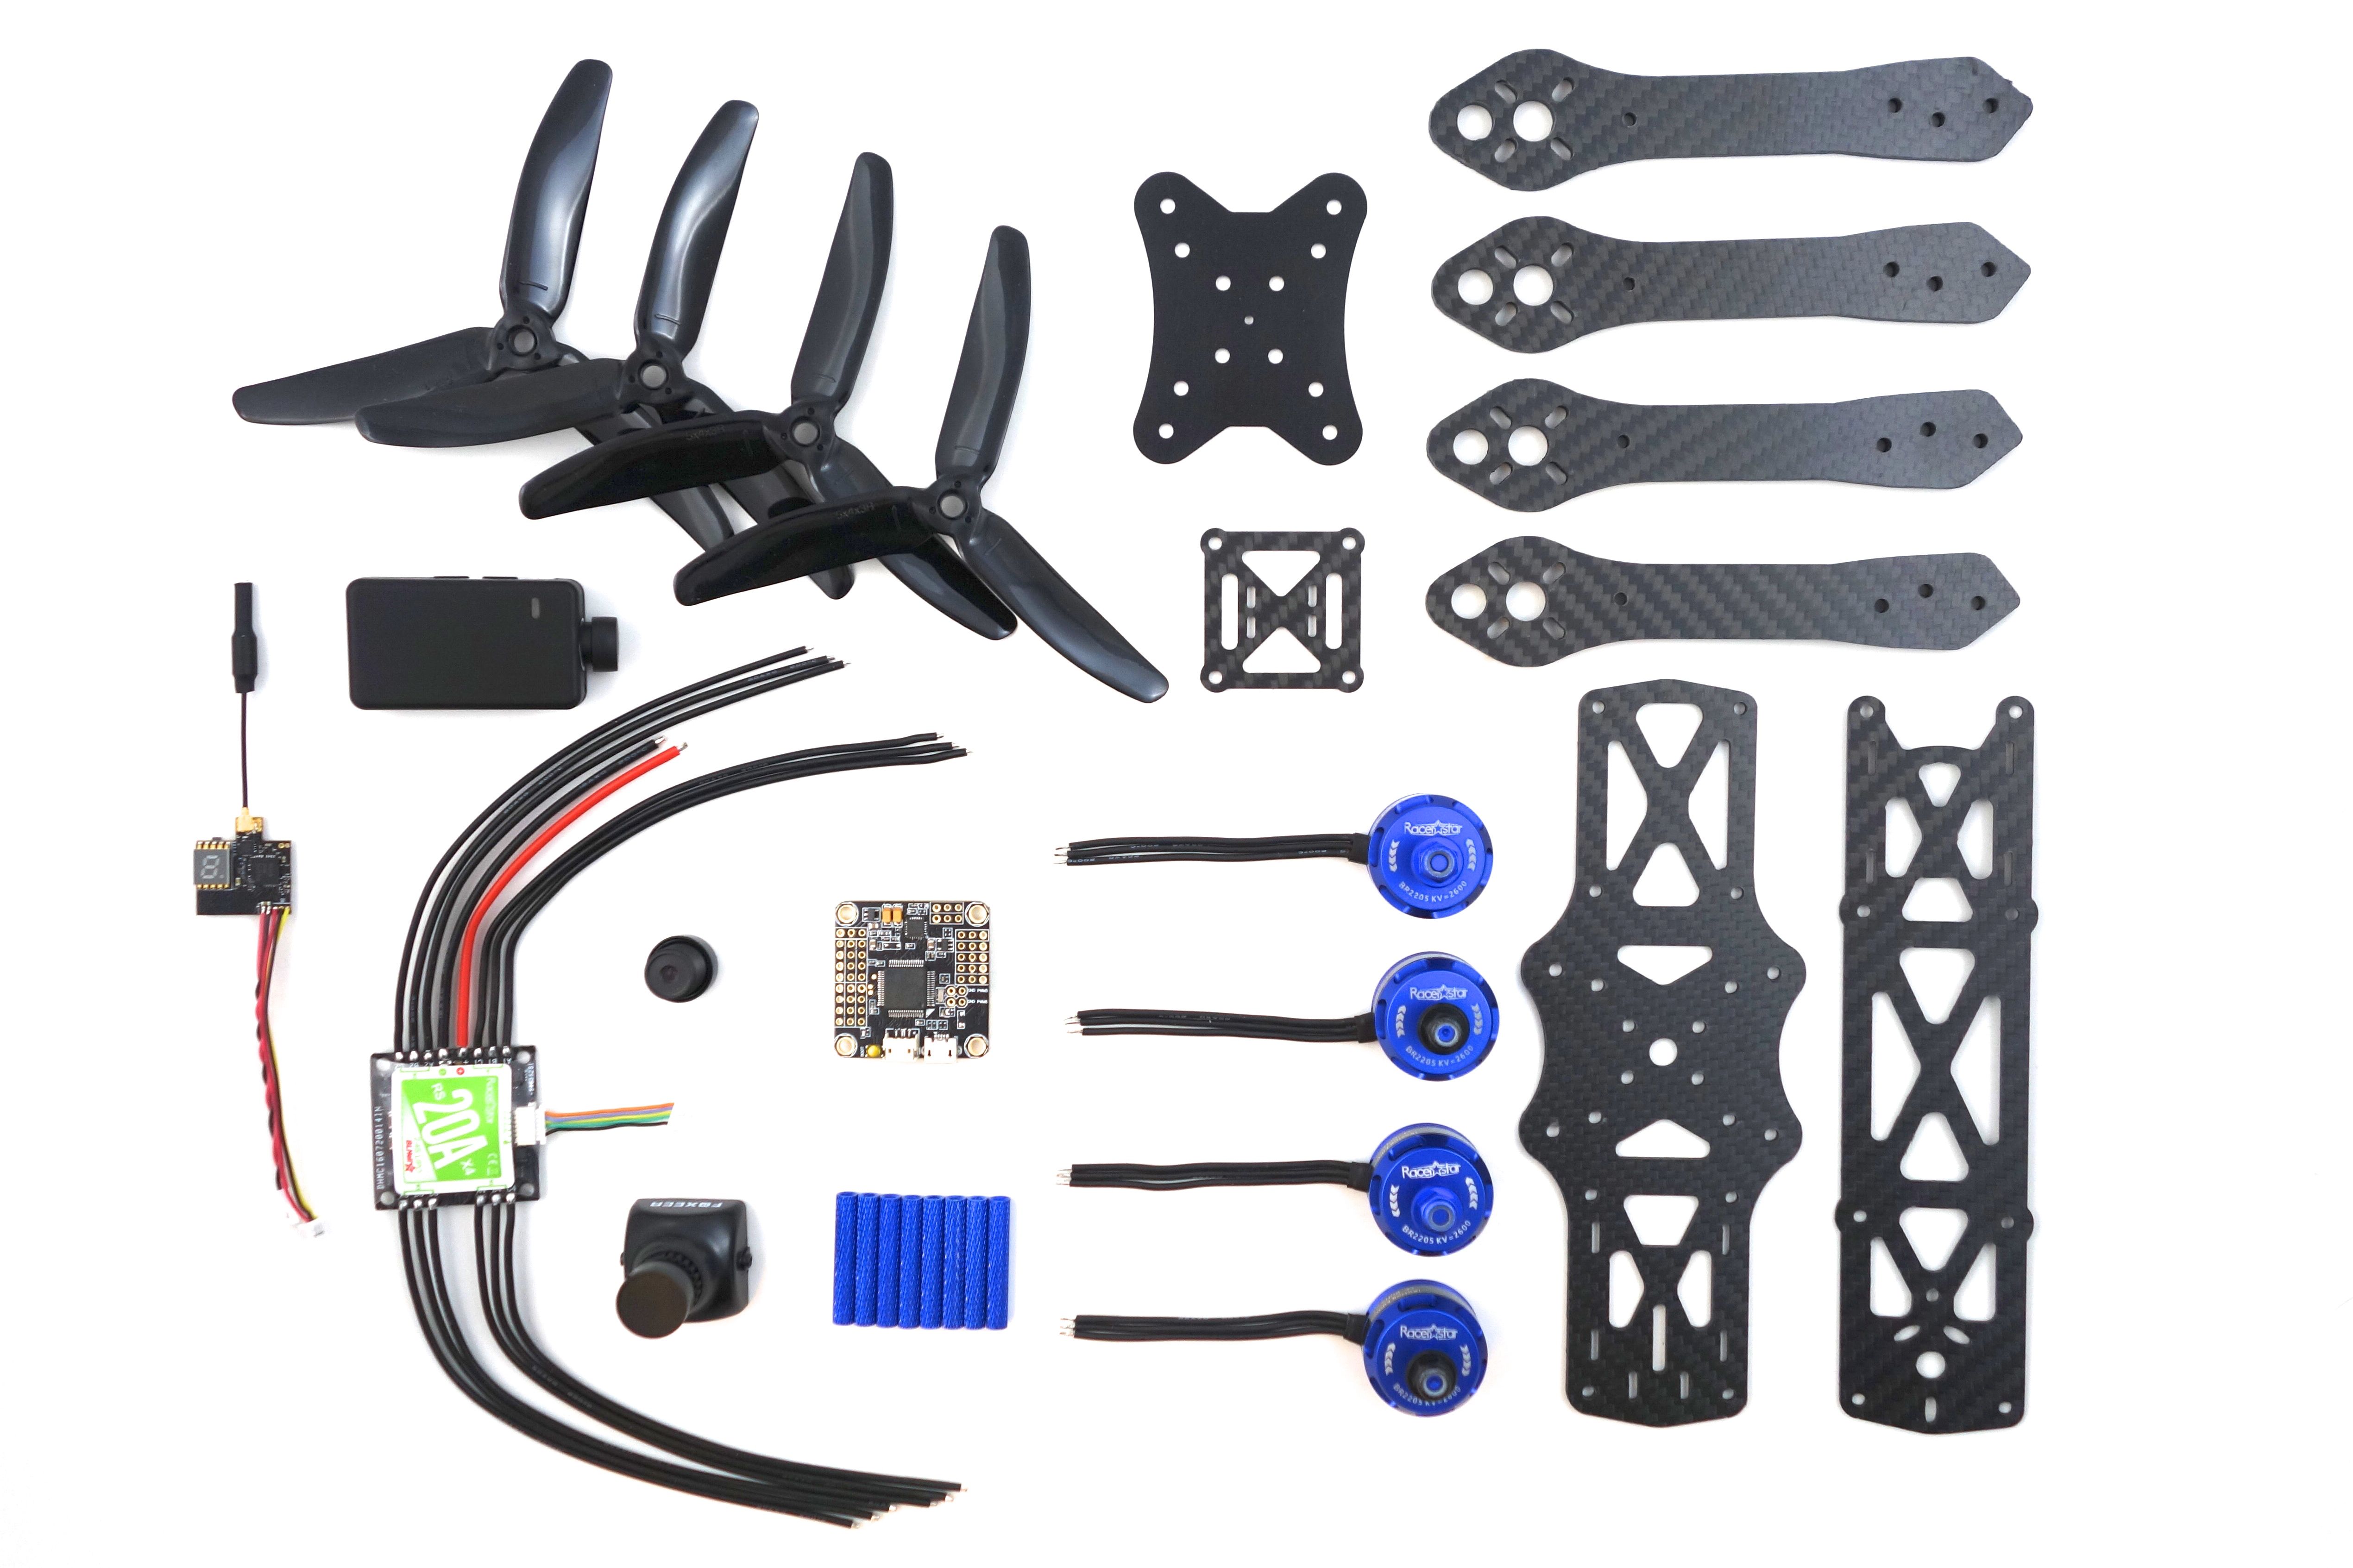


Part List
Show stores (3)
Question, I want to run the FC you listed in this build with a Racerstar RS30x4 30A 4 in 1 ESC with a built in 5V 3A SBEC. I also want to run a VTX that says its rated for 6-17 volts. Can i power the VTX directly off the battery pads on the ESC? I plan on doing this build with a runcam micro swift 2 and that VTX is supposed to be good. I think this setup will allow for some upgrade-ability in the future. I'm a first time builder in need of severe guidance lol
links for parts:
ESC - https://www.banggood.com/Racerstar-RS30x4-30A-Blheli_S-2-4S-4-in-1-Brushless-ESC-with-5V-3A-SBEC-for-FPV-Racing-p-1119836.html?p=3F201911077692015010&utm_campaign=rb&utm_content=zhangruihua

Hey Whiffles!
Awesome build! Been looking at doing my first build I currently have a Wizard but seem to keep upgrading parts so though I'd be best to start from scratch since I have more knowledge about it all now. Would u mind checking out my build list? Any input would be great!
https://rotorbuilds.com/build/5844
Hey!
Beautiful, super clean build. I absolutely love the paracord idea and refuse to use anything else now. ;)
I'm currently planning a Martian II build myself as a first racer (a first build as well, figured I'd be better off putting something together myself).
What I'm planning on using is a BG's F3 controller, Matek PDB and 30A BLHeli ESC (I'd like to use 4S in the future as well as 5045 props. Gotta practice that soldering!).
As for the camera I'd use a Runcam Swift 2 with the same VTX. As far as I know I wouldn't need a separate BEC for this config, right?
I also can't figure out how to wire the VTX and camera as I've seen many people do it in different ways.
Should I wire it through the PDB or wire the camera through the VTX? Does it change the amount of possible noise? What do you think?
I'd love your input as I can see you sure know how to put these together. ;)
Cheers!
Hello there!
May I say that this is an awesome build, and that I can't wait to build something similar to this with the help of your amazing pictures. Anyway, I'm sorry if this question was already answered, but where did you find that piece that took the place of the PDB? I was looking at the Frog Lite as well, but I figured it would just be easier to build in a Martian II due to its size.
Thank you!

I'm a huge advocate of 4-in-1 boards, but you'll get people on both sides of the fence. Certainly there is some risk in that you'll need to replace the entire board in the event of a failure, but I've got 6 builds with 4-in-1s and I've yet to have one fail. My flight controllers fail far more often. Personally I think the convenience and build cleanliness is well worth it. No need to protect your ESCs from prop strikes if they're in the stack.
That's good to hear. I first bought parts for a quad (The FPV system had some incompatibilities so now it's an 4S LOS....thing) On the topic of Flight controllers, I'm curious how you feel about these super cheap Omnibus F4's and how they compare to, say, the DYS F4 board. There's quite a jump in price, I'm just curious if you think it's worth it.
Thanks again for your responses.

Hey Whiffles,
just starting with FPV racing and keen to copy your build.
anything you would change now a few months are past?
i allready got my RC Turnigy Evolution now i only need the rest.
like to hear from you!
It really depends on your target price. This is still about as cheap as you can go without using junk parts, but if you don't mind spending a bit more you might want to consider 30A ESCs. The Racerstar StarF3S board will do the trick for nearly the same price as the two boards and the regulator board listed here, but you may have issues binding the Turnigy, so I'd look into that. Other than that you can consider a different frame like the Frog Lite 218mm which is pretty nice, but it's a tighter fit. The Runcam Swift is a nice choice if you want to do HD recording, but it's not quite available yet.
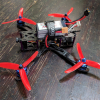
@whiffles I'm just getting into the hobby and I decided that this would be my first build. I was looking hard at the Eachine Wizard to start, but I wanted a bit more of a challenge than a pre-packaged kit. I'm proud to say I built this drone and it is just awesome! Thank you so much for the detailed pictures and descriptions. You've made so that even an absolute beginner can replicate the build easily.
Here's a photo, if you look closely you'll notice that my soldering and wiring skills are absolutely terrible. But, I think this is a great starter build if you're patient and careful!
Hi, do you have any recommendations for PIDS on this build? or atleast a guide on how you set the PIDS?
Thanks,

what are those racerstars like?

I like the direction you went with the paracord, looks great! So satisfyingly symmetrical.

SOLID inexpensive build. Never thought I would say that. Under 200 without the Mobius HD cam, almost disposable!! Only change I would make is to go 30A on escs (always for future-proofing and ease of mind while slamming throttle). I checked it and it is 20 dollars more.
Yeah, I'm impressed. I've been flying it these past few days and it's a lot of fun. What I love about it over my GEP-TX5 is the top mounted battery. I can land anywhere to adjust my PIDs via OSD and pick up right where I left off.
Since this was a budget build 30a ESCs were off the table. I was just trying to get the price as low as possible. The 20a performs just fine for what it is.
Clean build! I would like to build this just without the FPV stuff for LOS. I was wondering do I need the BEC you used or can the 4 in 1 ESC power the FC because someone said the racerstar ESC doesn't have enough power or something to power FC and should I use a PDB? I am buying the Revo F4 because the one you used is out of stock currently. Thanks!
I've got bags and bags of spare wire from building these things, so that black and white is just some grab-bag wire. If you do this long enough you'll have more wire than you know what to do with! If you know anybody personally who builds these they've probably got some wire to fit all your needs. You should be able to use the 22AWG to power the FC.
nice build, specially with the wire cord.

This is my 3rd build using an Omnibus board and they've been wonderful. While this is a clone it powers up just fine and I see no issues. They're made to handle up to 4S lipos and have a built-in 5v BEC. My favorite FC hands down.
If you're concerned you can always power it with the 5V BEC used to power the camera, but then you'd lose your voltage reading over OSD.

Guides & Reviews

AirbladeUAV has done it again and this time they've brought long range to the 5" class! Based on the popular Transformer Mini, the new Transformer 5" Ultralight adopts a lot of the same design philosophies with larger props and more payload capacity. It can fly upwards of 20 minutes on a 4 cell Li-Ion battery pack and in ideal conditions it's got a range of over 4 to 5 miles. In this guide I'll walk..
Read more
With the release of the DJI FPV Drone cinematic FPV has become a lot more accessible, but you certainly don't want to crash a $750 drone! The QAV-CINE Freybott is a compact, lightweight cinematic FPV drone that can take a hit and keep going. It's a lot safer to fly indoors and around people. With a naked GoPro or the SMO 4k you can capture some great stabilized footage. In this guide I'll show you..
Read more


Quick question, would you say there room enough to use smaller stand-offs and make a lower-profile build with this? Maybe swap out the cam?
Check my updated version of this build. It uses 25mm standoffs. If you use a Runcam Micro Swift it's certainly doable.