
Check the latest revision, the Wizard Killer Mark III
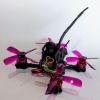
This is an even cheaper followup to my original Wizard Killer build. If you catch the sales and coupons just right you can build this for $100 excluding the cost of the receiver. This will perform nearly identical to the original Eachine Wizard except it offers a handful of additional features like OSD, Dshot, and Blackbox. This is a relatively easy build and should be perfect for a first time builder.
To build this you'll need a few extras not listed below:
- Blue loctite
- Shrink tubing (various sizes)
- 16AWG silicon wire
- 28AWG silicon wire
- Zip ties

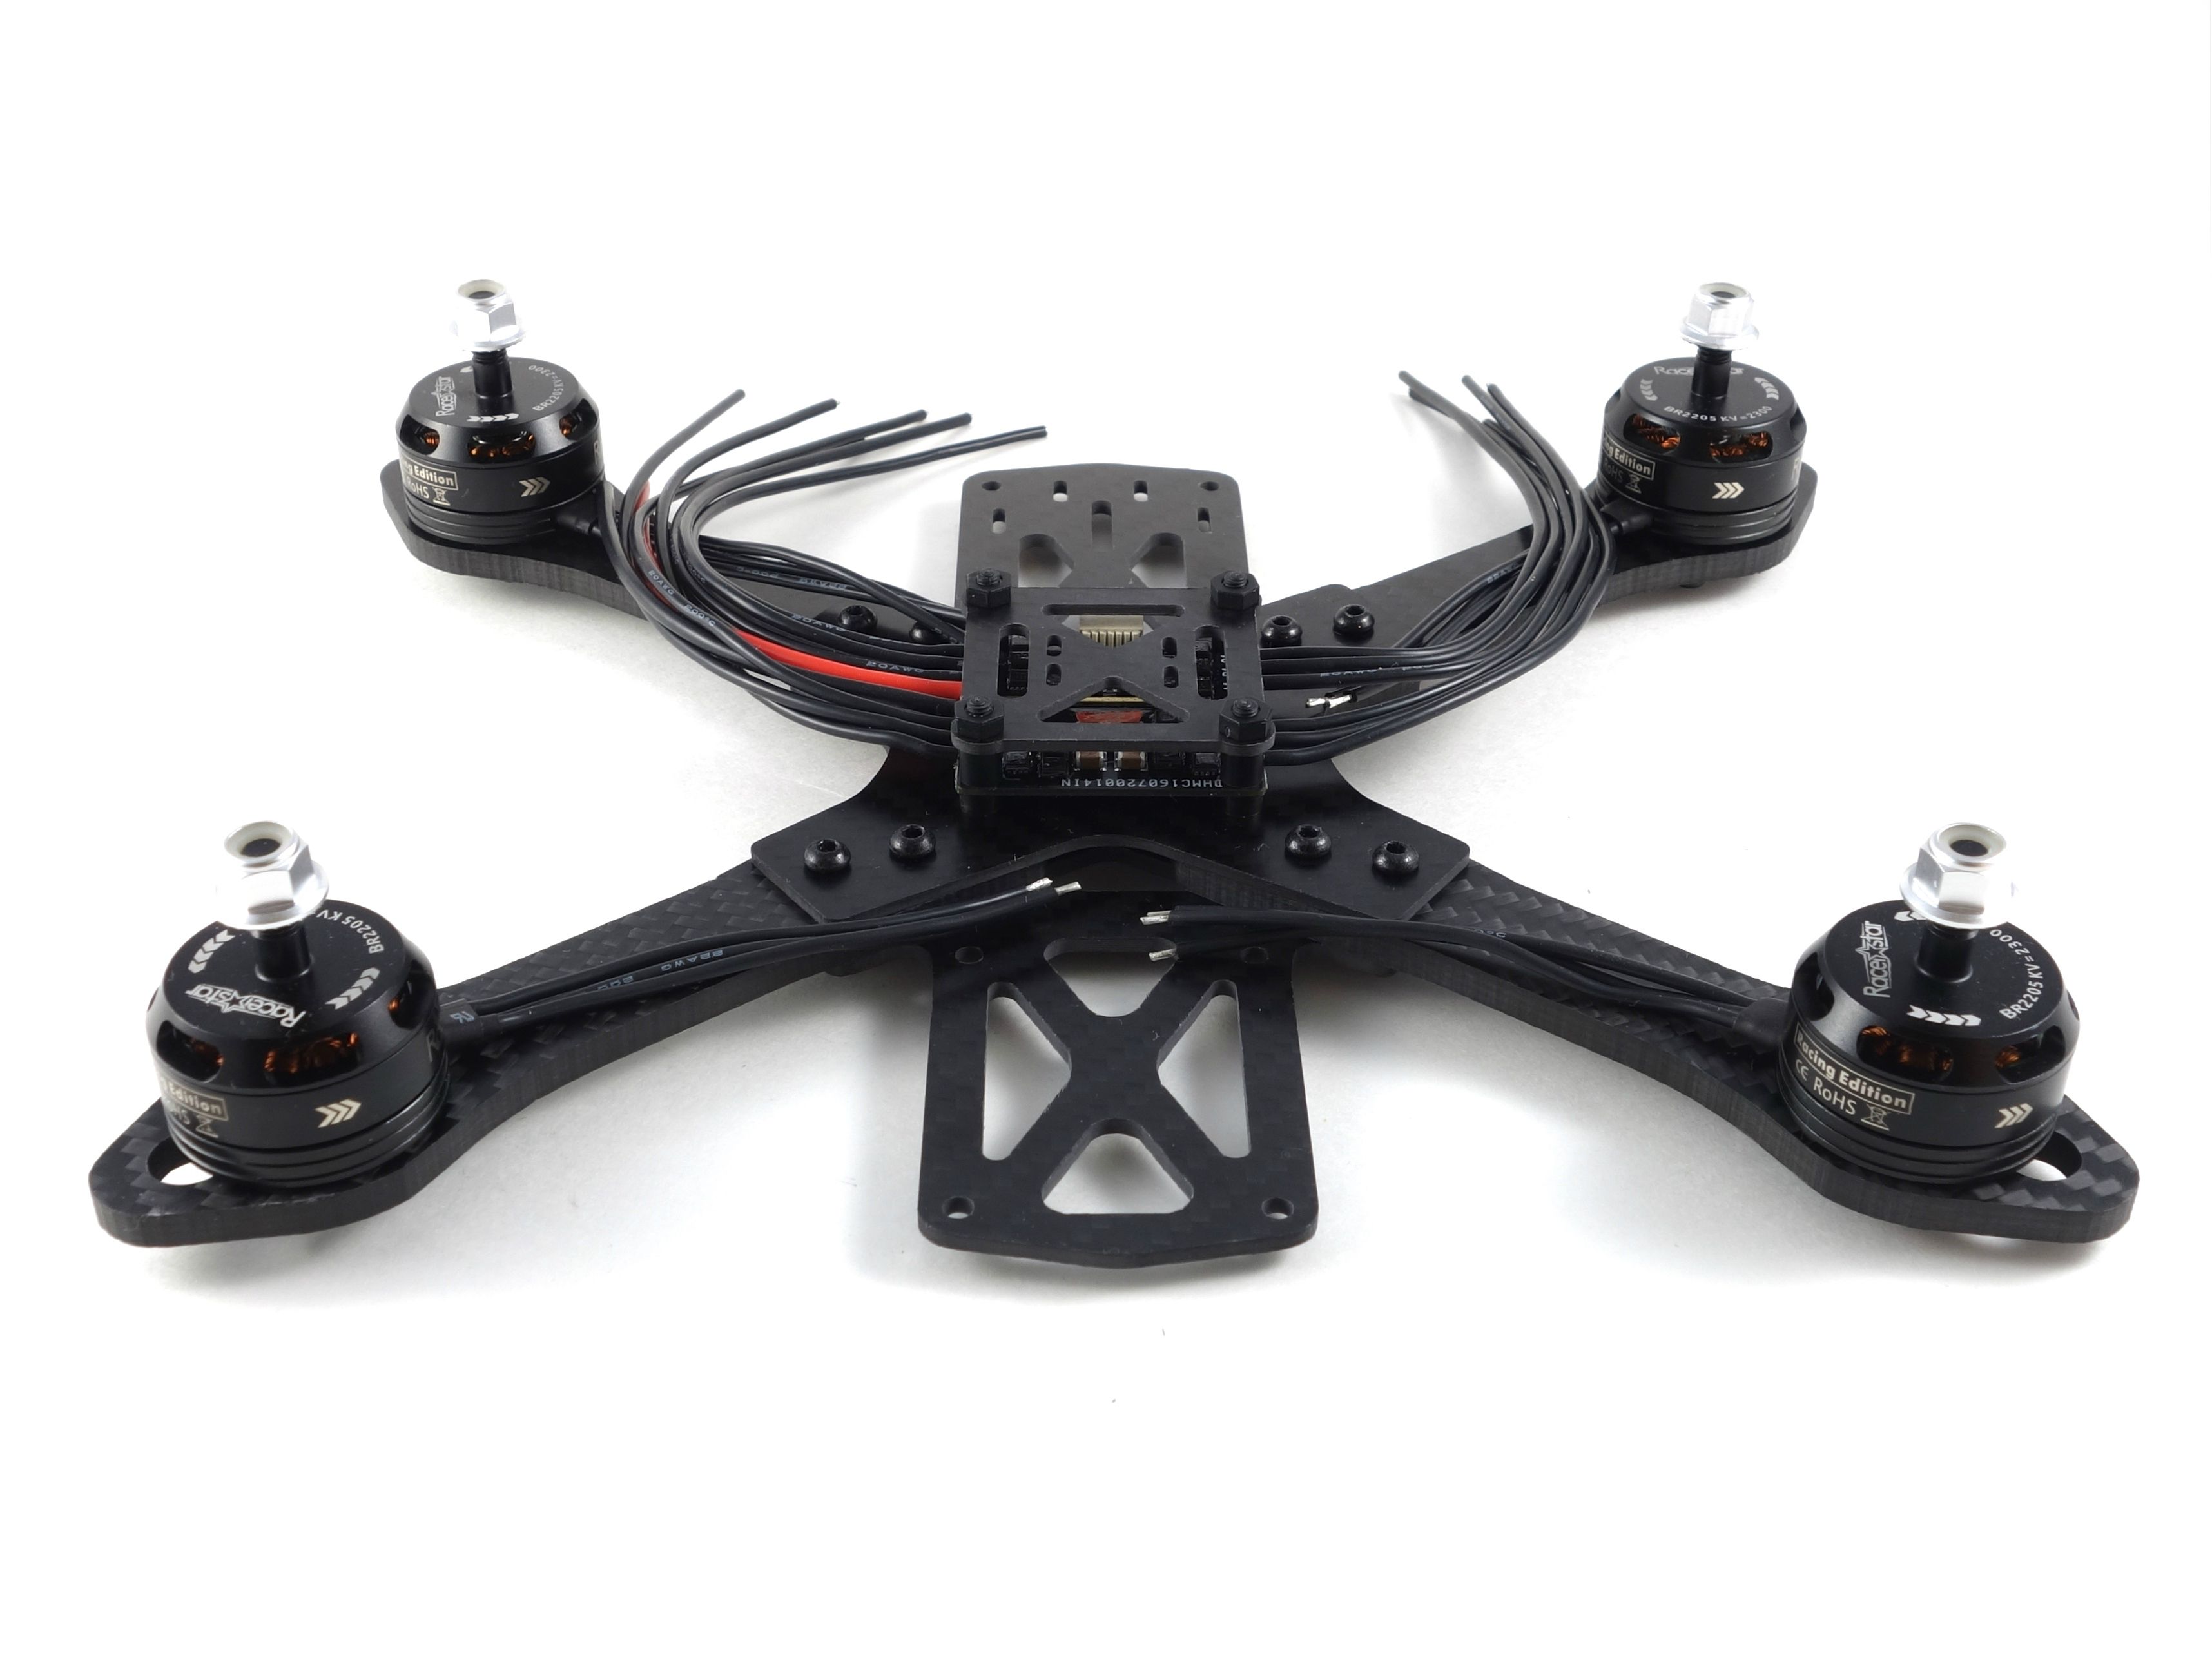
Frame Assembly
The first thing you'll want to do is assemble the frame. It's fairly straightforward, but I've got a couple tips that may save you some trouble. Before you tighten the nuts push the long nylon screws through the middle holes and wiggle the arms so they are away from the frame. If they aren't in the maximum outward position the props may strike the top plate. Also, if you don't insert the nylon screws before tightening the arms the holes may not line up. I had to loosen all the nuts because I neglected to do this.
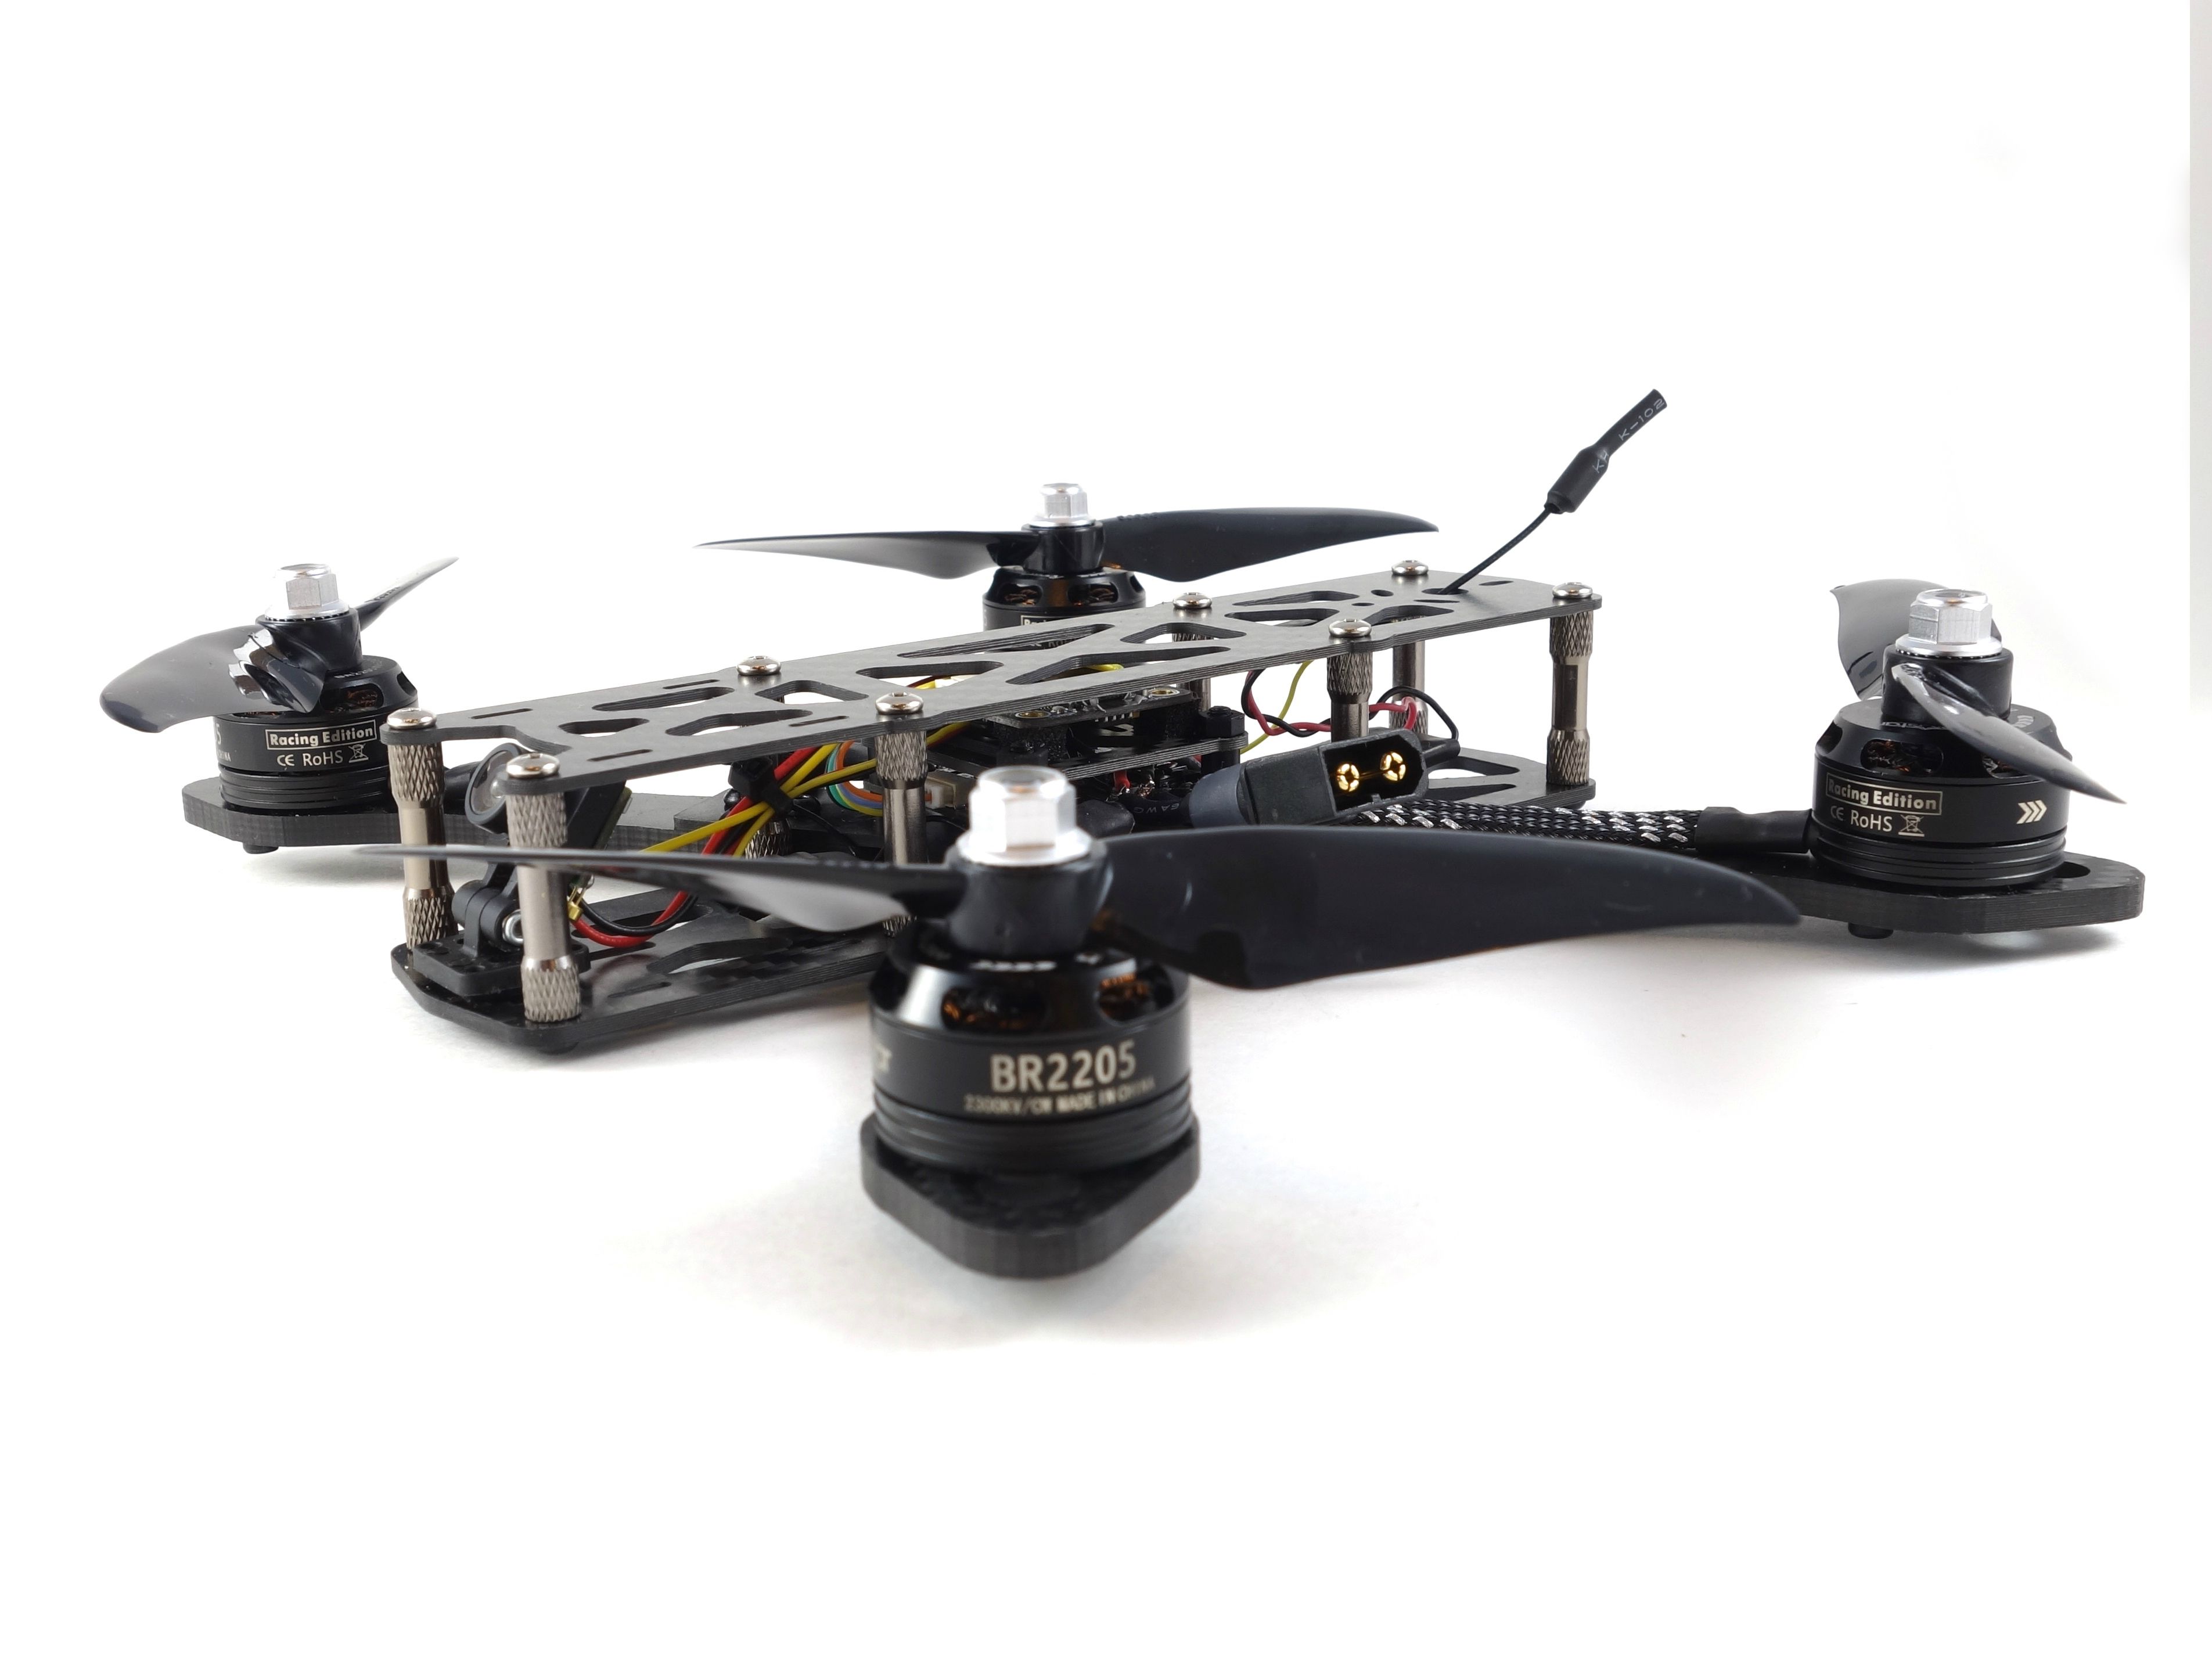
Once everything is tight you can attach the motors. I like to start with 2 screws each and apply the Loctite after the soldering is complete. I've found that I usually need to loosen the motors to slide shrink tube over the wires.
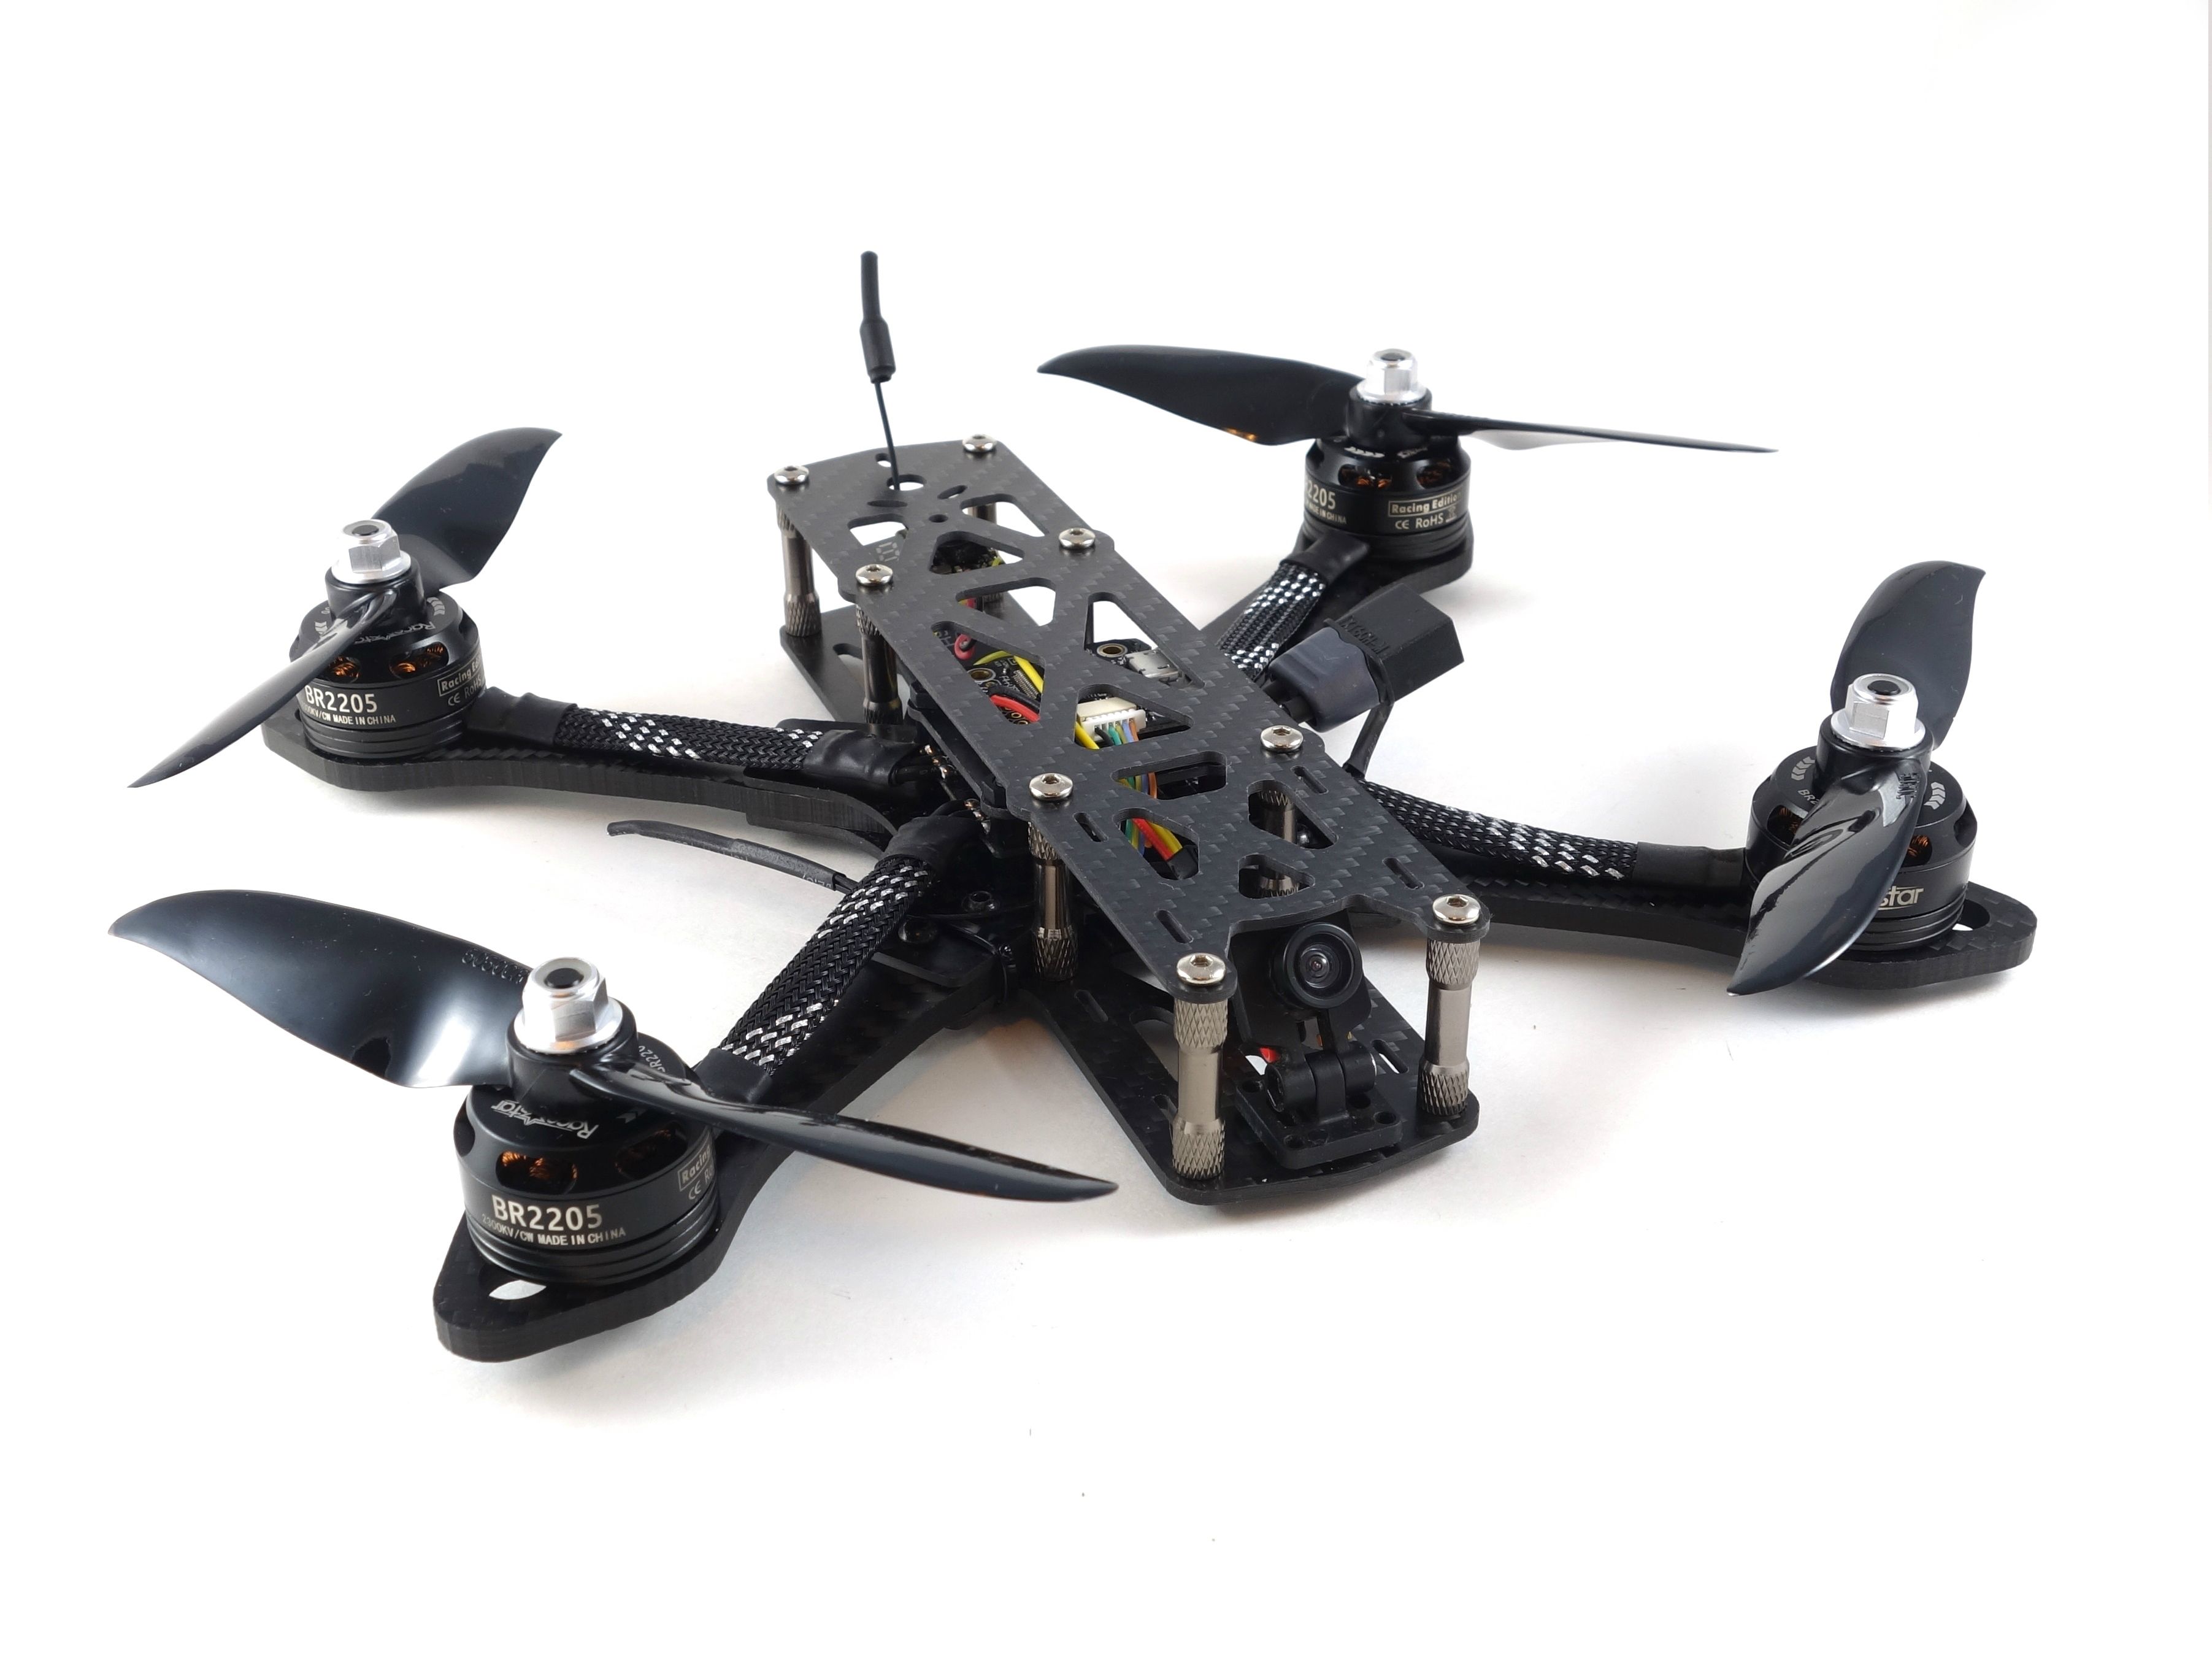
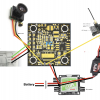
Next you'll want to mount the 4-in-1 ESC. Make sure the PWM connector (the white plastic bit) is pointed toward the front of the craft. Use the long nylon screws and tiny round spacers to build the stack. I used the shorter spacers below the ESCs and the slightly taller spacers above it. To hold it all in place you need to add the 35mm plate followed by nylon nuts. The flight controller will be soft mounted on this plate.
Wiring the Motors
Now for the fun part. Fortunately this 4-in-1 has wires pre-soldered, so all you need to do is attach them to the motor wires. I found it easier to cut the ESC wires close to the board while retaining most of the length of the motor wires. Don't forget to slide all your wire mesh and shrink tube over the wires before soldering. I typically use Paracord to protect the wires, but I wanted to experiment with the wire mesh. It's got more of a plastic feel to it and it doesn't feel as resilient as Paracord, but applying a single piece to all 3 wires is convenient. I used 2 1/4in pieces of wire mesh for each arm and 1/2in pieces of shrink tube to cover both ends.
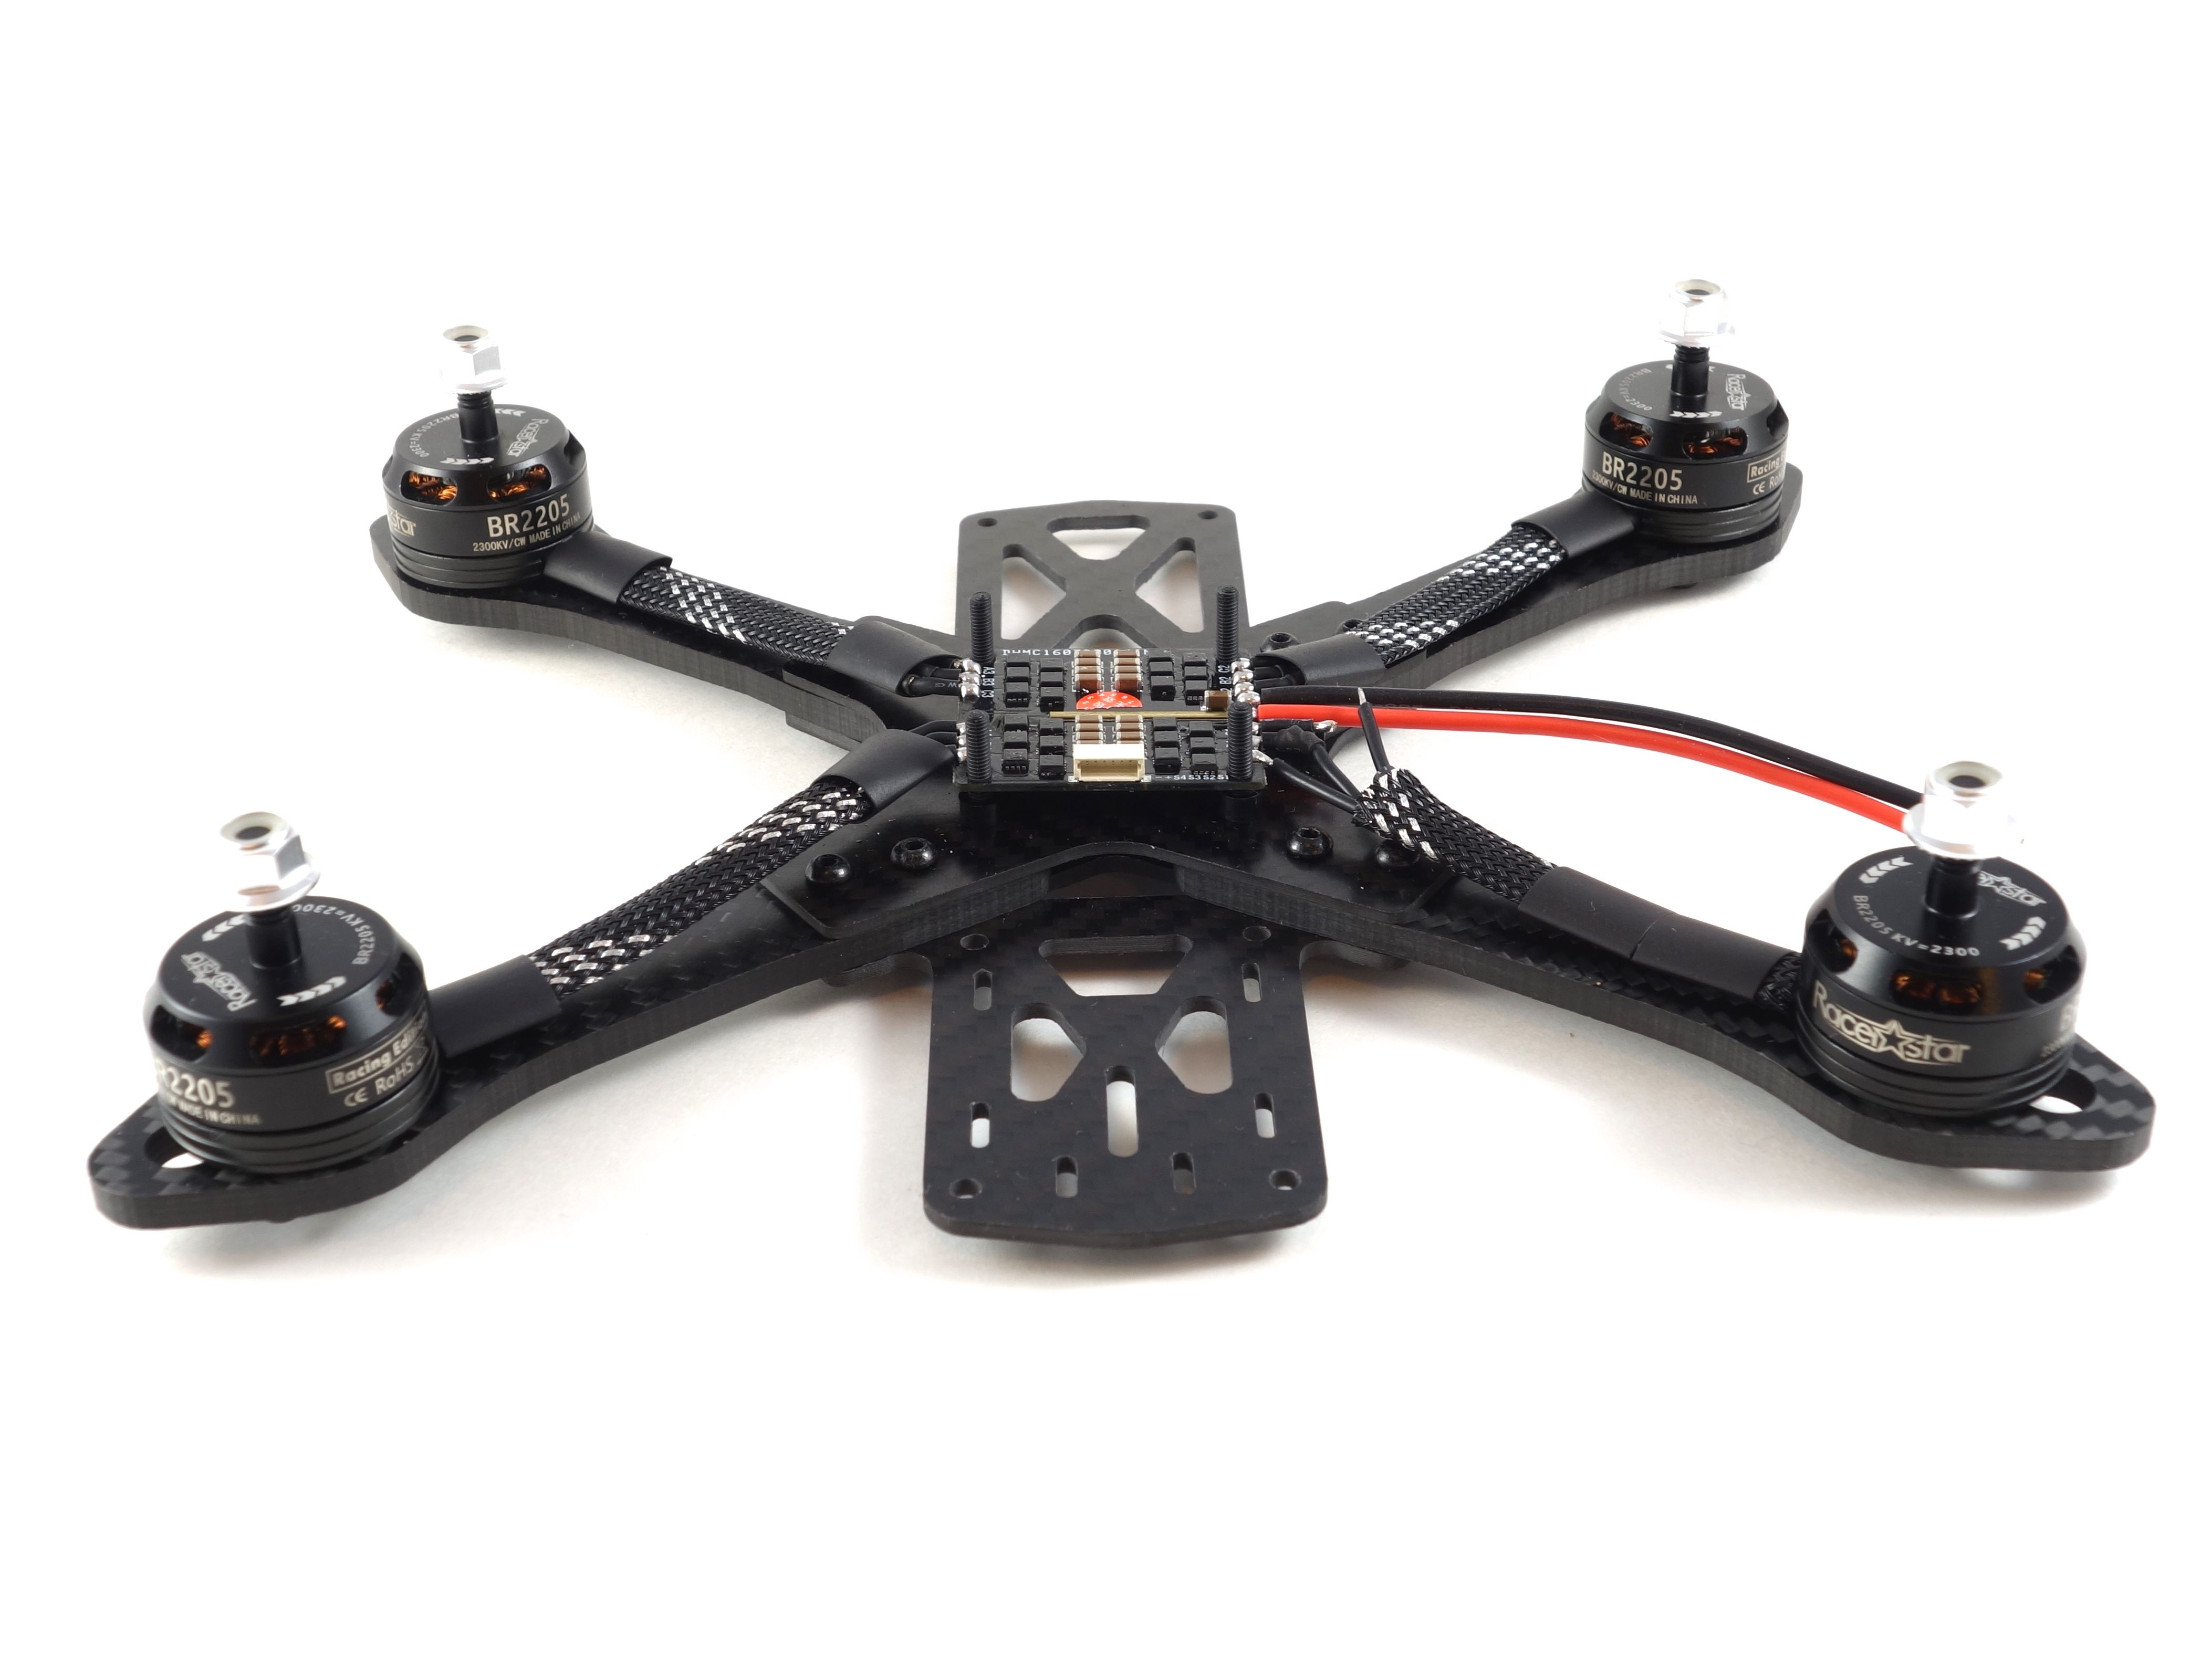
Attaching the Battery Lead
This frame doesn't come with an XT60 connector, so I listed a pack of connectors in the misc parts section below. Also, the 4-in-1 ESC comes with 18AWG wire for the battery leads which isn't ideal. You'll want at least 16AWG if not 14AWG wire, so make sure you've got some nice silicon wire available. Just de-solder the battery leads, add a little solder to the pads and attach your connector. I like to leave about 2cm of wire between the connector and the board.
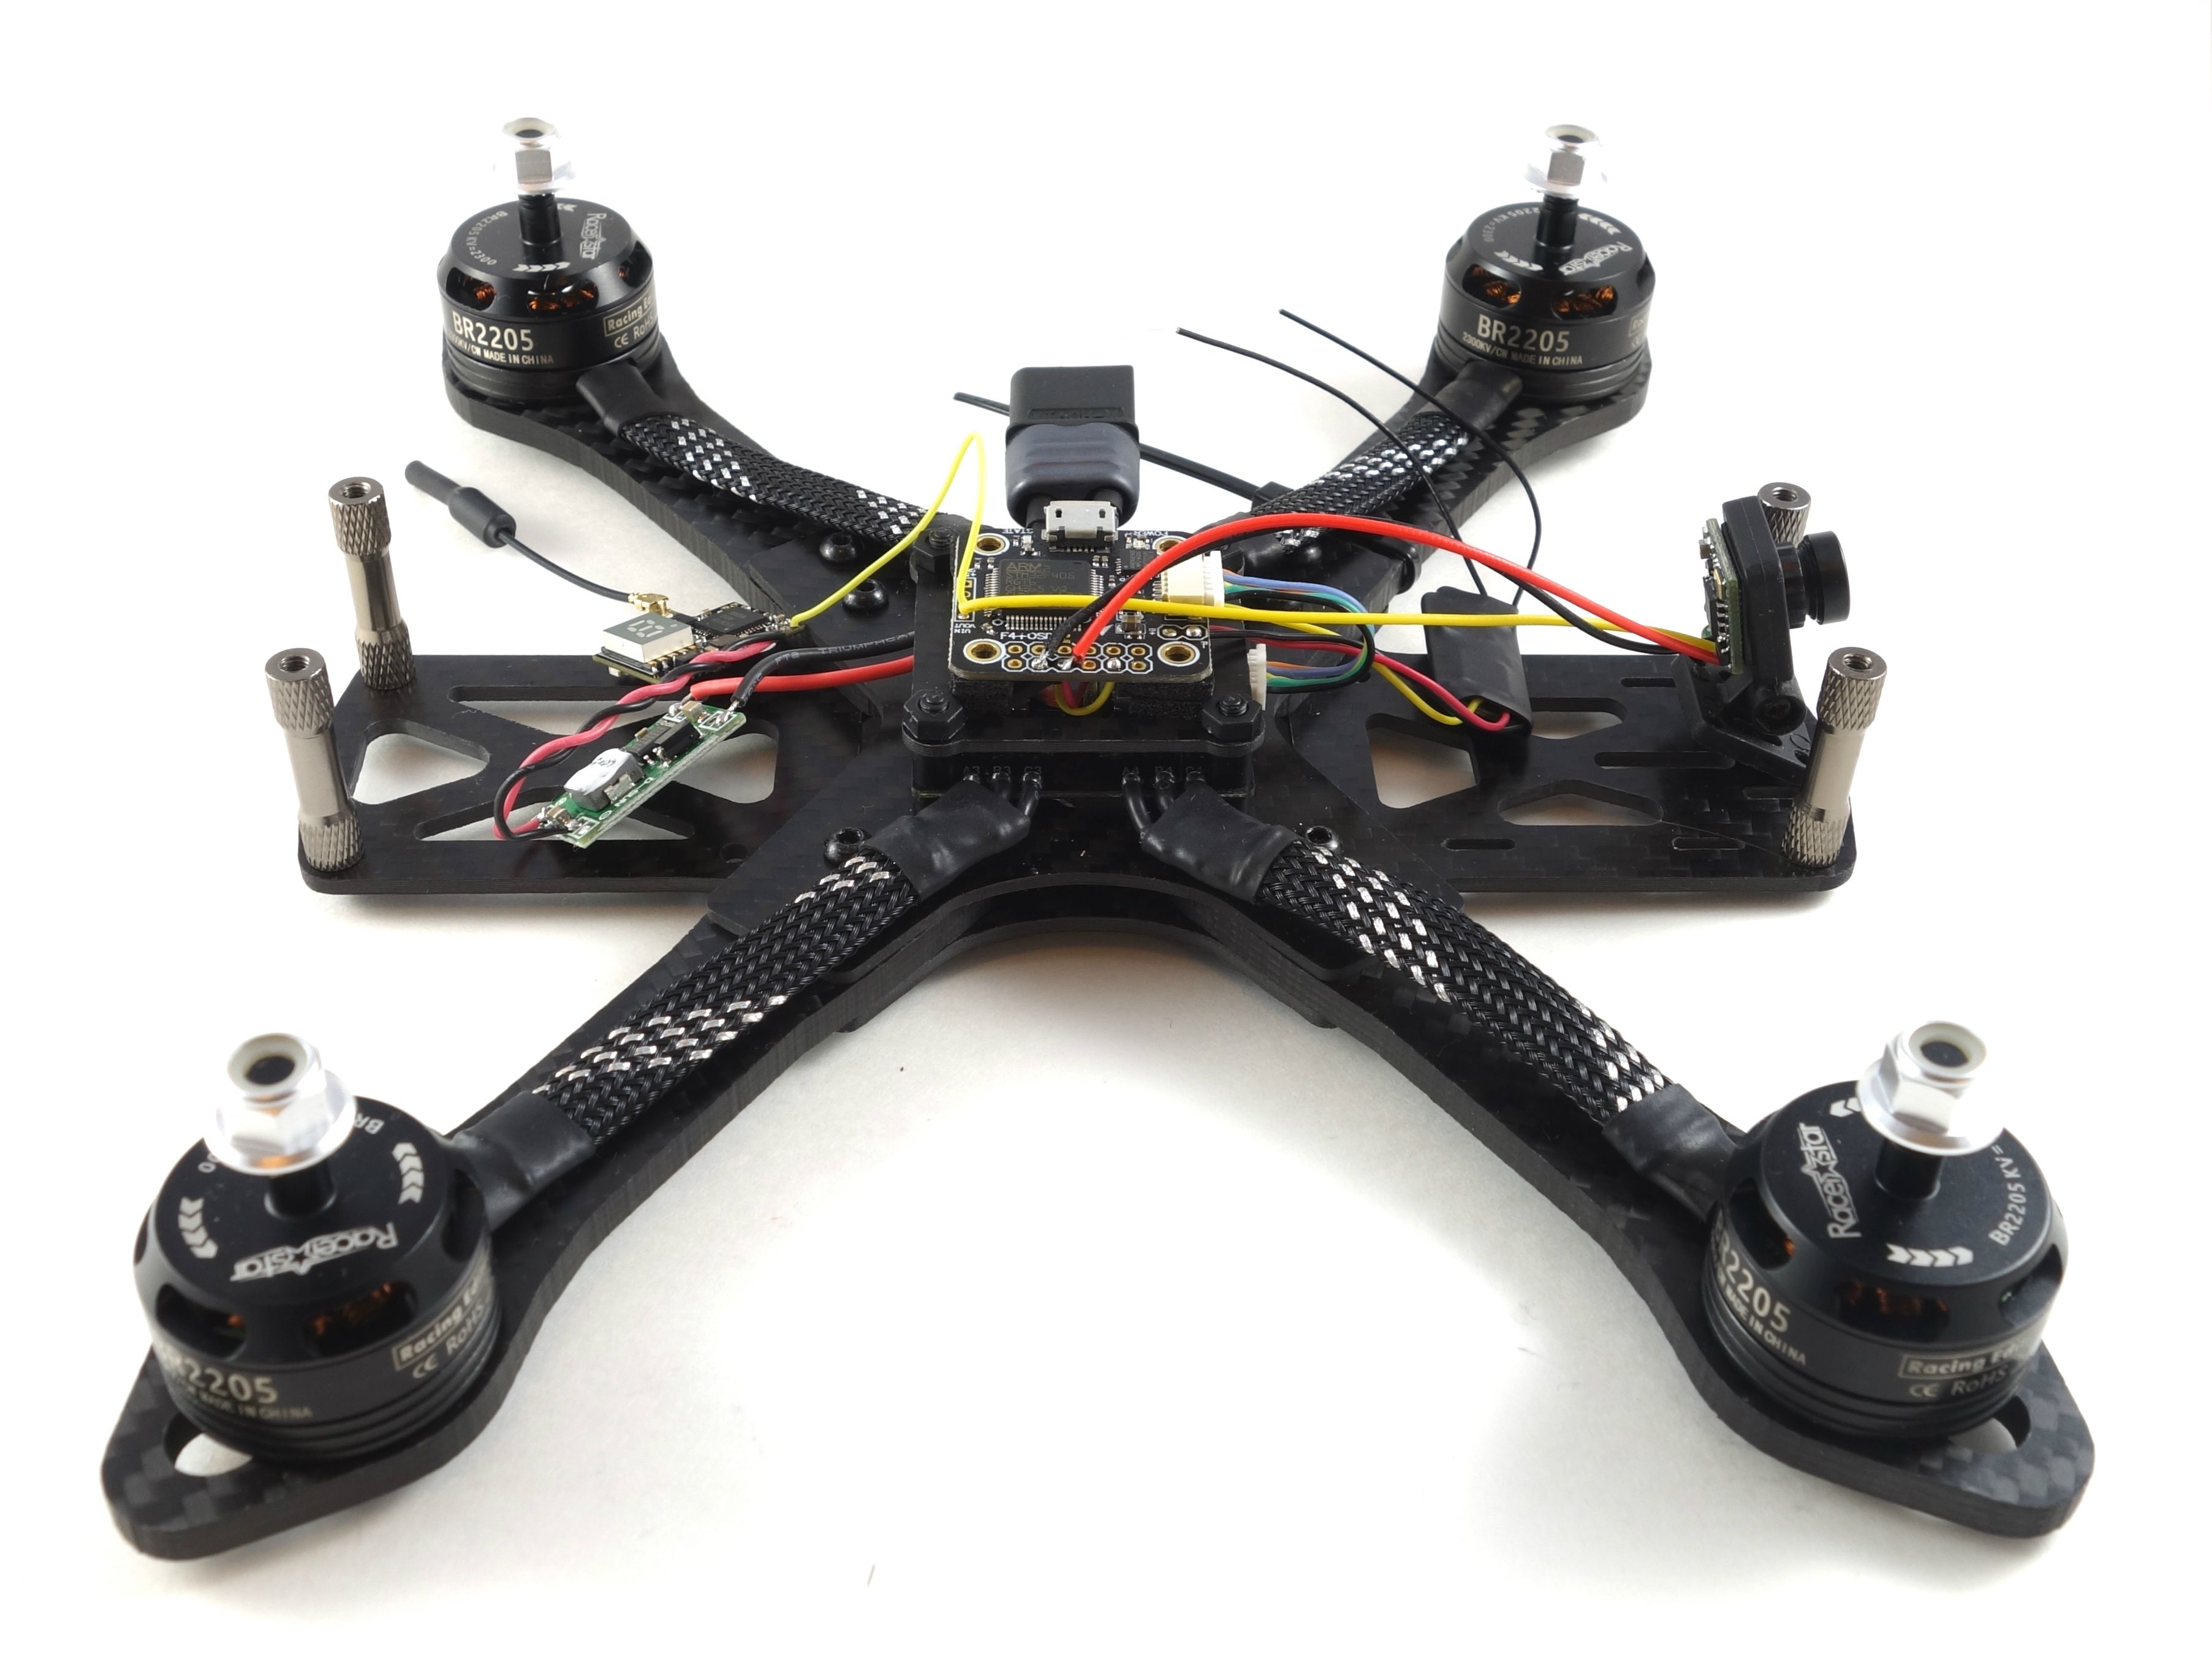
Powering the Flight Controller and VTX
Since this flight controller only has a 1A 5v regulator it's best to power the VTX externally, thus the 5v BEC listed below. The flight controller supports enough current to power itself, the receiver and the camera without issue. That being said you need to power both the BEC and the flight controller from the battery. You can stack two more sets of wires on top of the battery lead to power them. Refer to the flight controller pin layout to find the battery input.
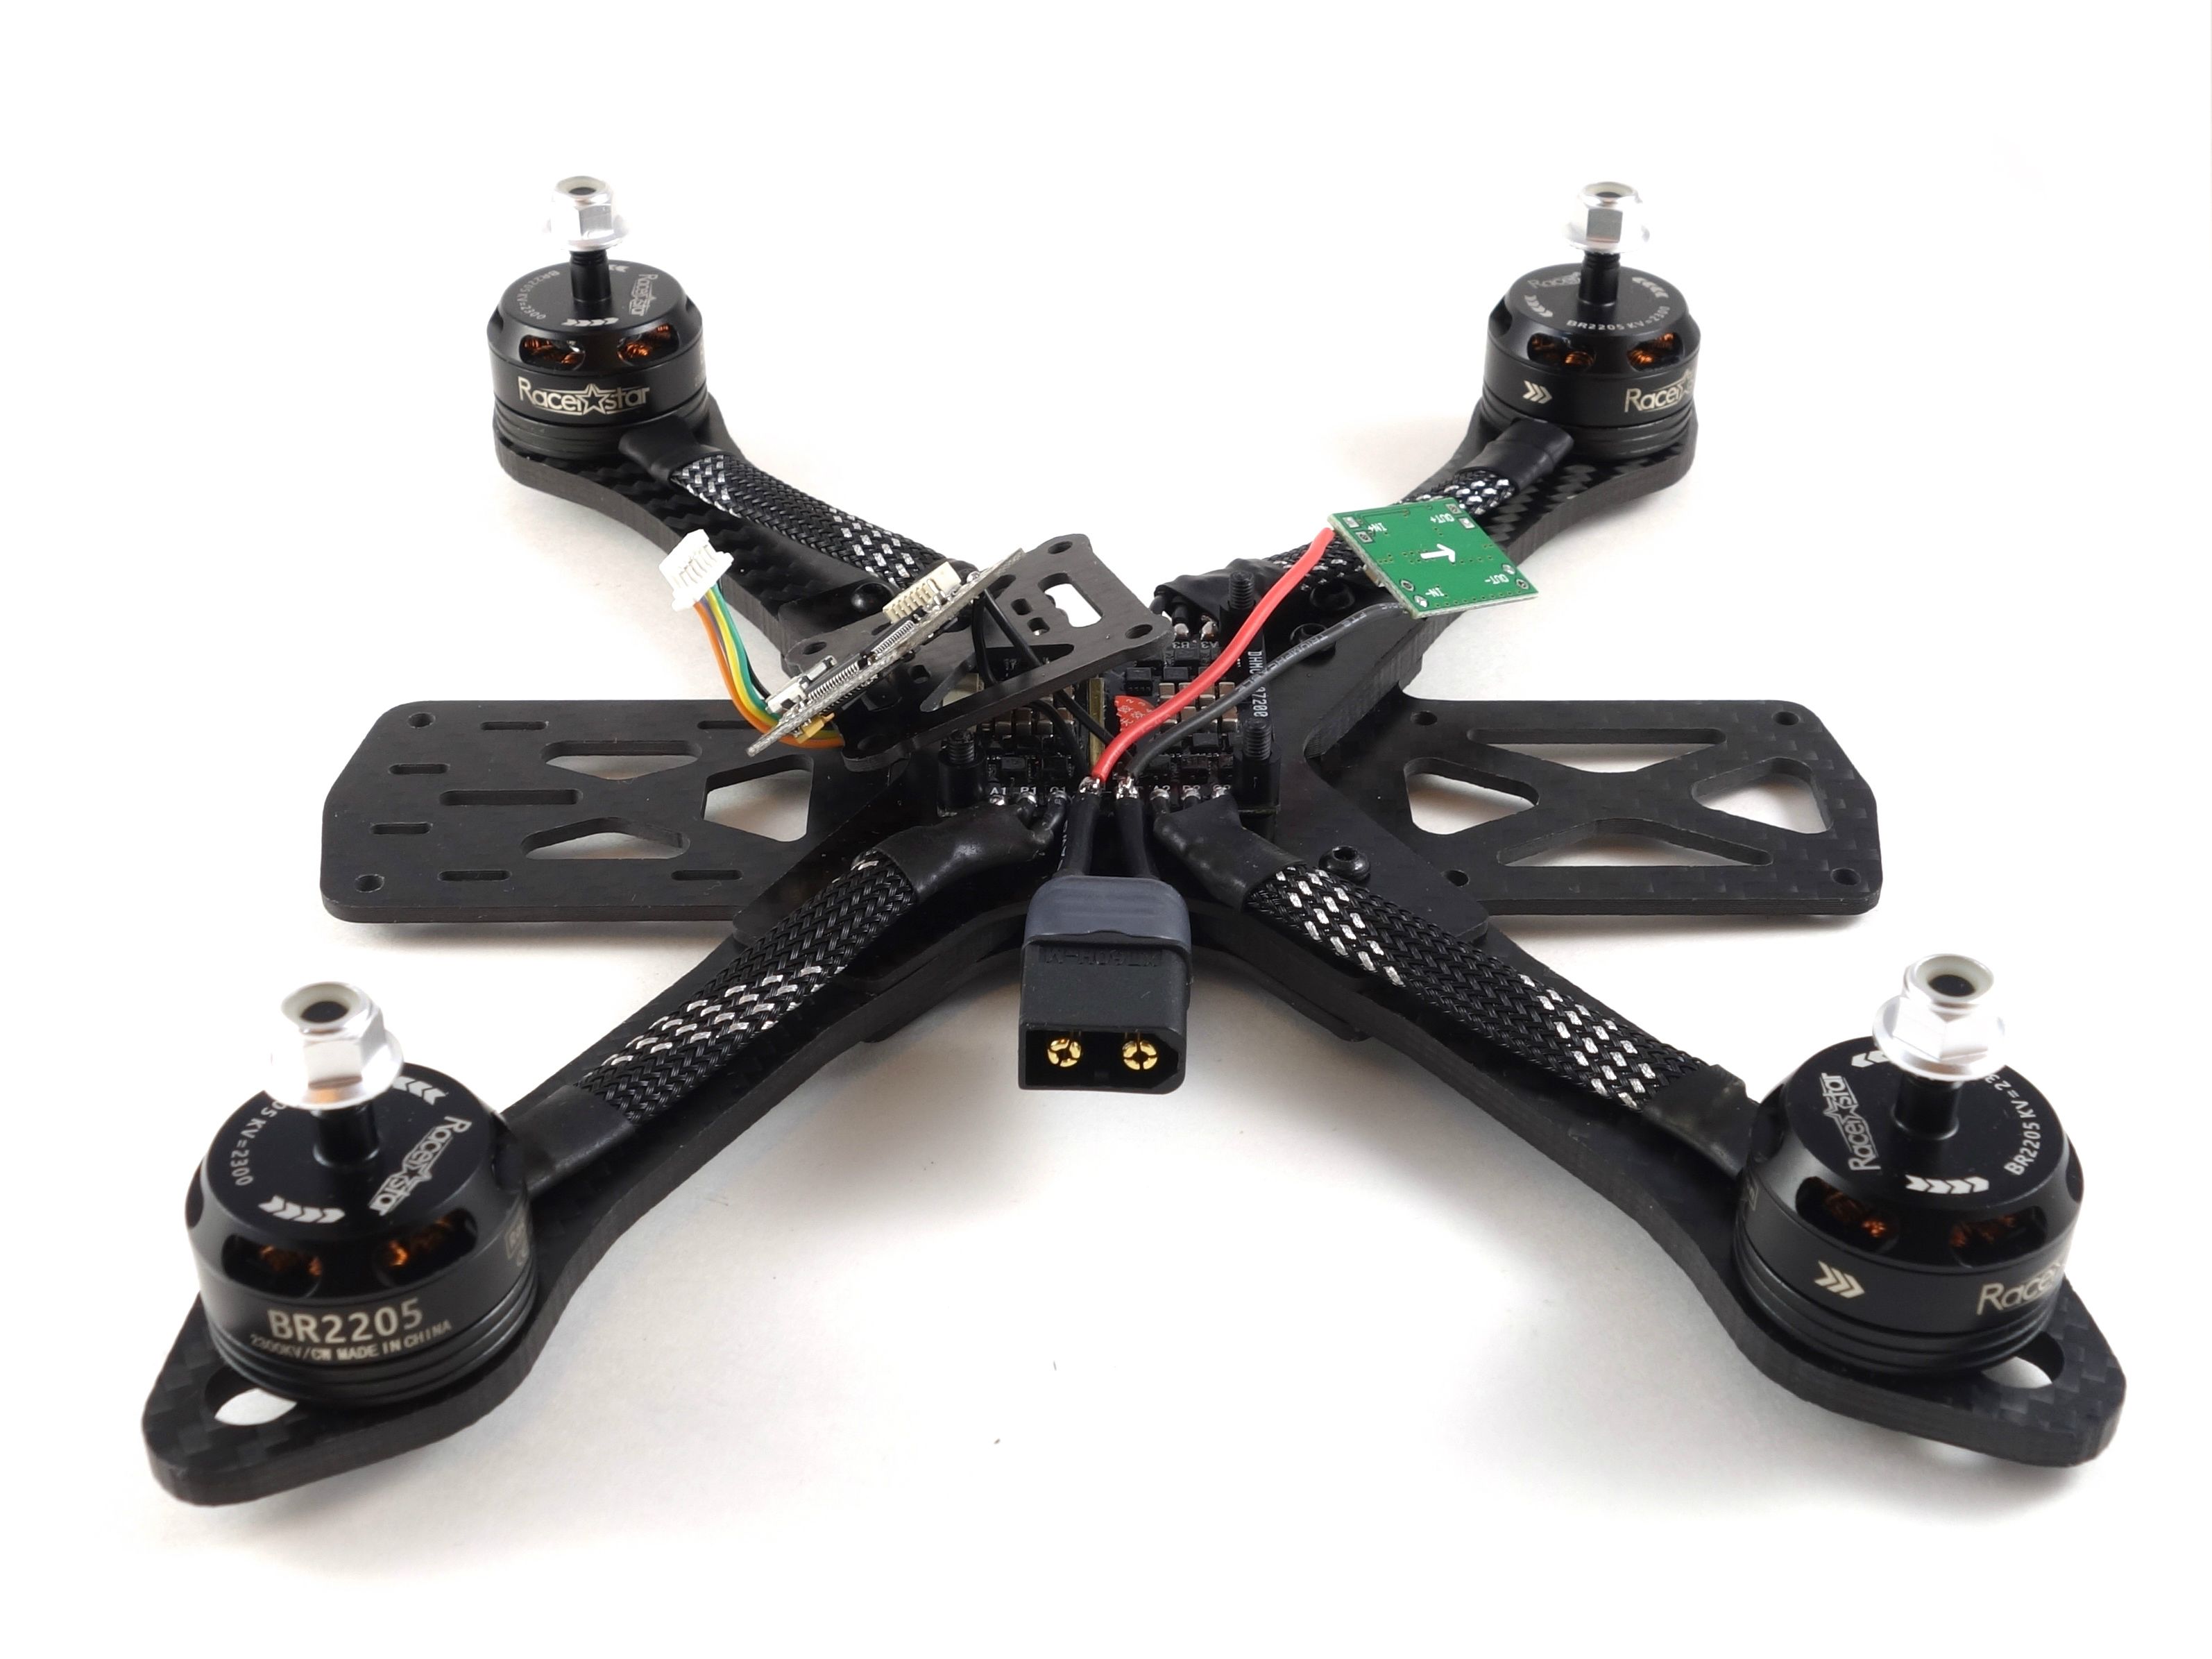
Wiring the Receiver and Video
First you want to wire the receiver. This is where some 28AWG wire comes in handy. If you're using a FrSky receiver you need to solder the control wire to the RCIN pad. The description on the product page says to use RX1, but this is incorrect. Power it off the 5v/GND pads directly below RCIN. Power up your quad and bind your receiver. It's best to get this out of the way before it gets buried. Add shrink tube to the receiver and foam tape it to the base plate in front of the flight controller. Add zip ties to the front arms between the two screws and shrink tube the RX antennas to the zip ties.
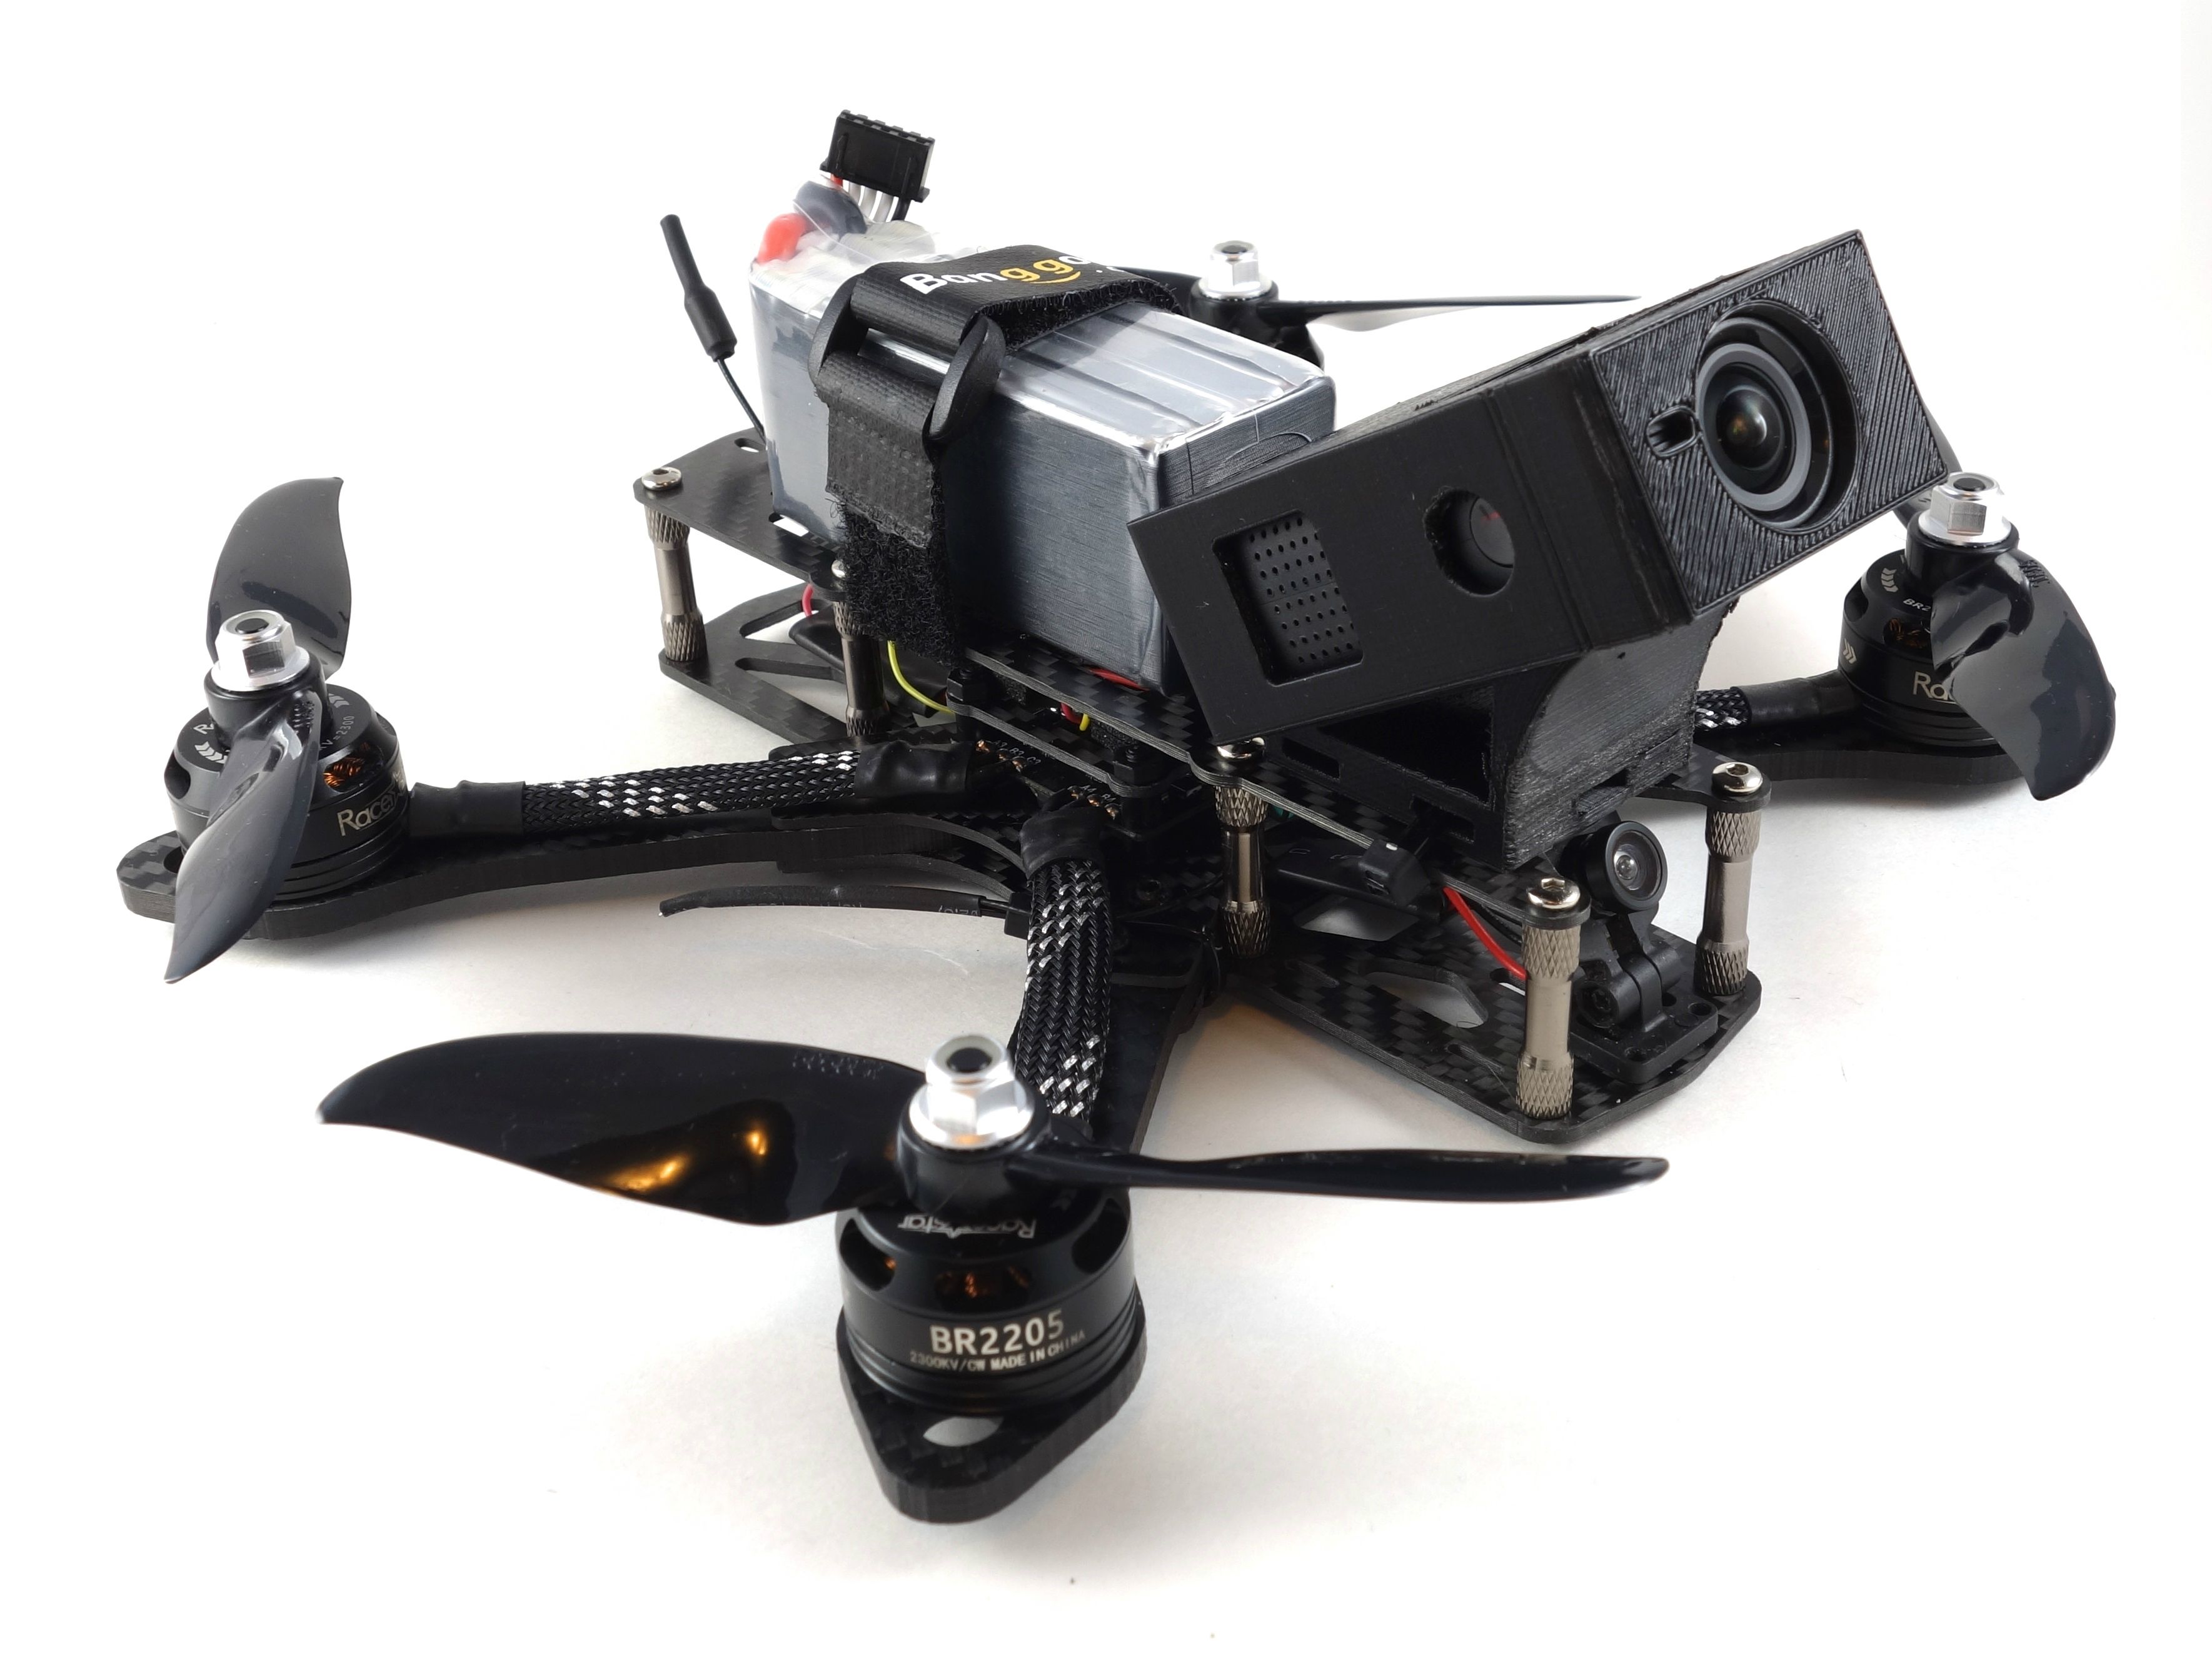
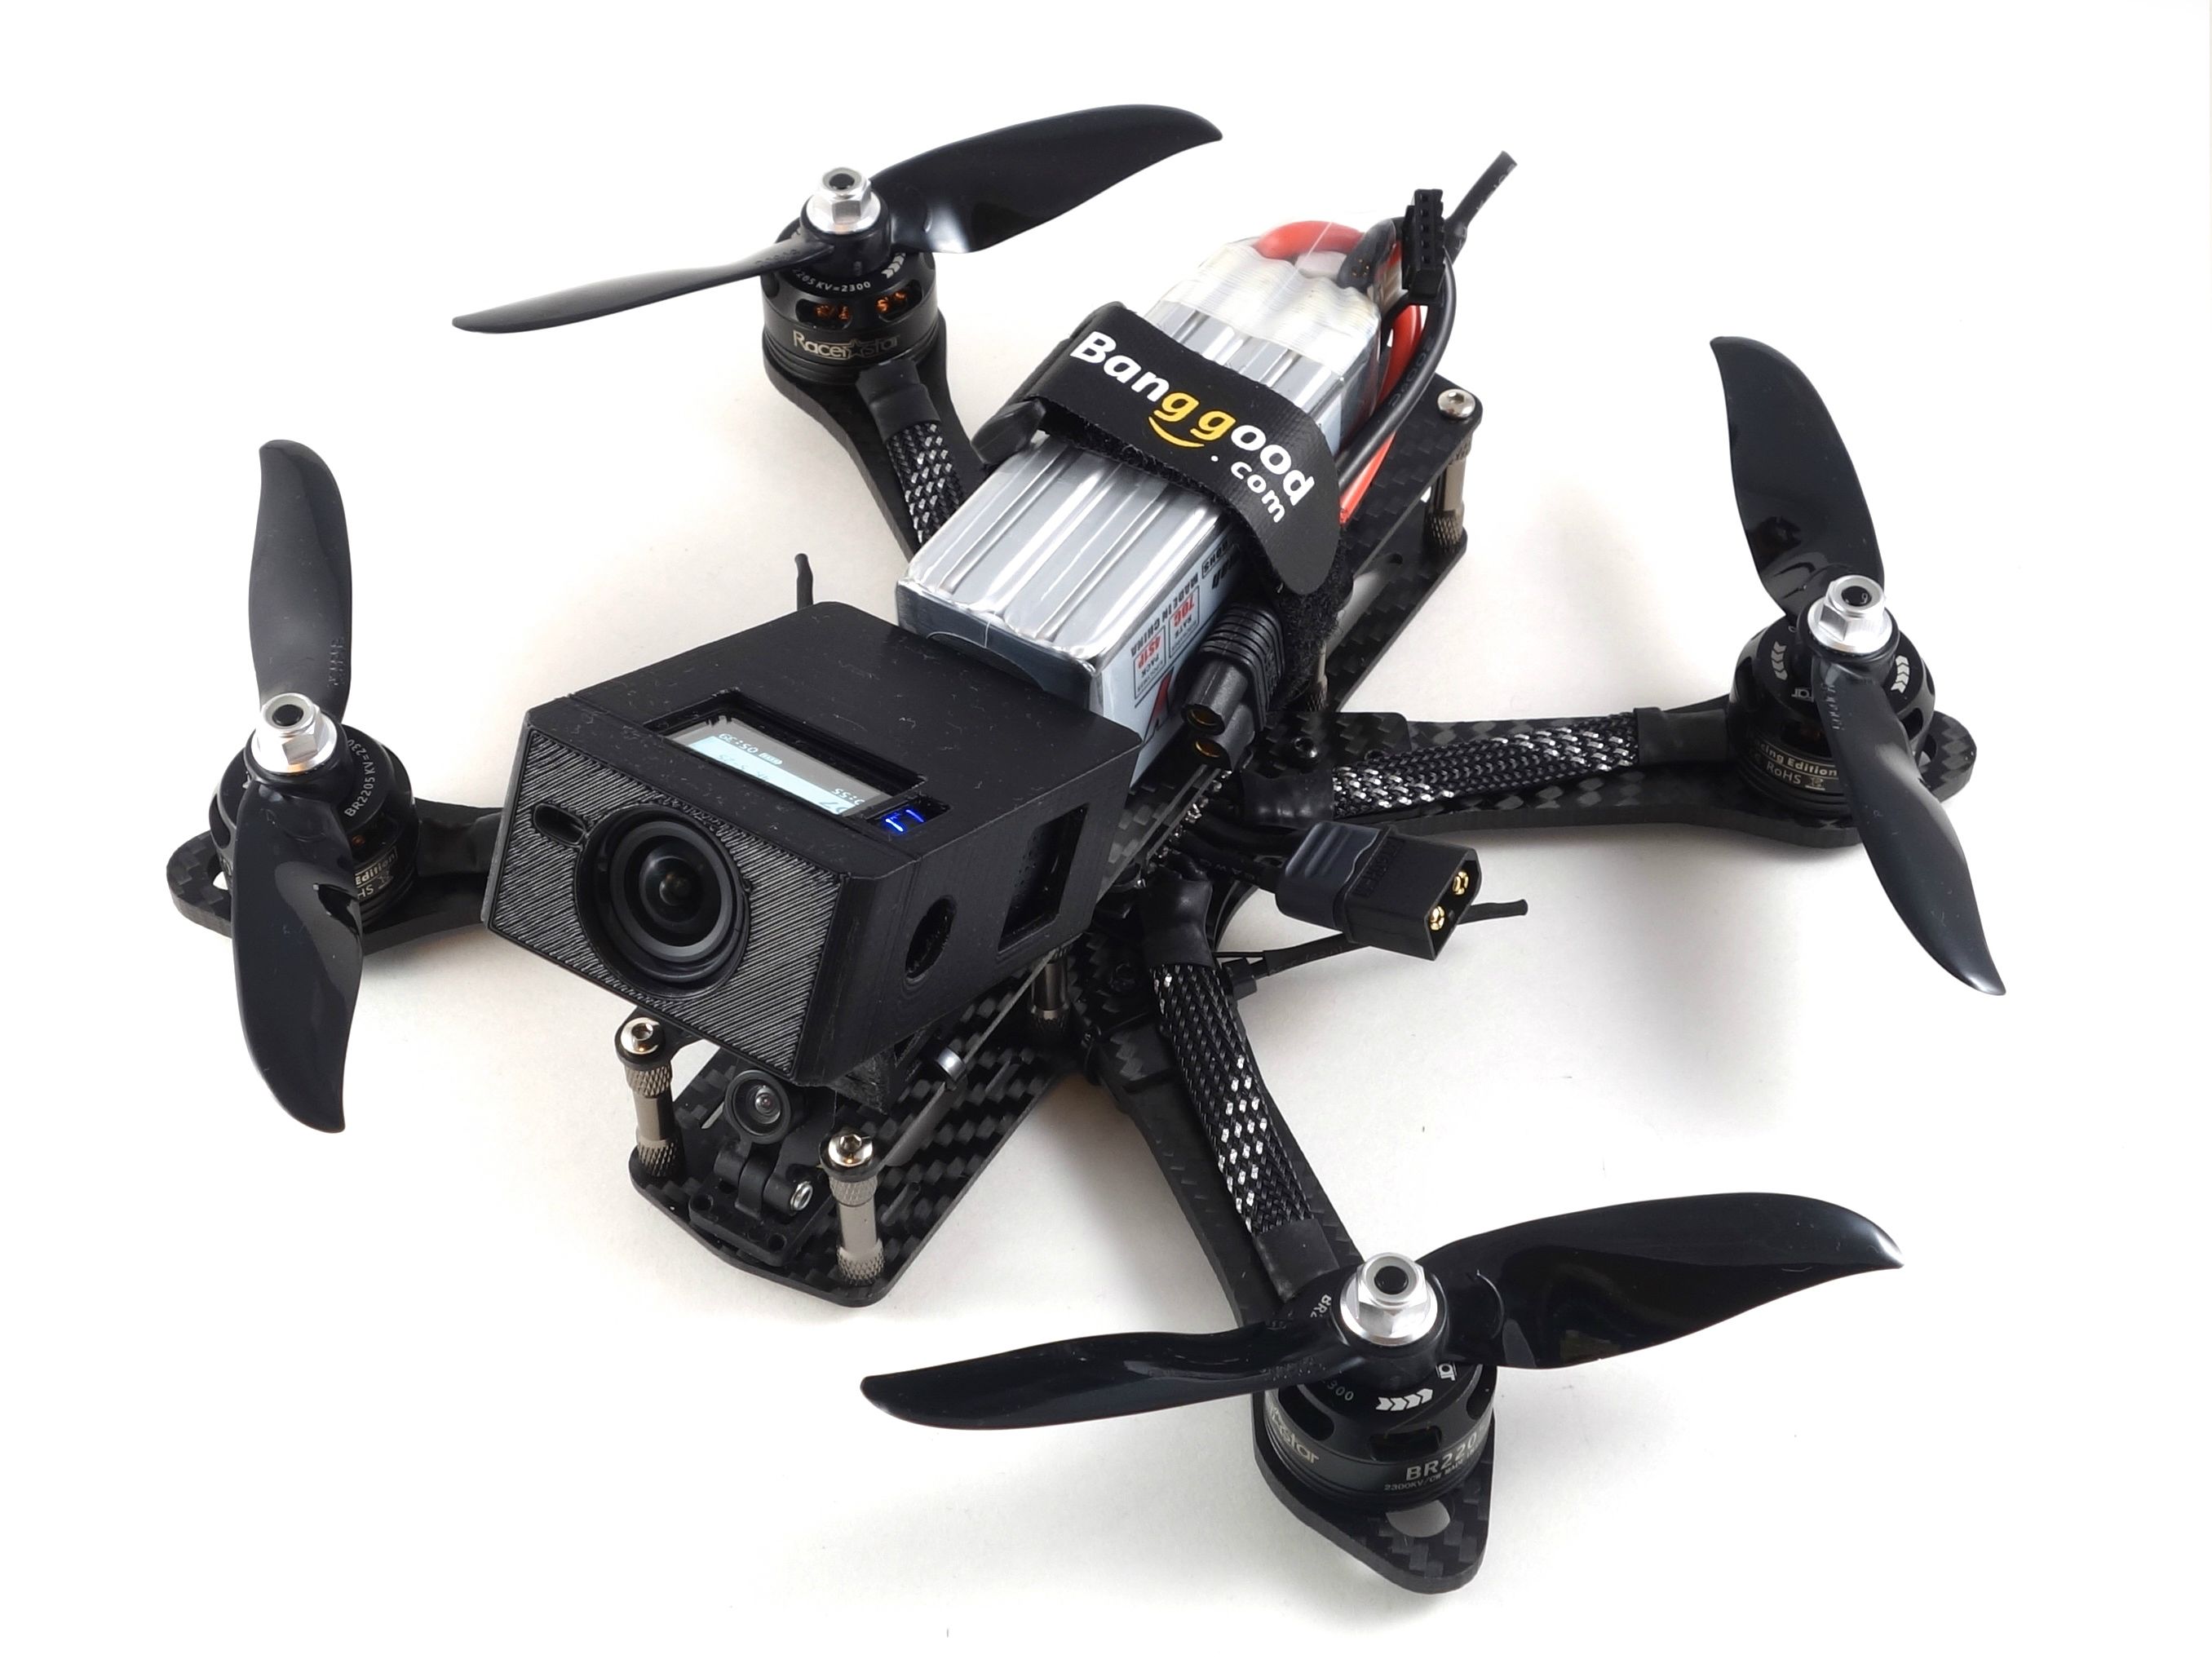
Next you can wire the video components. Power the camera off the same 5v rail you used to power the receiver. Remove the audio wire from the camera as you won't be using that. Solder the video wire to the VIN pad. Likewise, power the video transmitter from the 5v BEC and solder the video wire to the VOUT pad of the flight controller. Foam tape the camera mount to the front plate and foam tape the flight controller to the mounting plate. Ensure the PWM connector is pointed forward and that it is perfectly square to the frame.
Now you're ready to add the standoffs and assemble the frame. Foam tape the 5v BEC to the bottom plate and foam tape the VTX to the top plate.
BetaFlight Configuration
This build supports all the latest features of BetaFlight, so be sure to download BetaFlight 3.2 and flash the firmware before you do anything else. From there I've created a checklist to get you started:
- Use resource commands to order the motors:
resource motor 3 A02
resource motor 4 A03
- Use BLHeli Configurator to set motor rotation. (Motors 1 and 4 are reversed)
- Update ESCs to enable Dshot Commands. (latest BLHeli version)
- Configure your Receiver and check your rxranges.
- Set arm and beeper switches.
- Configure OSD.
- Enable dynamic filter and gravity mode.
- Set your rates.
Final Thoughts
For the price this is a great starter rig, but there is certainly some room for improvement. It wasn't apparent to me from the website, but this is a Realacc frame. If you're familiar with their frames they are hit or miss. This one does fit together fairly well, but the tolerances are quite tight. I used 25mm standoffs and unless the arms are fully extended the props will brush the top plate. This is not likely an issue with 30mm or 35mm standoffs. You might want to consider the original Martian II 220mm for a slight quality upgrade.
Suggested upgrades:
- Frame: Martian II 220mm
- Flight controller: Omnibus F4 Nano or Omnibus F3 Nano - These boards include a 3A filtered regulator, so you will not need the external BEC to power your VTX.
- Motors: EMAX RS2205S 2300kv
- Camera: Runcam Micro Swift or the Foxeer Arrow Micro
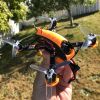
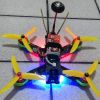
Photos


Part List
Show stores (2)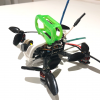
First, thanks for the build and very nice craftsmanship!
I'm thinking about going from tiny whoops to something bigger and this build seems extremely popular. I wonder if you had any thoughts/ideas on where this build stands now, 2.5years after its conception? I've seen the Mark III but I'm budget conscious and a newbie after all.
Many thanks.
Hi, this is my first time biulding a drone and ive got a few questions;
Are different size AWG wires necessary or can they be close enough? For example can I use leftover 22AWG for 28AWG?
Can I connect the FC to any of the three GNW and +5V? Eg the ones next to the VOUT or the inner and outer ones?
With the receiver, which wire is the control wire? Also can the receiver connect to any GNW and +5V on the FC?
I created this diagram. Is this correct? https://imgur.com/l0IXuXk
Thanks!

You can use 22awg instead of 28awg if the wires will fit on the pads. To power this particular flight controller you need to go to the B+ and B- pads at the top of your diagram. Only those will take 4S from the battery. If you wire the power from the 4-in-1 ESC to a 5v pad you'll kill the flight controller. If you're using the XM+ the square pad is SBUS (control) and yes you can connect it to any 5v pad and ground. Good luck!

Hello, I would like to know the specifications for the top piece of the frame, do you know where I could find these. If not, and you know them, I would like to know the hole sizes, length, etc.
I know this is an older build, but I am following it for my first. I bought this FC and I am curious why power the cam off of the same 5V rail as RX, instead of the 5V where VIN/VOUT is located?
Hi! Brand new to the drone scene and building my first drone. I'm trying to follow as closely to this build as possible but I have a couple of questions. How does the FC stay in place? I got the 20x20 like you said, but where does it actually screw into the plate?
Sorry to bring up this old build but I'm slowly working in it and am running into a few more questions. Looking at the pin layout of the FC am I supposed to solder to the gnd/5v holes in the top side or the bottom? And where exactly does the BEC go? I appreciate the time you're taking to answer these probably very simple questions.
No problem! Since the FC has holes you can solder to the top or bottom. It really depends on what's more convenient for the wires. The BEC takes power from the main power lead and I just placed it behind the FC with the VTX. It's a good idea to wrap it with shrink tubing to avoid any shorts and you can simply use double sided tape to attach it to the bottom plate.
Looks awesome, I will be trying this build soonish. 2 quick questions, if you upgrade to a micro swift or foxeer arrow, what is the best way to mount? Also, do I need to buy a separate 35mm plate to mount the FC to, or would a Martian 215 come with what I need already? Thanks!
You might want to mount it in the included bracket and just screw it down to the baseplate from the bottom. The frame kit comes with a 35mm plate and I do recommend using the original Martian II frame as it's a little better quality than this one. Another upgrade I'd consider is a 4-in-1 with a 2a 5v regulator to avoid the need for an external regulator. It might cost a little more, but it would greatly simplify the build. Another upgrade consideration is a VTX that handles Betaflight OSD configuration.

I have a Flysky Radio and 3 receivers to choose from. The FS-A8S, the FS-iA6B or the Flysky X6B. The Flight Controller supports SBUS and PPM. I hear that SBUS is faster. I think the FS-A8S is the only receiver of these three that does SBUS. This is a micro receiver with only one antenna. Is SBUS always the best option or should I use one of the other receivers on PPM because it has two antenna? One for Horizontal and the other for Vertical orientation.

How did you hold the VTX on the frame?

Could you use the regular martian frame for this? The anniversary edition is sold out on banggood.
EDIT: Also, could you use single ESCs instead of a 4-in-1?
If we upgrade the camera to a Foxeer Arrow Micro or something like that which needs 5v up to 40v range, should we power it the same way from 5v rail on the FC or is it better to tap right into the battery leads since the camera says it can take it?
Great mods - I went for the 28mm standoffs and the lower height looks so much better. A micro CCD will fit with some of the standoff mounts like on the floss. I do hate that this ESC does not come with BEC!

Wow, nicely done my friend! That is a nice build with some excellent part selection. The only question I have is about the camera? How does it compare to say, a Runcam, as far as image quality and FOV?


Camera is being restocked as of 8/02/17 but that's ok.
http://www.valuehobby.com/power-systems/brushless-motors/outrunner-multicopters/2205-2300kv-motor-set.html
Did you see these? The shipping difference probably doesn't cover the price difference but they'll arrive quicker.


First of all, very nice and clean build! Would this be a good first build and when choosing motors does a pair need to CW and the other pair CCW?
I'd probably go for something more modern. Check my newer builds.