
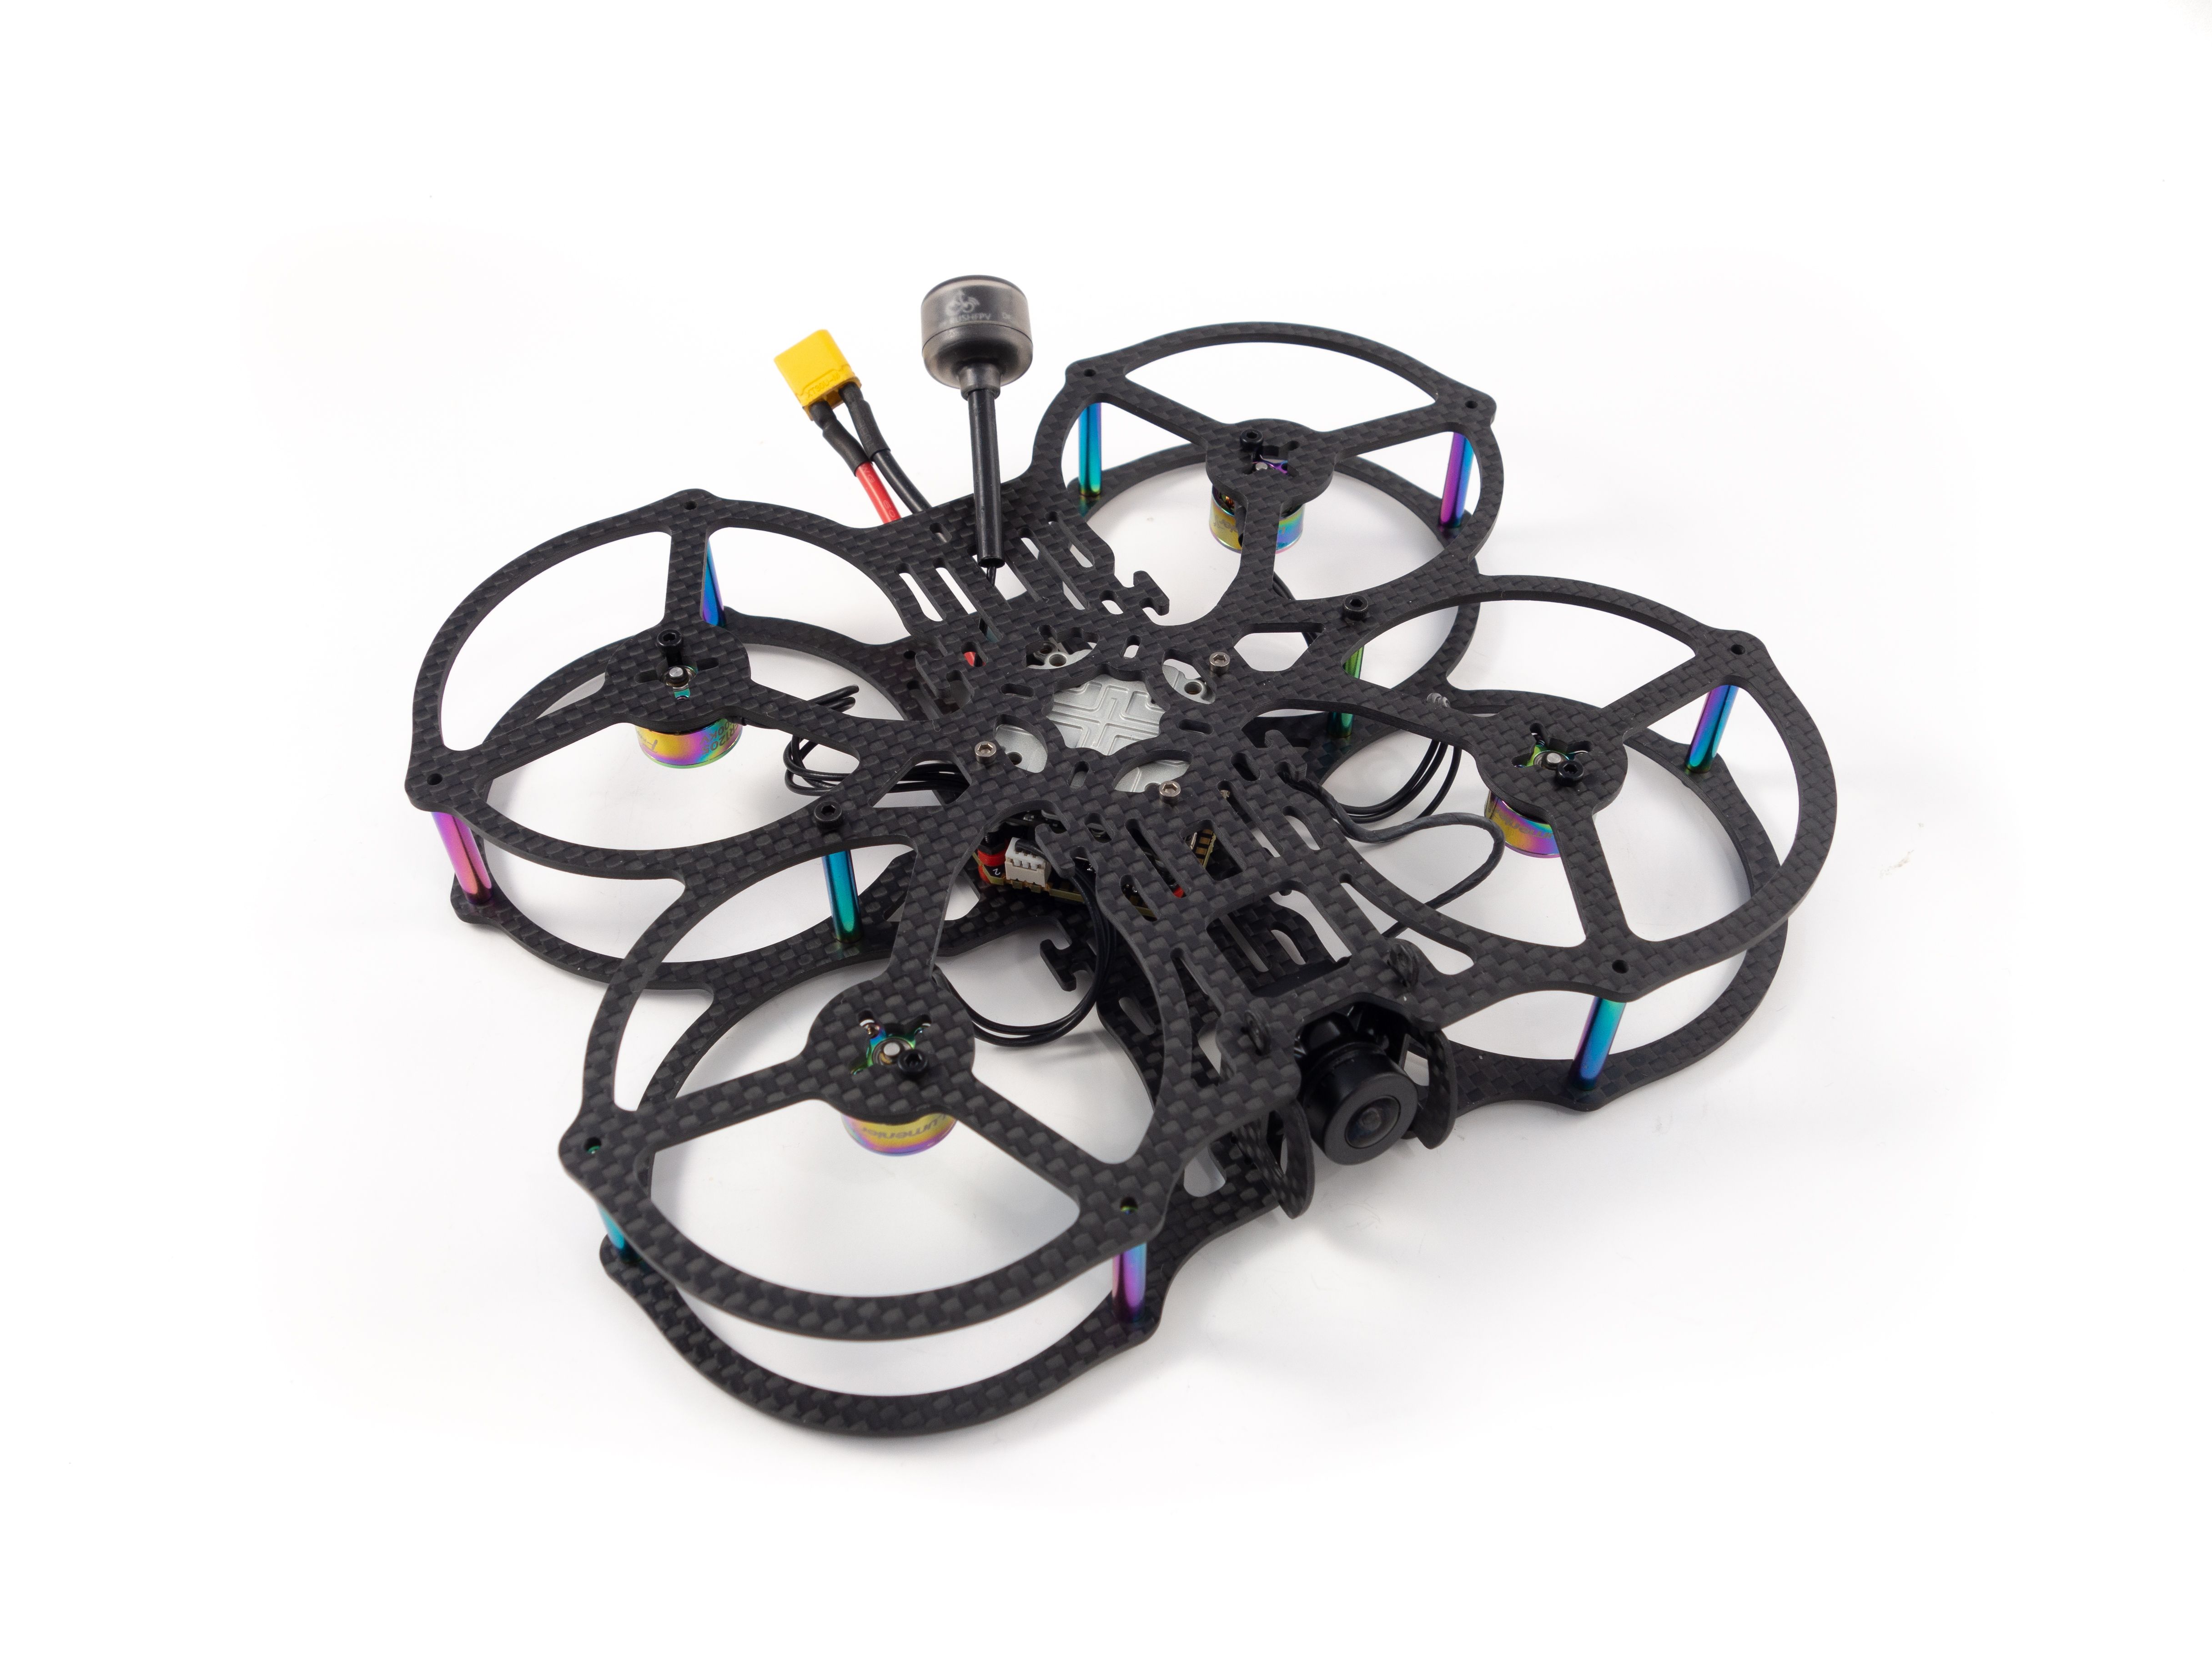
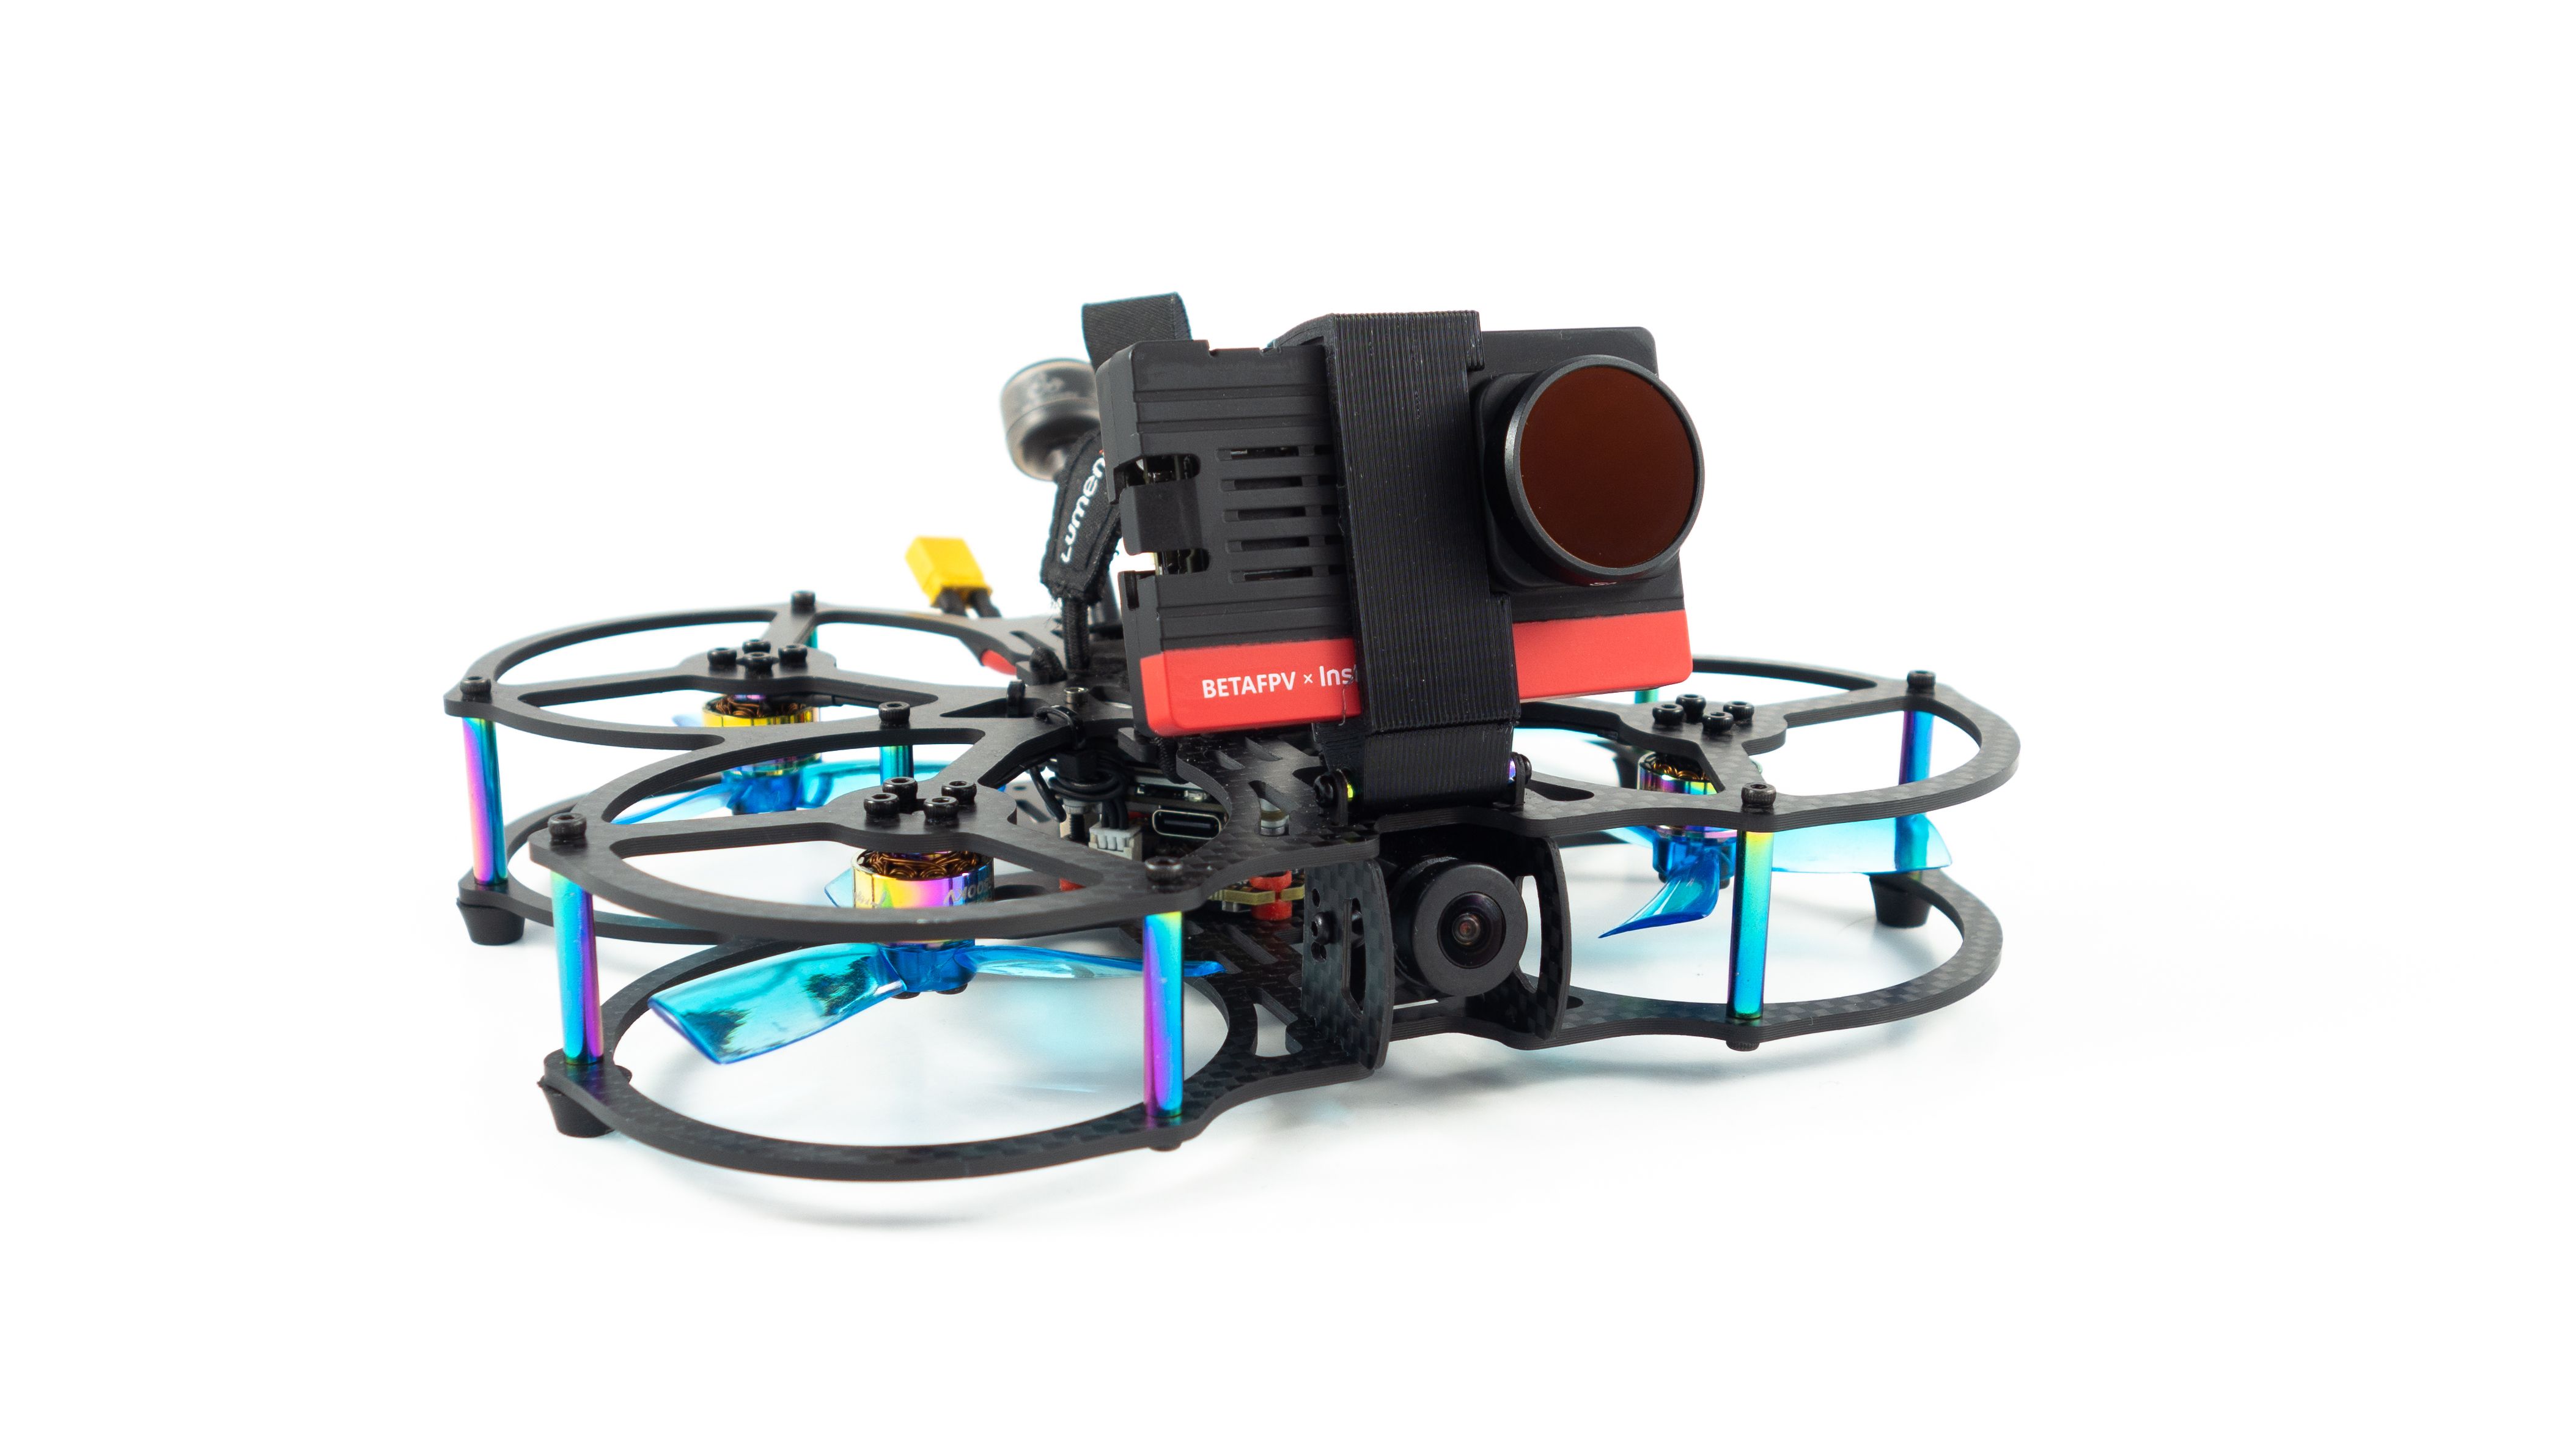
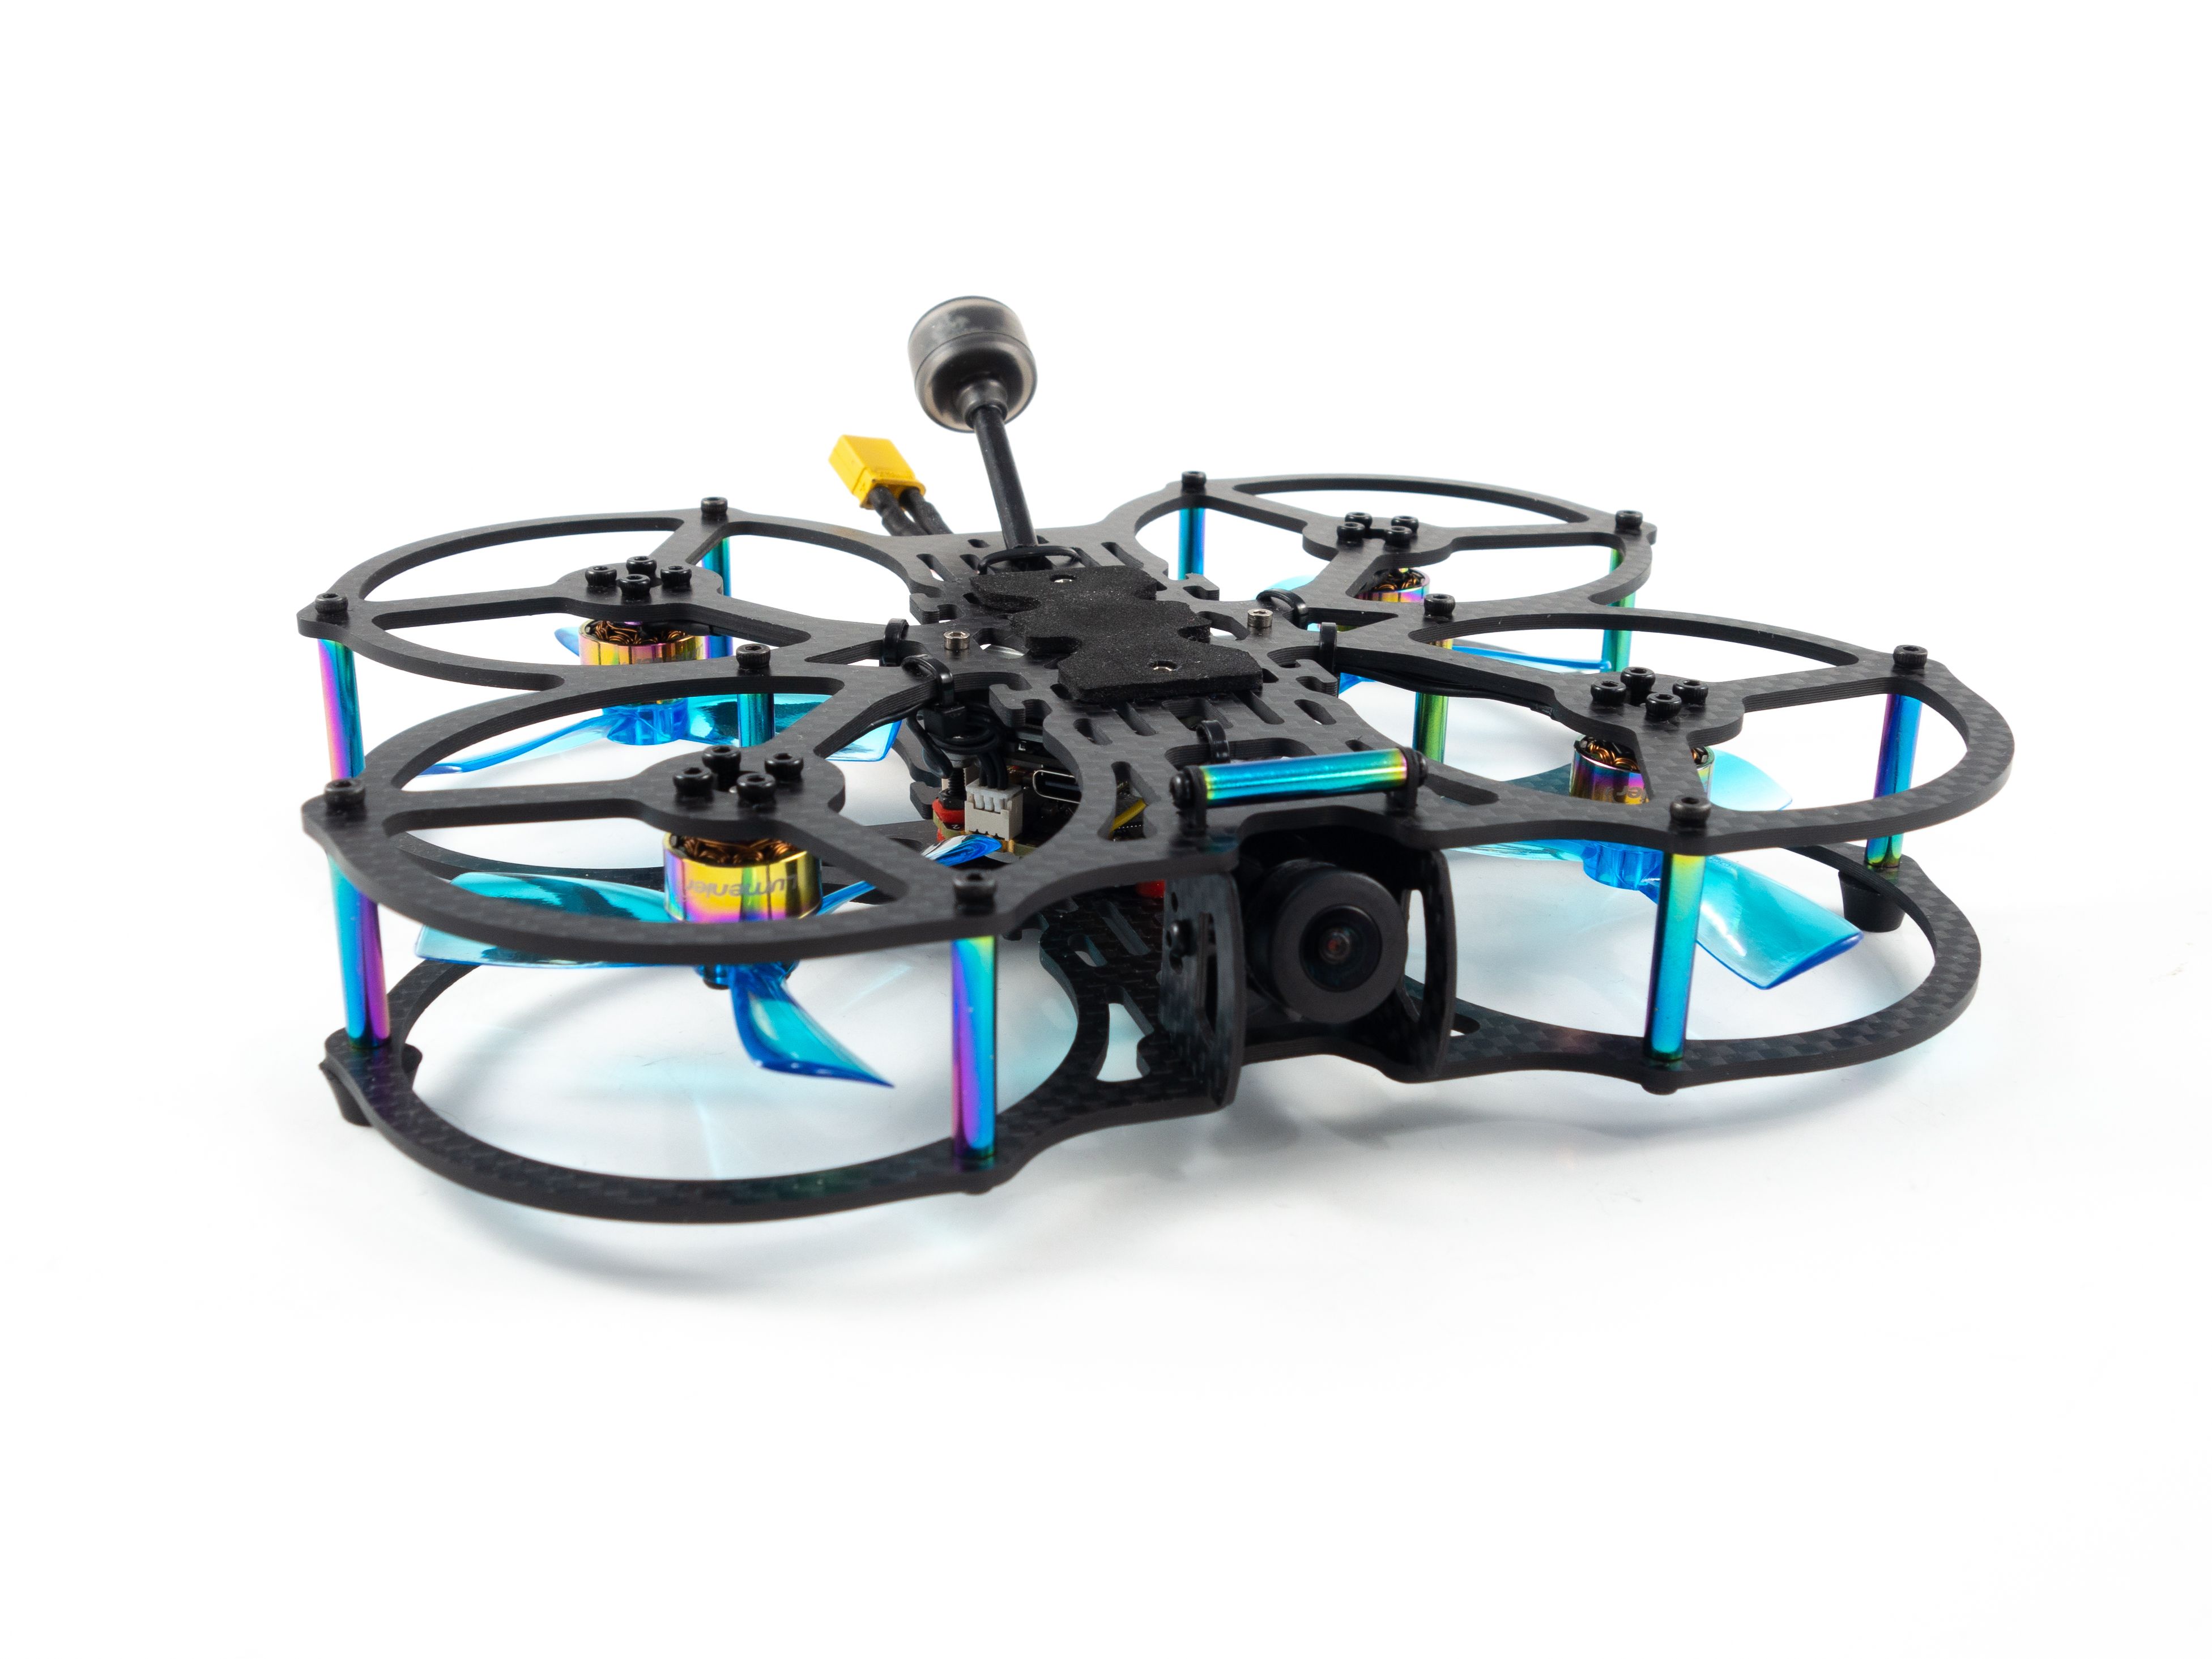
With the release of the DJI FPV Drone cinematic FPV has become a lot more accessible, but you certainly don't want to crash a $750 drone! The QAV-CINE Freybott is a compact, lightweight cinematic FPV drone that can take a hit and keep going. It's a lot safer to fly indoors and around people. With a naked GoPro or the SMO 4k you can capture some great stabilized footage. In this guide I'll show you how to build it, pair it to your DJI FPV goggles and remote and configure it.
Tools & Supplies
This build requires some soldering experience as the pads are quite small. I highly recommend a flux pen, 63/37 leaded solder and a quality soldering iron. Here are the tools and supplies you'll need. My preferred tools are listed in the Gear section below.
- Soldering iron
- 1.5mm hex driver
- Precision Tweezers
- Precision Screwdriver set
- Wire cutter/stripper
- Heat shrink tubing
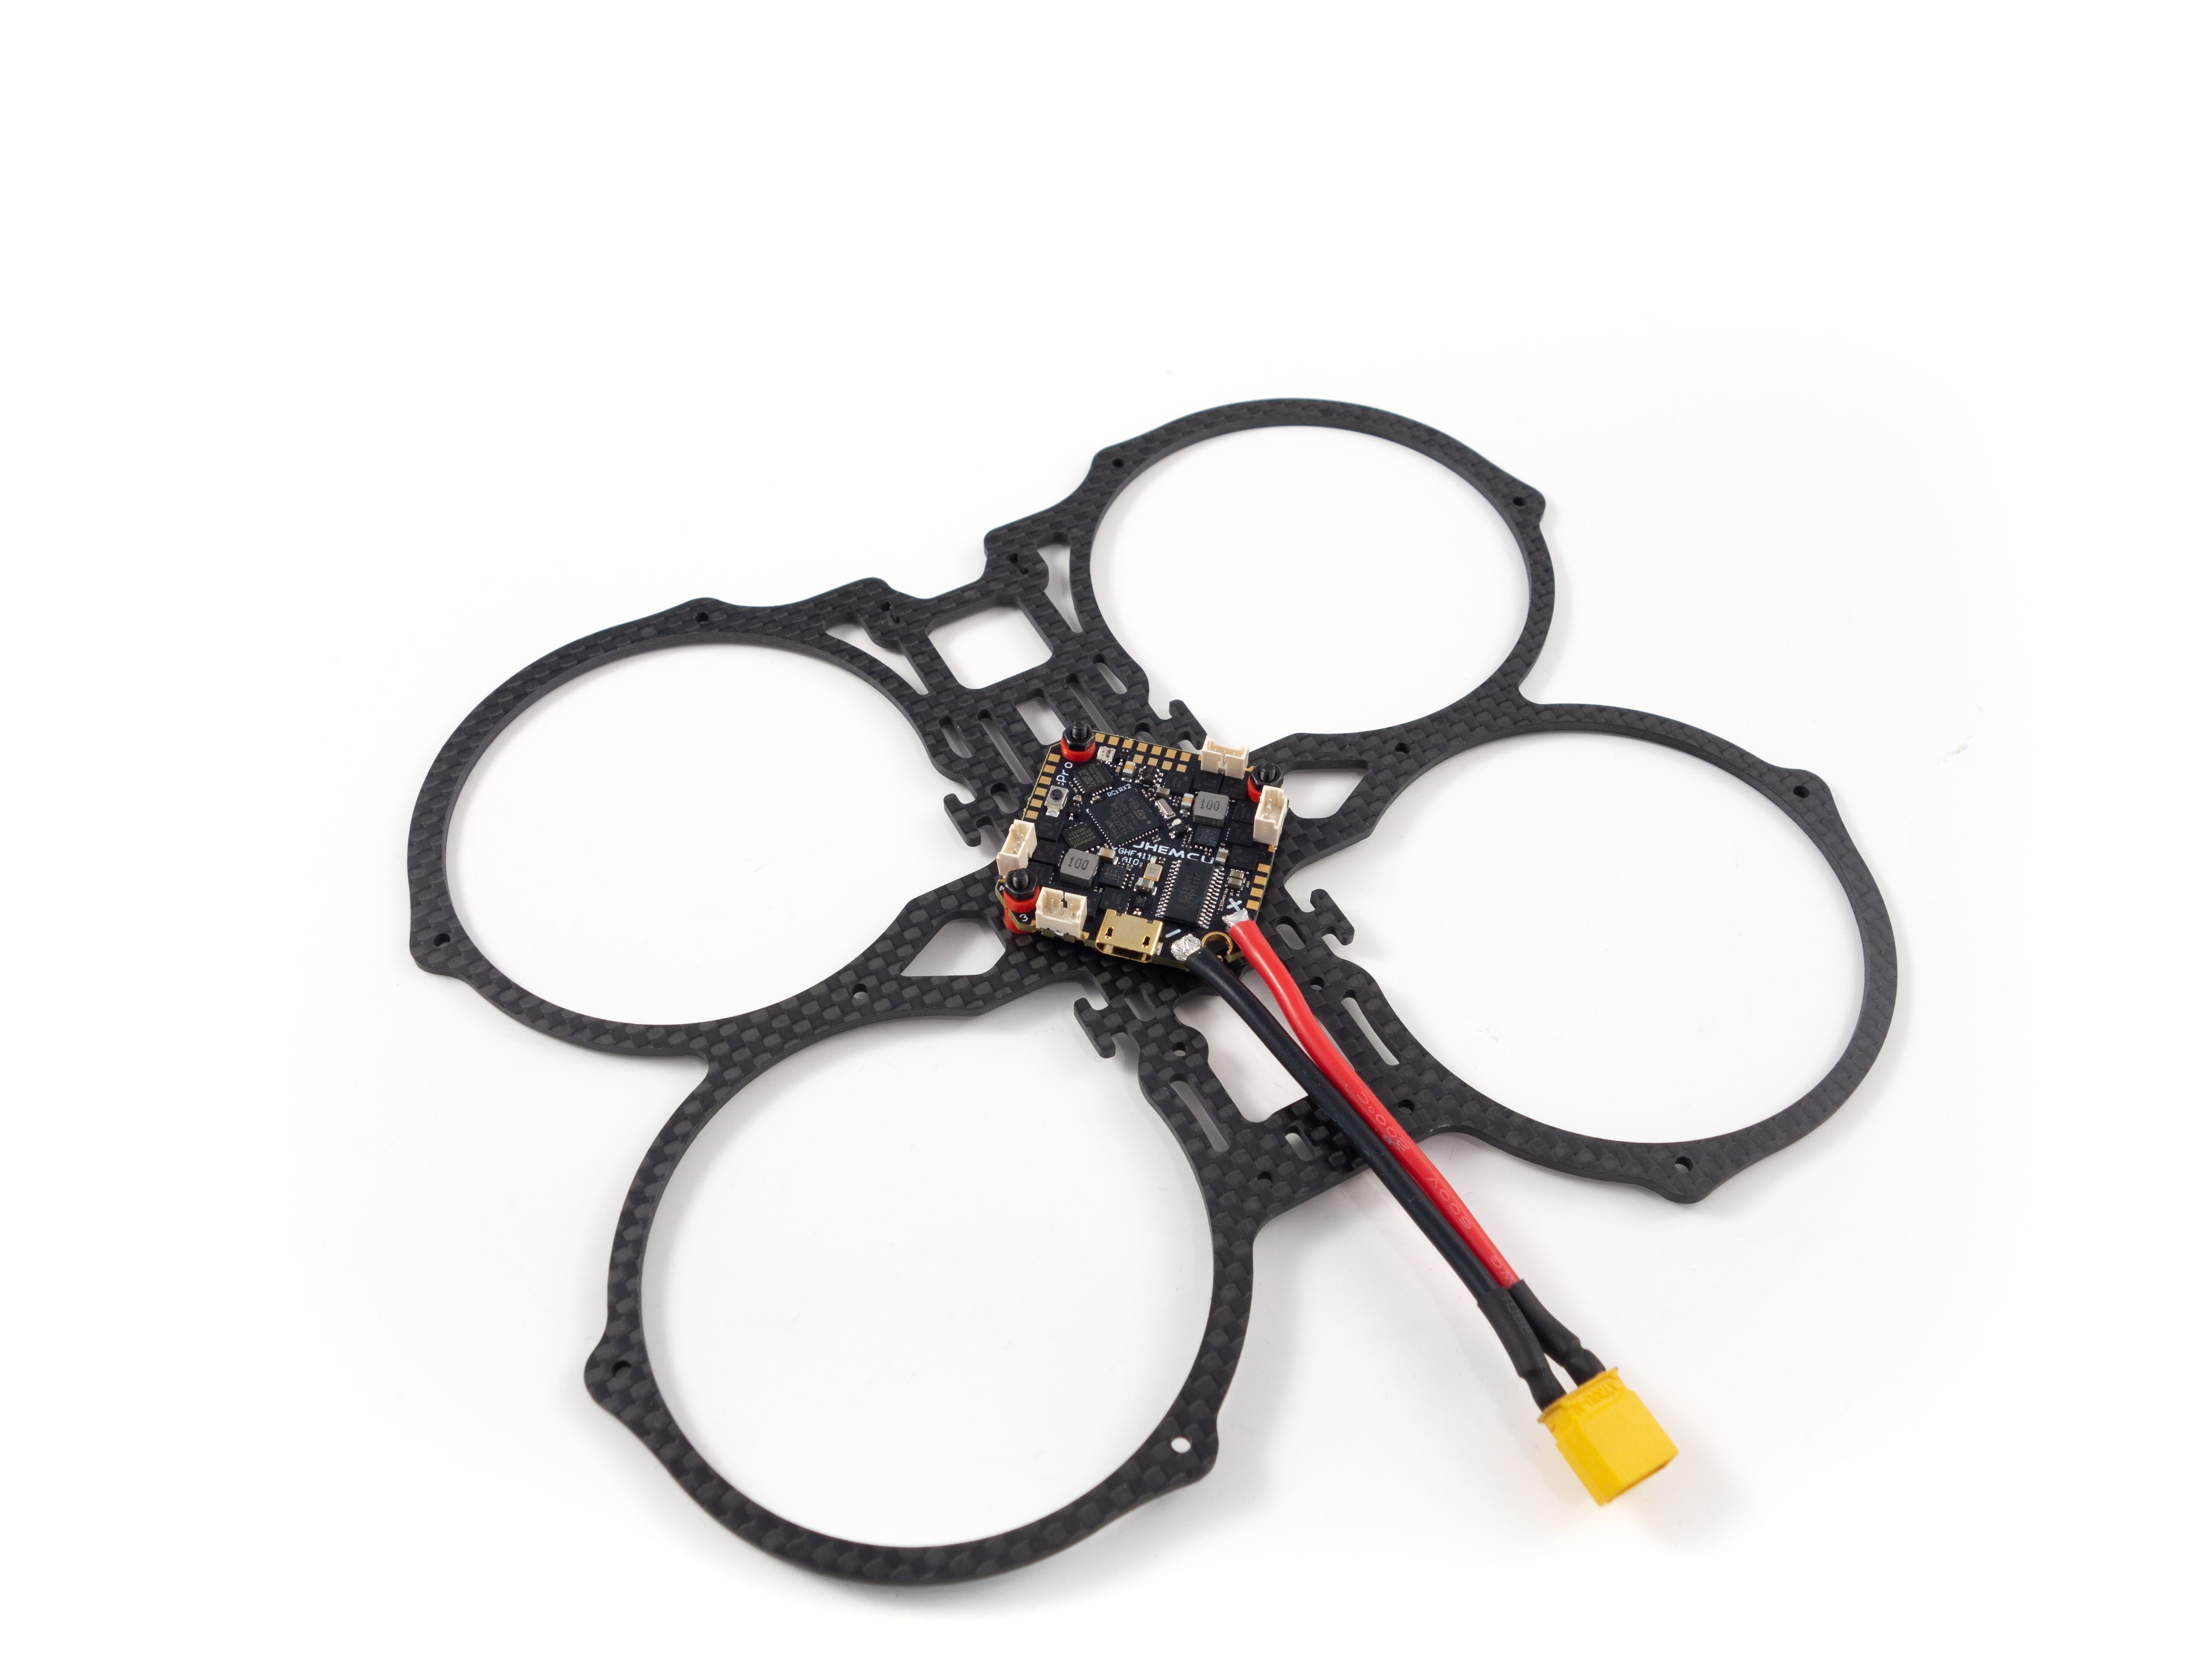
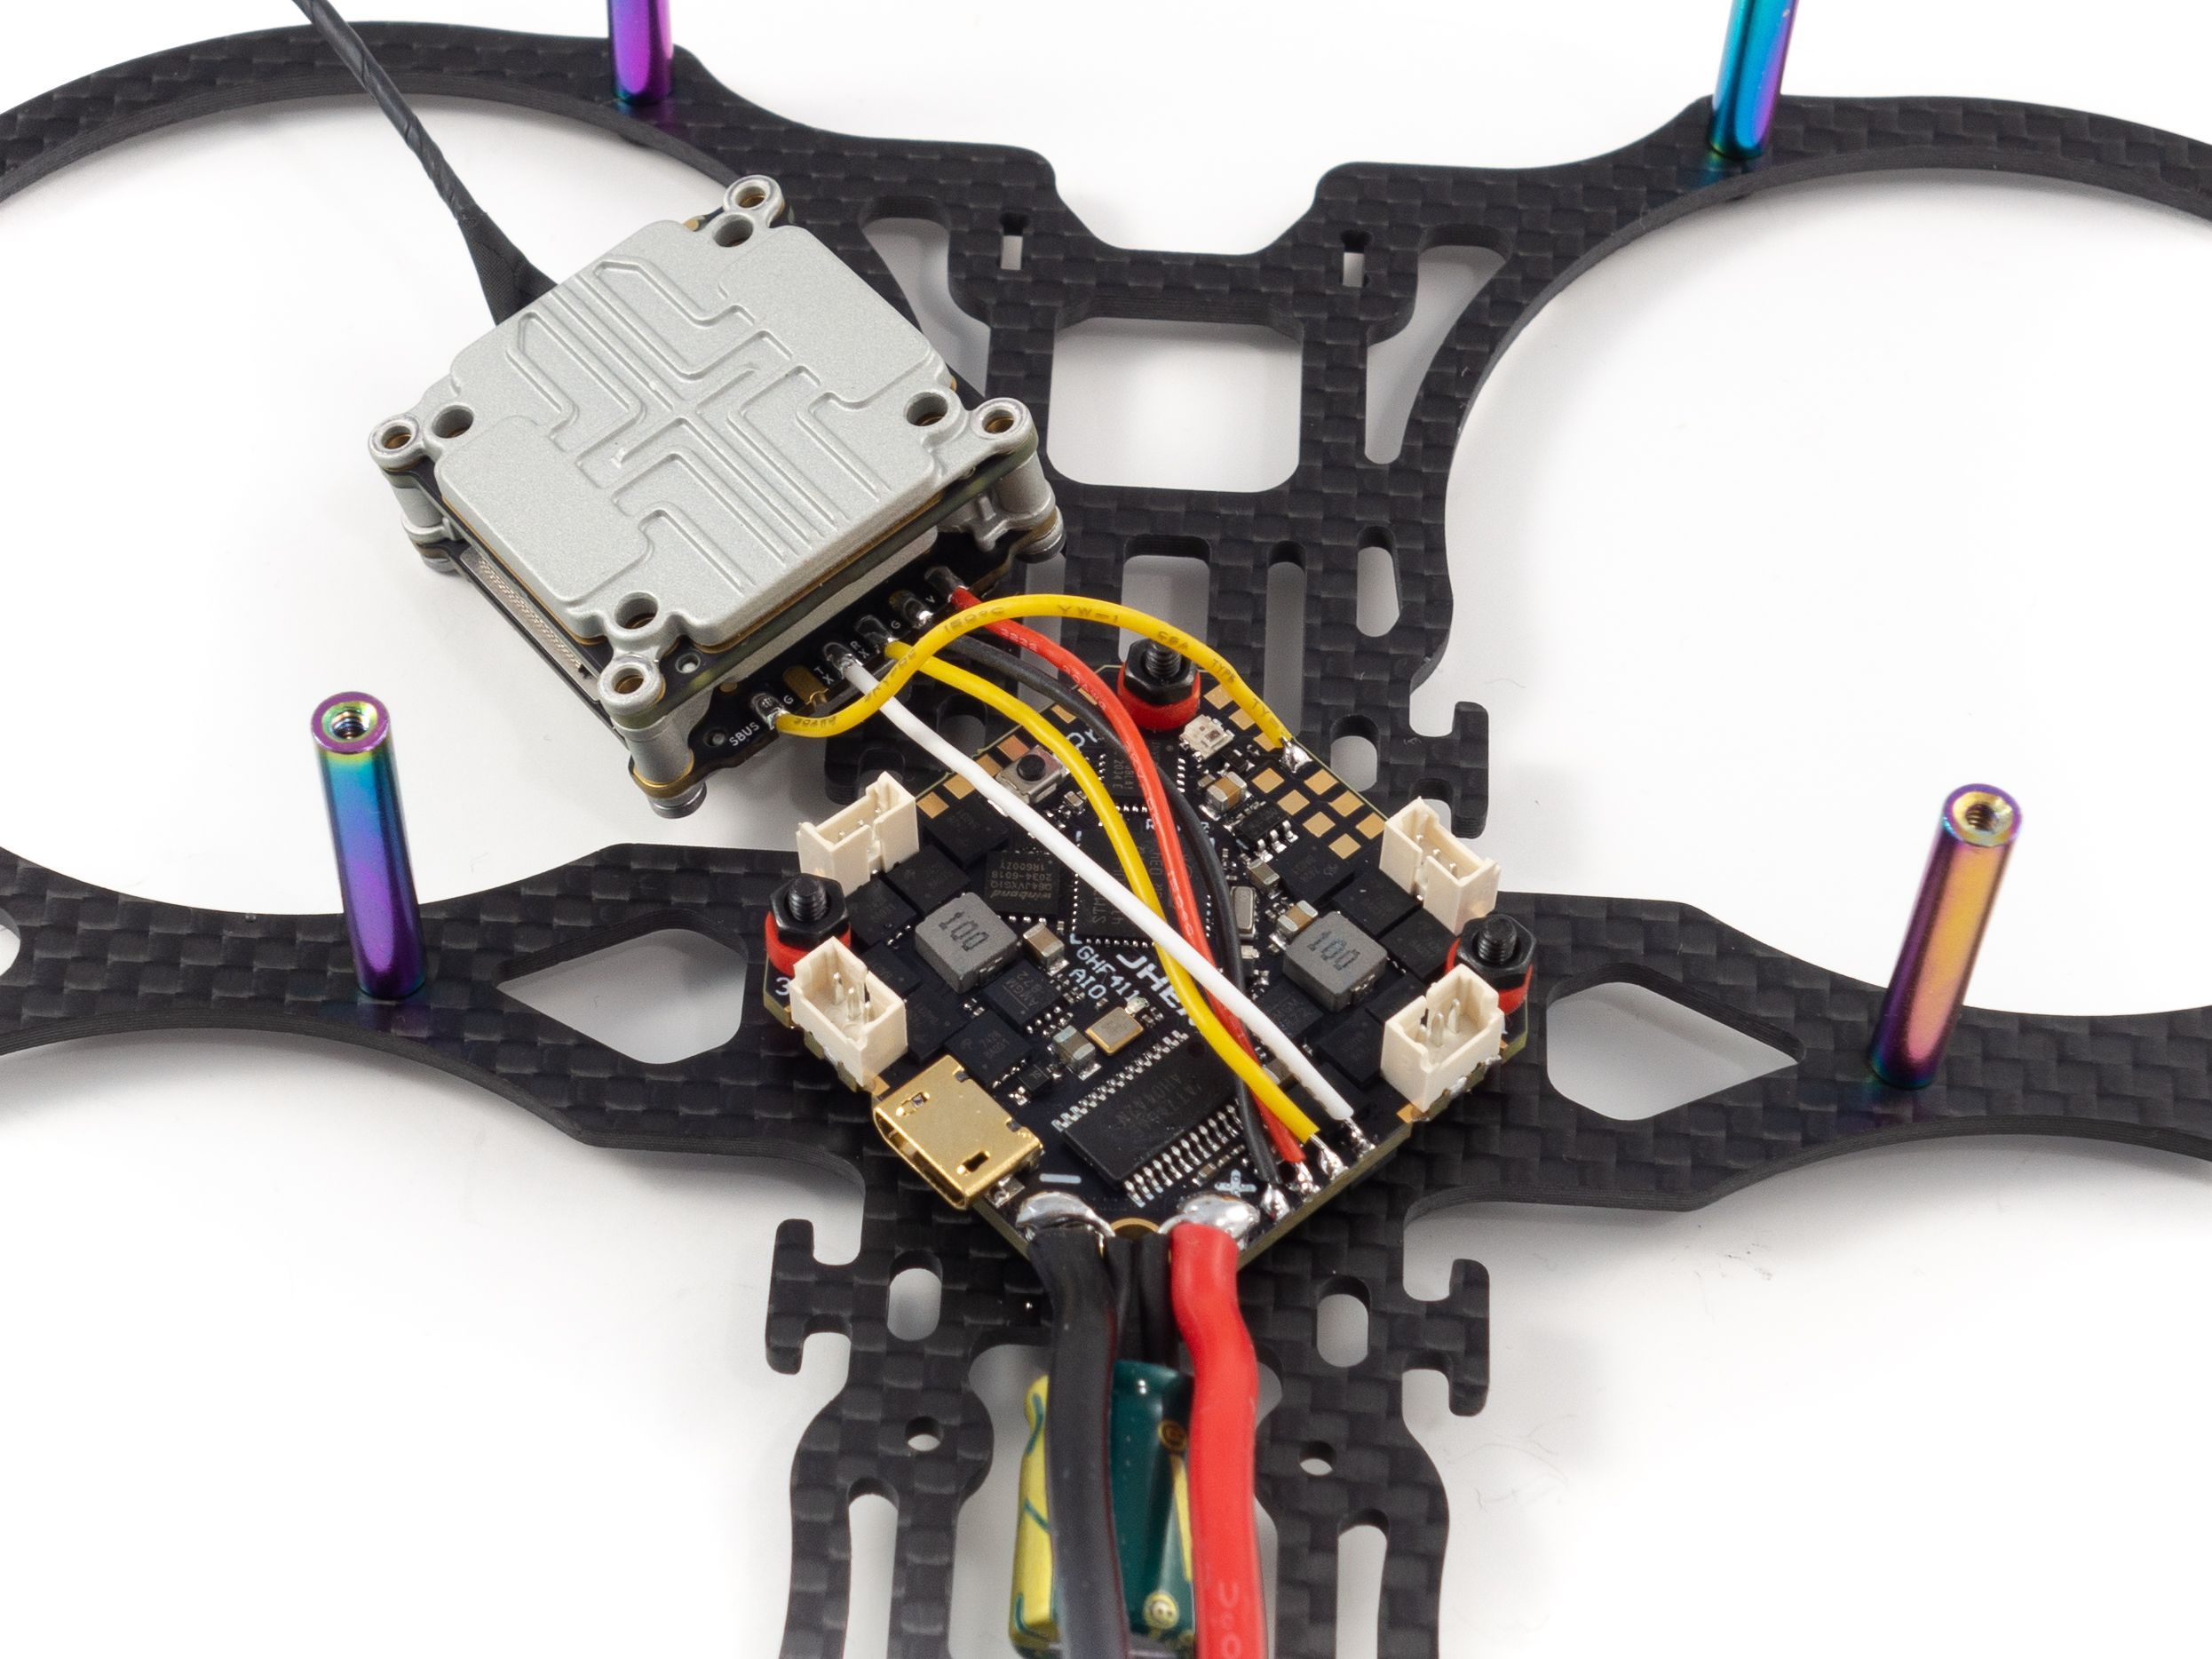
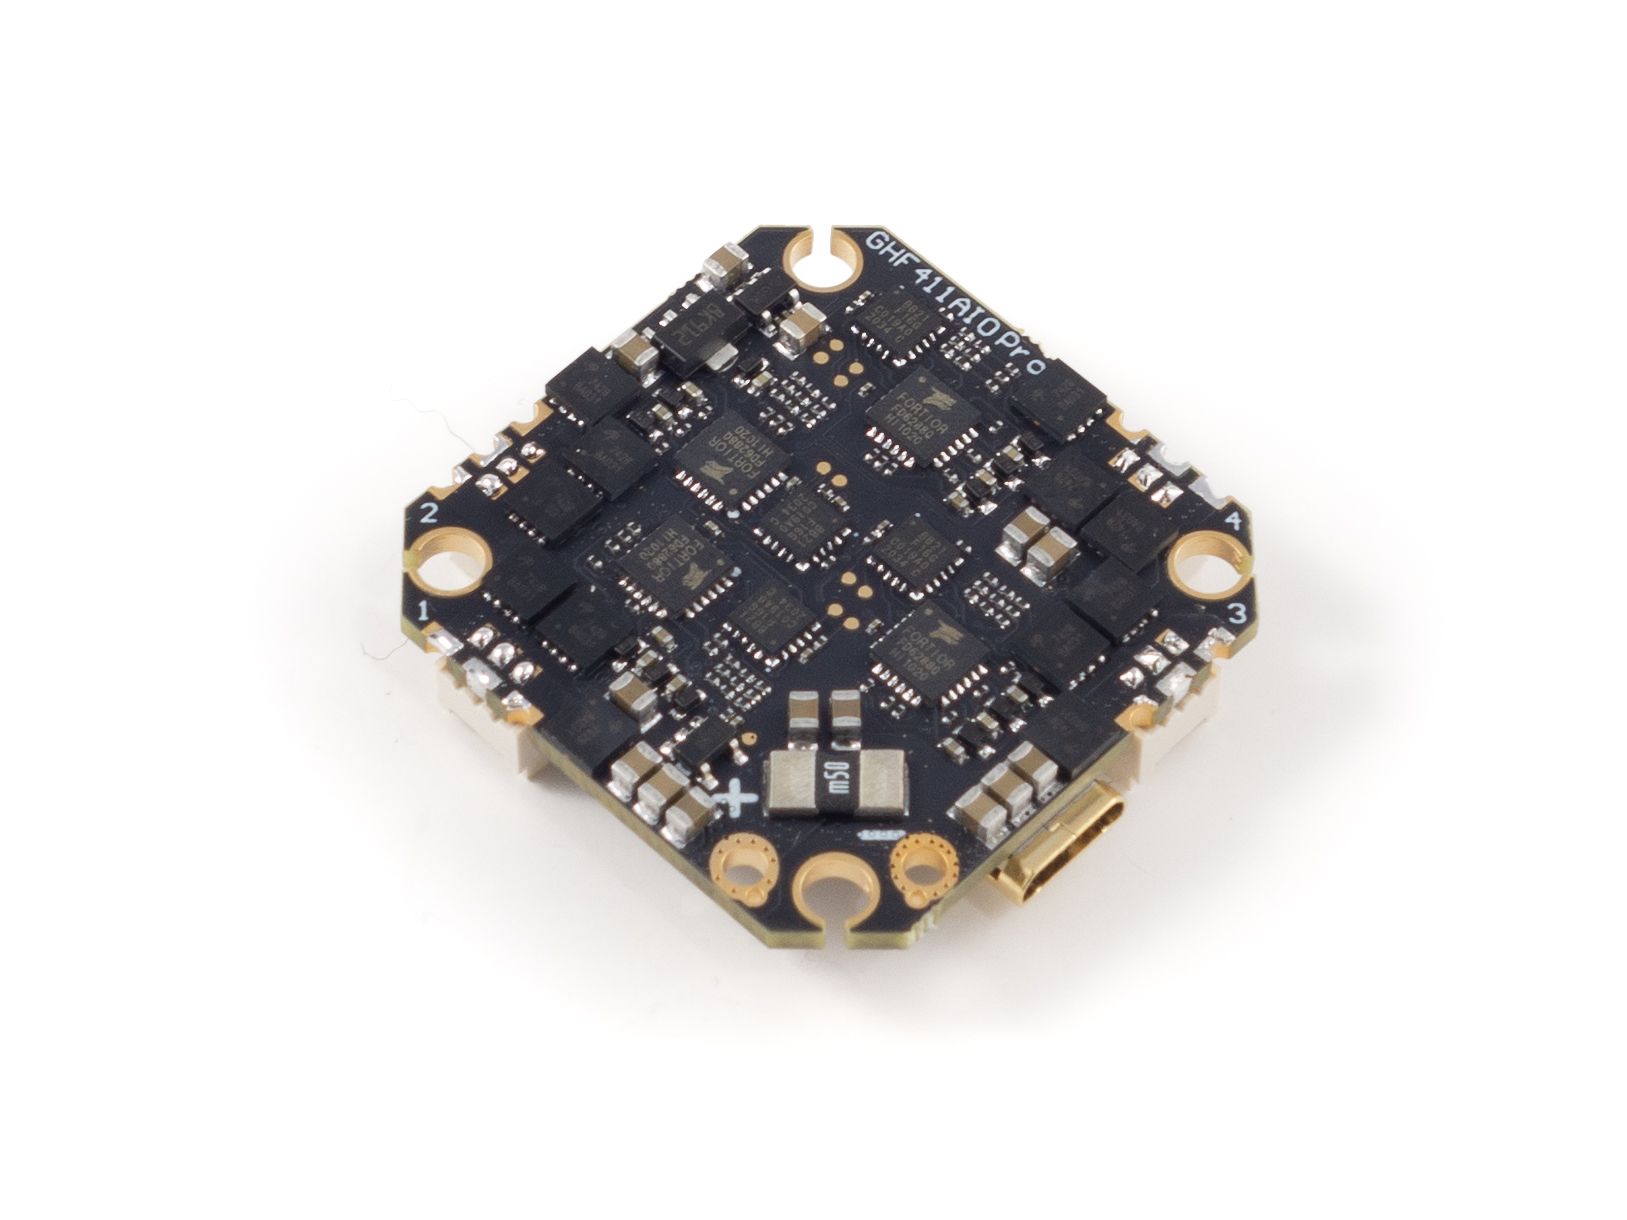
Flight Controller
The first thing you need to do is solder the plastic motor plugs to your flight controller. You can solder the motor wires directly to the board, but that'll make this build a little more tricky to assemble later. Solder one plug at a time and it's helpful to use some Fun Tak to hold the board in place while you do this. Apply a tiny bit of solder to the tip of your iron and tap the back-side of each prong under the board. Be careful not to use too much solder and have some solder wick handy in case you do. This is a little trickier than it seems so just be patient with it. I found it was most effective to slide iron tip across the pad into each prong to apply the solder.
Now let's mount it to the bottom plate. This is the one without the motor mounts. Use the longer M2 screws included in the frame kit as well as the red silicone dampeners to mount it. You can exclude the rear screw and dampener. They'll just get in the way of the battery lead. Three mounting points are enough. Hold it in place with the nylon nuts and get it nice and low so it just clears the frame.
Power Connector
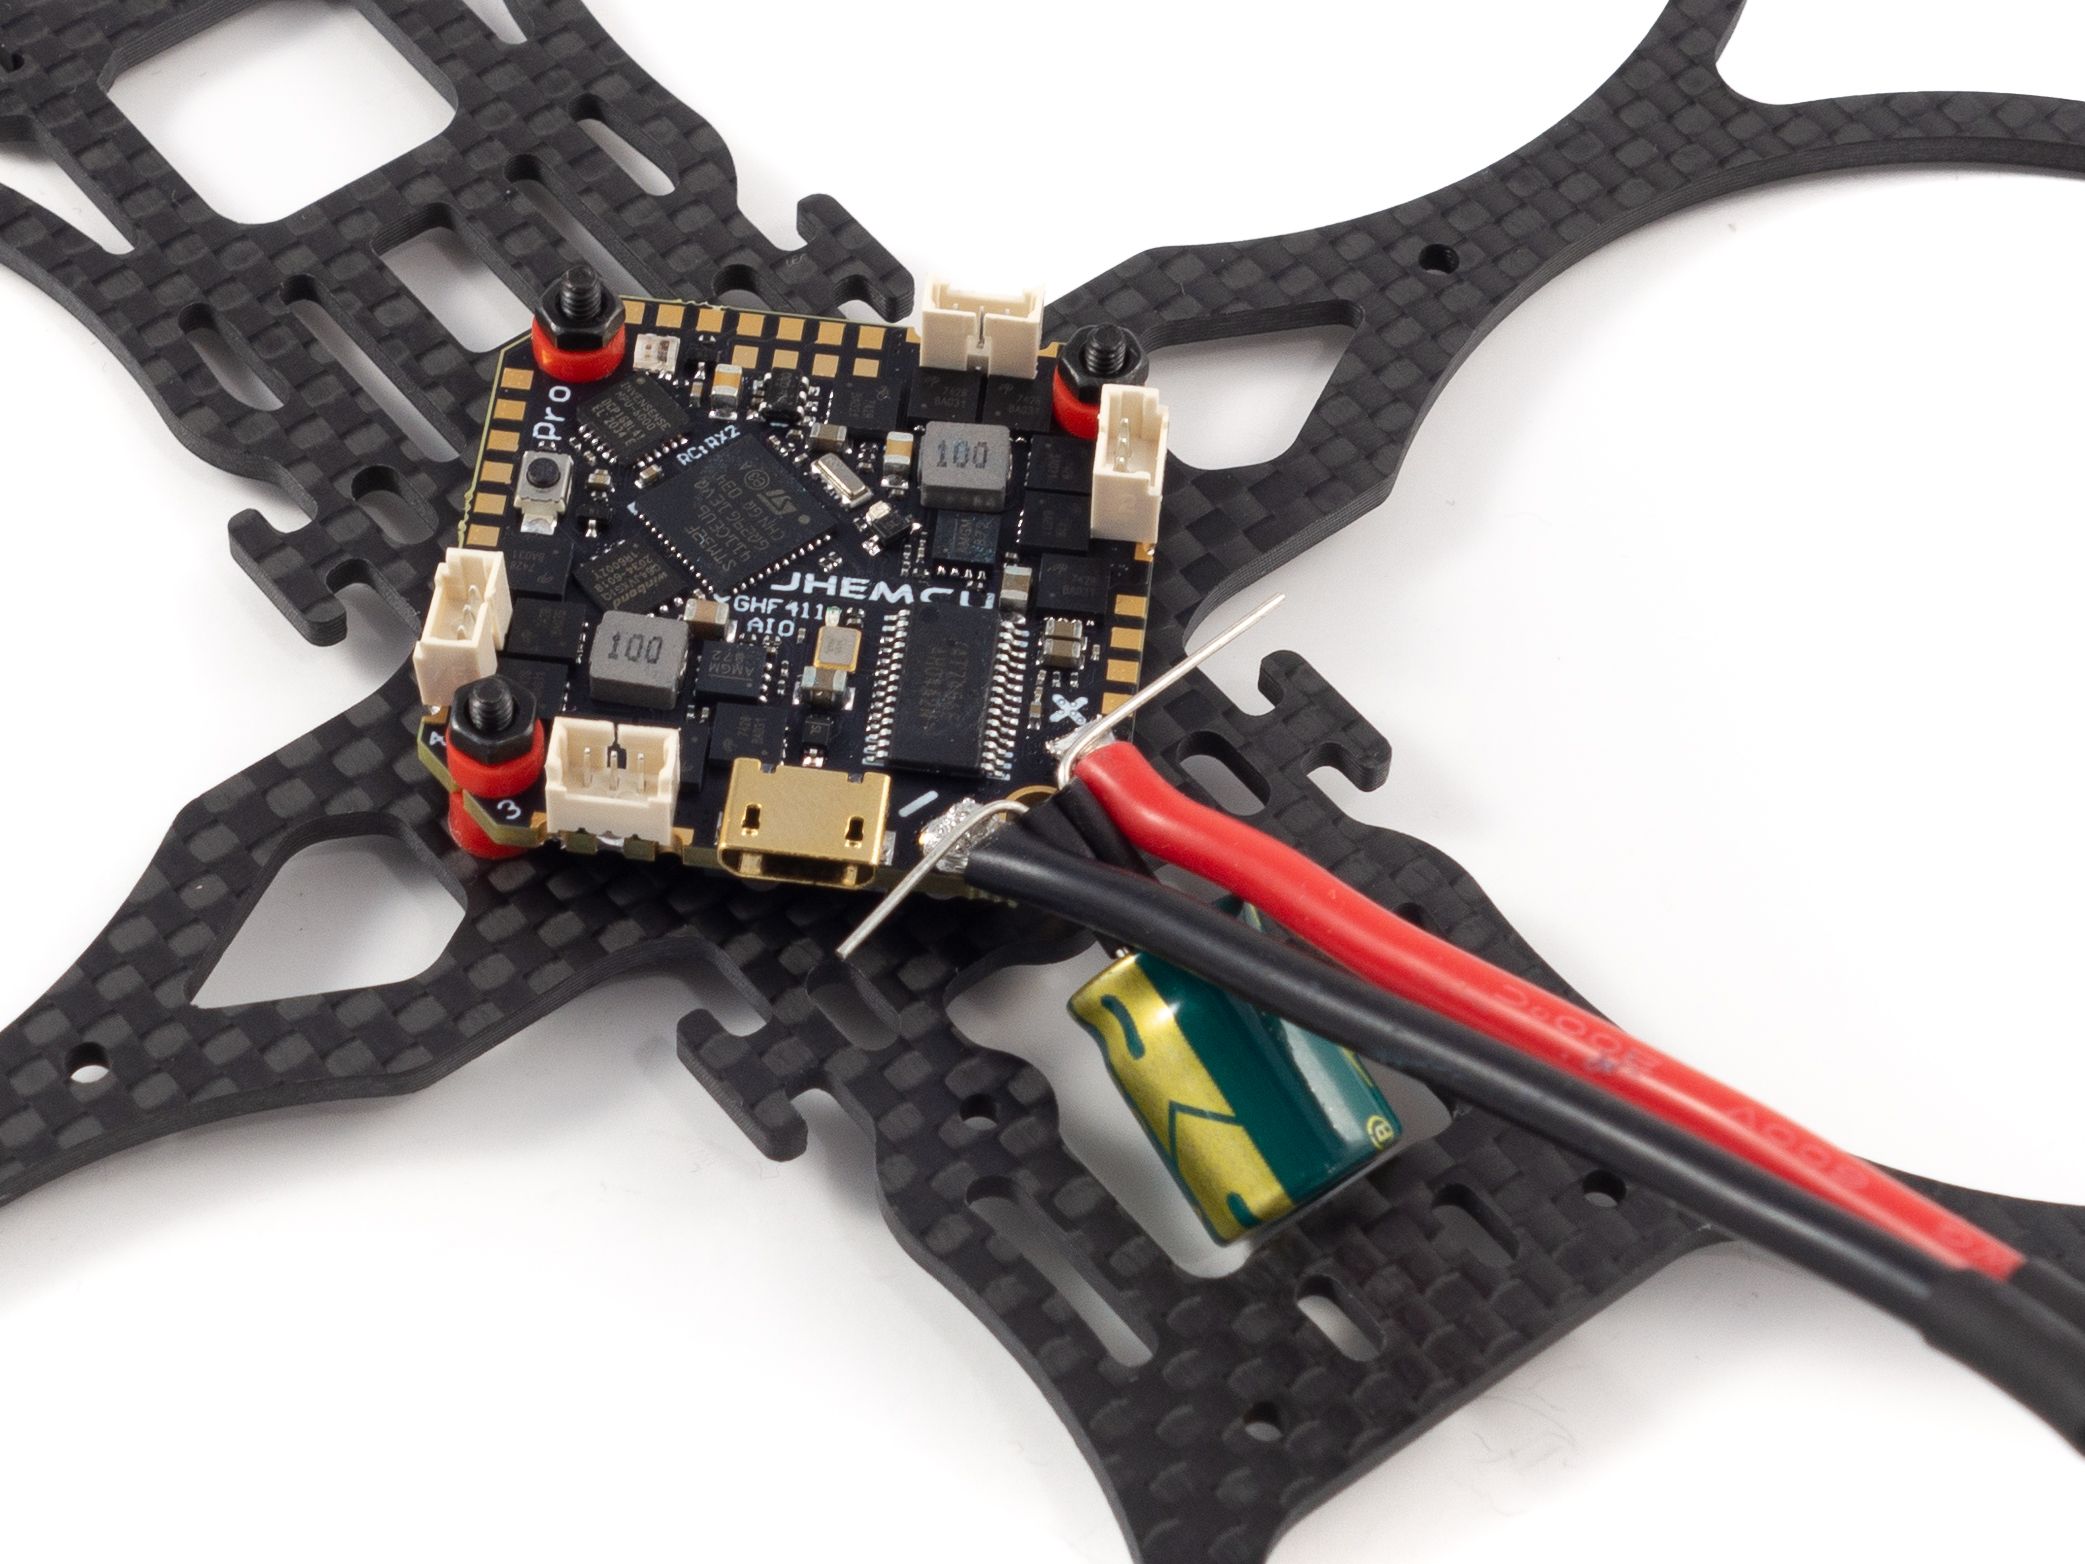
Now let's prepare the battery lead. Always solder the wires to the XT30 plug before soldering to the flight controller. This makes it a lot easier. Use some Fun Tak to hold the connector face-down while you fill the wells with solder and slide the wires in. It's helpful to apply a dab of fresh solder to the pre-tinned tips to get them flowing again. Be sure to pay attention to the polarity. The red wire always goes to the flat side of the plug. Add some shrink tube to cover your joints.
Next, solder the battery lead to the flight controller. I trimmed about 2cm from the wires, but you can keep them full length if you want. This flight controller has holes for the battery leads, but the wire they include is too thick to fit those holes. Instead, cover the holes with solder to create a flat surface for the wires. Make sure your wires are properly tinned and push them horizontally against the pads with your iron. Wait until you see the solder run through the strands of the wire and make a solid connection to the board.
Now you can solder the capacitor directly on top. Add some shrink tube to the wires and bend them up and out over the joints. Apply a little solder and hold your iron until the solder flows into the entire joint. Snip the ends.
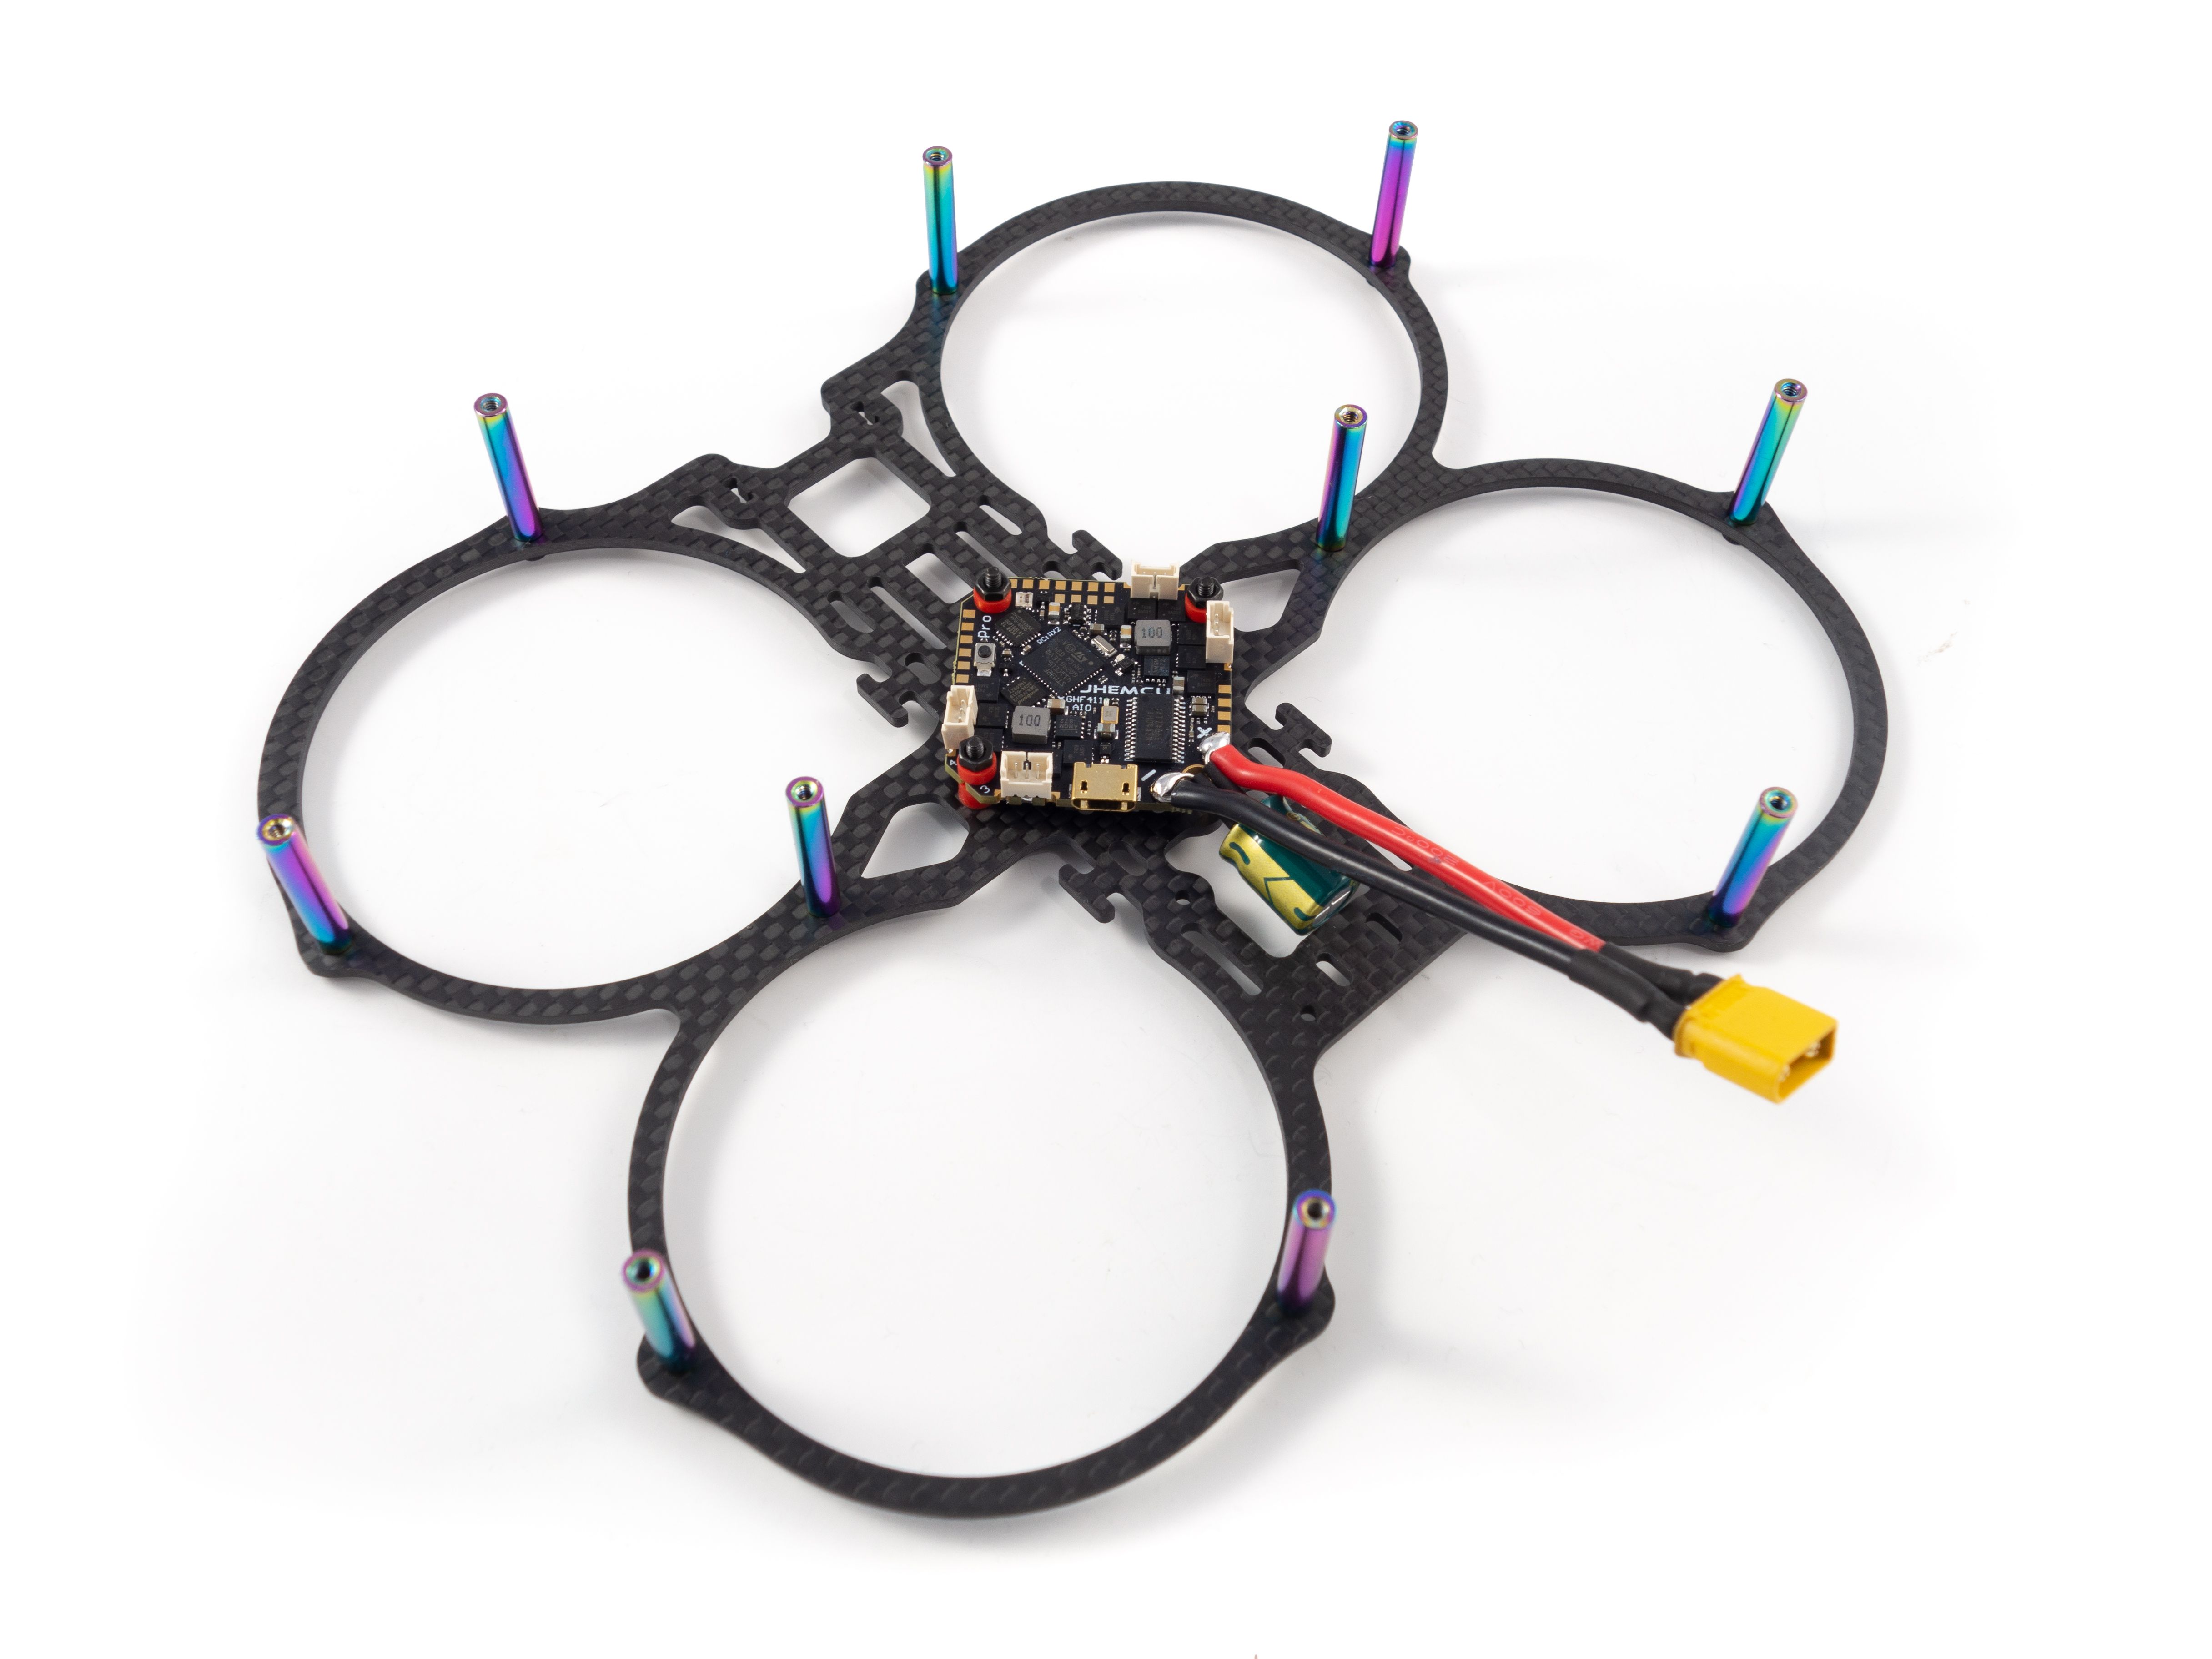
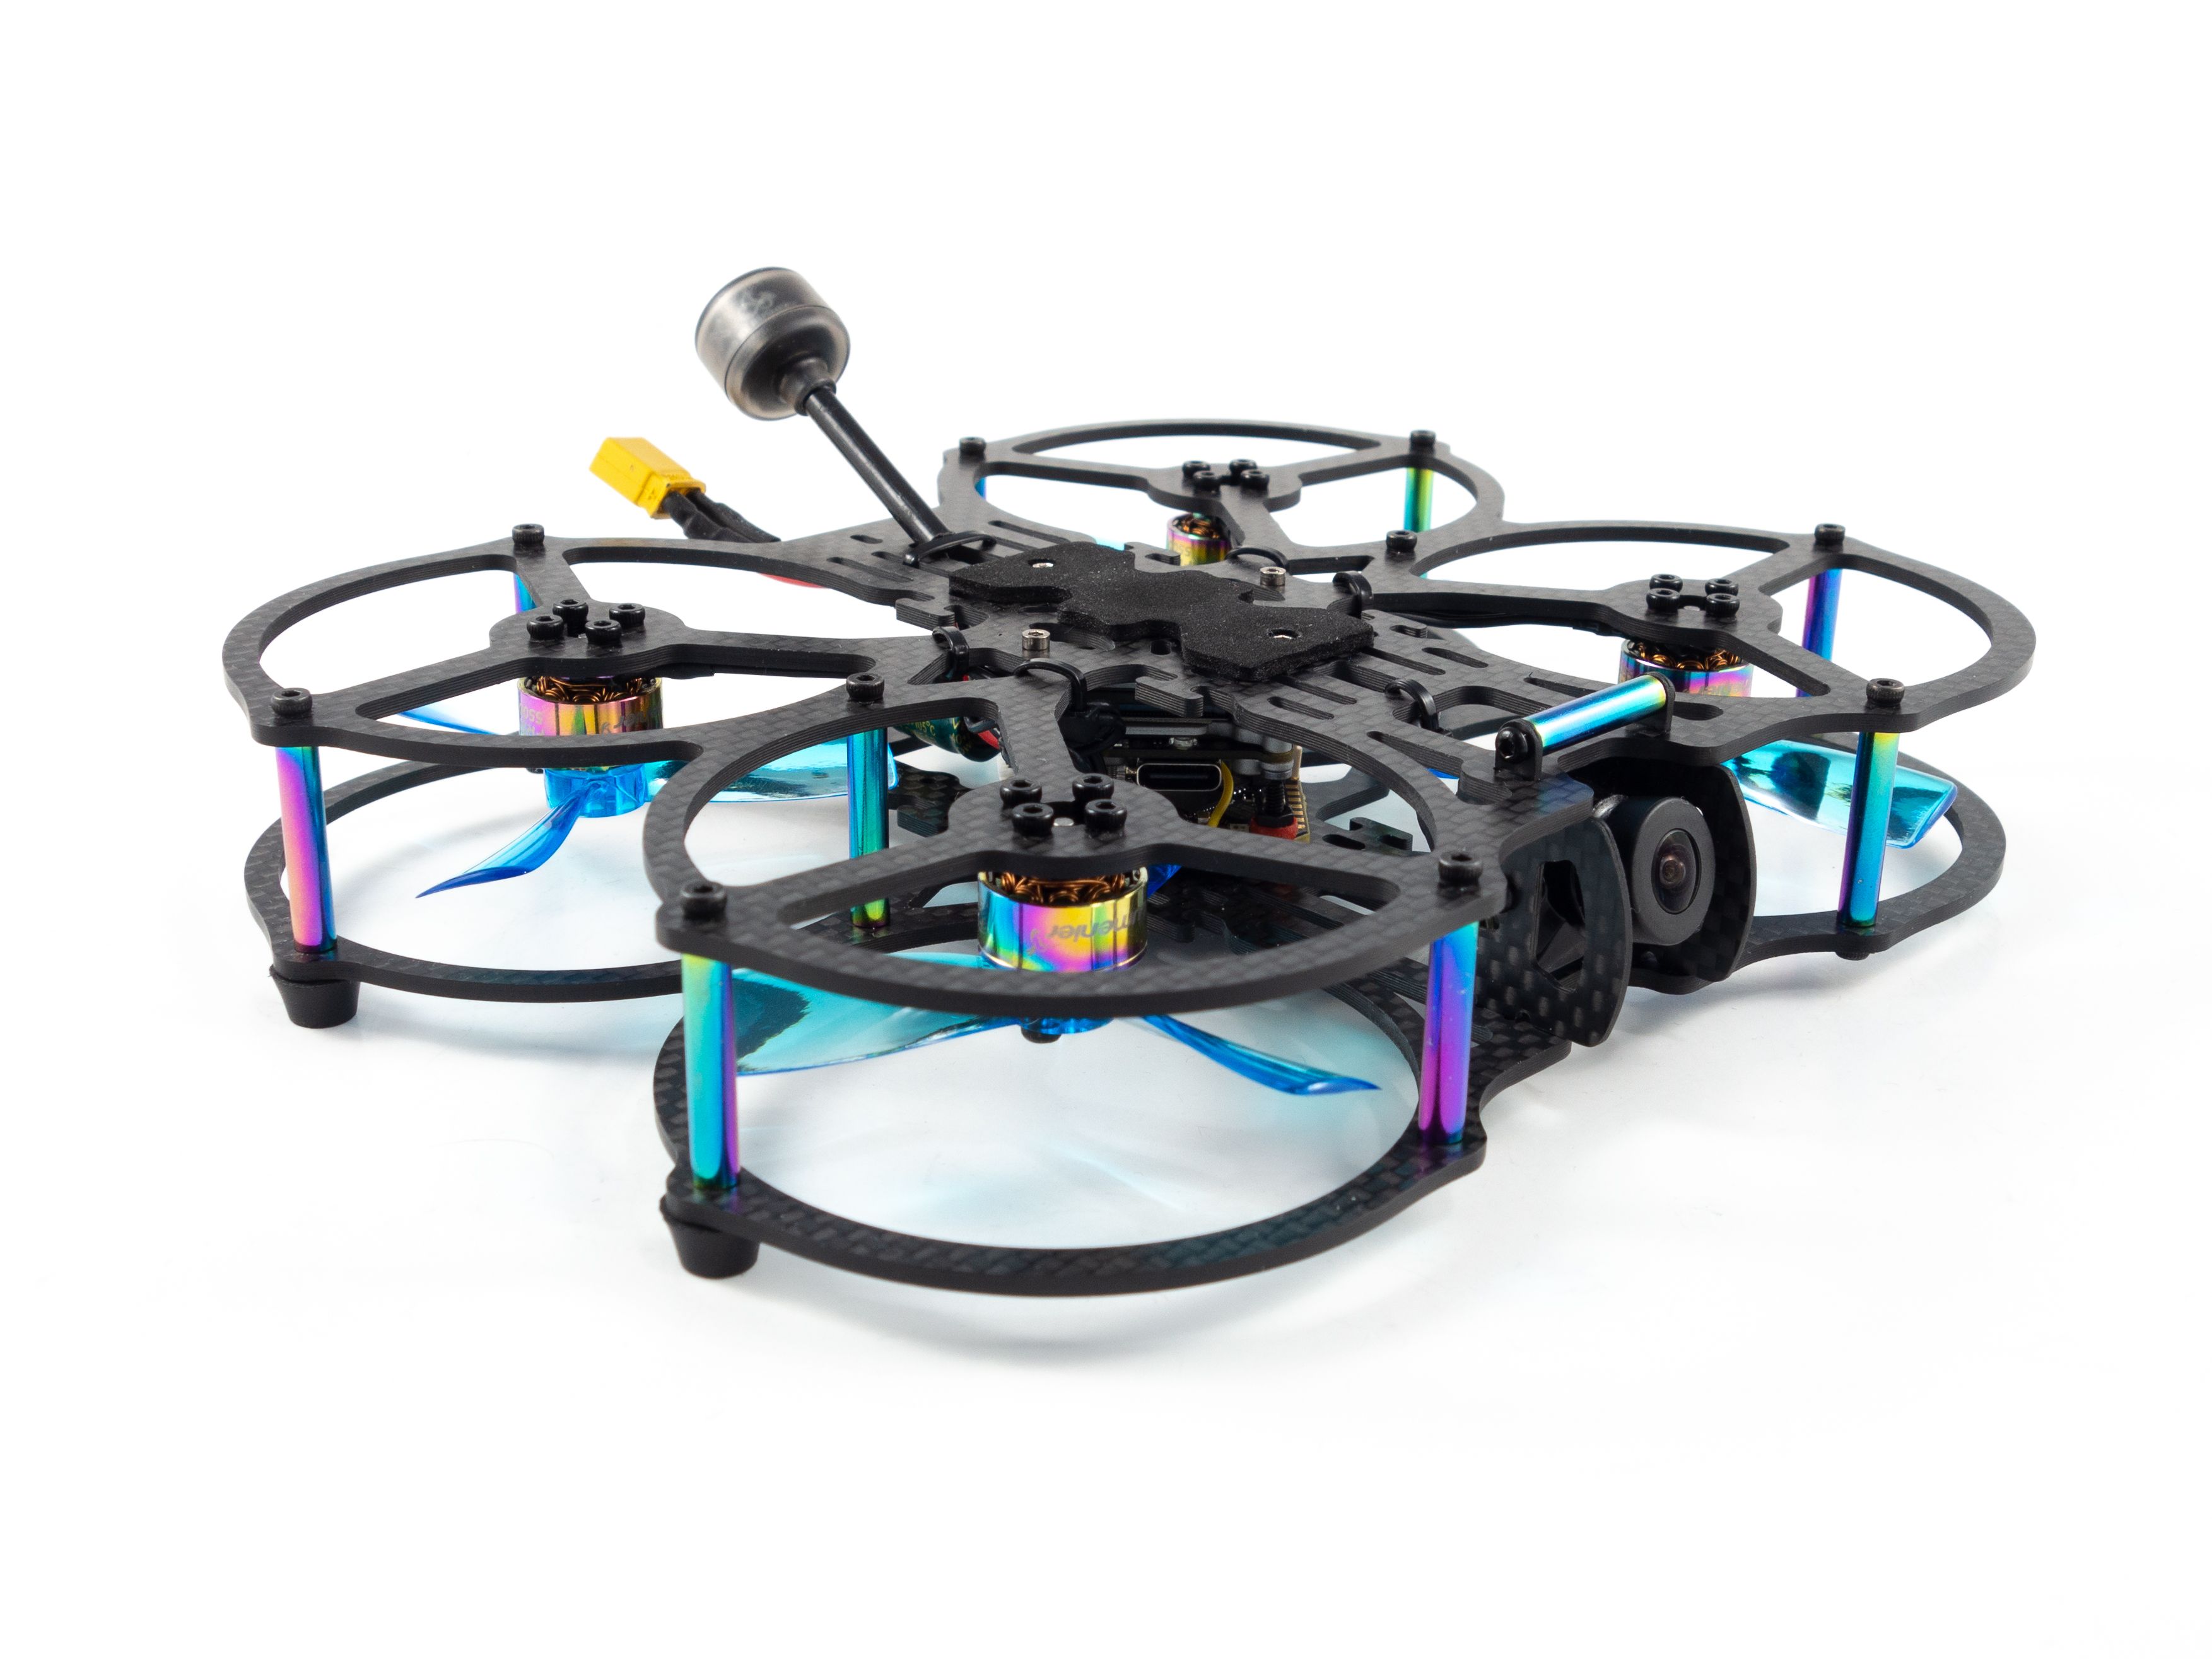
Next, screw all the standoffs to the frame. It's a lot easier to do this now. Use the longer M2 screws included in the frame kit and mount the rubber feet to the outer edges of the frame.
Video Transmitter
Now you can wire up the Caddx Vista.
- Remove the M1.6 screws from the bottom of the Vista for mounting later. (It mounts upside down)
- Make sure the Vista is upside down so the full pads are exposed.
- Cover the pads with solder and attach each of the wires starting on the right with red. You can exclude the 2nd ground.
- Cut the wires down to about 4-5cm.
- Solder V and G to the +9V and GND pads.
- Solder RX to TX1 and TX to RX1.
- Solder SBUS to SBUS.
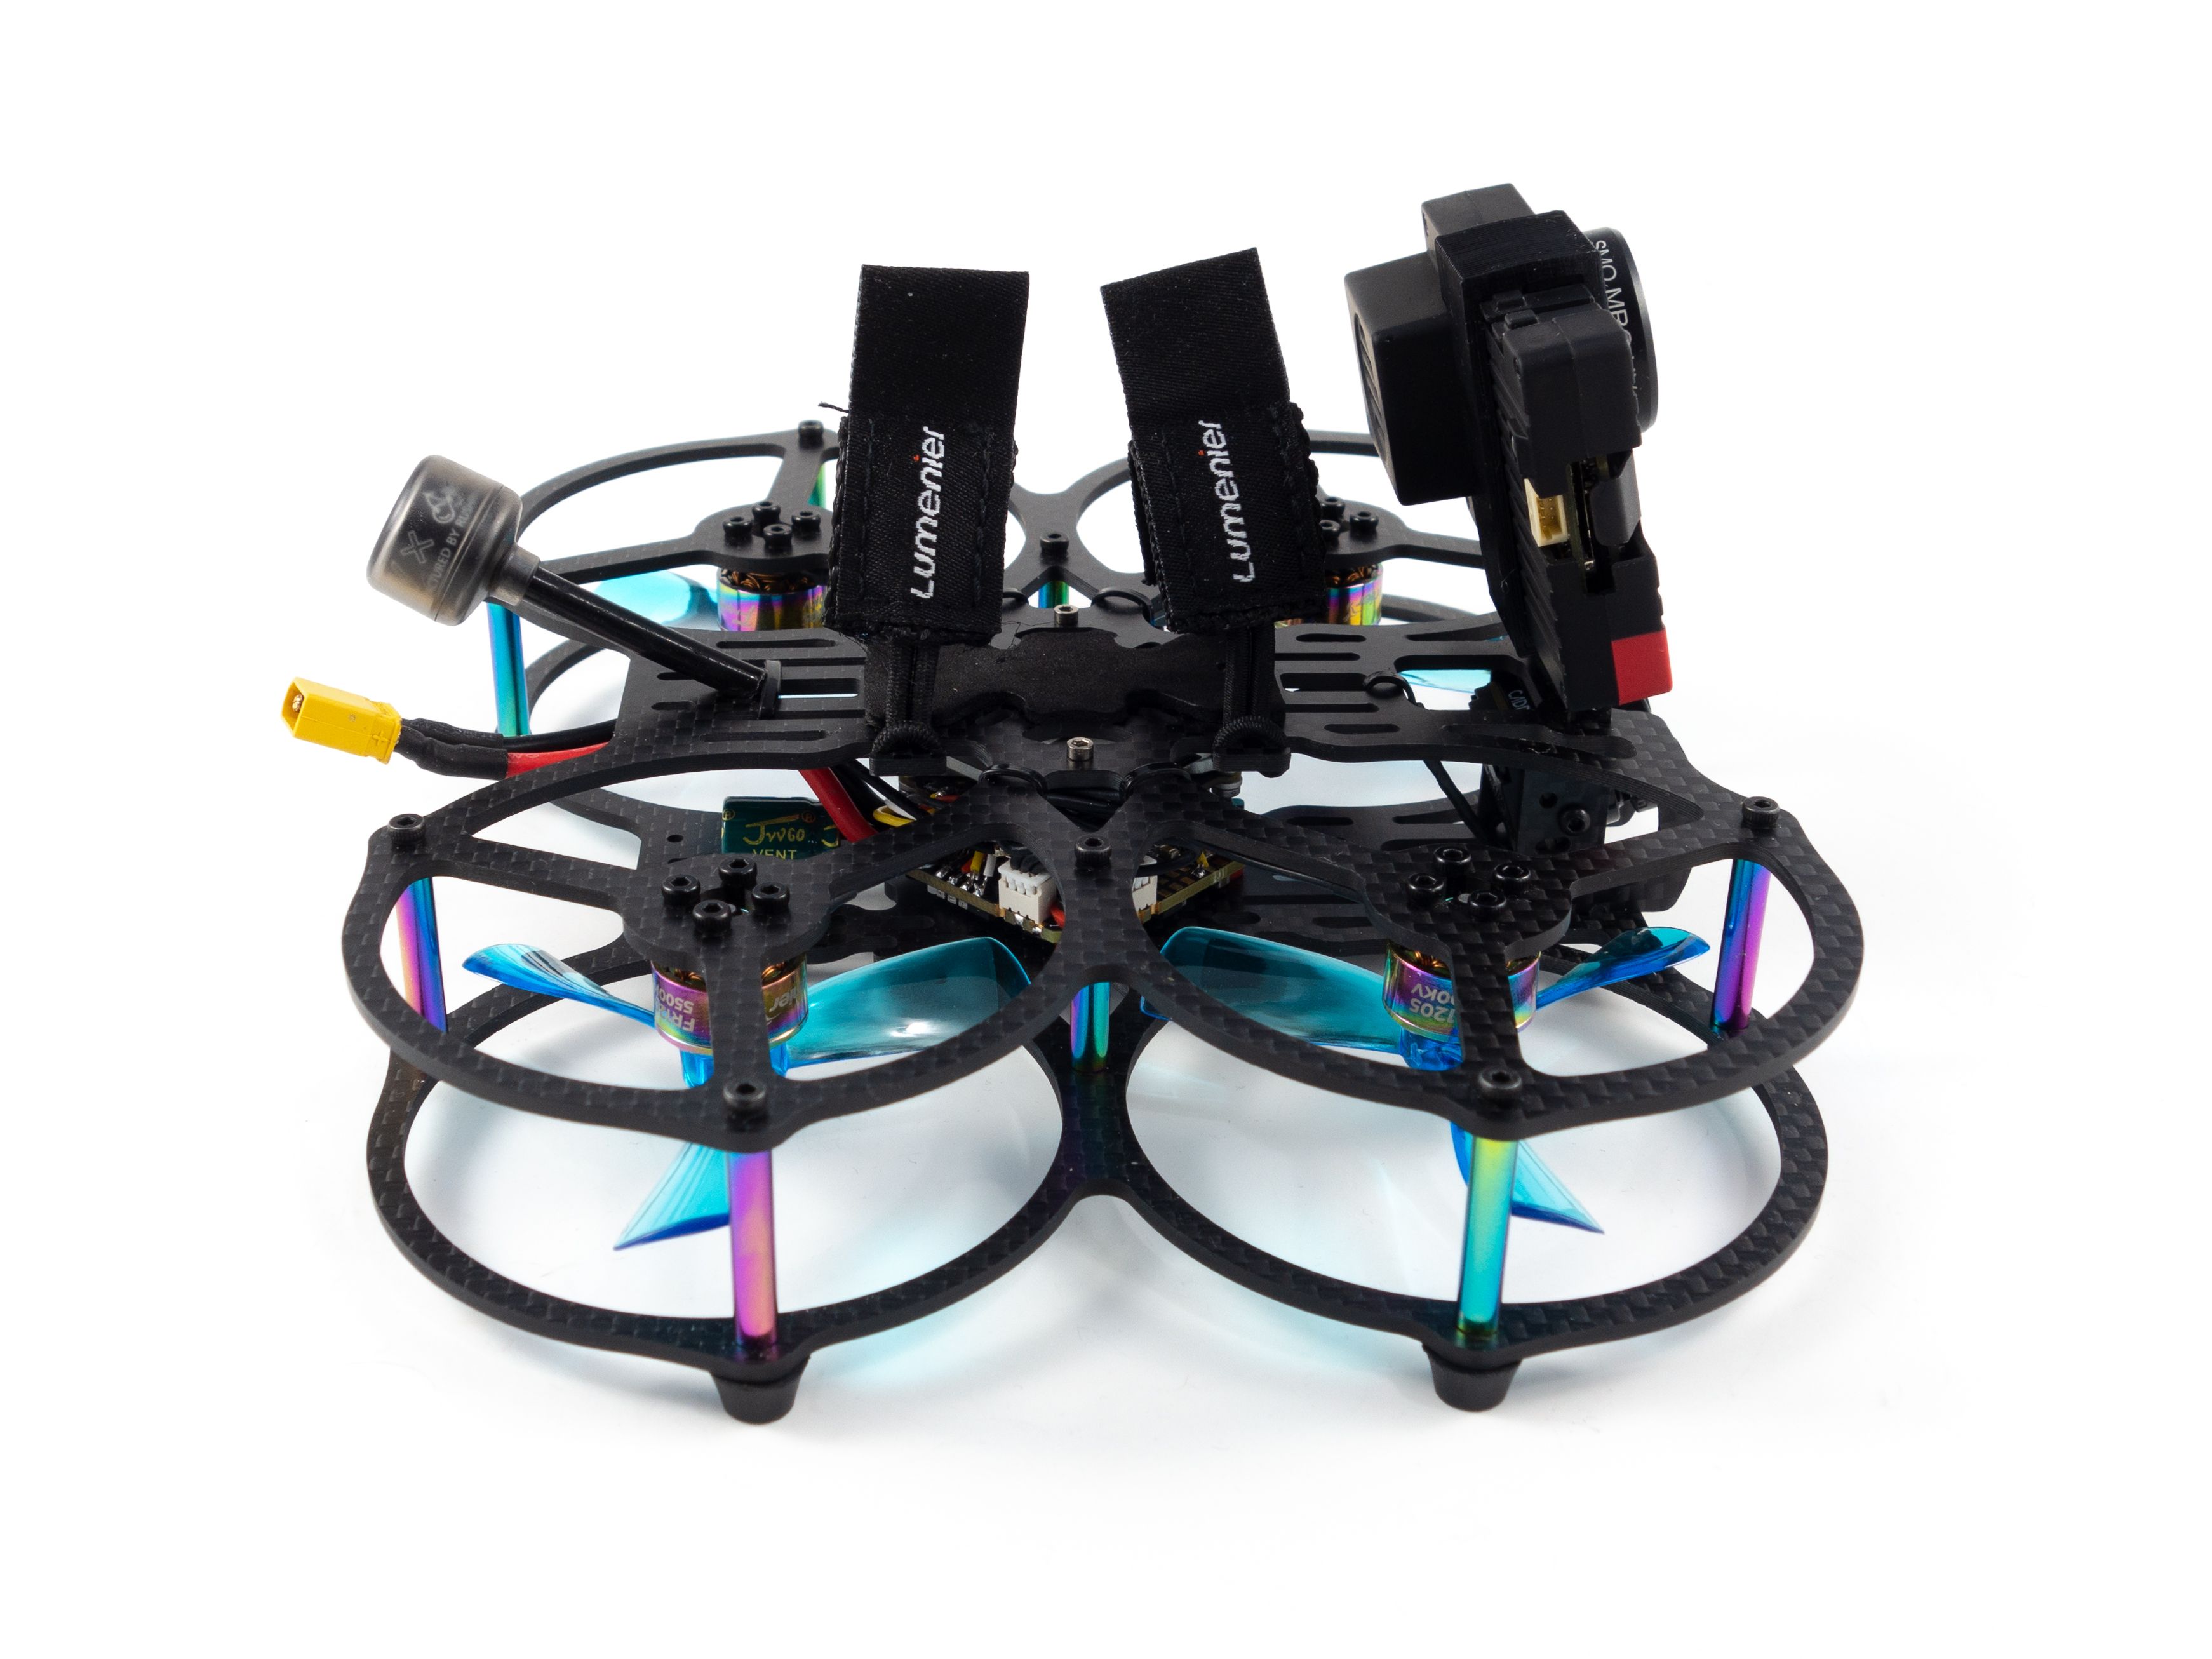
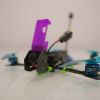
Mount the camera to the side plates, but make sure you've got it right-side up. The cable should be on the bottom. Use the shortest M2 screws included in the Caddx Vista kit. Don't make it tight otherwise the side plates won't slot into the frame. You can even add a couple small washers as the camera is slightly more narrow than the gap.
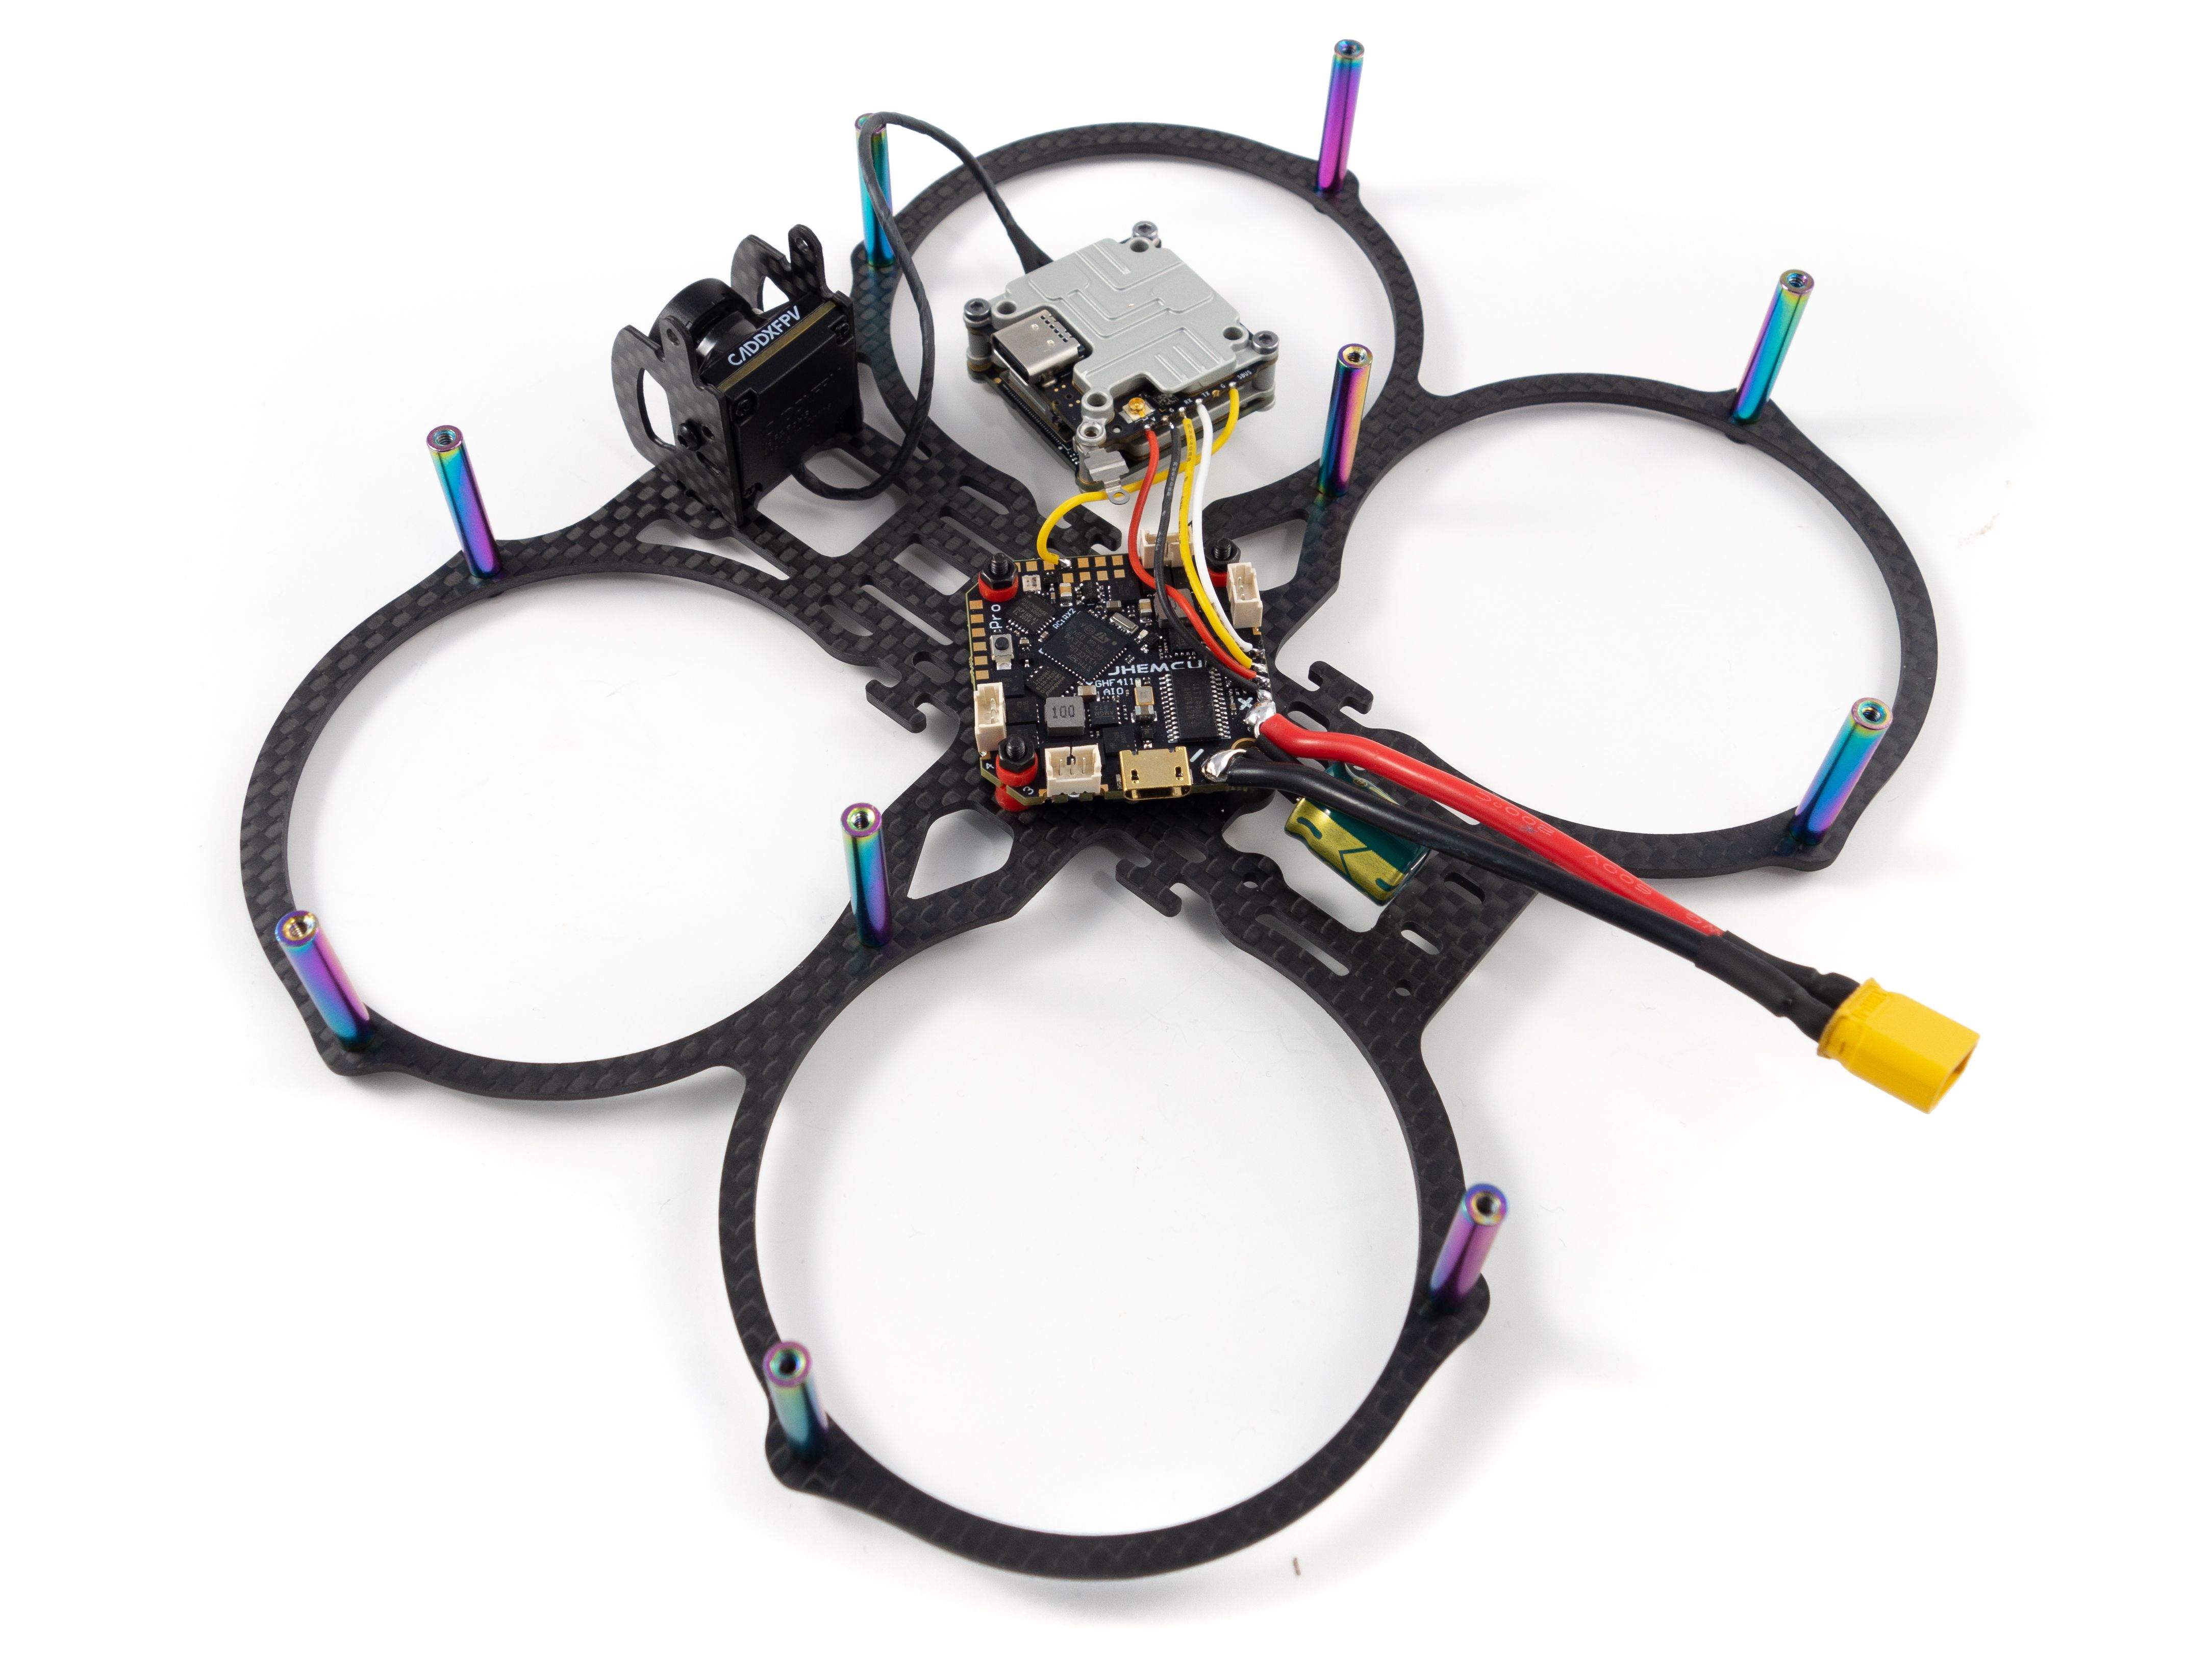
Now here's where it gets a little tricky. If you send the antenna out the back of the frame it won't clear the battery which will affect reception. It's better to send it through the top plate to give it more height. To do this you need to unscrew the bracket from the Caddx Vista and pass the antenna through the top plate before you snap it in. The little bracket can be a fiddly and the top plate can get in the way, so just be patient with it.
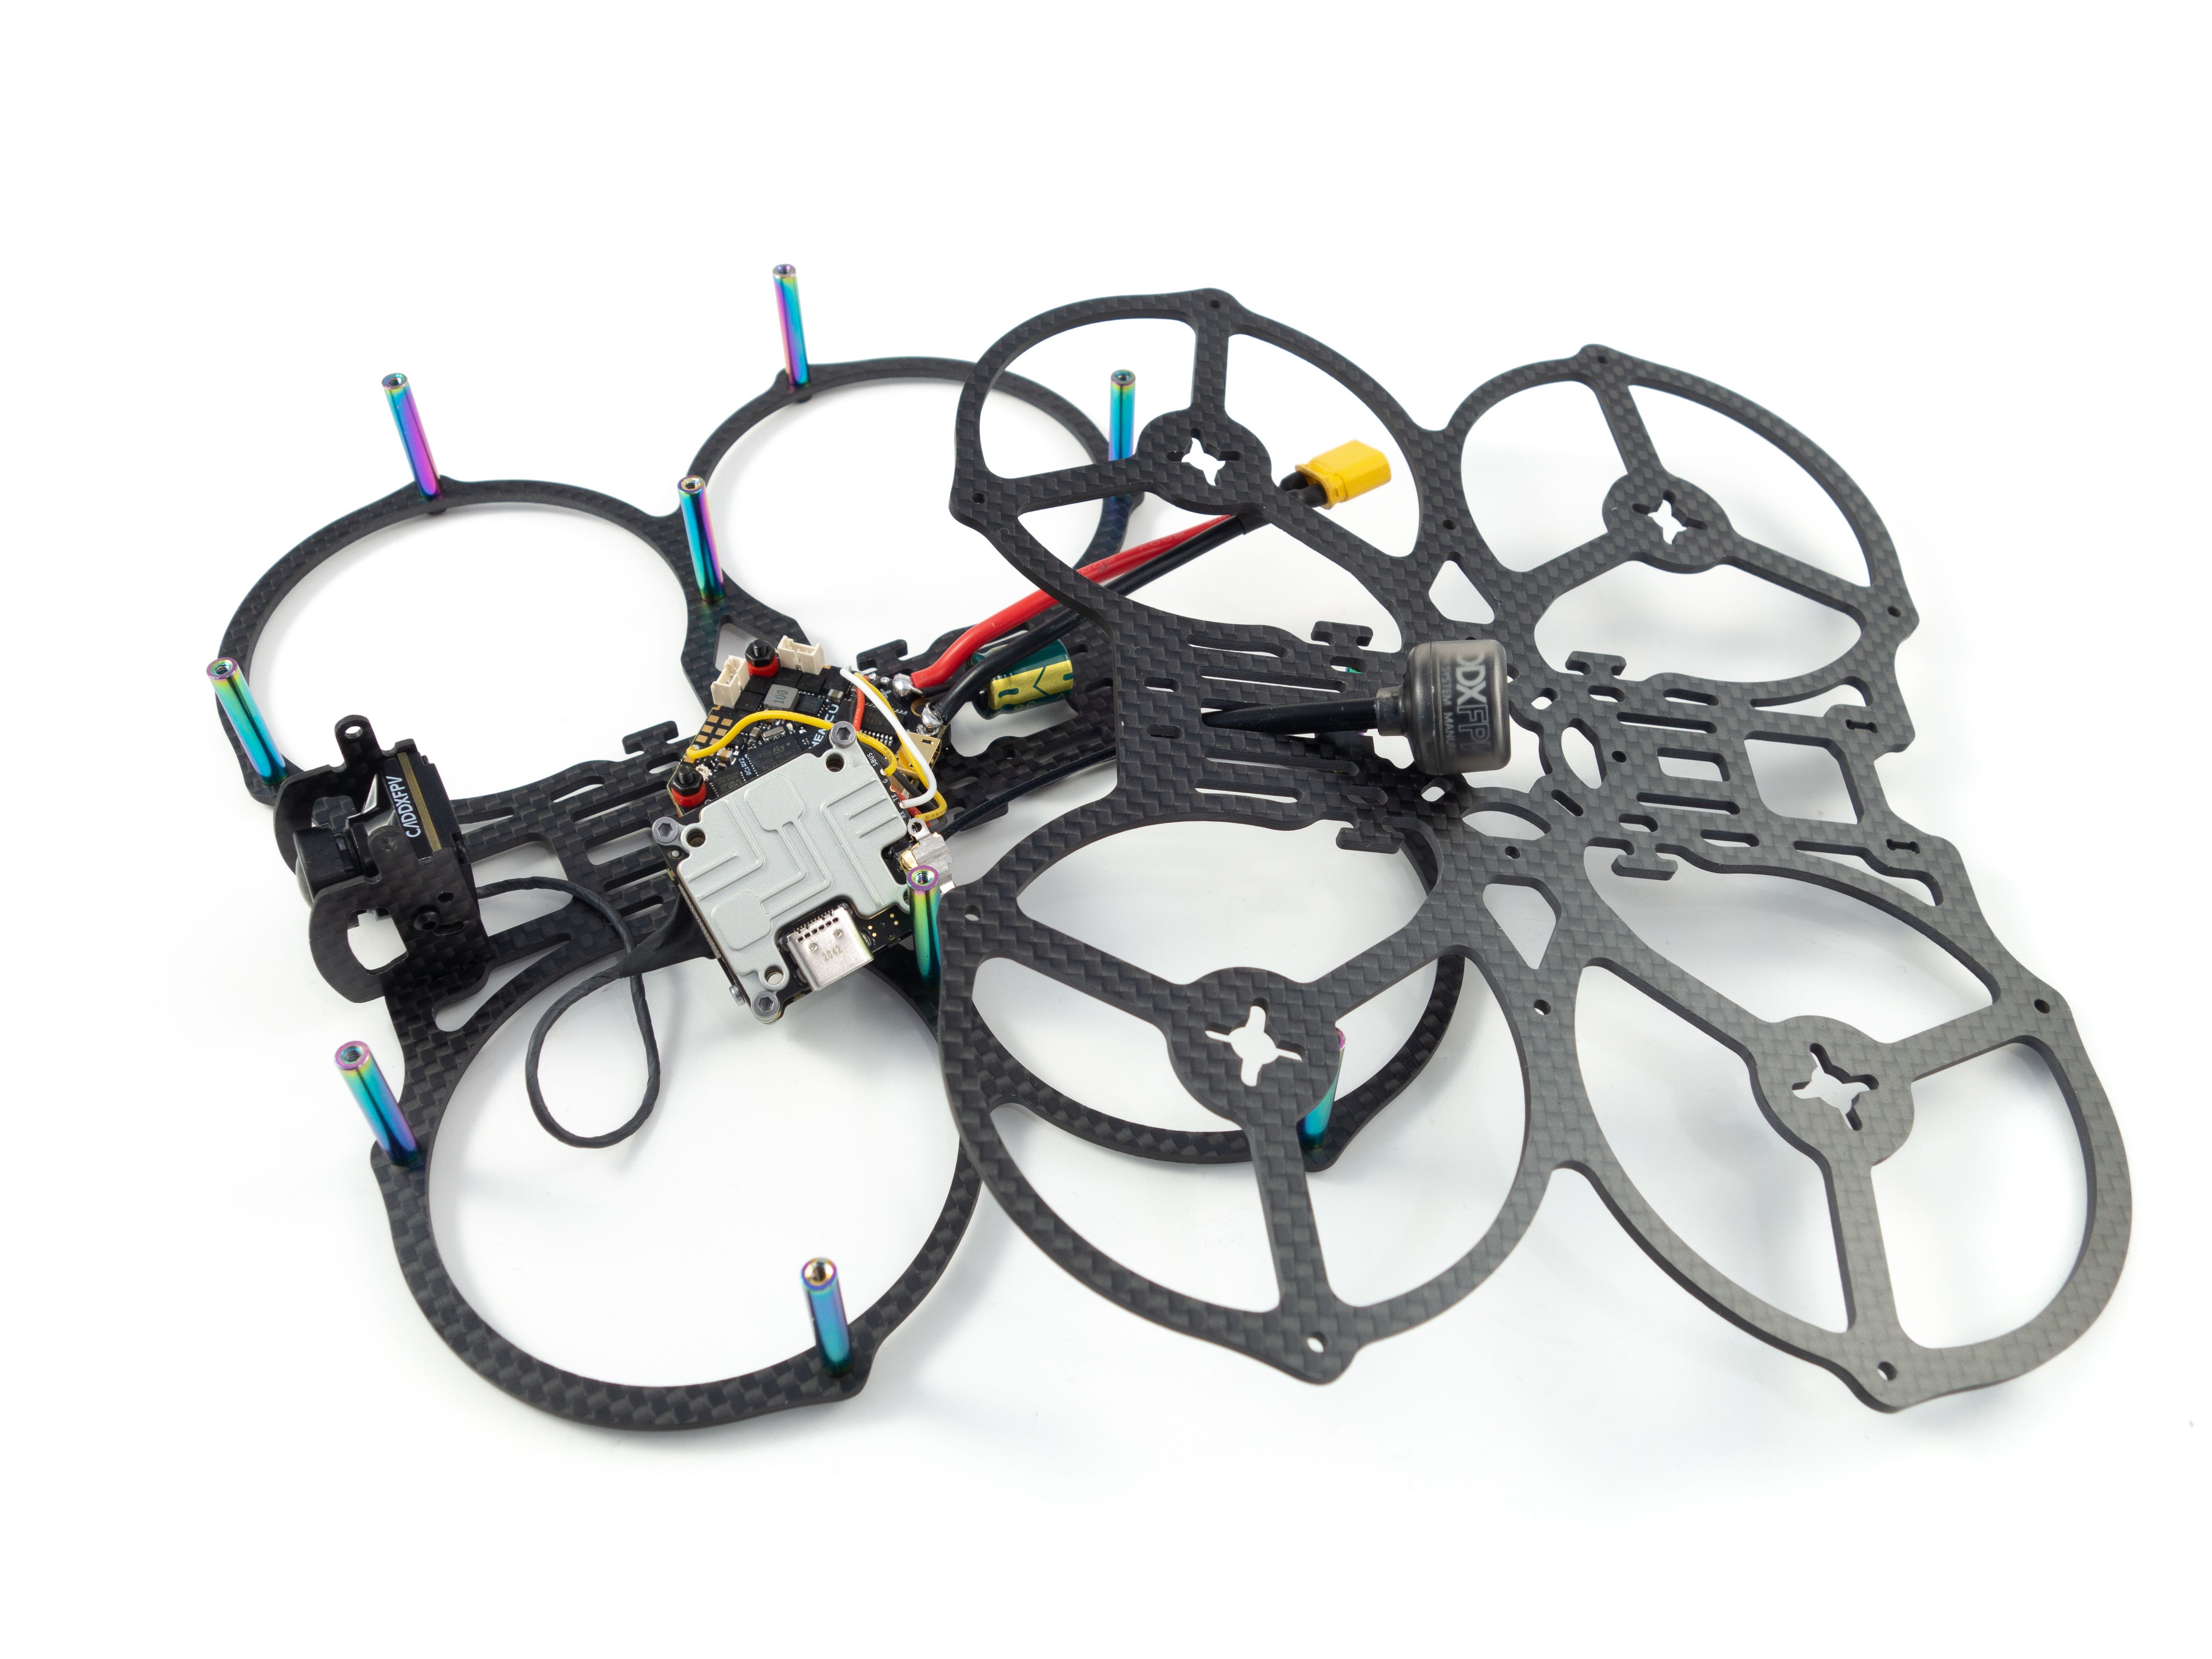
Assembly
Planning this out took quite a bit of forethought. The whole process is very particular and if you miss a step you might need to backtrack. Do your best to follow the steps and look closely at the photos.
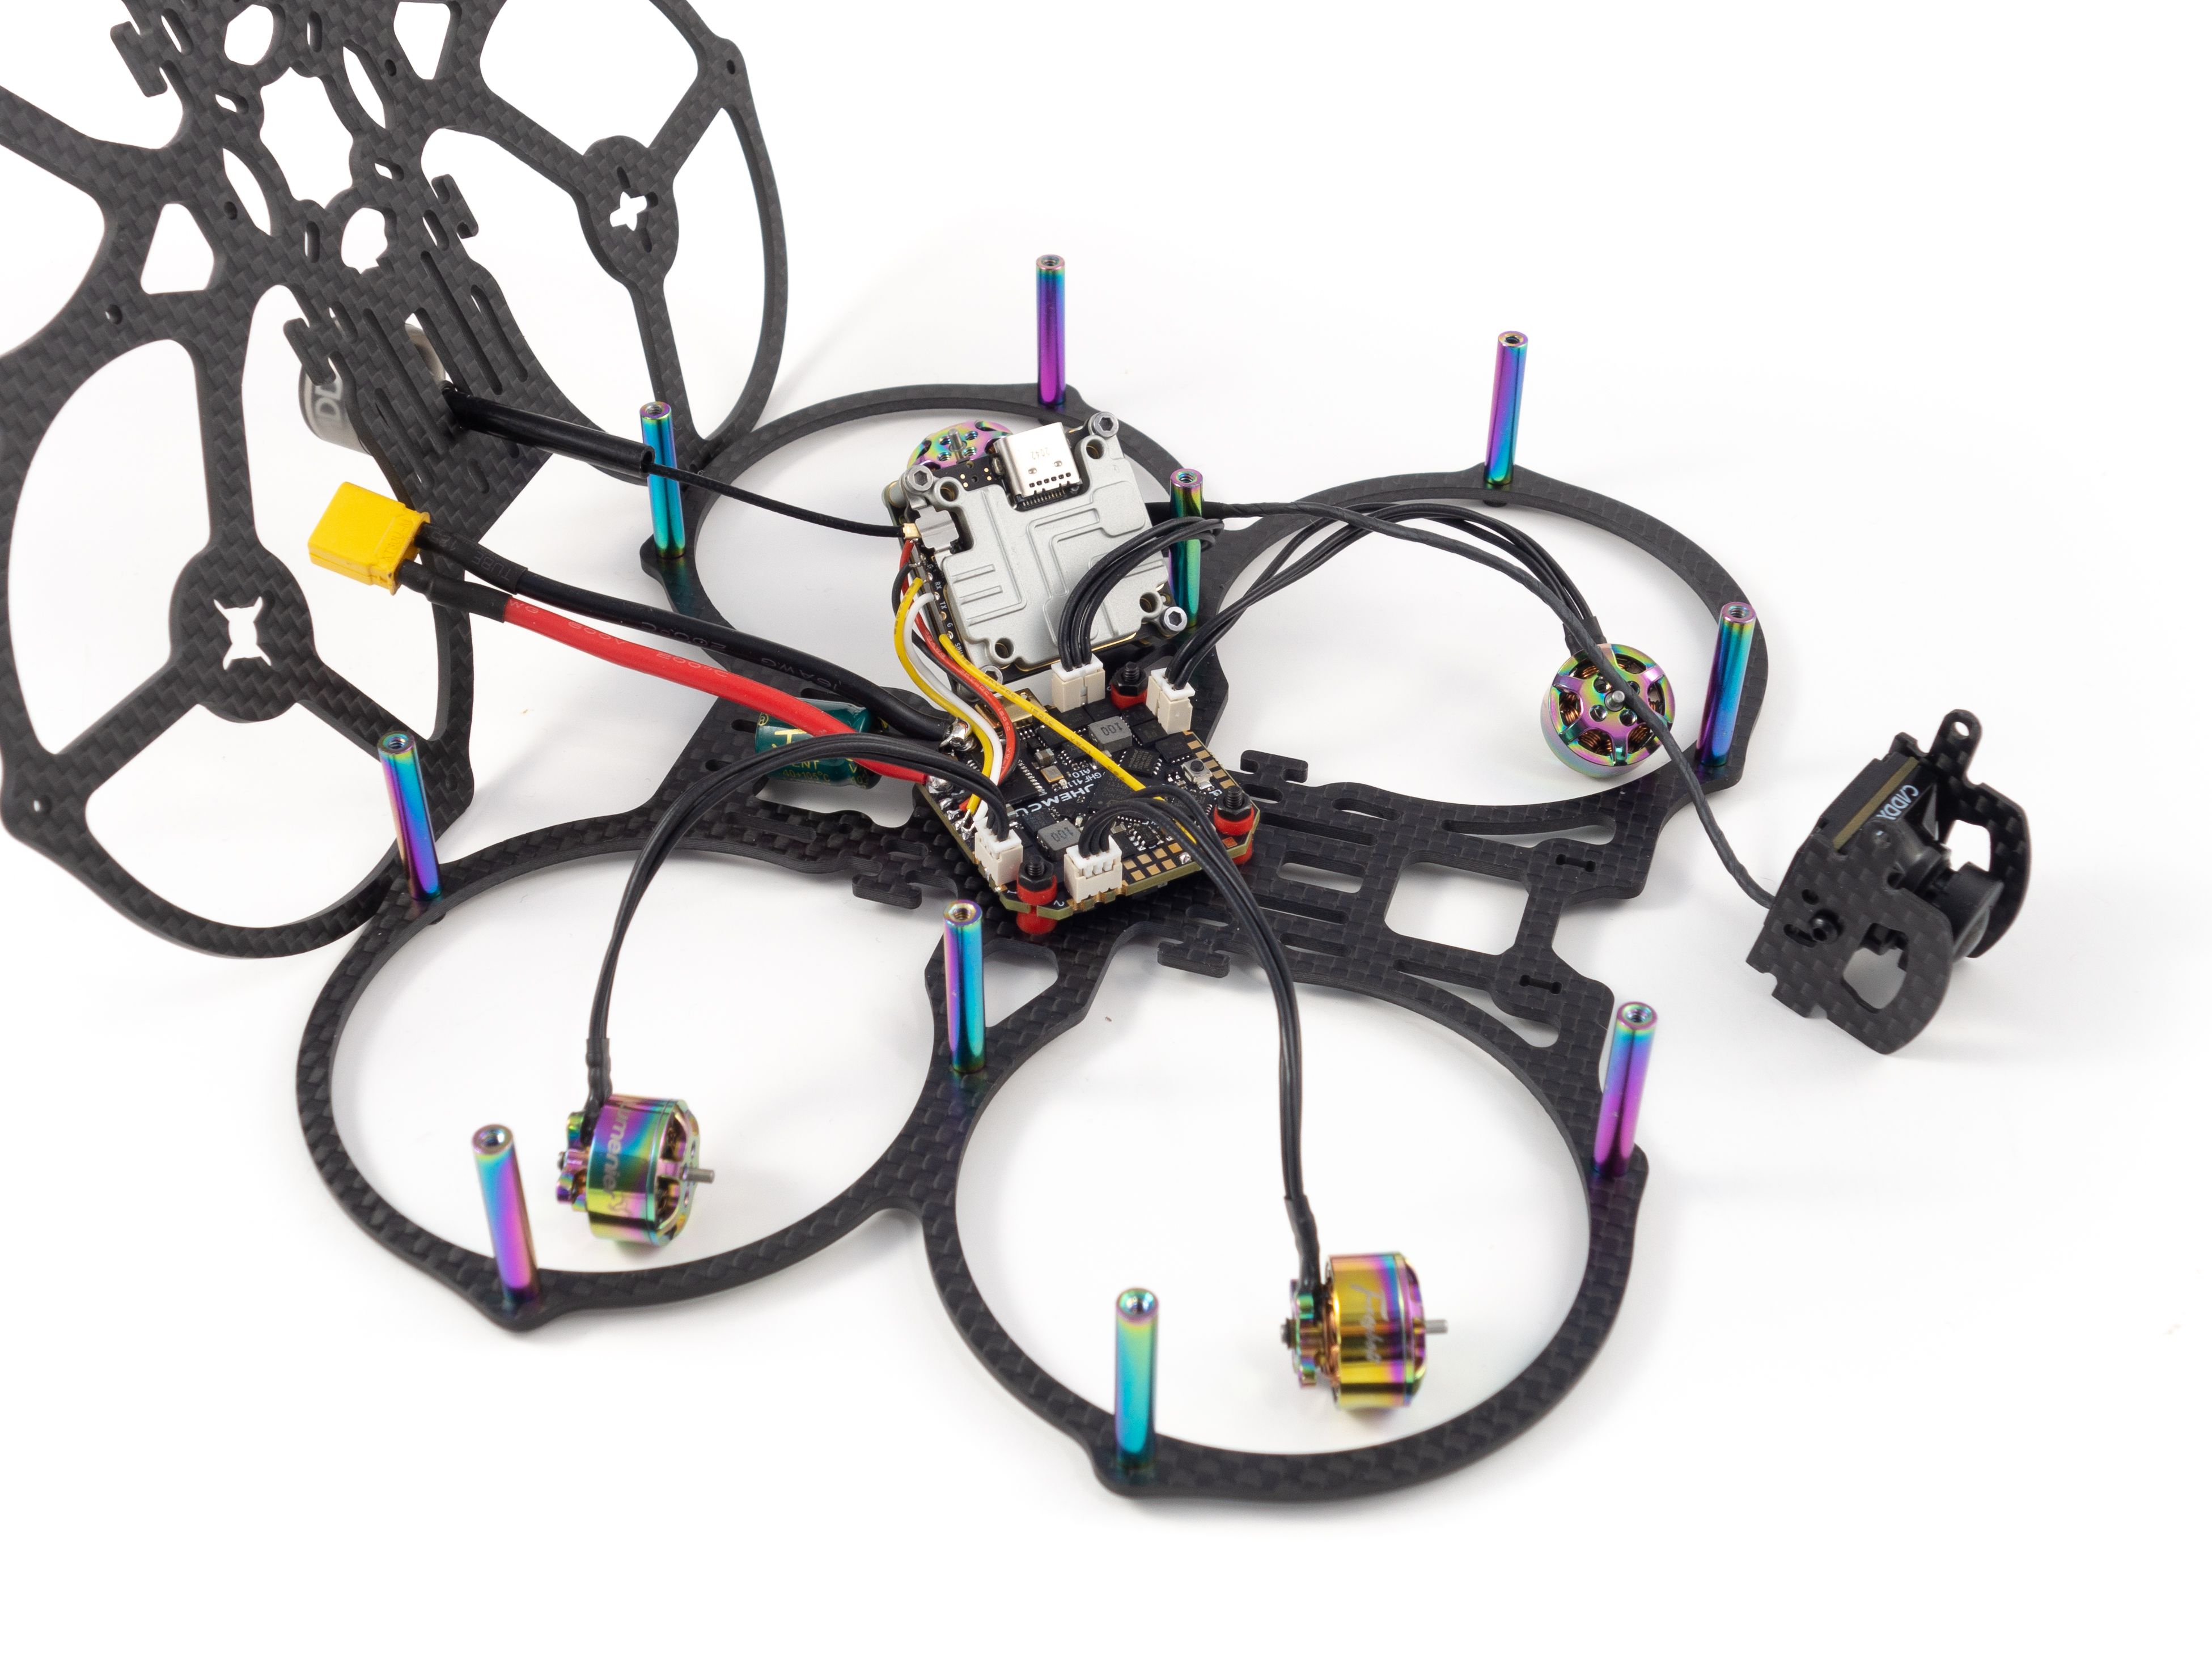
- Plug the motors in.
- Make sure the flight controller is screwed tight against the silicone dampeners to keep it low. Otherwise the Vista will put pressure on the motor plugs.
- Use the M1.6 screws included in the frame kit to screw the Vista onto the top plate. The USB-C plug should be on the bottom and pointed toward the front-right motor. It mounts at a 45 degree angle just like the flight controller.
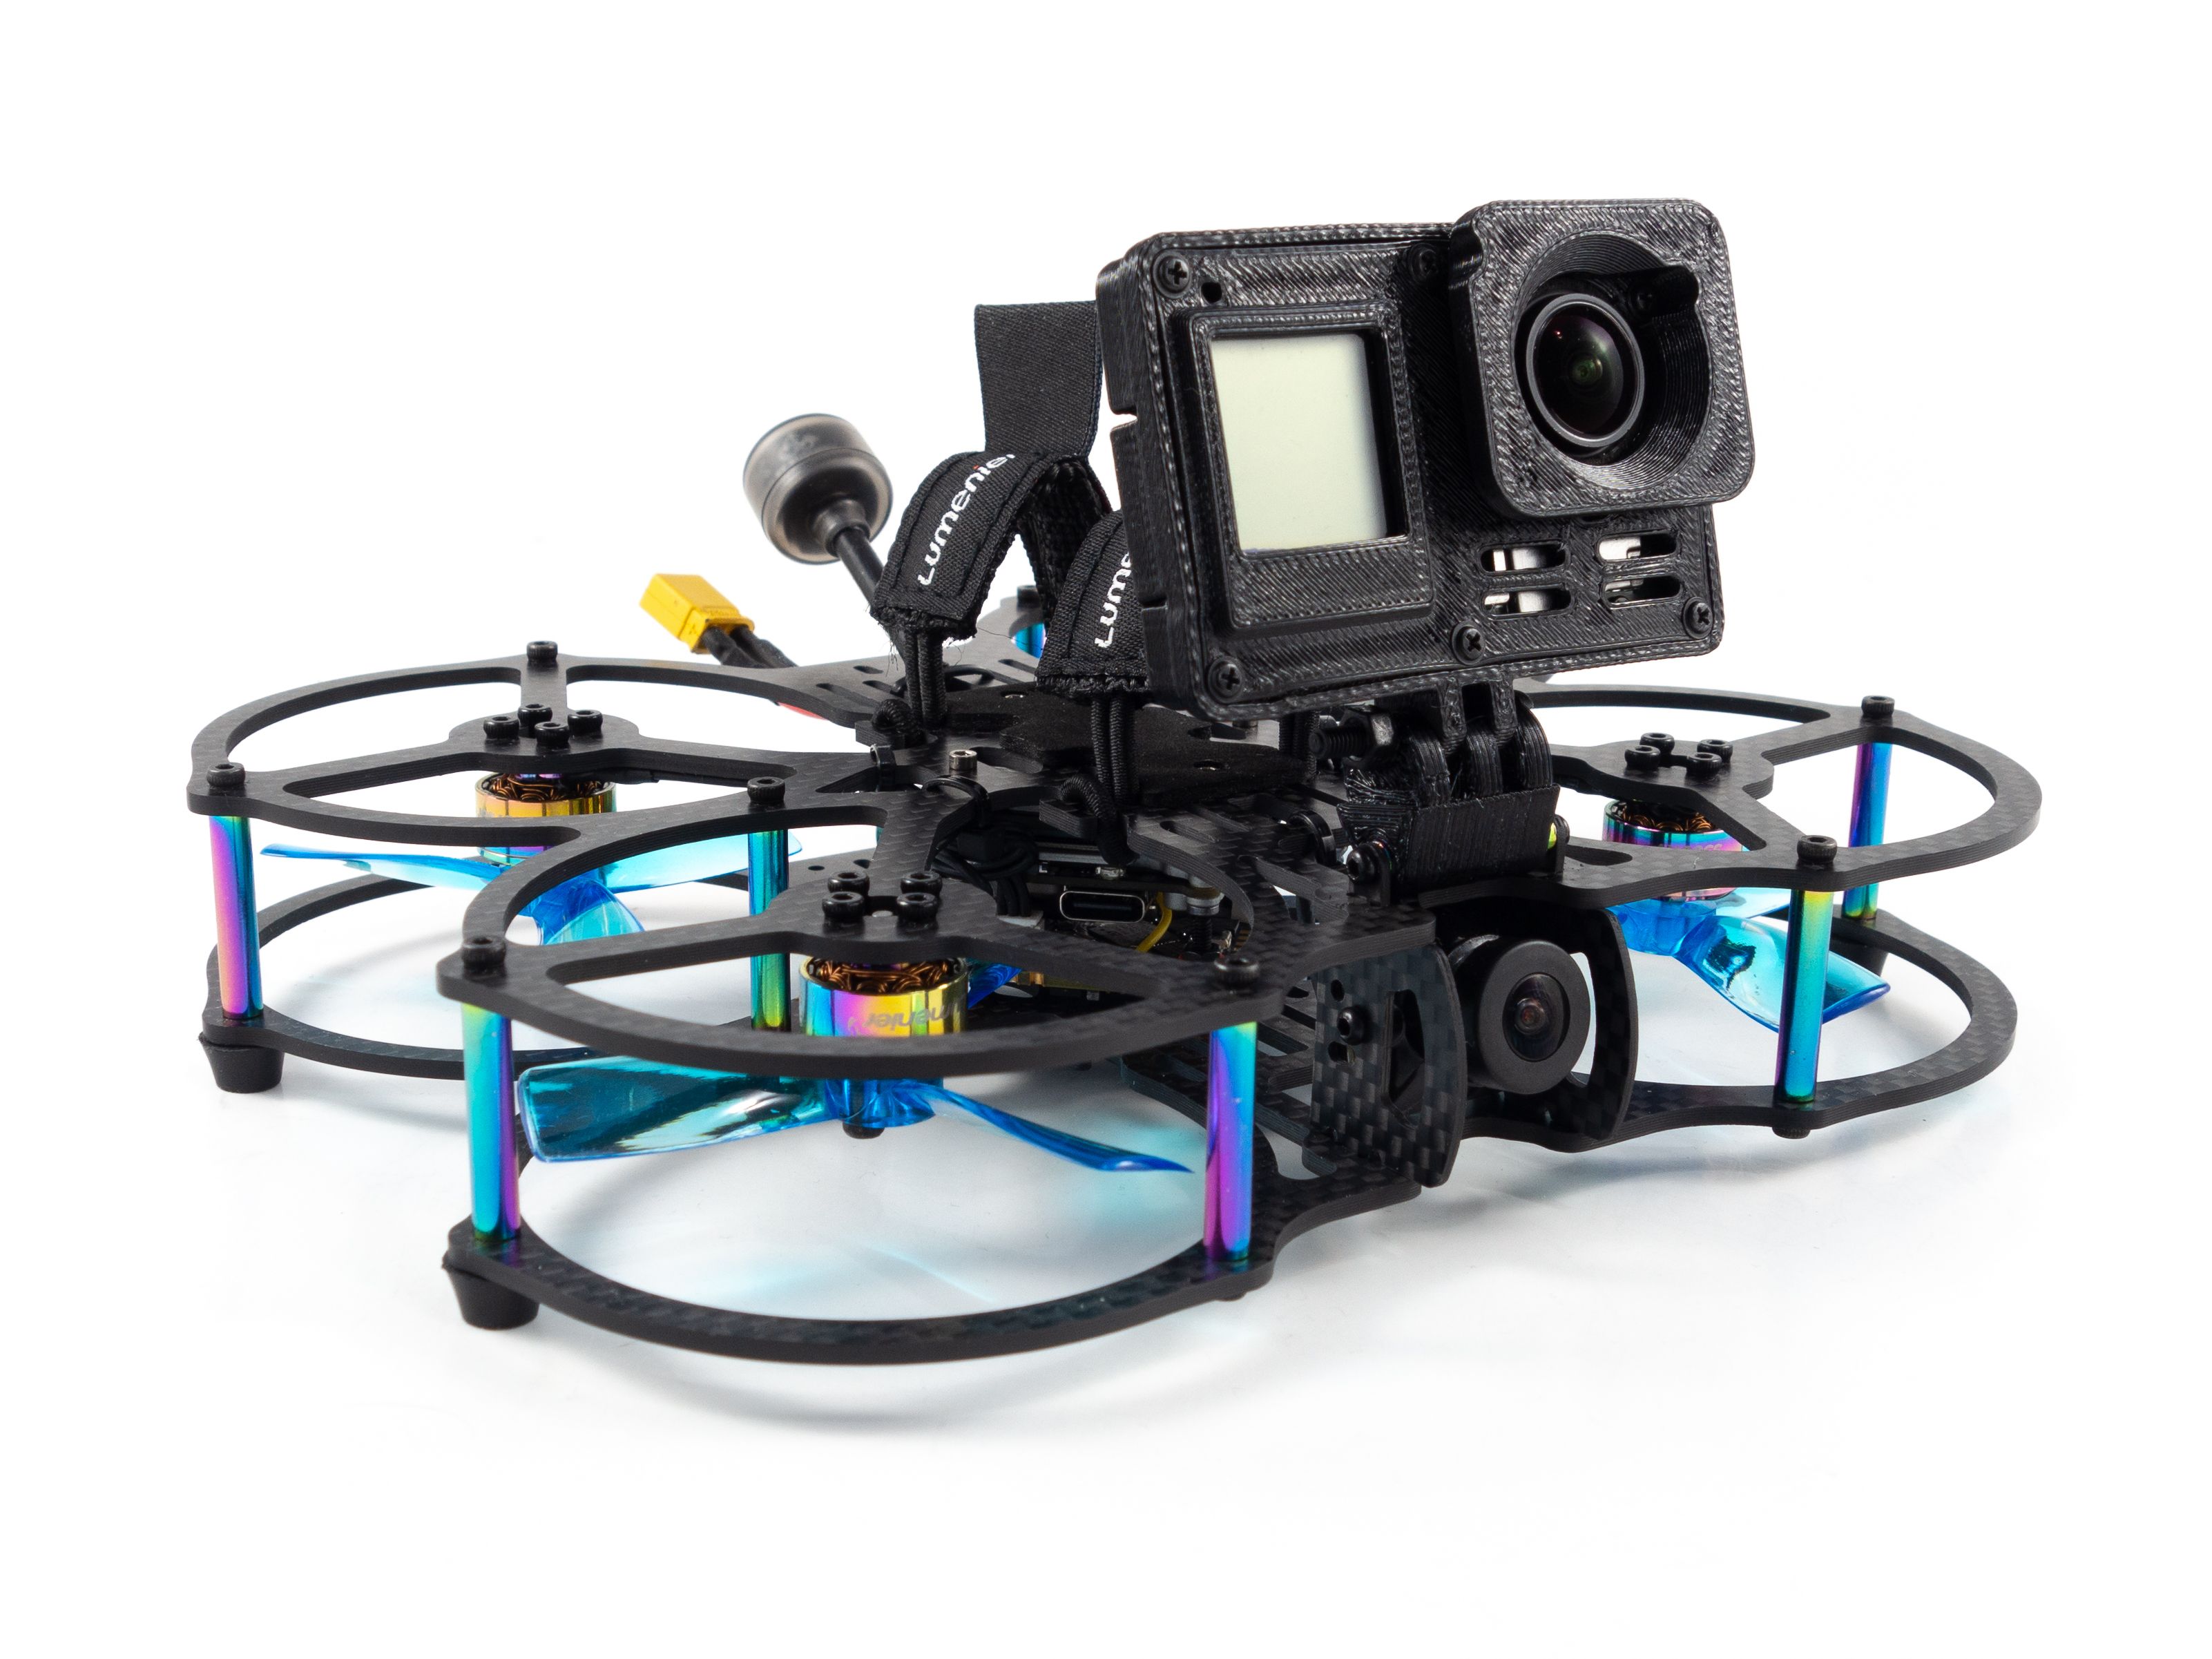
- Mount the camera onto the bottom plate.
- Carefully set the top plate onto the standoffs. Make sure your motor wires aren't wrapped around the standoffs and be careful not to bend your motor plugs with the Vista. Don't forget to slot the camera mount.
- Screw the top plate into place with the remaining M2 screws.
- Screw the motors onto the top plate. Use the short, knurled-head M2 screws that came with the motors. A little trick I found was to screw just one onto the motor and use the screw as a hanger to mount the motor to the frame. Use some blue Loctite on these screws so they don't vibrate loose.
- Zip-tie the motor wires to the top plate and try to be as tidy as you can. Make sure they won't get into prop-strike range.
- Loop the camera cable and zip-tie it to the top plate as well. You don't want that getting into prop-strike range either.
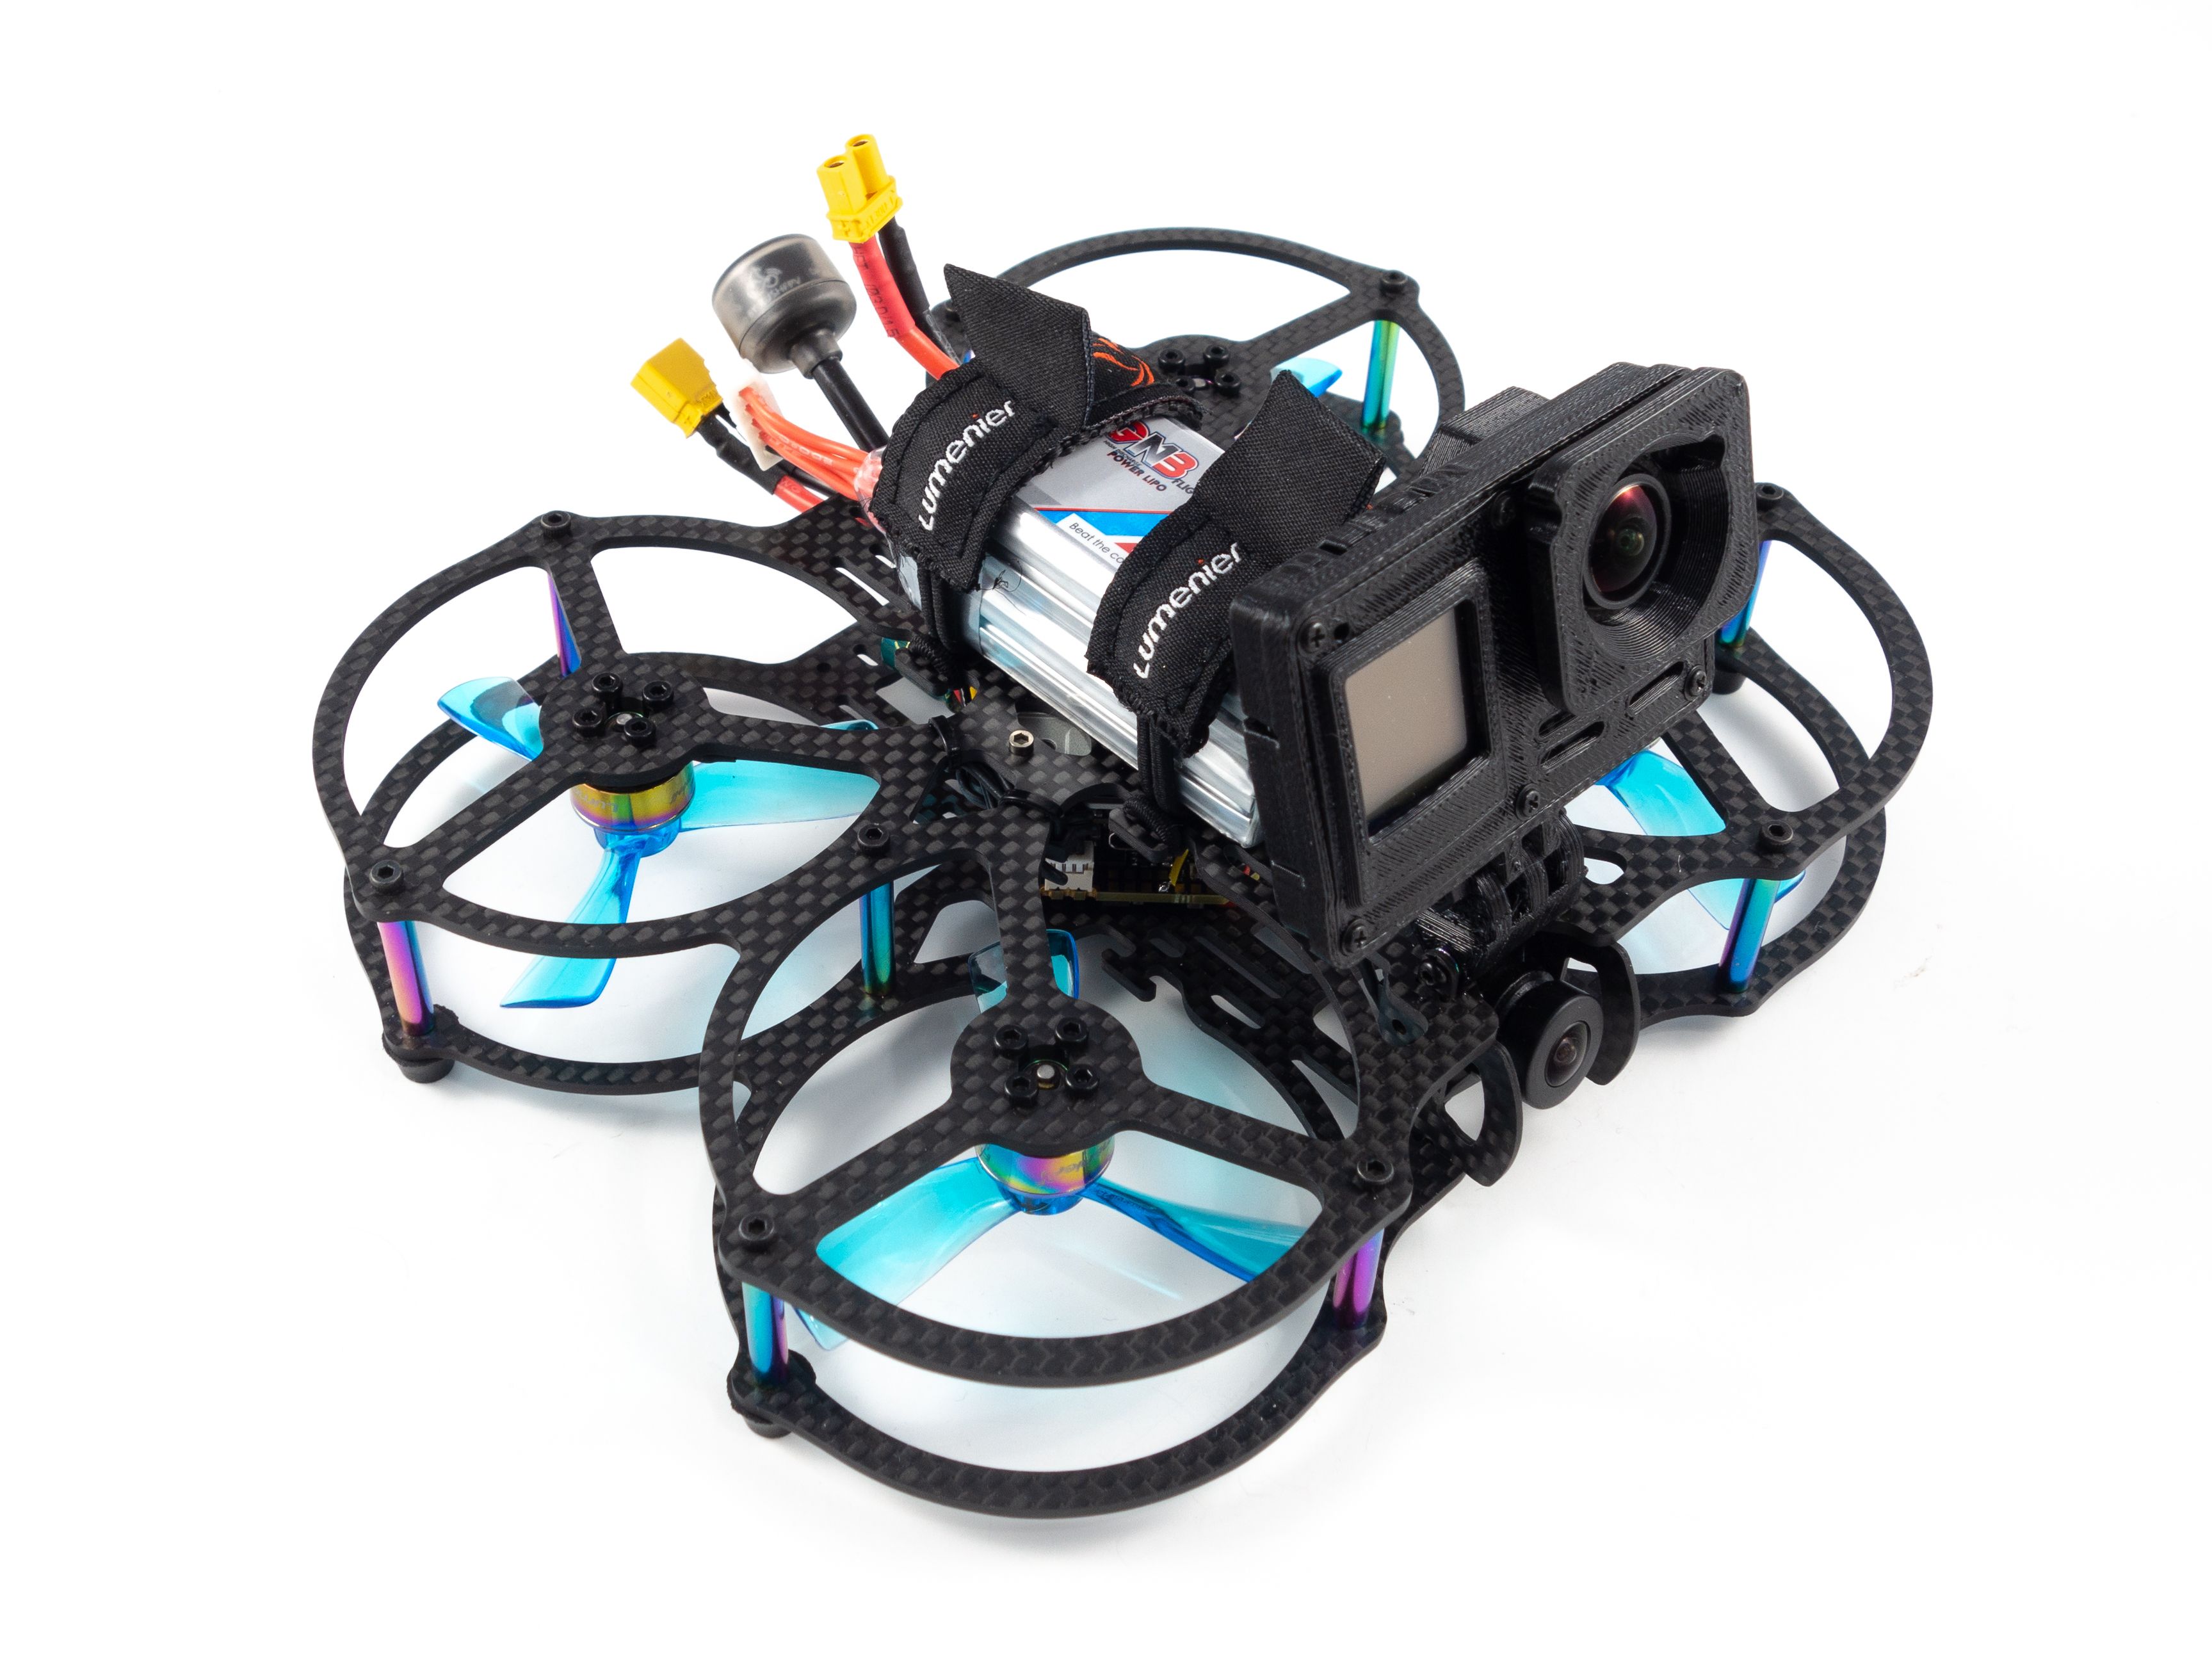
- Zip-tie the power lead and the antenna to the top plate.
- Stick the foam pad onto the top plate.
- If you aren't going to use an HD cam you can mount the last standoff between the camera plates.

Binding & Firmware Update
Now we're ready to bind the DJI Goggles and Remote. Before you do that download DJI Assistant V2 (FPV) to activate and update the Caddx Vista firmware. Run DJI Assistant, plug a USB-C cable in to the Vista, plug a lipo into the quad and plug the cable into your computer. Follow the prompts to activate and update the firmware. This process takes several minutes, and it doesn't hurt to run a fan on the Vista to keep it cool.
Once that's complete unplug everything and turn on your DJI Goggles and DJI Remote. Put the goggles into bind mode by pressing the red button with your precision tweezers. Plug a lipo in and press the bind button on the Vista. The beeping will stop once it's bound. Double check that you've got a video feed in your goggles.
To bind the remote press the record button, right dial and C button all at once. Press the bind button again on the Vista and the beeping will stop when the bind is complete.
Betaflight
Now let's get the flight controller configured. If you don't already have them, you'll need to download Betaflight Configurator [Download] and BLHeli Configurator [Download] or JESC Configurator [Download]. Start by opening Betaflight Configurator.
Flash the Firmware
This is optional, but it's usually a good idea to flash the latest version. Hold the boot button on the flight controller while you plug in to enter DFU mode.
- Go to the Firmware Flasher and choose "Release", "JHE/JHEF411(STM32F411)" and the latest stable release of Betaflight (At this time 4.2.8)
- Leave the remaining options unchecked.
- Click "Load Firmware [Online]" and then "Flash Firmware" to update your flight controller. Once complete, click "Connect"
- Accept the default settings and calibrate the accelerometer.
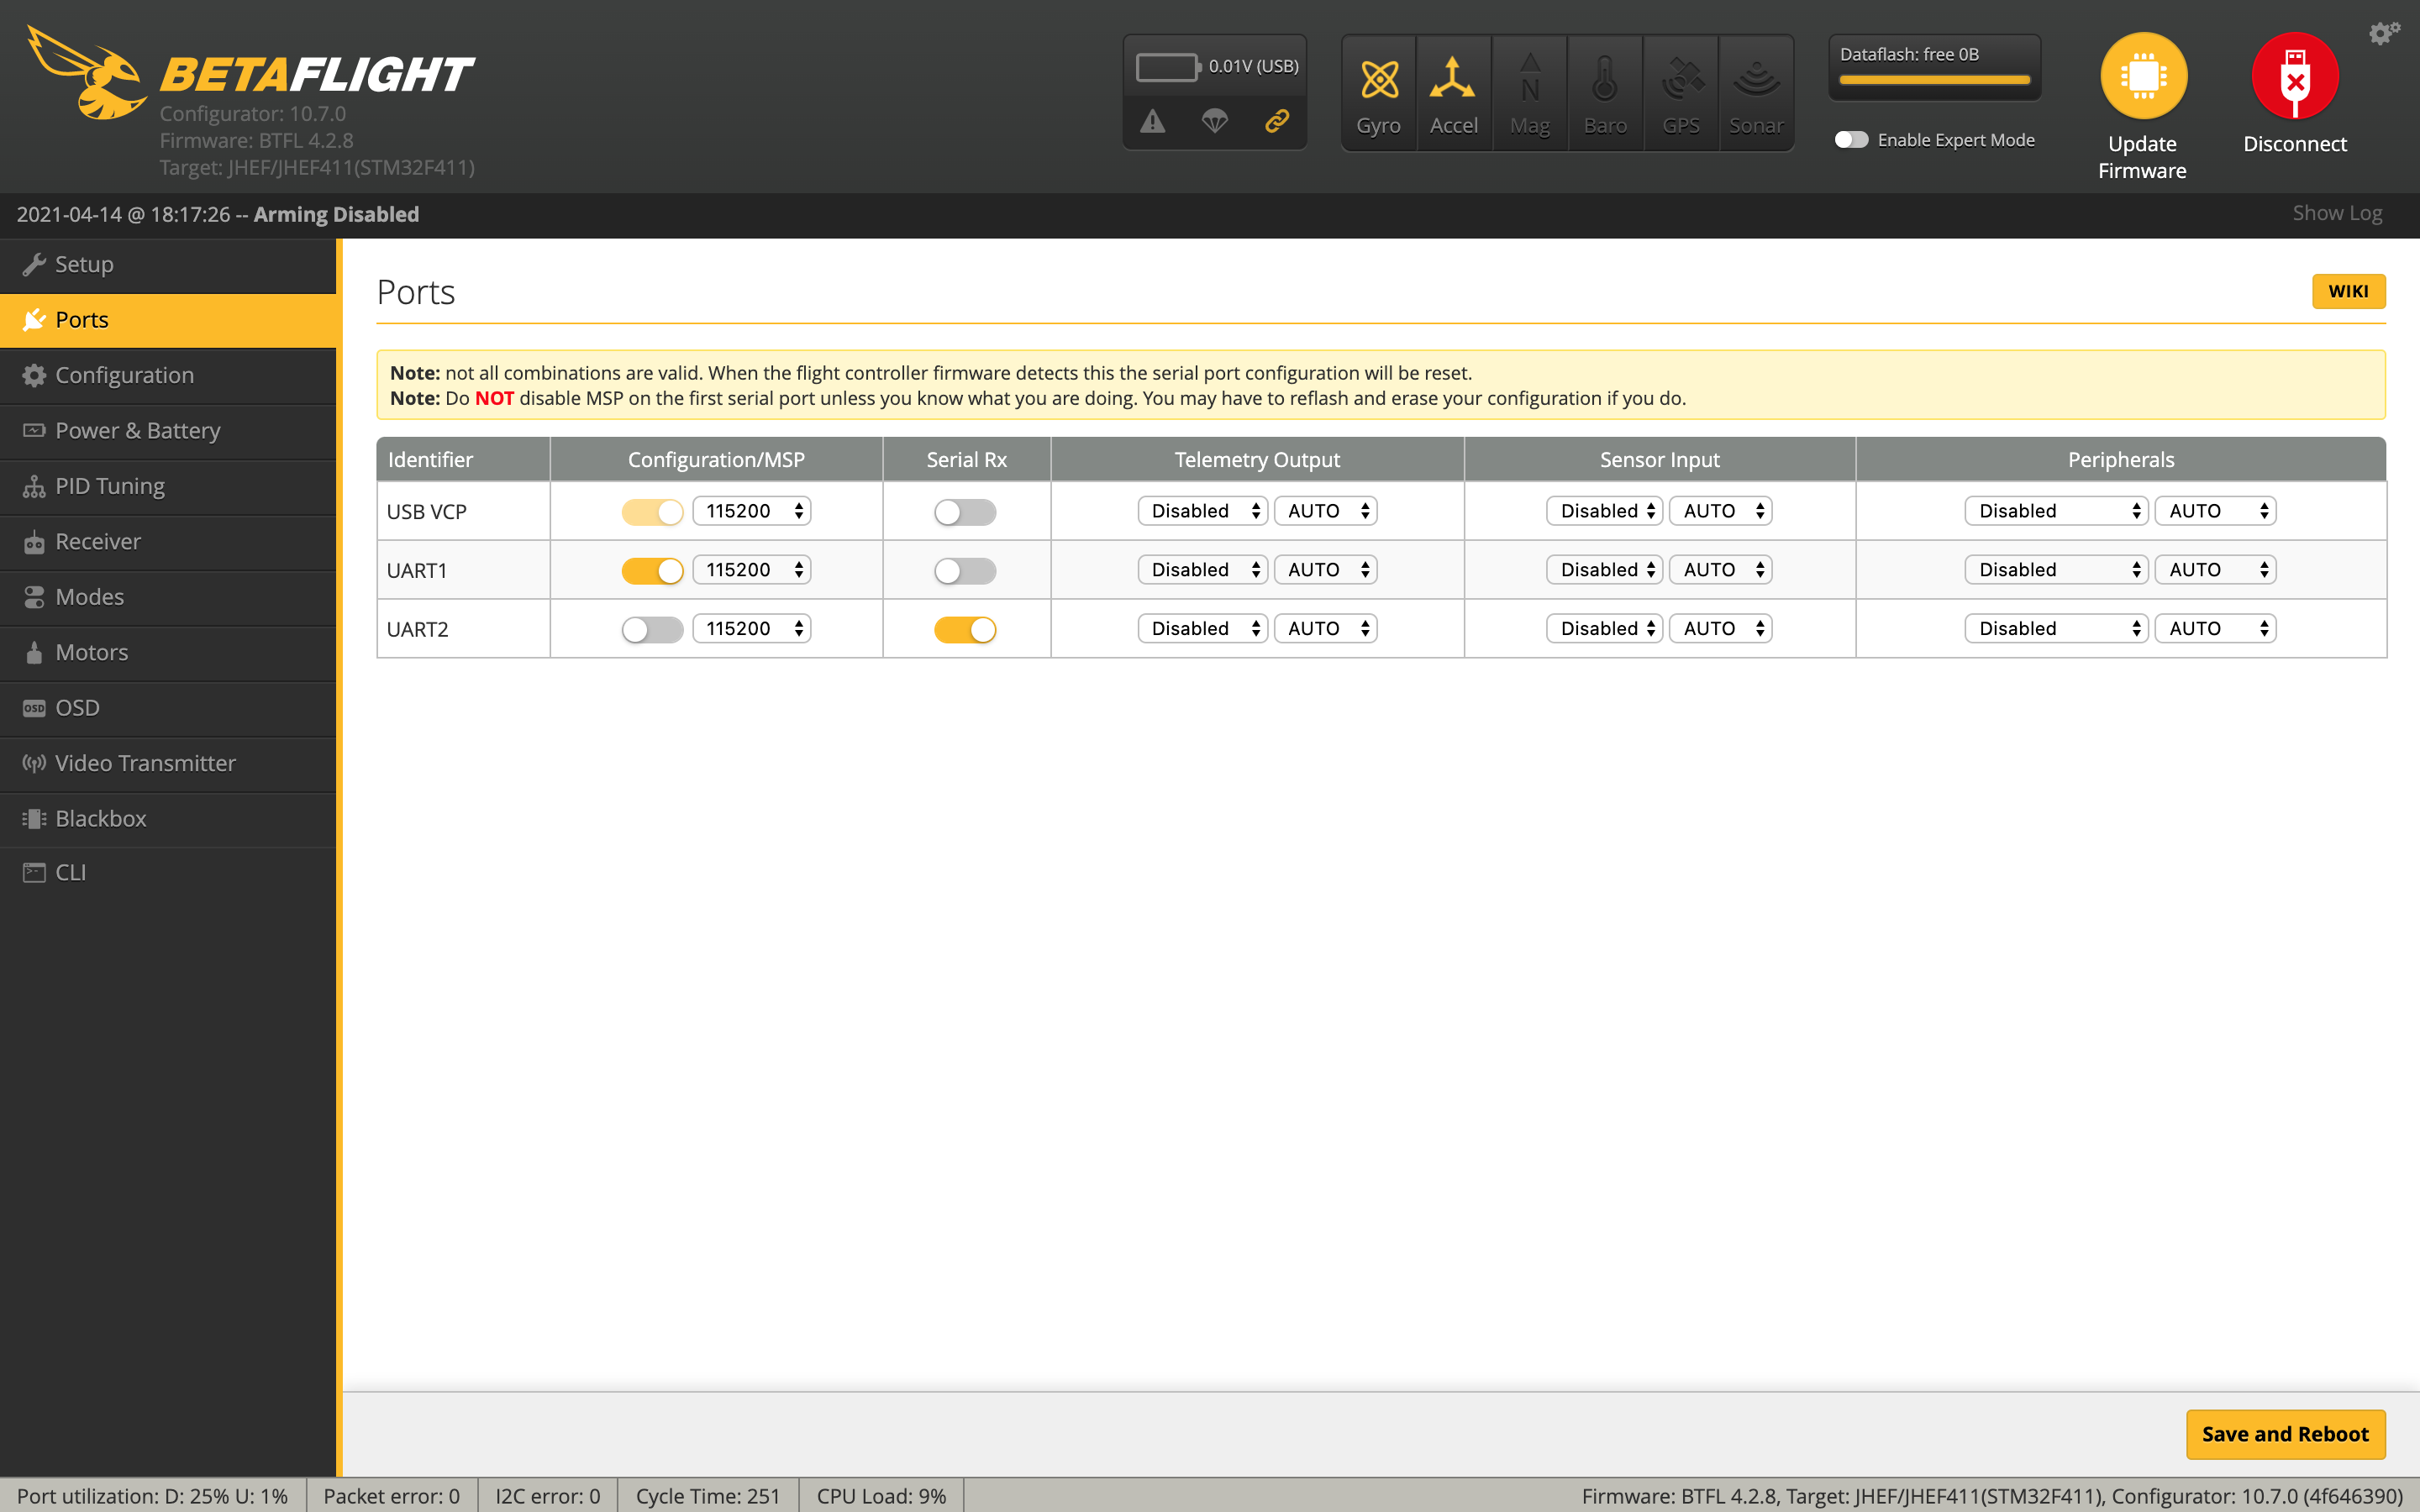
Ports Tab
- Set UART1 to Configuration/MSP (Peripherals disabled)
- Set UART2 to Serial Rx
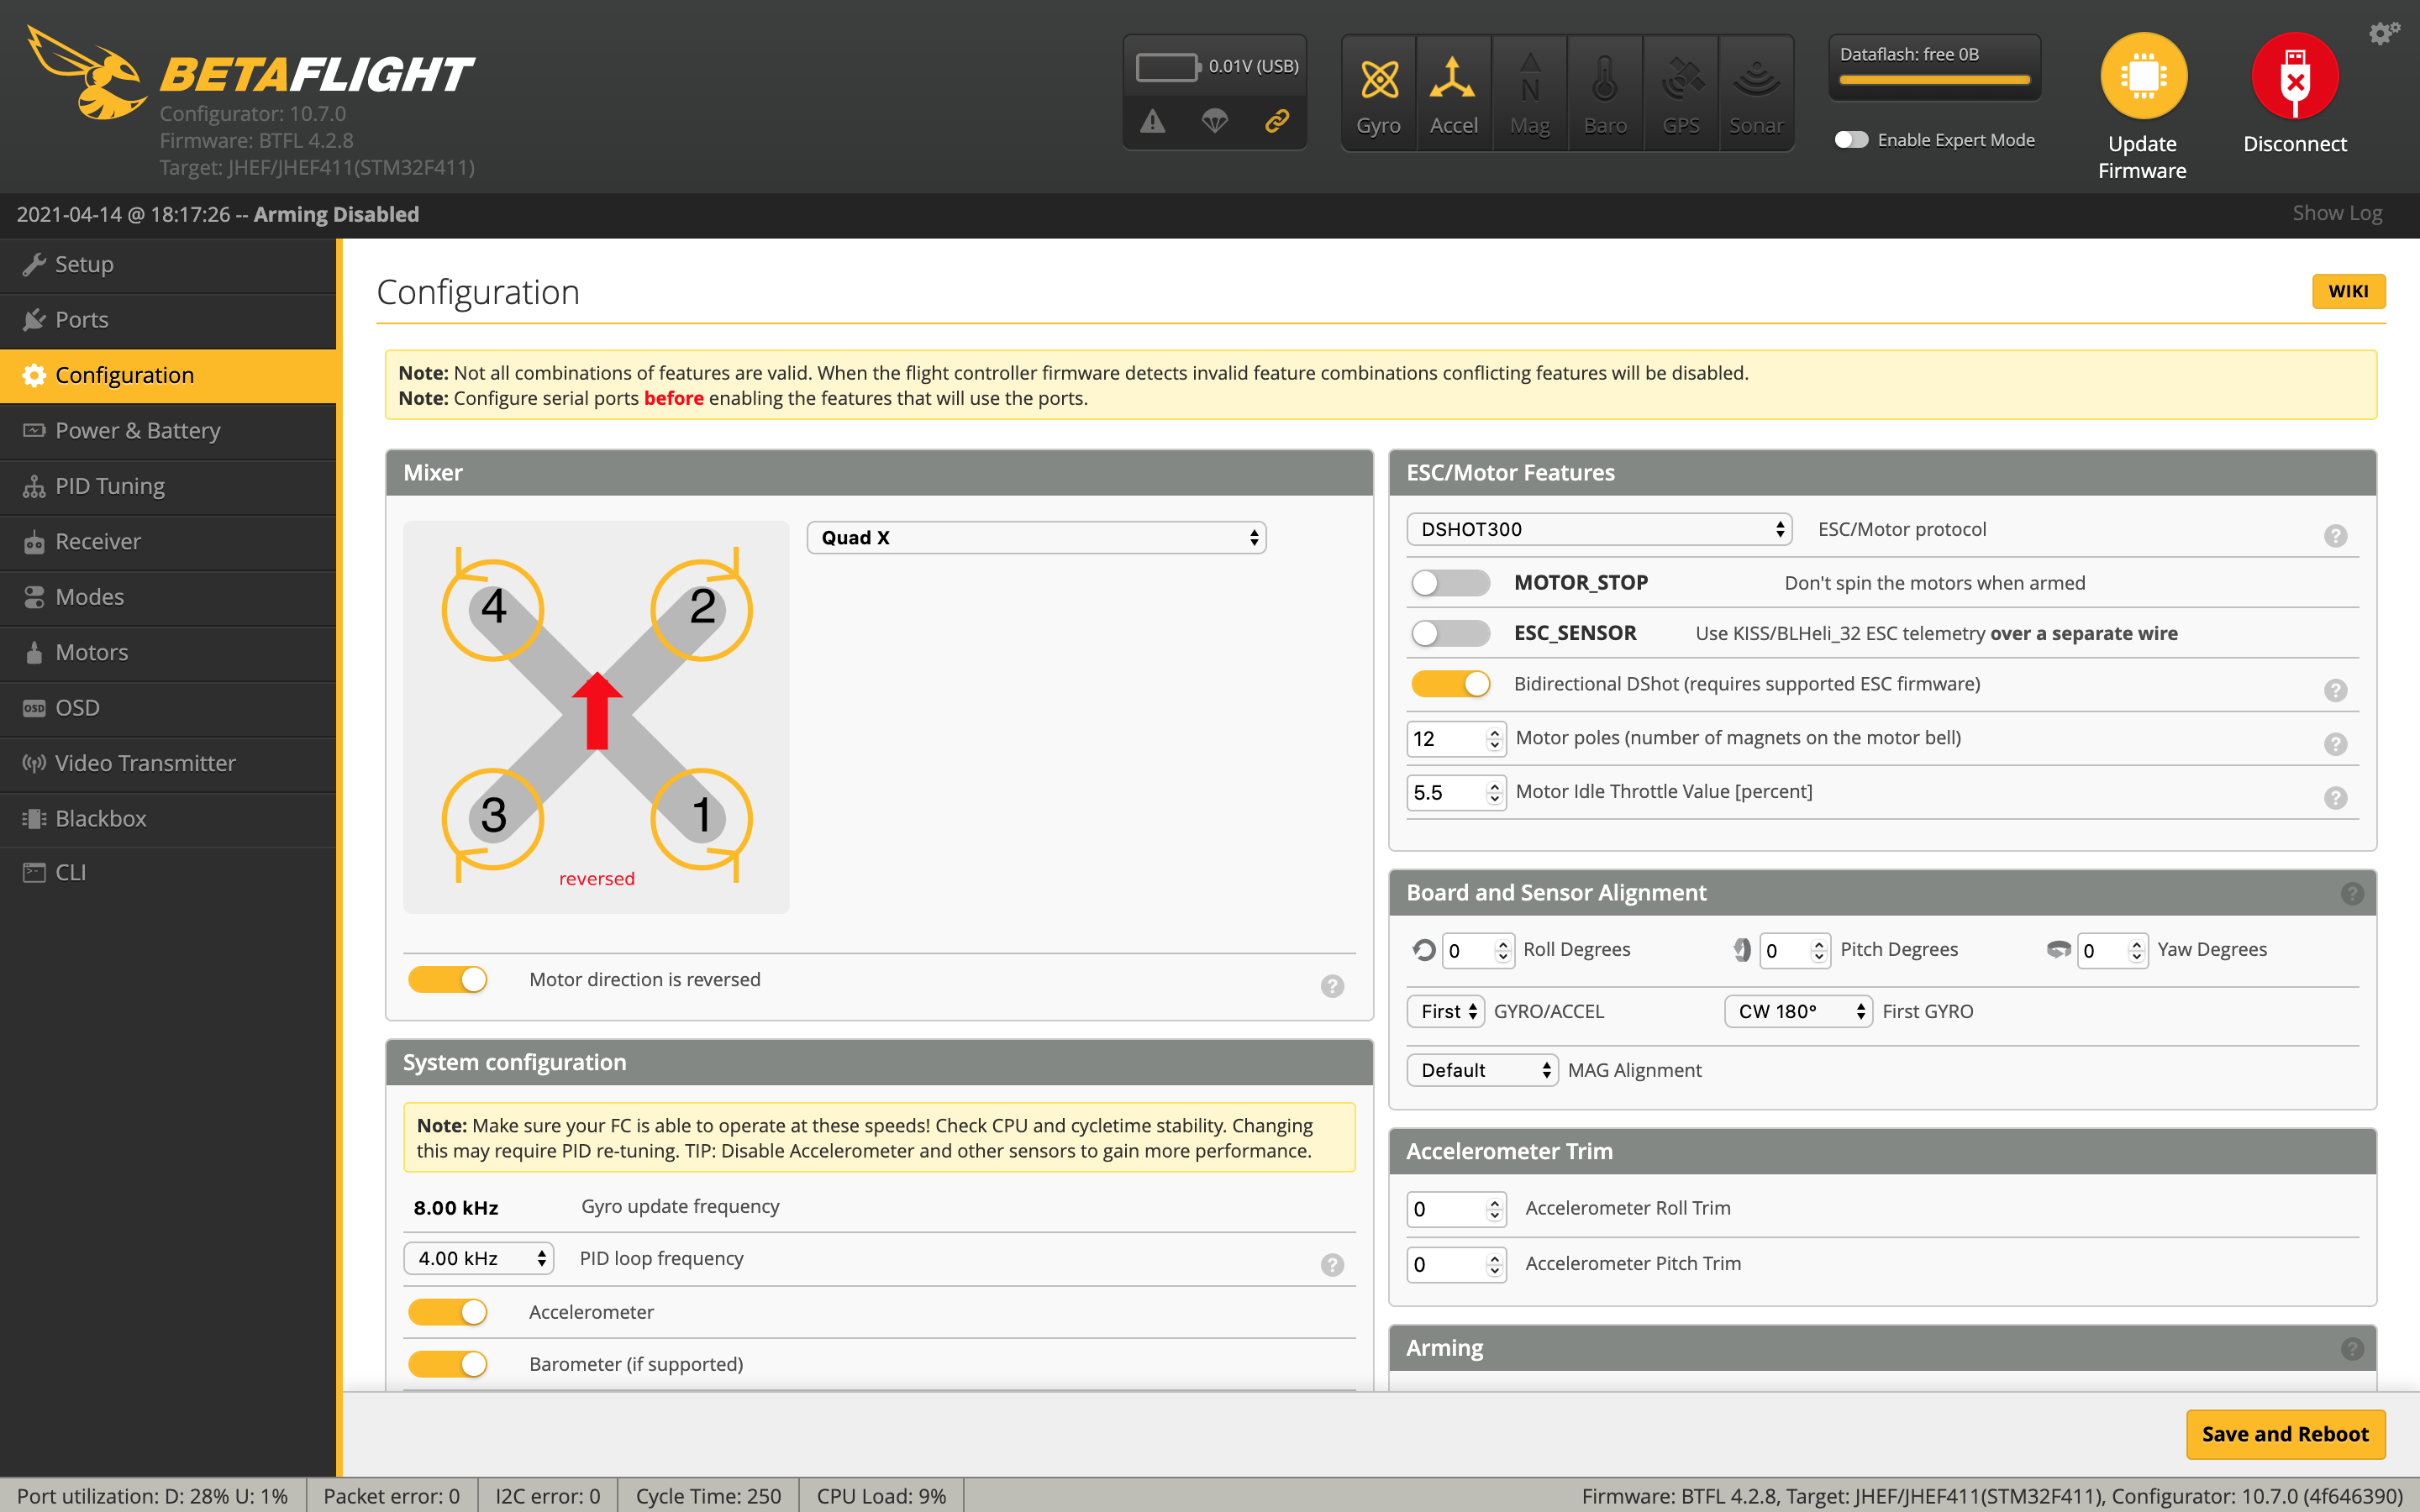
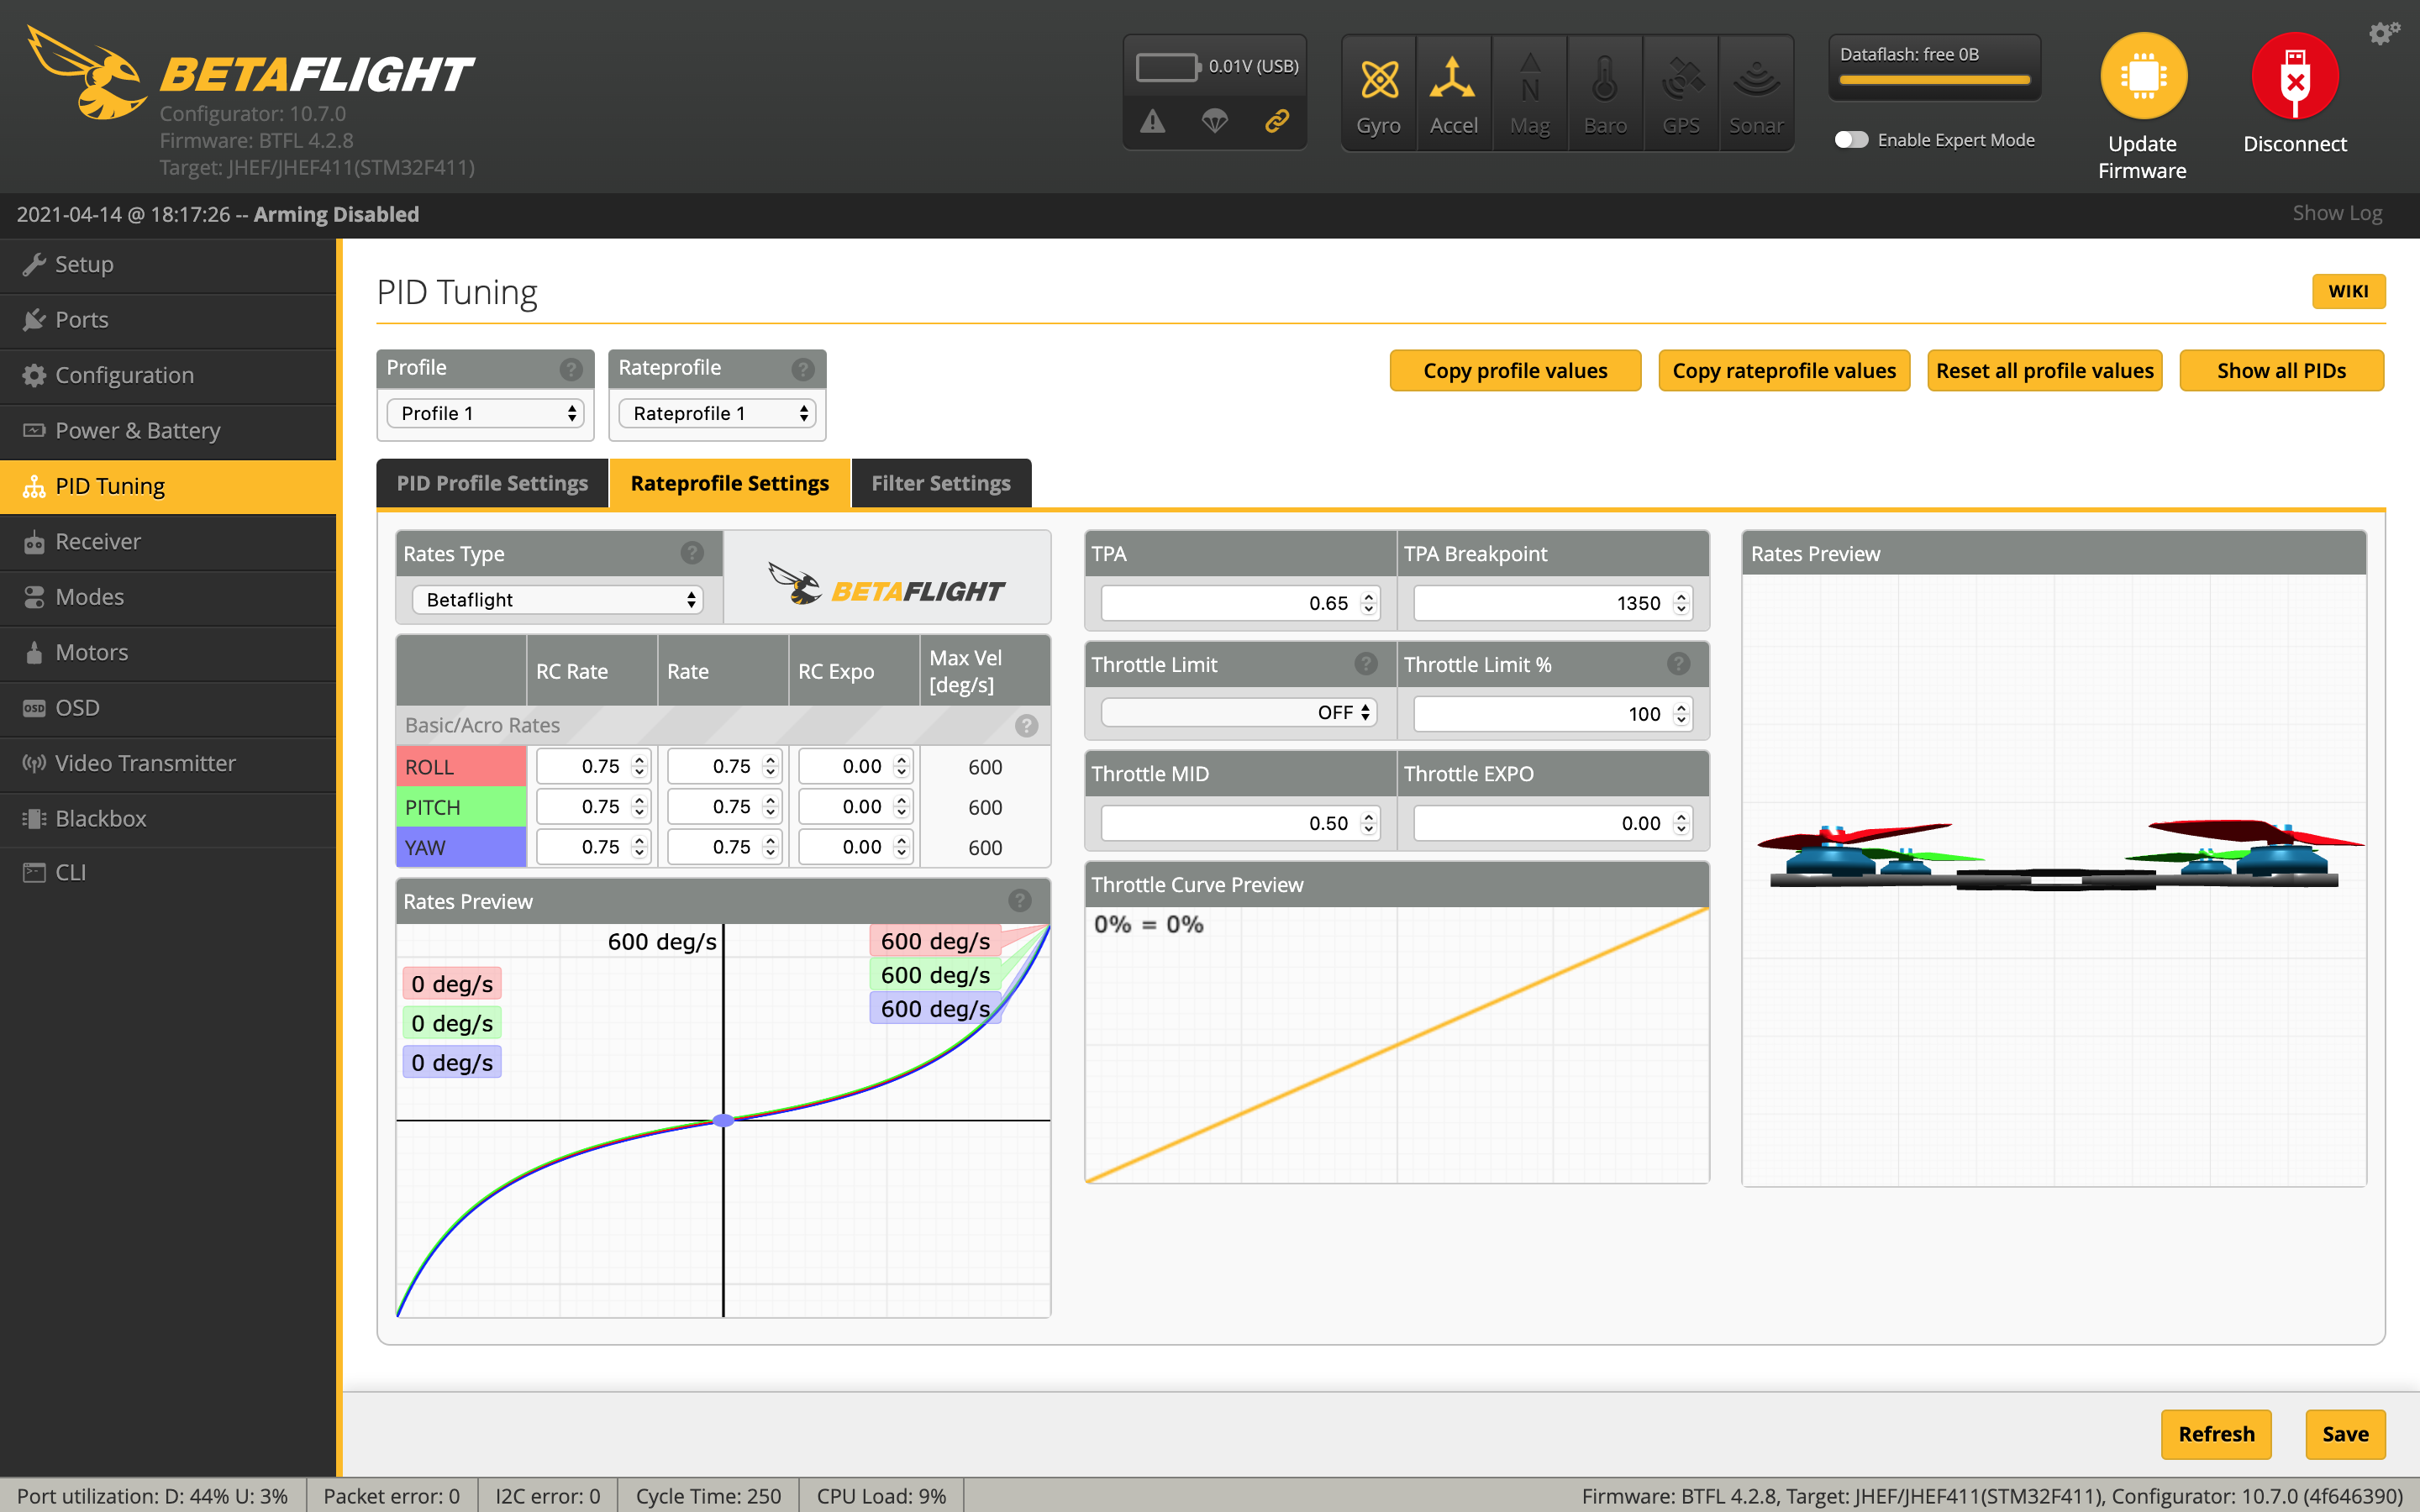
Configuration Tab
- Under Mixer set "Motor direction is reversed" if you want to fly props out. (This is what I use)
- Under ESC/Motor Features select "DSHOT300", enable "Bidirectional DShot" and set Motor poles to 12.
- Under System configuration set the PID loop frequency to 4.00 kHz.
- Under Arming set the Max arm angle to 180 (Only if you keep the accelerometer turned on for angle mode)
- Under Personalization set your FPV handle
- Under Receiver choose your receiver. If you've got the DJI remote choose "Serial-based receiver" and "SBUS"
- Under Other Features enable: Airmode, OSD and Dynamic Filter
- Under DSHOT Beacon Configuration enable "RX_SET" and change your beacon tone to 2.
Click Save and Reboot
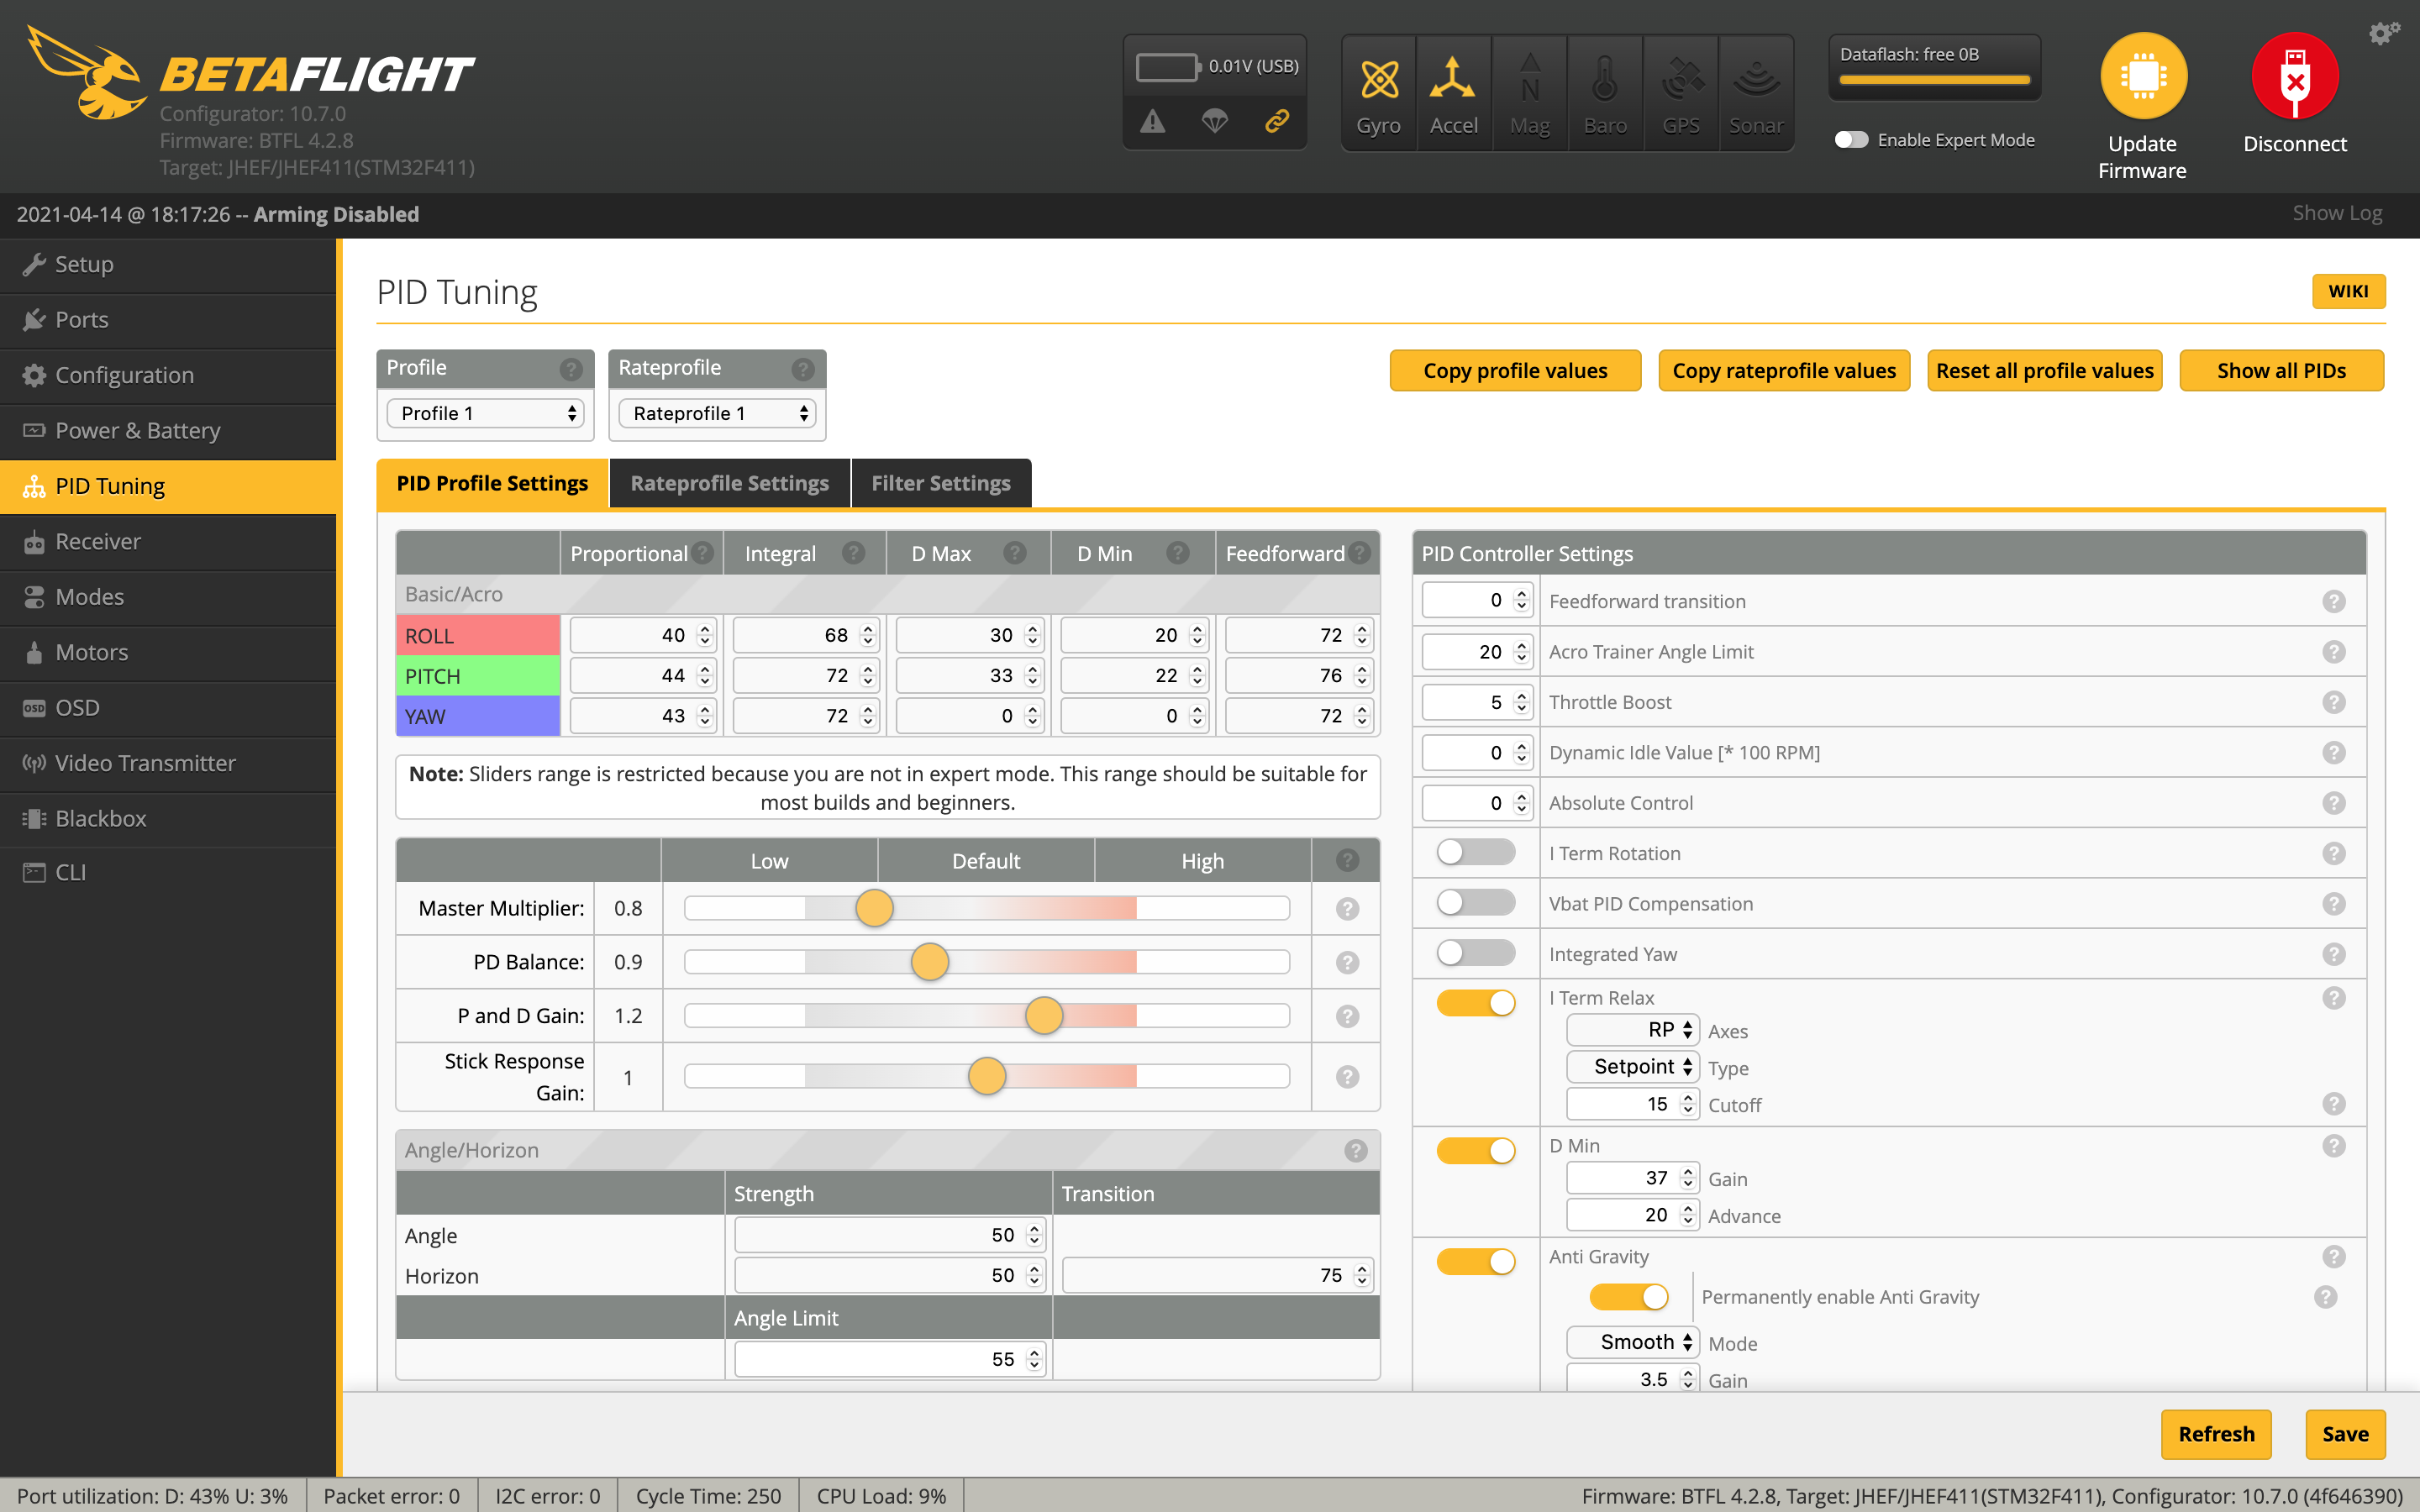
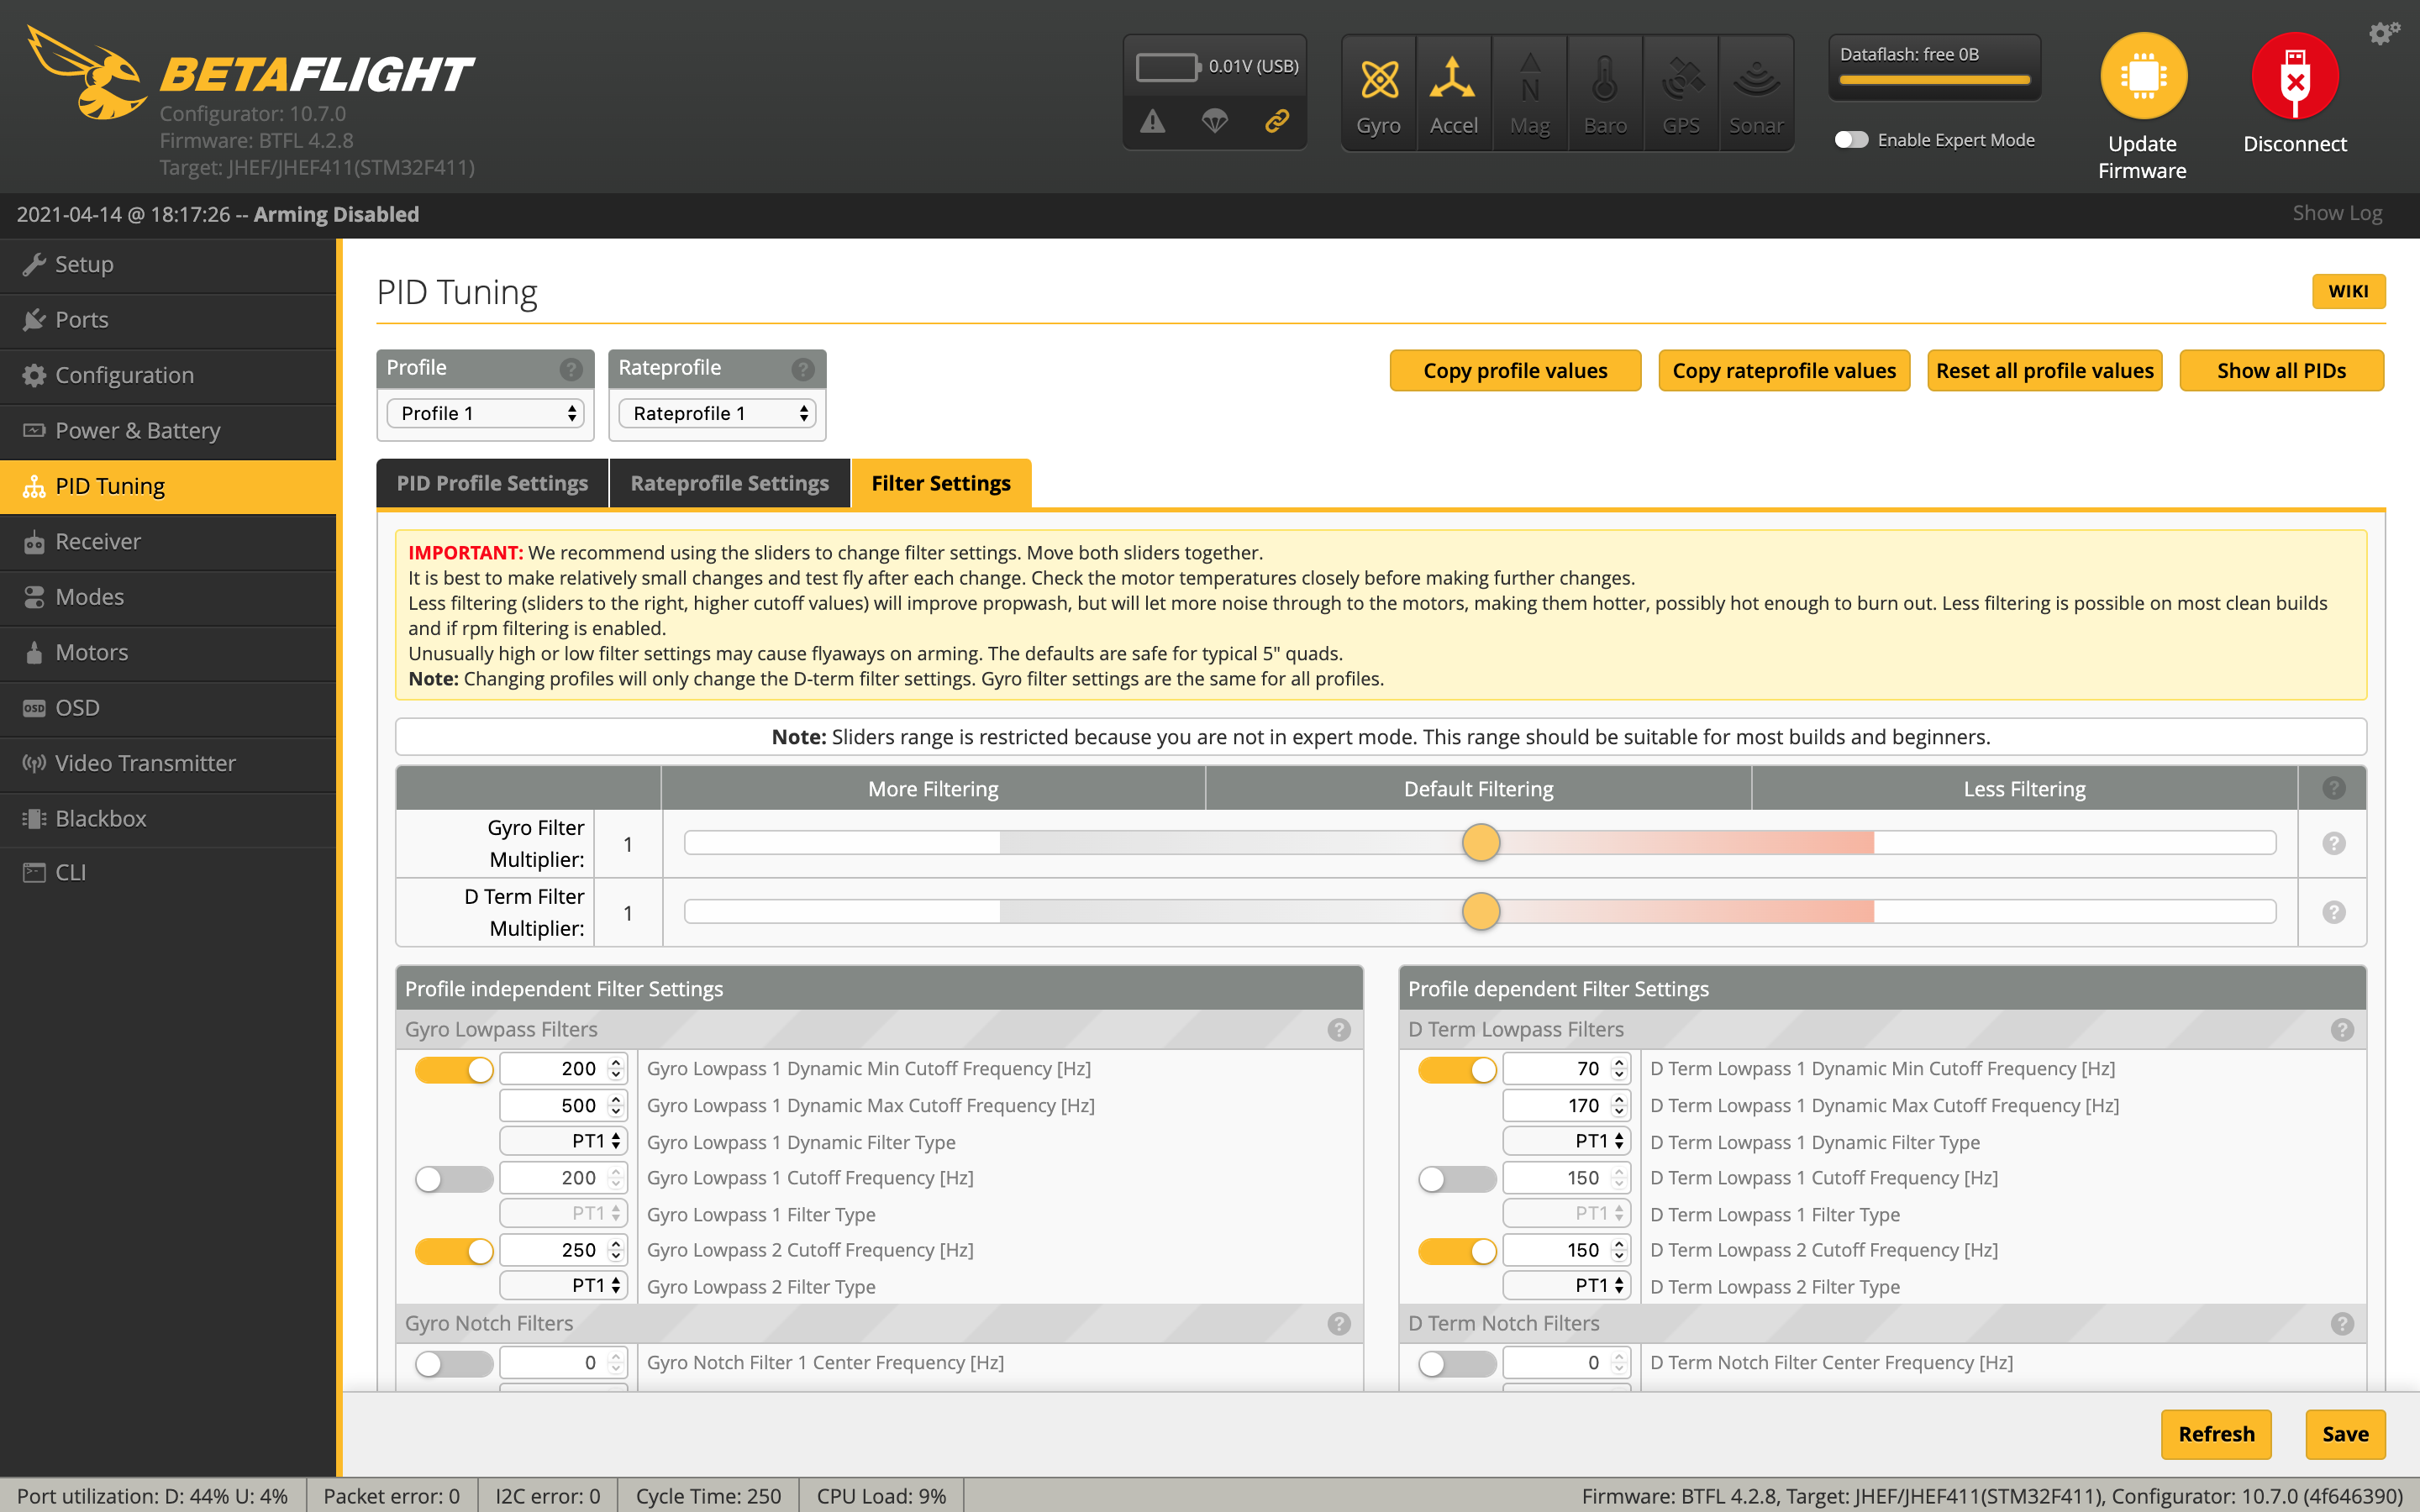
PID Tuning
I spent quite a bit of time toying with the PIDs. The motors can get quite hot, so you need relatively low D-term values, but too low and the flight characteristics suffer. I found these values to offer a fair middle ground. The motors still do get hot, but to an acceptable level. You might also want to have a look at Freybott's Settings, but proceed with caution. You don't want to paste his entire dump into the CLI. Study it and make the changes manually on your end.
To complete the remaining steps apply lipo power and turn your radio on
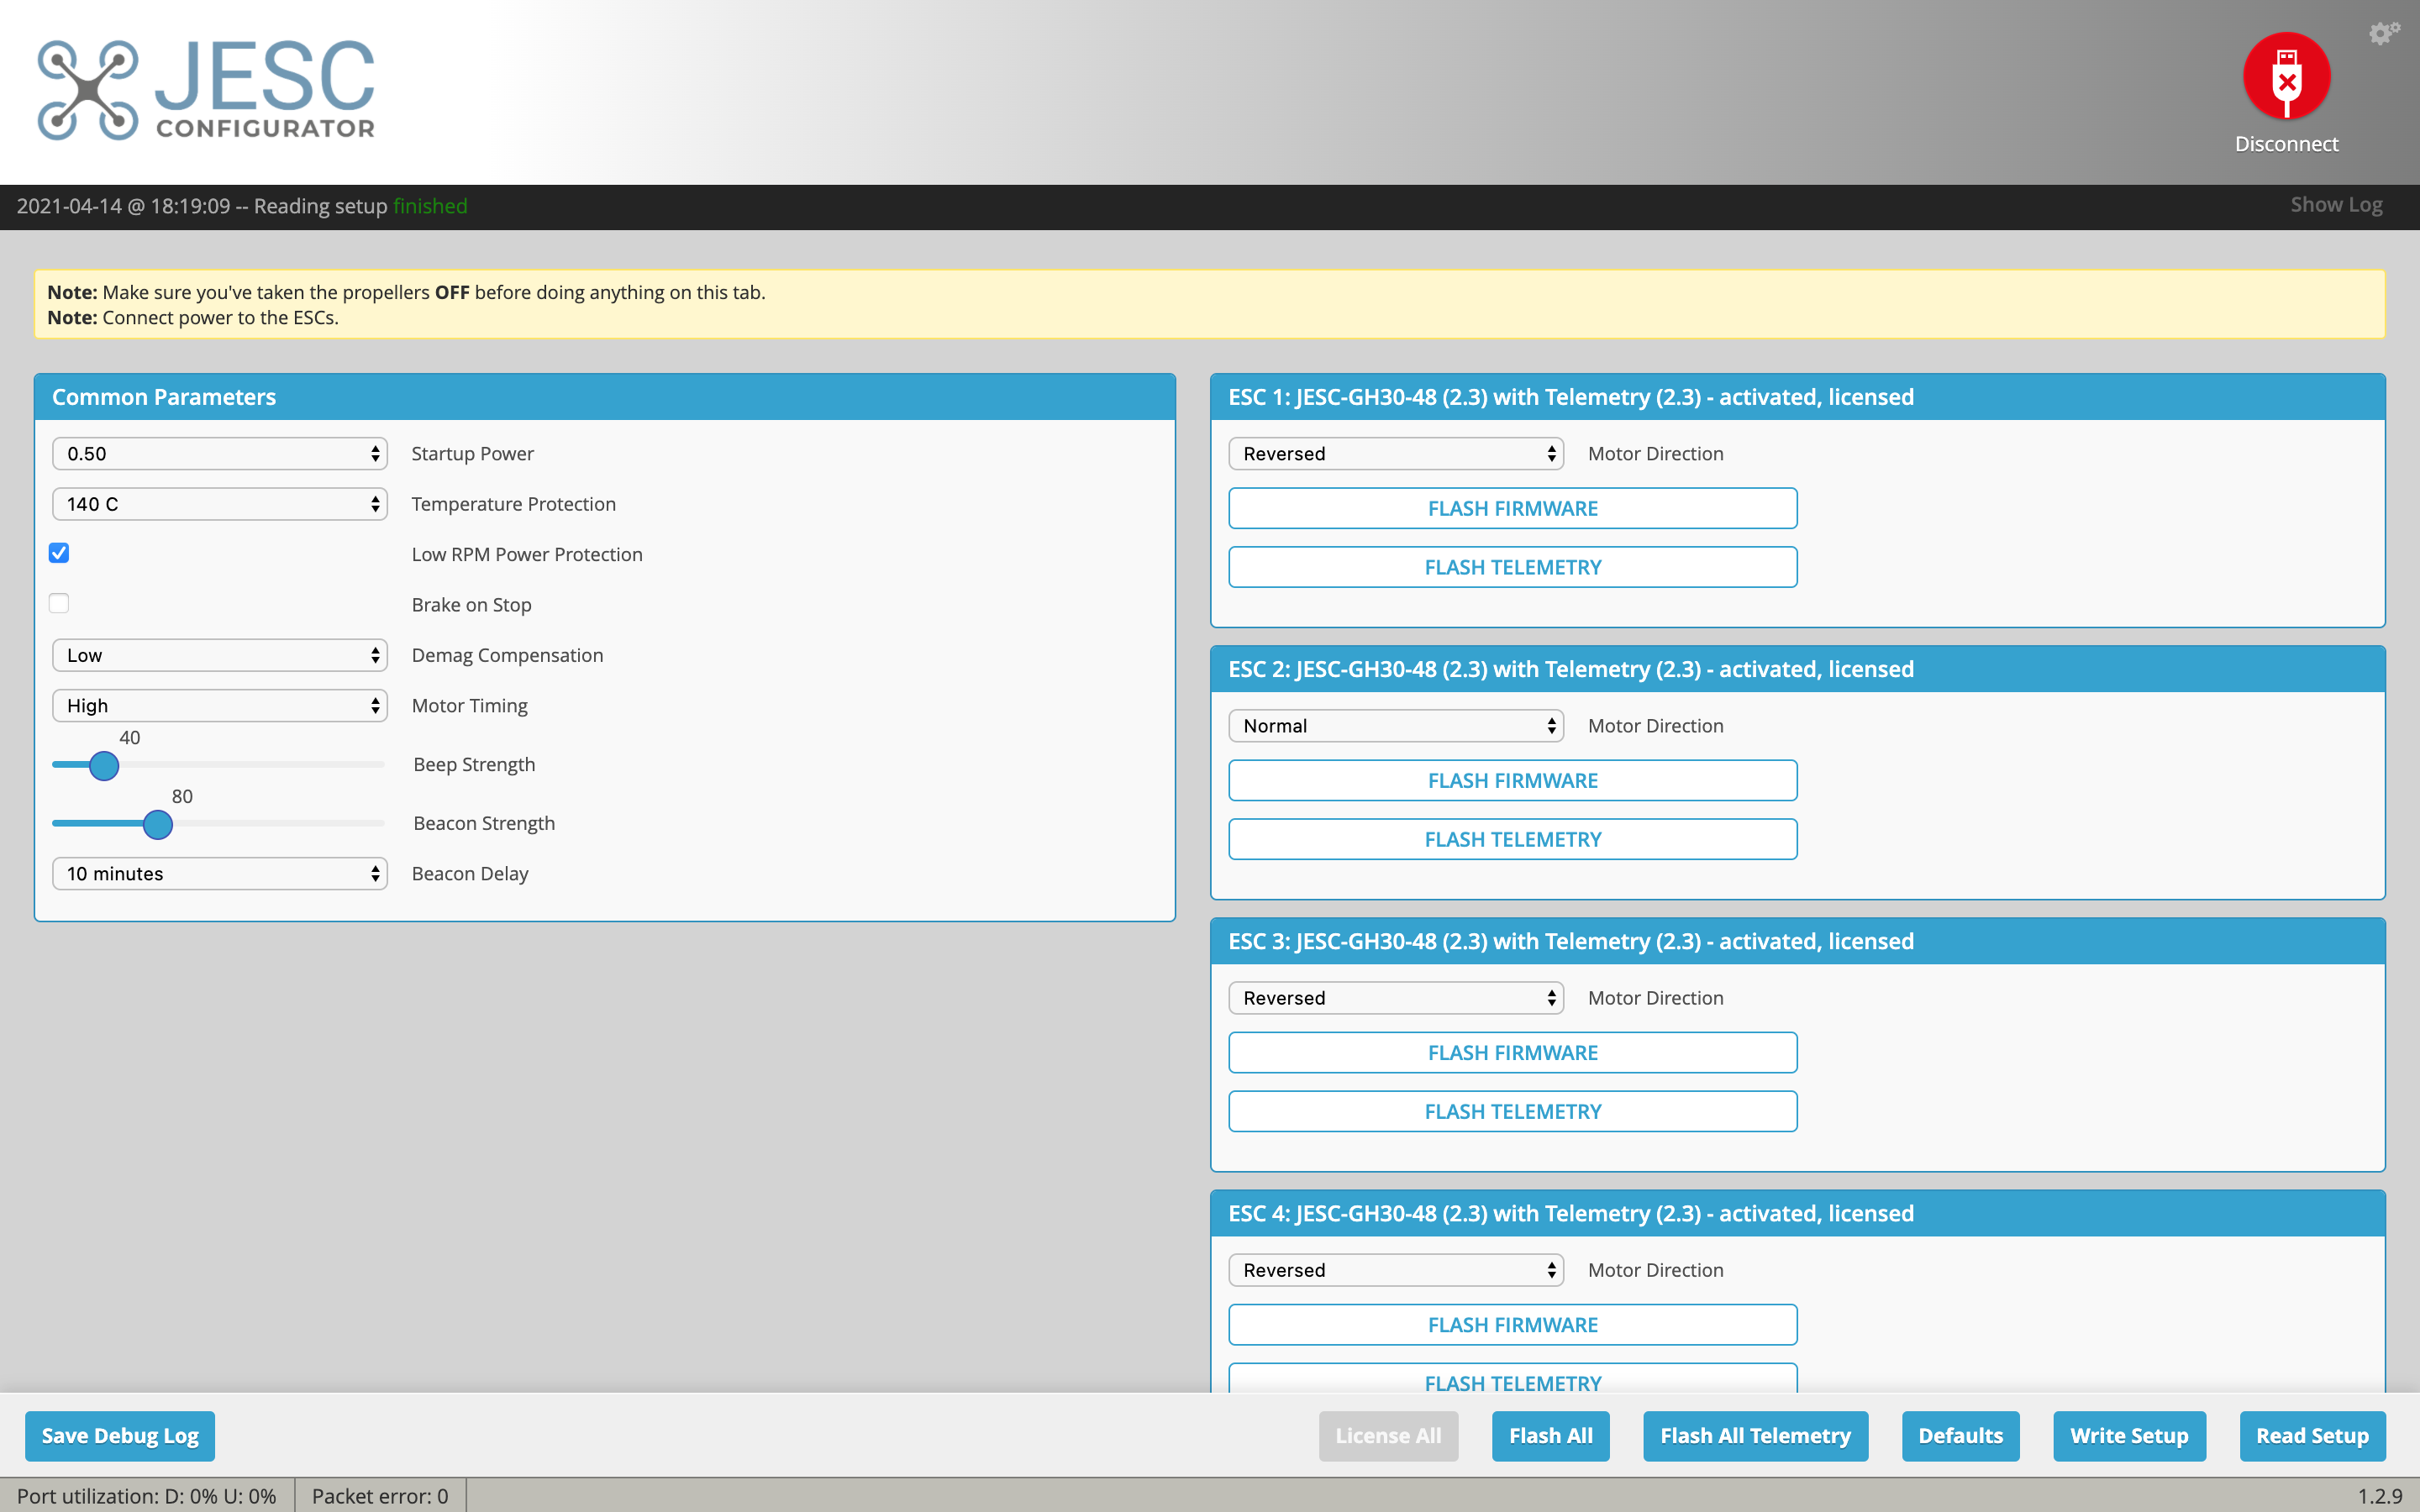
ESC Firmware
You need to flash to an ESC firmware that supports a 48khz PWM rate. This is crucial for reducing motor temperatures. You can use either JESC or JazzMaverick. For JazzMaverick you can use the traditional BLHeli Configurator to flash the firmware you download from Github. To use JESC you need to download the JESC configurator. The only caveat is JESC requires you to purchase a license to use Bi-Directional DSHOT. You can use 48khz for free though.
For details on how to flash either of these firmwares please refer to this video:
BLheli-S Free RPM Filtering JazzMaverick vs. JESC (How-To) - Joshua Bardwell
JESC Configurator:
https://github.com/jflight-public/jesc-configurator/releases
JESC Bi-Directional DSHOT Licenses:
https://jflight.net
JazzMaverick Firmware:
https://github.com/JazzMaverick/BLHeli/tree/JazzMaverick-patch-1/BLHeli_S%20SiLabs
Finally, be sure to reverse any motors that need to be reversed.
Reconnect to BetaFlight Configurator
Receiver Tab
Ensure your pitch, roll, throttle and yaw are being applied correctly. Adjust your transmitter and Channel Map as needed.
- I like to add 3 to both deadbands to smooth out gimbal jitter.
Modes Tab
- Assign an Aux switch to arm and disarm your quad.
- Assign another Aux switch to enable Horizon or Angle mode if you want them.
- Assign the Beeper and "Flip over after crash" to a 3rd and/or 4th switch.
Save
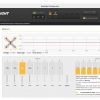
Motors Tab
Enable the motor test and check the rotation of each motor.
- Do this by sliding the master to around 1040 so you can lightly rub the side of each motor with your finger to determine the direction.
- Refer to the image on top and take note of any that need to be reversed.
- You might also want to ensure each motor is in the correct position by referring to the numbers in the image and powering them one by one.
- If any motors need to be reversed reconnect to BLHeli Configurator and reverse them.
DJI Goggles
Finally, you'll want to configure the goggle settings. These are my preferred transmission settings:
Transmission Menu
- Preferences: High-Quality
- Focus Mode: Off
- Bitrate: 50Mbps
Be sure to choose a Player Channel other than the public channel and you're good to go!
Finishing up
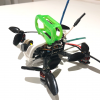
Mount the props to the motors using the longer M2 screws. I used the "props out" orientation so the front left and rear right props spin counter-clockwise. Make sure the props are mounted right-side up. That means the top of each prop should be touching the motors.
You might want to conduct a hover test indoors just to make sure it doesn't flip out. If it does then you've likely got your motors in the incorrect positions, the rotations aren't correct or the props are on wrong. Double check each of these.
Photos
Part List
Show stores (6)
This excellent and intriguing essay. Thank you very much! Thank you for sharing this outstanding content. poppy playtime is a blog that will help you recover your password and regain access to your account if you've lost it.
We stumbled over here by a different website and thought I might check things out. I like what I see so now i am following you. Look forward to finding out about your web page again. 다바오포커
Pretty good post. I have just stumbled upon your blog and enjoyed reading your blog posts very much.
Escorts in Bangalore
can it carry a:
gopro hero 4+
gopro hero 5
gopro hero 6
gopro hero 7
gopro hero 8
gopro hero 9
goprohero 10
gopro hero 10 bones
dji action 2
osmo action?
Im asking because I want to build this and I want to put another camera
im currently running the qav pro micro whoop which is almost the same thing as the freybott. Has anyone ever experienced a wobble from their stock configuration? im wondering if my configuration is causing it. Any clue?
I've configured the Lumenier QAV-CINE Freybott Edition with Betaflight 10.7.0 and I have a problem: the motors don't spin.
These motors correctly emit beacon tones and all system beeps but when I try to activate them through Betaflight's dedicated panel (see picture), they vibrate a bit but they don't spin. Later I tried to flash the ESCs with JESC Configurator, with no avail.
It's likely that I have missed some step and/or I have to correctly set something somewhere but it's hours I'm wandering through Betafight's configuration panels and I haven't figured it out yet.
The drone features:
• JHEMCU GHF411AIO Pro Flight Controller
• TBS Crossfire Nano RX
• Caddx Vista (with Polar cam)
• Xing2 1404 motors.

I have to say the carbon cutting on the frame's baseplate is pretty retarded. There is enough place for a vista and fc + esc stack behind each other instead of stacked, but the carrbon cuts made in front and in the back just don't allow for any known format to mount there.
Great Guide thanks, i can´t find the nebula camera, it seems to be sold out, any other recommendations?
I have the DJI FPV and I would love to use the goggles for this, but I prefer to use a remote that also serves for flying a fixed wing. Can I follow your instructable and bind the drone to another remote other than DJI´s?

Any recommendations on connecting a naked GoPro Hero6 to this?
I built it in the same way, but the motor is very hot. Same for PID. Is there a solution?
In the back, are that holes for a 20*20 stack mount? I see in the middle it any size of stack (whoopa io 25.5, 16, 20) but in the back and front I'm not sure?
I have a betafpv405 v4 blheli_32 fc with the 5500kv freybott motors, on 24khz it flies great, but once i set it to 48khz it starts wobbling like crazy. Its not even possible to tune it out. Even on idle speed (4,5%) i have the feeling that they dont run smoothly. (Same with a betafpv405 blheli_S
Motors are running crazy hot on 24khz
Thanks for the build log!
I have made the same build with some components that I still had, e.g. 1404 motors.
It flies really well, but I am experiencing quite severe jello at mid to high throttle.
Unfortunately it is also visible in the naked gopro footage.
Is this a general issue with this frame, or should I start looking for bad motor bearings or other mechanical defects?
Thank you!
Im flying the Gemfan D63 5-blades. Really like the sound of them. I had the 3-blades on the beta95x and they sounded quite annoying. I have tried spinning the motors without props yesterday and one sounds a fair bit rougher than the others. Should probably replace it. Blackbox logs from flying show some resonance peaks at 300 and 500Hz on roll and 350Hz and above on pitch, which are easily attenuated by filtering and don't affect flight performance. My guess is though that these resonances are being hit at mid throttle and cause the jello because FPV and HD cam are both hard mounted. You don't have any jello? Should I try soft mounting the motors or the HD cam? Using a GoPro 6 naked. I dont really care about the jello in the FPV feed, but in the HD it can render a whole sequence useless.
Thank you

yoooo great build!
how come the YT channel is ded?
Super nice build dude! I've been eyeing that frame. Mind if i ask about the weights? dry, with camera and fully loaded with battery+ cam?
thank you
keep up the sick builds

You forgot the most important part, haha! 😂 How to install the custom battery straps! So many post I see have them installed wrong. Down through the hole and up around the T.

I didn't even know that.. Not much documentation for this frame. I'll be sure to add that! This is a tricky one tune. I've been testing different props and different tunes. These 5 blade props are far too much prop for these motors. I'm having better luck with the HQProp and iFlight Nazgul props. I need to take some new photos without these props.
noob here, great guide! I'm hoping to make this my first build ever, some concerns I have are...
1) would it be okay to use a 4s 850mah battery on this build? if not what should i change? motors? (any parts recommendations?)
2) im also hoping to mount a gopro session 5 (74g) on top, it seems like this build might not be strong enough to support something like that, what can i change to make that happen?
I had no specific interest in the particular parts being assembled in this one, but I like looking at your guides for the guide itself. Great pics and layout every time! Plus I never installed a cap quite like that before. The way you used the leads to hold it in place before soldering. It may seem obvious, but I just installed a cap last night in the same position and did something...less clever. That's my favorite thing about rb, seeing what and how other people build. Thanks for keeping it awesome!
I appreciate the support! This was my first time installing the cap like that, but it just made sense at the time. I didn't want the power lead tugging on the cap. A lot of this comes from the comments. For example I mounted the cap above the power leads one time and got called out. Another time I didn't add shrink tube and got called out. We're all learning!


awesome tutorial!