Riptide Red True X CDR Spec
 By shutupshake on Jul 28, 2017
Build goals:
- Clone-ready racing quad
- Short stack internals
- Under-mounted battery
- Good crash recovery
- Reliable, proven components
- Compliant with CDR specs
Summary:
This will be my second full build. Unfortunately, I have noticed when racing that my current rig almost always lands upside-down. I think this is a product of the significant weight being above the prop plane (Alien frame and top-mount battery). Quads generally settle on the side with the most weight. Thus if I wanted to seriously race quads, I need a quad with better crash recovery, i.e., lands rightside-up. This drew me to an under-mounted battery design. Additionally Chicago Drone Racers has been discussing a low-power, entry-level race specification. This build will be one of the prototype builds.
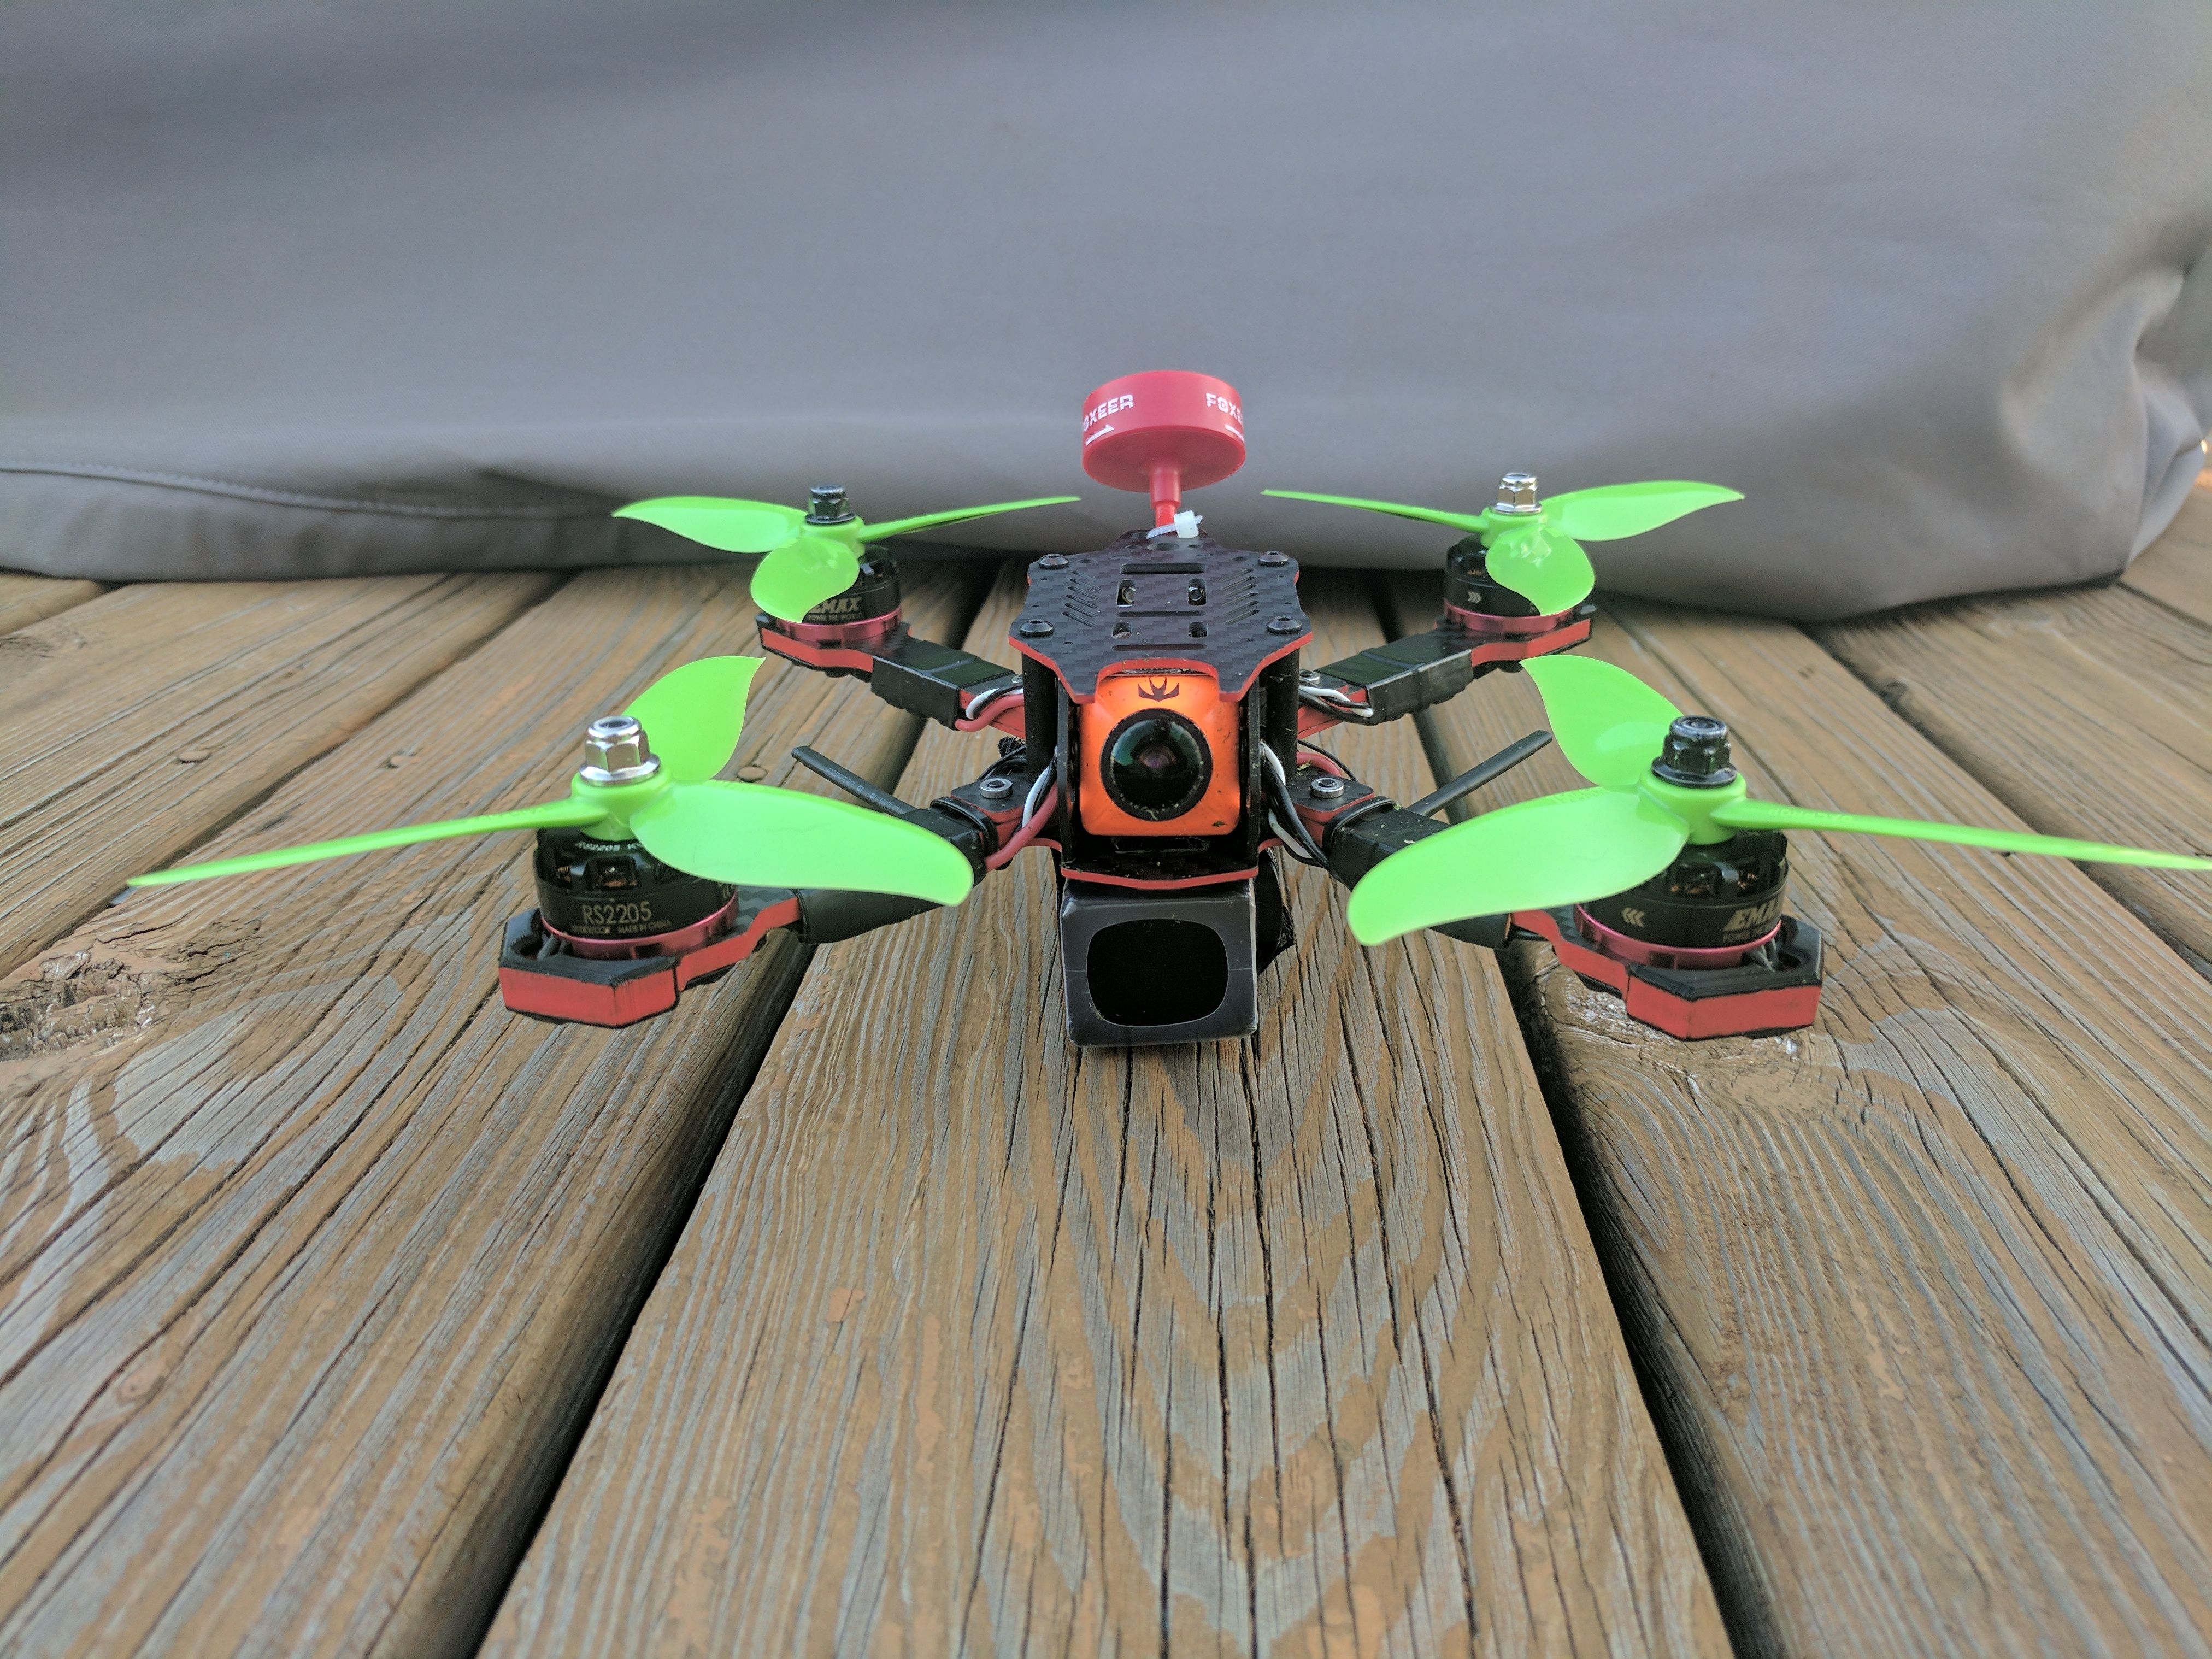
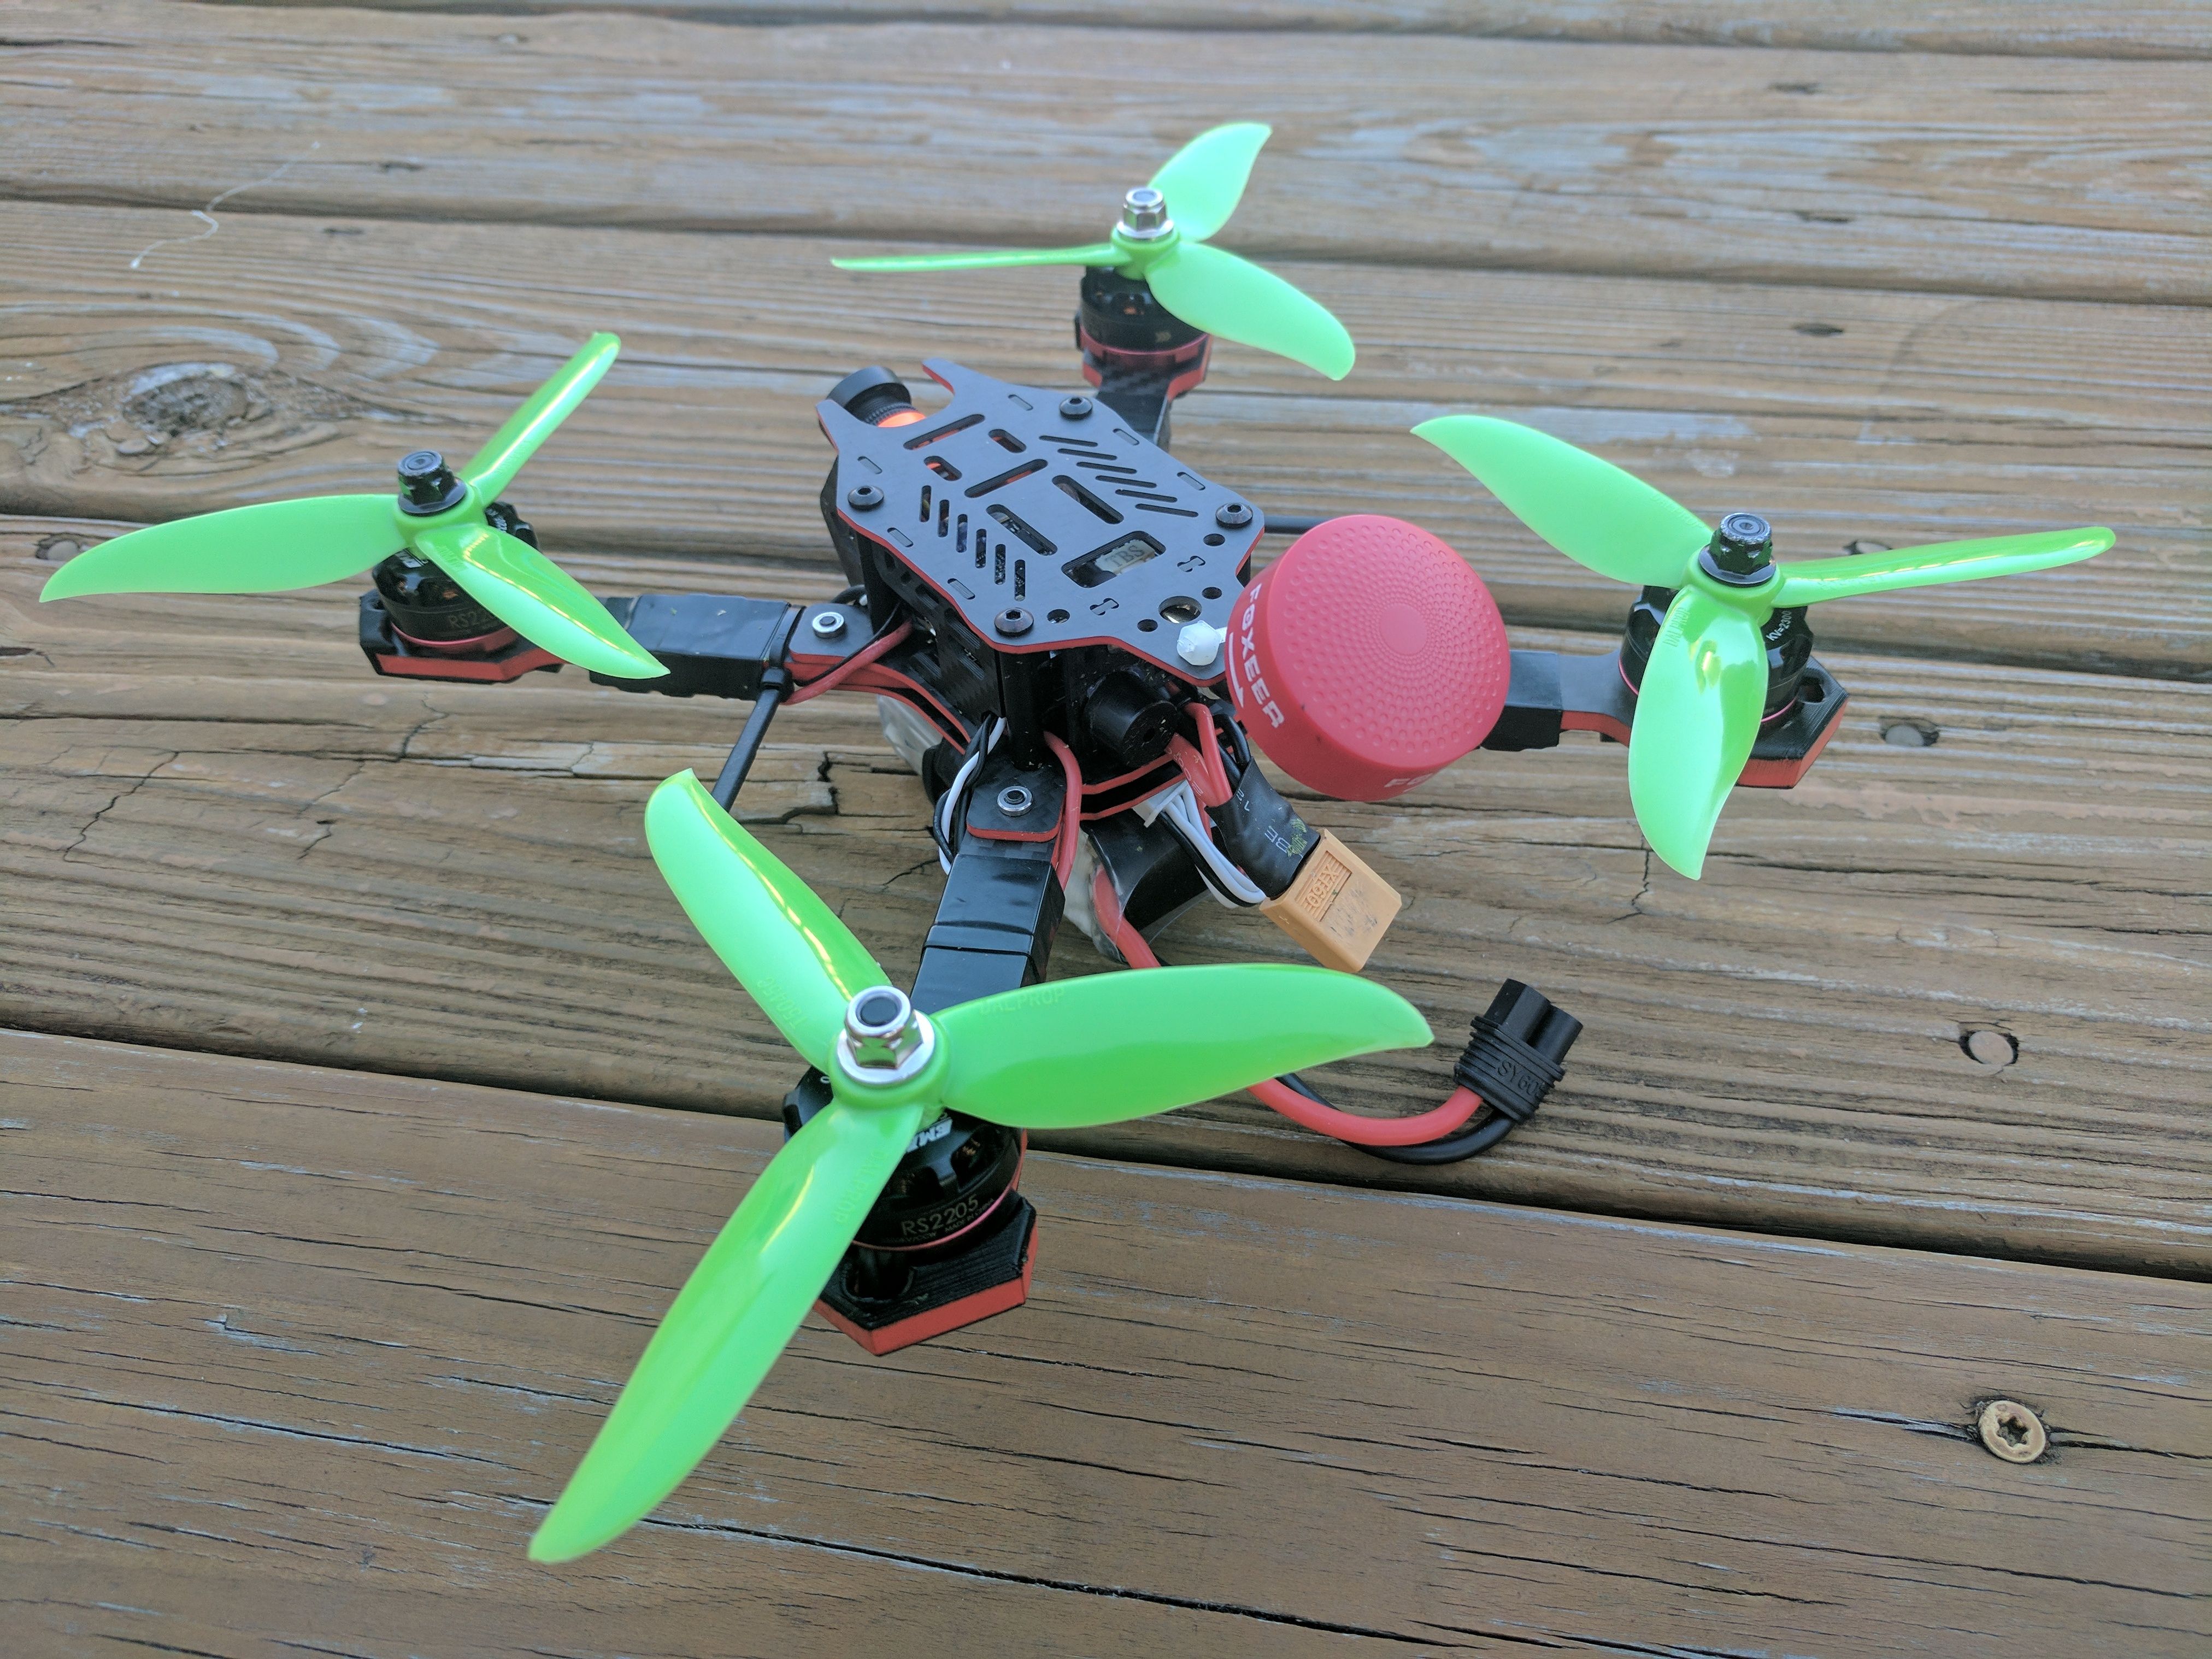
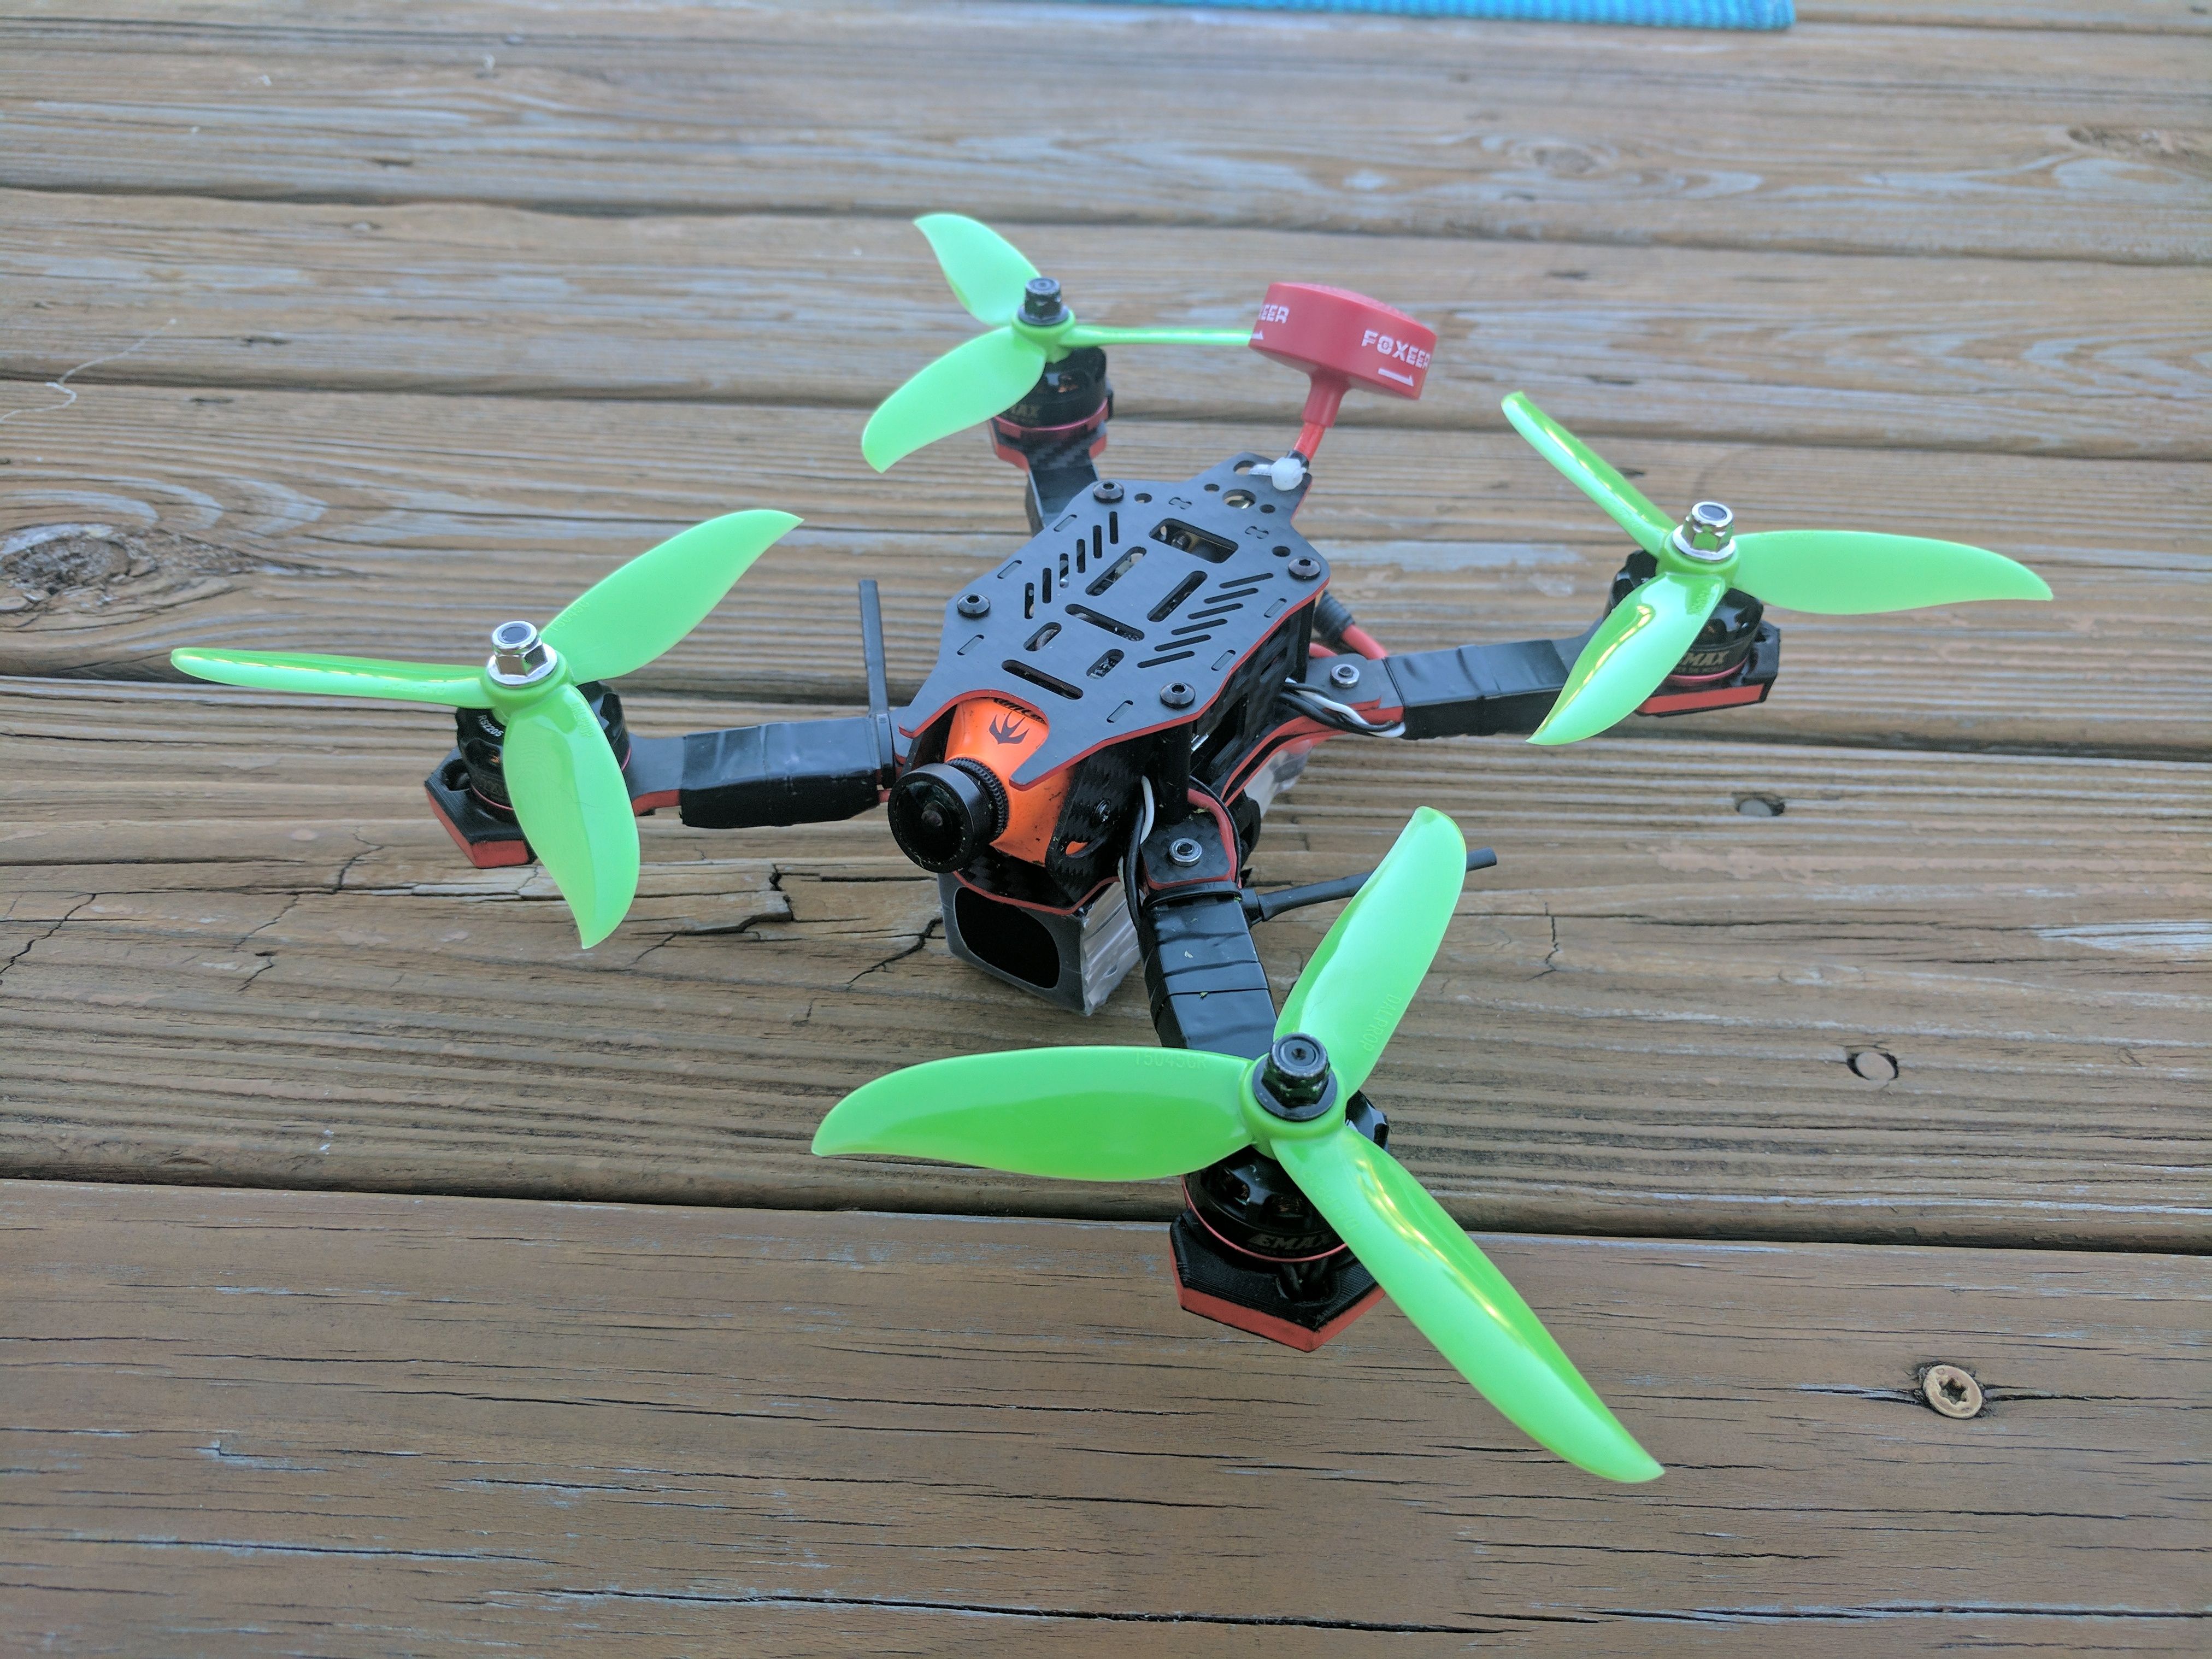
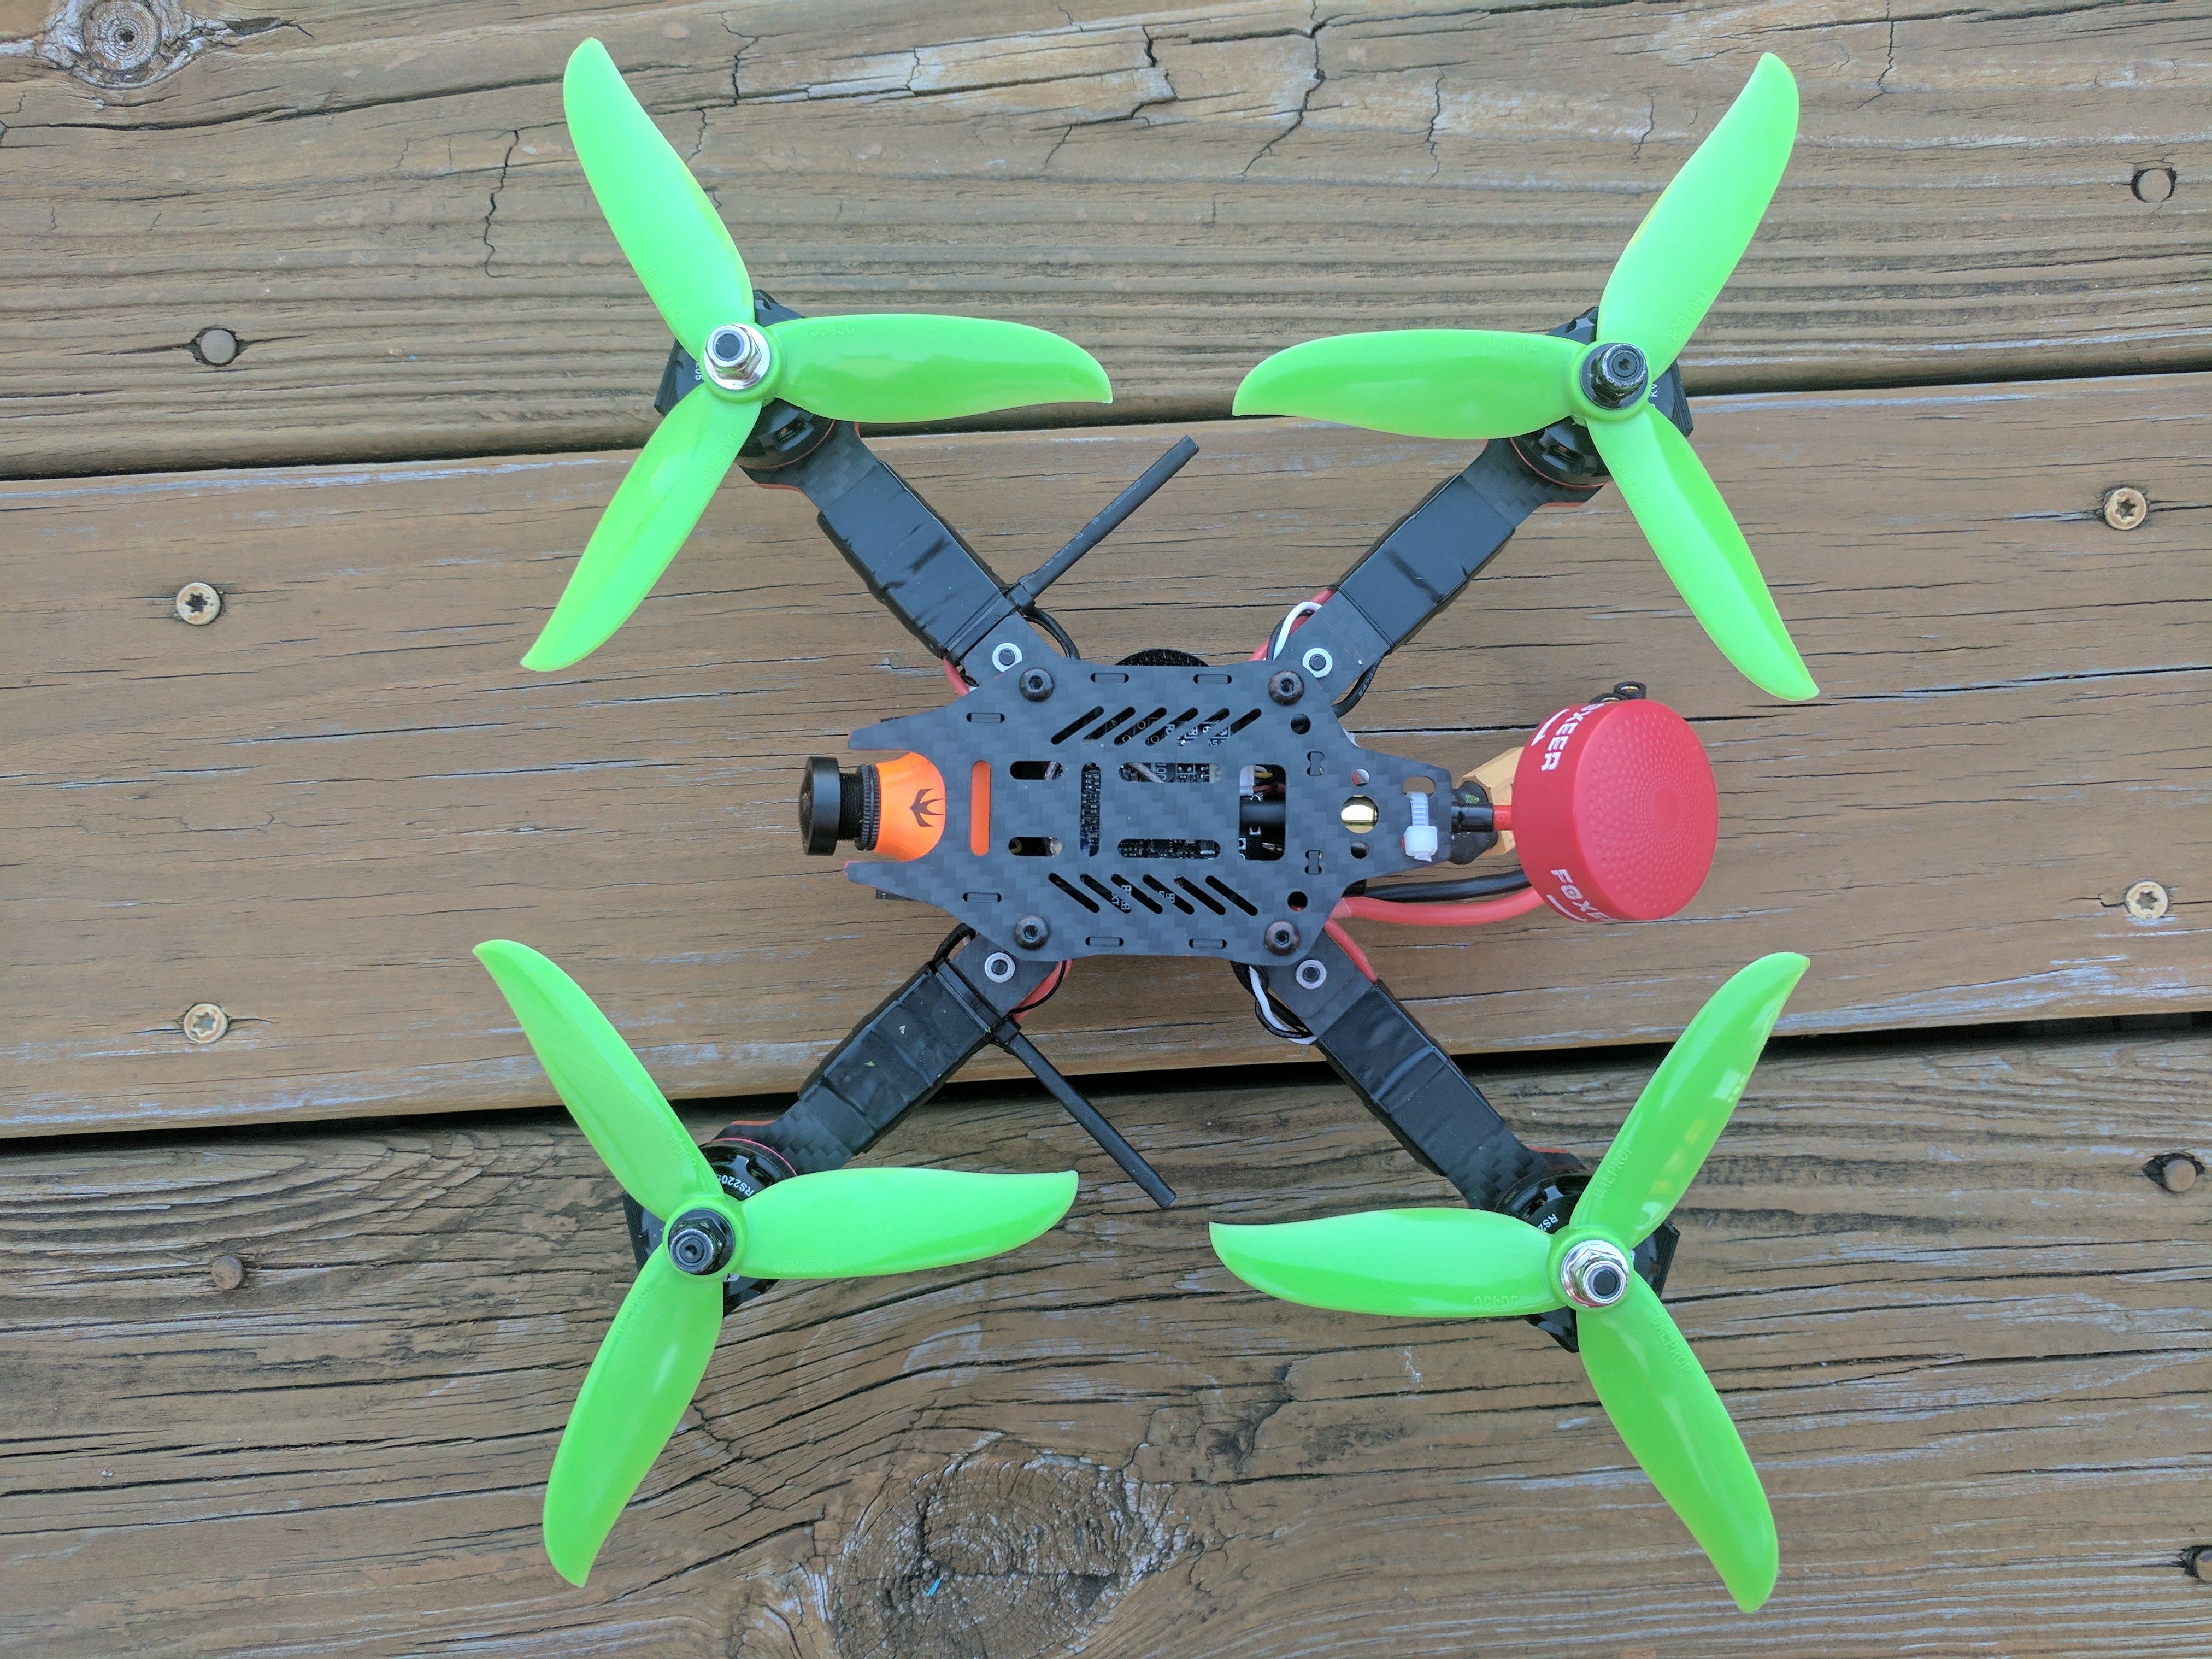
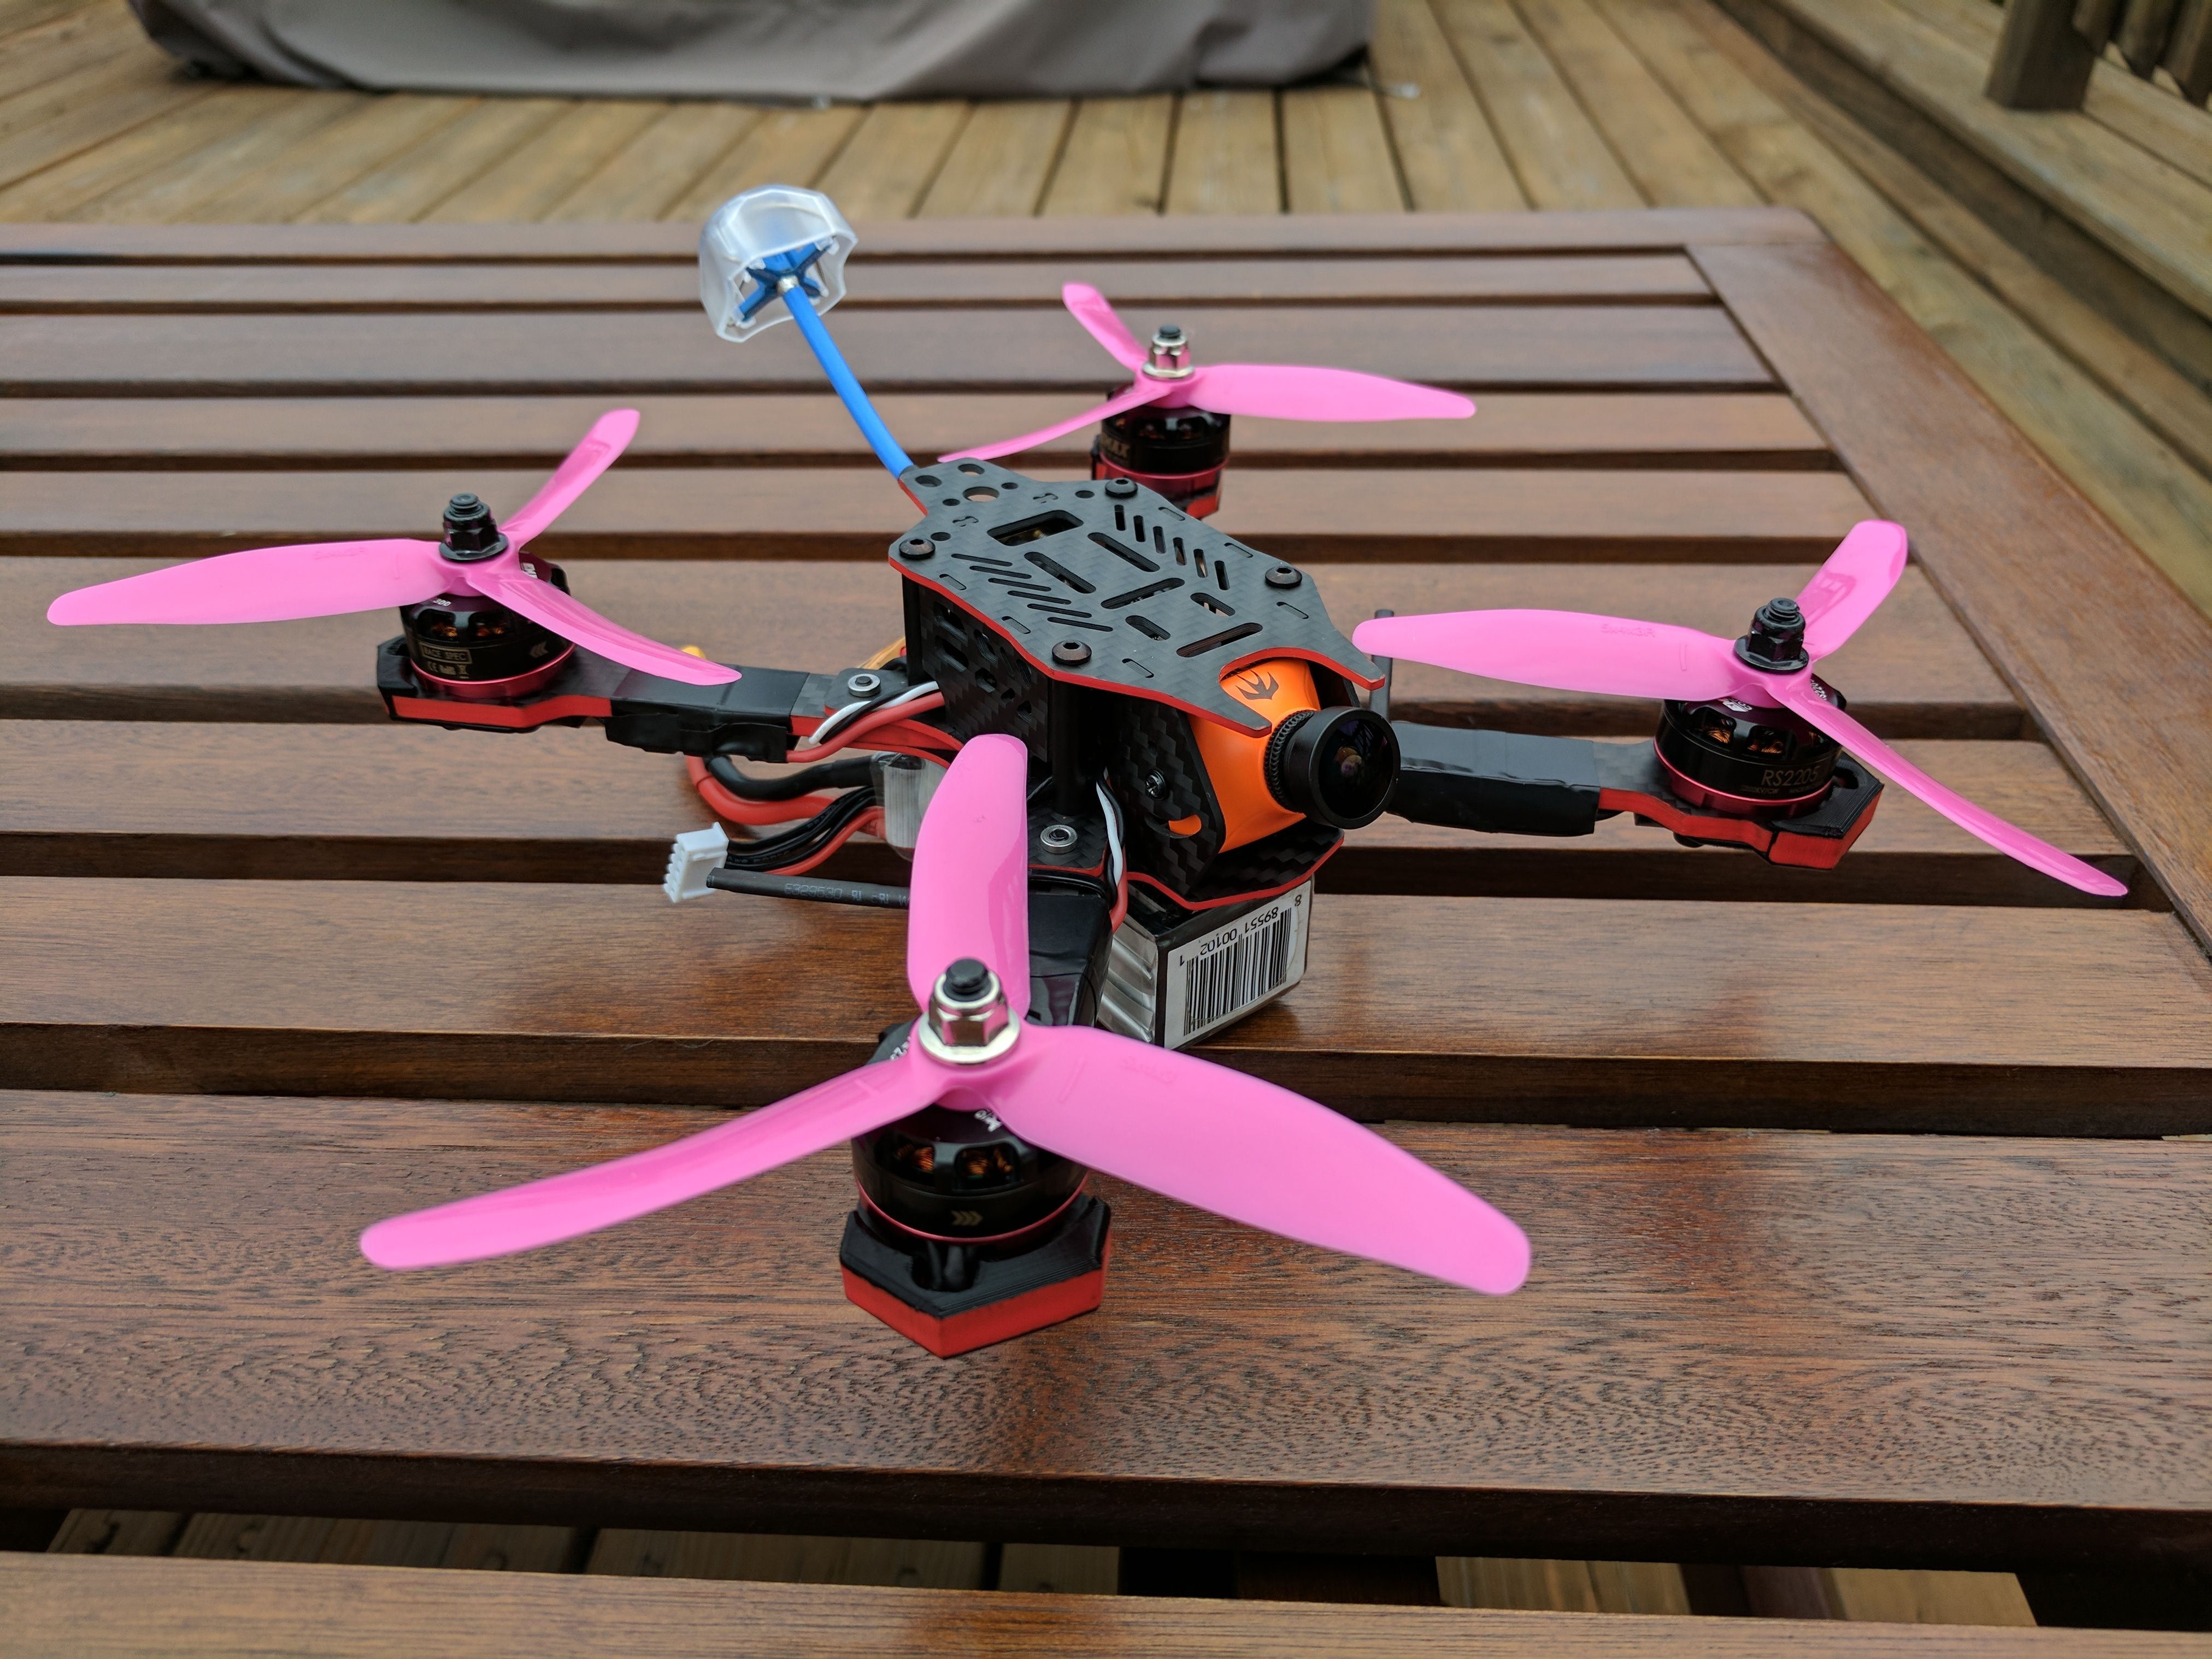
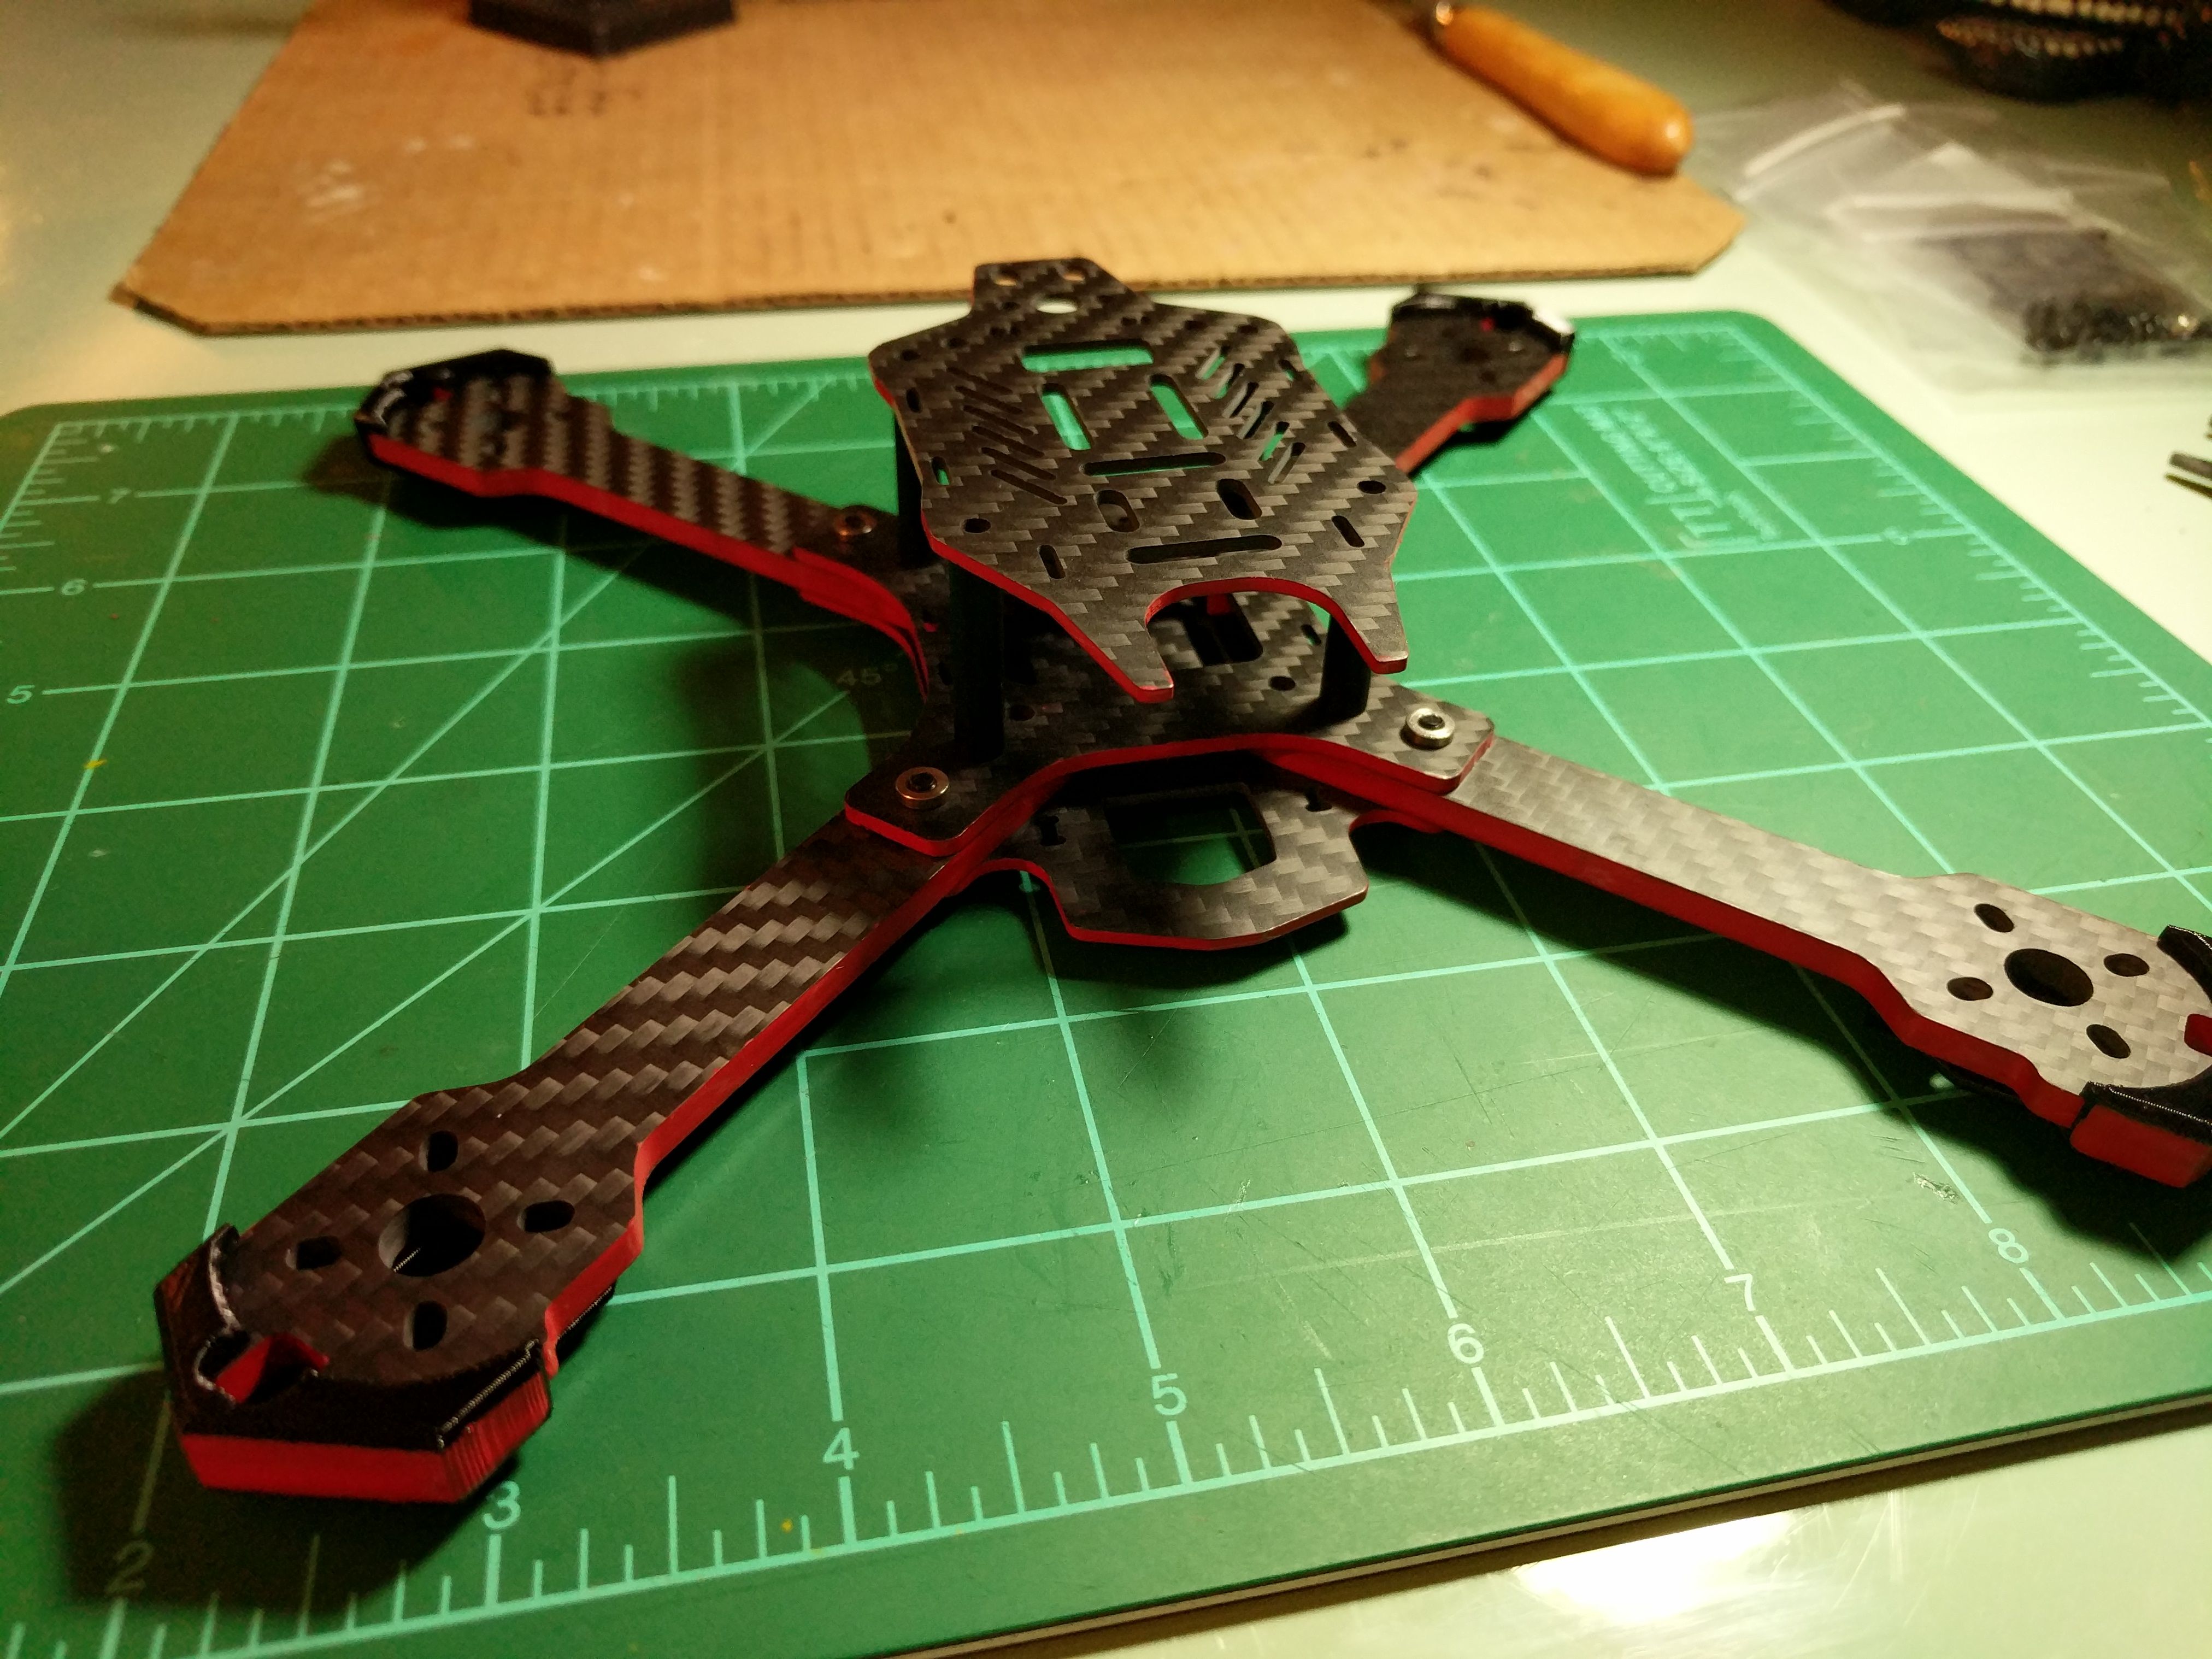
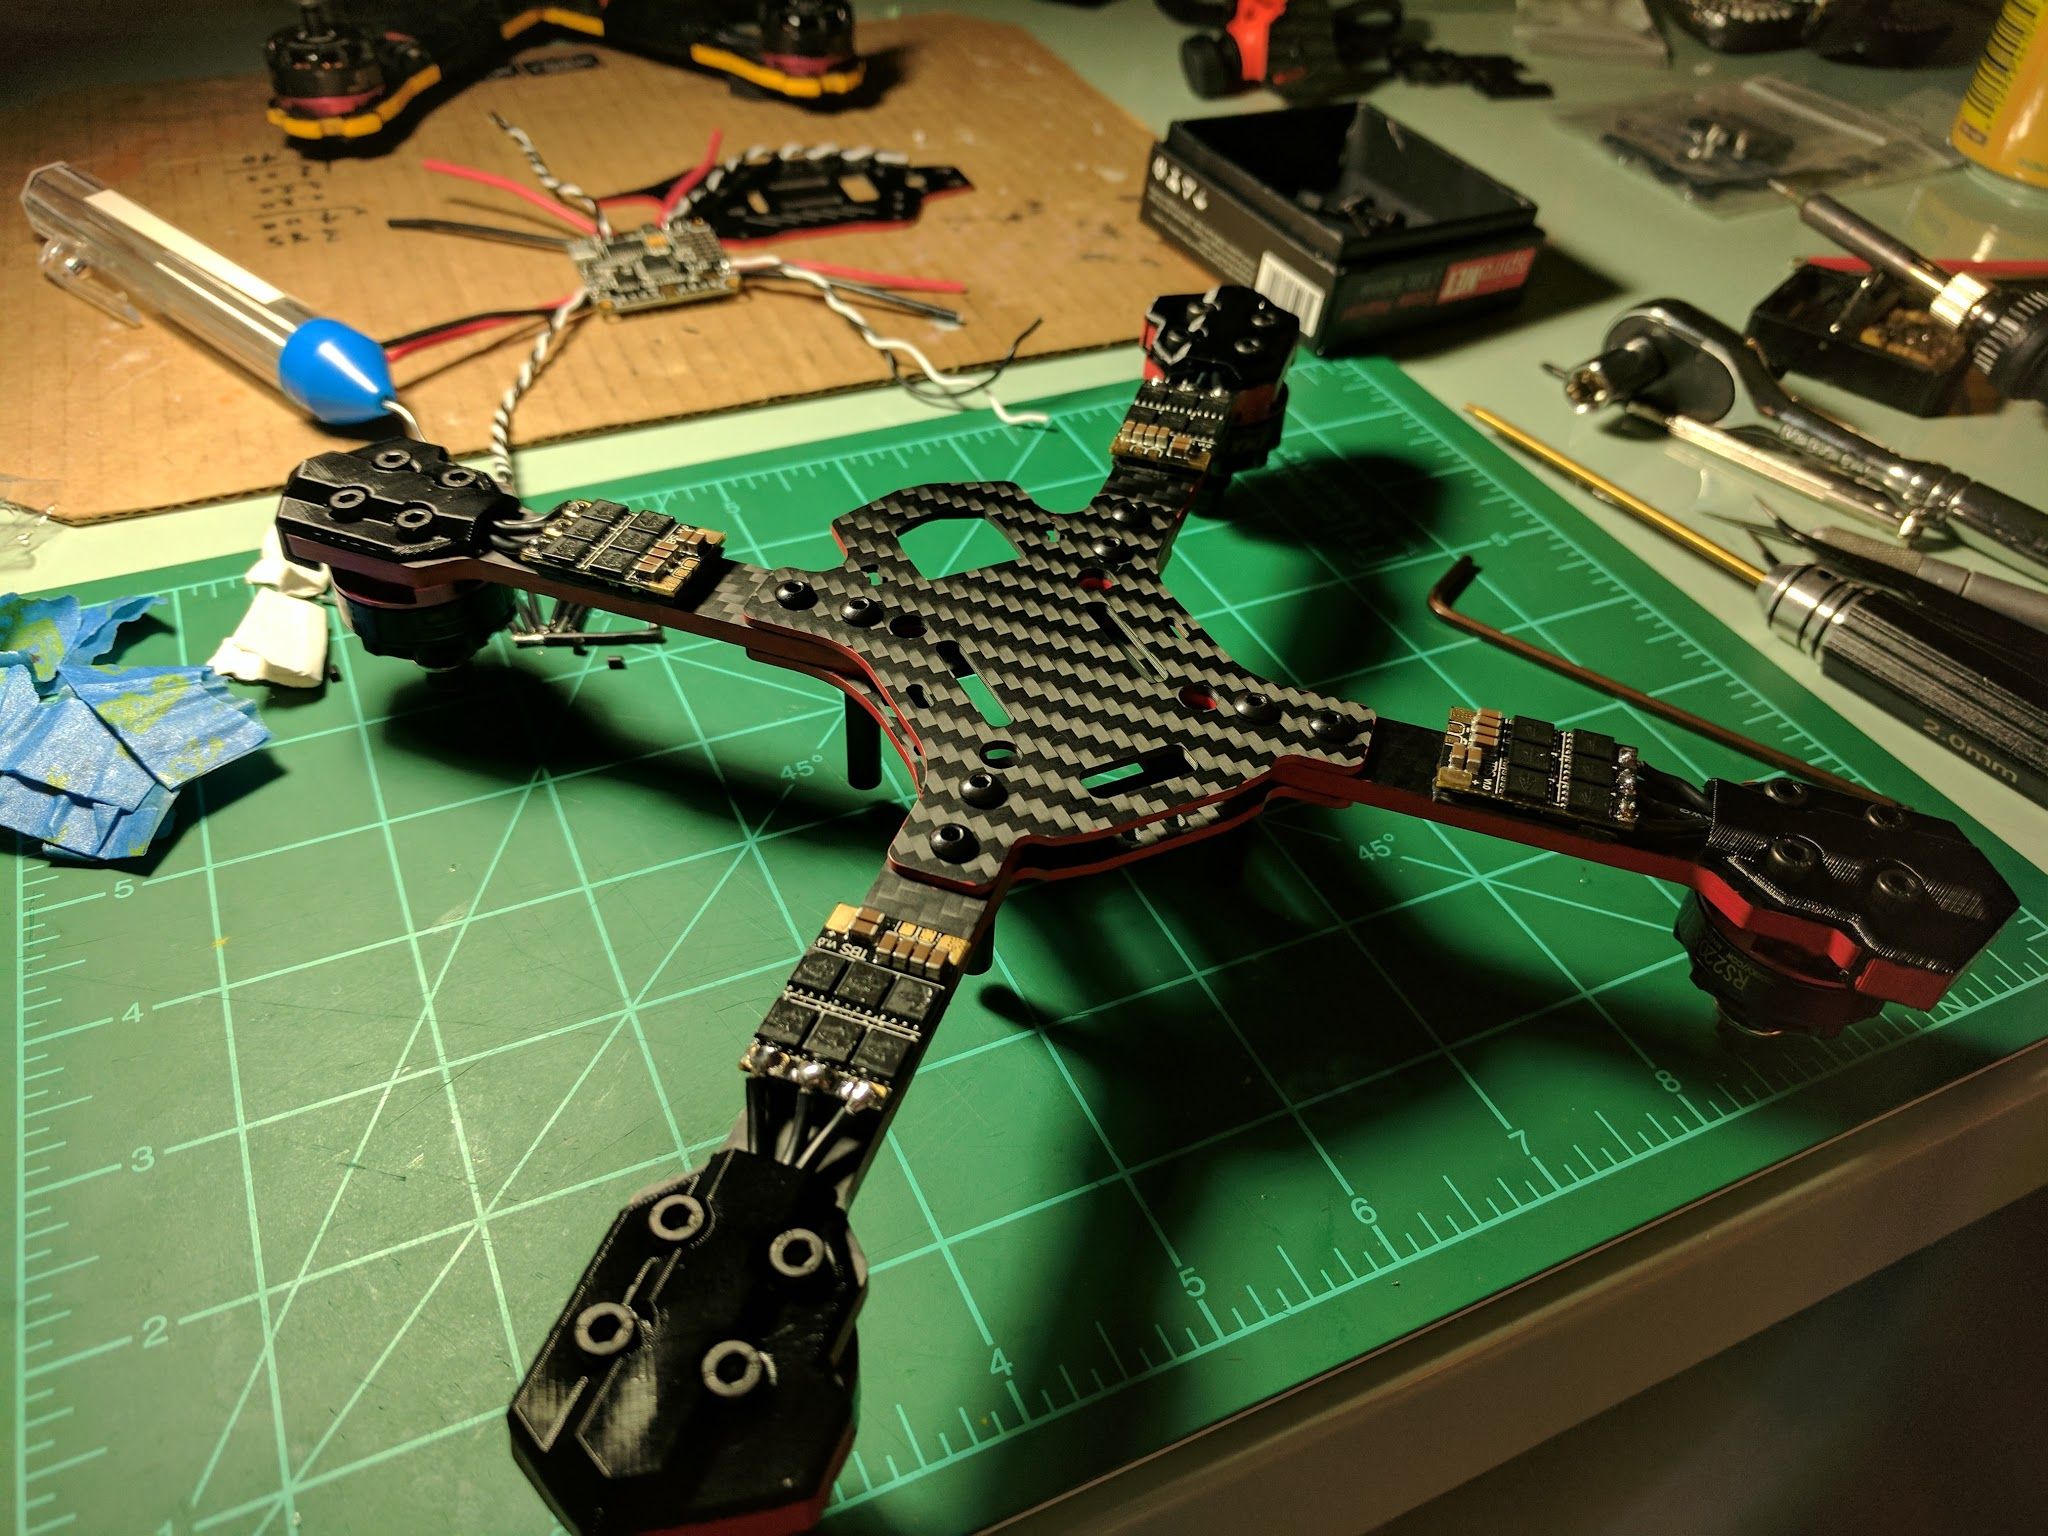
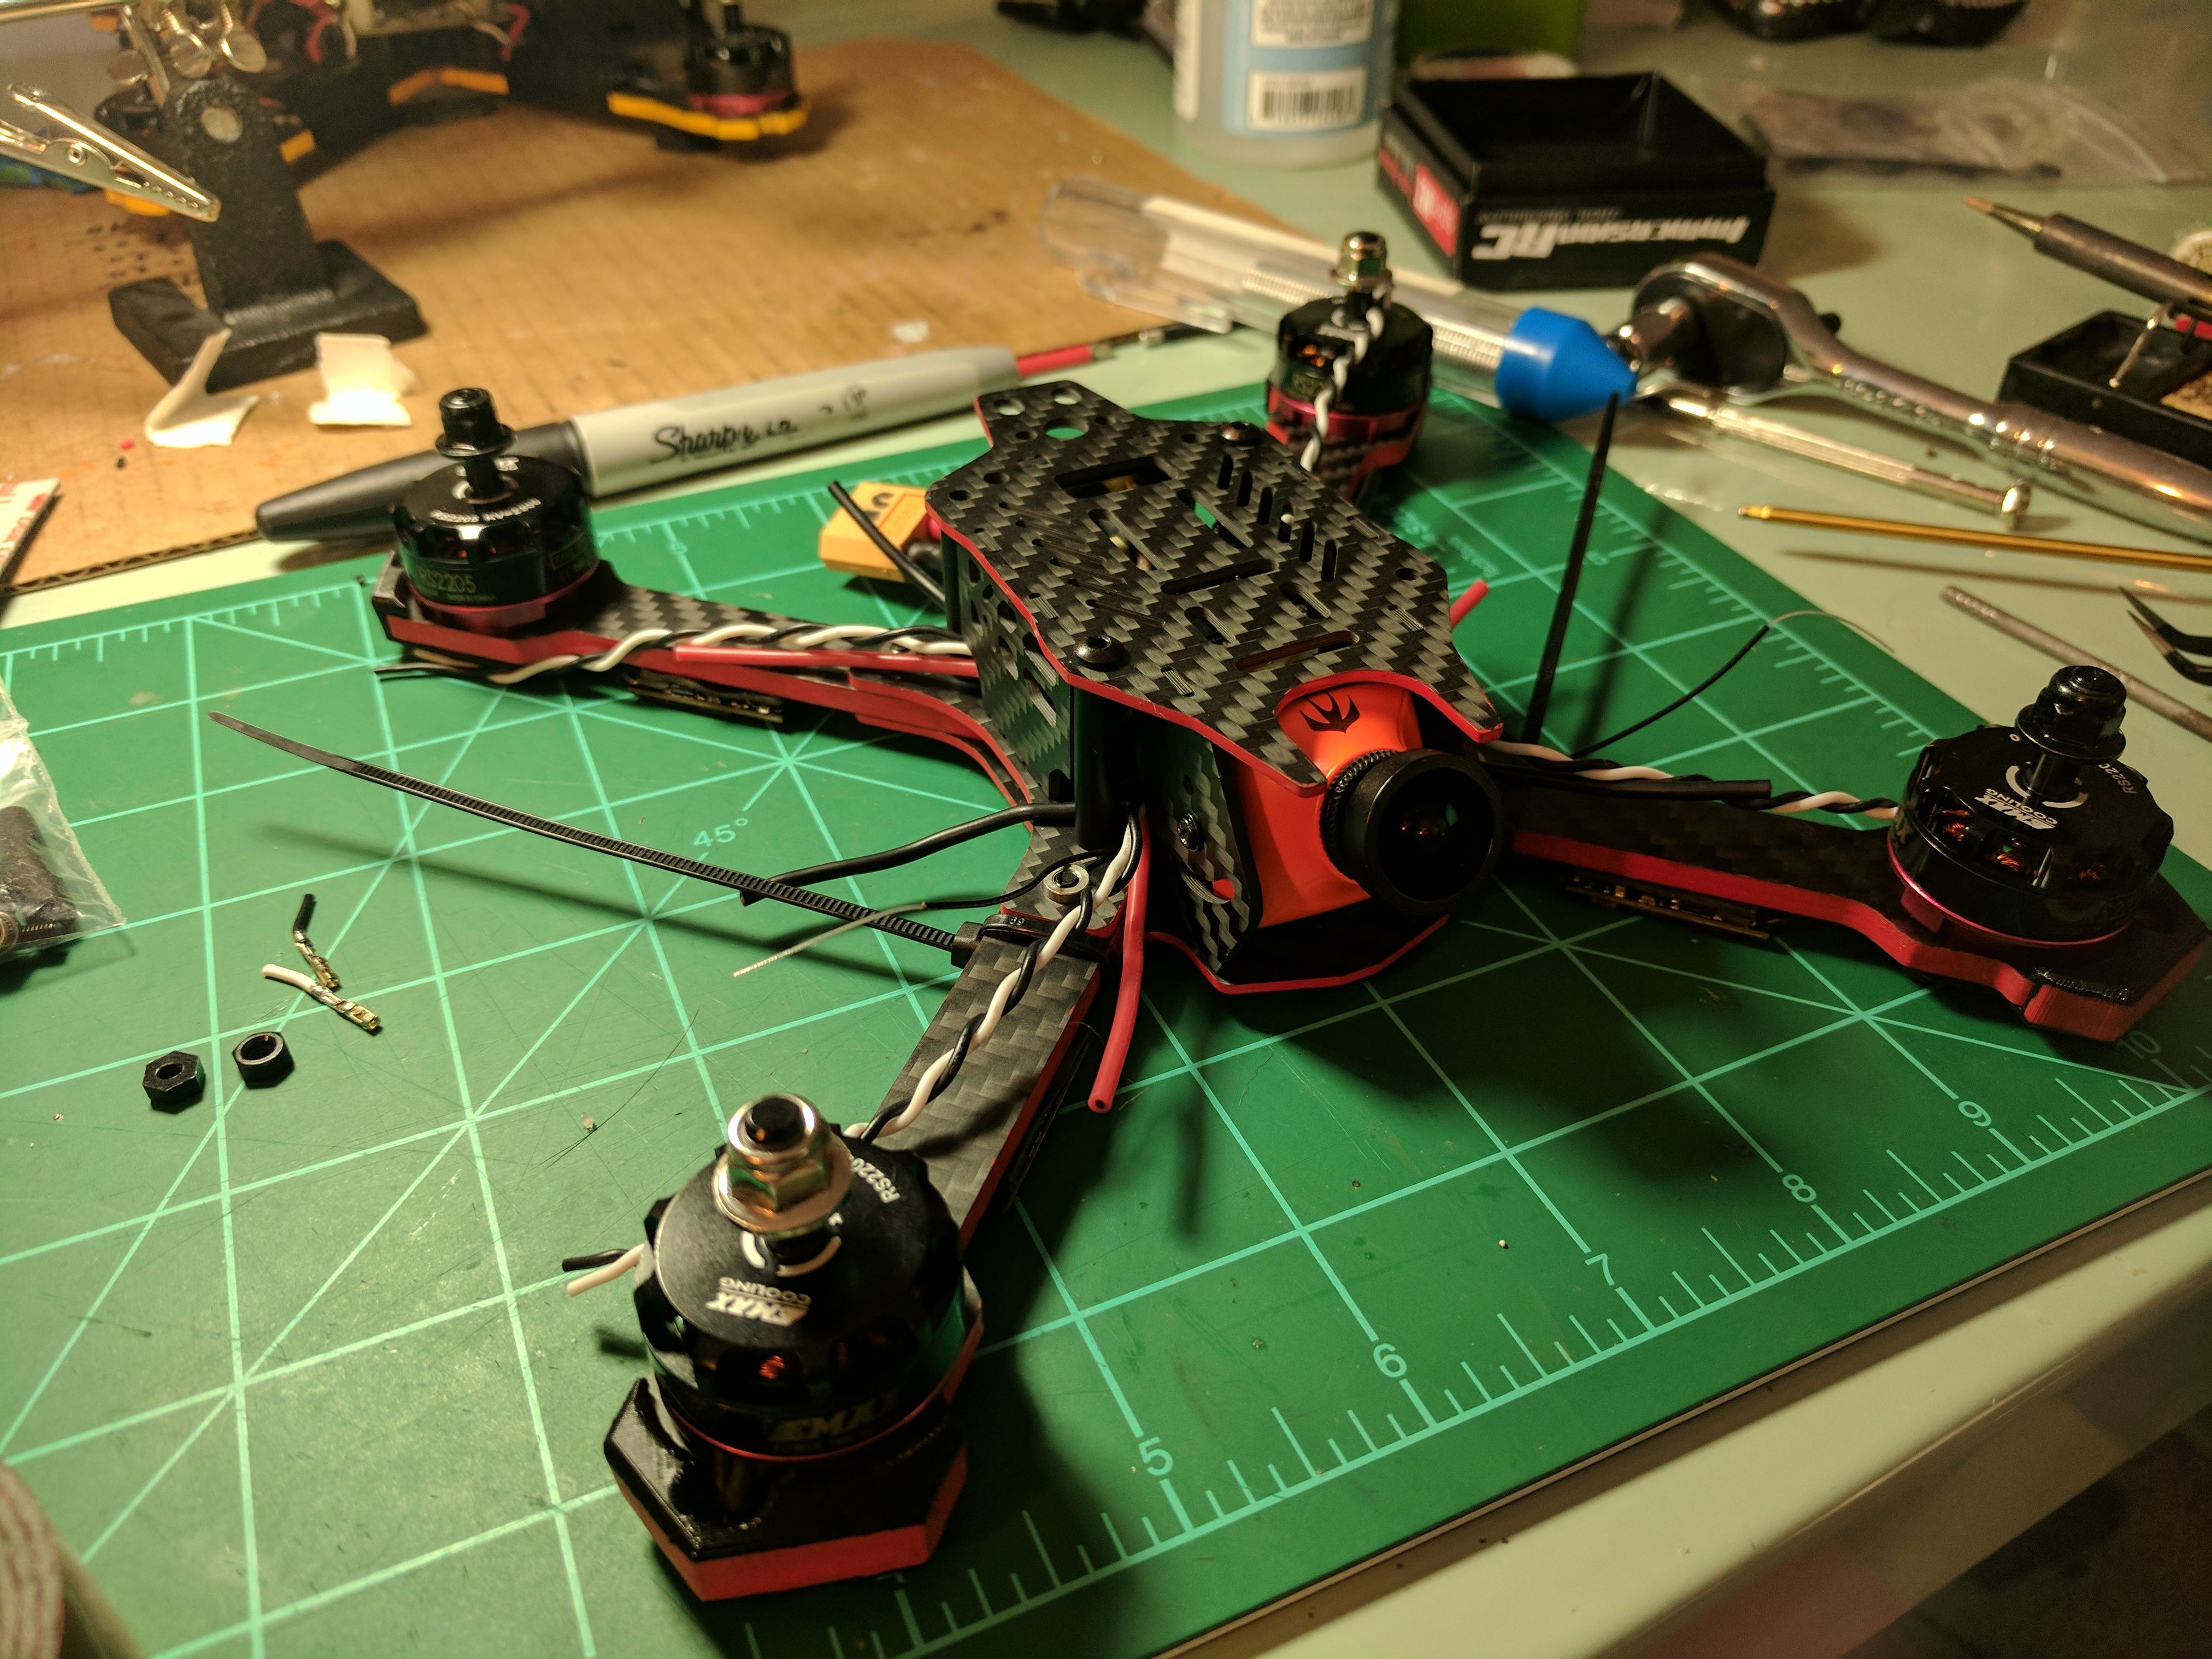
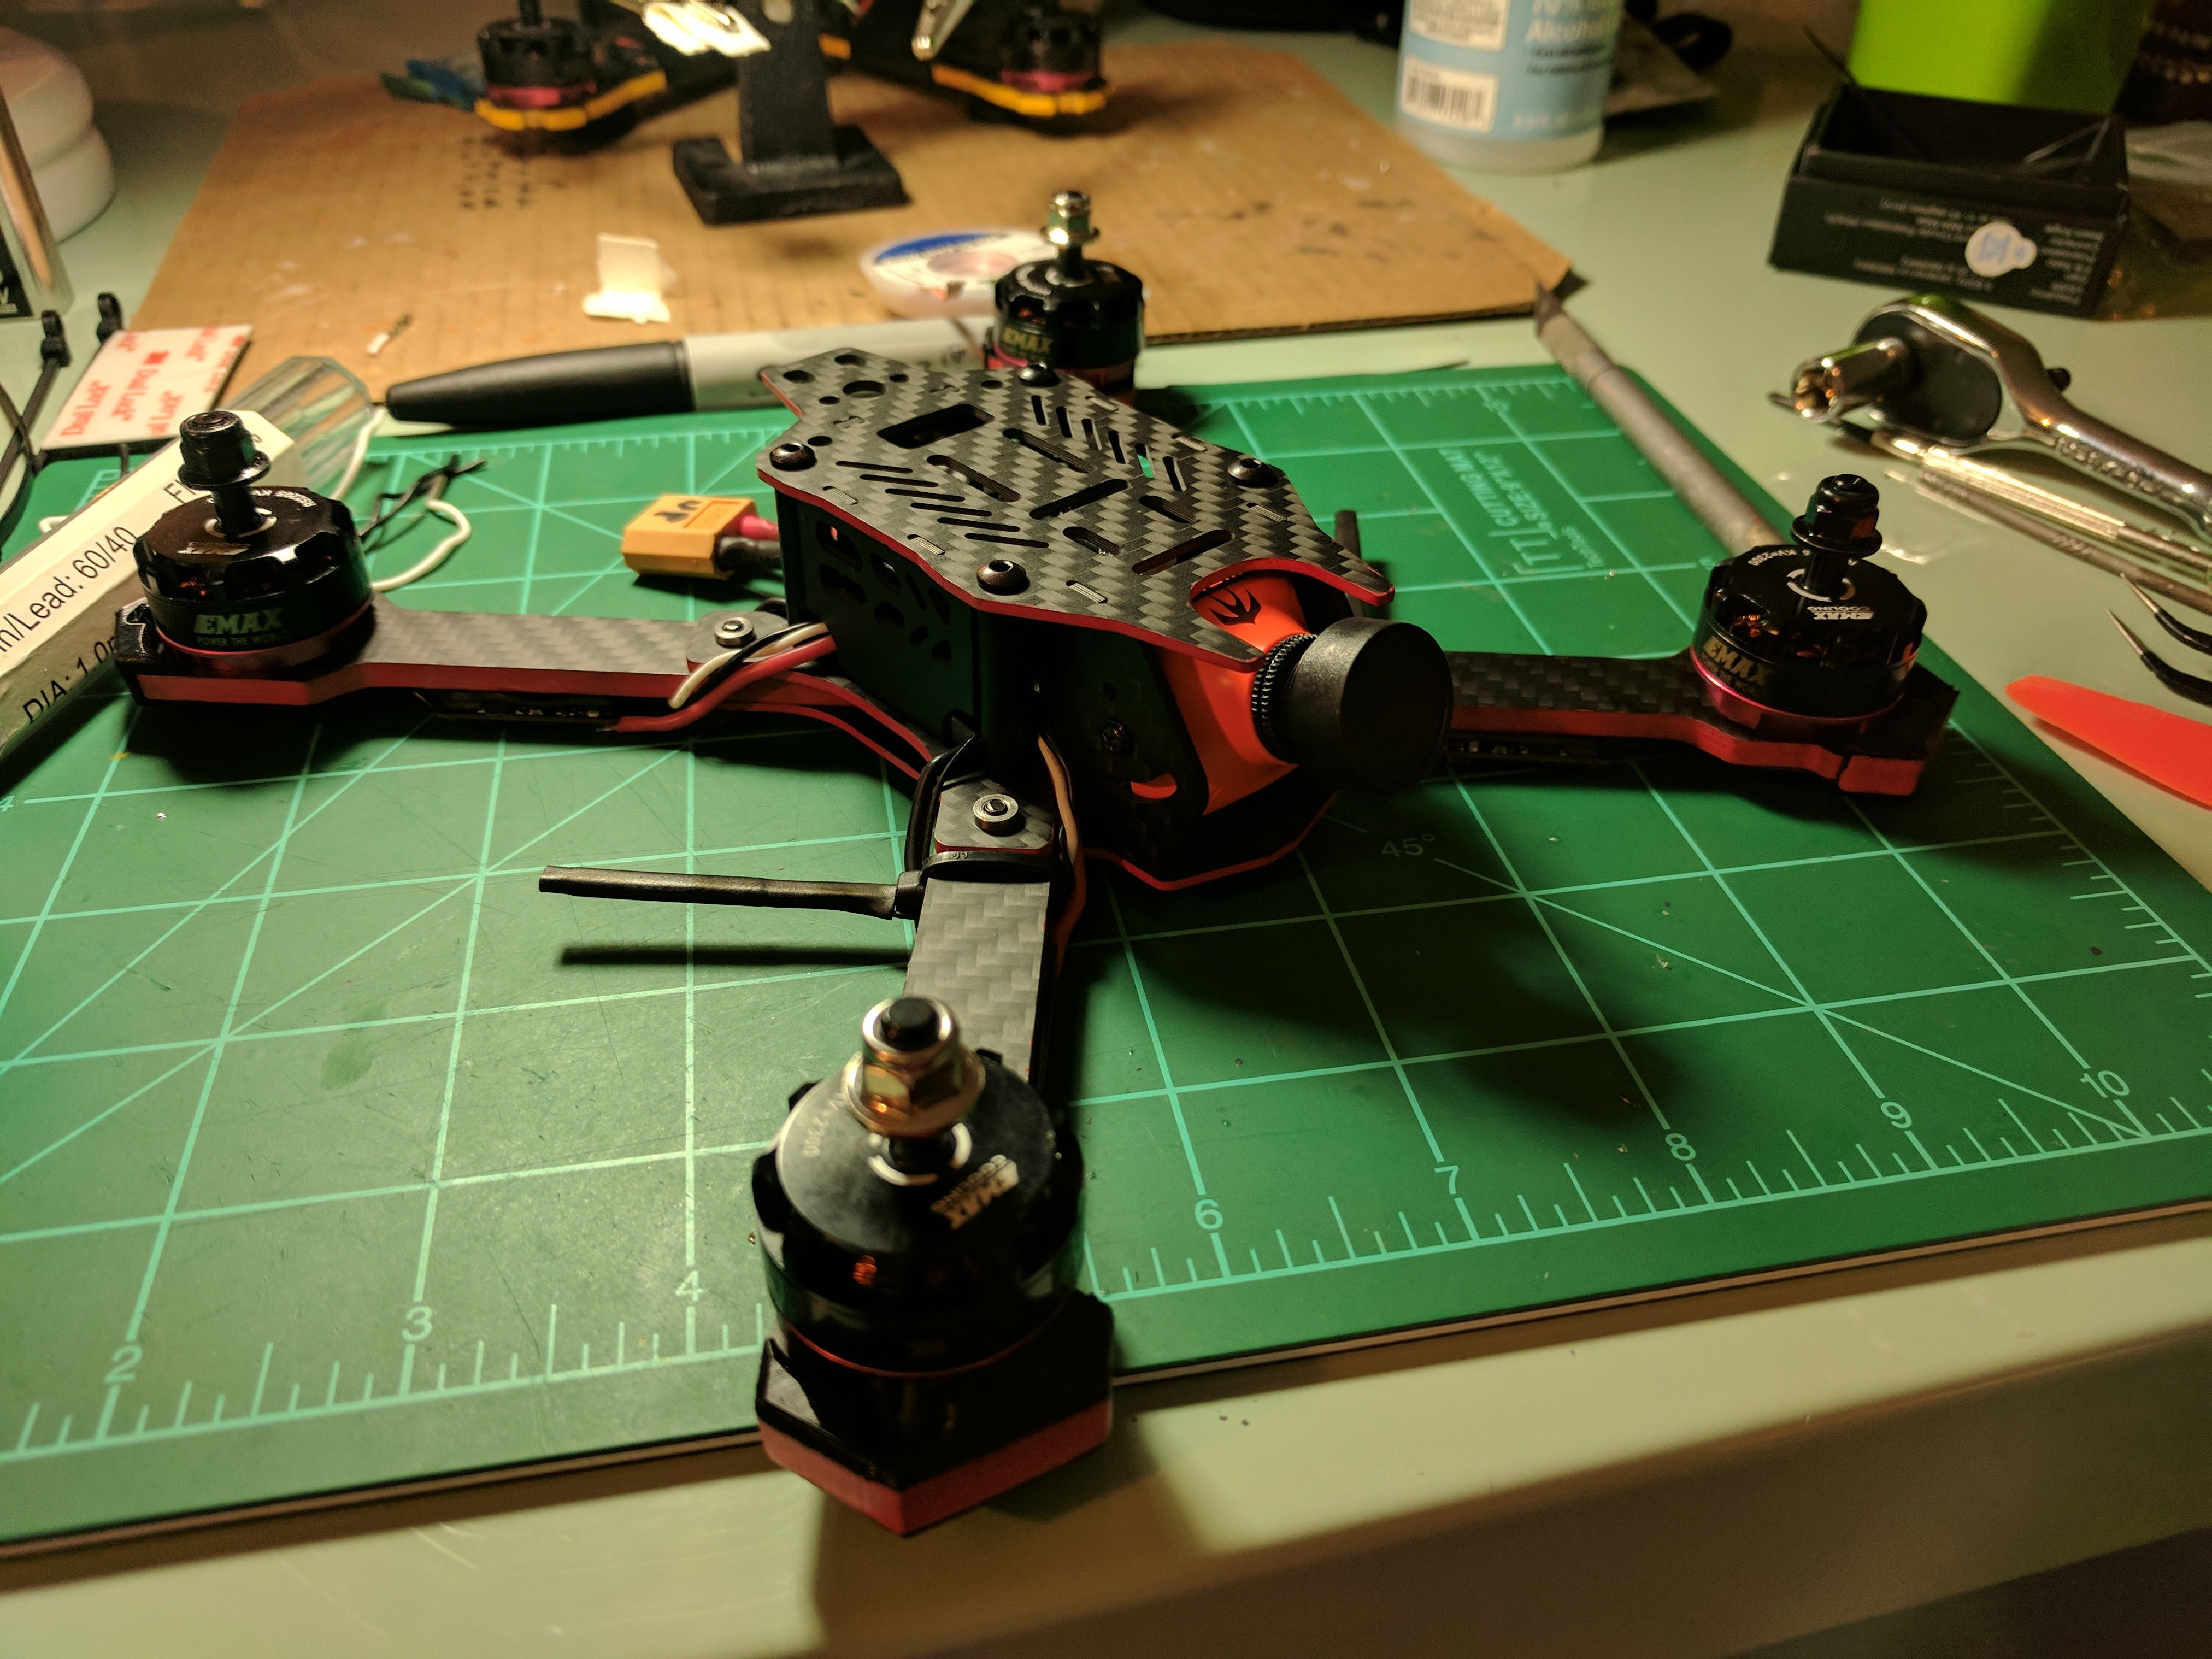
Frame: I settled on WhitenoiseFPV's Riptide frame for several reasons. Firstly, I went with the true X over the stretch because I am not totally convinced by the stretch frame theory. It's bottom-mount, which helps get the battery mass under the prop plane. That should help it settle correctly on crashes. I wanted a backplate with horizontal hole for the vtx antenna SMA. The body is small and low profile. A very interesting feature is slotting at the tips of the arms, which allows for the motor wires to run along the underside of the arm. That in turn allows for the ESCs to be easily mounted on the underside of arms. This will protect them from prop strikes and move more mass under the prop plane, further improving crash recovery. The frame comes with optional TPU arm bumpers that are great for increasing durability of the quad and further level the quad after crashes. I painted the carbon fiber edges with acrylic to protect them and add some aesthetic appeal. Also, WhitenoiseFPV is a Chicago Drone Racer guy and I wanted to support a local contributor.
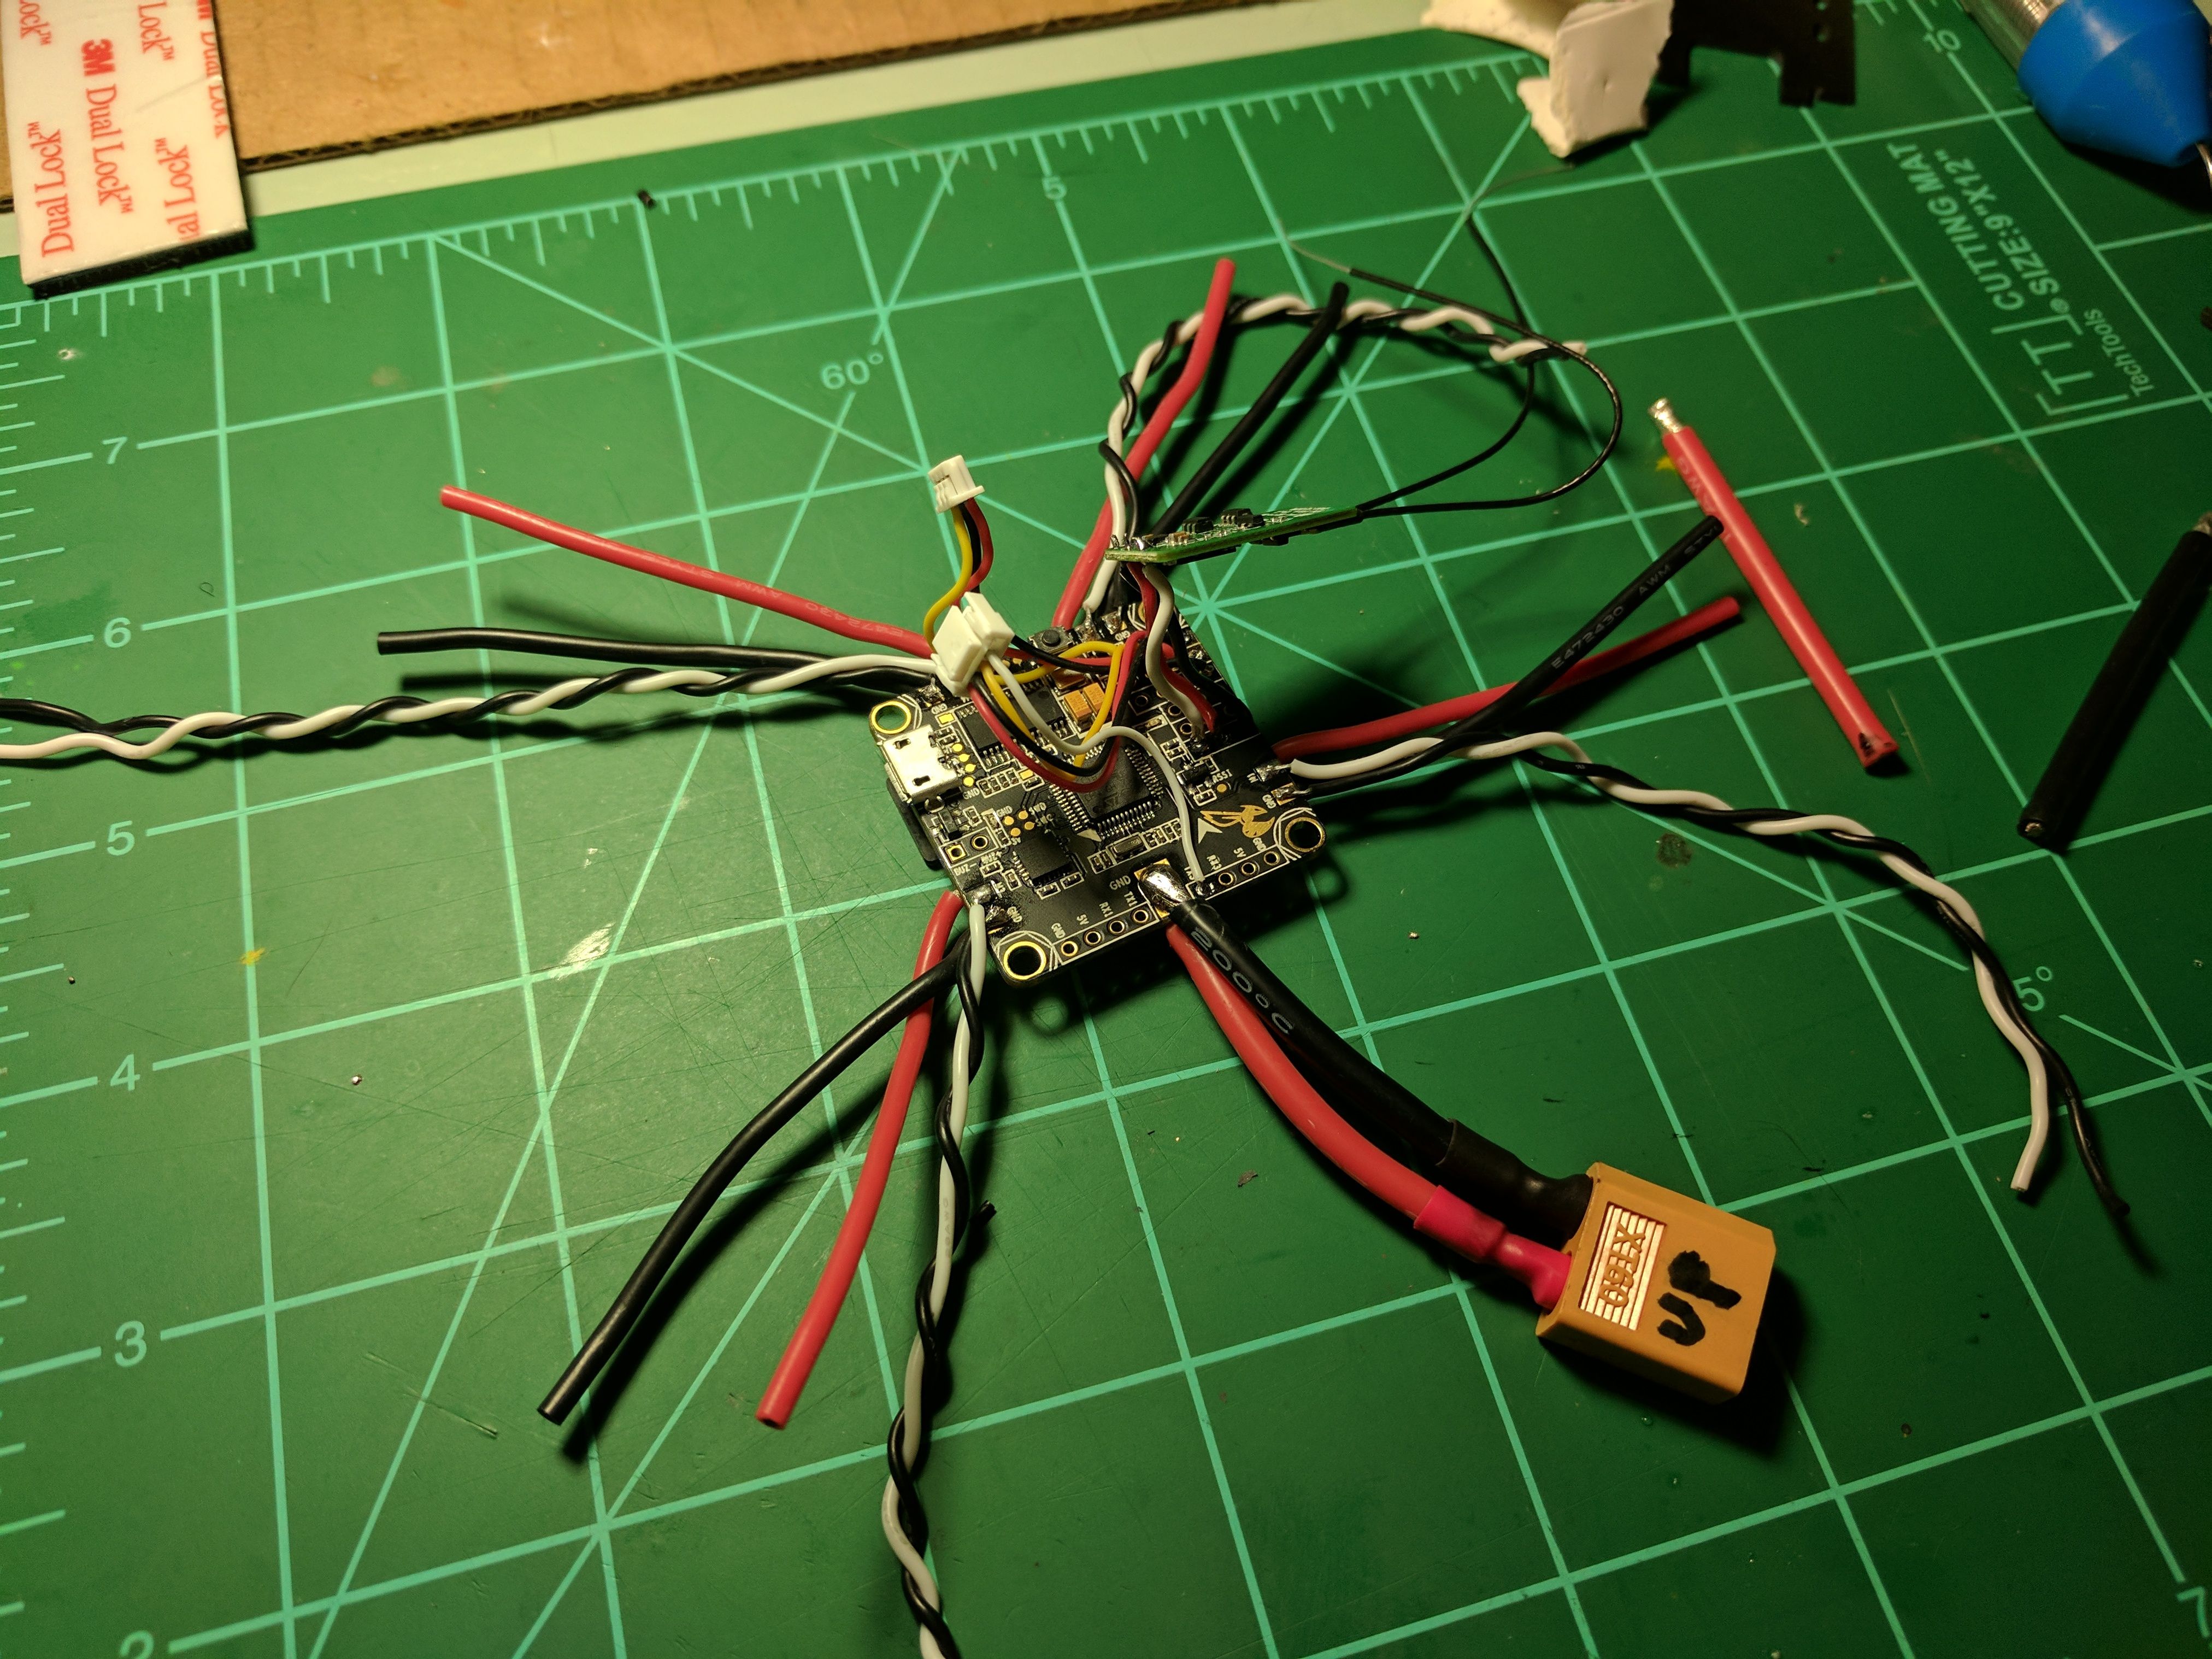
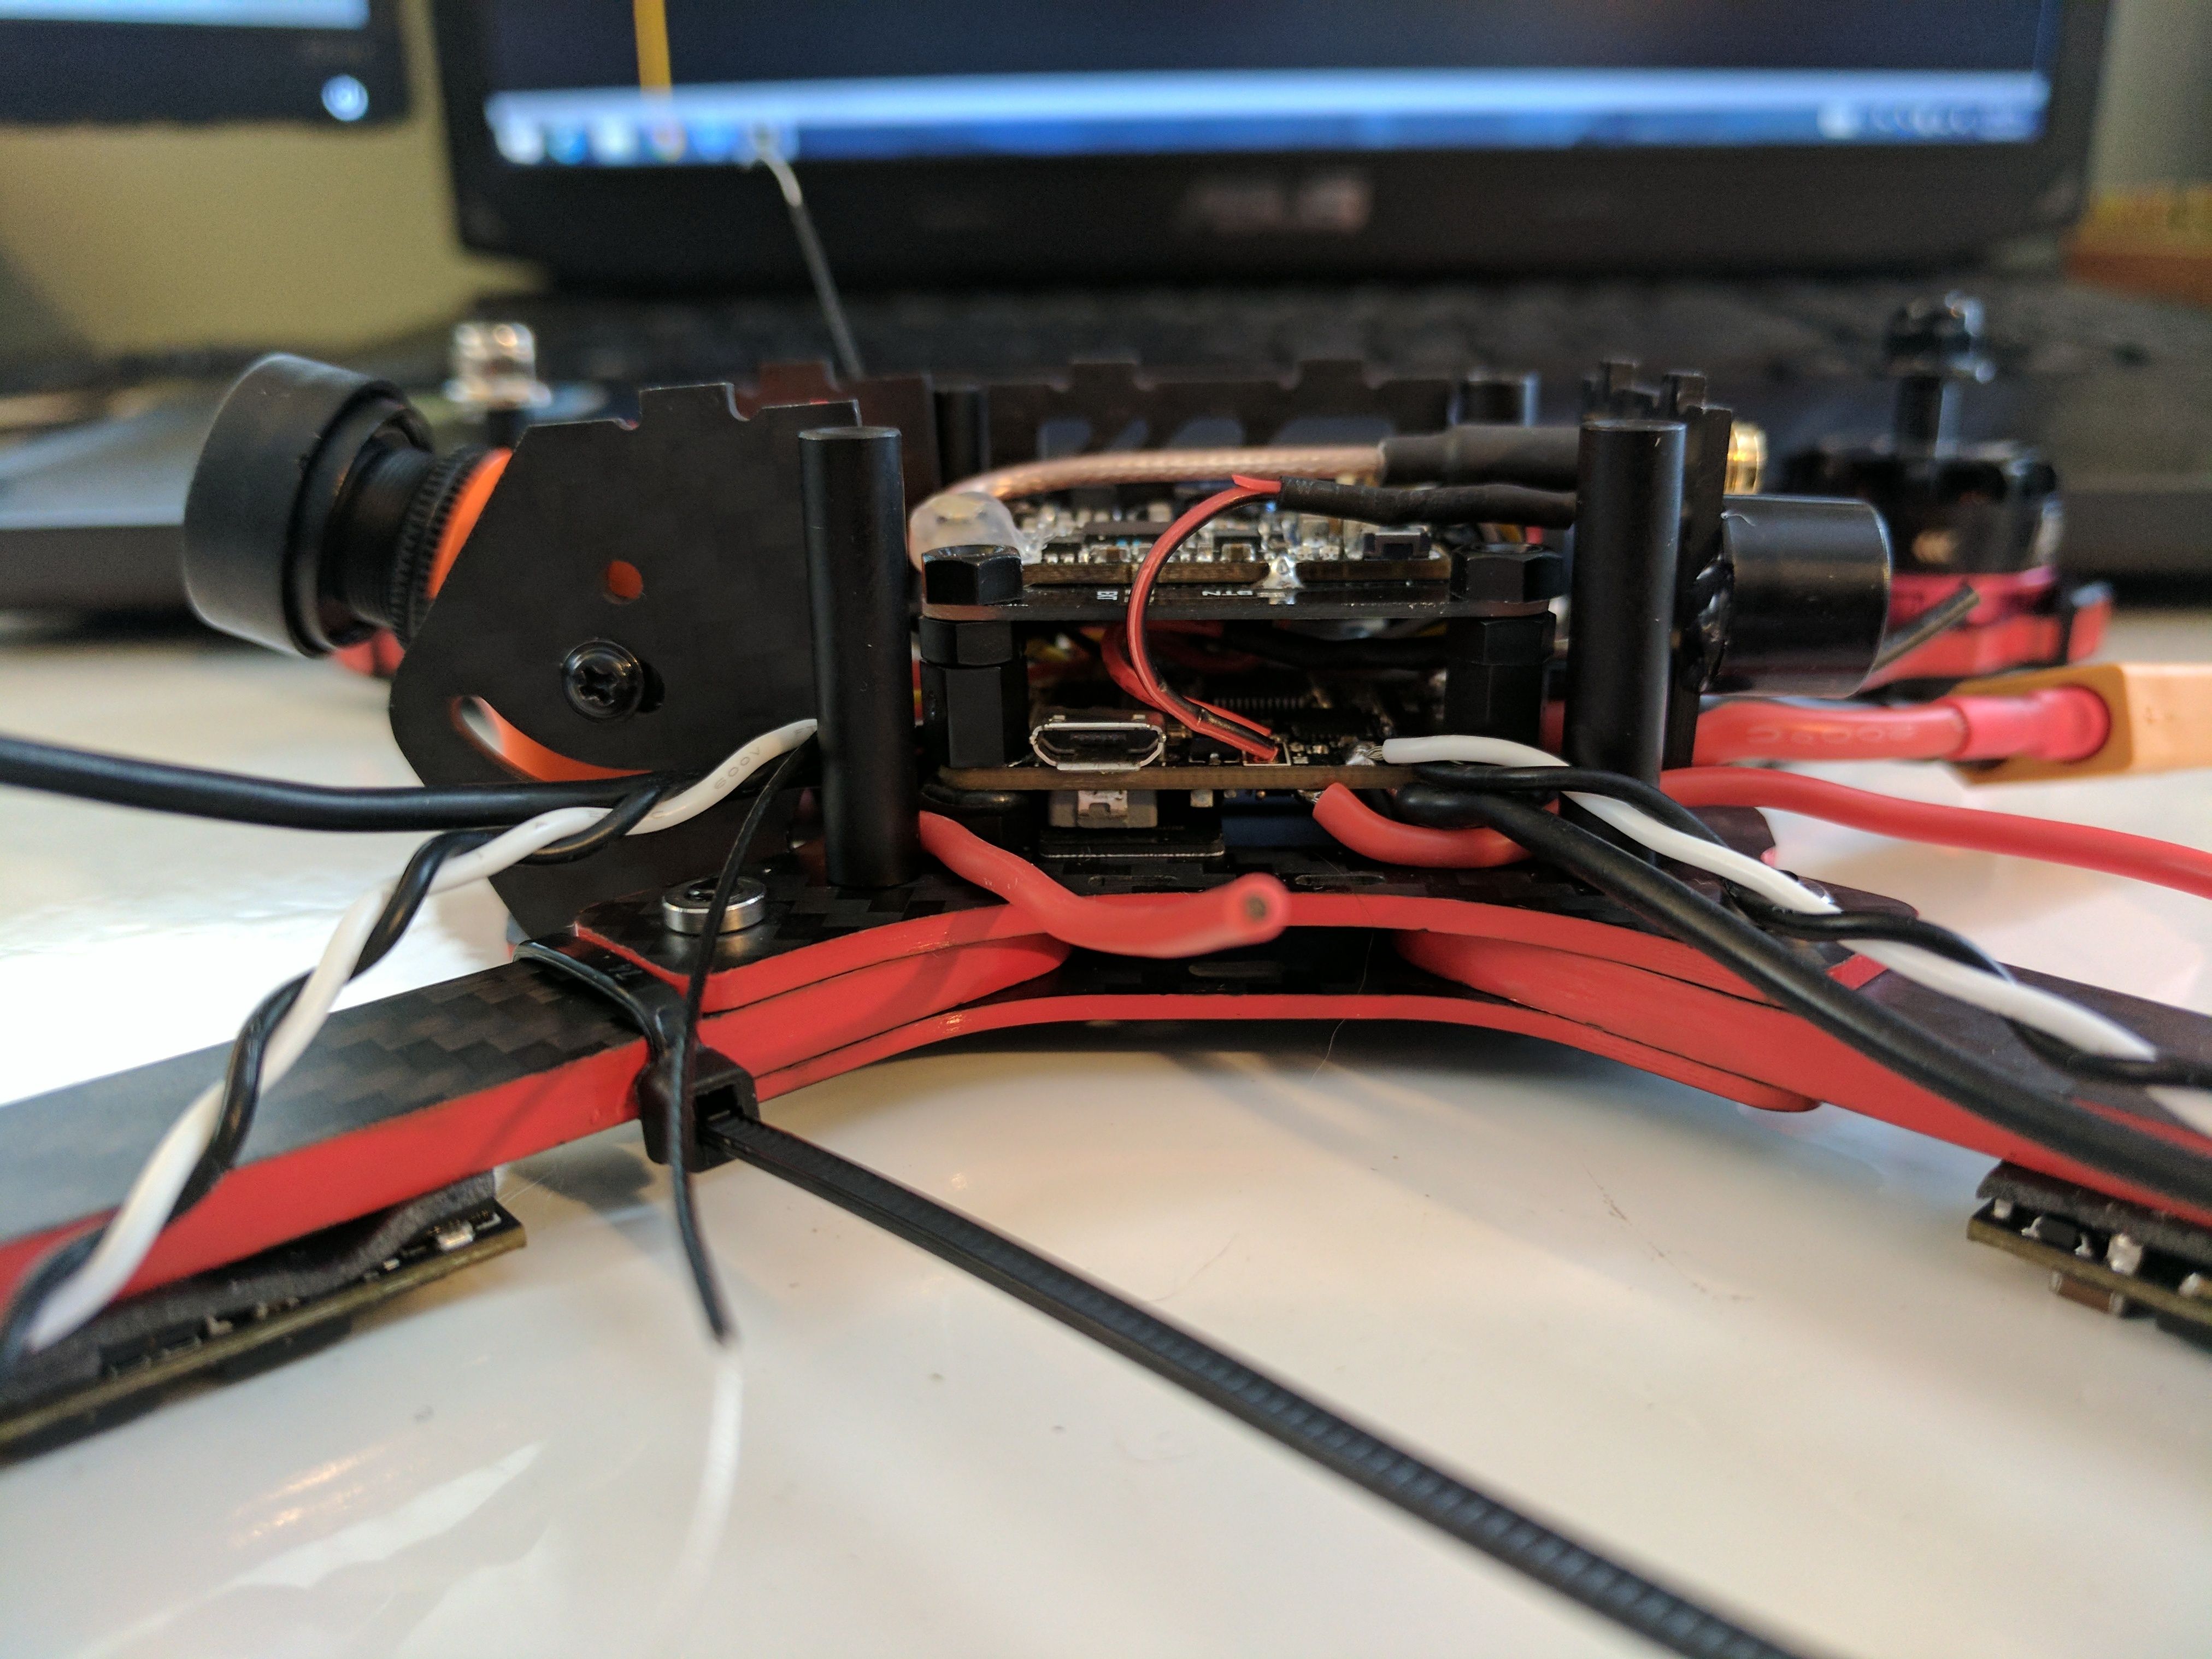
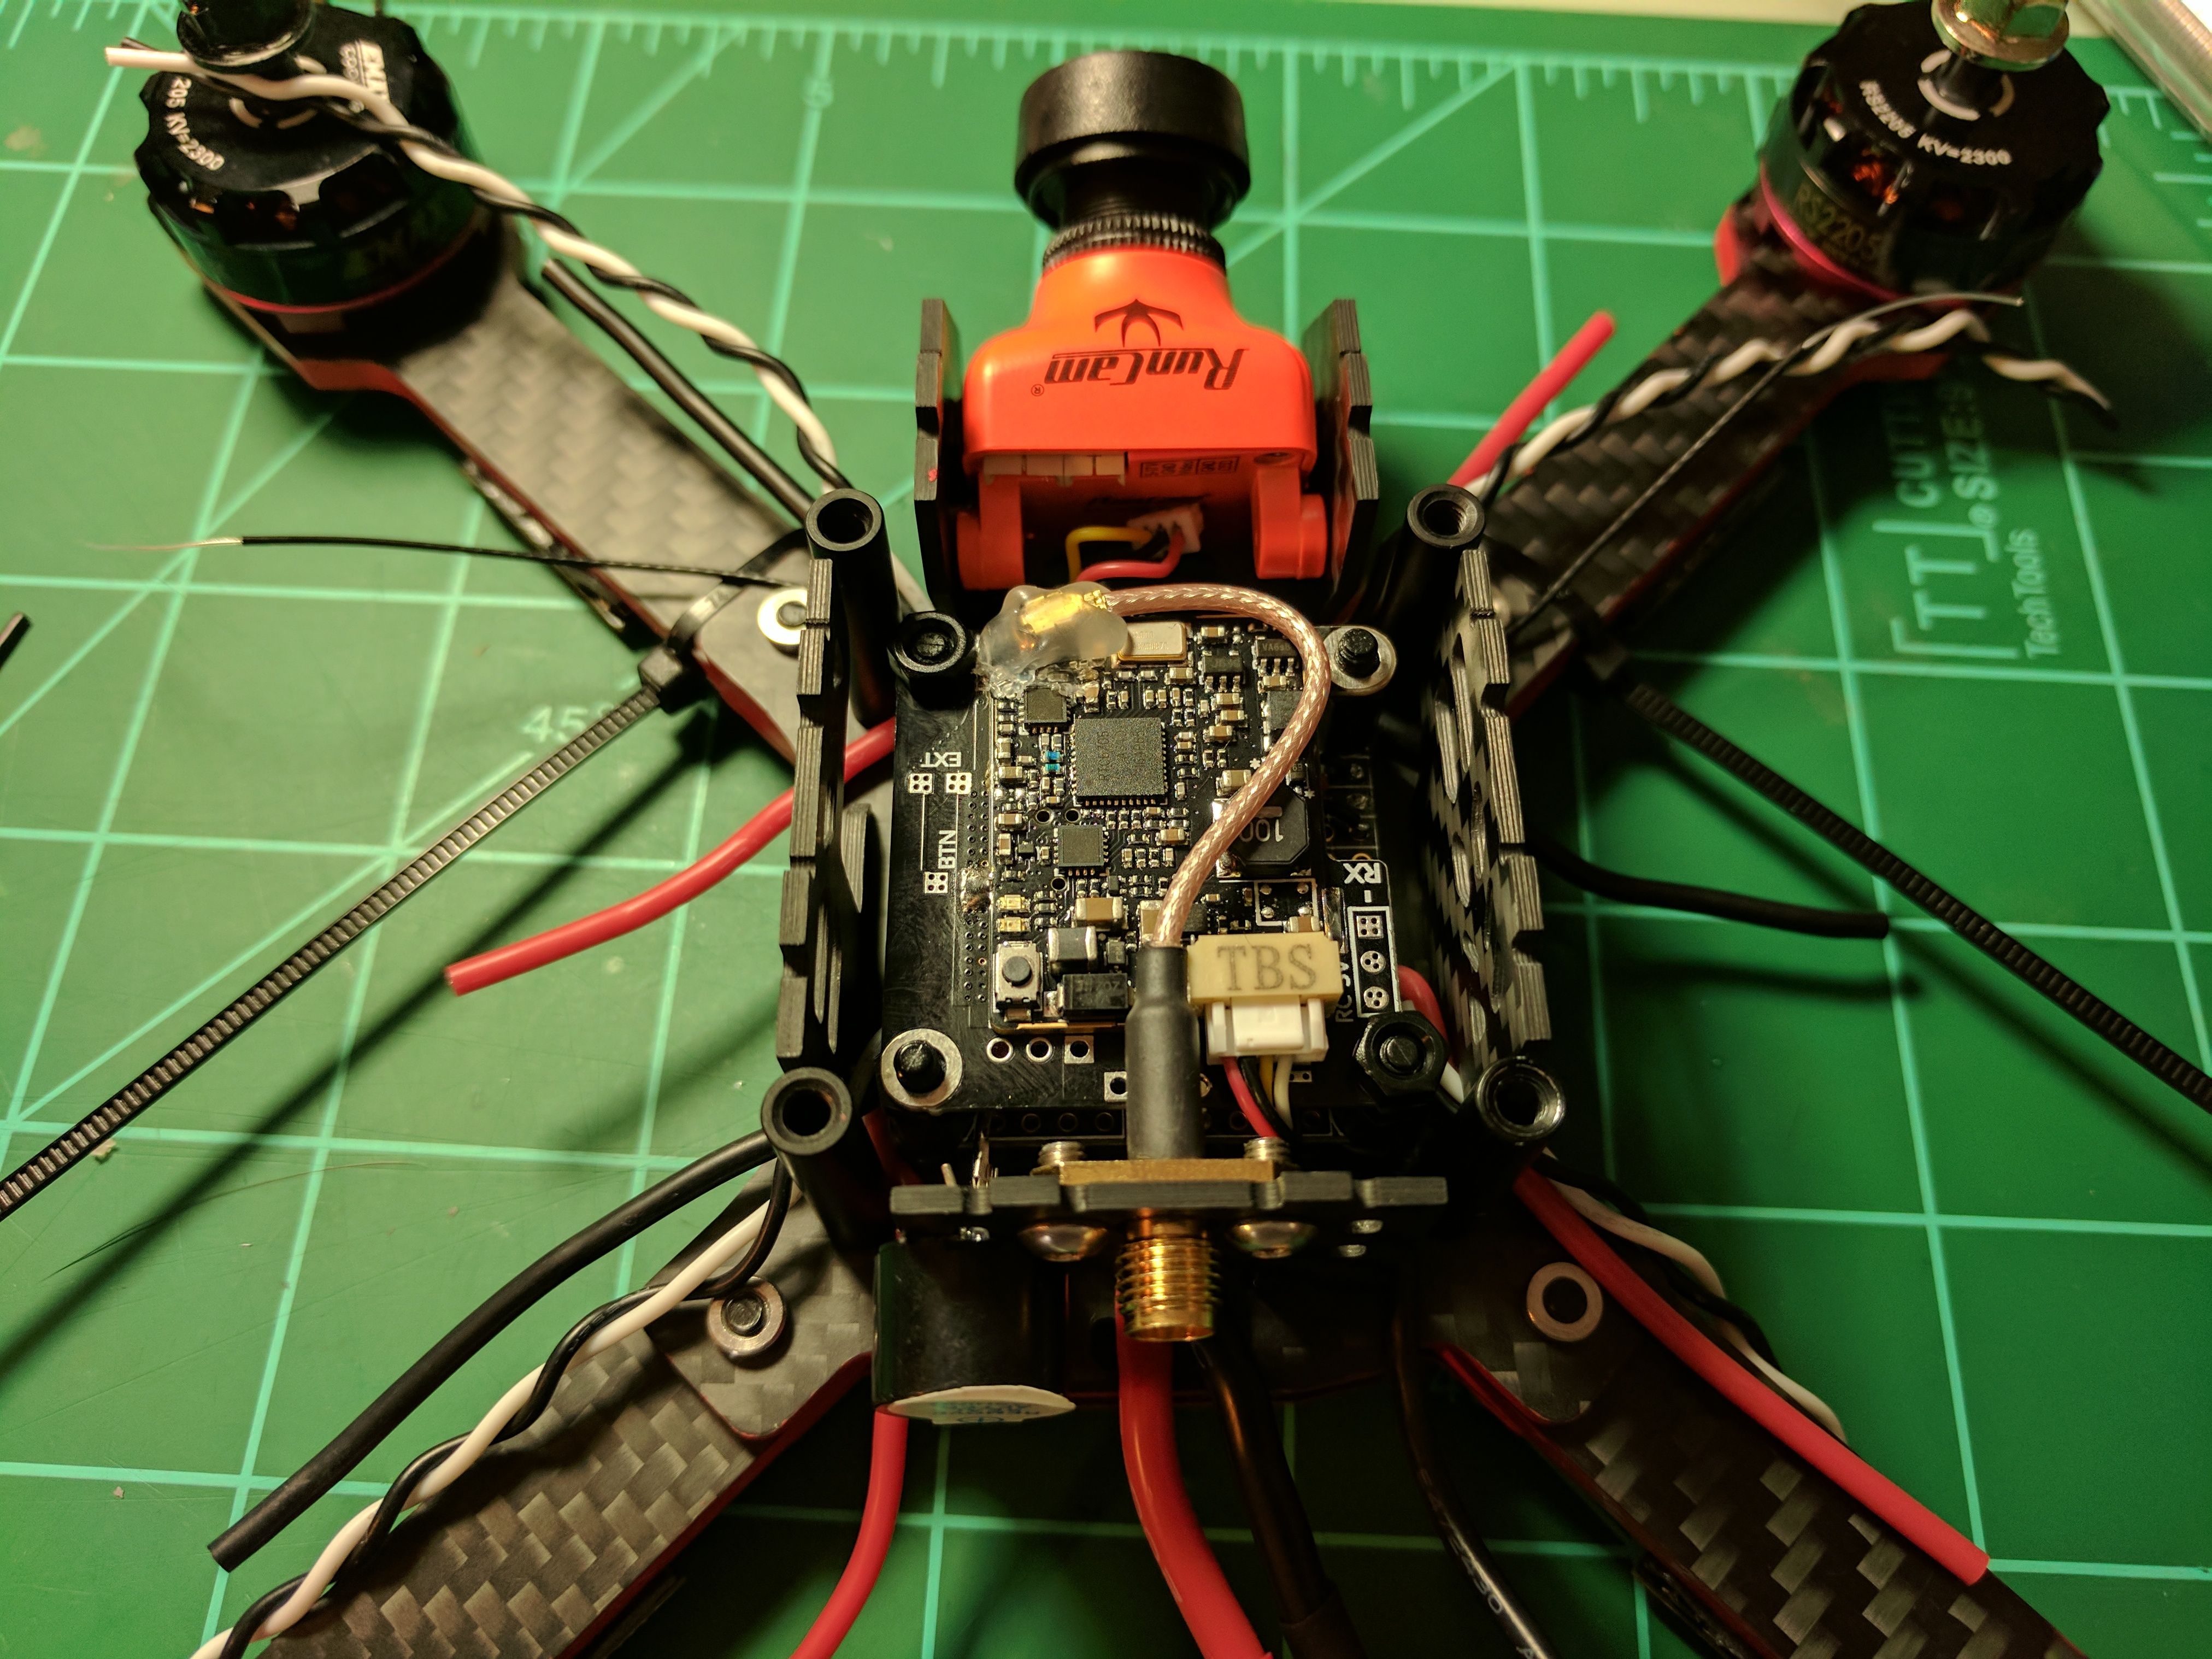
FC/PDB: I wanted to keep the stack short, simple, and light. So I got a Betaflight F3 all-in-on FC/PDB. I already use the BF OSD on my other quad, which is easy to set up and gives me everything I need. The board has current sensing, but honestly I doubt I will set it up since I only fly for a few minutes at a time.
Motors: I struggled with this for a while, but I settled on the EMAX RS2205 2300KV motors. They aren't the new hotness or the most powerful motors, but they are tried and true. They are proven motors. They provide sufficient power for my skill level. An additional perk is since they are older, they are generally inexpensive, which helps me clone the build for less and keep spares without wrecking my wallet. Additionally CDR has discussed allowing these motors for their spec class.
Props: For now I am using the KingKong 5x4x3 because they are under consideration for the CDR spec class. I use DALPROP 5045 cyclones on my other quad and may switch to those. The DALs are almost indestructible and should be sufficient for my needs. (UPDATE): The hub of the KingKong prop is too short of the motors. The prop nut bottoms out on the shaft thread before the prop is held tight. So if I want to use them, I will have to add a washer of some sort between the prop and nut.
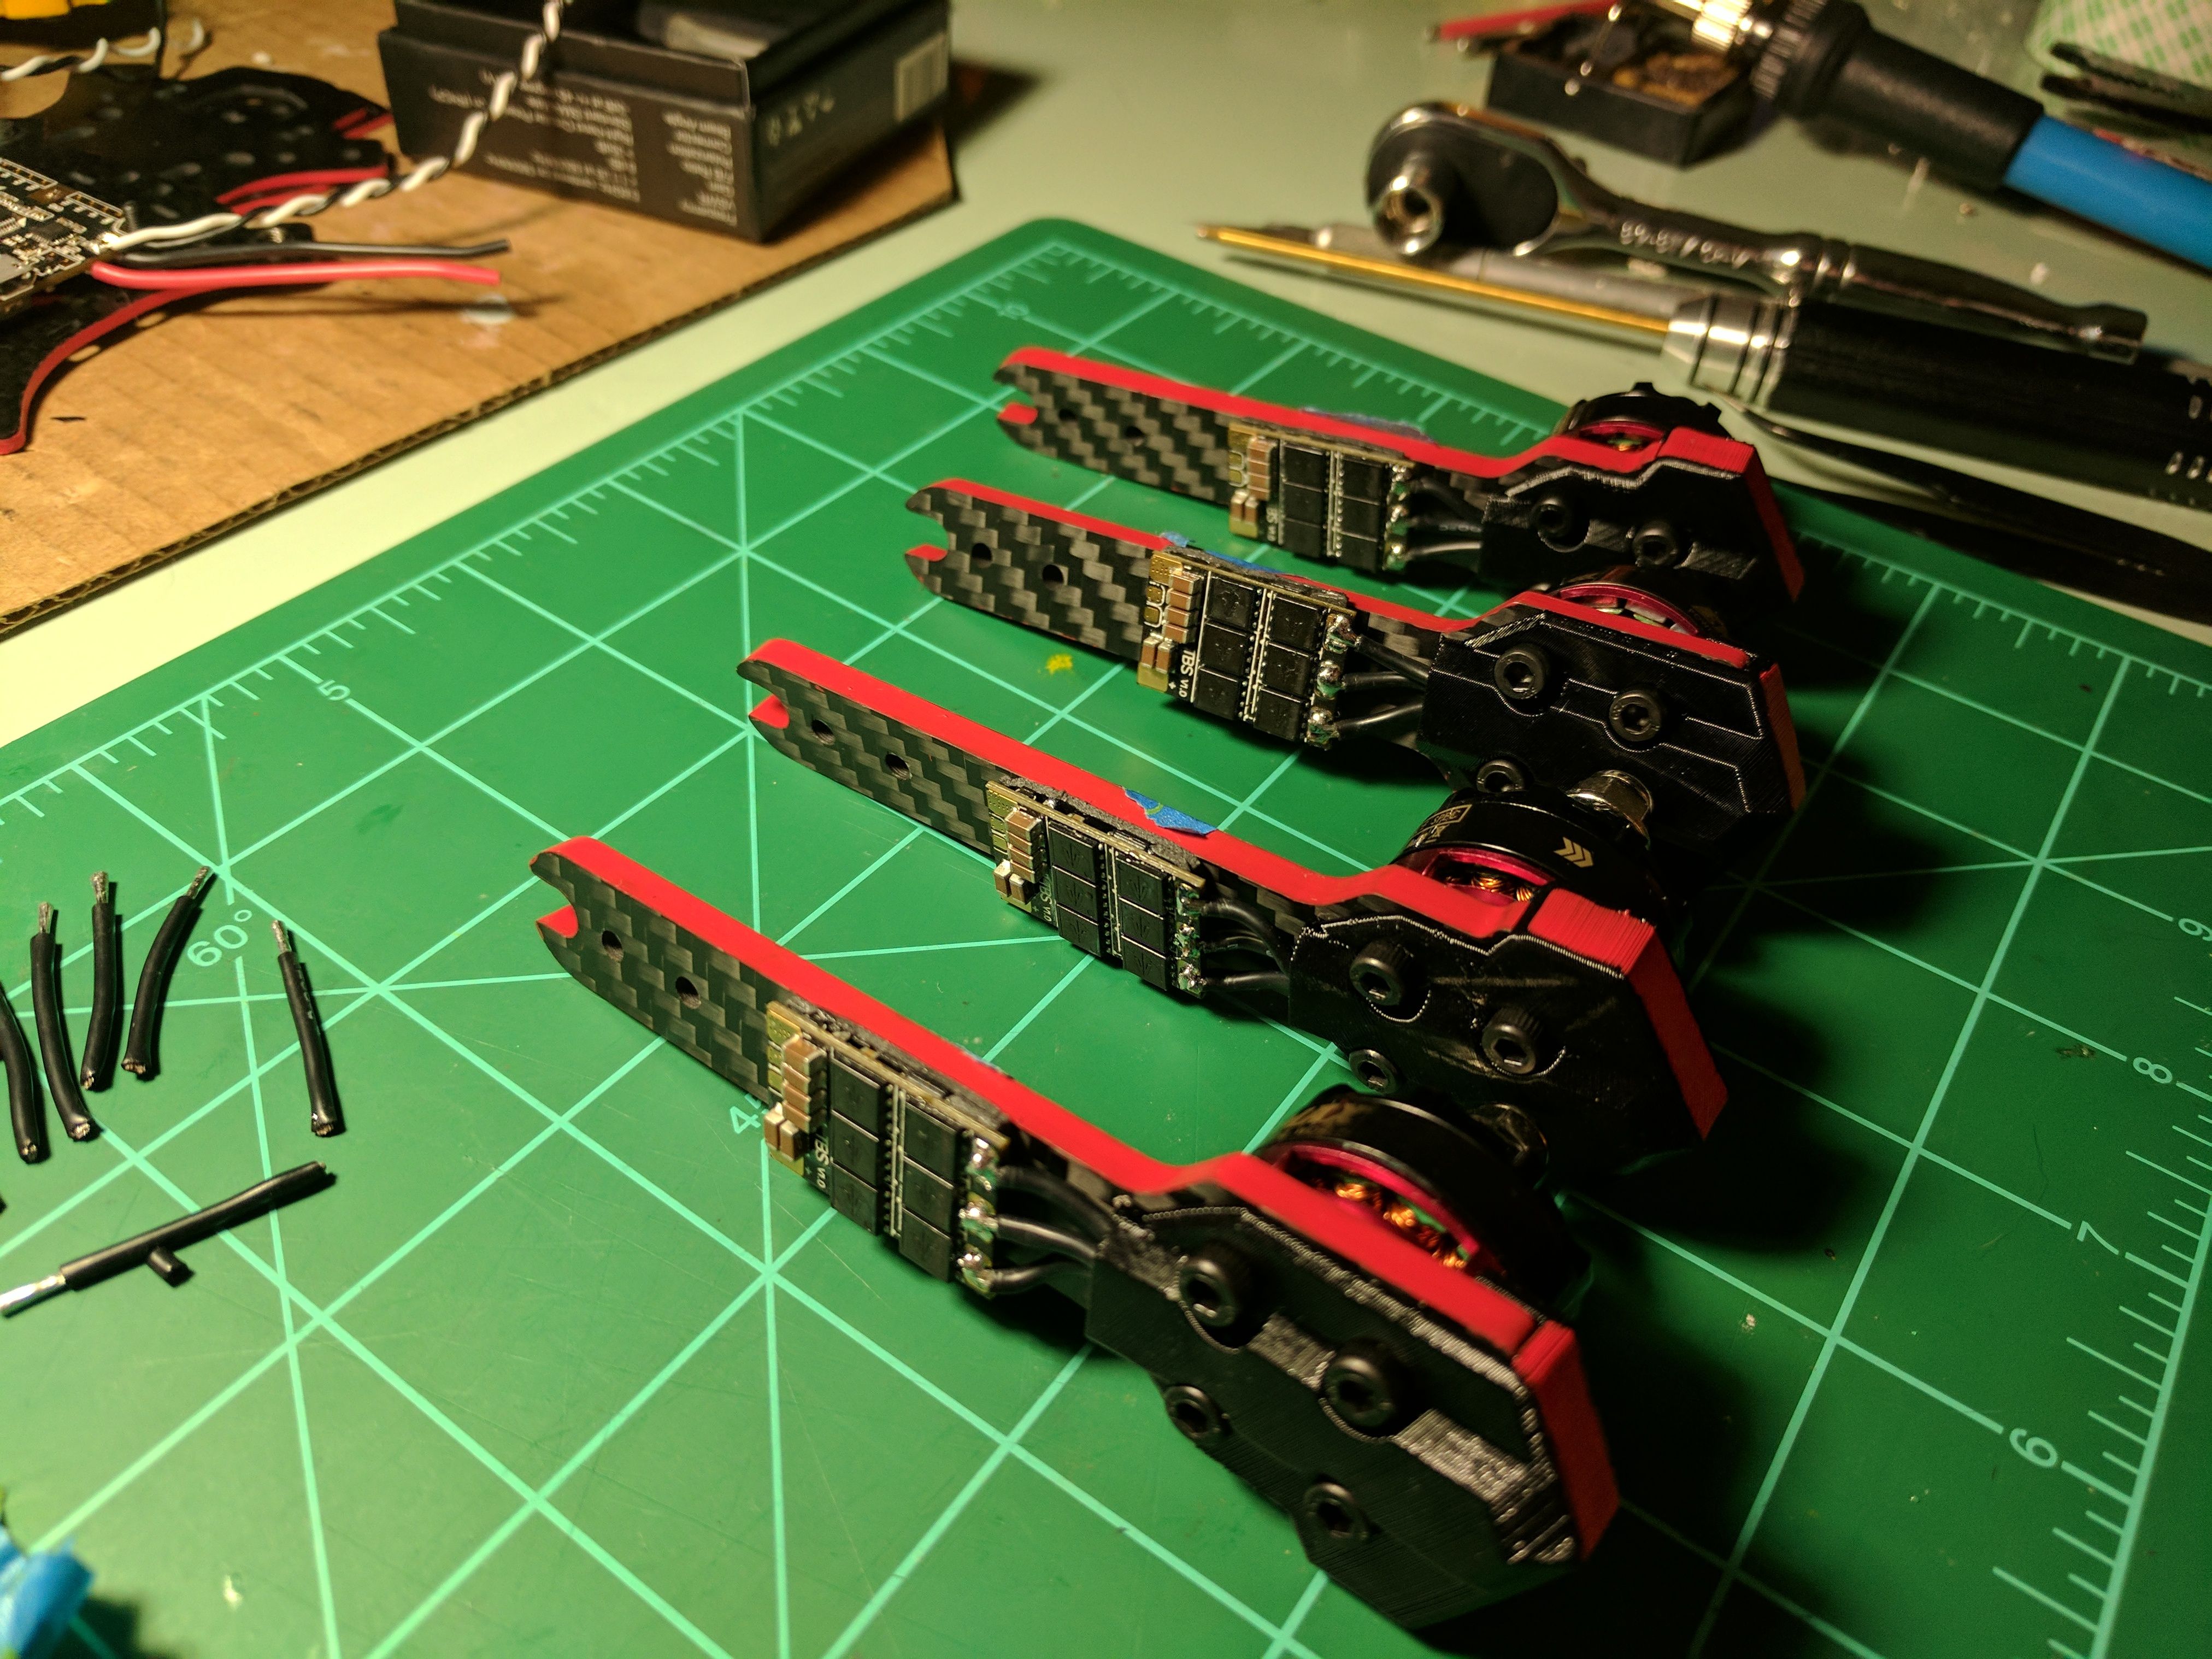
ESCs: I got these TBS 25A Bulletproofs from the KWAD BOX and want to give them a try. They are slightly wider than the frame arms, which concerns me. However they should be protected well enough on the underside of the arms.
VTX/RX: As part of my effort for a simple, clean stack, I got WhitenoiseFPV's stackable VTX/RX mounting board. The TBS Unify Race fits the mounting board and the pig tail SMA can be mounted to the frame backplate. The FrSky XM+ is their smallest SBUS receiver and also fits the mounting board. I don't really use telemetry on my radio because the OSD provides all the info I need, so the XM+ is sufficient for me. I mounted the RX antennas off the front arms for a lower profile build. I am concerned about prop strikes and will need to consider extra protection.
Antenna: I went with stubby foxeers because they are robust, function well, are cheap, and are sized right to clear the arc of the props.
Camera: I have Fatshark Dom V3s with 16:9 screens, which might make me interested in 16:9 cameras, but I find using a stretched 4:3 picture isn't bad and gives better vertical FOV. I thought about getting a Runcam Eagle for slight better resolution, but I think the Swift is sufficient for my needs and the lower price improves clone-ability of the quad. I opted for not the Swift 2 since I didn't need the added features at this time. I would like to try the 2's audio feature at some point.
Battery: Right now I use 1300 mAh graphenes on my other build. They seem to provide sufficient juice for how I fly. So I will continue to use them for now. If I start to get low voltage issues, I will switch to 1550s.
LEDs: I would like to add some LEDS to the back of the body or underside of the rear arms. It looks cool and helps out the other pilots to avoid crashes. They will need to be 5V strips since the BF3 board only steps down to 5V (no 12V pads) or get 16V strips and draw right from the vbat wires on the ESCs.
Building
I started by beveling the edges of the frame carbon fiber components and painting the edges with red acrylic. Doing so should help prevent delamination of the carbon fiber sheets. Also it looks cool.
Next I started two processes in parallel. I began soldering wires to the FC for the battery, ESCs, camera, vtx, rx, and buzzer. I also mounted the motors on the arms, ran the wires under the arms, and mounted/soldered the ESCs to the undersides. I then assembled the frame and dry-fitted all the components to ensure there was room for everything. I glued down the UFL connector on the Unify since those connectors are pretty flimsy. I also glued a buzzer to the backplate. I soldered all the wires coming from the FC to the ESCs. I added some plastic (old props) protectors on the front ESCs and wrapped them all in electrical tape. I added zip ties to the front arms to act as the booms for the rx antennae. I wrapped them in several layers of heatshrink for protection. FInally I assembled the top portion of the frame it was finished.
Photos


New Message for shutupshake