Did somebody say Titanium? Armattan Rooster 5" Build
 By 1_over_cosine_c on Apr 05, 2018
Overview
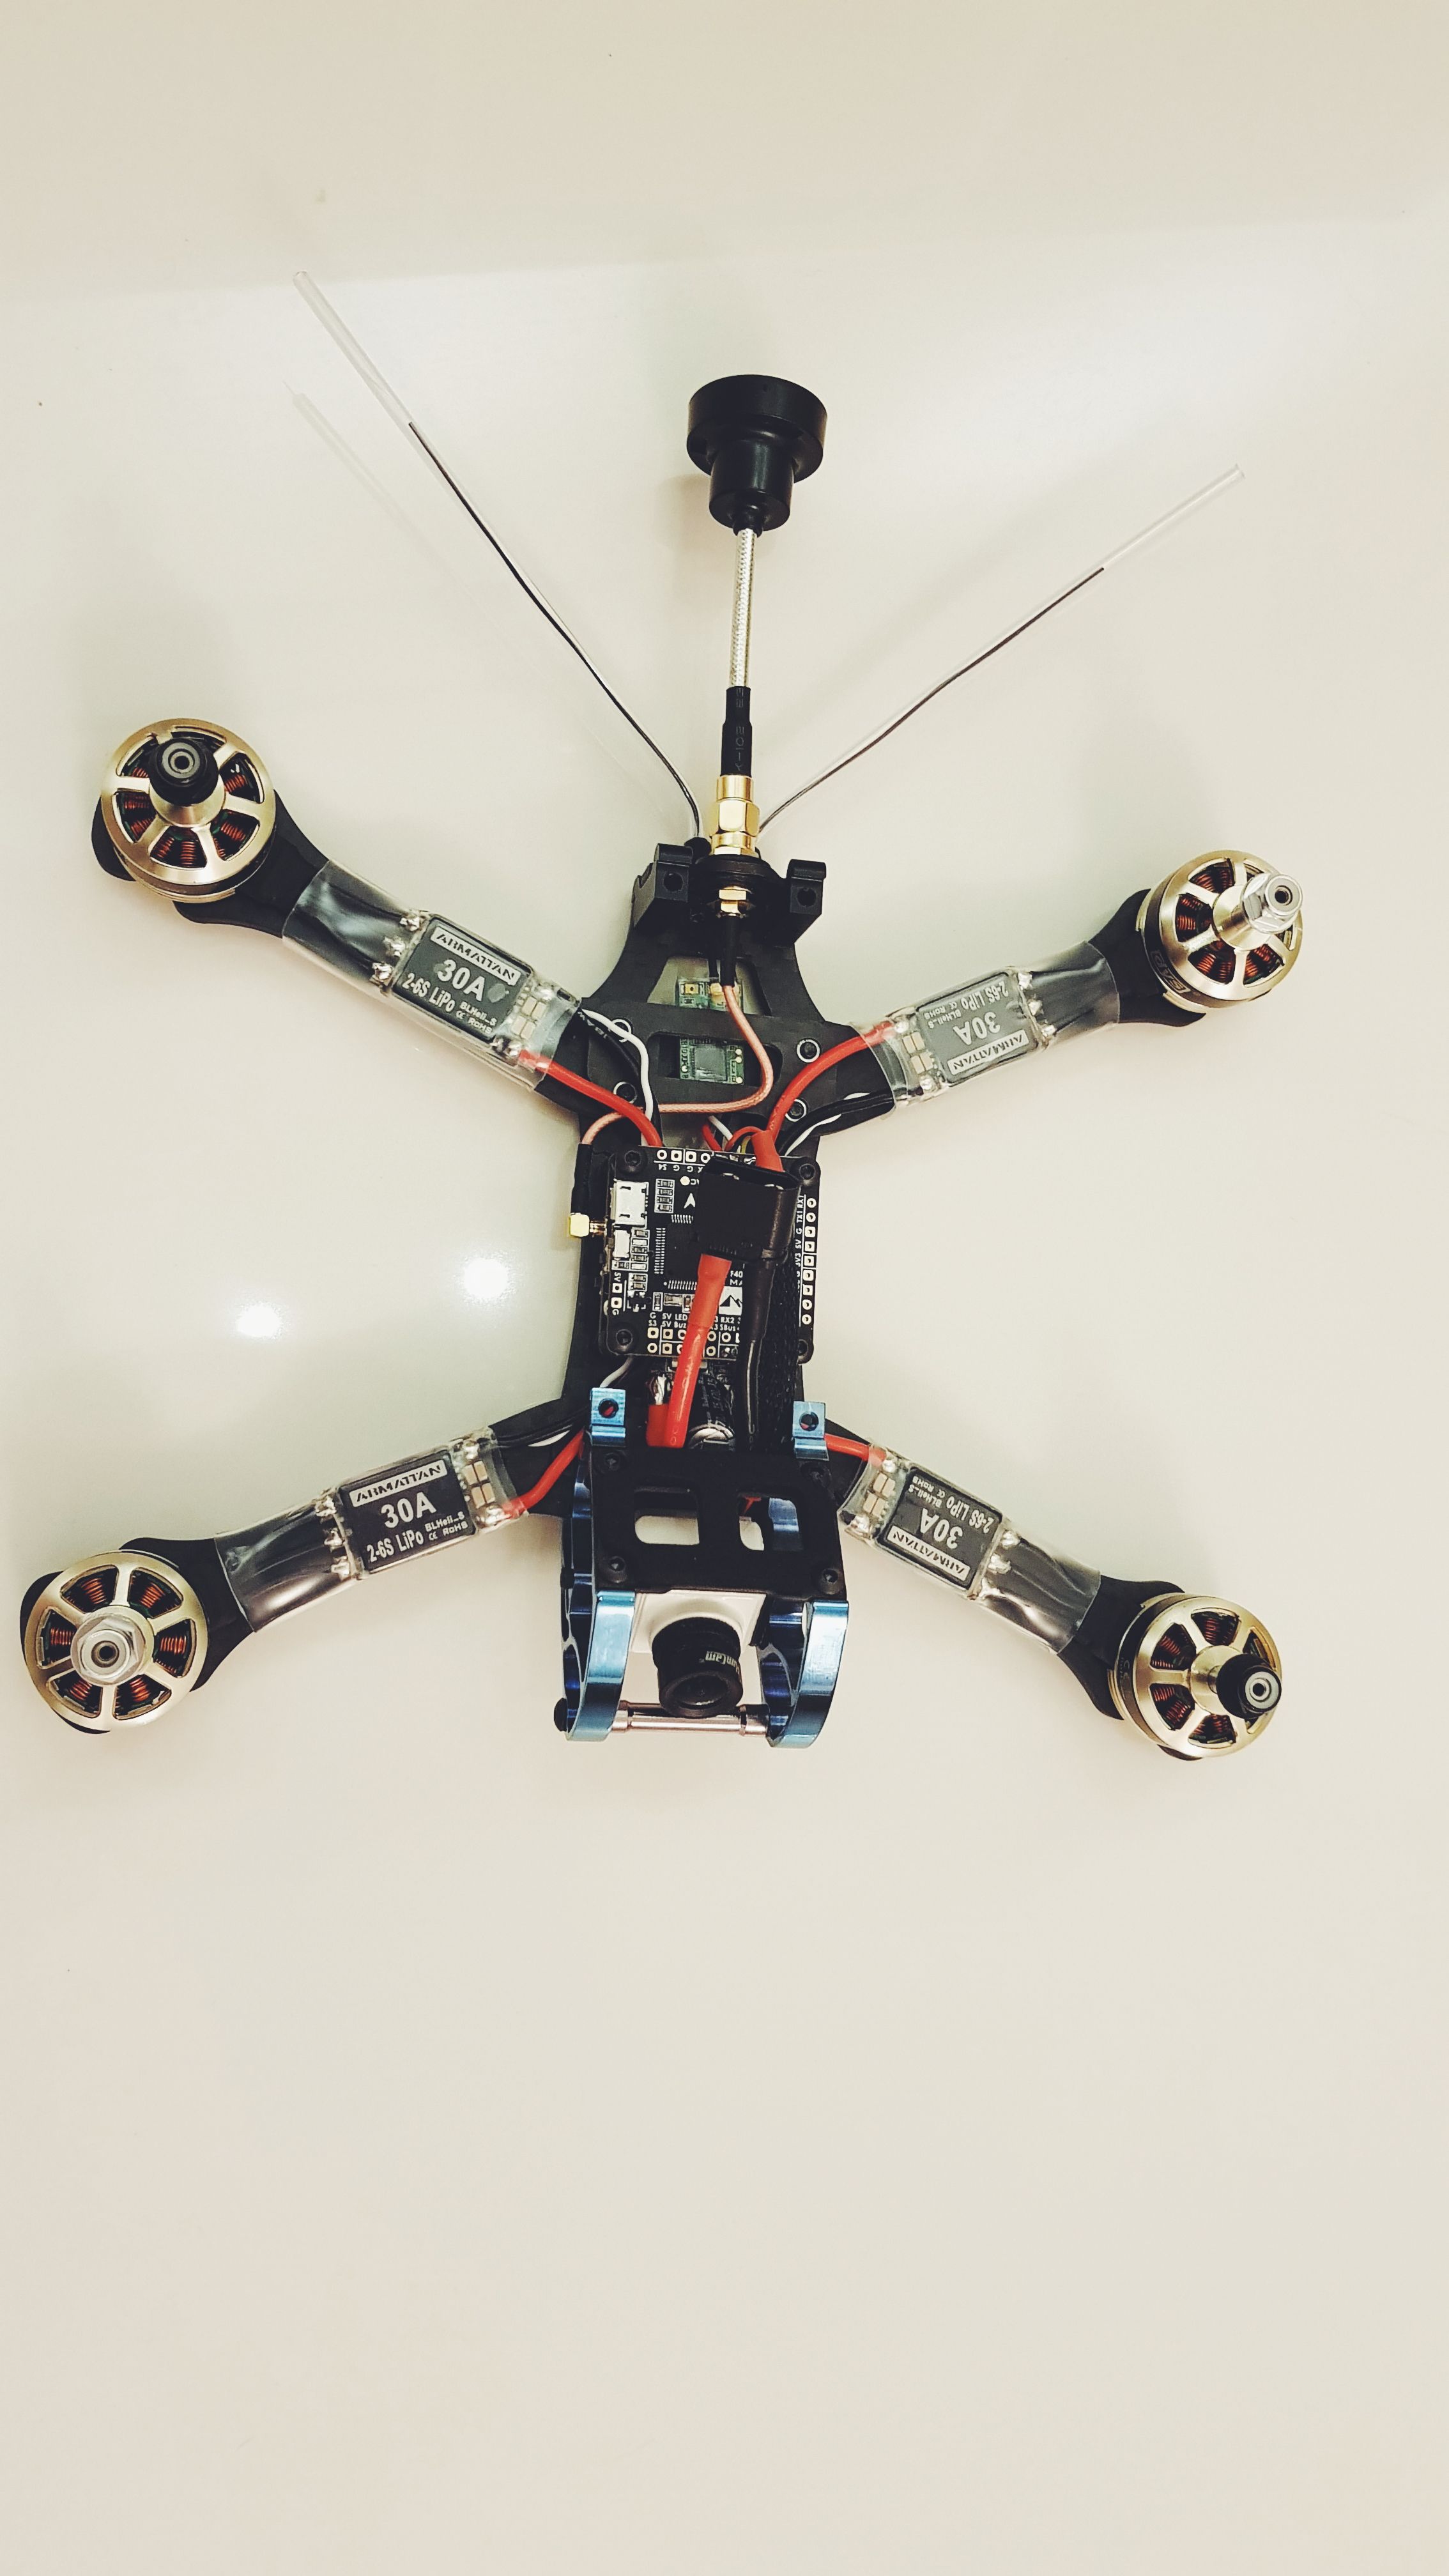
Decided to build a nice 5" Freestyle quad that could take a beating, since I'm not the kindest to my quads! The star of the show is the Armattan Rooster frame (spoiler alert: this guy REALLY did live up to its hype. I'm very satisfied with it). This isn't really a build/assembly guide, but I'll show you some of the things I did to clean up the build :)
Well, before that, I'll tell you how it flies - VERY locked-in, floaty with tons of hang-time. And NO gyro noise problems despite using the 32kHz ICM20602 IMU. I've had countless headaches with the MPU6500 gyro, so I told myself I would never stray away from the MPU6000/6050... yet I bought this board before checking what chip it used! There was some yaw twitching when I powered it up on my desk without props, but as soon as I added in a notch filter that went away. Right now, I'm running it on Butterflight at 8k/4k - I tried the Fast Kalman filters @ 32kHz, and whilst it definitely did feel a little more responsive and 'accurate', the motors got a little too hot for my liking. It's still a dream at 8k/4k, but it's nice to know I have that added option of improving it slightly through software if needed.
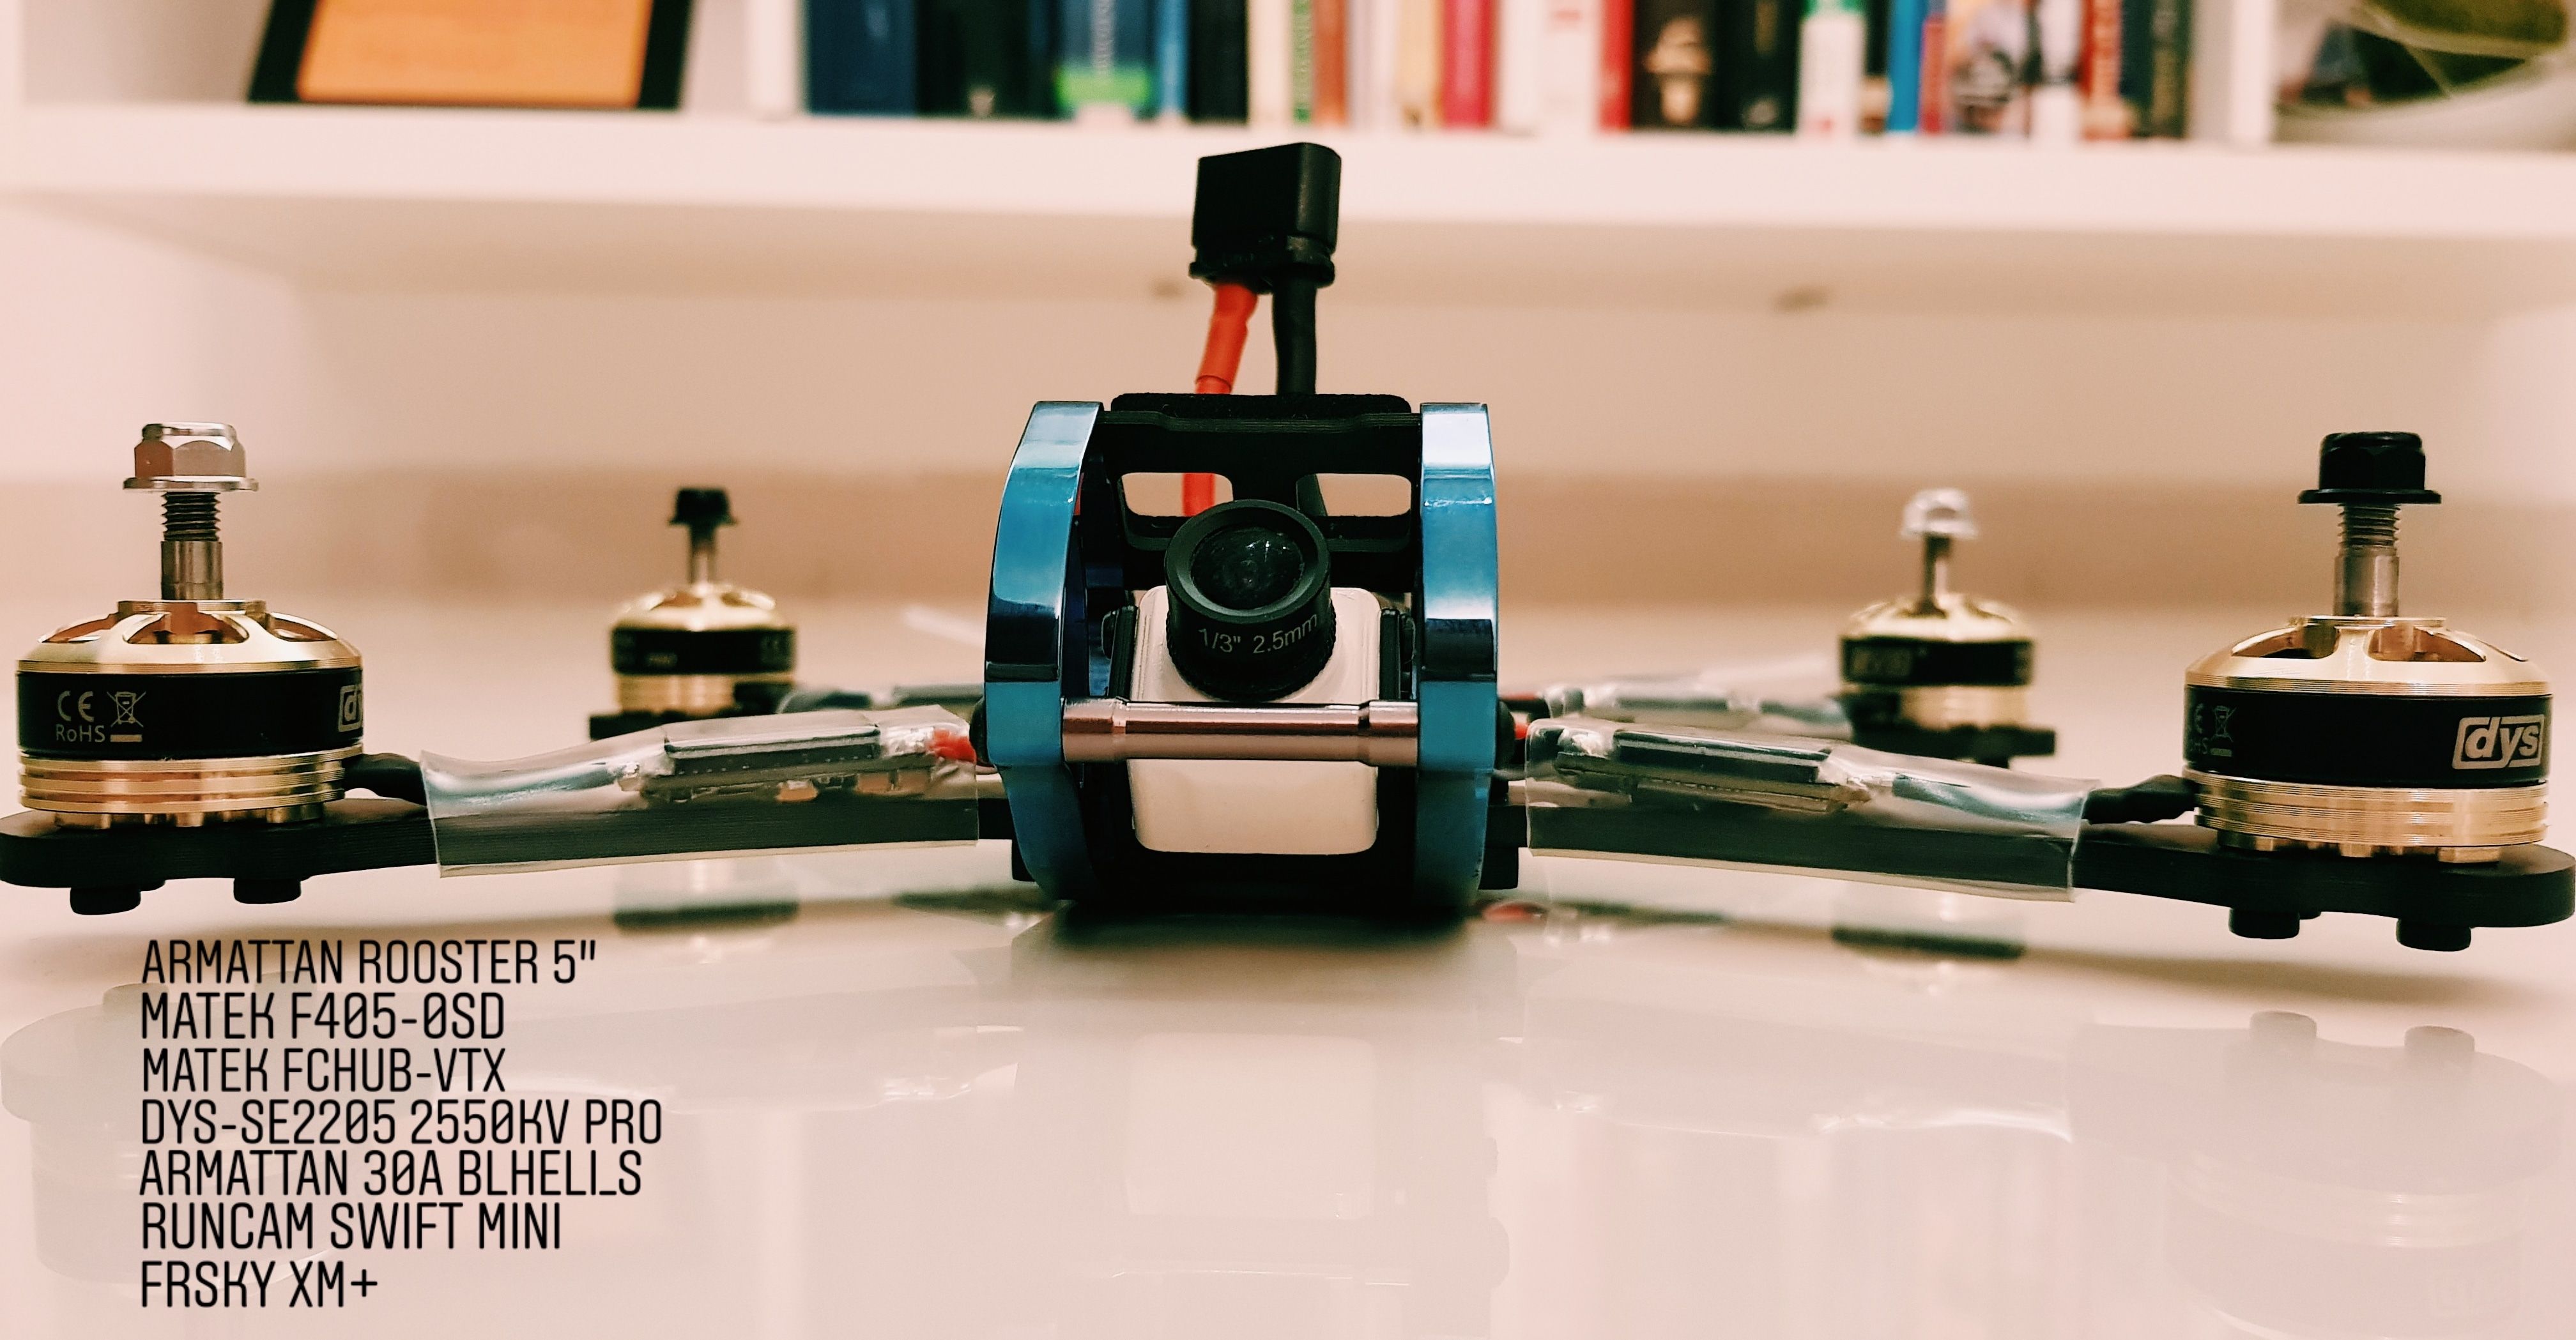
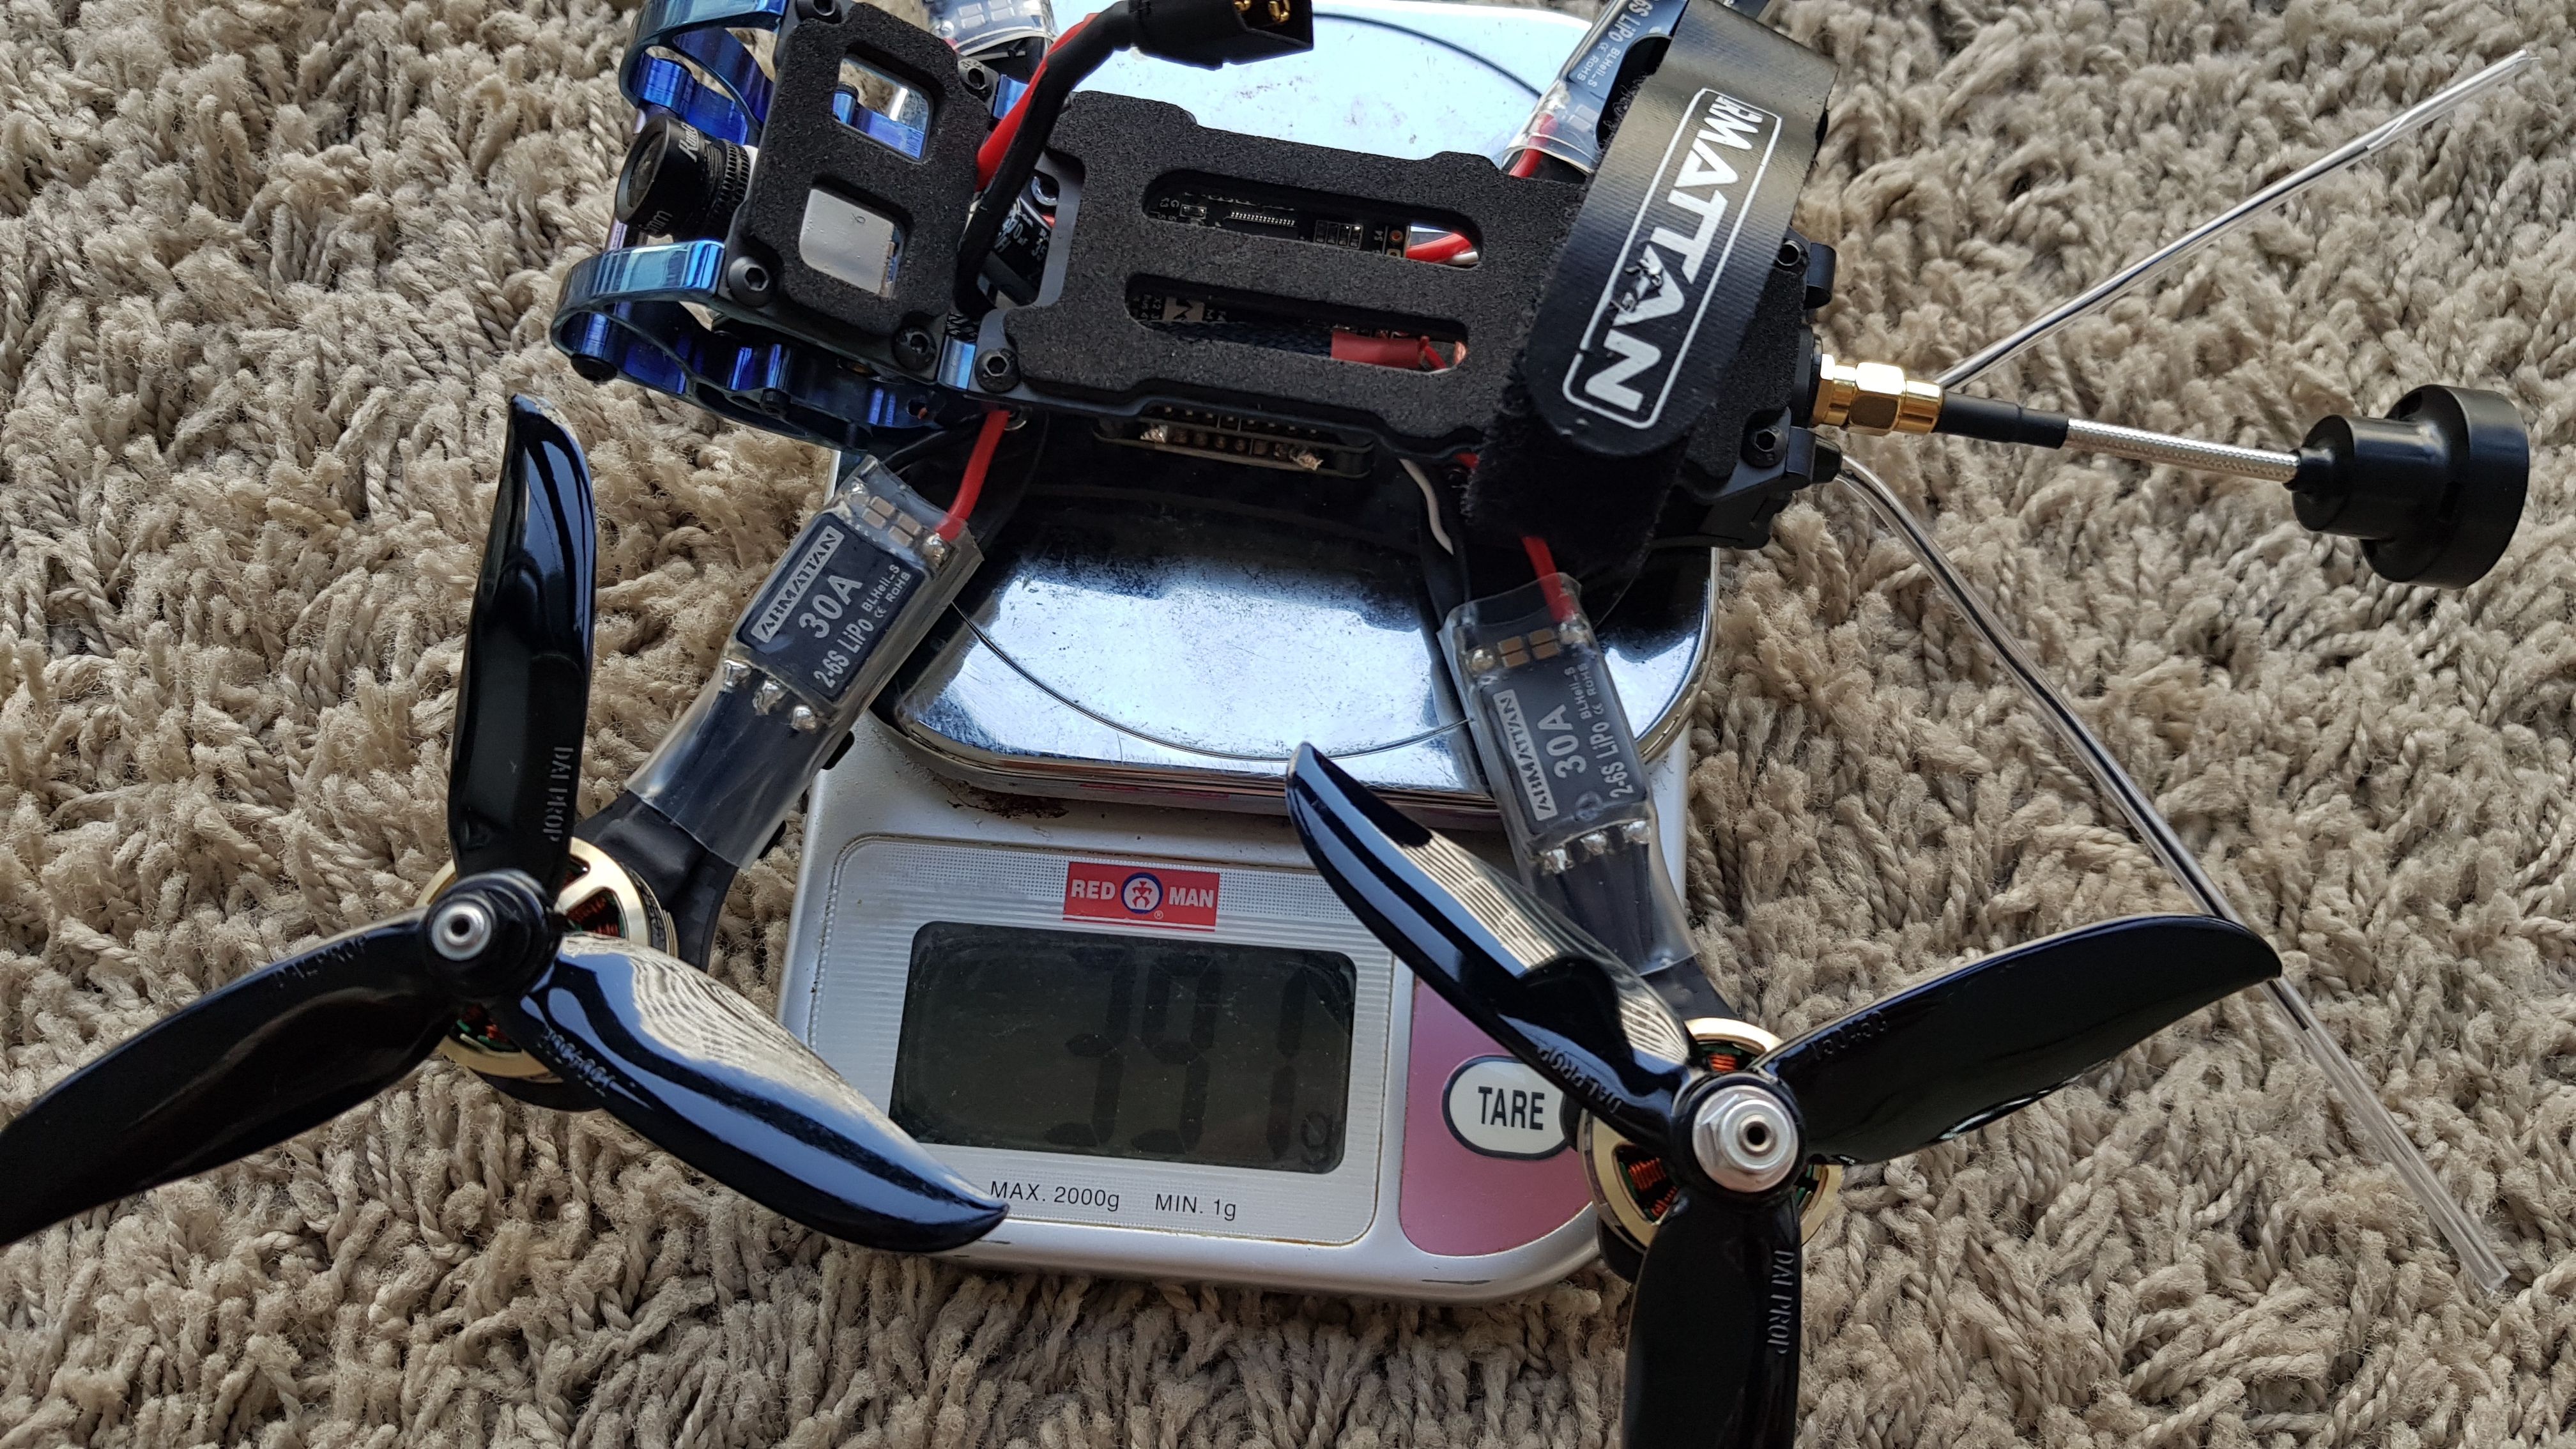
Total weight is 391g with everything but a battery (yes a little fat but don't shame, he flies just fine). AUW is 560g with a 1300mAh Tattu 4s.
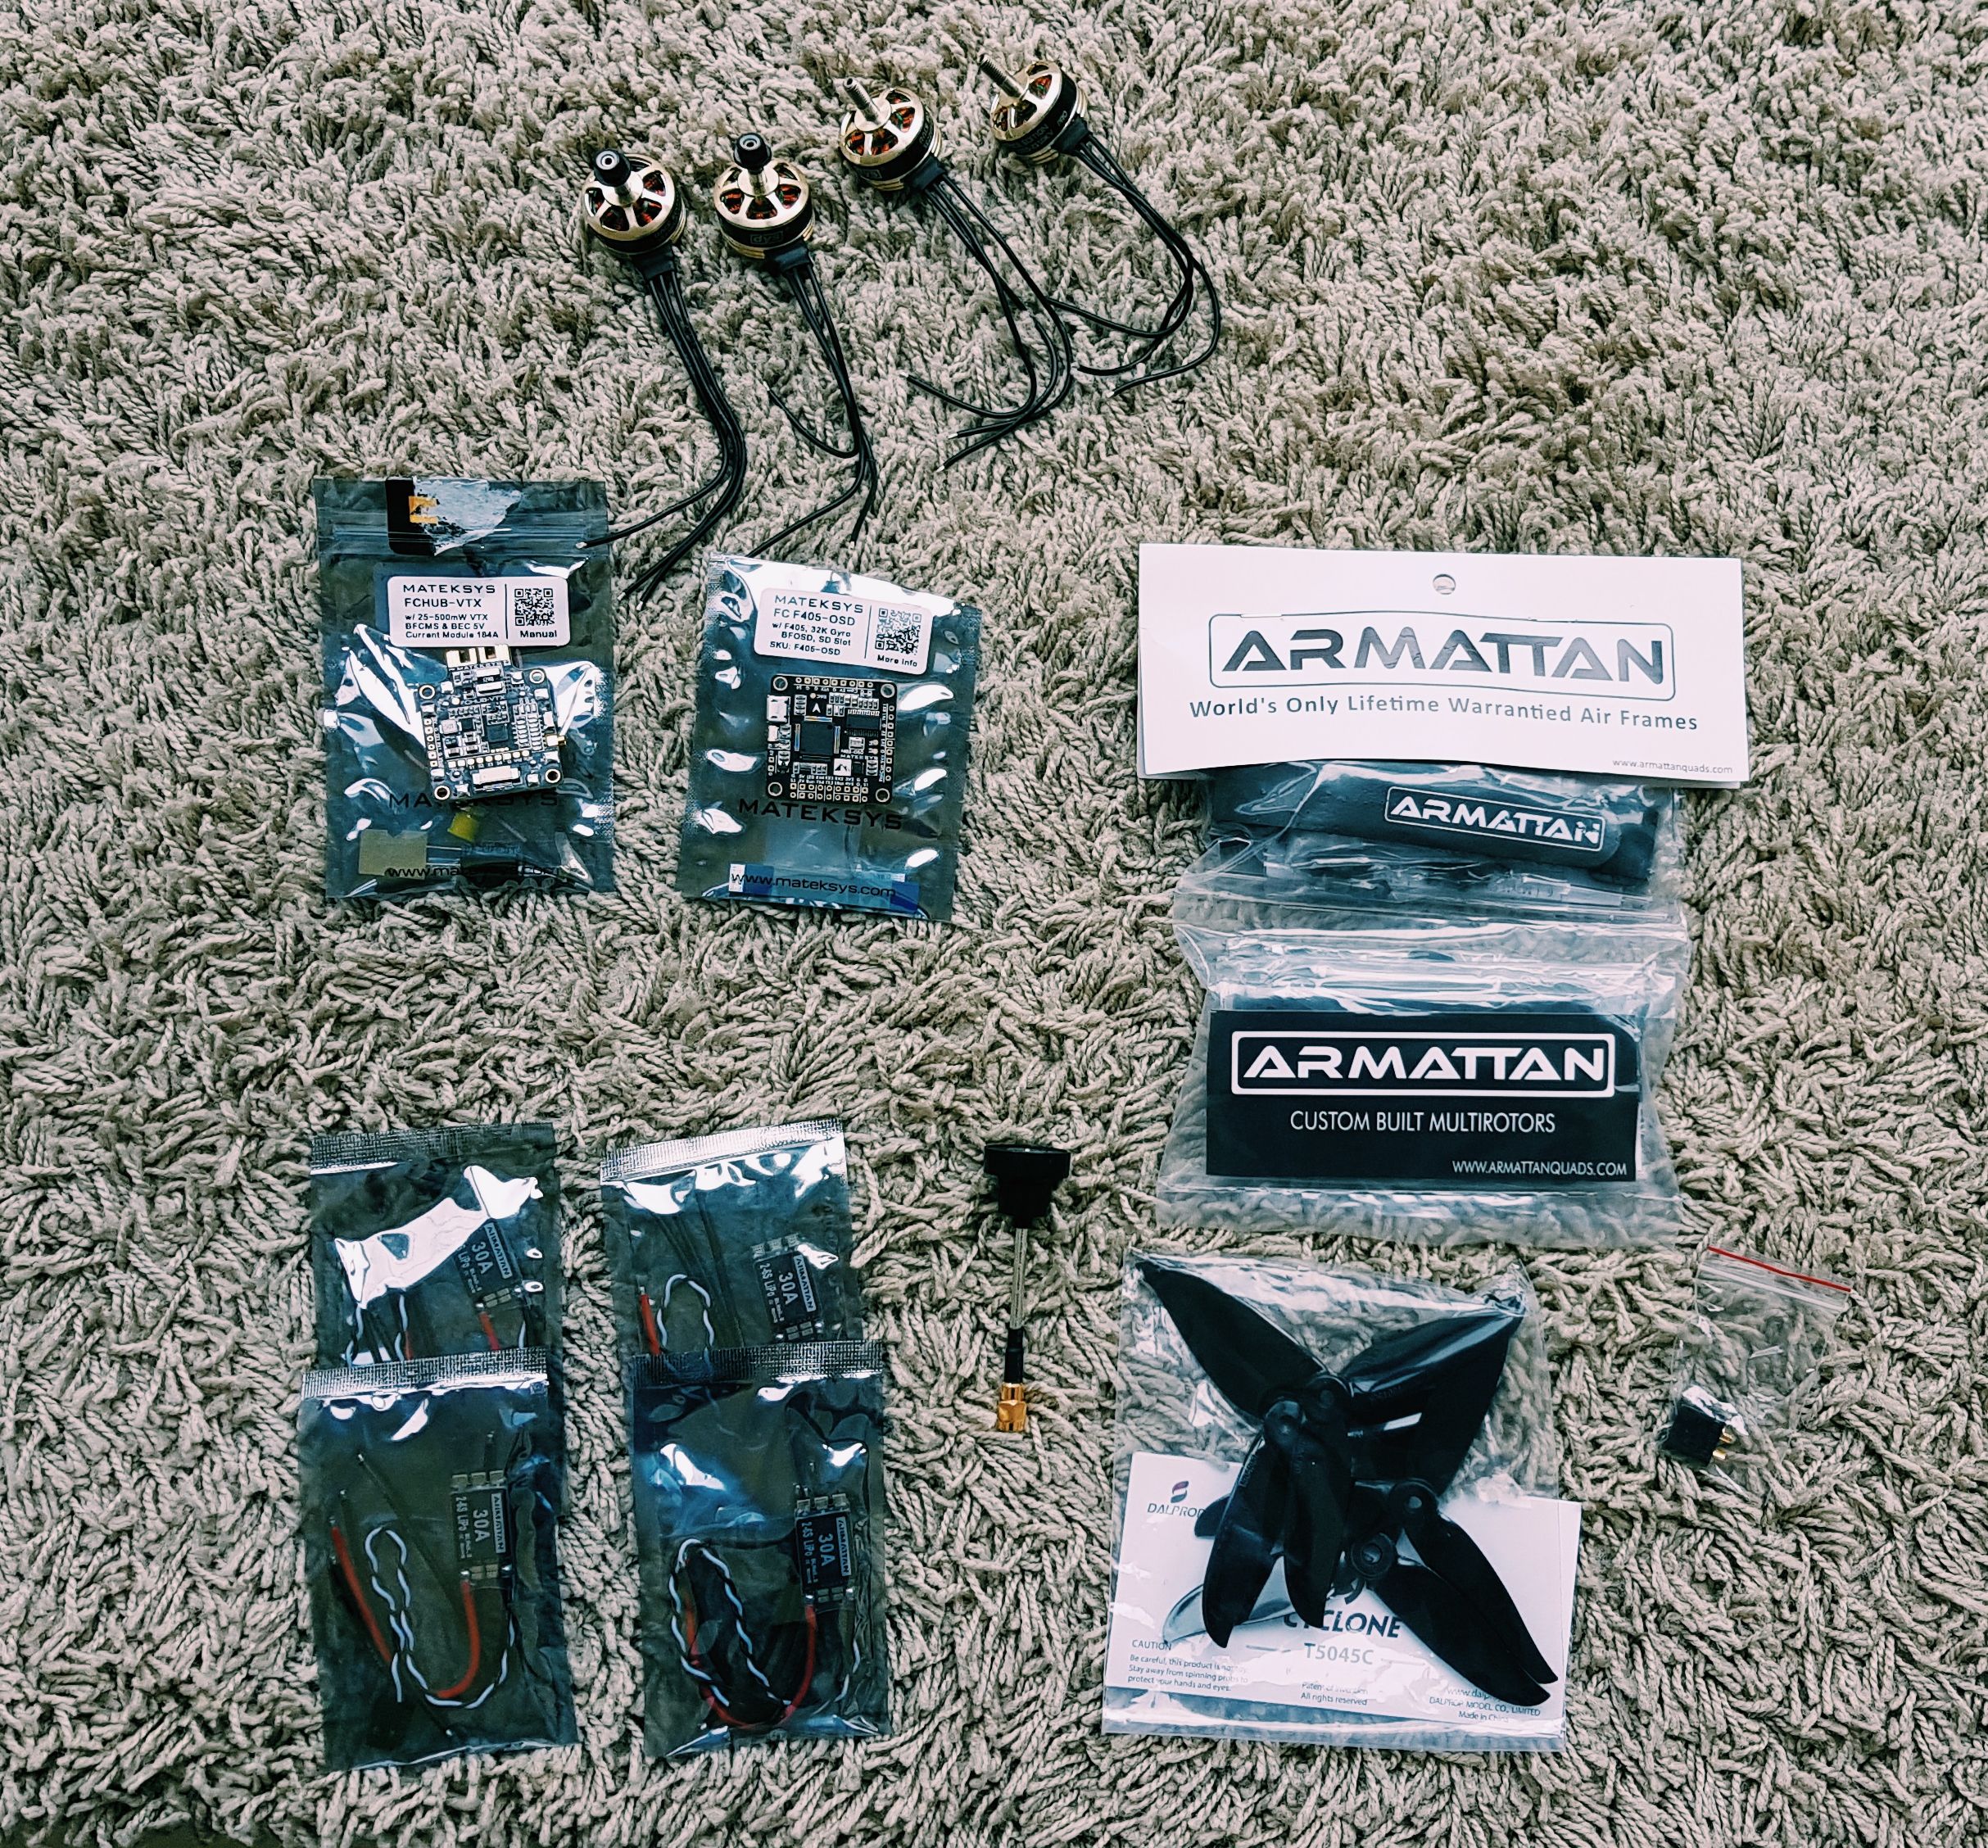
The parts
Frame: You all know this bad boy. I would give this a 9.5/10 - it does so many things right (tolerances are impeccable, camera mount well designed, roomy enough to mount all my gear, looks sexy af). If I had to nitpick one thing, it would be that hammering in the little press-nuts does cause the carbon fibre to delaminate slightly, which irked me. But they do give you some regular ol' M3 lock nuts if you so desire, I just assumed those were for something else and ended up not using them (so uhhh... I guess my complaint isn't really a complaint, just something for you guys to know).
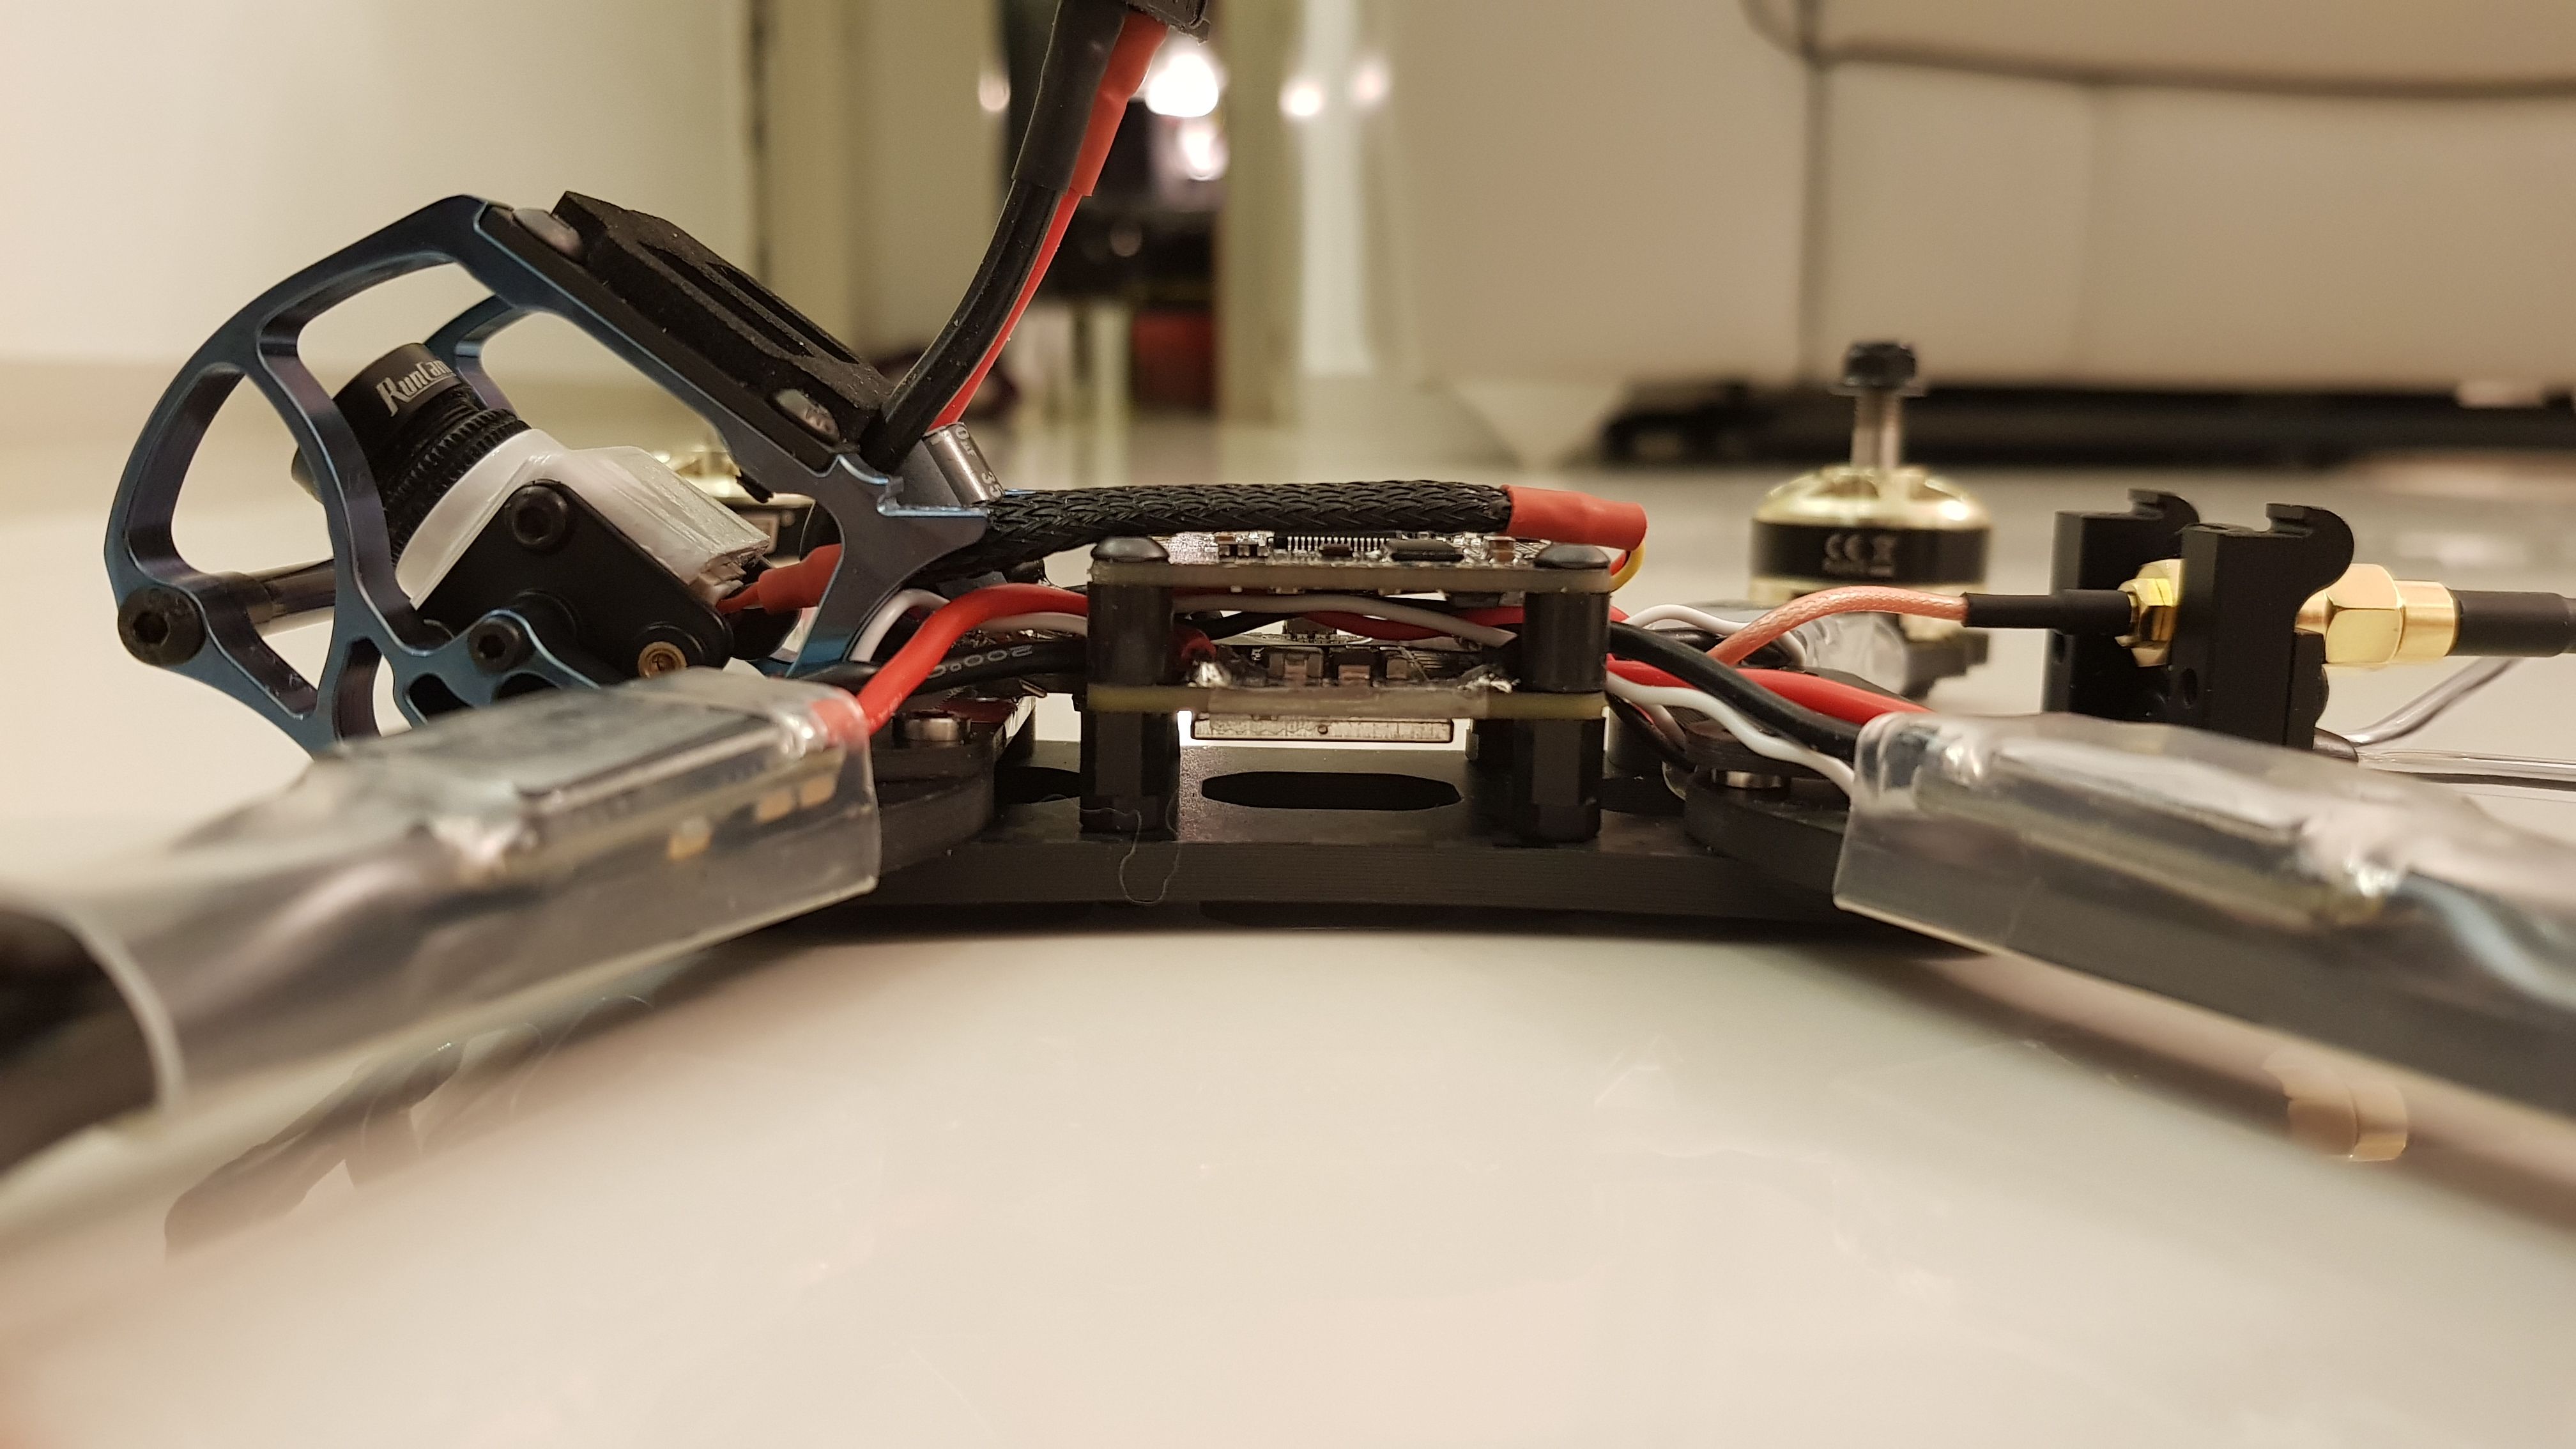
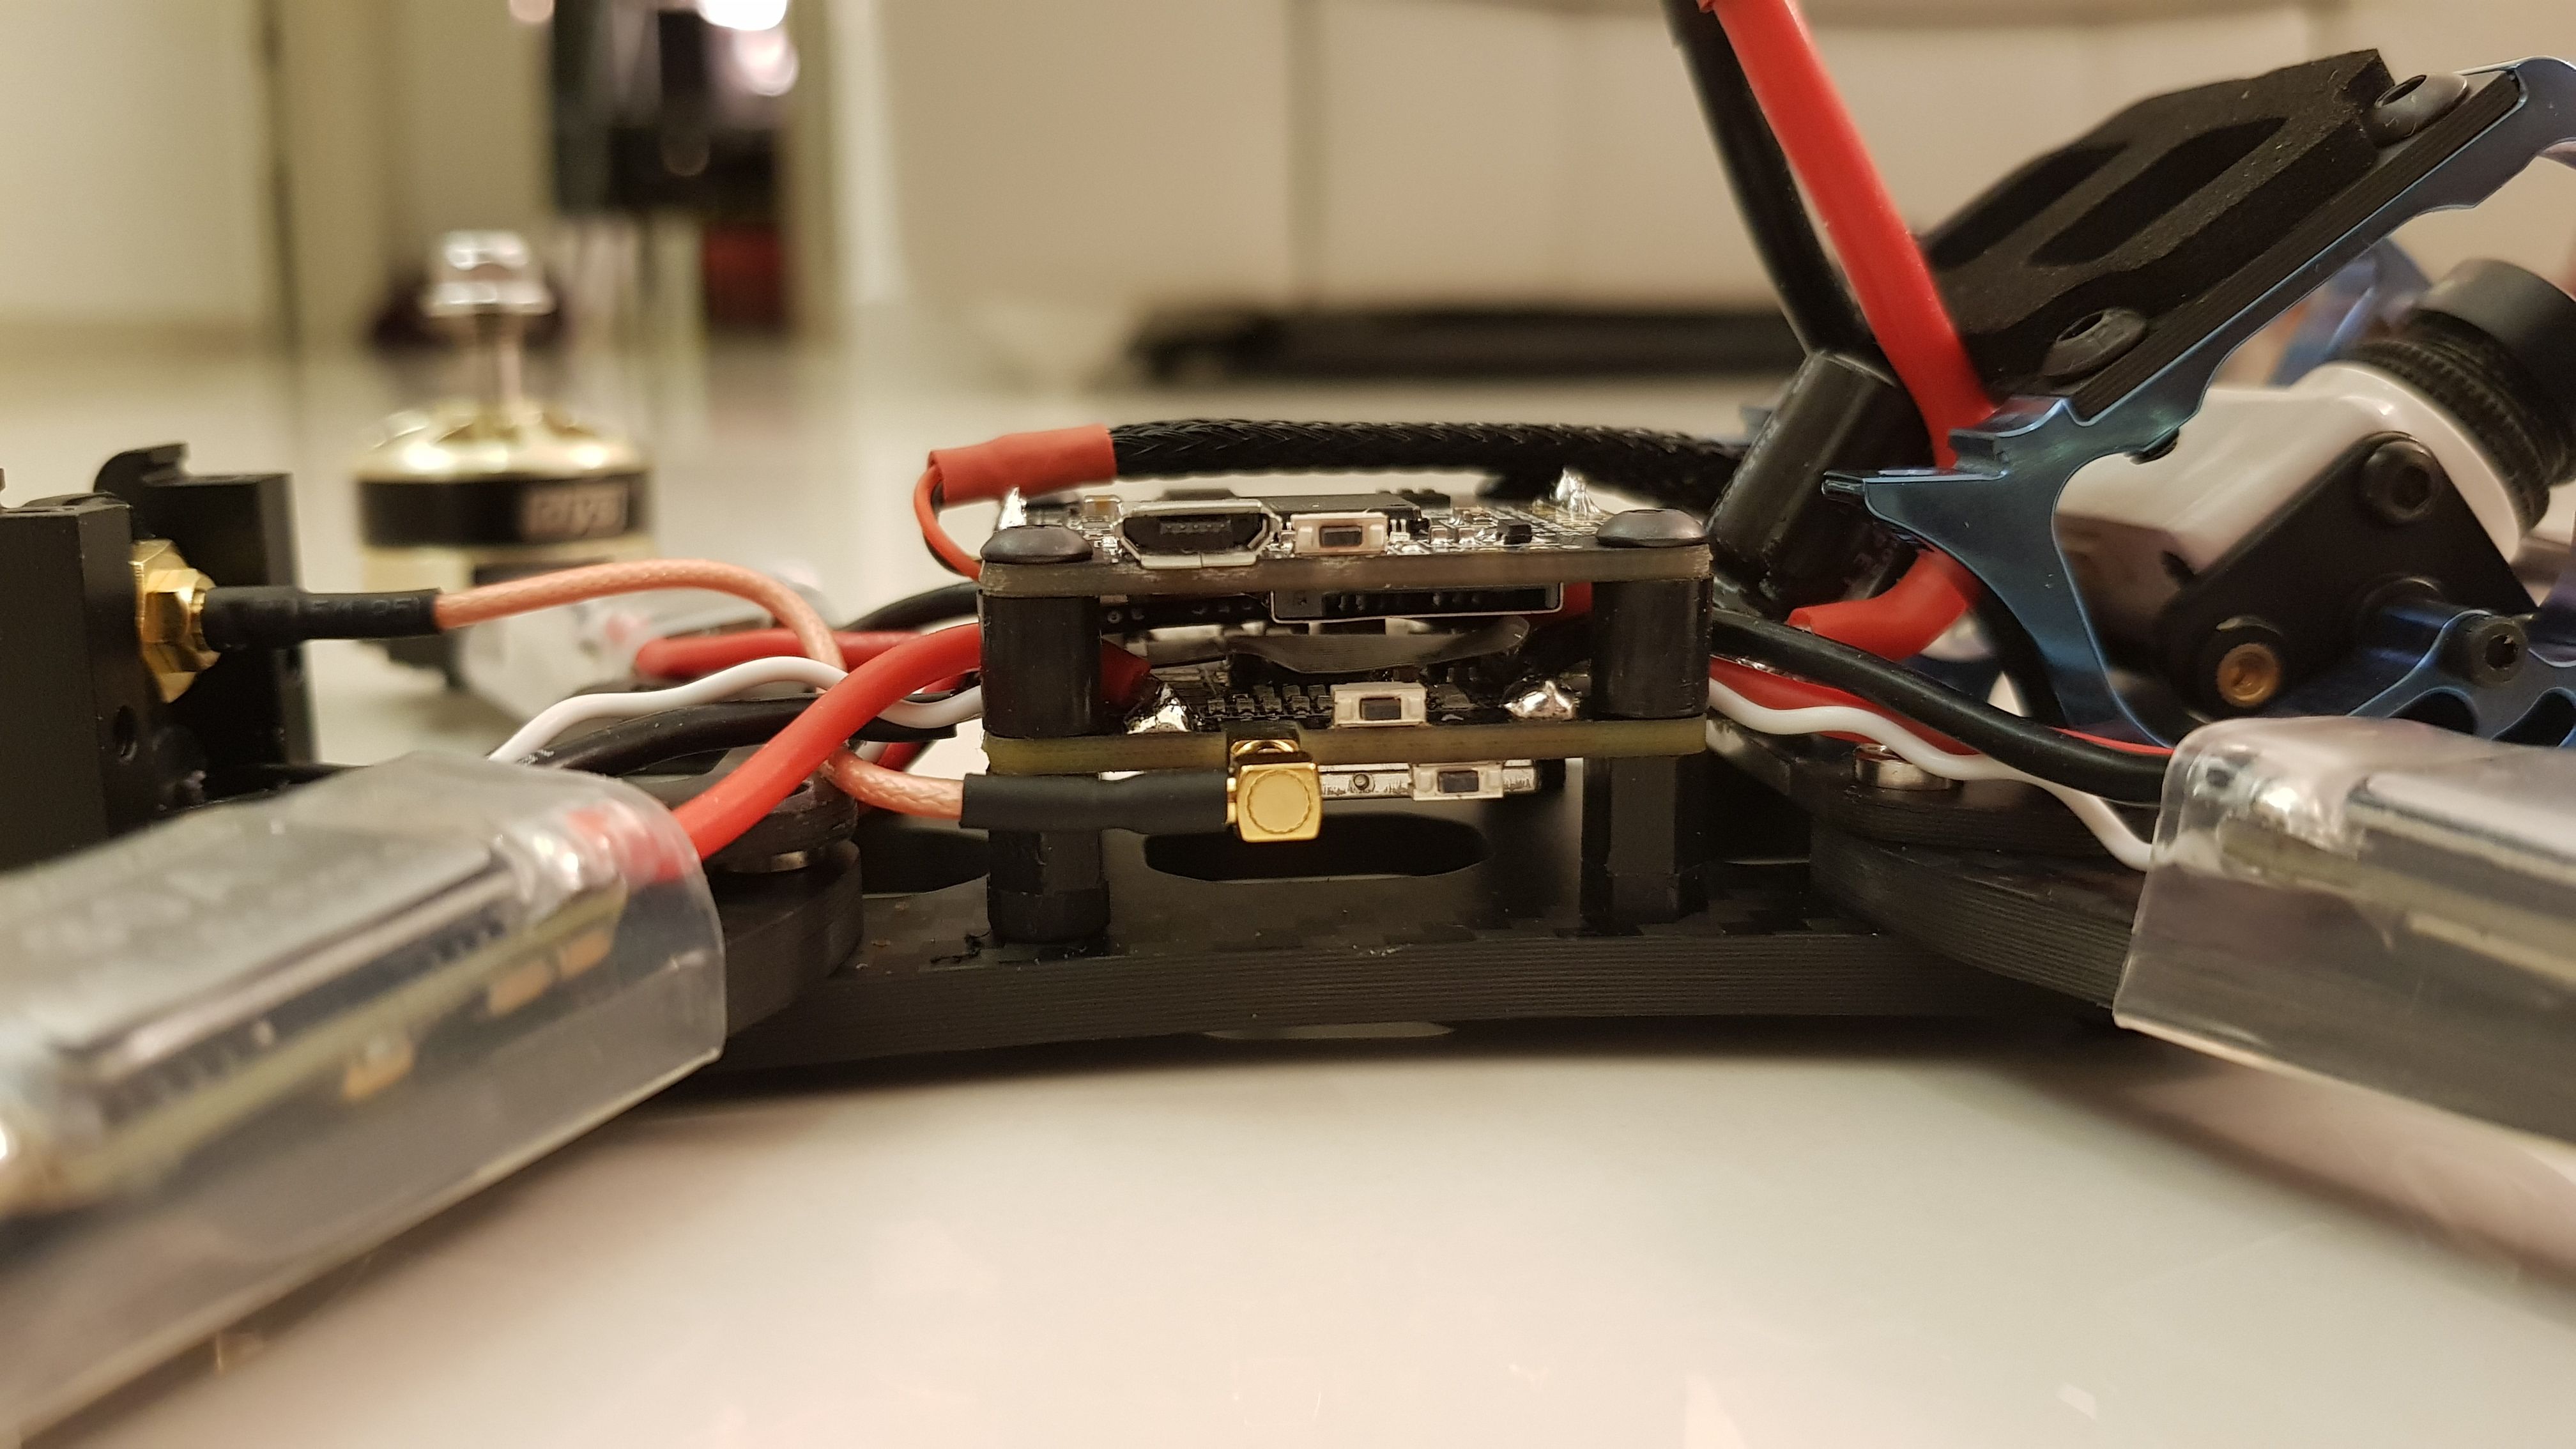
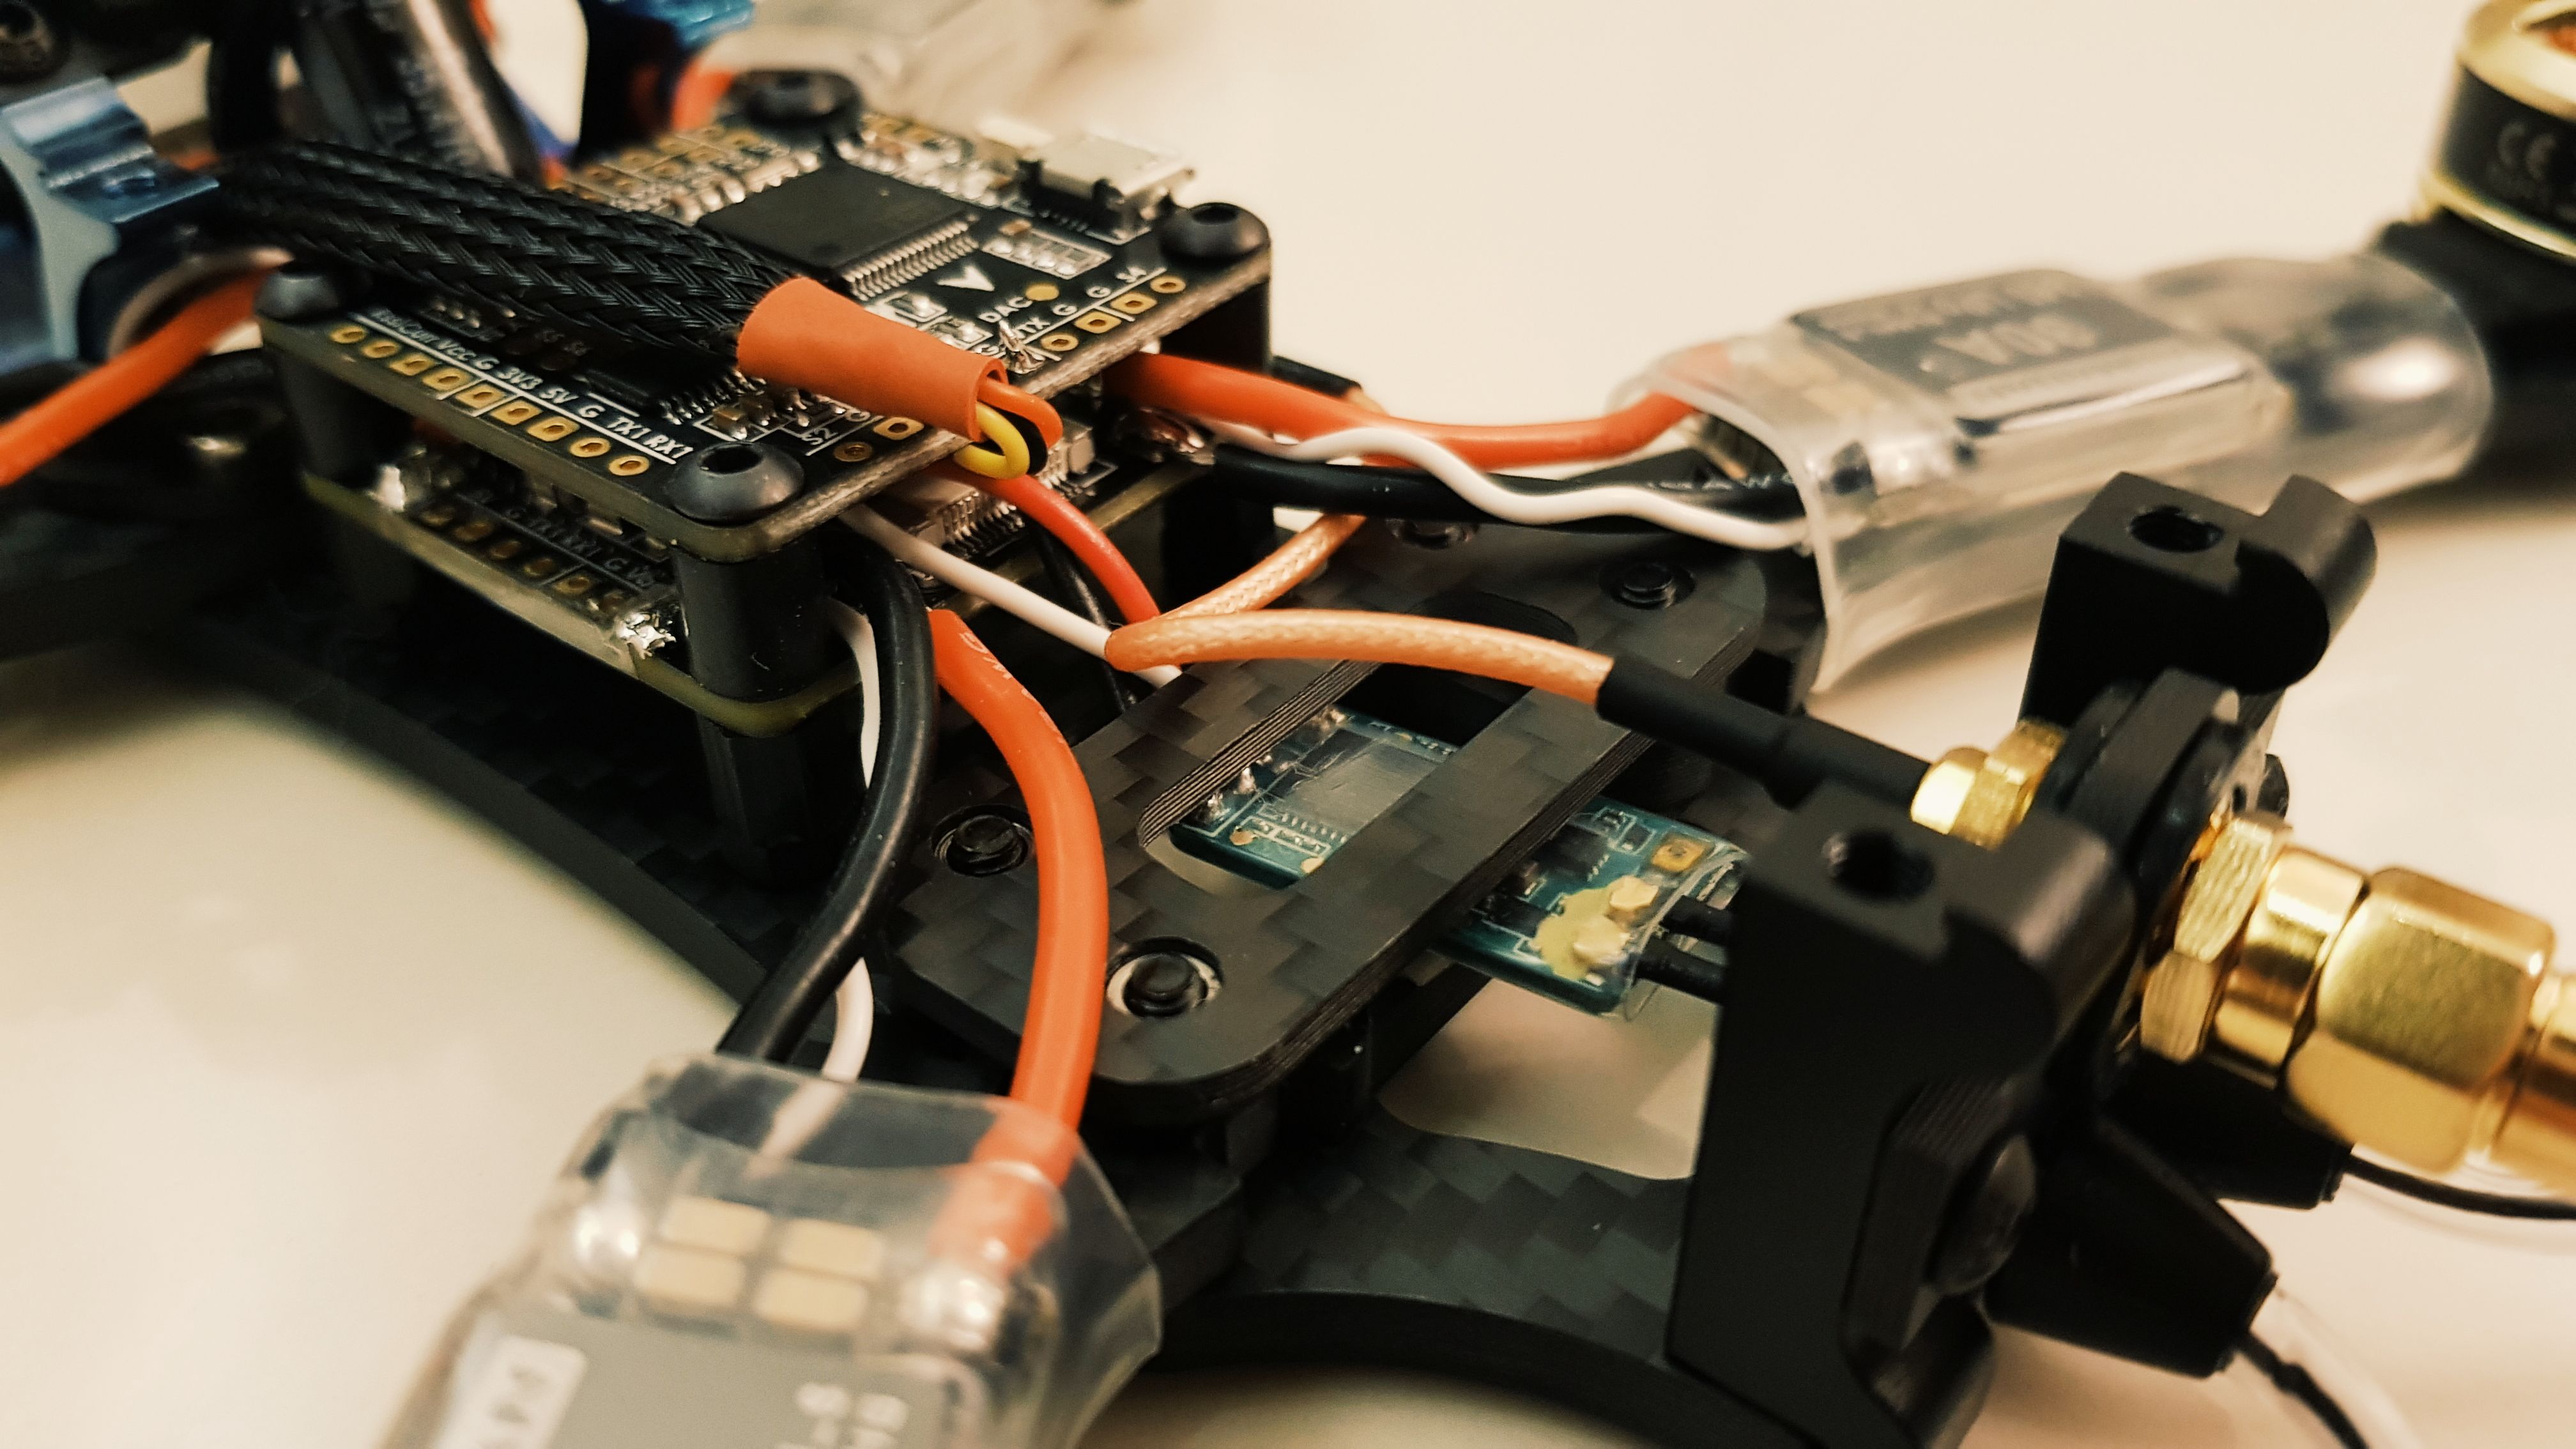
Also, there isn't much room for a big FC stack. 2 boards at most, don't even think of running a 4-in-1 ESC with a runcam Split and a stackable VTX. In fact, with the Matek FCHUB VTX mounted backwards (I wanted the power leads coming out the front), I needed at least 8mm standoffs below, otherwise the battery leads would be touching carbon - BAD! I stuck a tiny bit of tape over the frame at that point to prevent any shorts. Well, turns out if I use 8mm standoffs below, and the given (6mm?) rubber vibration-damping standoffs between the PDB and FC, I have JUST about a millimetre or 2 above the FC before I hit the top plate.
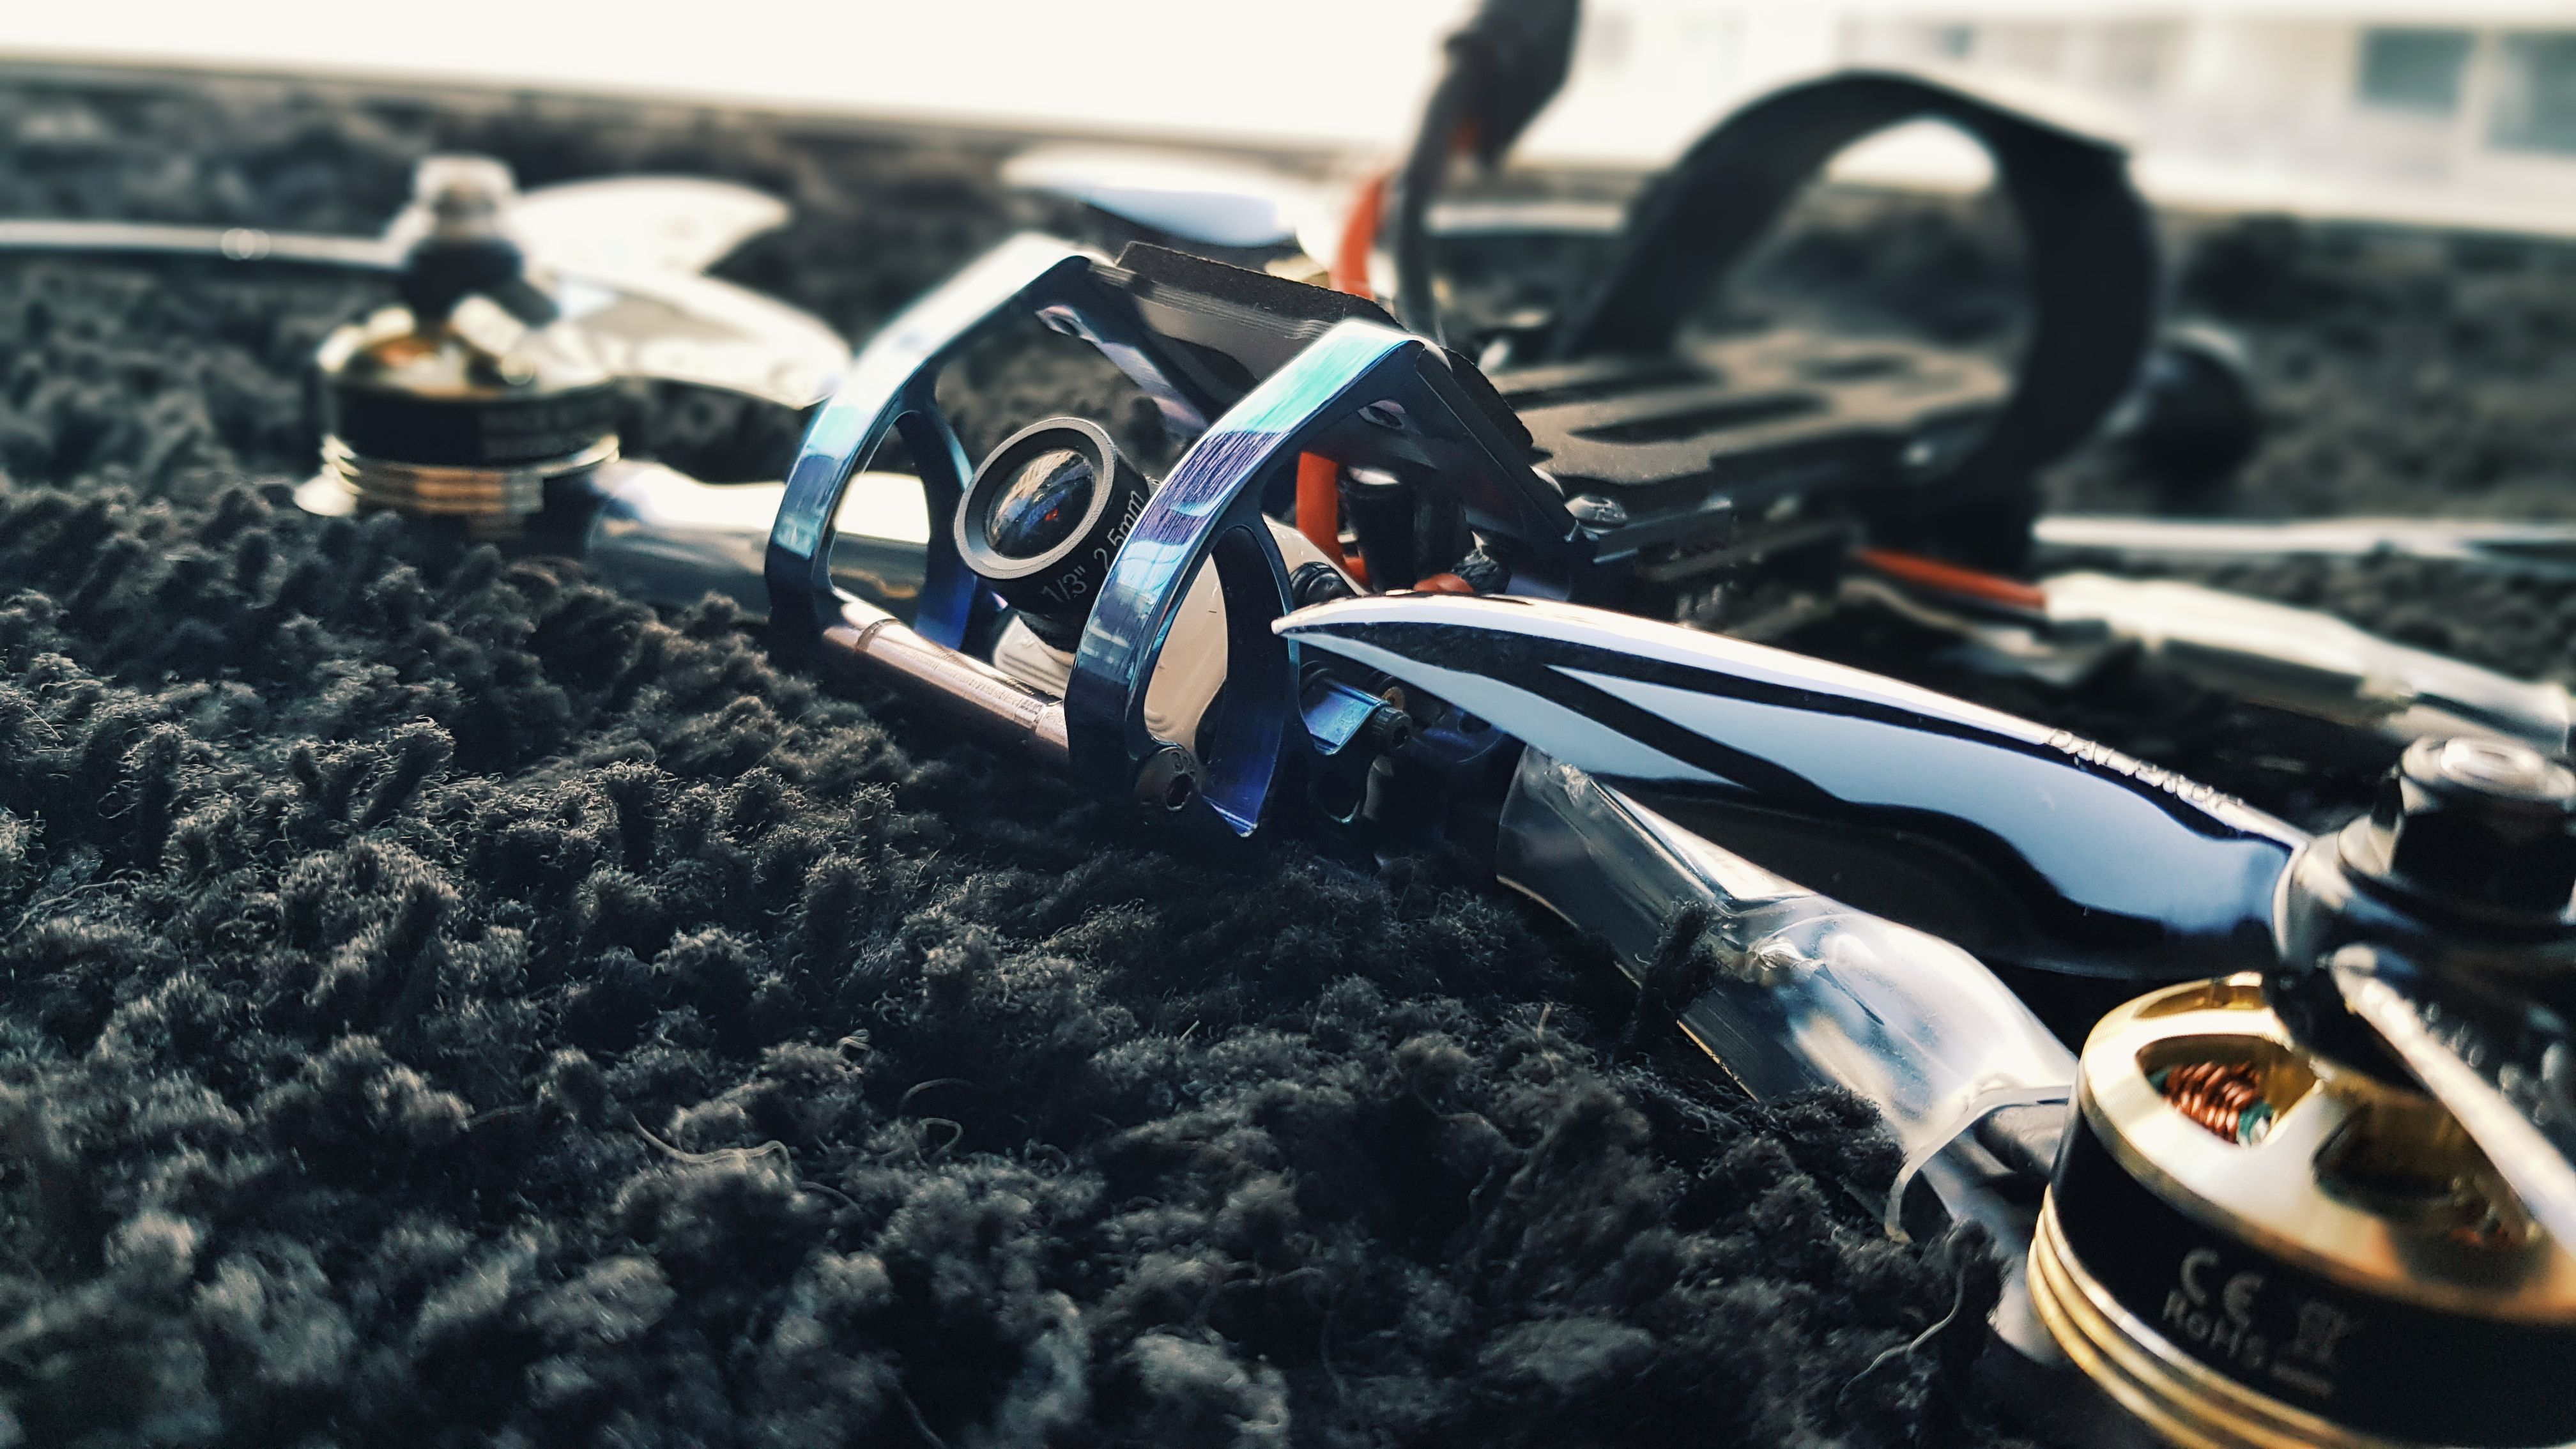
One super fun thing about this frame is that the titanium camera braces can be anodised! Google it, it's dead easy and looks beautiful. Just don't think about heat-treating the titanium with a blowtorch to colour it, that voids the warranty. Anodising it with an electrical current however does NOT void the warranty, and achieves much of the same results. If you want a more patterned look to it, you can use a sponge soaked in electrolyte as the cathode and wipe the part, varying voltage and time you apply the current to get the effect you want. I was a bit too lazy to do that so I just dunked it to get a more even finish.
Flight Controller: I don't have too much to say here, except that this FC doesn't really make a lot of sense unless you get the matching FCHUB VTX. That ribbon cable is so lovely. I know Joshua Bardwell had some issues with it, and some people are concerned that in a crash it's gonna fail, but it worked absolutely fine for me, and it's really unlikely for anything to get snagged in it/apply stress to it, so I think it's a great idea. It makes the build so much cleaner.
Aside from the ribbon cable and gyro (which I already mentioned), there's not much more to it! It's a solid F4 board, and it's really well documented. Just be sure to power it up/test it (BEFORE SOLDERING TO IT) by:
- plugging it in via USB and making sure it connects
- probing it with a multimeter to check voltages
- connecting it to the FCHUB VTX with a ribbon cable and test that it turns on/works okay
PDB/VTX: 10/10 for me, less if you care about pit mode/need 800mW for some reason. This baby does everything. 25/200/500mW switchable, easy to access buttons on the side, a sturdy MMCX connector with an SMA pigtail (and a whip antenna too if you want, although that's irrelevant to this build), built-in UART connectivity. It just doesn't support pit mode, but I don't race or fly with big groups so I don't really care about that. The ESC power and signal wires solder directly to this board, and are passed up through the ribbon cable. Good stuff.
Note that there is one tiny VBAT pad that is dangerously close to a giant ground ESC pad. It shouldn't short, but y'know, Murphy's law... so I just stuck a thin piece of cello tape over it as a layer of added protection.
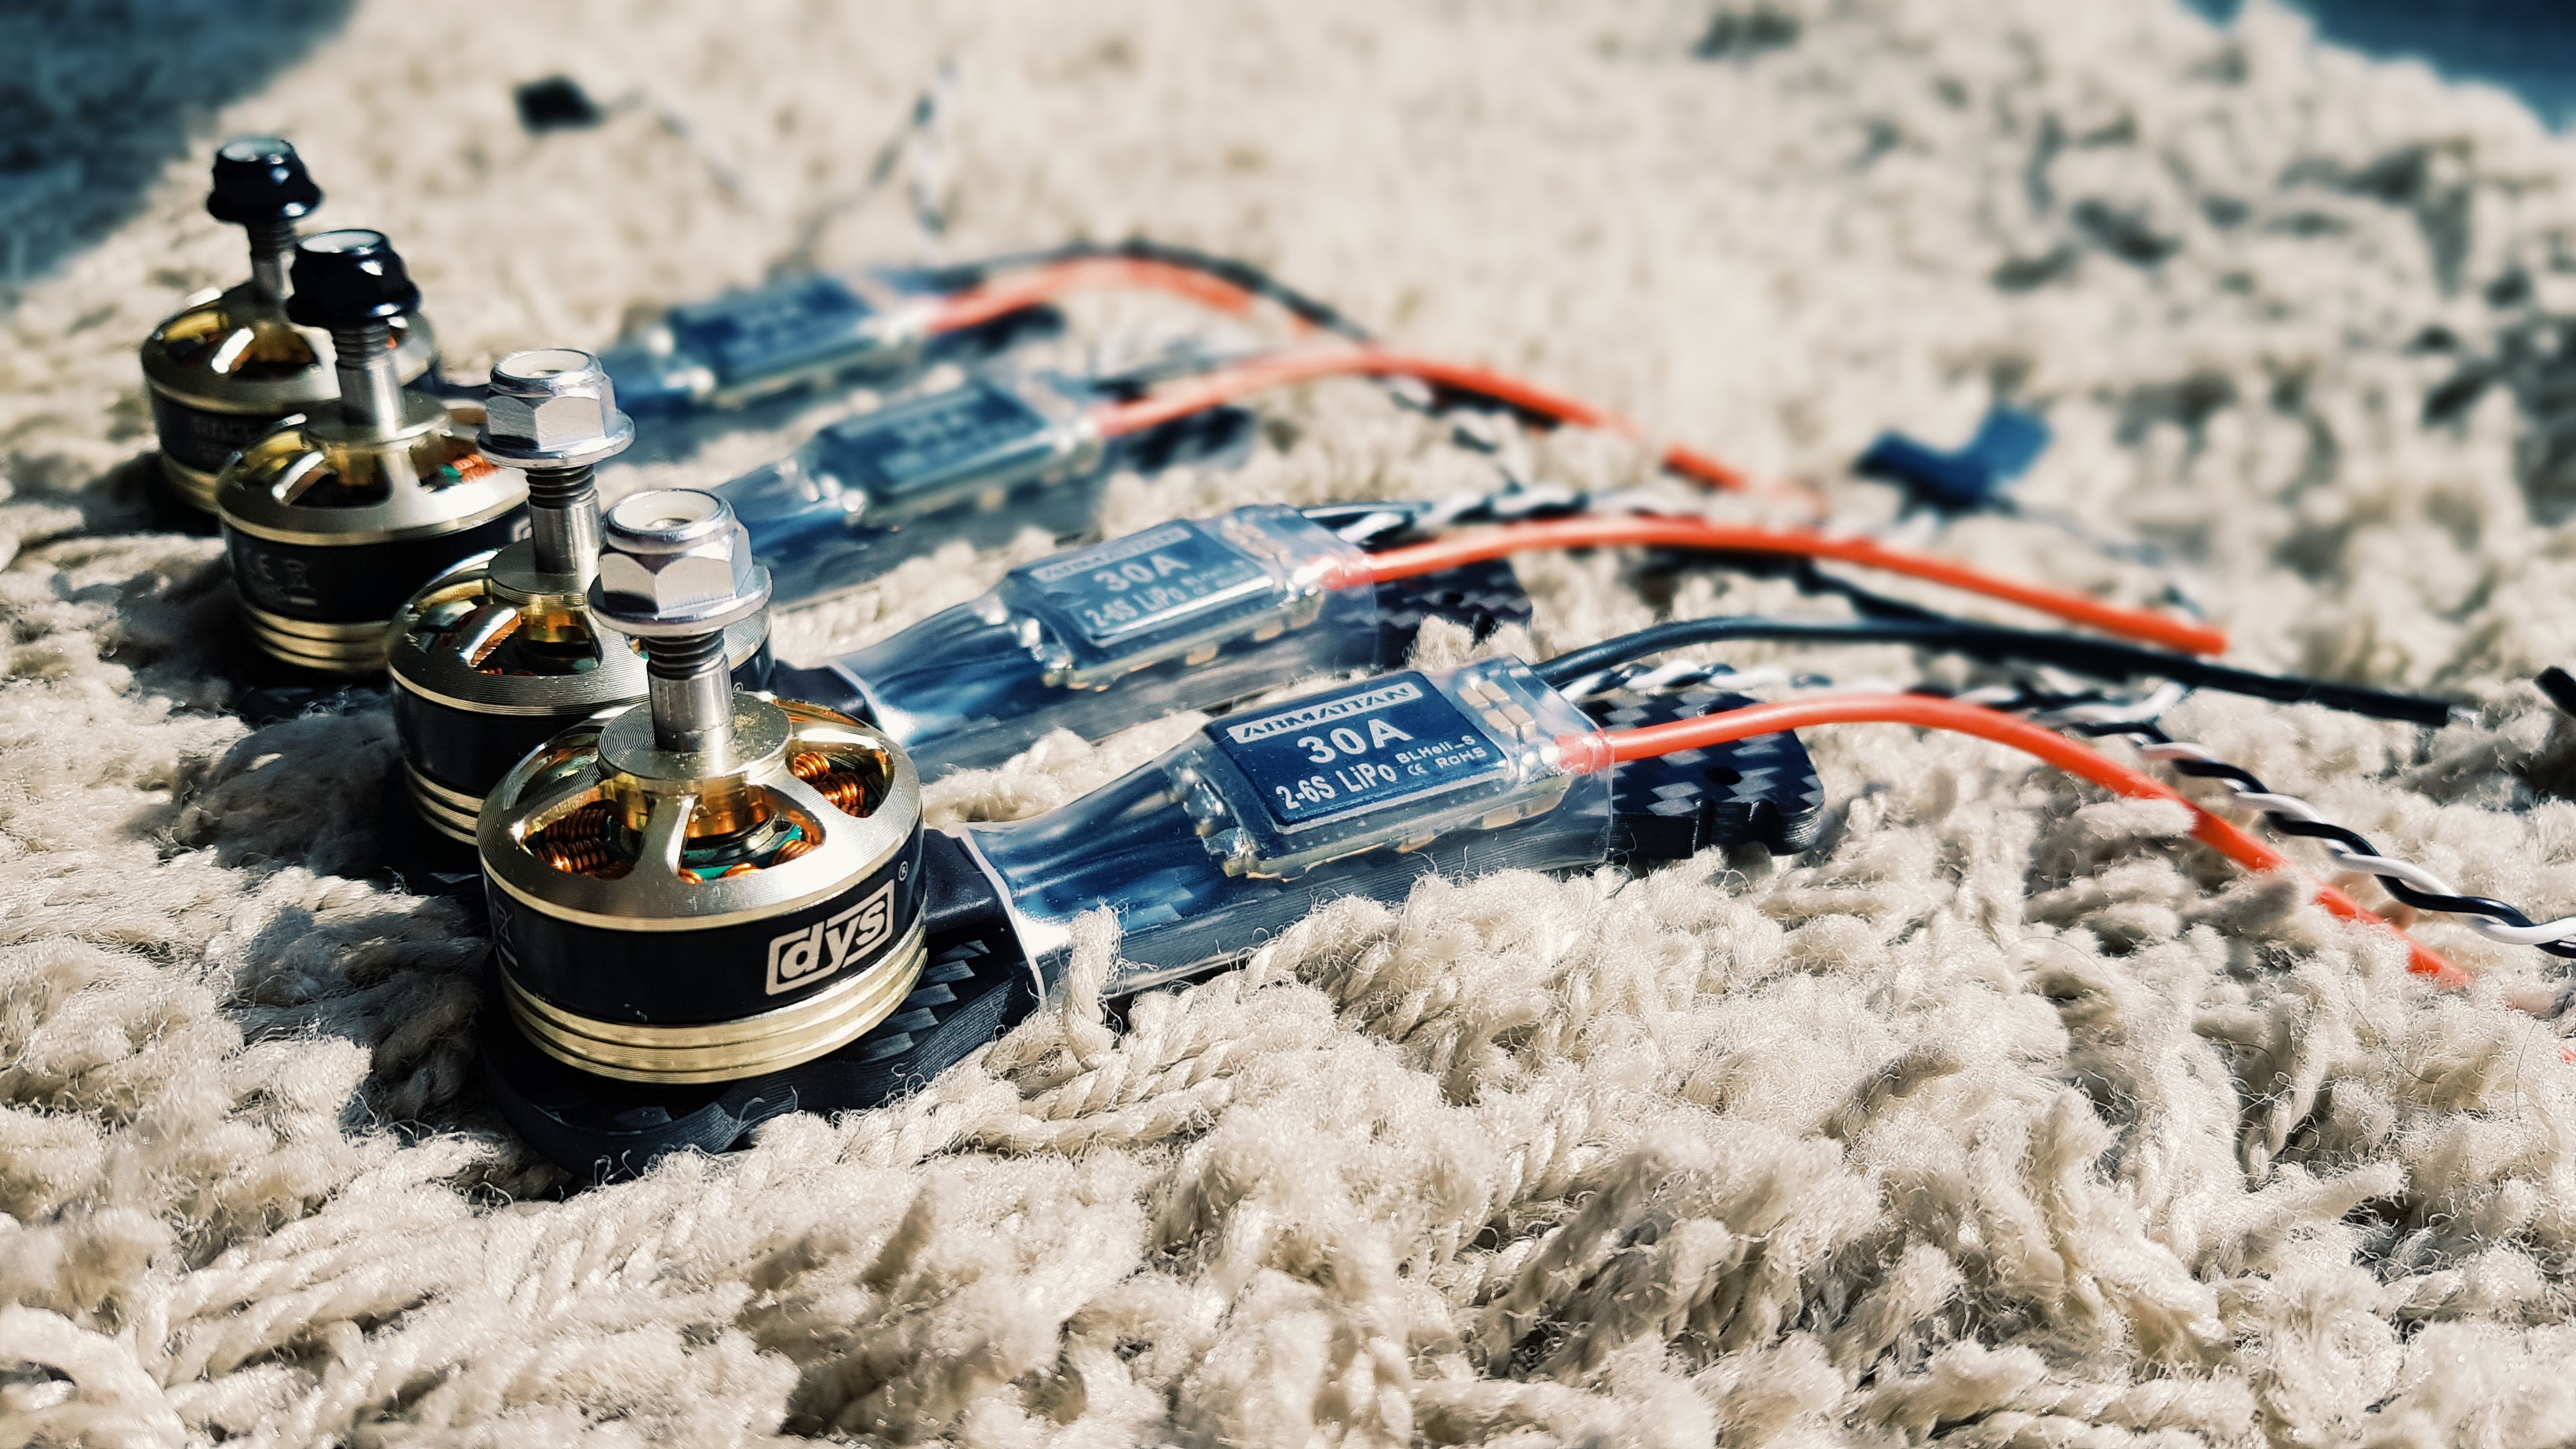
Motors: 7/10. Okay I know these aren't the best of motors. Literally the only reason I chose them is that I had a 2 unopened 2550kV CW ones lying around (spares for another build), so I saved some money and just bought 2 CCW ones for off Hobbyking. I know DYS has is a little notorious for dodgy QC, but honestly, I have not had a single problem with these motors. I have abused the **** out of them, and they still work the same as they did out of the box. That being said, maybe I just got lucky because many people have complained of bearing issues/magnets coming off from DYS motors in general before, so buy at your own risk. If was buying 4 new motors, I would've gone for some Hypetrains. But hey, that's a hundred bucks $$$$
At 4s with 5045 DAL cyclones, I'm drawing about 90A max on punchouts. They do come down hot with Fast Kalman filters, so maybe some lower KV, better-cooled bottomless motors would be an improvement.
ESCs: 9/10. Not 10 because they ain't BLHELI_32. Aside from that, they are more than just fine. And not too pricey if you bundle them with the frame off Armattan's website. I wanted to go for a 4-in-1 to make the build cleaner, but there isn't enough vertical room for that. Plus, my FC/VTX combo already cleans up the build so much that arm-mounted ESCs look good in this build IMO.
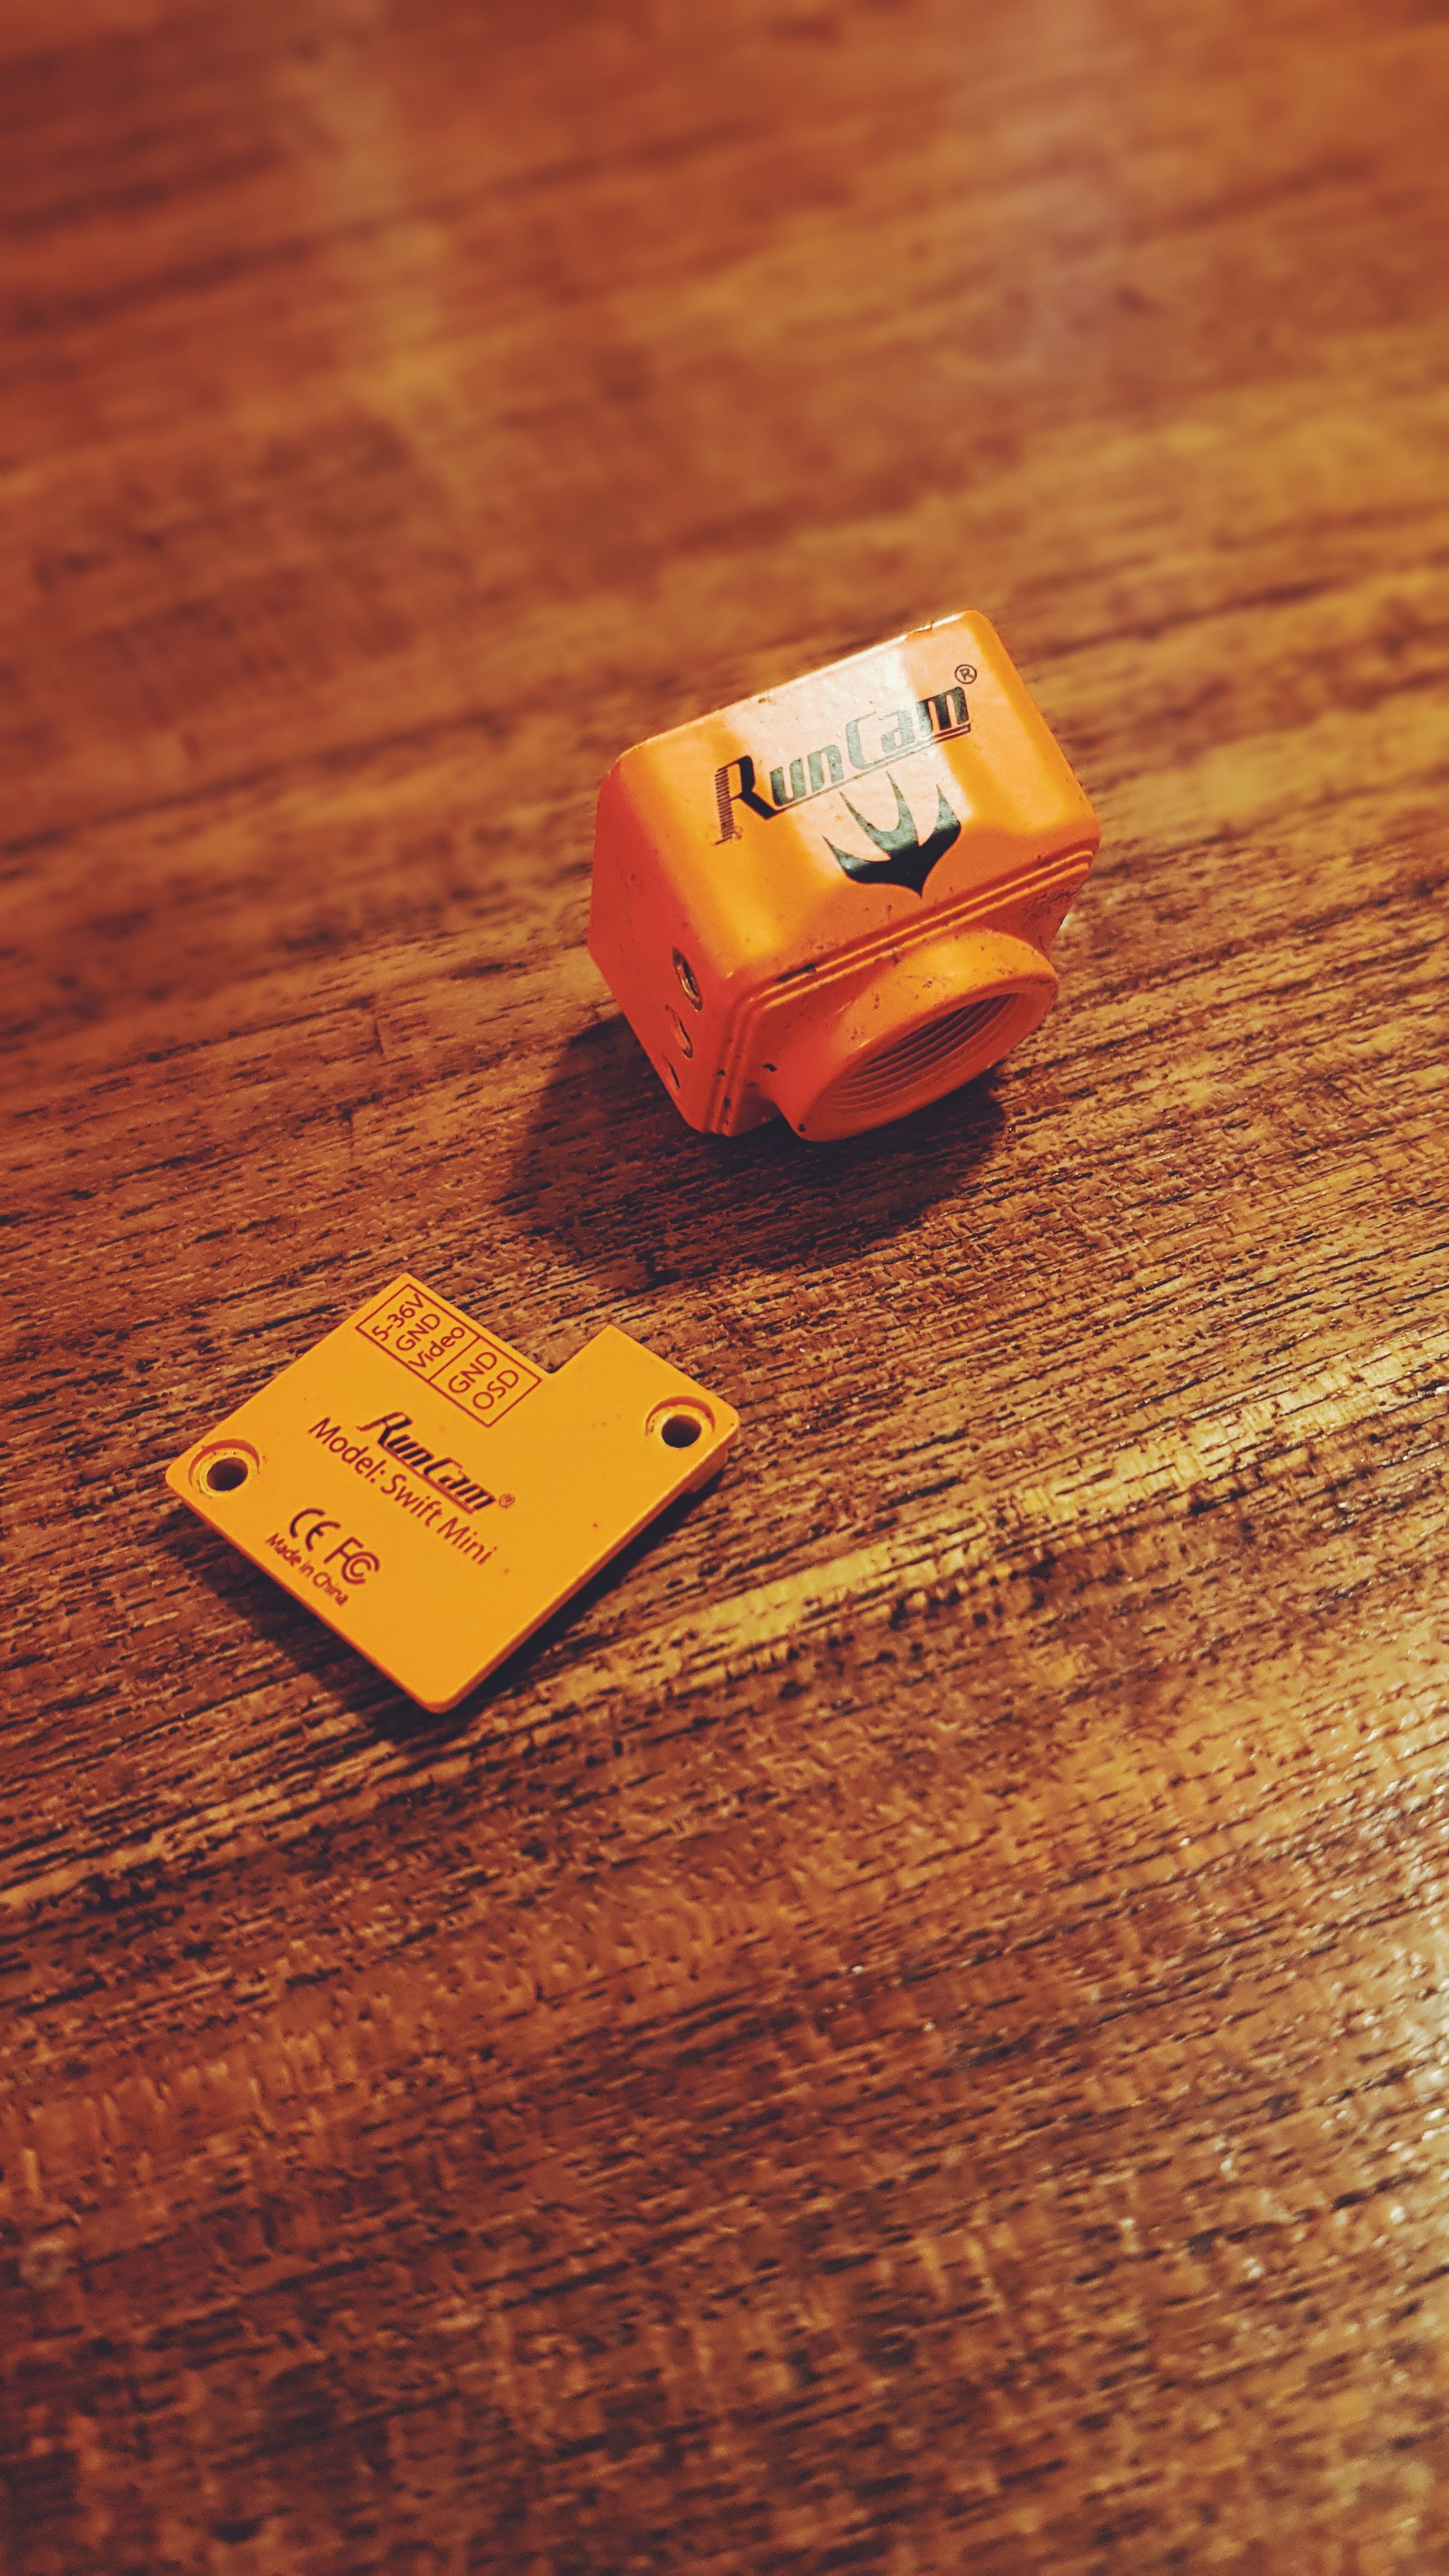
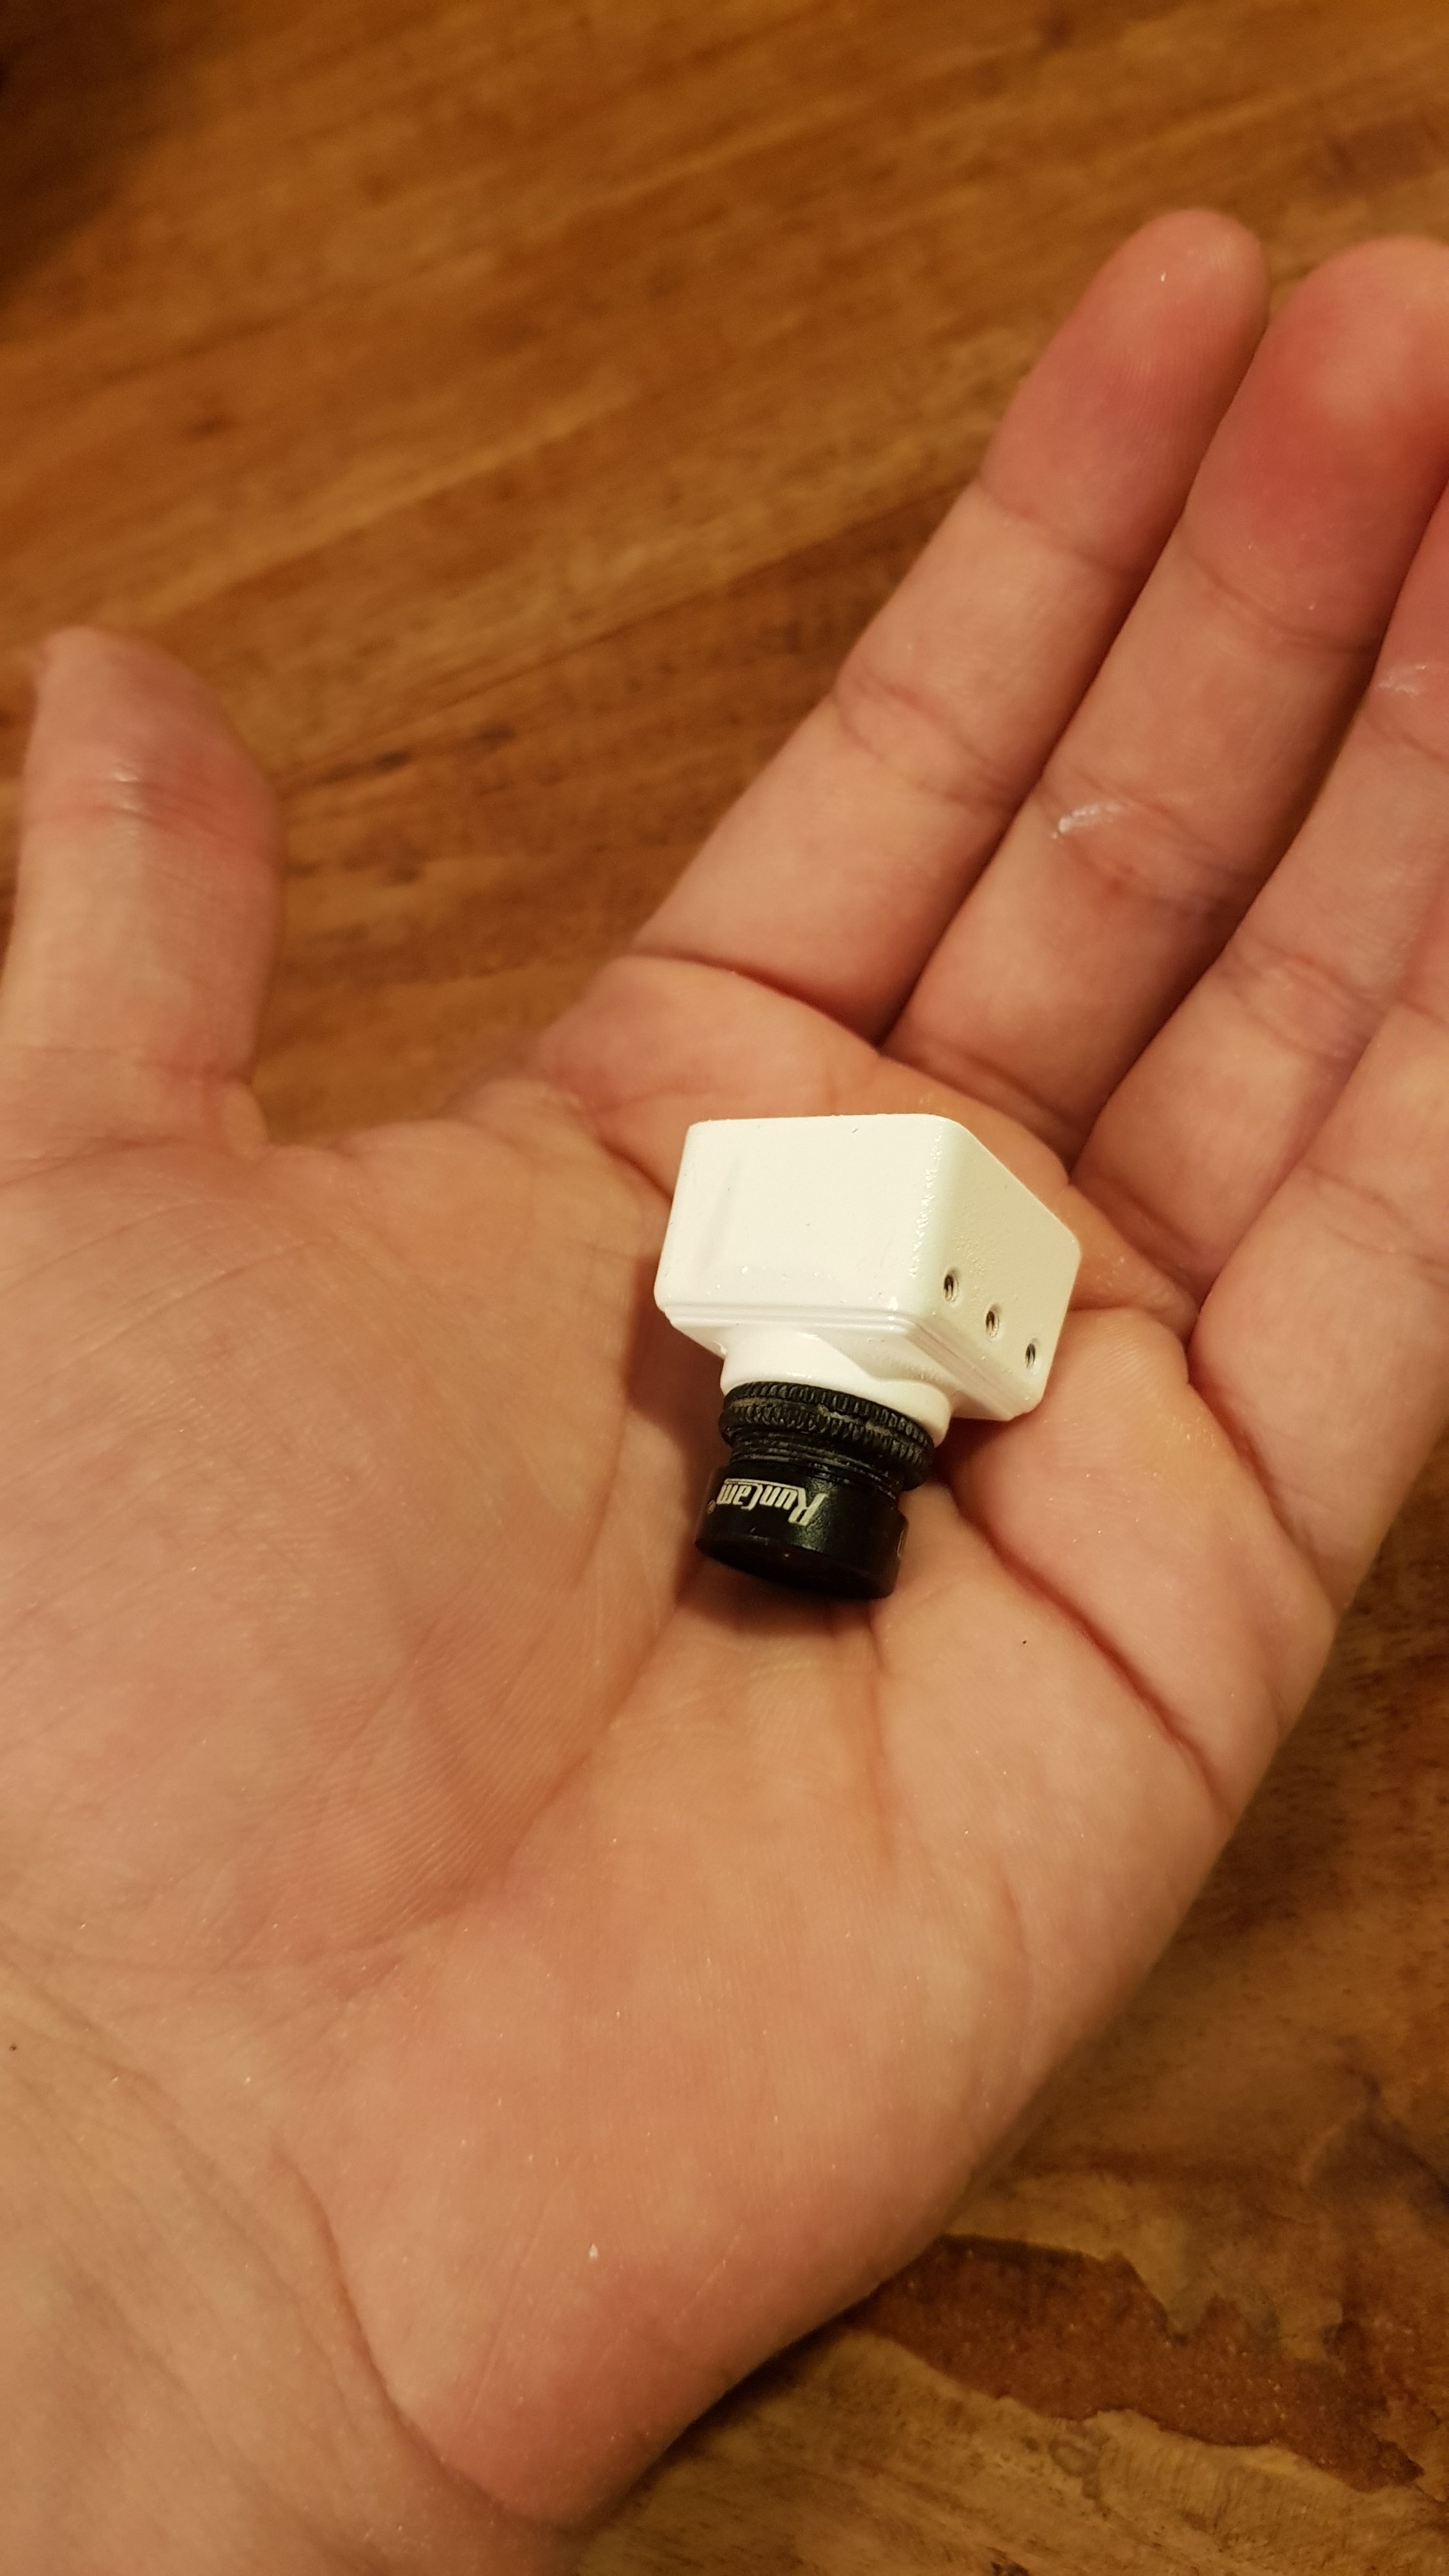
Camera: 8/10. I chose this because I had it lying around. Spray painted the housing white because orange would be so out of place here! It works fine, but the lens occasionaly goes out of focus during flight. This can be fixed with some loctite. Also note that the included bracket to bump it up to full size only allows you to fit a single screw on each side to mount it to the frame. I haven't had the camera move during flight but I wouldn't say it's impossible for the angle to get messed up in a crash/collision with a tree branch. It can't go down too much though, thanks to the horizontal metal standoff on the chin.
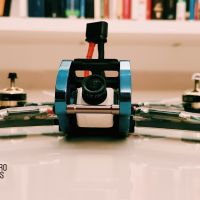
Note that the view is completely unobstructed by the frame, but the camera is fully protected (no protrusion out of its cage). Hats off to Armattan for this.
Receiver: 9/10. Not 10 because it doesn't support telemetry. I don't care about that because all my info is on the OSD anyway, including RSSI (this is inbuilt into SBUS channel 16, no need for an extra wire).
Batteries: 10/10. Not much more I can reasonably ask from batteries. I'm using 1300mAh ones because I had them, but if I buy more I'd go with some 1550mAh ones. Voltage sag is nonexistent on my 4" build, but on this guy, I do notice it on flat out 100% throttle speed runs of more than a couple seconds. This would be greatly reduced by a slightly larger capacity battery, and tbh there's no real sag on my normal freestyle flying. Joshua Bardwell tested these and they perfomed great.
Extra: Cable management:
- I heatshrinked the entire arms because I hate zipties with a vengeance. It looks cleaner, and my ESCs aren't coming down hot so I'm not worried about cooling. Hell, you heatshrink ESCs anyway. I used 2.5cm wide transparent heat shrink if you're wondering, but you could do with 2cm and have it a bit tighter.
- I sleeved the camera cable with some 6mm wire mesh to make it a little neater. Little things like this go a long way in pretty-fying your build :) I didn't do it with the receiver cable though because it was too short for it to make sense, but I wanted to. If you're using a 4-in-1 ESC, you can do this with some larger mesh on the motor wires, it looks really proffessional.
- Measure twice, cut once. Literally. Even though I was so meticulous, the XT60 lead is about 1cm too long for my liking. The ESC wires are just right. Listen to goldilocks here folks, too short and your cables will be under tension, and likely fail at the solder joints. Some people like them long and then wrap the excess somewhere, but IMO uhhh... you do you. It looks pretty messy, I've tried it before.
- To make the build cleaner, make sure the ESC power cables don't take the easiest route to their pads. They go AROUND the standoff and connect from behind. It's not really hard to do, just requires a minute of planning.
Photos


Man what a nice build/read. Do you think fitting an Runcam Split in there is really not possible?
Thanks! It's possible if you use an AIO FC like the CL Racing F4. Basically your stack height is limited to 2 boards, I don't think 3 layers can be done.