Geoff the Destroyer; the 3 inch Toothfairy
 By Quantum FPV on May 26, 2018
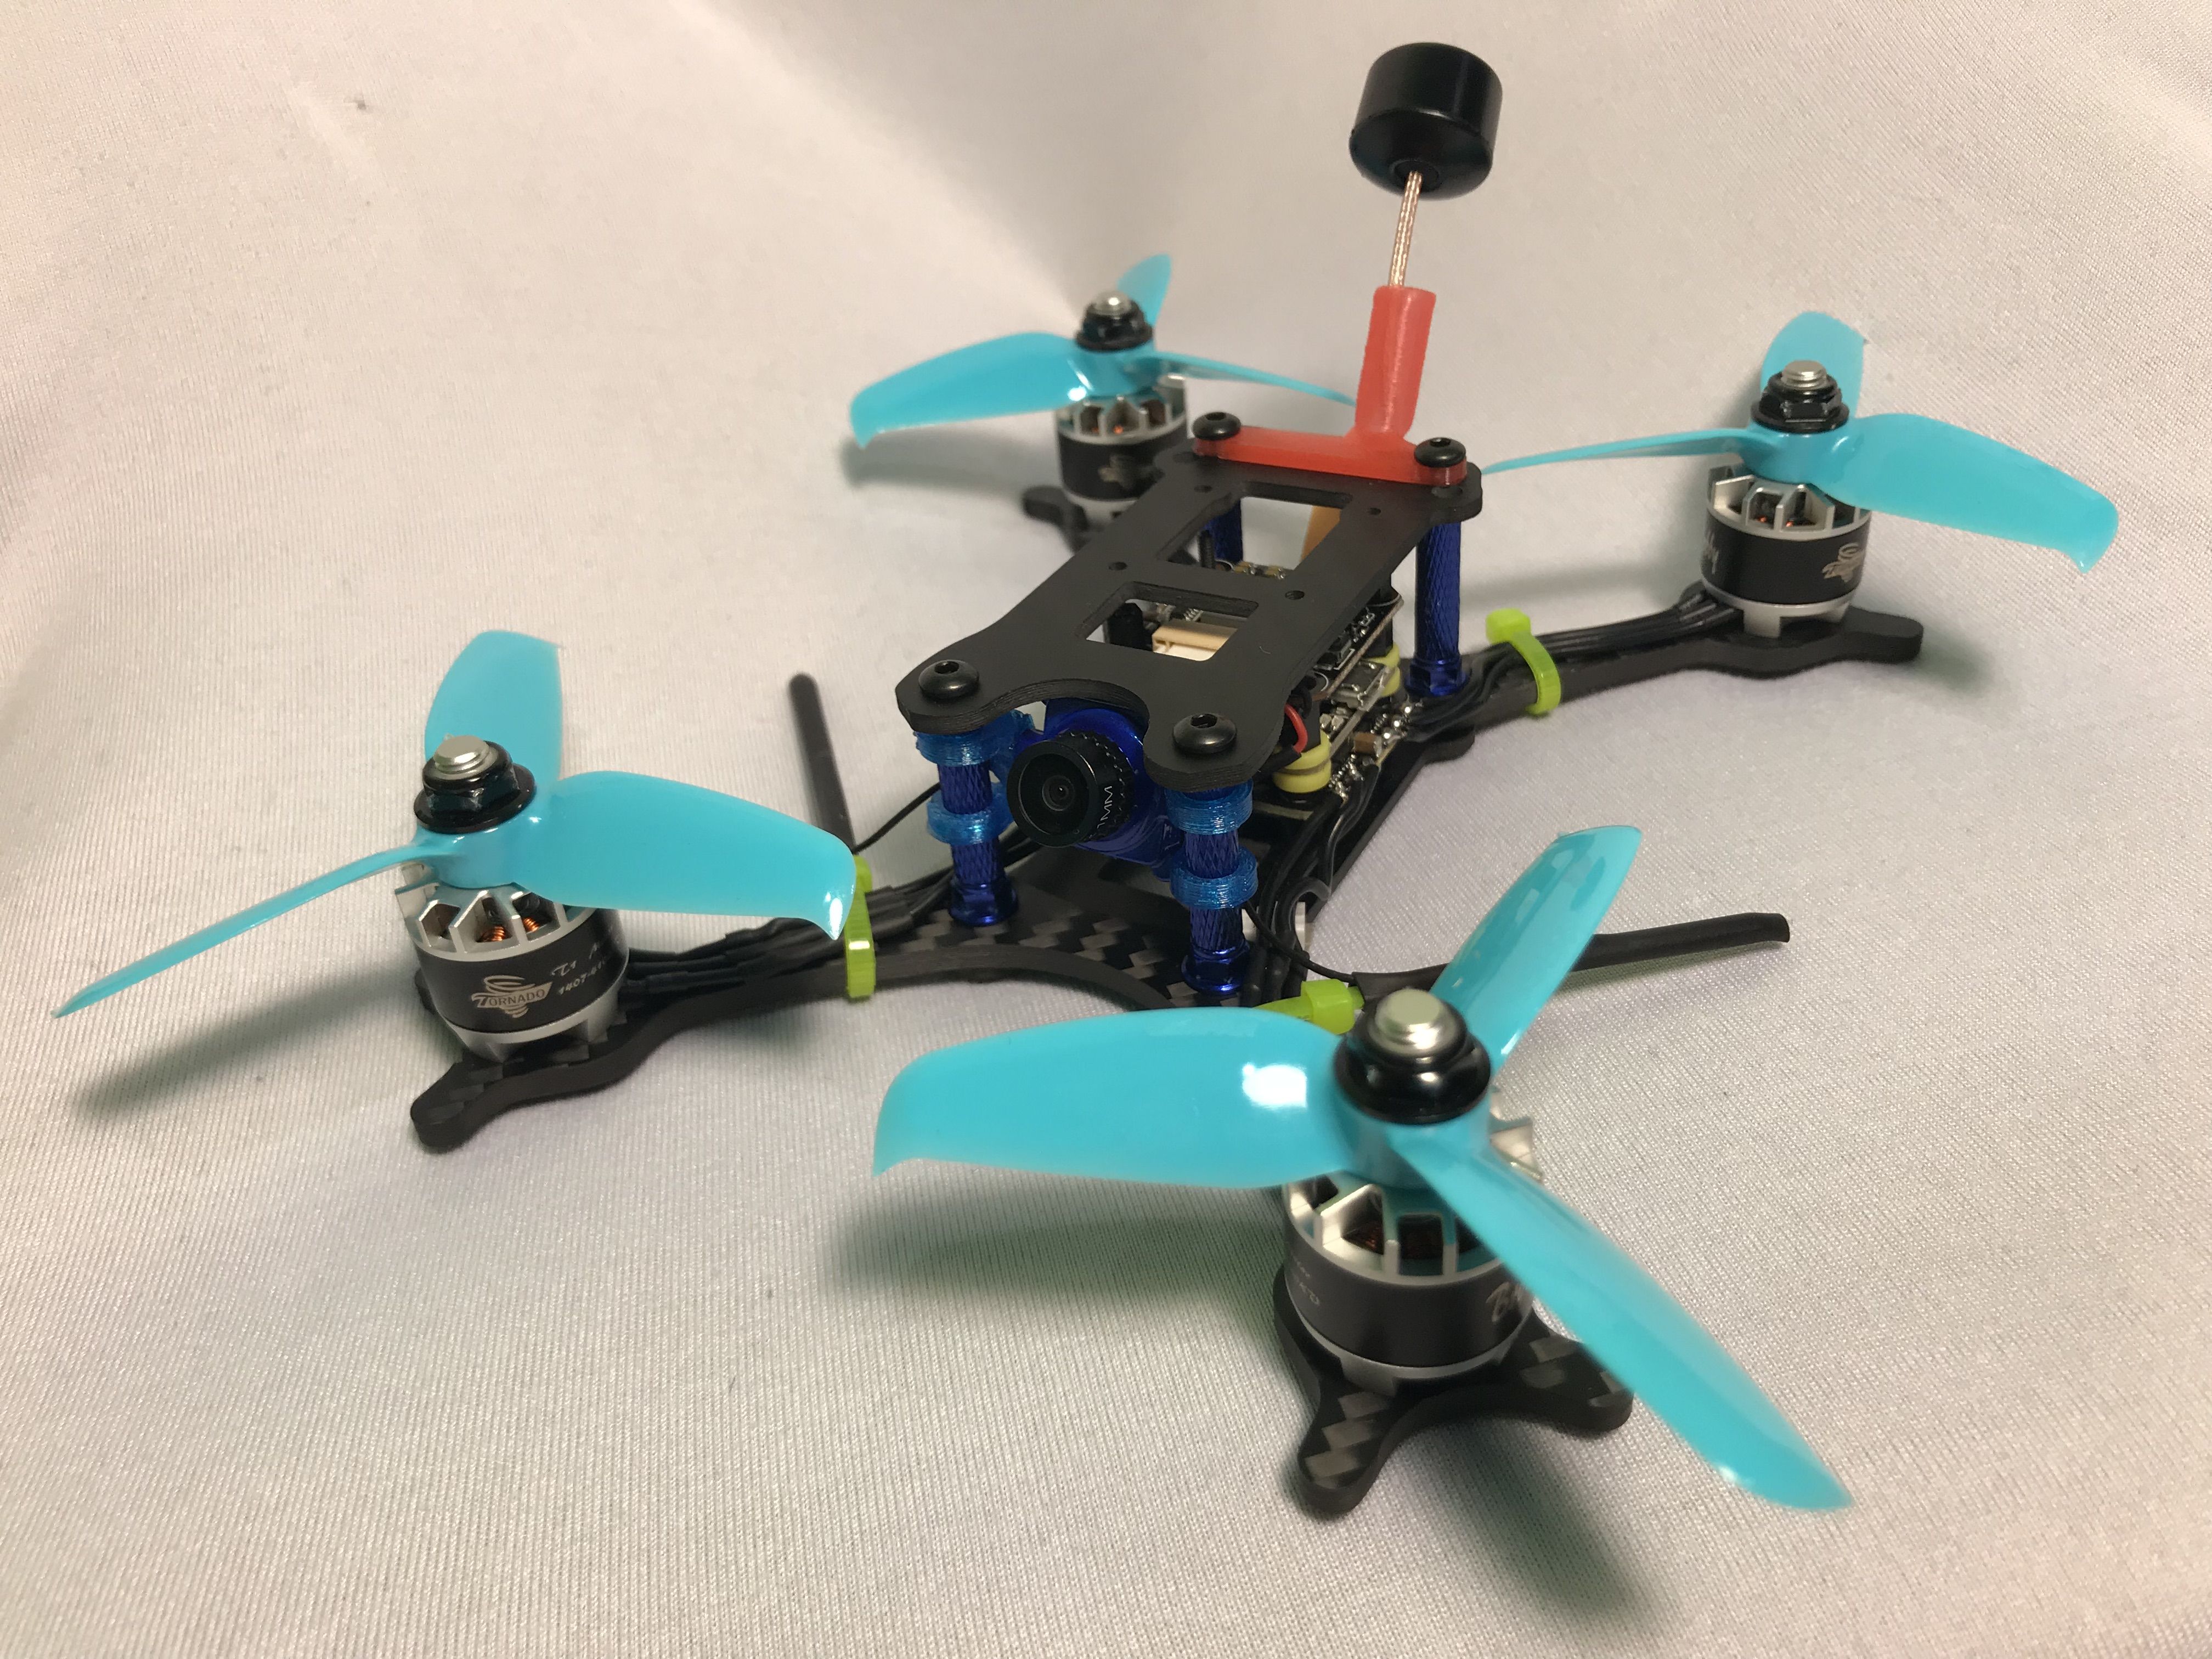
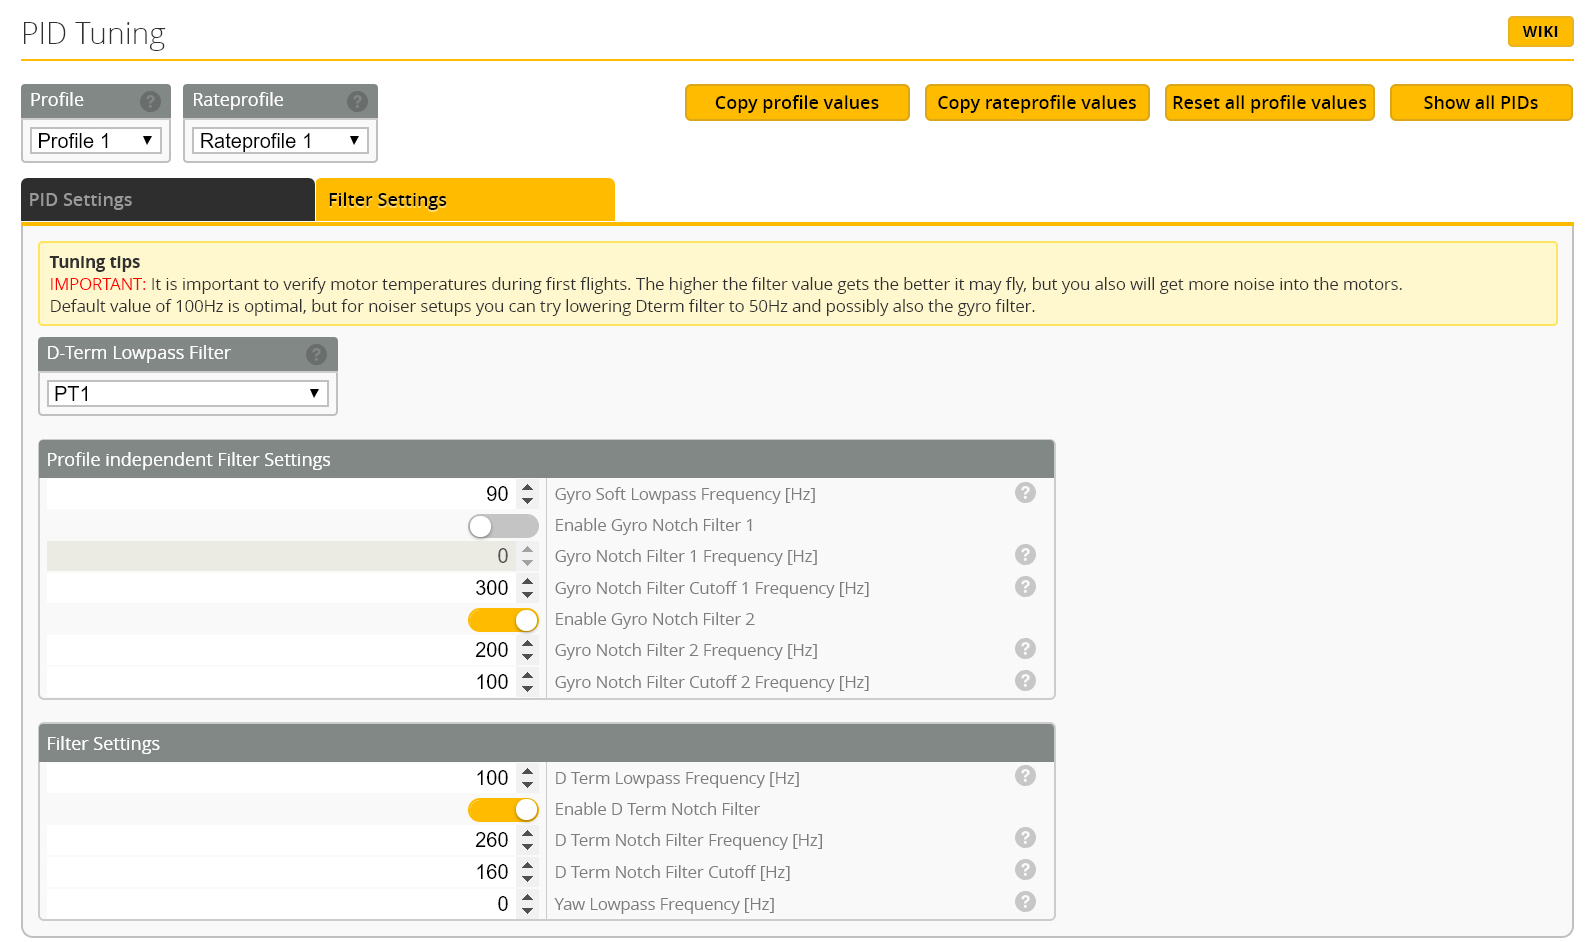
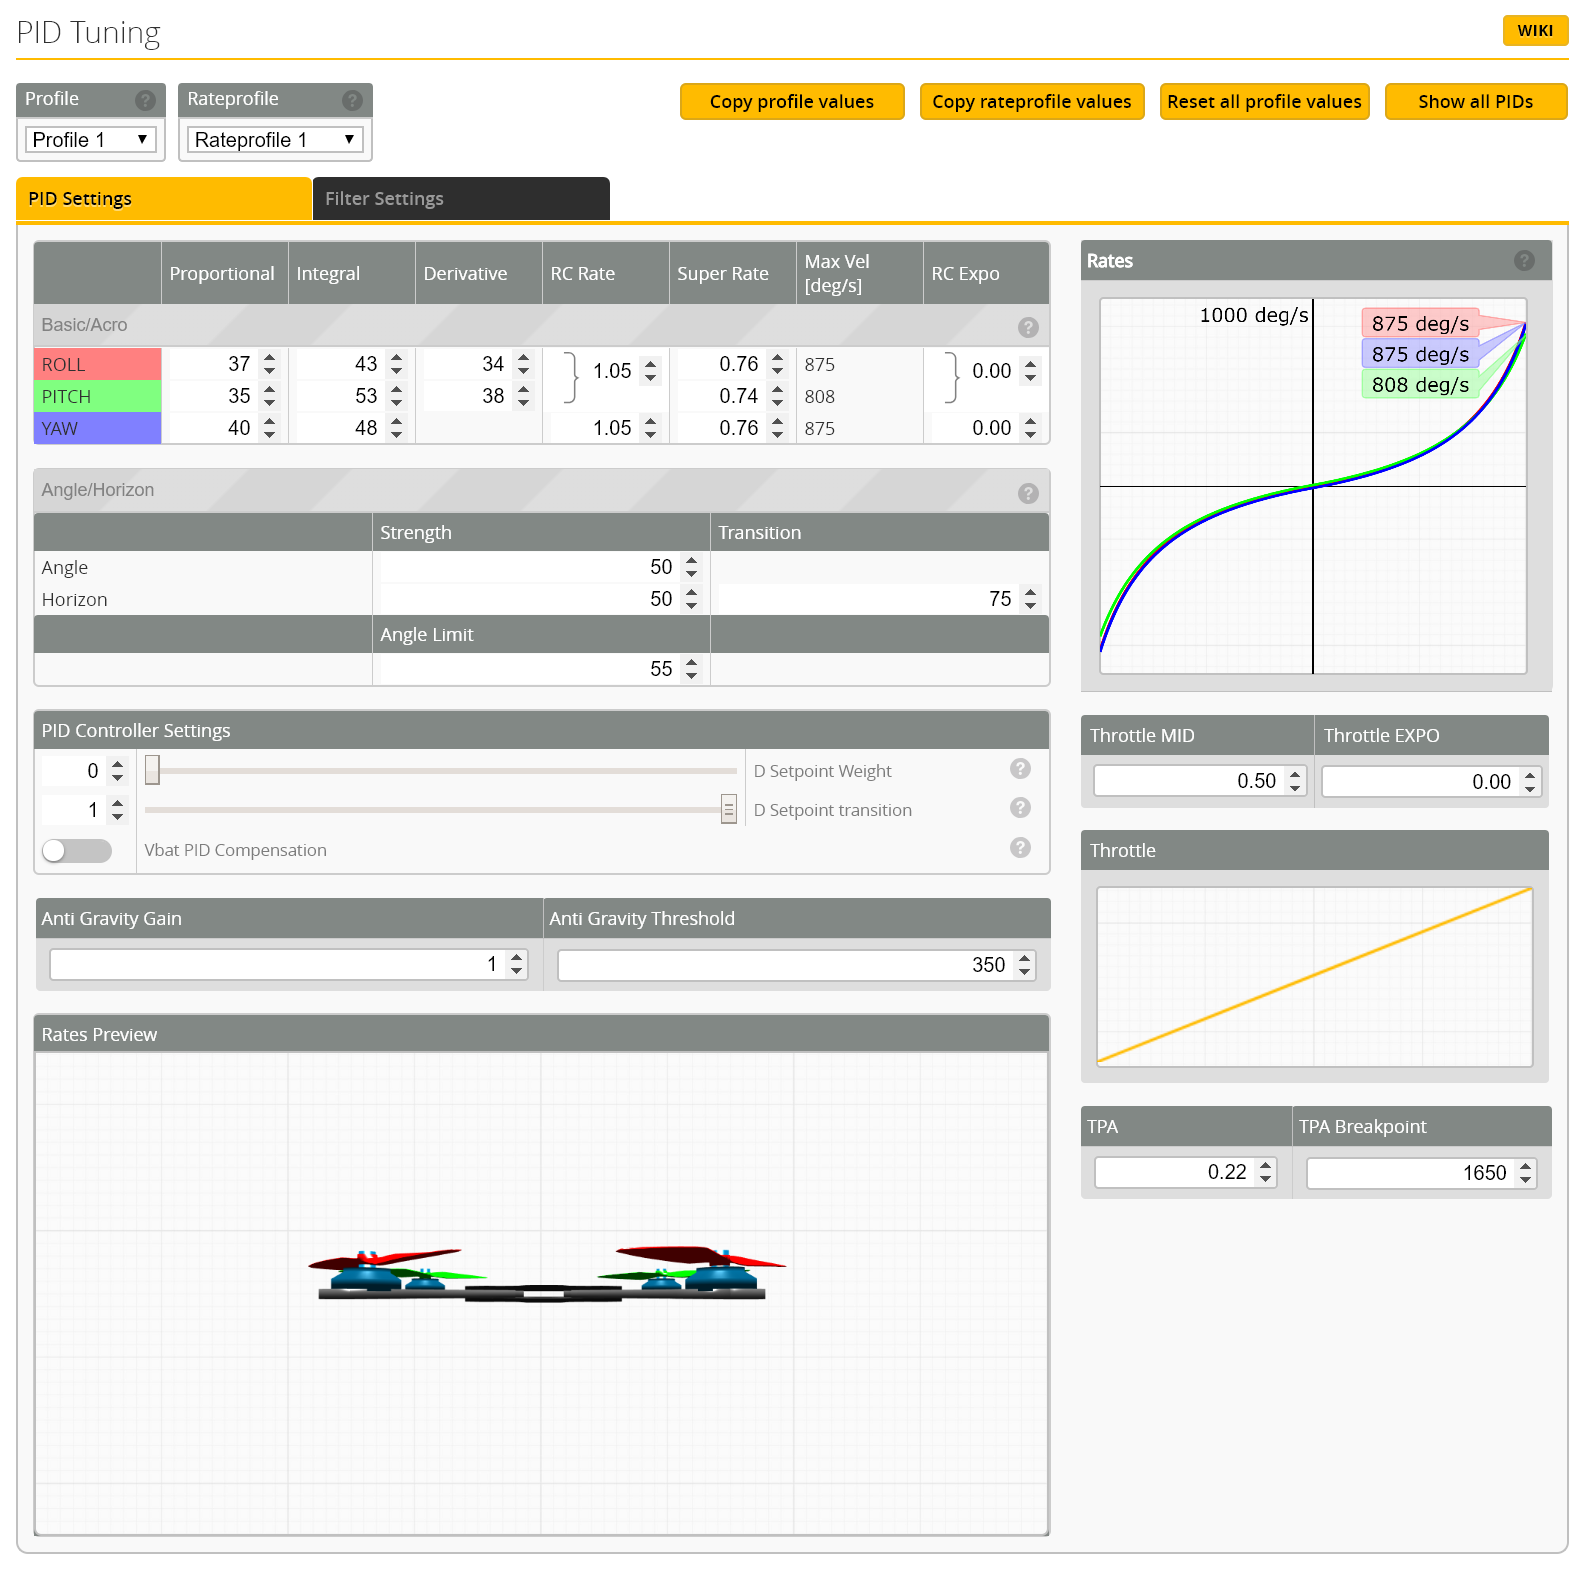
This 3 inch is insane. It can easily break 100 miles per hour if you really are crazy. It's designed for racing, with it's stetch X frame. It runs the gemfan 3052 Props, and 4100kv Tornado motors. It took quite a bit of tuning to get this quad flying well, but I have included a snapshot of my PIDs and rates to save you a whole lot of time. If you use any different parts, do not use my PID and filter settings. You might break a motor. With this exact setup, the motors will get warm, but don't worry. They're not too hot, and they are designed to be a little toasty :)
To build this quad, start by assembling the bottom half of the frame. Also, if you have acsess to a 3D printer, print the part linked in misc parts. It helps to route your antenna well.
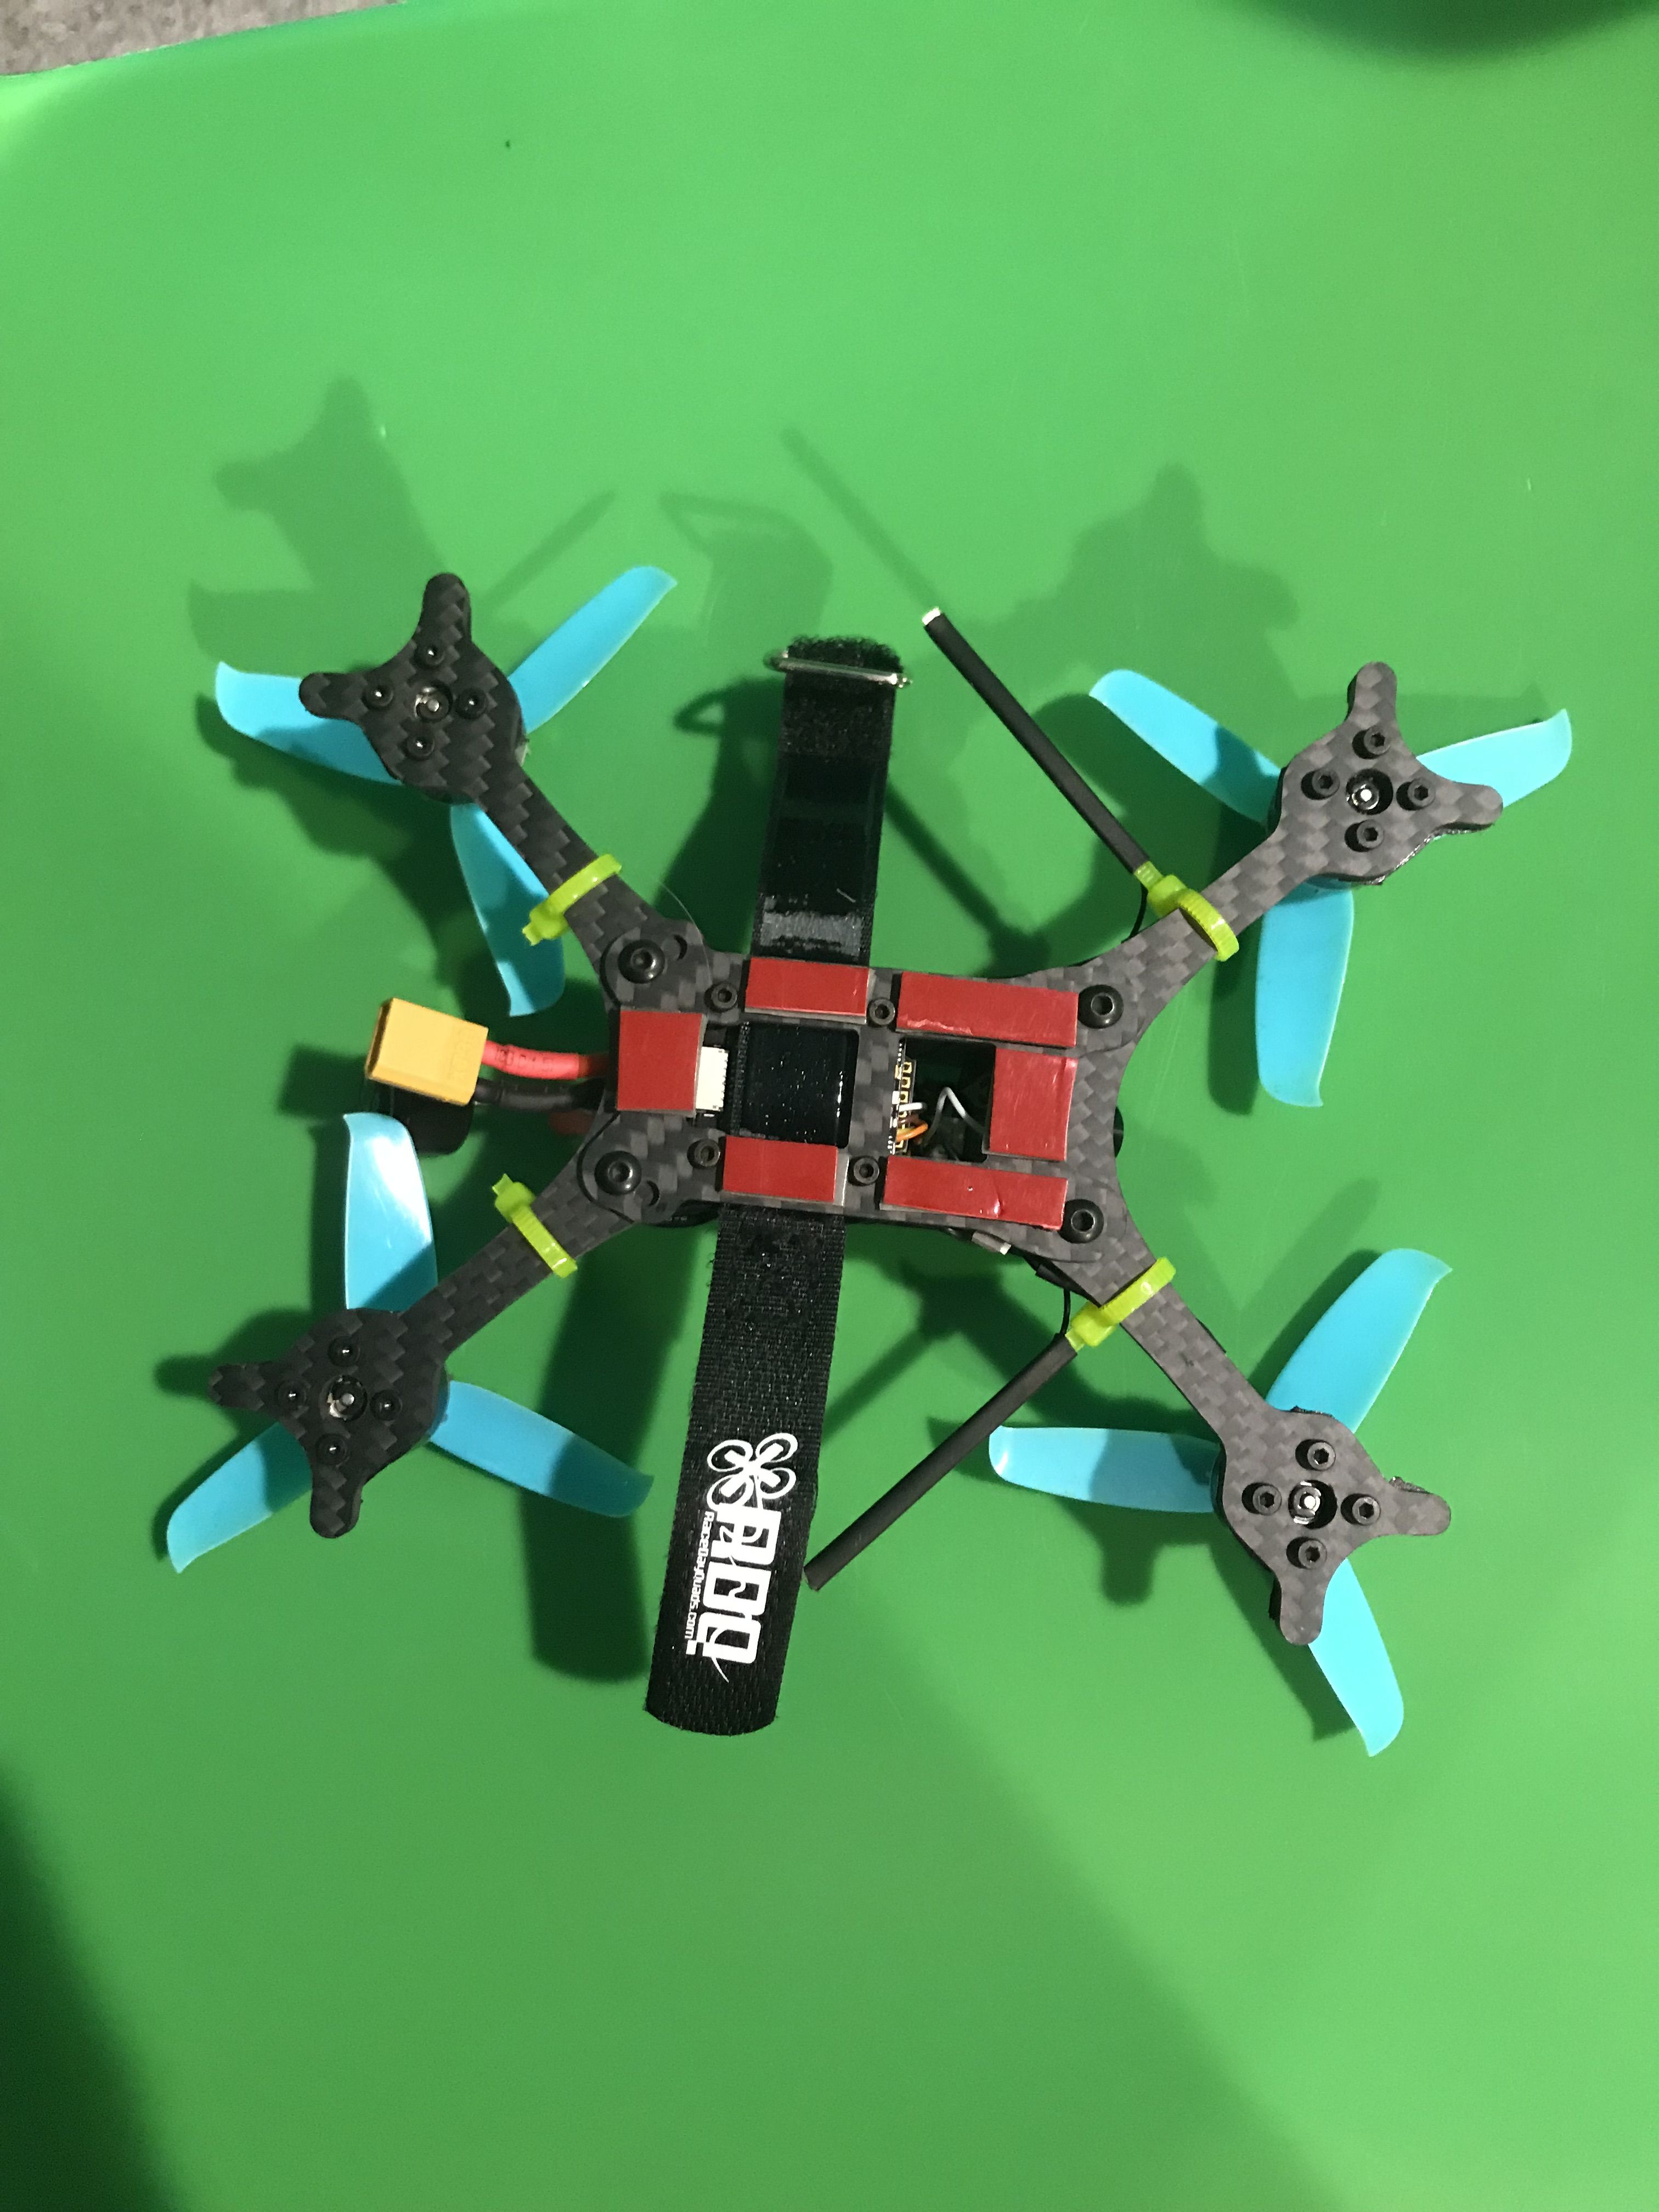
Step 1: Install all 4 motors (if you want to, put 2 layers of electrical tape between the motors and the frame for a smoother flying experience), and the Spedix 20a 4 in1 esc. Solder them all on strait, as we will be fixing motor direction in BL_Heli S later. Before you screw the board down, plug in the motor wiring harness. You will not be able to plug it in later. Make sure to leave some extra wire when soldering on the motors, as you may want to take off the esc board. Solder on the main power leads, making sure to tripple check polarity. Make sure you have enough wire to reach your battery when it's on the bottom. I have included a picture showing how far my plug extends from the rear of the quad (use the image with the green background, that's the most recent length of the wires).
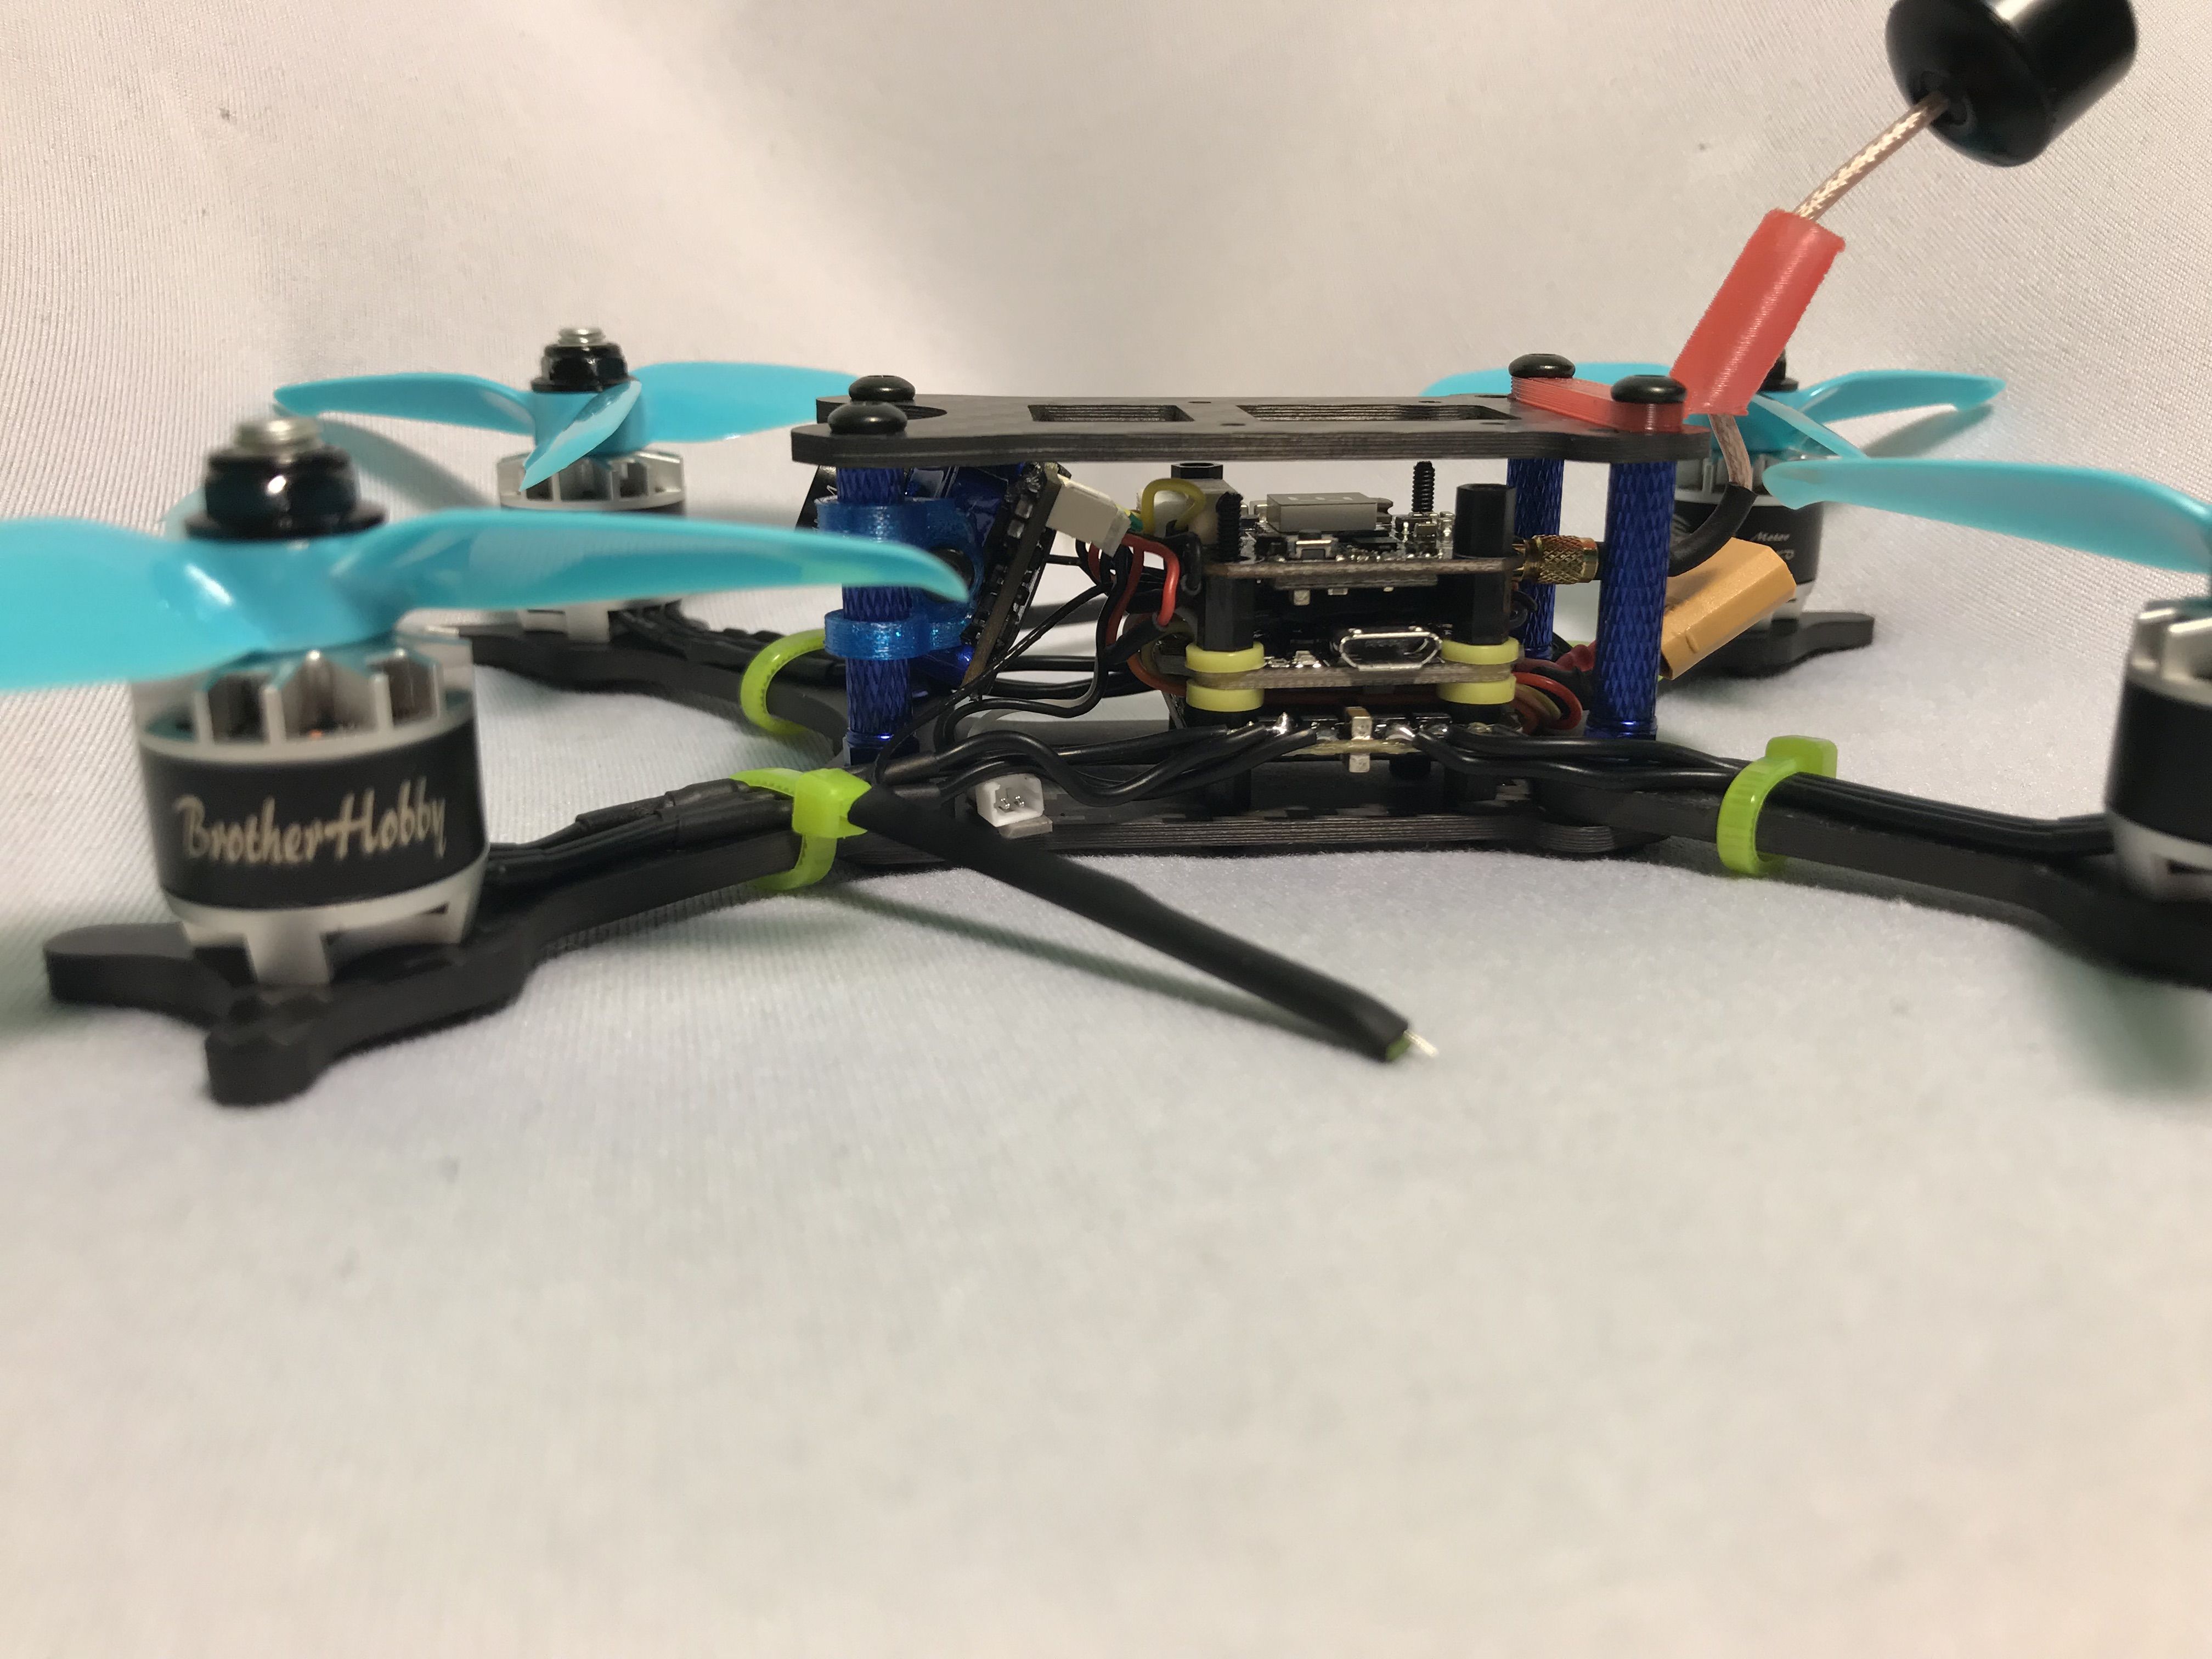
Step 2: Now we will mount the flight controller. The gummies are a bit hard to get in. Squeeze them to be as little as you can, then try to grab them from the other side of the board. Insert the little brass threaded inserts into the gummies. NOTE: The brass threaded inserts won't screw onto nylon standoffs well. It is recomended that you use long M2 screws, and spacers for this build.
Step 3: Soldering the flight controller. The motor numbers on the spedix 4 in 1 esc are wrong. Don't solder motor wire 1 to 1, 2 to 2, etc. Instead, Solder them like this:
Motor wire 1 - M3
Motor wire 2 - M4
Motor wire 3 - M1
Motor wire 4 - M2
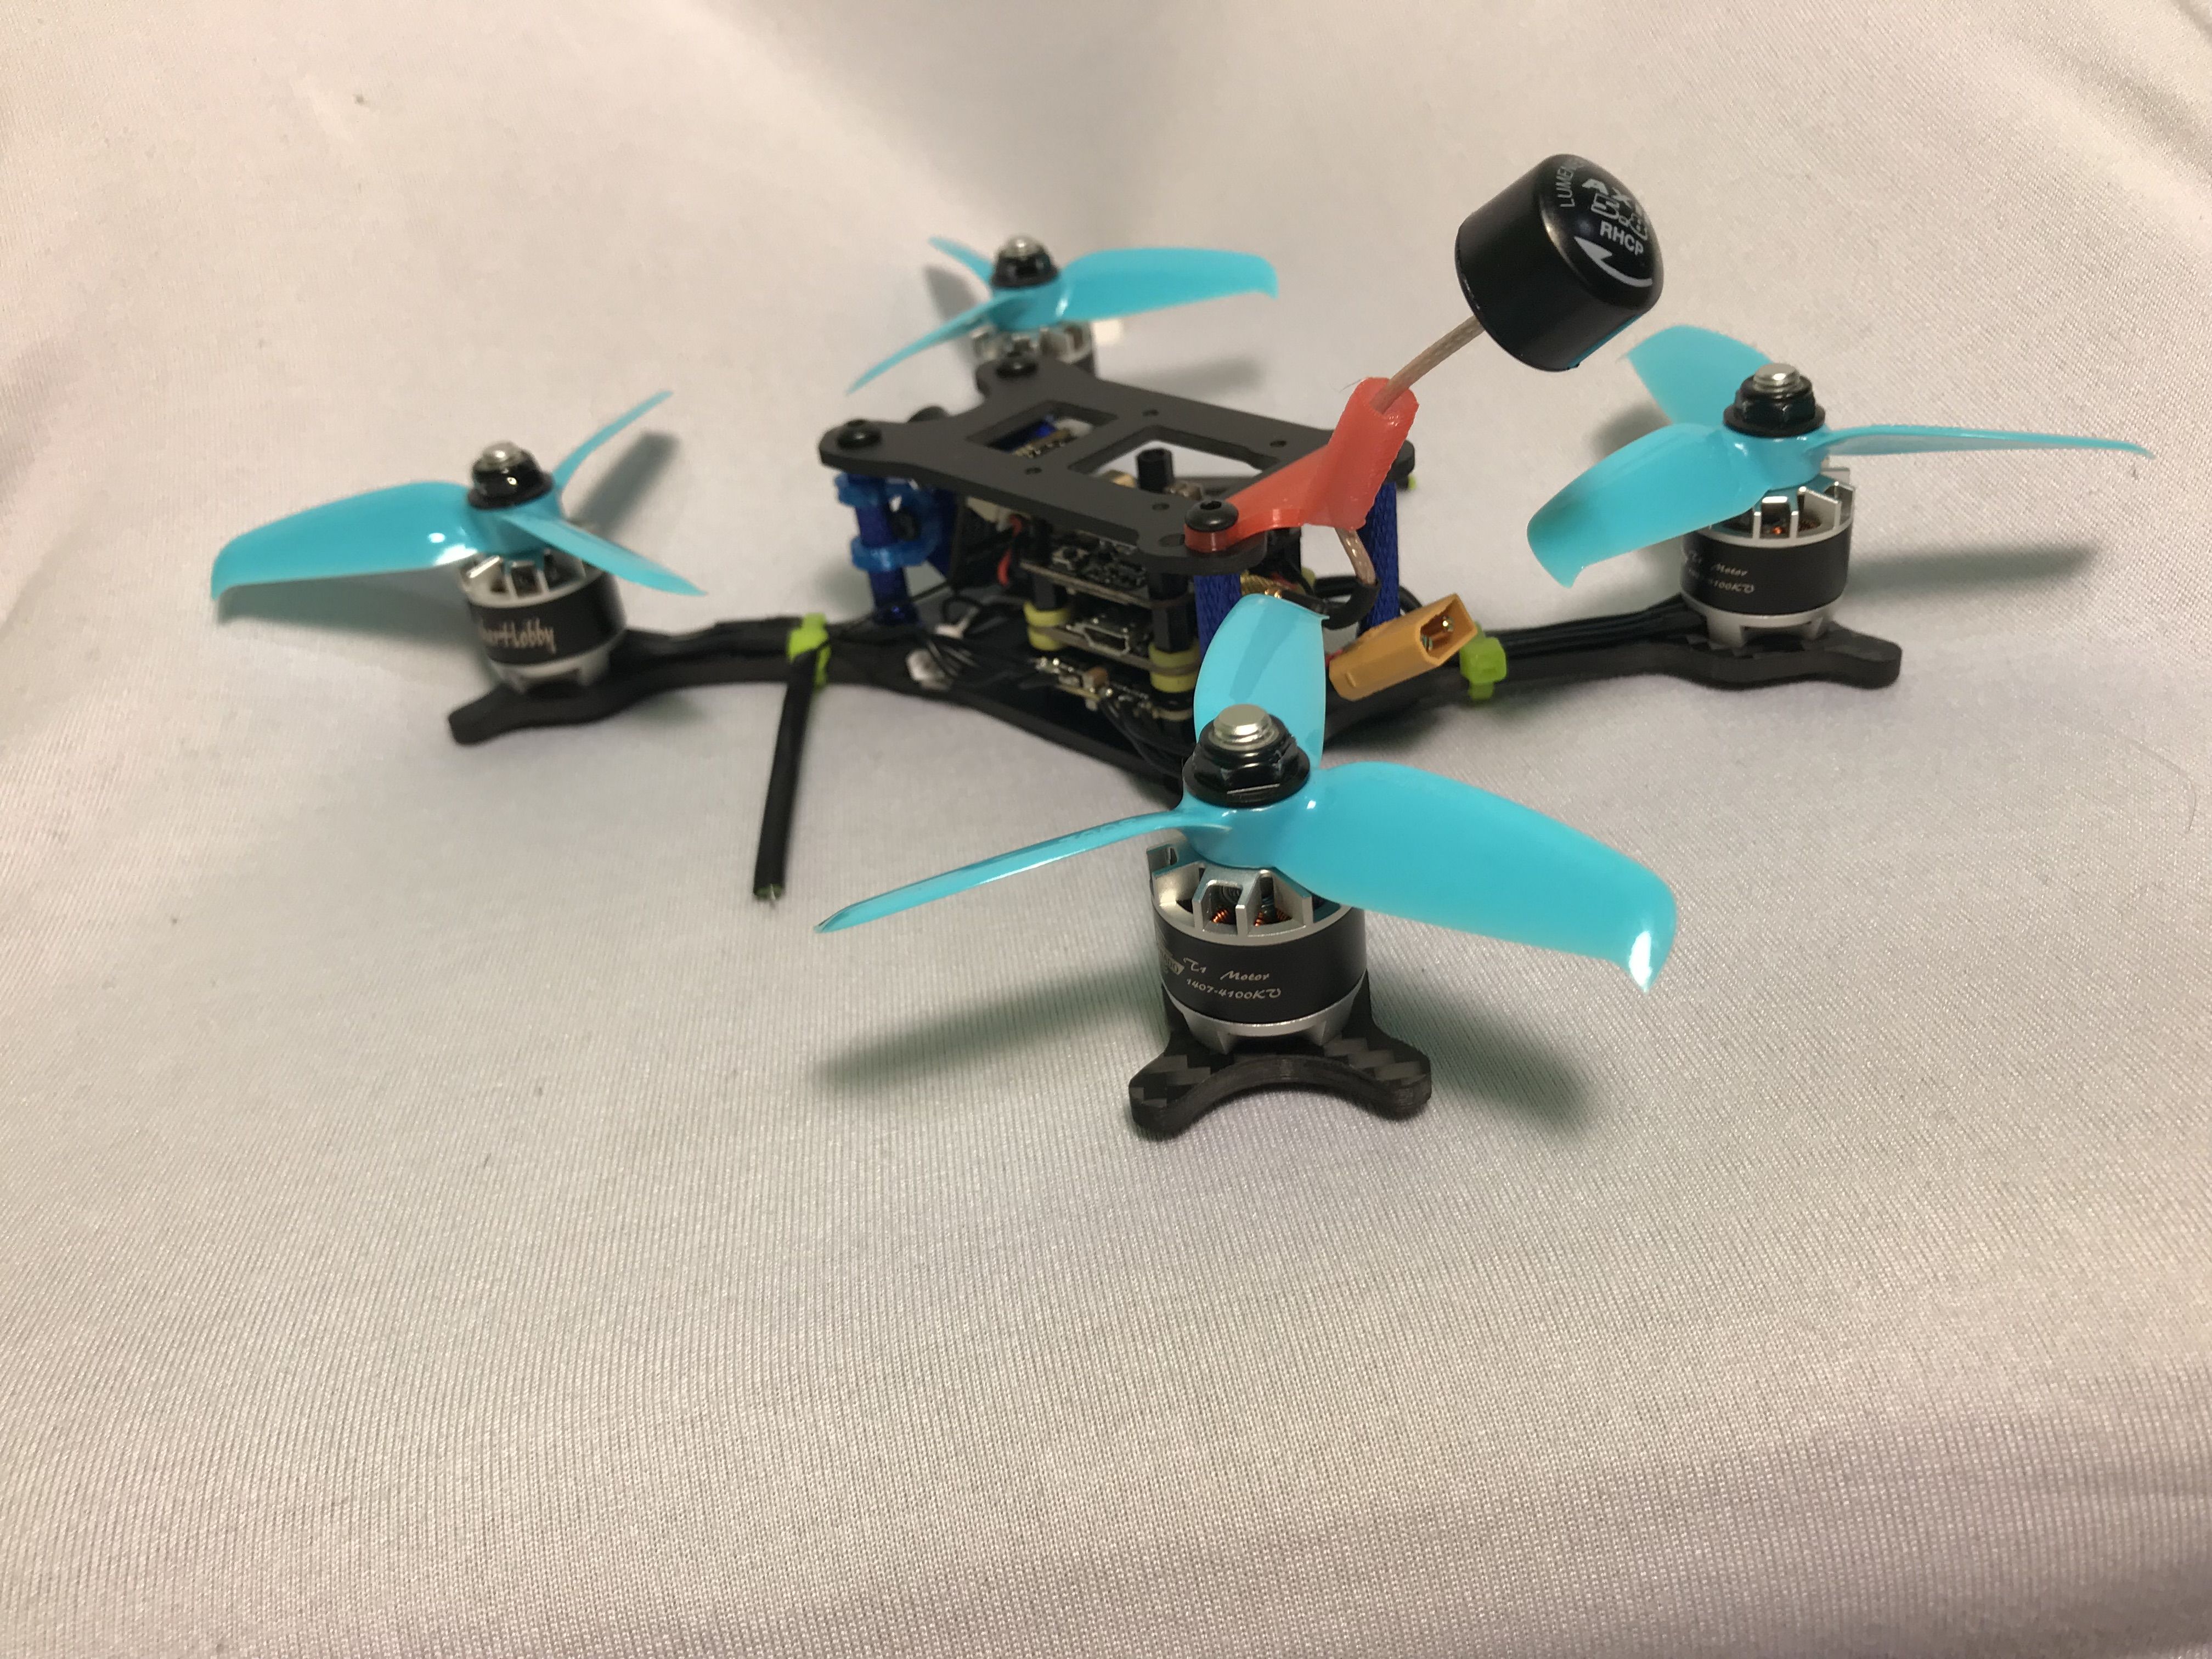
Step 4: Now we are going to solder the camera and VTX. Start by taking the included wiring harnesses from the Foxeer Arrow micro PRO and the AKK FX3, and wiring them together. Wire the 5 volt out and Gnd wires on the VTX harness to the 5-40v in + gnd on the camera. Do not wire the video to video, unless you don't want an awesome betaflight OSD. Now, wire the camera video out to the "CAM S" pad on your flight controller. Then, wire the video in wire on the VTX to the "VTX S" pad. Then, wire the VTX power in and GND to the "VTX +" and "VTX -" pads. This will supply your VTX with 9 volts, which is well within the 7-24 volt the VTX supports. This is better than soldering it directly to the battery, as the 9 volt regulator will clean up the power supplied to the VTX for a better video experience.
OPTIONAL: This VTX does support smart audio, which is a technology that allows you to change VTX settings from your radio. I did not set this up or wire it, and have not felt the need to use it as this build has easy acsess to the VTX button, but you can do it if you wish to obtain this functionality.
Solder the green wire from the VTX harness to the "RX3" pin on your flight controller.
Step 5: Now, it's time to mount your receiver. Solder a white wire to the "SBUS" pad on your XM+. Then, solder a black wire to the "GND" pin and a red wire to the "5V" pin. Then, solder the white wire to the "SBUS" pad on your flight controller. Next to that pad, you will see a 5V pad and a GND pad. Solder the wires accordingly.
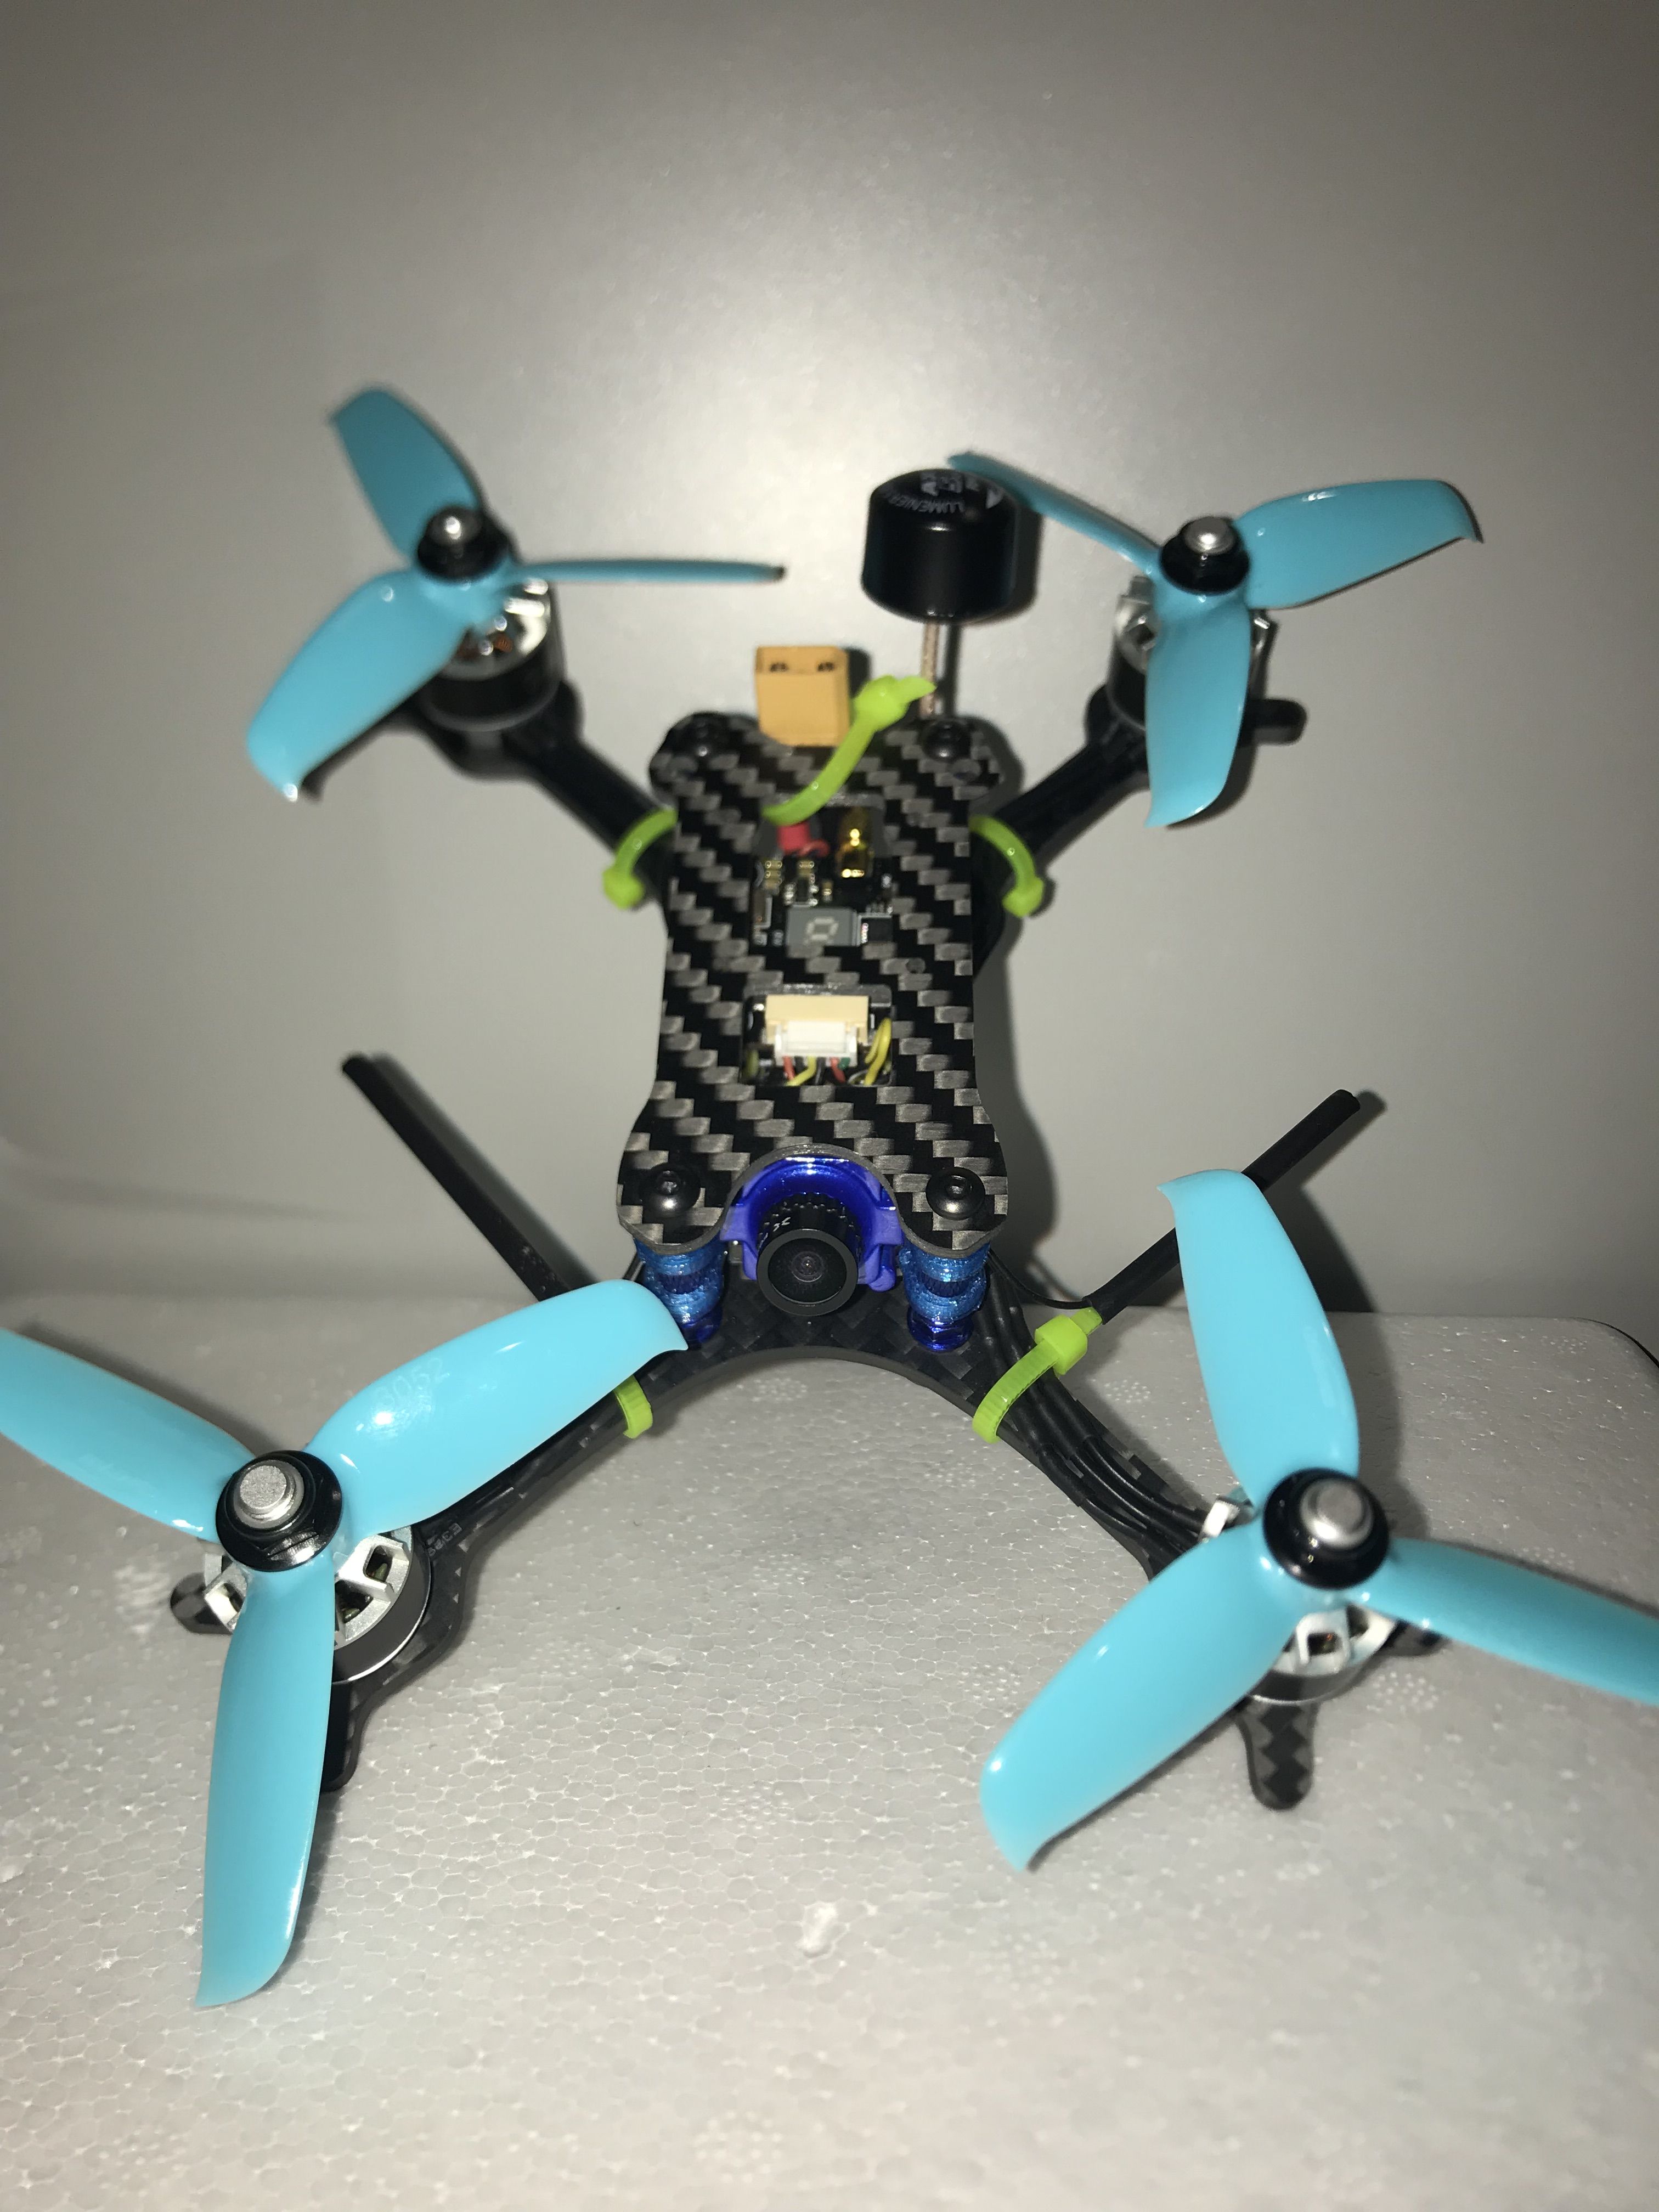
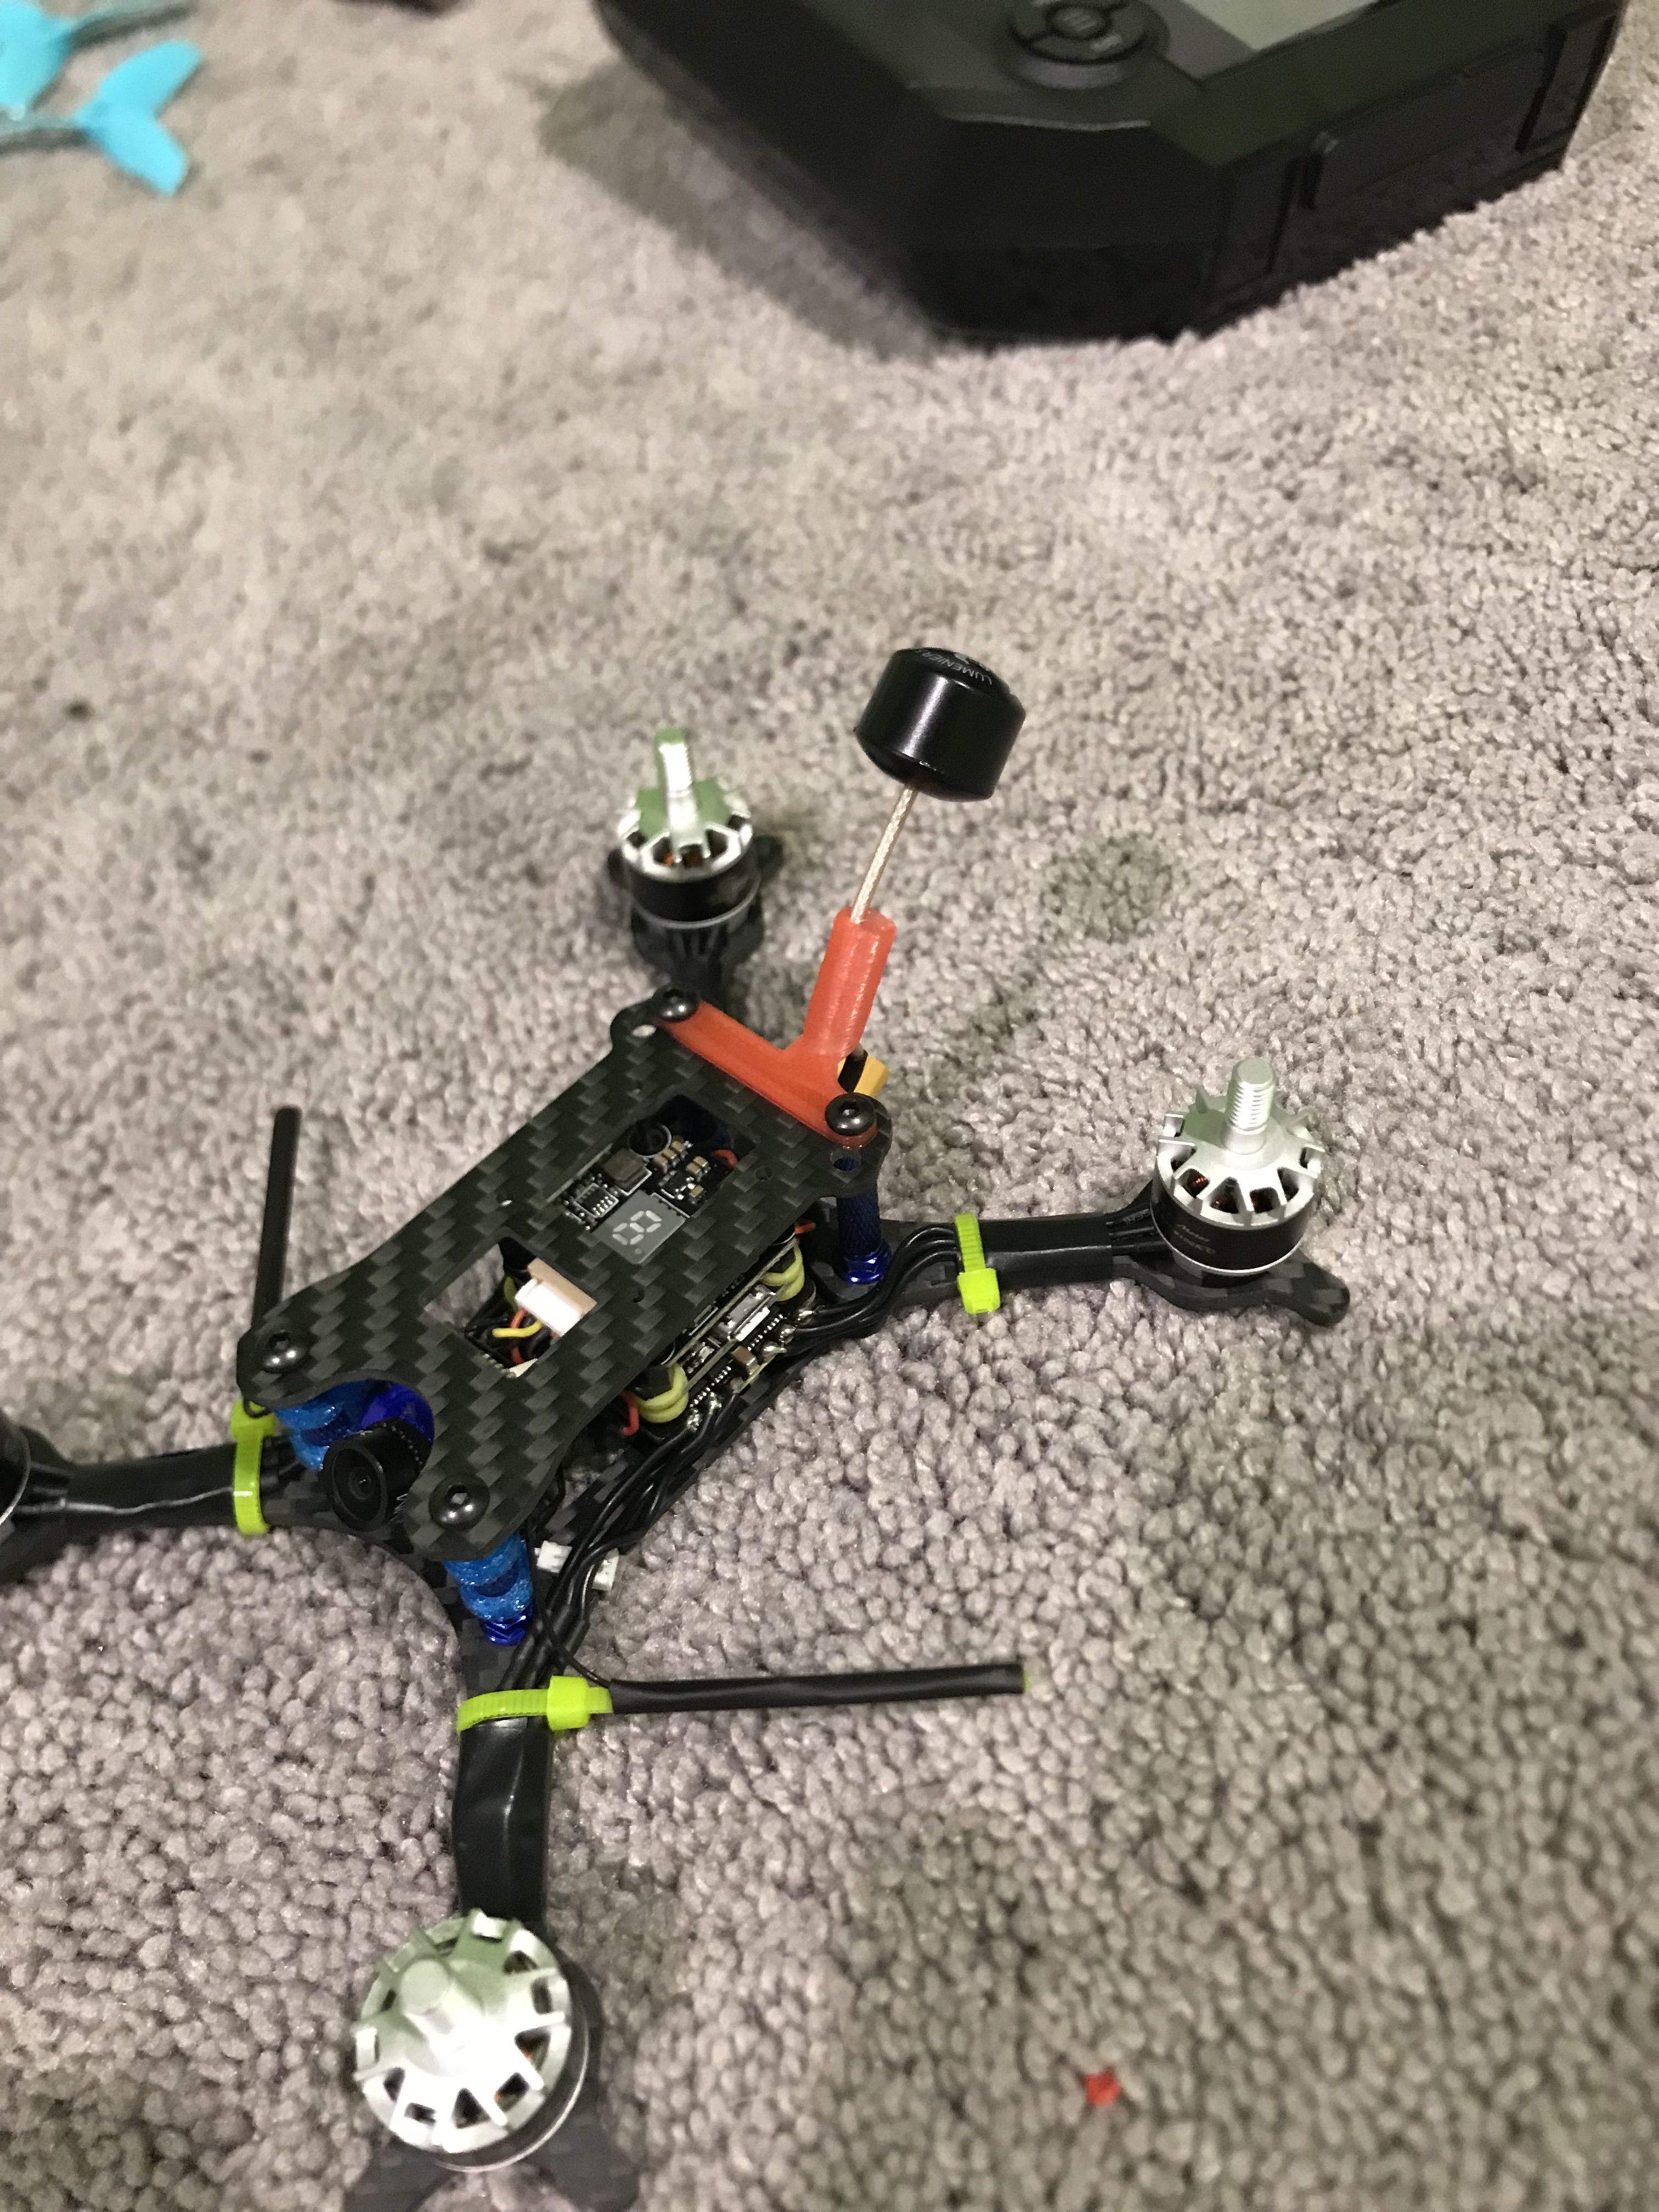
Step 6: Congradulations! You soldered everything. Now, it's time to clean up the build. Mount your camera using the included blue TPU mounts. I found the best way to do this is to screw the mounts onto the camera before you put them onto the standoffs. Wrap some electrical tape around your XM+, and stick it ontop of the flight controller (without tape). Then, mount the VTX. Do not mount the antenna for your VTX yet. Thread the antenna through the 3D printed part, and plug it into your VTX. This will take some force, as MMCX is a sturdy little connector. Finally, screw on the top plate, making sure to mount the antenna holder. Take some foam tape, and layer it on the bottom in the places shown in the picture I attached of the bottom of the quad. This will insure your battery does not hit the screws.
Step 7: This is a very important step. Do not skip this. Take a multimeter, and make sure it's on continuity mode. WITHOUT A BATTERY PLUGGED IN, test continuity on the main power leads. If you hear a beep, you have to check all your connections. If not, it's time for the scariest part of the process. Take your battery, and touch the connectors together. DO NOT plug it in all the way. If everything beeps to life, you're quad is working! Now, plug it into your computer, and connect to betaflight. Use this video by Joshua Bardwell to help you set up your new quad:
Make sure to use the BL_HELI S configurator to switch motor directions. Use this video by Albert Kim to help you:Step 8: Flight time! Once you've set up everything, put on the props and head outside! Go into an open field. Set your quad down on something flat, and make sure it's perpindicular to the ground. It can be wobbly with the underslung battery. Arm it, and hover it over some grass. If it hovers, it's working! Disarm it right above the grass. It will fall a little bit, but that's fine. Put on your goggles, and have some fun!!
Here's a video of me talking about the quad it's self, and showing some line of sight footage! You may notice the battery is top mounted here; this was how I origionally had it, but it flew poorly, so I have decided to mount it on the bottom.
Photos


So what does yours weigh? i just built one with a rushfpv core f7 stack and 1404 airblade 4850kv. did i need to go up to those bigger motors? Or are they sufficient
I actually sold this quad almost two years ago, so I don't really remember much about it. However, it think it weighed somewhere around 130 grams without a battery. If I were you, I would definitly consider running larger motors, because the core f7 stack is pretty heavy. Heavy 3 inch quads work better with motors in the 1407 range, in the 4000kv range on 4s or 3s.