Kissed Chameleon
 By ThatGuyIvory on May 05, 2018
I know what you're thinking - Steve, is it actually safe to kiss reptiles? Well, my name's not Steve but let's find out.
1. Overview
Since I've already built a Betaflight quad I wanted to try something different. Initially it was supposed to be a Raceflight build but due to all the drama surrounding it recently I decided to go Kiss, especially now that v1 parts prices dropped since 32bit release.
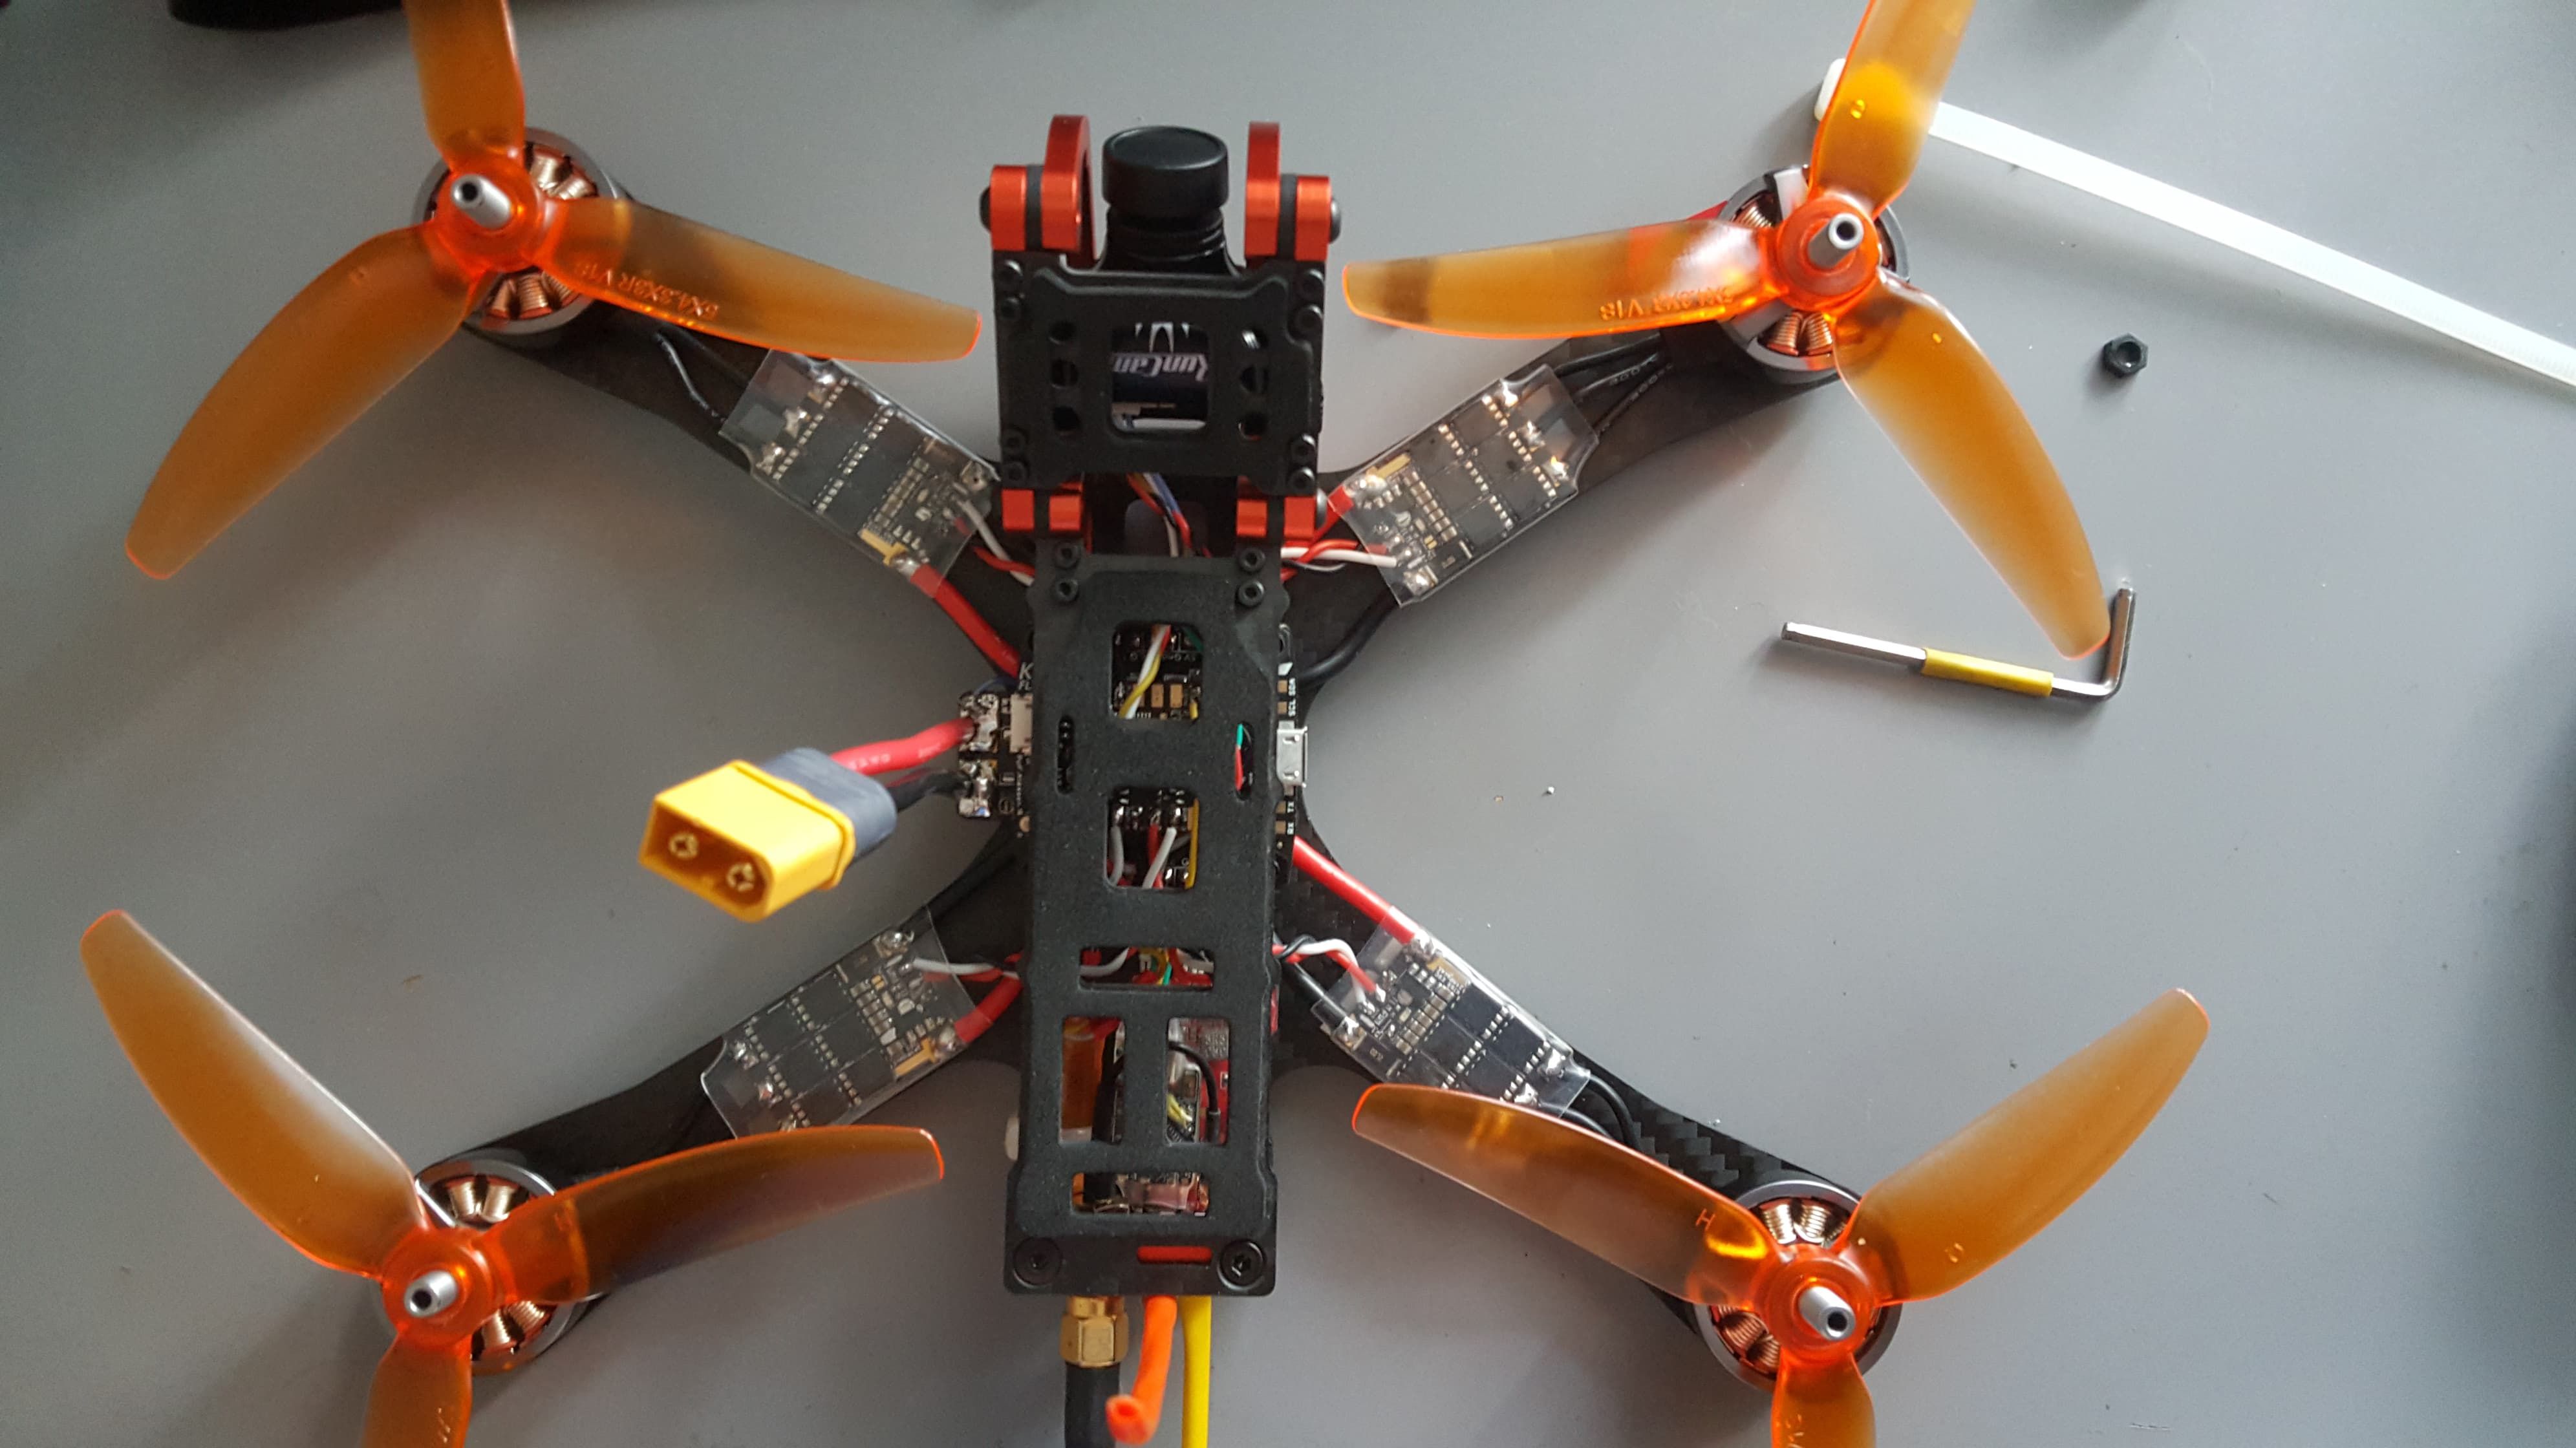
I based the build on Chameleon frame - simple, durable, nifty HD cam mount, lifetime warranty are just some of the reasons.
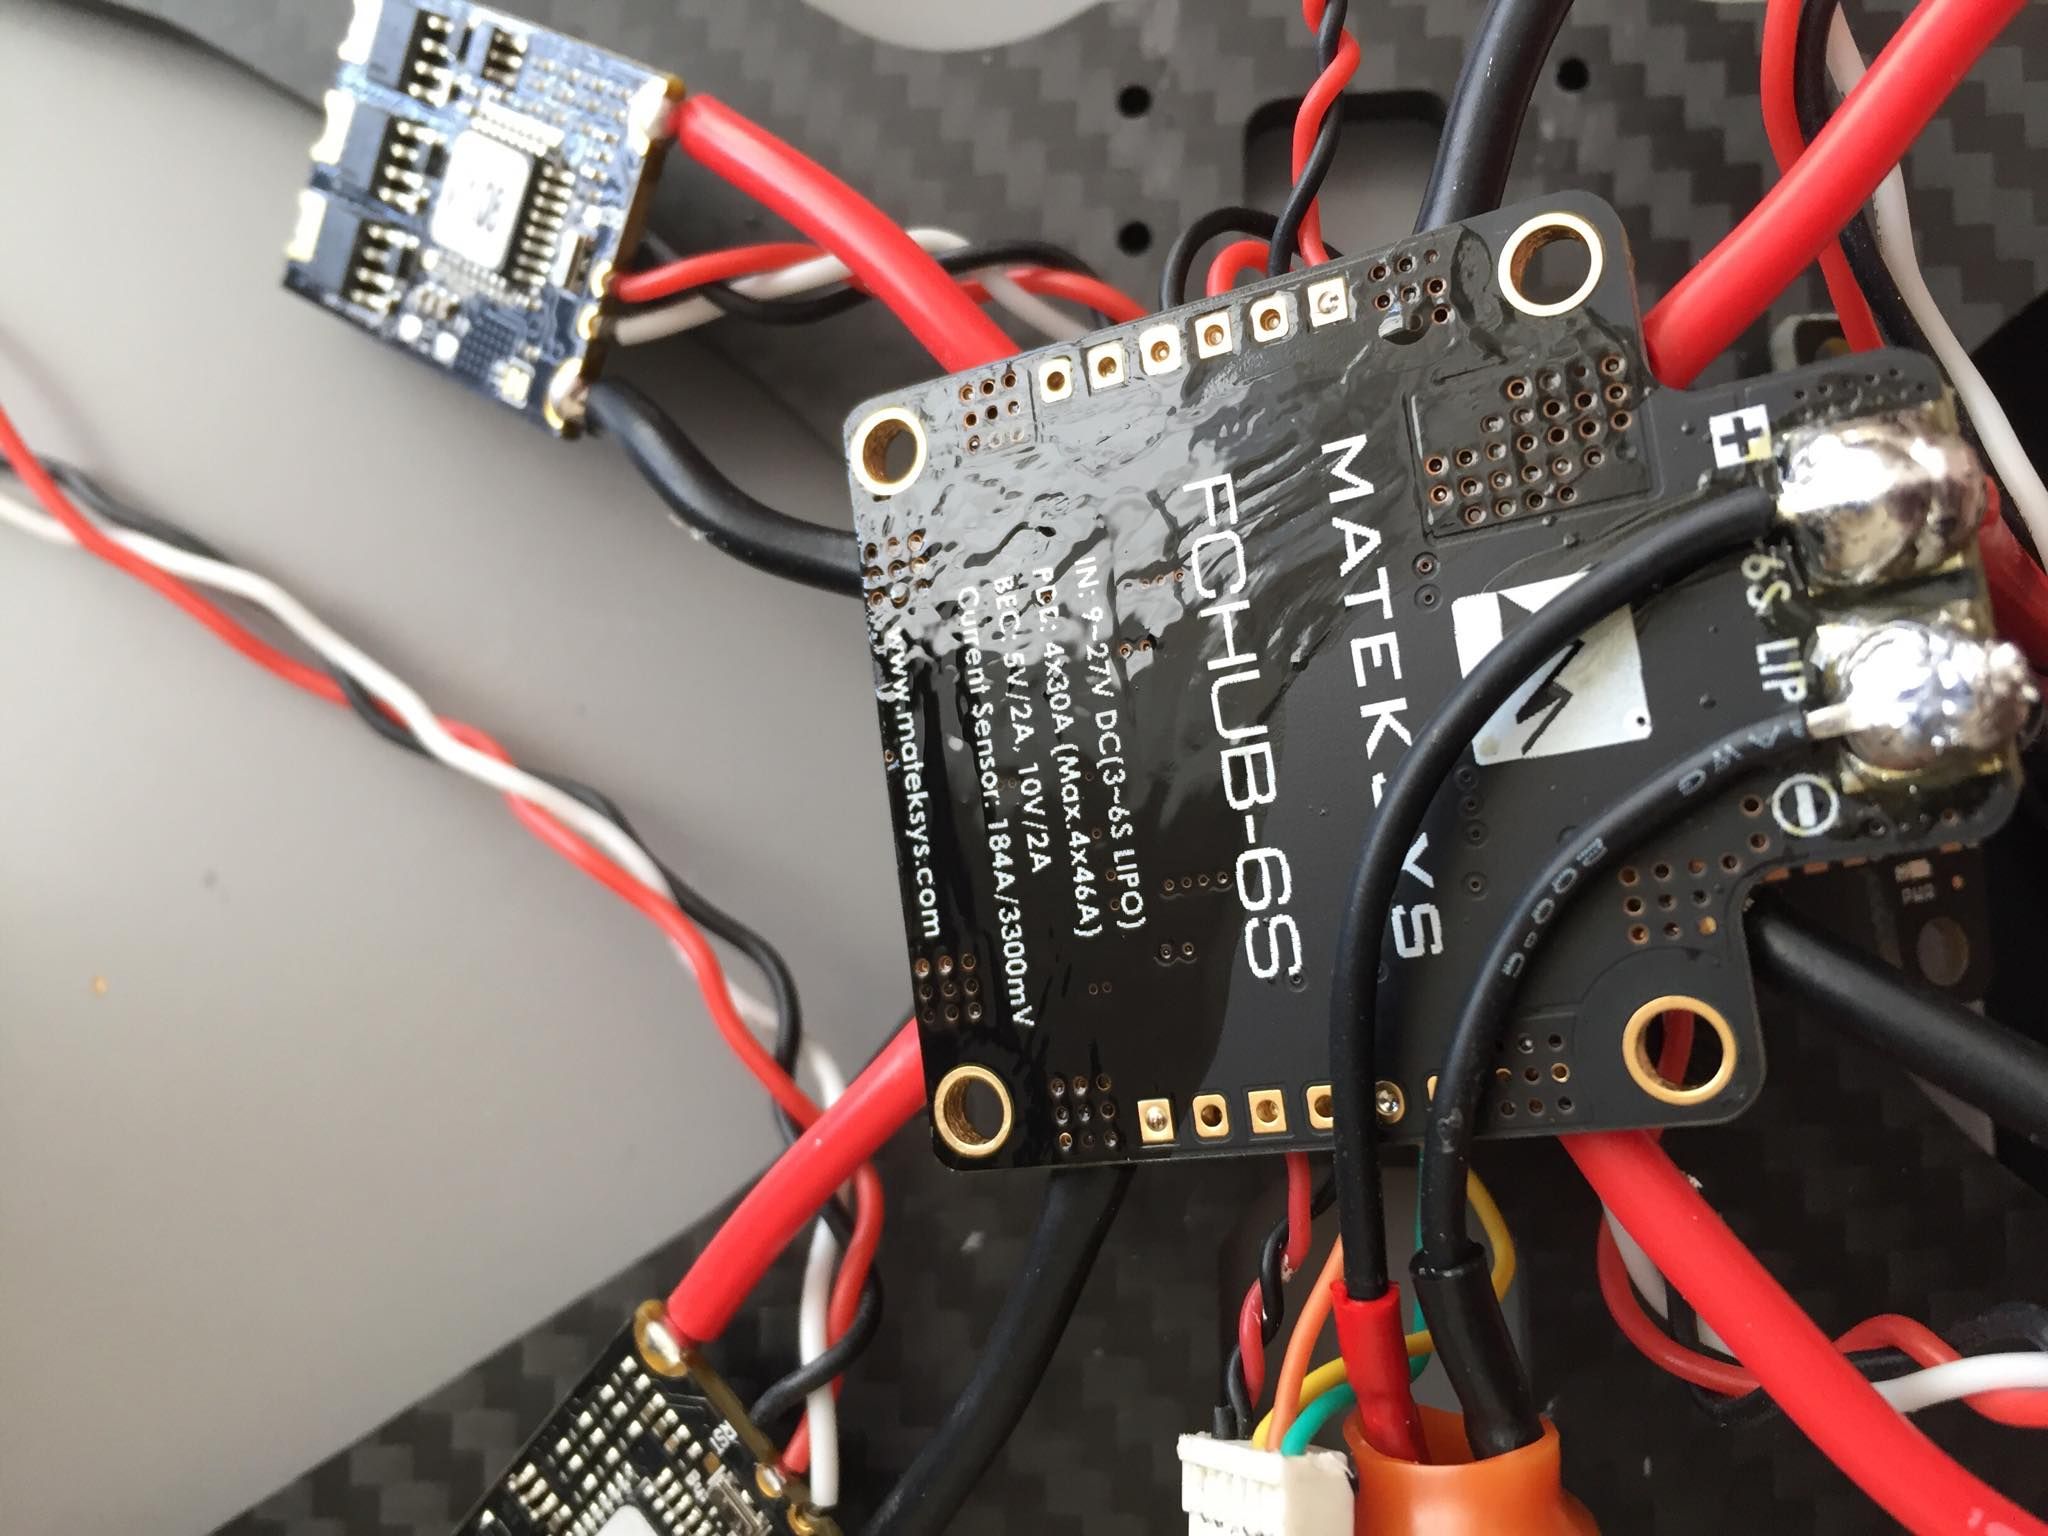
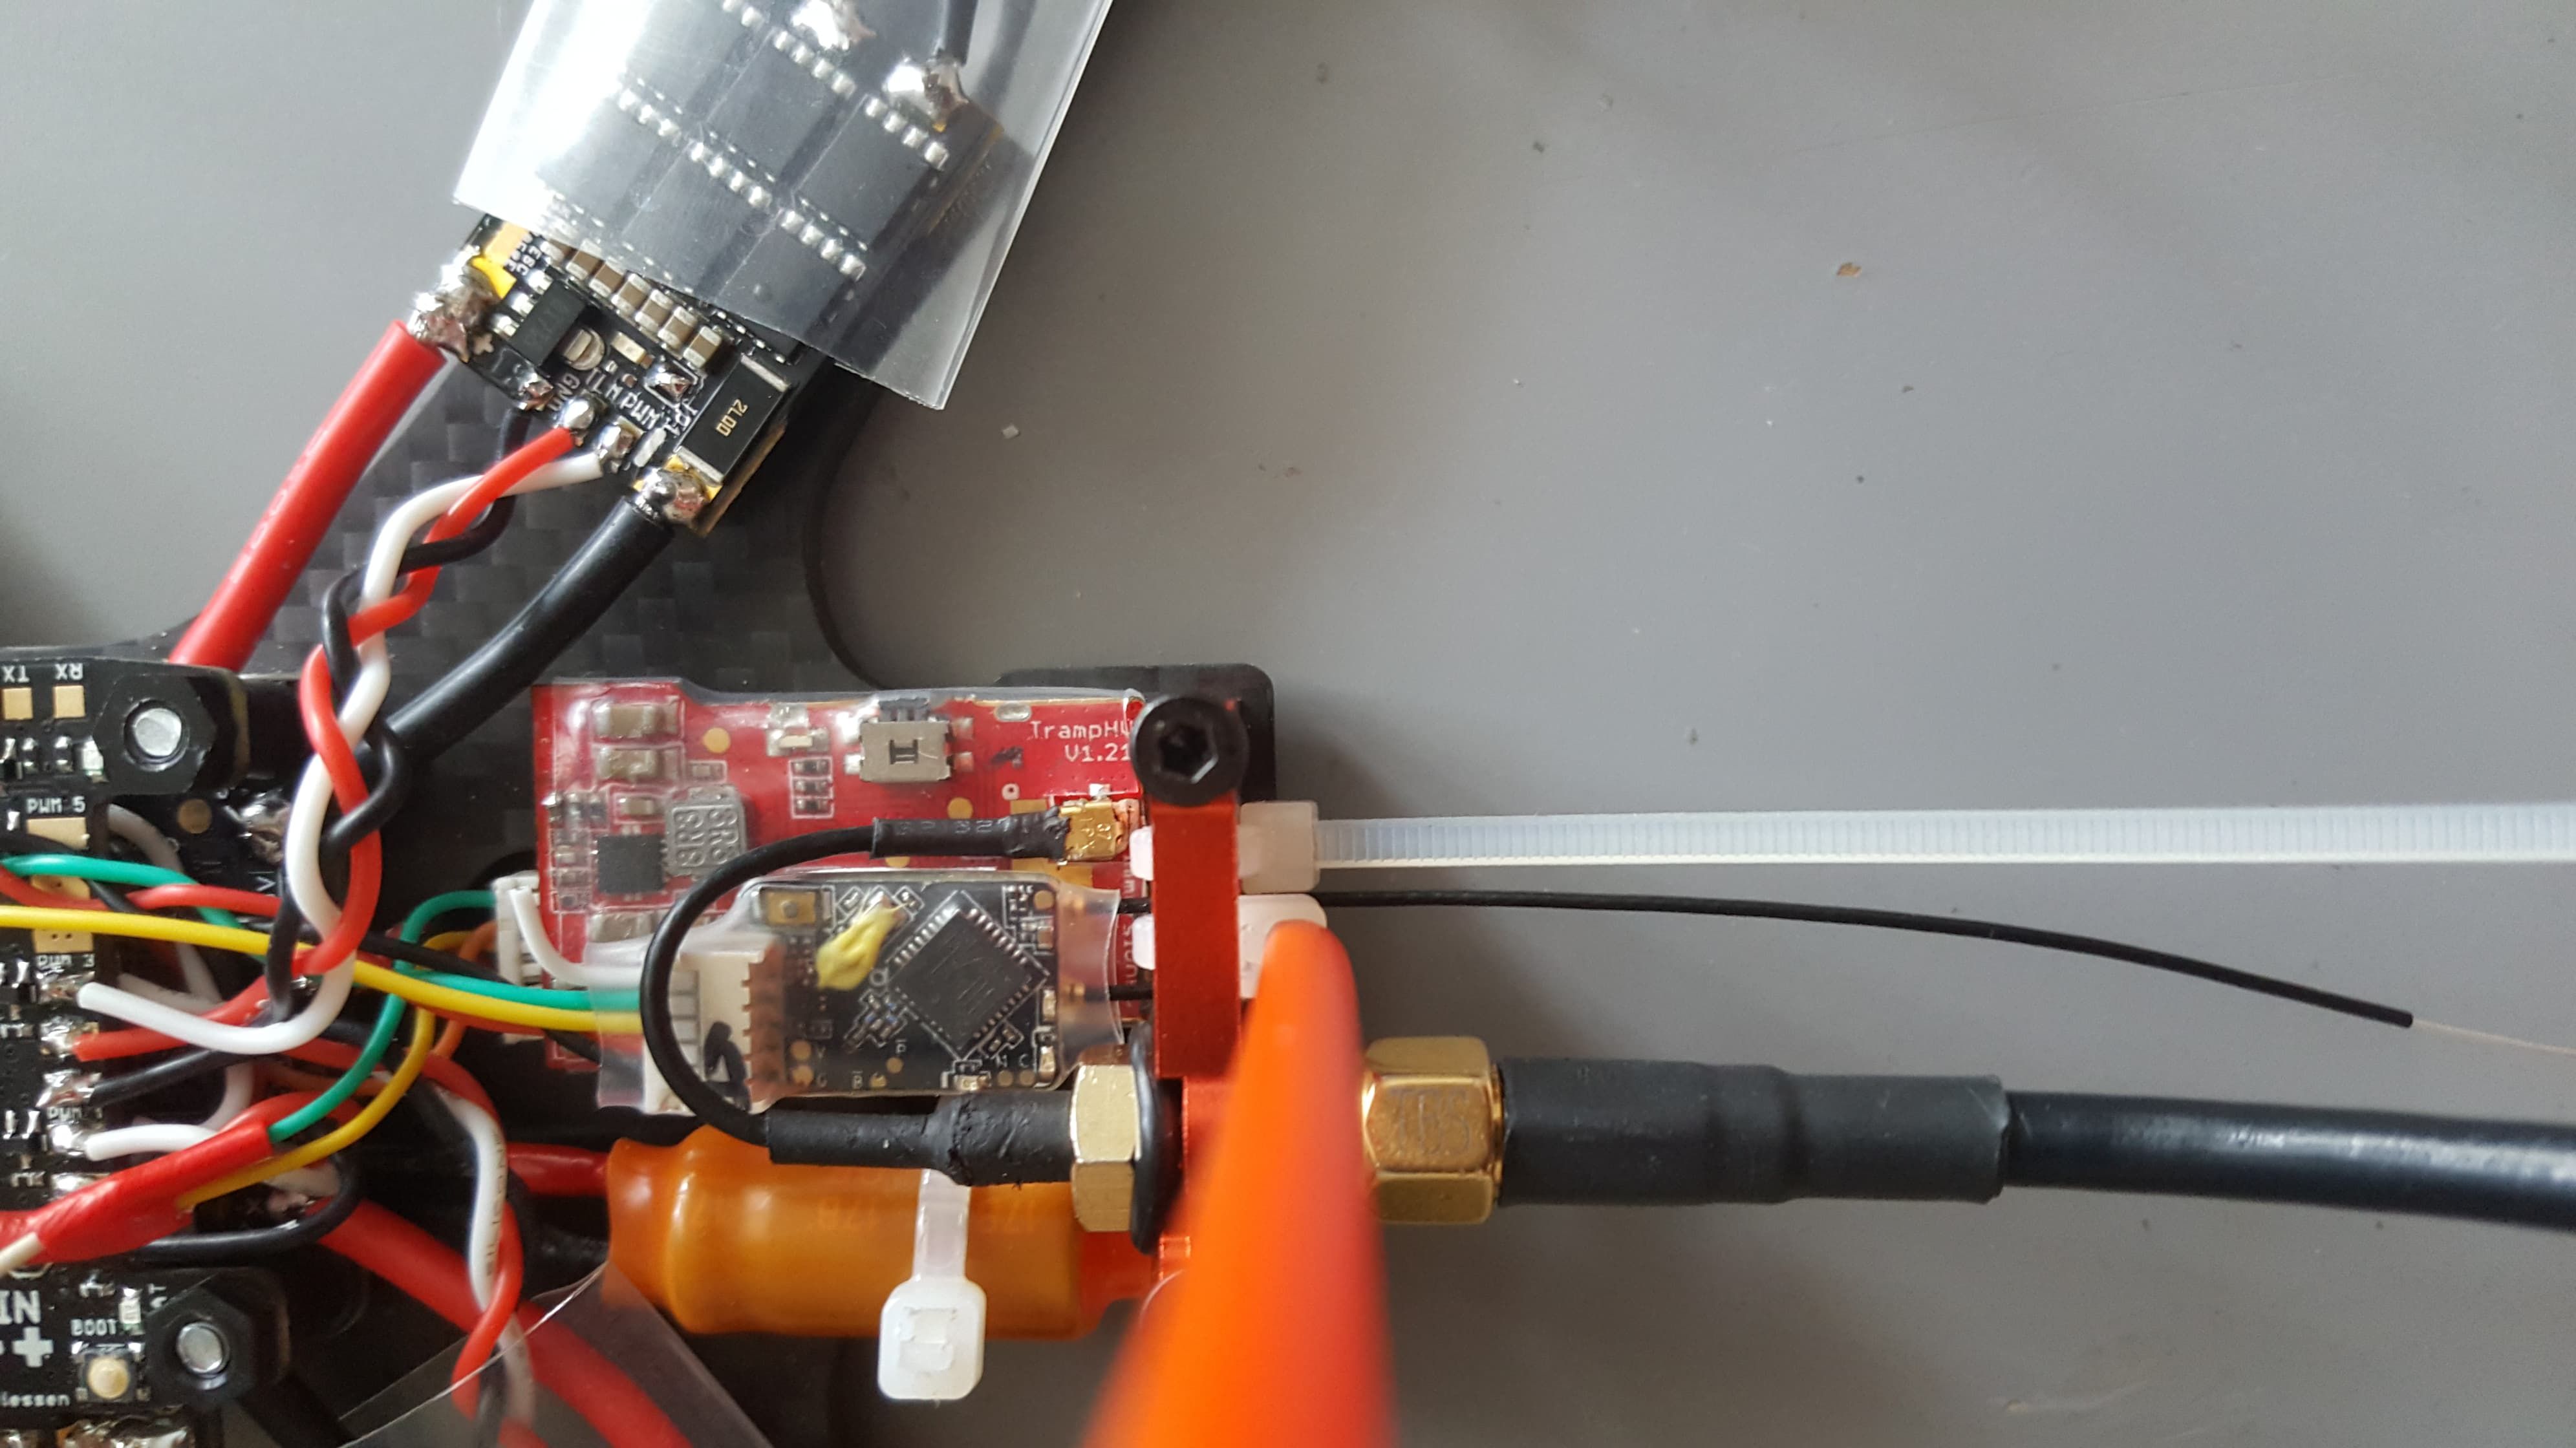
At it's core lies Kiss FCv1 and Kiss 24A ESC's wired to a Matek FCHUB PDB. For FPV I've settled for good old Swift 2 powered by Tramp HV VTX.
2. Build
The frame was, for a change, easy to assemble although instructions are helpful for the camera cage. There's a lot more parts to it than it seems. Armattan is kind enough to provide a lot of spares and extras (looking at you, Flyduino) like rubber o-rings for a more secure VTX antenna mounting.
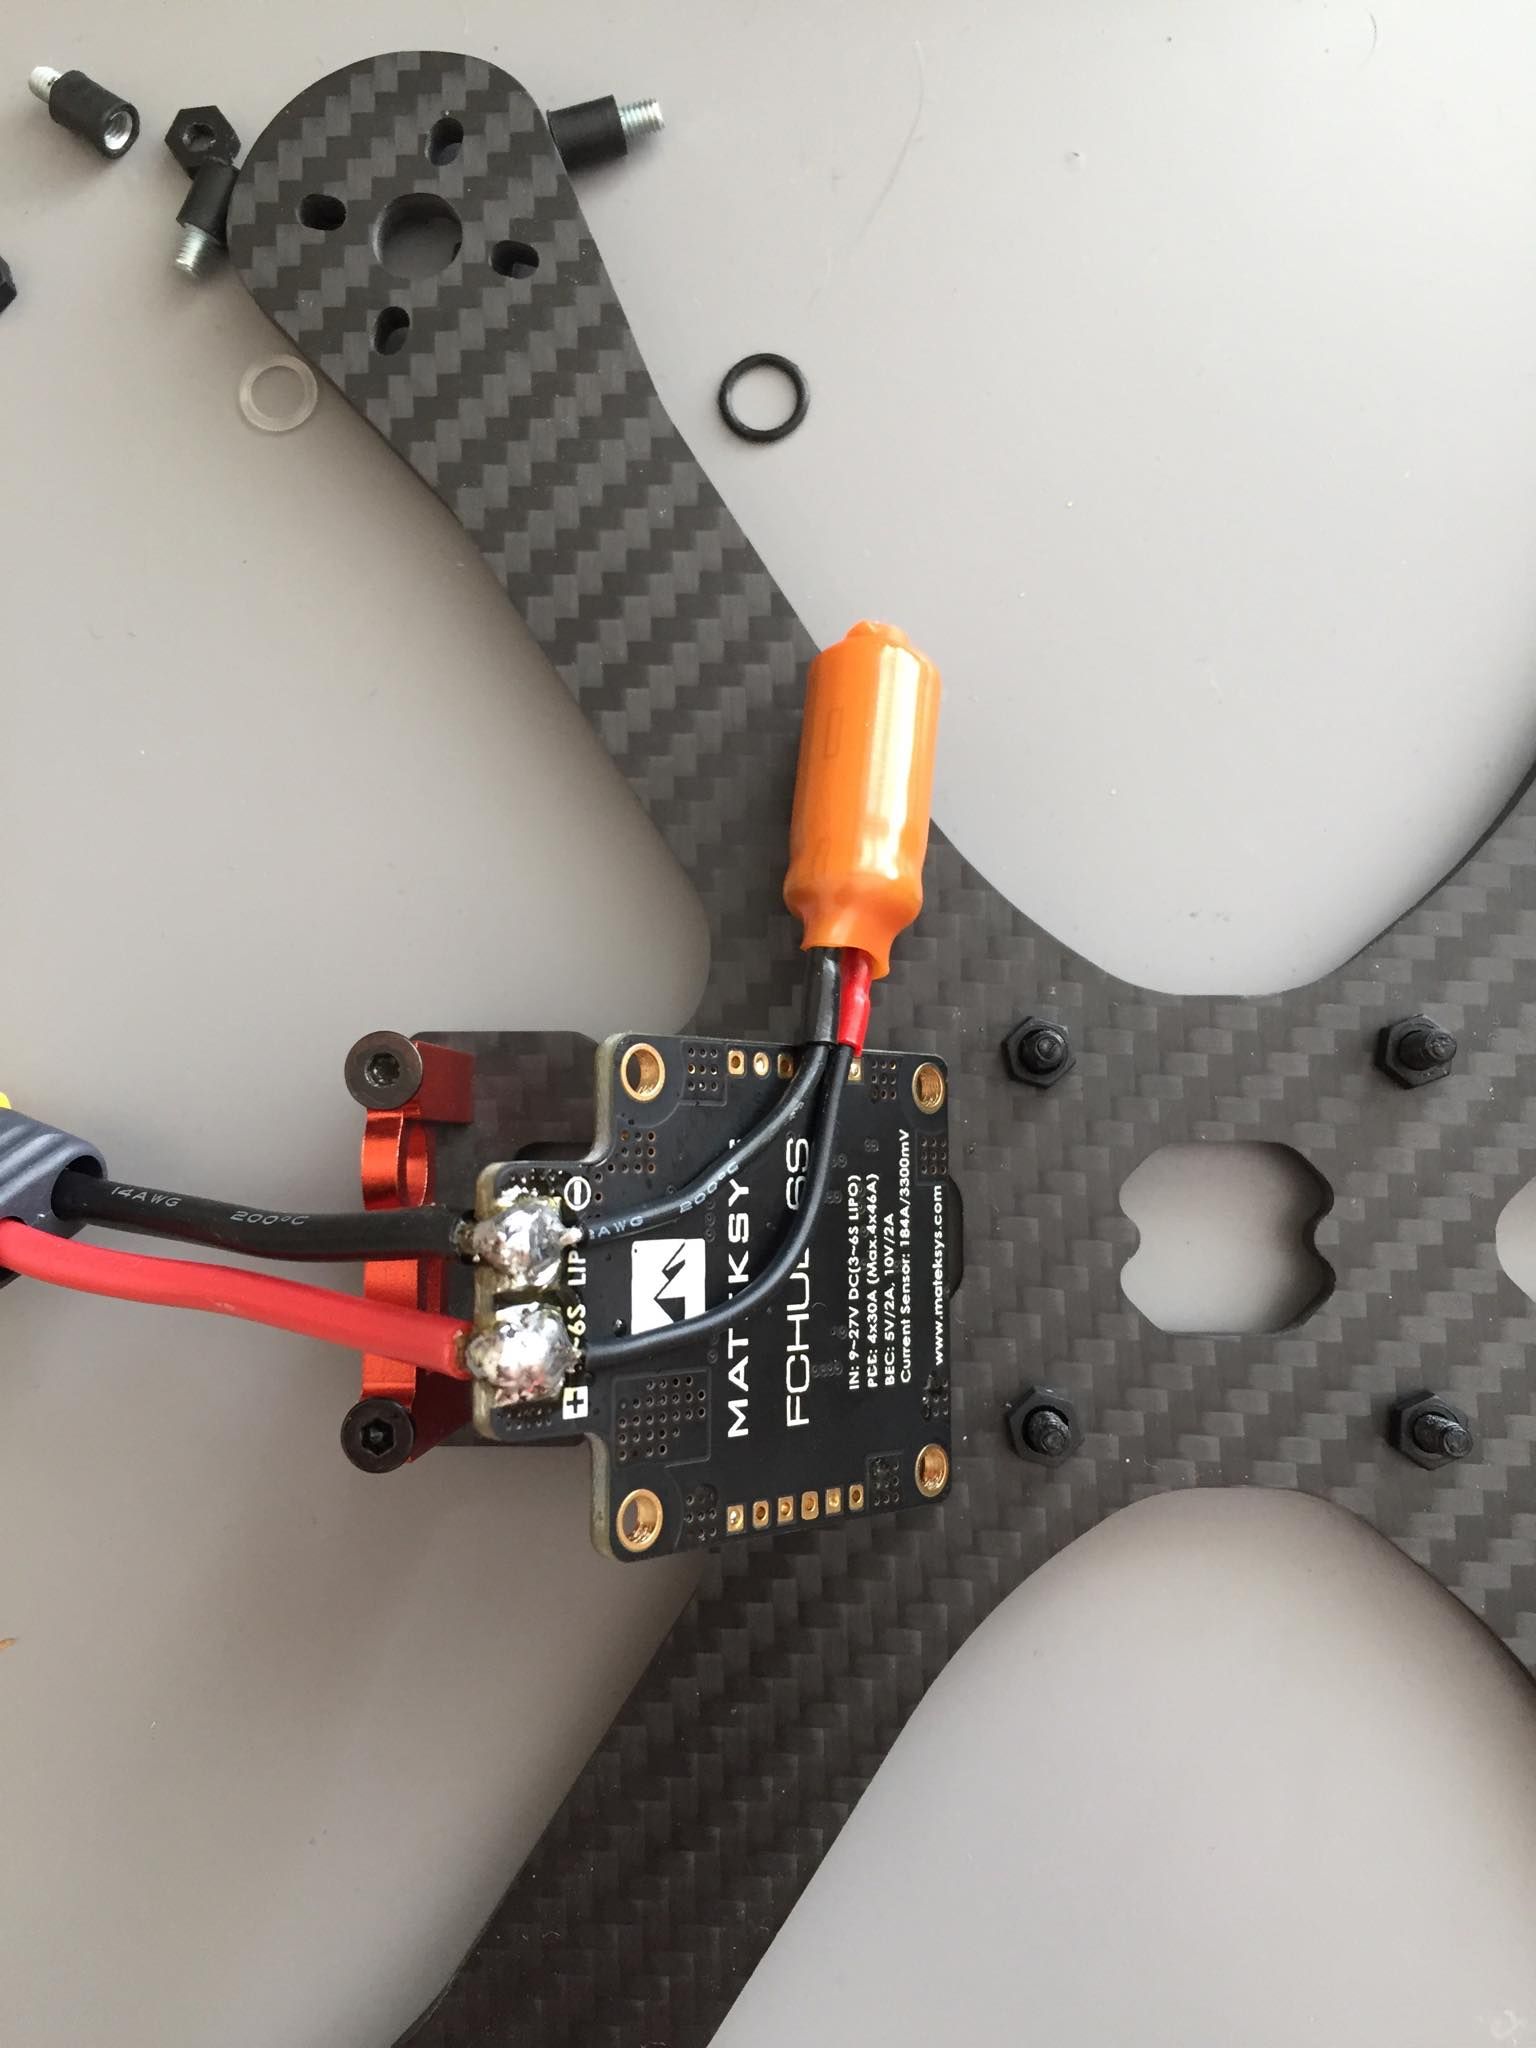
I started with the PDB, tinning all the pads and soldering an XT60. I couldn't decide on the lenght so I left the wires longer and decided to revisit it once it proves to be a bad idea (hint: it was). I also added a 1000uf 25v capacitor to protect the components from voltage spikes - v1 Tramp doesn't have this feature built in so it was all the better idea.
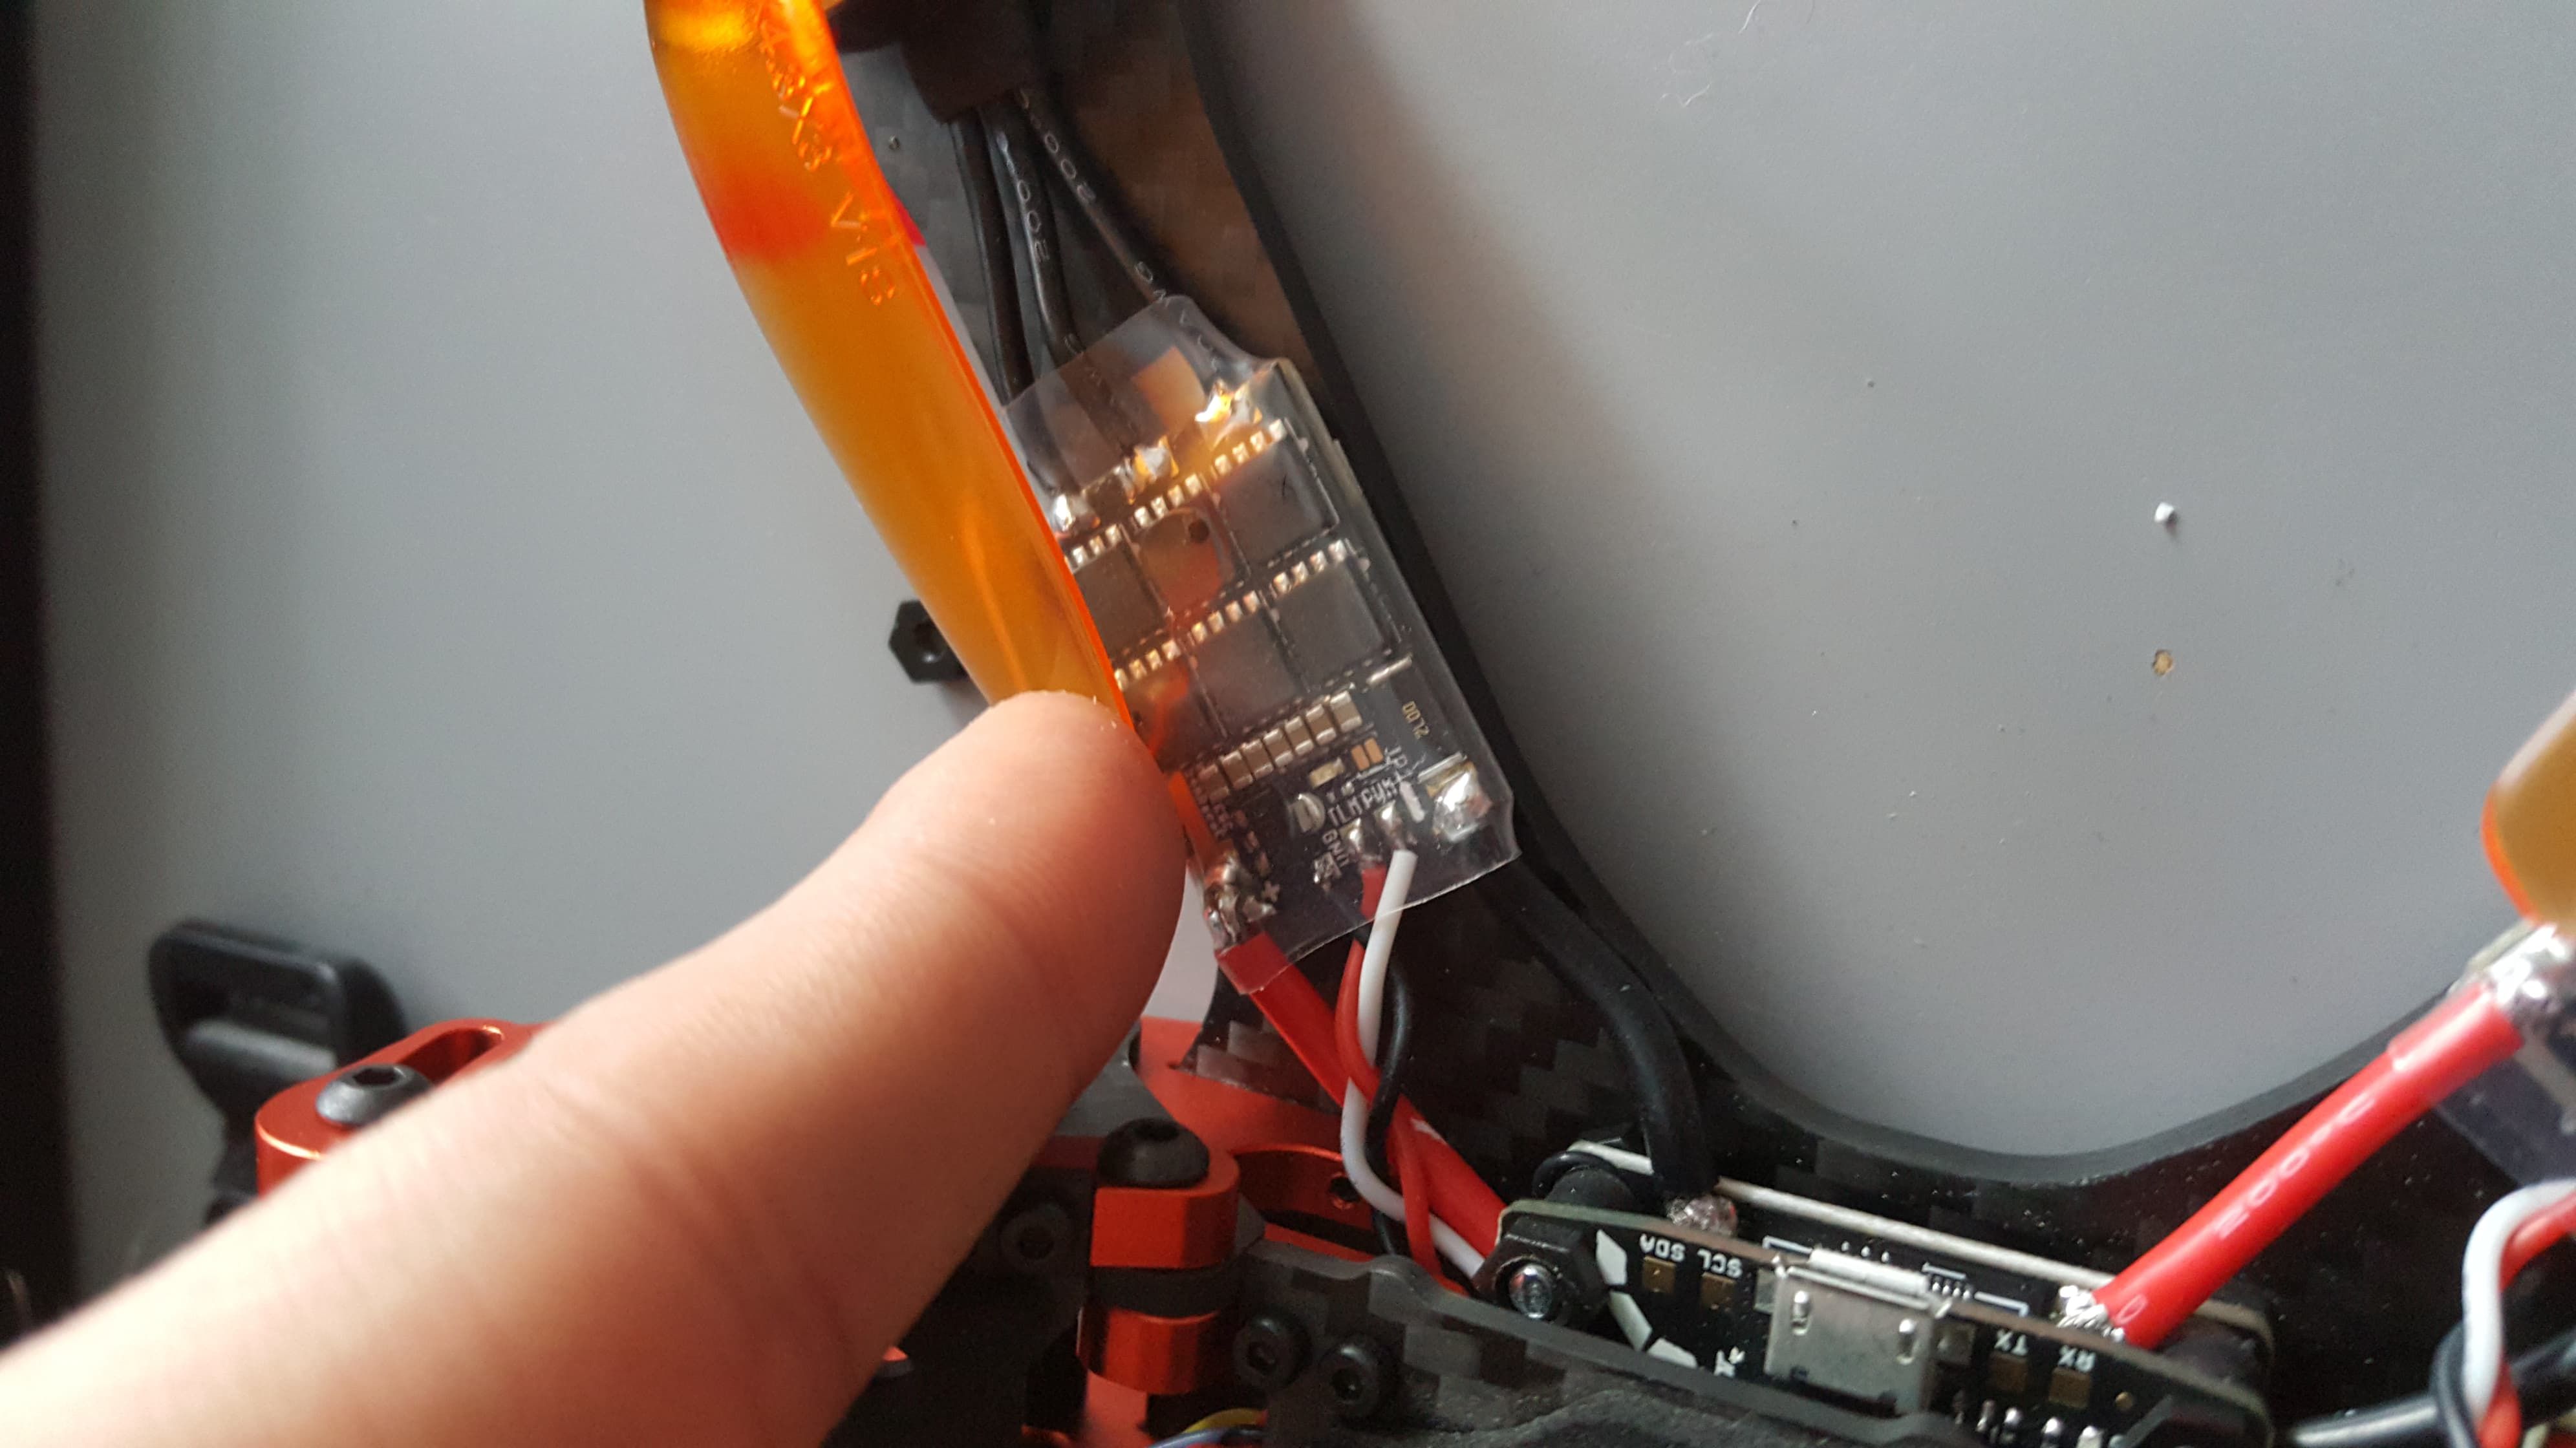
Next I started to work on ESCs. The pads were easy to work with except for signal ground, which for whatever reason is not extended like signal or telemetry pads. Furthermore it's right next to a little something that seems important and would probably like to remain solder-free.
I also braided the signal wires. What, braids are gay? So is noise, desyncing, chopped wires and supposedly one of my ex girlfriends.
If you have one ask her to braid it for you.
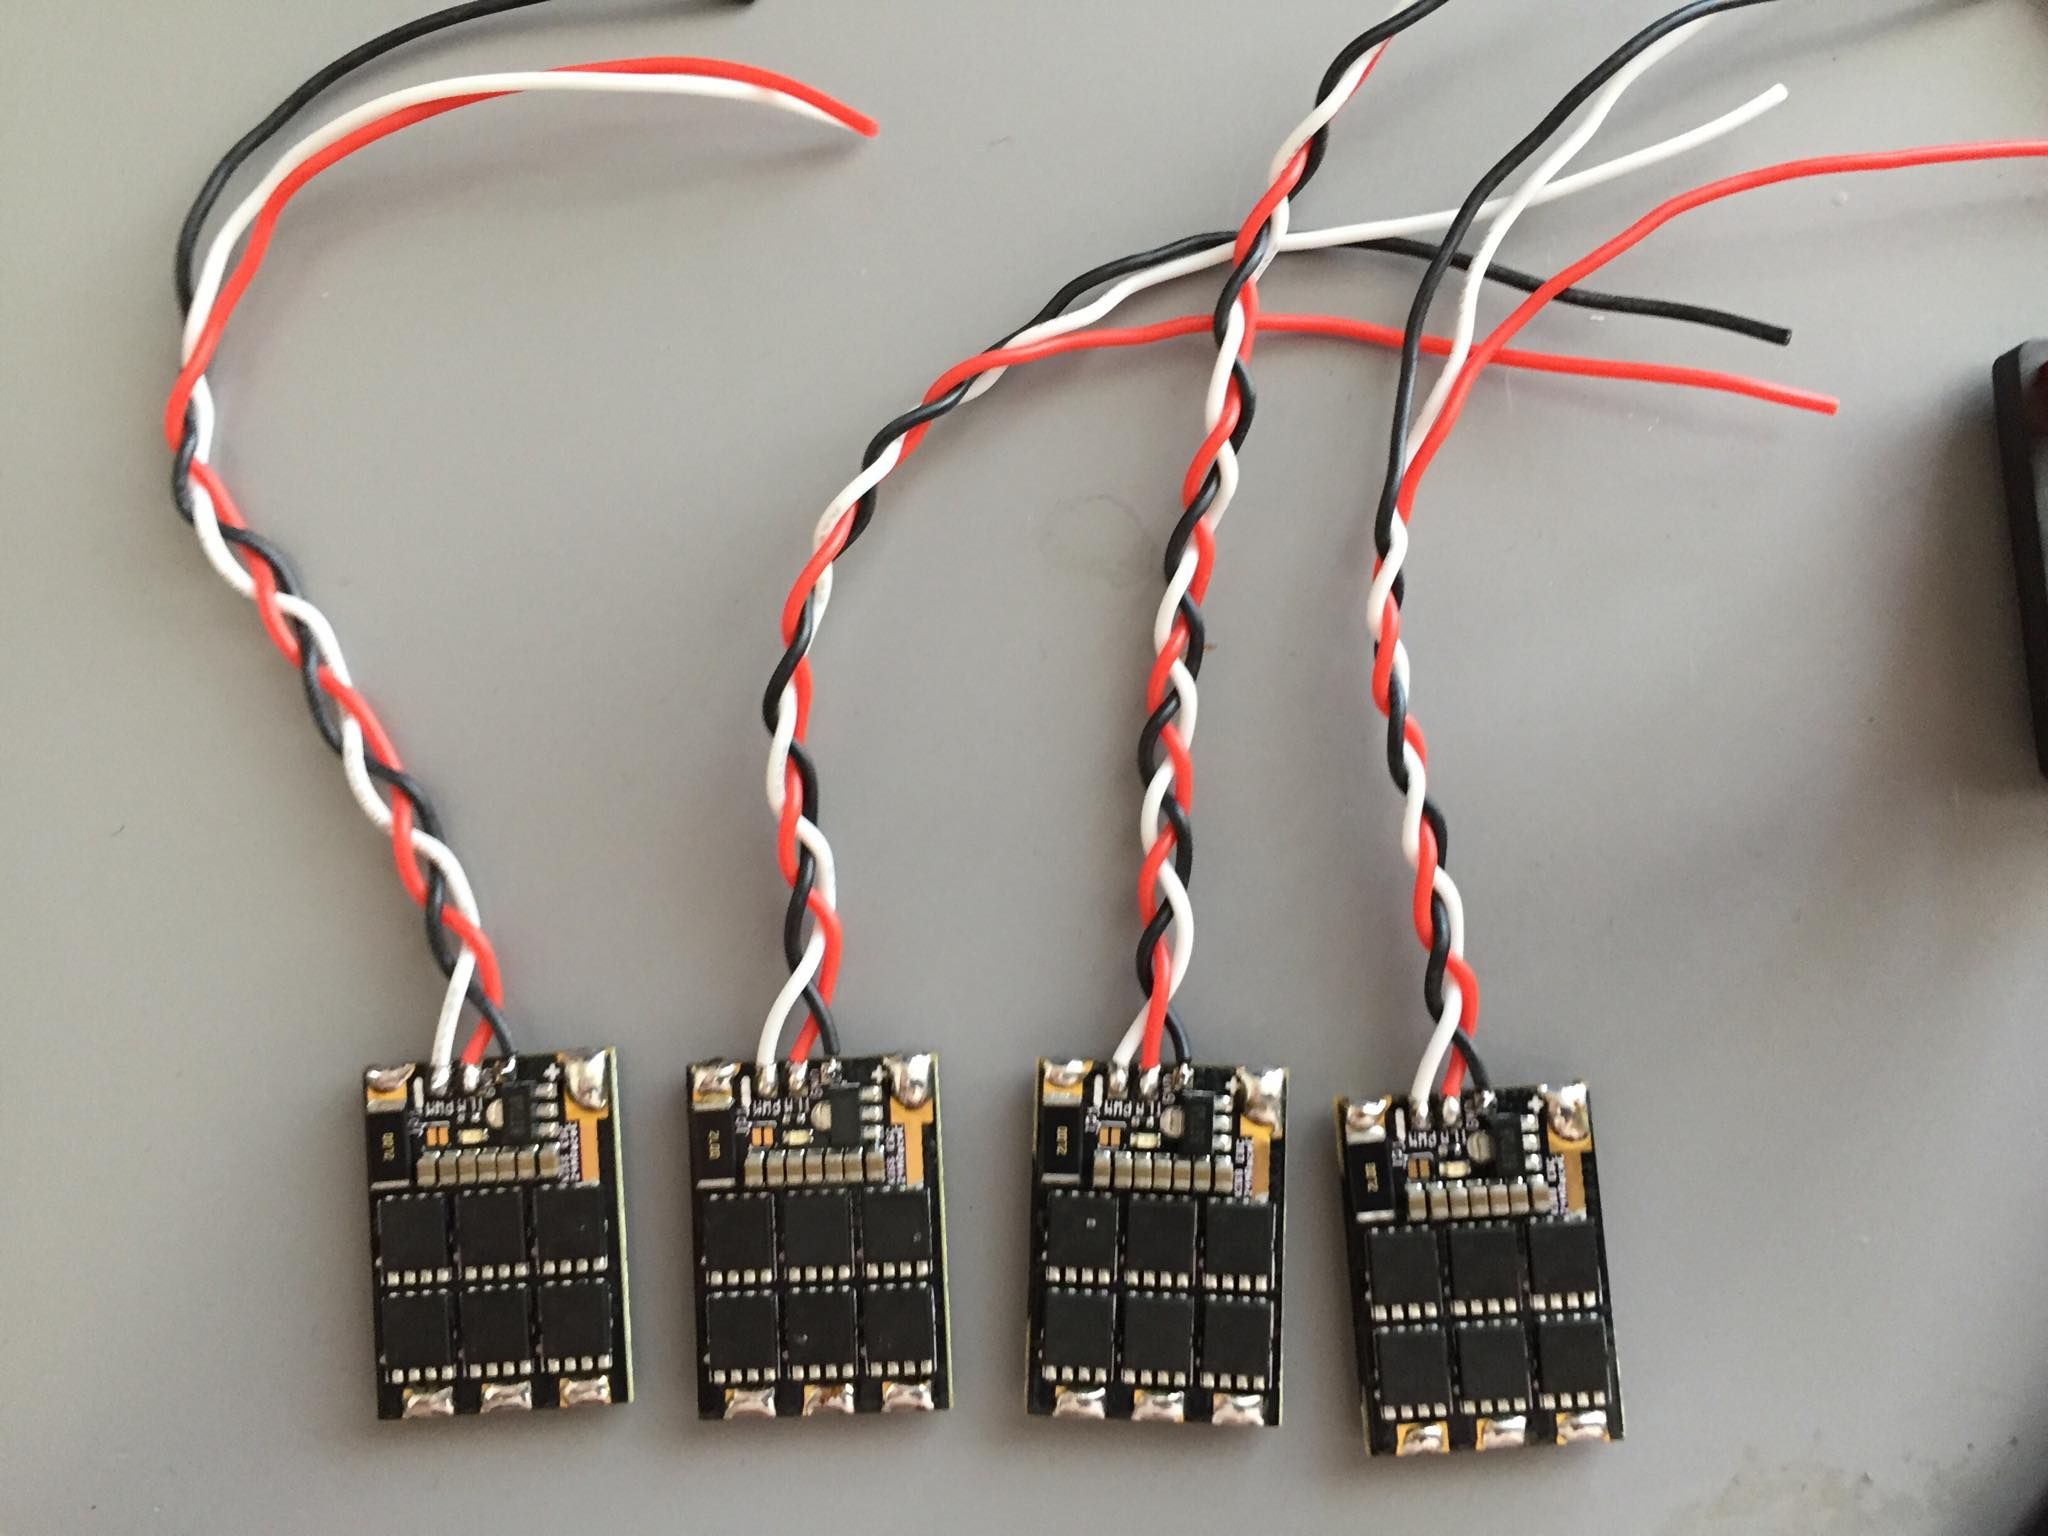
It was time to add positive and ground wires, cut them to size, lay 'em out and get them connected to the PDB.
I prefer to work my way outside in - first solder the wires to the ESCs and lay them out on the arms. Then mark your wires to cut them to proper size (leaving the signal wires for now). I wanted to have some headspace for motor wires but didn't want to get them too close to the PDB, otherwise it might be difficult to work with them later and do eventual repairs.
Running my soldering iron quite hot (with a huge tip) it was a quin in and out.
Make sure to tin the wires beforehand but go easy on them - they'll eat up solder like crazy and flow it deep into the wire making it harder than a pedophile's d#ck in a Disneyland.
Now let's get to that flight controller. For whatever reason it seems the holes in mine weren't evenly drilled out so I had to use softmounts added to the frame instead of the nylon standoffs. Supposedly they're not the greatest and their bottom part is surprisingly shallow - I had to add rubber orings below them to properly secure my PDB - but they get the job done. They allowed me to mount the FC and have a bit of wiggle room for it.
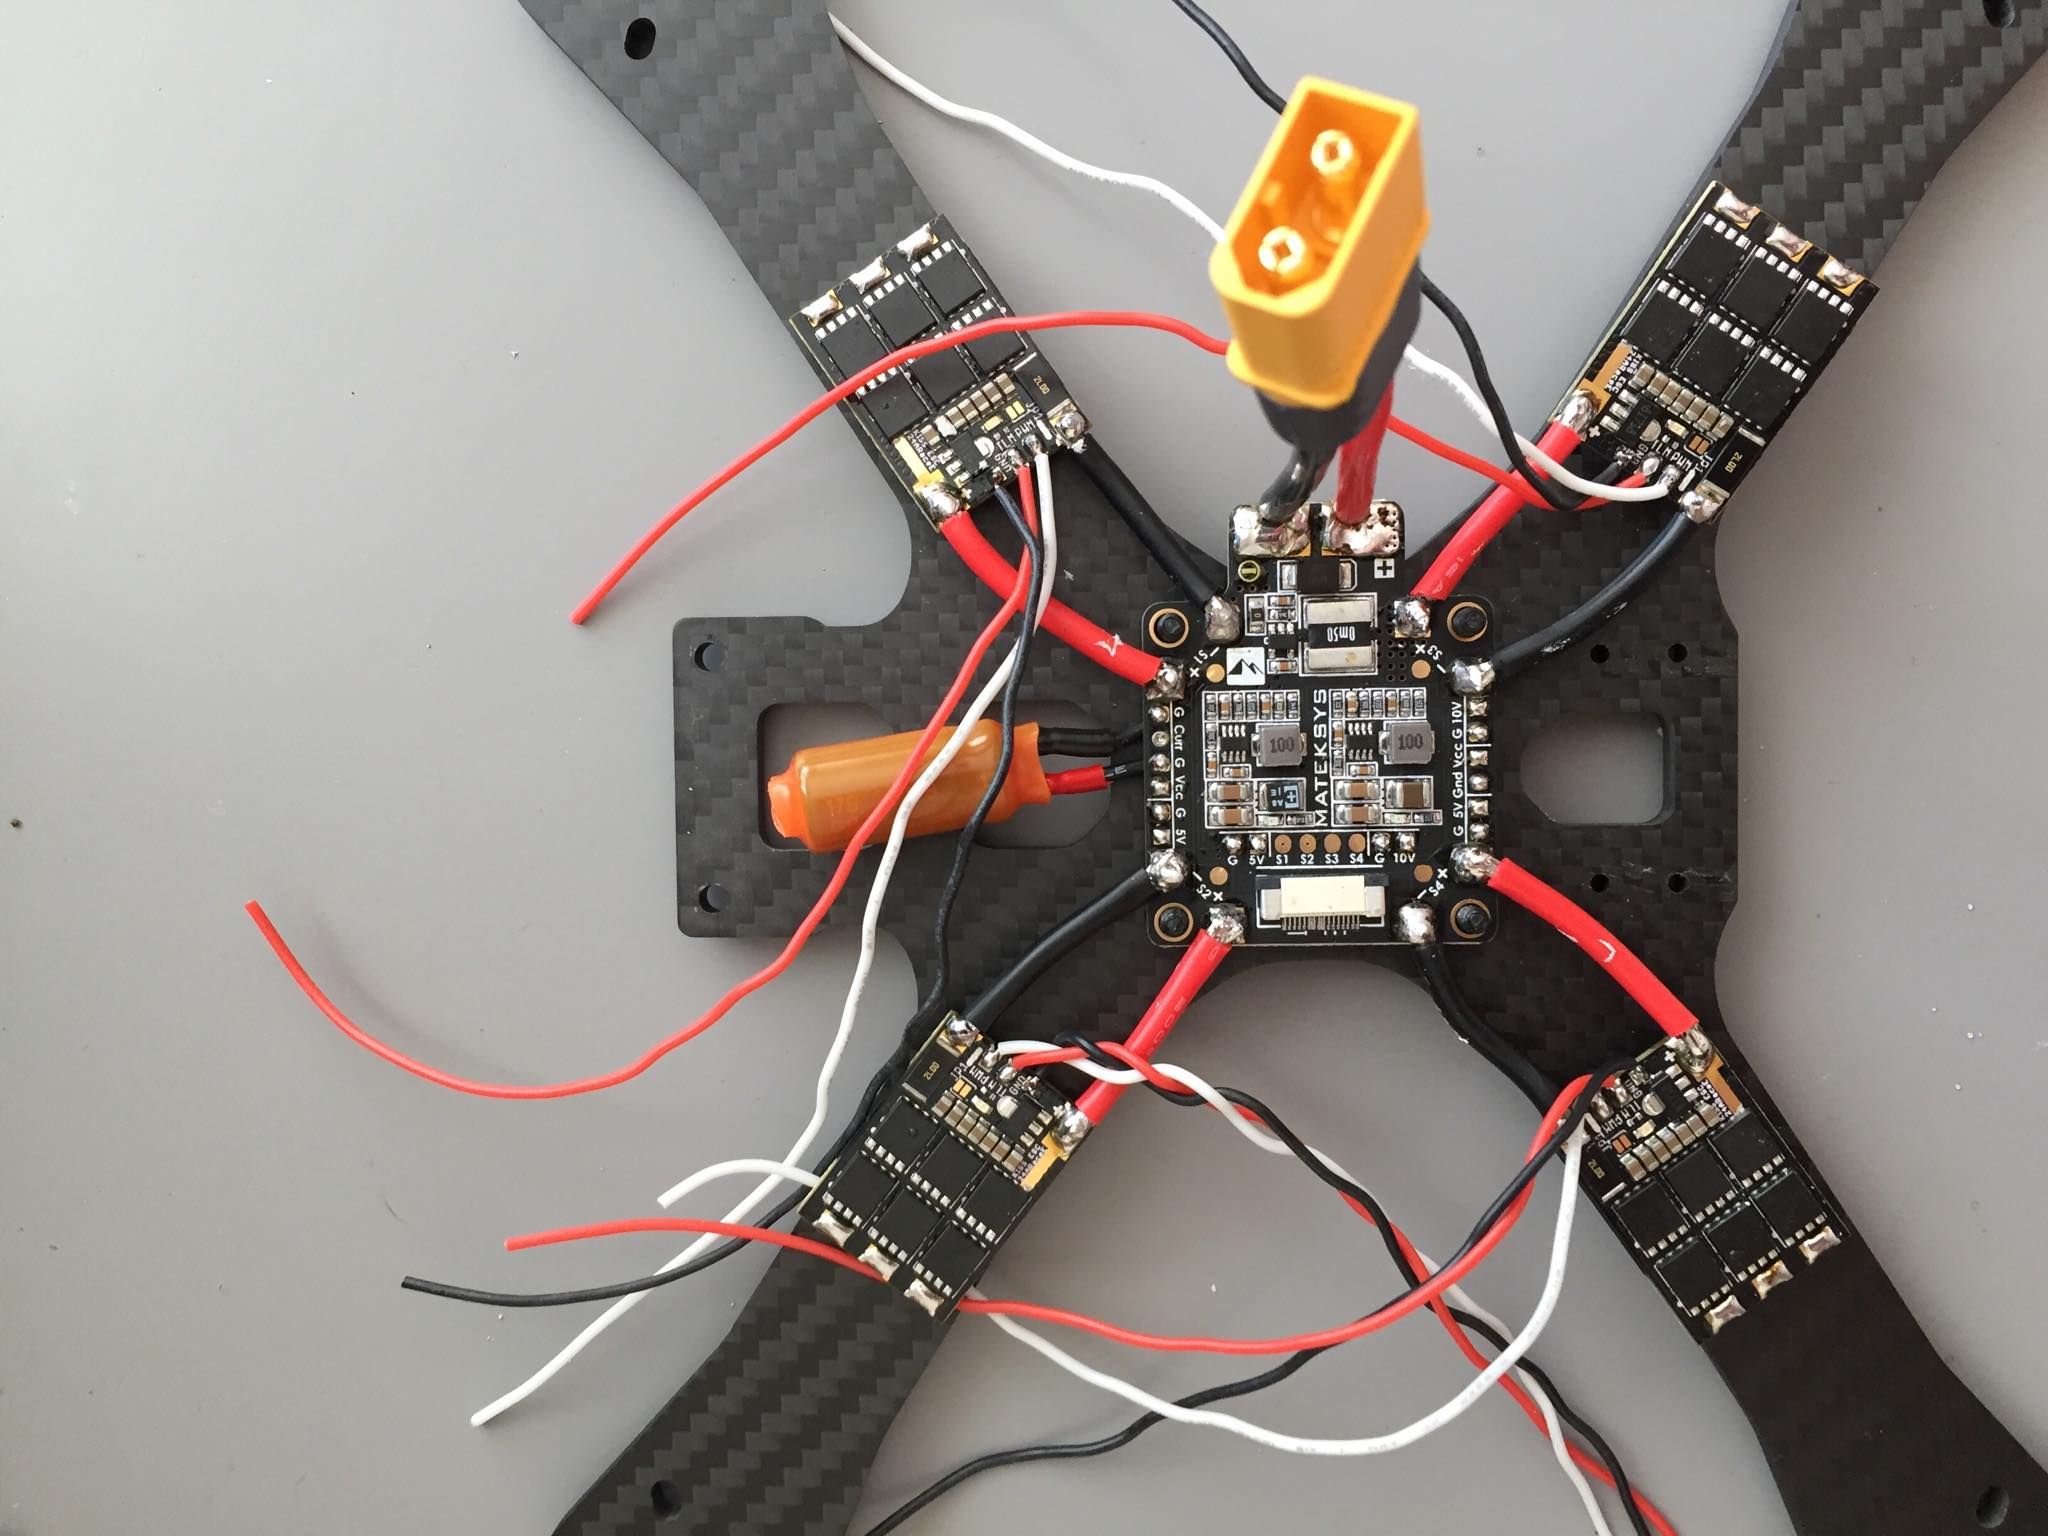
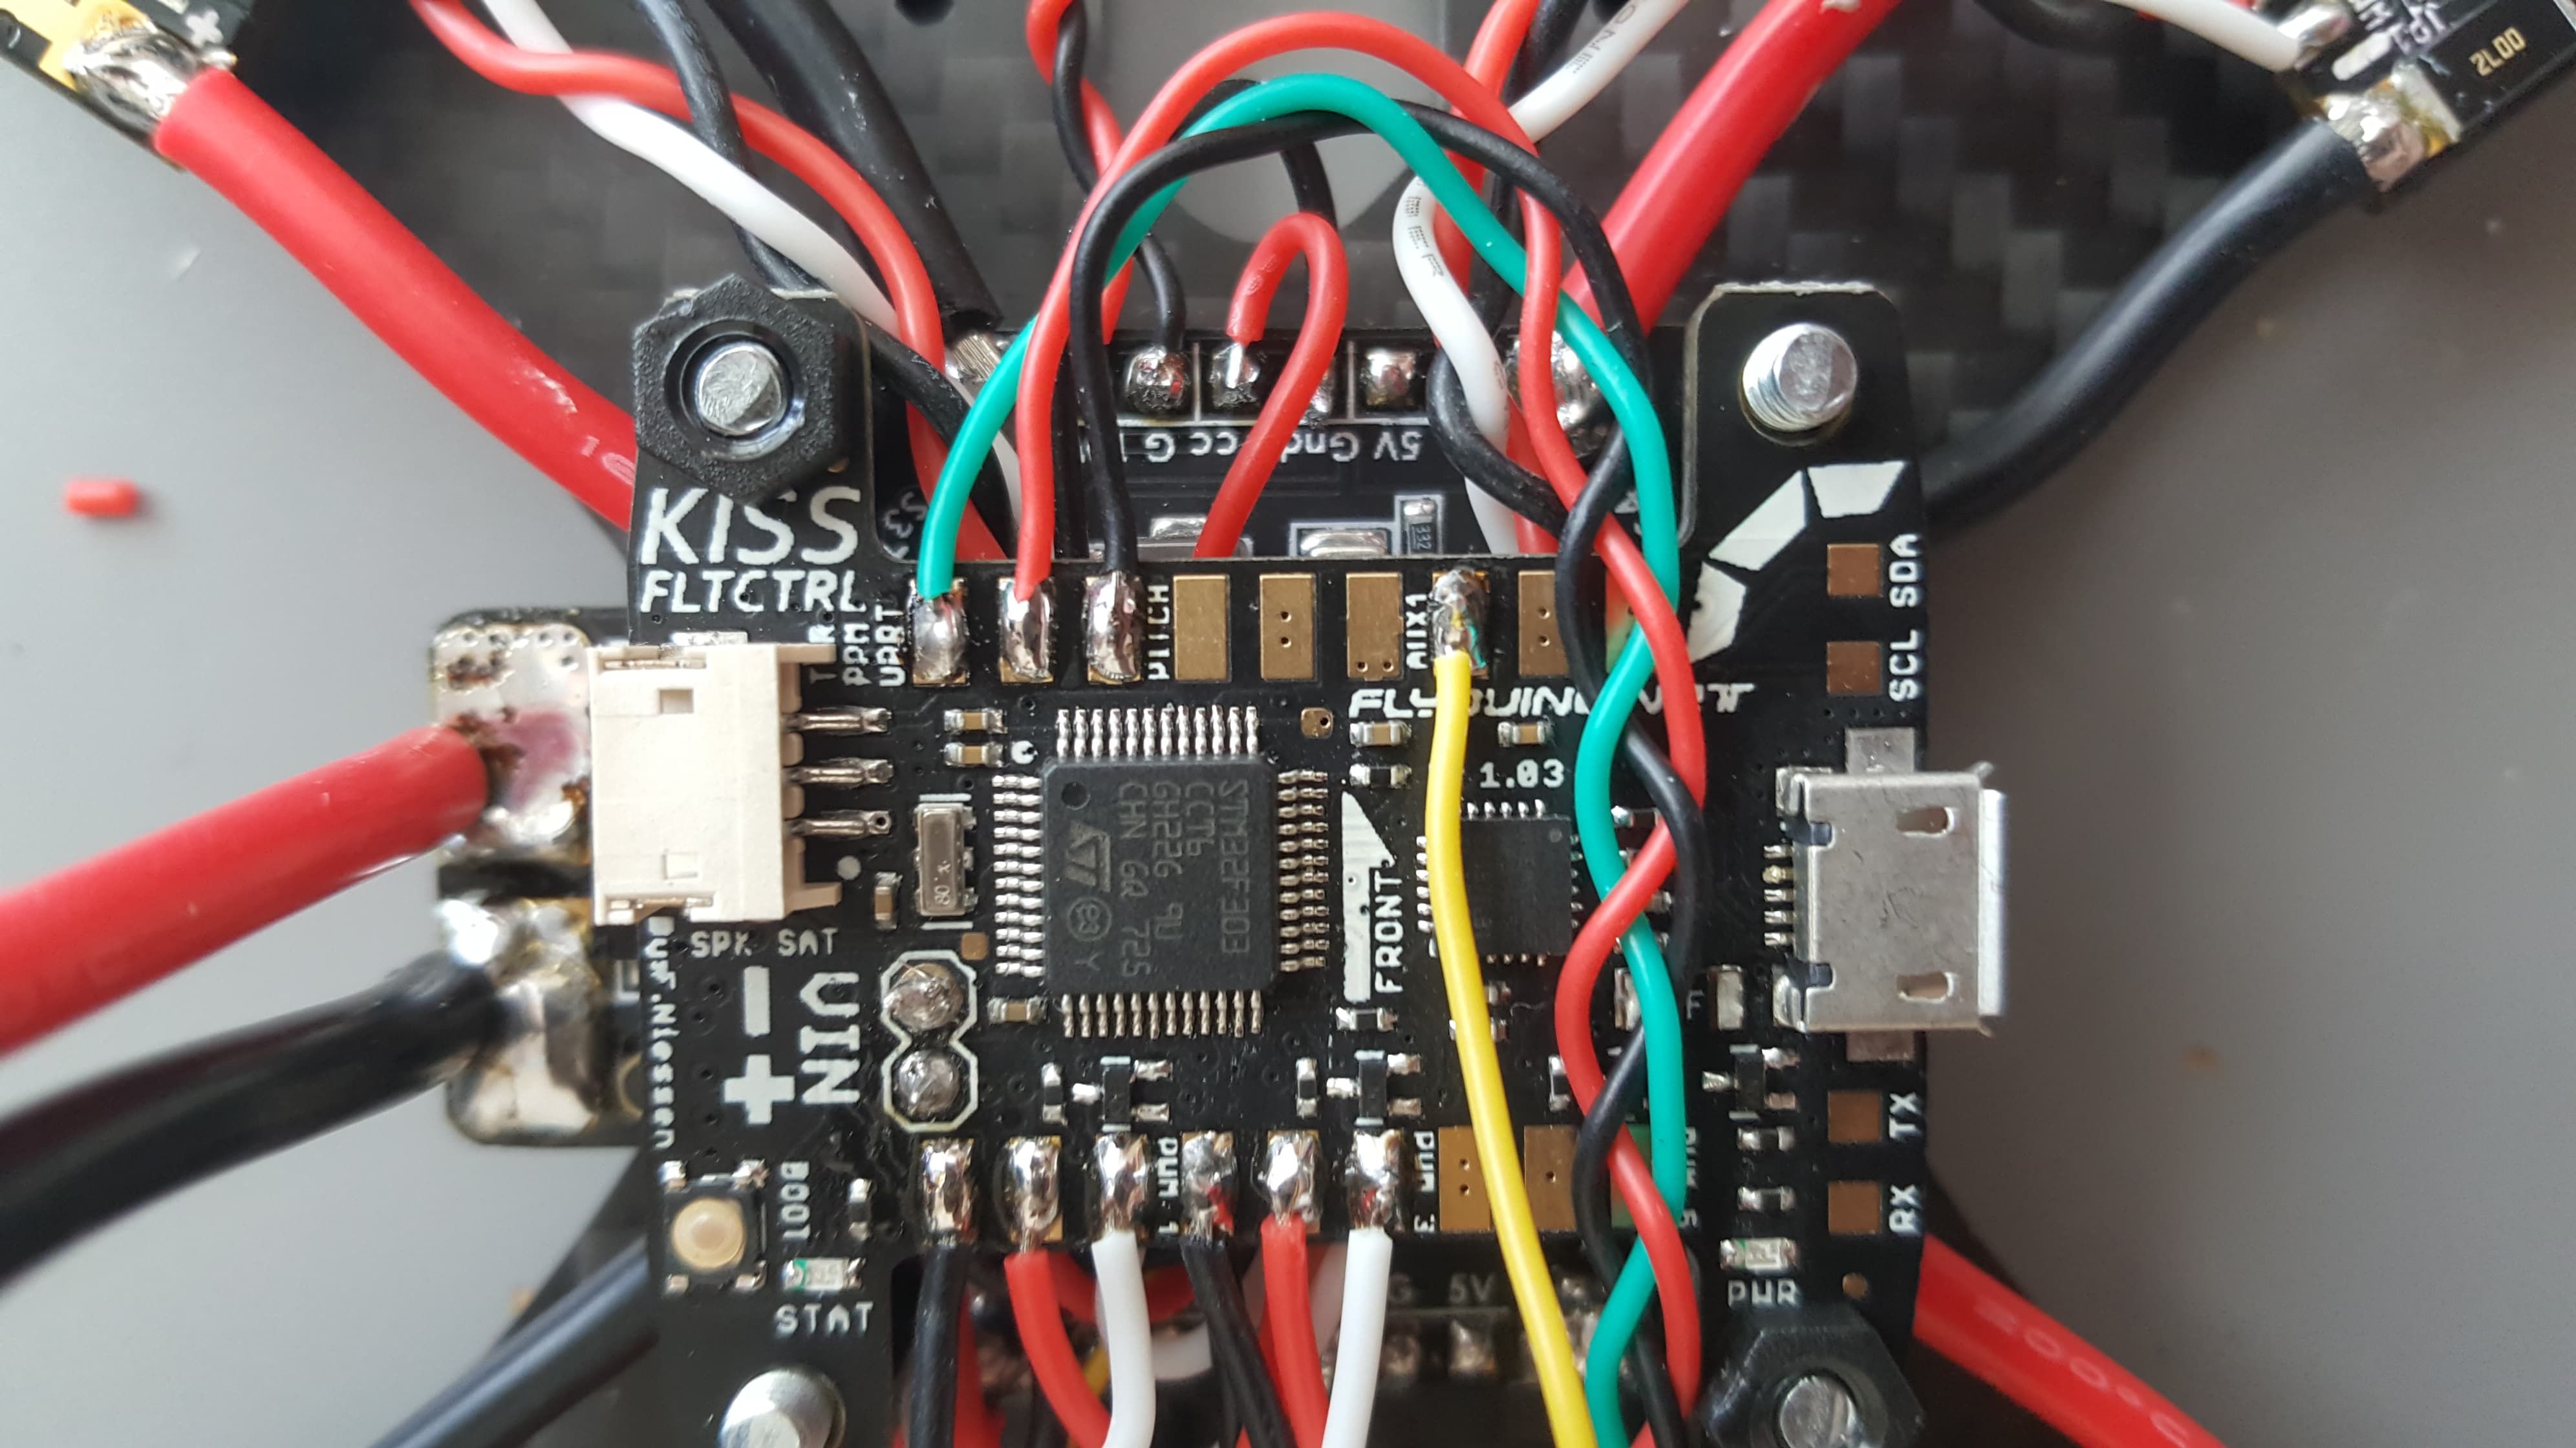
Wiring up Kiss flight controller is no easy task. Despite the pads being easy to work with, their placement, especially for ESC signal wires is questionable to say the least.
I started with the underside, soldering motors 2 and 4 as well as Tramp's Telemetry wire to RX3 (for LUA magic). Power and ground from VTX's bracket, since it's a HV version meaning it takes full voltage of the battery, went to Vcc pads*.

Now that I was done with the underside of my flight controller I decided to revisit the PDB for a second before it's gone in an ocean of nylon, zipties and wires forever:
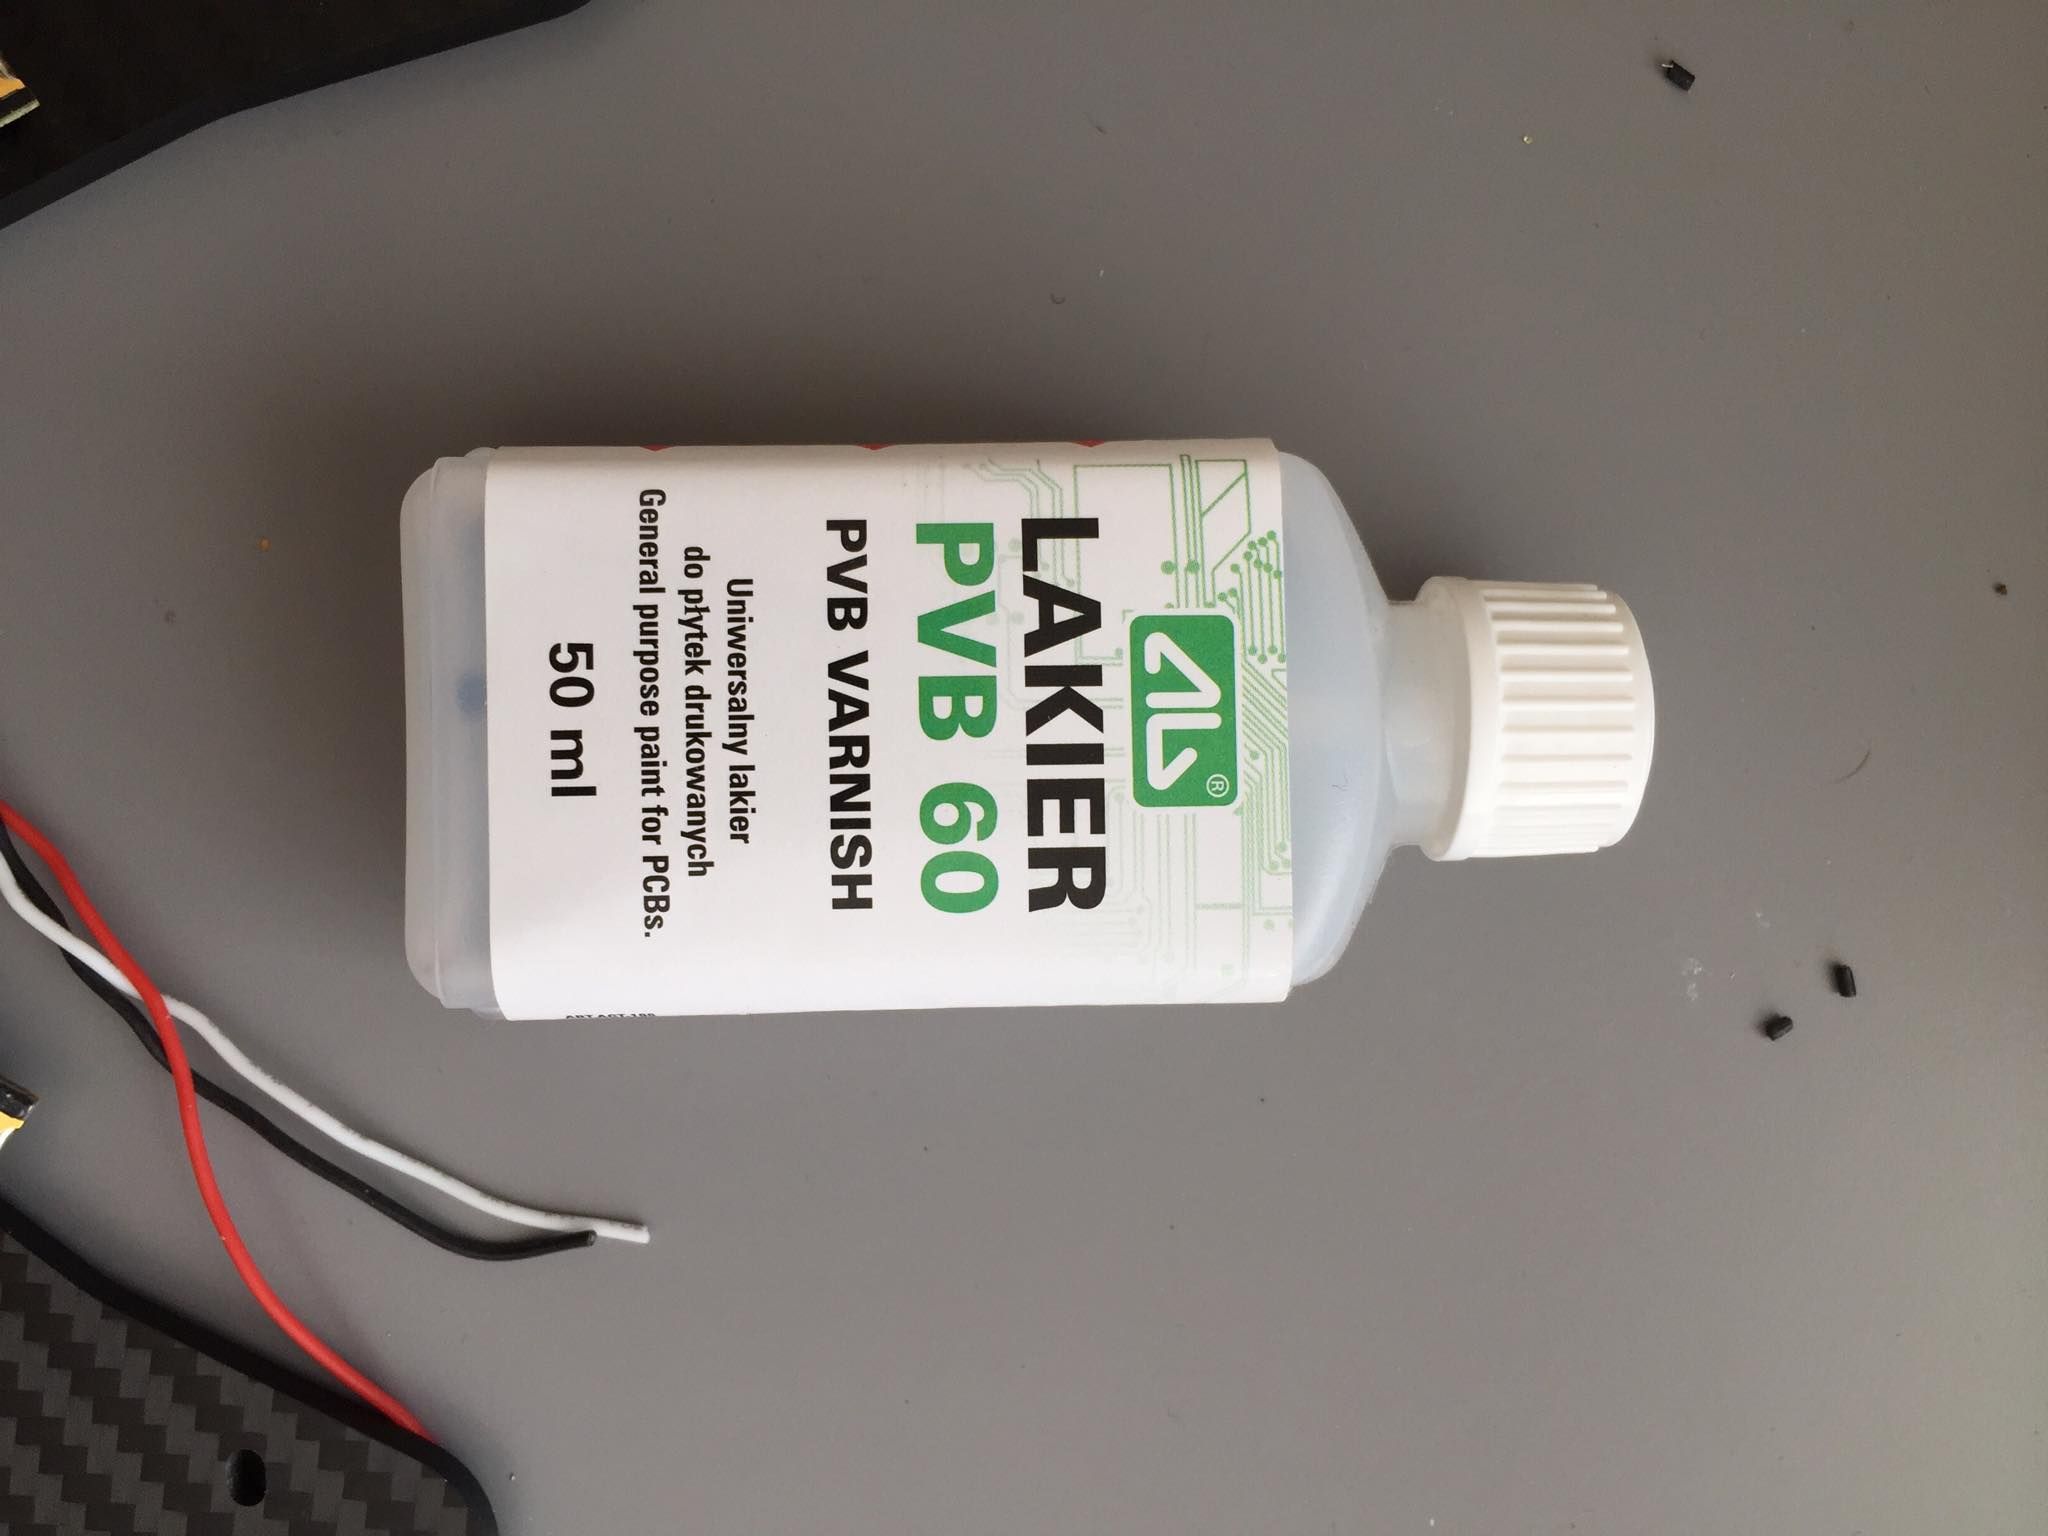
Gather 'round ladies and gents. This right here is the magic. Sniff it for long enough and you'll figure out why, if you'll still be able to figure out anything that is. PVB60 is a great conformal coating that saved many quads and a ton of money. Smack that brush wherever you want and be generous at that. In case you'll need to do any repairs feel free to solder right through it, easy as that. No, no, don't drink it! Filthy degenerates.
Now that I've waterproofed my PDB and got high as a kite I started wrapping things up on the top side of the flight controller.
I finished the ESC wires, soldered my receiver and wired SmartPort to AUX1 - since the build has no OSD (yet) this will allow for nice field tuning via Taranis LUA script. I also powered the camera from 10v off the PDB.
Viola! Soldering is pretty much done.
Time to start putting things together before someone comes in and realize I haven't eaten for the past 7 hours.
I put heatshrink over pretty much anything I could fit in there and soldered my motors.
Don't heat up that heatshrink on ESCs yet! While things have probably changed by now, for quite some time there was no other way to reverse motor direction on Kiss ESCs other than bridging a jumper on them. I played it safe and left the heatshrink for now to figure out which motors to reverse and bridge corresponding jumpers.
I plugged whatever I've put together so far to the PC and bound the receiver. The glory of passthrough.
Once that was done it was time for another multimeter pass. Take note - if you have a capacitor soldered you pretty much bridged positive and negative, meaning you'll get a beep on continuity check. Worry not (at least not yet) and keep holding the needles (?) to the pads. If you have no shorts in your circuit the capacitor will charge after a few seconds and beeping will cease. If it won't - now's the time to worry.
Once I knew that there are no shorts in the circuit I plugged my battery in - lo and behold, the quad breathed in for the first time.
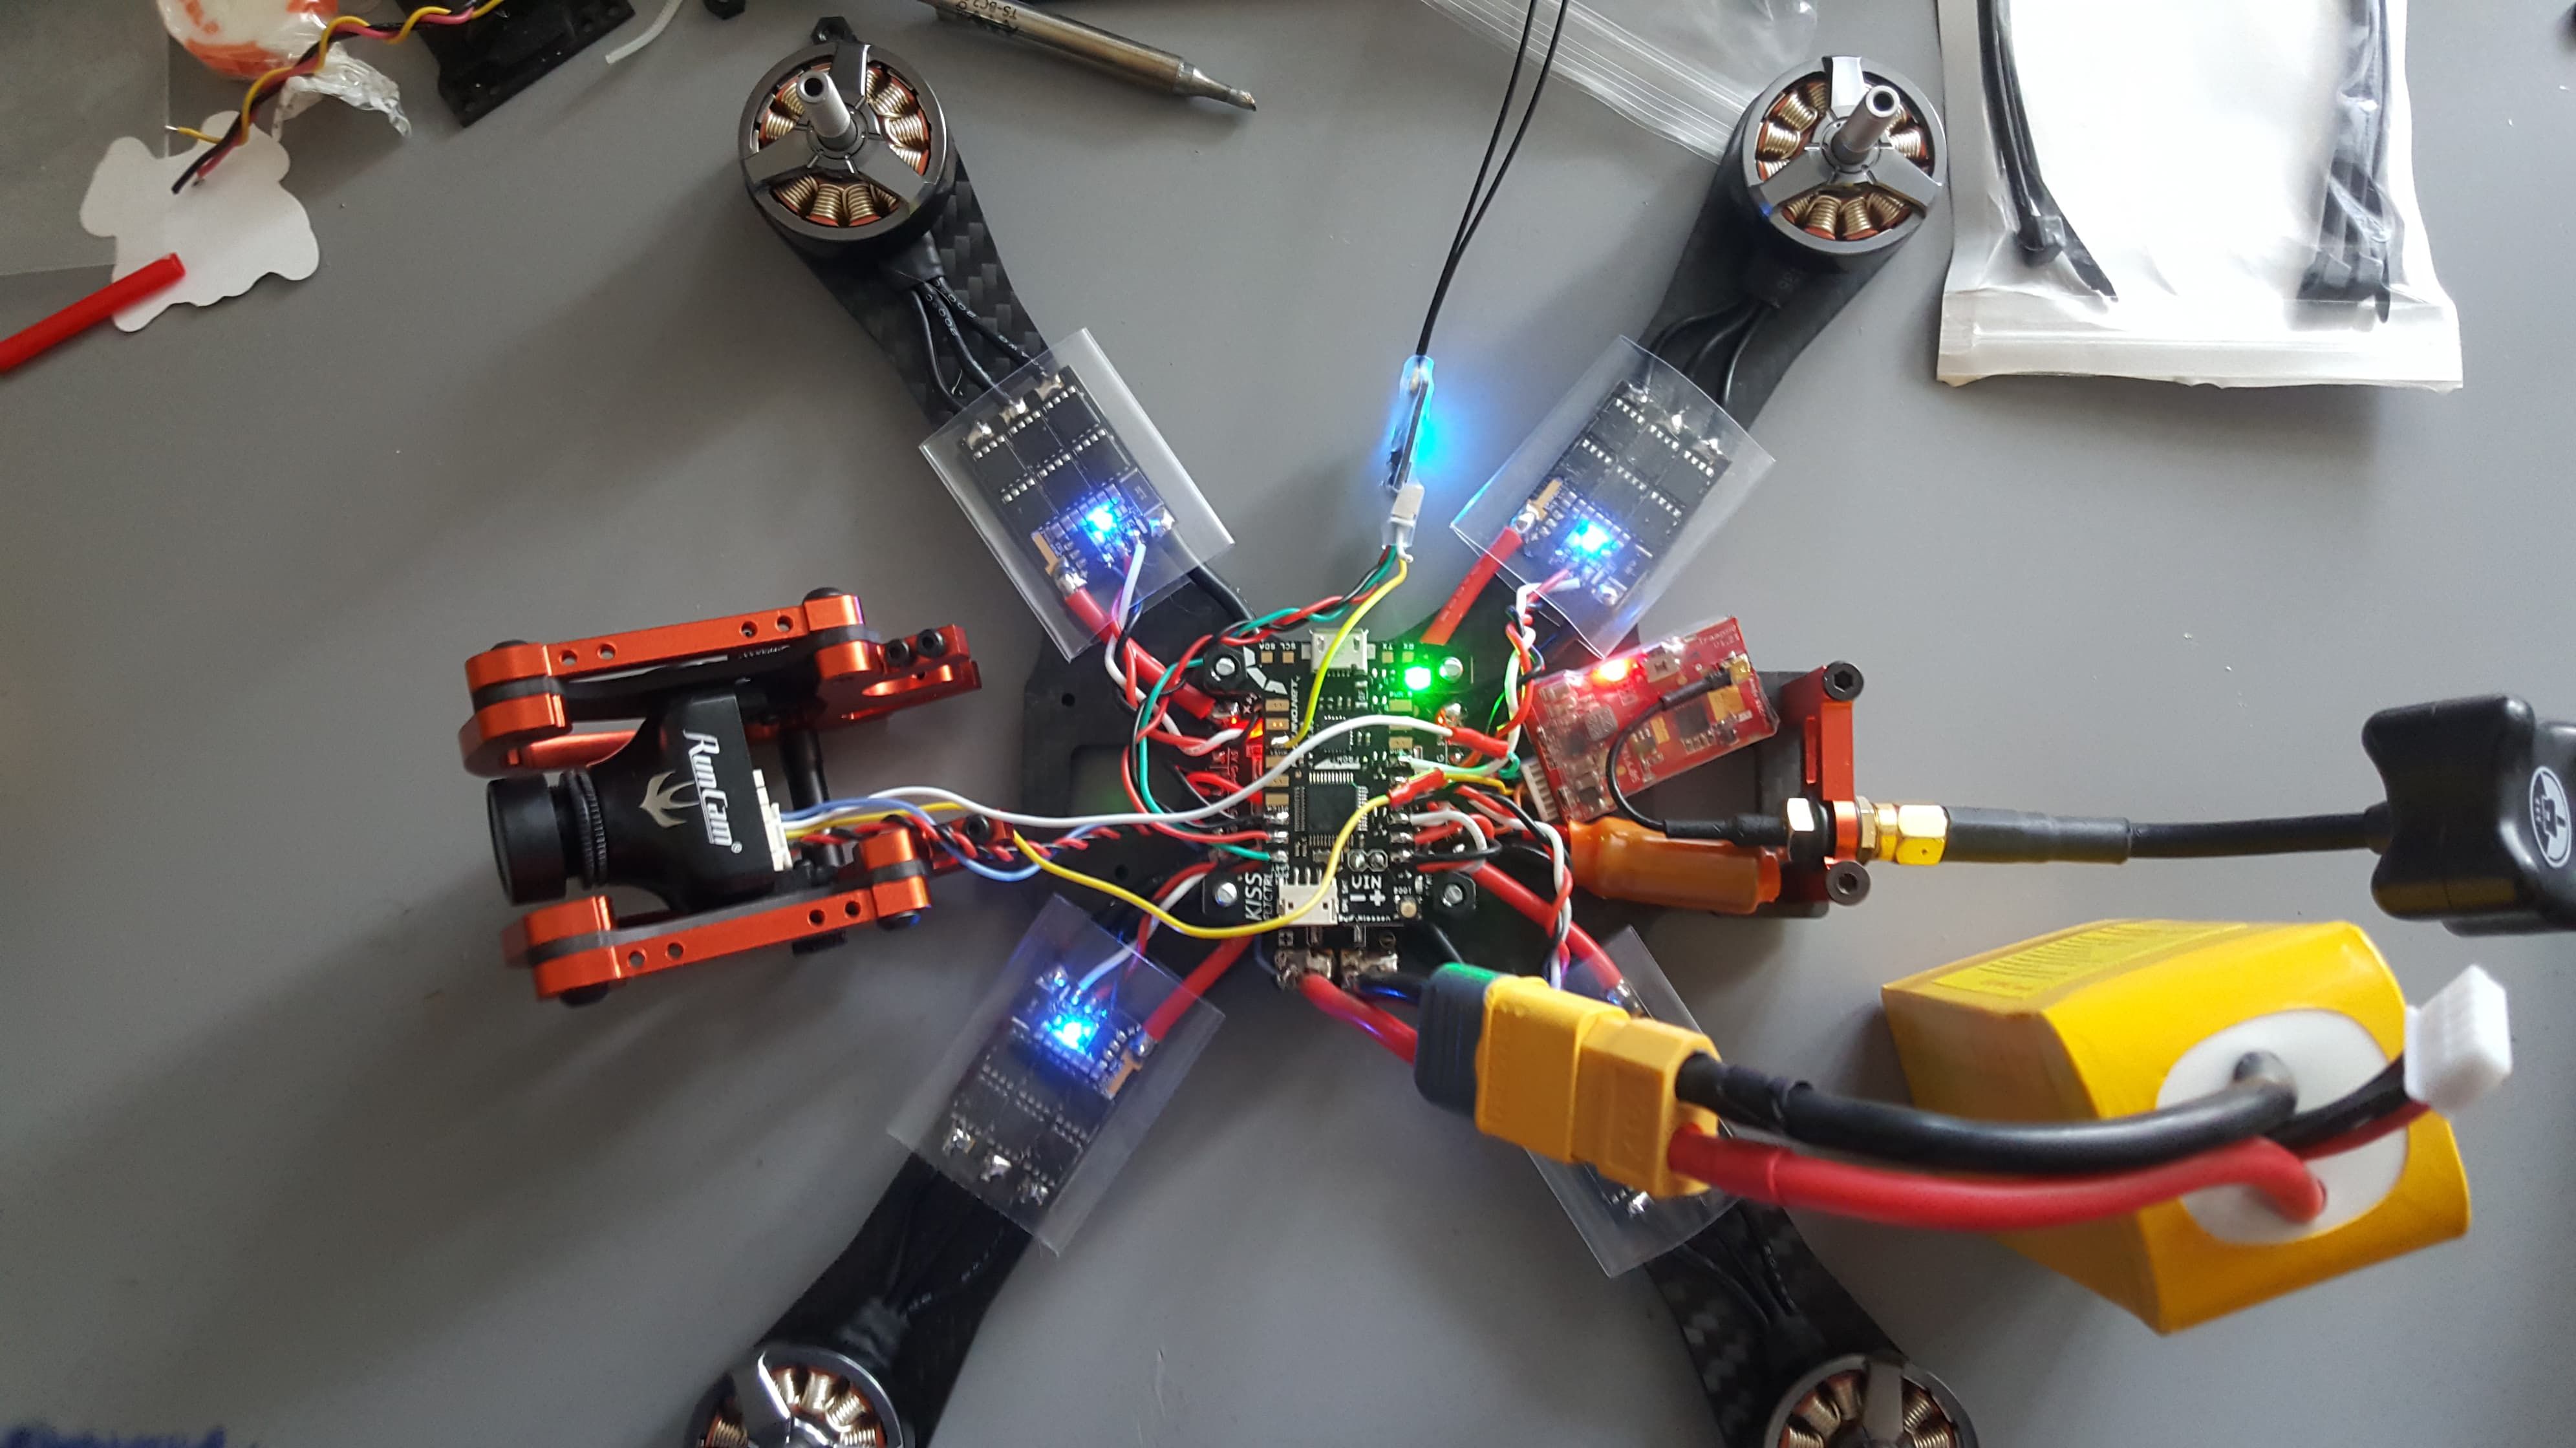
Let's wrap it up. Literally. I sorted out the mess on the back adding double-sided tape and zipties wherever needed.
As per usual, two zipties, one pointing back, one pointing upwards, getting that 90 degrees angle for the receiver antennas.
Then you slide the heatshink down the lenght of the ziptie with antennas inside, heat 'em up and boom, atennnas are secure.
As the last step I bridged reversing jumpers on motors 2 and 4, heated up the heatshrink and used double sided tape to hold them down.
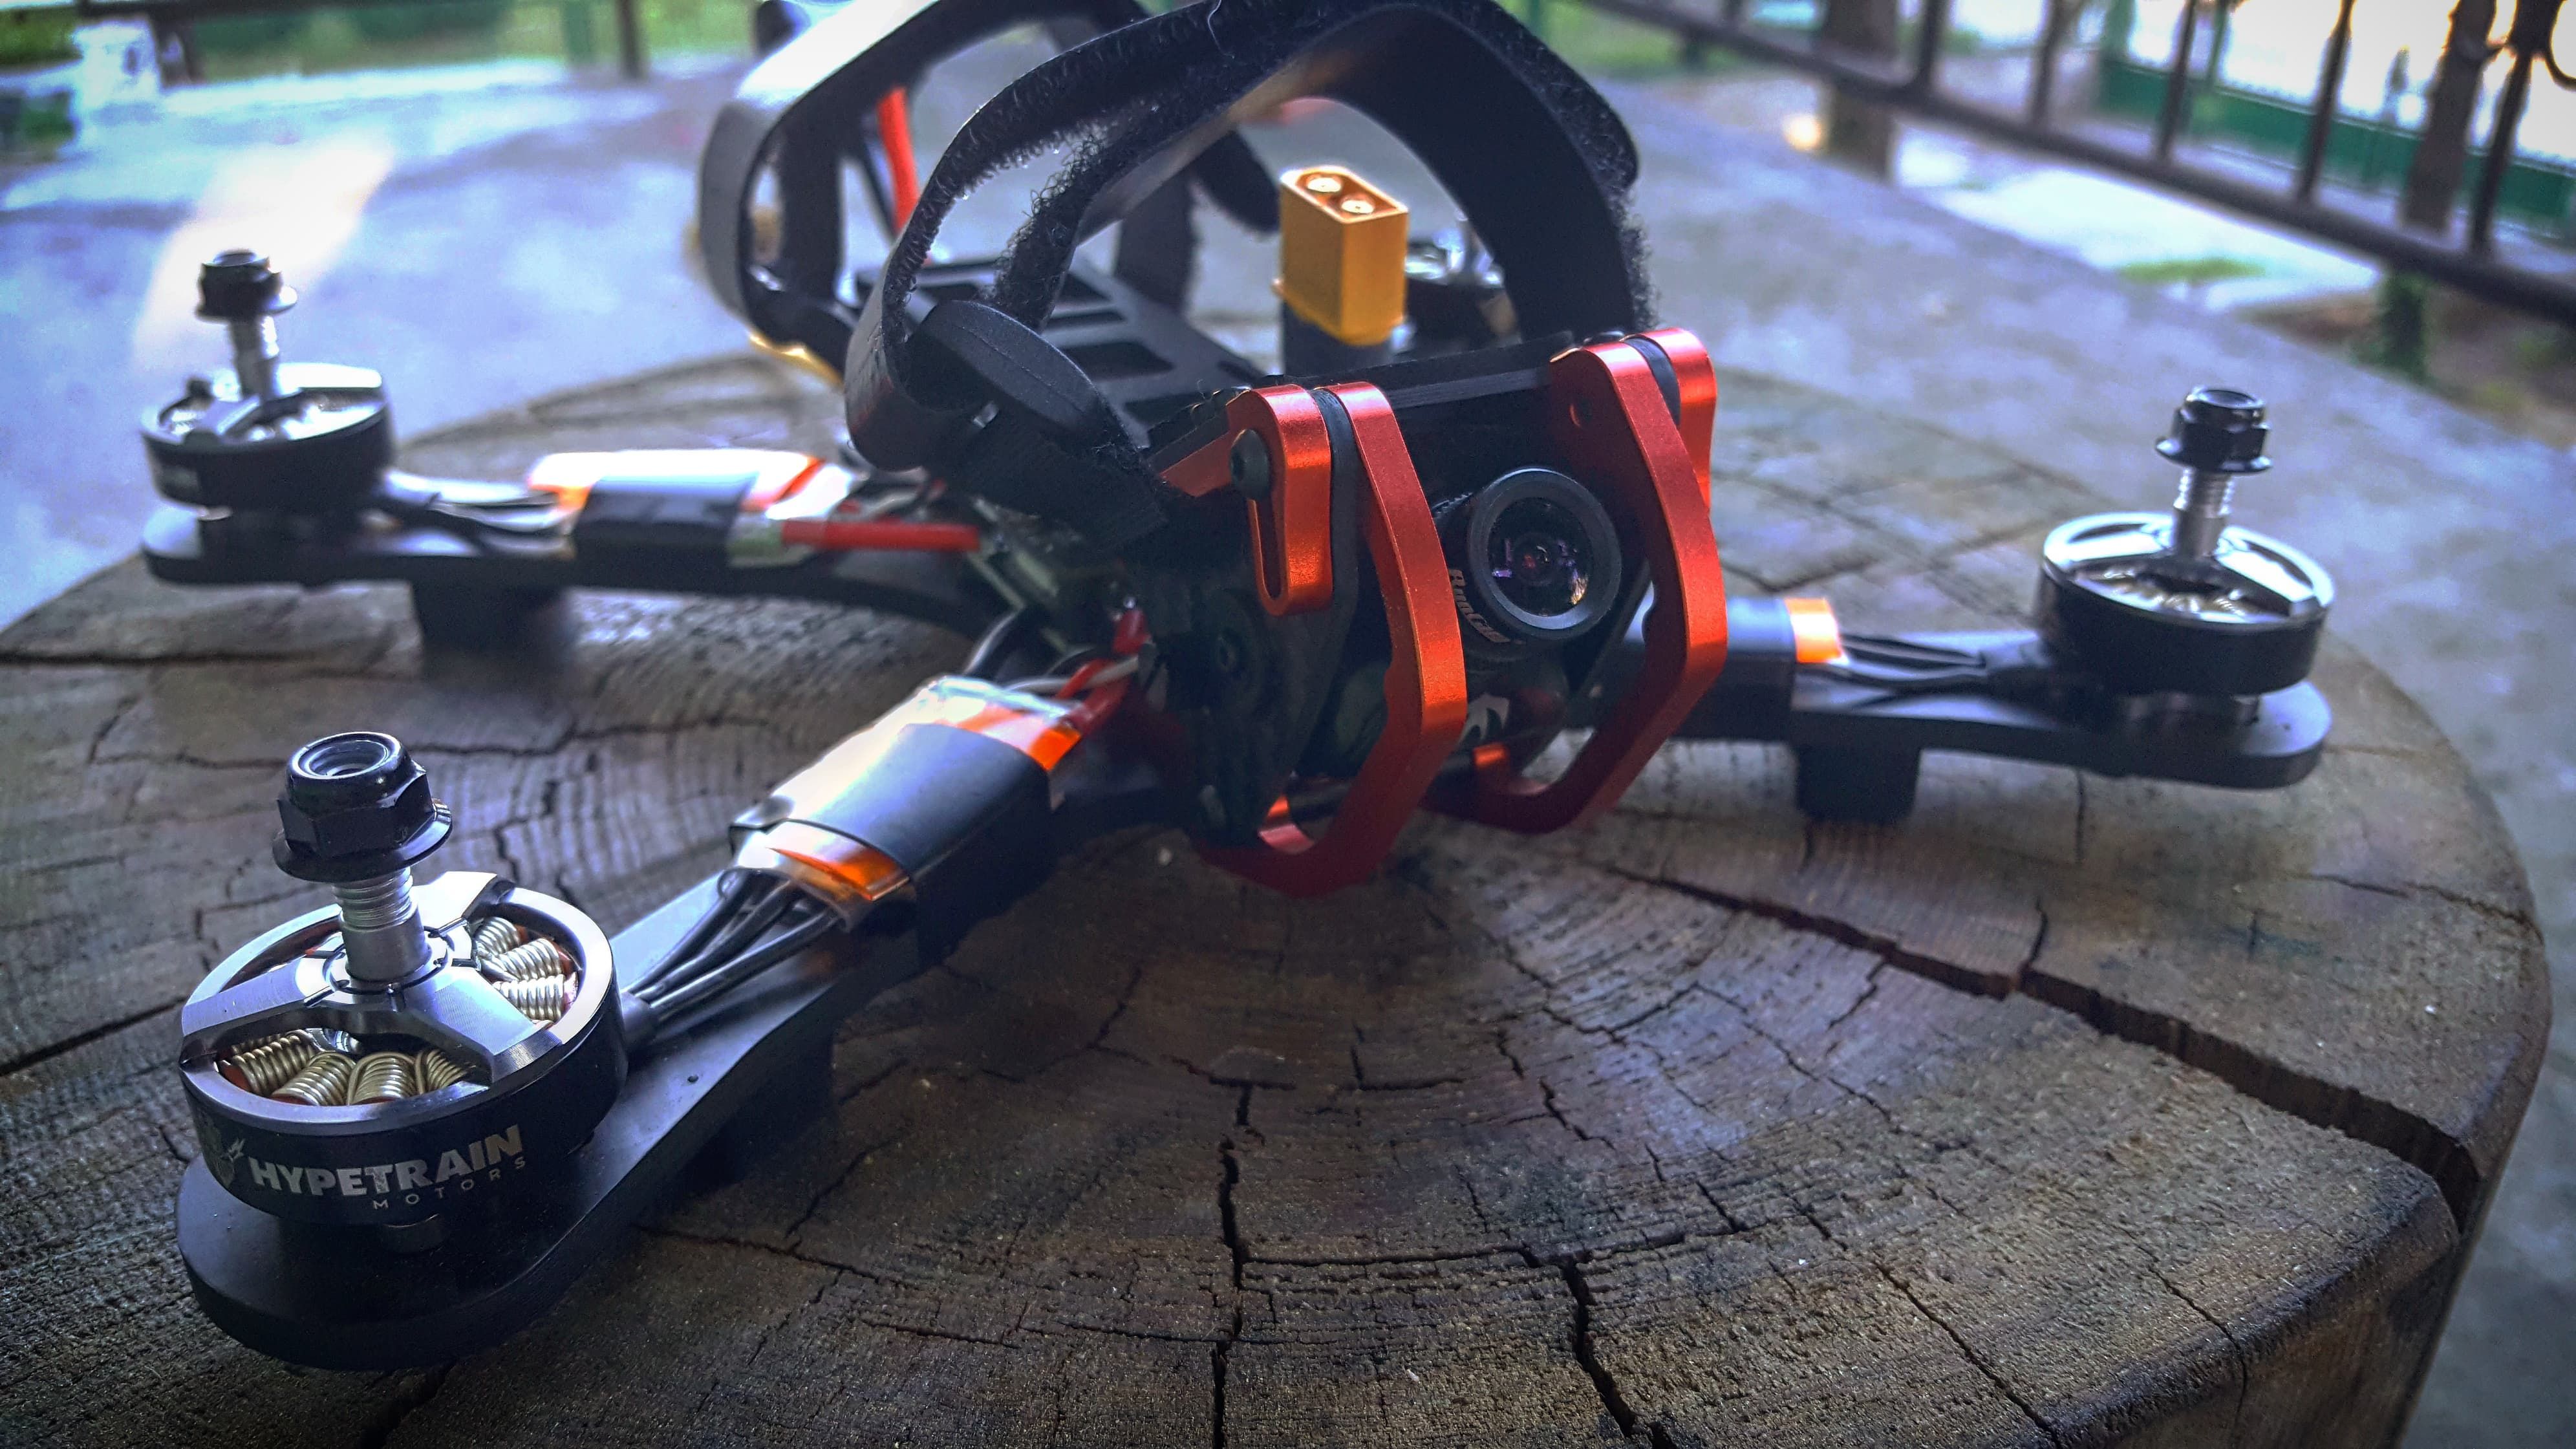
Close everything down, mount the head of the snak... cough chameleon and we're golden! Well, orange.
Haven't you forgotten something? No? Let me give you a hint.
In appreciation of your own building skills stand in front of your mirror and flex some muslces you've grown holding down that soldering iron.
You know what flexes better that that? HQProps.
Cut down some props and stick them to the ESCs using some double-sided tape. Since I've used HQProps they weren't covering the entire ESC so I favoured the side which is exposed to a prop strike. Finish off with some electrical tape, otherwise known as "will fix anything, relationships included" and make sure you're not covering ESCs status LED. Now we're done, have a cold one, you're not going to maiden anyway 'cause it's 1AM, your wife is long asleep and you ain't getting any tonight since you've been building all day long without getting anything done.
3. Things I've learned I wish I didn't.
This is a tip from my previous build, fortunately I didn't learn it again this time - don't apply solder to the tip of your iron while holding it over your flight controller. Ever wondered where is that solder going since you can't see it on the tip even though you've added like 2 centimeters to it so far? Yeah, right there.
Say you're in the middle of soldering something. Say you realize there's something you gotta do real quick. You put the iron down and do the thing. Smell that? It's burning plastic. Get a soldering station. Or a brain. Preferably both.
Not something I've learned the hard way but an important tip if Kiss build is your first - Flyduino doesn't add any extra wires, heatshrinks, even manuals to their stuff. If it's your first build make sure you get some. They do have packages sold separately with a decent lenght of two different sizes of wires and transparent heatshrinks as well as some telemetry wires for your ESCs.
Did you know there's a thing called ground loop? Do you know what it does? Me neither. Unless you're using an OSD or a garbage bin full of LC filters ground your VTX and camera on the same pad.
Ideally you want to power your camera off 5v coming from the VTX. Those offering that possibility usually have a double ground wire extended from the harness/pins. If you don't want to power your cam from the VTX then at least ground it there.
An easy way to determine if you screwed up the grounding is to see noise in your FPV feed before arming the motors.
Long power leads are bad. Always. Fortunately in my case it was on extended pads on the side, meaning I could desolder and shorten it without messing up the build. Battery XT60 going to the front is not only safer but aligns the battery in a way that provides great counterbalance for those of us flying with HD cameras.
Use all 4 motor screws and locktite them. Yes, I know Steele uses two, but you're not Steele and neither am I. Unless you are in which case just slap some bluetack under them and forget about the screws.
No, I didn't use locktite. No, I don't have all of my motor screws anymore.
Photos


Part List
Frame |
Chameleon
(164 builds)
Armattanquads.com
|
$90.00 |
Flight Controller |
KISS F3 32bit Flight Controller V1.03
(178 builds)
Hobbyking.com
|
$29.33 |
ESCs |
Flyduino KISS 24A Race Edition ESC (2~5S)
(122 builds)
Hobbyking.com
|
$22.05 |
Motors |
Hypetrain Freestyle 2306 2450KV Motor (V1.1)
(96 builds)
Store.rotorriot.com
|
$19.99 |
Propellers |
HQ 5x4.3x3 V1S (2CW+2CCW) PC **Choose Color**
(354 builds)
Pirofliprc.com
|
$3.69 |
FPV Camera |
RunCam Swift 2
(412 builds)
Shop.runcam.com
|
$44.99 |
FPV Transmitter |
CA$54.73 20% ImmersionRC Tramp HV 6-18V 5.8GHz 1mW to>600mW Video Transmitter International Version V2 RC Parts from Toys H
(141 builds)
Banggood.com
|
$39.99 |
Antenna |
TBS Triumph 5.8GHz Antenna RHCP (SMA) (2 Pack)
(369 builds)
Hobbyrc.co.uk
|
$36.90 |
Receiver |
FrSky R-XSR 2.4GHz Micro ReceiverDefault Title
(937 builds)
Racedayquads.com
|
$21.99 |
Power Distribution |
Matek FCHUB-6S Hub Power Distribution Board 5V & 10V BEC Built-in 184A Current Sensor for RC Drone
(96 builds)
Banggood.com
|
$9.99 |


New Message for ThatGuyIvory