
This is my second complete build and while I had hoped things would go a little smoother I still ran into plenty of issues. Fortunately I was able to overcome them all and get this bird in the air. This is heavier than my 5" race quad in part due to more carbon/hardware and in part due to the larger motors. I really like the weight however. This build is intended for freestyle and that extra weight provides a really smooth floaty ride.
Frame:
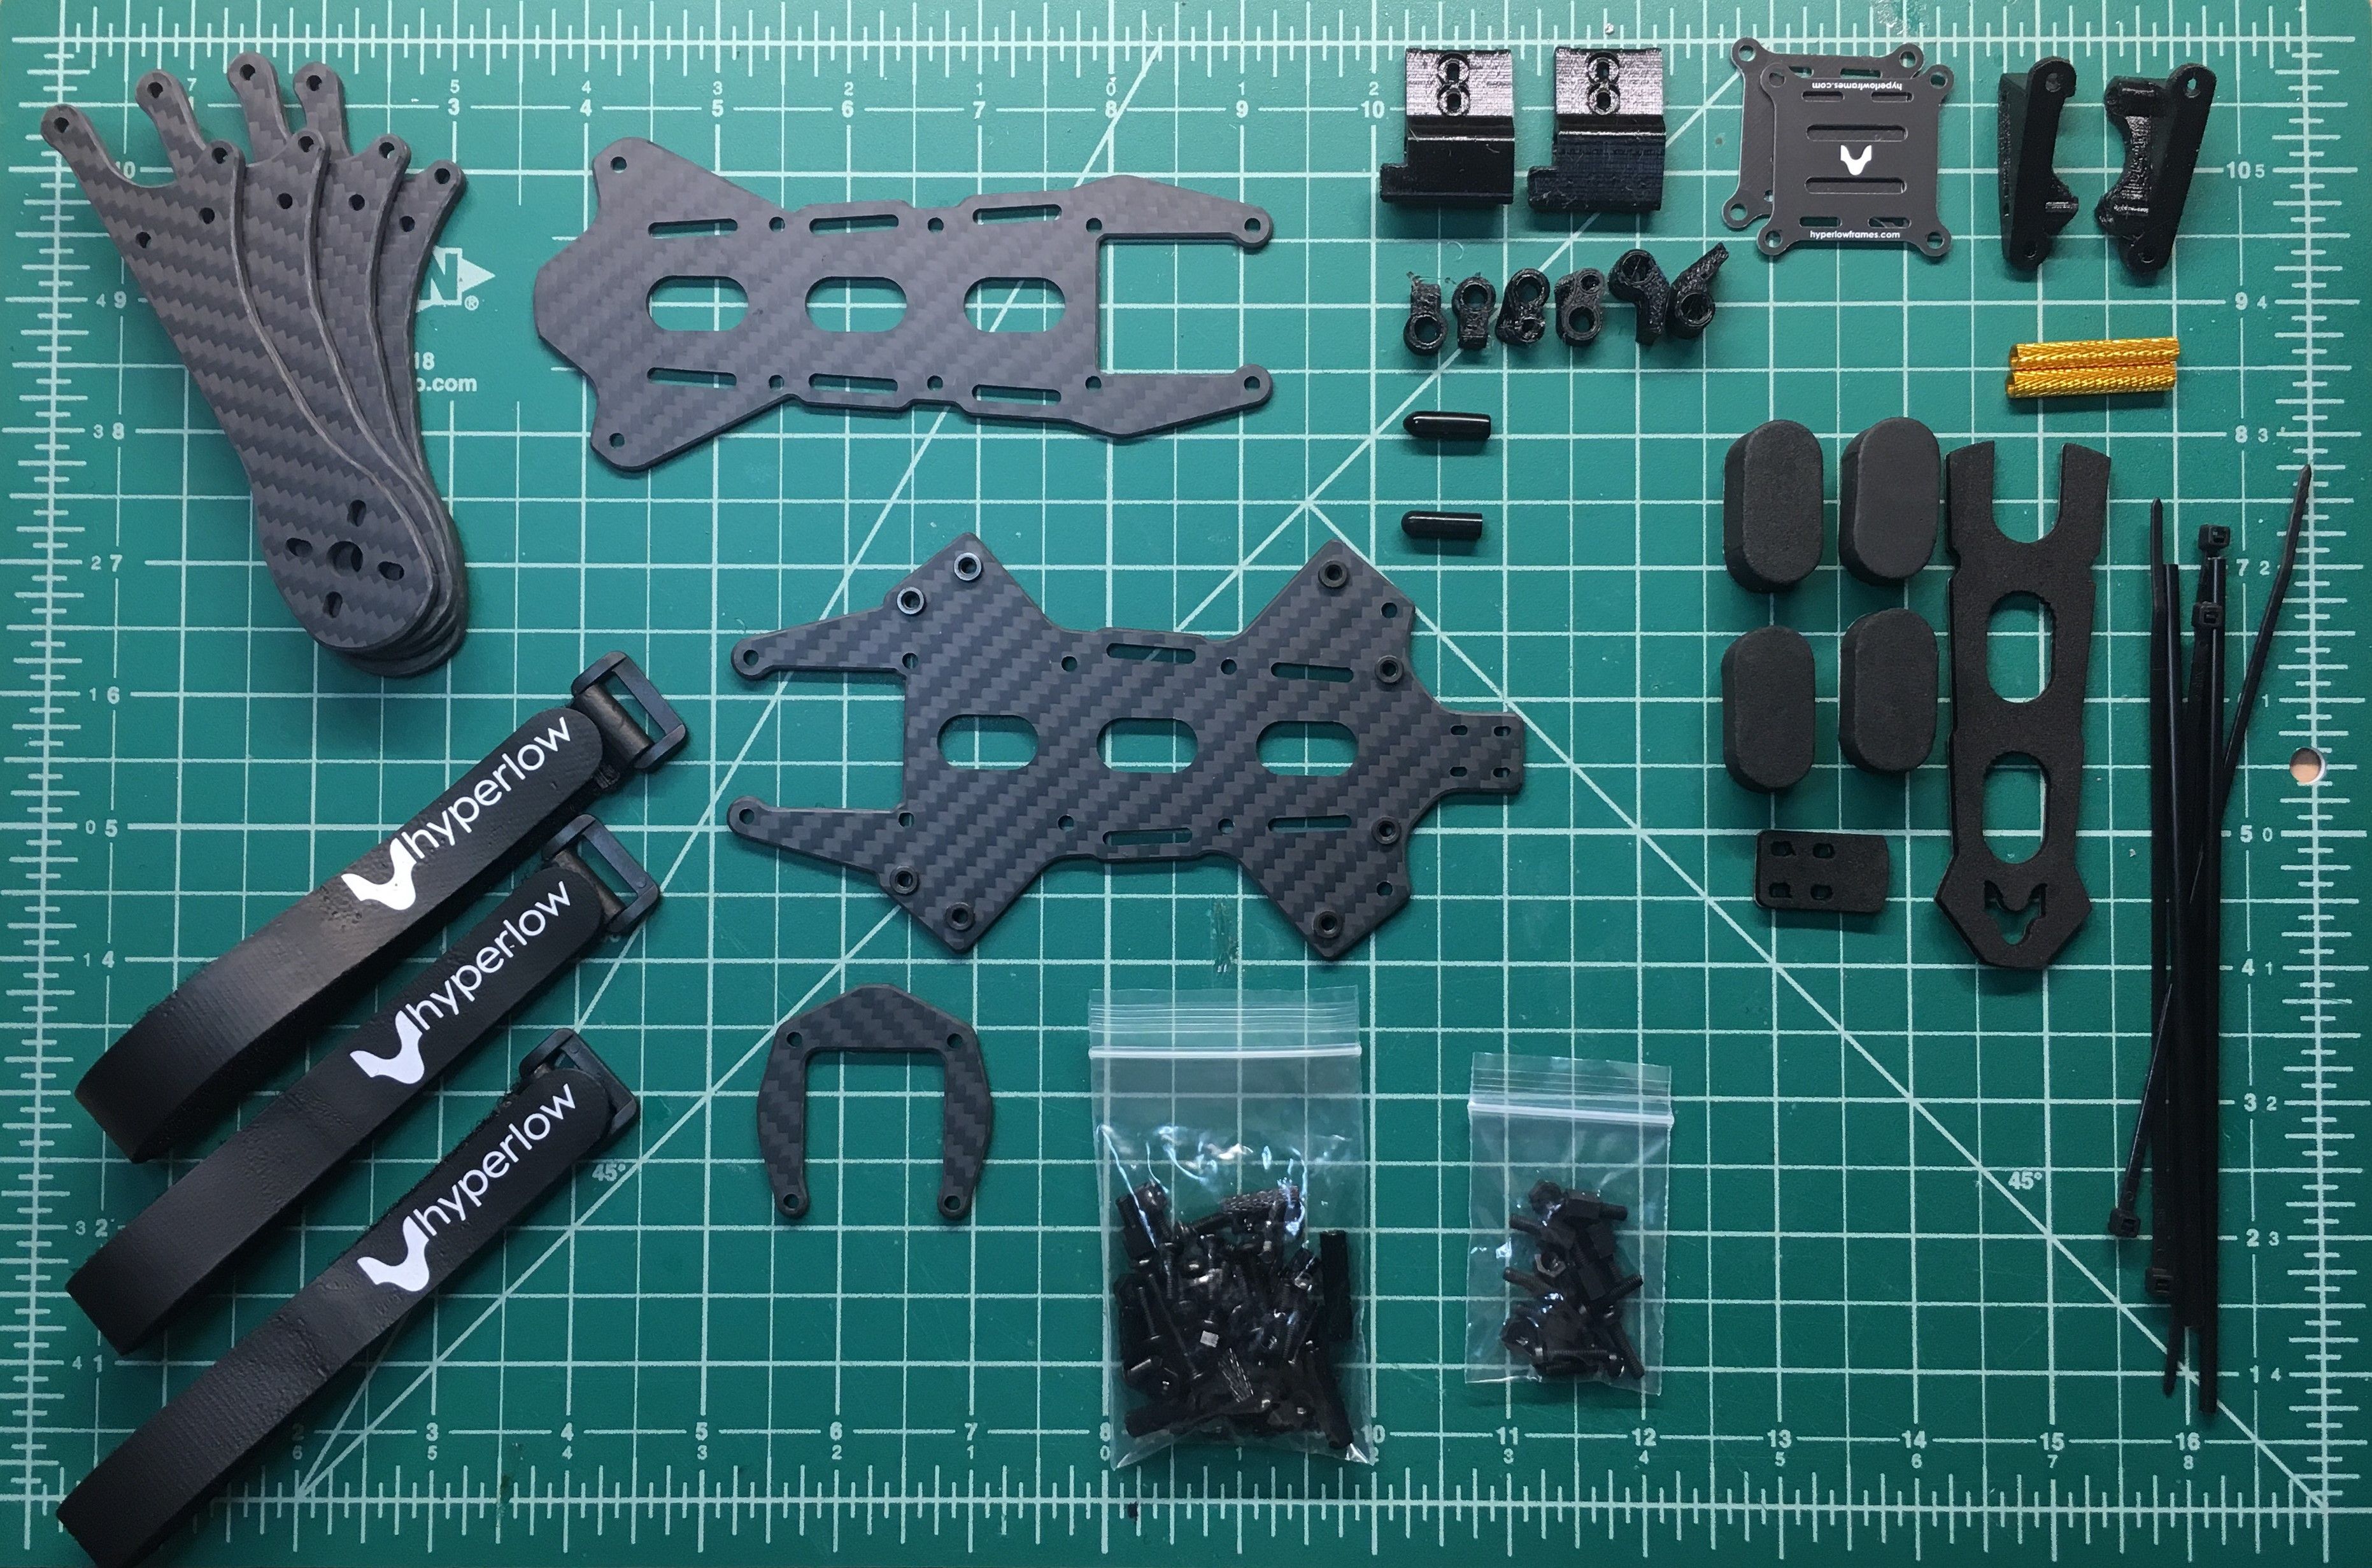
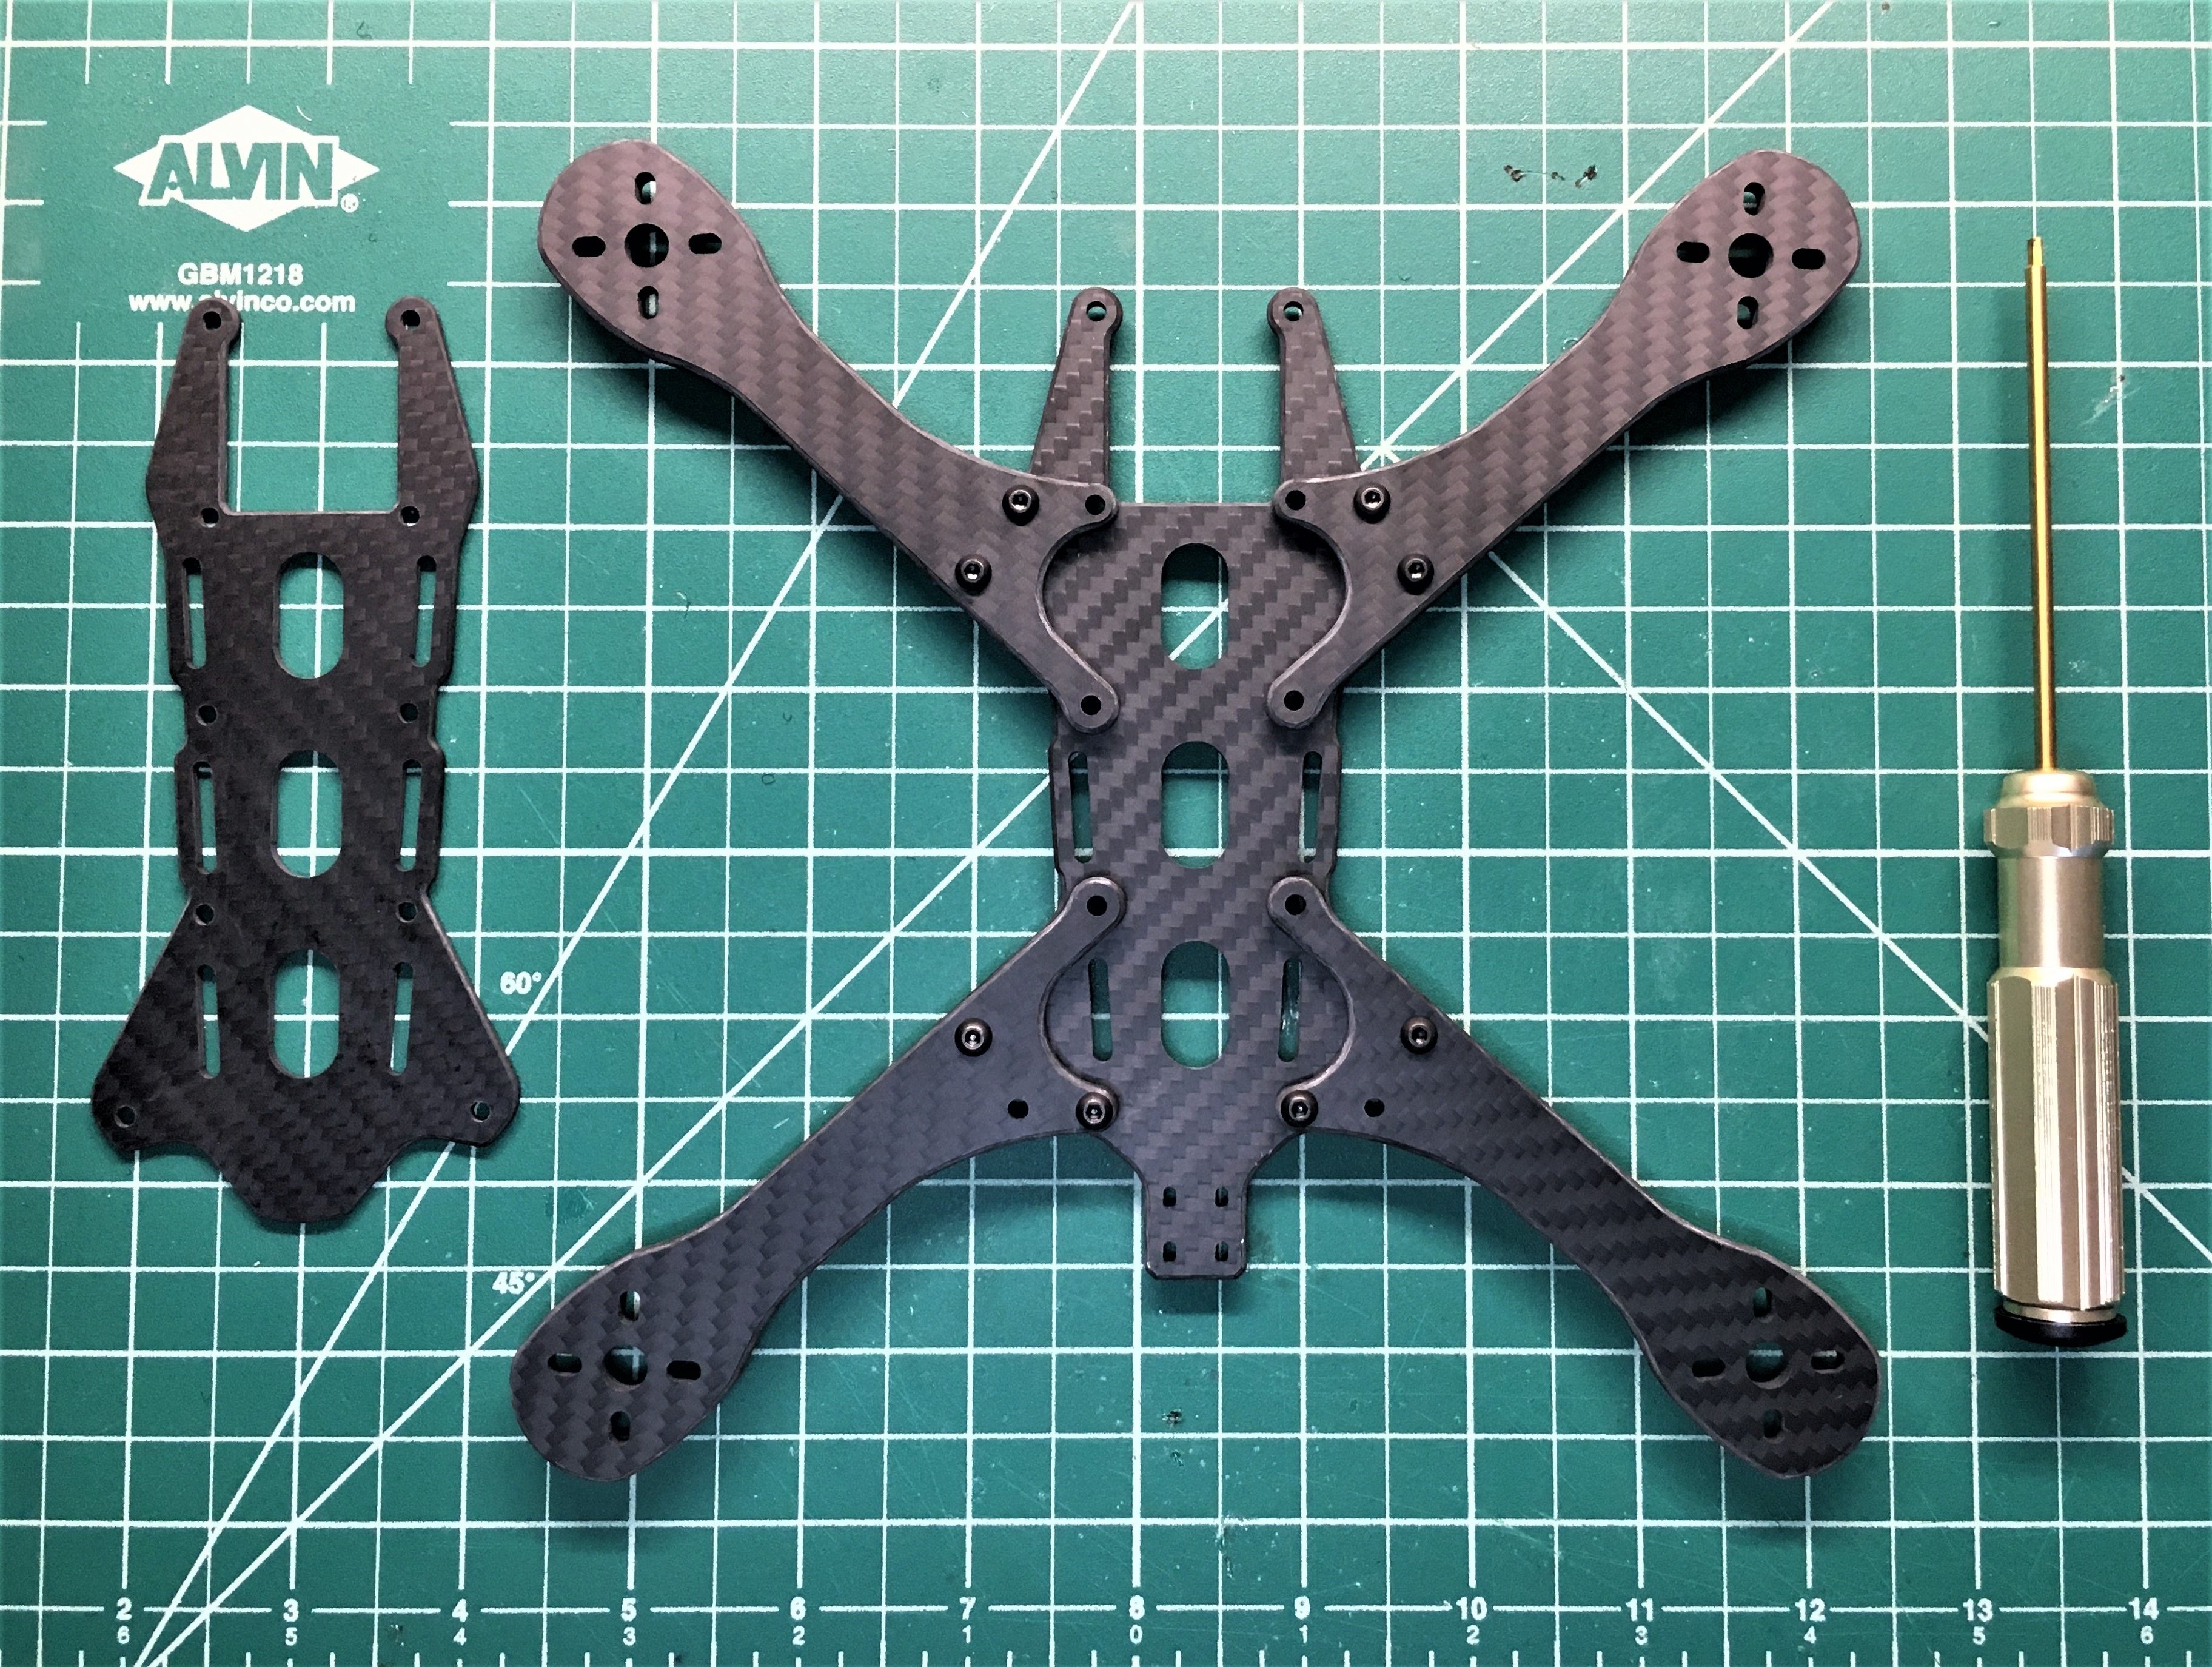
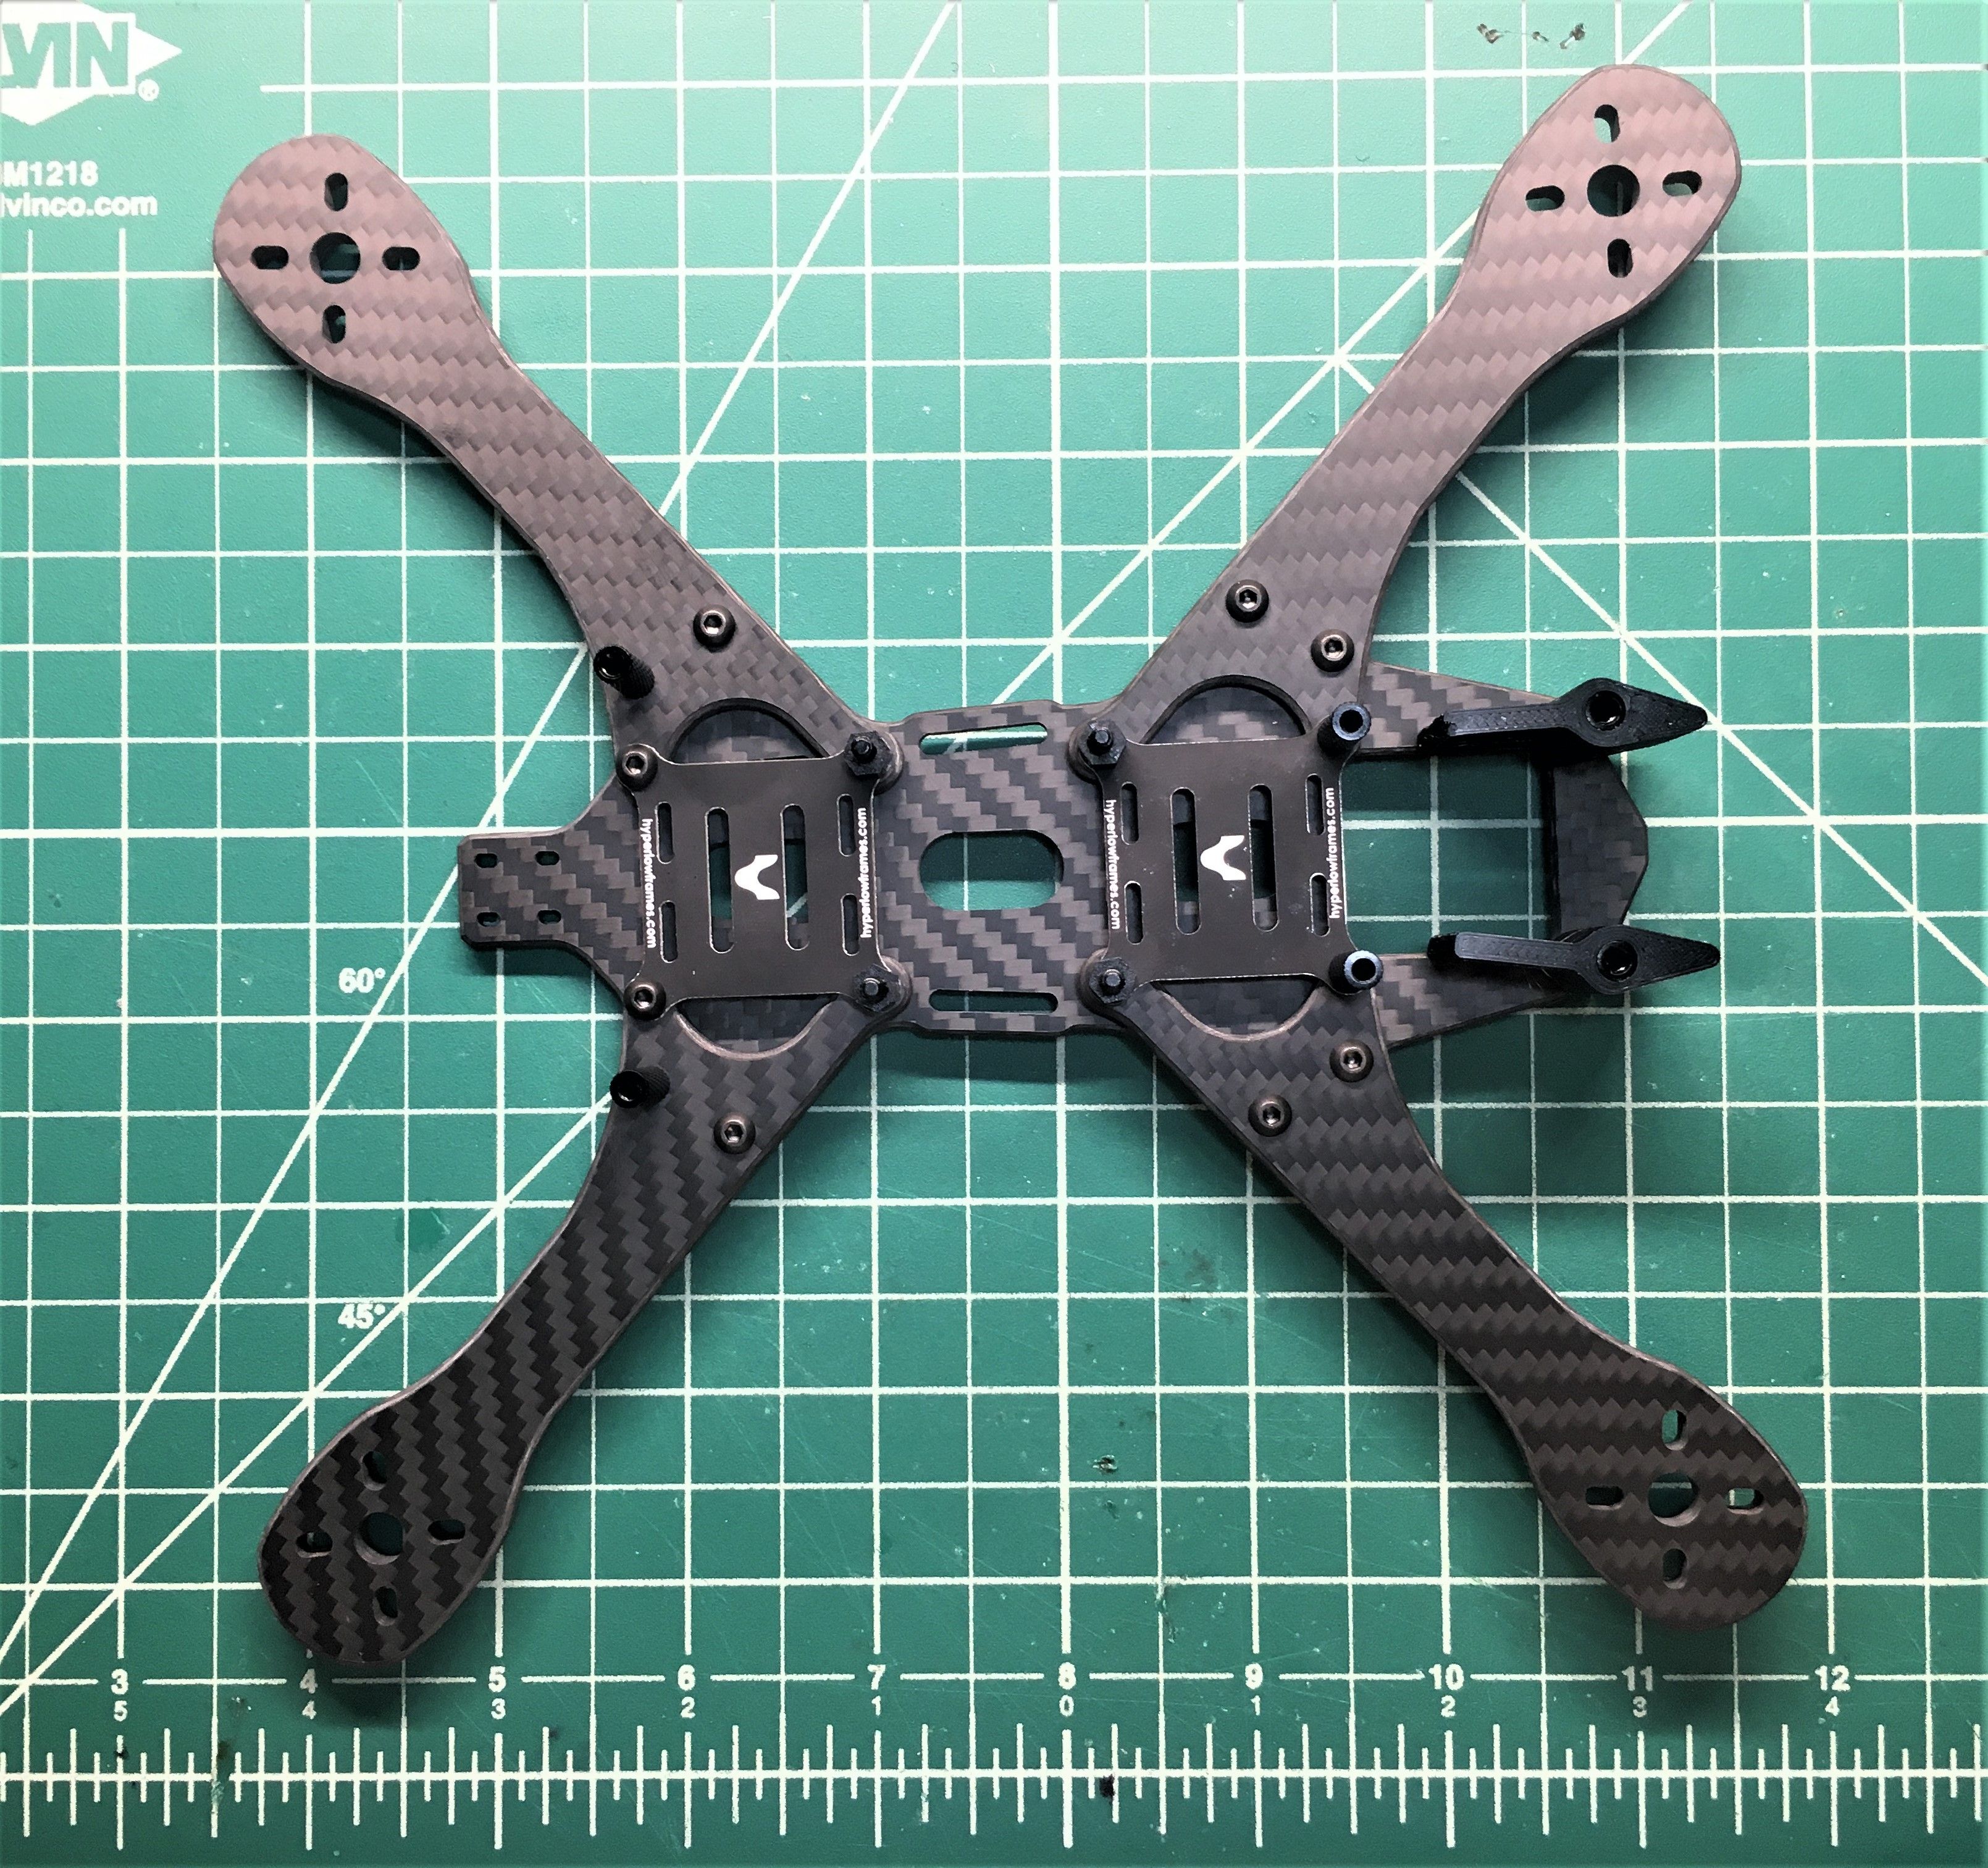
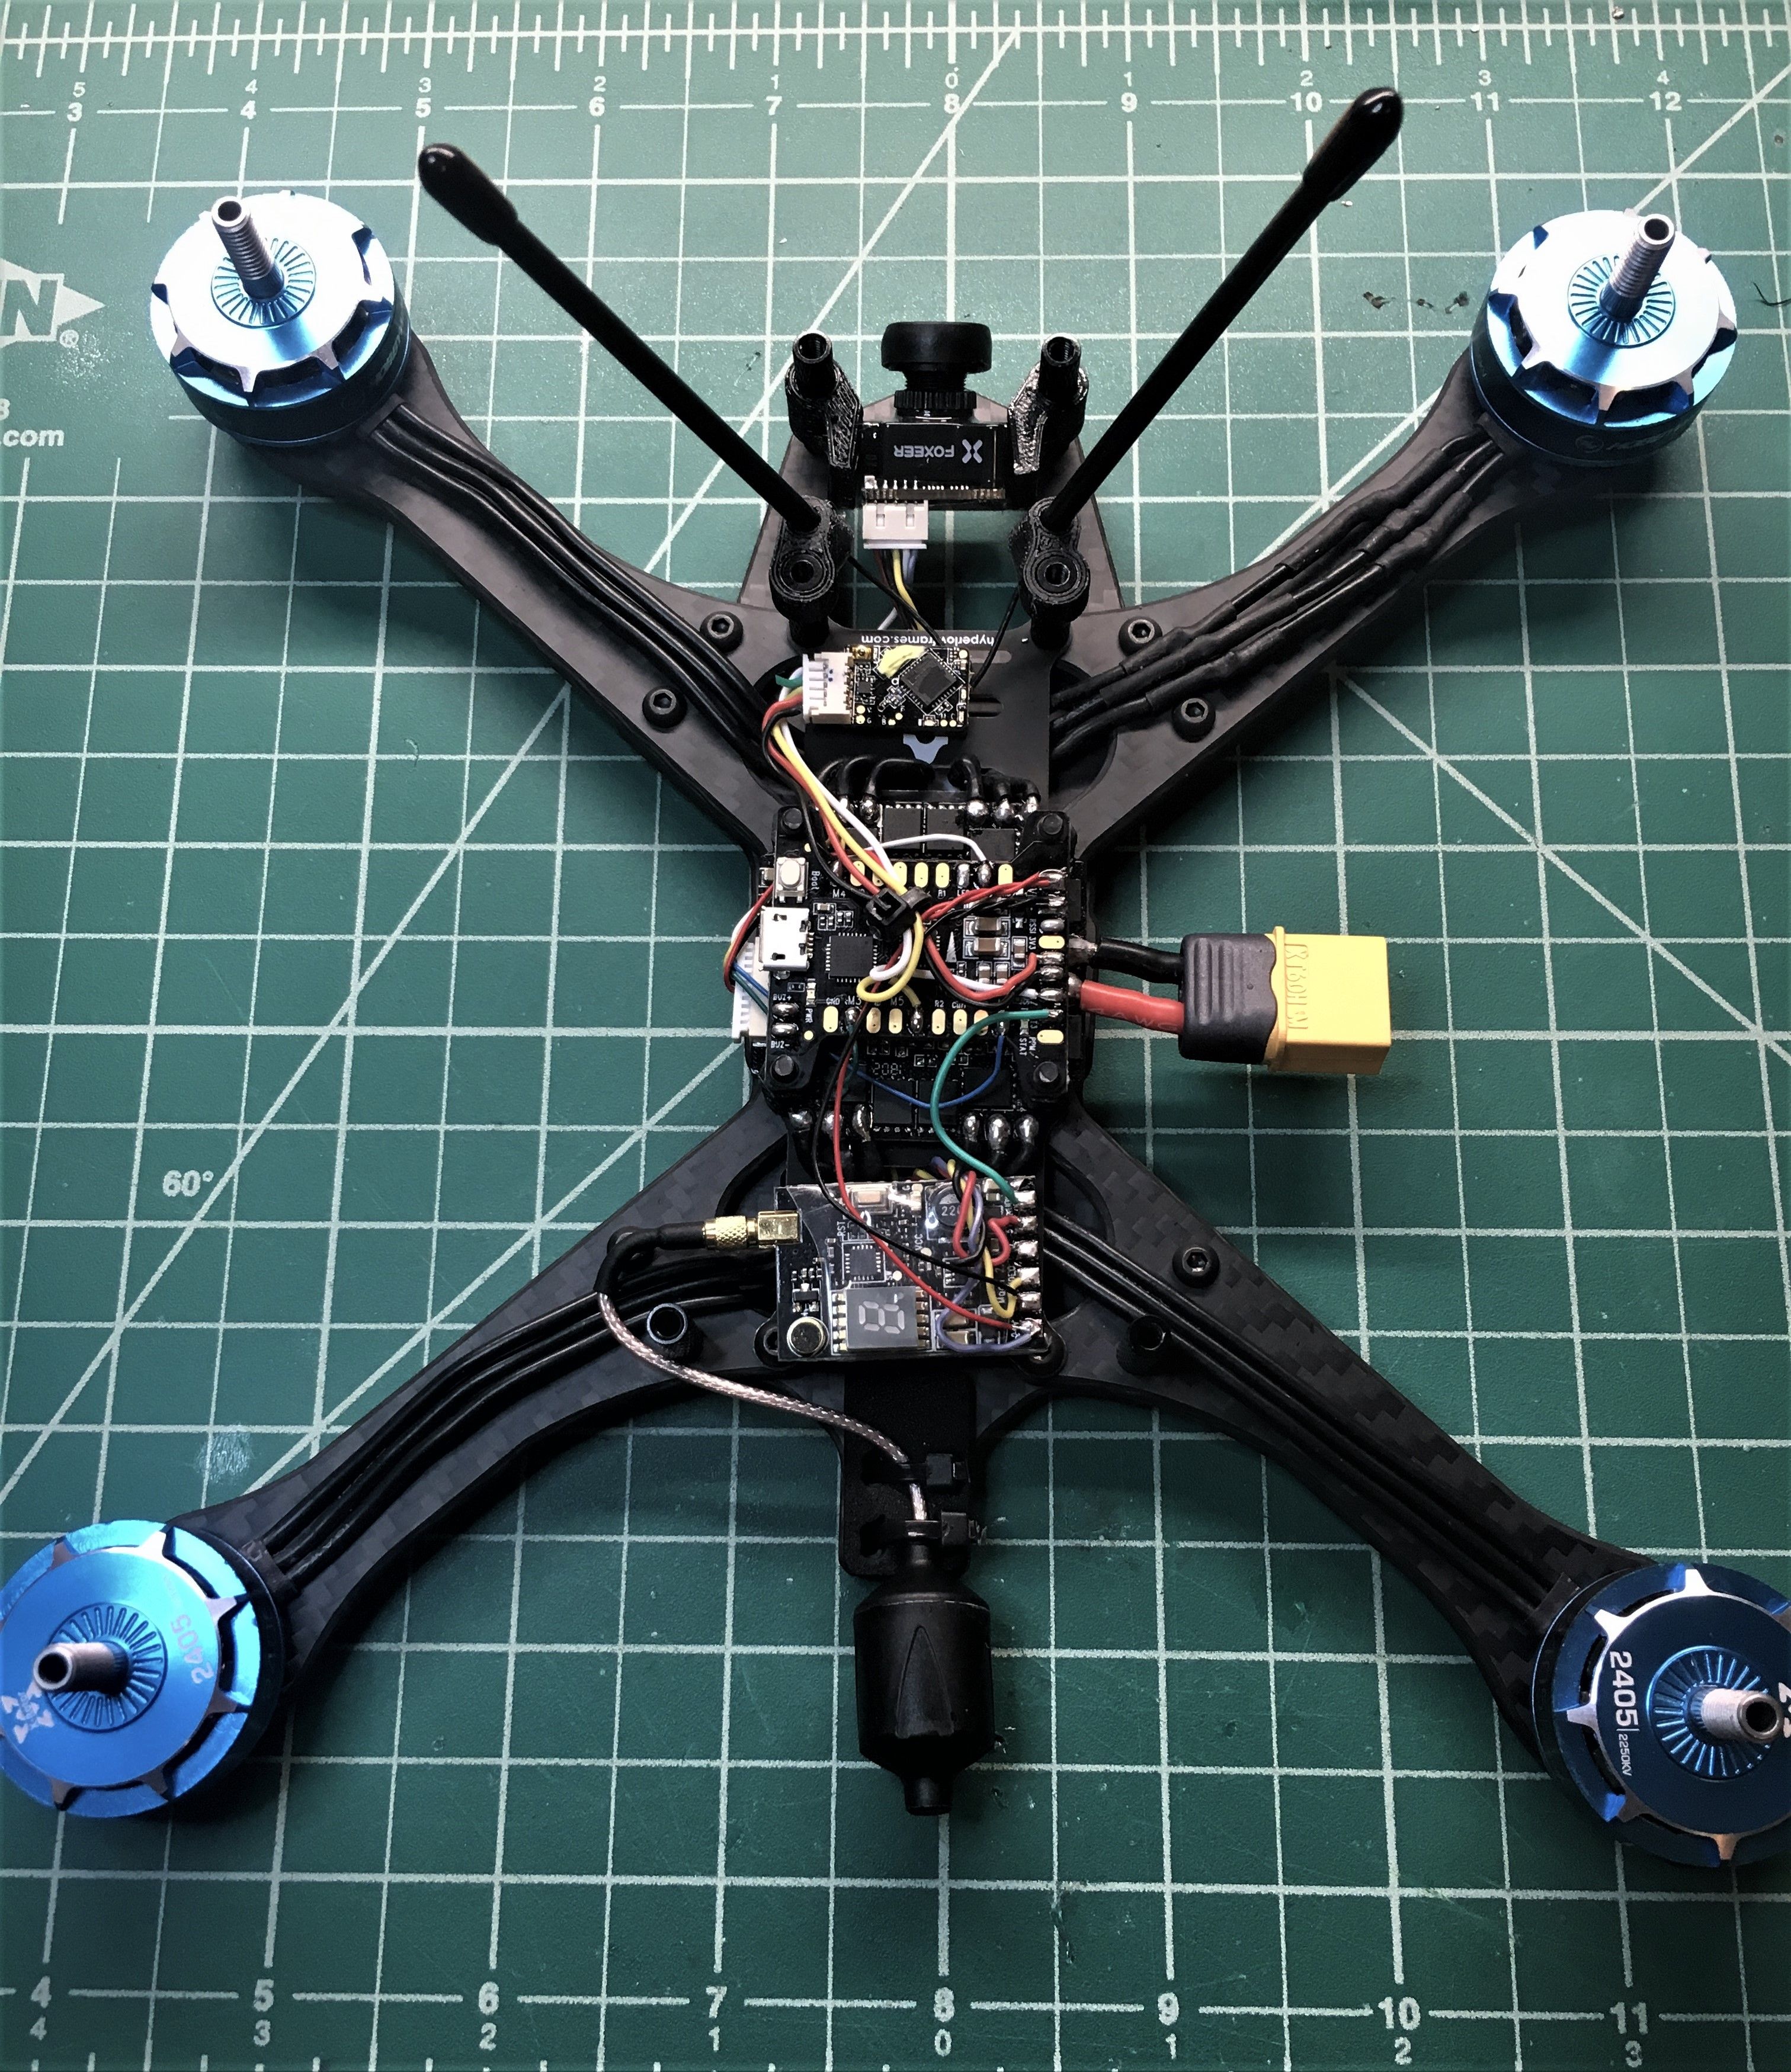
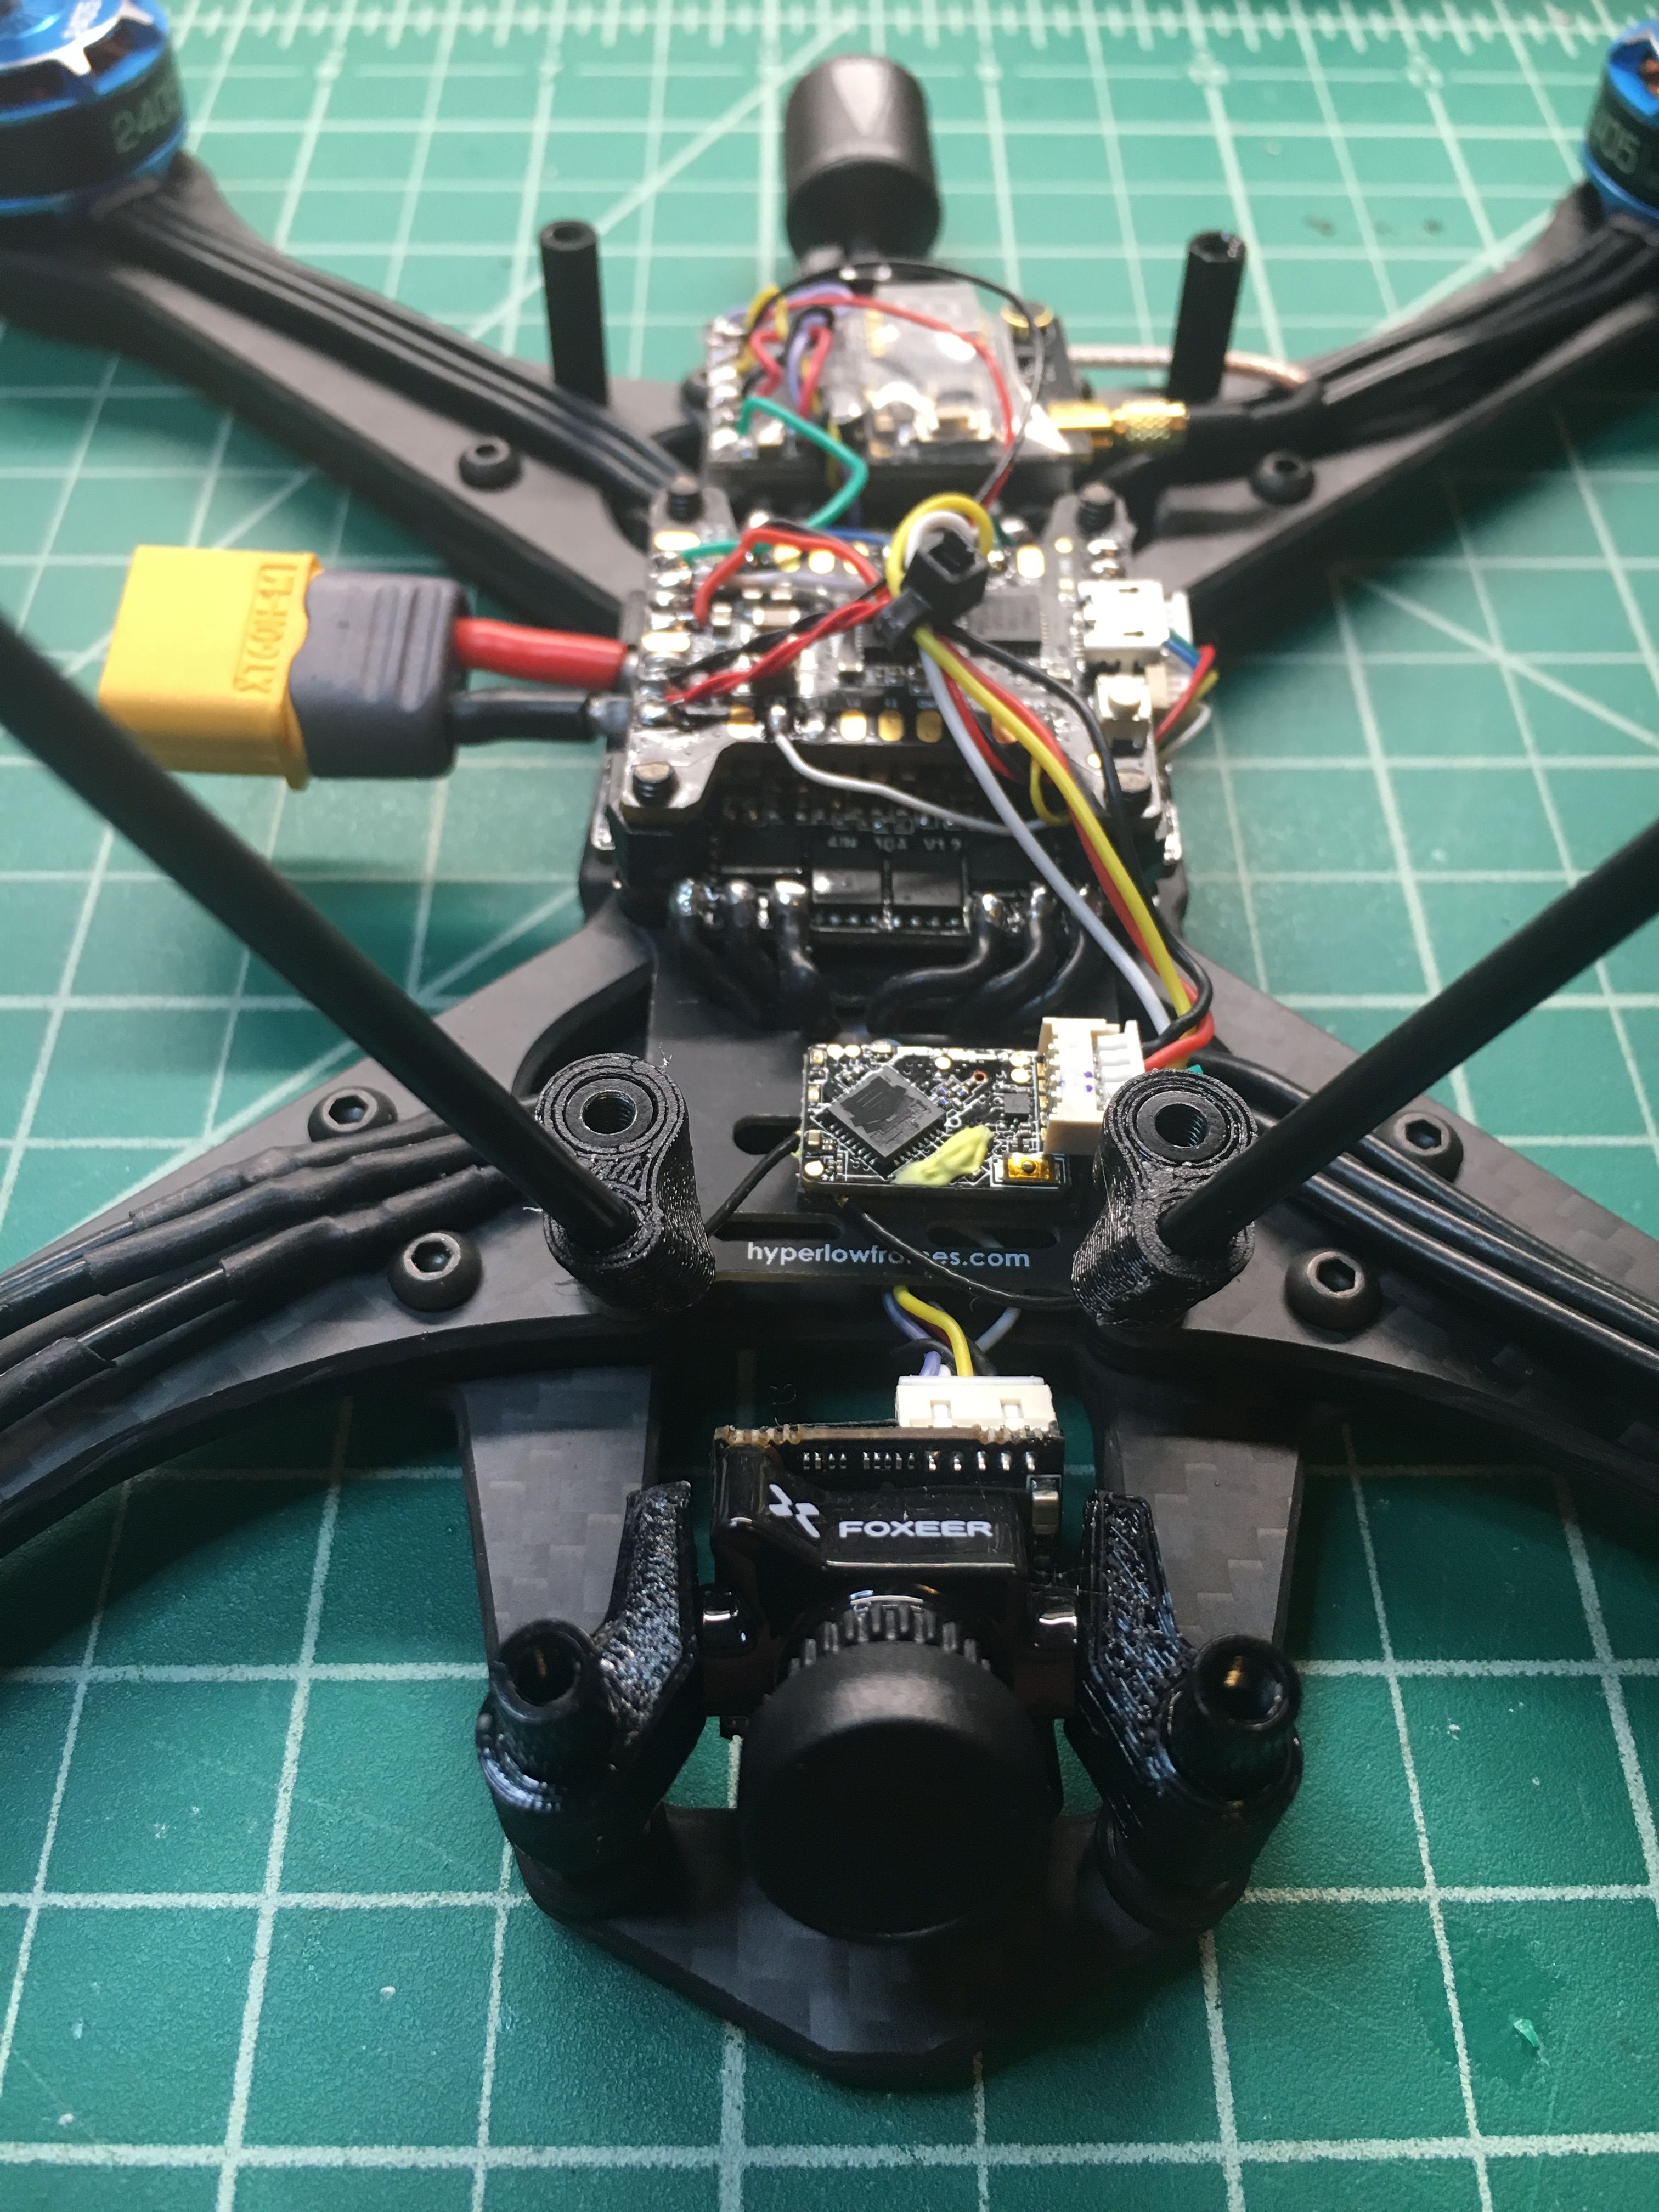
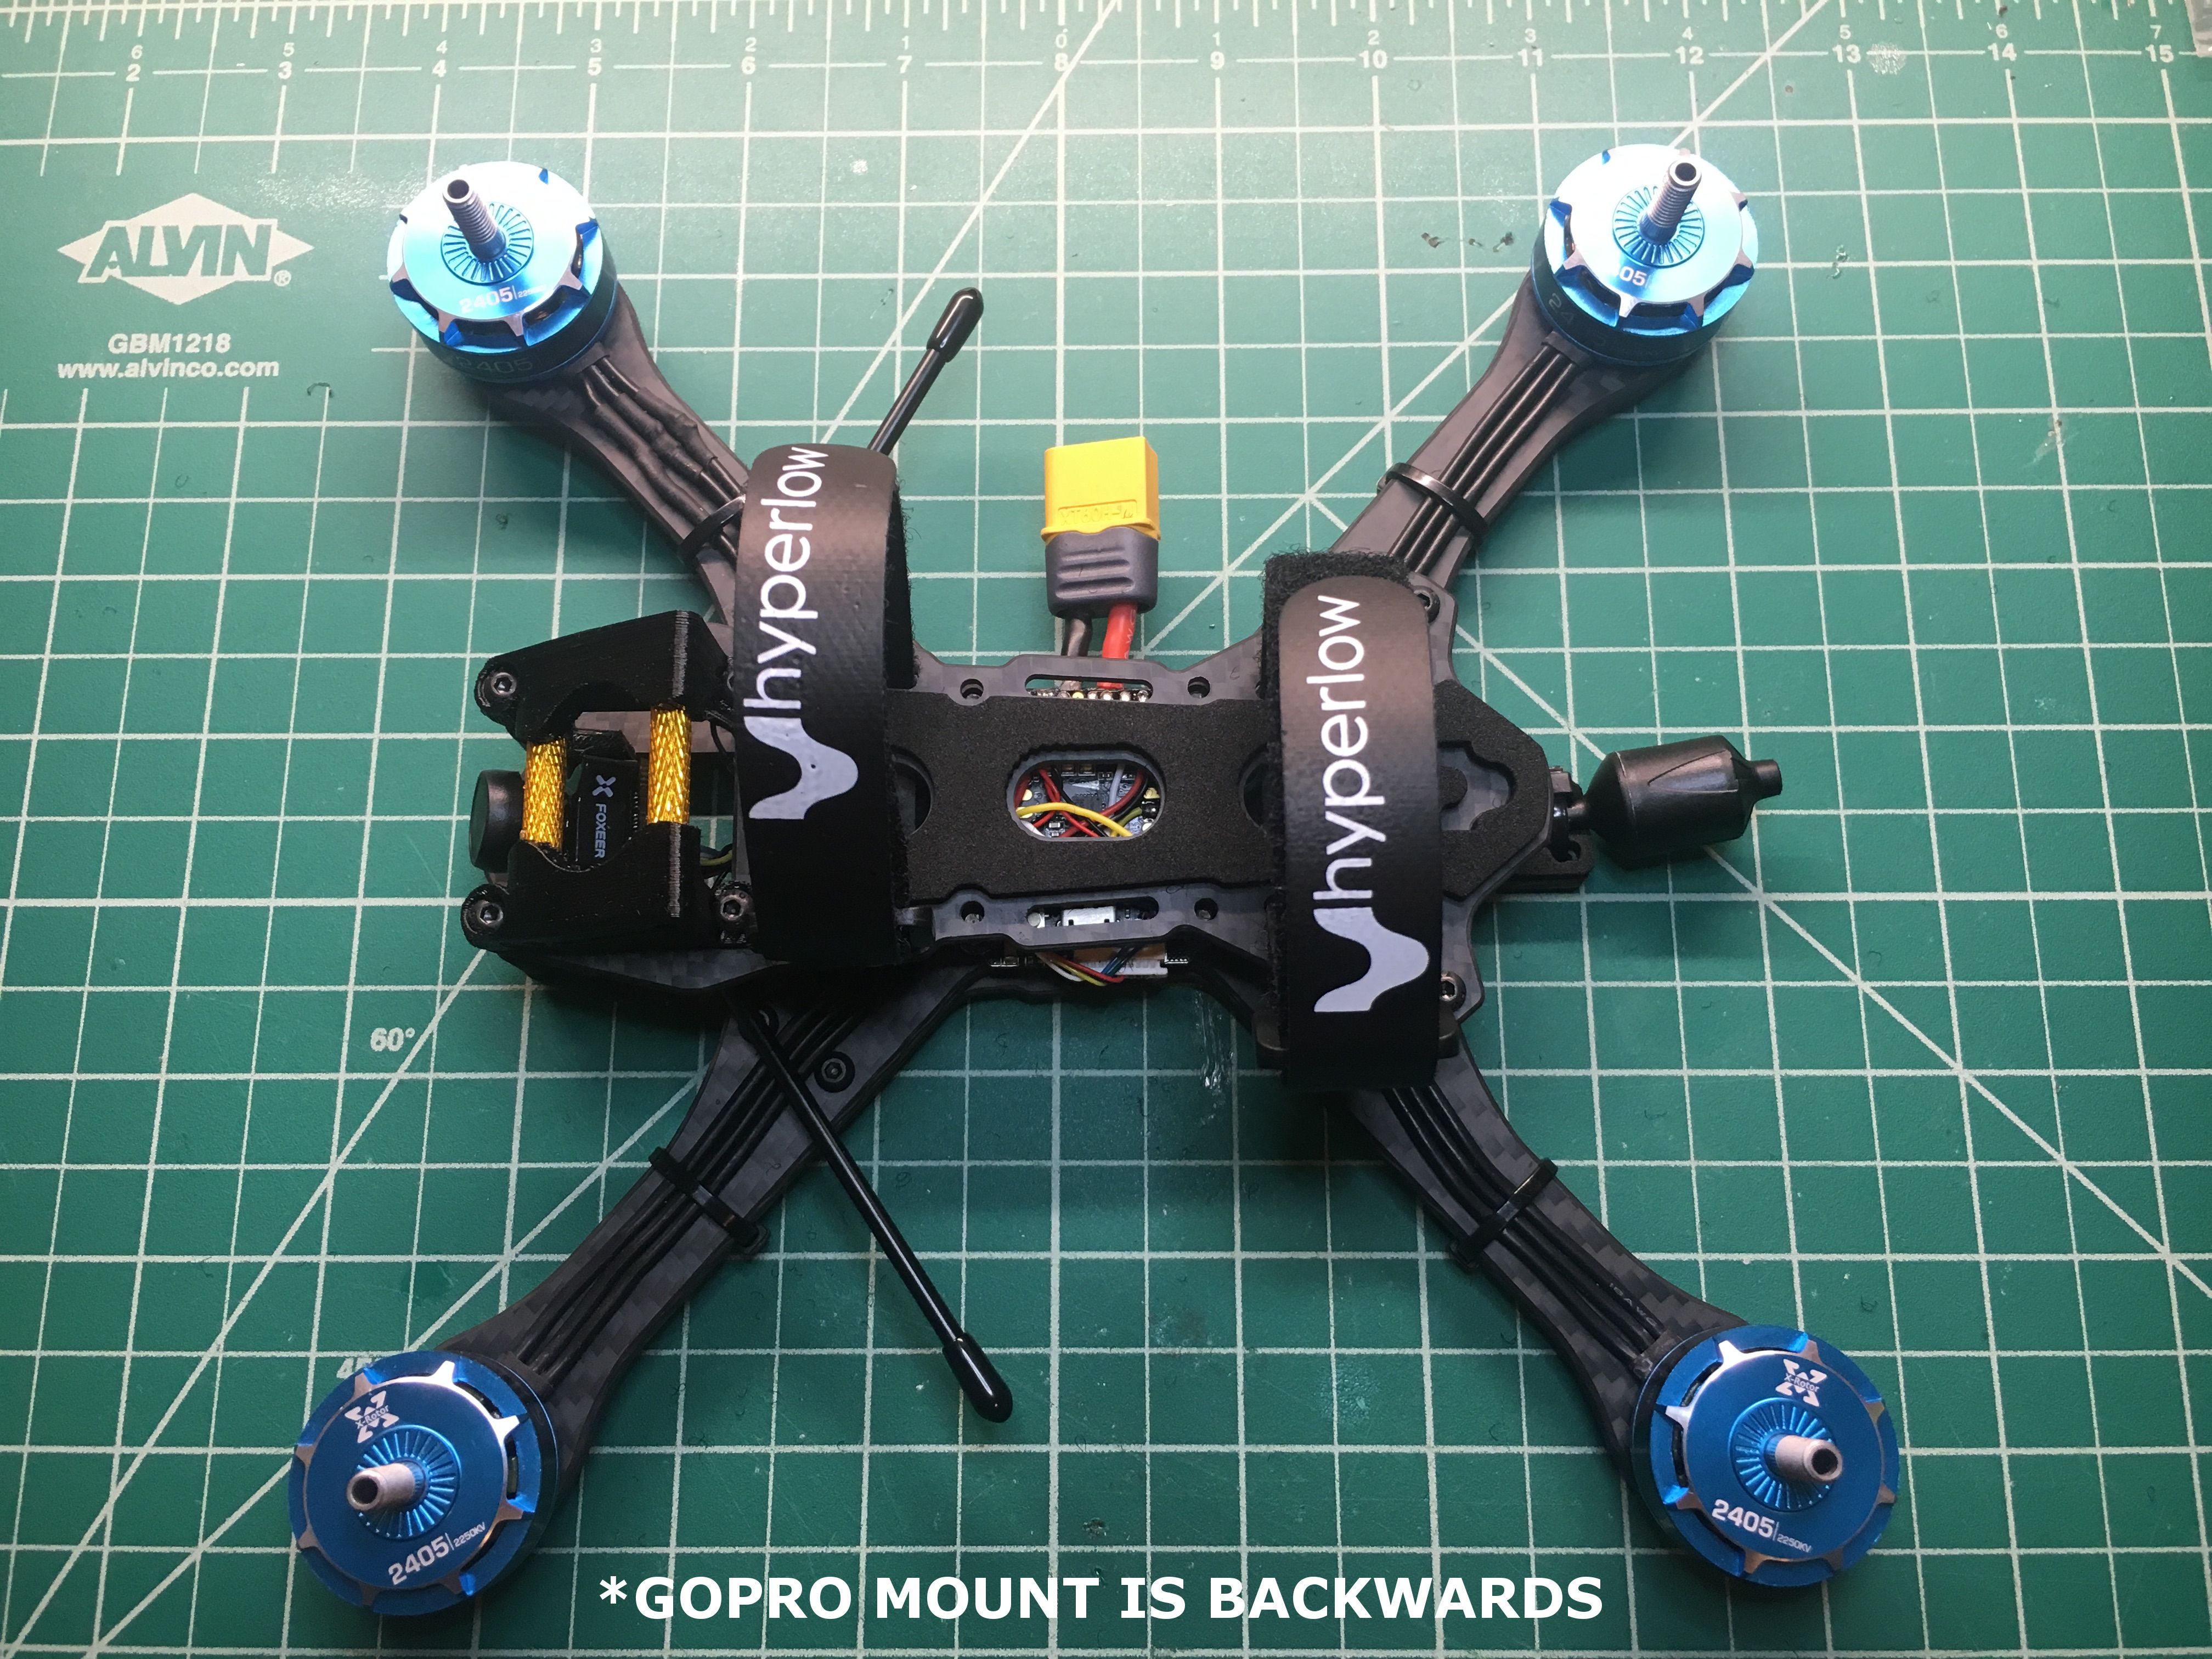
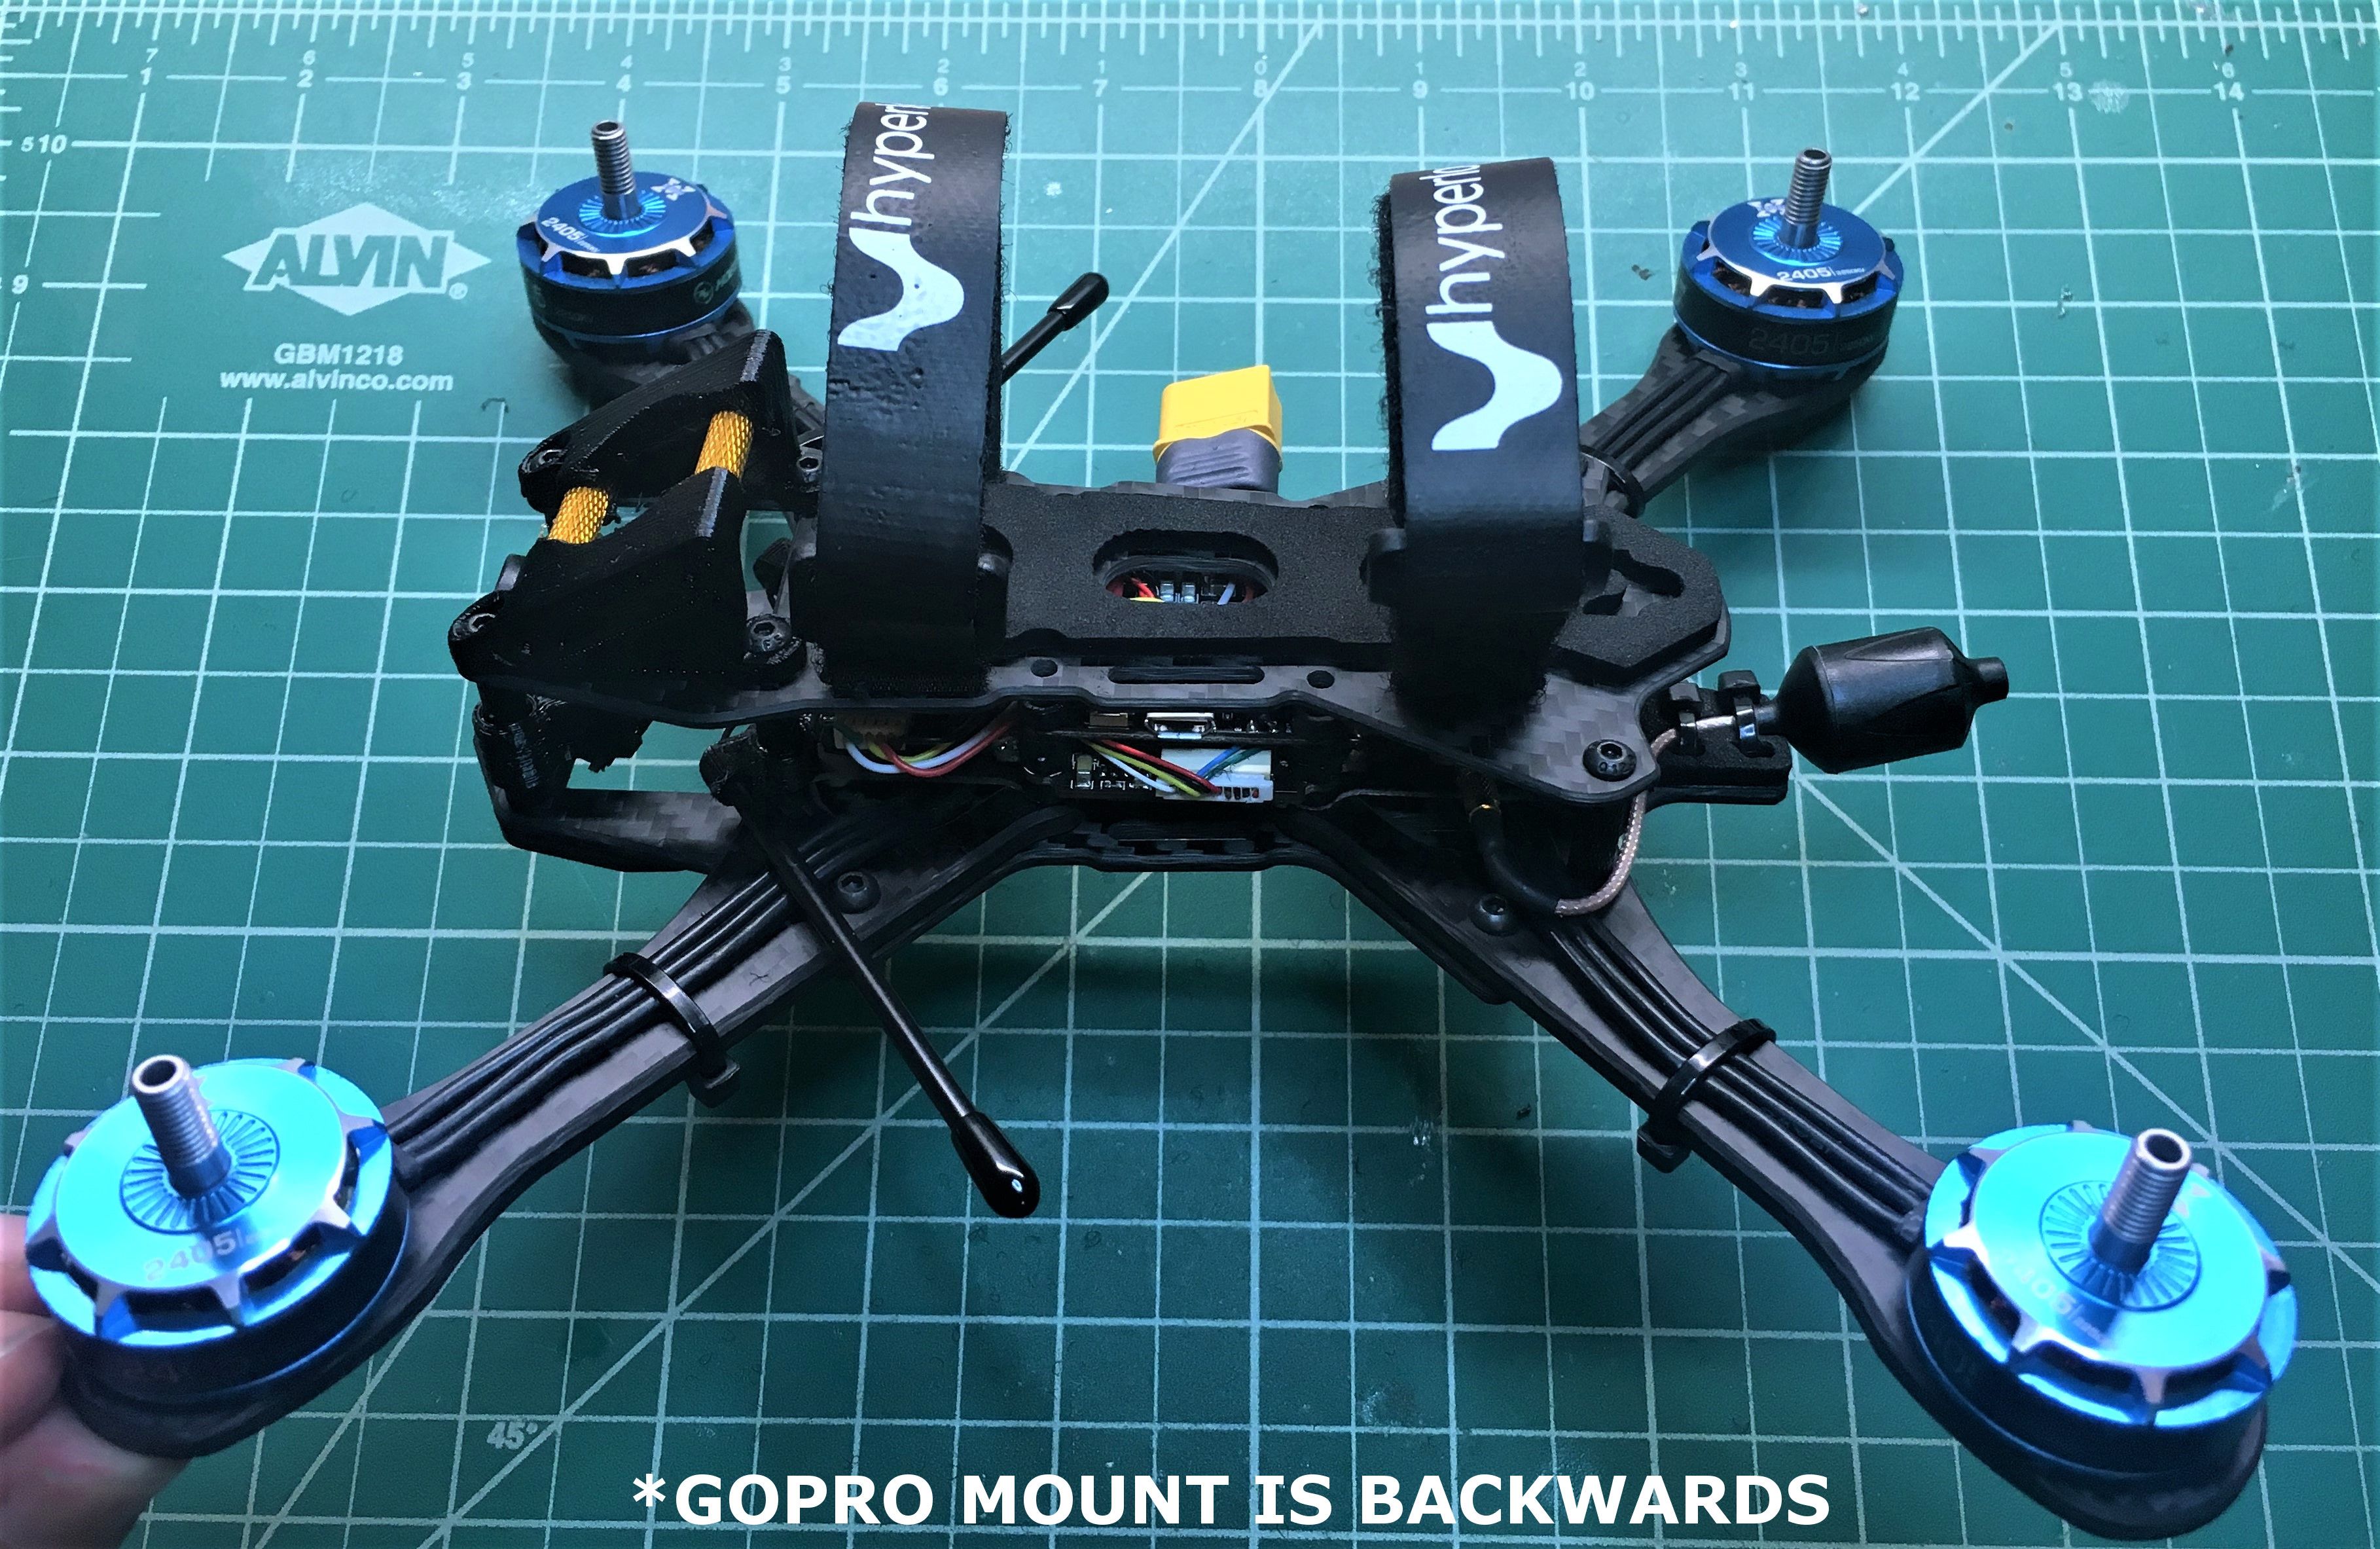
The Hyperlow frames first caught my eye several weeks ago at Open Grove Raceway's DolmaFPV v. Nytfury race. While helping to tech in pilots I had a chance to see everyone's rigs up close and the Hyperlow frame just blew me away. The company's owner, Richard Howarth, was the pilot and it was obvious he put a lot of care and consideration into the frame and into his build in general. While I was considering the cheaper model they offer (Modular FS) I ended up going with their CG because it just looks soooo goood. Once it arrived I was even more impressed than I was with the pics on their website. The carbon has a silky matte finish and chamfered edges and it goes together like a well planned work of art. The included 3d printed camera mounts (yes mountS - got you covered for all sizes), gopro couch and antenna mounts were nicely made and very clean. I was warned this is a fairly complex build and it definitely was but a little pre-planning and patience is all it took to get it done.
ESC/FC/Motors/Props:
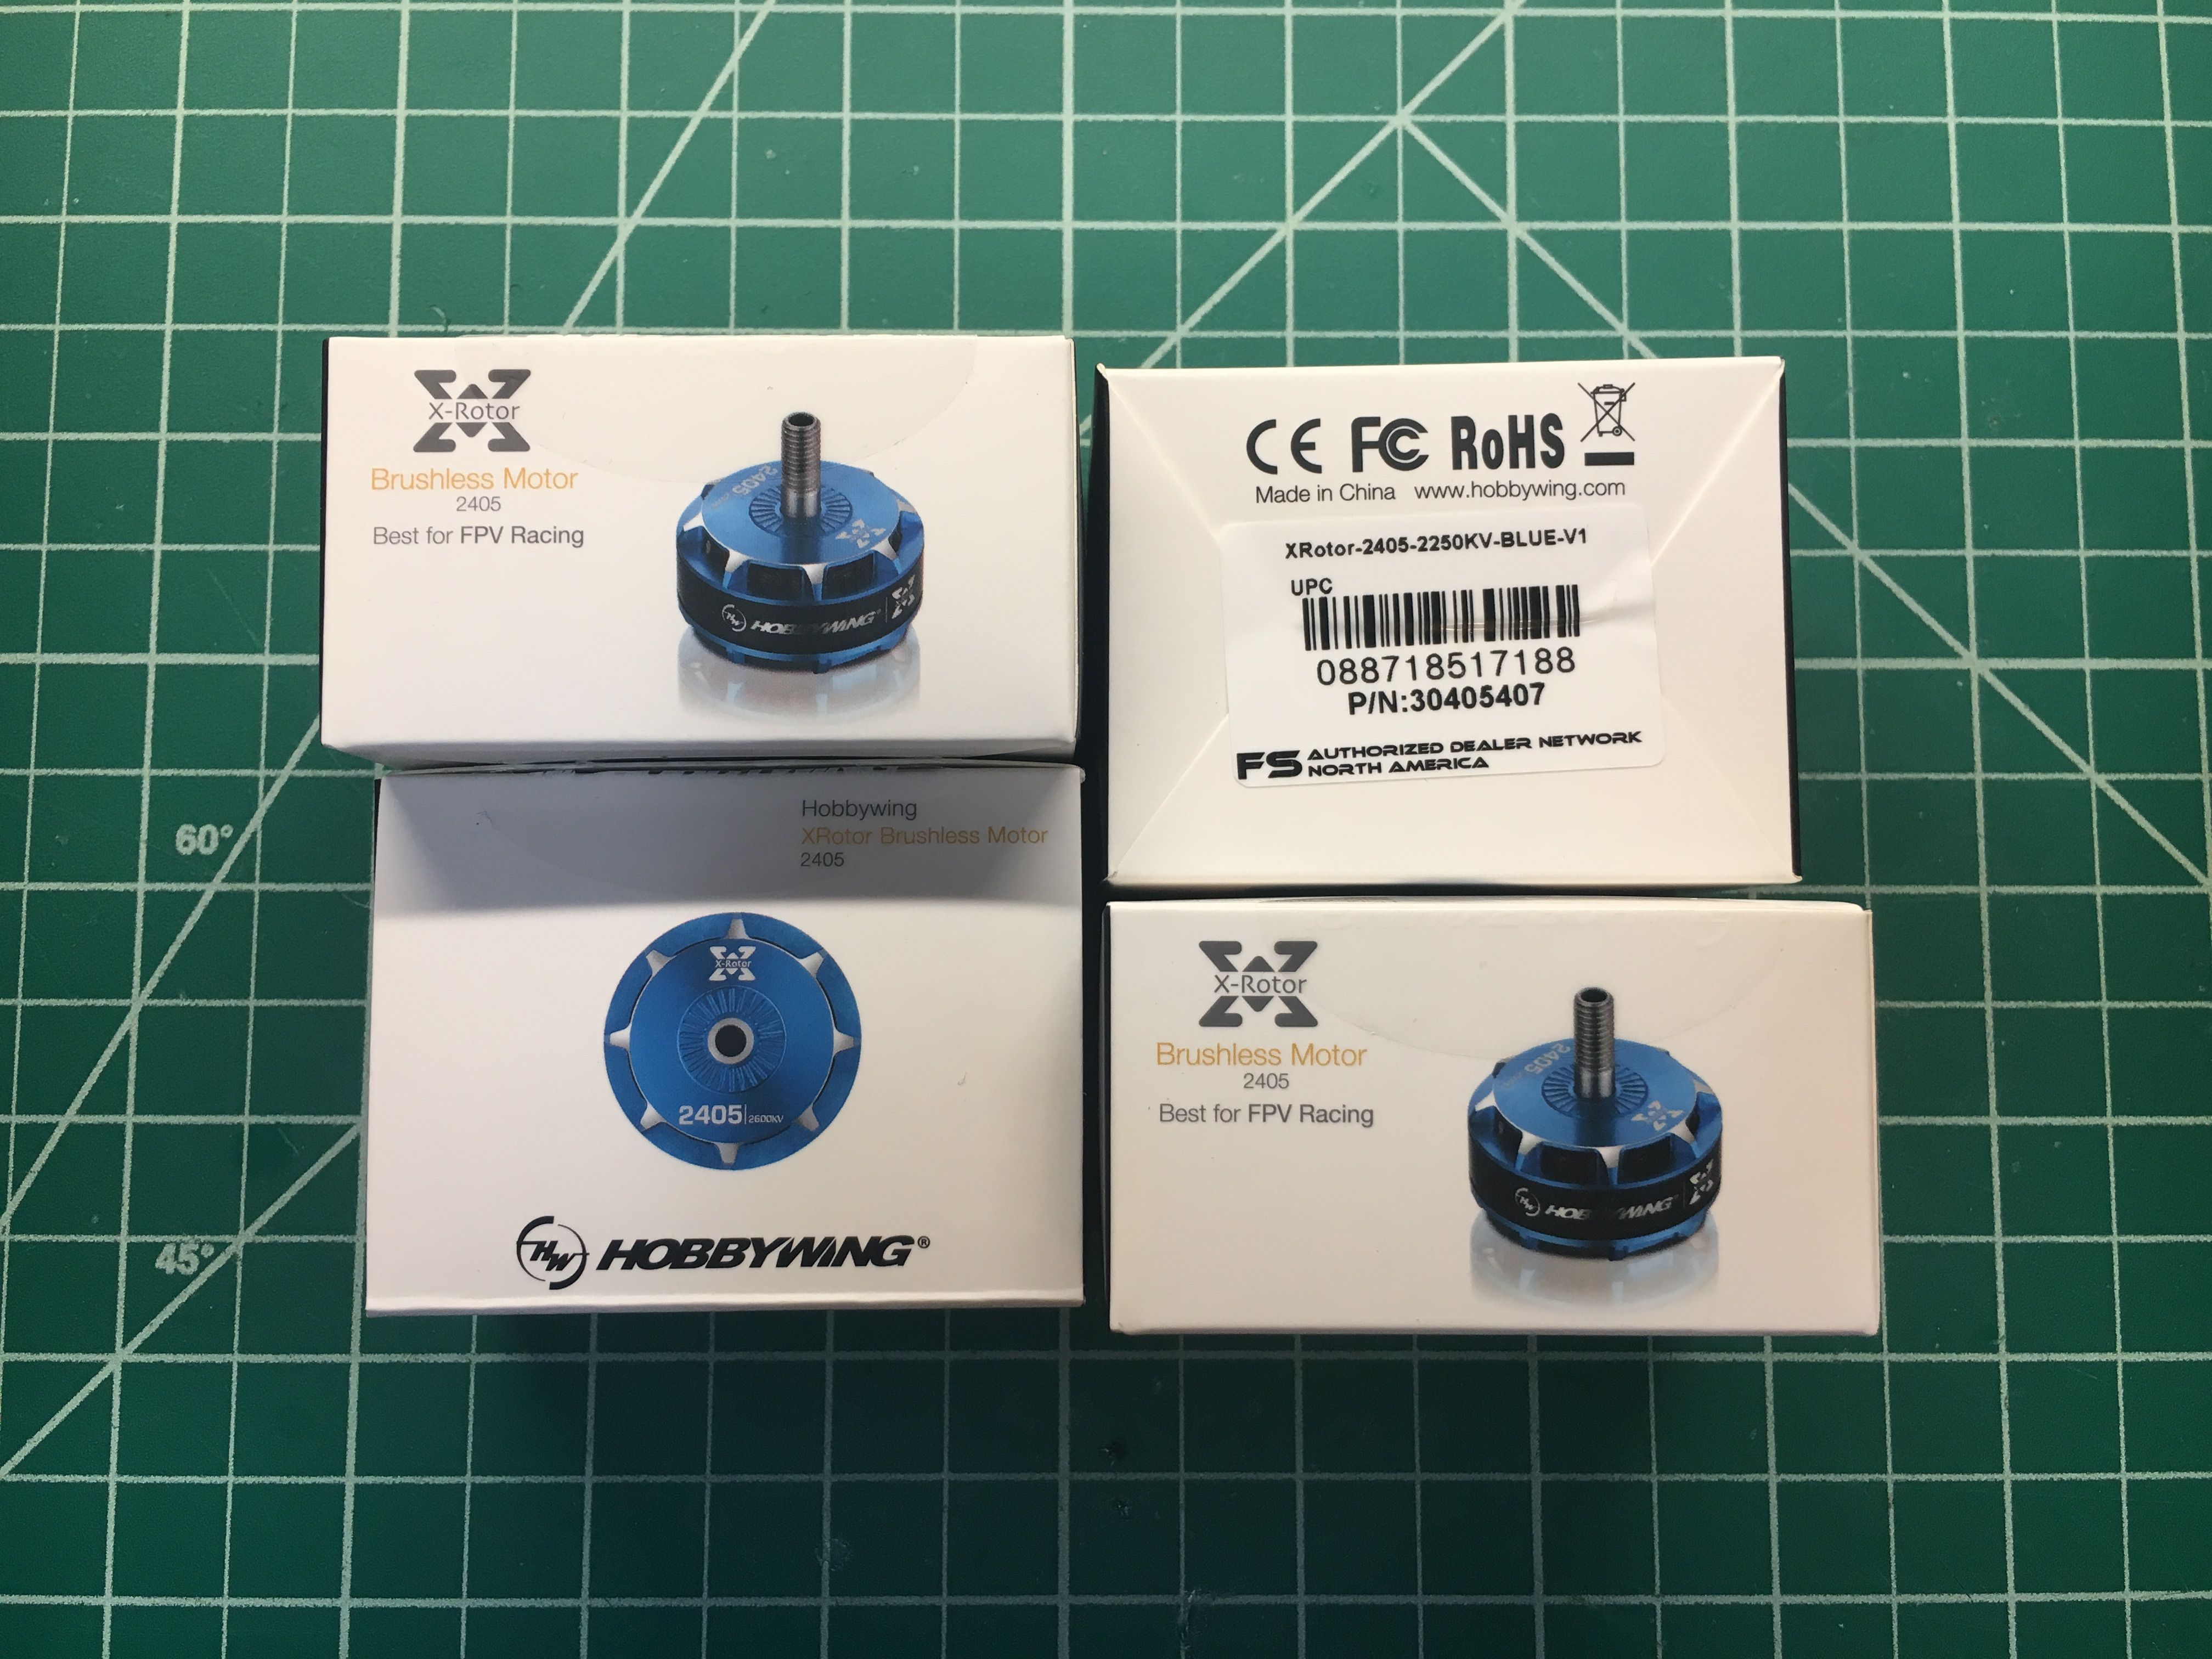
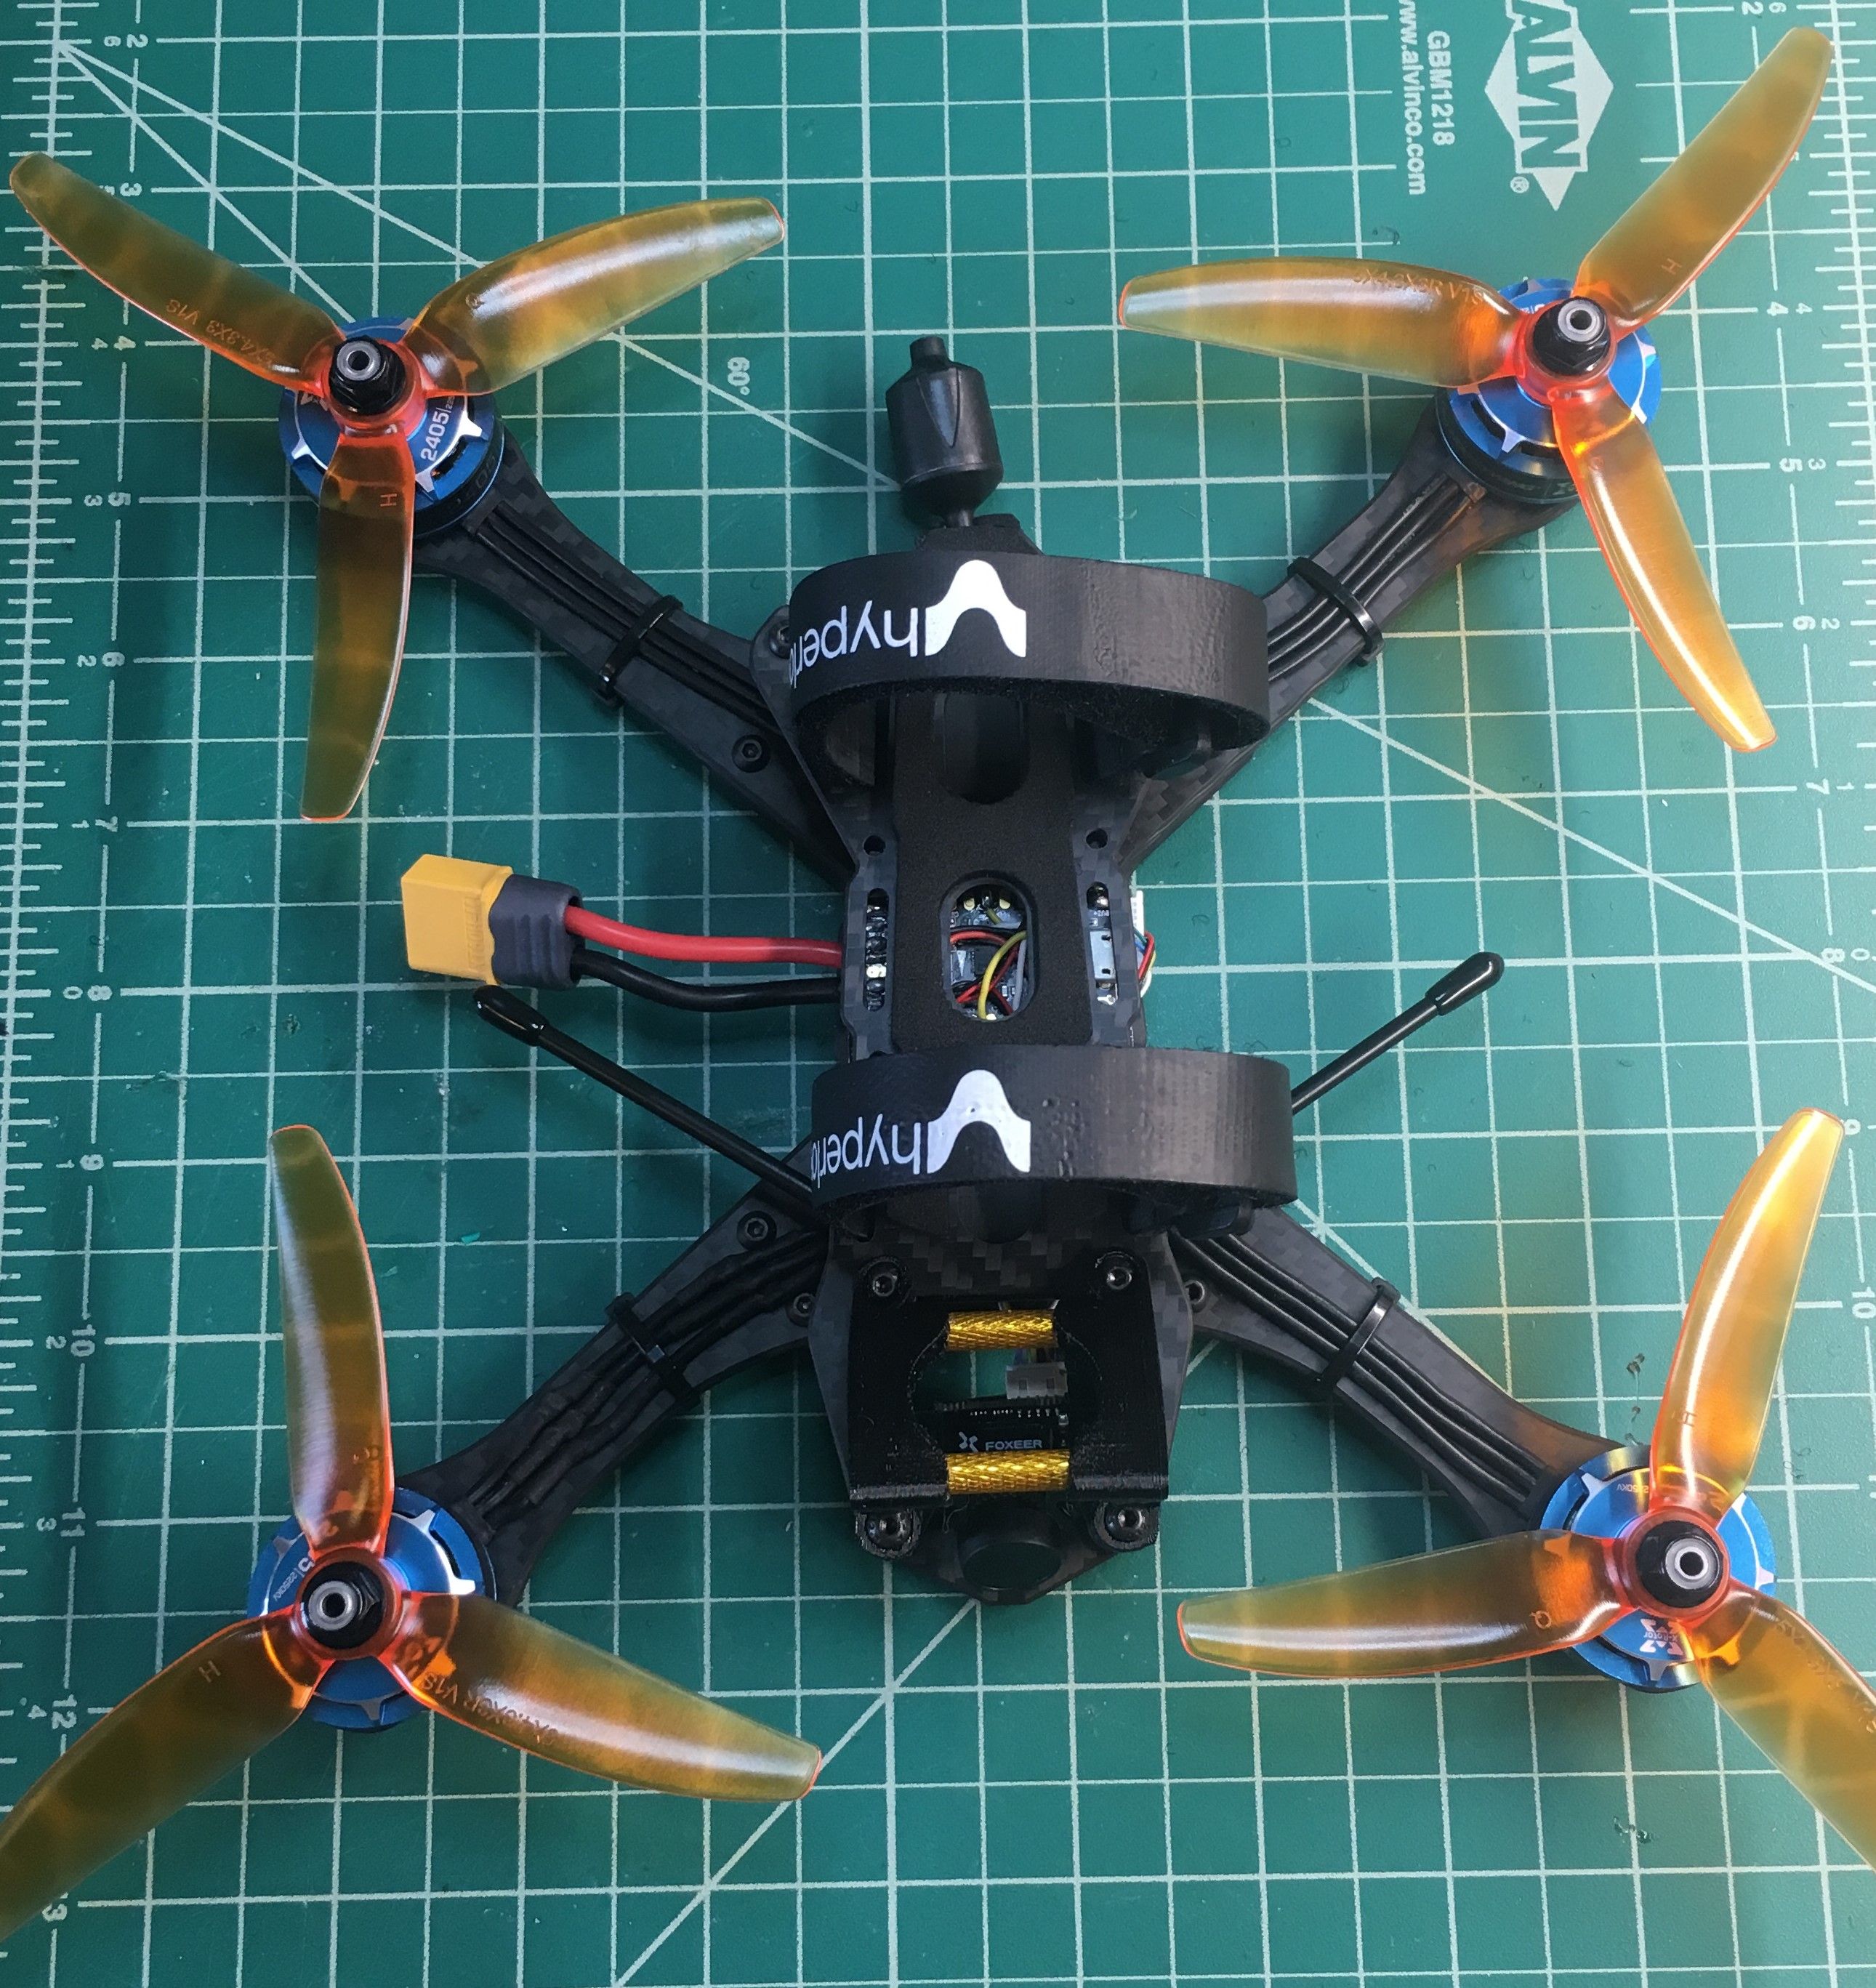
Well this time around I actually started with the motors. I won them at an event and was looking for a way to use them. The challenge here is that they're big and somewhat rare and I struggled to find a lot of use cases out there for reference. Rotorbuilds lists the motor with all 3 kv options so most of the builds on here didn't happen to have the same kv as these. Mine are the 2405-2250 version. With that I went with a 30amp esc and opted to roll 4-in-1 even though it would make for a tighter fit in this slammed frame. I used the Dys 4-in-1 on my last build and it was easy to work with so it seemed a good choice this time around as well. For the flight controller I was fortunate enough to get a deal on the Holybro Kakute. While the FC is really streamlined and wires up rather clean it's more geared for racing than freestyle. It's pretty lean and could use another uart or two but I'm using it not as intended - not a complaint about the board so much as a remark on which board I chose to build with. I'm using the HQ V1s 5x4.3x3 props and plan to use something more agressive. These motors have plenty more to offer and I don't feel I'm utilizing them to their ability.
Camera/VTX:
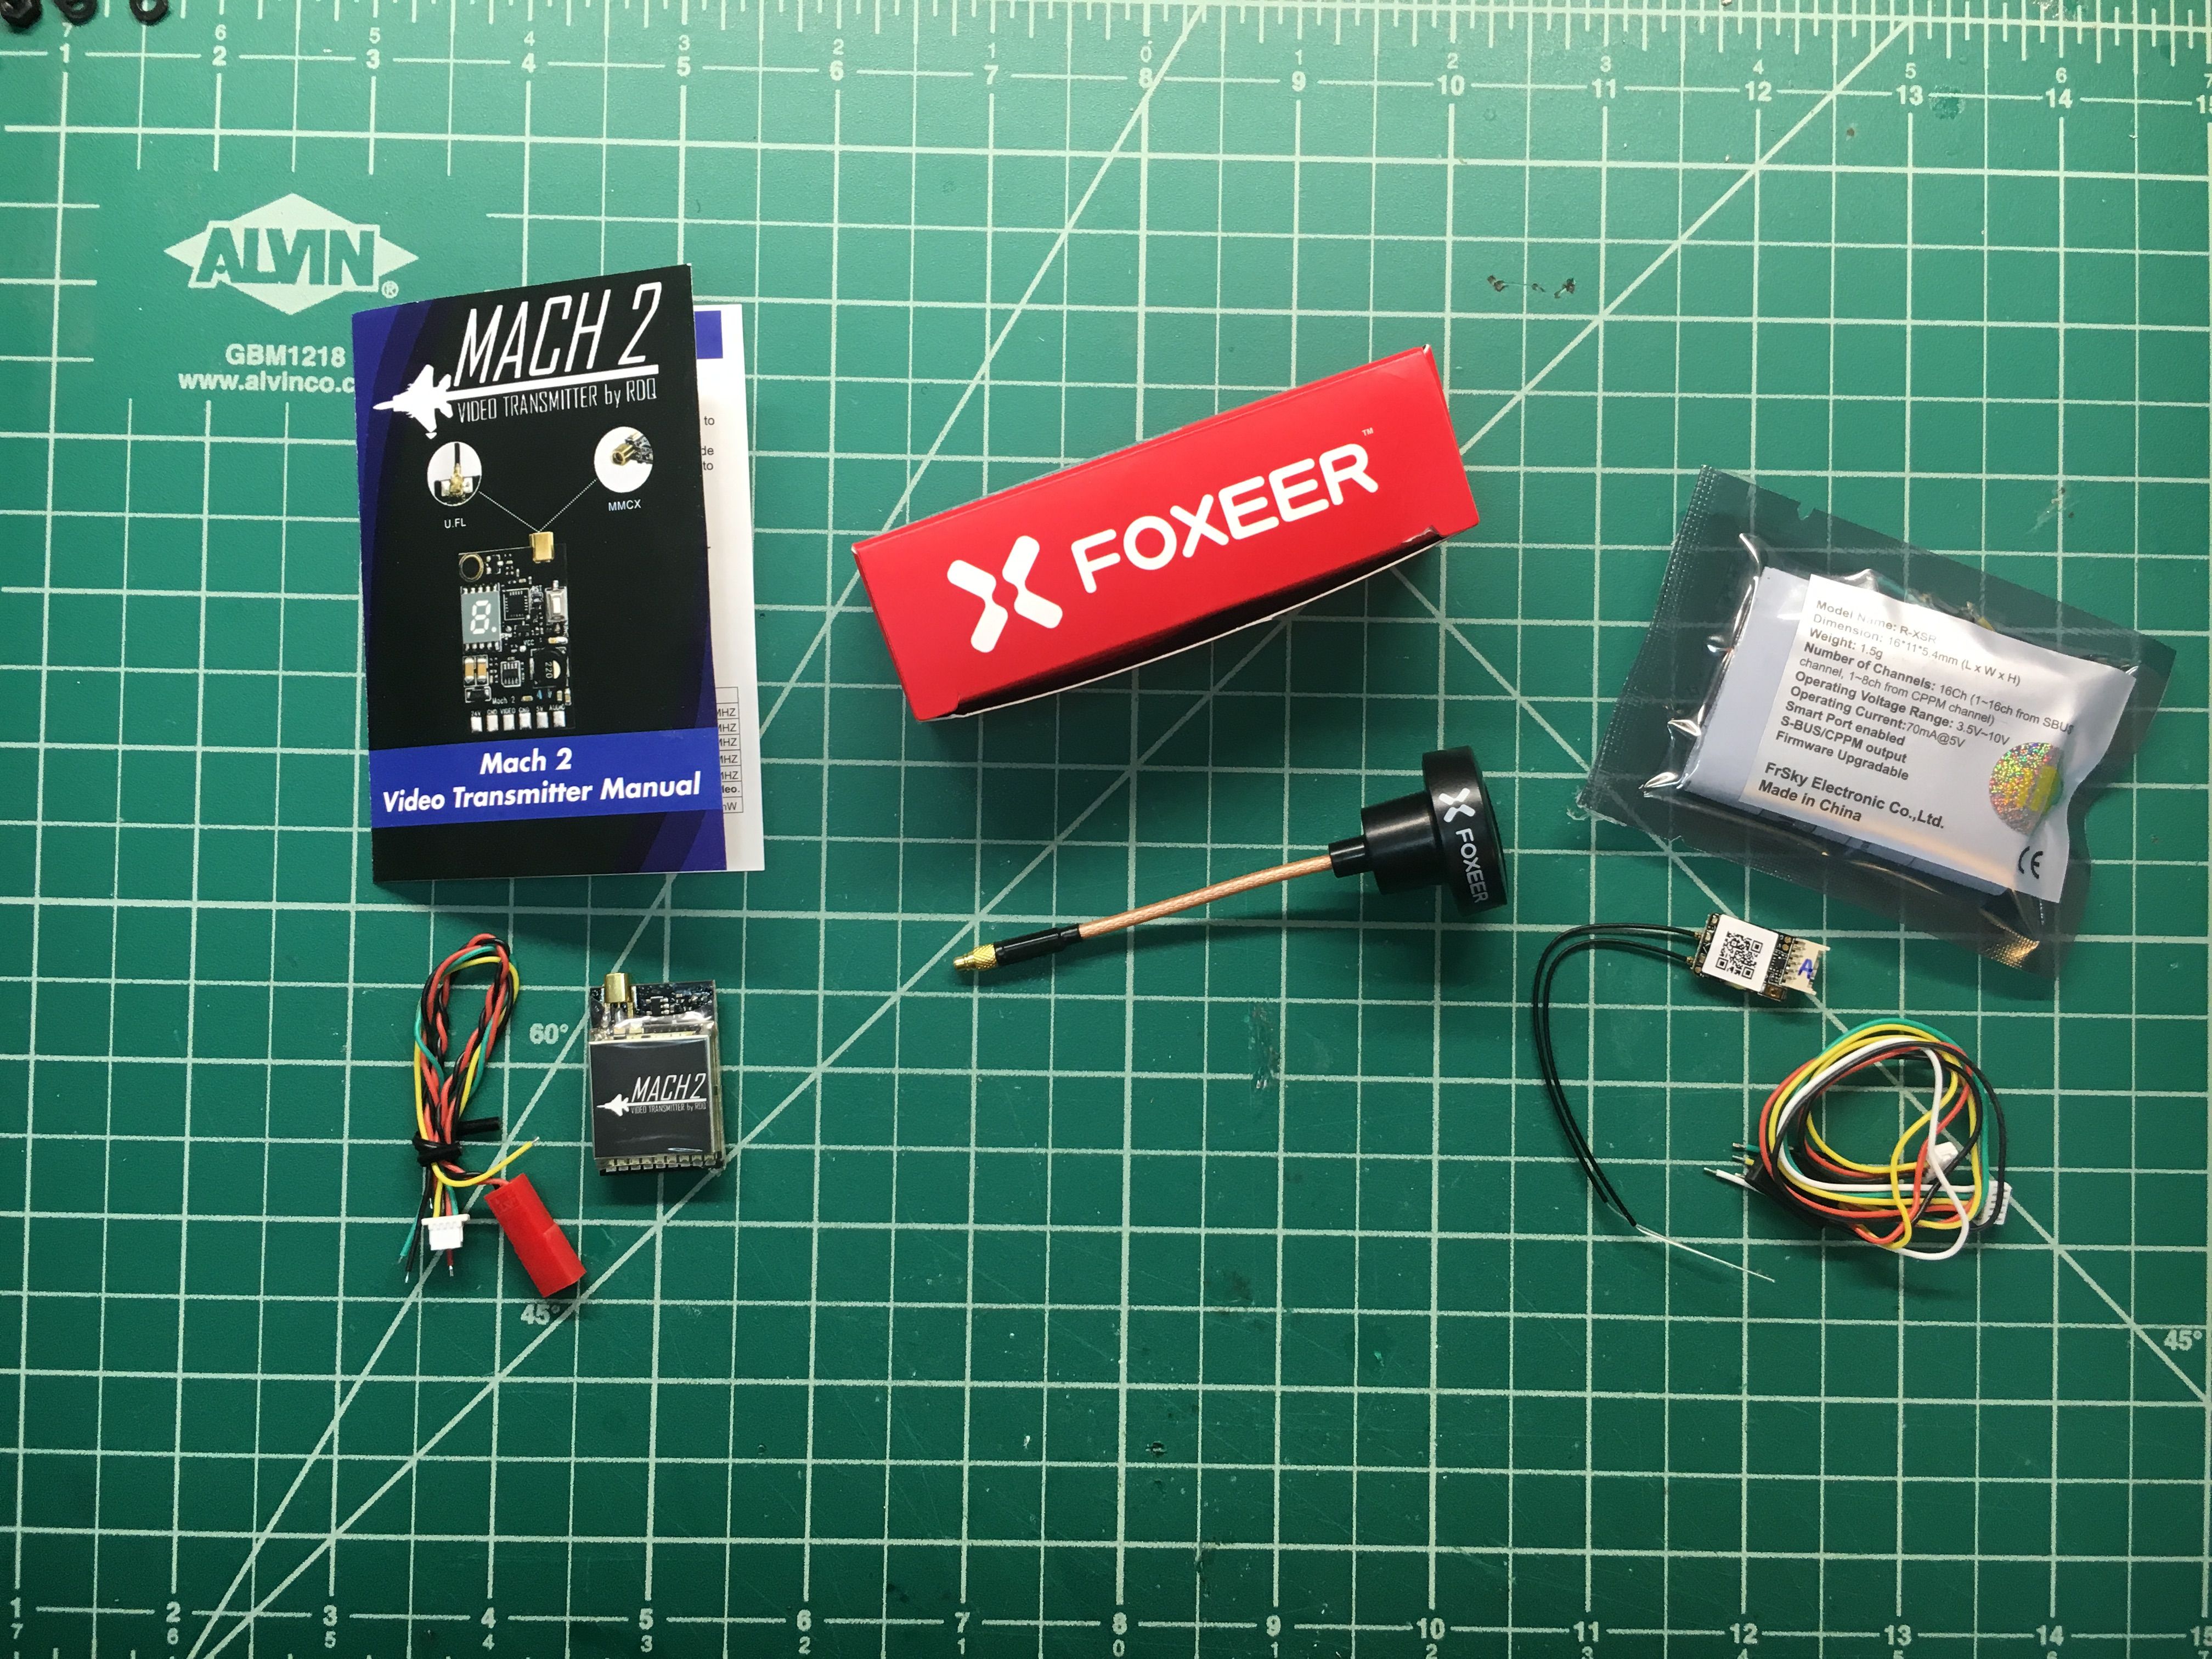
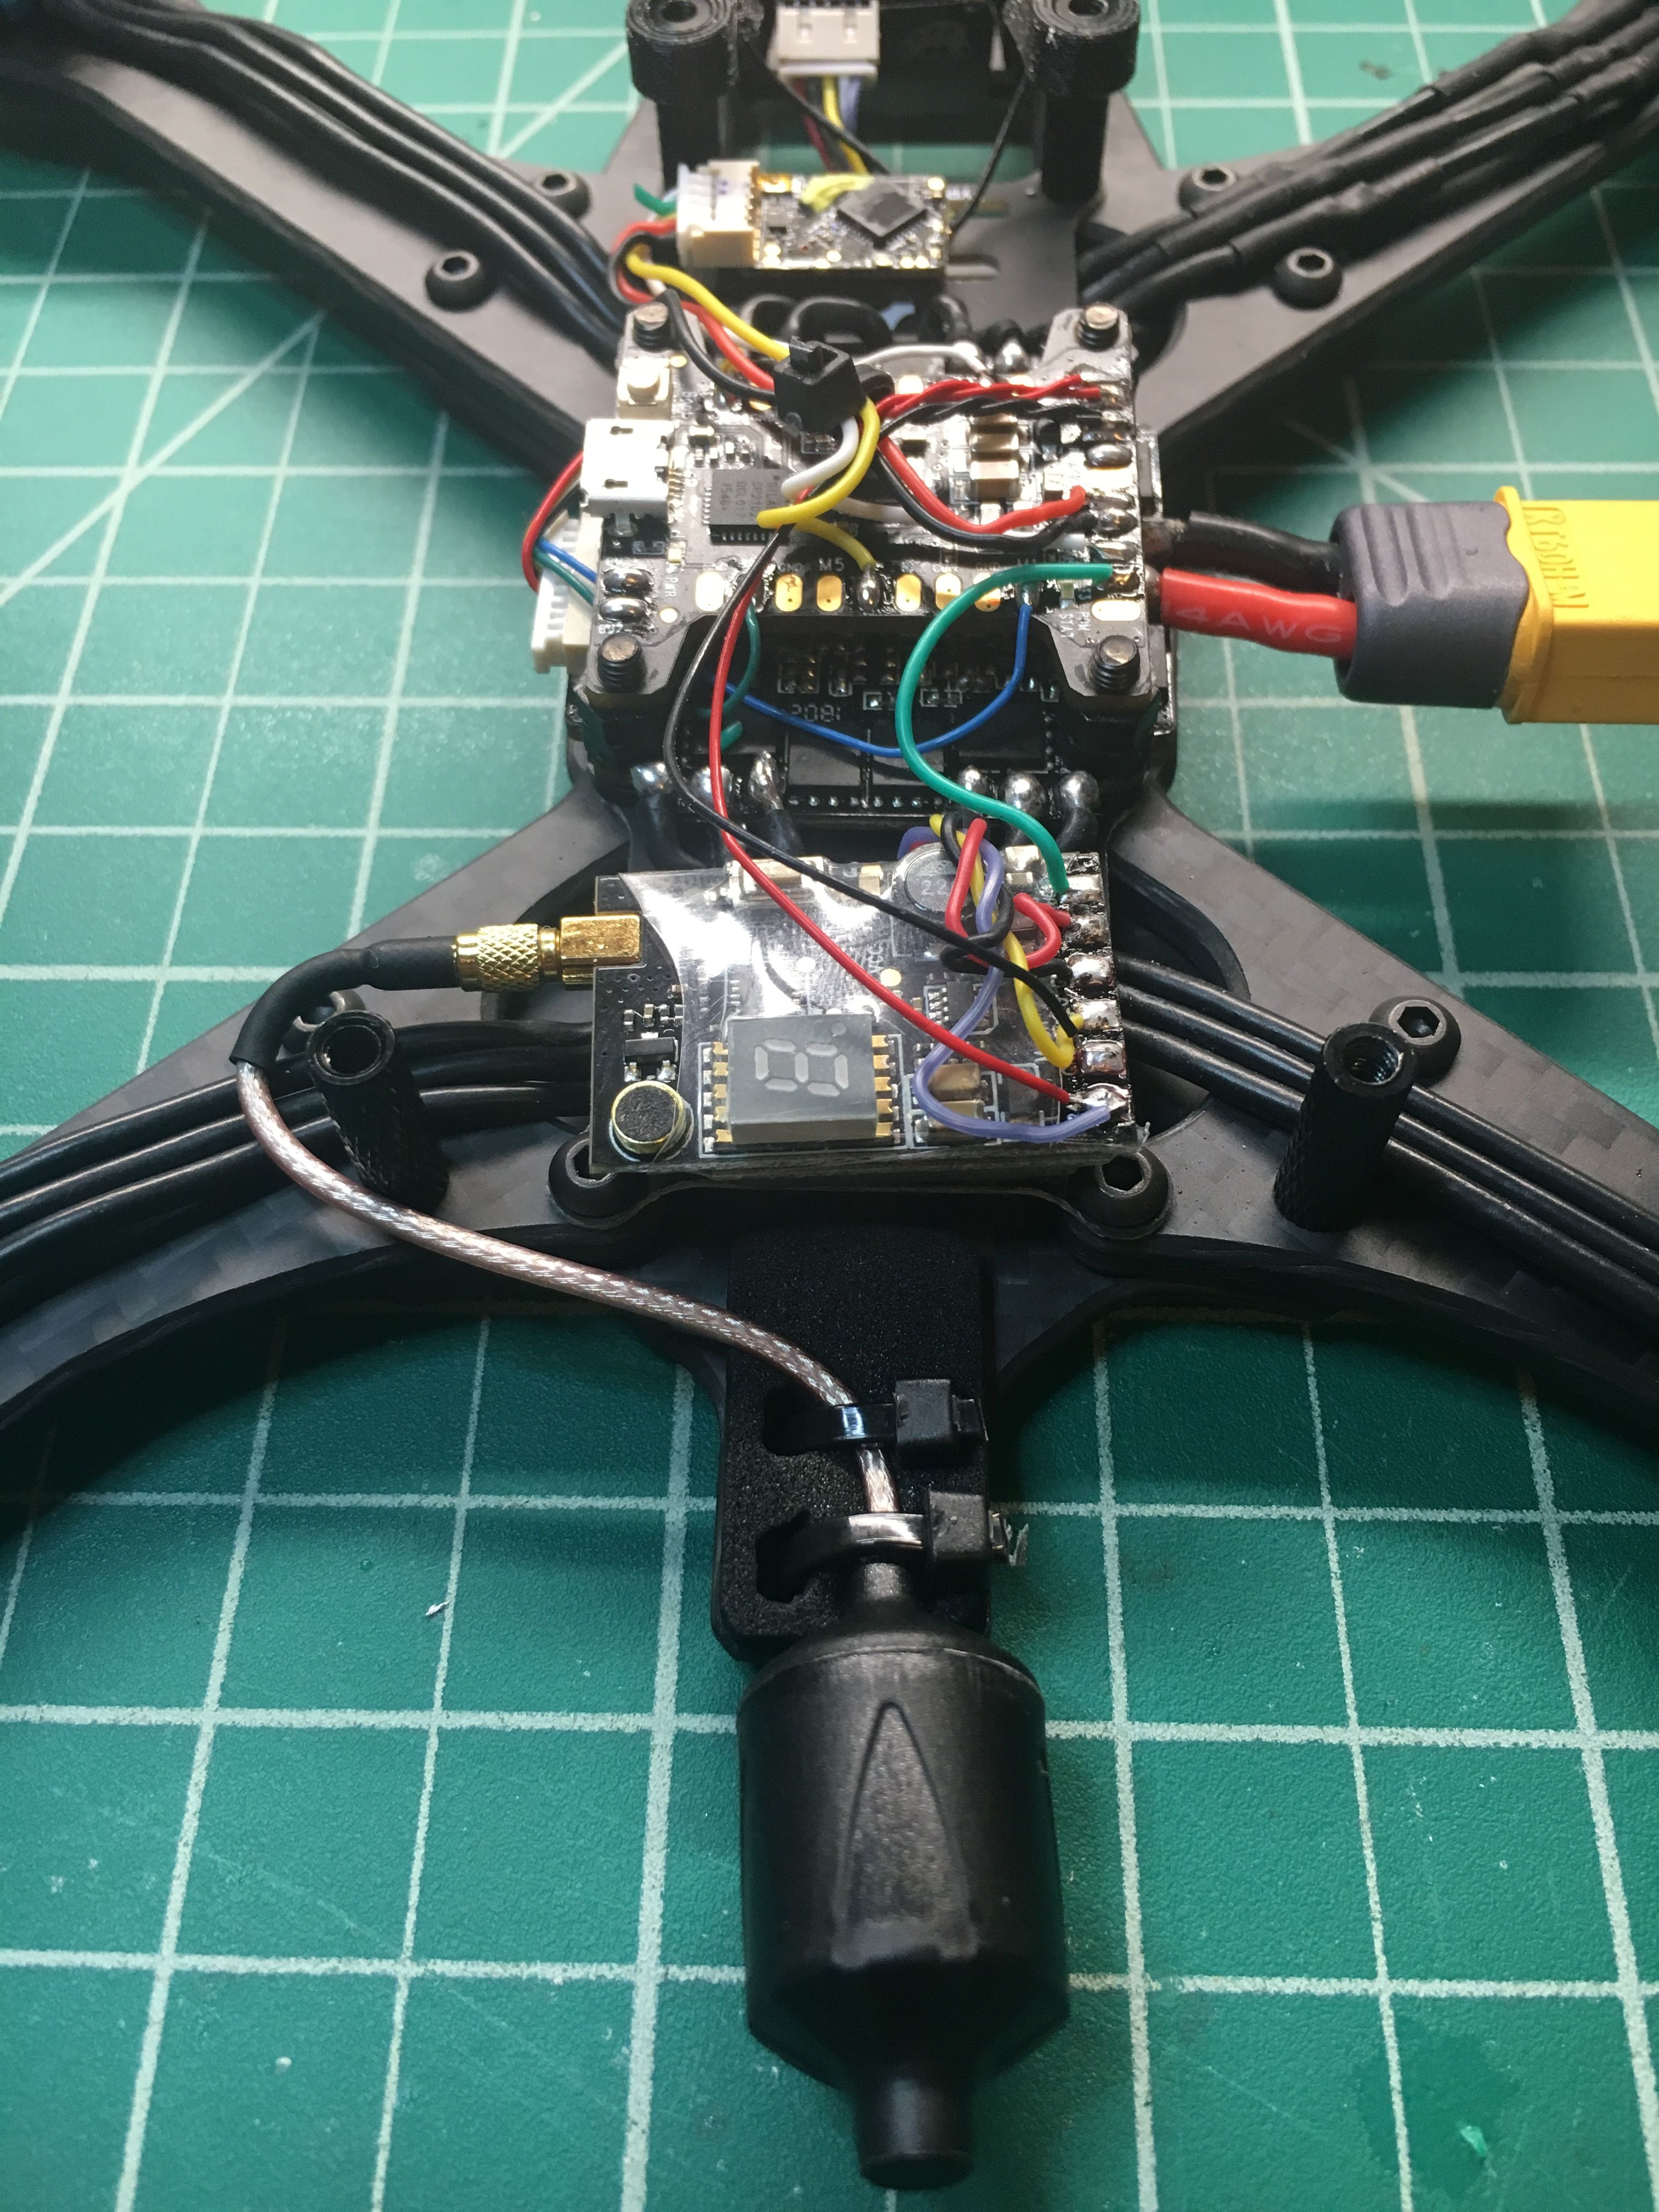
Again I found myself viewing every camera comparison video and article yet when all was said and done I was right where I started - undecided. I opted to try Foxeer as my other two quads have Runcams Swift Micros and what better way to get a real feel for the alternative brand but to try it out. The Foxeer Predator Micro has more than enough room in this build and I kind of wish I went with a mini opposed to micro to see what improvements that may yield visually. As for the VTX I actually ordered a TBS Unify and the Mach 2 to compare and see if one fits the build better than the other. Right now I'm using the Mach 2 and I don't foresee swapping out to the TBS. It's really working well and fits just fine. That being said I would like to pick up a 90degree MMCX connector. The VTXs would have to sit with the MMCX port facing left or right, not out the back. As such the antenna swings out the side of the build. Not a big deal but not ideal. As for antenna I bought the Foxeer pagoda, Vas Minion, and Lumineer AXII. I'll just be swapping out and see if there's one more suitable than the others.
RX:
I ditched my Spektrum DX6e for a FRSky Taranis X9D. With that change I swapped out my RXs in my other builds and wired this one up with the RXSR. That thing is TINY.
Hyperlow CG Lessons Learned:
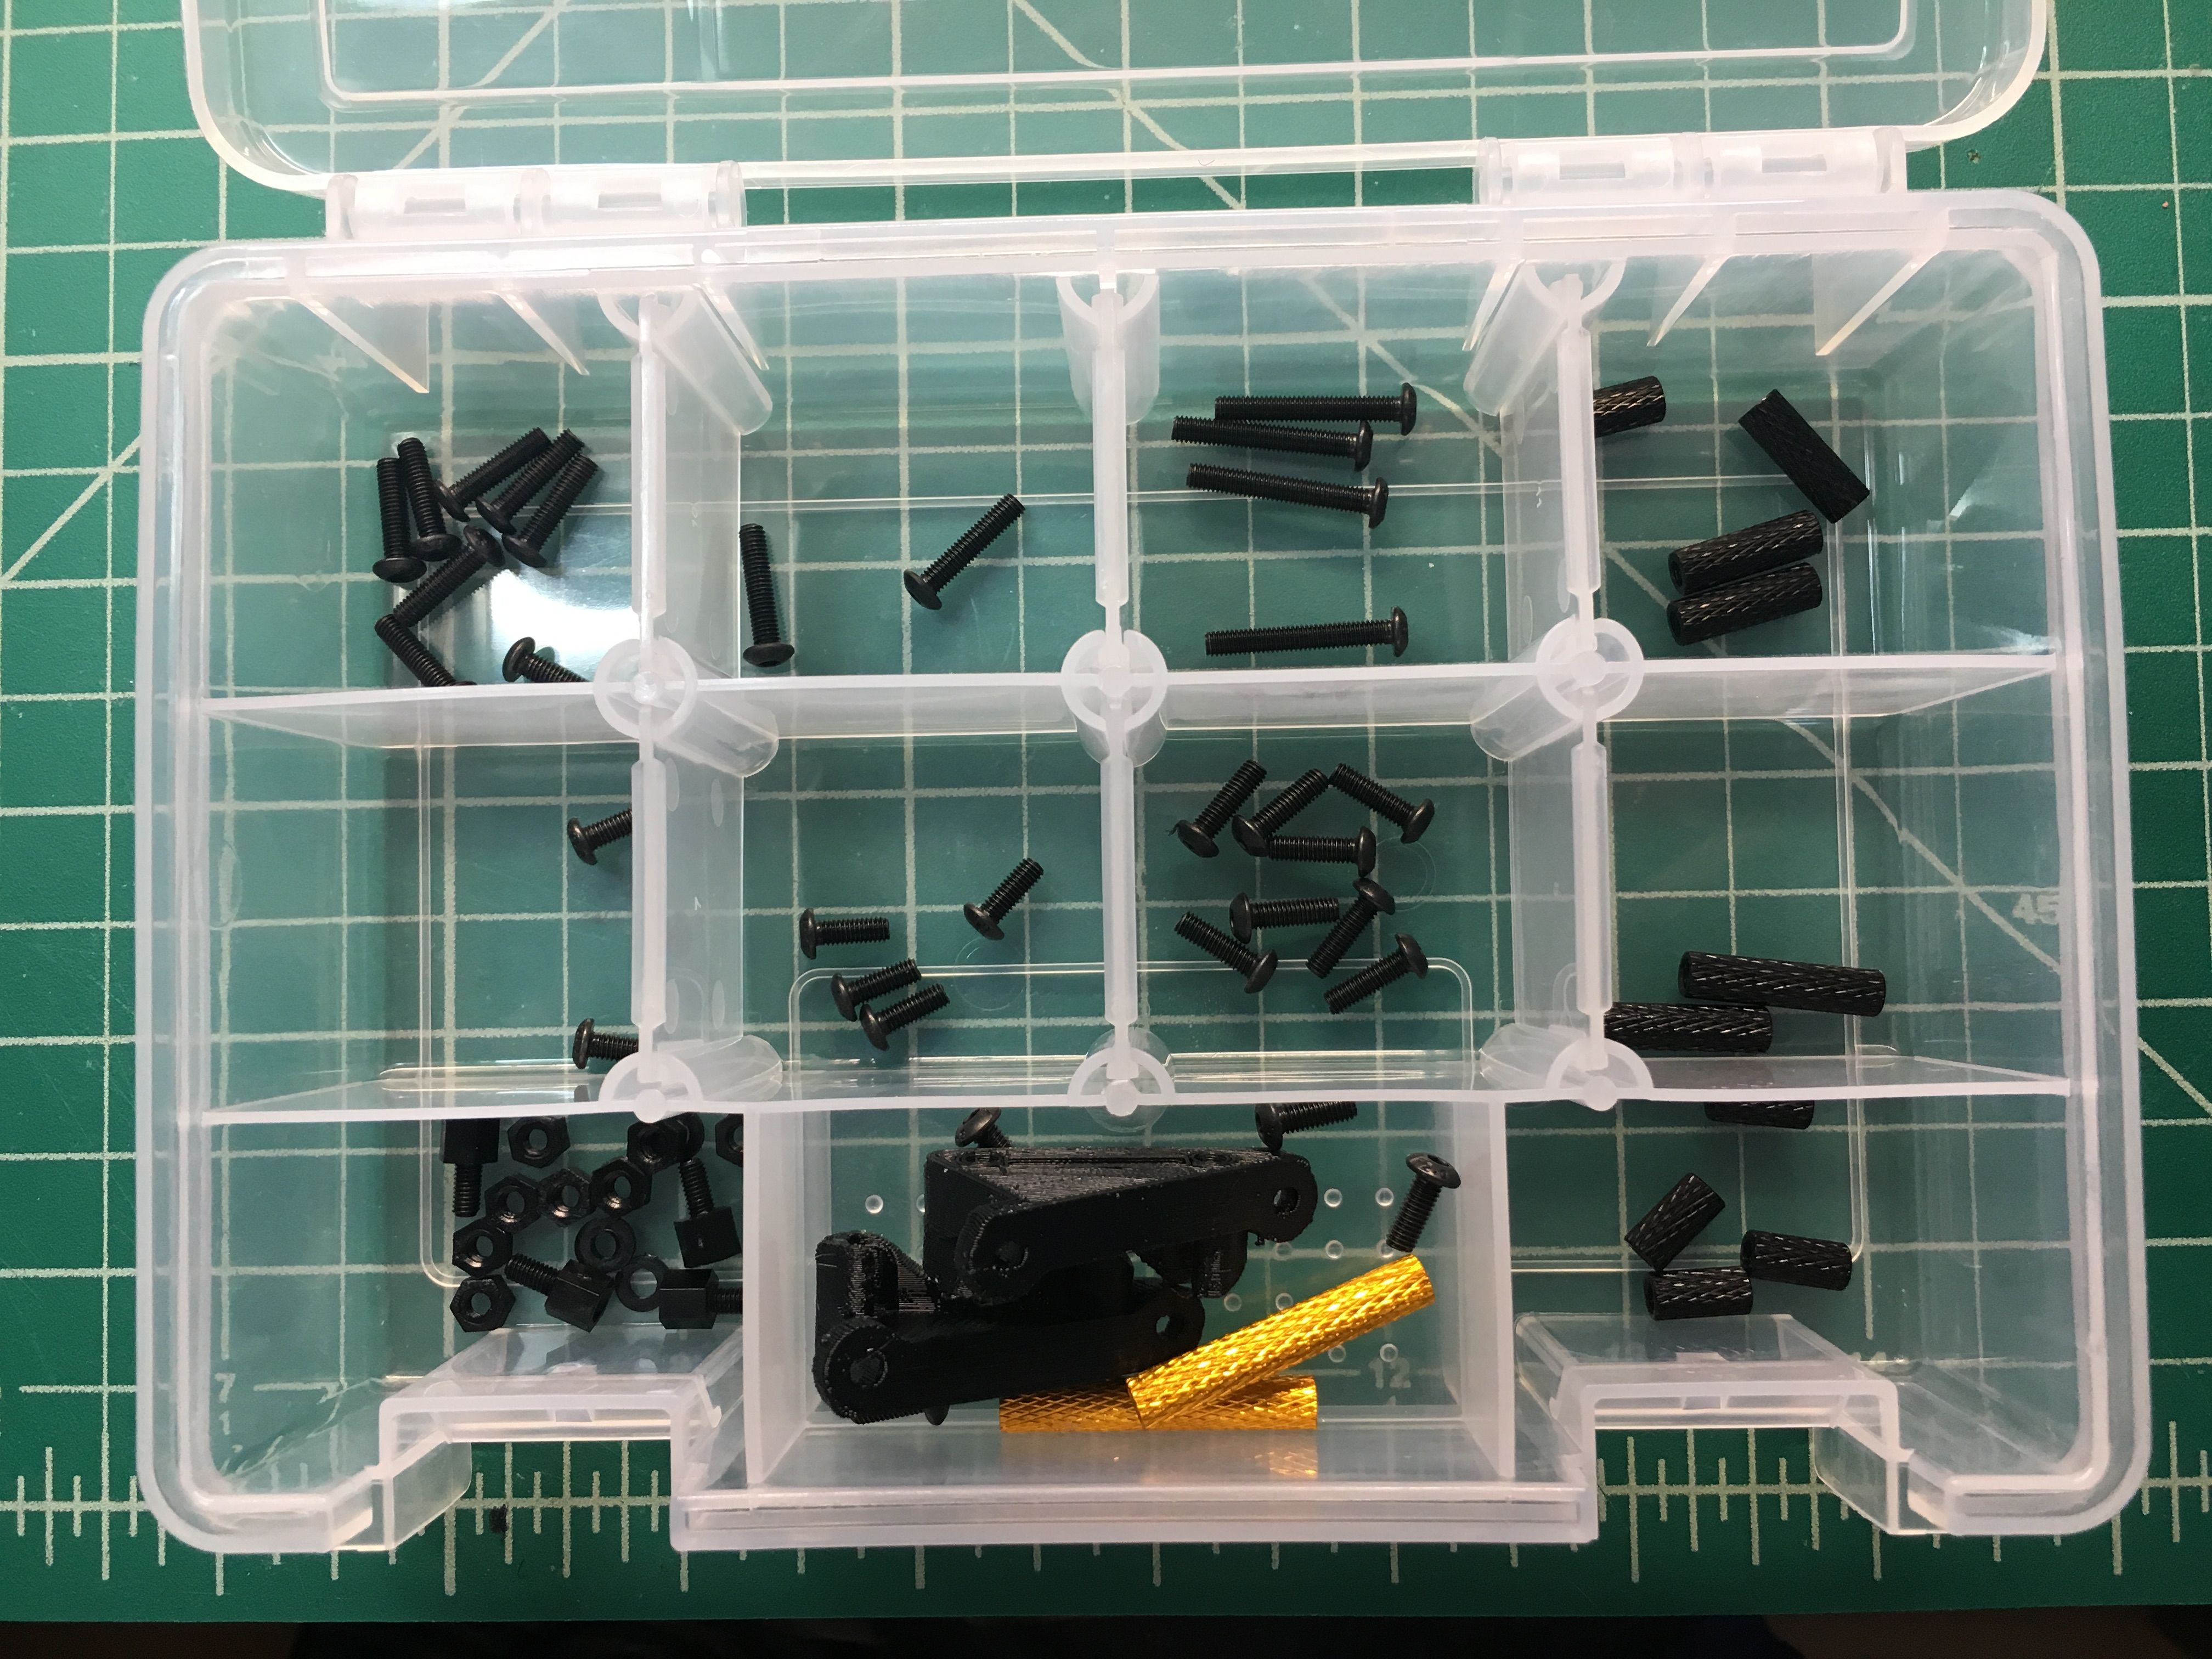
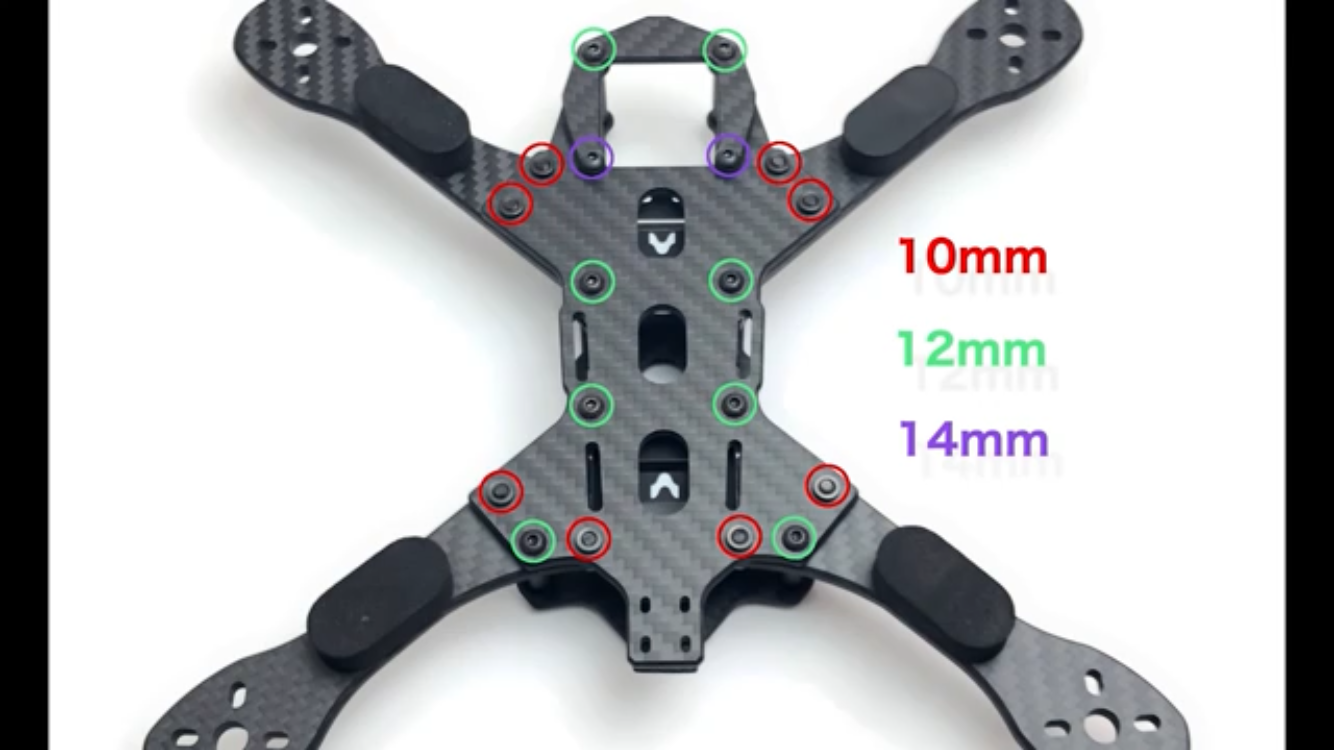
- Measure screws: This frame has several different length screws, yet nearly identical, and using the wrong ones can be a headache later on. The build video for this frame had a great tip that I adopted. I measured and separated all the screws and placed them in a plastic divided container. It allowed for quick reference and an easier build.
- I kept wanting to put the GoPro couch on backward. It looks more aerodynamic facing the wrong way but obviously won't do it's job very well. You'll notice it's actually on incorrectly in some of the pics.
- The 3d printed rx antennae mounts come in two shapes - 90 degrees to standoff and ~15(?) degrees to standoff. 90 degrees lays them in the plane of the motors. The other points them more perpindicular to the plane of the motors. I've seen these builds done in both ways but for some reason I couldn't find the right combination between placing the 15degree mounts and getting the top plate to fit. It seemed the antenna were always in the way of the top plate no matter where I placed them. It turns out I like them laying in the plane of the motors anyway so that's a non-issue.
General Lessons Learned:
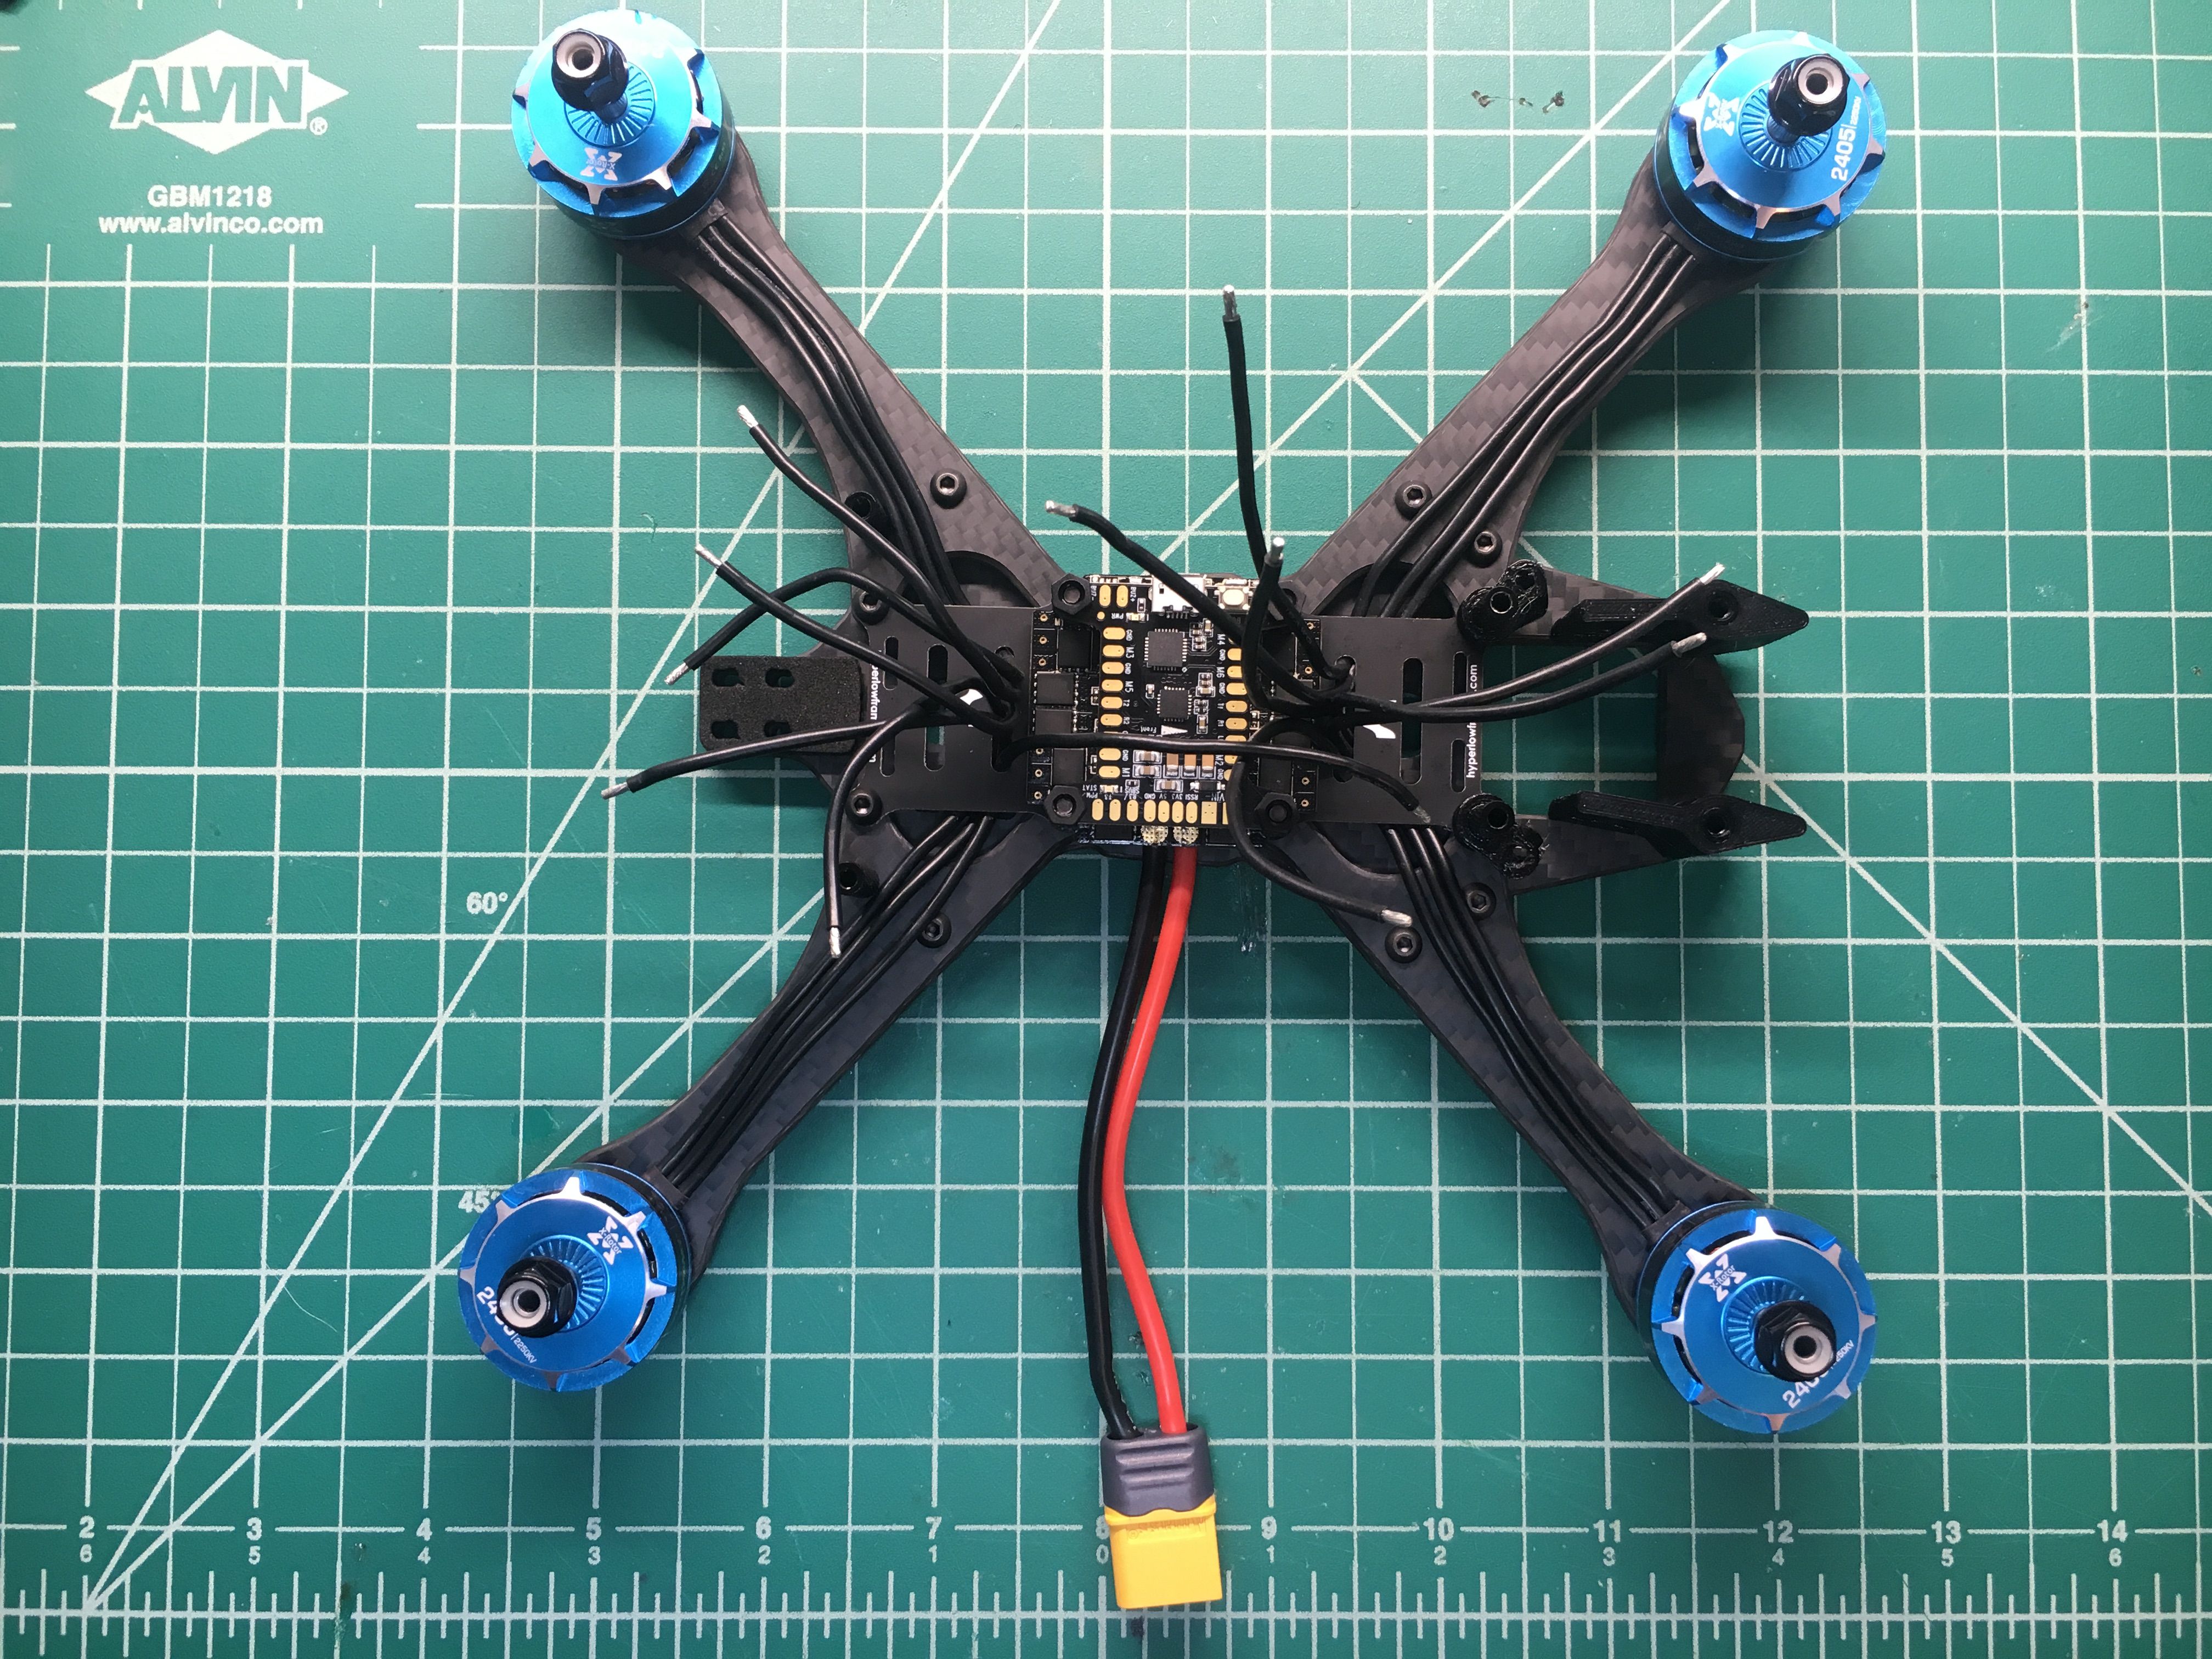
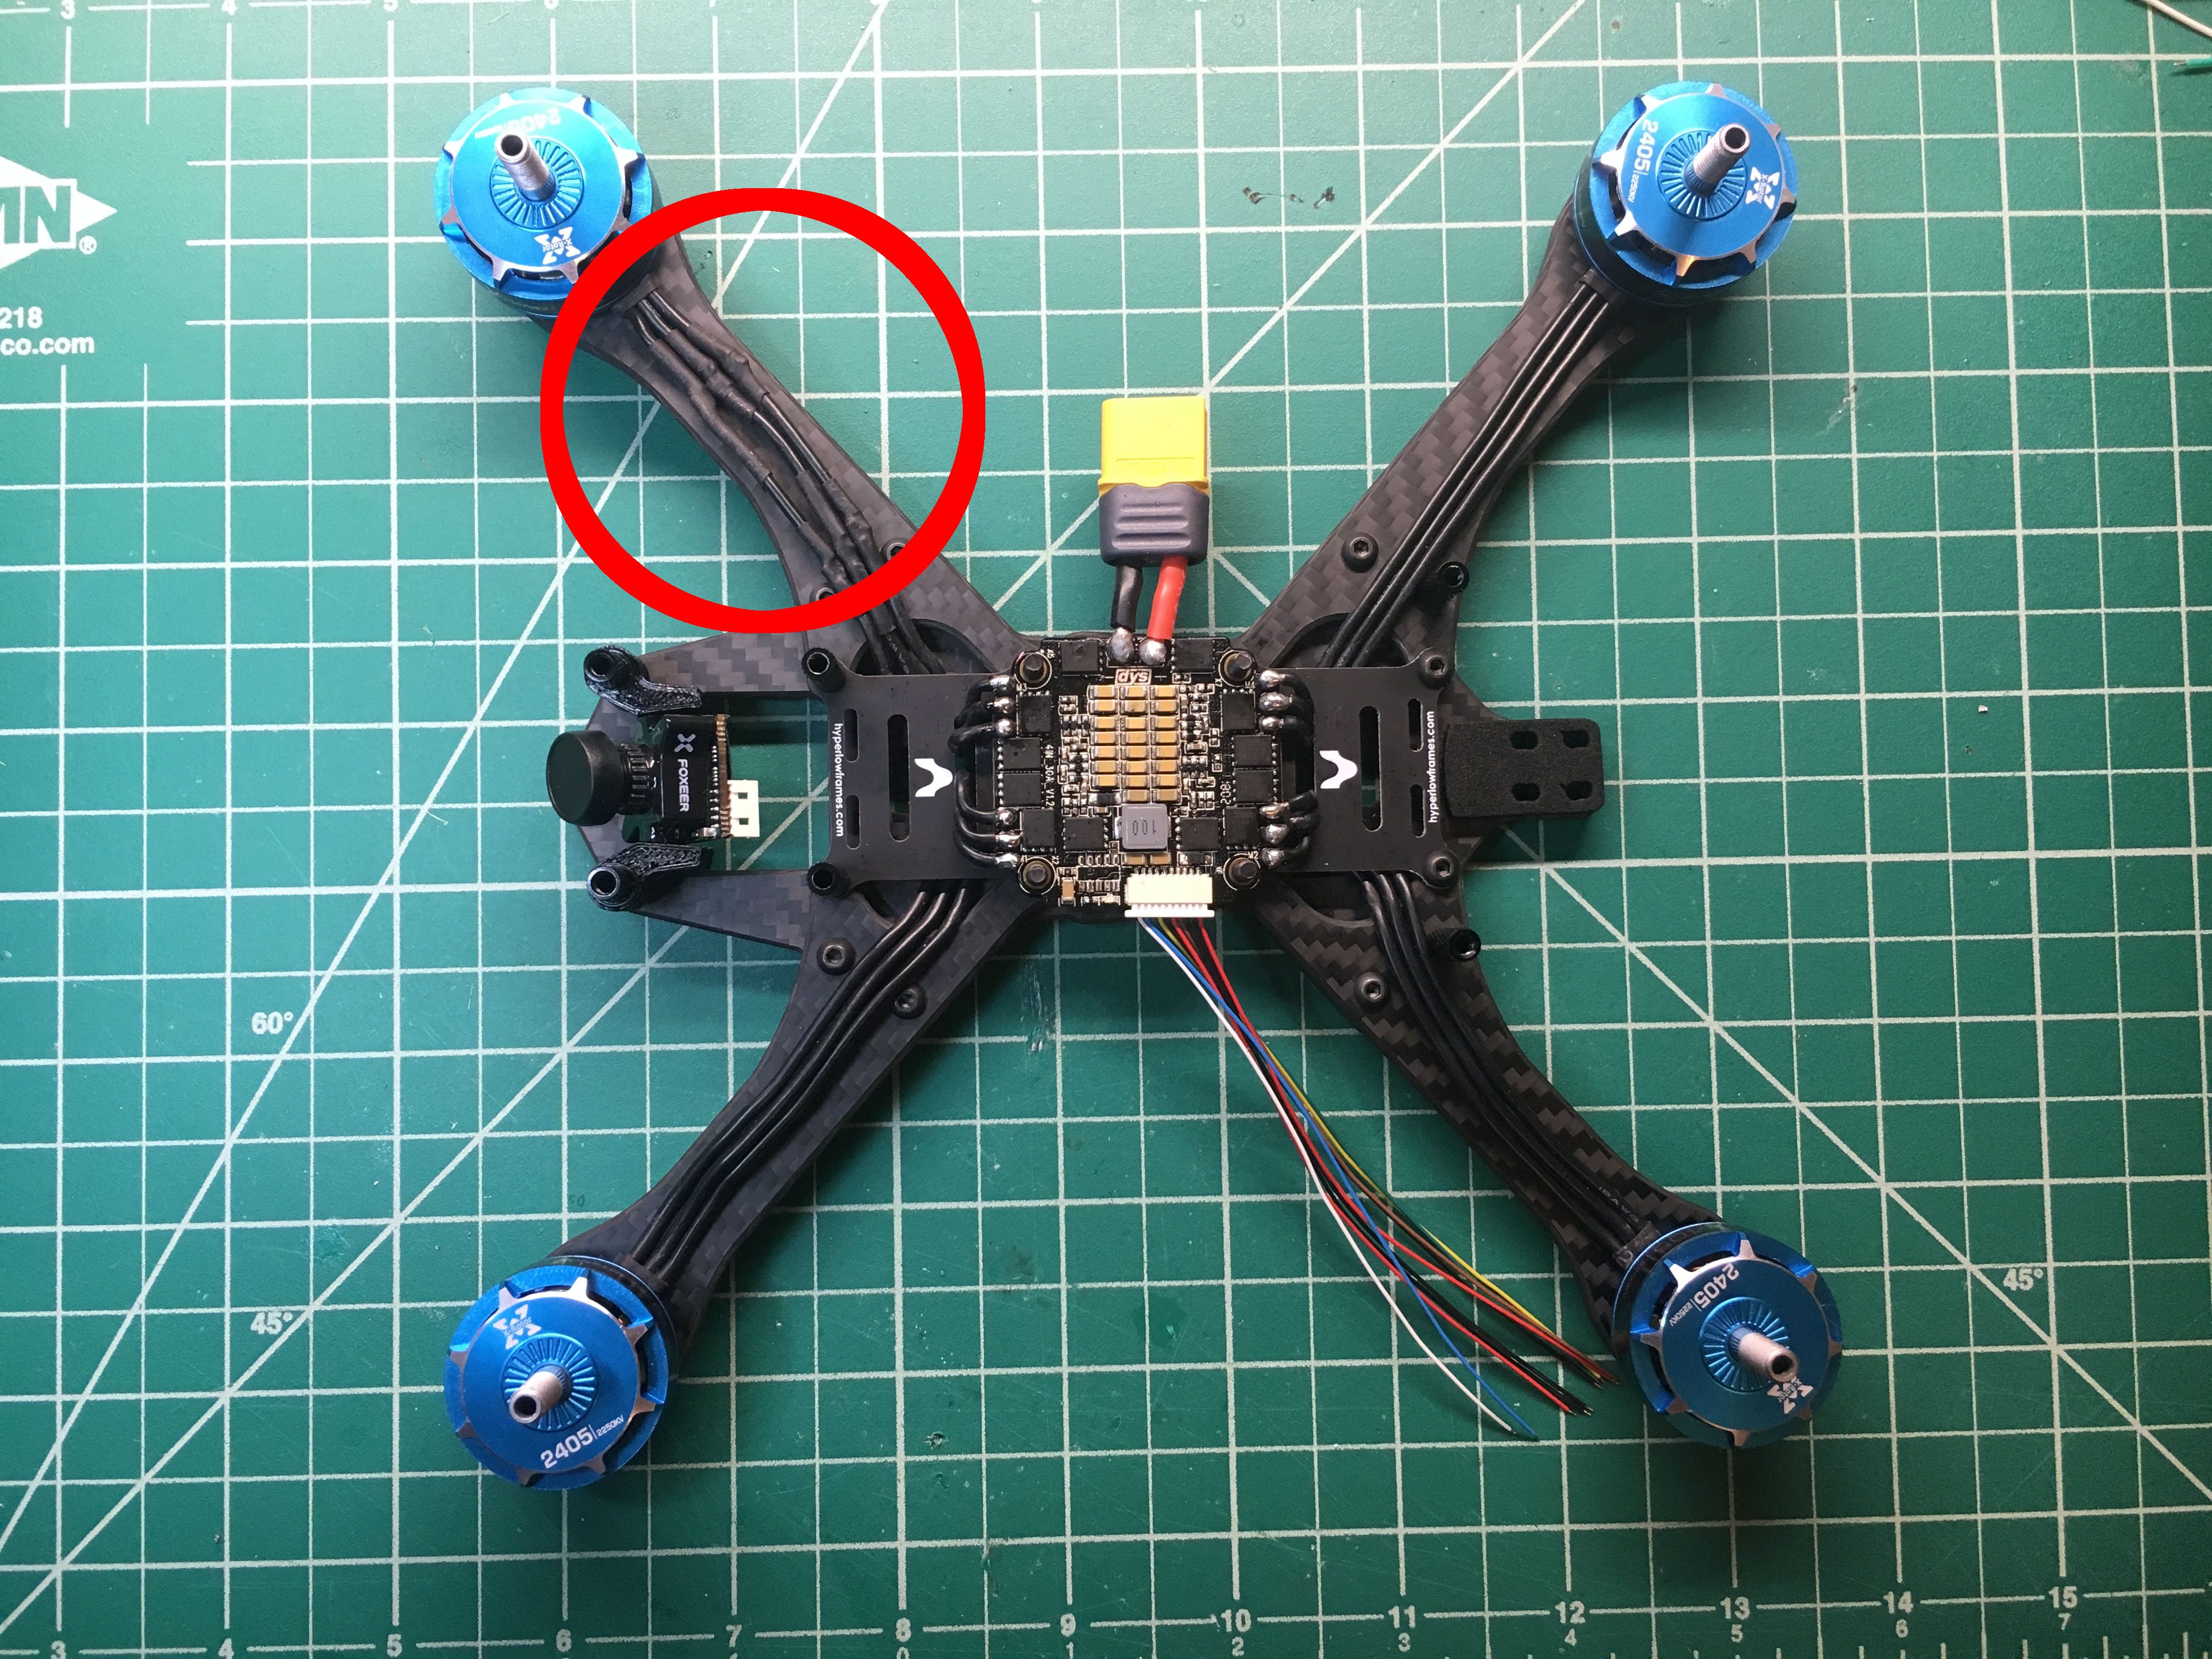
- Don't cut motor wires too short!!! This frame provides some nice options for hiding wires. You can see how I routed them under the raised end plates and wanted to keep them nice and clean. Unfortunately as I was trying to solder the newly cut wires I realized I just didn't have enough length to get it done. I had to extend the wires which is a) a pain in the ass and b) not very attractive. Maybe some racewire to hide my mistake!?
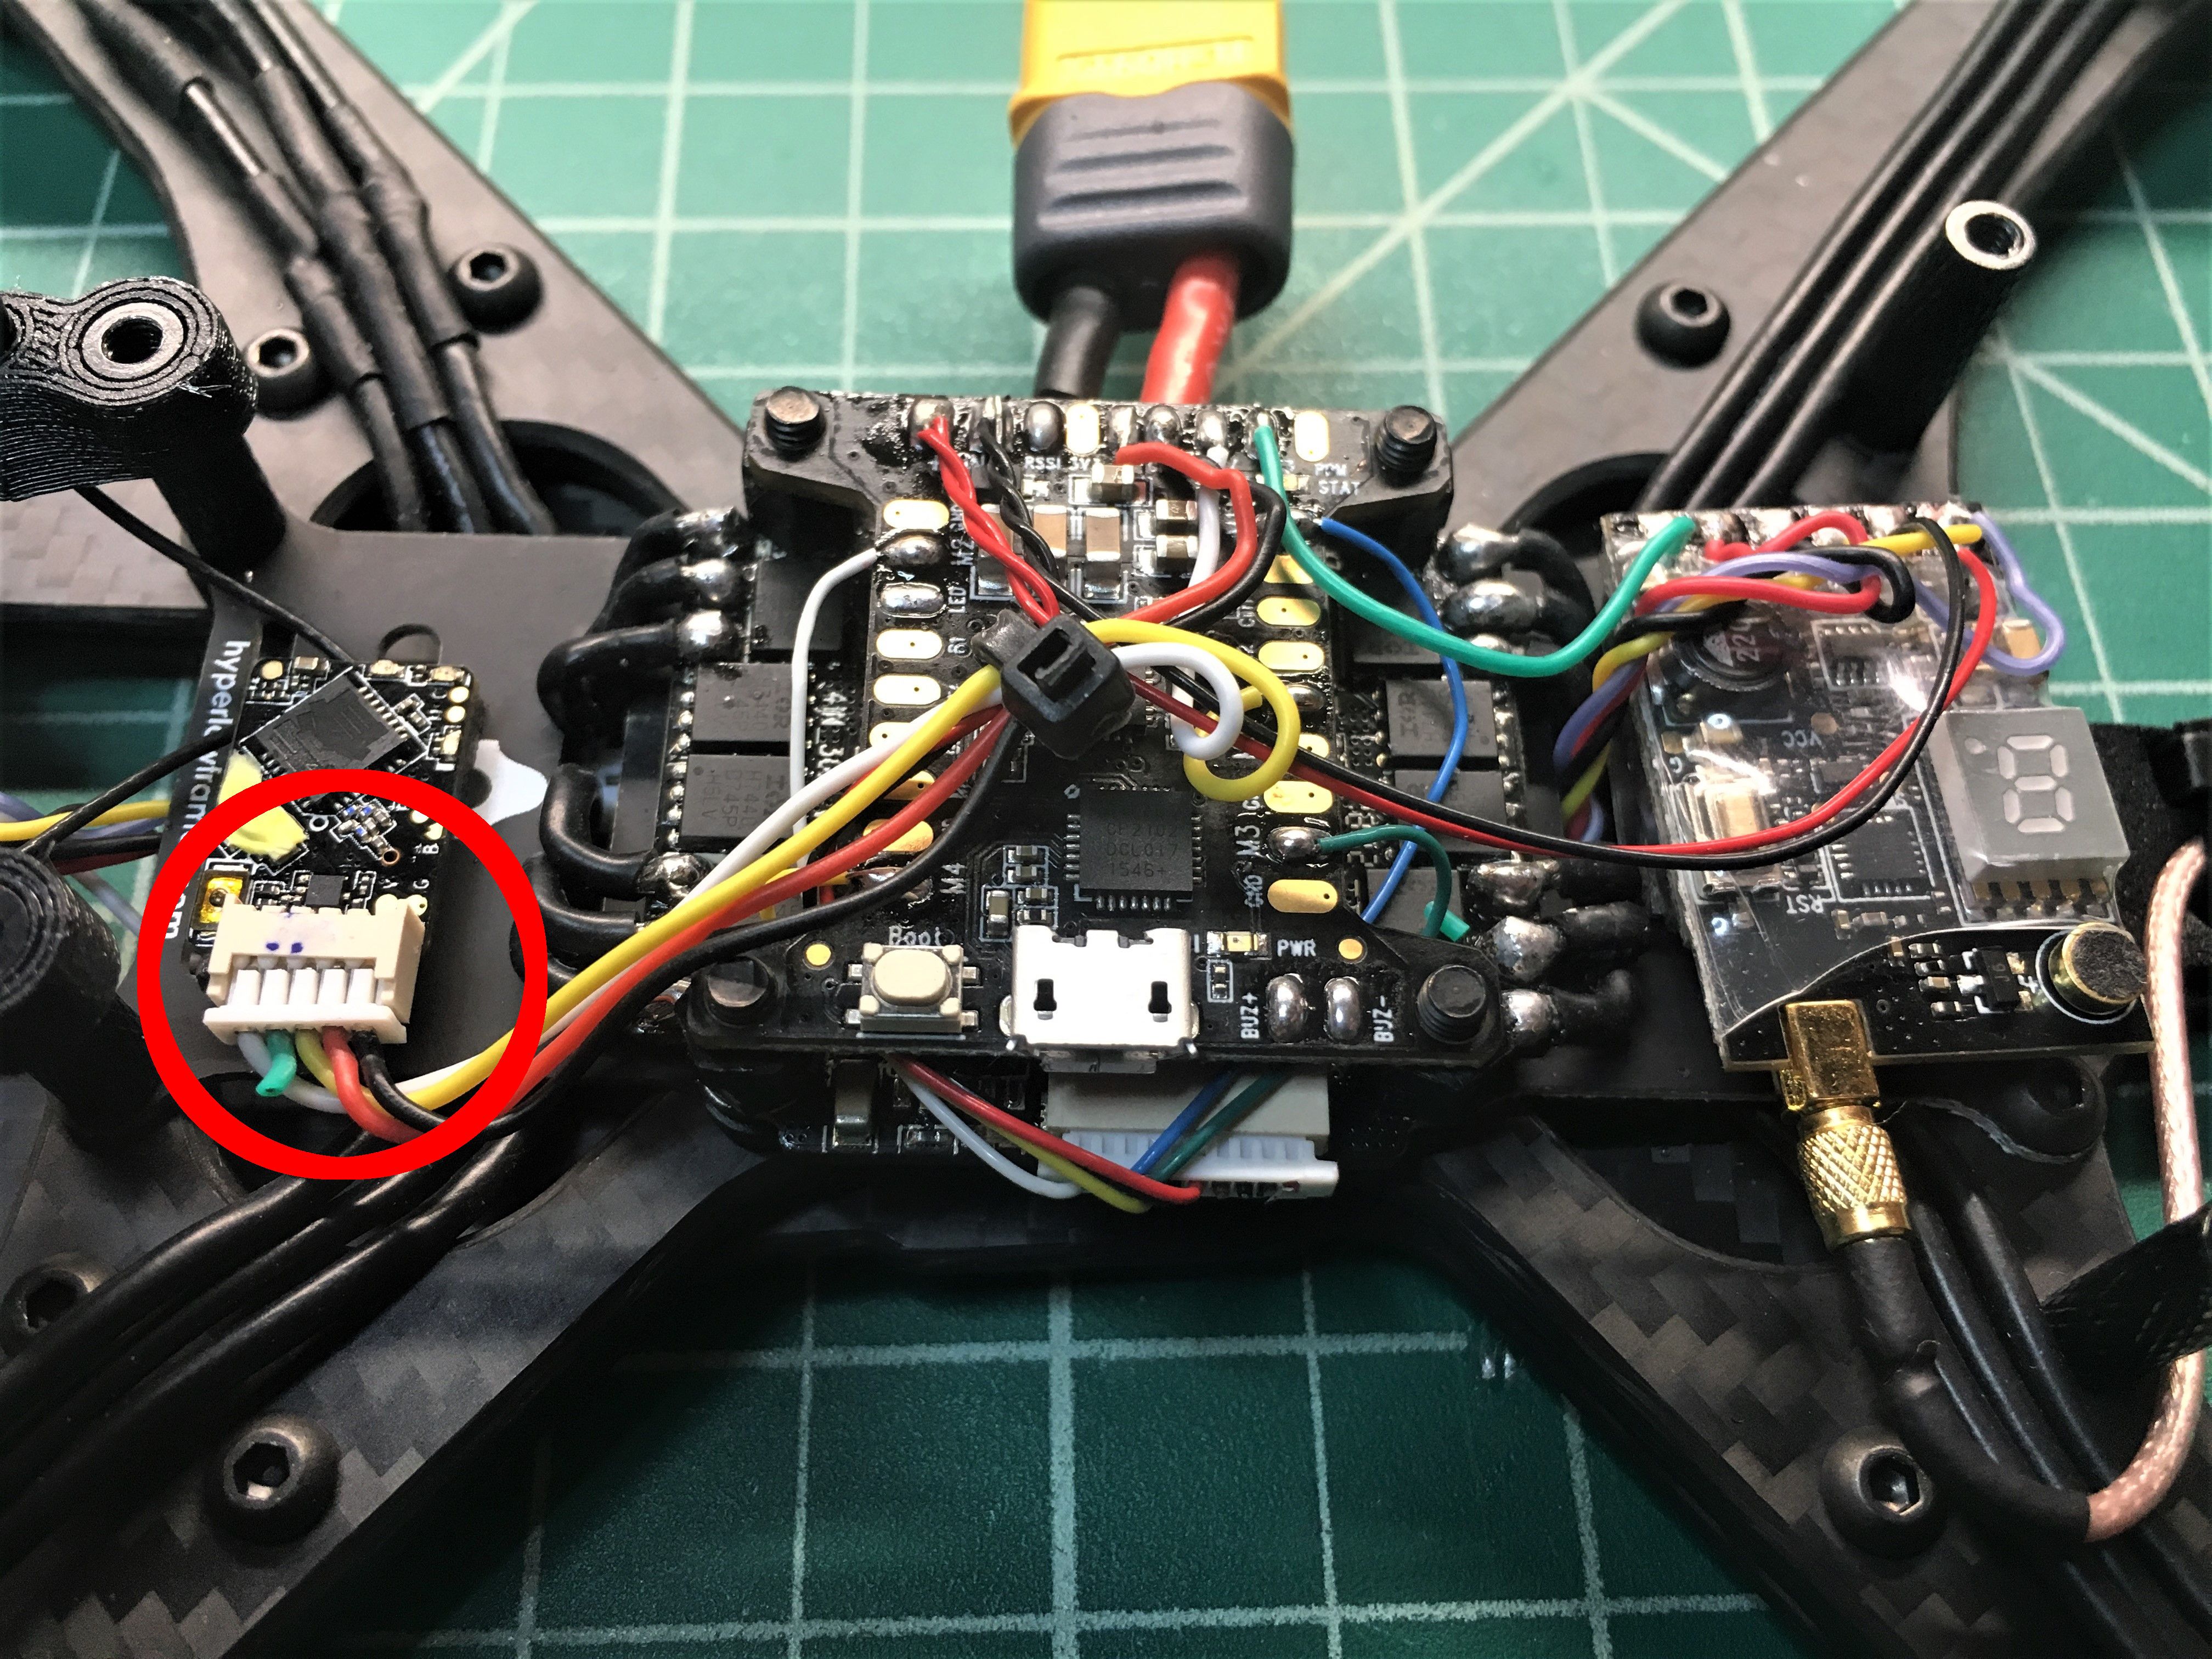
- I got my "S_Bus in" and "S_Bus out" confused when wiring up the RXSR. Thinking I did it correctly I snipped the spare wire coming out of the harness. After spending a VERY LONG TIME researching binding issues and whatnot with my new FRSky I finally came to realize I had wired the RX incorrectly. I got out my ultra tiny tool (sewing needle) and disassembled the plug to swap the white wire into the snipped green wires hole. Now white = SBUS_Out instead of green.
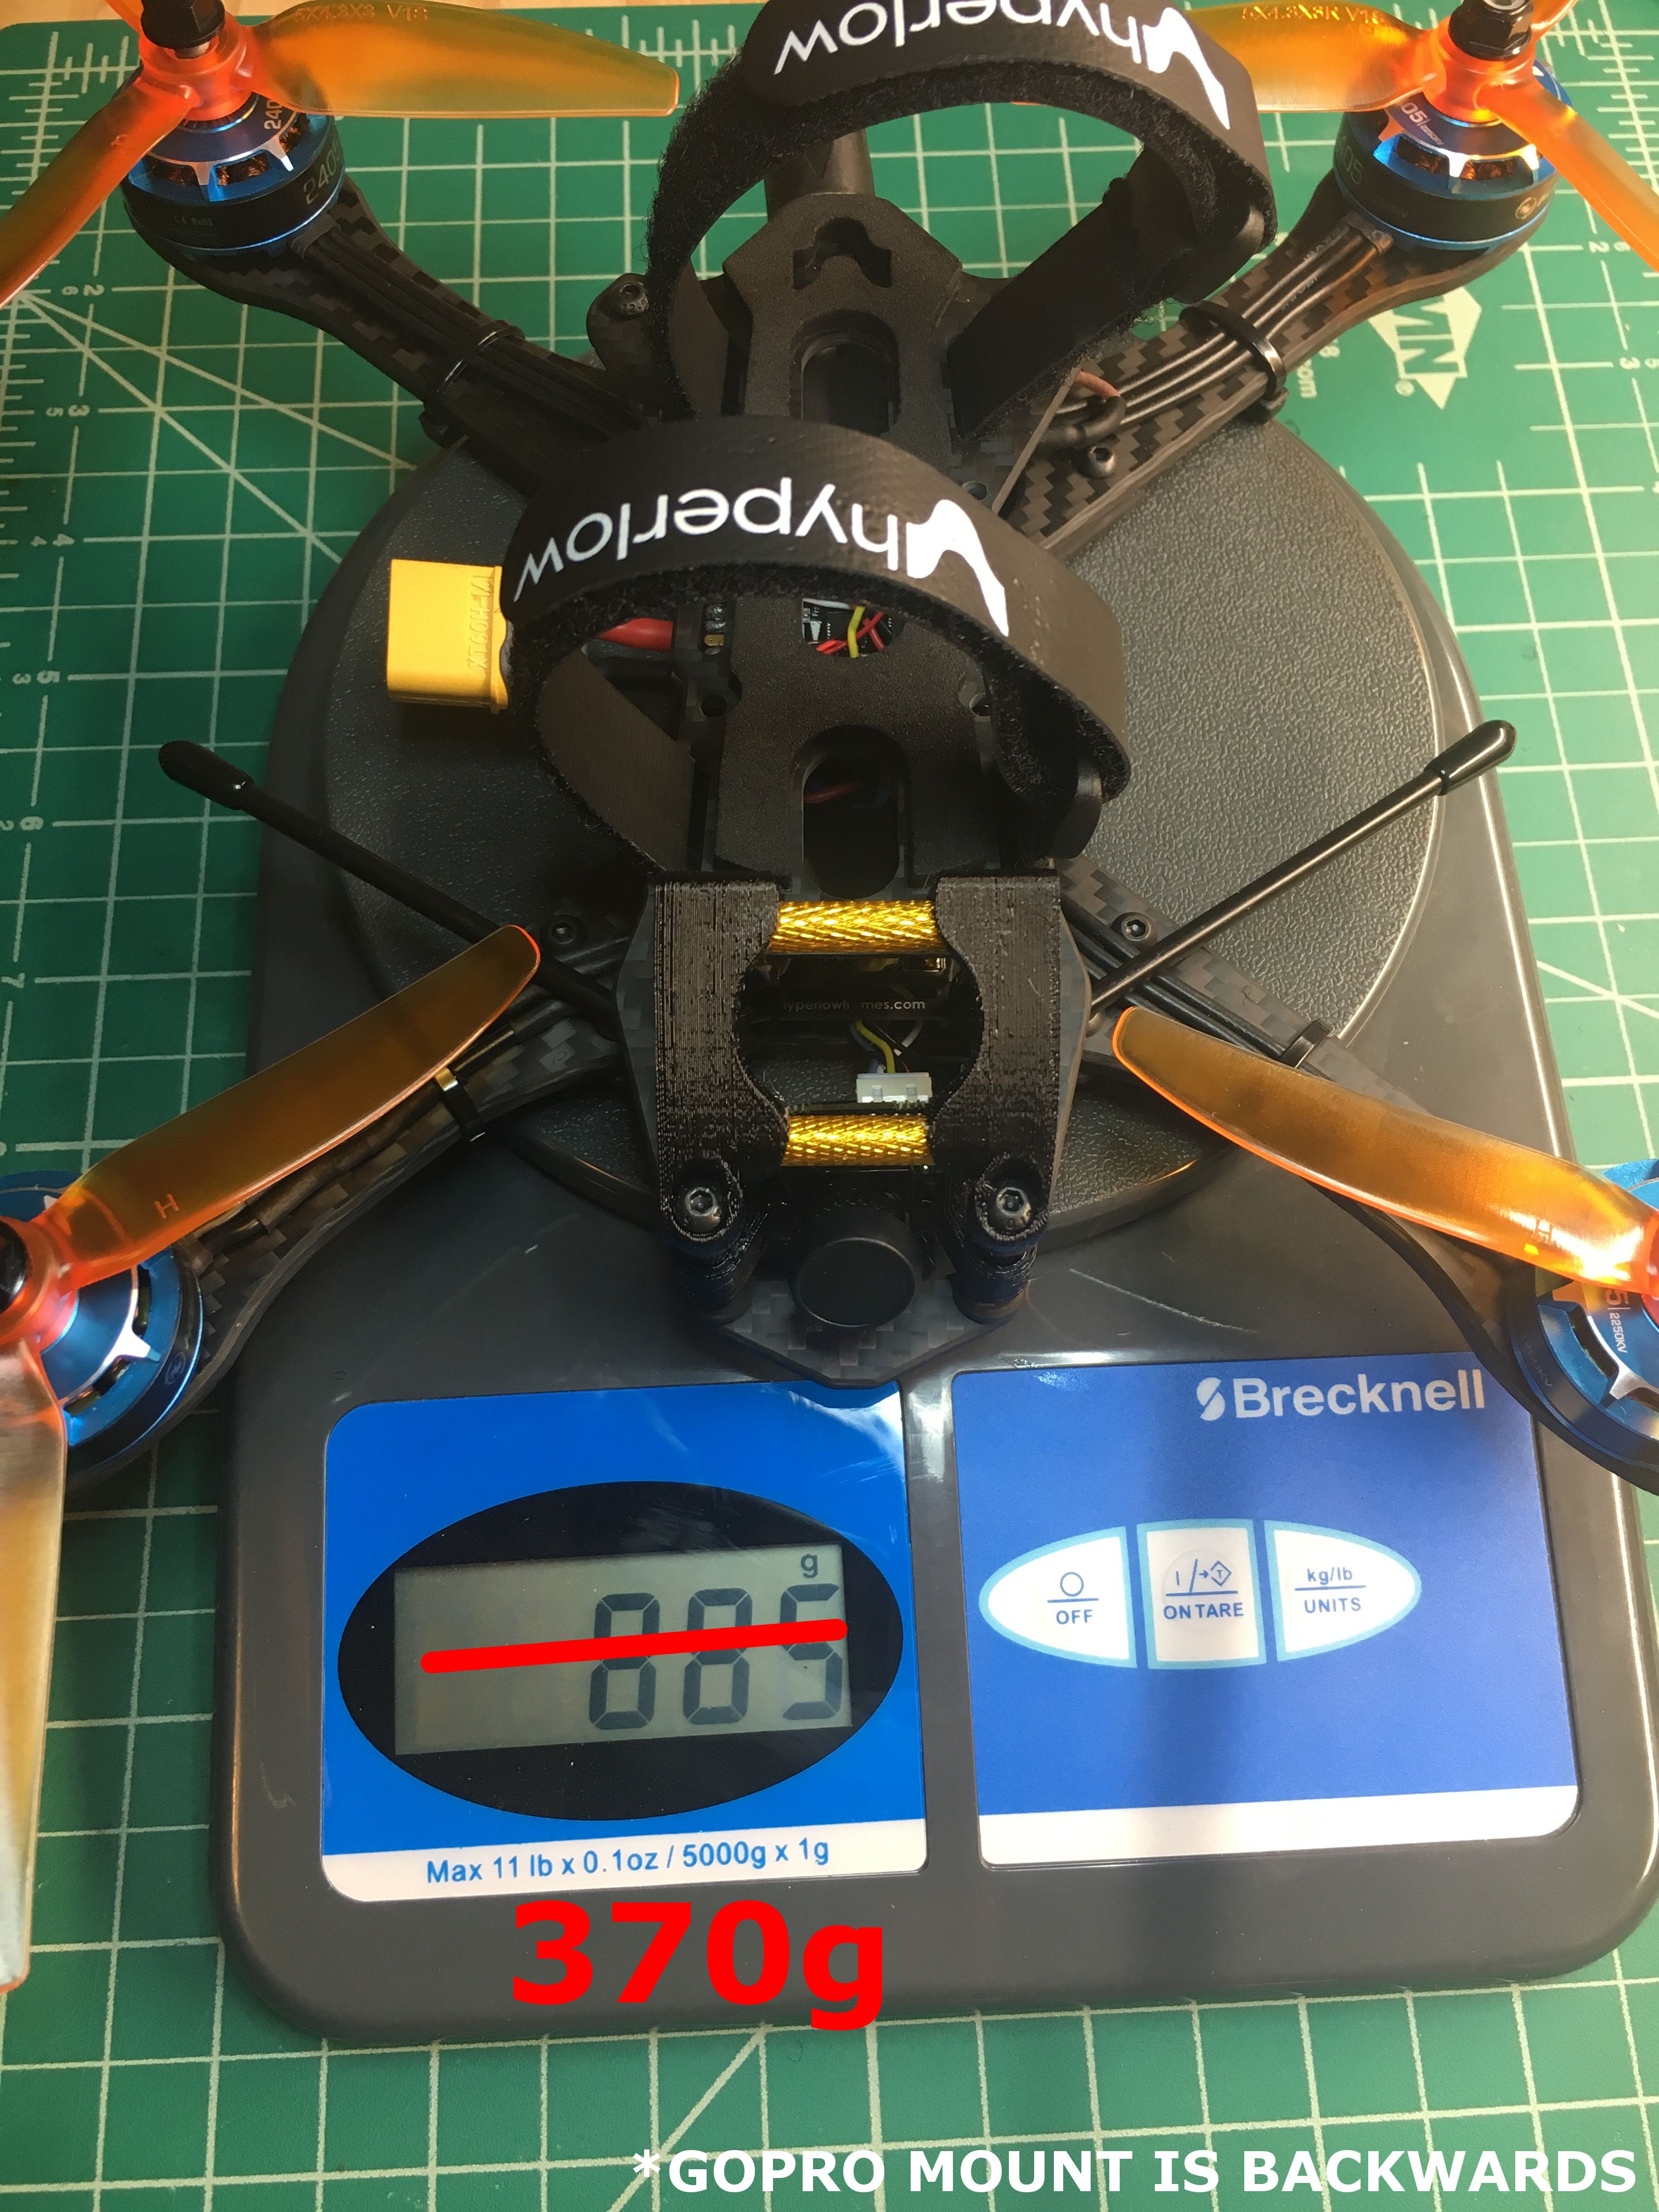
- Always zero out your scale. I don't know what happened but I weighed my quad and my heart sunk when it read 885g. I started searching all over to compare and I was roughly double the weight of other similar quads. I just accepted it as a chunky build at the time. Finally, not content to be the fat kid on the block, I re-weighed to start trimming excess only to realize it actually comes in at 370g. Still heavy but acceptable.
- I left the buzzer on the table AGAIN. Frustrated I overlooked it I rushed it on and attached it to vbat opposed to 5v and blew it up. $25 hellgate buzzer - dead before use.
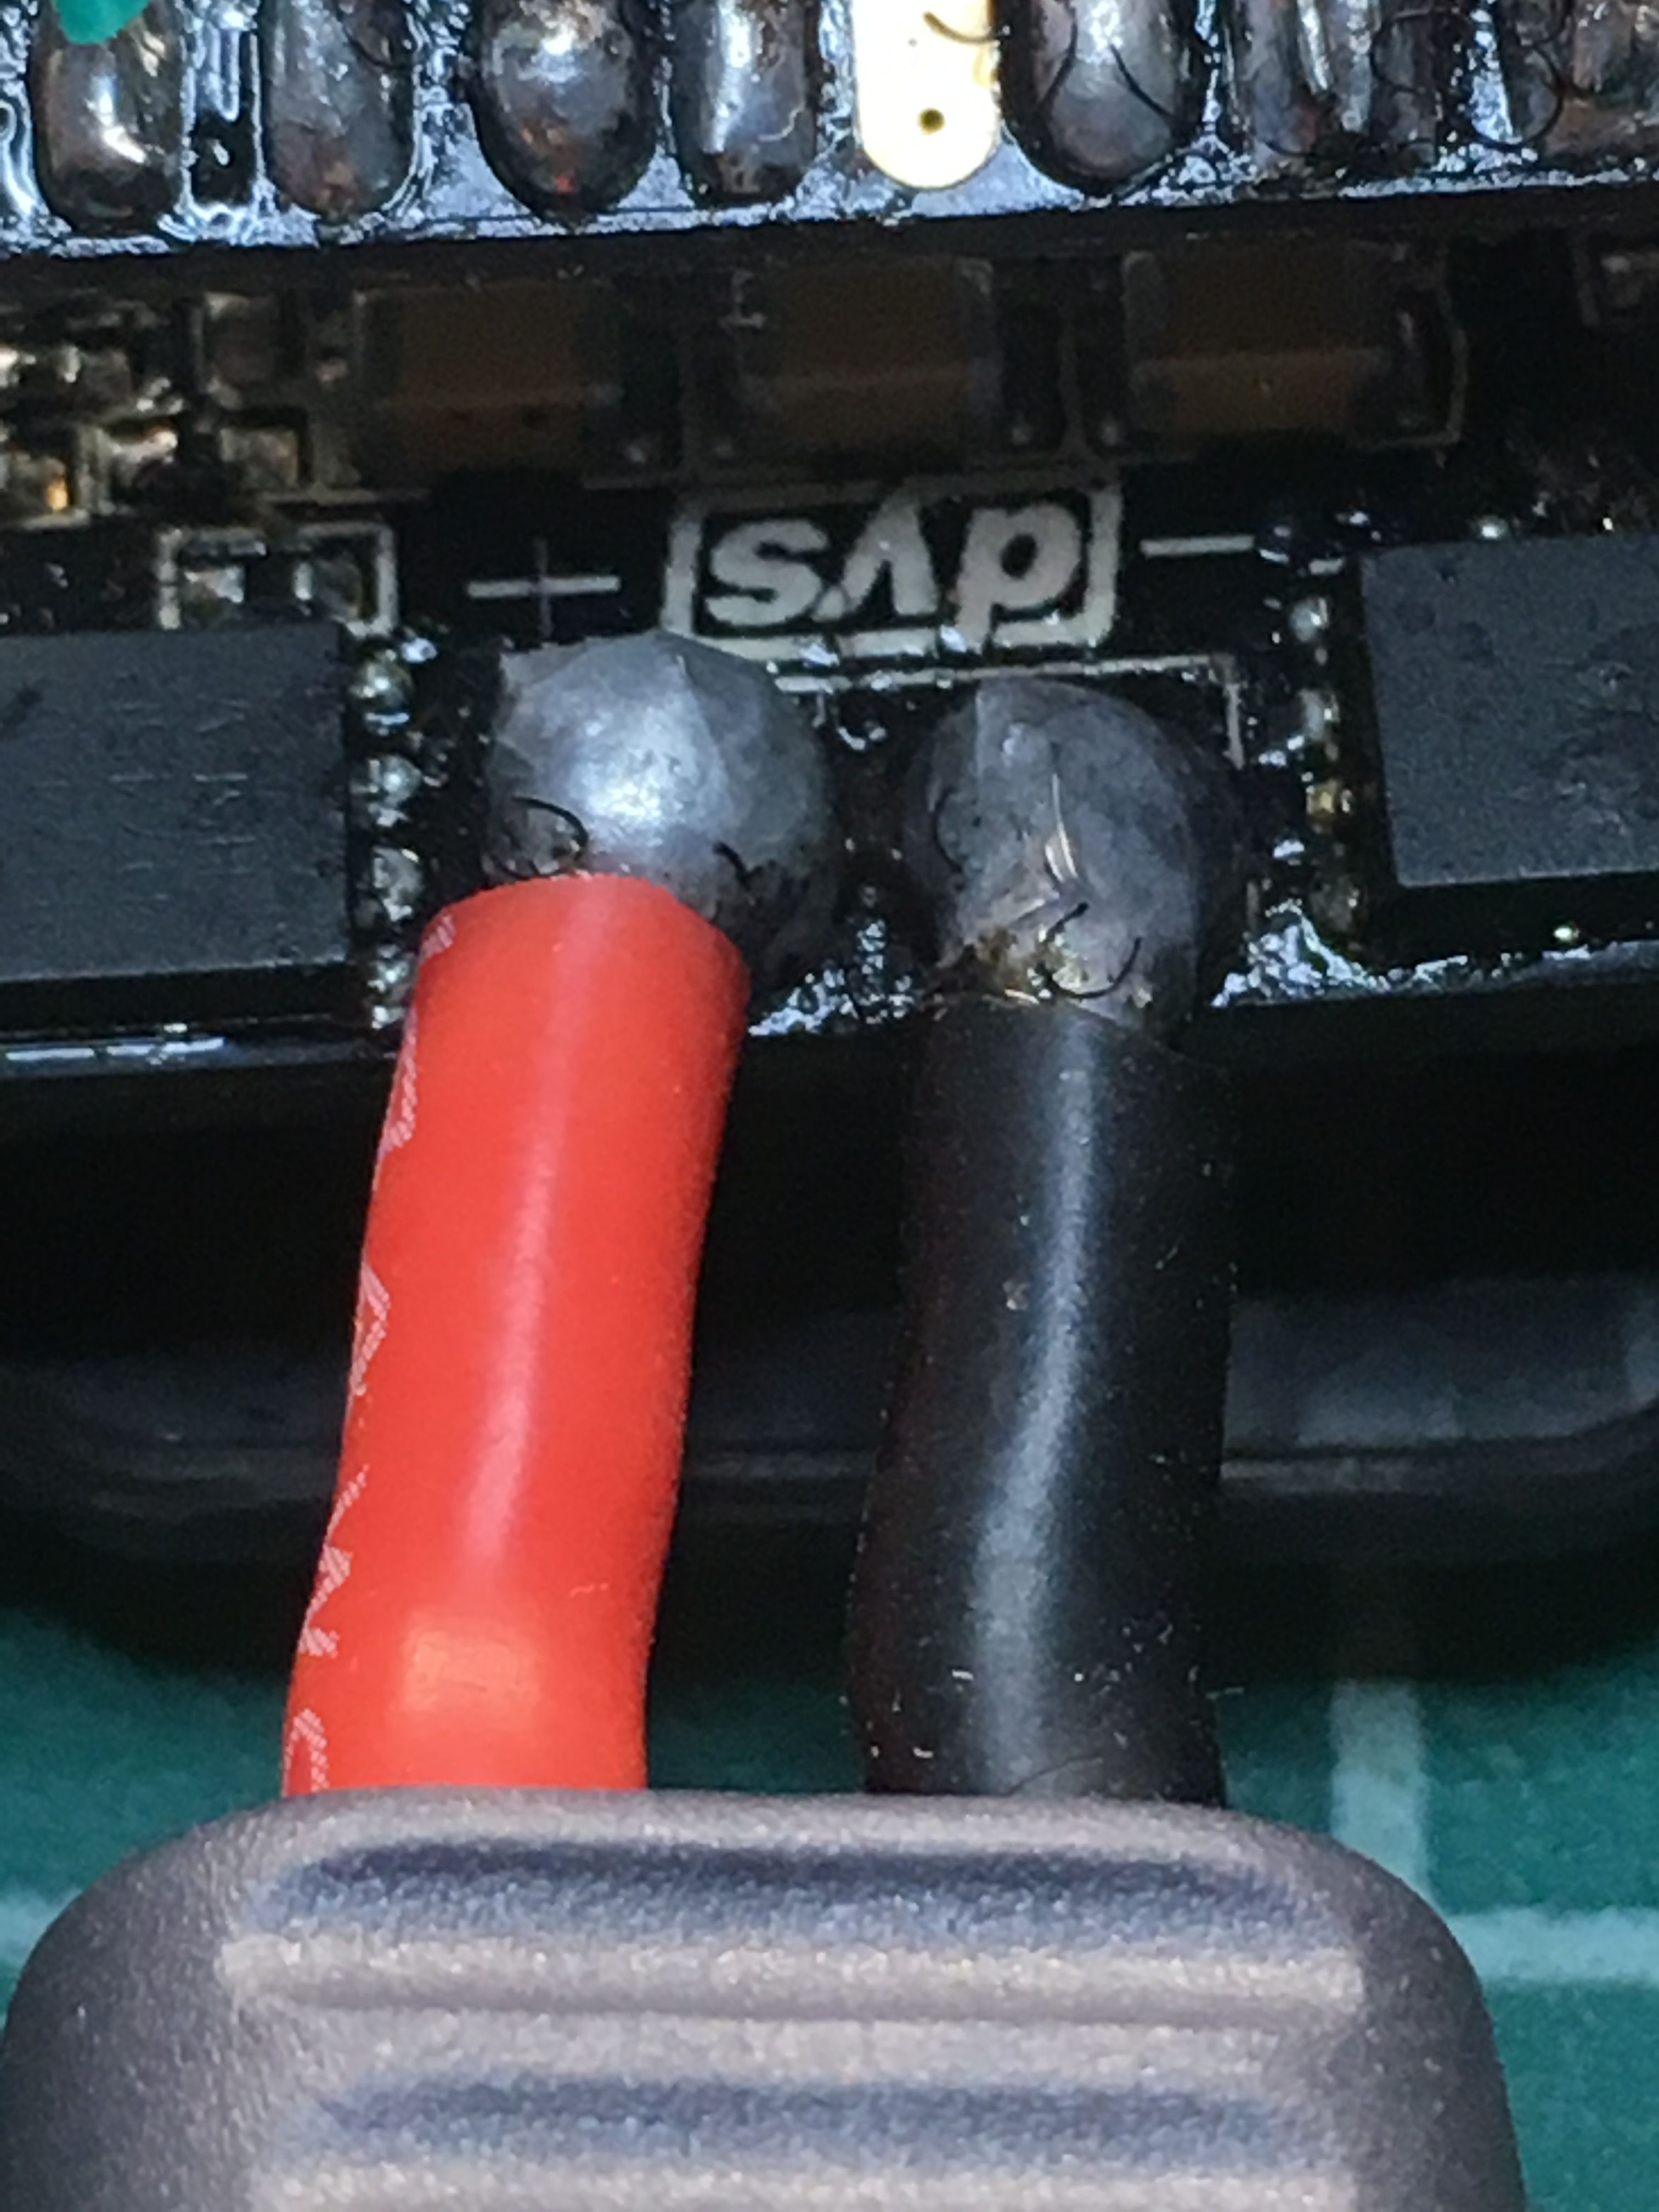
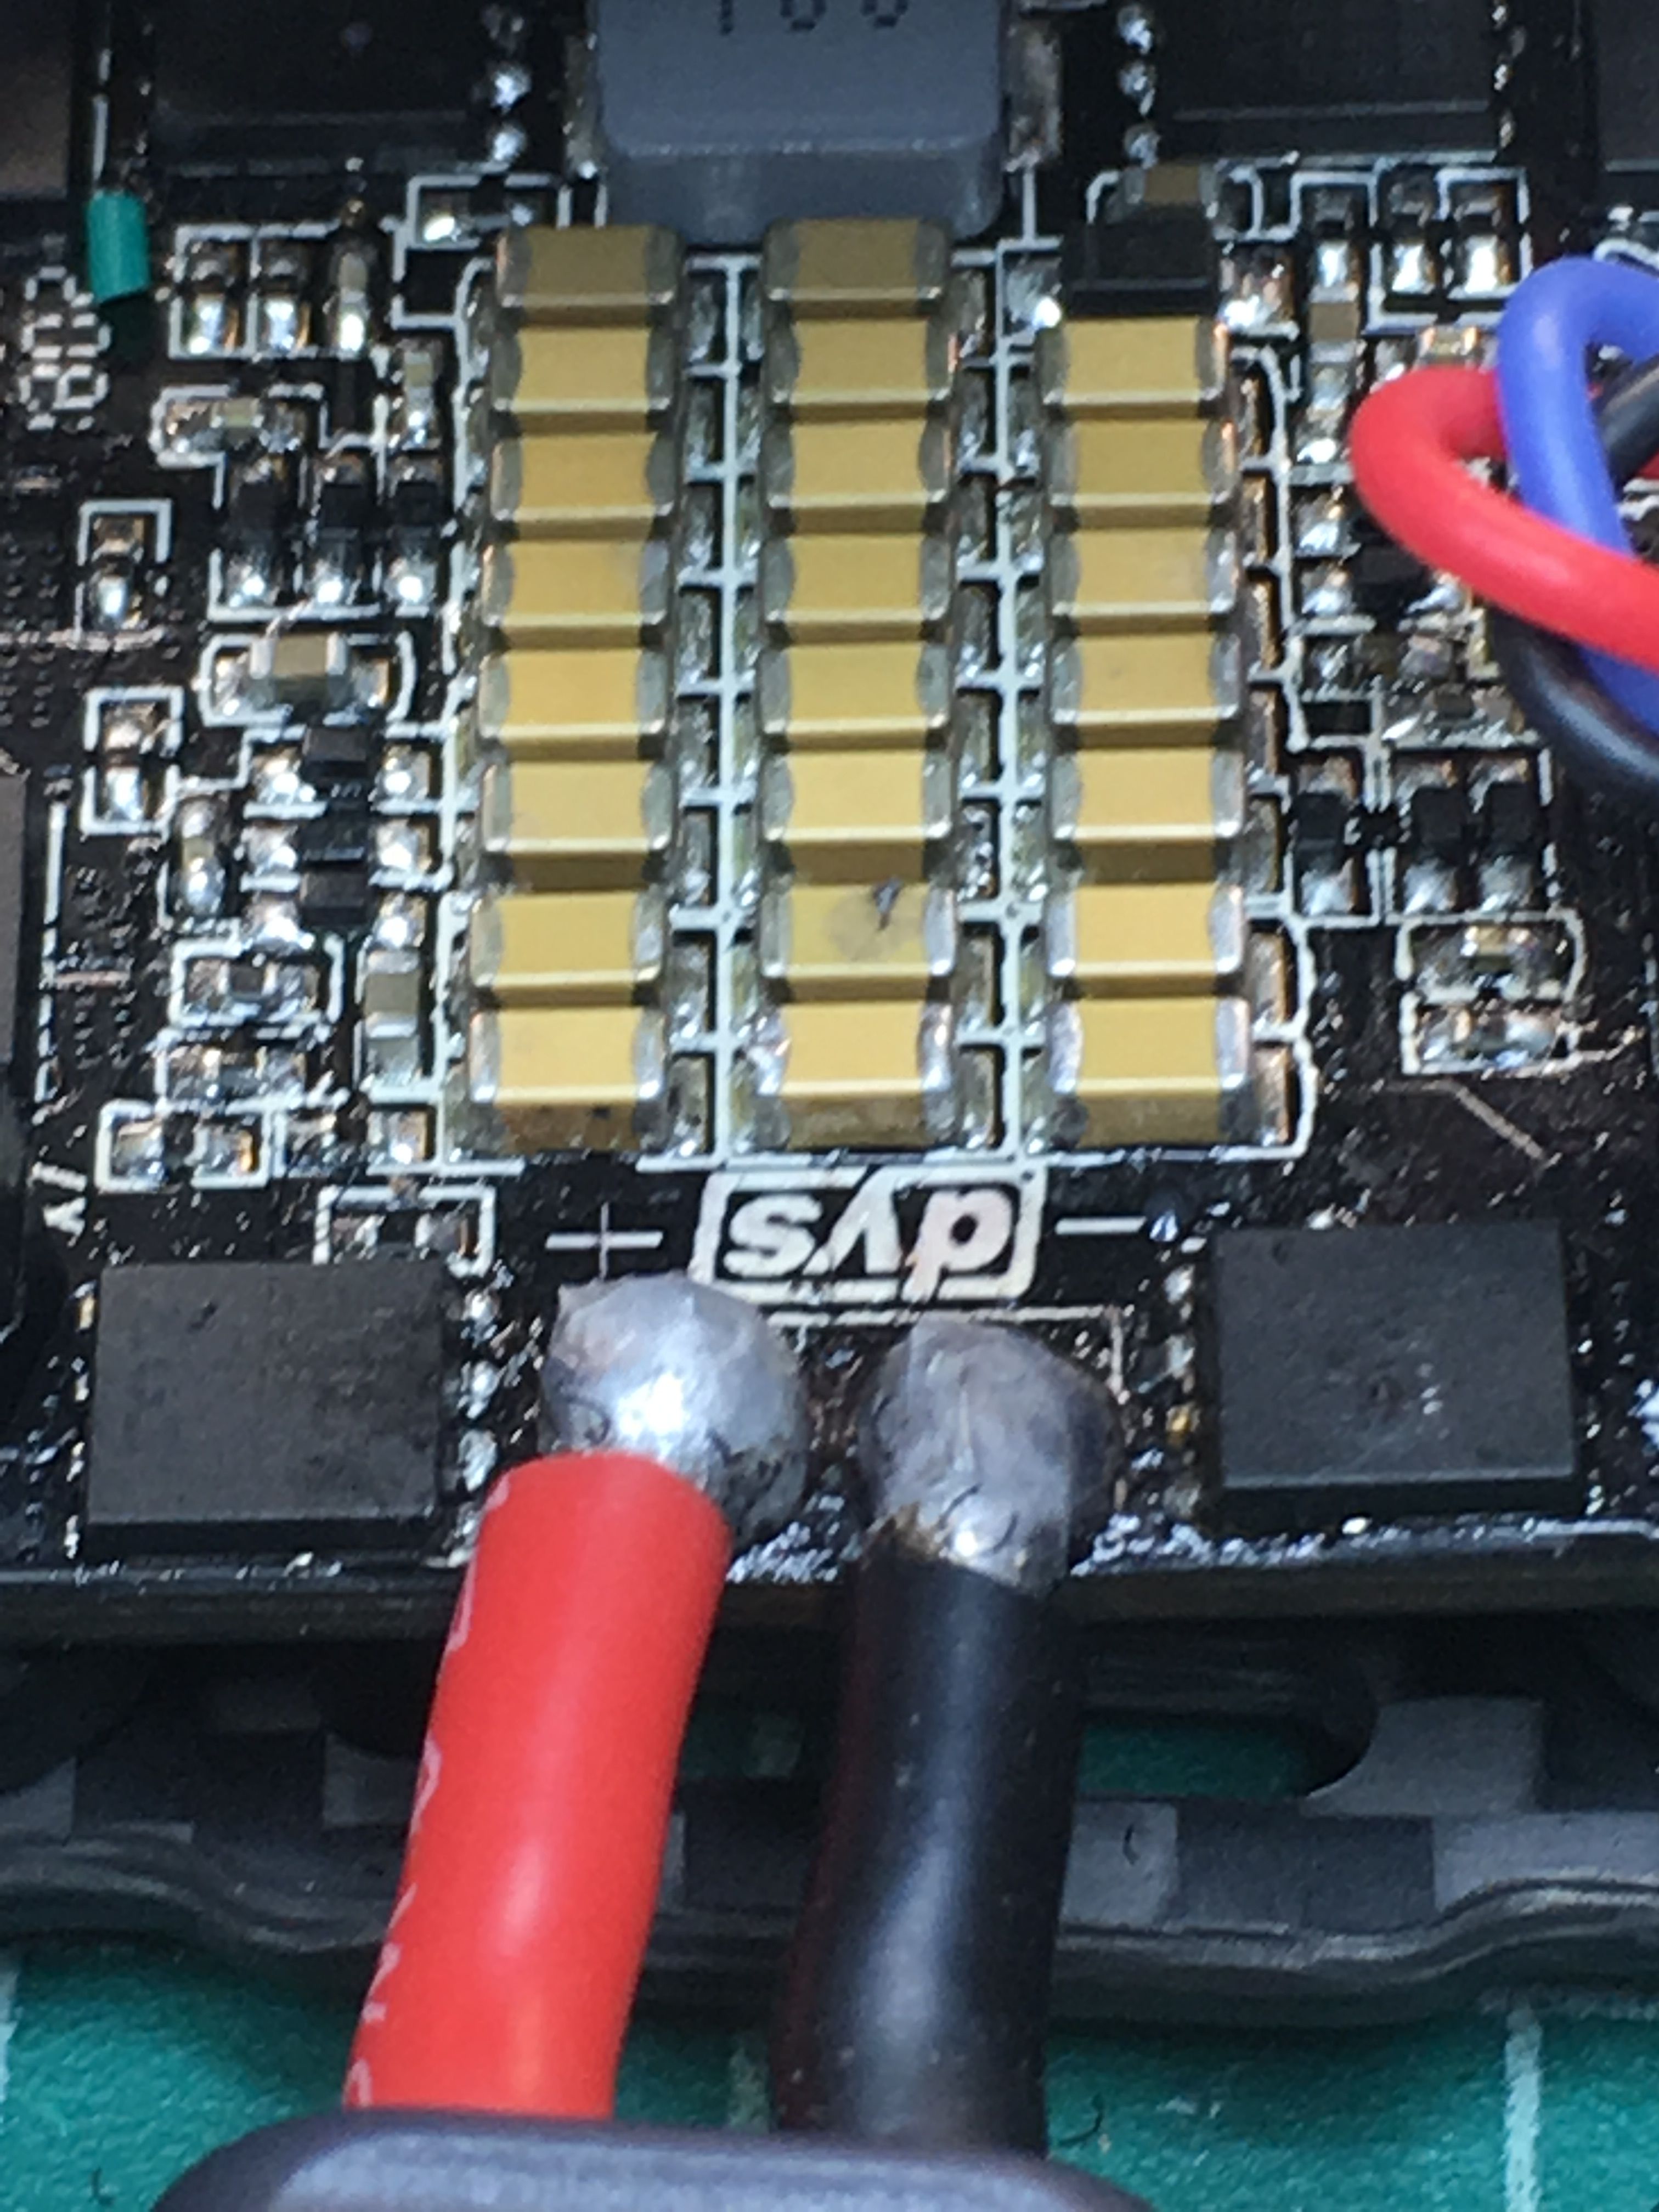
- Be more careful with wire stripper. Apparently I cut through the wire coating into the actual wire and as a result several tiny 2mm long wires were freely floating in my solder when connecting the battery leads. When I first powered up the build I got some magic smoke and actually saw sparks (yes I had a smoke stopper on). The Pos and Gnd pads on the ESC were arcing. It appeared they were close but that was surprising. I reflowed the solder and started to see little spikes poking out and not just due to a lack of flux. You can see in the pics below the little pieces of wire stuck to my iron after cleaning up the pads. (This is not the first time tiny frayed/snipped wire has shorted out my boards.)
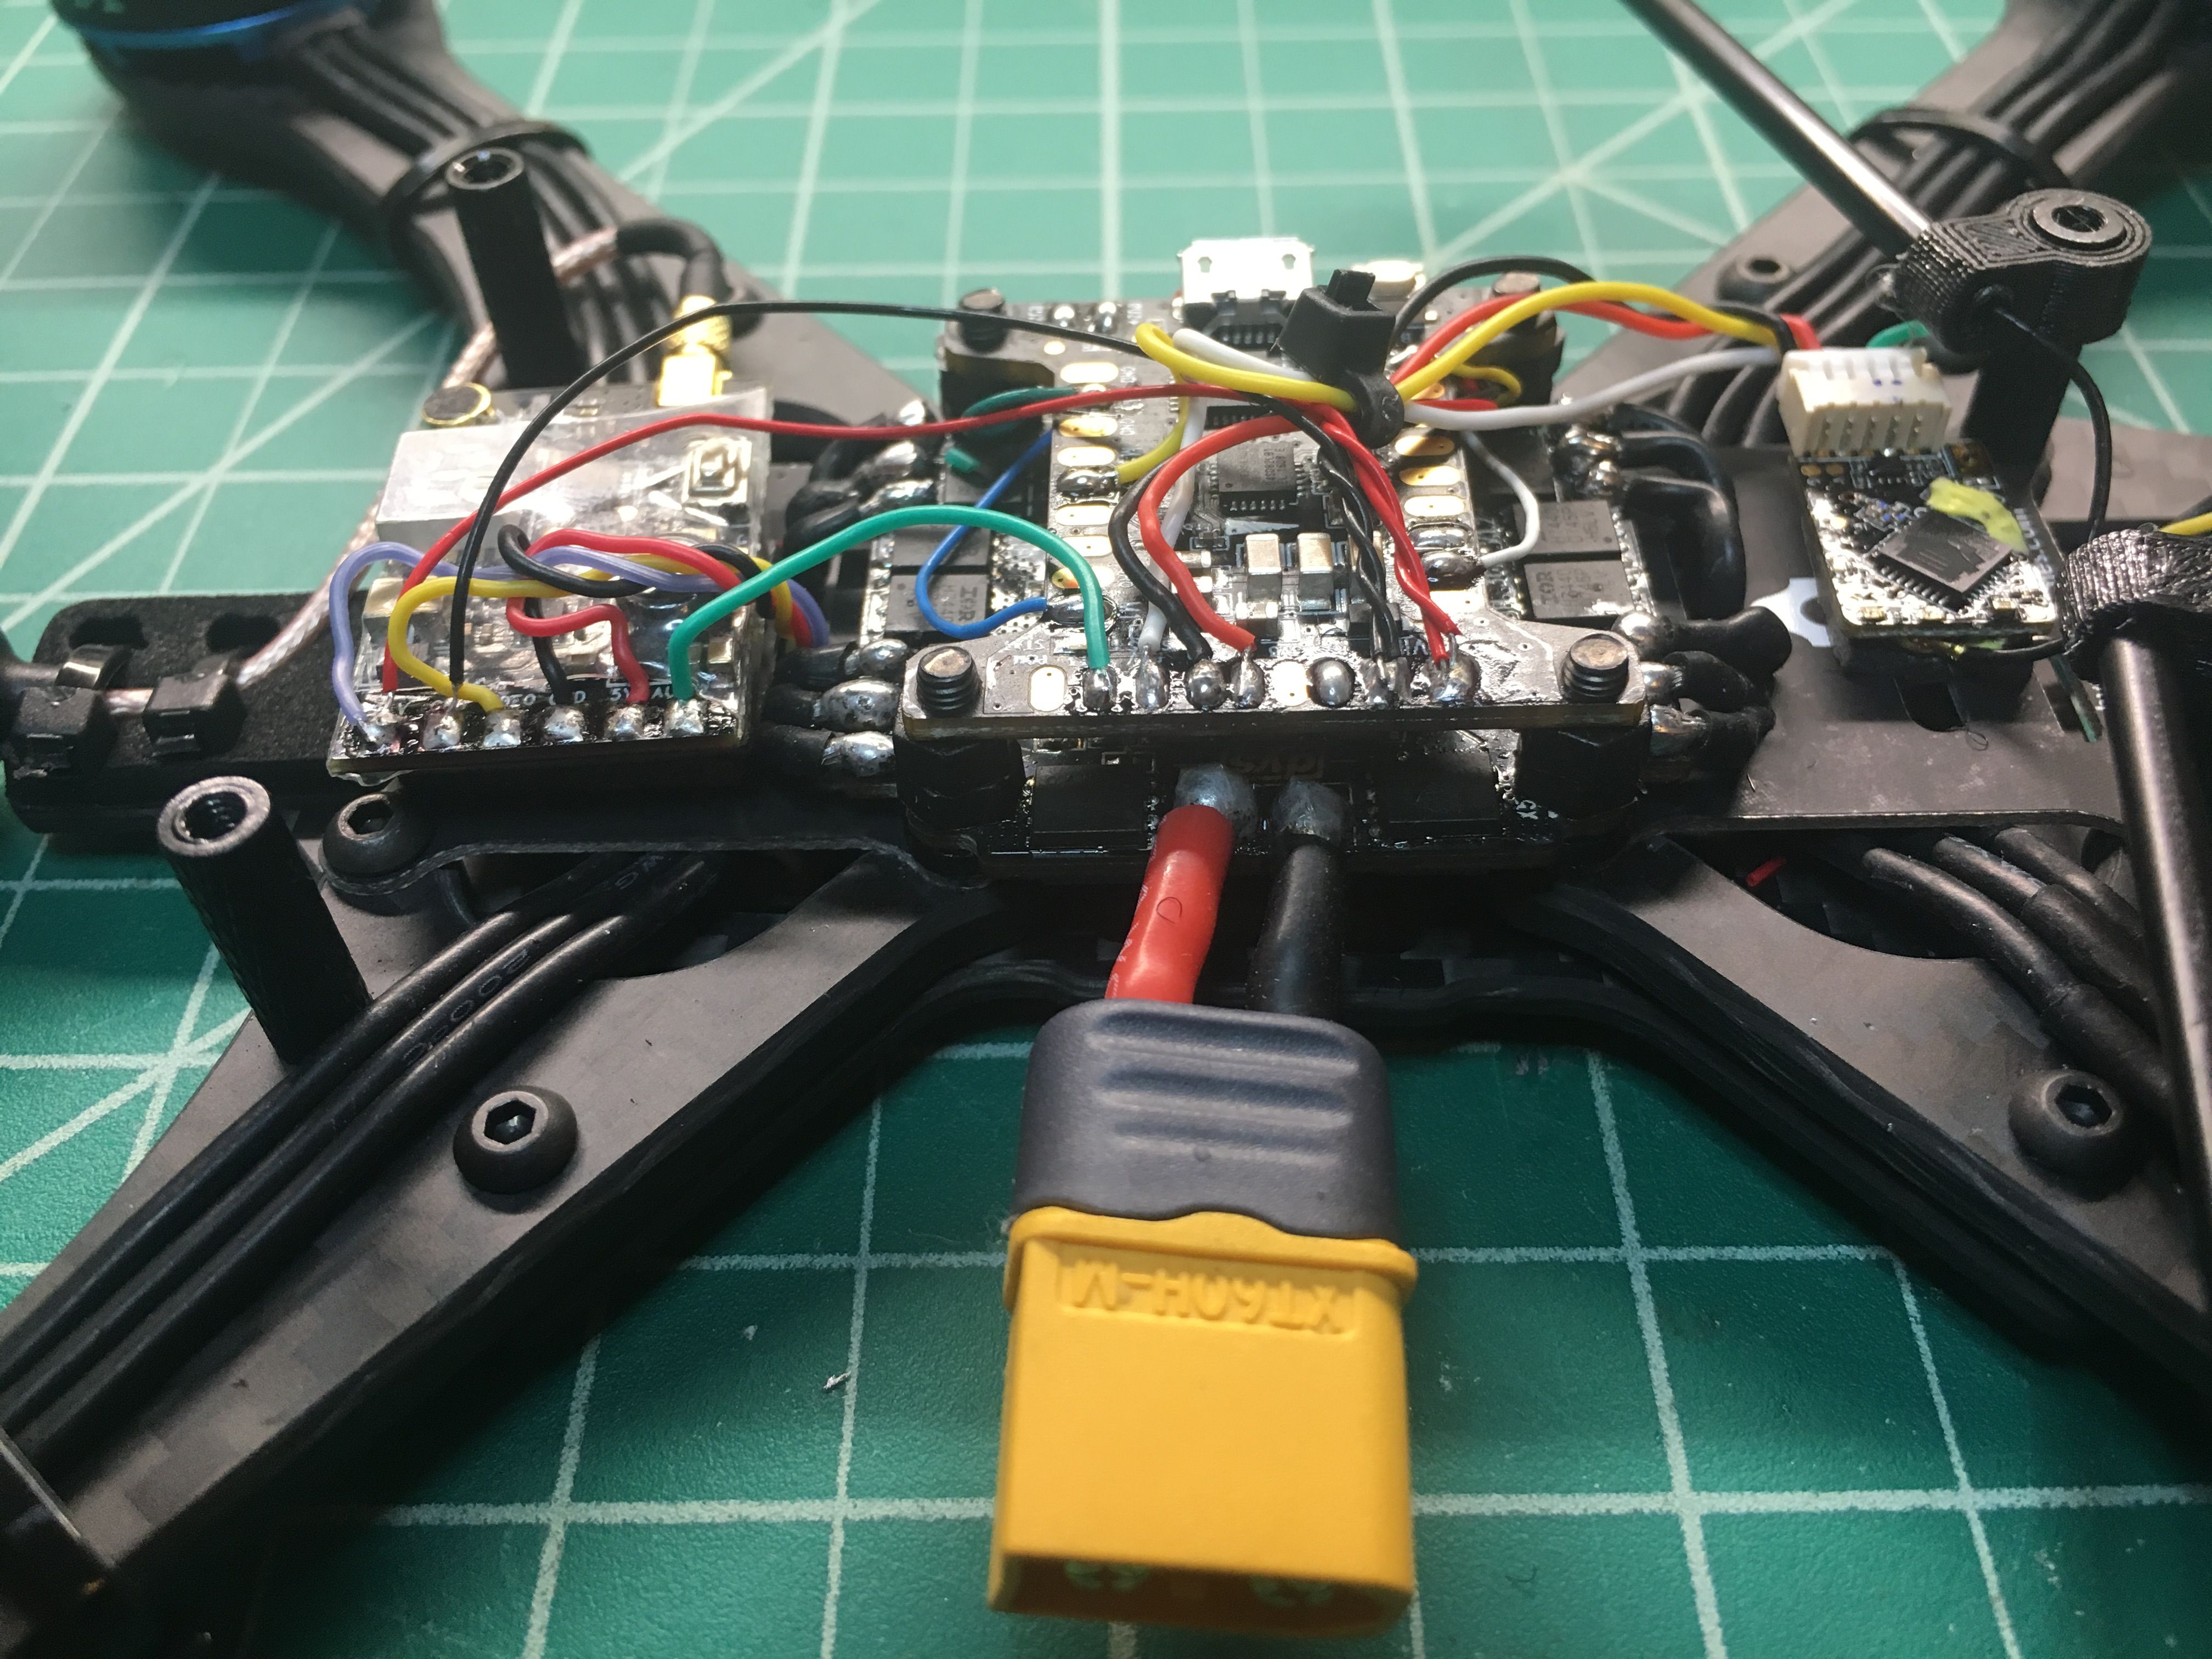
Photos


Thanks for all the info it will help me with my first build.