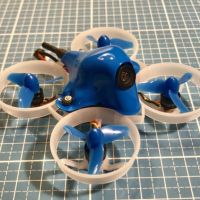
ET100++
 By Johnny Halfmoon on May 27, 2018
So much power, so much fun!!
Seriously, I cannot begin to describe the amount of fun I'm having with this thing. So I wanted an ET100, badly. But I wanted an even better one and I also did not feel like getting screwed by customs / taxes (anything imported worth over 21 euros gets taxed with 13 euros+21%), so I decided to build one from parts. I opened a spreadsheet, sherlocked all the parts together and calculated that the total cost of this little asskicker would be roughly no more than 20 euros more than the BNF version. Yes, I'd be spending hours putting the thing together, but I very much enjoy that process, so that's a win too. Oh yes, I had never built or flown a quad before, ever, apart from 60+ hours in Velocidrone (buy it, NOW!) and watching 100+ hours of youtube FPV material, so this was quite an interresting experience, if only because of that fact. Weight was also an issue I kept in mind and the total weight of the aftermarket components was calculated be about 3 grams less than stock.
Okay now; why is my ET100 so much cooler than yours?
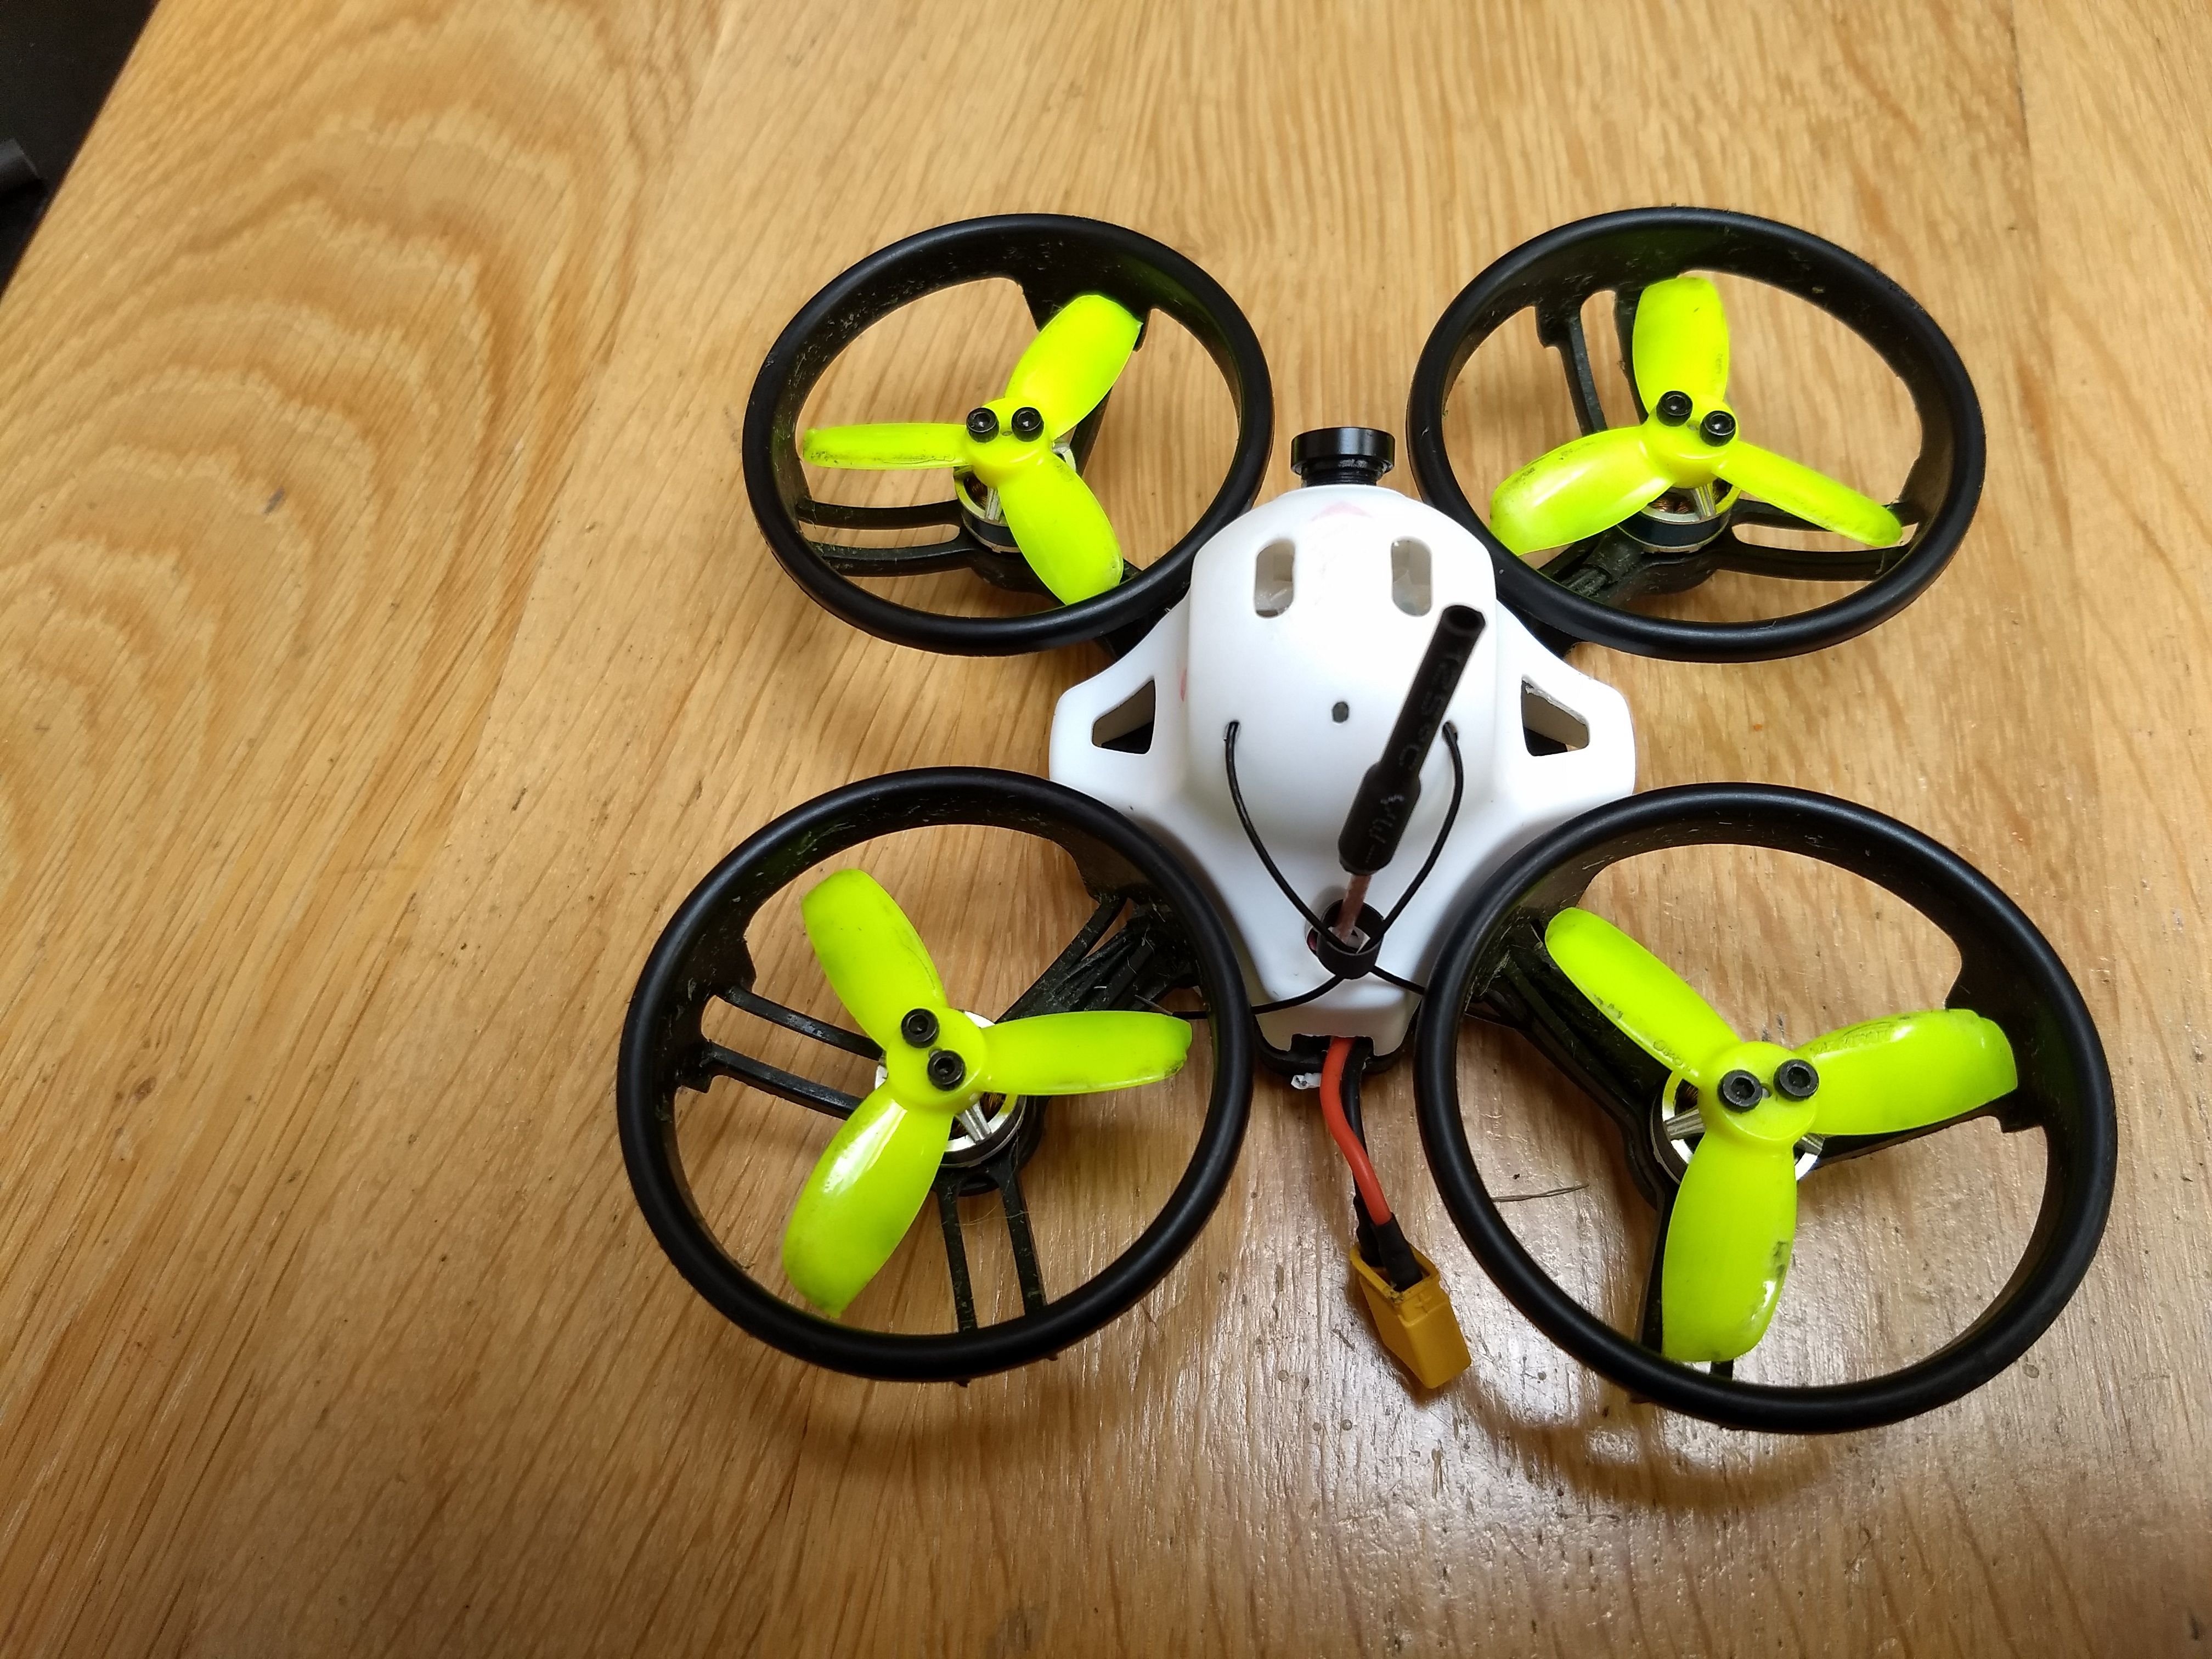
- Betaflight OSD... Seriously, this is the b0mb.
- The VTX does 48channels, 25/200mW and OSD configuration. Yes, really.
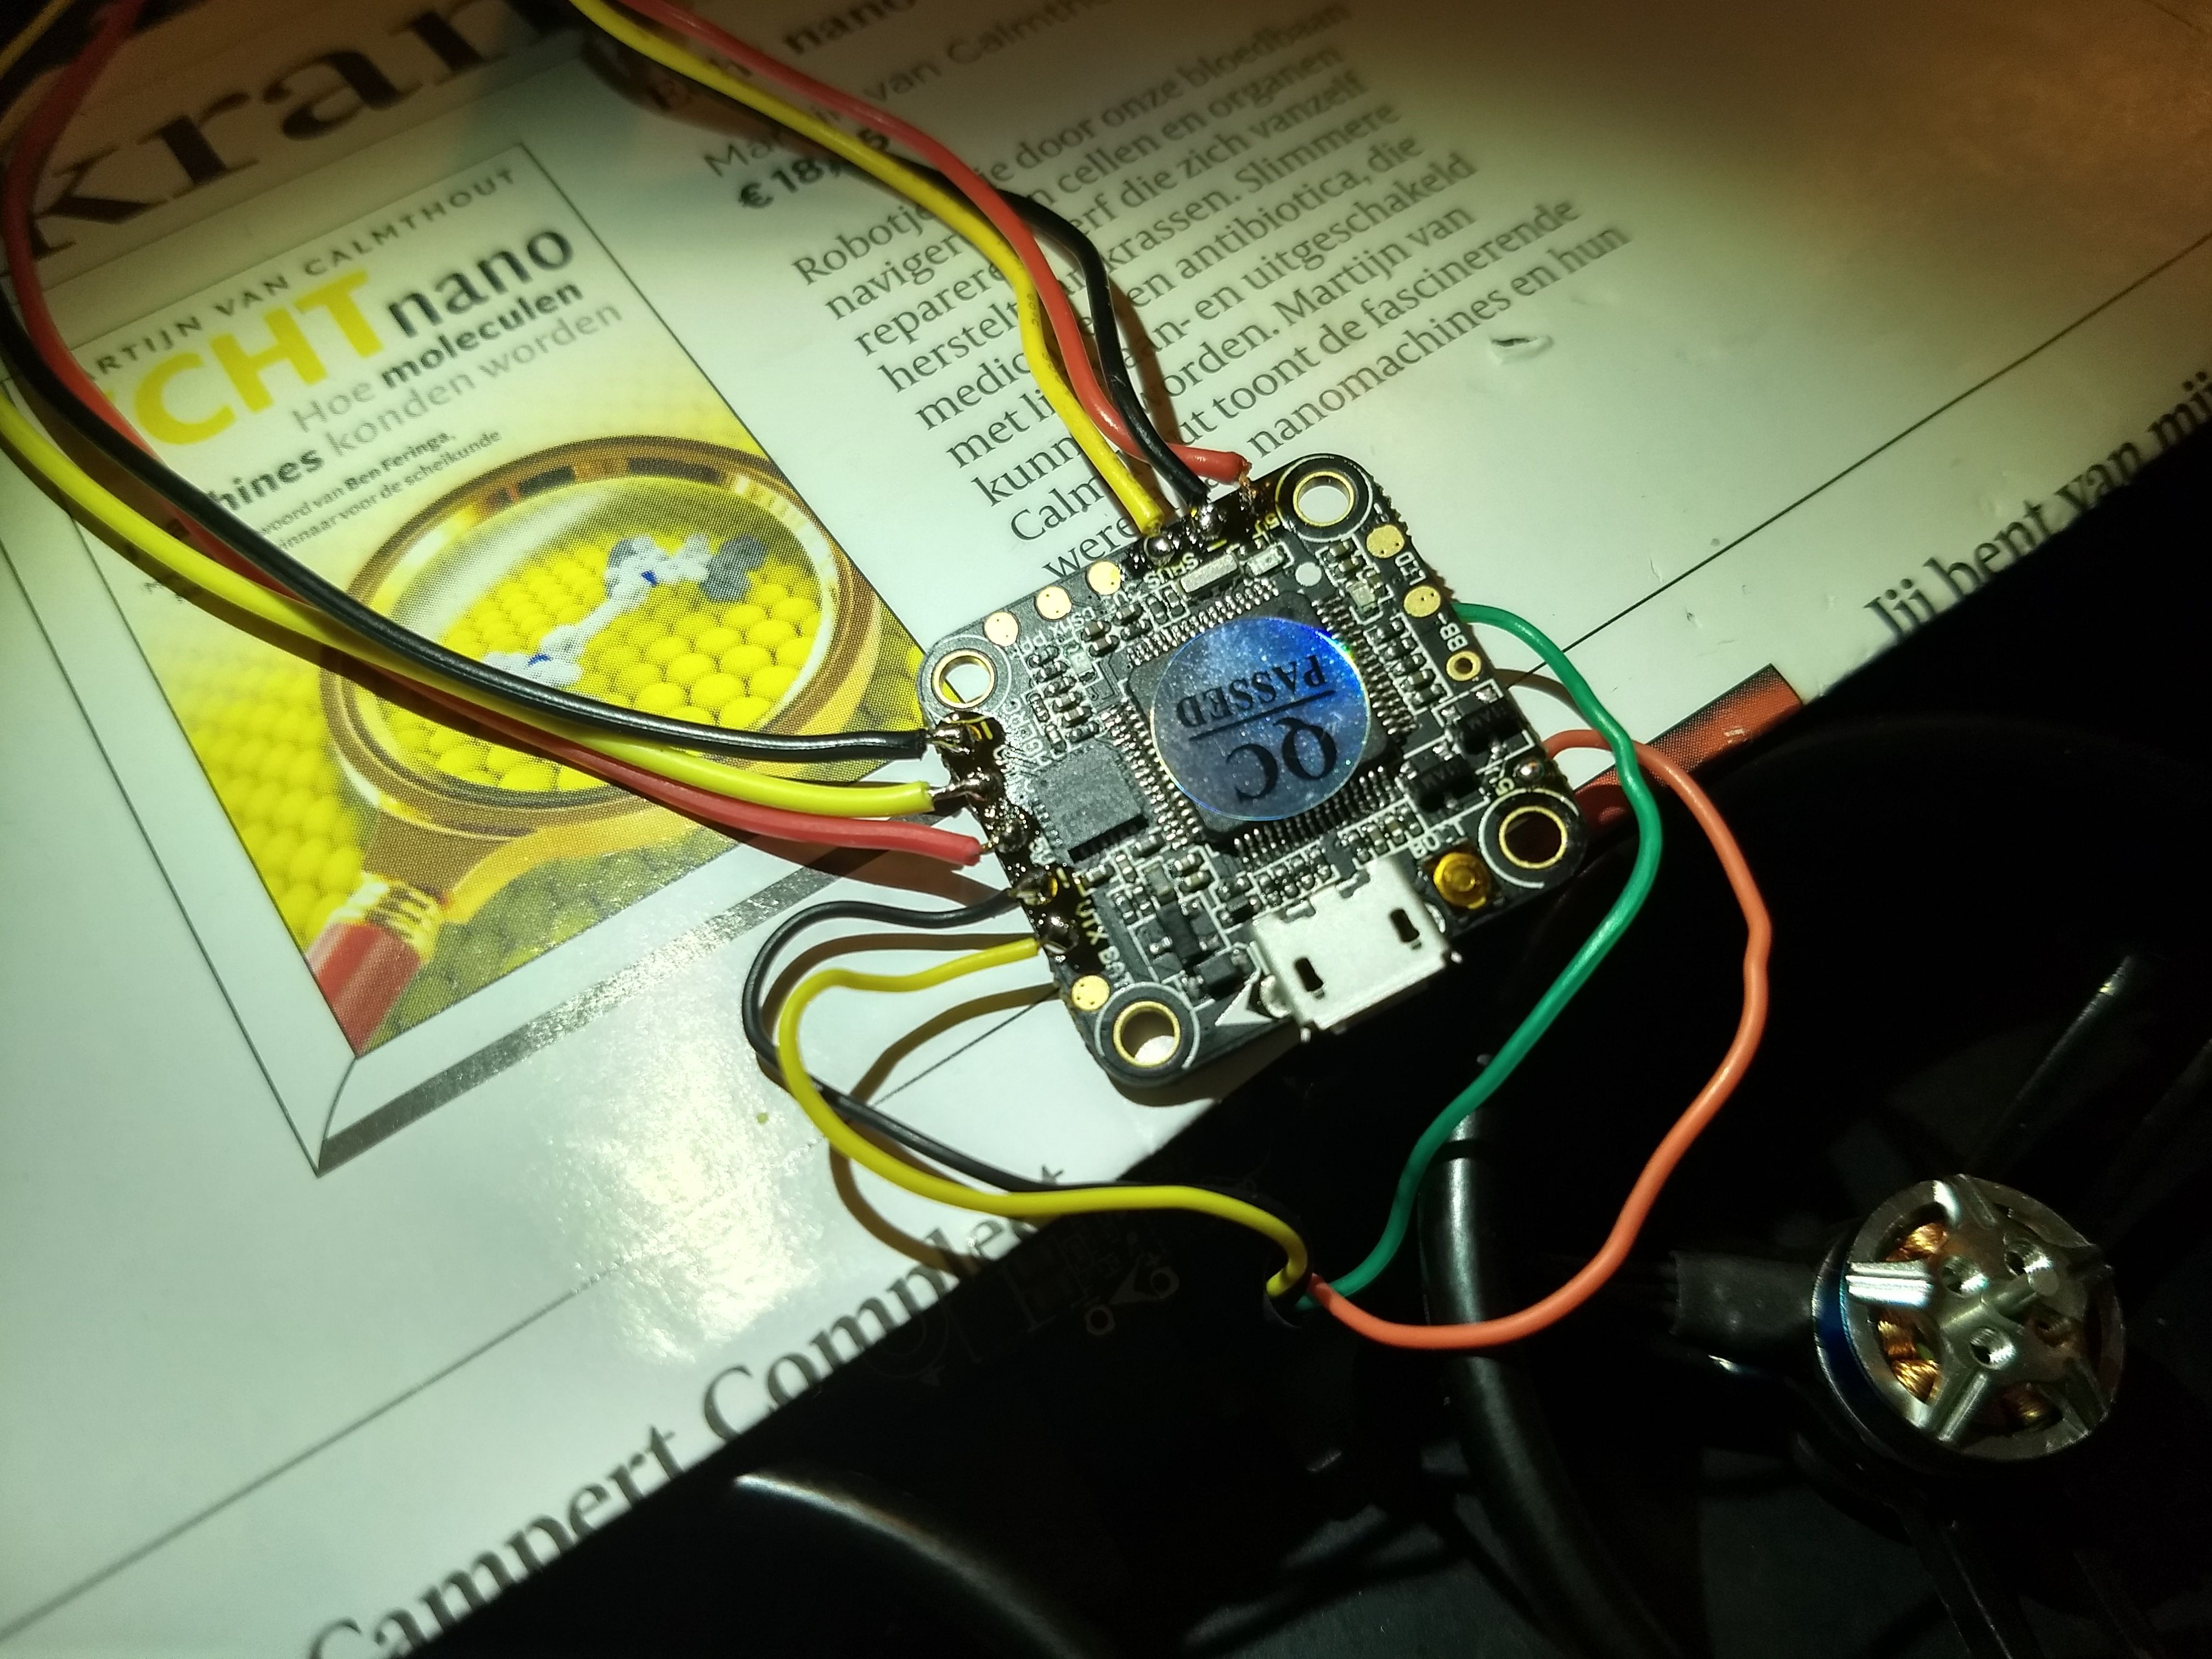
- It sports a frikkin F4 processor. Who cares, right? But still, it's got one. Oh and 16MB of blackbox storage because why not?
- 28AMP ESC because just because. LOL. It might just give a bit longer flight times due to the higher efficiency. I wanted the F428 and it's a part of that stack, that's why I used it.
- It's got a much better camera than the stock one, or so I've heard. The colors are sooo nice.
- Diversity RX because XM+ .
- It's got a seperate, fairly loud buzzer, to locate it after crashing in that cornfield you always fly over.
- It's about 3 grams lighter than stock, according to my calculations, without the buzzer. With buzzer, almost exactly the same weight.
- The prop protectors are alligned with the arms, for slightly more lift / less turbulence.
- A VTX antenna with RG178, for just that bit more range.
What I would really want for christmas / my birthday / just-for-the-just is that the F428 ESC gets a current sensor. That's something I sorely miss on this build. But then again, a current sensor shunt resistor would take up 25% of the space of the 20x20mm ESC, so I understand why this is probably not going to happen any time soon. I'm a spoiled little tosser for bringing this up, but I wanted to say it anyway.
Build notes
- A micro build may not be such a good idea if you've never soldered before. I had experience, so I managed.
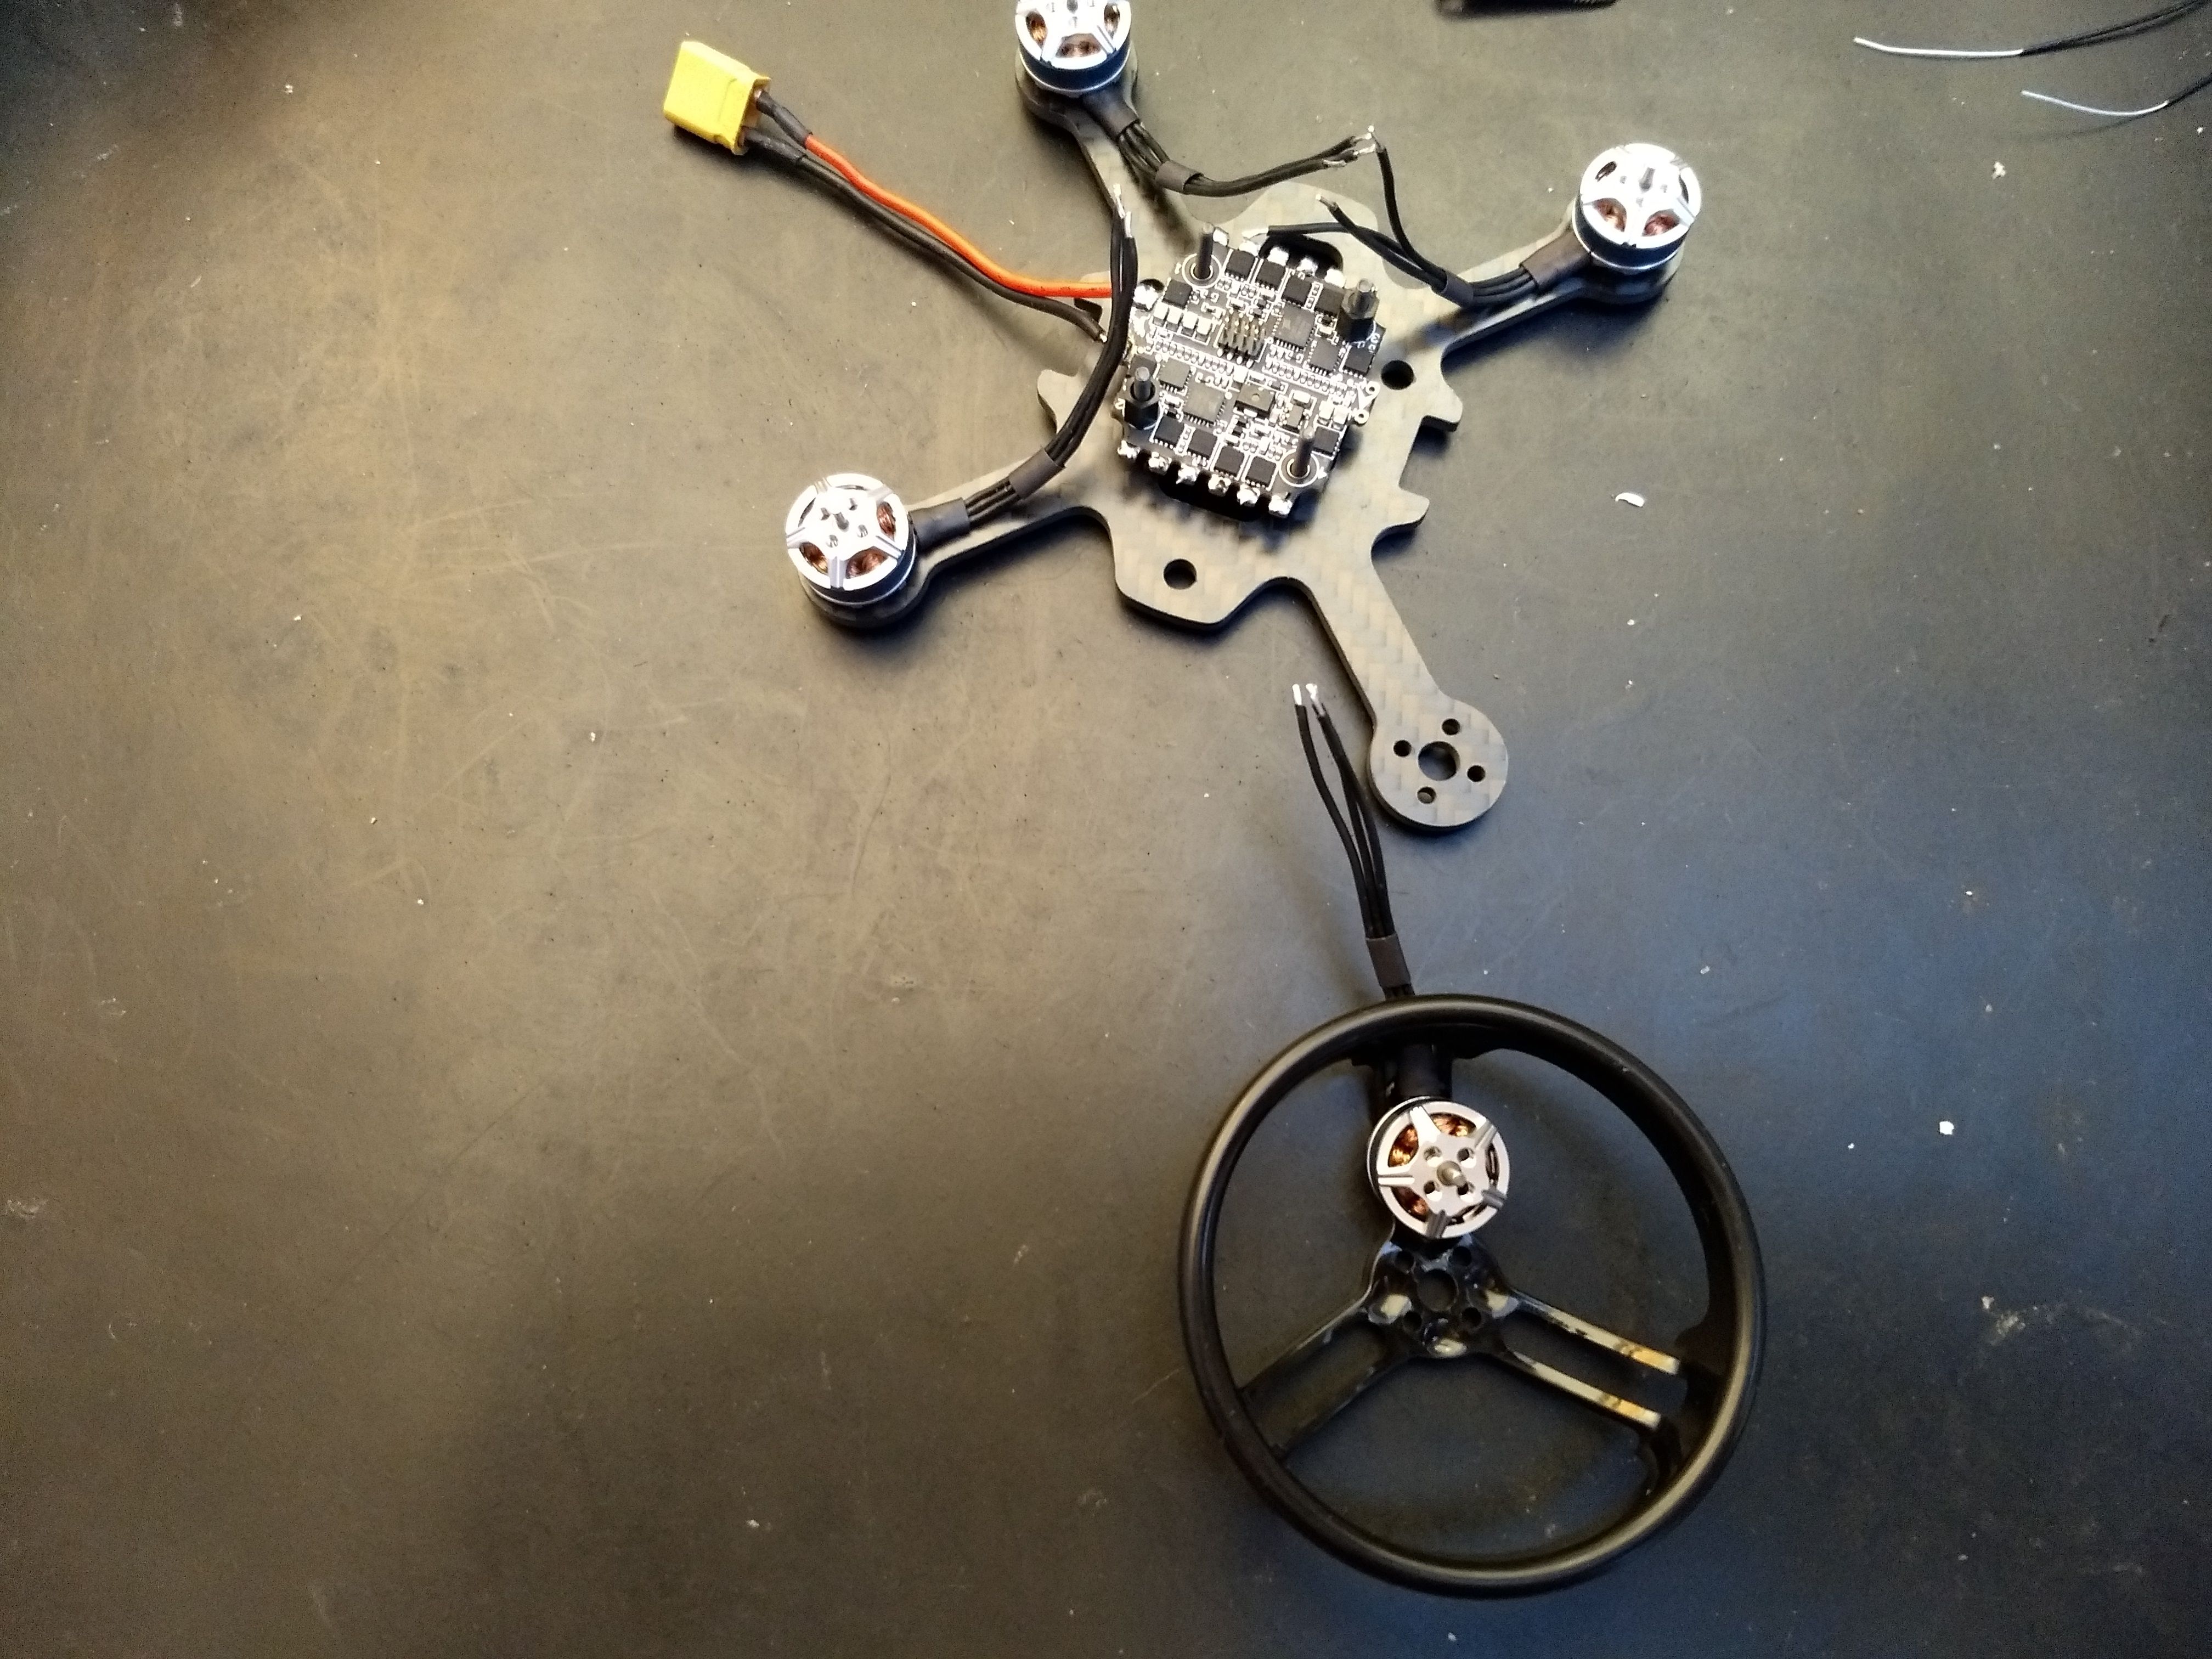
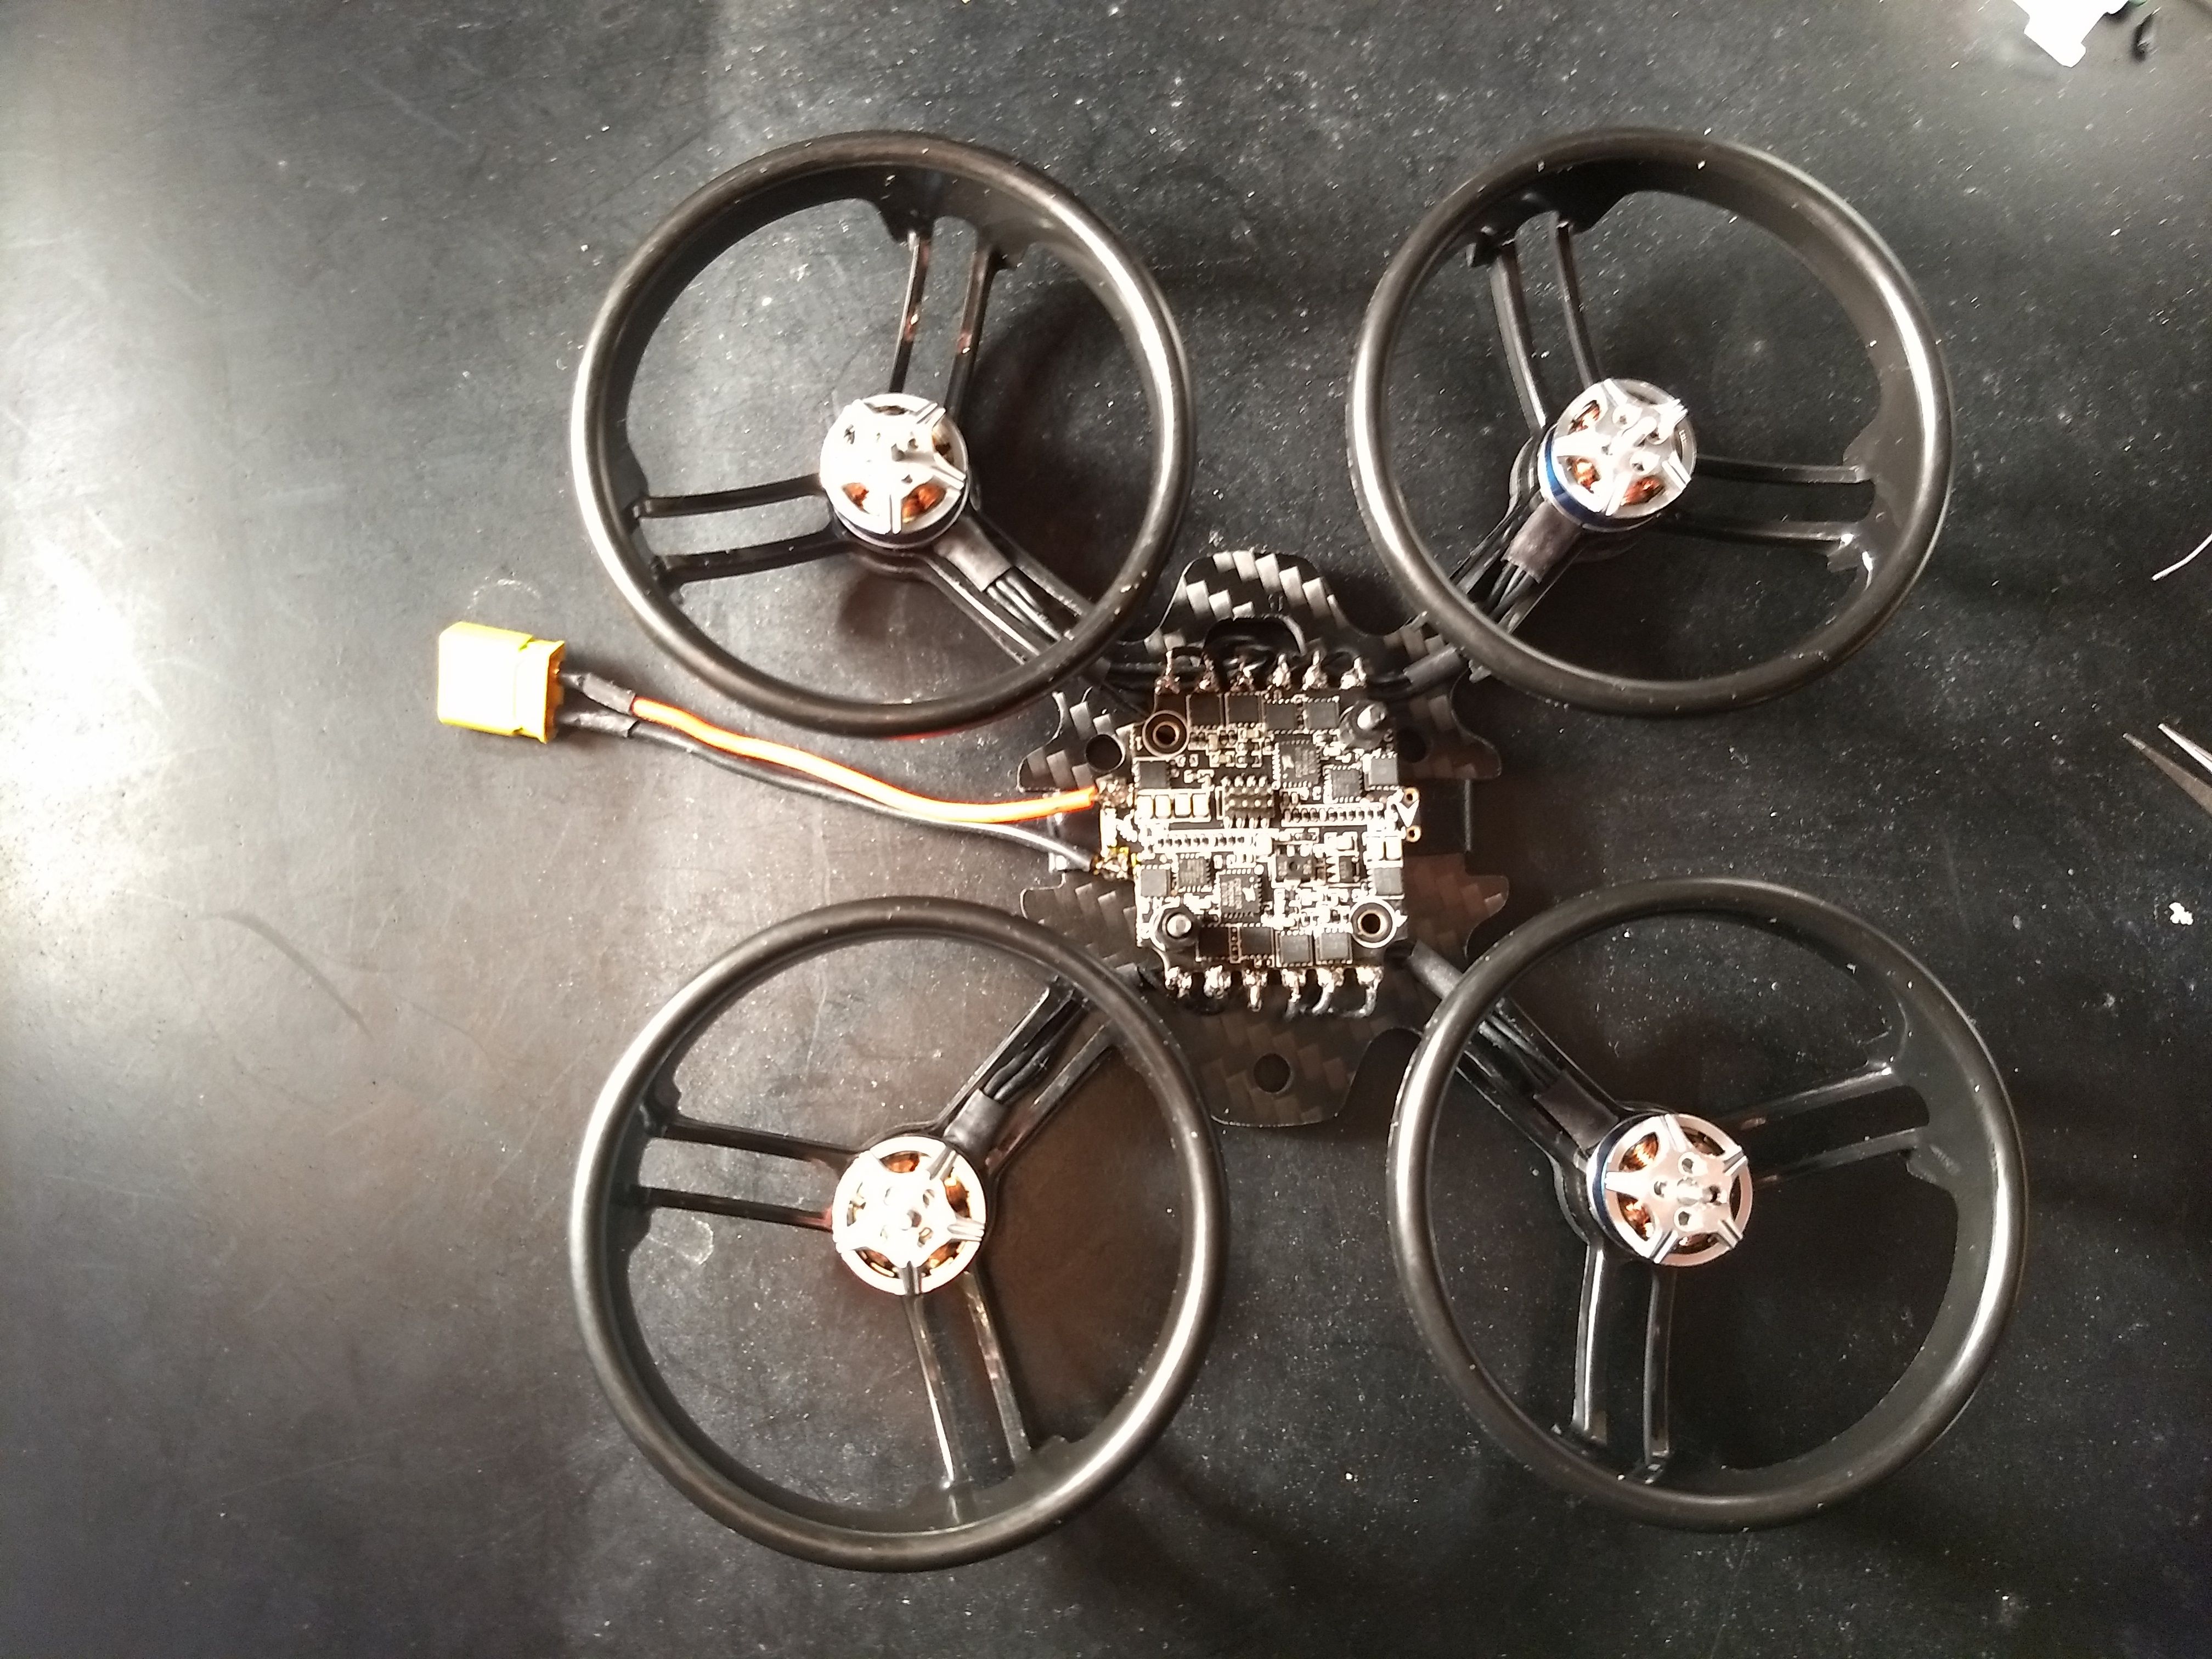
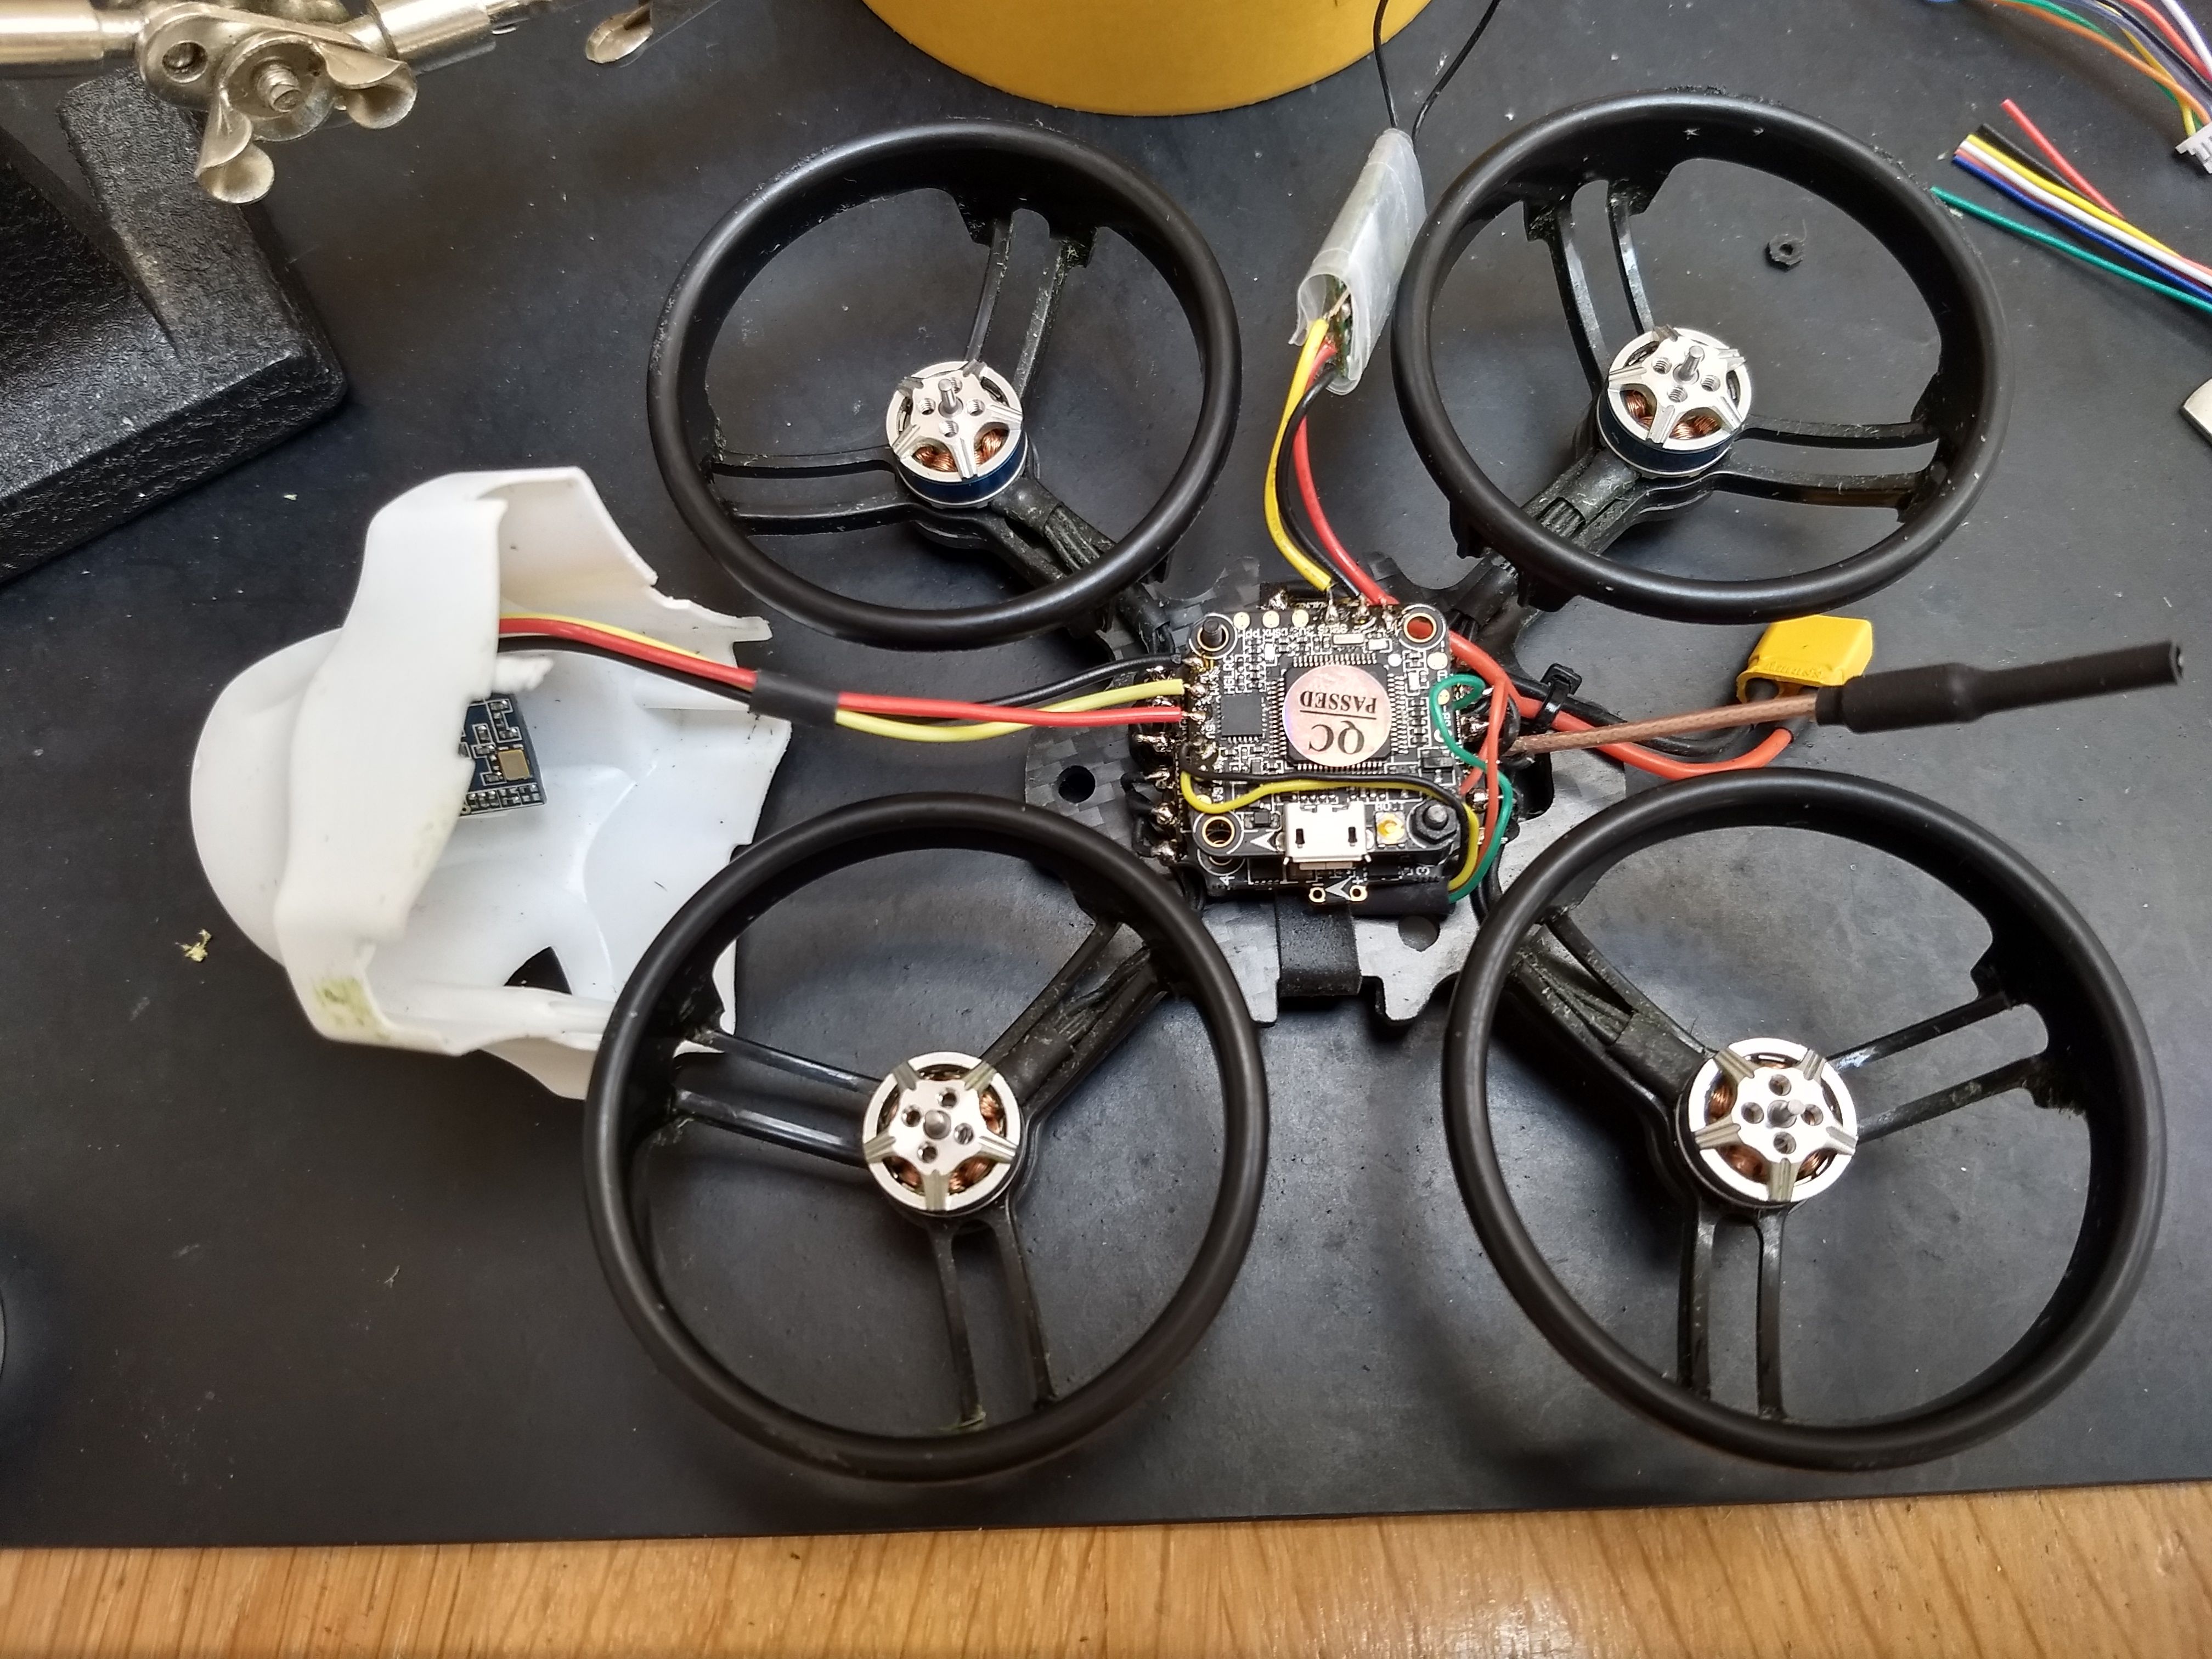
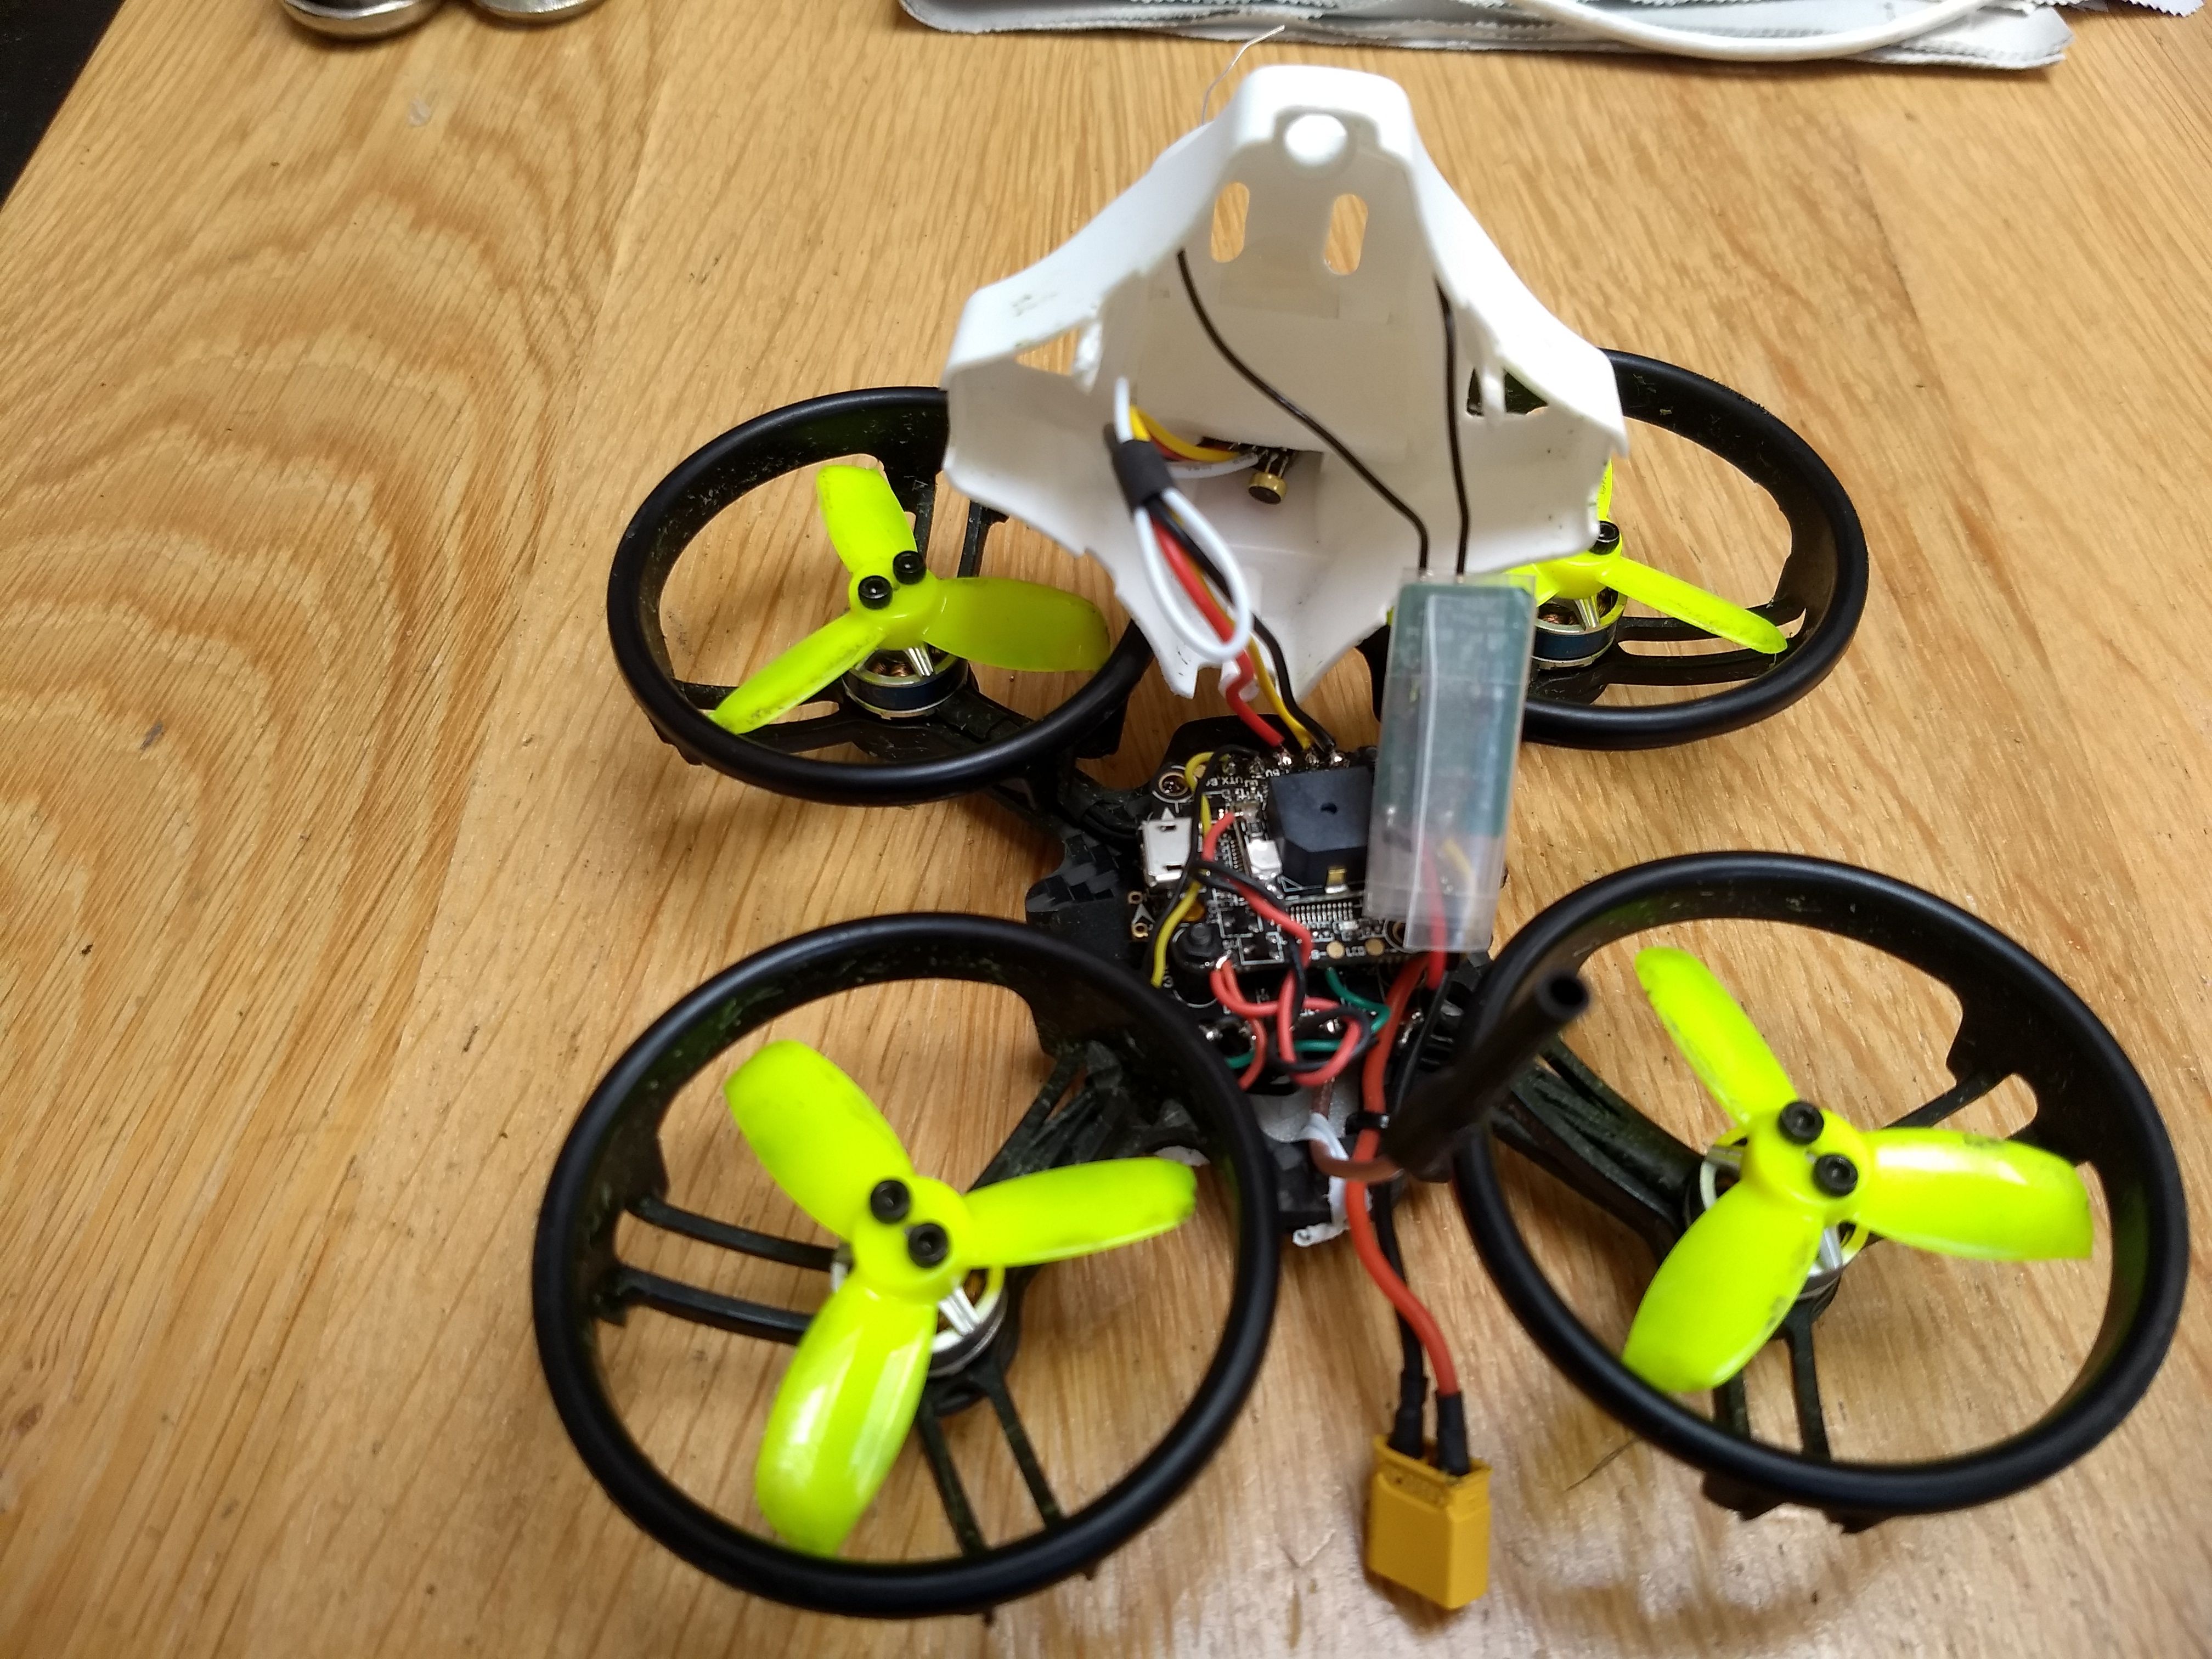
- Besides the total weight of the components being slightly less than stock, I saved an additional 3 grams by using only 2 standoffs for the FC/ESC and mounting each motor and each prop with only 2 screws each. Quite an impressive weight saving.
- The pictures show 4 standoffs in use for the FC / ESC stack, but I only used 2.
- The ESC board needs to be mounted with the battery connector facing sideways, so that the ET100 canopy can be placed properly. If the ESC is mounted otherwise, it will block the 2 rear canopy mounting holes. And it still might be a somewhat tight fit.
- I love XT connectors and so I use an XT30 on my ET100 and replaced all those junky JST connectors on my batteries with XT30 connectors.
- I chose to mount the prop-guard inline with the arms. This makes mounting the motors much harder than otherwise is the case, because the motor wires now go through the prop-guard spokes. First solder the motor wires before mounting them to the frame. Also, the prop-guards can now only be removed by unsoldering the motors, should you ever wish to do that.
- Be very, very careful not to overtighten the screws. I'm sure they strip very easily. Also, I had one motor where one prop-mounting screwhole was not threaded properly. It's made of very soft aluminum, I found out, because you can screw a screw in, with some gentle force. Or you could just use the other 2 mounting holes, because you only need use 2 screws to mount the each prop anyway.
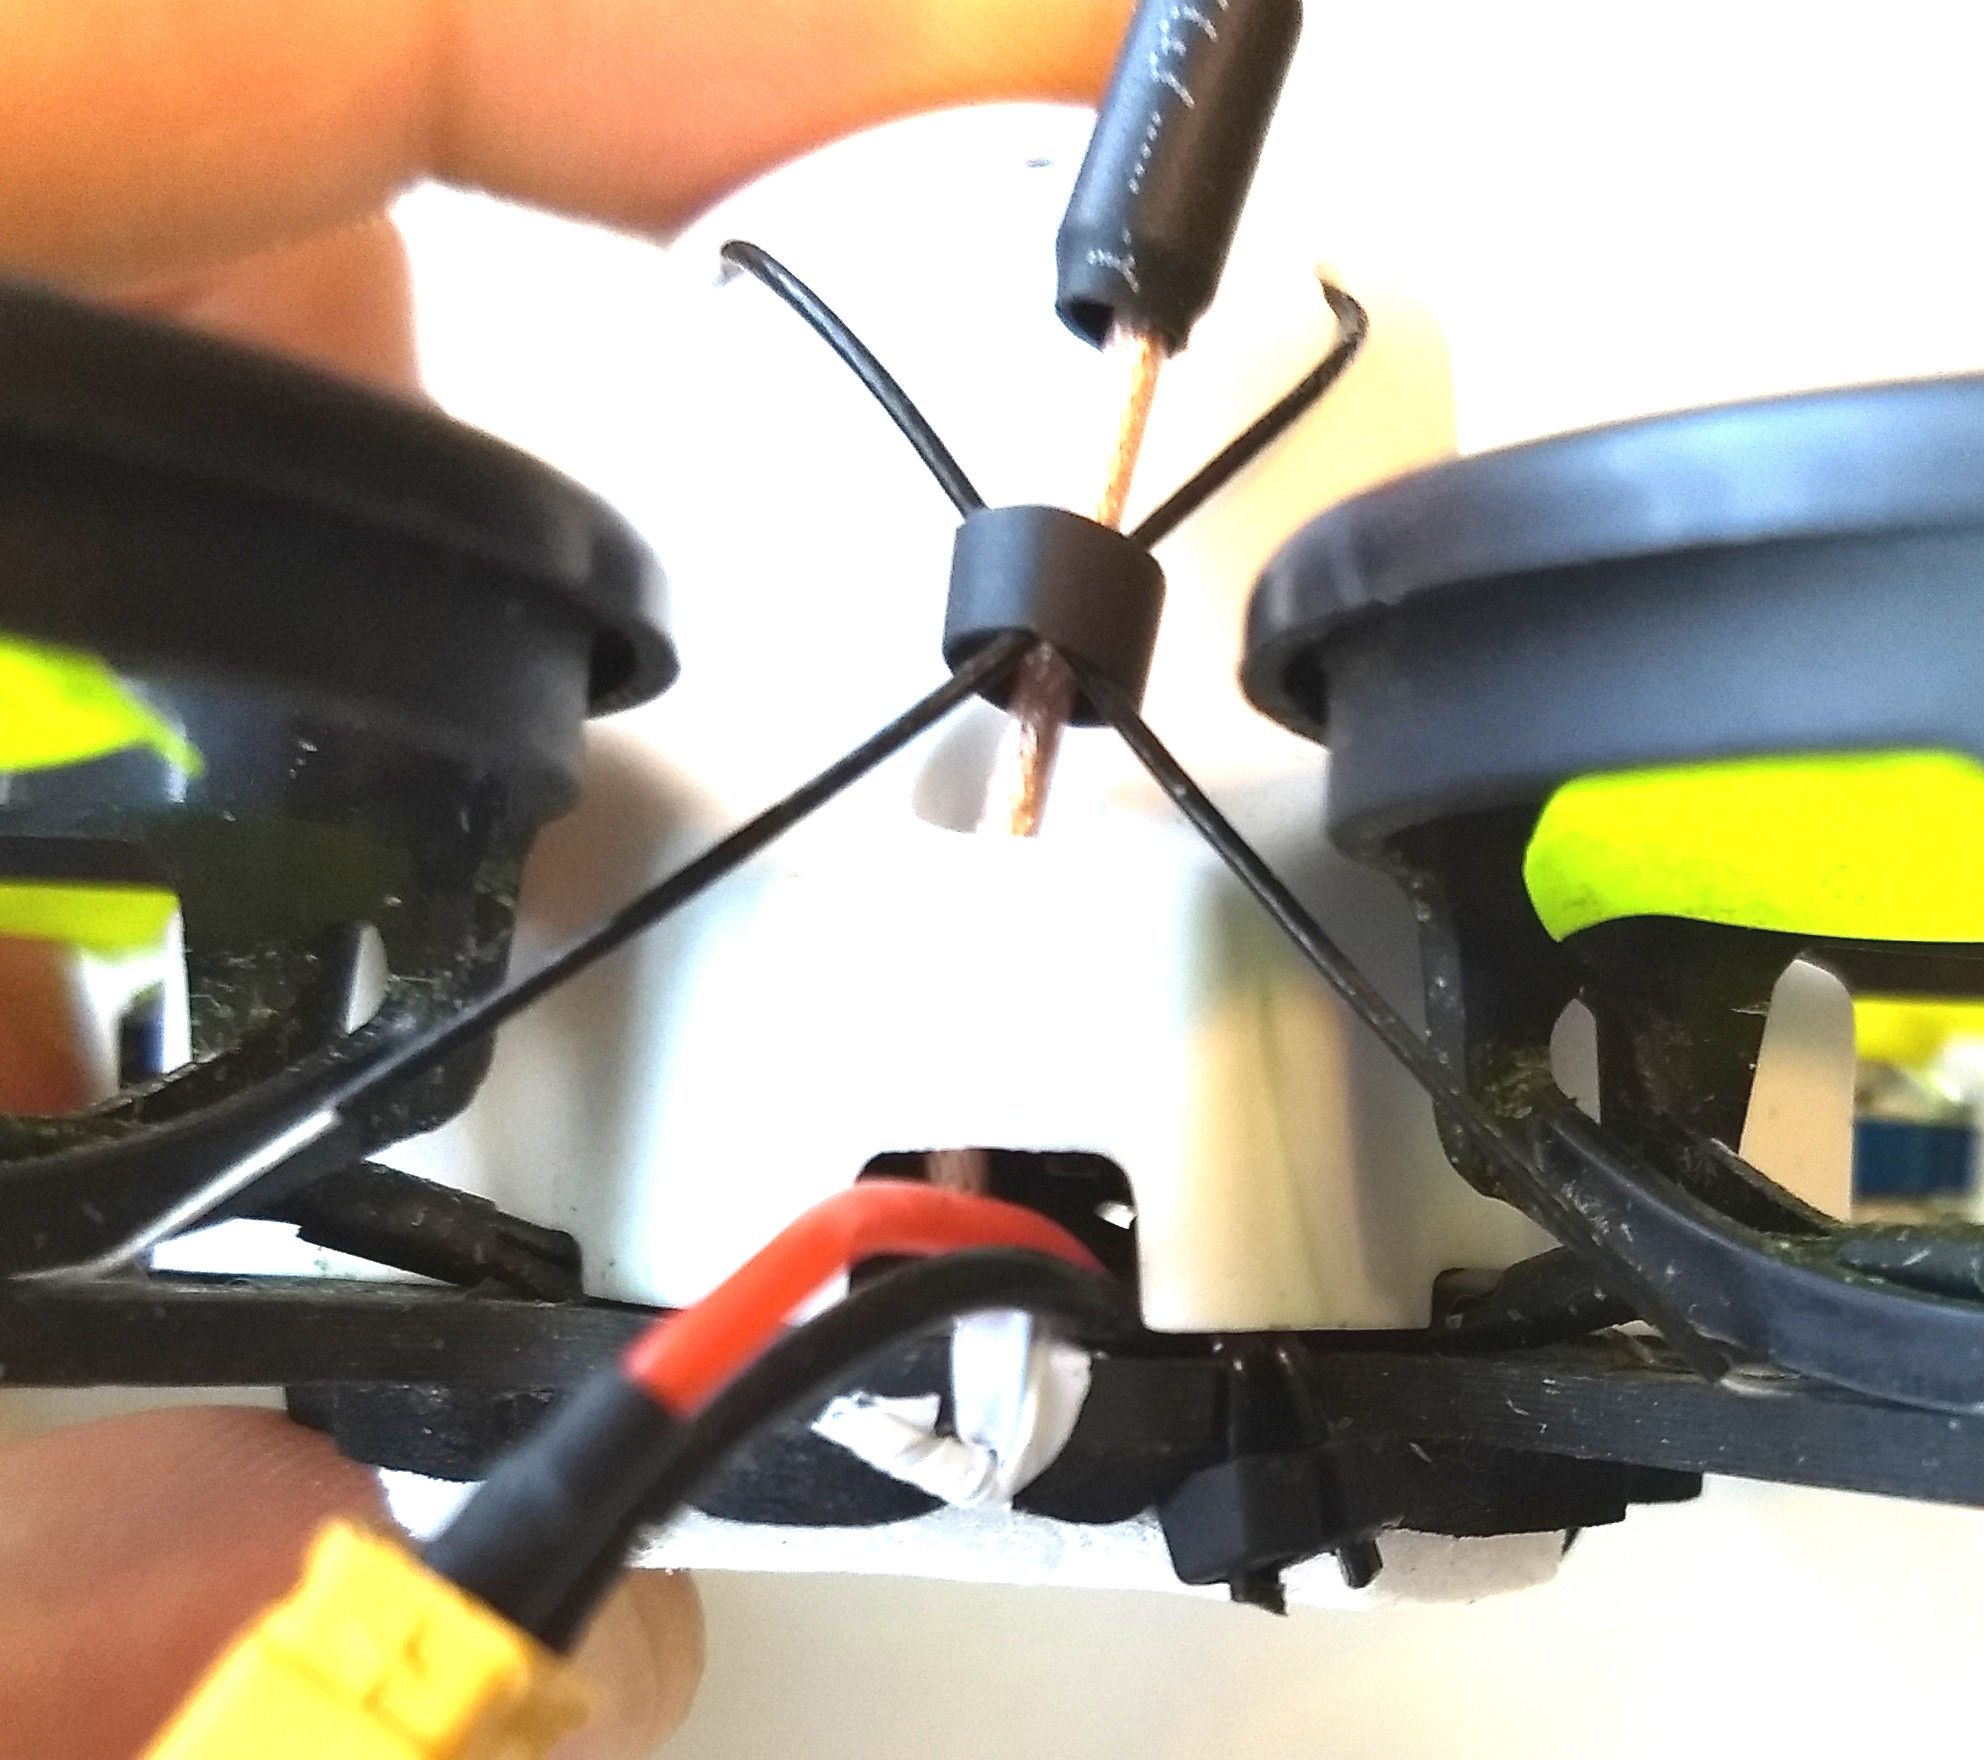
- Be sure to use two tyeraps to secure the battery lead, or it will get torn off, along with the PCB pads, during a crash landing. The picture shows one tyerap, but I placed another one later on.
- I placed a small piece of shrink tube over the motor wires, to keep the cabling more tidy. I recommend doing this.
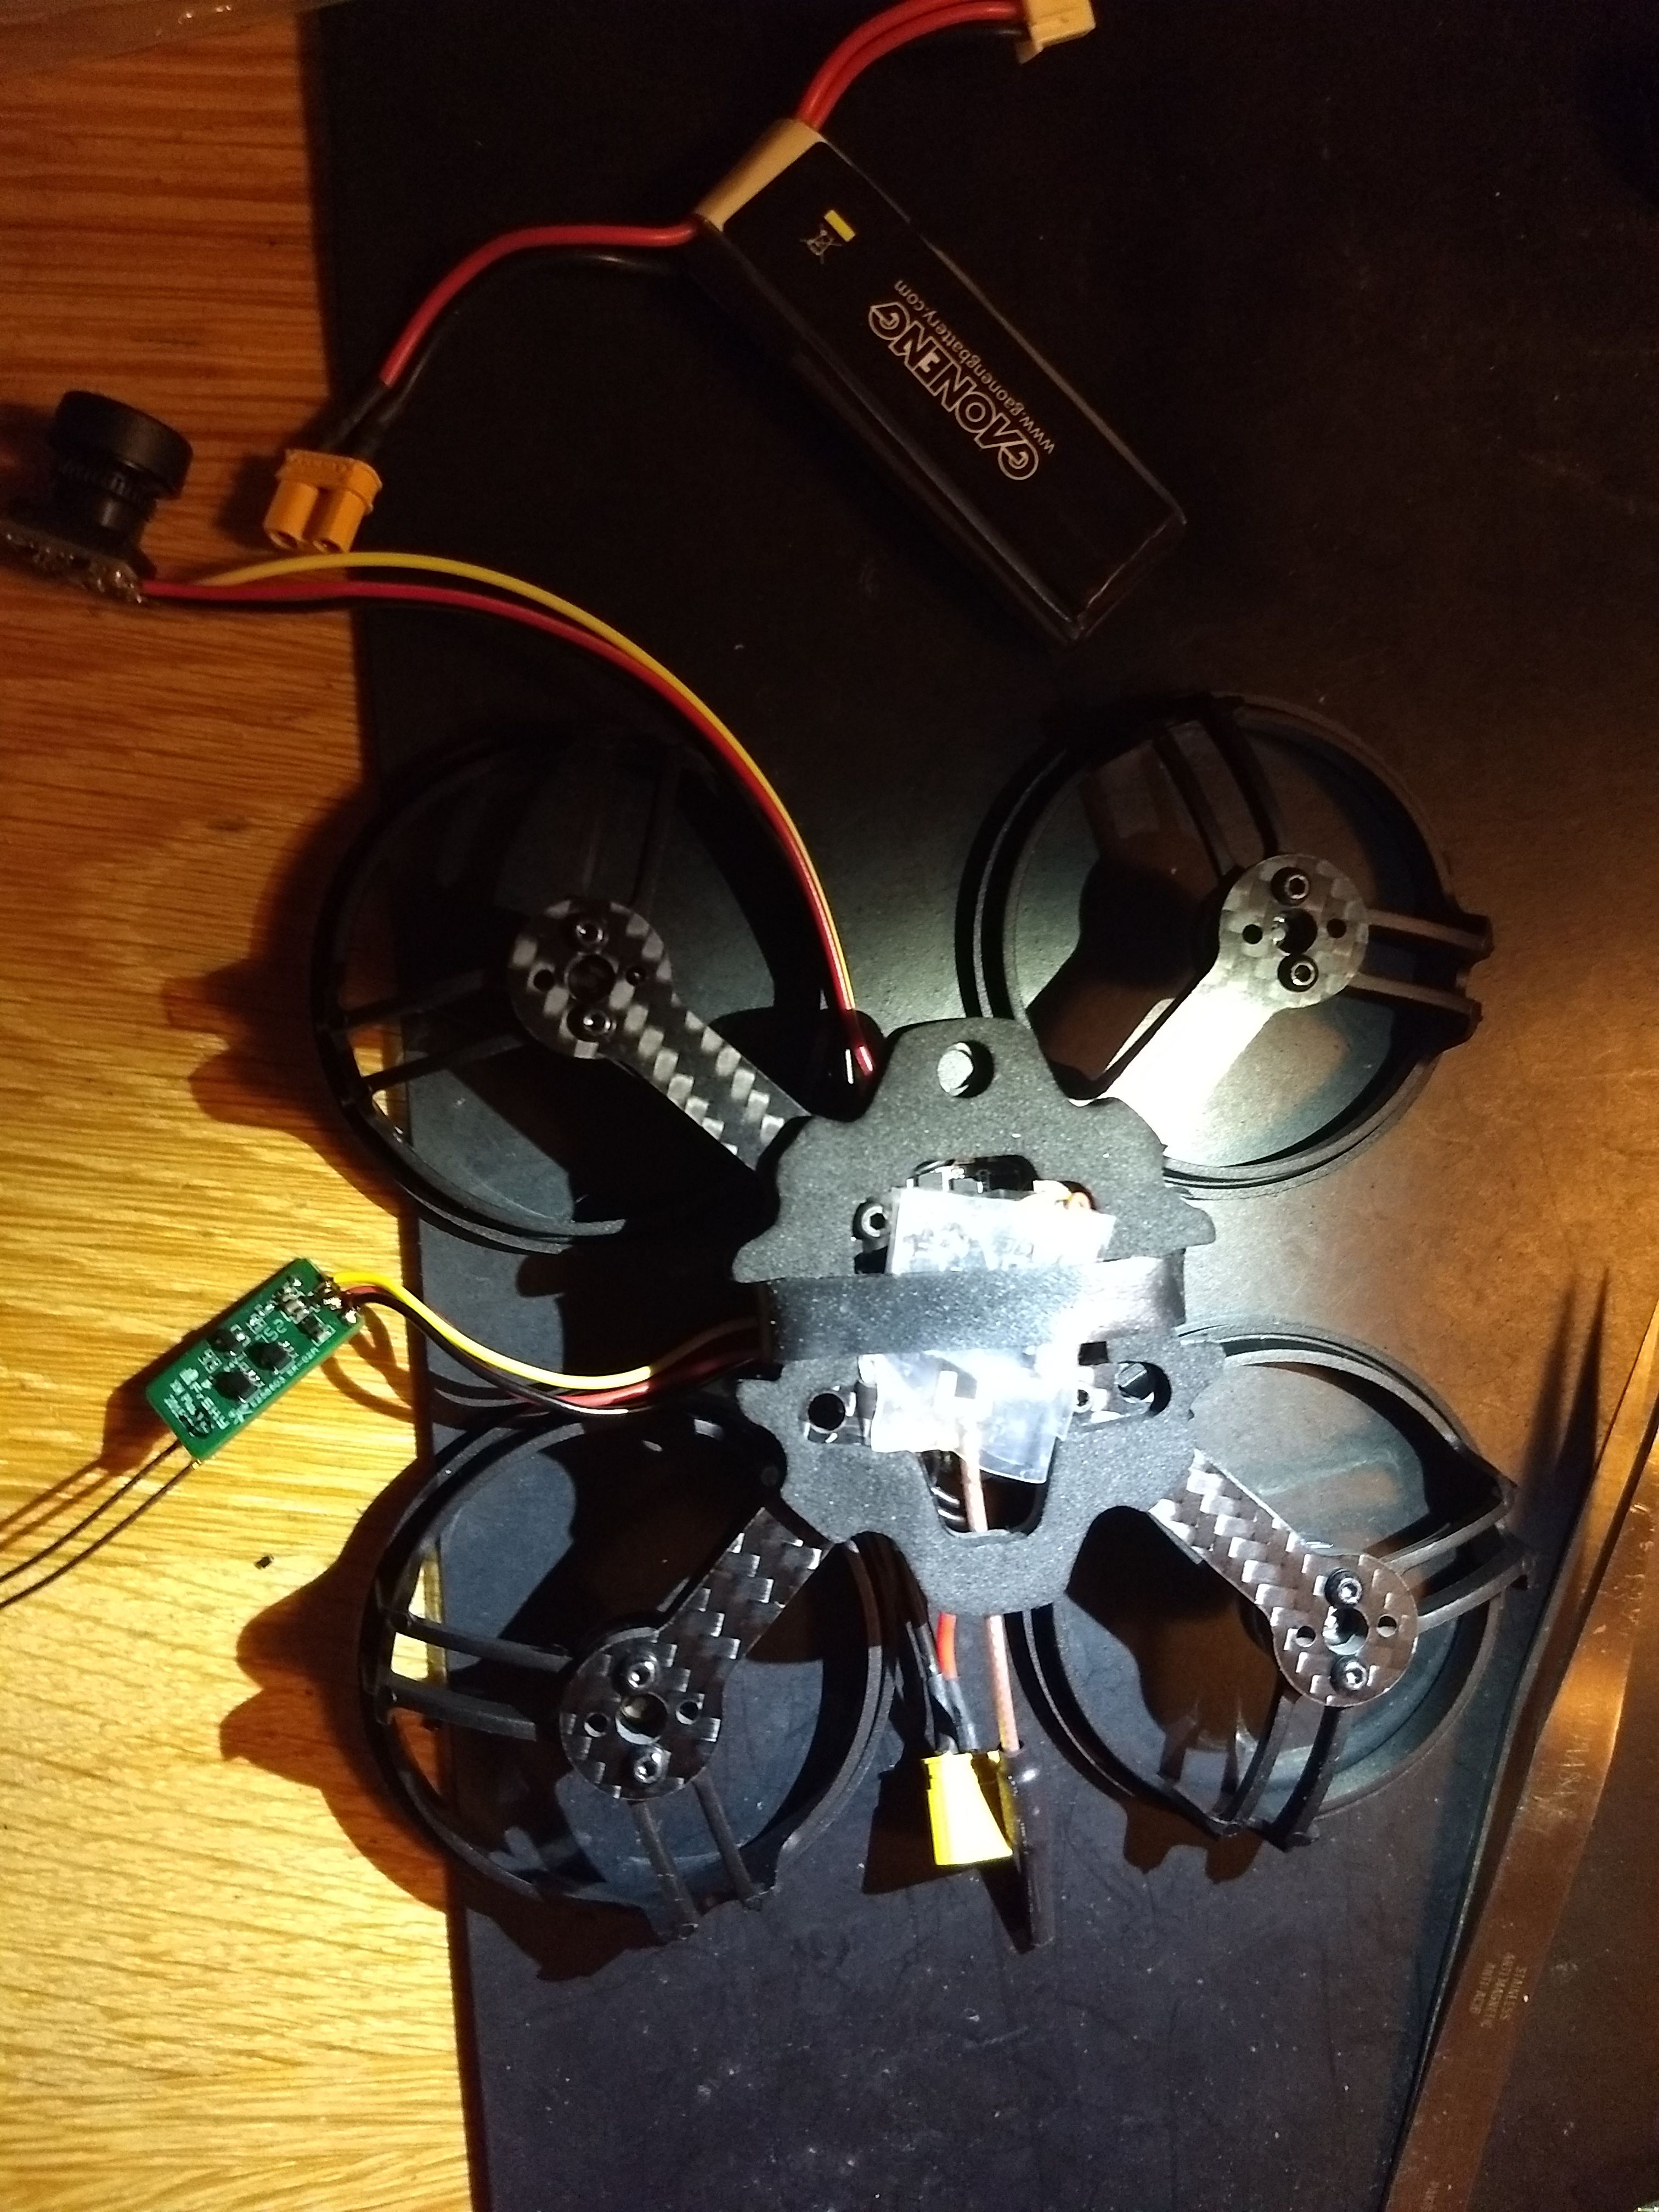
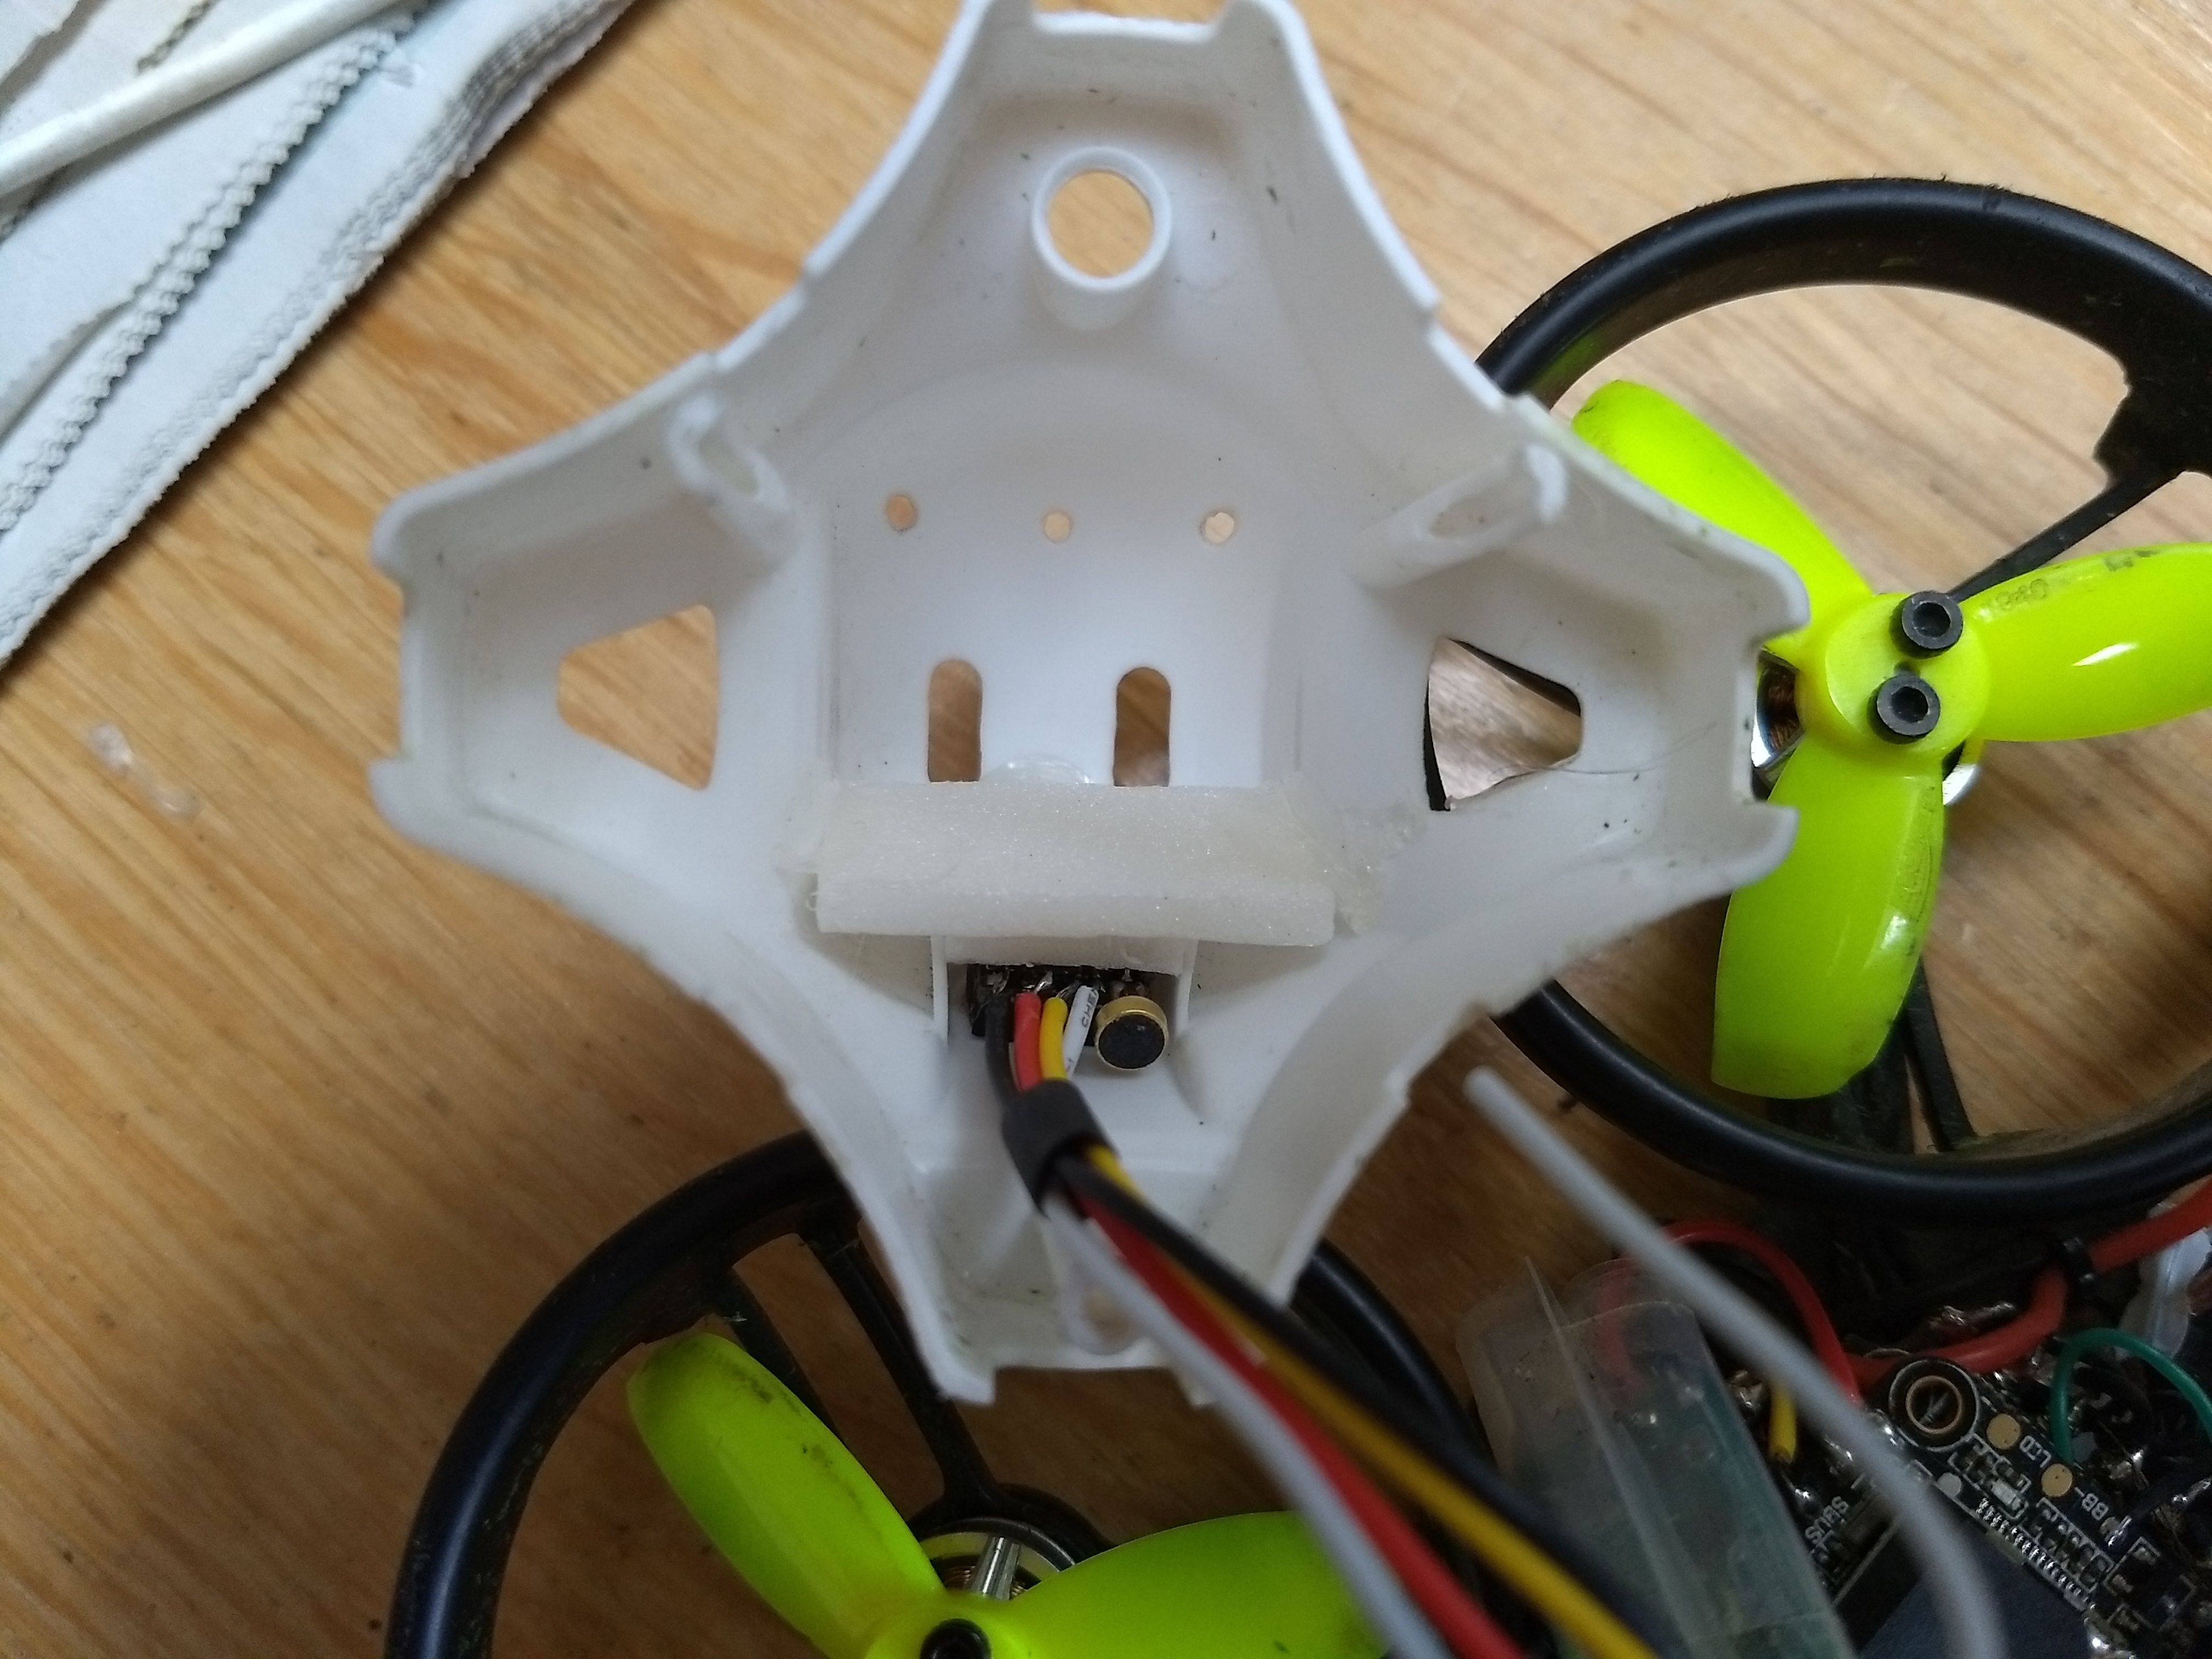
- The Nano2 VTX is actually slightly too big to fit under the quad, but you can manage to place it diagonally, in between the black cut-out-foam that's supplied with the frame, and then place some thin styrofoam over it using double sided tape, so that the battery doesn't bash the VTX up and / or the VTX doesn't puncture the battery. Sounds horrible, but works just great (see picture).
- The VTX is orriented so that the antenna connector is facing the top of the quad. I did not hot-glue the antenna to the VTX, instead I used a tyerap to secure it to the frame (see pictures). Be sure to do this or the antenna will detach from the VTX. Mine did and I flew around for half an hour (line of sight) without noticing it. The VTX was running @25mW but did not release the magic smoke, as VTXes tend to do when running antenna-less.
- The two RX antenna's are led through the two outer tiny holes on the top of the ET100 canopy and held in place to the VTX antenna using a small piece of a straw (see pictures). This actually looks quite nice.
- Make sure the RX has the correct region firmware before installing it in the quad. Mine didn't , which cost me an extra hour to reflash the thing using my Taranis.
- The RX is not mounted to anything on my quad. It just floats inside the canopy. If I did not have a buzzer mounted on the FC, I could have used doublesided tape to stick it on the processor.
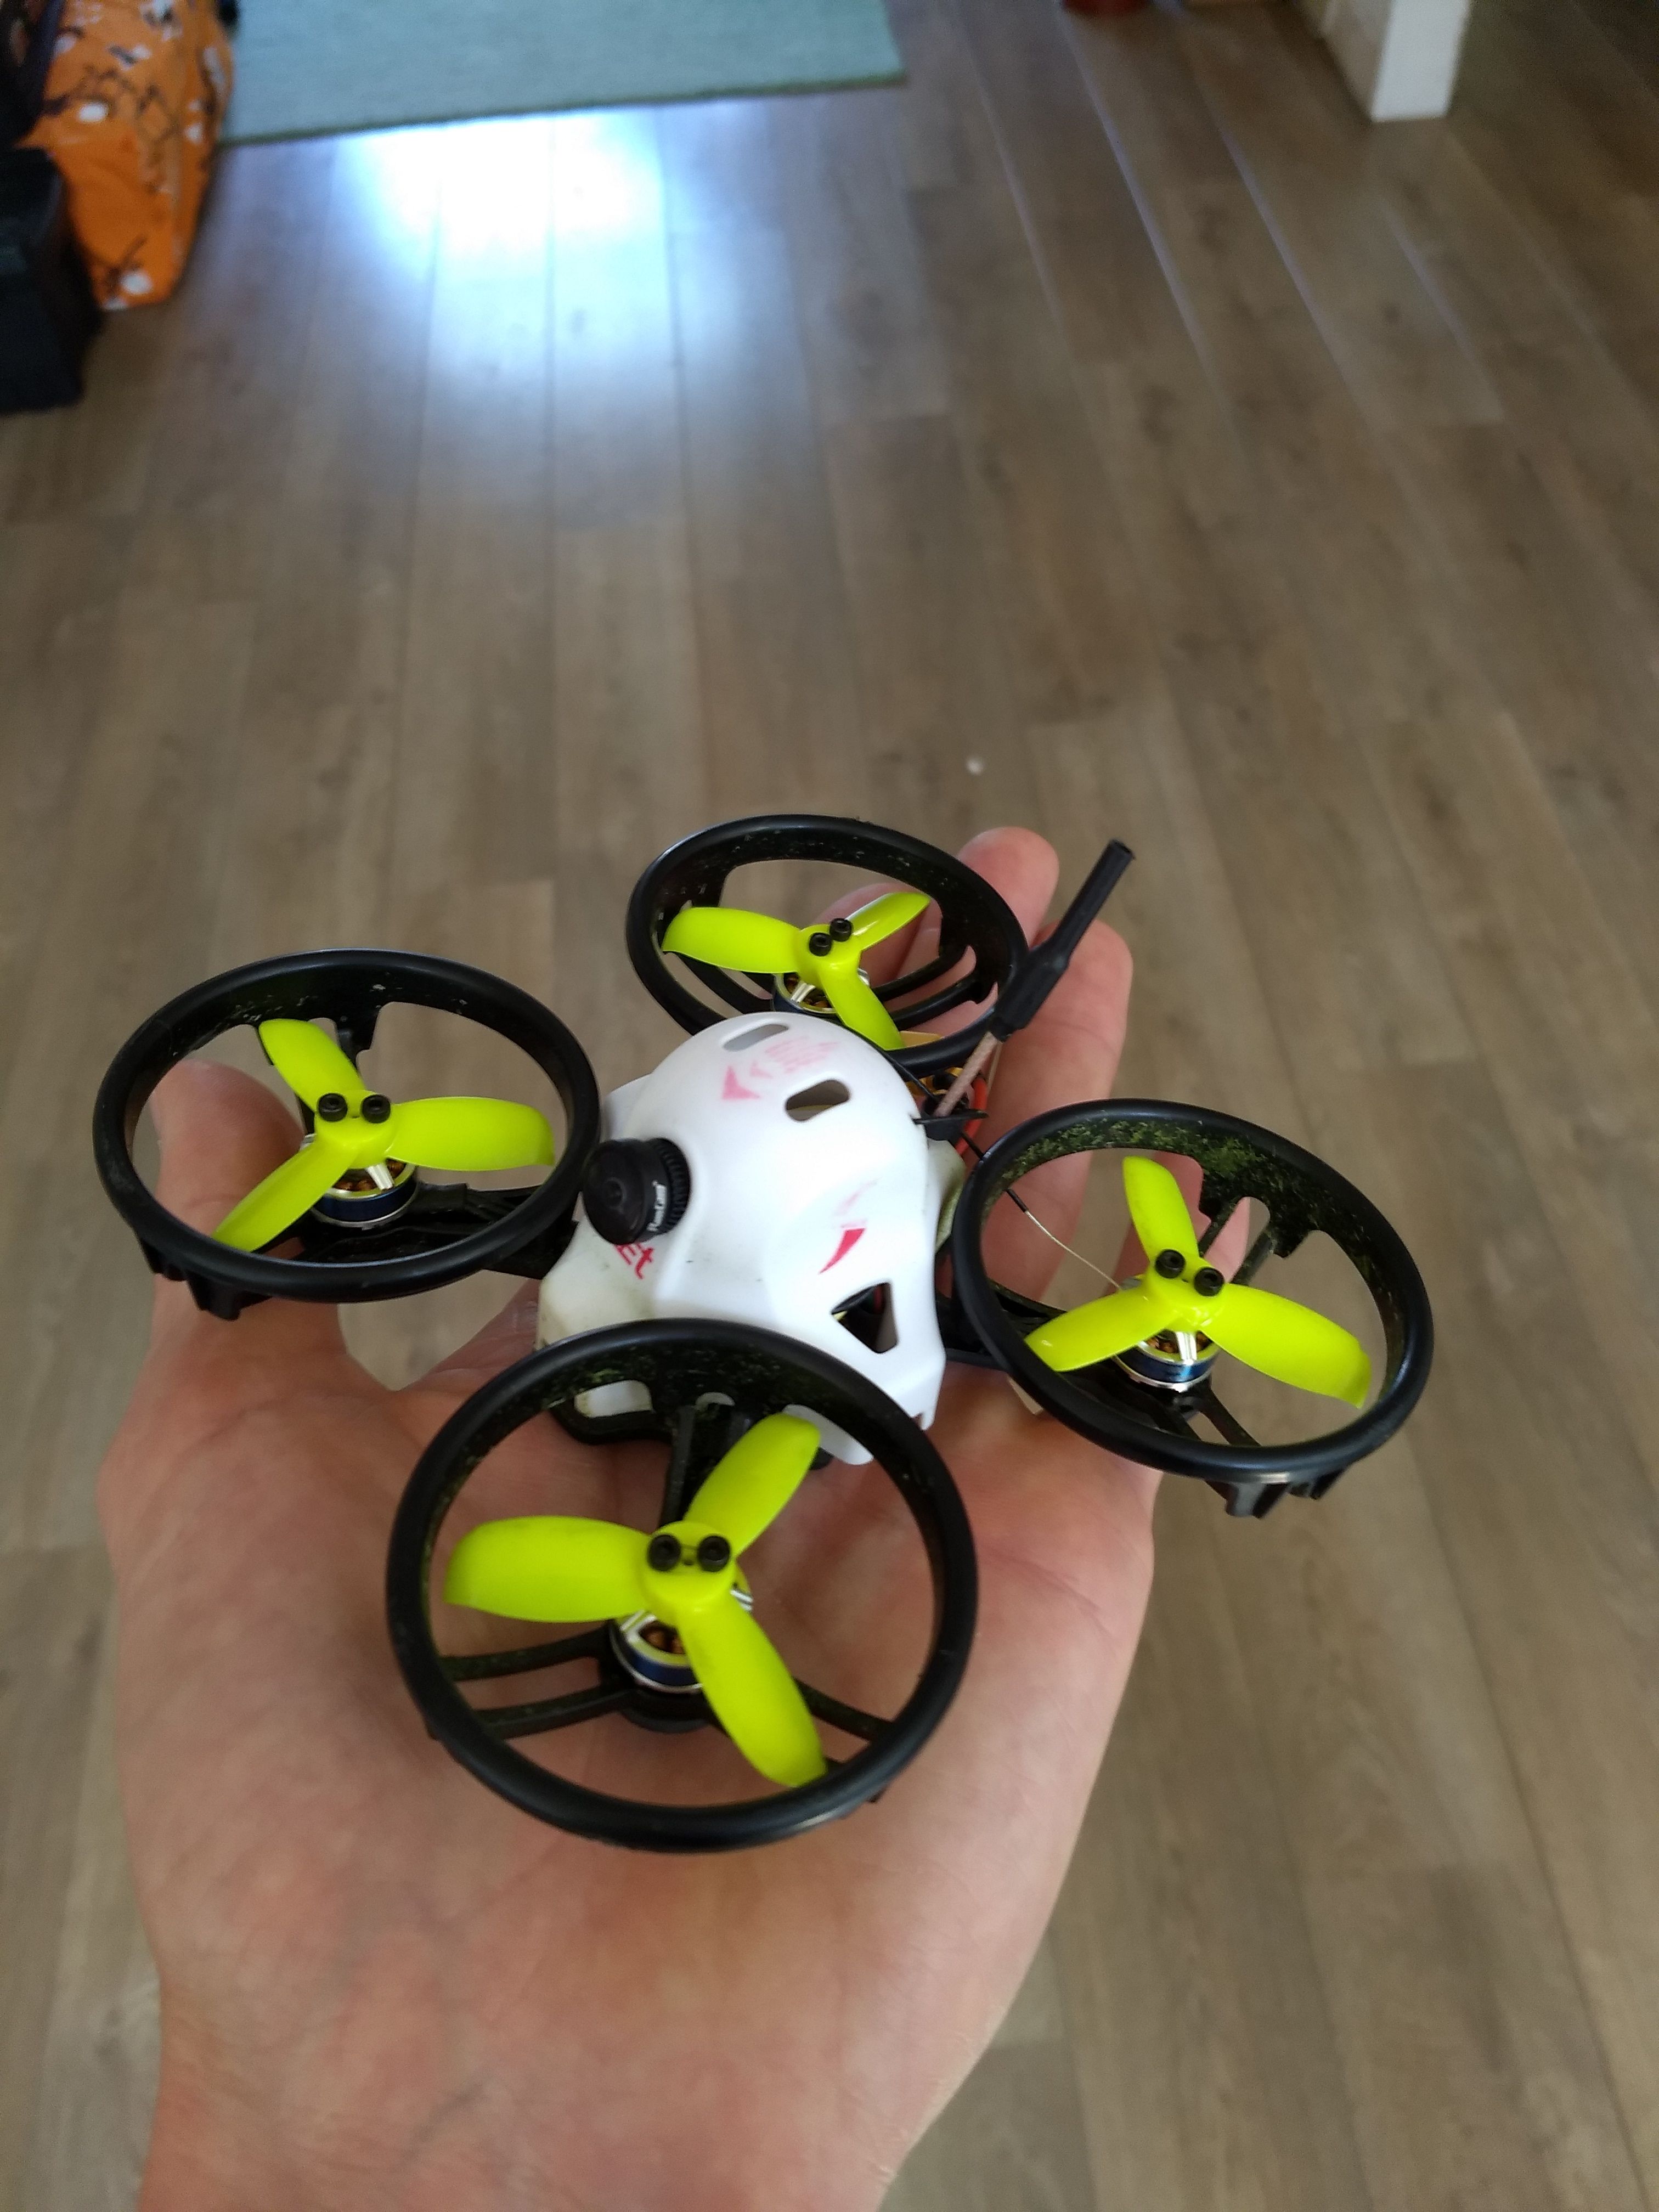
- The camera has one big flaw: The lens housing is not glued to the sensor. It is just tightly shoved over it. Crashing the quad will dislodge it. You won't loose the lens, because the housing is too large for to pass throught the camera hole on the canopy, but you might damage the sensor and you'll certainly not have any usable image on your goggles anymore. I've found out the hard way. The fix is to glue the lens housing to the camera PCB. I used contact-glue and also hot glue, for good measure. So fasr so good.
- The camera is so tiny that you cannot jam-mount it in the ET100 canopy. I used two strips of styrofoam and hot glue to wedge the camera in place. This also works to protect the camera in case of a severe crash on the camera, because the styrofoam will bend inward, so that the camera doesn't have to absorb the impact of the crash.
- A Runcam Nano cam be mounted by just removing the lens, mounting the camera board, and re-mounting the lens. NOTE: You must secure the lens using loctite or something like it, otherwise you're sure to loose the lens when it vibrates off. It happened to me.
- I stuck a tiny buzzer/LED unit onto the FC processor, after almost loosing the quad in a shrubbery (Ni!). Using 1103 motors as beepers just doesn't cut it, unsurprisingly.
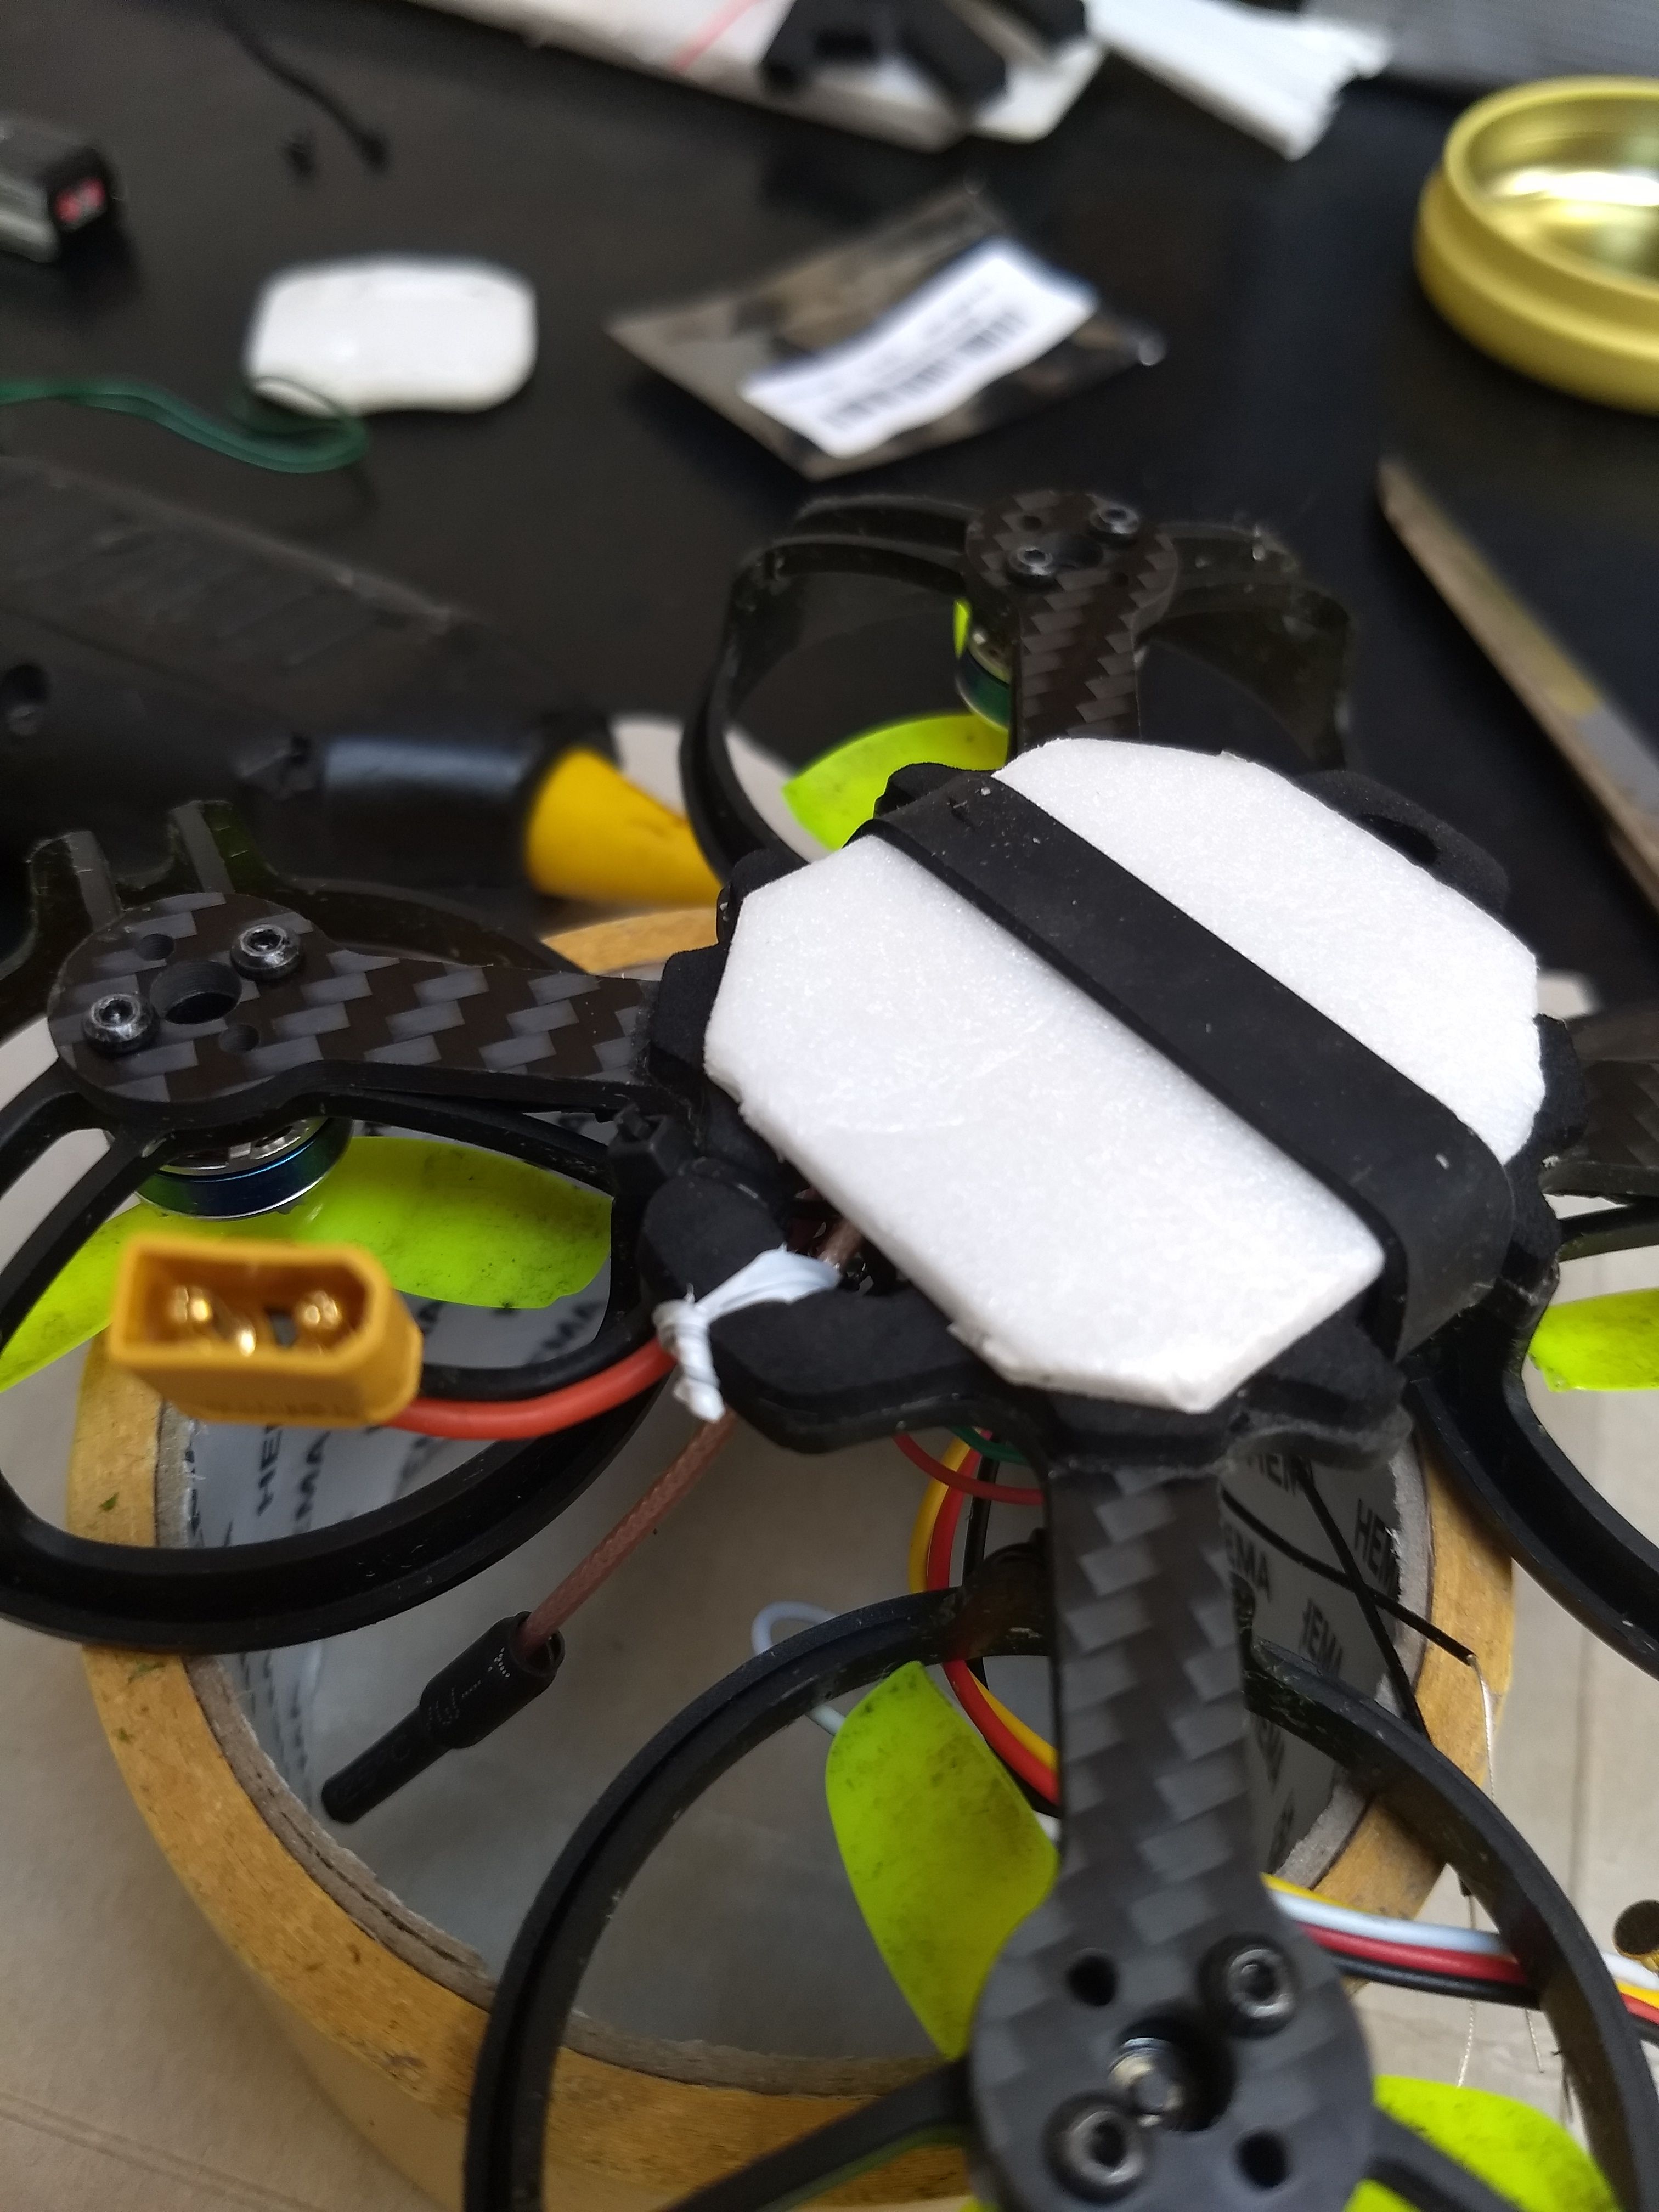
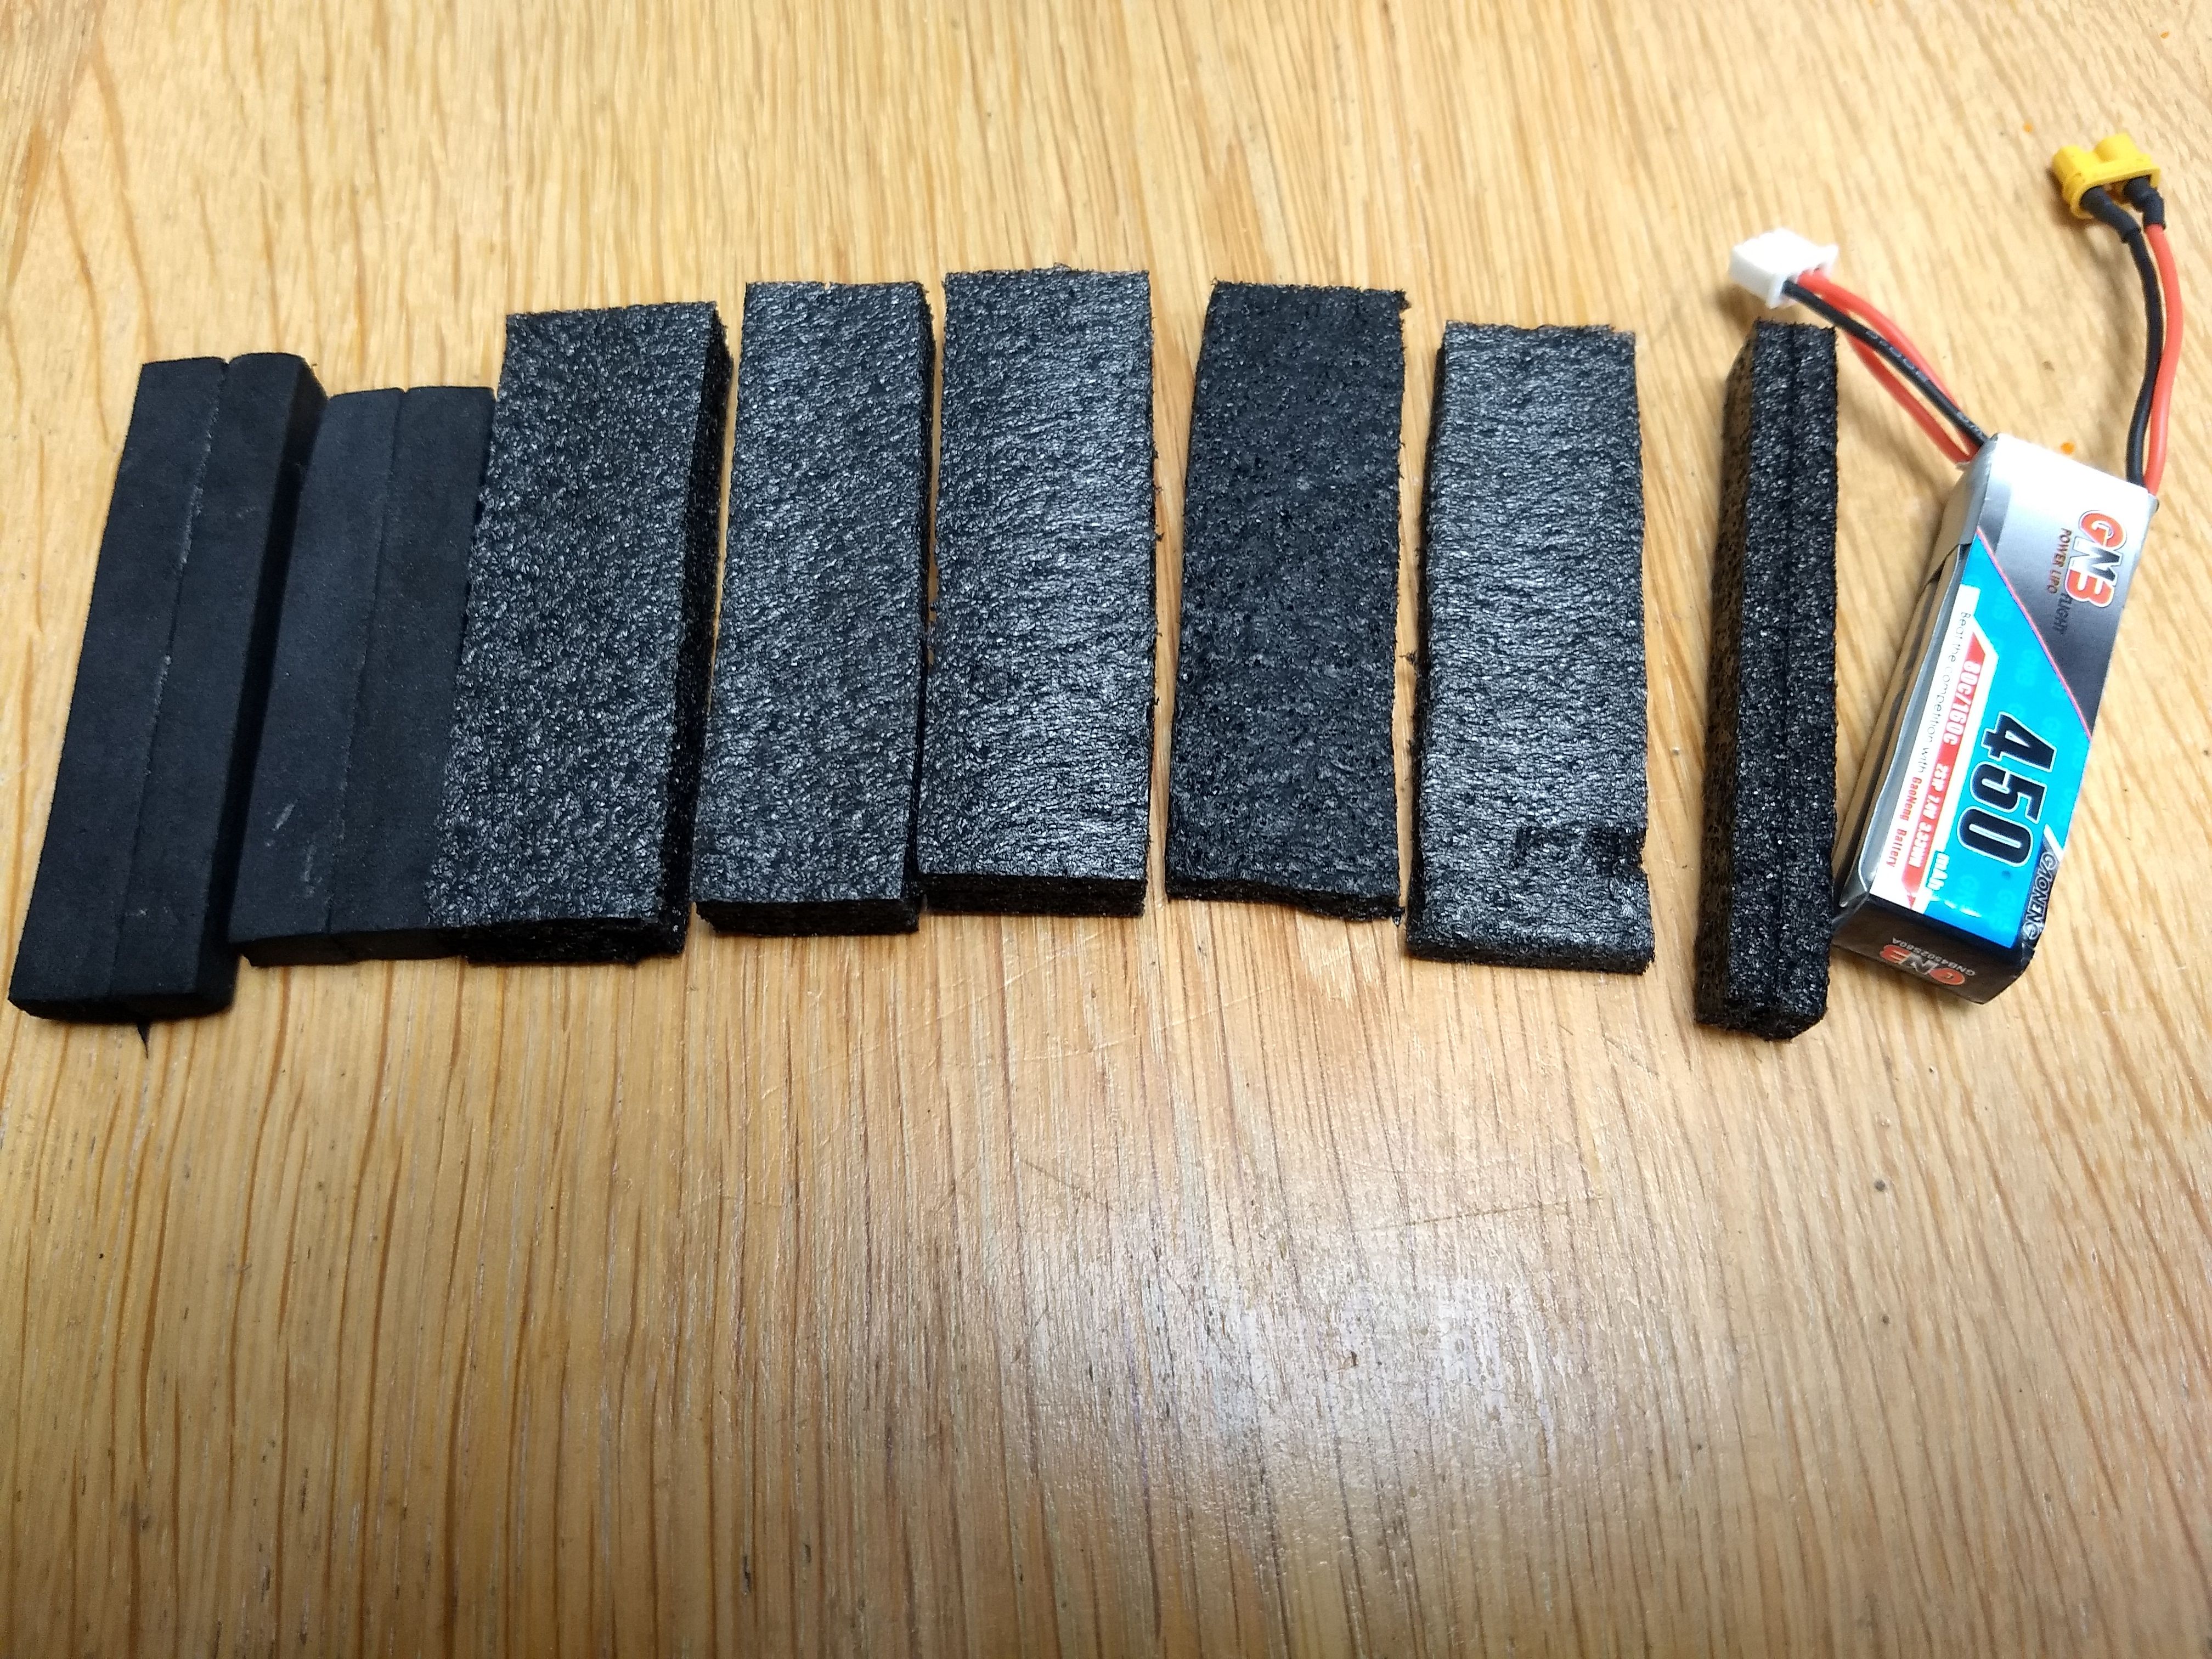
- I regard bottom-mounting of lipo batteries on an indoor FPV quad a very realistic fire hazard. To prevent crashes of the quad turning me into a homeless person, I mount a piece of bouncy material of some type to the bottom of the battery. This also works very nicely to protect the battery during crashes outdoors. I've added a picture of the spare pieces of foam that I keep in my lipo-bag for exactly this purpose.
- I don't like that the battery leads on the ESC and batteries are all 22AWG, but I didn't have any 20AWG laying around. Also, I don't really feel like replacing the battery leads on all 10 of my 450mAh batteries.
- To make this tiny quad an ominous little mofo, install BL_Heli 1.65 and configure it to play the imperial march on boot. The canopy reminds me of a stormtrooper anyway.
- I've only flown it with stock Betaflight 3.3.2 pids / DSHOT600 + dynamic filtering and it flies wonderful. Only thing is that it sort of 'flutters' when I let it drop down really fast (cut the engines). I might try to fix that the coming week.
-
I run this quad with reversed prop rotation. You should too (https://bit.ly/2sdL9XM) :
- physically reverse props
- betaflight: set yaw_motors_reversed = ON (PREVIOUSLY: set yaw_motor_direction = -1)
- bl_heli: reverse direction of motors
Now go build one. And an extra one, just in case.
Photos

Part List
Show stores (3)Guides & Reviews

AirbladeUAV has done it again and this time they've brought long range to the 5" class! Based on the popular Transformer Mini, the new Transformer 5" Ultralight adopts a lot of the same design philosophies with larger props and more payload capacity. It can fly upwards of 20 minutes on a 4 cell Li-Ion battery pack and in ideal conditions it's got a range of over 4 to 5 miles. In this guide I'll walk..
Read more
With the release of the DJI FPV Drone cinematic FPV has become a lot more accessible, but you certainly don't want to crash a $750 drone! The QAV-CINE Freybott is a compact, lightweight cinematic FPV drone that can take a hit and keep going. It's a lot safer to fly indoors and around people. With a naked GoPro or the SMO 4k you can capture some great stabilized footage. In this guide I'll show you..
Read more


well.. since it was the only thing (apart from props) that I've yet managed to damage at my own ET100...
I'd be pretty scared that this camera is going to break right on the first flight?
Yes, that was my expectation too. But I've really smashed the thing around, both indoors and outdoors and the camera never once got impacted. I even went full speed into a tree, which I didn't see because it was behind another one, and nothing happened. I did lose the runcam nano lens, because it vibrated off, then lost a VTX antenna, because I hadn't fastened it, and the entire case of my current camera came off, because apparently they don't use any glue at the factory to fasten the lens housing to the PCB. But anyway, my current camera setup should prevent any damage because it 'soft mounts' the camera in place. Only the styrofoam that holds the camera in place should break.