How it started
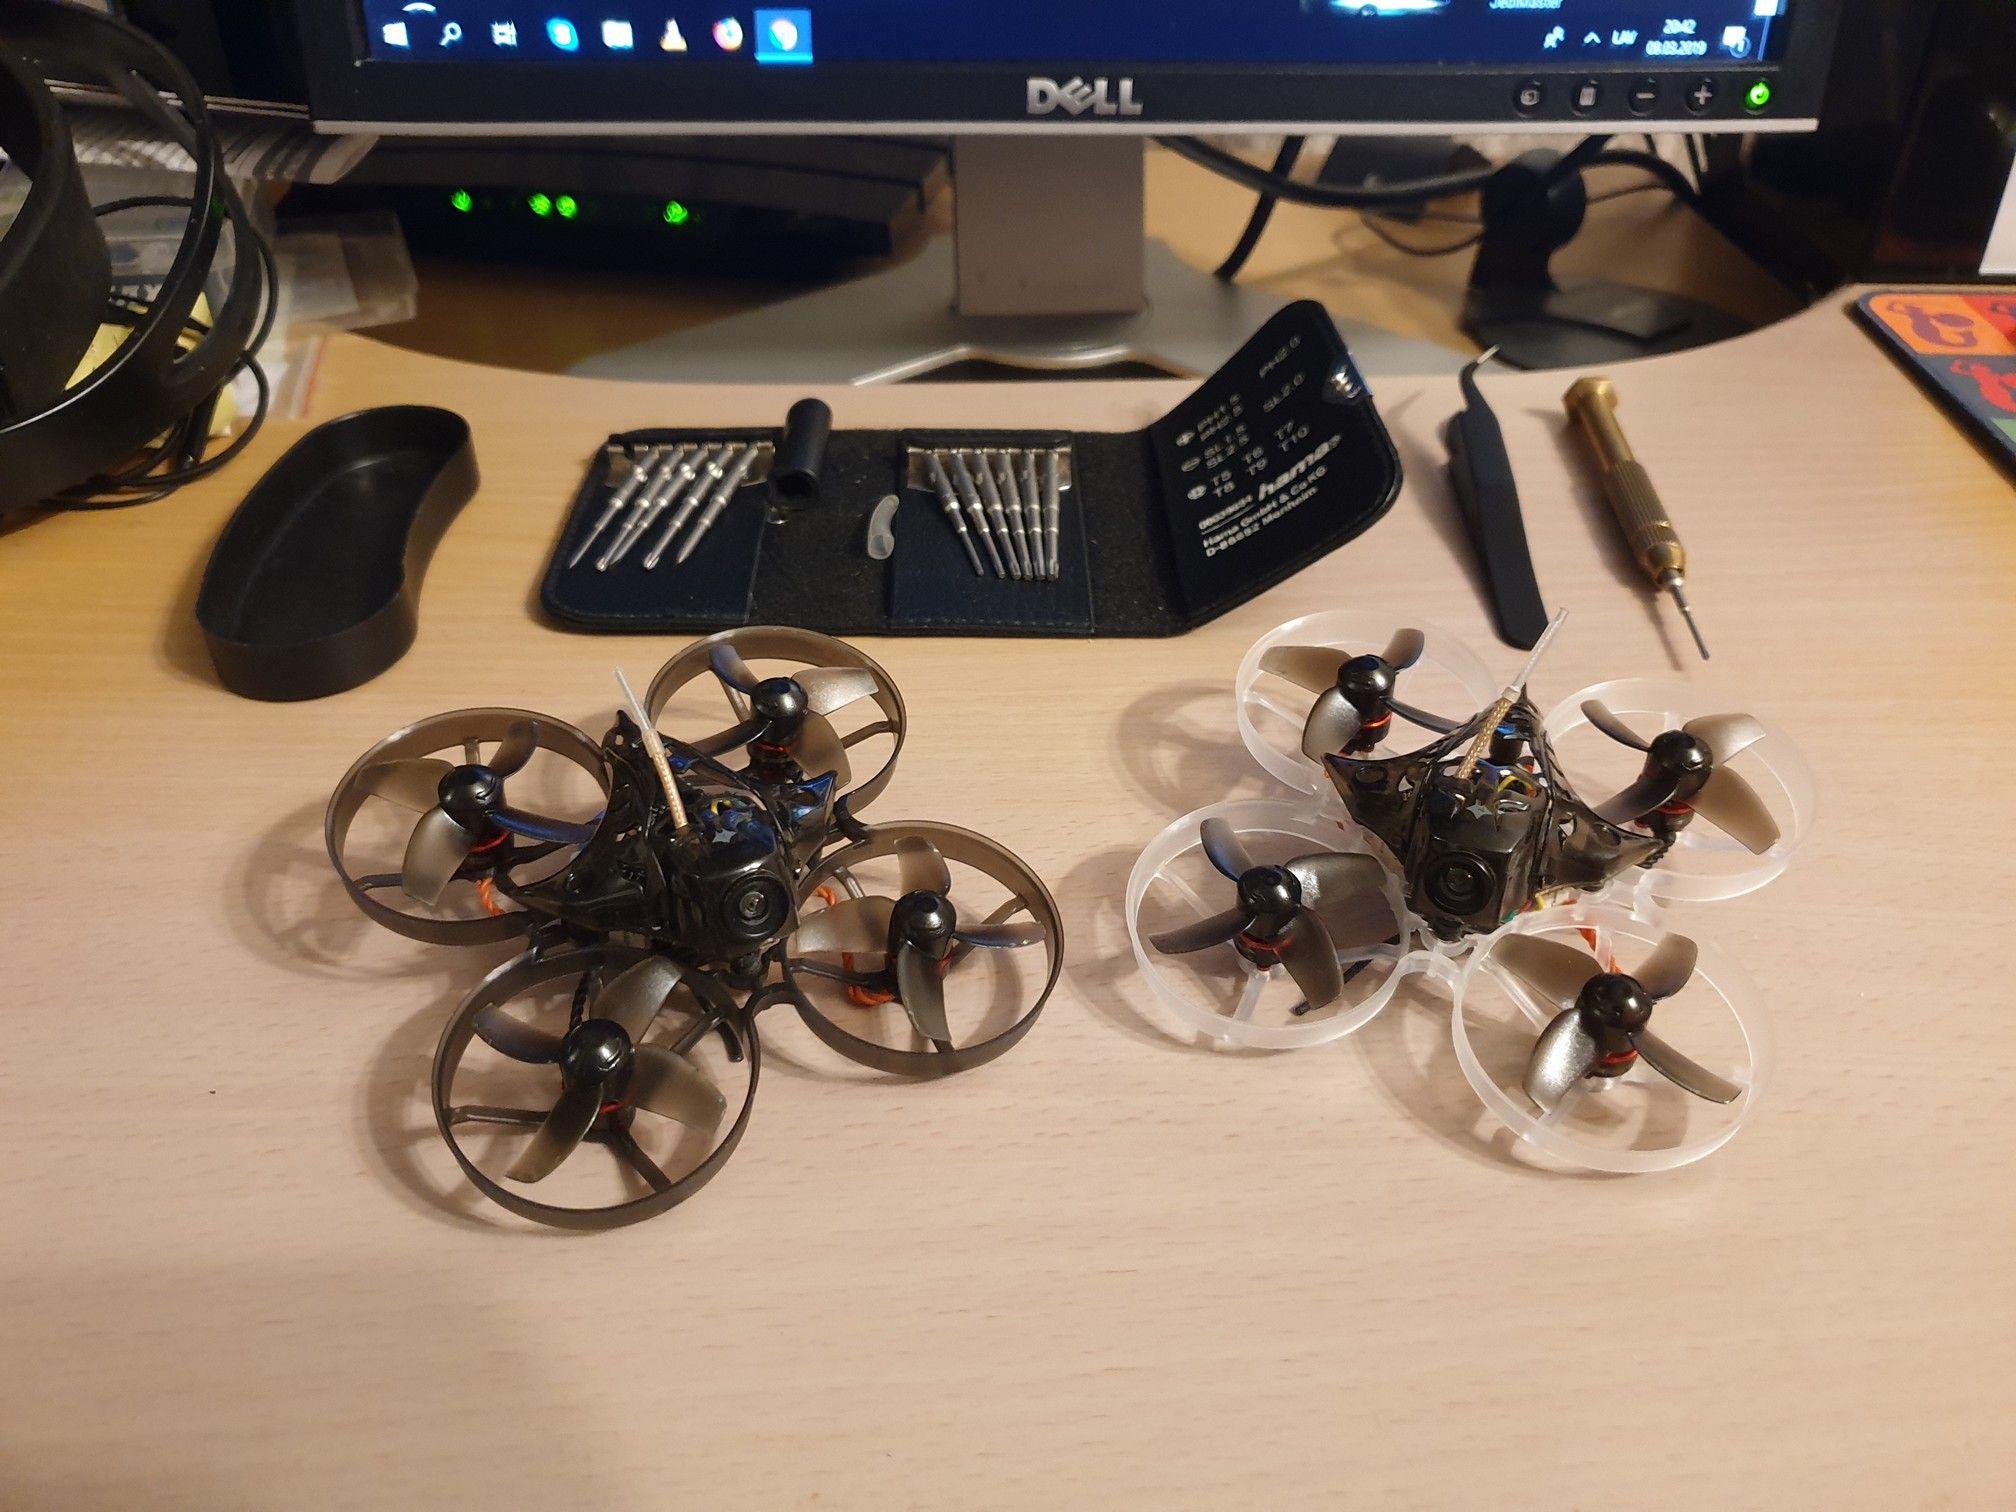 To shorten weekends in last winter for me and make a Christmas present for my nephew, I purchased a pair of Happymodel Mobula7 75 mm brushless whoops. We both already had a history with small brushed and brushless quads. However found these little things awesome. Much more agile and stronger in comparing with their brushed counterparts and without sudden dying motor plague which caused me to literally hate brushed quads. Possibility to fly with one 1S battery indoors and have fast little freestyle thing on two batteries outdoors made Mobula7 very attractive to us. Possibility to switch VTX channels over SmartAudio from Betaflight OSD or FrSky Lua scripts without searching for tiny hidden camera button is good as well. In short - this winter had more fun :)
Flying is good, but FPV should upgrade
When weather outside improved, we came out to push our new whoops to their limits. On two battery configuration they was great as expected. However soon I became disapointed about stock camera picture with low resolution which become bleak with huge overexposed area in middle at cloudy days. See below.
Due to low resolution crashed in ghost branches a lot. Also 25 mW output power for VTX appeared a bit too low when tree and bush obstacles come in game. Decided to upgrade camera and VTX in my Mobula7, but keep VTX control intact.
Parts to buy
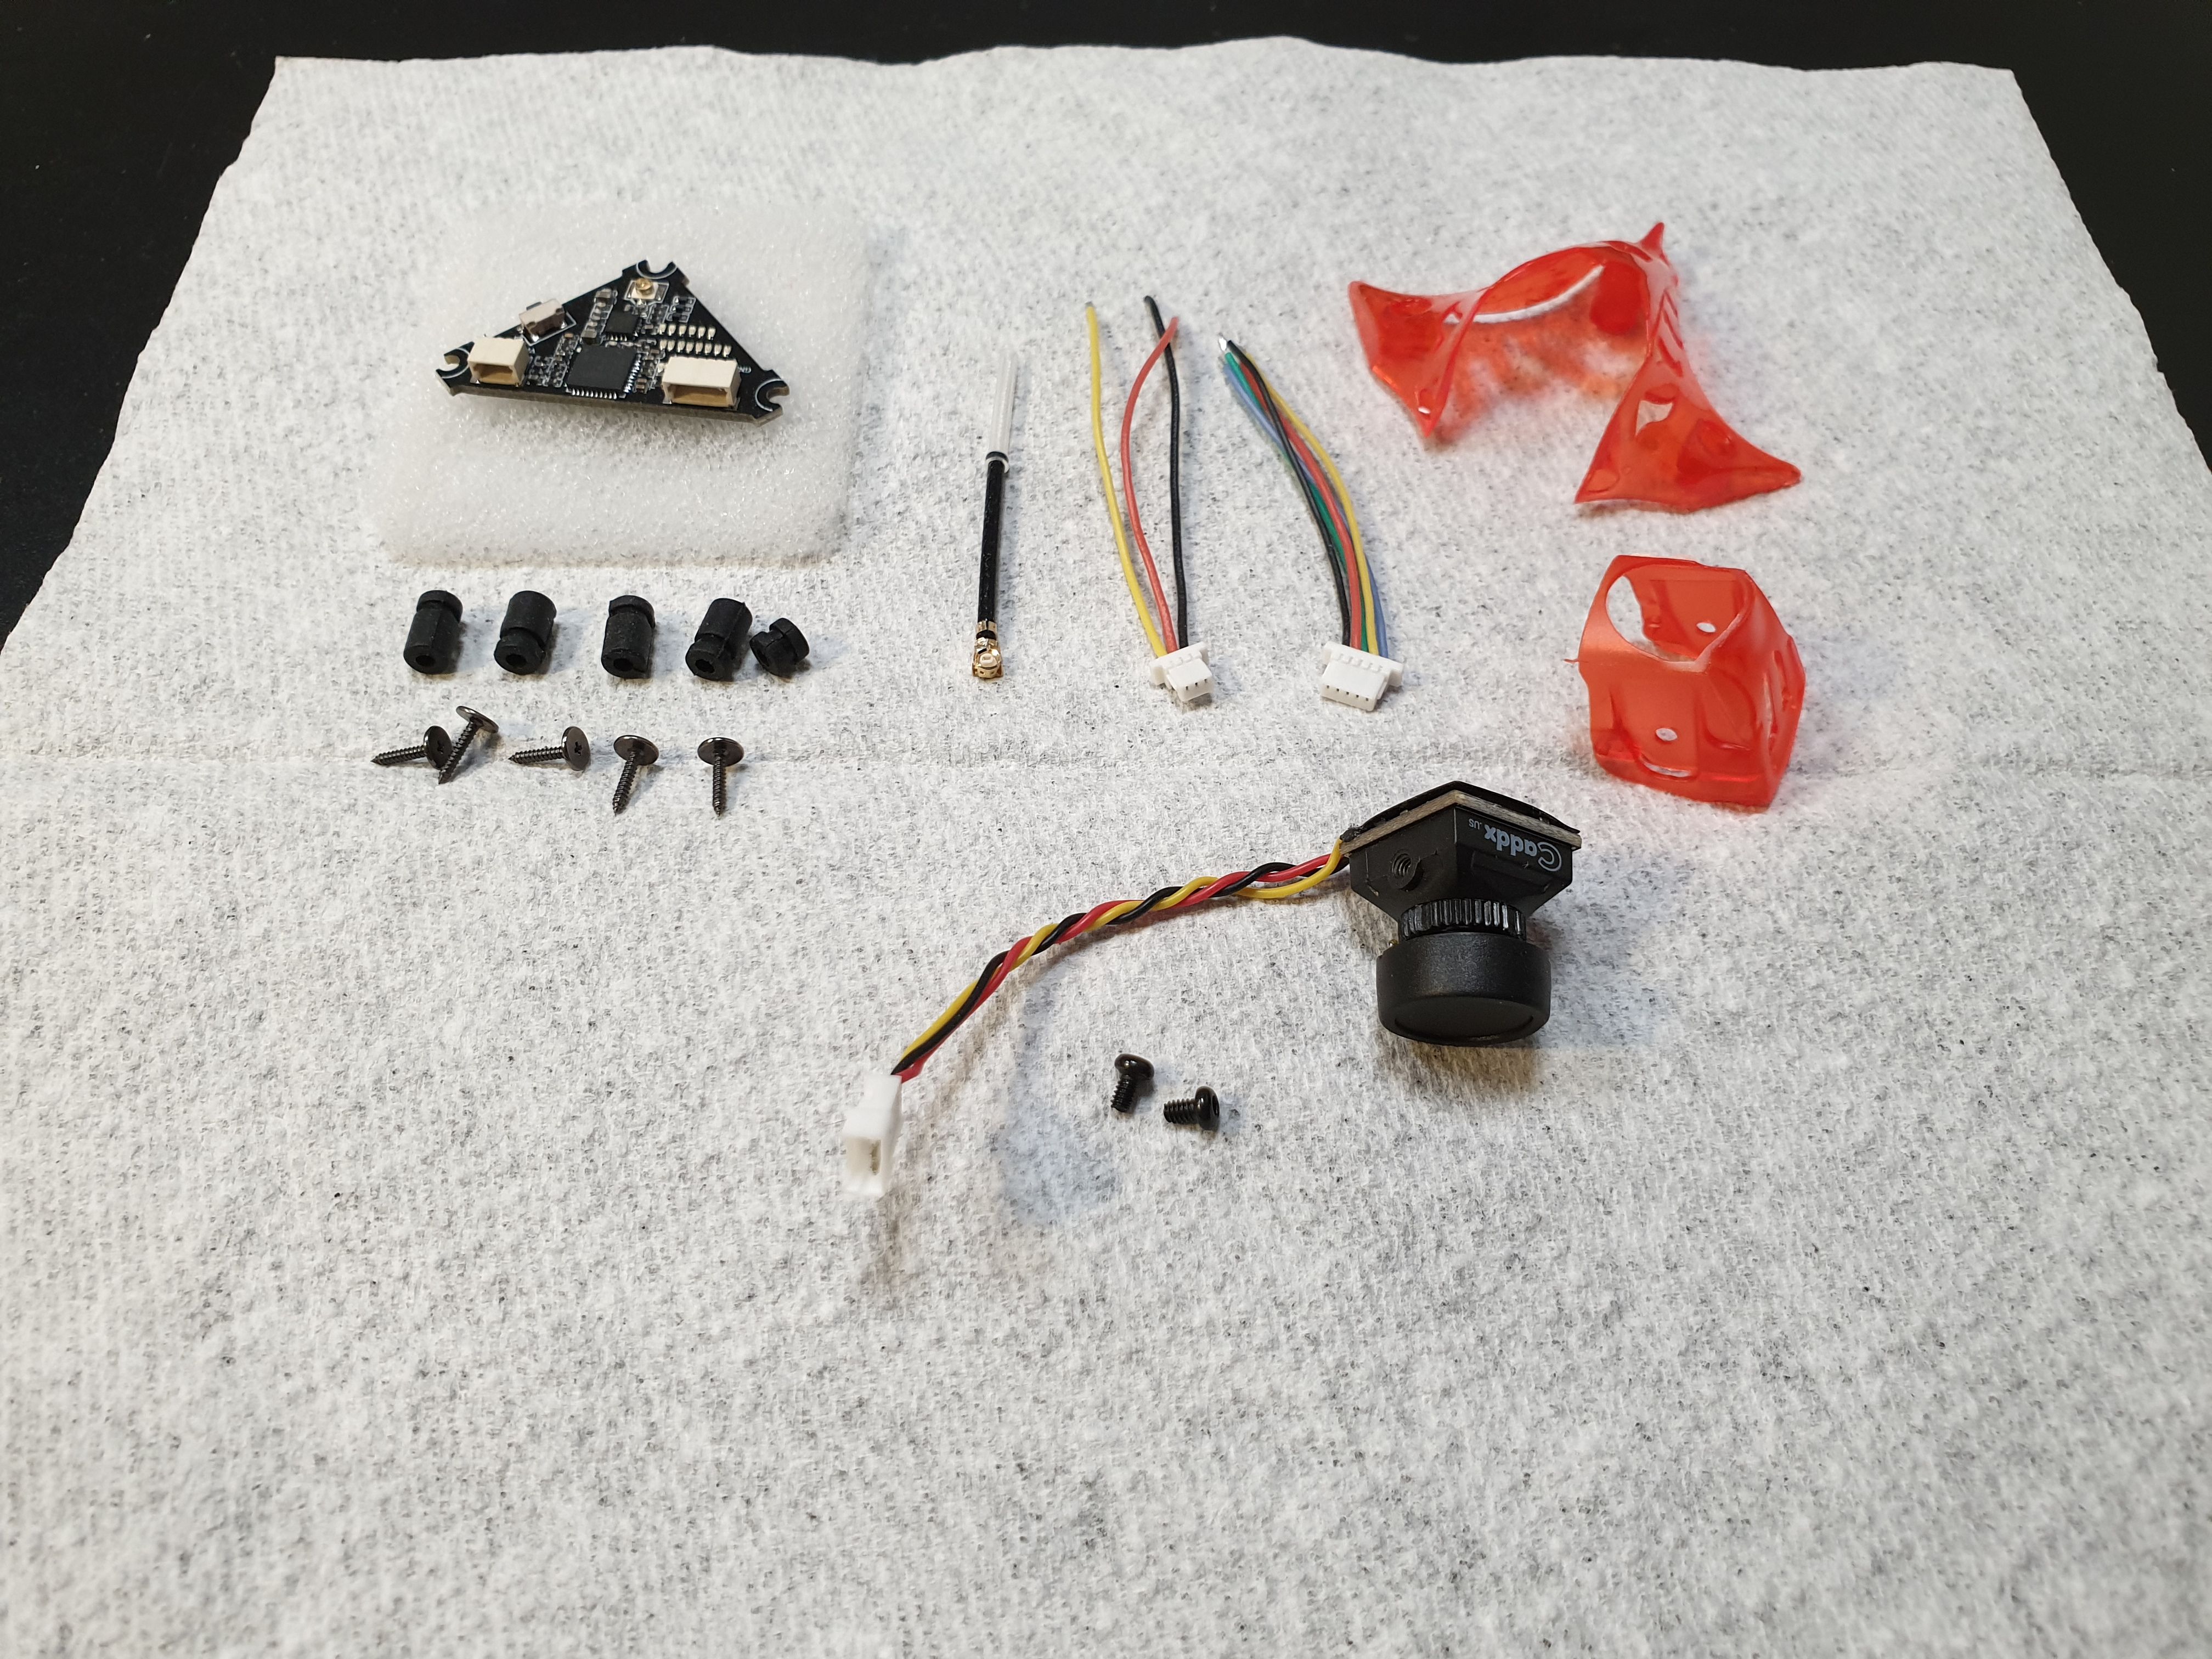
Cheap AIO cameras have mediocre picture and most of them have only channel/band switch button. AIO combos with Micro Swift or Micro Eagle seems too heavy for a 75 mm whoop. I noticed Caddx Turbo EOS2 camera which seem have quite sharp picture. Also found Mobula7 upgrade VTX with SmartAudio control which have 25 mW to 200 mW output by specs and board seems should fit inside Mobula7 without tedious planning. Added a whoop canopy for EOS2 camera in list because this camera doesn't fit into Mobula7 stock canopy. Time to put them together.
Required tools and materials
- Philips PH2.0 screwdriver.
- Soldering iron with temperature control and thin tip
- Wire cutters
- Tweezers
- 1.0 mm heat shrink tube
- Electric isolation tape
Build
Disconected motors from flight controller. Stock canopy was disassembled. All 5 canopy screws kept for later use. Flight controller board removed from frame together with short rubber boad holders. Alarm buzzer with sticky pad detached from board. Holders and sticky pad kept for later use.
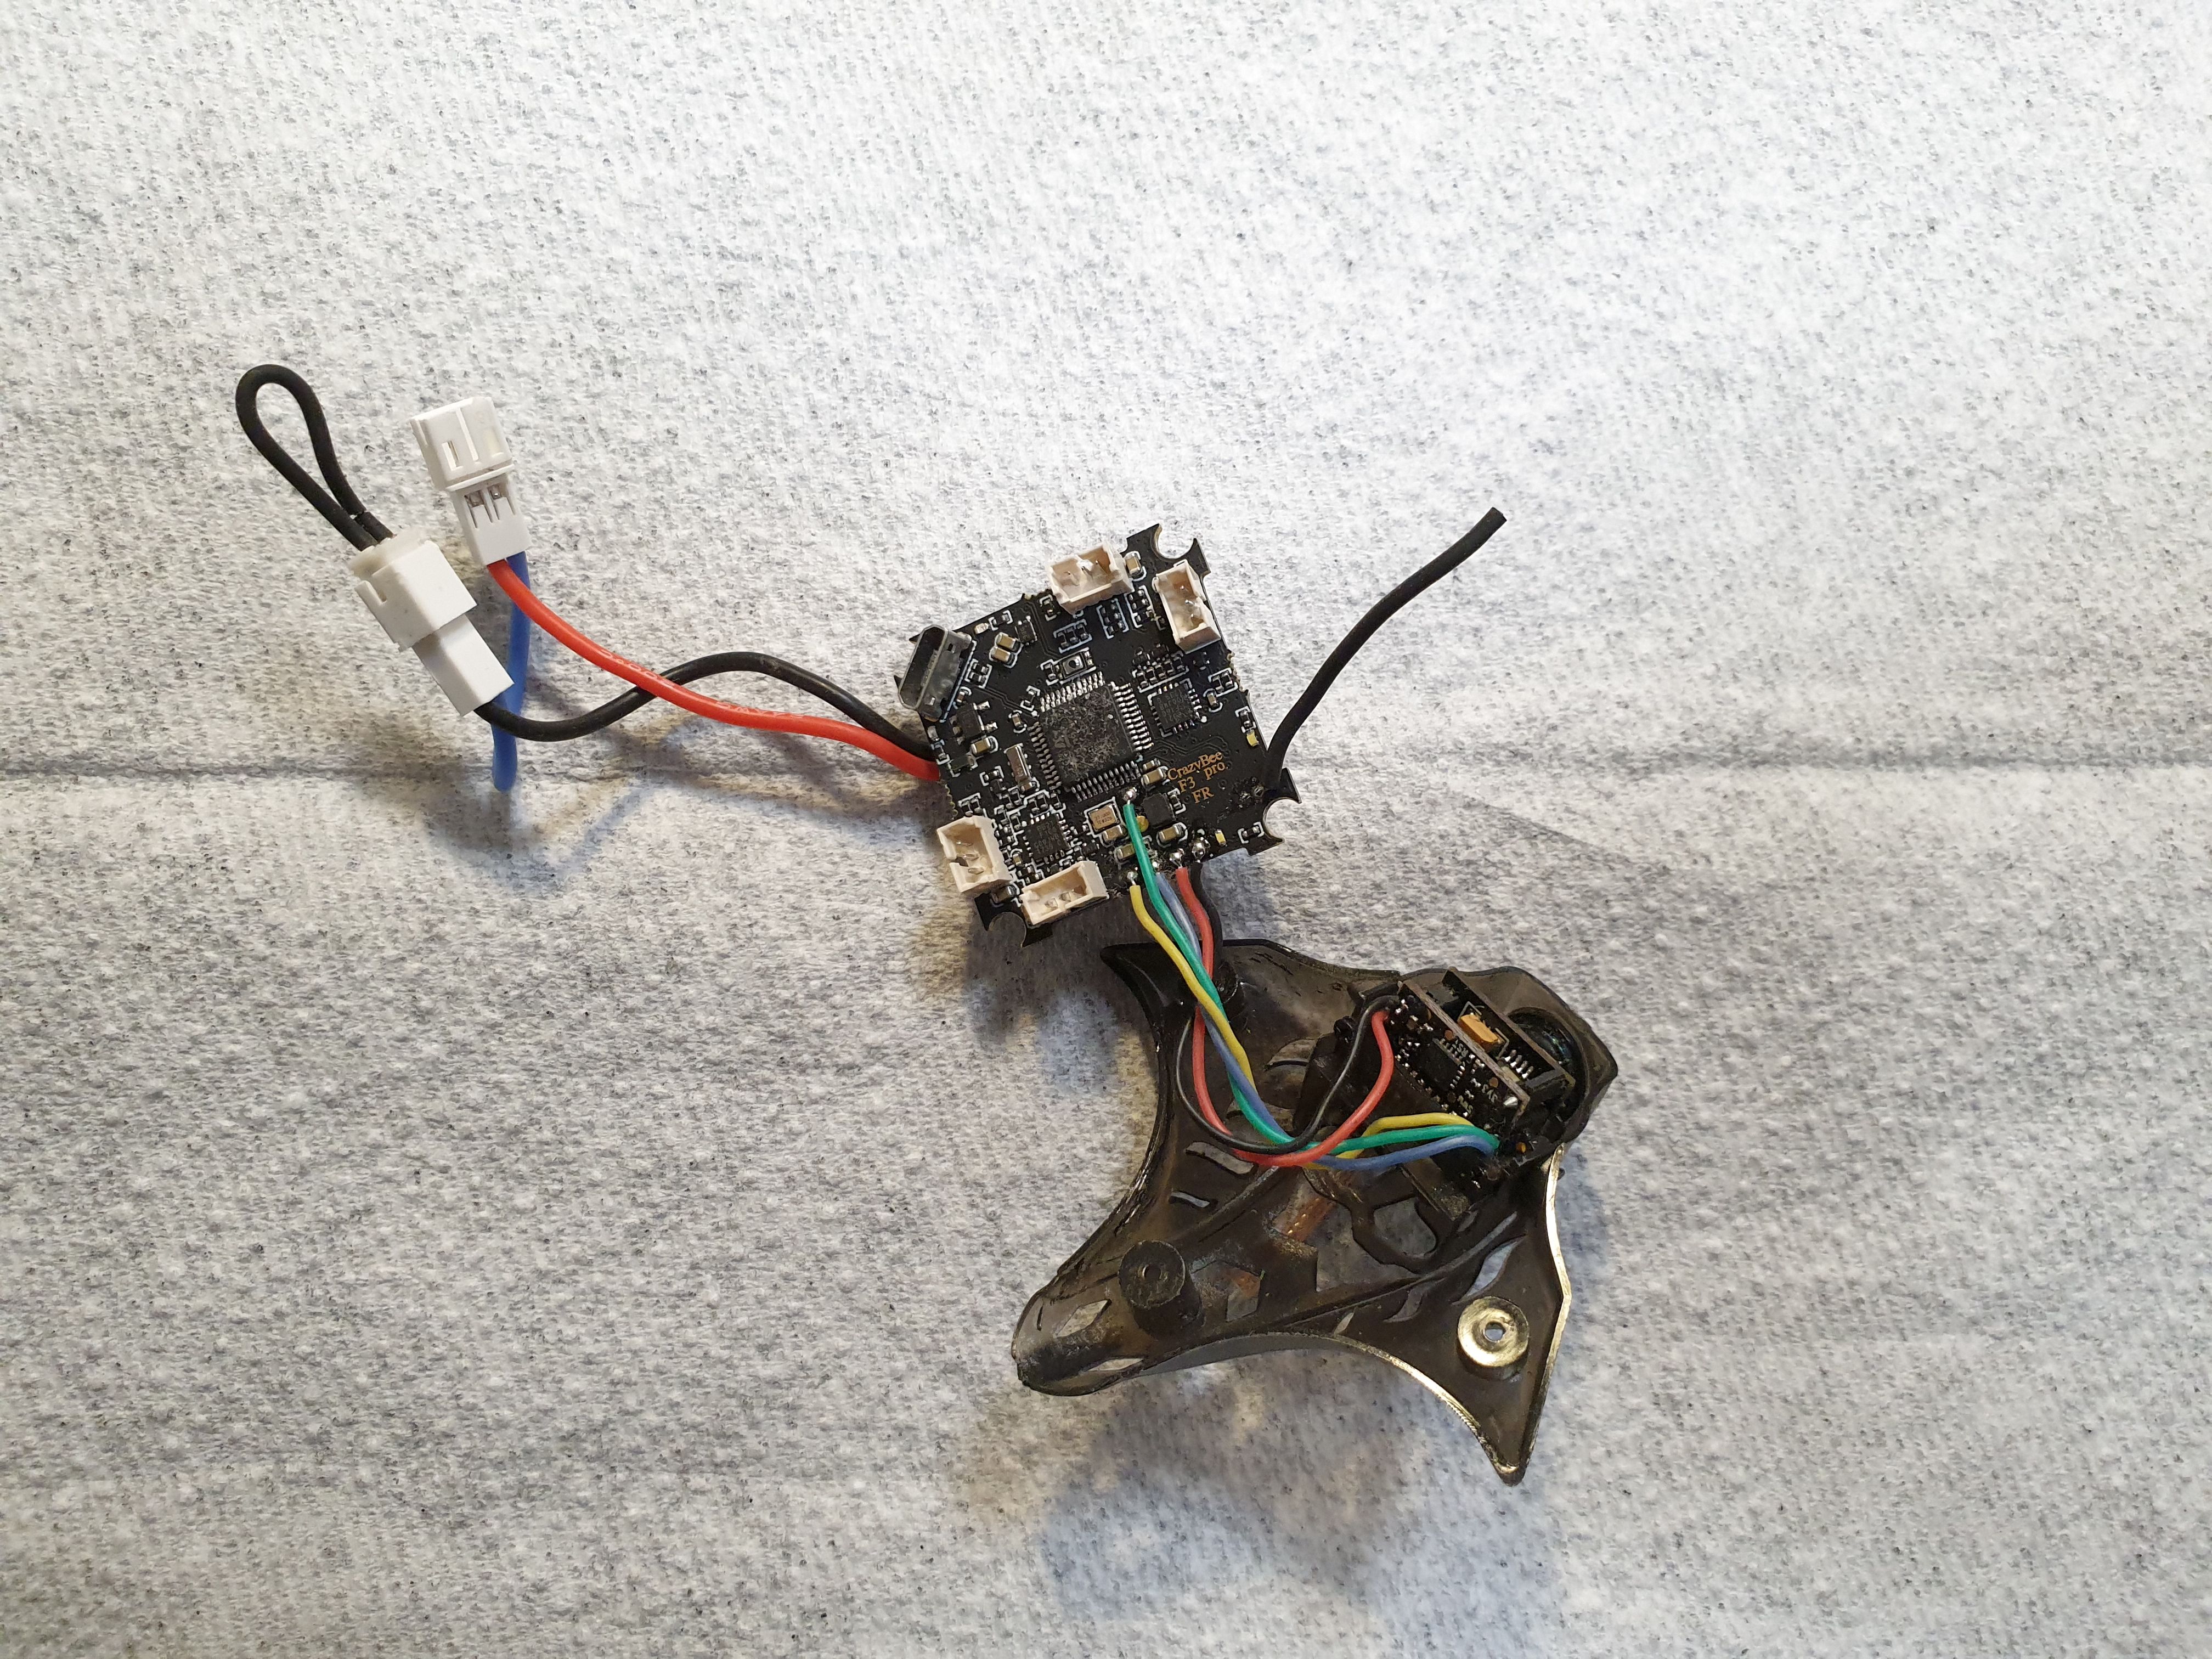
Stock camera unsoldered from flight controller.
For easier installation upgrade VTX cable with 5 wires shortened to 2 cm length. Green middle wire (VTX control) was left 2-3 mm longer.
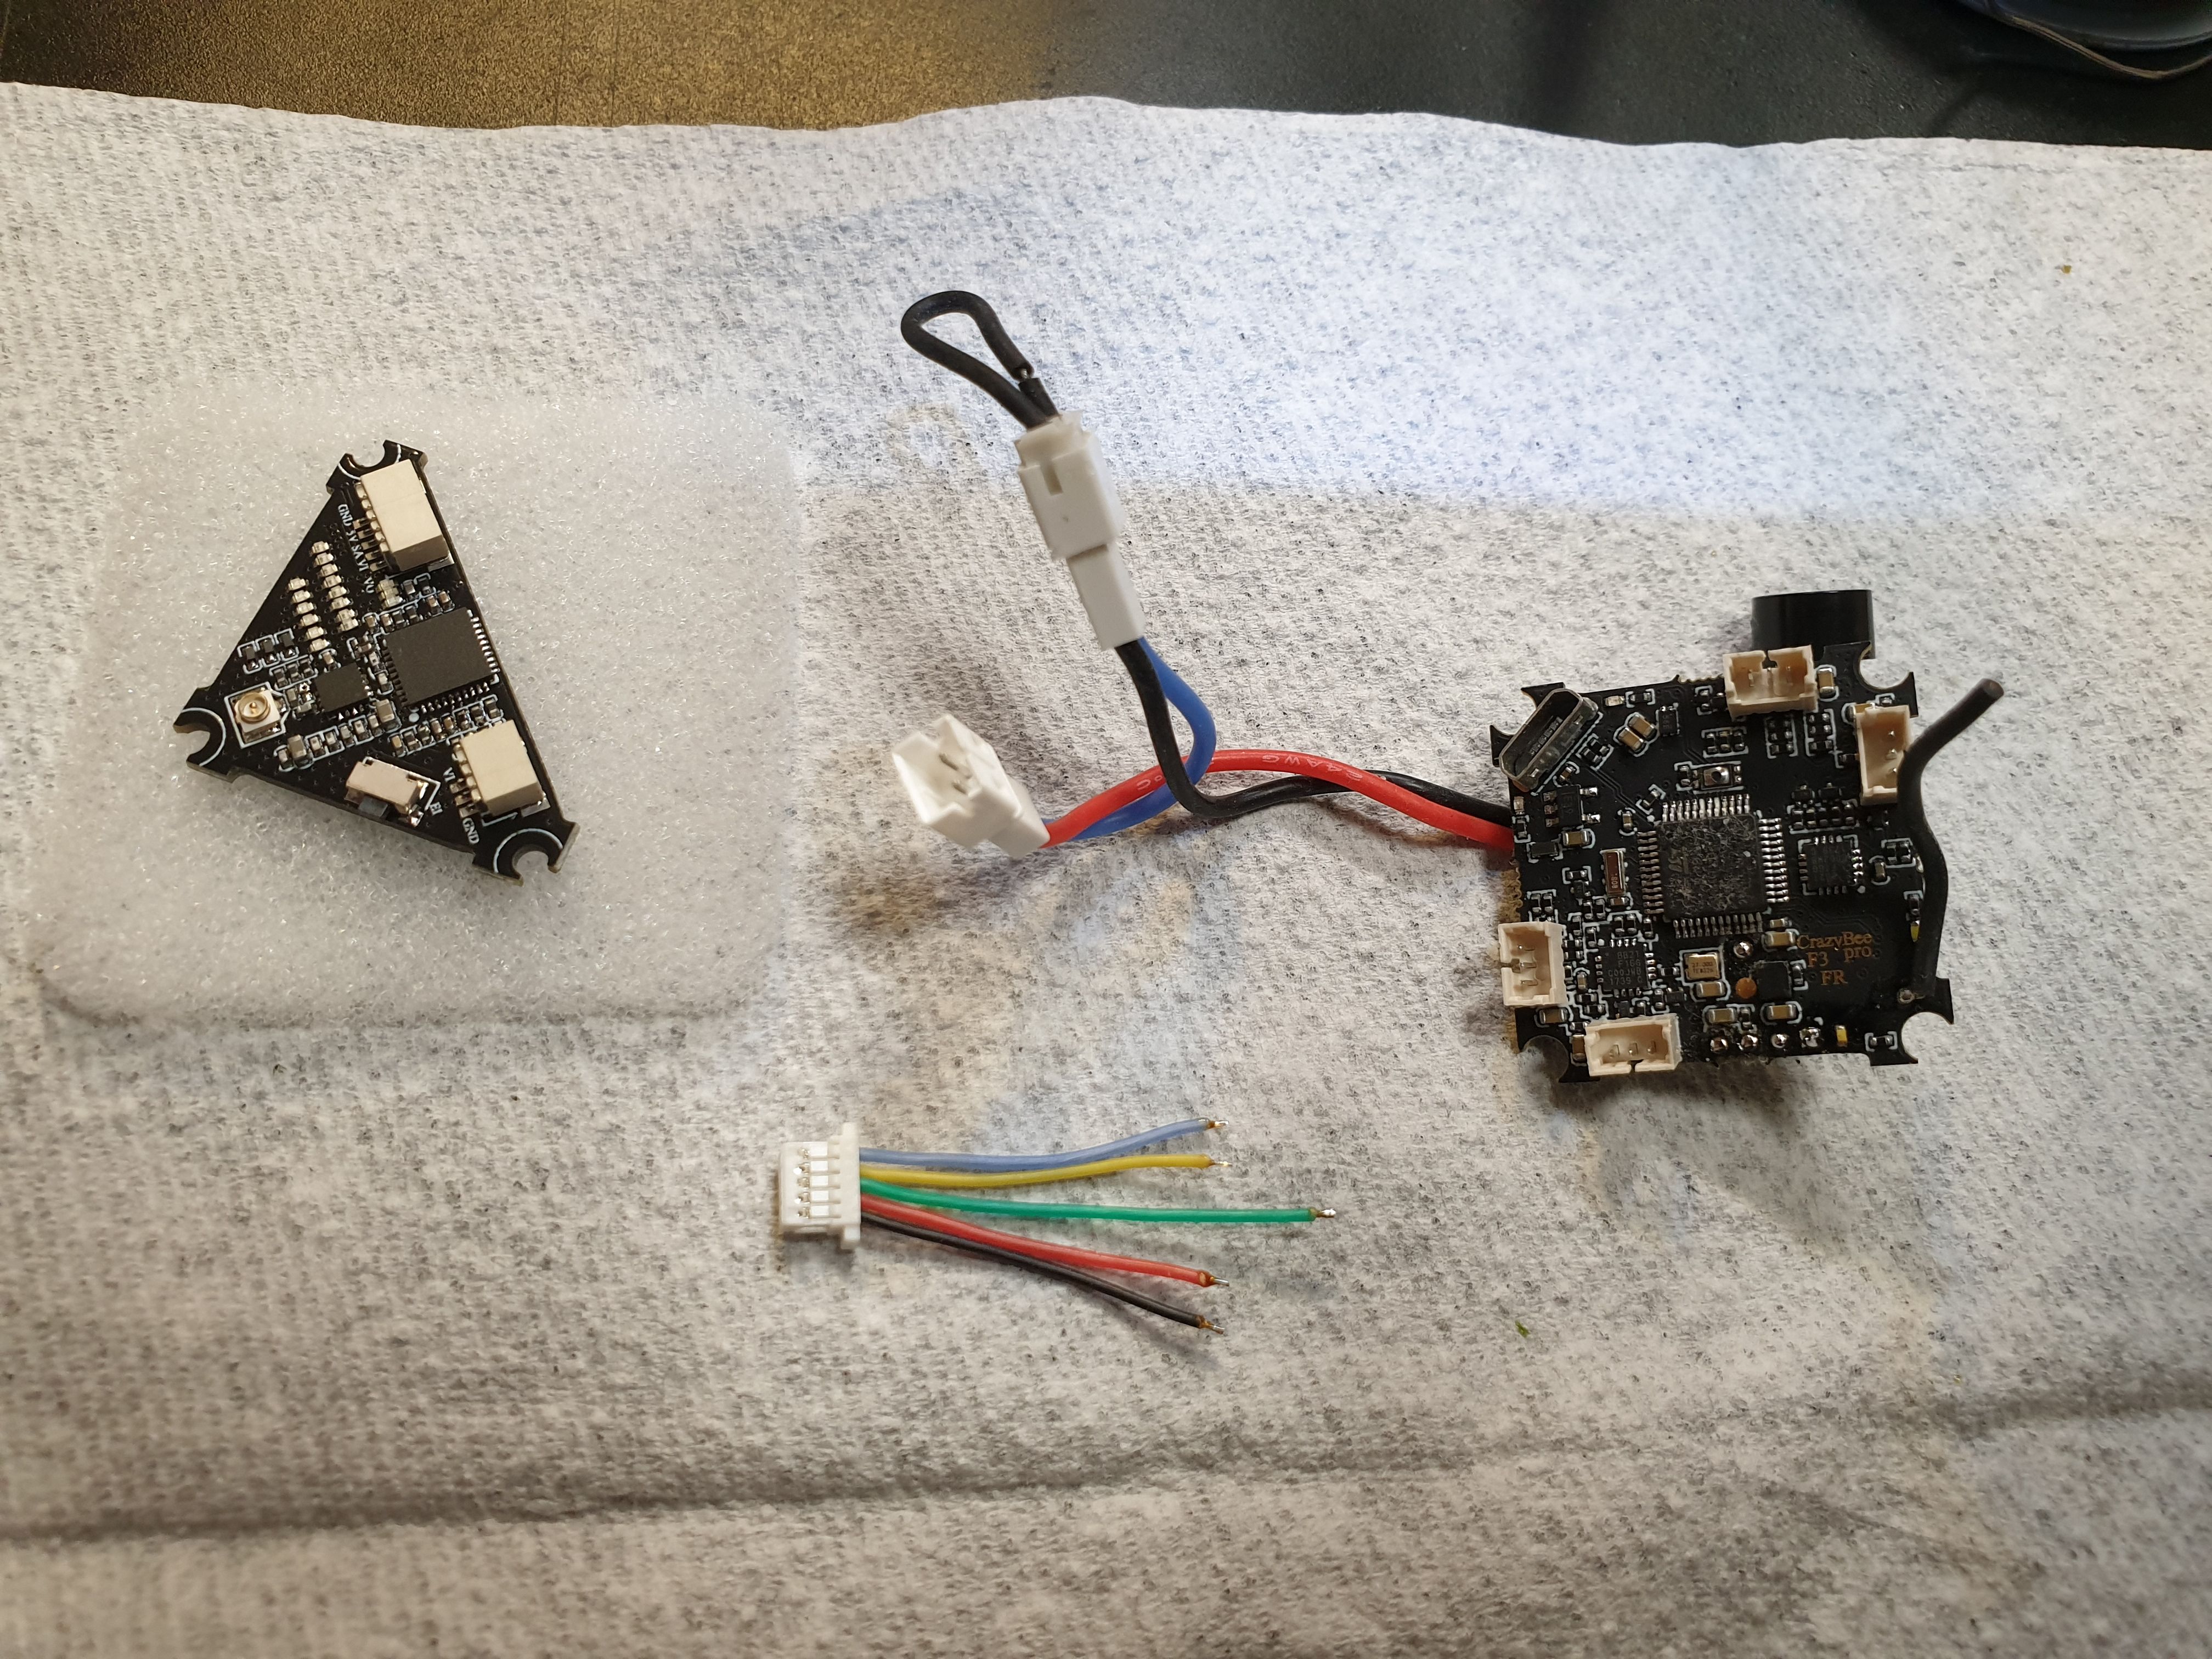
Black (ground), yellow (camera output) and blue (VTX input) wires twisted together to avoid noise in picture. Cable soldered to flight controller. See example wiring photos below.
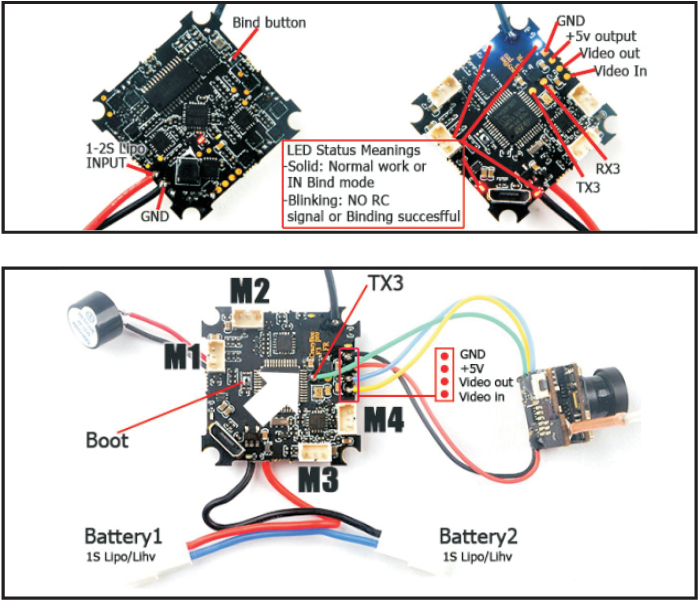
Mobula7 F3 FC camera wiring
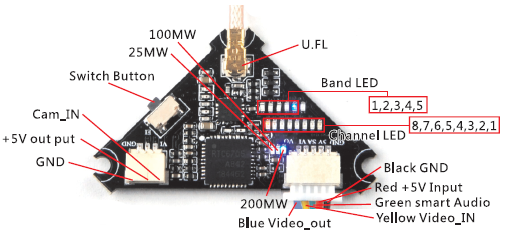
Mobula7 upgrade VTX wiring
To put larger EOS camera into whoop, flight controller board and canopy must have larger clearance. VTX board must have some clearance between flight controller board as well. Because of that rubber holders in frame must have such configuration:
- one old short board holder in front
- three long board holders from new canopy in both sides and in rear.
At this point flight controller was inserted back into frame. Seems right.
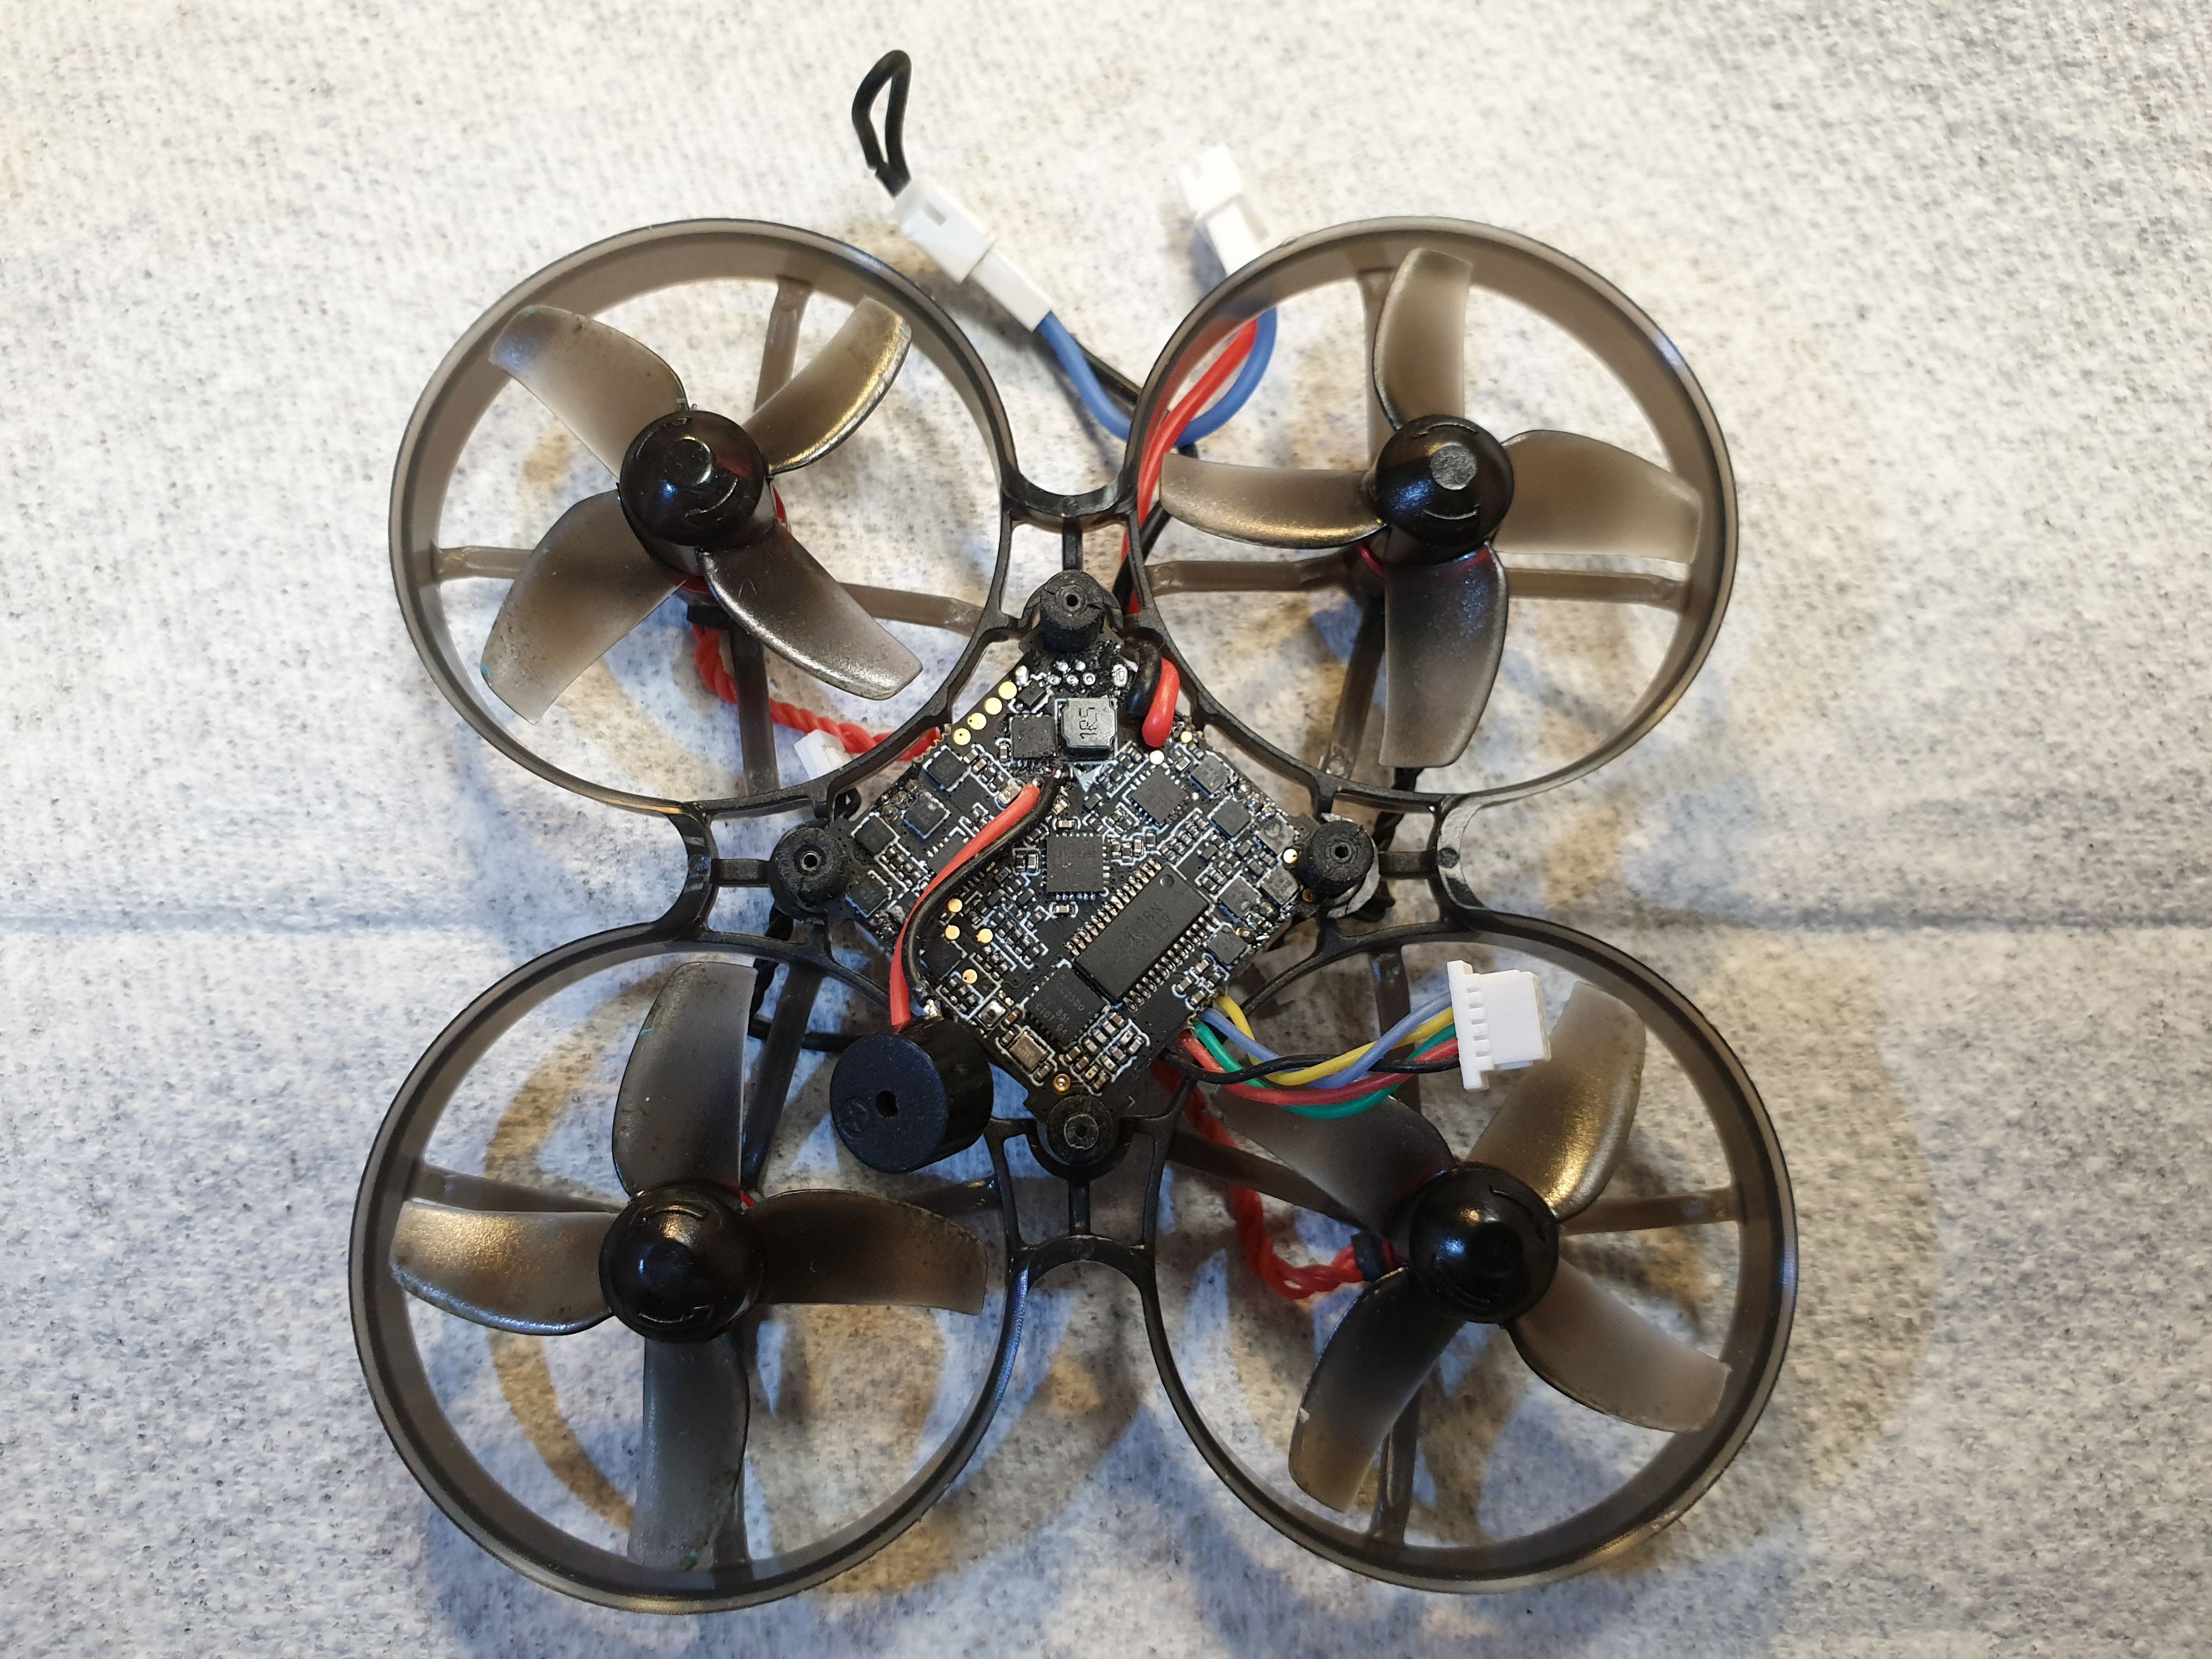
EOS2 camere have too long cable with male socket conector. Upgrade VTX also have male socket. Now what?
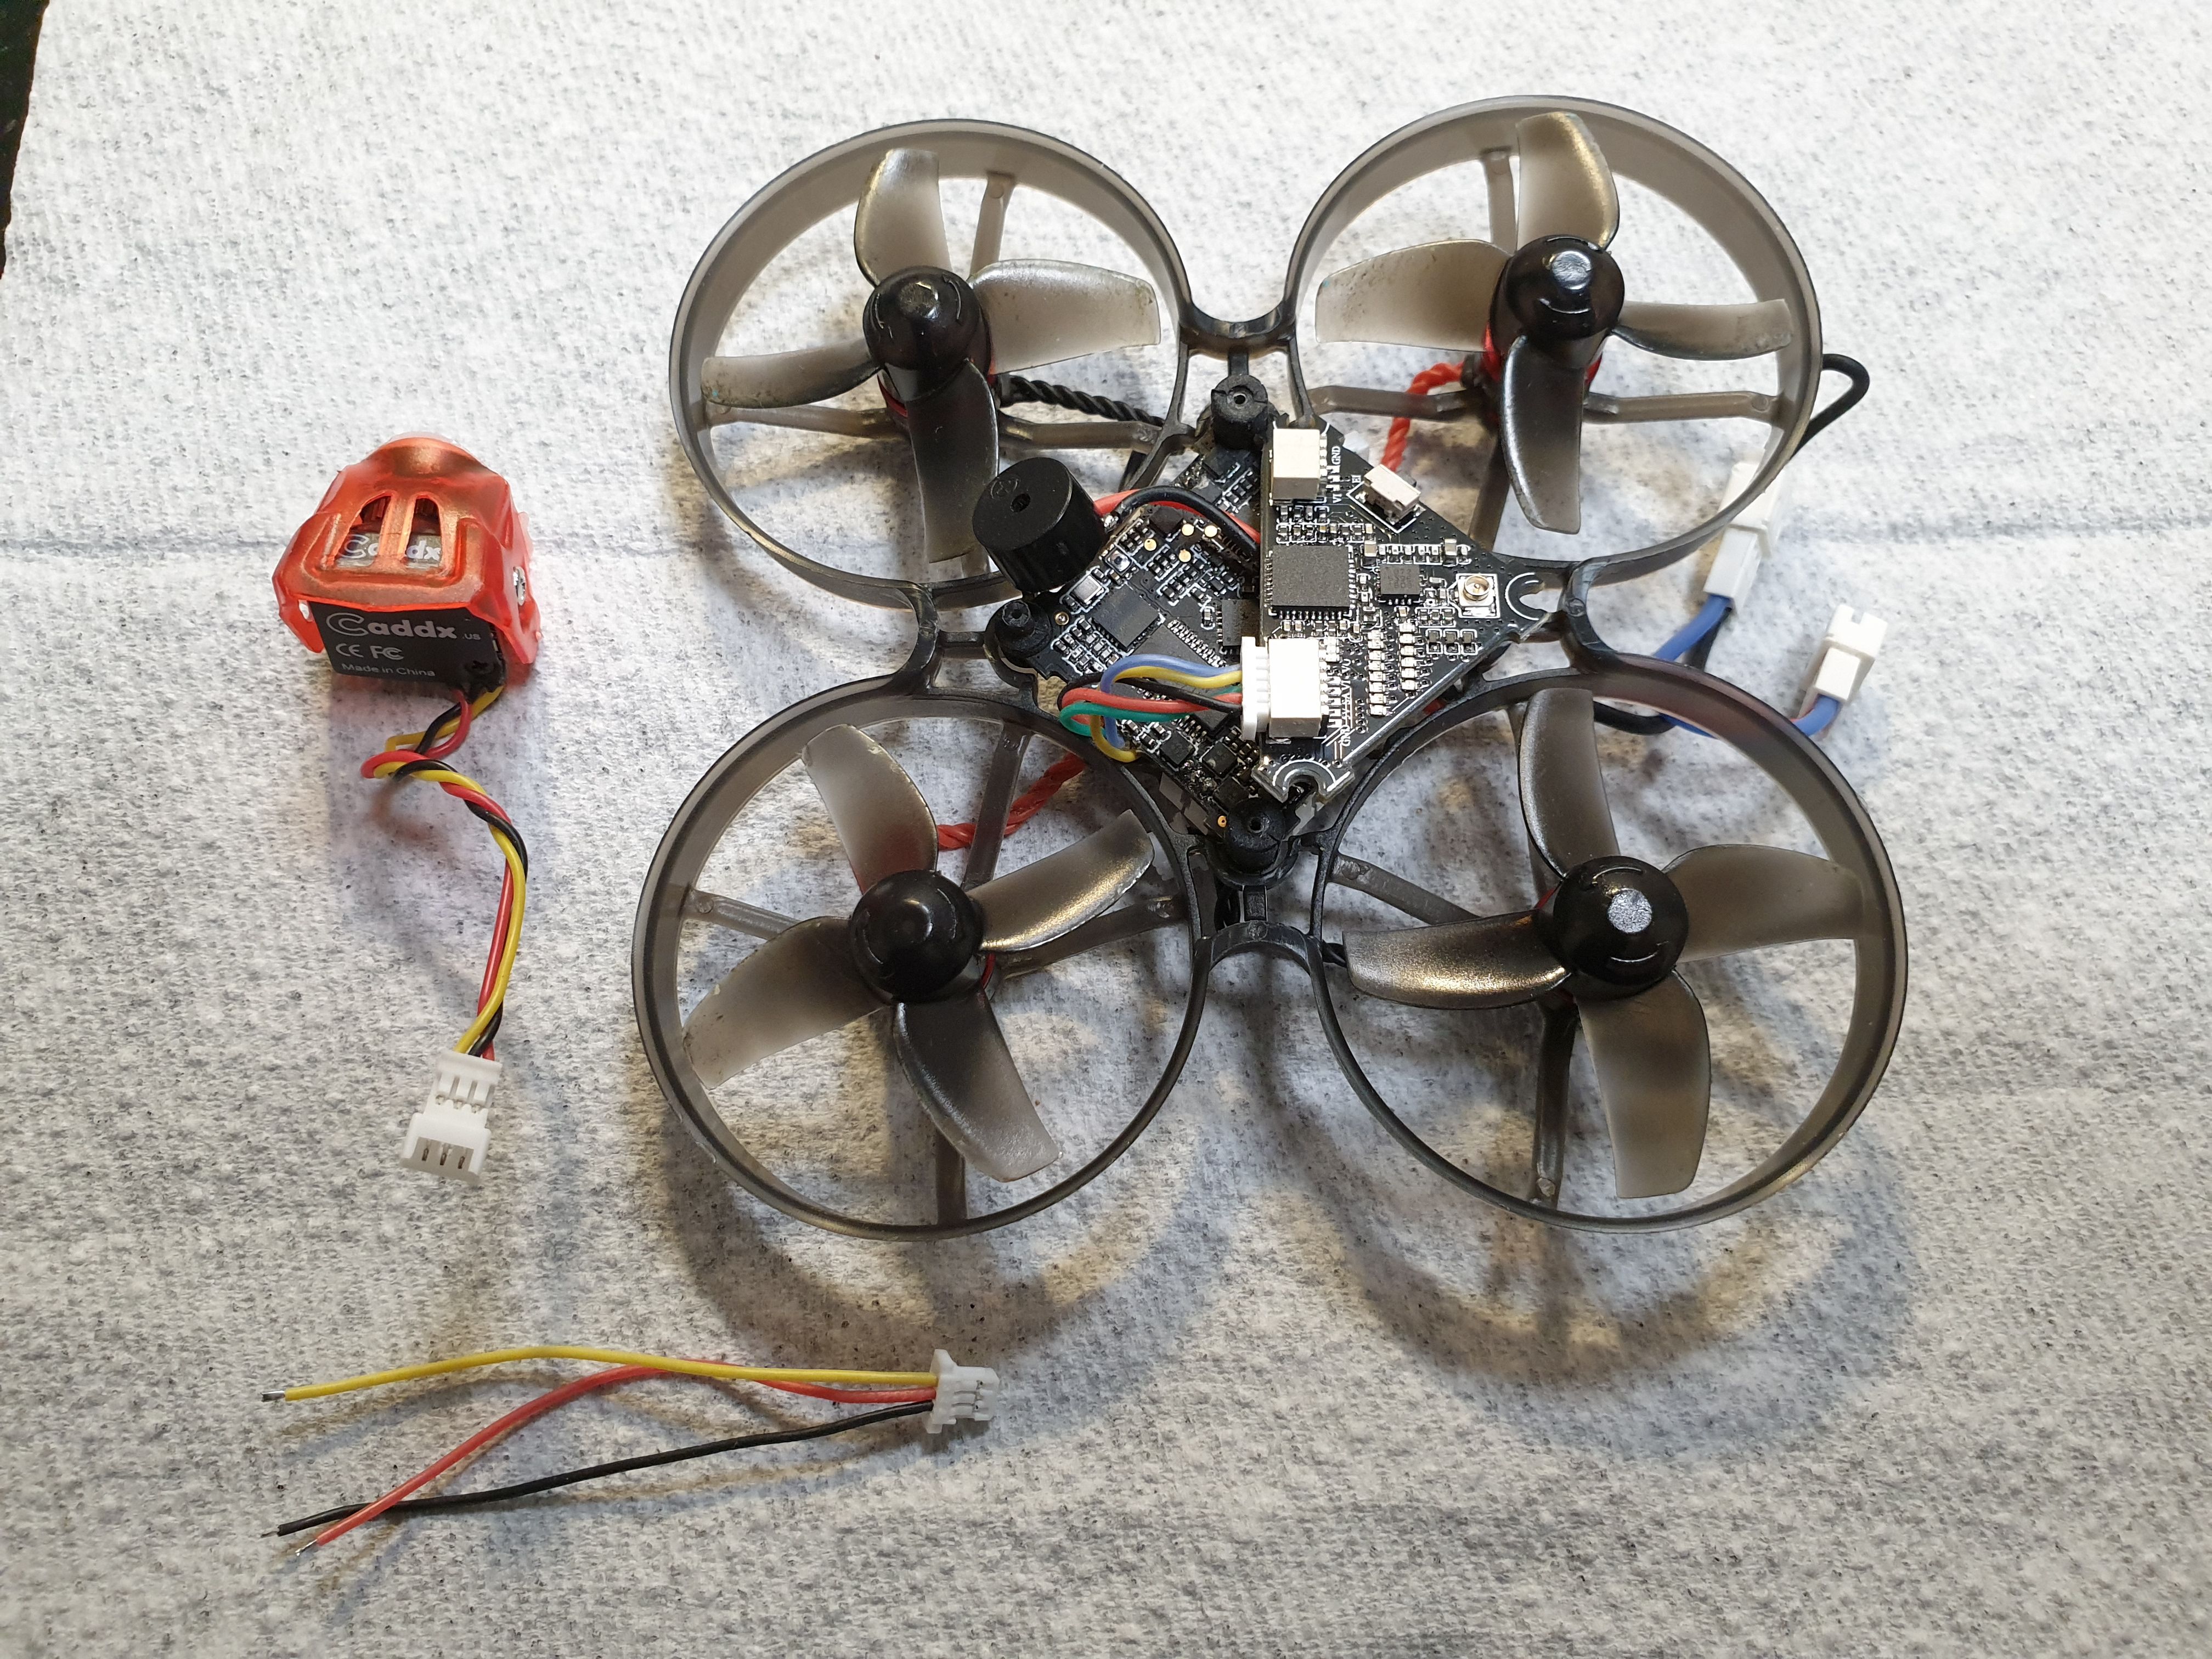
Well, there is VTX bundled 3-wire cable with female connector. Shortened this cable wires to 7 mm. Camera cable wires shortened to 2 cm, soldered to VTX camera cable connector and isolated with heat shrink tubes.
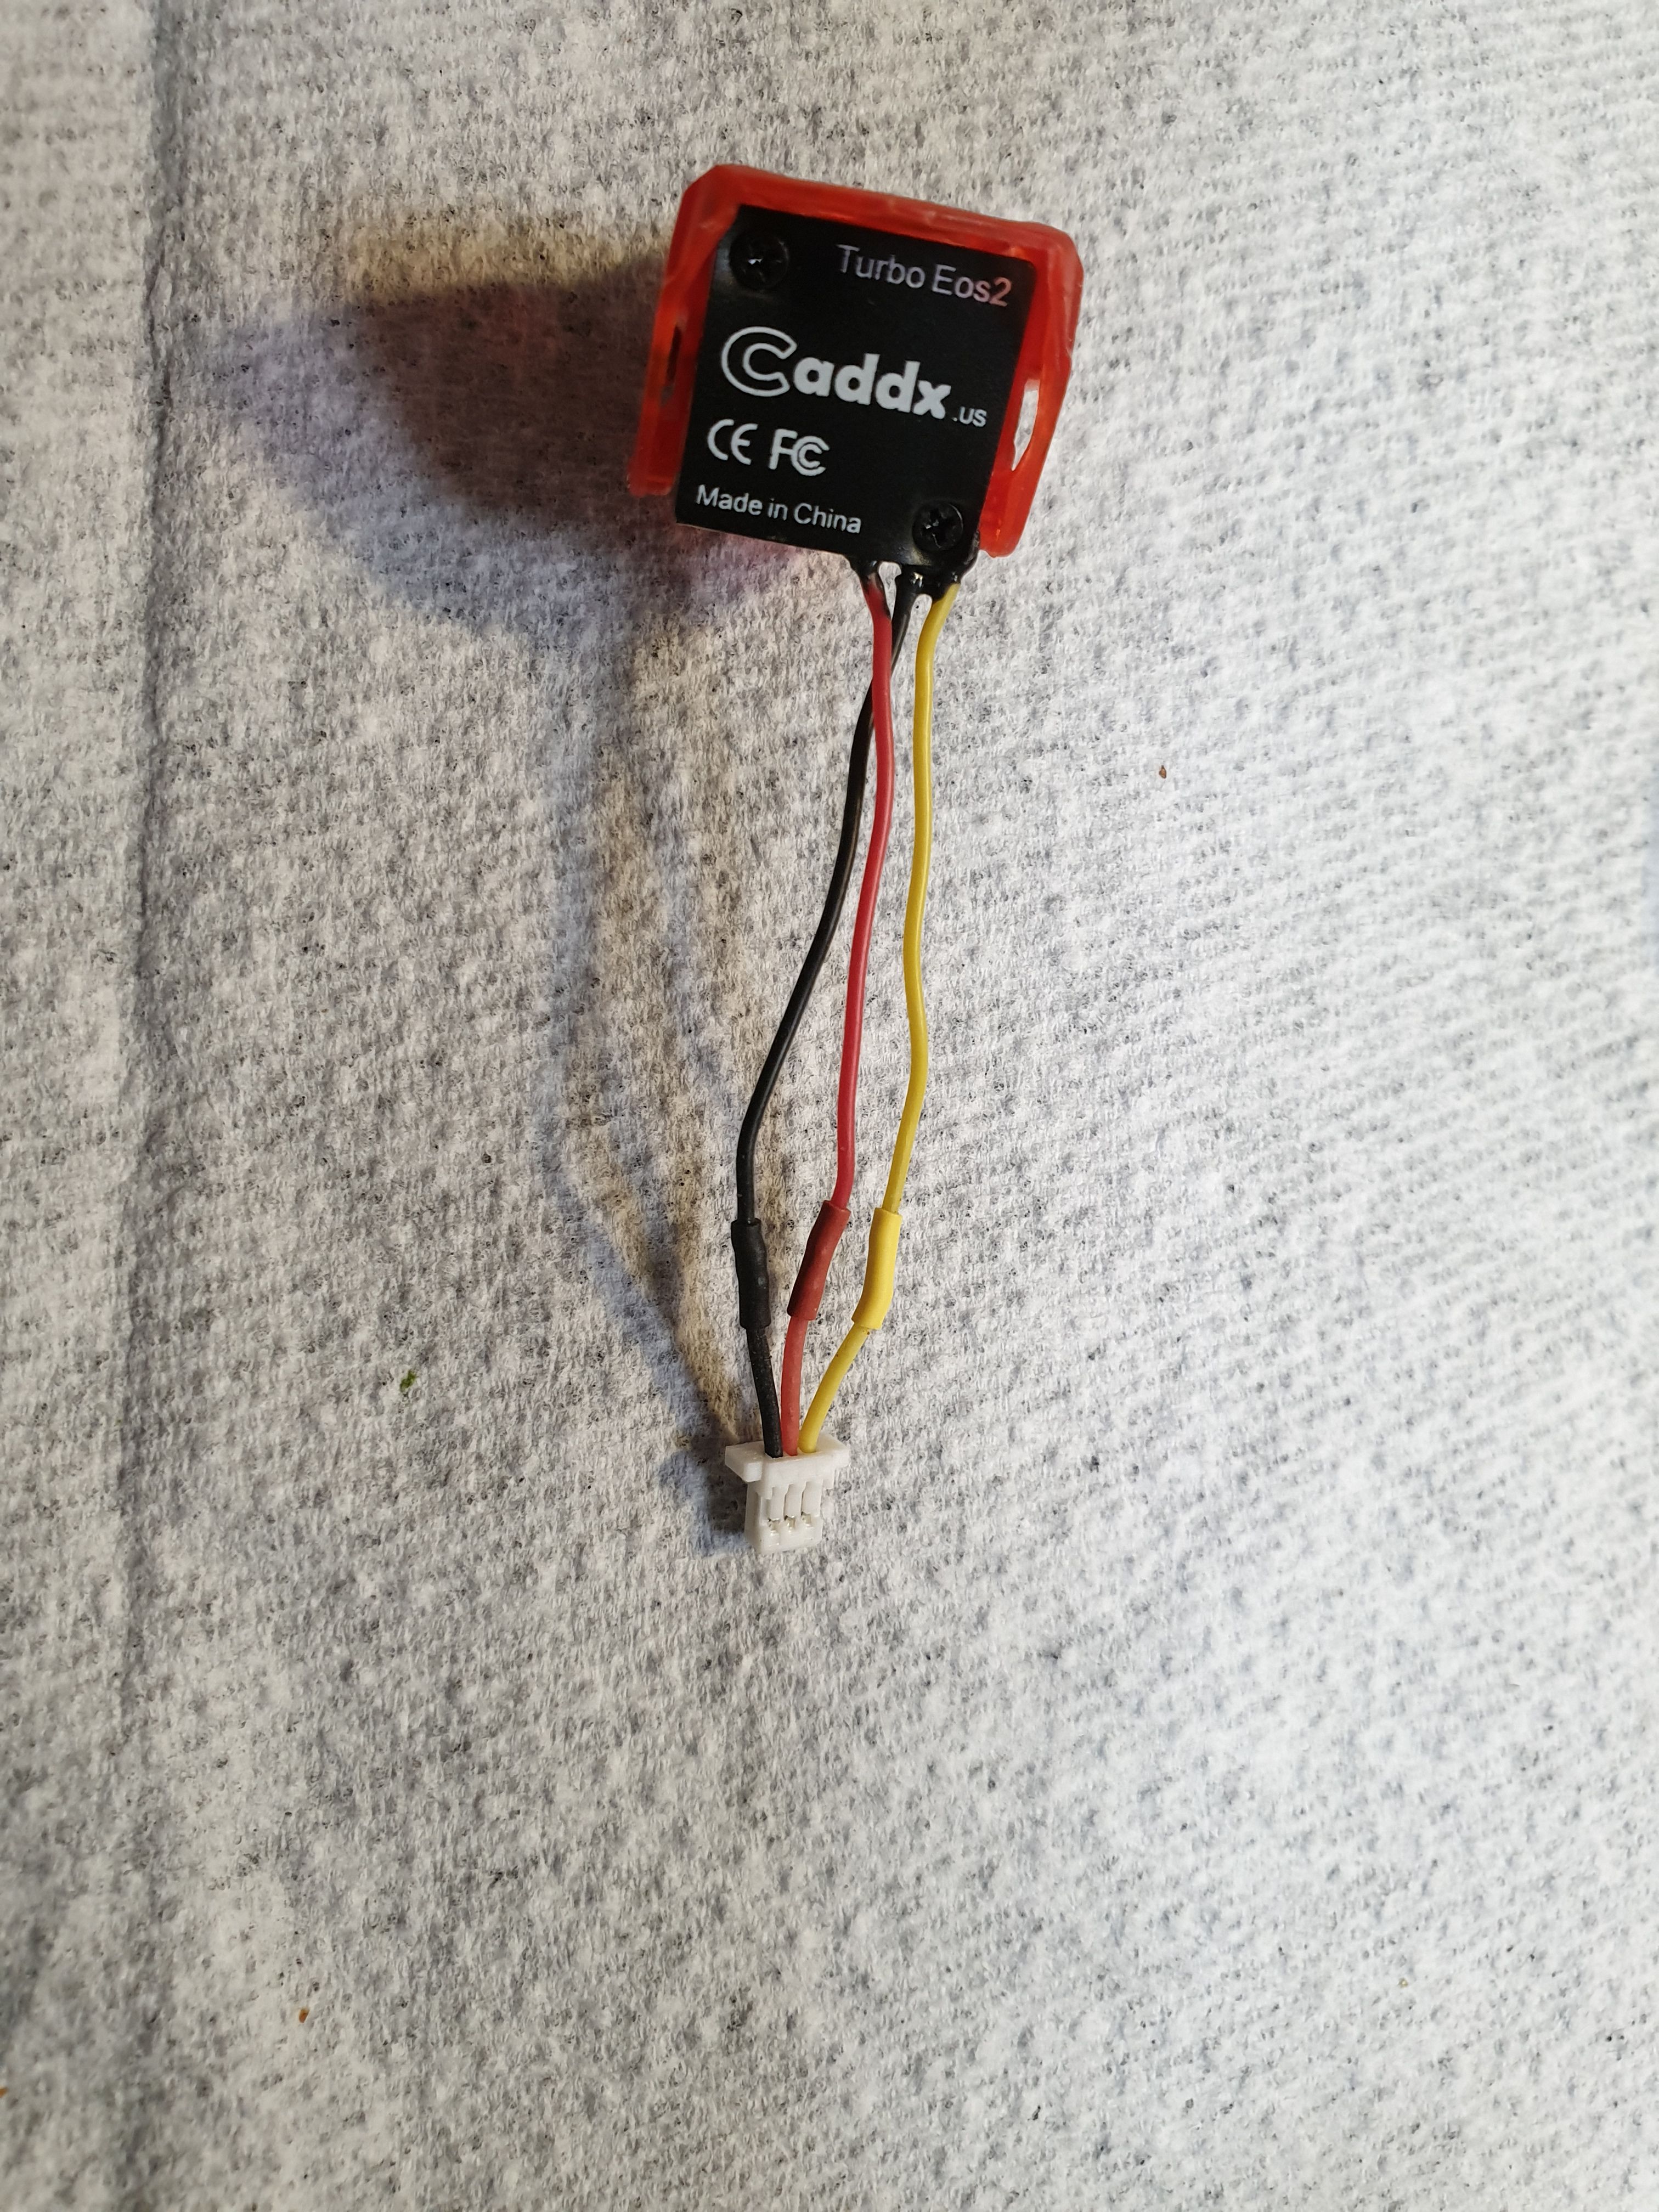
Camera plugged in VTX and dressed into new canopy camera holder. Used camera screws that was bundled with canopy.
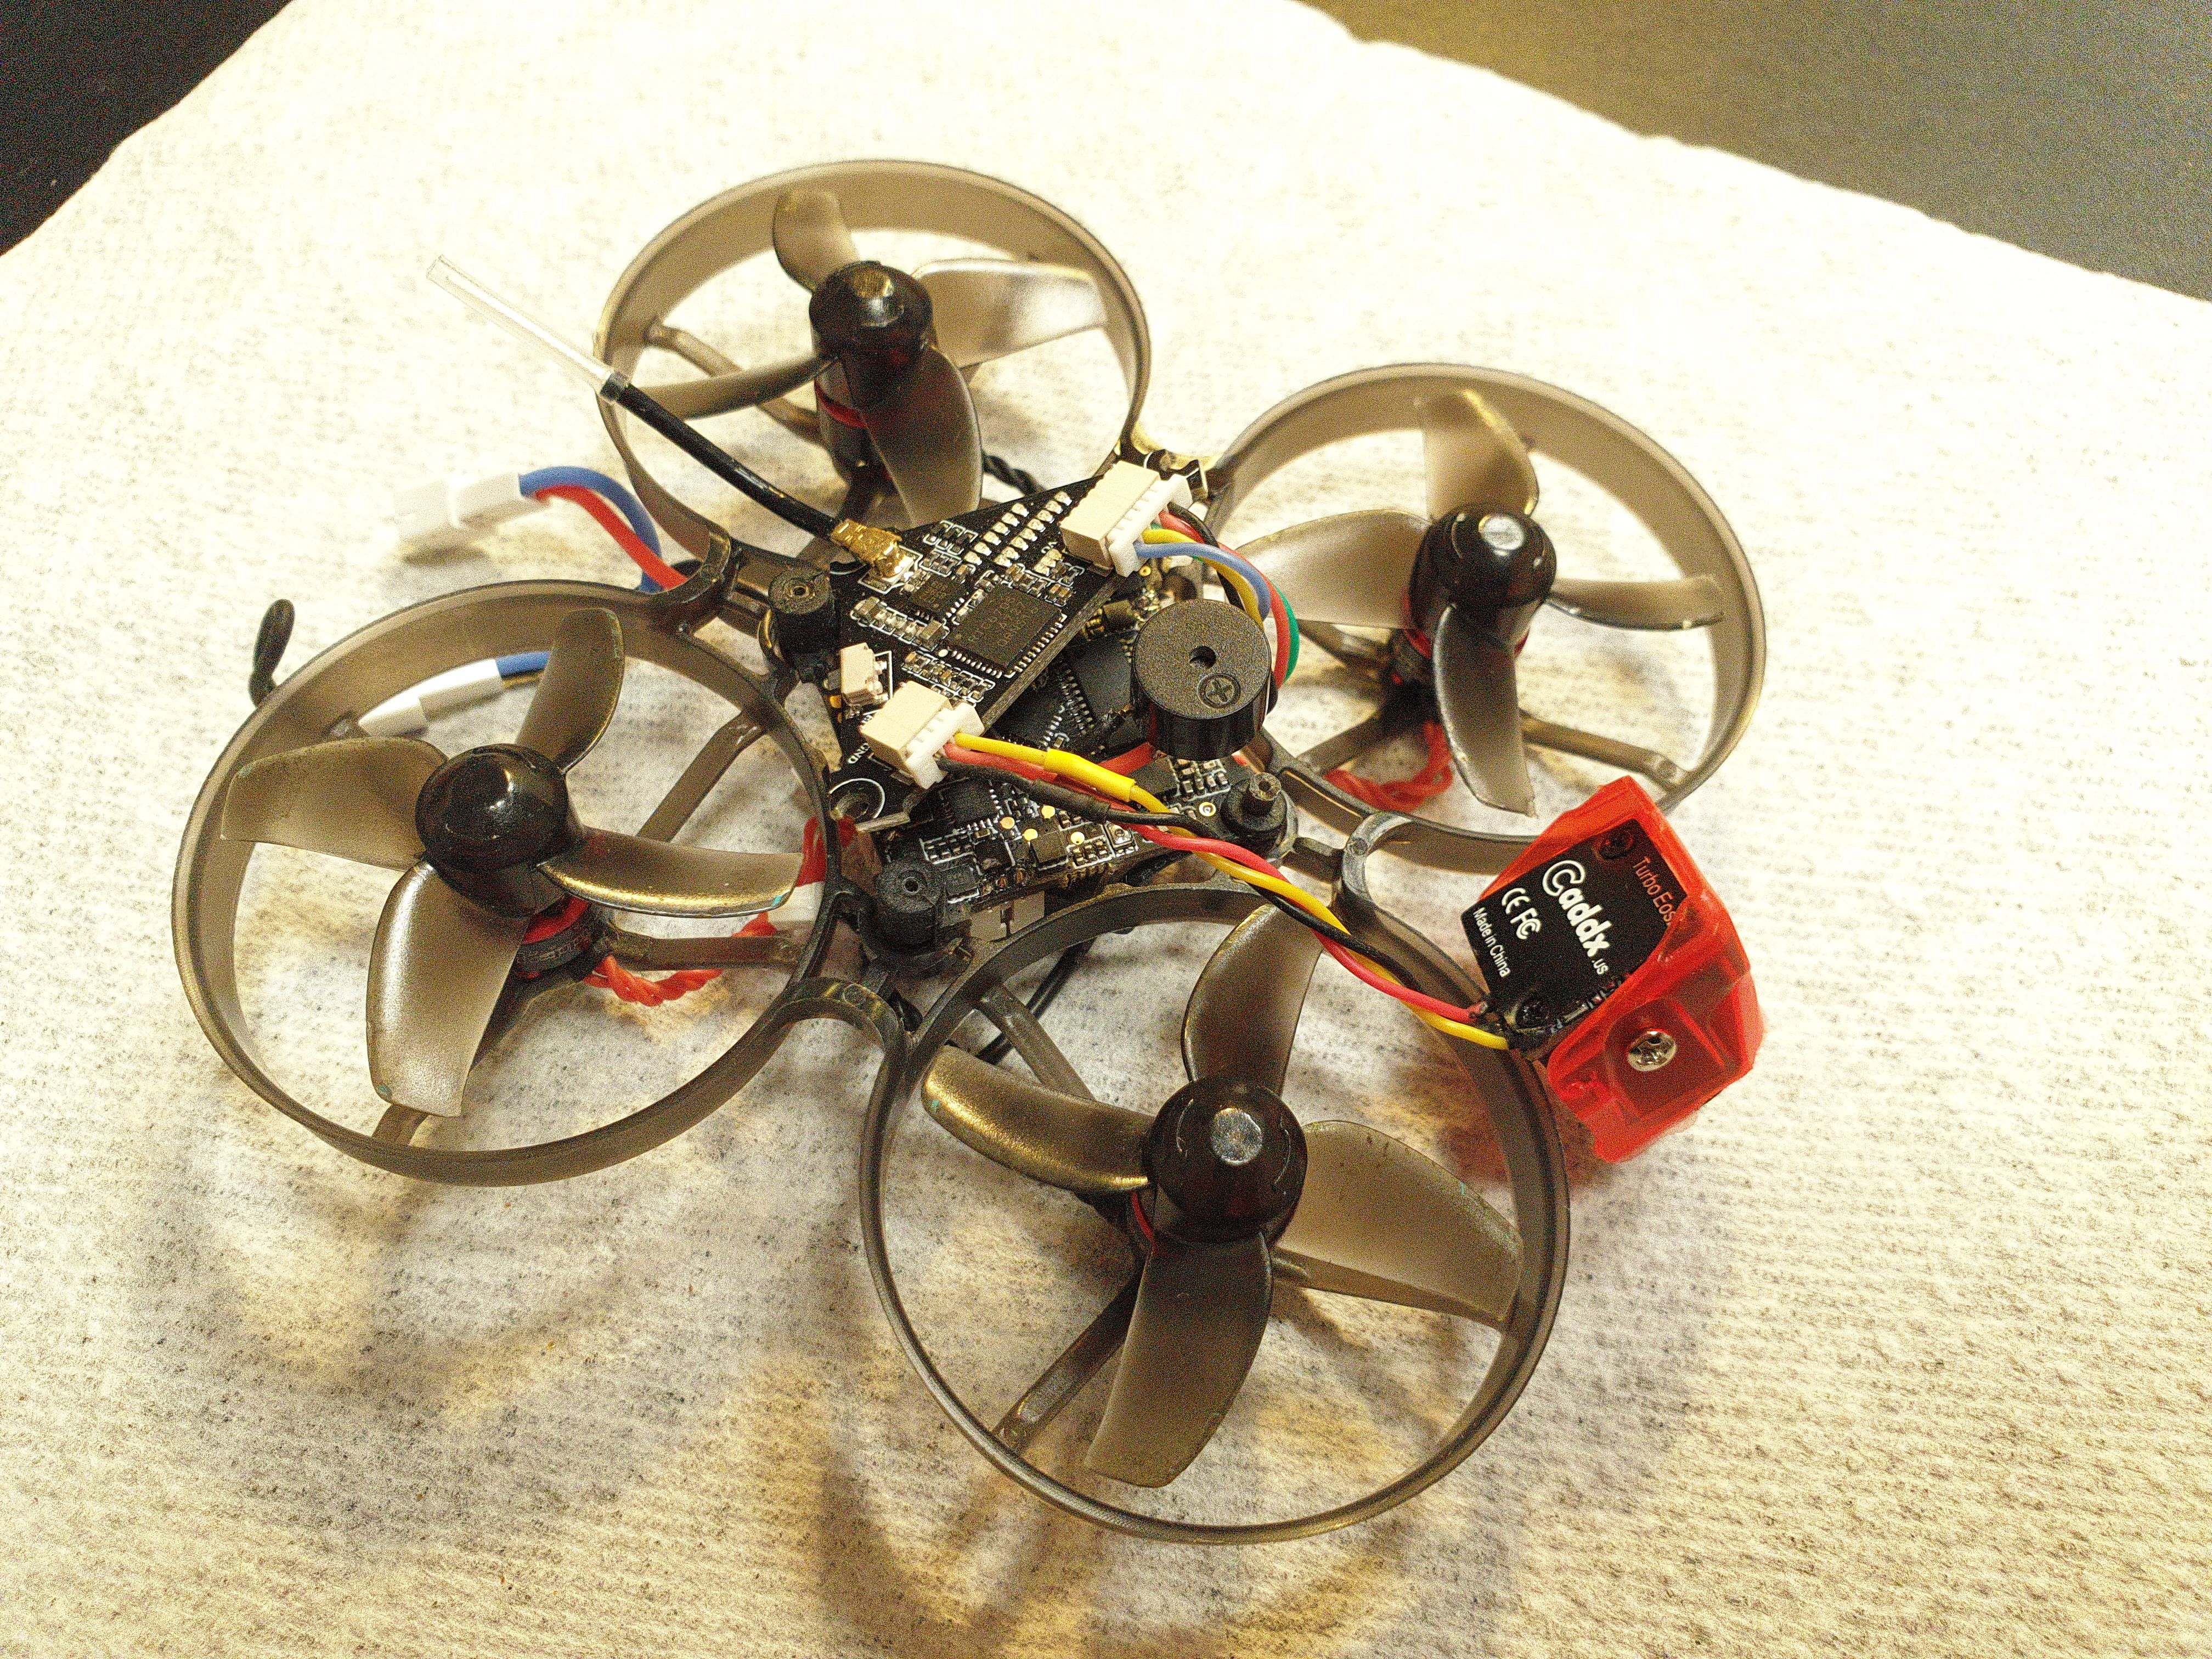
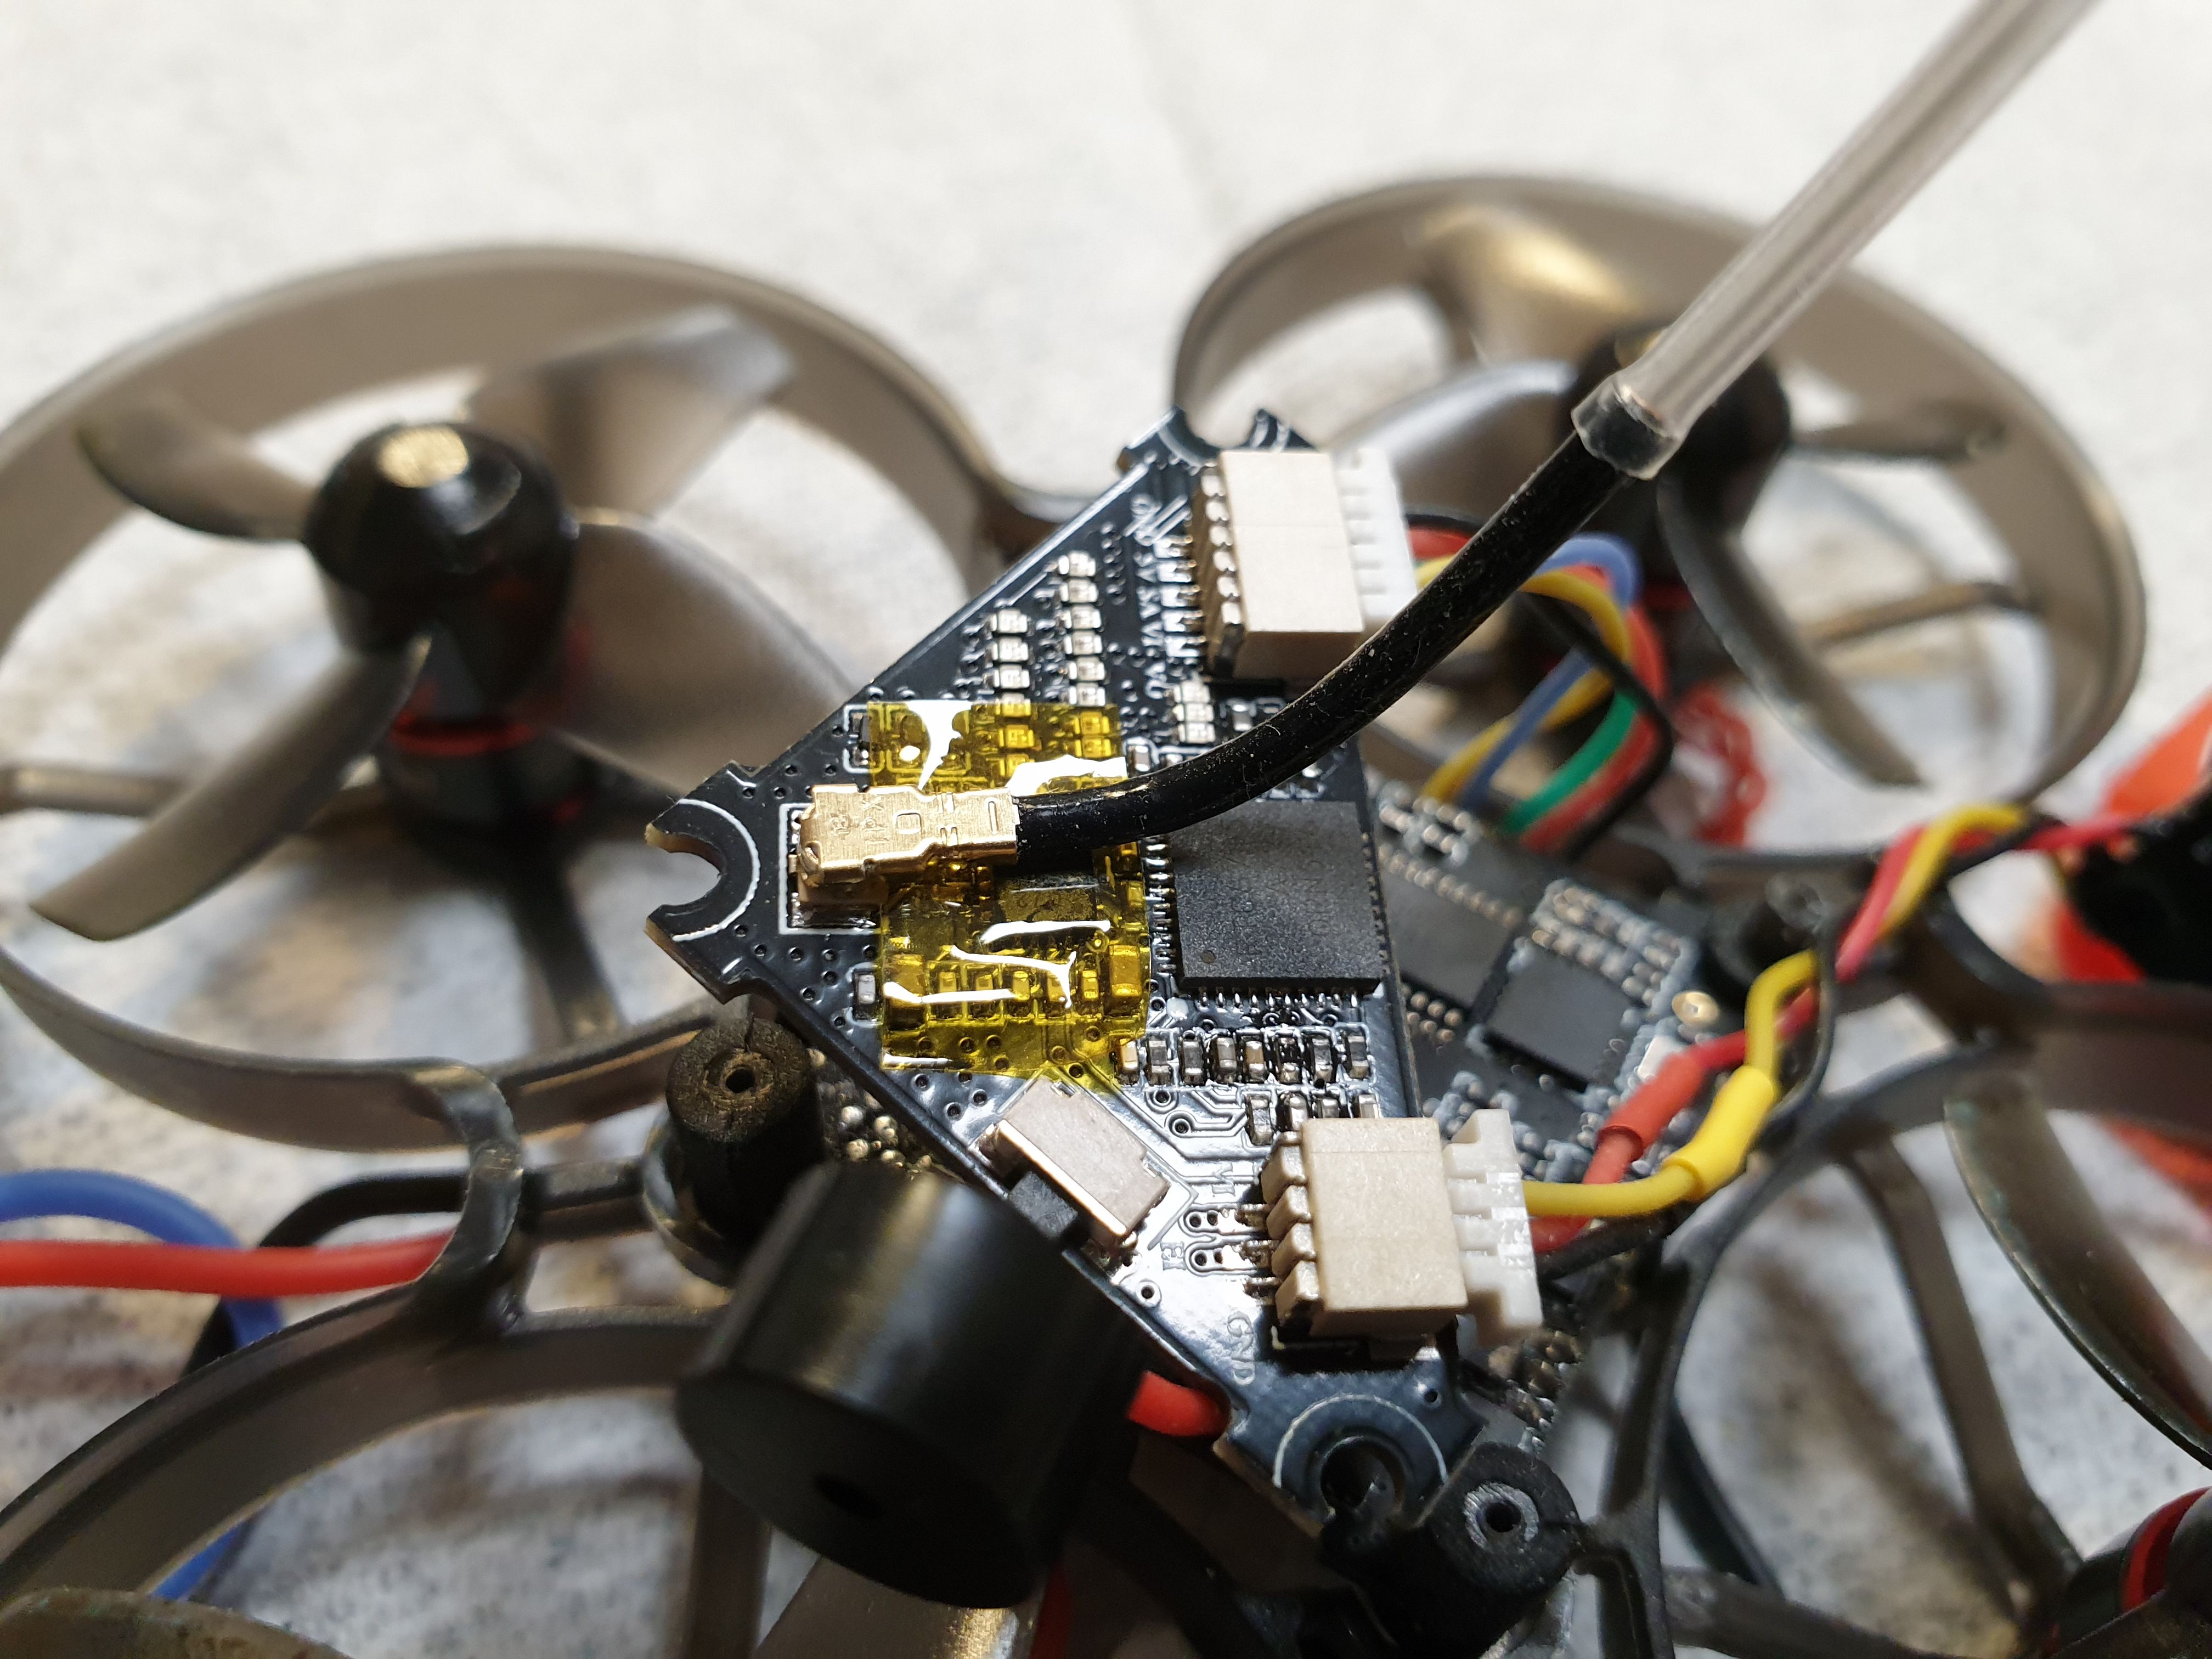
New canopy have no opening for VTX antenna in rear. However antenna can stick out behind camera. To do that it must be turned to front and bent upwards. A little piece of electric isolation tape glued under it to prevent accidental connector short with VTX board. I used kapton tape that is more resistant against heat. Translucent tube in antenna end was loose and required to put a dab of moment glue between antenna and tube base to prevent tube escaping.
To hold antenna in place, alarm buzzer was glued over it on same stock sticky pad used for buzzer mounting earlier. Win-win. In fact buzzer can be glued on any square form piece of double sided foam tape.
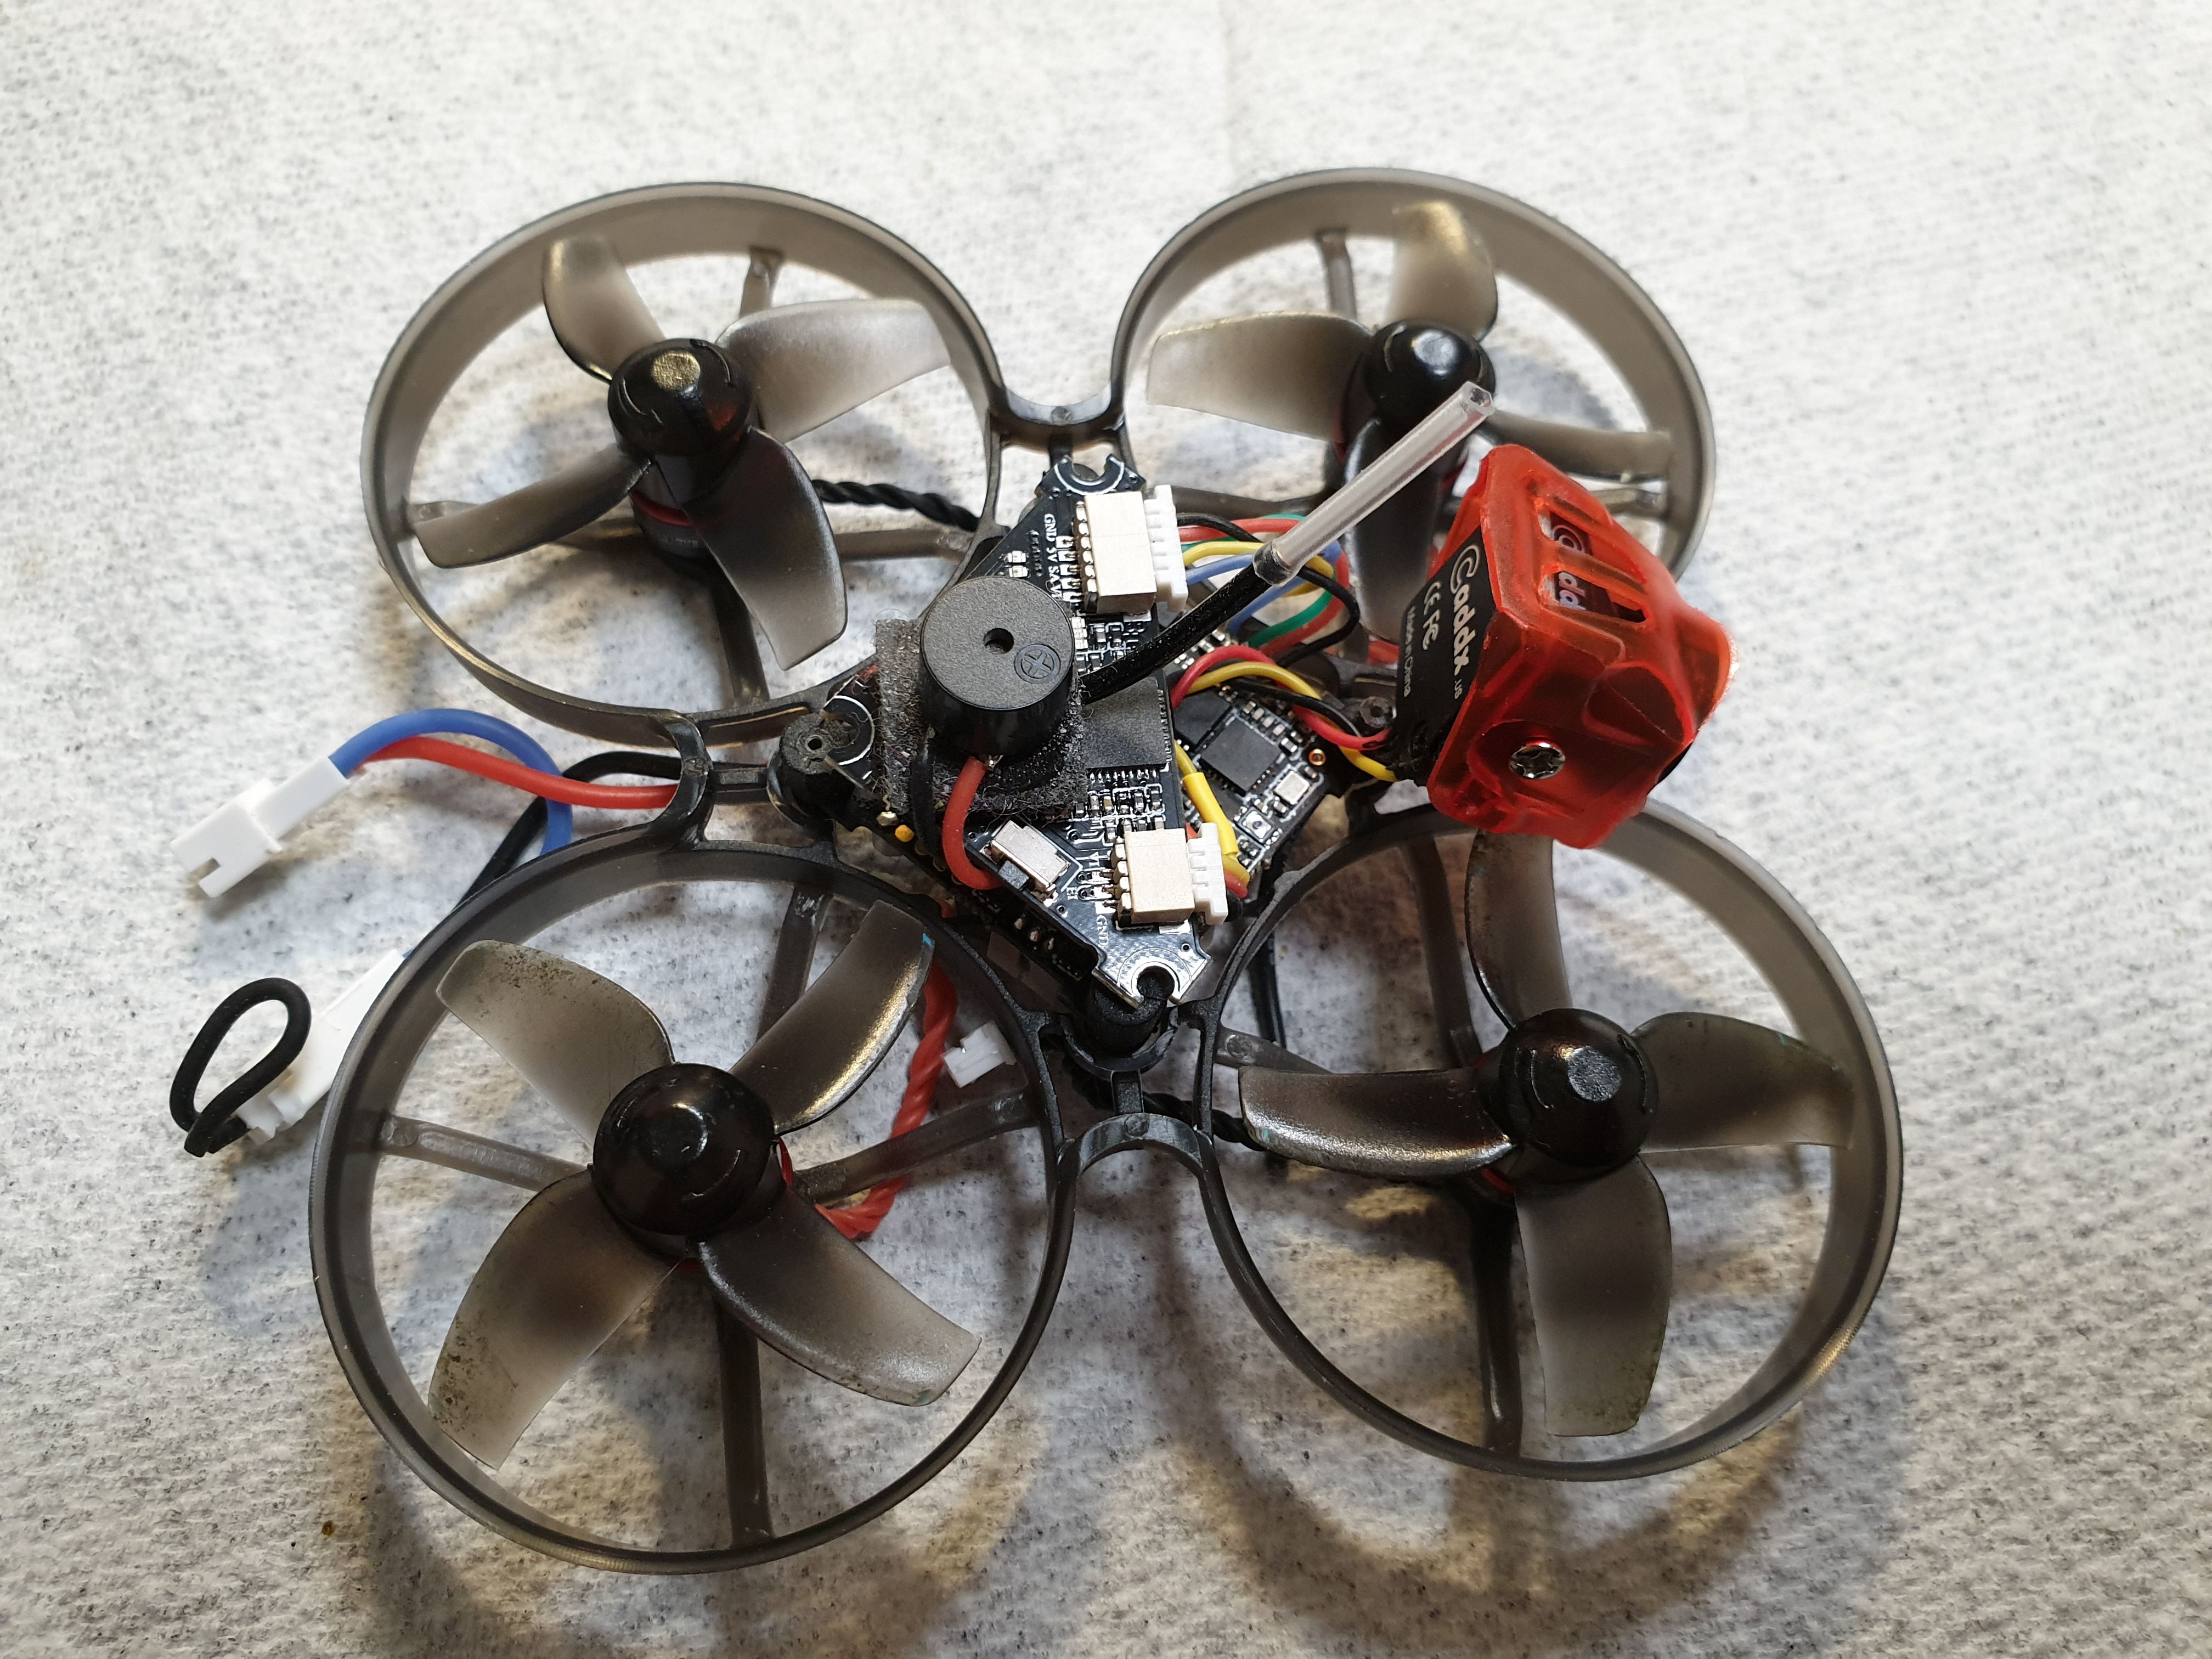
Camera mounted into canopy and canopy installed back on whoop. New canopy screws are too long and I used 5 screws kept from old canopy here. All done.
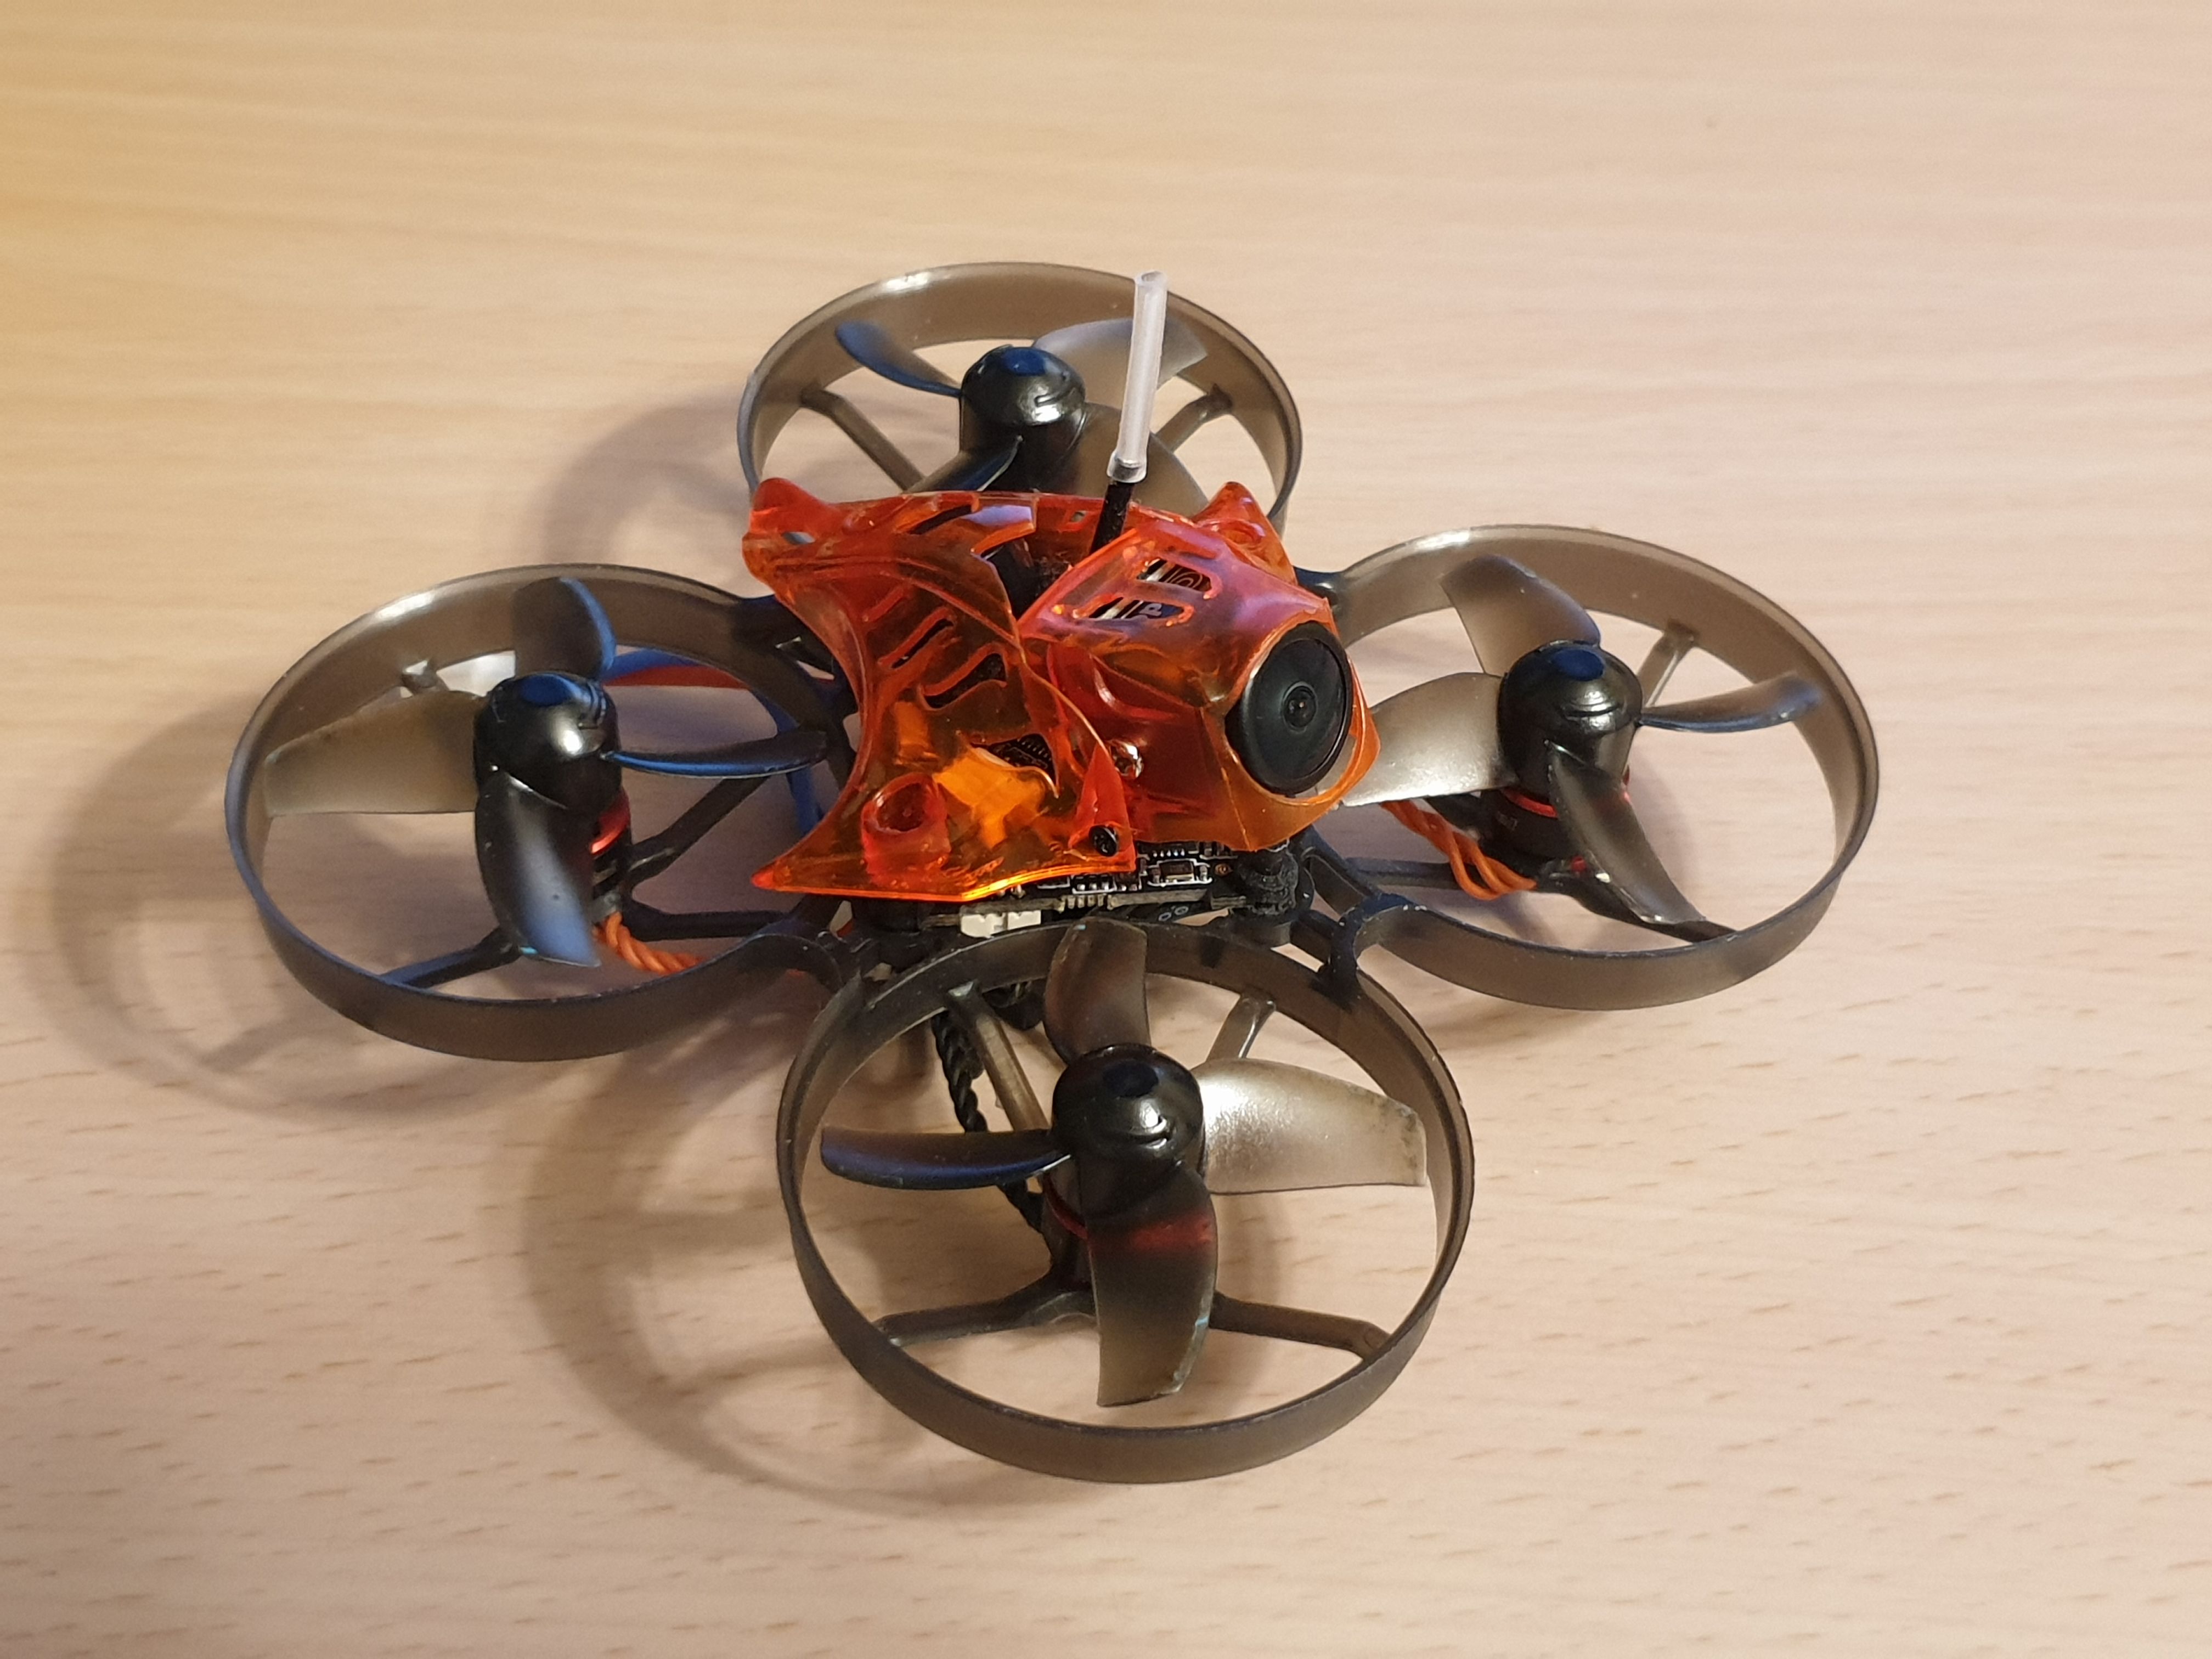
Picture in googles definitely became sharper. Less ghost branches and easier to control. Mobula7 gained 5 grams in weight, but is still flyable like nothing was added. Though noticed characteristic EOS2 camera issue - reddish tint over dark spots. It is possible to almost get rid of it by google picture controls so red is absent in google picture. In DVR recording however it still appear.
Notice about Mobula 7 v2 frame. Upgraded stock frames in both Mobulas to v2 frames after first outside flyday when they get completely trashed in 2S flight crashes. v2 frames are good - crashed against trees, ground, asphalt and even got chewed by bystander's dog. Still in business, no dents or cracks appeared.


Thanks for this nice walk through!
Just wanted to share my experience:
I bought a 'kit' and it came with standard gromets and screws. The head of the screws is much too big for the holes on the TC canopy. I've been searching for the right screws and found them in the screw/gromet set for the UR65. The problem is that there's 1 screw per set and you need to buy 3 sets :)
Also the TC canopy only fits 100mm toothpick. 90mm is no go.
Thanks again!
Good discovery. I also ordered Trashcan canopy for this same Mobula7 when noticed that two little "hinge" screws at camera hood bottom are not strong enough for heavier EOS2. On impacts camera often deliberately tilt forward which is not good at all. So far fixed it with a piece of foam :) I still have other screws in various sizes left from old toy cars and quads. Let see which screws will match.