Primo 1102
 By Jeremy Chotto on Mar 27, 2019
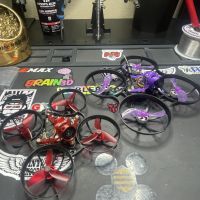
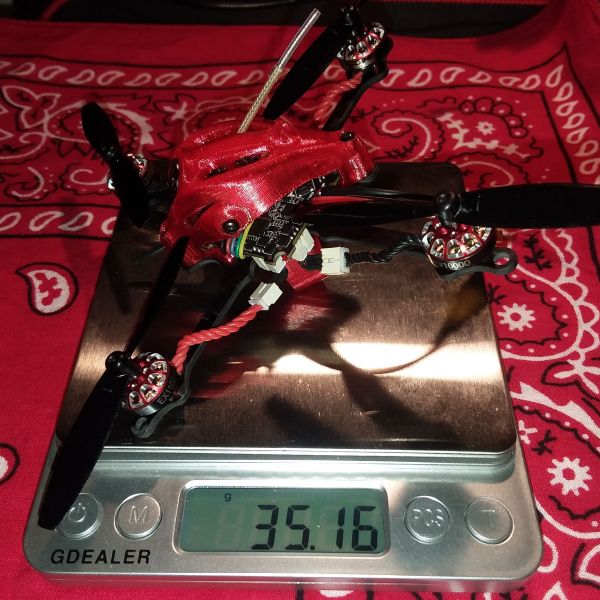
[check out my fight of this tiny little beast on YouTube JeremyChotto].This is a build from gnarly fpv. I most say that I am 100 percent into these micro builds .The way these micros fly and handle is just amazing. This is a really nice build kit from gnarly fpv and the 1102 happymodel motors just put it on another level. This is the primo 080X version but the happymodel 1102 mount perfect on the frame. It is coming in with a pretty light dry weight of 35grams. Going to build the 110 version next. This tiny quad is a Beast.[](https://
Photos
Part List
Flight Controller |
Whoop Flight Controllers for - Toothick FC - RaceDayQuads
(48 builds)
Racedayquads.com
|
$49.99 |
Motors |
4 x Happymodel EX1102 10000KV Mobula7 HD Original Brushless Motors for 2s-3s 75mm-85mm Whoops DIY FPV Drone Quadcopter
(4 builds)
Taco-rc.com
|
$35.96 |
Propellers |
10 Pairs Kingkong 65mm Blade Propeller Prop 20Pcs for 720 8520 Coreless Motor DIY Micro Quadcopter
(30 builds)
Banggood.com
|
$4.99 |
FPV Camera |
Camera/VTX Combos & AIOs for Whoops & Micros
(17 builds)
Racedayquads.com
|
$24.99 |
Batteries |
Gaoneng GNB 7.4V 2S 450MAH 80C Lipo Battery XT30 Plug
(47 builds)
Banggood.com
|
$8.99 |
Great biuld one best ive found so far so Im copying your biuld, saw your youtube and it looks great and flys great. Im not great a betaflight setup do you have CLI dump anywhere that I could copy to get me started?
no I just don't use the top of my throttle don't really see the need for it for me . once u fly it u will get the feel for it and know that u don't use all your throttle . don't get me wrong u could but I like to keep it simple and if I want all my throttle for some crazy reasons it will be there. u will know were your cut off point is again this just my personal preference I don't do throttle limits. set your tpa break point in the pids tab in betaflight to 1460. I like my feedforwad set to 100. rc rate 1.15 roll and pitch 1.20yaw super rate 80 try 75 first .make sure u have air mode turn on mine is on a switch. i run 8k2k for my pid loop on a f4 board of course. it is going to fly nice on stock pids betaflight has come a long way. don't forget anti gravity and dynamic filter turn on.
Those are pretty motors! 👍
You got two connectors for each motor. As I build more toothpicks I am starting to hate the connectors. The base of a crimp is the place where the wire is most likely to break. I am also starting to hate lots of other things therefore I have started building a better toothpick. We'll see how that goes.
Thank u my friend. I don't feel the connector takes from power or efficiency. Don't get me wrong u might can gain 5 r 10 percent more power soldering directly to the board. I think the battery connector plays the biggest part in which I am using 20awg wire and xt30. I am fairly good at soldering but for me to be able to plug and unplug the motors is very useful for me. Think about all the brushless whoops coming out today just about all of them have plug and play connectors. These little quads are so fast and powerful I don't think u are going to notice anything different but I will keep u posted. As far as flight time on this quad I am getting 3and half to 4 minutes and that is getting on it hard. My motor wires were to short that is way I made silicon wire extensions. Thank u again
I'm guessing using 3s or 4s won't change performance too much on a toothpick-style frame? (I have Rex80 components, ~10g heavier). Has Youtube reviewer or otherwise noted a significant bump in performance with 3s or 4s?
3 to 4s nothing is impossible my friend but I don't really see the need for it on these builds. U are going to want to try to stay light and on 2s these quads have all the power u need . 3 to4s would be getting really heavy and for me take from my acro flying style. U can do 3 to4s with larger props and thicker frames. trust me stay within 40 to 45 grams r under and these quads have all the speed u need . check out my flight on the toothpuff on my channel JeremyChotto. going to upload the primo soon.3 to 4s is not needed on a toothpick type build. these quads are beast mode on 2s.
Guides & Reviews
AirbladeUAV has done it again and this time they've brought long range to the 5" class! Based on the popular Transformer Mini, the new Transformer 5" Ultralight adopts a lot of the same design philosophies with larger props and more payload capacity. It can fly upwards of 20 minutes on a 4 cell Li-Ion battery pack and in ideal conditions it's got a range of over 4 to 5 miles. In this guide I'll walk..
Read moreWith the release of the DJI FPV Drone cinematic FPV has become a lot more accessible, but you certainly don't want to crash a $750 drone! The QAV-CINE Freybott is a compact, lightweight cinematic FPV drone that can take a hit and keep going. It's a lot safer to fly indoors and around people. With a naked GoPro or the SMO 4k you can capture some great stabilized footage. In this guide I'll show you..
Read more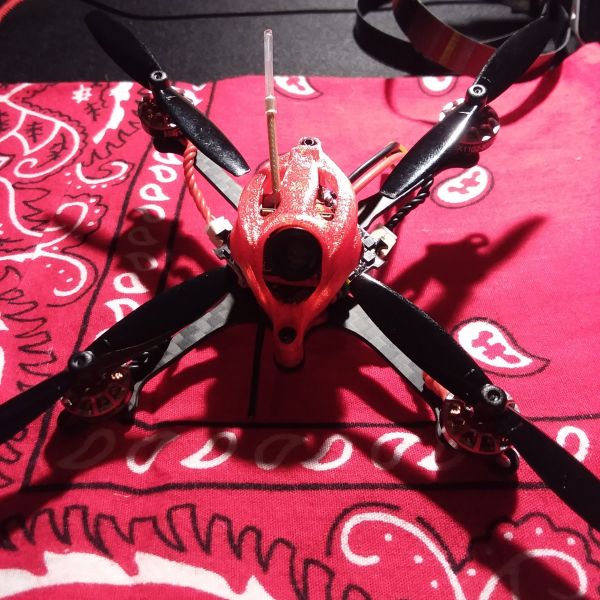
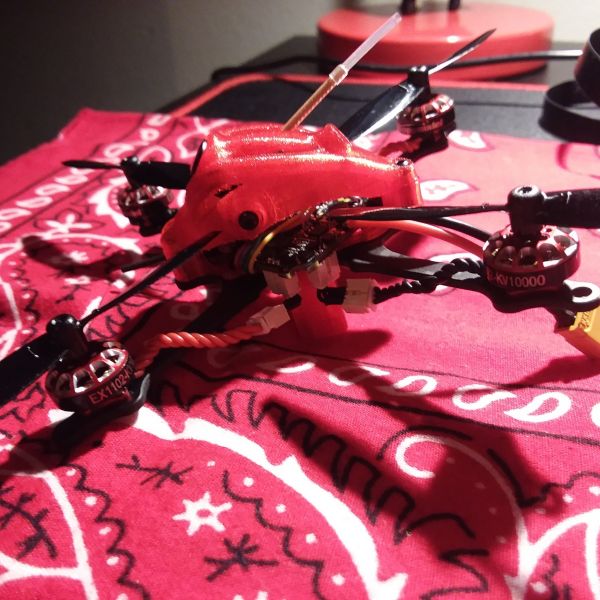
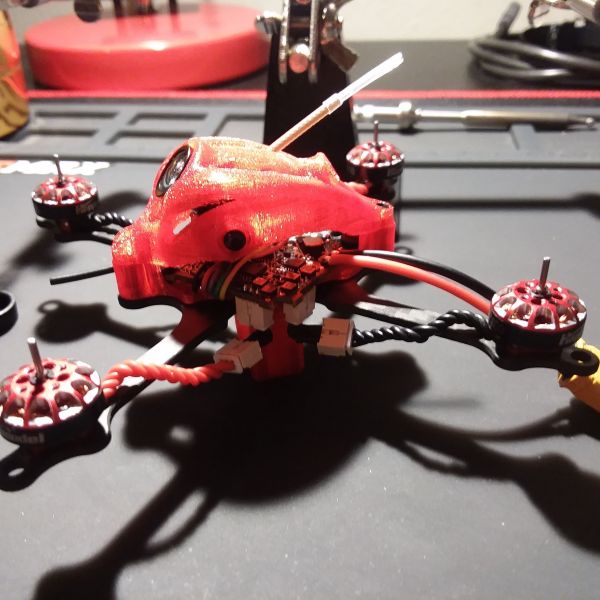




do you have any photos how you mounted the AIO board (without the canopy) and which direction you soldered the battery leads? I'm not sure if the rubber isolators should be mounted with the notch toward the top or bottom. also seems like they should be bolted down but no bolts of the correct length were supplied with my kit. thanks!
your battery leads are labeled on the fc. red is plus black is minus. the fc can be mounted how ever u want. put the rubber garments in the fc and mount it in the bottom u will need some m2 4mm screws are 5mm. i suggest buying a small kit.
thank you. actually i see that you went from the top on the battery lead in the last photo. it looks like I'll have to procure some additional screws... wish they would have been included with the kit.
just make sure u use two rubber garments for the mounting of the fc. one in the front one in the back. look on Ebay for 2m 4mm button head screws