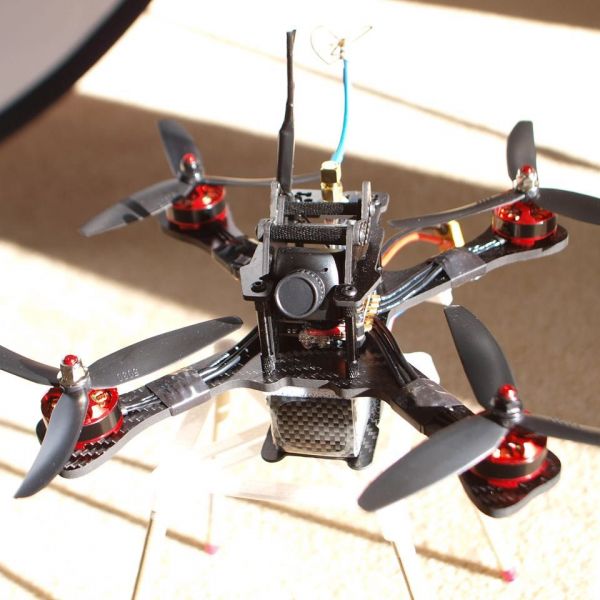
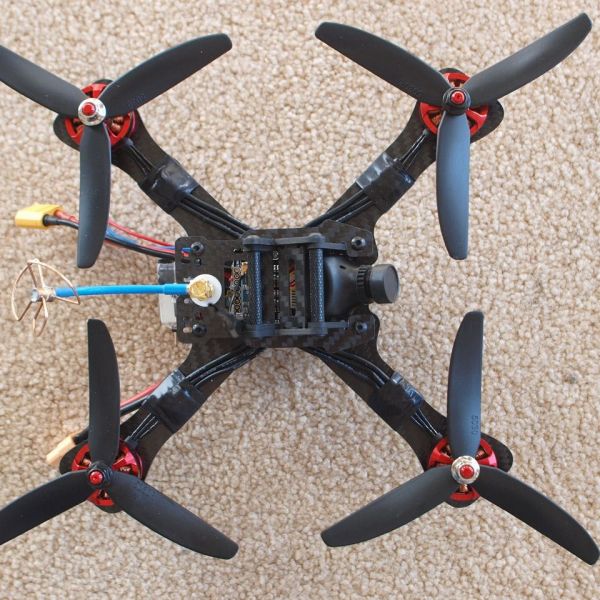
I created a series of videos about my experience setting up the Racercube All-In-One package. I wanted to build my first mini-quad and this looked like it was going to be a great setup. However, there were some things that I had to modify to install this on a 210 sized mini quad in addition to some poor design choices that required workarounds. I was successful in completing the build and am just working out little issues.
Please visit my YouTube channel for the Racercube:
https://www.youtube.com/playlist?list=PLT7c4vznV5Dp_TUp1E5oYWATYdWe5PSsy
FITMENT
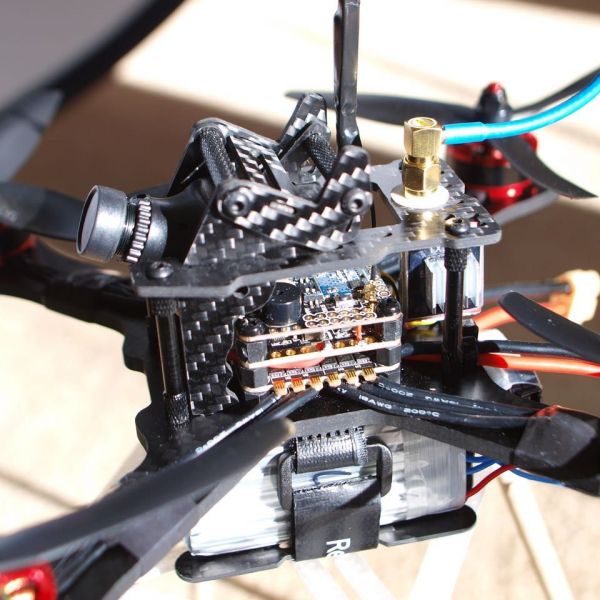
The stack height of the package is quite high. The mini quad frame I used was made for a 2 board package with the camera mount quite low. I've had to reduce the standoffs height between the frame and ESC and ESC and Flight Controller board by 2mm each, giving a vertical reduction of 4mm overall. Additionally, I had to grind 5mm vertically from the frame. The total is 9mm more vertical clearance with 1-2mm to spare.
For ultra compact X frames 210mm and smaller, you will run into FPV camera clearance when running the standard square housing HS1177 type camera. The SD card impinges on the forward clearance for lowering the FPV camera angle. On my frame, removing the SD card provides enough clearance to almost match the lowest angle of the Go Pro mount. I modified the frame further by drilling new camera mount holes diagonally 4mm up and forward. The compact frame already had the camera lens exposed to possible contact during a crash and this modification put the camera even further into harms way.
LittleBee ESC
Pay no attention to the motor markings on the 4-in-one ESC. The numbers do not correspond with the motor layout of Cleanflight. After puzzling about this for a while, I traced the pre-soldered micro plug wires and found that they are correctly soldered to correspond to the correct physical motor layout.
The power lead location on the ESC faces forward on the frame which is not ideal for me since I prefer my battery leads and voltage monitor to be on the rear of the craft. Rotating the board 180 degrees will place the female micro connector beyond the reach of the pre-soldered PWM wires/male micro plug. I plan to install the ESC in the standard position and extend the battery cables to the rear of the craft.
FIRMWARE UPDATES
After fitting the unit into the frame, I decided to upgrade to Betaflight and upgrade BL Heli. Using the Cleanflight/BL Heli passthrough, the new BLHeliSuite identified the 20A Little Bee ESCs and easily allowed me to upgrade to the latest version. Upgrading the firmware on the FC was a lot more complicated. If you try to upgrade by using either Cleanflight or Betaflight GUIs, the F3 Evo FC will disconnect. If you bridge the boot pads on the bottom of the FC, turn on No reboot sequence and Flash on connect, it will also disconnect when plugged in.
While I was unsuccessful upgrading the F3 Evo FC using the GUI, I was able to workaround by using the ST Electronics DFuSe package (http://www.st.com/en/development-tools/stsw-stm32080.html) See this video for a demo:
and then download your favorite flavor of *Flight firmware to your computer and upload it using the DFuSe package.FRSKY CLONE RX
After checking that the built-in FrSky receiver dip switches were in the proper positions to enable the receiver and to be in SBUS mode, binding was very straight forward. It wasn’t clear how to set failsafe on the “Throttle 3ch” as mentioned in the documentation.
MW-OSD seemed to be up to date, and I was able to easily connect using it’s dedicated USB port. Be sure to power the FC first as the USB connection doesn’t seem to completely power-up the OSD hardware. You will see the COM port, but will not be able to connect. Overall, this is a huge improvement over using a FDTI adapter on a standalone MinimOSD unit.
I fiddled with the RSSI settings in Betaflight and MW-OSD for some time and was not able to get it working. A true disappointment, but I could live with it. After I got the quad flying, I kept noticing that Aux 5 in Betaflight always had a changing value. I came across an article by Oscar Laing https://oscarliang.com/rssi-ppm-channel-taranis/ and although I don't have a Taranis plus, I had what looked like a signal value.
You have to turn off the RSSI_ADC in the configuration tab and on the receiver tab, select RSSI Channel 9. You then have to go into MWOSD configuration and turn off Use PWM. Turn on Use FC RSSI and set the RSSI min, RSSI max and RSSI alarm.
I have mine set to:
235 RSSI Min
899 RSSI Max
30 RSSI Alarm
DOCUMENTATION
The documentation, although adequate, left a lot out that you have to glean from the information presented, or investigate further through physical inspection, or search the Internet for common F3 Evo, Cleanflight, and Betaflight issues. This was a very technical installation that could be easier by improving the documentation. Sort of the opposite of what you expect from and all-in-one package.
ANNOYANCES
Sometime during the build, I became aware and annoyed of the built-in buzzer. Eventually, it will start beeping when the transmitter is not on. This is good and bad. I now instinctively turn on radio every time I connect the USB to the FC. And, I power up the whole system since even plugging the USB into the FC alone, it will still produce a faint beeping sound until both the FC and TX are powered up.
MAIDEN FLIGHT
Now that the build is complete, I have begun to fly it and continue to work through any issues. On my setup, the default Betaflight settings work great. I’m sure that as I fly it more, I will continue to tweak the settings, but this is the first time any build has worked great without any tuning. However, all is not great. The FrSky radio range is unacceptable. If you like to fly close by, this may not be a problem. I like to fly in big spaces and usually my range is limited by my 5.8ghz FPV system. I tried several different high-gain antenna combinations, even going so far as attaching a pigtail on the Racercube RX to fit a 7dbi antenna. Admittedly, I was using the range test mode on the TX and the small differences in my house would increase proportionally at least 30 times outdoors. For the big space flying I would do, it will not make a huge difference. I finally decided on a plain dipole with the antenna cut to as close to 31.23 mm as possible. It was just a tiny bit better than the stock antenna.
CONCLUSION
I am pointing out a lot of problems in this review but overall, this is a nice package. All of the major functions are usable and it looks great. In the end, the FrSky (clone) receiver range is a true disappointment and I would not buy this product again for that reason alone. You cannot remove the top board and use another receiver since the SBUS input is on that board along with some other good stuff. But, I am going to enjoy this mini quad and keep it as built. Eventually, I may strap on a better RX, but that sort of defeats the purpose of the Racercube. I don’t plan on racing so maybe this is the perfect product for racers who are on a small course. Just use a 250 or larger frame if you are not good at making modifications.
Photos
Part List
Frame |
GEPRC GEP-TX Chimp 4 5 6 Inch 180MM 210MM 230MM Carbon Fiber Frame Kit with PDB LED XT60 Camera Moun
(6 builds)
Banggood.com
|
$62.69 |
Flight Controller |
RacerCube Integrated F3 EVO 4 In 1 20A F396 ESC Frsky 8CH PPM/SBUS Receiver for X Racing Frame
(2 builds)
Banggood.com
|
$56.99 |
Motors |
4x 2205 2300KV Brushless Motor 3-4S brushless motor QAV-X 214 220 250 FPV
Ebay.com
|
$25.99 |
Propellers |
8 PCS Propellers GEMFAN 5030 50*3 3-blade Props CW for Multi-Copter
Ebay.com
|
$3.99 |
FPV Camera |
1/3" Sony 600TVL CCD HS1177 Mini FPV Camera 2.1mm 2.5mm 2.8mm 3.6mm Lens QAV210 180 day Version
Aliexpress.com
|
See Site |
FPV Transmitter |
TX360 5.8G 600mW 40CH 5V Wireless AV Transmitter Set for FPV Aerial Photography
Aliexpress.com
|
$12.37 |
Receiver |
2016 HOT FPV 5.8Ghz Circular Polarized Clover Leaf Antenna High Gain Aerial Set w/SMA(THA001201+THA001202) SEP 07
Aliexpress.com
|
$3.81 |
Batteries |
720P HD Baby Monitor Video Pan/Tilt Security Camera Wireless 2 Way Audio 2.4GHz
Ebay.com
|
$99.99 |
Great review! It really sounds like you had to make a lot of compromises to use that stack. I think a 30A 4-in-1 and an Omnibus F3 is probably an easier and cleaner solution. I did a similar build with the same frame. The only thing I'd have done differently is replace the ESCs with a 4-in-1. BTW, nice job keeping the price low!
Guides & Reviews
AirbladeUAV has done it again and this time they've brought long range to the 5" class! Based on the popular Transformer Mini, the new Transformer 5" Ultralight adopts a lot of the same design philosophies with larger props and more payload capacity. It can fly upwards of 20 minutes on a 4 cell Li-Ion battery pack and in ideal conditions it's got a range of over 4 to 5 miles. In this guide I'll walk..
Read moreWith the release of the DJI FPV Drone cinematic FPV has become a lot more accessible, but you certainly don't want to crash a $750 drone! The QAV-CINE Freybott is a compact, lightweight cinematic FPV drone that can take a hit and keep going. It's a lot safer to fly indoors and around people. With a naked GoPro or the SMO 4k you can capture some great stabilized footage. In this guide I'll show you..
Read more


Yes! This was a terrific writeup. Thank you for the detail and explanation.