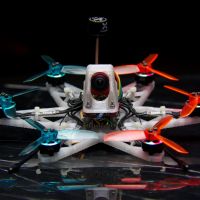
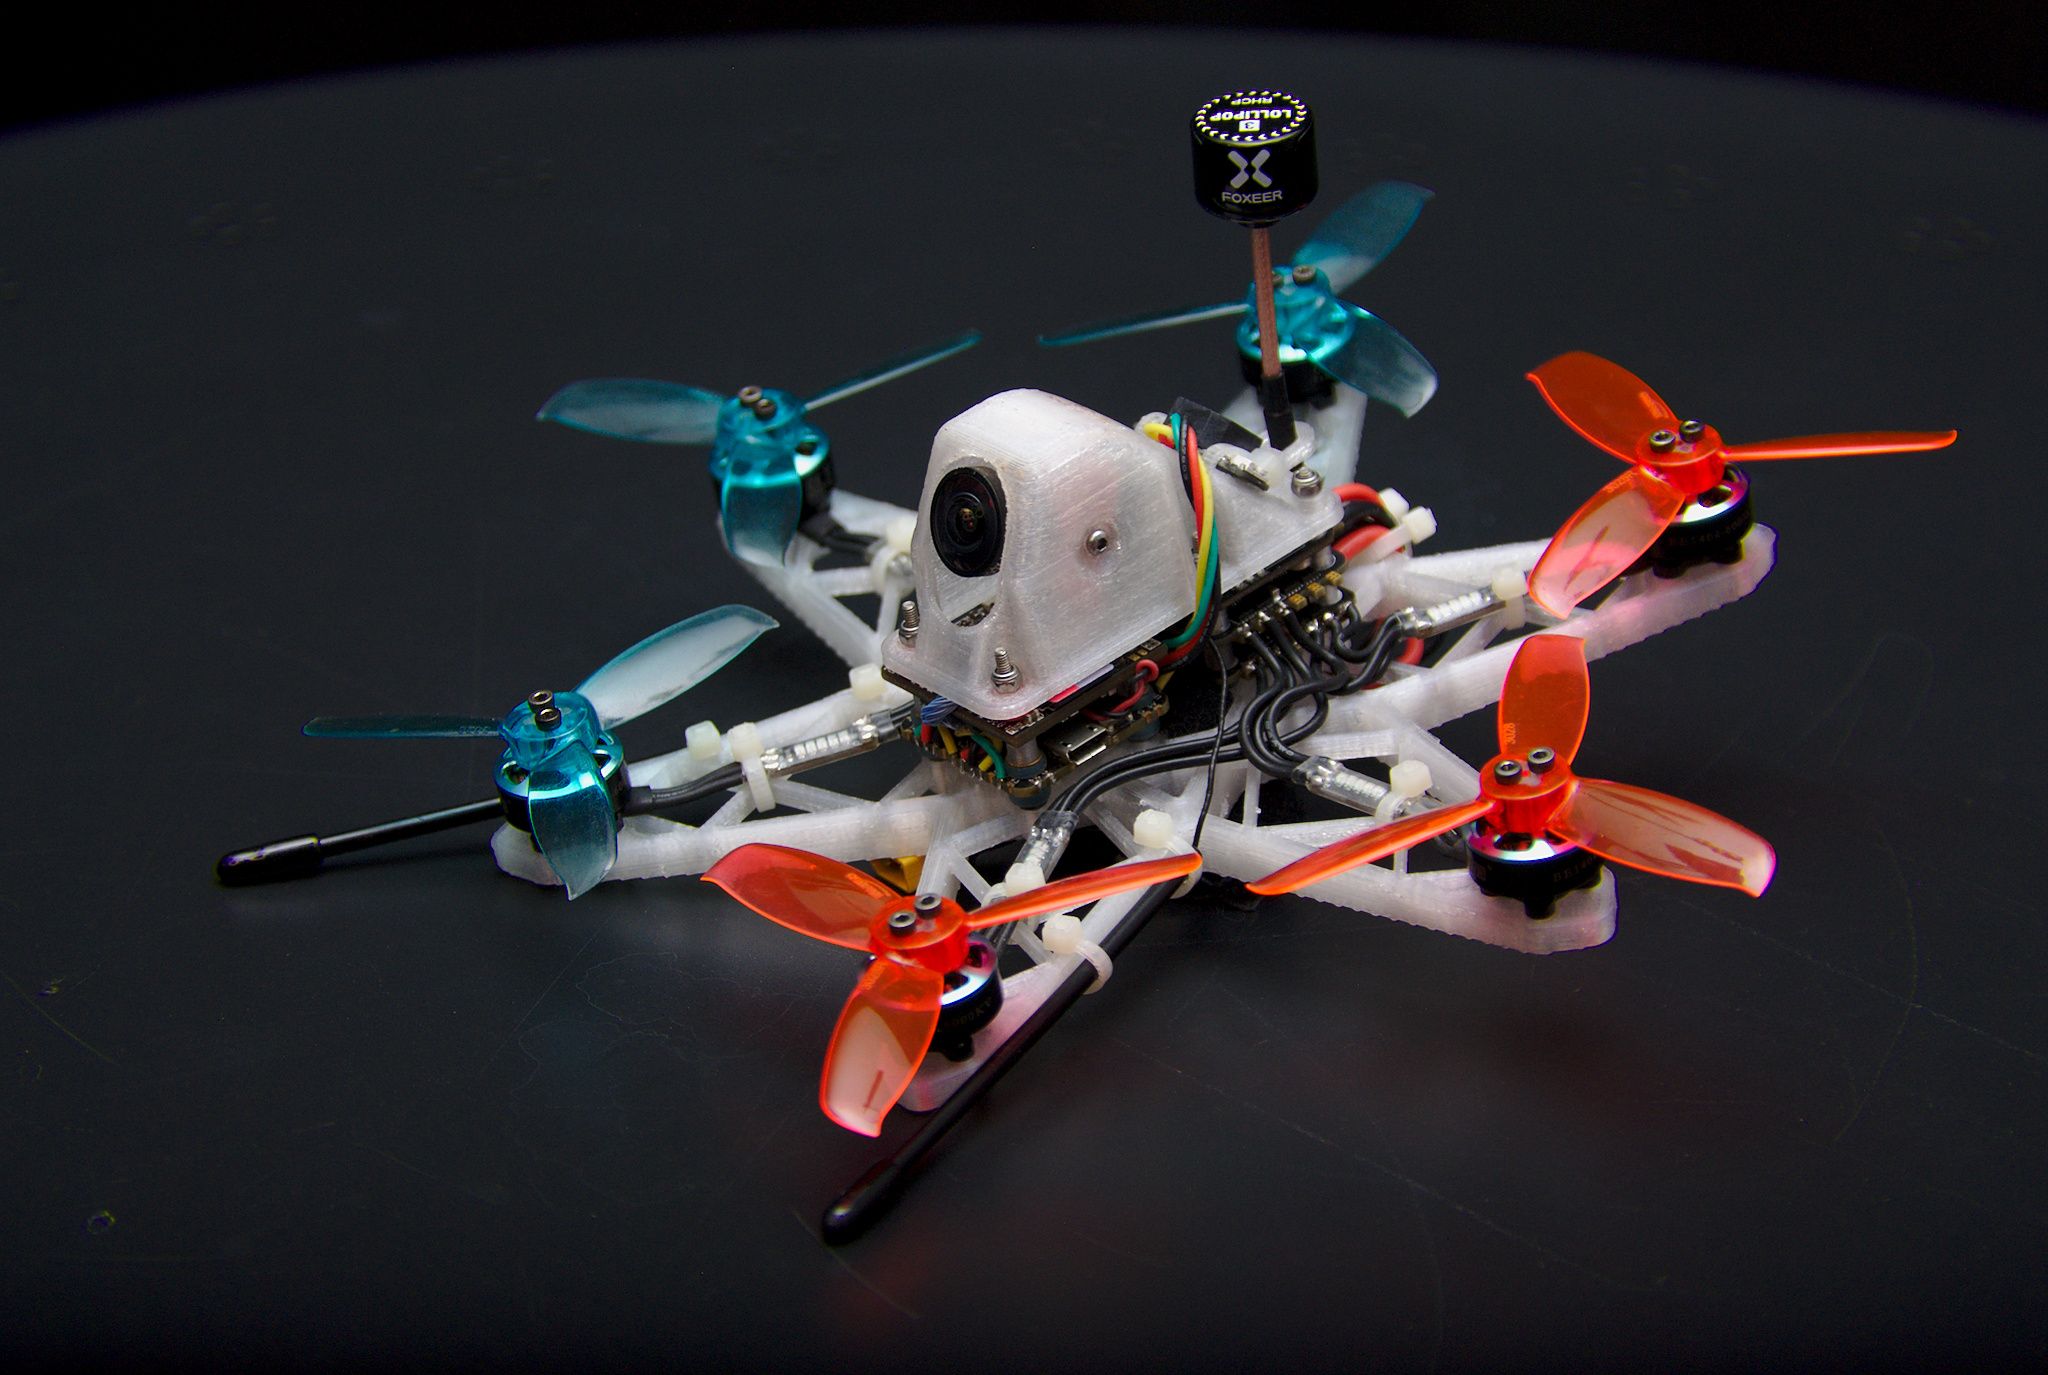
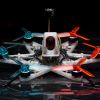
Why a Hex?
Ever since I got my Eachine E011 about a year ago, I've been obsessed with drones, and I started using my 3D printer to create my own, progressively larger drone frames. After flying my 3D printed 3 inch quad for while, I thought that with my spare motors and props, I could make a hexacopter. It's not the fastest nor the most efficient setup, but it was a fun little project.
The following is some footage I cut together from a few flights. They're not from the latest version of my frame, so there's still a bit of vibration in places.
Flight Characteristics
The hex is running Betaflight 4.1 using RPM filters with 48kHz JESC firmware. It's pretty hefty, with its dry weight coming in at around 184 grams. Using Onbo 3s 850mAh batteries, I can get flight times that last around 3:40 to 4:10 minutes with some freestyle, and can reach up to 8 minutes doing slow cruises. On GNB 3s 550mAh batteries, I usually get flight times that last around 2:30 minutes. A 3s 650mAh LiPo might be the sweet spot between flight times and performance, but I haven't gotten around to trying them yet.
In comparison to 3 inch micro quad, it's definitely less agile, but I do like that it has more momentum to throw around. It's nice for cruising around and doing light freestyle, though I have not flown any 5 inch or toothpick-style quads to really compare it to. The motors don't have a lot authority, due to its larger wheelbase and mass, so it required me to push P/D gains a lot higher than the default PIDs. However, the motors come down cool and PID tuning has been fairly simple, thanks to having a blackbox capable flight controller and following along Mark Spatz's tutorial series on PID Tuning Principles.
My PIDs in Betaflight with the Gyro and D Term filter multipliers both set to 1.5
Step Response graphs generated by PID Analyzer
Durability
I actually don't know how the frame itself will hold up in a hard crash as I've never had any. However, the canopy has remained unscathed after bouncing off dirt as a result of a flyway (don't make major changes to a frame and fly with the same aggressive tune...). The bottom plate also seems pretty tough, judging from the few times I've crash landed into dirt or grass from mechanical/electrical issues. But I'm not so sure if it could survive a hard crash on to concrete.
Design Process
I am not at all an engineer, so my approach to designing a frame mainly came down to trial-and-error and gleaming what information I can from online. I did follow a few guidelines when designing the frame: Keep weight to minimum. Place most of the mass near the center of thrust. Make the frame as stiff. Avoid using print supports to prevent wasting filament. As for my goals, I simply wanted a drone that didn't have a lot of vibration in the footage and that had a good balance between performance and flight times. Initially, I also wanted to keep props out of view of the camera, but eventually gave that up as leaned more towards performance. Obviously, a carbon fiber frame is pretty much superior to a 3D printed frame in terms of stiffness, durability and weight, but there's something to be said for designing your own 3D printed frame. Printing it out, assembling it, flying, analyzing logs, then making changes, all within a couple of days is a pretty rewarding process.
Configurations
Prior to designing my hex, I was fiddling around with indoor tiny whoop-style quad frames. I liked experimenting with different layouts and configurations, and so my time designing my hex was no different. I used FreeCAD to create the models.
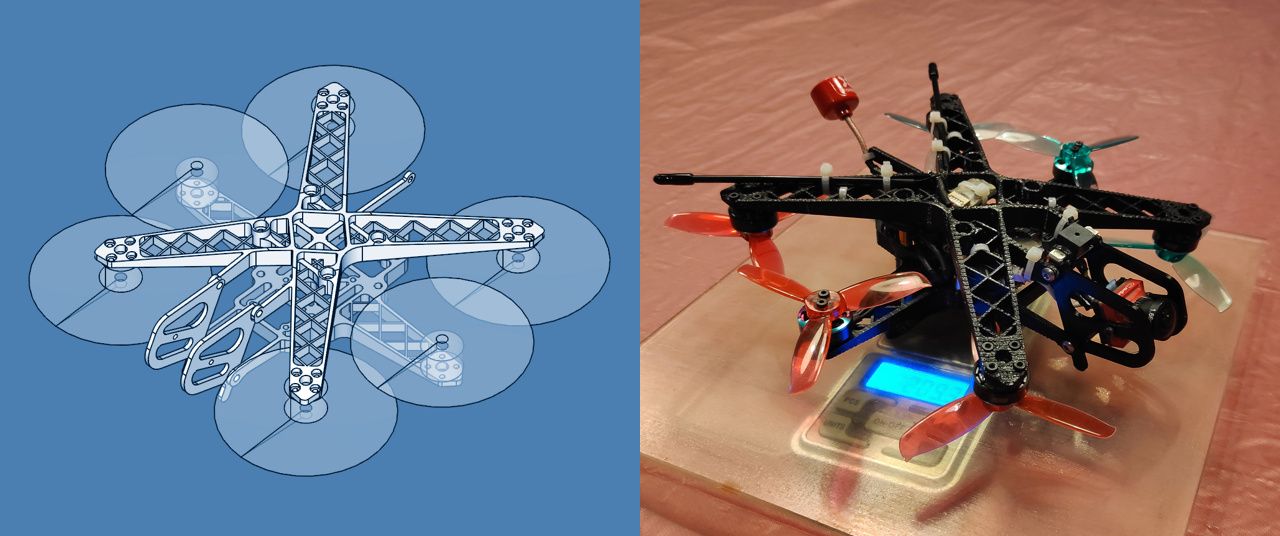
Coaxial
I wanted to try something unorthodox first, so I started with a frame that used coaxial rotors, using the Y6 mix in Betaflight. From what I've researched, coaxial rotors do suffer from efficiency losses, but have the advantage of having a smaller wheelbase than a standard flat hex. They also keep props out of view of the camera. However, due to the need for some kind of landing gear, my initial design ended up very chunky looking. And its flight performance was pretty disappointing. Despite being lighter than my current design, it felt very slow and heavy in flight. I did try swapping the props on the bottom motors with those of a higher pitch, but it didn't feel like it made much of a difference. From what I can tell from the blackbox logs, the rear bottom motor was maxing out much quicker than the rest of the motors, severely reducing the maximum thrust. I'm guessing since the rear bottom motor were directly behind the body of the drone, it was receiving a lot of dirty air, limiting its thrust. Its middling flight performance, coupled with the fact that it was a bit of a maintenance nightmare, made me feel like it was a dead end, so I quickly moved on to other designs. However, I was able to find that it was capable of losing a motor, since one of my ESCs was malfunctioning at the time. But it did start tumbling in the air if I pushed it too hard.
Box Style
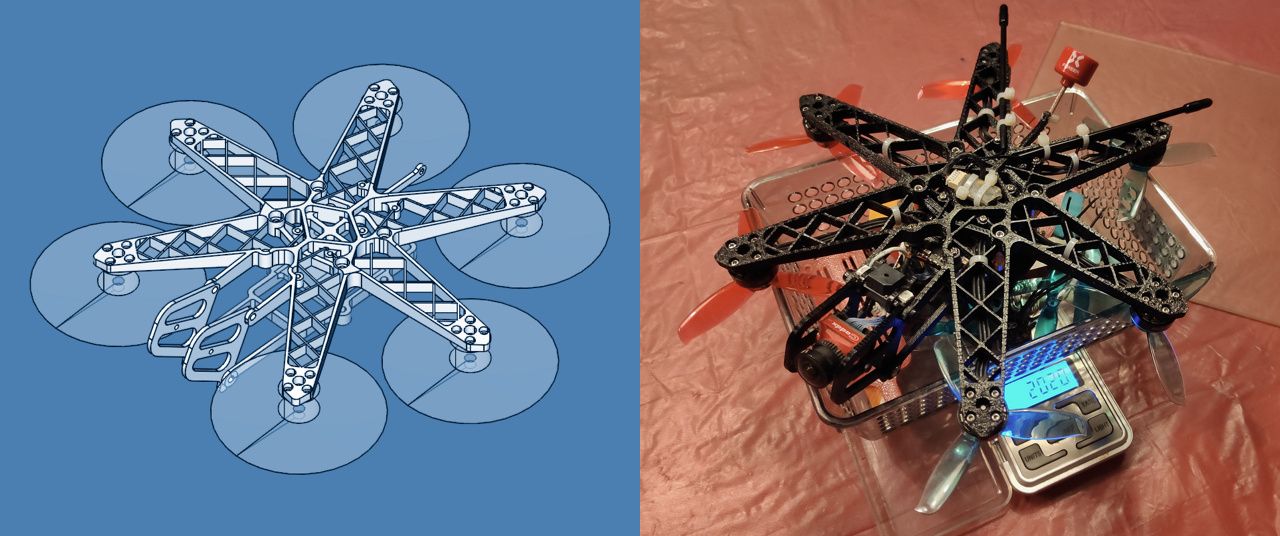
So for the next set of designs, I went with a standard flat hex with box style struts that connected each motor mount. Without the struts, the hex suffered from severe resonance issues, even when I increased the thickness of the arms. So it was simply a more effective use of material to have the struts, and it allowed me to increase the height of the arms while keeping them thin. This increased the vertical stiffness of the frame. However, I found that if I made the arms too thin, the outer ring of motors and the center of the frame began acting as two separate bodies of mass, which limited yaw responsiveness (which was wild to see in footage, seeing the two front motors oscillating side to side). This frame design flew well for the most part, and had noticeably less drag than my current frame, though it had some mid-throttle oscillations. It also didn't seem to matter if the motors weren't in a perfect hexagon as far as I can tell. Betaflight seems to handle it fine using the Hex X mix, so a custom mix isn't really needed.
Overlapping
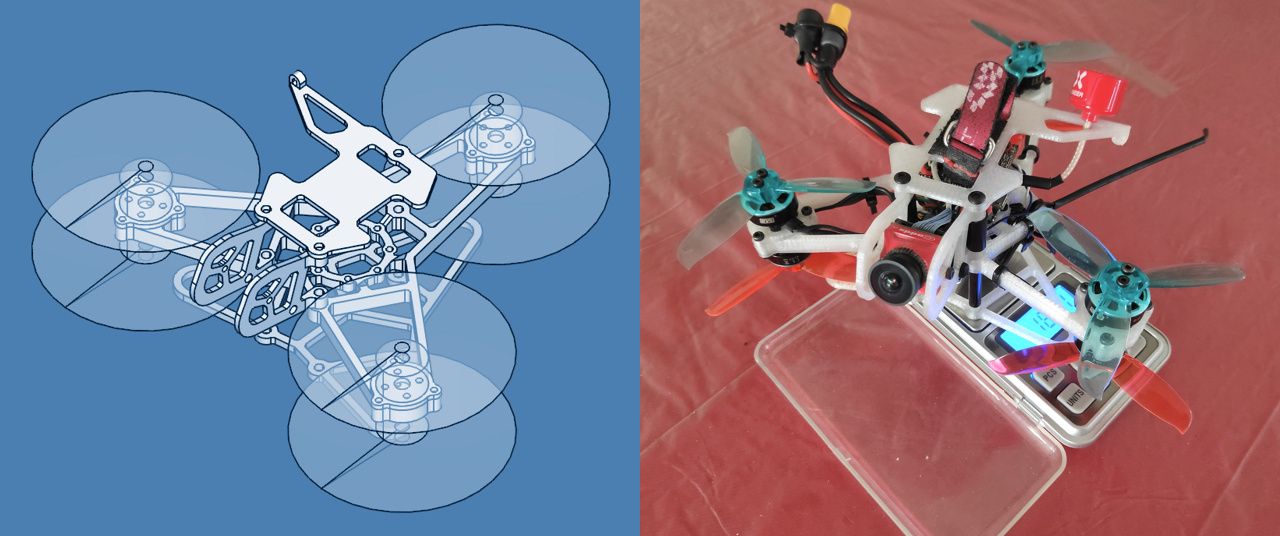
Next up, I tried overlapping props, which helped shrink the size of the frame. Judging from a few science papers, props that overlapped a small amount only had marginal efficiency losses. Initially, I used an overlap of 15% of the prop diameter and simply used a smaller version of the box style frame and had spacers to raise the side motors up about 8 millimeters. This worked fine, but I was afraid that this would also increase the magnitude the vibrations produced by the motors on to the frame. So I decided to mount the front and rear motors on to a top plate. However, since the struts of a box style frame would get in the way, I took inspiration from the DJI Flame Wheel arms and split the motor arm into two with cross struts in between. As for the flight performance, I didn't really notice any difference and flight times remained mostly the same. However, it suffered from more vibrations and was generally noisier (though it did make a neat chopping sound at high throttles).
Pusher
Since I already had four of the motors mounted on the top plate, I thought I might as well try a pusher configuration with all six motors. Plus, it allowed me to mount the Avan Mini 3x2.4x3 props on to the DYS 1404 motors, which normally don't fit. Putting props in a pusher configuration supposedly helps raise efficiency due to having no obstructions downstream of the props. However, it does increase vibrations due to the increased turbulence of air from the arms hitting the props. So in terms of flight performance, I didn't really notice that much difference except some more vibrations getting into the footage, as well as it being noisier overall.
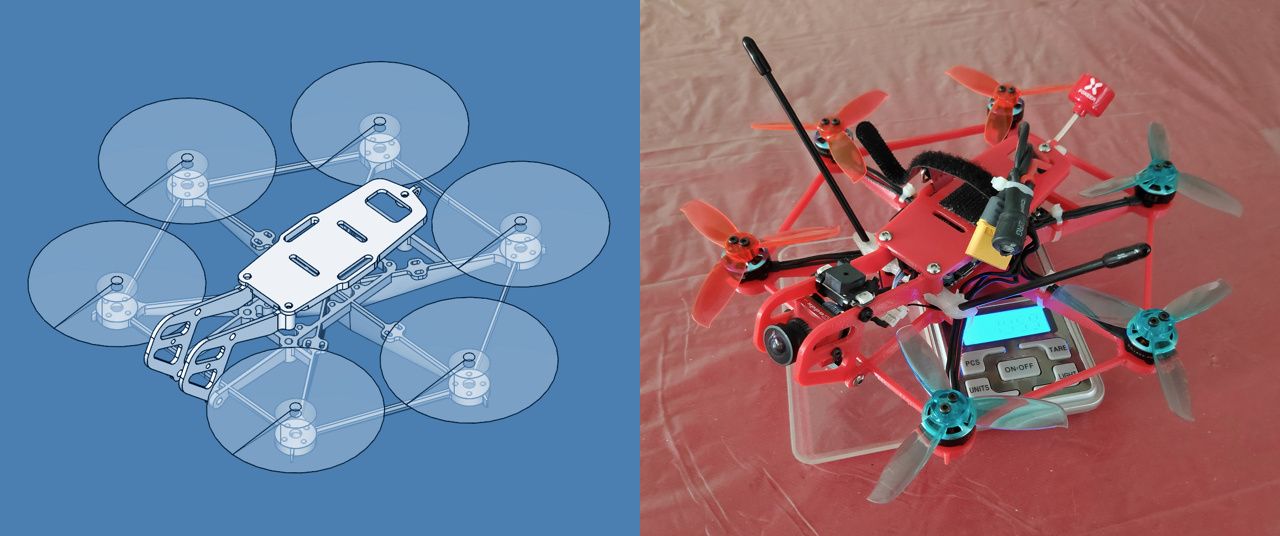
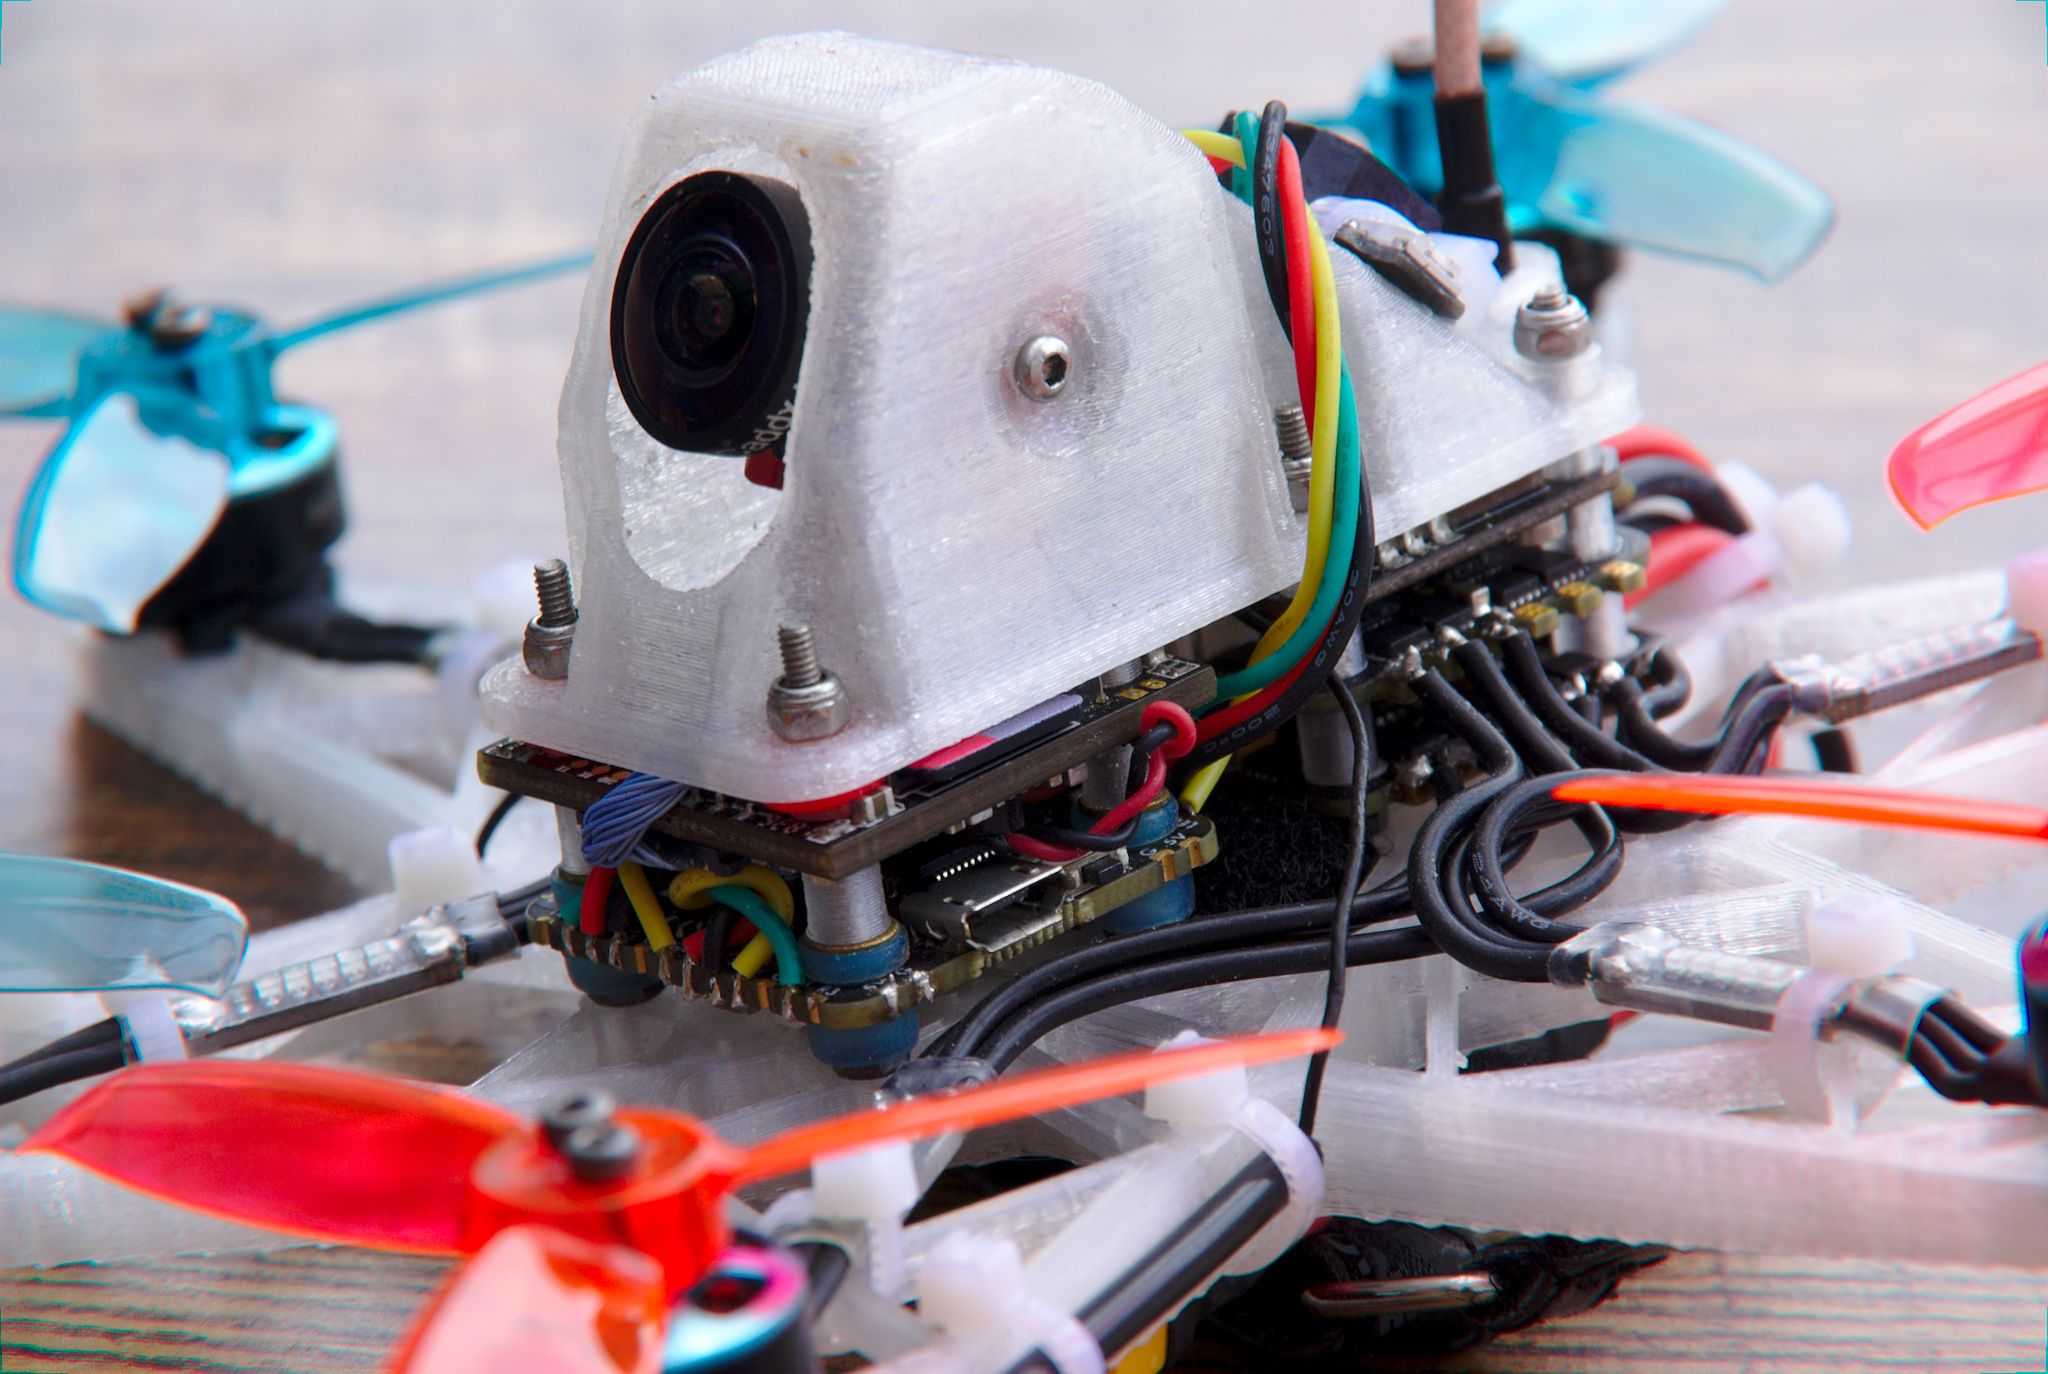
Current
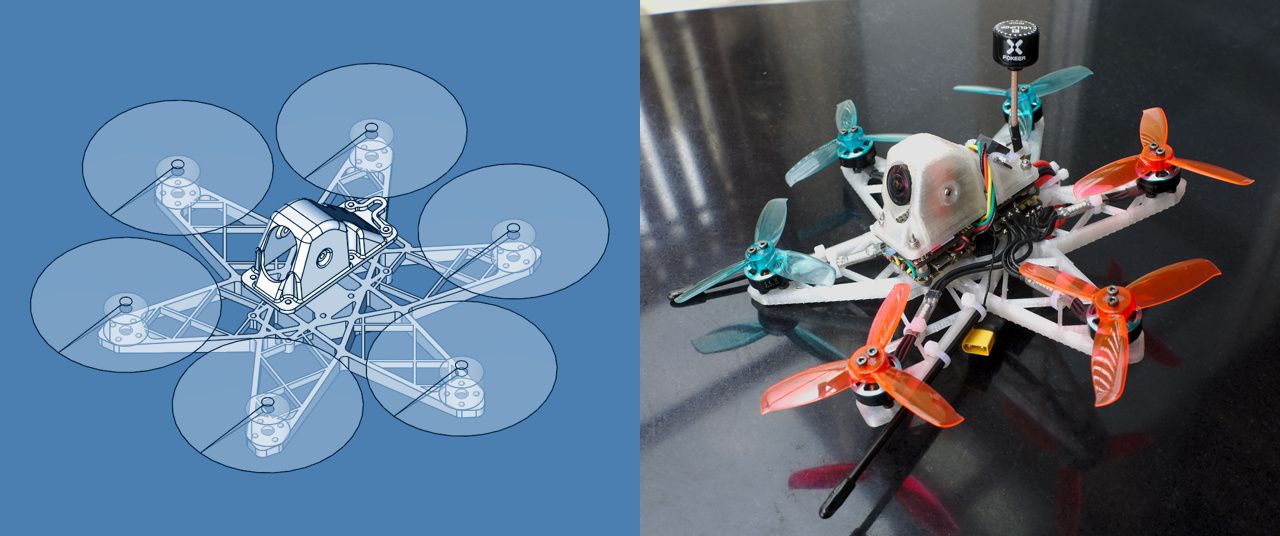
At this point, the hex was getting pretty heavy, having a dry weight of around 200 grams, so I really wanted to shed some of the weight. Since I rarely crashed, I felt that I could sacrifice some of the protection. A lot of the toothpick style builds I've seen had the camera canopy mounted directly on same set of screws as the flight controller. Using that idea, I got rid of all the heavier aluminum M3 standoffs I was using earlier. I also replaced the XT60 connector with an XT30 connector, which further reduced the weight and didn't seem to affect voltage sag that much. I did manage to bring the dry weight down to around 176 grams, with an AUW of around 256 grams, just a few grams over the 250 grams limit (which doesn't apply in my country, but is a nice goal to try to reach). Unfortunately, the hex was still suffering from mid-throttle oscillations, so I had to increase the thickness of the arms, which brought the dry weight back up to around 184 grams. However, shedding the extra weight really did help improve the flight performance, making the hex feel punchier and nimbler. I did try a design that didn't have the cross struts in the motor arms to reduce drag. But this caused more mid-throttle oscillations, even when I did increase the thickness of the arms. Having less vibrations is more valuable to me, so I stuck with the cross struts. In the current version of the frame, the bottom plate weighs 33 grams while the canopy weighs 7 grams.
Filaments
Of course, experimenting with 3D printed frames means experimenting with different kinds of filaments. All frames were printed by my modified ANET A8 3D printer (the AM8 by pheneeny) with a Bowden extruder without an enclosure. I keep all my filaments in a dry box while printing and I use PrusaSlicer to slice my models.

- PLA (eSUN PLA): I never used PLA in any of the hex designs, but I did use them a few times when I was designing indoor whoop-style frames. They're probably the stiffest 3D printer filament I've found, but they might be too brittle to handle impacts, though I've never attempted to anneal them. PLA also tends to flow under pressure, so I've had times where motor screws were falling out mid-flight, especially if the motors were running a little warm. But PLA does have the advantage of being easy to print.
- PETG (eSUN PETG): PETG is a decent material to use in drones frames. But it's not quite as stiff as PLA and in my experience flying indoor whoop-style quads, it shatters on hard impacts. It is fairly easy to print and I haven't had any motor screws fall out while flying. Though you do need to tighten them up every once in a while, which can be said for most 3D printer filaments.
- Nylon (eSUN ePA): Nylon is far too flexible to be used as a frame, though it has a much higher durability compared to other filaments, which makes it suited for canopies. However, in my experience, nylon is incredibly difficult to print due to it being very prone to warping, despite using PVA glue on the heat bed. Because of that and that its print quality isn't great, I generally avoid using nylon altogether.
- Nylon-Carbon Fiber (eSUN ePA-CF): I used Nylon with micro carbon fibers the most when I was making indoor whoop-style quads, but looking back, I find that it's not a great filament in general. The prints lose a lot of their stiffness as it absorbs the humidity in the air (which is unavoidable in the humid climate I'm living in). It oozes constantly while printing, regardless of any retraction settings I used, and requires a hardened nozzle as the filament is abrasive. And it just seems like a bad idea in general to print with a filament that has the potential to spread micro particles of carbon fiber into the air. It is fairly durable though, judging from the impacts it took while flying my indoor quads, but it does eventually bend and break from repetitive stresses to the same area.
- Polycarbonate (eSUN PC): Polycarbonate, specifically the eSUN polycarbonate blend I'm using, is pretty much my go-to filament for printing drone frames now. It's both slightly stiffer and less dense than PETG. Judging from hitting canopies with a hammer, it doesn't shatter like PETG and has held up in the few crashes I've had with the hex. It's not quite as easy to print with though, as it needs a higher heat bed temperature. I usually print with the heat bed temperature at around 95 degrees Celsius, on a glass bed with glue. Depending on the design, I may have to use brim as well.
- TPU (eSUN eFlex): Obviously, TPU shouldn't be used for a frame, but I should mention that in my experience, using a flexible TPU canopy on a frame that already has a bit of flex like a 3D printed frame, introduces even more jello. So I prefer to use stiffer materials for my canopies and pretty much only use TPU for my antenna mounts.
Motors
T-MOTOR F15 1106 6000KV vs. DYS BE1404 6000KV
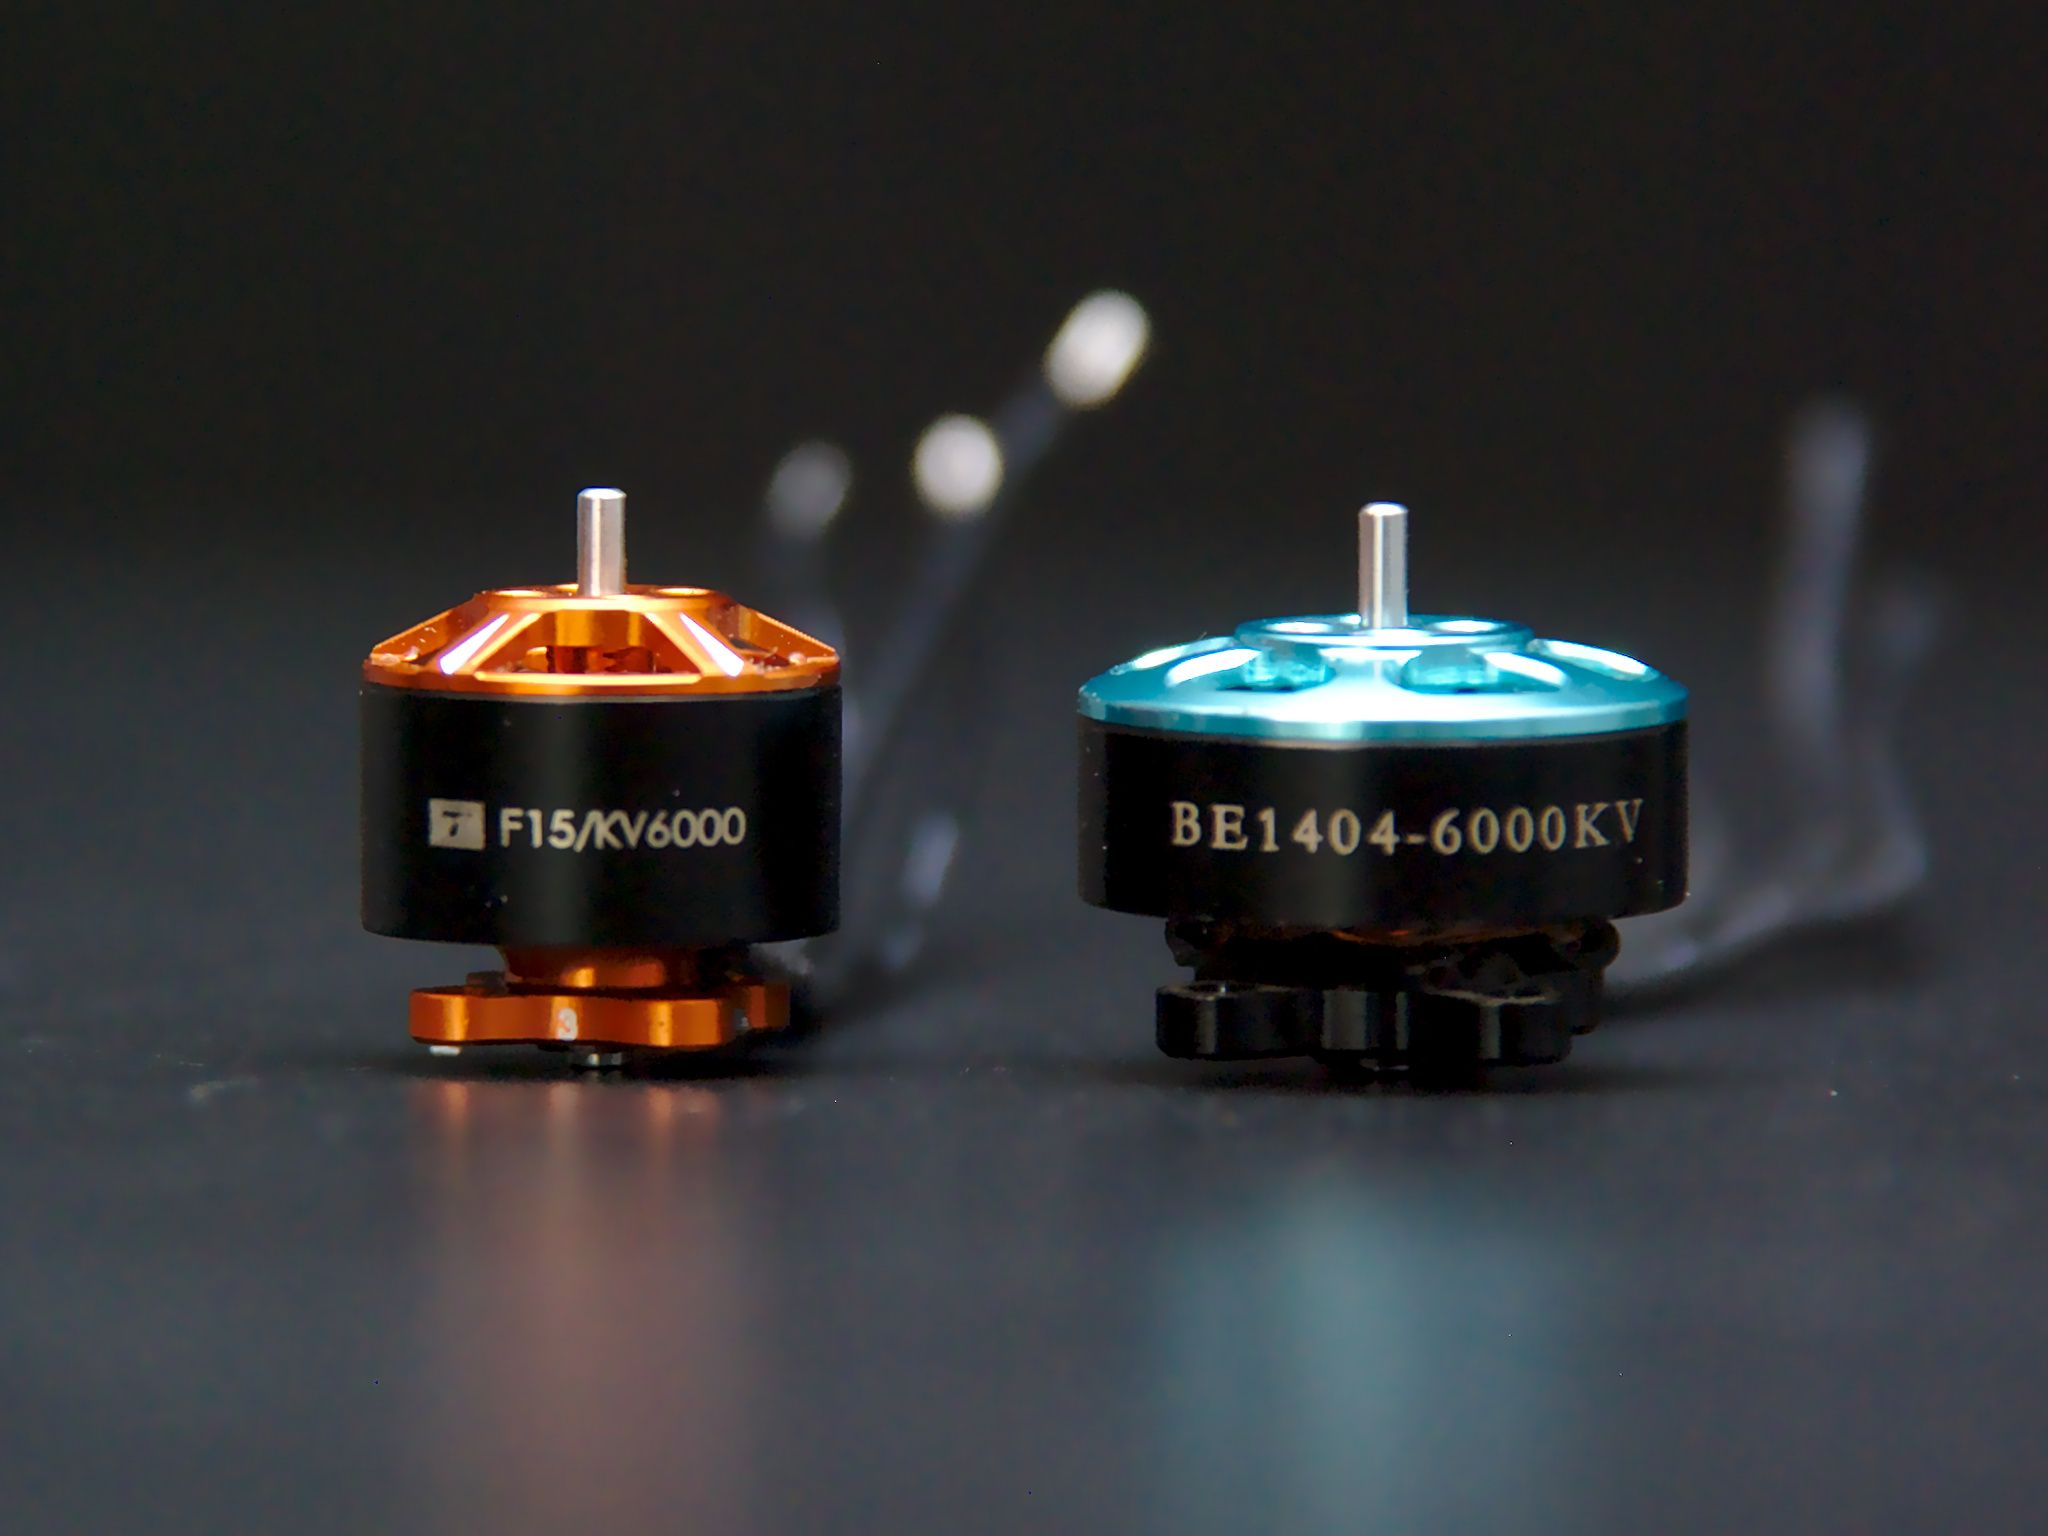
Previously, I've used these two motors on a 3 inch quad in similar configurations. I find that the 1106 generates more thrust, is lighter and more responsive. But I generally get longer flight times with the 1404, and that it seems to handle less filtering and/or higher D gains much better. I'm guessing it's because it's larger and thus it's able to dissipate heat better. So I decided on going with the 1404 for the hex. I've had to disassemble the 1404 motors a few times to clean out dirt, which was relatively easy. But I had an issue with a motor where the motor bell refused to come off, and I eventually had to give up on using it.
Props
I haven't been flying drones long enough to say that I could pick up on some the nuances of a prop's flying characteristics. But I did try a variety of 3 inch props to feel them out.
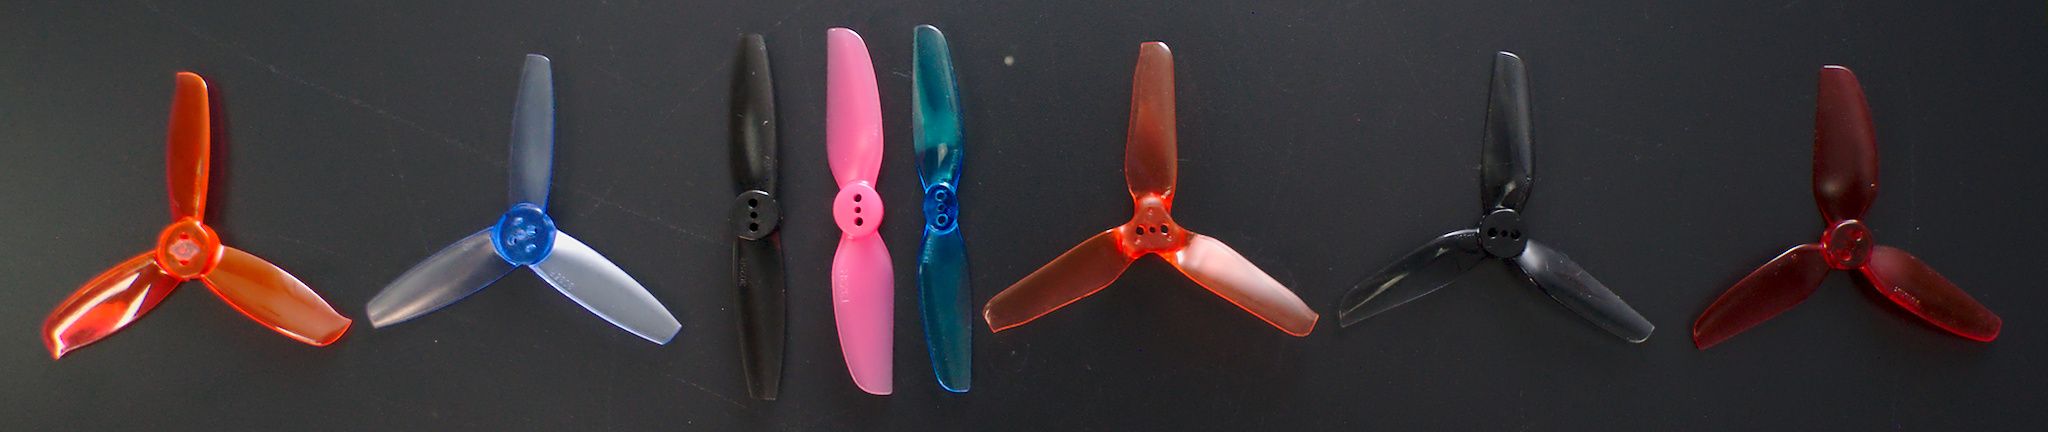
- Gemfan 3028: The Gemfan 3028 is pretty much my favorite prop to use. It has good acceleration and speed, but it's not quite as punchy as the other props. Though, the main reason I use them is for their longer flight times and their lower amp draw at full throttle. But they're also a bit louder than the others. Also, during a flight, I had a prop explode, slicing through the motor signal wires connected to the flight controller and causing my hex to crash. I noticed afterwards that these props sometimes develop small cracks around the hub, maybe due to them requiring the small plastic adapter to fit on to t-mount motors. I've already had to throw out a few of these cracked props as I can't trust them anymore. I haven't had this issue on any of the other props, but then again, these props are the ones most under use.
- Gemfan 3035: Not much to say about these props, as they fly very similar to the Gemfan 3028. However, I get slightly less flight times using them.
- Gemfan 3025, HQProps T3x3x2, HQProps T3x2x2: These bi-blades produce a lot of vibrations on a 3D printed frame, and I feel like I lose a bit control using them. I also didn't notice any increase in flight time when using the lighter HQProps T3x2x2, and so I just avoid using bi-blades altogether.
- HQProps T3x3x3 and Avan Mini 3x2.4x3: I feel like can lump these two together since I generally have the same experience using them. They cause too much voltage sag at full throttle, so I had to set the throttle limit to 80%. They're both fairly quiet and have a higher top speed, but I do lose around 20 seconds of flight time using them. I also feel that they're a bit slower than the Gemfan 3028 when I'm just cruising. However, they don't need as high a P gain for them to follow setpoint.
- HQProps T3x2.5x3: I recently tried these props, but ended up getting terrible vibrations using them, almost as bad as using bi-blades. Thinking that somehow my frame softened in the several days I haven't used it, I swapped back to the Gemfan 3028, but they were flying just fine. It's possible that my current tune is too aggressive for these props as the Gemfan 3028 needs higher P/D gains in general, but it's strange that I didn't have the same problem with the HQProps T3x3x3. I did notice that the pitch near the hubs of these props are even more aggressive than the HQProps T3x3x3, but I'm not really willing to put in the time to re-tune my hex to these props.
What's Next?
I'm not sure what else I could do to reduce the weight of the frame with this set of components. But if I could start from scratch, I am curious how an ultralight hex with HD would perform. I'm not sure if there is universal definition for ultralight, but if I go by what I generally see for the AUW for 3 inch toothpick-style quads (100 grams), and extrapolate from that, I get that an ultralight hex would have an AUW of around 150 grams. I could swap out the motors for some 1105 motors, swap the VTX and ESCs for a 16x16 stack, and use a 3s 650mAh battery instead, but that probably only gets me to AUW of around 200 grams, with everything else being equal. At this point, I probably would have to look into creating a light weight carbon fiber frame to further reduce weight. But I'm not looking to designing a new frame any time soon.
Miscellaneous Thoughts
- I usually use PID Analyzer to look at noise and step response graphs, since I can use it in a script that spits out images whenever I put a blackbox log in a folder. But to compare two different flights, the PIDtoolbox is pretty handy since it can display graphs of two different blackbox logs side by side.
- I find the field of view of the default Caddx Turtle lens to be a little too narrow, even on my 16:9 box goggles, so I swapped them with the Caddx Ratel 1.66mm lens. It introduces more fisheye and some vignetting, but I much prefer the increased spatial awareness. Unfortunately, the ND filter for the Caddx Turtle lens doesn't quite fit the Ratel lens due to its larger curvature.
- That being said, the fisheye doesn't make for great HD footage, so I use a combination of Hugin, ImageMagick and FFmpeg to undistort the footage. I use Hugin to automatically get the correct parameters for lens correction, FFmpeg to generate the image sequence from the footage for ImageMagick to work on, ImageMagick to undistort the image sequence and FFmpeg again to generate the new undistorted video. You could also use Blender to undistort the footage, though its parameters seem incompatible with Hugin's, so you'll have to create them manually. FFmpeg does have a filter that undistorts video, but again, its parameters aren't compatible with Hugin's.
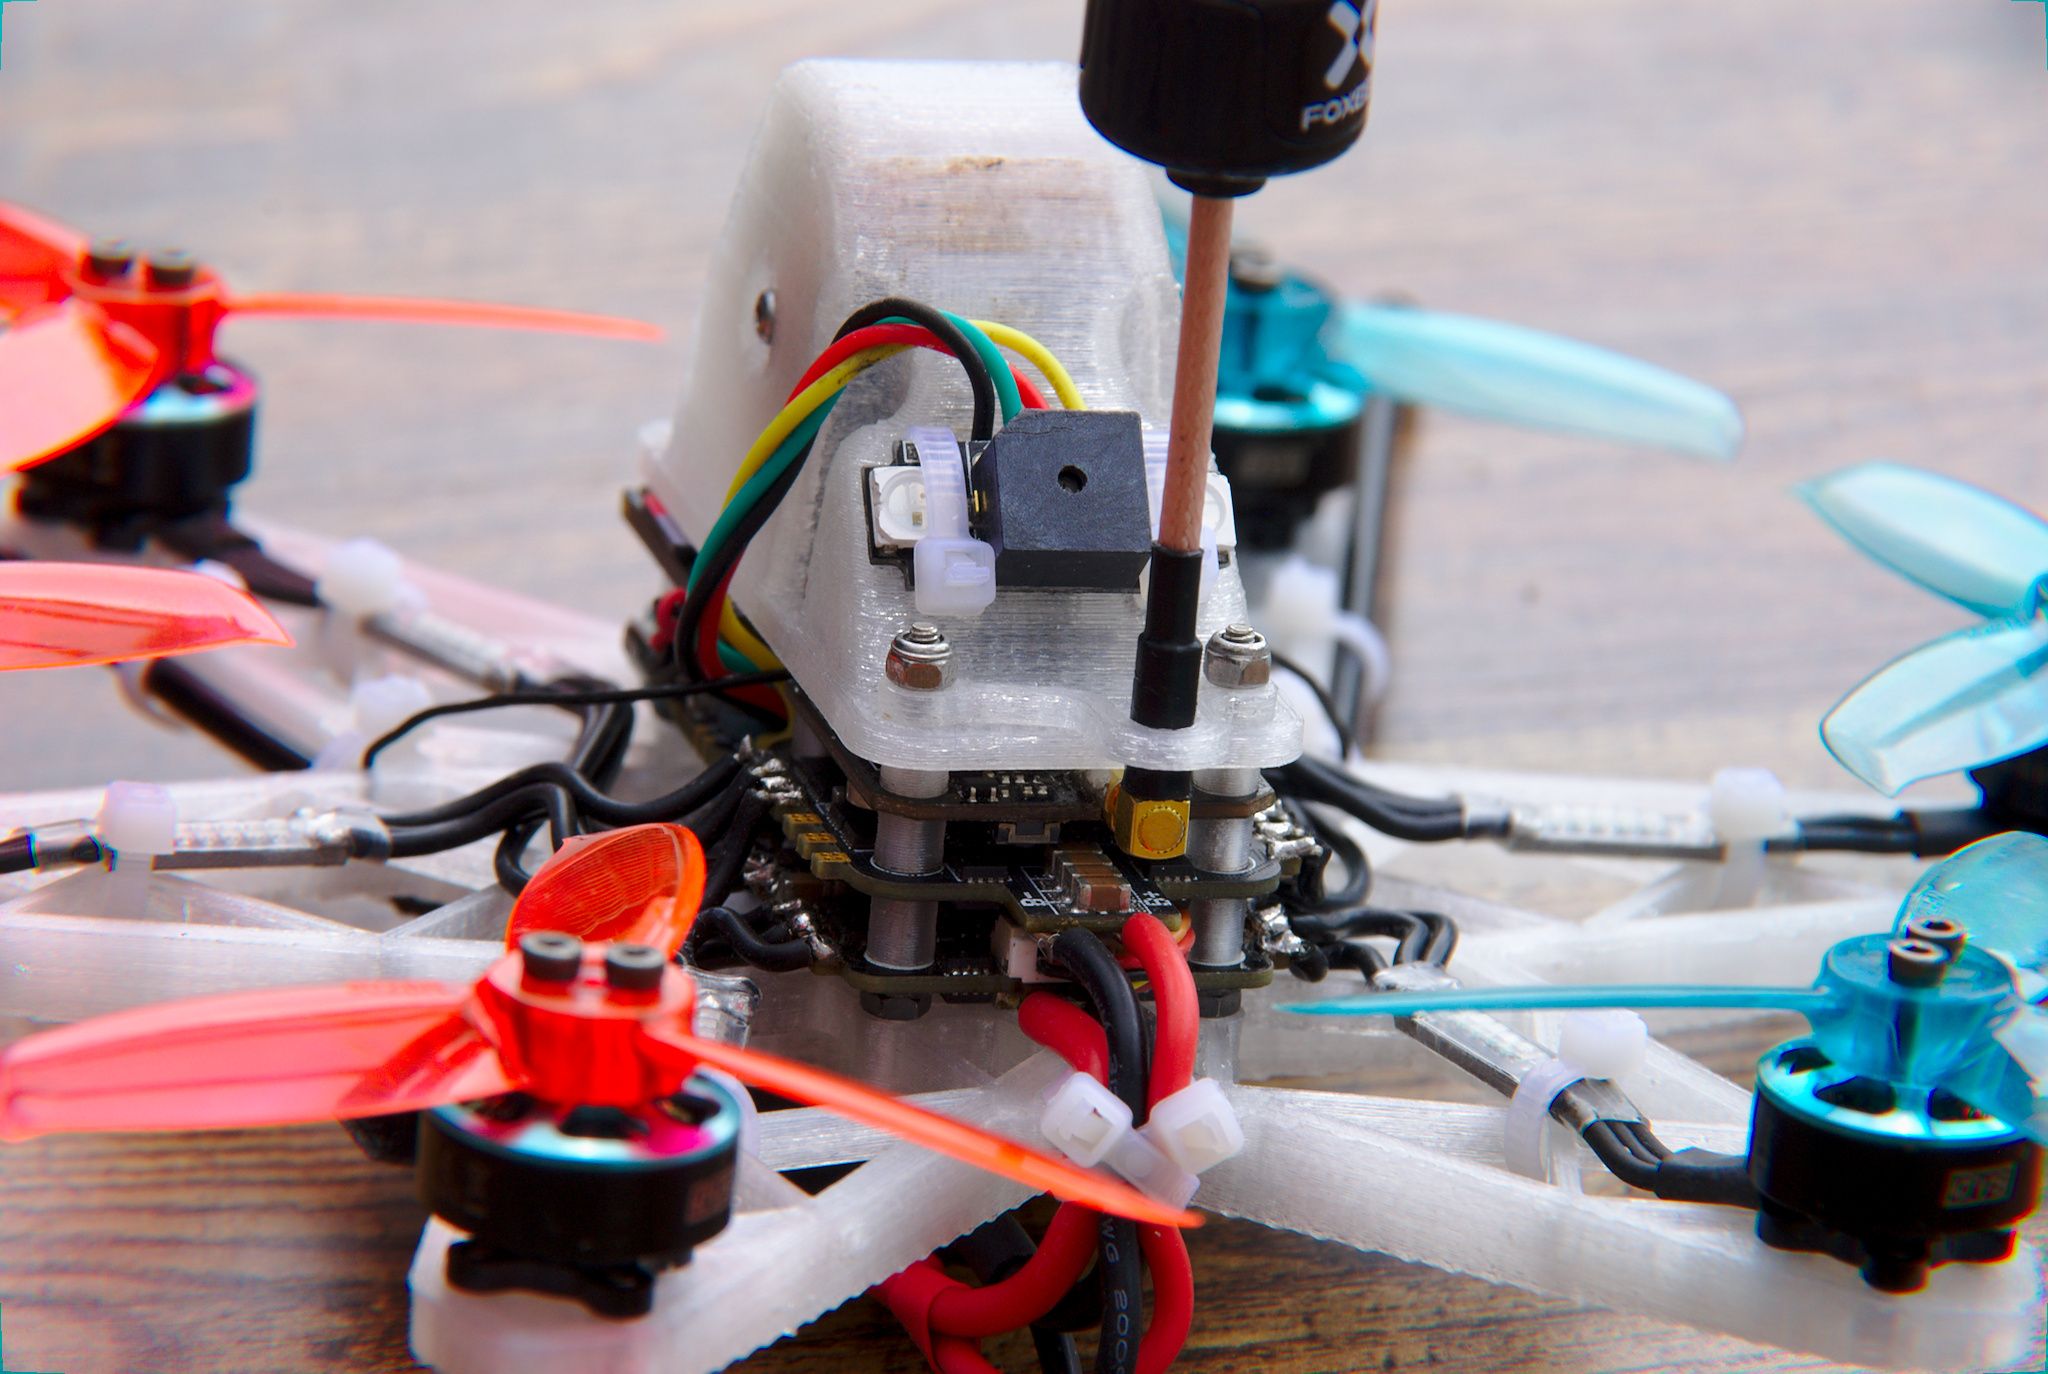
- Yes, the receiver antennas are in a really bad spot if I ever collide with anything from the front. I originally had the antenna tubes attached to the rear arms, but I didn't want the rear motors' thrust to be further reduced than they already were as a result of dirty air. I probably should design a proper antenna mount in the canopy at some point.
- Usually, I run my quads with props out, but on a hex, I think props in works better. You generally want the rear inner motor to spin faster during a turn, to combat the dirty air it experiences, which matches with a props in configuration on a hex. However, it might not make much of difference anyways, though I did feel like it made turning smoother when I switched from props out to props in.
- I am no scientist, but looking at science papers was pretty helpful for me to figure out designs for some of the more unorthodox configurations. They're a bit hard to parse, but they do come with conclusion sections that summarize their findings, and make for good jumping off points.
- I'm not exactly sure if the flat hex configuration supports losing a motor/prop. My only experience with redundancy was when I didn't properly solder a motor's wires to the ESC. It managed to take off and fly for a few seconds, but Betaflight's Runaway Takeoff Prevention feature kicked and disarmed my hex mid-flight...
- Even on my F7 flight controller, I couldn't get Bidirectional DShot working error free on 8k8k with DShot600, but 8k4k with DShot300 works fine.
- Both the Matek F722-mini and Matek F411-mini have available pads for additional motor outputs, but it should be possible to use other flight controllers, and use Betaflight's Resource Remapping to use other pads as motor outputs. However, I haven't quite wrapped my head around DMA conflicts and timers to understand which pins are usable.
Anyways, I enjoy designing drones as much as flying them and hopefully this writeup helps someone out there. I designed my frame to fit my specific needs and components, but let me know in the comments if there's any interest in the STLs and I'll post them on Thingiverse.
I'll leave off with an uncut flight of mostly cruising and some freestyle in 60fps with the onboard audio on the current version of the frame.
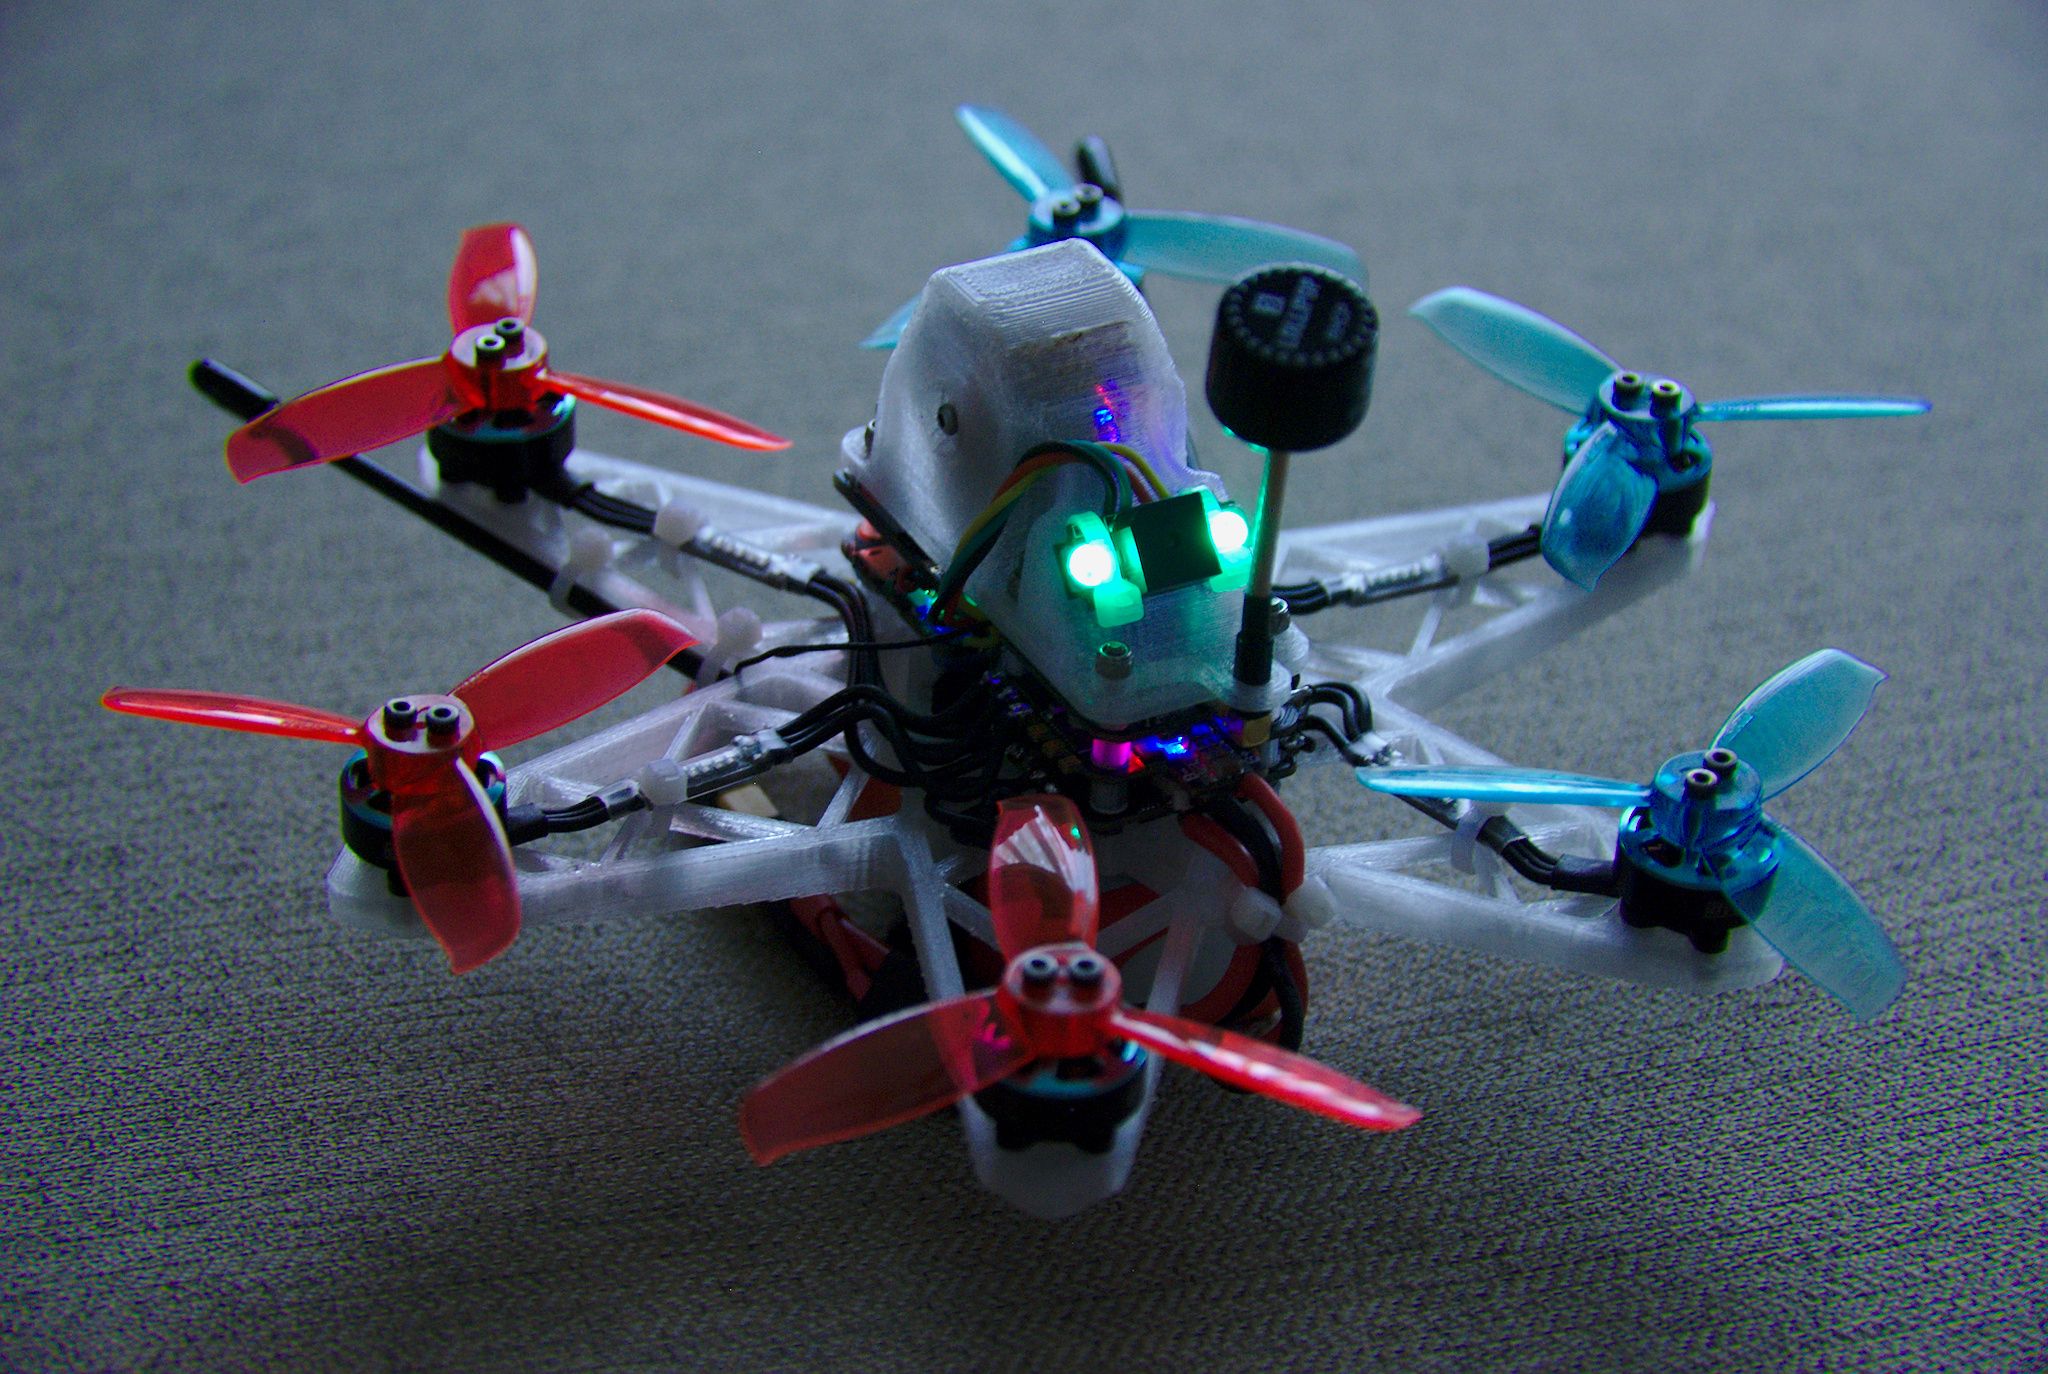
Photos


Part List
Flight Controller |
20x20 Mini Drone Flight Controllers for - RaceDayQuads
(12 builds)
Racedayquads.com
|
$0.99 |
ESCs |
2 x Spedix 20A 4 In 1 Mini ESC BLHeli_S Dshot600 2-4S 20x20mm For RC Drone FPV Racing
(11 builds)
Banggood.com
|
$53.18 |
Motors |
6 x DYS 1404 BE1404 4300KV 6000KV 2-4S Brushless Motor For RC Drone FPV Racing Multi Rotor
(15 builds)
Banggood.com
|
$72.84 |
Propellers |
3 x 2 Pairs Gemfan Windancer 3028 3-blade Propeller Compatible 5mm/1.5mm Mounting Hole for FPV RC Drone
(31 builds)
Banggood.com
|
$9.00 |
FPV Camera |
Caddx Turtle V2 1080p 60fps FOV 155 Degree Super WDR Mini HD FPV Camera OSD Mic for RC Drone
(74 builds)
Banggood.com
|
$71.28 |
FPV Transmitter |
Banggood.com
(16 builds)
Banggood.com
|
See Site |
Antenna |
A Pair Foxeer Lollipop 2 RHCP MMCX Right Angle/Straight 5.8G 2.5dBi FPV Antenna For FPV Racing Drone
(15 builds)
Banggood.com
|
$19.90 |
Receiver |
FrSky R-XSR 2.4GHz Micro ReceiverDefault Title
(937 builds)
Racedayquads.com
|
$21.99 |

Hats down to you sir!
I mean build itself is interesting but documentation of whole process is priceless!

Dude this is detailed, and unique, and interesting, and well thought out. Your performance, and designs are GREAT!
You must be awesome at builder time. I would love to meet you and build something together.

Oh wow! This is fantastic! Quite a detailed design and engineering process. For me, a hex is a chance to slow down and really enjoy the aspects of building a multirotor. The extra 50% in the "bottom end" seems to just be able to complicate things "just enough" to both be maddening and exhilerating simulatenously. Props for... doing more props!


Would you mind linking to the stls for the quad?