
Update! The 3D print file for an adapter for 16 x 16mm flight controllers has been added on the Jellyfish Thingiverse page. 16 x 16mm stacks are now usable with a Jellyfish! Shout out to Tobias (Apocalypsedude on RCgroups) who designed this mod. :)
Last friday (31/01/2020), after almost a year of drawing, test printing, flying, redrawing and doing it all over again, i have released the 3D print files for my Jellyfish 45mm micro quadcopter frame. Besides a video manual that i made earlier, i decided to also make a little writeup here to show my project to the community. It can also serve as a written build guide.
The Jellyfish has been created for those who want to explore today's limits of micro fpv power in a frame that is today's absolute limit in terms of size.
It is primarily designed for 1S lipo setups but a 2S lipo battery mount is also included in the files for those who want to experiment with that.
The Jellyfish can accomodate:
- any Tiny Whoop style brushless flight controller. 16 x 16mm stacks are usable with a printed adapter which is also available for download on the Jellyfish Thingiverse page.
- micro brushless motors (0802, 0803, 0603...) with 31mm propellers in a pushprop setup
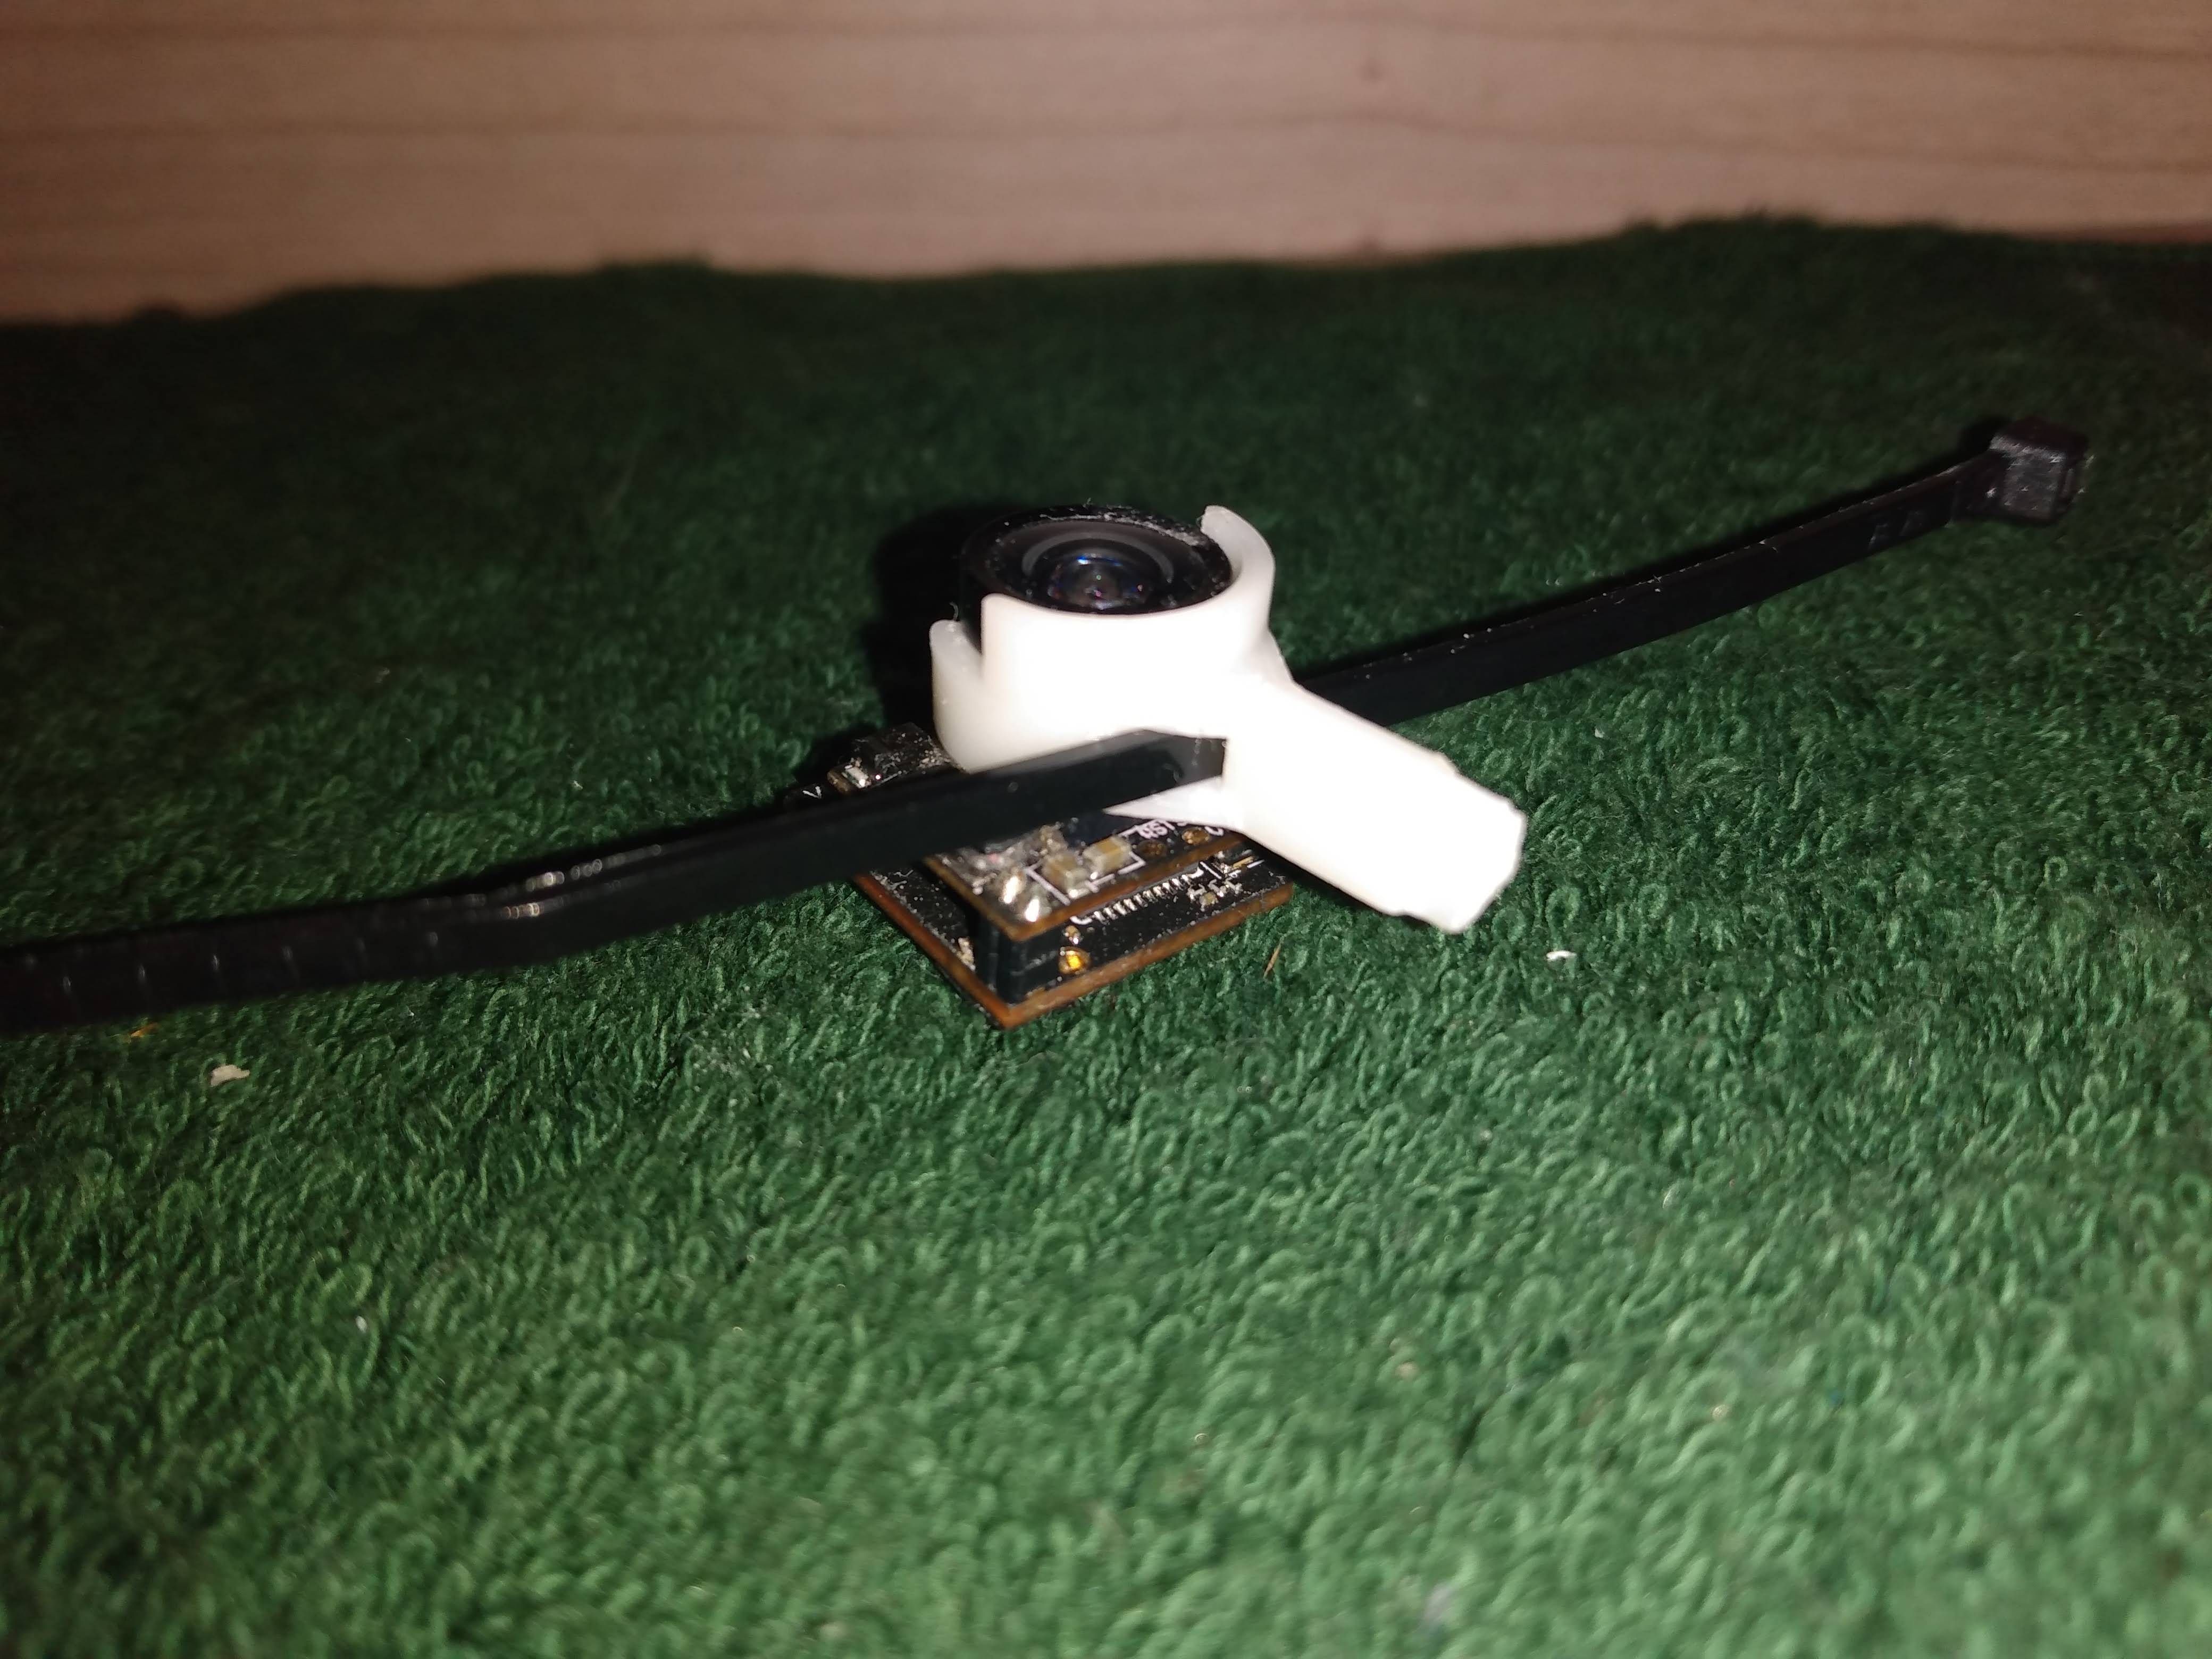
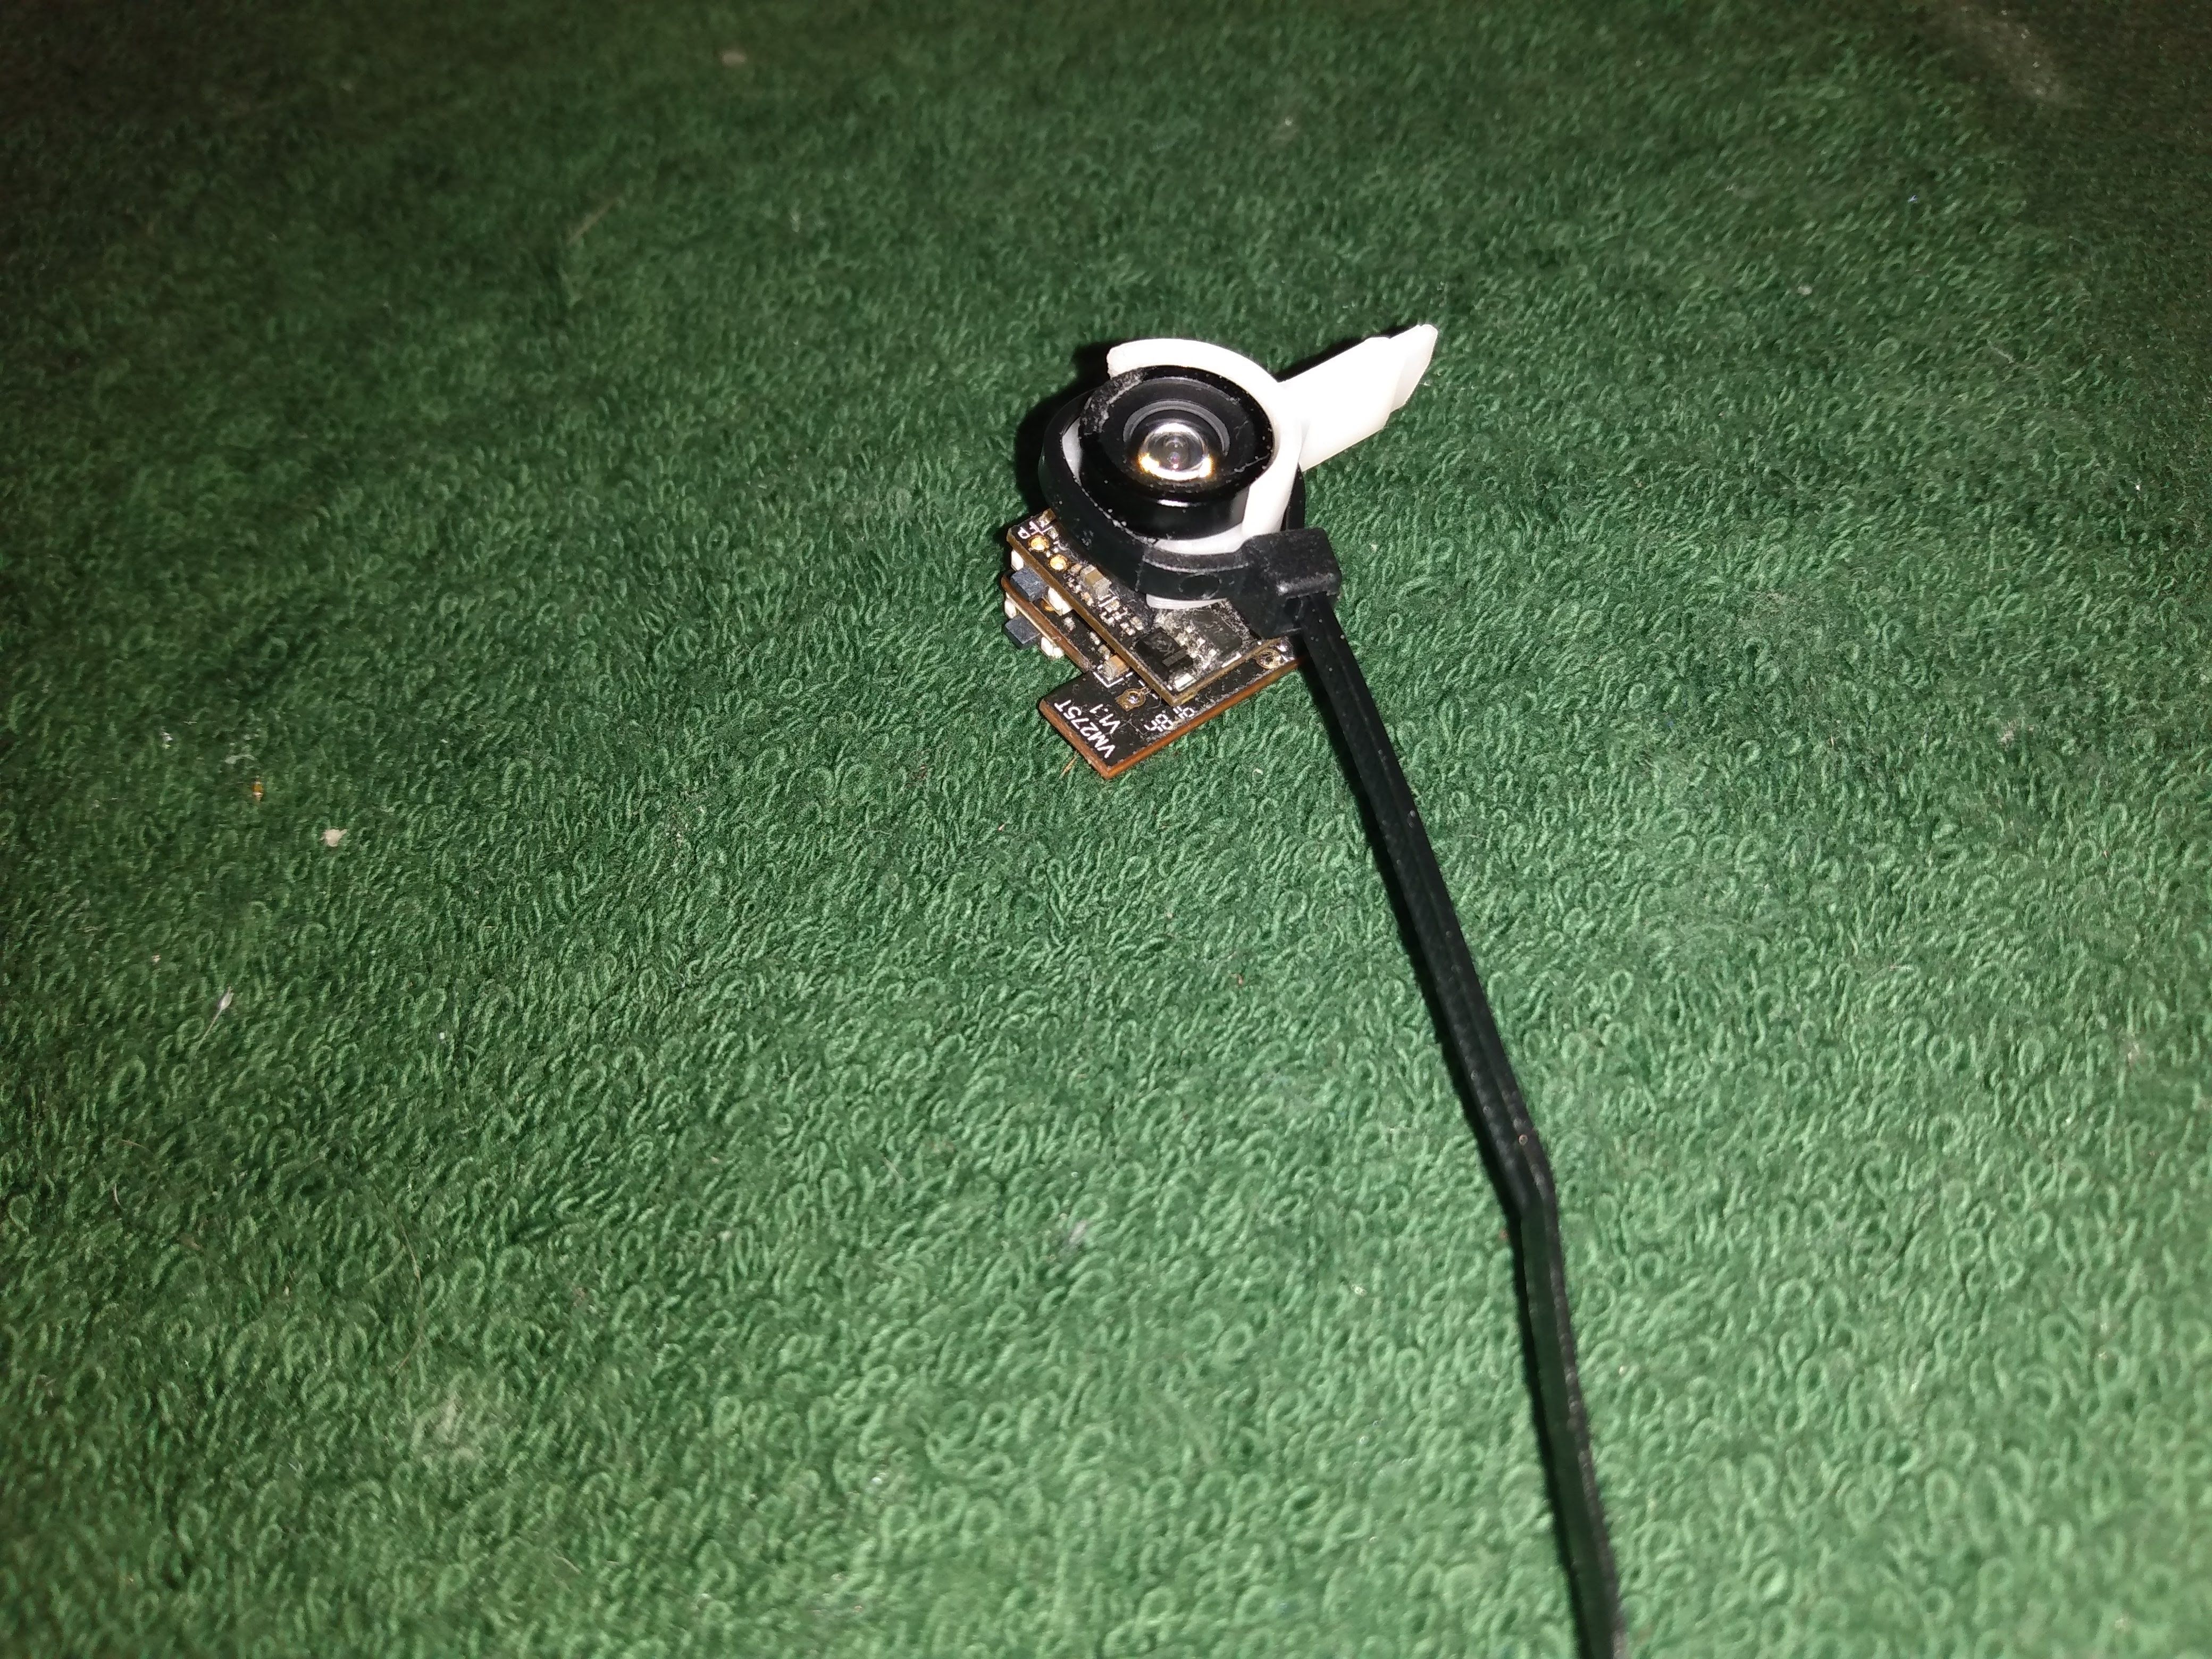
- camera/vtx setups, either connected or separated, with FXT style lens. (see parts list for an example)
Feel free to visit my website www.fpv-jelly.fish which is fully dedicated to the Jellyfish micro quadcopter frame. It contains an extensive video manual and order details in case you want me to print one or more frame kits for you. A free Jellyfish sticker designed by Brandon Delong (Dogwood Graphix) is allways included in a frame kit but can also be ordered separately if you really like one. :-)
Direct link to the 3D-print files: https://www.thingiverse.com/thing:4138023
Here are 2 flight video's in angle mode, please try to ignore the interference. The indoor halls i fly in are big metal structures which impairs video signal abit.
Below i will go over an example build with the electronics that i have been using through the whole development process.
3D printing
3D printing tests have been performed with ABS, PLA and PETG, which i consider the 3 "basic" filaments in the 3D printing community. I'm pretty sure more filament styles will be compatible since its a fairly simple print.
All 3 filaments are usable to print a Jellyfish frame. Ofcourse durability and weight will depend on the filament you choose. An empty frame with camera mount weighs between 4.50 and 5 grams
I do not recommend using a flexible filament like TPU for a Jellyfish. That just won't work.
All parts need to be printed on the horizontal axis of the print bed. The "regular arm" will be printed 3 times, all other parts just once.
printer settings:
- 0.4mm nozzle or lower
- 0.2mm resolution or lower (layer height)
- no infill, a few top and bottom layers
- no support. Small holes can easily be bridged.
Printing takes about an hour for all parts. Make that 2 hours if you choose a 0.1mm resolution instead of 0.2.

let's build!
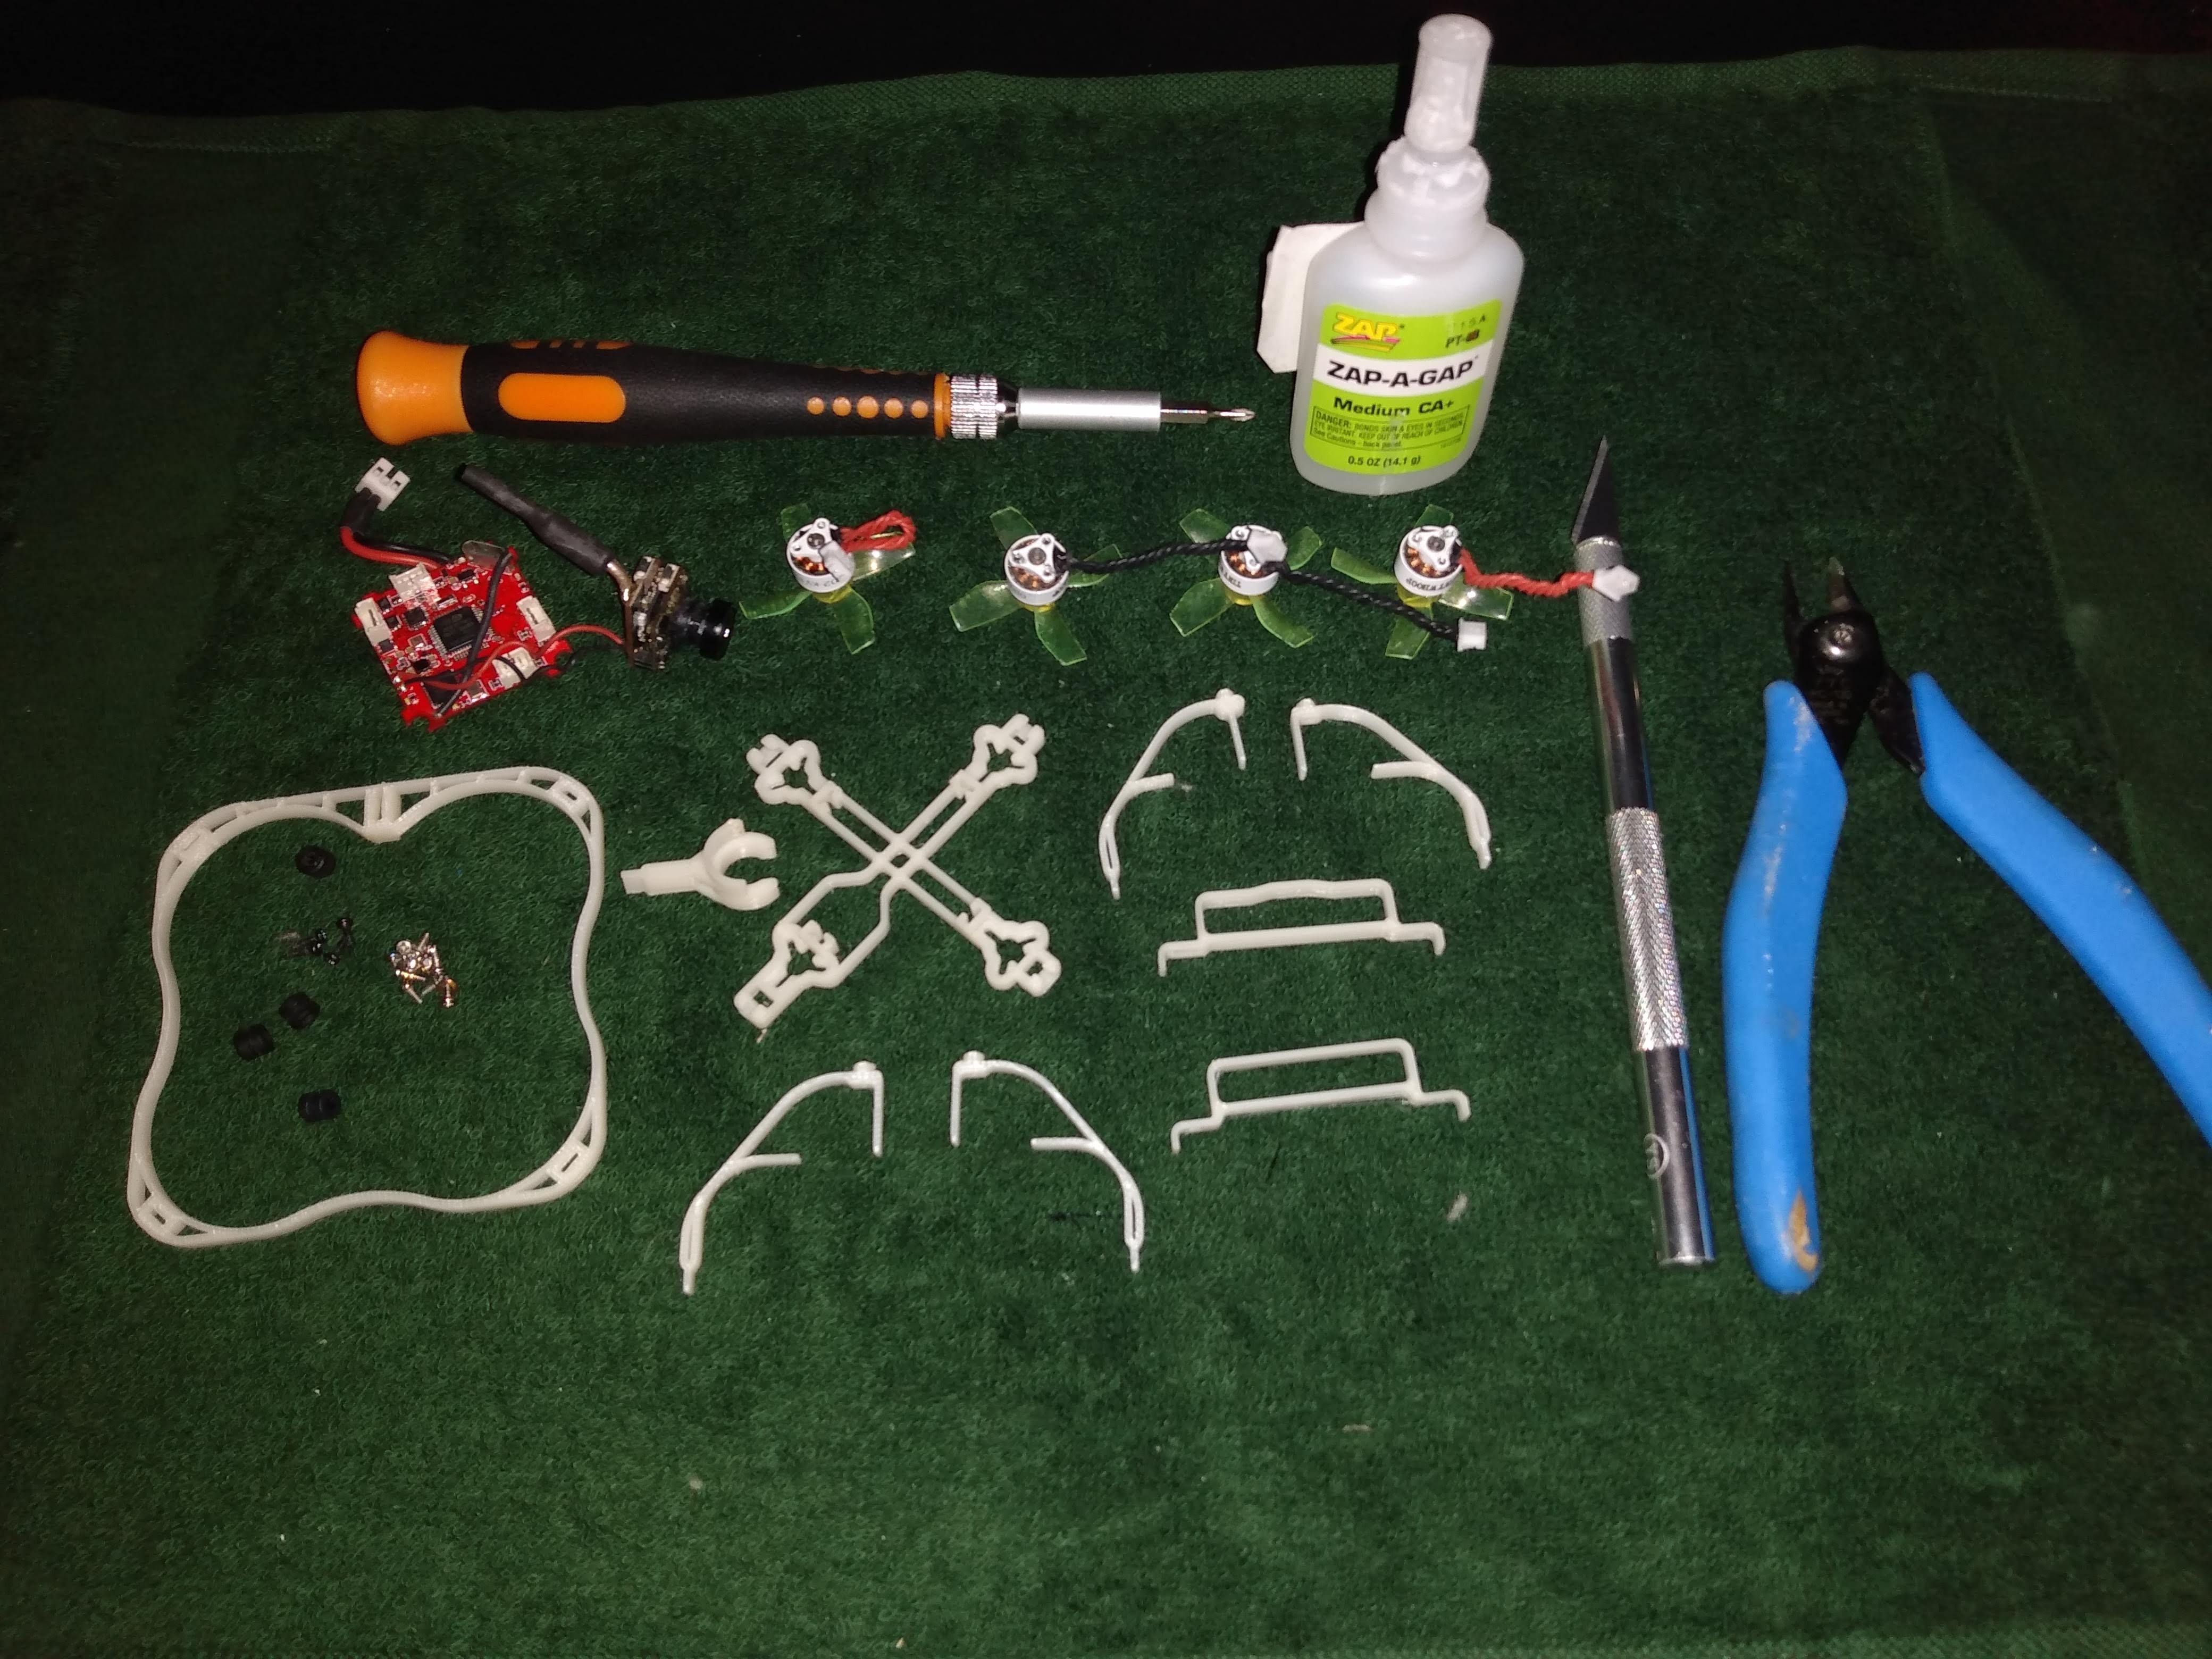
We need:
- 3D printed parts
- electronics
- FC and motor screws
- 4 FC grommets
- knife, cutting pliers, screwdriver and some CA glue
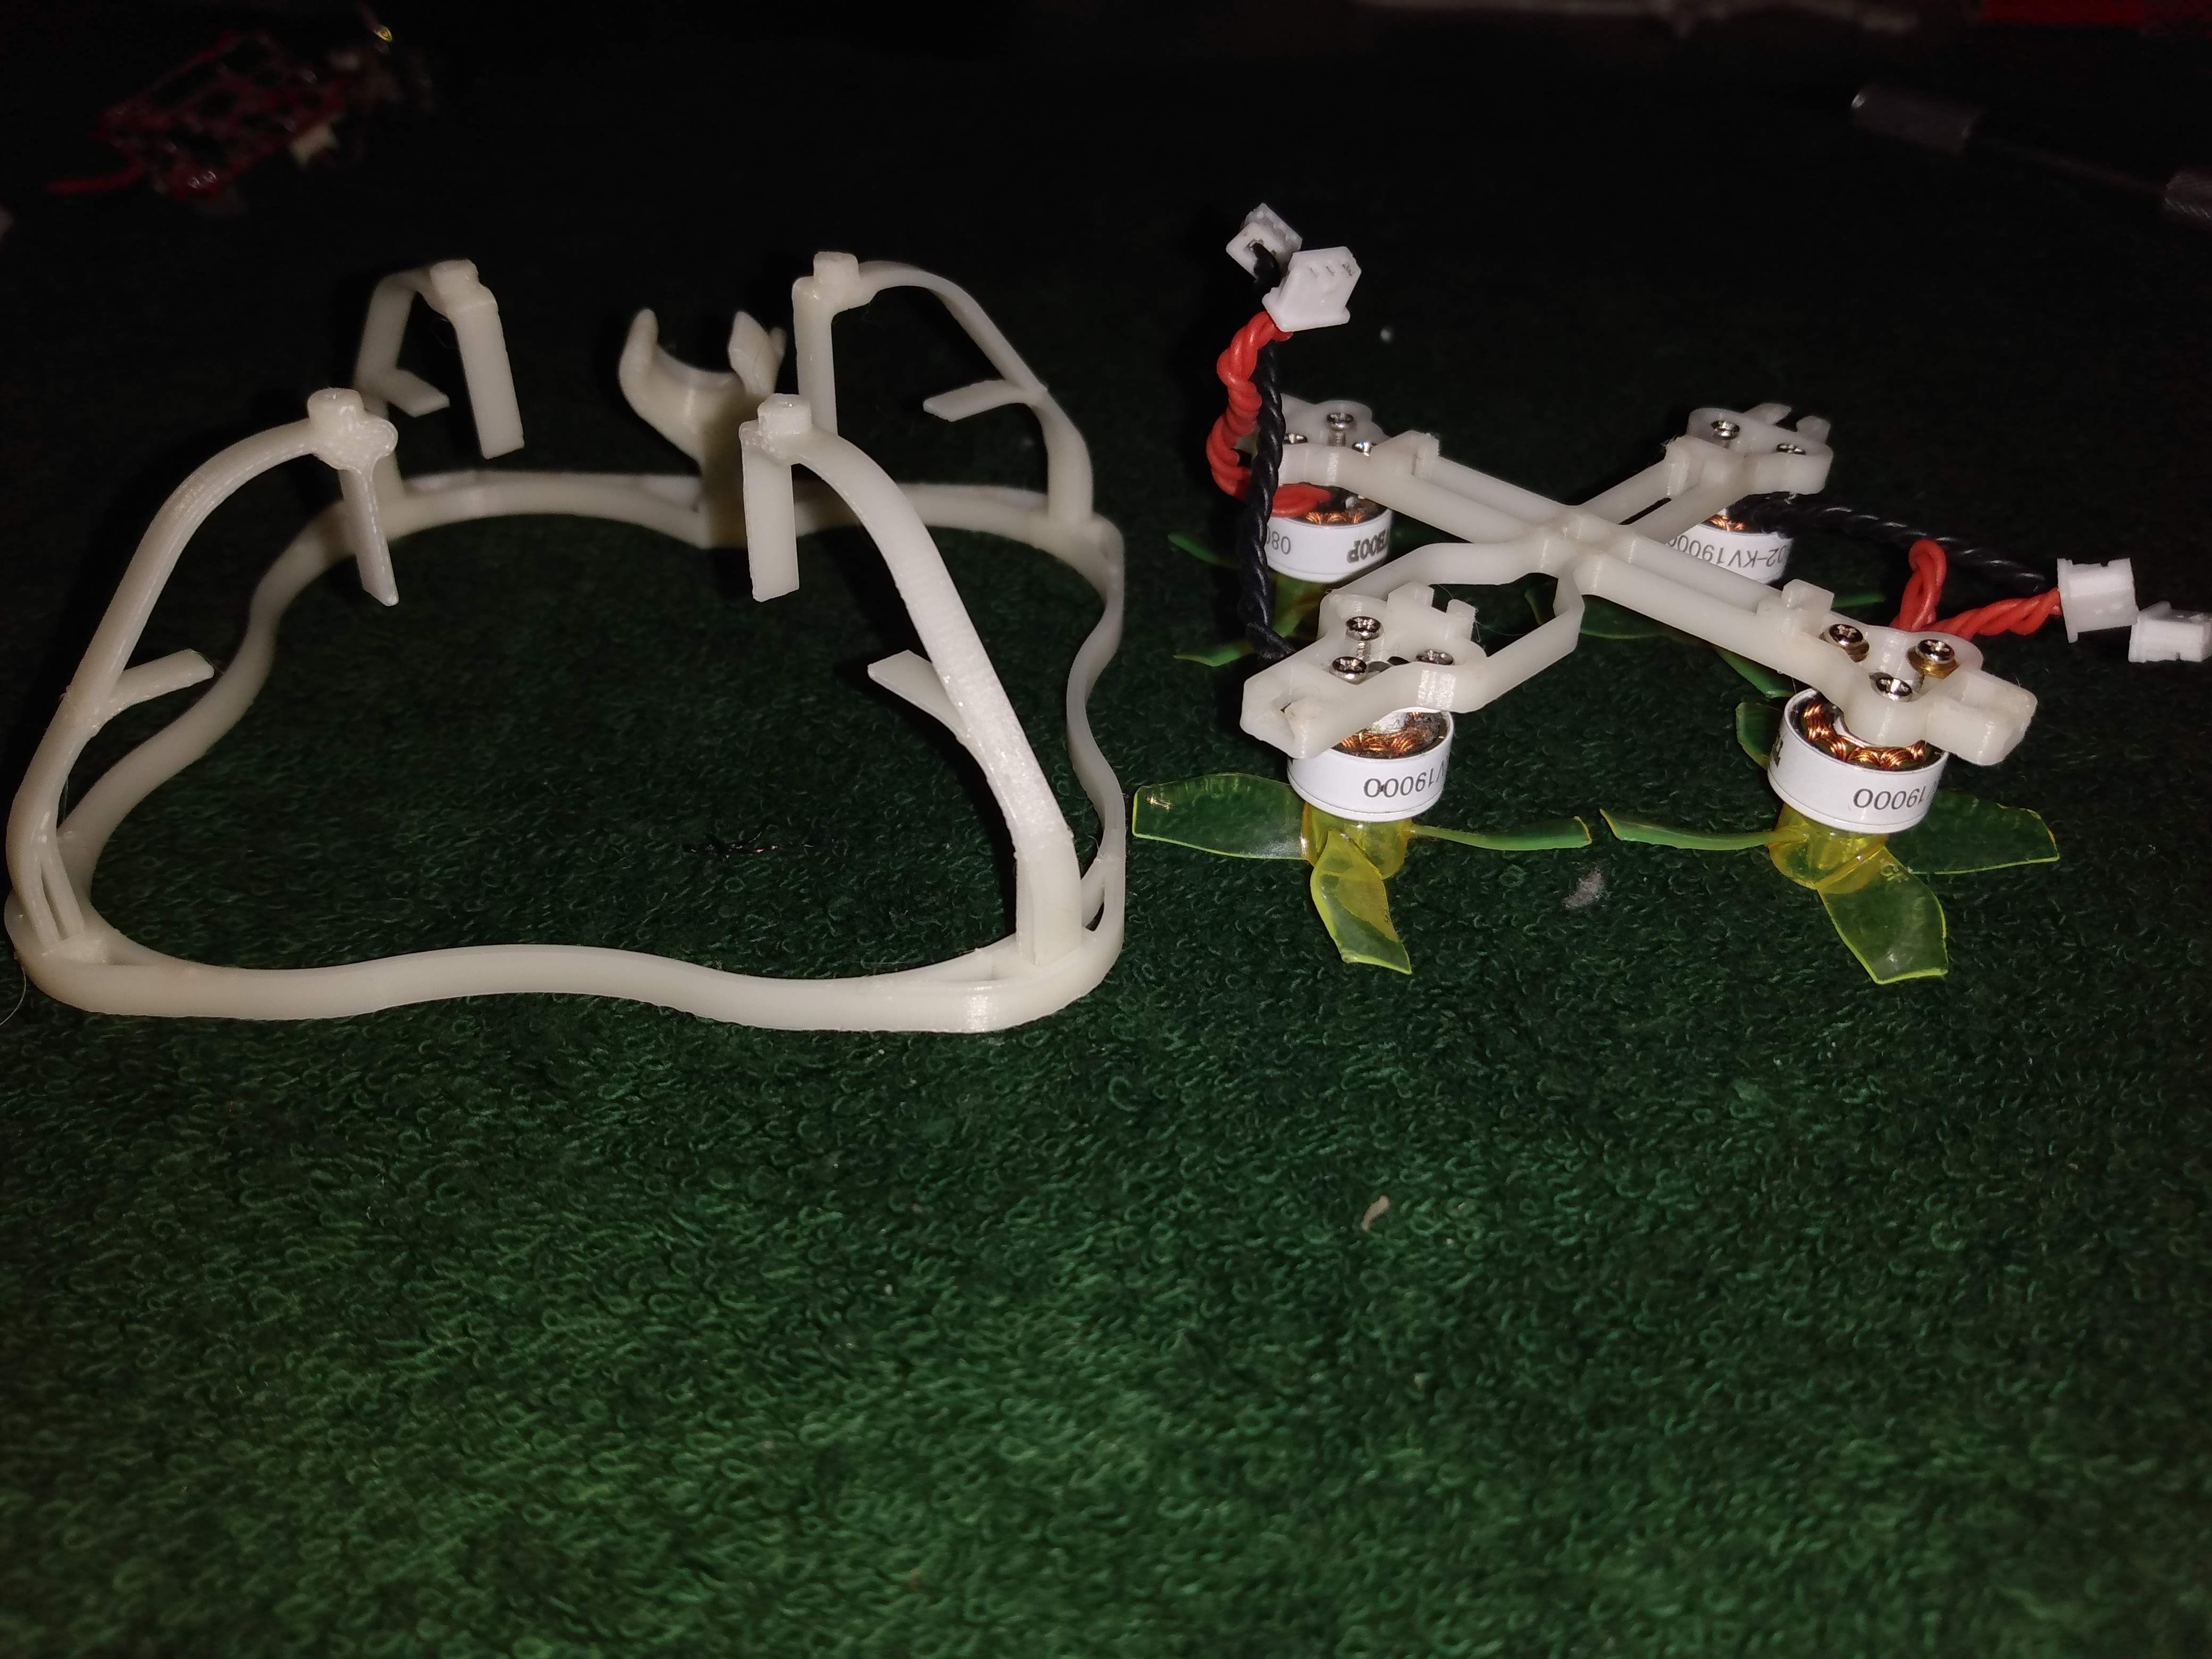
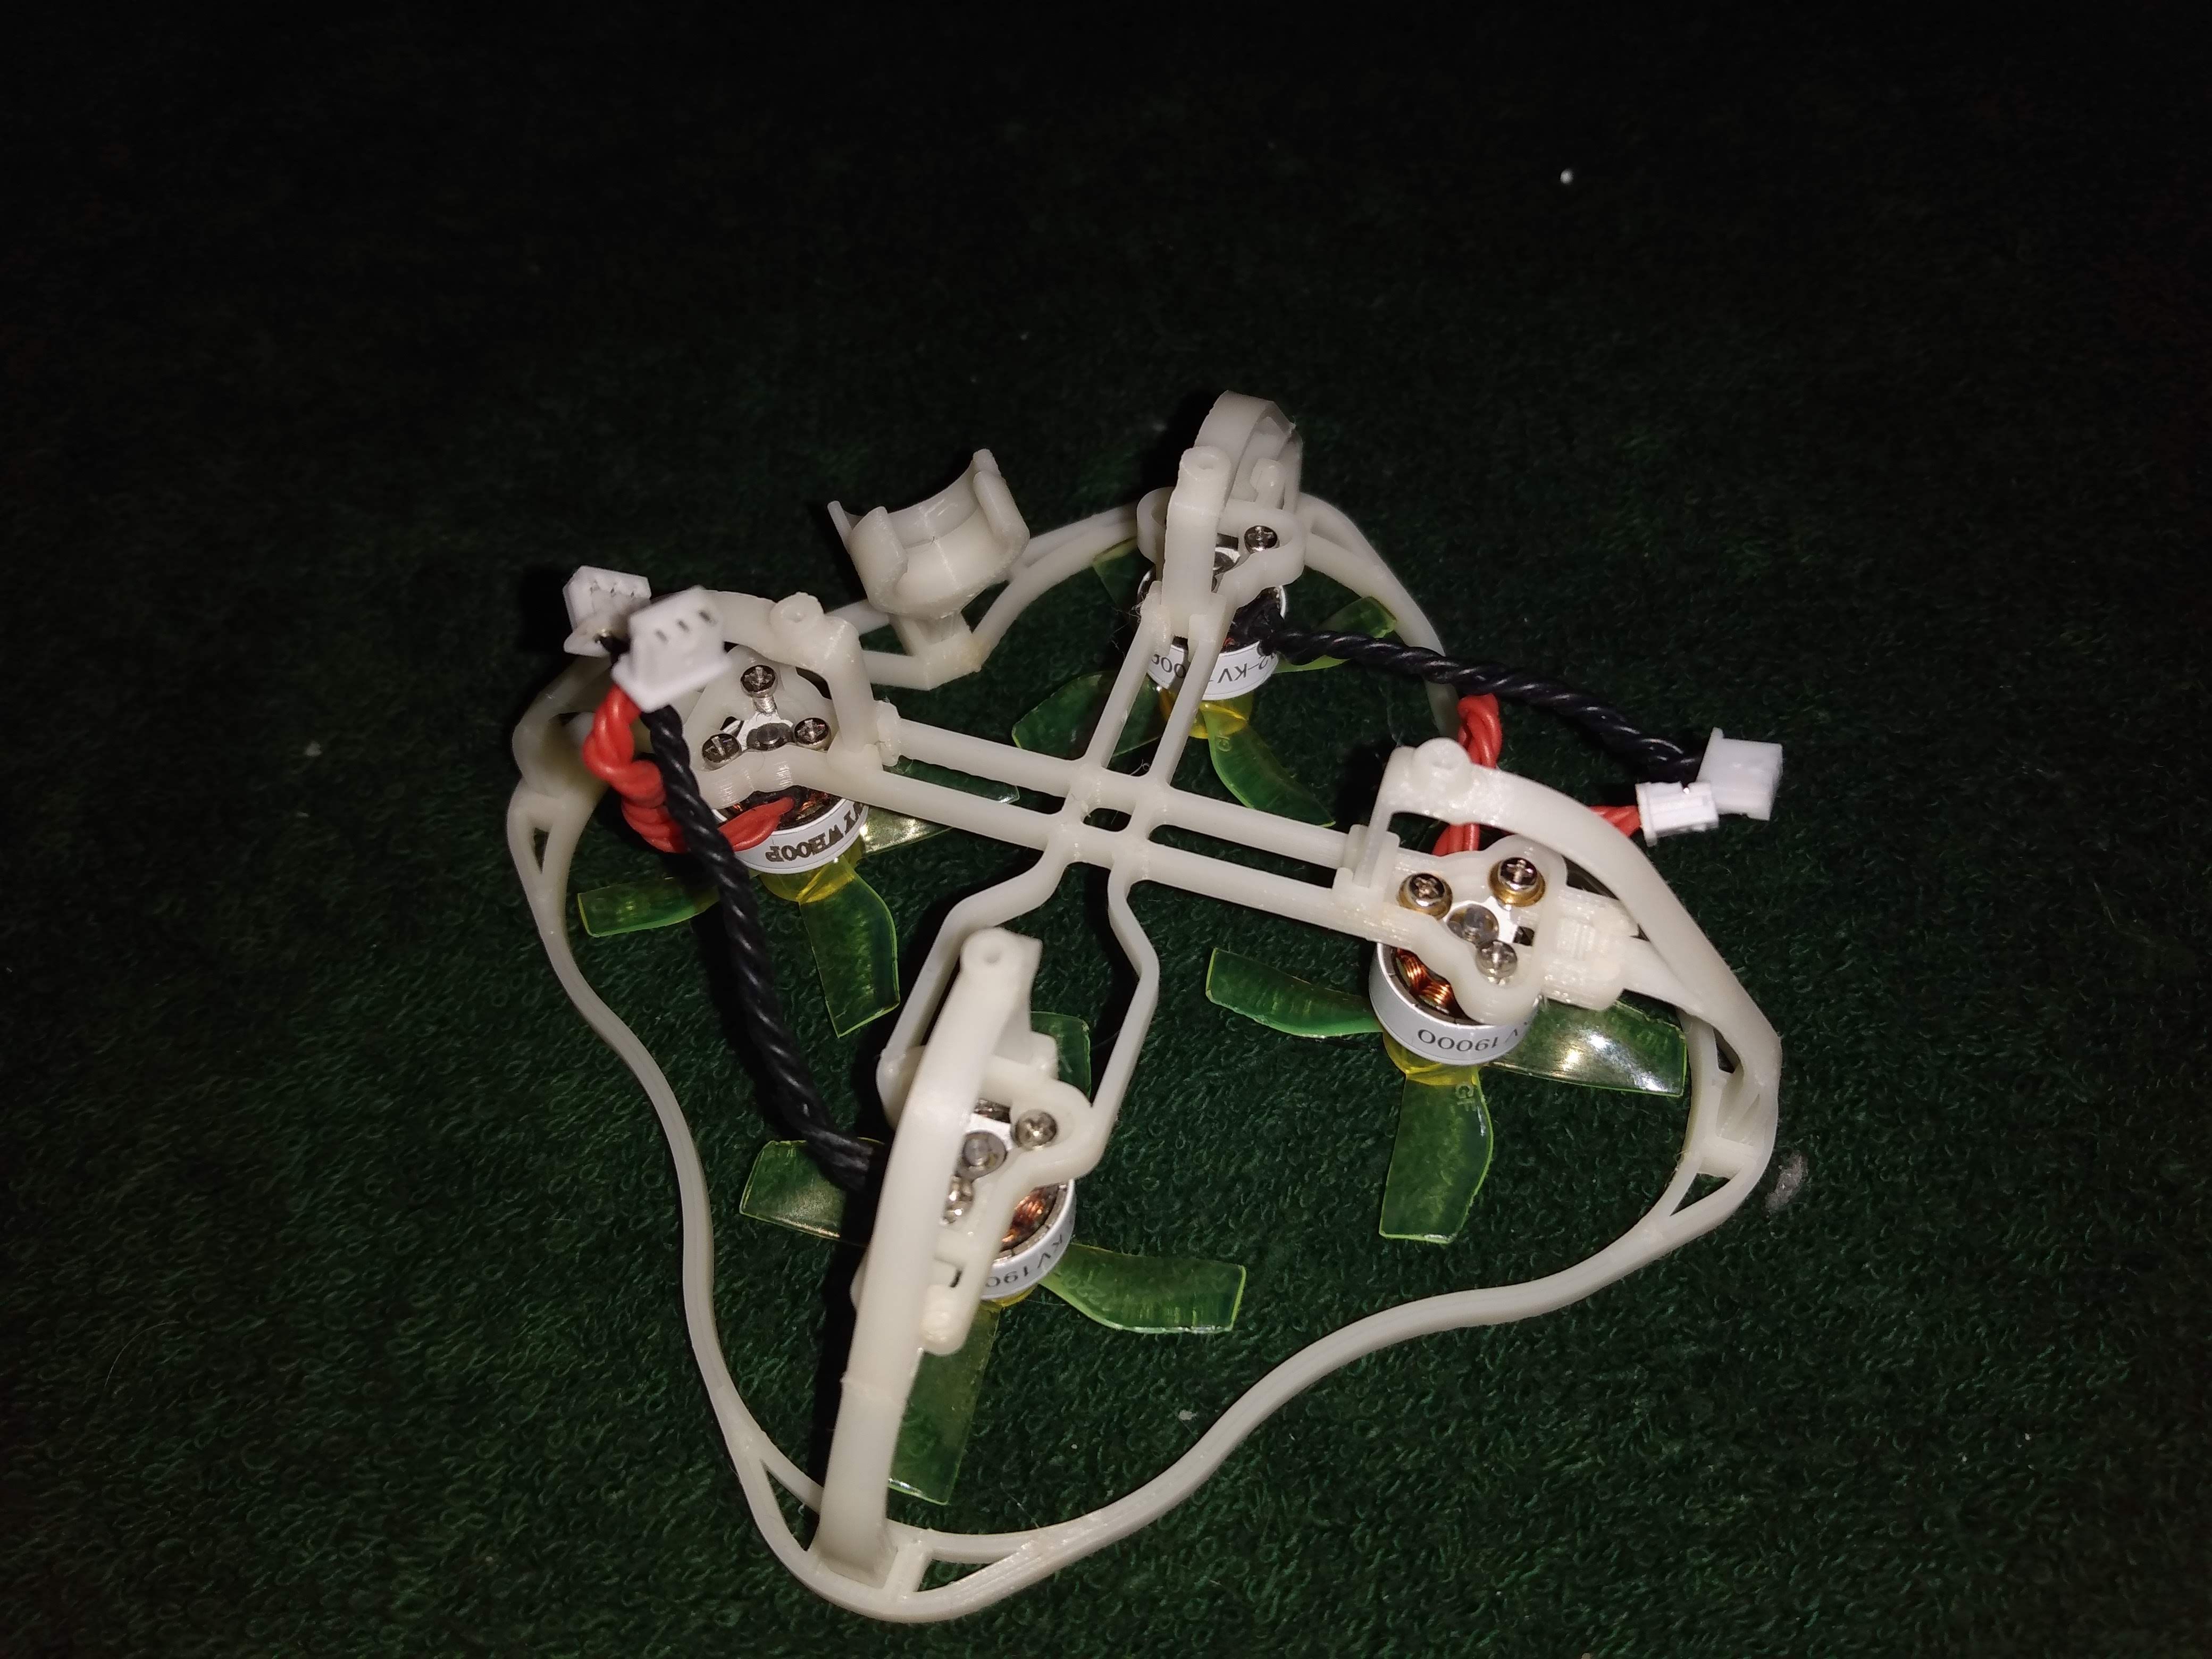
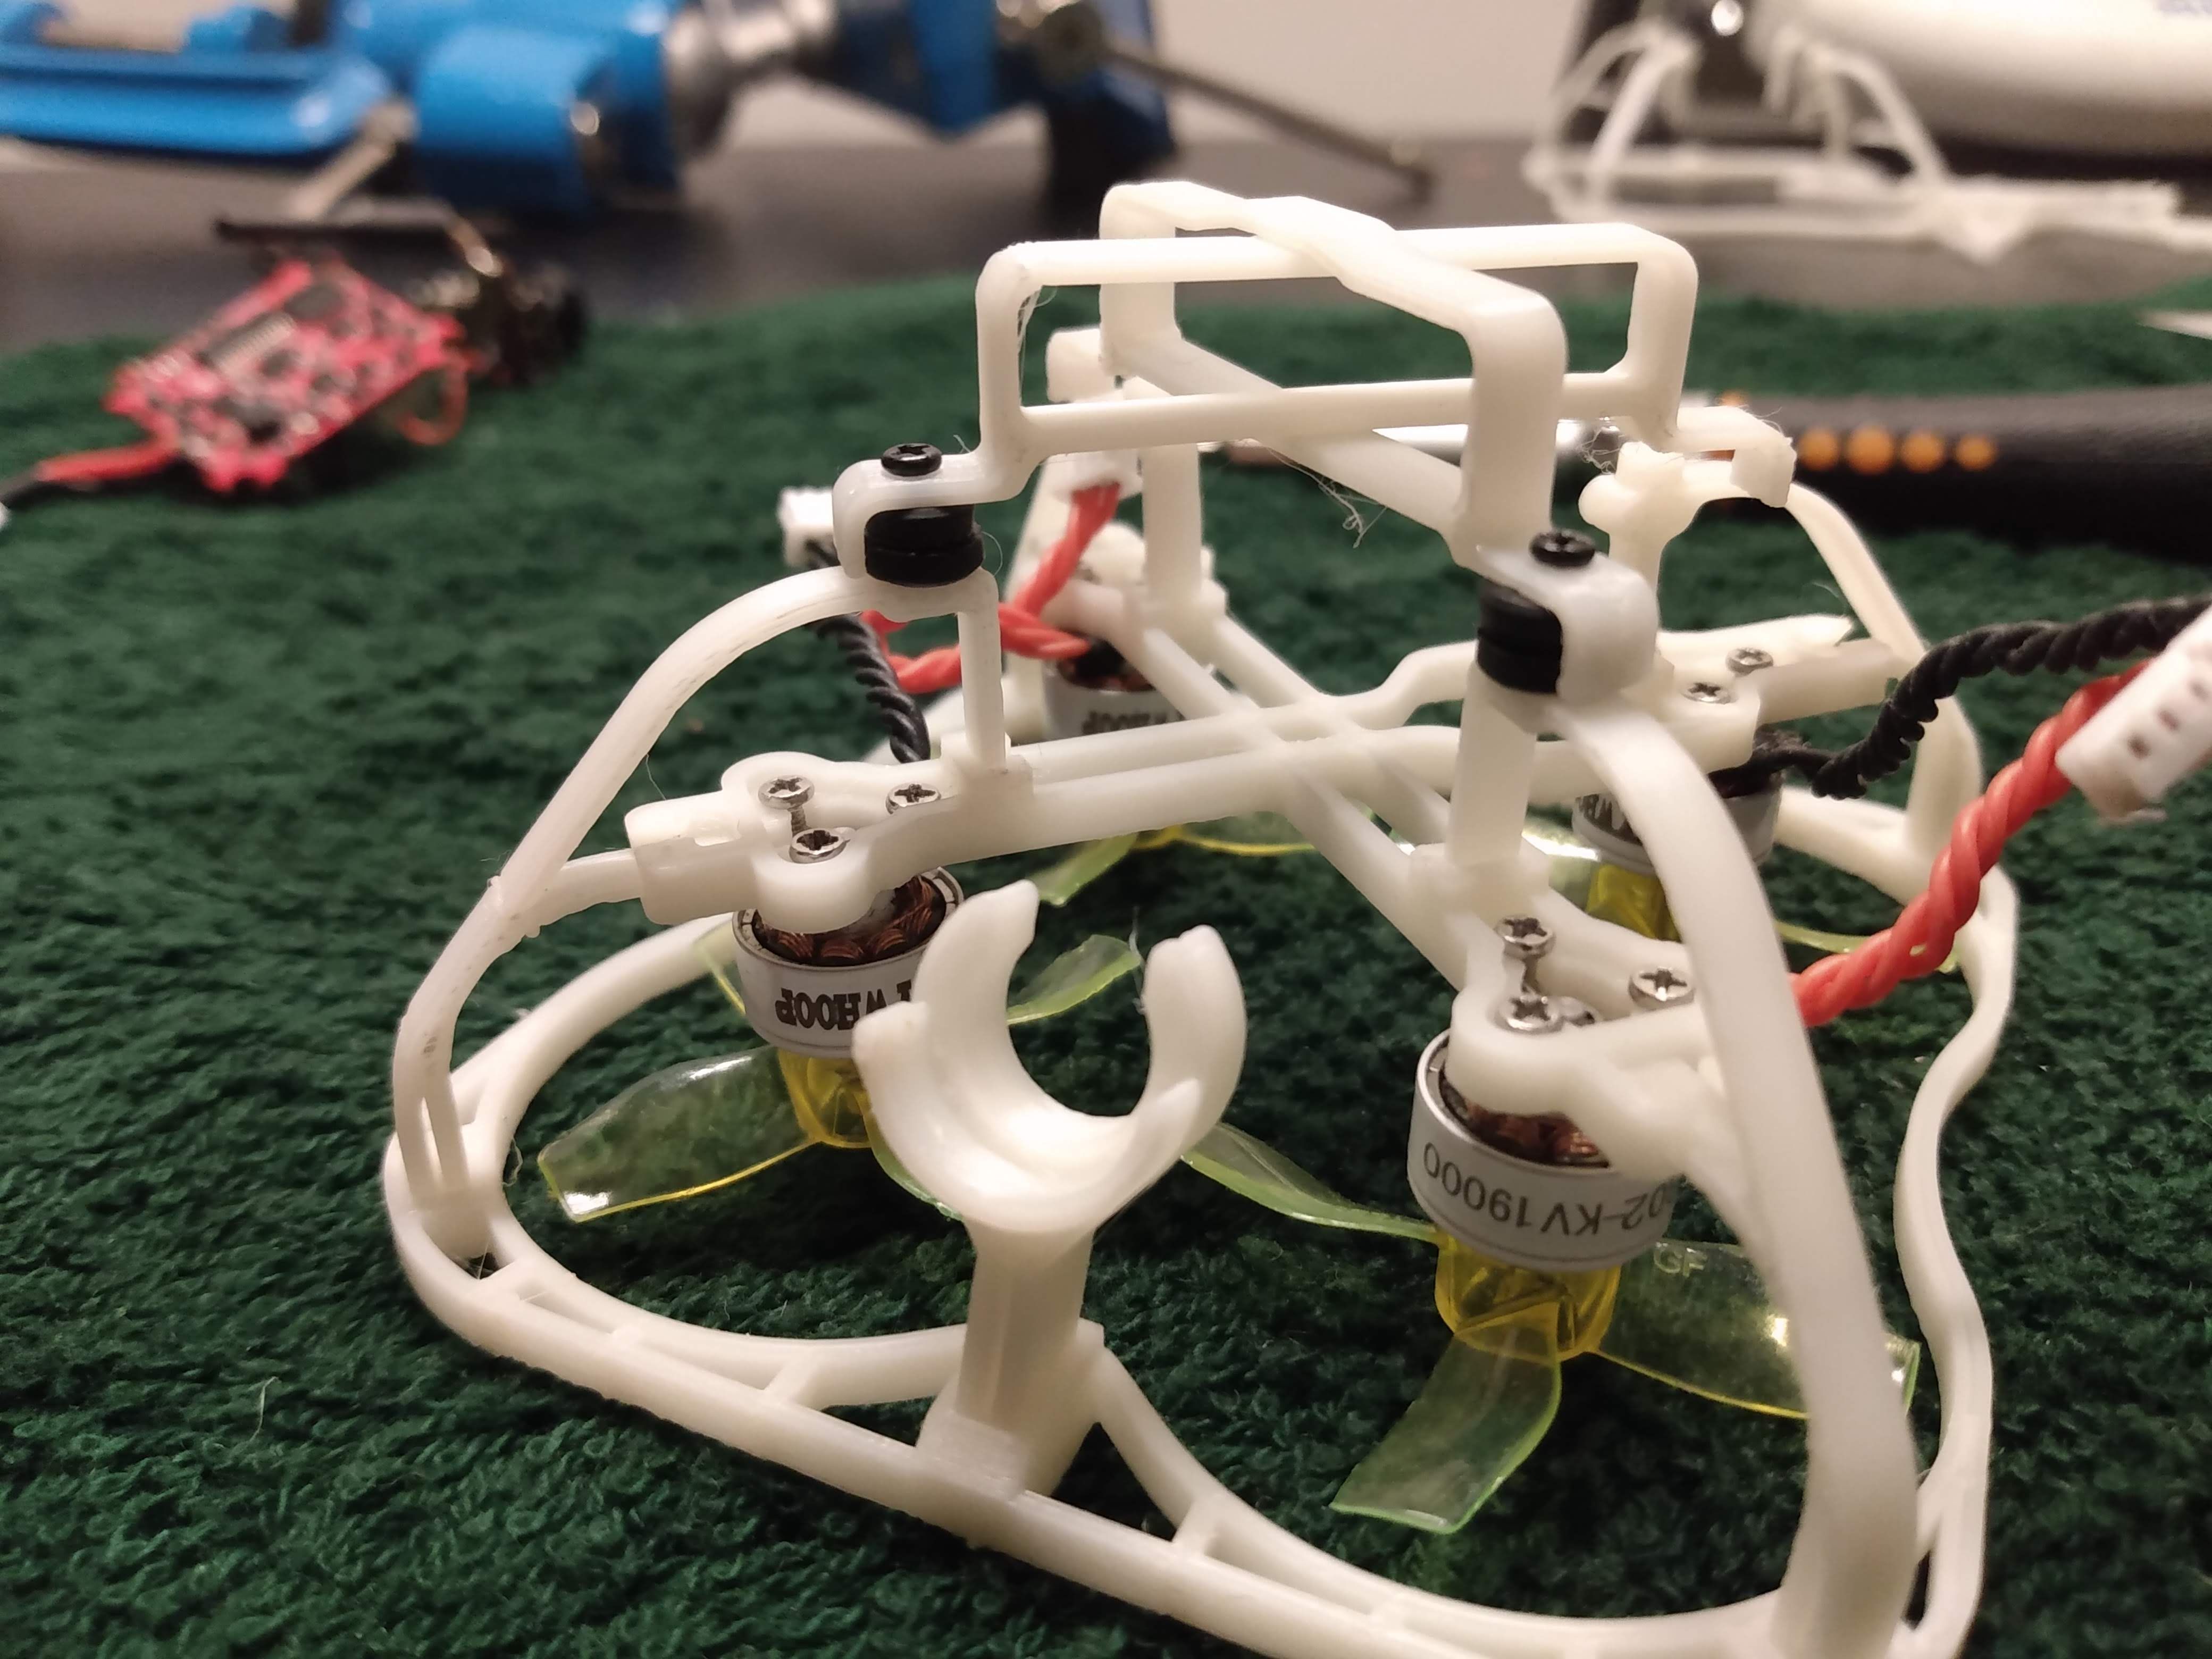
First of all, we're going to install our motors in the "motor block", as i'd like to call it. Before you start, first decide on which side (preferably the back) you want the USB port of your flight controller to be. I like to have it on the rear left. The motor block has a hole to allow your usb connector to pass.
Now something very important about the motors... We are building a pushprop setup. That means the motors will be installed UPSIDE-DOWN. Therefor, the sense of rotation of each motor will be inverted! Because of that, heres a very important rule of thumb:
- For a CCW rotation as seen from the top of the frame, we need a CW motor with a CCW propeller mounted top first on the motor shaft.
- For a CW rotation as seen from the top of the frame, we need a CCW motor with a CW propeller mounted top first on the motor shaft.
- One mistake here, and your Jellyfish will not lift off!
So for a props-out configuration, we have for example a CW motor with a CCW propeller on the front left of the frame to get a CCW rotation as seen from the top of the frame


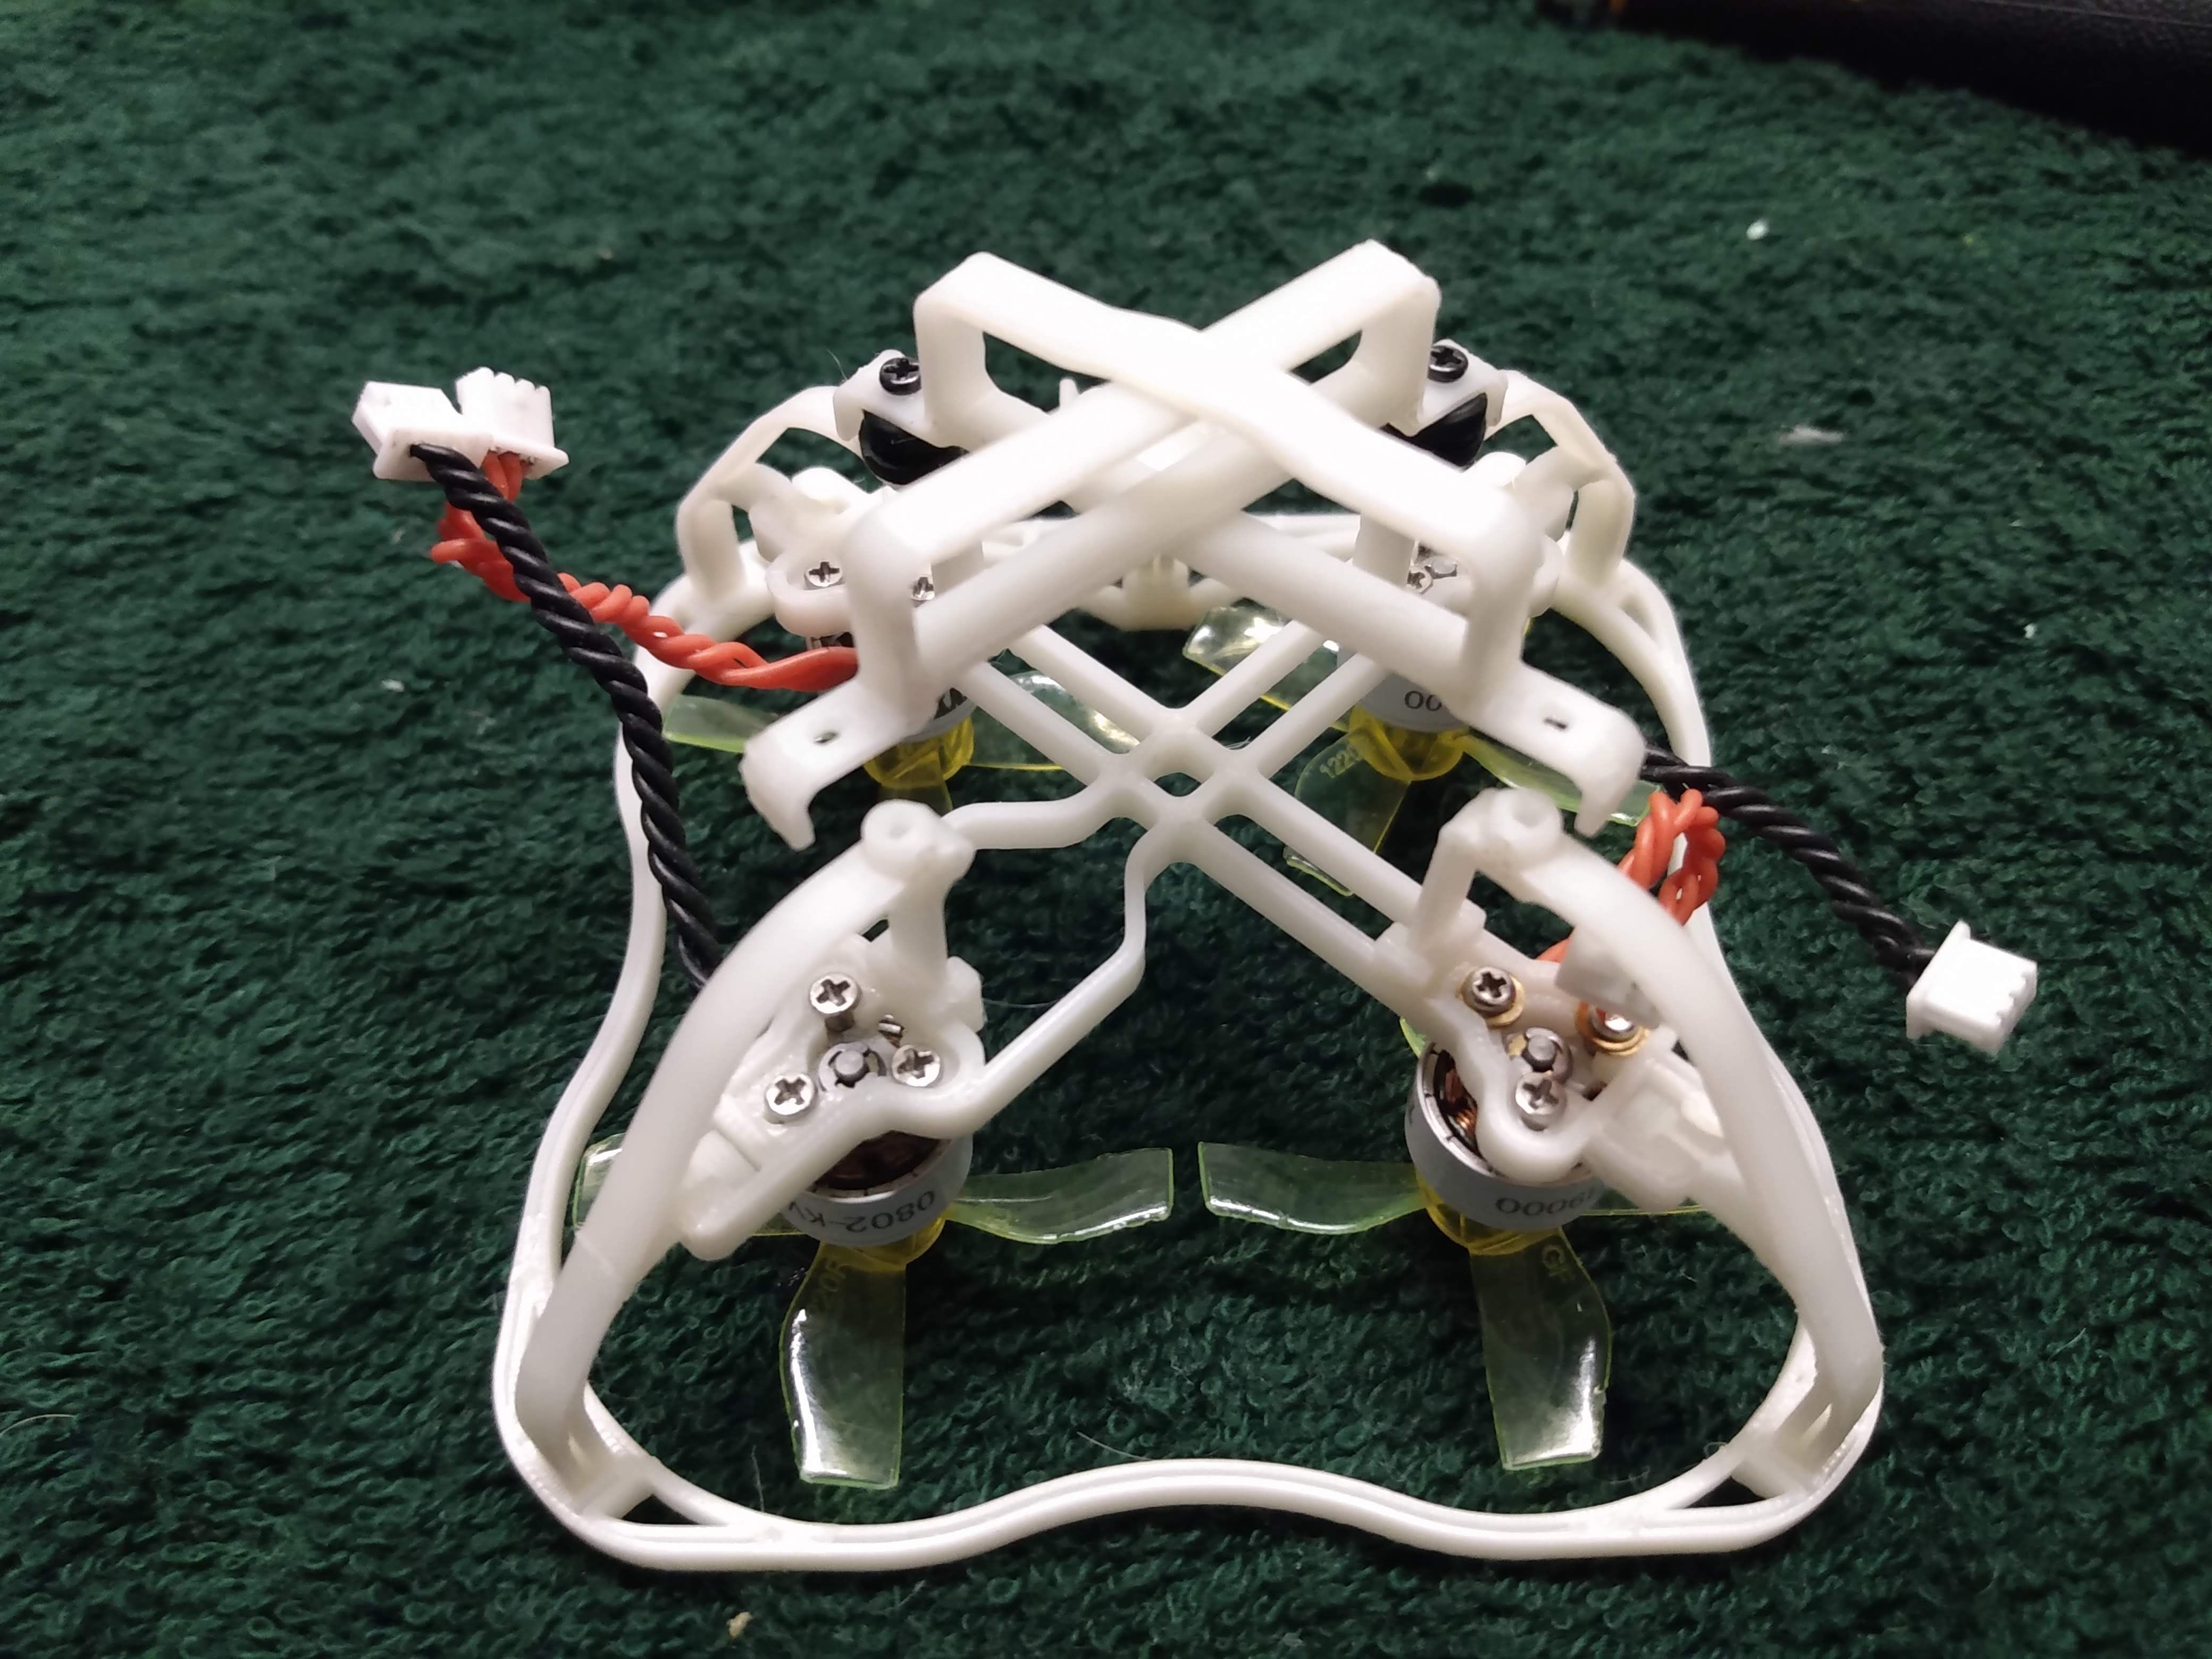
For the next step, we can put aside our motor block for a while. We are going to install the "arms" (or tentacles?) in the shroud. Just push them in the slots on the shroud until you can no longer continue. Install the "USB arm" where the USB port of your FC will be. A piece of each arm will protrude through the bottom of the shroud. We will deal with that later. If you have difficulties installing the arms, use your sharp knife to clean out the slots in the shroud or to make the slots a little bigger if necessary.
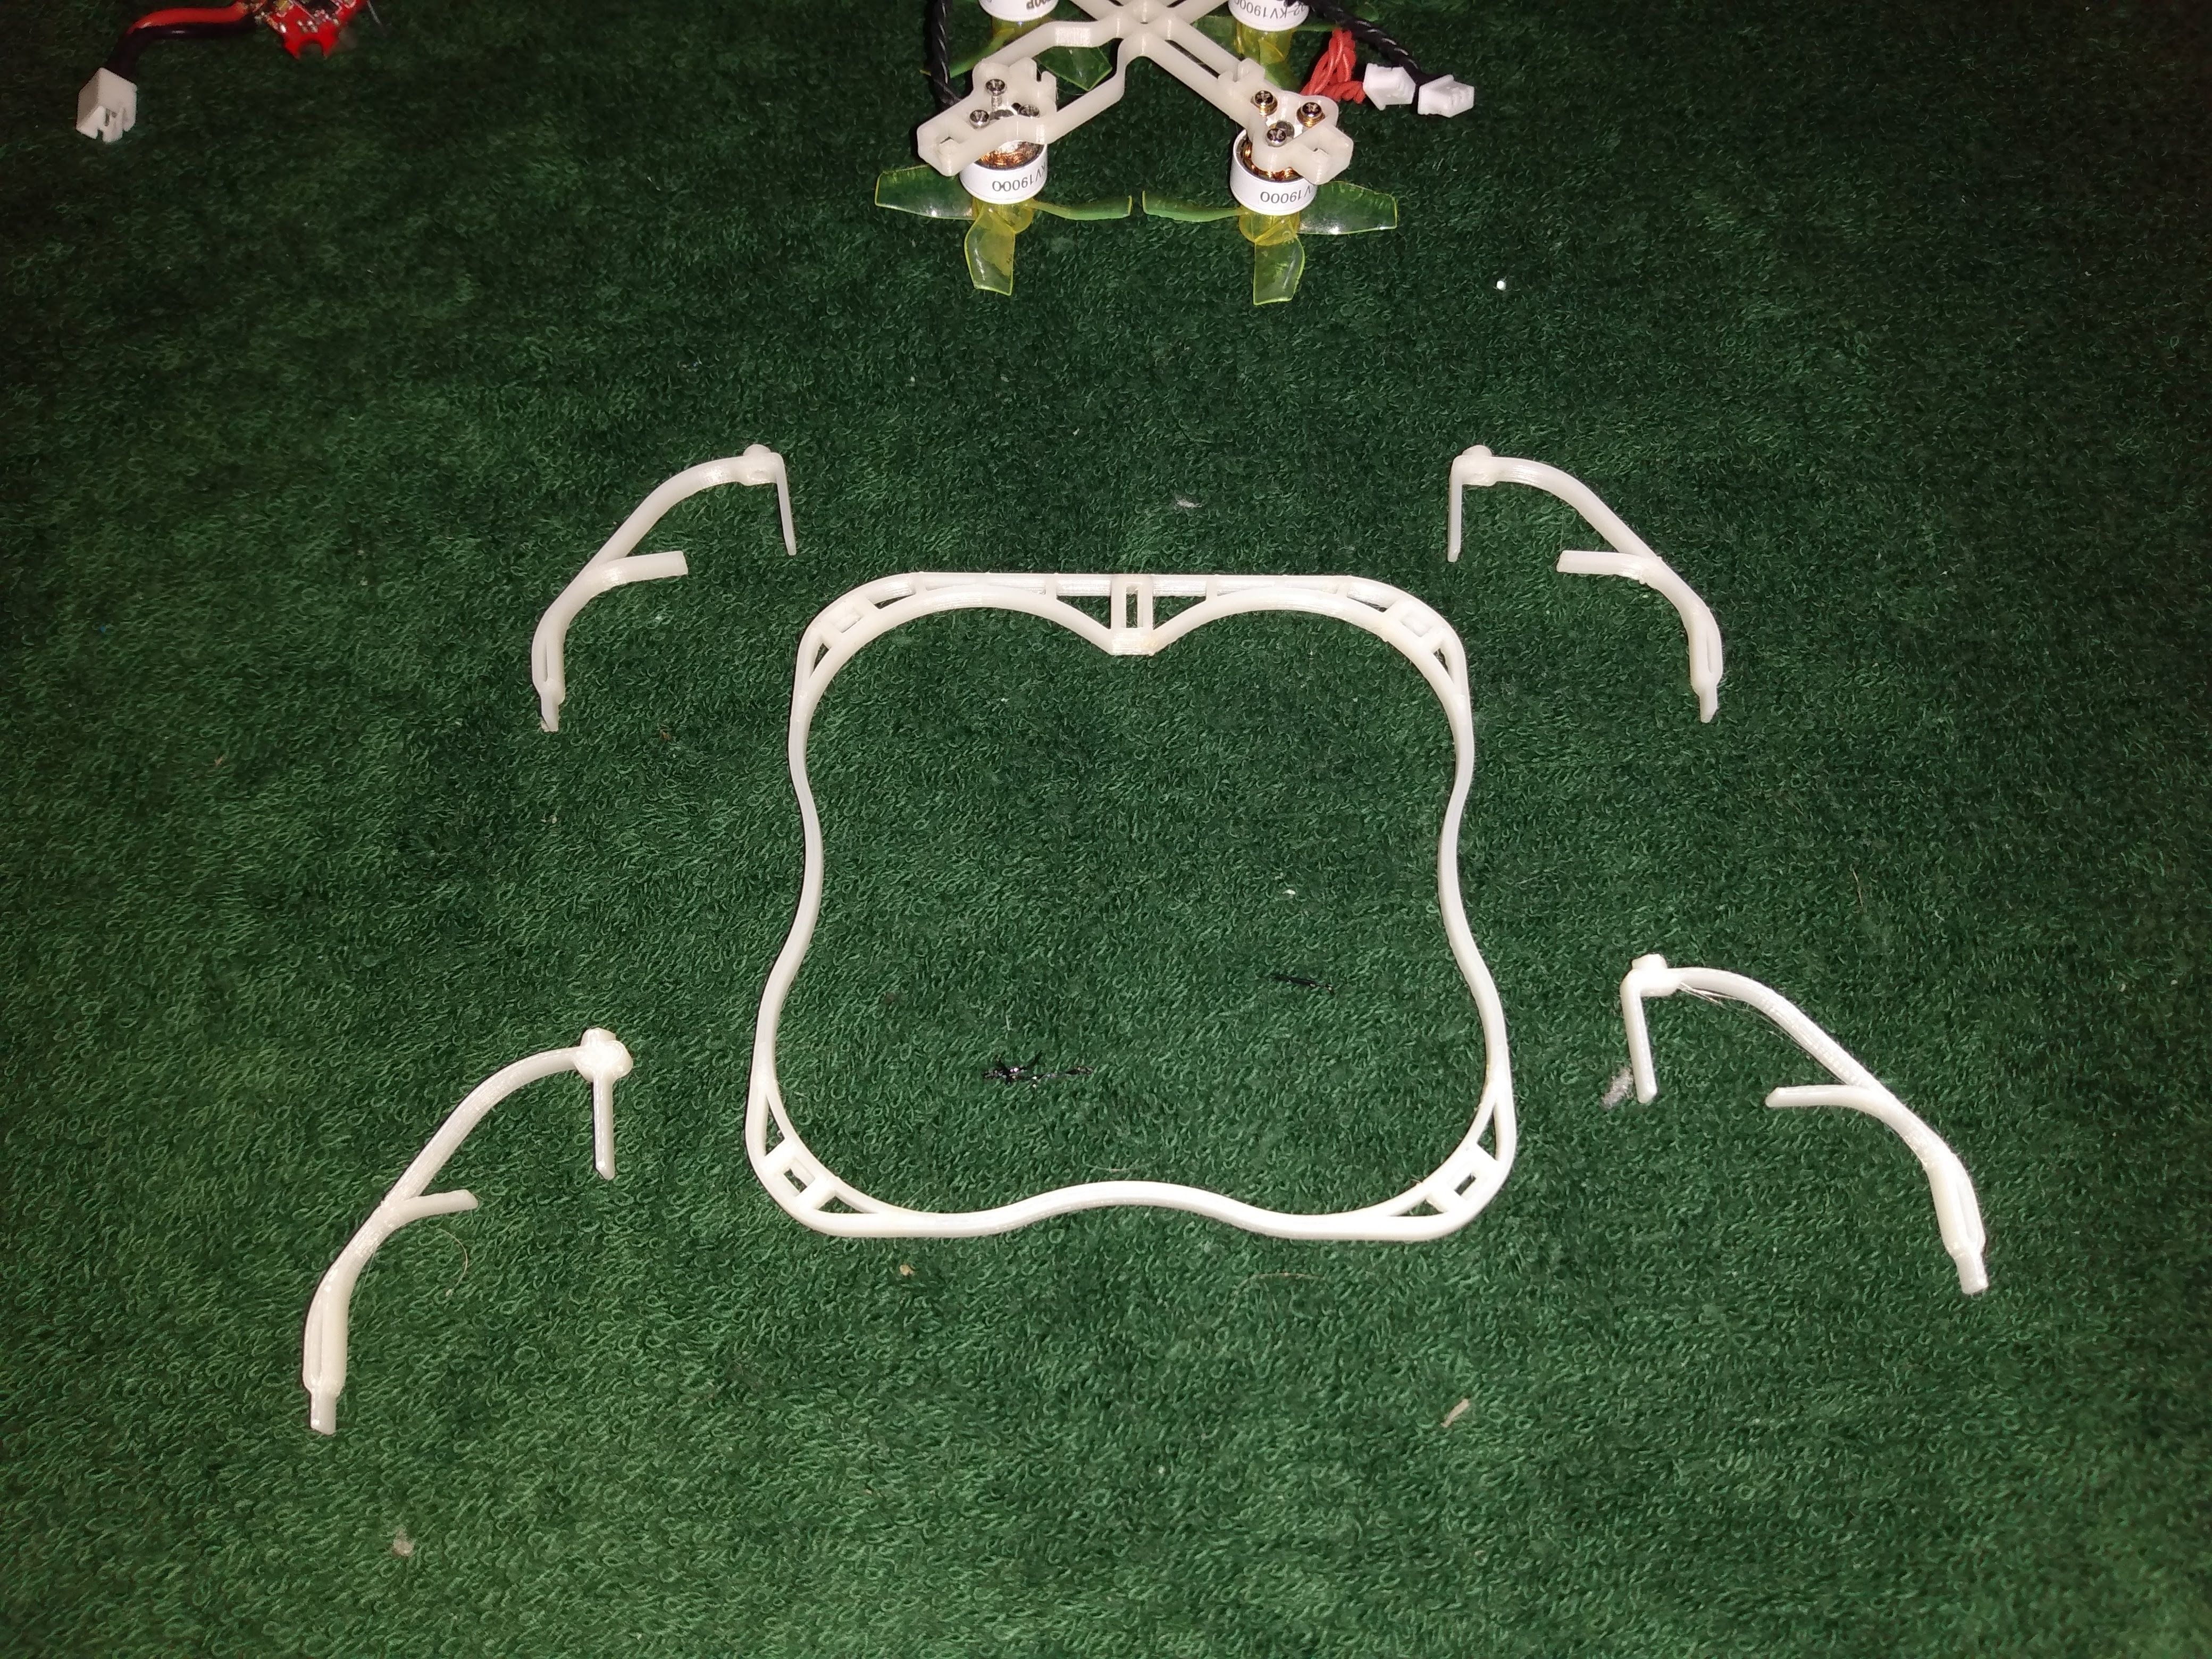
The camera mount, which has a 20 degree angle, is installed the same way as the arms. Again, a small piece will protrude at the bottom of the shroud. Leave that for now.
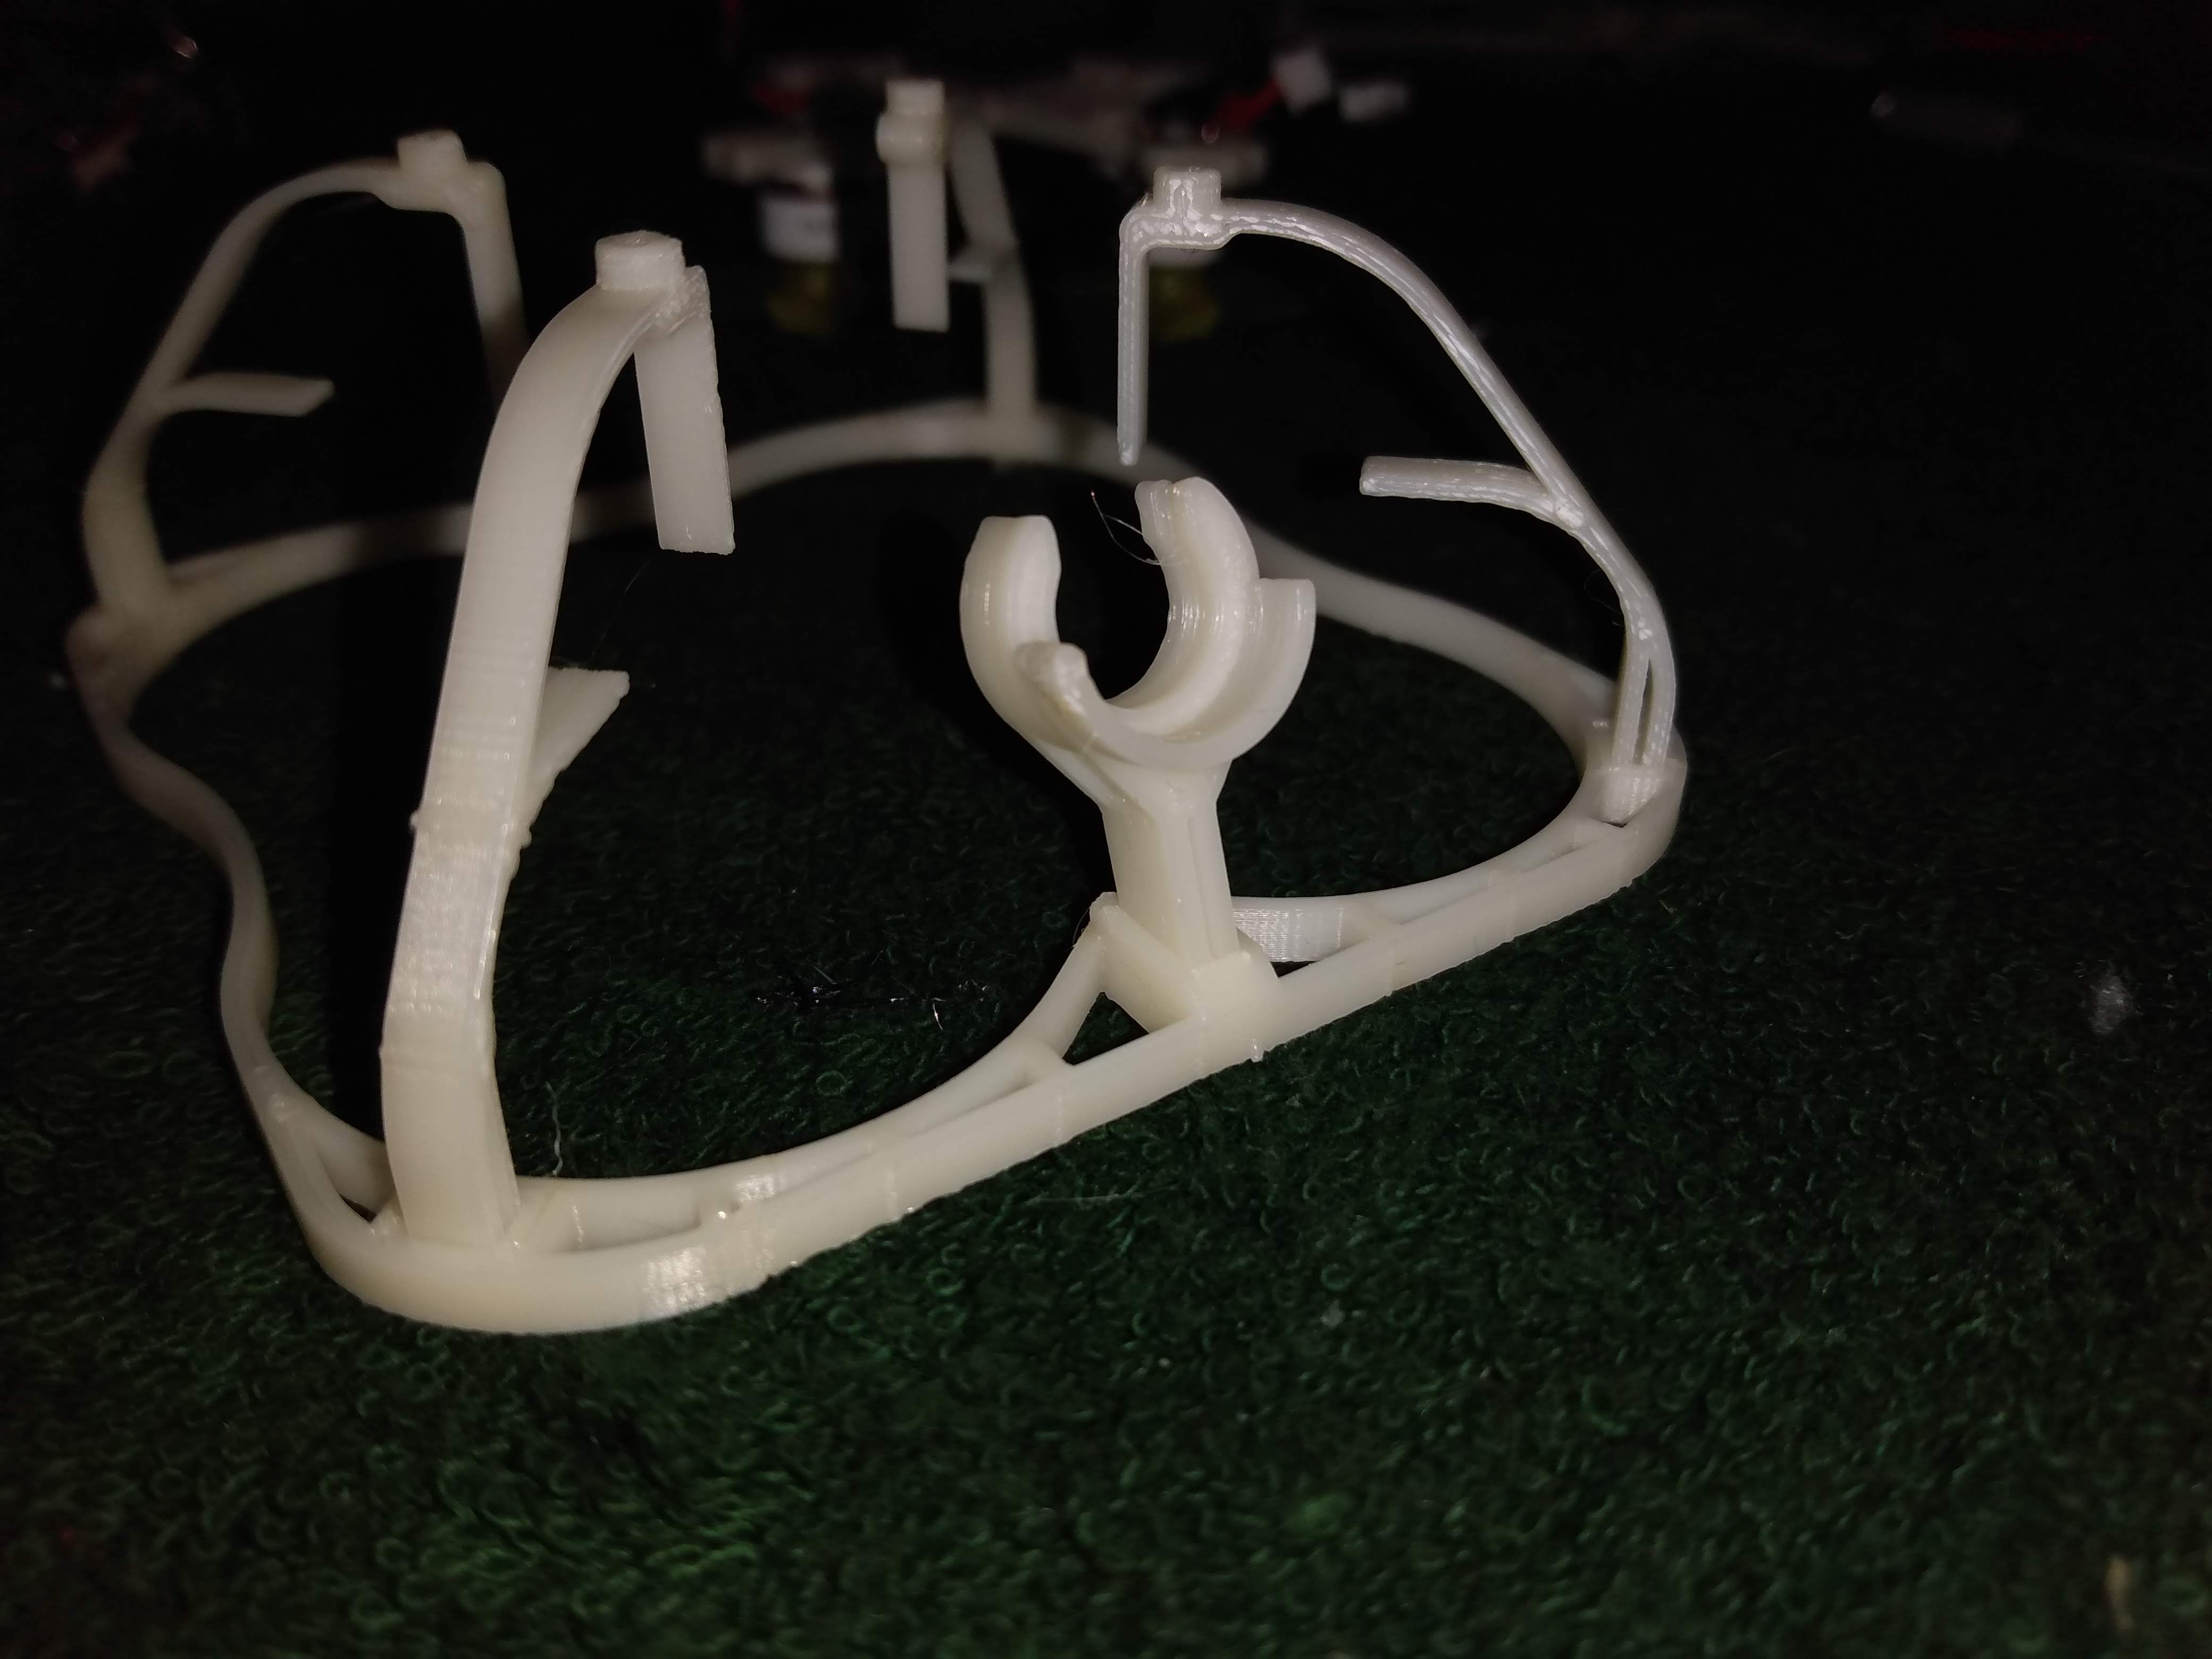
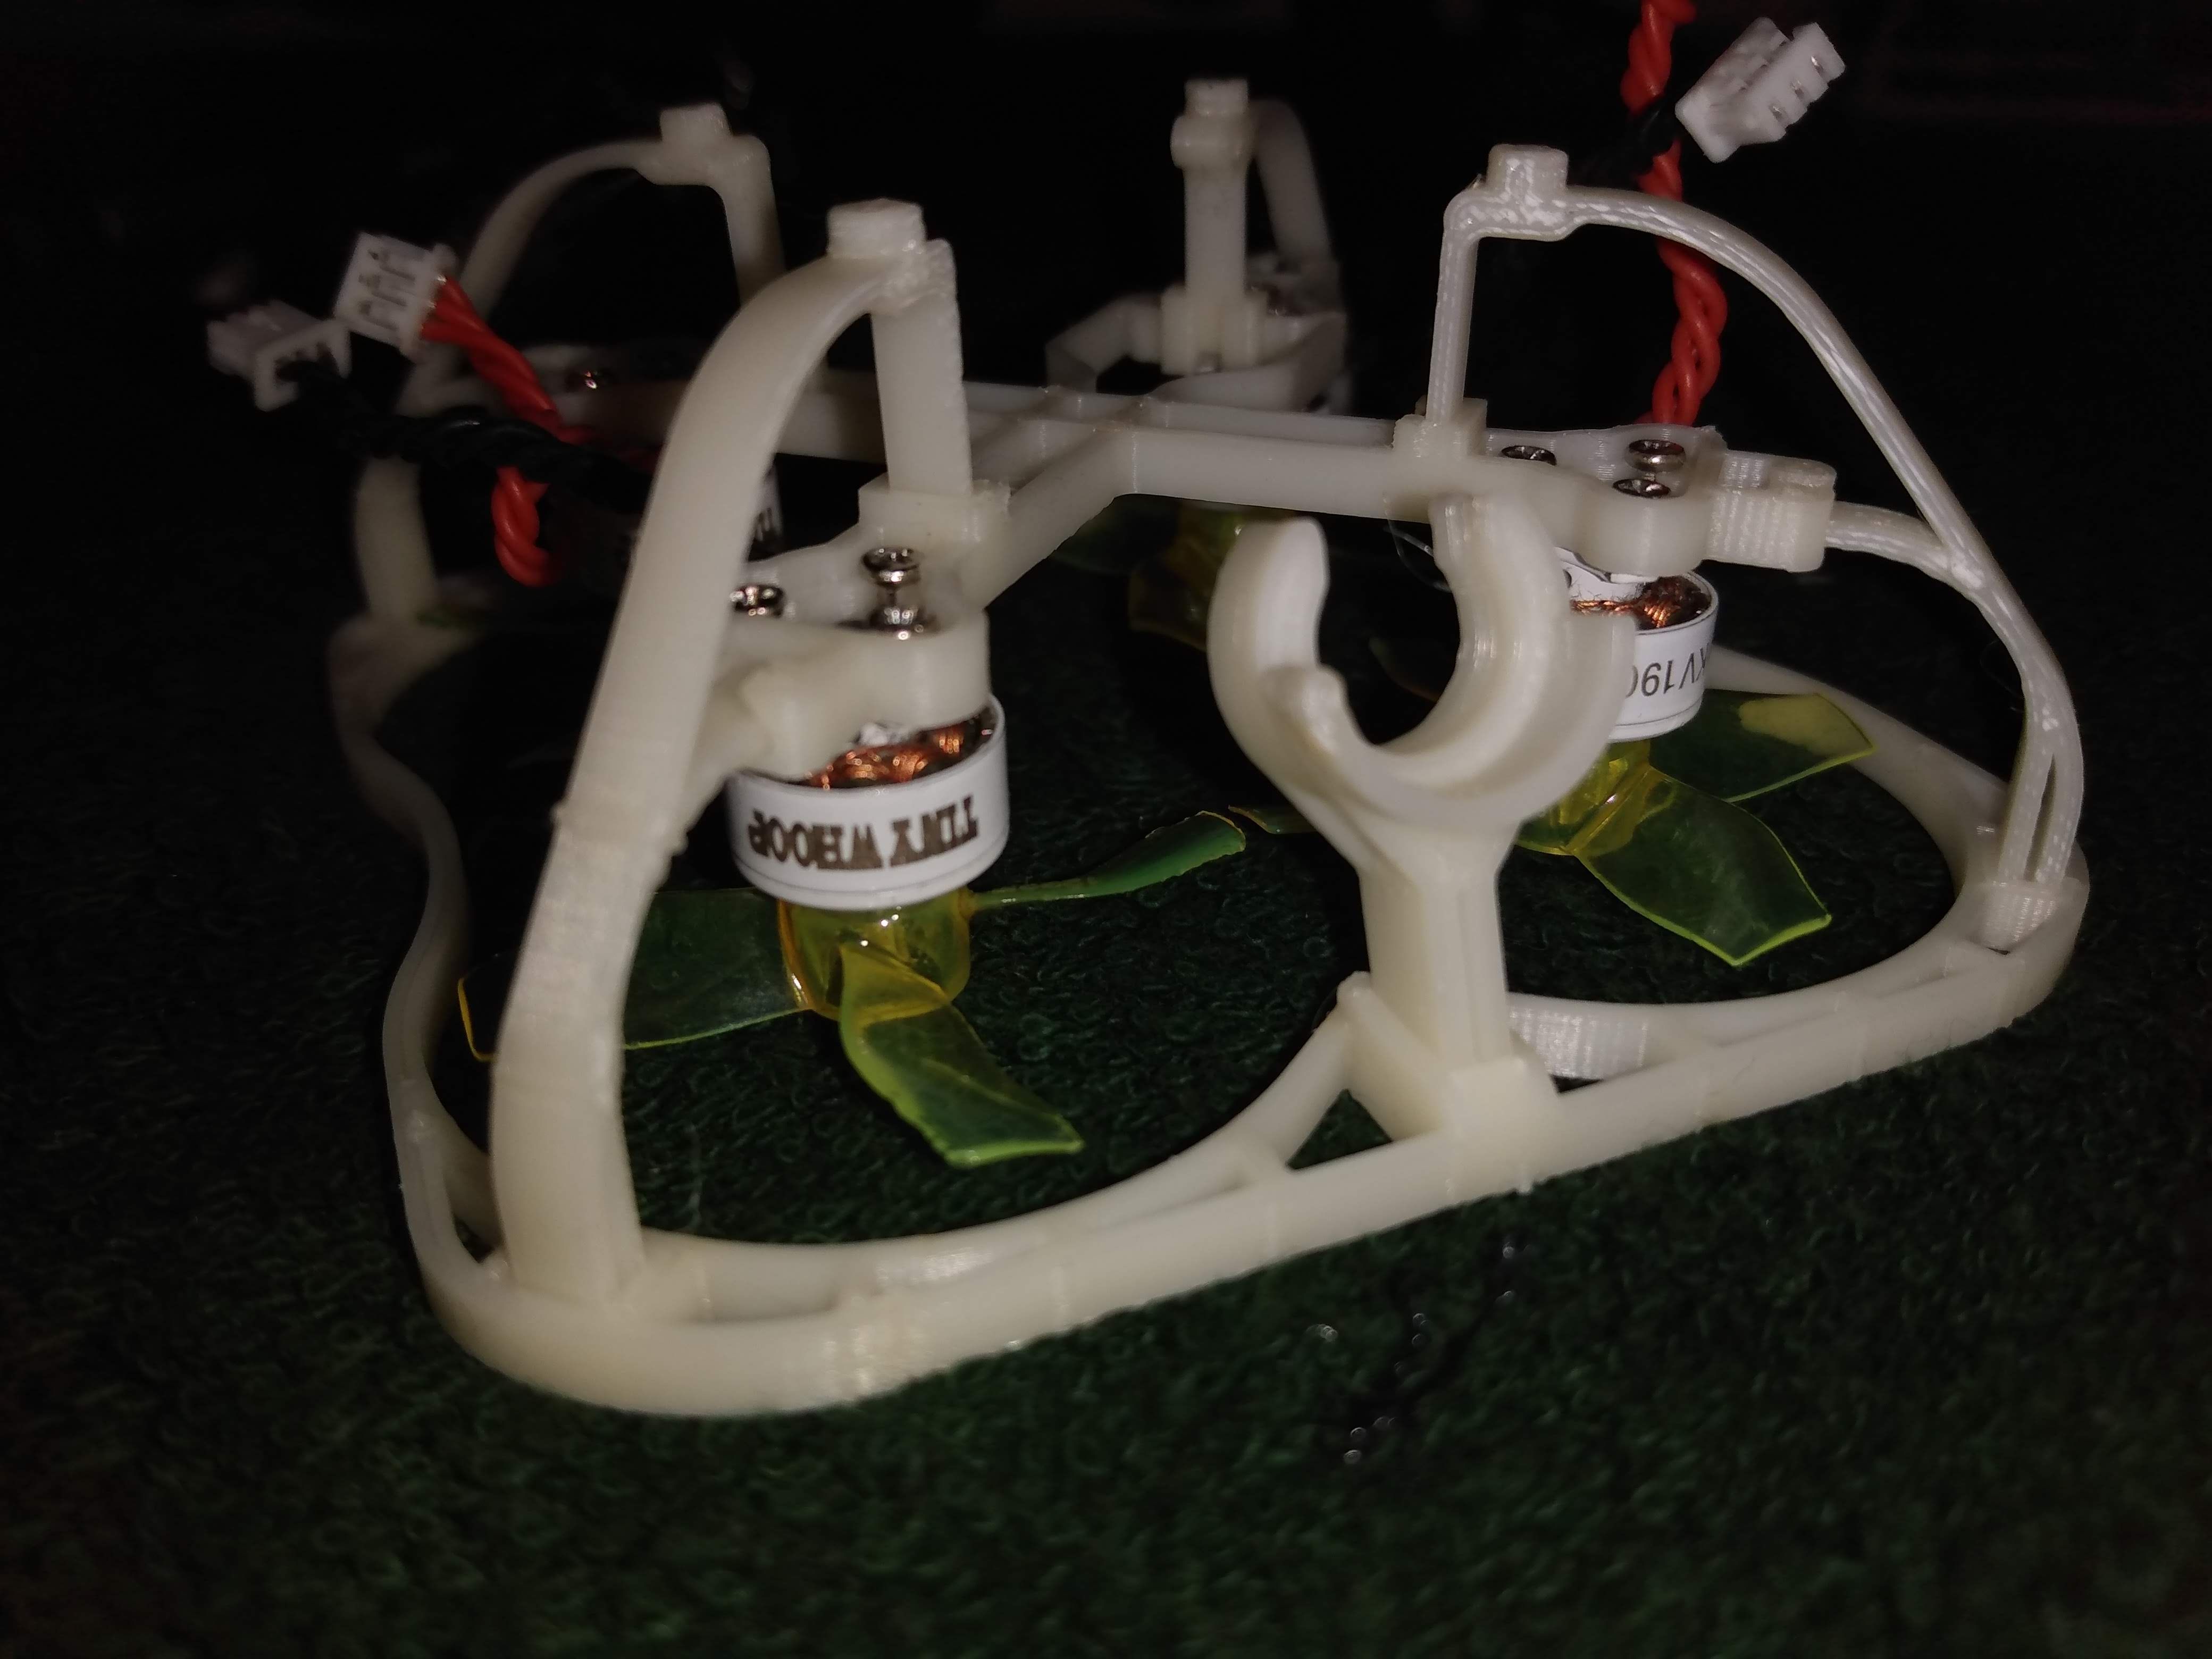
Next, we're going to combine the motor block and the shroud/arms assembly together. The motor block has at each motor mount a vertical and horizontal slot where the vertical and horizontal strut of each arm will be fitted in. Pretty straightforward.
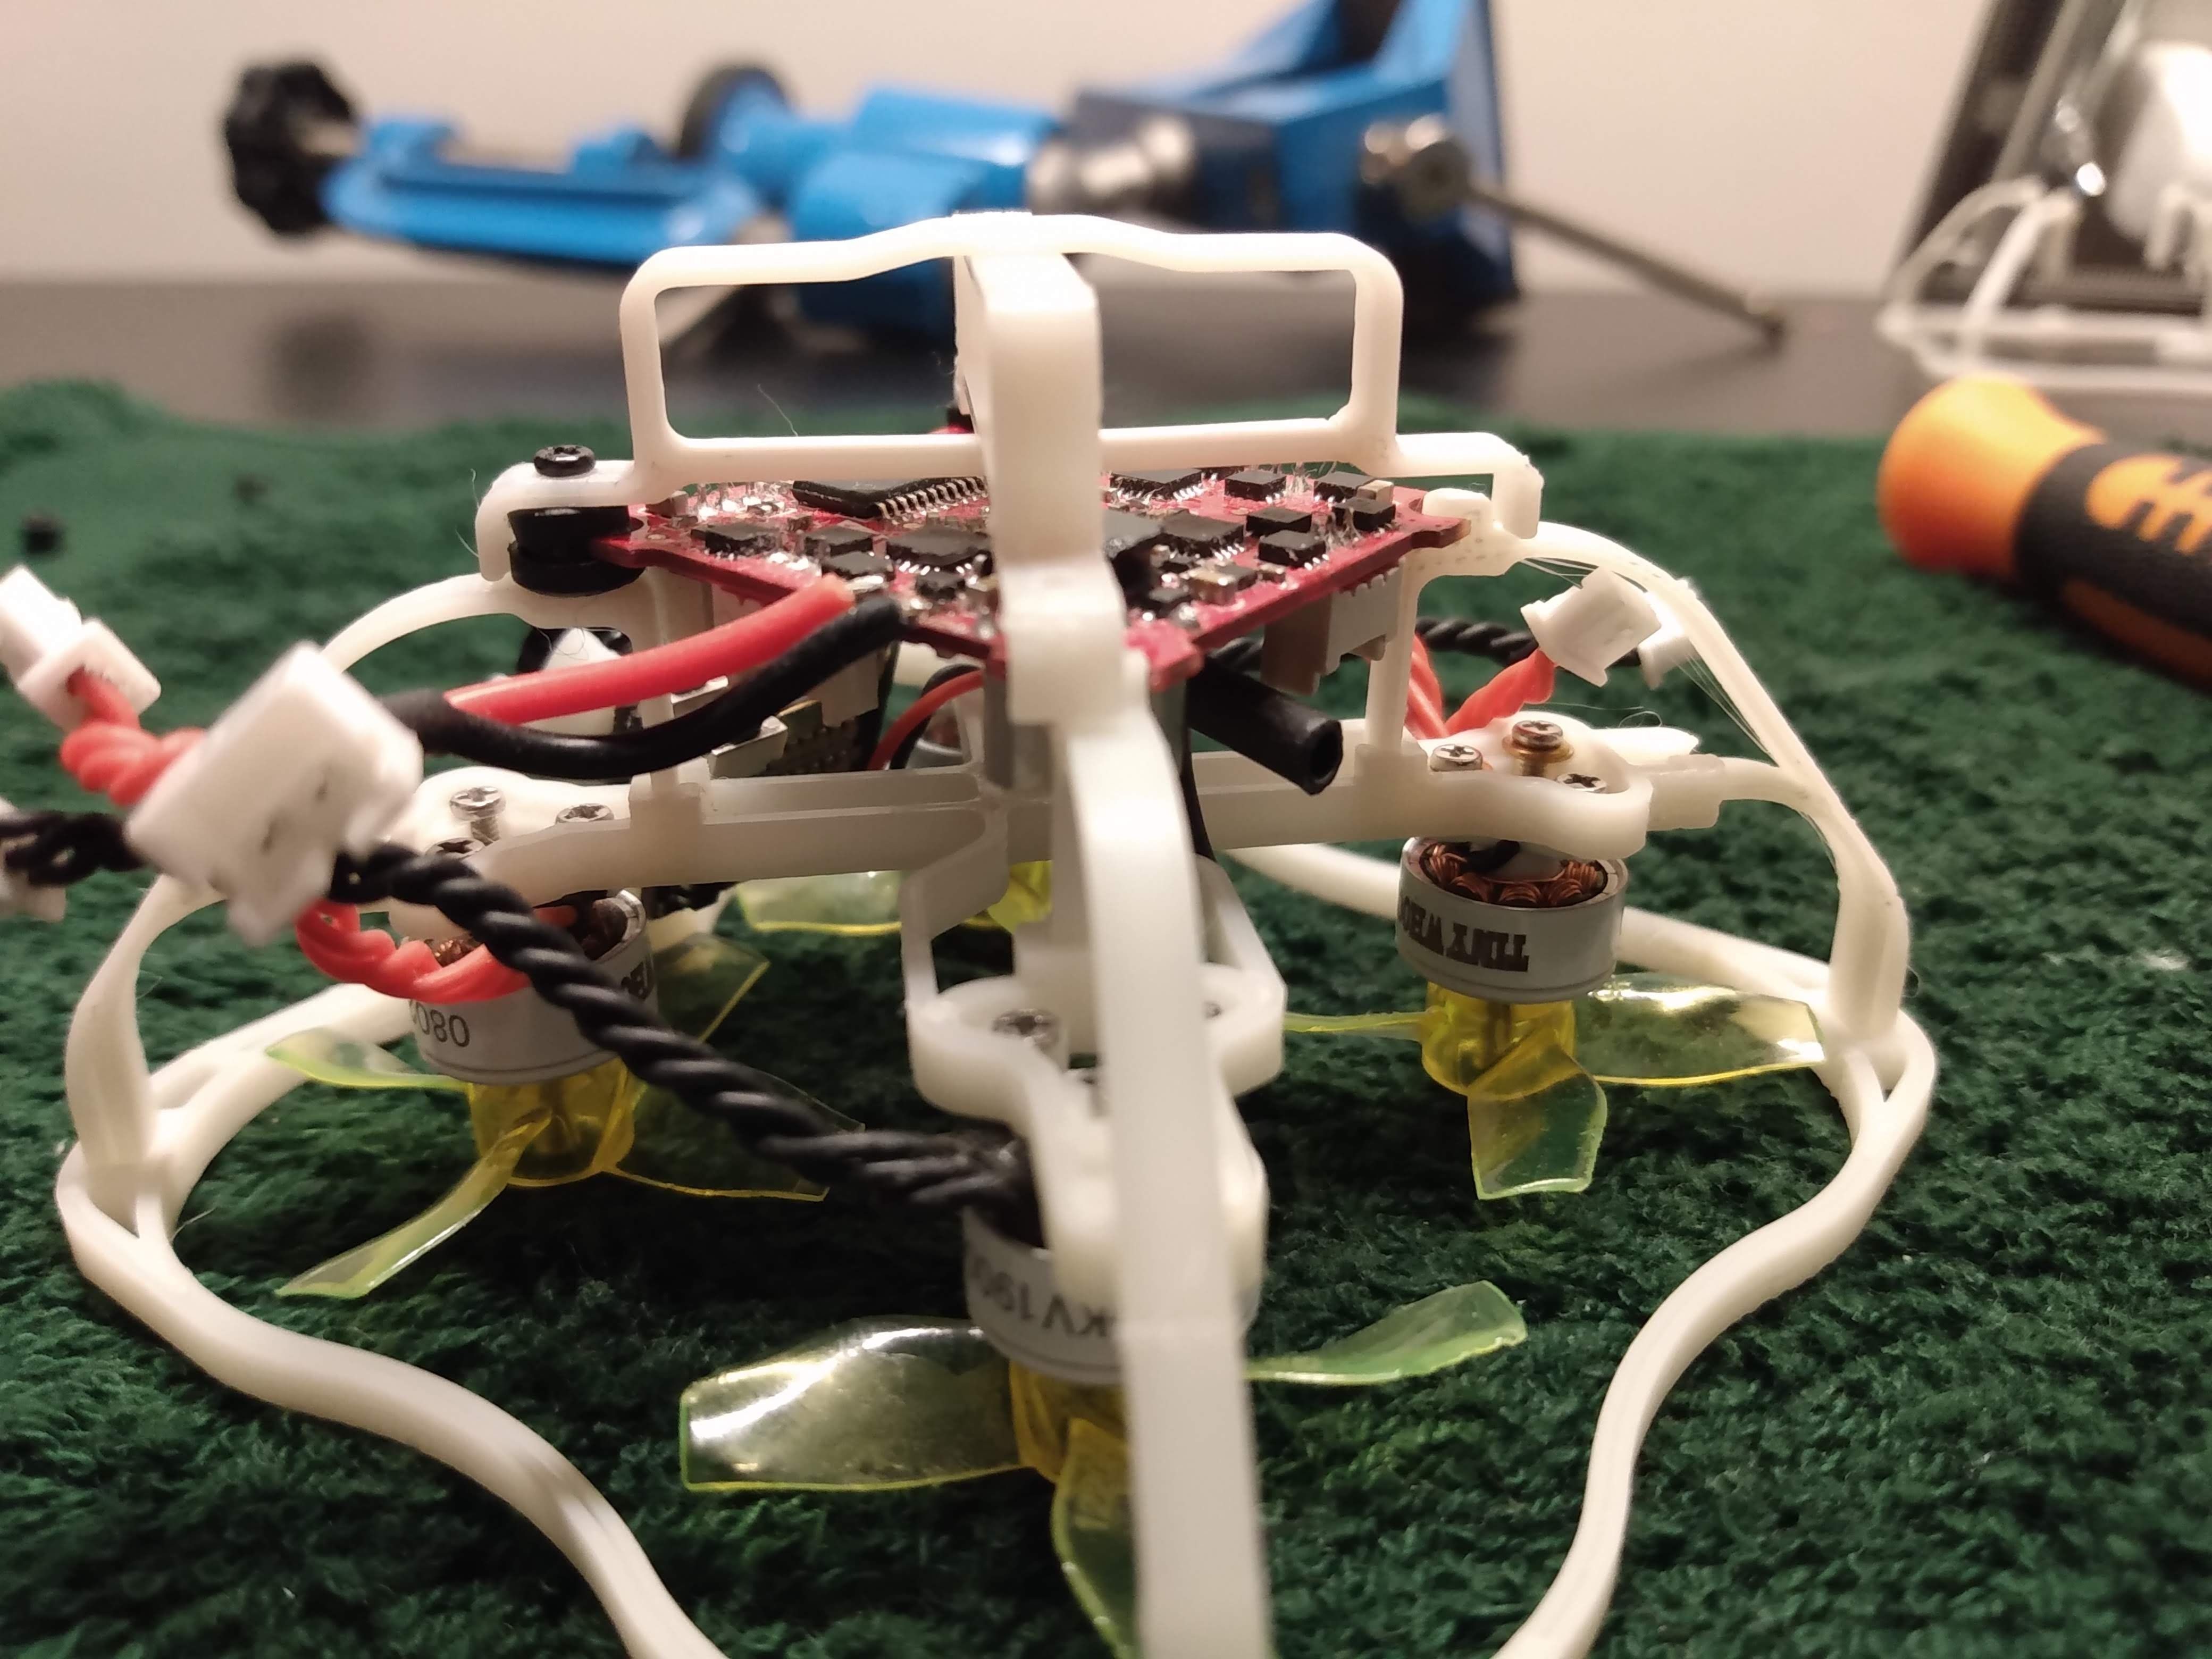
Now we're going to install the flight controller and camera unit while "closing up" the frame with the battery mount set.
Use the flight controller screws and grommets. First screw in the battery mount parts, but only on one side. That way, we leave a gap that allows us to install the FC and camera unit. The camera unit is slotted in the camera mount with it's lens. For an AIO camera/vtx unit, tuck away the antenna below the FC. In case you use a separate vtx, i suggest to install it under the FC. Make sure the corners of the FC are seated in the grommets, like it would be in a regular Tiny Whoop. Then "close up" the assembly by screwing in the other side of the 2 battery mount parts that were still left undone.
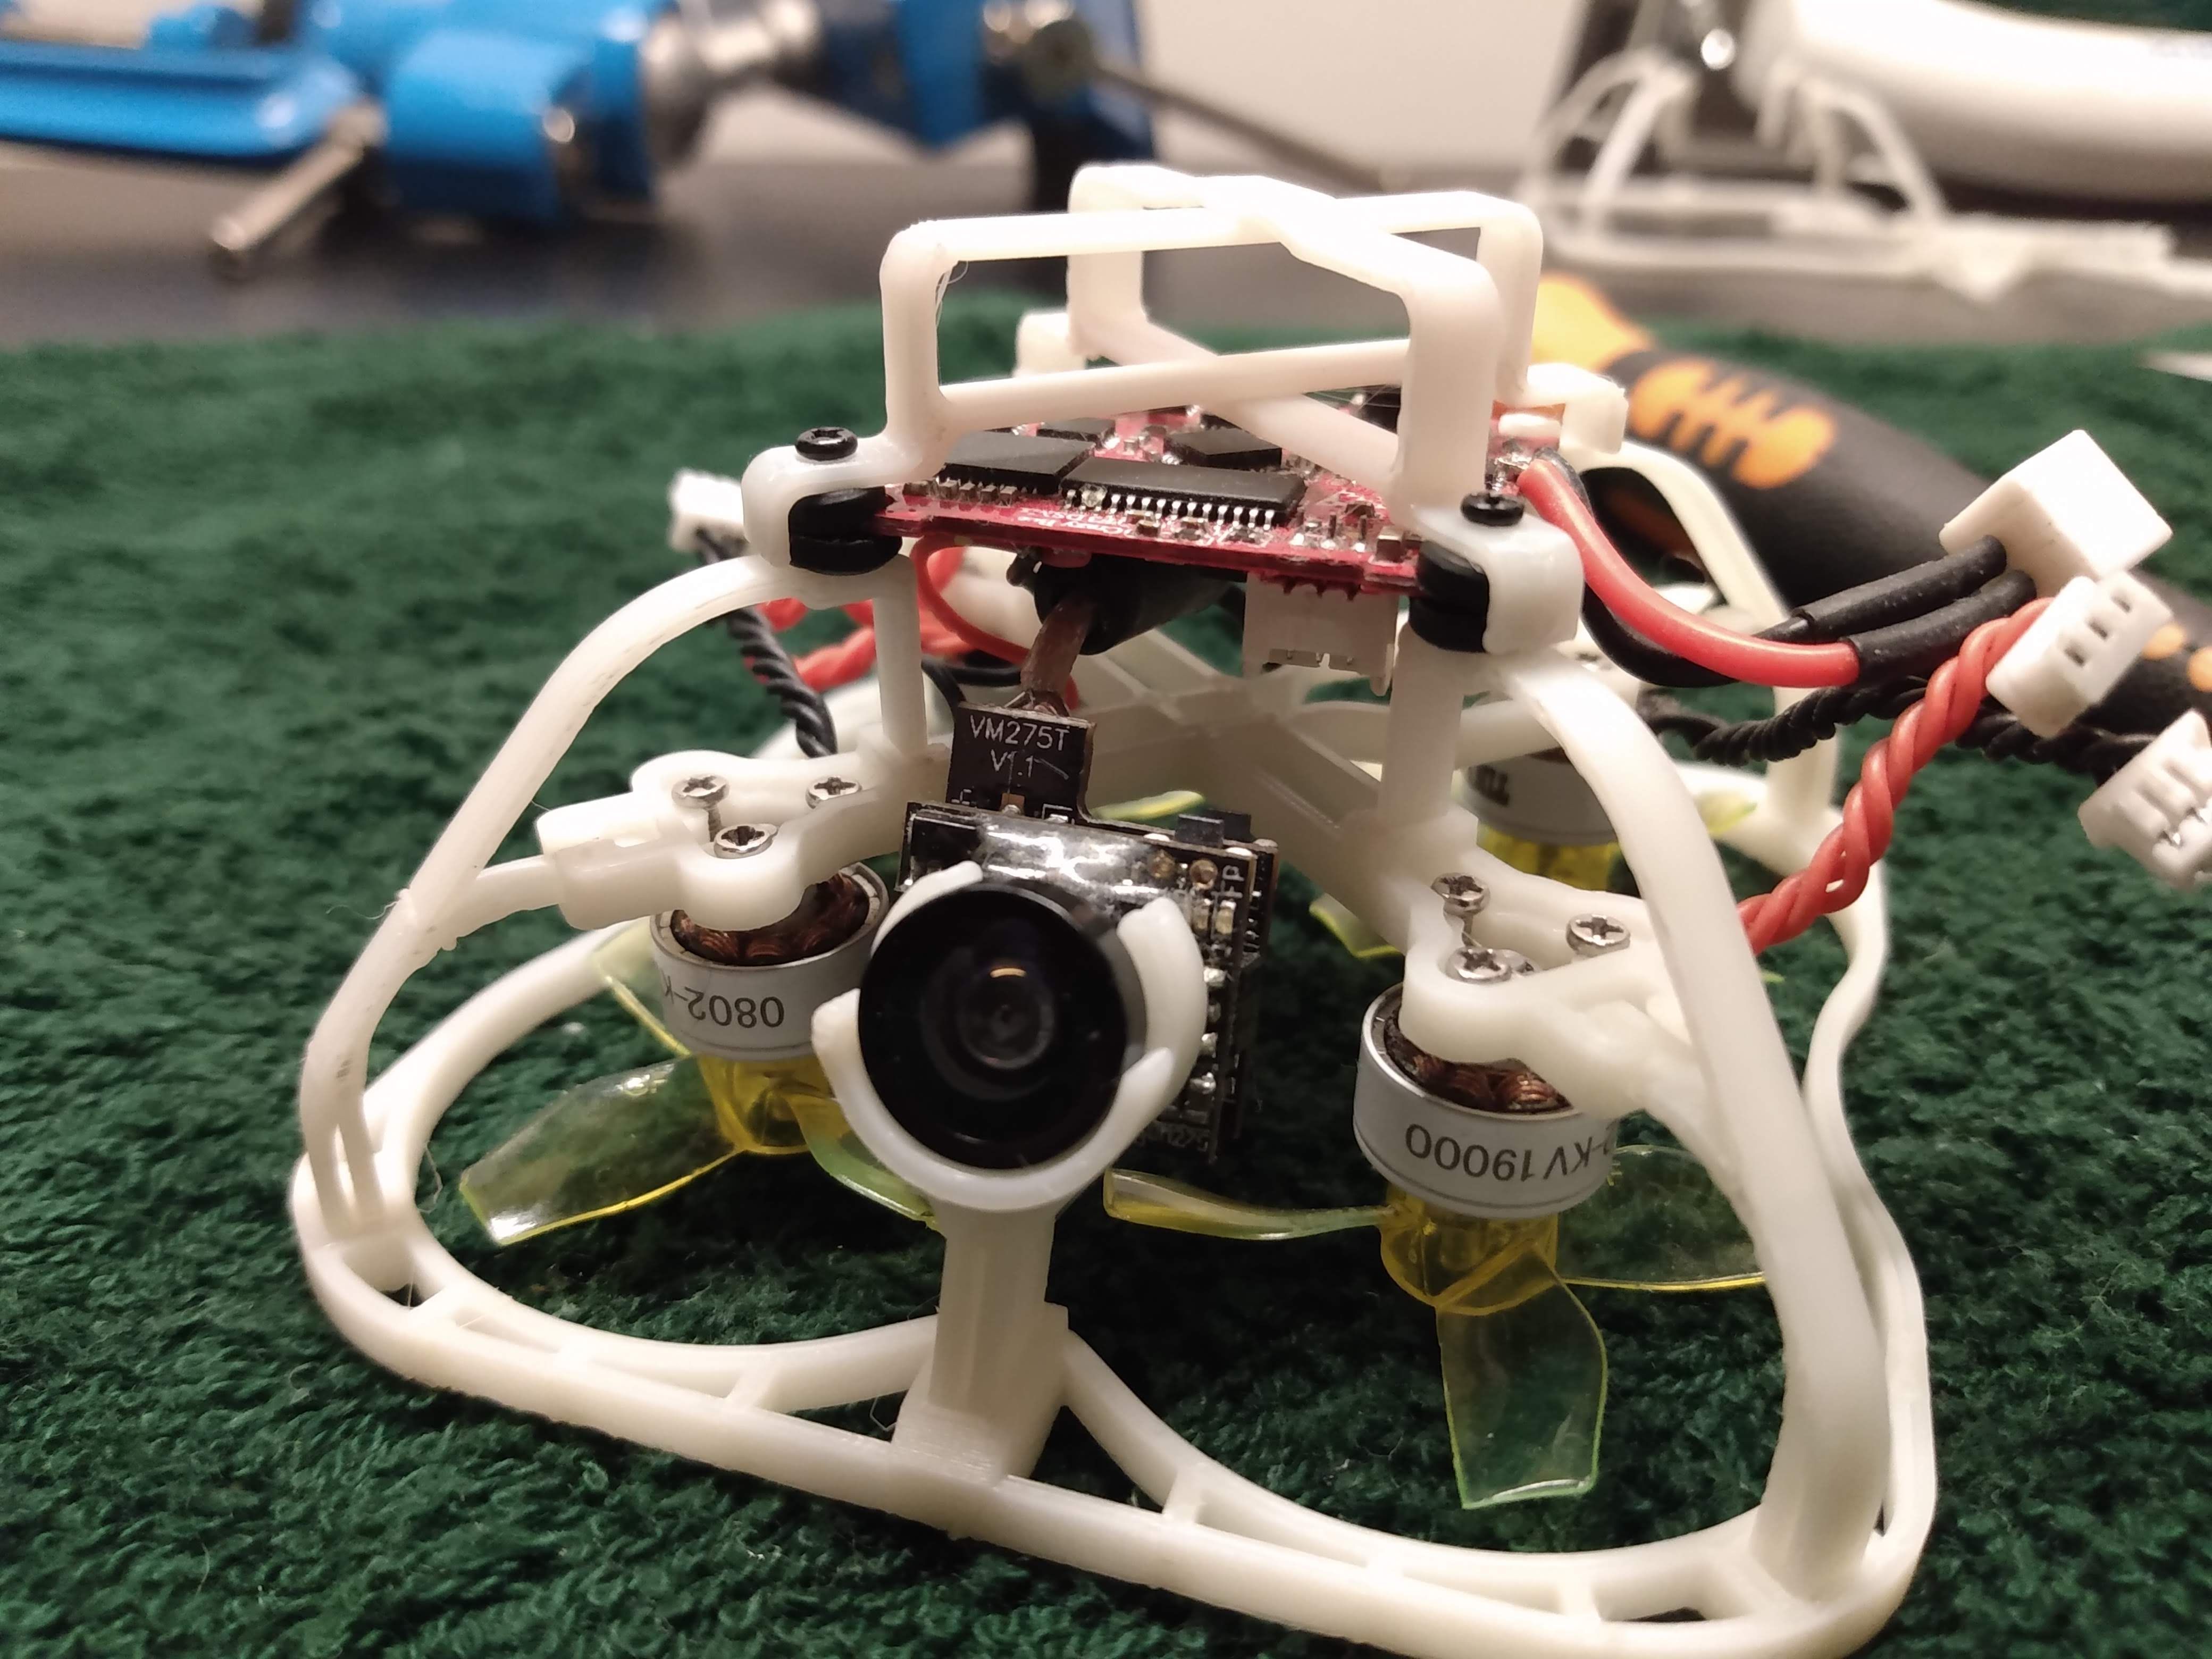
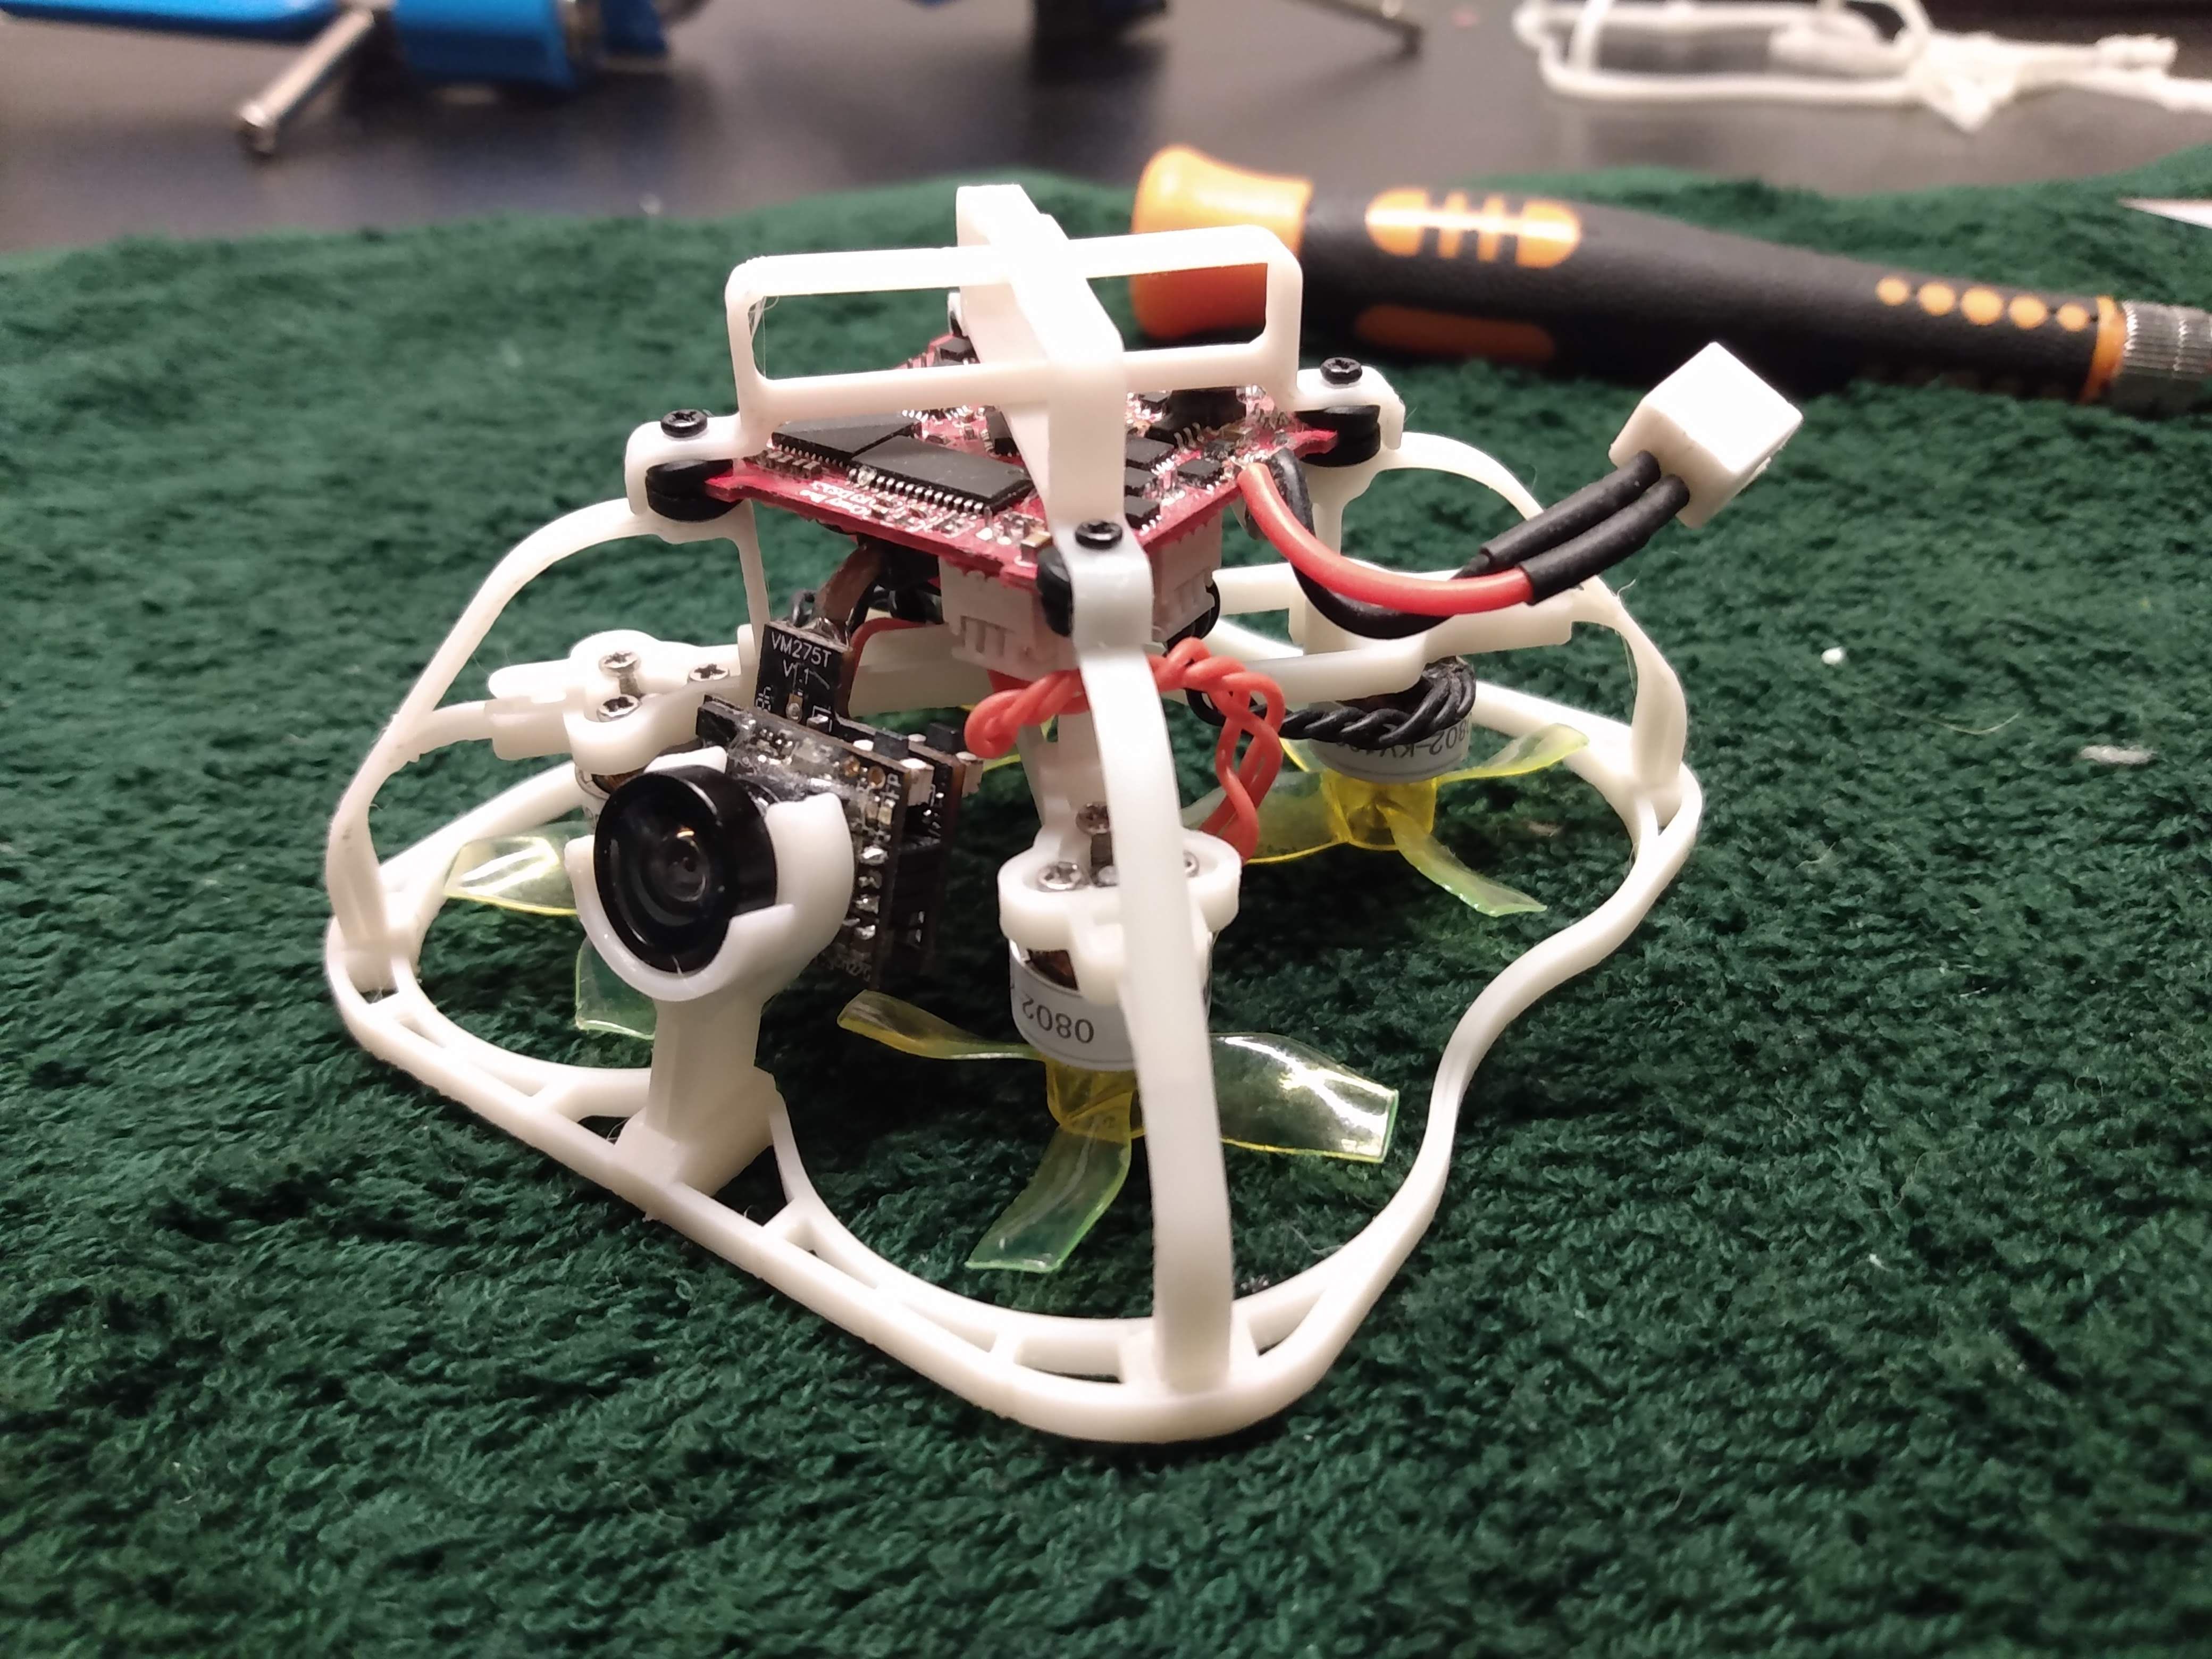
If you feel that your camera is sitting too loose in the camera mount, you can use a small ziptie to tighten it up. I have included a small hole on the "foot" of the camera mount that allows a small ziptie to be feeded through.
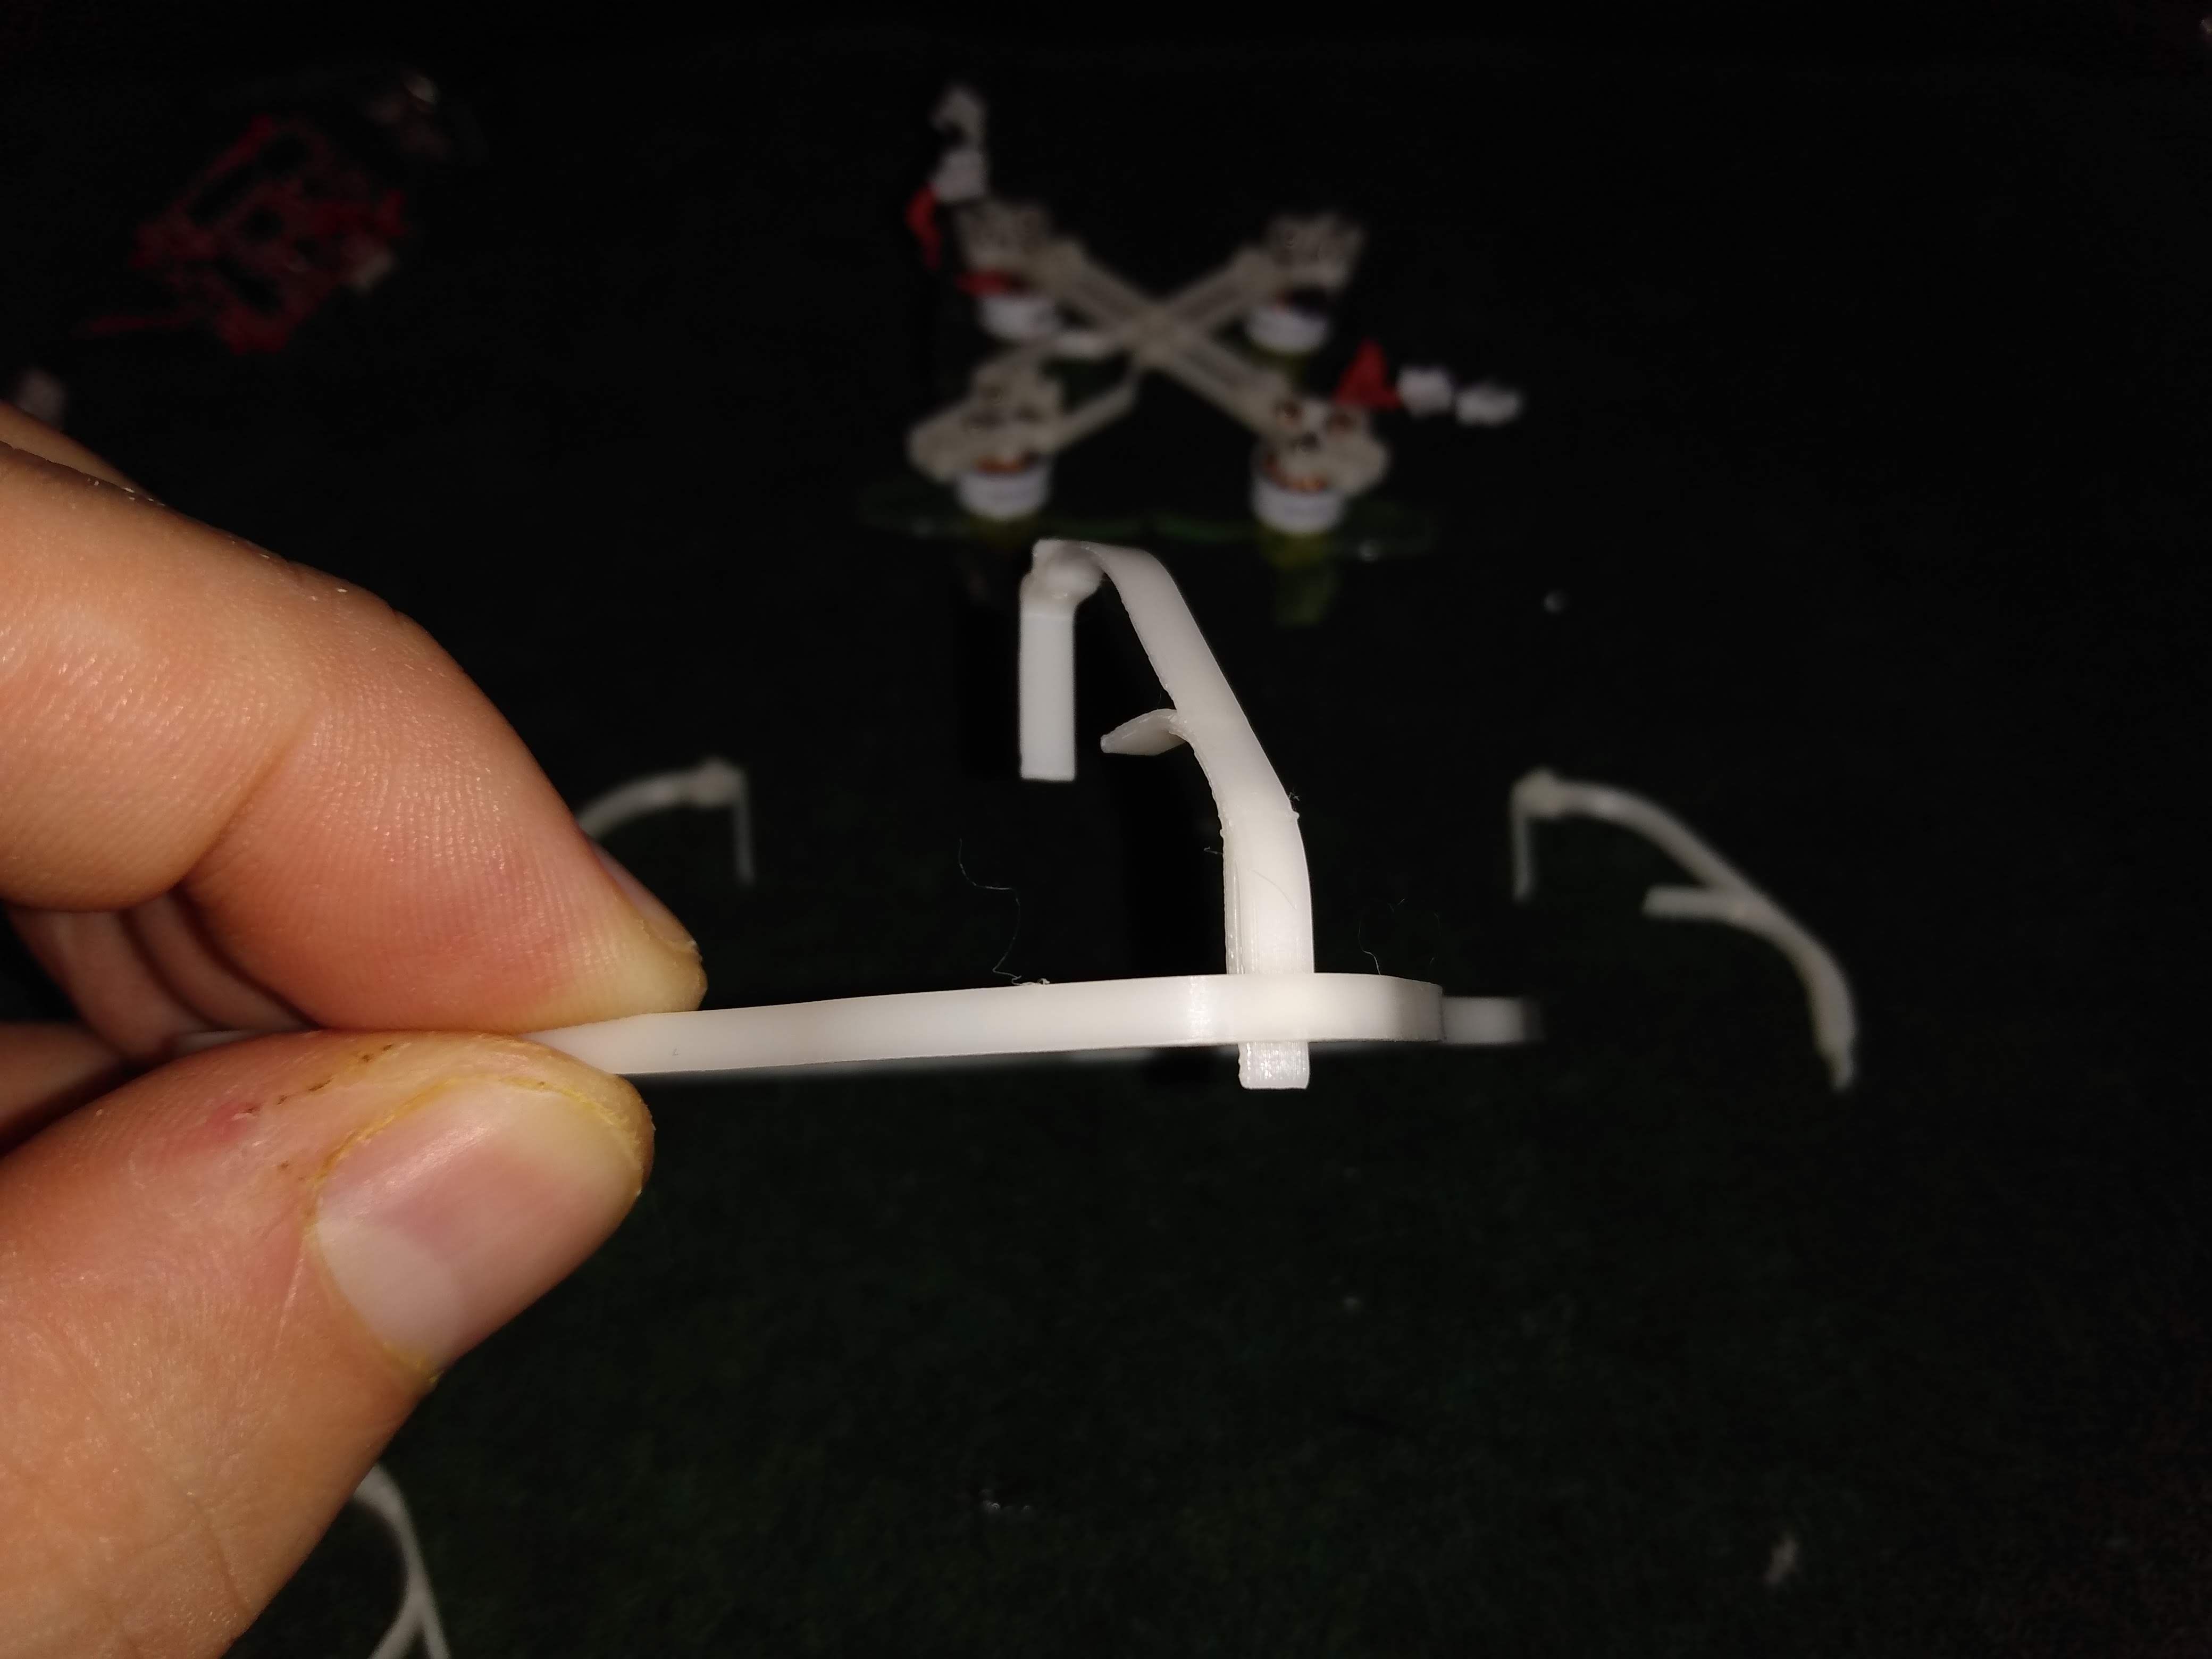
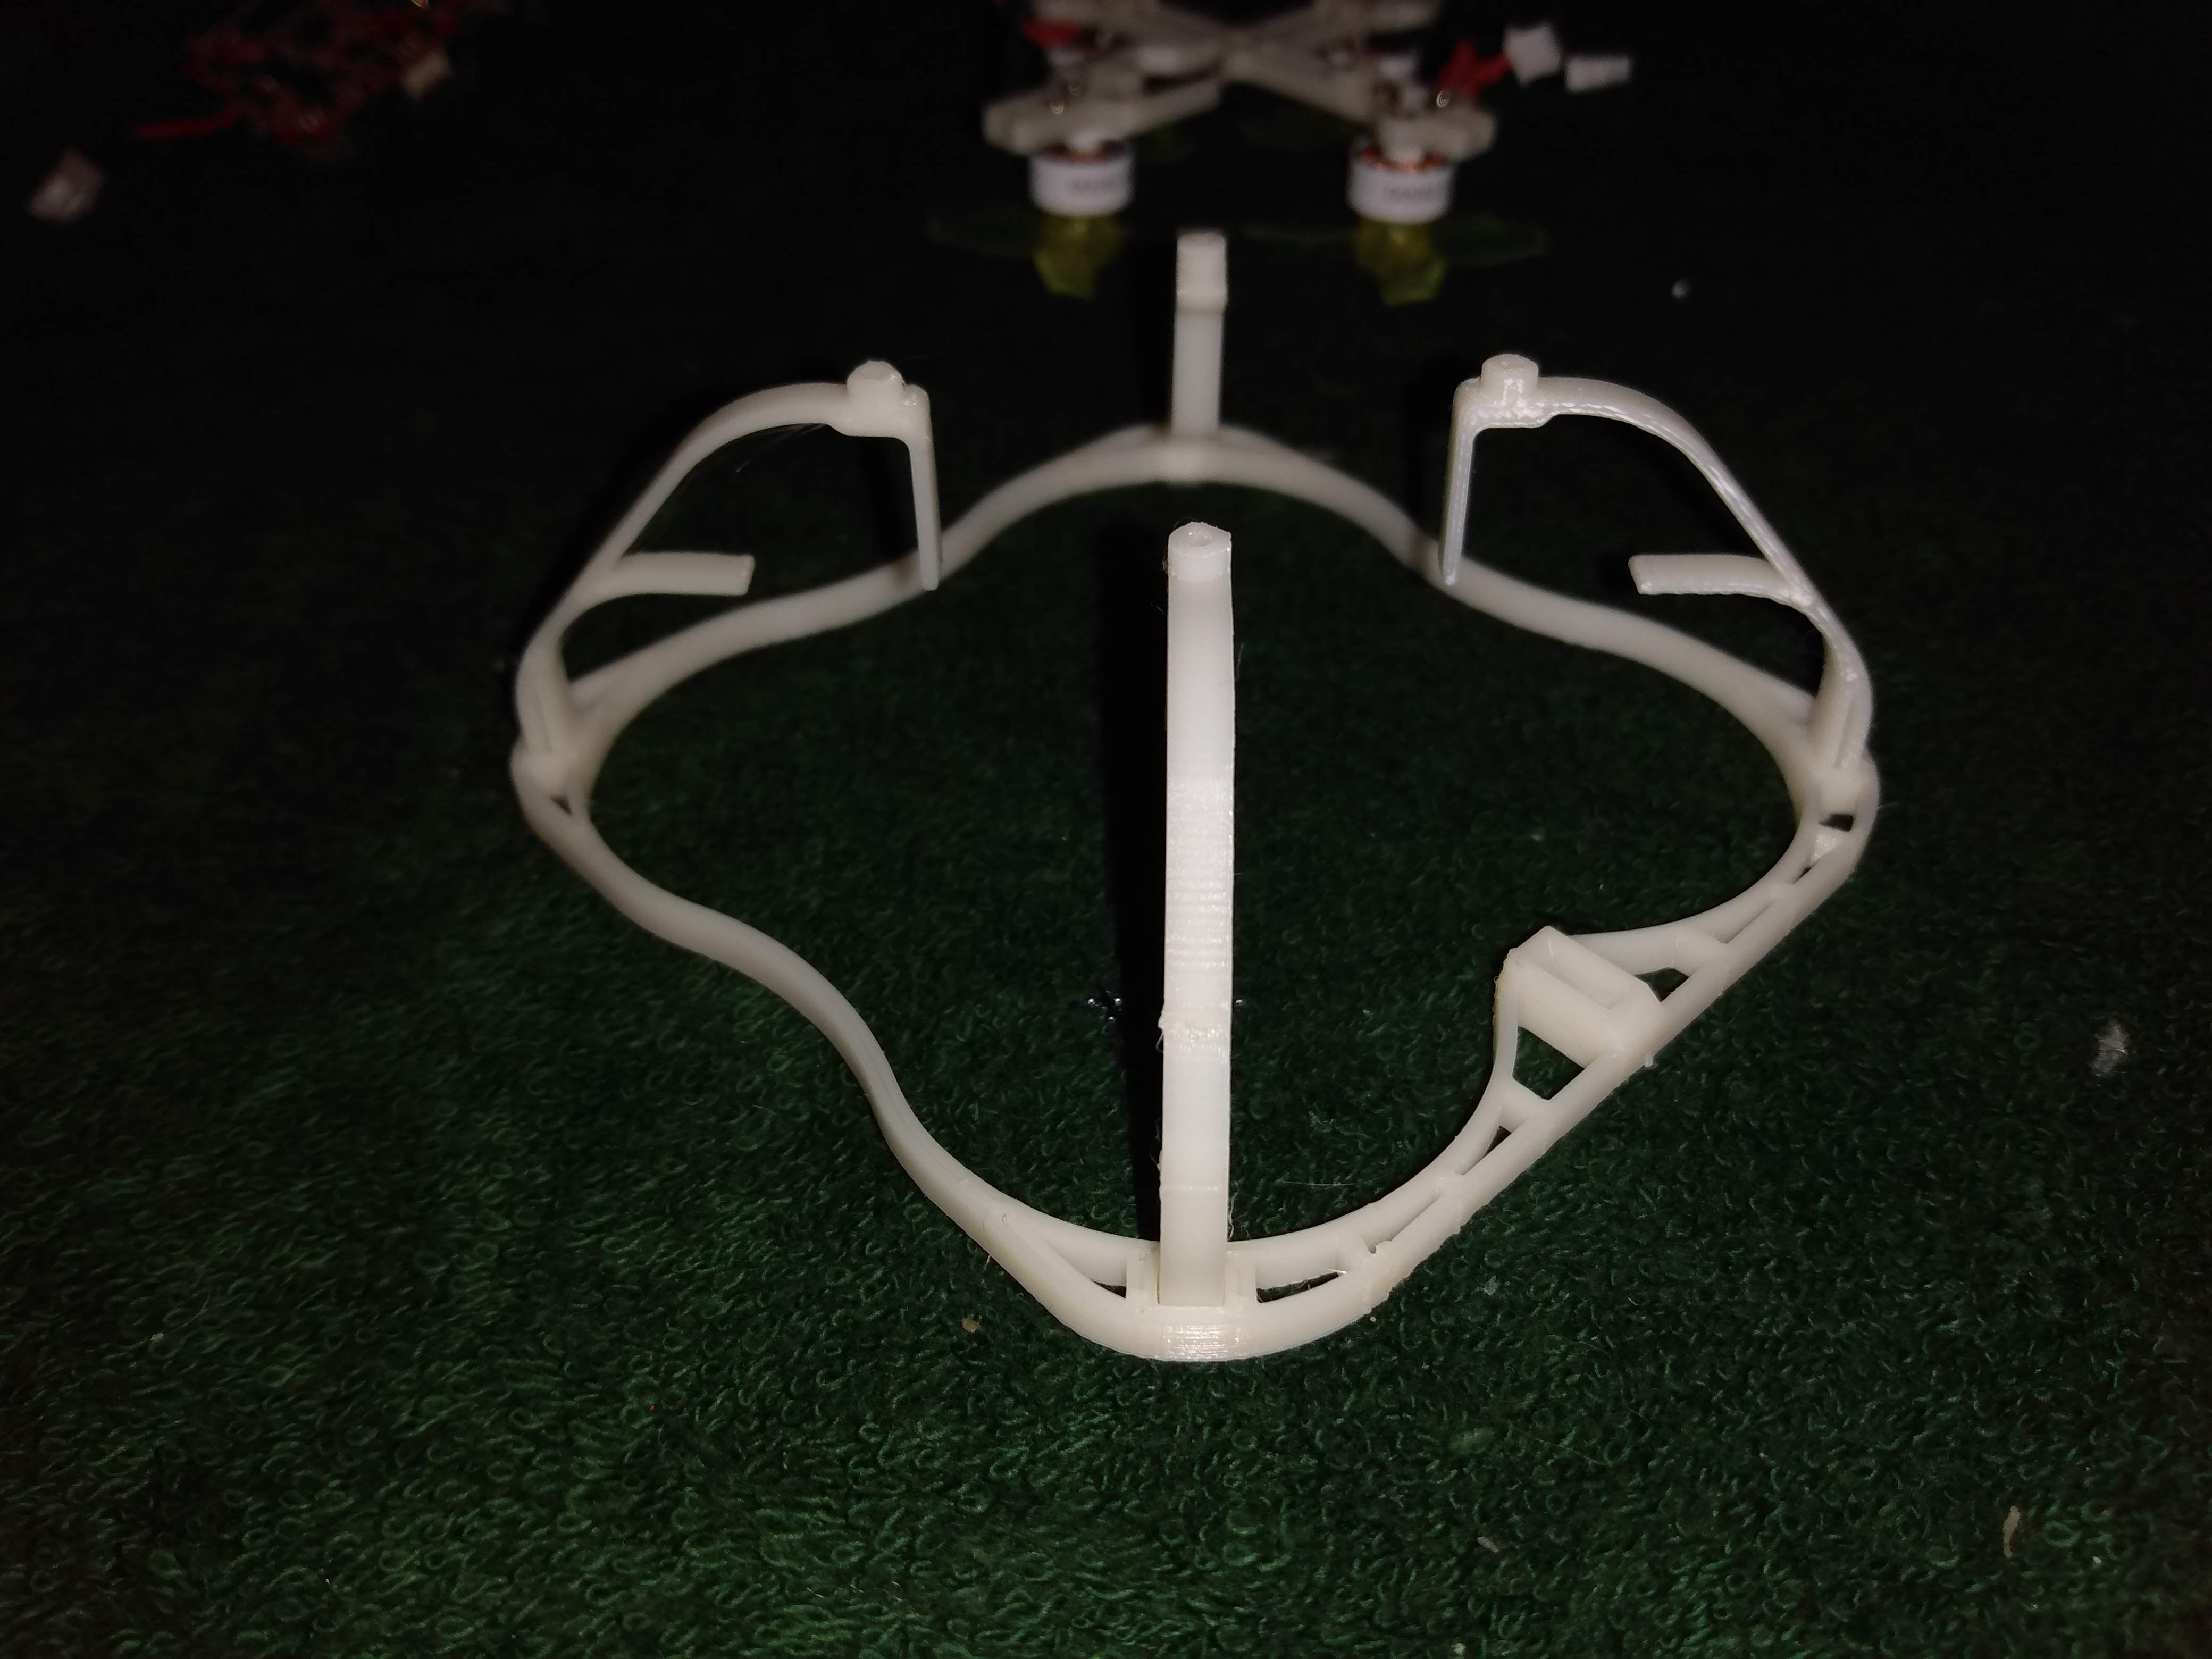
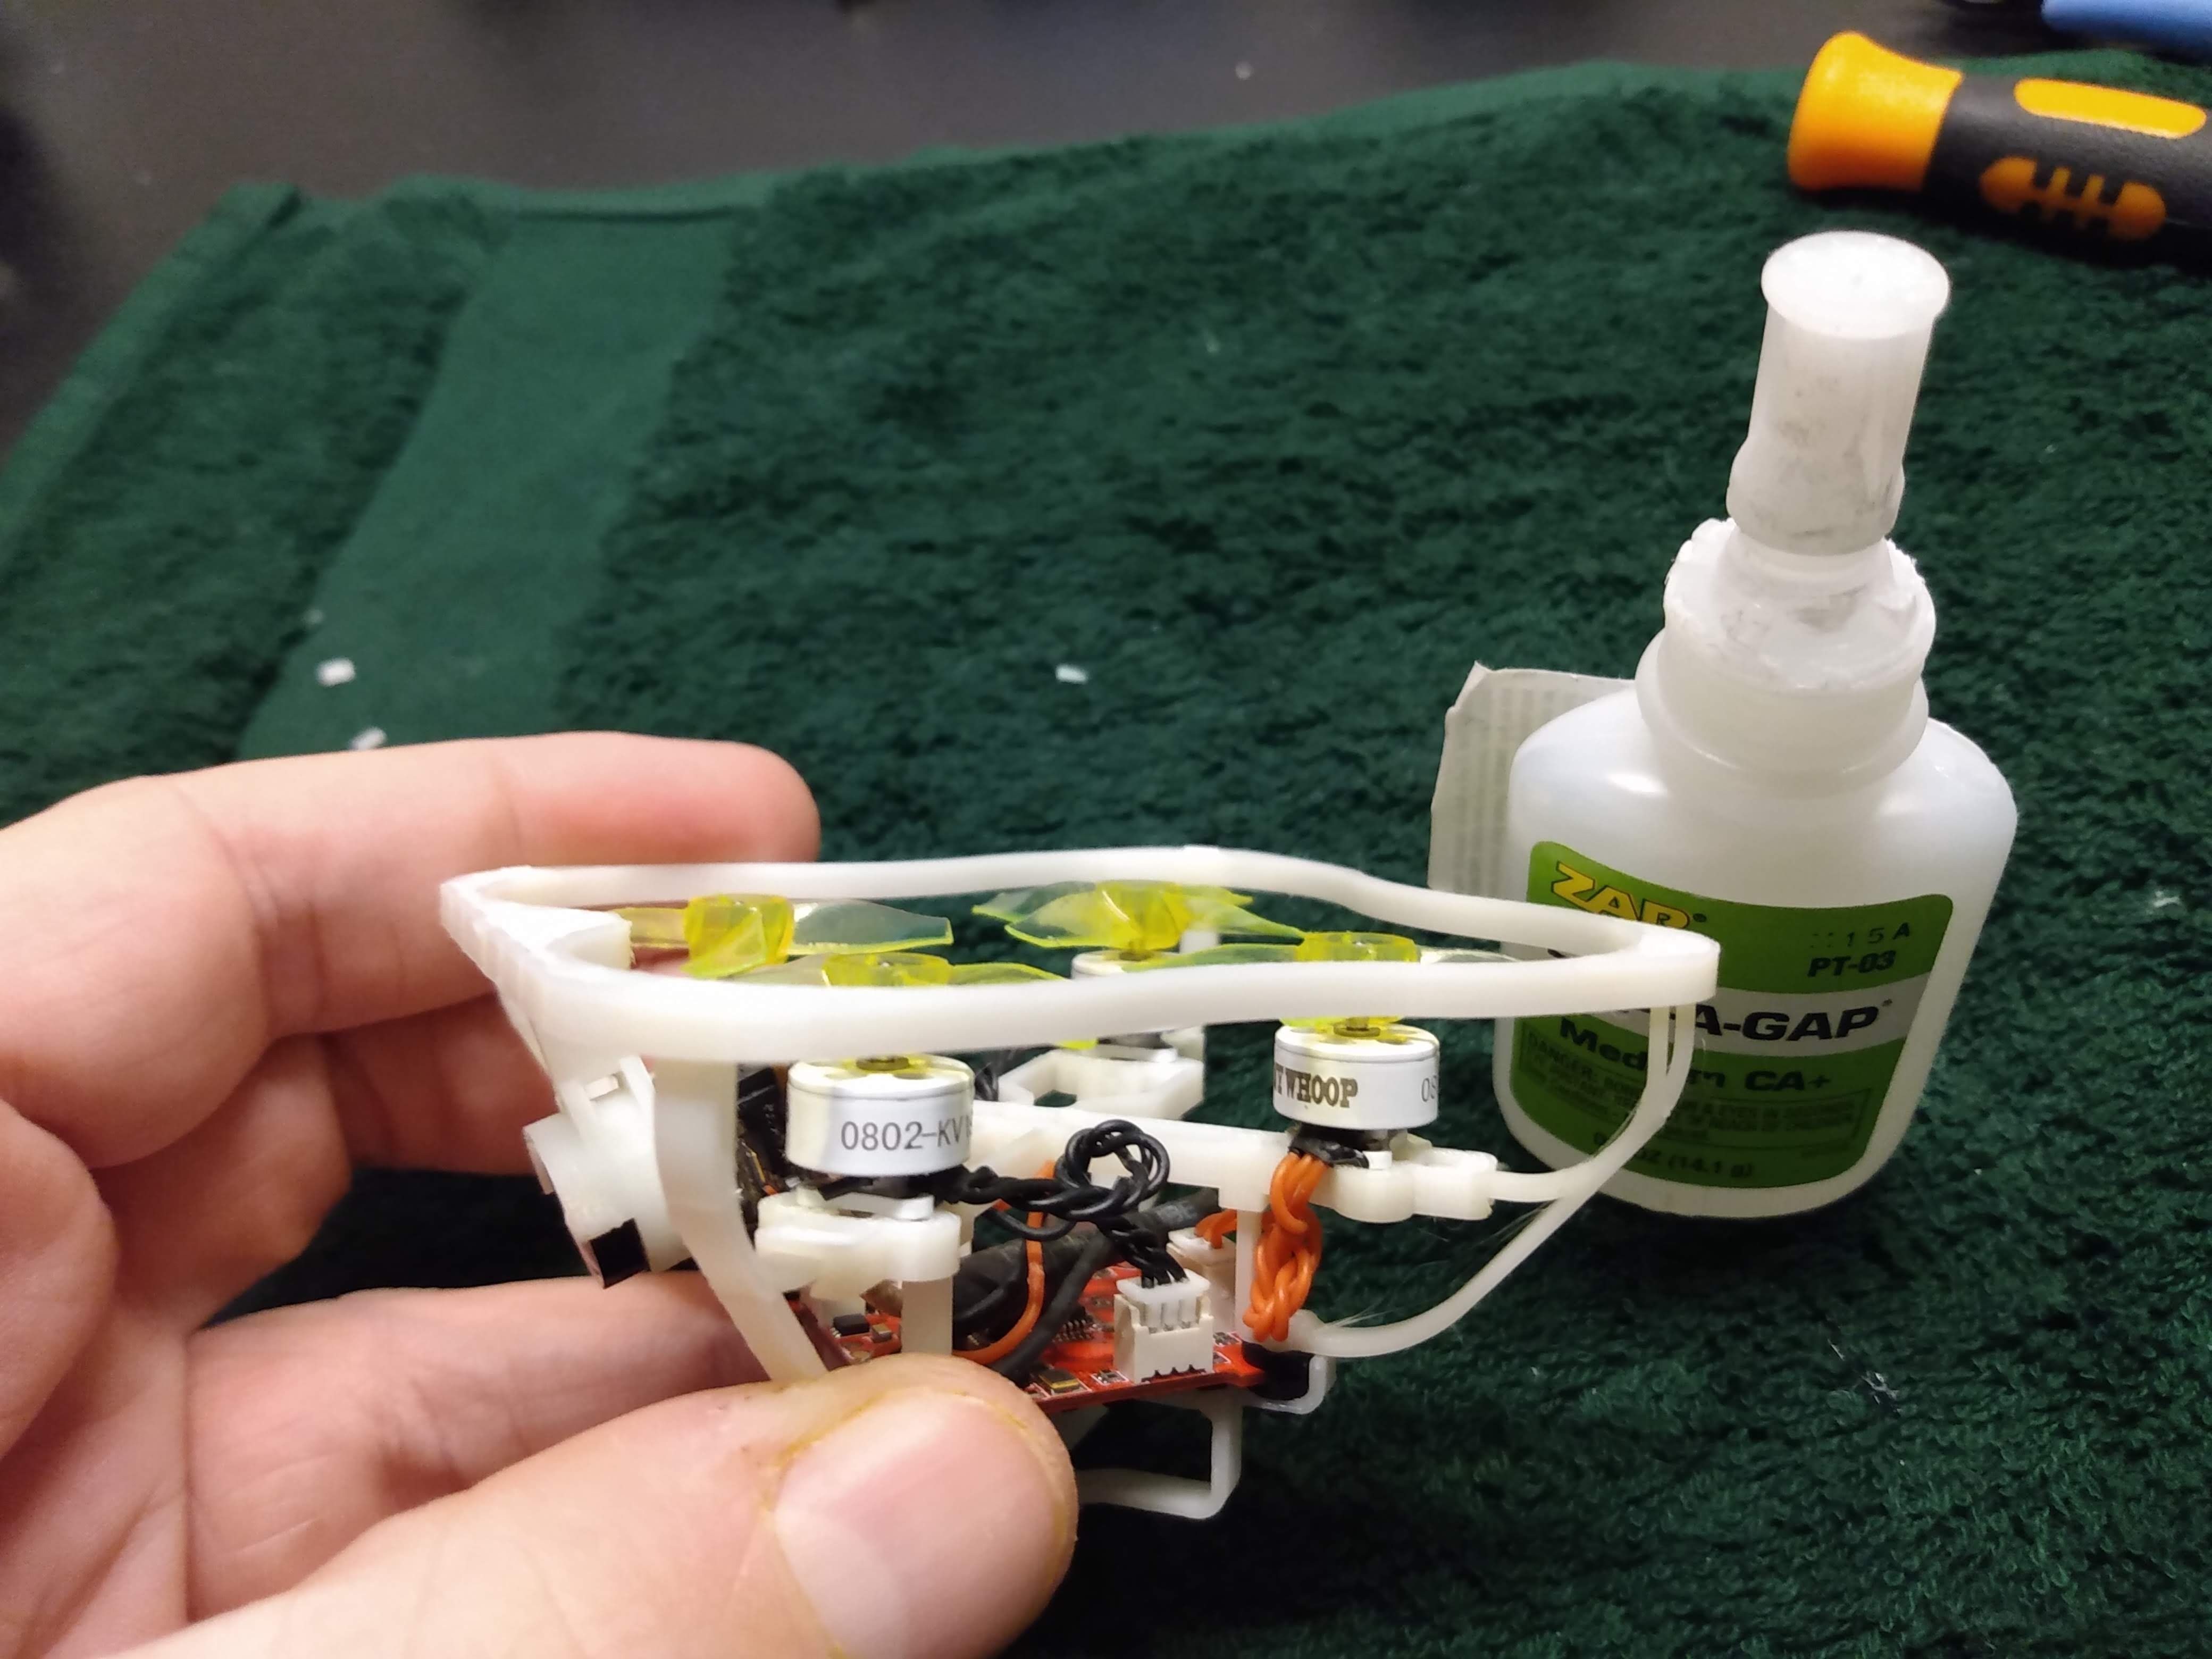
And last but not least... Check if the frame fits straight and firmly together. Then turn over your frame, use your cutting pliers to cut away the parts of the arms and camera mount that protrude through the bottom of the shroud. Finally, add a drop of ca glue on the bottom of the shroud at the slots where the camera mount and the arms are fitted in.
No glue is necessary on the motor block. With your flight controller and battery mount screwed in, the motor block will be kept in place. The joints will remain flexible but they shouldn't let go. This improves durability since a glued part gets stiff, and stiff parts can break.
Also, if you ever have to replace a motor for whatever reason, all you have to do is to unscrew the FC screw on the side where the motor is installed. Then you can remove the vertical strut of the arm from it's socket in the motor block to allow you to get easy access to the motor screws.
Betaflight setup
In this article, you will not find an in-depth overview of my Jellyfish setup in Betaflight because i never did any fine tuning to it. I left pid and other tuning stuff pretty much stock and my Jellyfish flies comfortable enough for me in angle mode. I'll leave the more precise fine tuning to people in the community who have more experience with it than me.
There are 2 very important things that i need to mention here though.
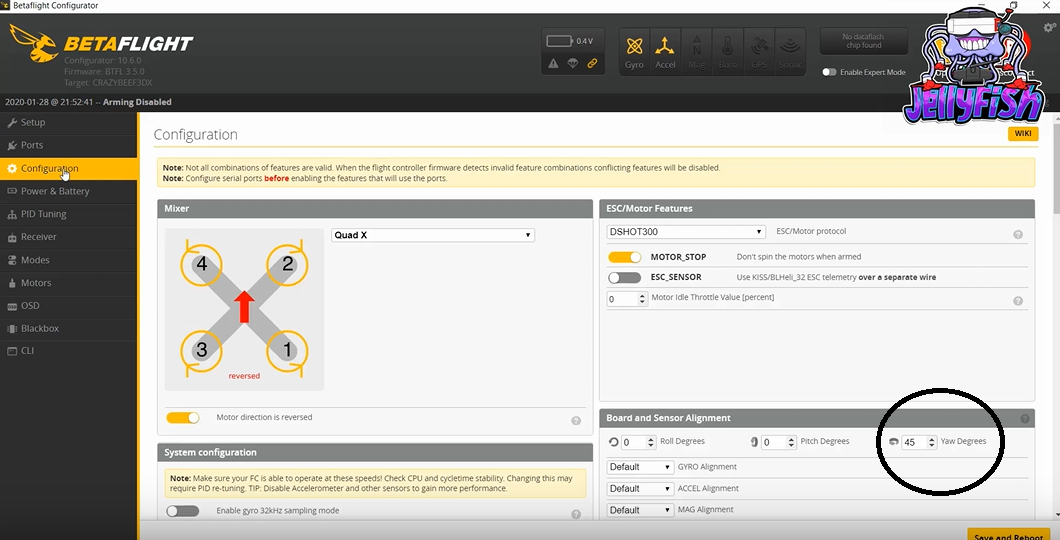
- In the "board and sensor alignment" section on betaflight, you need to adjust the "yaw degrees" to 45 degrees when the USB port is on the rear left, and -45 degrees when the USB port is on the rear right. We need to do this since the flight controller is installed in a different orientation compared to what is usually done in Tiny Whoop style setups.
- Make sure, as i said before, that the sense of rotation for each rotor is correct! Remember: CW rotation = CCW motor+CW prop mounted top first. CCW rotation = CW motor+CCW prop mounted top first
That's it for this article! If you have any questions or feedback, feel free to use the comment section below or visit my website www.fpv-jelly.fish to see how you can get in contact with me. Im on Facebook, Instagram and Reddit!
Thank you for your interest, good luck and have fun with everything you do!
Robby Roels
Photos


Part List
Flight Controller |
Racerstar Crazybee F3 Flight Controller UR65 4 IN 1 5A 1S Blheli_S ESC Compatible Flysky AFHDS 2A Receiver
(7 builds)
Banggood.com
|
$35.10 |
Motors |
802 19,000kv Tiny Whoop Onesies Brushless Micro Motors - Boost Juice
(10 builds)
Tinywhoop.com
|
$39.99 |
Propellers |
Gemfan 1220-4 31mm 4-Blade 1mm Shaft
(6 builds)
Tinywhoop.com
|
$4.99 |
FPV Camera |
US $25.9 |Gratis Verzending HOBBYMATE FPV Micro AIO Camera VTX 5.8G 40CH 25 mW Zender met Y Splitter voor FPV Drone zoals Blade
Nl.aliexpress.com
|
See Site |
Batteries |
*Lipo 240mAh 3,7V 25C/50C BLADE mcp x / nano QX 3D
Mylipo.de
|
$5.67 |


Cool concept!