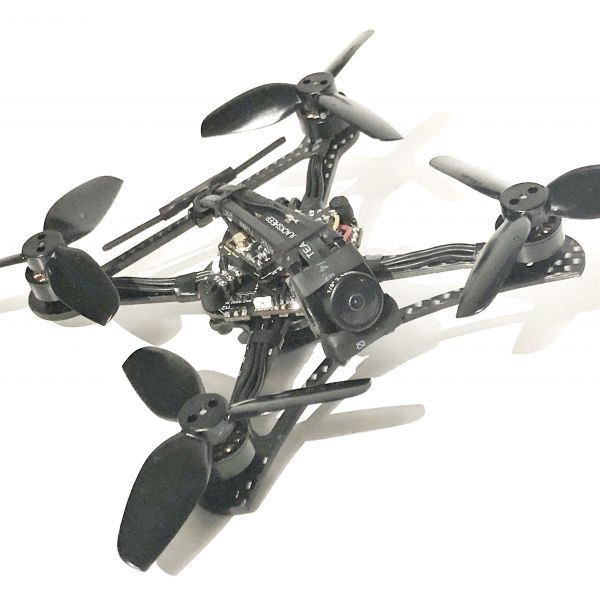
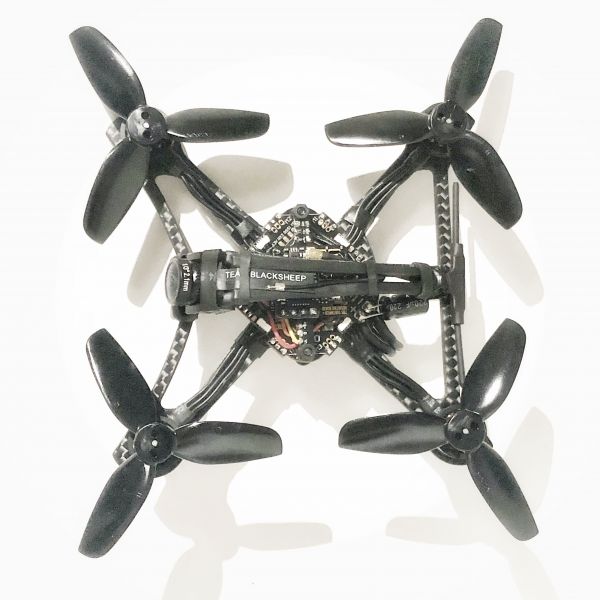
This build was inspired by two things - the Diatone GT R349 which I think looks badass, and zip tie frames which fascinate me.
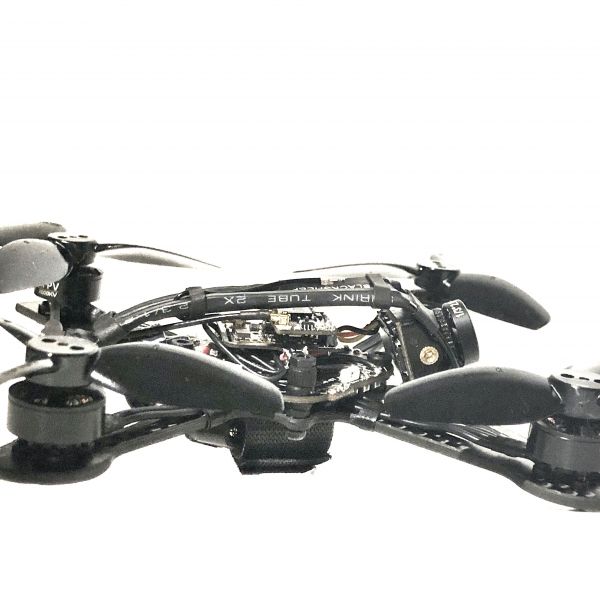
I wanted a bare minimum, spartan look to it, but with components I like.
The frame is a Twig racerX frame, and the top is made out of 4 zip ties and heat shrink. A lot of the inspiration comes from Youtube: Quad 66 - who also has a great video series on it.
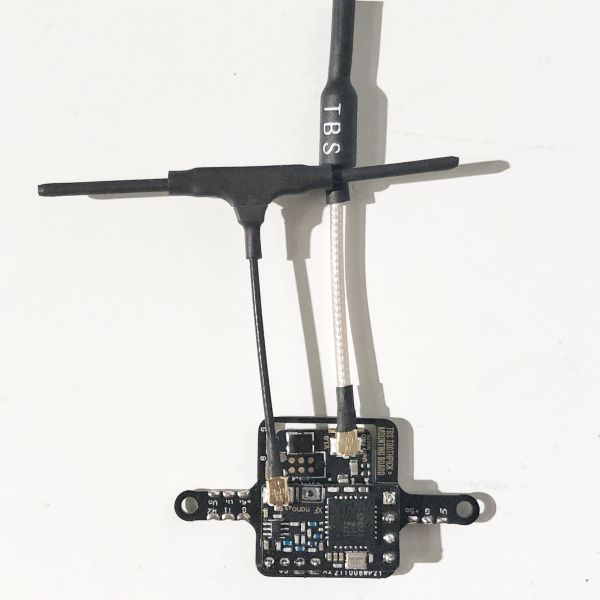
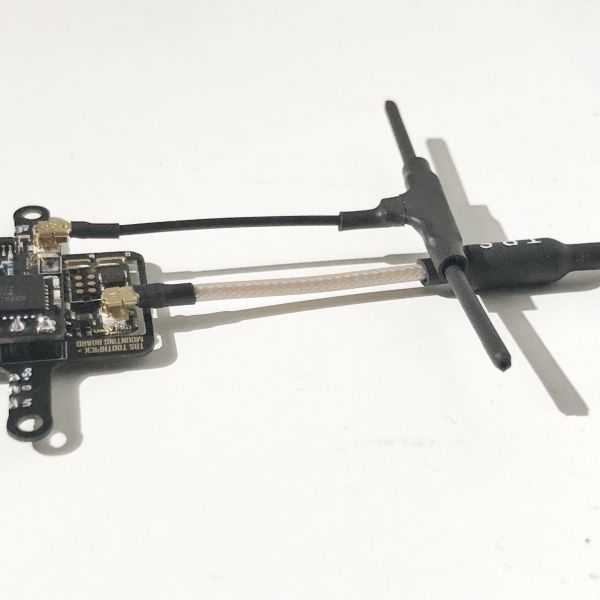
Since you will see all the guts of the quad, I wanted a clean look. A big help was the tbs toothpick mounting board, which keeps wires short and tidy.
Also, I tried to reduce the weight with a mini immortal T and the tbs micro race antenna - sacrificing a little range (but not much)
The build is intended for 2-3S, I think it will perform light & nimble around a 2S 350mAh
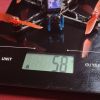
Weight without battery is 50g
Photos
Part List
Frame |
Racer X FPV Speed Racer TWIG Ultralight FPV Frame
(12 builds)
Heli-nation.com
|
$21.99 |
Flight Controller |
Flywoo Goku GNF413 13A AIO V2.1 (MPU6000) Flight Controller
(20 builds)
Pyrodrone.com
|
$54.99 |
Motors |
1103 Brushless Motors
(35 builds)
Betafpv.com
|
$23.99 |
Propellers |
AVAN Rush 2.5 Inch Prop - RED
(34 builds)
Emax-usa.com
|
$1.59 |
FPV Camera |
RunCam Nano2
(184 builds)
Pyrodrone.com
|
$19.99 |
FPV Transmitter |
TBS Unify Pro Nano 5G8
(97 builds)
Team-blacksheep.com
|
$19.95 |
Antenna |
TBS 5G8 Micro Antenna
(2 builds)
Impulserc.com
|
$6.95 |
Antenna |
TBS FPVCycle Mini Immortal T Antenna
(9 builds)
Phaserfpv.com.au
|
See Site |
Receiver |
TBS Crossfire Nano Rx - FPV LONG RANGE DRONE RECEIVER
(1505 builds)
Team-blacksheep.com
|
$24.95 |
Hardware |
TBS Toothpick Mounting Board
(2 builds)
Team-blacksheep.com
|
$2.50 |
for a couple of zip ties and some heat shrink tubing this thing is clean as hell. curious to know how sturdy the camera mount is though. any noticeable jello?
Guides & Reviews
AirbladeUAV has done it again and this time they've brought long range to the 5" class! Based on the popular Transformer Mini, the new Transformer 5" Ultralight adopts a lot of the same design philosophies with larger props and more payload capacity. It can fly upwards of 20 minutes on a 4 cell Li-Ion battery pack and in ideal conditions it's got a range of over 4 to 5 miles. In this guide I'll walk..
Read moreWith the release of the DJI FPV Drone cinematic FPV has become a lot more accessible, but you certainly don't want to crash a $750 drone! The QAV-CINE Freybott is a compact, lightweight cinematic FPV drone that can take a hit and keep going. It's a lot safer to fly indoors and around people. With a naked GoPro or the SMO 4k you can capture some great stabilized footage. In this guide I'll show you..
Read more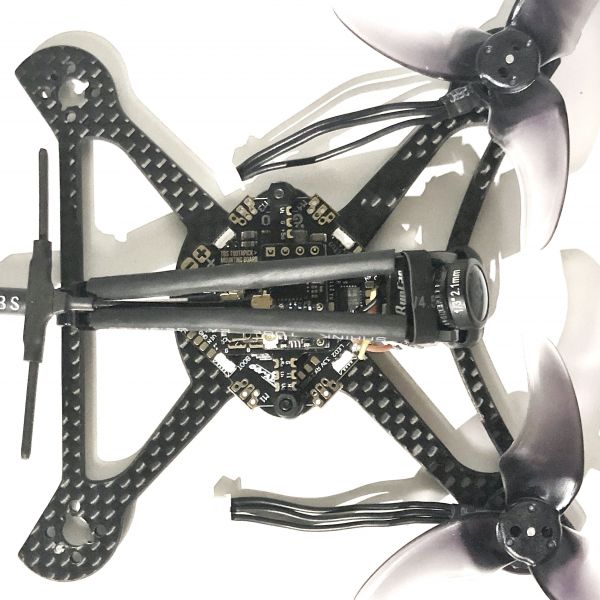


Any chance you have a wiring schematic for the Toothpick mounting board? Looking for the wiring for the vtx and rx to the fc as manufactures seem to leave this out. Love the build and have a few frames laying around that I may do like this. Awesome build!
Did you ever find this ? Im in the same situation
No I did not. Ended up using the tinyleds sled. If you do go that rought... make sure you bridge either the 5v or batt pwr option on the back of the sled or you will get not pwr to the vtx. Thought my vtx was dead but turns out user error. Sucks that they do not post instructions for us new to the hobby or like me who has been around a little bit but do not have access to racing clubs. Nearest one is 2hrs and hobby shops charge alot to work on quads.
I've got the tbs toothpick mounting board too and just soldered the Rx and Vtx yesterday. I used a multimeter with a continuity-function (beep-mode) to see what's what. There seem to be different versions of this board, but these were my findings:
a) I've got two pads marked as 'cam', one on both sides. This confused me at first, but they are not connected to the RX nor VTX at all. It seems to me they are just a plain pass-through for easier wiring. You could use them but you may also connect to camera directly to the flightcontroller and ignore these pads.
b) I've got a pad marked as 'vtx' and it's used for video-signal input. I know because there is 75ohm impedance between the VTX and ground. I will wire the camera to the flight controller for OSD and then from the flight controller to the VTX pad on the toothpick board.
c) The 5v-input and 5v-output pads are not simply passthrough connections; the Unify VTX does some sort of filtering (Warning! while the Unify Pro32 Nano accepts voltages up to 13v, the CRSF Nano receiver DOES NOT)
d) If all pads are soldered, then you get a TBS-specific connection between the VTX and the RX so they can communicate without flightcontroller. You can change VTX settings with LUA scripts. It works like a charm and that's nice, because this saves one UART connection and most 26x26 flight controllers are low on exposed UARTS (not that you need many on a toothpick).
e) If you want Smart Audio, there is a small pad on the front of the mounting board. And another one marked 'tx'. Easy to overlook. I'm unsure if these are regular pads or if they need to be bridged. I don't use Smart Audio. But in a normal situation, Smart Audio goes to a TX pad on the FC.
I created this. Hardly a wiring diagram, but hope it helps.
Great thank you! I too had to do some deep digging to figure this board out. I can confirm your findings. Mine had the same layout and function.
I only have one more question ! Can you explain what you mean by (if tou solder all pads they can communicate) what pads? the two big long ones near button near bottom of your picture ? I have mine totally working now on uarts including smart audio without doing that, but i am curious. Thanks much !
You're welcome! And thank you for validating the findings :). It's a neat little board.
Regarding your question; I'm referring to page 8 of this manual: https://www.team-blacksheep.com/tbs-unify-pro32-manual.pdf.
It says that the Unify PRO32 has a full serial interface which has extended functionality compared to Smartaudio. This interface needs two connections:
Crossfire Nano pad named channel #3 ← Unify PRO32 (CRSF TX = big long one marked as 'B')
Crossfire Nano pad named channel #4 → Unify PRO32 (CRSF RX = regular smart audio signal wire)
If all solder pads are connected to the mounting board, the connection between Unify and CSRF Nano works out of the box. I'm not sure what the 'extended functionality compared to SmartAudio' exactly entails, but I use it for switching channel, band and powerlevel on the Unify without any flight controller connected. To do this, you can use the Crossfire LUA script on the controller. It will automatically show 'Unify Pro32 Nano' in the tbs-devices menu after binding/updating.
Thats awesome . I have the normal lua working so far, but I may try this additional functionality on my next build. TBS cloud is sounding like the glue that is going to tie all this functionality together. It will have the ability if you use the TBS fusion fatshark module, to automatically change vtx/module channels in sync via wifi, among other things. Not sure what the current state of affairs is with regards to functionality, but heres one basic setup walk thru.
https://madmikefpv.com/article/configuring-tbs-cloud
Thank you!