UPDATE 2020-04-26: (photos)
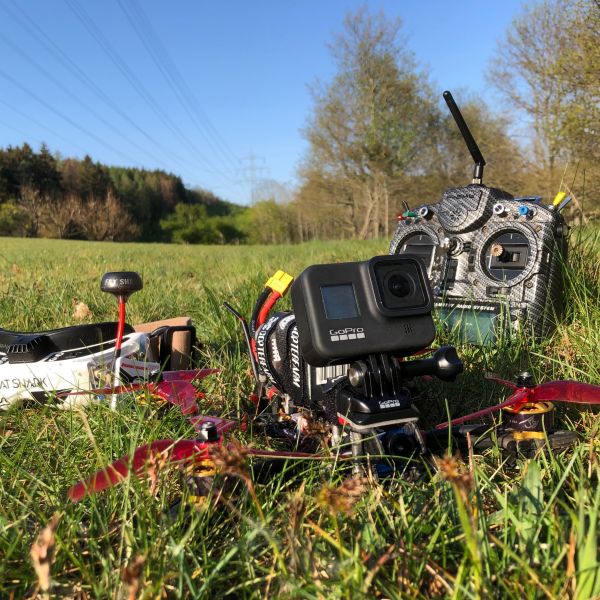
Runcam Phoenix 2 and Gopro Hero8 added (Spoiler: hypersmooth IS cheating :-D ). Weight now with 1550 4s: 730 gr.
I let the cables long, that was a mistake, so the Lipostrap was in touch with the Xm+ cables and the strap loosened the black minuscable. Fortunately it caused no crash, I soldered and test perhaps later- weather is fine today.
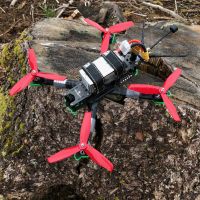
This is my first 5 inch build.
When I started with FPV one year ago, I found out, that I don´t like practicing in simulator because I have no feeling for gravity in sim. But only tested velocidrone-demo-version.
So I started with 65mm 2s whoops, flew, crashed ( many times : - ) ) and rebuilt them. Next I had a 3 inch toothpick RTF and finally build another one from scratch with a 20 Amps AIO- FC (rotorbuilds 21781) with Betafpv- and other parts. Not as difficult as I thought before. Even the betaflight settings are not rocket science.
Now it was time to do the first 5 inch build. I want to share my build experience because reading here at rotorbuilds helped me so much in understanding quadcopters.
Please don´t look closely at my solder joints. My skills aren´t at that level where I want them to be, but the electric connections work very well even they are not looking nice.
Wanna thank Joshua Bardwell to make it easy for me to find the right parts that work together. I saw “JB´s Perfect Freestyle Quadcopter” on youtube and I quickly knew which components to choose.
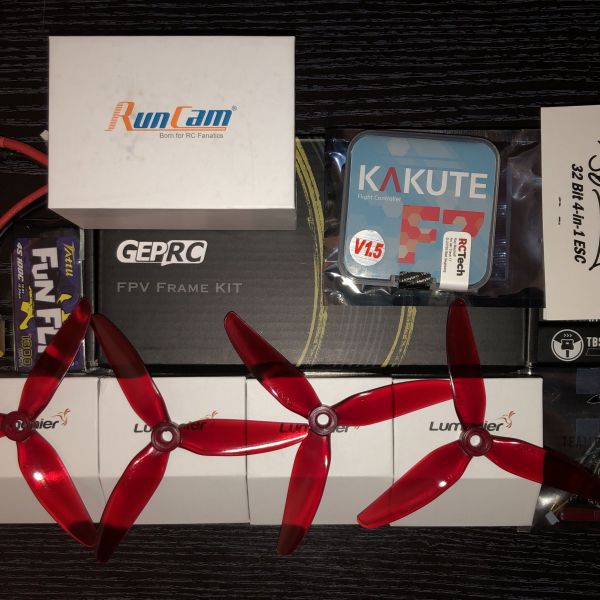
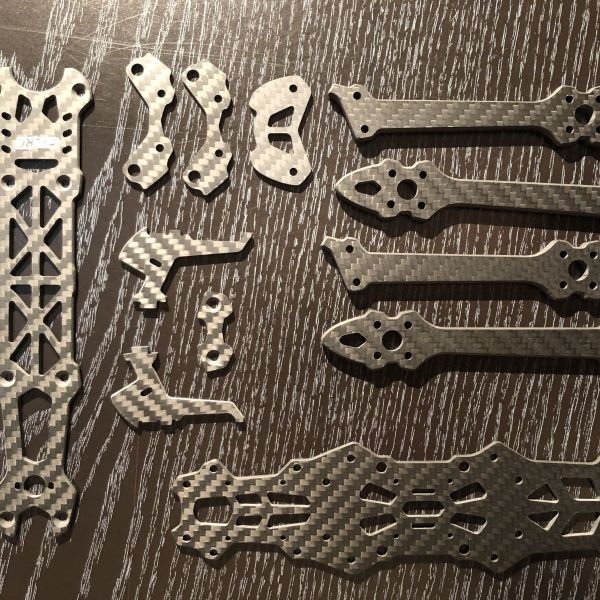
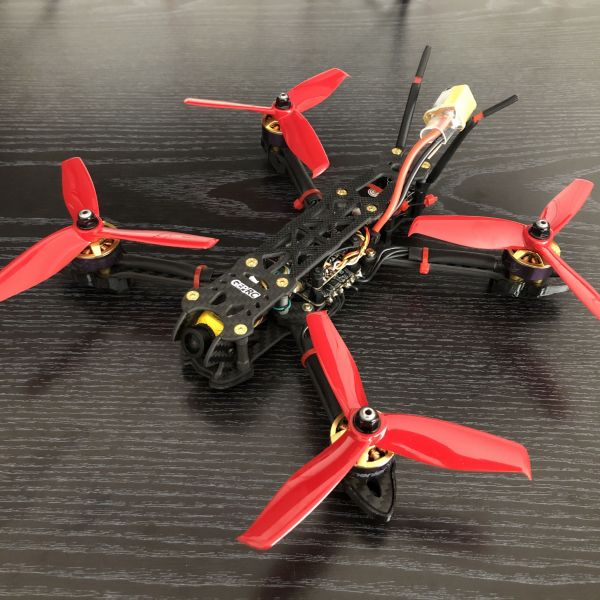
The chameleon TI frame from his build is not so pretty in my eyes and it has no changeable arms. So I have chosen Geprc Mark4 5 inch – I liked the design at first sight.
I thought about how to place the AIO- ESC, but I have choosen the standard rotation. The advantage was that I don´t had to remap the motors. Perhaps you can protect the soldering pins of the motorwires better with turning the FC 90 degrees so that the motor pins are in front and back, and only the powerconnector is sideways. Maybe I try this next time. Also I will solder the motor wires from below next time, because it is a little bit difficult to grab the copter without touching the motorwires.
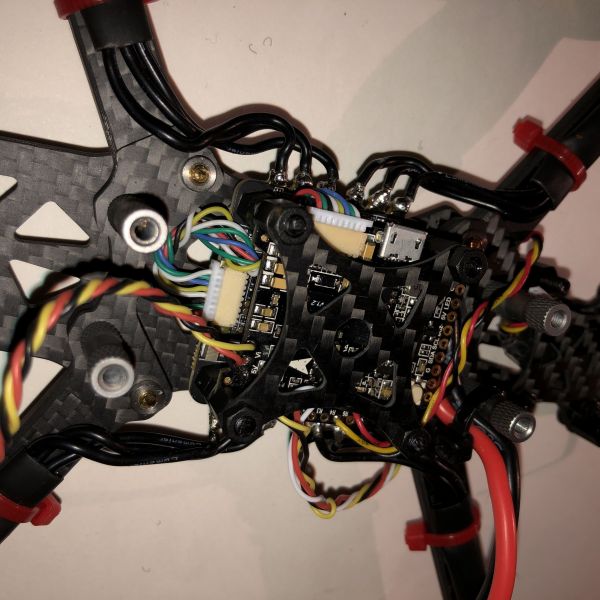
The gyro of the Kakute F7 is soft mounted with a little foam on top of the FC connected with a ribboncable. I wanted to have one lipostrap exactly above the FC so I put a 30x30 plate on top of the stack just for protection.
In general I tend to leave the cables long. I can shorten them anytime later if needed.
I used male and female JST 3 Pin Connectors for Cam to FC and Frysky RX to FC connection. The AIO- ESC is connected via standard cable. I just plugged in – it´s compatible and it works.
Thank “Pamilias” at thingiverse it was easy to get an GEPRC Mark4 Protector Skid.
A friend 3d-printed this Protector Skids for me. I took the v2 because of bigger skid- surface – and I had more space for the little rubberpads. I had to cut of the top surface and the little ceiling after printing because I could not get the arm- end into it, but that is okay. Just wanted to protect the motor- skrews and the arm- ends in general.
I used the back mounting 20x20 area of the frame with a topplate to mount the Frysk RX under it. If you place it like shown you can easily reach the bind button from below through one of the holes in the frame. I used the 30x30 backarea to mount the TBS Unify Pro32 seperately but above the Frysky RX. The VTX is placed there so that the MMCX connector is in the middle of the end of the frame and it gets enough cooling from all sides. Fortunately the form factor of the Unify makes it possible to match between the M2 hex nylon spacers exactly. In my experience VTX and RX has not to be soft mounted.
The Frsky antennas are not best positioned. I read 90 degrees to each other would be best but it looks good as it is now and the reception is pretty good enough though.
I have bought TBS Triumph Pro VTX antenna for this build, but used a mini antenna with MMCX connector, which I had in my spareparts. Perhaps I will change the antenna someday.
I took the Caddx Ratel from my 3 inch build instead of the Runcam Hybrid for the first flights, and it was not a mistake. Due to the 5th or 6th flight I had a crash in the field after a little dive– everthing on the quad is good, but the ratel has cracked at impact.
The downside of the Runcam Hybrid format factor is that there is not enough space for the Cam and the board. Don´t know how Geprc made it happen in their RTF Mark4 4k Version with the Tarsier cam and board in front.
So I took the Caddx Turtle v2 from my Beta85X HDR, but only borrowed this. The cam- exchange only added 5 gr of weight.
Soft mounting / hard mounting:
Kakute FC is not effected because of soft mounted gyro. My well- meaning advice is NOT to hard mount the Caddx Turtle v2 board. After mounting the board in front of the frame it had a touch to the front frame standoffs. This effected vibrations that made it impossible to see the OSD while flying and I had to land immediately.
The new position of the camboard is not exactly nice, but it is workable. As a next step I´m gonna change it with a Runcam Phoenix Oscar as FPV Cam and a Gopro Hero 8 with hypersmooth for HD recording.
Throttlecurve in my taranis is shown in one of the pictures if needed.
I used betaflight 4.0.4 standard PID- Settings and just changed the rates to my prefered ones. Maybe my knowhow in PID tuning will grow someday and I will optimize PIDs. No need at the moment- the quad flies great.
Tried different props so long:
Gemfan Hulkie 5055S-3 -> beasty, loud and amperehungry
HQ 5X5X3V1S -> somehow boring
AzurePower 5.1x4.0x3 -> best flight characteristics in comparision to the two above but not as durable as thought before
The frame is very durable and tough. Anyway I ordered a spare- arm (you can use the arm for all 4 positions, there is only one version, that´s cool) and a spare motor, because the parts are sometimes out of order in my country.
Best lipo is 2000mah 4s with a flighttime of about 5 minutes with wild freestyle.
I tried a 6s- lipo but the motors are getting hot. That´s okay, the motors I´ve chosen are meant for 4s, there is a 6s- version of the motors with lower KV.
On my list for this quad is adding hellgate fpv buzzer and LED- racewires to find the copter more easily if gone down.
With 400 gr it is a little heavy but its my first 5 inch and the copter flies smooth.
This is not a budget build.









Try Liftoff on Steam, gravity feels really really good on there. it is paid but worth it imo
I love liftoff, but it can't compare to the real thing. I find flying in the simulator to be kind of pointless. I can never get my liftoff quad to feel real. That being said, it's certianly the closest thing to real before real.
maybe try DRL sim, you can tune the pids better on there and adjust physics settings to make it to your liking. I recently changed the settings on DRL and feel that its much better than liftoff actually