EVA-3"
 By onemorepabst on Sep 23, 2020
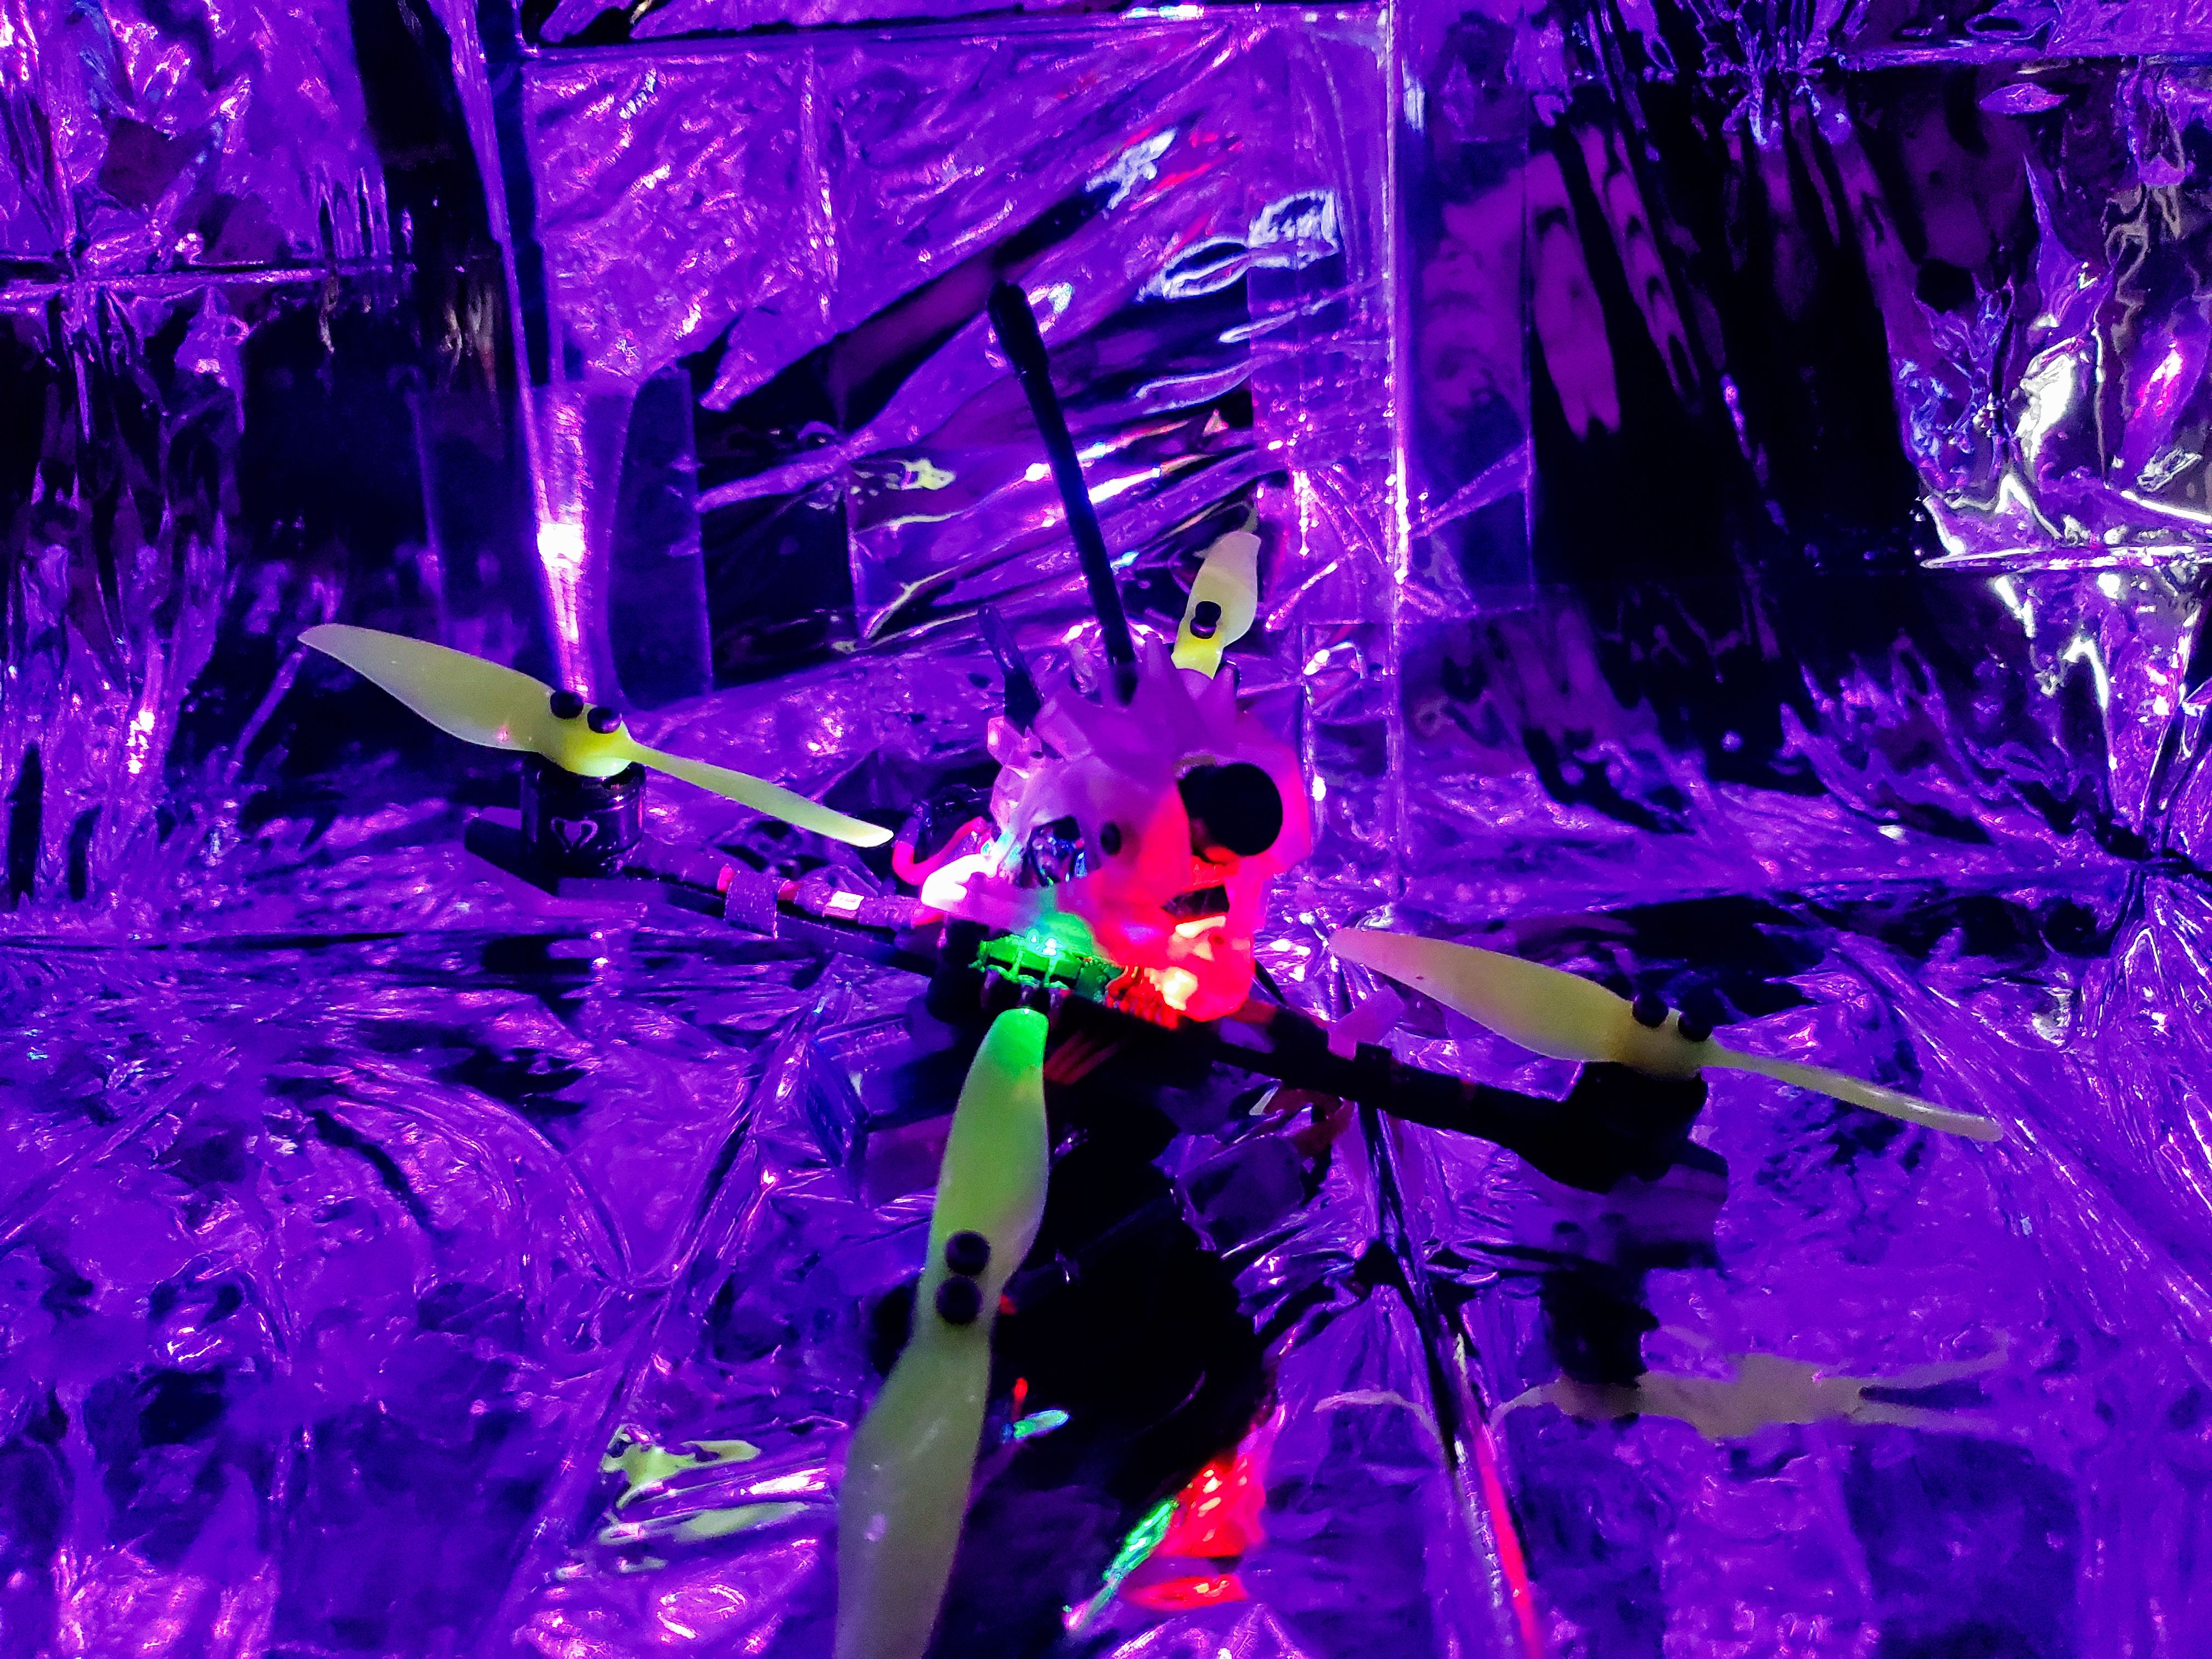
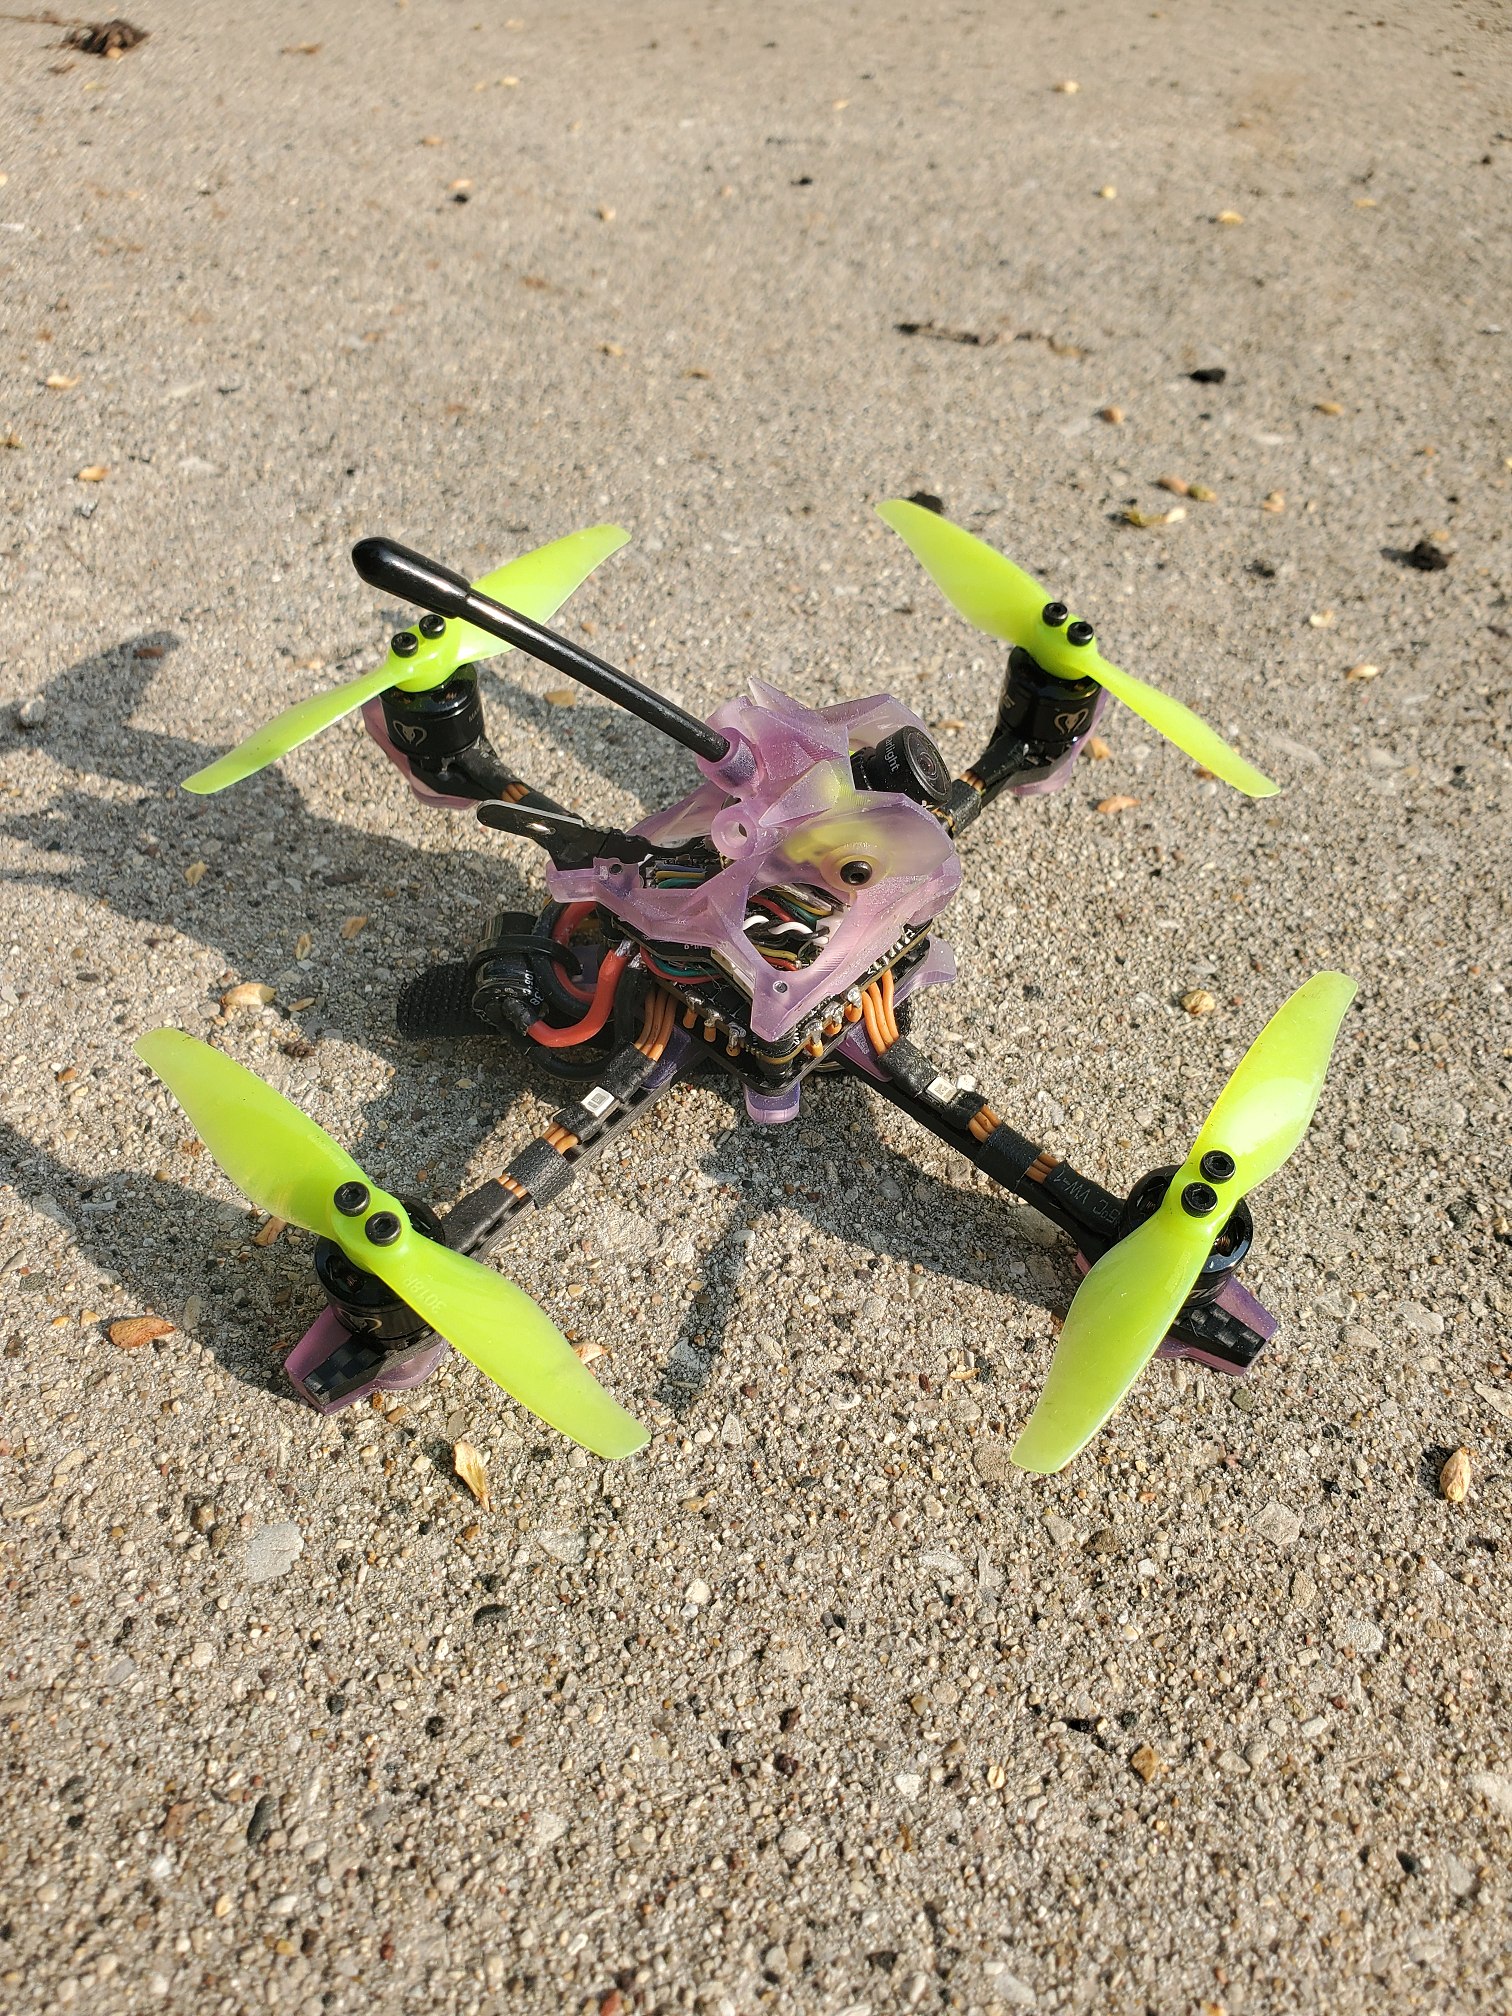
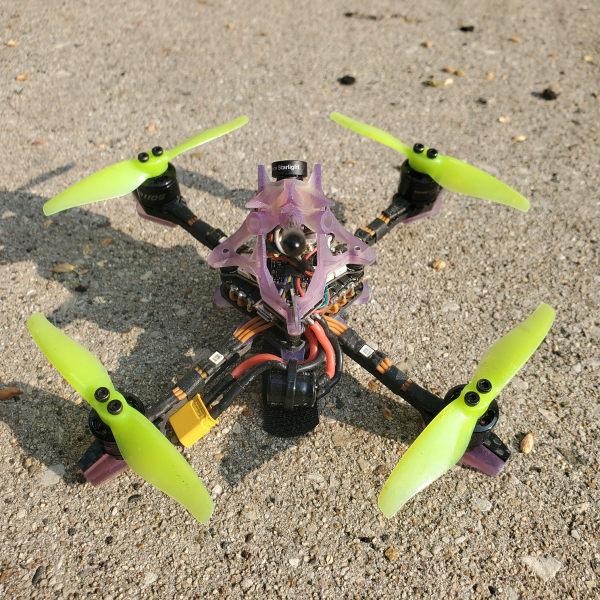
This is the EVA-3", a custom build i've been working on the past few months. Its a 3" toothpick-style park flyer meant for 2-3s and has a unique vibration dampener plate between the main frame and subframe. Carbon fiber was cut by CNCMadness, main frame is 3mm and sub-frame is 2mm. Flight controller mounting is for 26.5x26.5 boards like BetaFPV or GepRC boards. The plastic parts are MSLA printed by me with a blend of flexible yet tough resin. These parts are hella tough, I took a canopy and threw it as hard as I could on a sidewalk and it didnt crack or break, only left a small dent. Way less flexible than TPU, closest thing I can compare it to is tupperware plastic if that makes sense.
Onto how the frame is assembled:
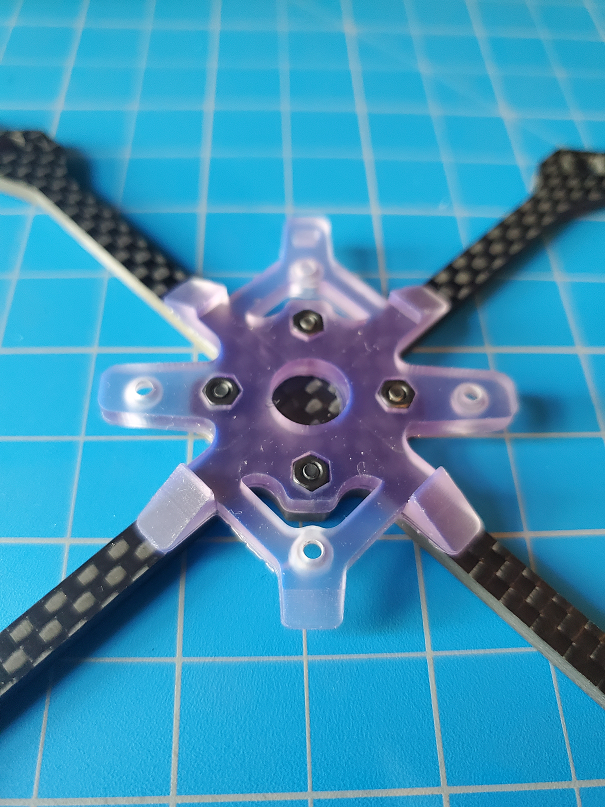
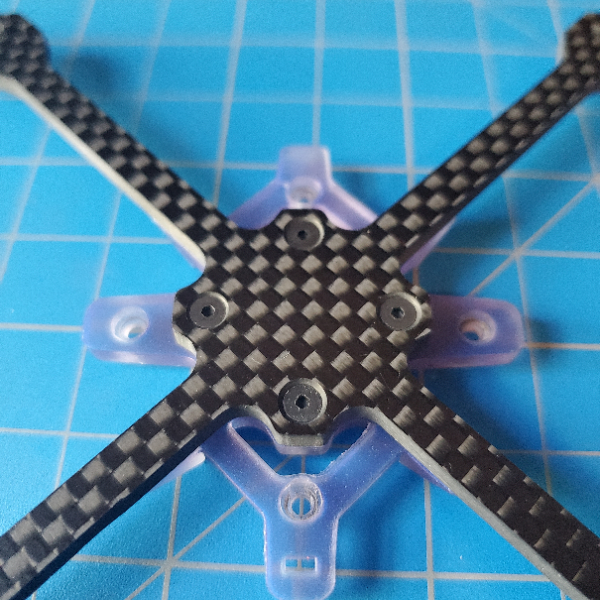
The frame has 4 countersunk screw holes for m2x6 countersunk screws that will tighten into the 4 nuts that are placed into the hex sized holes in the vibration dampener plate. There is a small slot in the back of the dampener plate for a zip-tie for your power lead and capacitor. There are also motor-bumpers that are "left and right" sided and orientation of the frame should be kept in mind if you want maximum protection. (plastic bumper part oriented inwards)

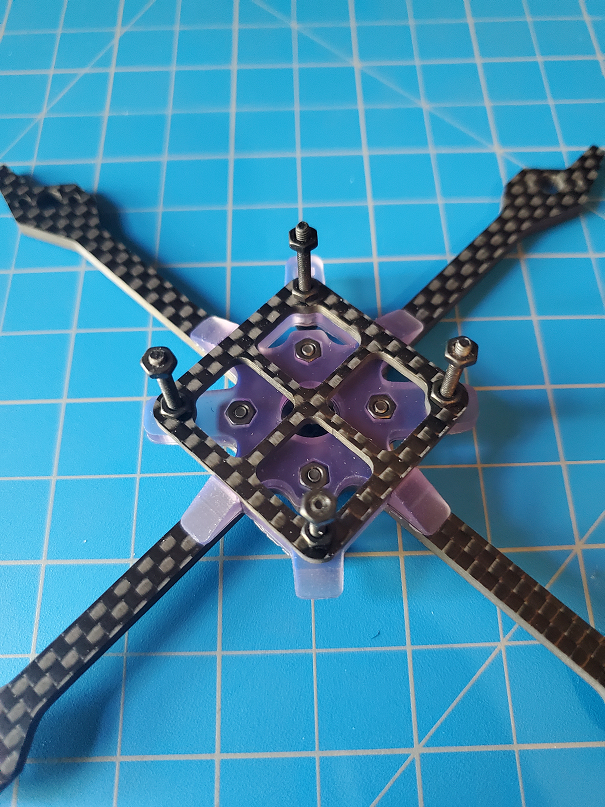
The subframe then fits on top of the dampener plate and 4 m2x20 screws are fed from the bottom and tightend with m2 nuts, while the battery strap is fed through the slots in the front and back of the assembly. At this point you would install your electronics, on my build I stared with my motors and flight controller, then my VTX, RX, and camera.
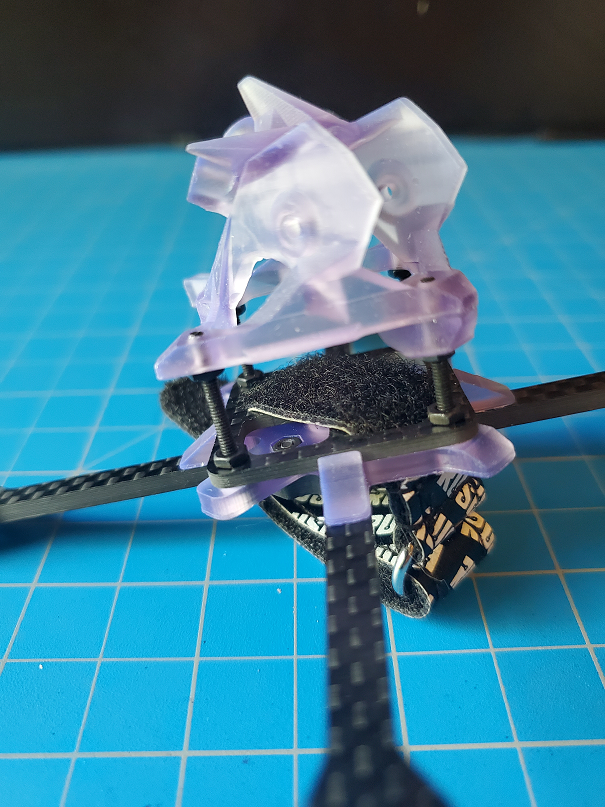
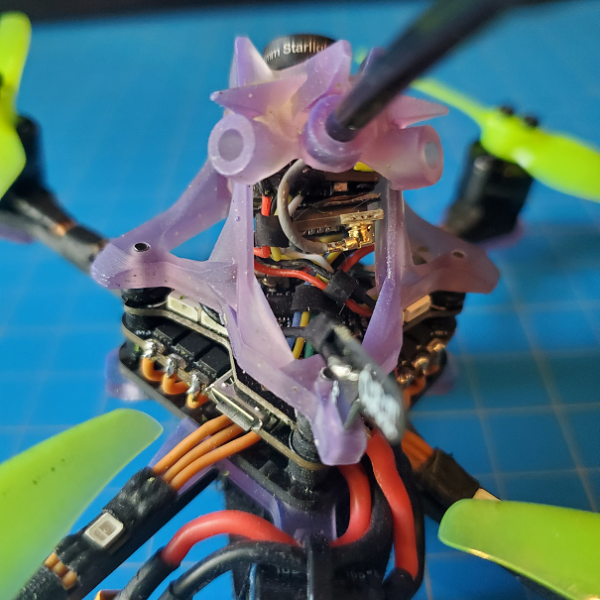
Finally after the electronics are installed, a m2 nut is tightened on the stack screws before the canopy is placed. I'm using a Rush Tiny Tank with the whoop style mounting plate so the front hole isnt used on this layer of the stack. I have a spacer that is used in its place yet separate from the canopy so a 4 hole vtx plate could be used instead while still using the same canopy.
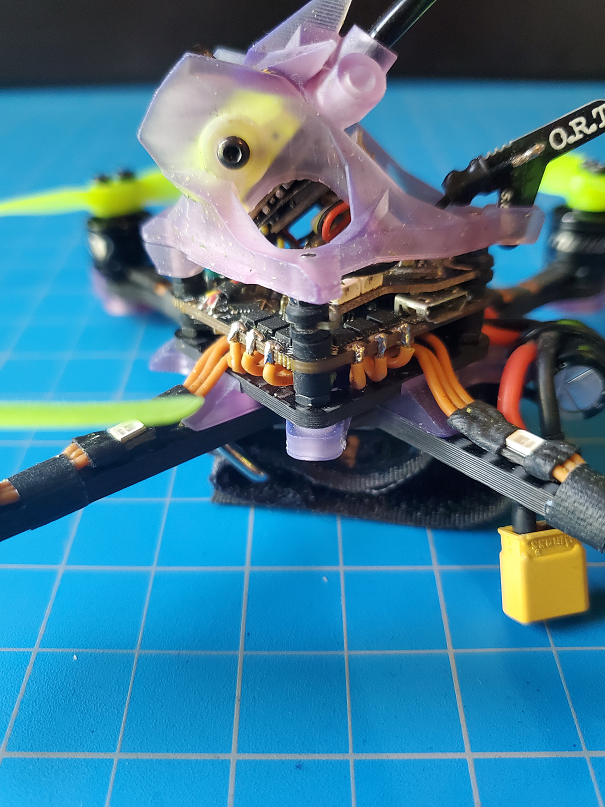

So now to detail some choices I made:
- Canopy fits nano cameras
- I put a slot so an ORT dipole antenna can be used for the VTX. This is the best small dipole antenna I found so far, works great for its size.
- There are 3 holes for antenna tubes at the top of the canopy for your choice of antenna mounting solutions.
- Canopy + spacer meant for Rush Tiny Tank VTX, spacer can be removed for different vtx choices.
- RX meant to be VHB taped to back of camera
- Can use battery strap or rubber bands
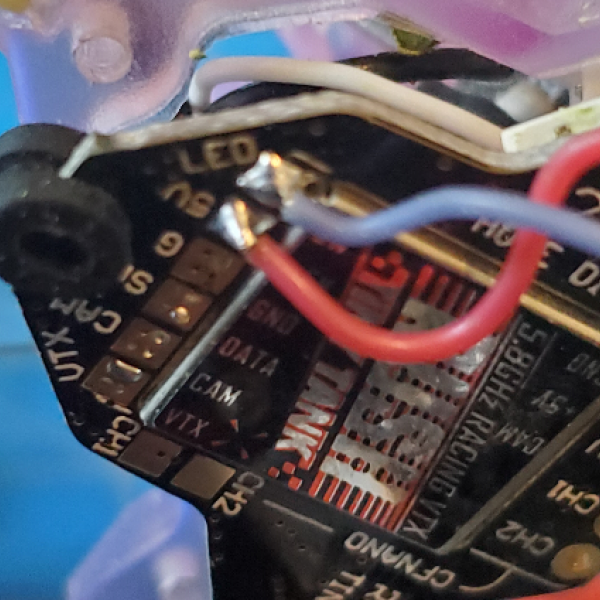
!!! PSA: since there seems to be no documentation that I could find on how to make the LED's on that plate work I will detail it here:
After soldering on the VTX to the plate, turn it over. You will see 2 pads labeled LED and 5V. They should be under the pads on the topside of the vtx plate meant for Switch and 5V. Solder a wire from the LED pad on the VTX to your FC, and solder another wire from the 5v on the VTX to a 5v out pad on your FC. LED's should work after configuring in betaflight.

Components used on this build:
- GepRC 20a AIO FC
- Diatone Mamba 1105 5500kv motors
- Rush Tiny Tank VTX
- Foxeer Nano Toothless 2 camera
- Fullspeed Frsky Nano RX
- ORT dipole antenna
- Gemfan 3018 props
- Flywoo motor wire LED's
Notes on components:
I think these motors are about the smallest I would go for this build. On 2s they are very tame, on 3s they really wake up.
I tried a build with Xing 1404 4600kv motors with gemfan 3016's and it flew much better.
GepRC board is pretty good, handles high amp draw on its upper end of its spec sheet well.
Now onto some weights: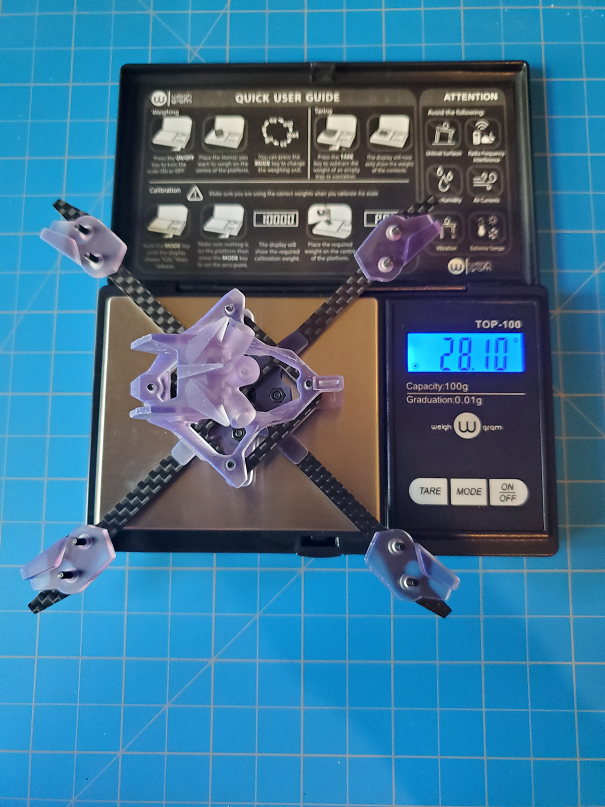
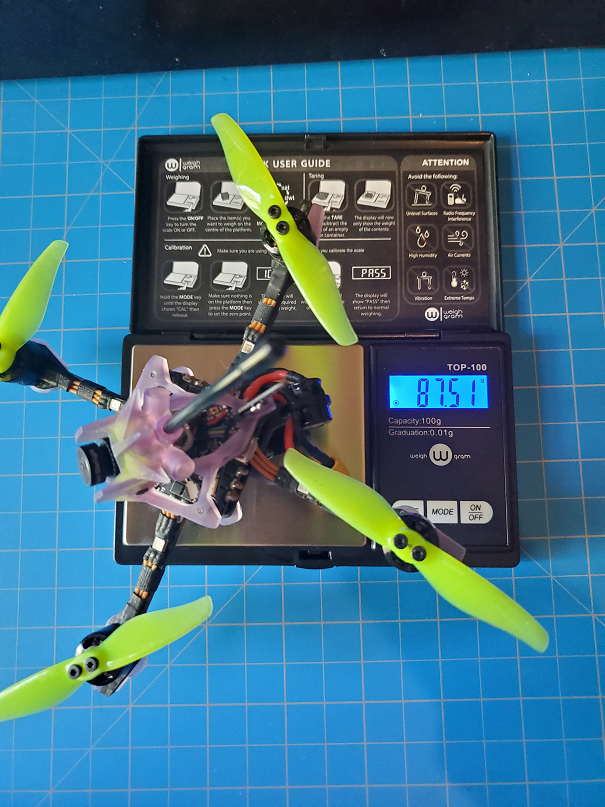
And some flights, 2s and 3s:
Overall, I am happy with how things turned out. I have a few kits available for purchase if you would like to build your own EVA-3". Kit includes everything you see below. PM for details as this is the first time im doing something like this. Shipping will be handled VIA USPS Priority Mail. Thanks for your time and have a great day!!
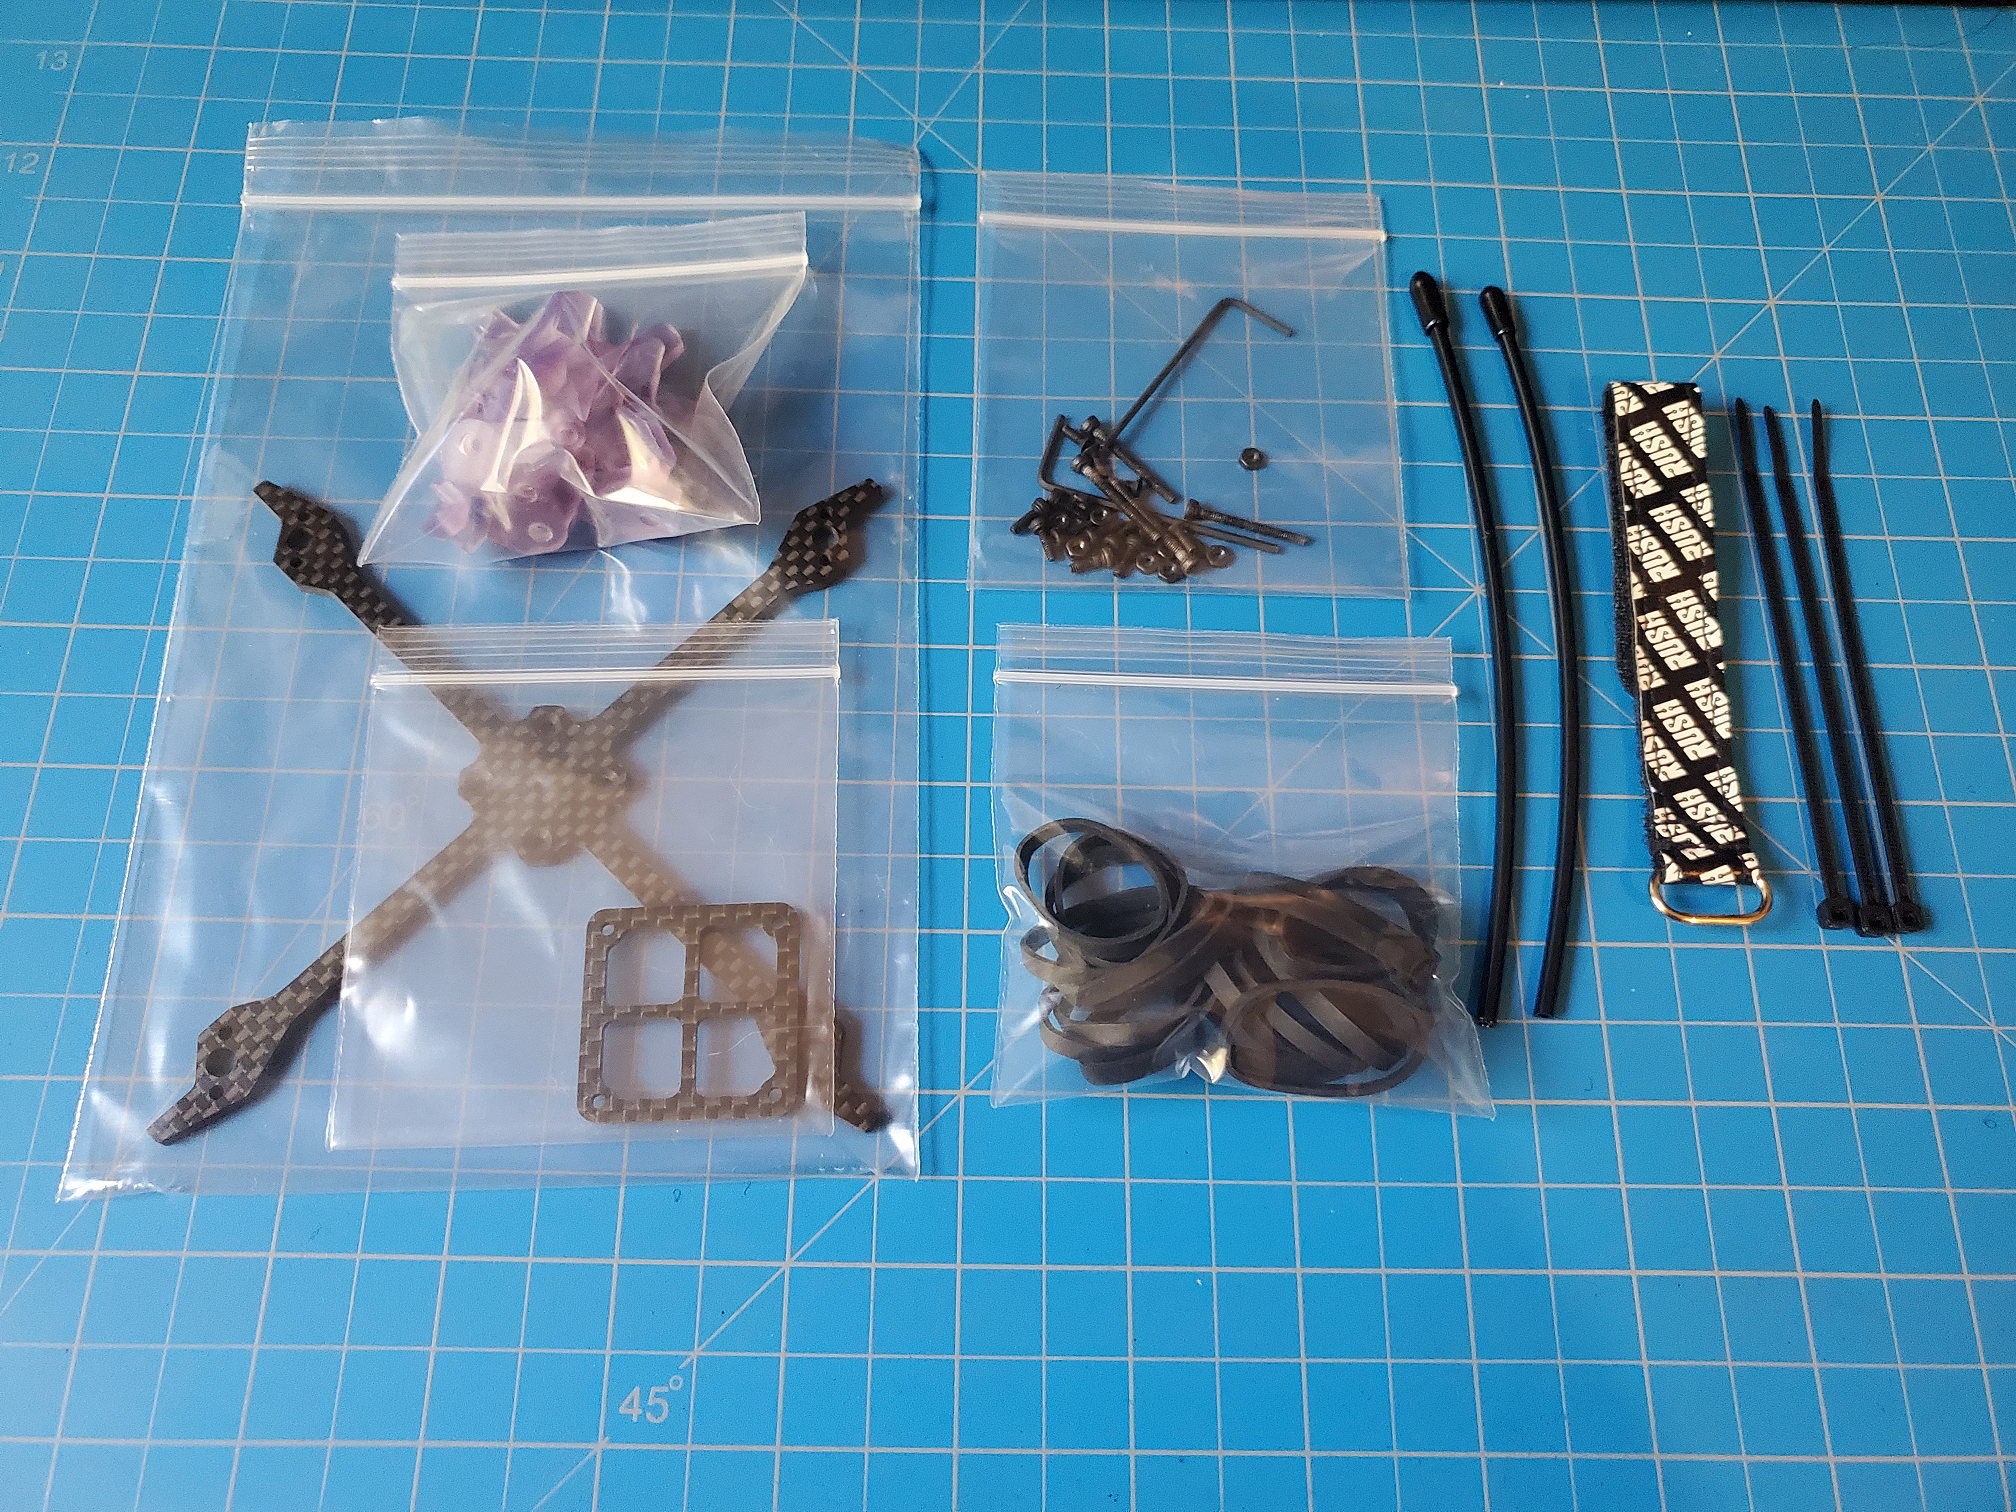
More pics: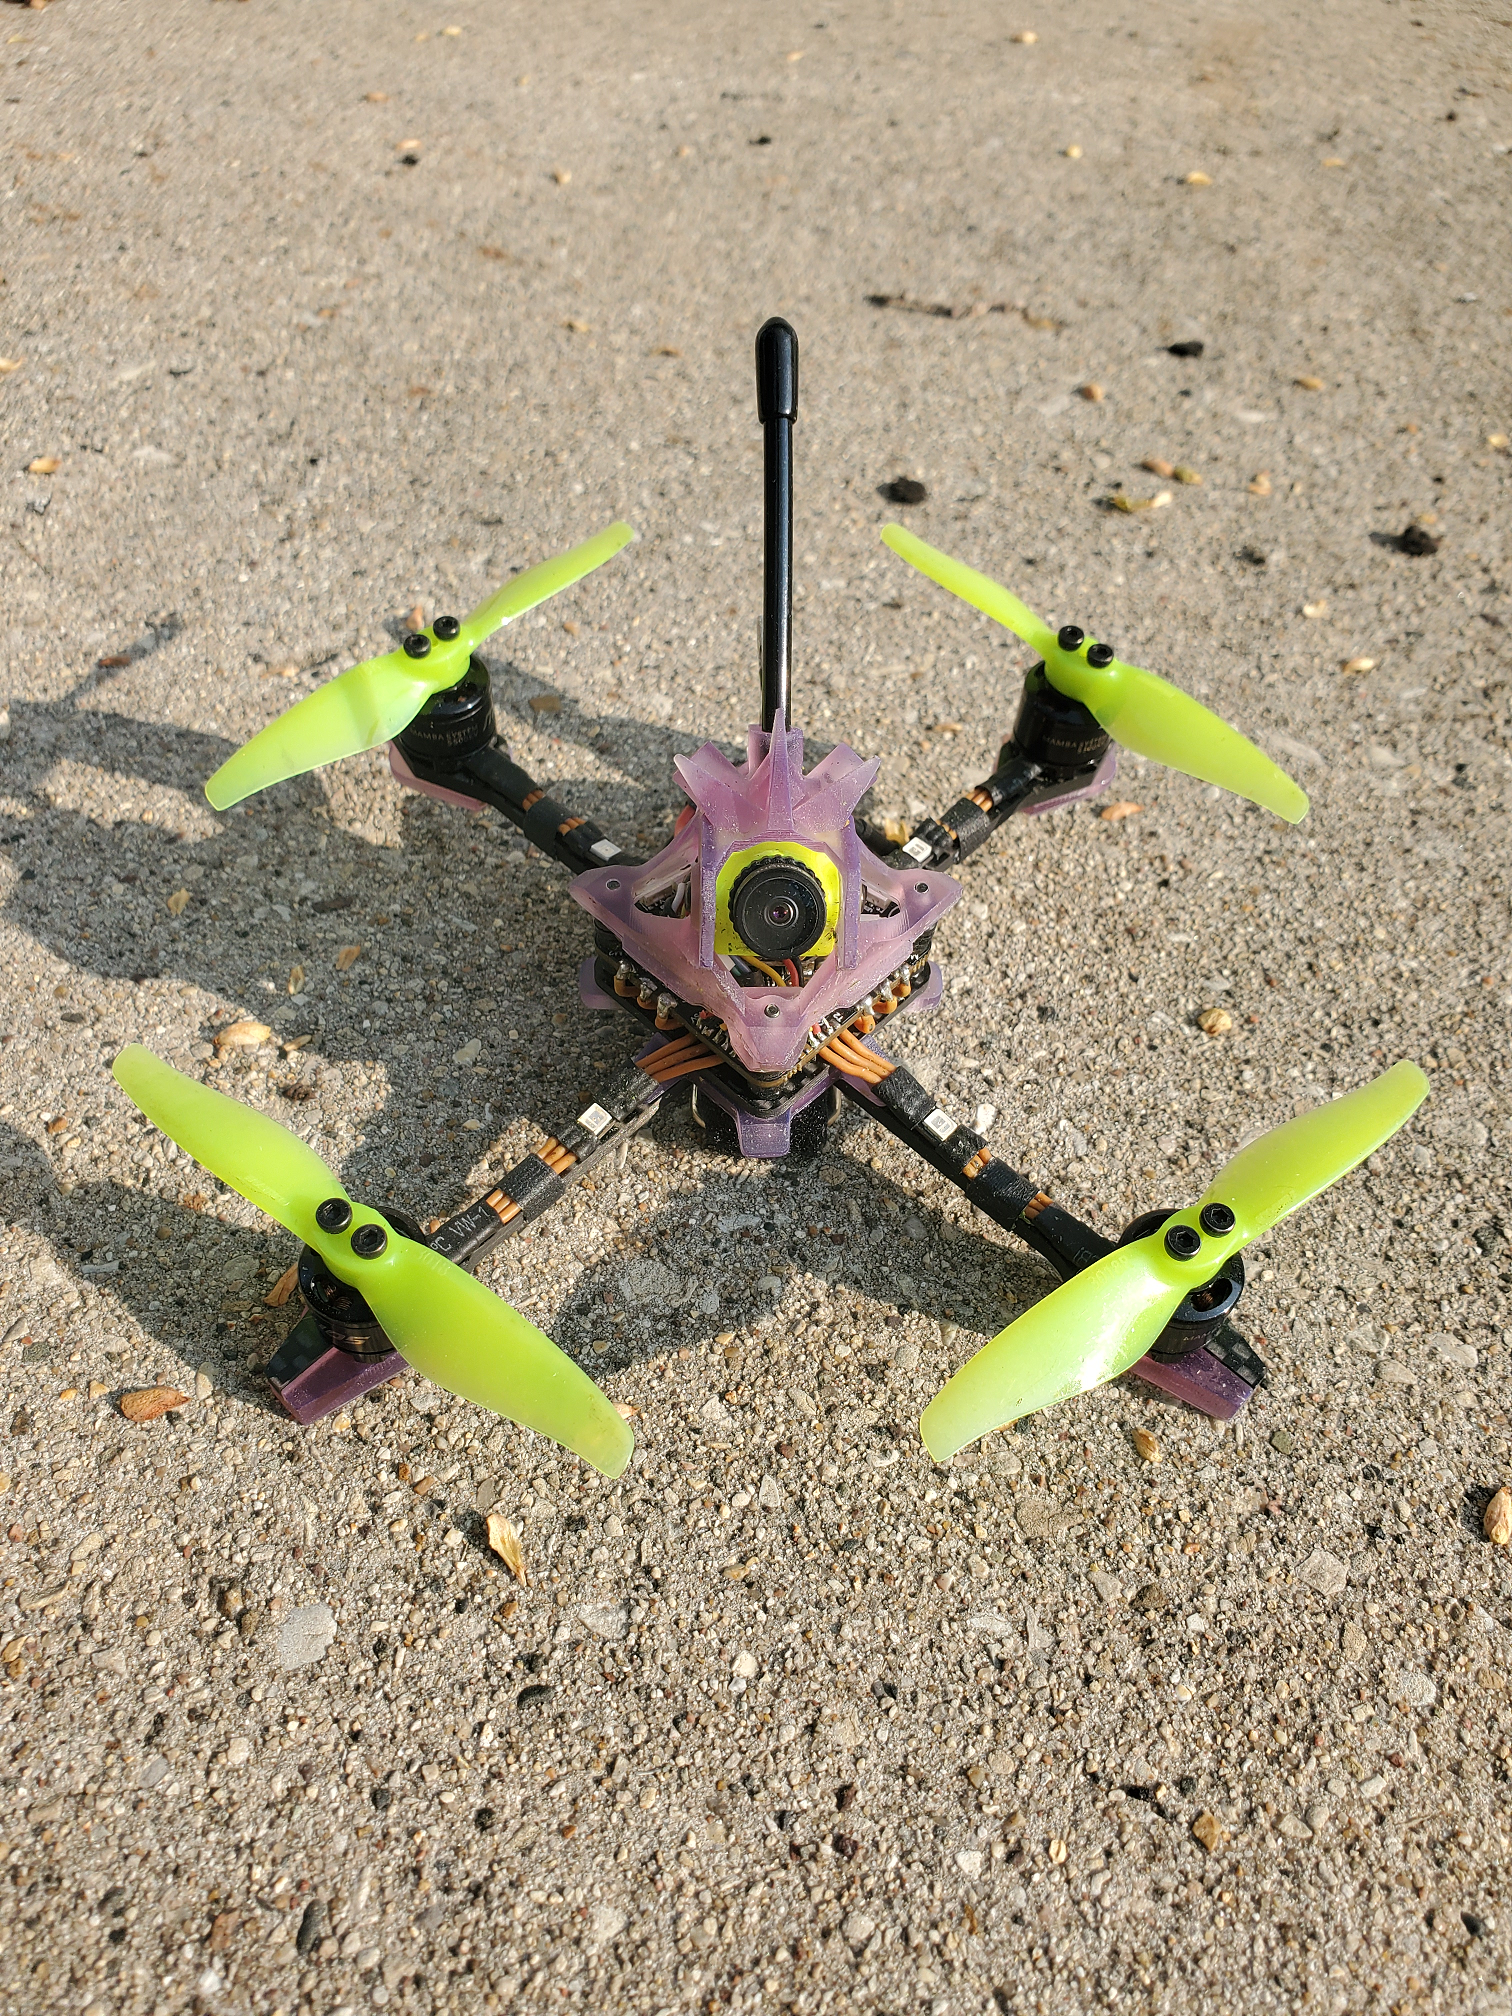

Photos
Part List
Show stores (6)Guides & Reviews
AirbladeUAV has done it again and this time they've brought long range to the 5" class! Based on the popular Transformer Mini, the new Transformer 5" Ultralight adopts a lot of the same design philosophies with larger props and more payload capacity. It can fly upwards of 20 minutes on a 4 cell Li-Ion battery pack and in ideal conditions it's got a range of over 4 to 5 miles. In this guide I'll walk..
Read moreWith the release of the DJI FPV Drone cinematic FPV has become a lot more accessible, but you certainly don't want to crash a $750 drone! The QAV-CINE Freybott is a compact, lightweight cinematic FPV drone that can take a hit and keep going. It's a lot safer to fly indoors and around people. With a naked GoPro or the SMO 4k you can capture some great stabilized footage. In this guide I'll show you..
Read more







Masterpiece.