His name is mittens because the motor/arm guards look like mittens!
Build Philosophy
I designed this build with three ideas in mind:
- Prioritize durability over all else
- Increase radio and video penetration for peace of mind
- Make it cute AF
In the next sections, I'll cover some of my design choices/parts of the build that might be different from a typical build.
Frame
This was my first major build where I had the disposable income to buy the "upgrade" pick in each of the component categories. That, combined with the fact that I live in the desert where the lack of soft grass means that every crash is a hard crash, shifted my priorities towards parts that are more expensive up front, but have better build quality and can withstand more hits. This primarily applies to the frame where I chose the Armattan Badger for its metal camera cage and lifetime warranty on all the parts... which have both come in handy after a 60 mph crash into the side of a mountain.
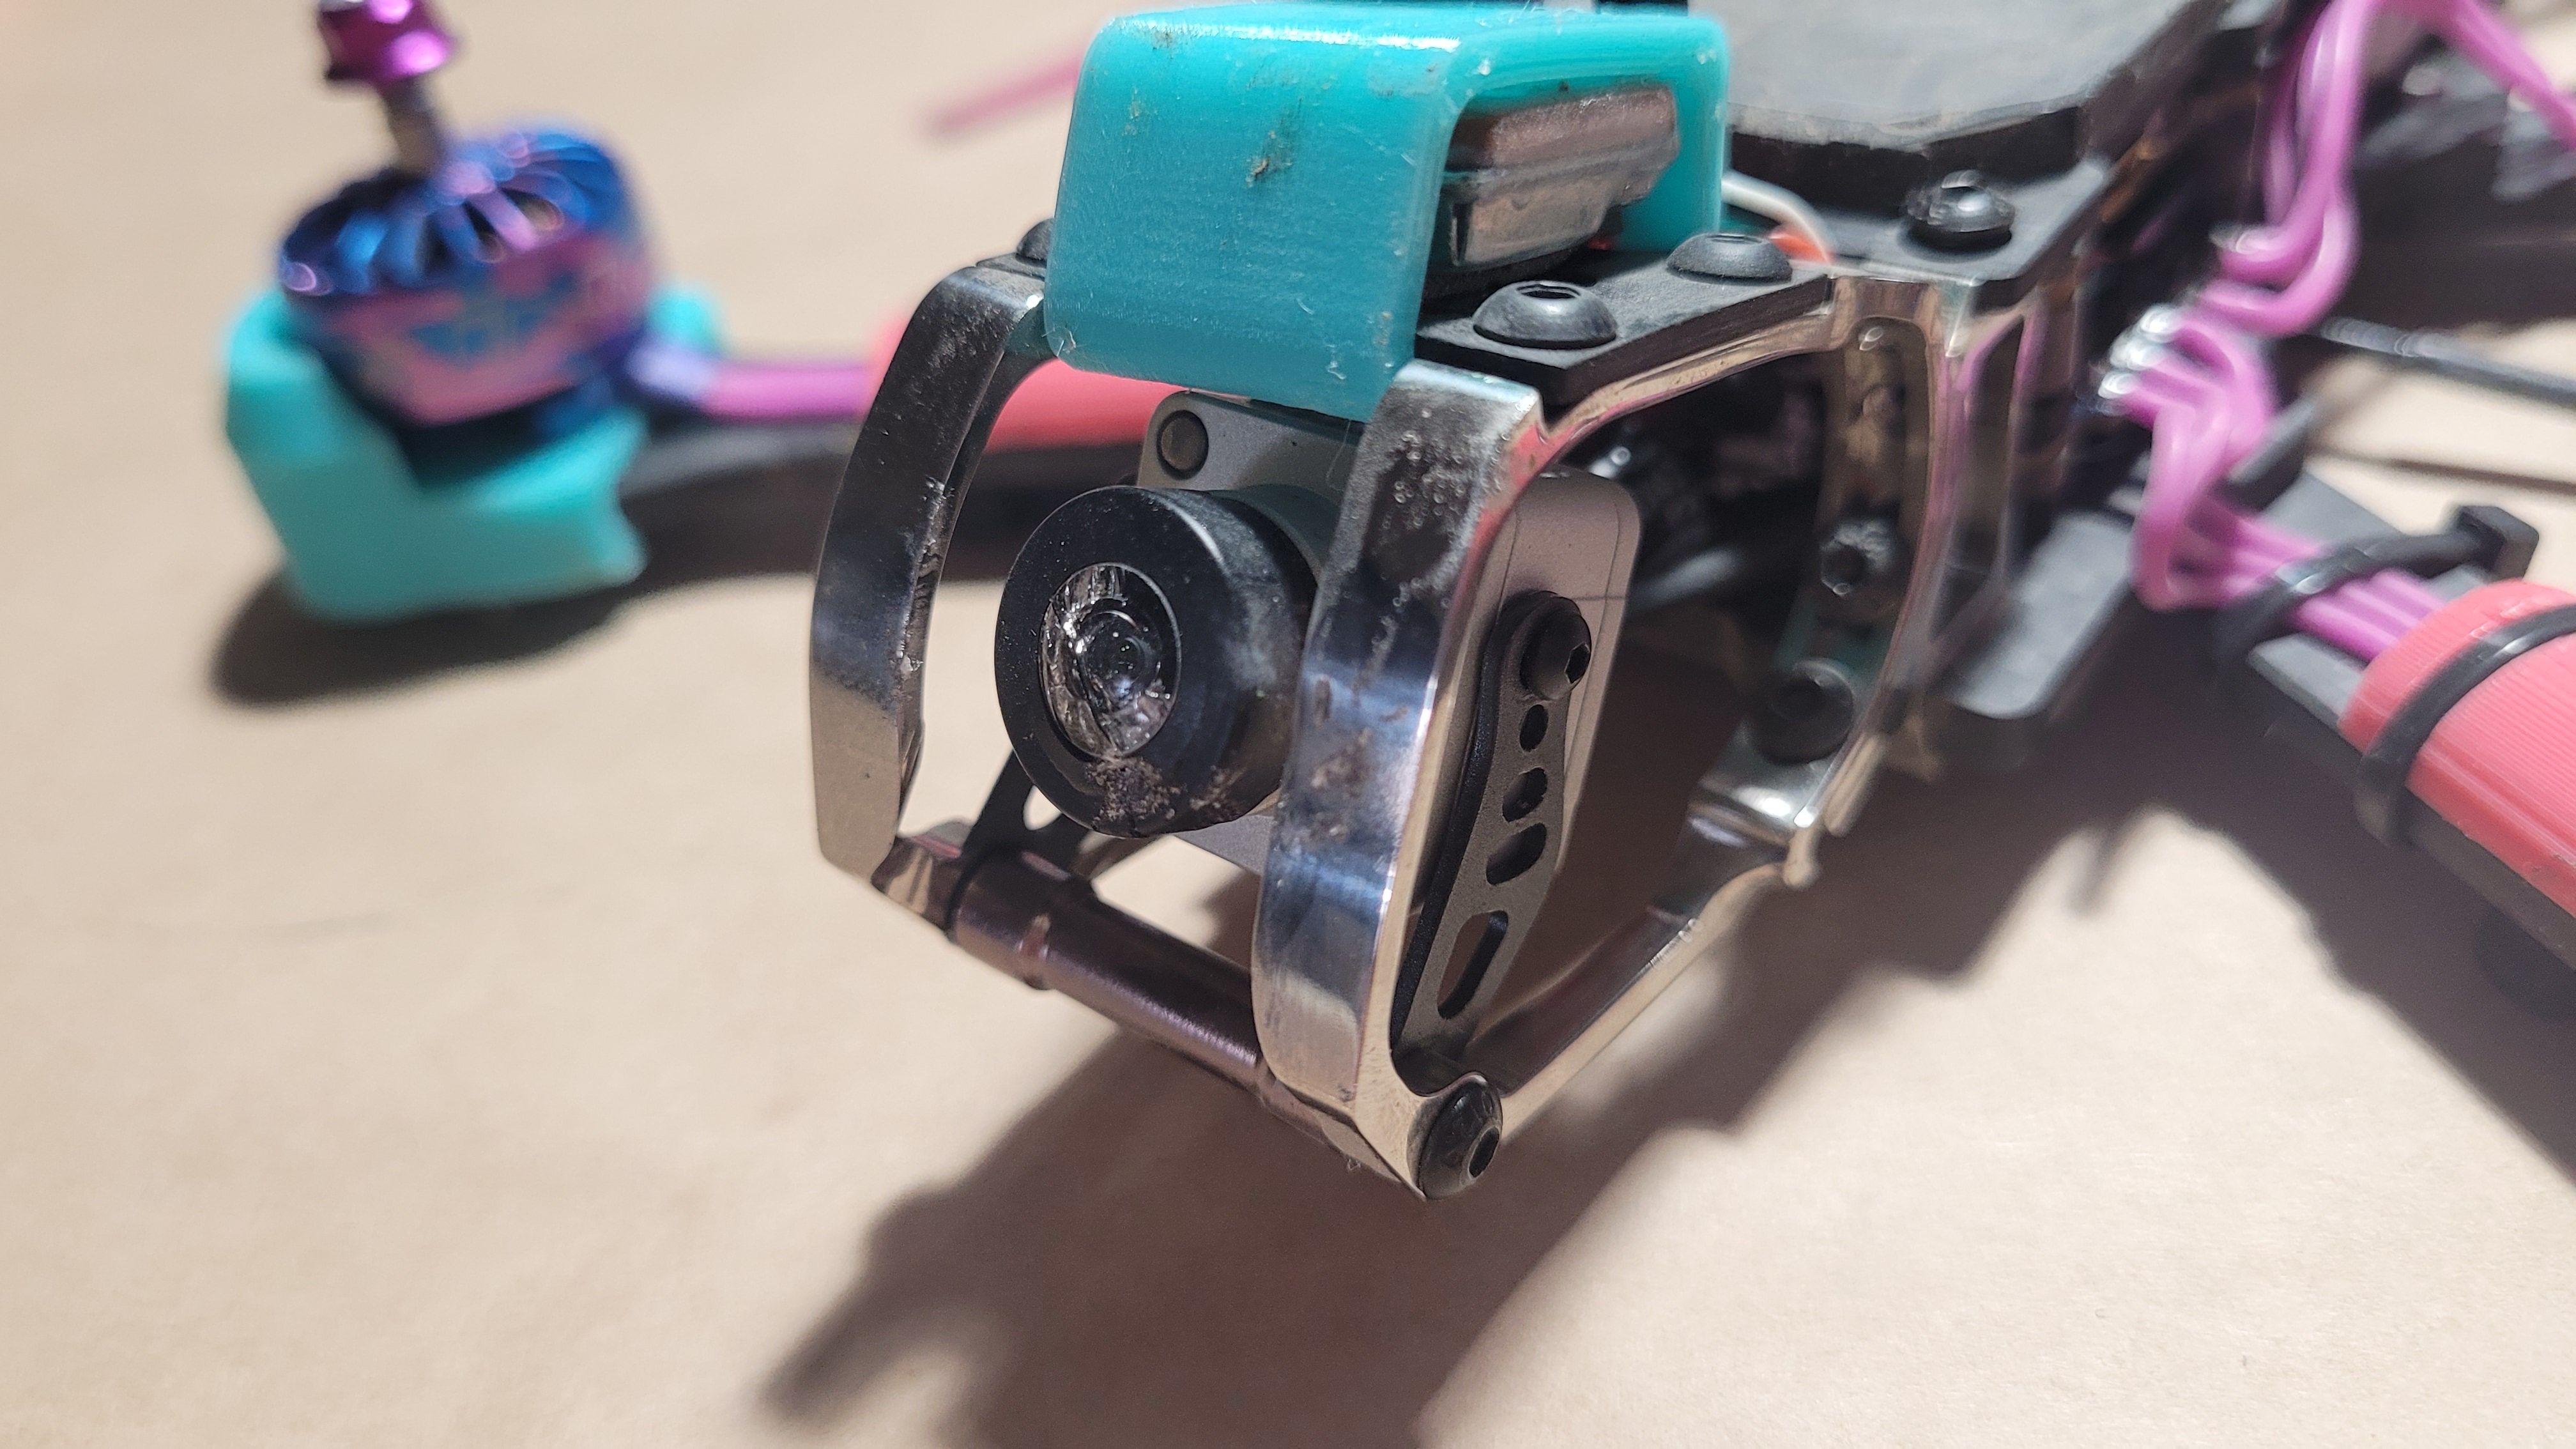
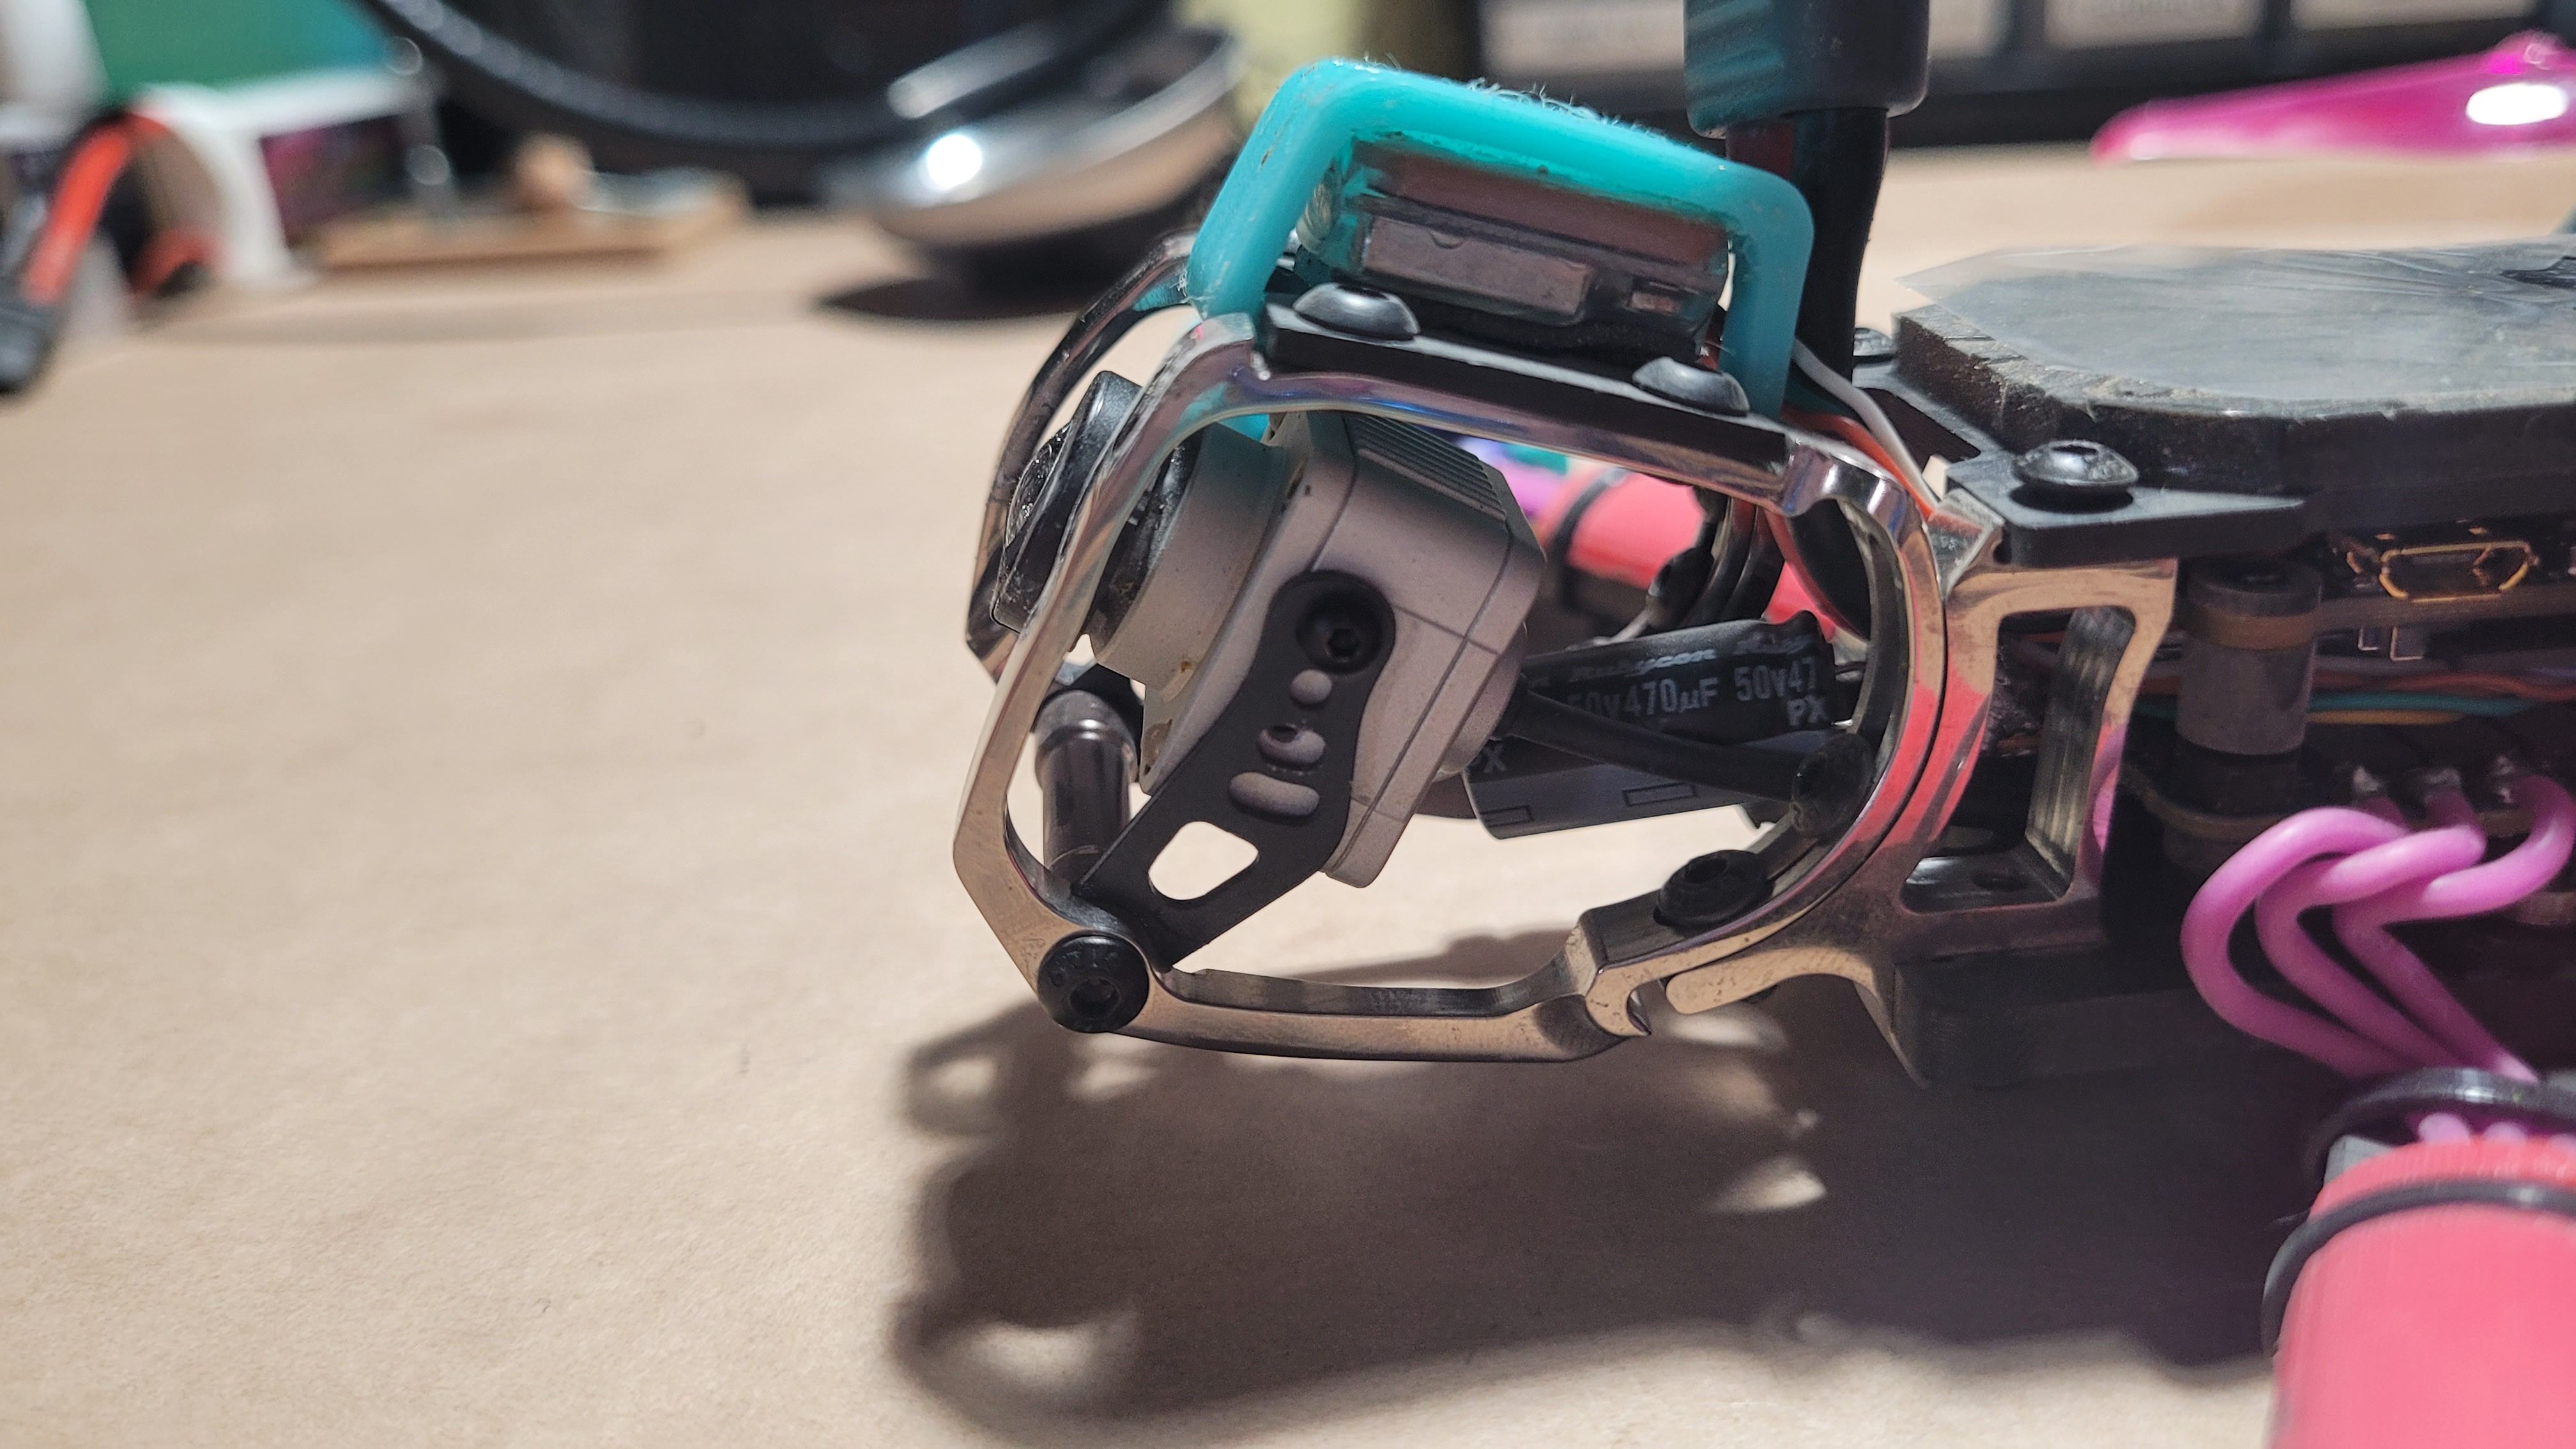
As you can see, I managed to bend the metal cage and crack the lens on the camera, but everything else in the build (except for some props) survived perfectly fine!
Heat Shrink
Another step I took towards increasing durability is using adhesive-lined heat shrink as an added layer of protection on many of the components.
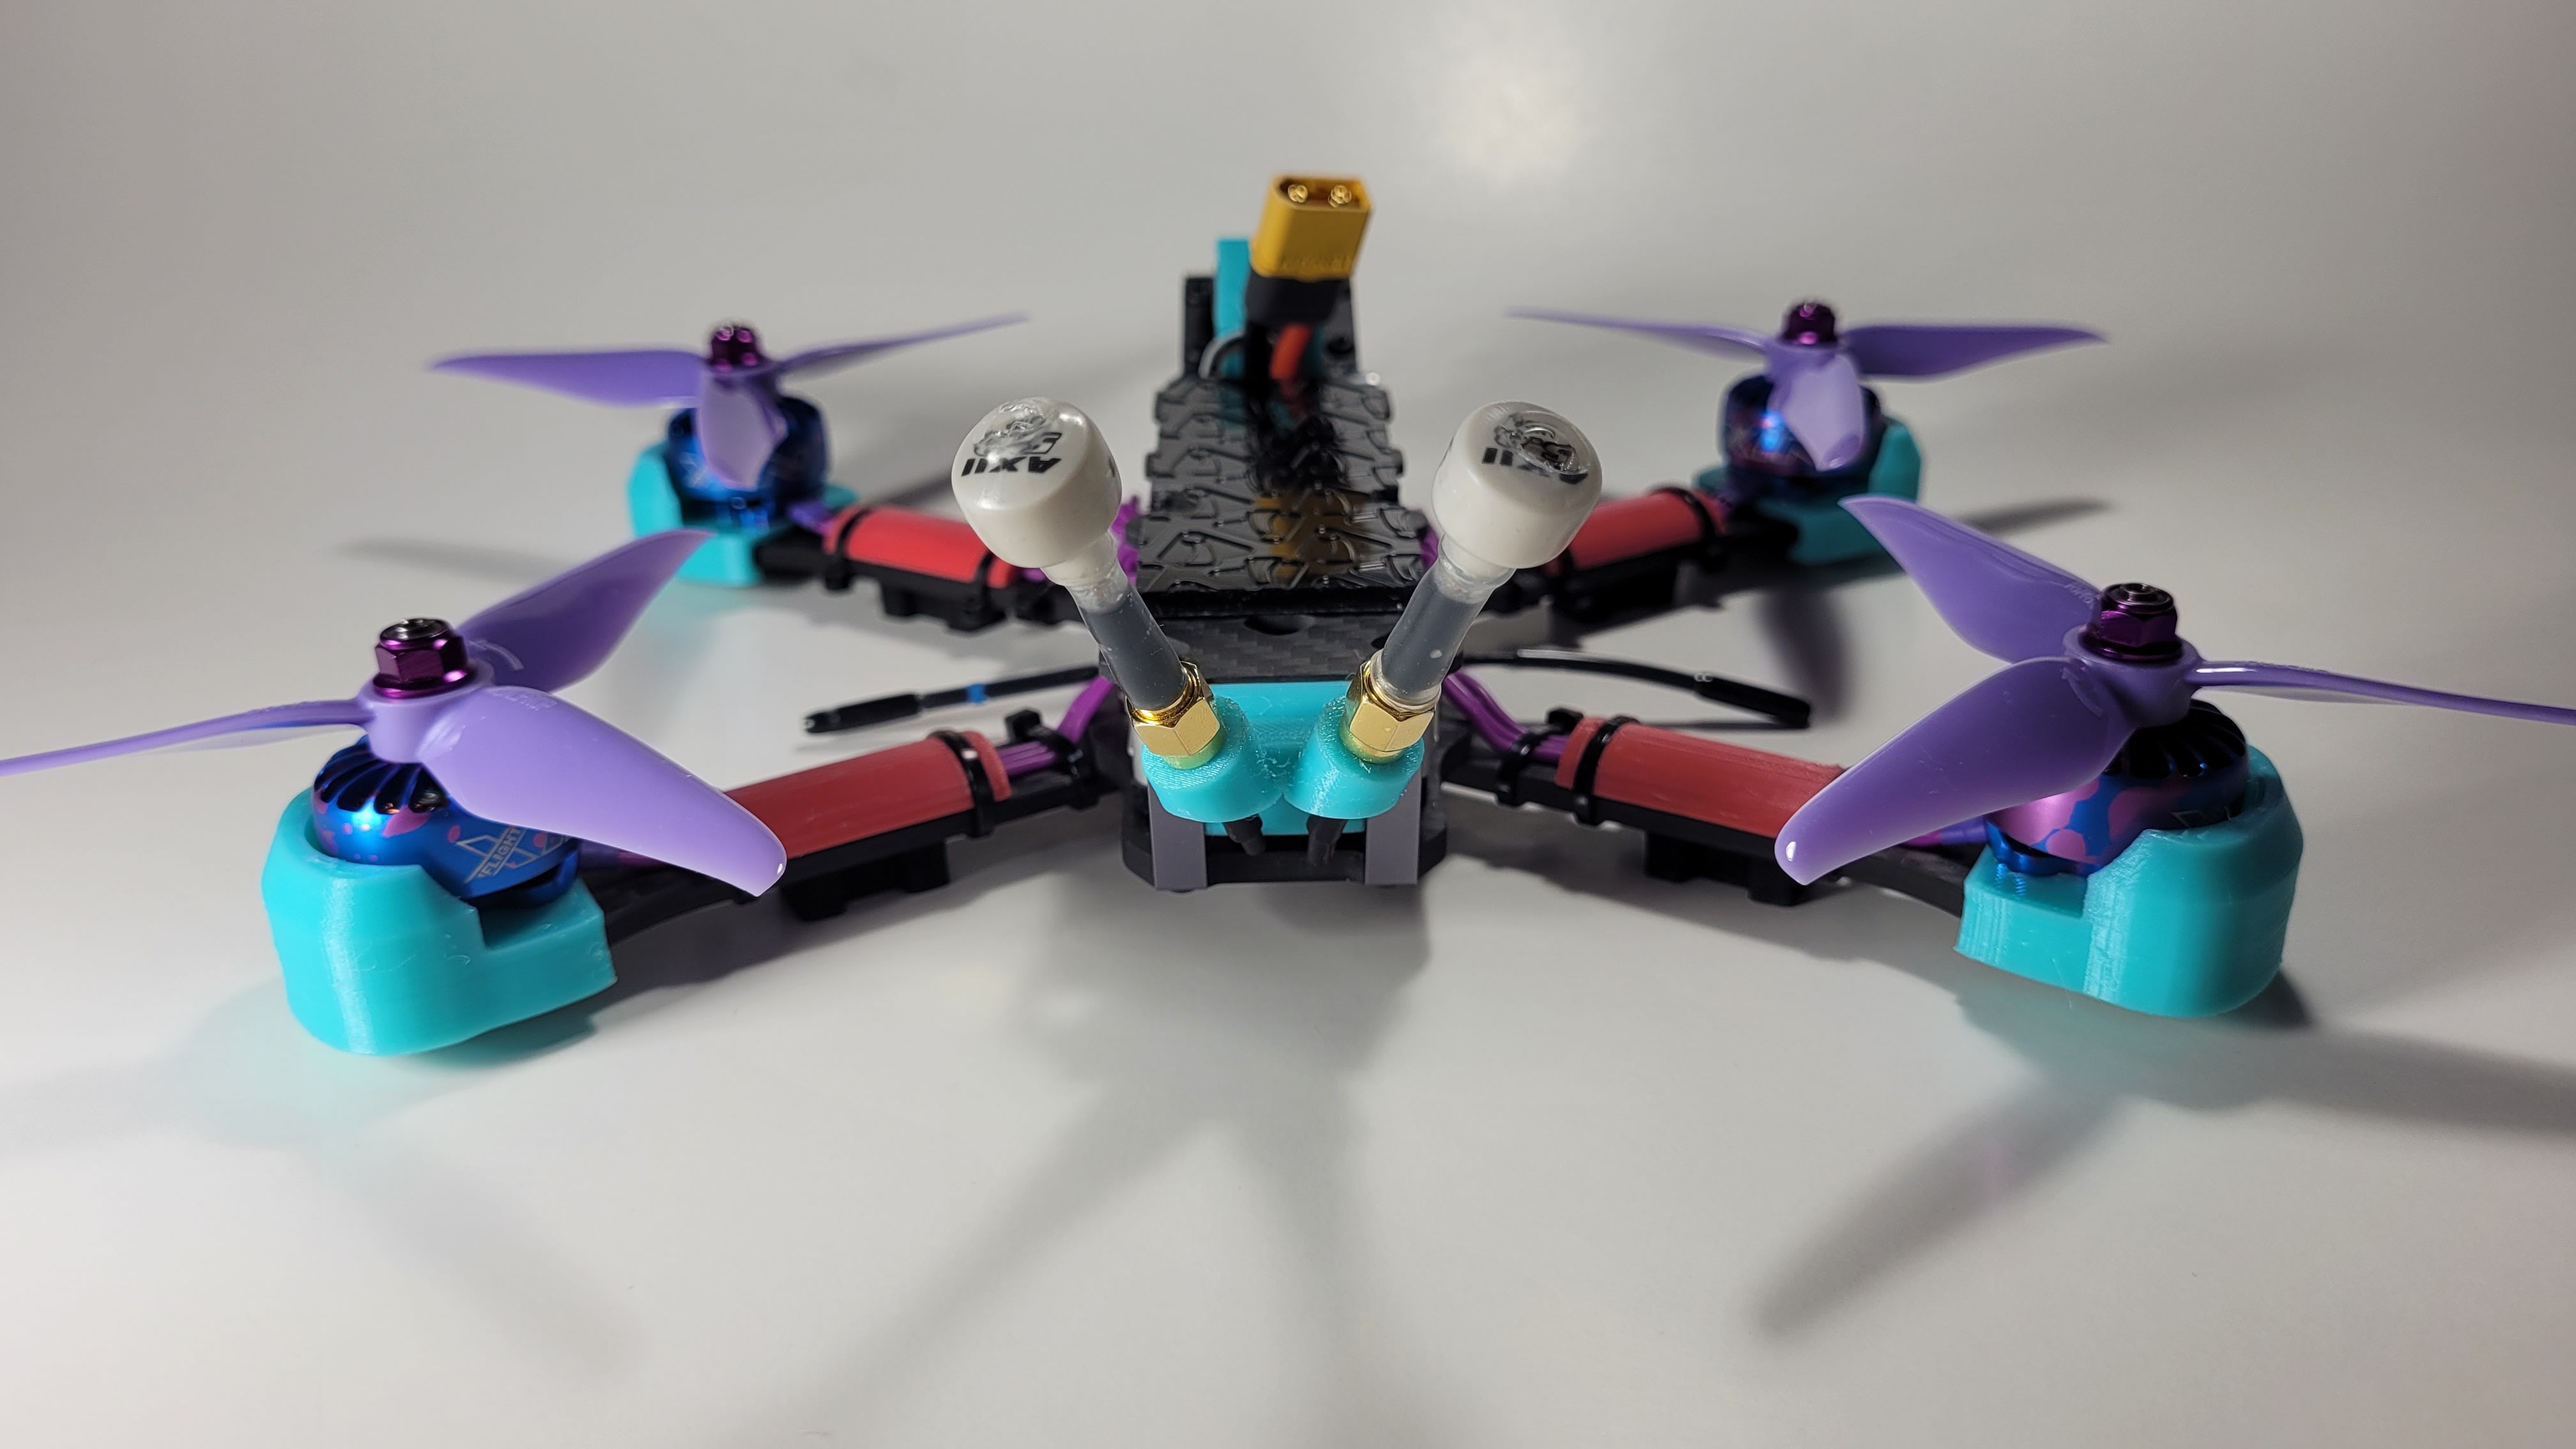
This is most evident on the two antennas in the back where the softer rubber of the heat shrink helps absorb impacts and prevent the plastic shells from cracking. I've also used the same technique on the R9MM antenna in case of prop strikes. The GPS module and R9MM reciever also have heat shrink on them, but more as a way to prevent short circuits rather than durability.
Antennas
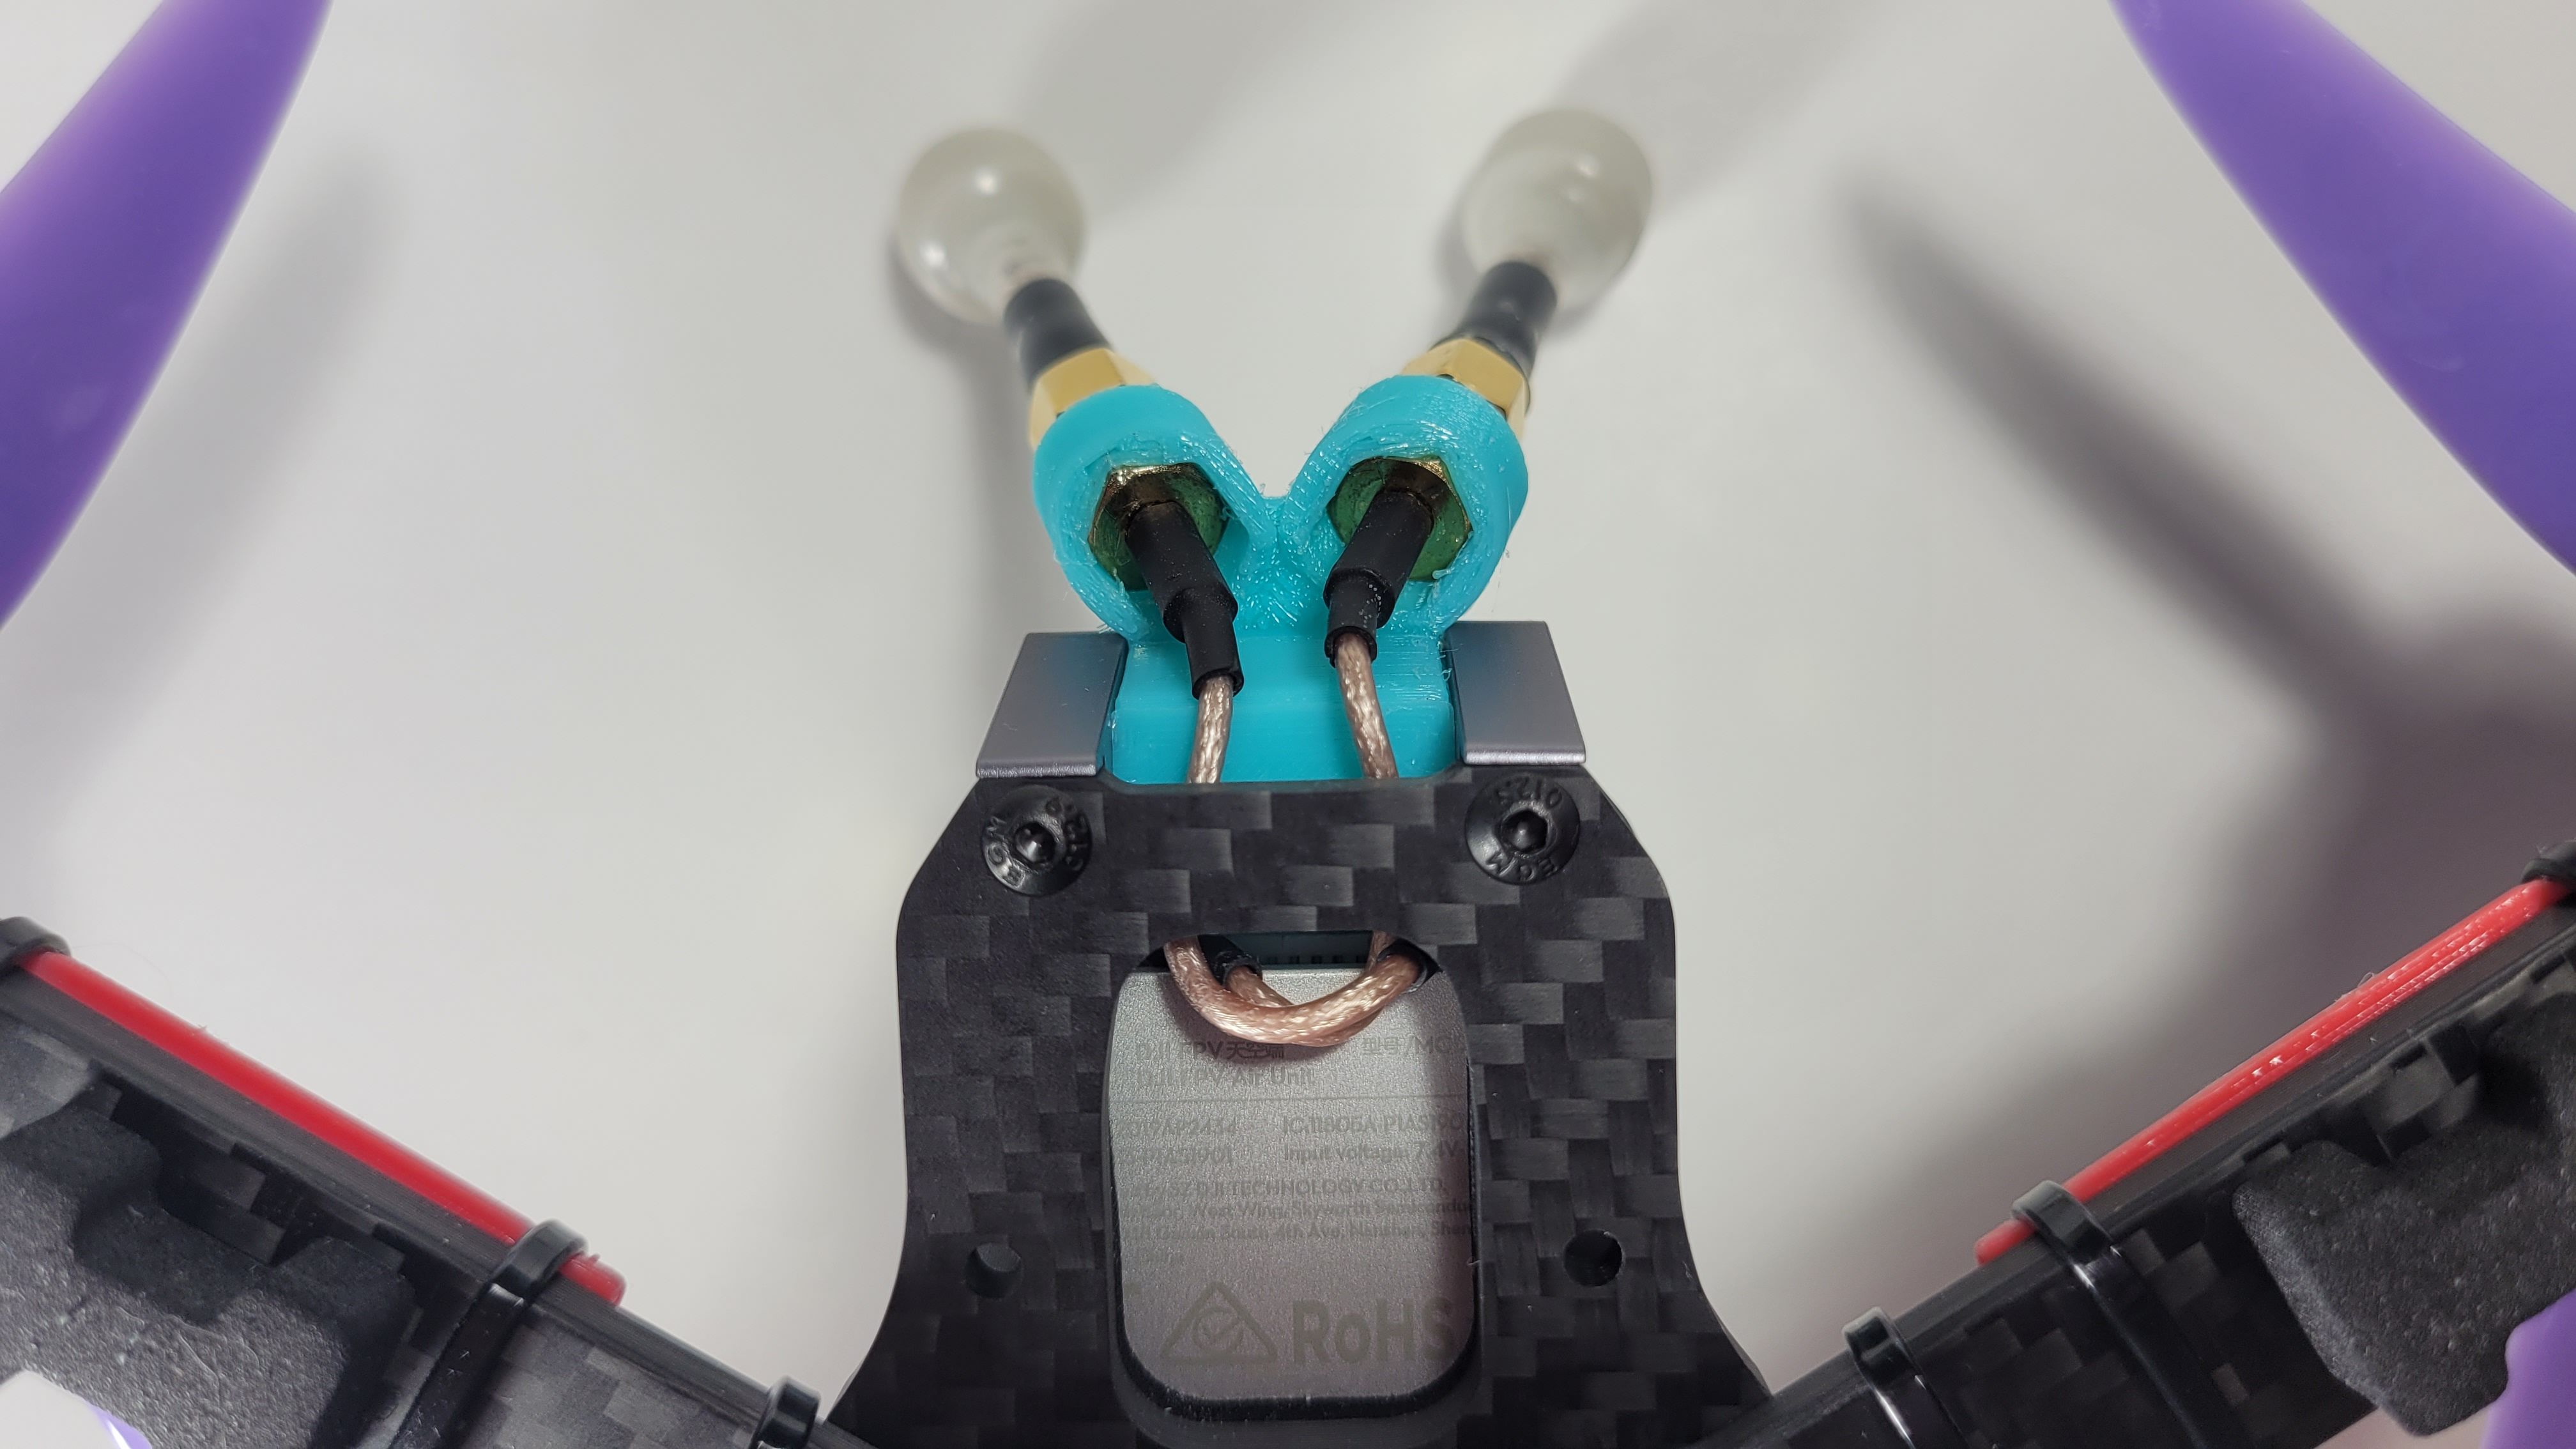
On the topic of antennas, I chose not to use the in-built antenna holes on the frame for the DJI Air Unit because they are placed in such a way that the stock antennas are angled in a way that there's already strain on them before any crashing even happens. I also prefer using pigtails to move the strain of a crash from the connector on the expensive VTX to the connector on the cheap pigtail. I also chose to mount the R9MM antenna underneath the main body of the quad because it was the easiest place to design a mount for and makes it nice and symmetric. The Image below shows how I guided the pigtails in the back. For reference, the wires do not stick out of the hole in the bottom of the frame, even though it looks like it from that angle in the picture.
3D Printed Parts
Last, and definitely not least, are the 3D printed parts. Here are links to the Thingiverse pages of each of the components:
- Mittens: https://www.thingiverse.com/thing:3994965/files
- Wire Guards: https://www.thingiverse.com/thing:3540827
- DJI Air Unit Antenna Holder: https://www.thingiverse.com/thing:3986467
- GPS Holder and R9MM Antenna Holder: I made them myself, so I will probably add them to Thingiverse later.
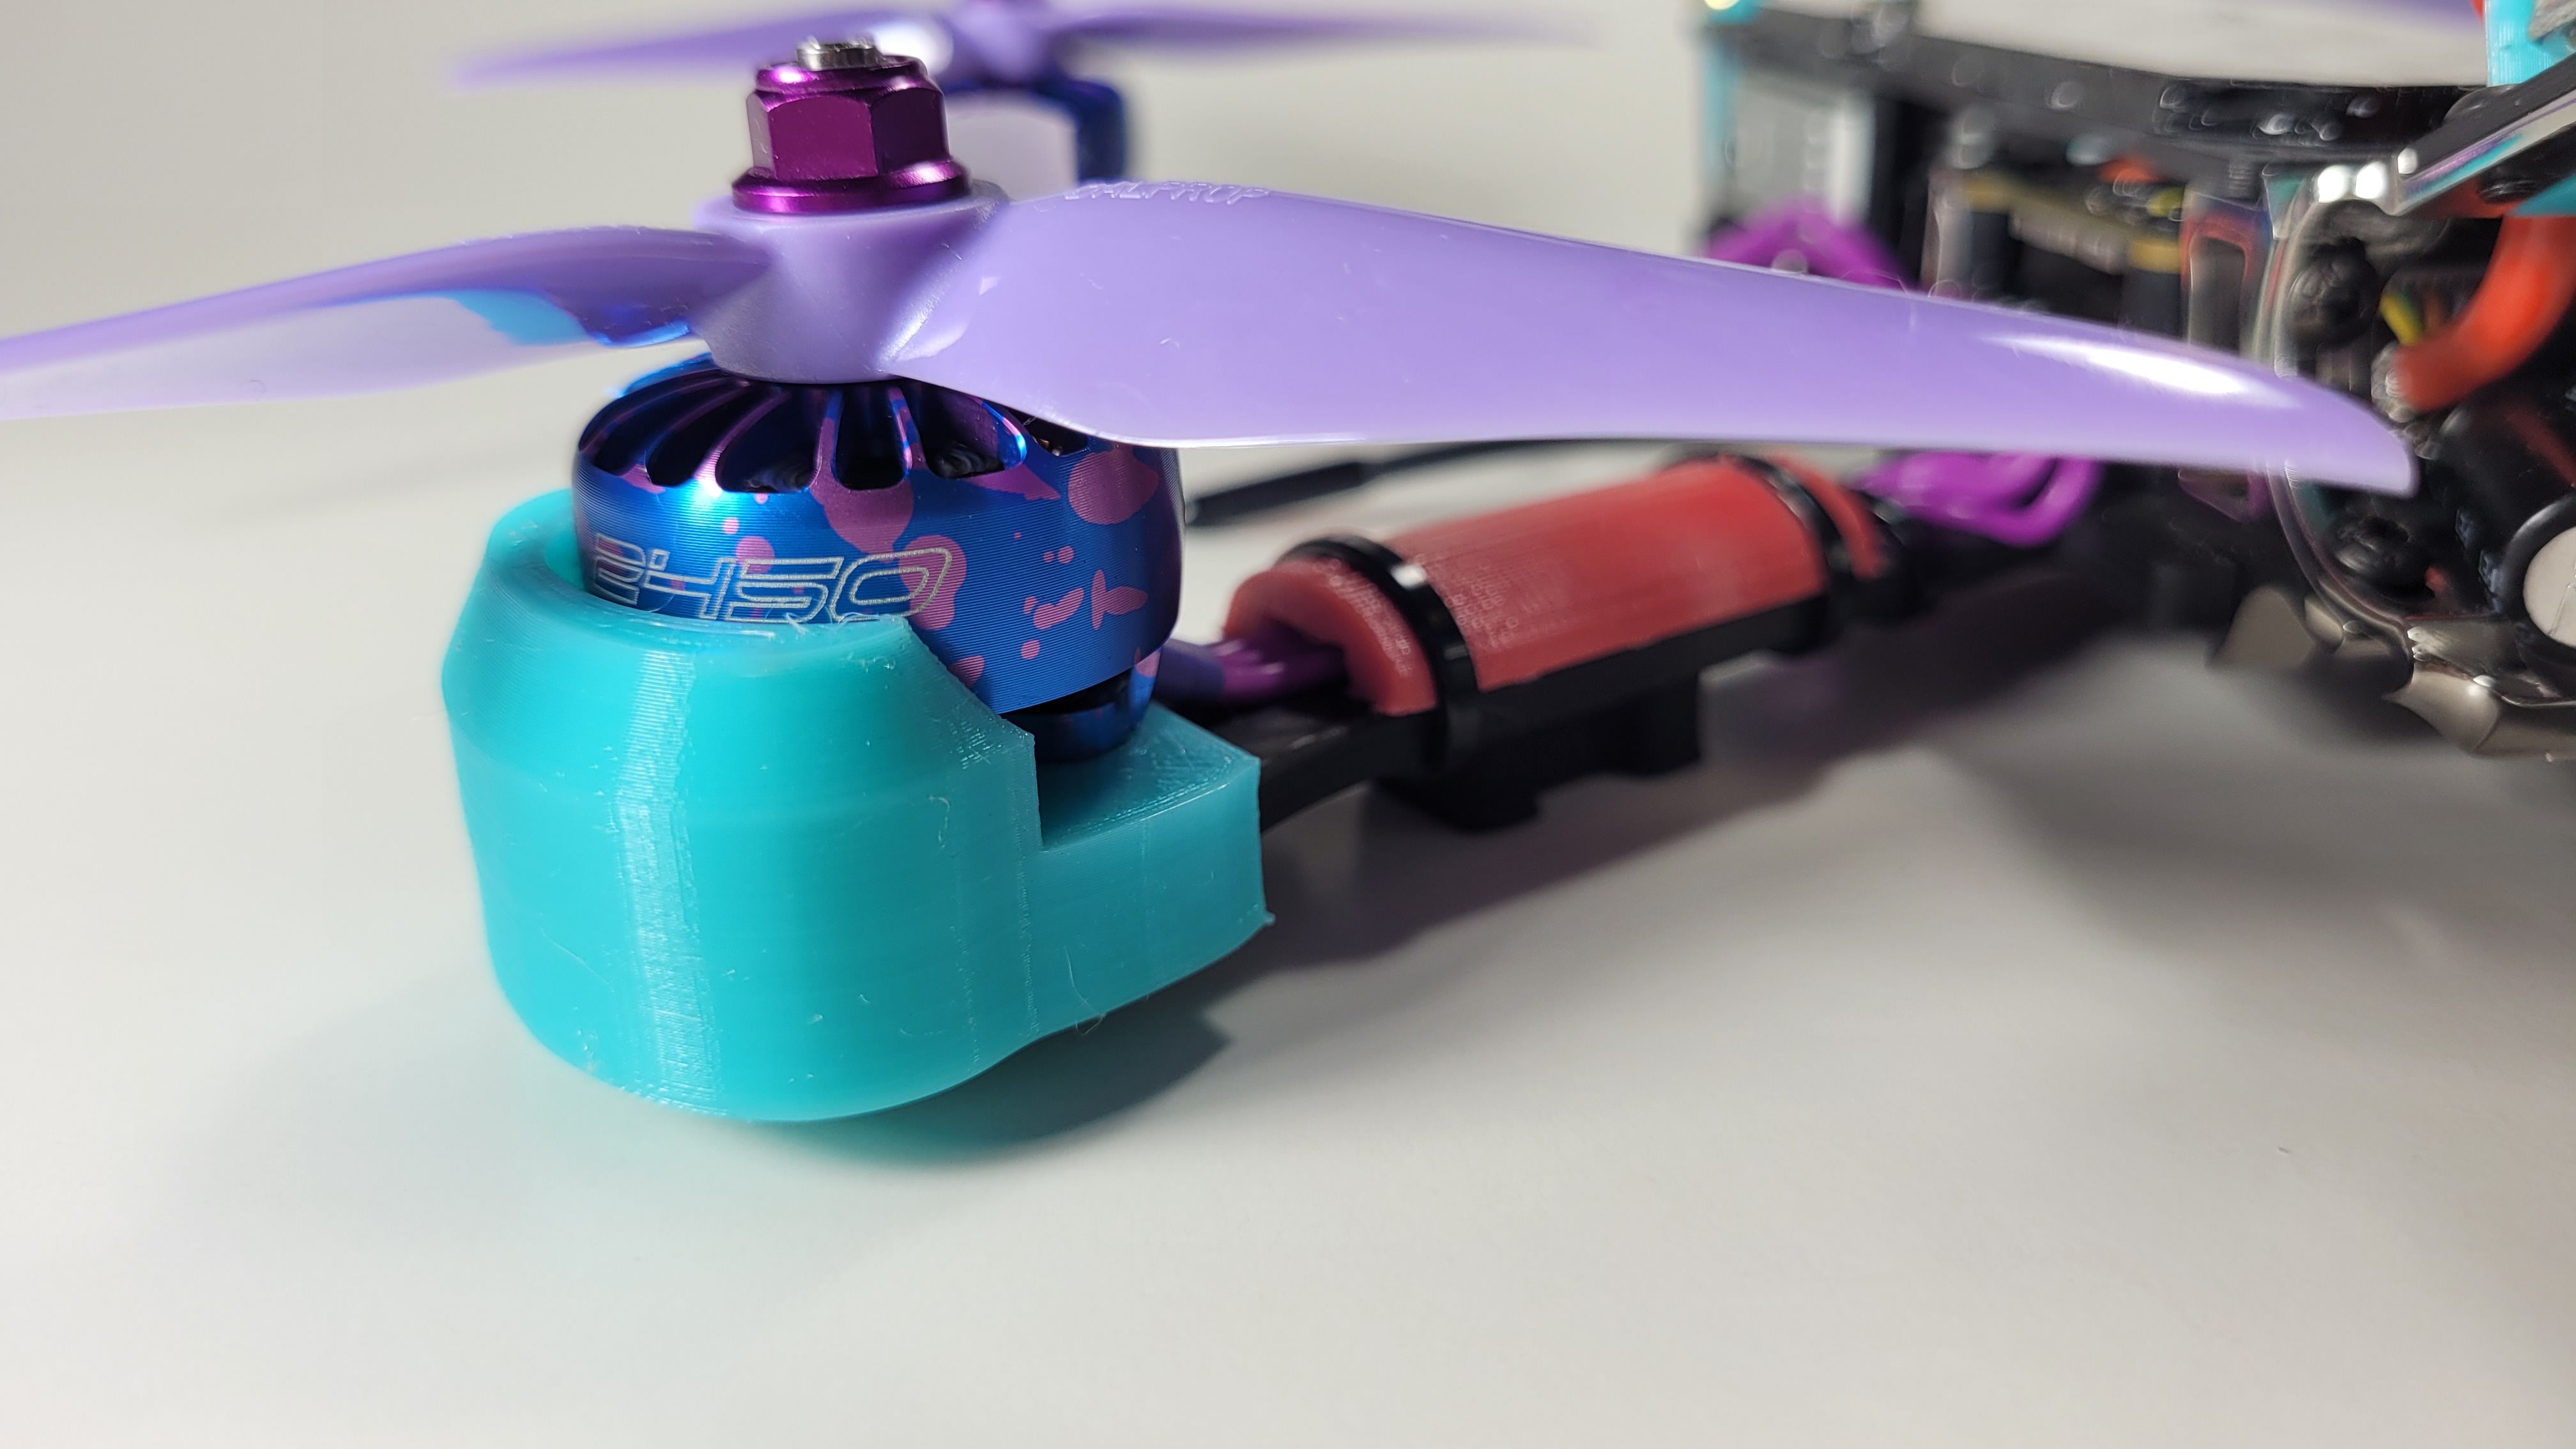
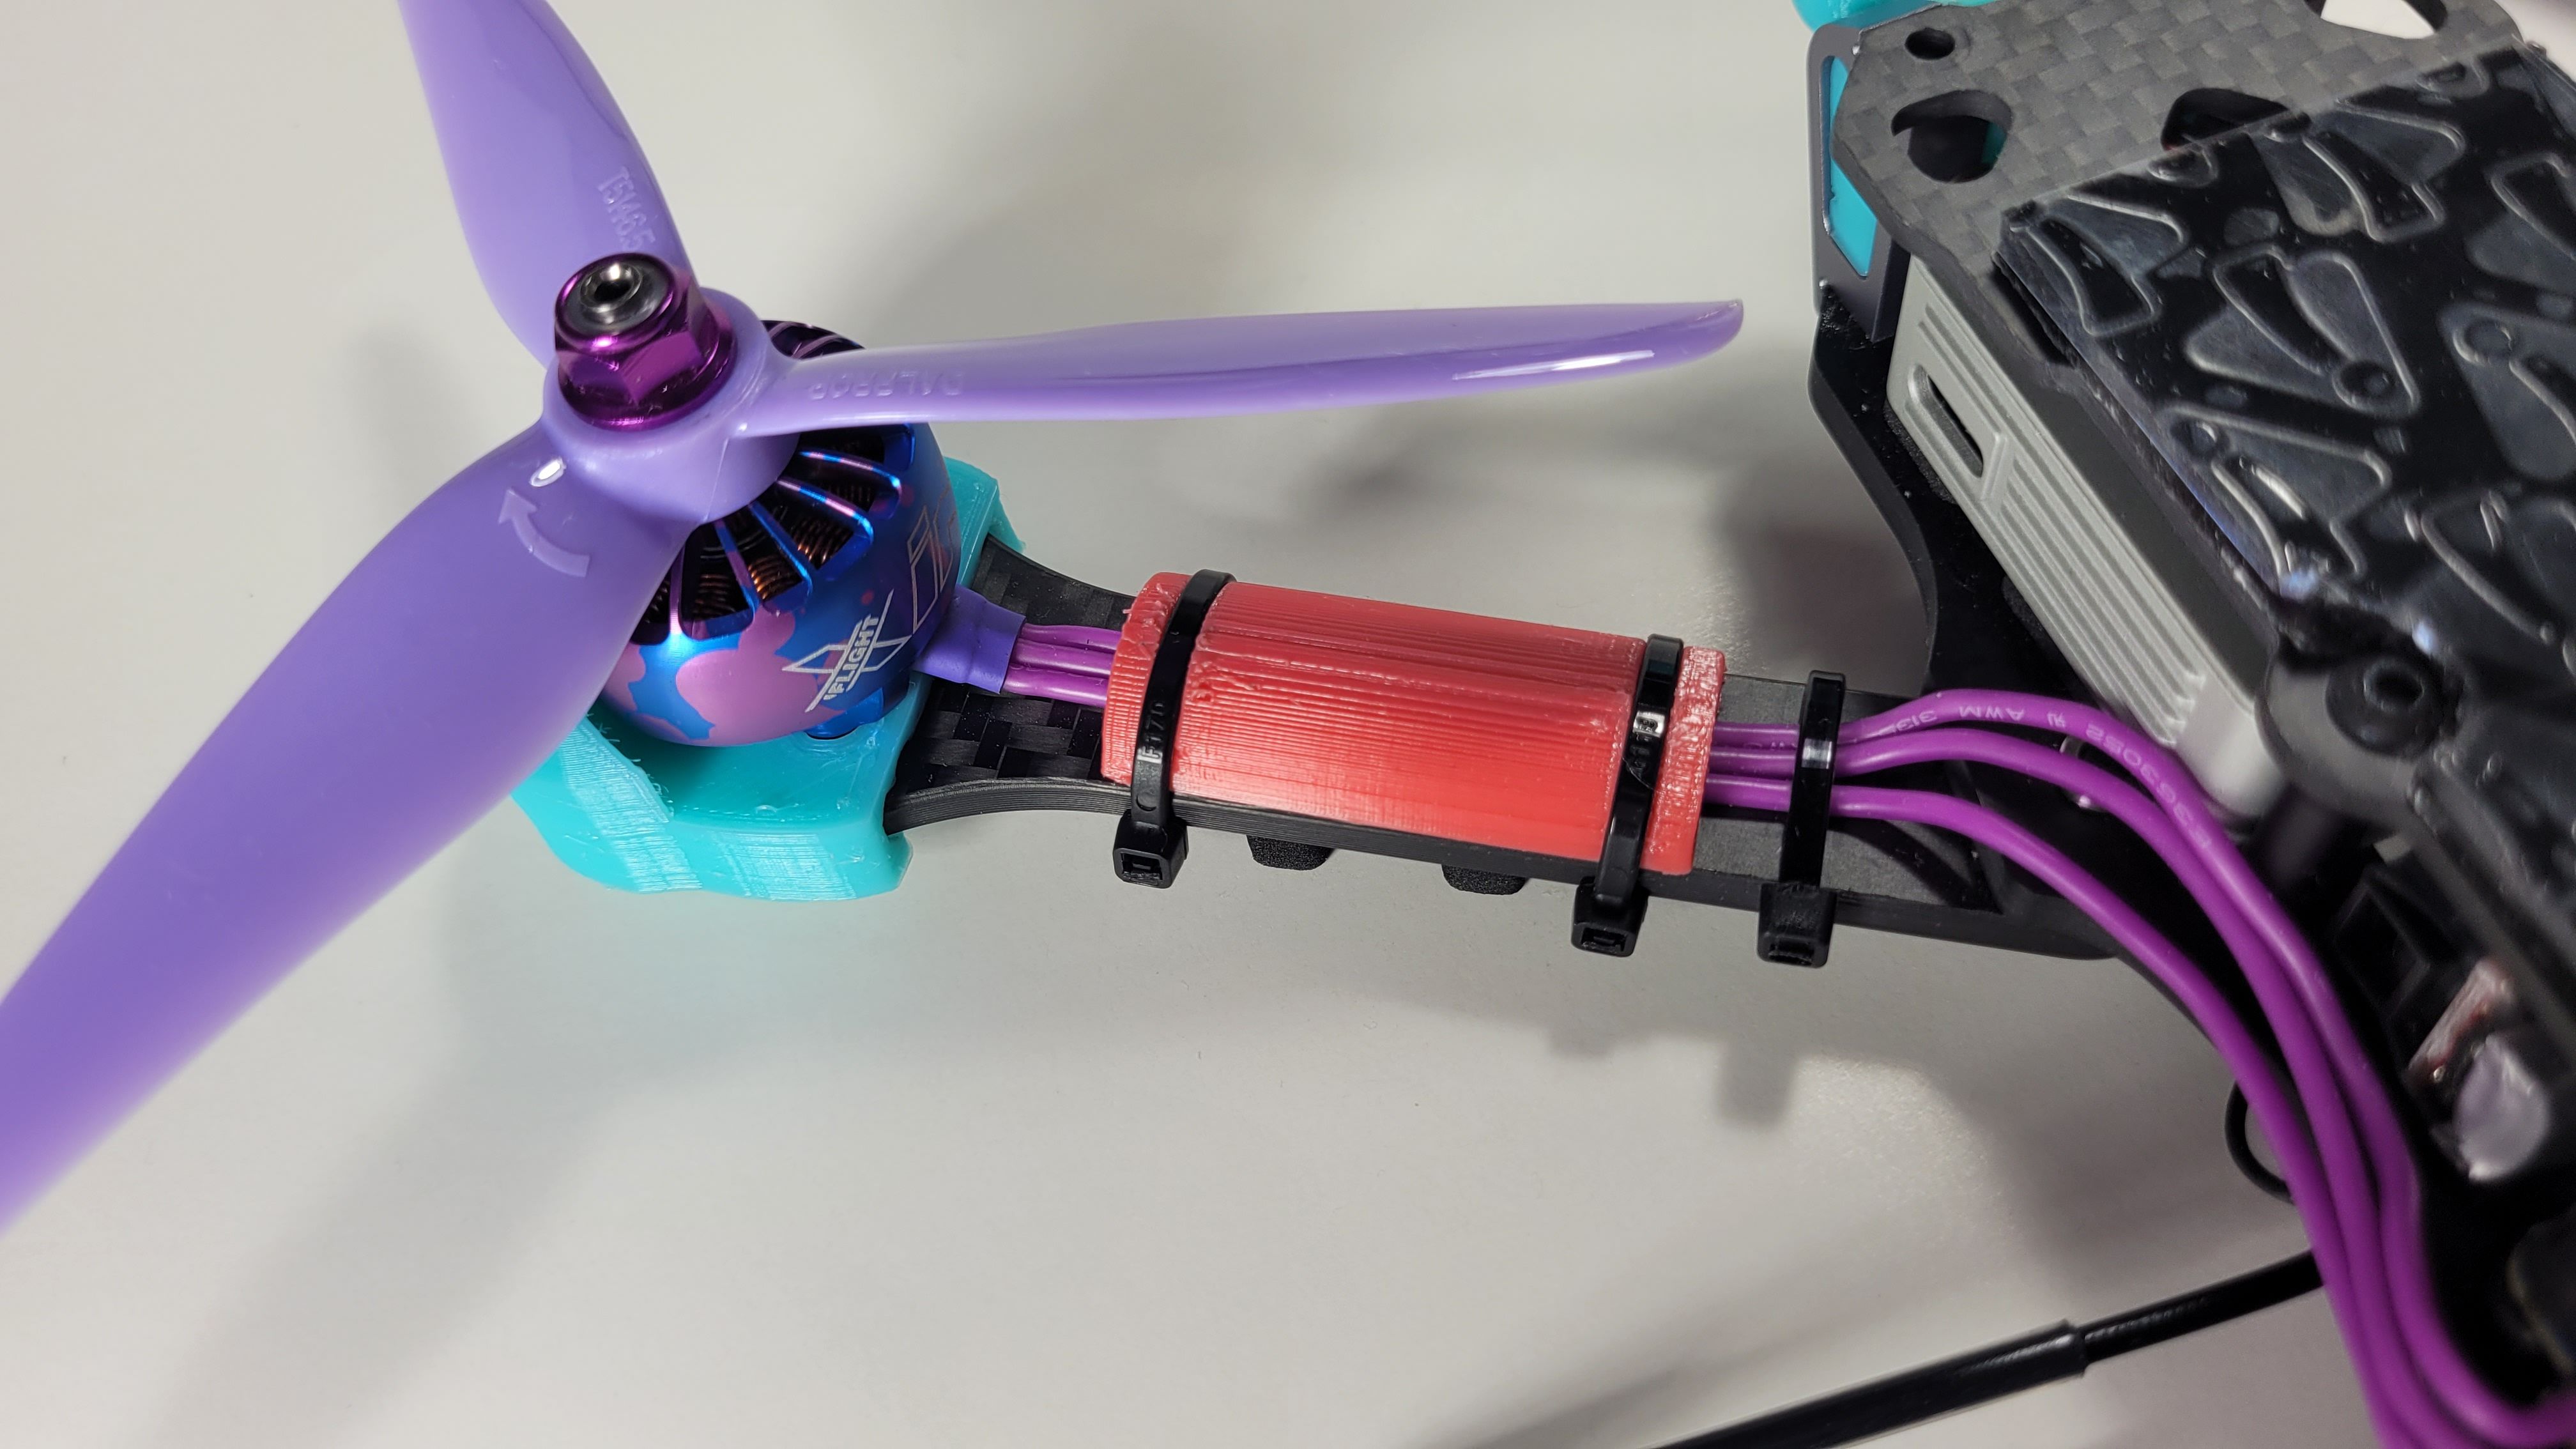
Everything was printed in TPU (the specific brands/colors are in the parts list) with no modifications to the Thingiverse STL files, except for some scaling for print tolerance reasons. Using a combination of non-stock DJI antennas and an R9MM prevented me from using "all-in-one" mounts that had the antennas and GPS module all in one place. I was too lazy to make my own, complicated all in one, so I made two separate, simple holders for the GPS module and R9MM antenna. The only things of note for those two designs are that the GPS holder was sized to fit the GPS with a piece 3M adhesive snug, and the R9MM antenna mount gives the antenna a slight downward angle on each side to reduce the risk of it bending up into the props.
Miscellaneous
Some extra tidbits that don't really fit in the other sections/aren't big enough to fill out an entire section:
- I rotated the 4-in-1 ESC 180° and remapped the motors so the battery leads would come out the hole behind the cage and not be in prop-strike range
- The wires from the Air Unit to the FC and camera are just long enough and were the primary limiting factors when determining component placement
- I used long, metal screws that go through my whole flight stack as opposed to nylon standoffs for durability
- I flashed my R9M setup with ExpressLRS and am pretty happy with the results
- The R9MM is basically free-floating since it doesn't have enough mass to warrant a proper mount
- The ViFly Buzzer already fits snug inside, but also has some 3M adhesive, just in case
- I'm running the PID presets from UAV Tech with my personal rates and it is buttery smooth
- I linked two different props in the parts list; the DAL Cyclones are the ones in the pictures and provide a very smooth flight performance, while the Azure Powers are a lot more aggressive and are my favorites when I want to do "punchier" flying
- It's on the heavy side, which reduces flight times, but is actually kind of nice for a lot of the momentum-based flicks I like to do
- I cut some notches into a strip of UmmaGrip to help hold the battery in place while keeping the screws accessible
- Vaporwave and Pastel are love; Vaporwave and Pastel are life
- My girlfriend came up with the name and is very proud of it
Conclusion
Overall, I'm very happy with this build. It flies buttery smooth and looks like it's made out of a girl's Lego set, so what more can you ask for?
P.S. - I like to look around at different builds here for references and inspiration before jumping into my own builds, so hopefully everything I wrote and all the pictures give a clear enough view into the build and some of y'all can use this as a resource for your own build!


New Message for Egmanila