R3DWhoop ZeroGrav SharkByte 1S using Boost Regulator
 By jason.gauruder on Nov 05, 2021
dont do this boost regular stuff anymore!!!
get the hdzero lite whoop bundle instead!!!
https://www.hd-zero.com/product-page/hdzero-whoop-lite-bundle
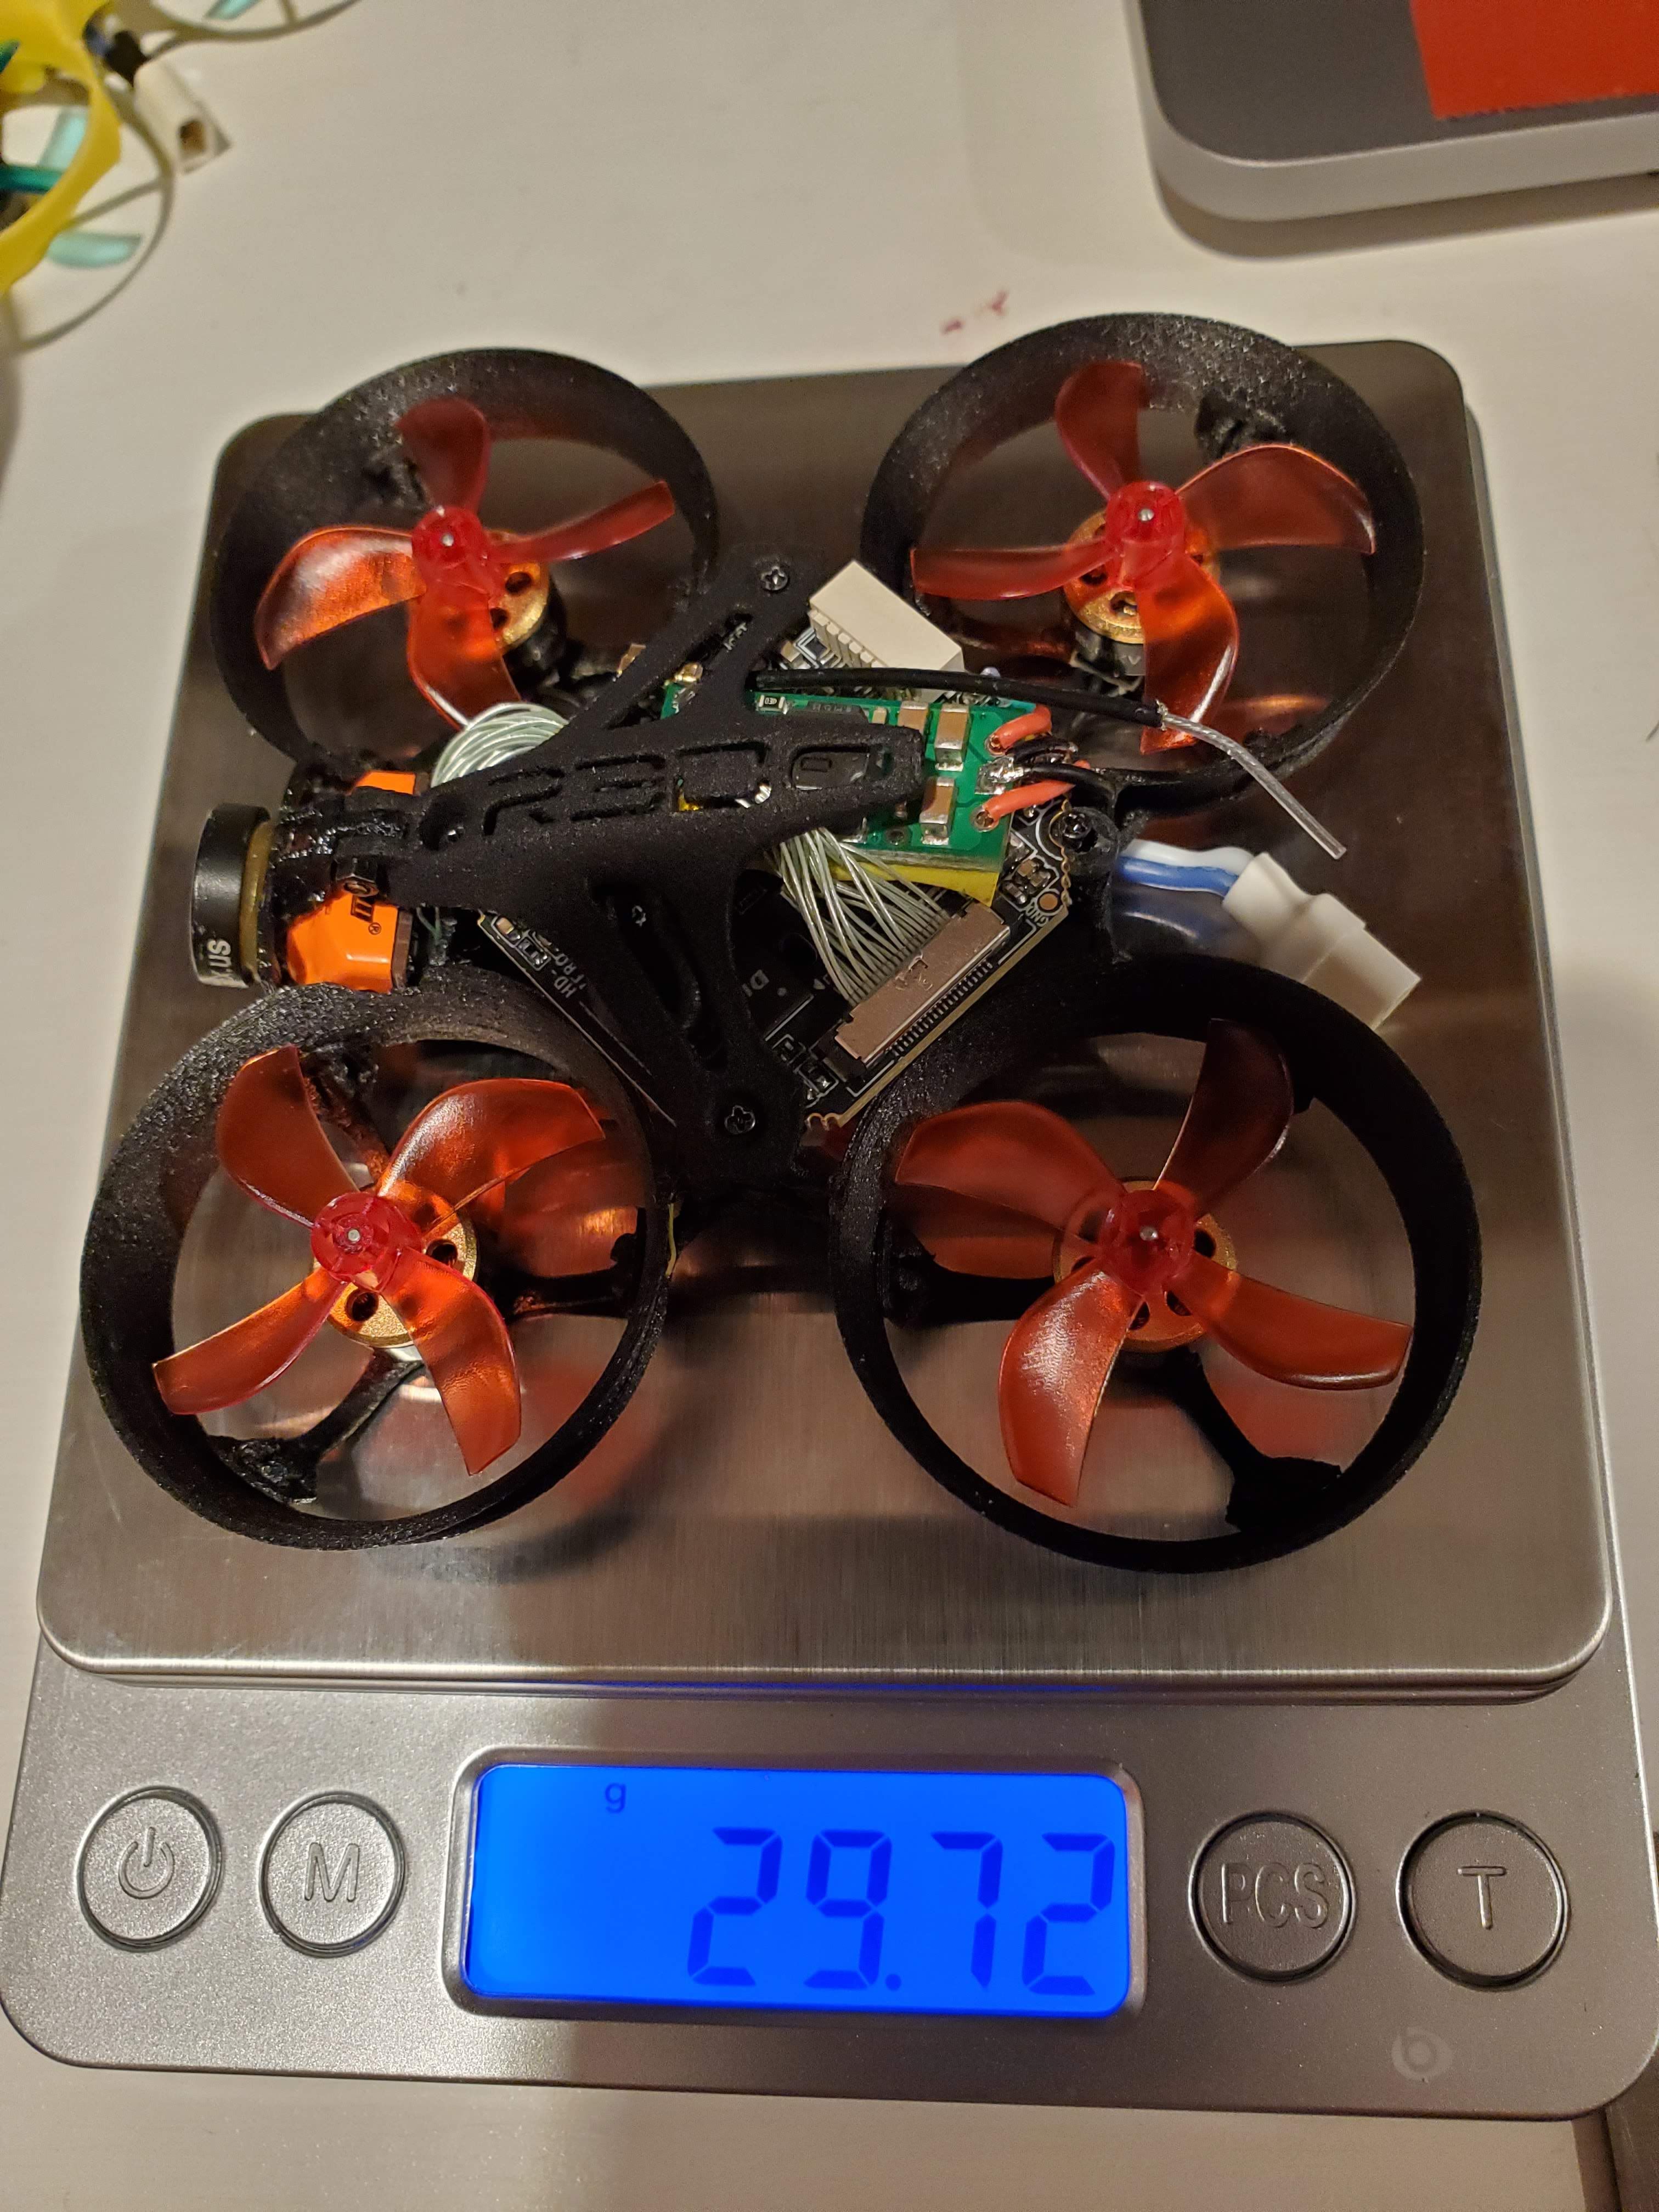
This is now my 4th SB TX5S.1 1s build using boost regulators. As I may have mentioned in my other builds, this is just kind of a novelty. No one is going to compete against a sub 20g analog whoop build that rides like it is on rails. I'm looking forward to a true 1S whoop board from hd-zero that will help close that gap. But in the meantime, I love 1s whoops and I love HD , so trying to combine them has been an interesting project. I have well over 200 flights between the 4 builds and have changed boost regulators (from Pololu #791 to #799) a couple builds ago which allowed me to get additional runtime (drive the battery voltage lower) which is great. Knock on wood I've had no regulator or vtx failures to date.
Here are the components and notes from this build :
R3D Shifters ZeroGrav frame
https://www.r3dshifters.com/r3dwhoop-zerograv.html
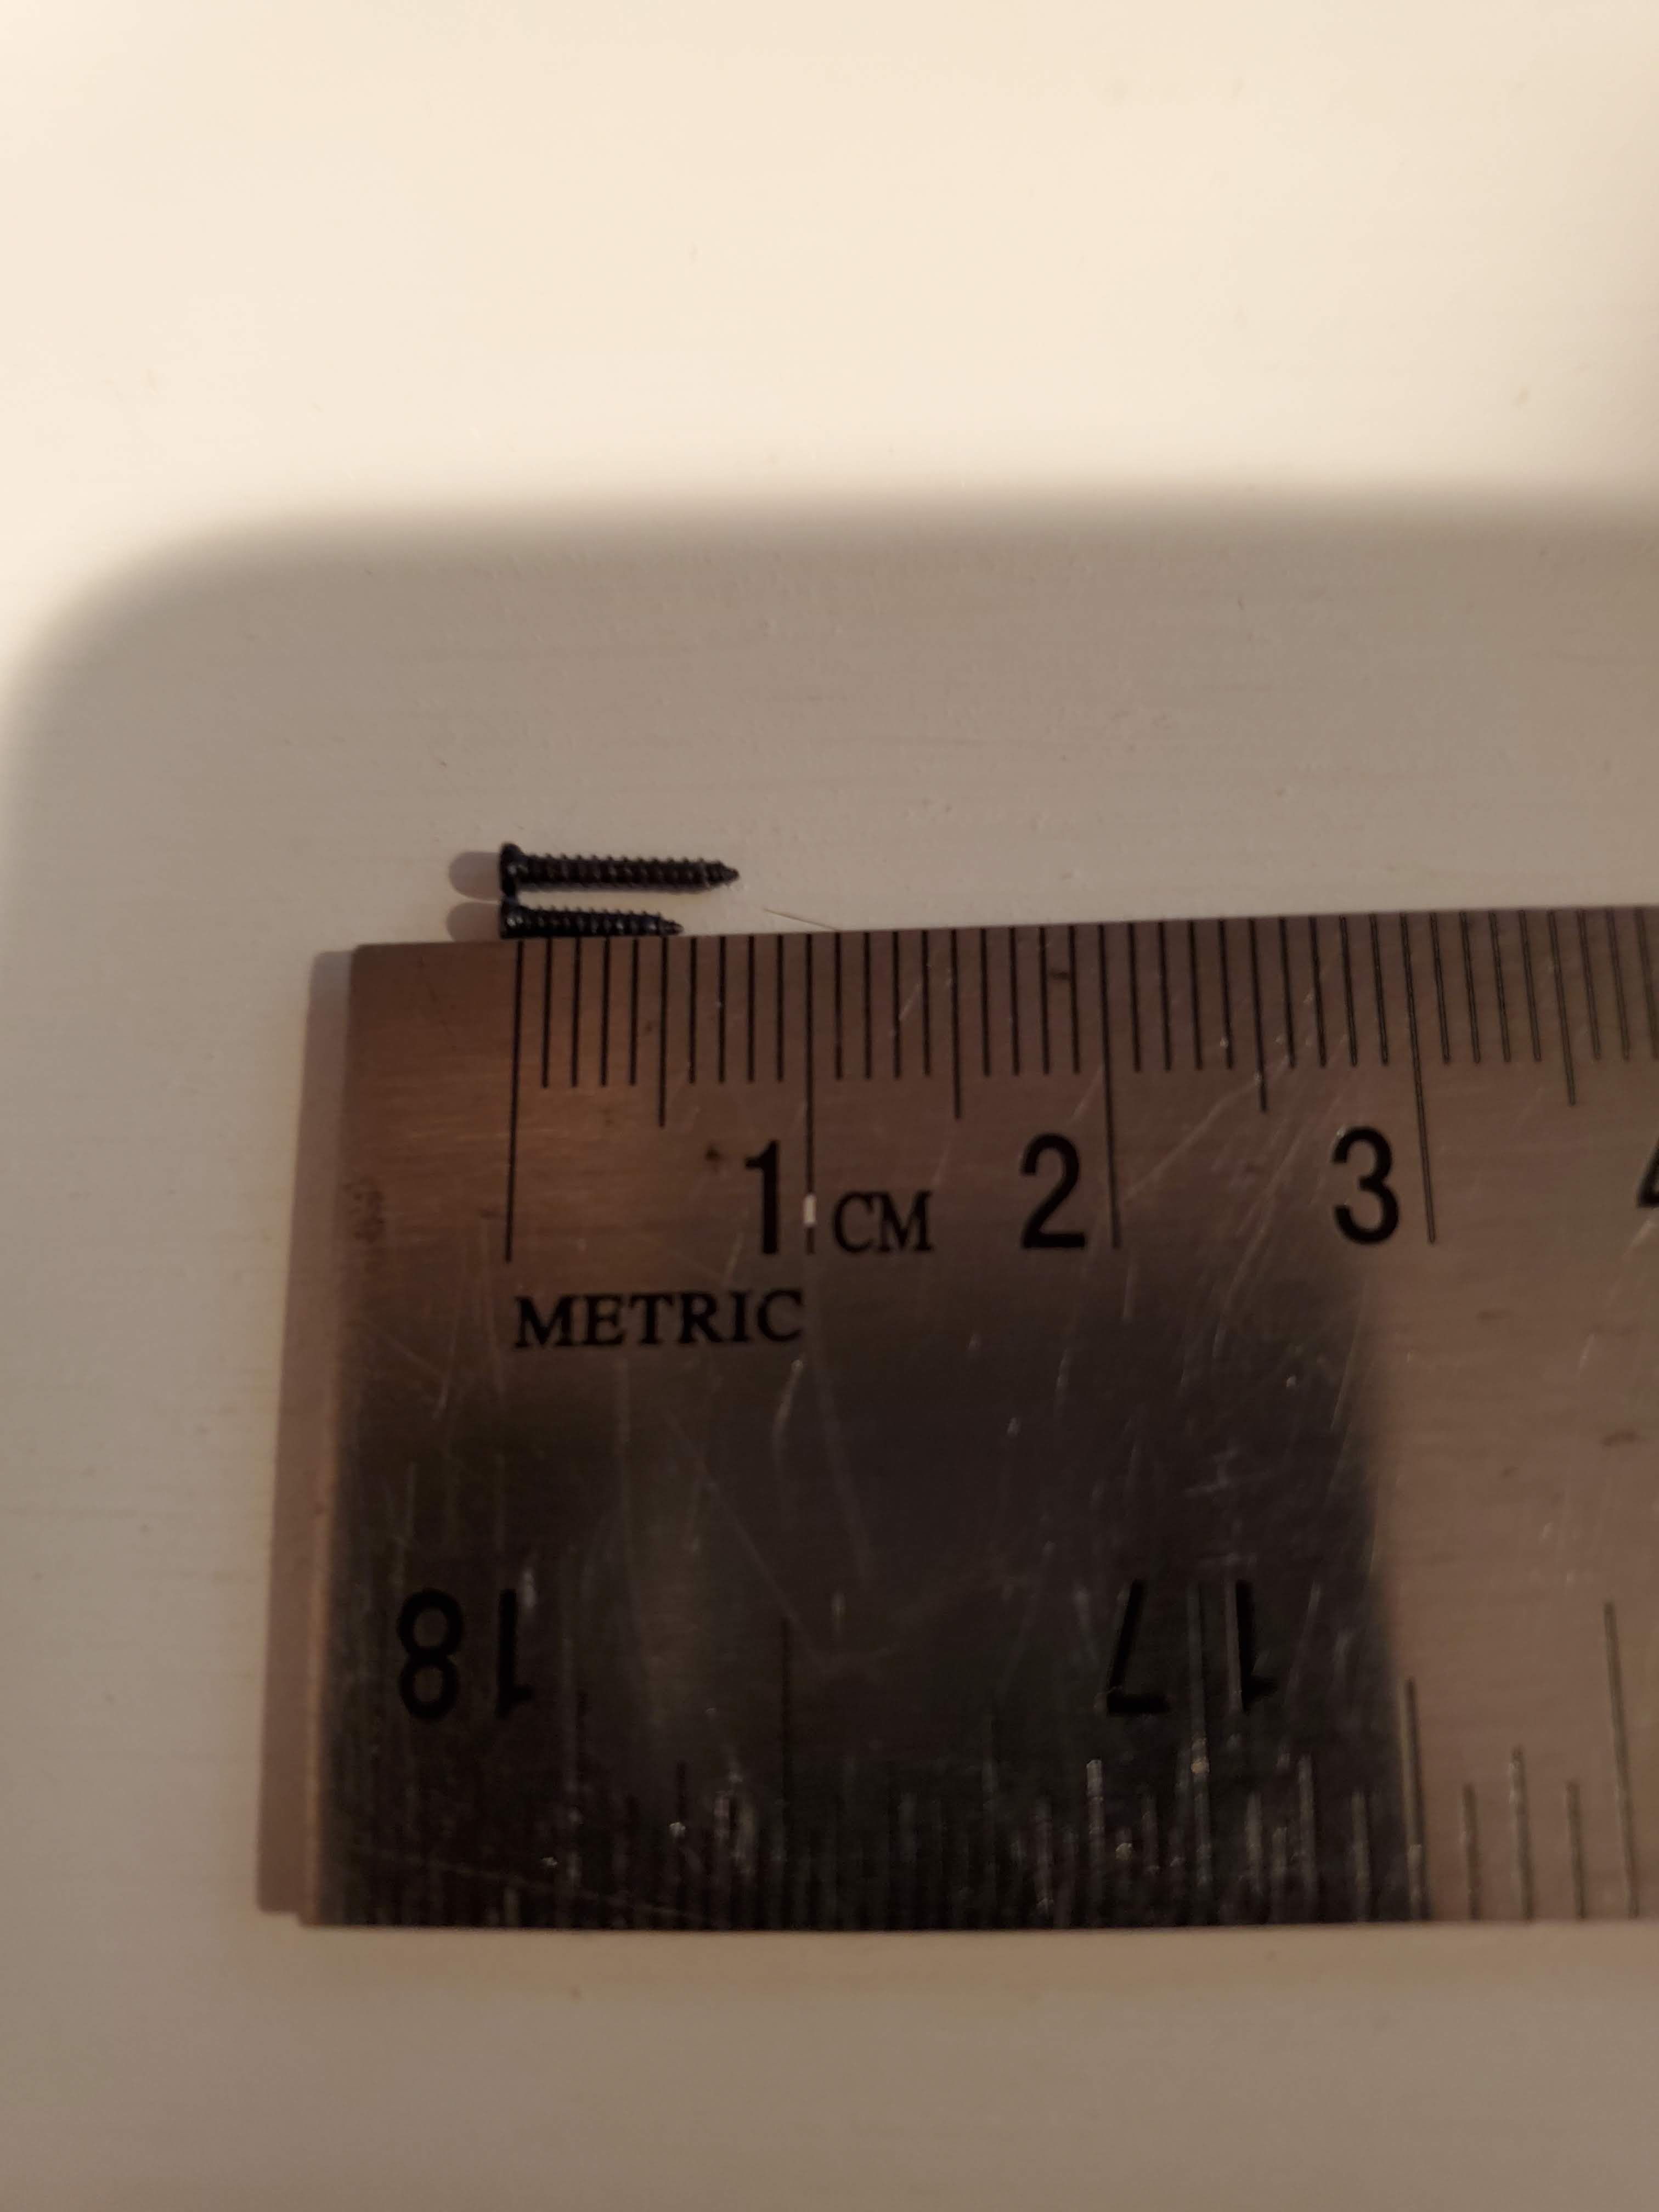
-I used the fuselage to frame mounting screws (4) from their Muon v2 kit which are 8mm long instead of the 6mm long screws from the zerograv kit (see picture for screws side by side). Longer screws are required as we are adding height to the overall build with the SB TX5S.1
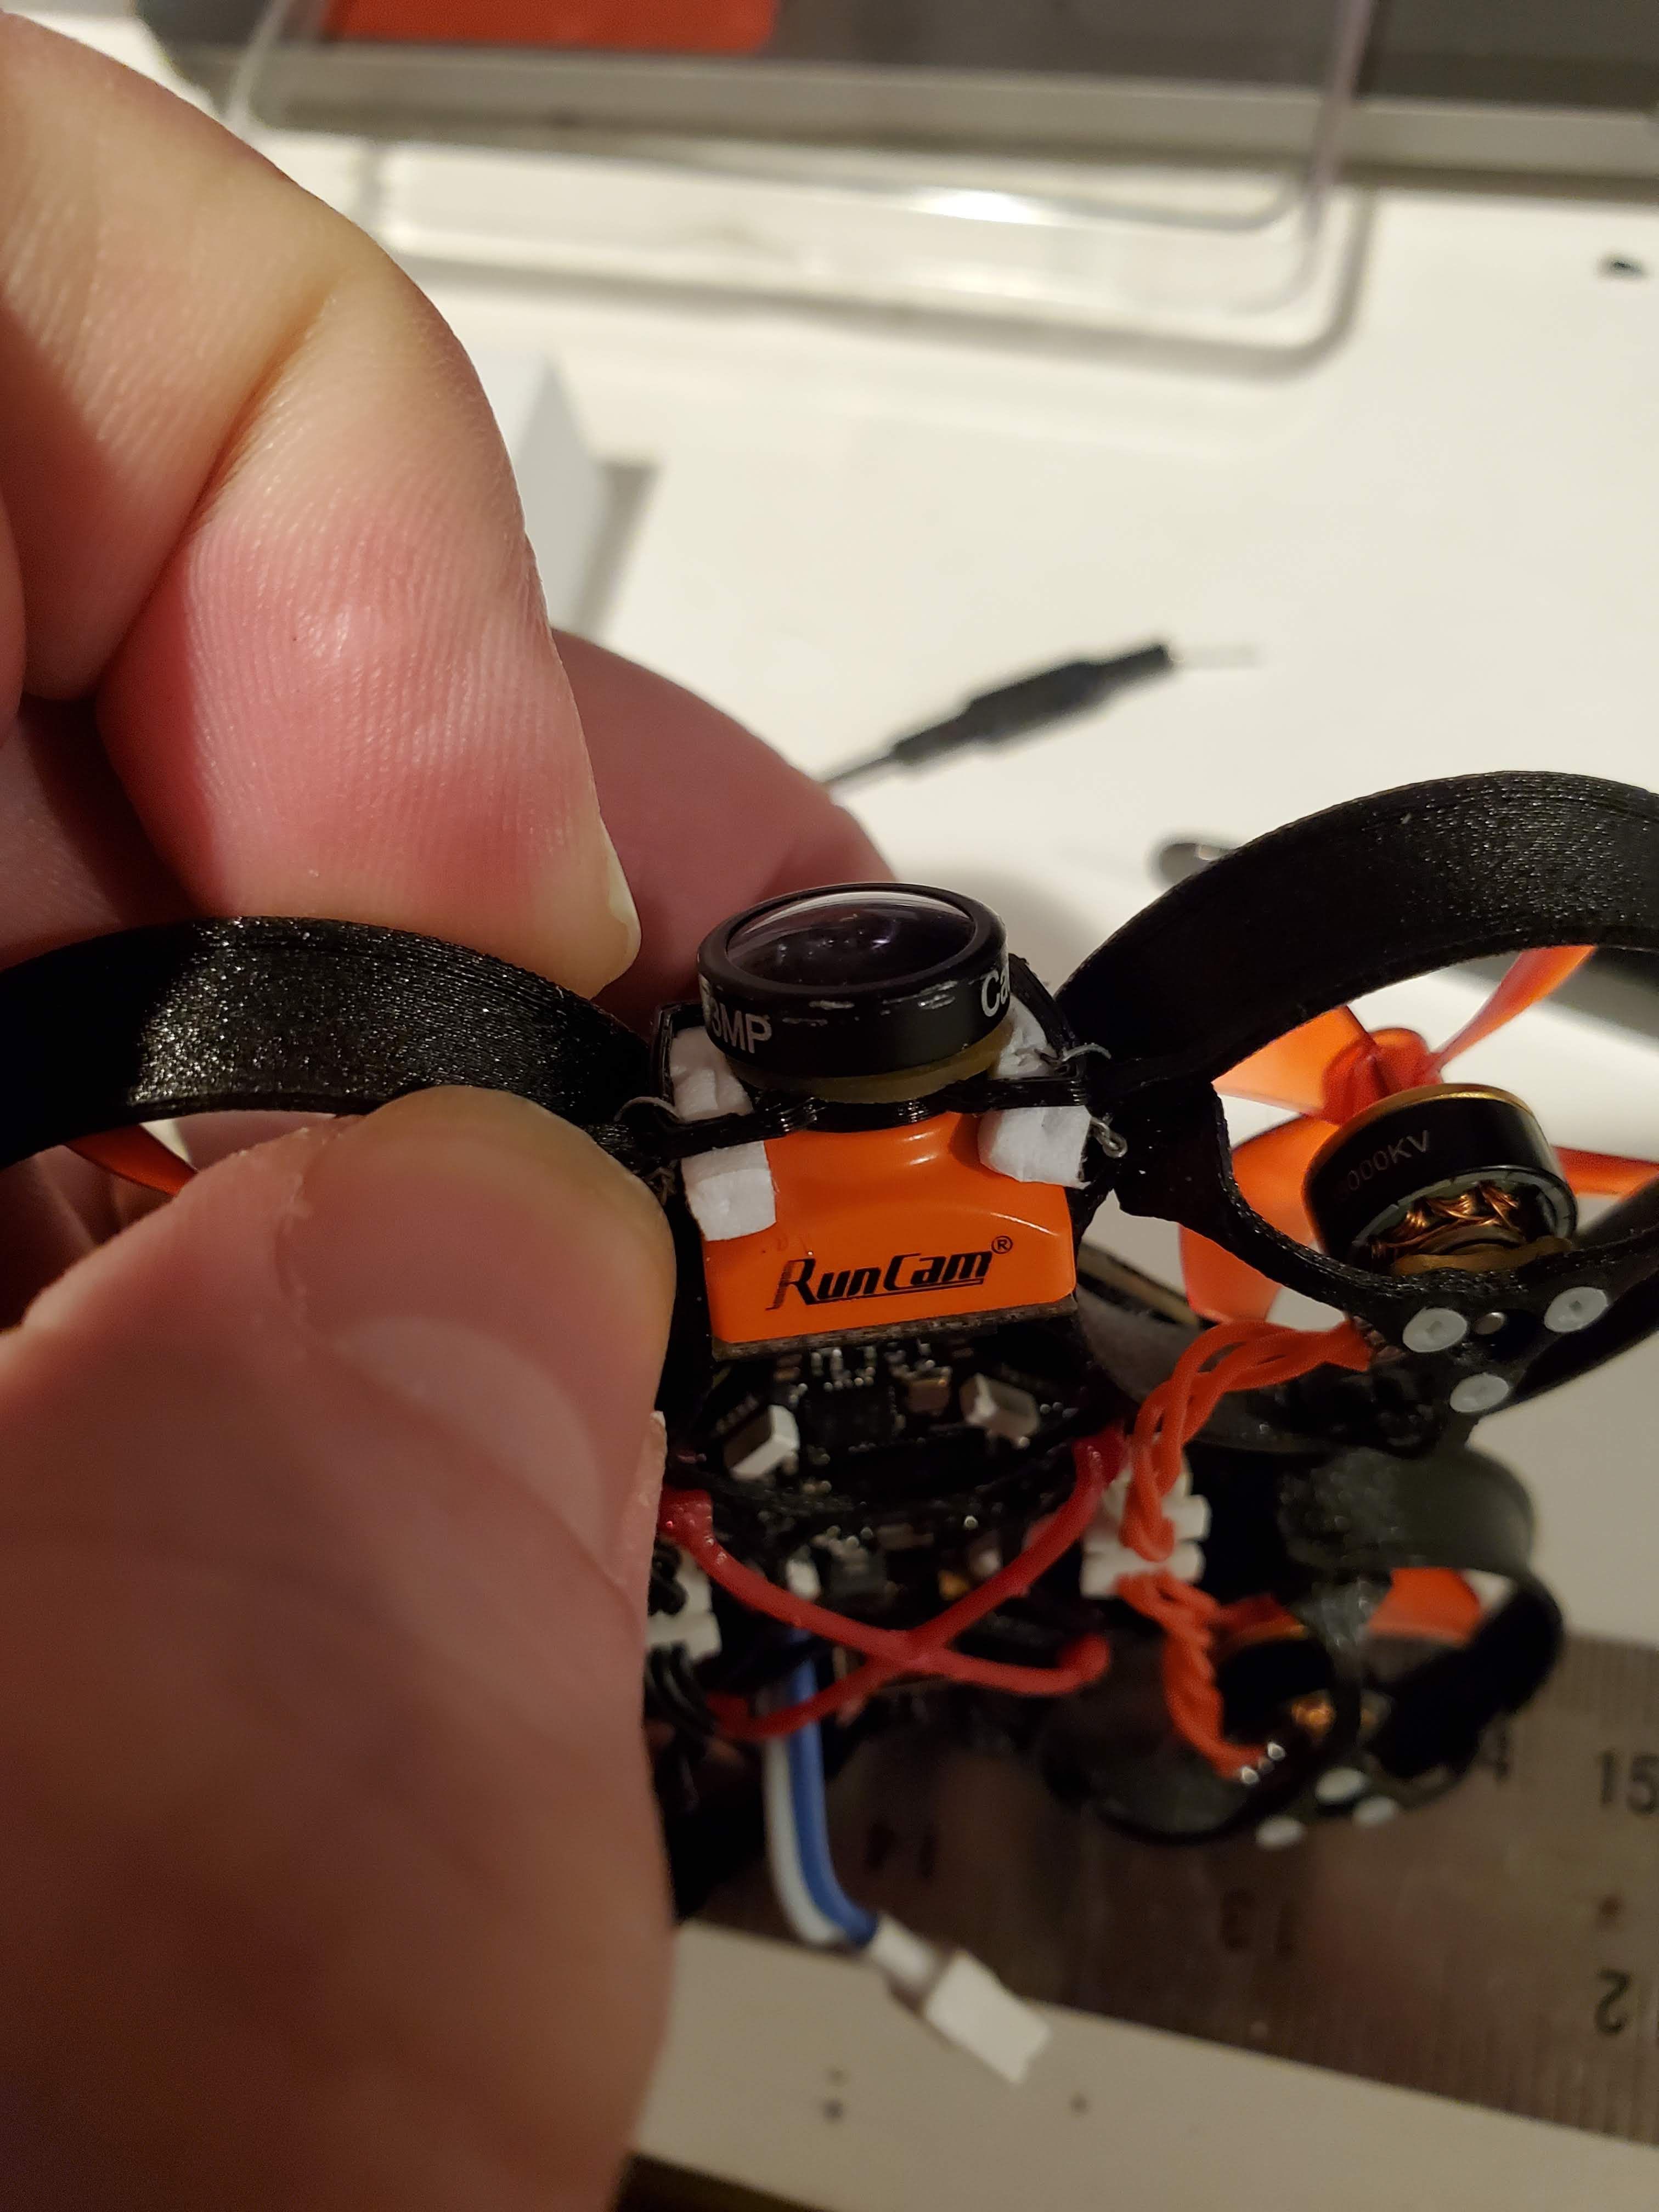
-I trimmed a mm or so from the top/inside of the front ducts where the camera sits in. Since this frame is really geared for nano cams such as the caddx ant lite (or similar that don't use side mounting screws) I had to get creative with the camera mounting.
-in order to get the r3dwhoop camera mount "head" (which again, is really meant for a caddx ant lite or similar) to accept the larger runcam nano camera, I put the circular mount portion of the "head" in place of the camera lens lock ring. To provide a tad more width to this faux lock ring and allow for a good camera adjustment (focus), I used a small rubber band just behind the lens, from one of those rubber band bracelet loom kits my kiddos have (google "rubber band bracelet loom")
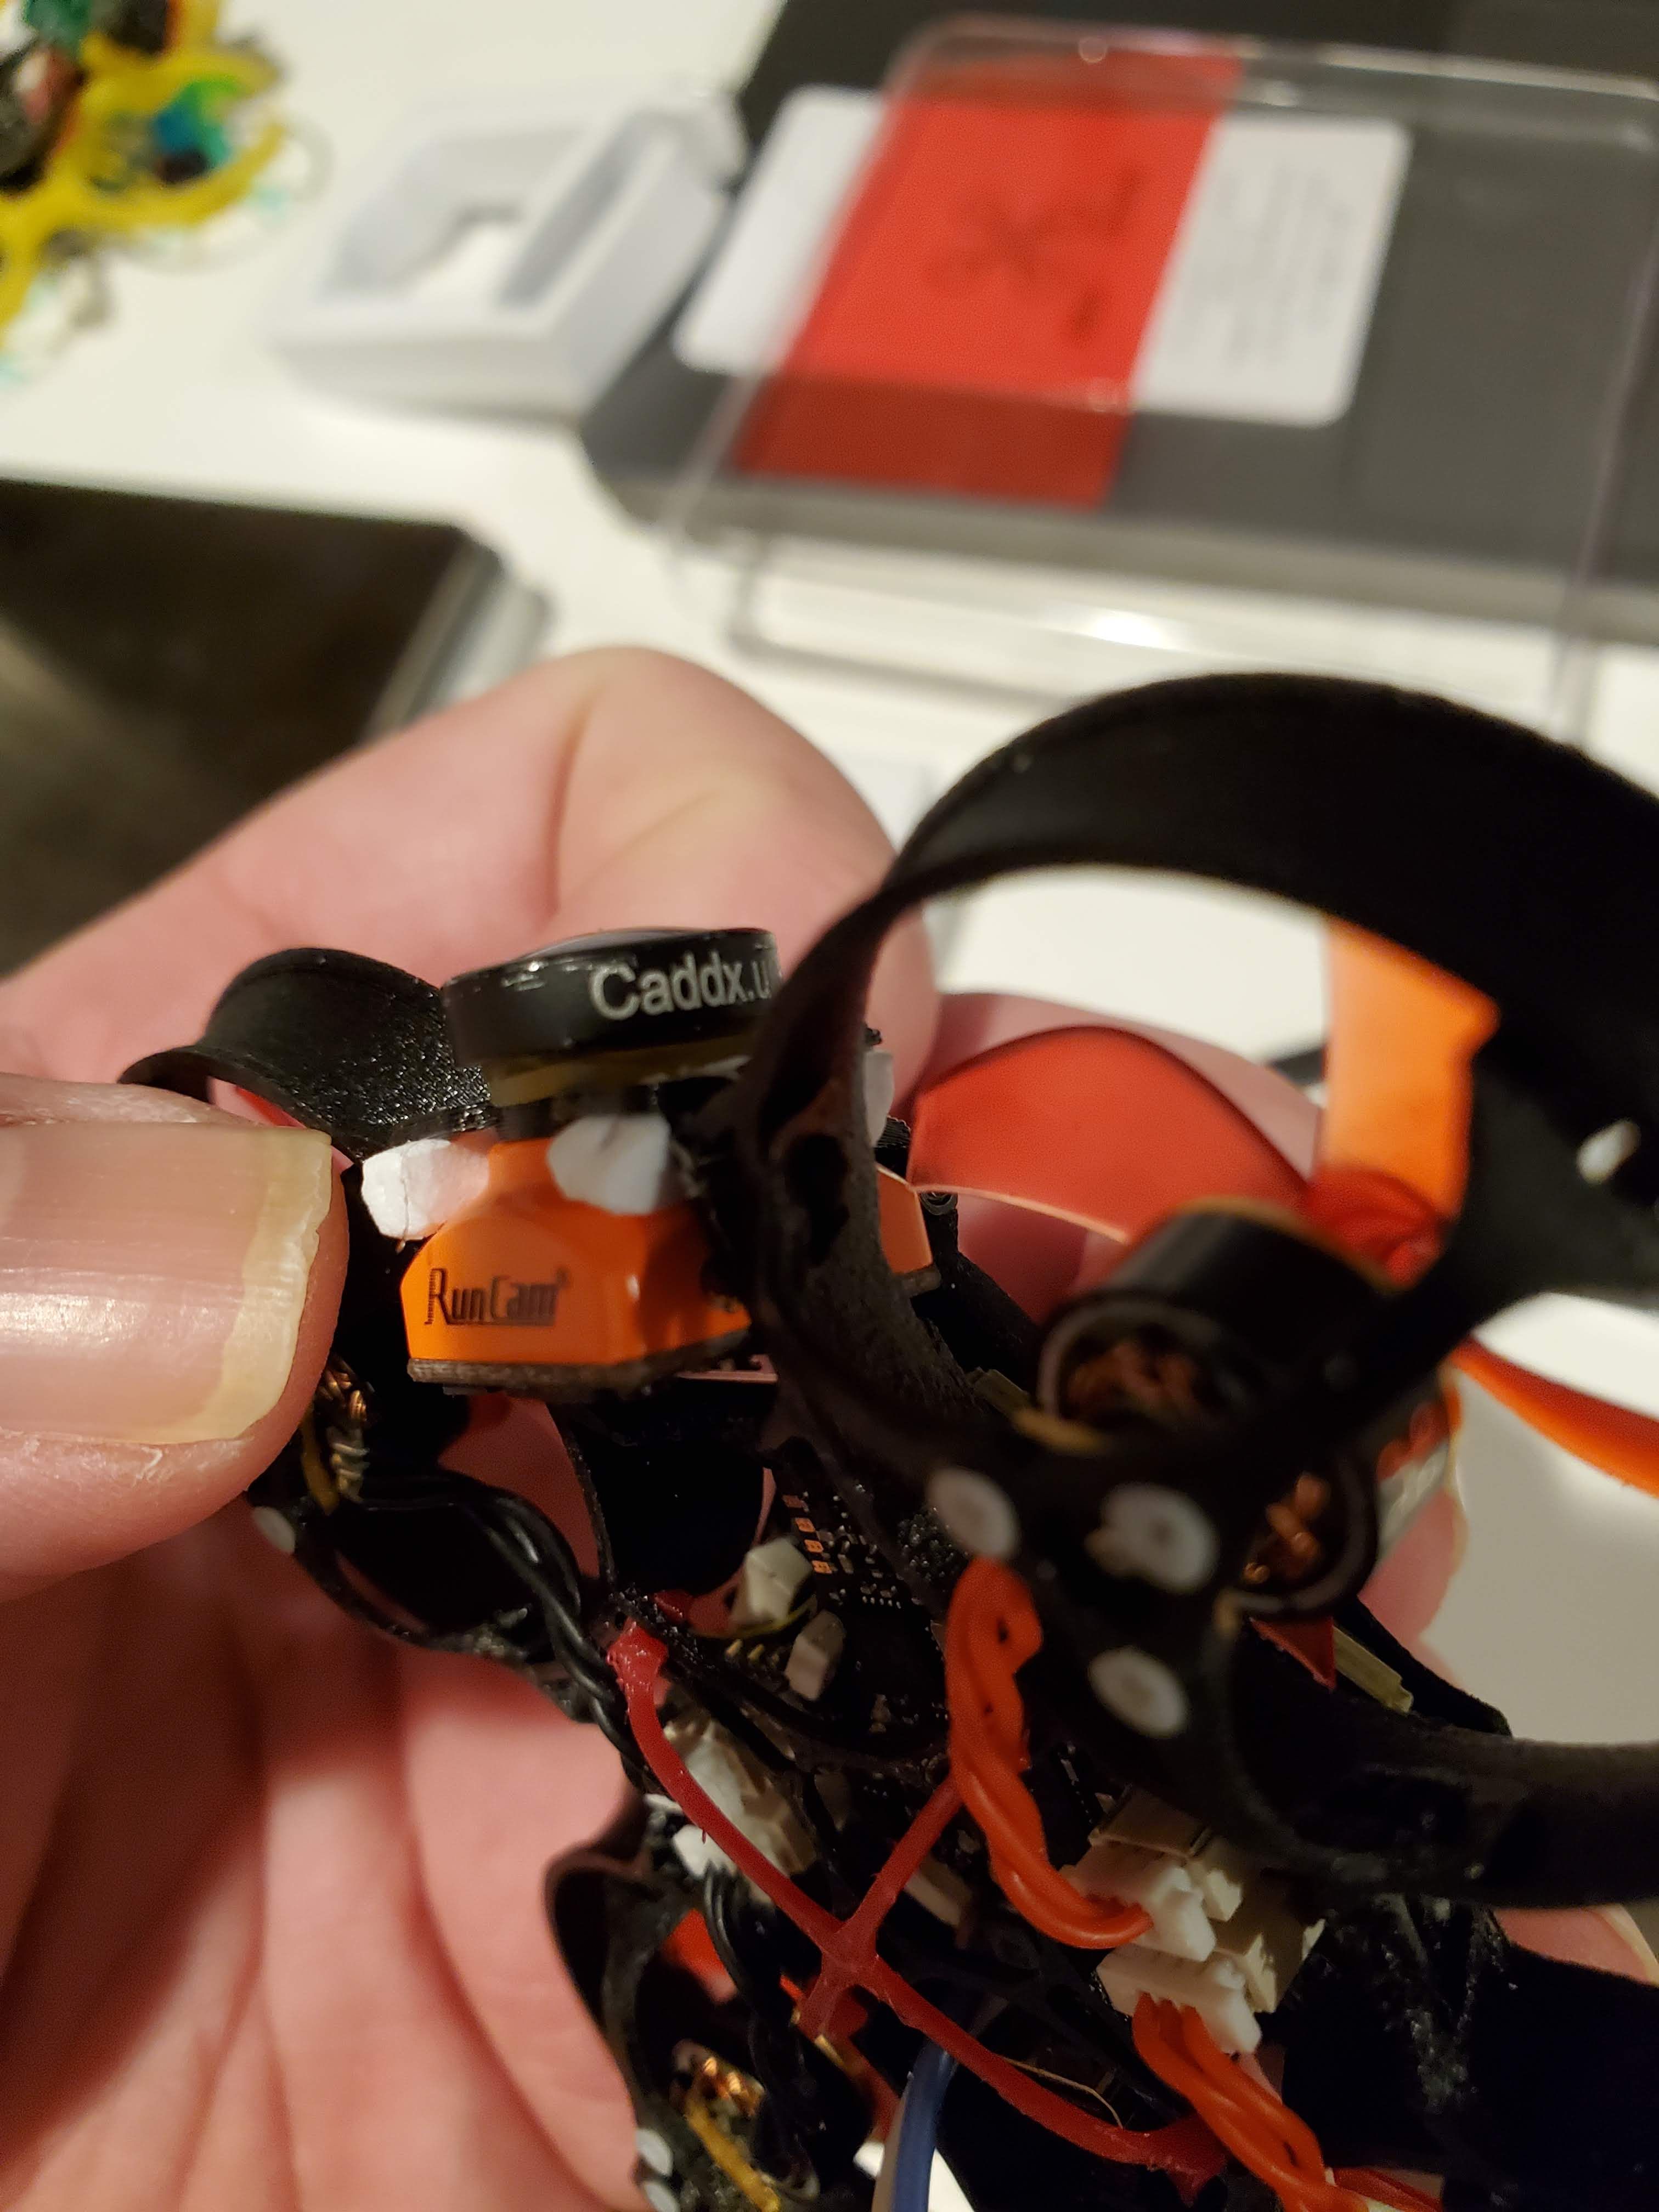
-note that I am NOT using the stock SB runcam nano lens - i am using a lighter/shorter caddx EOS2 lens.
-I took a side view picture so you see the camera lens is just a hair shorter than the very front of the ducts. However, the very top most portion of the camera (as it is angled up) is slightly exposed in certain hit/crash scenarios. I
-there are no props or ducts in view in flight.
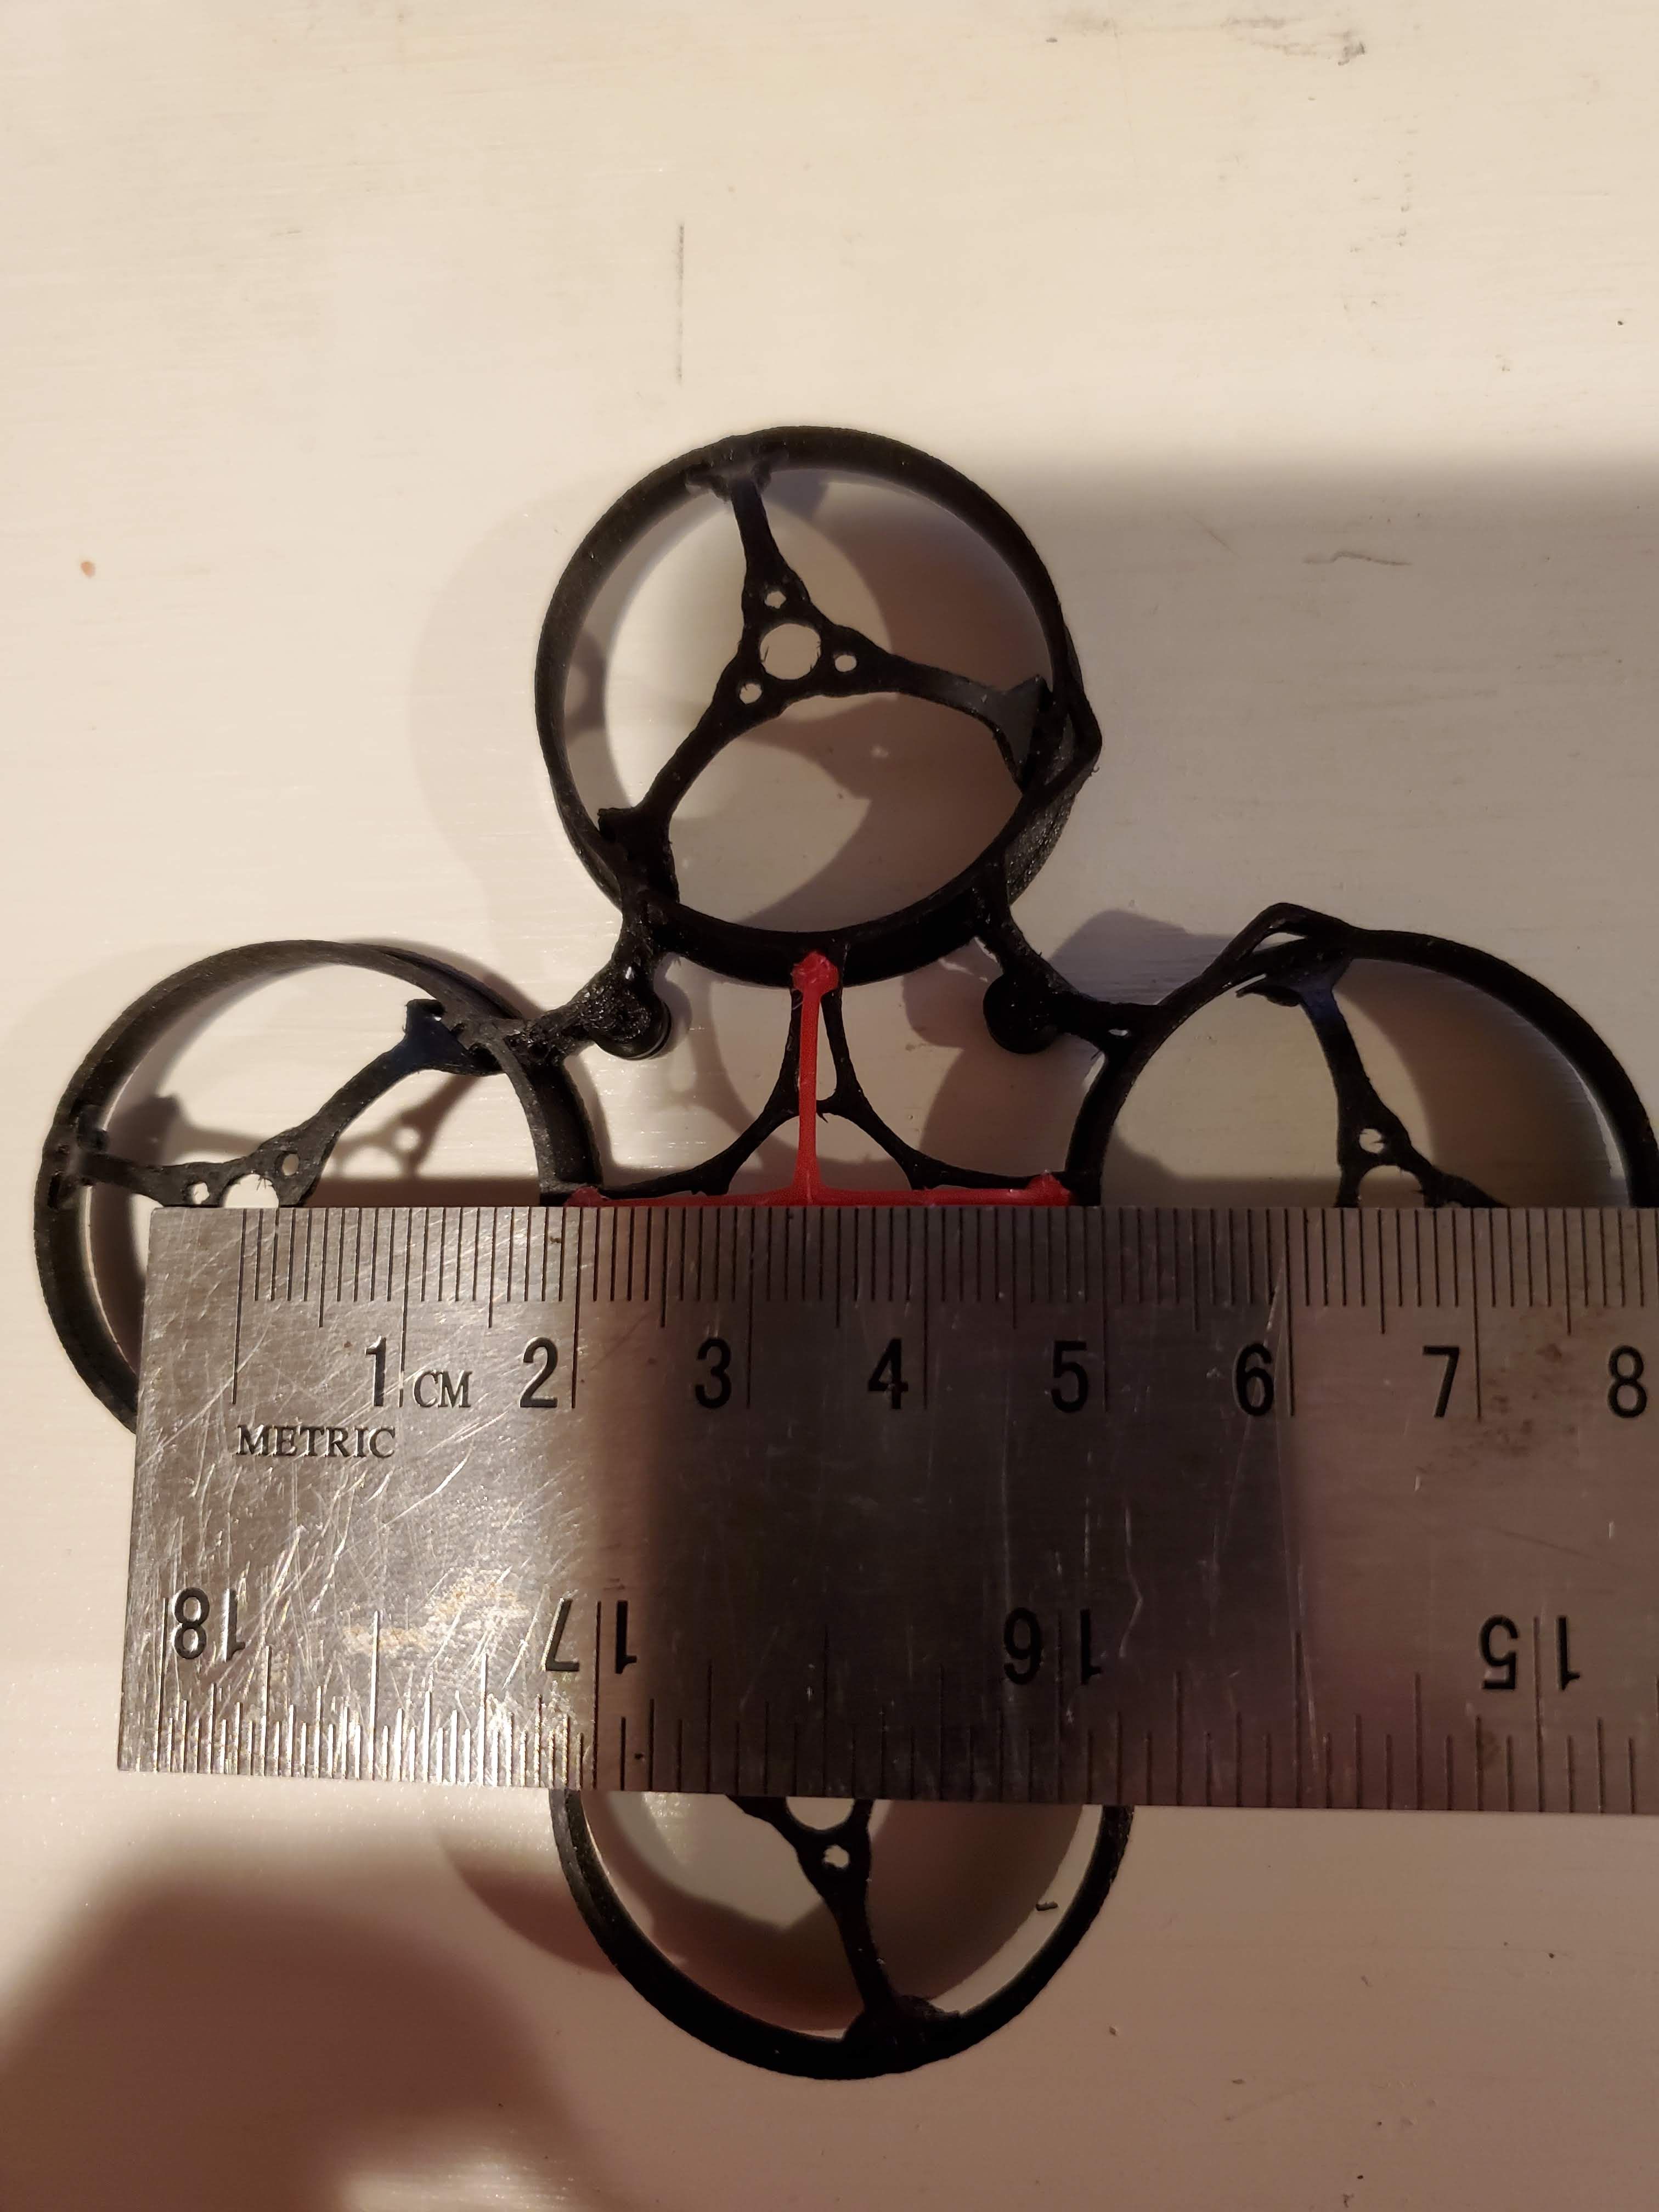
-I will note that this is not a 65mm frame even though it is advertised as such. It is more like a 66 or 67mm frame measuring diagonal motor center to motor center. Same with the Muon v2 frame which I also purchased. Not to split hairs over it - but I thought it is worth mentioning if that is important to you. It does use typical 31mm props that you would expect to use with a 65mm whoop.
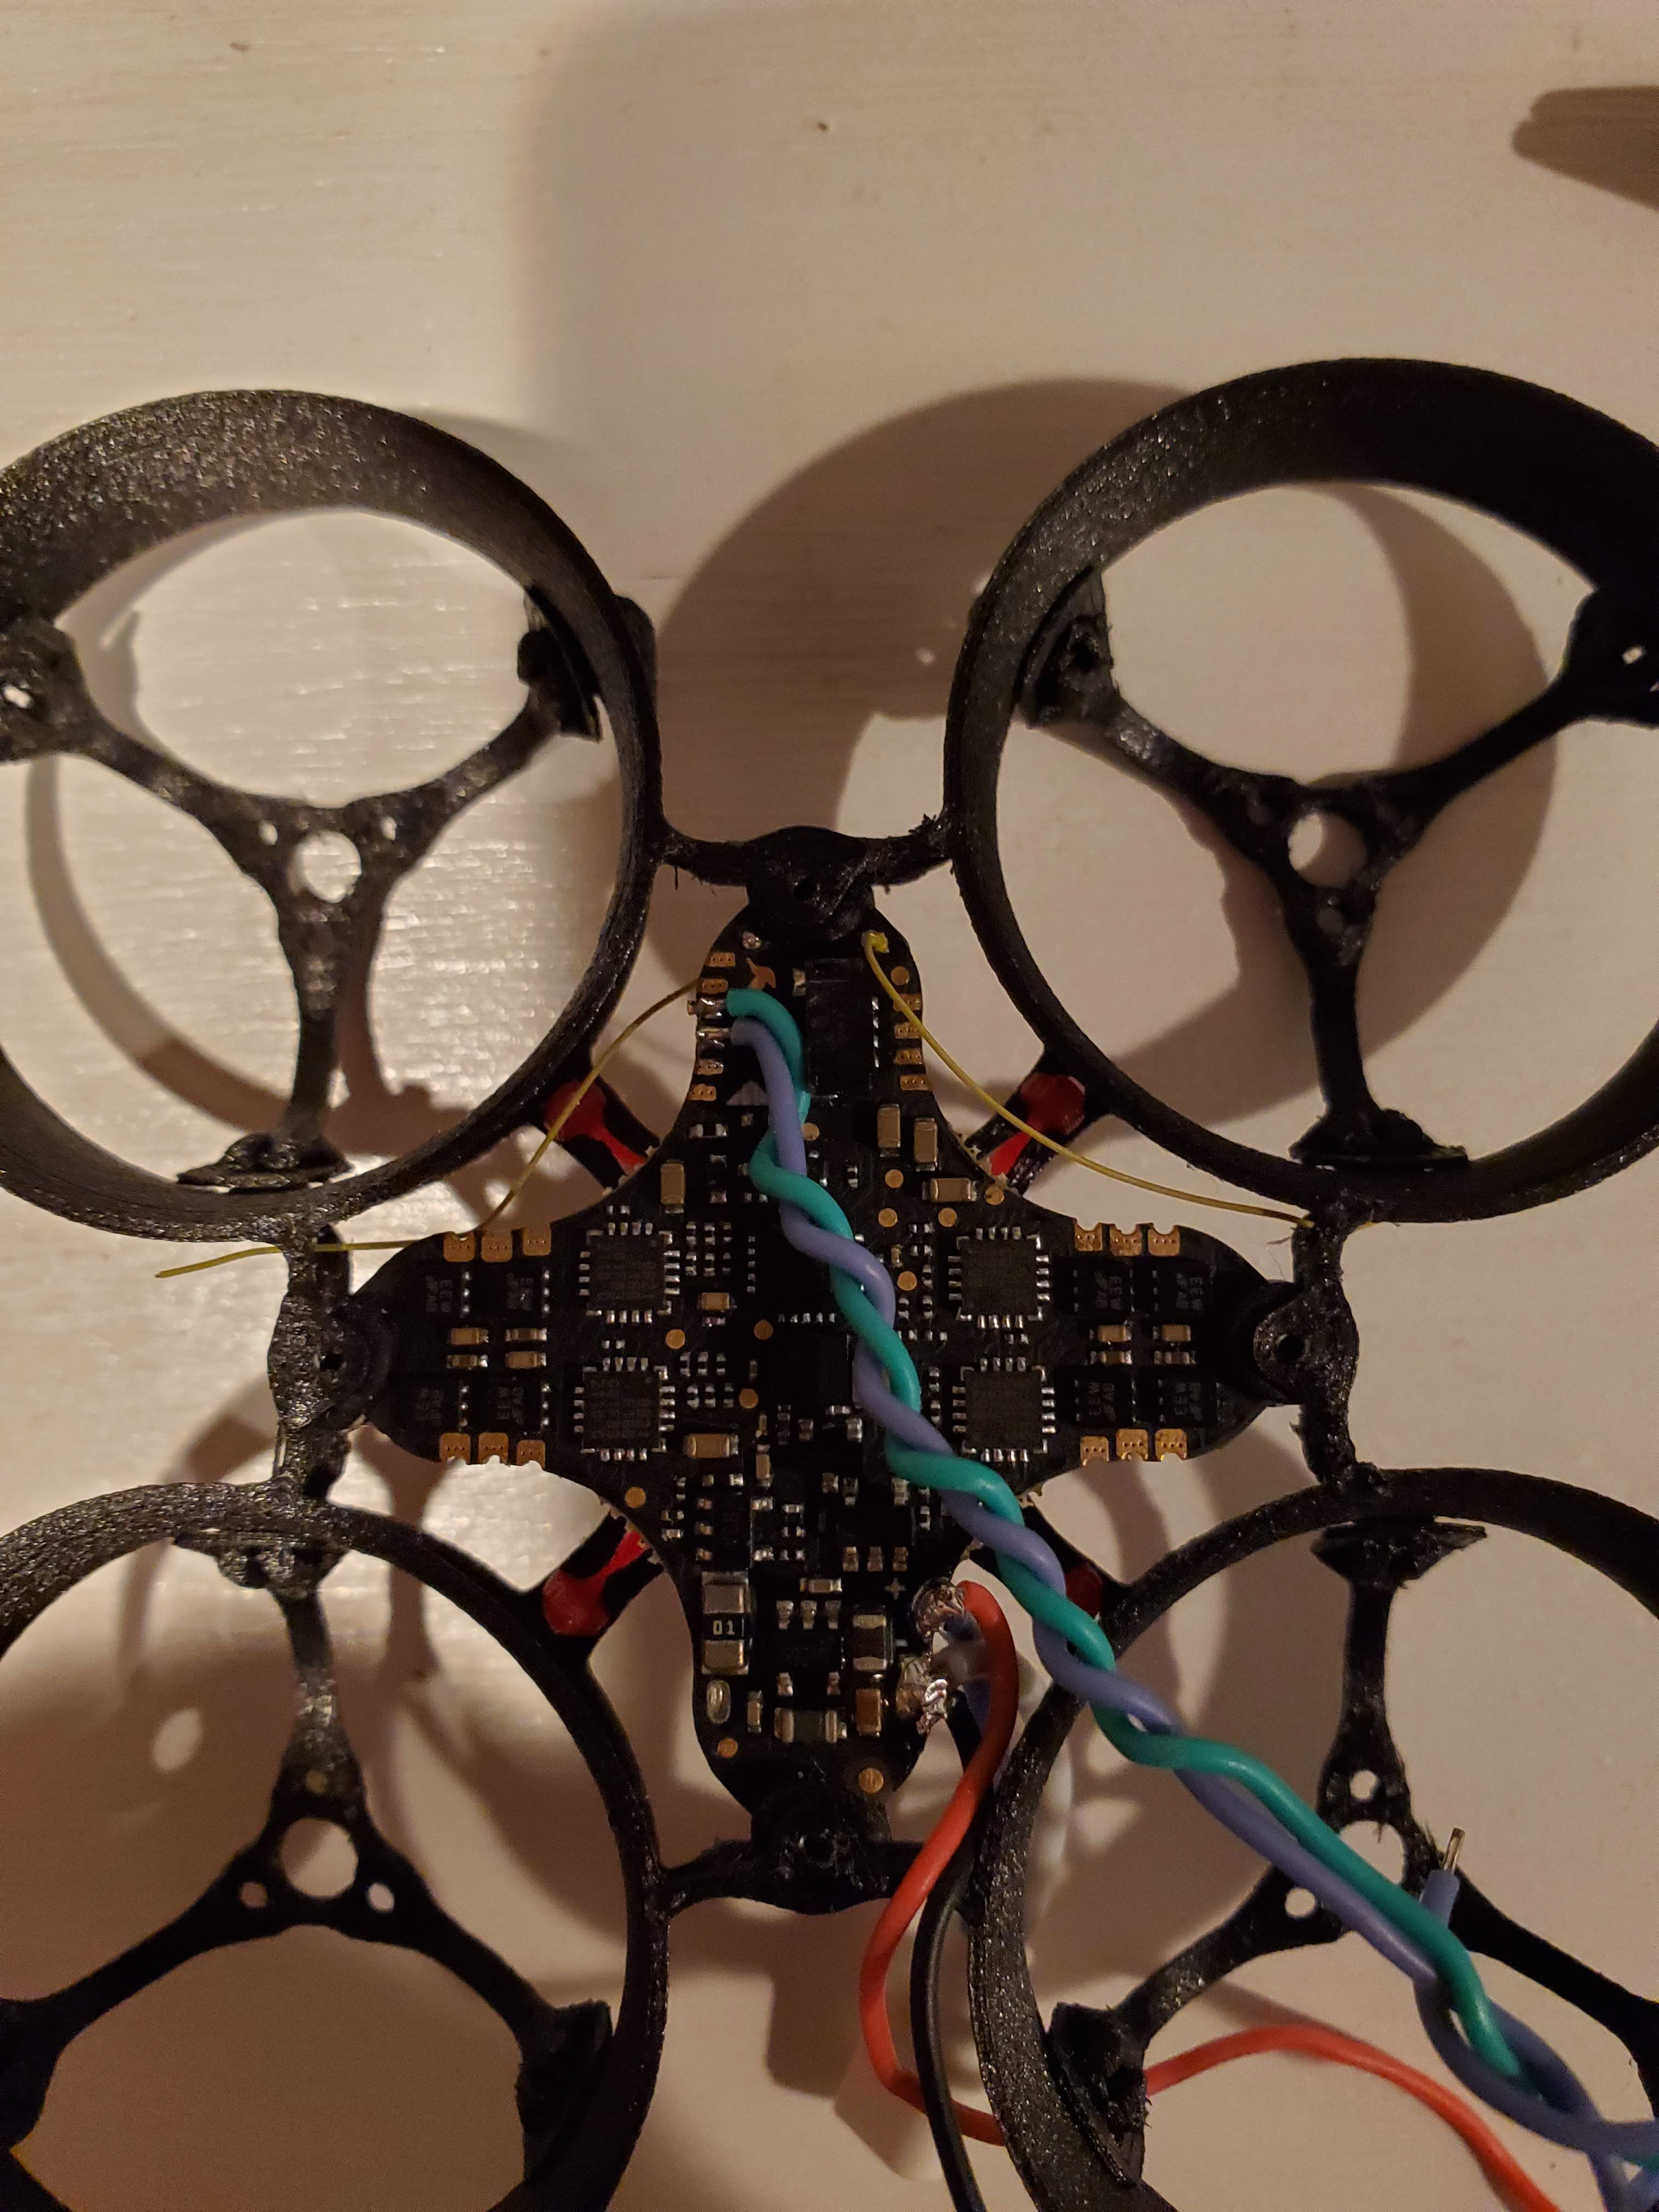
NBD Hummingbird Pro 1s AIO FC,
Firmware "betaflight_4.2.9_HUMMINGBIRD_F4_PRO_BASE_NOBEESIGN_b75650c.hex" @ https://github.com/newbeedrone/nbd-betaflight/releases/tag/4.2.9-v1.0
Betafpv BT2.0 connector
NewBeeDrone 0802 18000kv Brushless Motors - Gold Edition (Set of 4)
https://newbeedrone.com/products/newbeedrone-0802-18000kv-brushless-motors-gold-edition-set-of-4
-Note : I've not yet direct soldered for this build (yet! ) but another .3 - .5g can be saved by ridding of the JST 1.0 the plugs and socks
NBD Azi Tri-blade 31mm
GND or RDQ 380mah 1S 60C (PH2.0 replaced w/ BetaFPV BT2.0)
SB Whoop Board TX5S.1 w/ monopole antenna (VRX and VTX FIRMWARE 20102021 from hd-zero.com/support)
RunCam Shark Byte Nano Digital FPV Camera, CADDX EOS2 LENS
default length (80mm) mipi cable (hoping to change to 40mm once it arrives from shipping !)
RENY
RENY (Natural) Micro Flat Head Screw (Phillips) M1.4 4mm (Item # RENYMF144 from solidspot.com)
(100pcs/bag)
-2 additional soft mount grommets. I cut each in half, making 4 small rubber "shims" that i used under the VTX so I had just a bit of additonal vibration protection and clearance between the VTX and the frame (and the FC mounted in the frame).
-1 garbage bag twist tie. I took the thin piece of metal wire from the garbage bag twist tie and i used a short length on each rectangular side of the camera mount "head" to the little bump out on the front ducts to further snug up the camera mount assembly.
-couple small foam bits (I cut some out of the SB vtx box inside package - that type of relatively firm white foam material) . I placed a bit behind the camera "head" mouting rectangular tabs/ears , again to help firm up the camera mounting.
Pololu 4-25V Adjustable Boost Regulator
https://www.pololu.com/product/799
Key Points :
I set Boost Regular to approx 60% of its max setting (~7V volts) using the built in trimmer potentiometer
The Pot has physical "stops" as you turn clockwise (higher voltage to ~25V max) or counterclockwise (lower voltage to ~4V min). You can test various settings on the lower limits and you will see at what setting the VTX board powers up (but does not output video) and gradually increase clockwise until the red and blue lights come on the VTX. Do not make changes using the POT while power applied (not sure what will happen, but I tried to avoid doing so). I estimate for me it was about 60% of the total available physical clockwise movement that is allowed.
Soldered Vin and GND to FC input leads
Soldered Vout to TX5S.1 "V" (Voltage) pad
GND is shared/common from input GND ("negative" on FC input lead) and TX5S.1 "G" (ground) pad
No Capacitor used in this application.
TX5S.1 using FC UART2 TX/RX pads (per SB instructions TXRX and RXTX)
I used a bit of electrical tape under the regulator as i had it sitting on top of the VTX. Since there are contact points I did not want to create a short. In my other builds with the newbeendrone camera mount, I flip the regulator over and don't have the wire/solder contact points touching the vtx.
The Caddx EOS2 lens was used because :
1) saves approx 1gram in weight over stock lens
2) does not stick out as much (even more important with this type of front mounted camera style frame from r3d shifters)
3) image quality is not as good as the runcam lens, but it is acceptable to me for this project given the weight/size savings.
see my other SB whoop builds for notes on the osd element "vtx channel" and the dreaded triple question marks "?:?:?" and resolution of that OSD display element issue.
I used bluejay esc firmware v14 , 48khz, with 0 degree motor timing and low demag compensation.
my esc startup tune is from the "pac man" Atari video game from ~1982 . Here is the Melody string that can be used in the melody editor window for the ESCs in bluejay v12 or higher.
Melody:b=112,o=5,d=4:32b,32p,32b6,32p,32f#6,32p,32d#6,32p,32b6,32f#6,16p,16d#6,16p,32c6,32p,32c7,32p,32g6,32p,32e6,32p,32c7,32g6,16p,16e6,16p,32b,32p,32b6,32p,32f#6,32p,32d#6,32p,32b6,32f#6,16p,16d#6,16p,32d#6,32e6,32f6,32p,32f6,32f#6,32g6,32p,32g6,32g#6,32a6,32p,32b6.
i used the project mockingbird betaflight tune from here and i added the dual axis steering to my radio as descibed in the guide :
http://projectmockingbird.squarespace.com/pmb-setup-guides/nbdacrobee65v3pmb
note : i did not use jazzmaverick firmware, i used bluejay.
With the new GNB or RDQ 380mah 1s 60C batteries I can get about 2m30s (driving the battery down to 3.1v) of a basic indoor angle flight, not pushing it too hard, but also going up and downstairs.
I'd love to get 3min, maybe once I get the 40mm MIPI (and get rid of the JST ***
dont do this boost regular stuff anymore!!!
get the hdzero lite whoop bundle instead!!!
https://www.hd-zero.com/product-page/hdzero-whoop-lite-bundle
This is now my 4th SB TX5S.1 1s build using boost regulators. As I may have mentioned in my other builds, this is just kind of a novelty. No one is going to compete against a sub 20g analog whoop build that rides like it is on rails. I'm looking forward to a true 1S whoop board from hd-zero that will help close that gap. But in the meantime, I love 1s whoops and I love HD , so trying to combine them has been an interesting project. I have well over 200 flights between the 4 builds and have changed boost regulators (from Pololu #791 to #799) a couple builds ago which allowed me to get additional runtime (drive the battery voltage lower) which is great. Knock on wood I've had no regulator or vtx failures to date.
Here are the components and notes from this build :
R3D Shifters ZeroGrav frame
https://www.r3dshifters.com/r3dwhoop-zerograv.html
-I used the fuselage to frame mounting screws (4) from their Muon v2 kit which are 8mm long instead of the 6mm long screws from the zerograv kit (see picture for screws side by side). Longer screws are required as we are adding height to the overall build with the SB TX5S.1
-I trimmed a mm or so from the top/inside of the front ducts where the camera sits in. Since this frame is really geared for nano cams such as the caddx ant lite (or similar that don't use side mounting screws) I had to get creative with the camera mounting.
-in order to get the r3dwhoop camera mount "head" (which again, is really meant for a caddx ant lite or similar) to accept the larger runcam nano camera, I put the circular mount portion of the "head" in place of the camera lens lock ring. To provide a tad more width to this faux lock ring and allow for a good camera adjustment (focus), I used a small rubber band just behind the lens, from one of those rubber band bracelet loom kits my kiddos have (google "rubber band bracelet loom")
-note that I am NOT using the stock SB runcam nano lens - i am using a lighter/shorter caddx EOS2 lens.
-I took a side view picture so you see the camera lens is just a hair shorter than the very front of the ducts. However, the very top most portion of the camera (as it is angled up) is slightly exposed in certain hit/crash scenarios. I
-there are no props or ducts in view in flight.
-I will note that this is not a 65mm frame even though it is advertised as such. It is more like a 66 or 67mm frame measuring diagonal motor center to motor center. Same with the Muon v2 frame which I also purchased. Not to split hairs over it - but I thought it is worth mentioning if that is important to you. It does use typical 31mm props that you would expect to use with a 65mm whoop.
NBD Hummingbird Pro 1s AIO FC,
Firmware "betaflight_4.2.9_HUMMINGBIRD_F4_PRO_BASE_NOBEESIGN_b75650c.hex" @ https://github.com/newbeedrone/nbd-betaflight/releases/tag/4.2.9-v1.0
Betafpv BT2.0 connector
NewBeeDrone 0802 18000kv Brushless Motors - Gold Edition (Set of 4)
https://newbeedrone.com/products/newbeedrone-0802-18000kv-brushless-motors-gold-edition-set-of-4
-Note : I've not yet direct soldered for this build (yet! ) but another .3 - .5g can be saved by ridding of the JST 1.0 the plugs and socks
NBD Azi Tri-blade 31mm
GND or RDQ 380mah 1S 60C (PH2.0 replaced w/ BetaFPV BT2.0)
SB Whoop Board TX5S.1 w/ monopole antenna (VRX and VTX FIRMWARE 20102021 from hd-zero.com/support)
RunCam Shark Byte Nano Digital FPV Camera, CADDX EOS2 LENS
default length (80mm) mipi cable (hoping to change to 40mm once it arrives from shipping !)
RENY
RENY (Natural) Micro Flat Head Screw (Phillips) M1.4 4mm (Item # RENYMF144 from solidspot.com)
(100pcs/bag)
-2 additional soft mount grommets. I cut each in half, making 4 small rubber "shims" that i used under the VTX so I had just a bit of additonal vibration protection and clearance between the VTX and the frame (and the FC mounted in the frame).
-1 garbage bag twist tie. I took the thin piece of metal wire from the garbage bag twist tie and i used a short length on each rectangular side of the camera mount "head" to the little bump out on the front ducts to further snug up the camera mount assembly.
-couple small foam bits (I cut some out of the SB vtx box inside package - that type of relatively firm white foam material) . I placed a bit behind the camera "head" mouting rectangular tabs/ears , again to help firm up the camera mounting.
Pololu 4-25V Adjustable Boost Regulator
https://www.pololu.com/product/799
Key Points :
I set Boost Regular to approx 60% of its max setting (~7V volts) using the built in trimmer potentiometer
The Pot has physical "stops" as you turn clockwise (higher voltage to ~25V max) or counterclockwise (lower voltage to ~4V min). You can test various settings on the lower limits and you will see at what setting the VTX board powers up (but does not output video) and gradually increase clockwise until the red and blue lights come on the VTX. Do not make changes using the POT while power applied (not sure what will happen, but I tried to avoid doing so). I estimate for me it was about 60% of the total available physical clockwise movement that is allowed.
Soldered Vin and GND to FC input leads
Soldered Vout to TX5S.1 "V" (Voltage) pad
GND is shared/common from input GND ("negative" on FC input lead) and TX5S.1 "G" (ground) pad
No Capacitor used in this application.
TX5S.1 using FC UART2 TX/RX pads (per SB instructions TXRX and RXTX)
I used a bit of electrical tape under the regulator as i had it sitting on top of the VTX. Since there are contact points I did not want to create a short. In my other builds with the newbeendrone camera mount, I flip the regulator over and don't have the wire/solder contact points touching the vtx.
The Caddx EOS2 lens was used because :
1) saves approx 1gram in weight over stock lens
2) does not stick out as much (even more important with this type of front mounted camera style frame from r3d shifters)
3) image quality is not as good as the runcam lens, but it is acceptable to me for this project given the weight/size savings.
see my other SB whoop builds for notes on the osd element "vtx channel" and the dreaded triple question marks "?:?:?" and resolution of that OSD display element issue.
I used bluejay esc firmware v14 , 48khz, with 0 degree motor timing and low demag compensation.
my esc startup tune is from the "pac man" Atari video game from ~1982 . Here is the Melody string that can be used in the melody editor window for the ESCs in bluejay v12 or higher.
Melody:b=112,o=5,d=4:32b,32p,32b6,32p,32f#6,32p,32d#6,32p,32b6,32f#6,16p,16d#6,16p,32c6,32p,32c7,32p,32g6,32p,32e6,32p,32c7,32g6,16p,16e6,16p,32b,32p,32b6,32p,32f#6,32p,32d#6,32p,32b6,32f#6,16p,16d#6,16p,32d#6,32e6,32f6,32p,32f6,32f#6,32g6,32p,32g6,32g#6,32a6,32p,32b6.
i used the project mockingbird betaflight tune from here and i added the dual axis steering to my radio as descibed in the guide :
http://projectmockingbird.squarespace.com/pmb-setup-guides/nbdacrobee65v3pmb
note : i did not use jazzmaverick firmware, i used bluejay.
With the new GNB or RDQ 380mah 1s 60C batteries I can get about 2m30s (driving the battery down to 3.1v) of a basic indoor angle flight, not pushing it too hard, but also going up and downstairs.
I'd love to get 3min, maybe once I get the 40mm MIPI (and get rid of the JST 1.0 motor plugs/sockets!) and shave another 1/3rd of a gram perhaps I can get closer to that target.
Indoor flight example :
https://youtu.be/SvDu6UP3sgs1.0 motor plugs/sockets!) and shave another 1/3rd of a gram perhaps I can get closer to that target.
Indoor flight example :
Photos


Part List
Frame |
R3DWhoop ZeroGrav
R3dshifters.com
|
See Site |
Flight Controller |
HummingBird F4 Pro Flight Controller
(4 builds)
Newbeedrone.com
|
$45.00 |
Motors |
NewBeeDrone 0802 18000kv Brushless Motors - Unibell Gold Edition (Set of 4)
(9 builds)
Newbeedrone.com
|
$32.99 |
Propellers |
NewBeeDrone Azi (Quad Blade) Micro Propellers 31mm -0.8mm Shaft(Set of 4)
(7 builds)
Newbeedrone.com
|
$3.99 |
FPV Camera |
Runcam Nano HD Camera for Shark Byte Digital FPV System
(2 builds)
Newbeedrone.com
|
$50.00 |
FPV Transmitter |
Fatshark SharkByte TX5S.1 Video Transmitter
(8 builds)
Pyrodrone.com
|
$50.00 |
Batteries |
4Pcs GNB 380mAh 1S 3.8V Lipo Batteries 60C JST- PH 2.0 HV for Mobula 7 UZ65 US65 Beta65x Tiny Whoop Micro FPV Racing Drone
Amazon.com
|
$17.77 |
Misc Parts |
Caddx Turbo Eos2 Nano 1200TVL CMOS 16:9 NTCS FPV Camera (2.1mm)
(37 builds)
Racedayquads.com
|
$14.99 |


Hey there! I'm trying to attempt the same thing with a DJI whoop and the 799 boost regulator and have encountered an odd issue. Ideally, the vista should power up with a dim red/green, initialize, then go solid green to indicate it's ready. Using a 450 mah 1s and various settings on the boost regulator, I can never get to the solid green on the vista. However, if I connect the micro usb port in an attempt to connect to betaflight, the vista goes solid green. Is there anyway to remedy this other than getting a 2s compatible board?
i am not sure about the vista/dji as i have no experience with that system. however, someone has a 1s build with dji... check out https://rotorbuilds.com/build/28379#c46761
the only thing I can suggest is make sure to run only 25mw video at least to start with ...you want to draw the least amount of current/amps through the boost regulator. good luck and check out the link to the vista/dji 1s build.