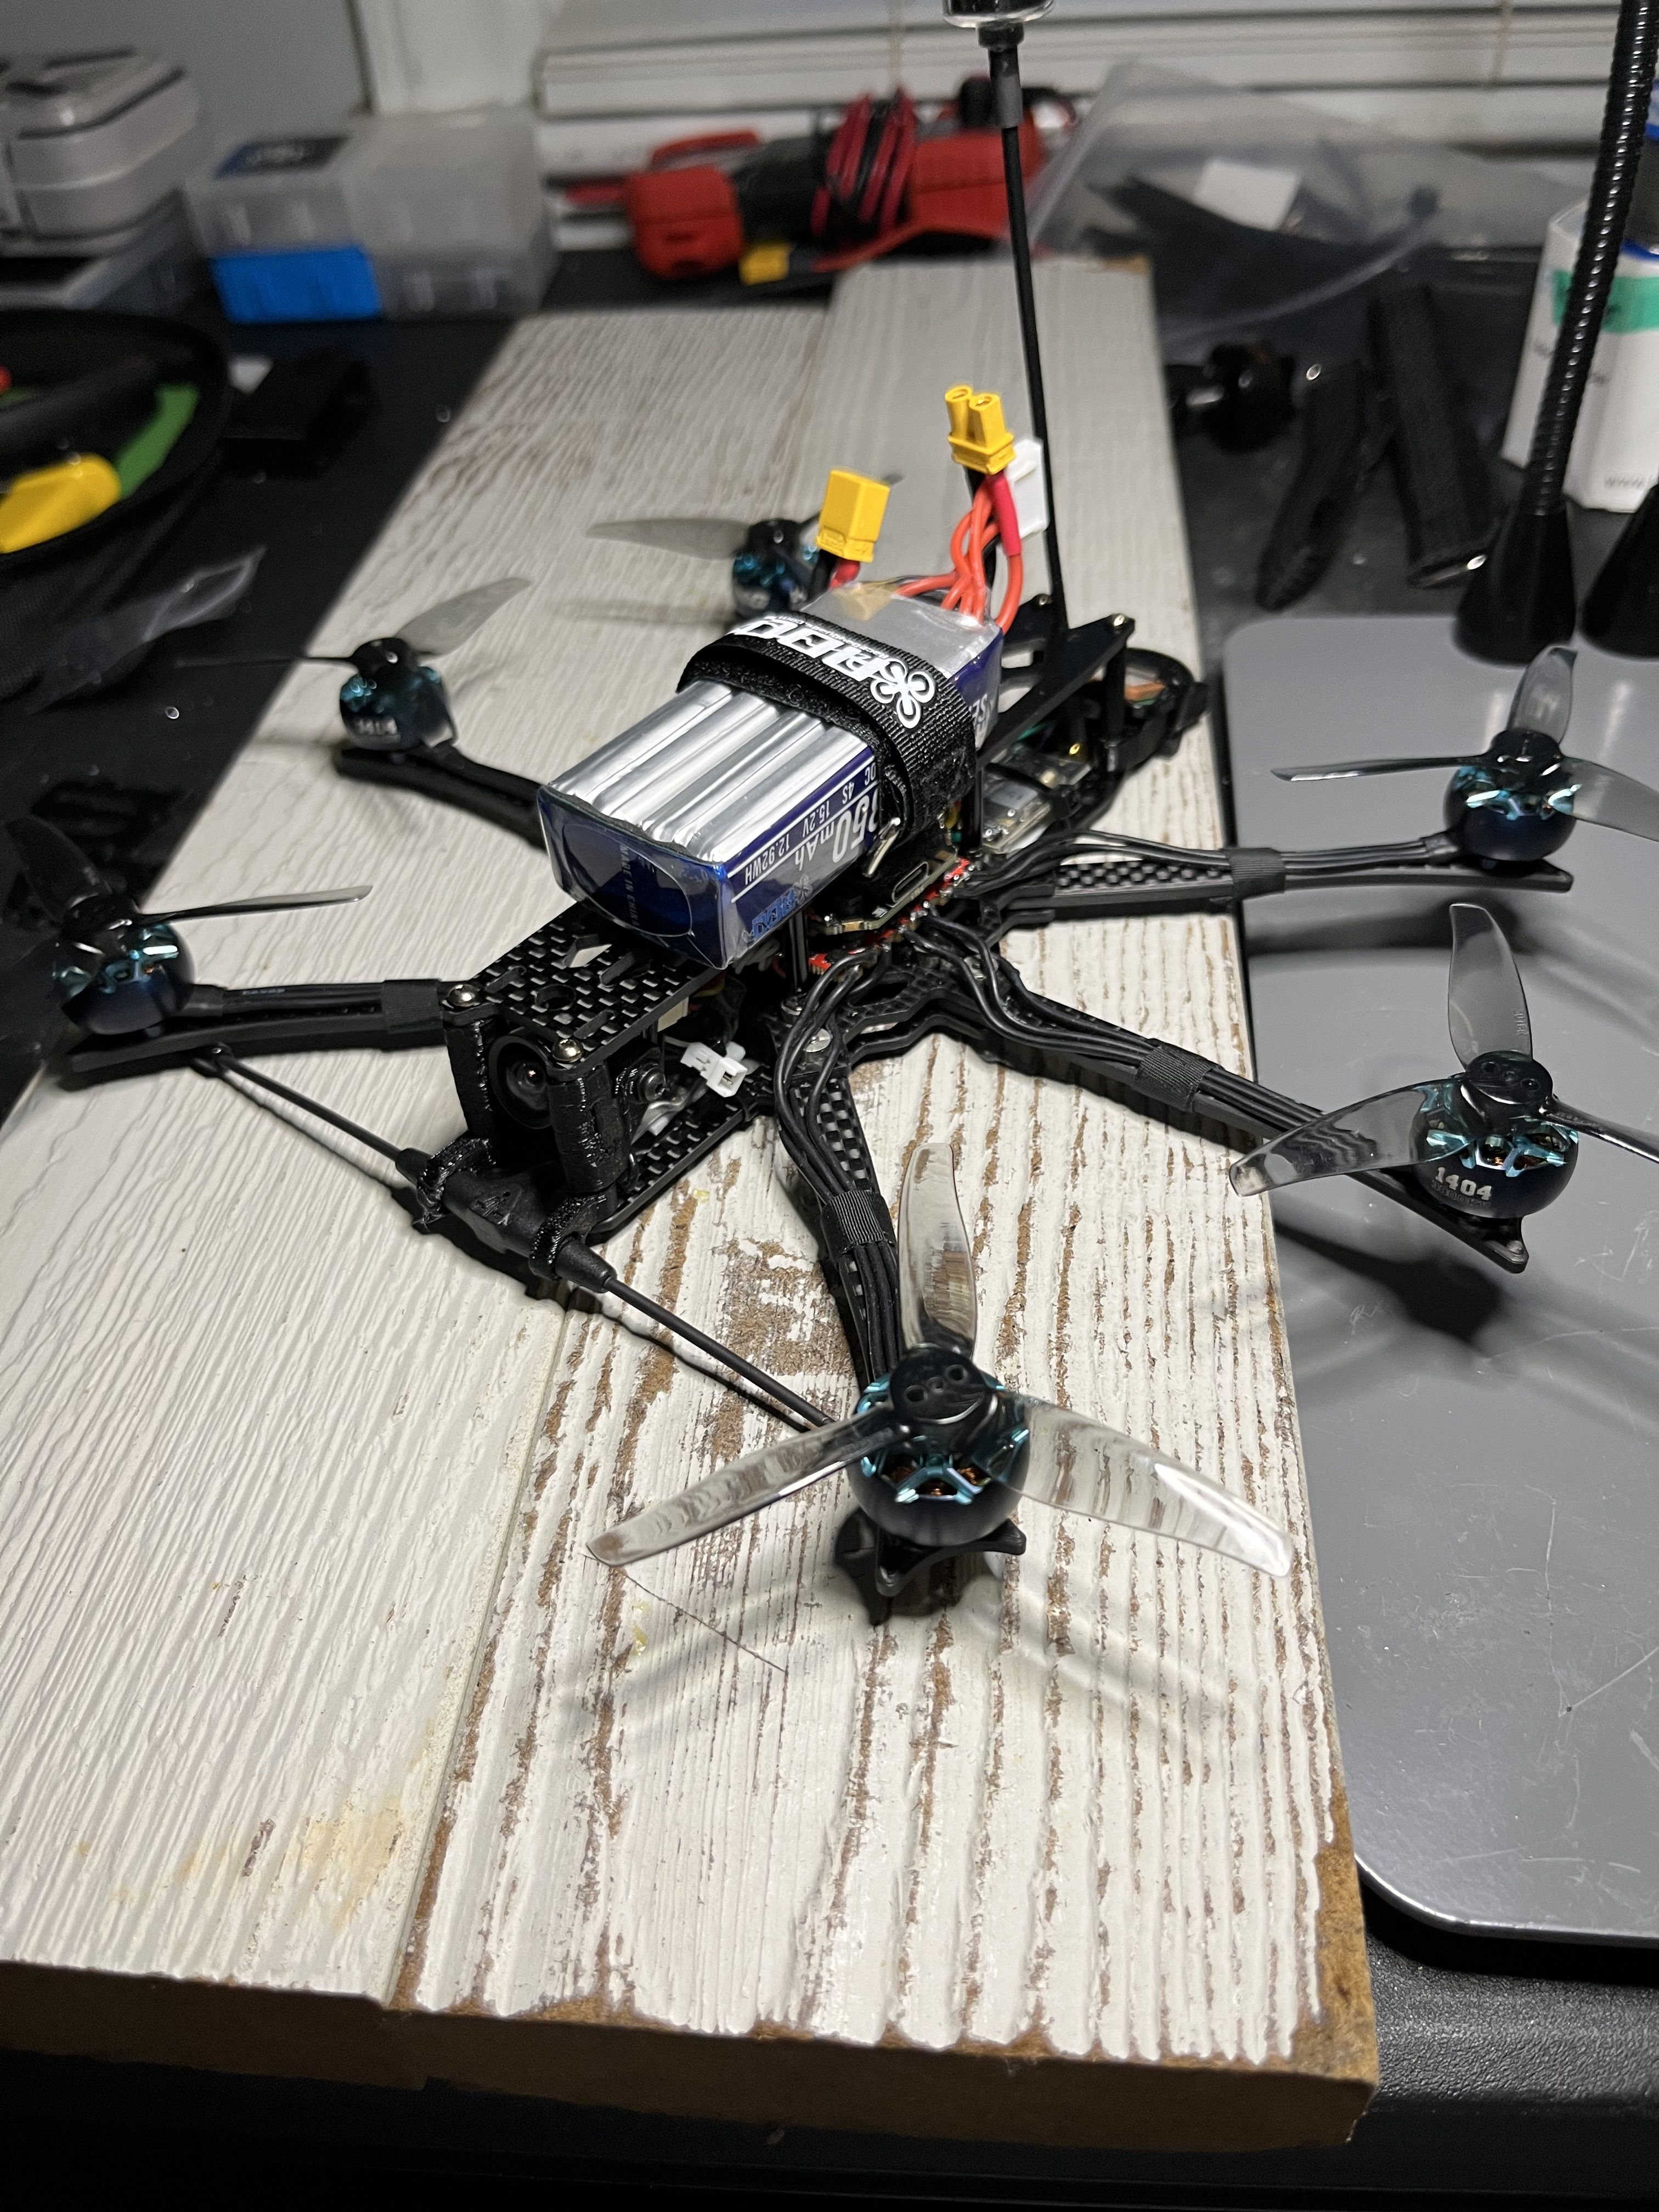
3" Hexacopter
 By cadensnyder on Mar 27, 2022
I first saw this hexacopter mid July, 2021 in a review by Justin Davis as a bind and fly from banggood. It was about $250 for the analog version and $365 for the DJI version with the nebula nano. I really didn't want the nebula nano so I figured I'd buy the analog version. By the time I was ready to purchase the bind and fly I could no longer find the analog version, the link under the review leads to a 404 error on banggood. Evidently, only the nebula nano version is available so I decided to build my own.
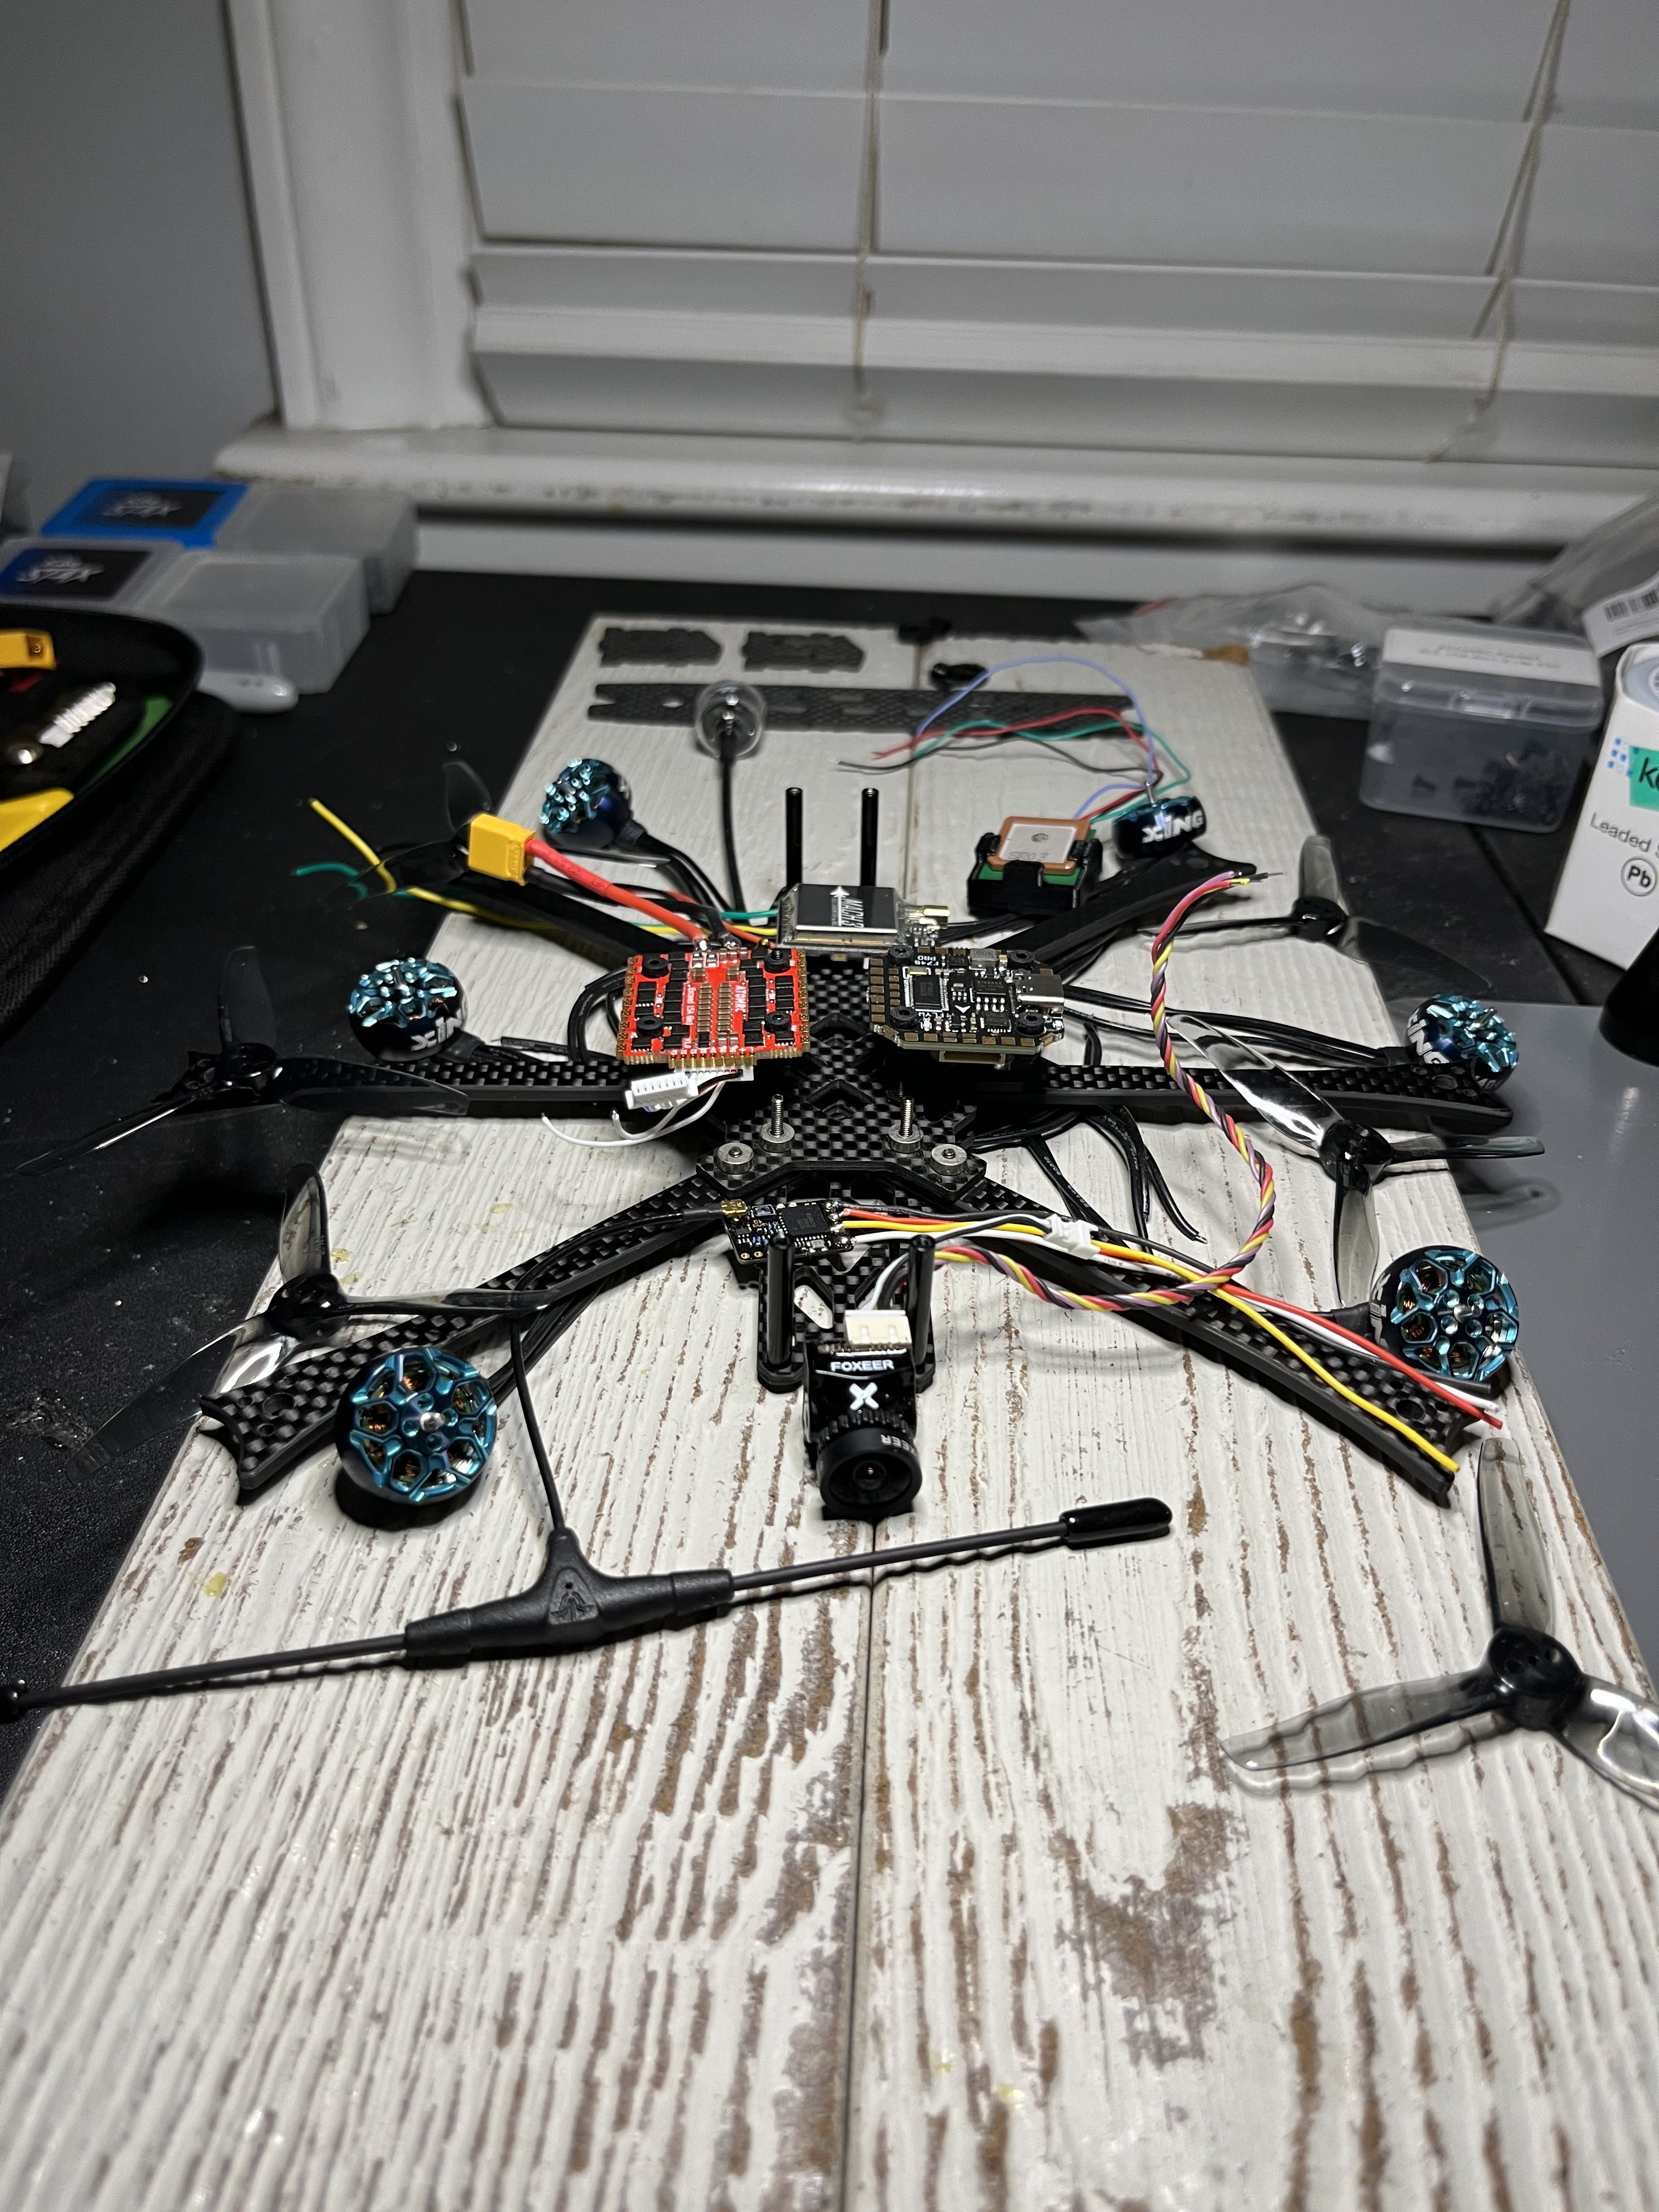
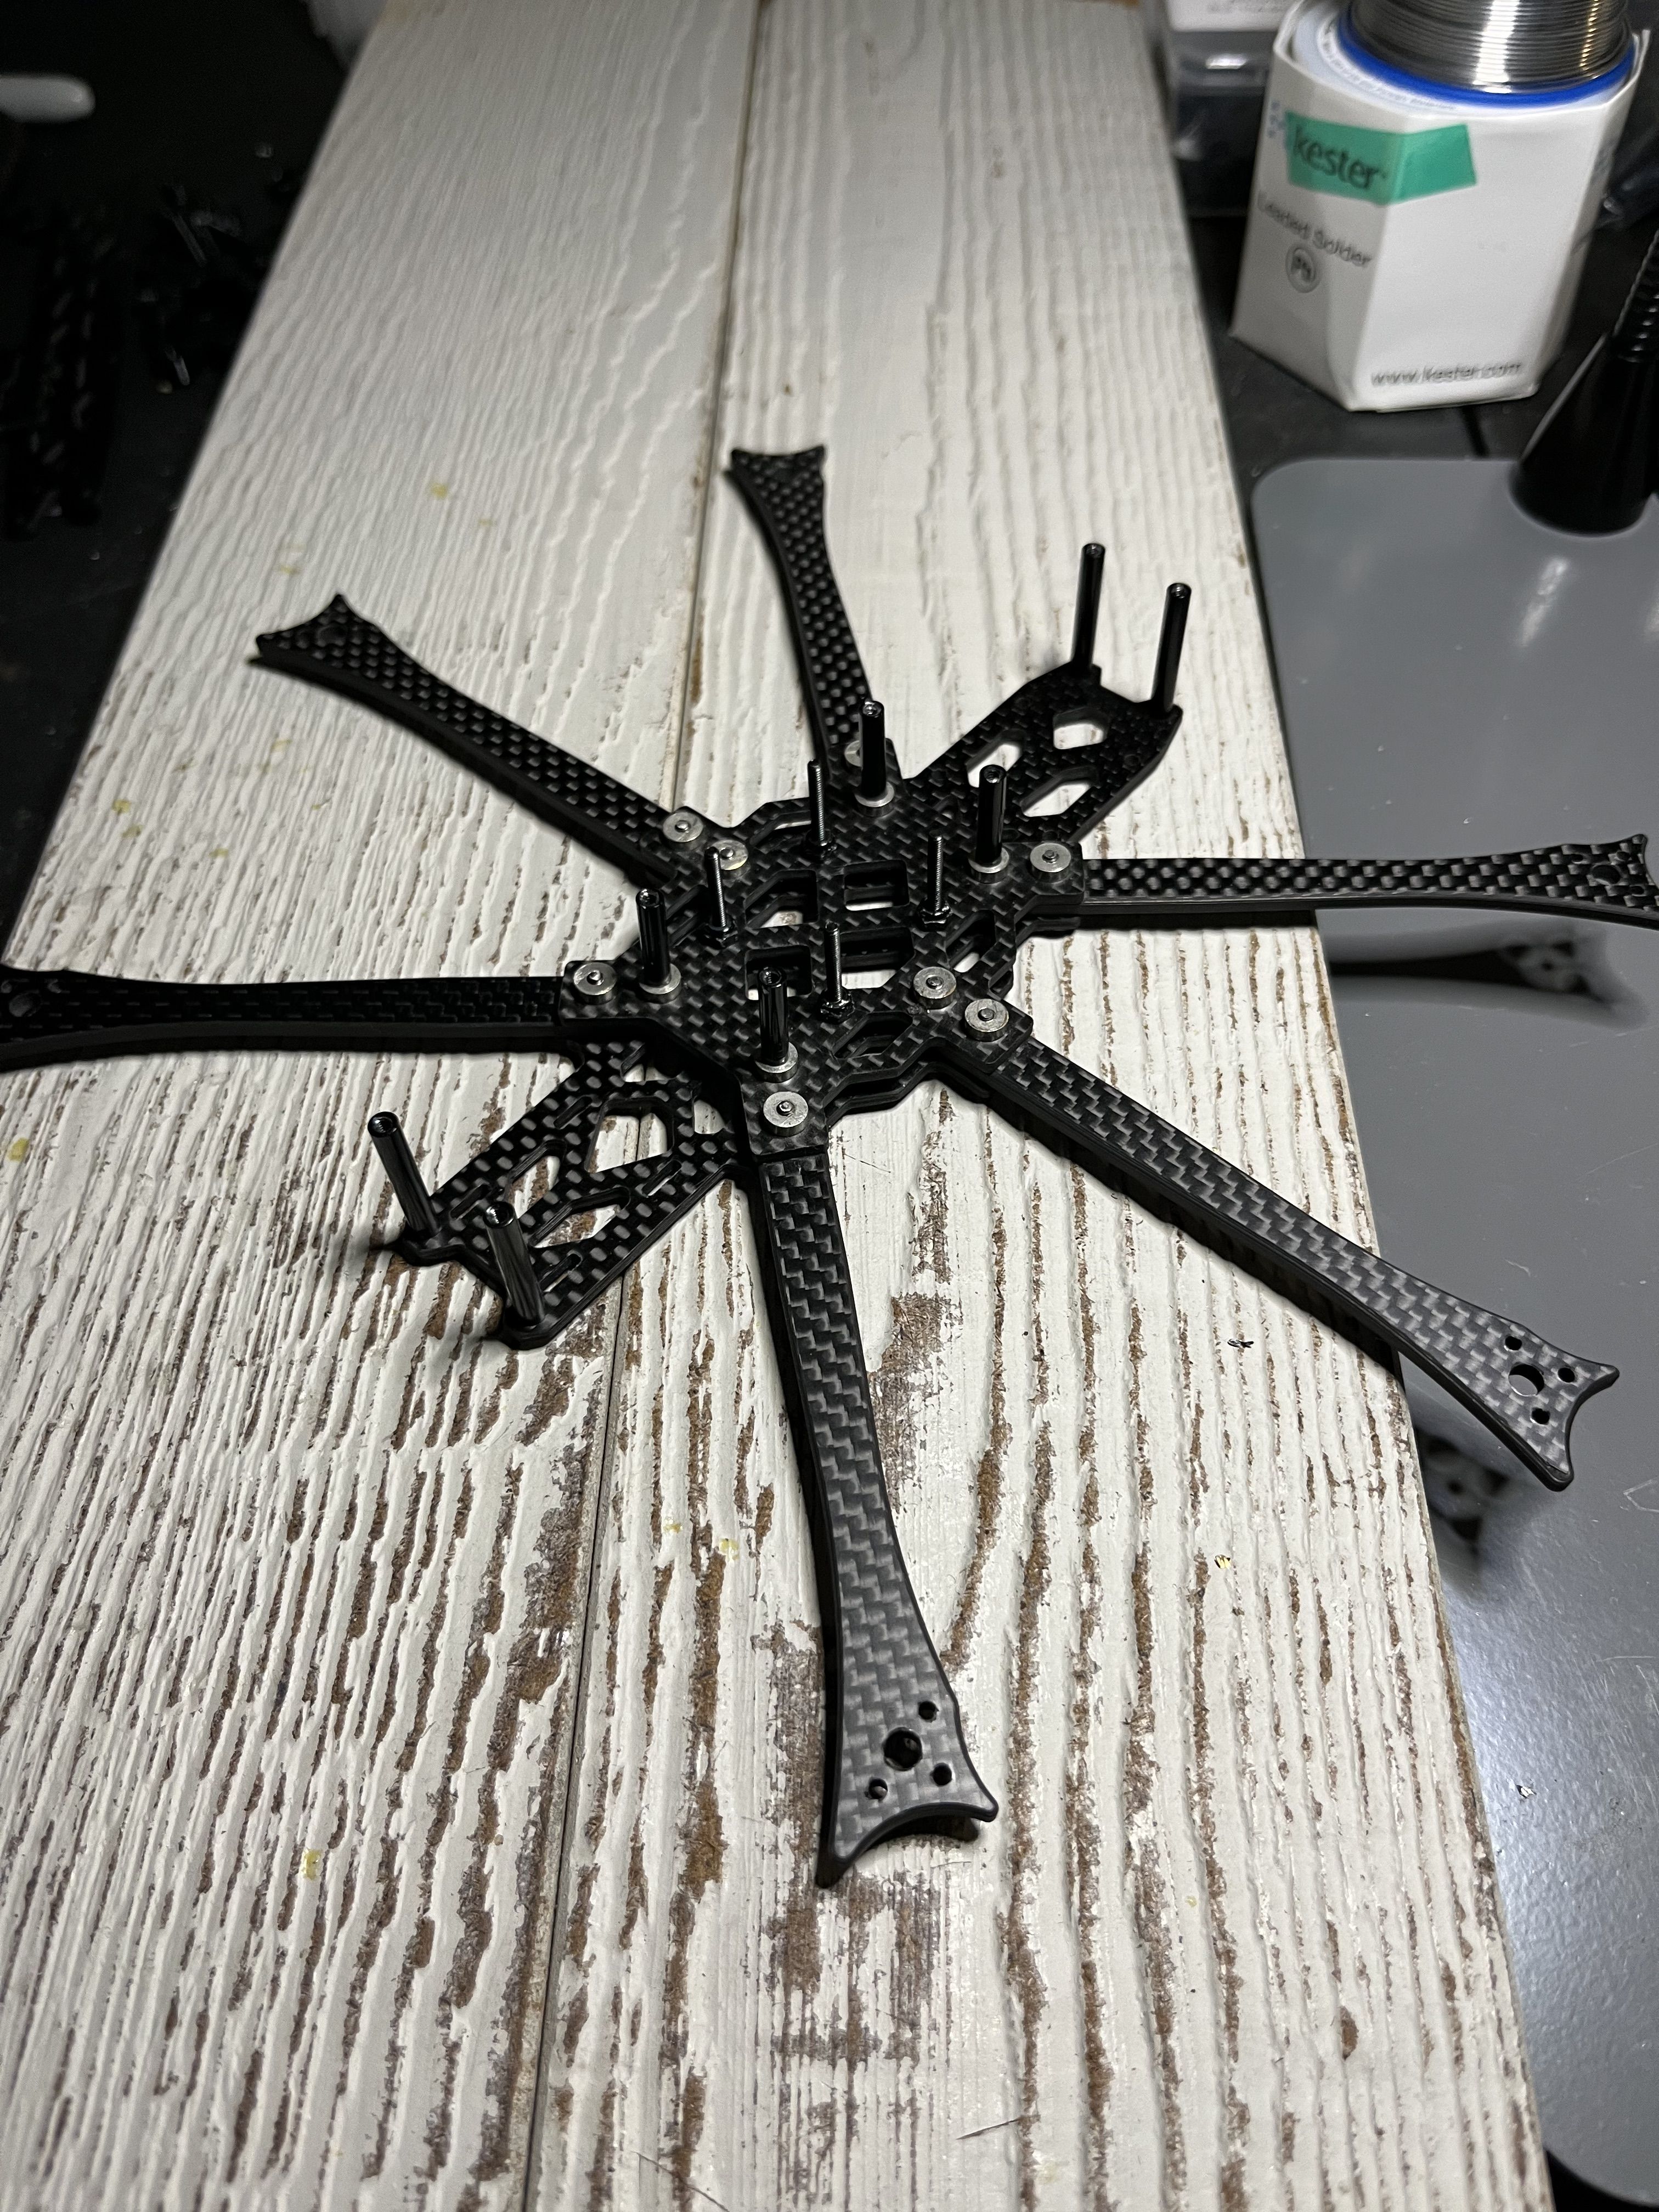
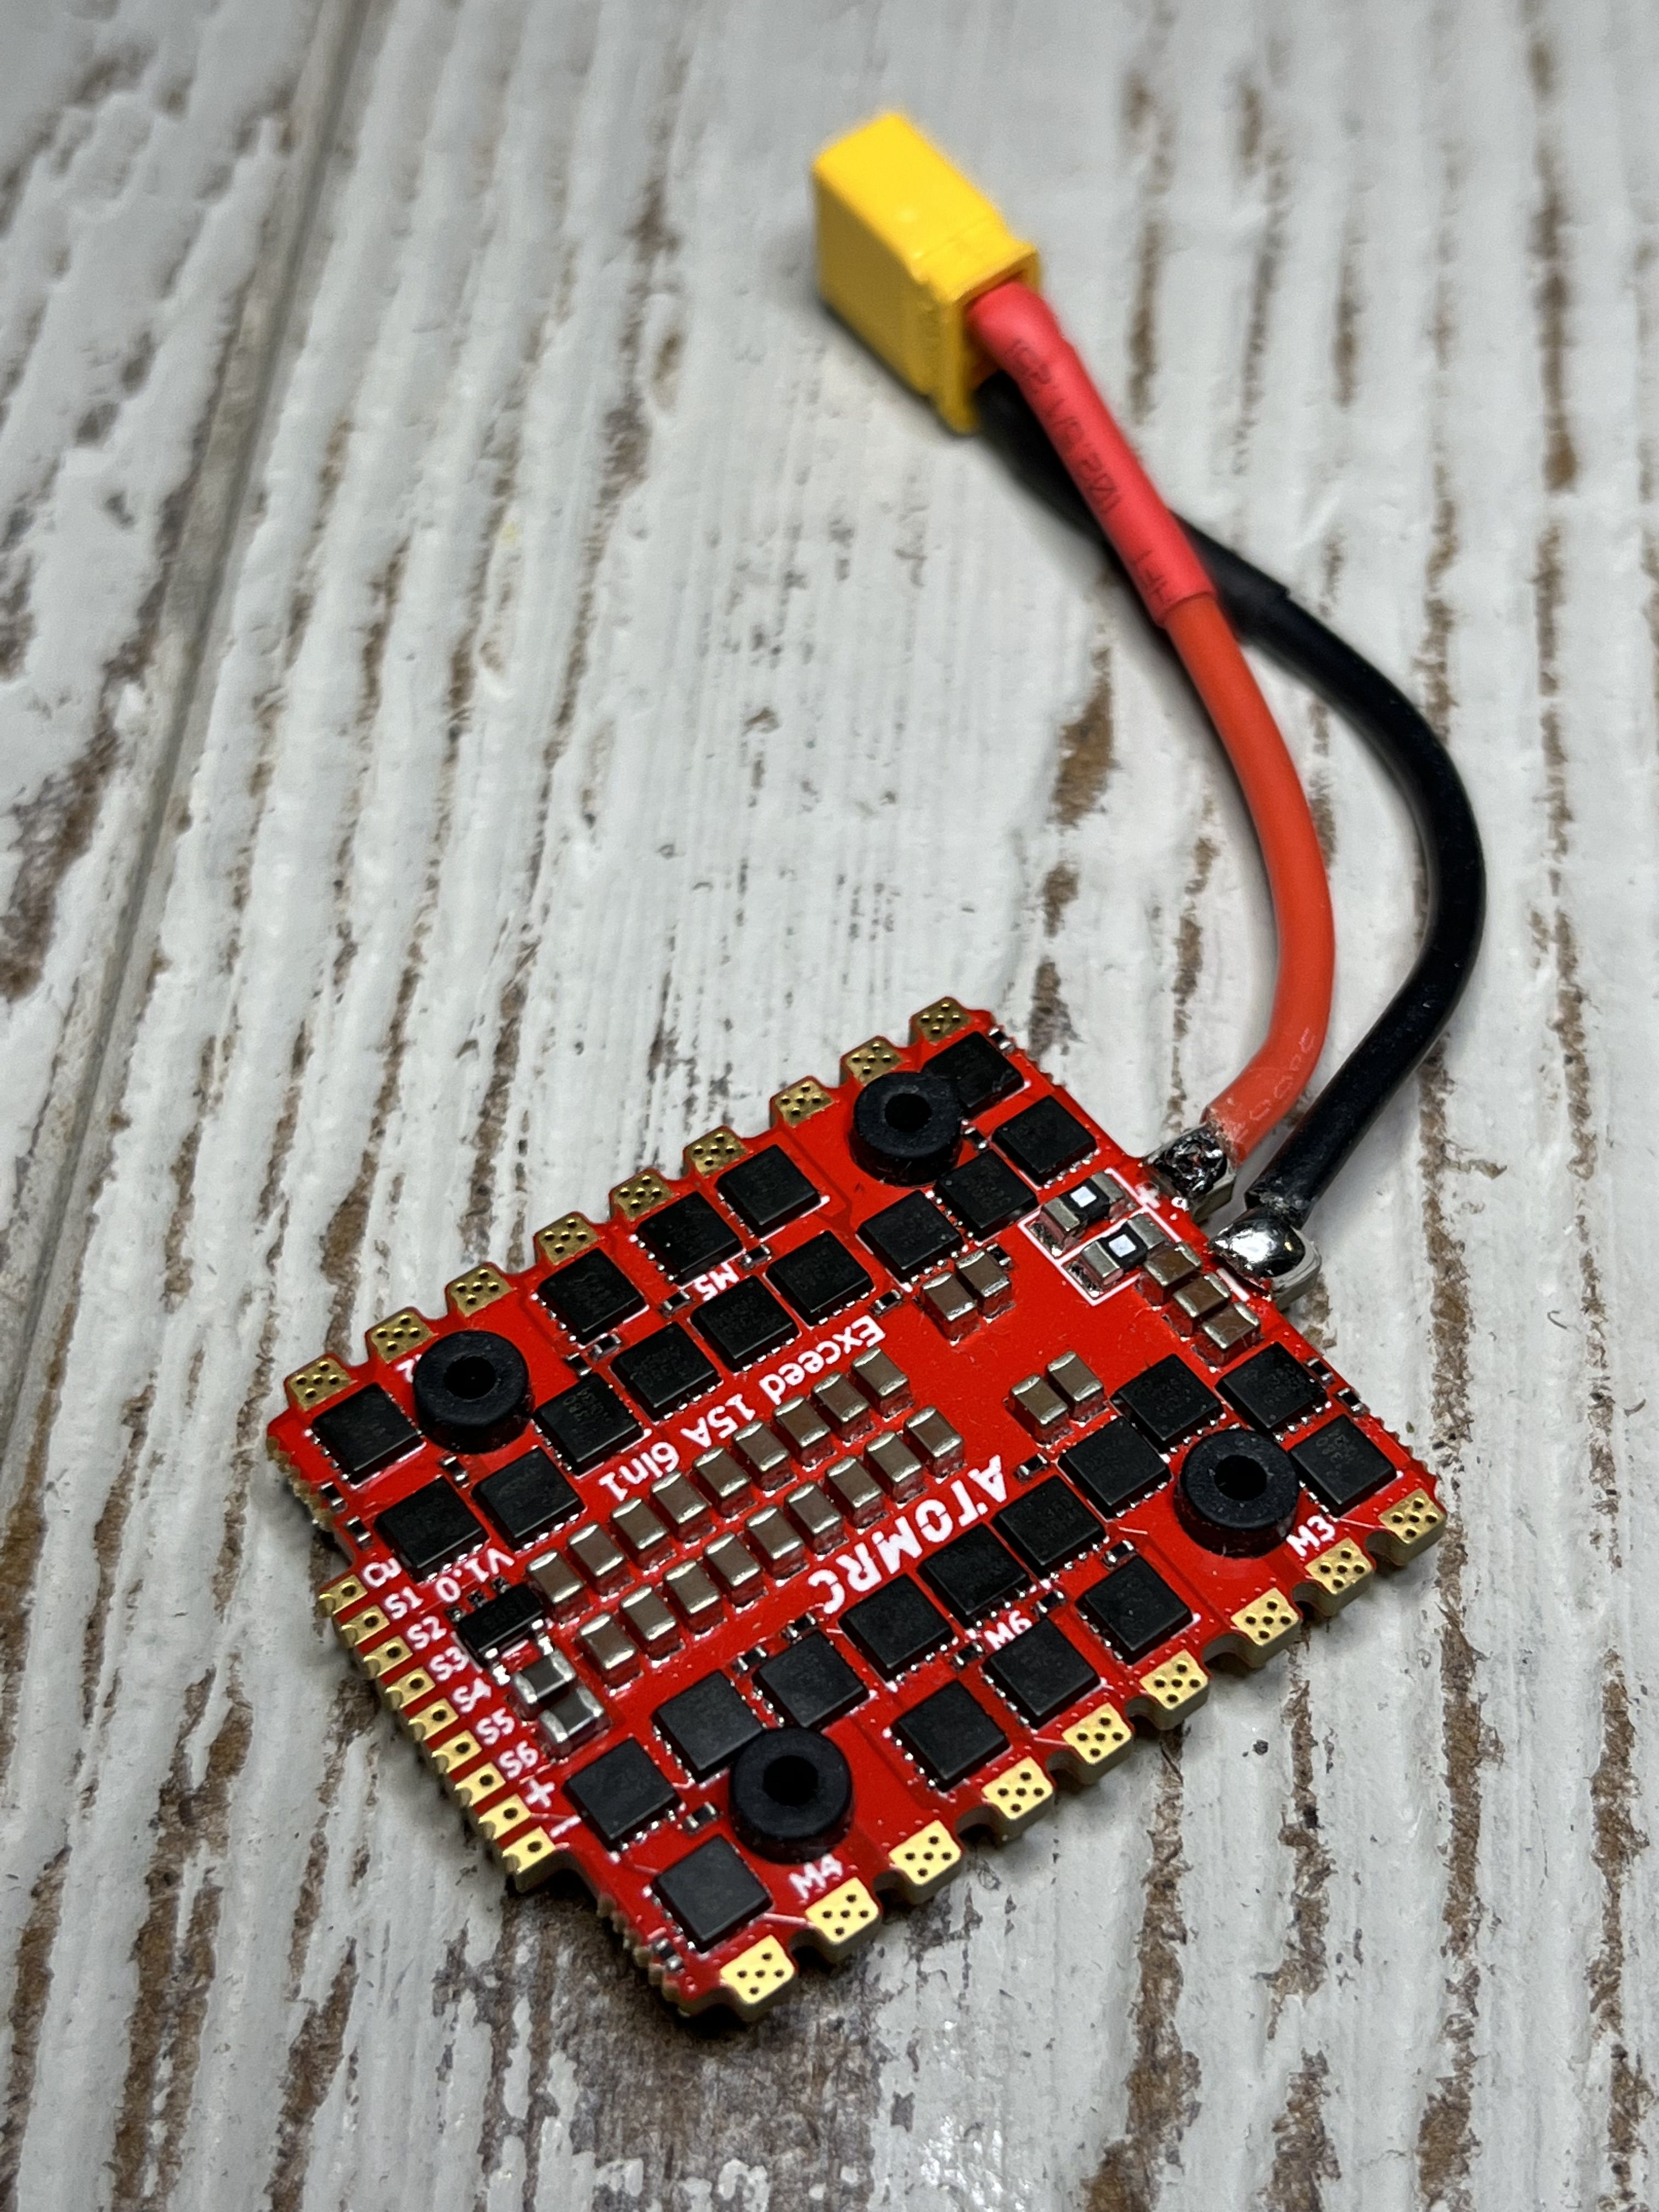
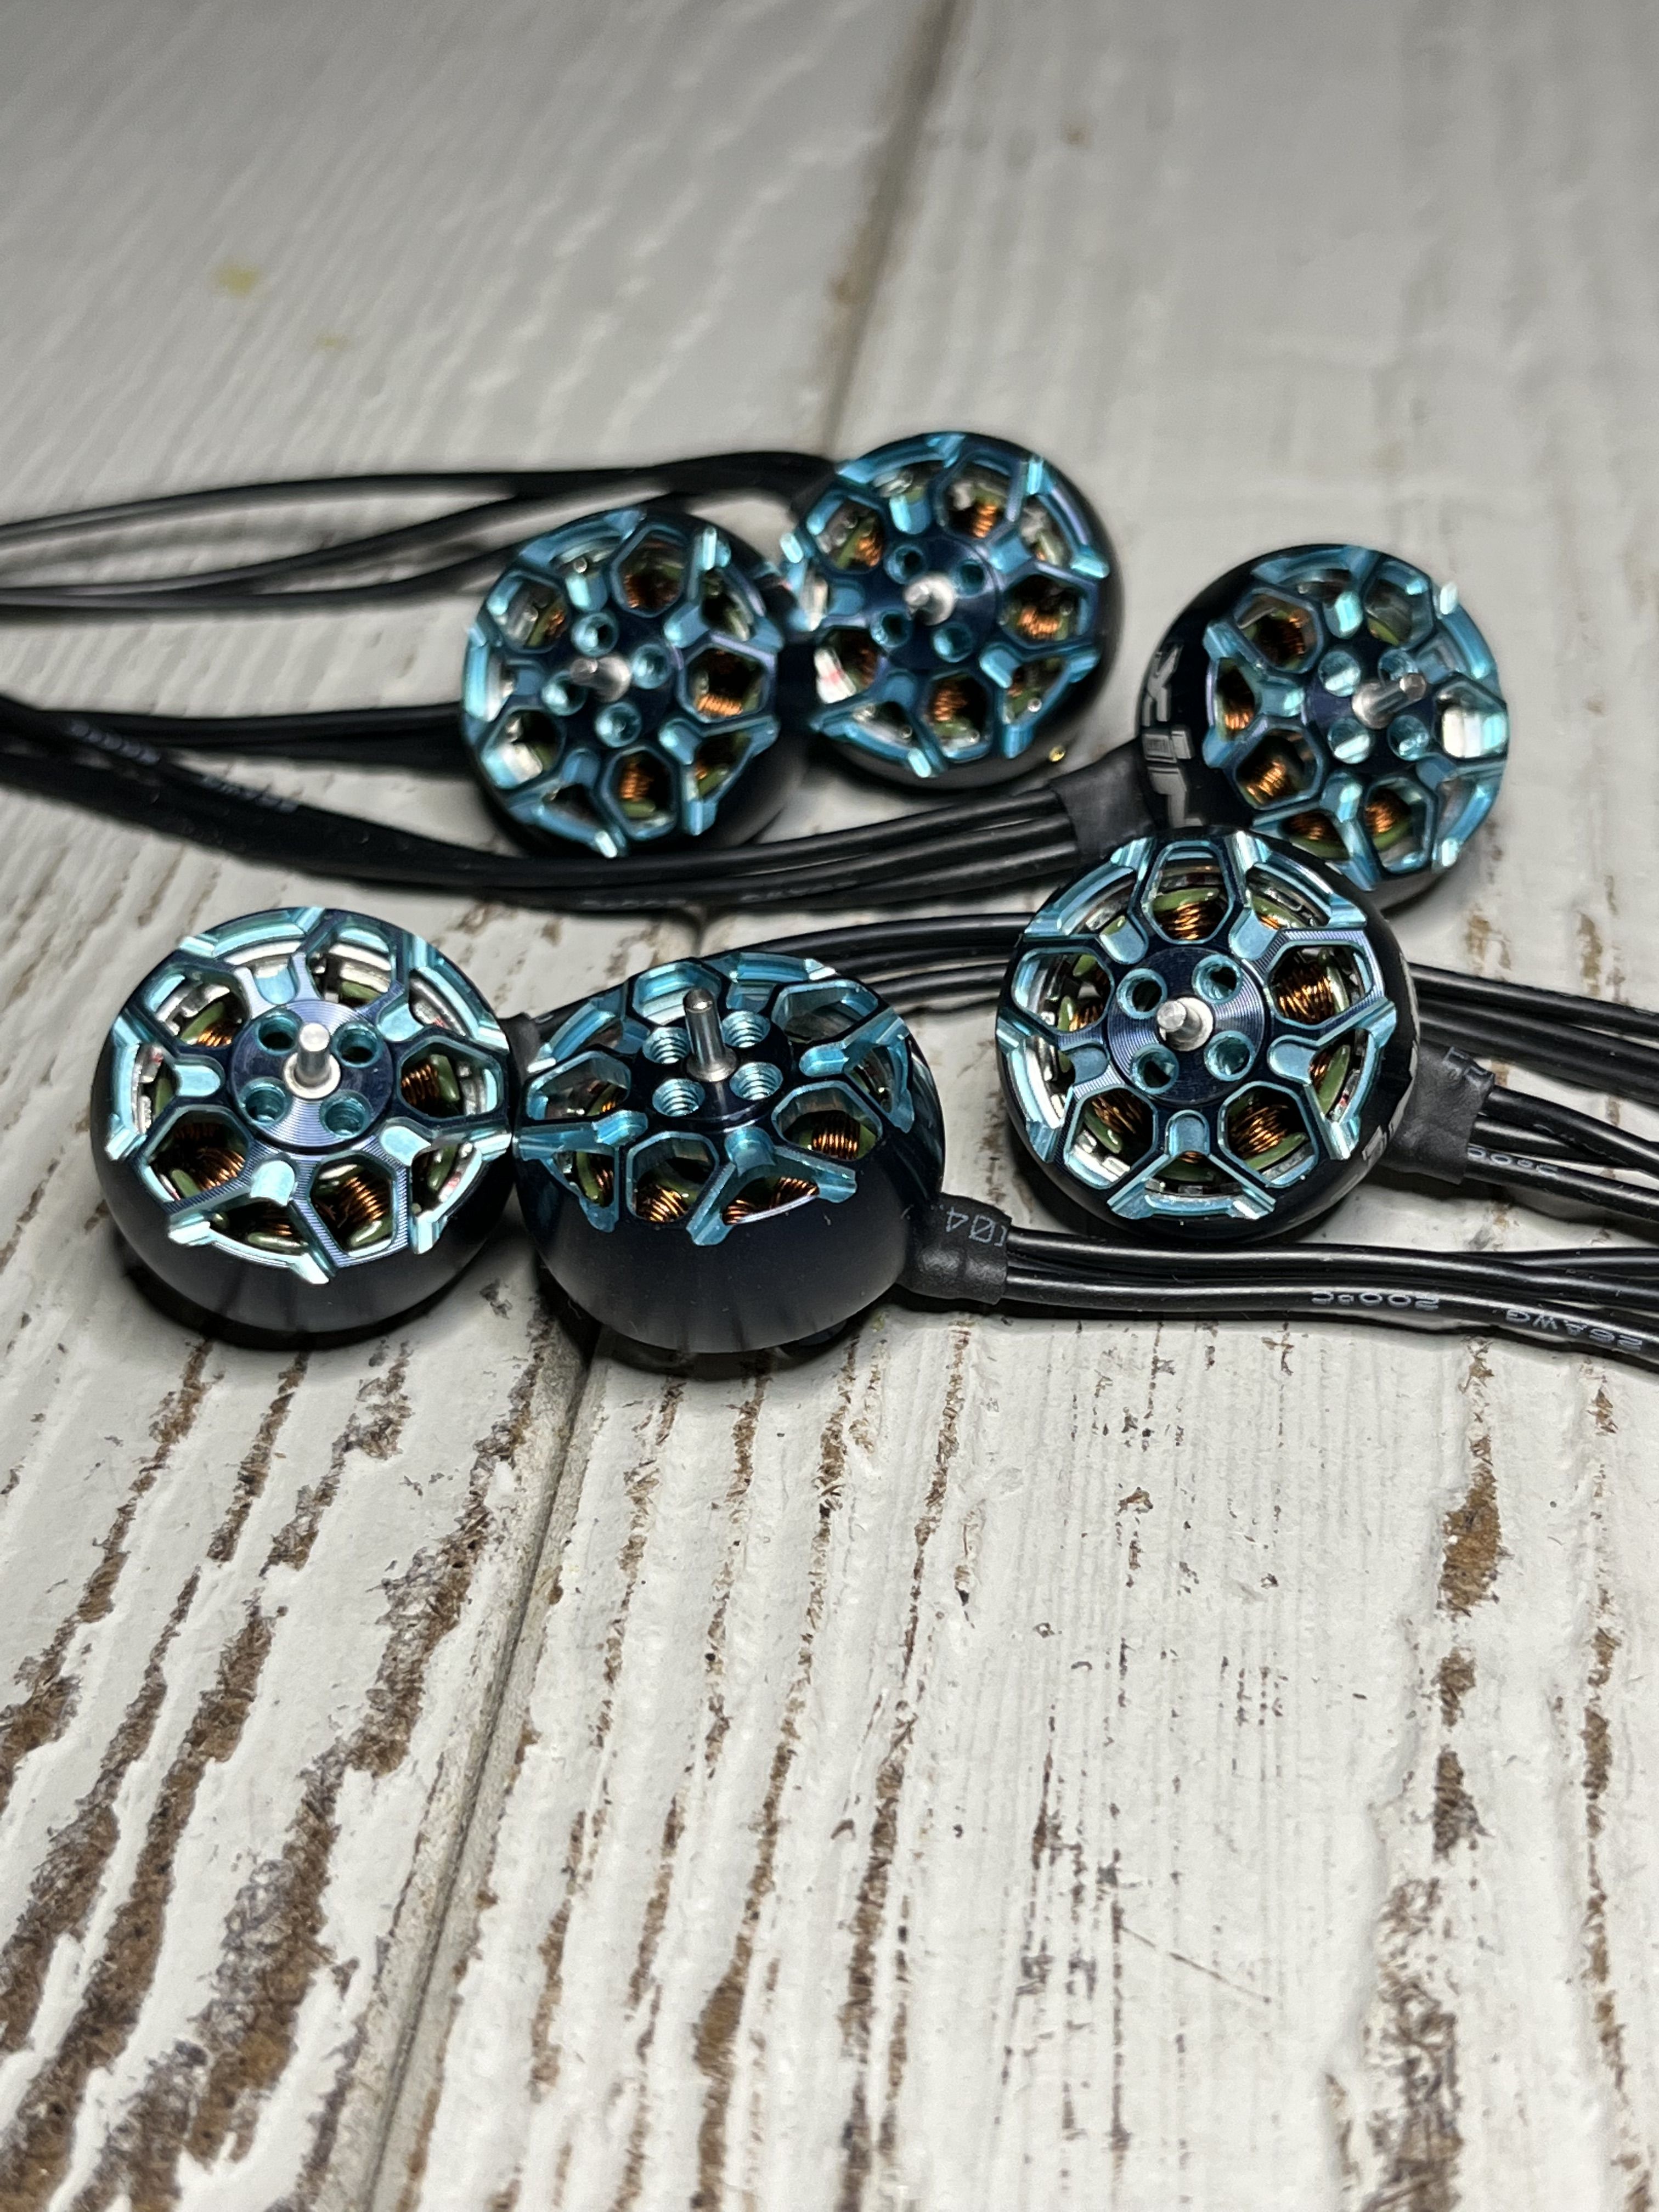
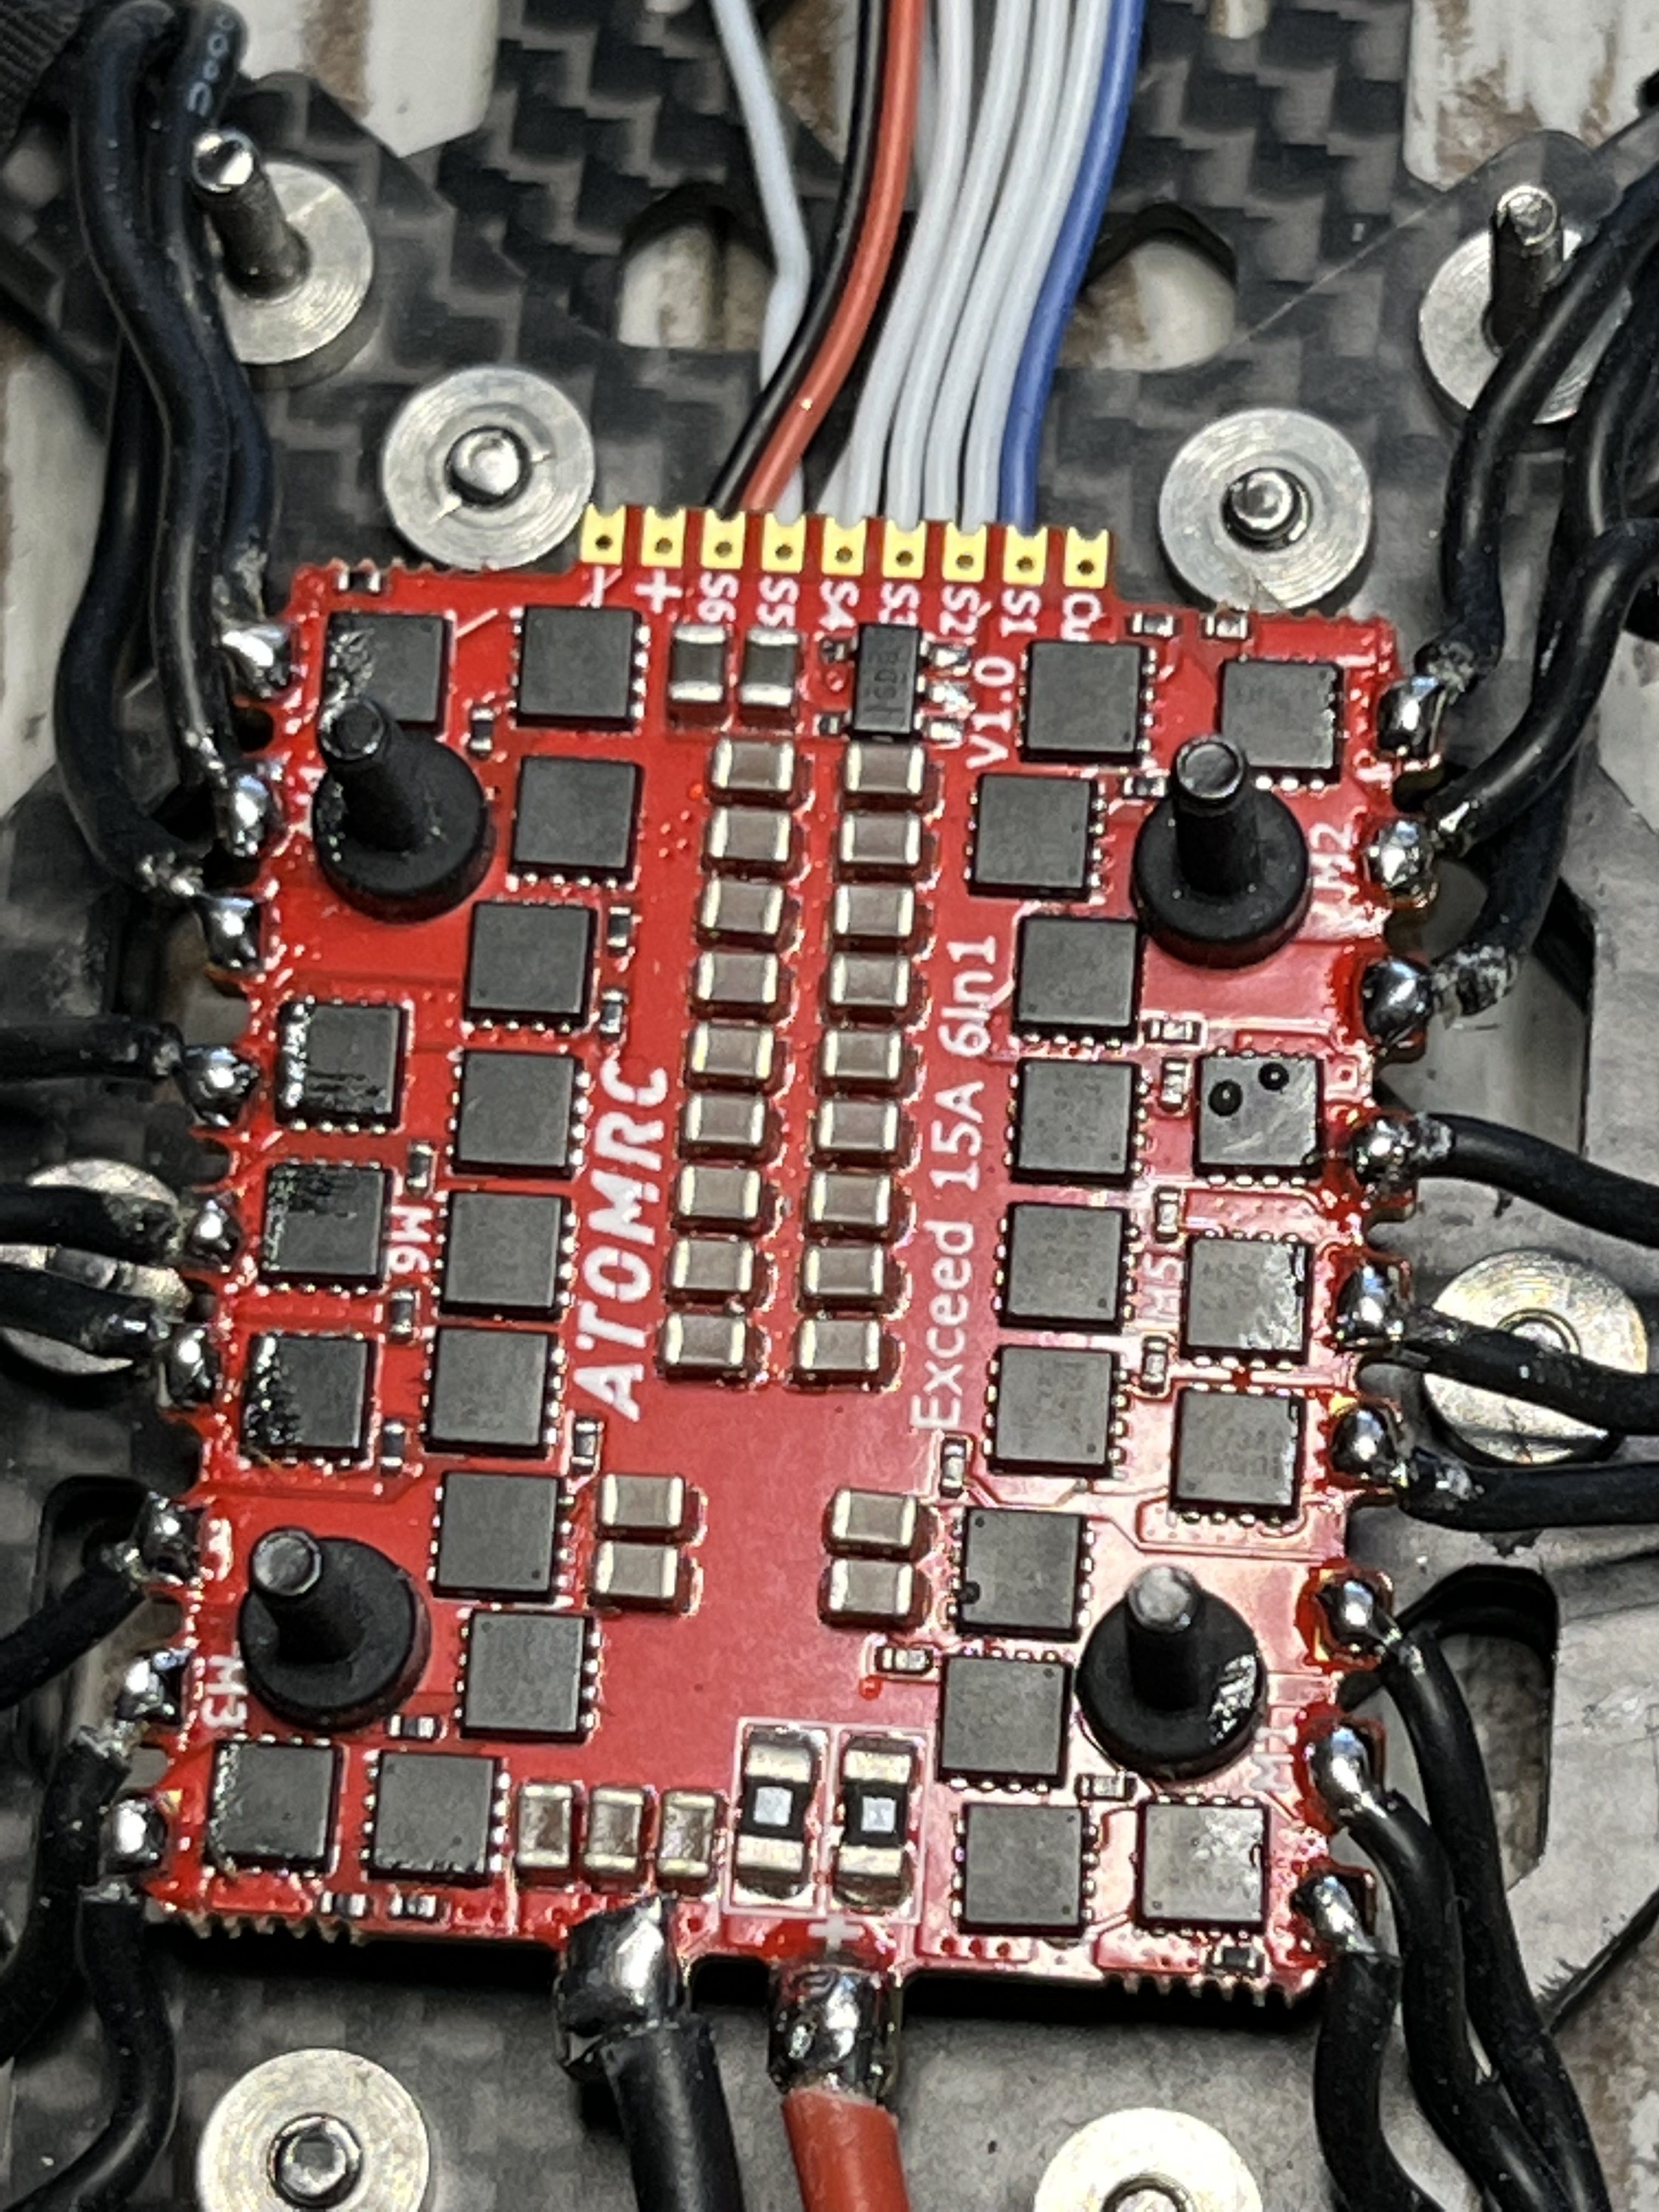
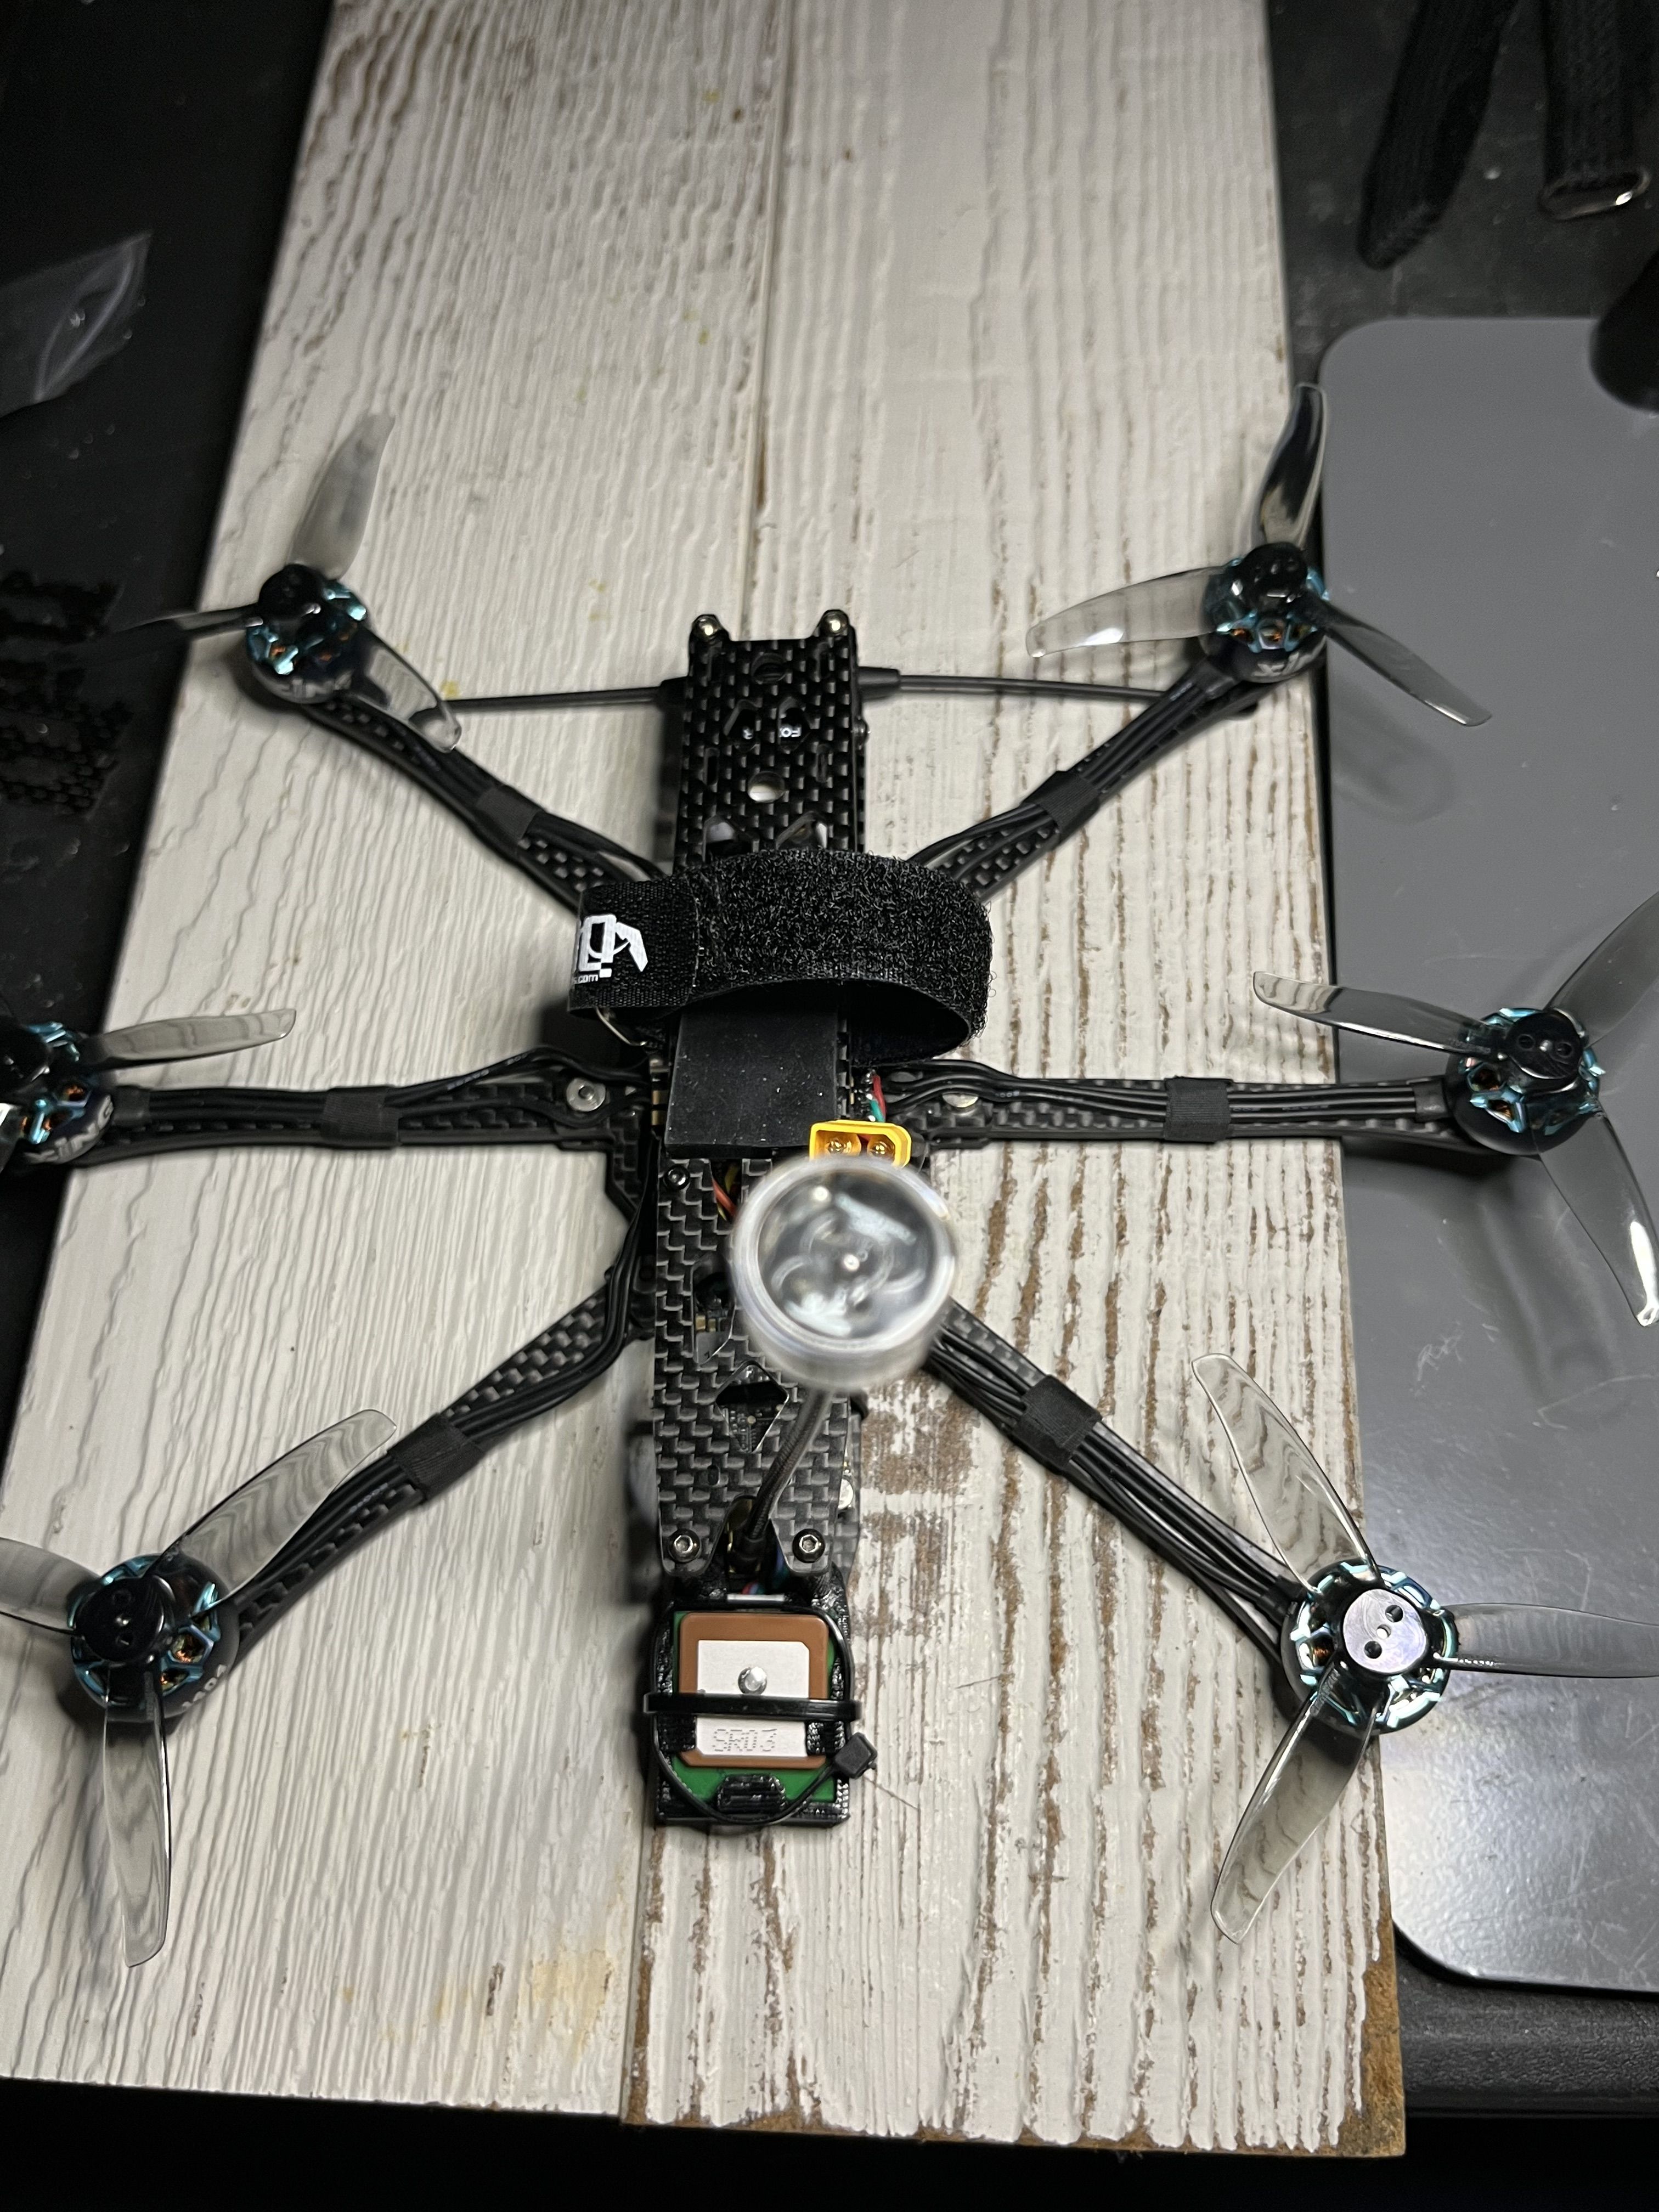
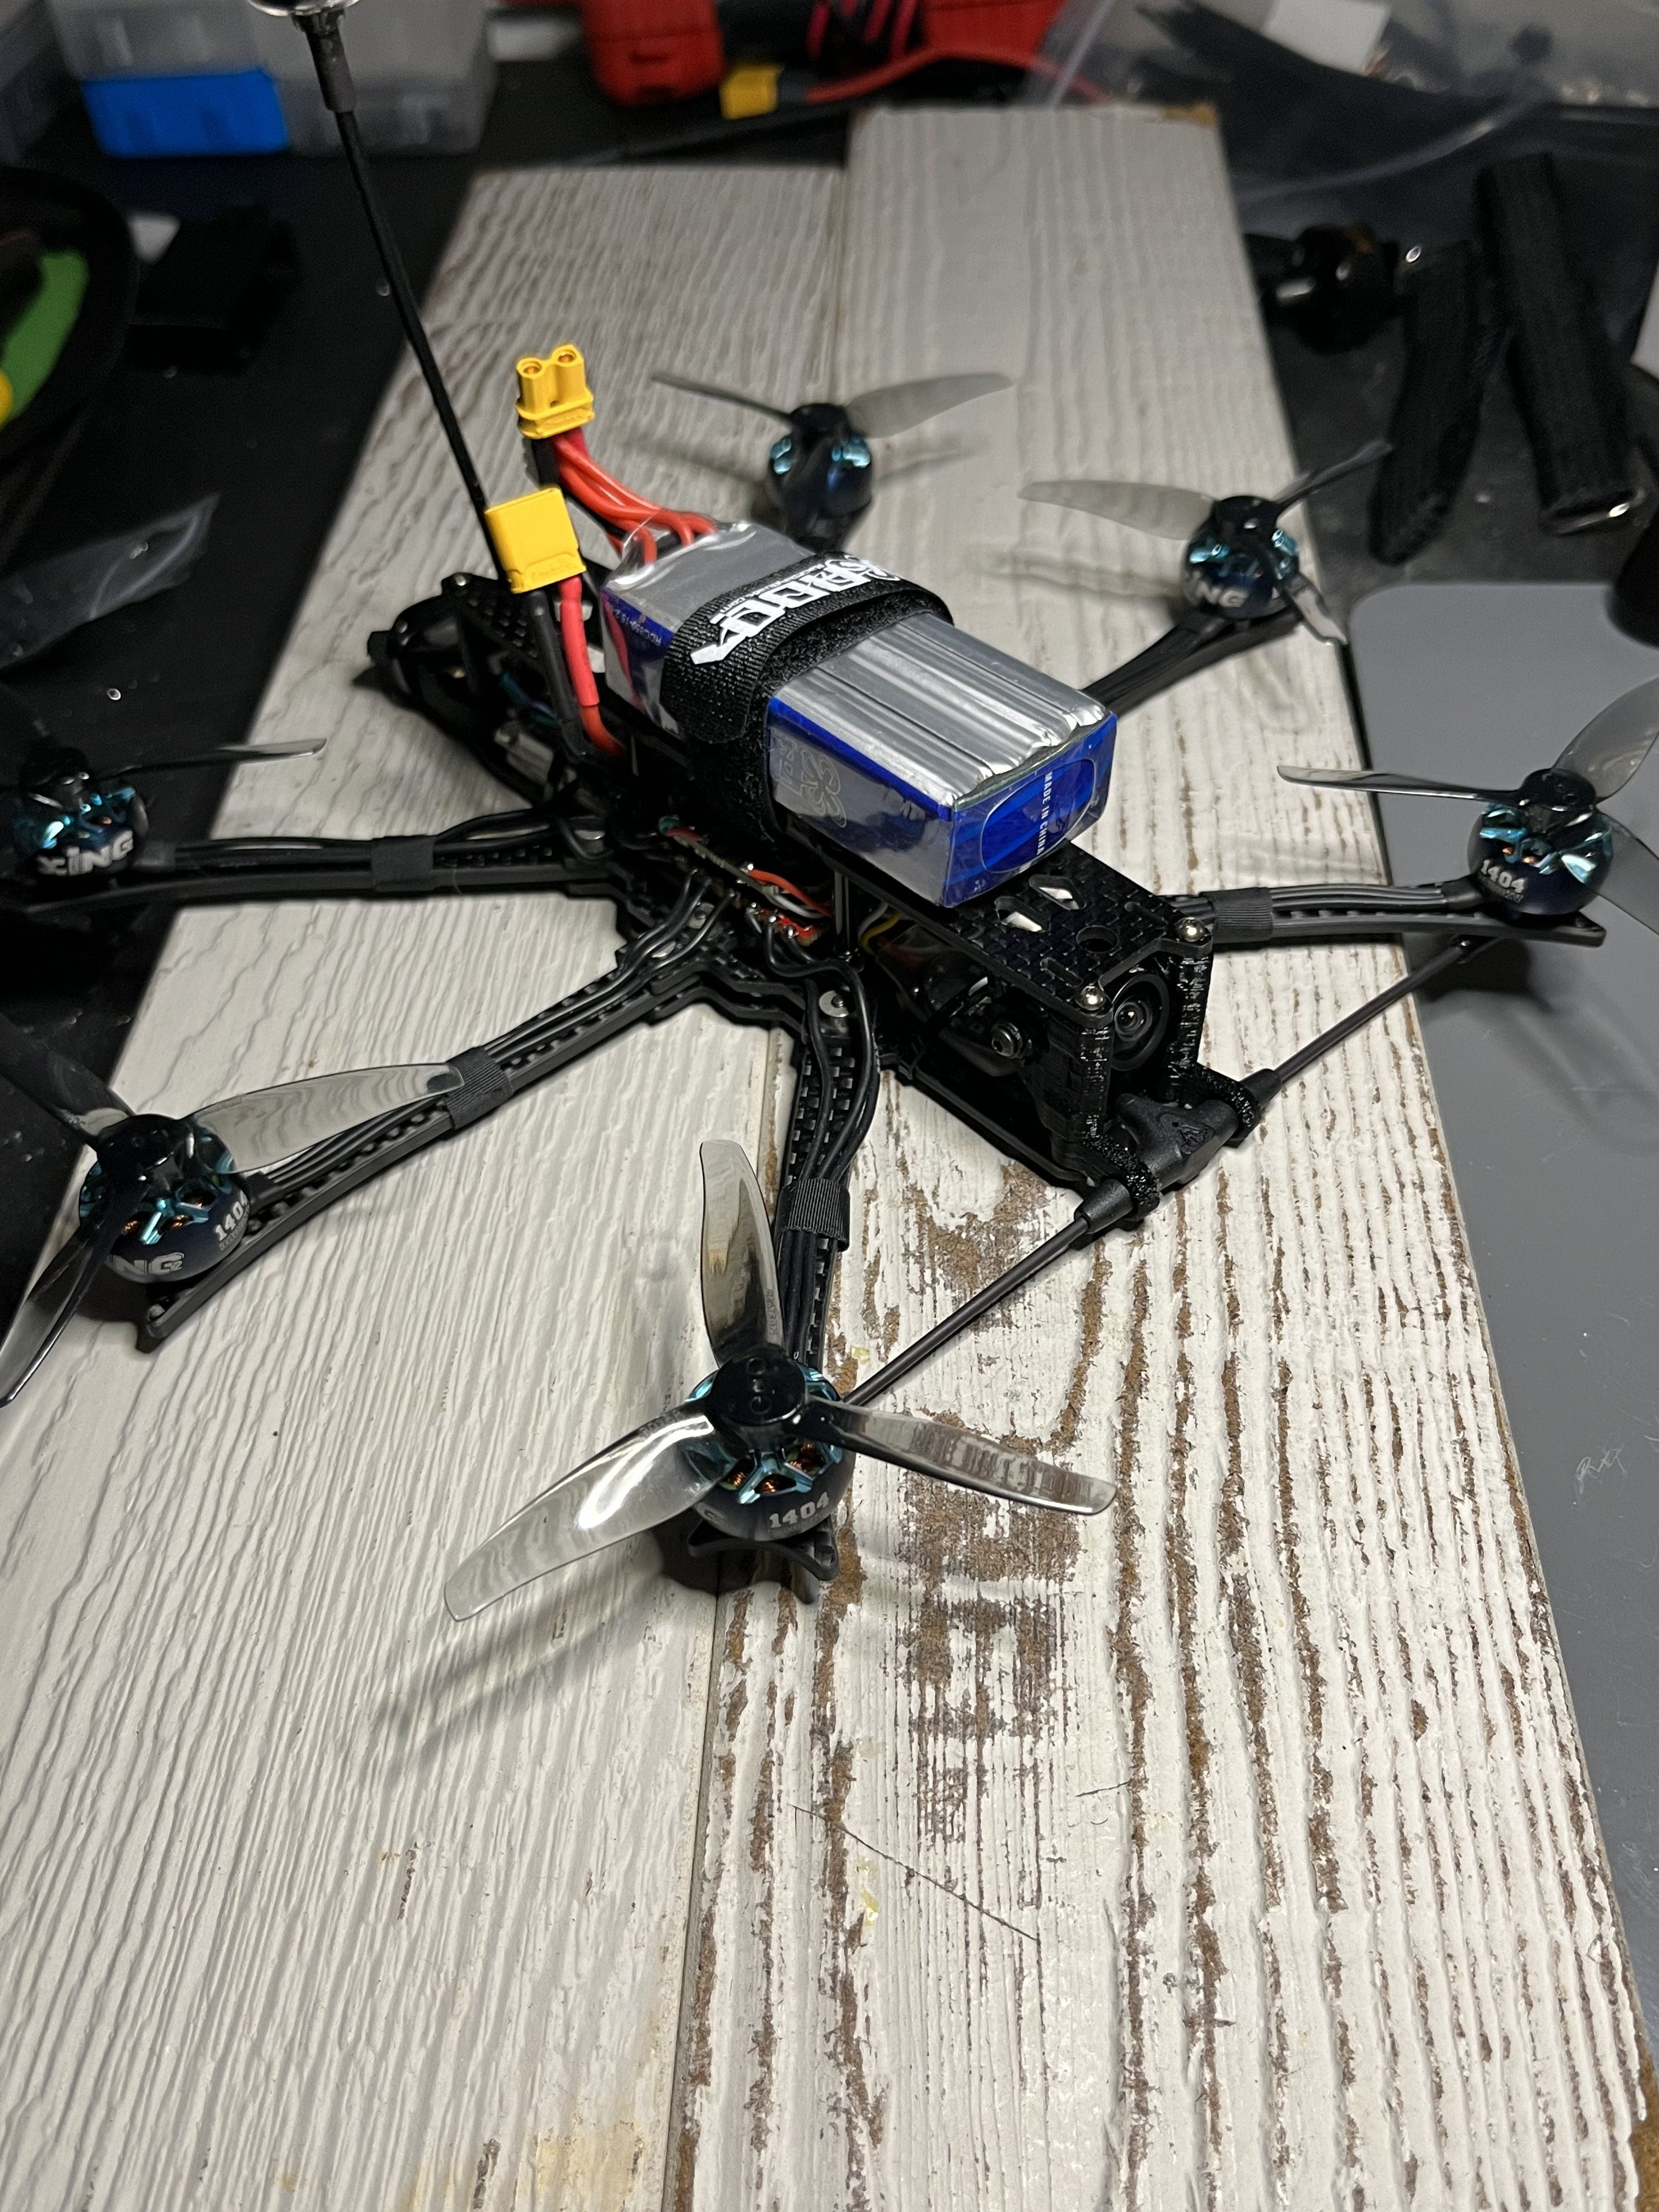
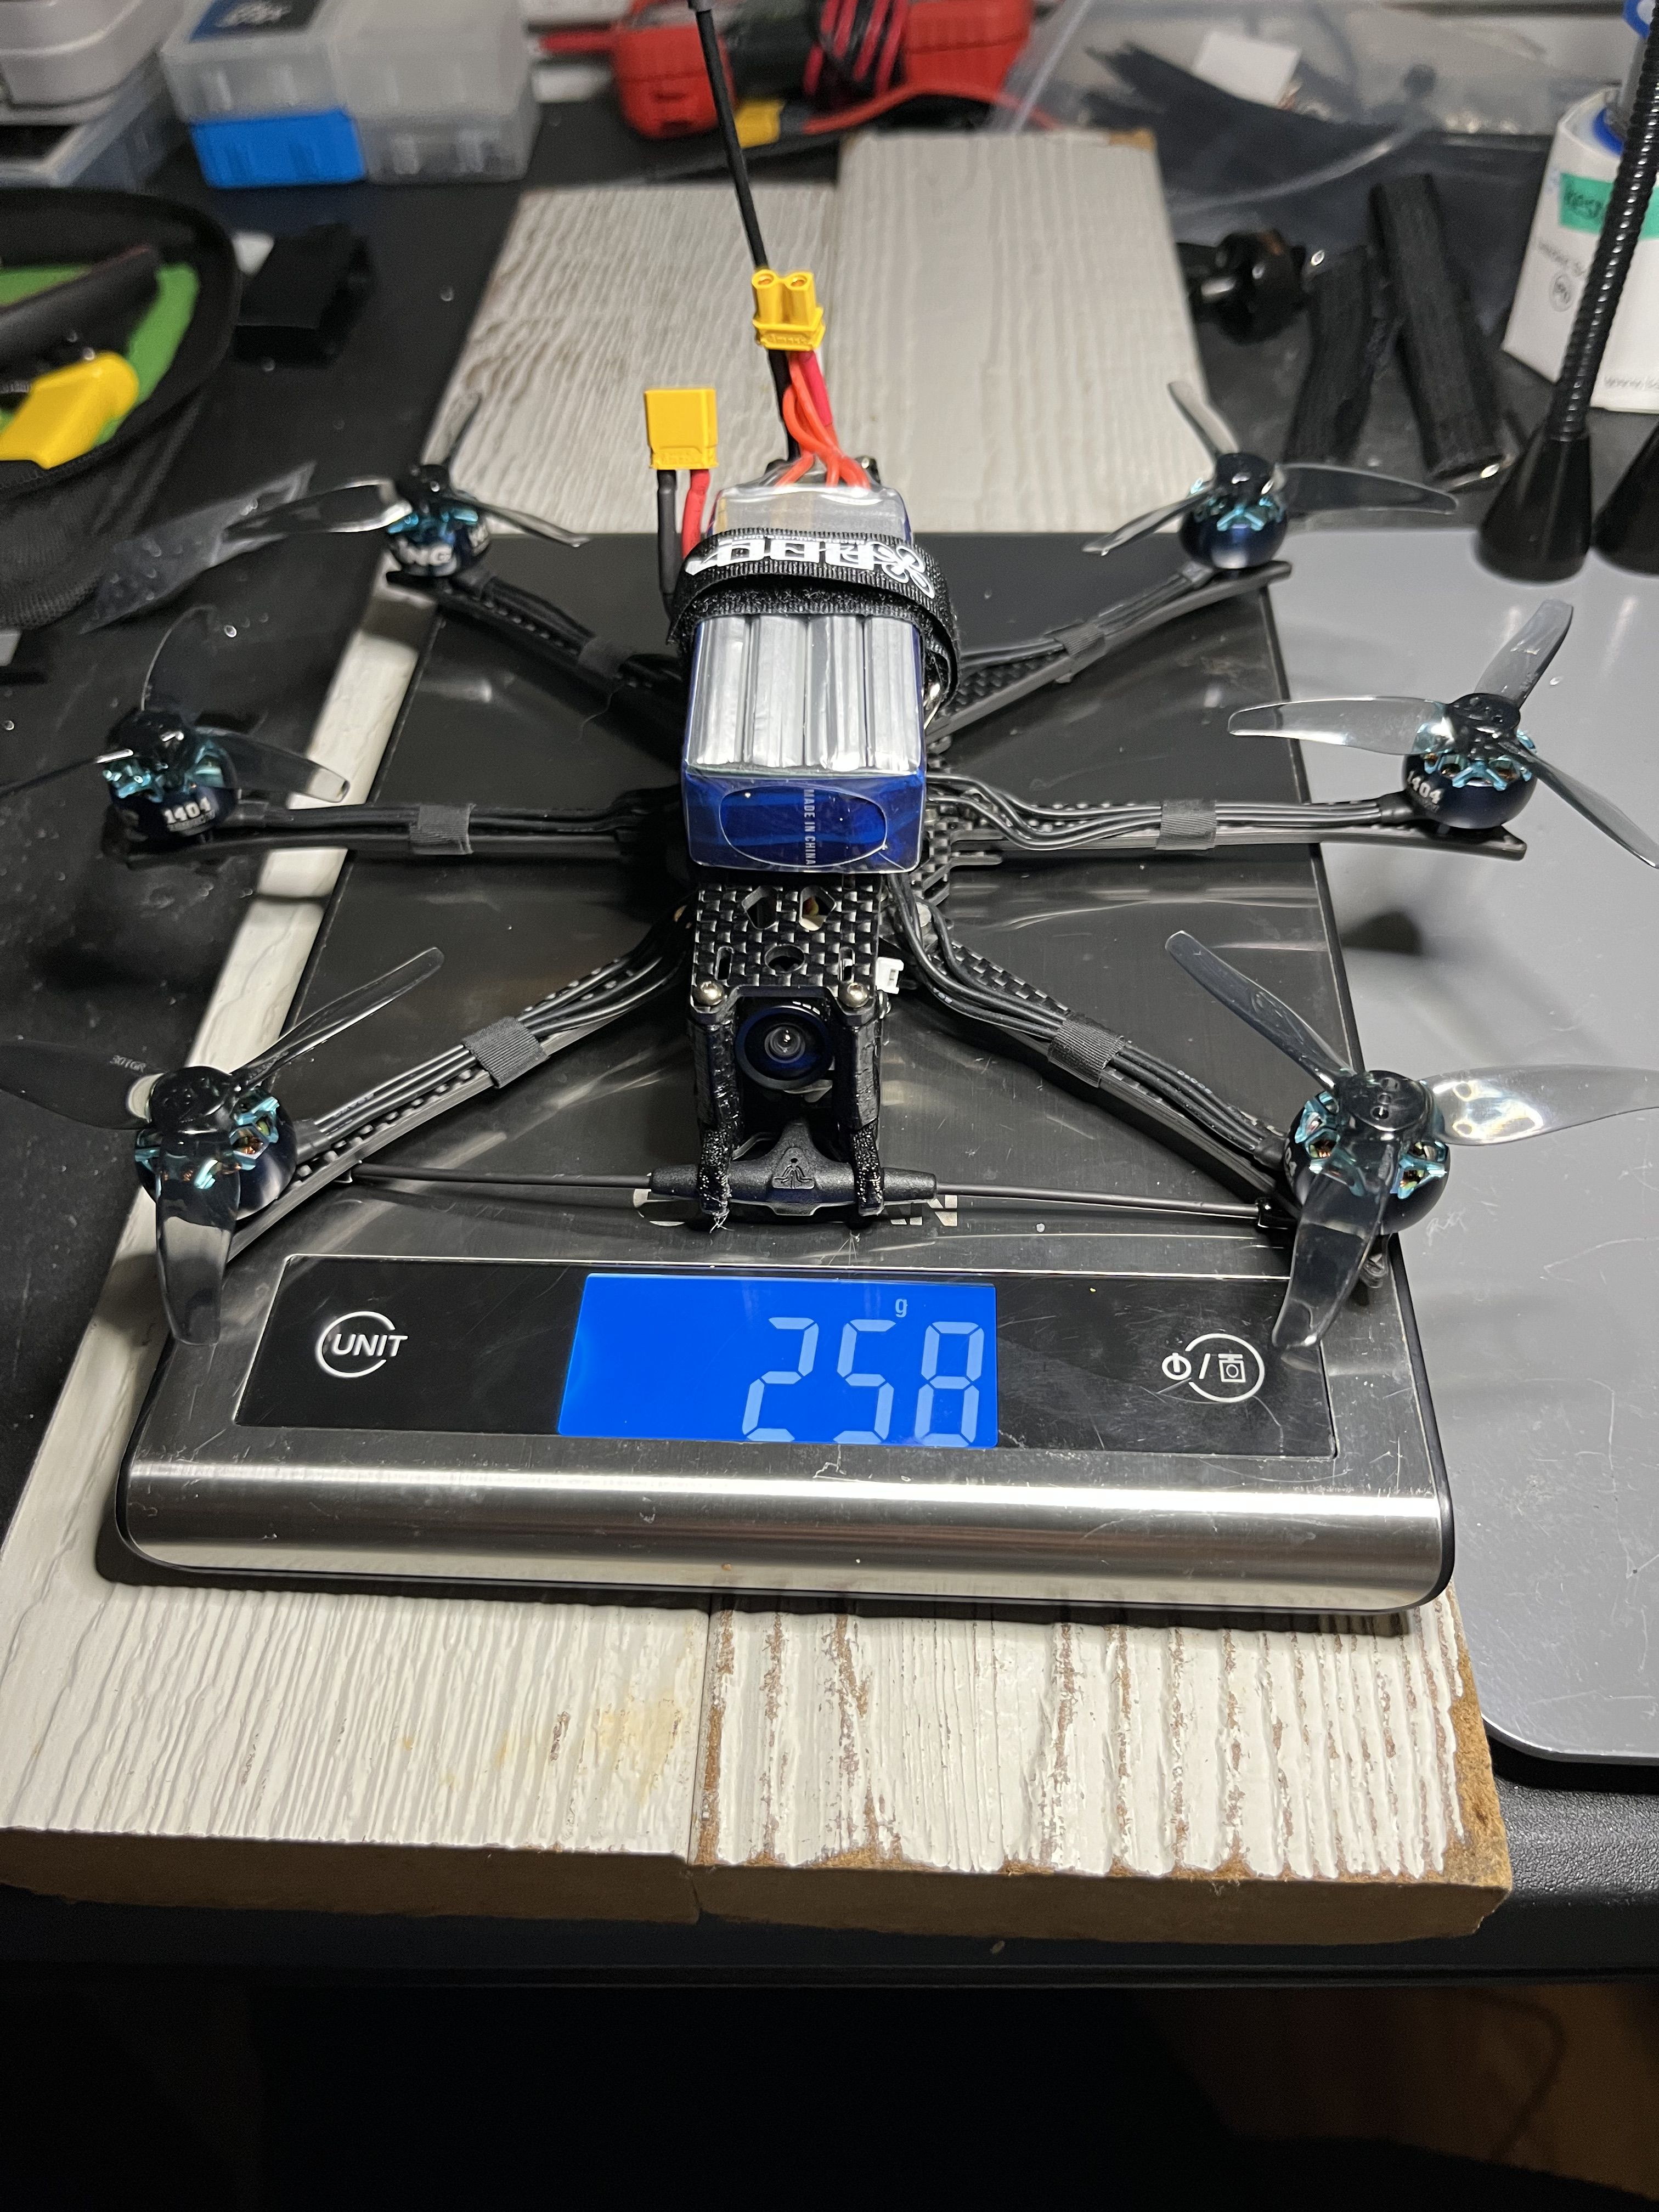
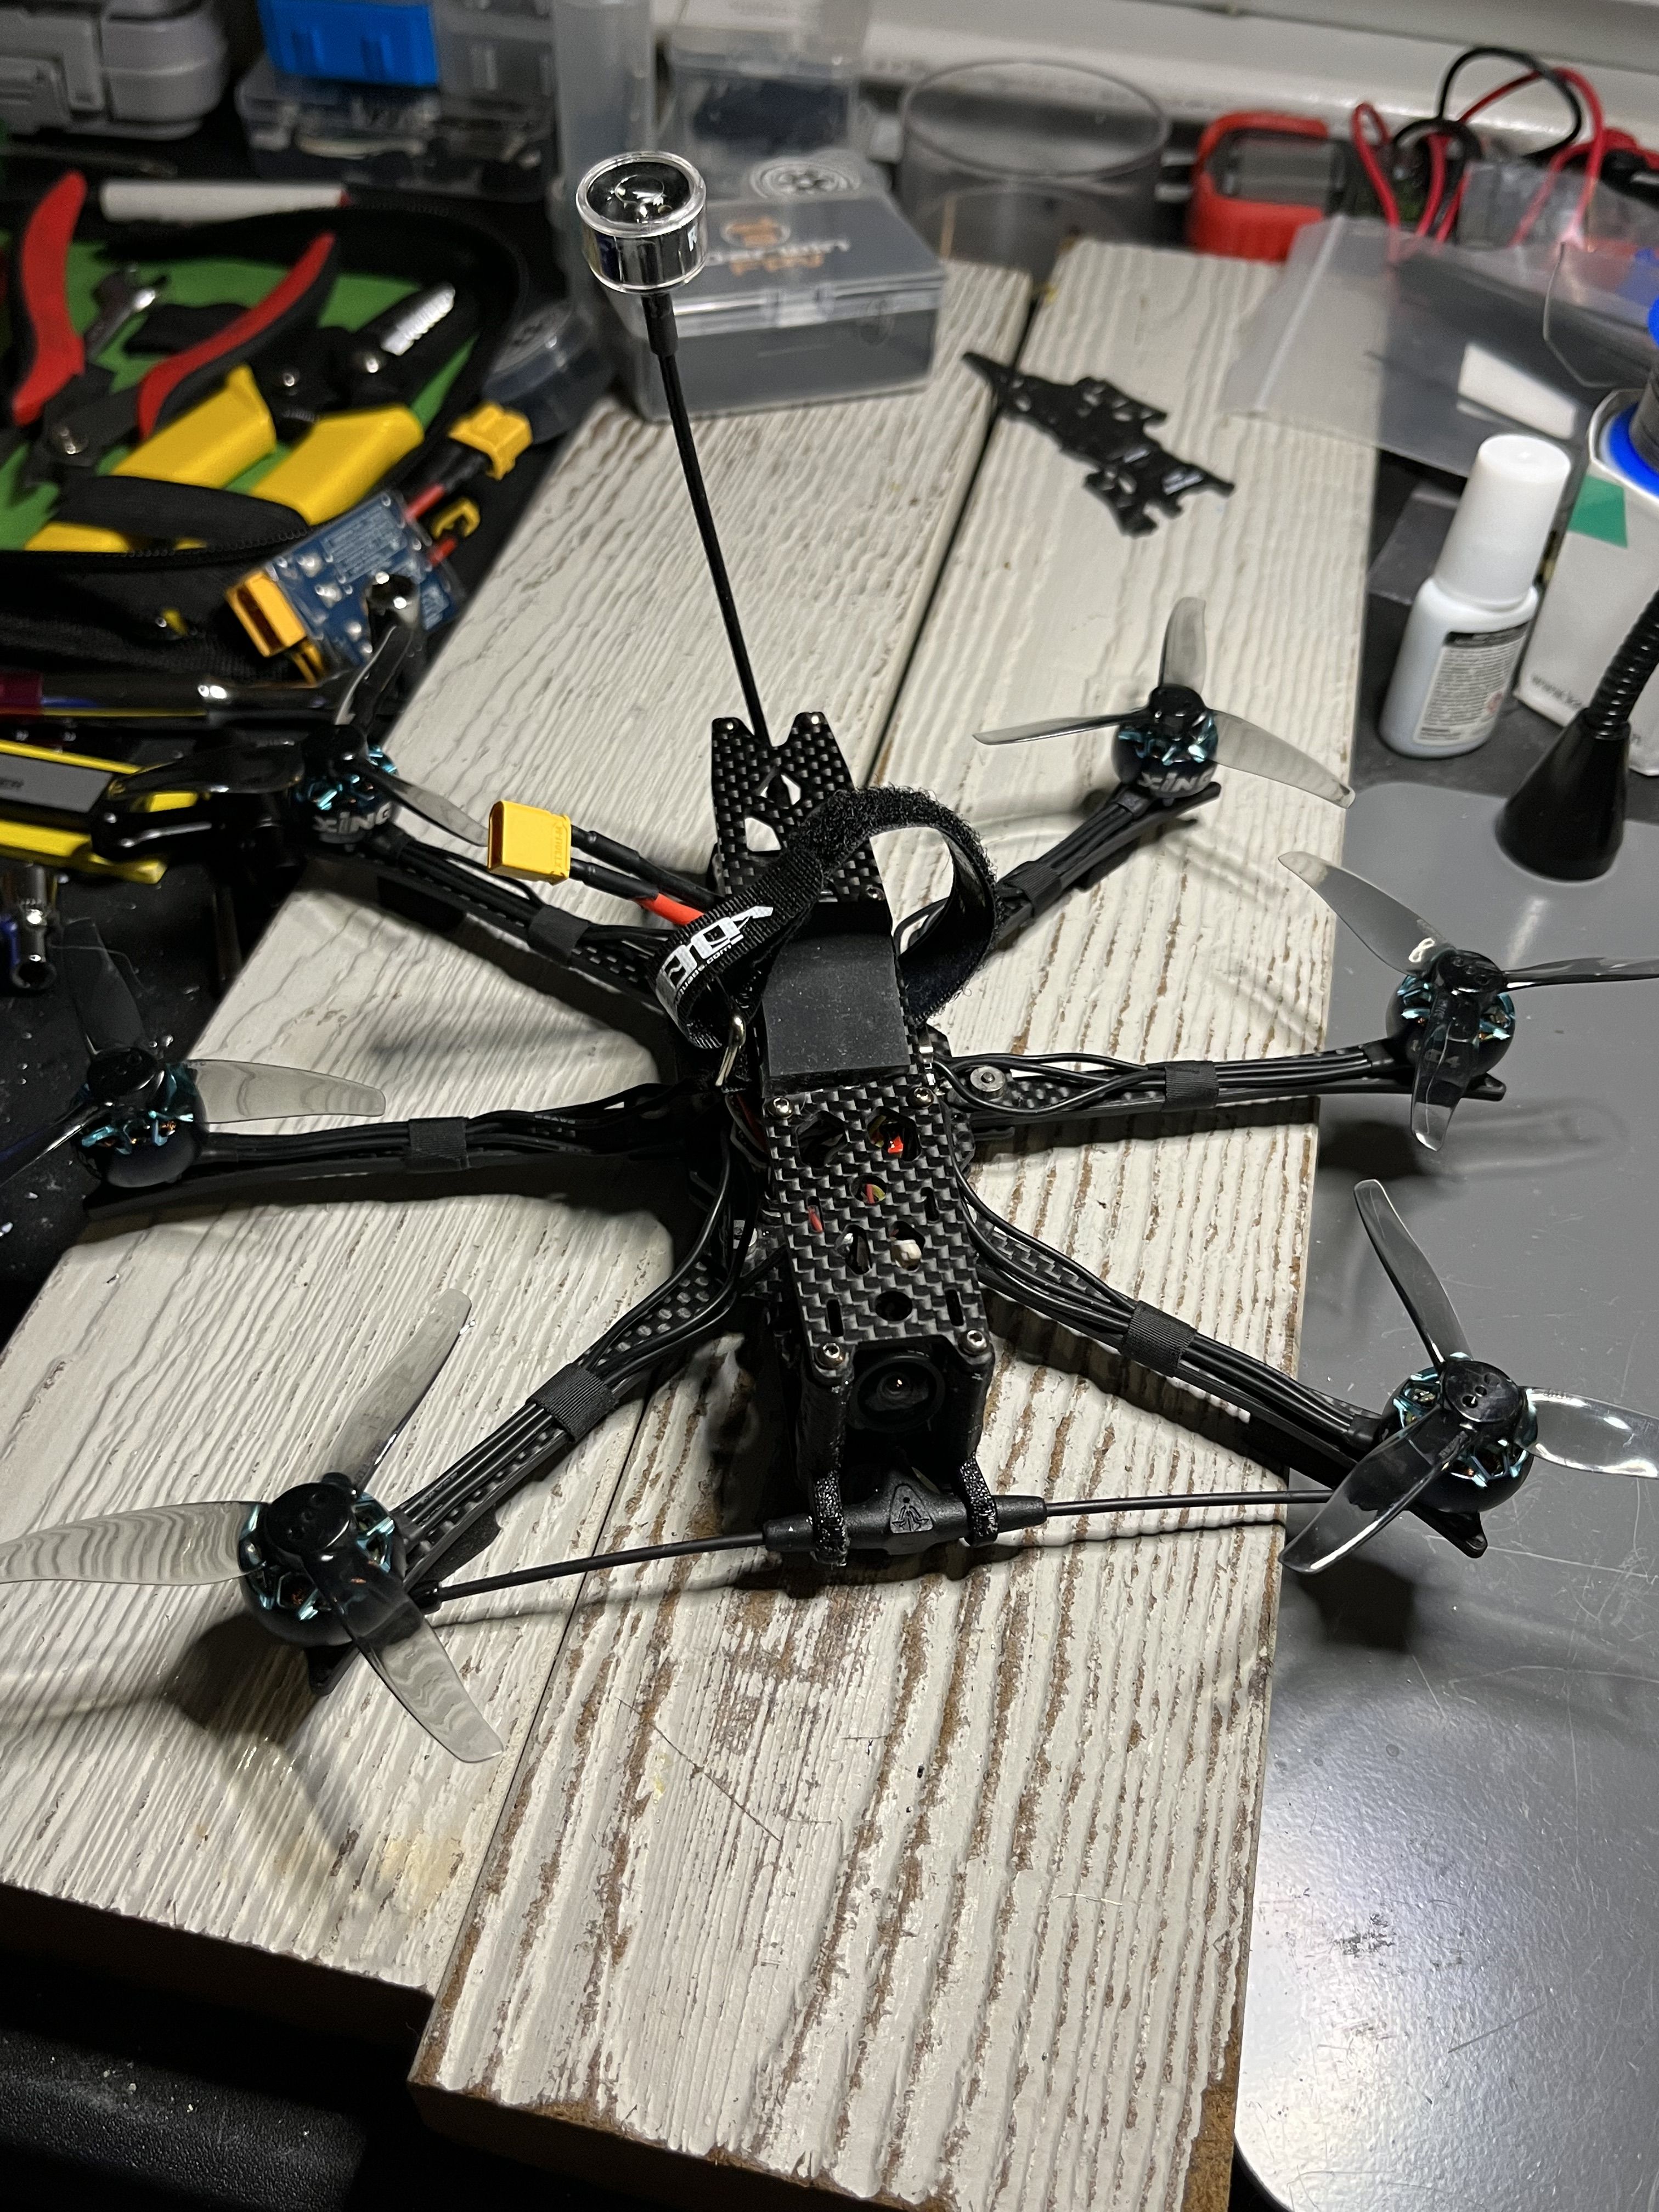
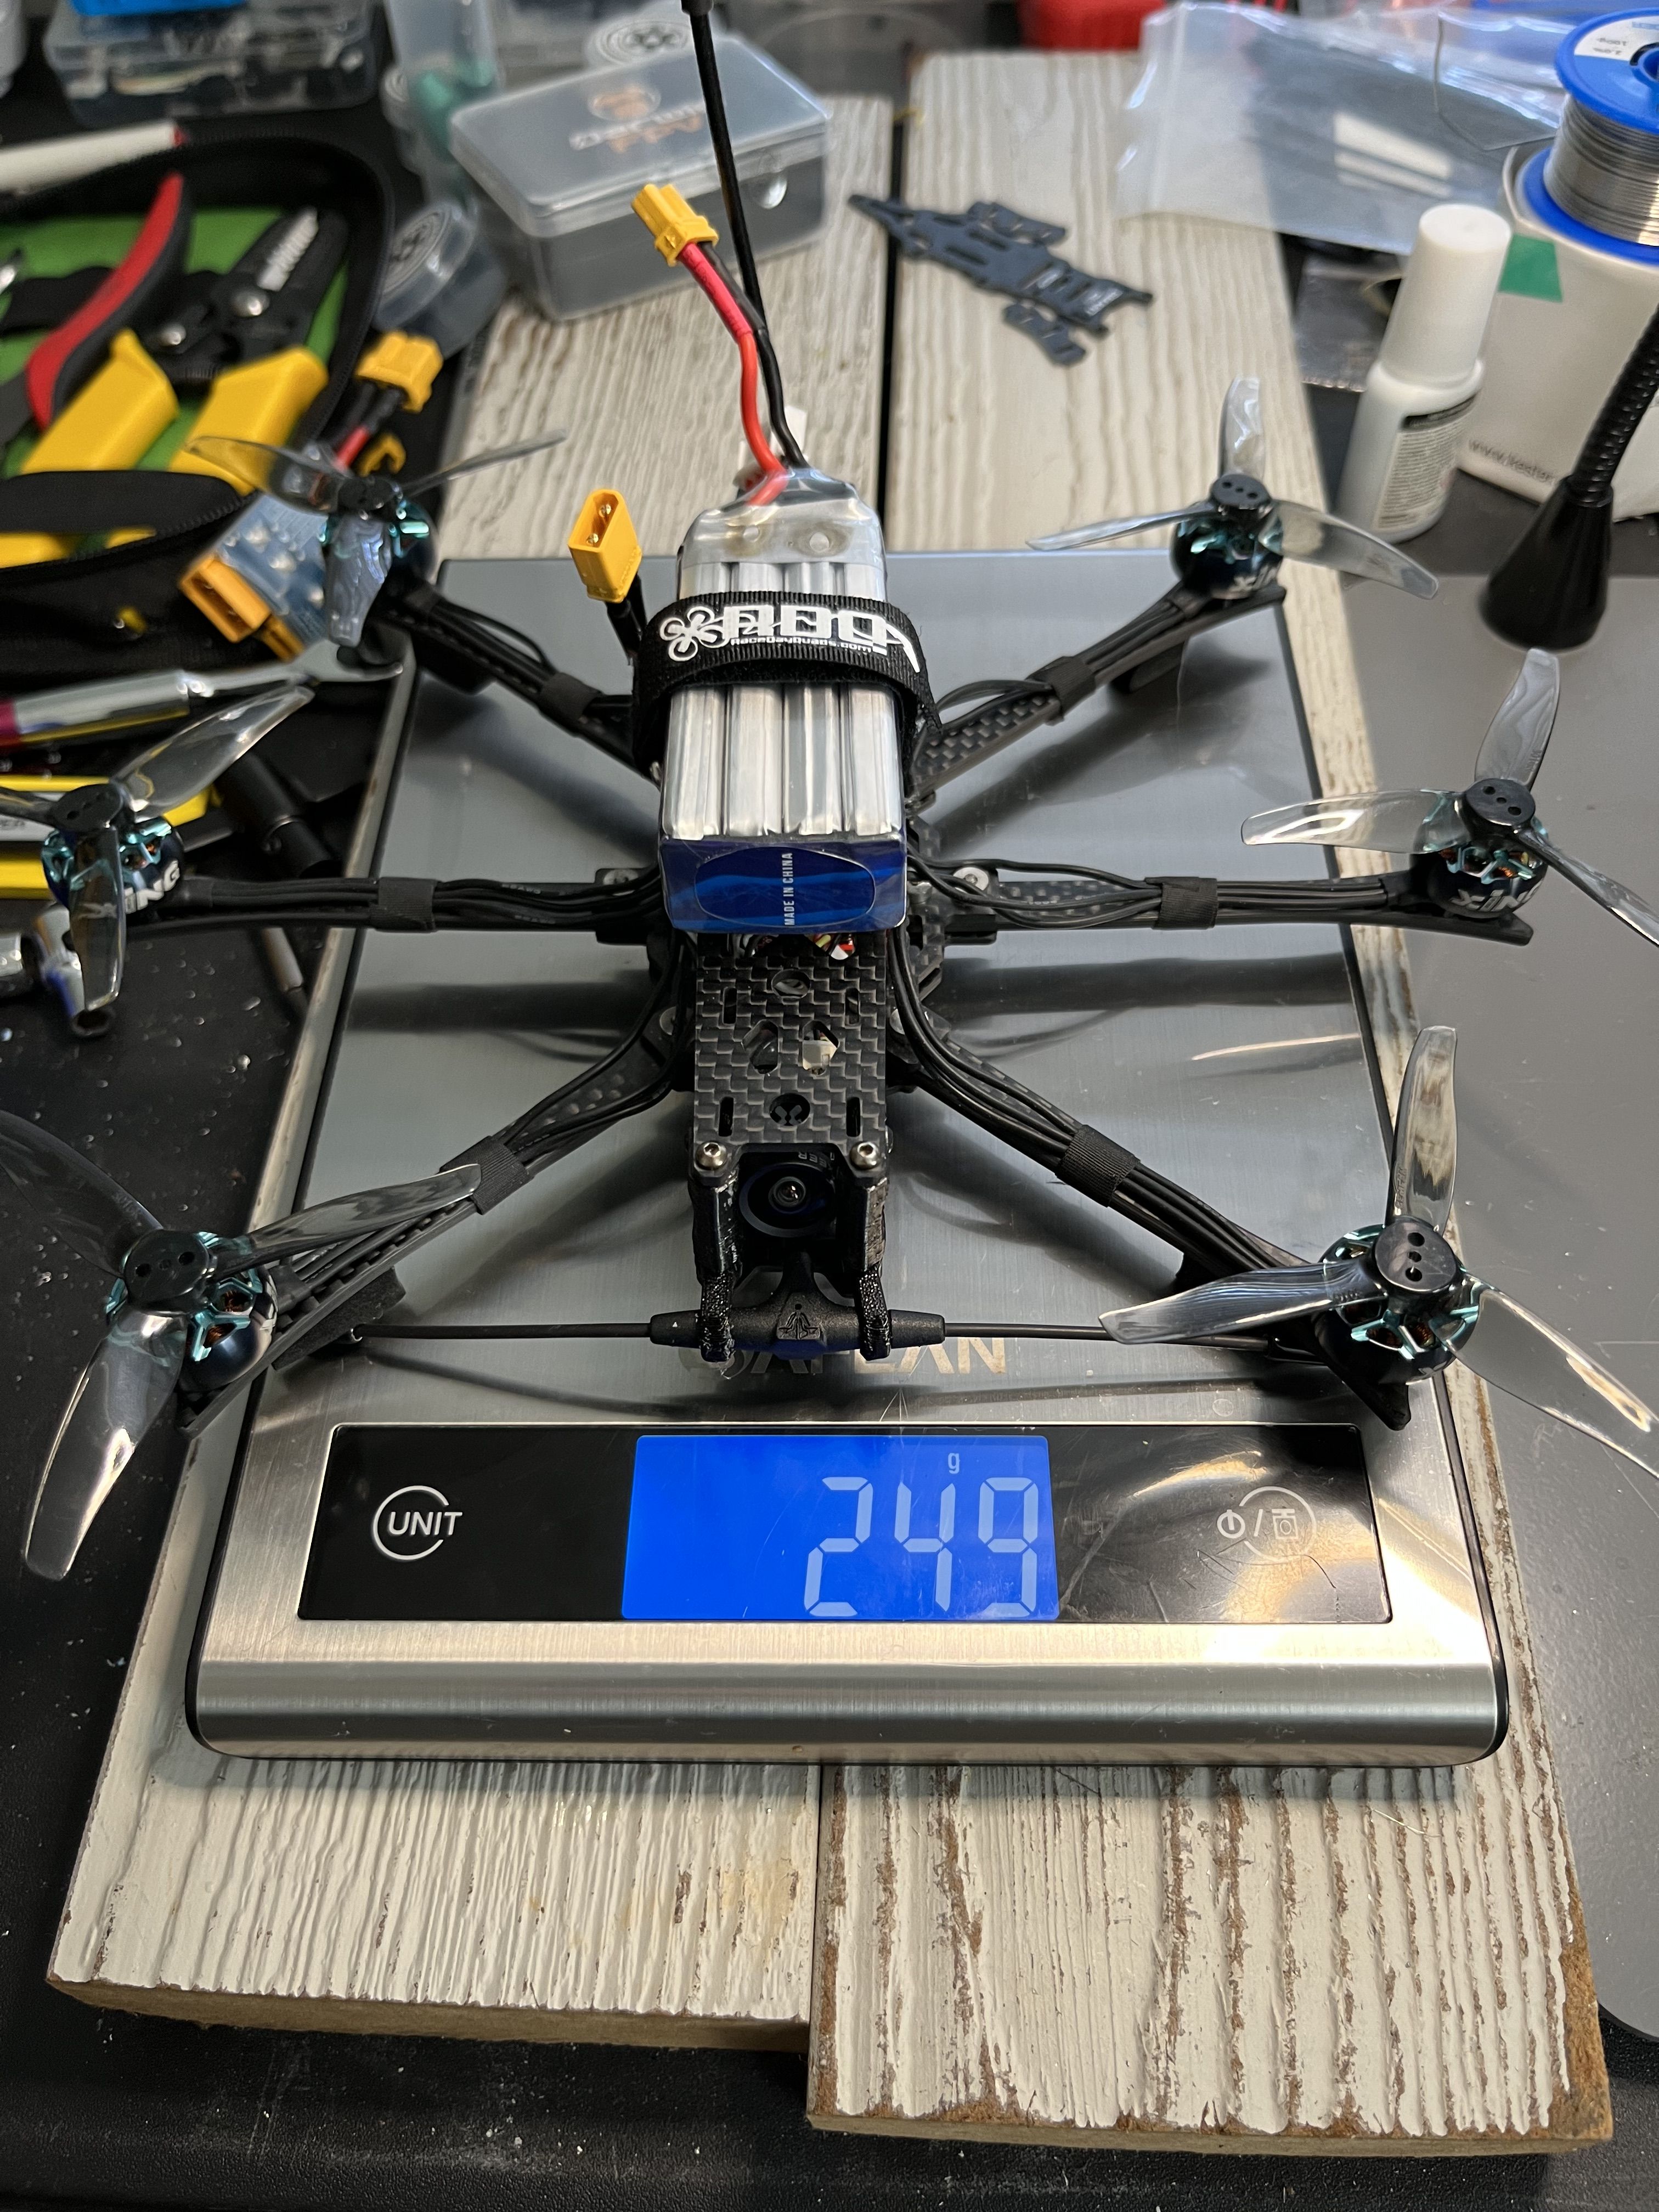
The frame is made by AtomRC, which is Skyzone. It is sized for six 3" propellers with a 210mm wheelbase. I just really like the way the frame looks and that's my only reason for wanting to build one so bad. I was going to just use the parts listed on the bind and fly to build my own, but the flight controller was an F4 and I wanted to use an F7, I wanted a barometer on board and I obviously needed 6 motor outputs. I couldn't find The AtomRC 3000kv "photon" motors used by the bind and fly for sale anywhere so I decided to go with some iFlight 1404 3800kv motors. It supports 20x20mm mounted stacks in the center and rear of the frame so finding a flight controller to match my criteria was a bit of a challenge but I went with the Flywoo Goku Versatile F745 pro, which can mount on both 20x20 and 30x30 stacks, has a barometer, 8 motor outputs, and 7 UARTS! The ESC is a 6-in-1 ESC made by Skyzone, which I'm a little concerned about the reliability of. It states it's rated for 15A, which I don't know if is enough for six 3800kv motors so I guess I'll have to find out. Crossfire nano rx because I use the Tango 2, Foxeer predator 5 because it's a great nano camera, RDQ Mach 3 VTX because 1 watt and mmcx, and a GPS for potential long range flights, but I know I'll need different batteries for that. I'm still not sure exactly what size battery I should use, I have some 850mah 4s LiHv from RDQ but they may be too small. I also want to try some 4s Li-ion batteries.
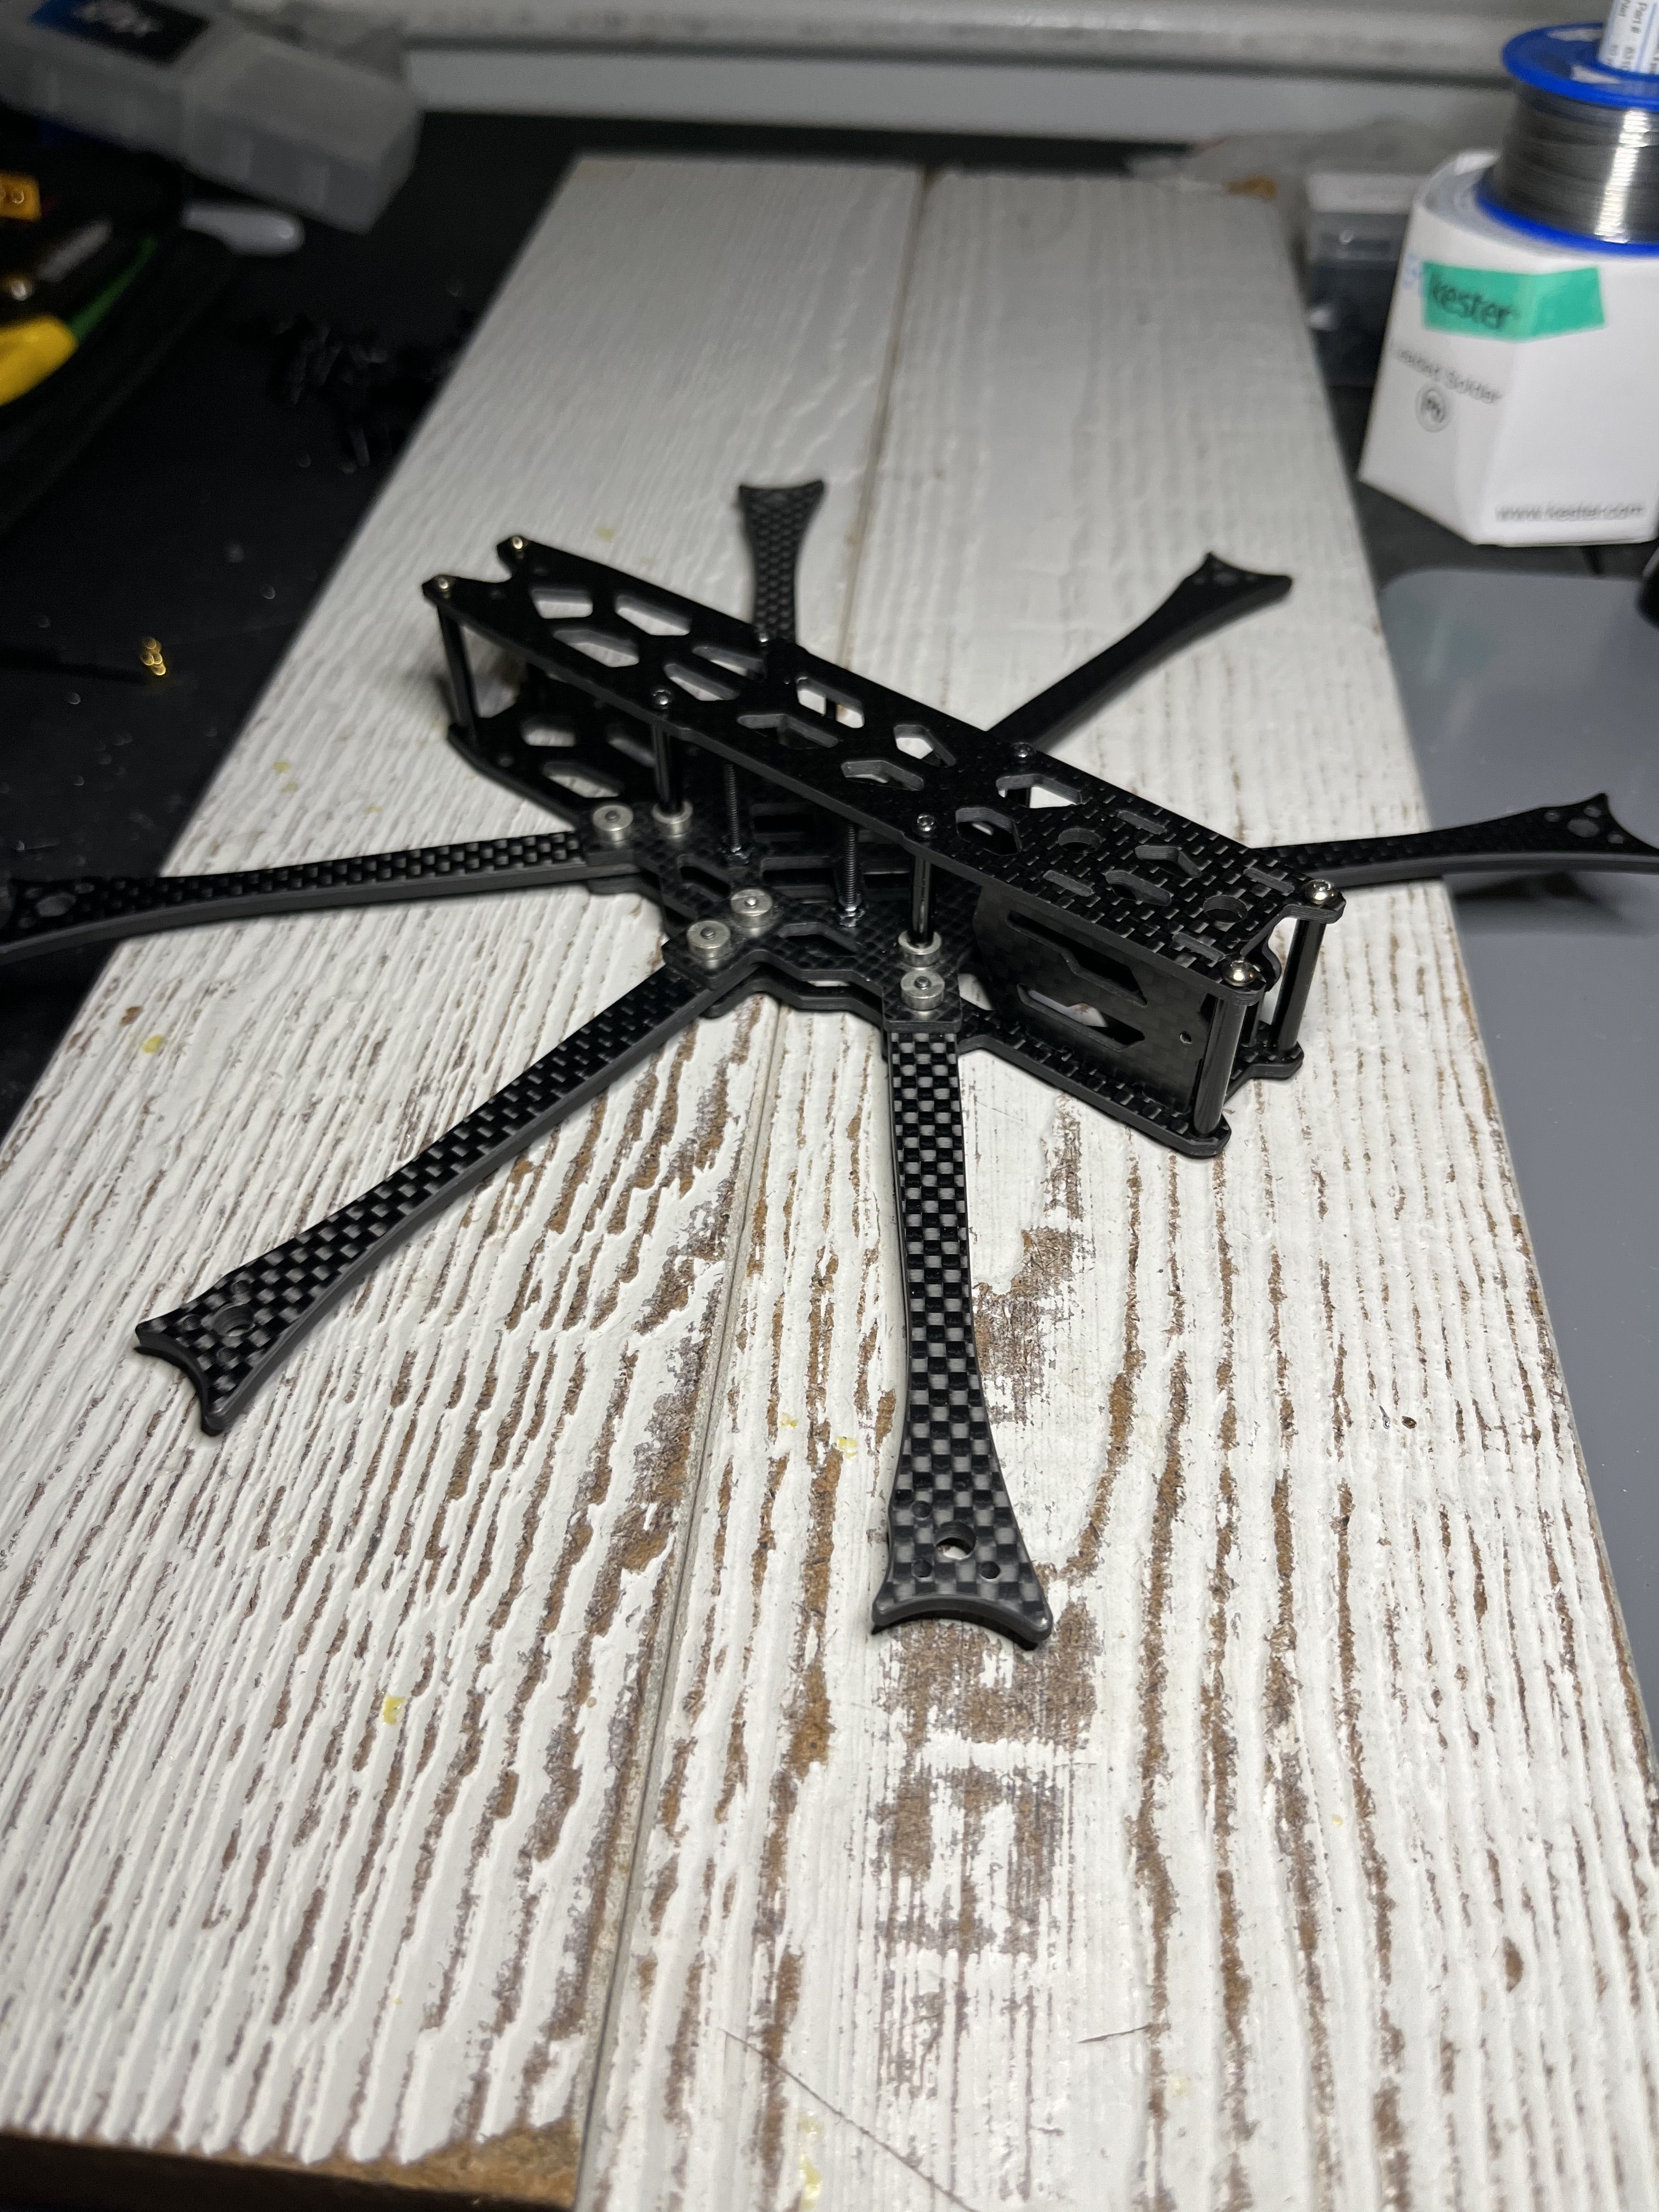
When I received the frame, it was super dirty as if it hadn't been cleaned after being cut. After handling the plates of carbon fiber my hands were covered in CF dust. Once I cleaned the frame it seemed pretty well cut, smooth on the edges but really tight tolerances, especially for the camera plates which I had to file the slots of to make the plates fit, they still barely fit. Speaking of camera mounts, the frame was supposed to come with 3D printed accessories as shown on banggood under the "package included" section, a T-antenna mount, a GPS mount, a camera mount and a battery pad, all of which were not included with the frame. I told banggood and they couldn't do anything about it, I assume they didn't even have the parts that were listed. So I emailed John from Skyzone asking if he'd send me the STL files and maybe some way to get the battery pad too. Daniel from Skyzone sent me the STL files but I don't guess I can get the battery pad anywhere. No problem my flight controller came with a gift from Flywoo, a sticky battery pad. I don't have a 3D printer so I sent the STL files to RDQ 3D printing service and $16 and several days later I got those parts in the mail.
The VTX was not my first choice. I wanted to use the AKK FX3 Ultimate DVR VTX because I'm not sure if I'm going to mount an action cam and onboard DVR is better than the DVR from my goggles. That VTX mounts with 20x20mm holes but it is much larger around the edges and deeper than I thought it was, and it has M3 holes while the frame uses M2 hardware. Too bad but that's life. I may figure out an action camera solution, I may just use the Sky 04x DVR.
When it comes to the actual build, mounting the motors was an interesting experience. after mounting them to the arms, I realized that five of my six motors were not spinning freely. I consulted the internet and someone on reddit said the shaft hole could be too small for the c-clip on the motors and they were right. I had to file the center arm holes out about 1-2 millimeters to get the c-clip to fit into the hole and be able to spin freely. Super weird that one of the motors was spinning fine but the other five arms needed to be filed for the motors to spin at all.
There is a plug on the 6-in-1 ESC side that has 9 pins for voltage, ground, m1-6 and current and I didn't use the plug. I soldered all of them to the ESC and I soldered the other end to the underside of the flight controller because I didn't want to take a risk of any of the pins not working. The plug on the FC side has 7 pins and would have fit, but it had two wires hanging out for the additional motor signals and I just figured why not solder them all securely.
The 3D printed parts from RDQ 3D printing fit perfectly! I'm really glad I got those because the both the immortal-T mount and camera mounts go on the front standoffs and the receiver mounts in the front as well. It would have been incredibly difficult to use the camera plates and have the crossfire nano behind the camera because it was so narrow between the plates. The GPS mount was super convenient, I was the most worried about mounting the GPS if I couldn't get the files from Skyzone but fortunately I was able to. I did have some problems with a few of these mounts though. The VTX antenna mount was too narrow for my original antenna choice, the trueRC singularity mmcx. I couldn't make the mmcx fit through the antenna mount so I went with a longer 90 degree mmcx antenna and ditched the 3D print. The immortal-T mount doesn't get the antenna far enough out to not be touching carbon fiber. I hope this doesn't too negatively affect the coverage of crossfire. Another problem I had was with some of the hardware that came with the frame from banggood. The standoffs the frame comes with are 22mm for the front and back and 15mm for the center standoffs. The front standoffs were too short for both the immortal T mount and the camera mount to fit onto them together. They need to be 25mm to fit both mounts so I needed four 25mm standoffs for the front and back and four 18mm standoffs for the center of the frame. I couldn't find any 18mm standoffs so I used the 15mm ones that came with the frame with a 3mm M2 nylock nut underneath them to raise them to the height of the top plate.
One more interesting experience I had was in betaflight after I flashed the FC to 4.3. I changed the motor mixer to Hex X and it told me "The Hex X model needs 6 motor resources and the current configuration of the firmware provides 4 usable outputs for the selected mode." In addition to that, The ESC did not provide throttle signal beeps when the FC was on 4.3. It was as if it the ESC didn't recognize it was connected to a flight controller. None of this occured before I flashed to 4.3, I received the FC on 4.2.8 and the motor mixer appeared to work fine in the Hex X configuration and everything powered up fine. I emailed Joshua Bardwell to ask what this message means and he believes that it's a bug with the 4.3 firmware target for this board and suggested I report it to Flywoo. I did and they emailed me back telling me to set dshot_bitbang = off in the cli and that appeared to solve the problem.
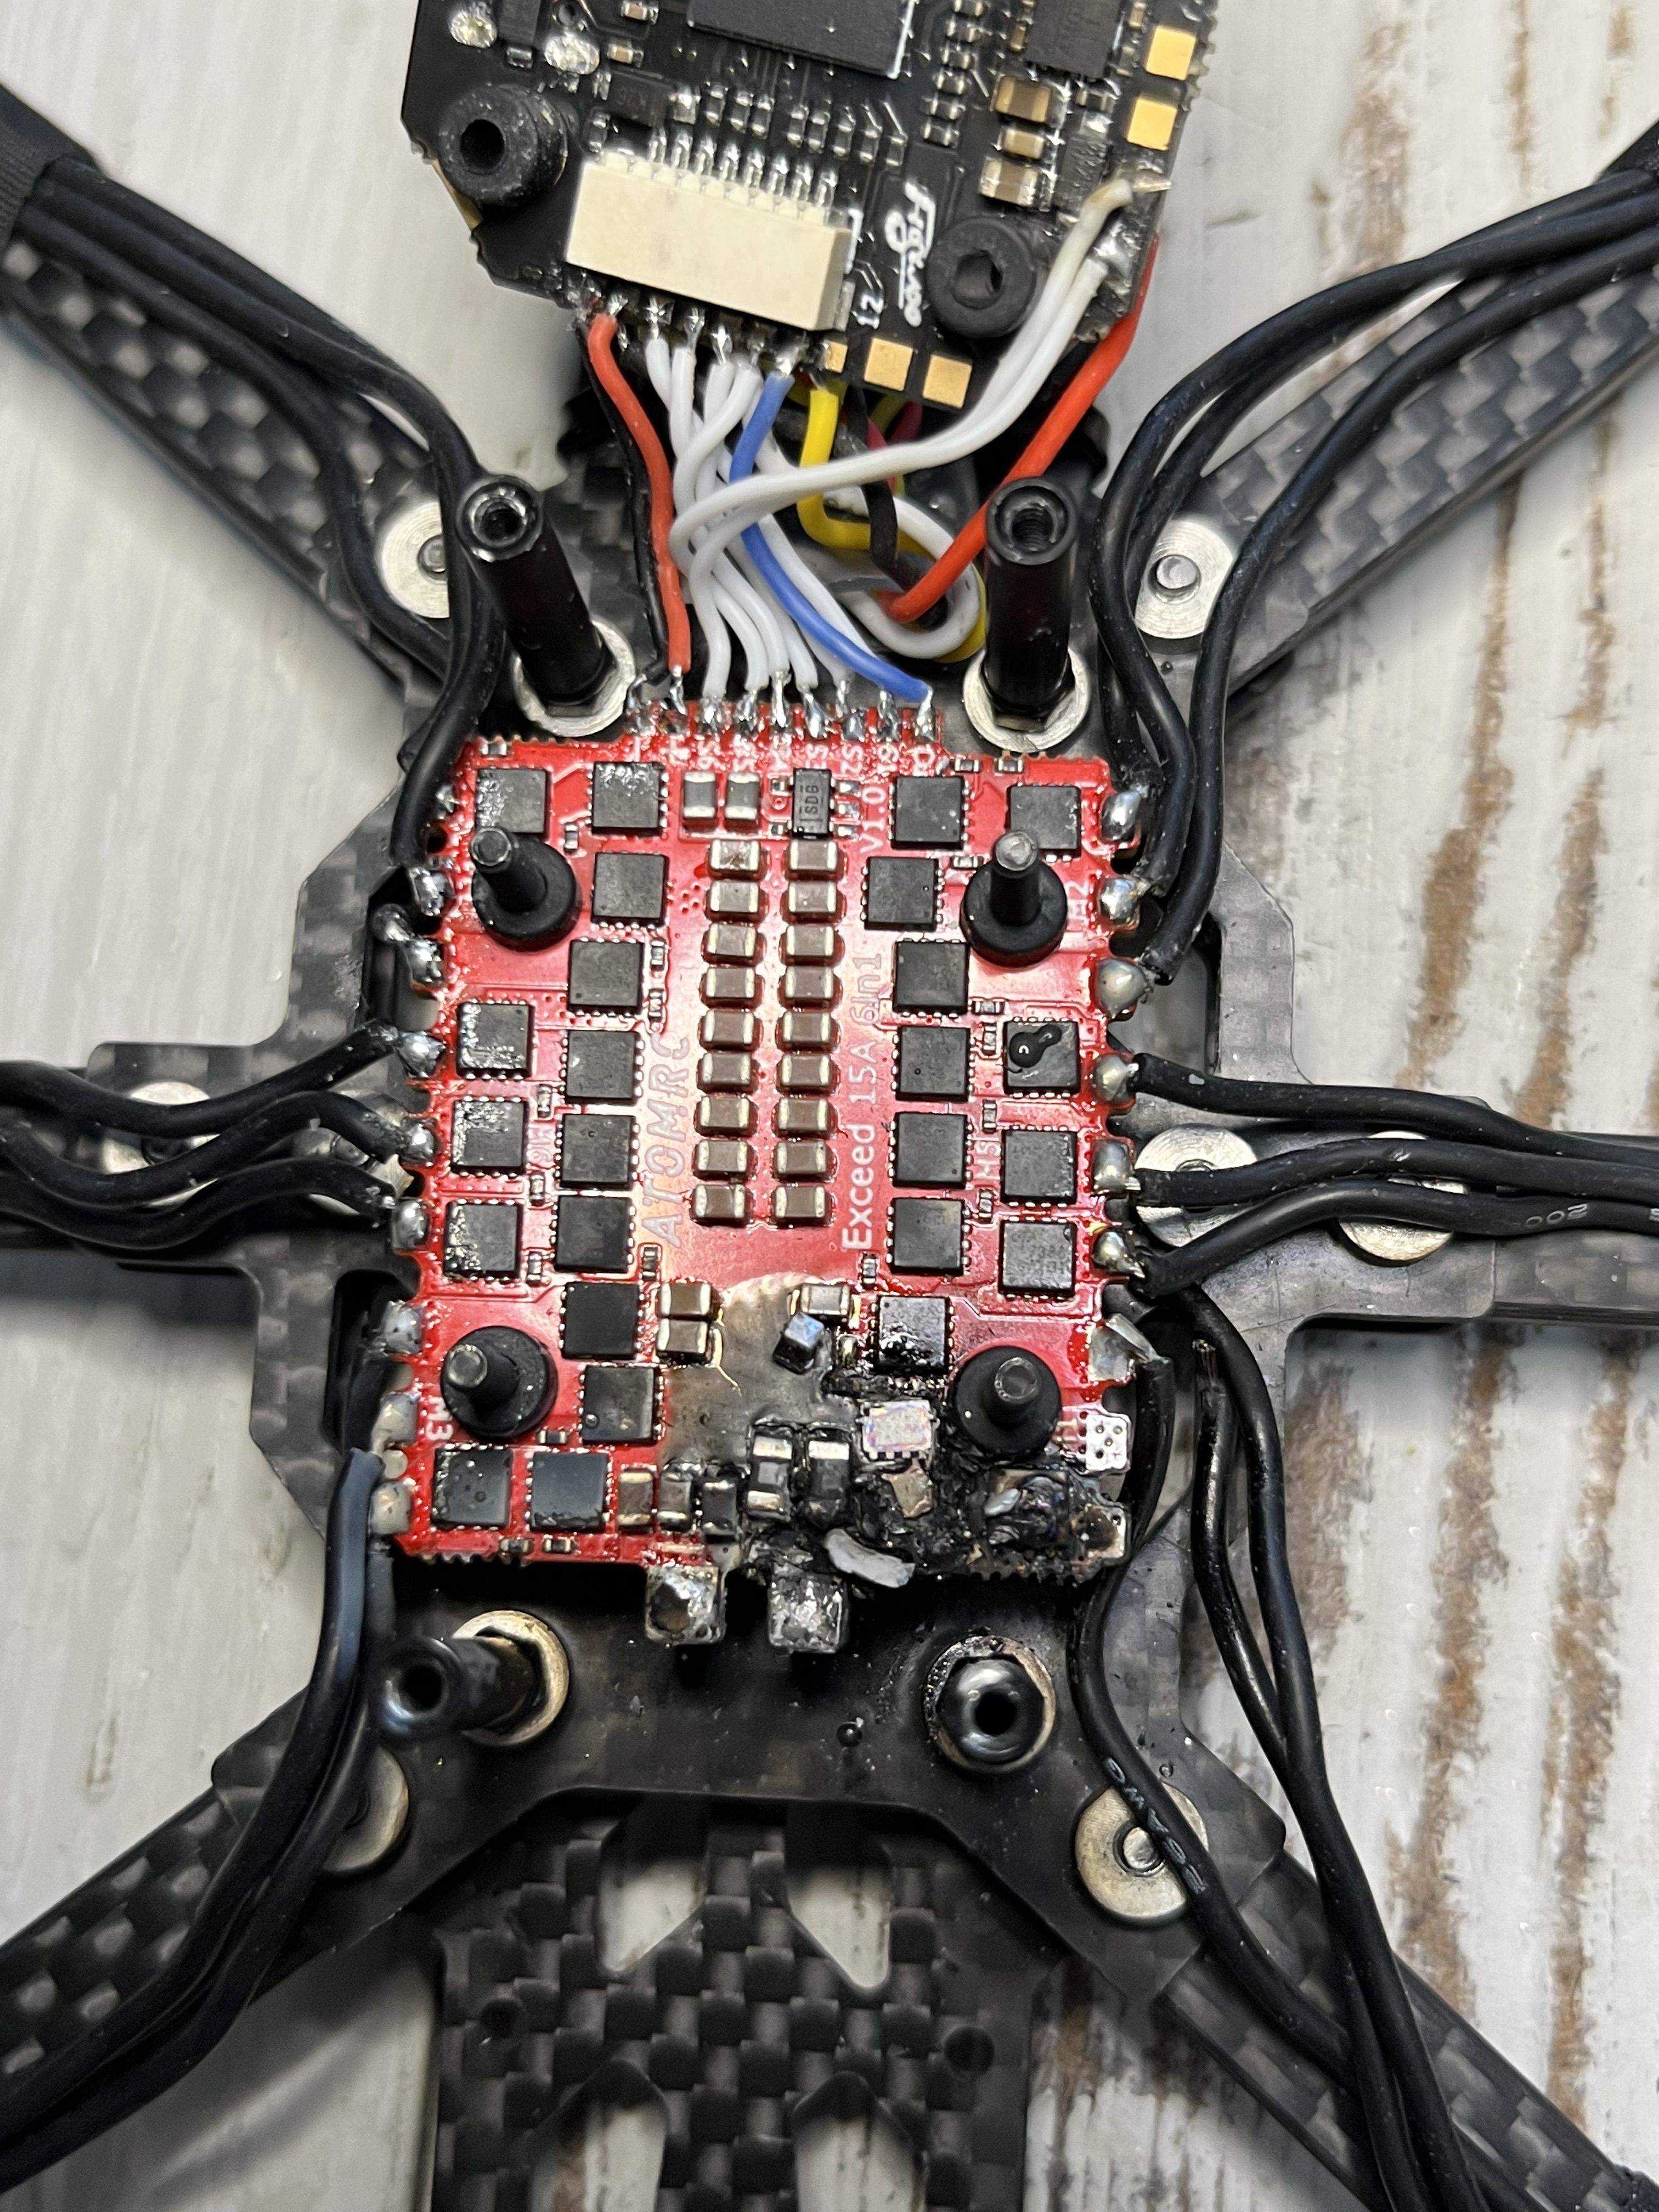
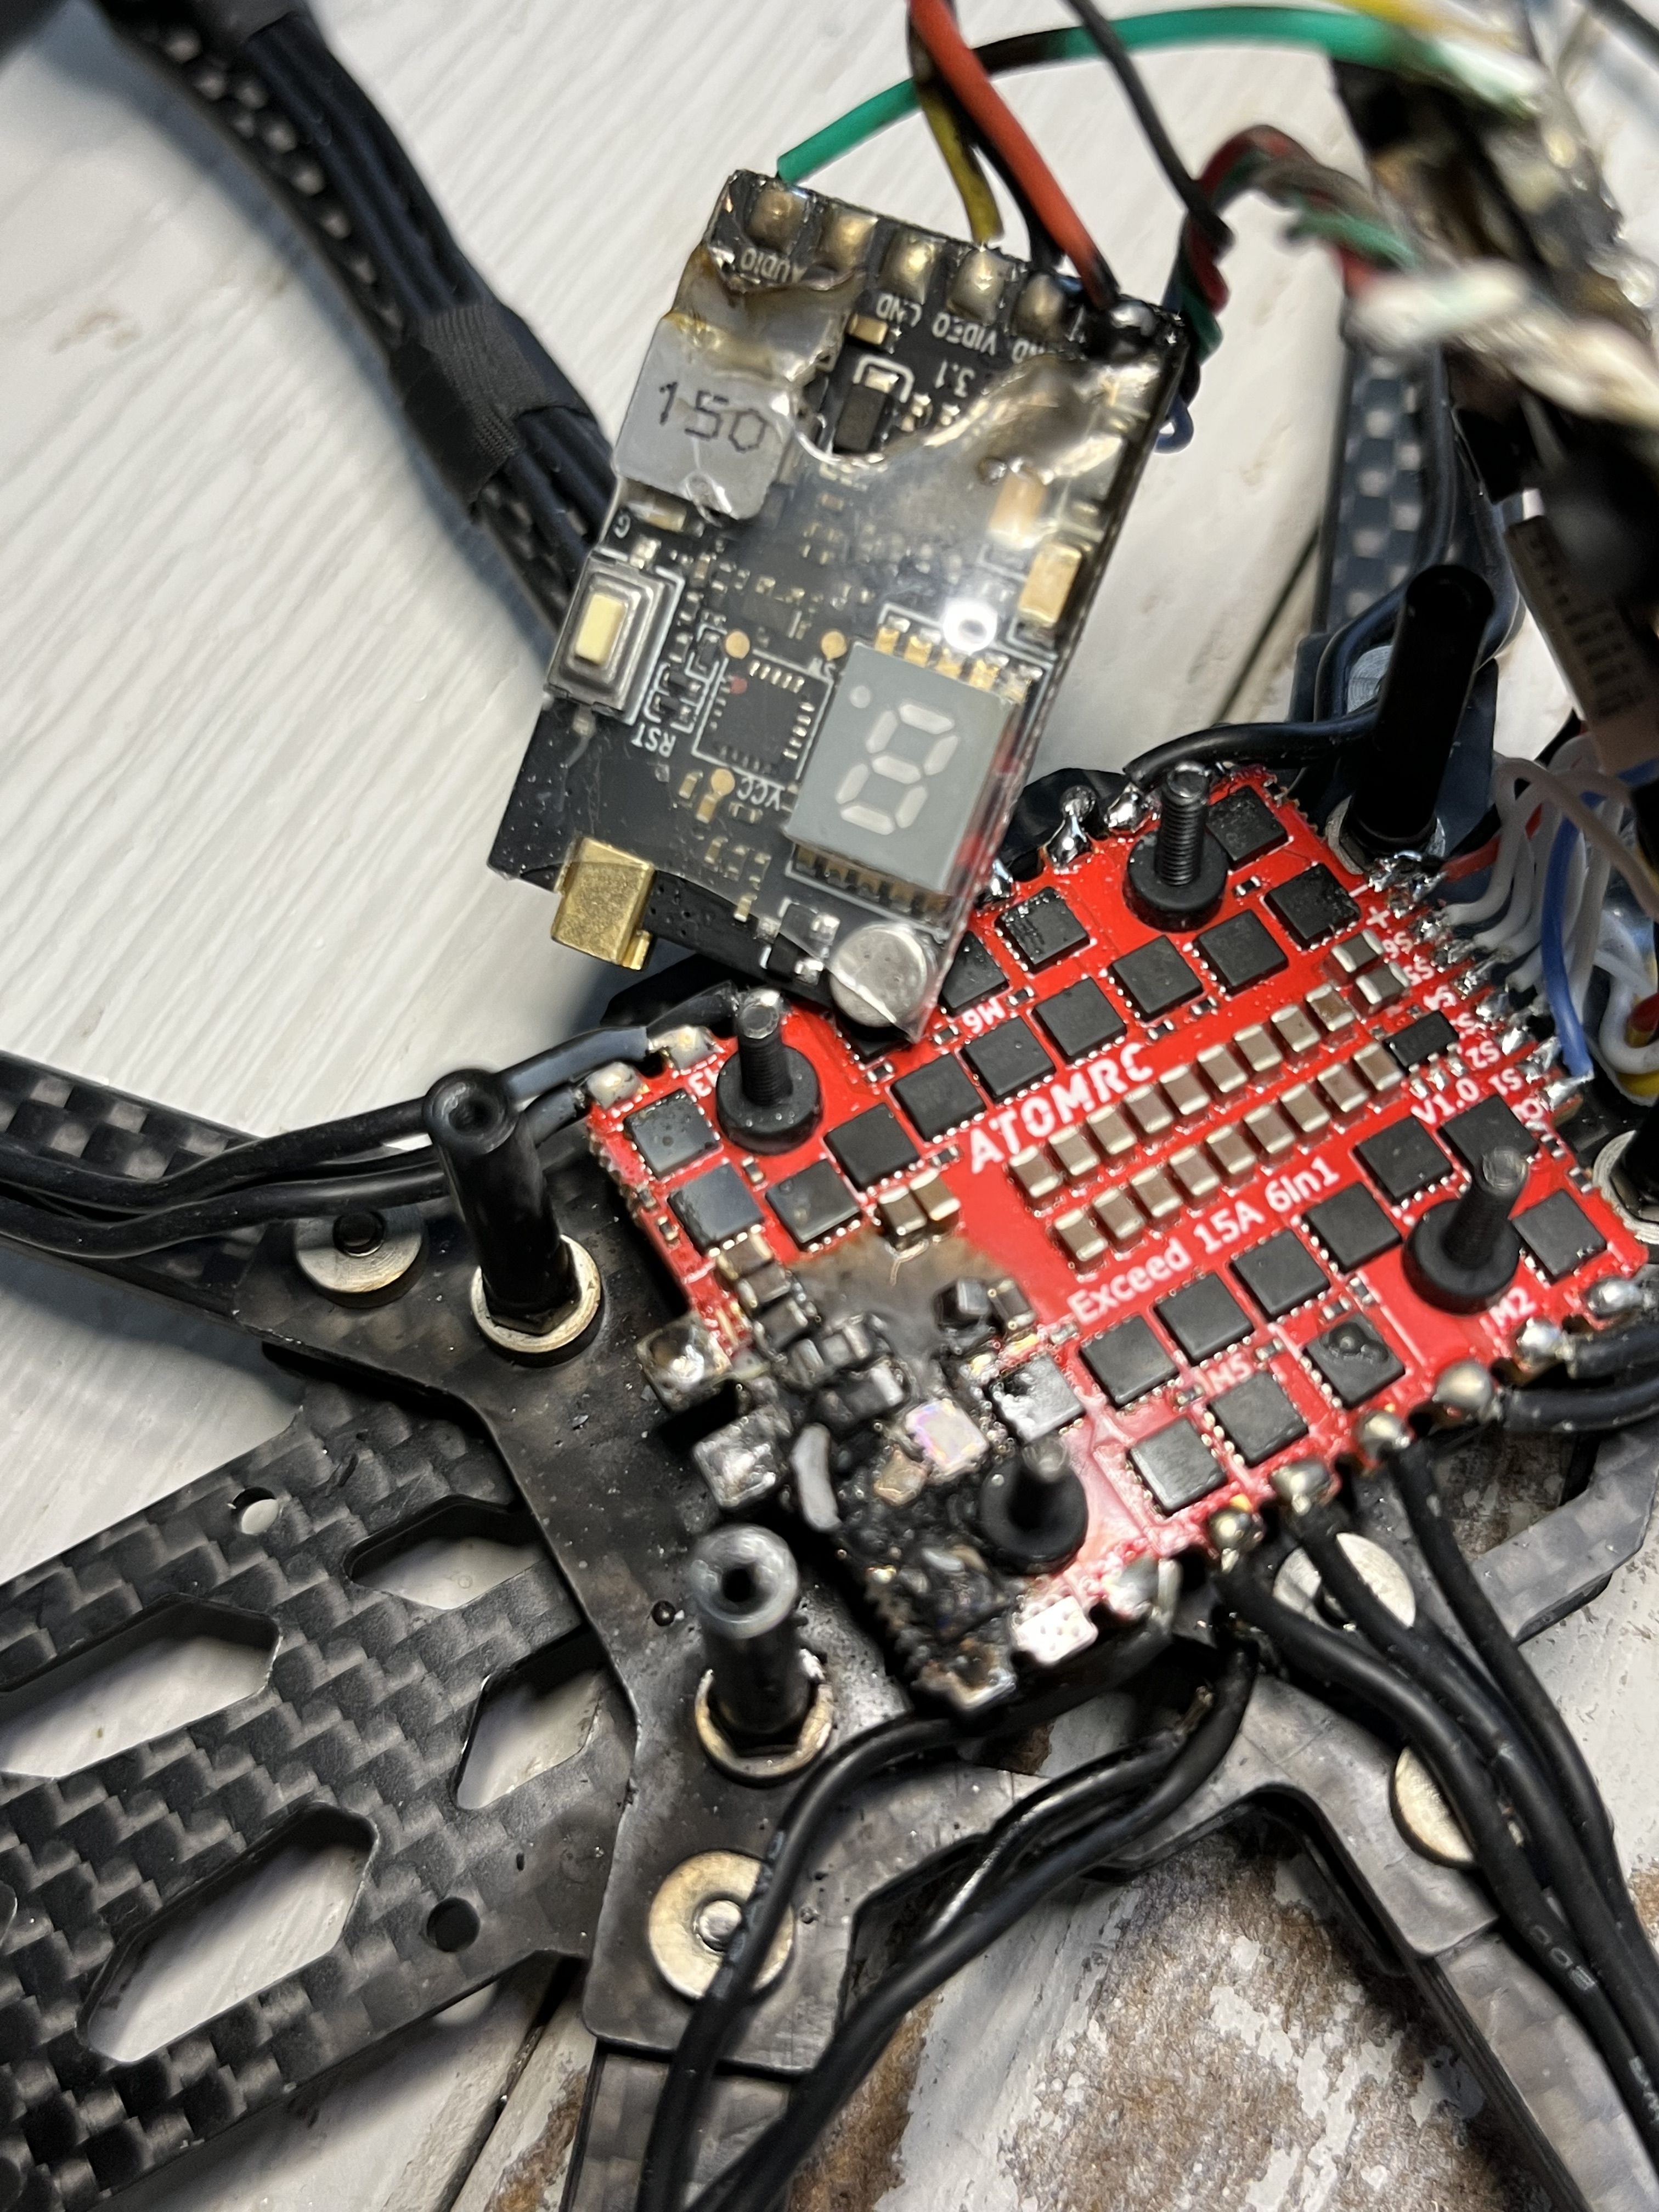
At a point, I was ready to test fly it for the first time. I had put everything together, double checked my wiring and sanity checked my configuration before putting props on and taking it out for it's maiden hover. I set the hexacopter down, turned on my tango 2, did my beeper check, turned on my goggles, got video, waited for some satellites to lock and finally I was ready. I took off and hovered for about six seconds before it flipped over, disarmed and started smoking. I rushed over to unplug it and then fire came out too. It seems the ESC had gotten so hot that it desoldered the back right motor wires and then the XT30 leads came desoldered too which caused the fire. Fortunately, nothing bad happened besides to the drone itself. Even so, most of the electronics appear to have survived except the ESC, obviously.
Maiden flight video:
It was the coolest thing to see fly. I don't know why because I've built quads before but for some reason the hexacopter just gave me a new sense of excitement when I saw it hovering there for six seconds. Looking back I probably would have been better off to use electronics from a reliable manufacturer like Flywoo. They make a 6-in-1 ESC but it's 16x16mm mounting and that wouldn't work on this frame. At which point maybe I also should have gone with the Flywoo Hexplorer 4" frame, which comes as a bind and fly if that's what I wanted.
Now what I think I want is to keep working at what I have to hopefully one day be able to make it fly and if one day it does then every second of troubleshooting problems and every dollar spent will all have paid off just to see this thing get in the air. That's the kind of satisfaction I want.
So I emailed John Li from Skyzone and told him my 6-in-1 ESC went up in flames during a hover test. He told me he could sell me a new one for $25, which is a discount from what it's sold for on banggood so I took it. About a month later I get it in the mail and install it in the hexacopter. This time I used the plug on the ESC but still direct soldered to the flight controller, I broke the plug off the FC side to make the soldering a little easier. I also reworked the solder joints on the back of the FC and on the VTX because they looked pretty charred. The wires going to my GPS were totally singed and I didn't have any spares that were long enough so I just took it out for the time being. After I finished soldering everything I checked for continuity on the flight controller and the ground pad on the back of the board didn't seem to have continuity anywhere else so I thought "great, now I need a brand new flight controller too." Regardless, I smoke checked everything and it all powered up and beeped and lit up as expected. I tested my receiver and yes I was still bound and then I tested the VTX and to my surprise I had video in my goggles! I was very amazed that all of the electronics had survived and could be reused. Very happy for my wallet. Not sure about the continuity thing, either I did it wrong or something's wrong with my multimeter.
This time I take it outside and I do the exact same thing as before, but it doesn't become a fireball. I successfully hover test, and I successfully fly this hexacopter fpv.
First successful flight:
This is so special to me because it took so long from the very first thought of wanting this hexacopter to now having one that actually flies. It wasn't particularly hard to do, besides some of the very small soldering on the underside of the flight controller, but I went through so much during the process and to finally have a finished project is very satisfying. Not that I'm done though, I do intend to put the GPS back on when I get the wire plug I need and maybe I'll even find a way to mount an action camera.
I know that this is a really long build log but it covers everything I dealt with to finally have built a hexacopter. It's not very incredible, it doesn't fly ridiculously well or anything. I just wanted it to work and now it does. This is the kind of satisfaction I wanted.
Photos

Part List
Show stores (5)Guides & Reviews

AirbladeUAV has done it again and this time they've brought long range to the 5" class! Based on the popular Transformer Mini, the new Transformer 5" Ultralight adopts a lot of the same design philosophies with larger props and more payload capacity. It can fly upwards of 20 minutes on a 4 cell Li-Ion battery pack and in ideal conditions it's got a range of over 4 to 5 miles. In this guide I'll walk..
Read more
With the release of the DJI FPV Drone cinematic FPV has become a lot more accessible, but you certainly don't want to crash a $750 drone! The QAV-CINE Freybott is a compact, lightweight cinematic FPV drone that can take a hit and keep going. It's a lot safer to fly indoors and around people. With a naked GoPro or the SMO 4k you can capture some great stabilized footage. In this guide I'll show you..
Read more


Really nice build! I wish these 6in1 ESC makers would make at least a 30A 20x20 option. I popped my Flywoo 13a 16x16 6in1 in a crash. Fully expected it to die in a fire like that. My next hex will be using spedix LS40 individiuals.
Just a heads up that the Axis AirForce Pro X8 which is a synced 2x4x1 30amp esc would be a good option if you have the room. You could just modify the resource mapping for a Hex by setting two of the esc's to unused. I recall seeing teamblack sheep store having it on blowout sale for aroung $50. That is if you have room for dual 20x20 esc's.