2.5" FPV Cycle HDZero ExpressLRS Quad
 By cadensnyder on Apr 09, 2022
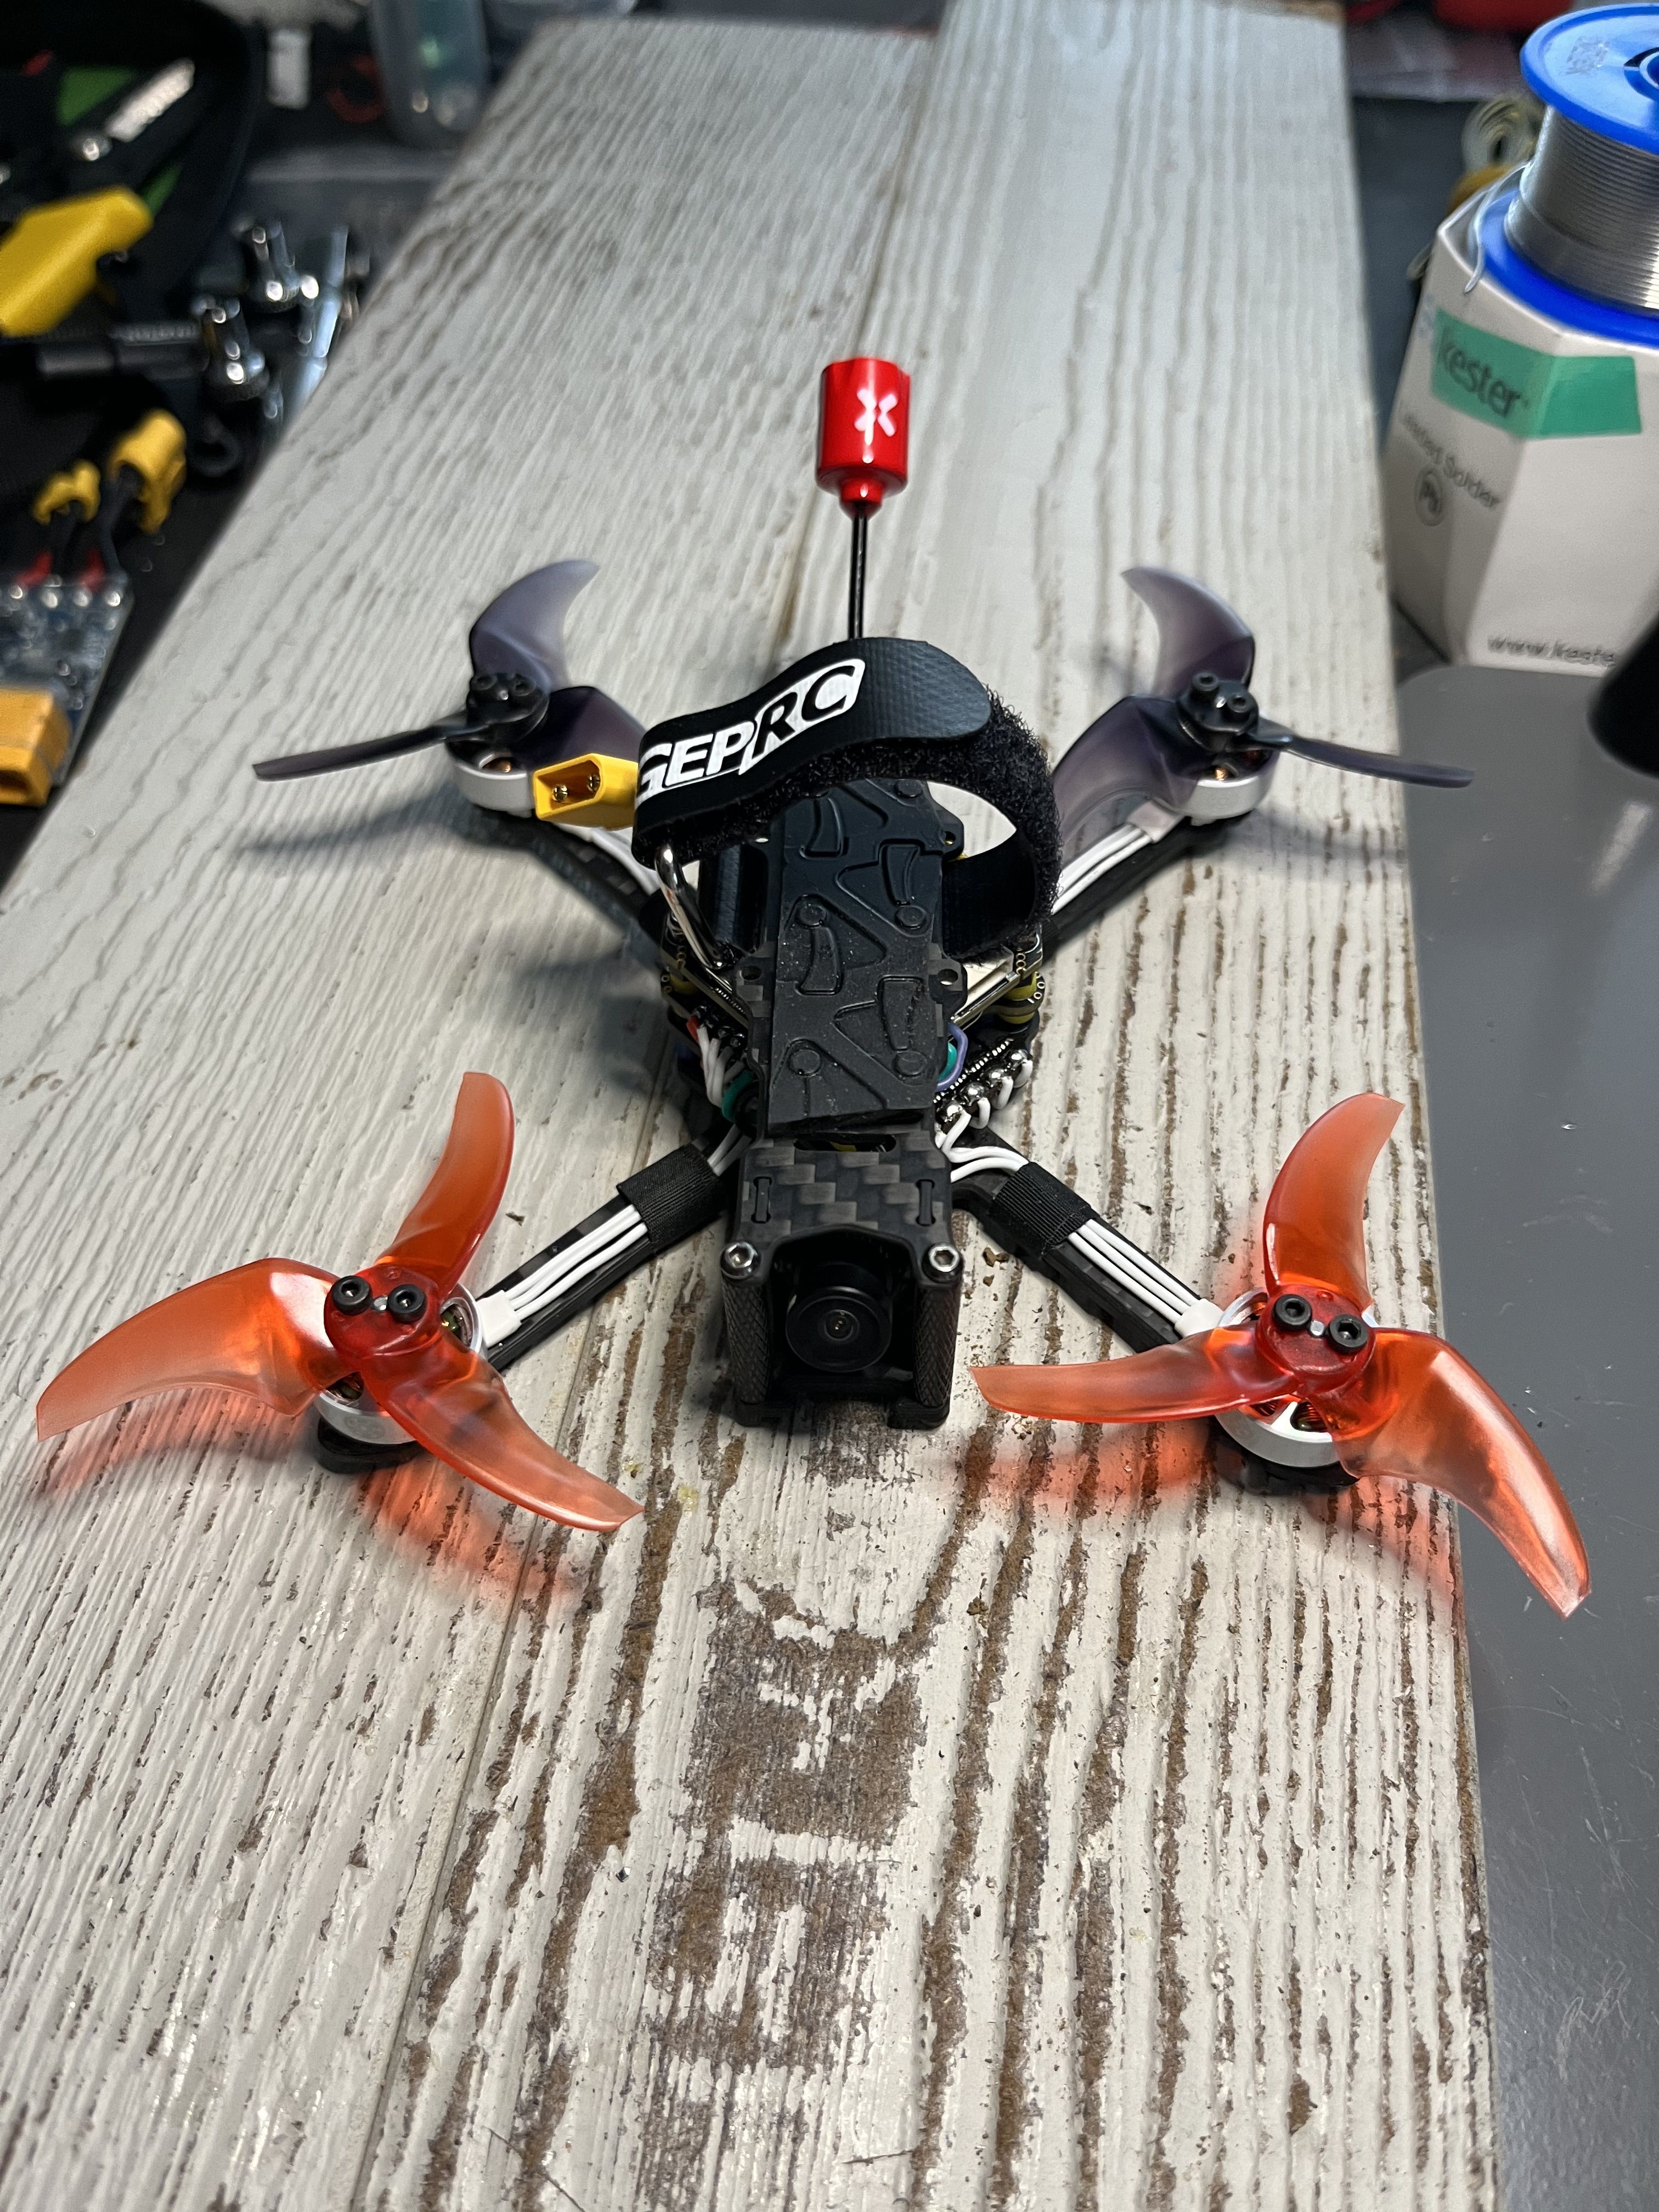
I had the Geprc Smart 25 bind and fly and the all in one burnt so I decided to change every single component. New FPV Cycle motors and flight control stack, ExpressLRS instead of Crossfire and HDZero nano cam and whoop VTX instead of DJI nebula nano and caddx vista.
I had never seen a stack with this mounting pattern and I was really excited to try it after having bad luck with an AIO. I also wanted to switch from DJI because I really hated the nebula nano and I could never get the DJI goggles to sit comfortably on my face. They would droop and I wouldn't be able to see the entire image which really sucked. I really like the way my Skyzone sky04x goggles are snug but comfortable and I never have problems seeing the screens so I'm looking forward to using the HDZero VRX with those.
Unfortunately I haven't upgraded to a 4:3 camera because this frame needs a nano camera and HDZero doesn't have a 4:3 aspect ratio nano camera yet, only 16:9. I imagine it won't bother me too much but when there is a 4:3 nano camera, I can just replace my current camera.
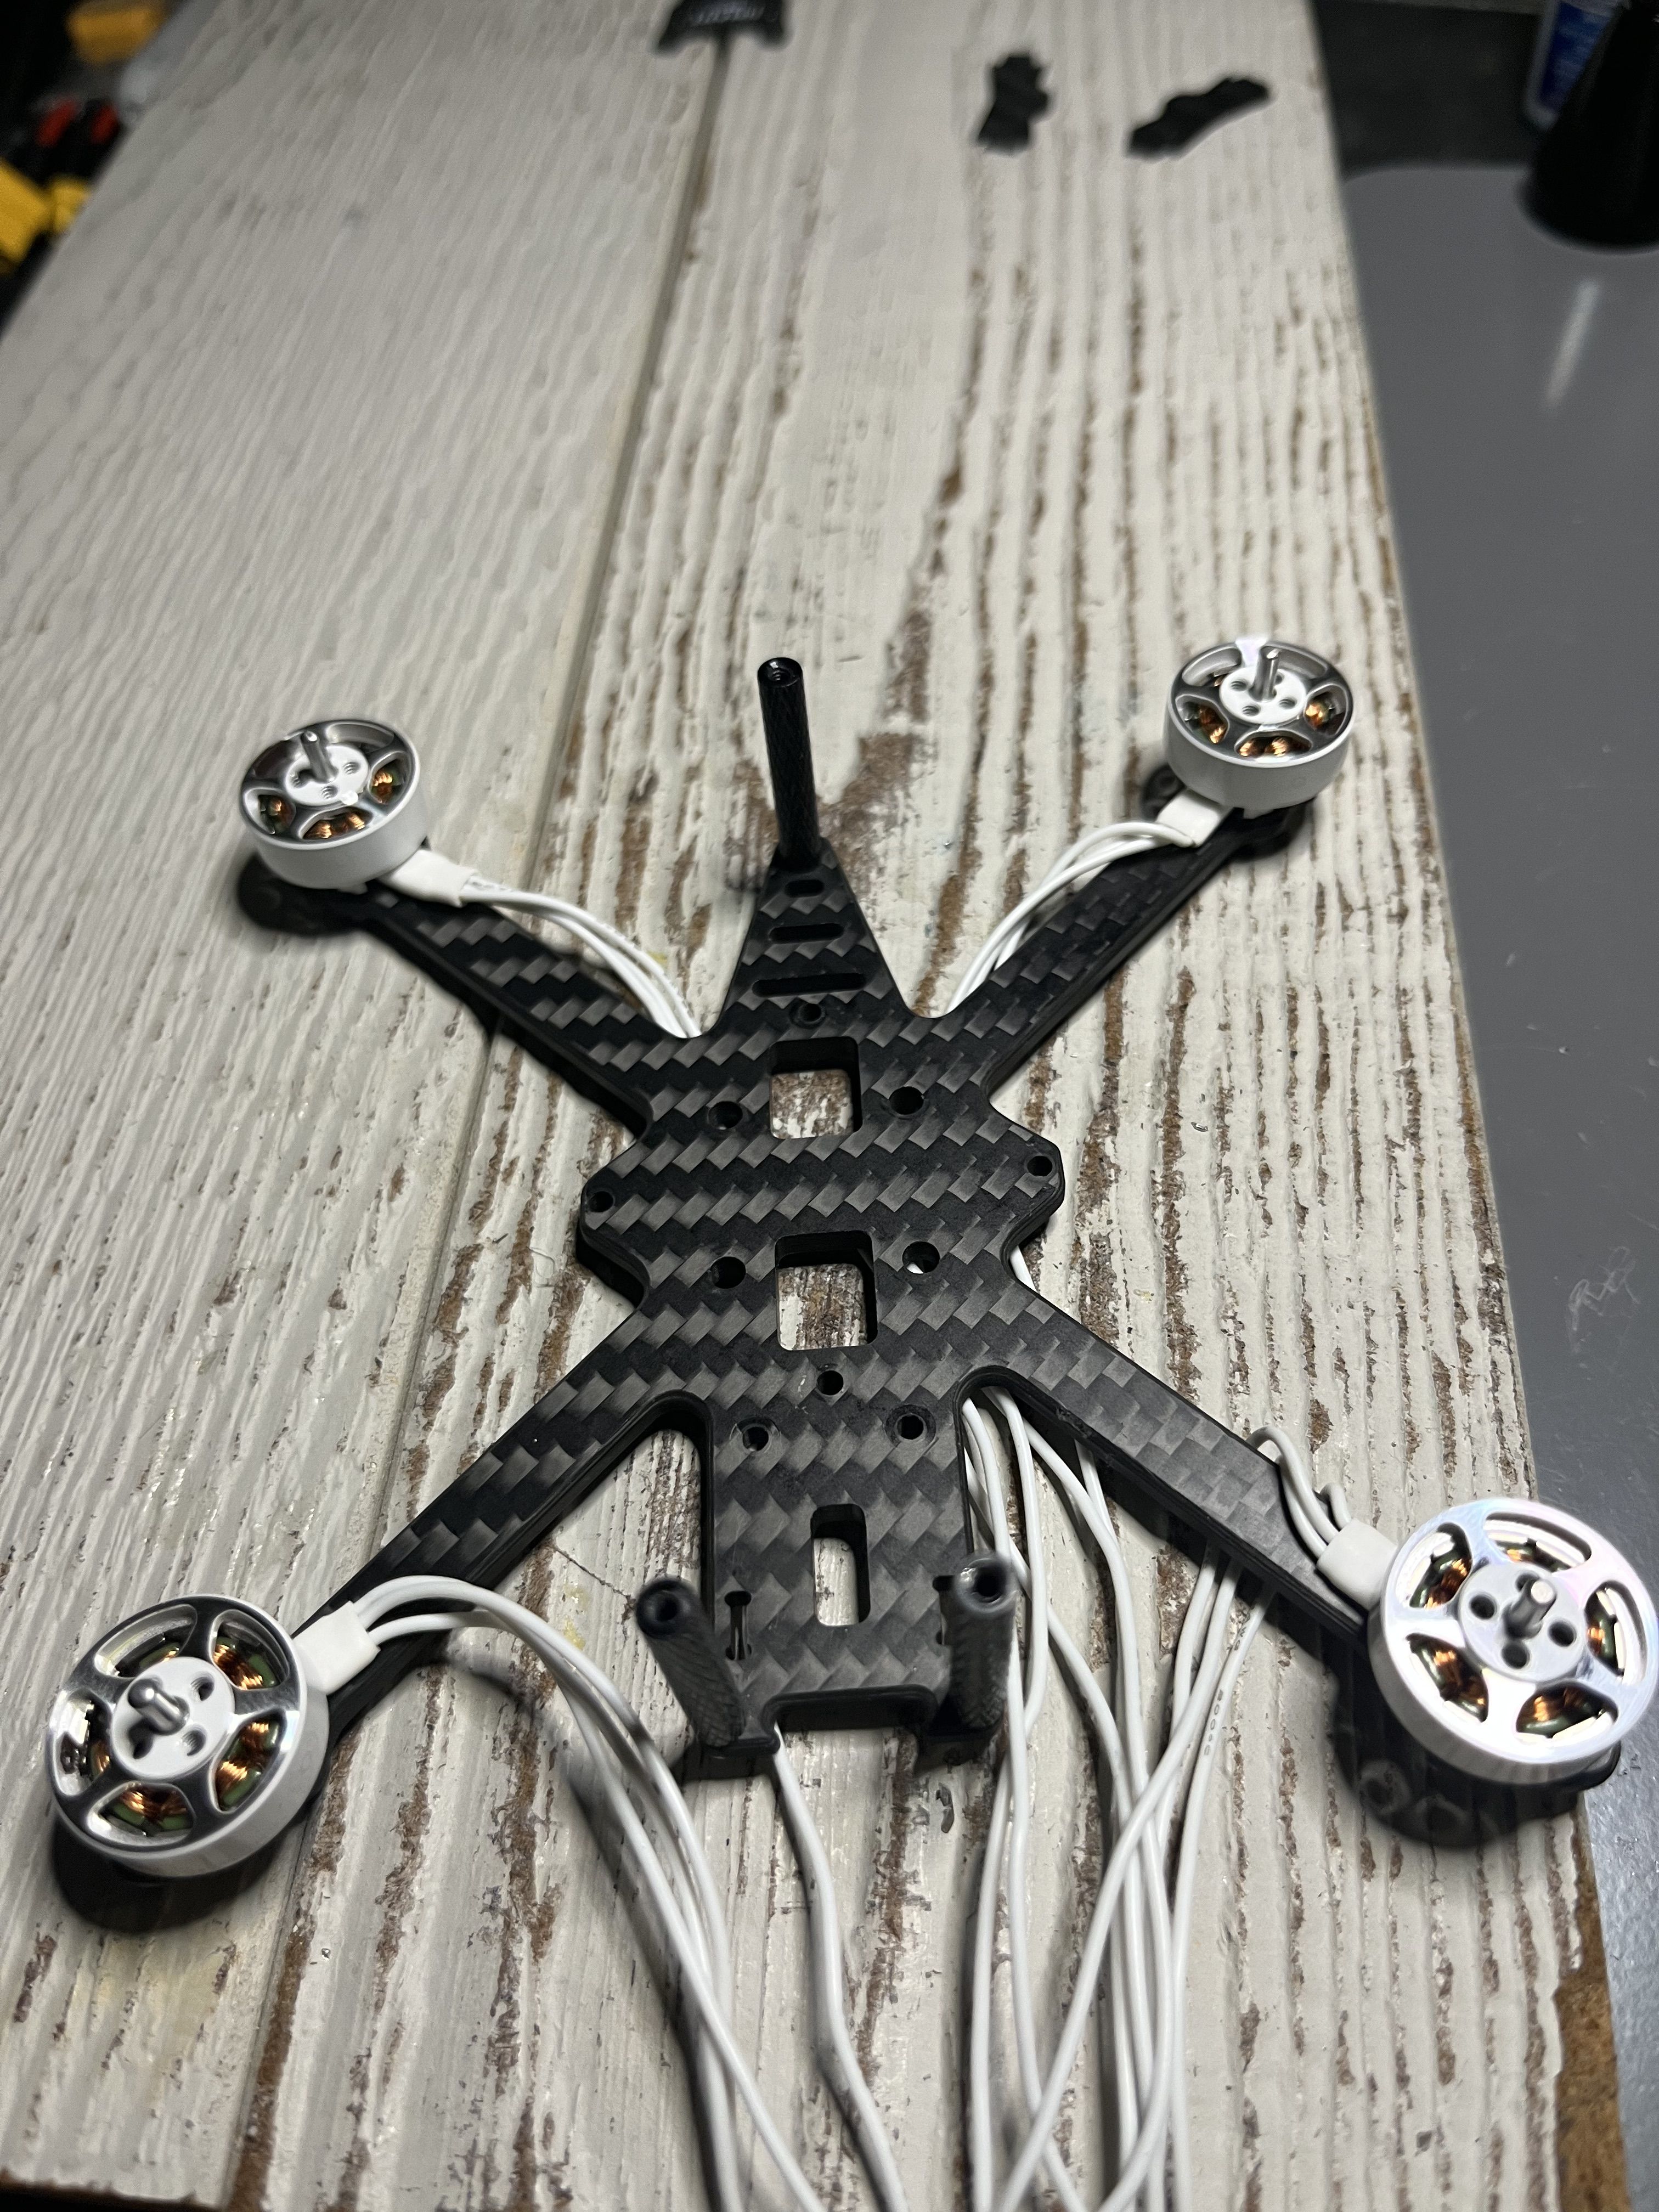
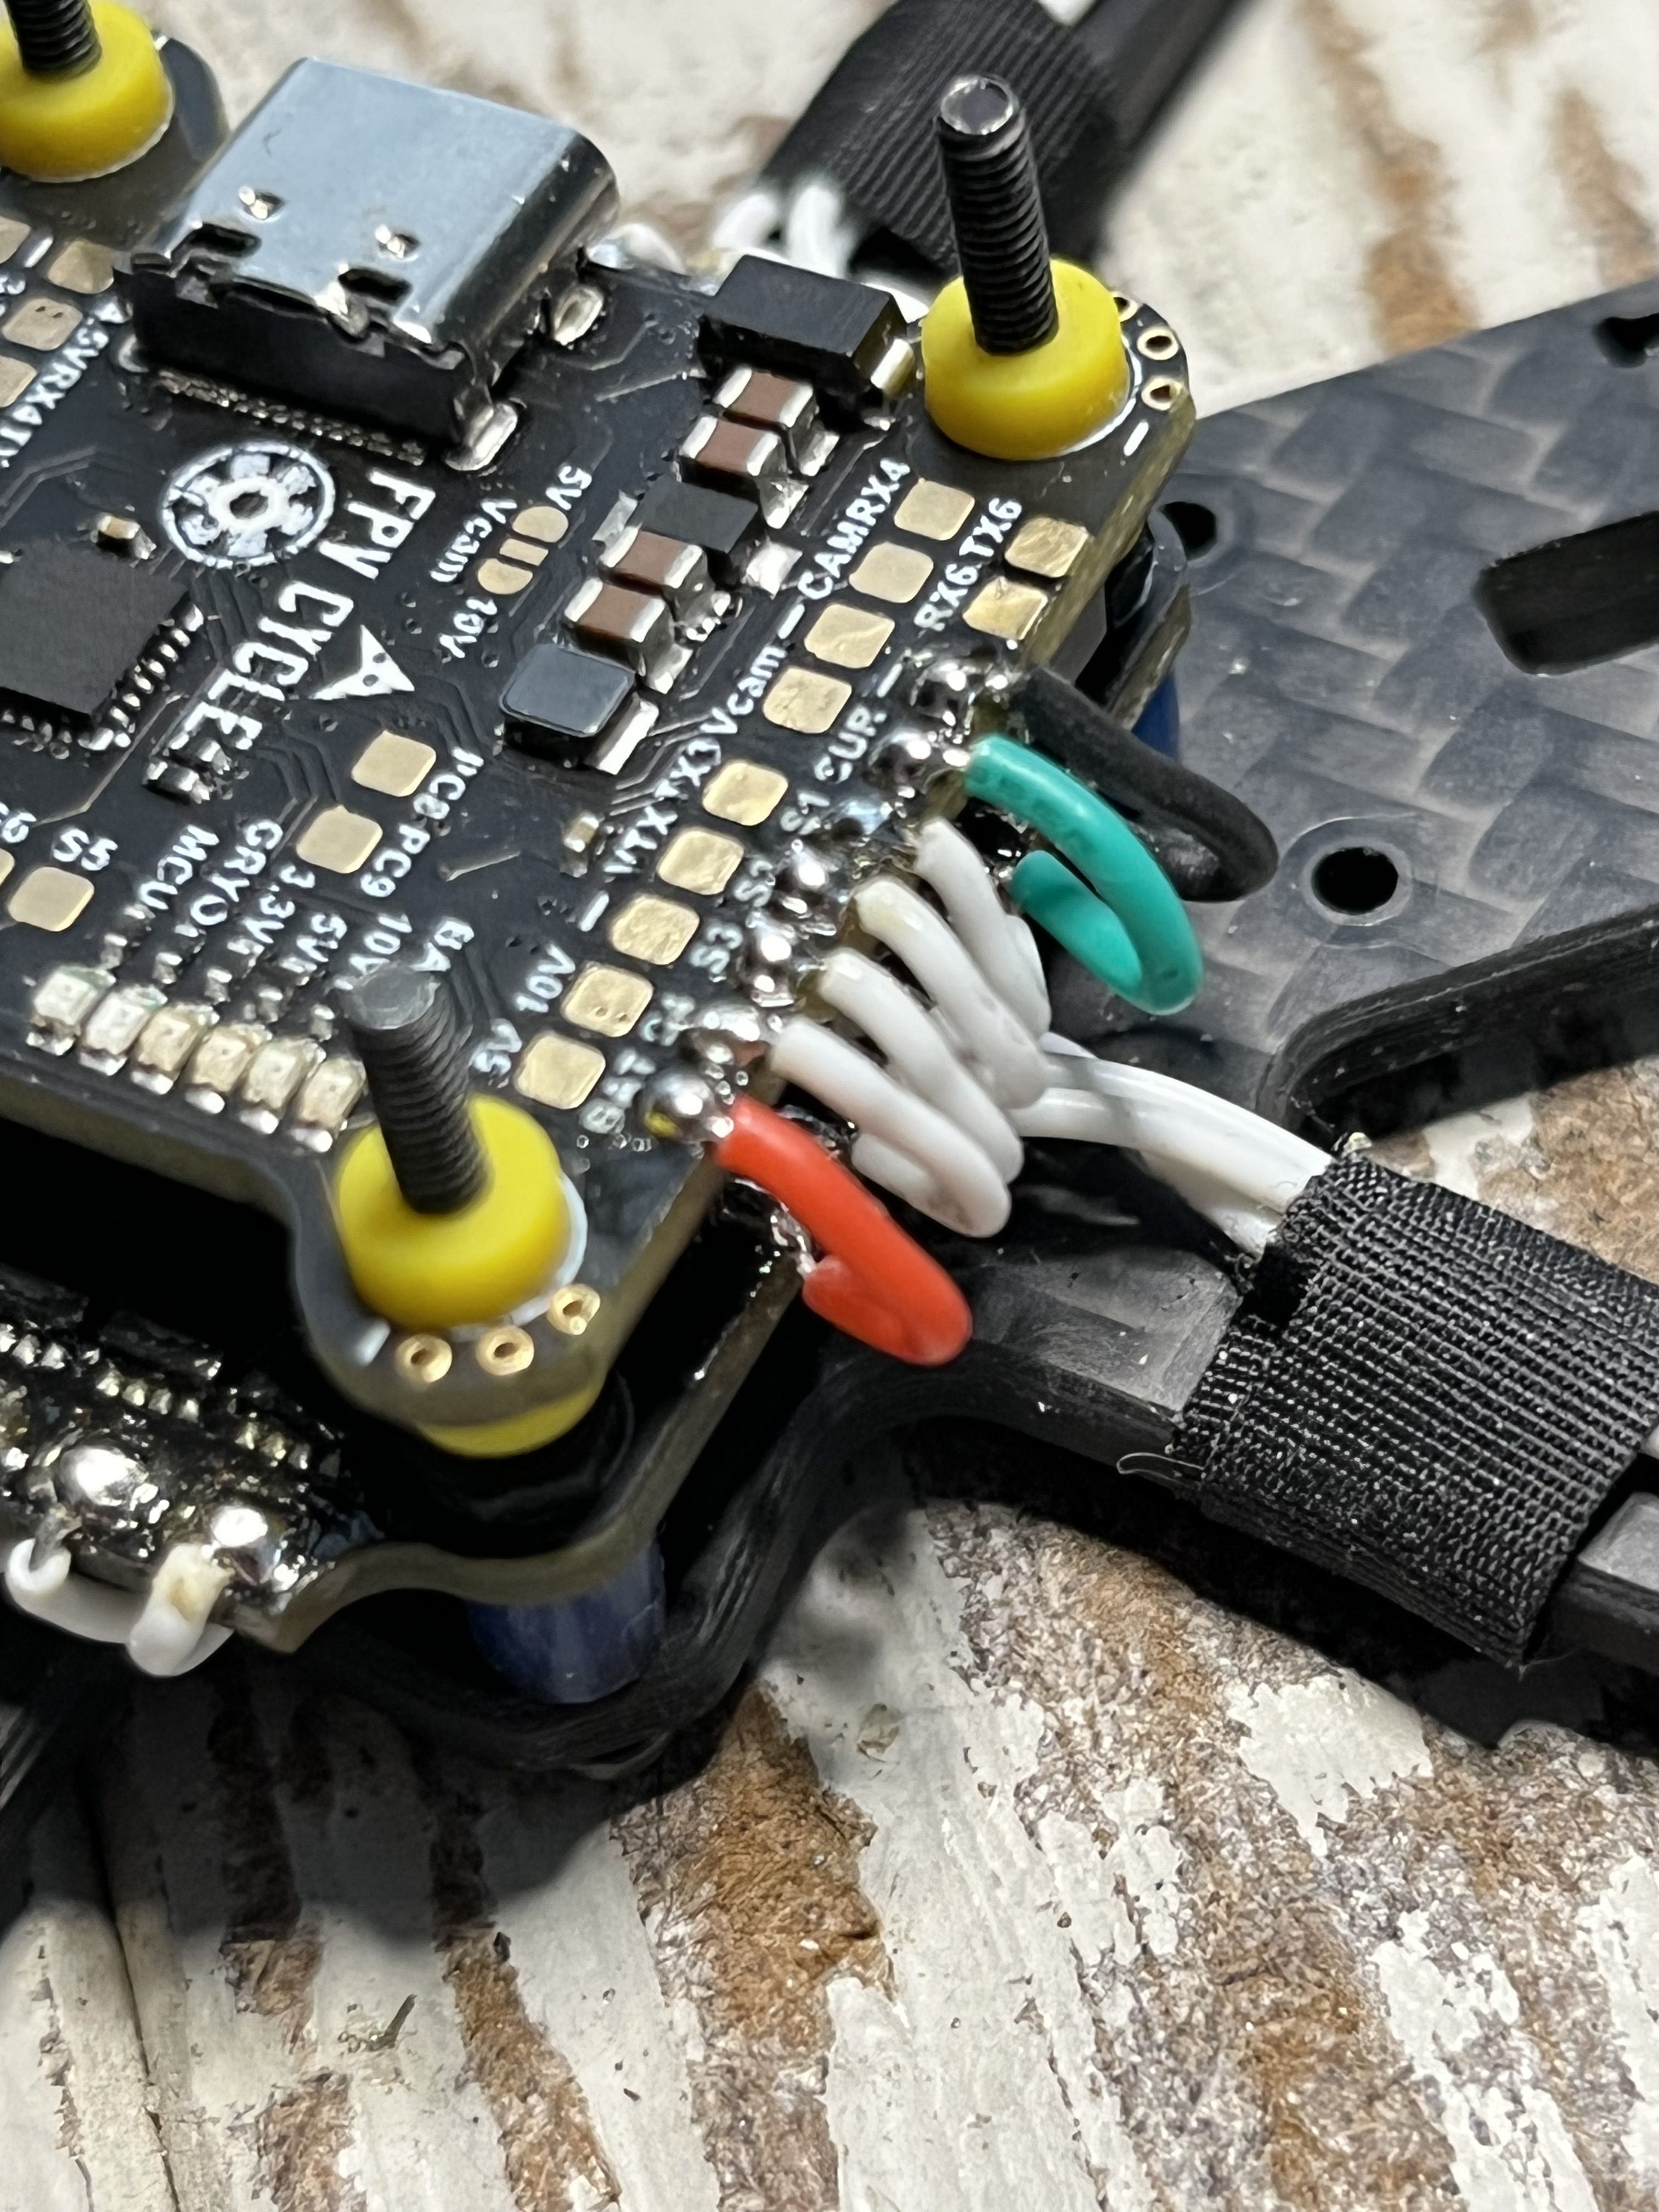
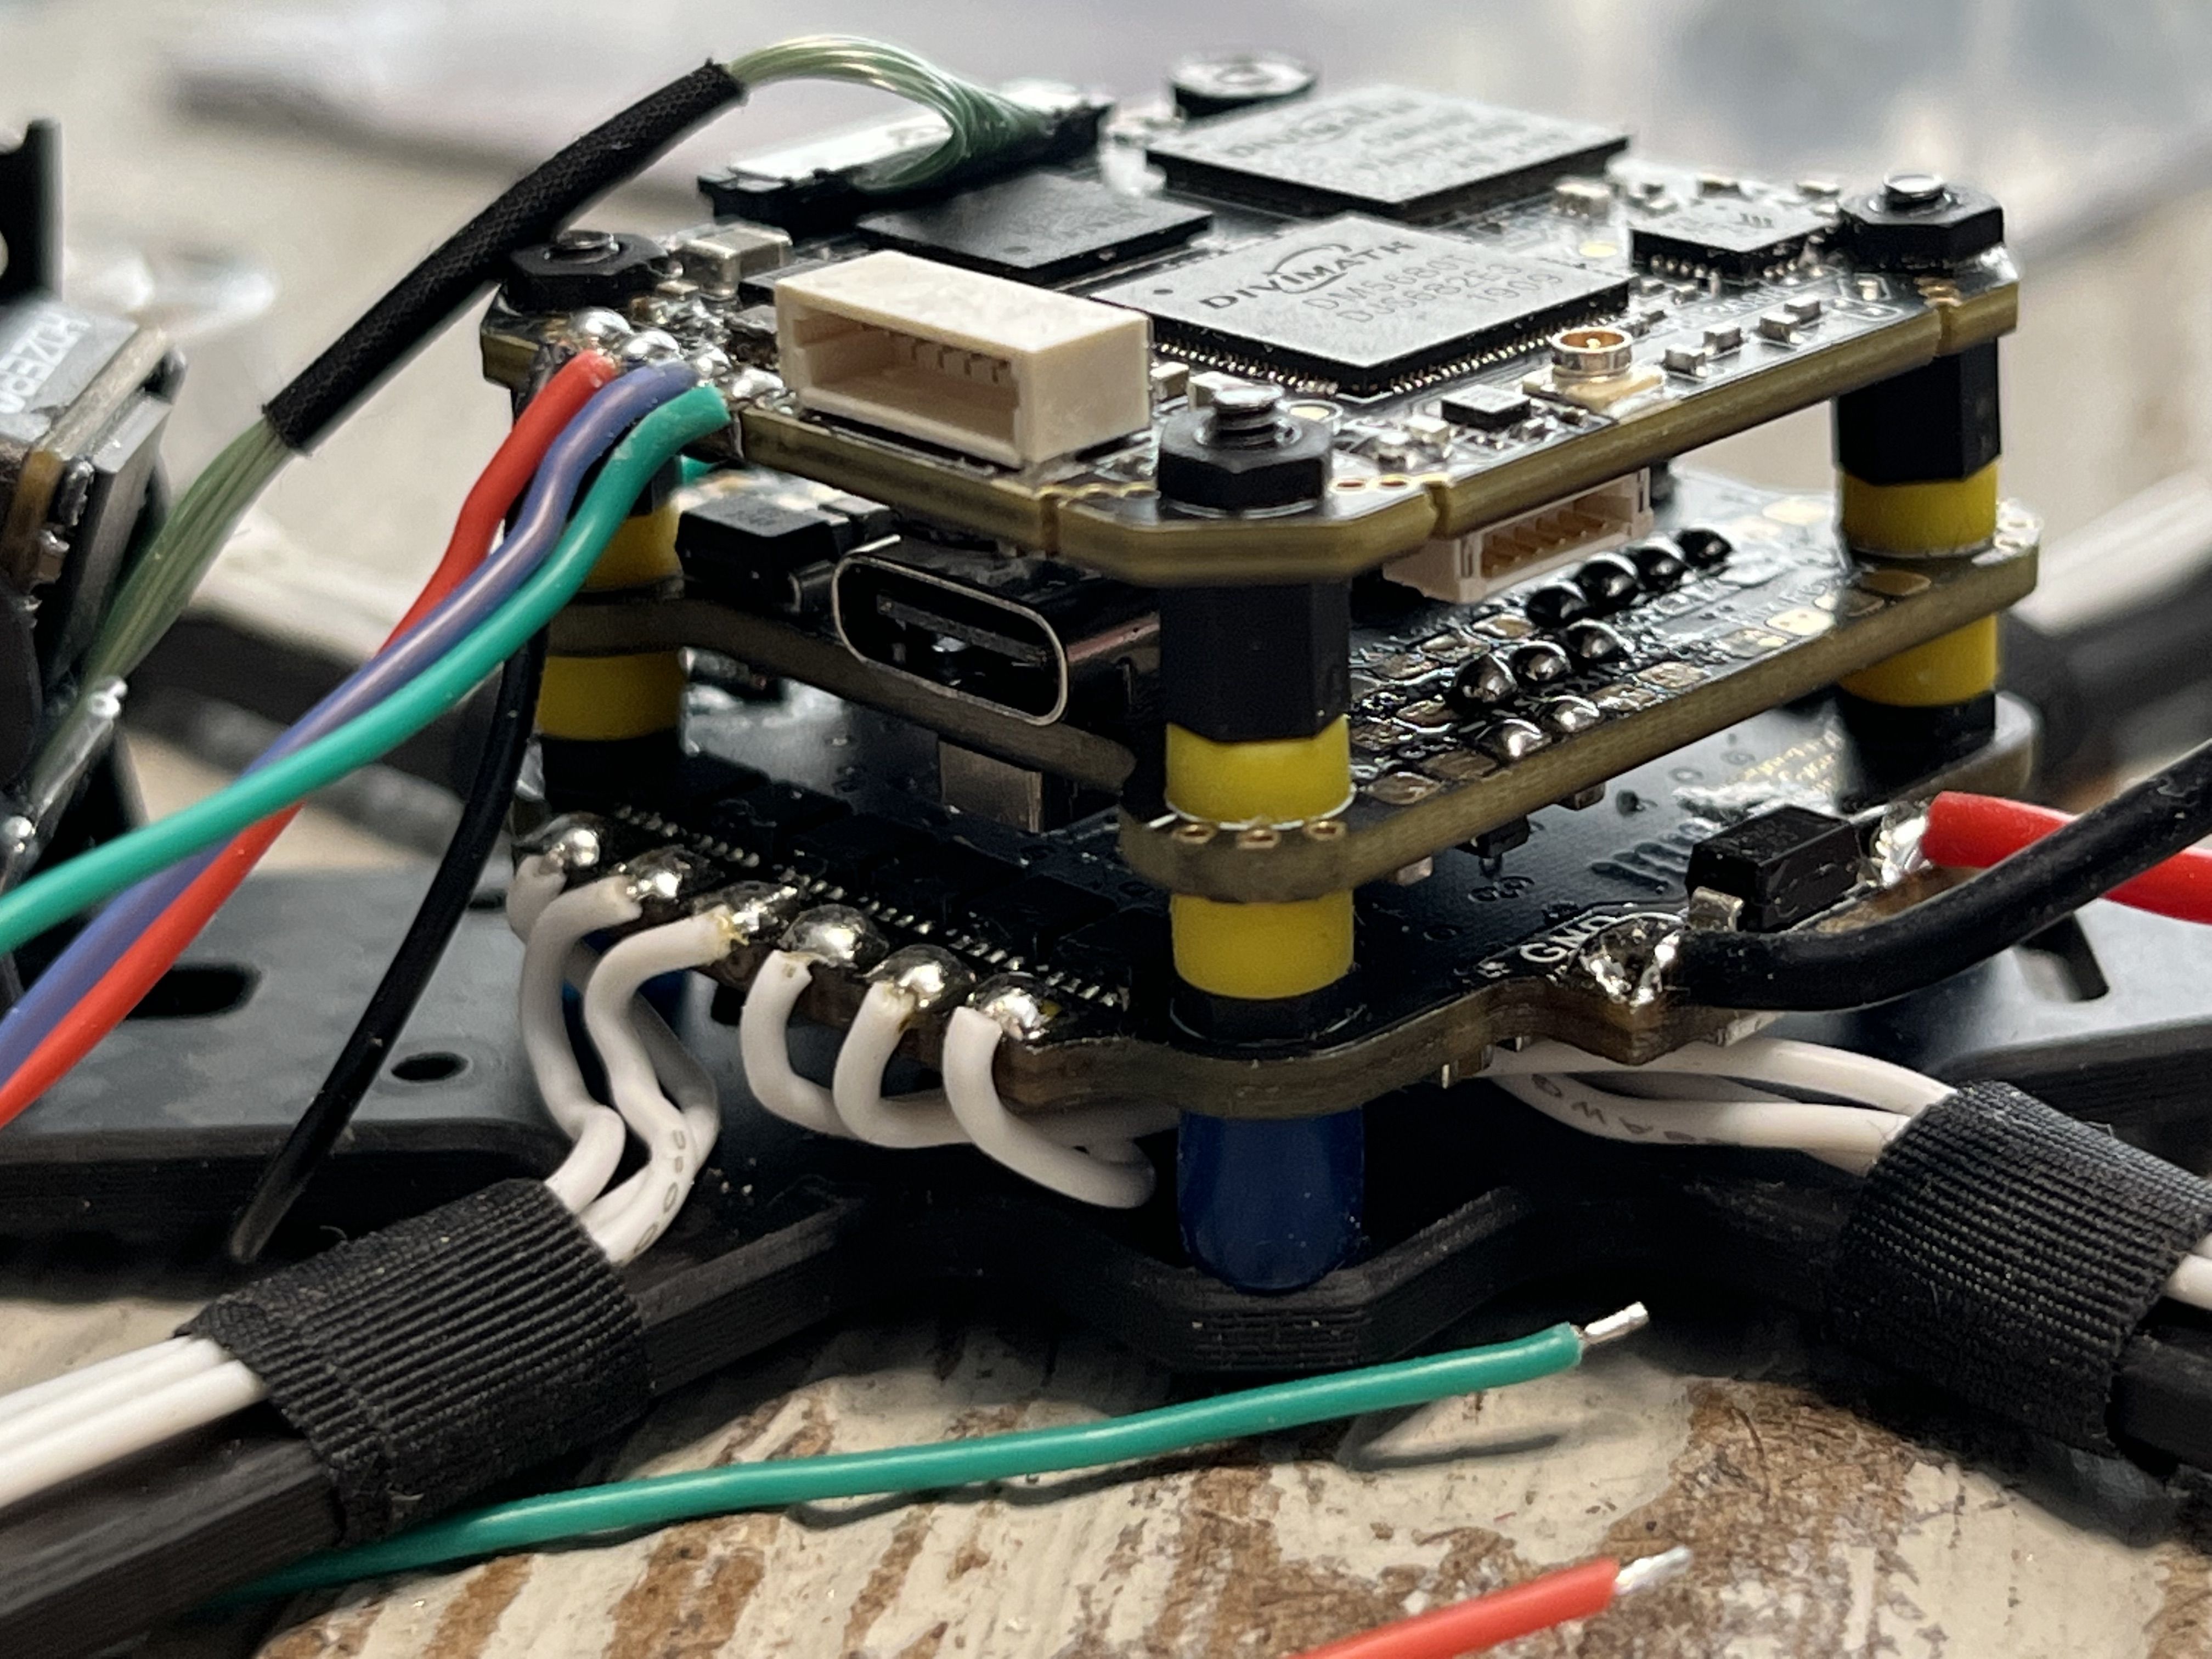
Mounting all three boards in the stack configuration was more difficult than I had anticipated. I needed 25mm long screws to fit all three boards. The holes in the ESC were so tight that the board wouldn't fit all the way down on the screws. I filed the holes out a bit to make the ESC go down onto the spacers that it came with. After spending way too long putting the vibration isolation grommets into the M2 flight controller holes, I needed a millimeter of space above the ESC to make the boards not touch so I used a nylon nut, which helped hold the ESC down while I was figuring it out. After I got the FC mounted I needed a fair bit of spacing above it for the VTX to not touch the USB port so I added 4mm standoff spacers which seemed to be perfect. The whoop VTX was really hard to get on because the screws were coming out kind of askew but I filed the holes of the VTX and with effort I was able to push the screws through and get it on. Once I worked out the board configuration it was time to start actually building.
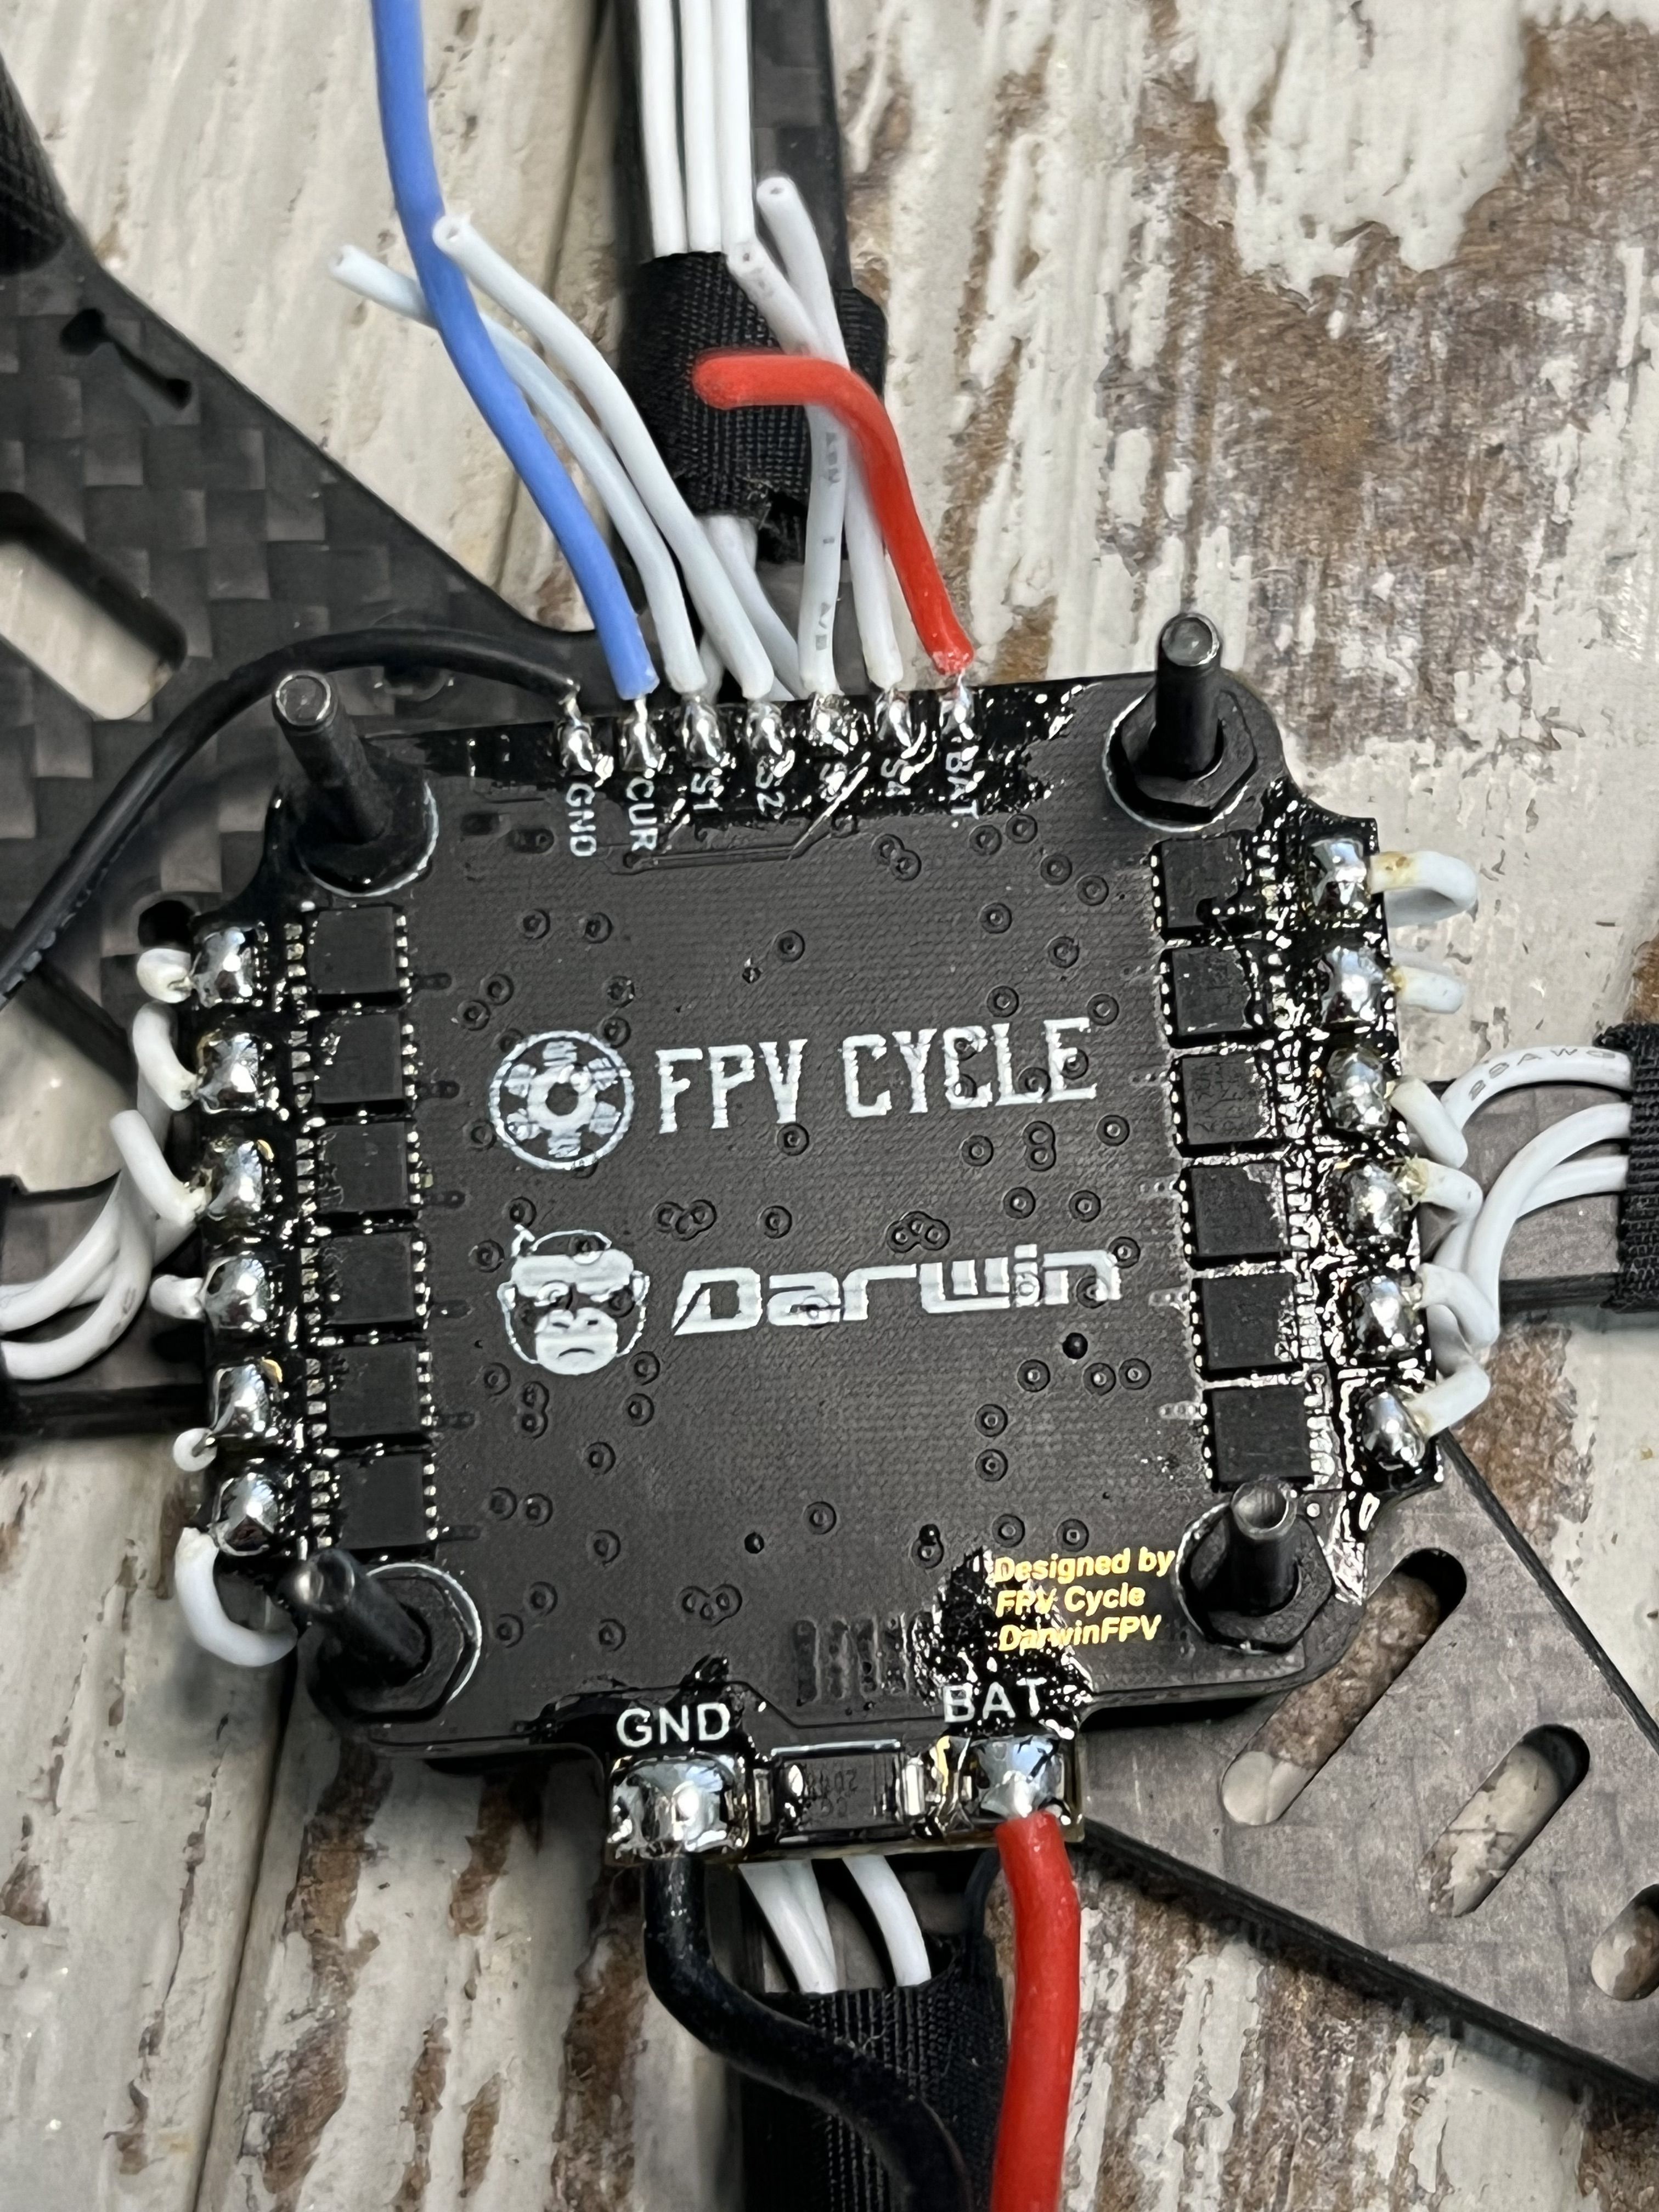
I mounted the motors and the ESC and, since the board mounts diagonally on this frame, I had to run two of the motor's wires underneath the ESC to be able to wire them up. There are no plugs on this stack; the only option is to direct solder the connection between the FC and ESC. I spent a long time trying to get the wire length right so that it looked as clean as I could make it. Then I wired up the ExpressLRS EP2 receiver and HDZero VTX and flashed firmware to my receivers and transmitters for both systems.
The motors I'm using have a 2mm prop shaft but the 2.5" props I wanted to use have a 1.5mm shaft hole. FPV Cycle makes a tool for this exact predicament, the 2mm prop hole drill bit kit. This tool was actually out of stock for months before I started this build and one day I just sent an email asking if they knew when it would be back in stock and they emailed me back telling me they had one on reserve "for emergencies" so they sent me that one. It took a long time to get through all of my props but now they all push onto the 2mm shaft just fine so it was worth the $12 for that tool.
Setting up in betaflight was pretty simple, I just had to change the board alignment by 45 yaw degrees because the flight controller is mounted diagonally. I forgot to change the rssi dbm warning for ExpressLRS though, so it blinked at me throughout the first couple of flights. Once I had changed the motor direction, it was time to put it all together.
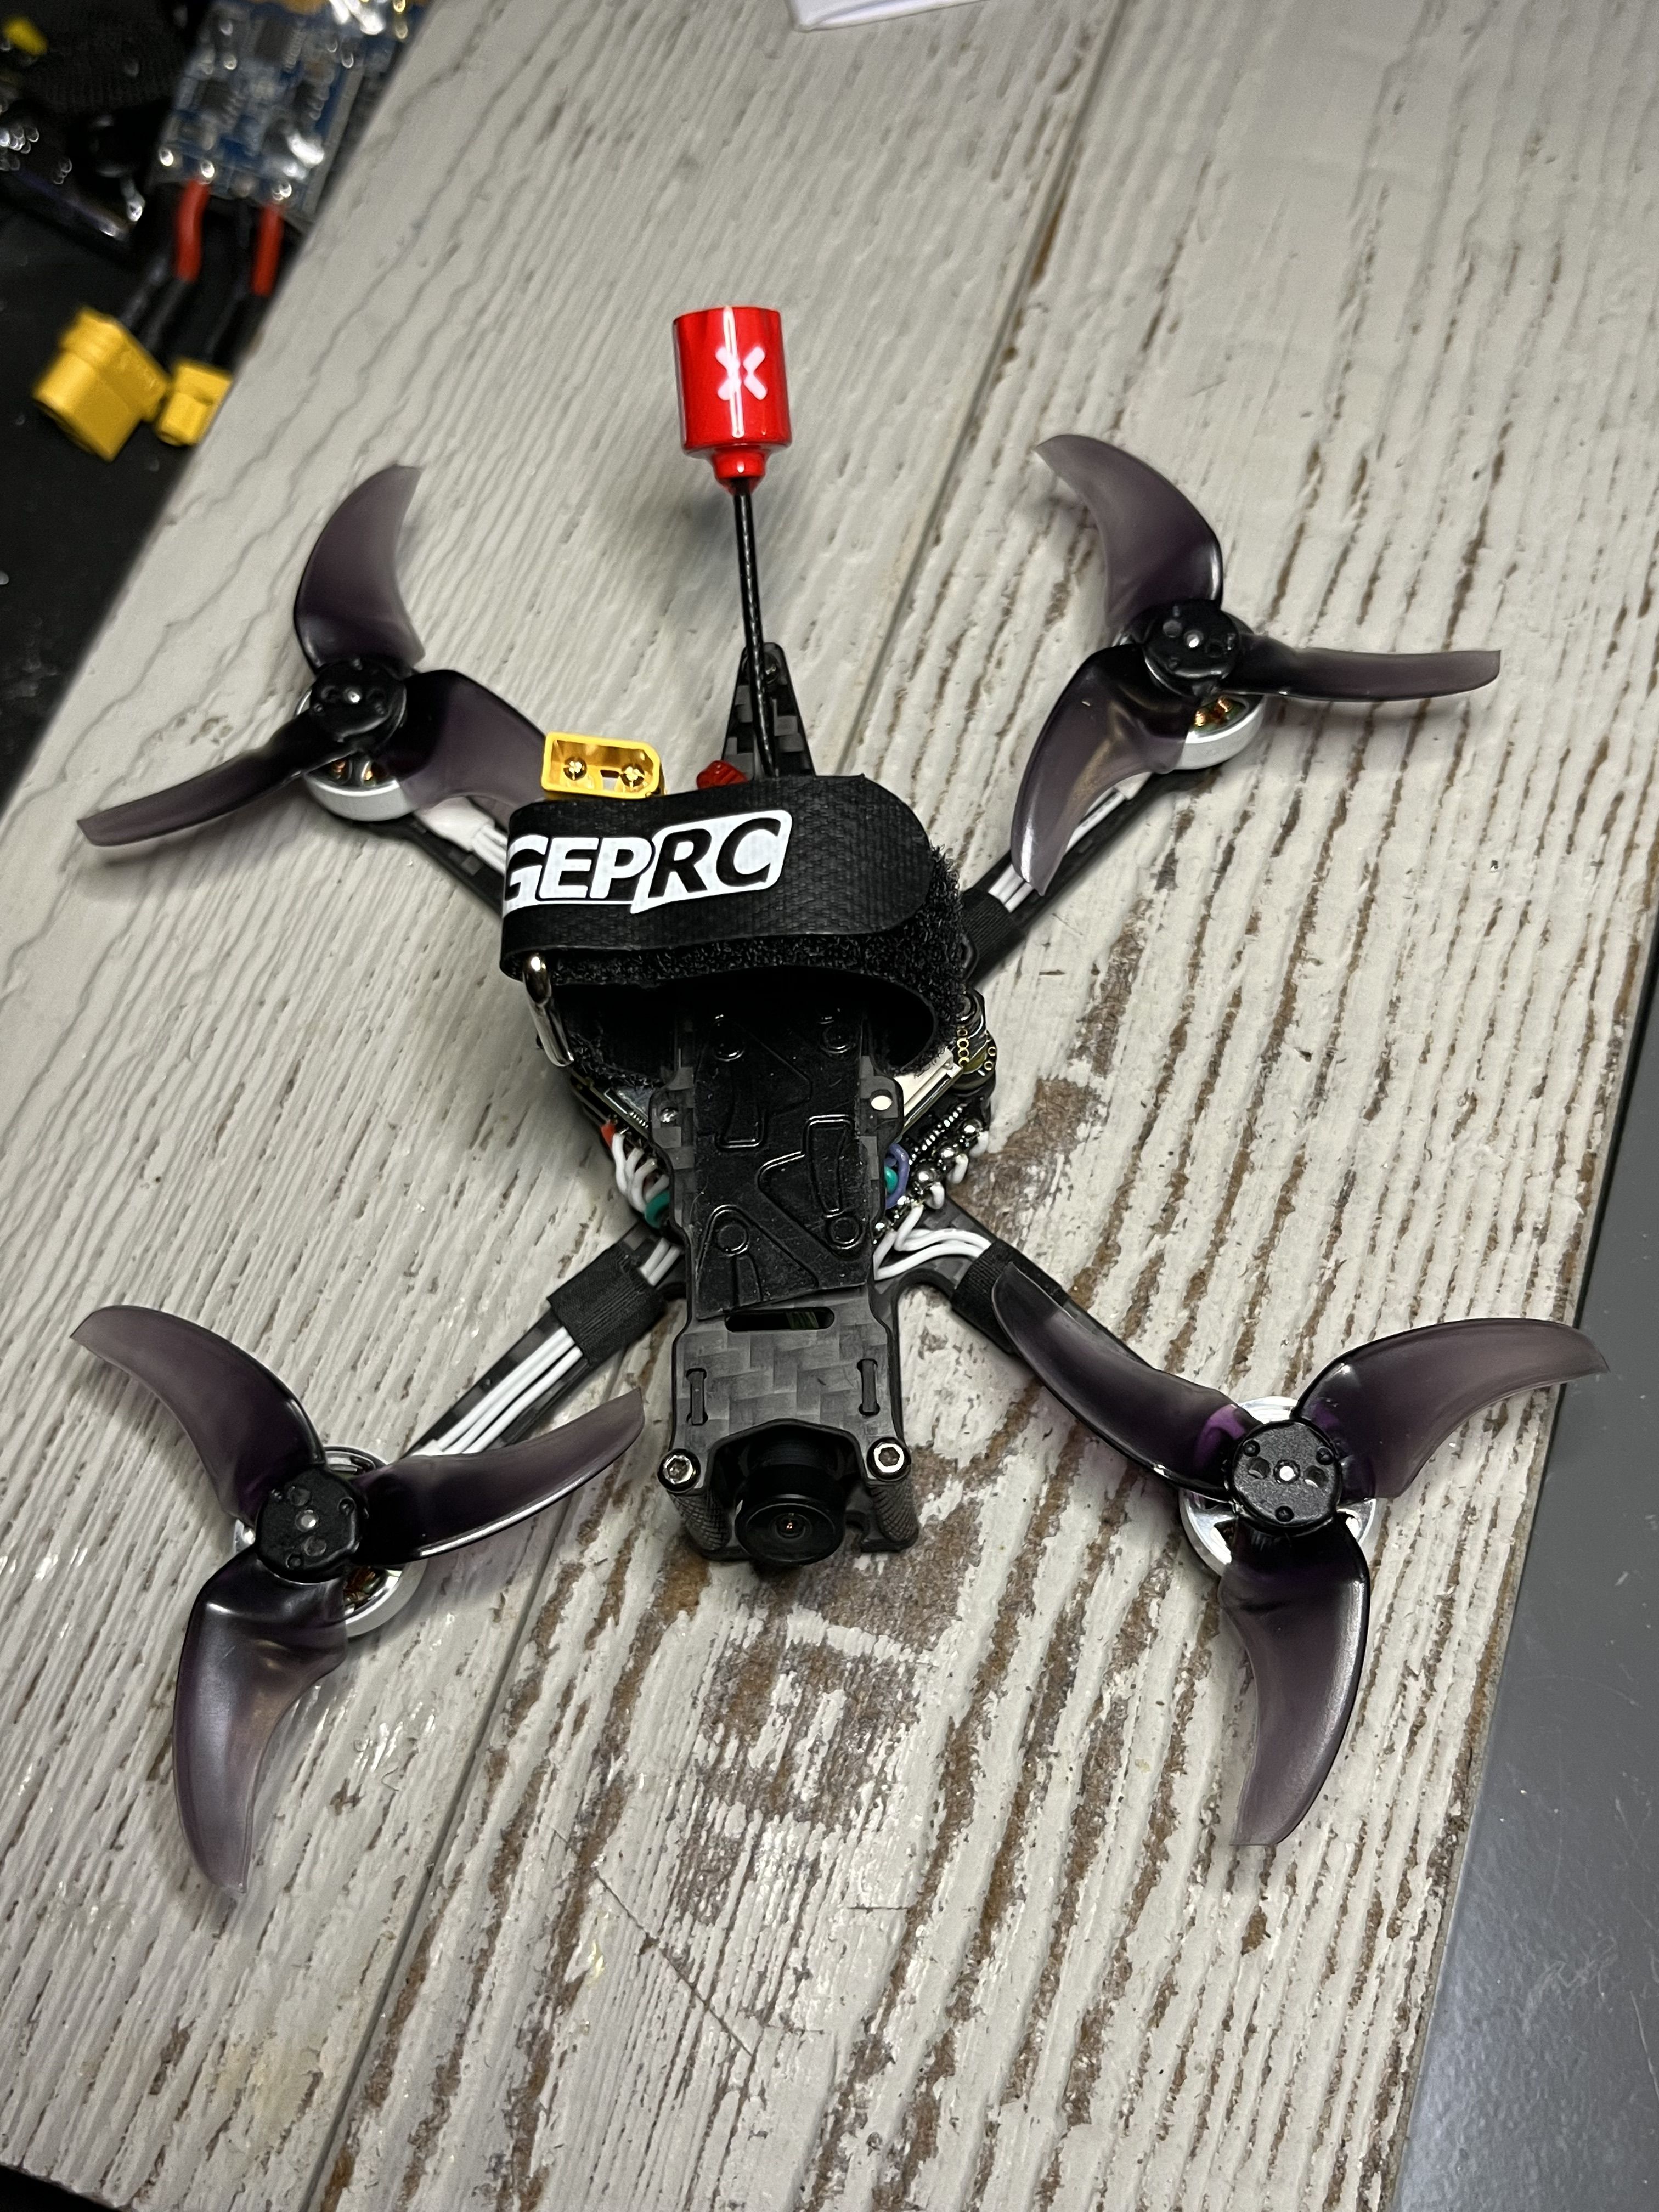
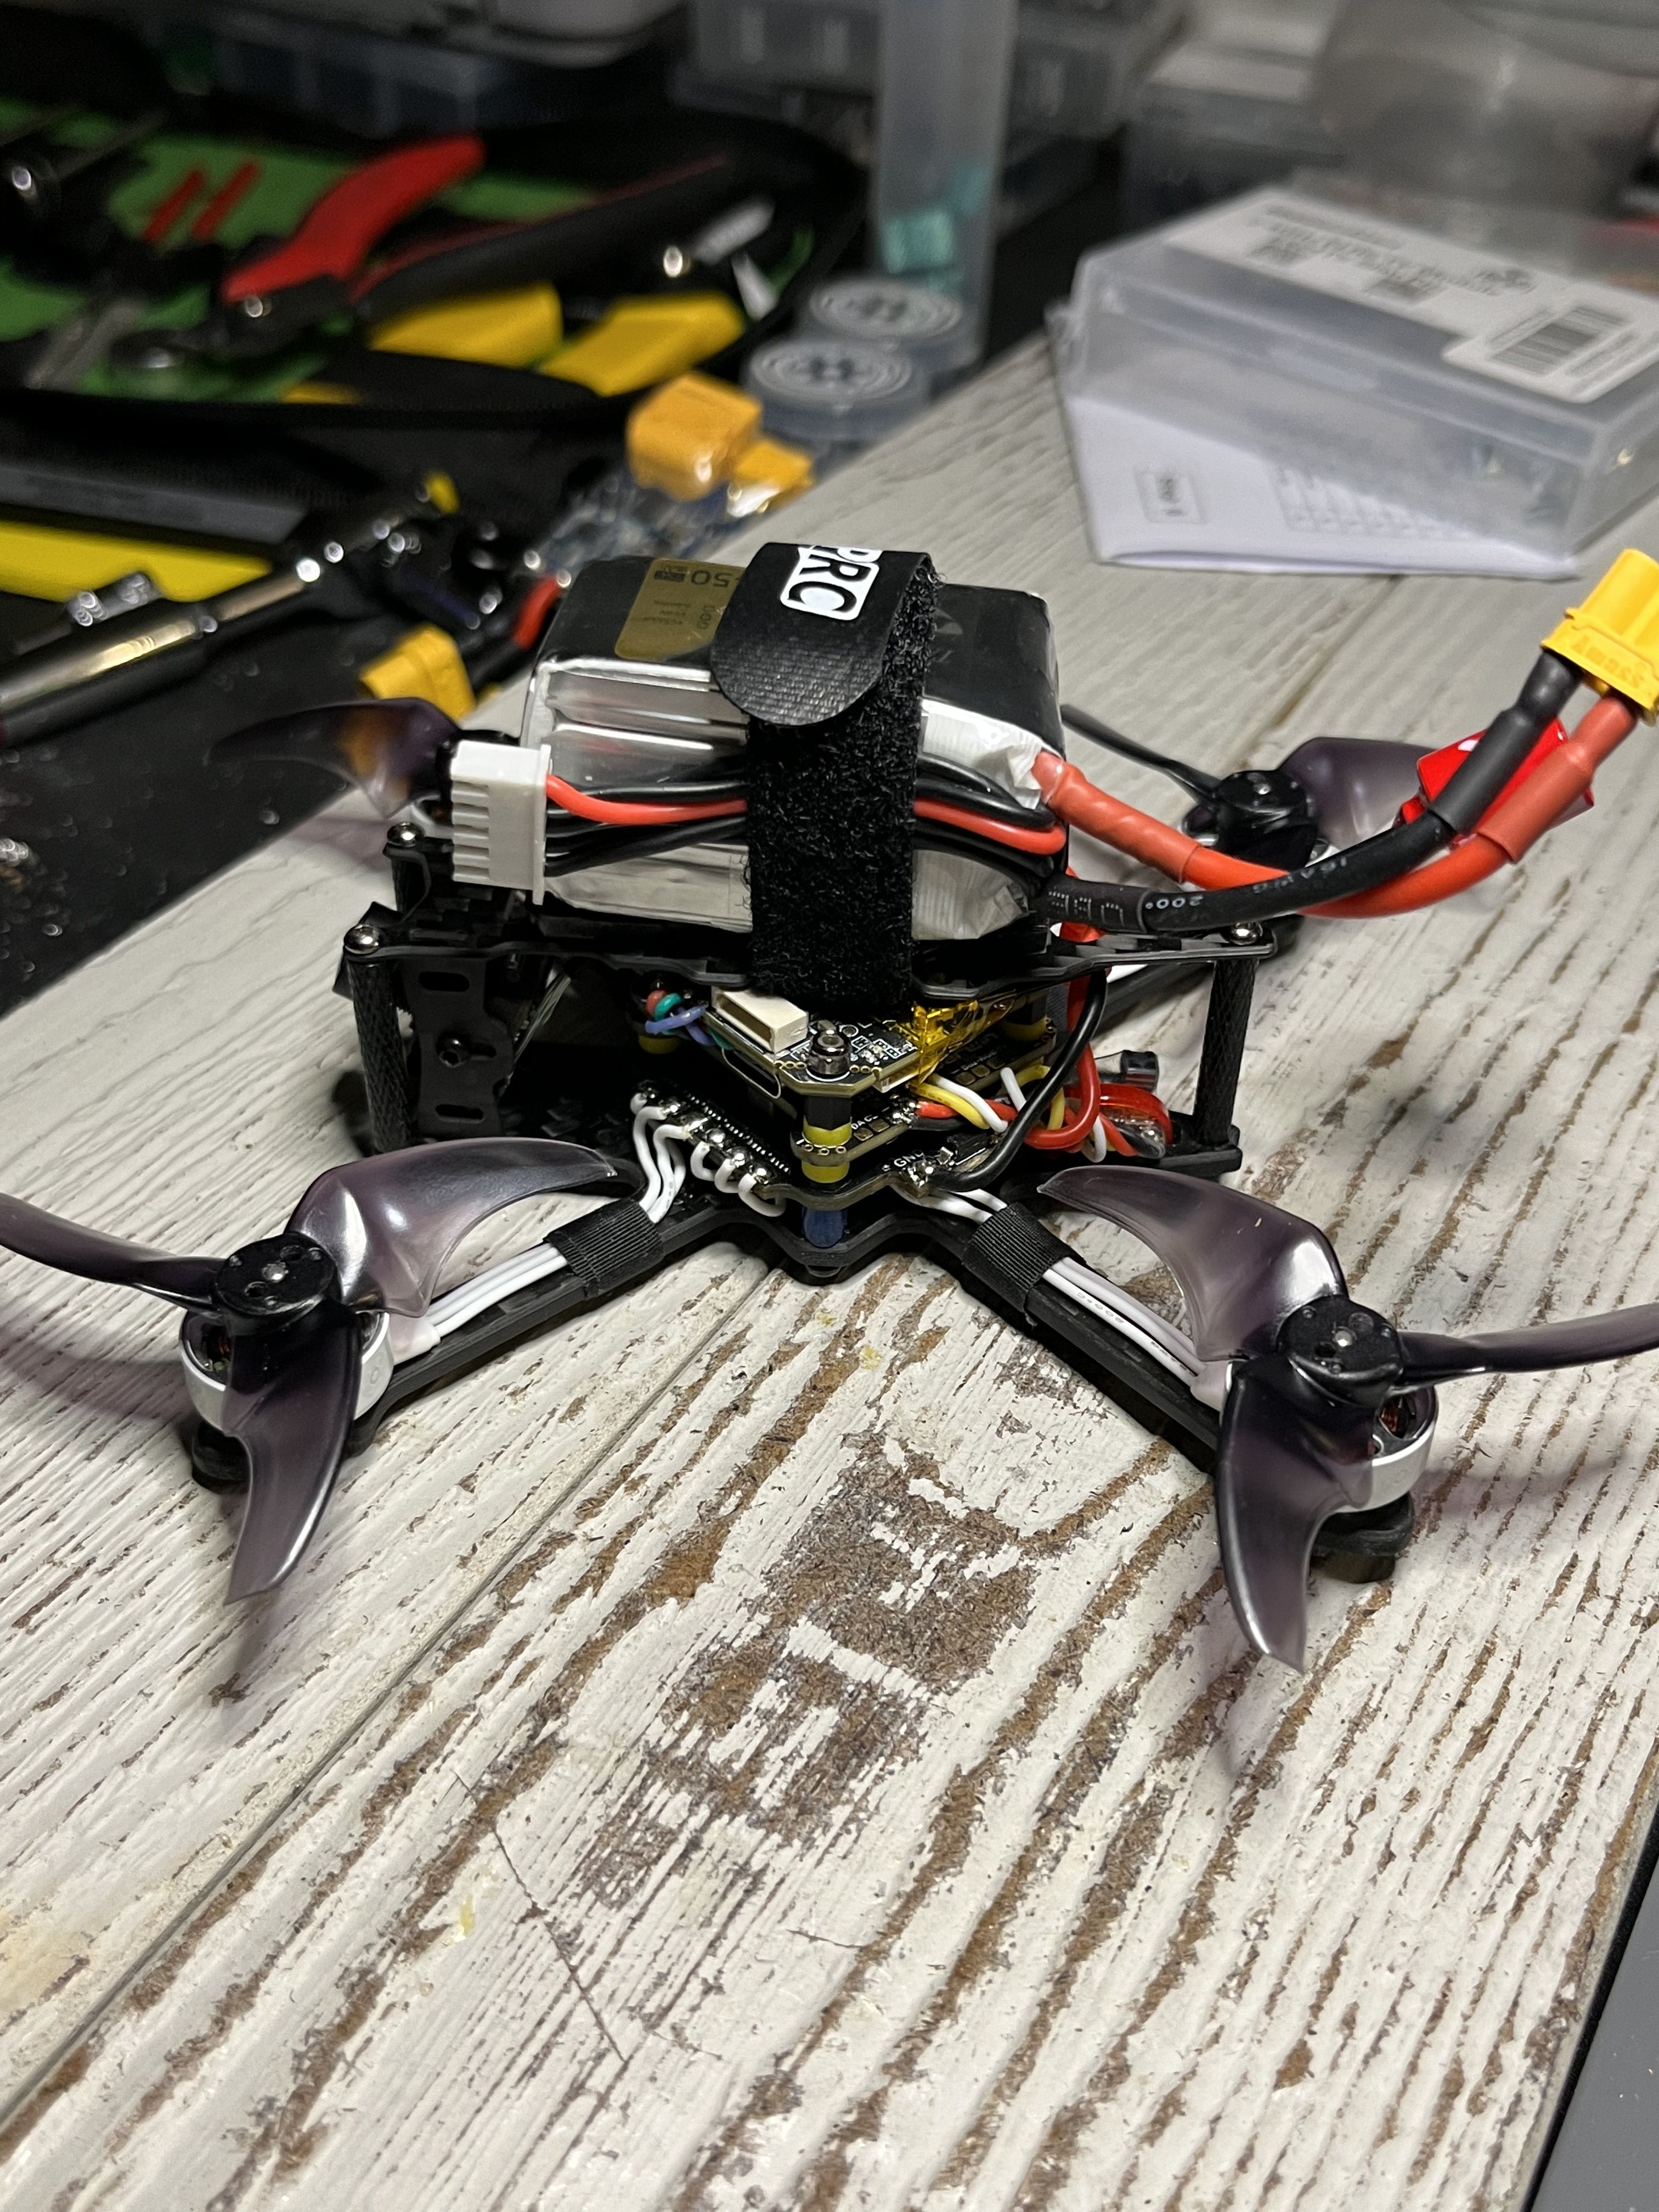
Once I got everything mounted and ready to finish, I noticed that there was very little room between the top of the stack and the top plate. Fortunately, I was able to slip a thin battery strap over the VTX and it wasn't a problem. One other concern I have is the UFL connector on the VTX. It seems to hold the antenna on pretty securely but I really don't want it to come off in a crash. I fed the antenna through the a slit in the top plate to get it angled higher and to keep it from getting into the props. Finally I put some props on and I was ready to go hover test.
Maiden flight video:
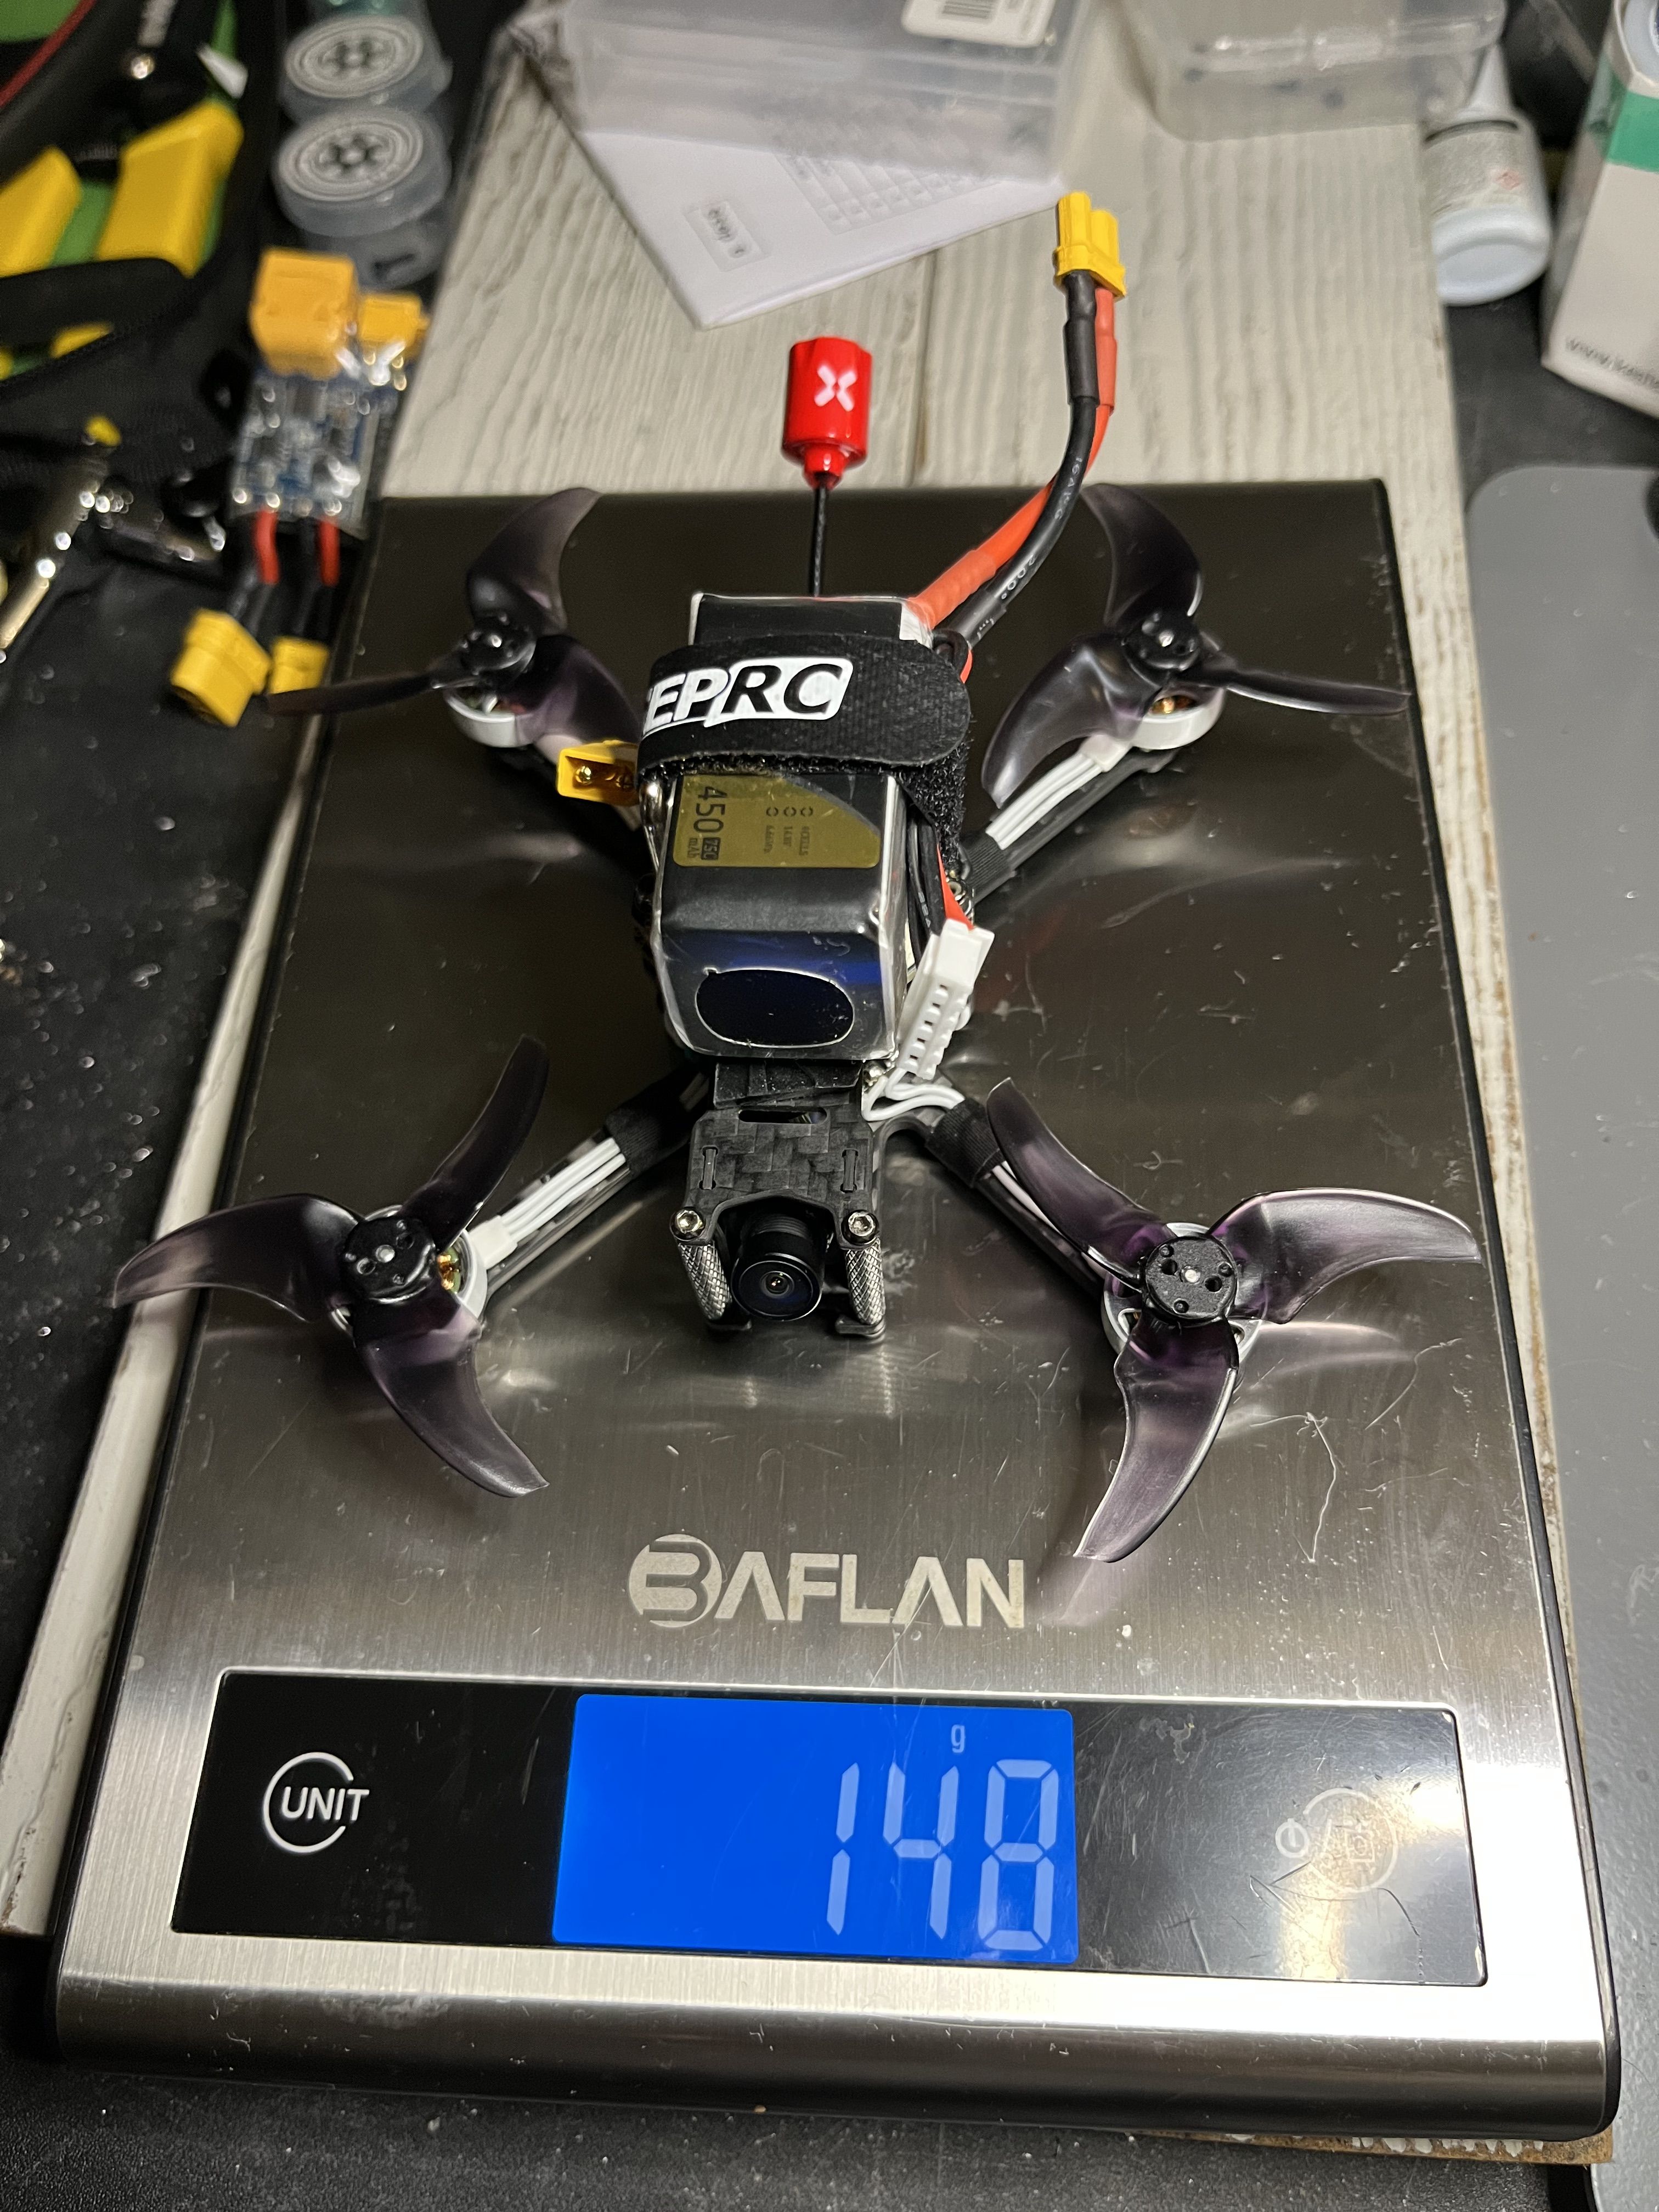
My first impression after the maiden flight was really good. I didn't even notice the camera was 16:9, just a little more distorted at the bottom than I'm used to. I was really impressed with the HDZero system when I flew behind my brick house, I get a lot more noise on 1 watt analog systems behind the house. ExpressLRS didn't failsafe even at 500Hz, as expected. I felt like I needed more camera uptilt to fly at a comfortable throttle position, which is something I changed for my second flight. I did a punchout during the second flight and that resulted in a prop flying off because I didn't use the prop screws because it makes the props such a pain to get off. I always try to get away with just using friction to hold the props on and it never works. The quad crashed into the wet grass in the backyard but nothing but the props were broken and a motor had some dirt stuck on it, the UFL didn't pop off either. I'm still using the same 450mAh 4s batteries that I used to fly with this quad and I think that they're in worse shape than I remember. One battery flew 1 minute and 20 seconds and was down to 14 volts so I may need some new batteries.
This quad is everything I thought it would be. I remember getting the bind and fly from geprc and flying it with DJI and the nebula nano like two months after I started flying. I remember having a ton of fun with it and being able to feel like I could go anywhere and do anything at first. Then it died and I left it alone because I was learning to build 5" drones at the time. Now that I have more experience as a pilot I think I'll have even more fun flying this quad around. My 5" quads don't have the same feel as this one; they fly better for sure but they just feel way bigger. I may try to tinker with tuning but it depends on how often I get out to fly.
Overall I'm very happy that I was able to get this quad, or the frame I guess, back in the air and fly it again because it always was so much fun. It also has a special place in my heart because it was the first real FPV drone I ever owned. I'm also very pleased that this build went as well as it did. I'm starting to get to a point that I can have the parts to build a drone, then I hack them all together and have a working, flying aircraft pretty quickly which is a lot of fun to do. I love this hobby because I love flying drones that I've built and I can't wait to see what I build next.
Photos


Part List
Show stores (3)Guides & Reviews

AirbladeUAV has done it again and this time they've brought long range to the 5" class! Based on the popular Transformer Mini, the new Transformer 5" Ultralight adopts a lot of the same design philosophies with larger props and more payload capacity. It can fly upwards of 20 minutes on a 4 cell Li-Ion battery pack and in ideal conditions it's got a range of over 4 to 5 miles. In this guide I'll walk..
Read more
With the release of the DJI FPV Drone cinematic FPV has become a lot more accessible, but you certainly don't want to crash a $750 drone! The QAV-CINE Freybott is a compact, lightweight cinematic FPV drone that can take a hit and keep going. It's a lot safer to fly indoors and around people. With a naked GoPro or the SMO 4k you can capture some great stabilized footage. In this guide I'll show you..
Read more


nice build, sexy darwin stack! what is your avg flight time with 450 4s?
Thanks! I get between three and three and a half minutes and my packs end ~15 volts so probably upwards of four minutes if I drained them to 14 volts.