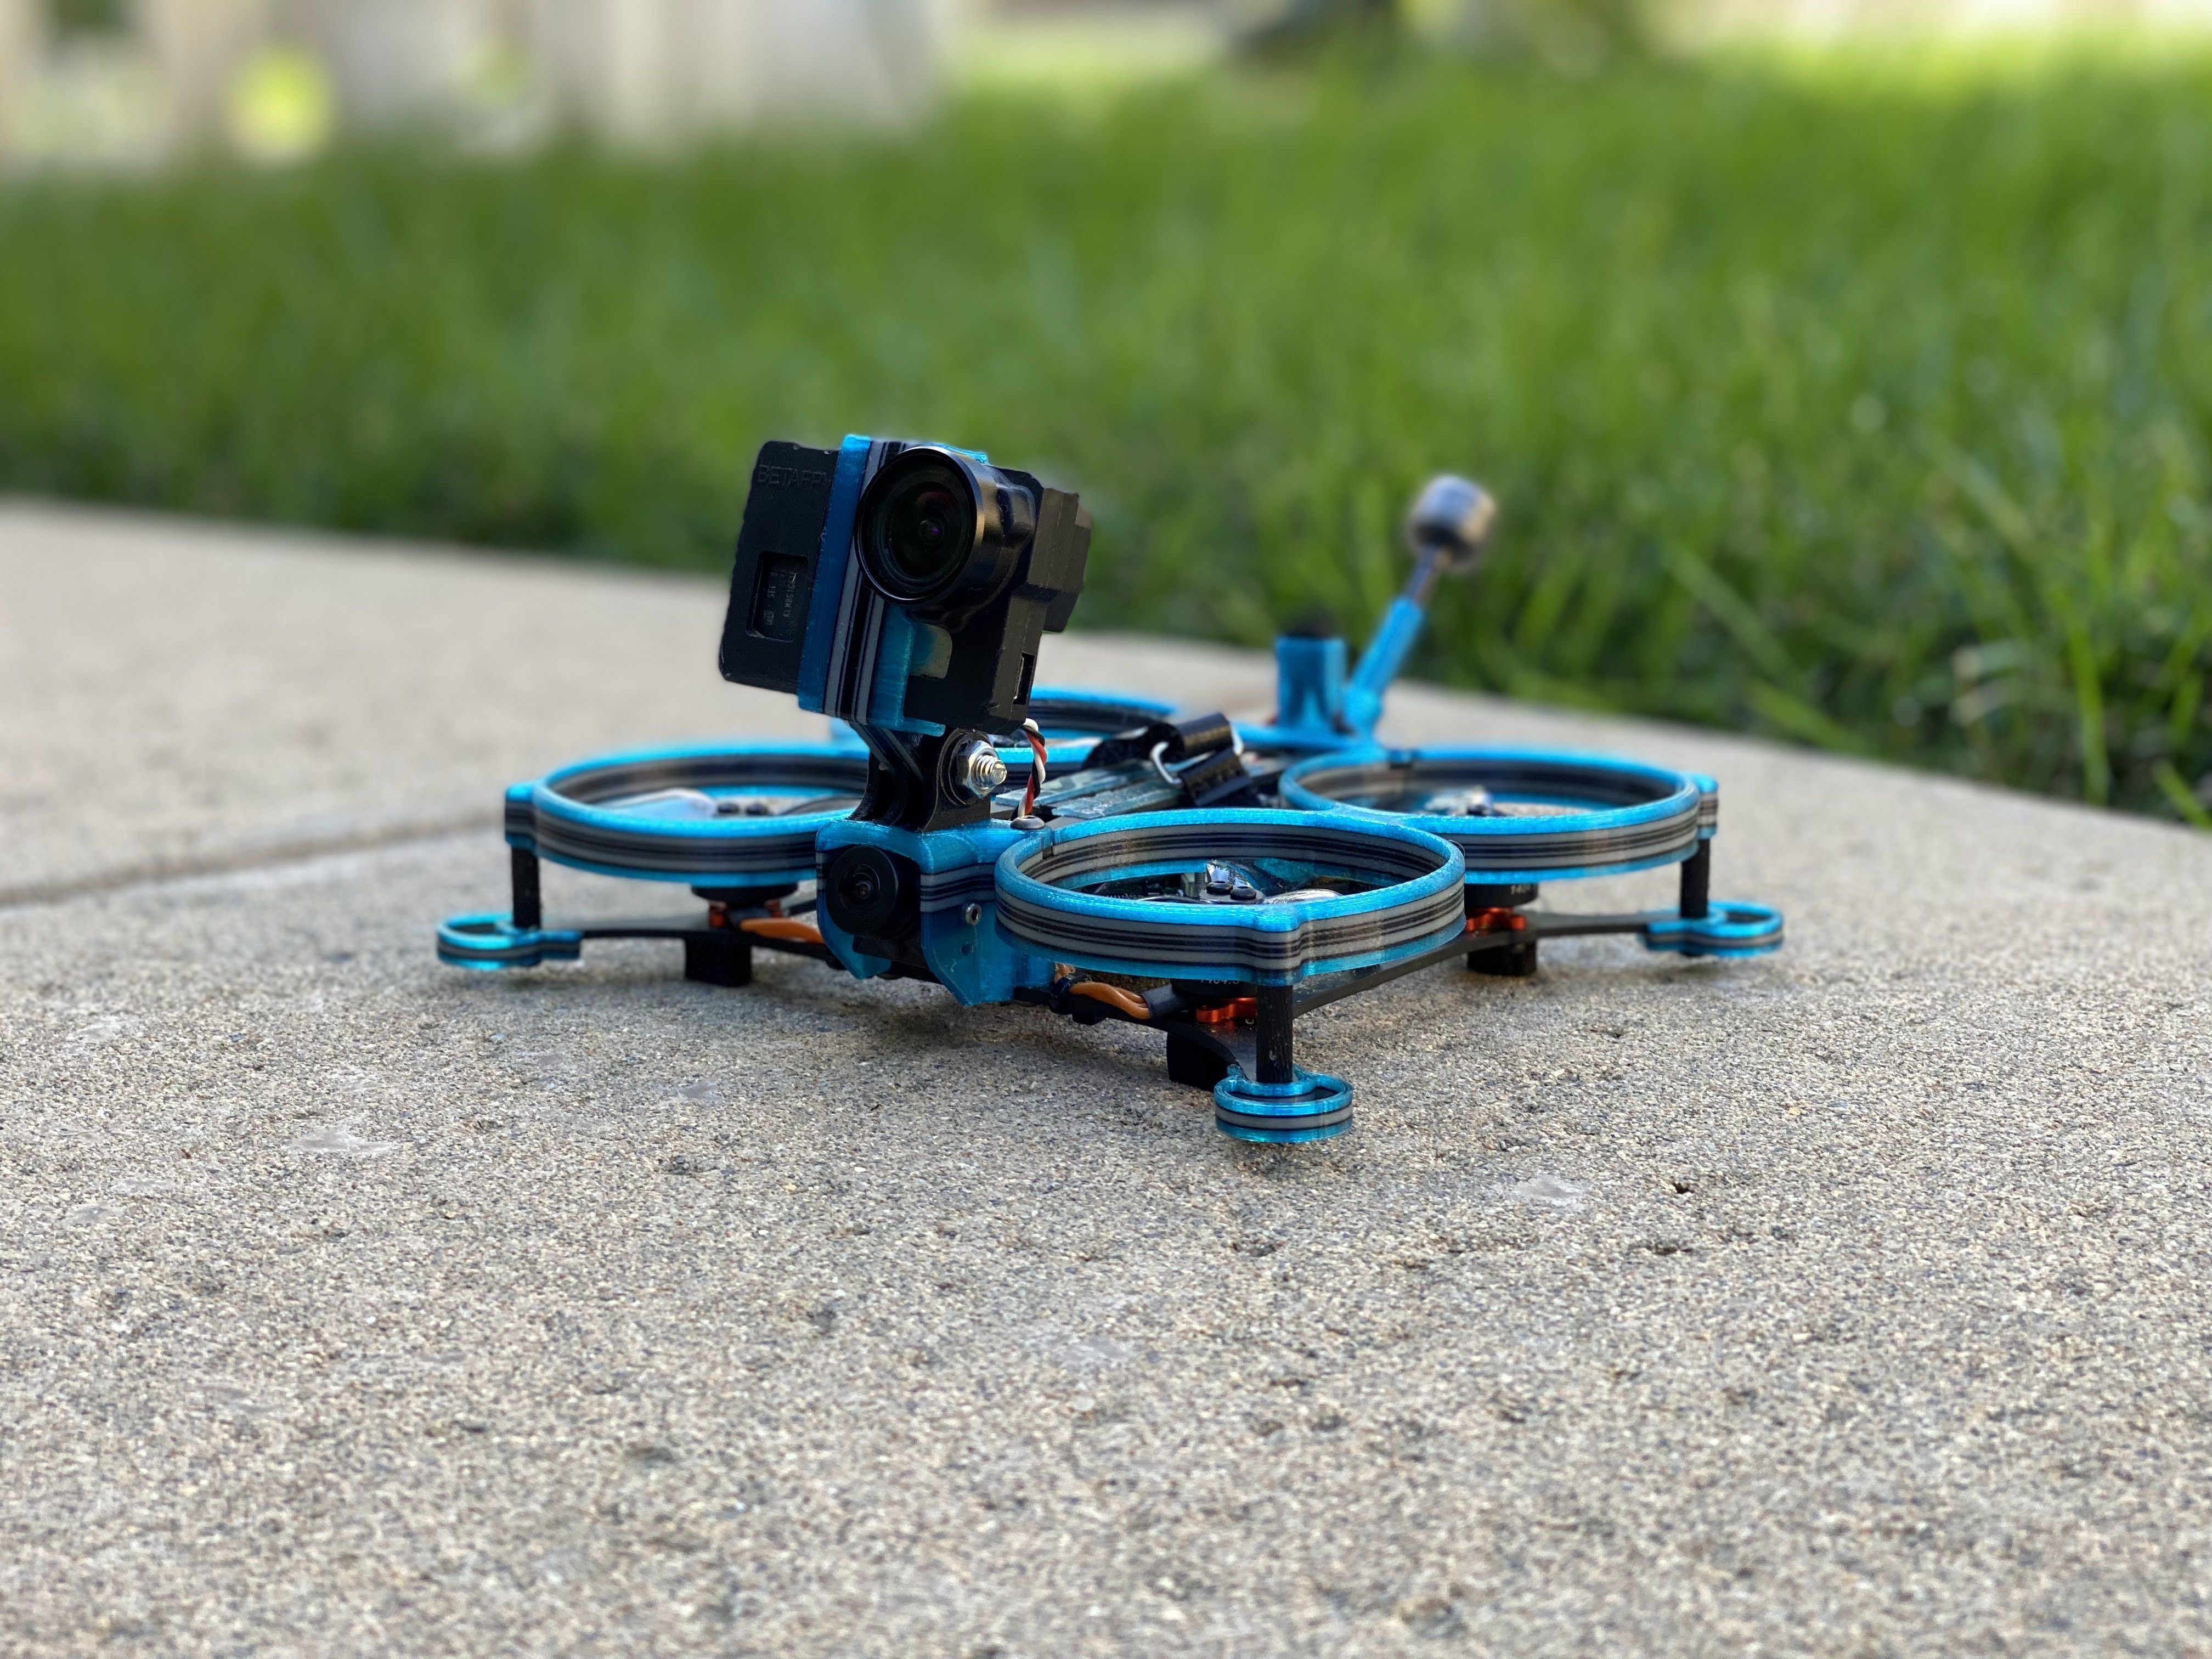
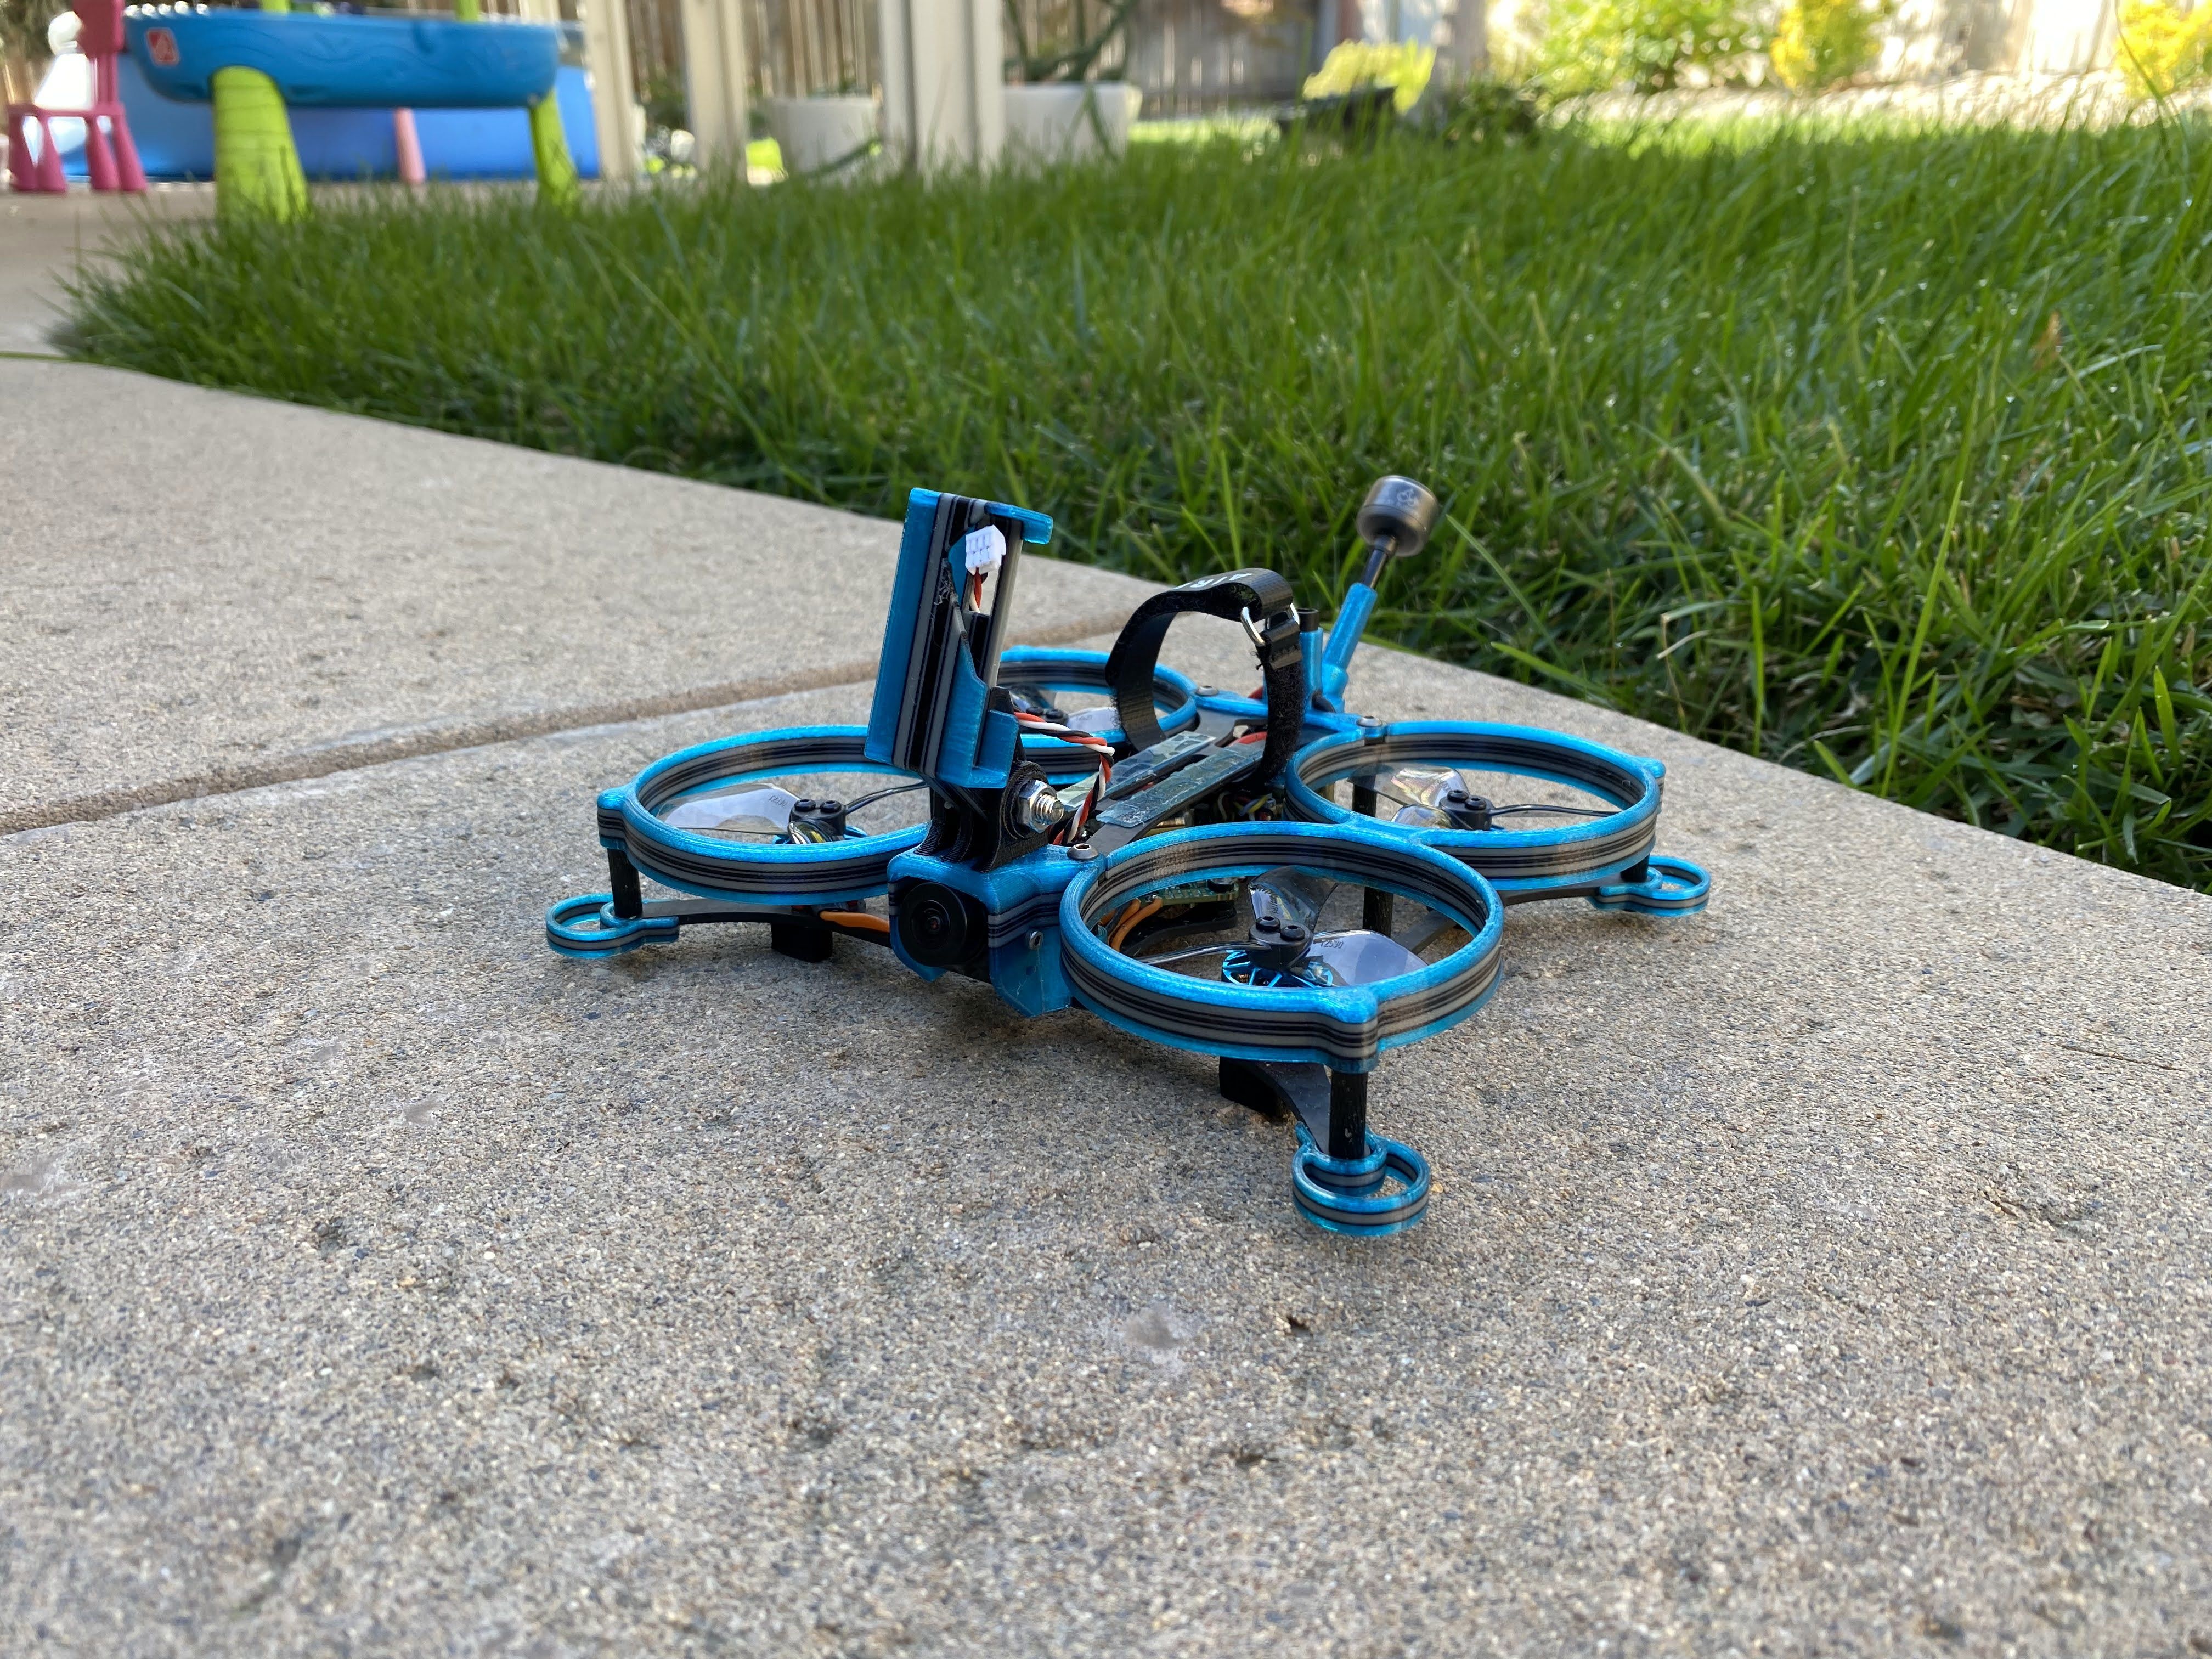
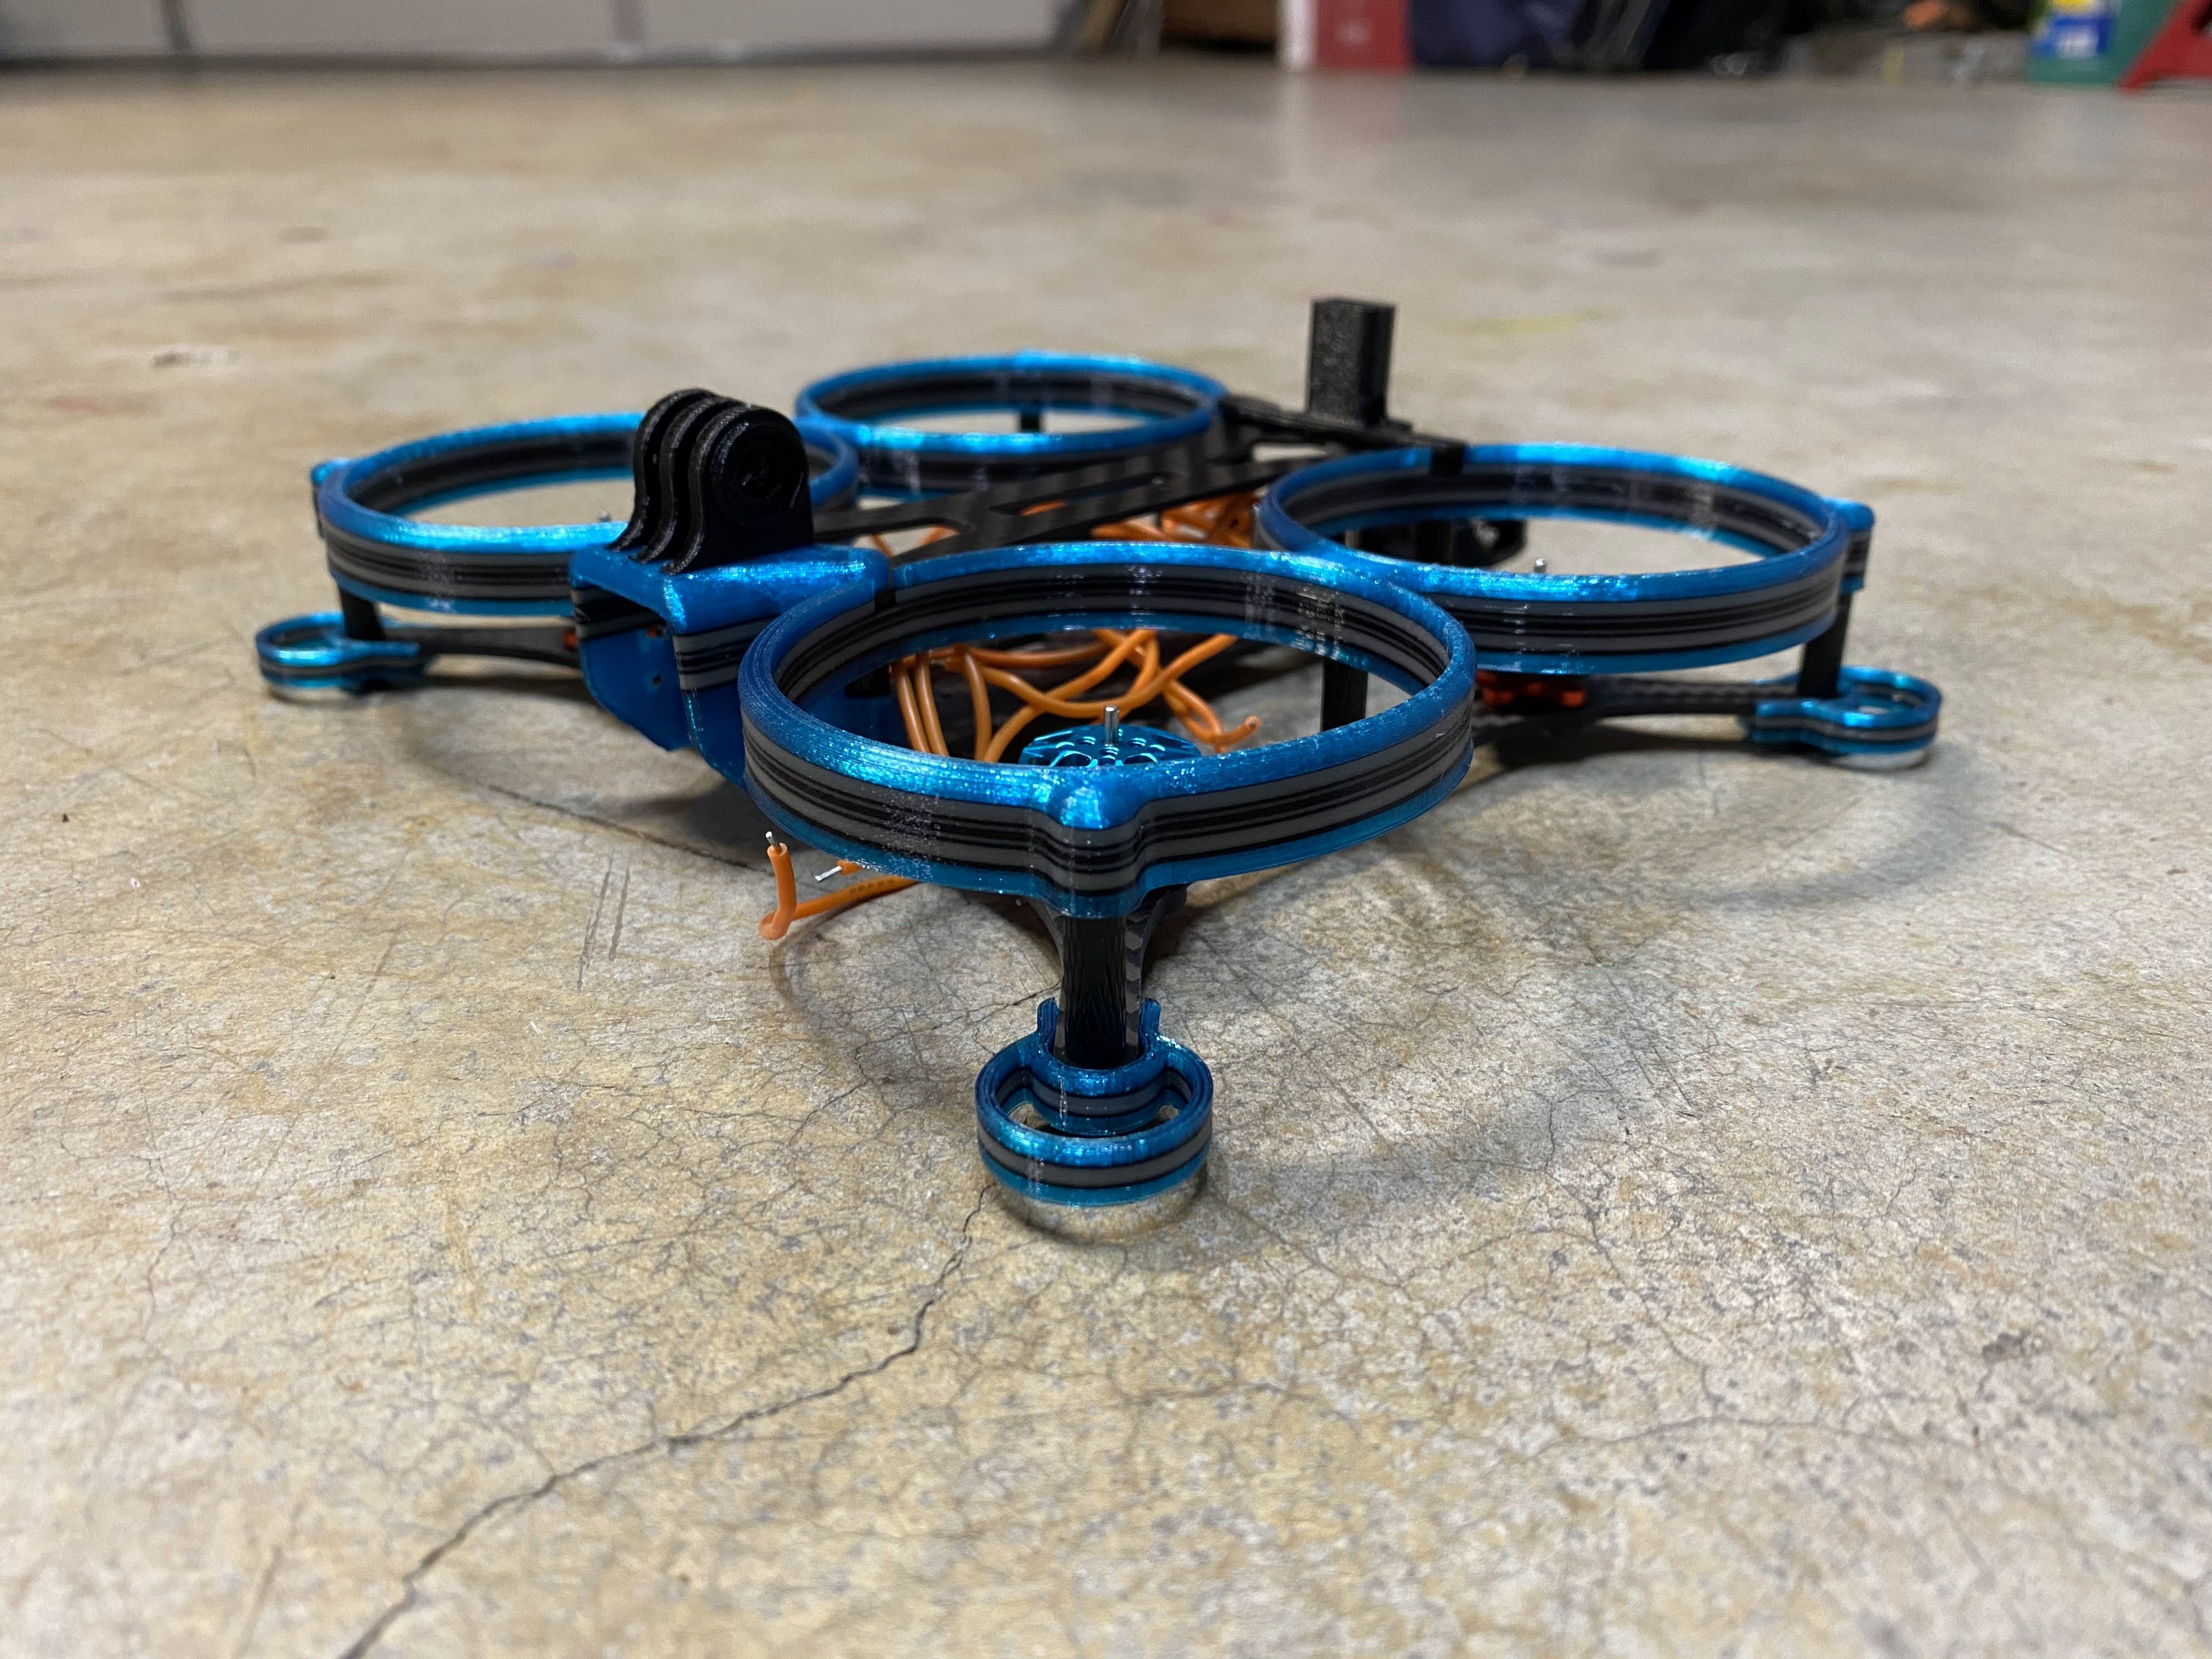
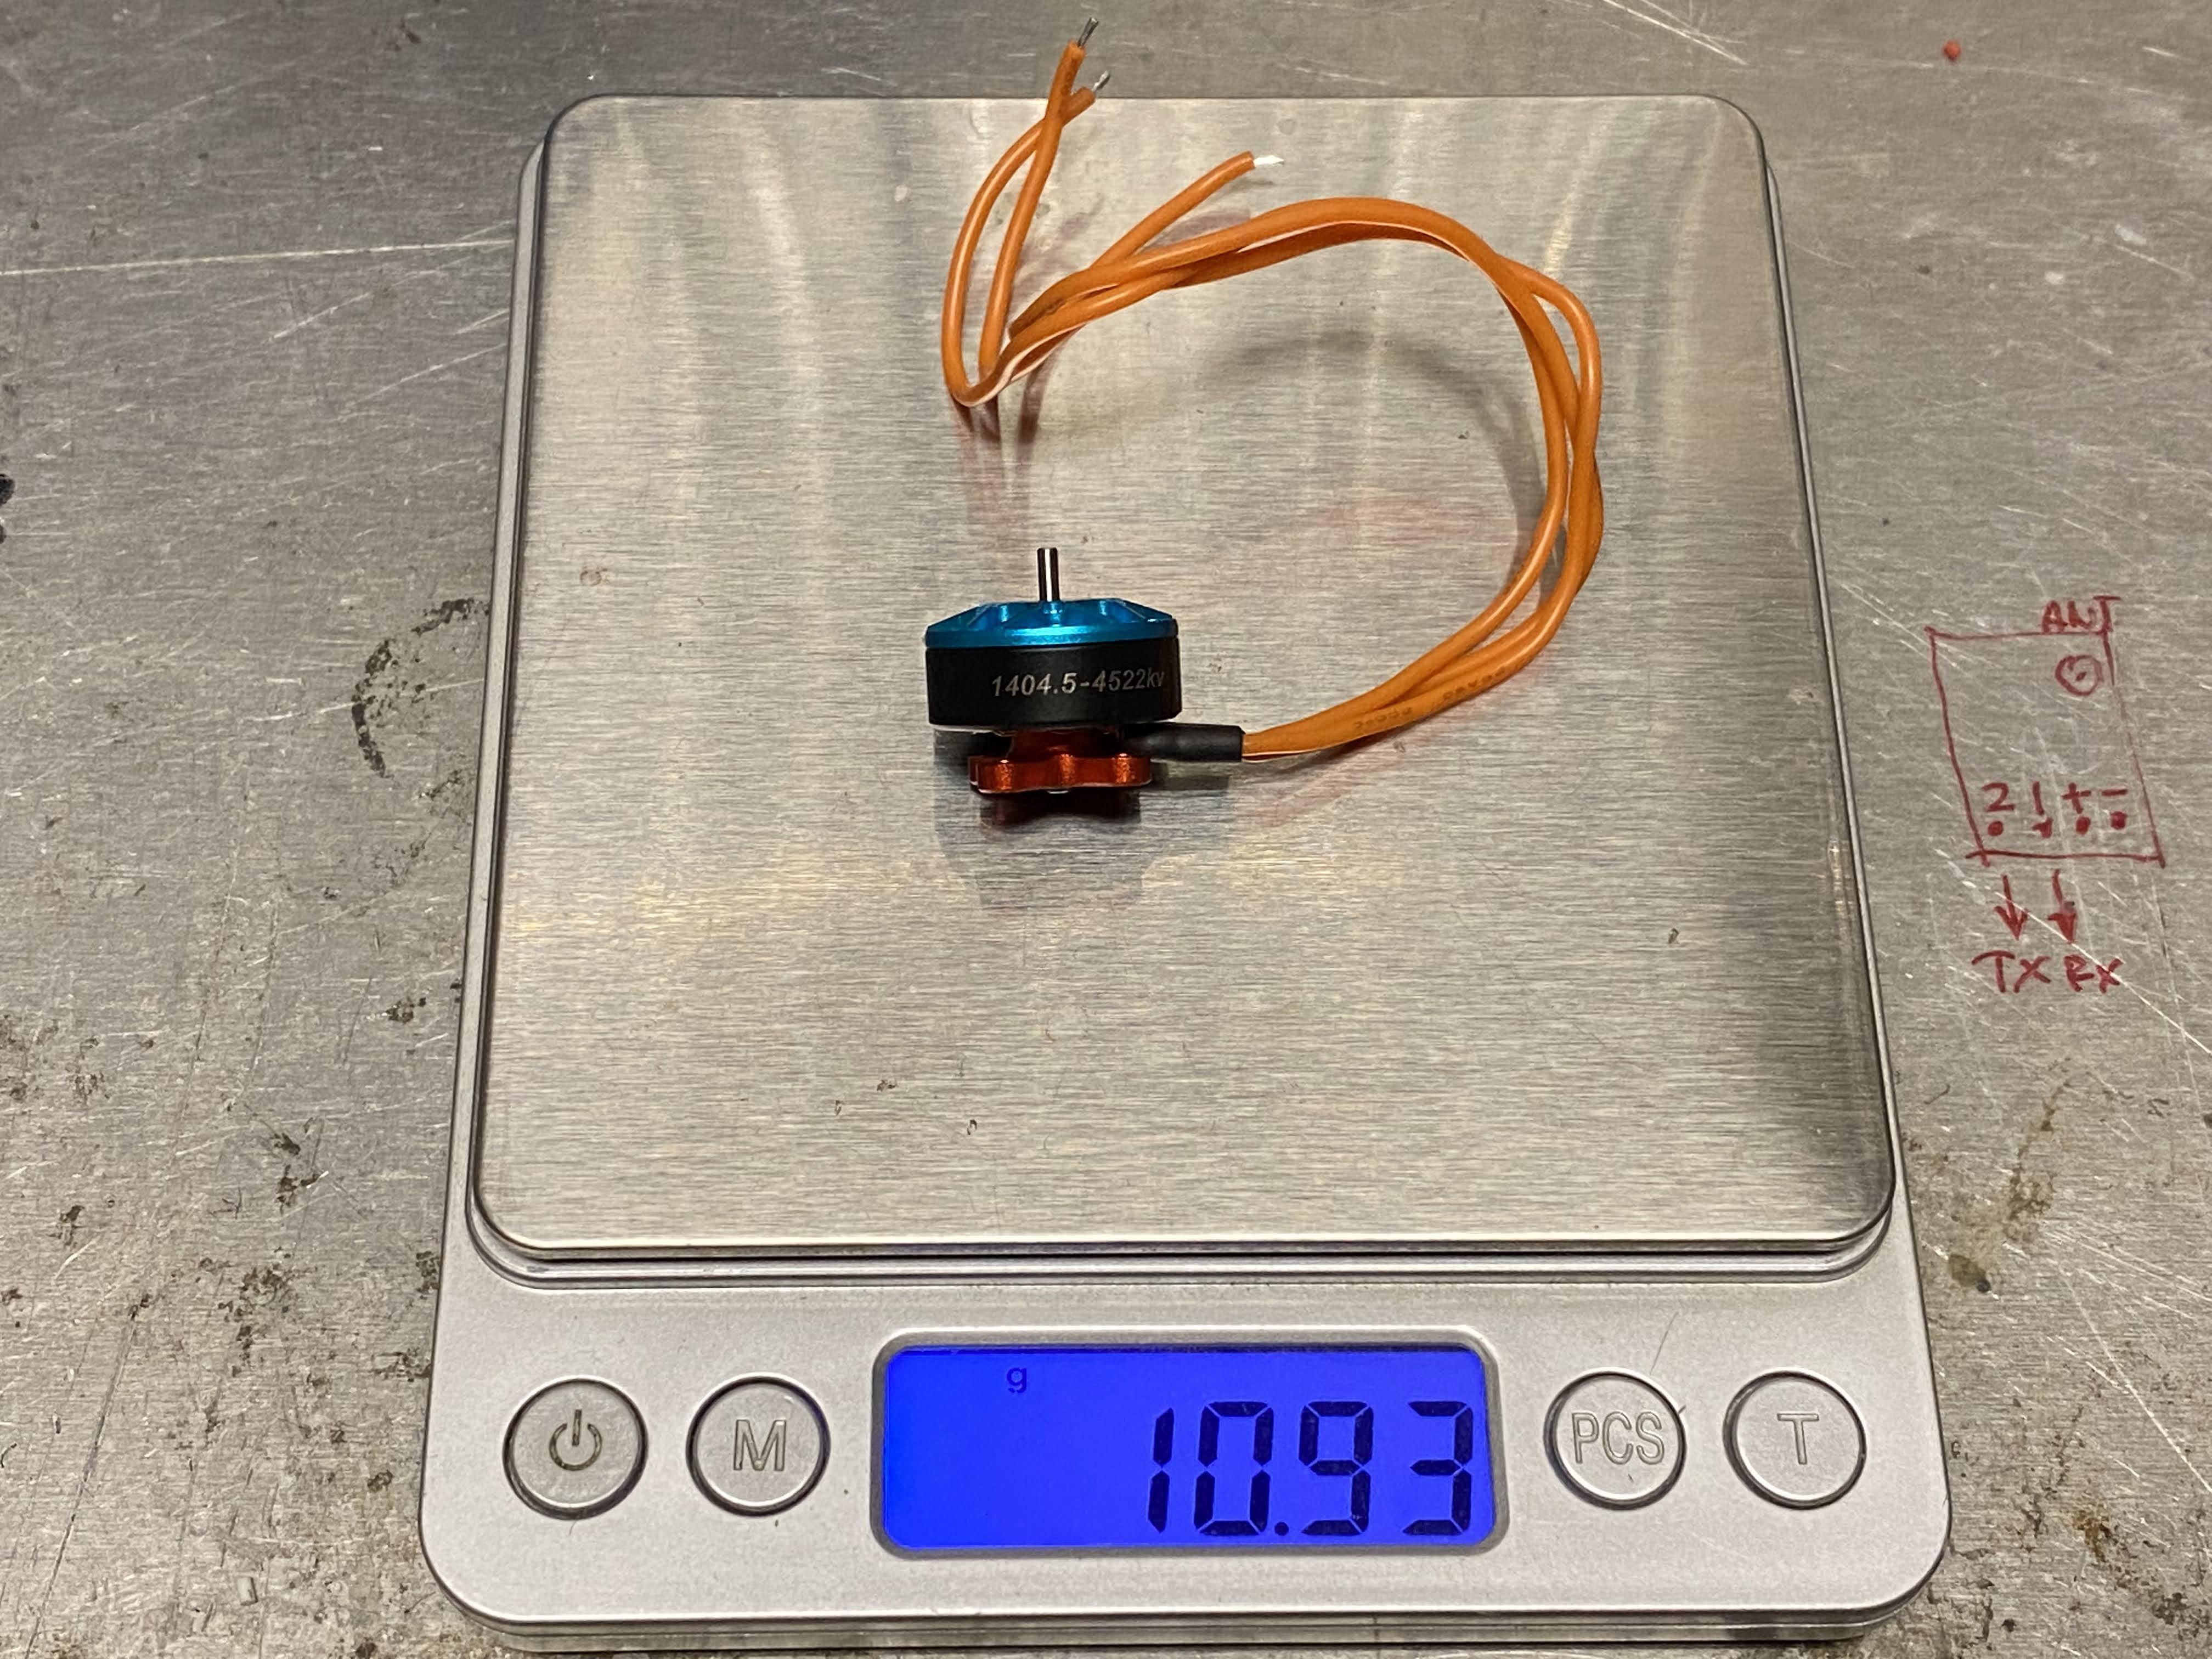
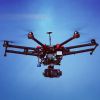
SnapShot 2.5" Cinewhoop HD - 1404.5 4522kv Motors - Both Pusher & Puller!
 By wrong17 on Sep 24, 2022
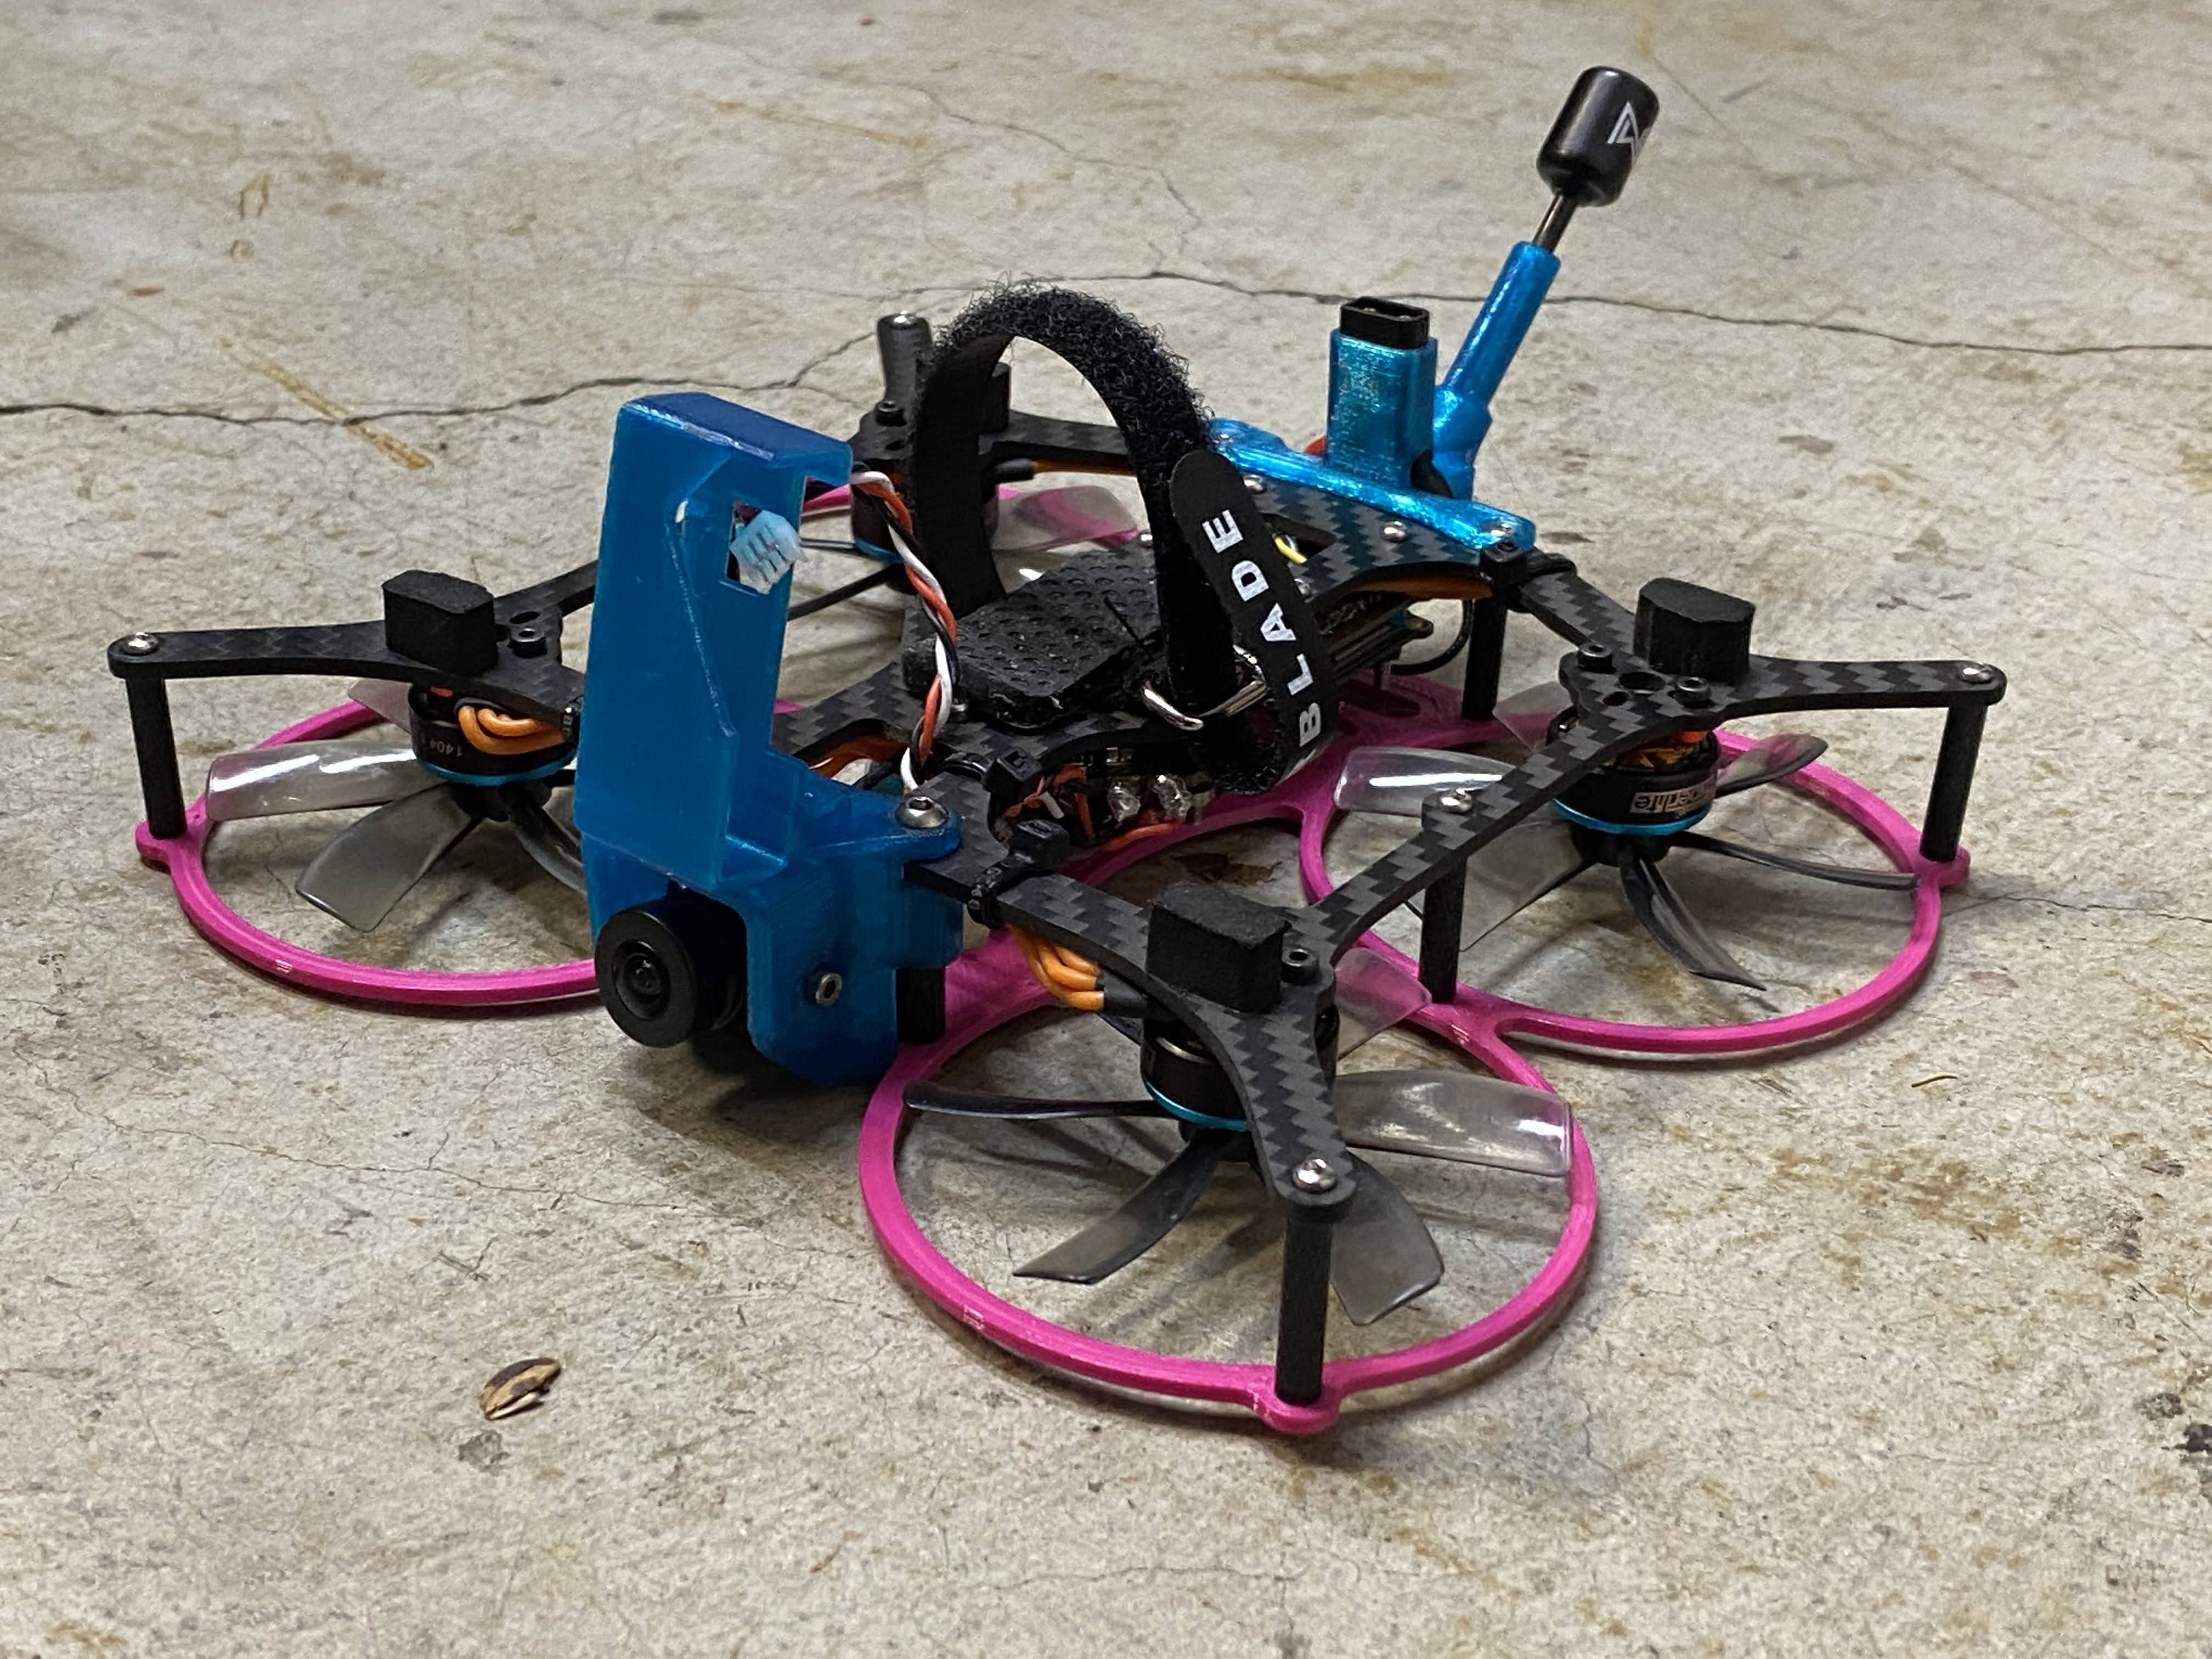
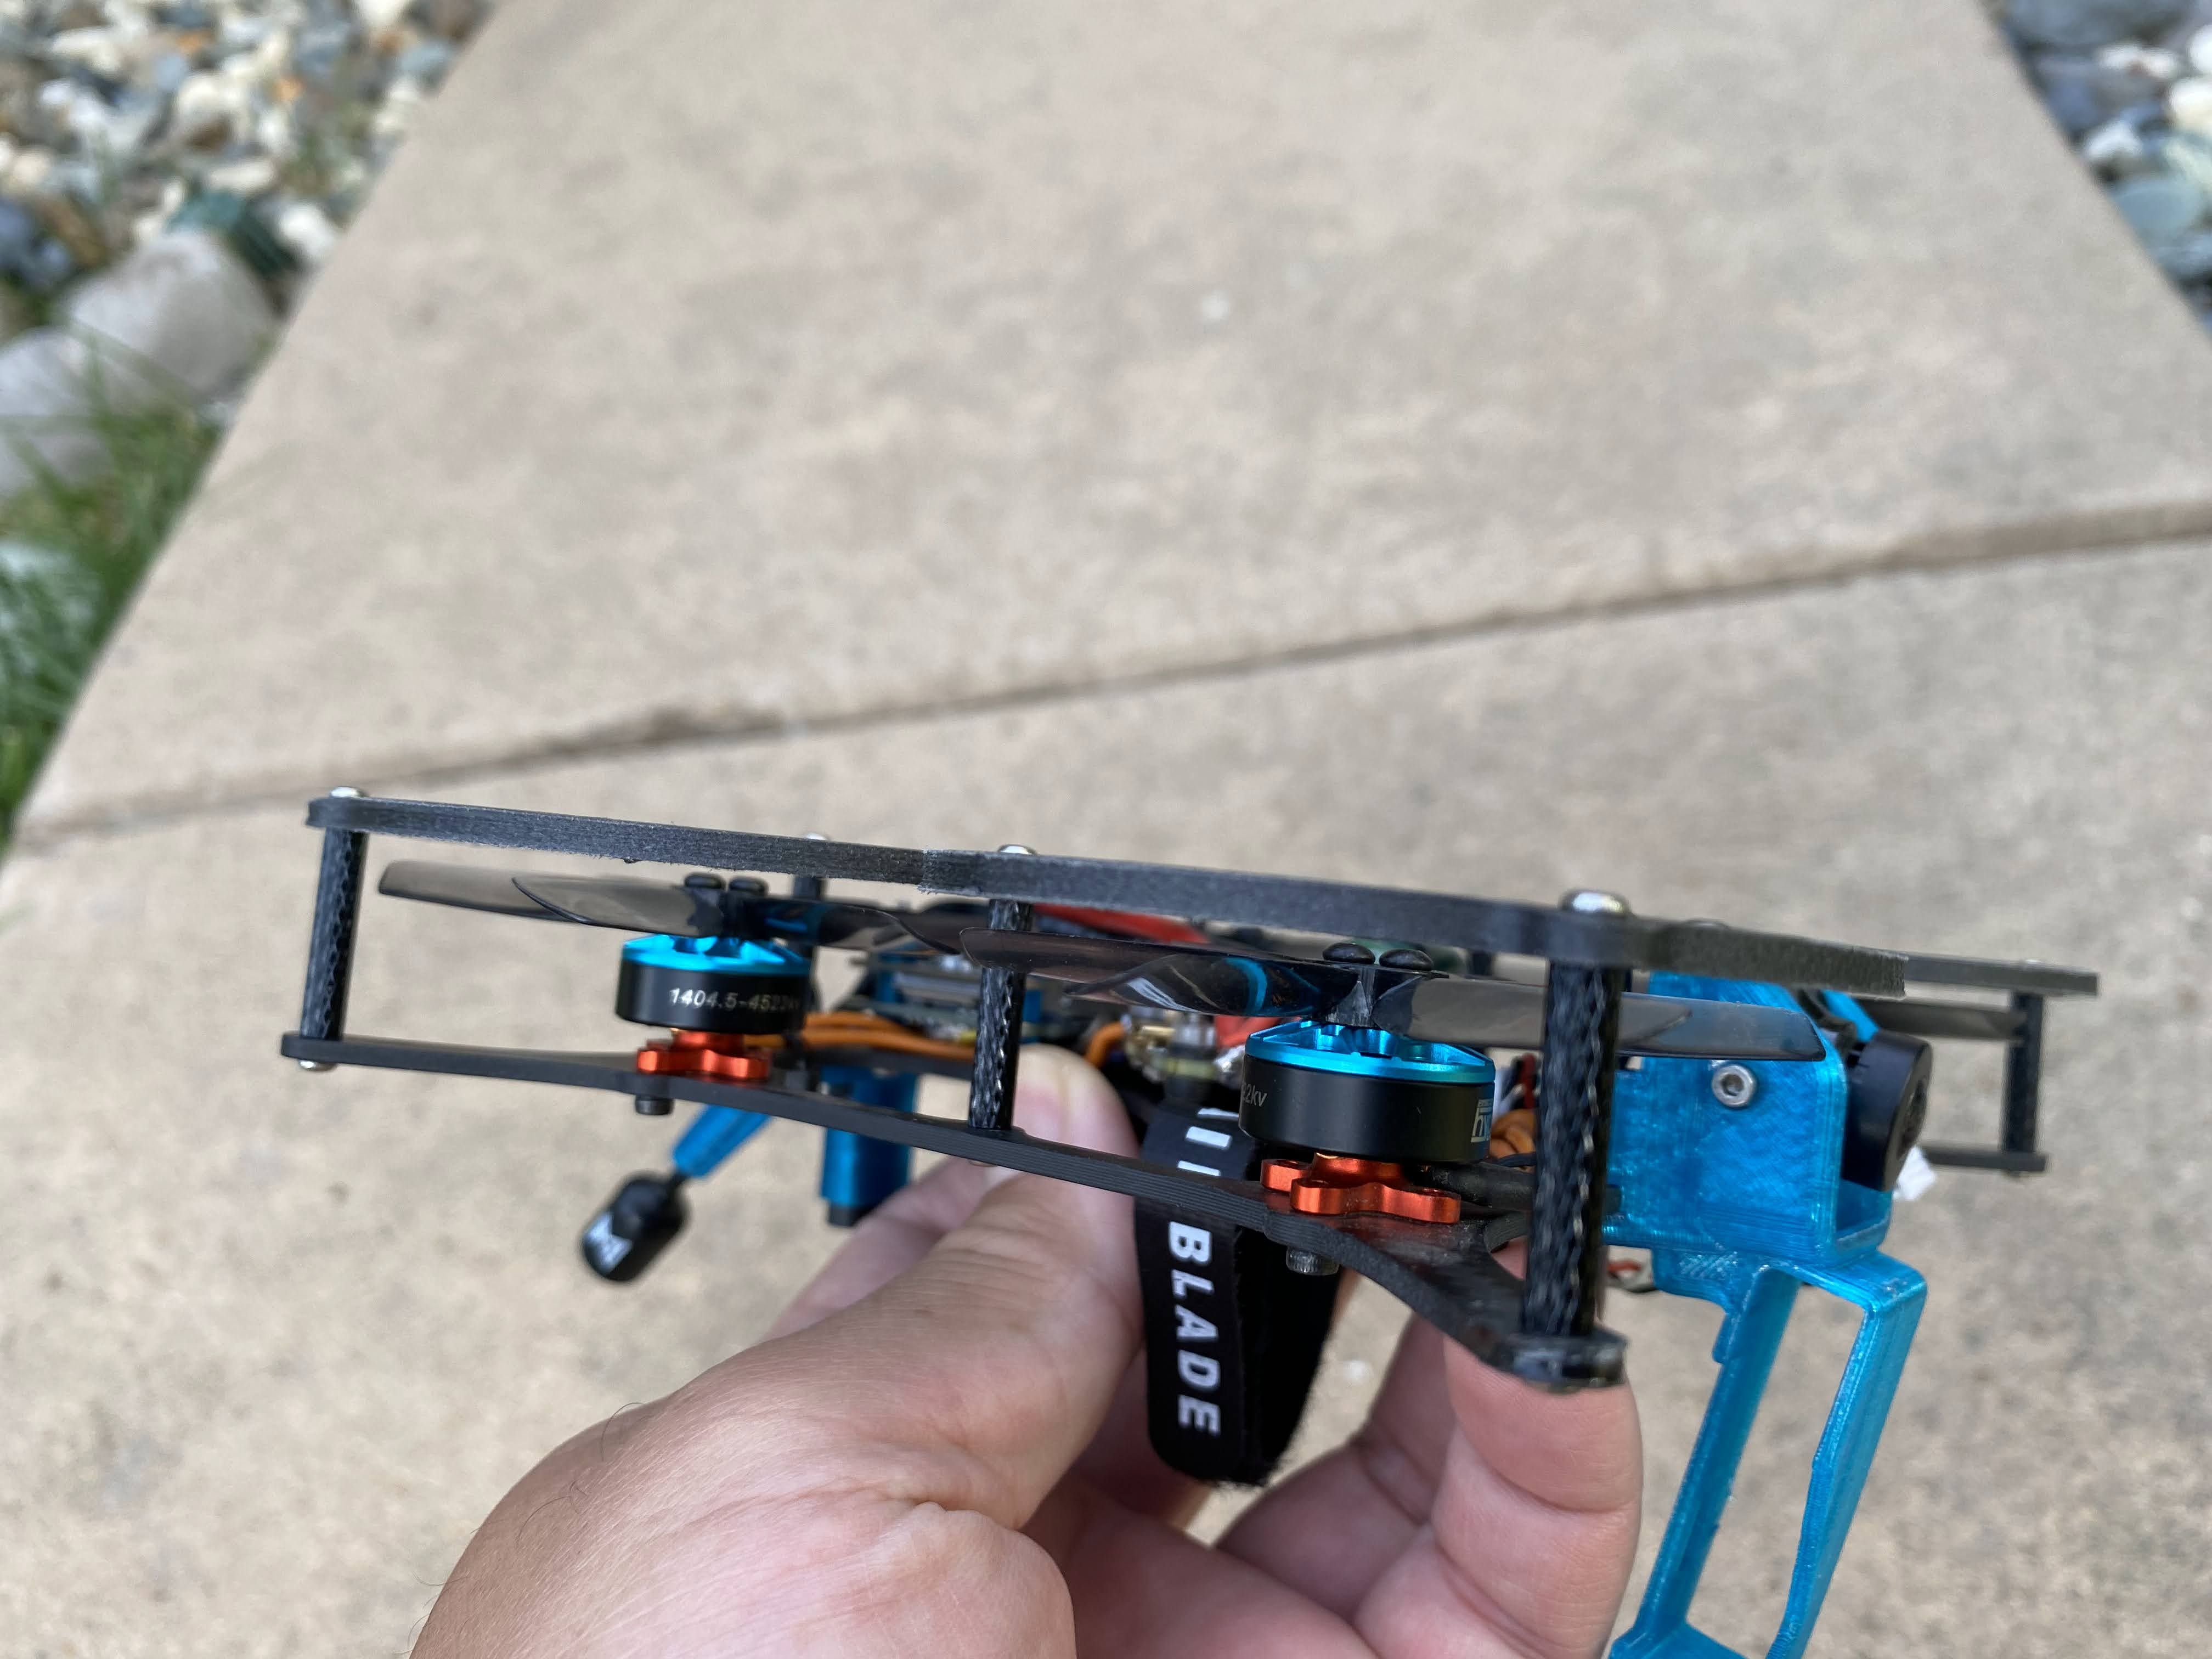
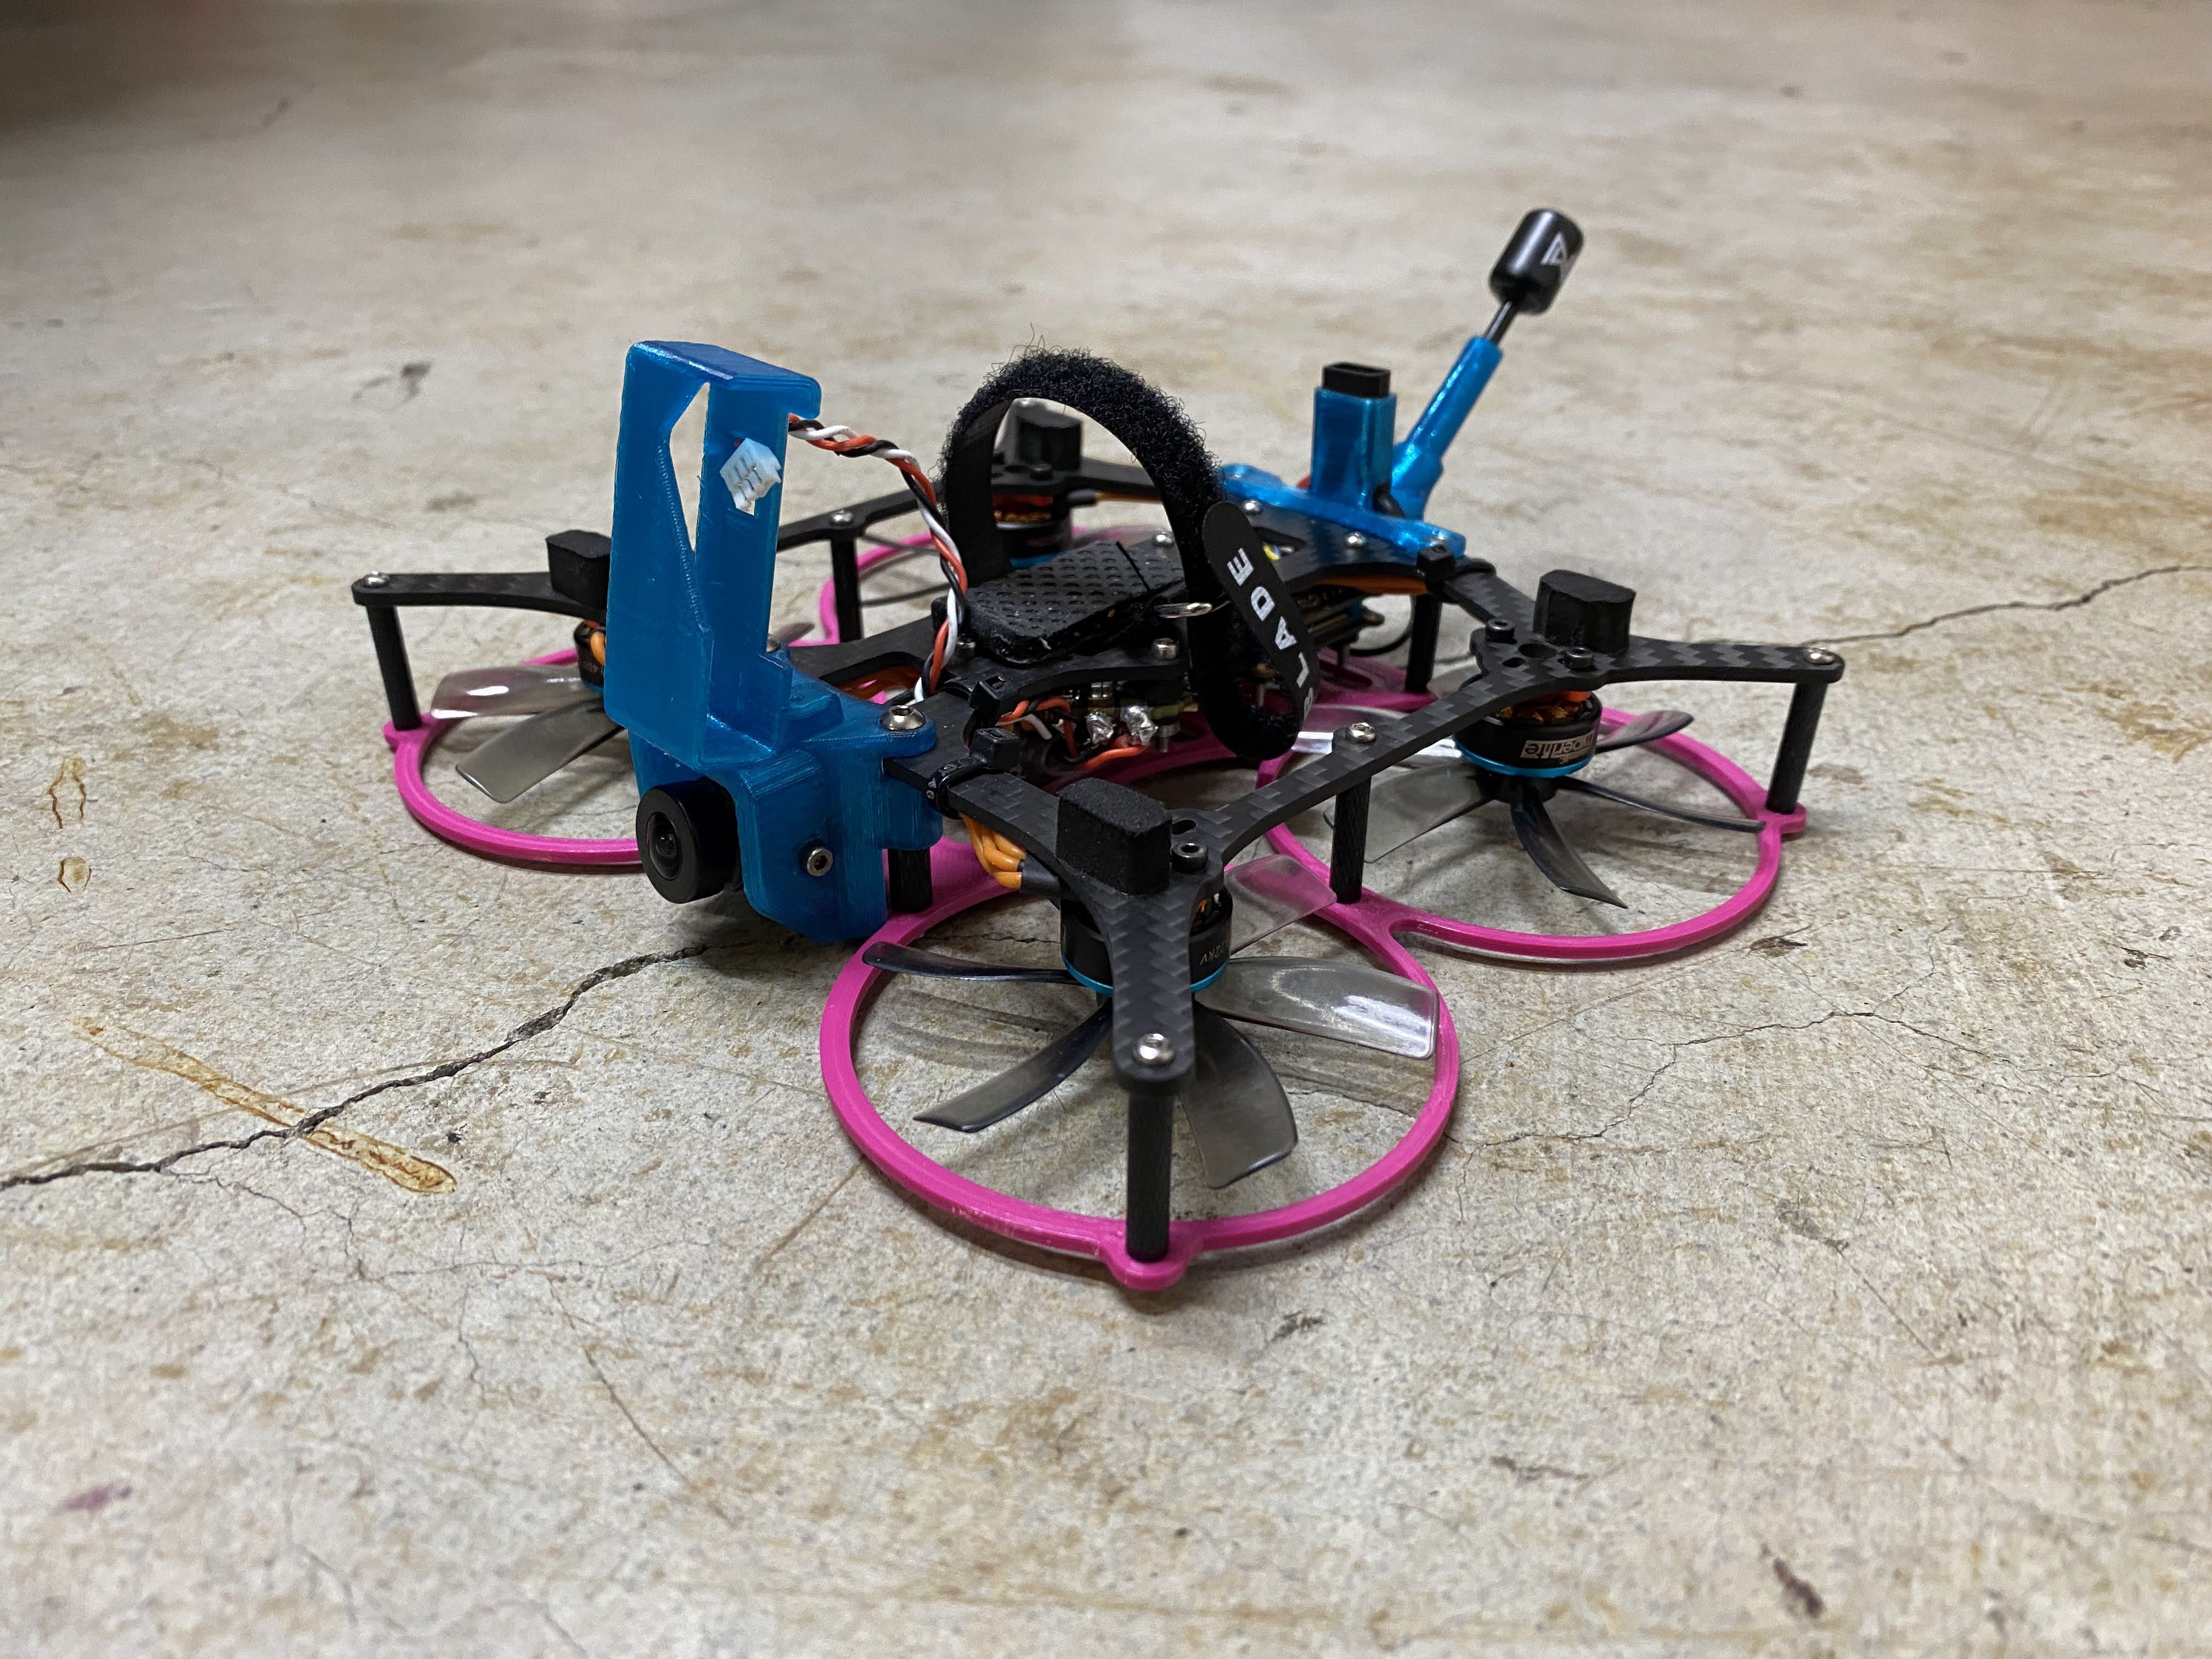
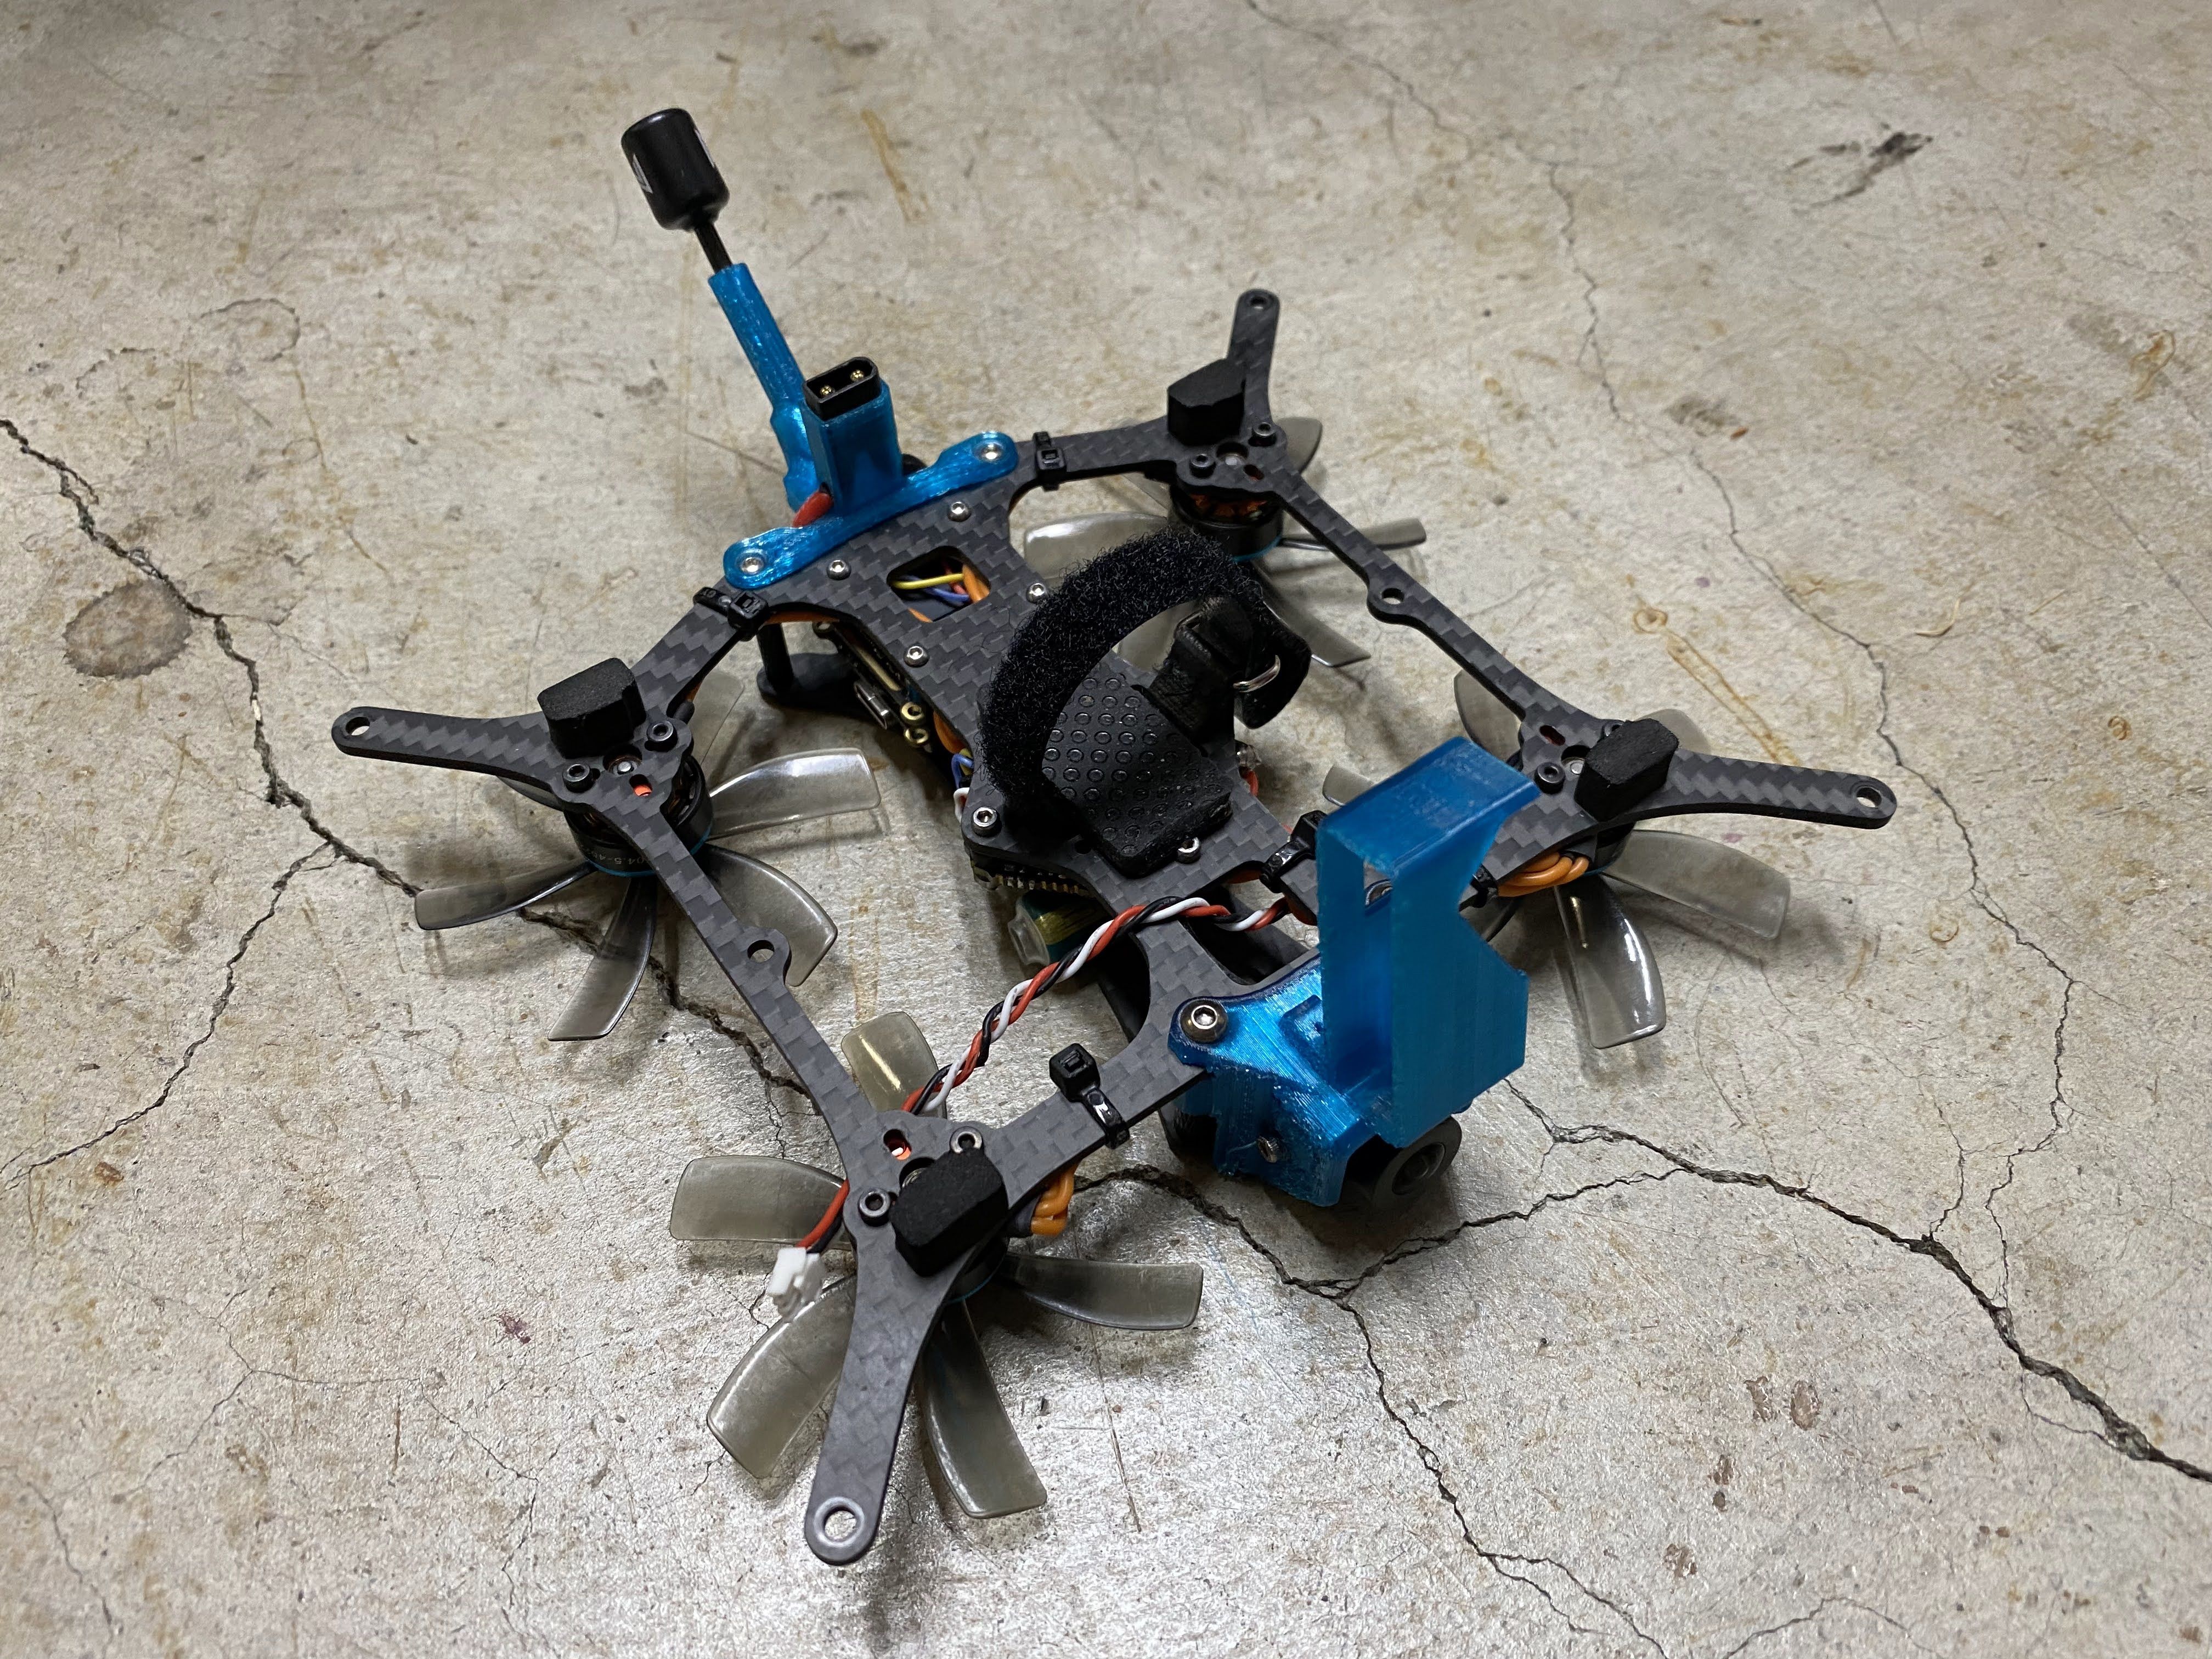
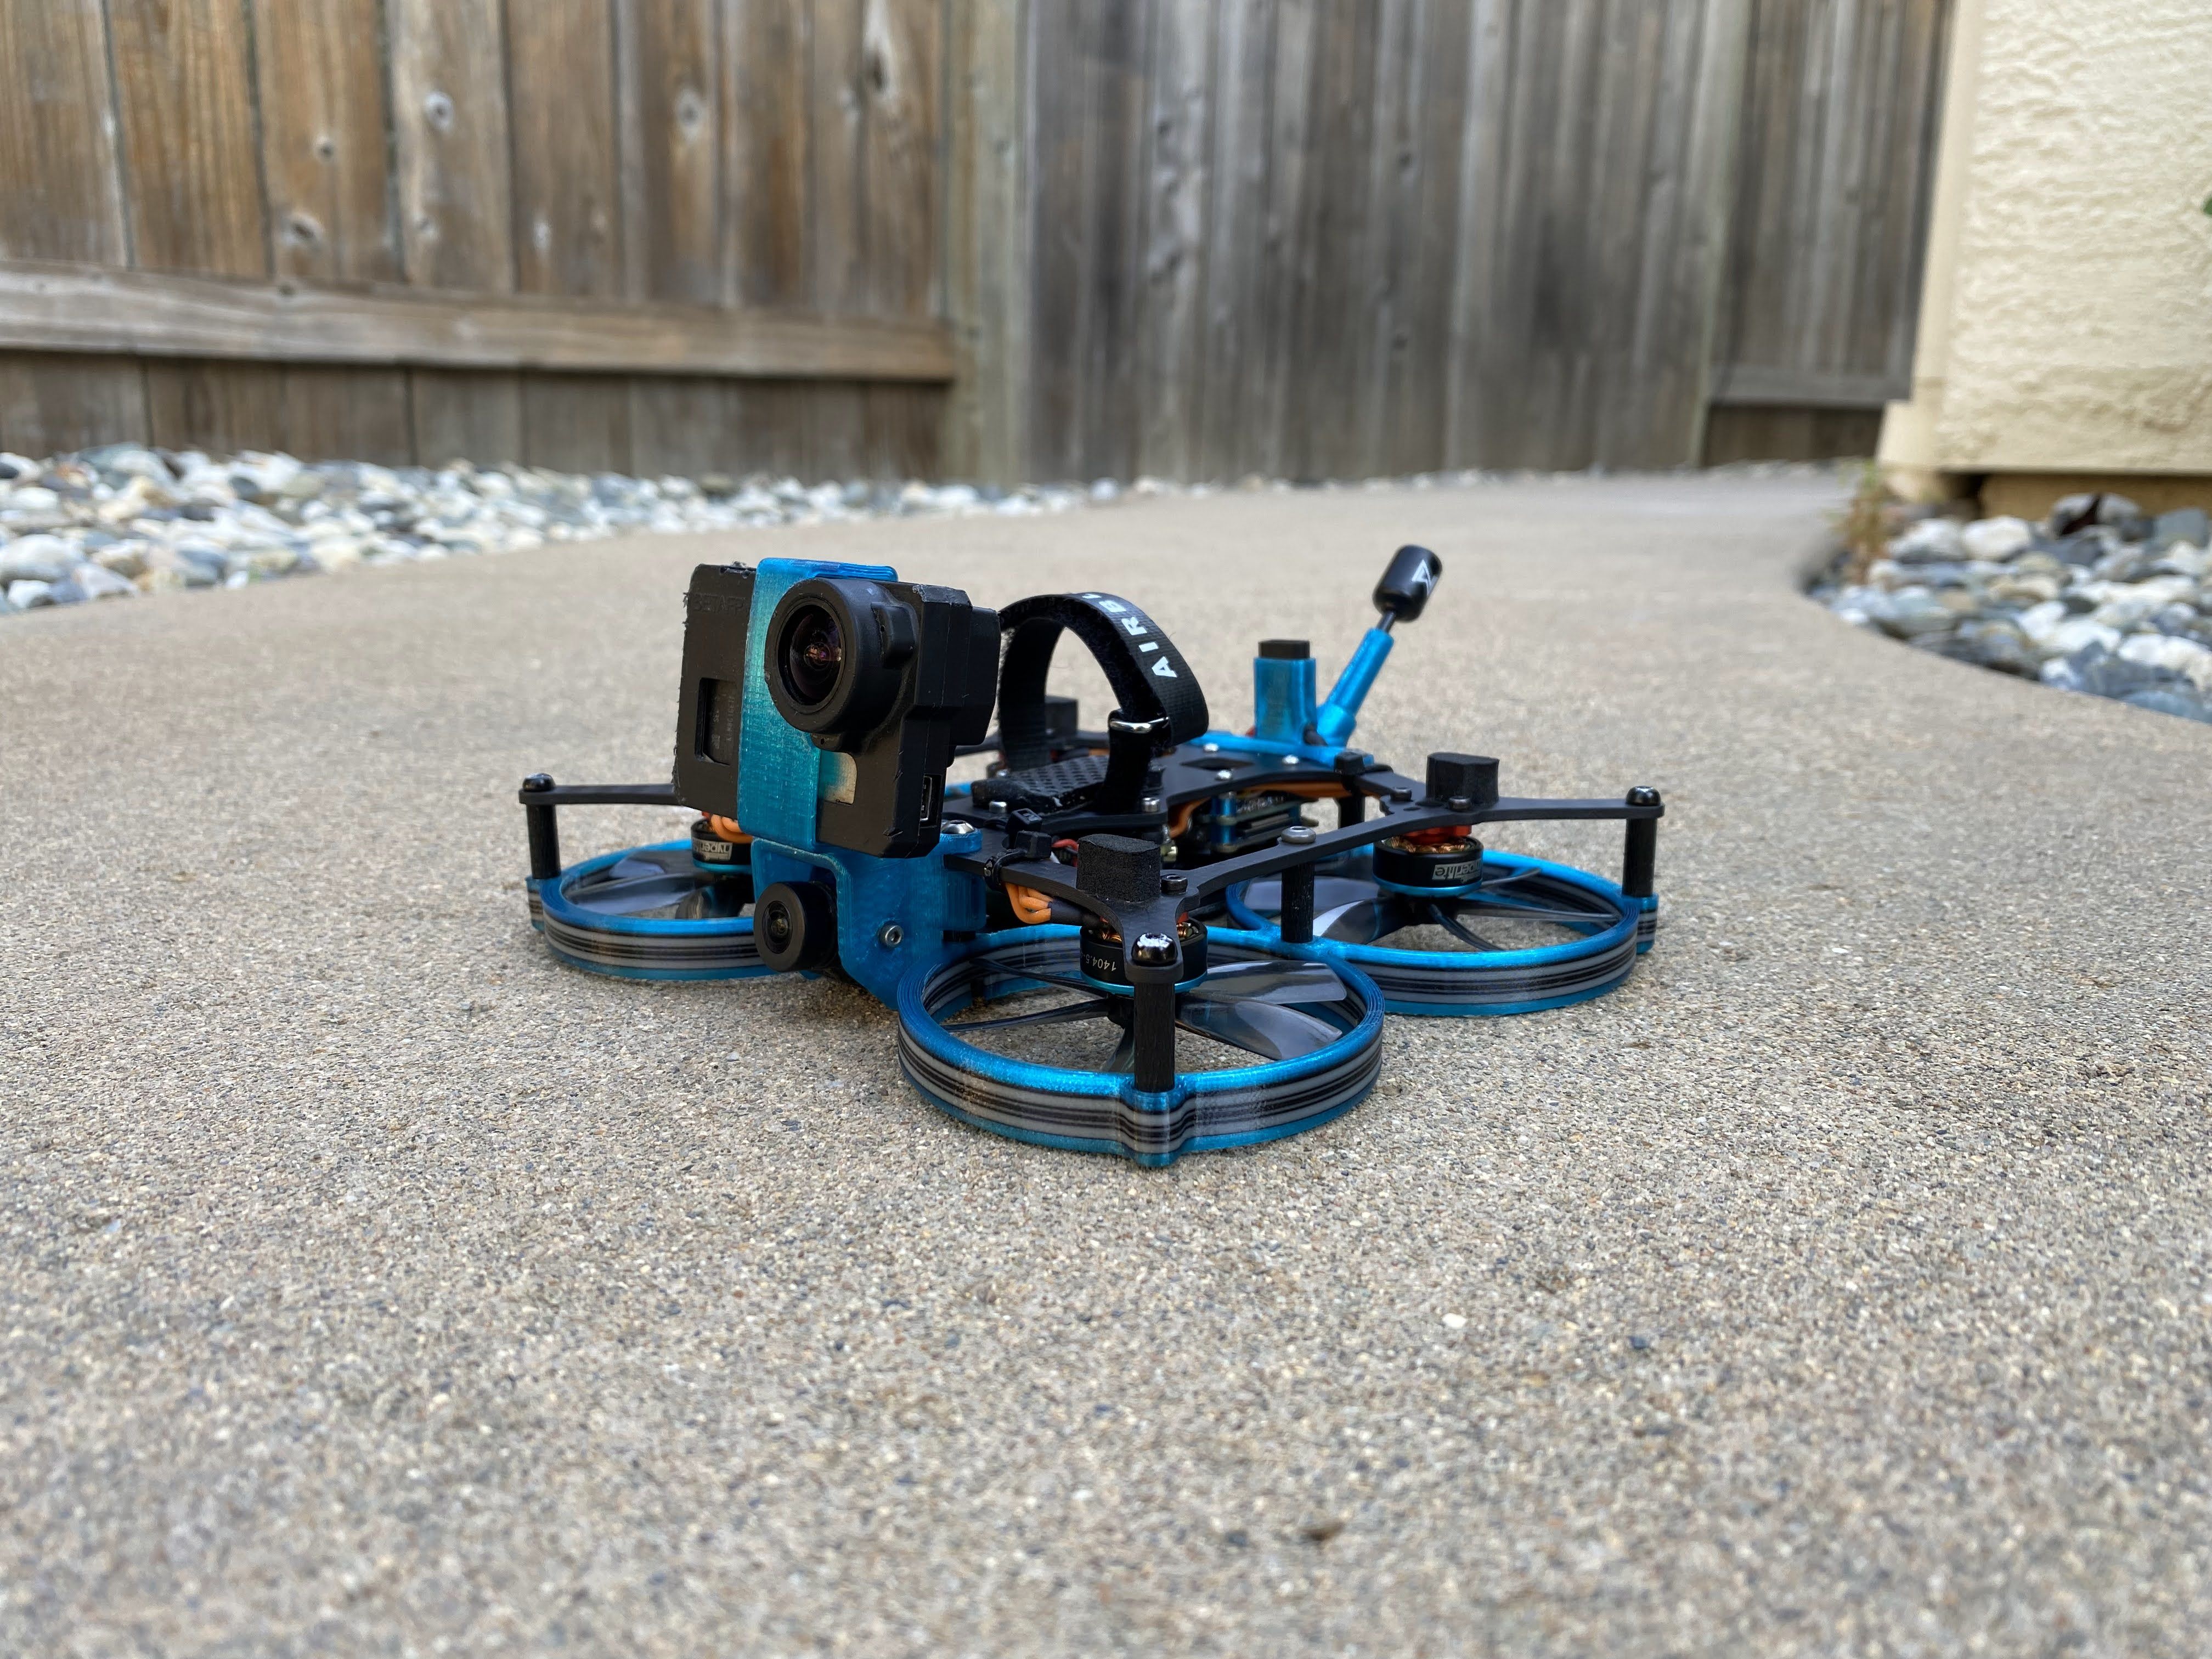
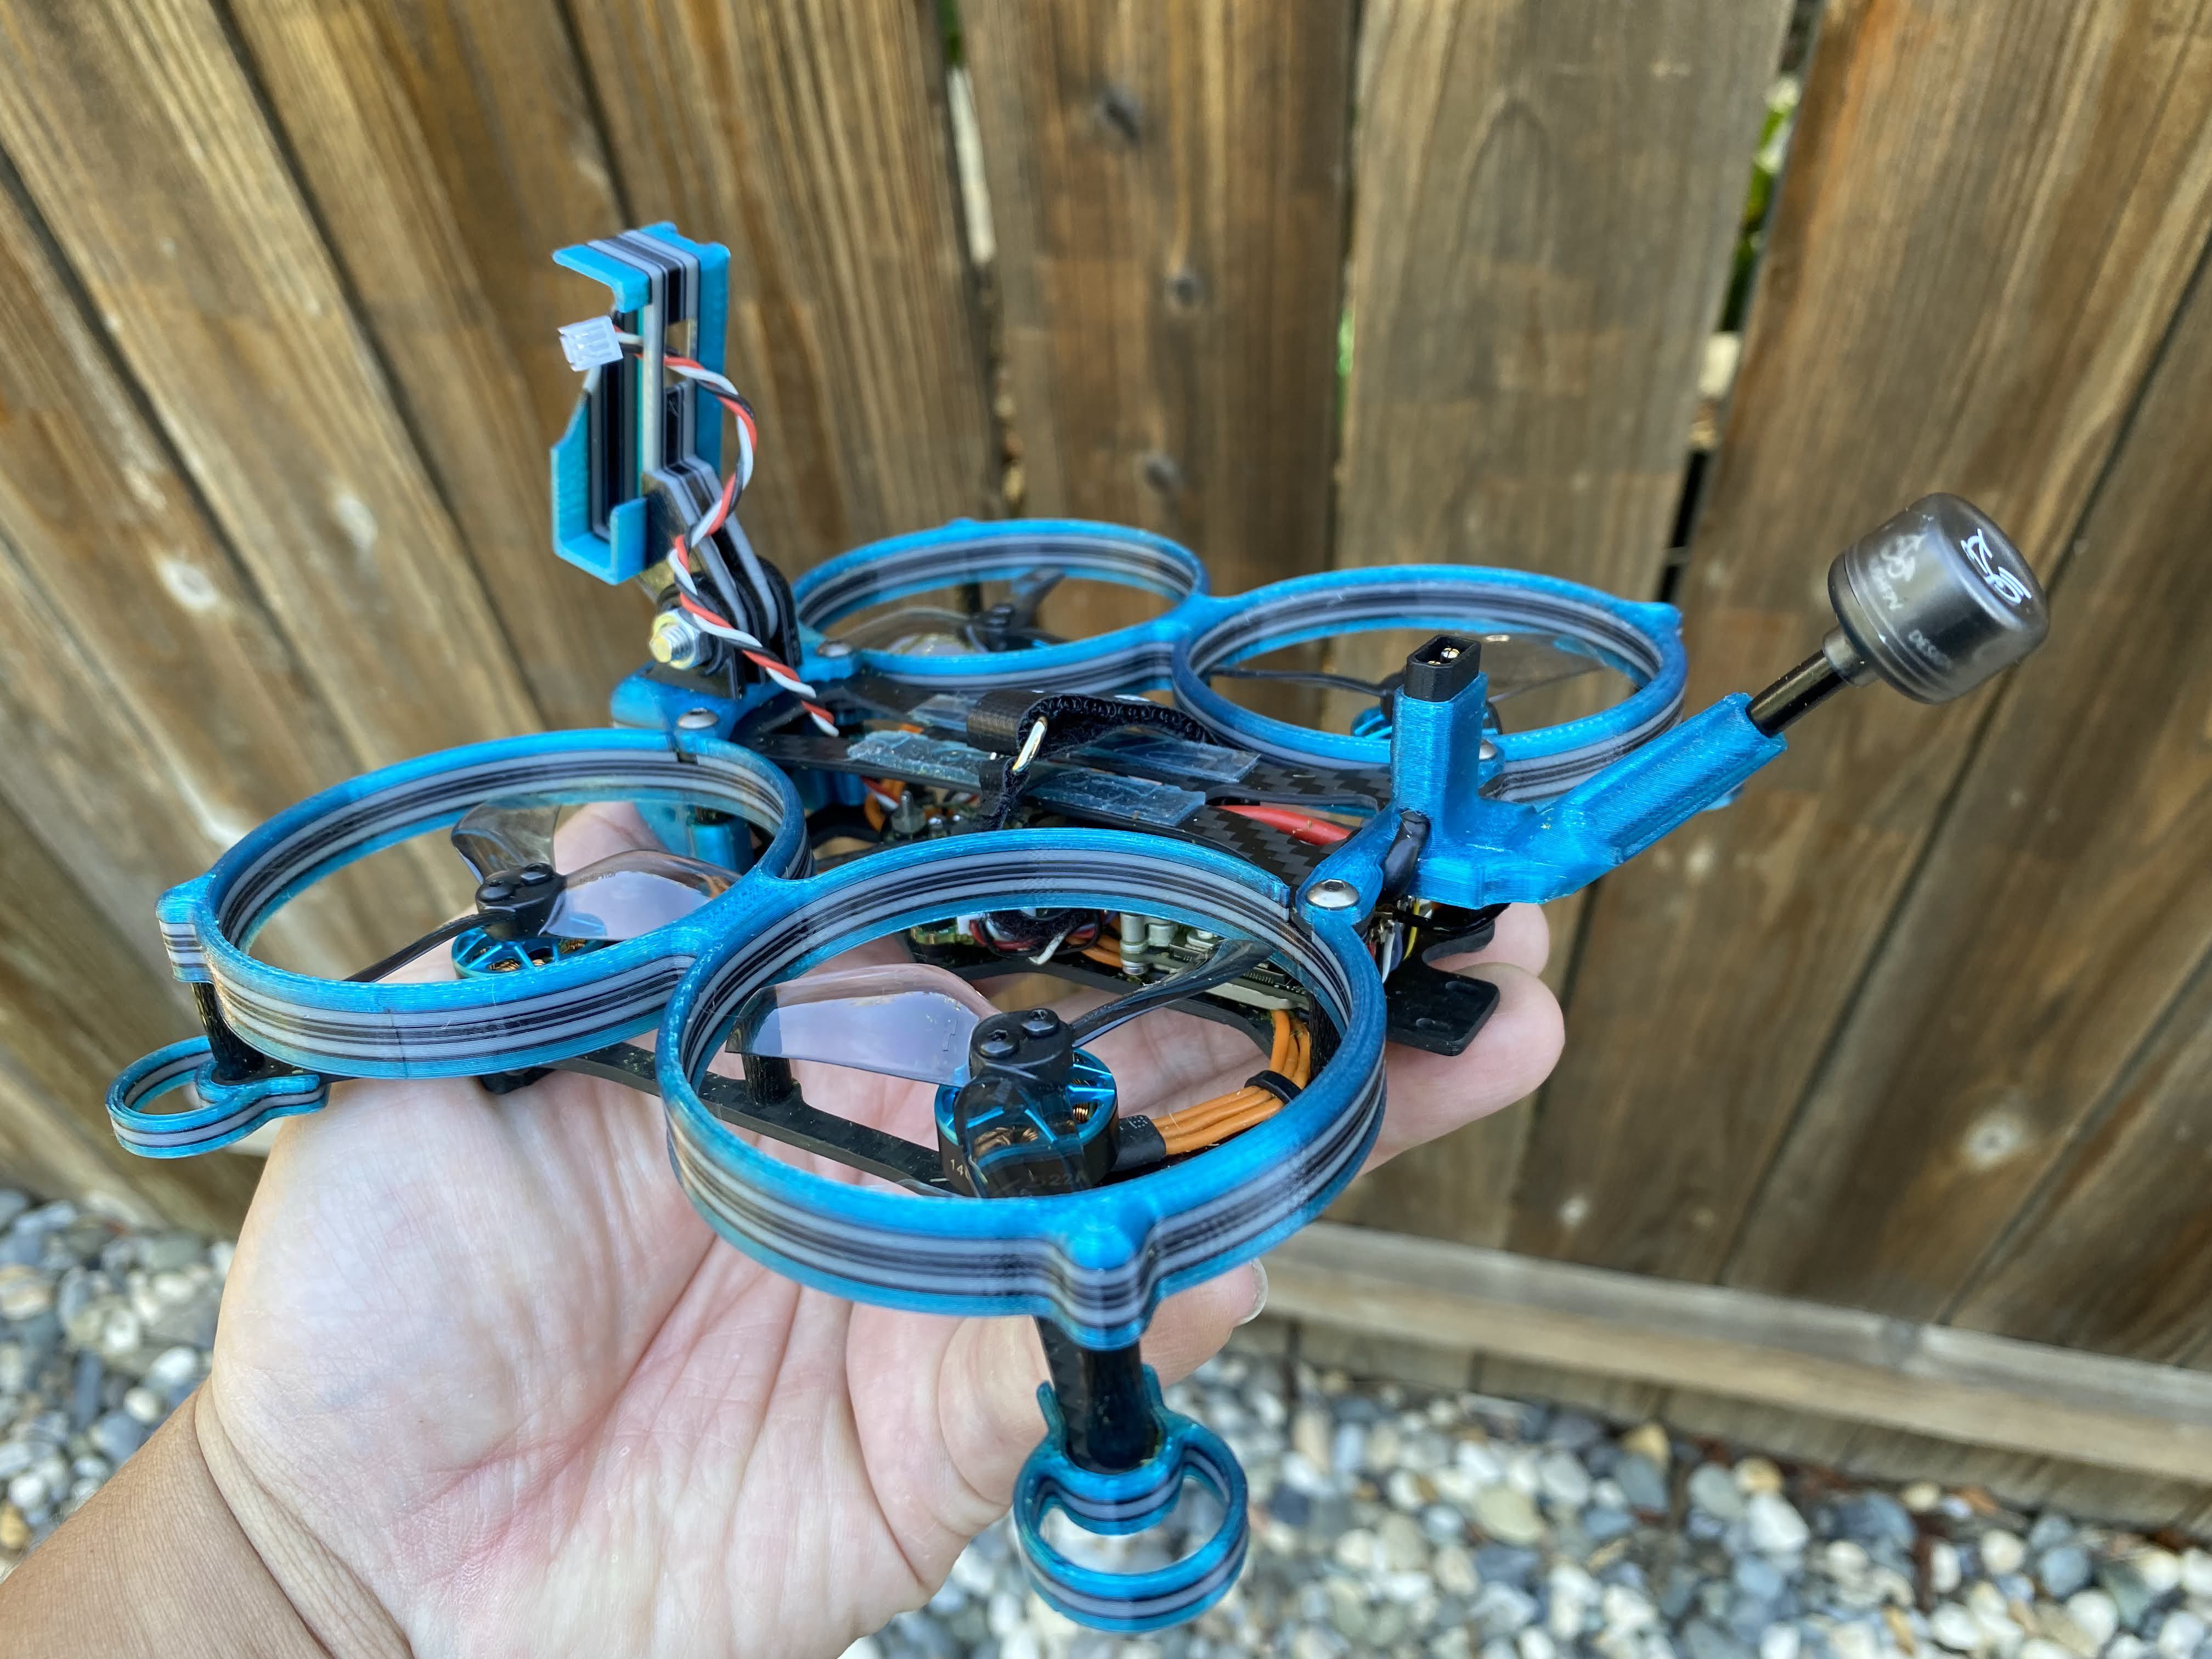
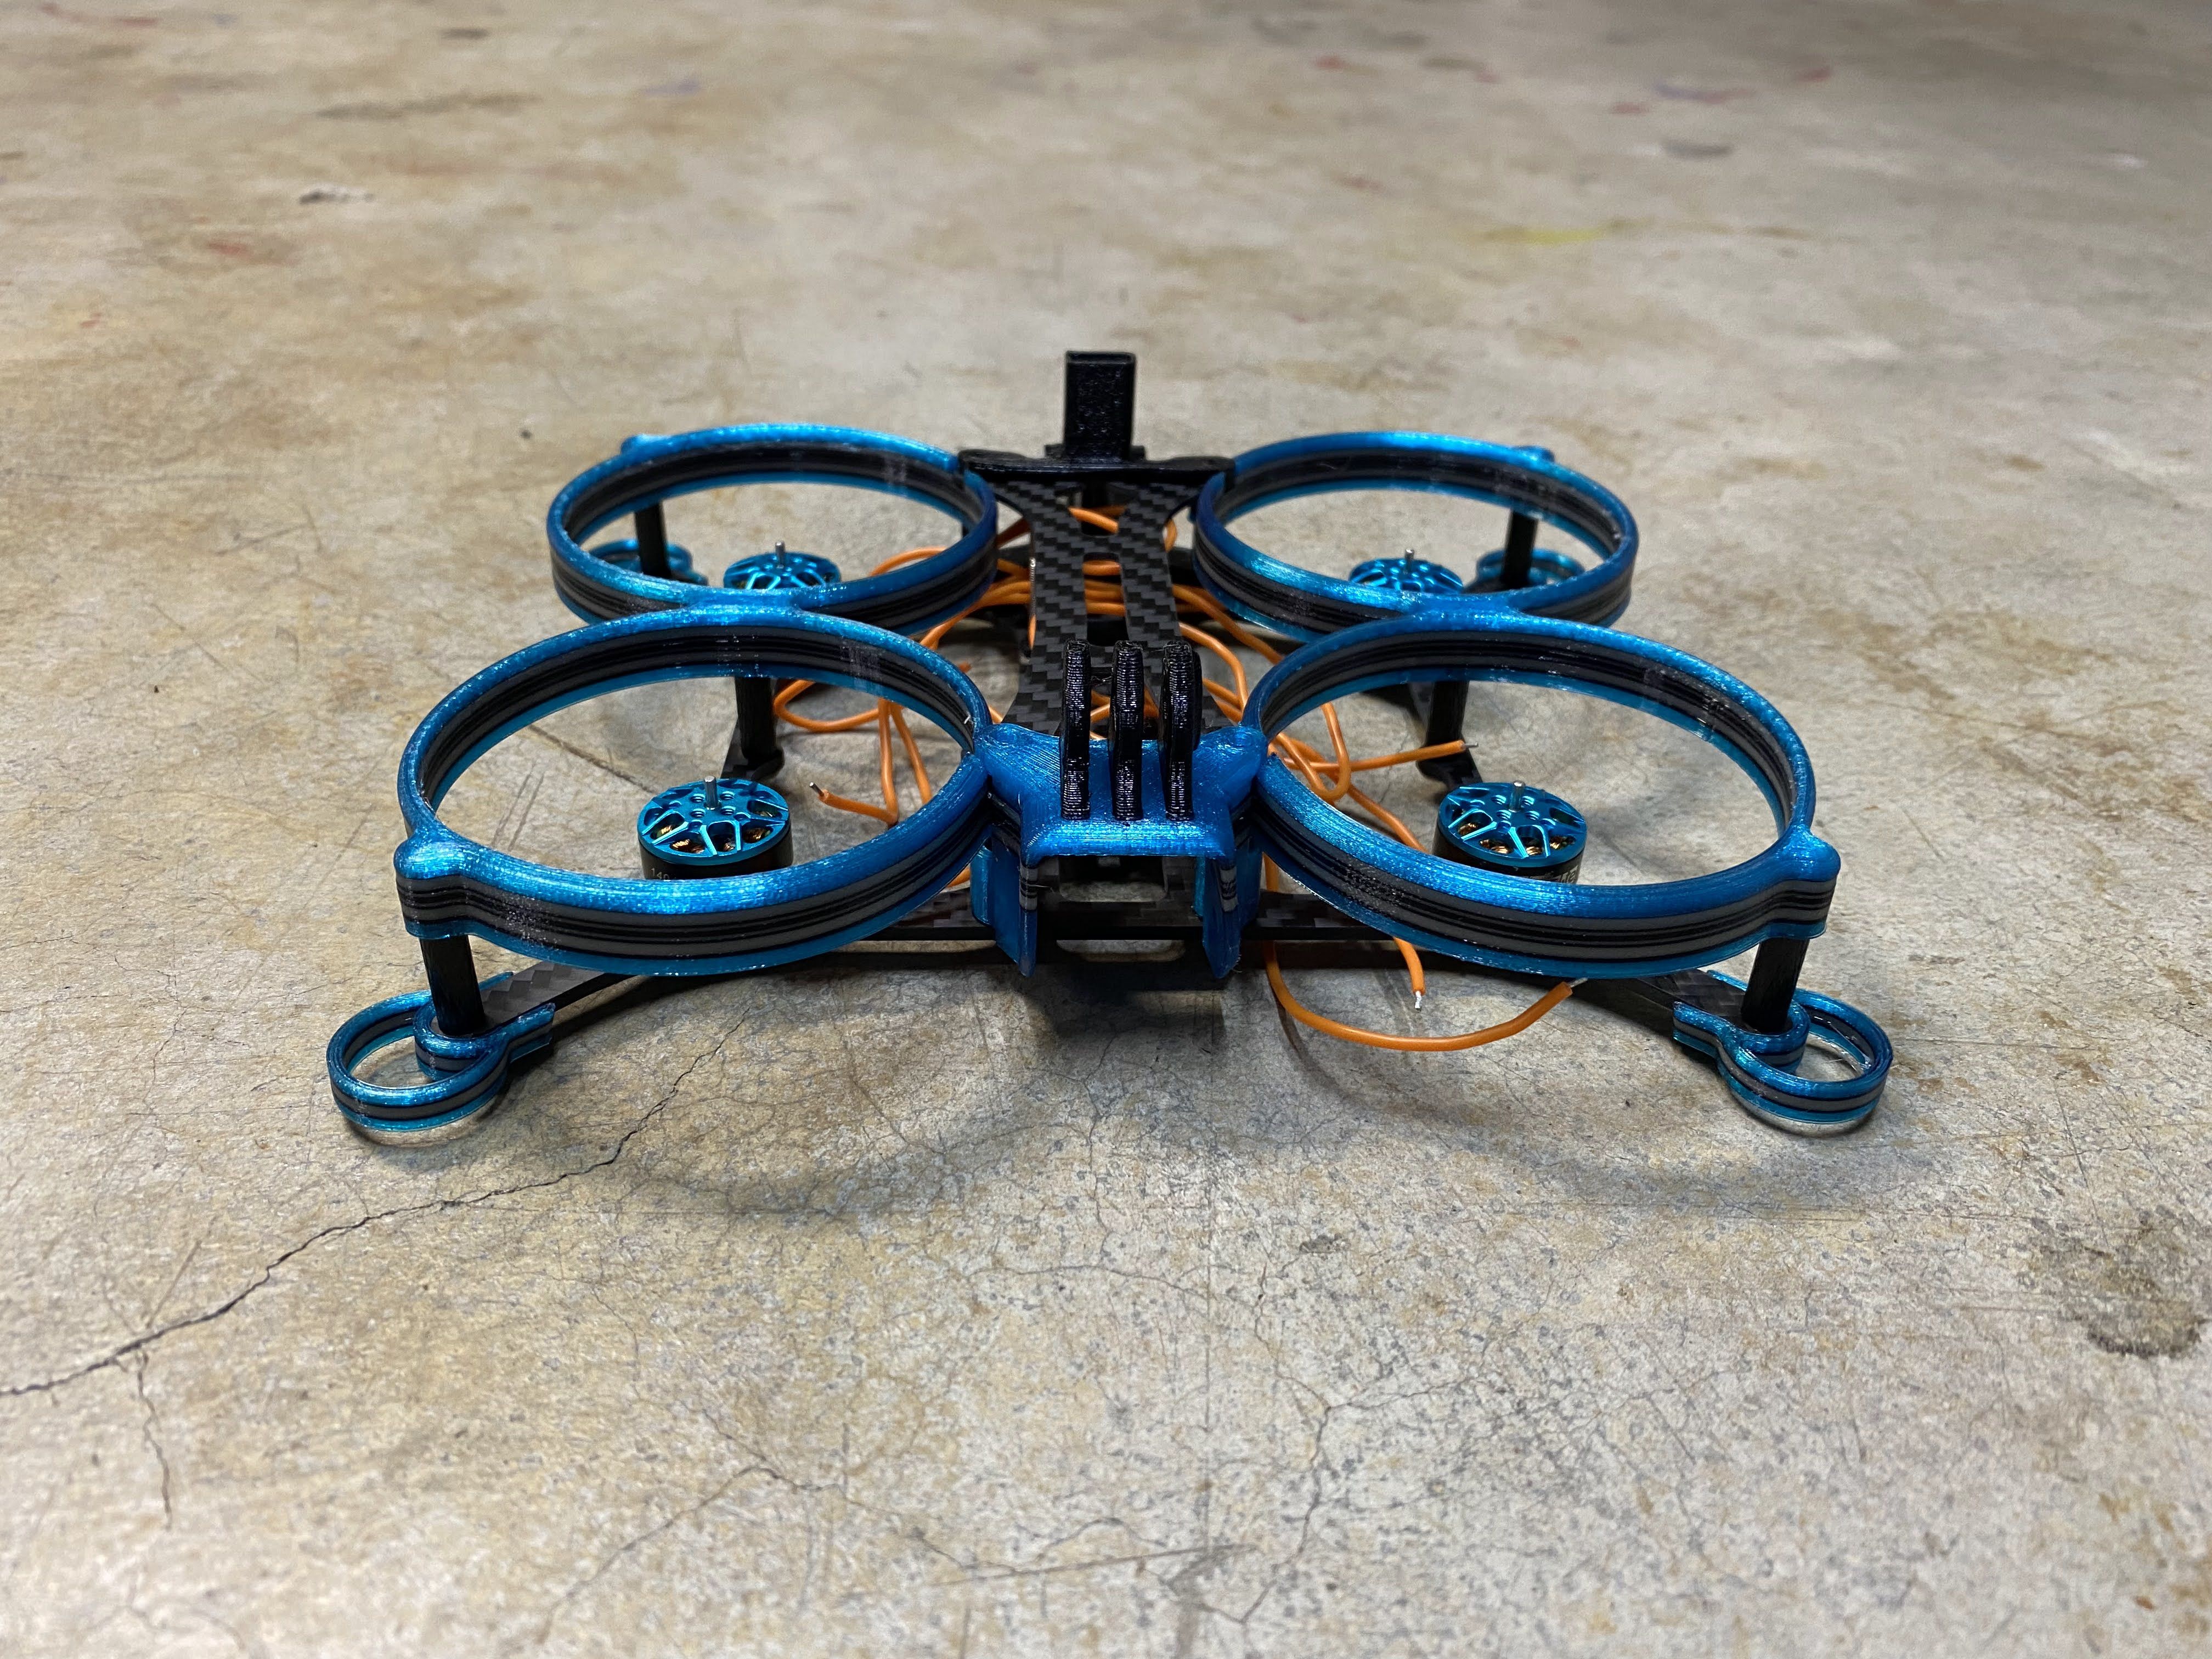
This is my pre build hopes and assumptions for the Drone CO Production SnapShot. What I like about this frame is that you can build it in both Pusher and Regular configuration. Personally, I am not a big fan of the pusher setup because I typically notice more vibration (jello) and it is also louder.
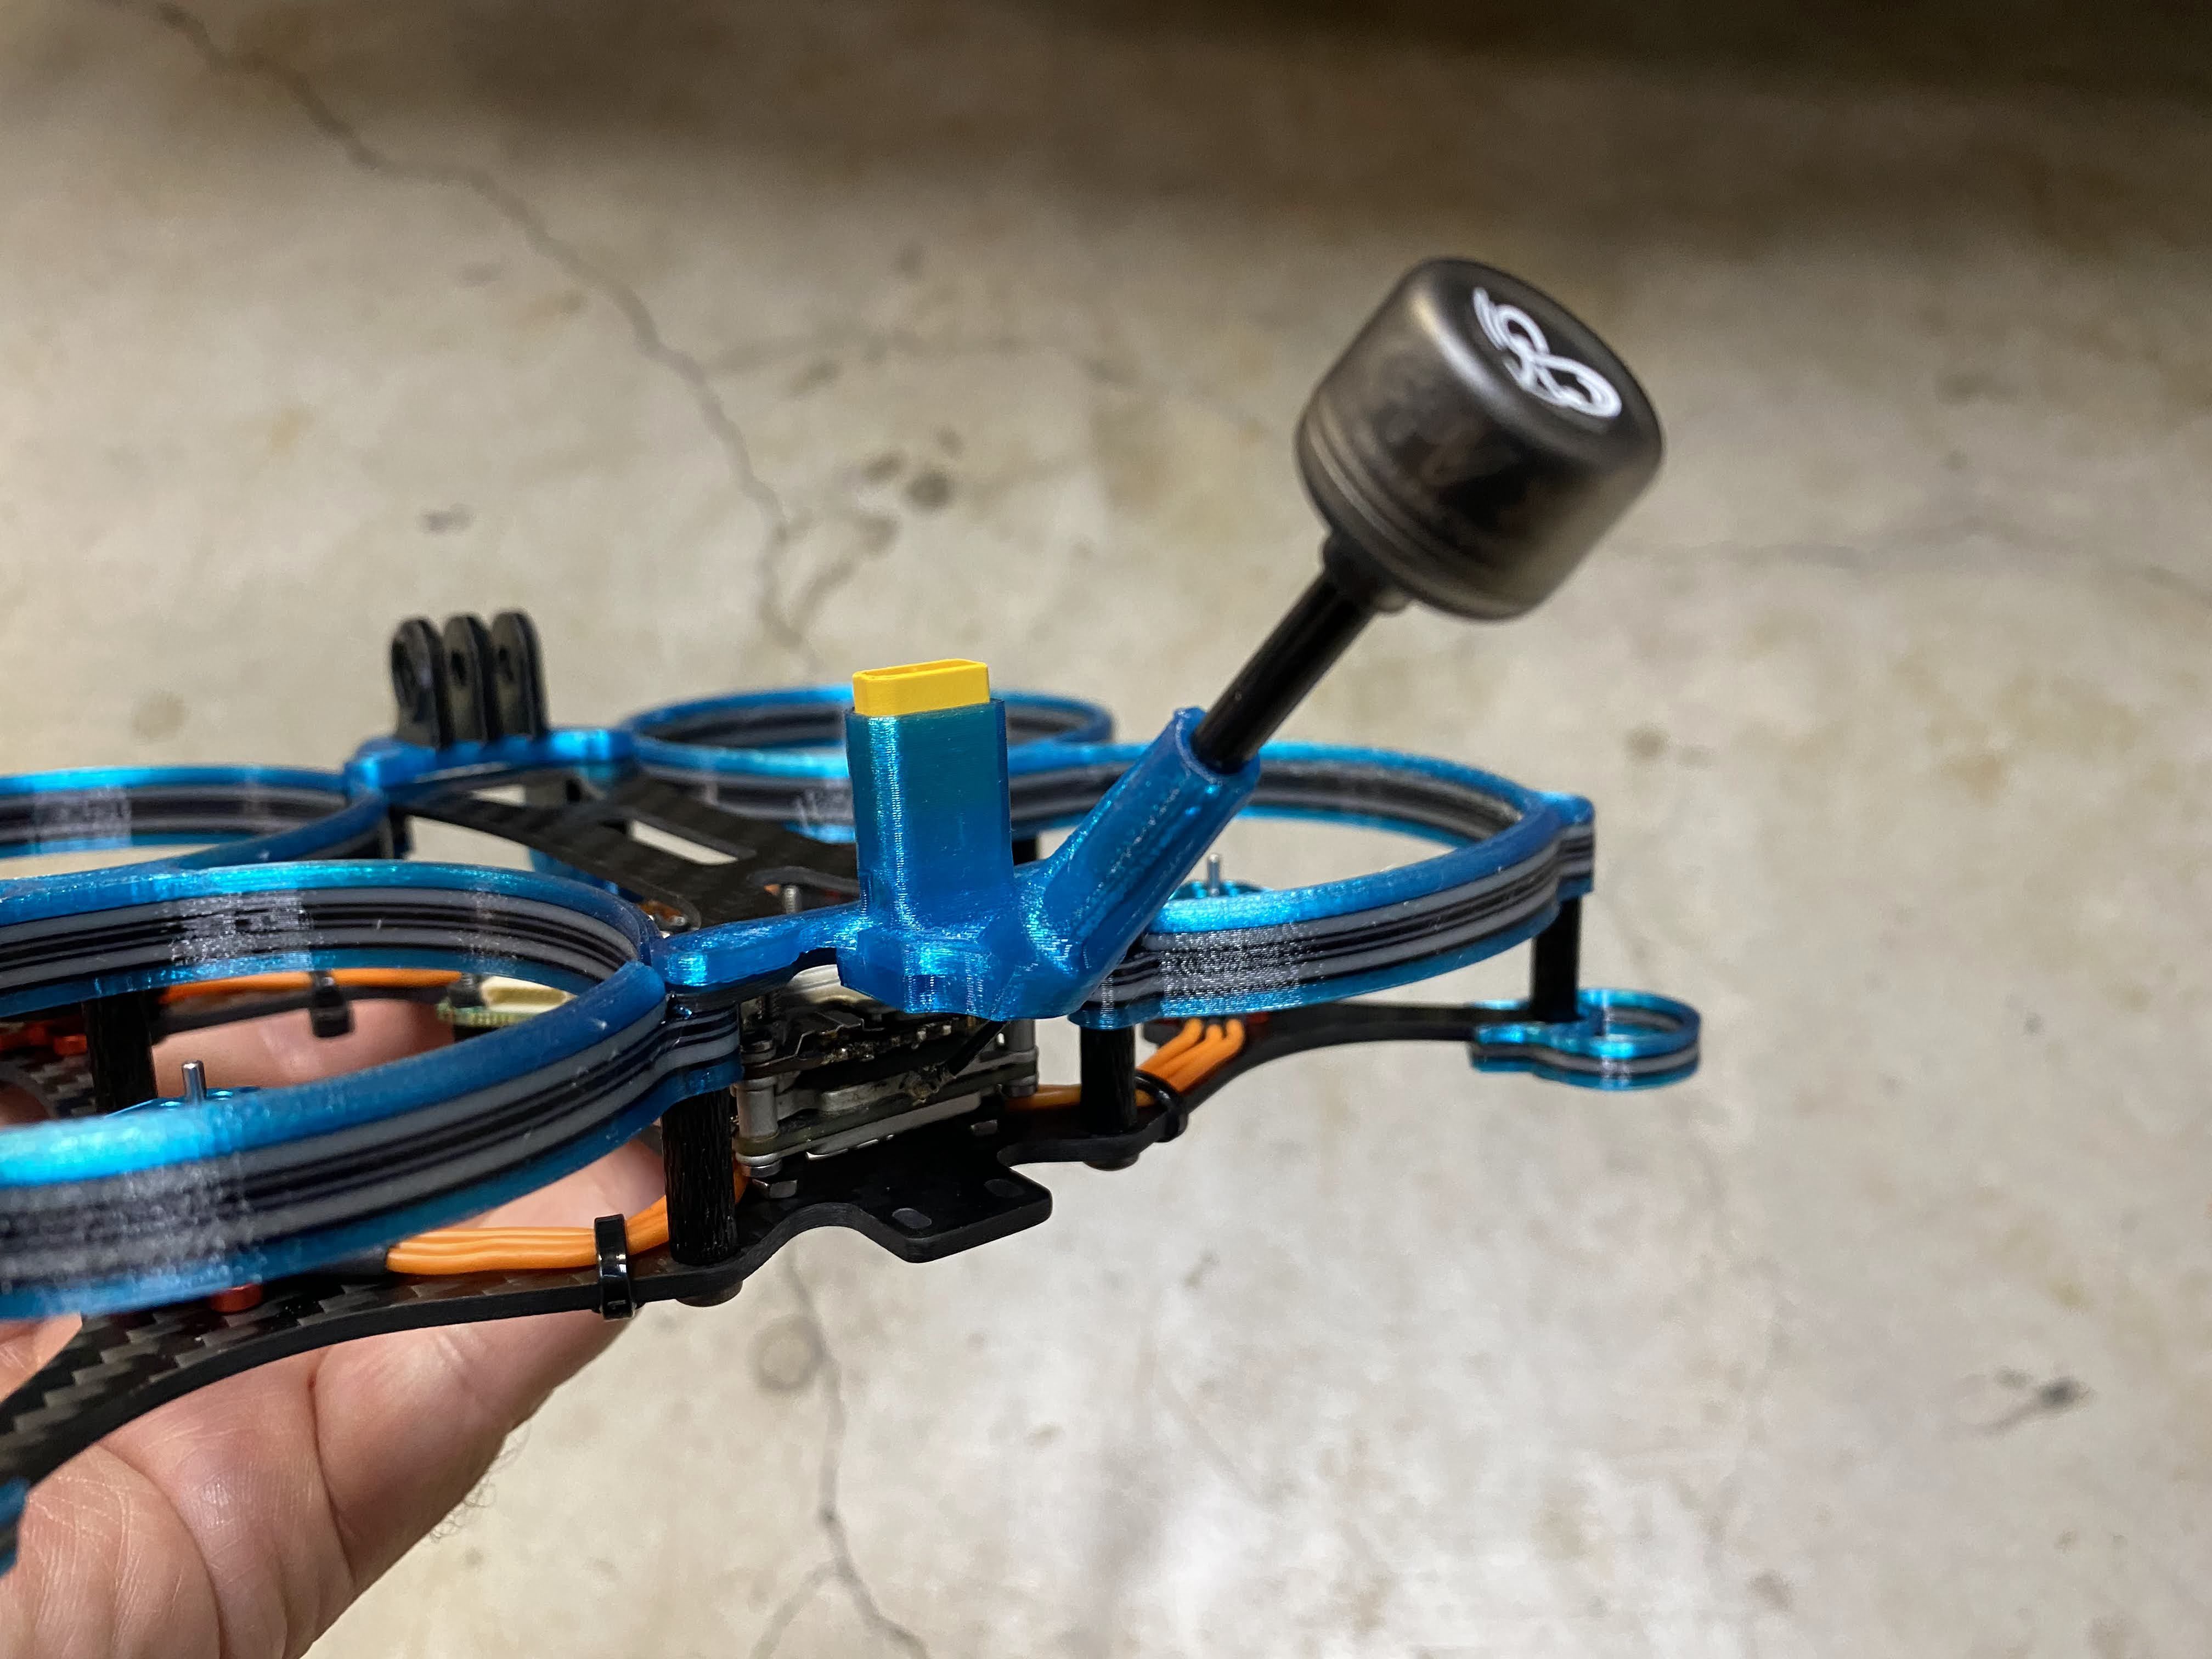
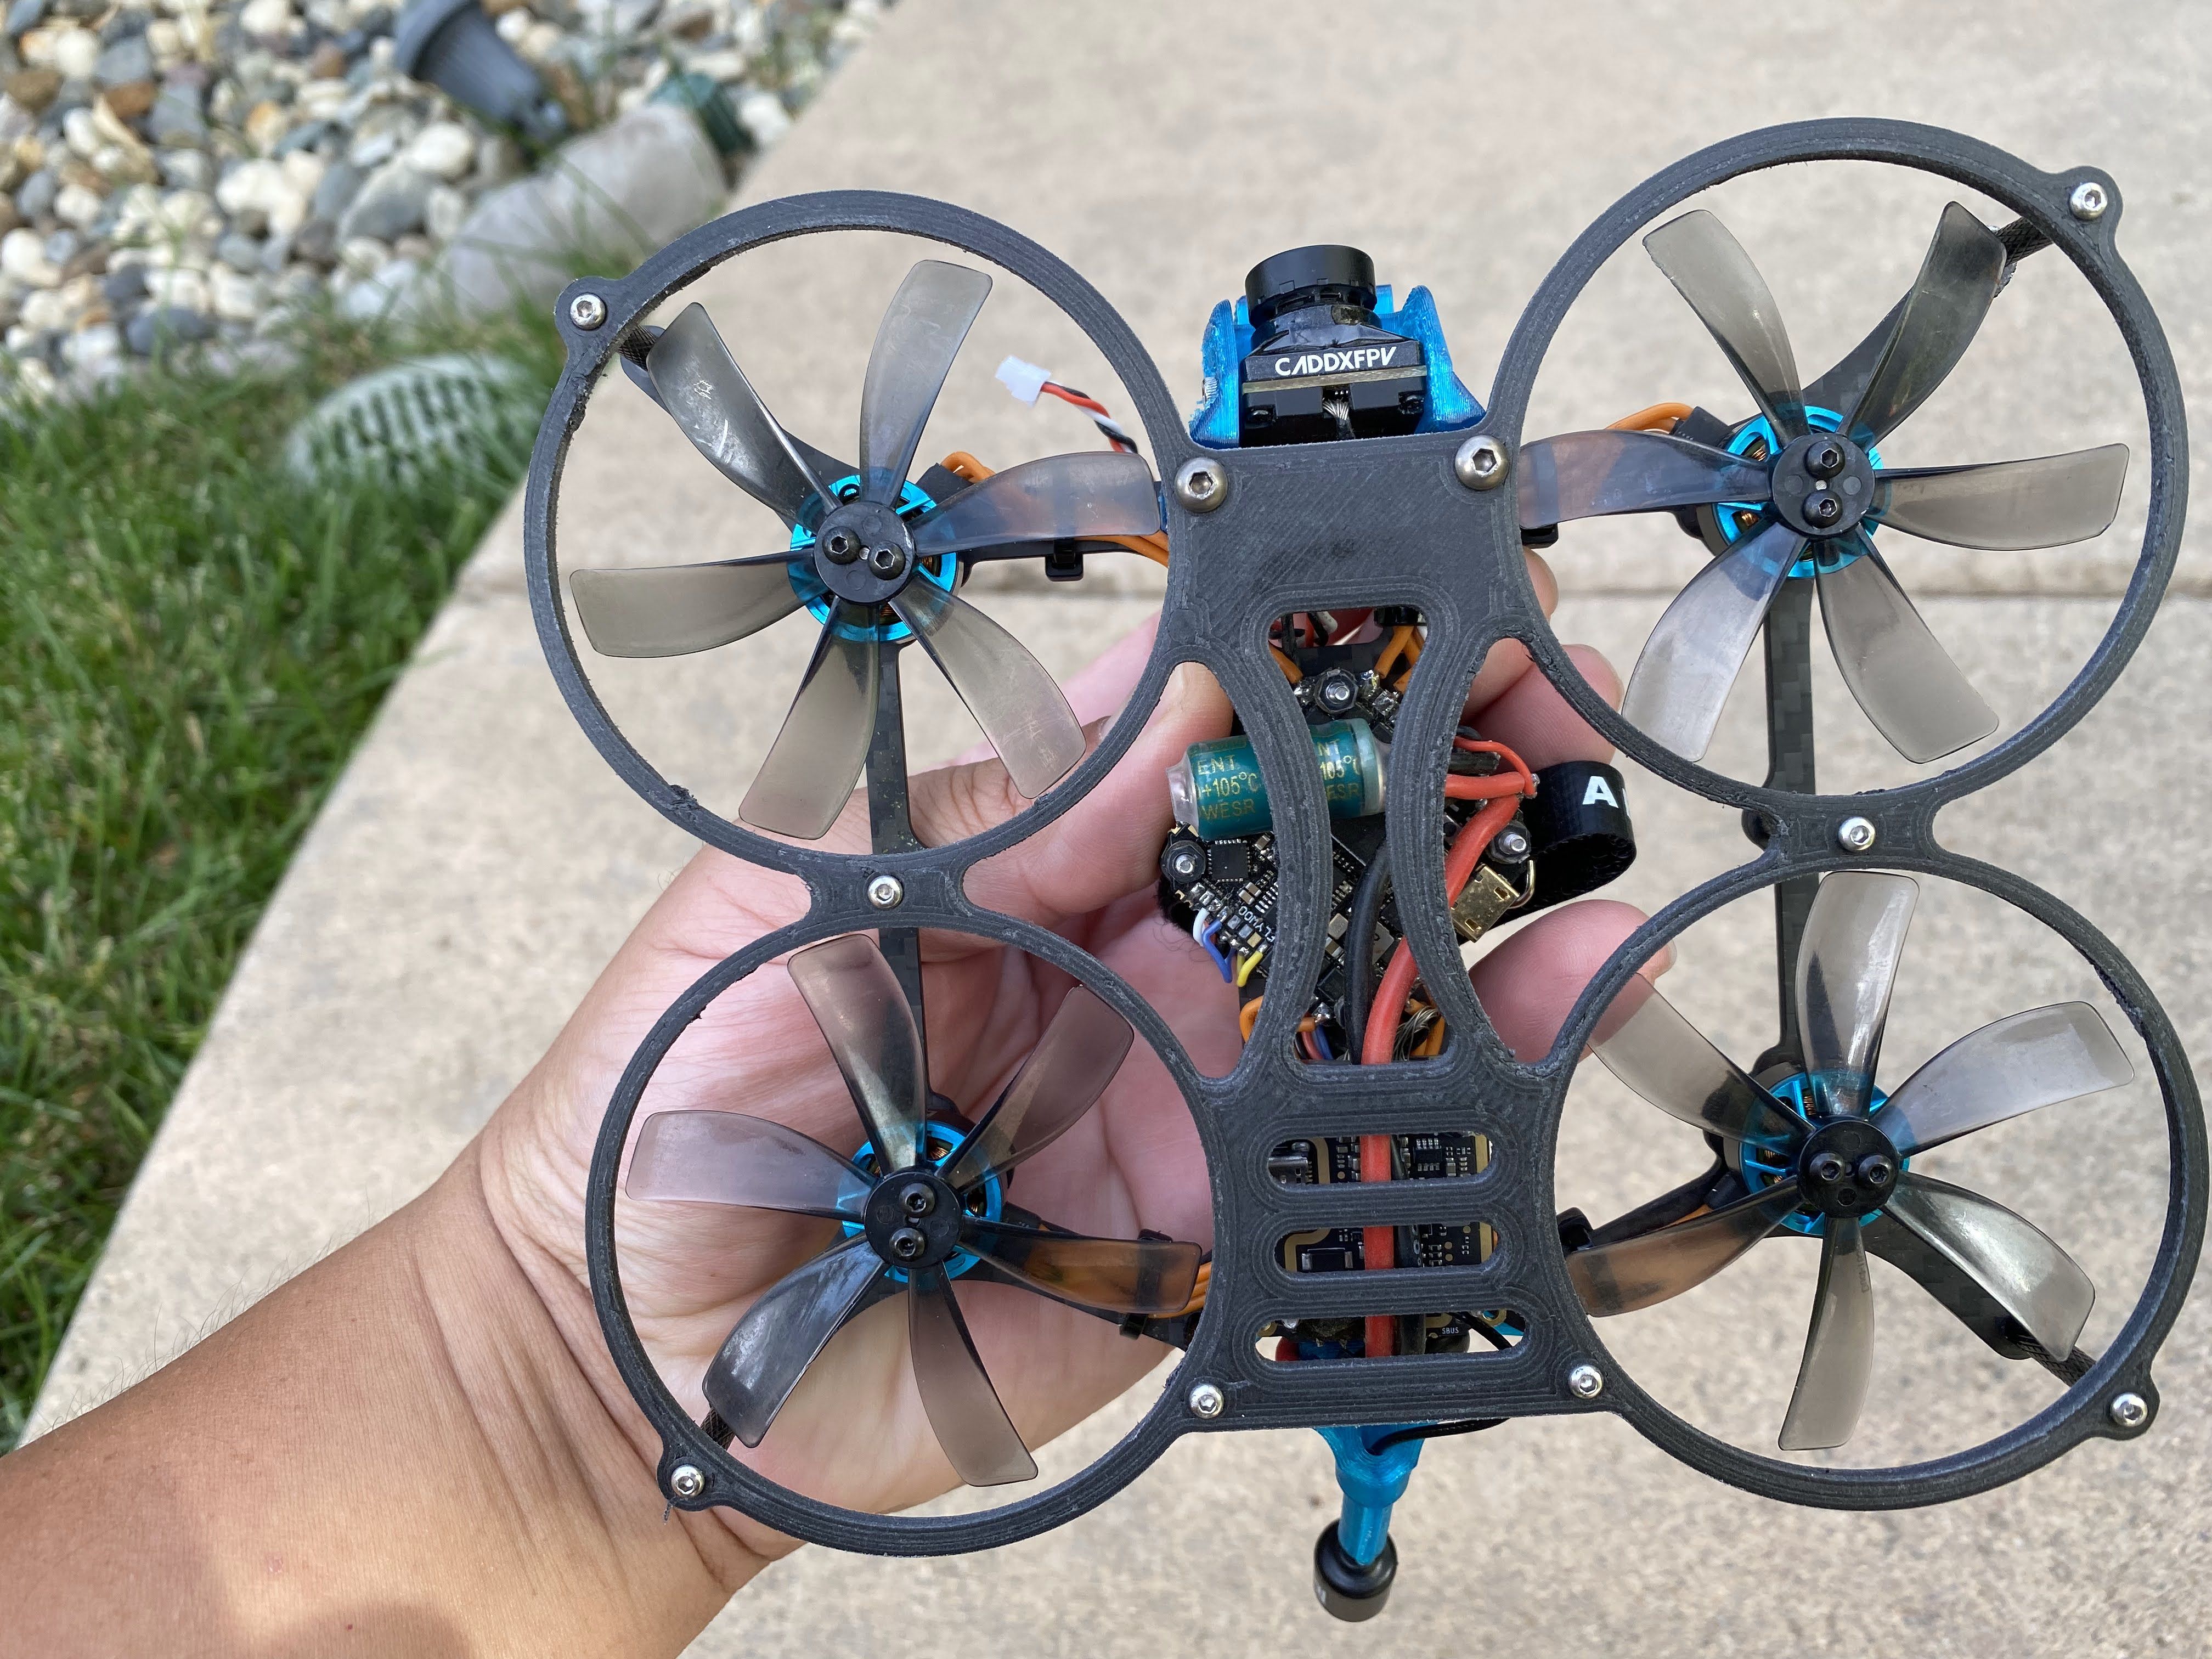
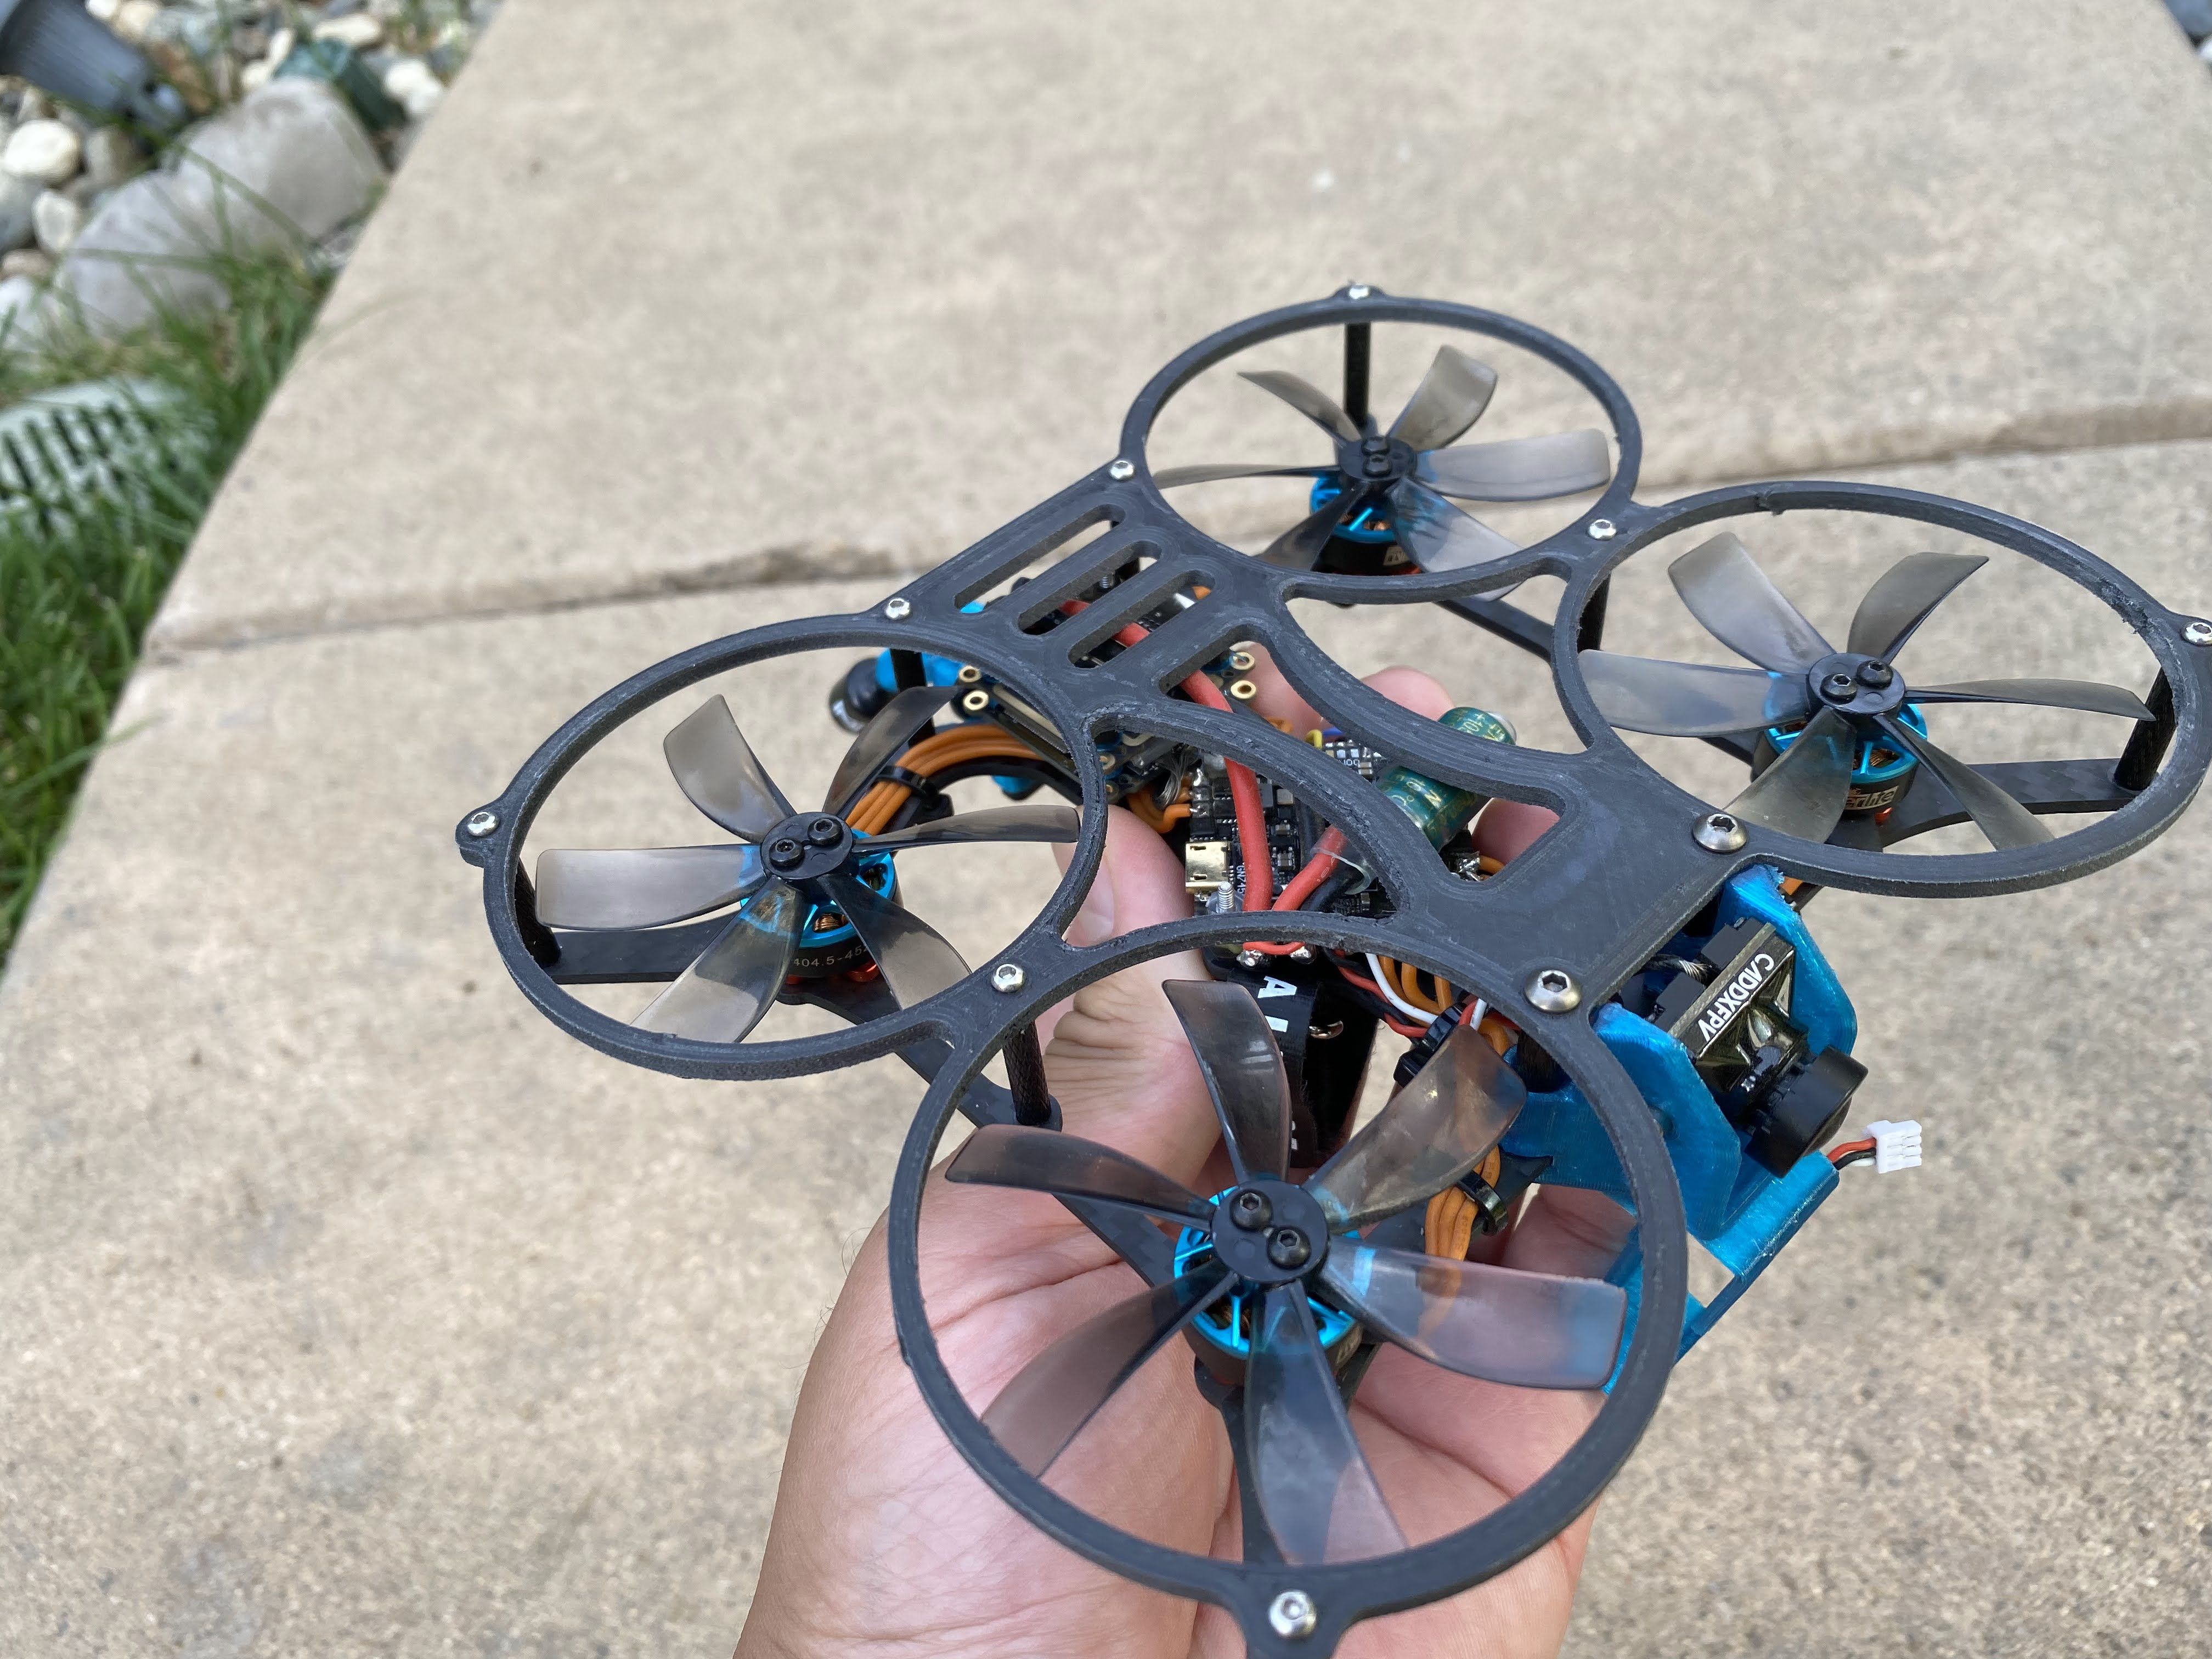
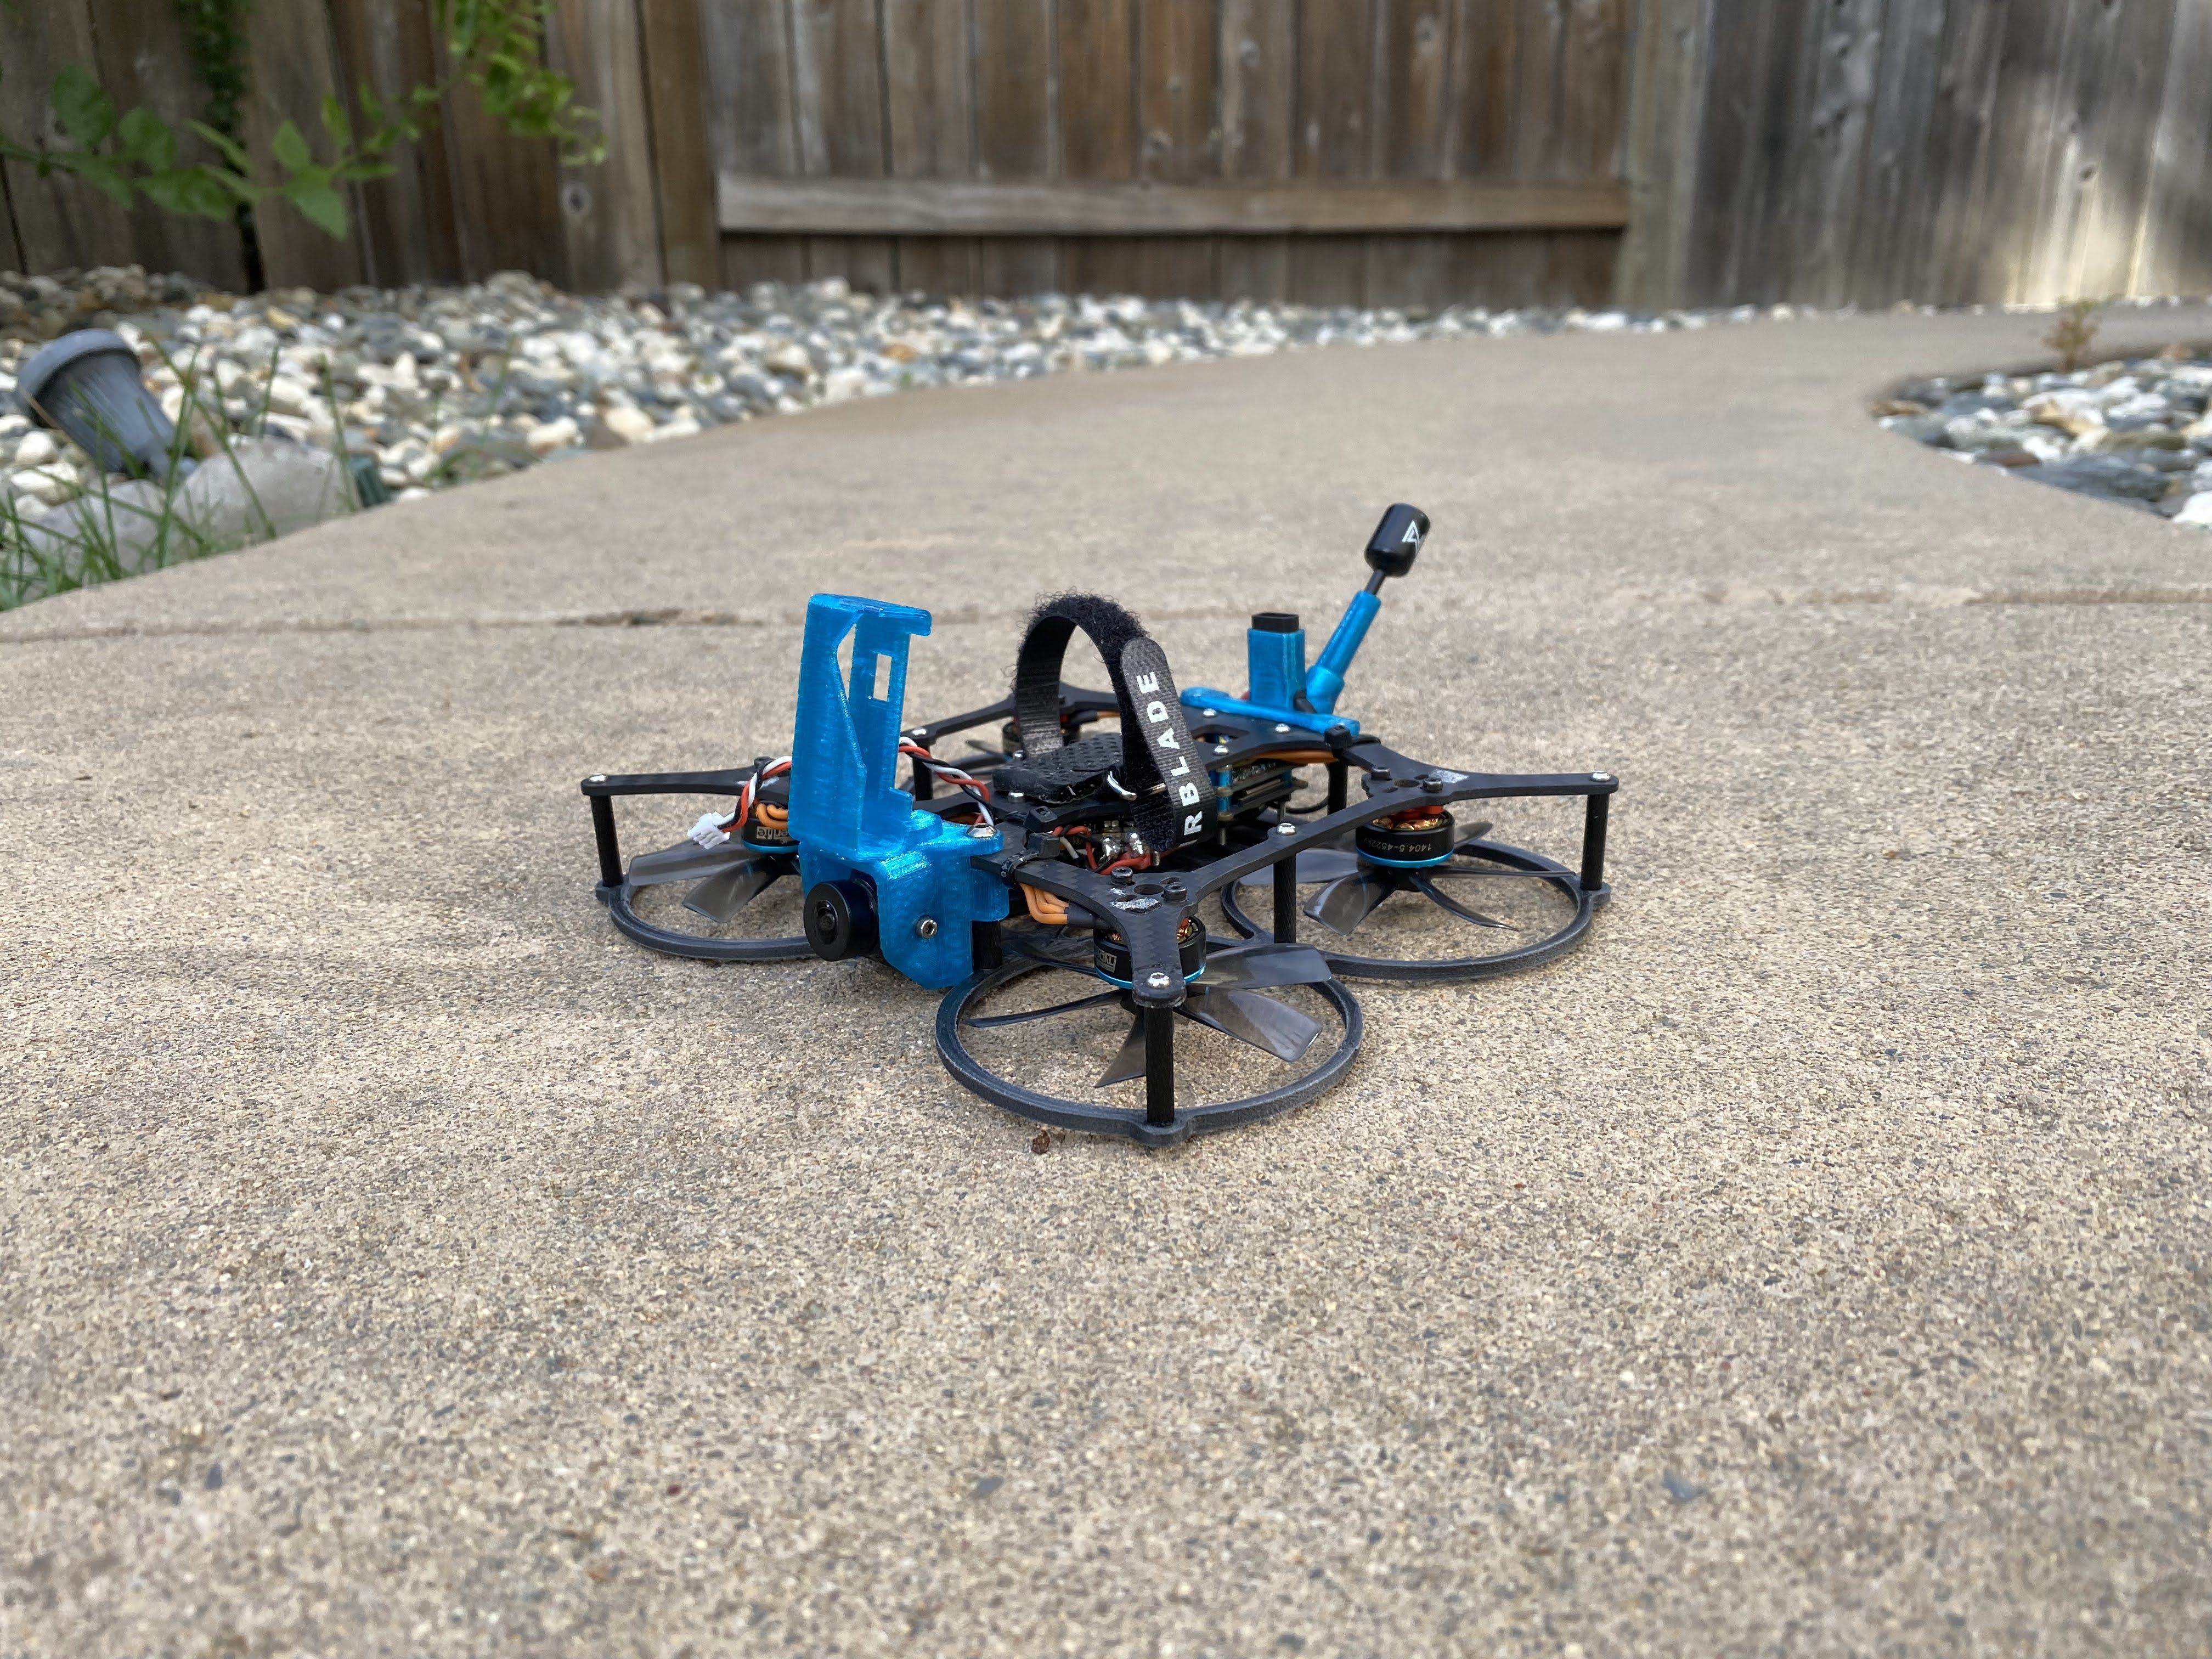
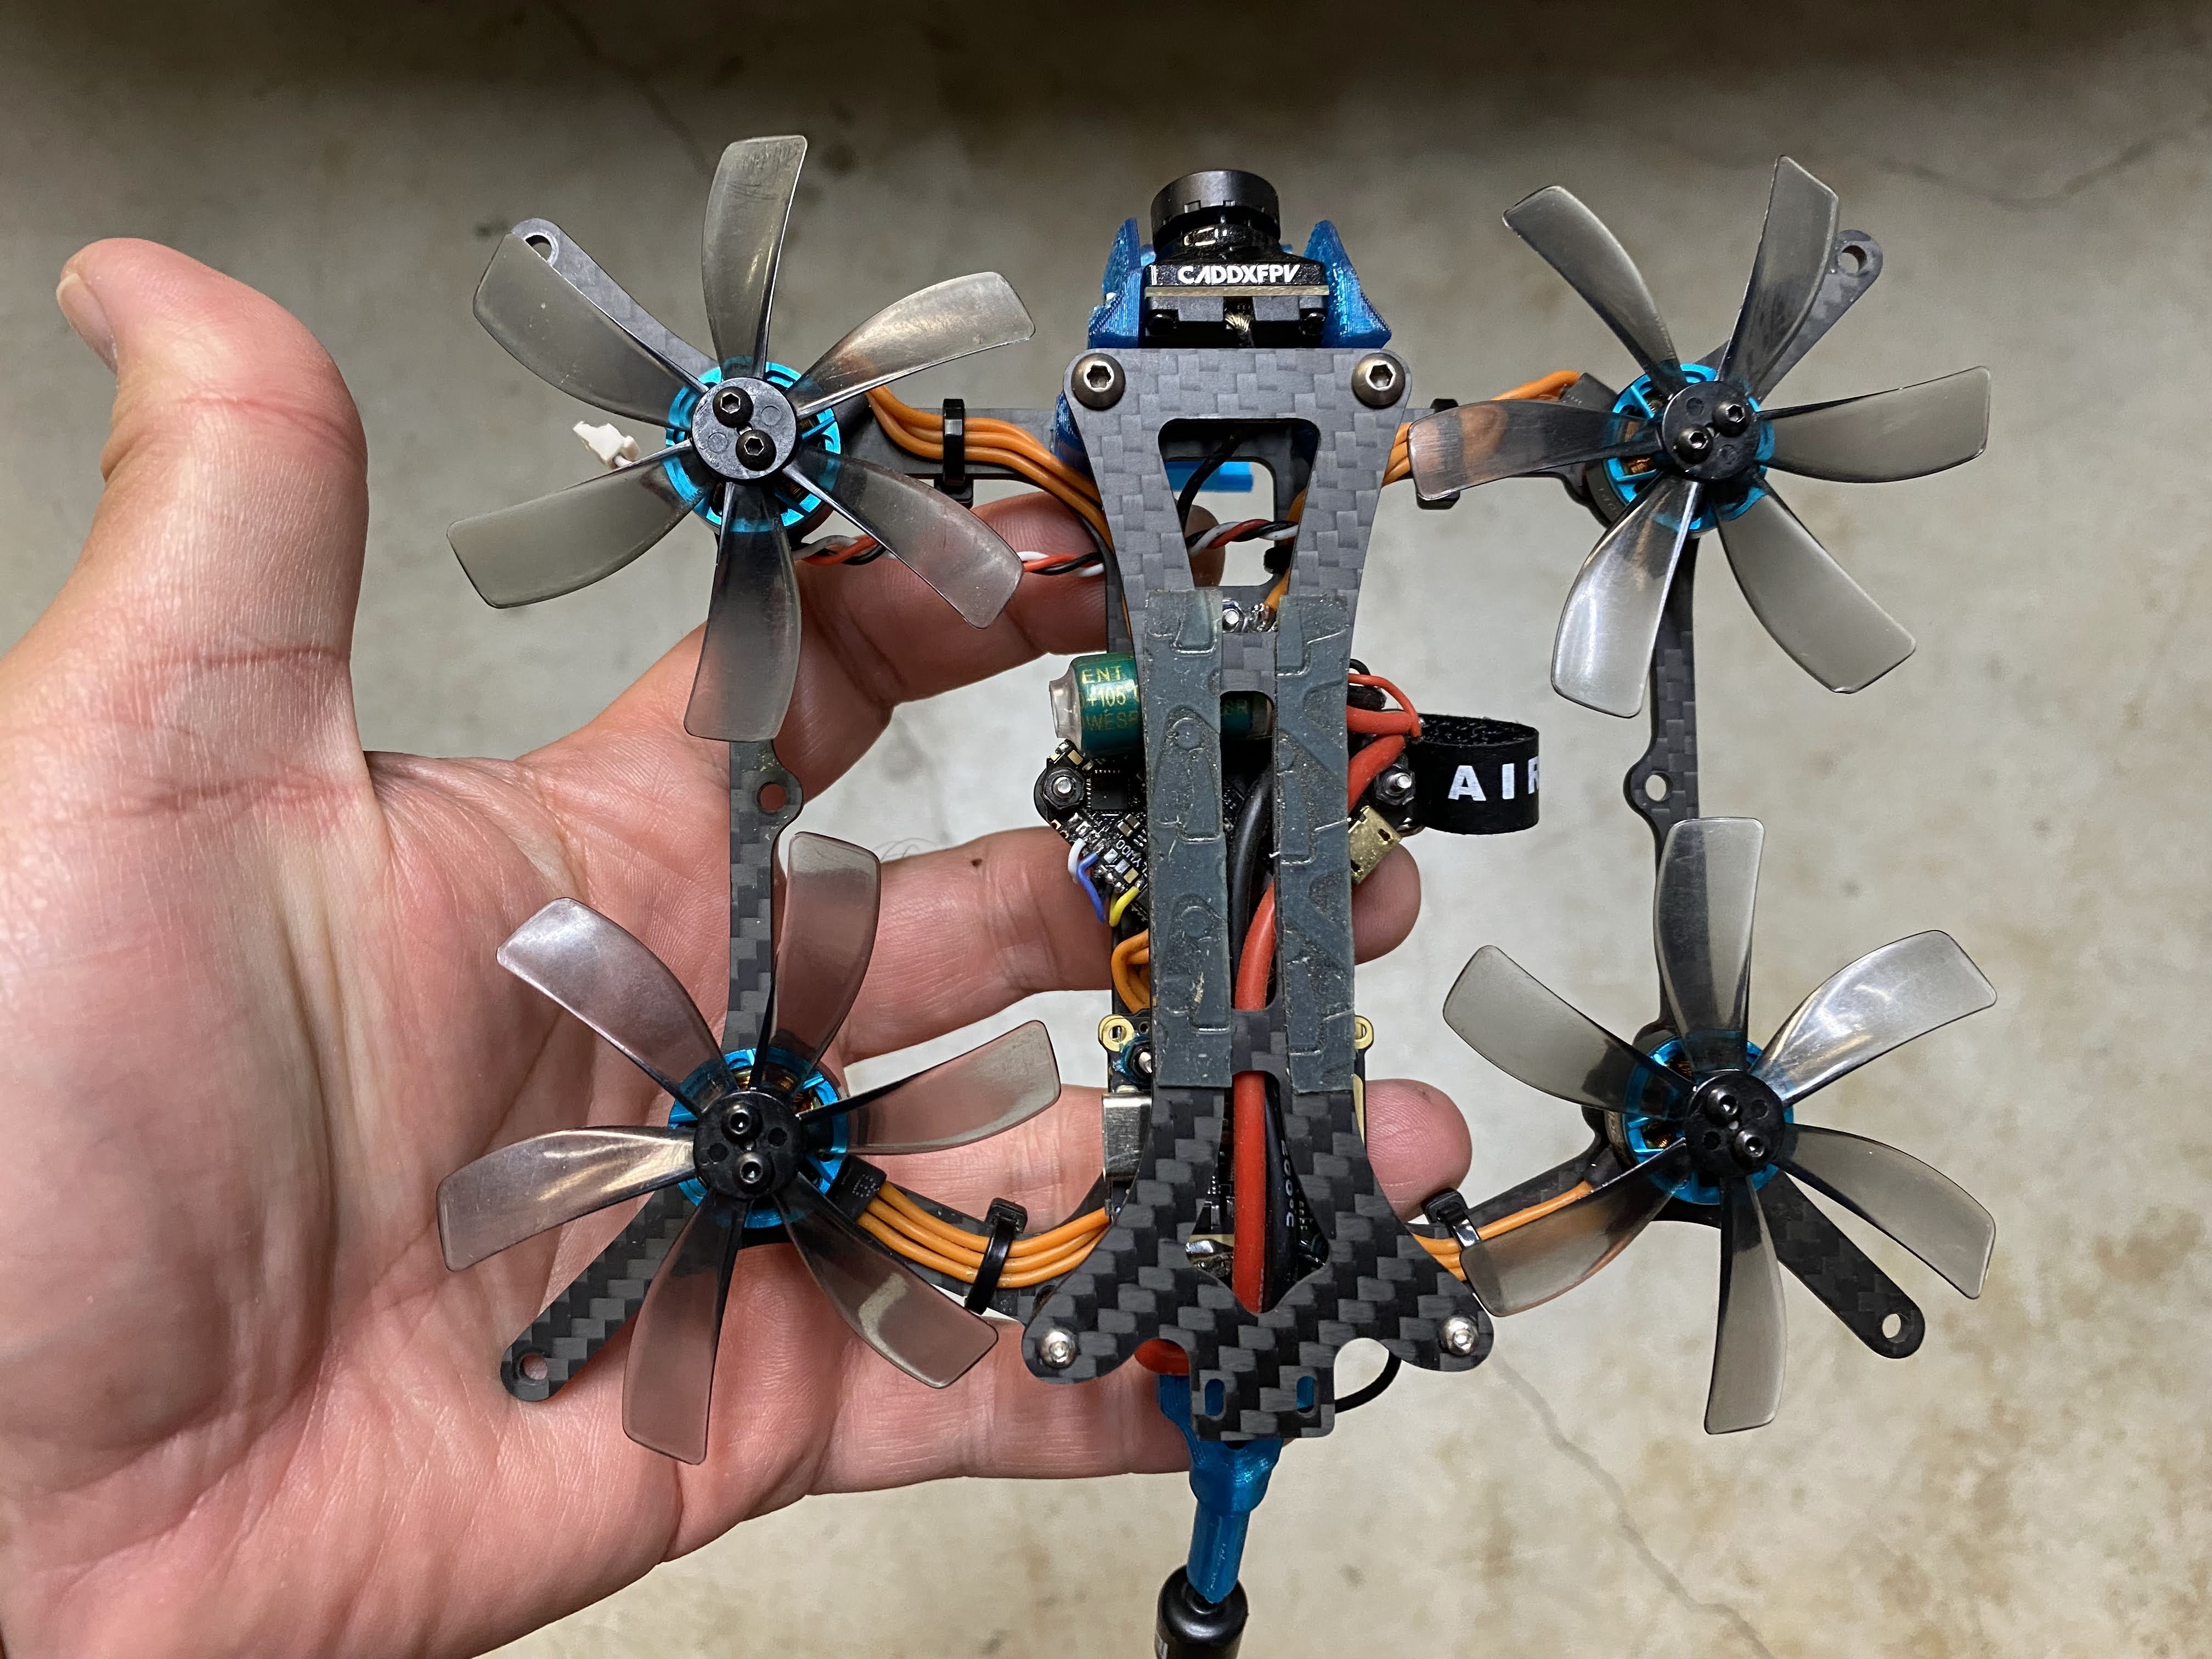
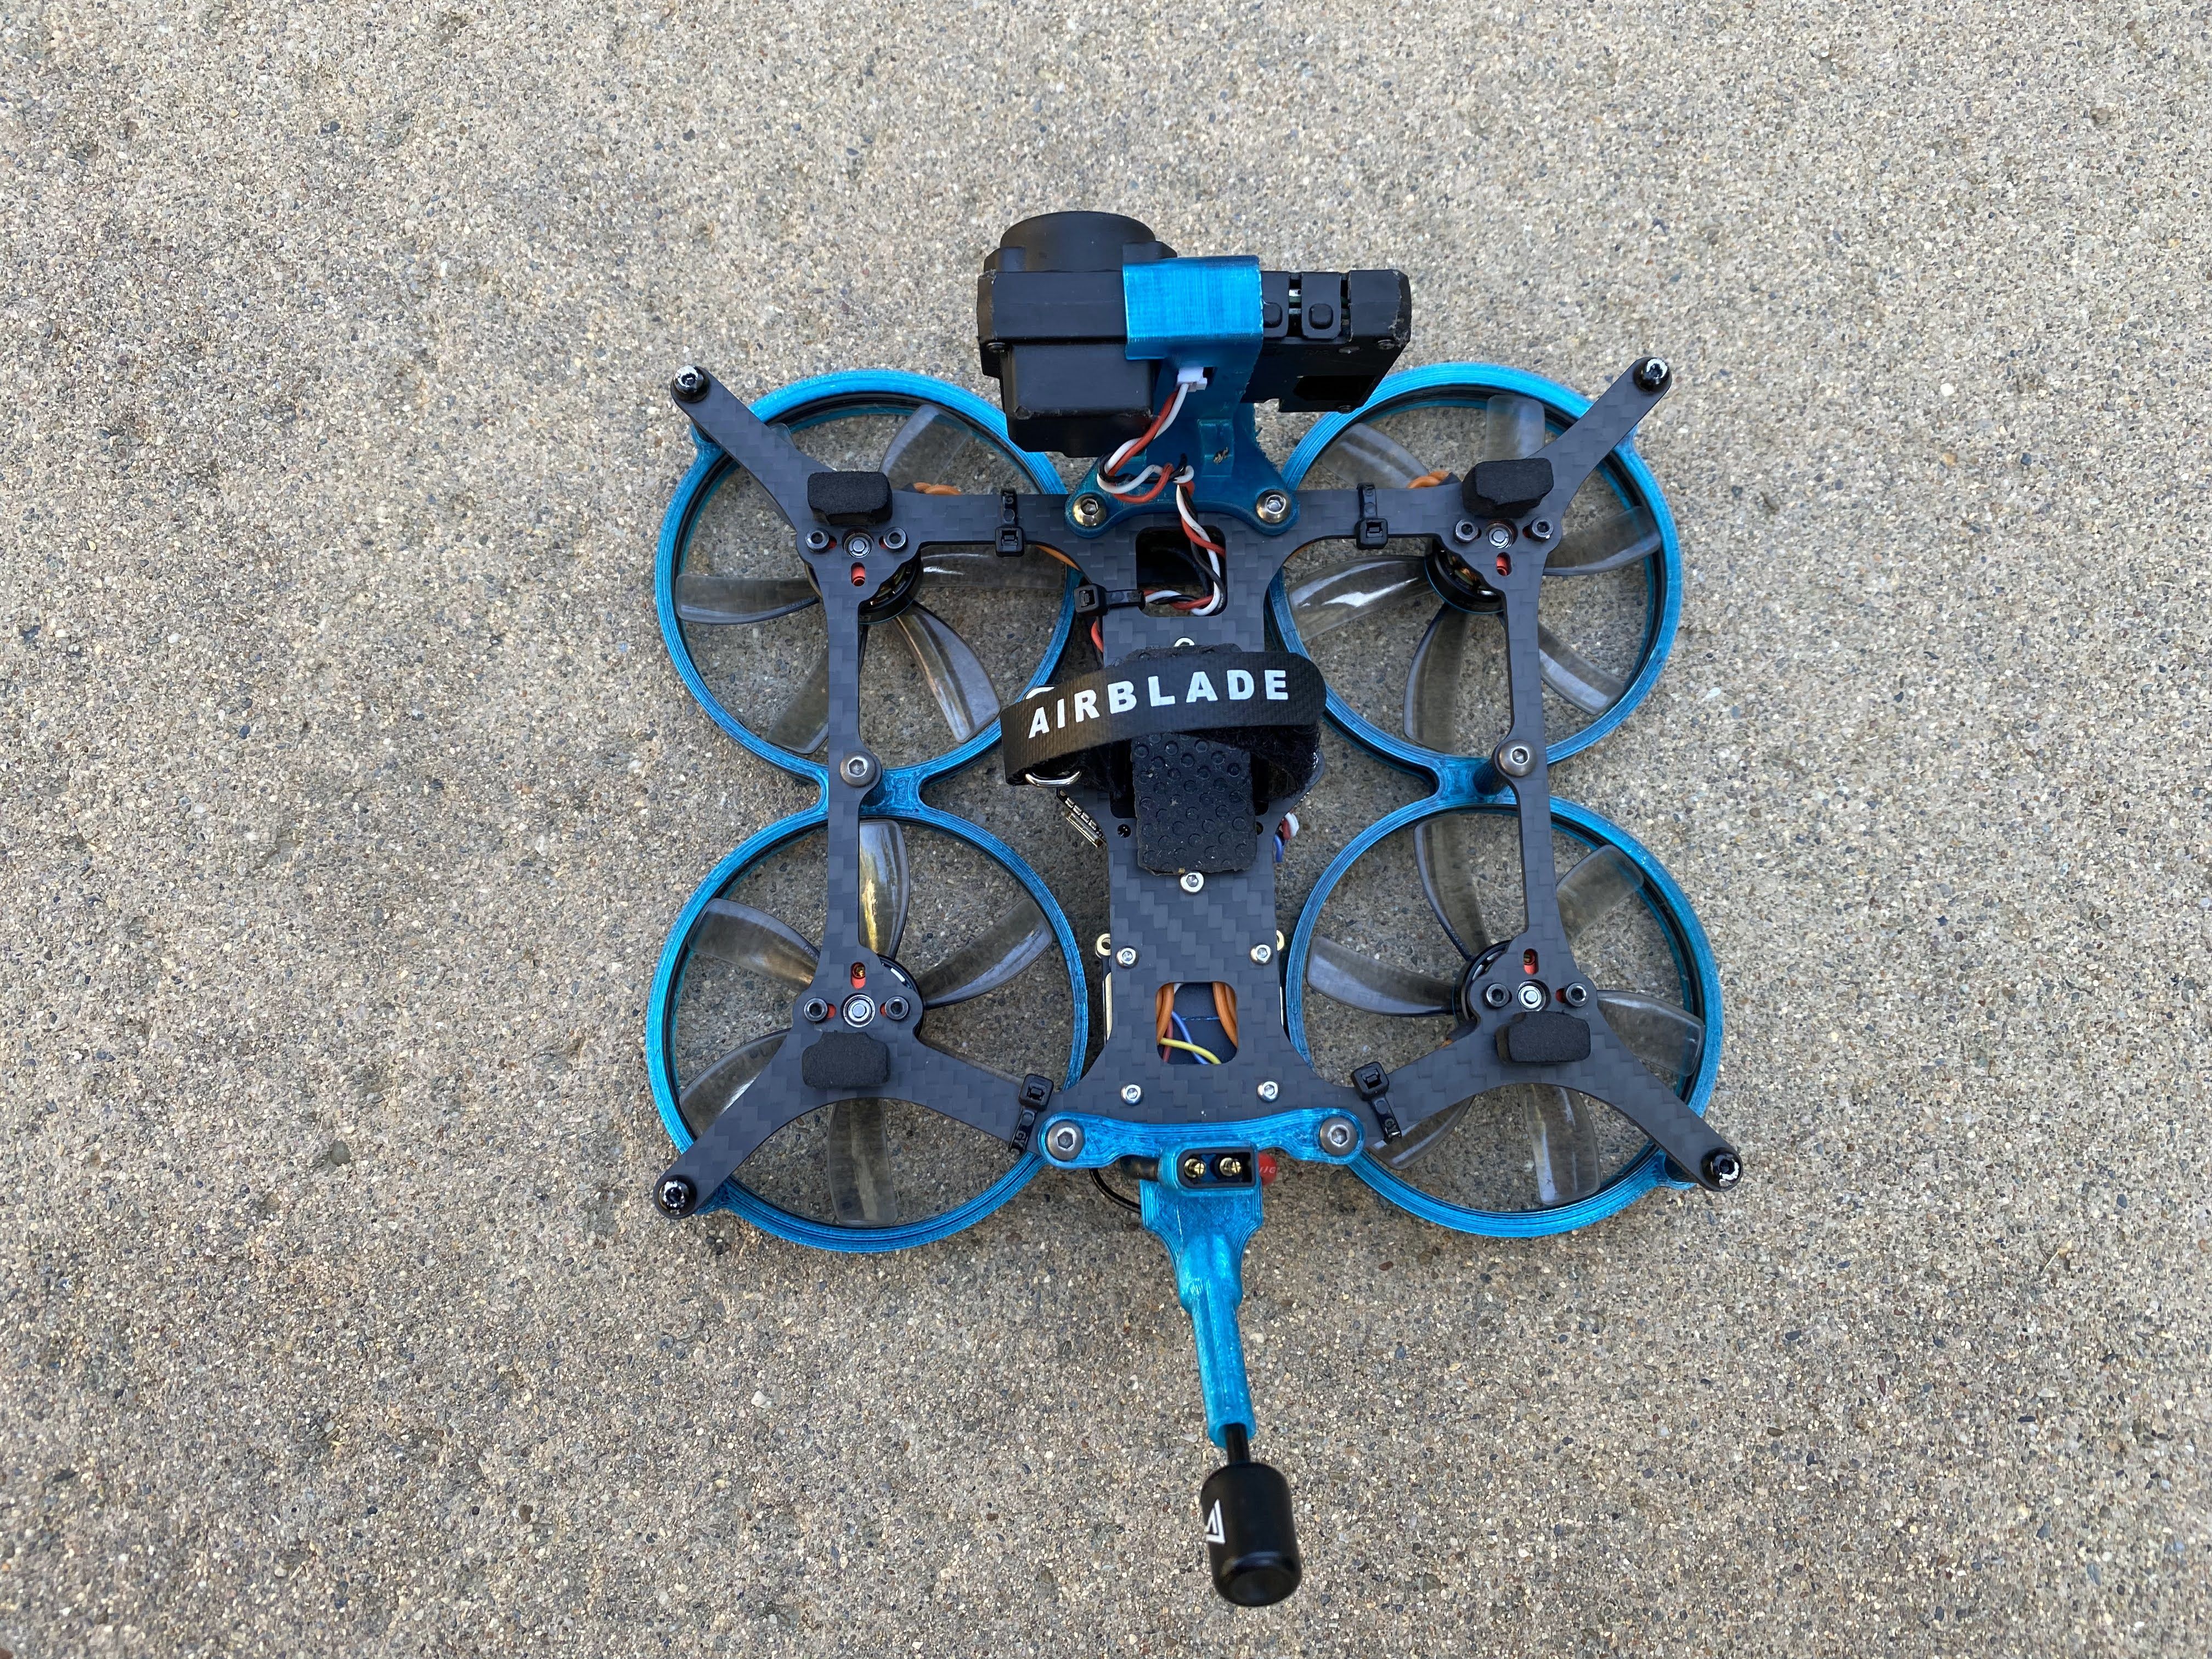
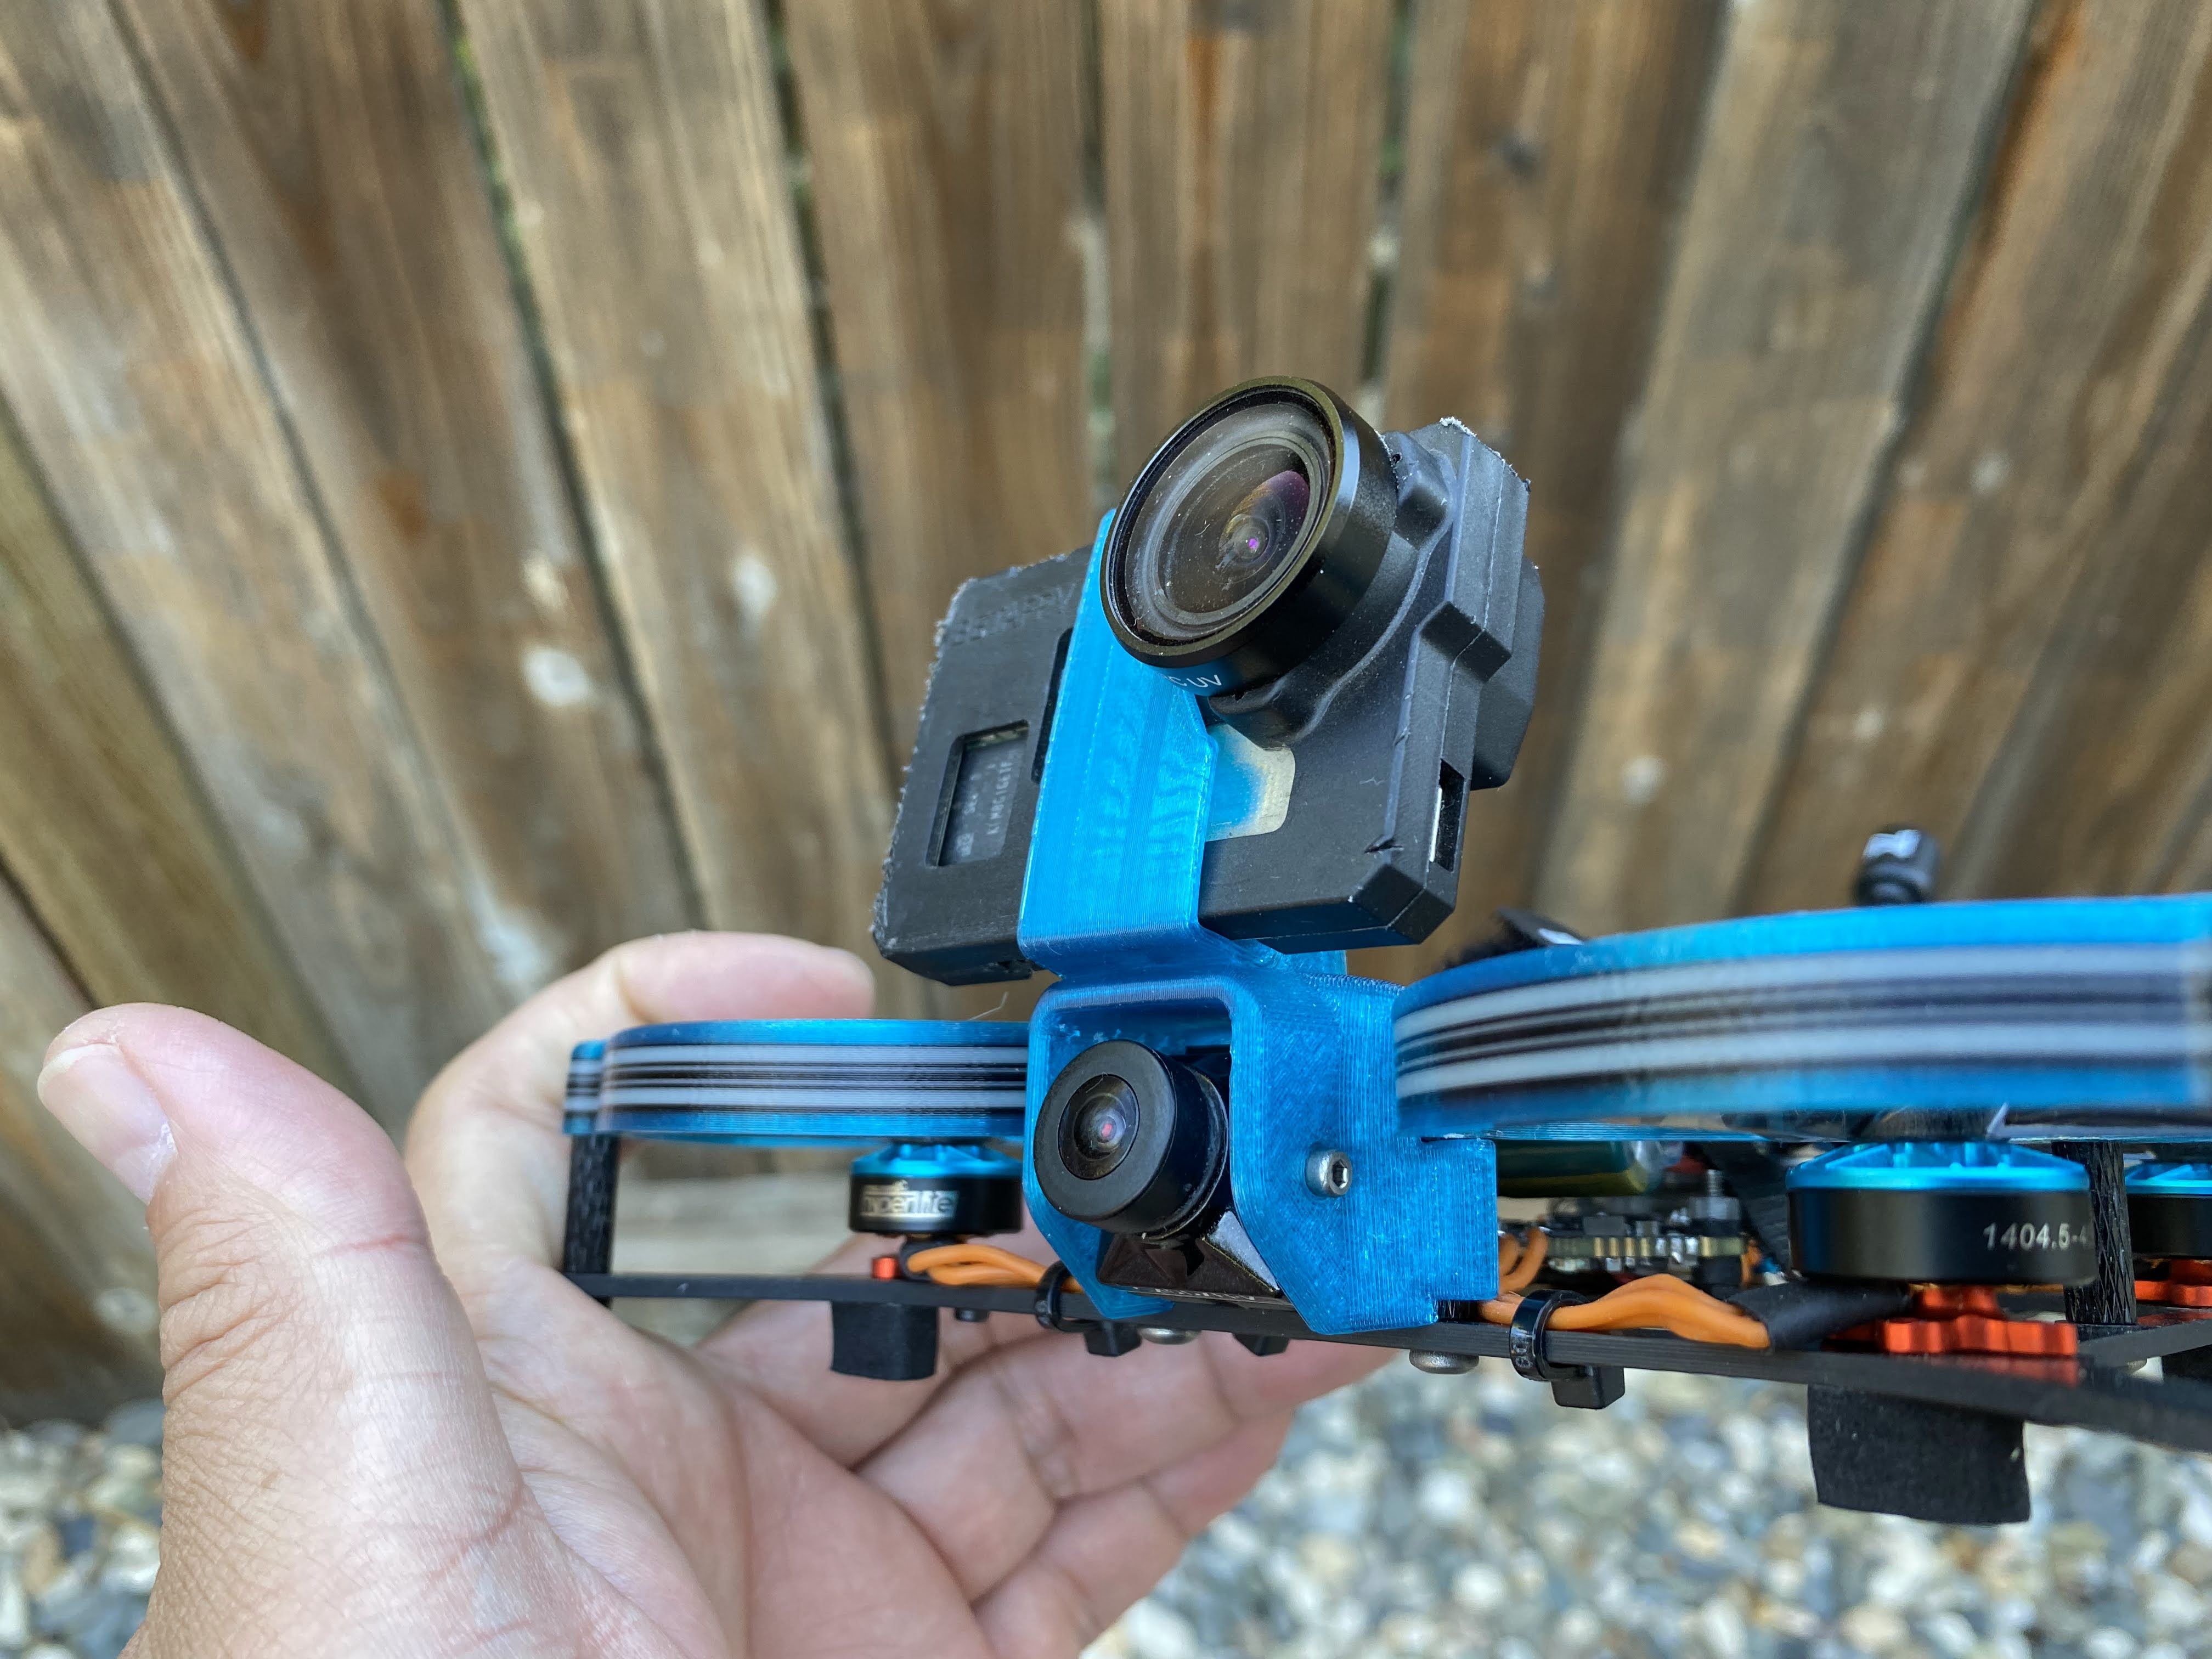
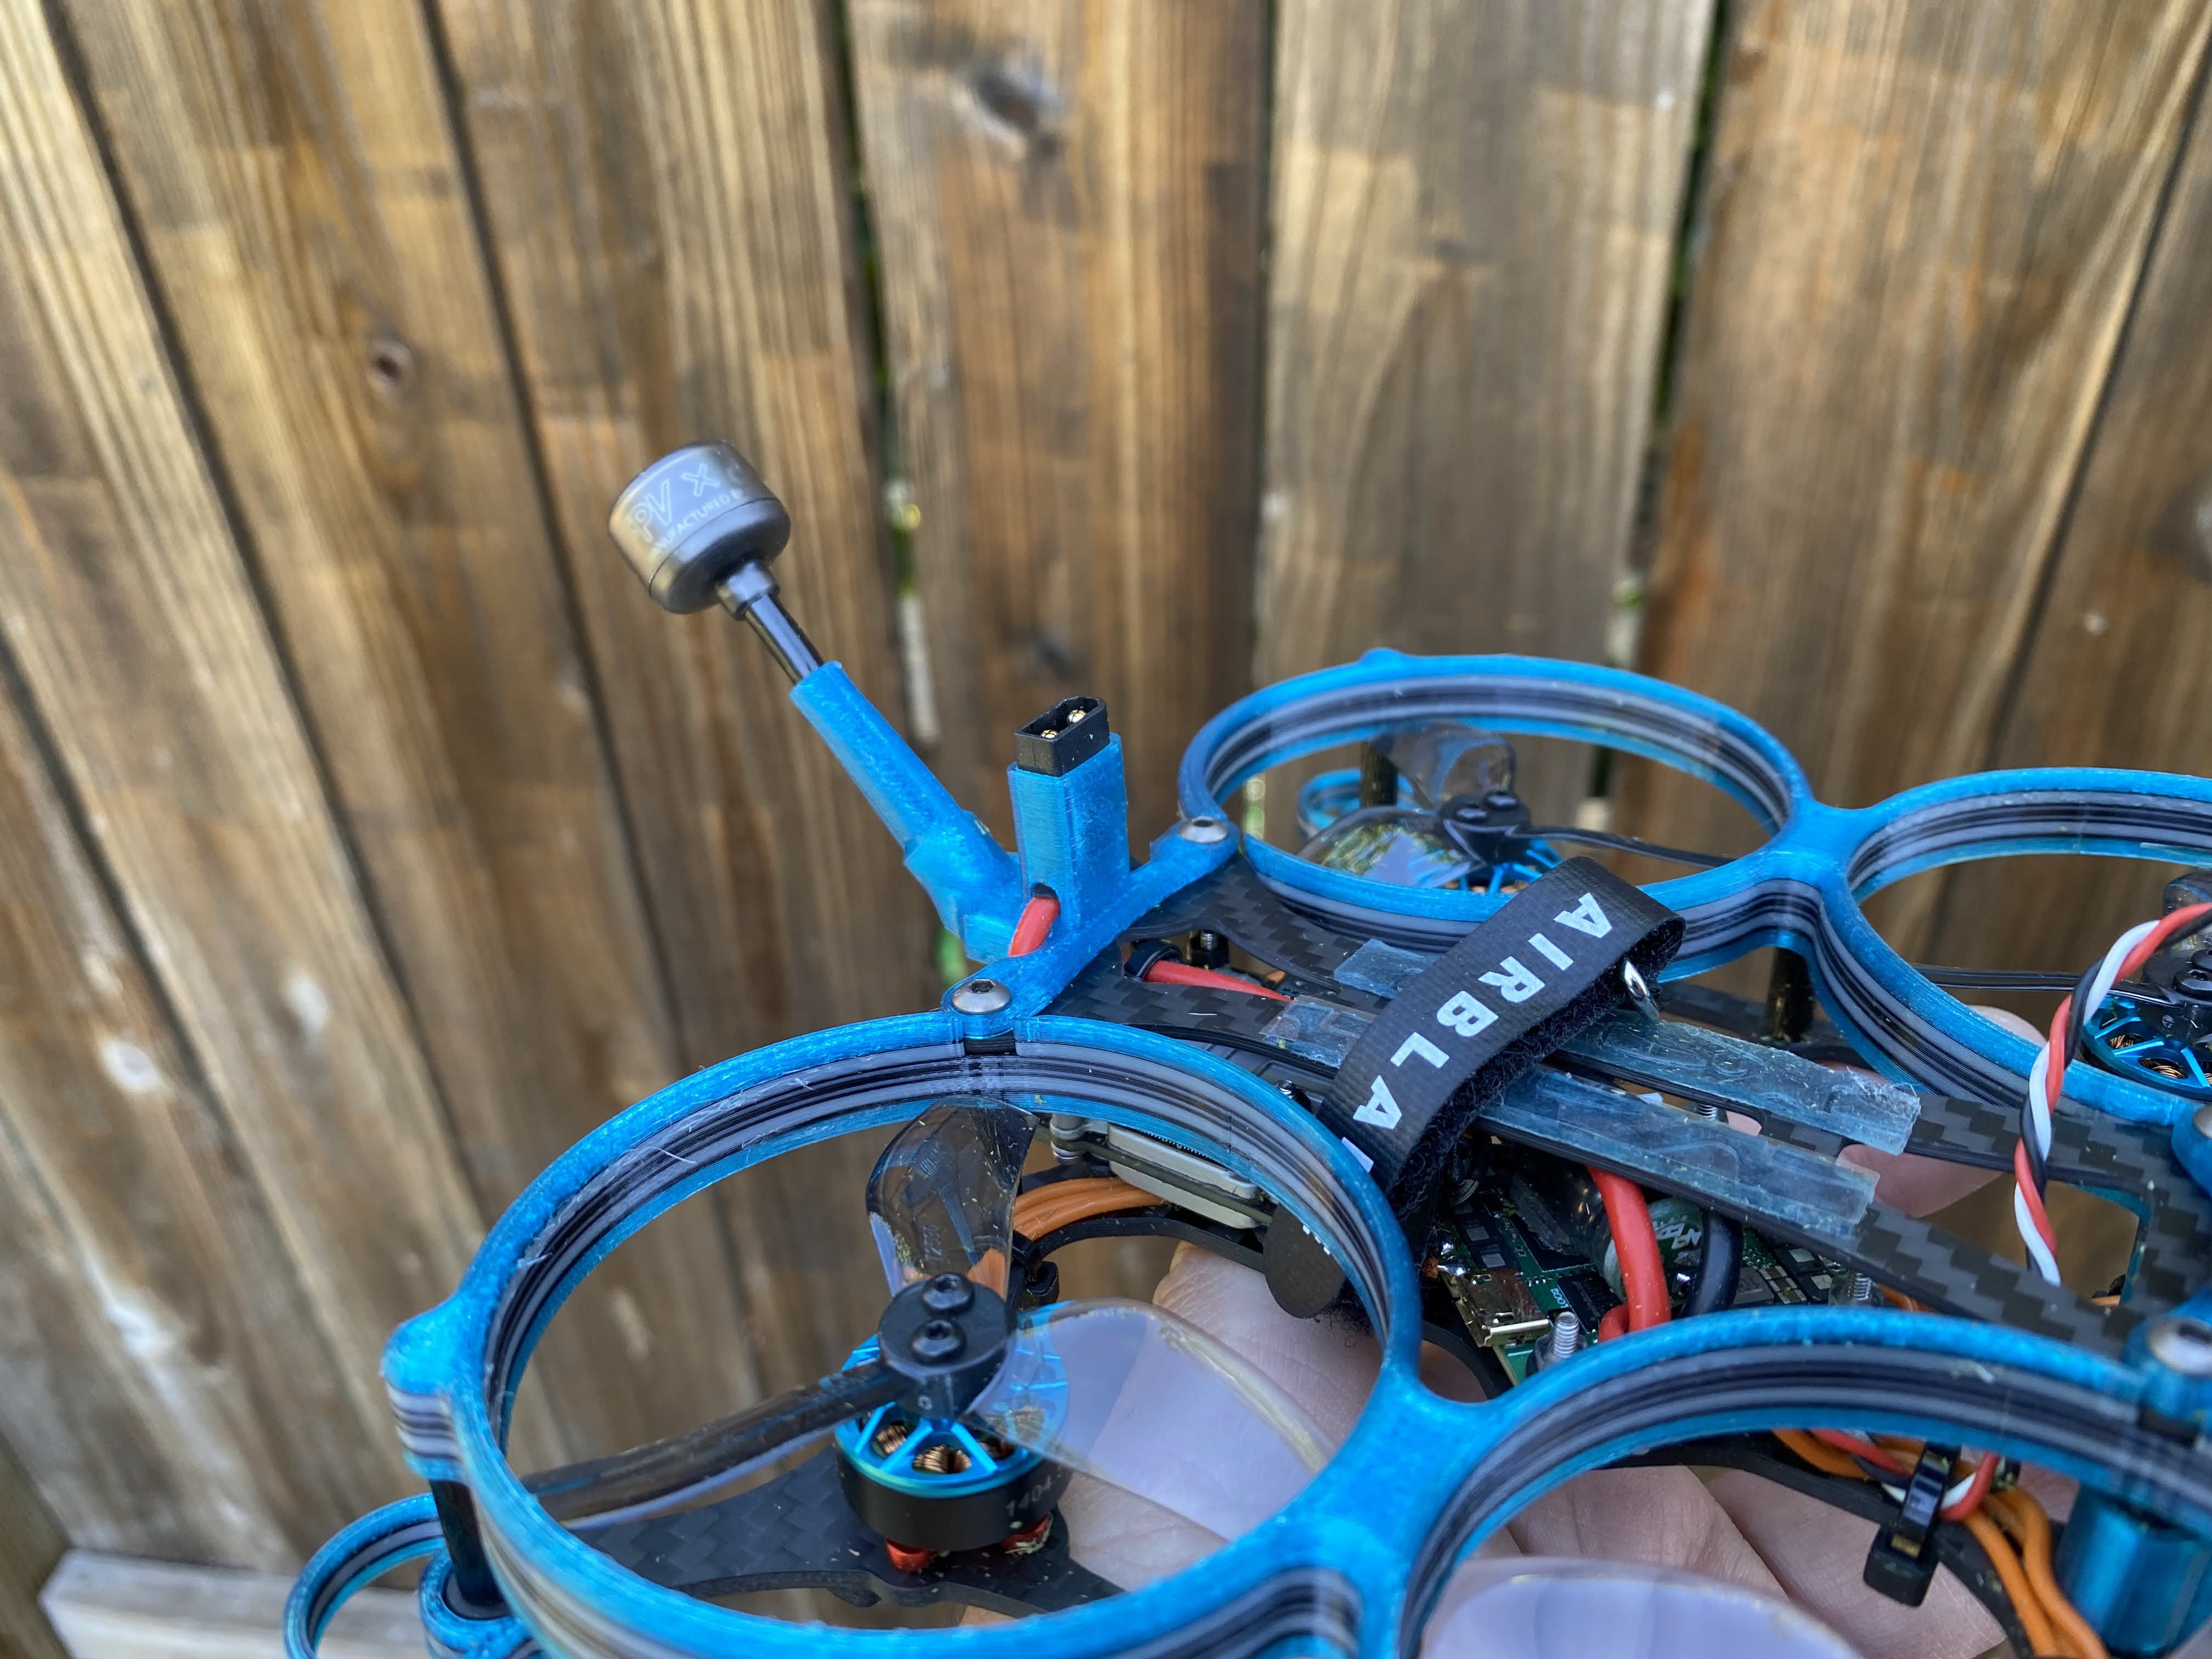
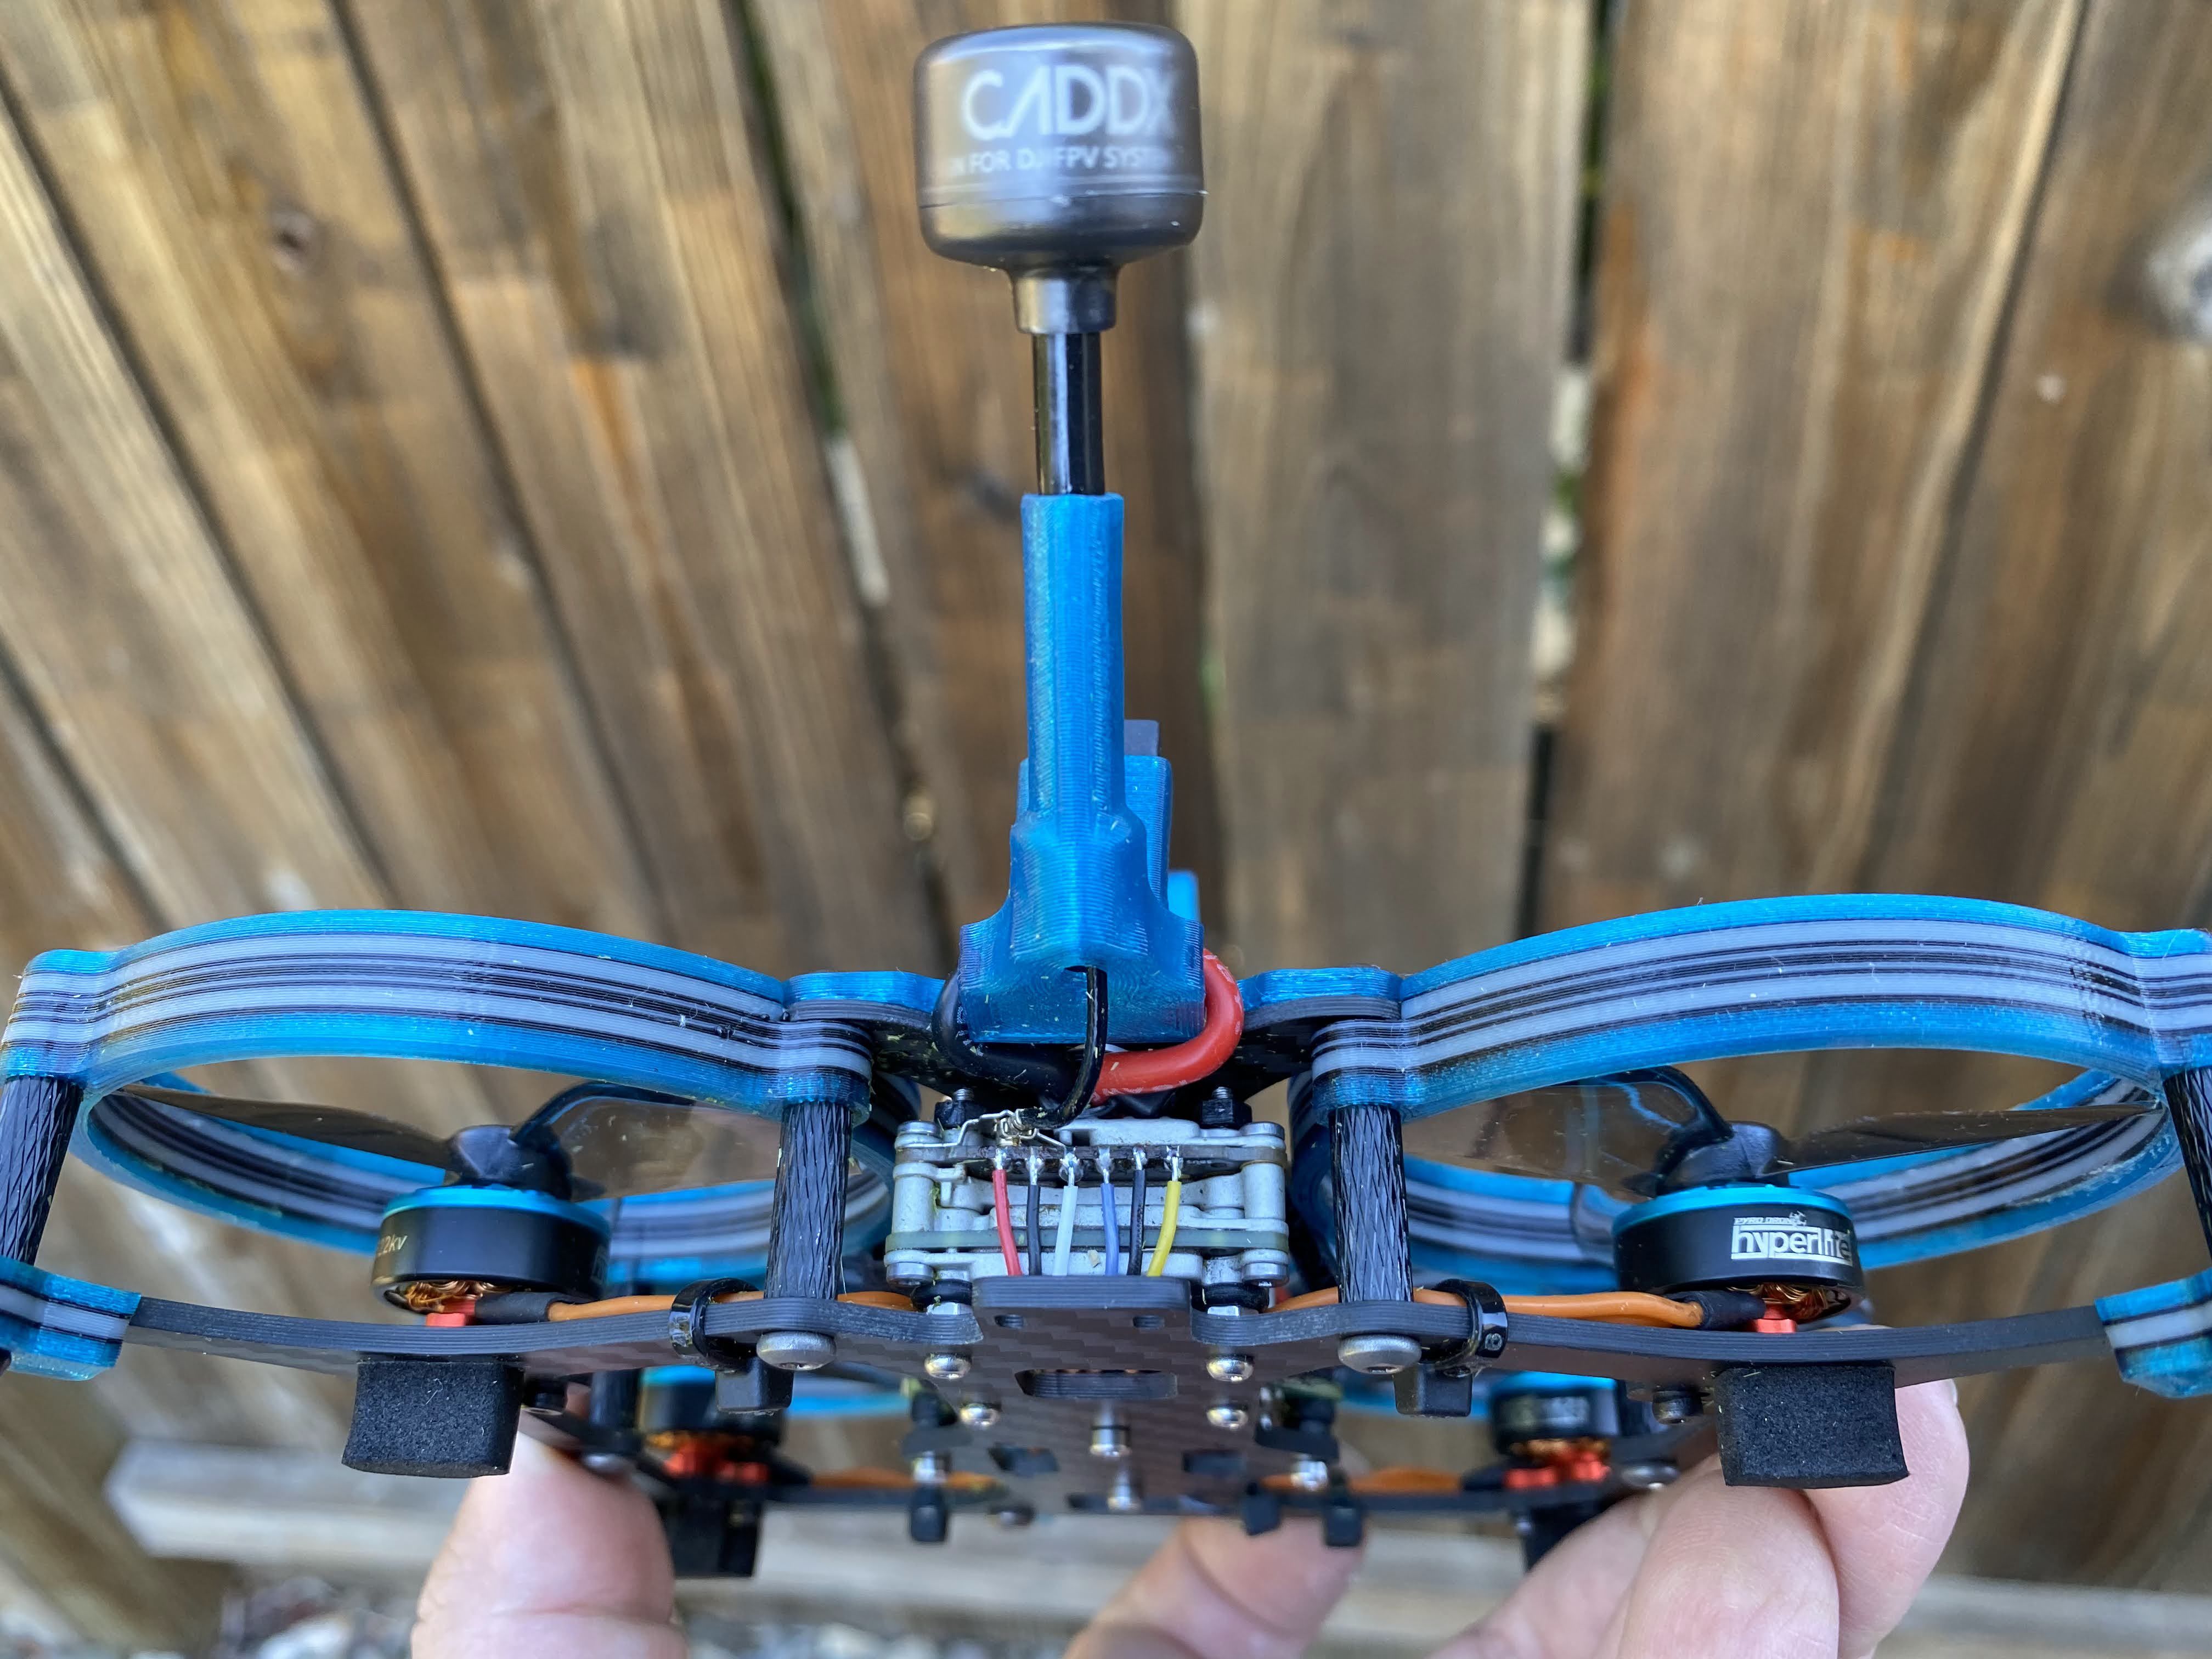
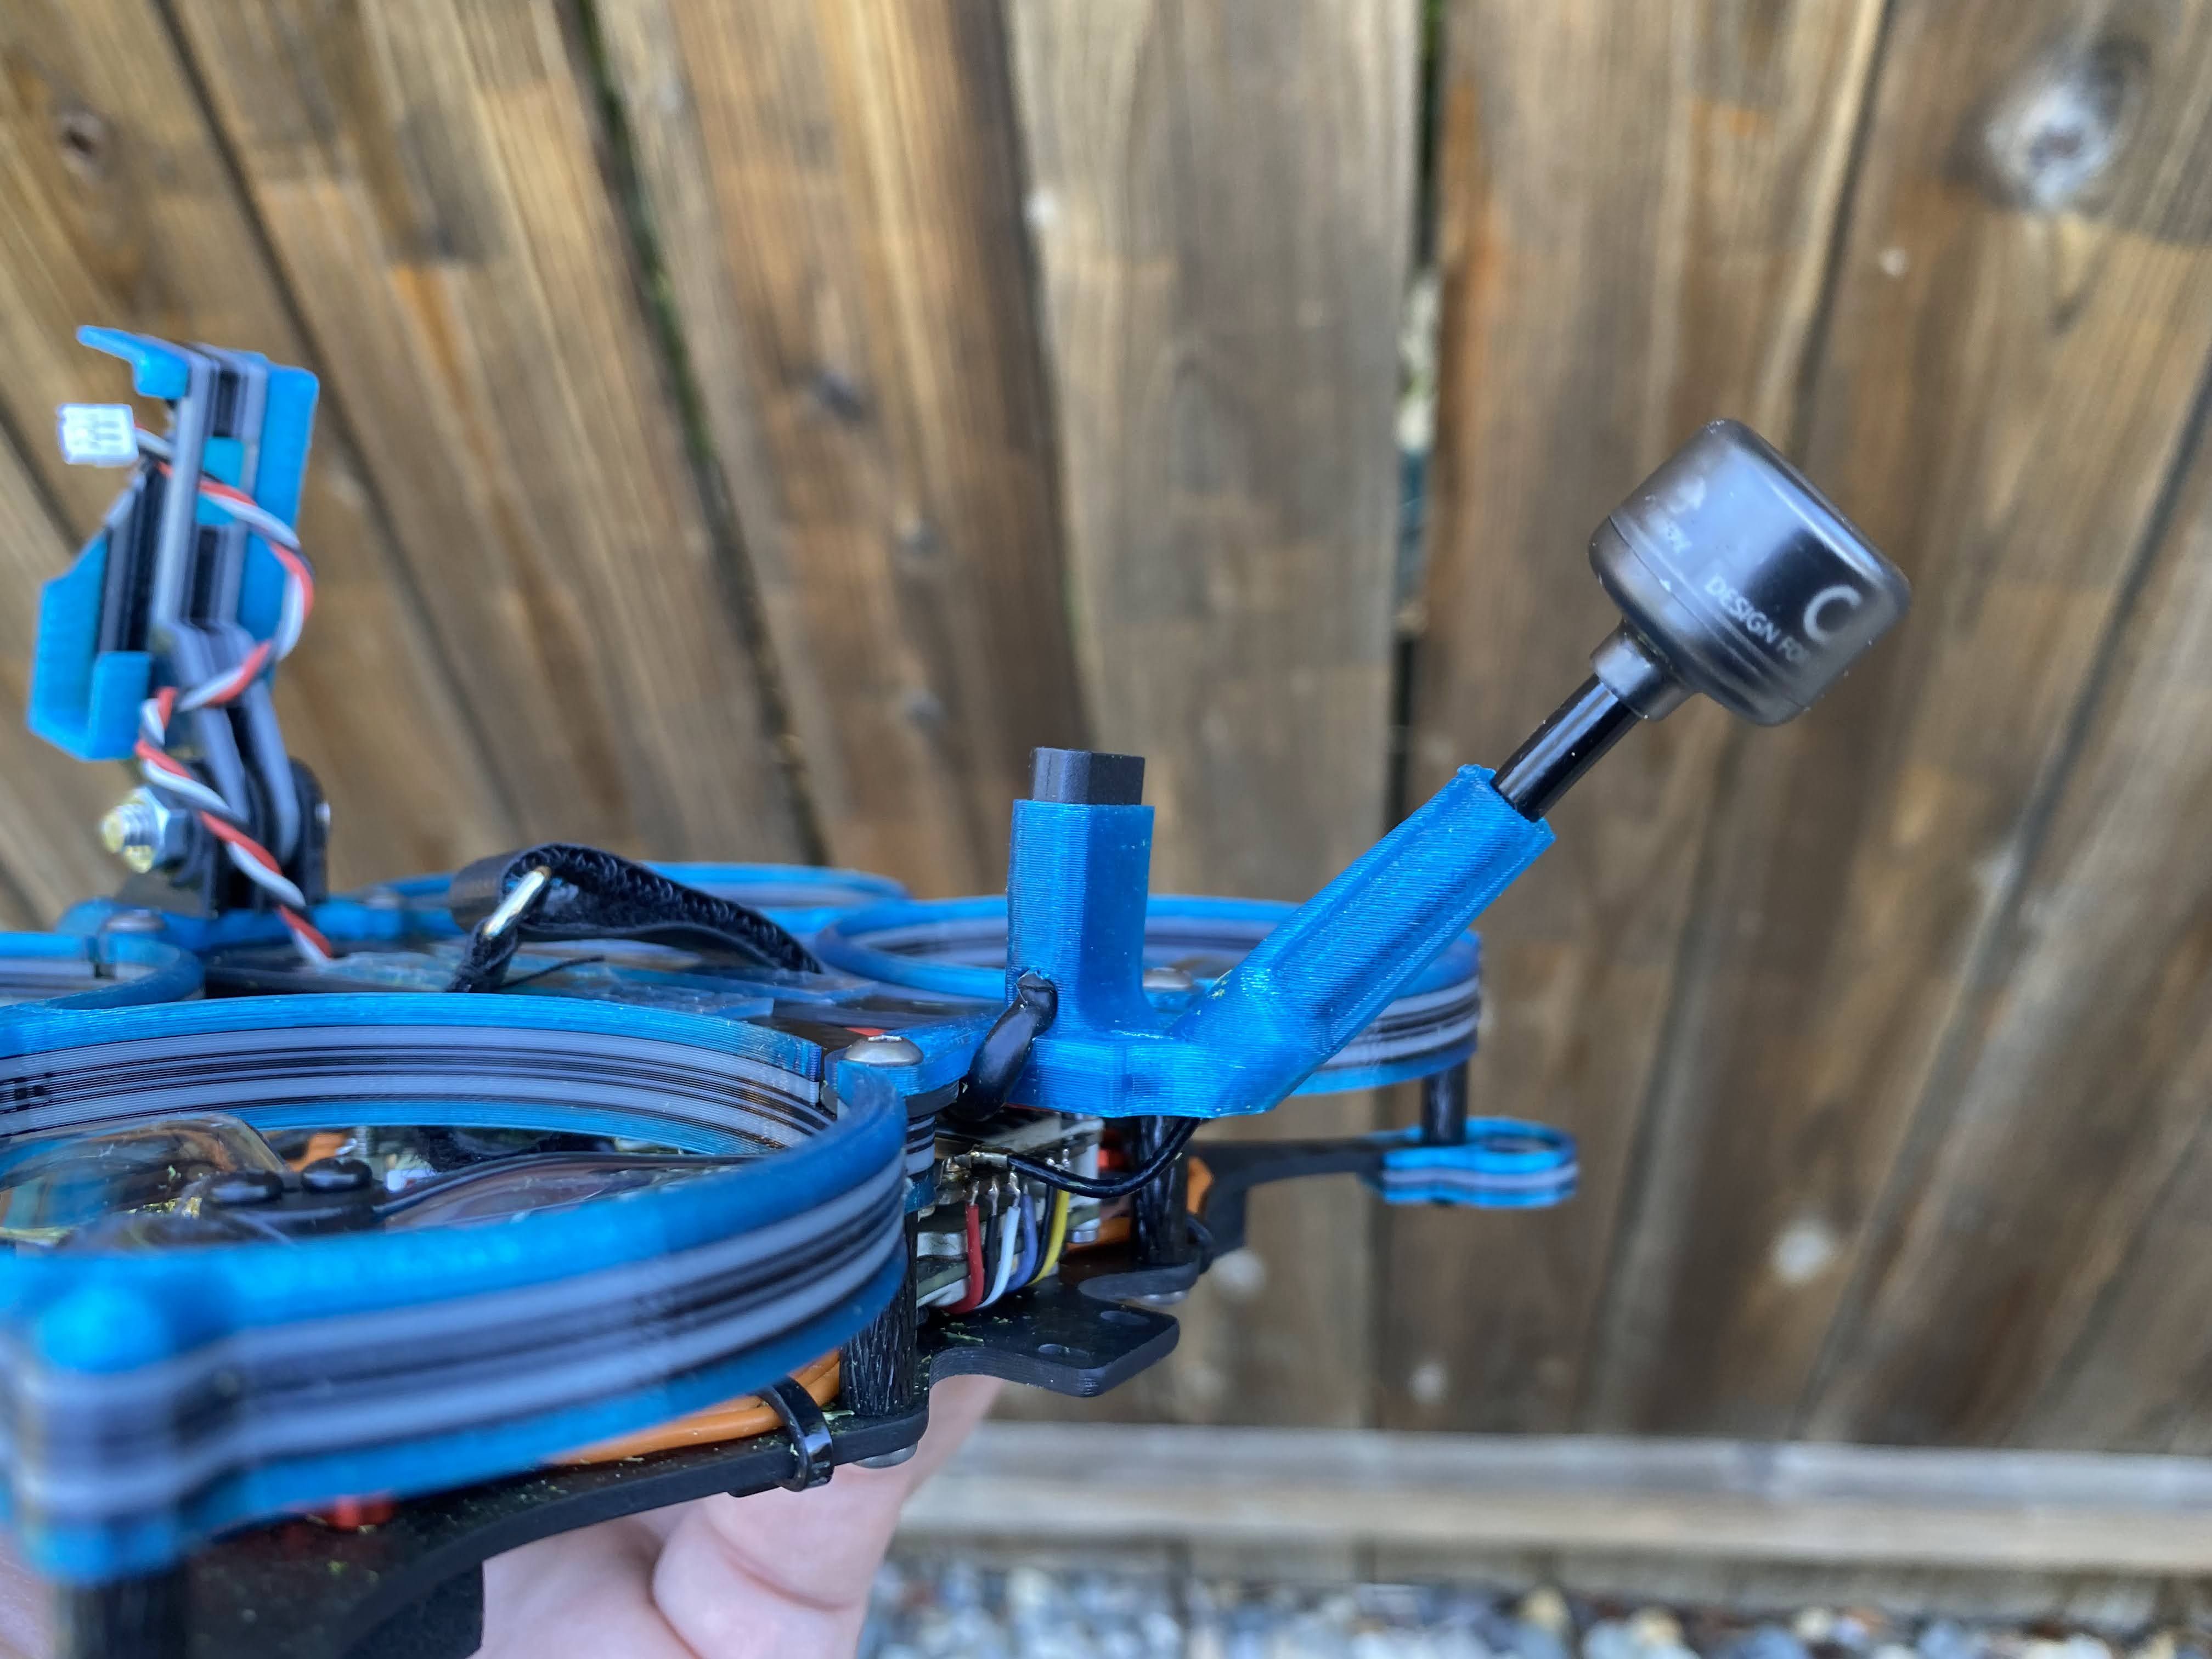
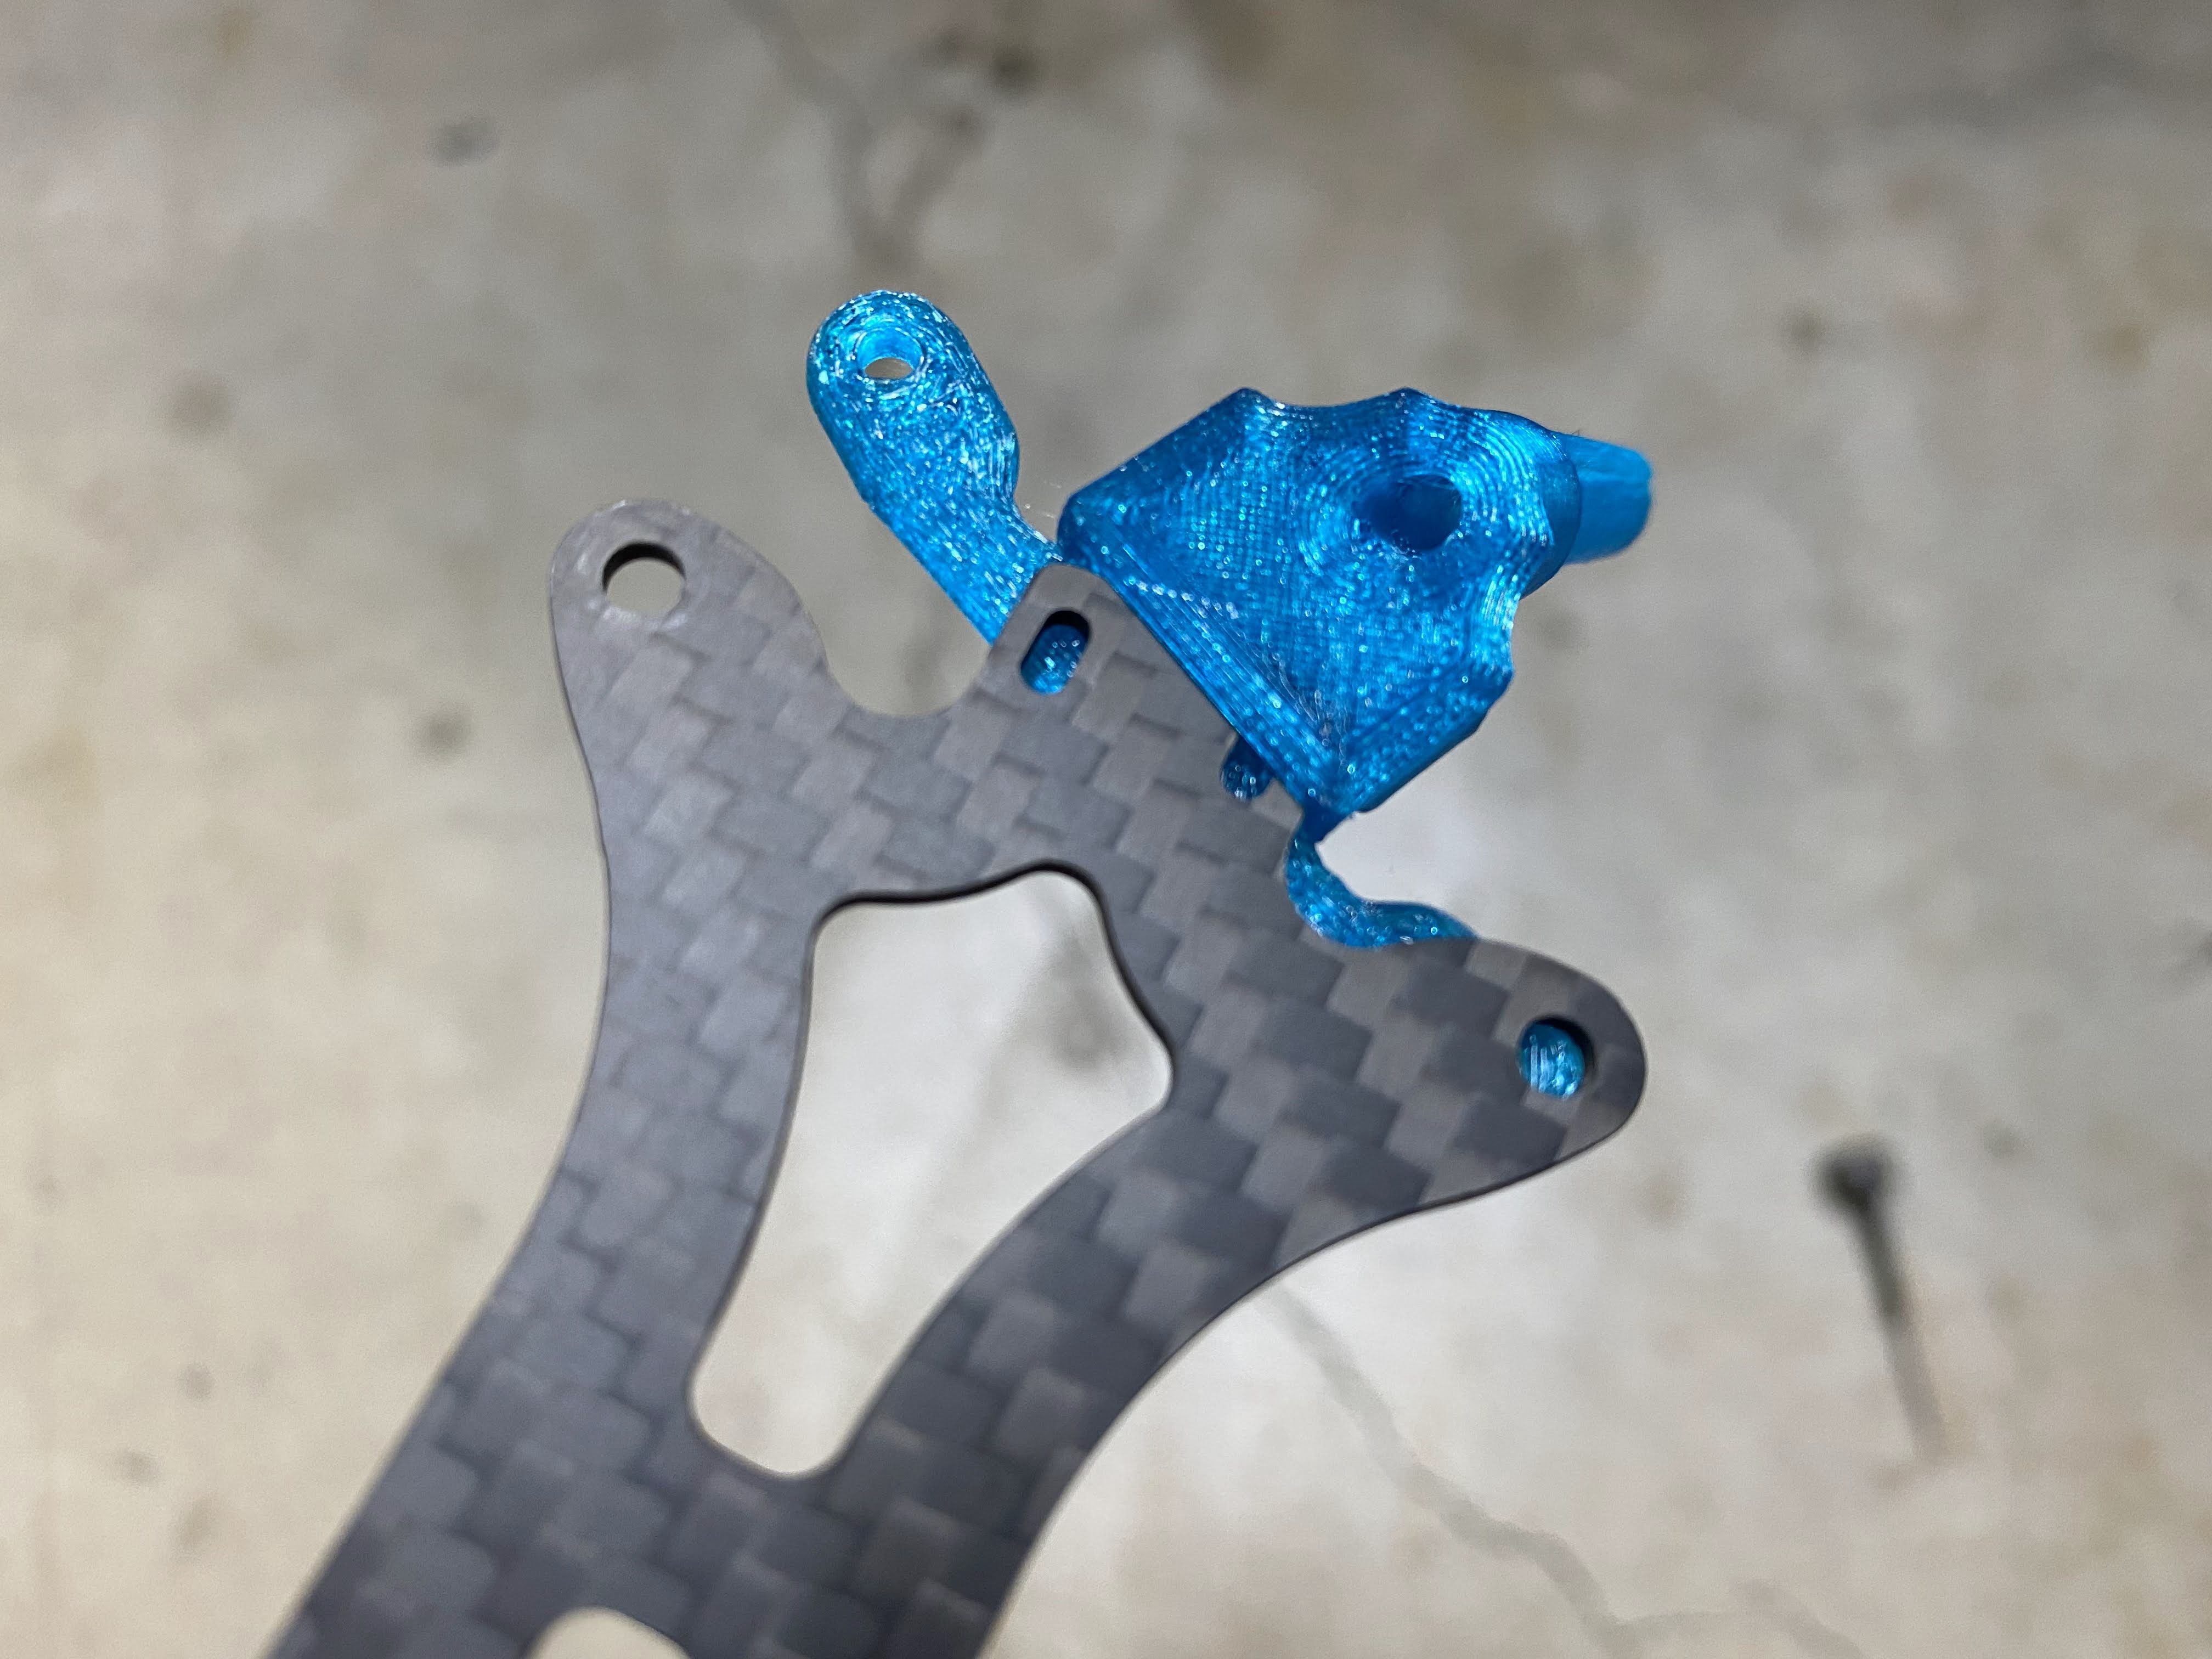
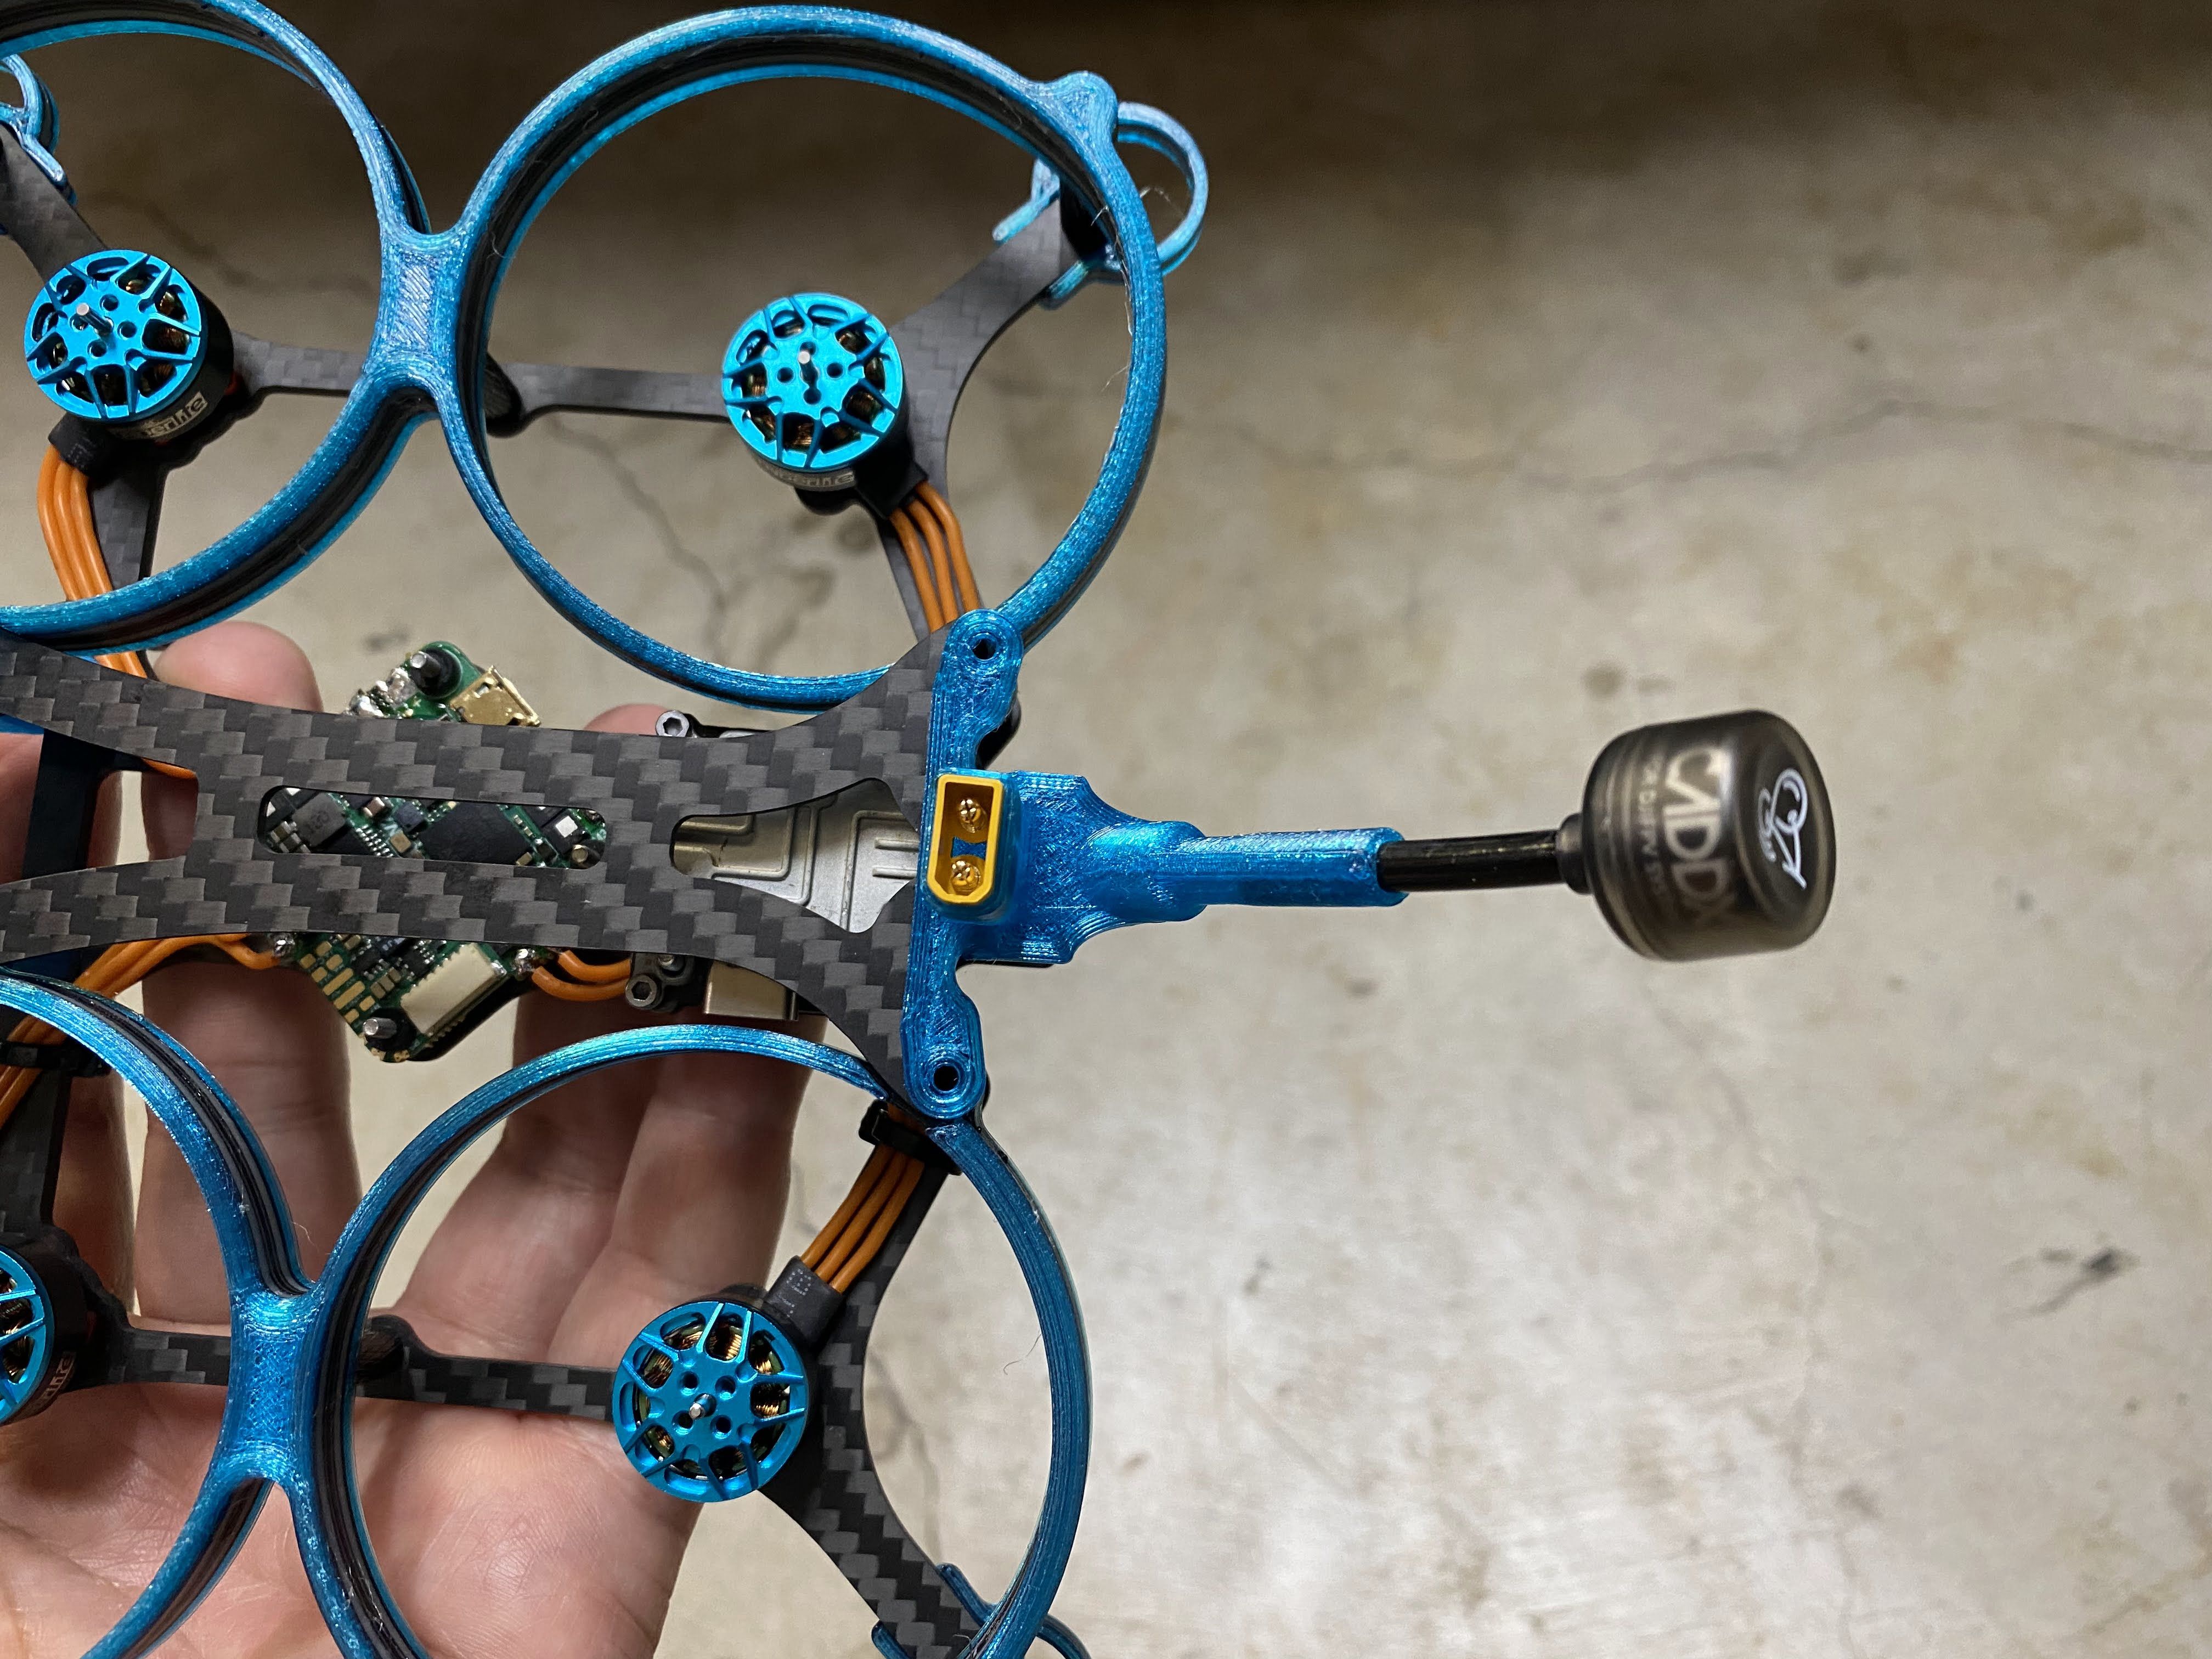
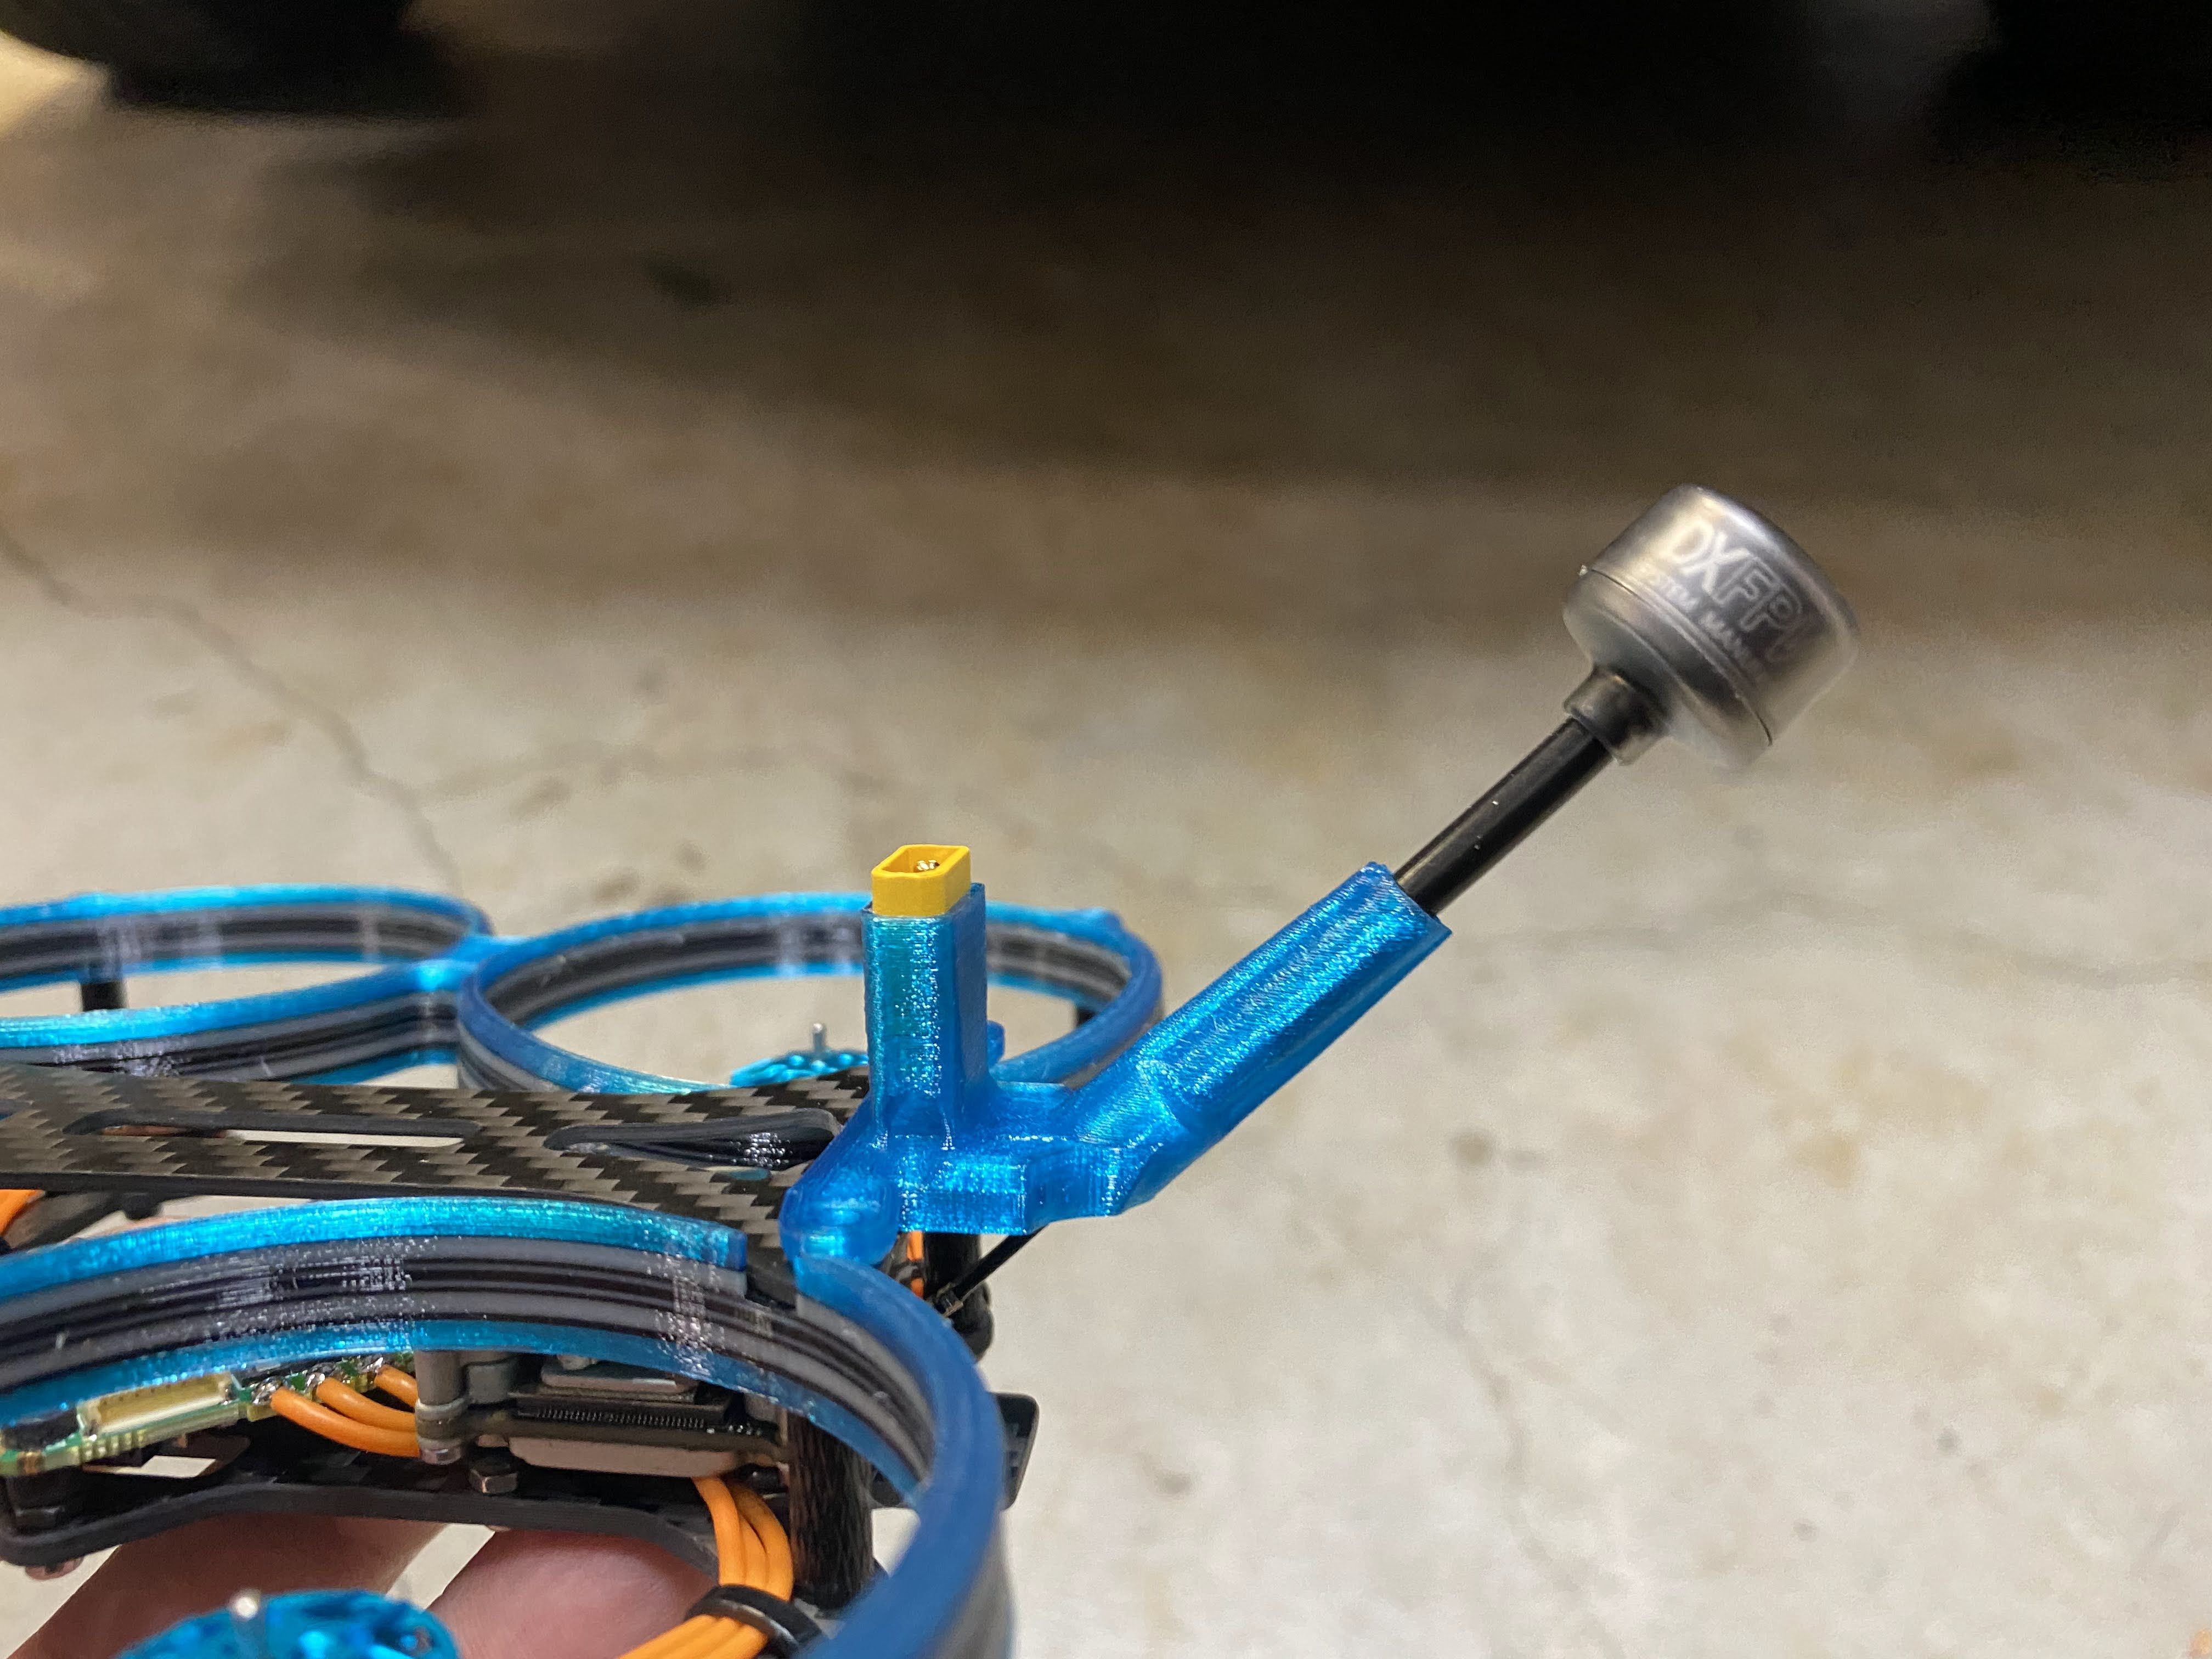
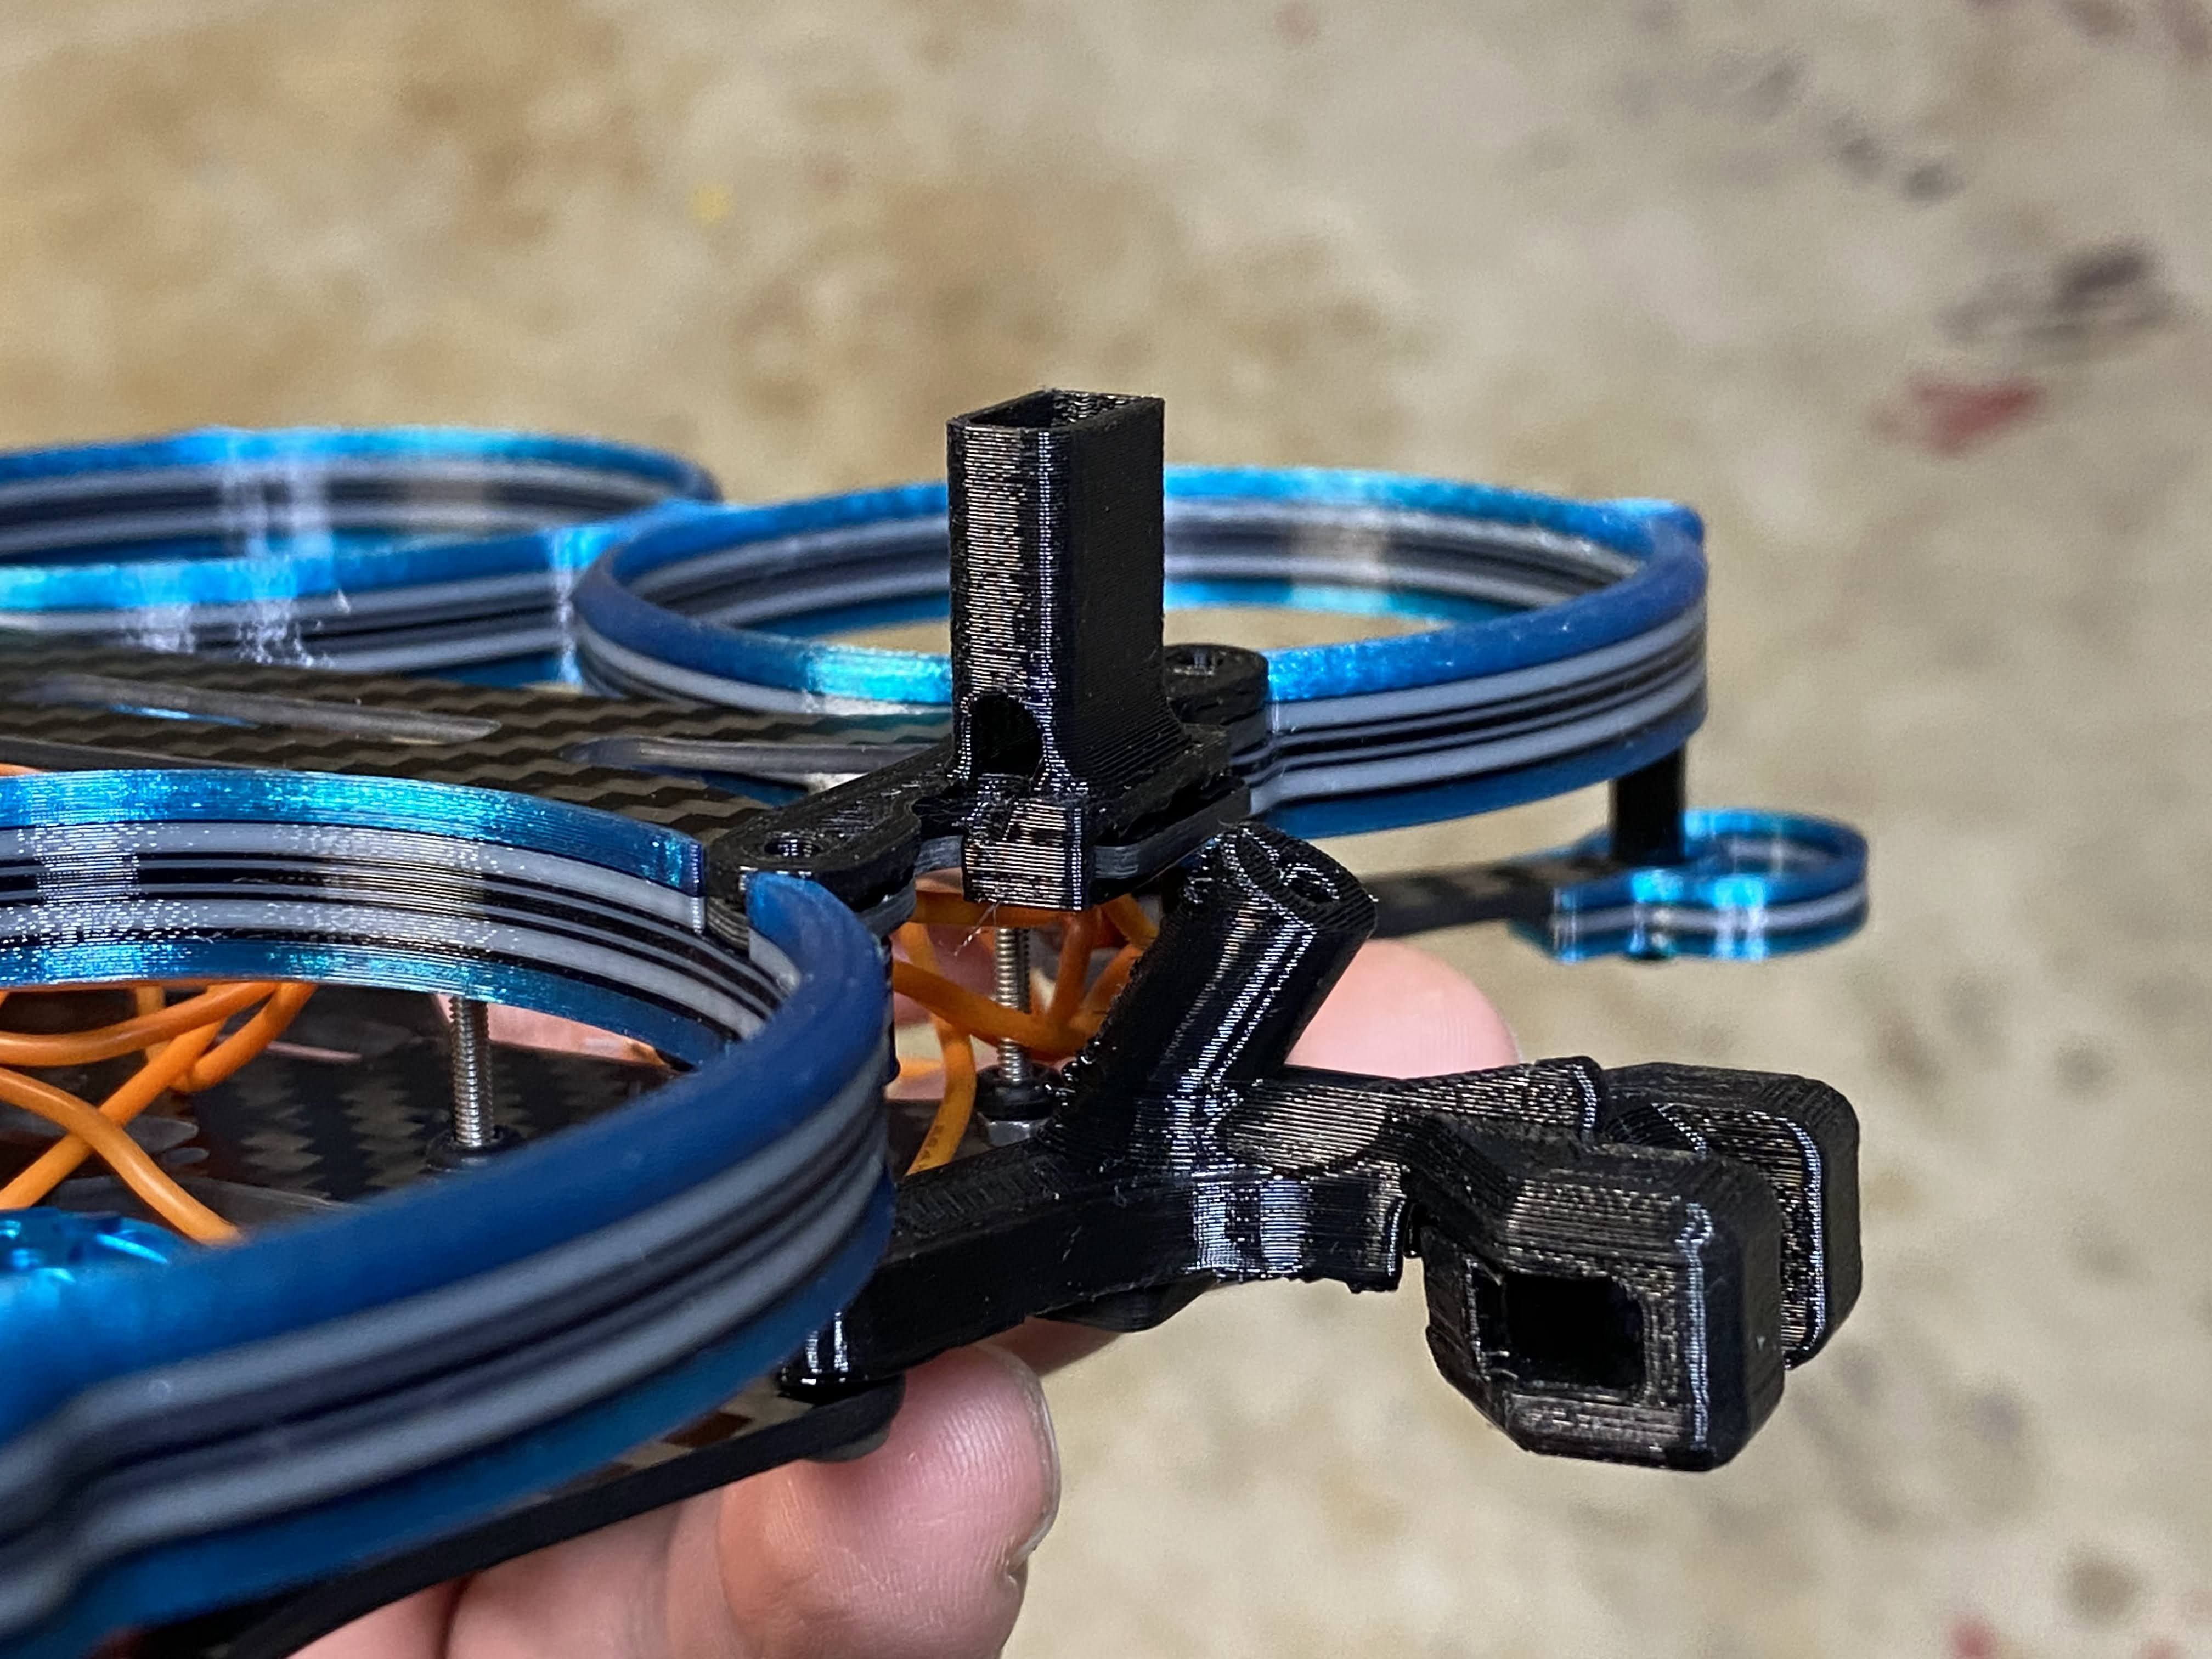
Like with most new builds, I 3D print the standard mounts, ducts, etc. Then I go back and see if there any custom modification that I like to make. For this fame, I wanted to add a XT30 plug mount, and lighten the Caddx Vista antenna mount. Ever since I purchased a DJI radio, all my new builds will not include a Crossfire RX because it is one less thing to install. Why not use the RX that is built in the Caddx Vista / DJI Air Unit? In this case, I do not need the immortal T mount, so I also added the Caddx Vista antenna mount to the XT30 holder too. I added a arm guard bumper that I took from a Shendron Squirt v2, it is a tad tight but it still fits.
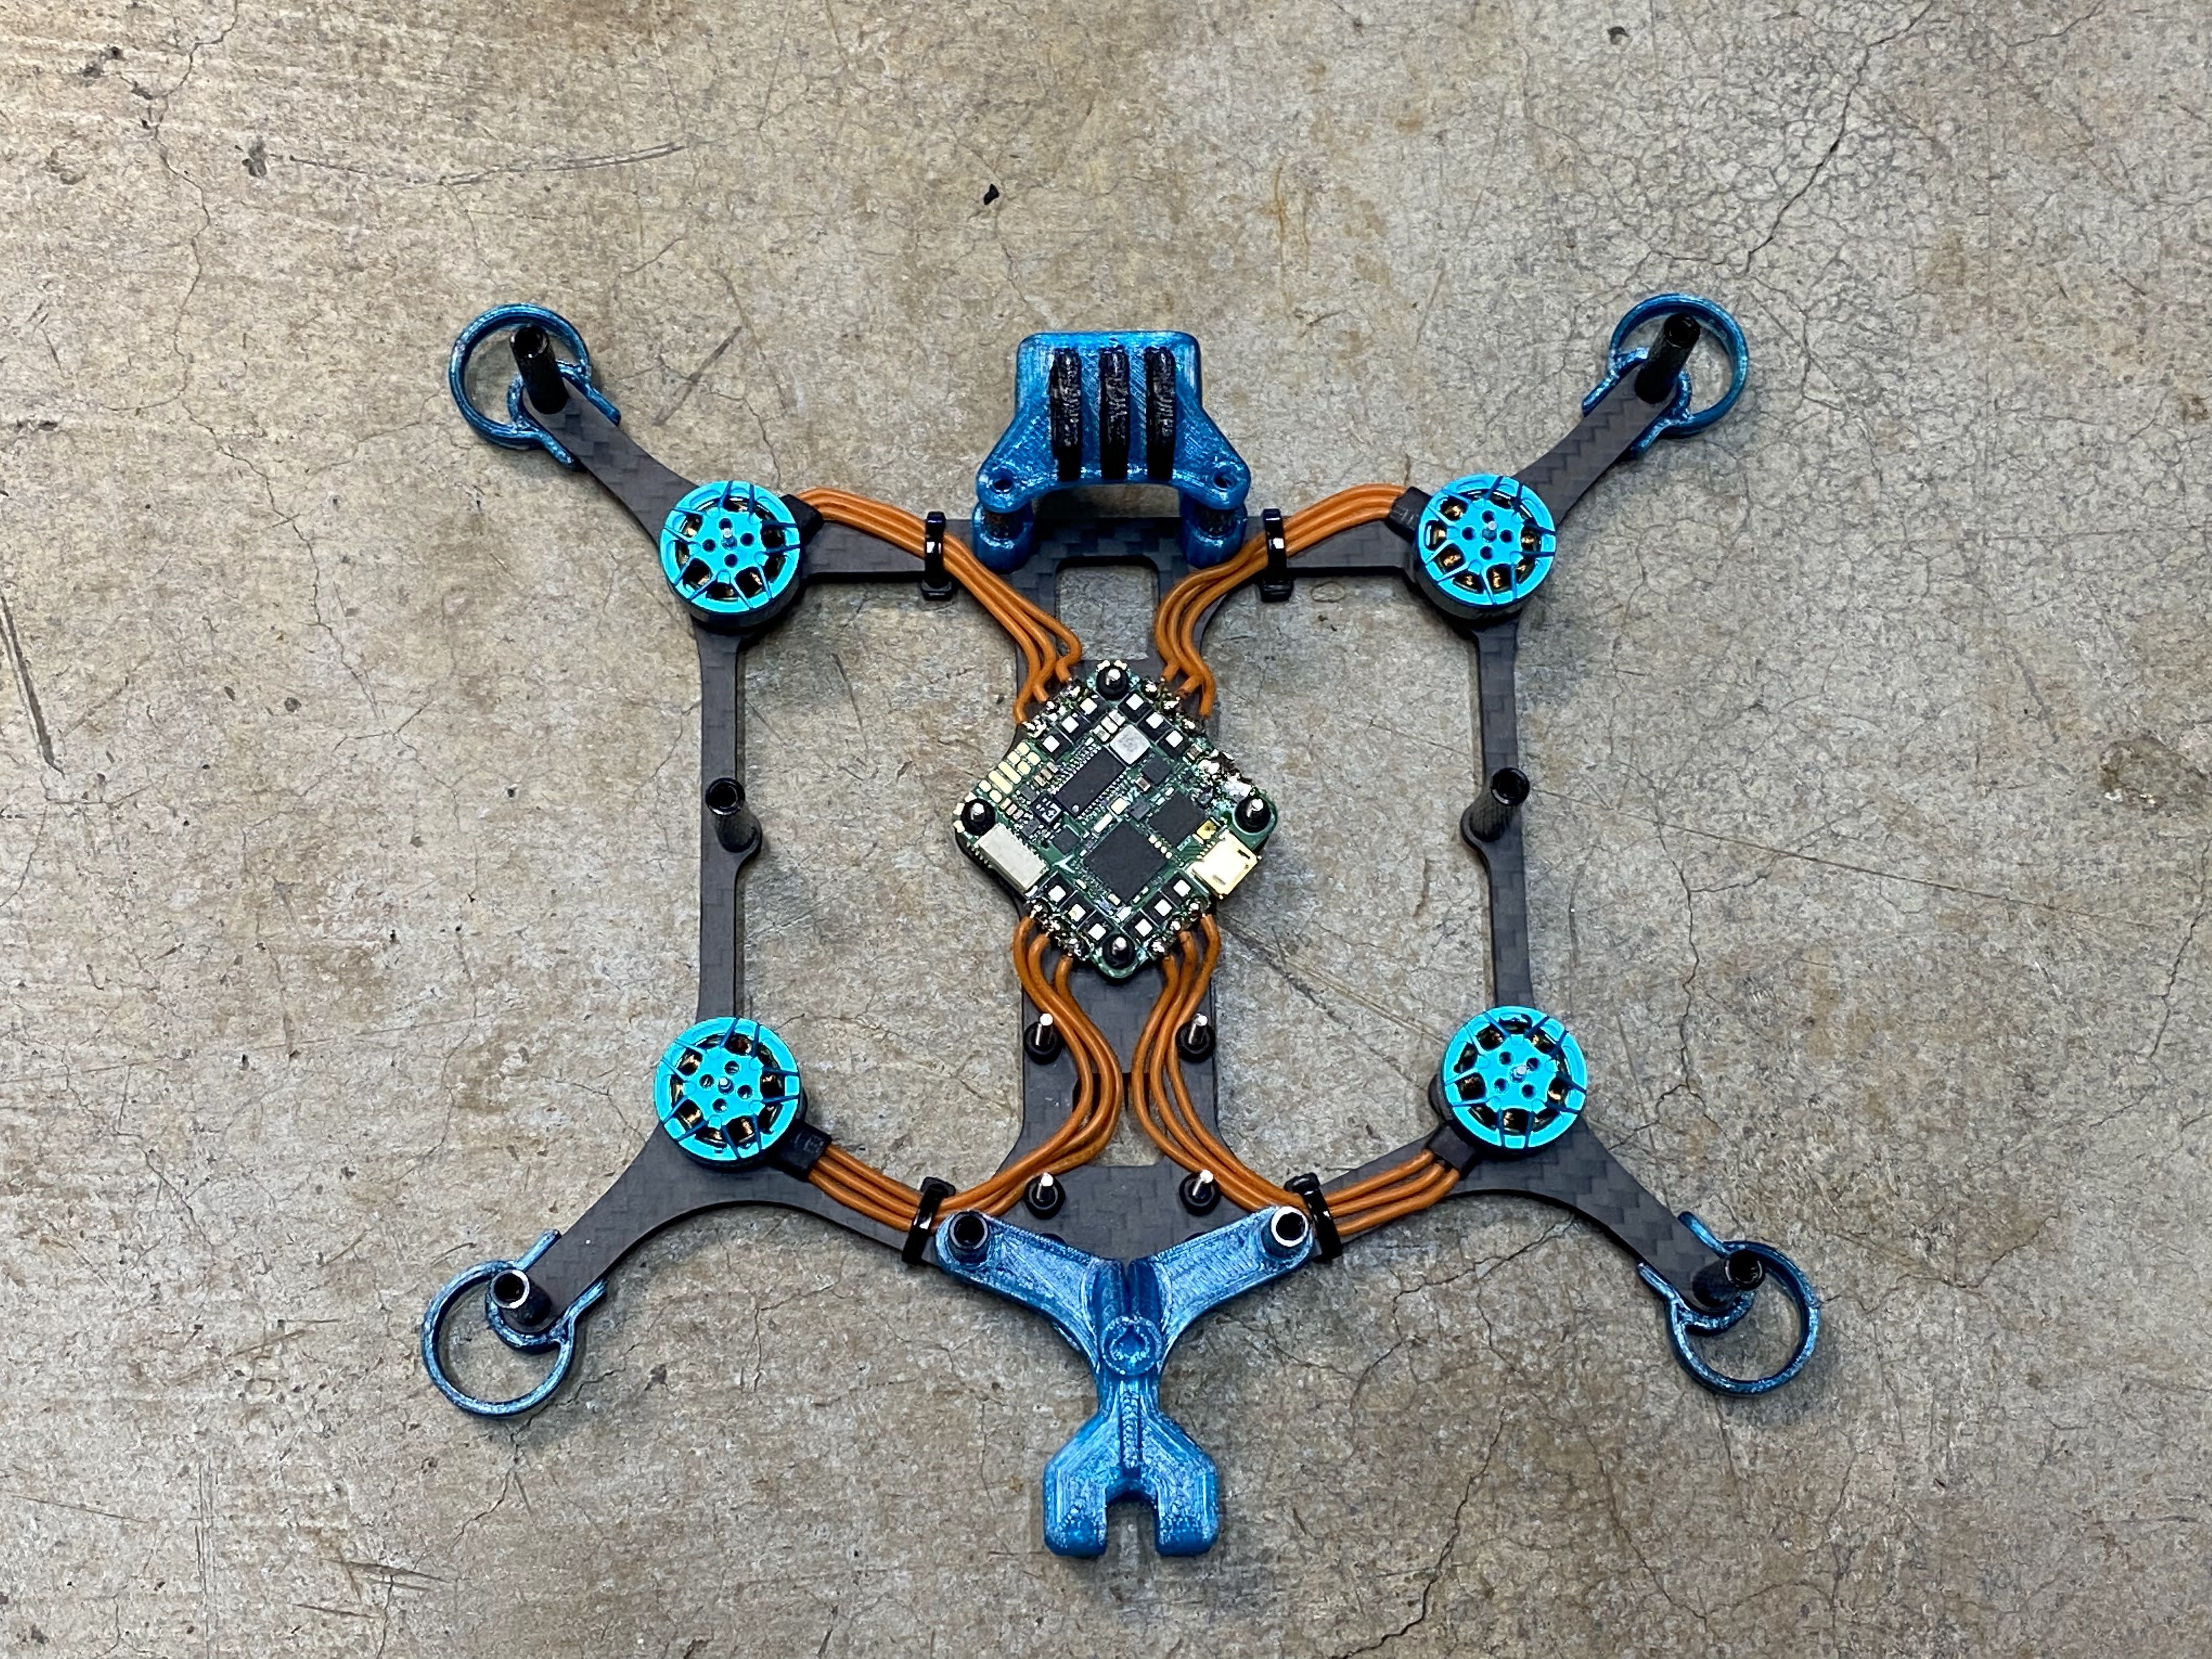
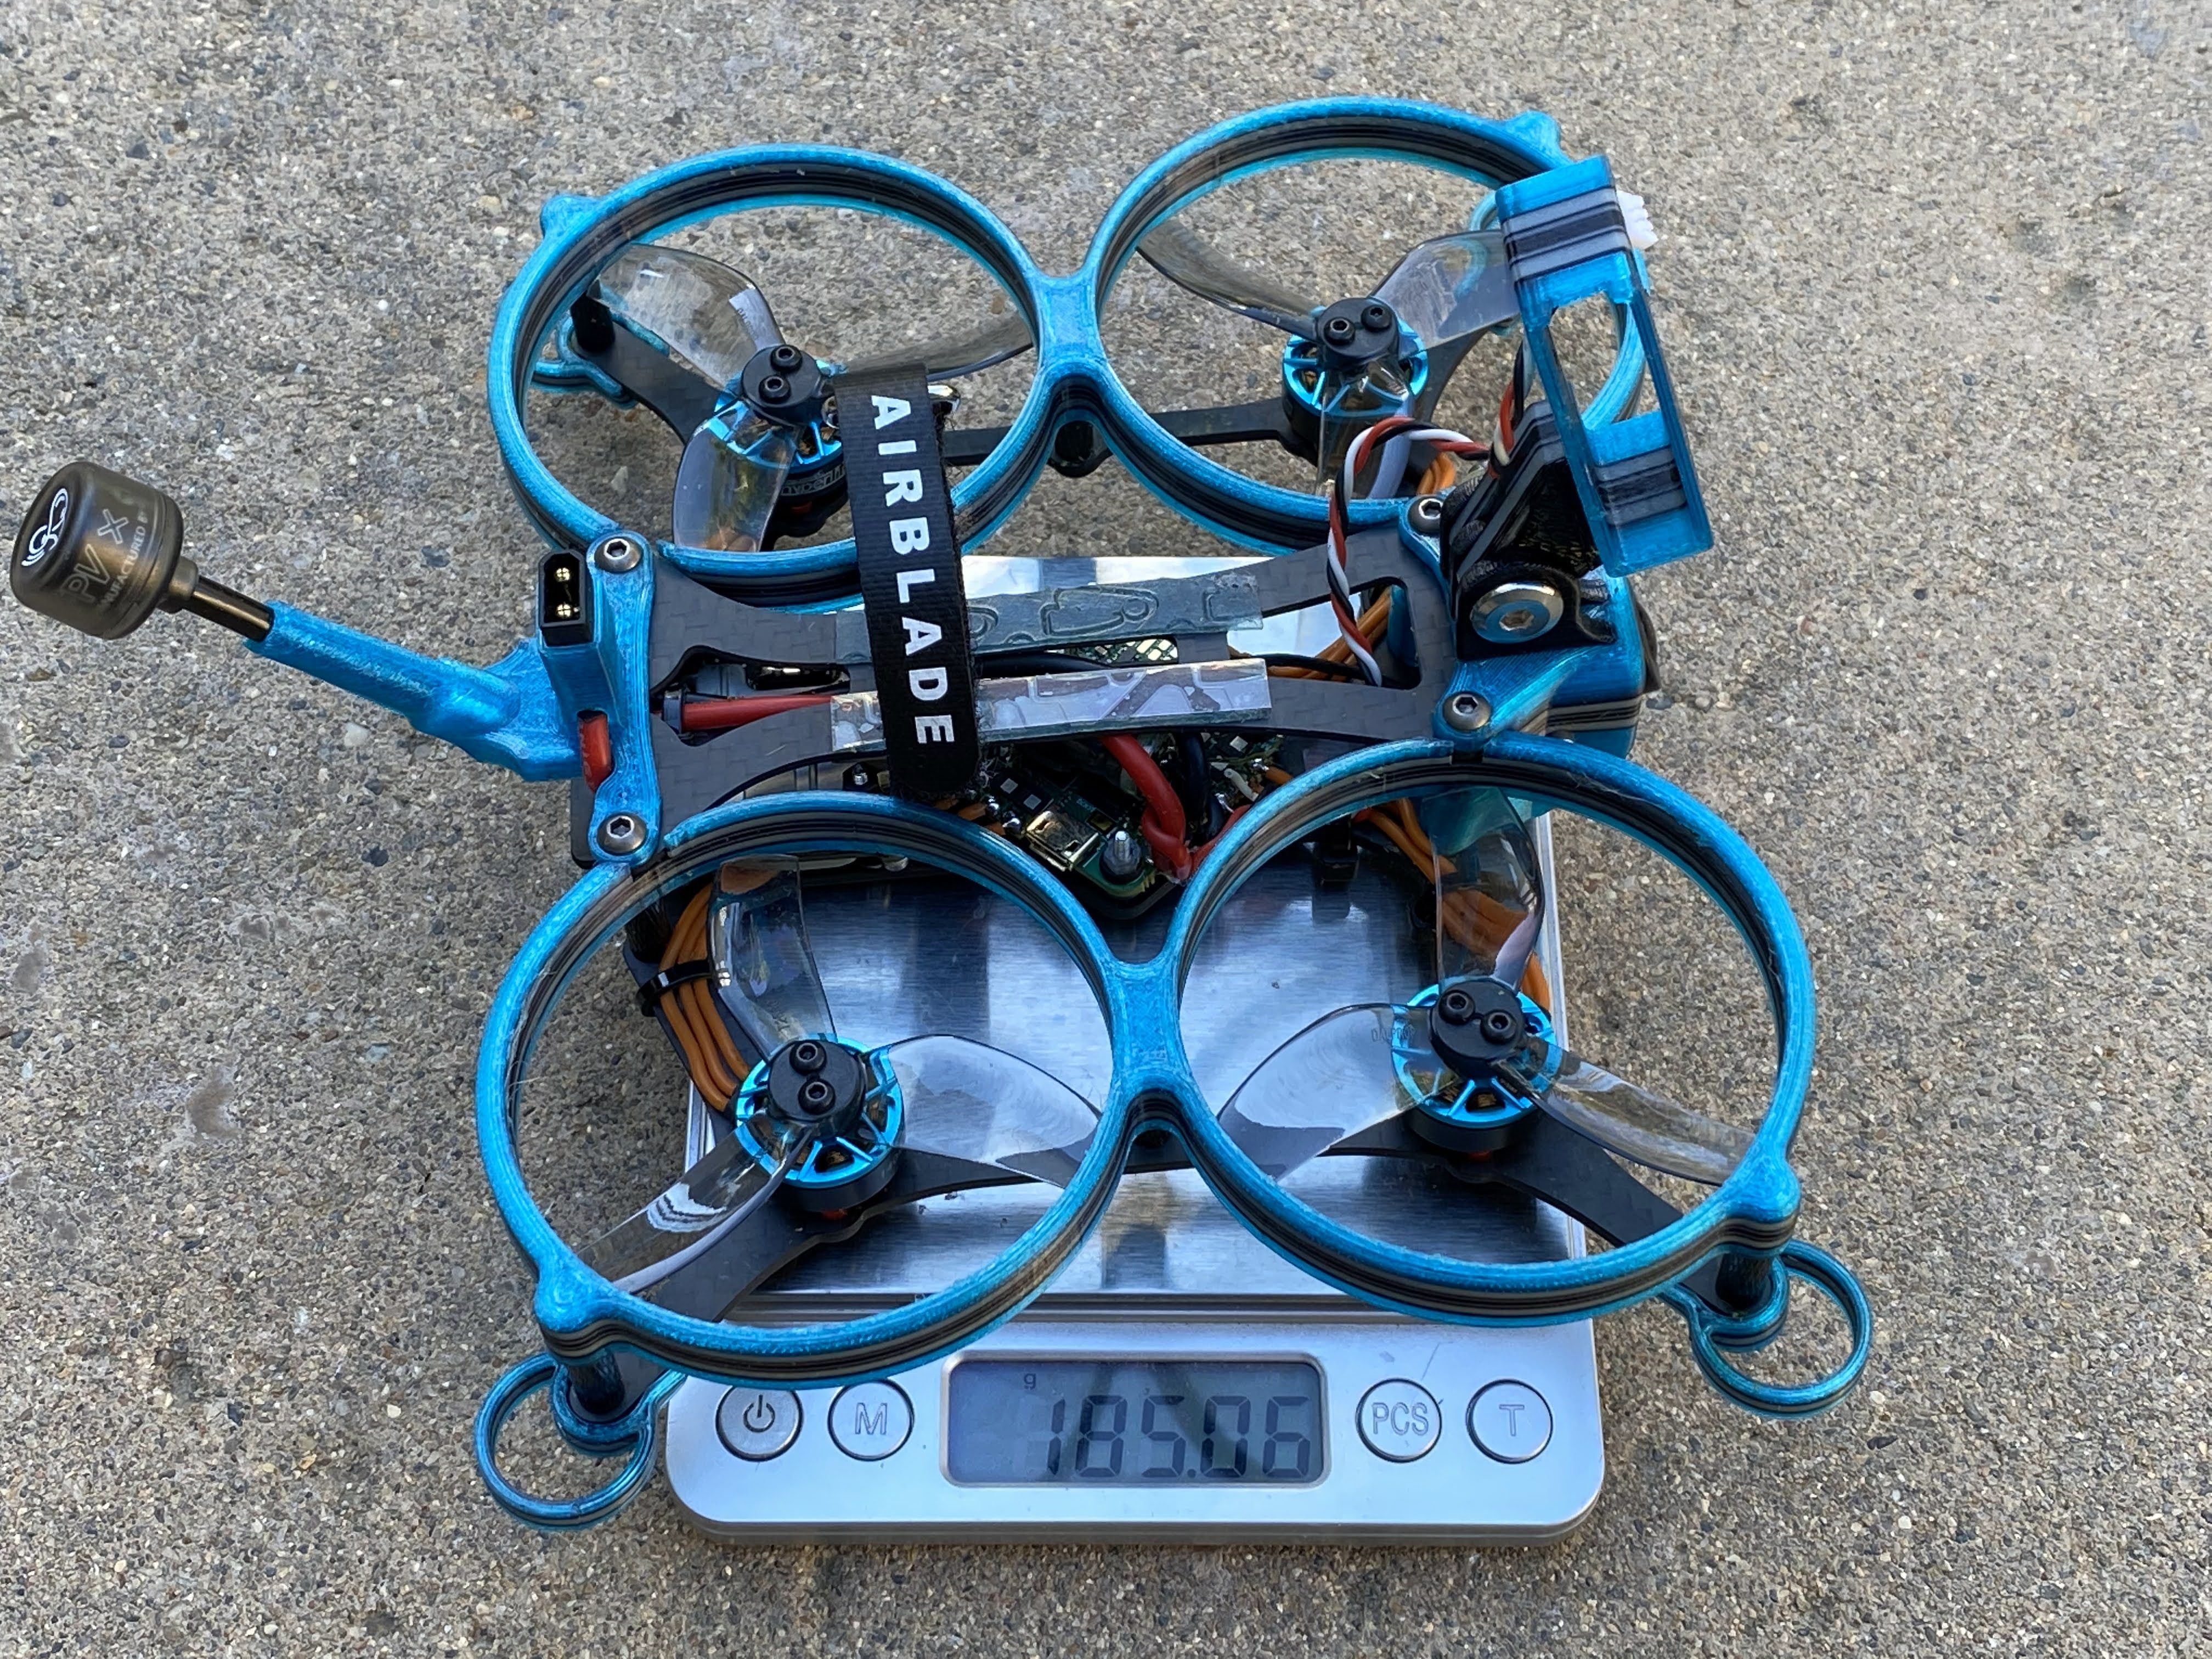
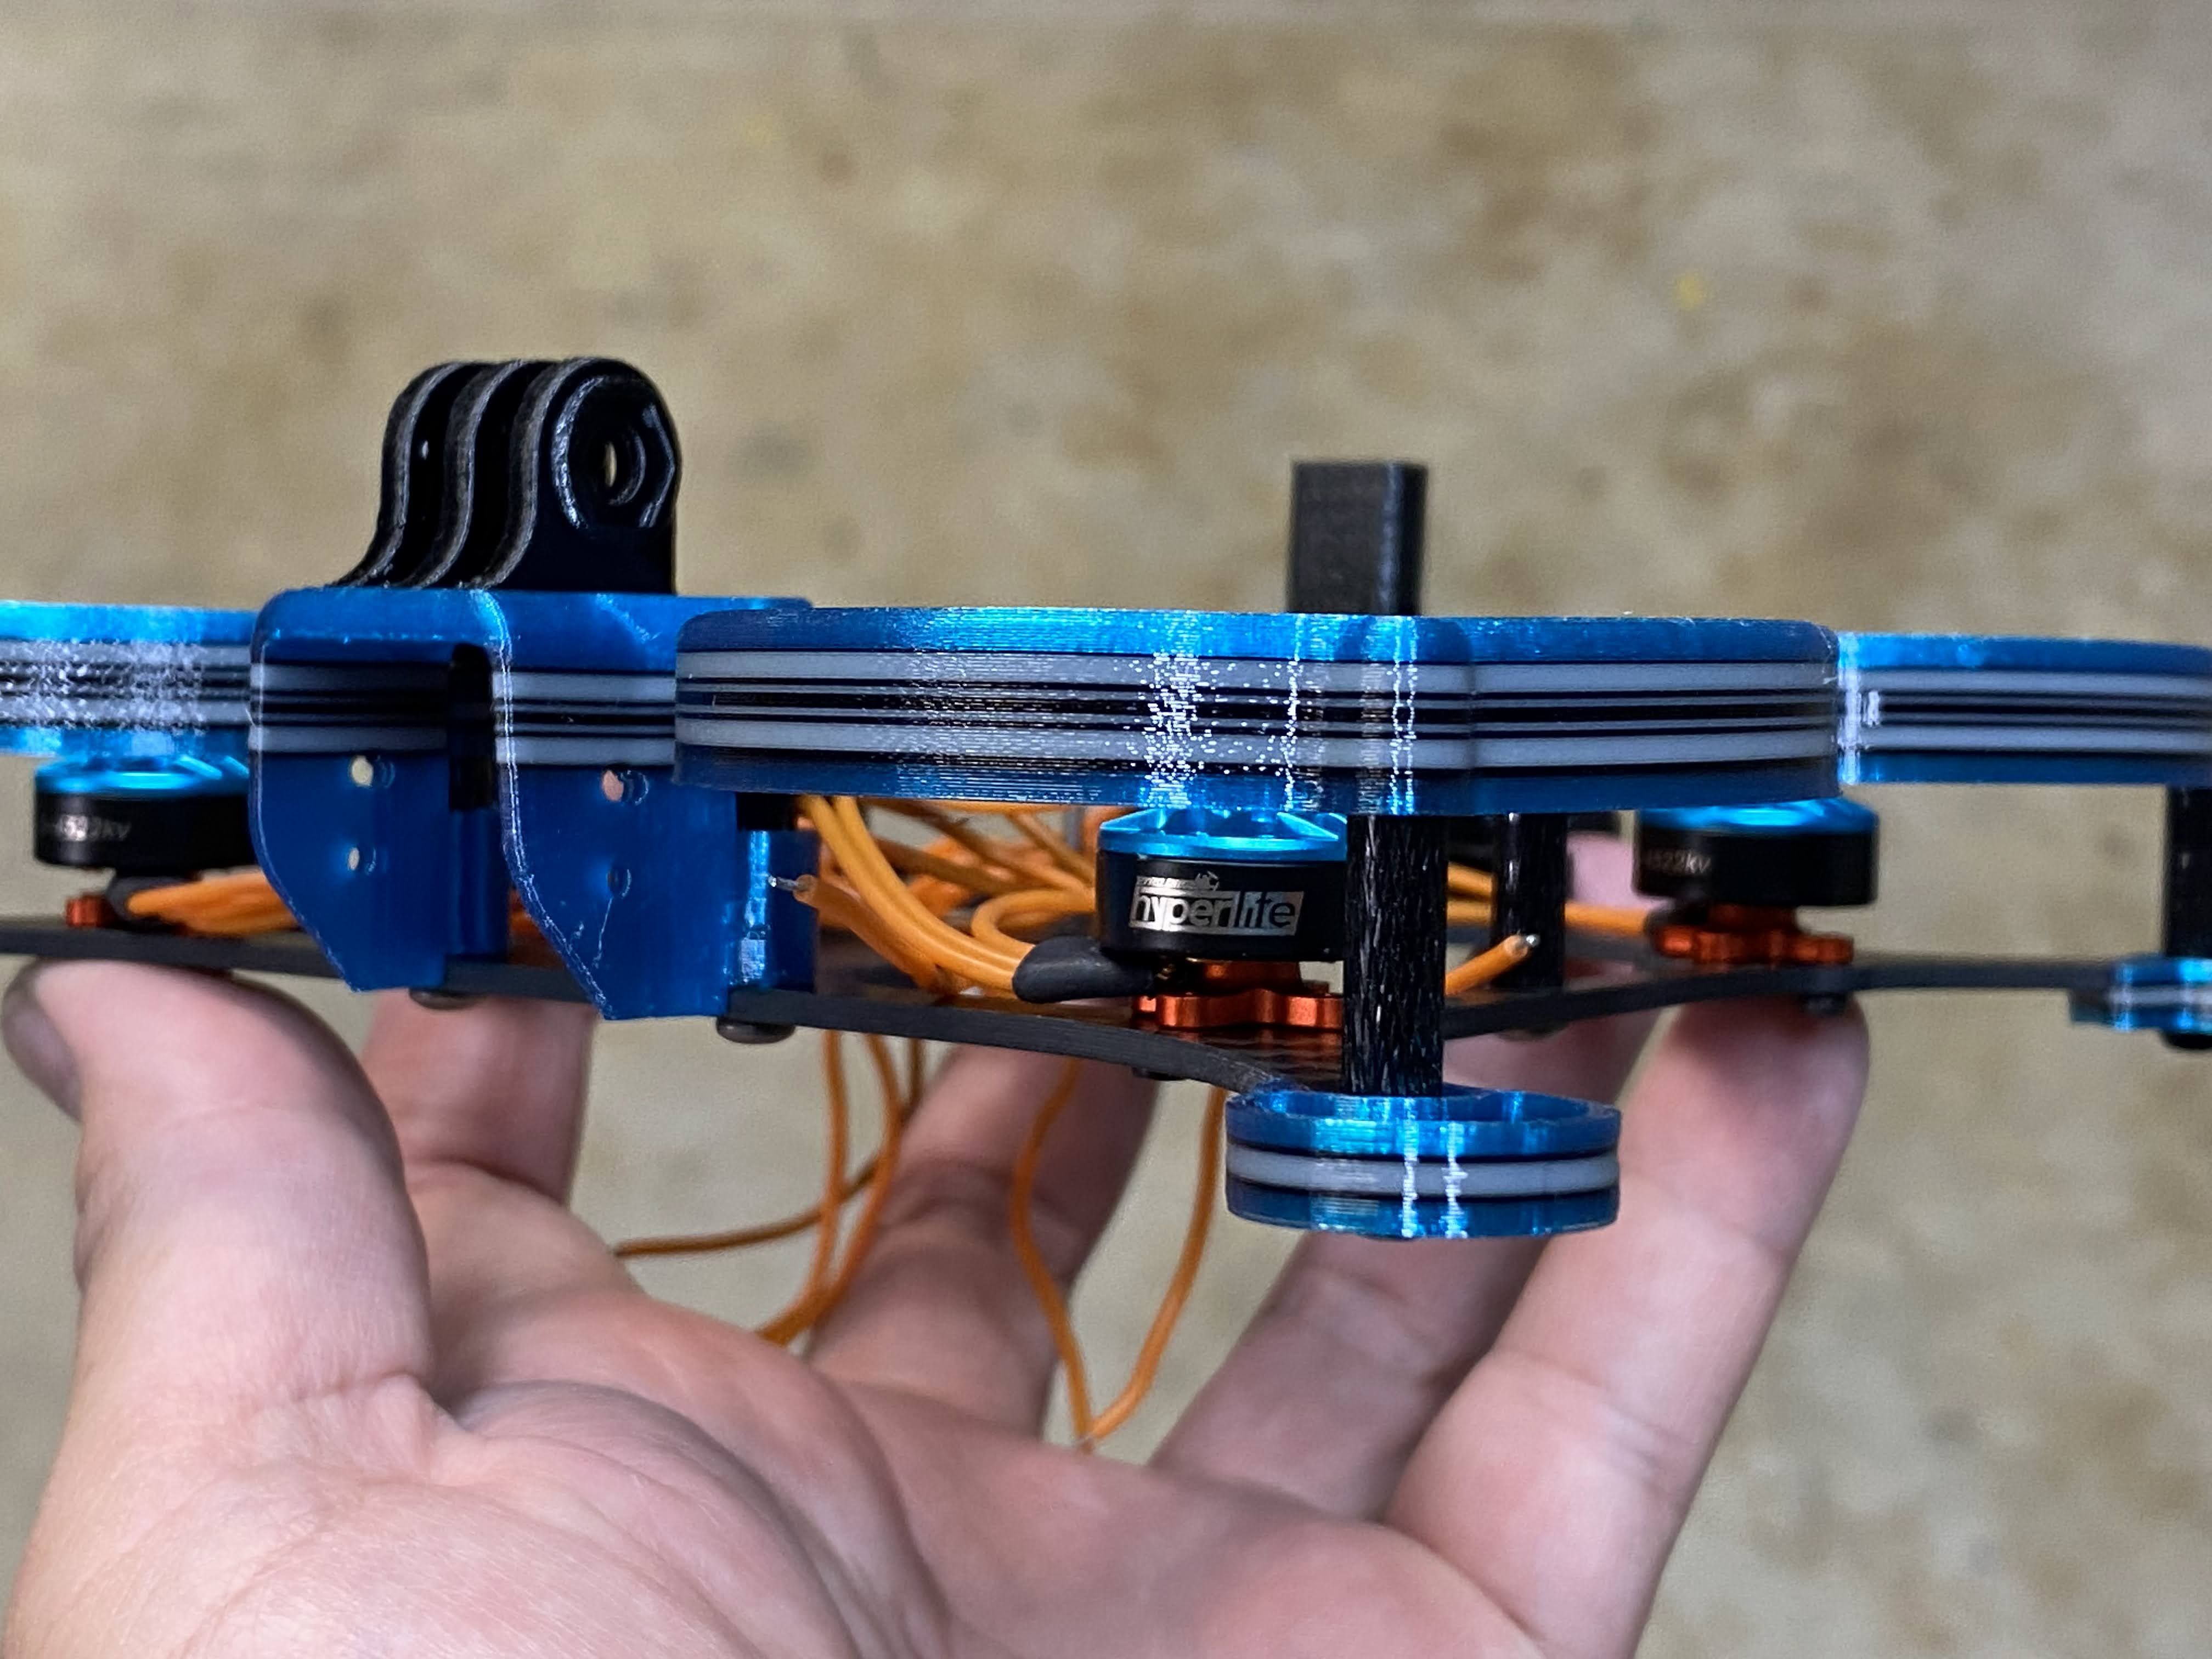
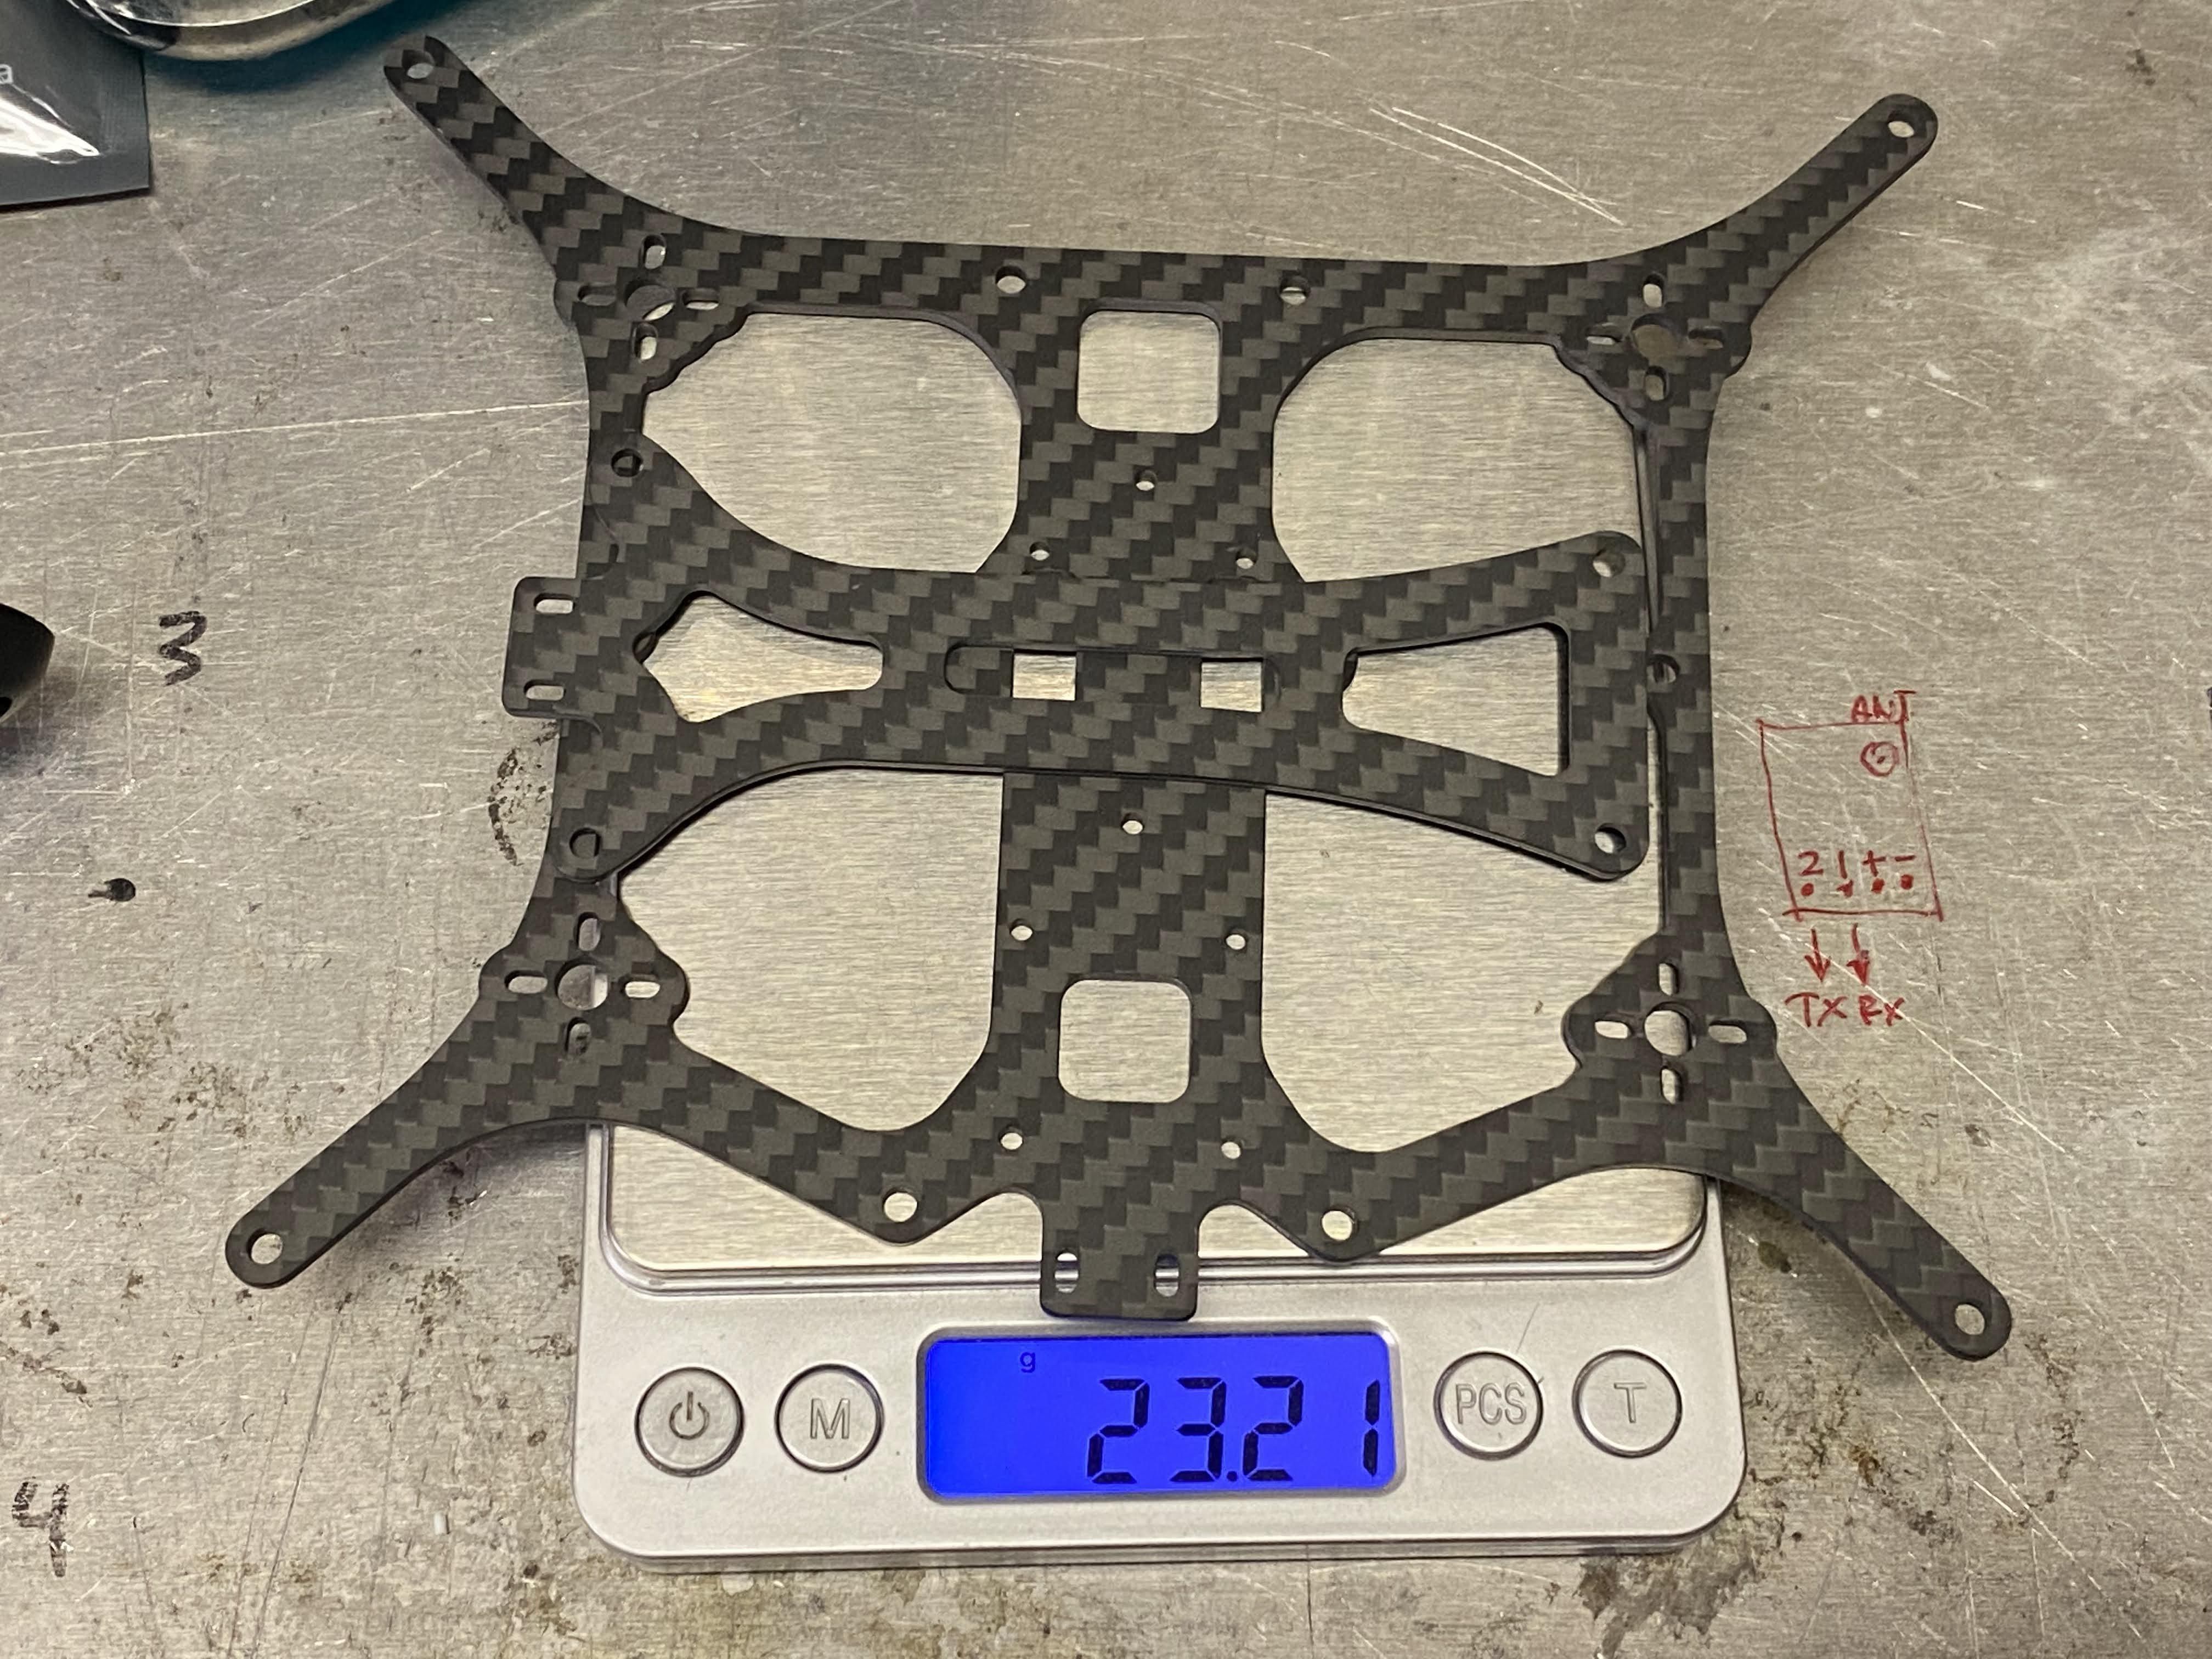
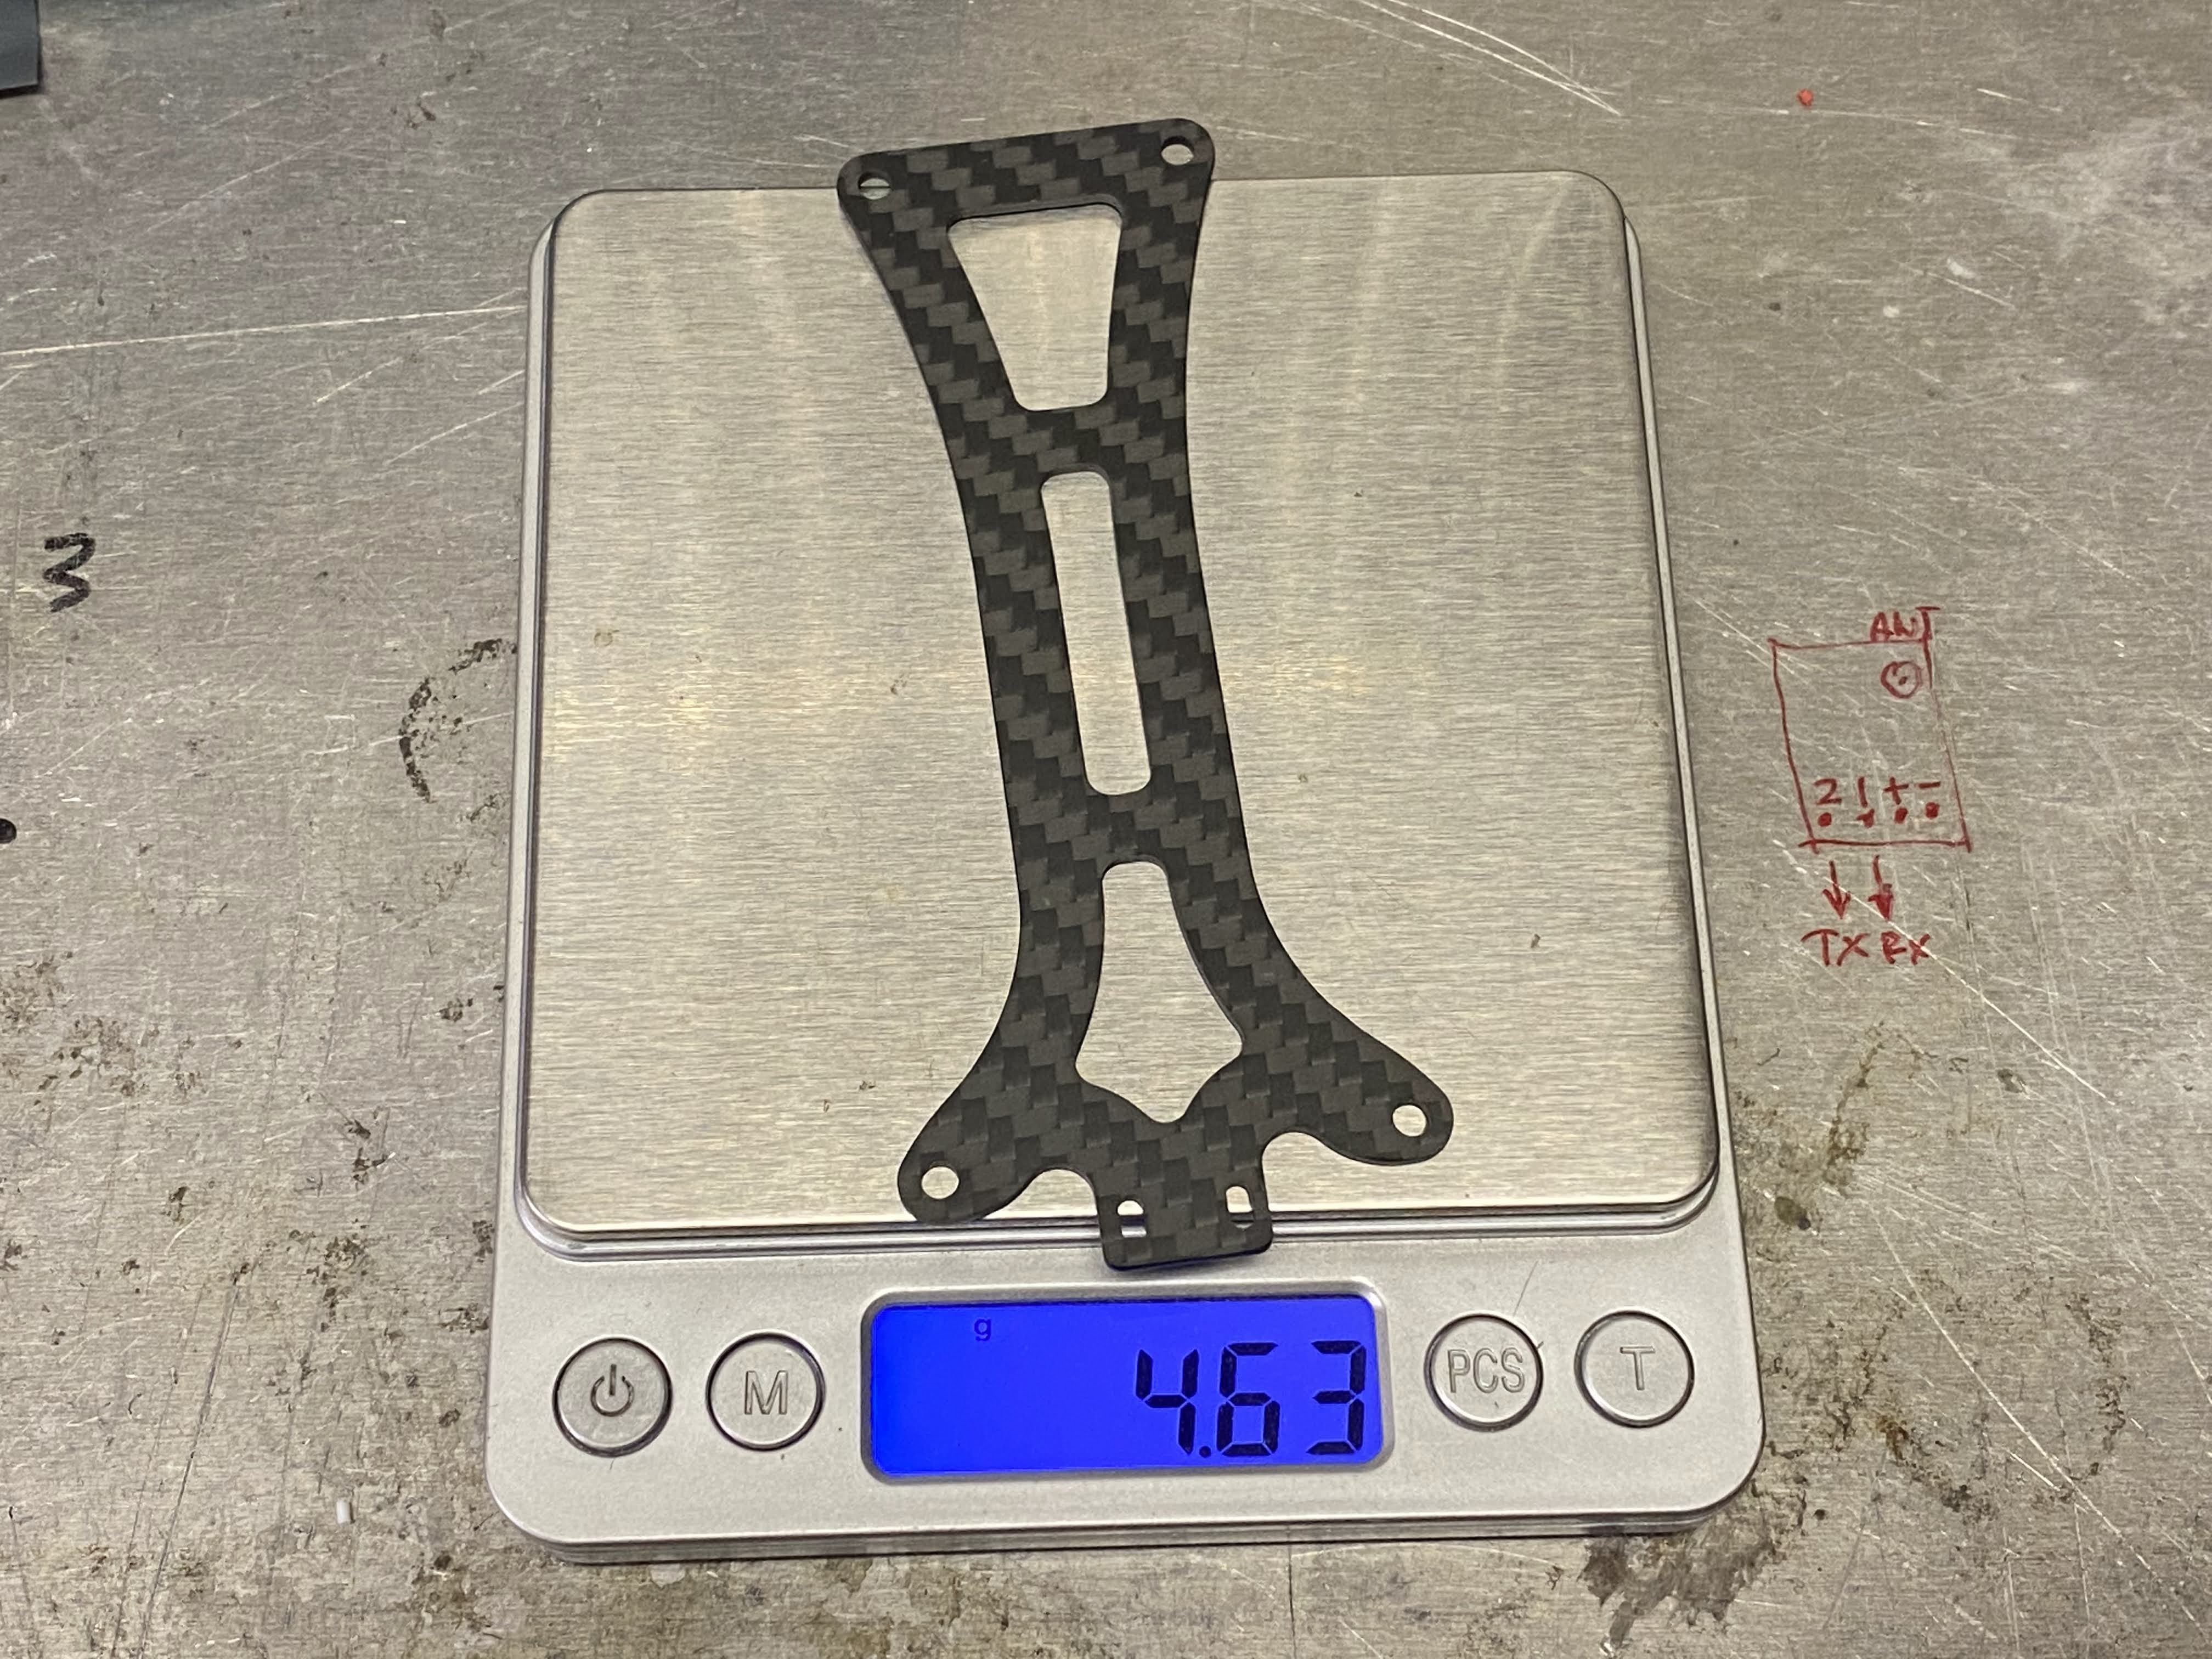
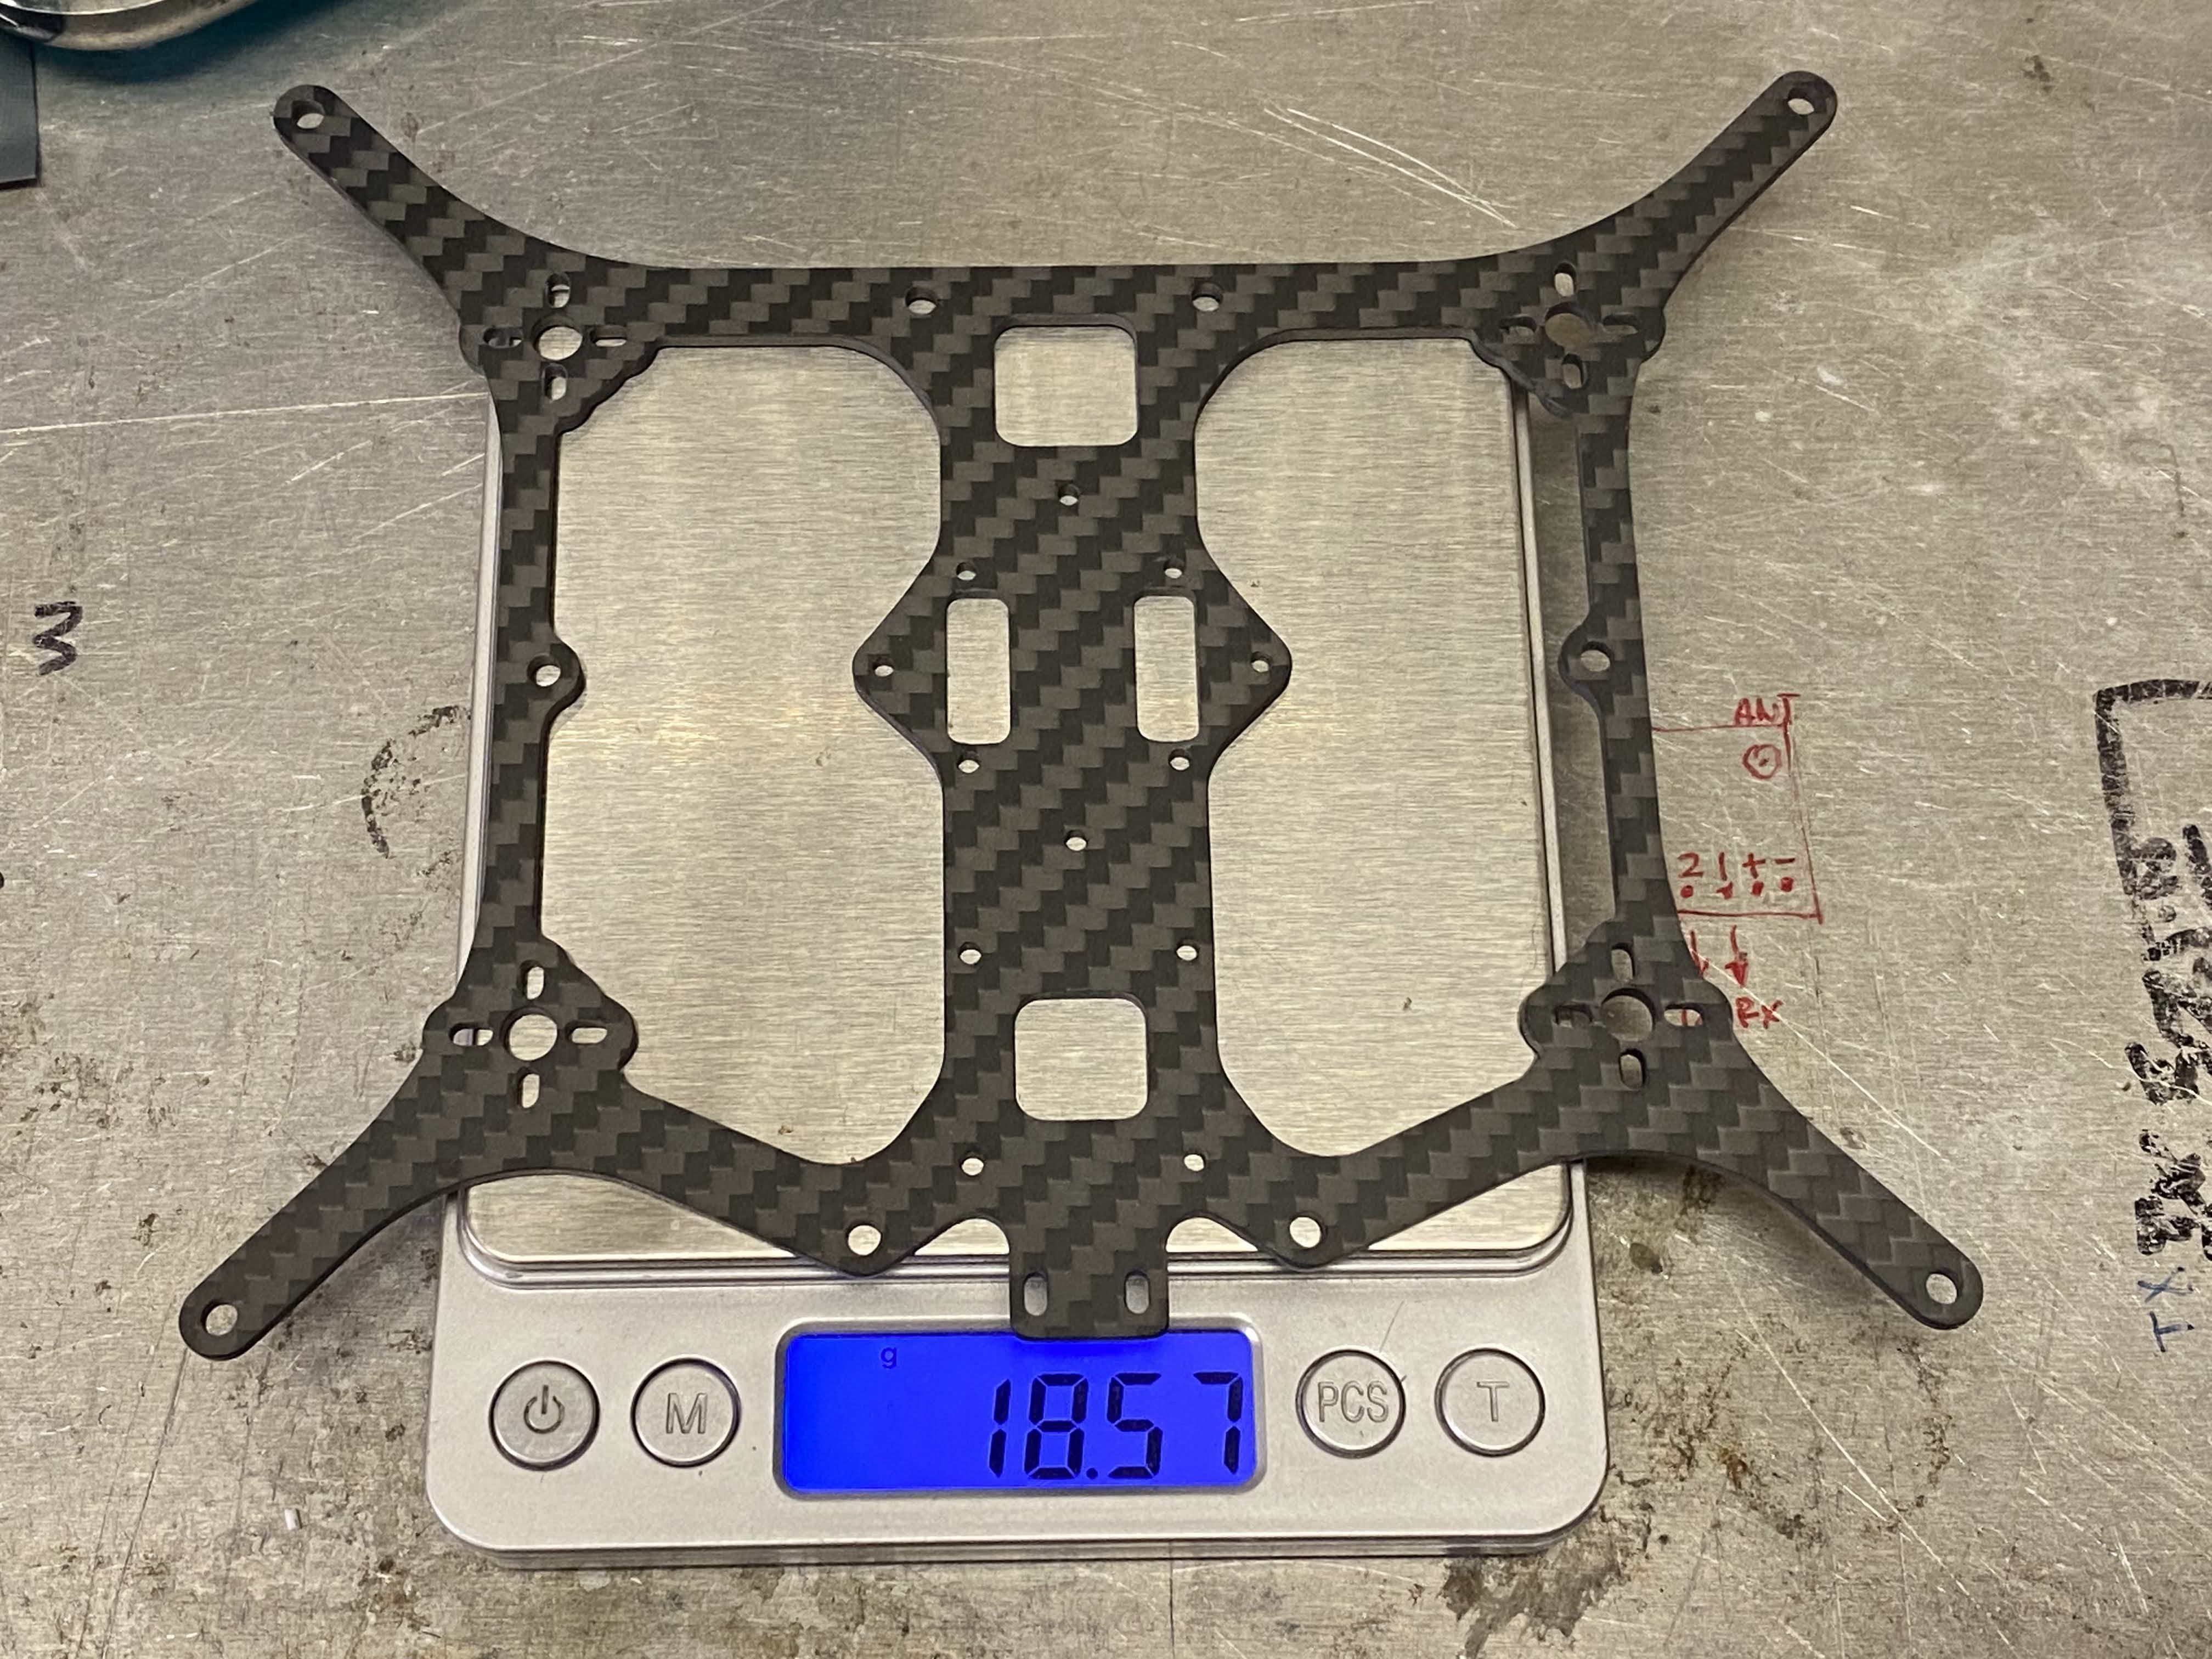
As I work on the layout, I am getting concerned about the possible weight outcome. But I do not think I will come close to the weight of the Cinelog 25 and that will put this quad at a disadvantage. I was looking on the SnapShot Facebook group and I notice the motors wires was free floating across the frame. I did not like how that was done, so I ran the wires along the frame instead. Because of this, I would have longer motor wires, which also means more weight.
Updated (Oct 14, 2021)
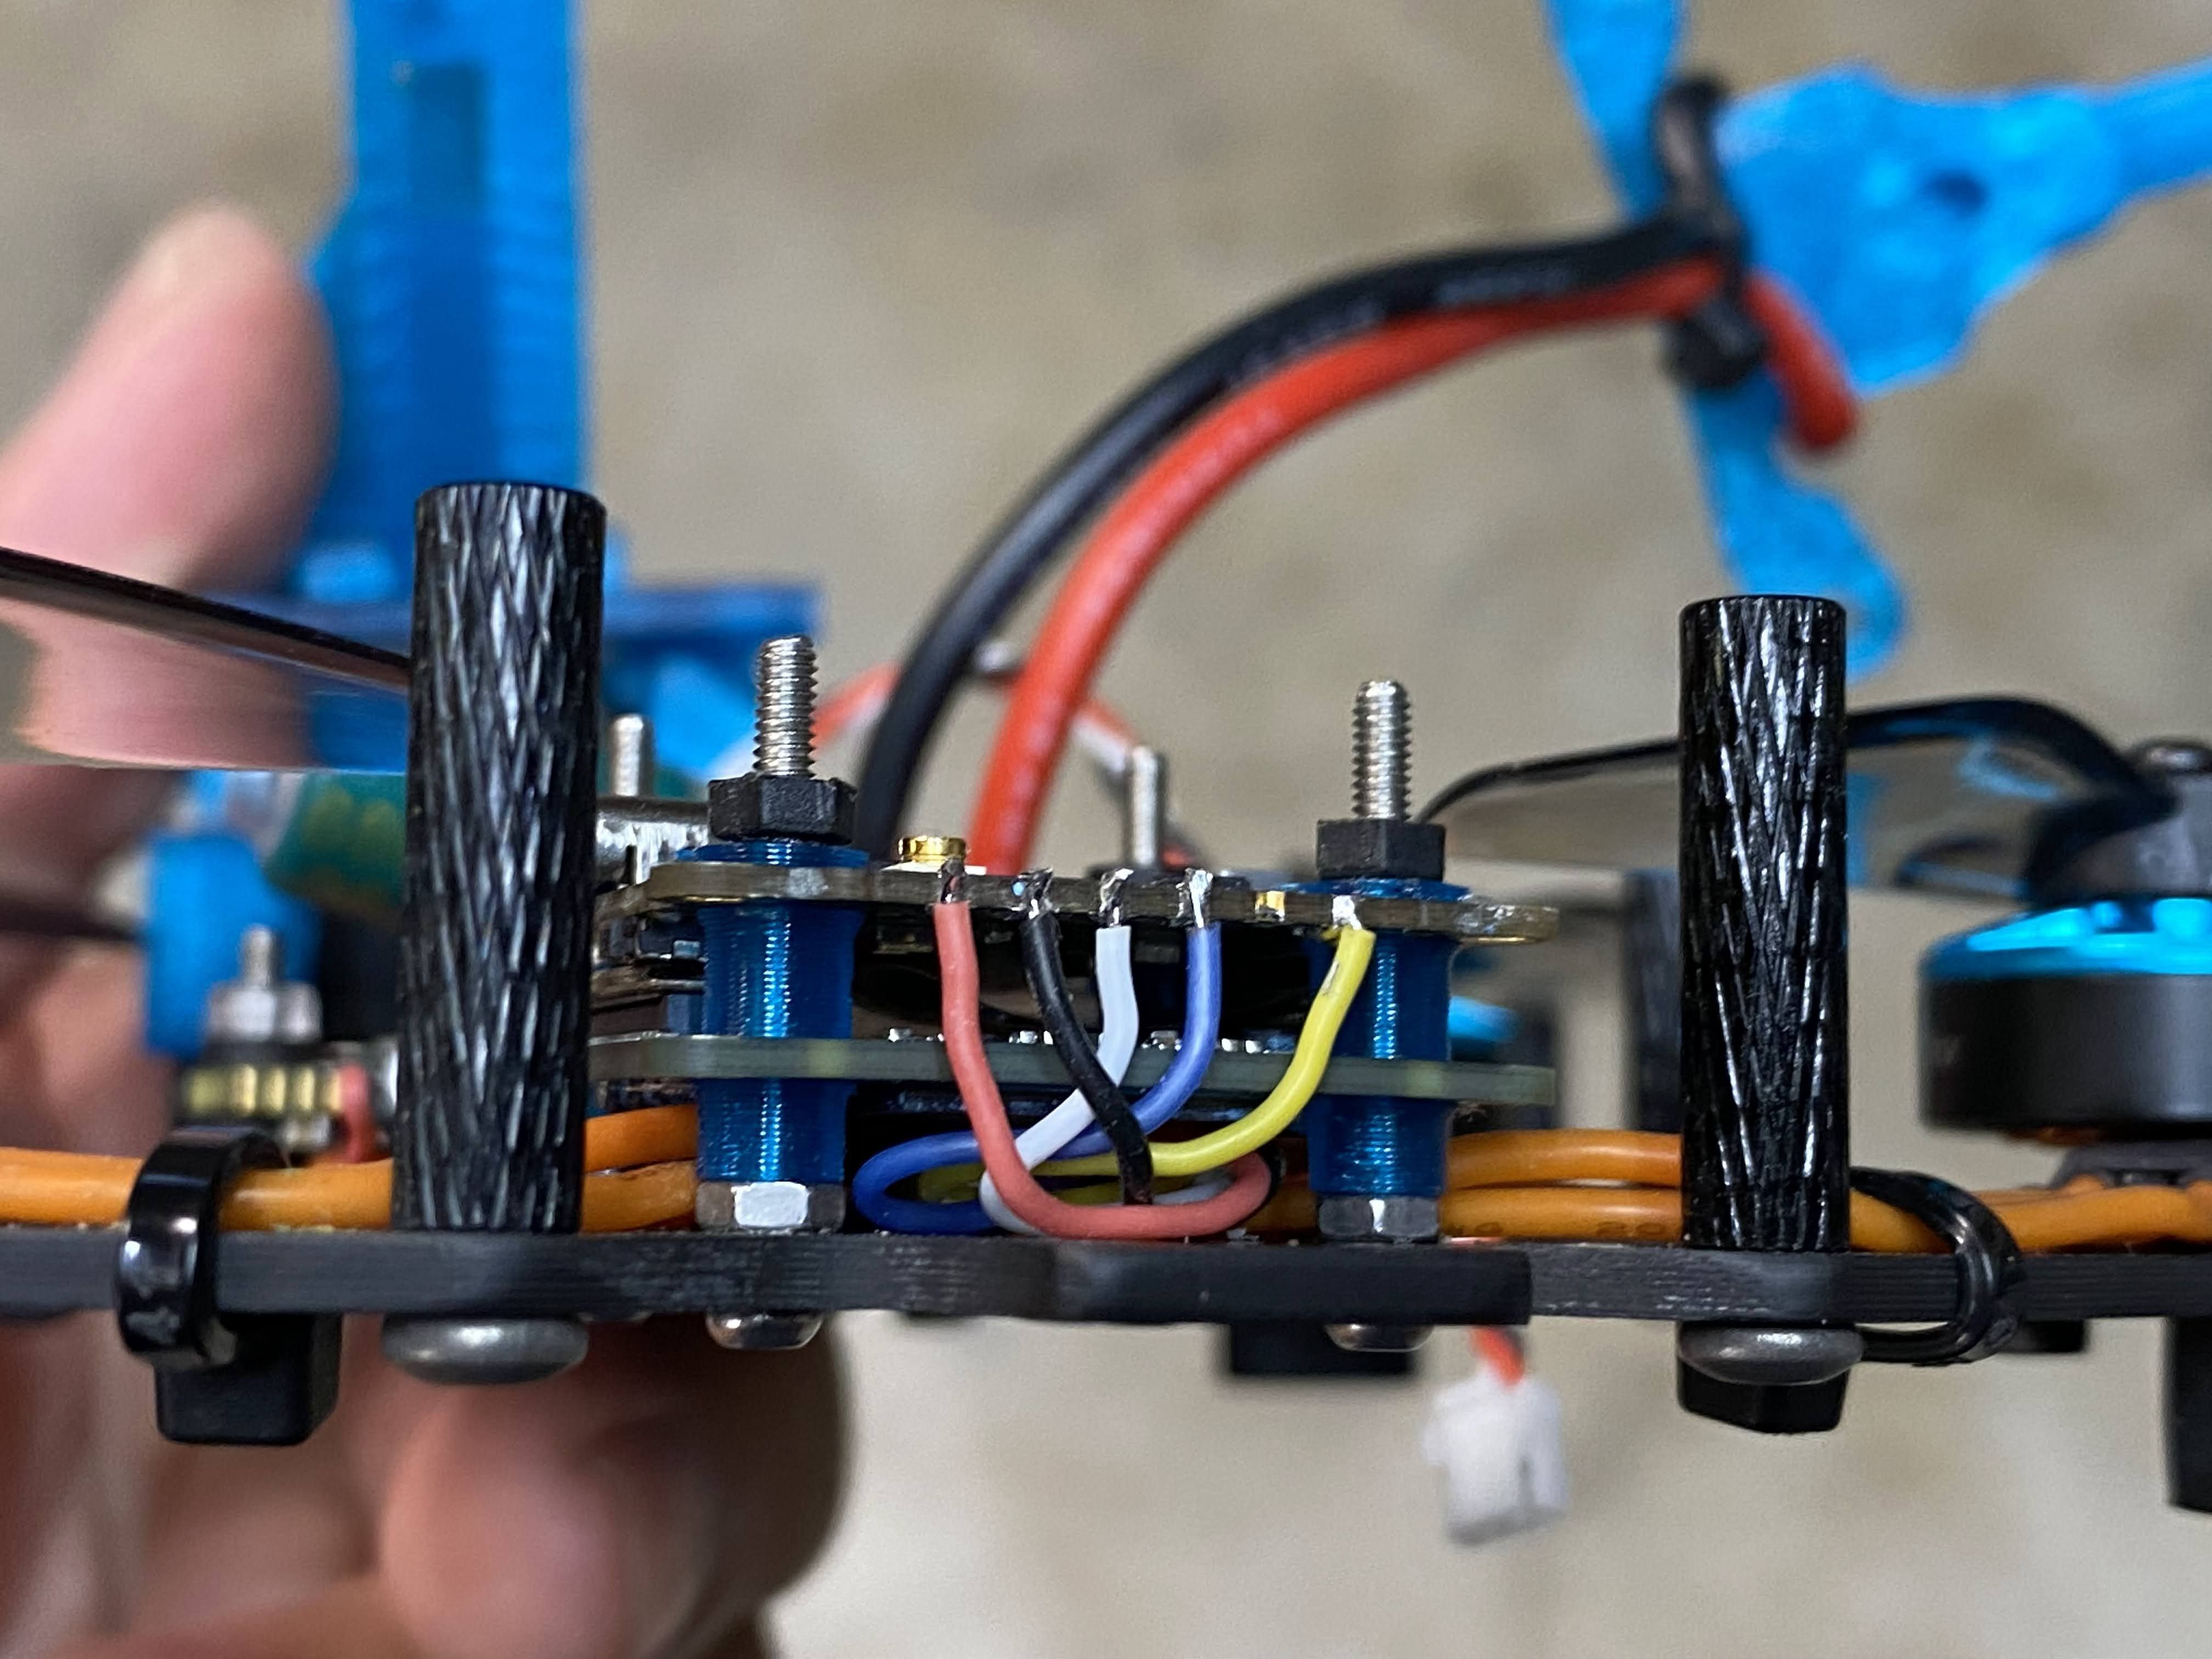
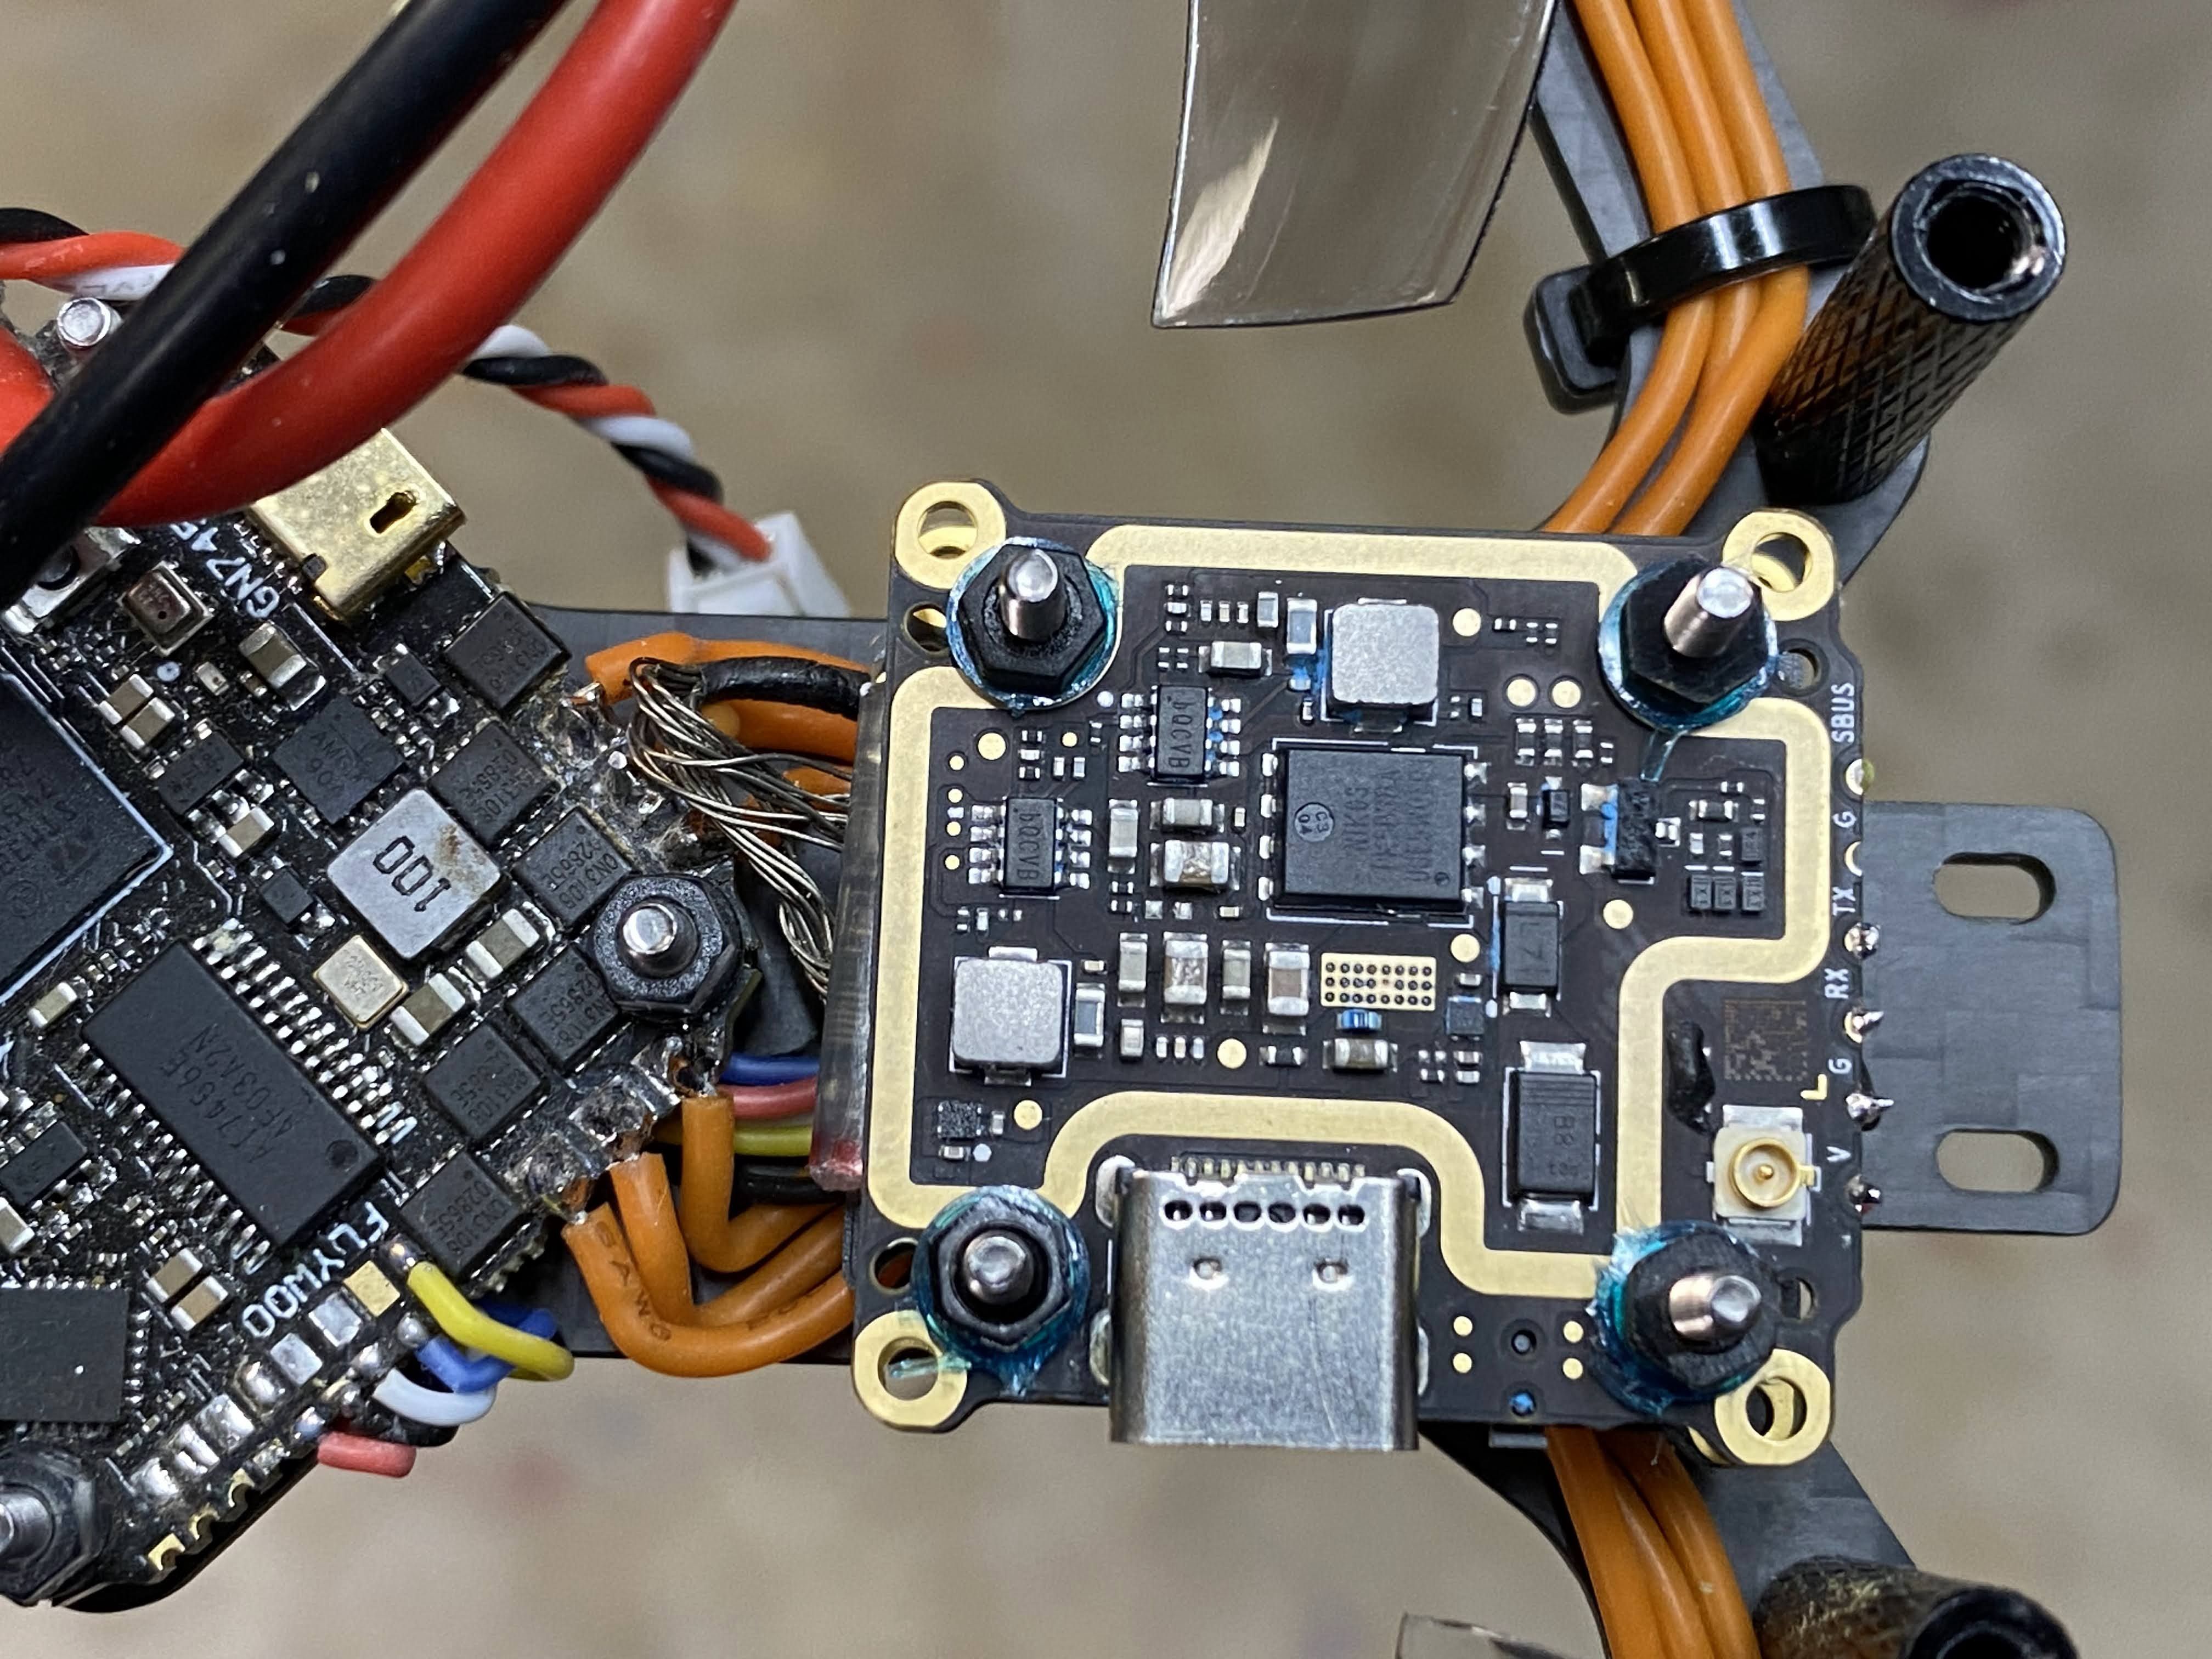
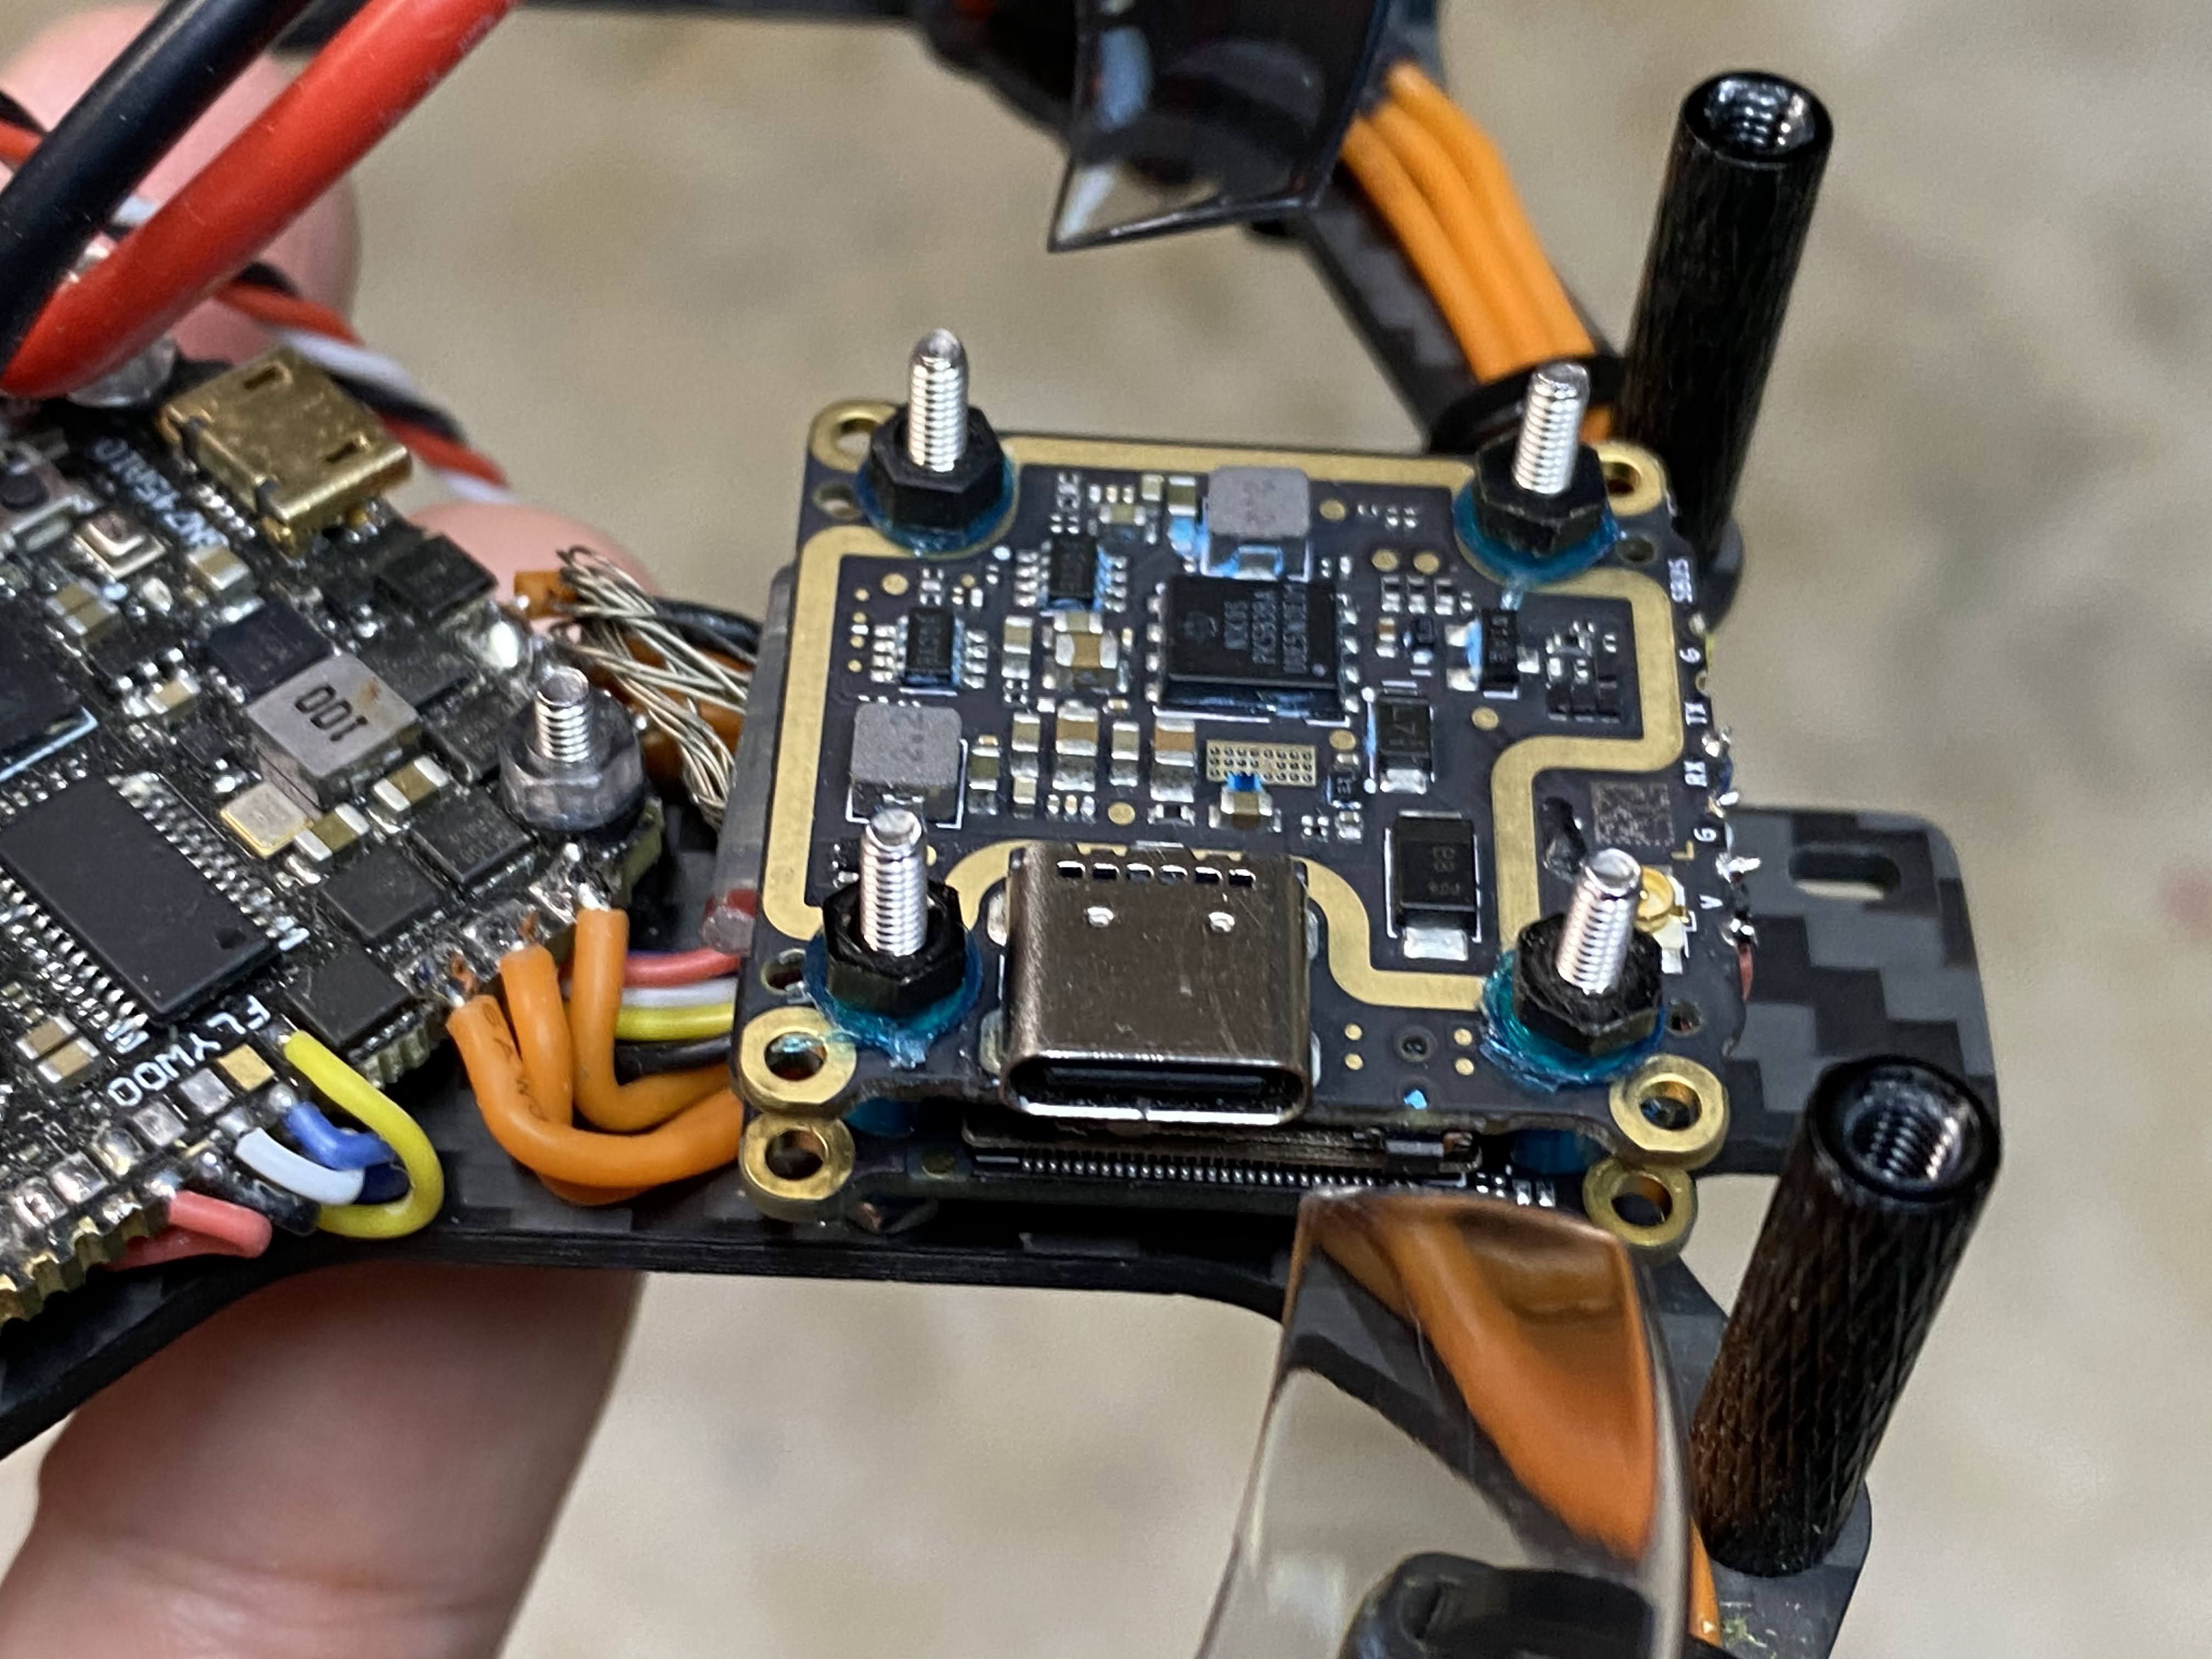
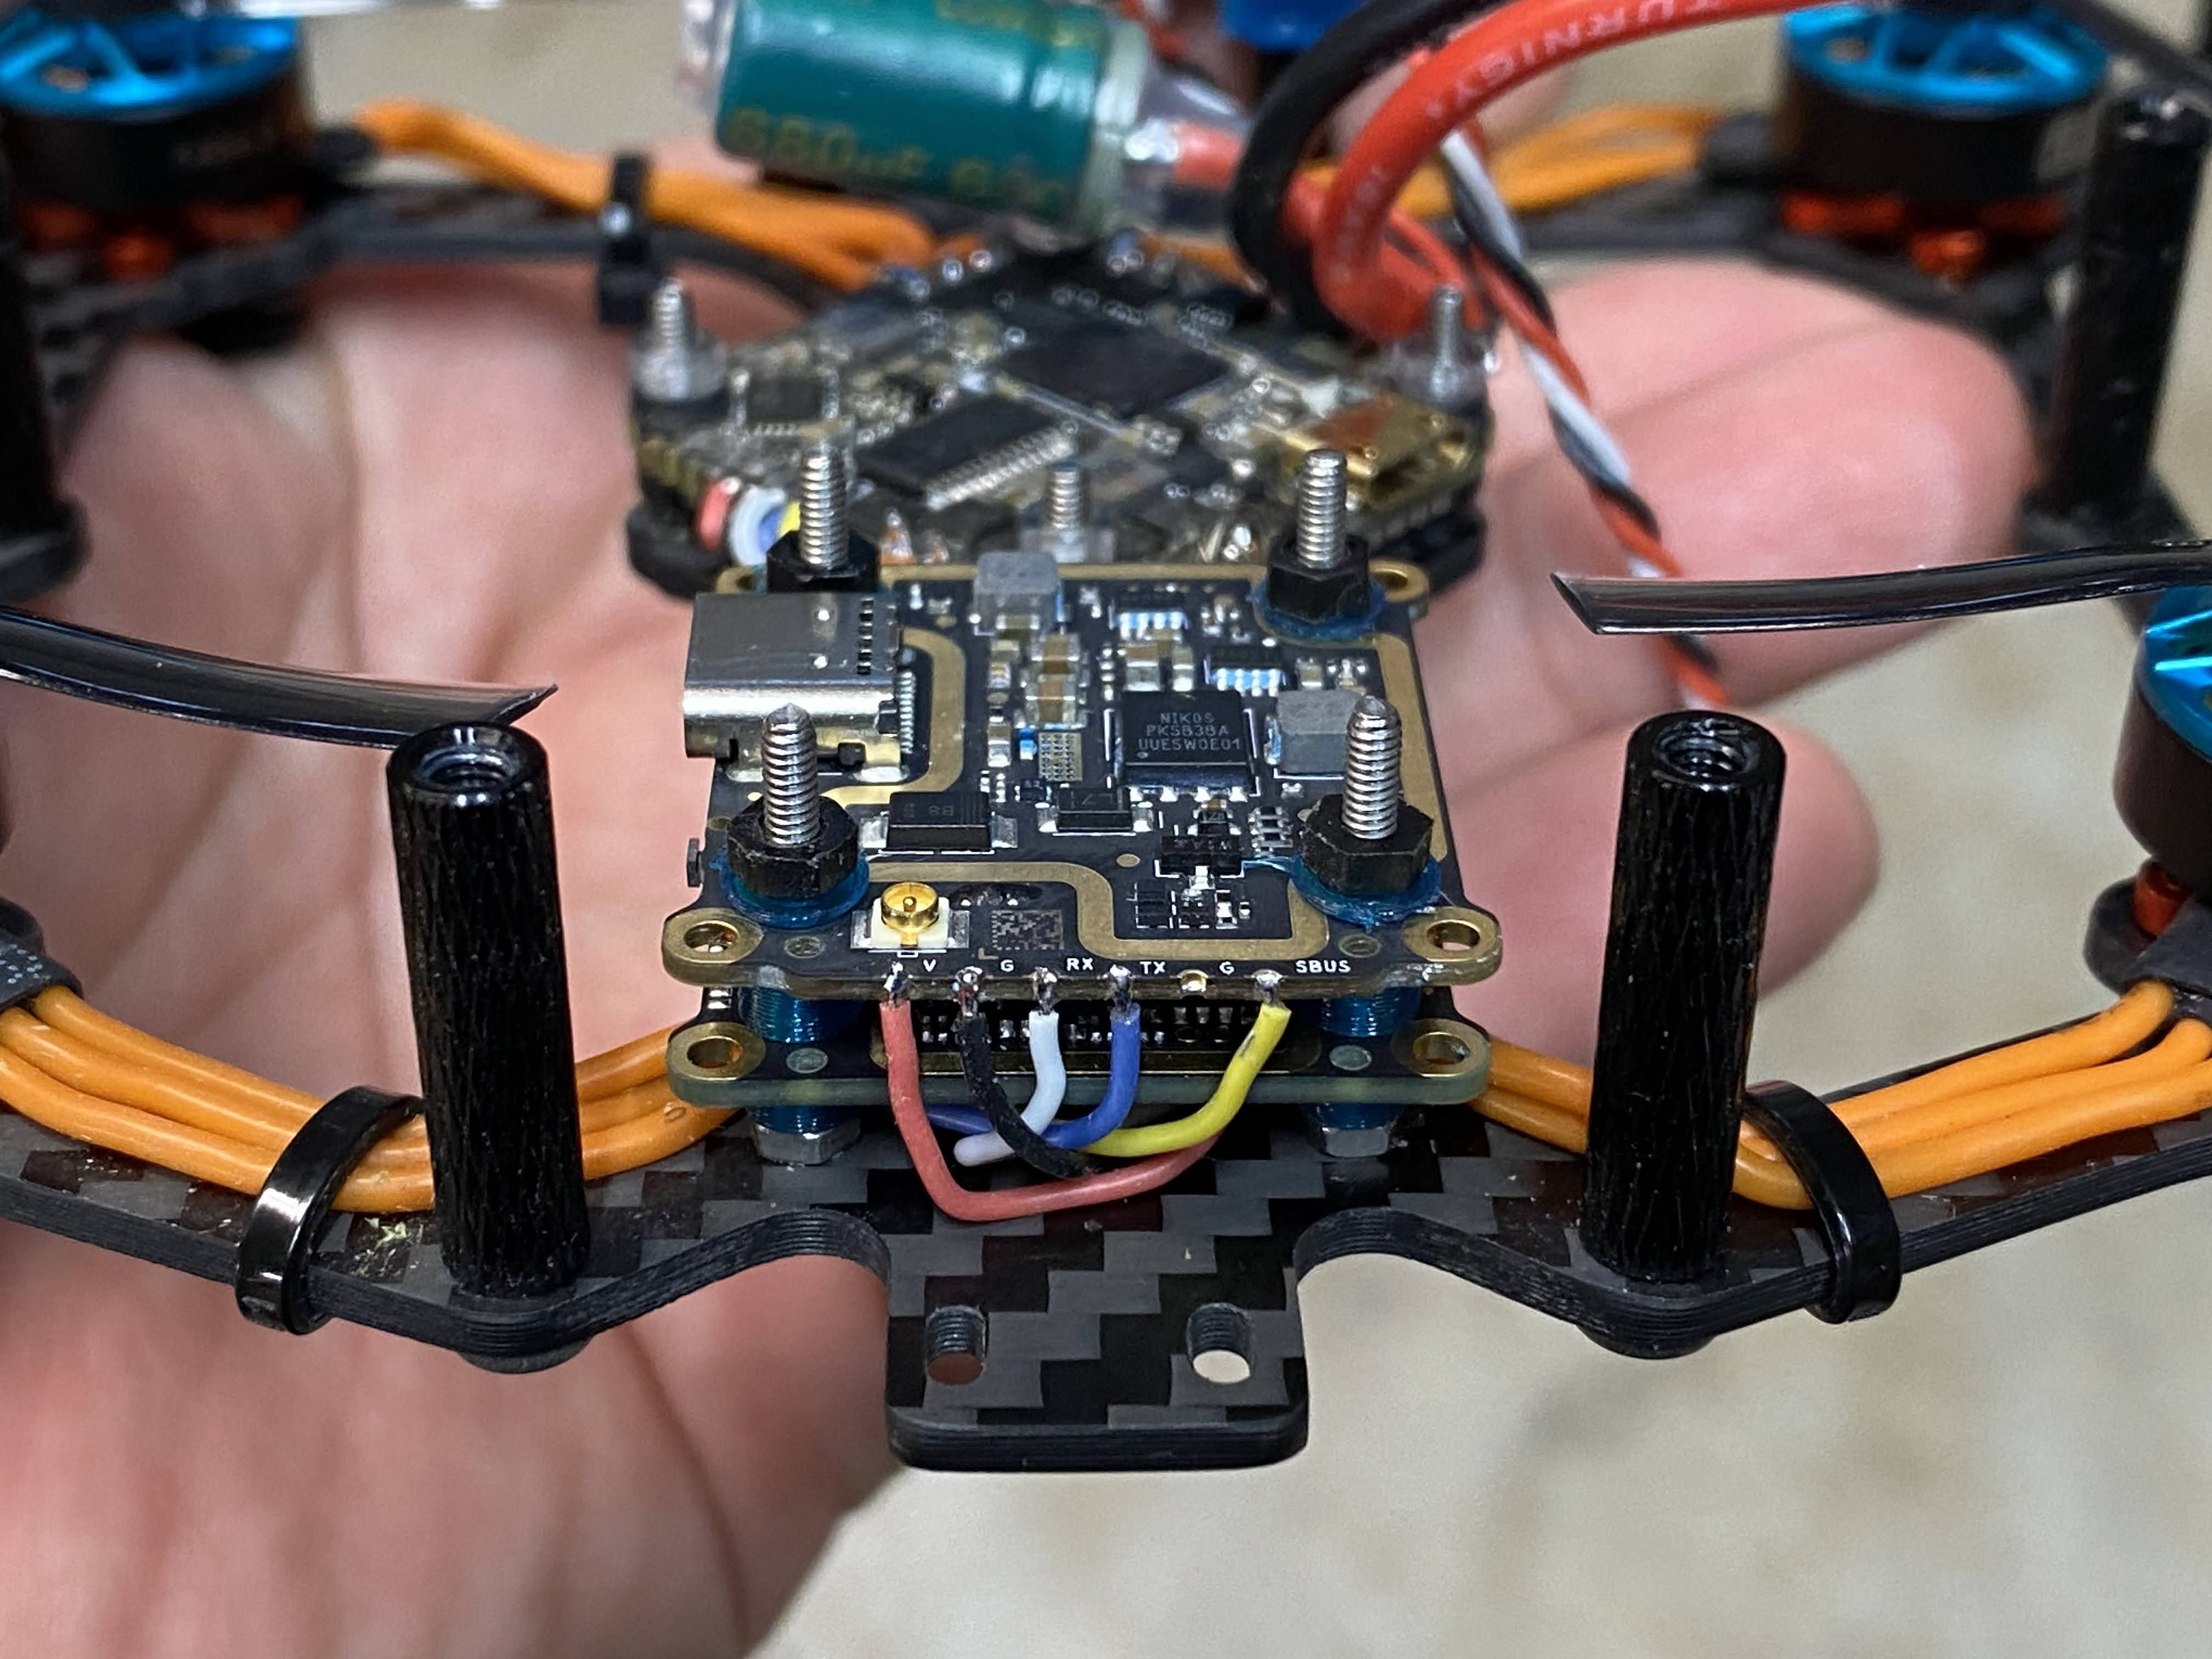
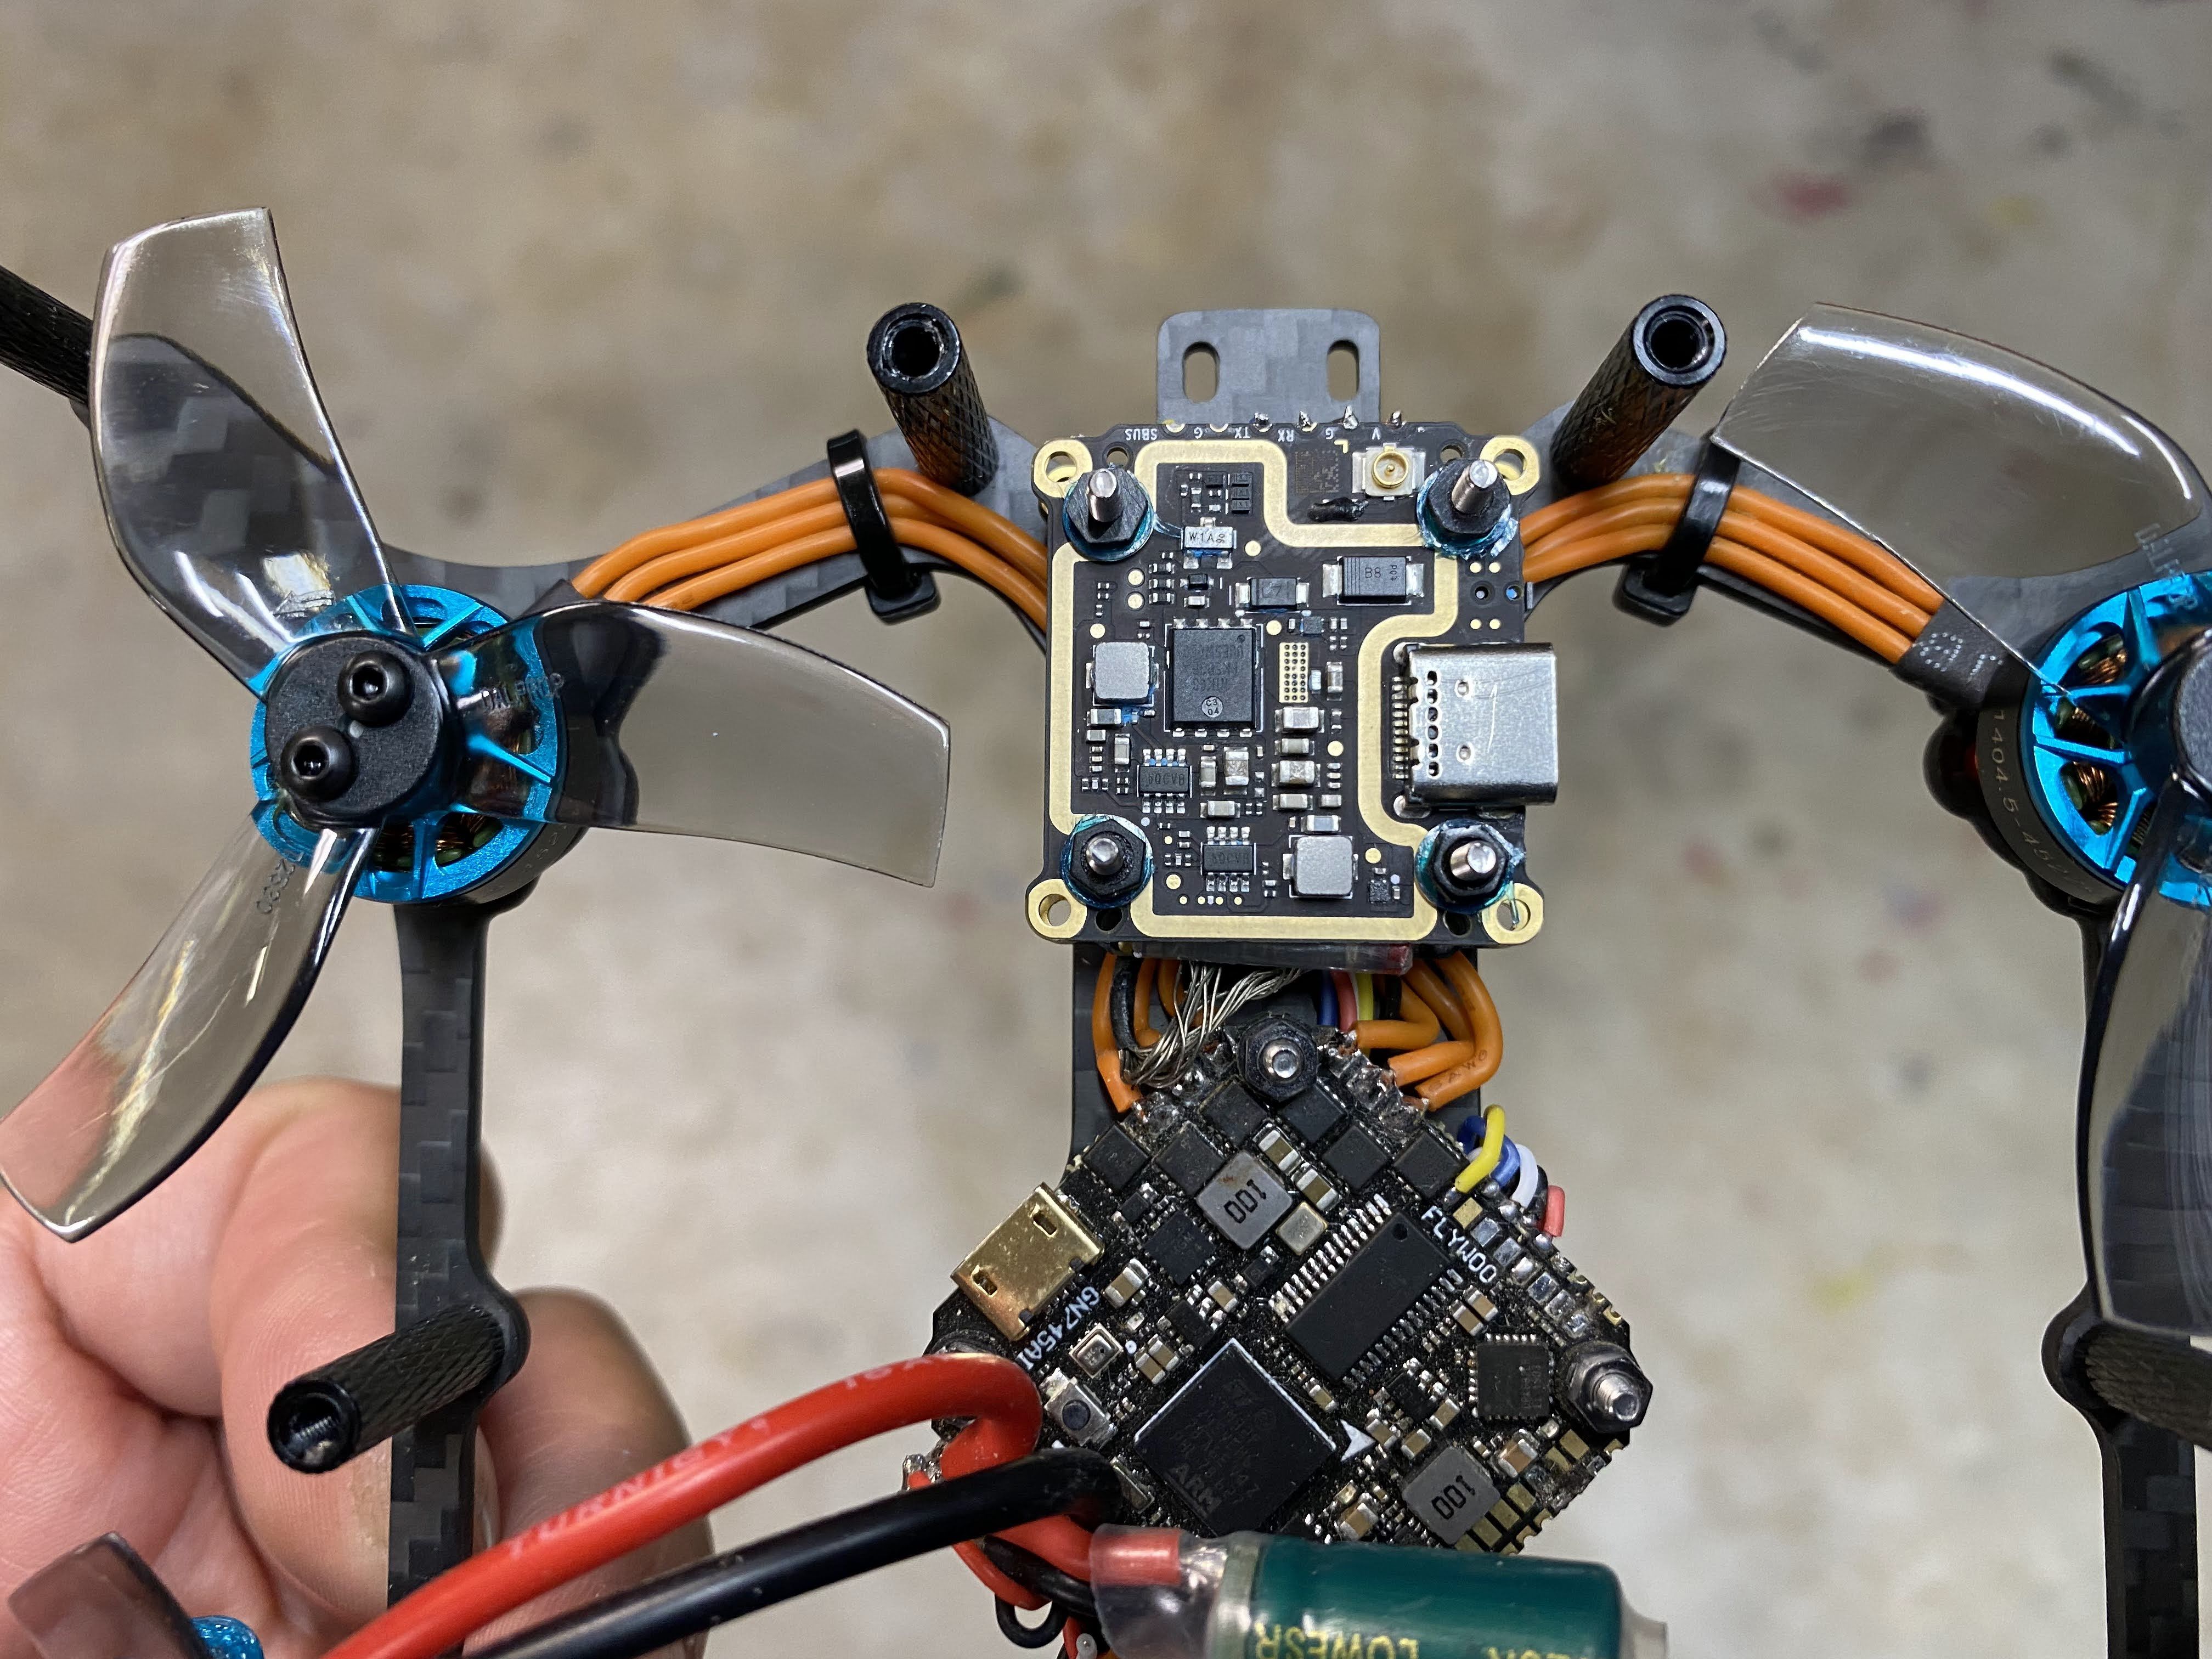
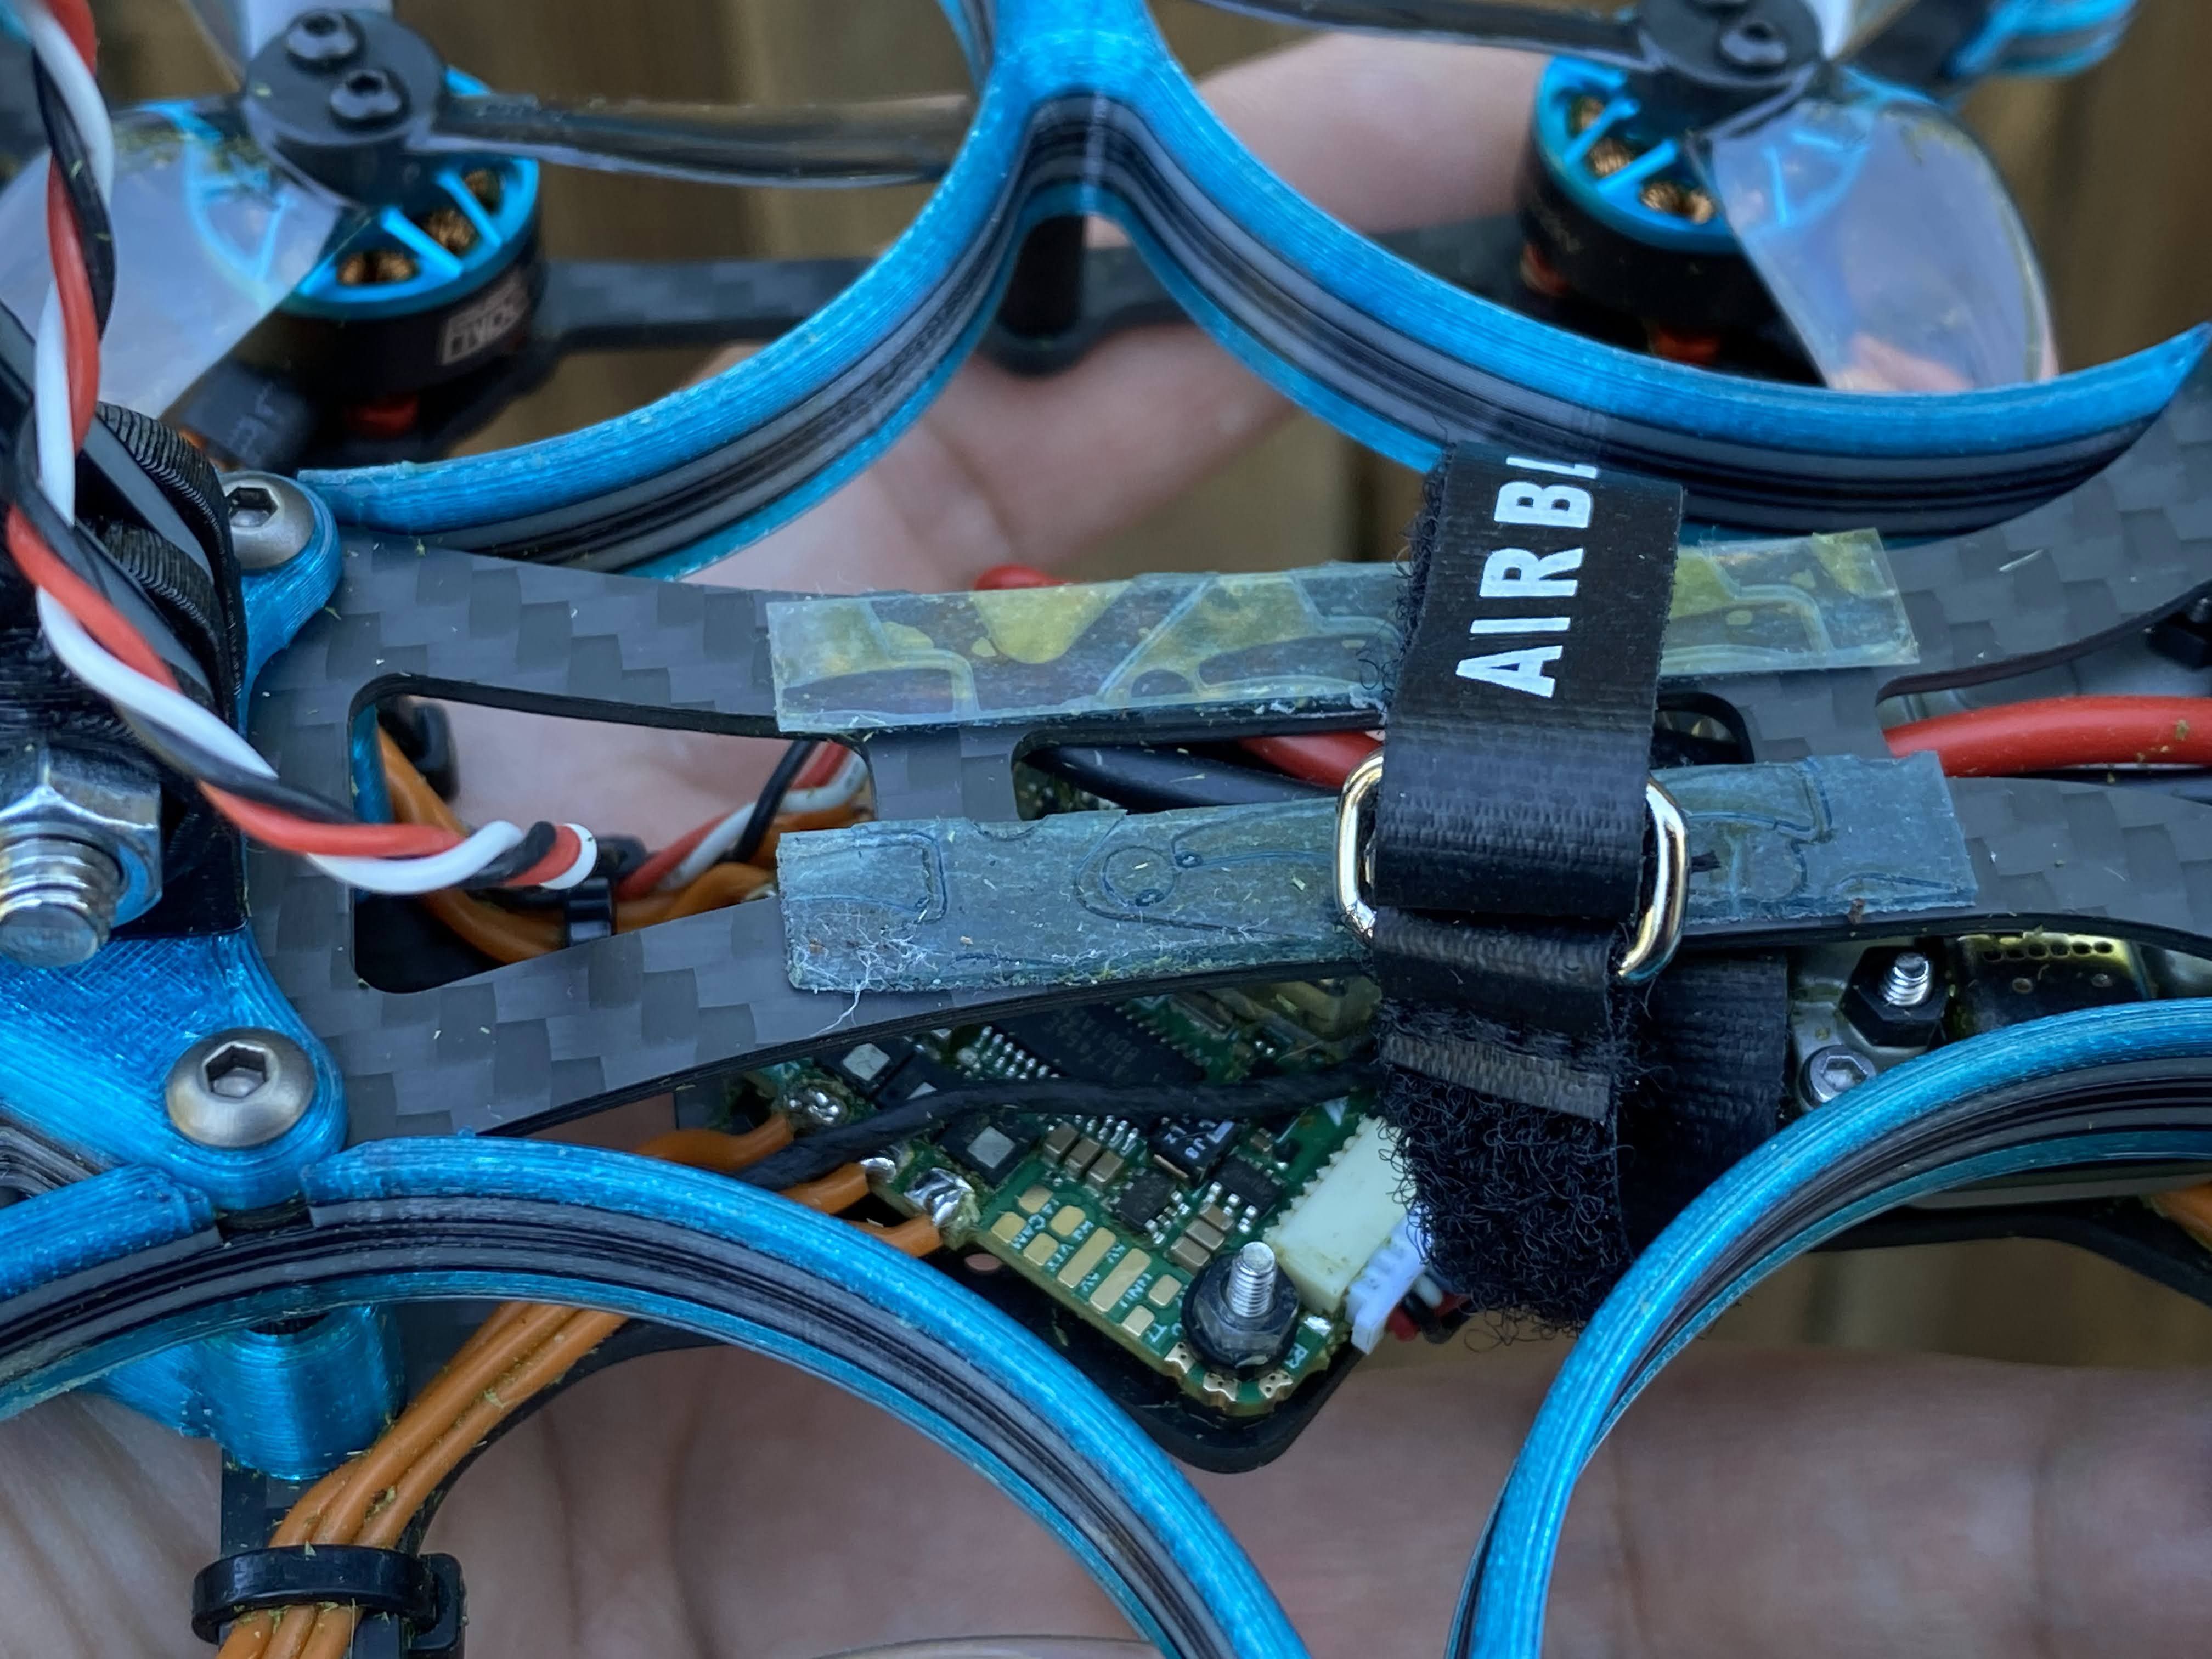
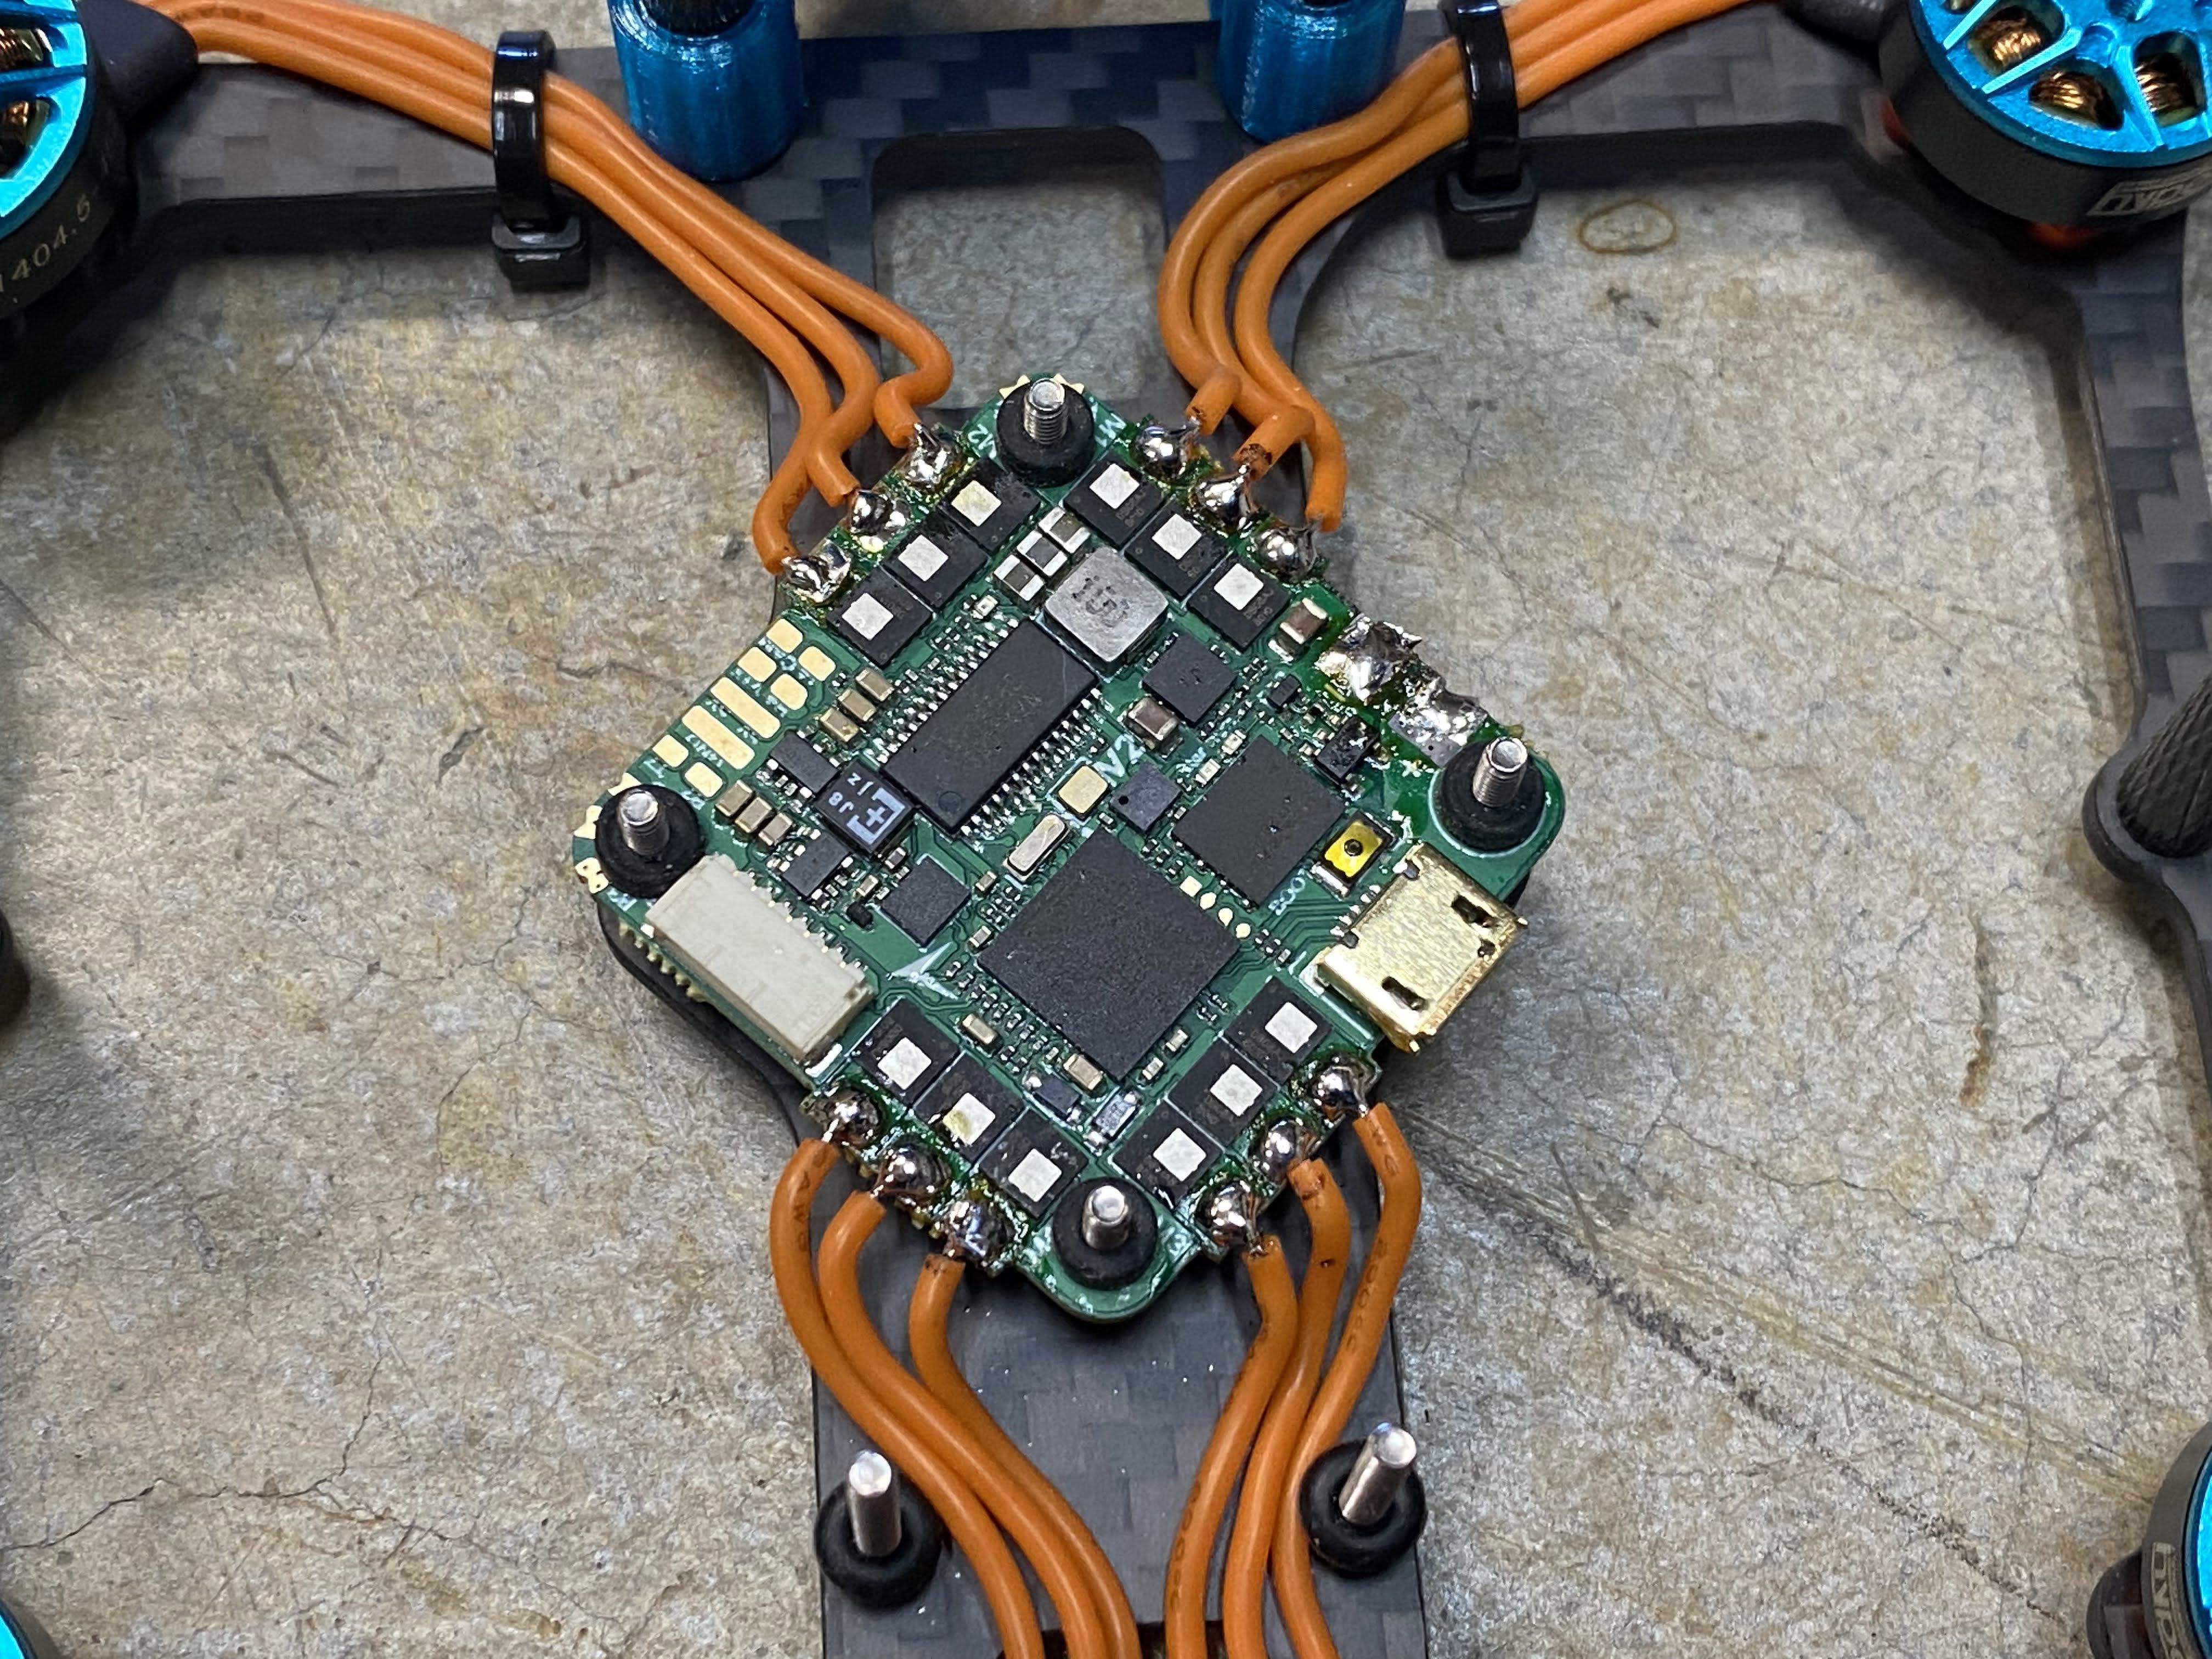
It was a rough start with this build because I ran into many issues. While test fitting the motors, I tried to adjust the wire and end up ripping one of the wires out. Next, during one of my crashes into wet grass, I fried a AIO board. Now, I have a new Flywoo F745 board, but I am not sure why my OSD is not working. I moved the wiring to a different UART and everything is working fine. Before moving to a different UART I notice that I might have bridged the pads between the ground and TX. The solder pads are so small that I had to bust out the magnifying glass and even then, it was difficult to tell.
Weight Loss Program

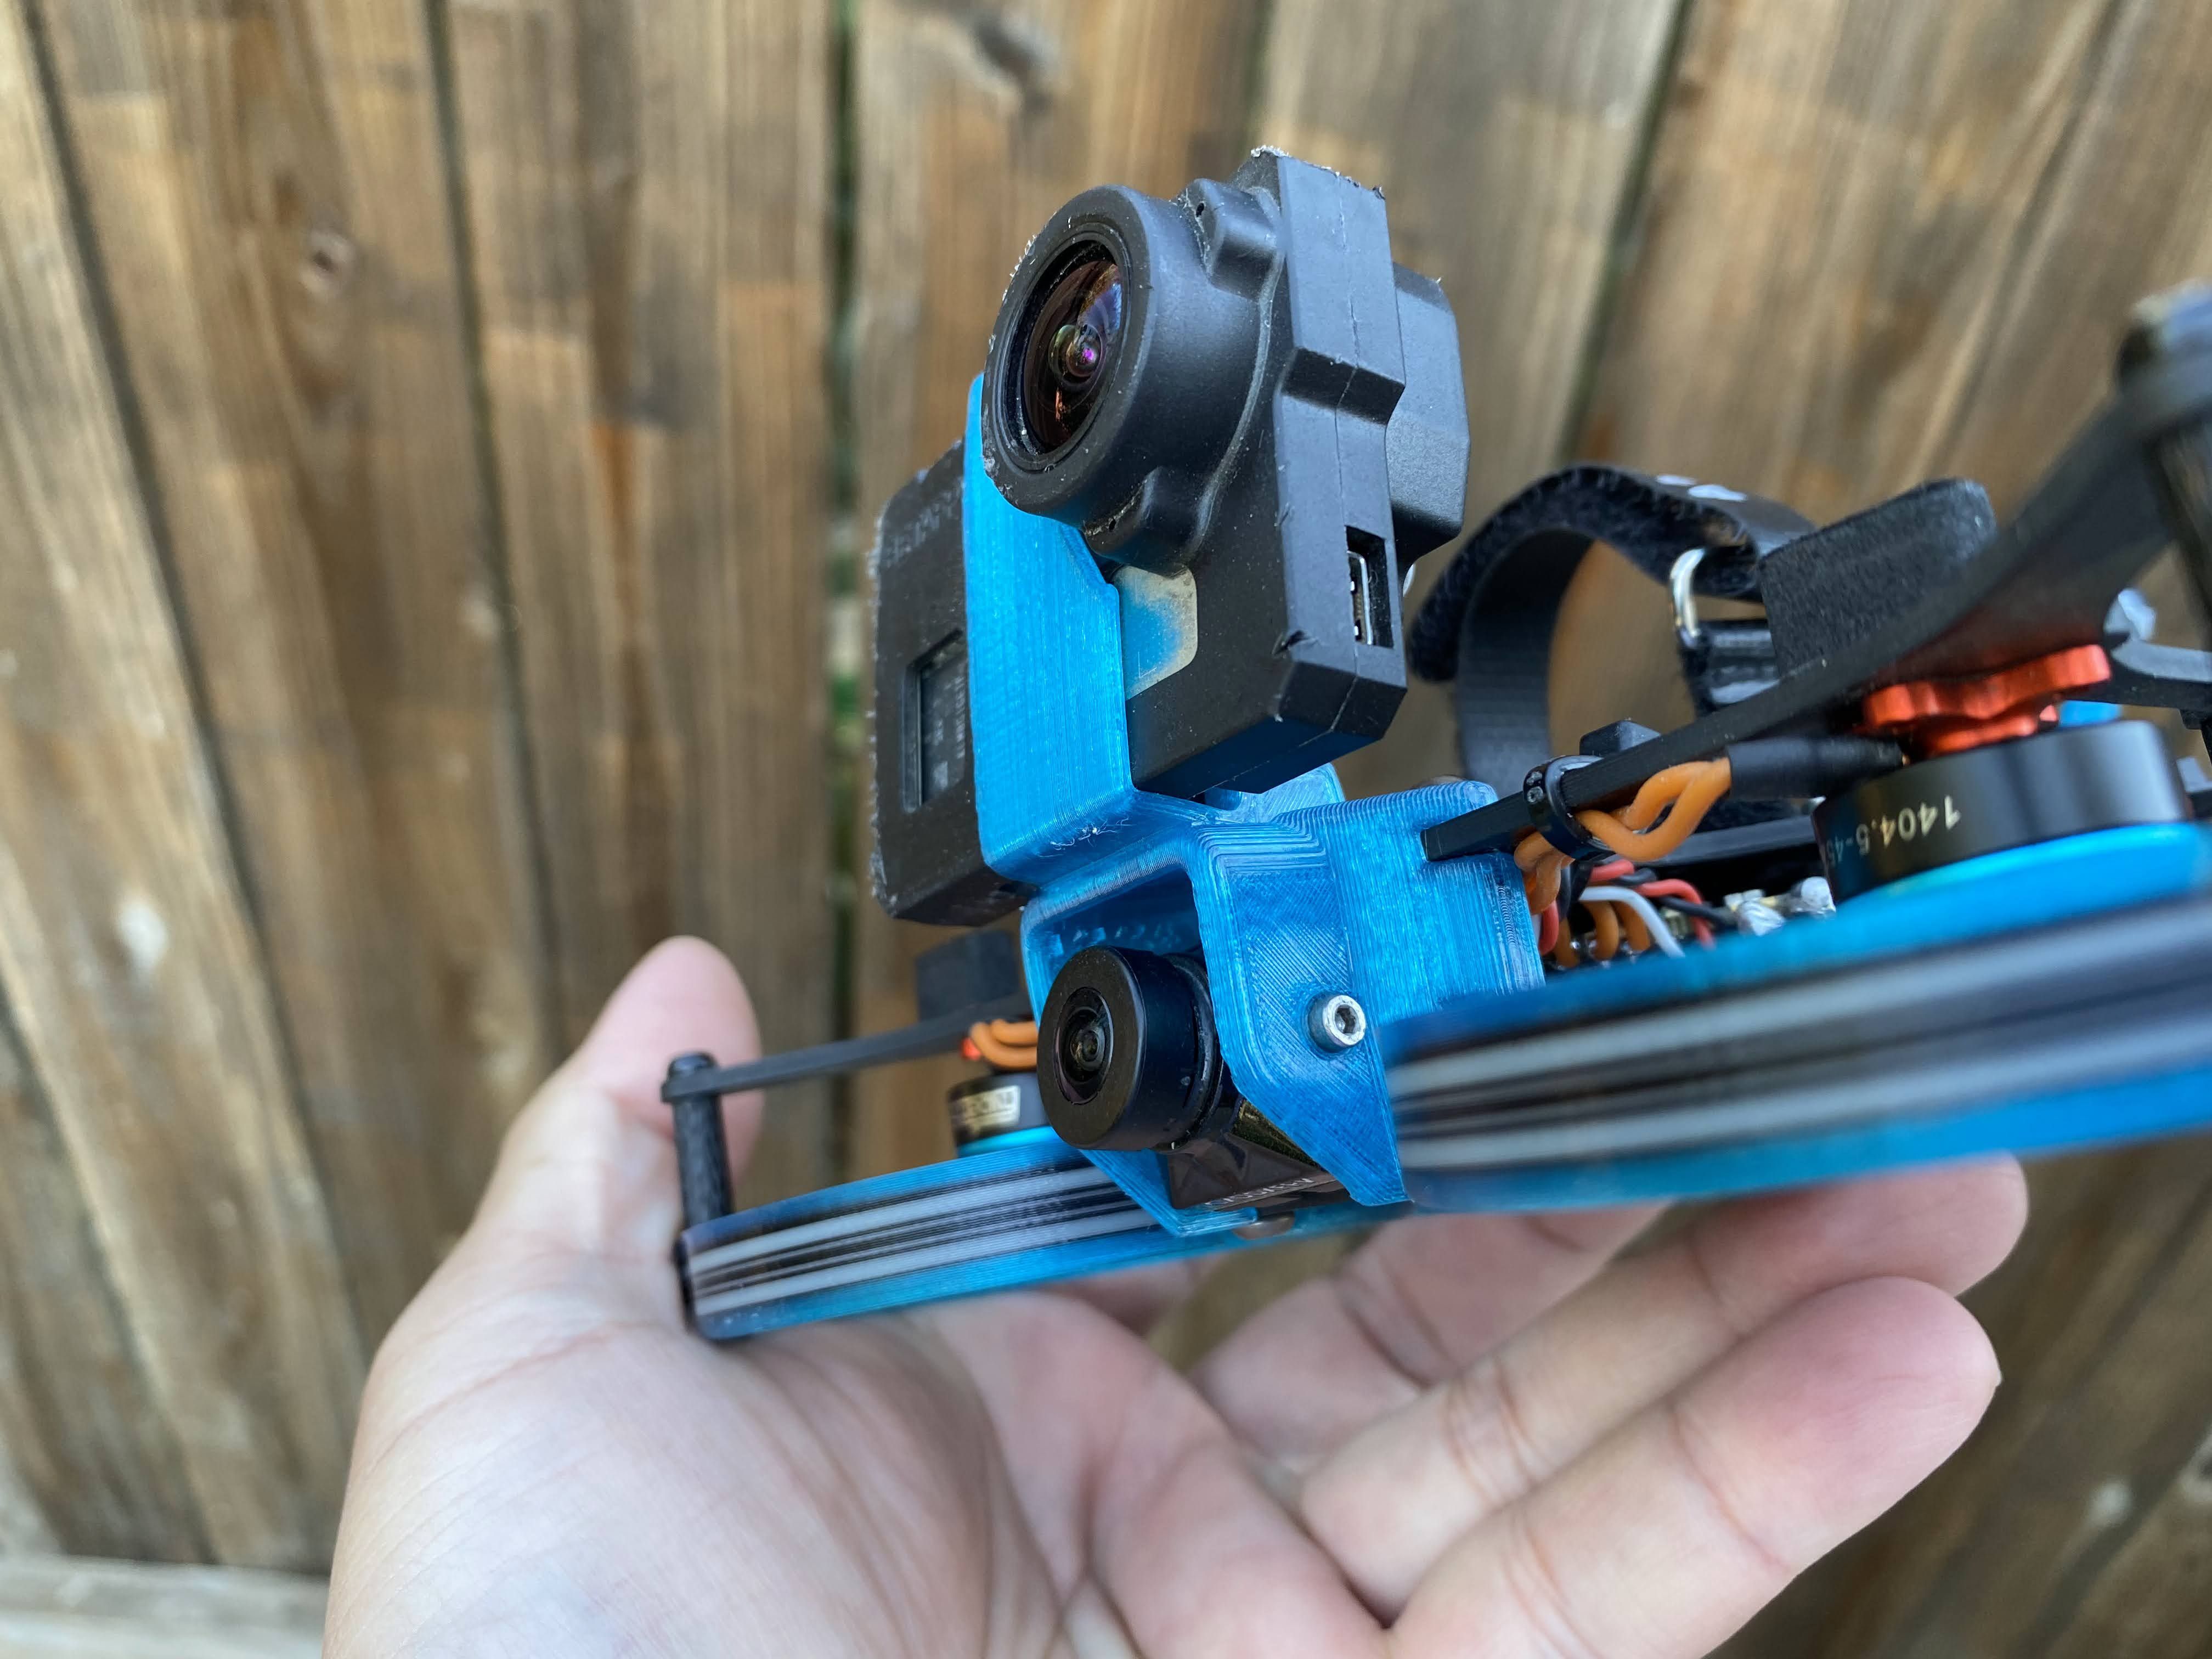
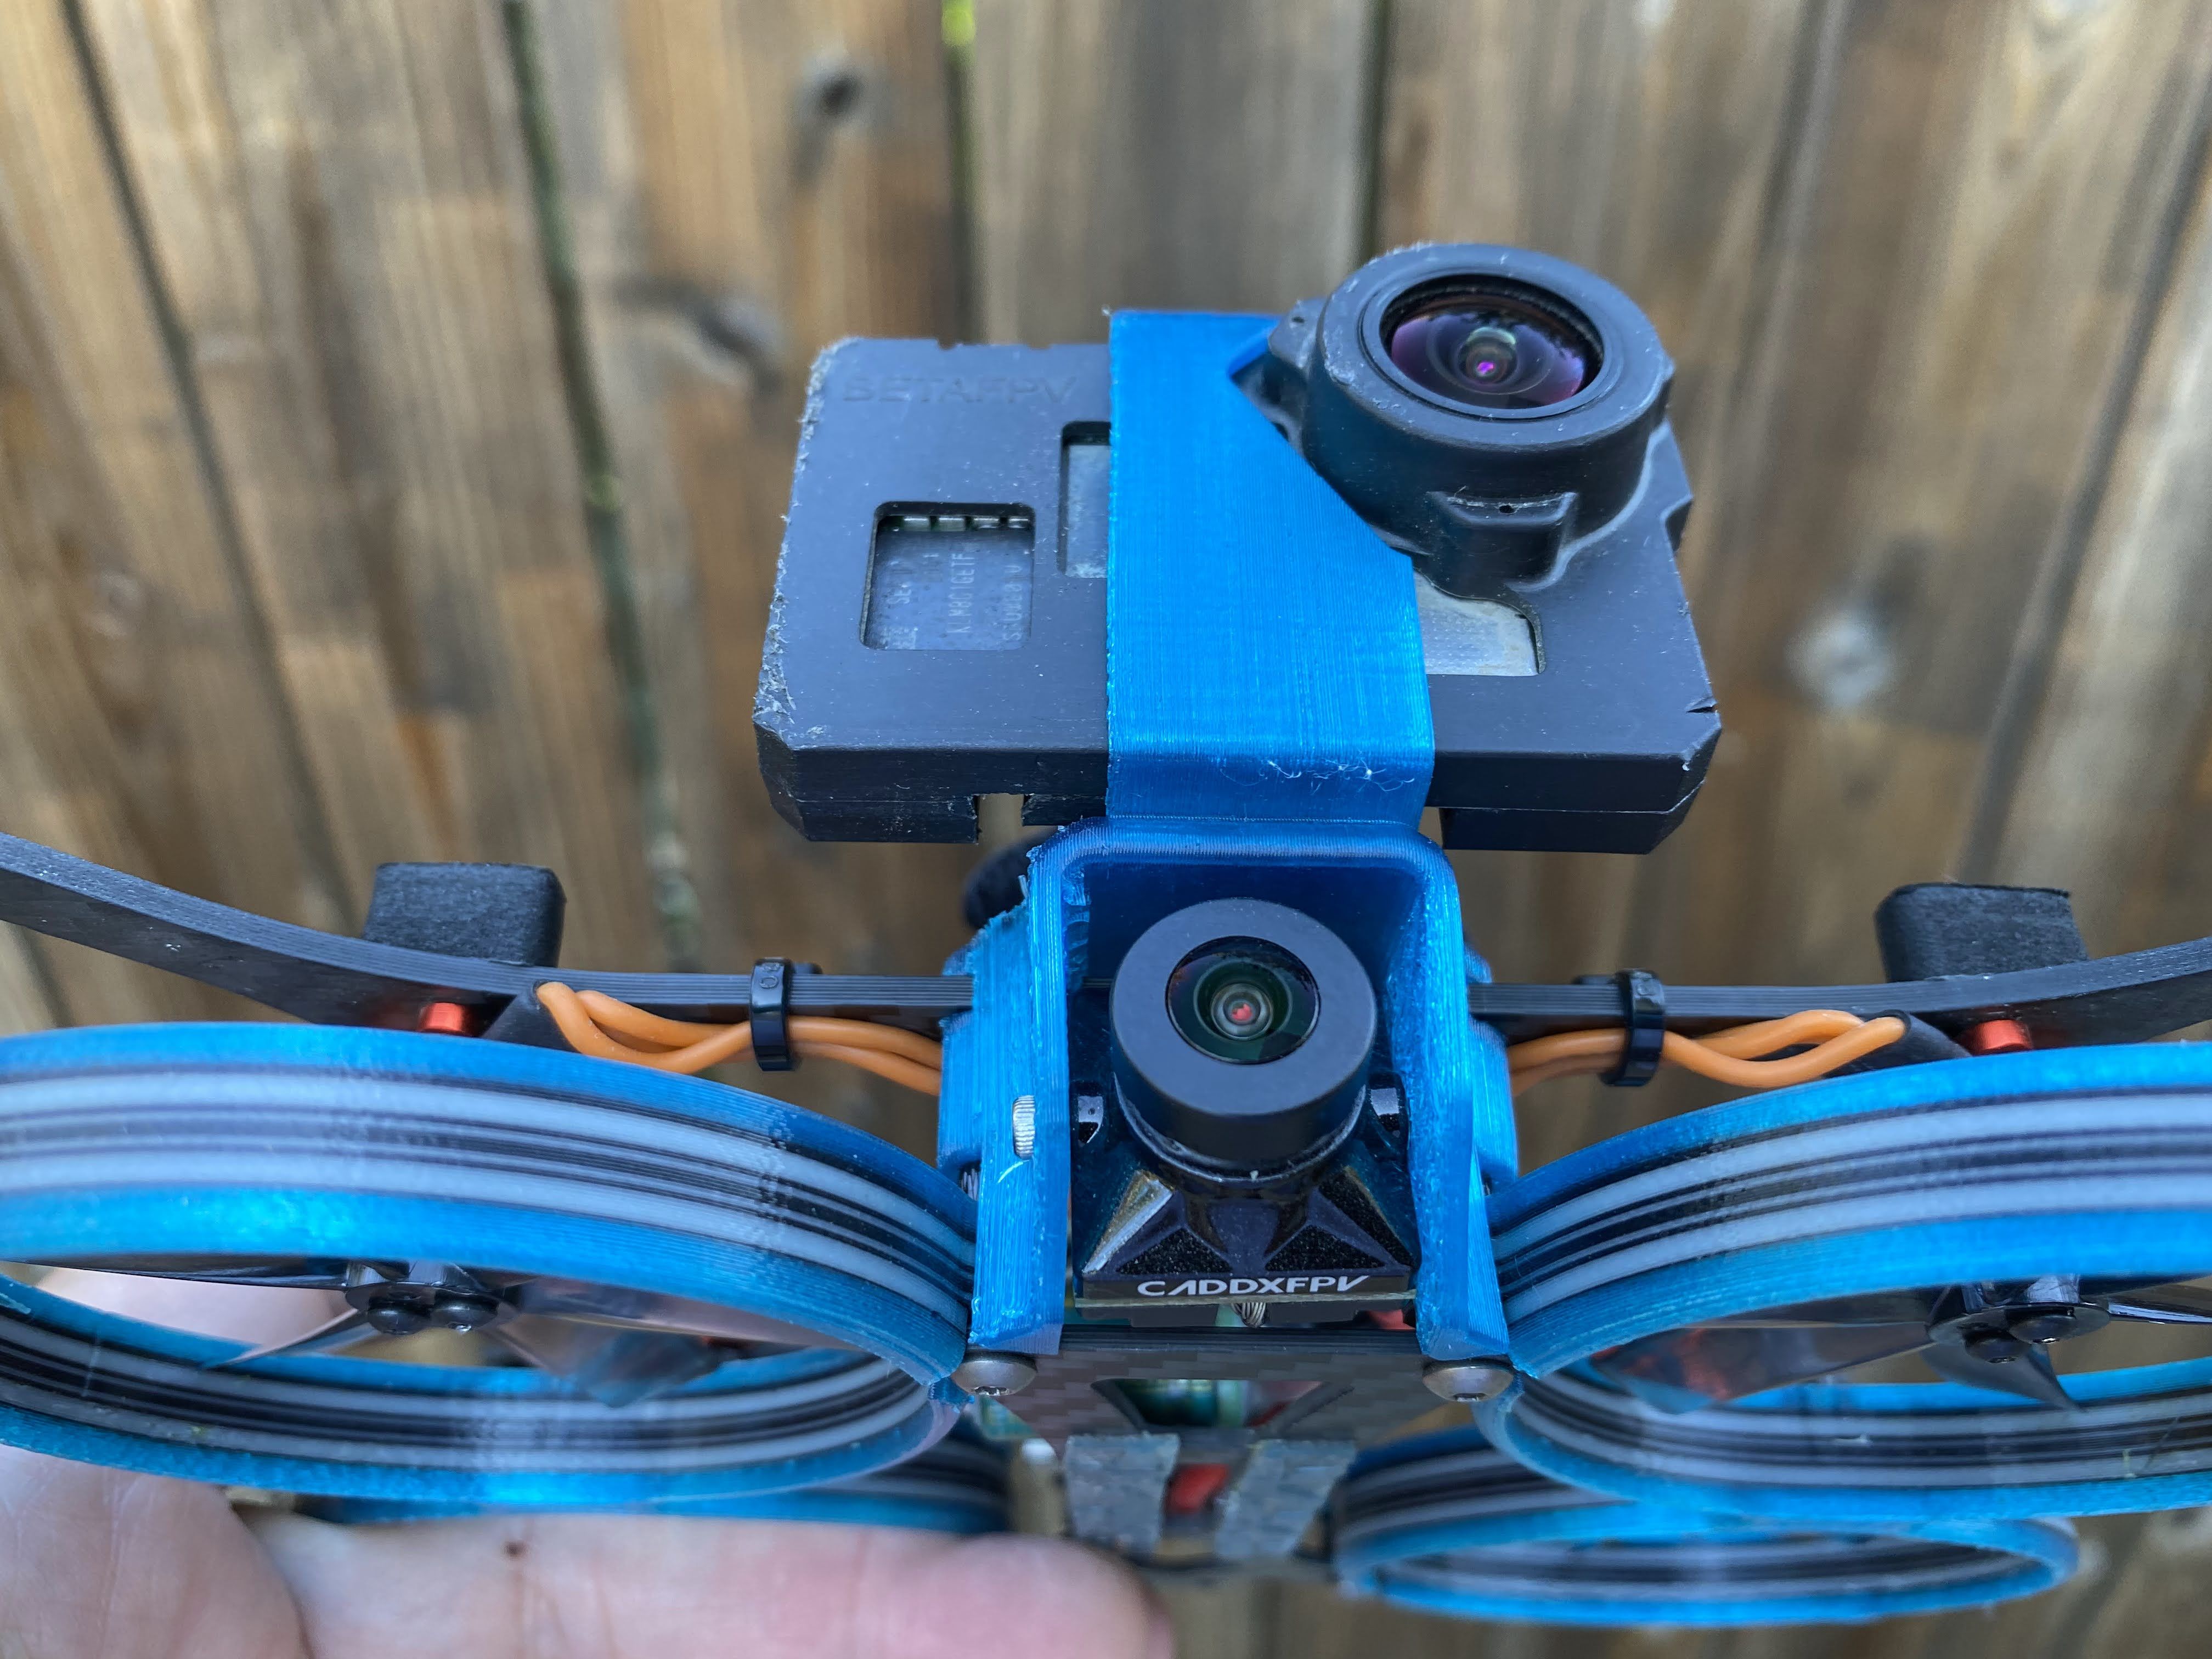
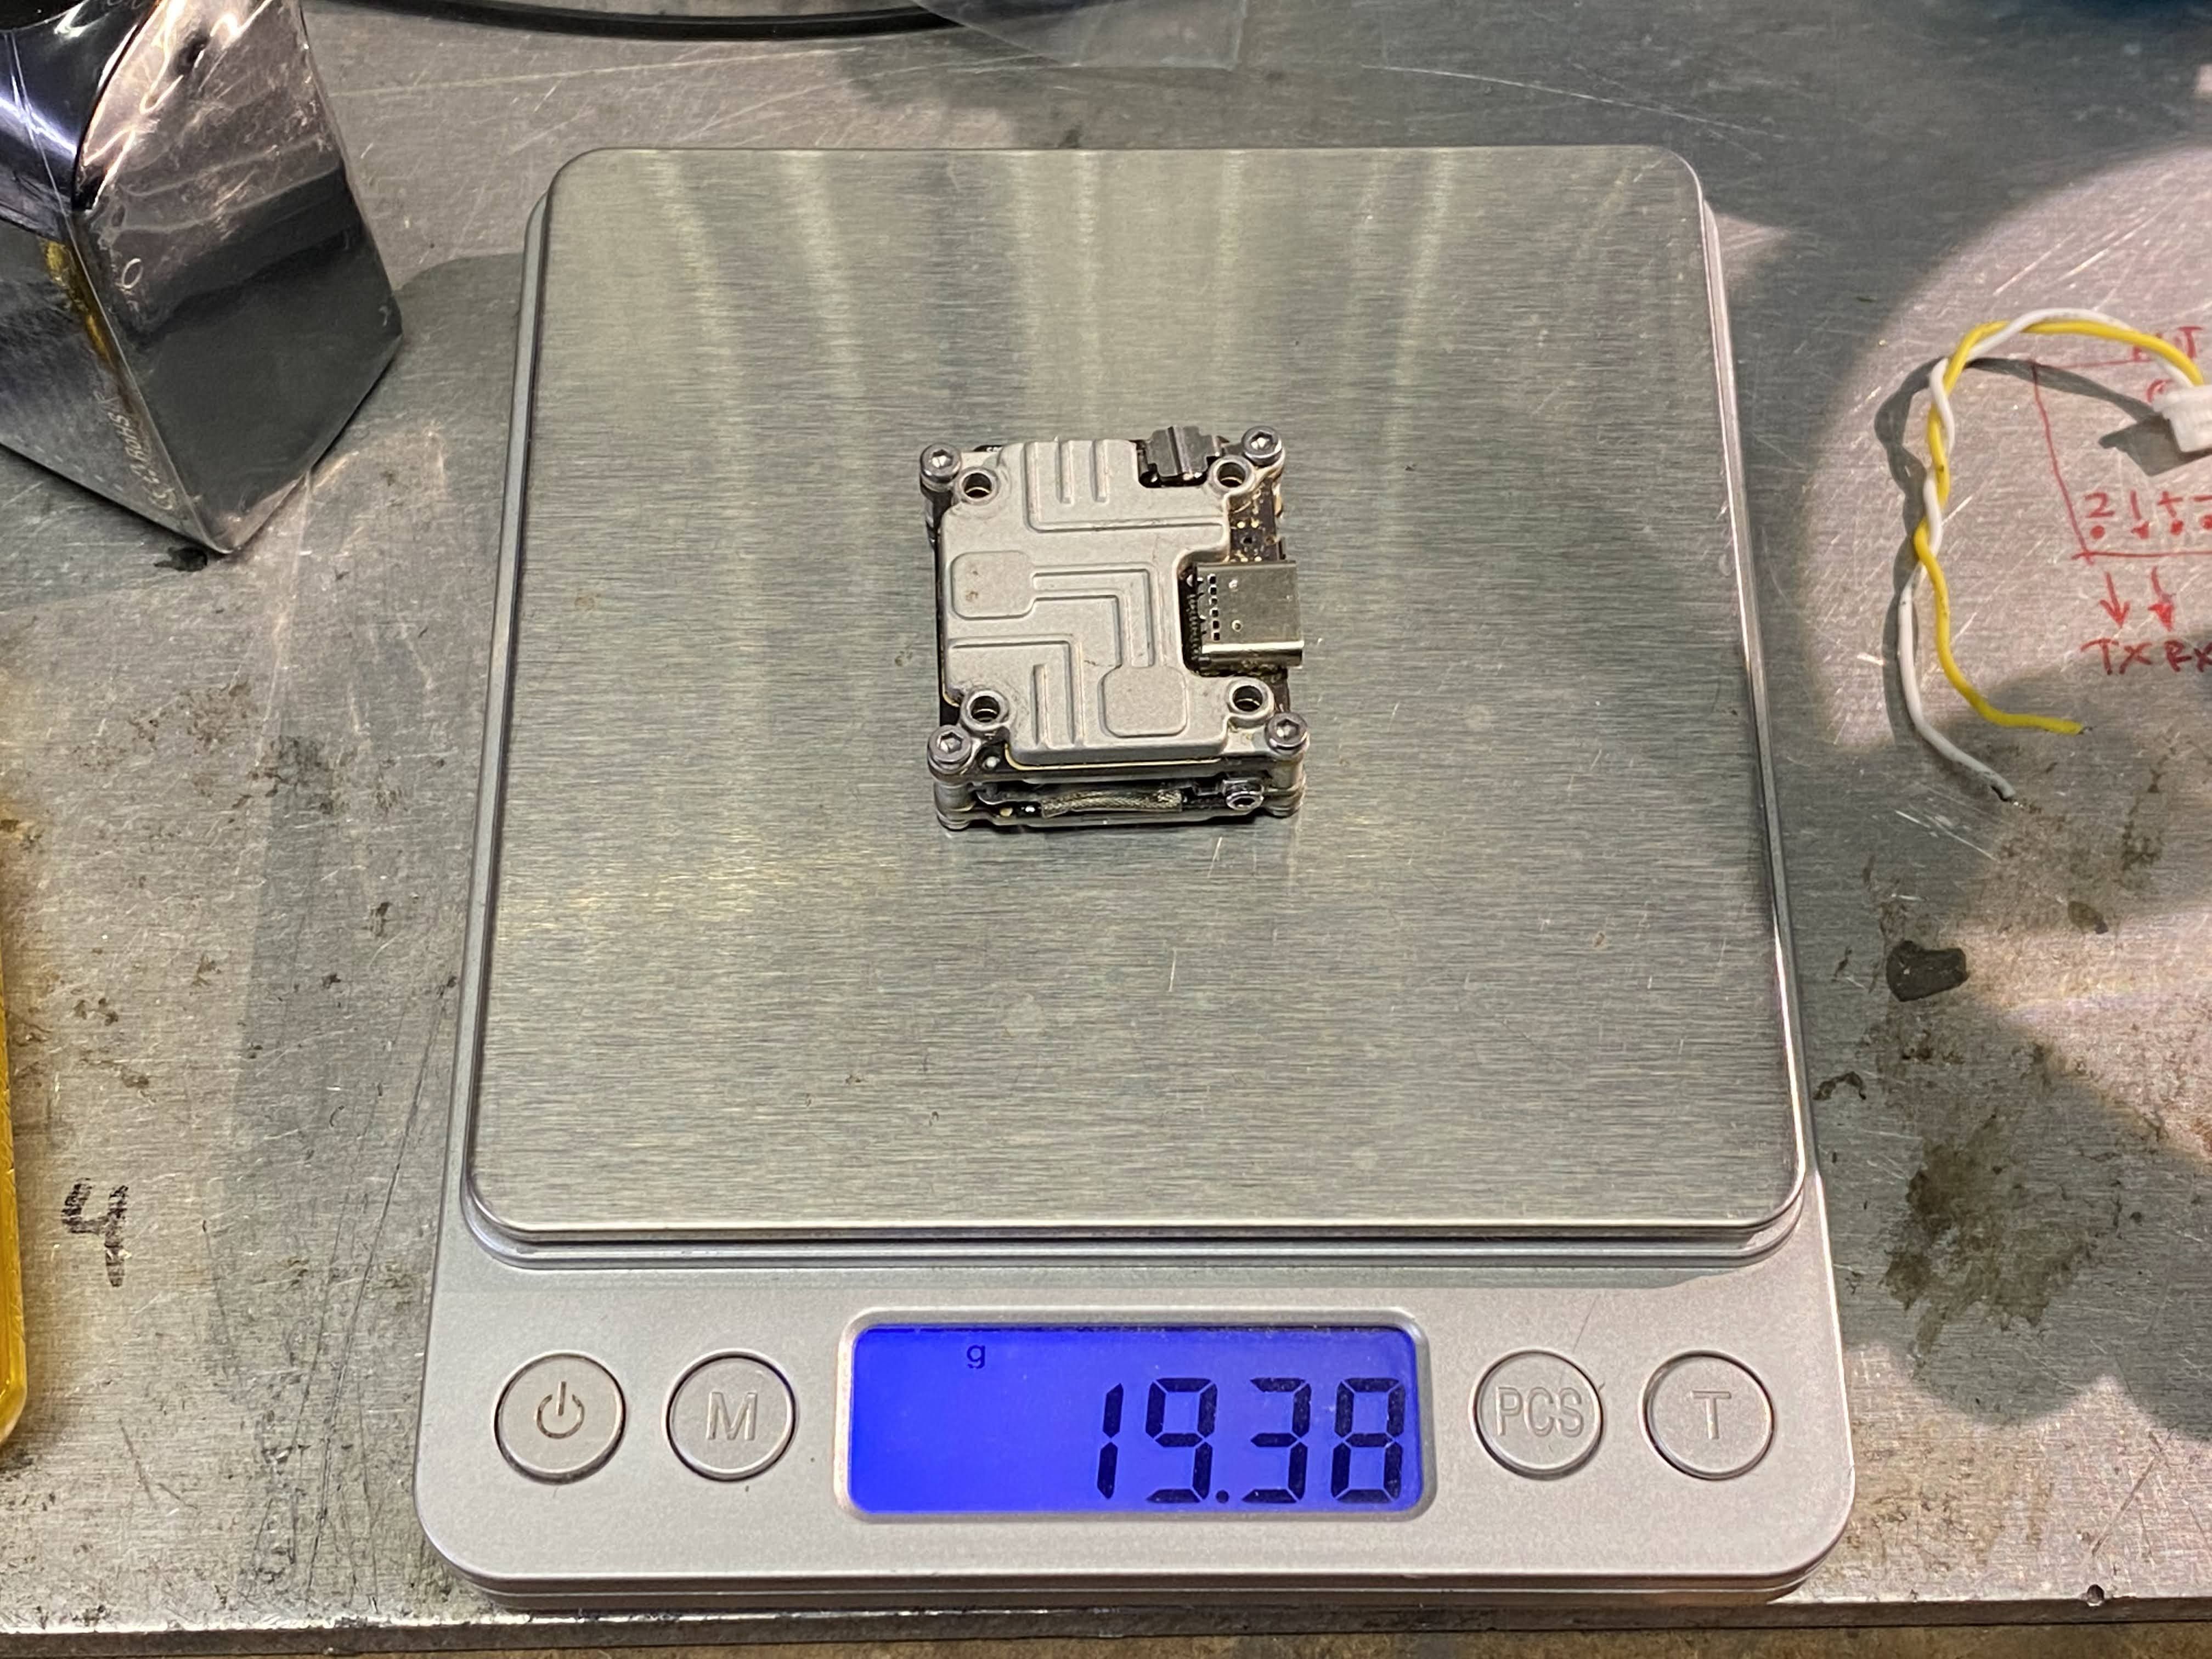
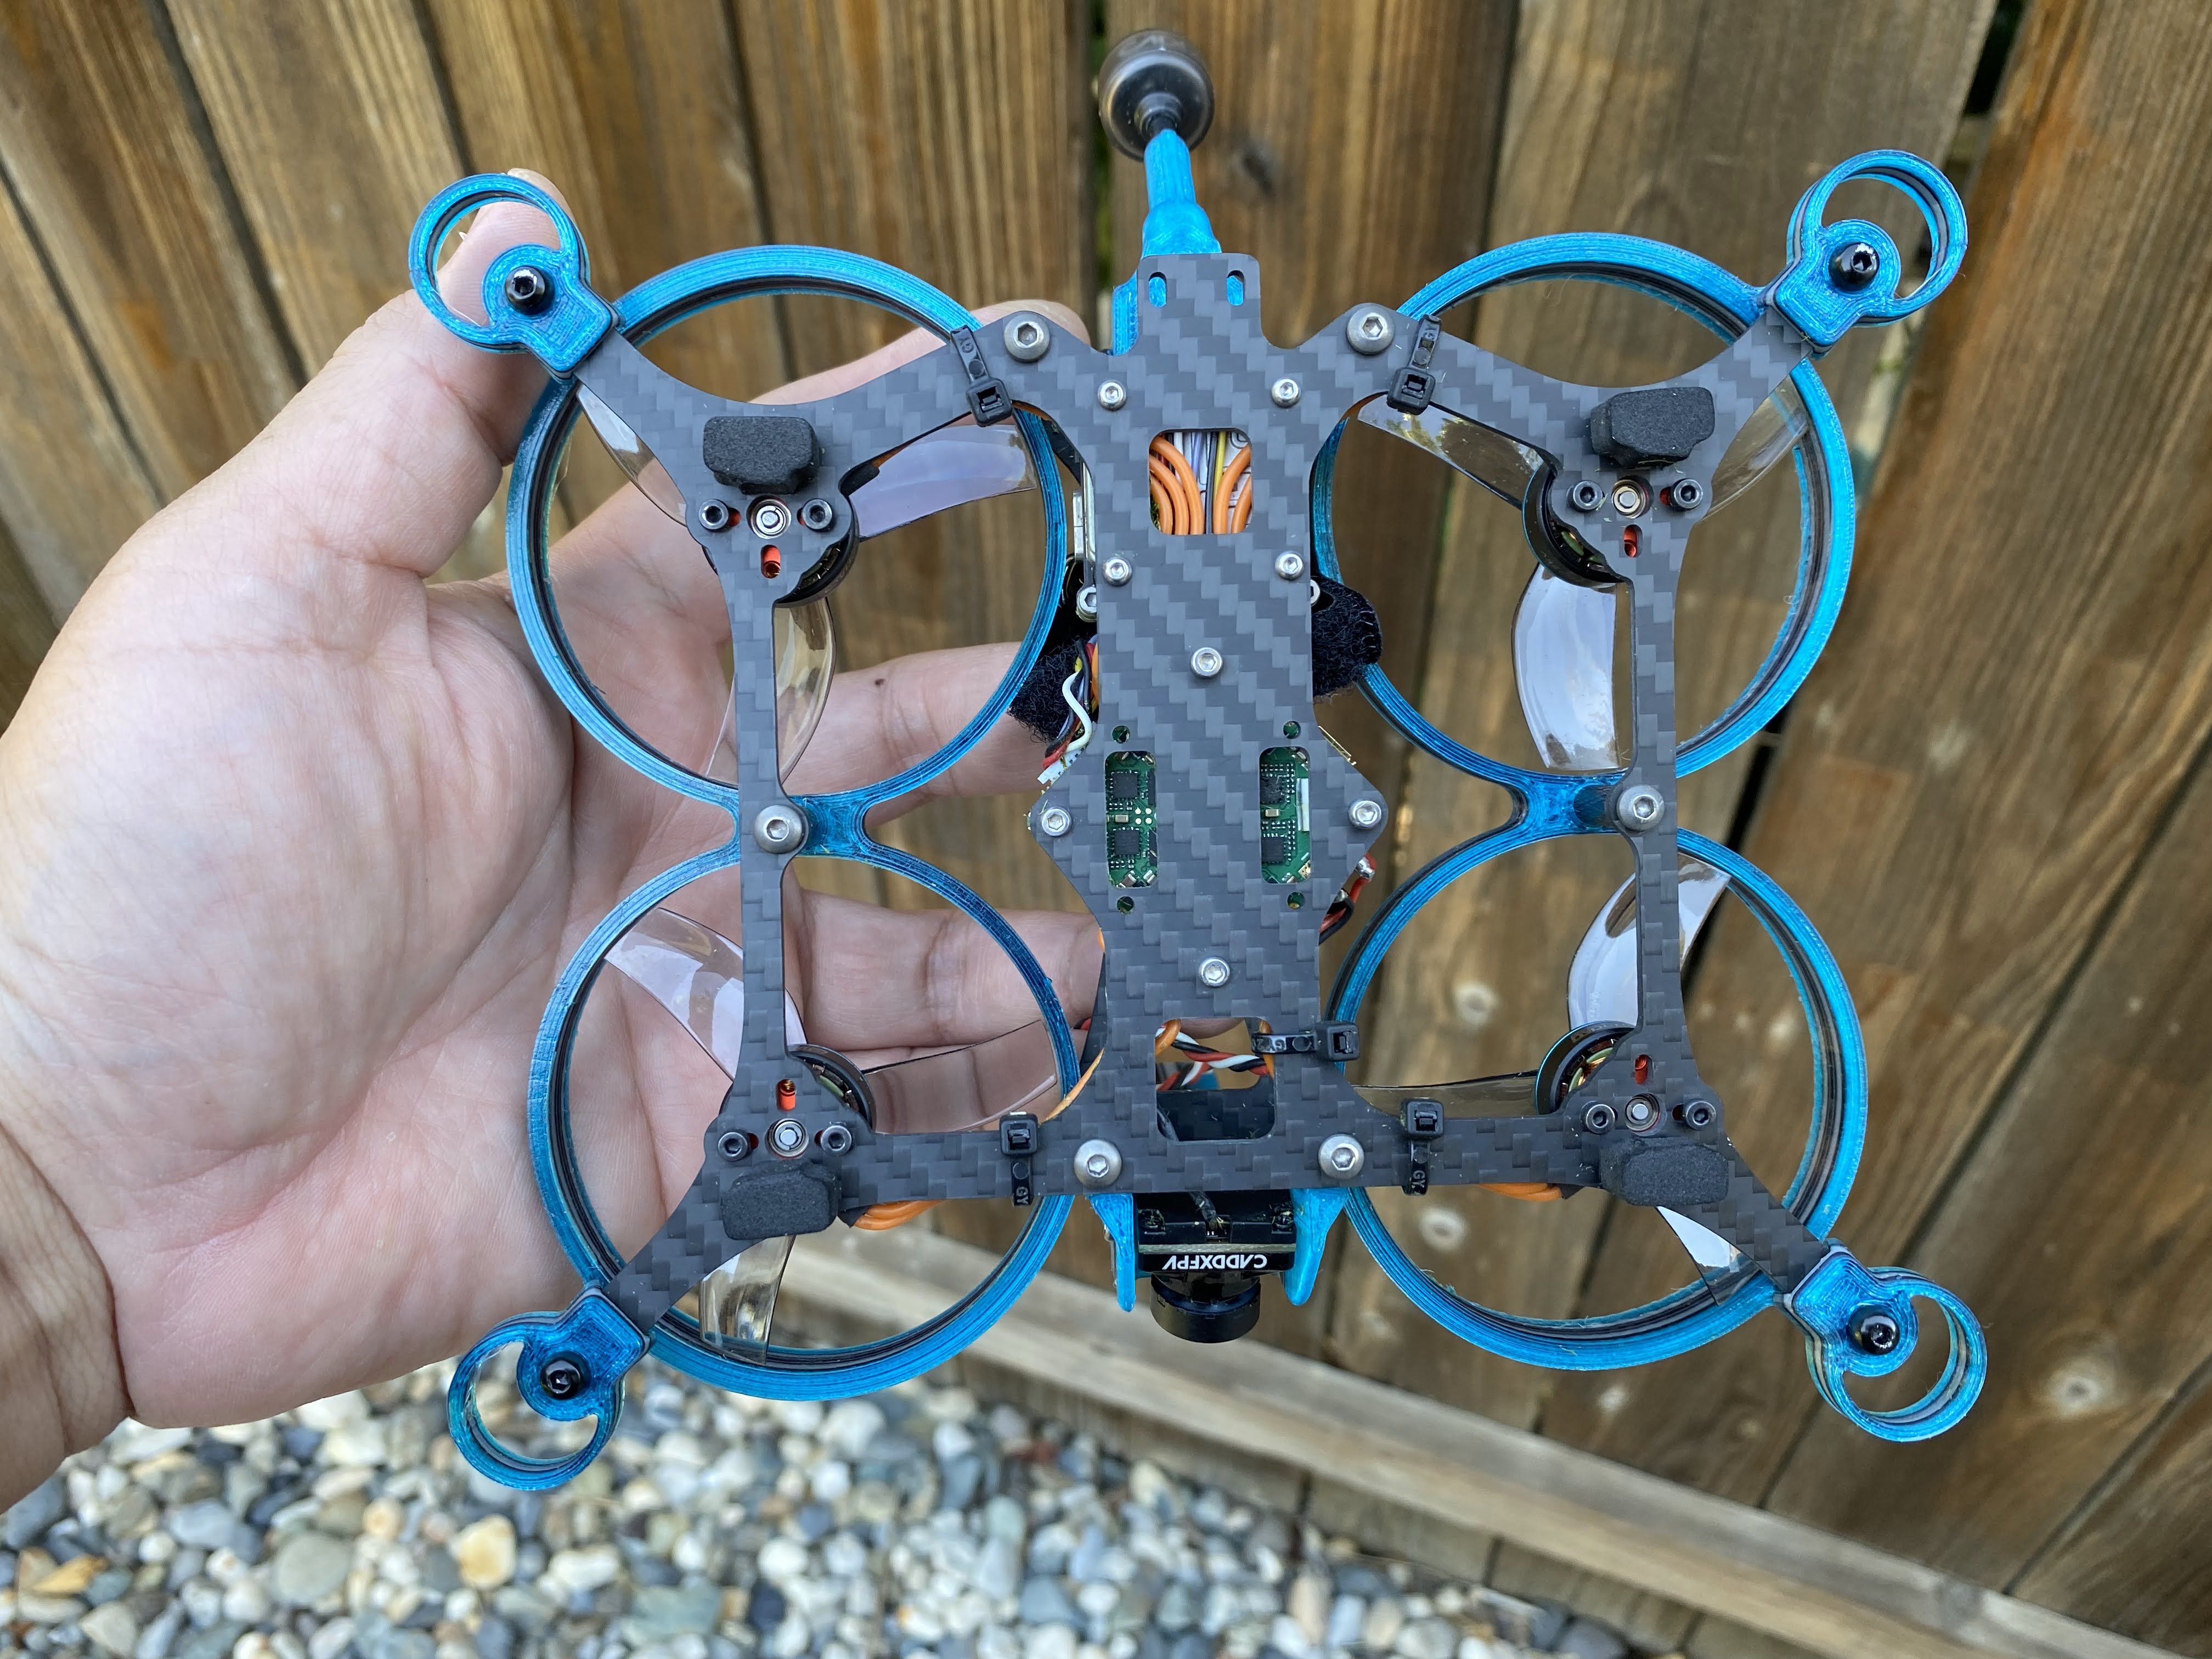
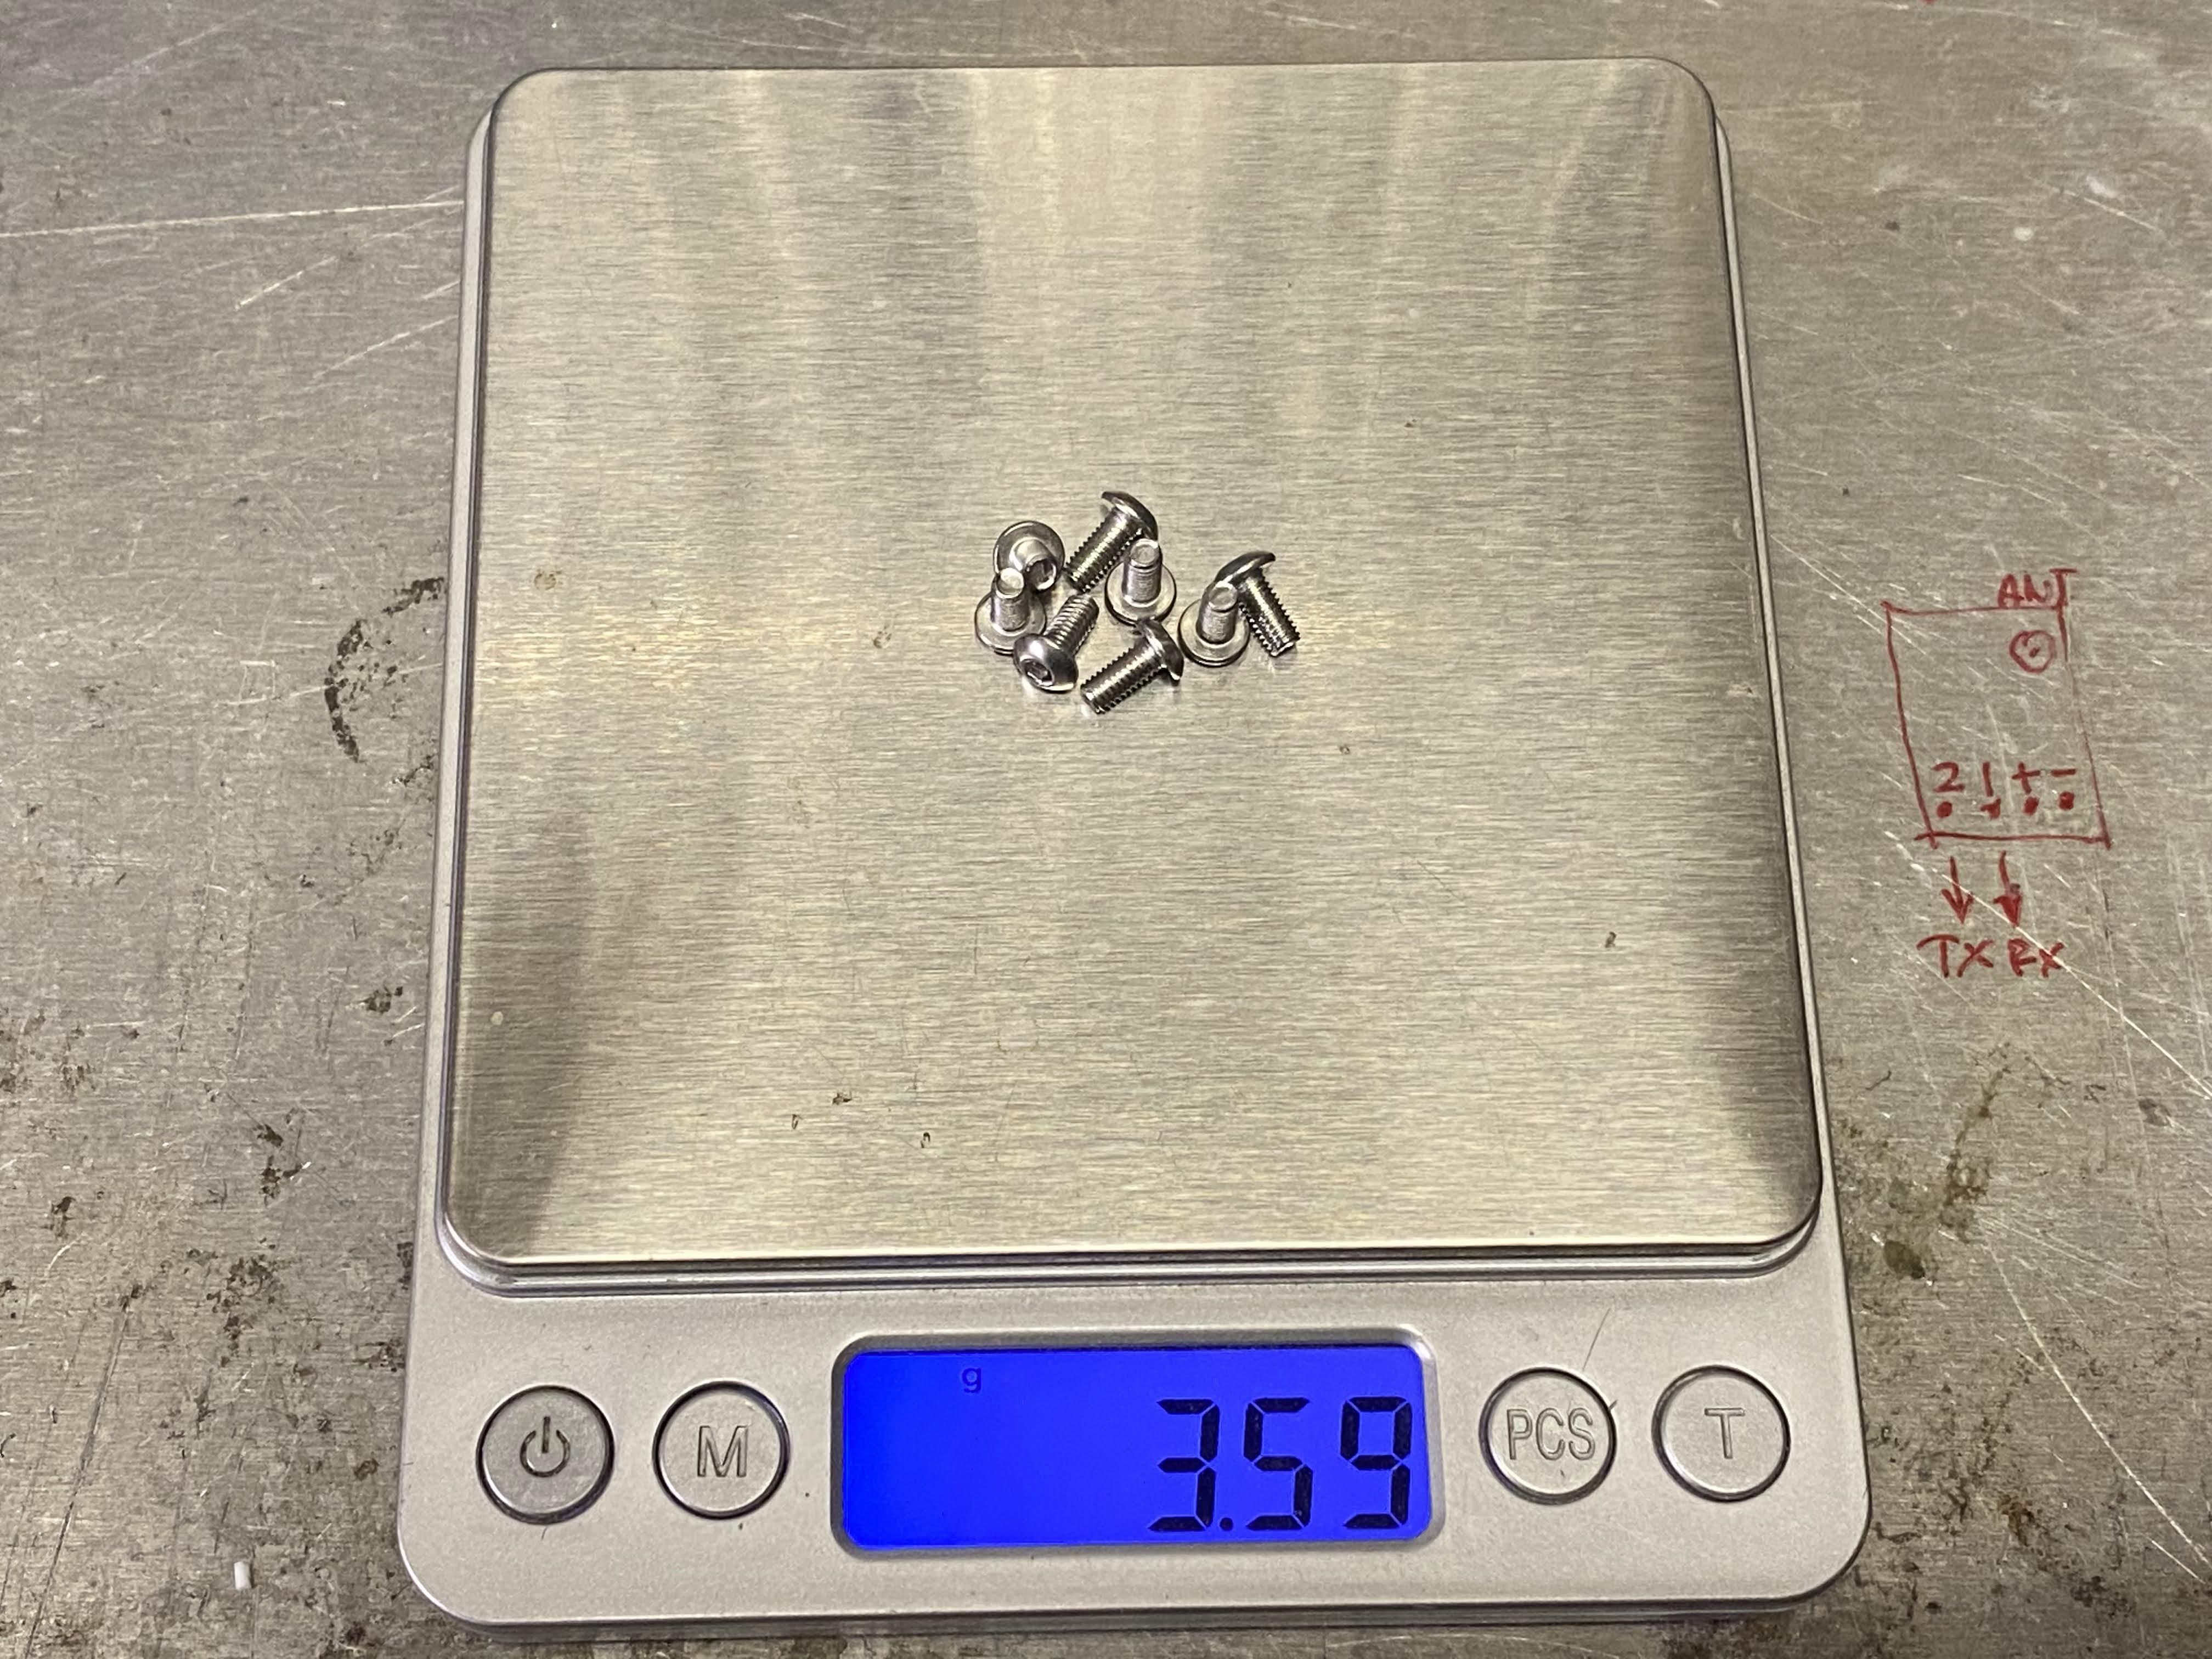
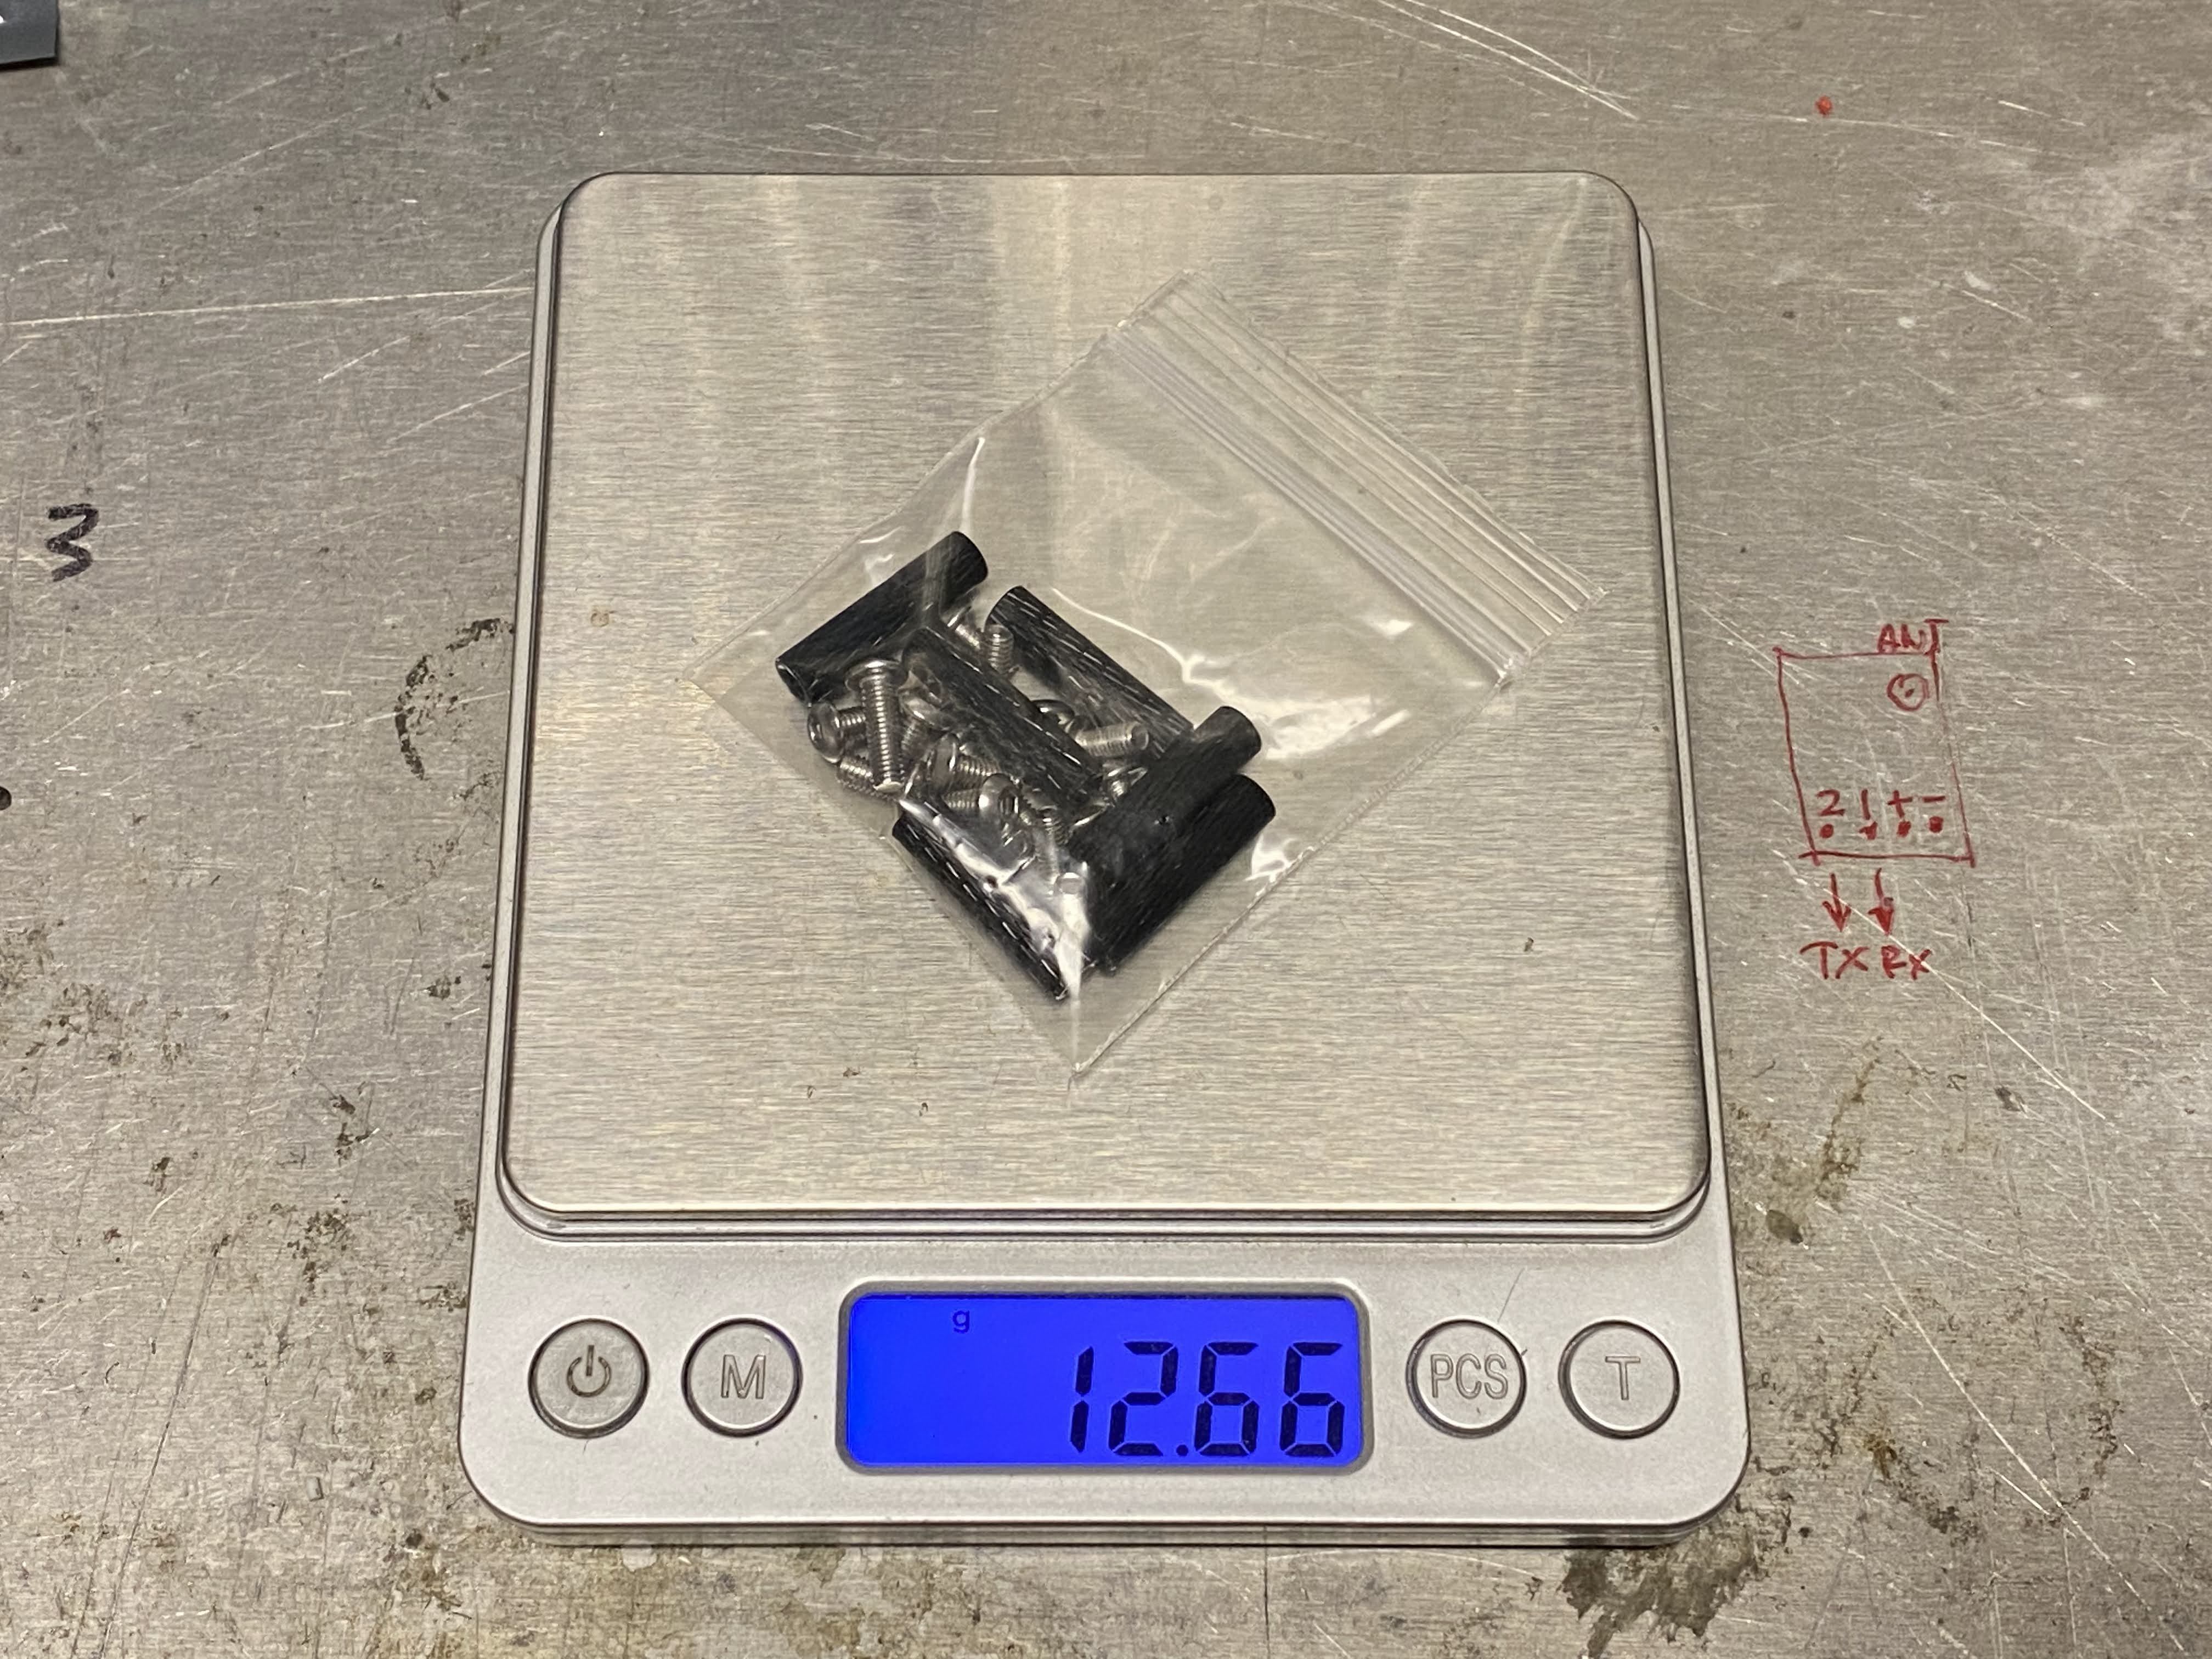
The first thing I did is to remove the case from the Caddx Vista (Air Unit Lite). I used 3D printed spacer for the Air Unit Lite, 3mm for the bottom, 4mm in the middle and 1mm on the top. The reason why I have so much space on the bottom is because I am running the motor wires under it. I was planning to replace the mounted screws to something shorter, but they had the same weight as the longer screws you see in the picture because shorter screws are cap heads and the longer ones are button.
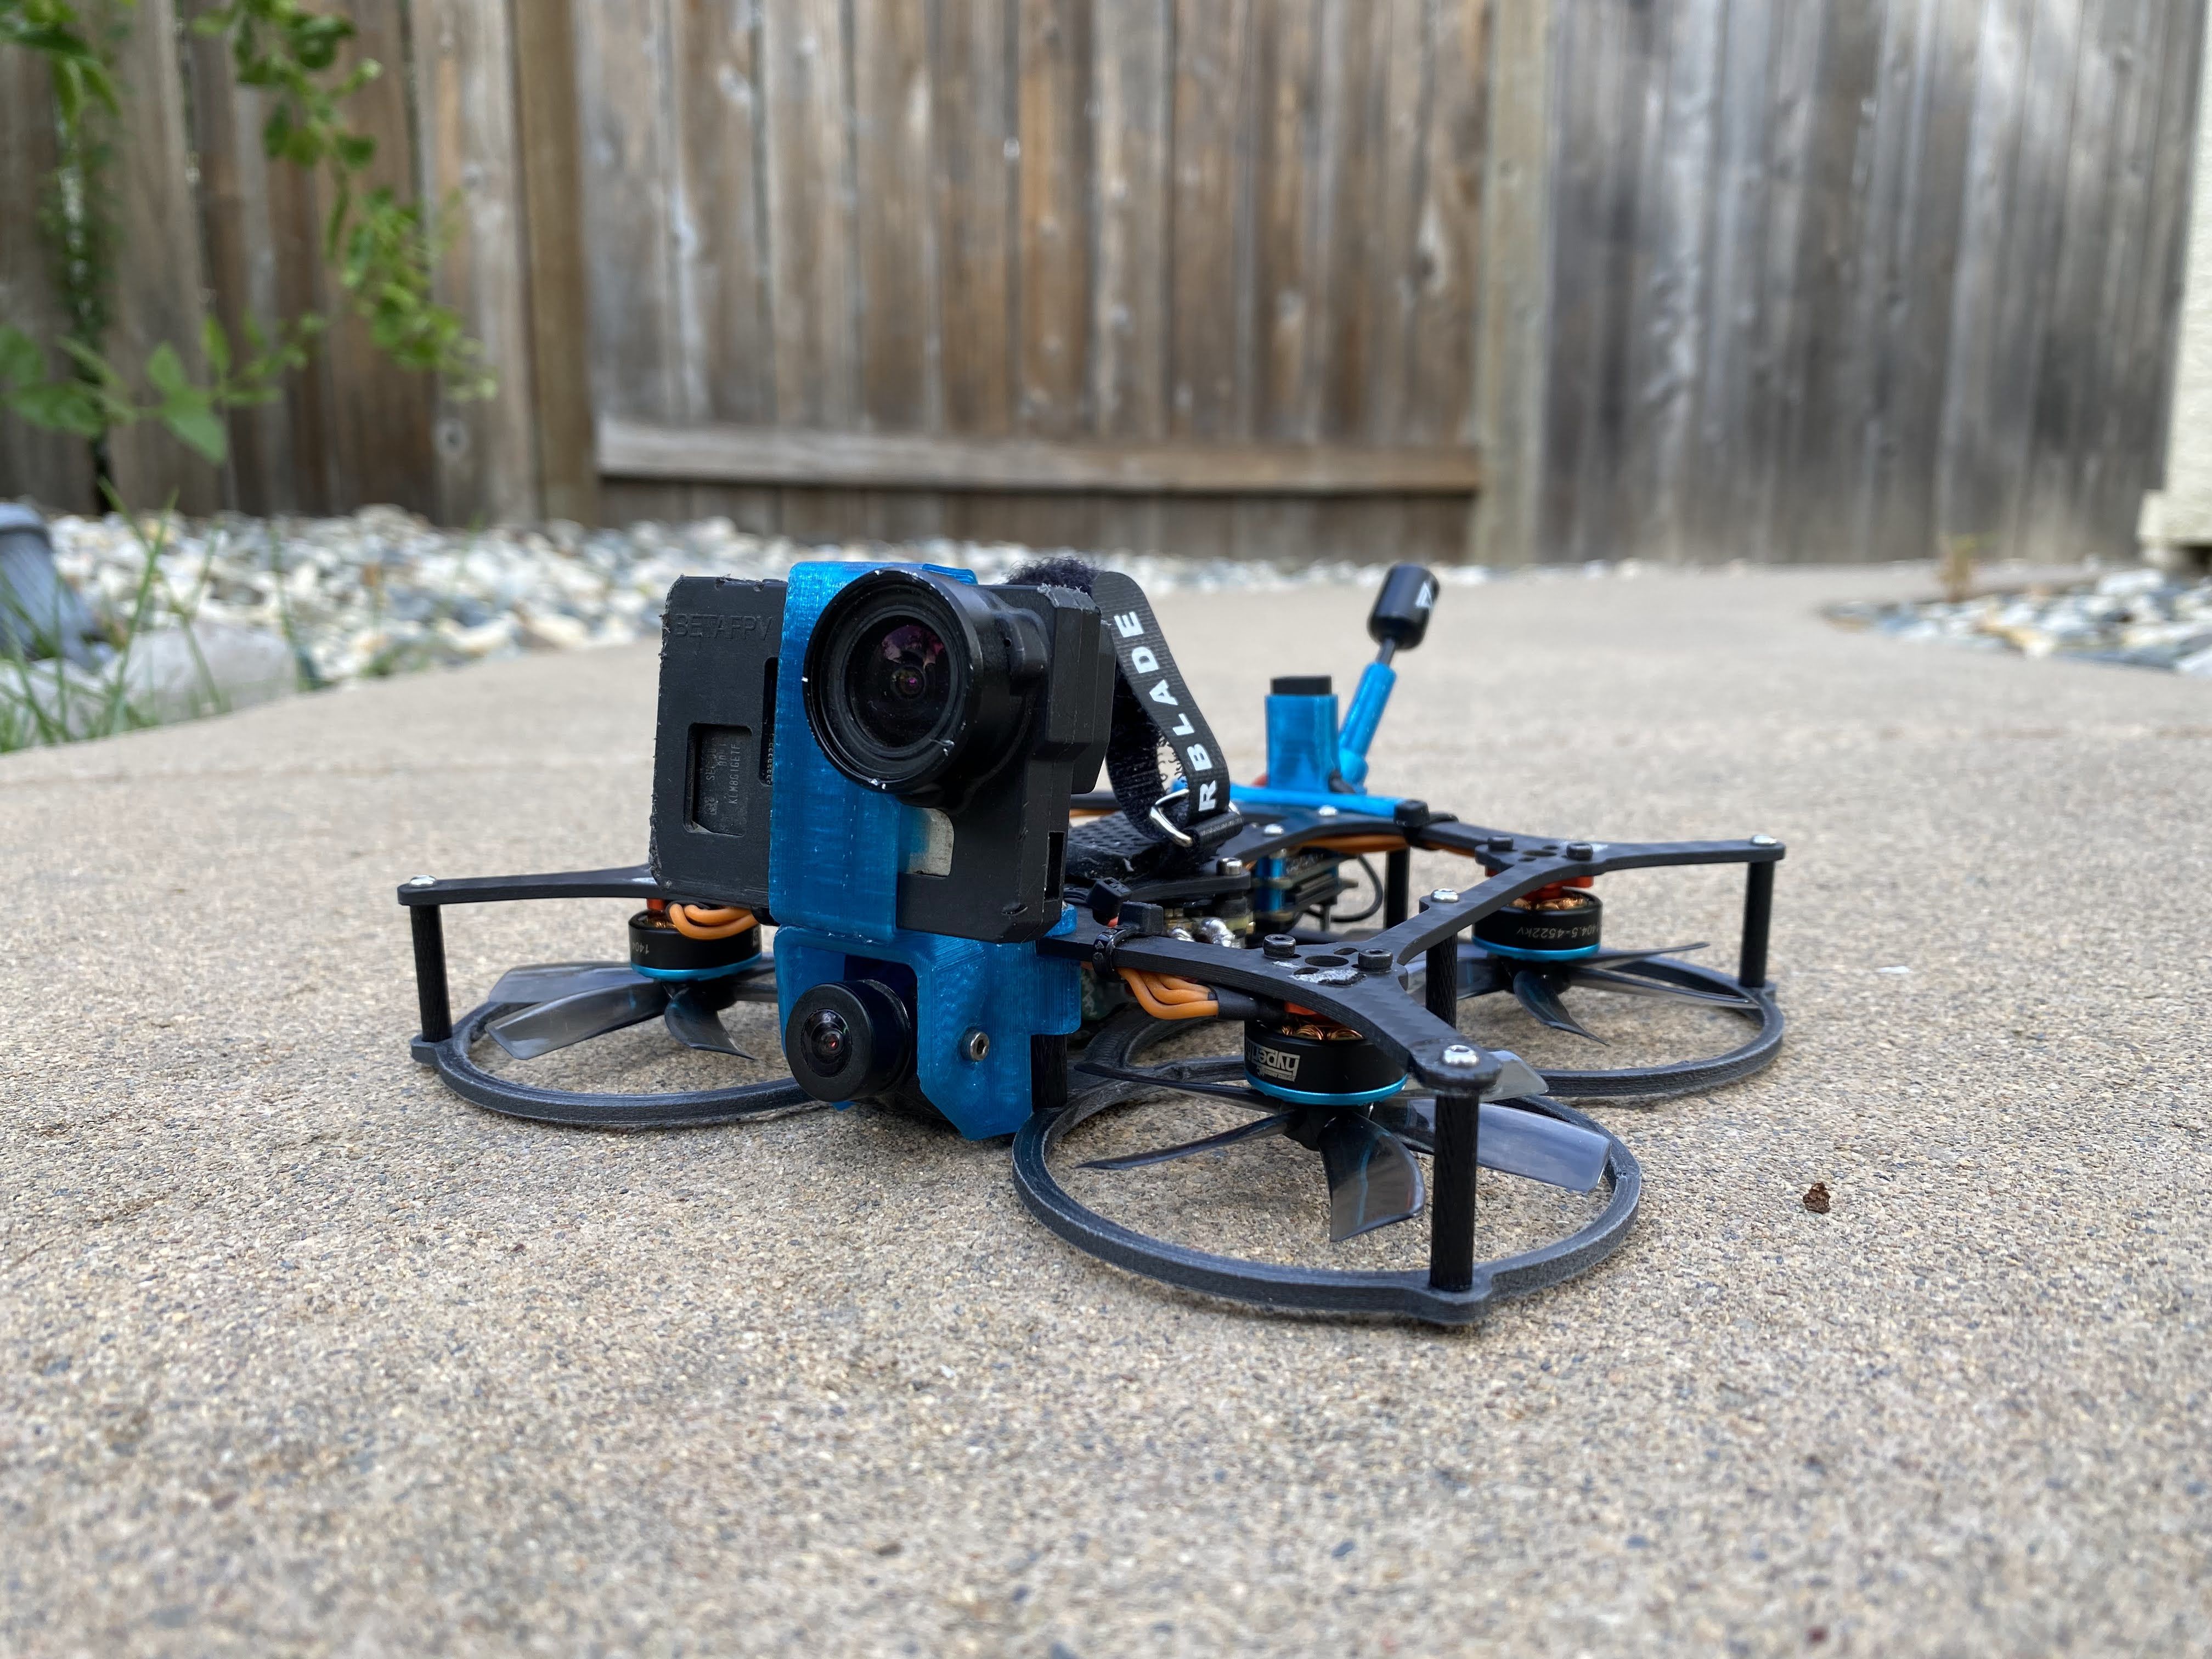
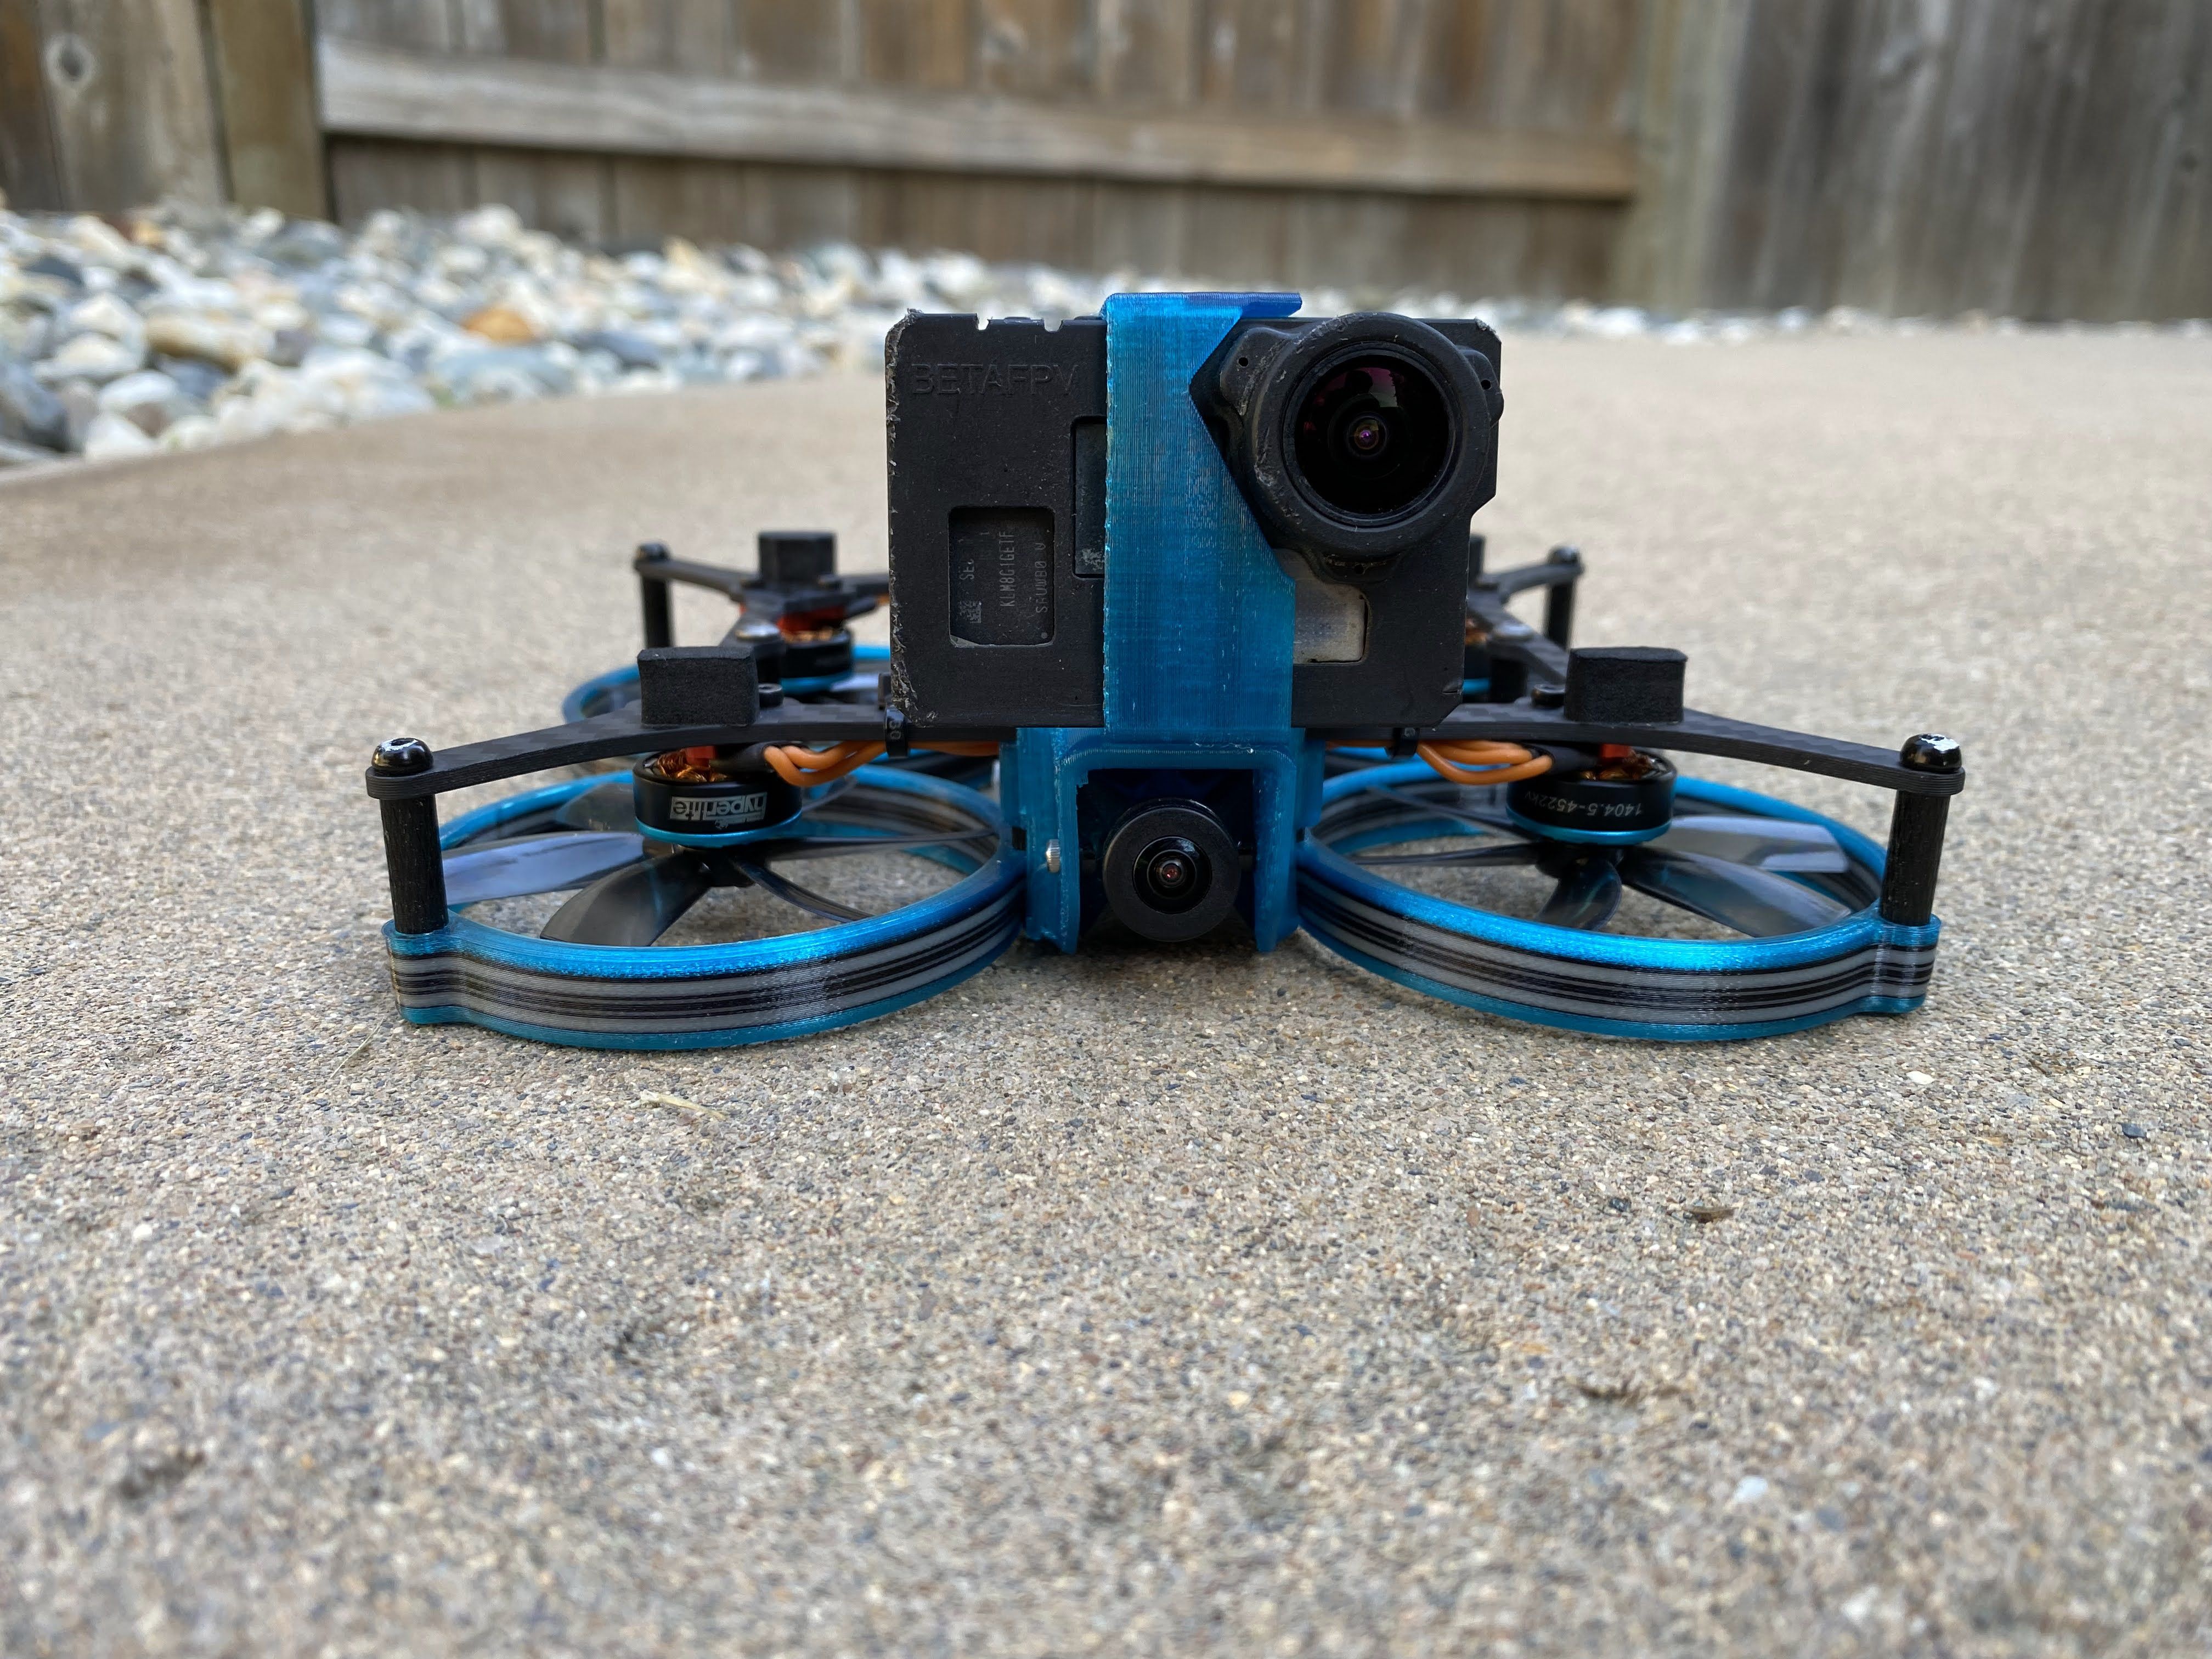
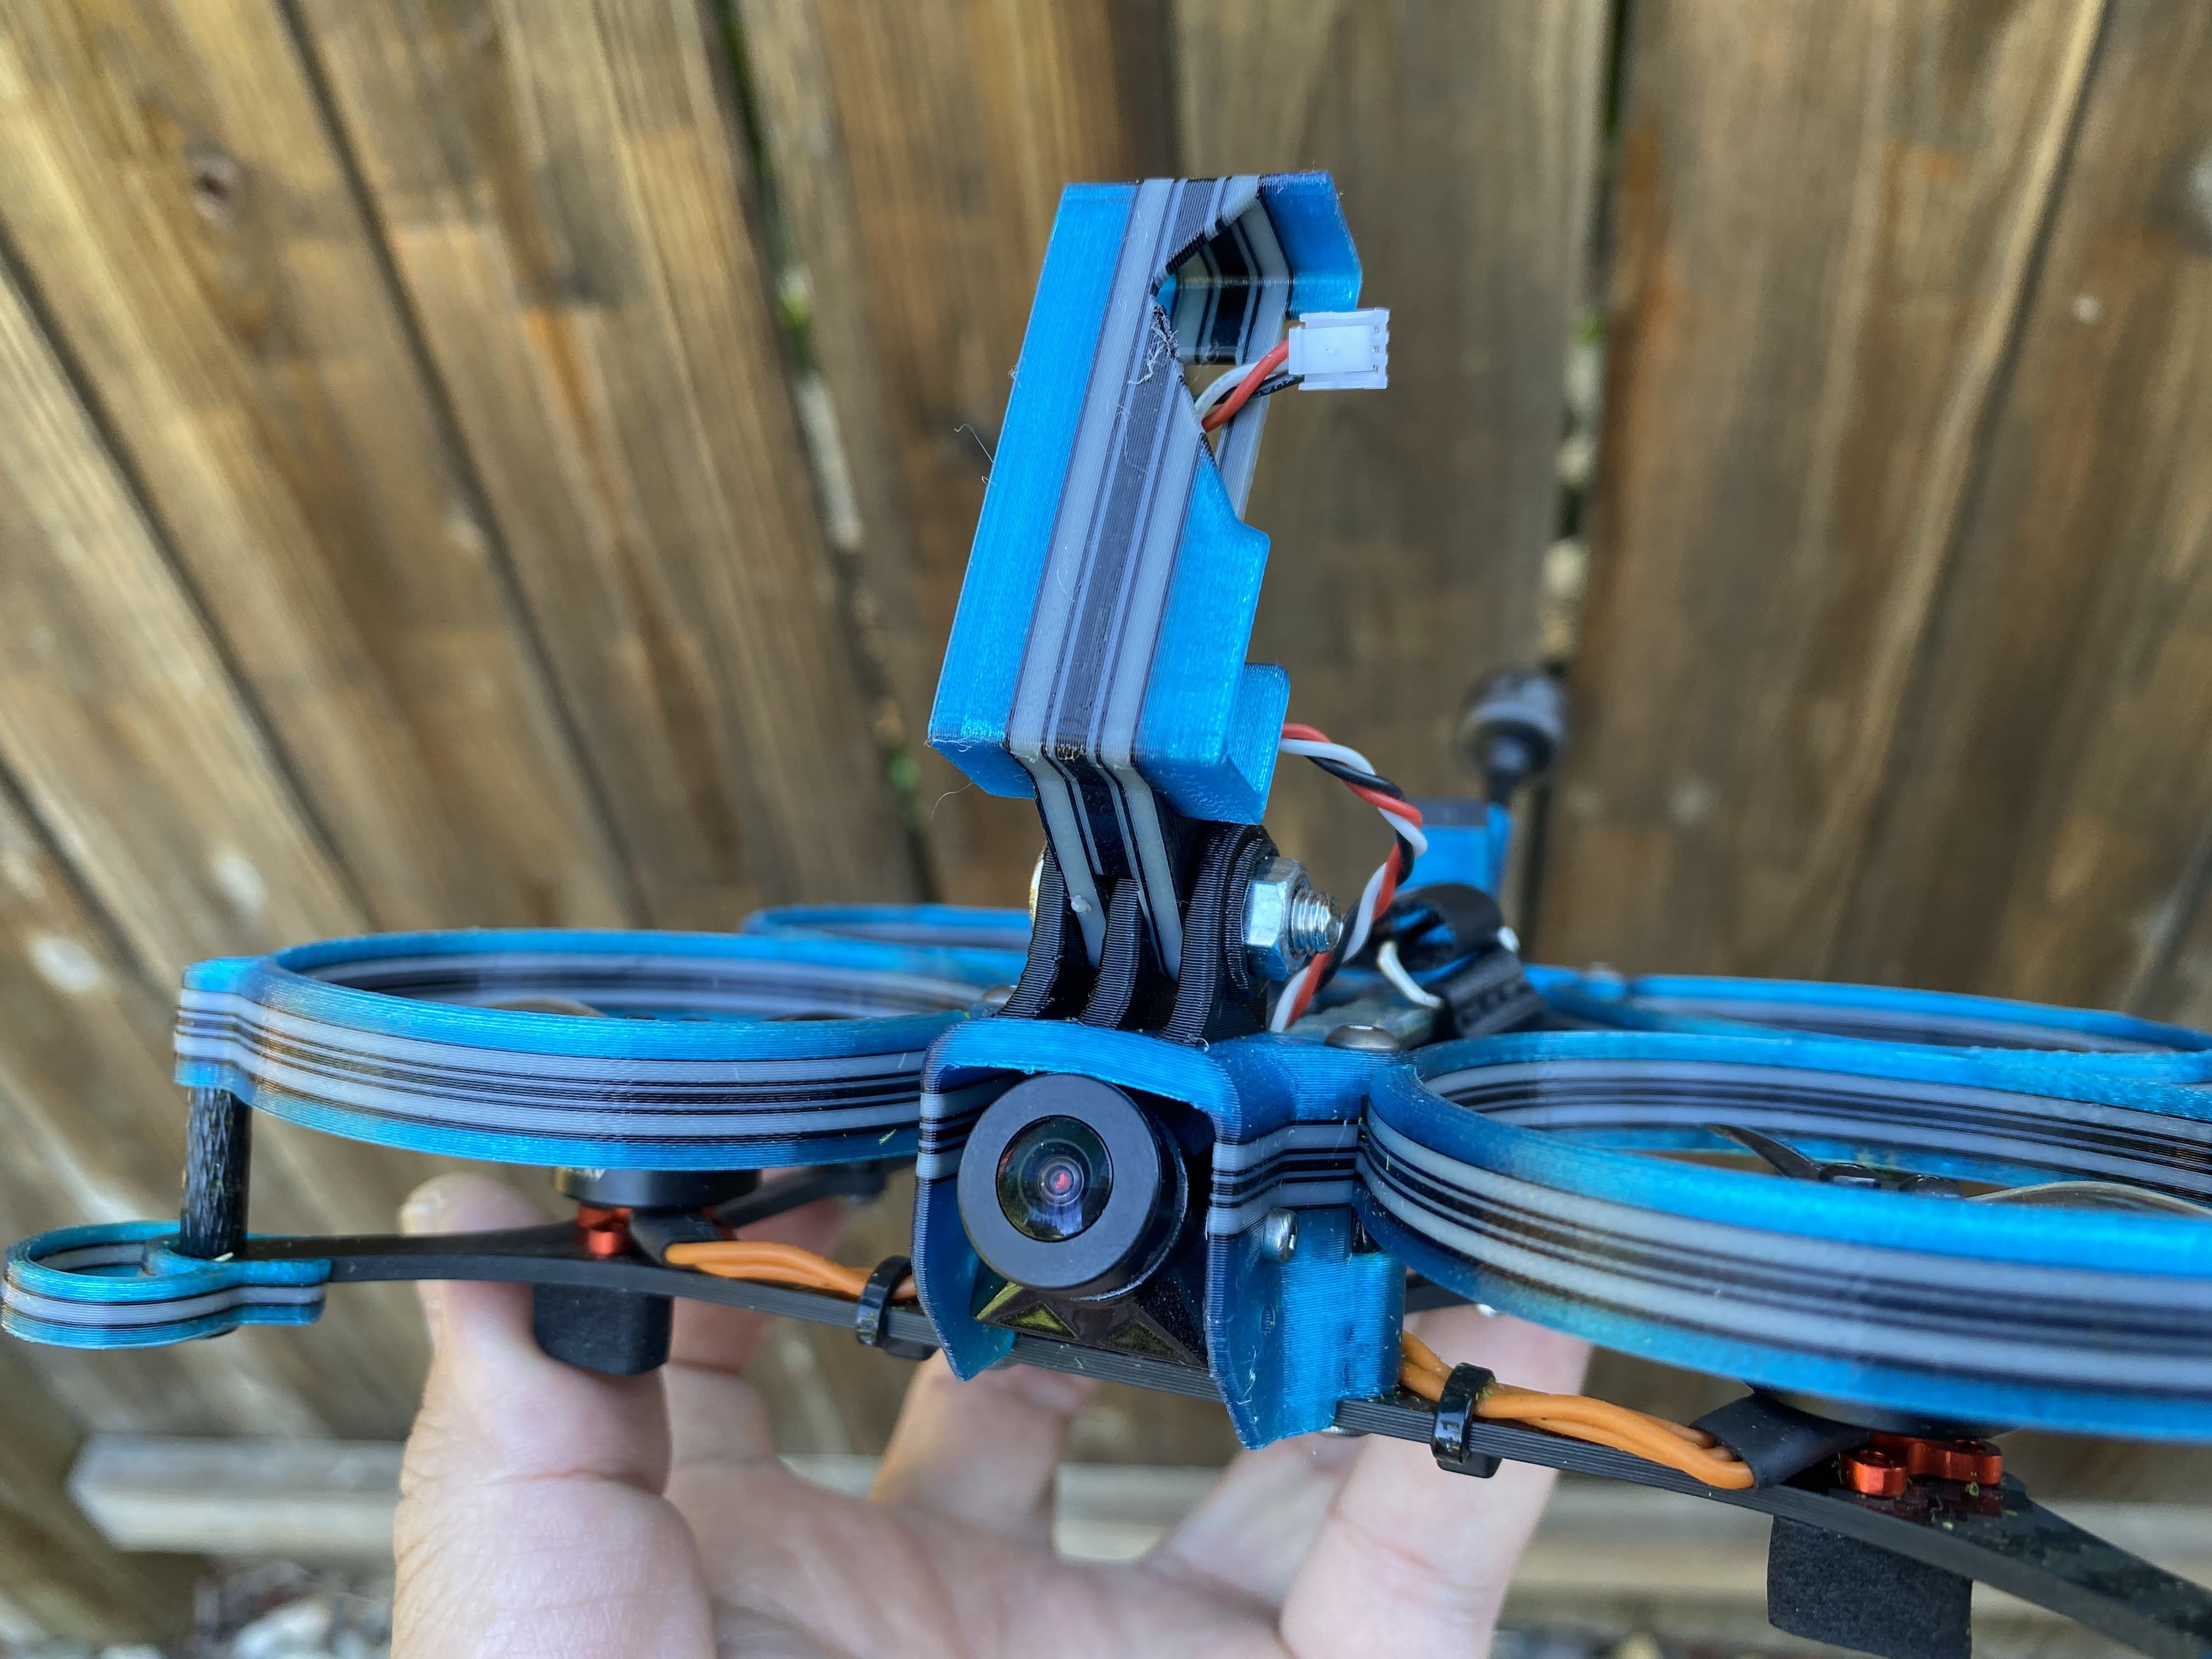
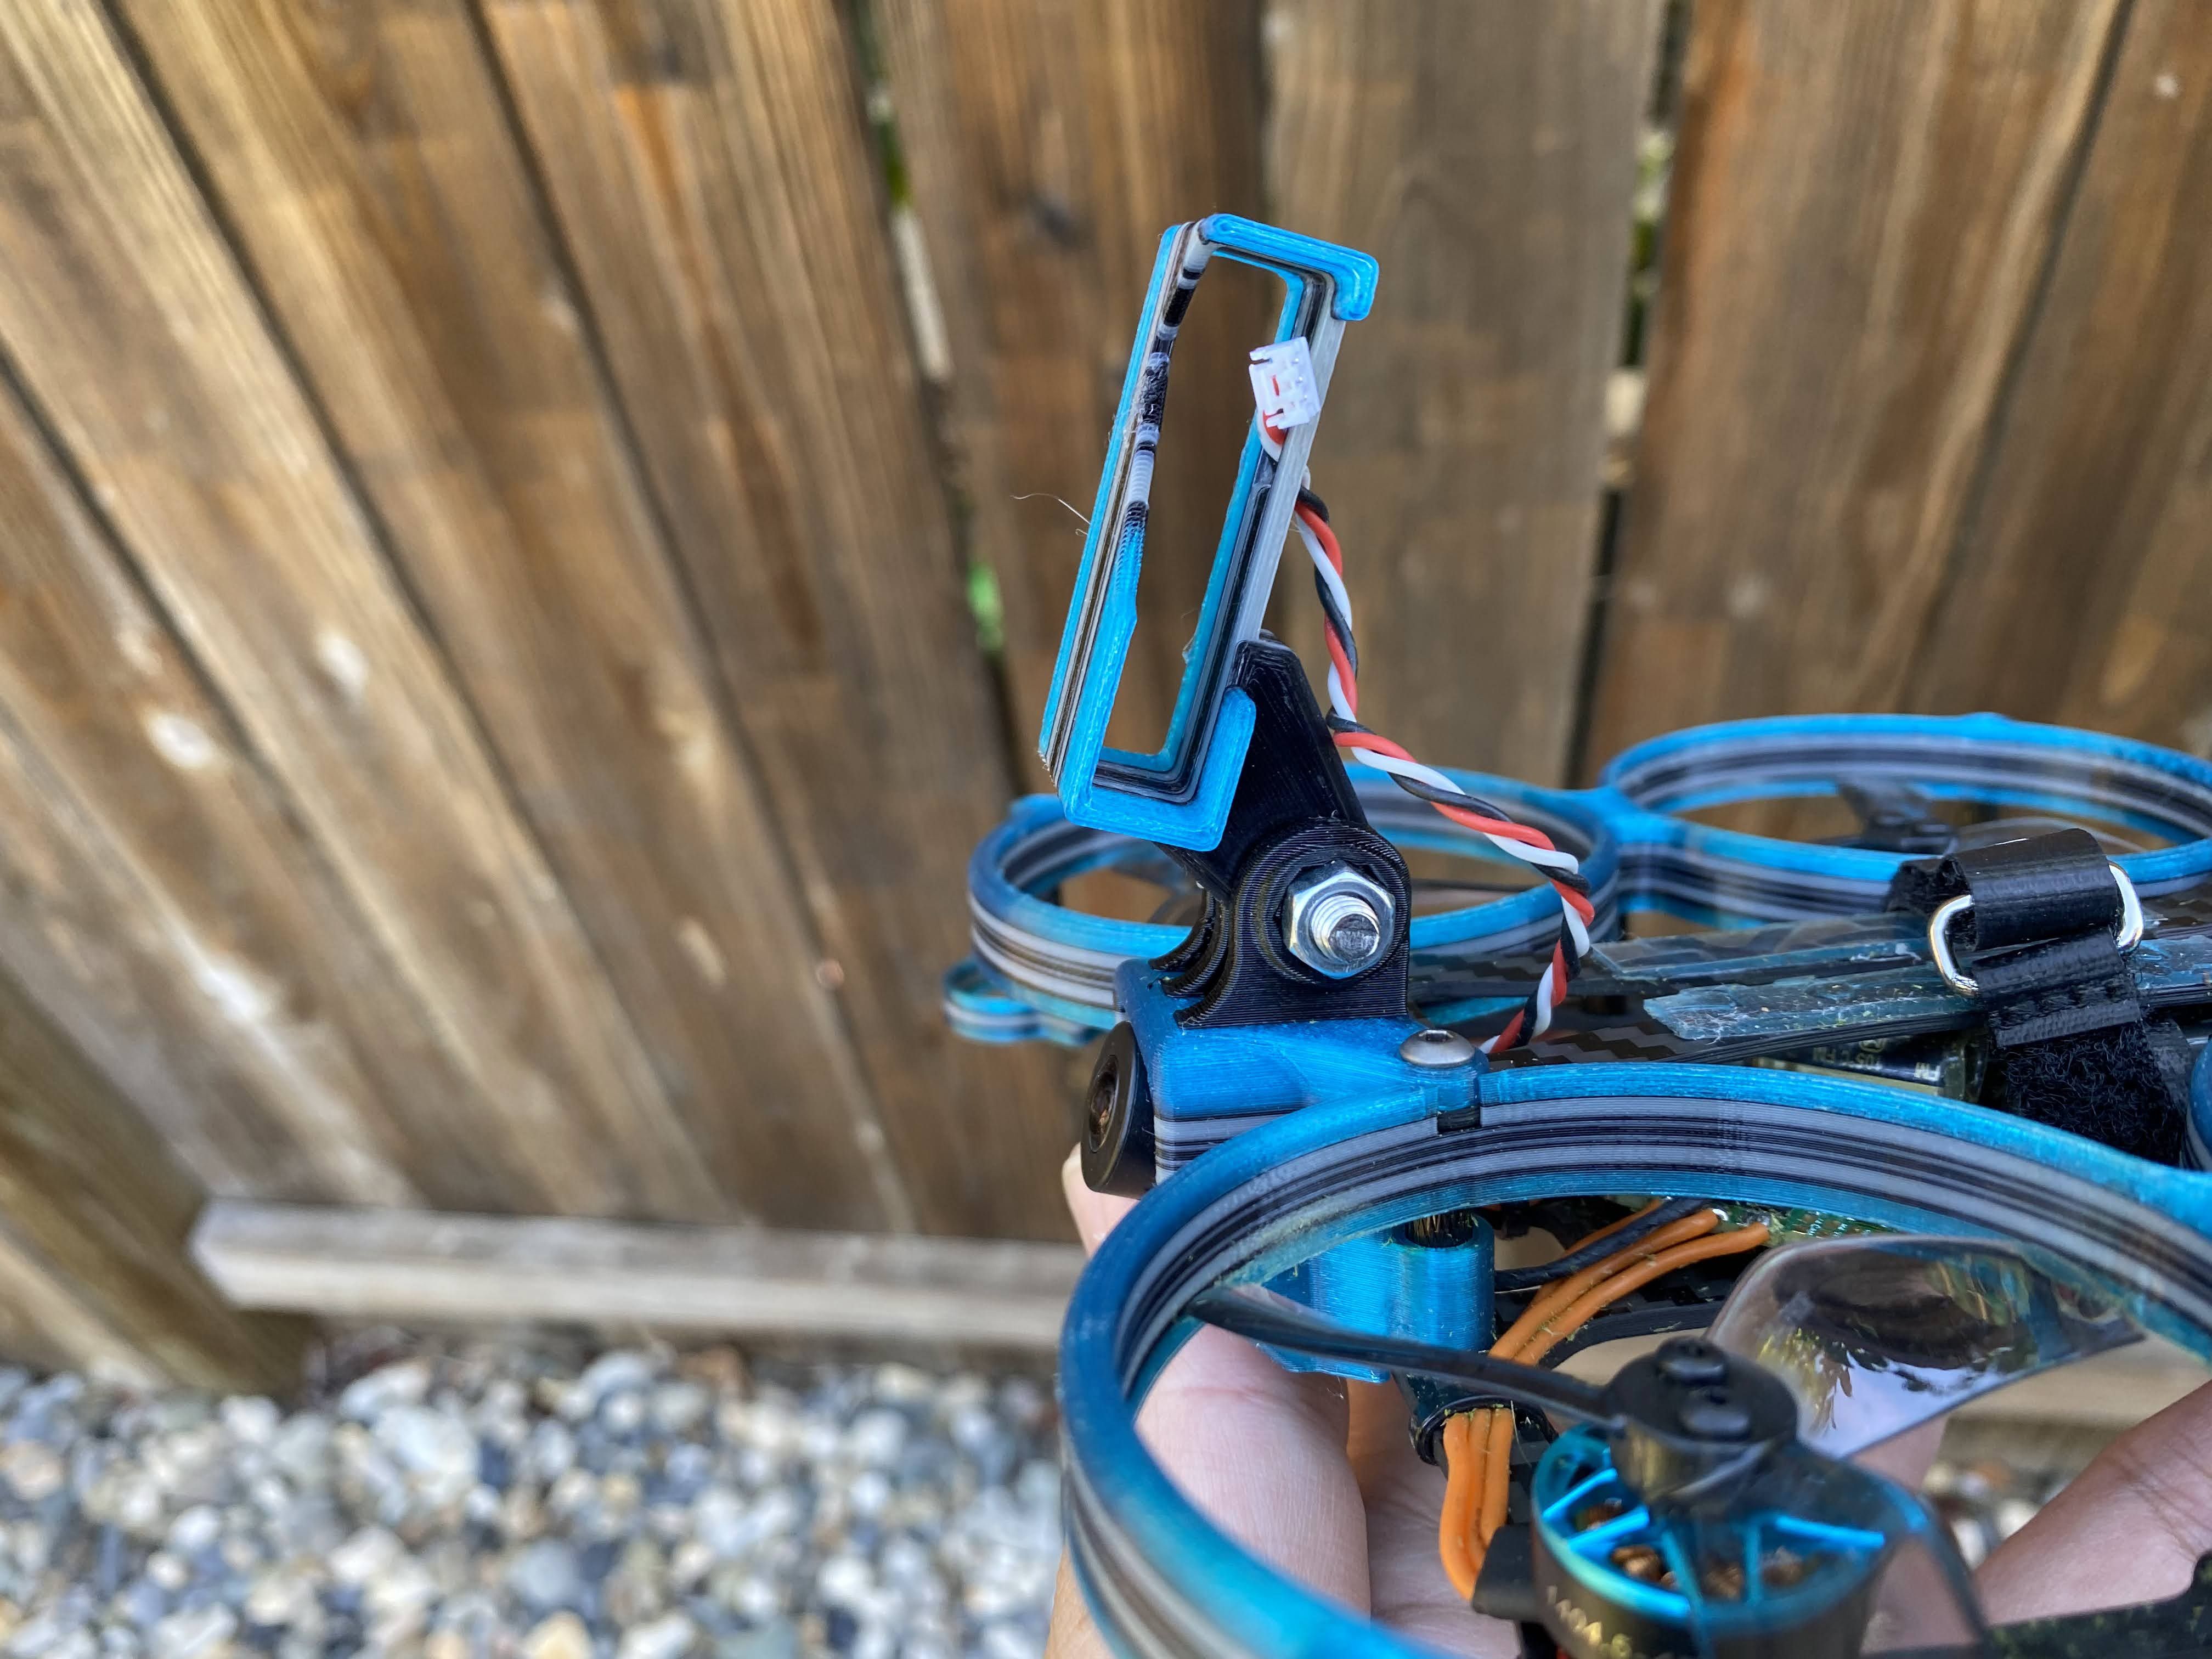
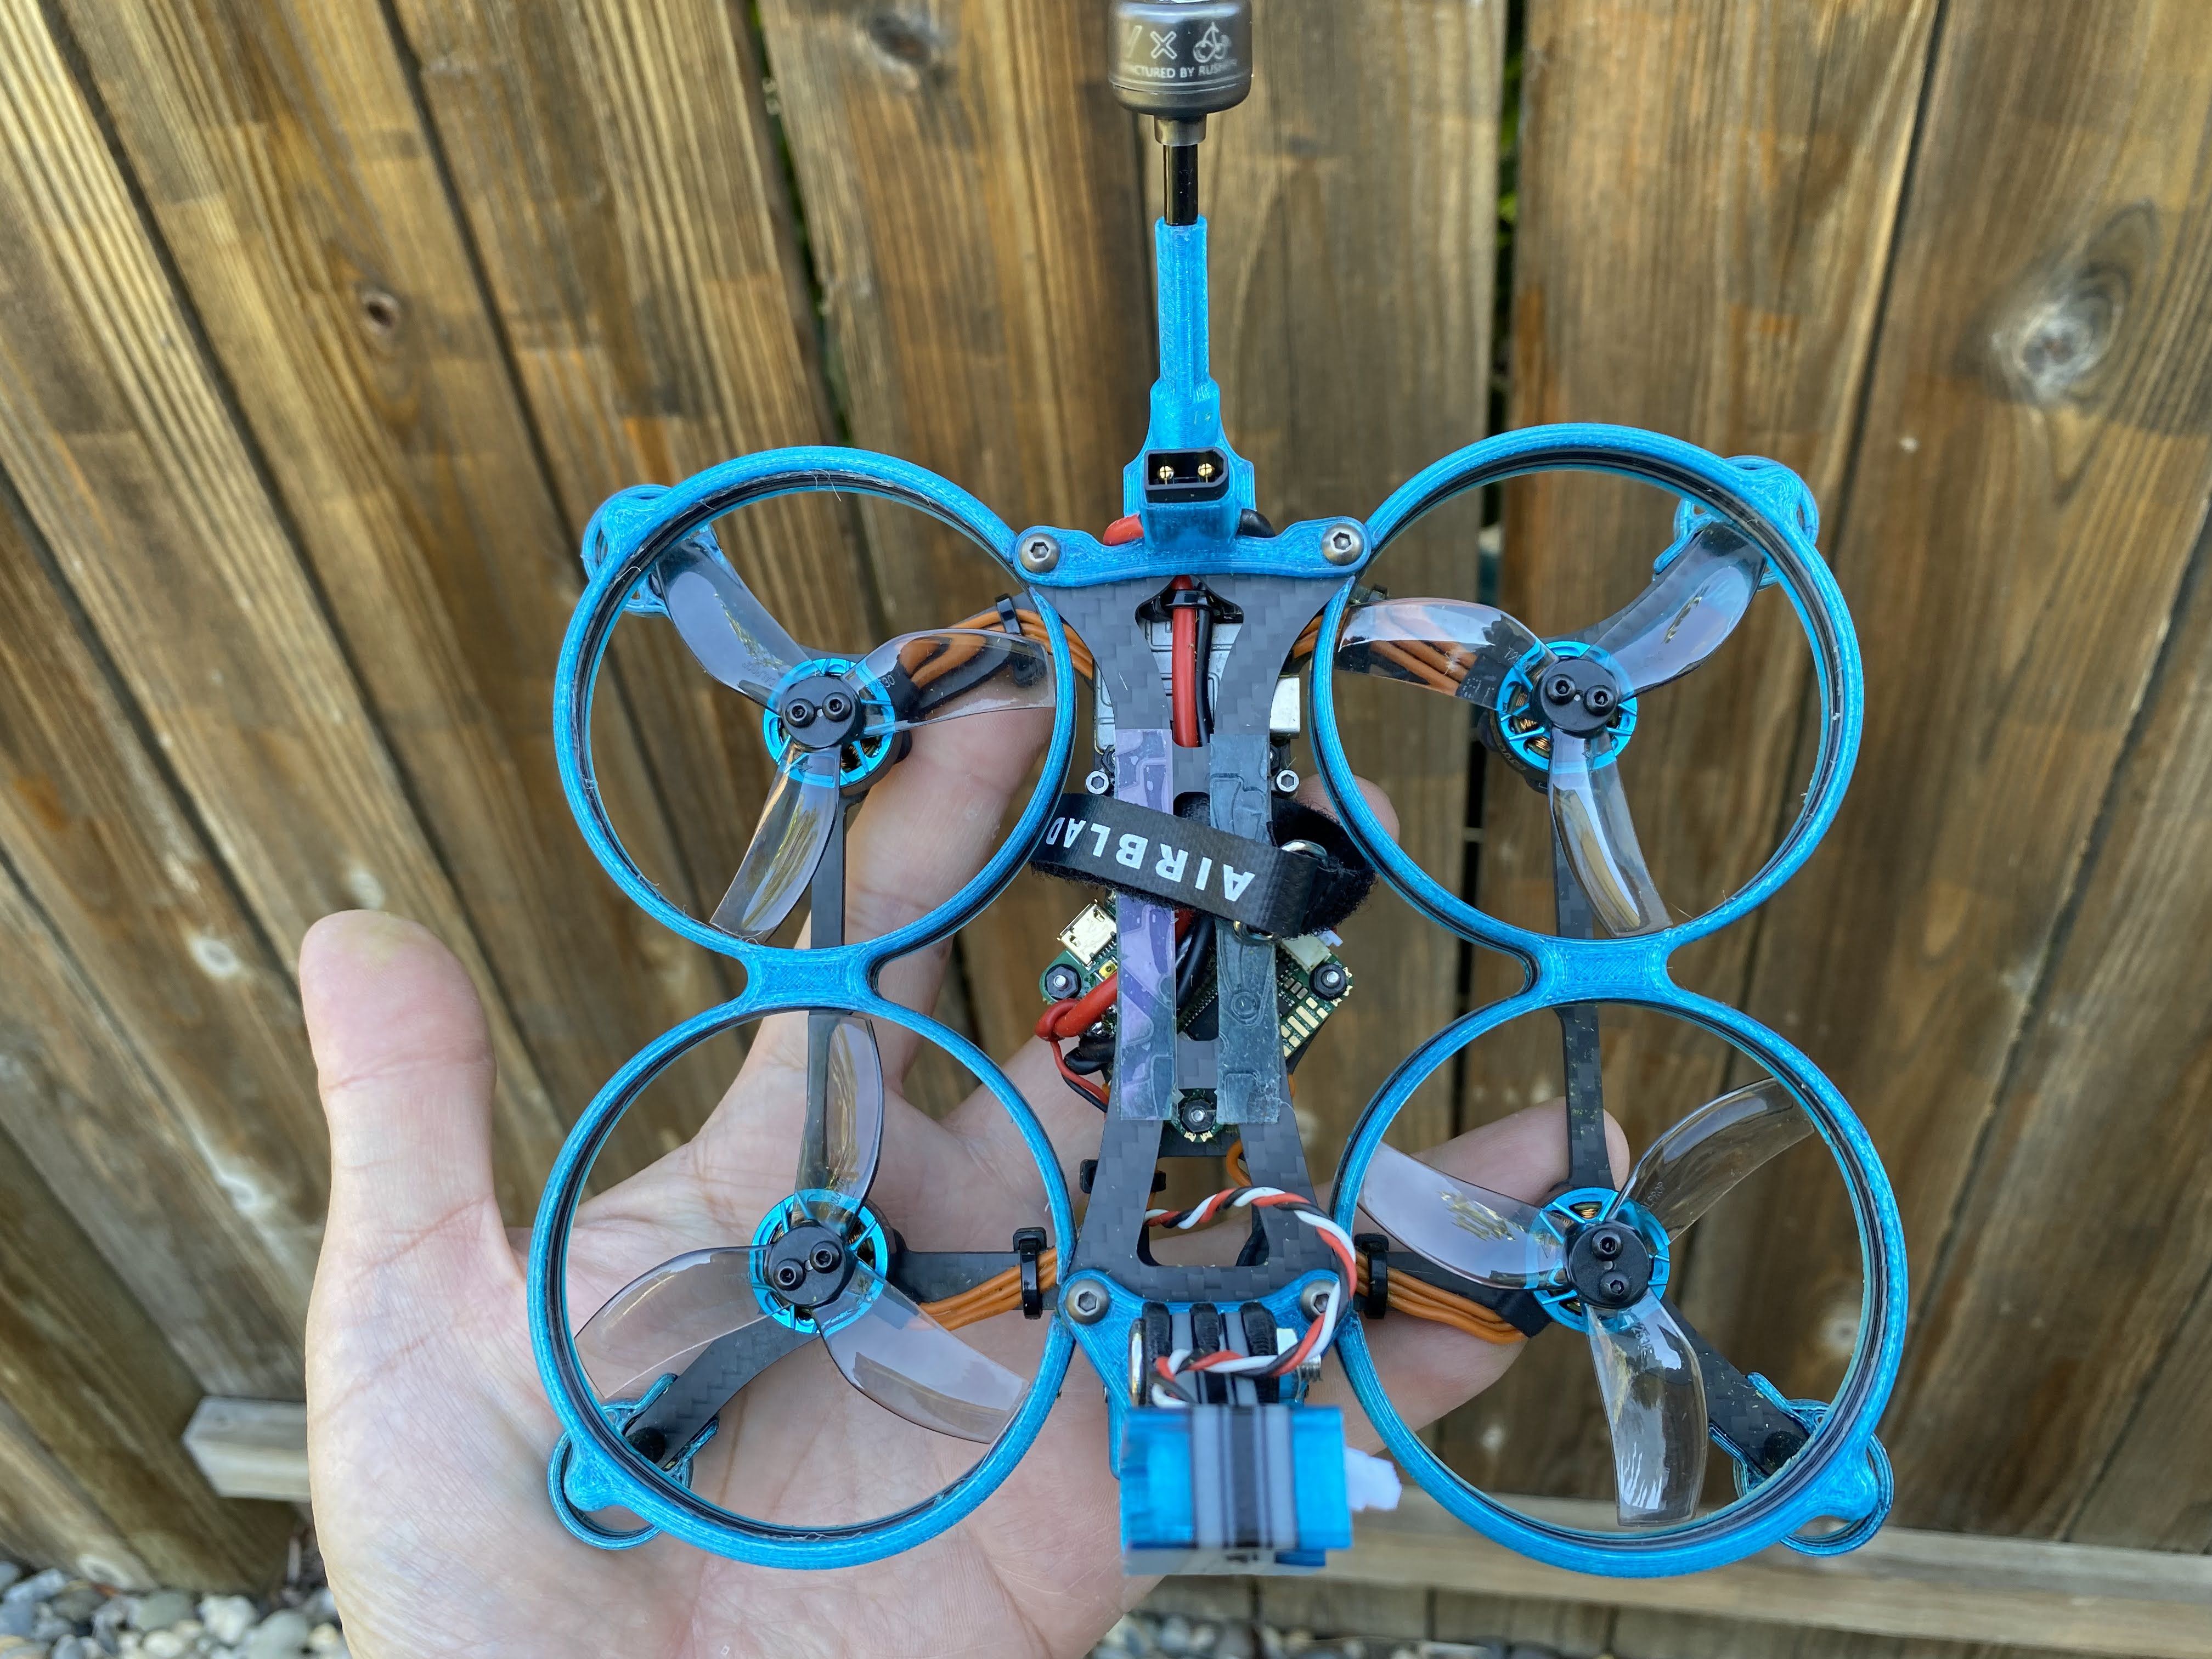
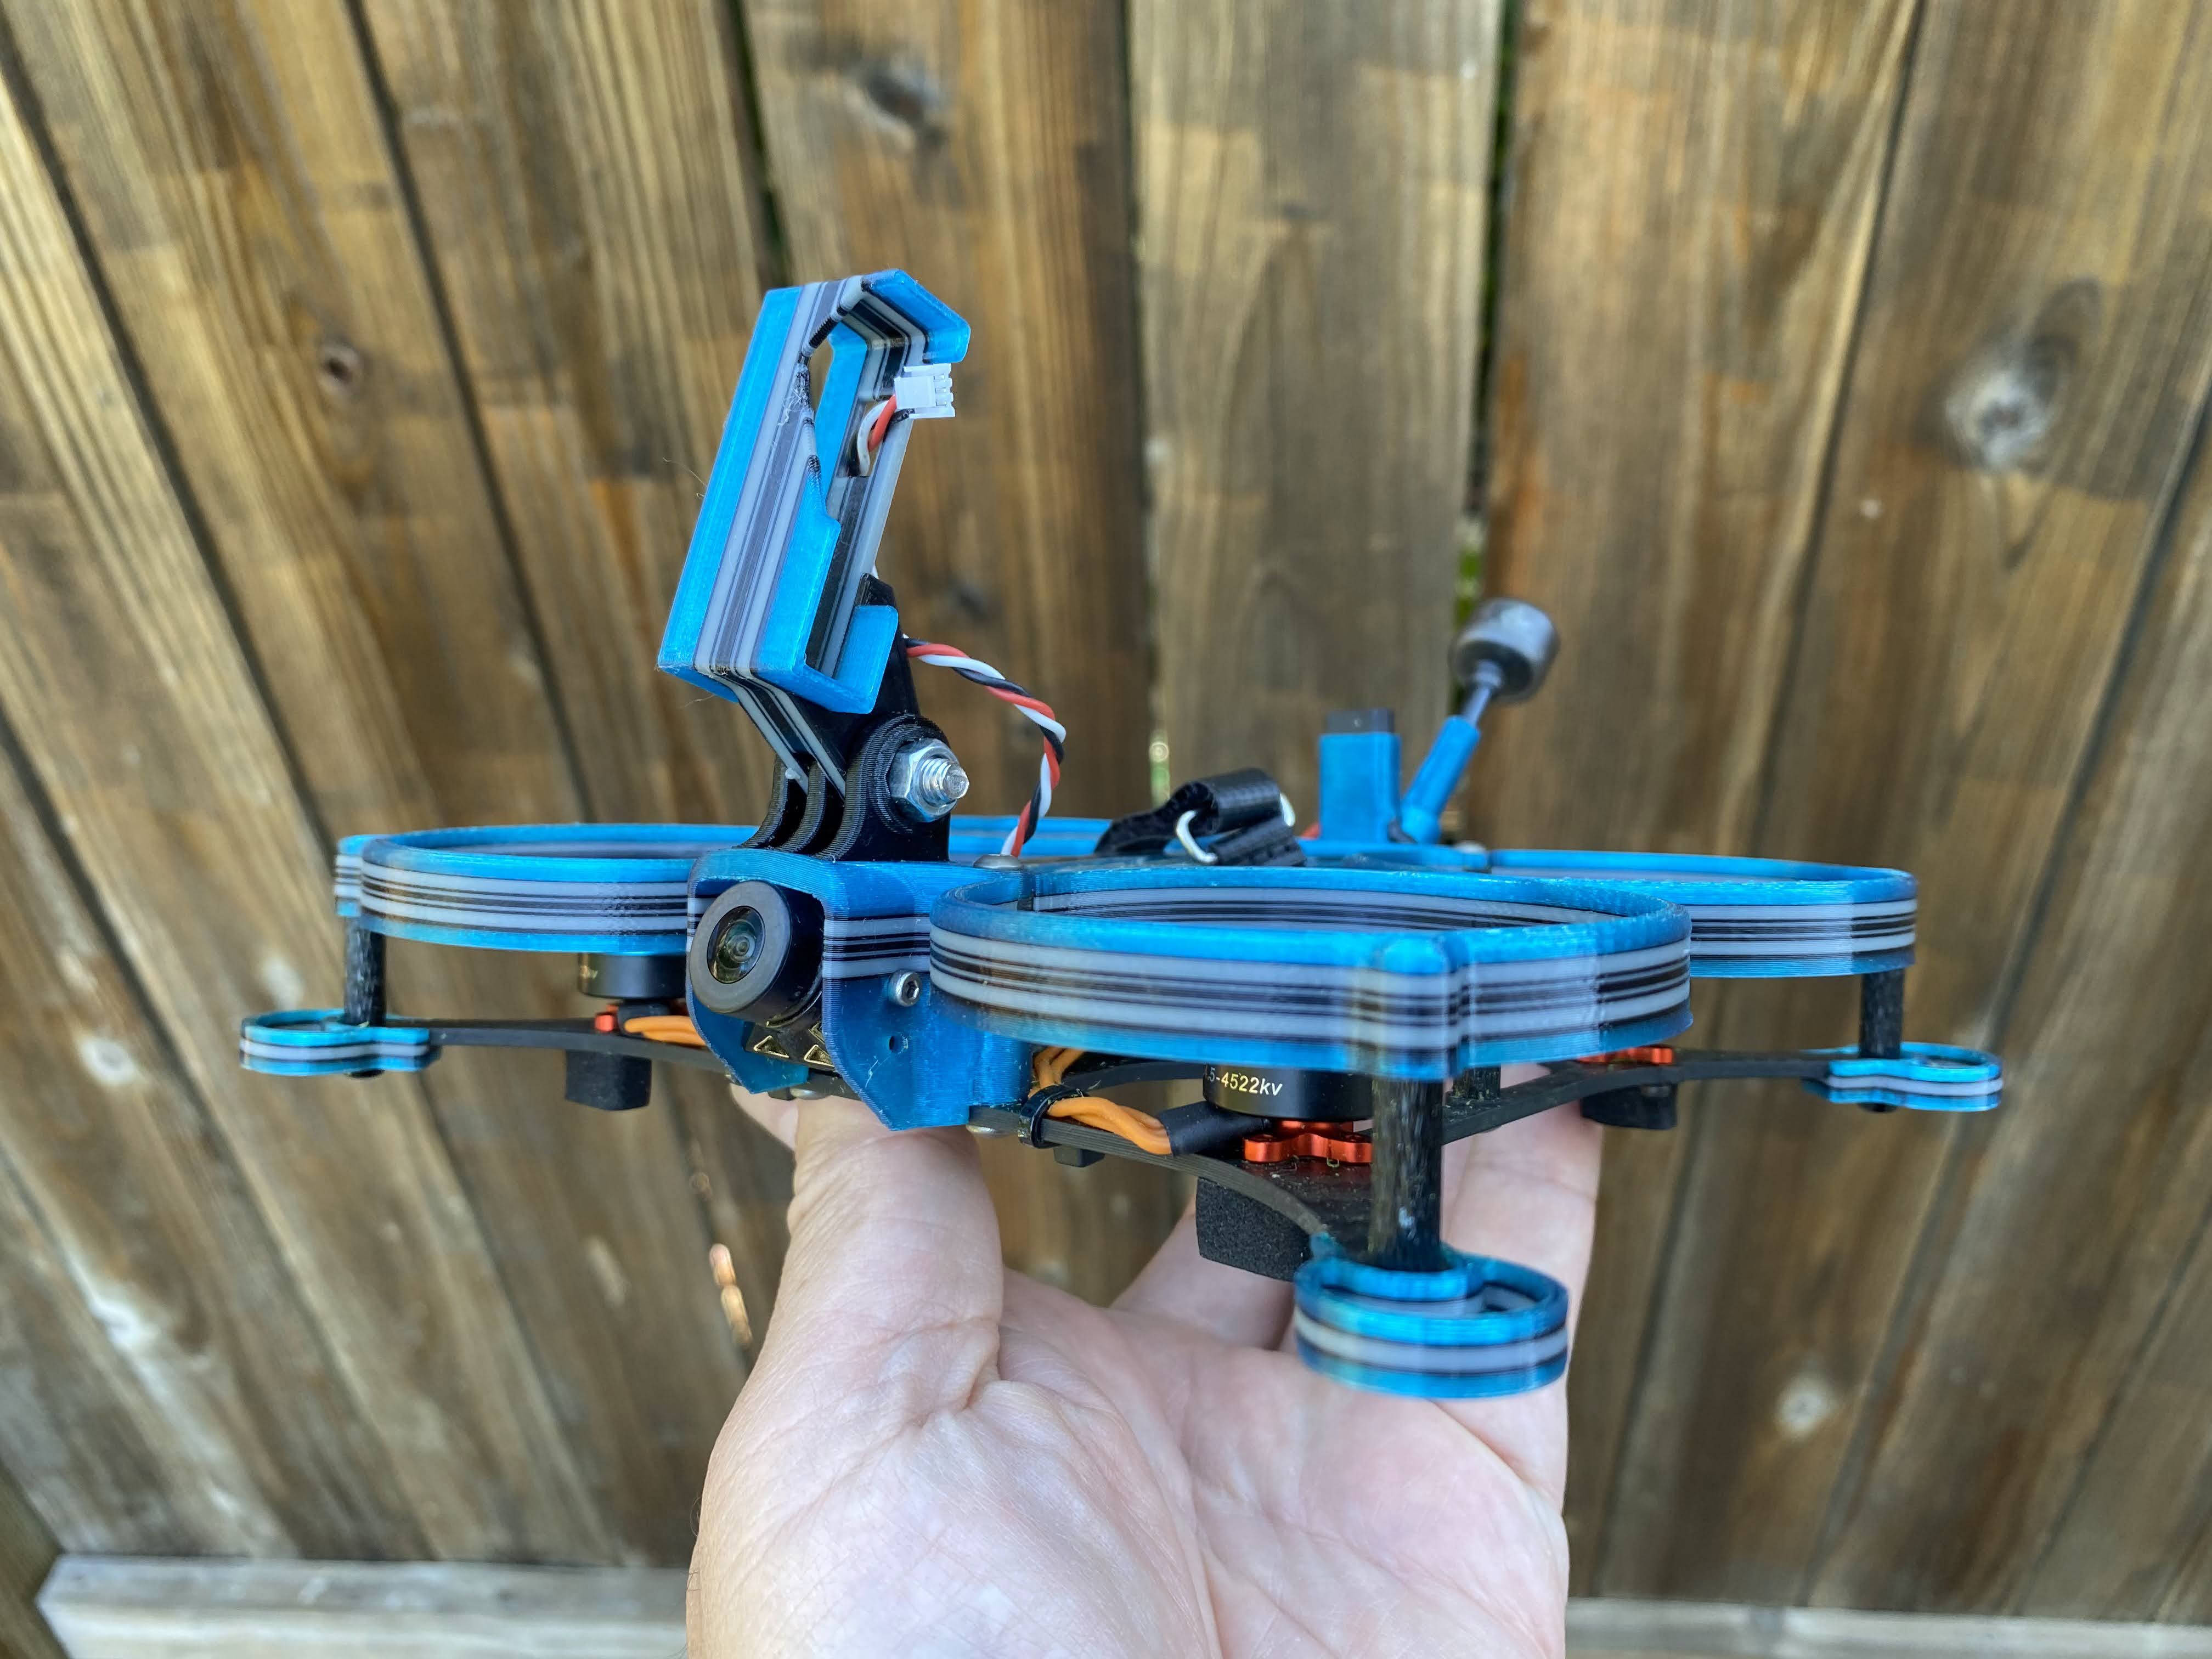
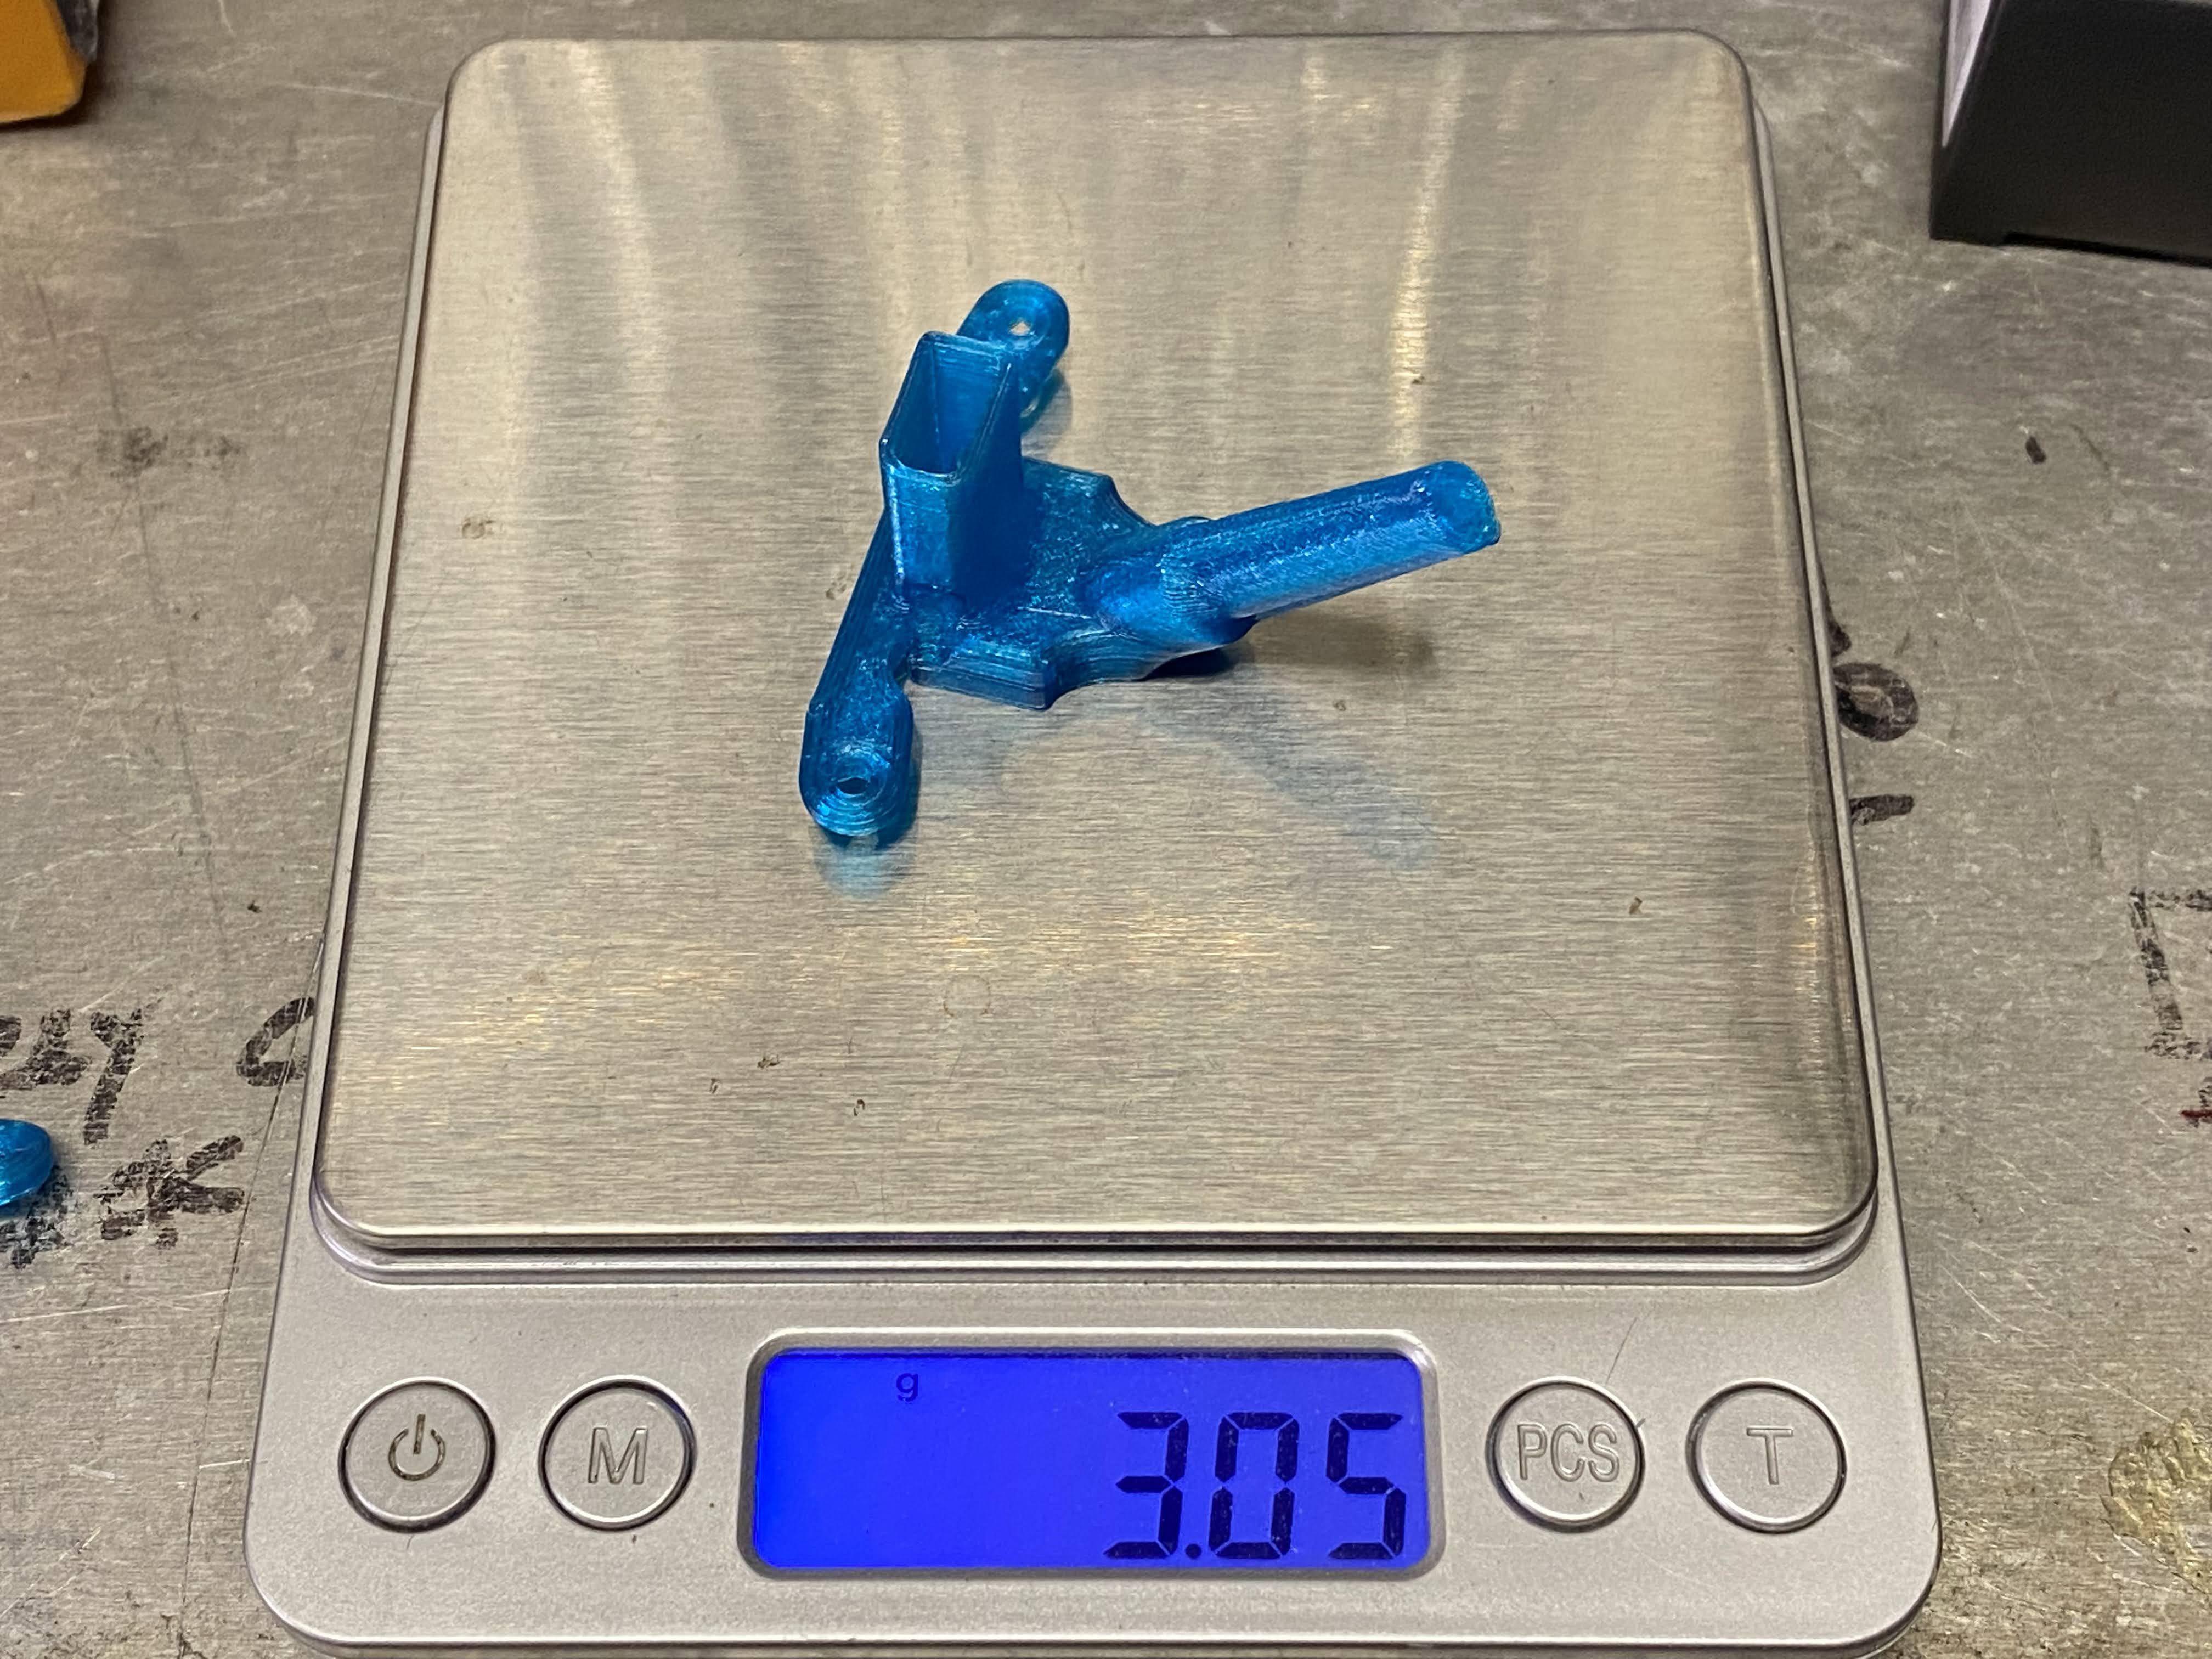
This is the original FPV and Naked GoPro mount and is a tad heavier and taller than I like. So, I plan to remix it to make it lower profile and lighter in weight.
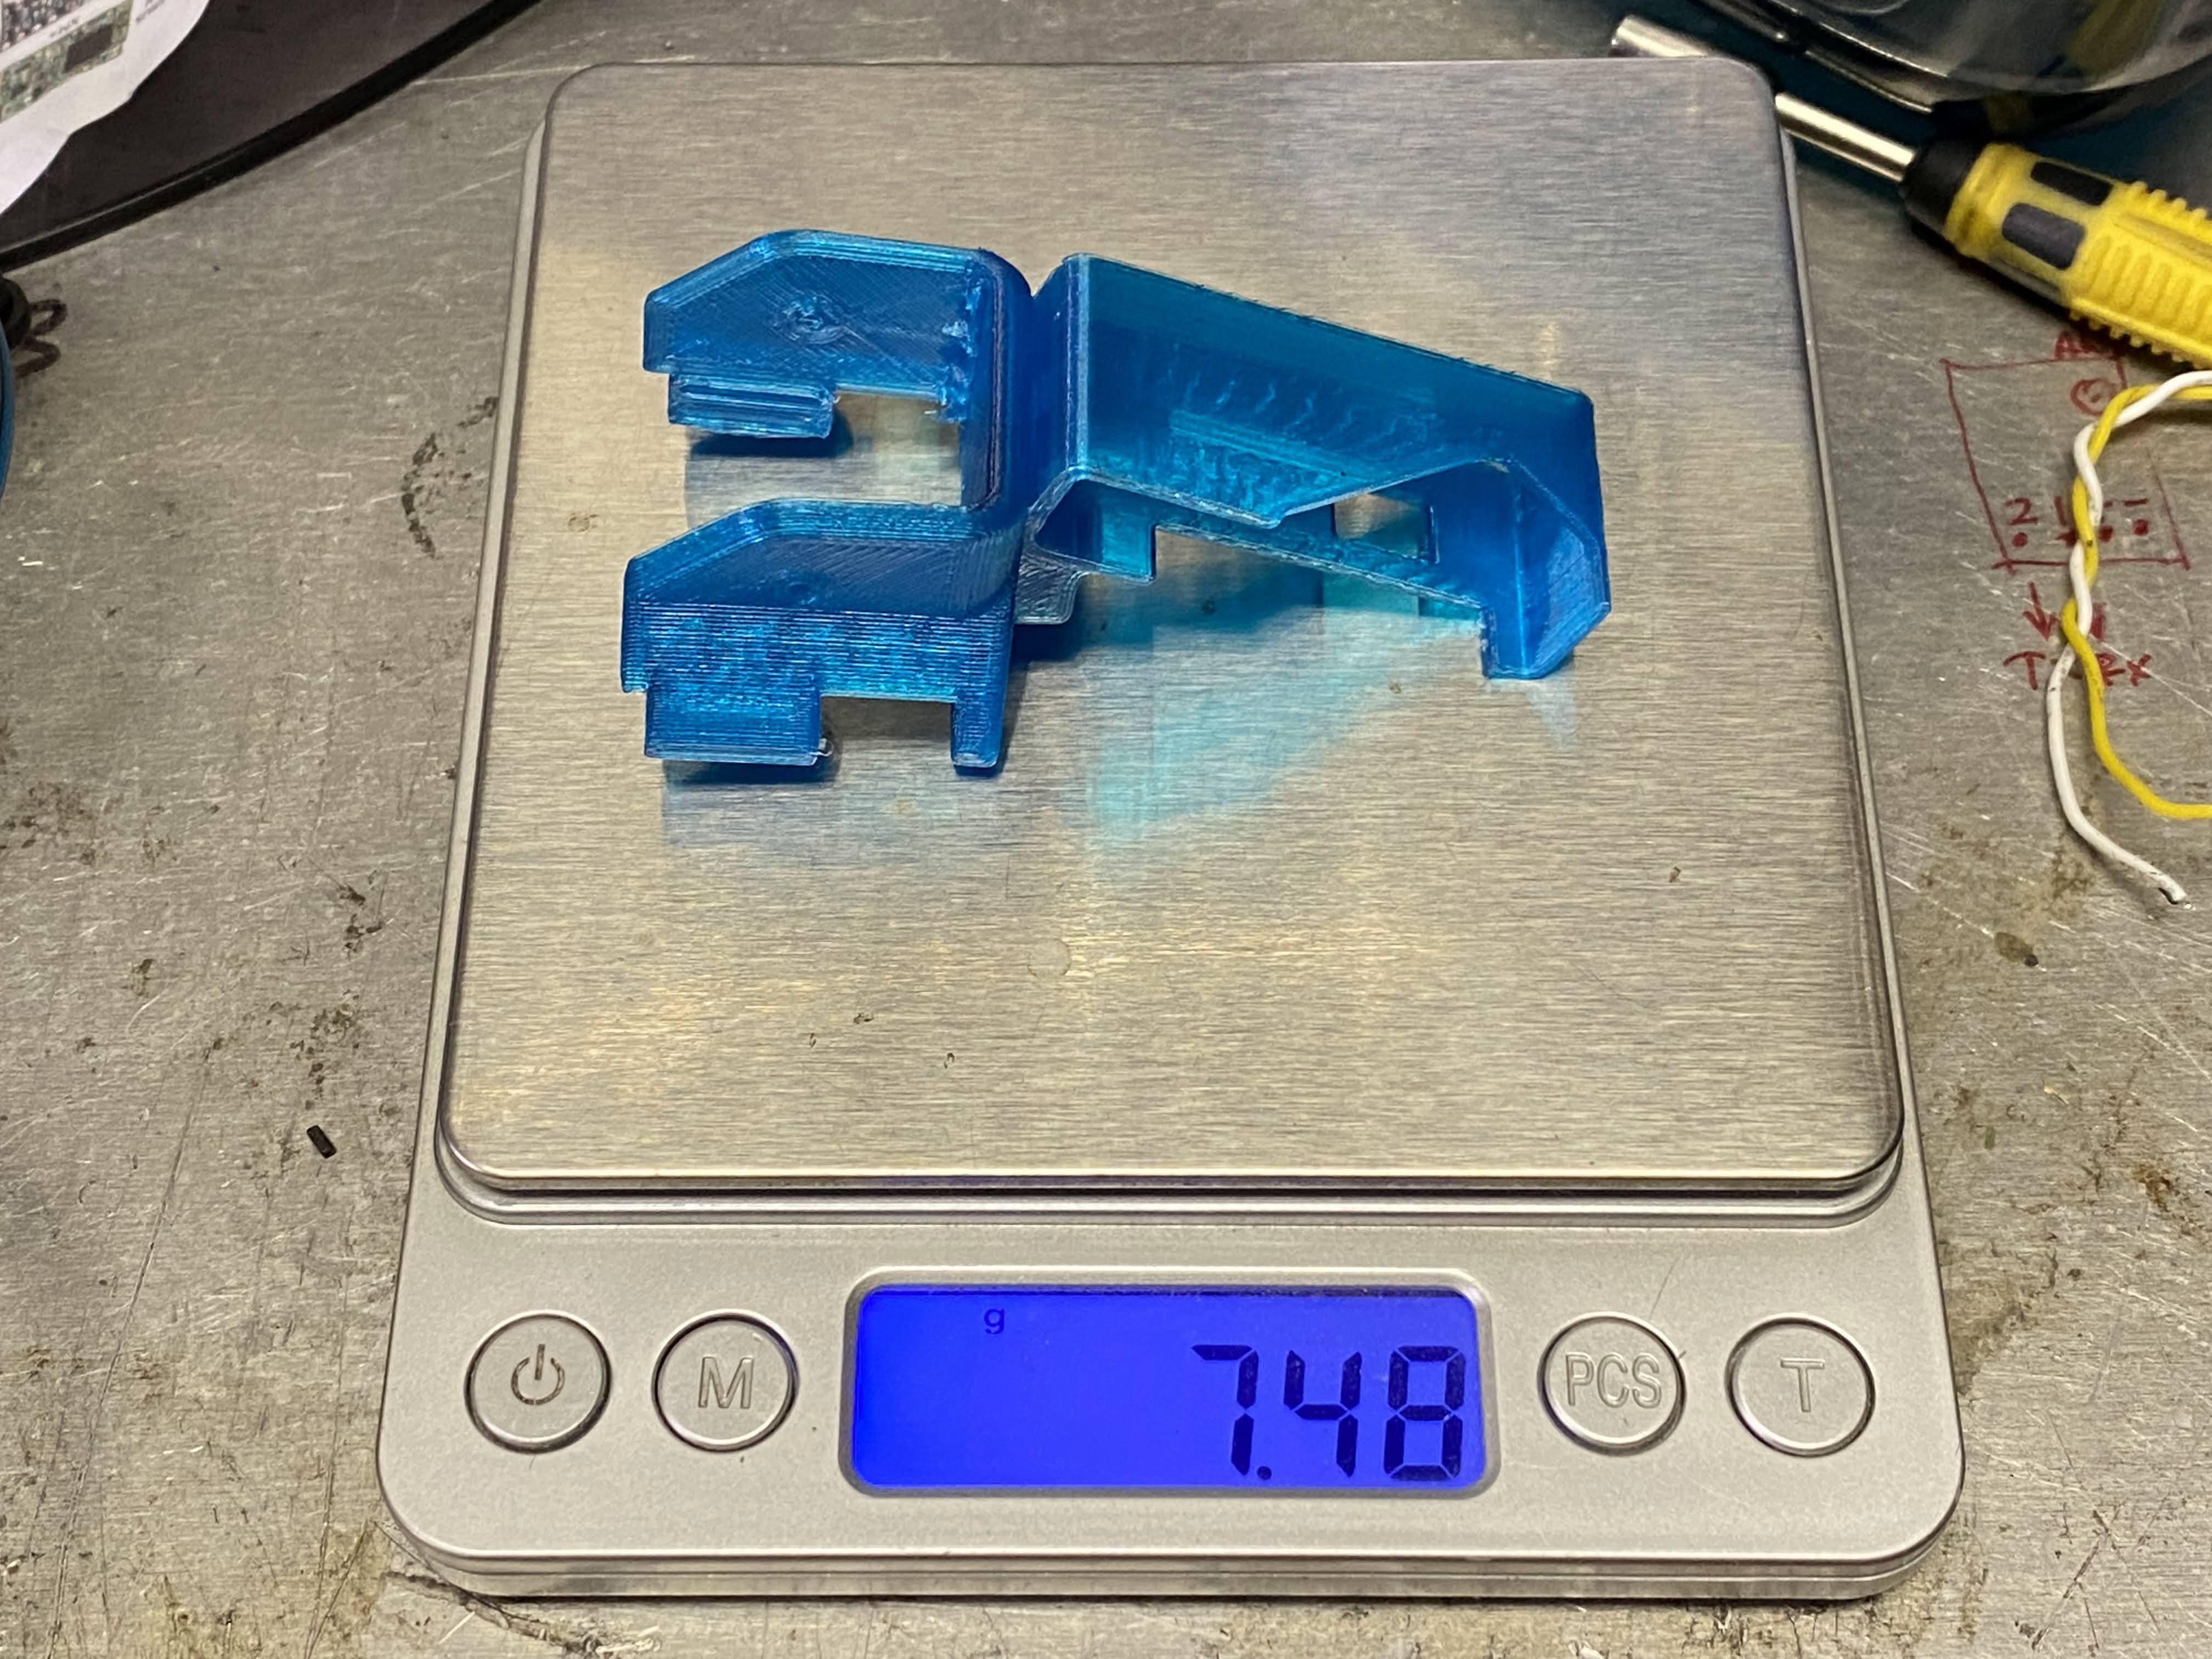
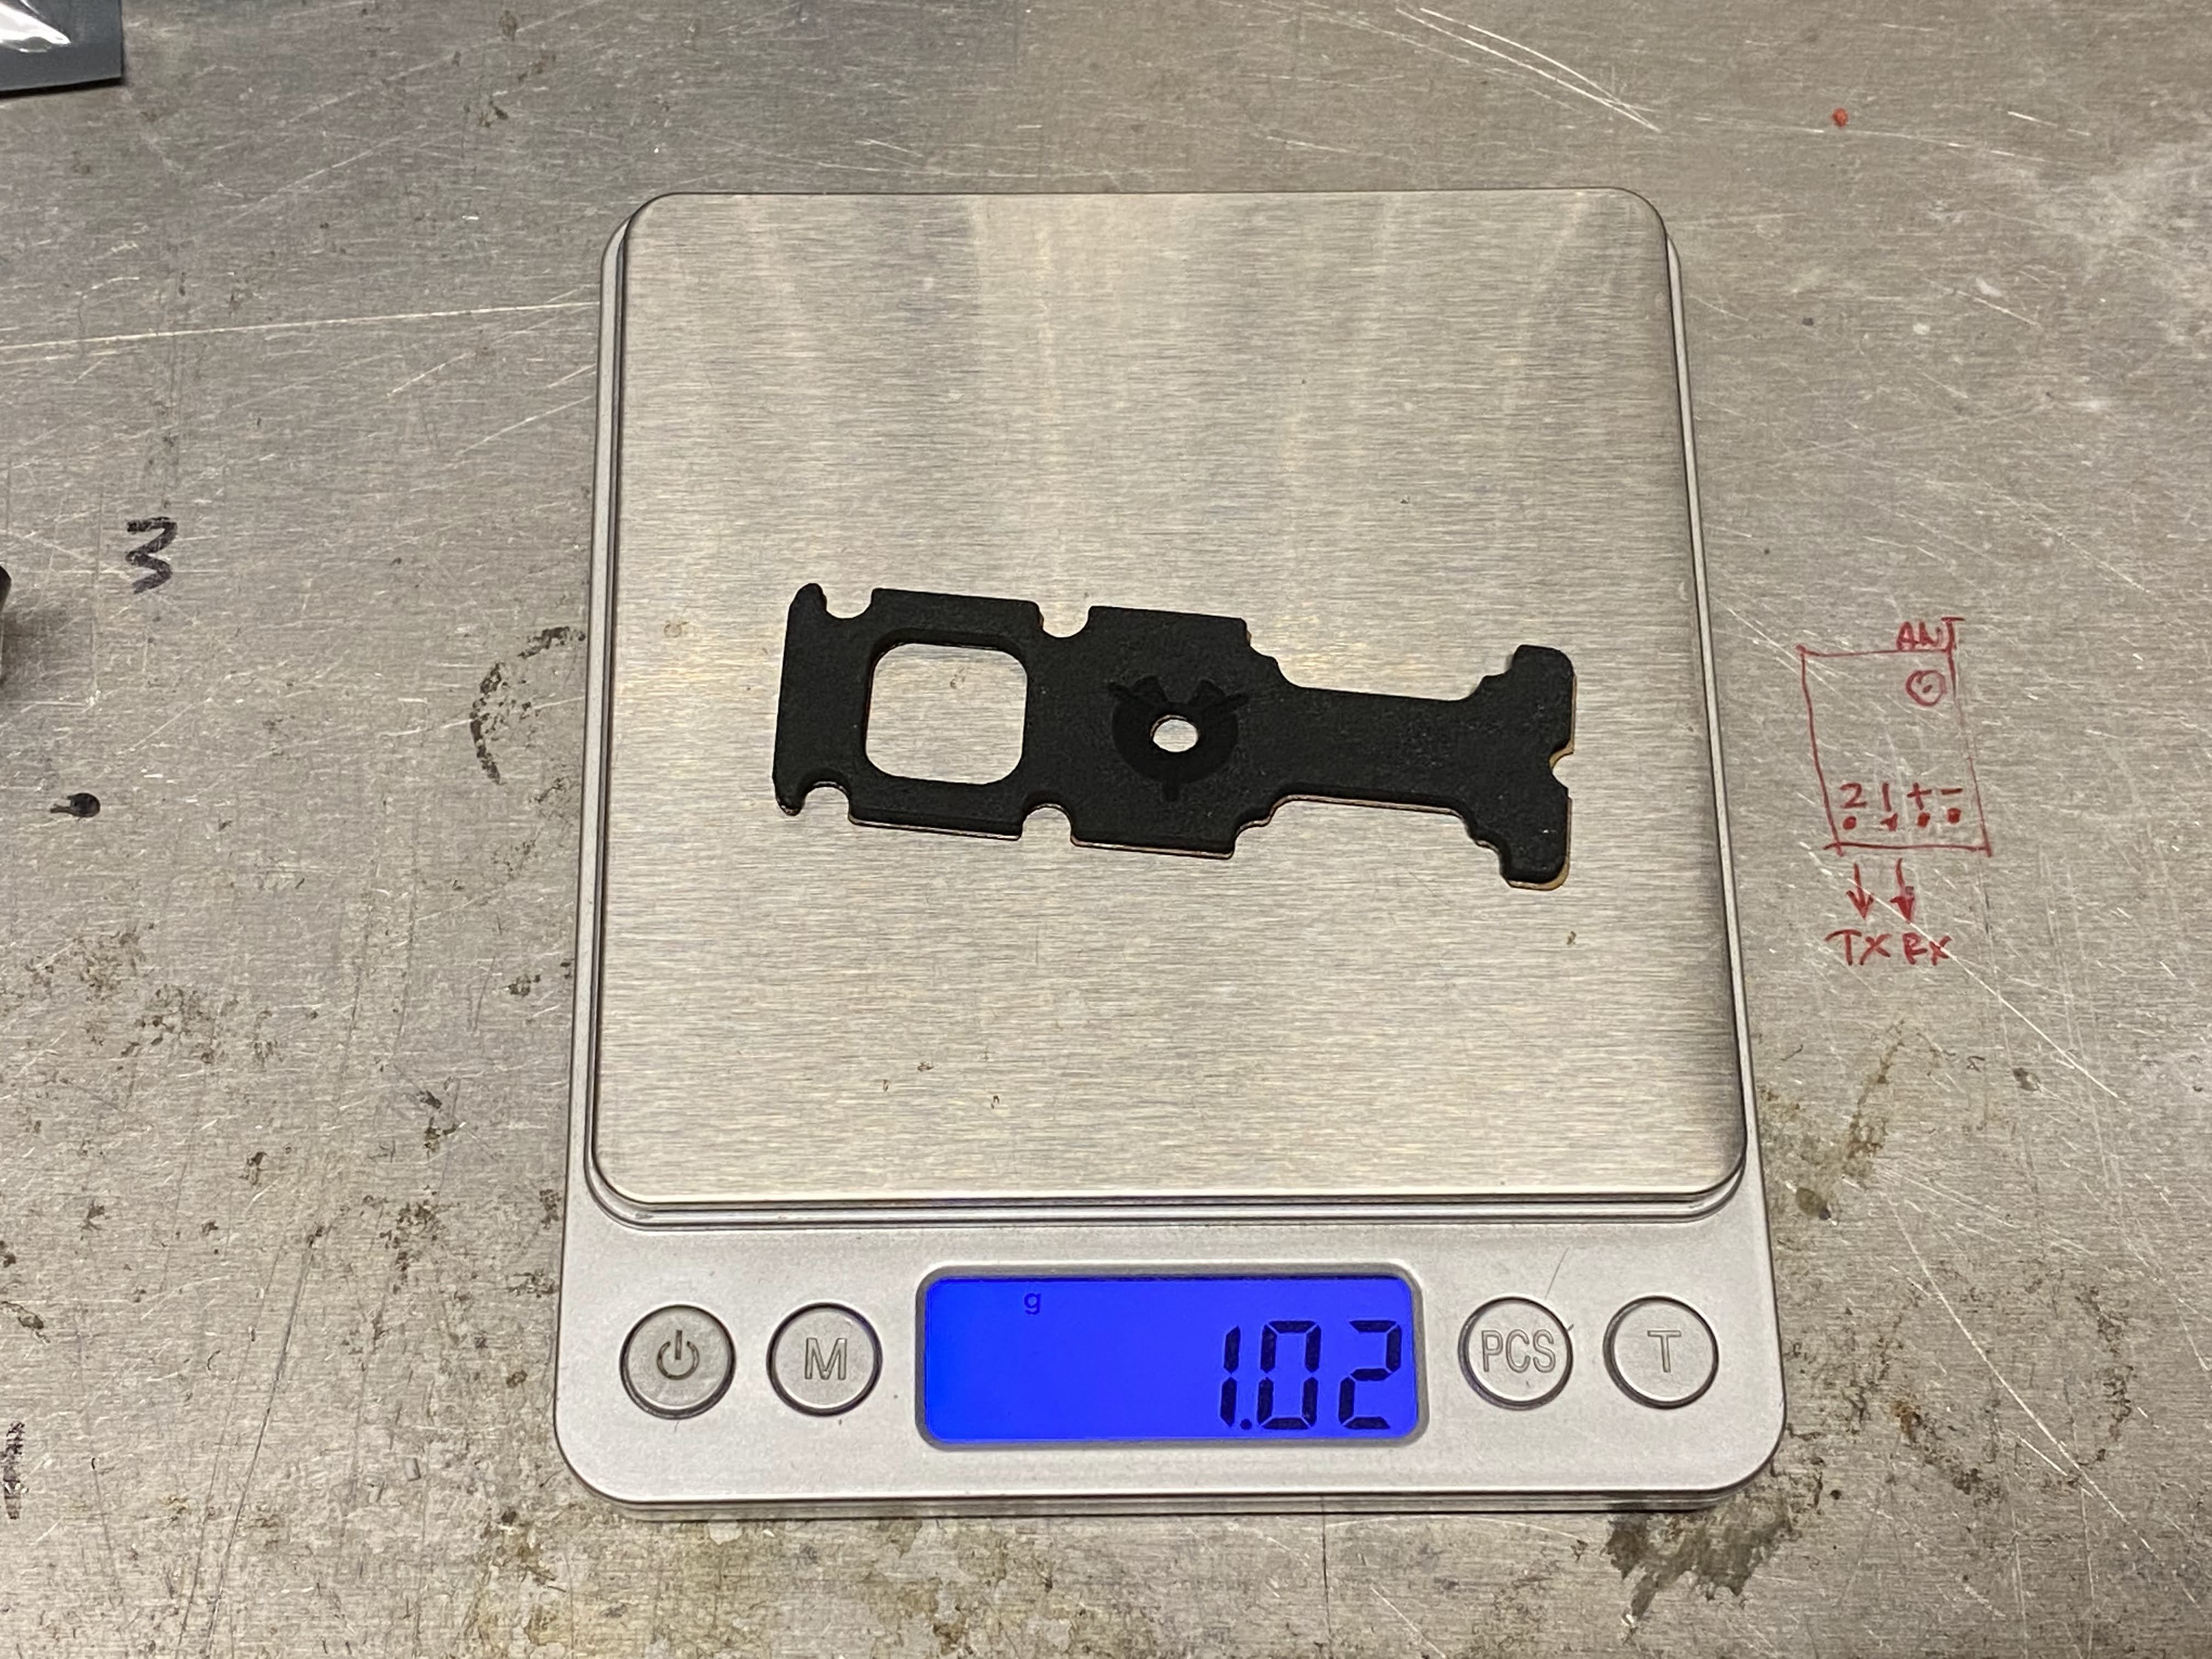
Here you can see I made a 1-piece fixed angle naked GoPro mount. I also relocated the FPV camera mounting hole because the original hole is designed for the OG DJI cameras with the 4 (2 on each side) screws. I was able to save about 7g with this modified camera mount.
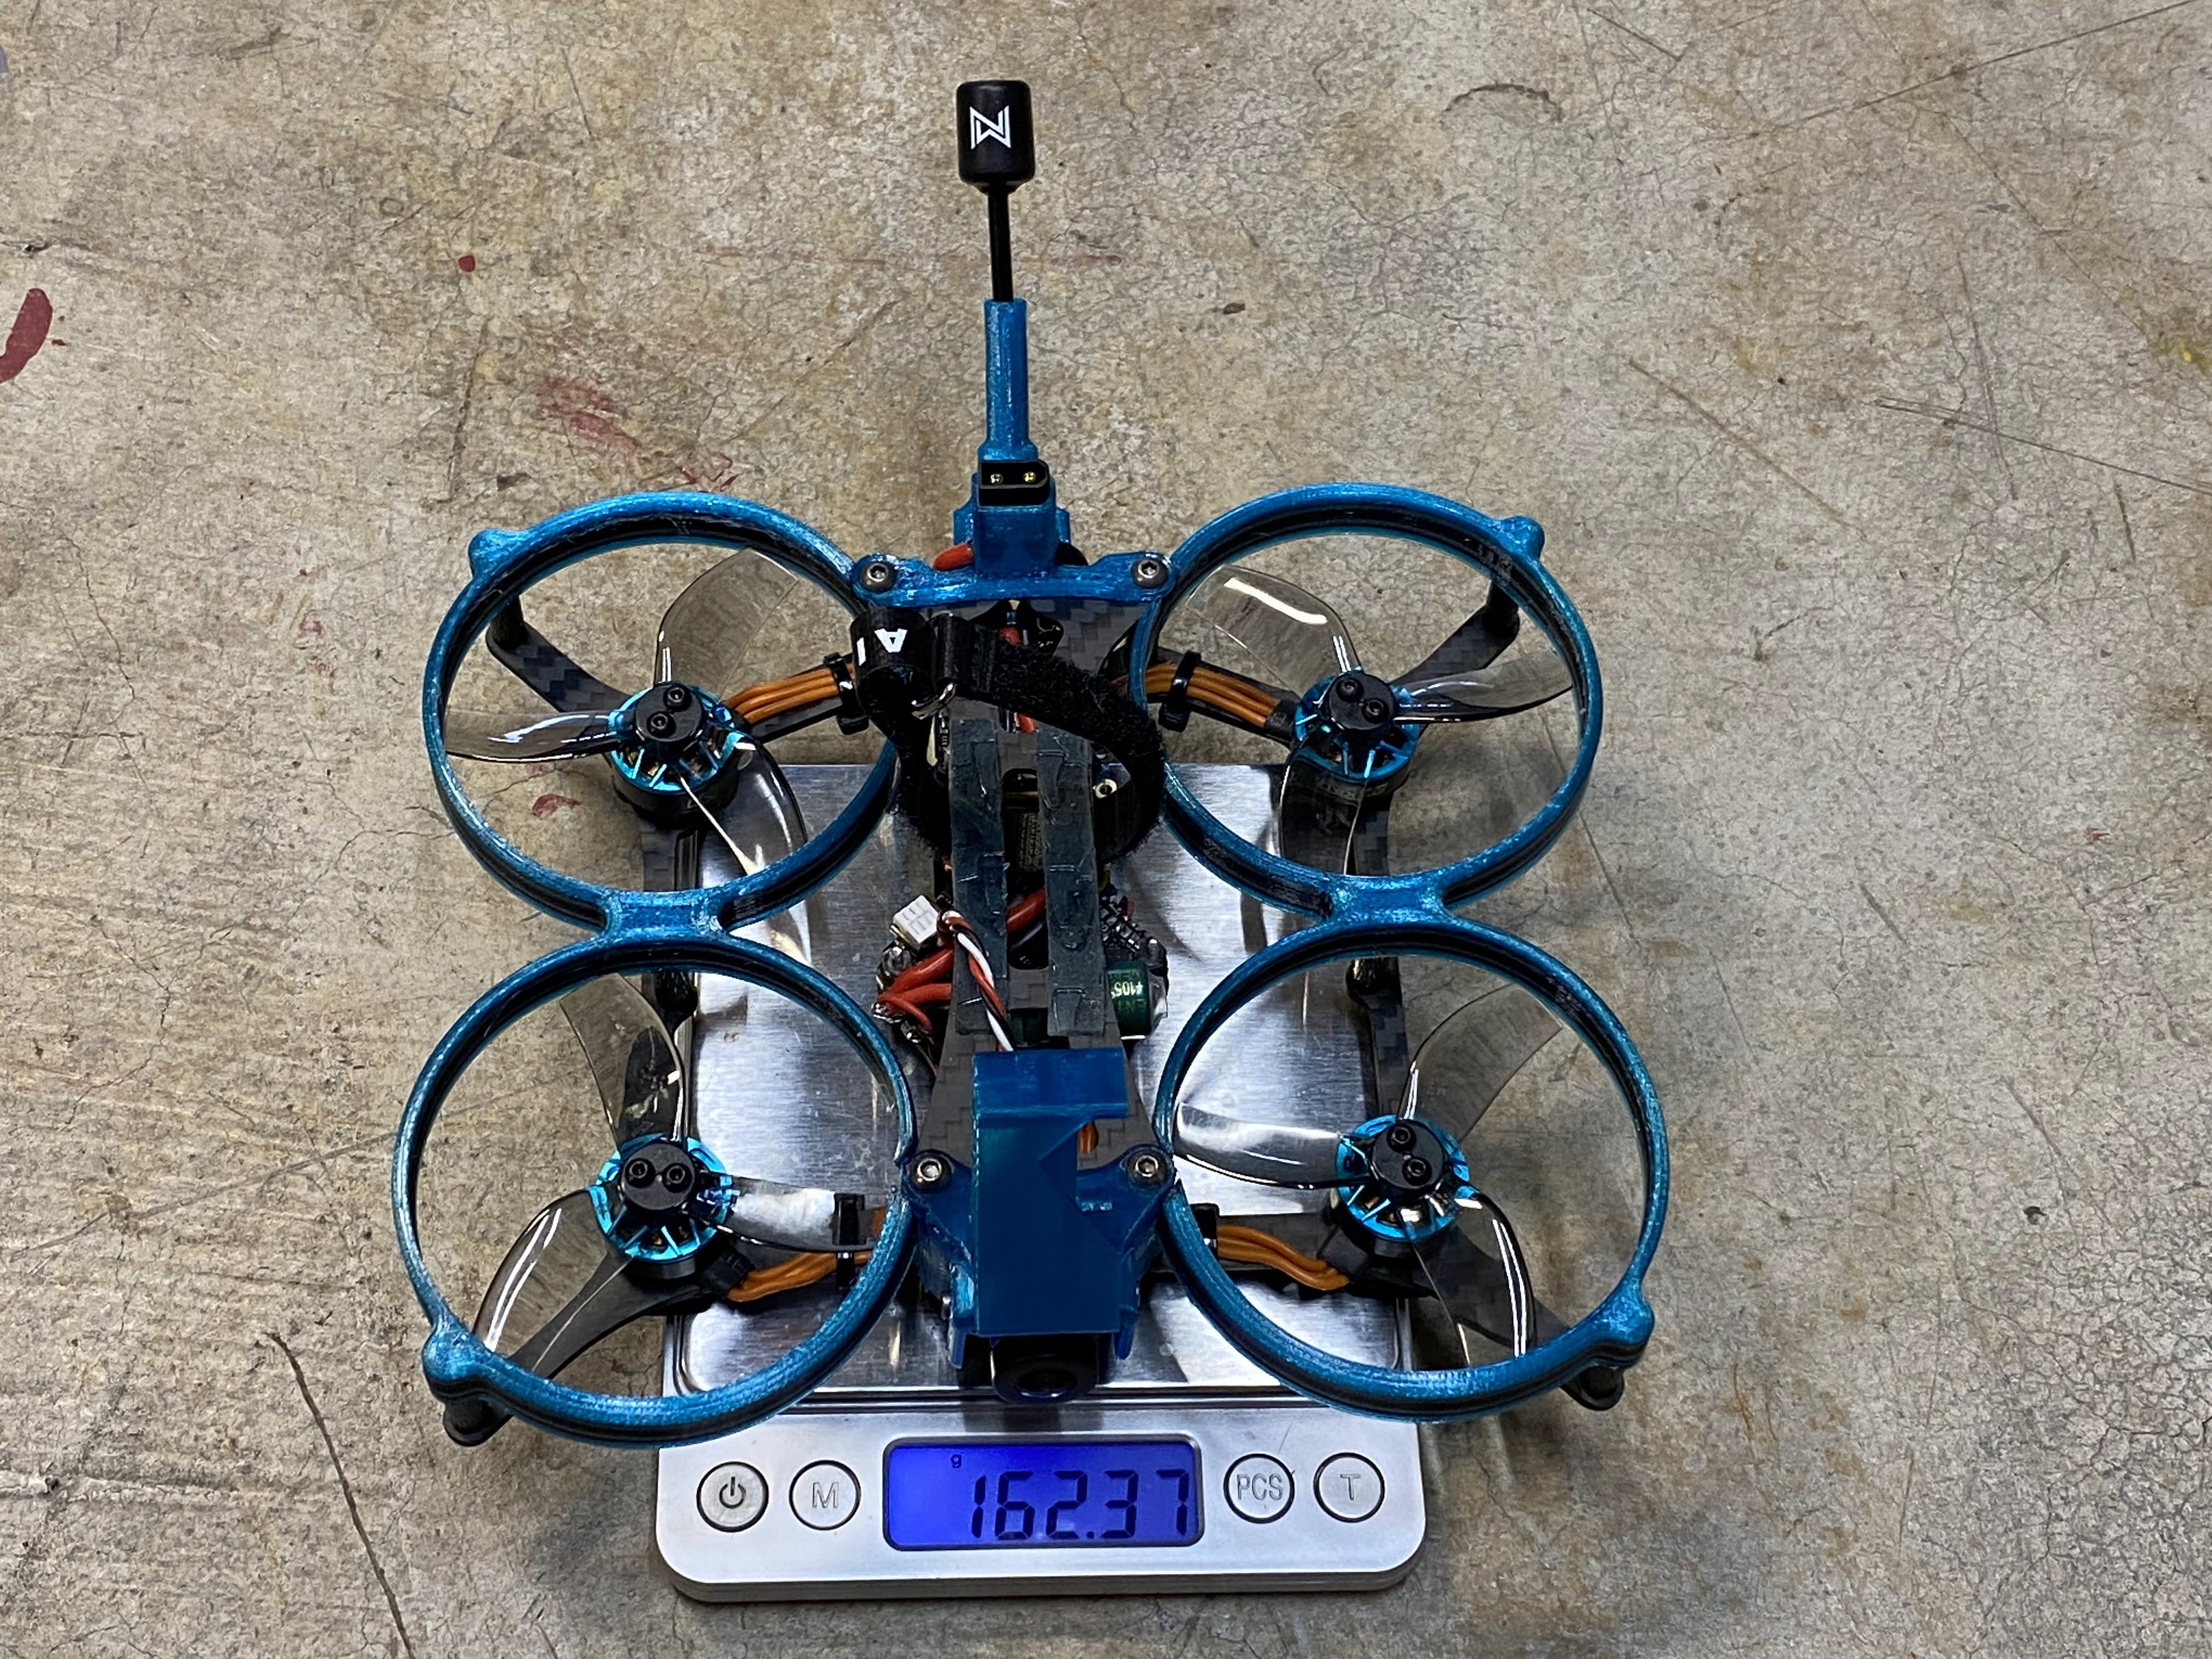
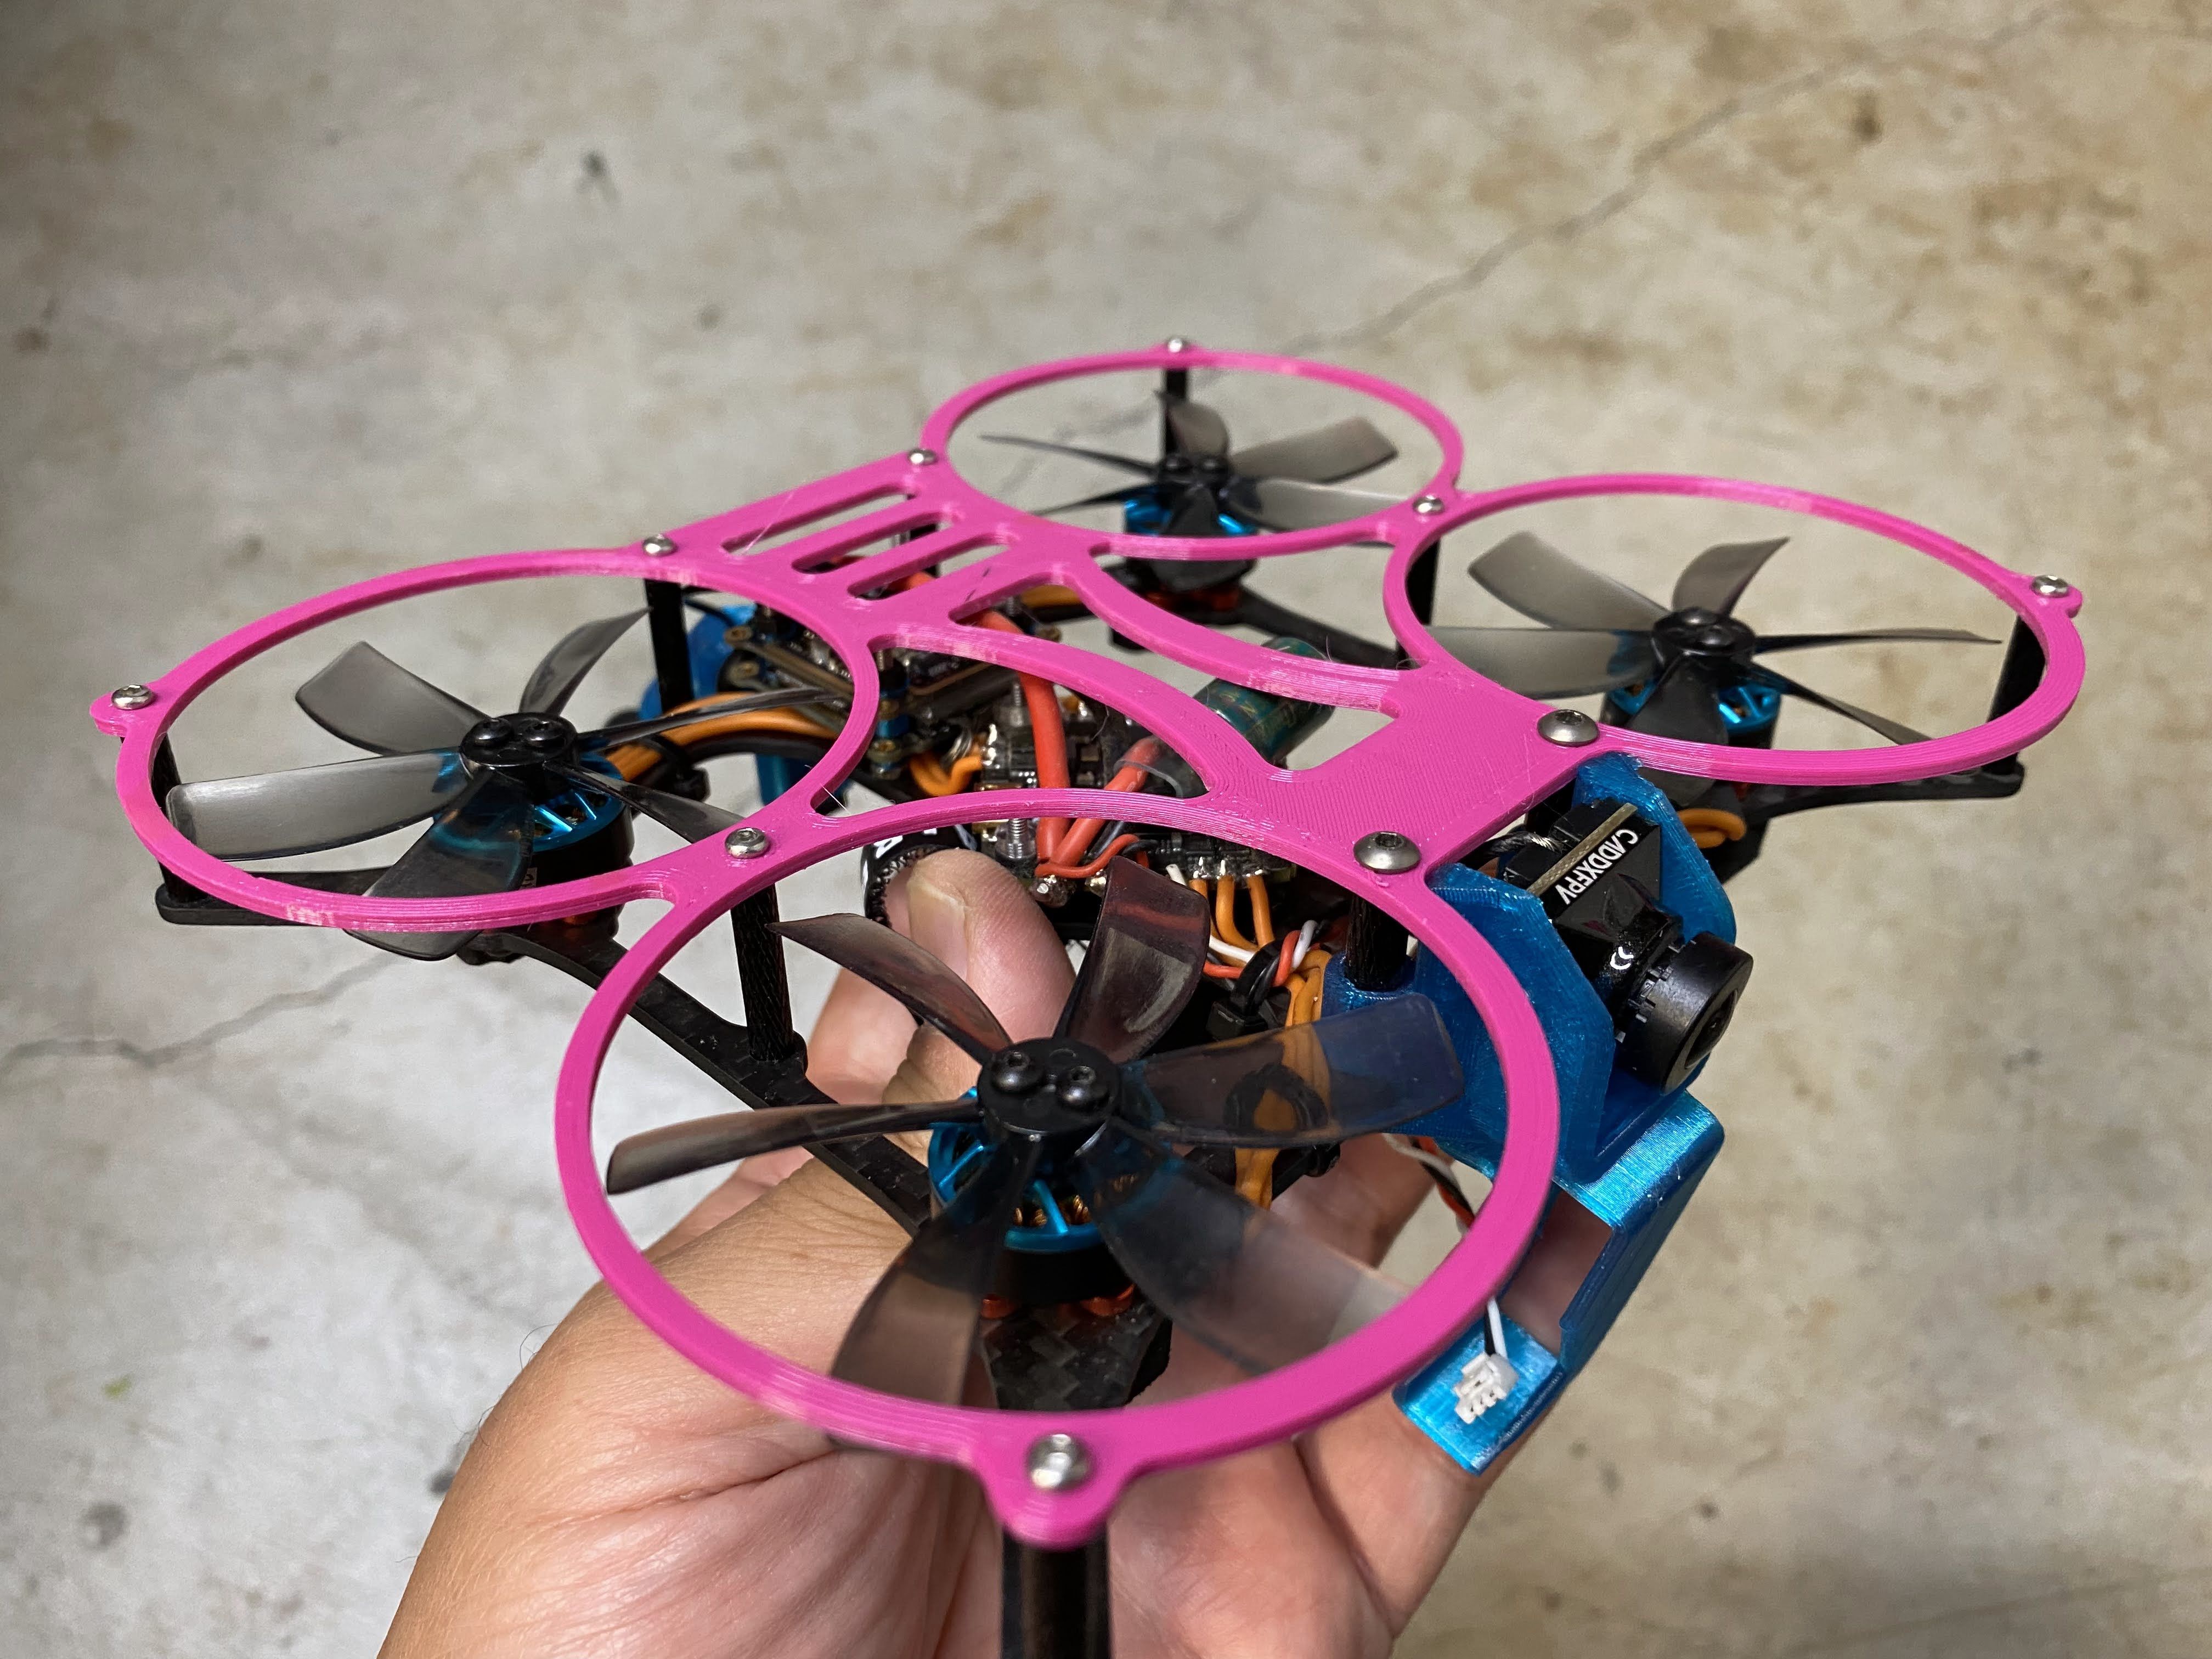
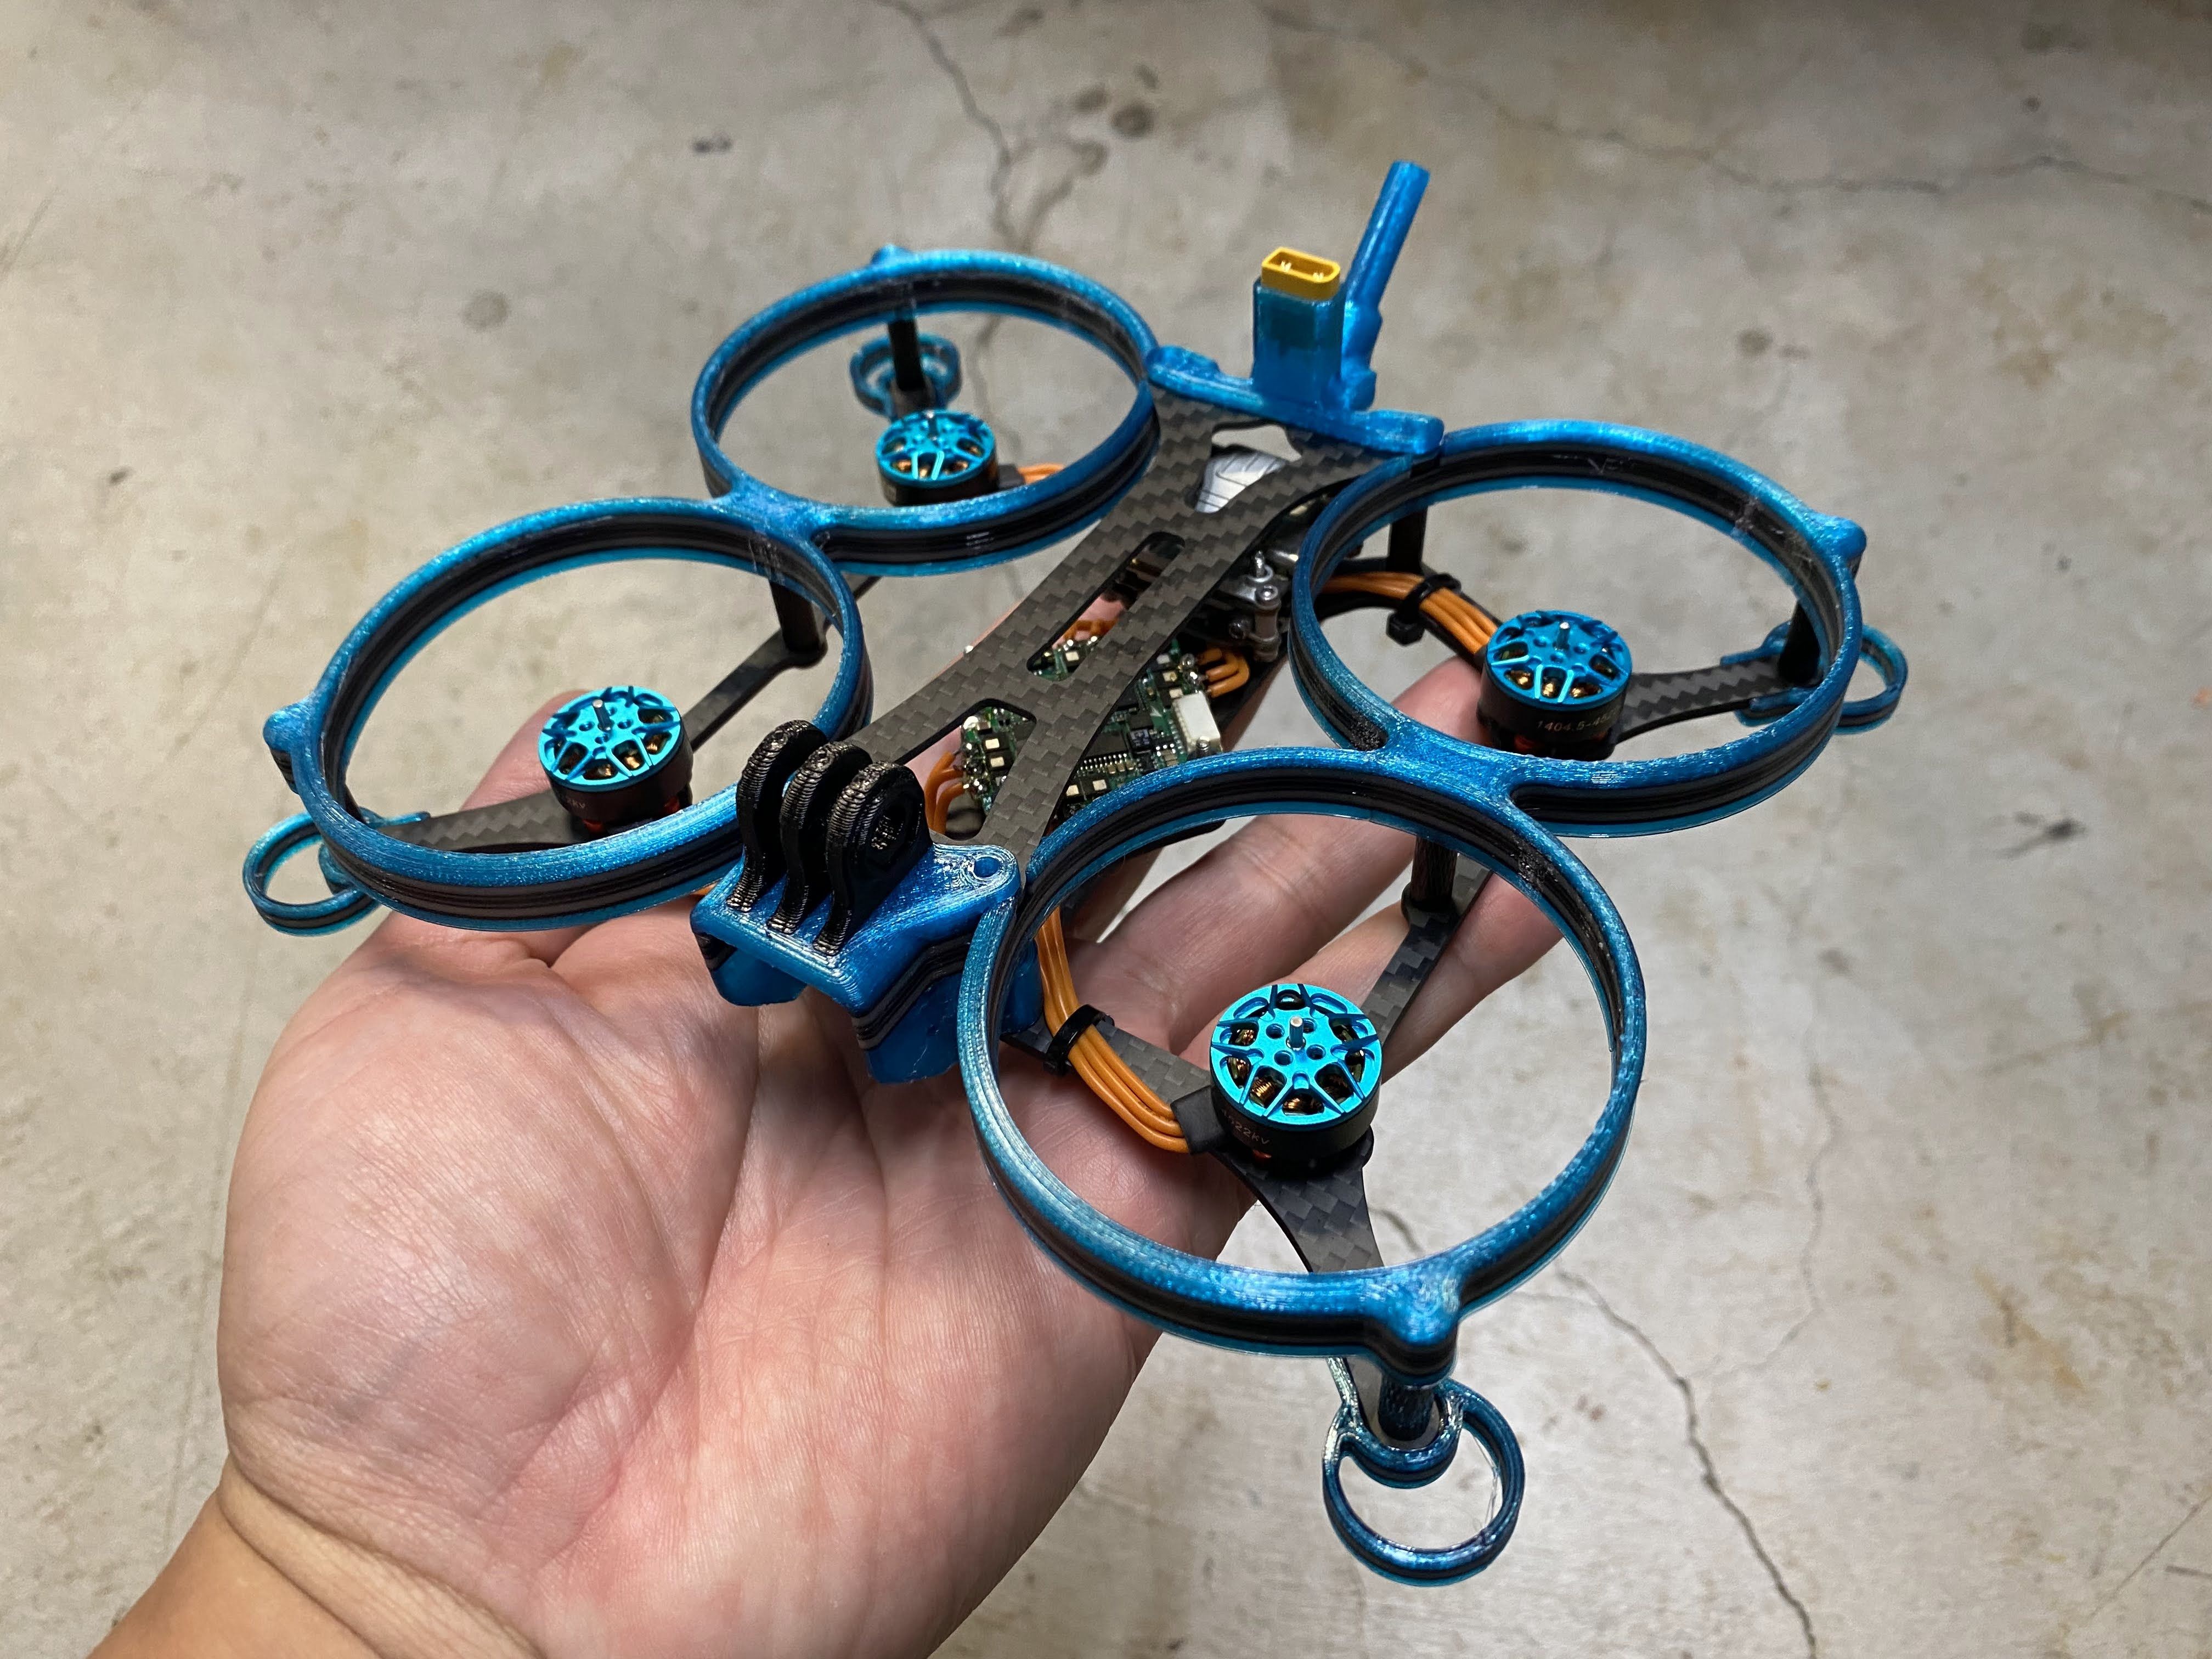
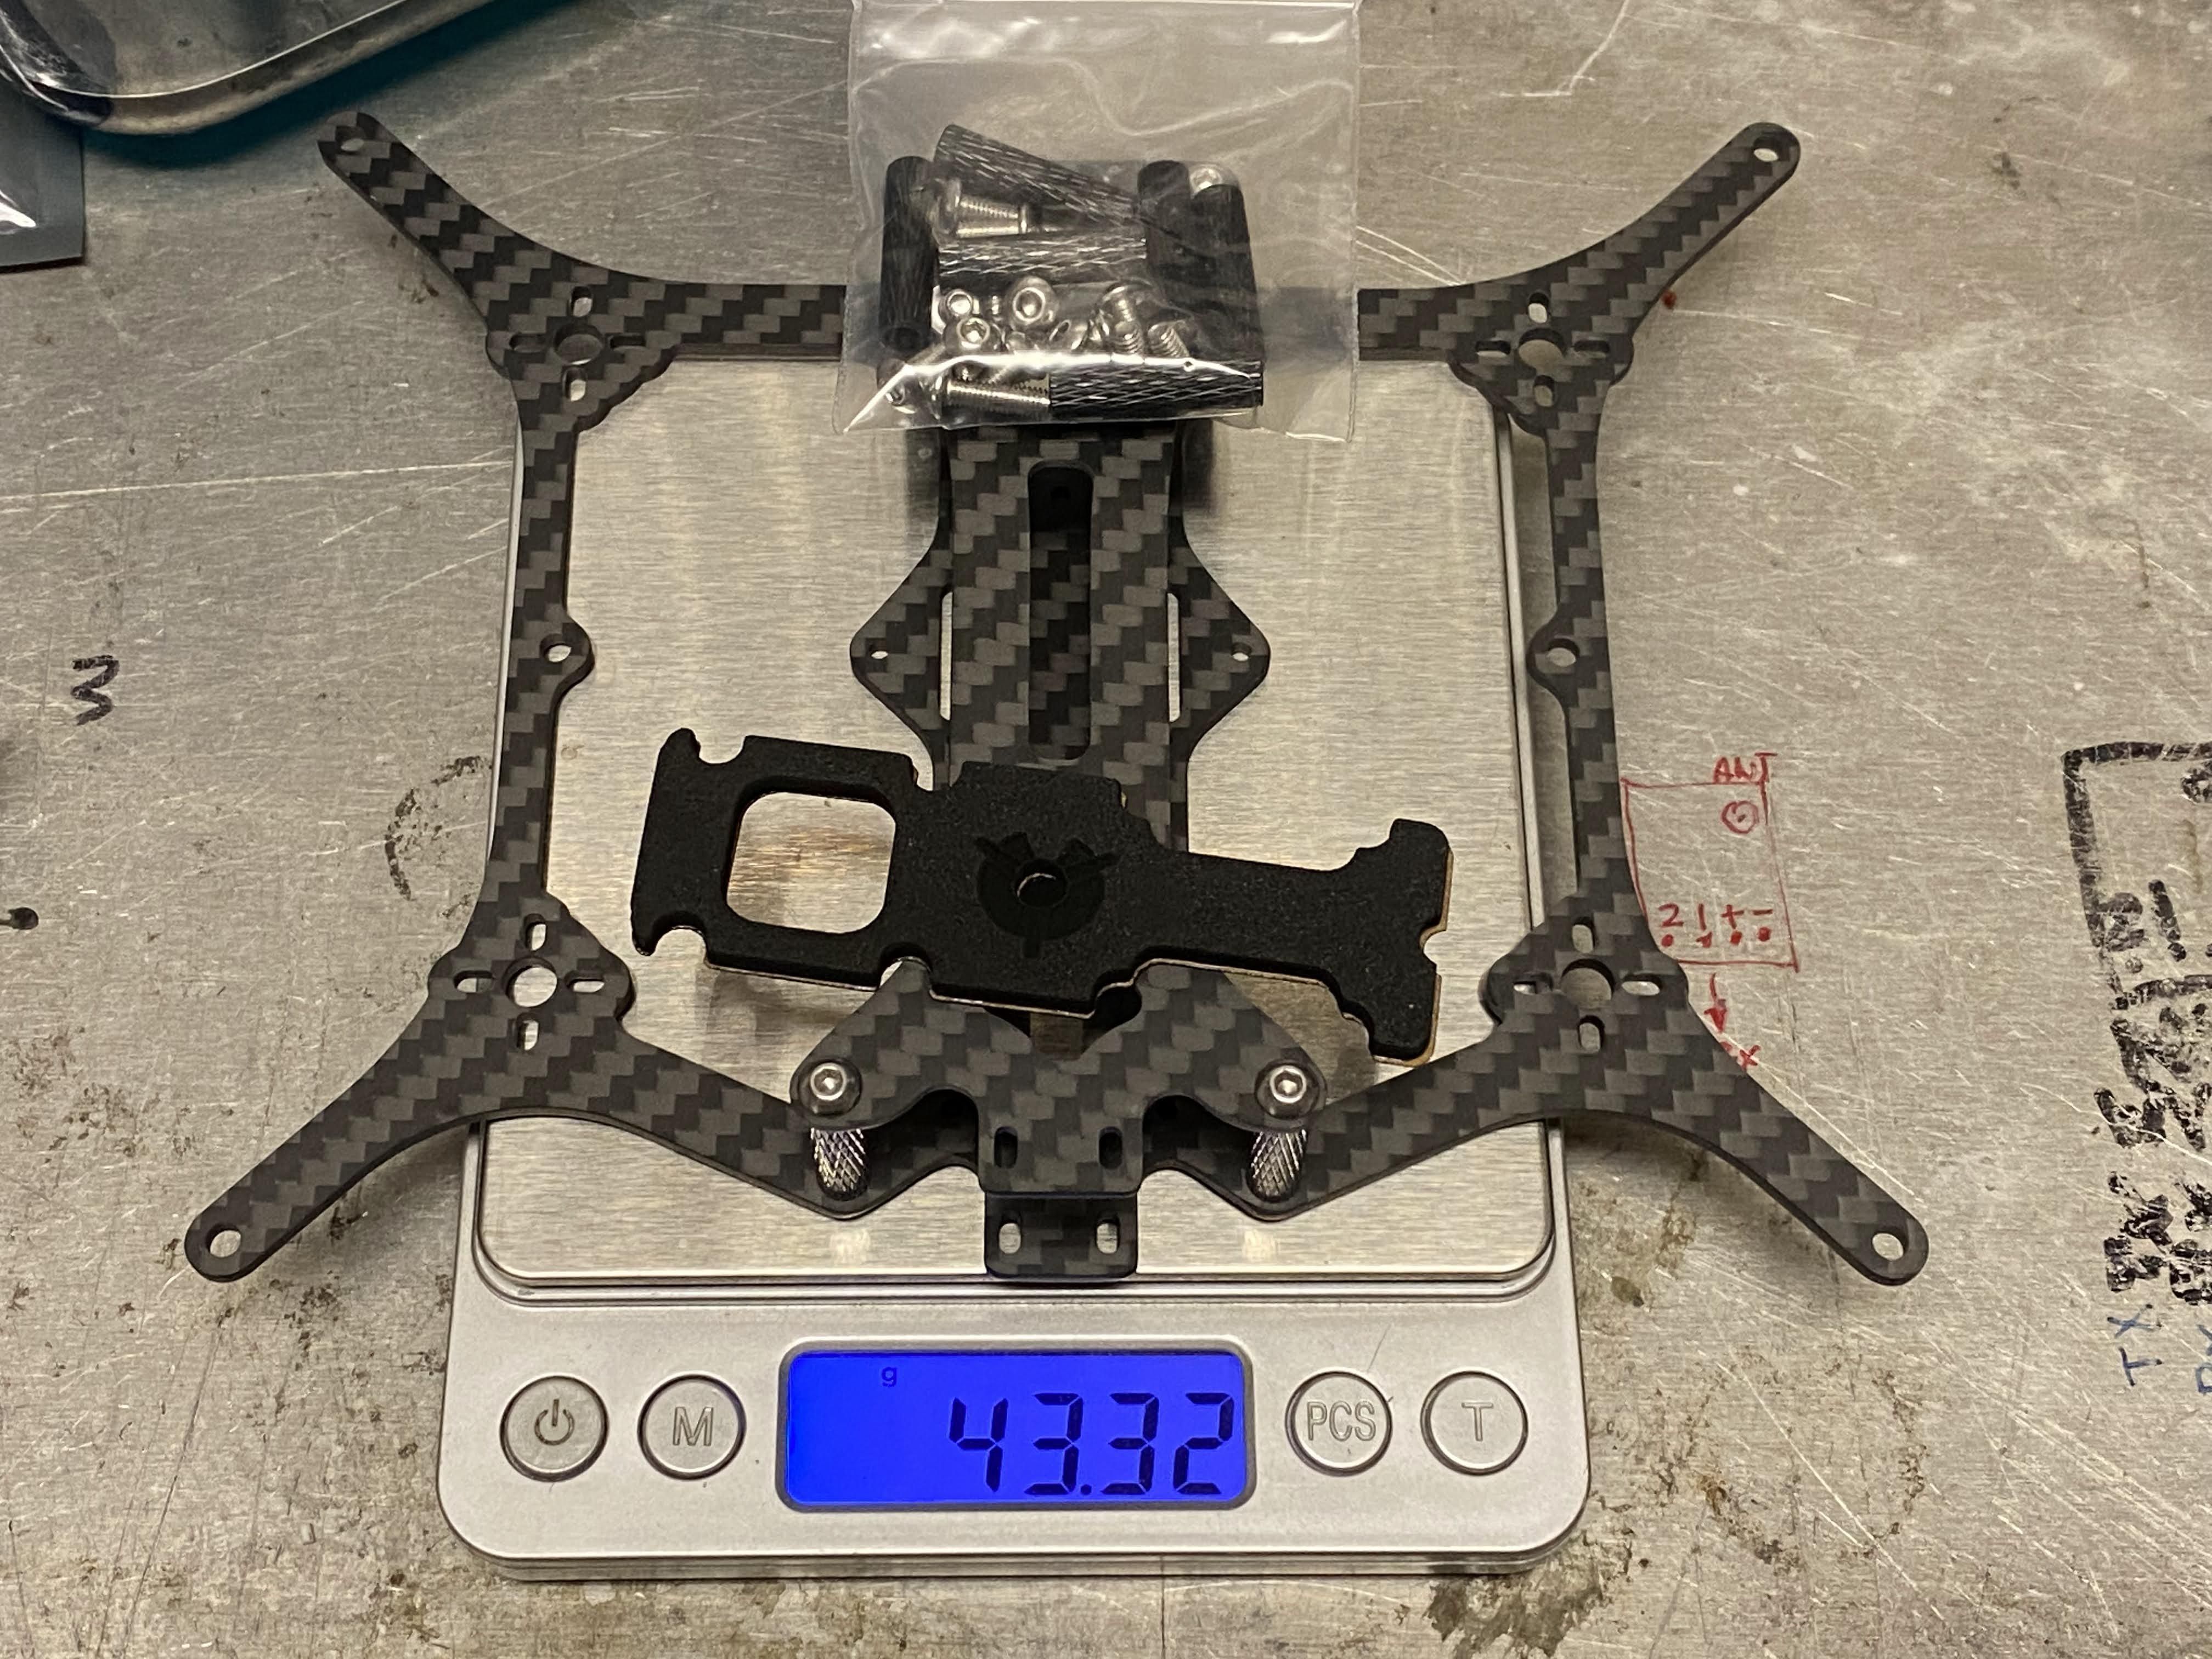
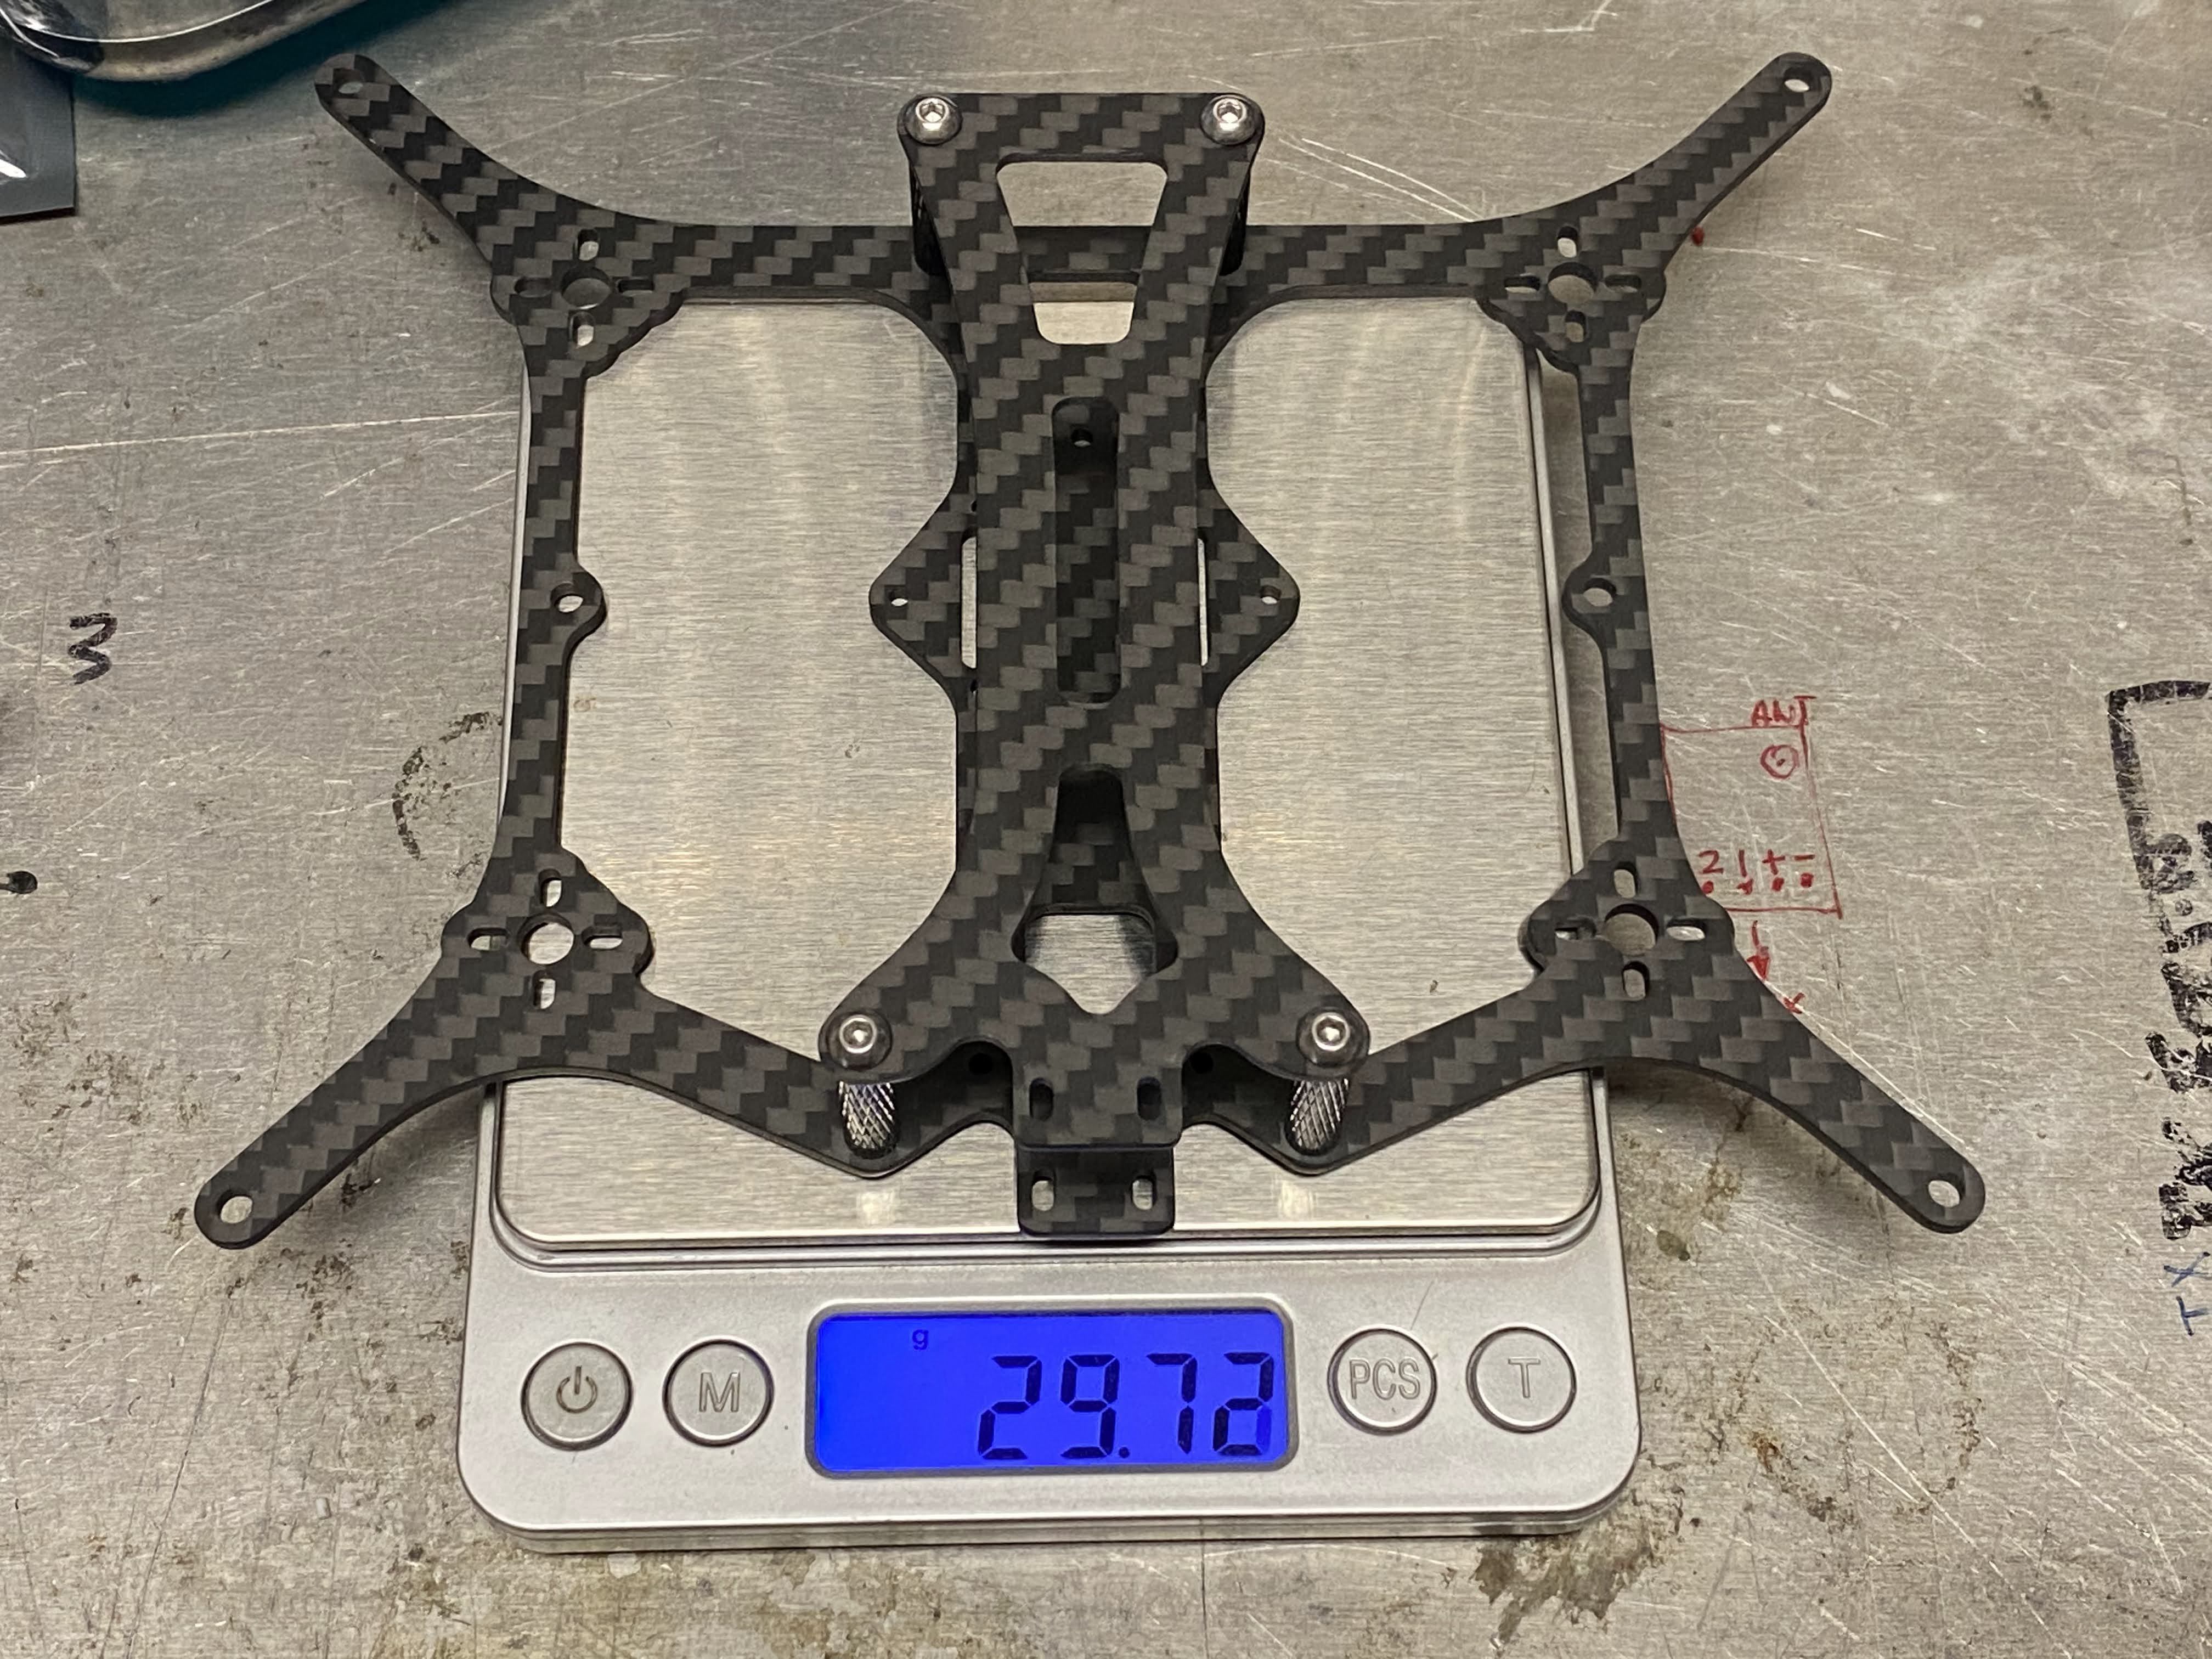
After making all the changes, I switched out the antenna and removed the arm bumper and I ended up with a 162g. It is nothing to write home about but still, it is progress.
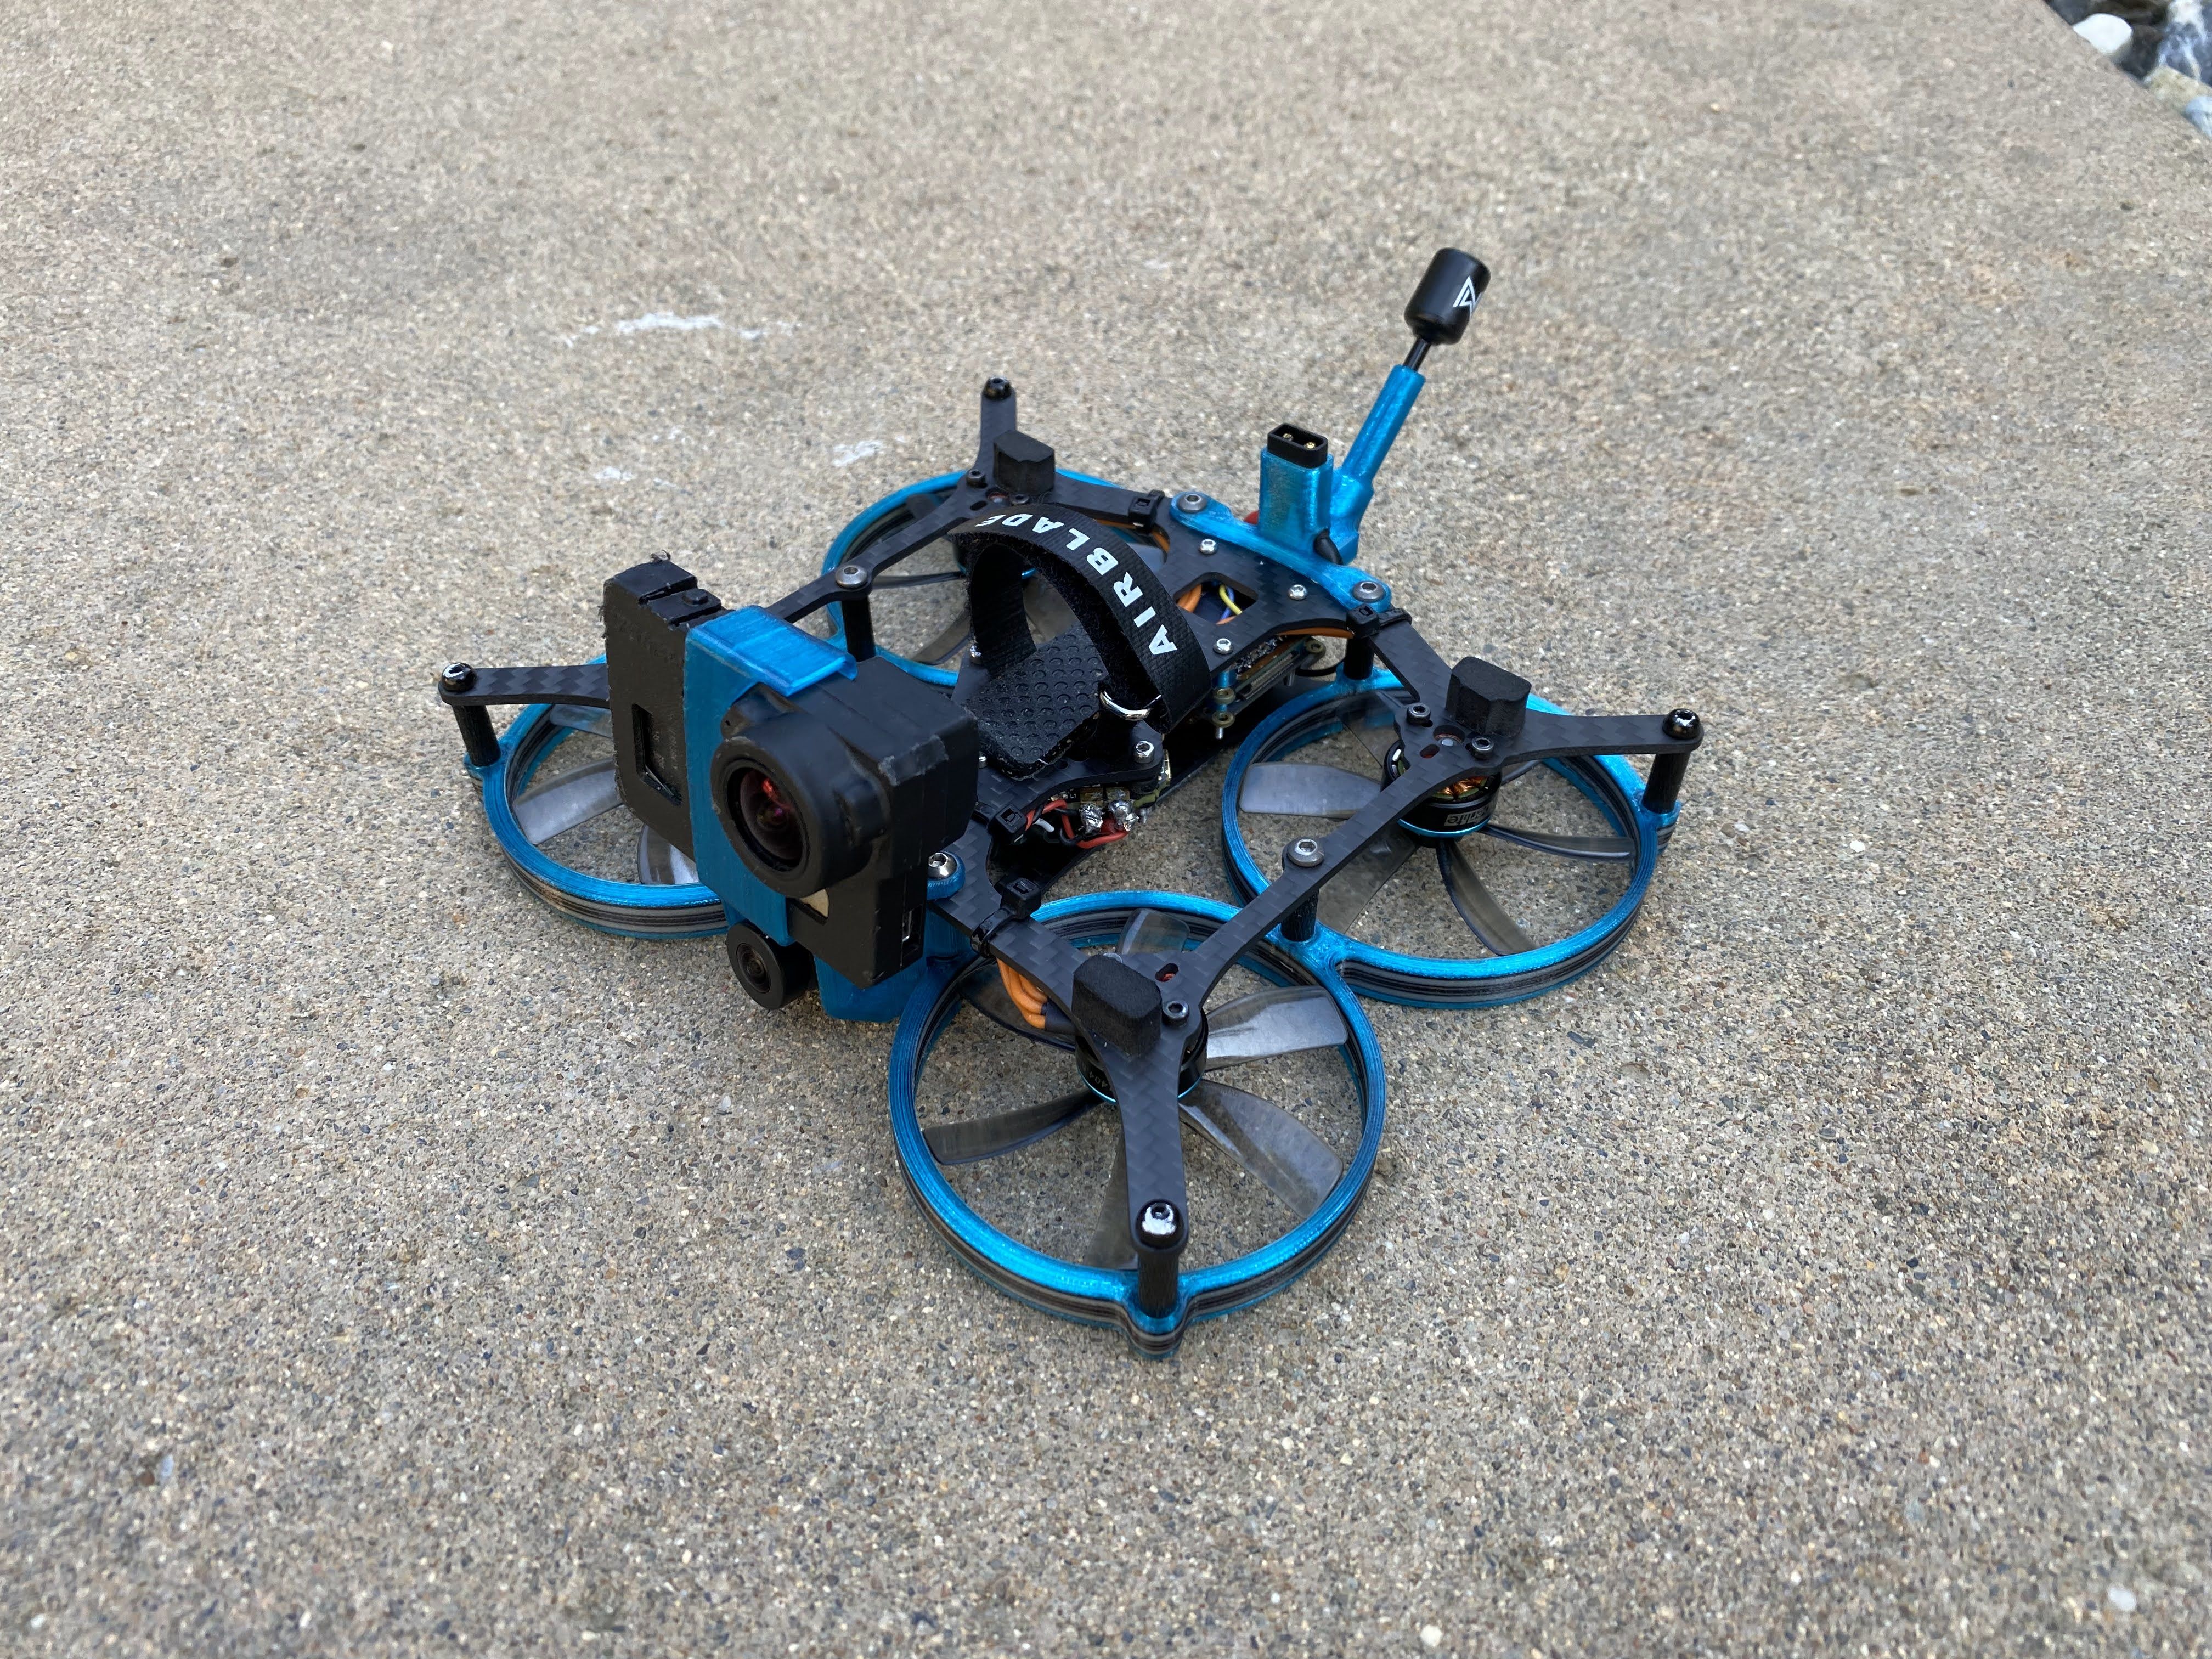
Regualr vs. Pusher
I am not here to prove or say one it better than the other. They are both different and typically I personally like one over the other. For this setup, I like how the pusher feels. The regular setup, the quad feels very floaty, especially with the 8 blade HQ 63mm props. Even when I switch back to the DAL 2530 3 blade props, the quad still feels sluggish. That might be a good thing if you want slow cinematic footage. But the pusher sounds louder and gets a little bouncy when it gets super close to the ground. Either way, both setups does not have any issues with vibrations or jello in the video feed.
What I found very interesting about this frame is that it is very easy to switch from a Pusher to Regular. Other than the different 3D printed camera mount everything else is change quickly. Here is what you need to change in Betaflight. Keep in mind that this info is specific to my build only because of how my AIO board is positioned.
Pusher Setup:
FC Board and Sensor Alignment – CW 0 degree flip
set gyro_1_sensor_align = CW0FLIP
resource MOTOR 1 E11
resource MOTOR 2 B01
resource MOTOR 3 E09
resource MOTOR 4 B00
Regular Setup:
FC Board and Sensor Alignment – CW 1800 degree
set gyro_1_sensor_align = CW180
resource MOTOR 1 E09
resource MOTOR 2 B00
resource MOTOR 3 E11
resource MOTOR 4 B01
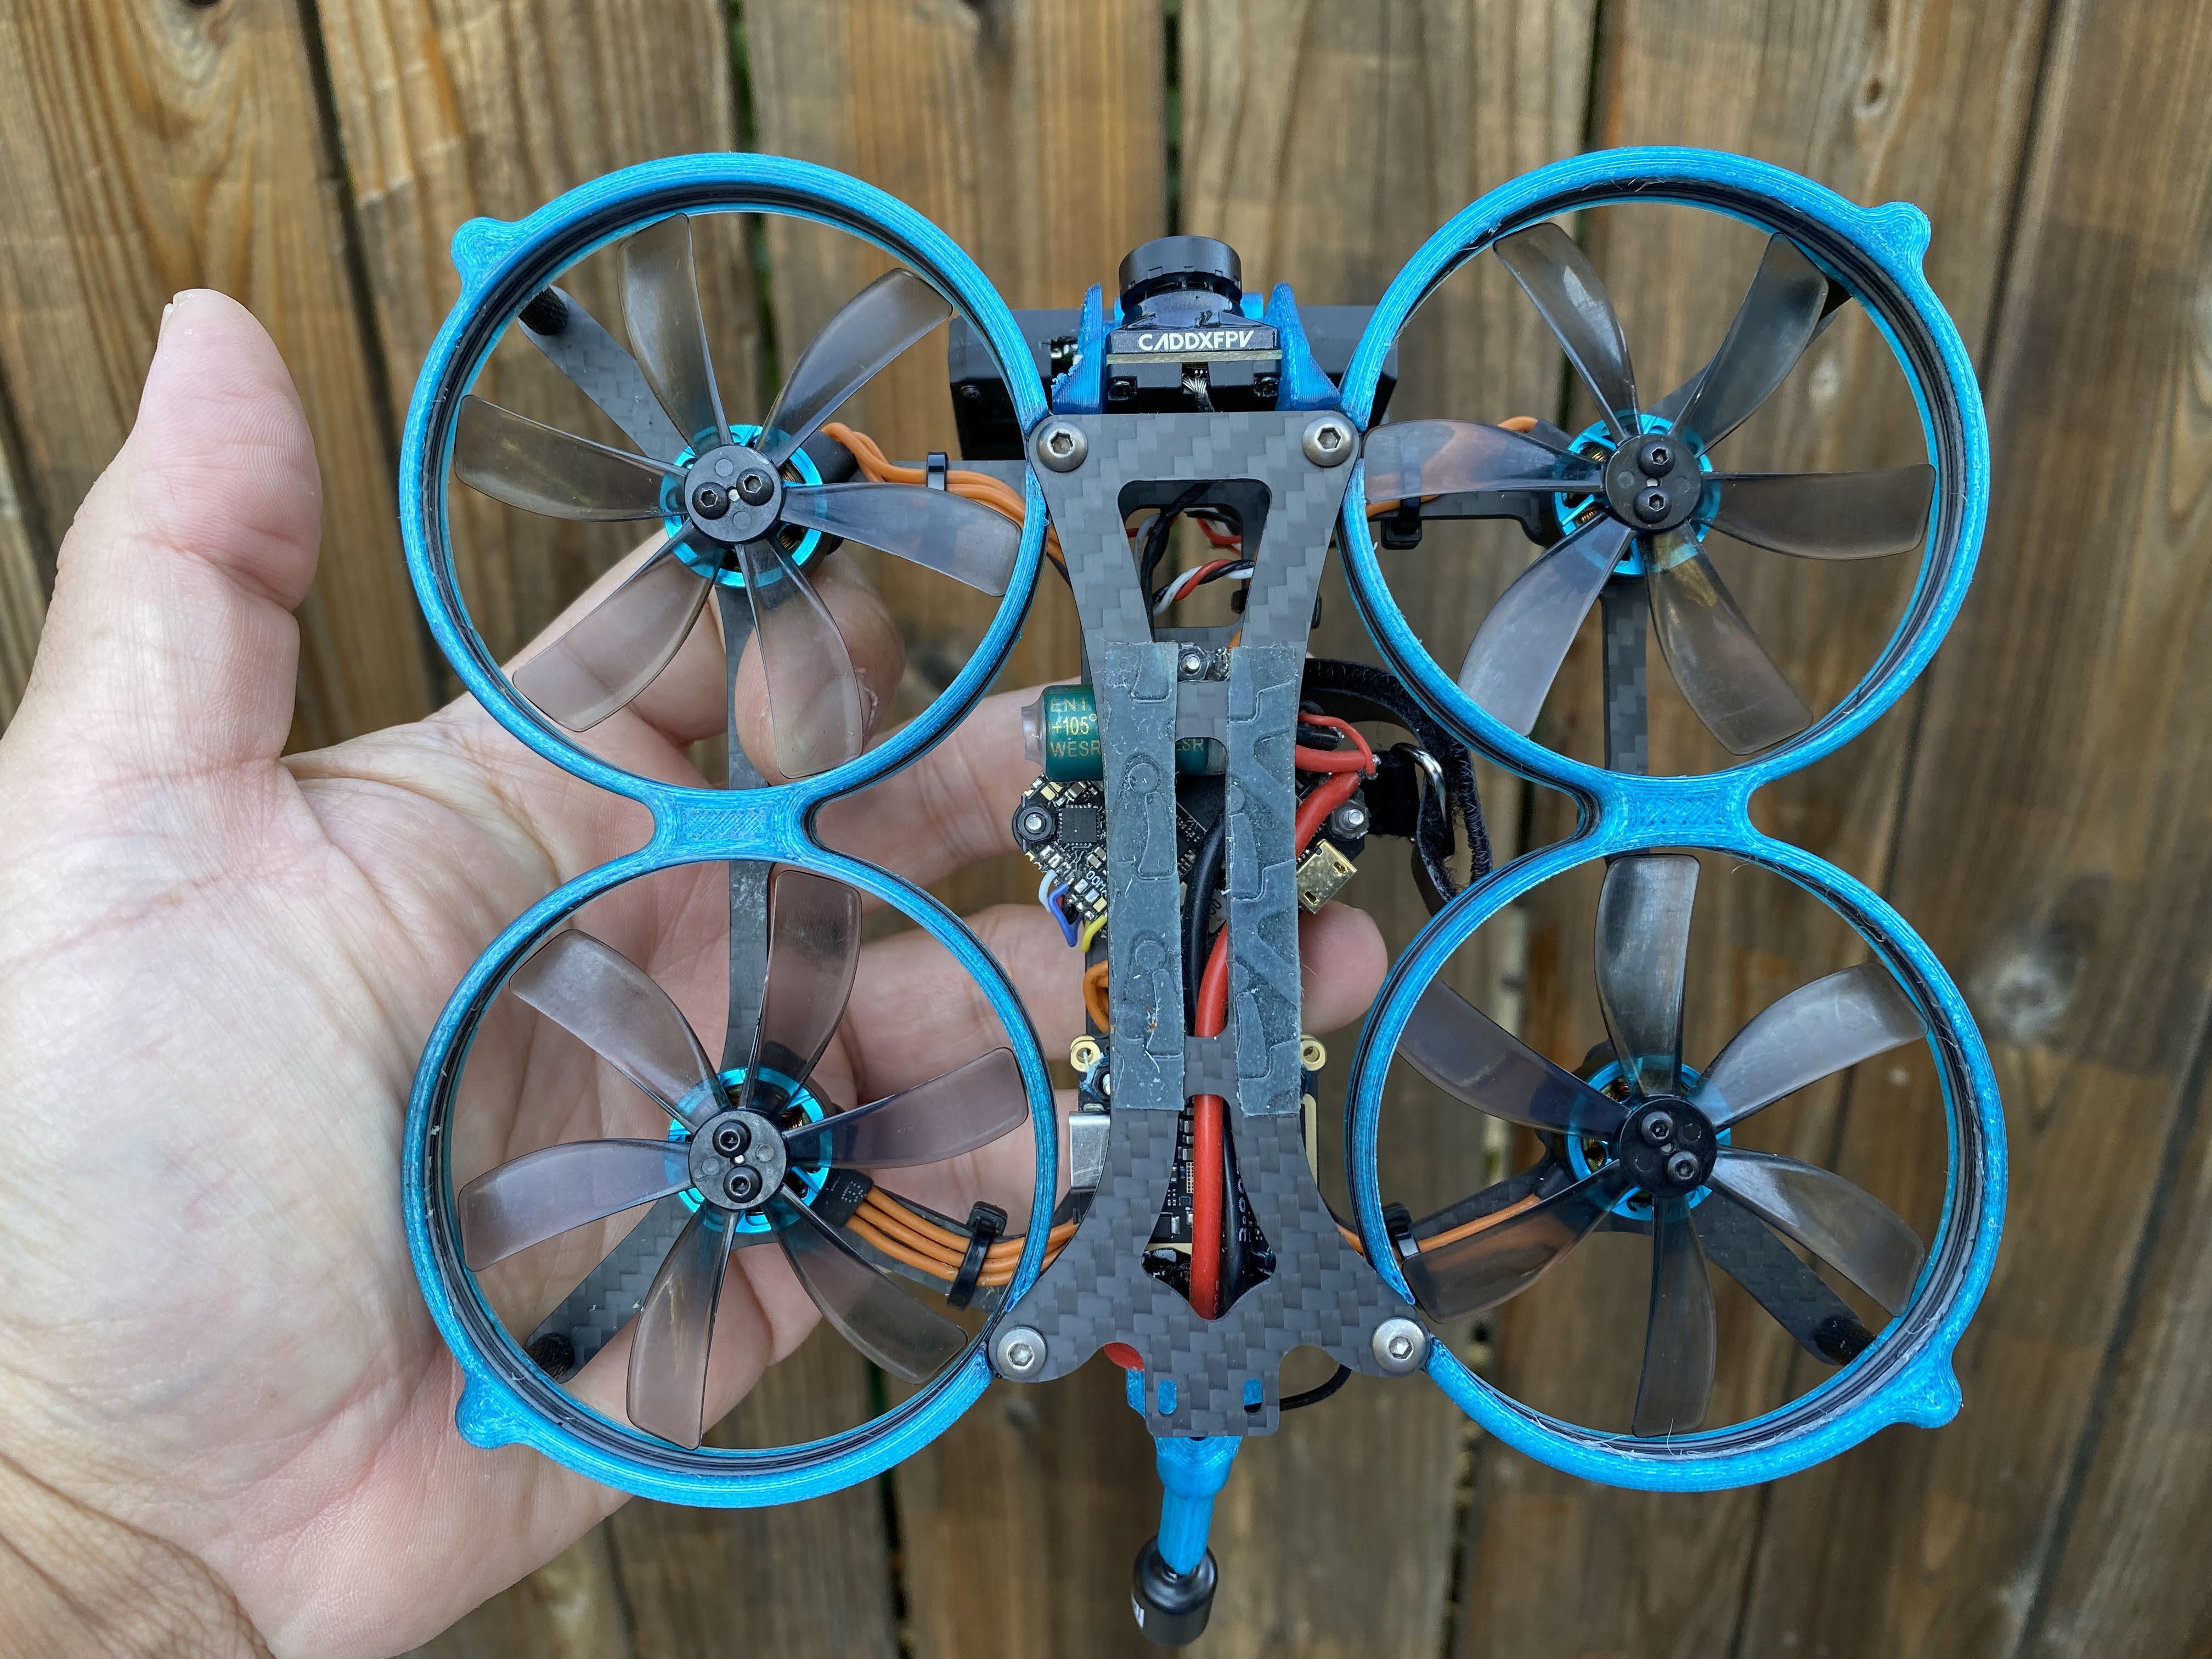
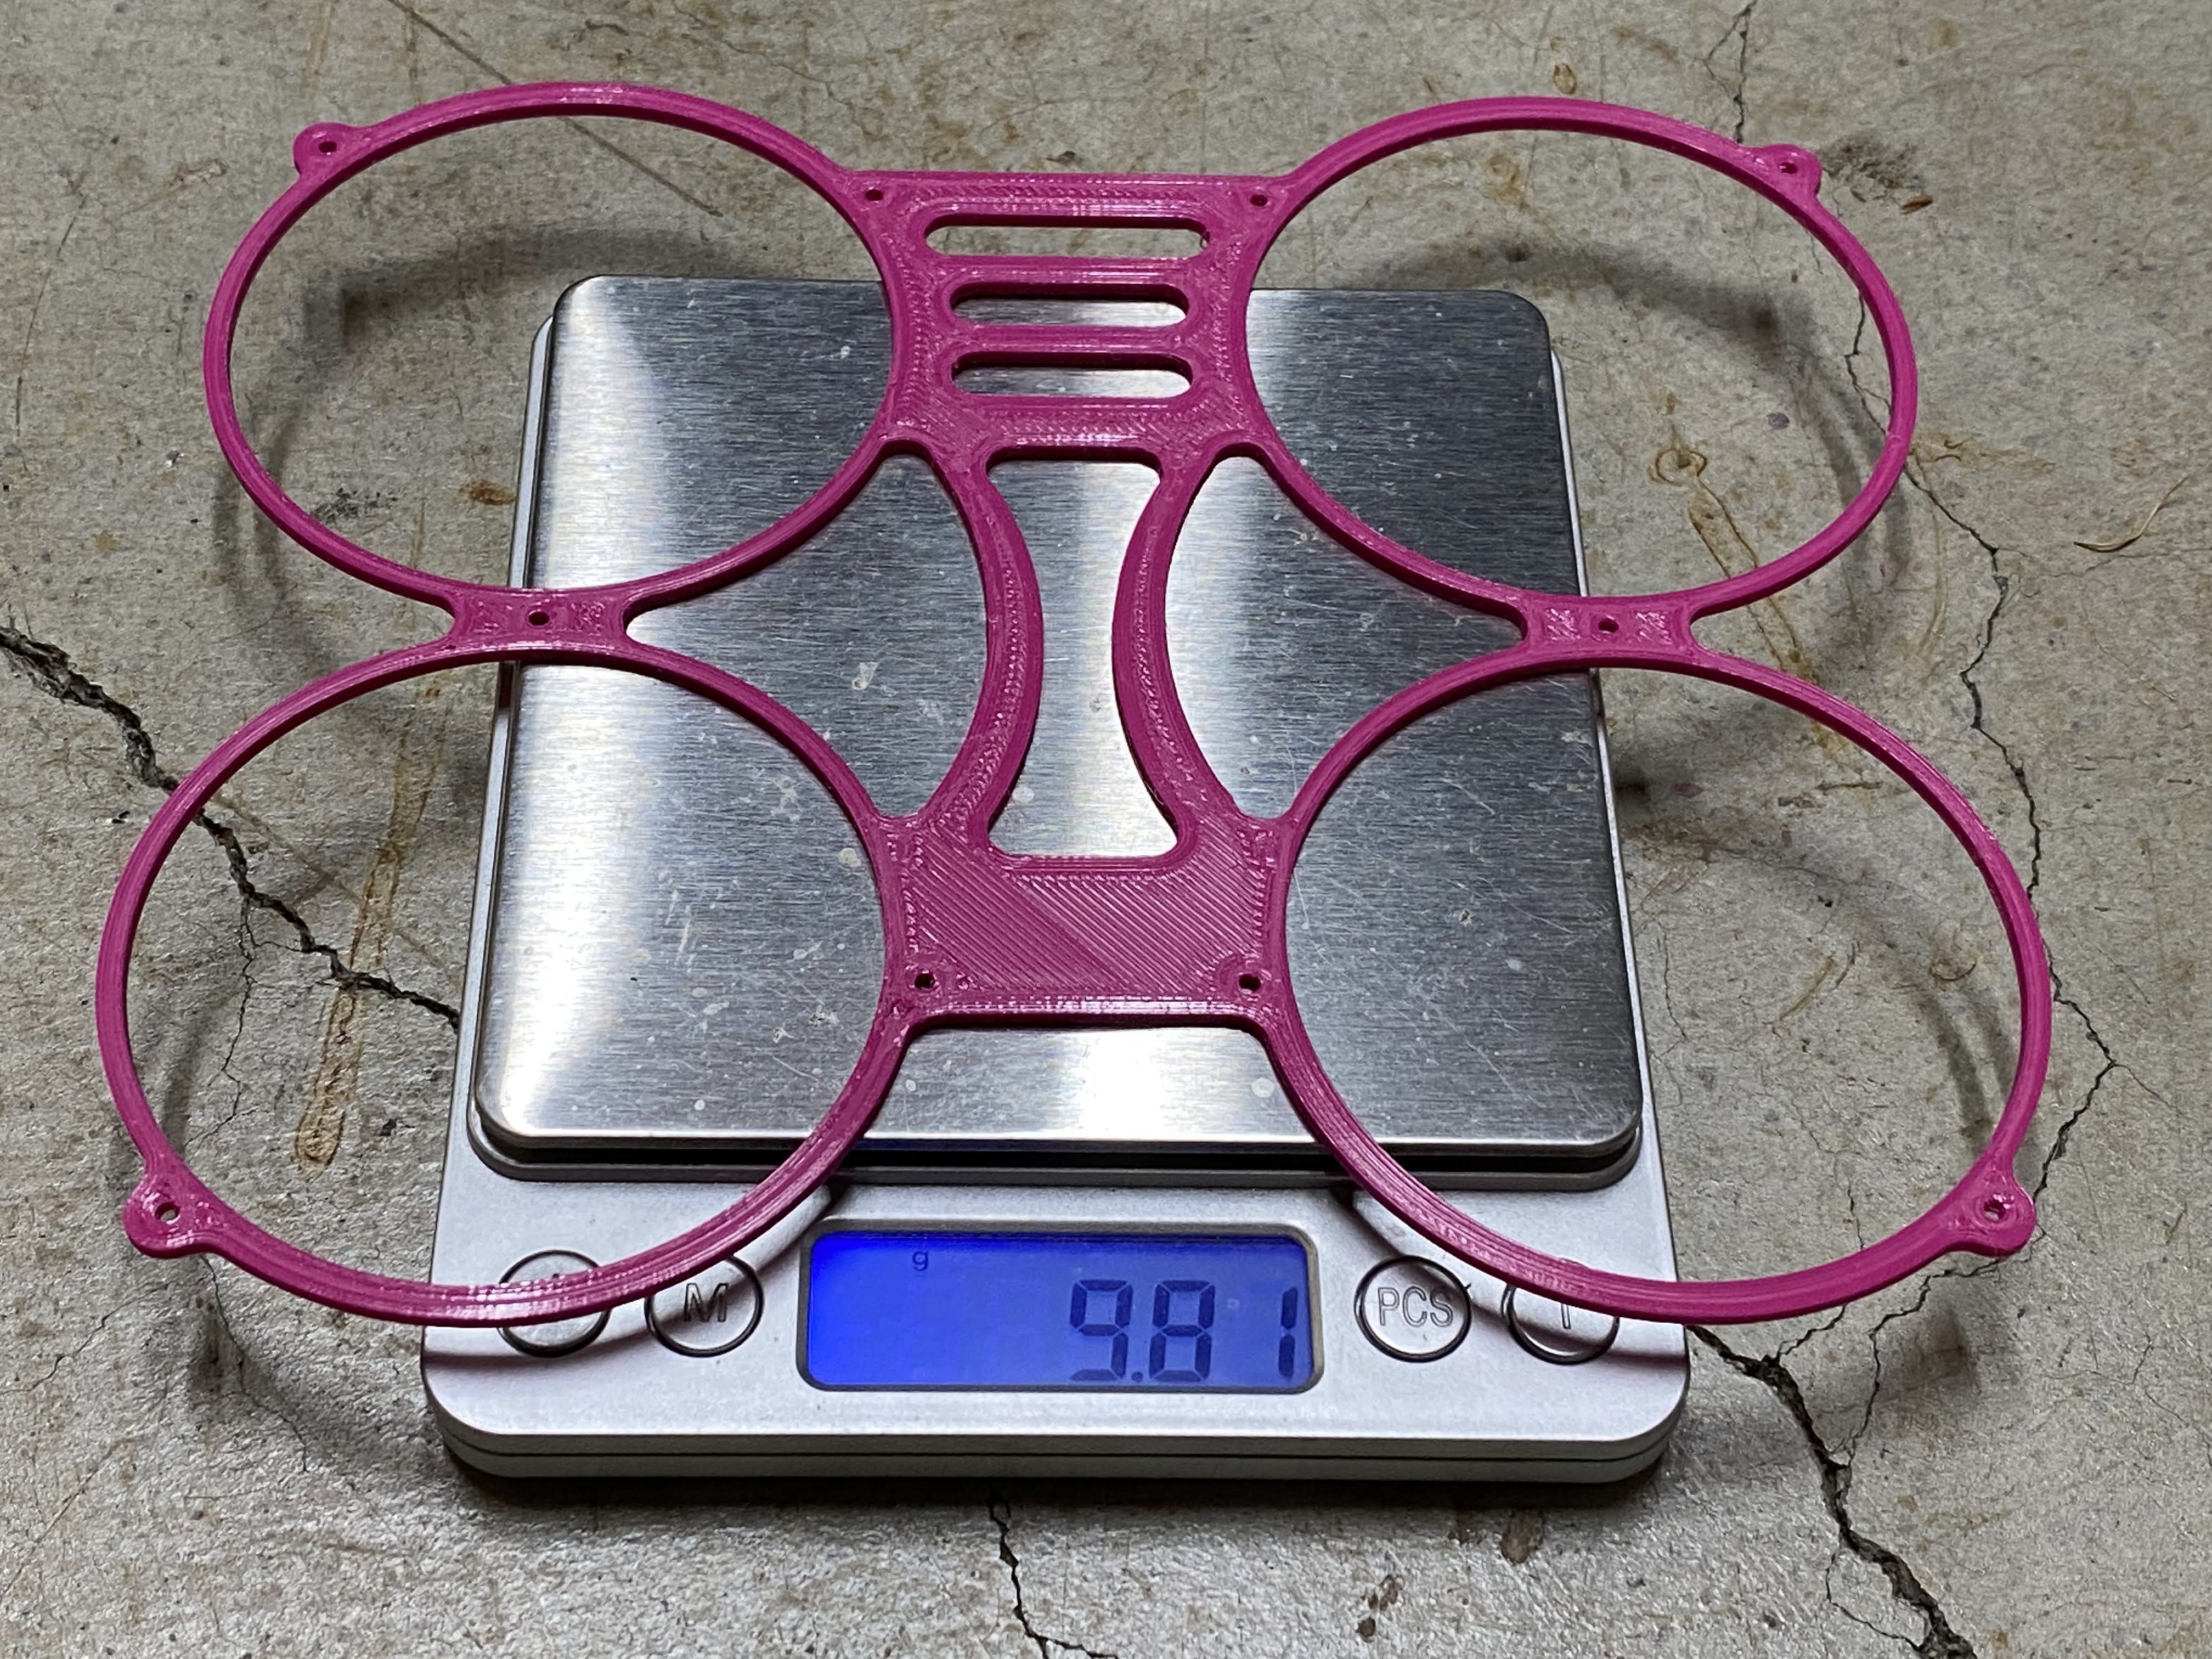
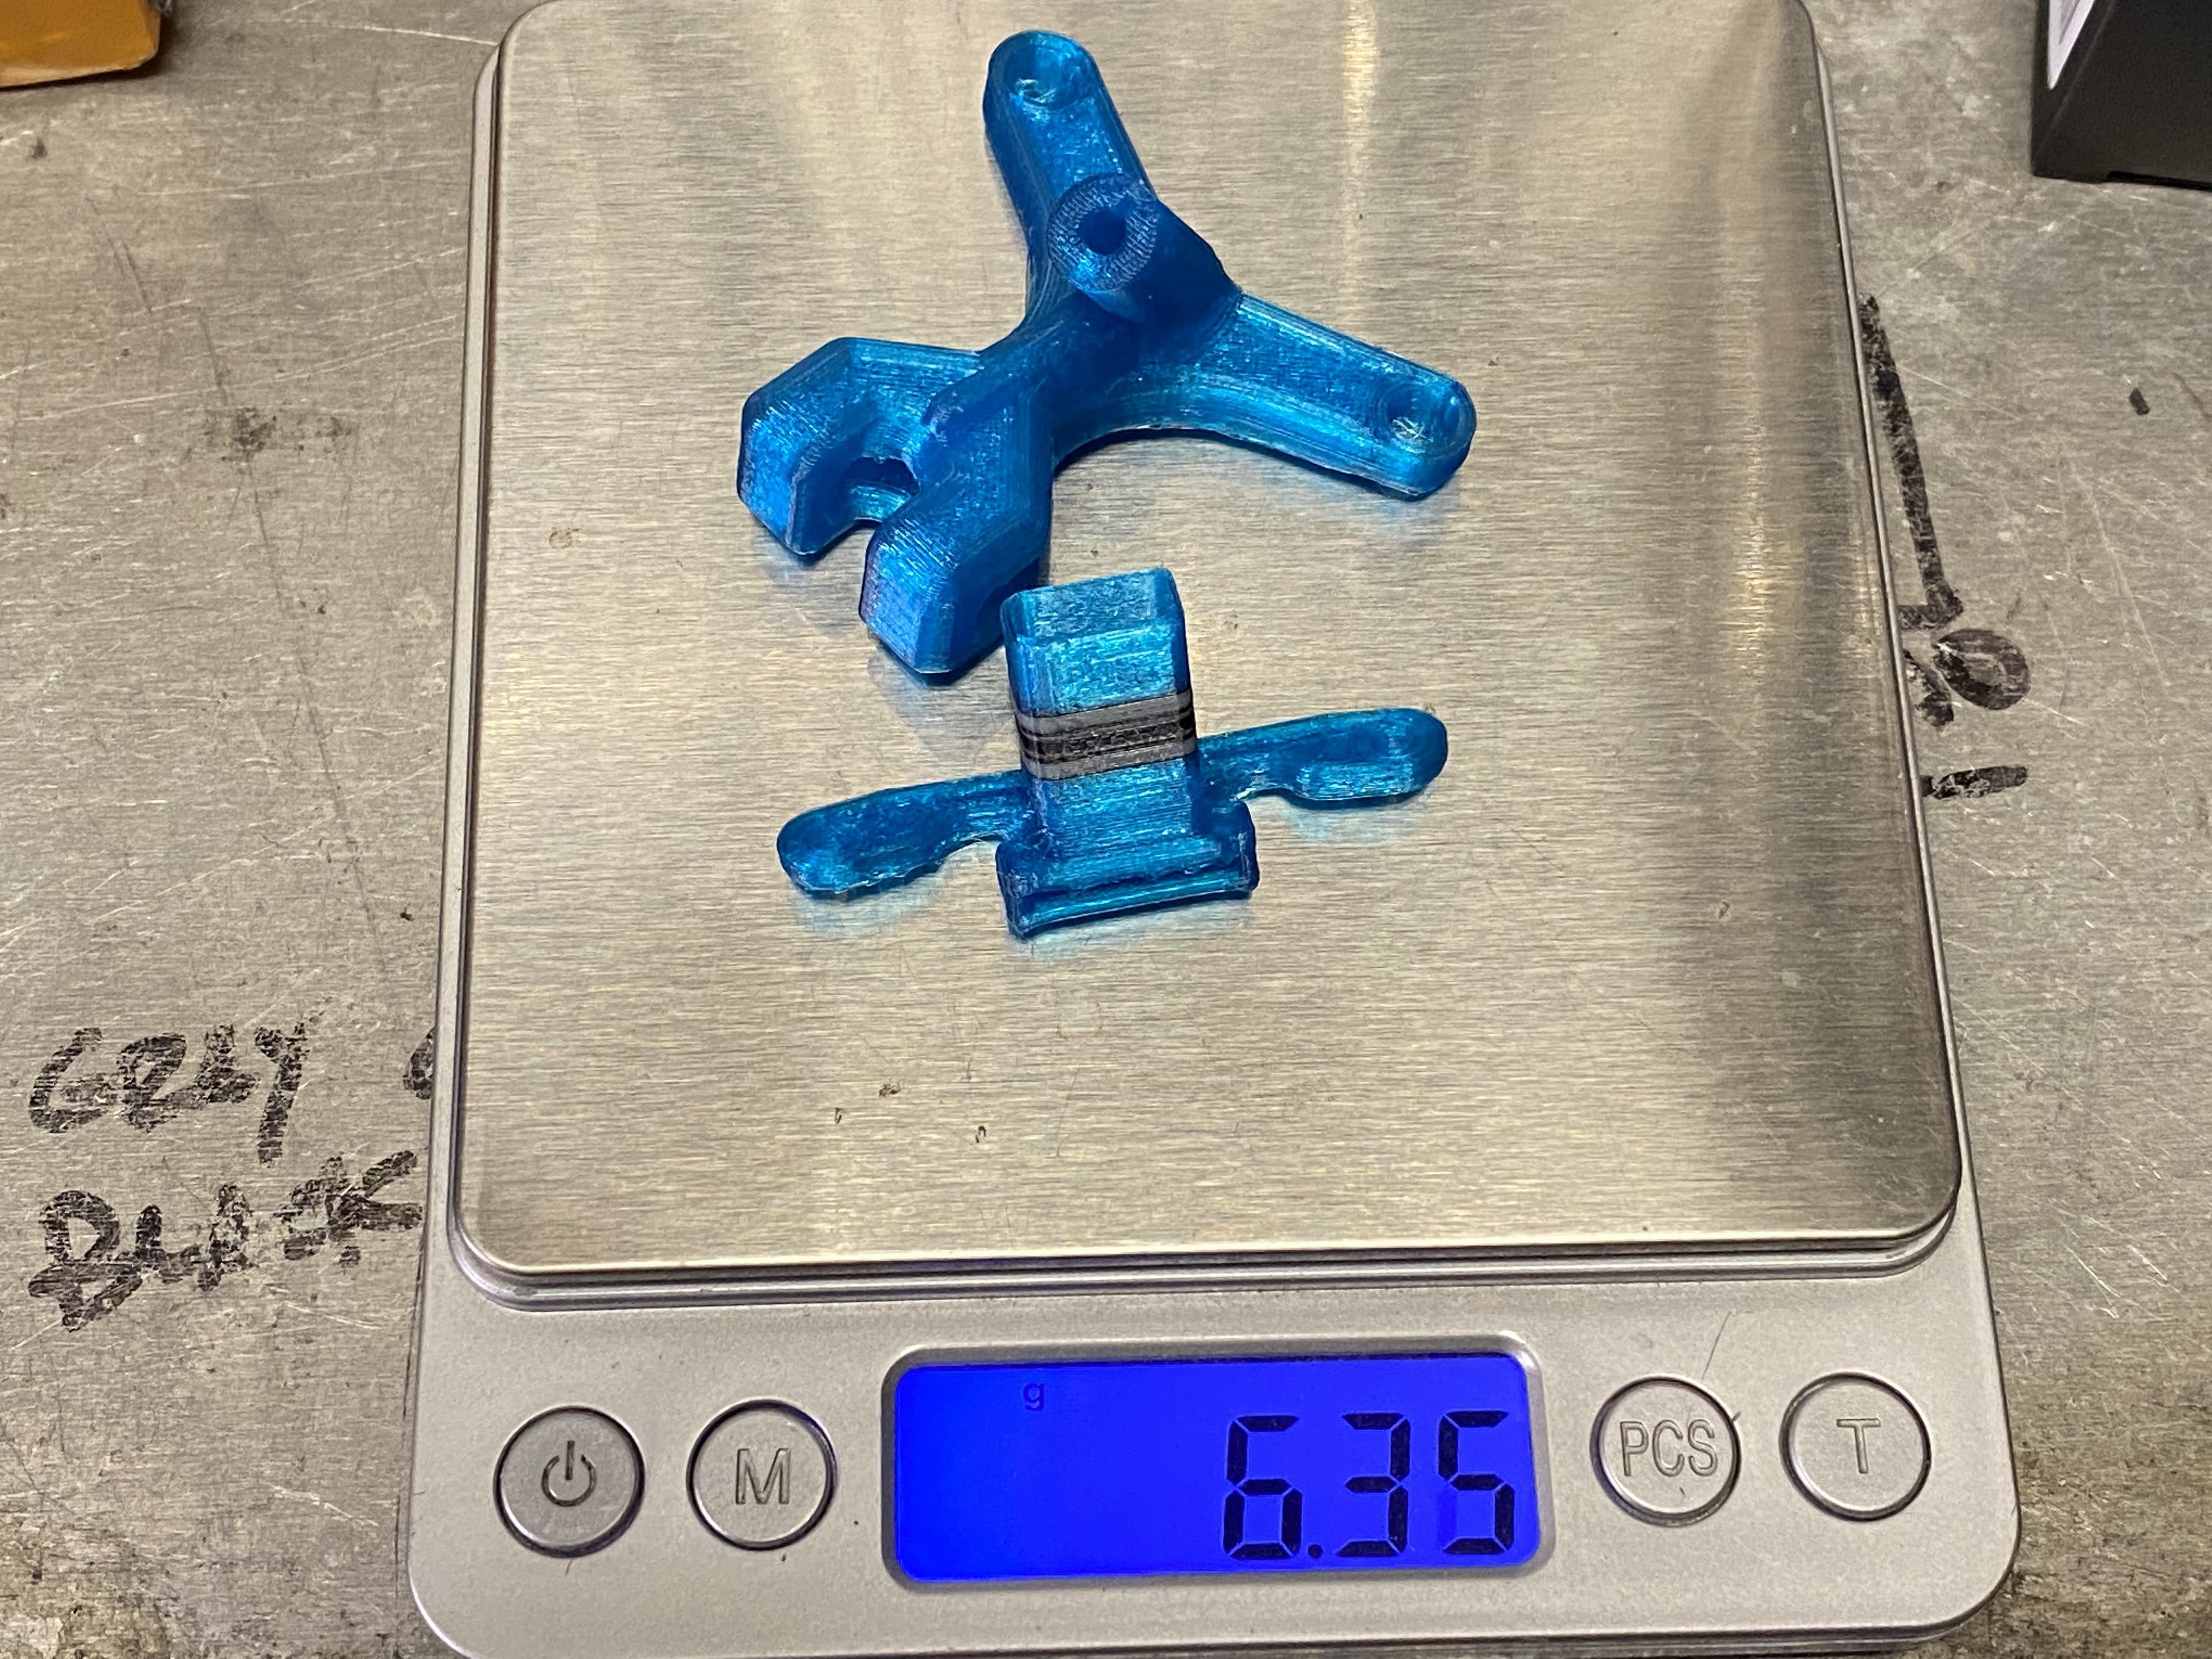
SnapRing 3D Printed
After seeing Chris Teal's post on Facebook, I wanted to try this new conversion. Since I am not very patient about waiting for something to arrive in the mail. I created one in 3D so I can print it out. I will use this while I wait for the one I ordered from him to arrive in the mail.
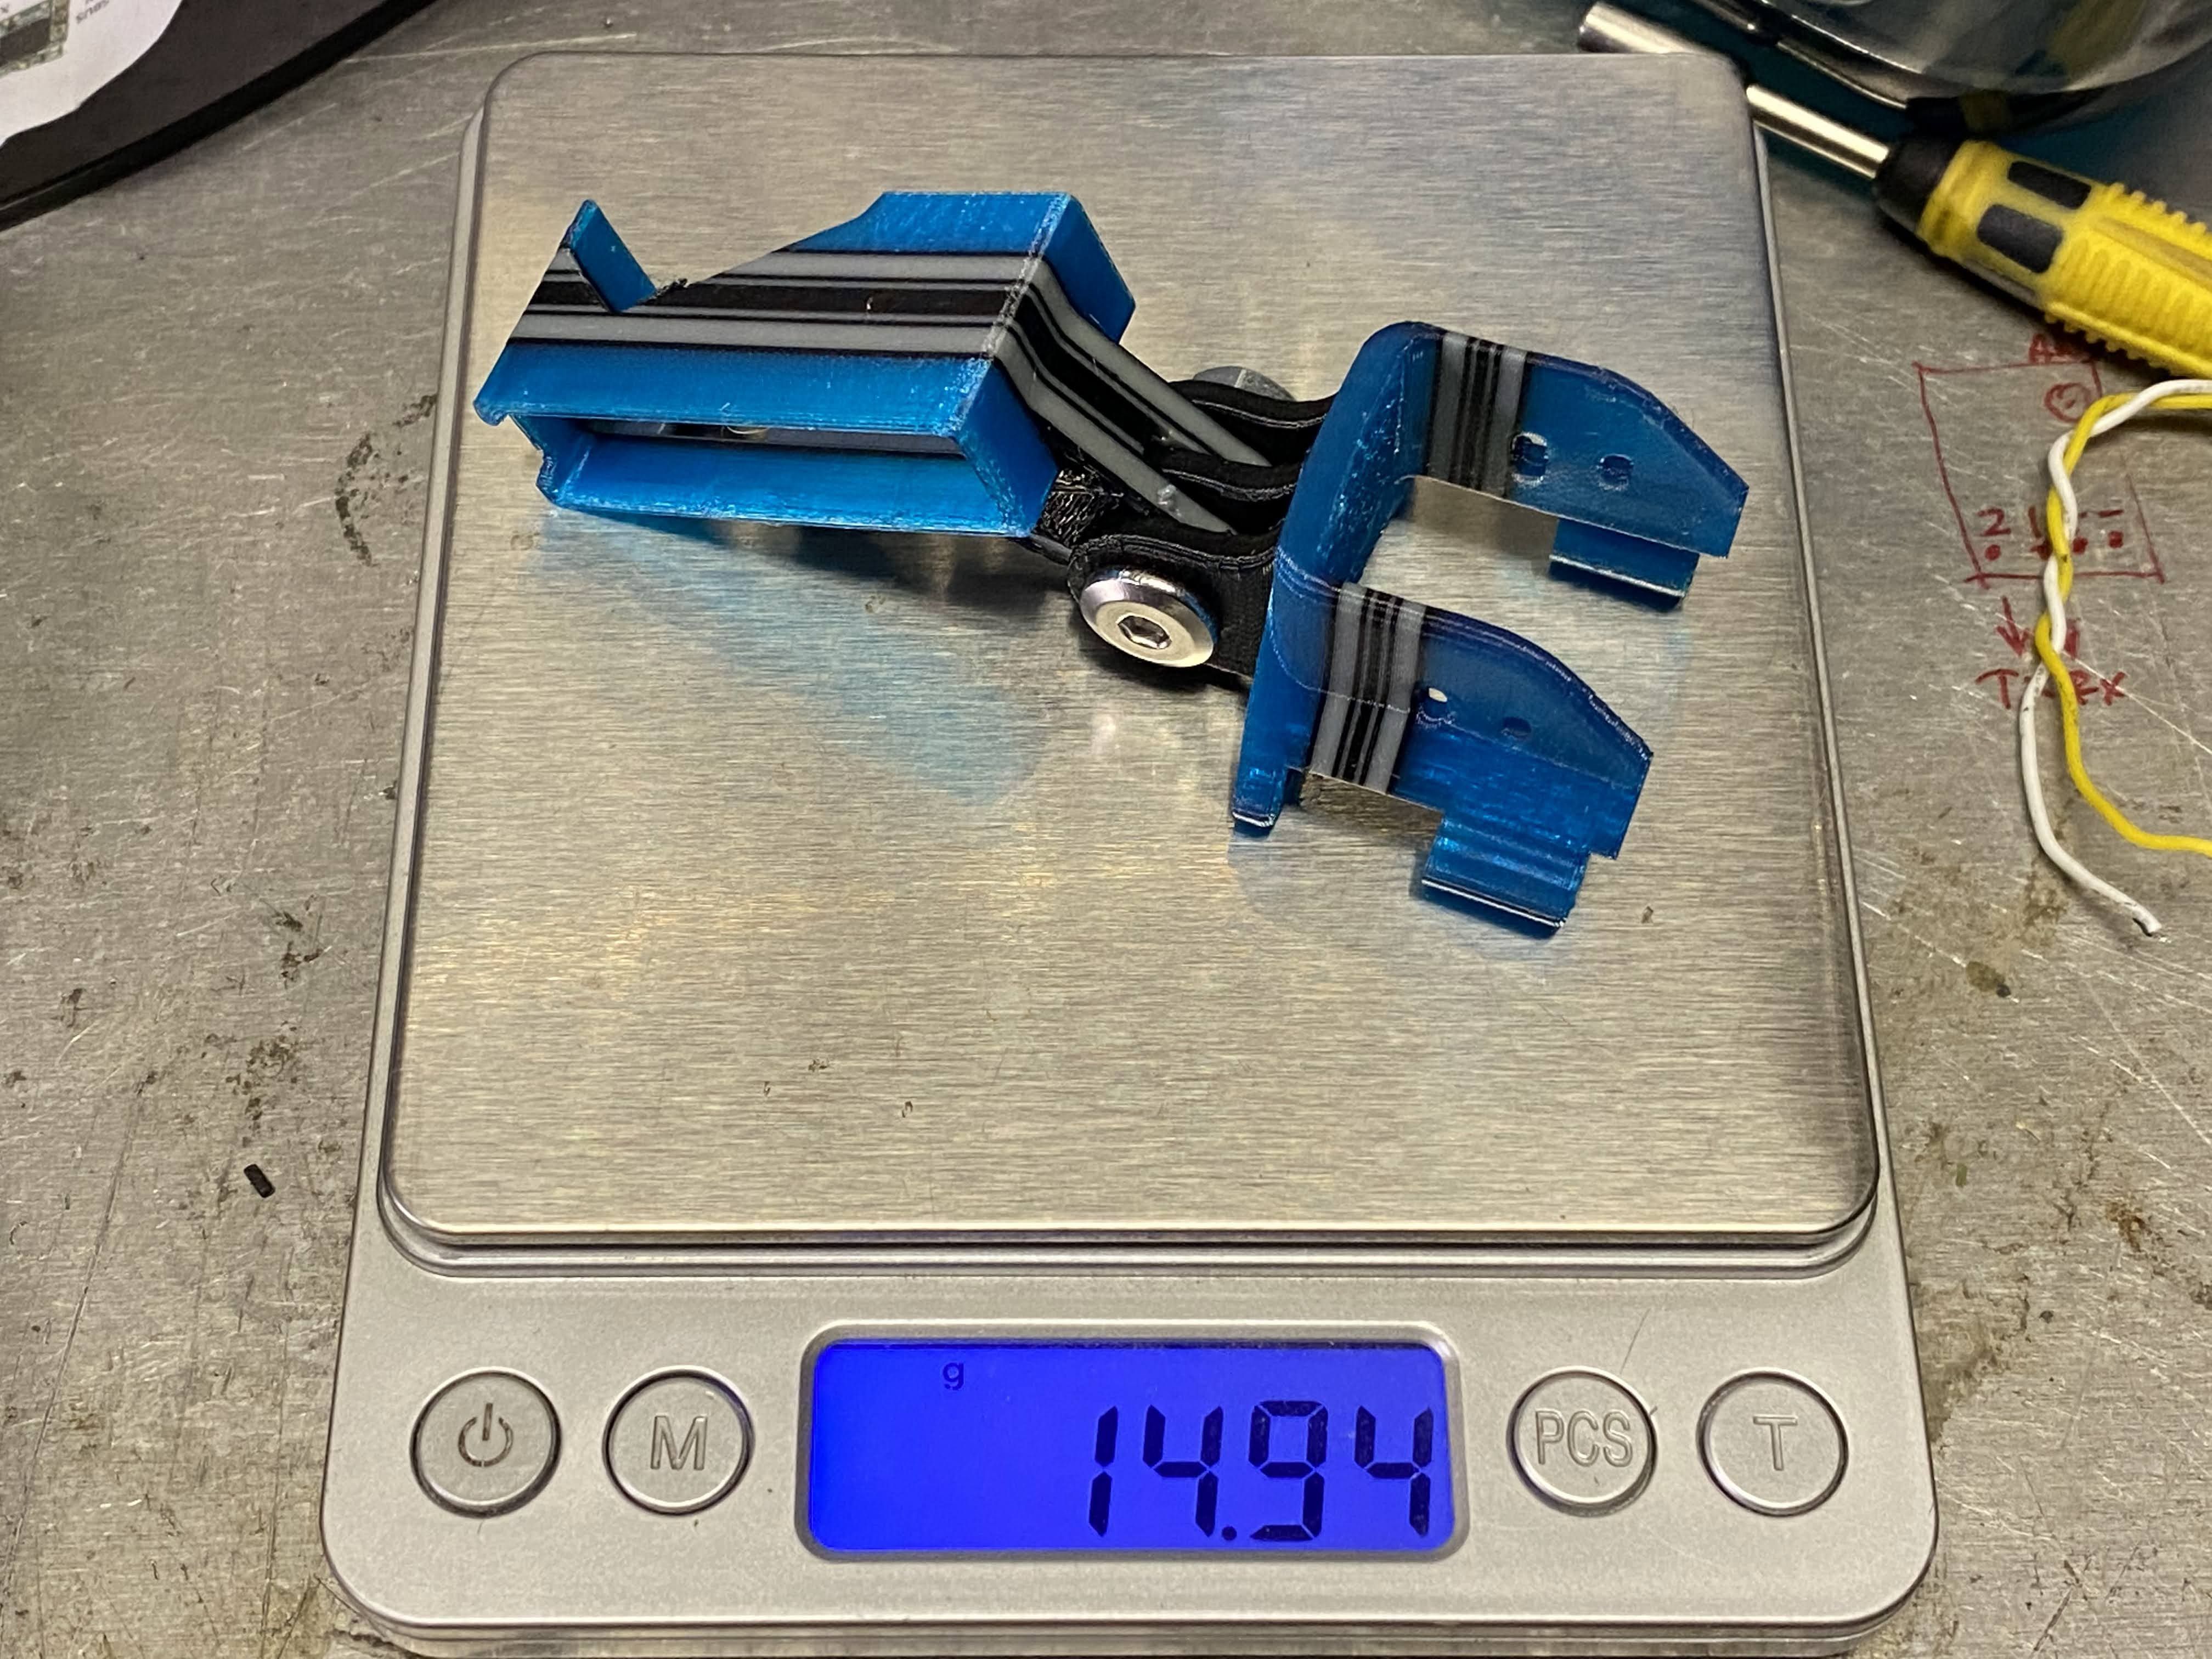
Here is a prototype test fitment with the 3D printed prop guard that is 2mm thick. I am going to do some test tomorrow to see how it does when it bumps around the wall. These guards are printed with PETG filament and I will try using Sainsmart Carbon Fiber Nylon next.
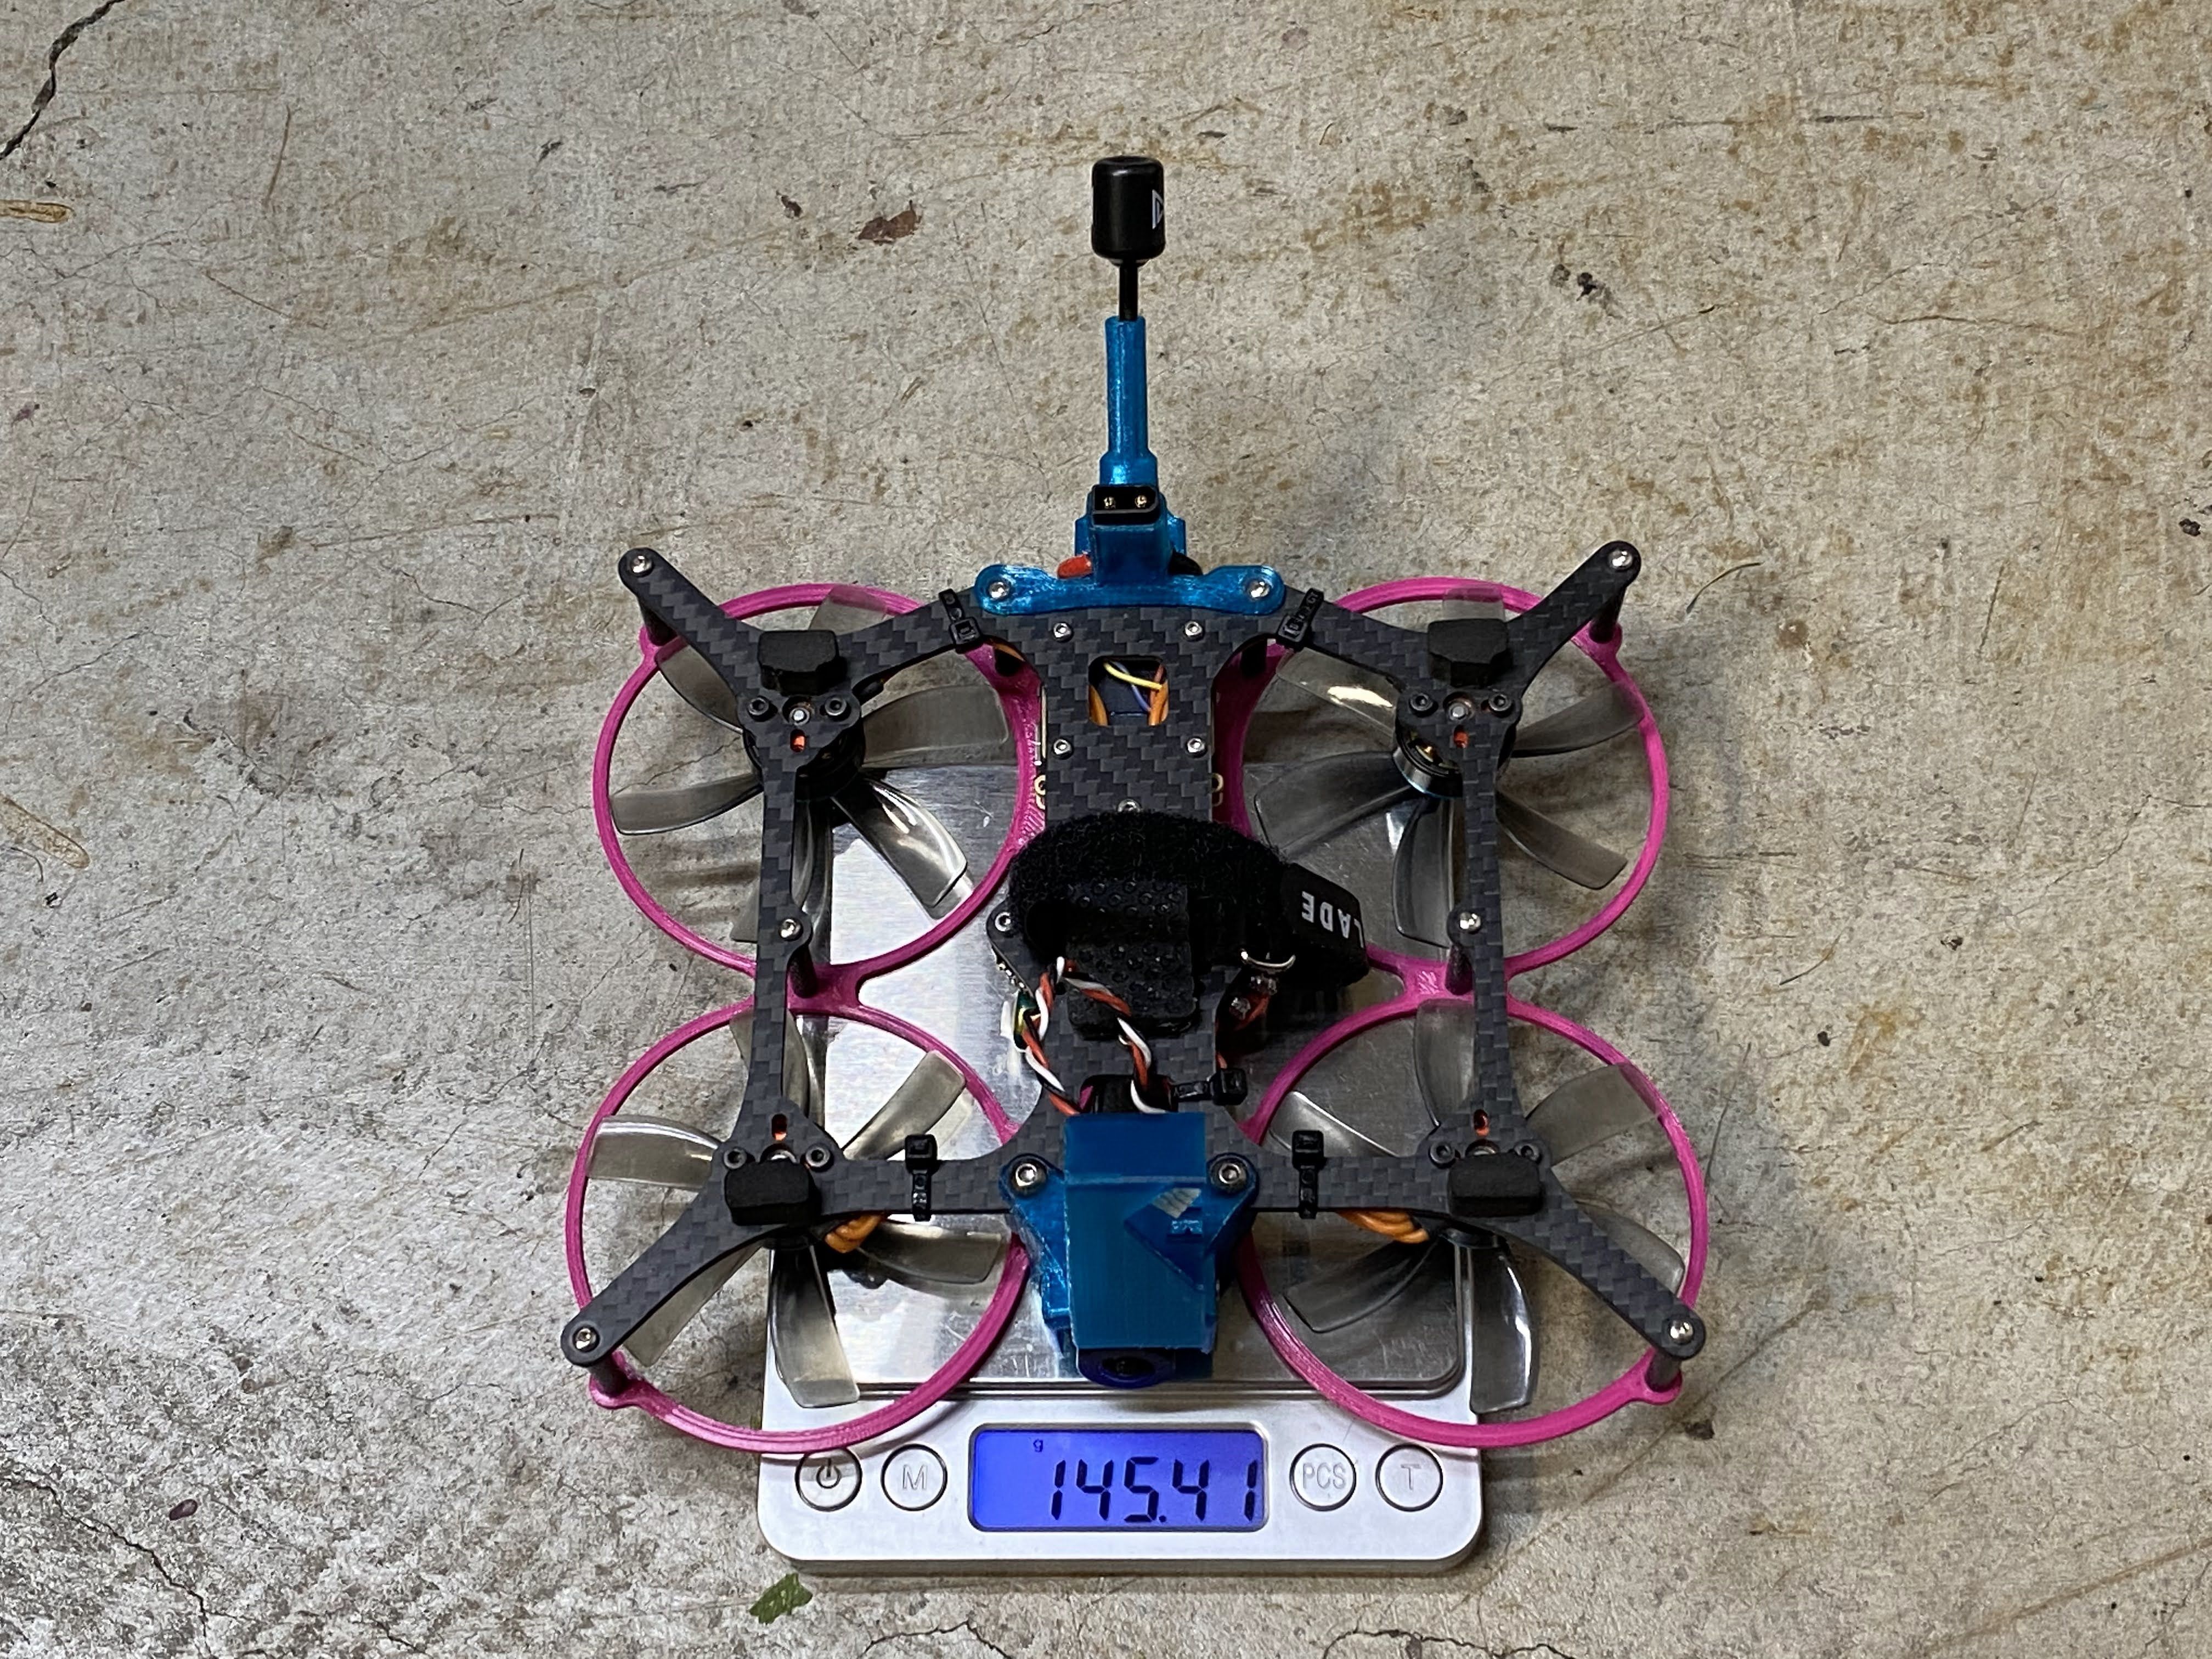
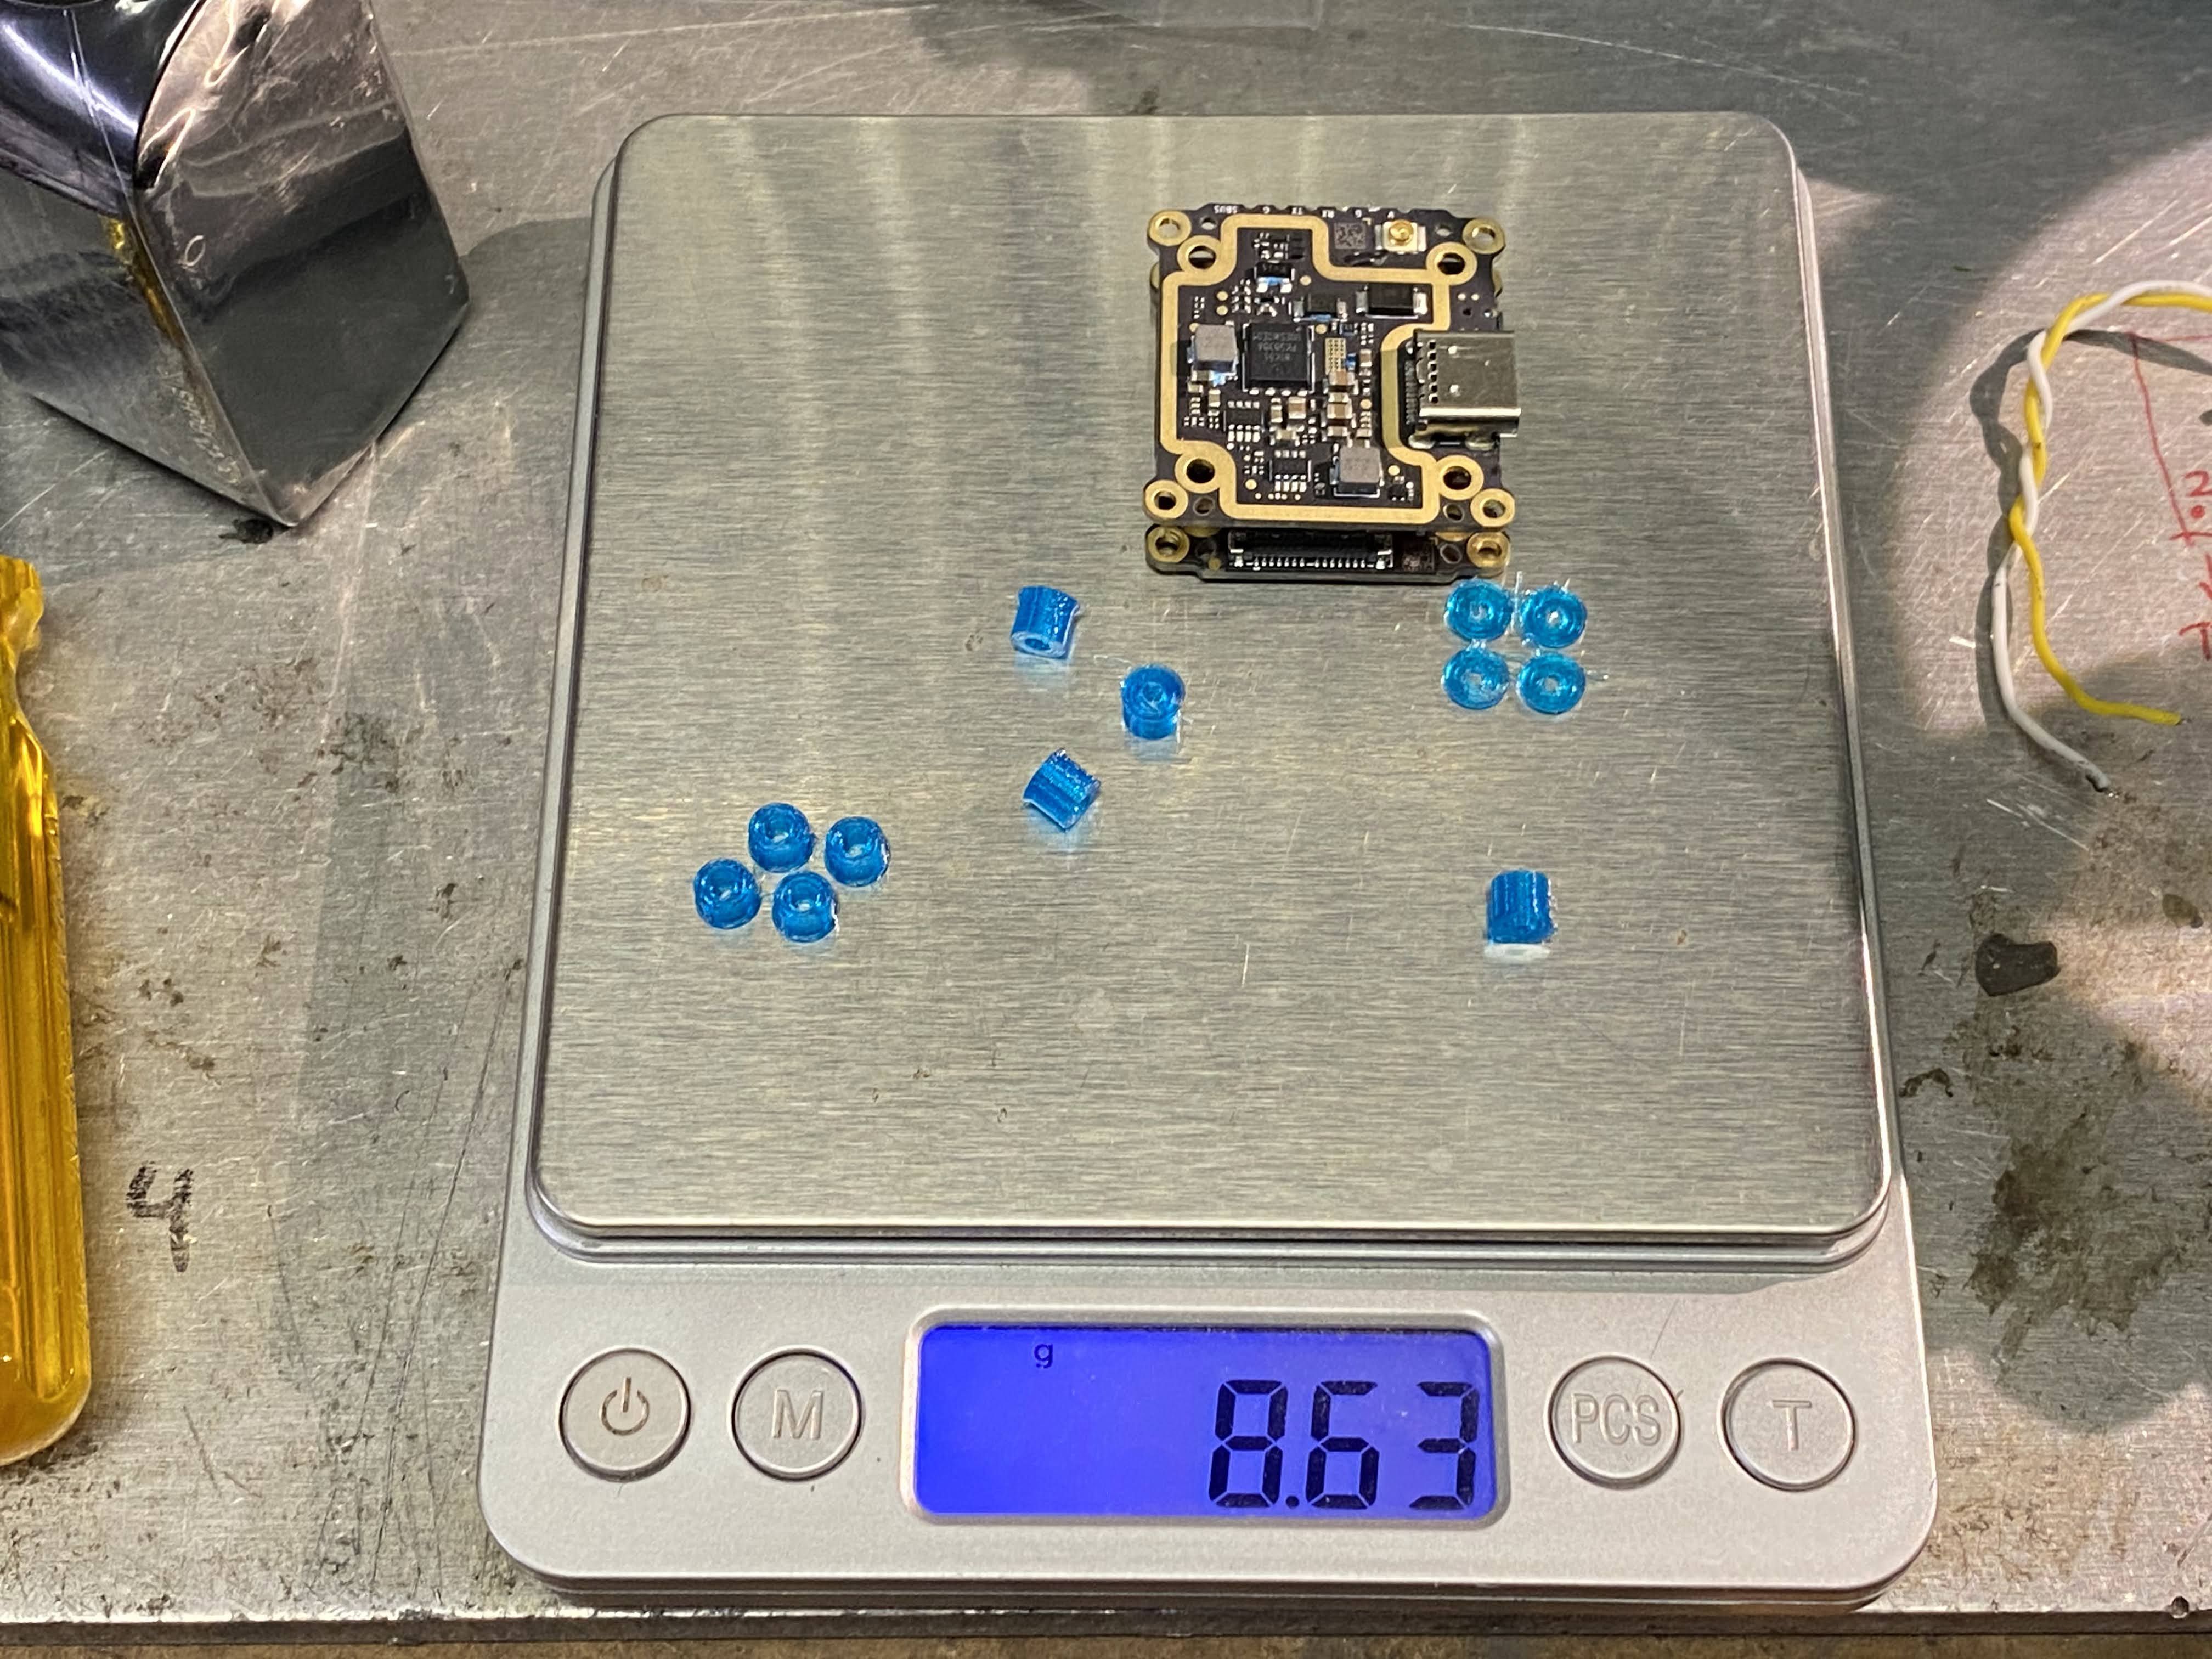
Another change I made with this conversion was switching all the M3 standoff to M2, except for the 2 in the front that holds the FPV camera. Those 2 are still M3, or else I will need to remix the camera mount to accommodate smaller standoff. With all that done, I was able to lose another 17 grams, so that will bring the total dry weight down to 145 grams. This will make it my lightest 2.5” cinewhoop.
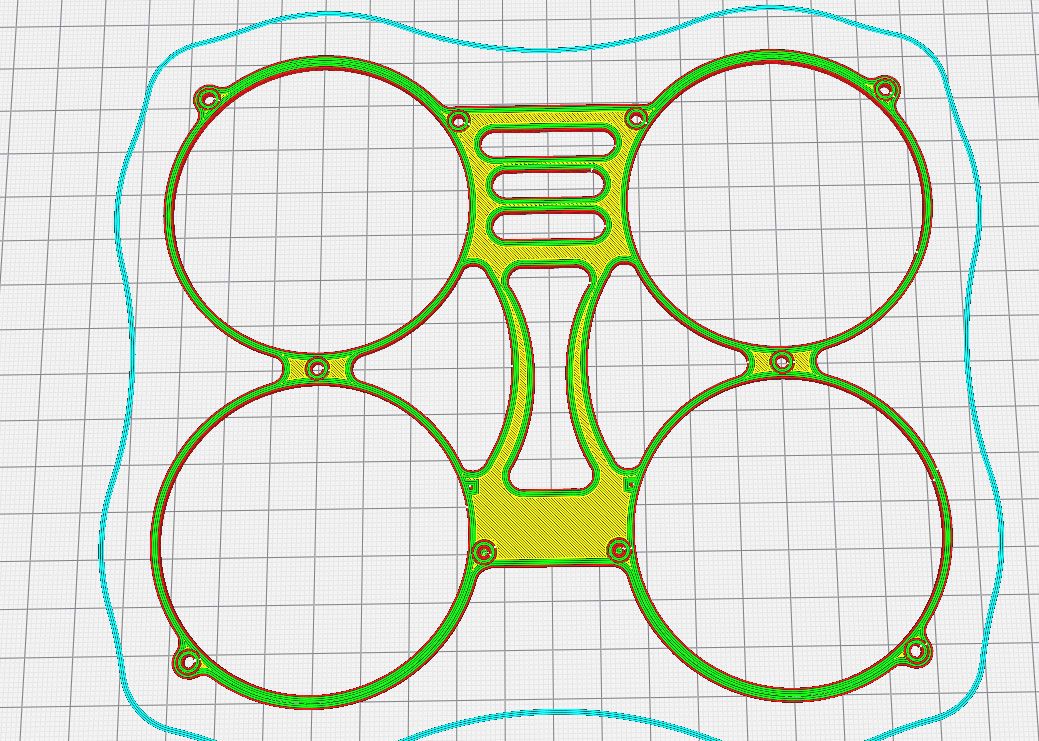
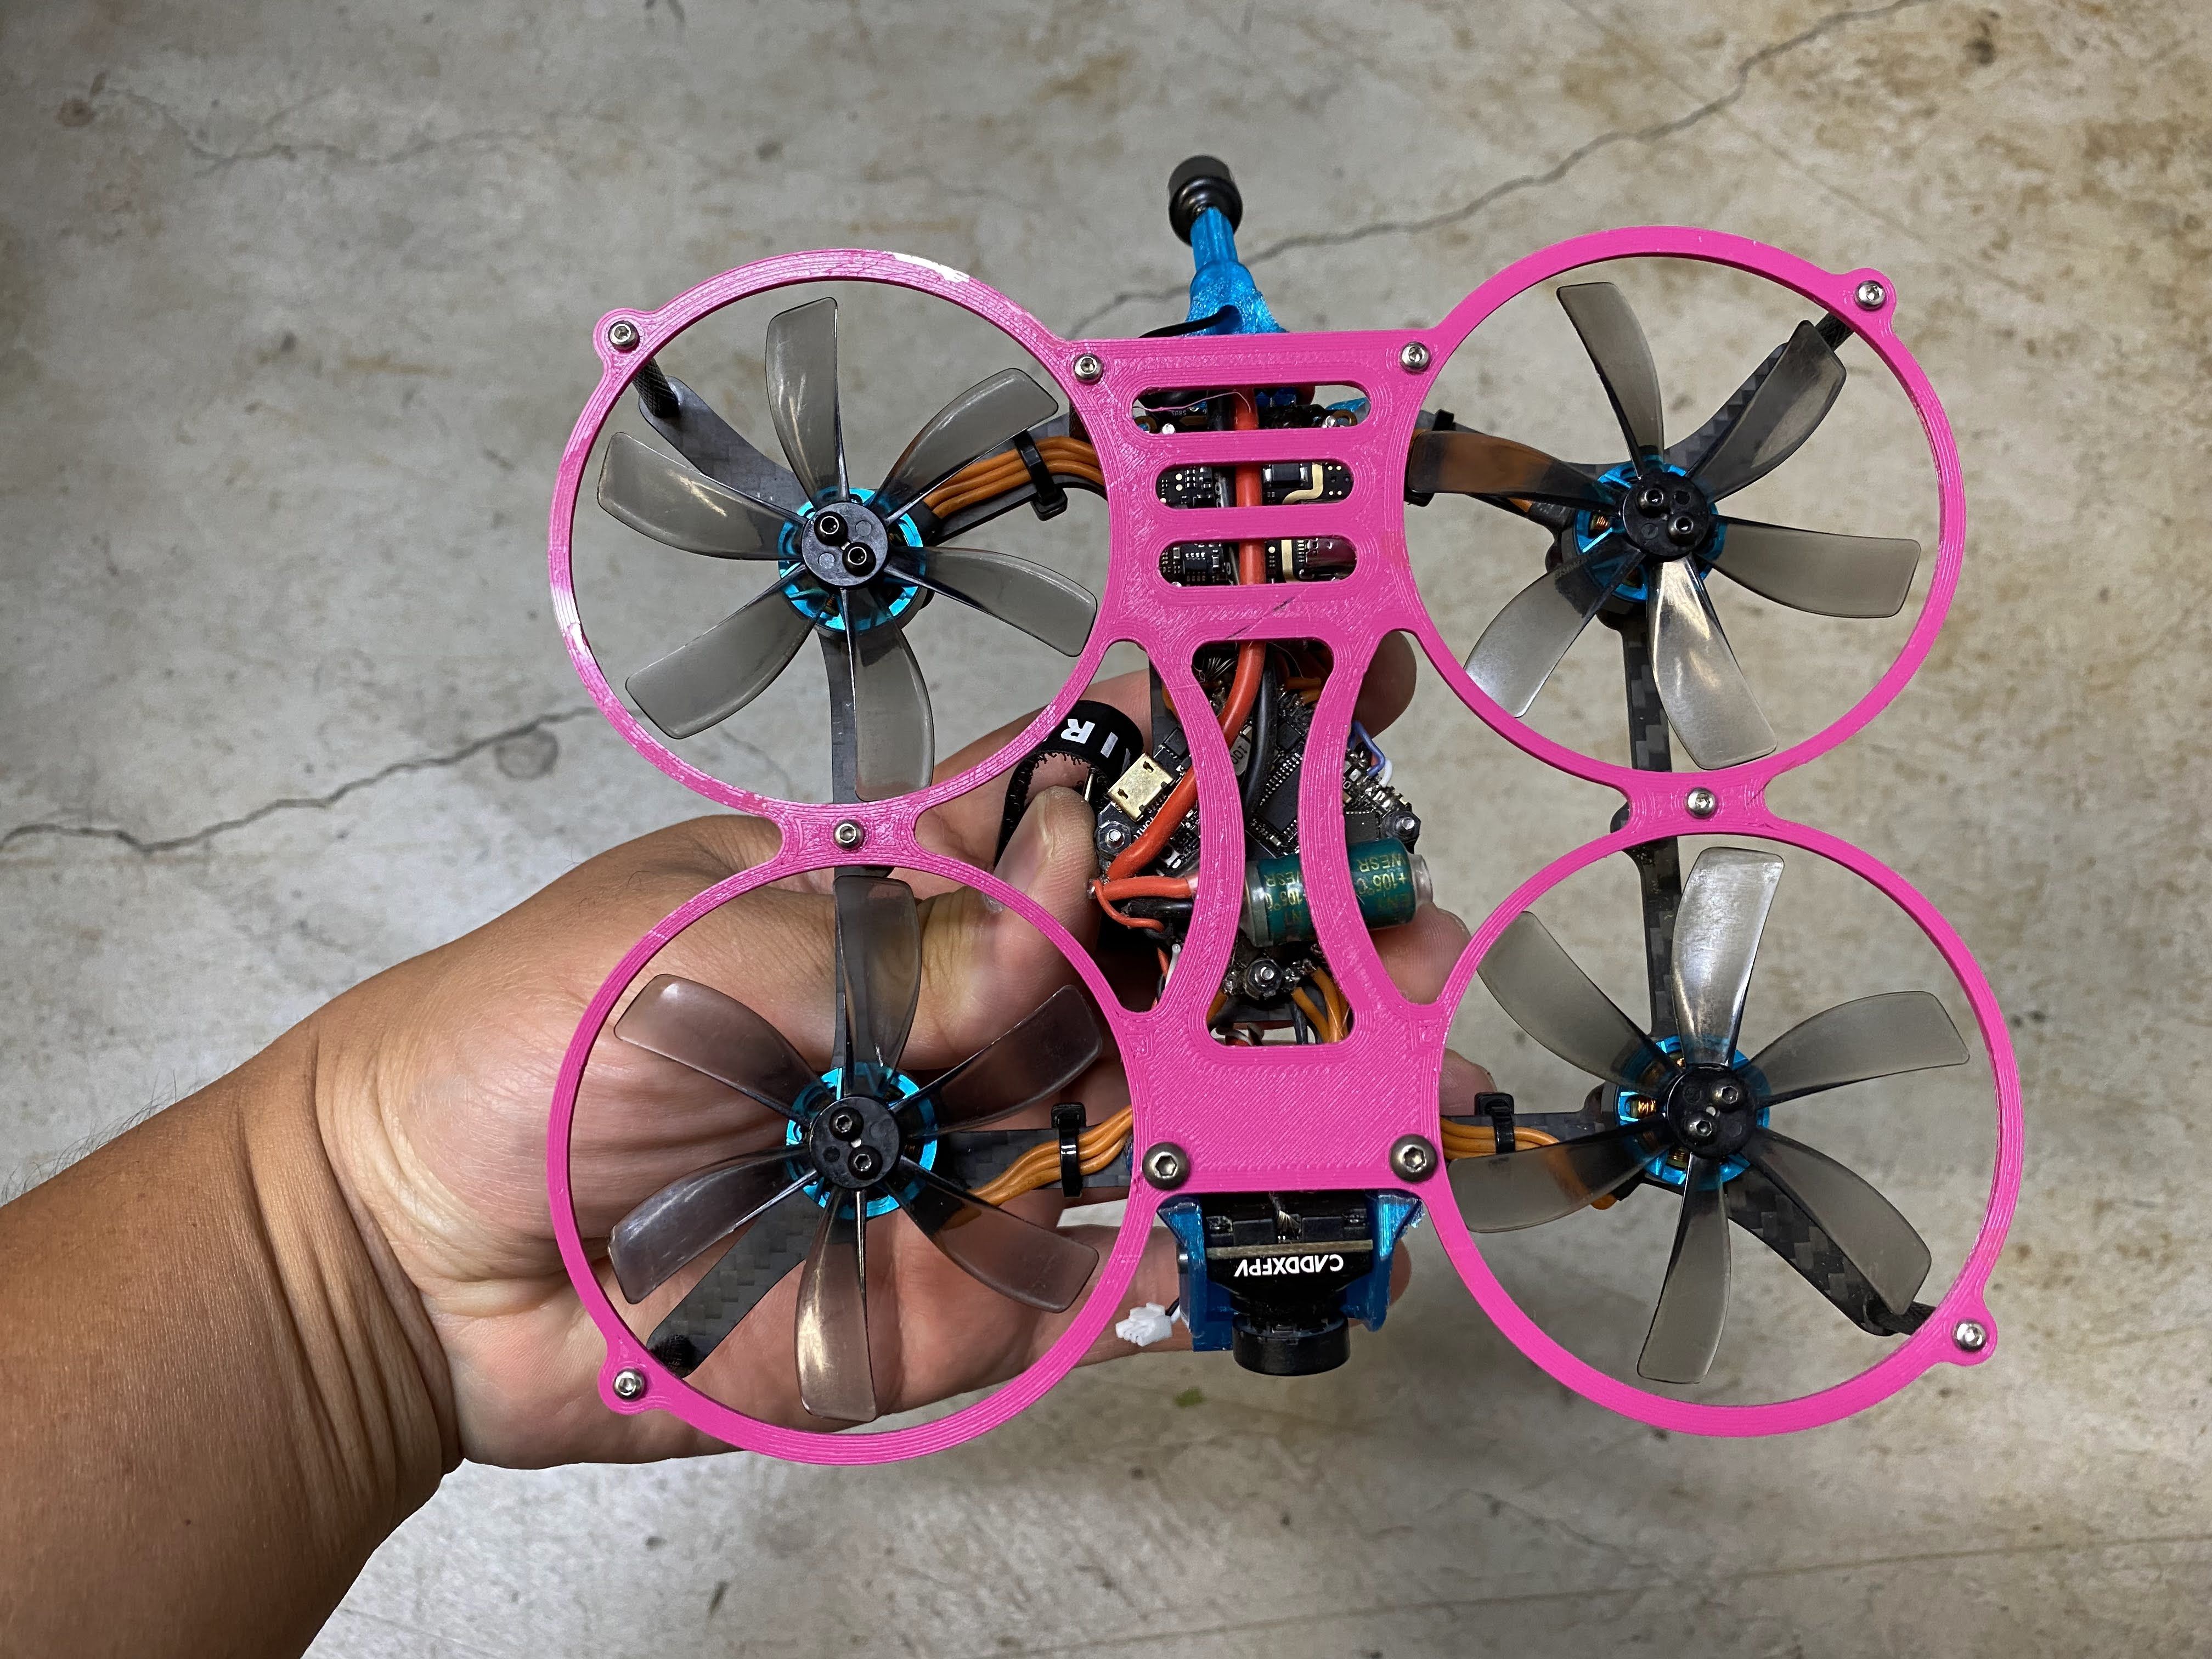
Update to my progress... The idea that Chris Teal had about using a carbon fiber plate might be the best upgrade for the snapshot. Here are 3 reasons why I like the SnapRing better:
- Lower Weight - which is a huge cascading effect, in a positive way (longer flight times, better handling and etc.)
- Lower Noise - A huge difference
- No more props rubbing or binding inside the ducts.
Carbon Fiber will be the best option, but in a bind a 3D printed version will work too. I am not going to comment on the carbon fiber because it did not arrive at the time of my testing. But in the meantime, here is what I have noticed with the PETG version.
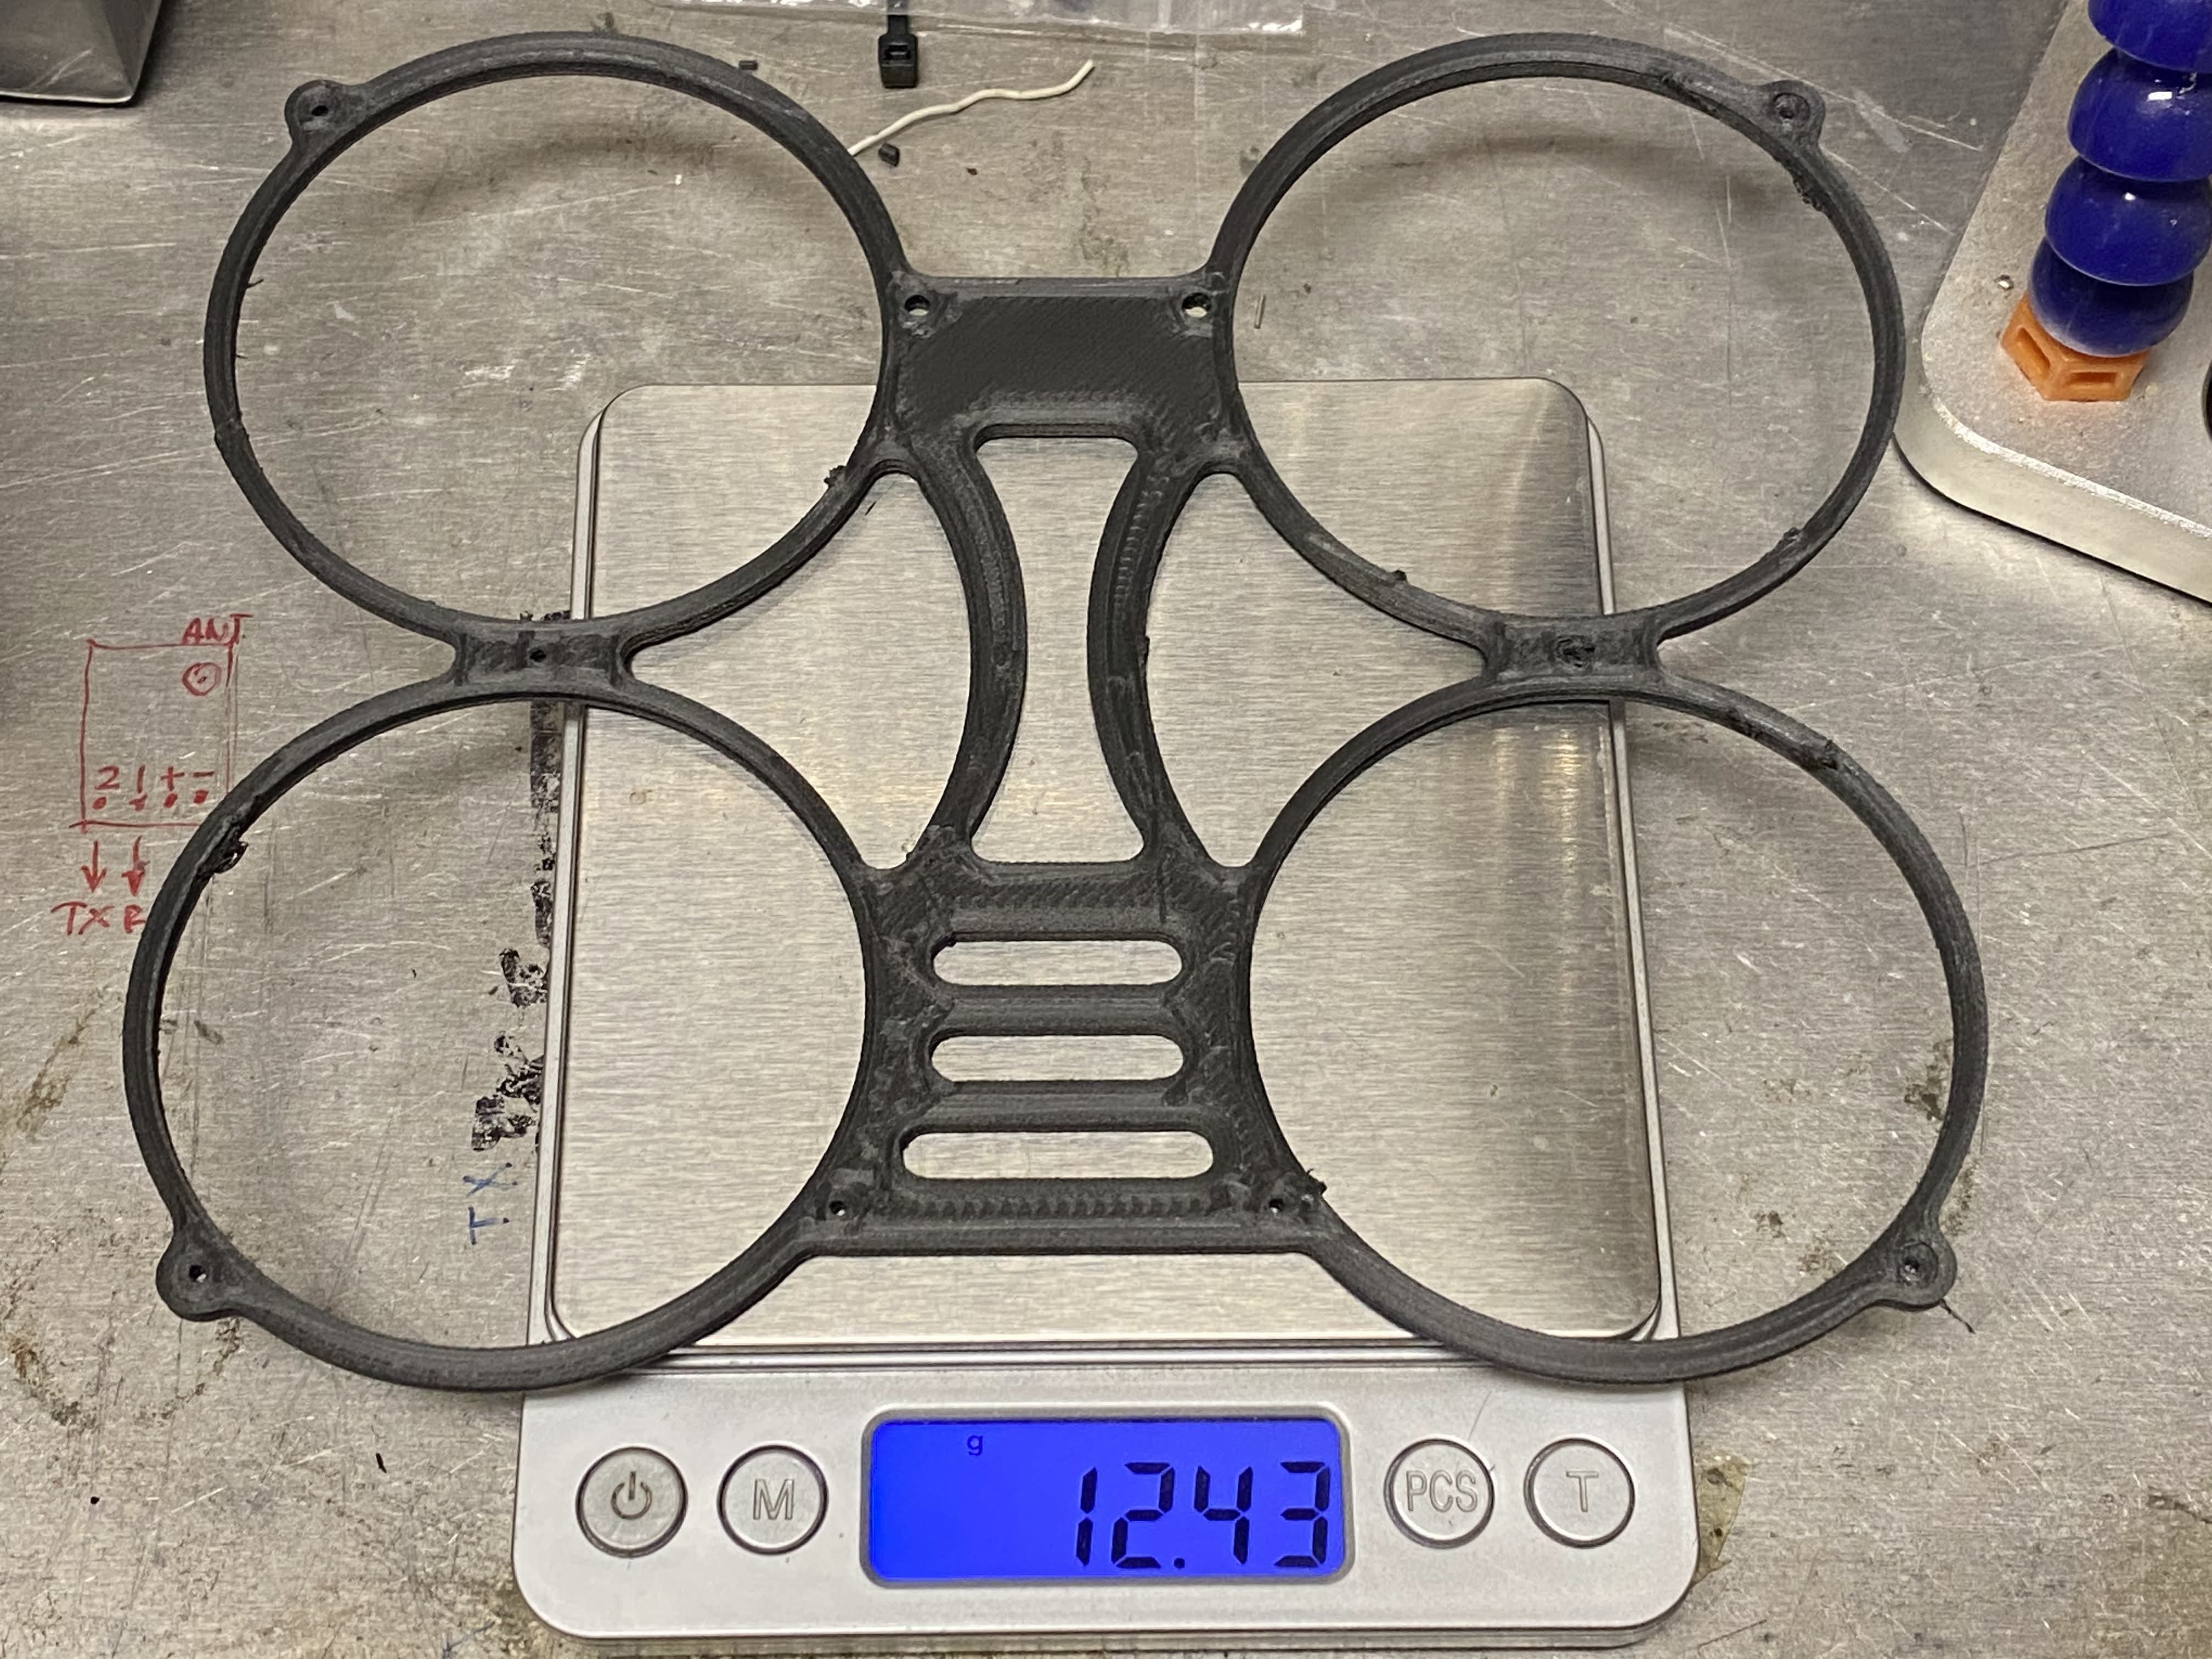
I printed it both in 2mm (weight: 9 grams) and 3mm (weight: 14 grams). It is obvious to state that the 3mm version is stiffer and I would recommend it over the 2mm version because I broke it on a hard landing. As for the 3mm version, after a 5 feet drop the guard survived but the fractured the upper carbon fiber top plate. I straightened out the fracture and sealed everything up with some CA and it seems to be holding up.
I just 3D printed a Carbon Fiber Nylon guard that is 3mm and I will try it out tomorrow. I will also try printing out a Carbor Fiber Polycarbonate next. Why did I pick these filaments? It because I already had it in my collection of filaments and I hope it is an upgrade to PETG.
Videos
GoPro 7 Lite
Same flight as above but the DJI DVR recording
Photos


Part List
Show stores (8)
Whats the verdict if you had to choose between the snapshot or the hurricane 2.5?
Hurricane 2.5 will be the clear winner, but that is because of the weight difference. As I get the SnapShot closer and closer to the Hurricane 25's weight, the differences are getting less noticeable. There has been a new development where the SnapShot can be converted to a SnapRing and that can bring the weight down buy a lot. Until I build the SnapRing I will not speculate anymore about it :)
Guides & Reviews

AirbladeUAV has done it again and this time they've brought long range to the 5" class! Based on the popular Transformer Mini, the new Transformer 5" Ultralight adopts a lot of the same design philosophies with larger props and more payload capacity. It can fly upwards of 20 minutes on a 4 cell Li-Ion battery pack and in ideal conditions it's got a range of over 4 to 5 miles. In this guide I'll walk..
Read more
With the release of the DJI FPV Drone cinematic FPV has become a lot more accessible, but you certainly don't want to crash a $750 drone! The QAV-CINE Freybott is a compact, lightweight cinematic FPV drone that can take a hit and keep going. It's a lot safer to fly indoors and around people. With a naked GoPro or the SMO 4k you can capture some great stabilized footage. In this guide I'll show you..
Read more


Hey you should check out Droneco's 2 inch Shotglass. I have it in a 4S setup (heavy 126grams with 1404 motors and full 03 unit) but I do get 5:45 min flight times with easy cruising (Tattu 650 LIHV lipo). Flies surprisingly well in winds for a 2 inch