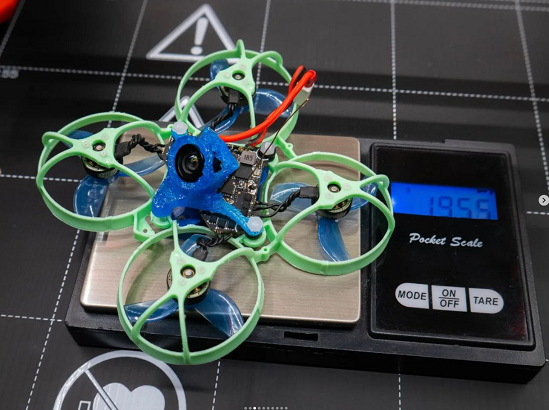
Diamond Meteor Pro. A sub 20g pusher tiny whoop with 35mm props!
 By SpeziLover on Oct 10, 2022
Diamond Meteor Pro. A sub 20g pusher tiny whoop with 35mm props!
NEW: https://rotorbuilds.com/build/30955
There is also a new MOD for flying upright: https://rotorbuilds.com/build/30483
This is a mod for meteor pro frame of Betafpv. More details: https://www.instagram.com/p/CjBv2YfoVi8/?utm_source=ig_web_copy_link and https://www.thingiverse.com/thing:5536503
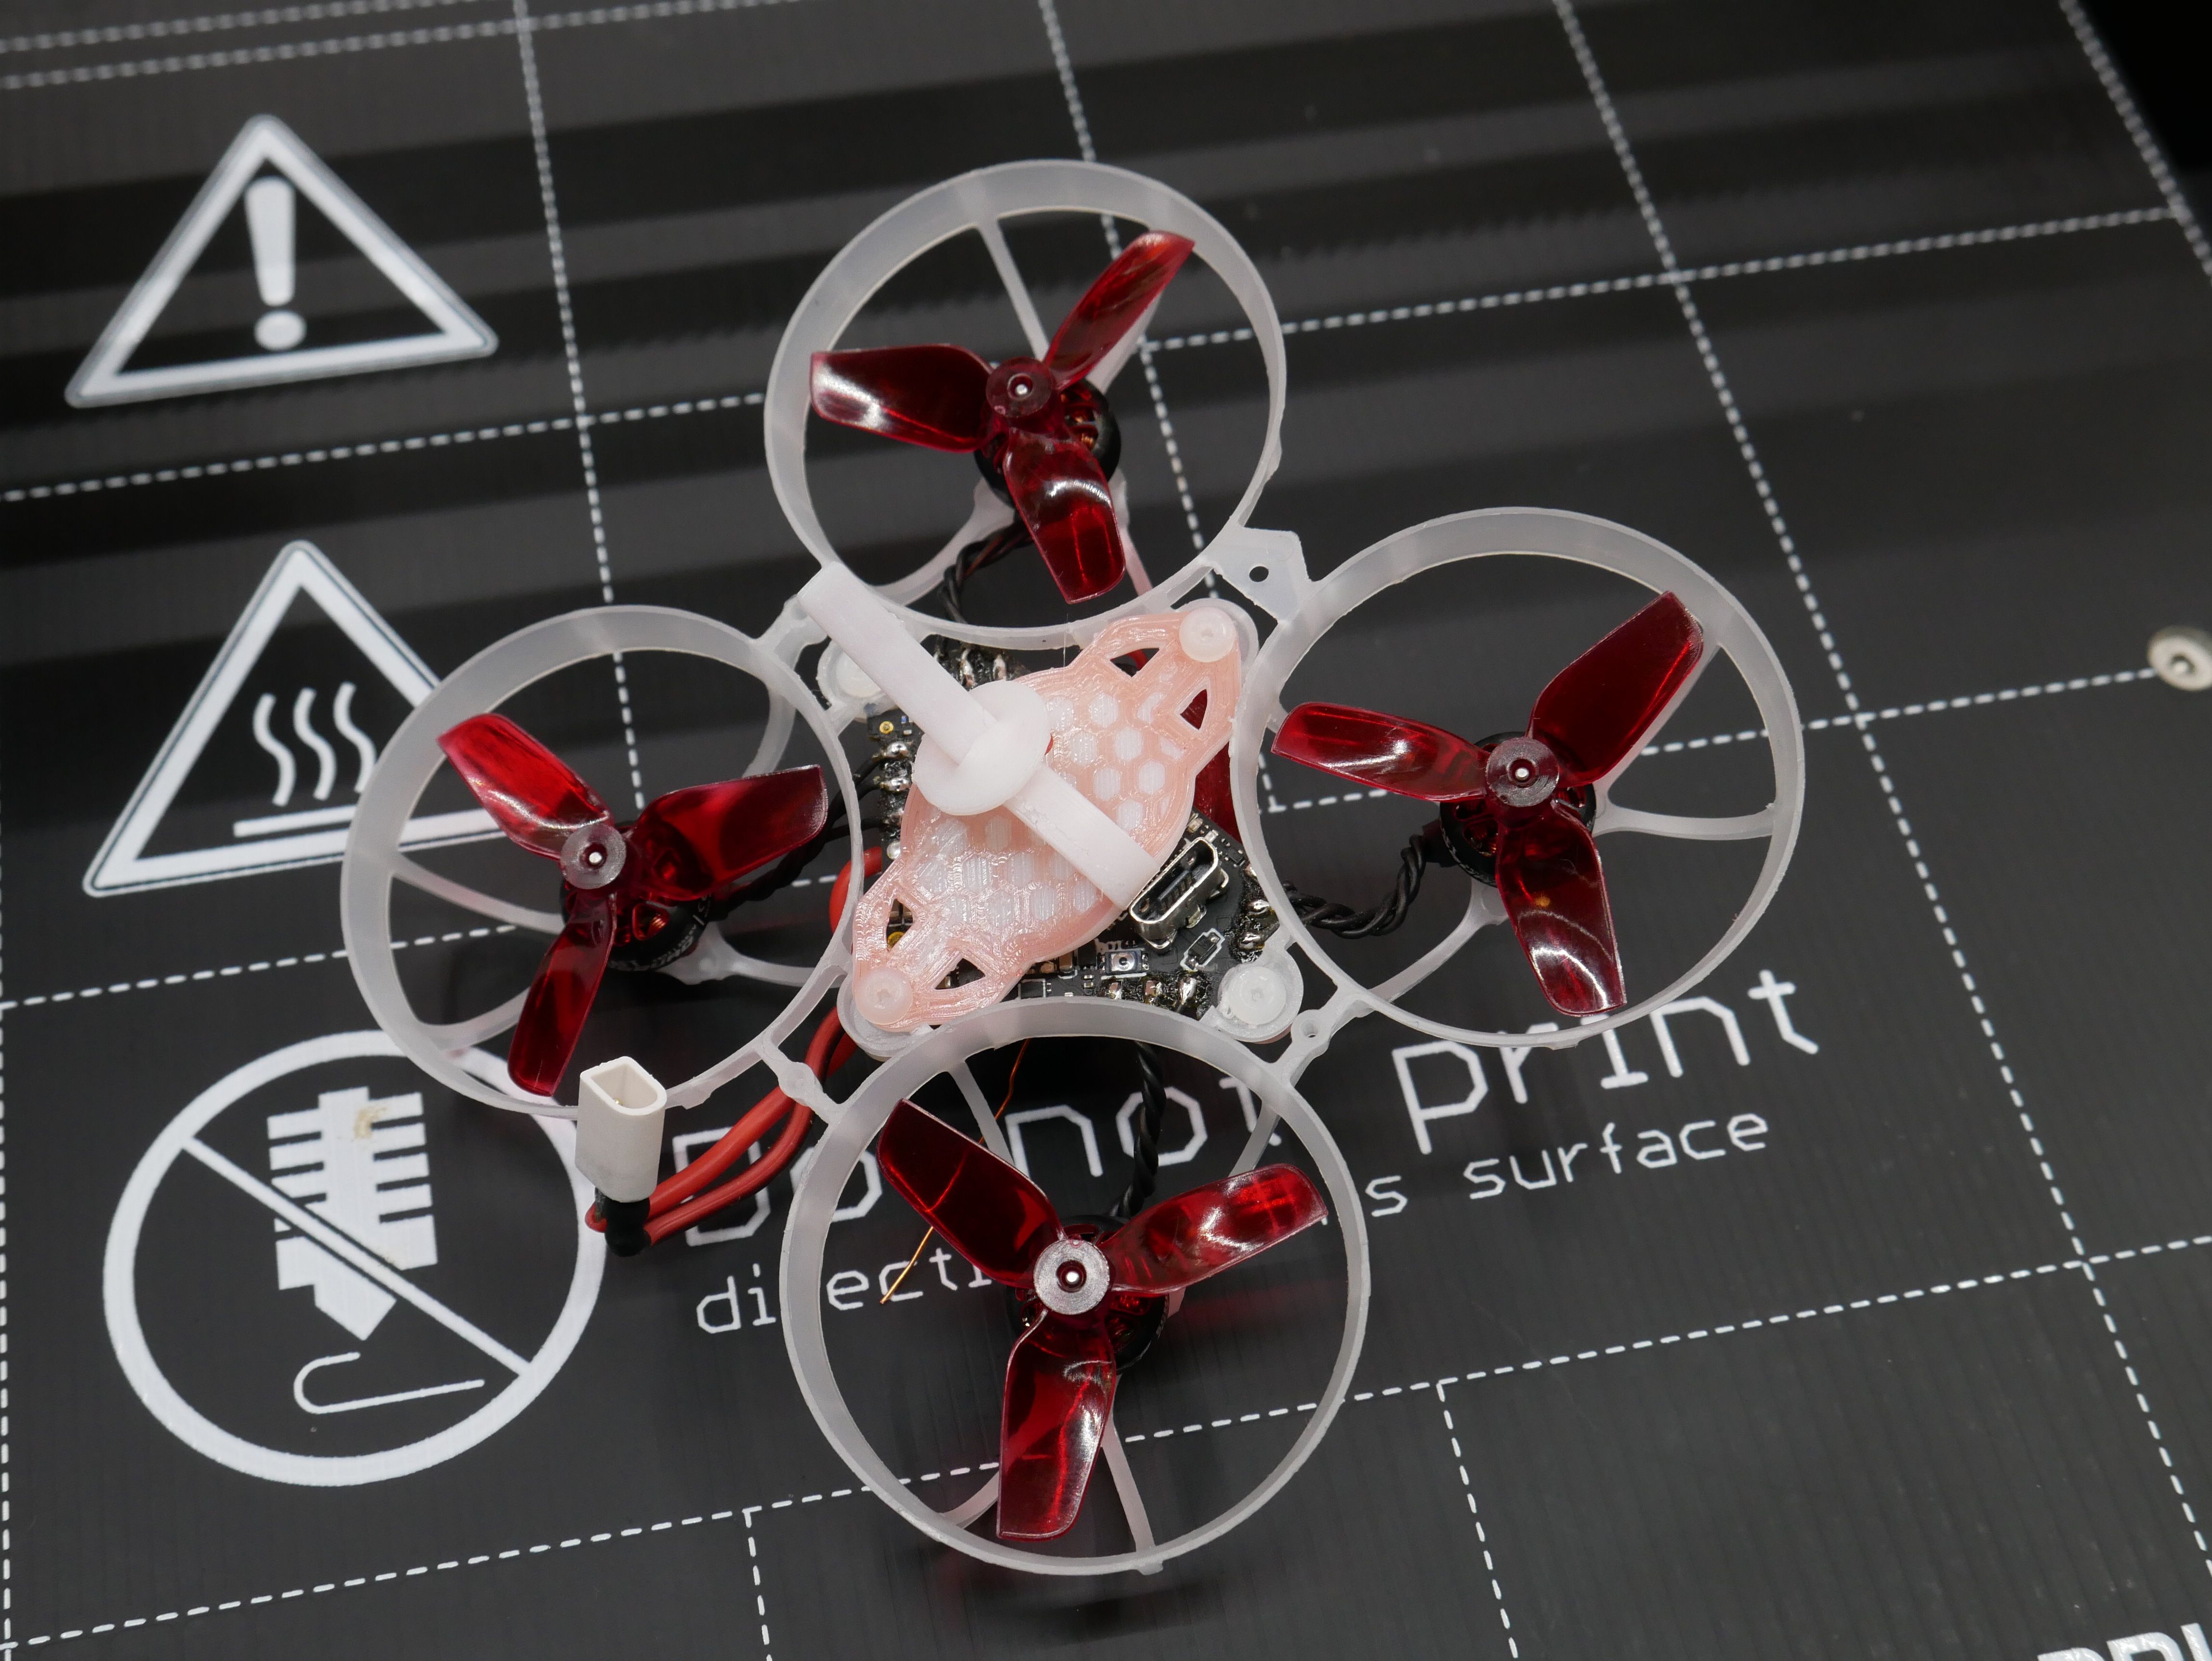
In early 2020 I designed the first pusher mod for the meteor frame. I have adopted this principle on the new Meteor pro frame with 35mm props.
Why pusher?
The goal is to fly a light whoop on 35mm props. However, you can only mount Betafpv FC (external VTX necessary) in the Betafpv meteor pro frame, which is the reason for a higher weight. The frame uz65 got similiar problems and overall is not as good as the betafpv pro.
Why not mounting another fc with aio rx and vtx?
The problem is it doesn't fit in. You would have to put the flight controller higher with spacers. This causes the problem that the whole profile of the whoop gets higher which also negatively affects the center of gravity. If we flip the frame and add new mount options, I can fly any flight controller and have a compact center of gravity. I can also fly different lipo positions which is a cool way of customizing.
Advantages of my Mod:
- Fly any flight controller on the Meteor Pro Frame
- Easy to reach under 20 grams on 35 mm props !!
- Use diffrent lipo slots (diffrent lipo size, check out my thingiverse)
- New mounting option for digital whoops on 35mm props
- Fly different lipo positions. Customize your whoop....
-
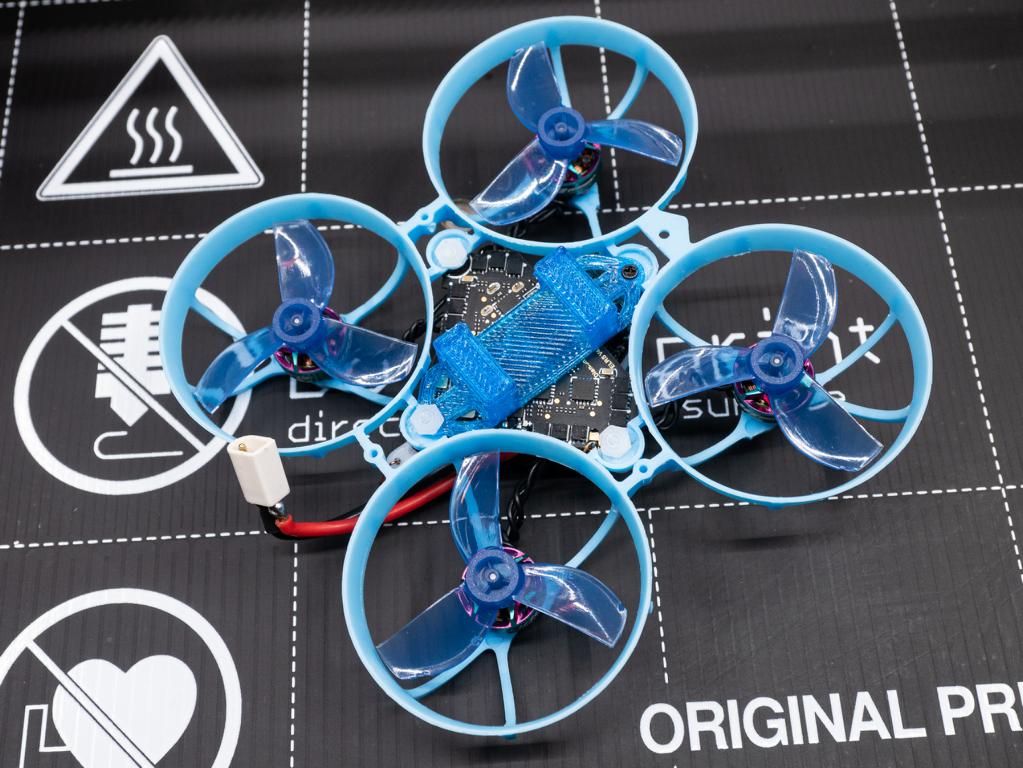
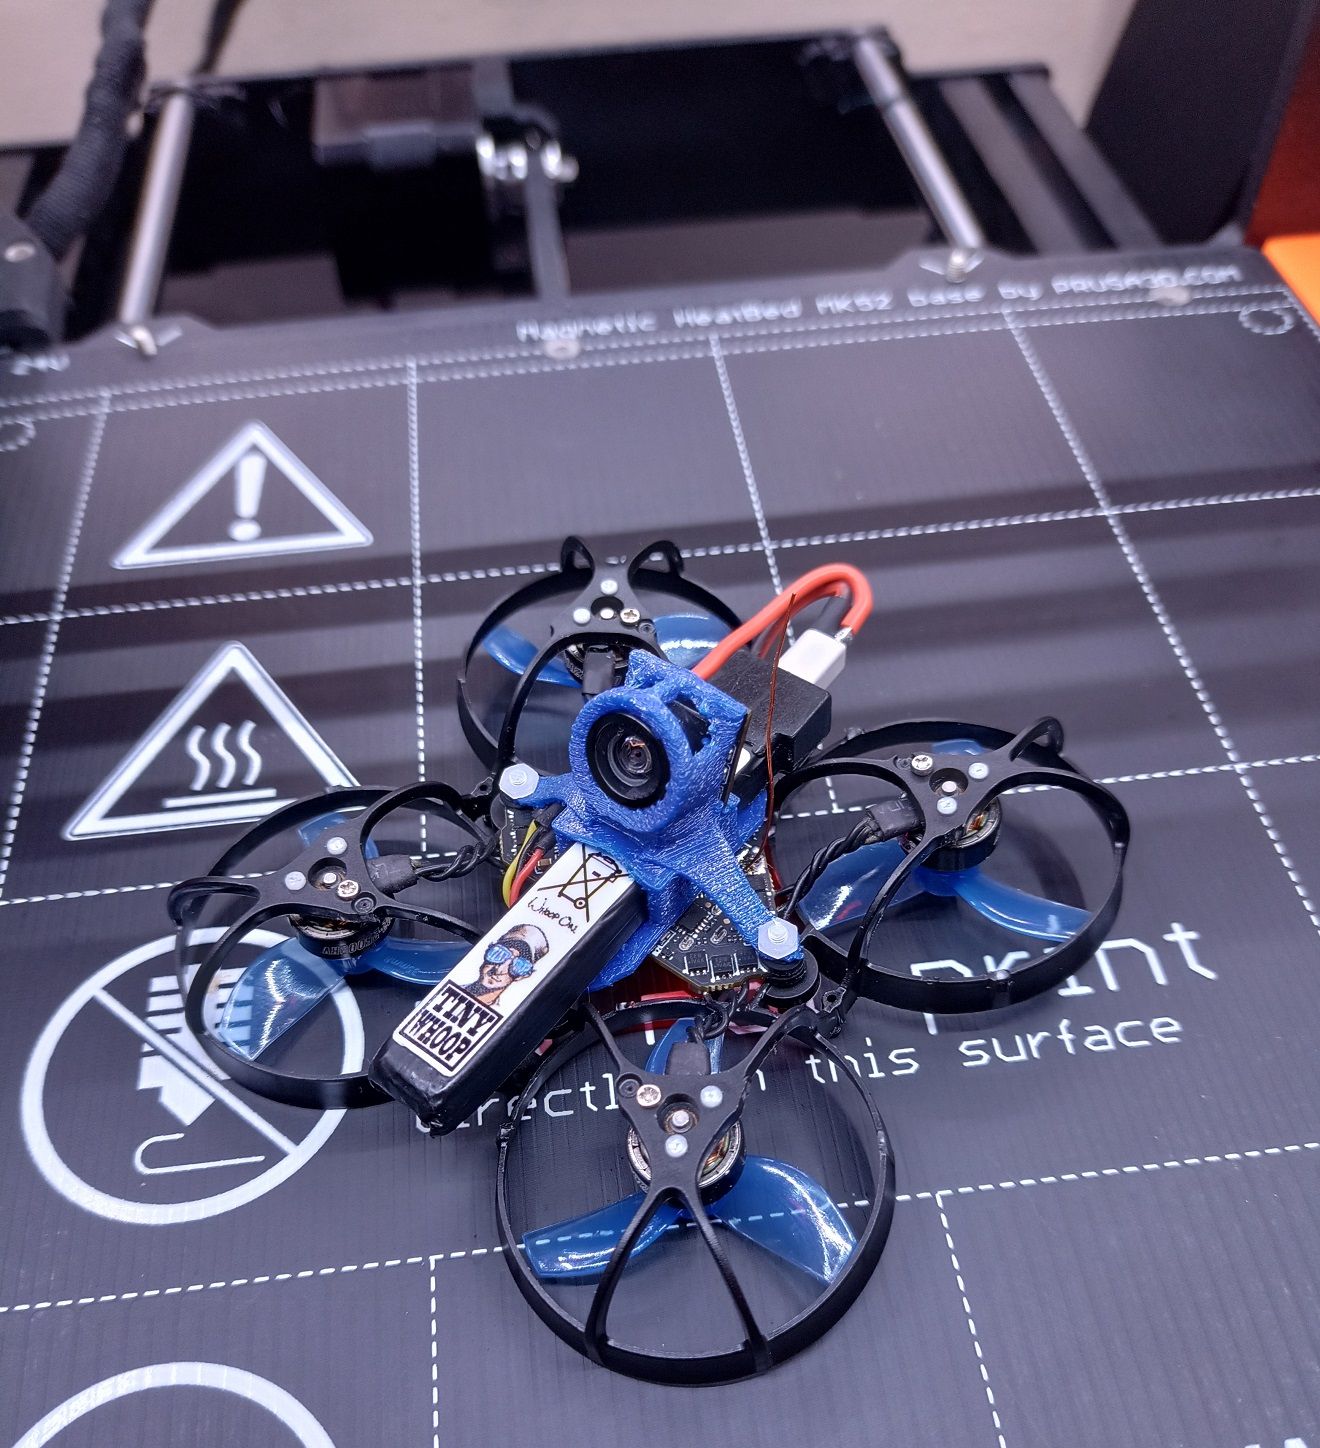
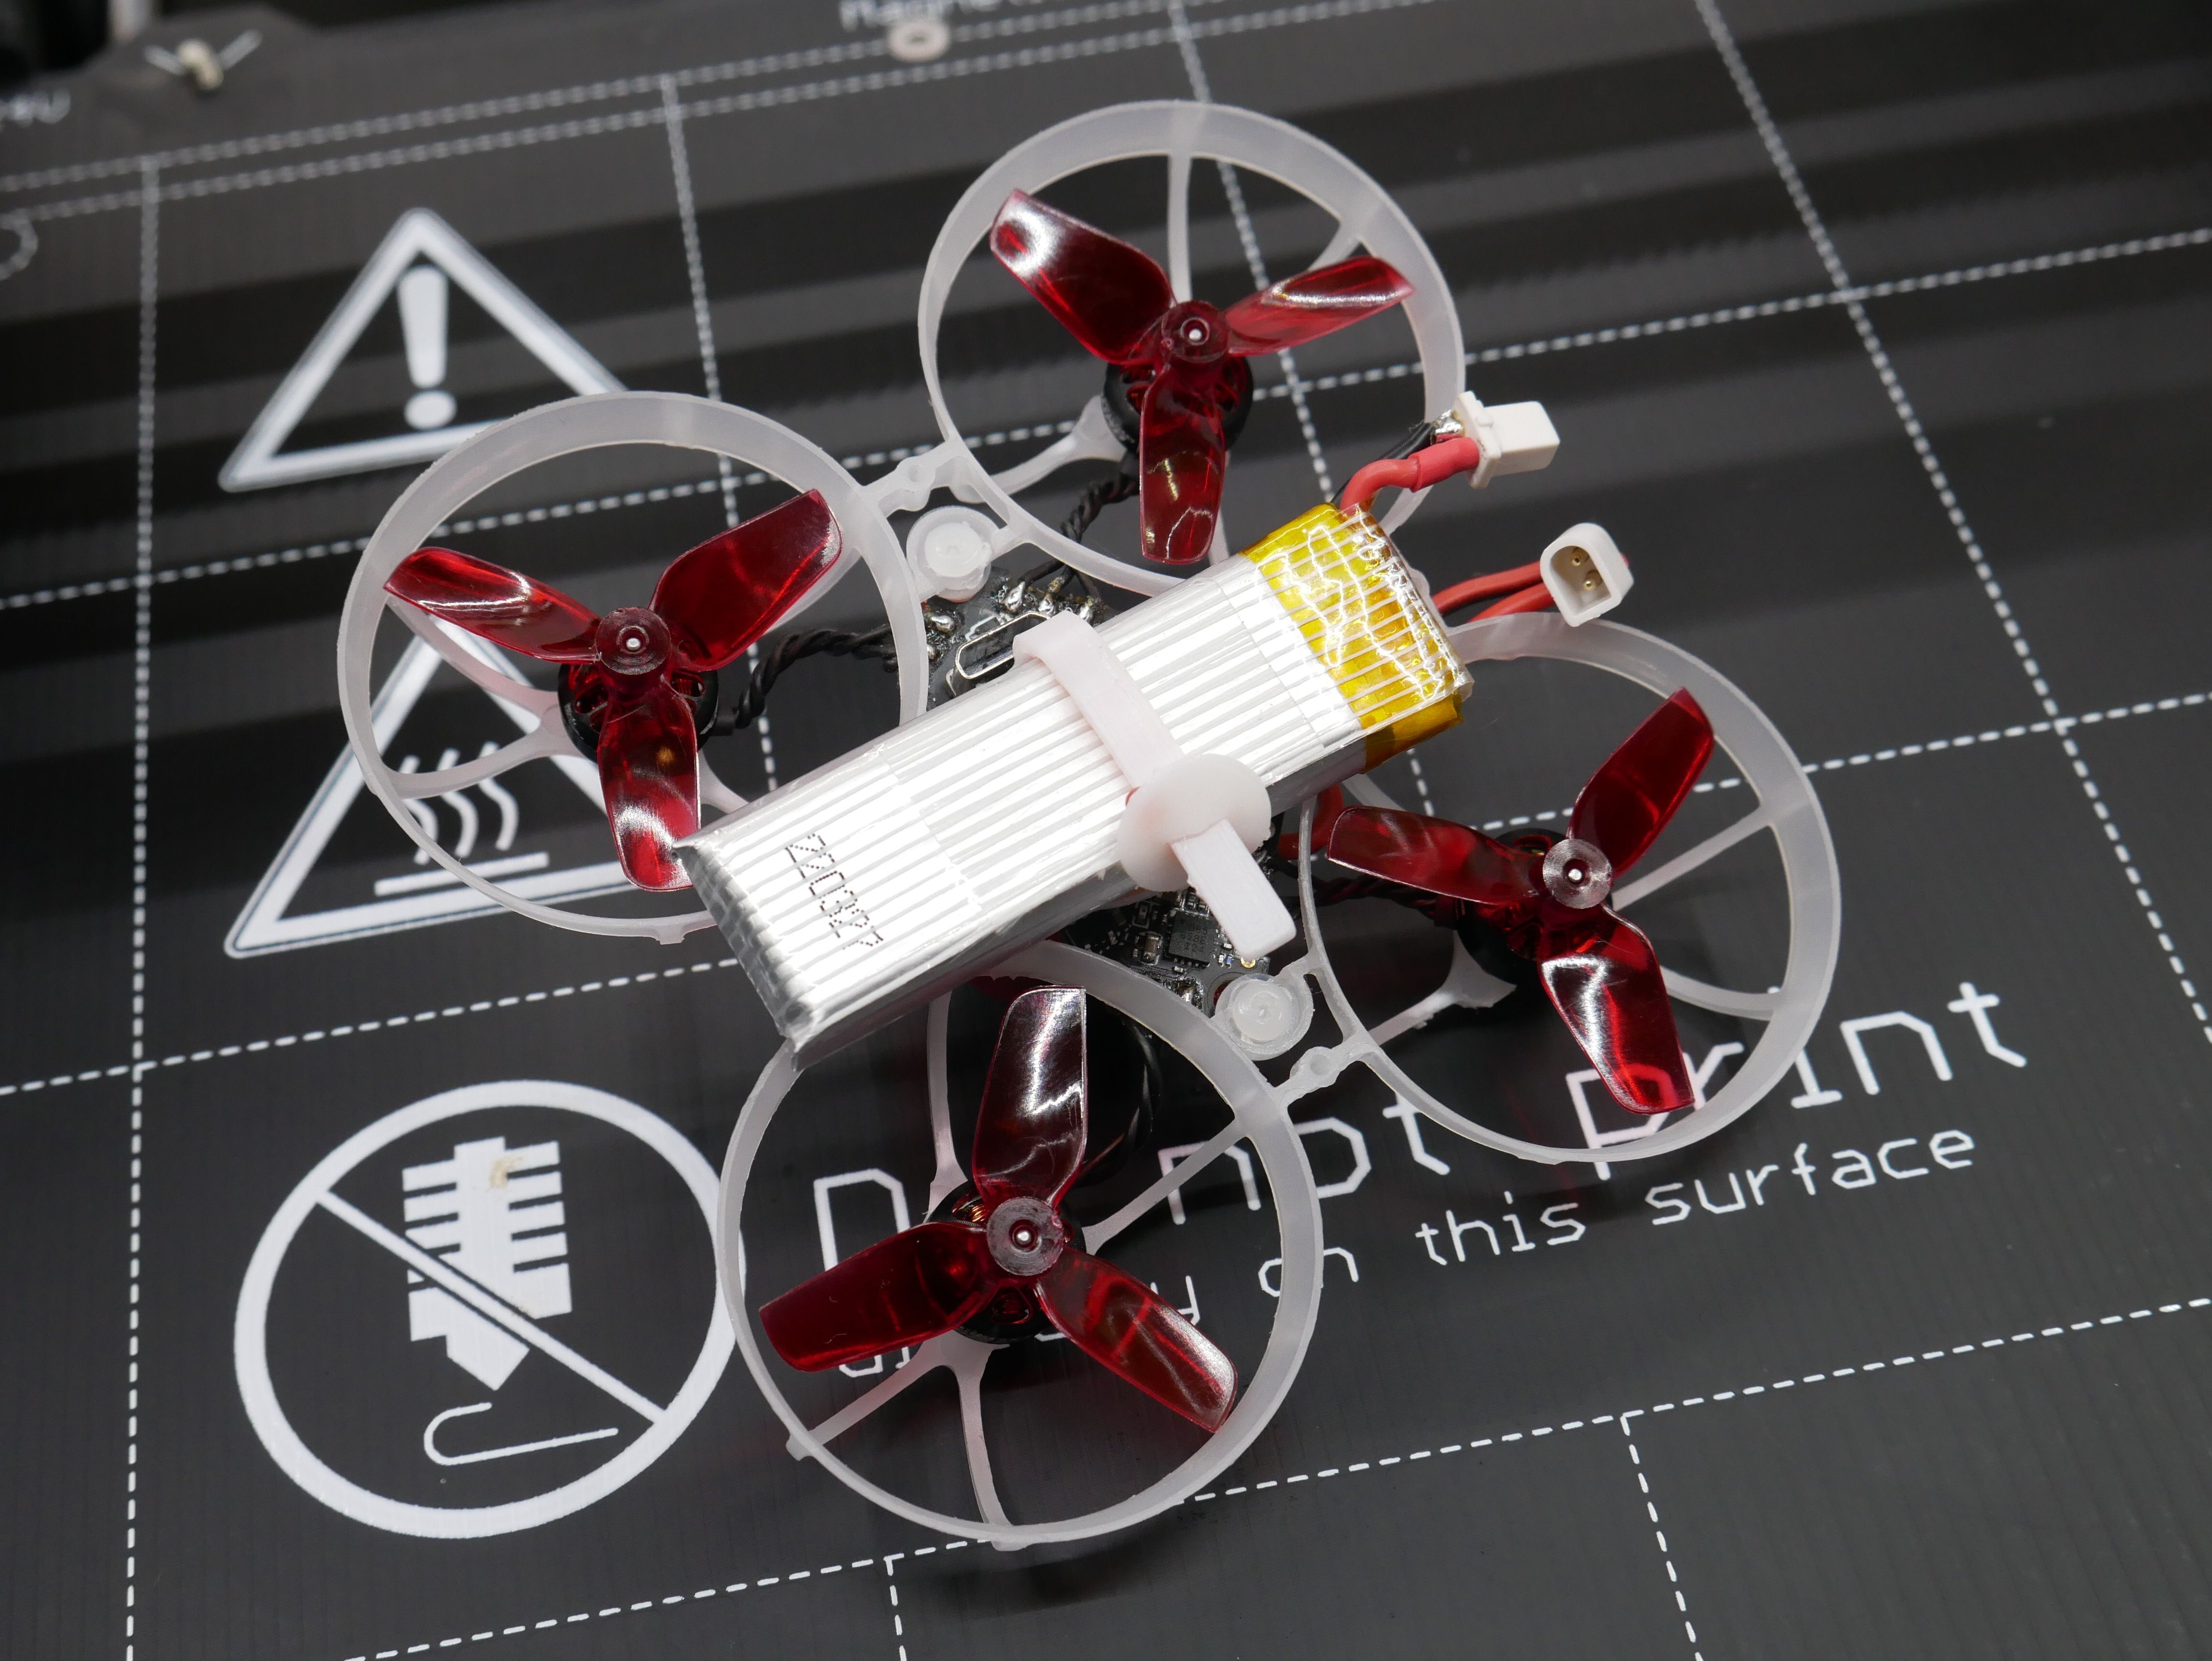
The Classic racer
Full Size Canopy on top, lipo at bottom. -
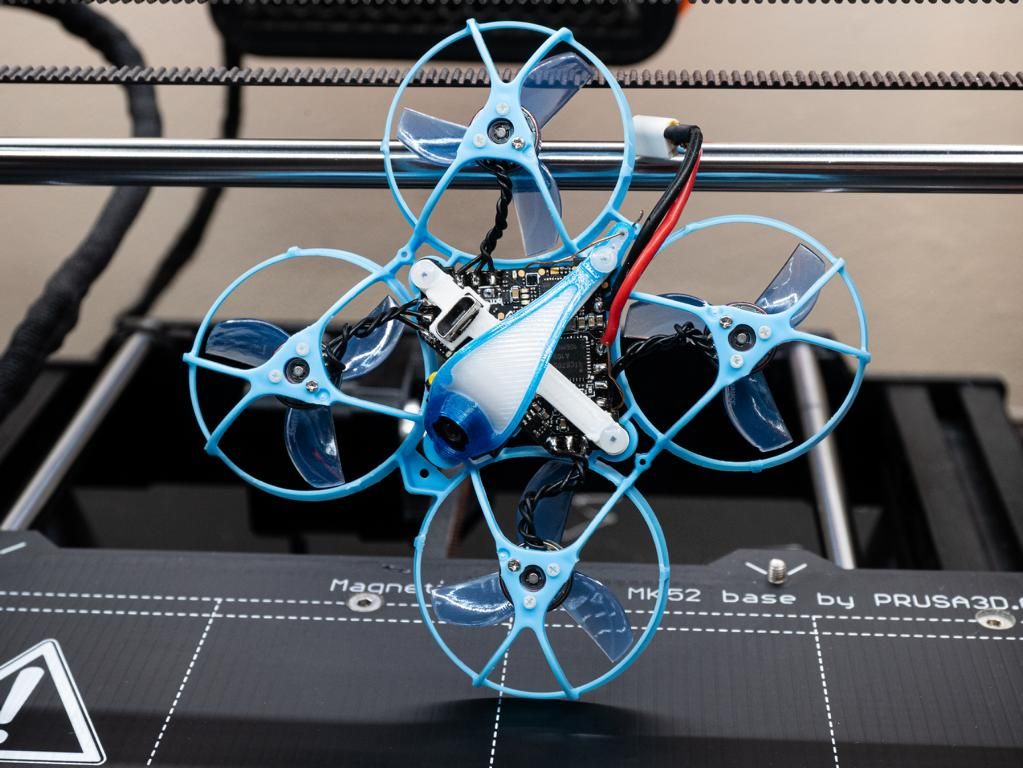
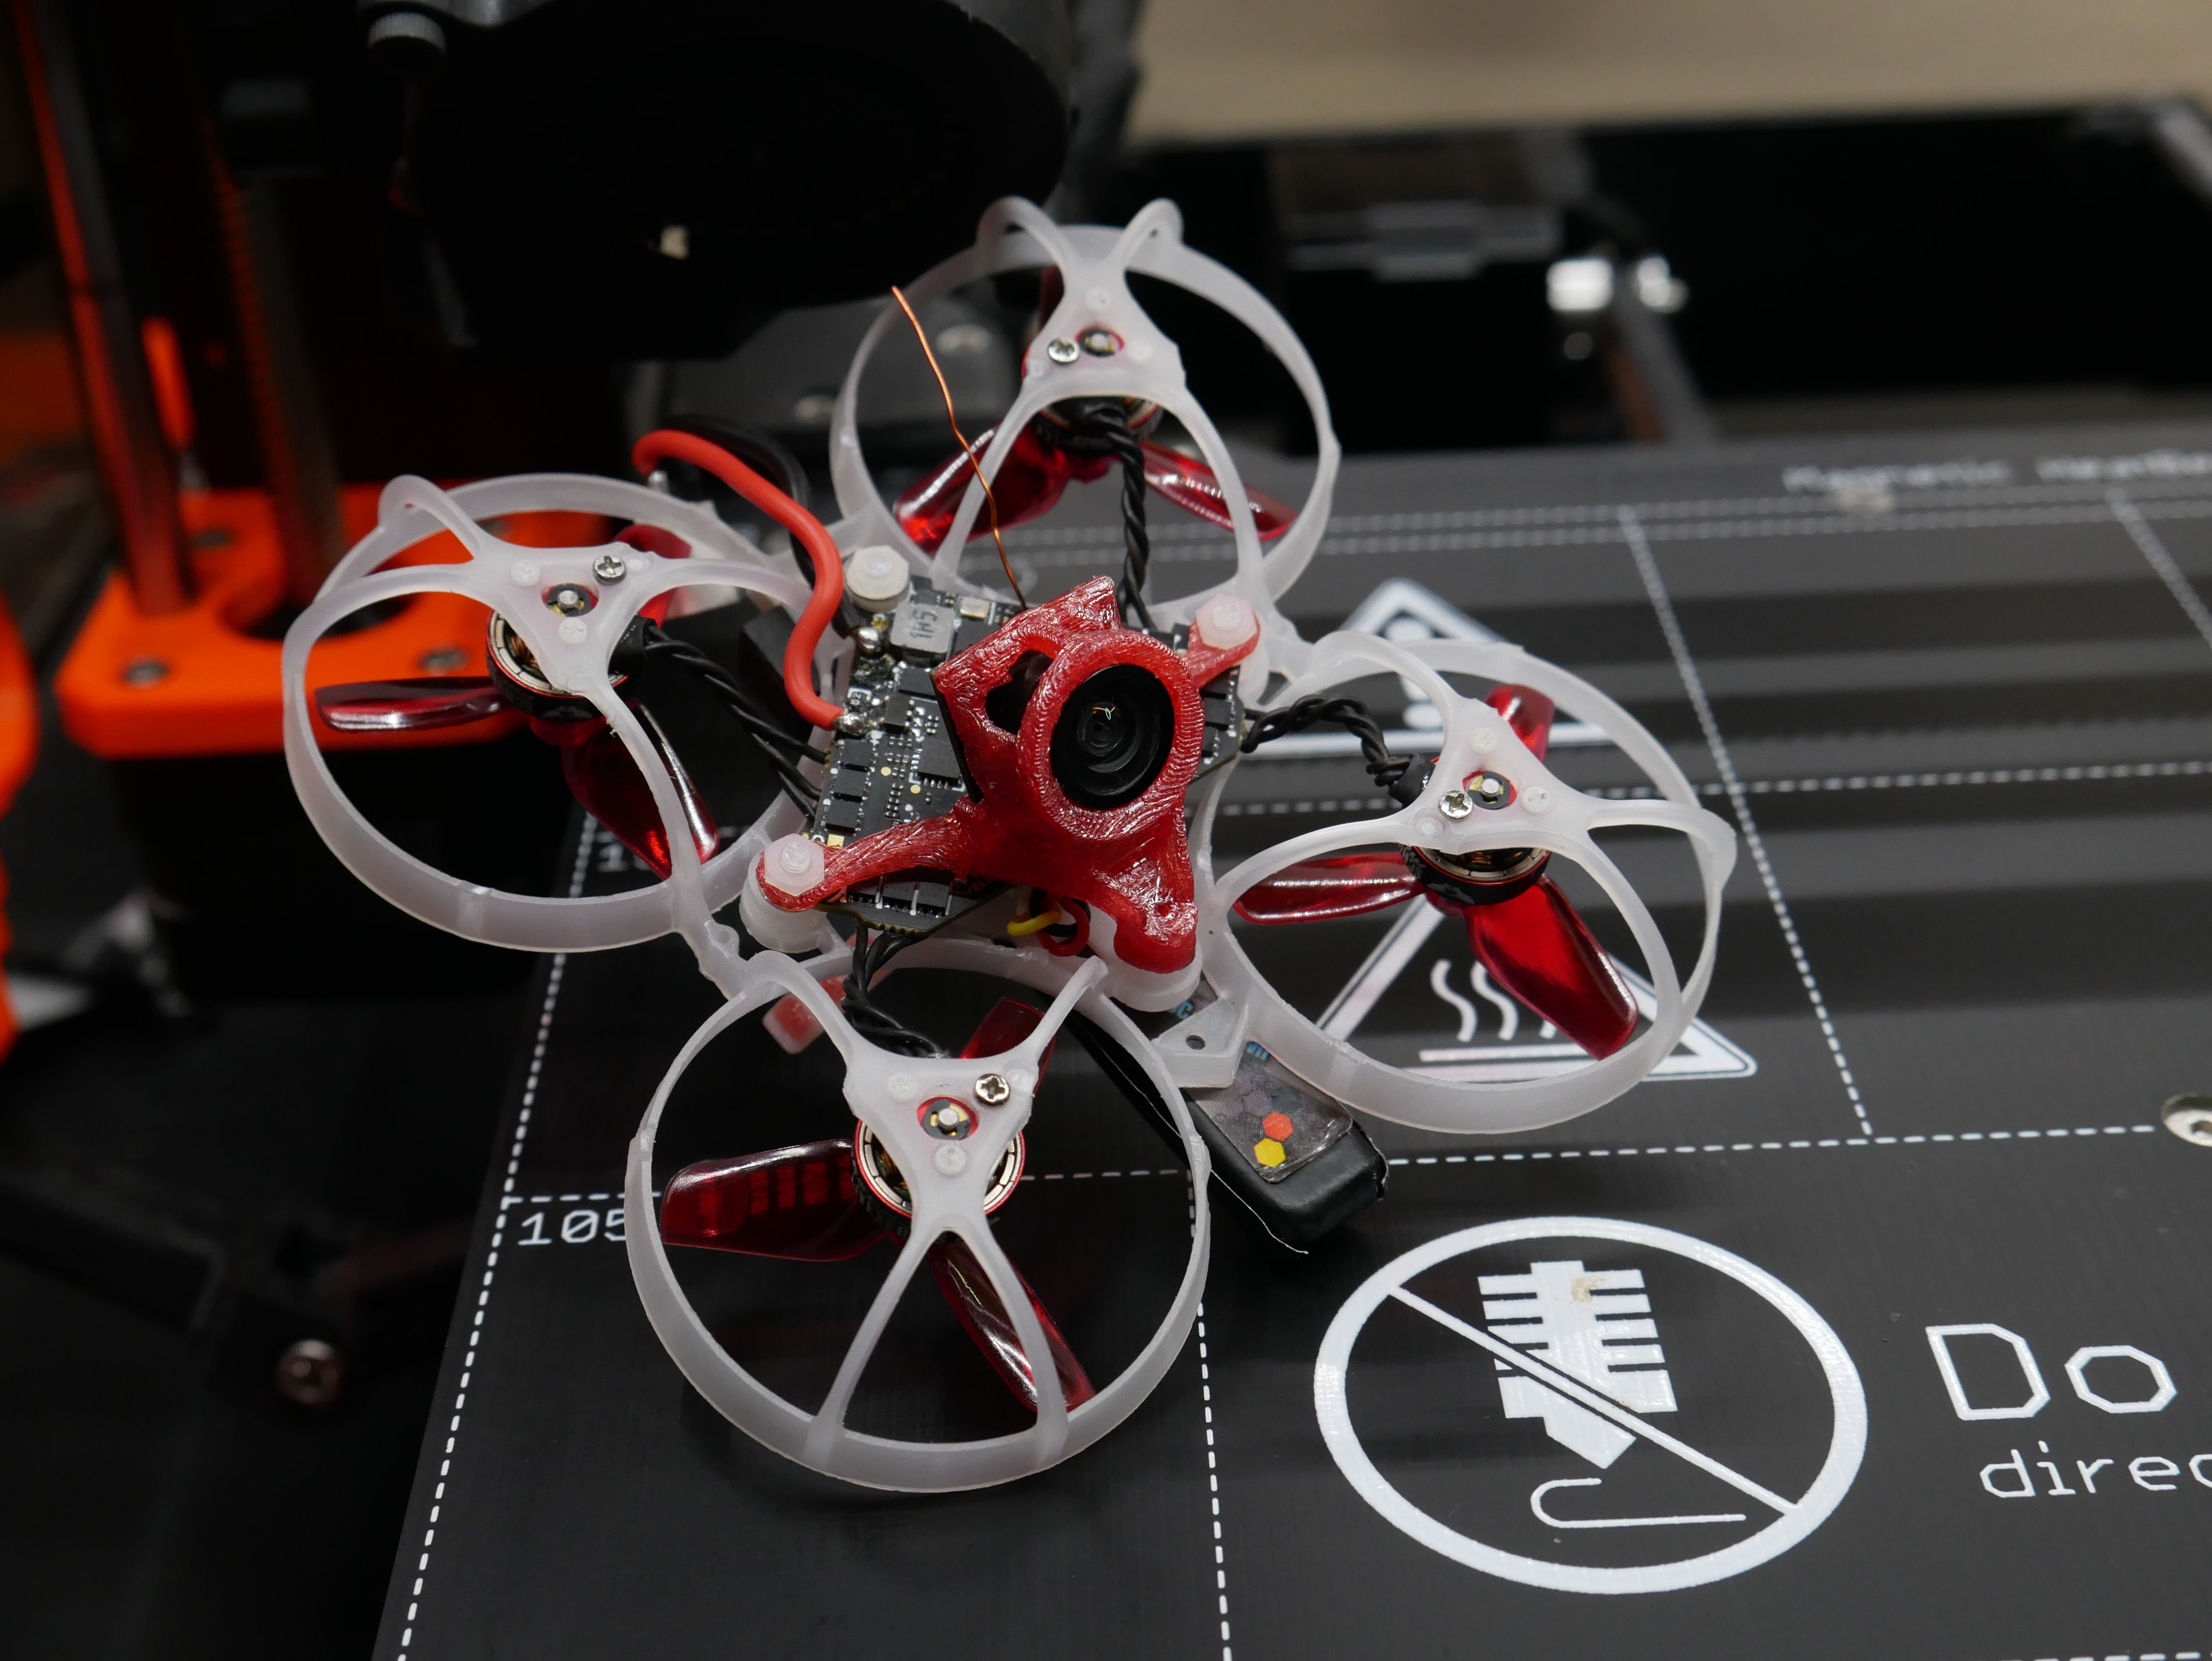
Low profile racer
Camera in front. Lipo at bottom. -
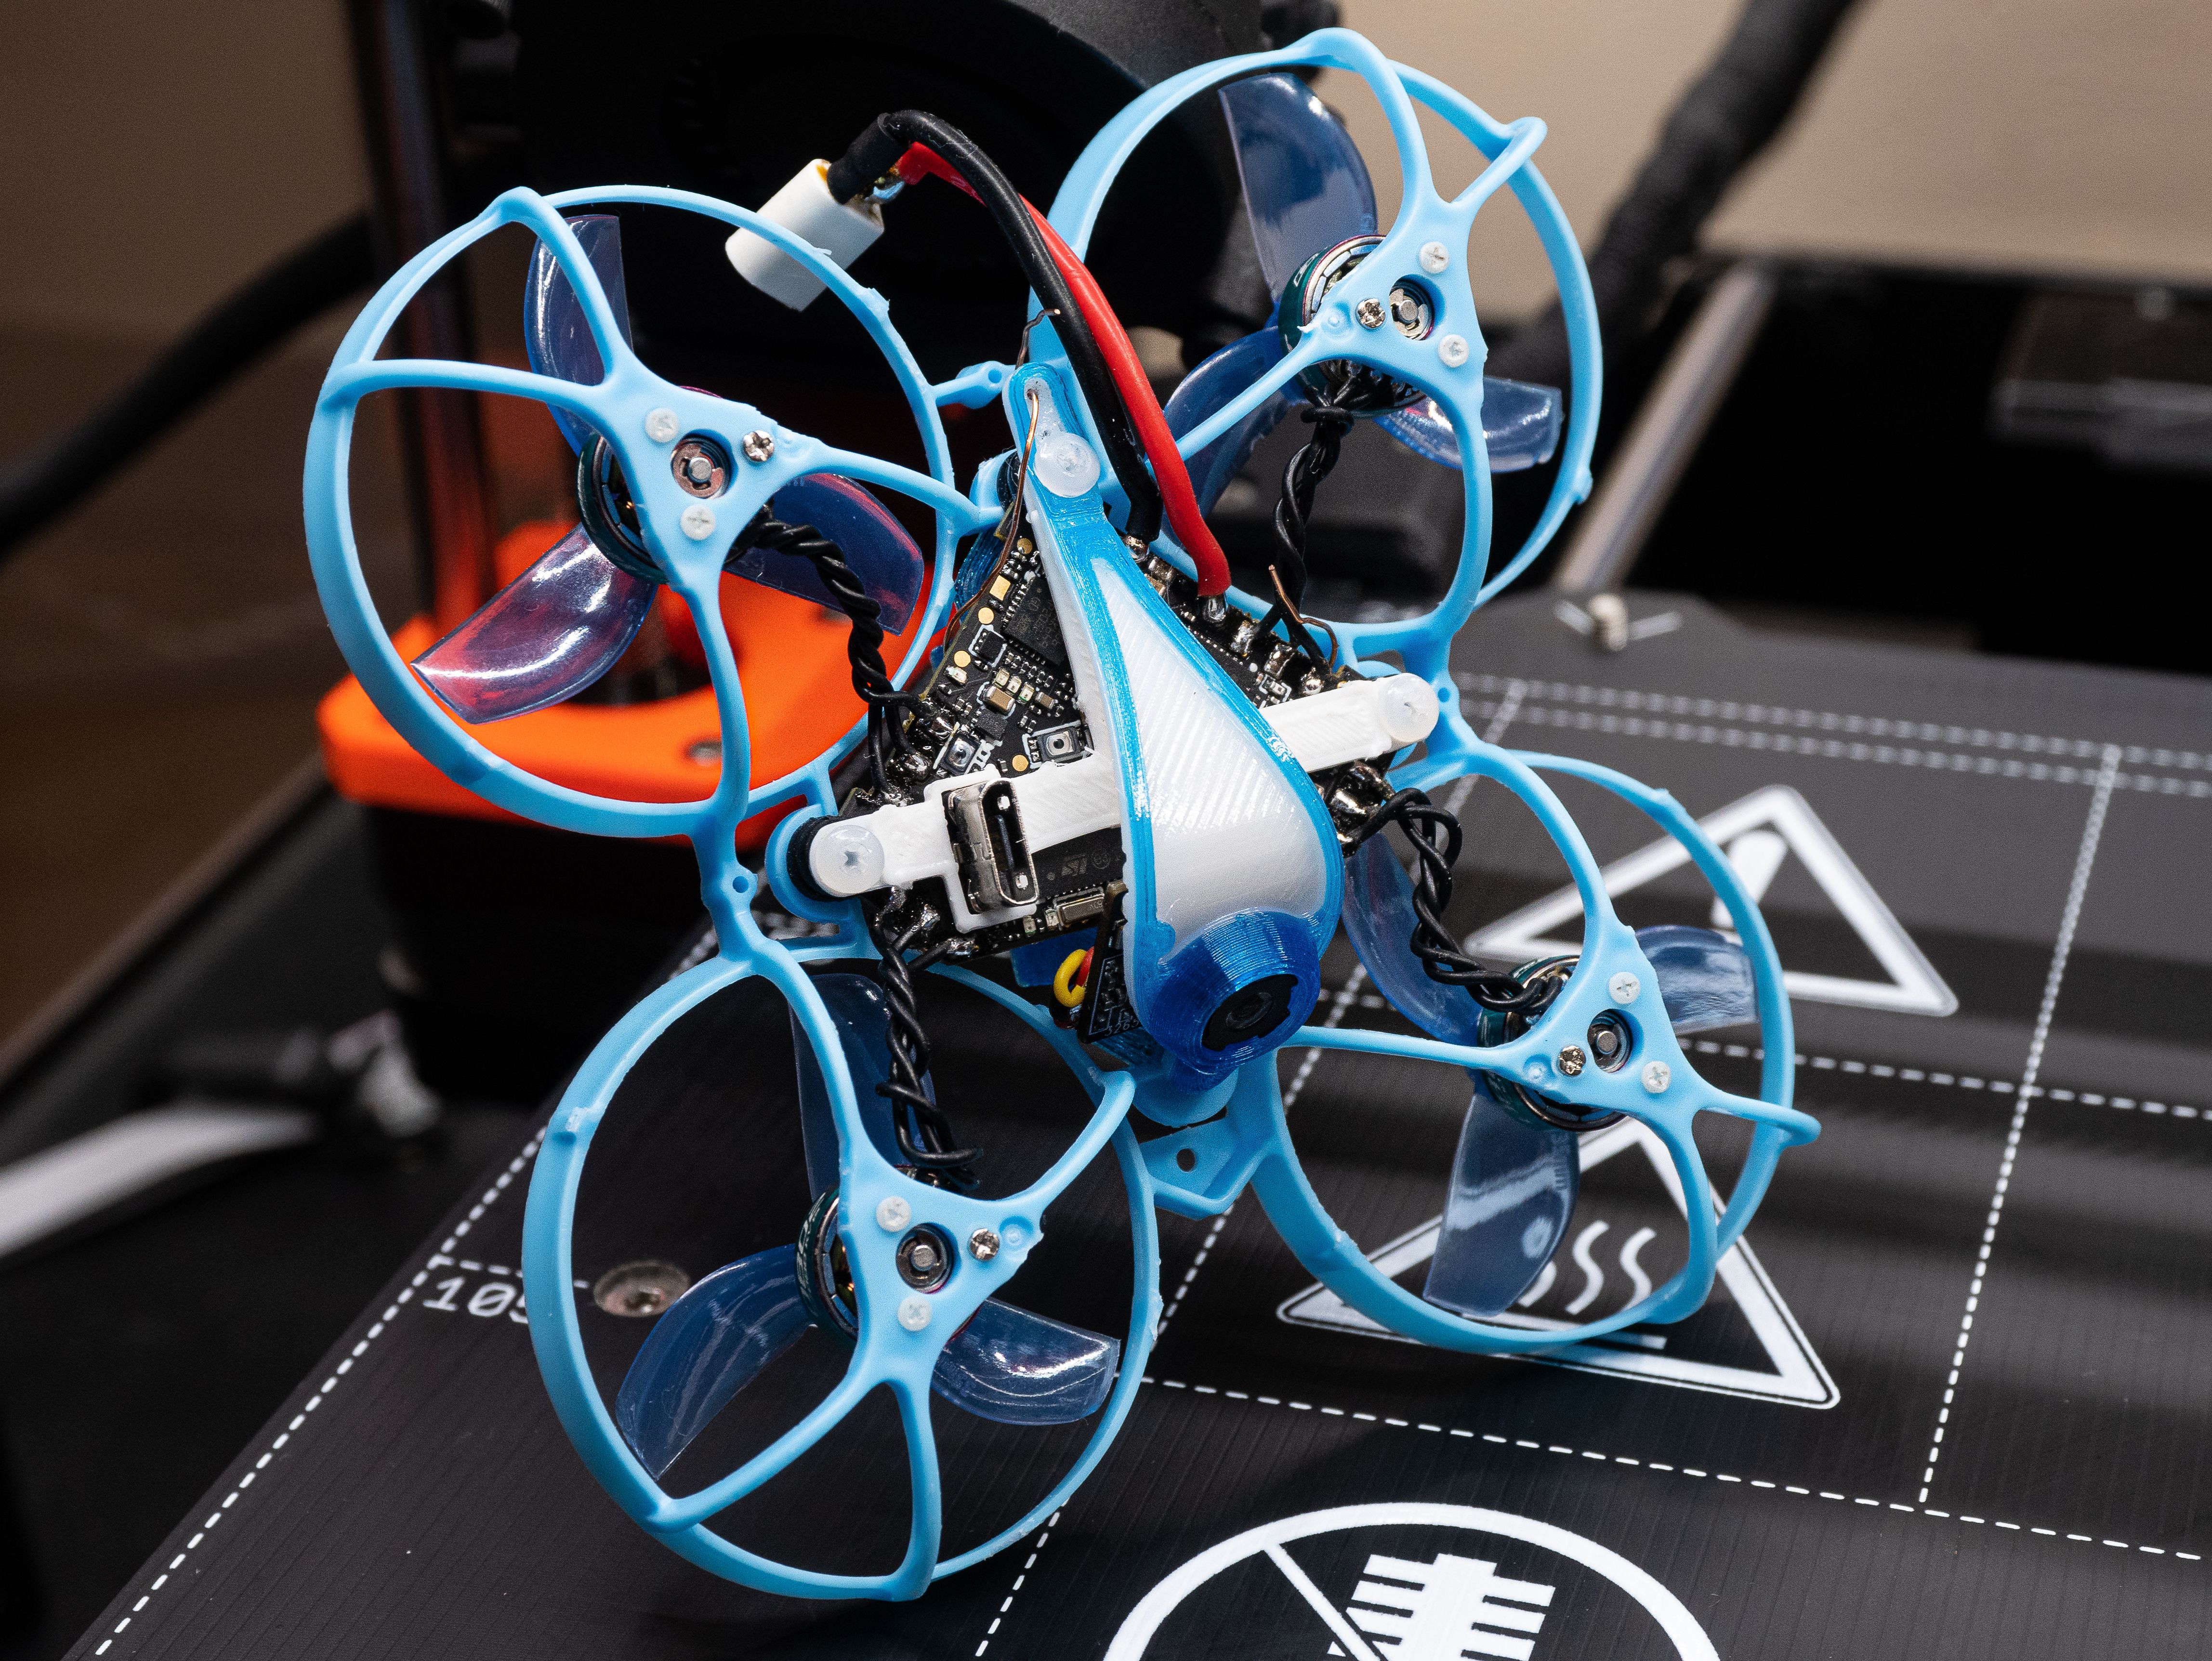
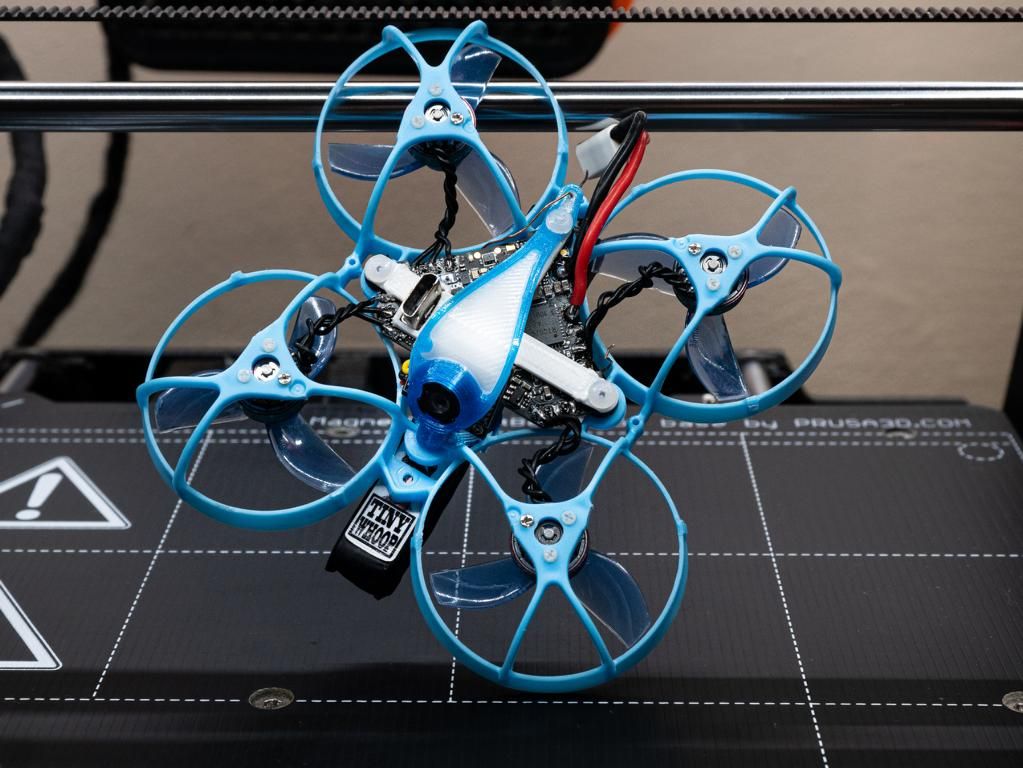
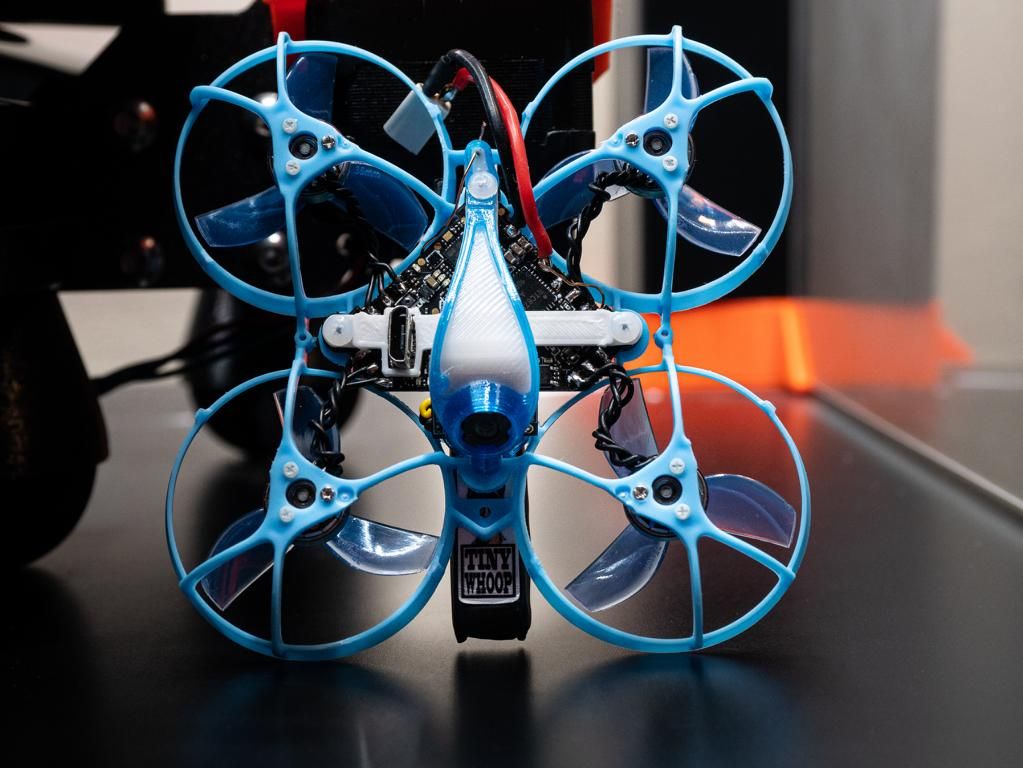
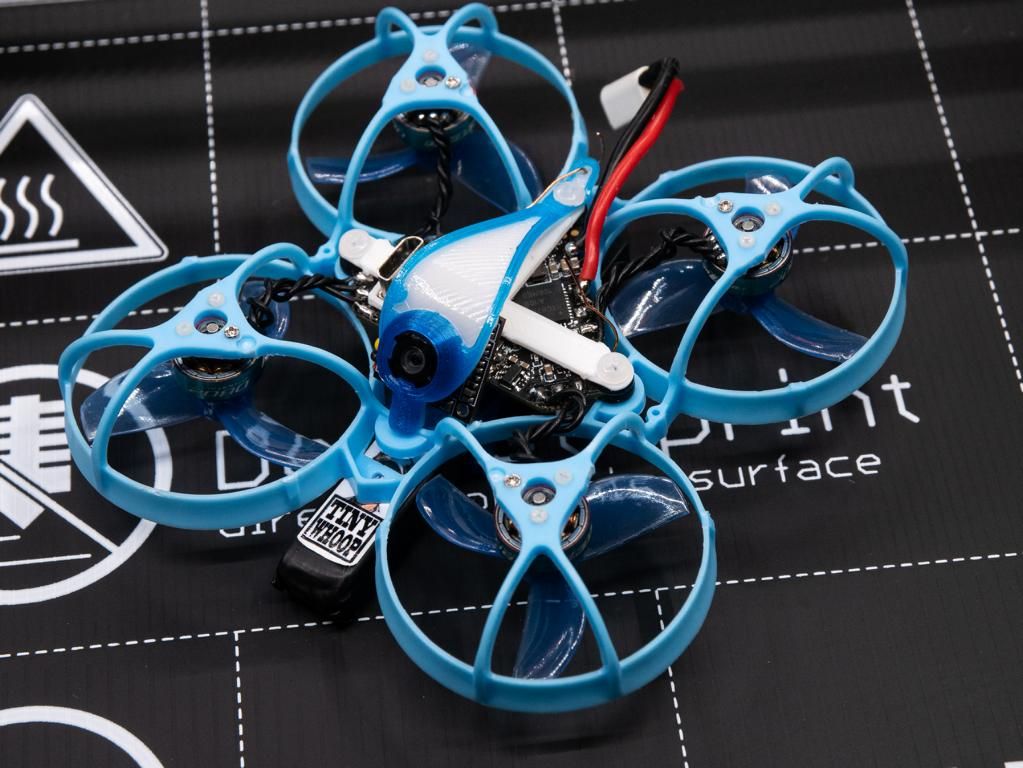
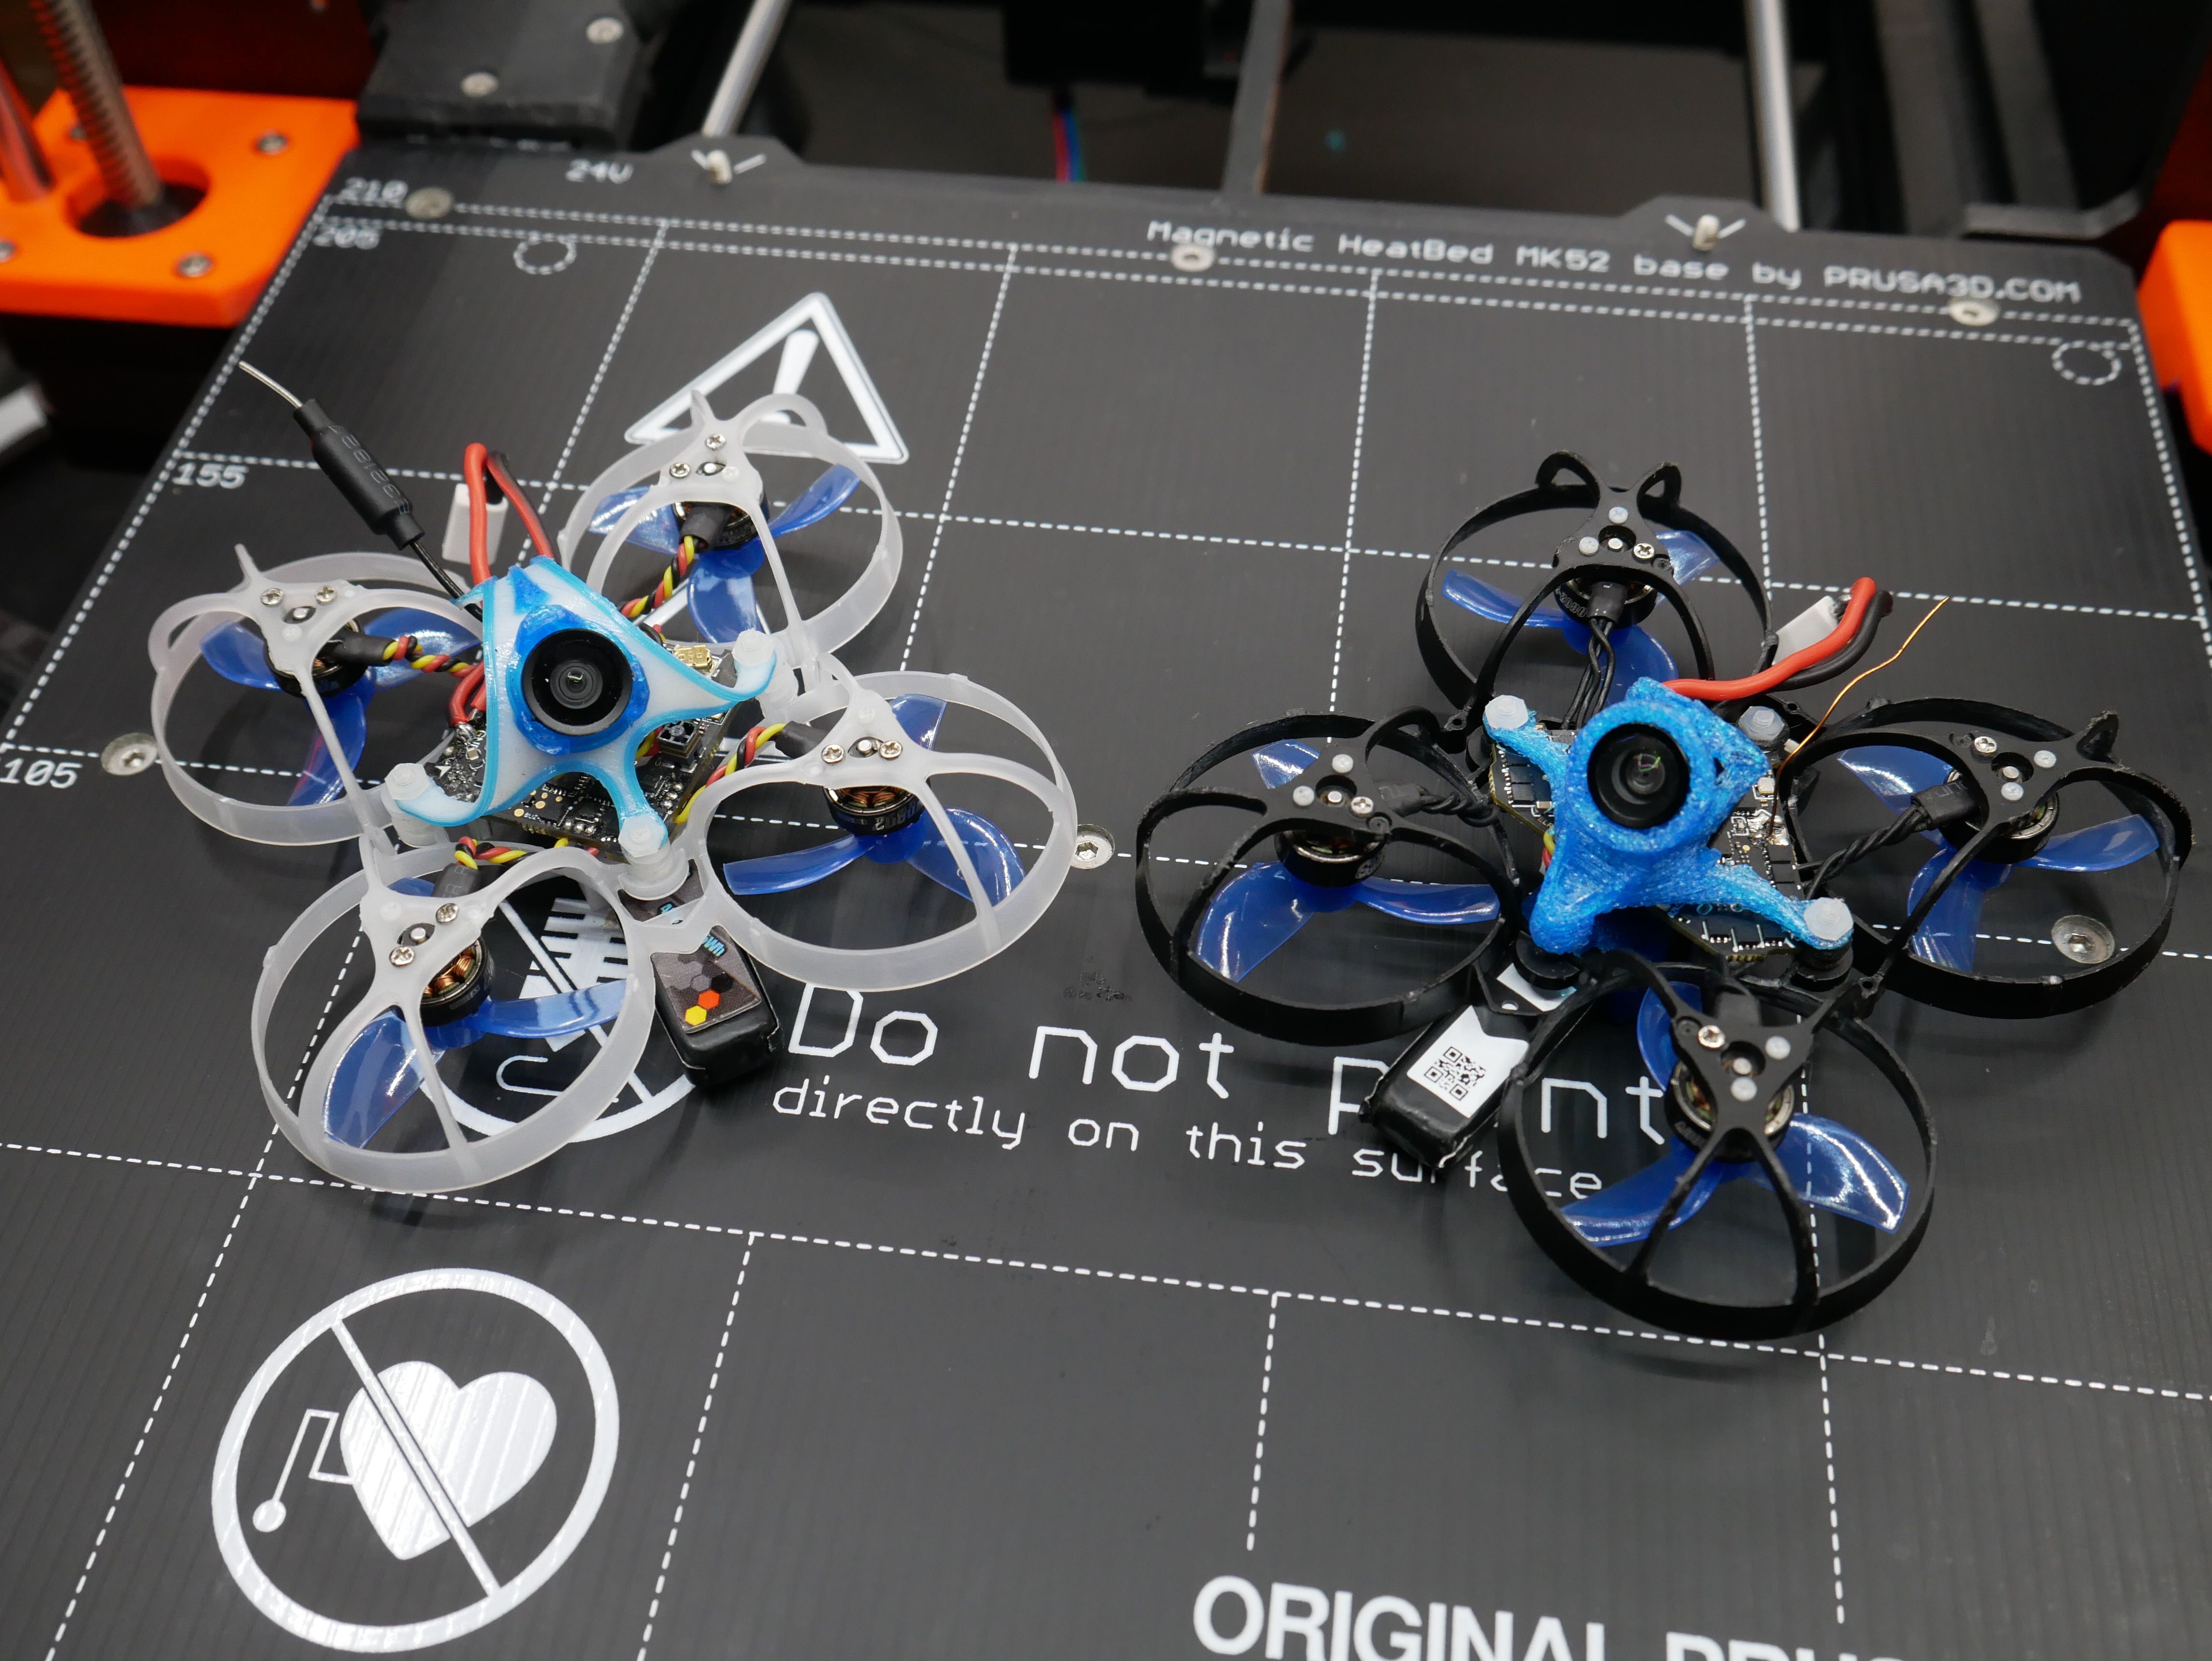
Duckface whoop
Top mounted liposlot including camholder for 199c fpv cam. - Low profile freestyler
Camera in front. Lipo at top left to right or right to left.
What do you need?
- Meteor Pro Frame and 35mm Props
- M2 nylon screws and nuts (min. 5mm long)
- when using low profile mount : 2x longer M1.6 screws
- printed parts which u want (at least liposlot) -> https://www.thingiverse.com/thing:5536503
- Hardware
What do you have to do ?
- Remove the lipo slot of the meteor pro frame
- turn the frame upside down. Remove two struts per duct. (Improving airflow+weight saving)
- Drill holes and use nylon/plastic screws for a stack build. (see pictures).
- Place the flight controller, new printed lipo slot where u want and motors.
- shorten the nylon/plastic screws
- mount props upside down !! (See pictures)
NOTE:
- It is really important to soft mount the flight Controller very well. The screws that holding the flight controller in place must not be tightened too tightly or too loosely. (that is why u have to use m2 screws with nuts and not these short fc mounting screws!!)
- The holes of the printed parts are small. If this causes problems use a lighter and heat very slightly.
- check that the Flight controller is placed correctly and does not press on the frame.
- If the flight controller presses on the frame, there are the following solutions
- ---> Mount the flight controller reversed
- ---> cut away pieces where the Fc is pressing.
- it is very important to keep the weight down. If you use full size flight controllers, be sure to remove motor plugs, use light motors and canopy, nylon screws and stuff like that... The goal is sub 20 g and high kv motors.
I recommend the Classic and Low profile racer. Also for freestylers. My tests have shown that the performance is most balanced.
Note: When flying top mounted versions i recommend to use two small screws as "landing pad" to give props more space and protect them. Screw them in these empty holes of the frame (left and right).
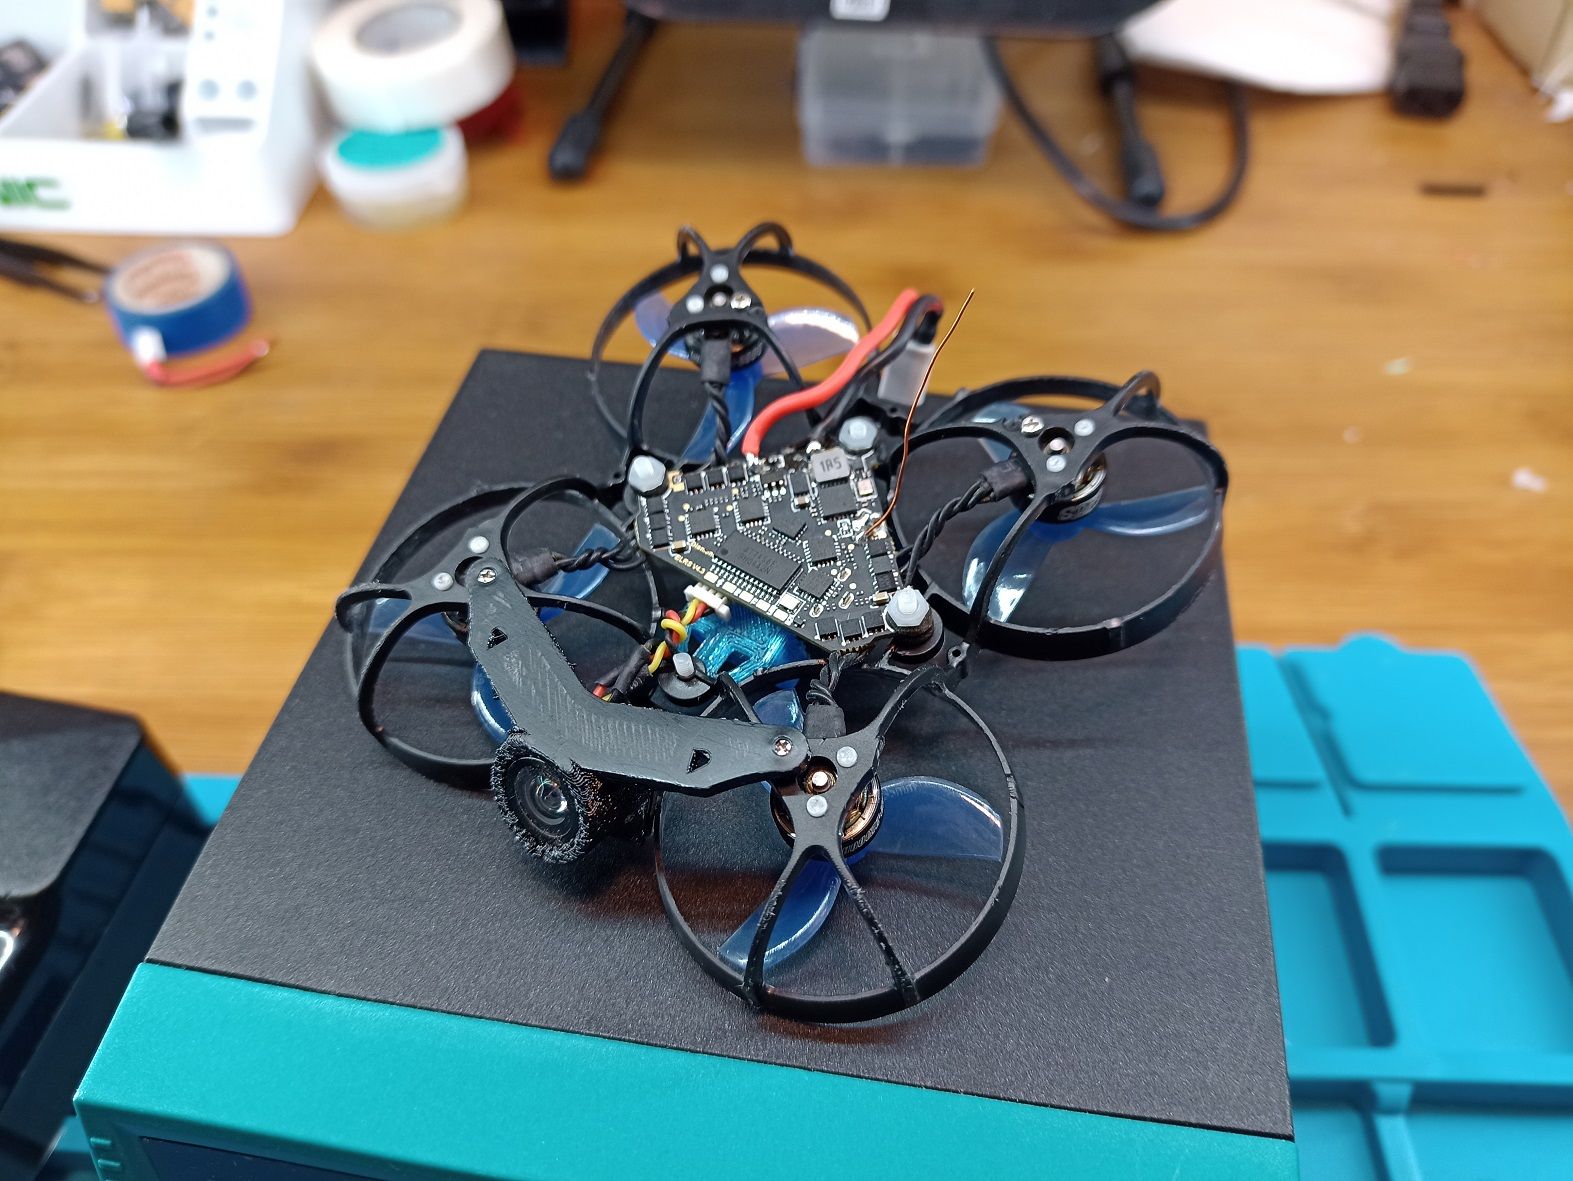
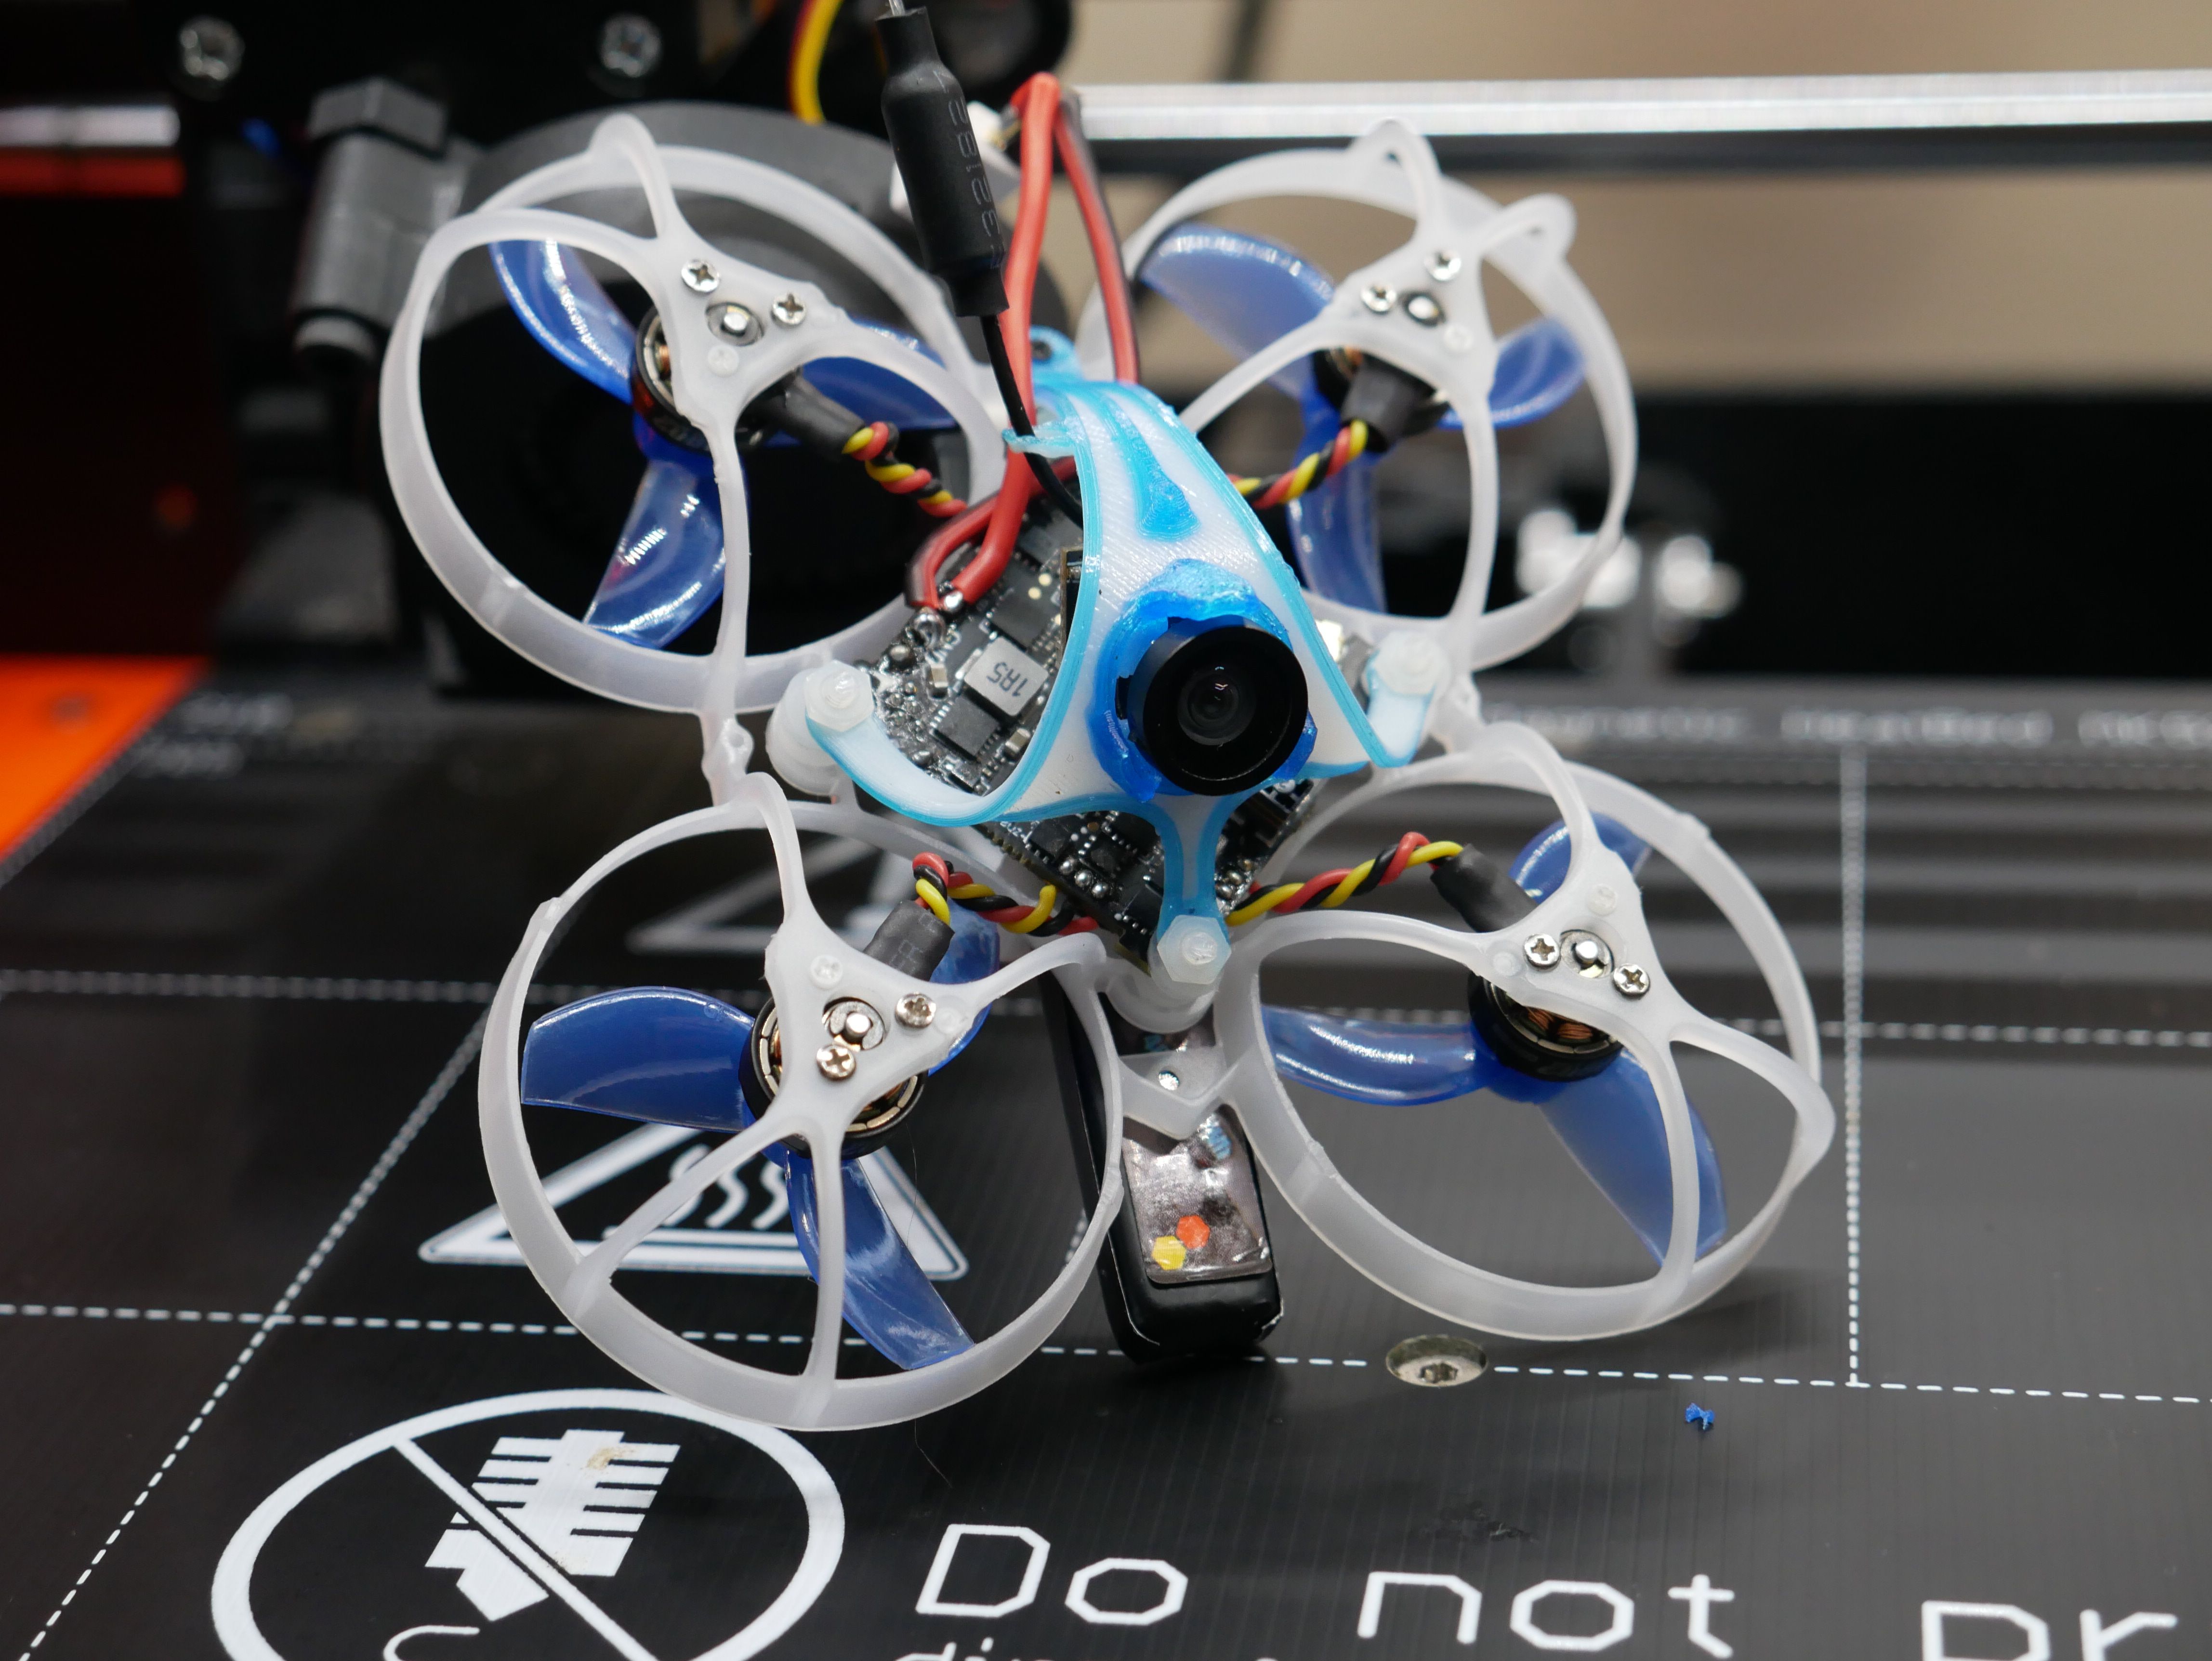
The Diamond meteor pro
Since we know how the mod is done. What are the best parts?
This is my latest setup.
- Happymodel diamond fc
- Gemfan 35mm props
- 0802 Rcin 27.000kv motors
- Runcam nano 3
- 2/3 nylon screws per motor
- 20 awg bt 2.0 lipo cable
- Configurator: latest bluejay ESC Firmware 48 khz pwm freq. Betaflight 4.3
If you do a clean job you will have a powerful whoop. Its worth it.
Hope u like !
Photos


Part List
Frame |
Meteor65 Pro Frame Kit
(10 builds)
Betafpv.com
|
$4.99 |
Flight Controller |
HappyModel DiamondF4 1S AIO Whoop Flight Controller (F4 FC / 5A 4in1 ESC / 25-400mW VTX) - Choose Your RX
(7 builds)
Racedayquads.com
|
$58.00 |
Motors |
4 x HGLRC Aeolus 0802 25000Kv Micro Motor
(4 builds)
Pyrodrone.com
|
$39.96 |
Propellers |
Gemfan 35mm 3-Blatt Propeller I RC-Hangar15, 2,99 €
(3 builds)
Shop.rc-hangar15.de
|
$2.99 |
FPV Camera |
LDARC 199C Mini-Kamera für TINY 6X FPV Racing Drone RC Racer Quadcopter
Ebay.com
|
See Site |
Batteries |
5X Lipo Akku 305mAh HV 3.8V 40/80C BT2 Stecker im Blister
(5 builds)
Mylipo.de
|
$24.90 |
Misc Parts |
Flachrundschrauben Kreuzschlitz DIN 7985 - M2x20 - PA6.6 natur / Nylon natur
Kunststoffschraube.de
|
$0.07 |

First of all, I like how clean your build was and how organized this article is. Really makes it easy for us to try it out ourselves. Second, I saw in one of the pictures a version with the battery above the fc and below the camera. How did that feel in terms of flight characteristics? and did it have any advantages? I've been thinking about something like that for a while for a toothpick with the battery mounted sideways instead of front to back (like your version) but always dismissed it.

Thx. over all this setup is of course flyable. but i noticed problems: Could not fix 100 % propwashing and little bit wobbles on roll when flying angle. However, I have not invested much time to test and tune so far. But there are also positive points. Feels like more thrust and
there are indications that this method may be more efficient (?). But this is still experimental. i think it has potential especially for non-ducted frames. i will do more tests and tuning in future.


Hey there Spezilover
really appreciate your contribution and development here. I m very close to trying this out. My only question is: did you ever fry the diamond esc with these RCinpower 27000s and 35mm in a race? From what i can take from thrust tables its at least critical. Thanks and Prost!
Thx man. No. Have not destroyed a esc yet. In Betaflight i use a a "Motor output limit" of 99% as my personal "safty feature" to avoid high peaks. I can not tell you if this works... but at least it is not worse.
Lieben Dank!