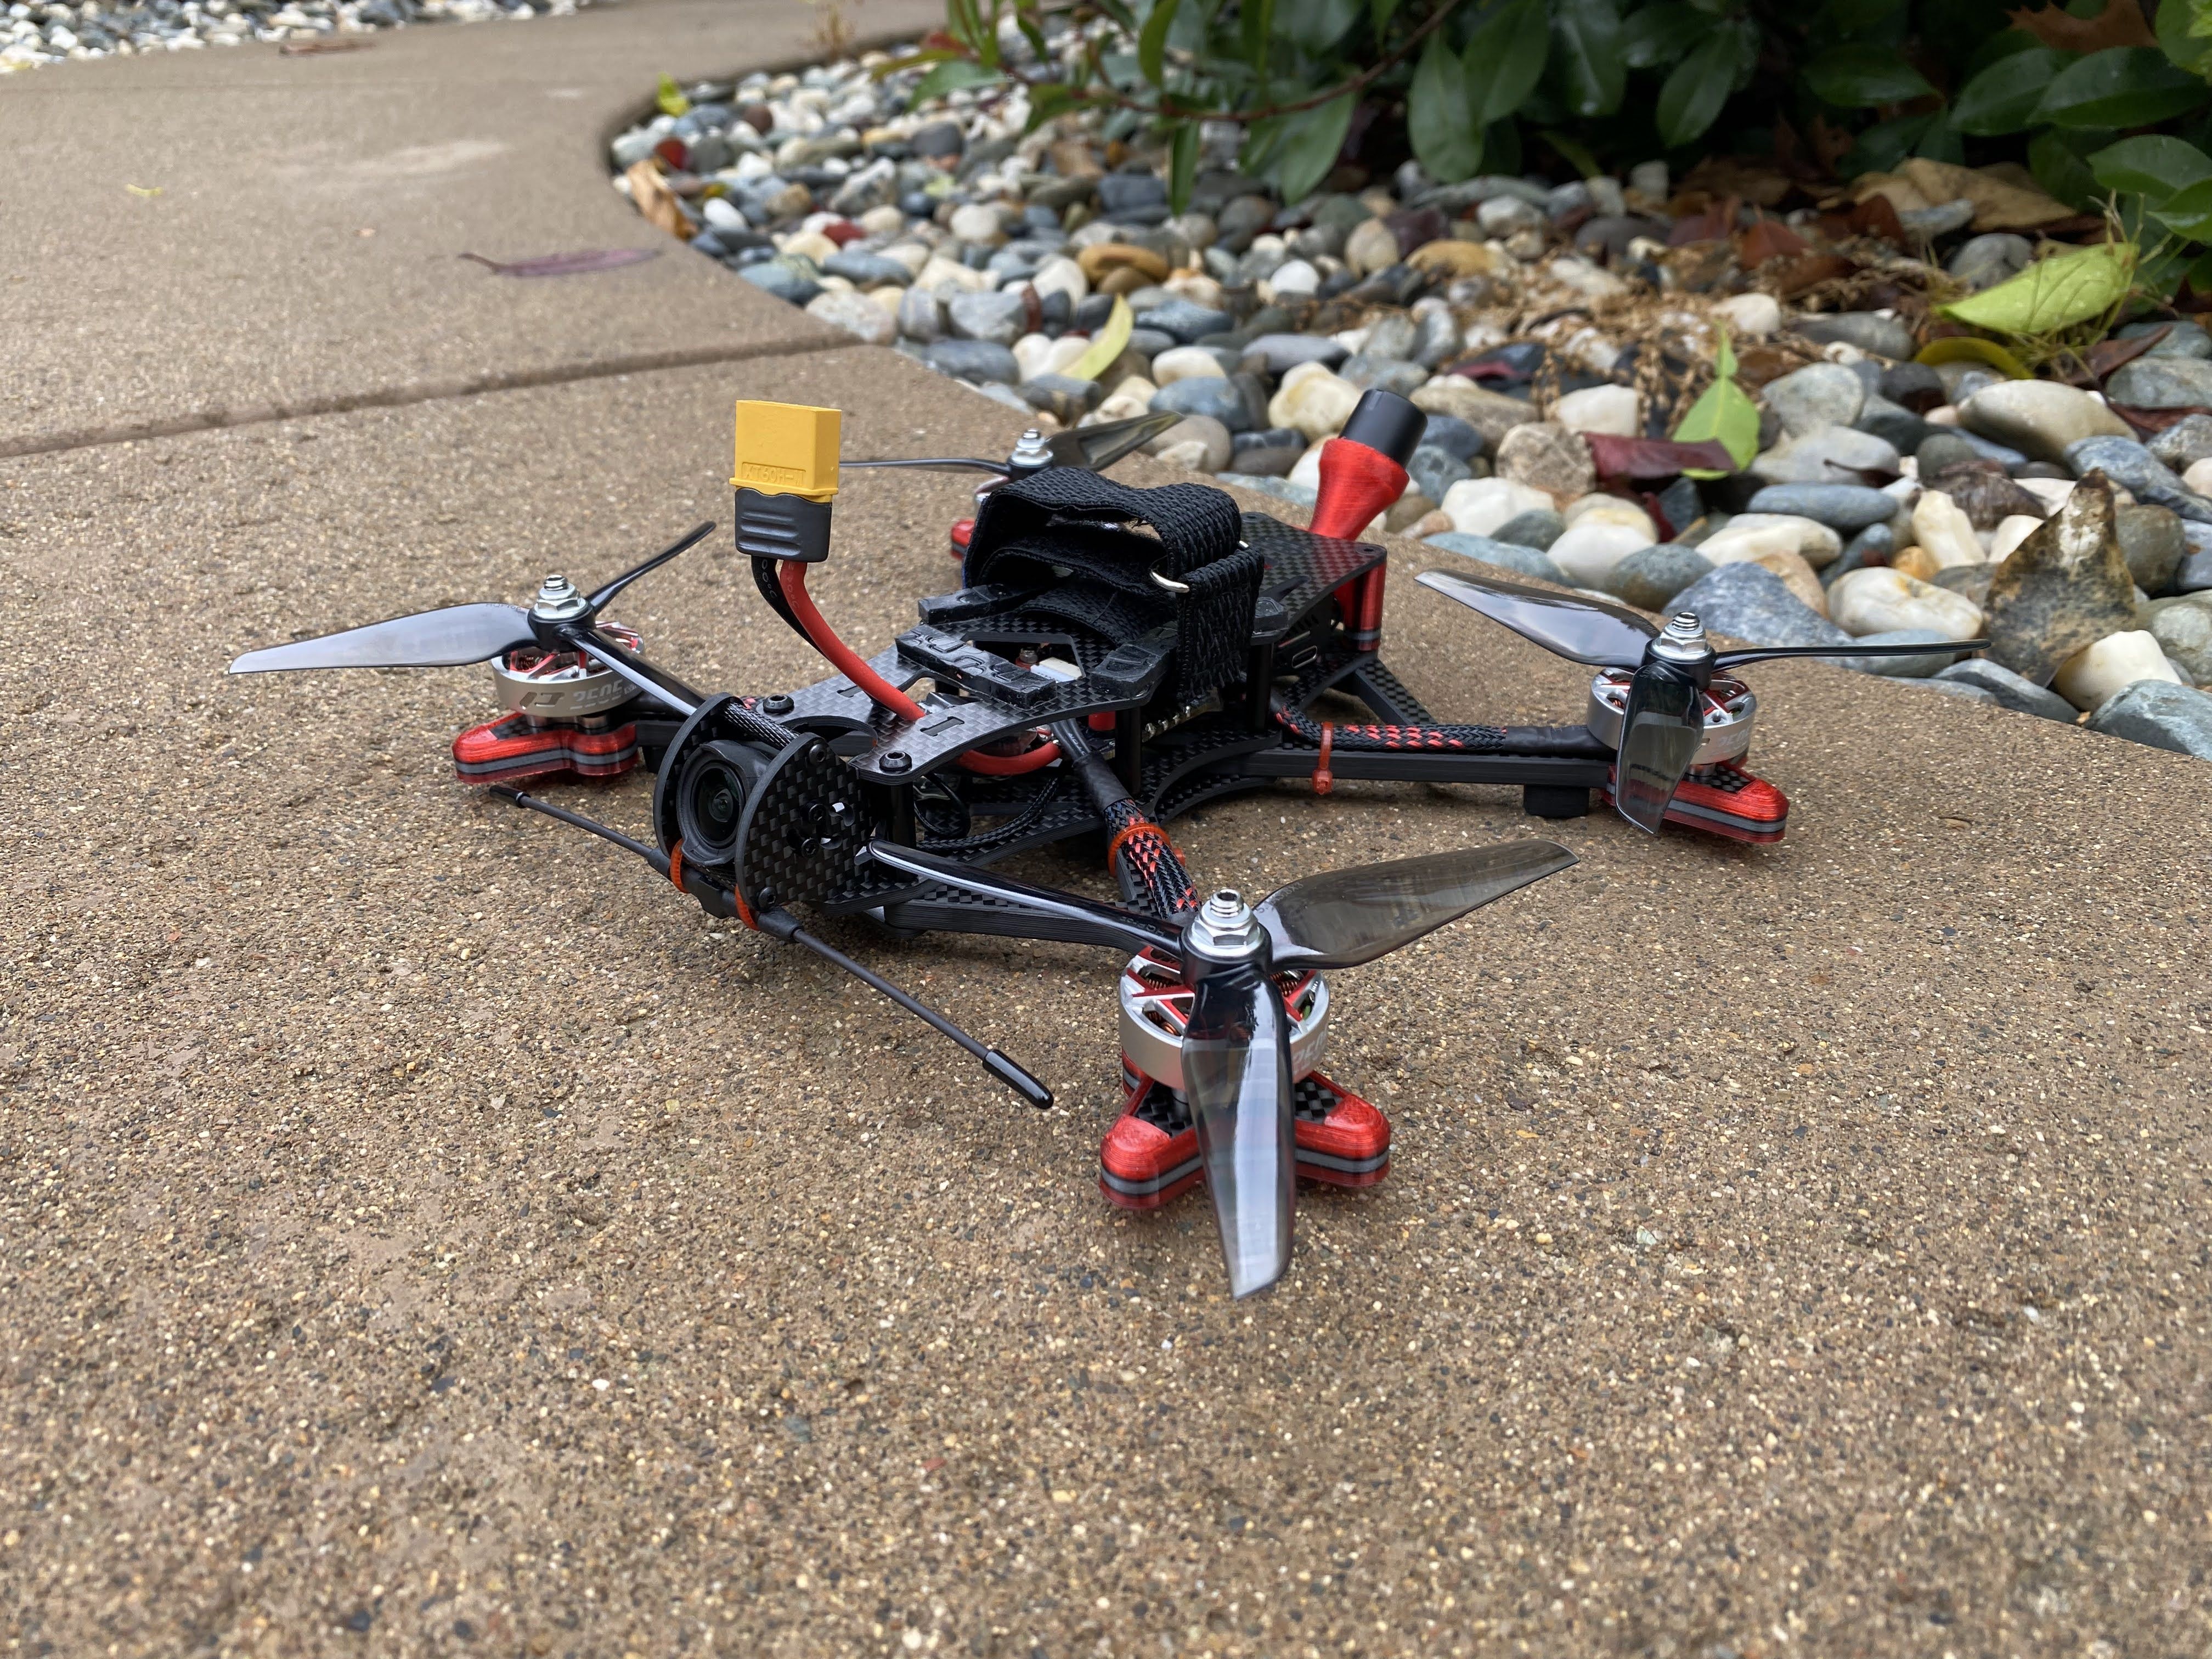
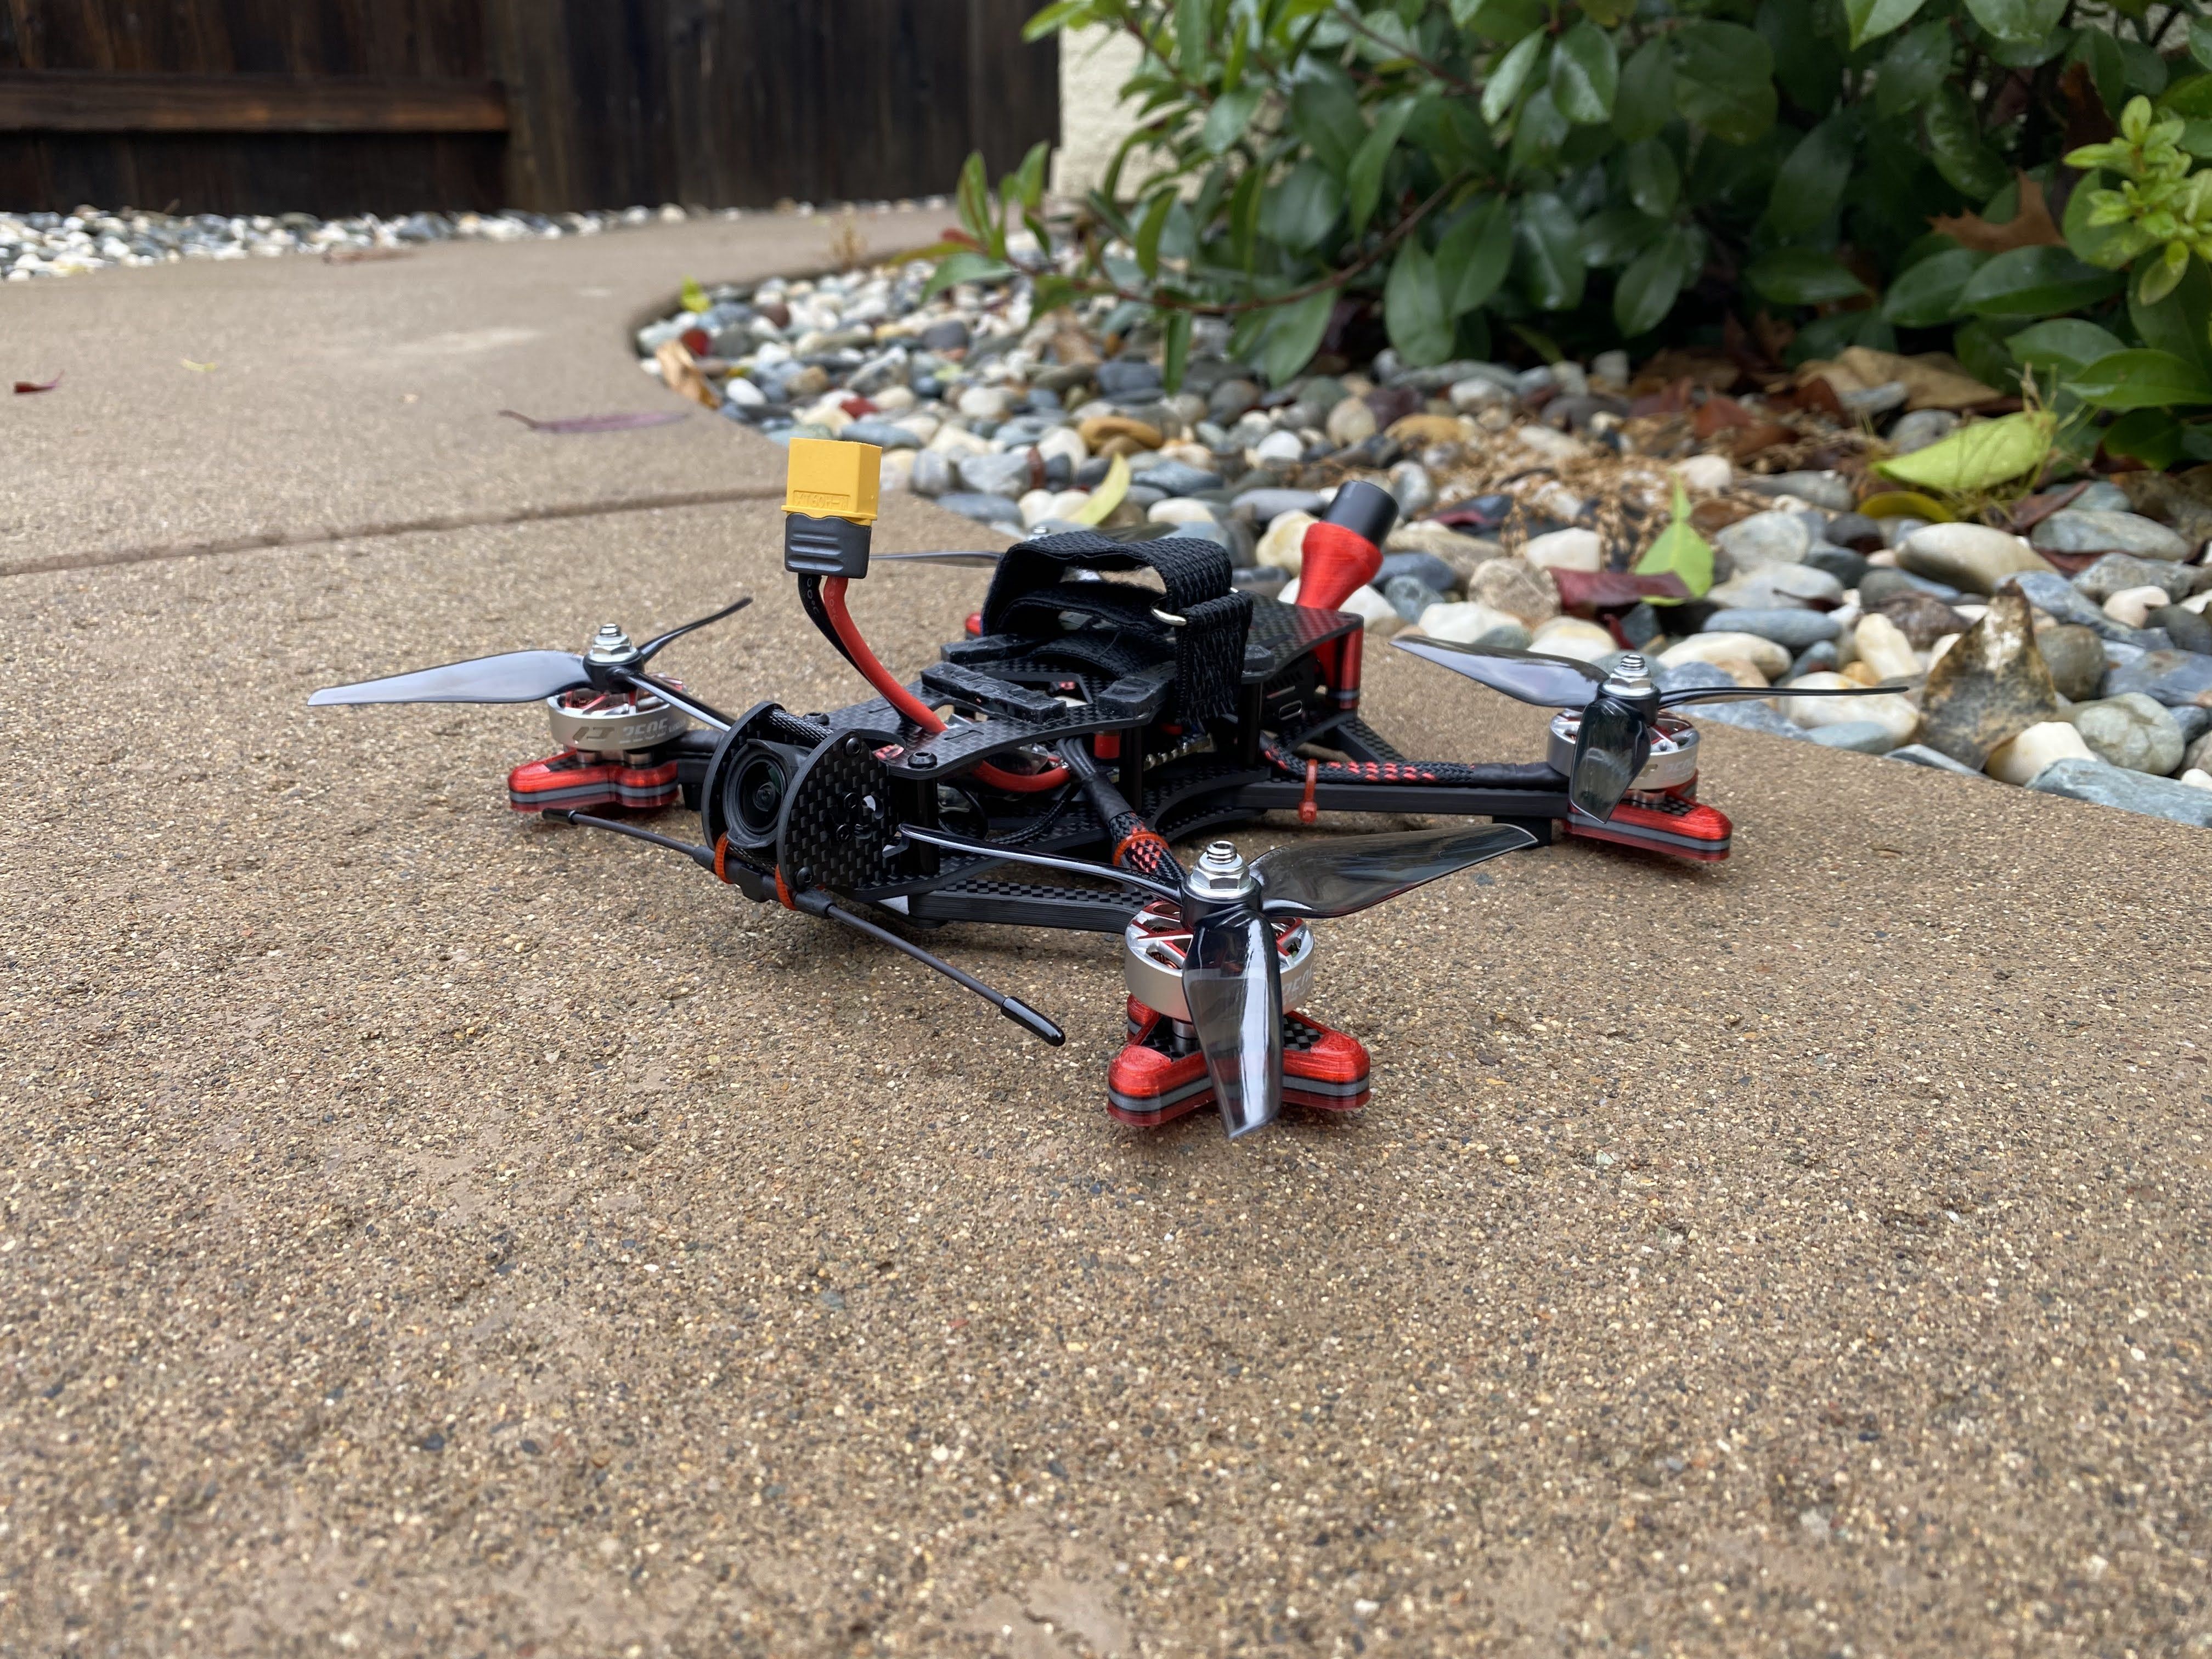
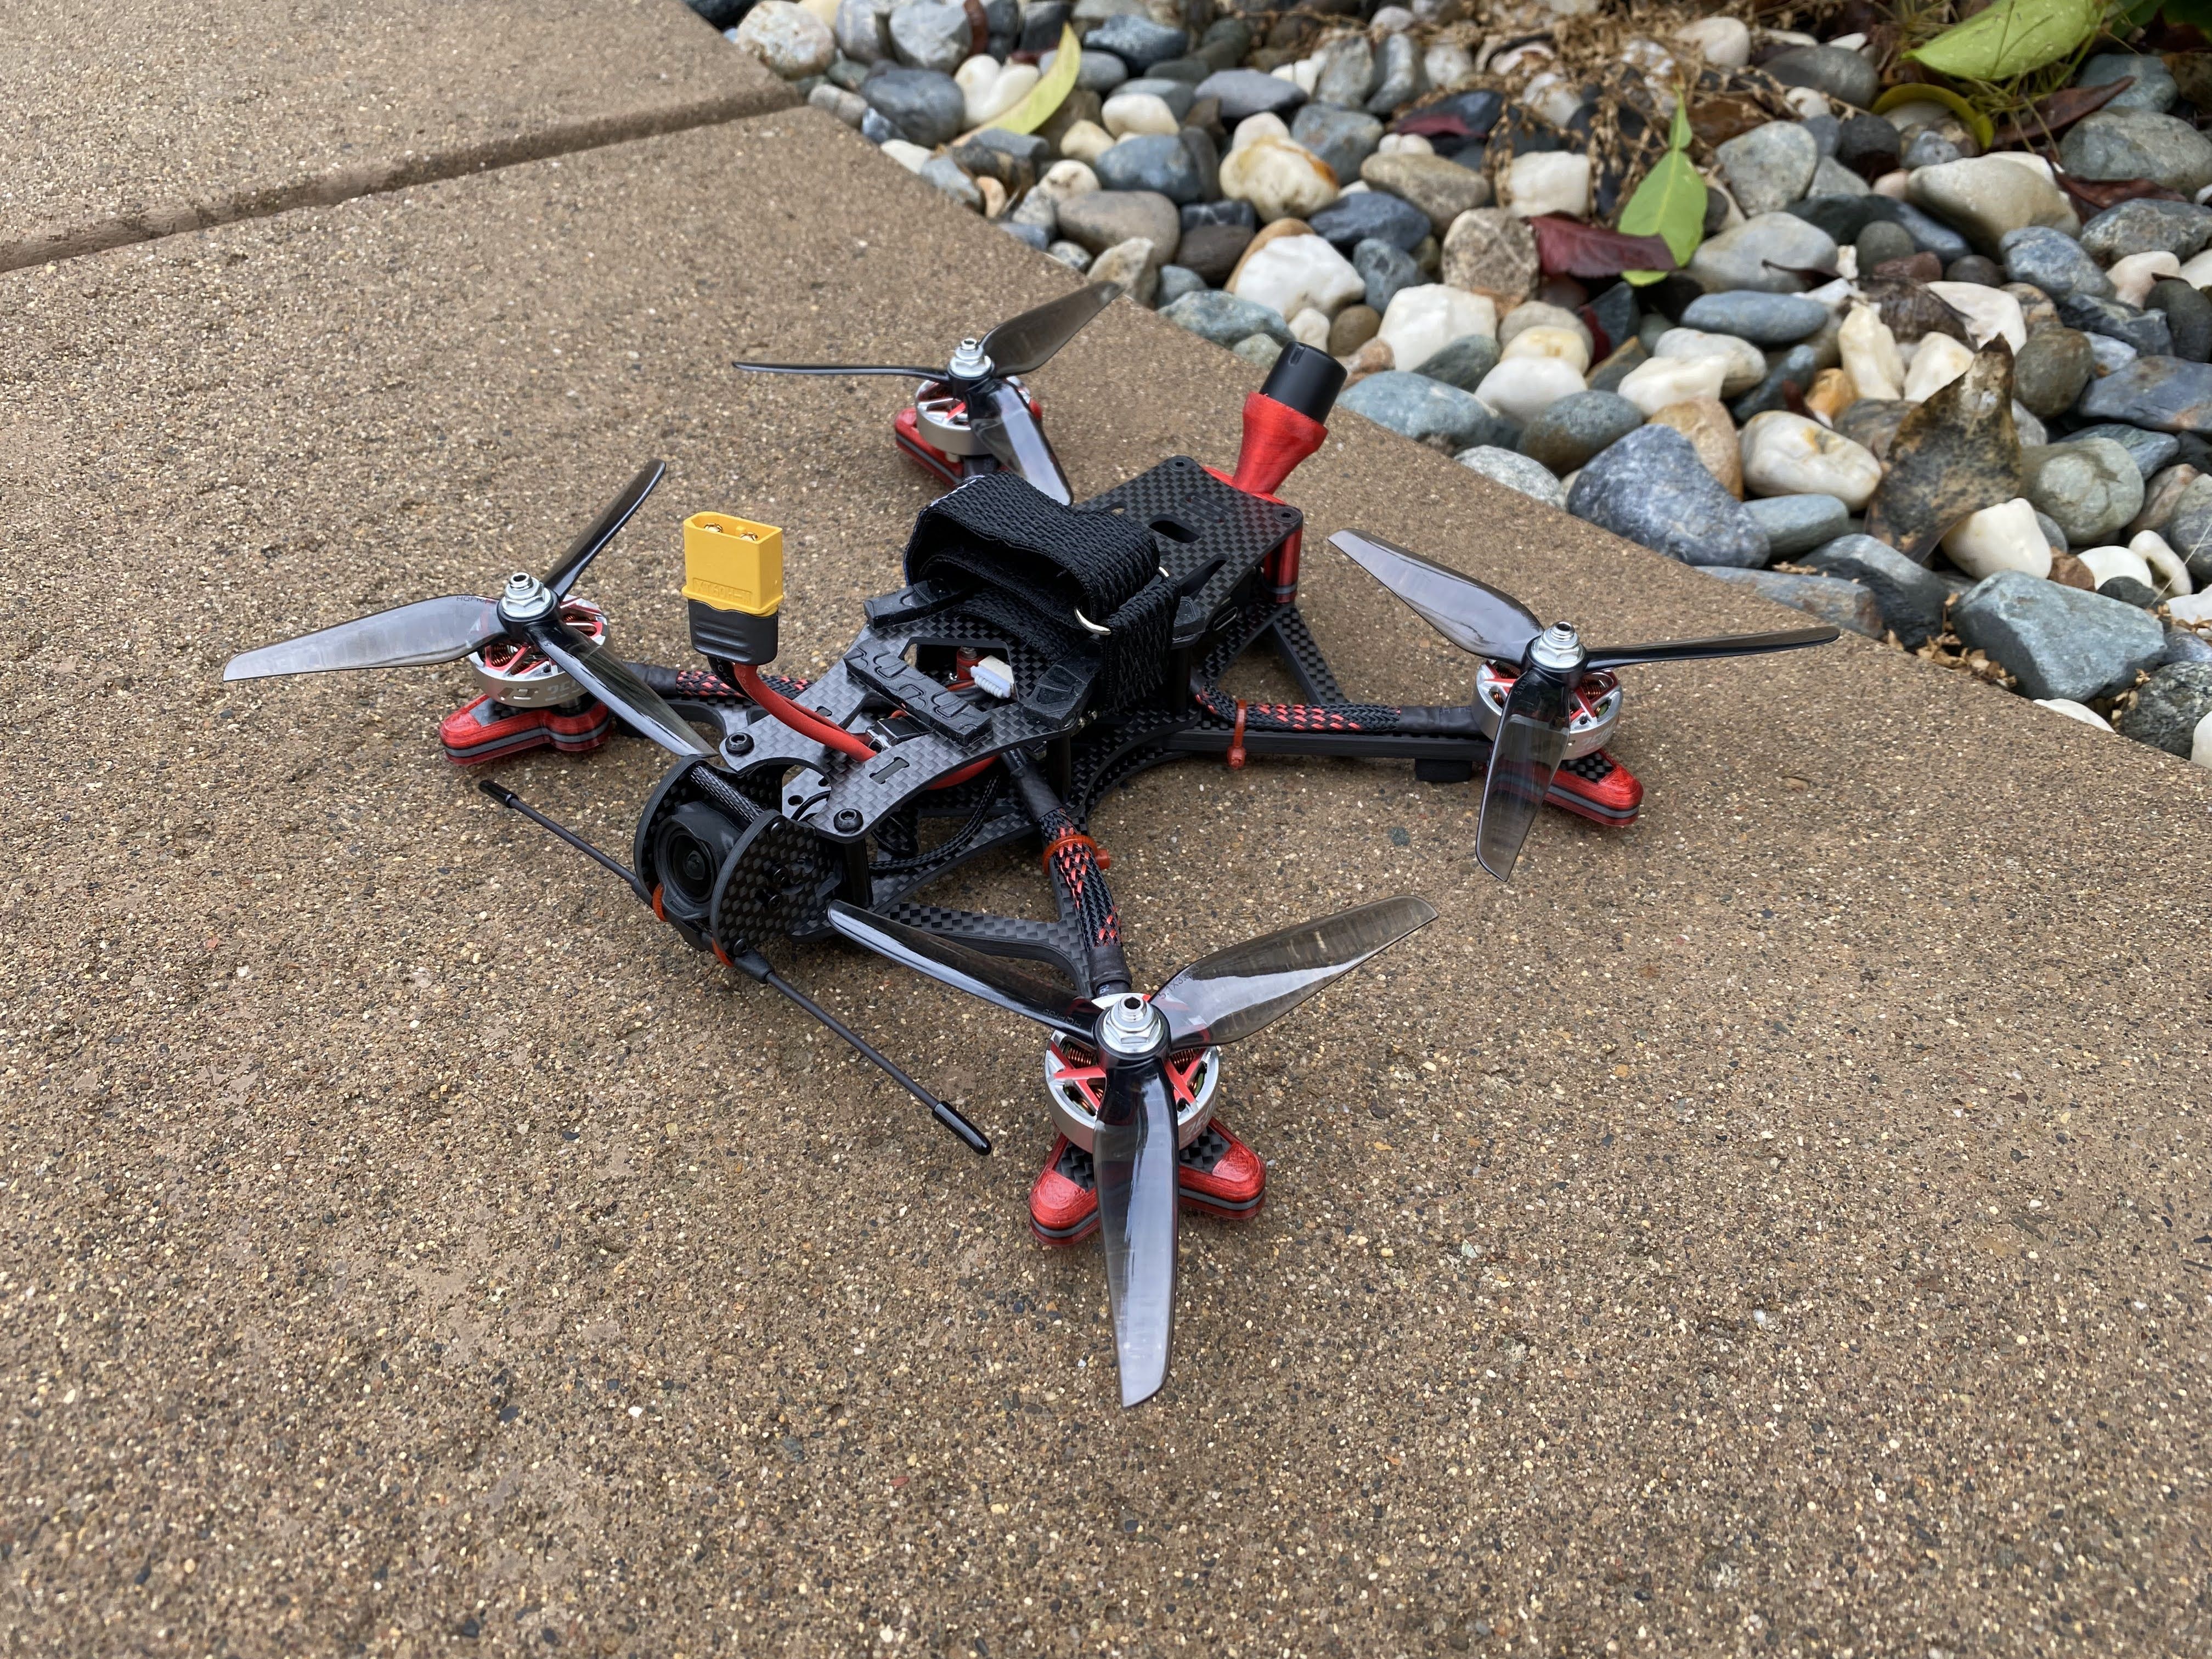
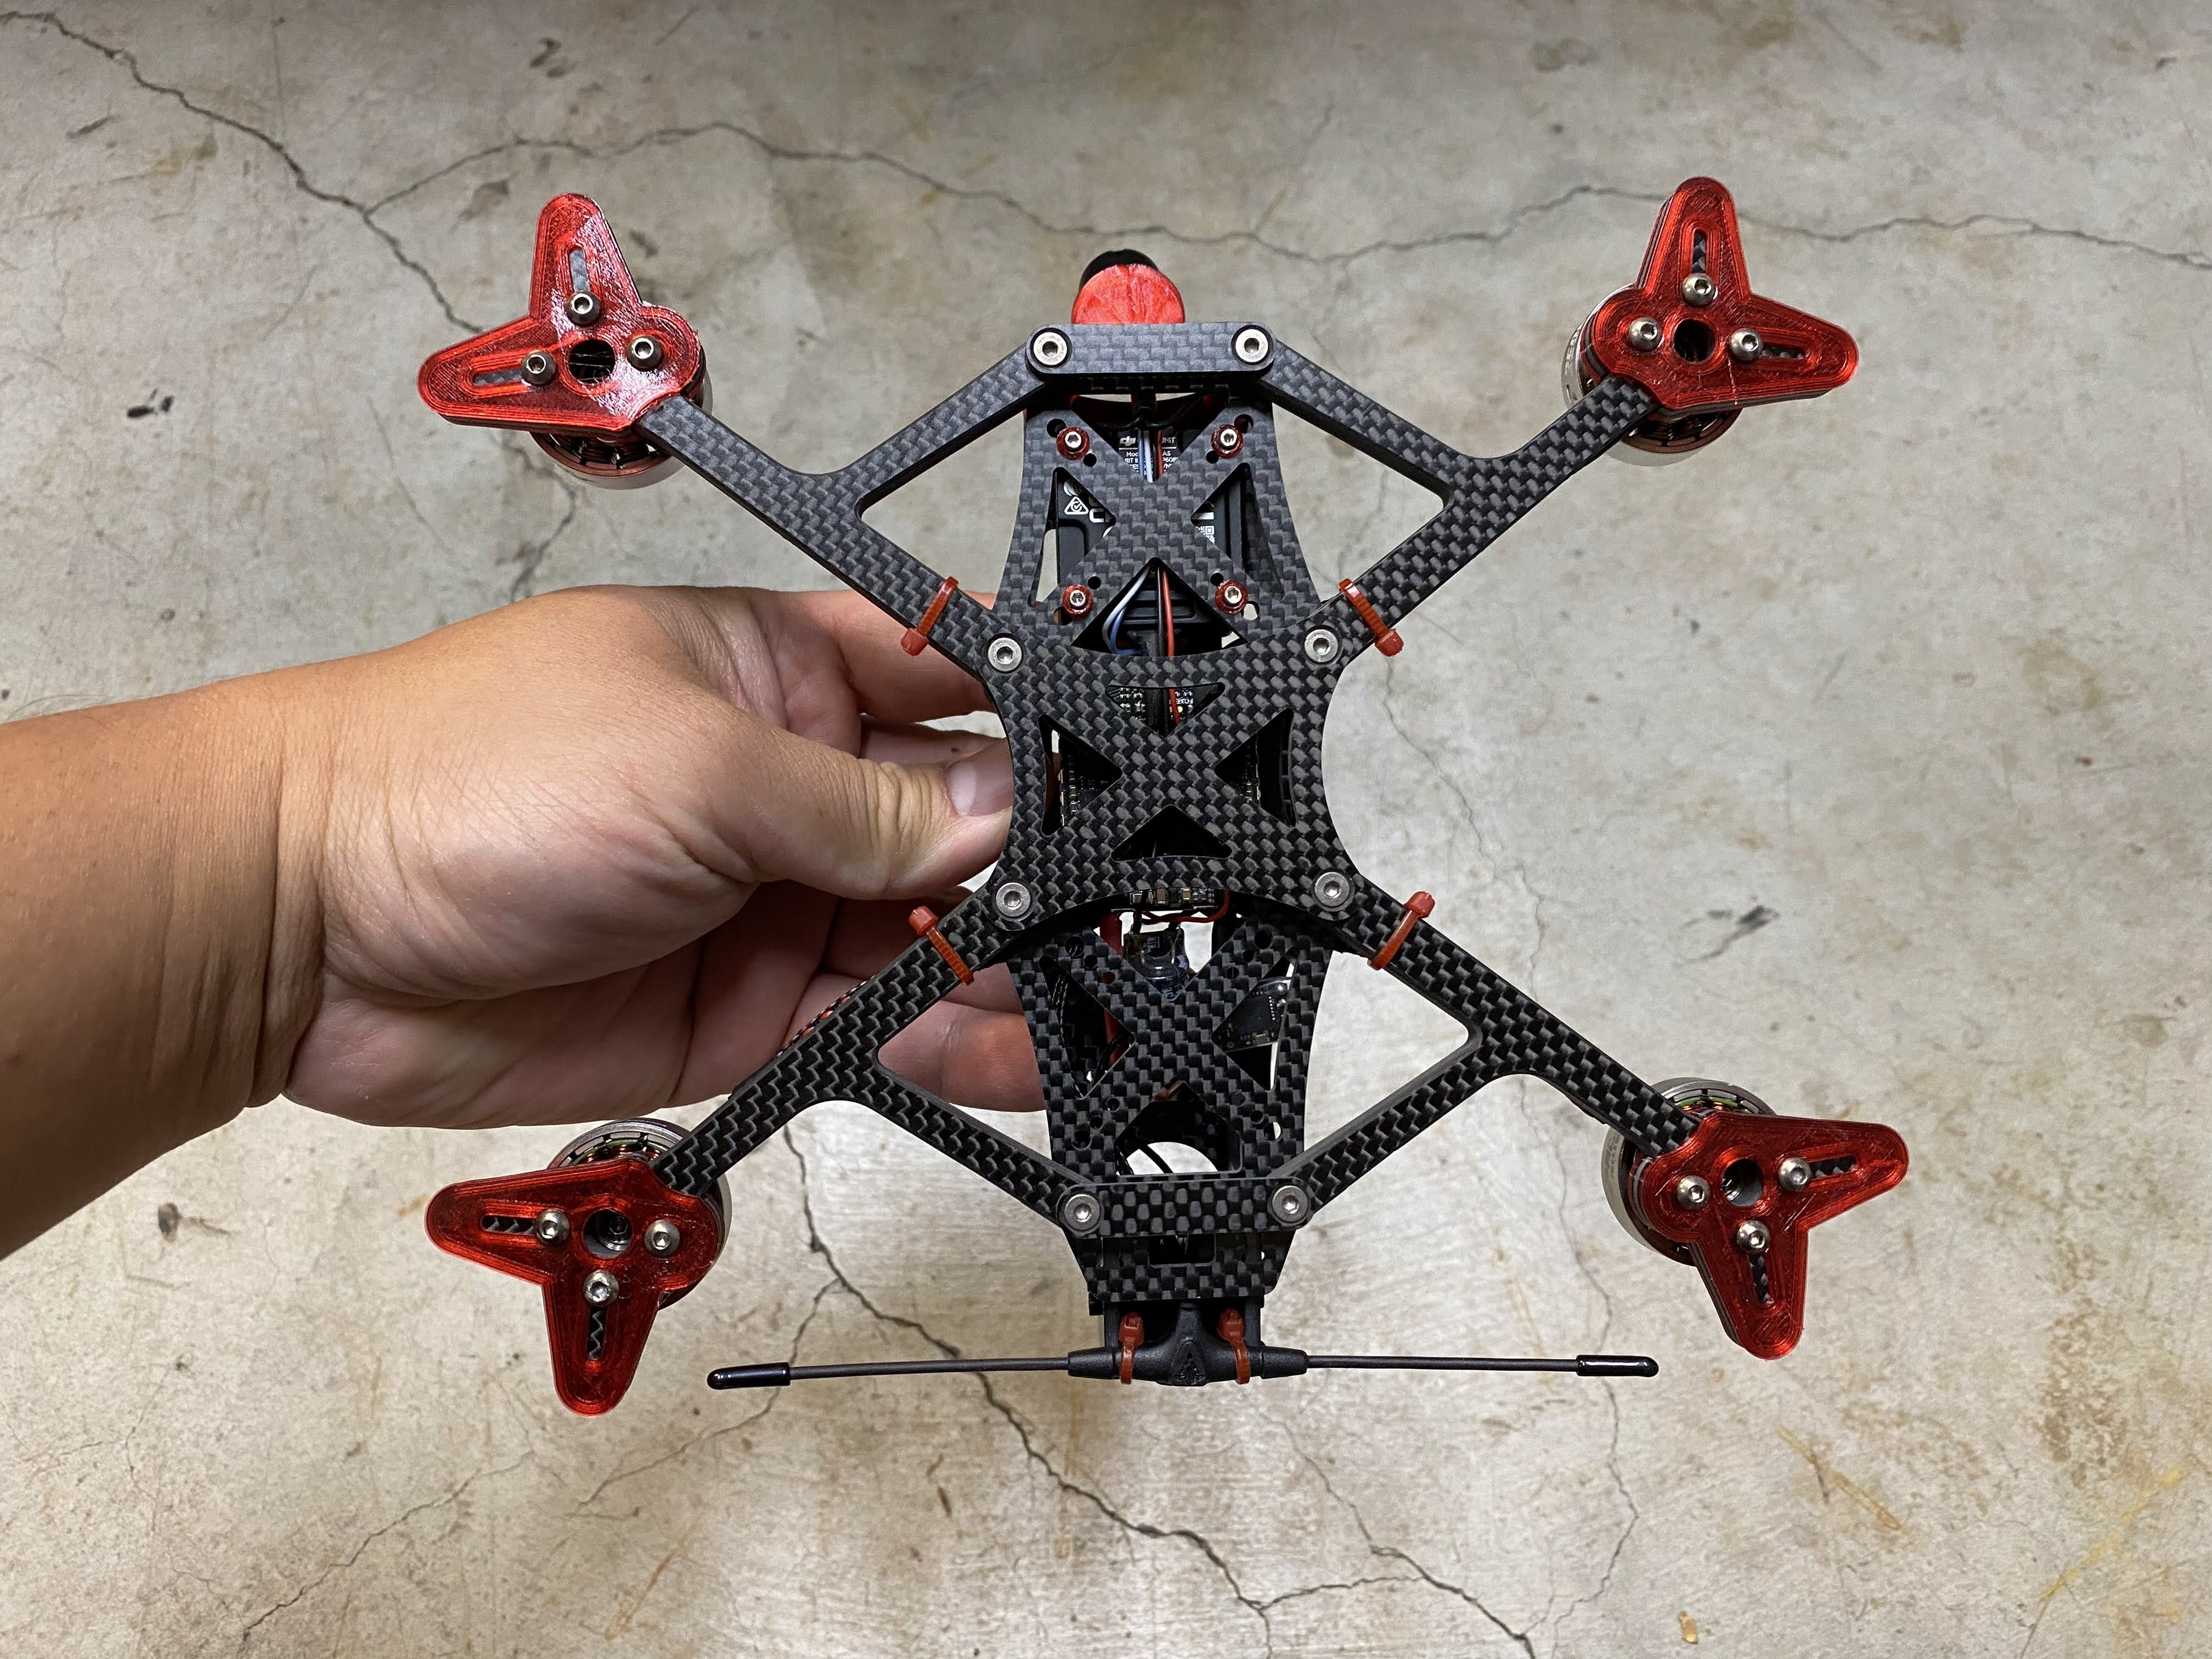
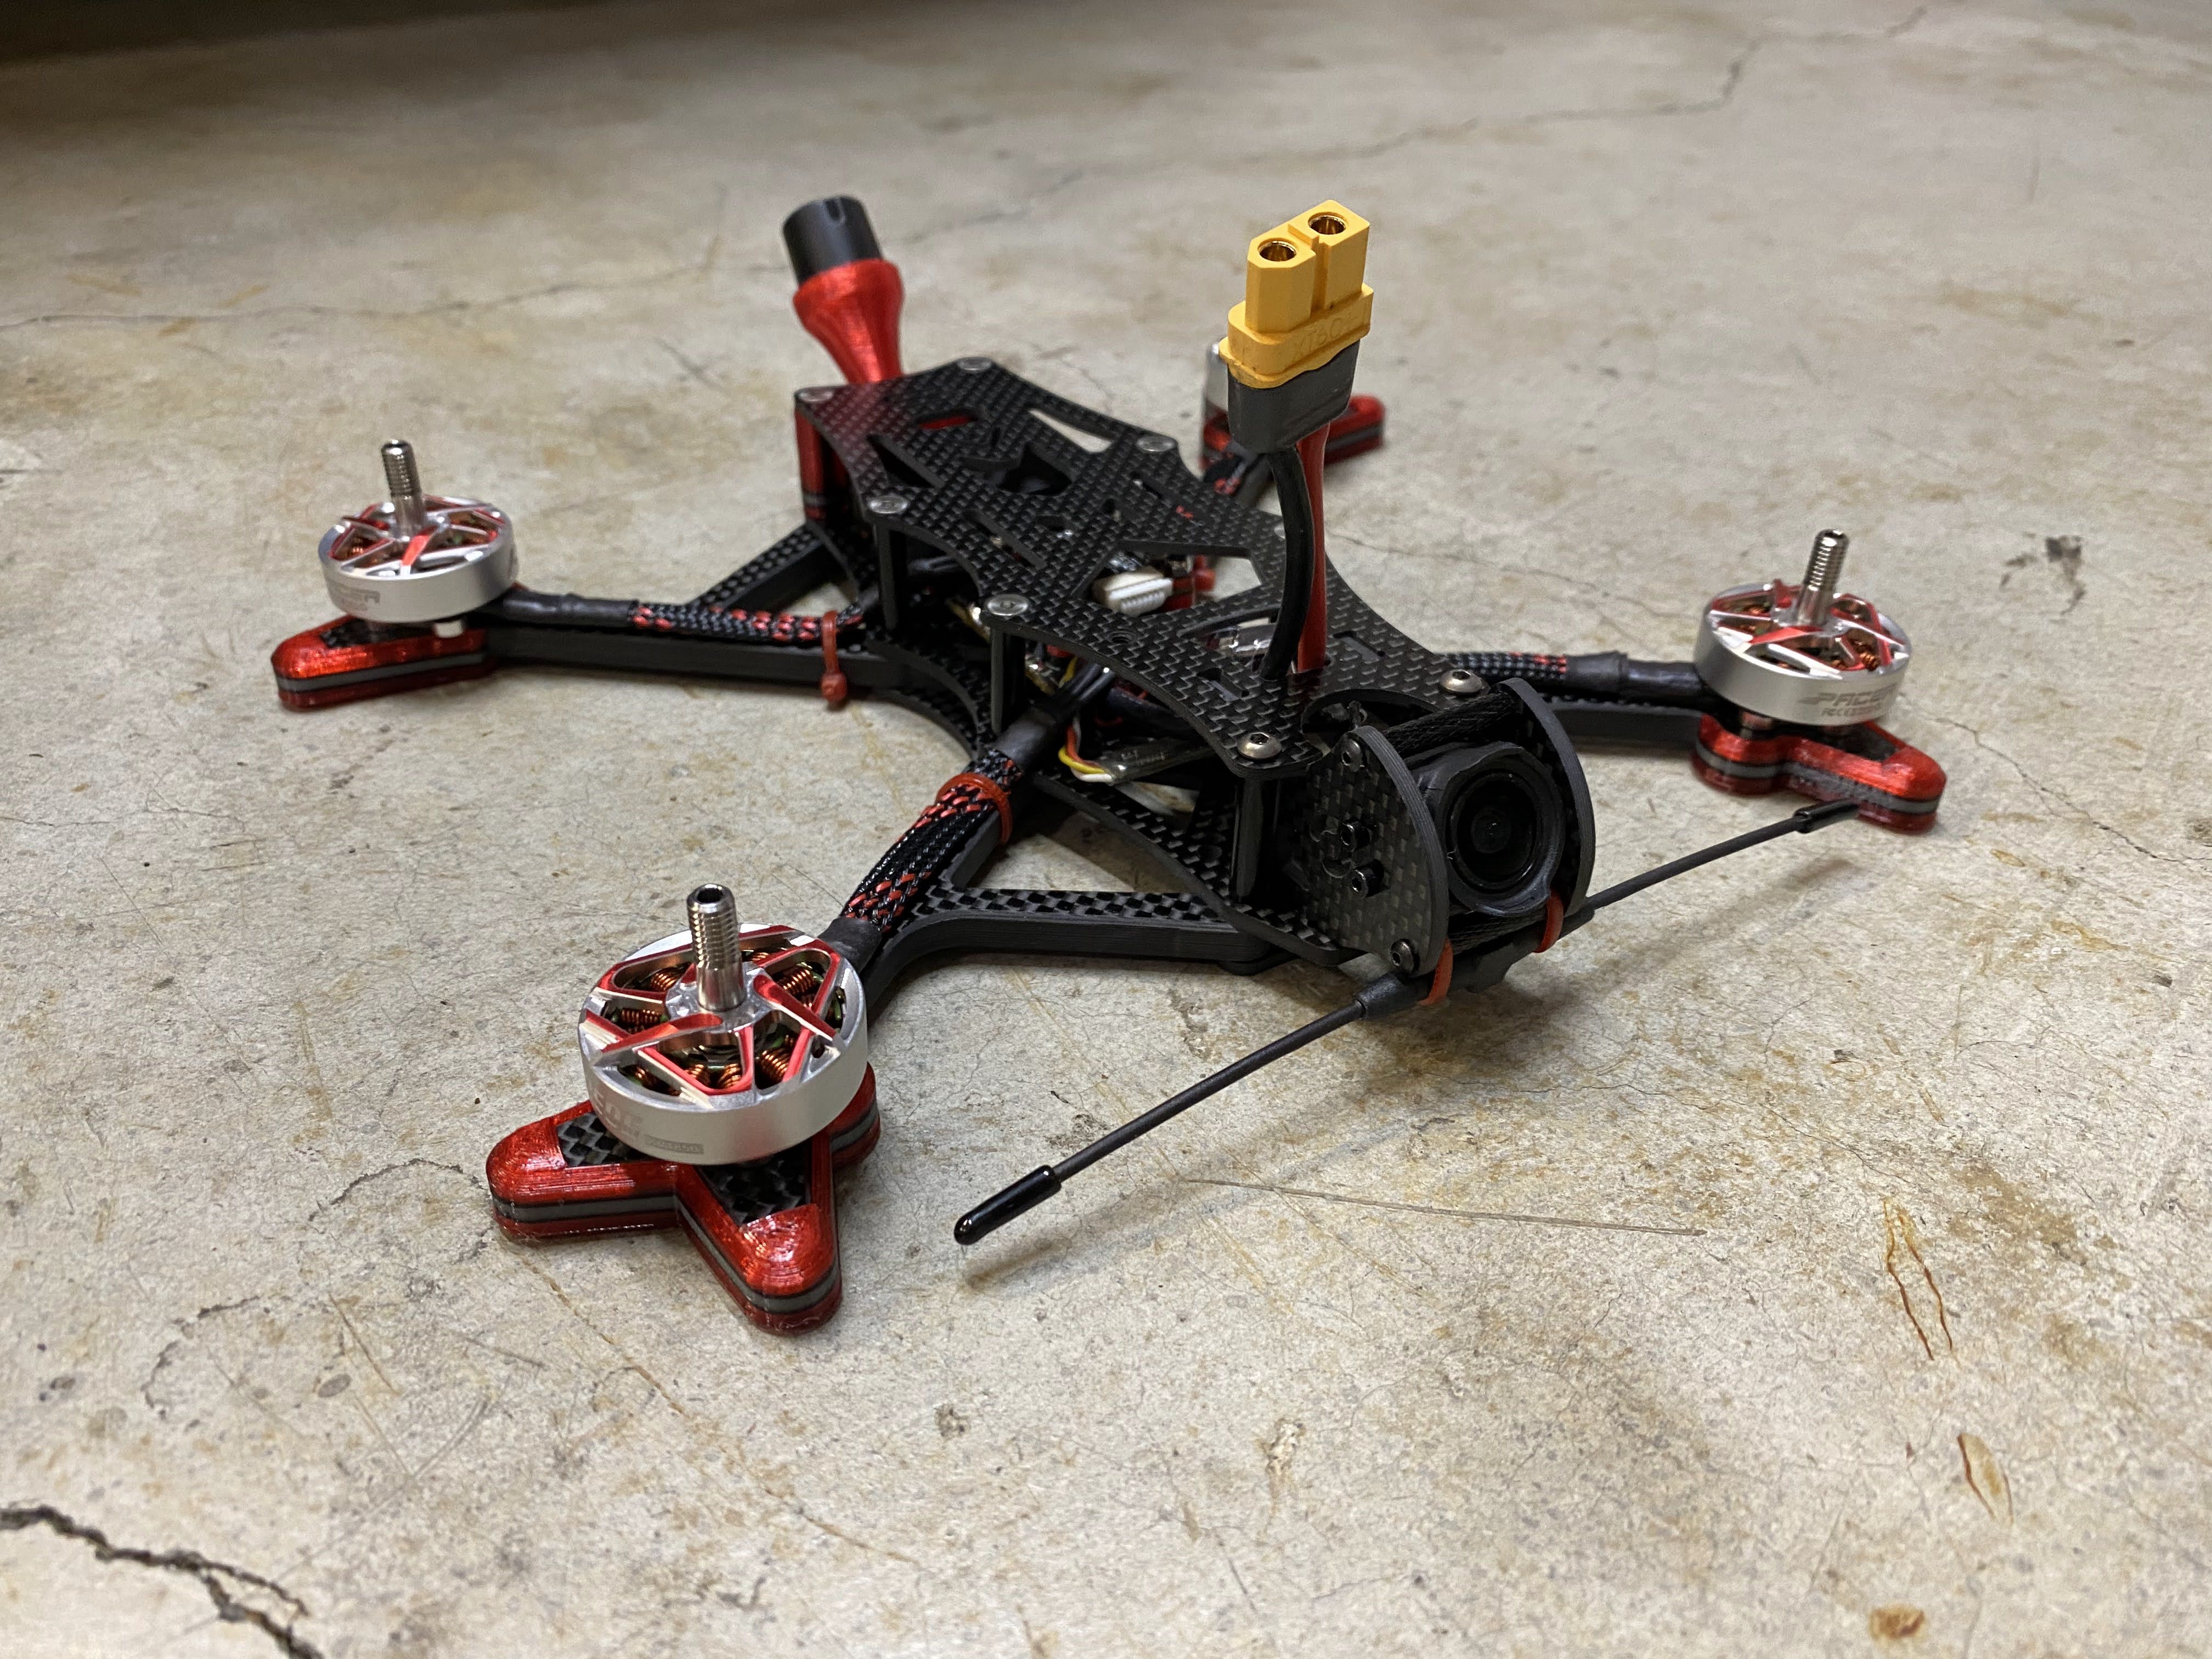
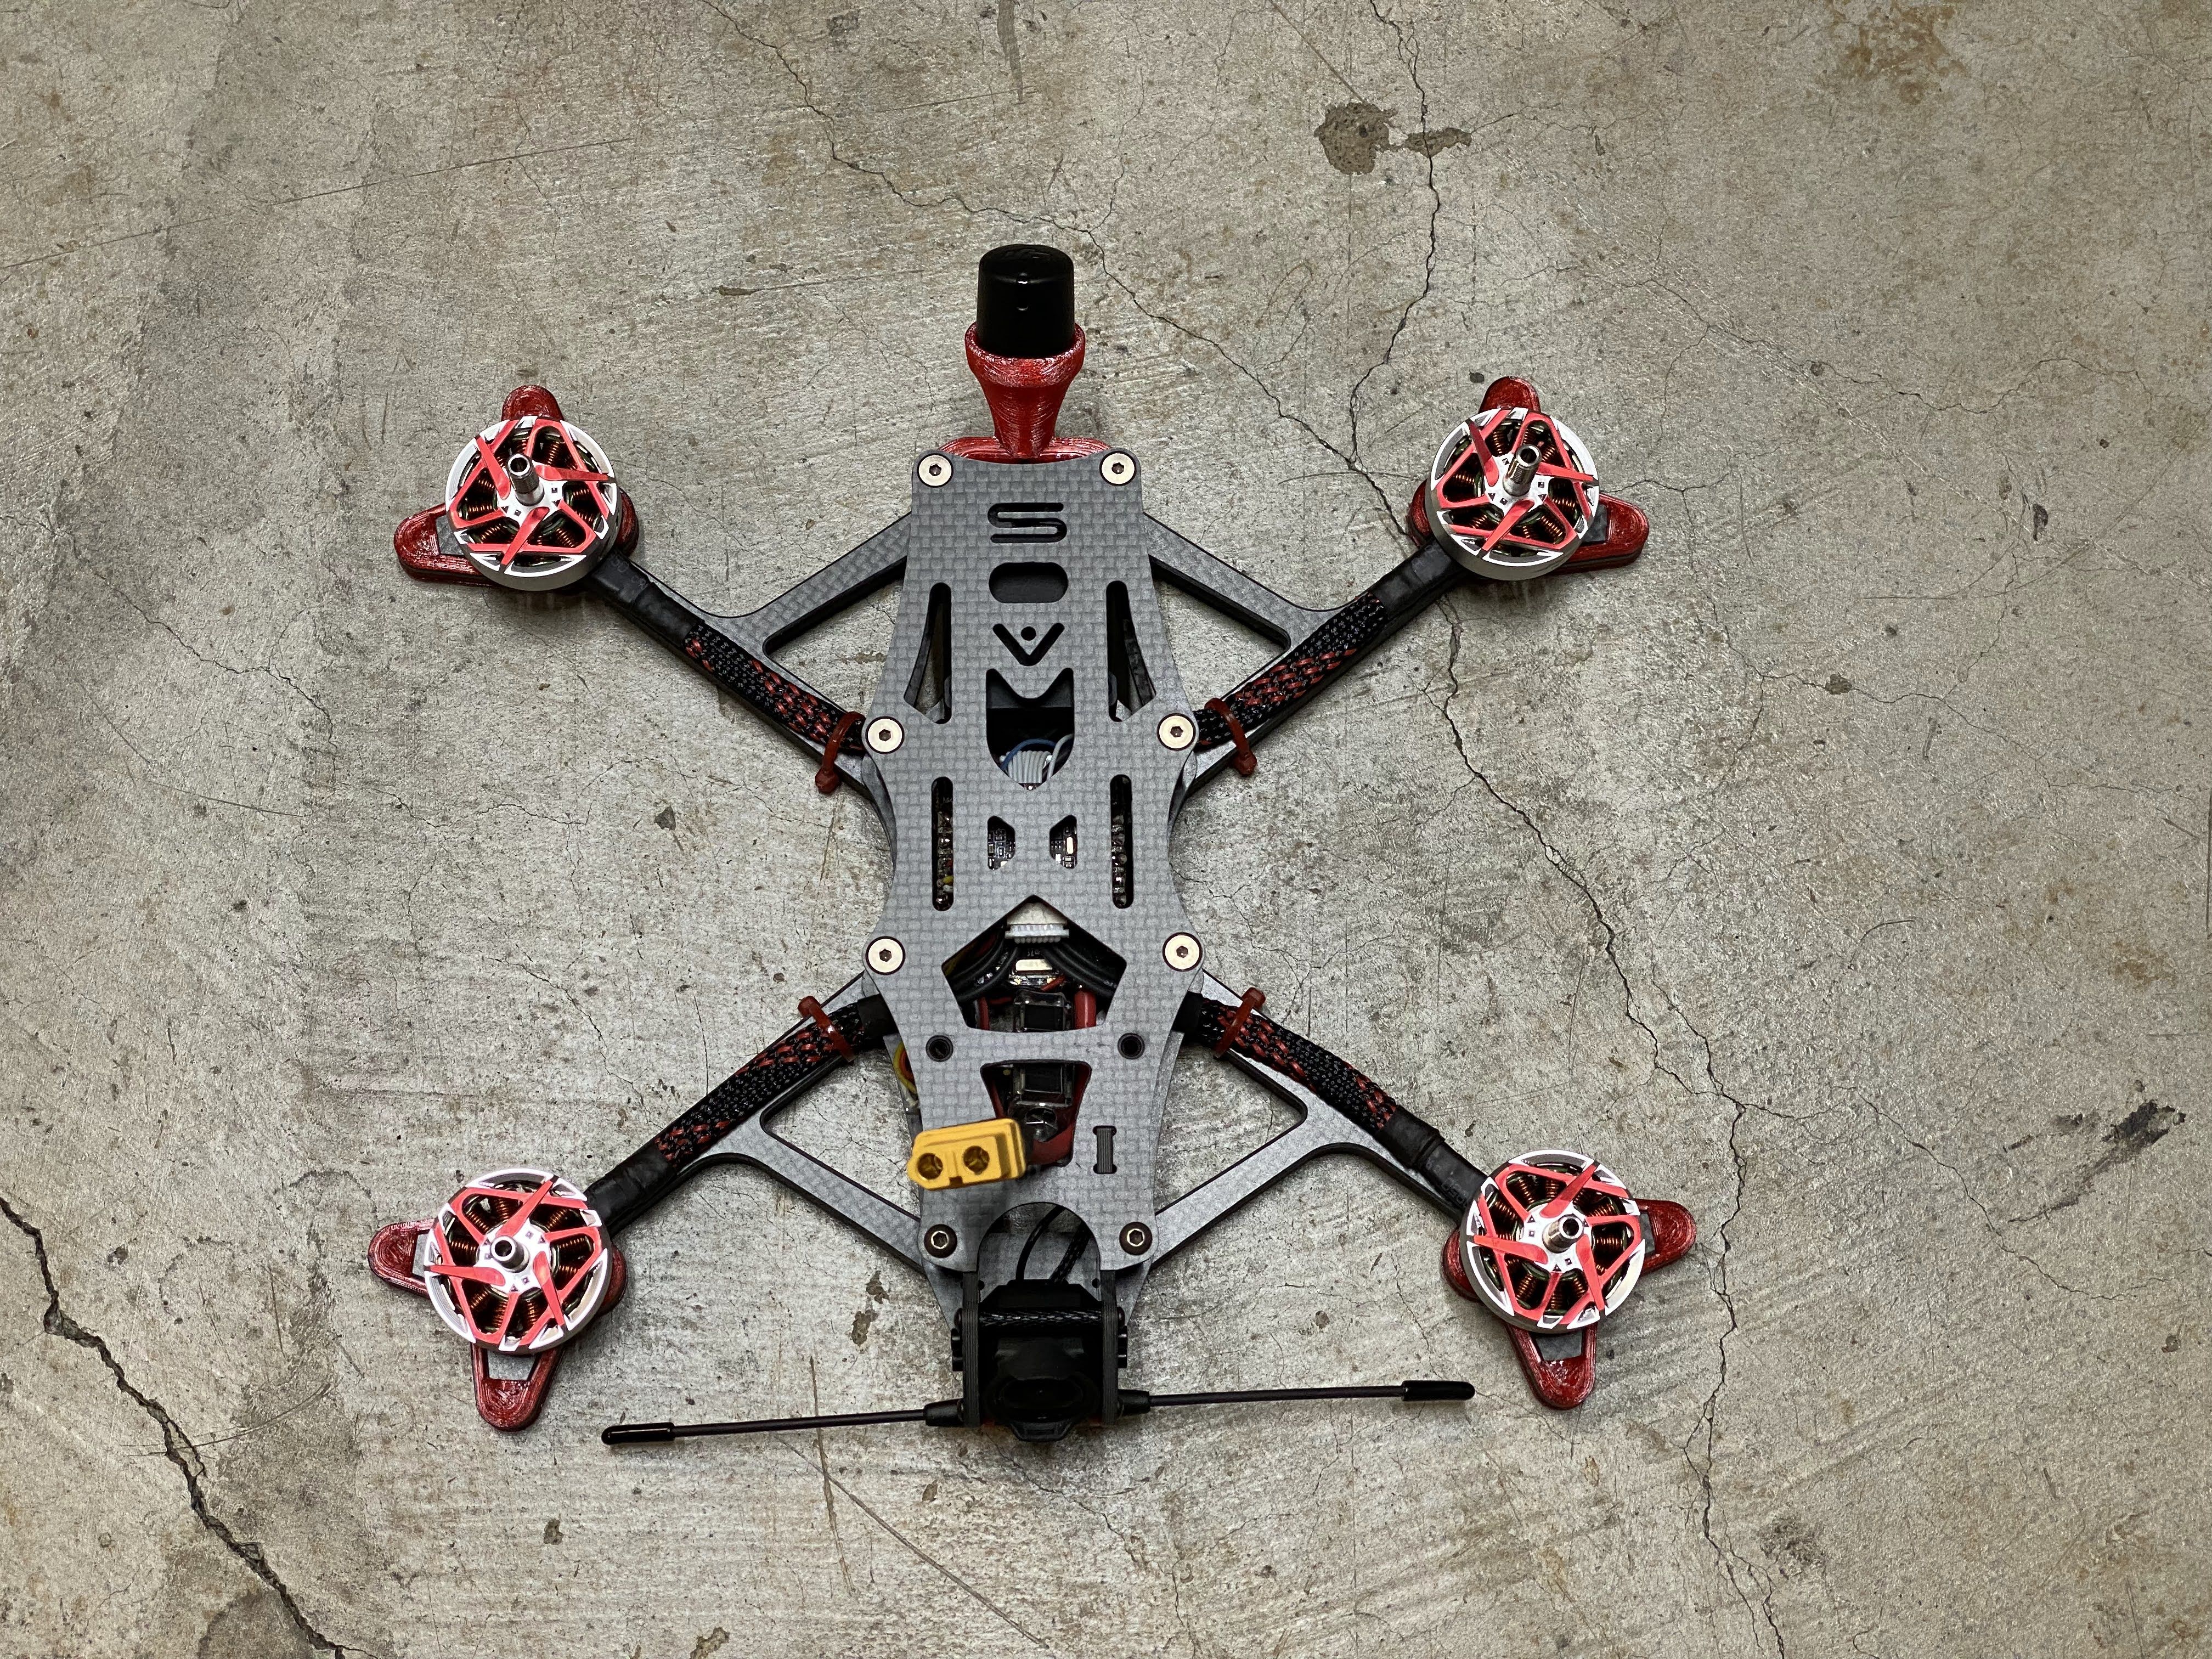
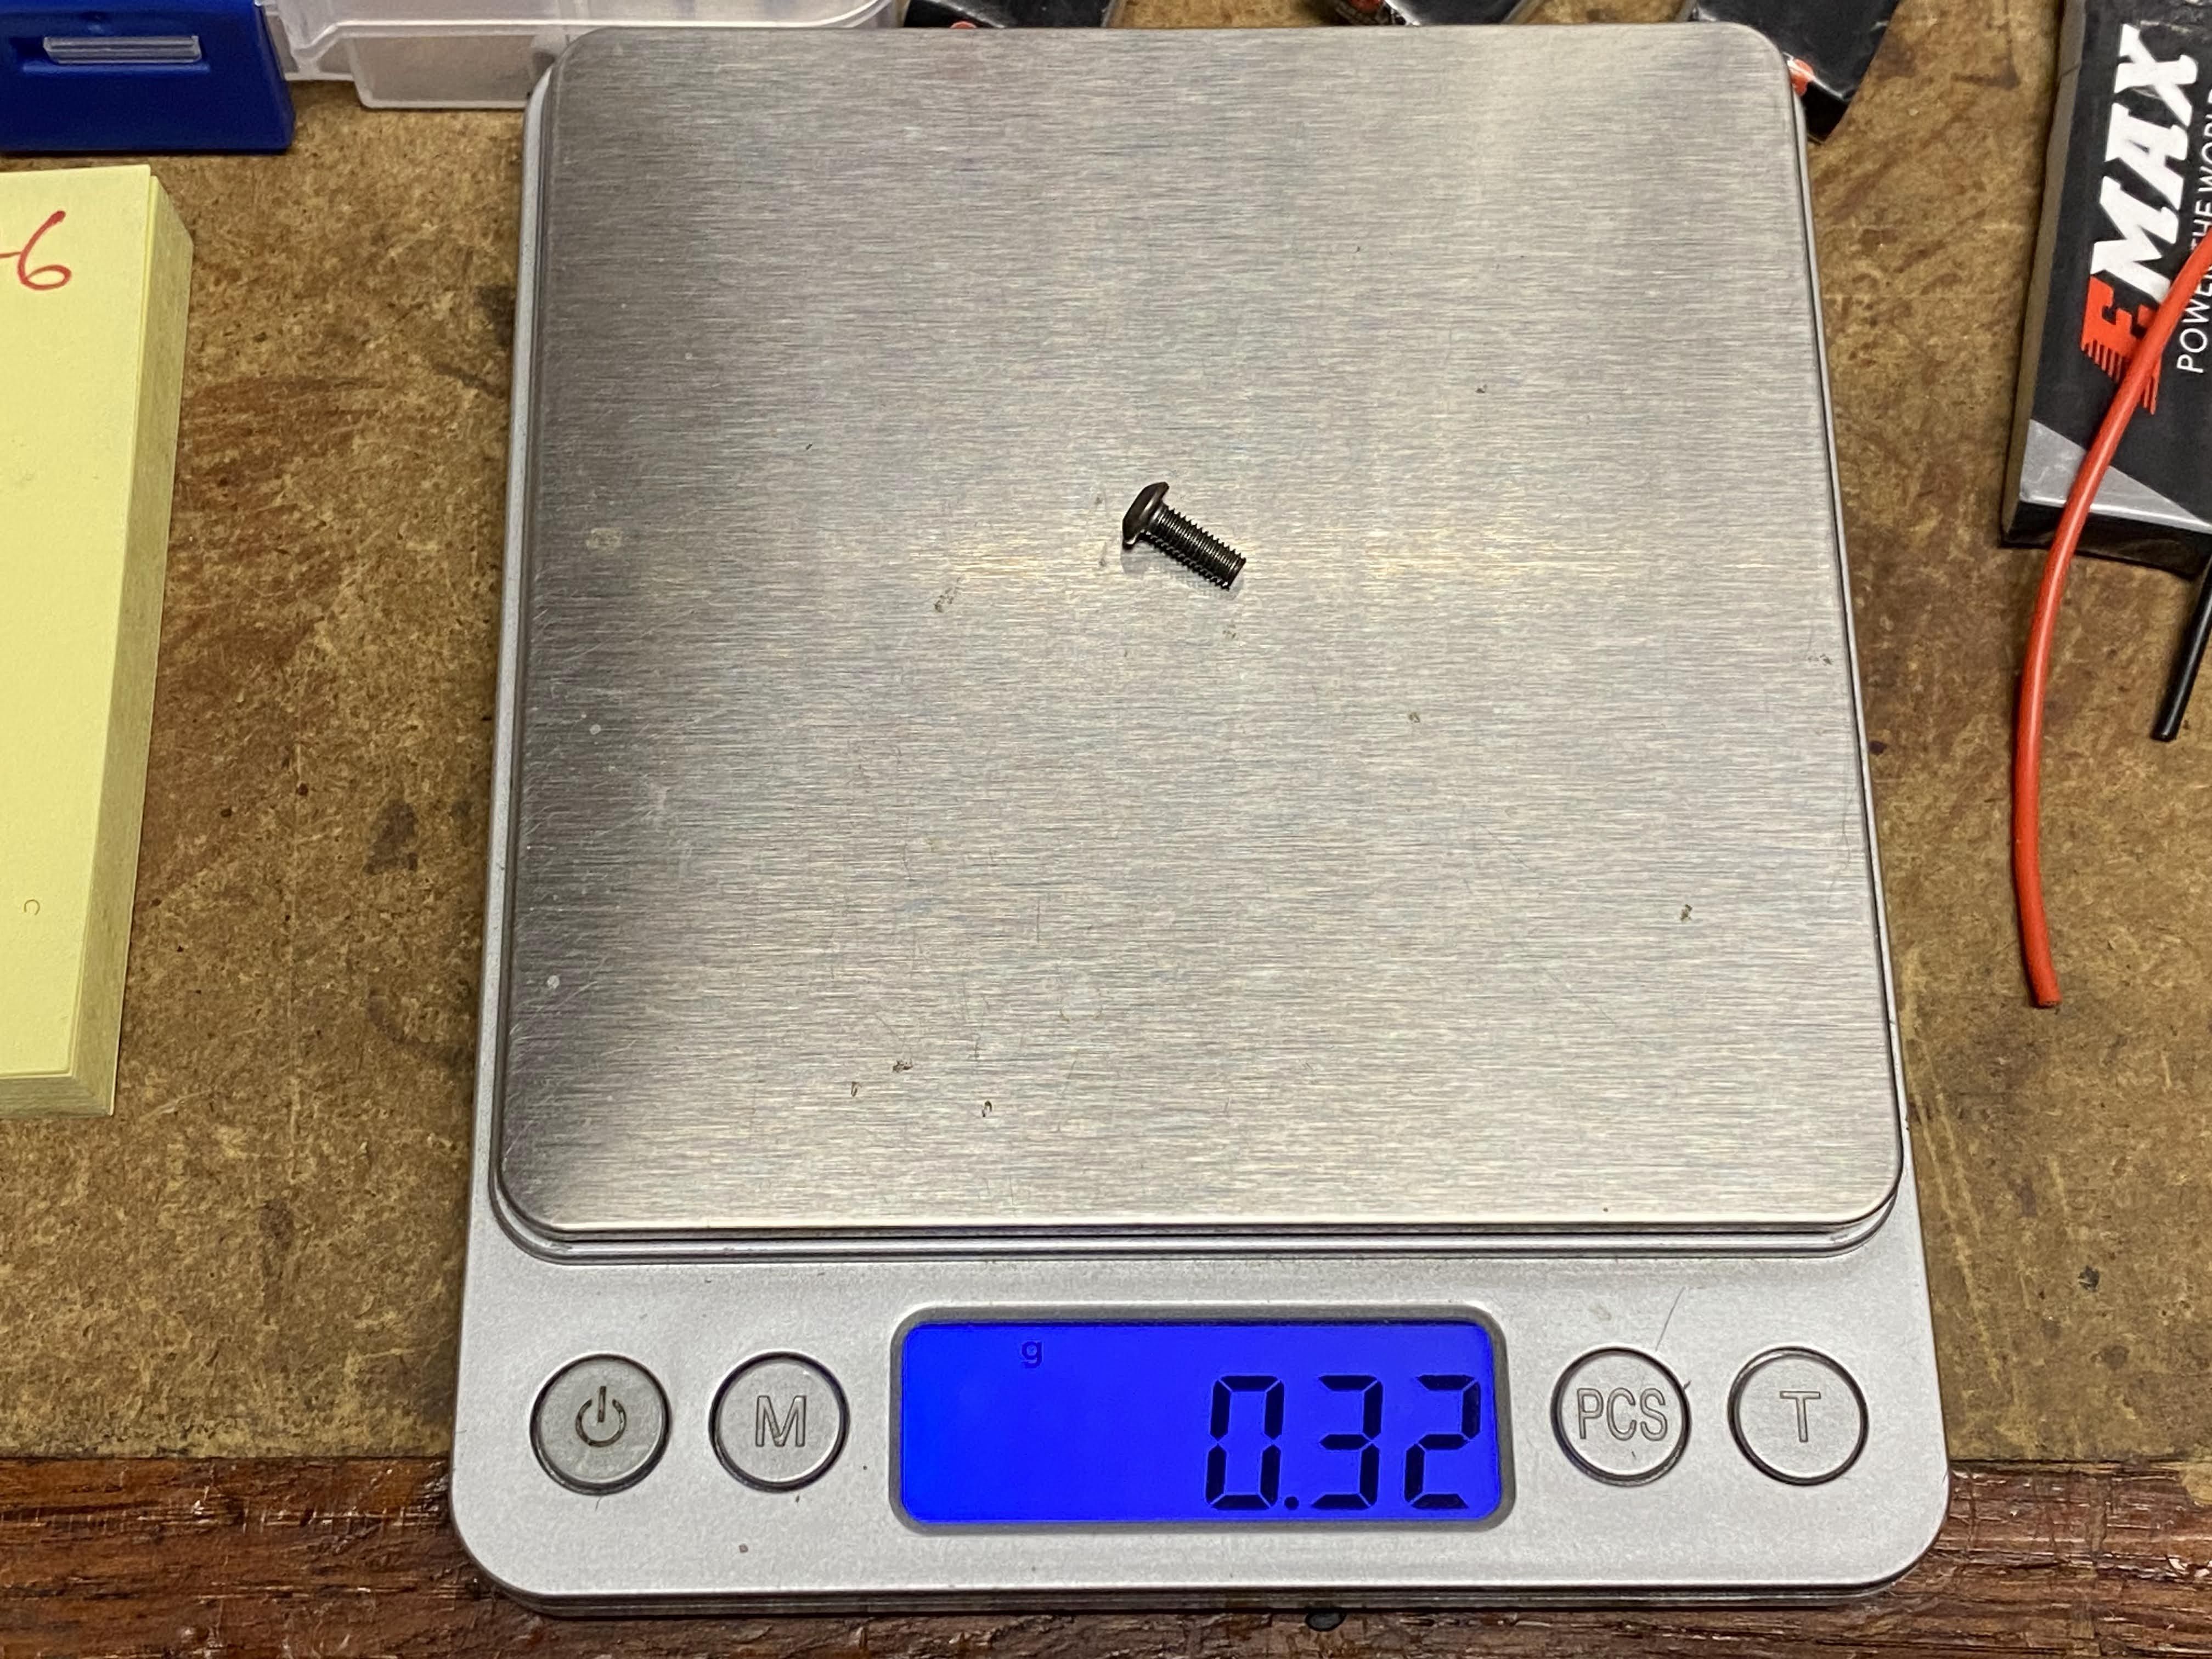
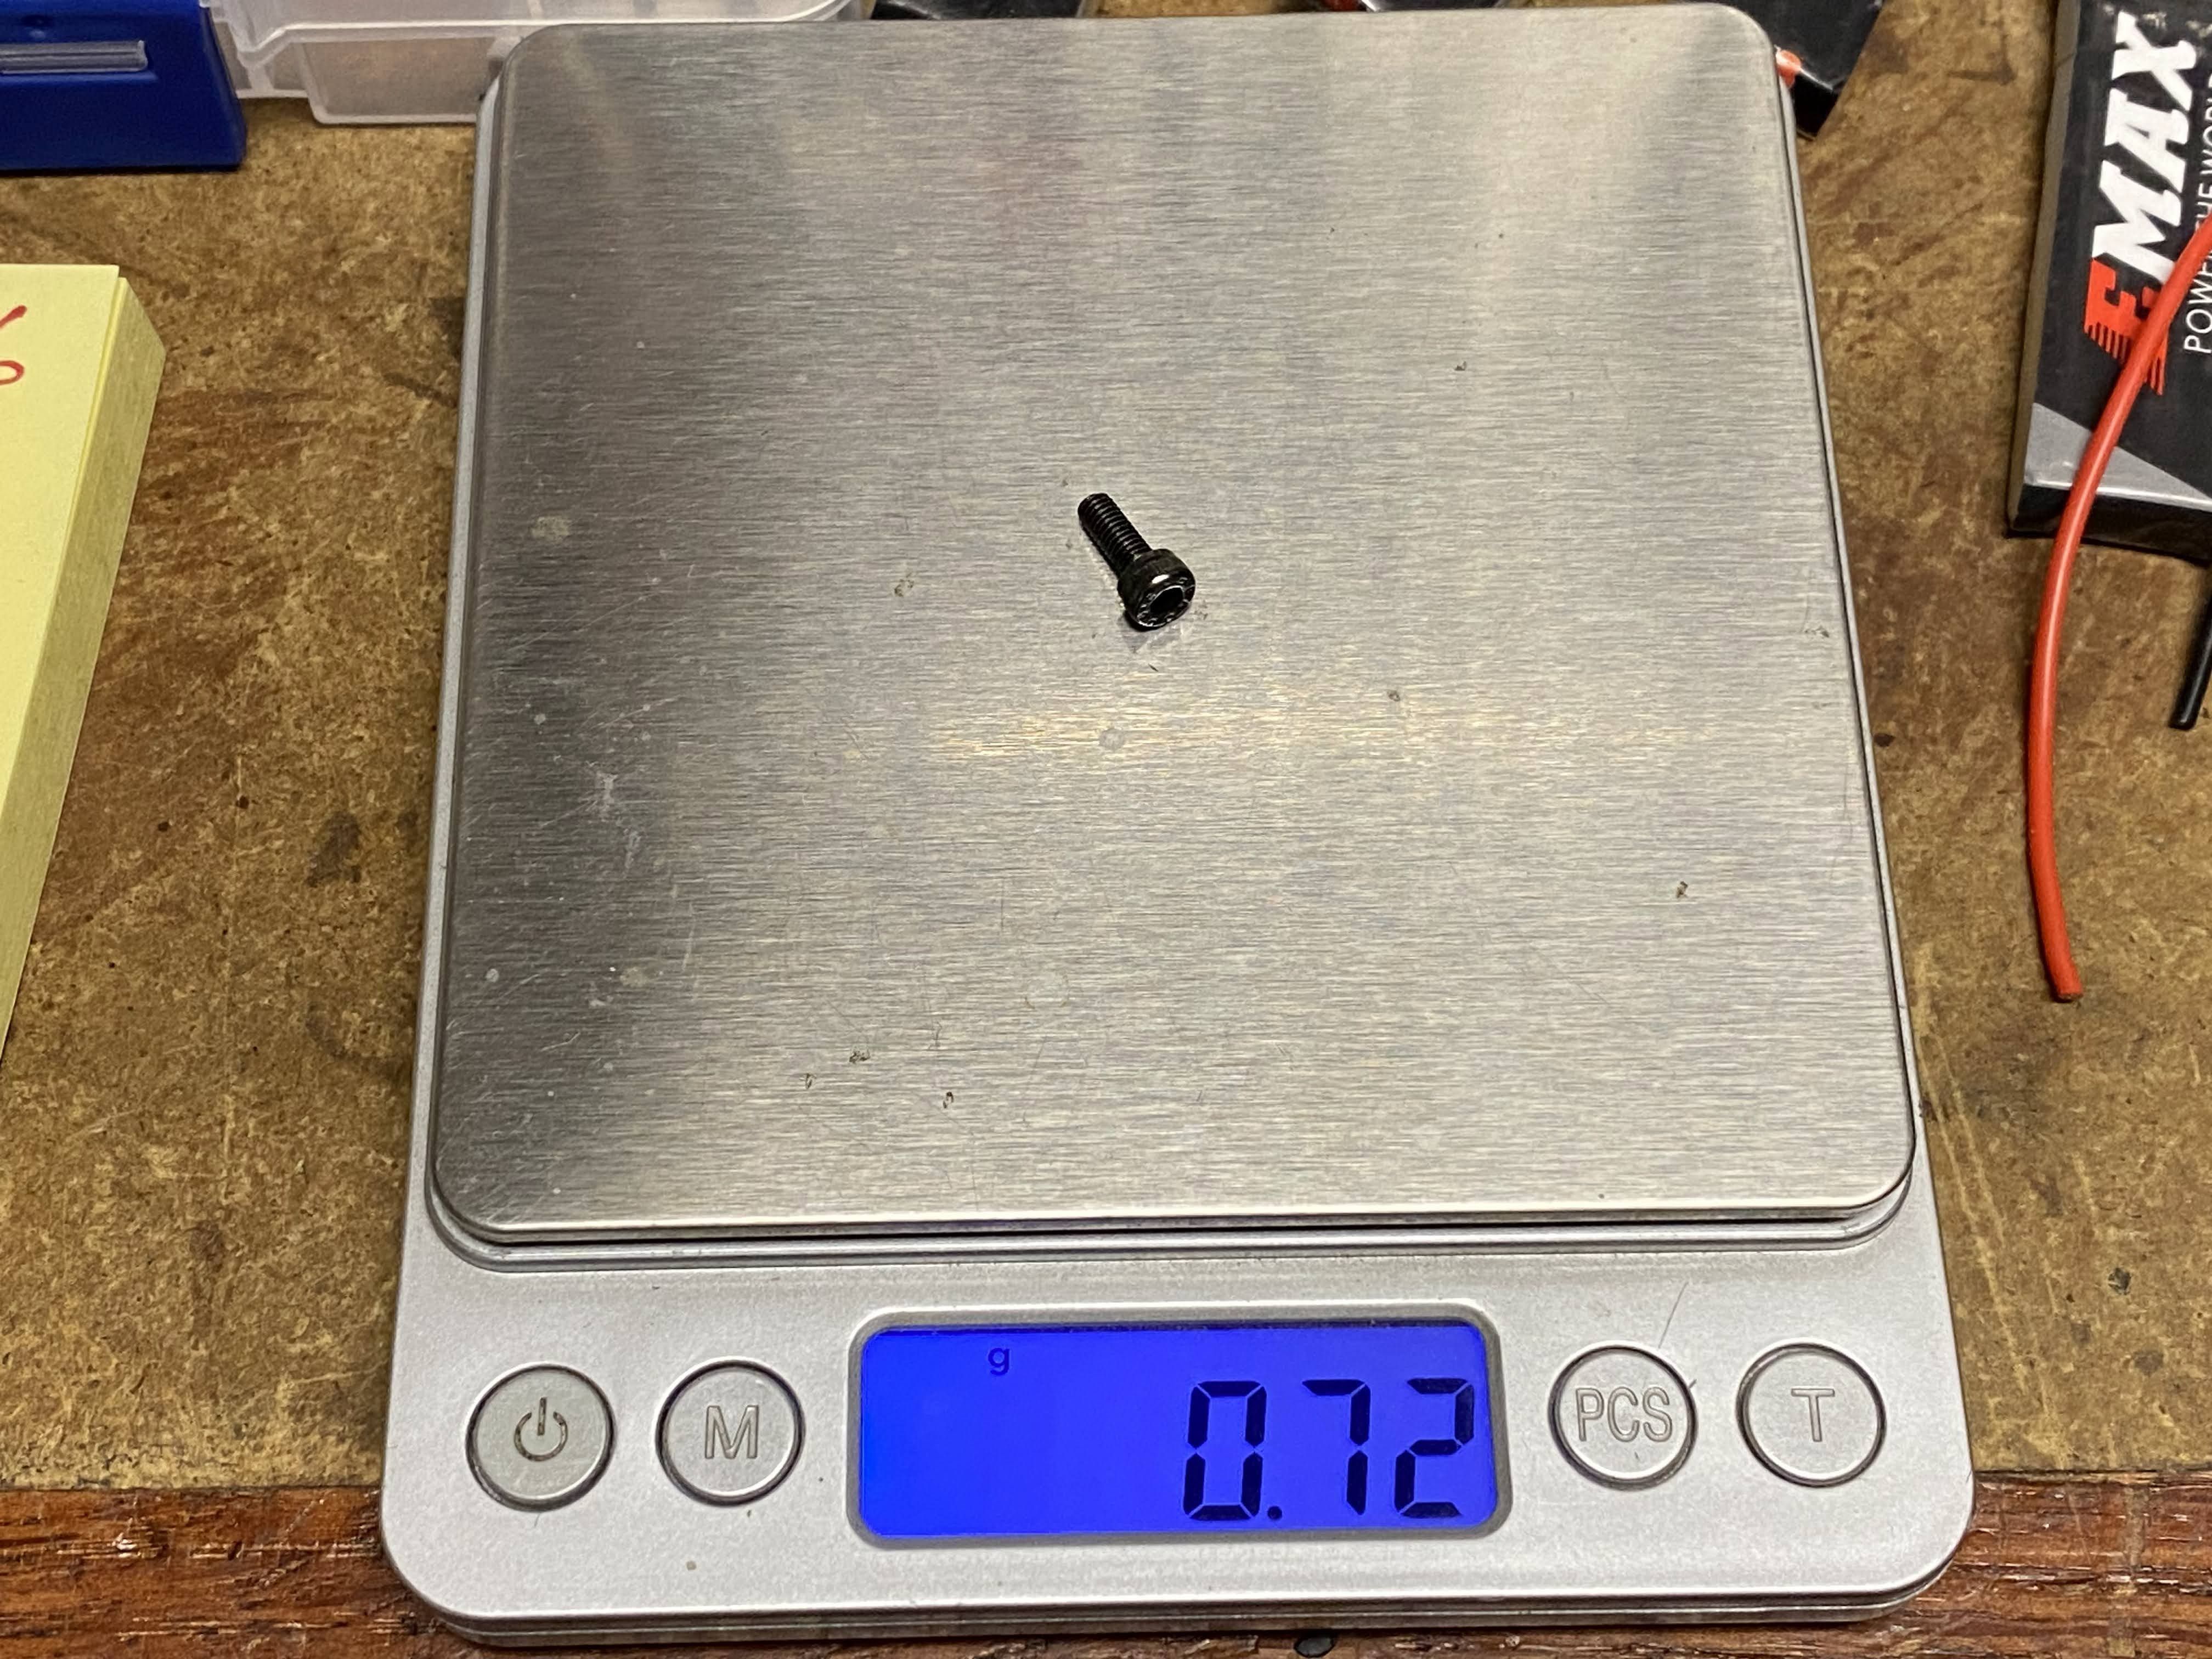
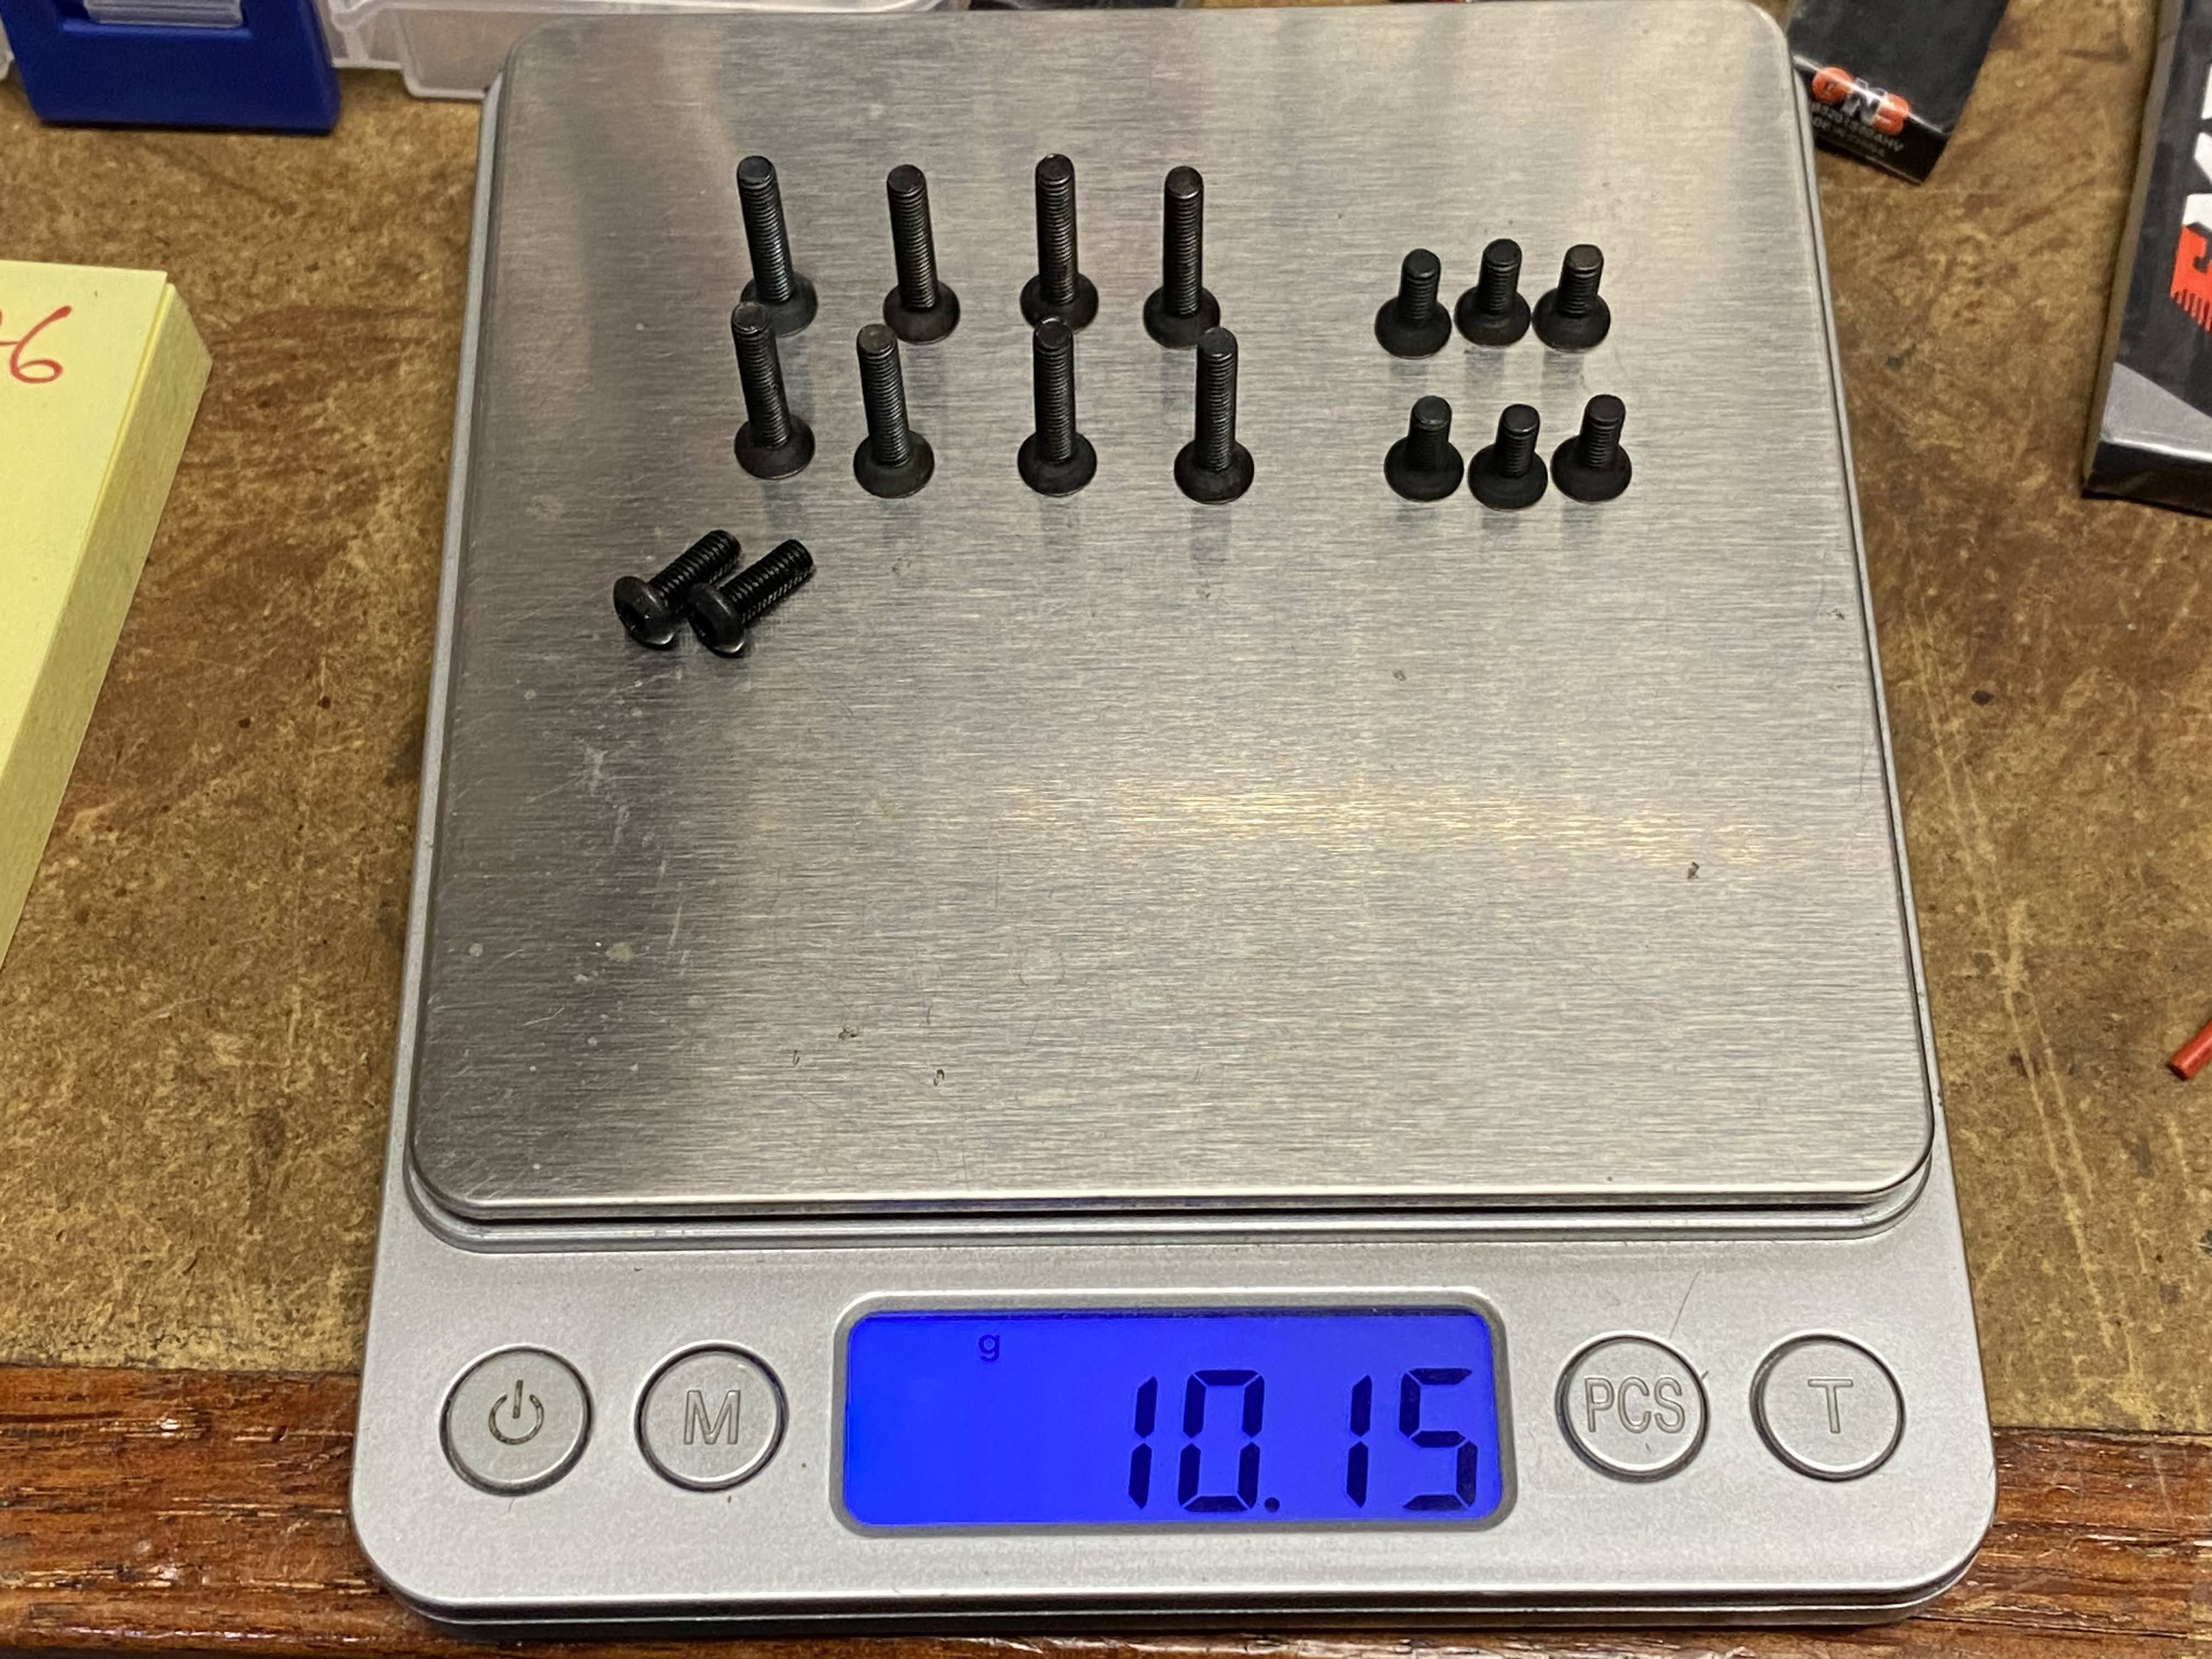
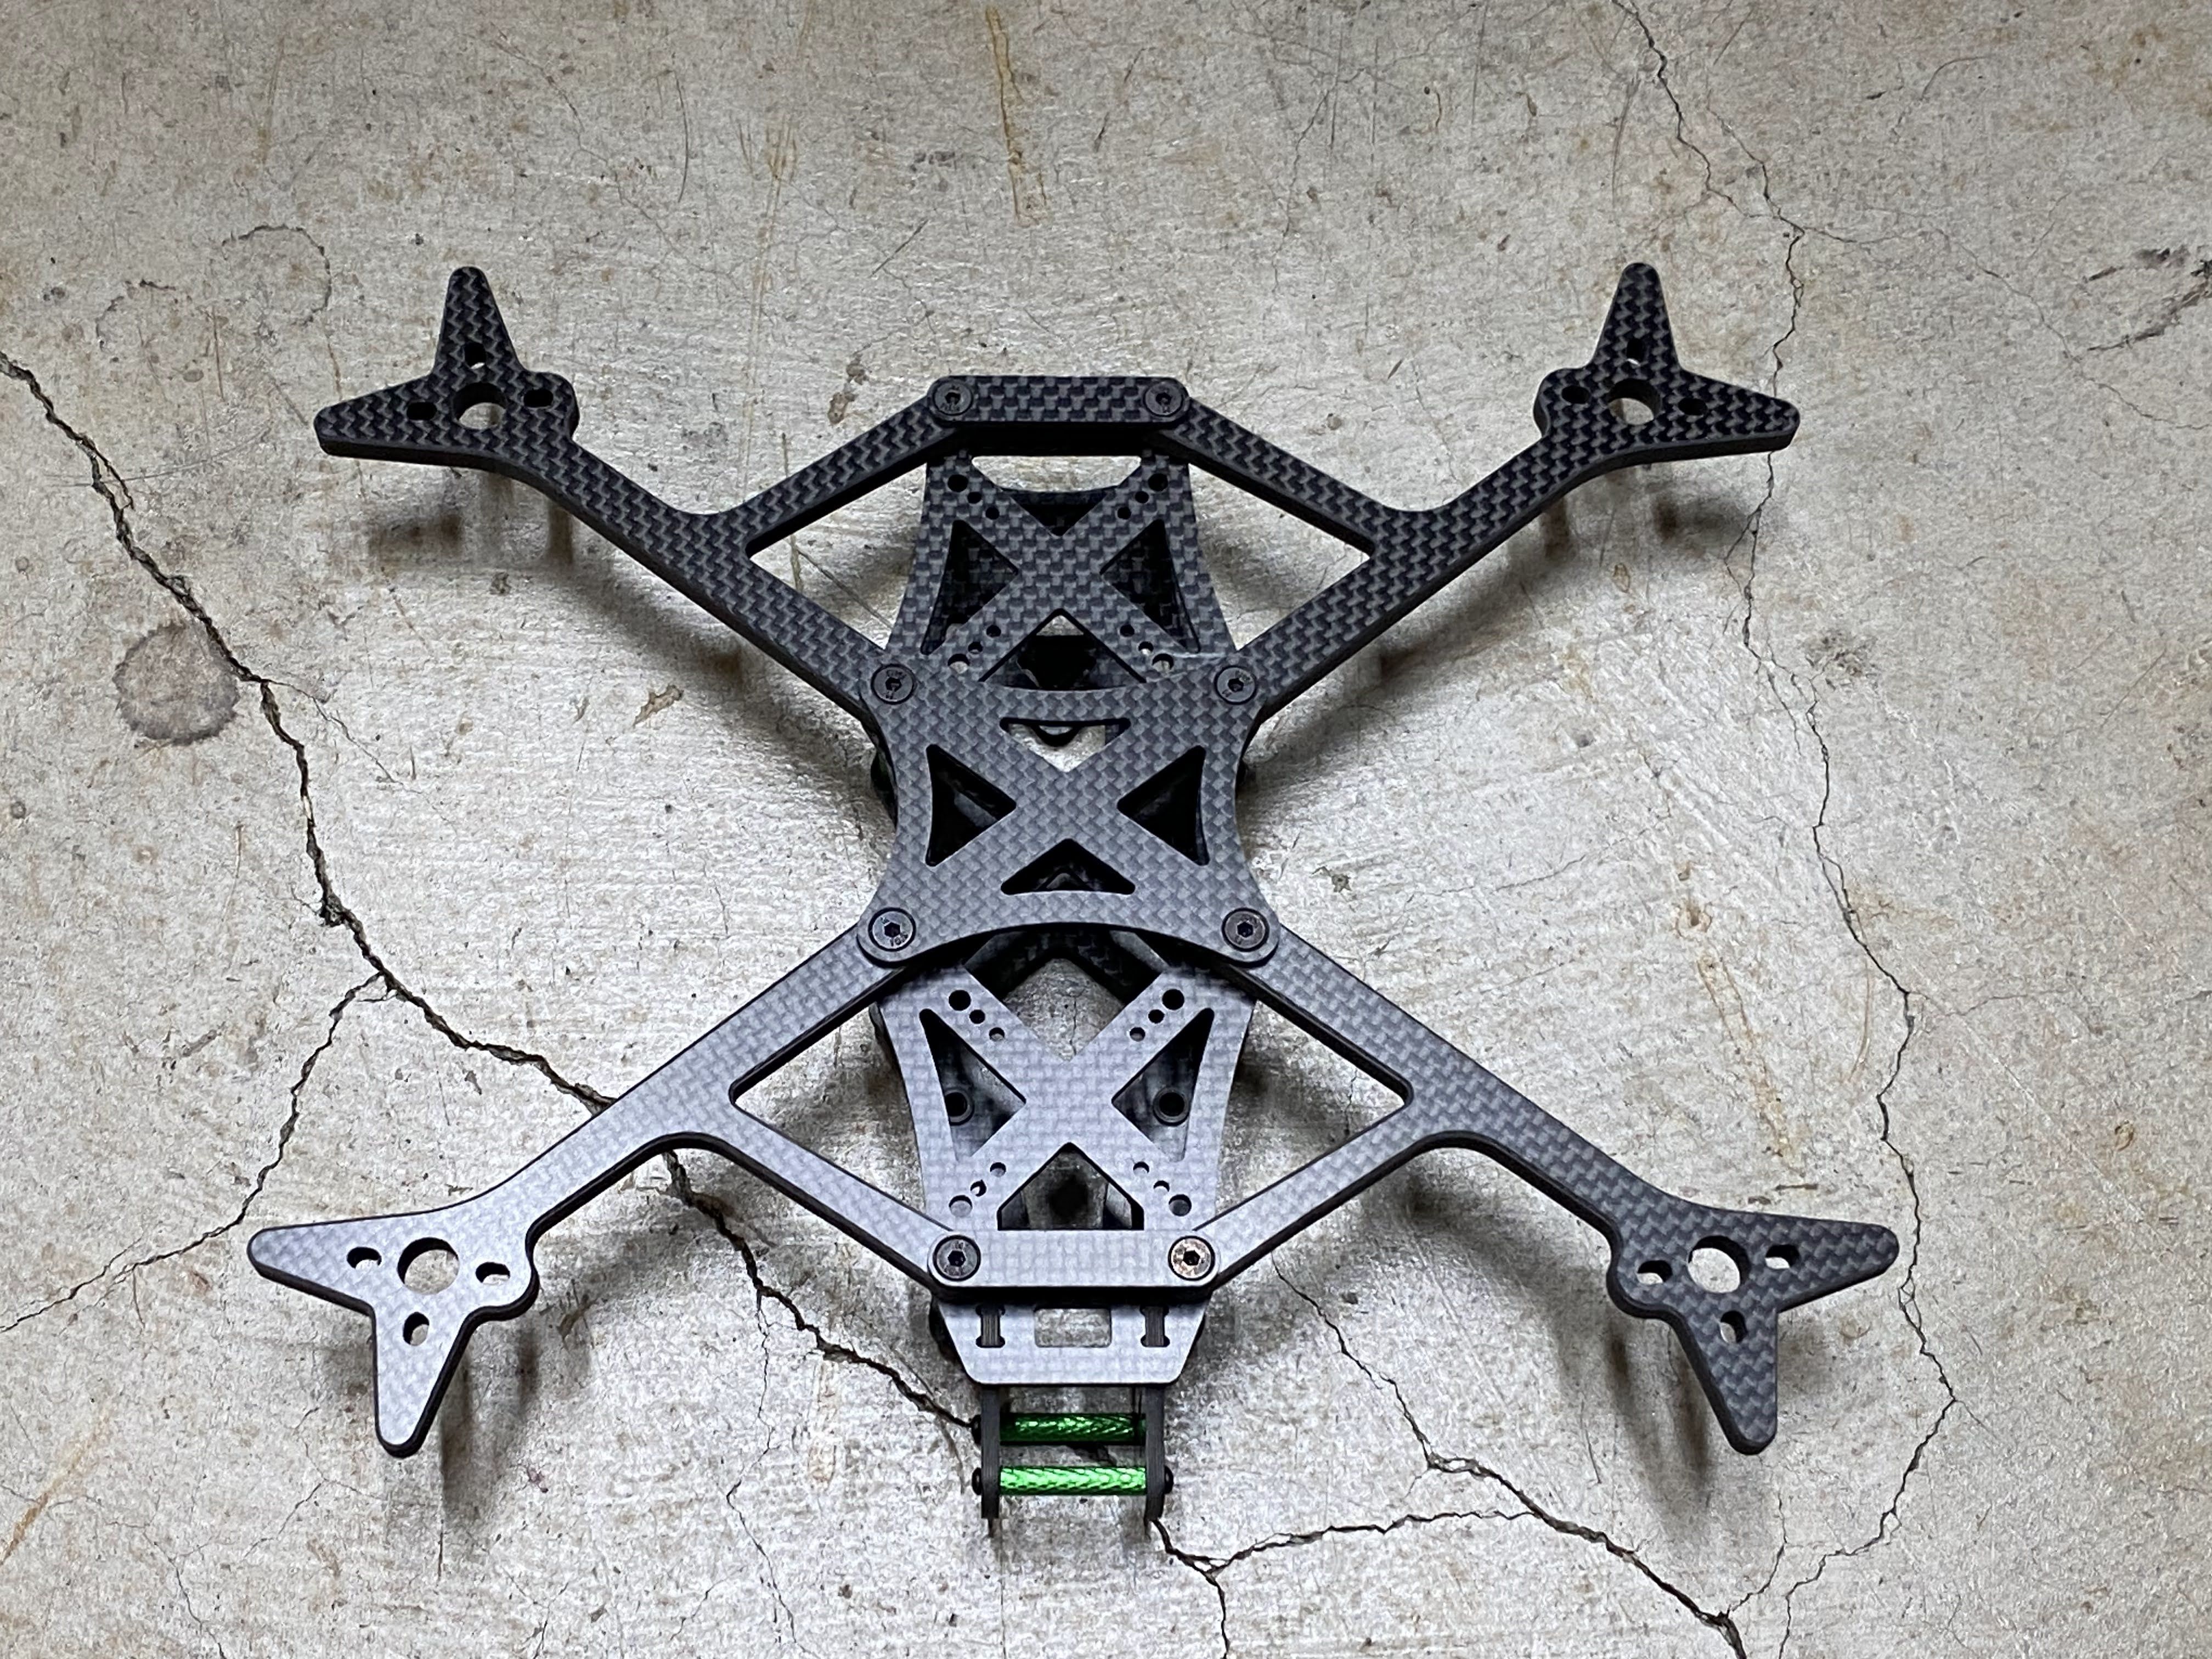
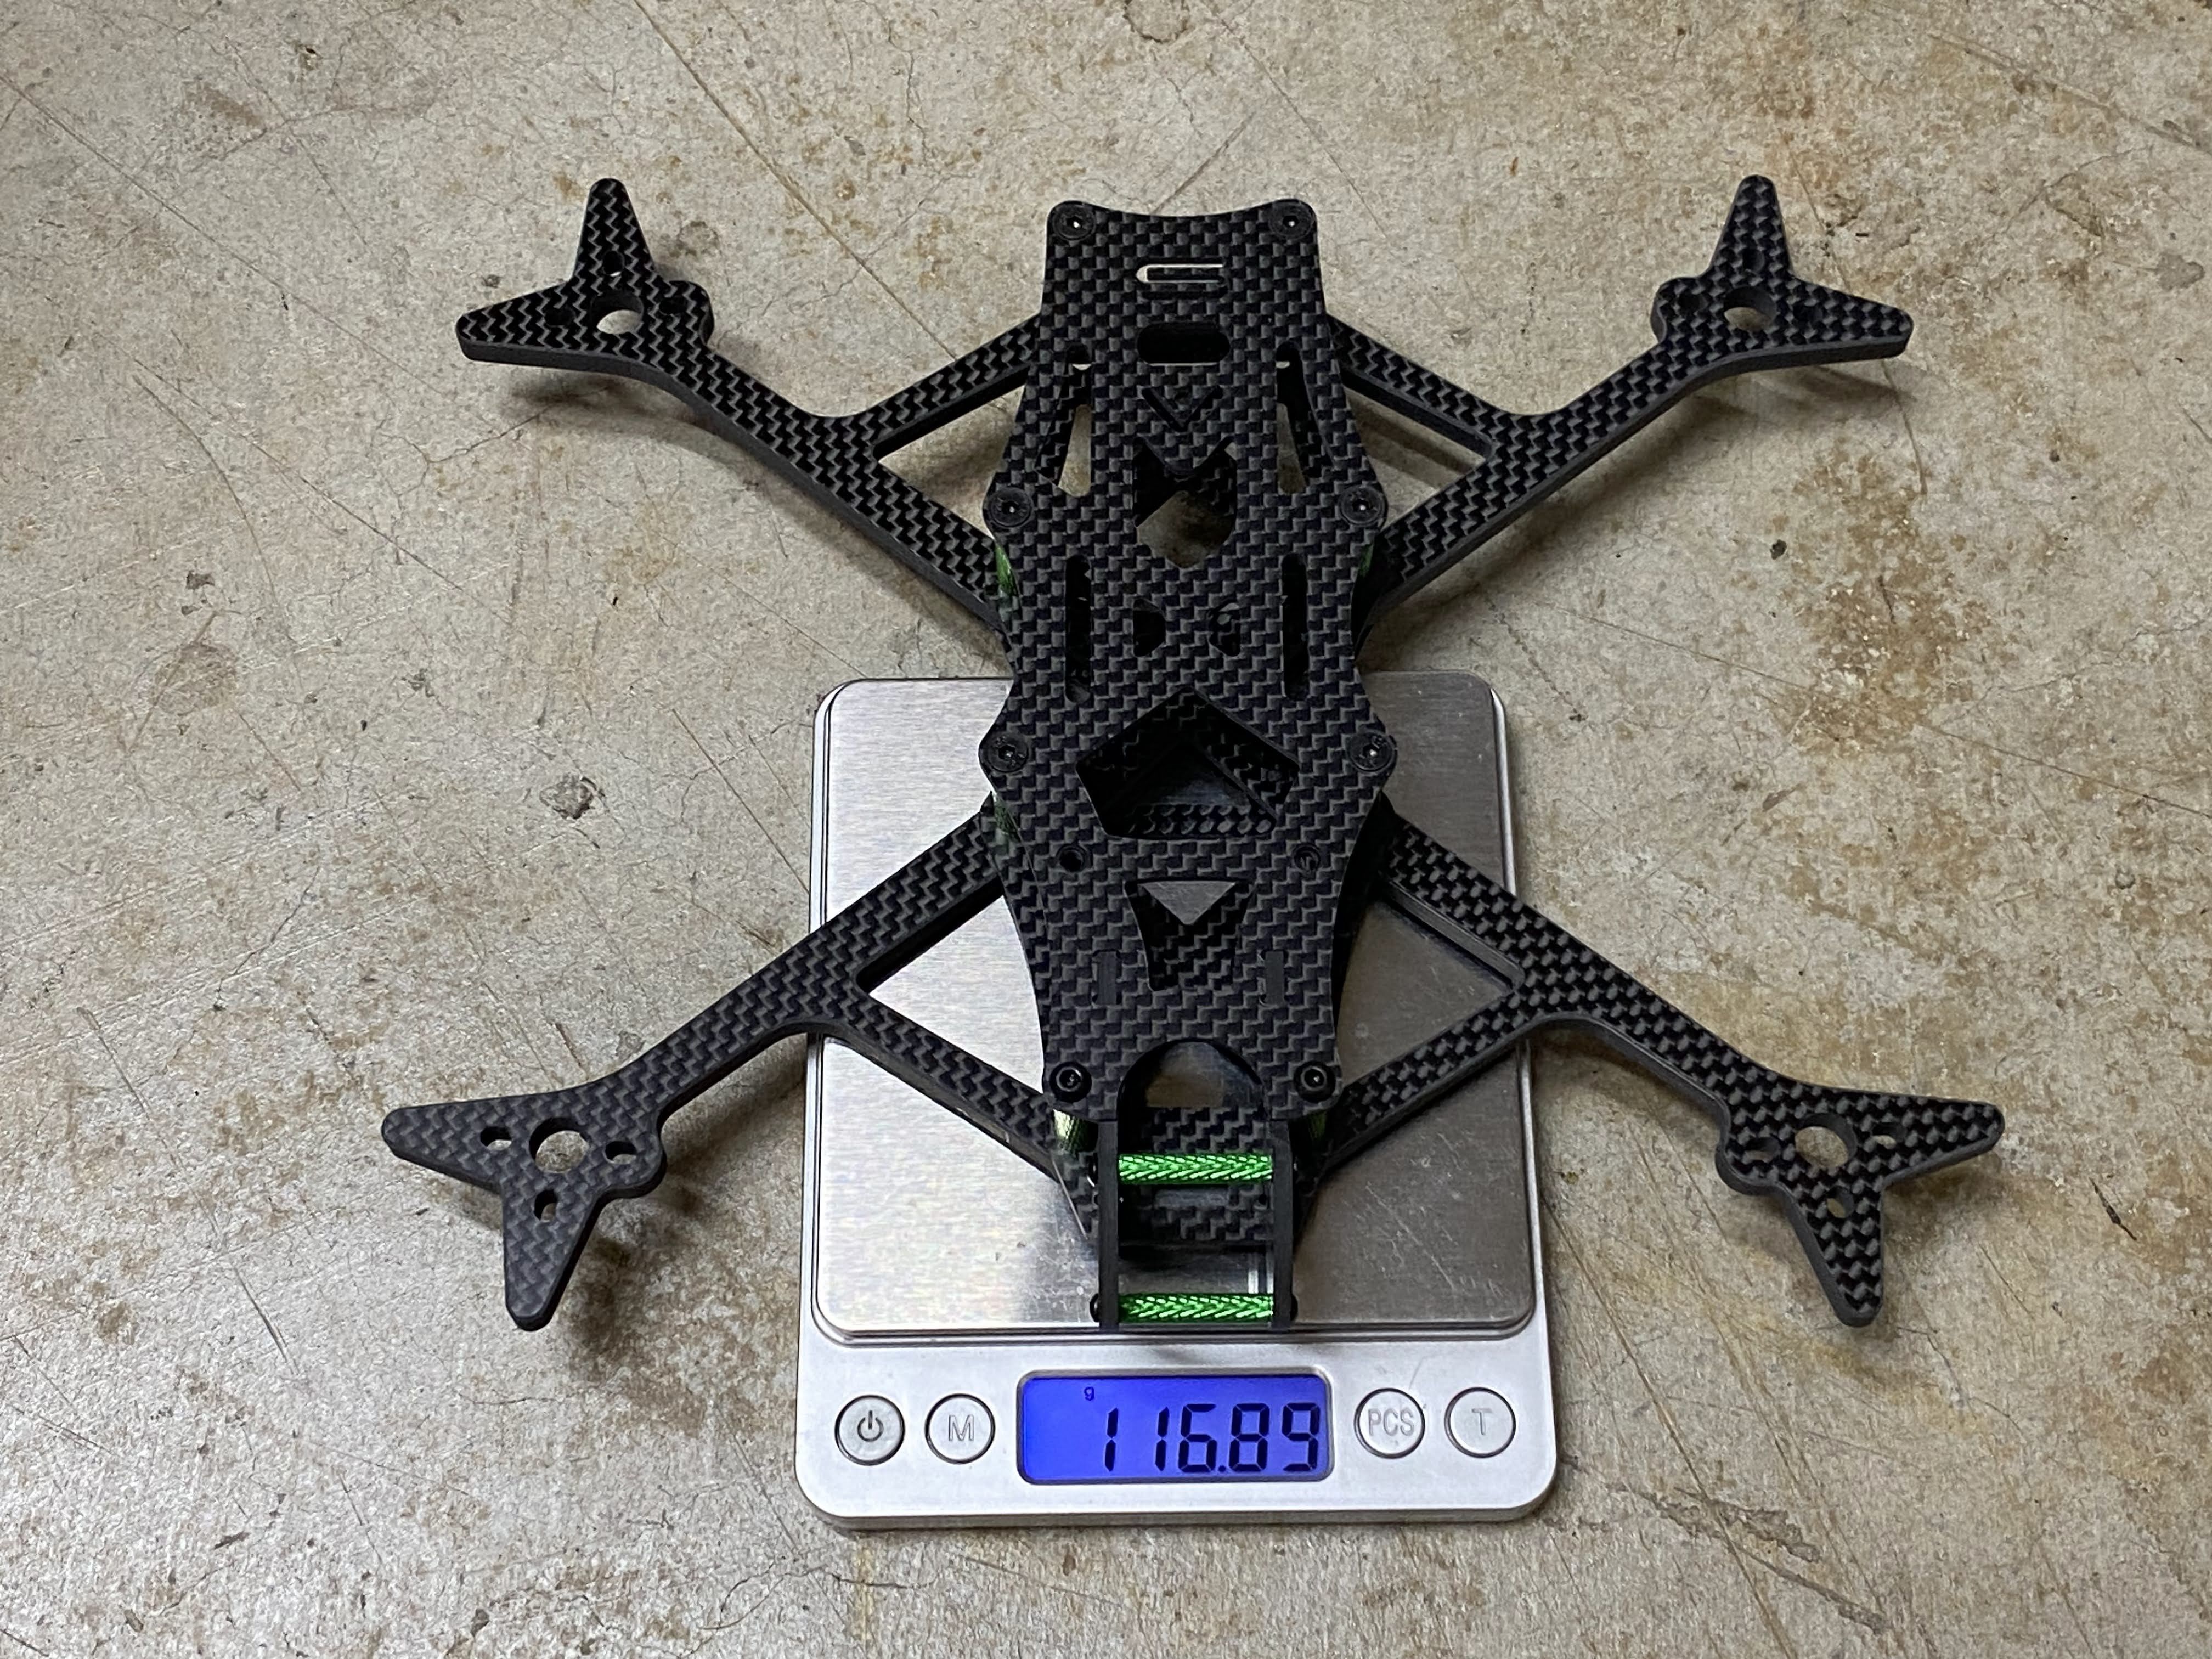
Right after pre ordering the DJI O3 Air Unit from RDQ during black Friday, I heard AOS released a new frame for the O3 system. I found the frames on CNC Drones and they also had a sale going, so I order an AOS 5 O3 and a AOS 7 O3 frame. With all the original steel hardware the total weight of the AOS 5 O3 frame is about 117g. As I progressed with the build, I started to swap out some of the steel screws with titanium ones. It is not a huge weight saver, but I was able to save 4g.
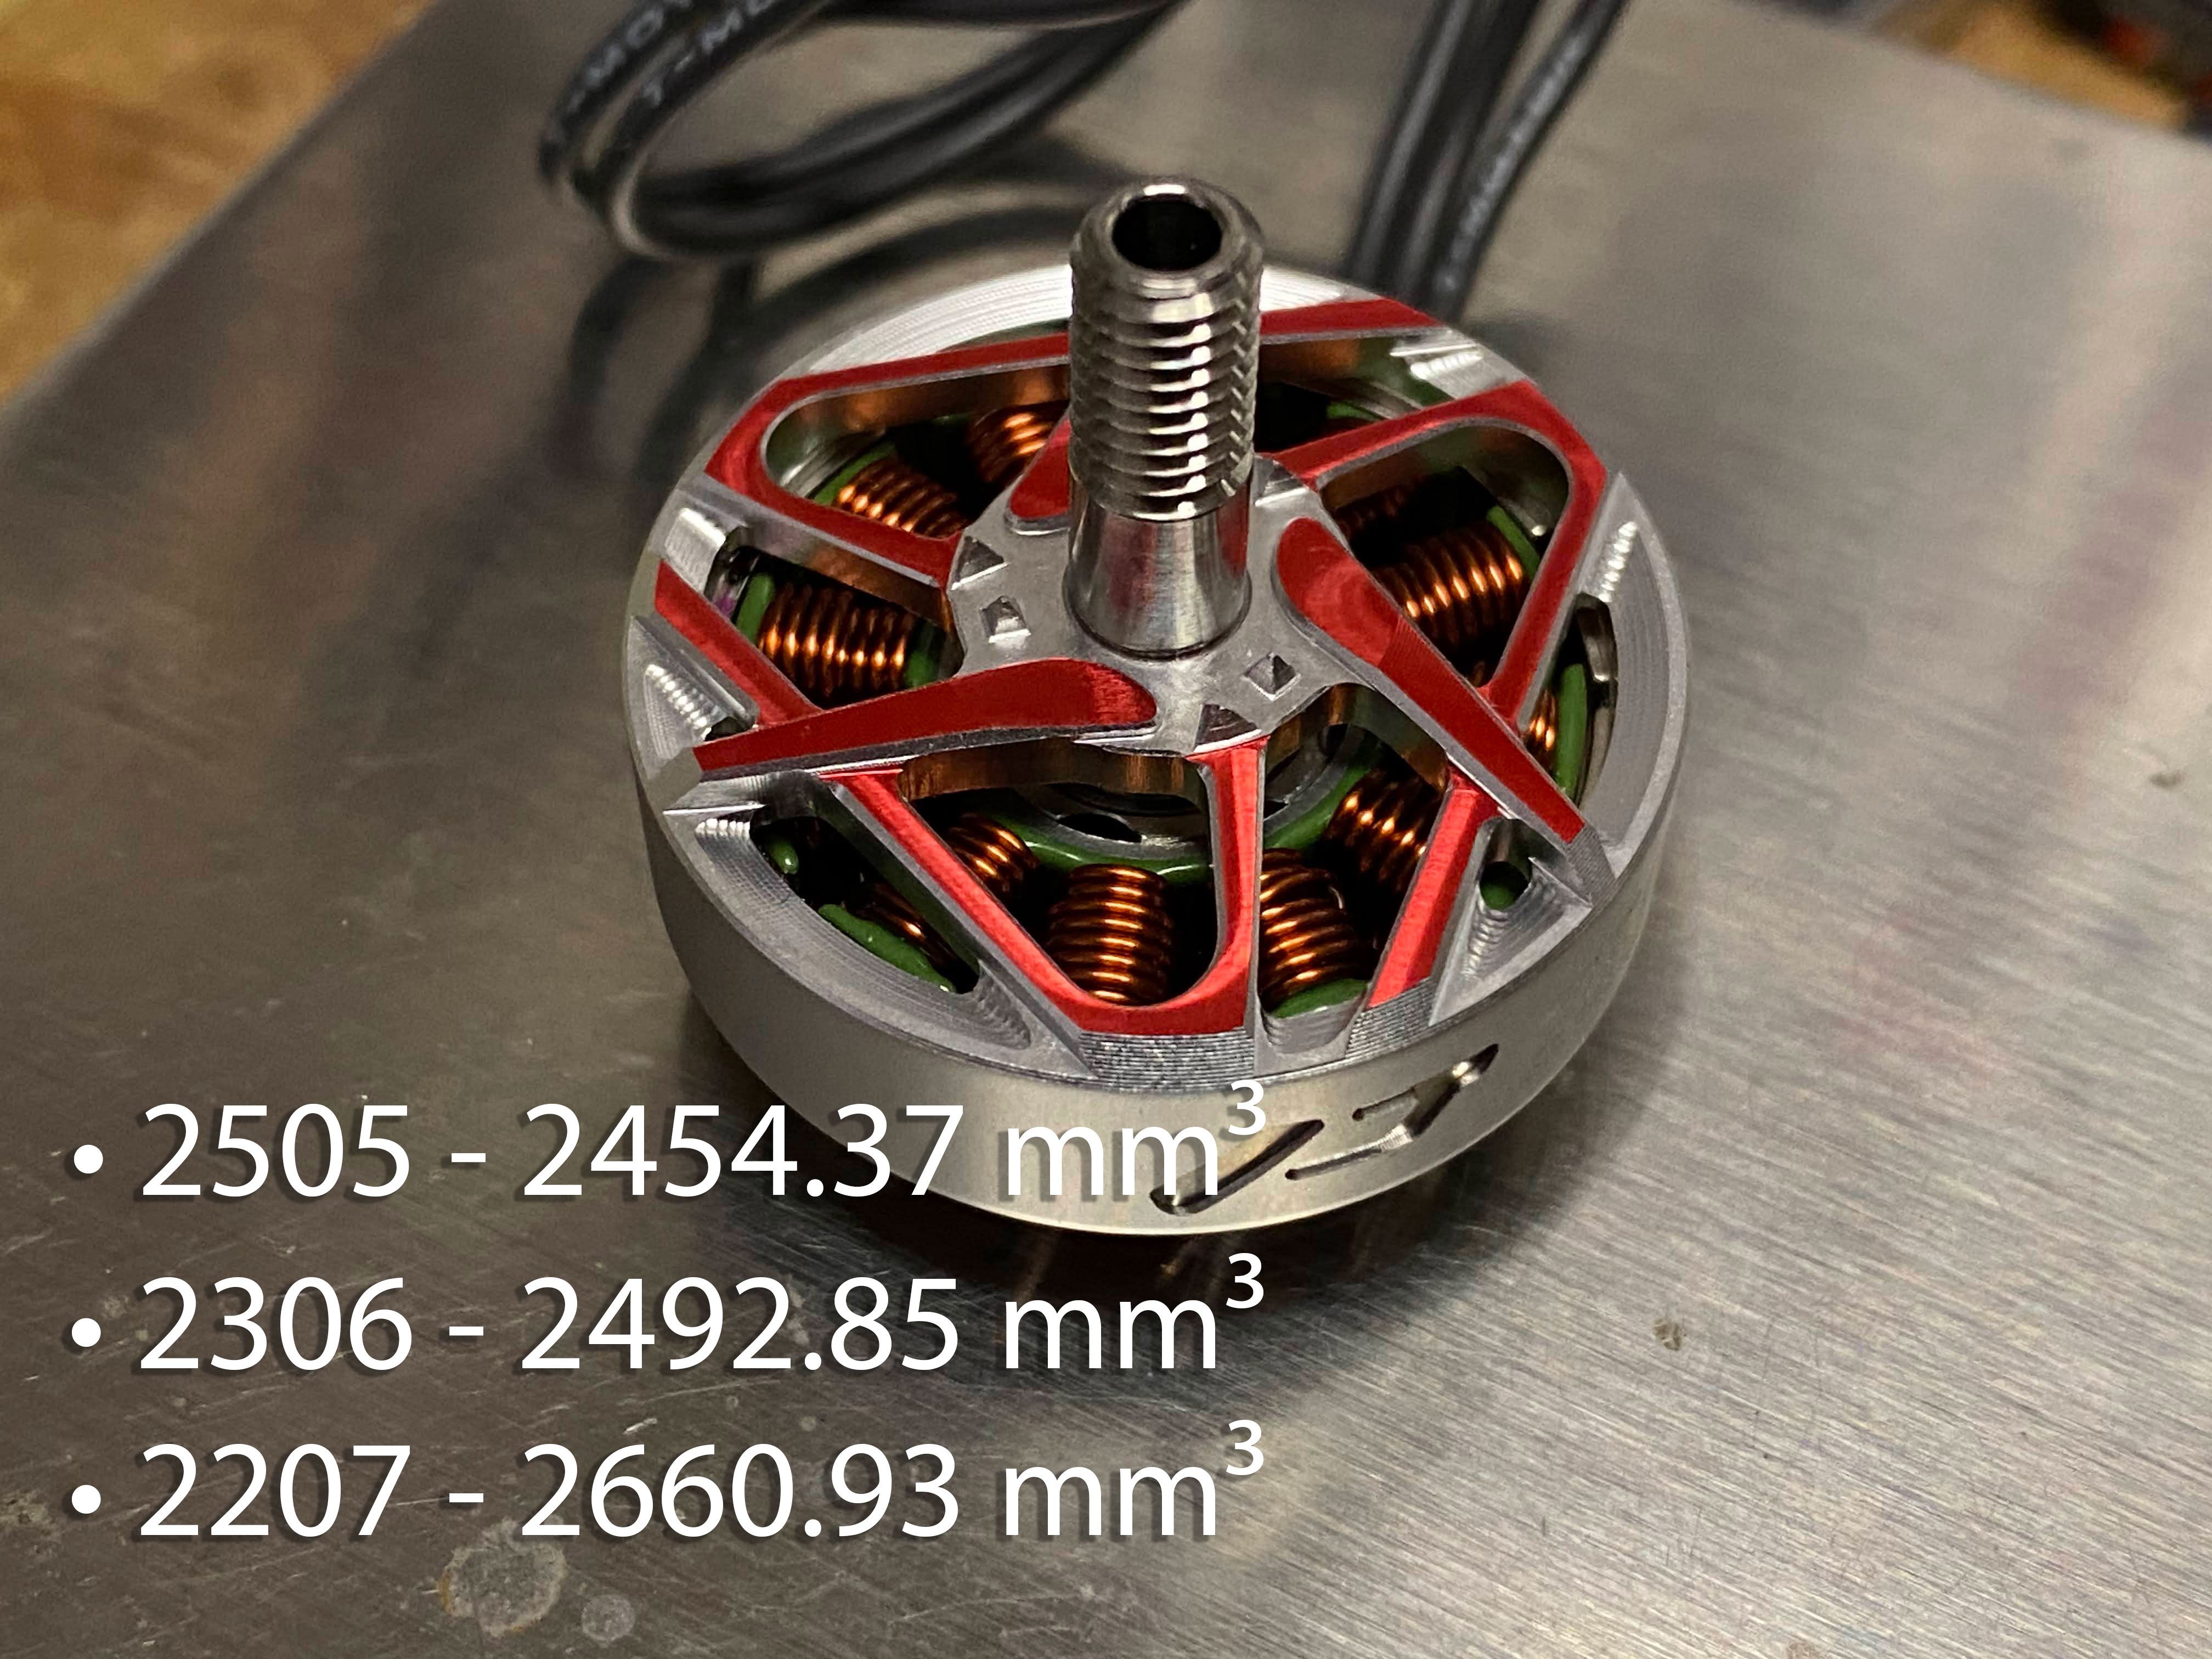
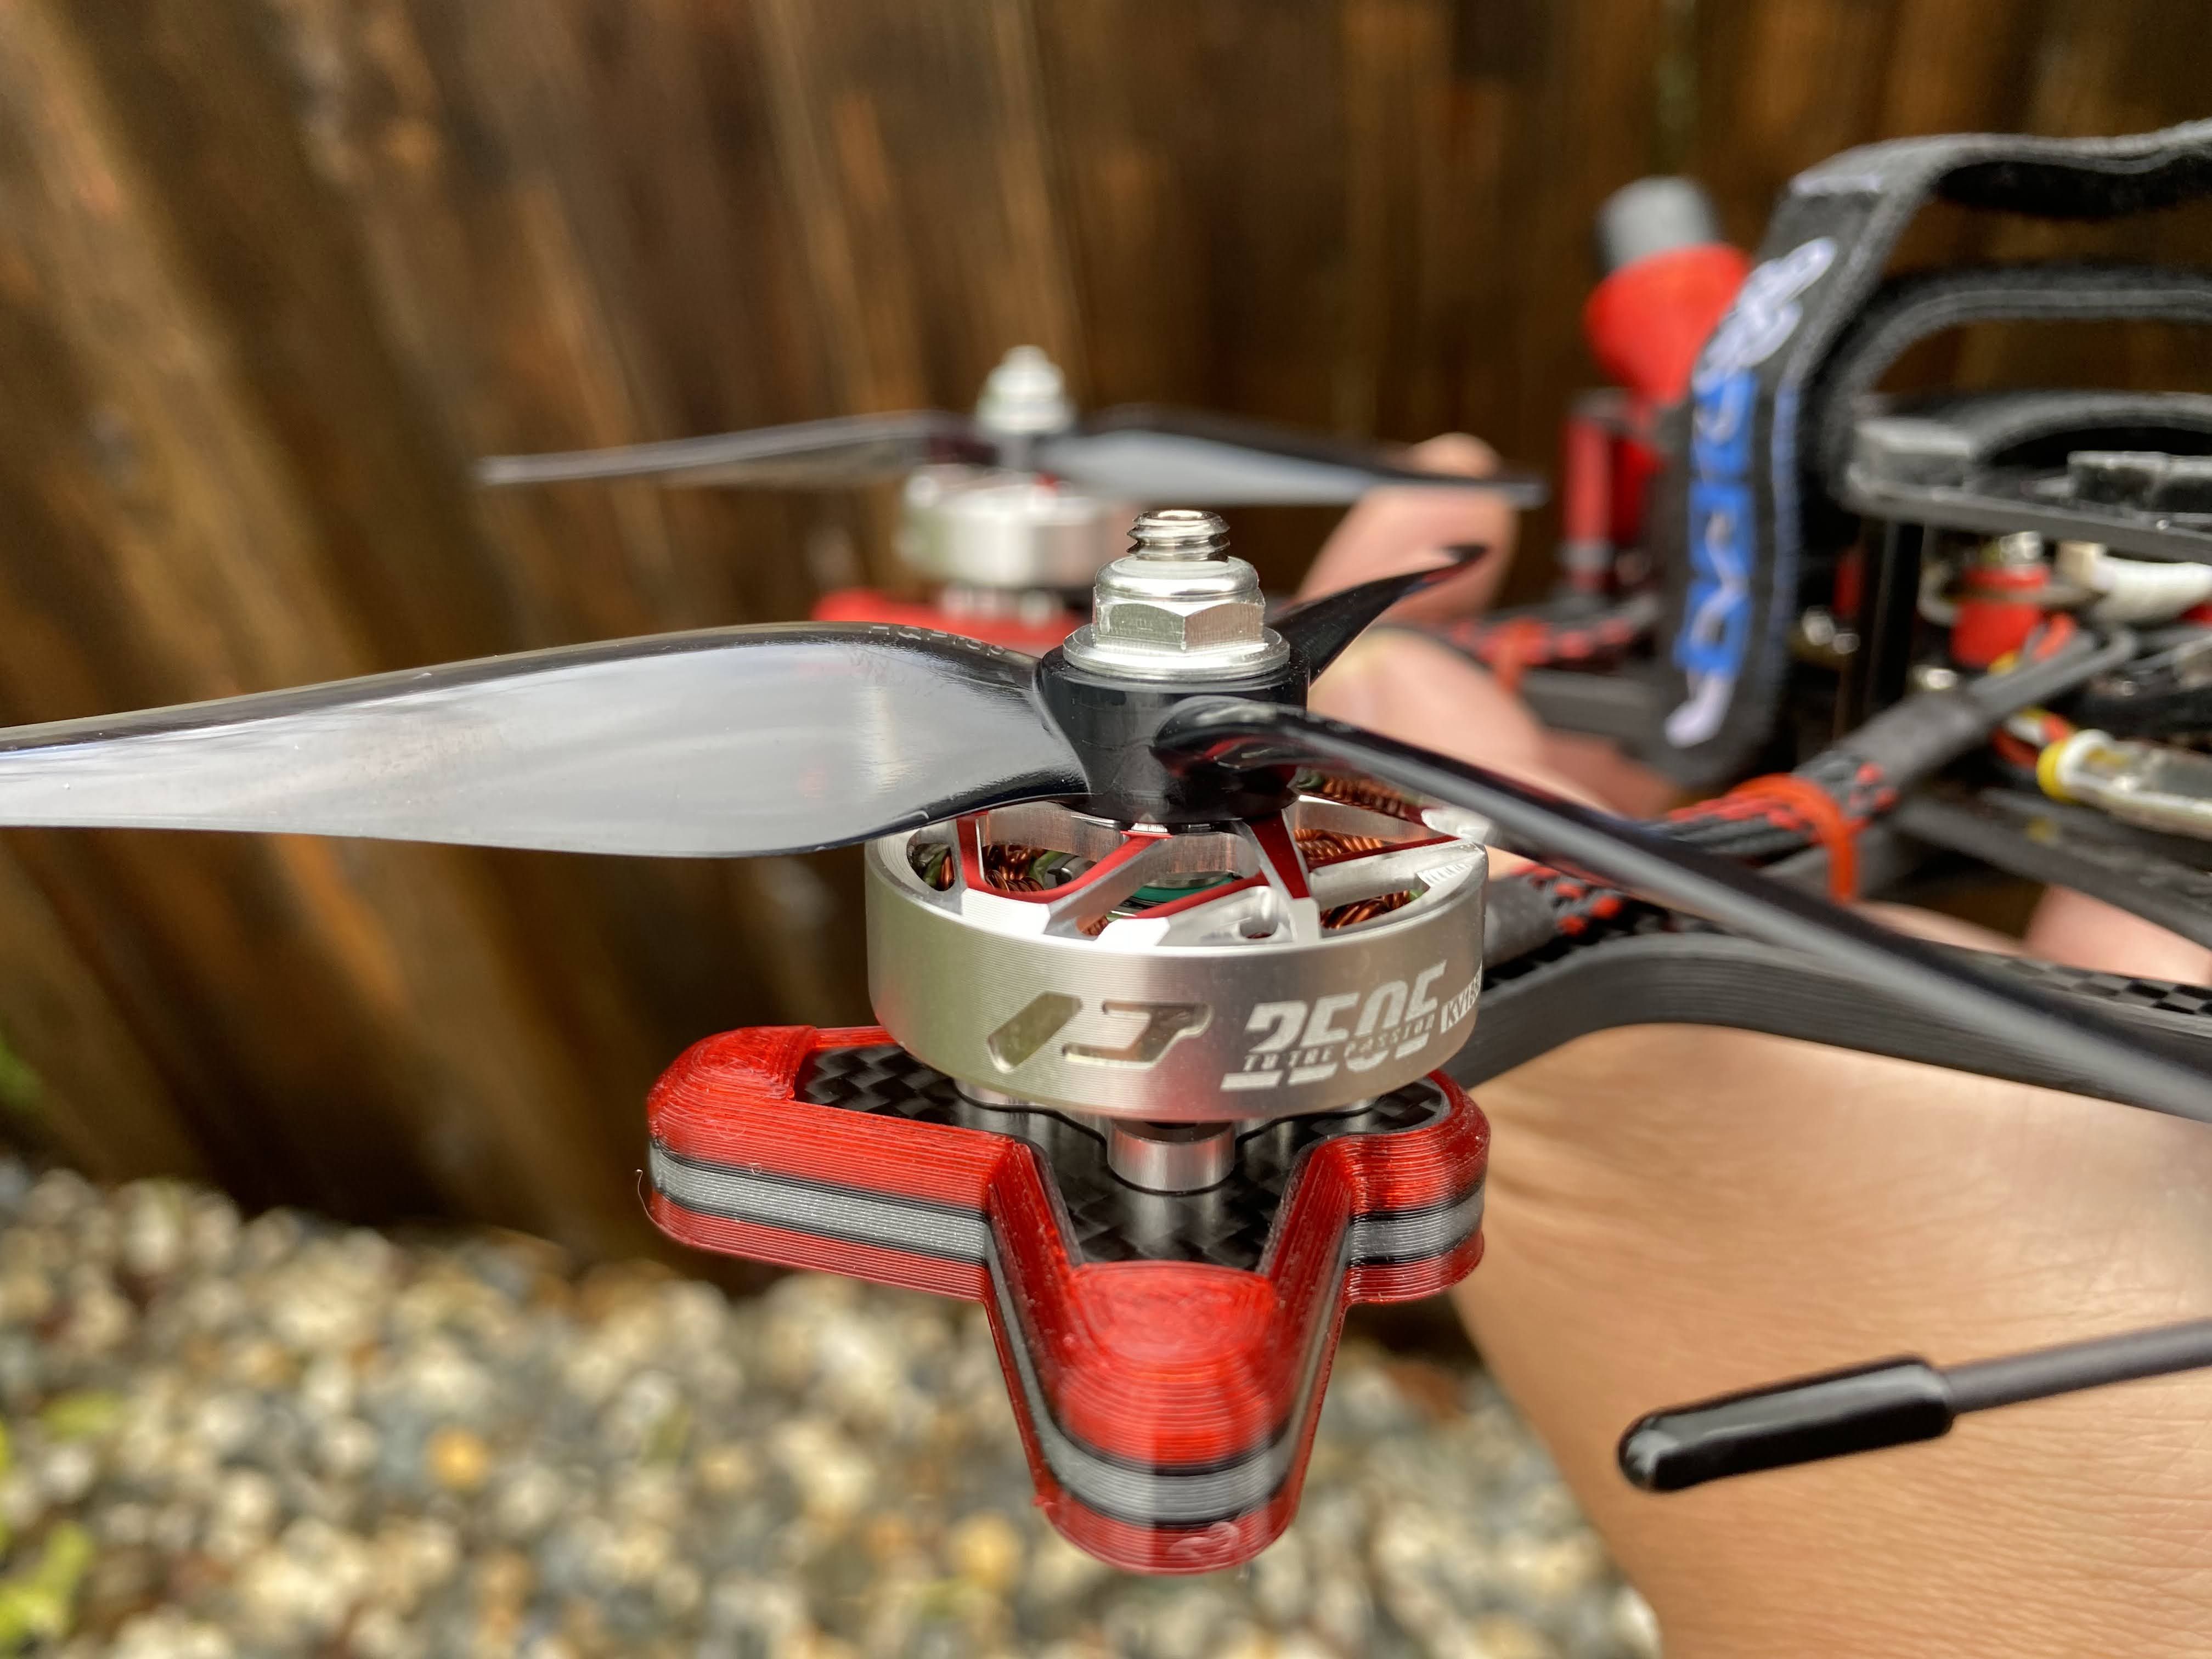
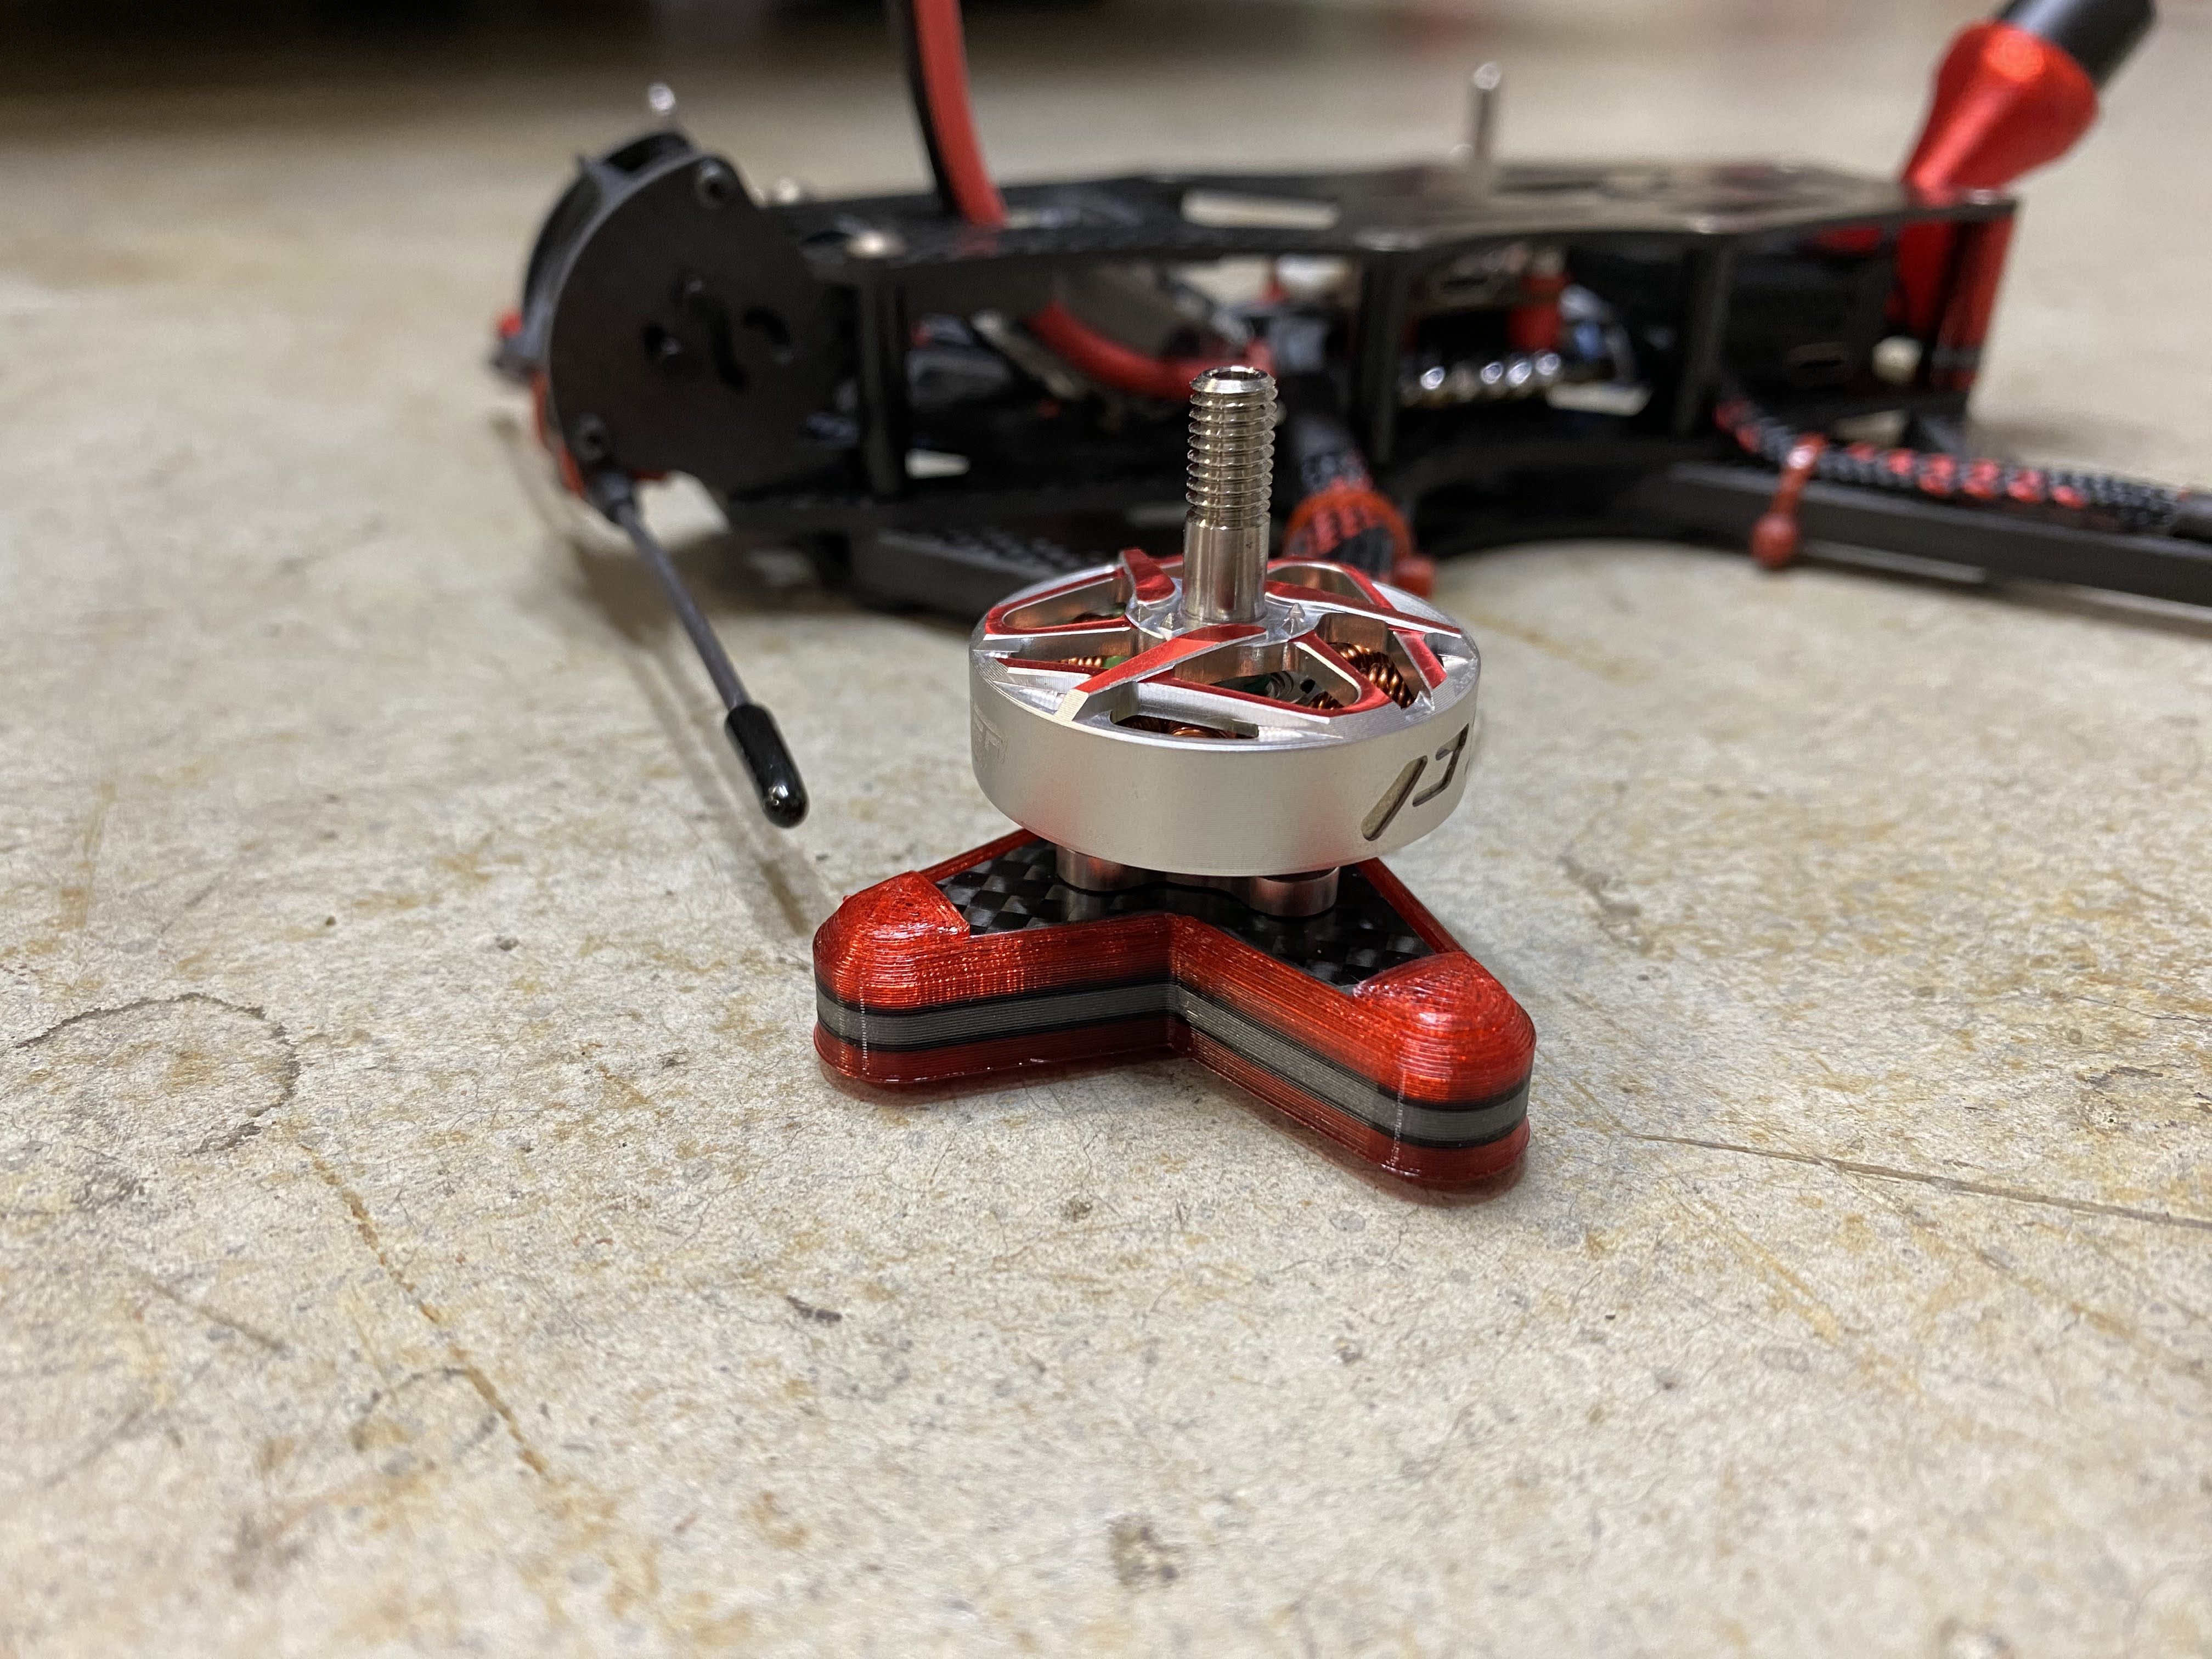
When I purchased this frame, I did not know what motors I am going to use. But I end up using whatever motor that I found during the Black Friday sale, Tmotors 2505 1850KV motors. These motors are not the typical size like 2306 or 2207, but I wanted to give it a shot because this quad will not be carrying a GoPro and I want to save a little bit of weight. Take a look at the image on the right and you will see the stator volume. The 2505 size motor is very similar volume to 2306 but, I assume 2505 might have less torque because it is a shorter motor.
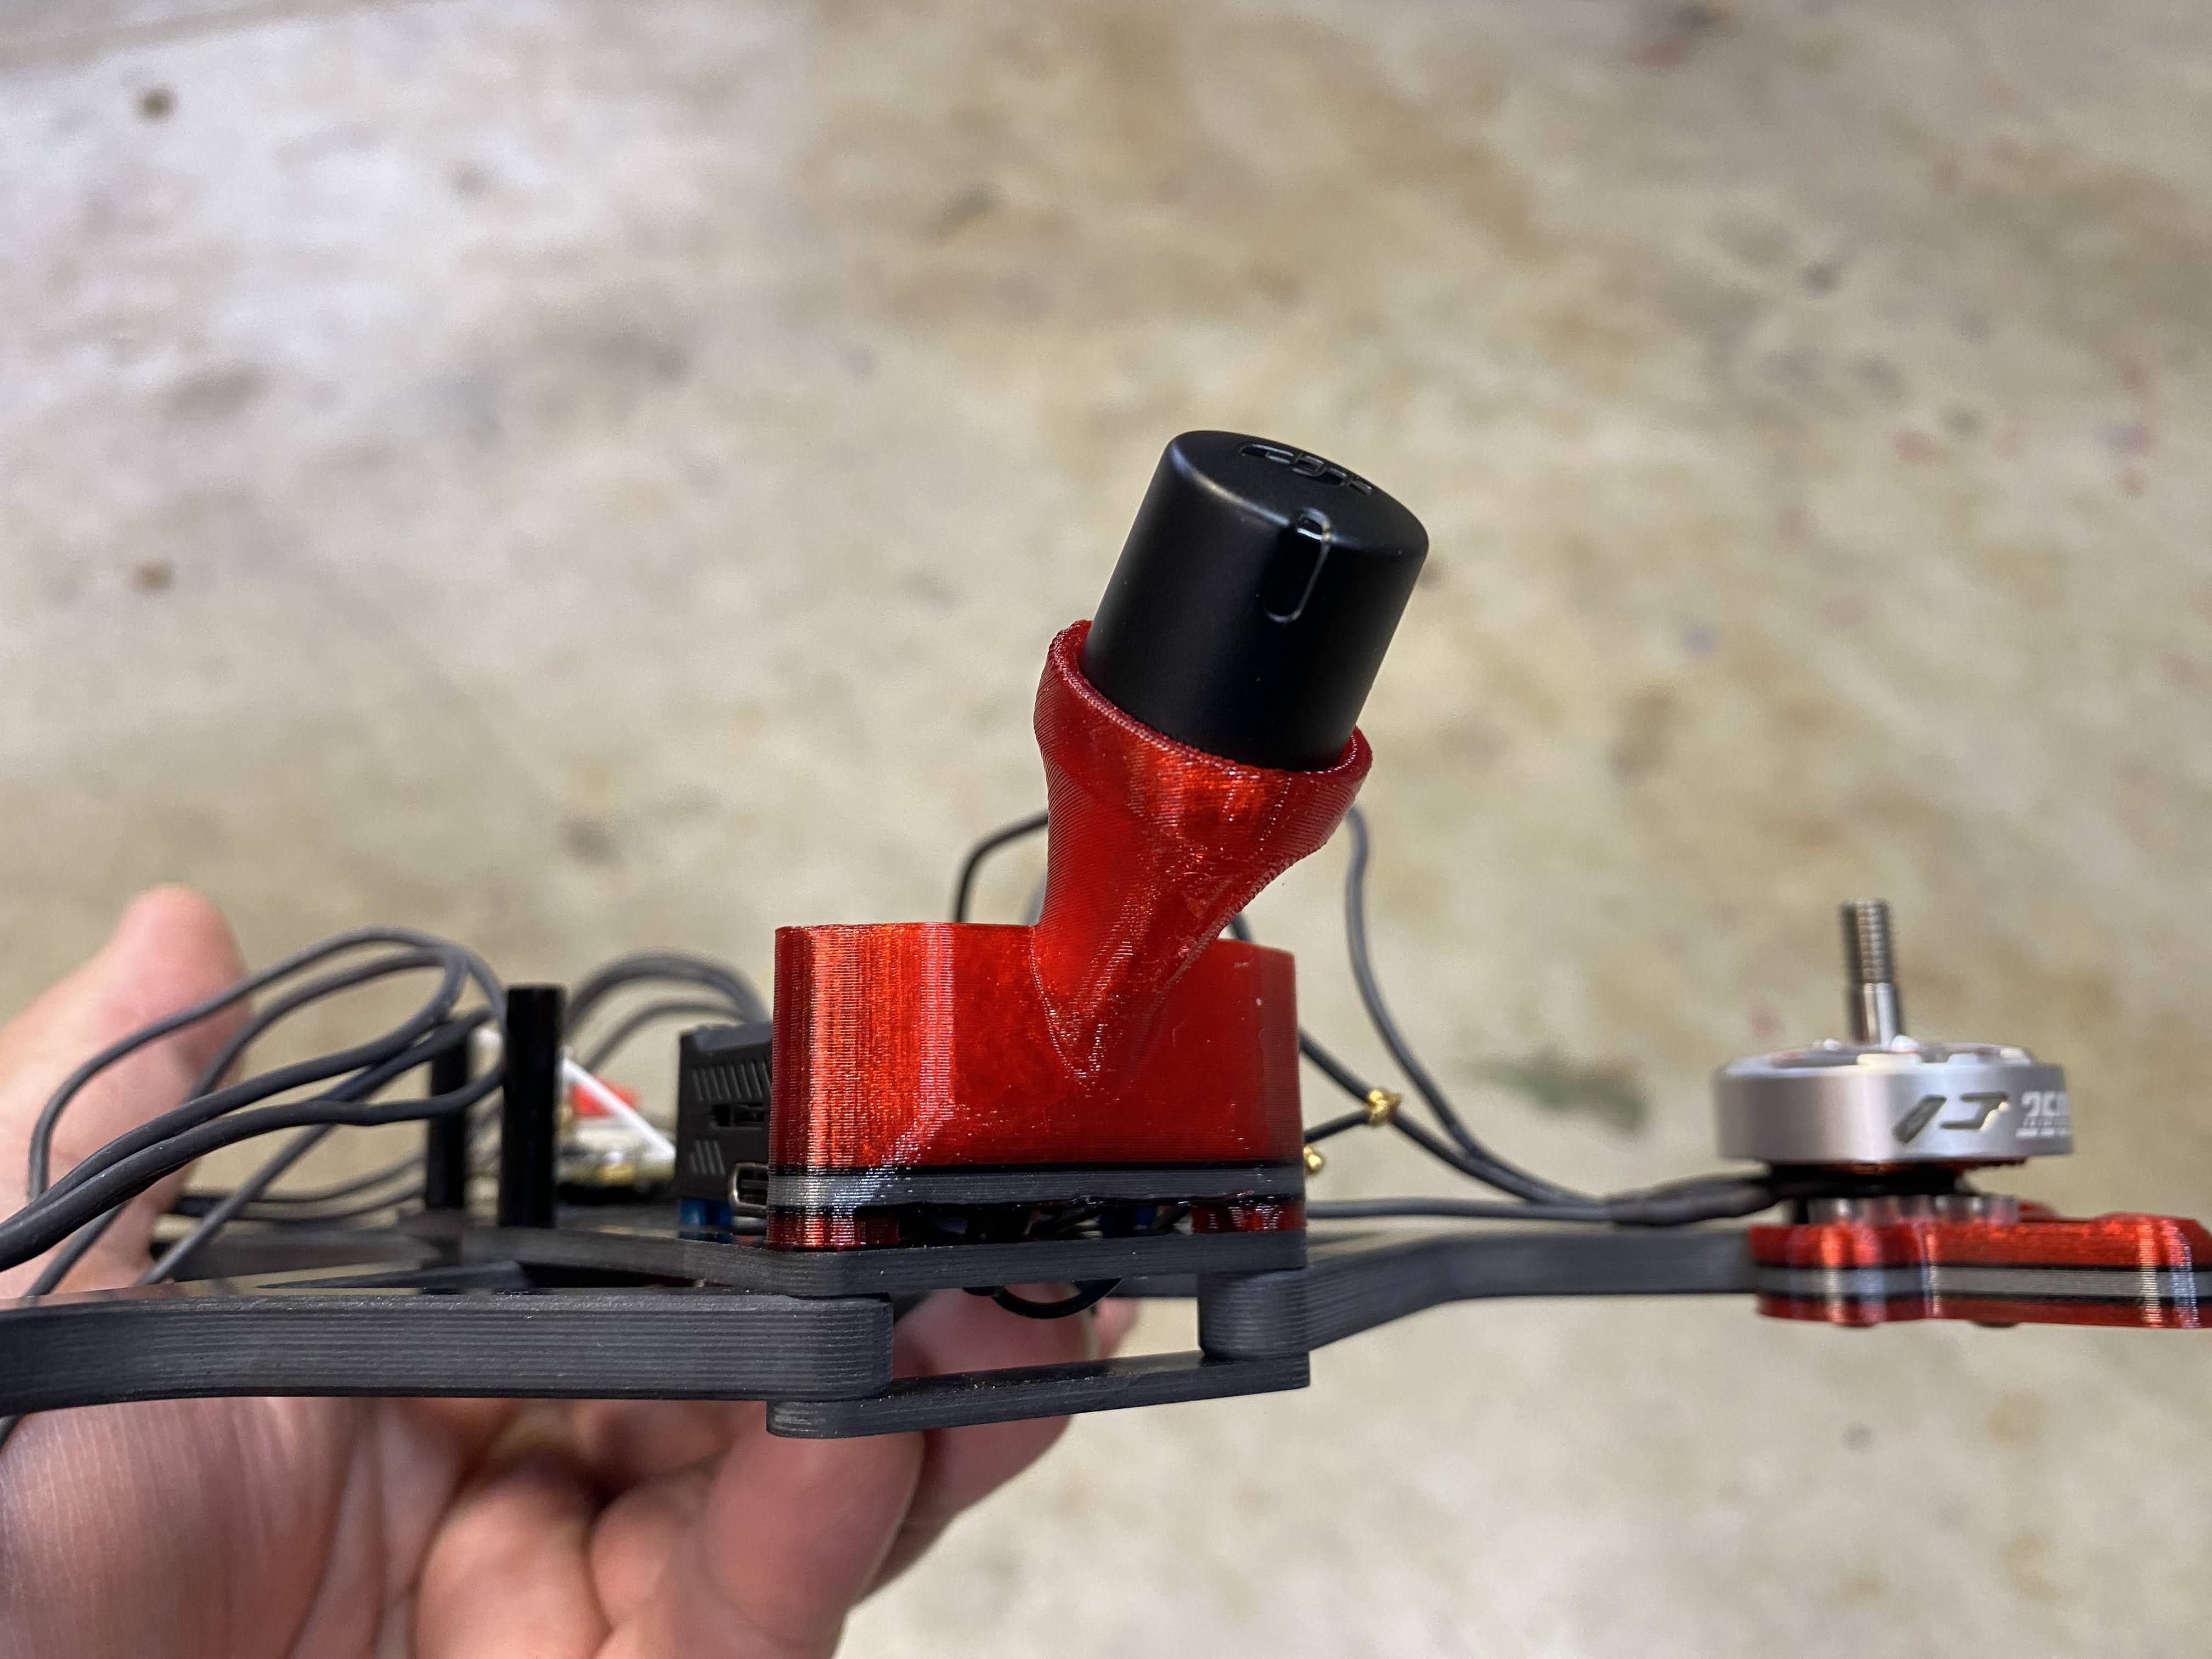
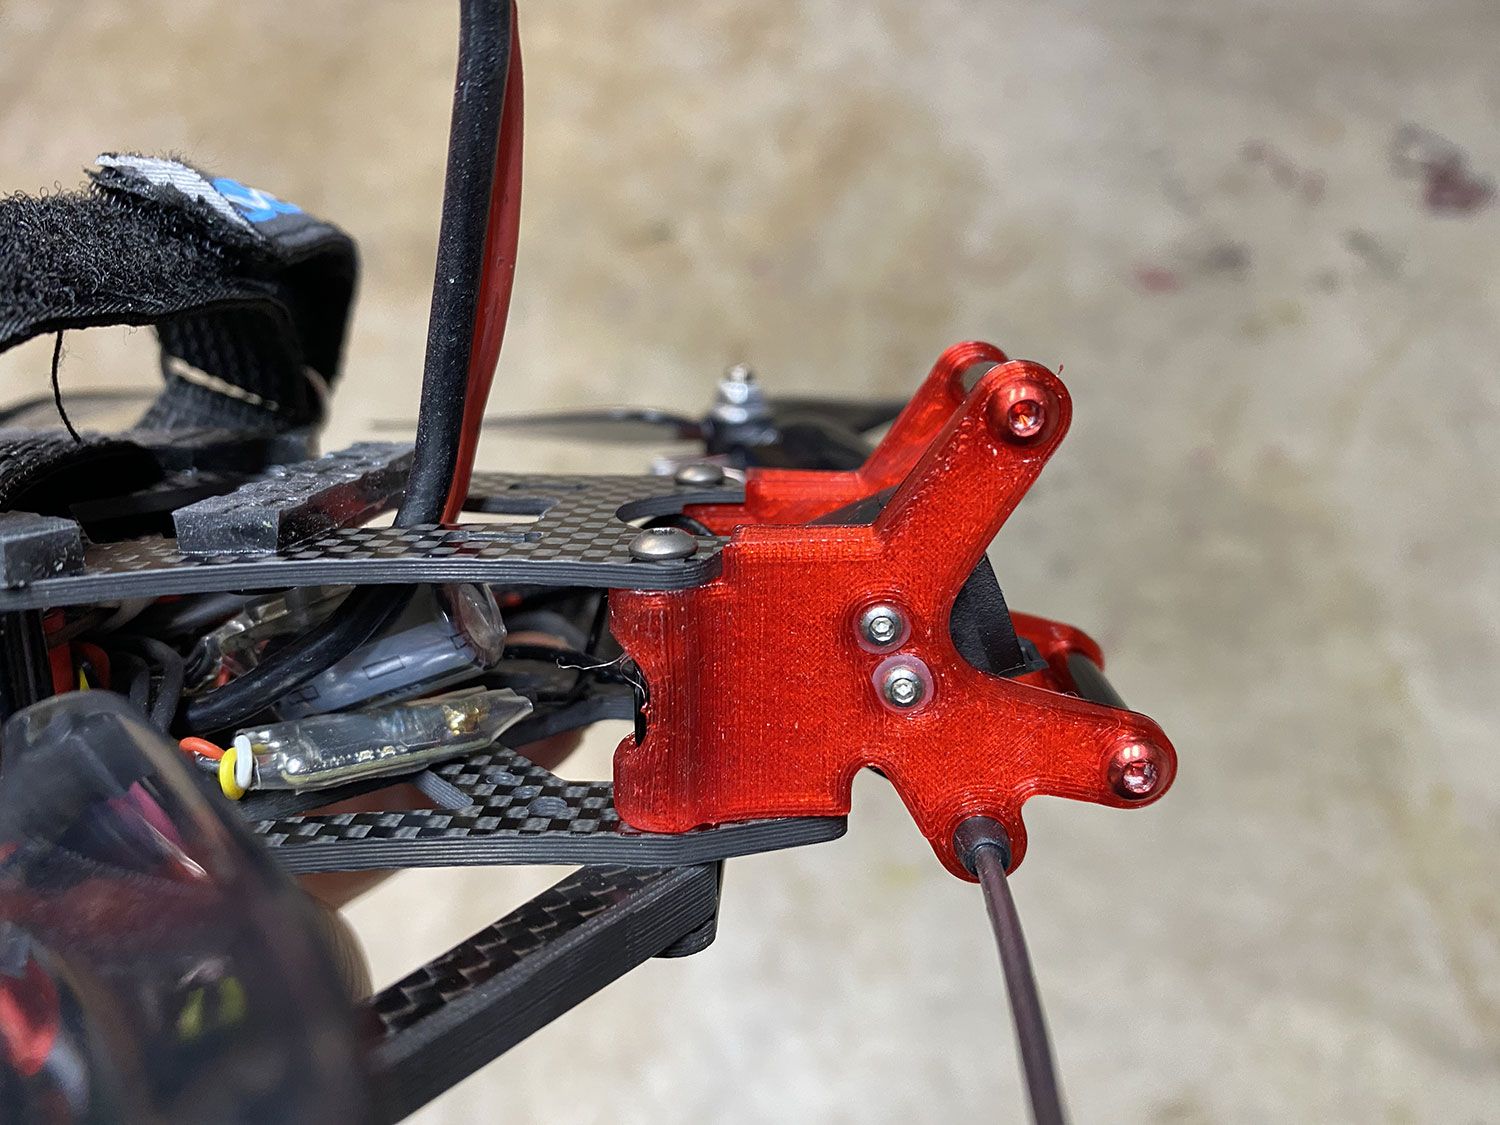
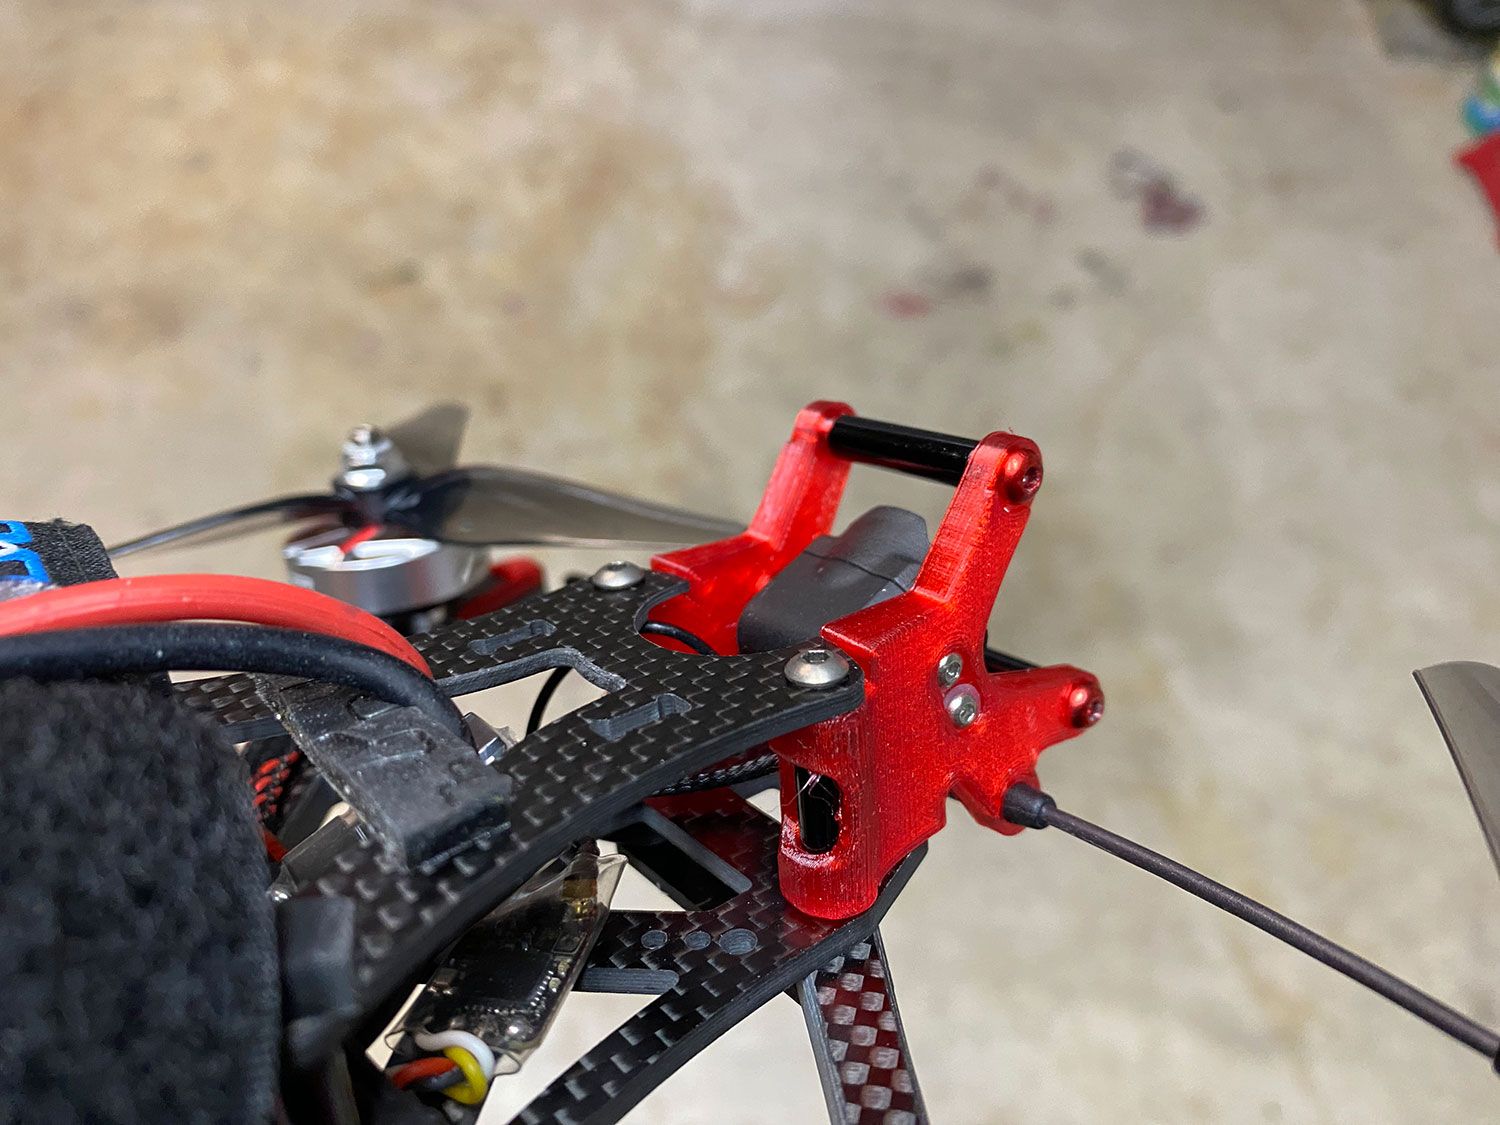
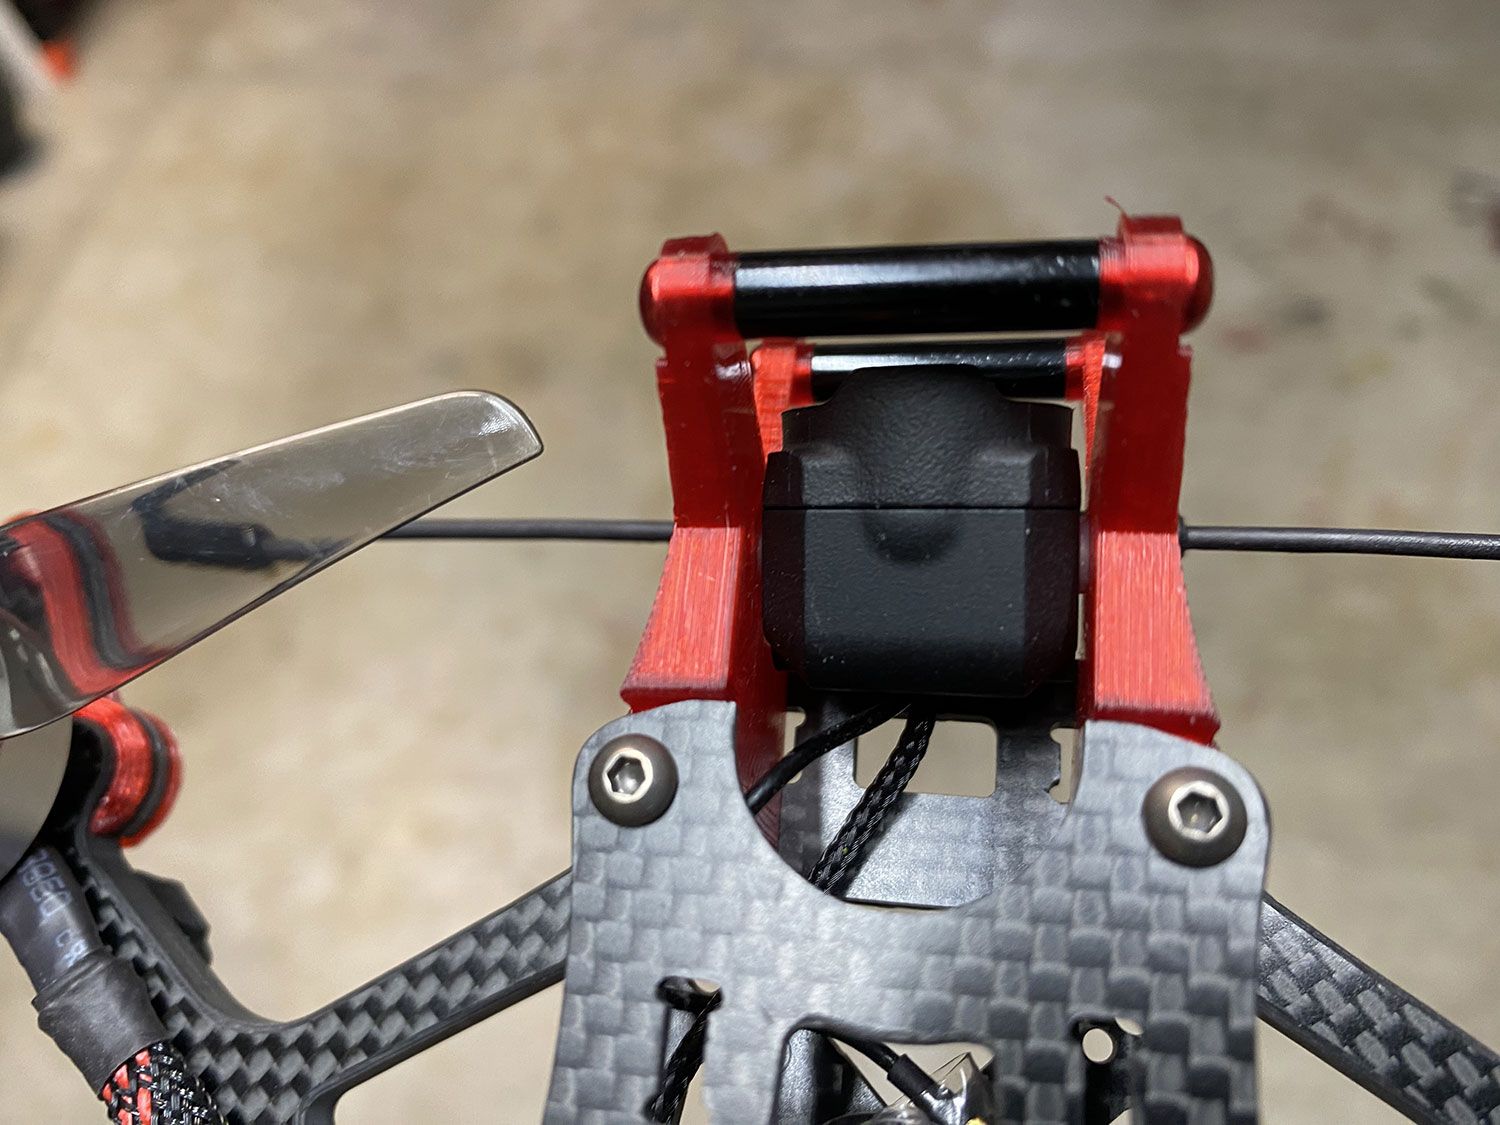
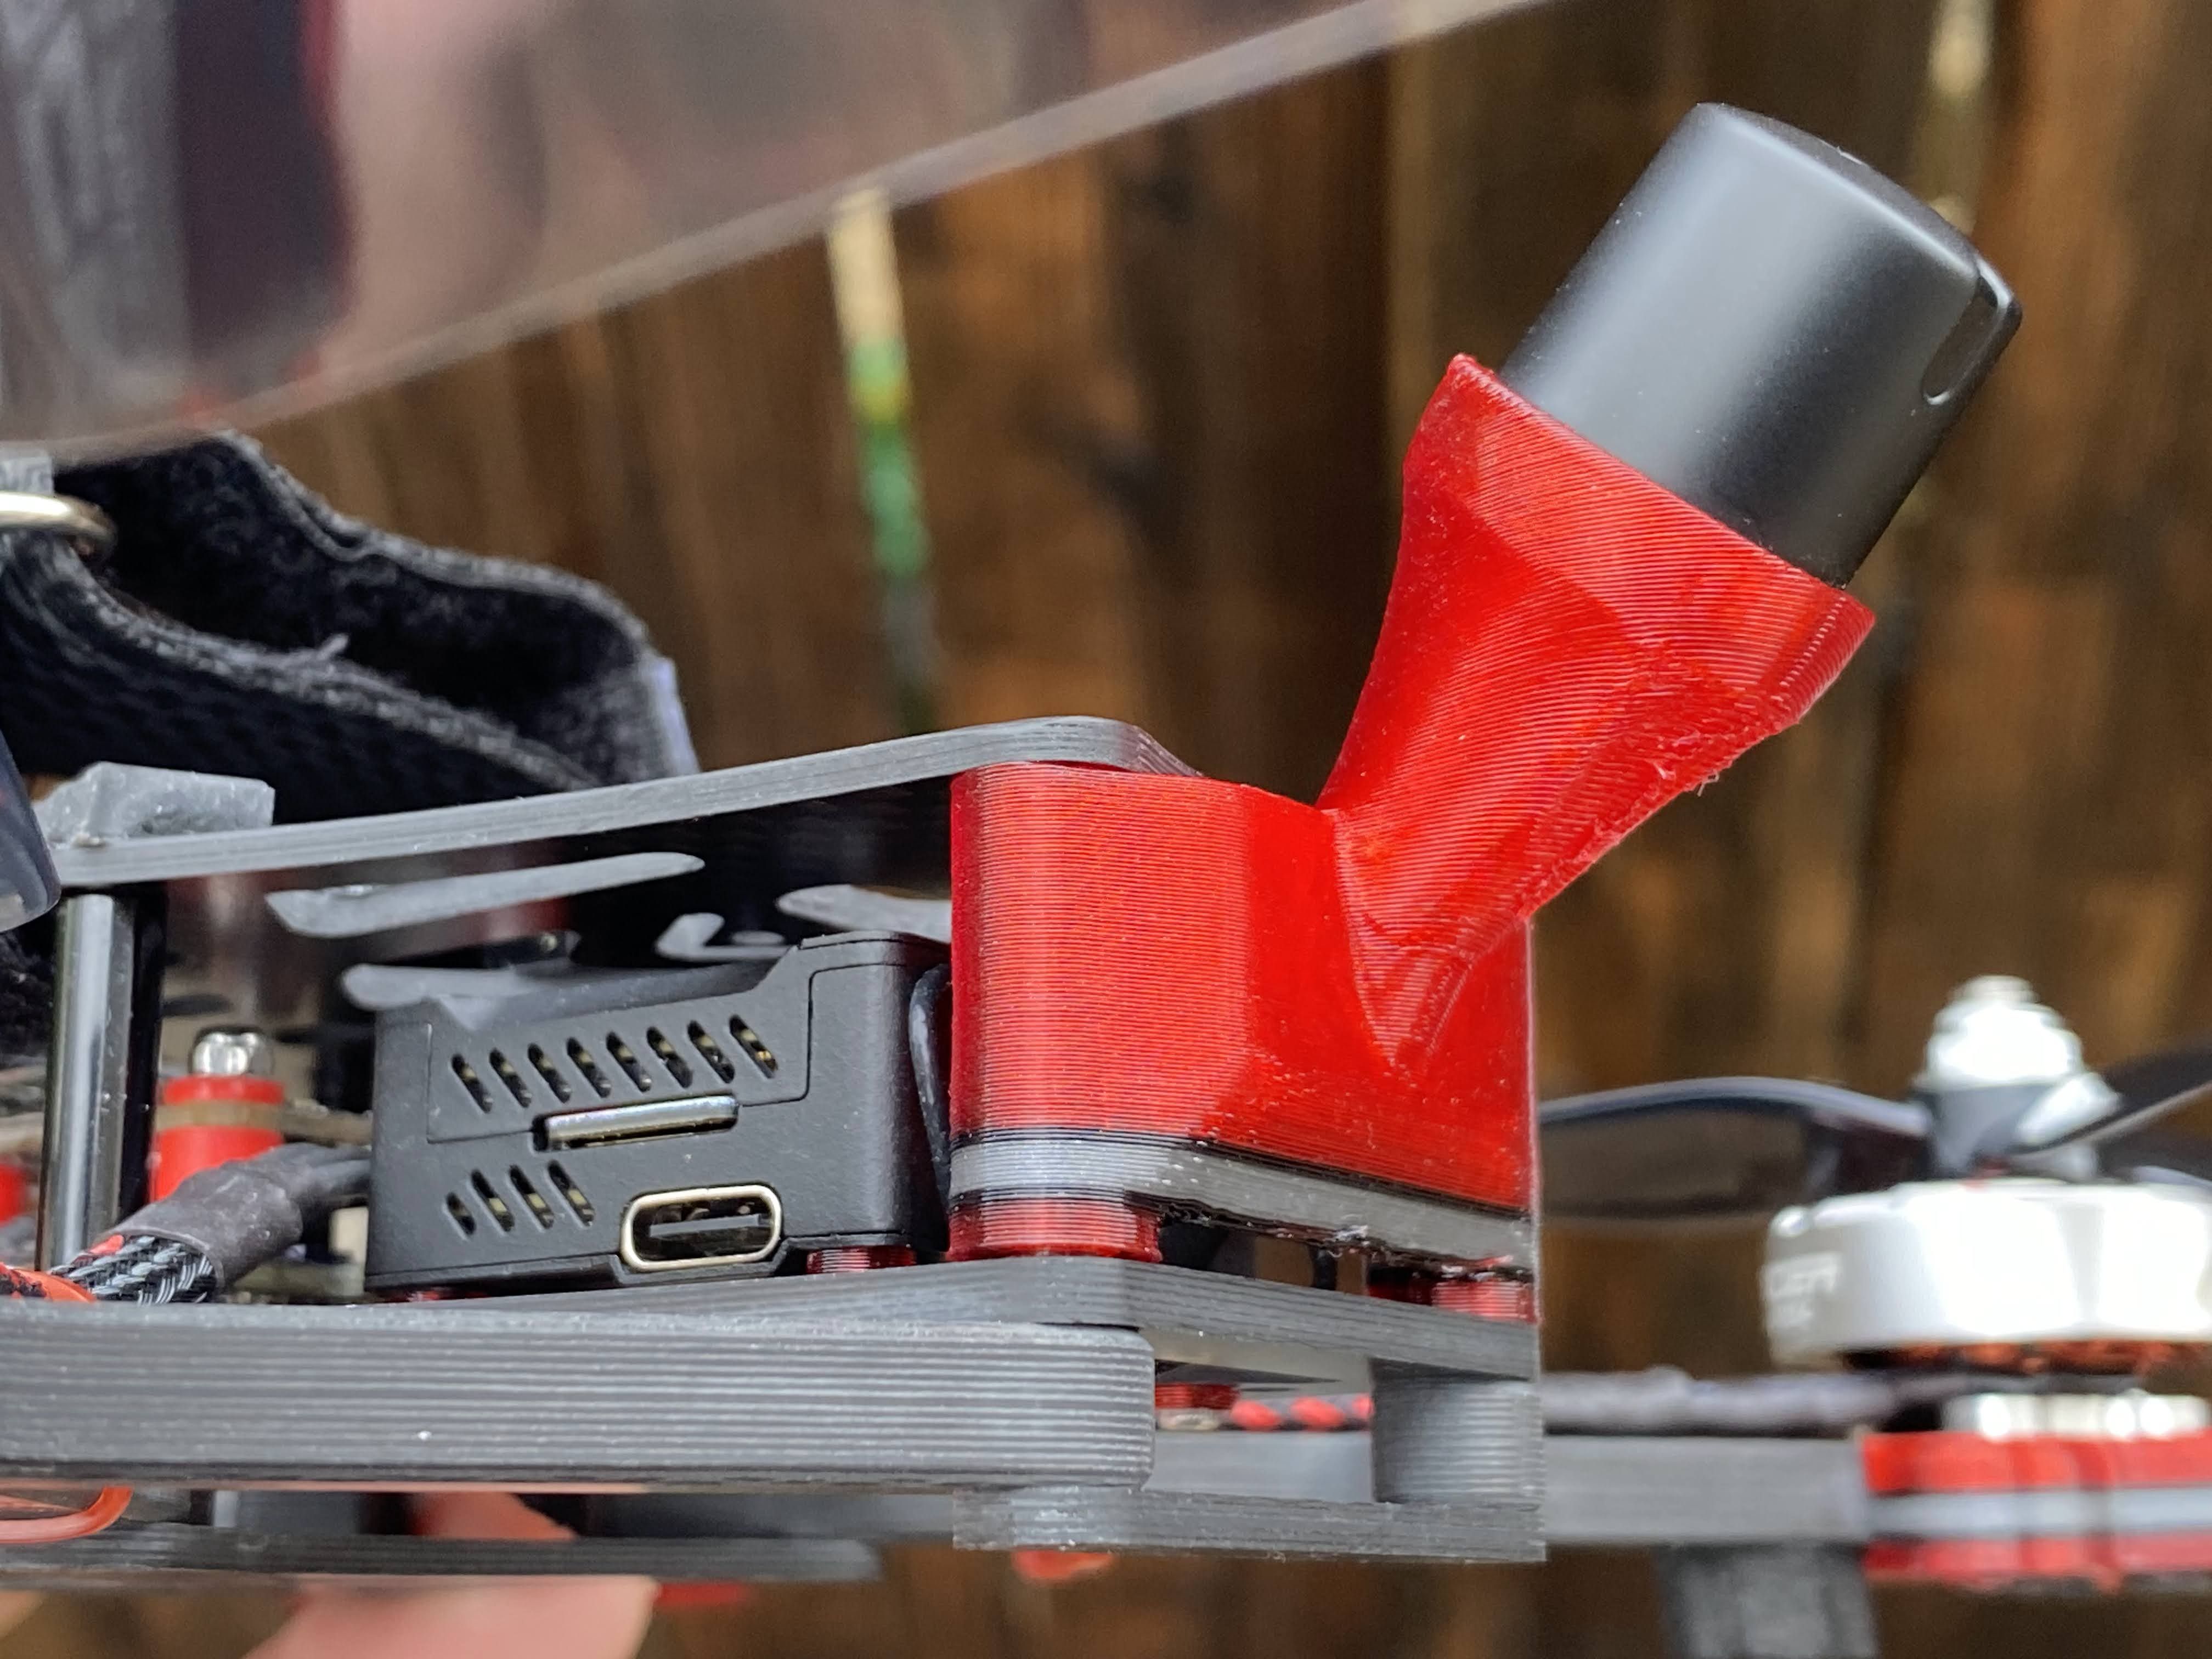
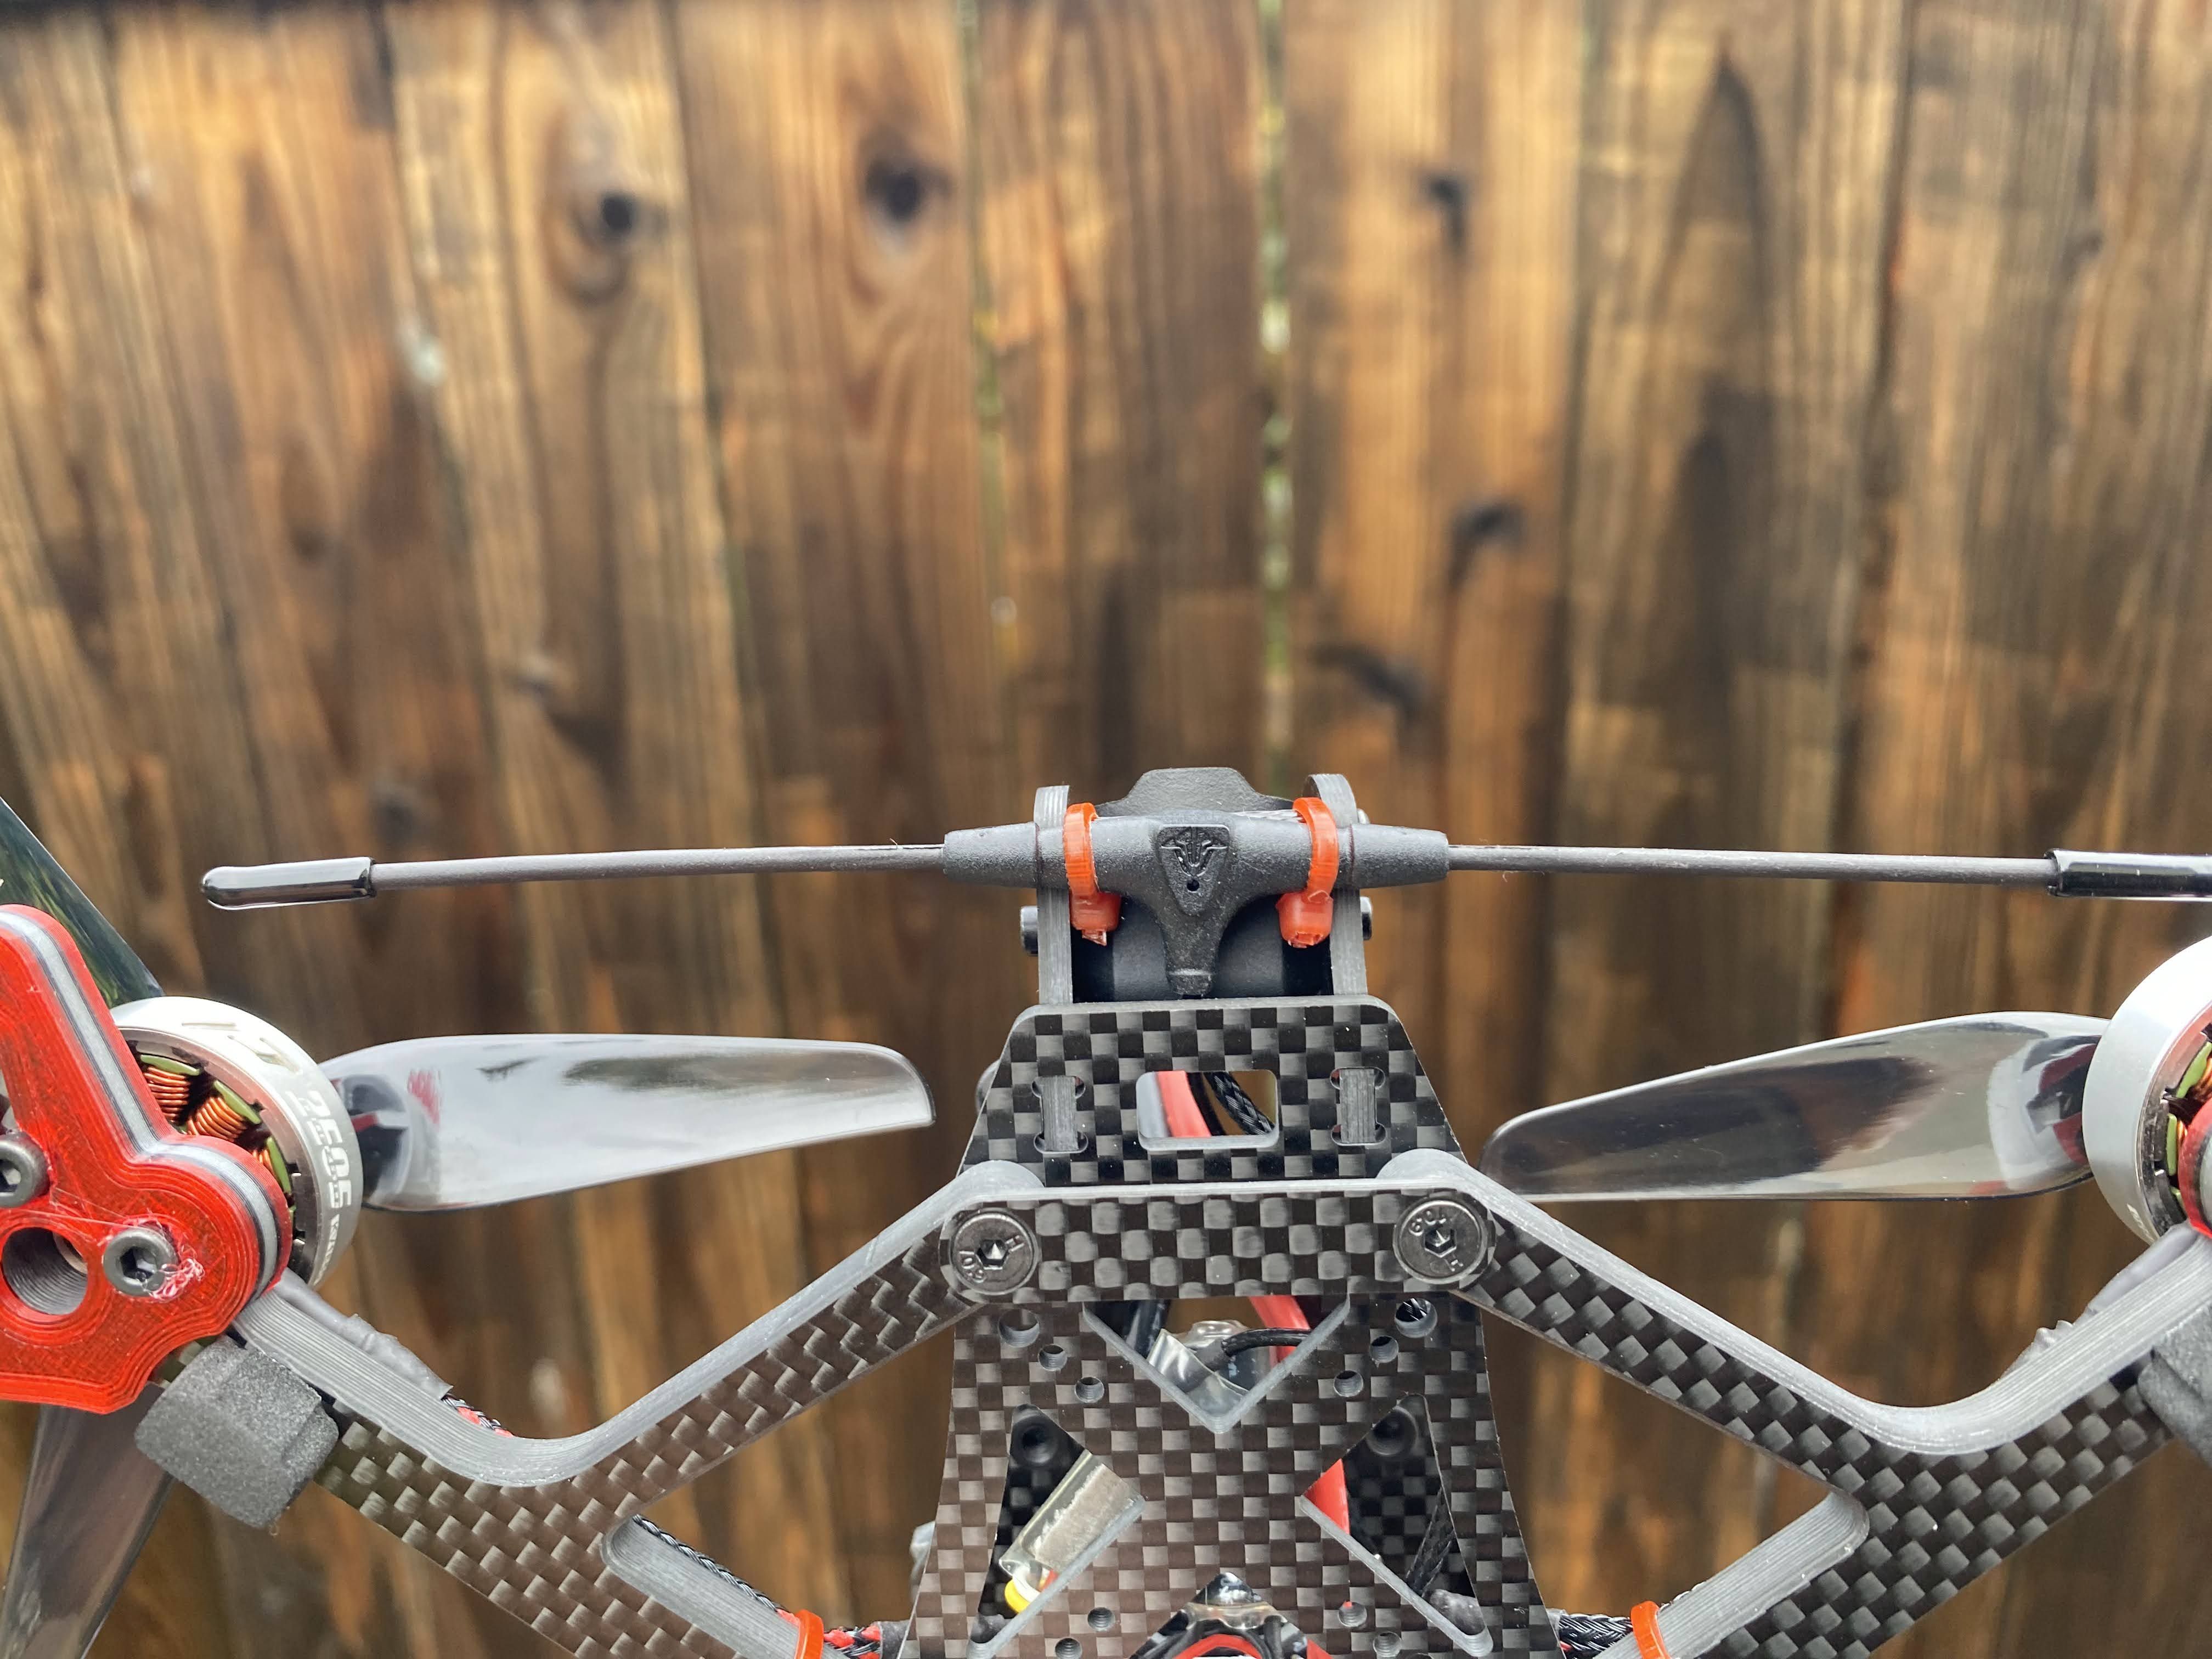
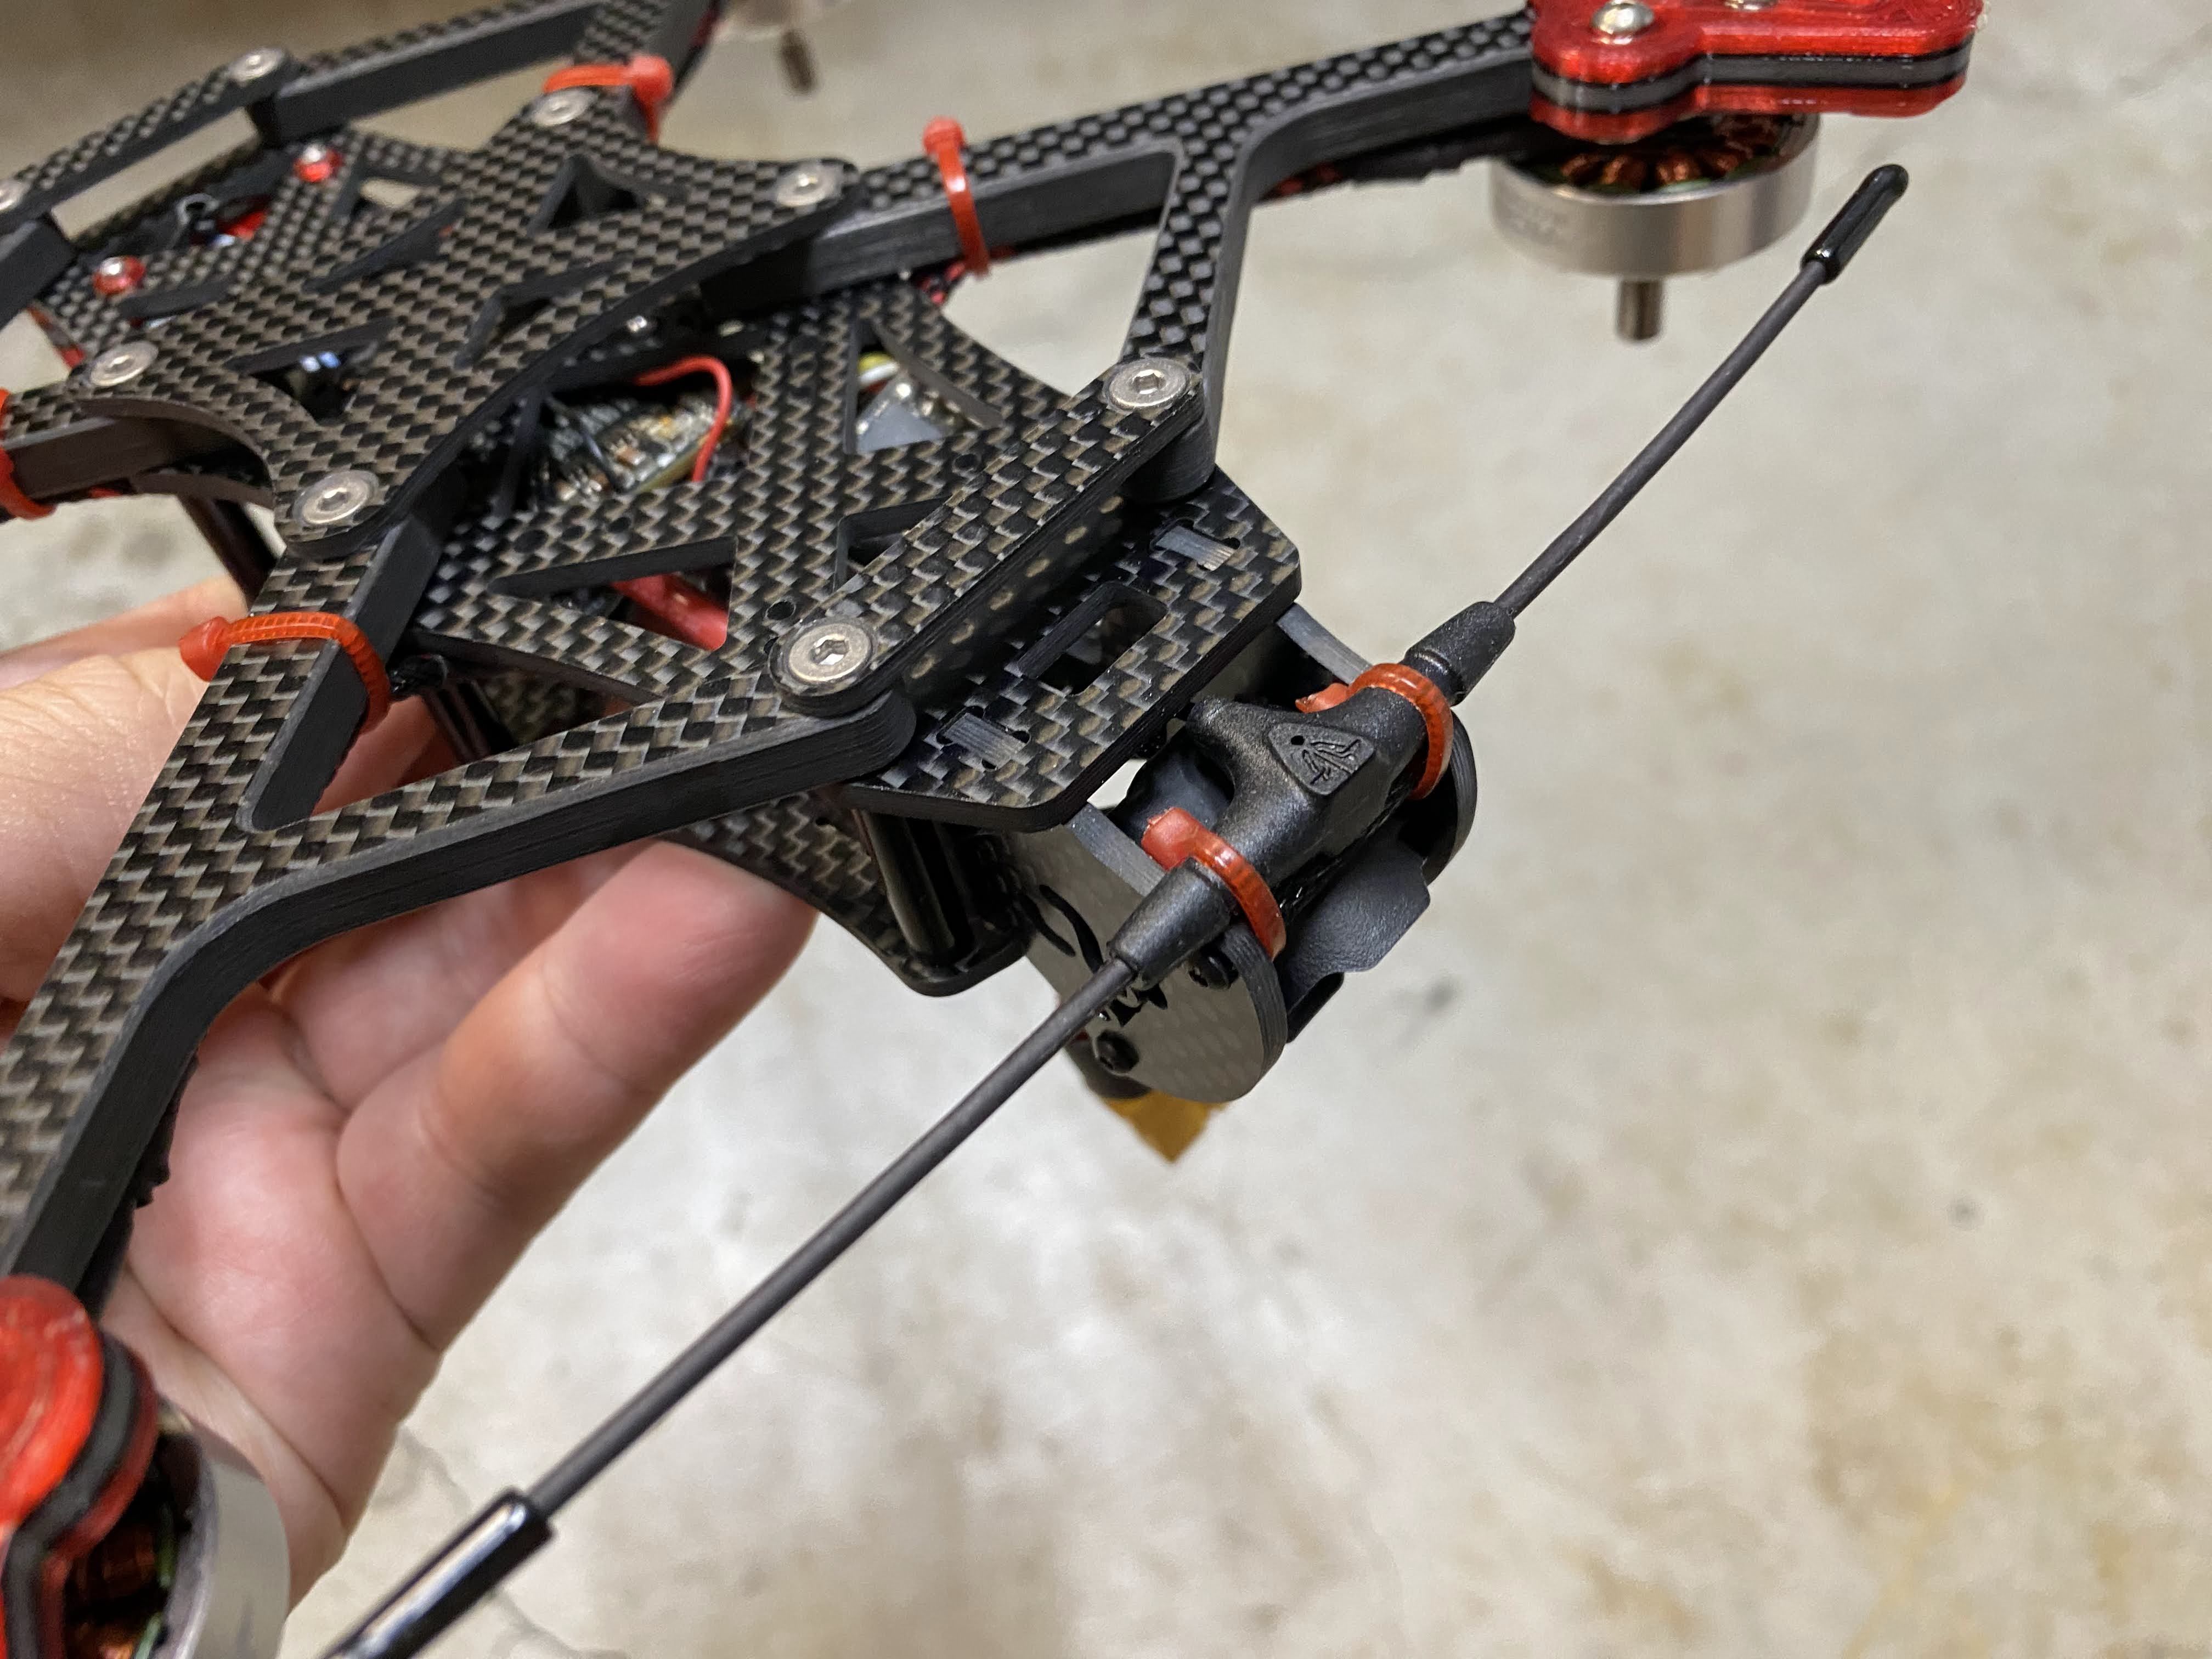
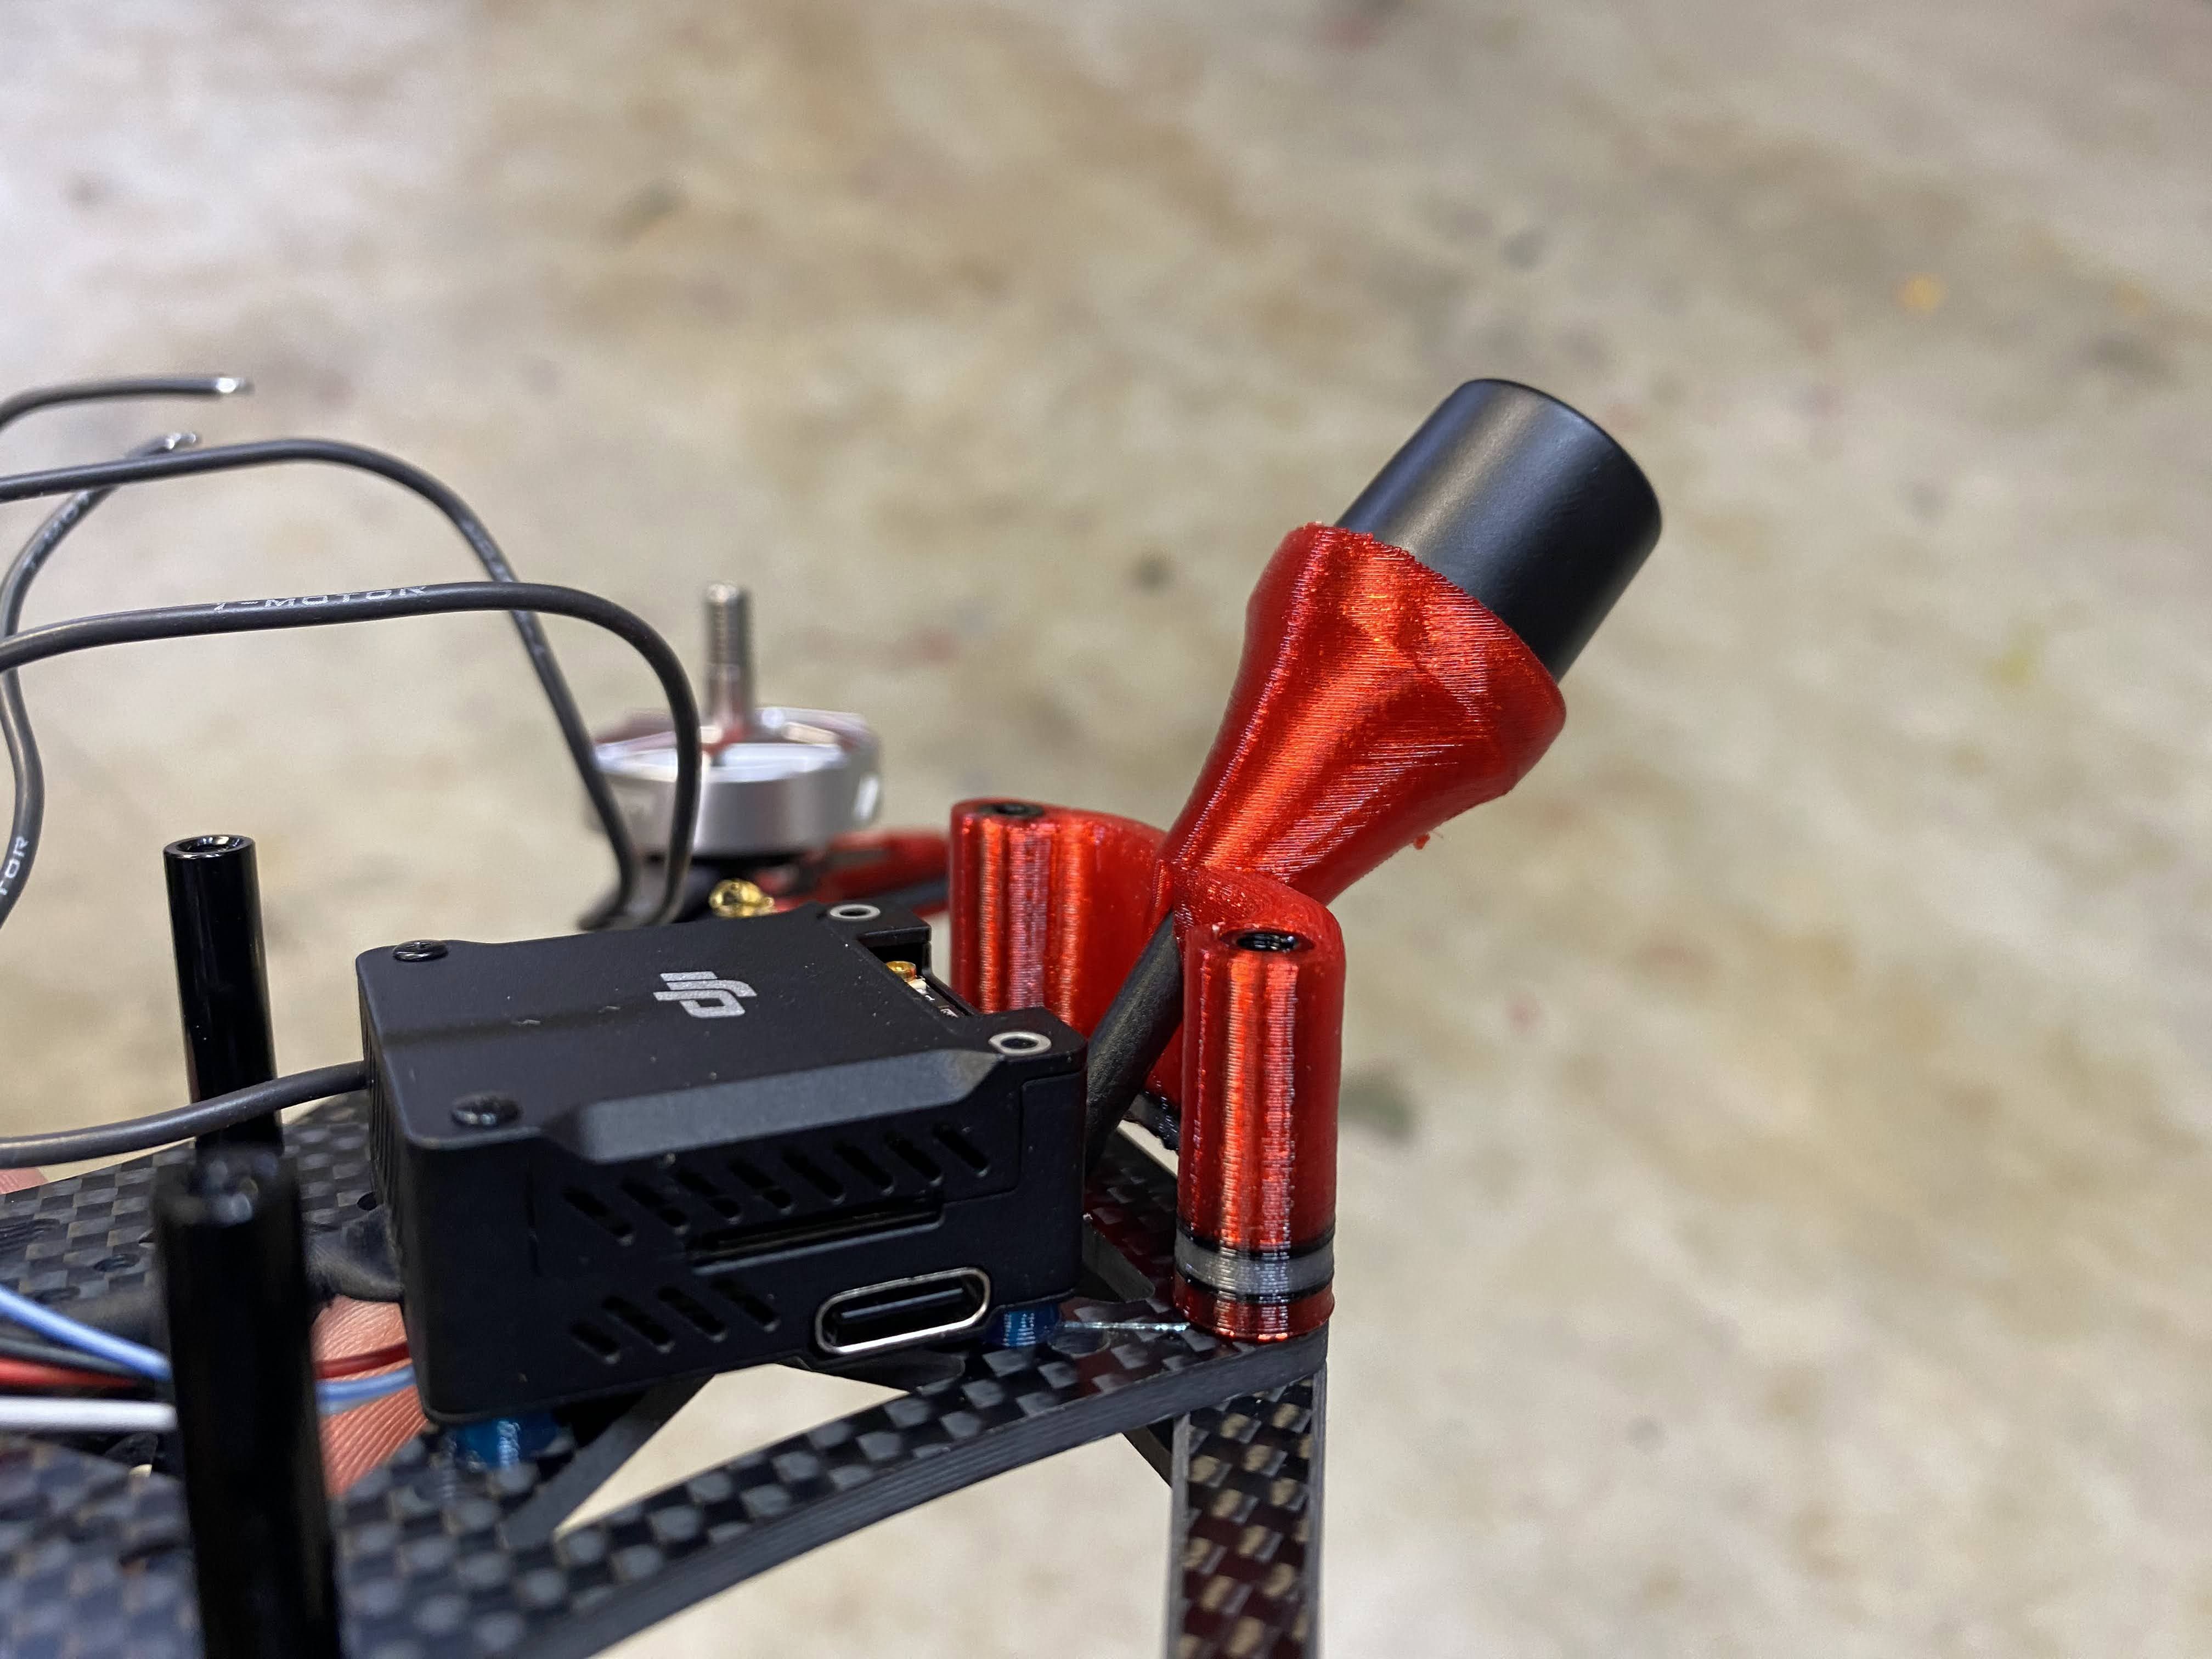
Here is a remixed of 2 different antenna mounts I found on thingiverse. According to a video I saw on youtube, it would be best to keep the O3 antenna as short as possible and provide support to the top of the antenna.
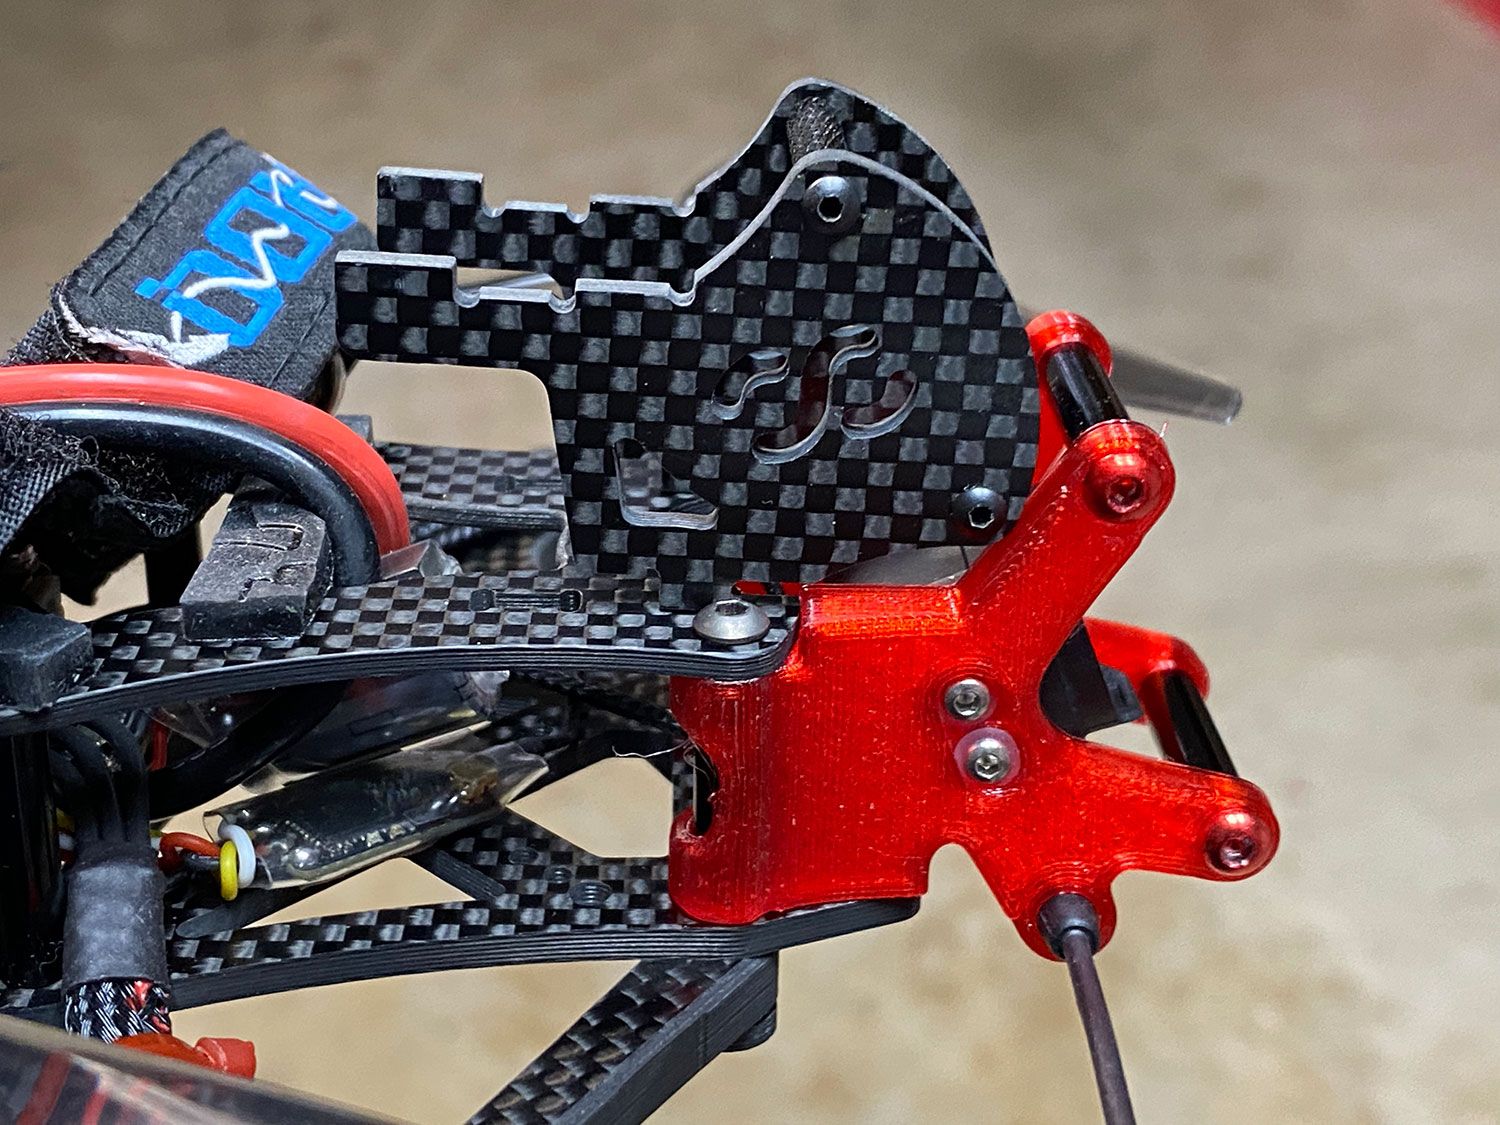
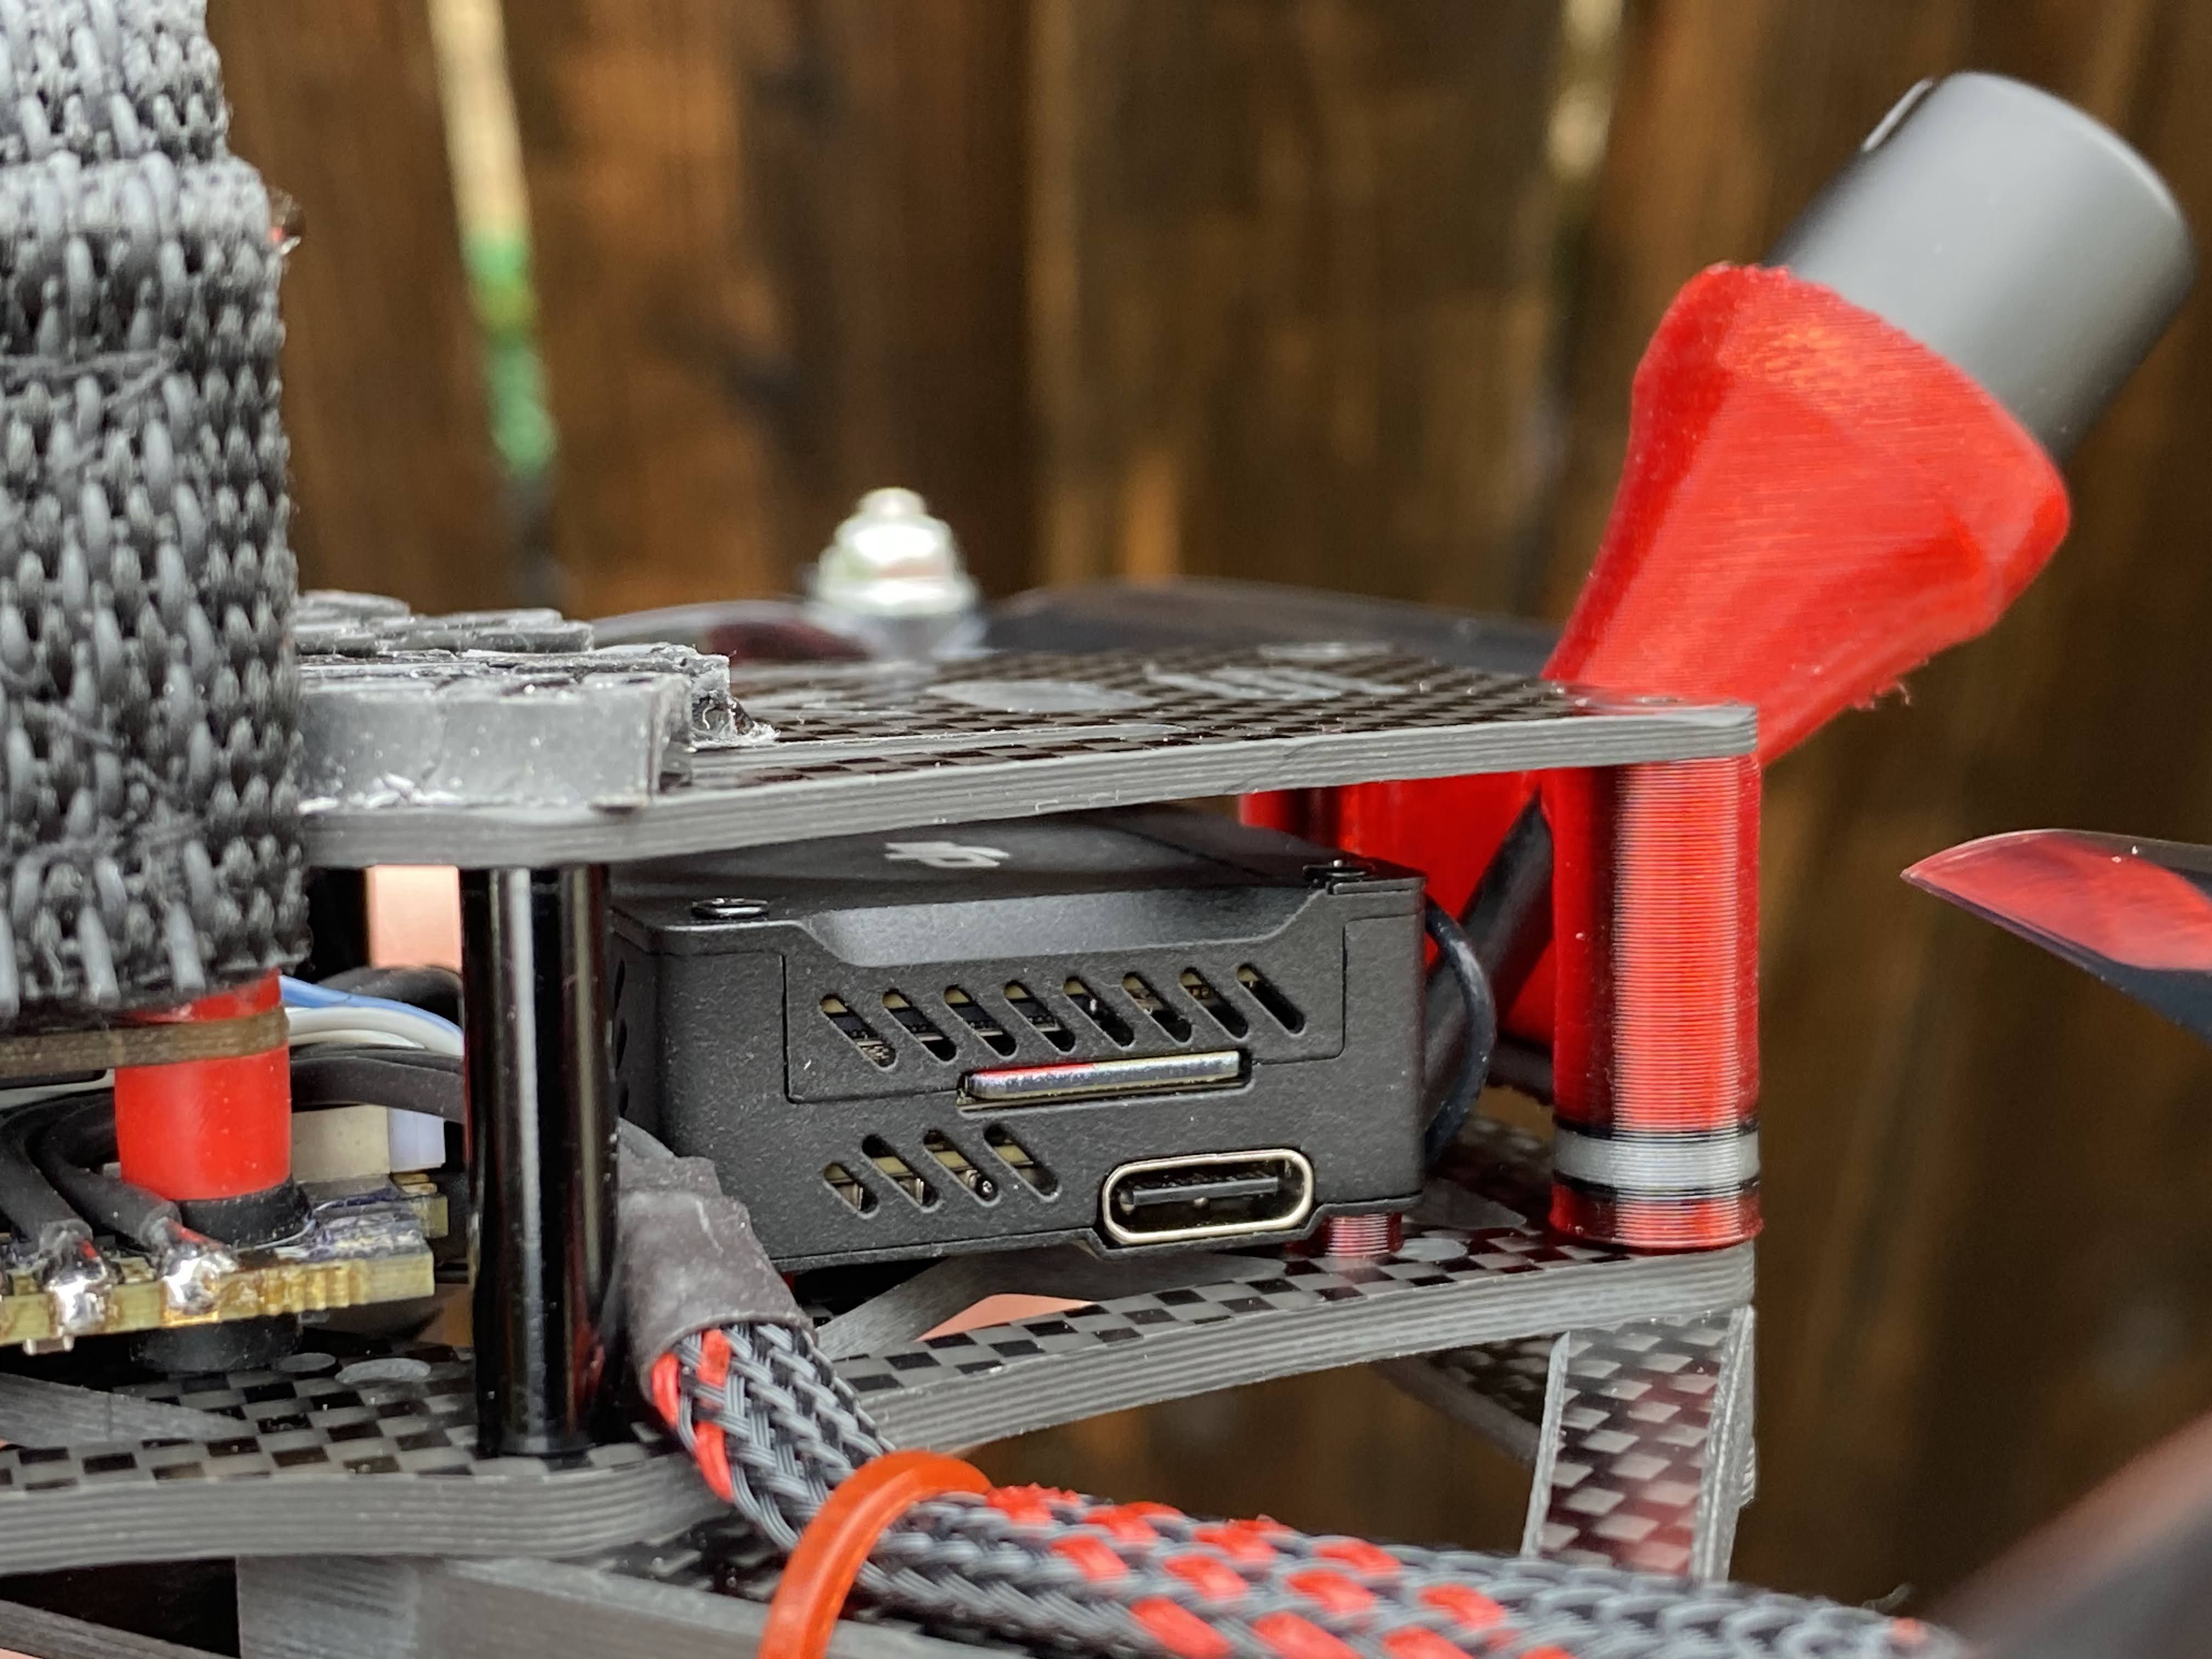
I wanted to put a O3 mount that NewbeeDrone just released because it looked cool, but I did not want to wait for it arrive in the mail. I end up using what I had available to me, and that is M1.6 x 12mm screws and 3D printed spacers. Since the screws are a bit too long, I printed longer spacers to compensate for the extra length. Plus, it also gave me some extra space on the bottom of the air unit to run wires underneath it, so it looks a lot cleaner. The reason why I had to figure out mounting of the air unit first is because I plan to run the camera cable under the flight stack.

Since the antenna is sitting so low, the end actually protrudes past the bottom of the frame a tiny bit. I did not want to modify the original antenna, so I left it as is.
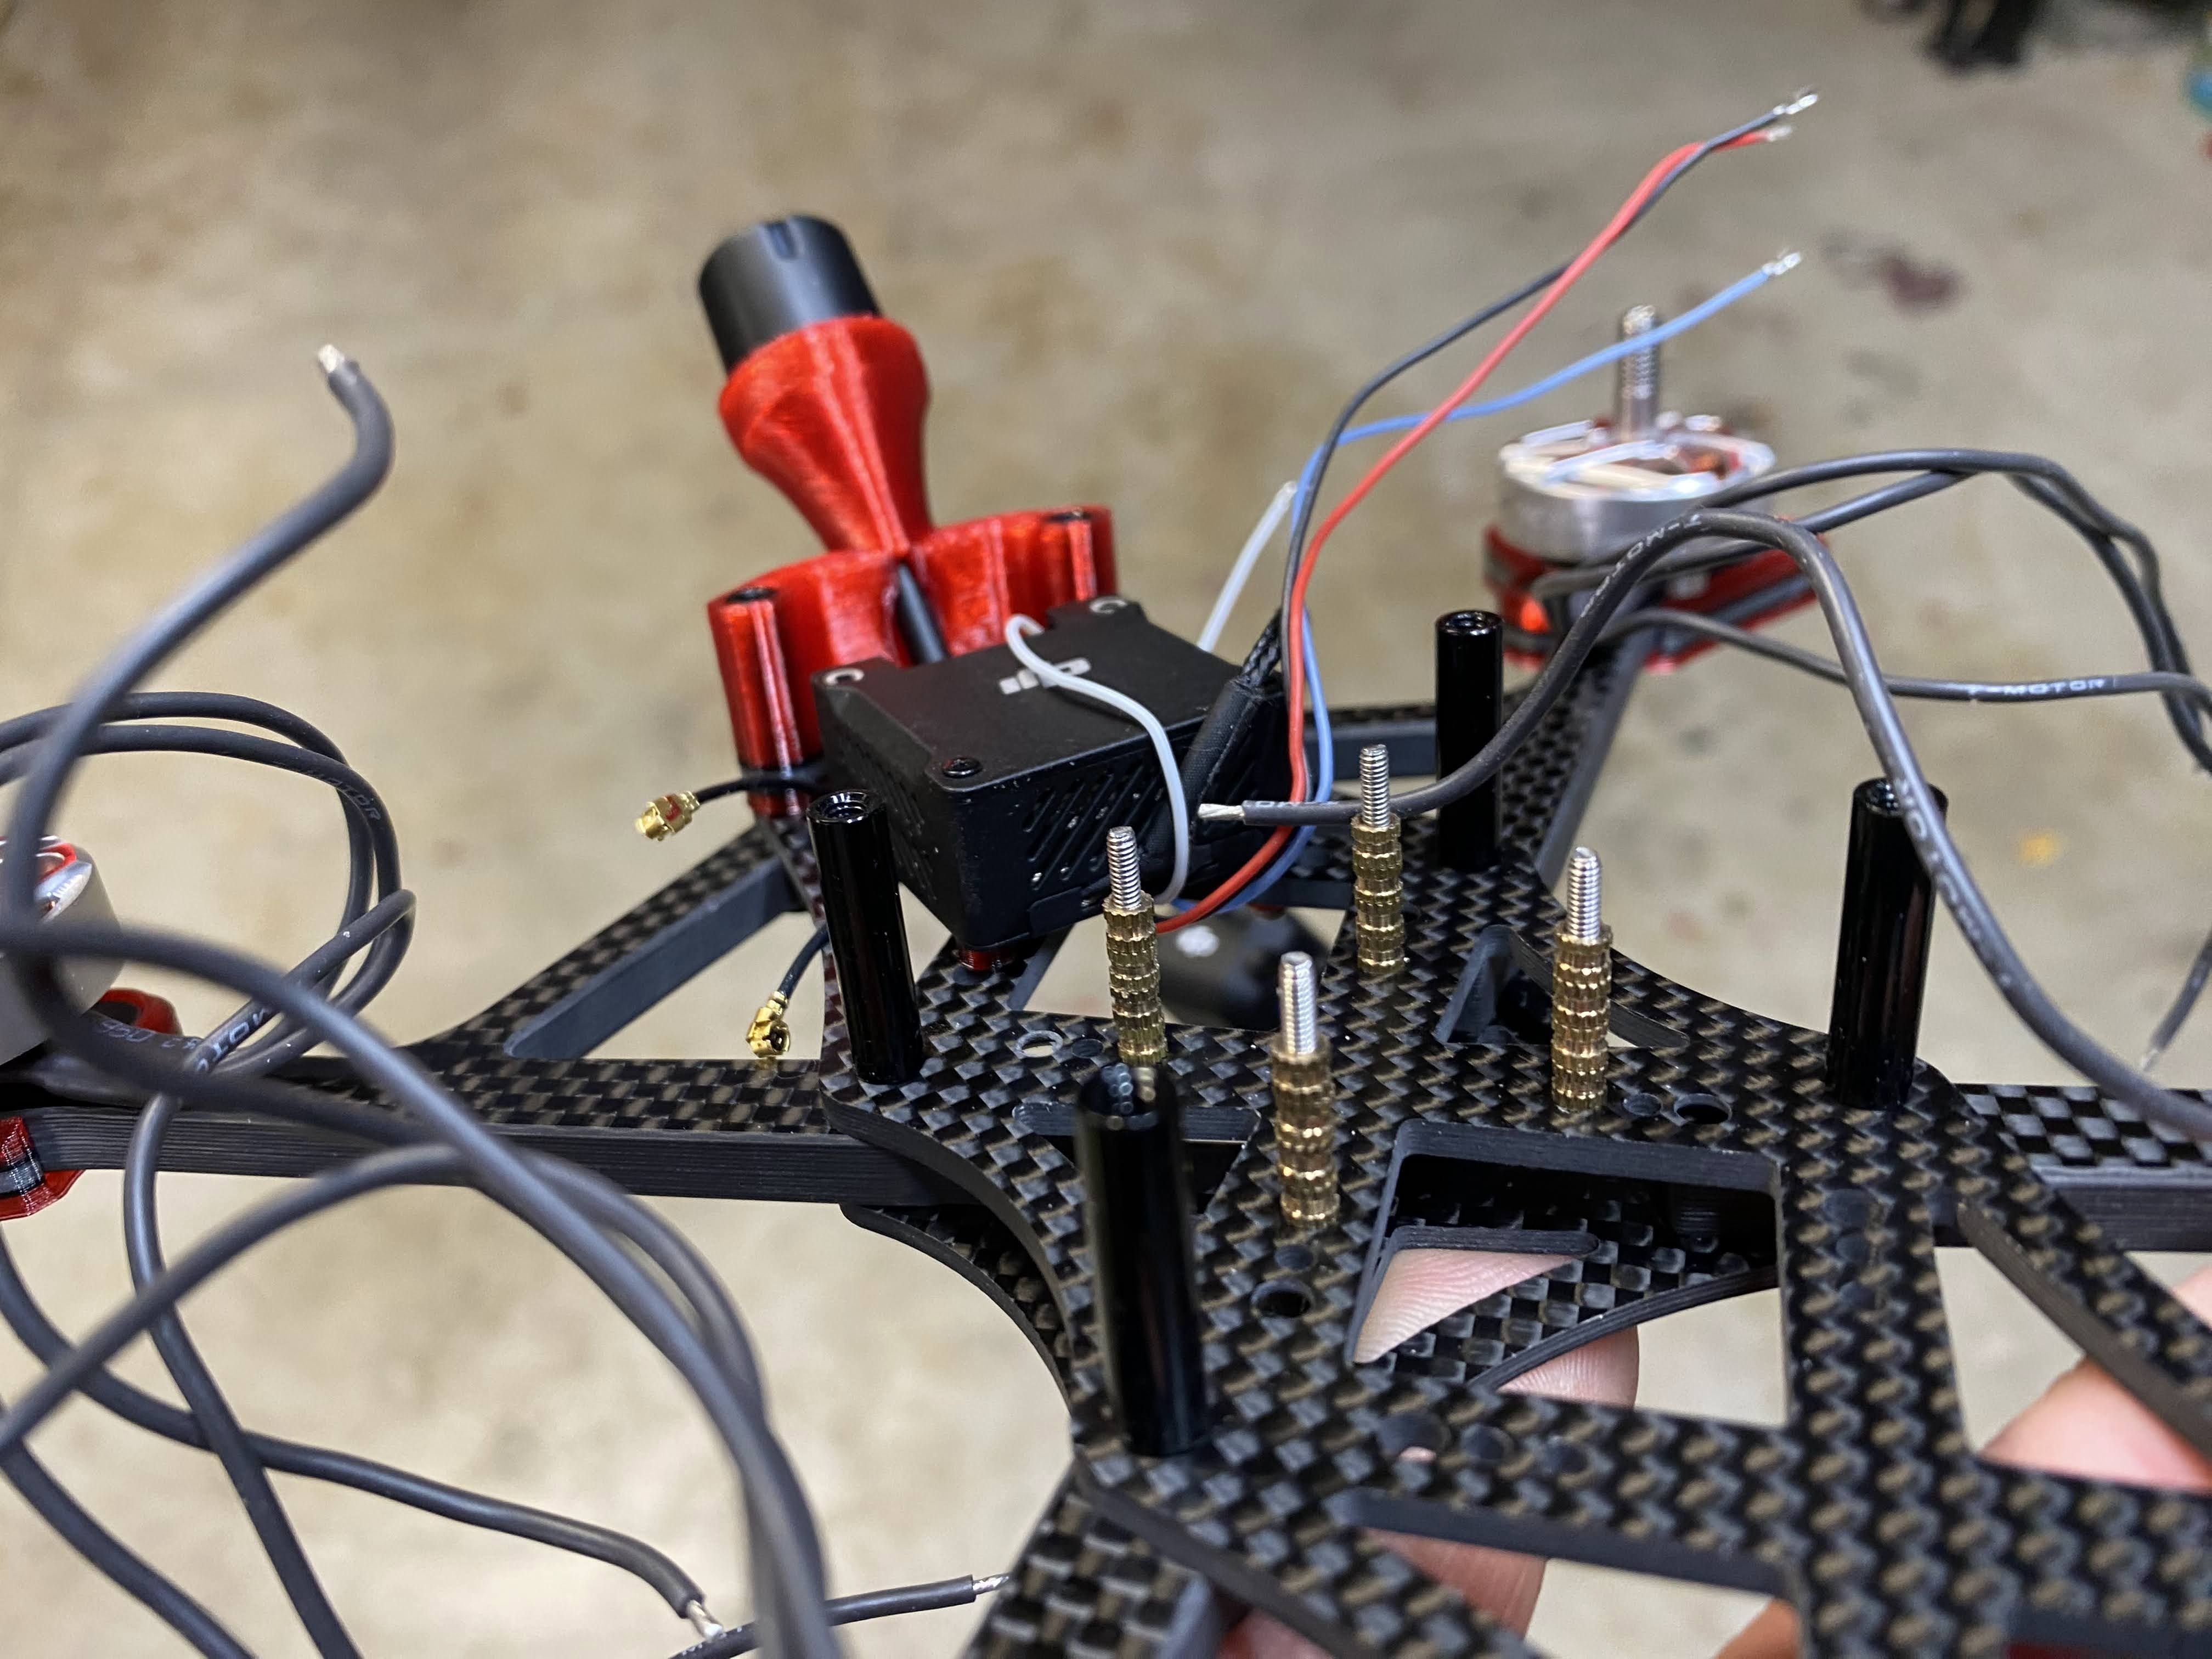
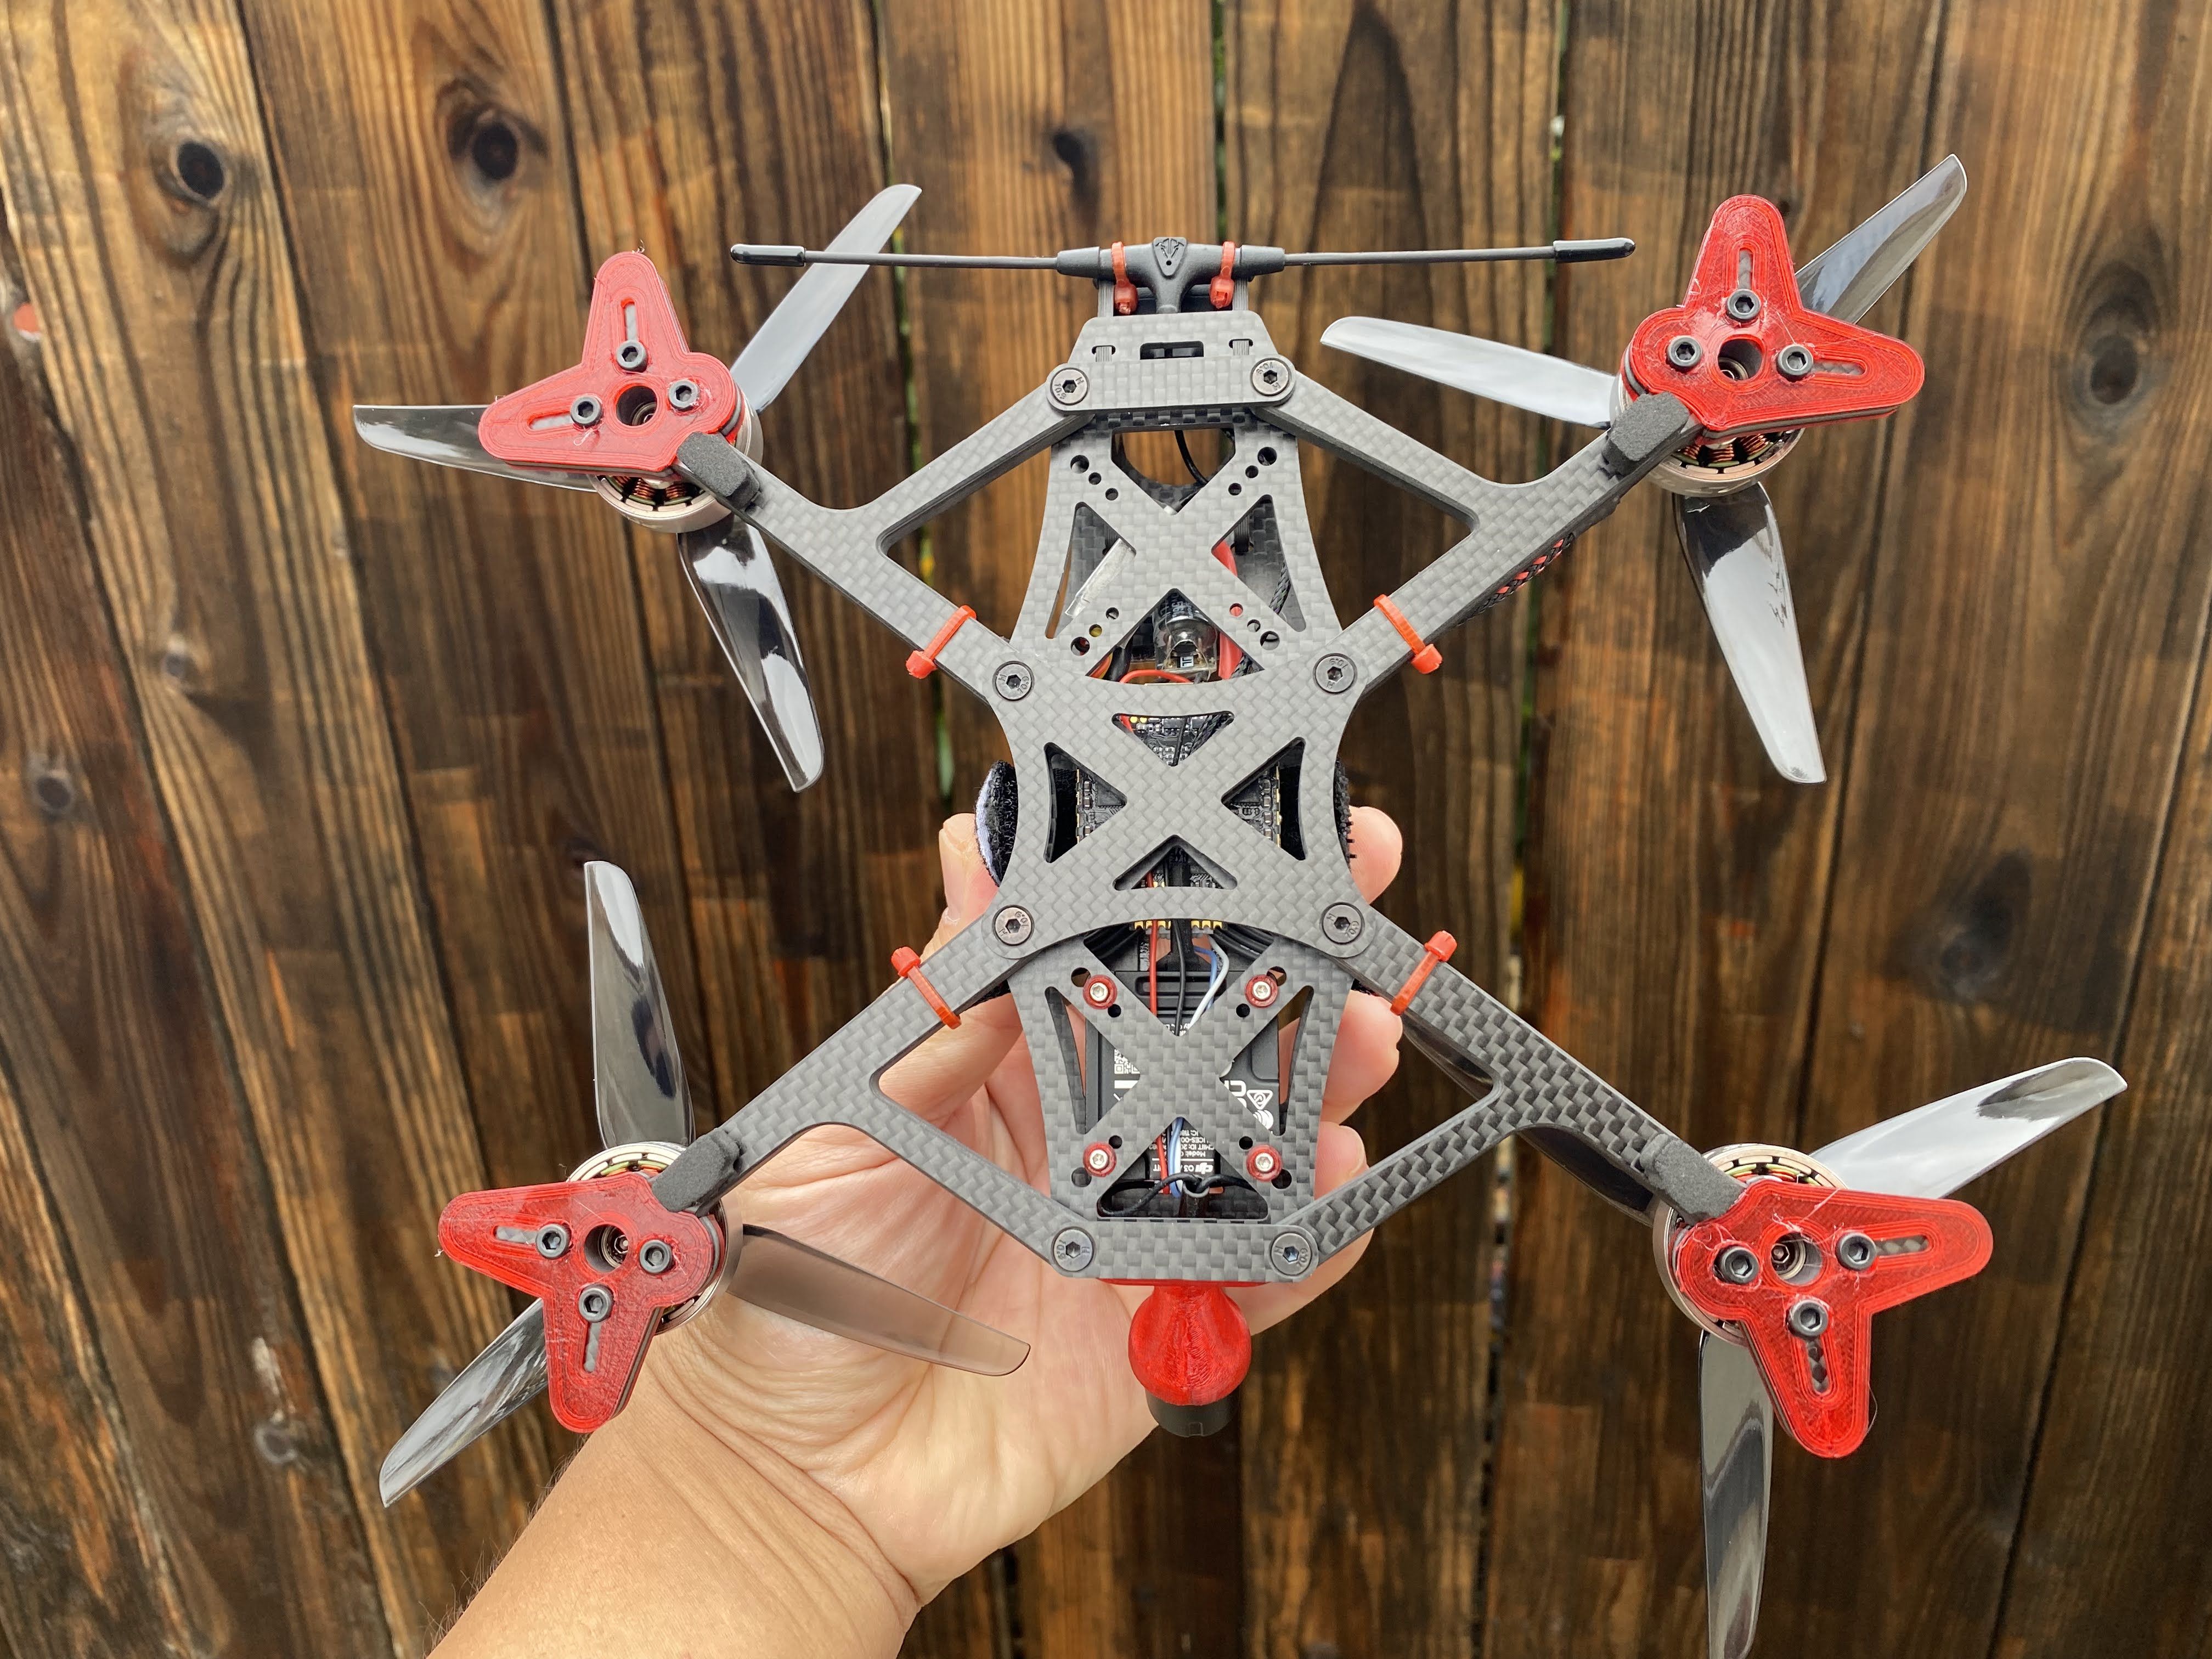
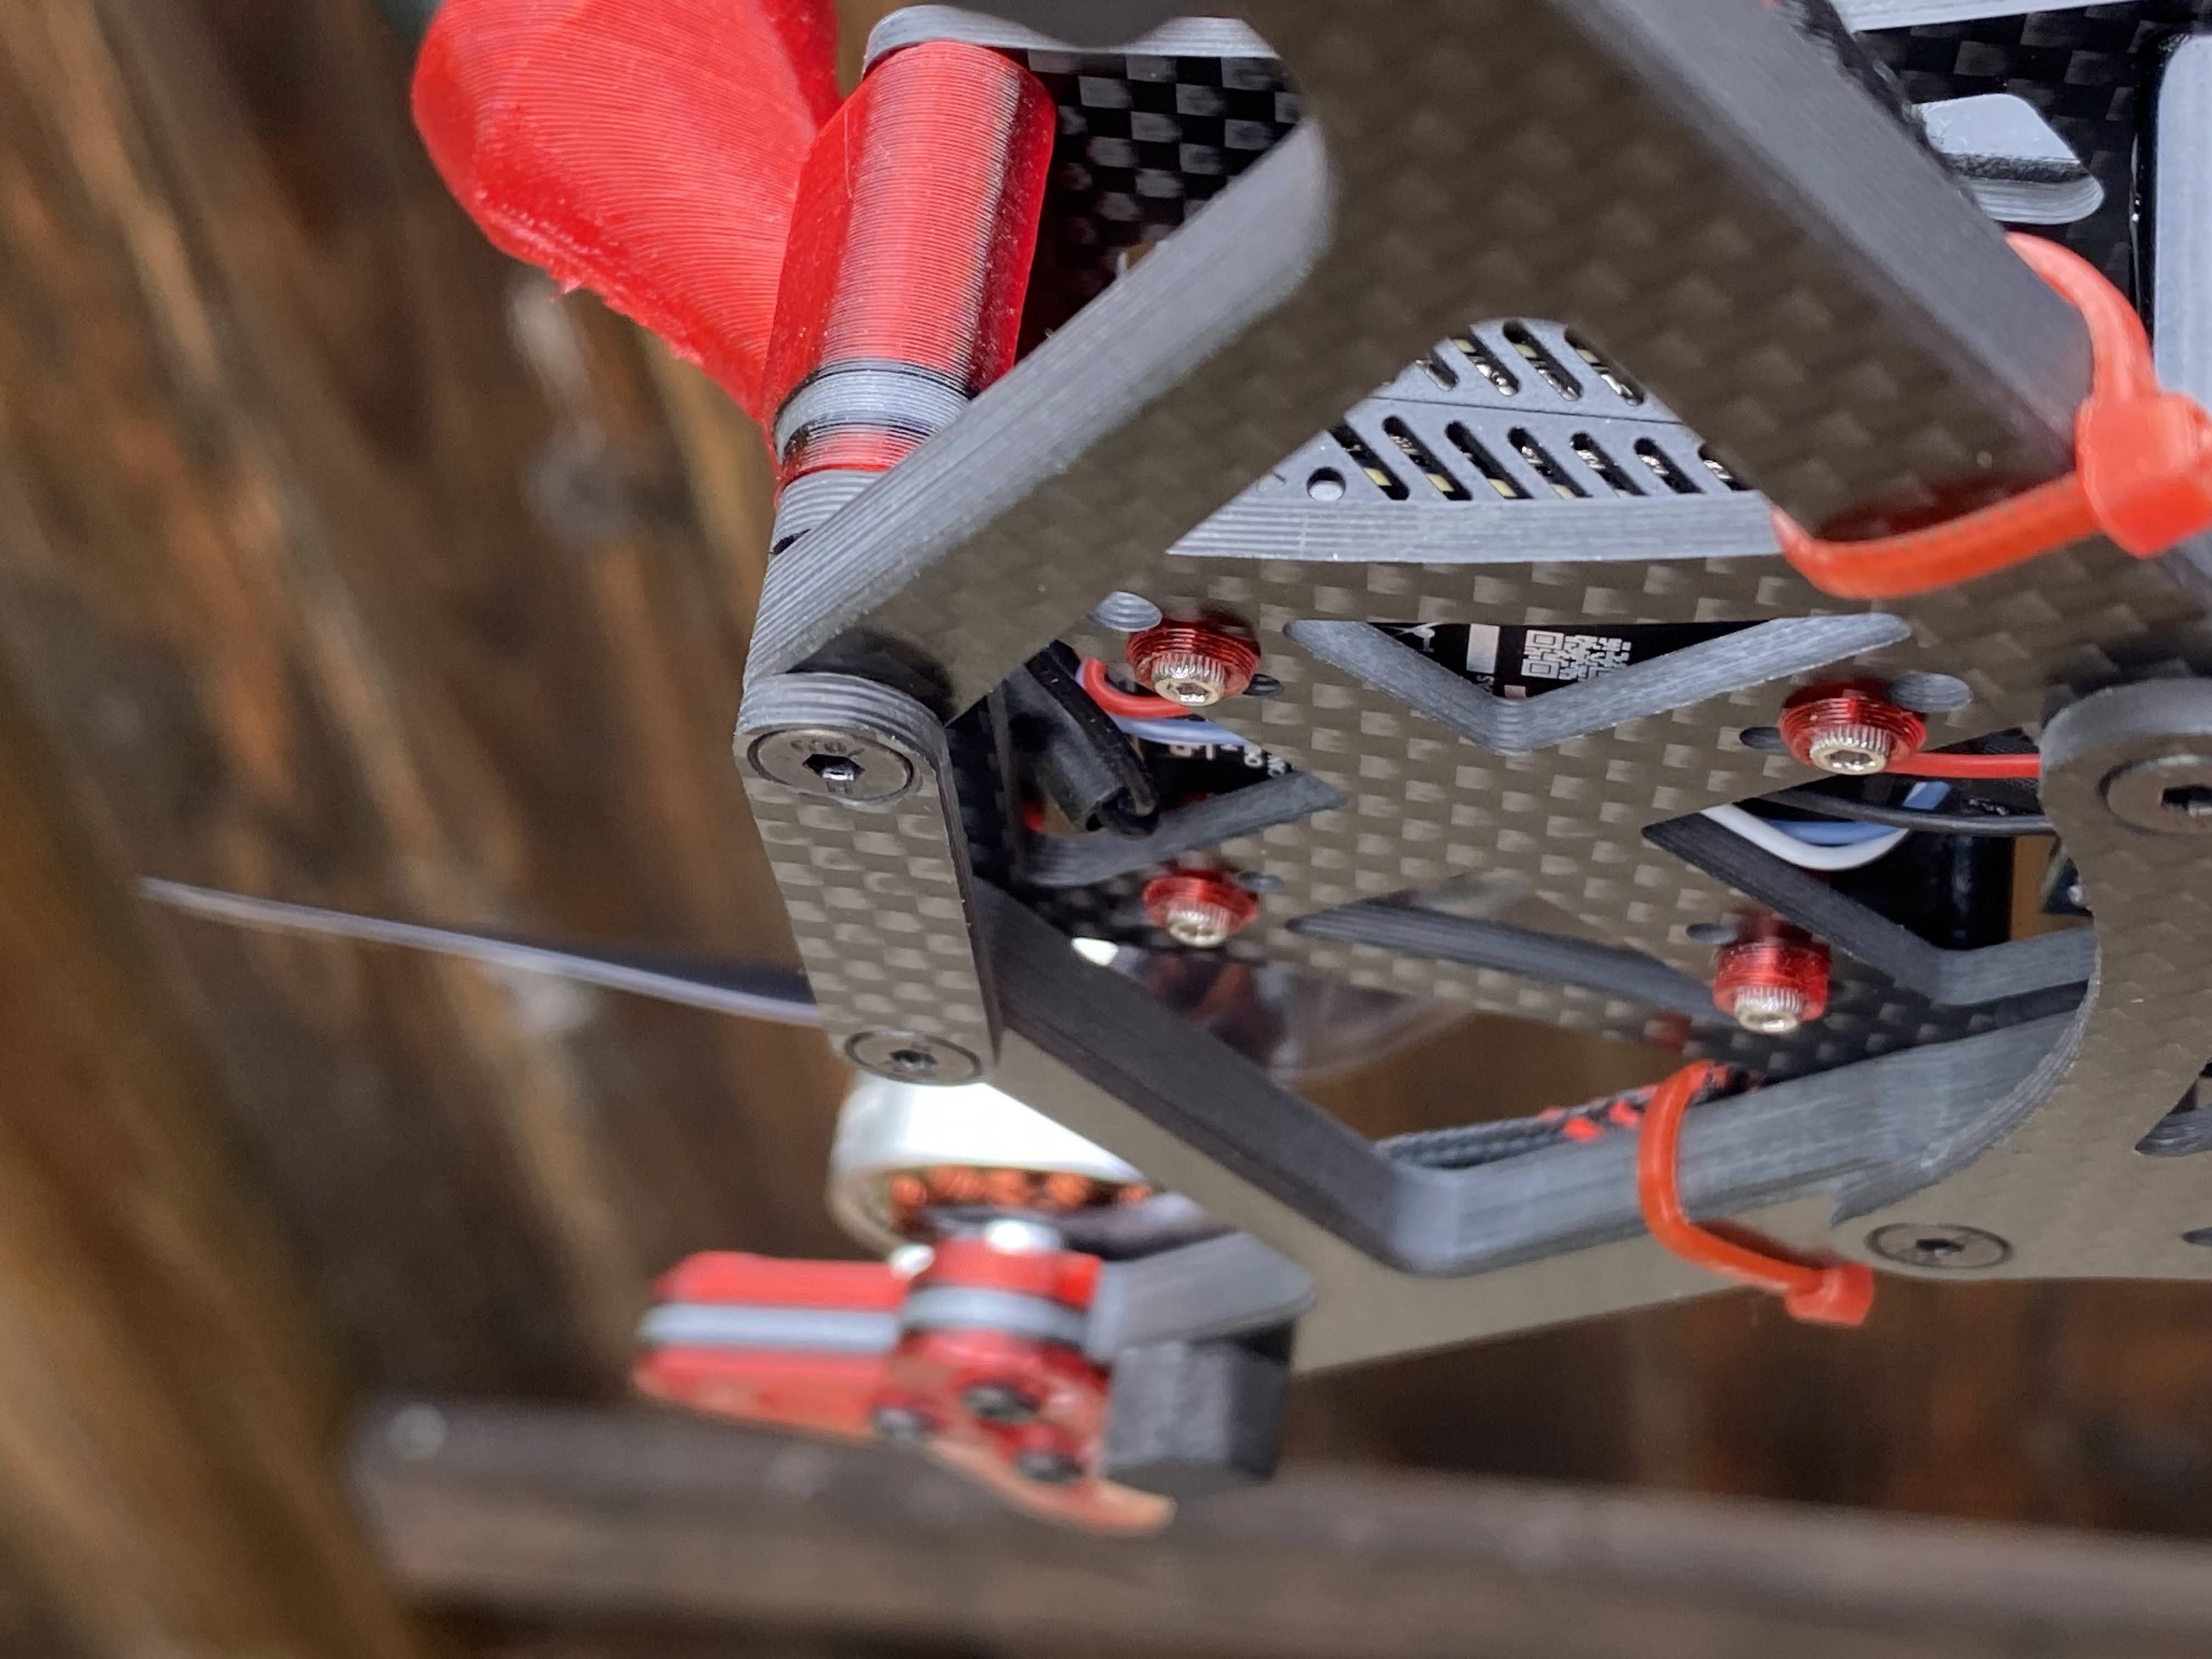
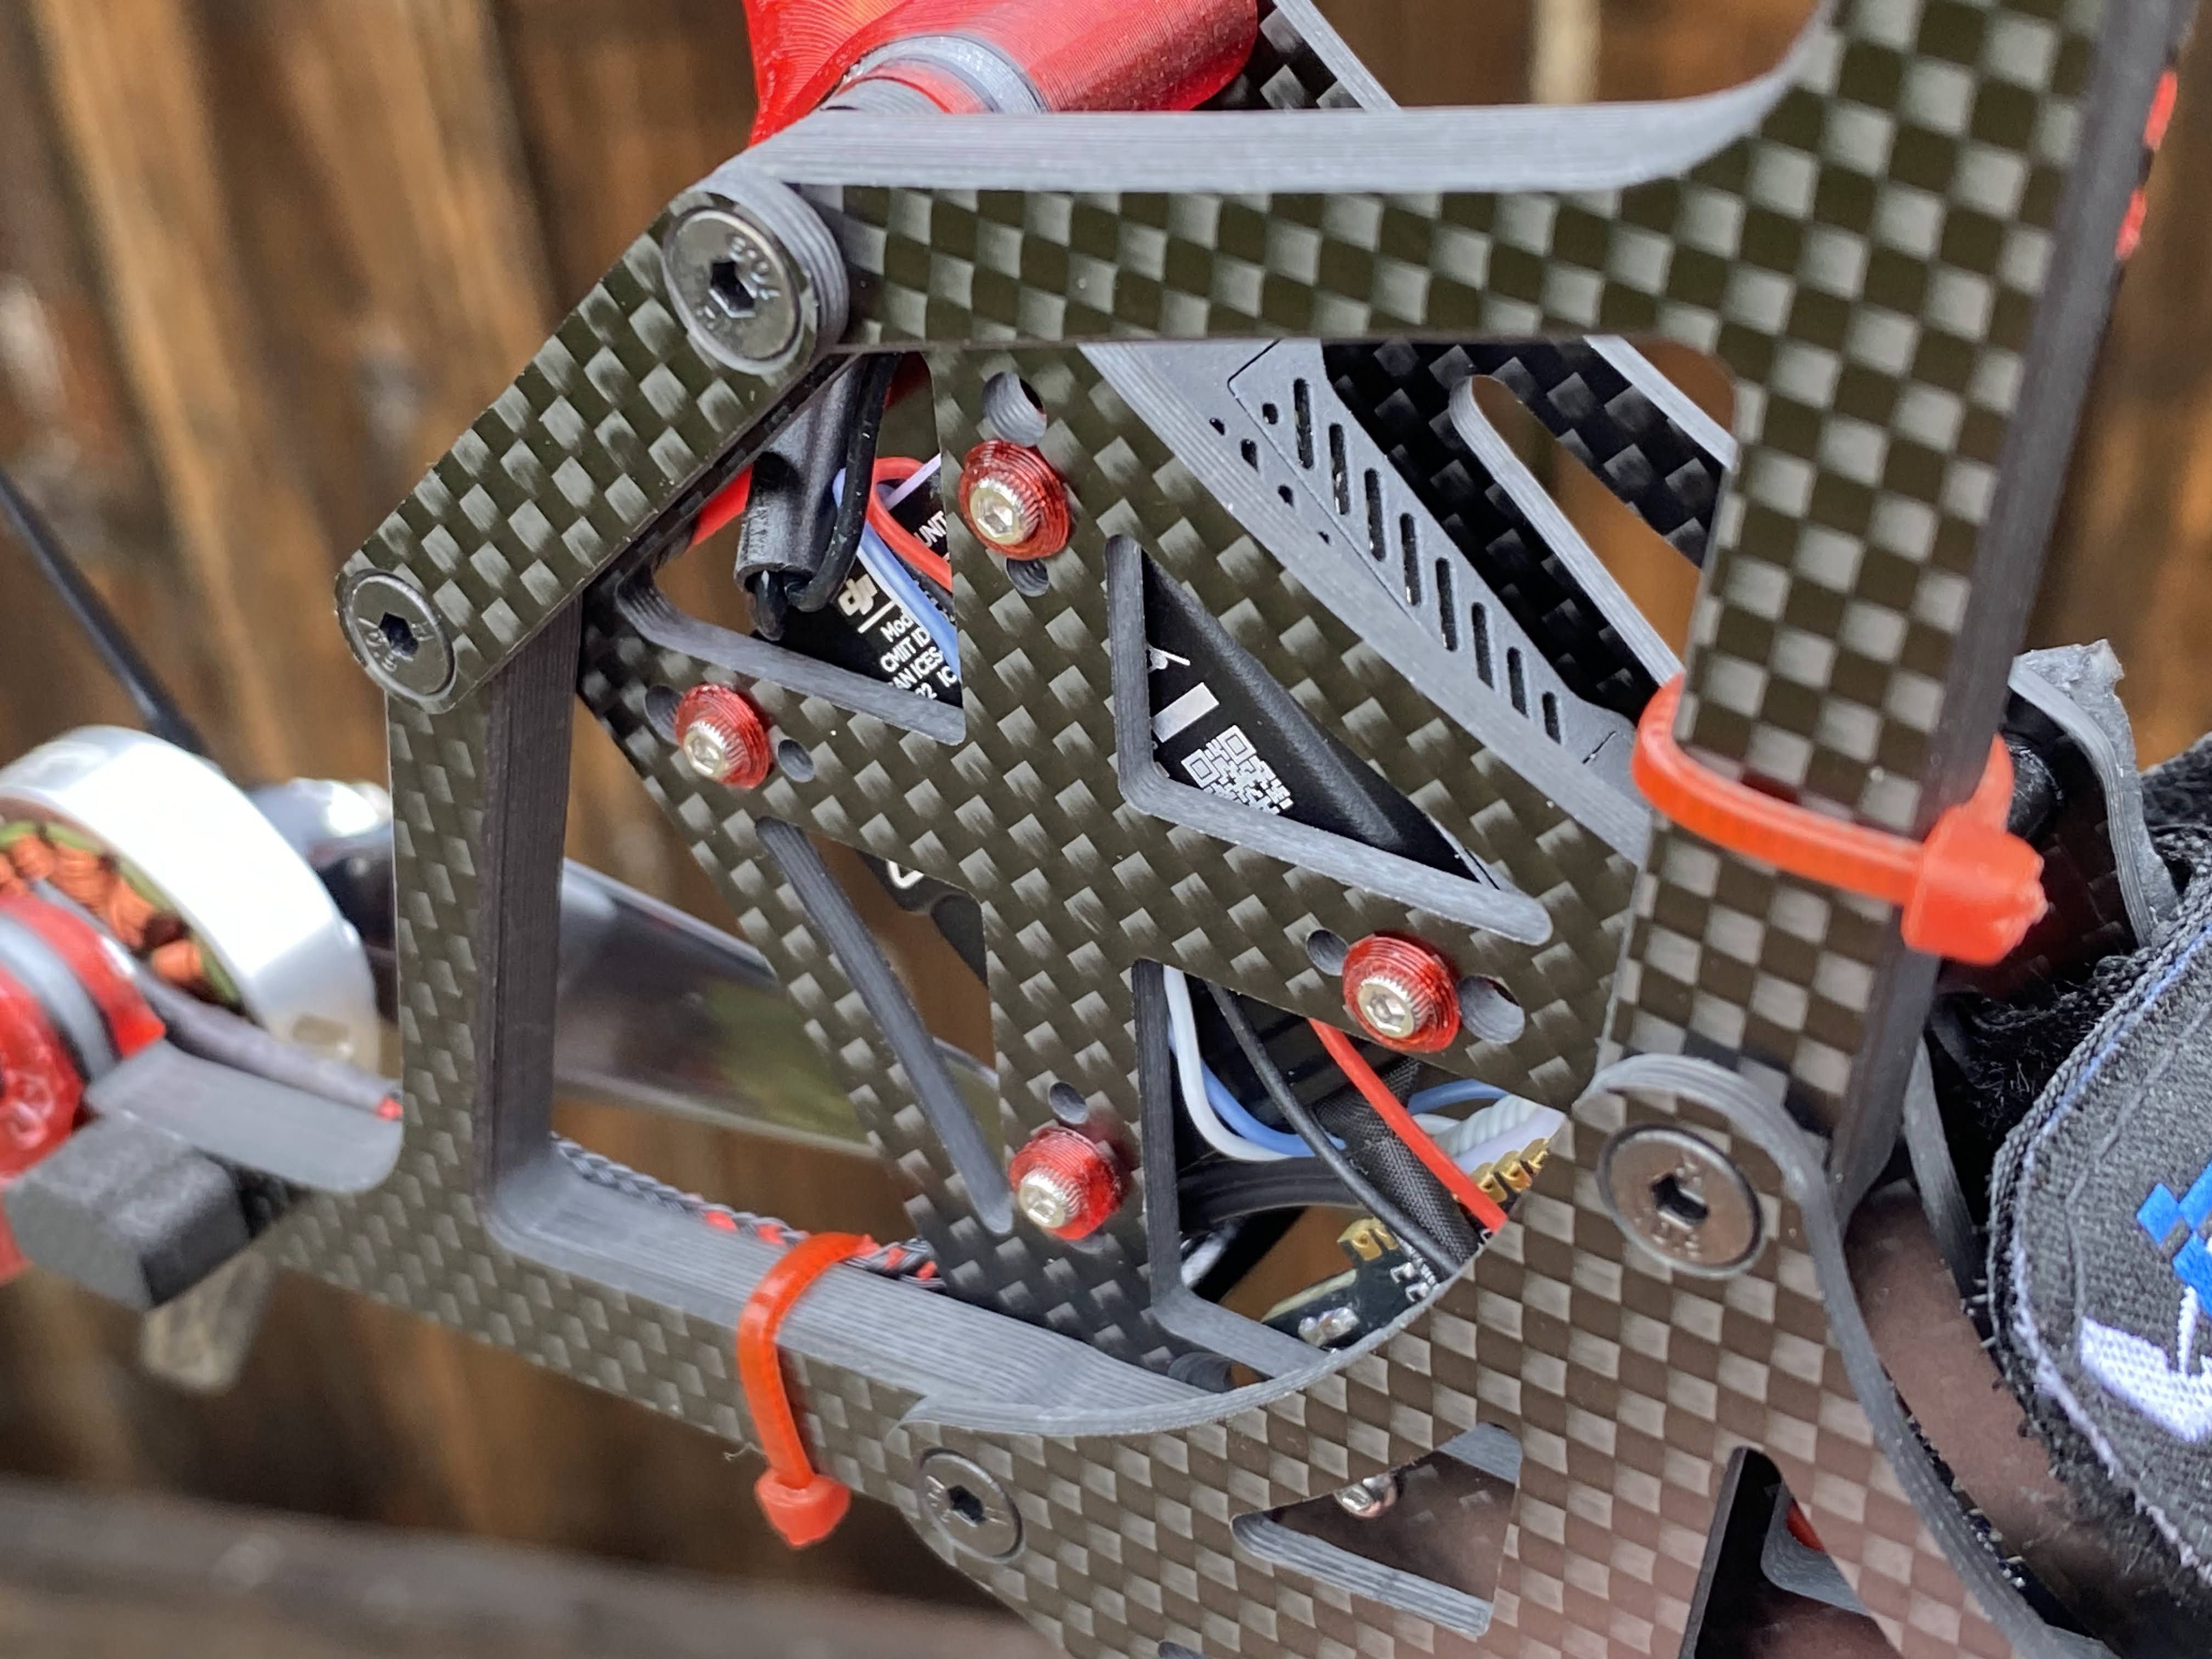
The mounting holes on the frame for the 20x20 stack are 2mm but the flight stack that I am using uses 3mm screws. I could enlarge the holes on the frame, but it gets very close to the neighboring hole for the whoop size boards. To fix this issue, I use a M2 screws with brass knurled nuts. These nuts enlarge the M2 screw to be equivalent to a M3 screw.
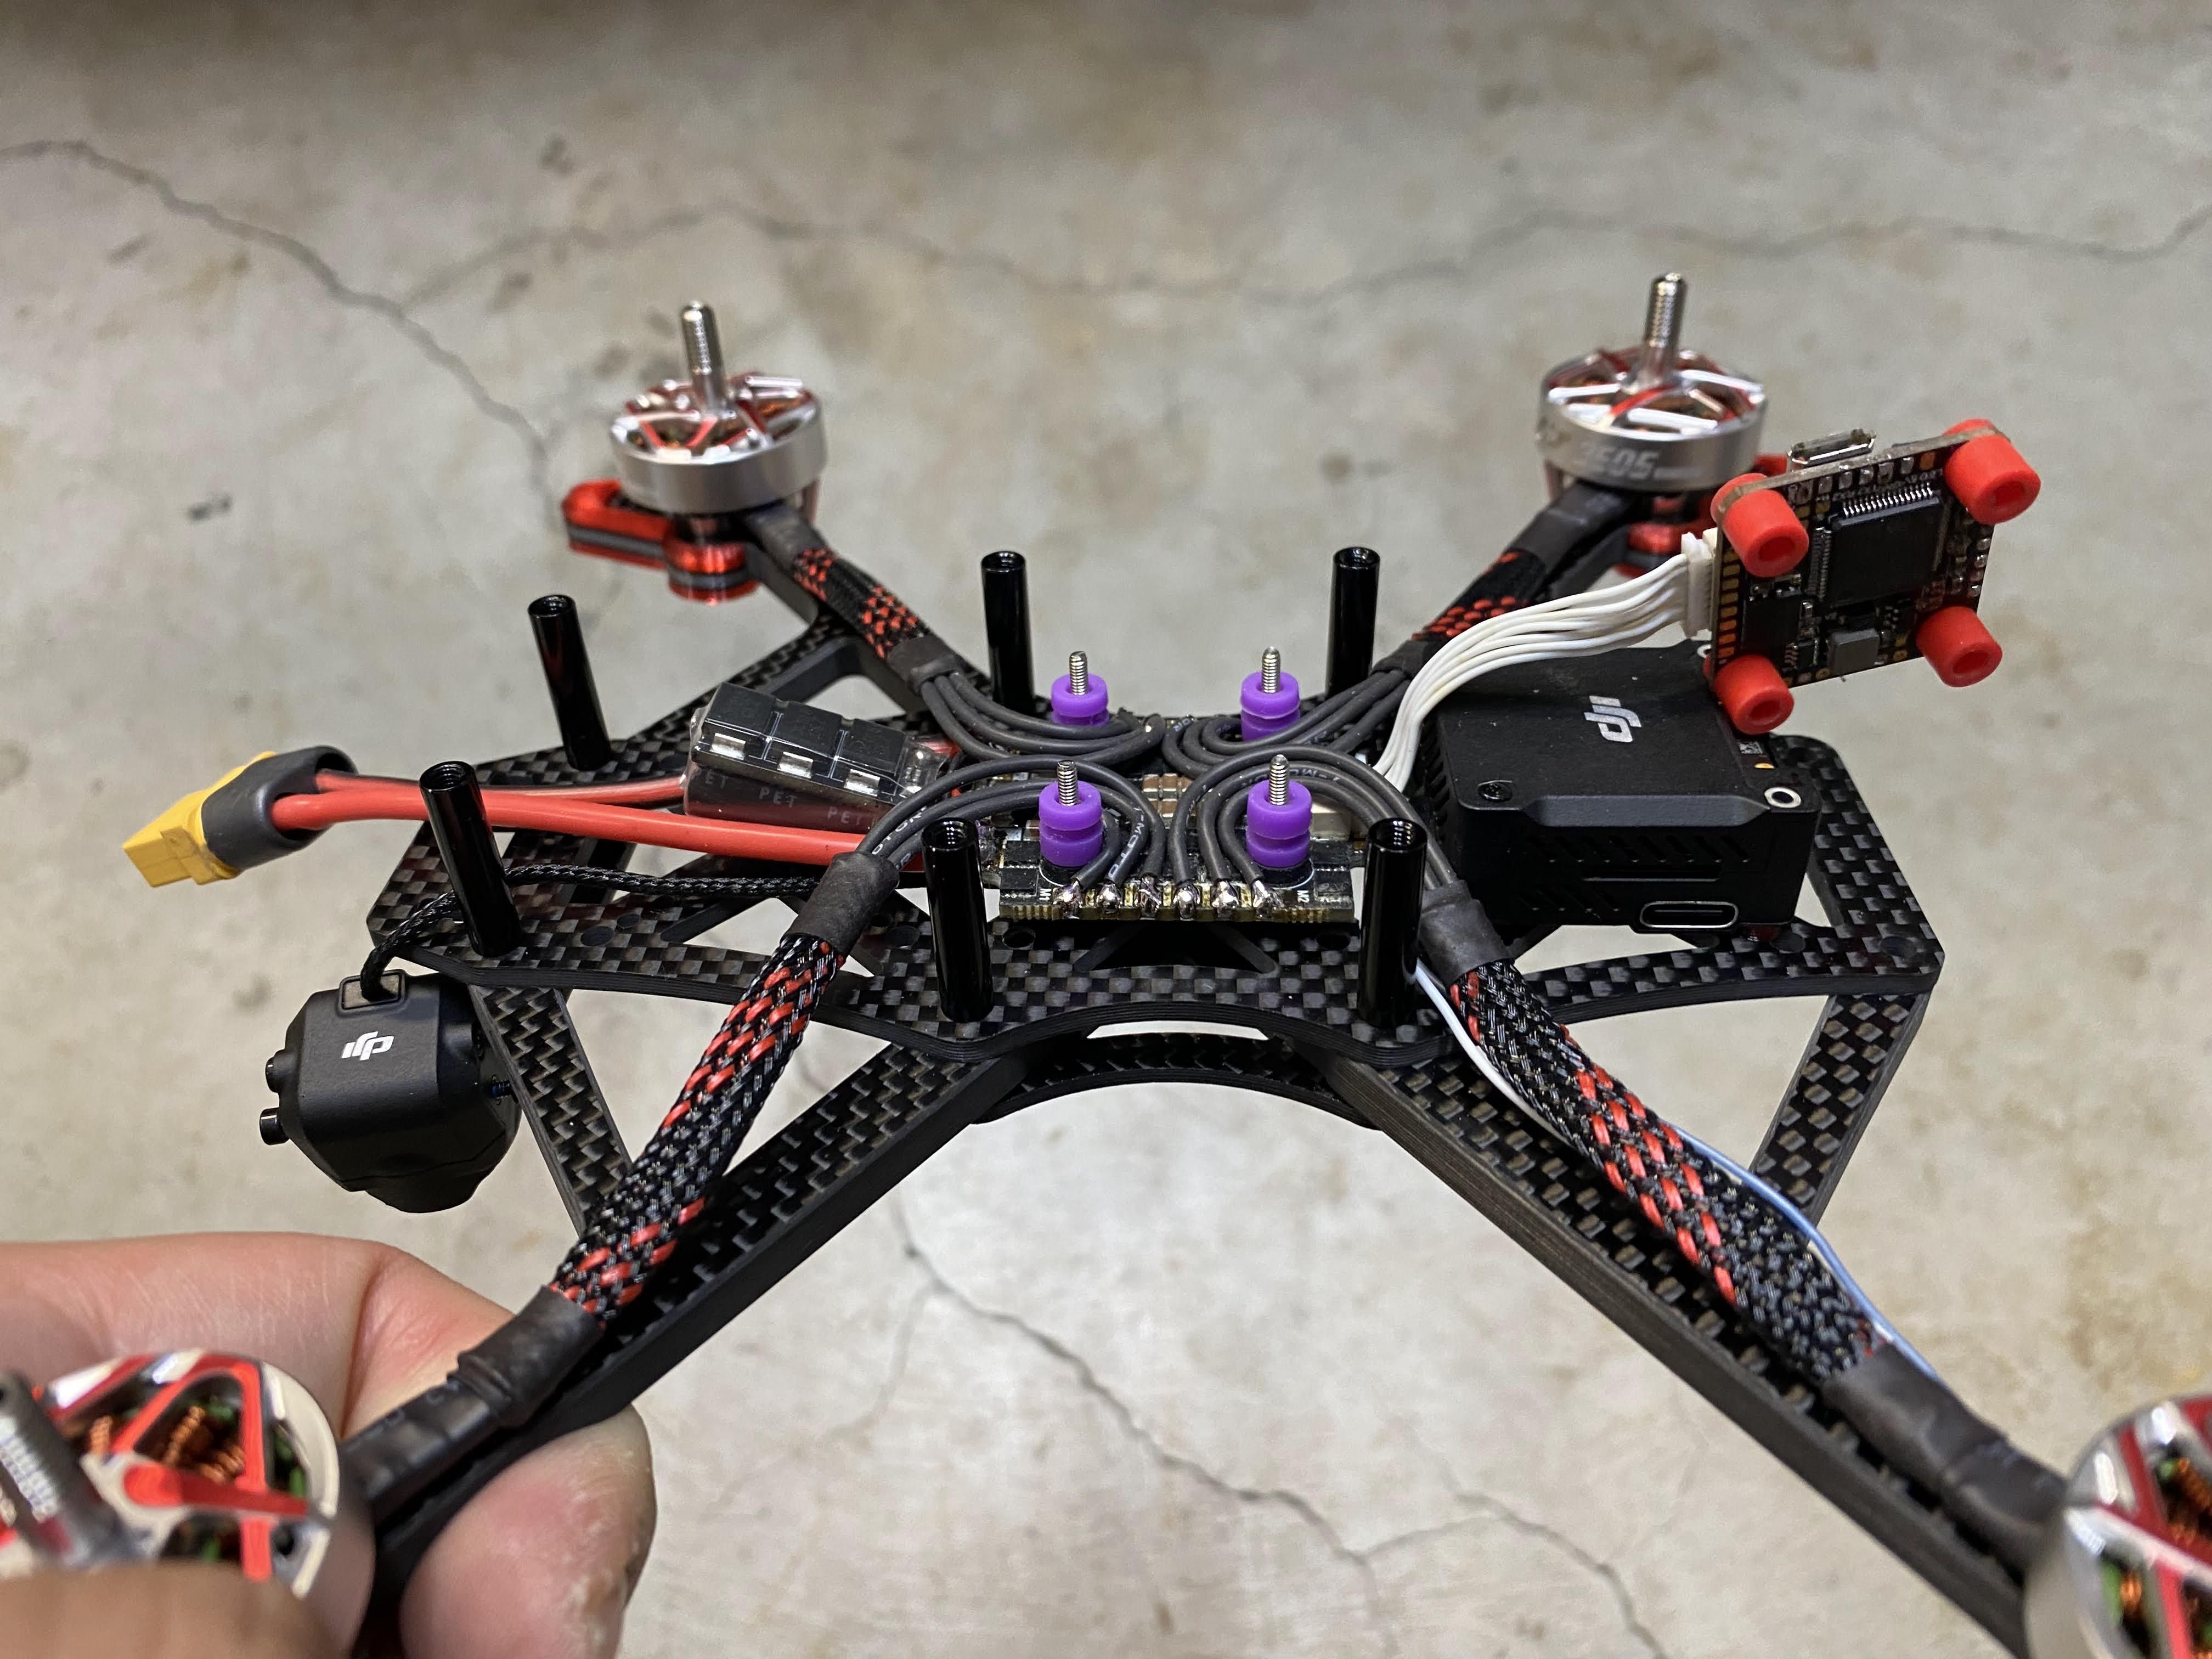
I was debating on the best position for the flight stack, and I ended up going with the middle because how the power wire ran perfectly through the top of the frame. But I had to rotate the ESC 180 degrees, so it is pointing to the front of the quad. The purple gummy you see in the picture are just place holder for the motor wires. After I solder on the wires I need to make sure it goes around the gummies on the flight controller and not under.
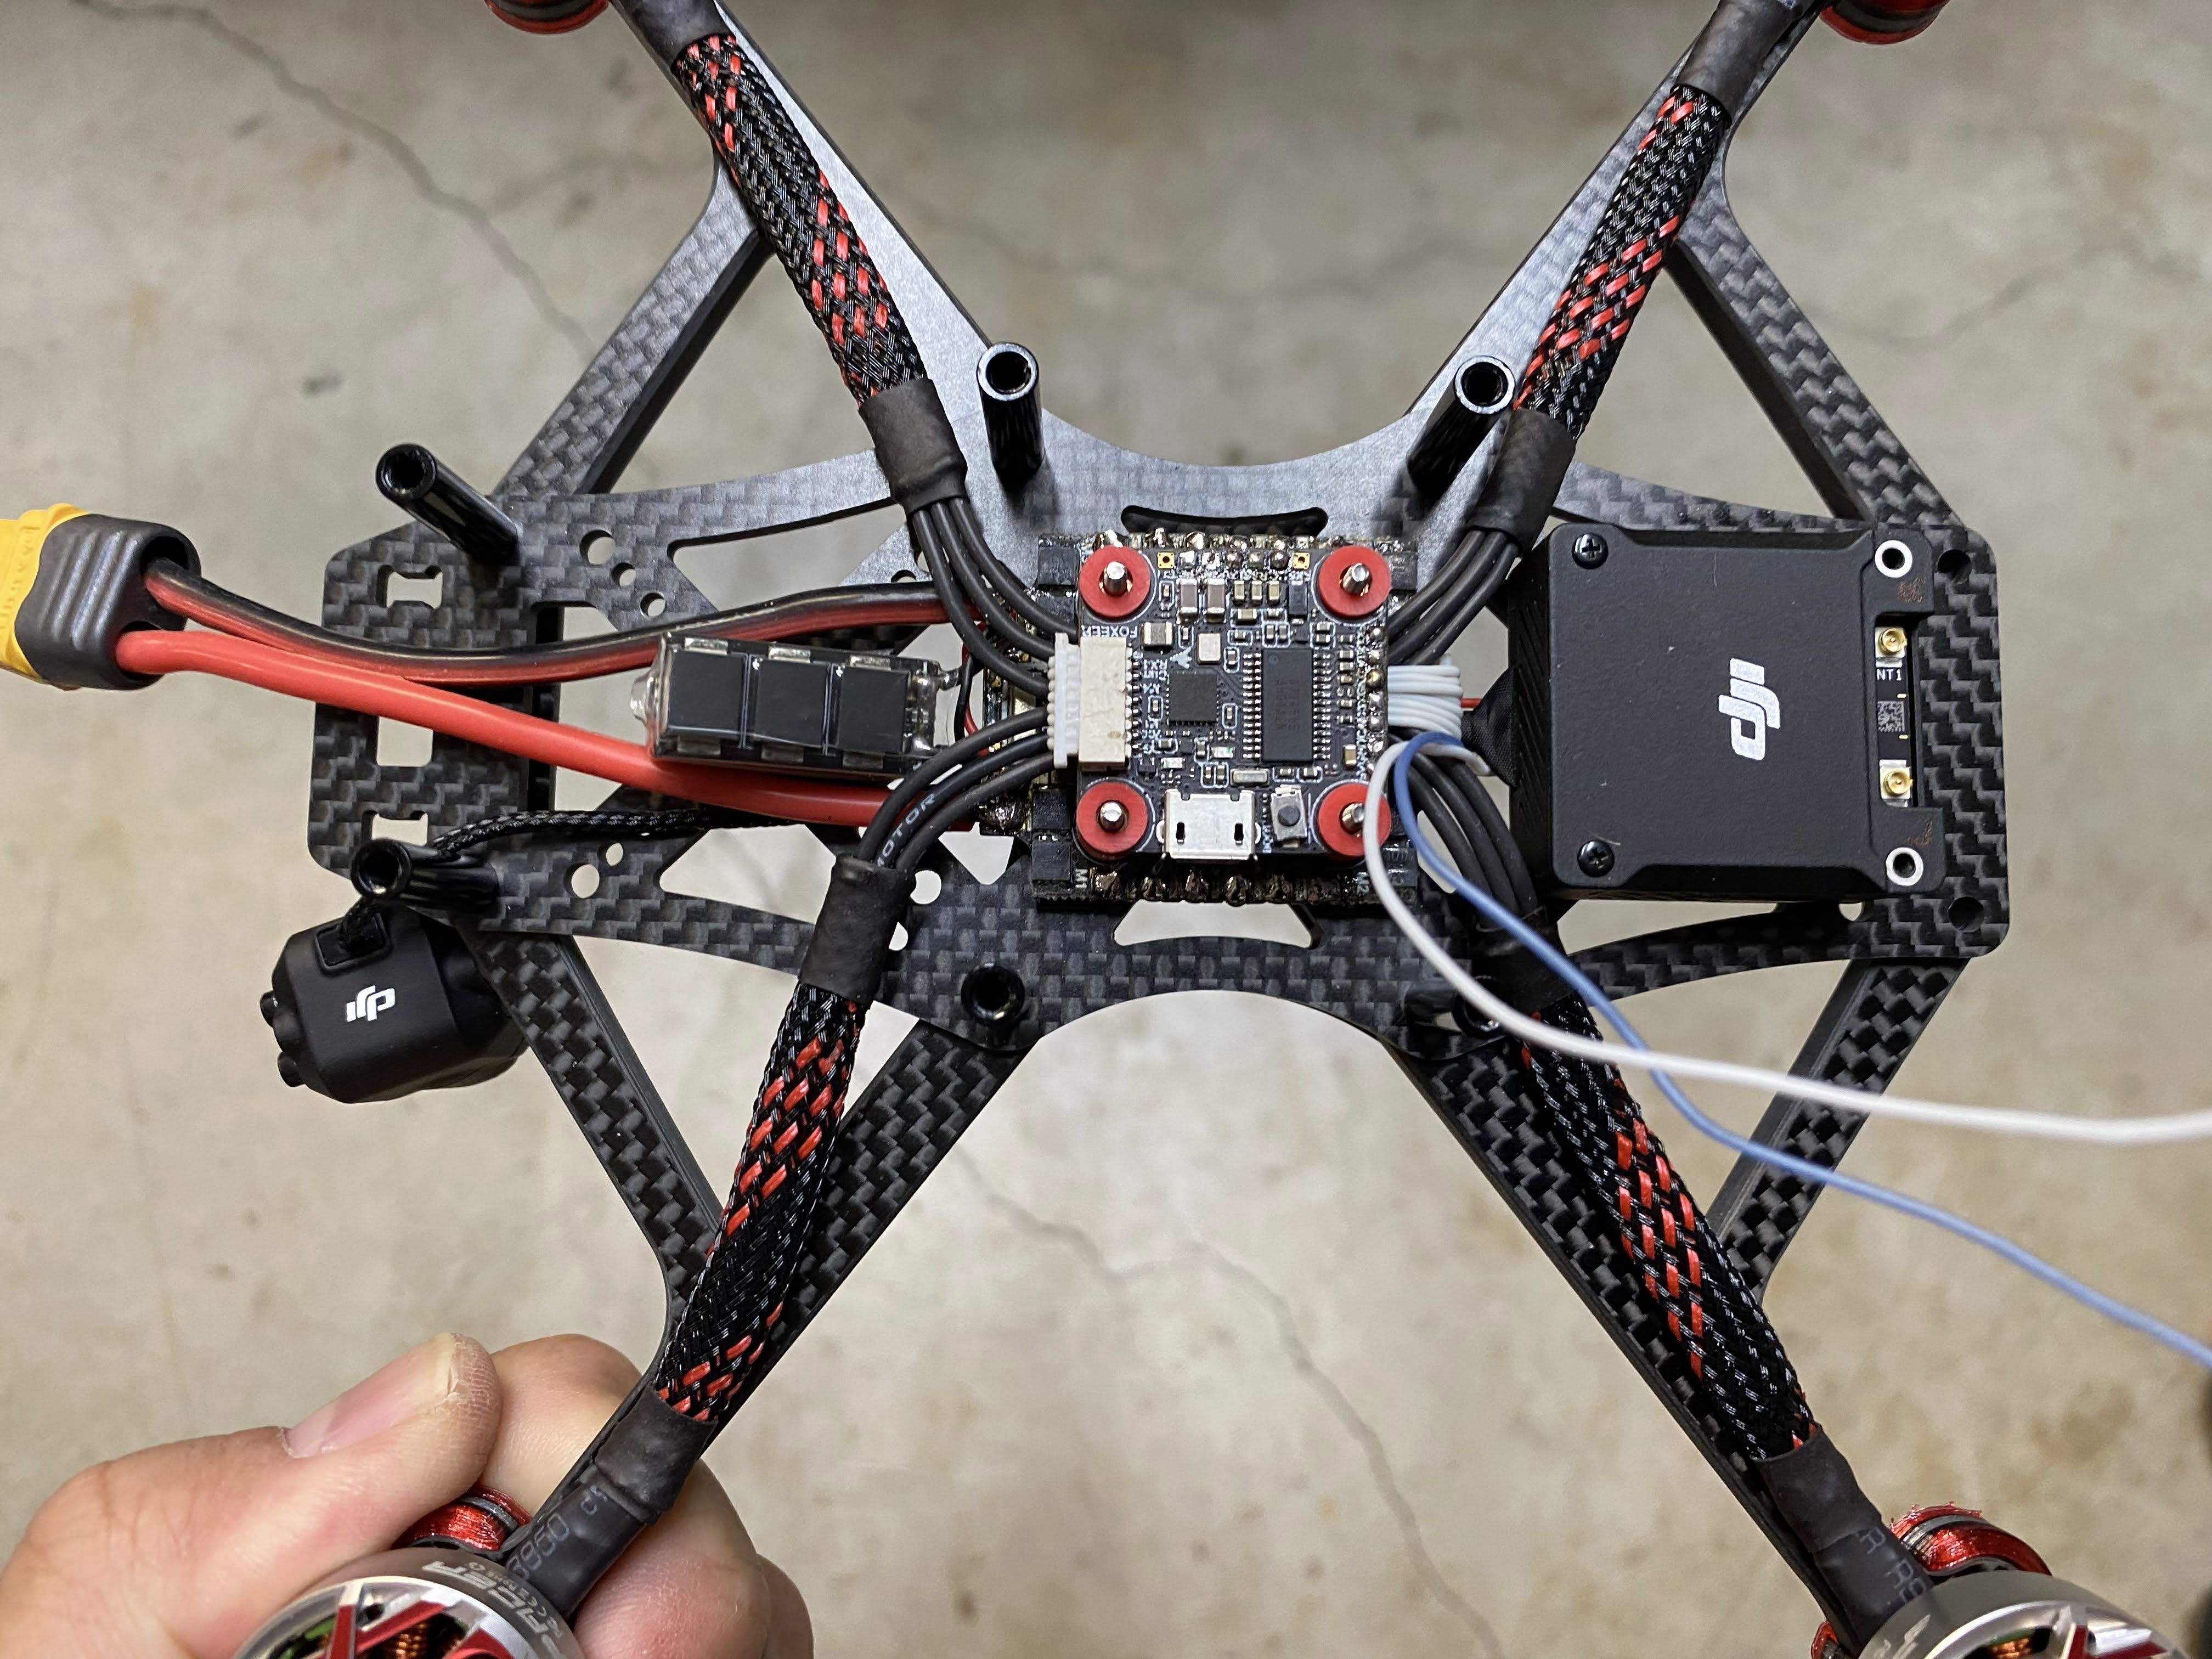
To top off the FC M2 mounting screw (Not Shown in the picture), I will use a washer and metal locknut to make sure the rubber gummy does not pull threw the tiny M2 nut. This was a used stack that I bought on Facbook and it came with spike absorber and capacitor as shown in the picture.
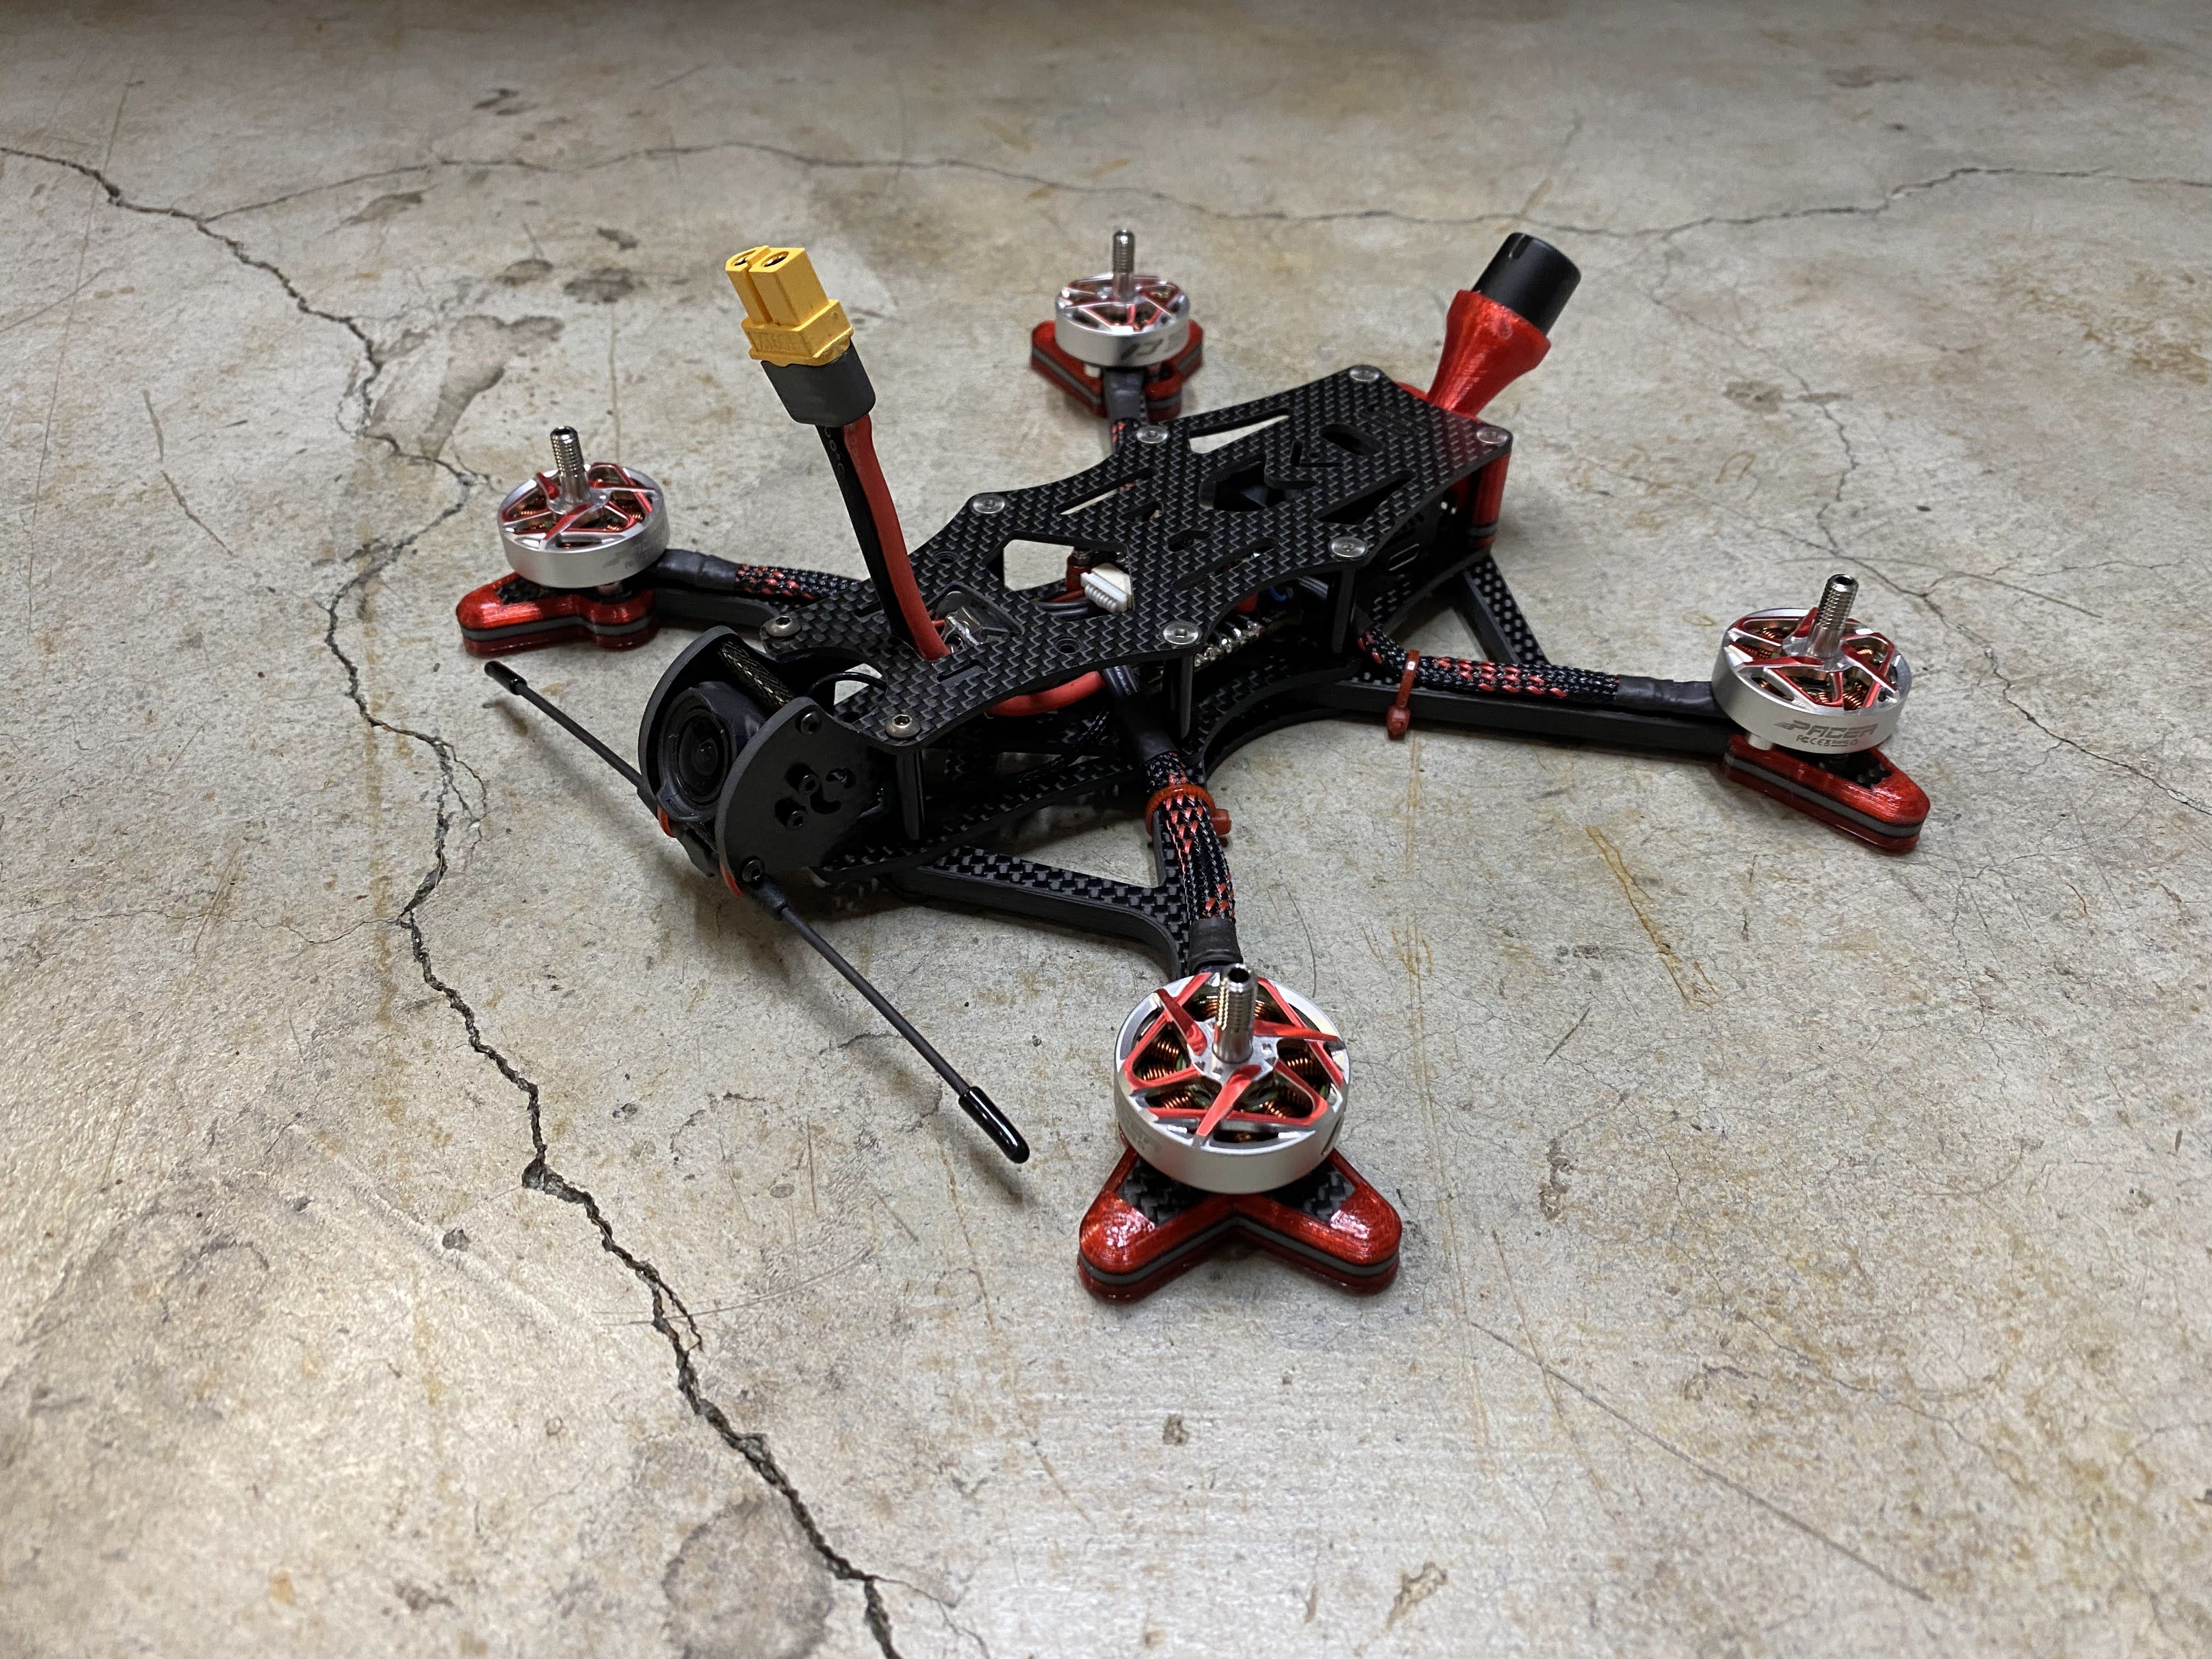
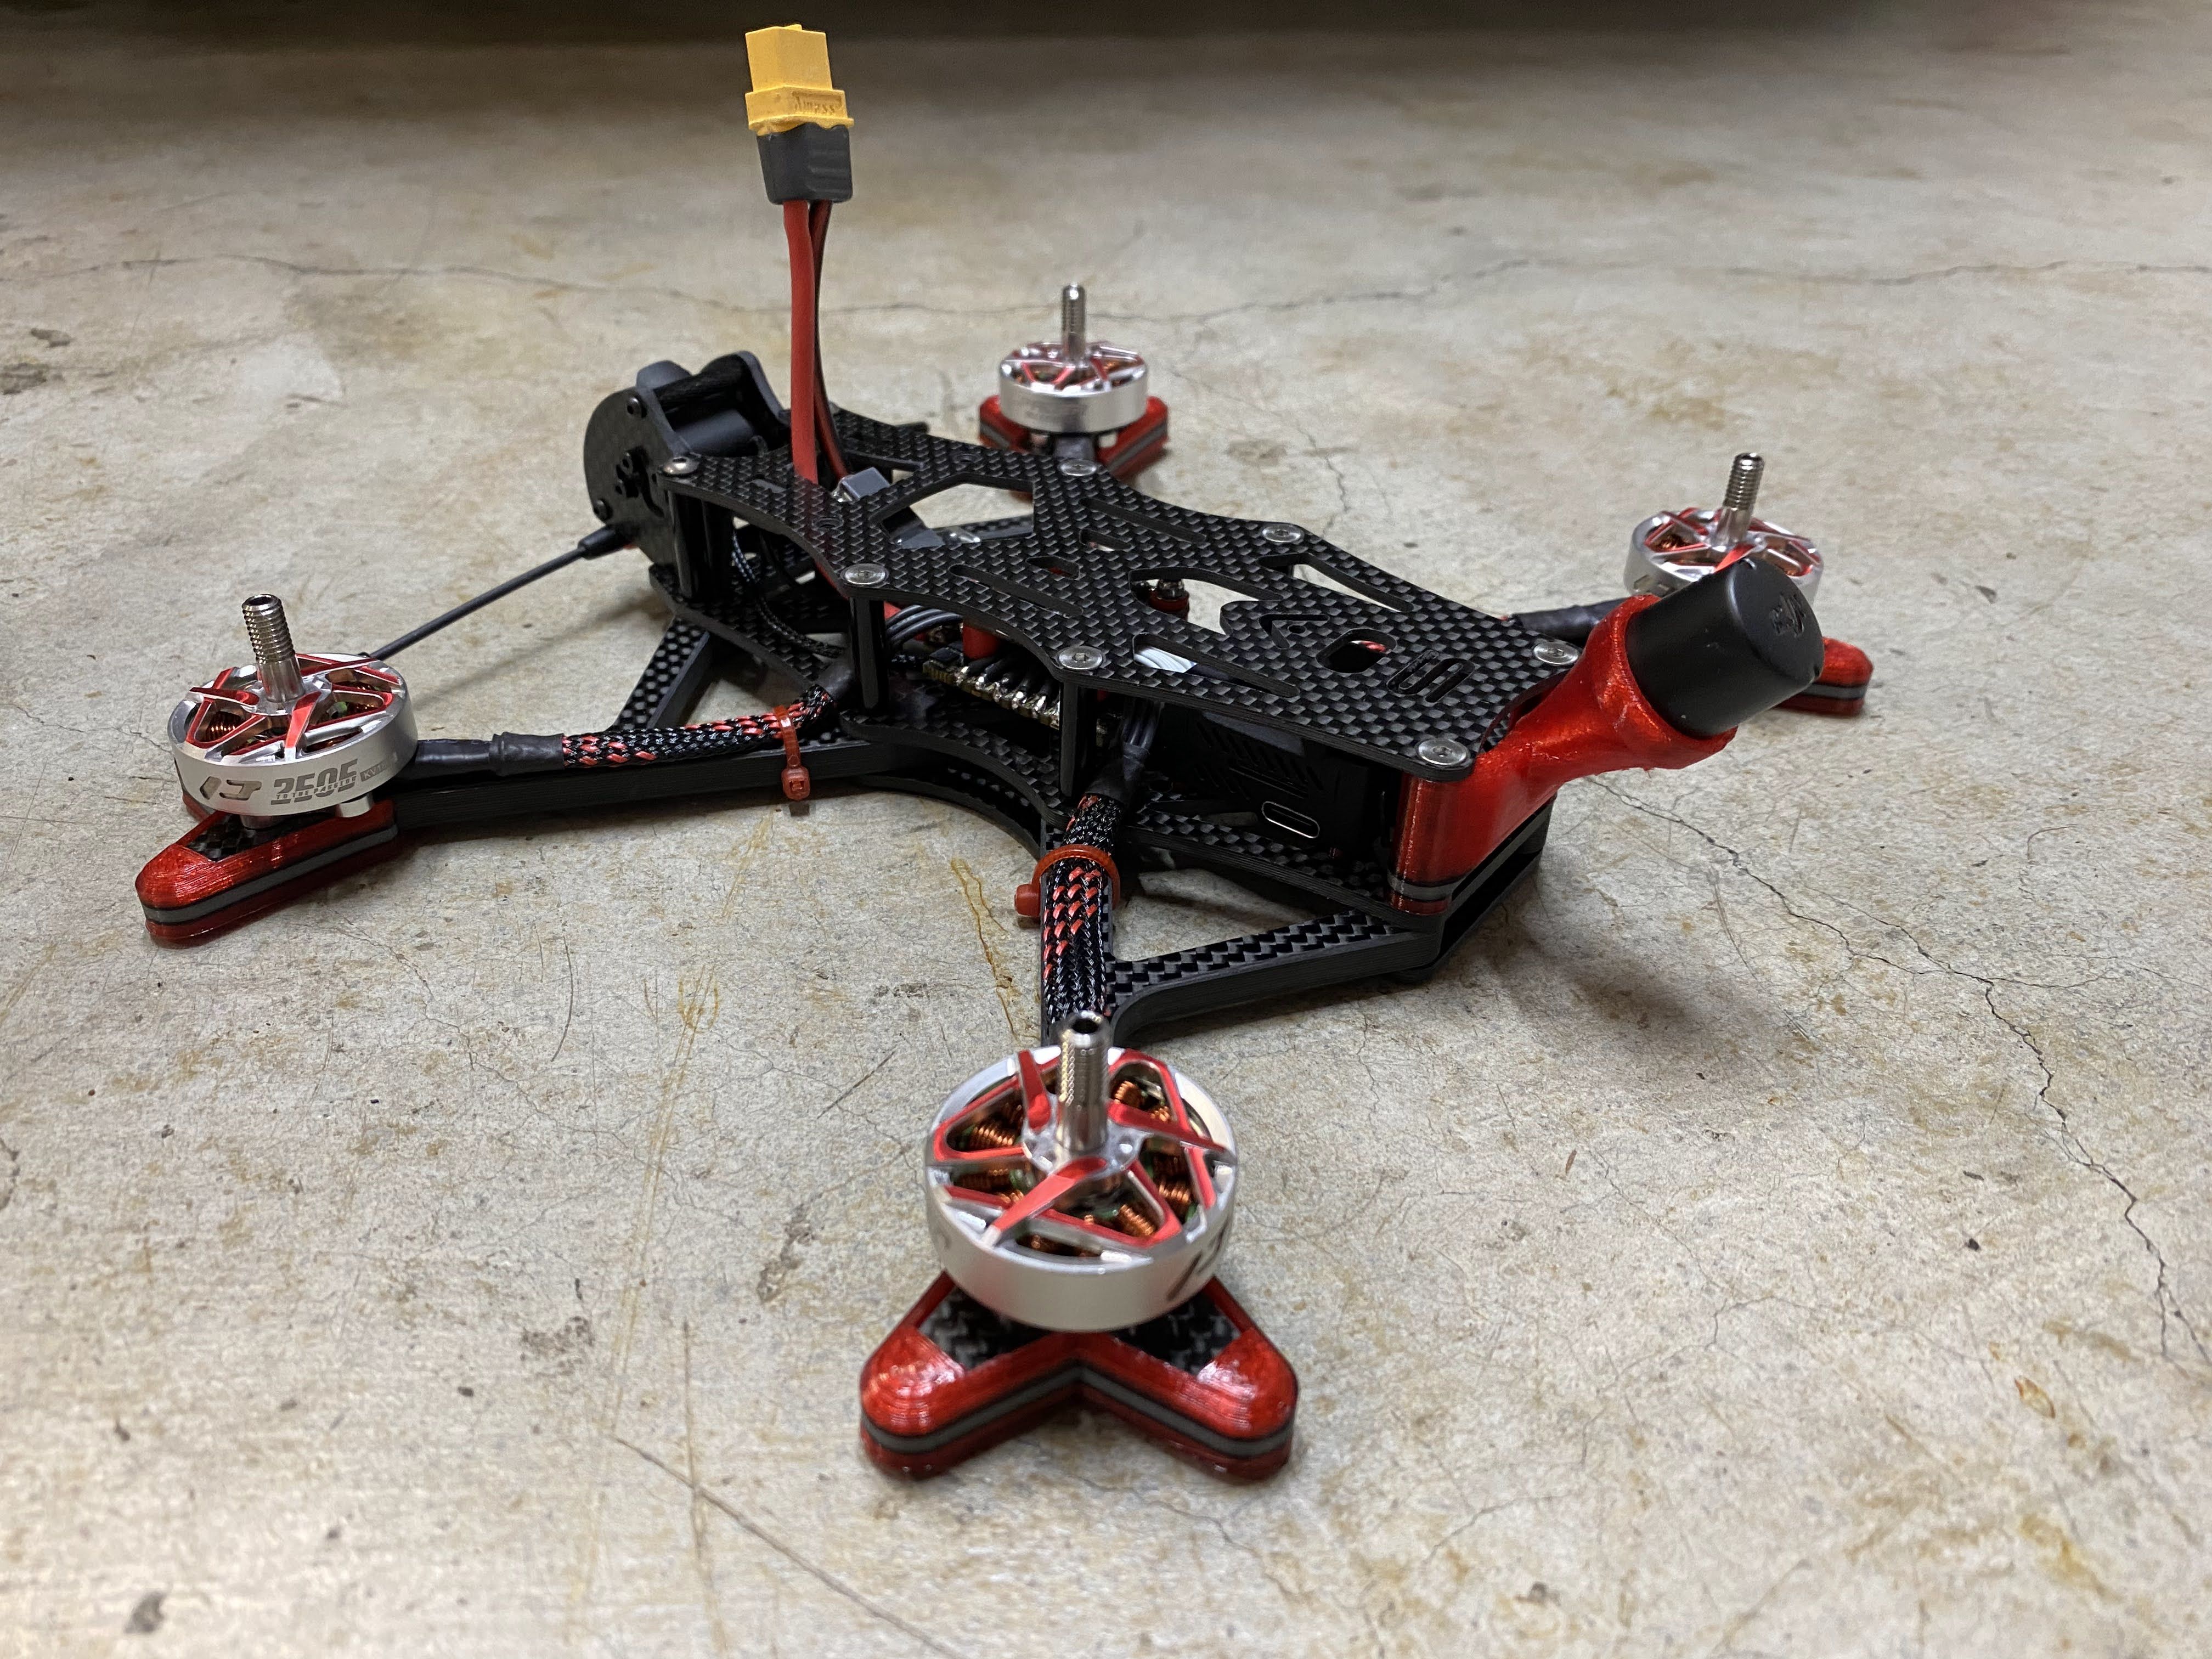
I ran the power cable through the front of the top plate, but before doing so I filed the edges of the carbon fiber, so I do not risk cutting the wires and causing a short. I you look carefully you can catch a very big mistake. Instead of making power cable from scratch, I dug in my pile of premade (New and Used) connectors and searched for anything with 14awg wires. I found one but did not notice it was a female XT60 connector until after trying to plug it in to test the electronics. It is an easy fix but all my early photos will show this mistake.
Maiden Flight - Issues
During the maiden flight the quad seems to fly well, you should have seen the smile on my face because it felt good. But when I reviewed the video footage, it showed something totally different. At first, I thought it was the DJI O3 air unit that was defective because DVR footage looked fine, but the Air Unit HD recording with Rocksteady enabled told a different story. Unfortunately, it was getting too late to do anymore test flights and I am not very patient. Instead of making one change at a time to figure out the problem, I made a bunch of changes all at once. Here is what I have done:
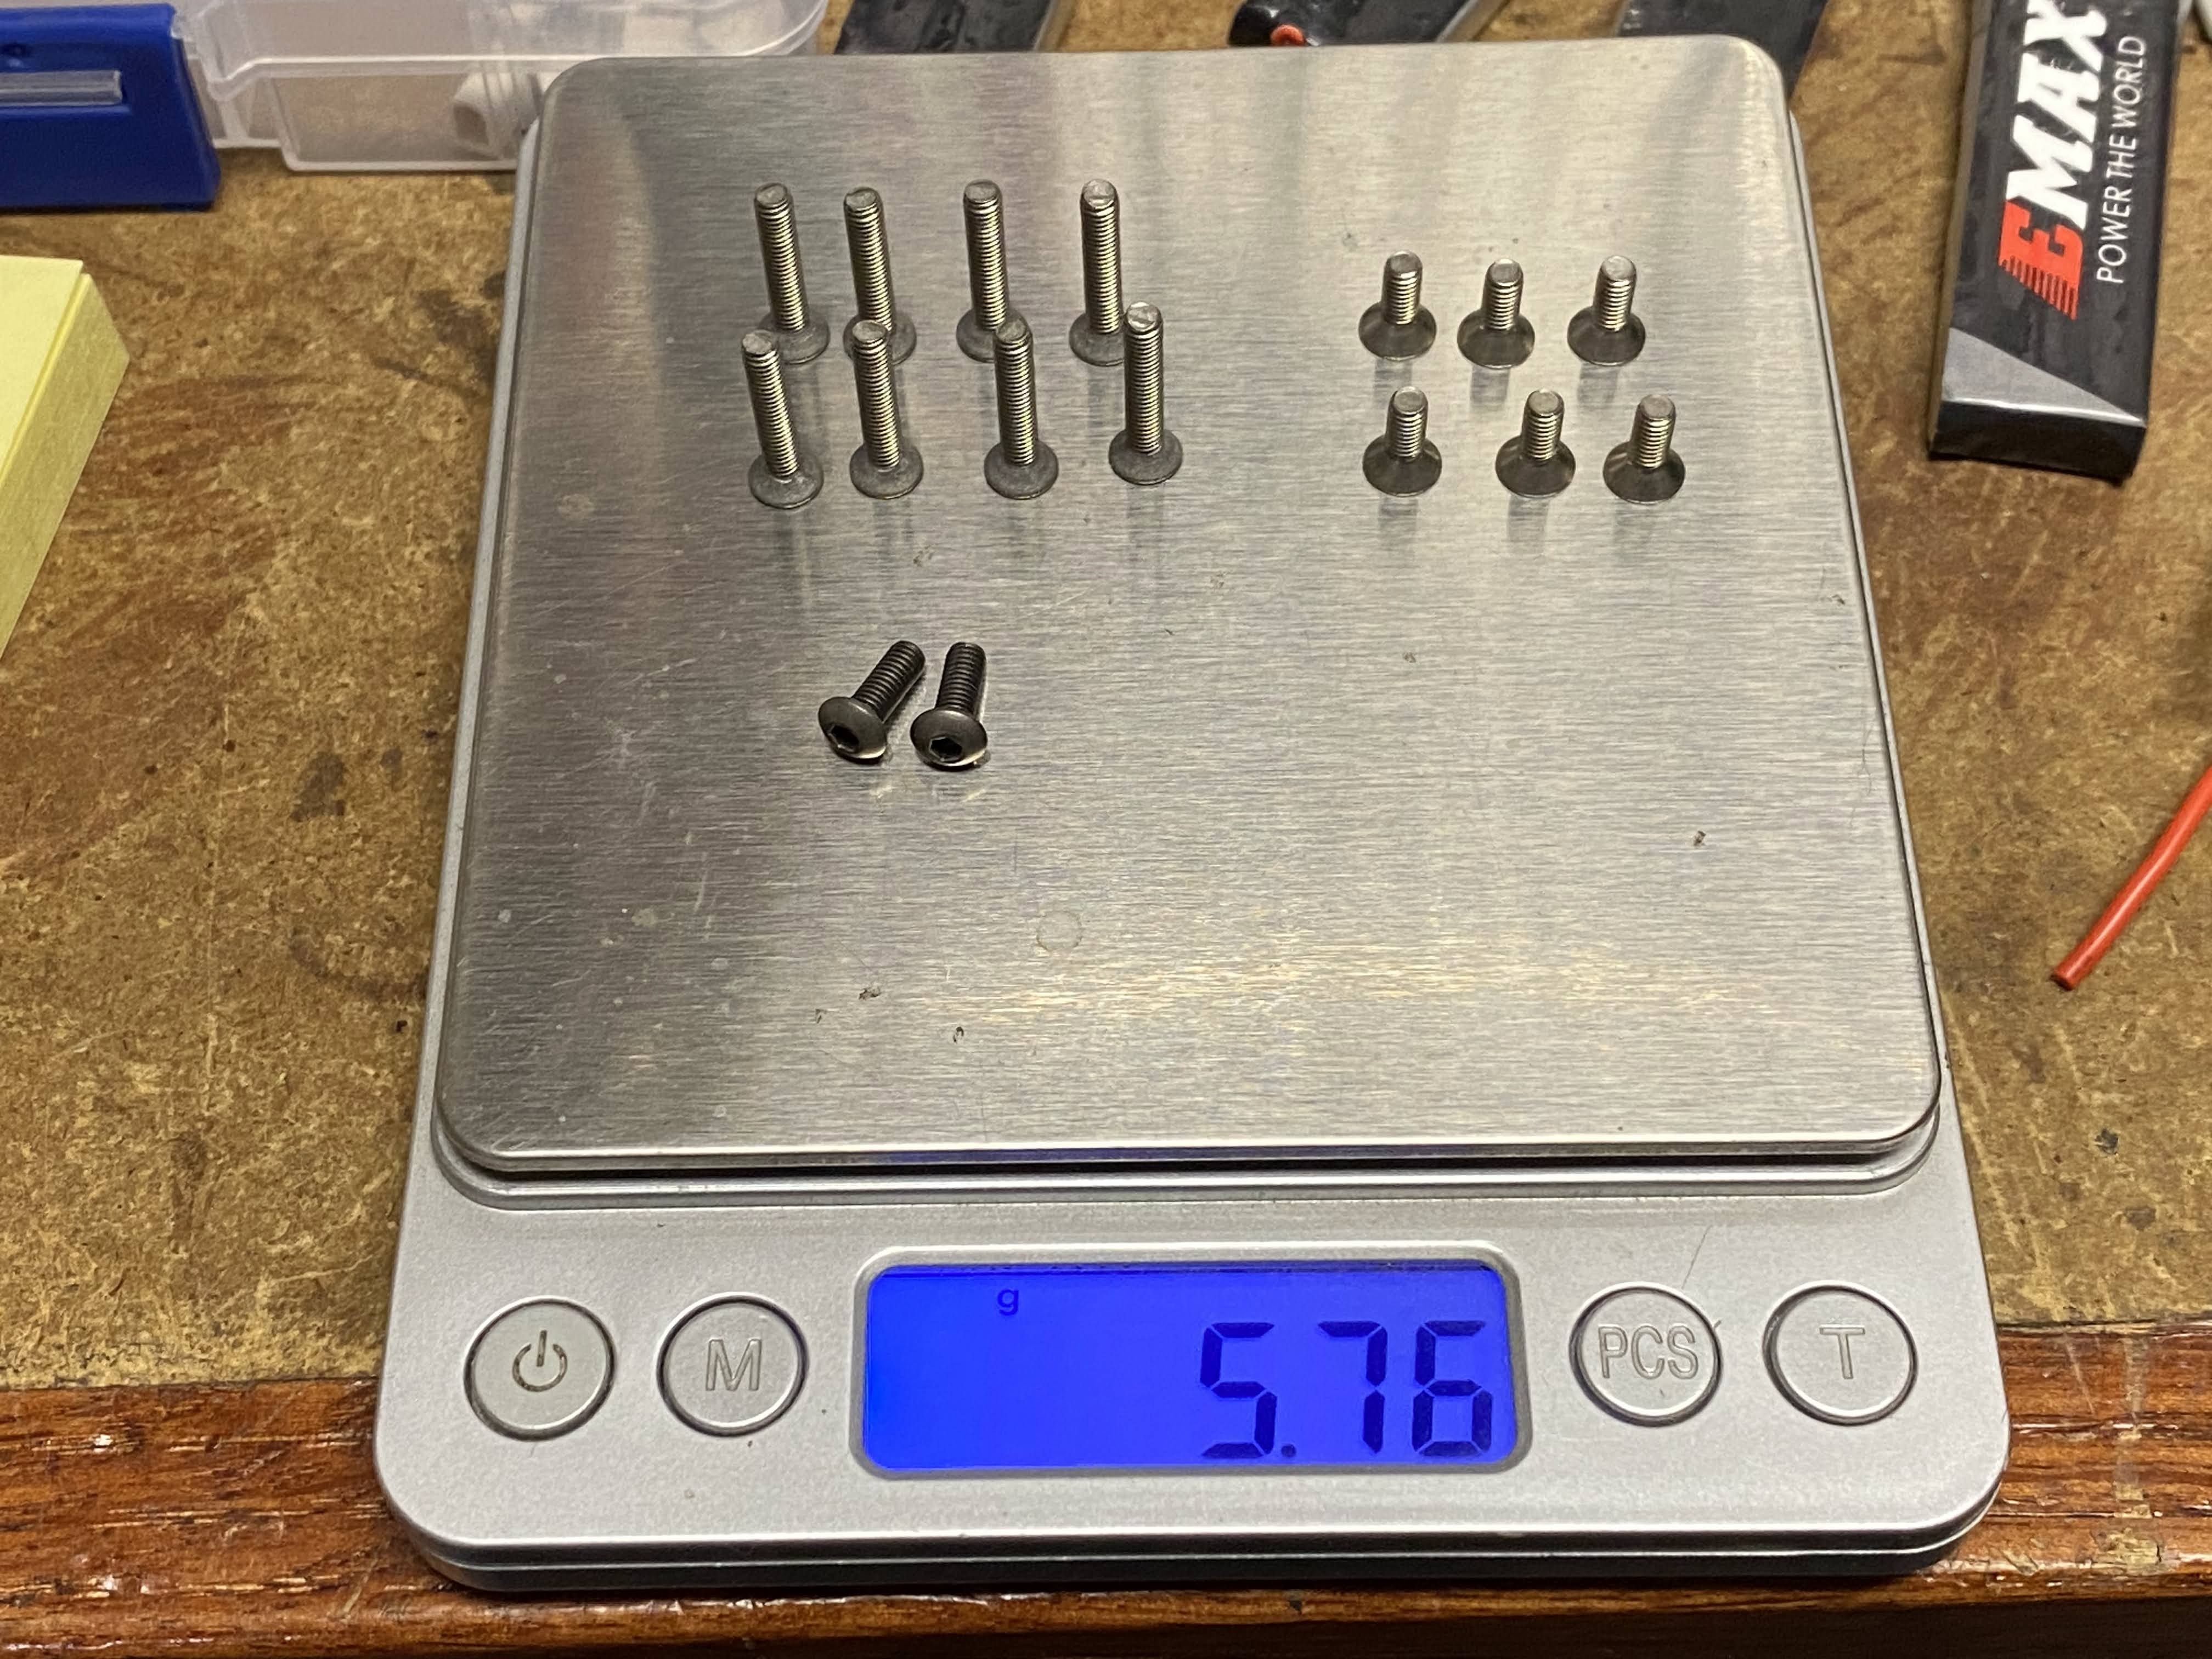
Switched back to the original steel screws, so no more titanium hardware. The reason why I switched back is because you can torque down the steel screws whereas the titanium will mostly like strip. The Ti screws I bought are alloy Ti, so it is softer but very light, about half the weight of steel. With this swap, I end up gaining about 10 grams back on the build.
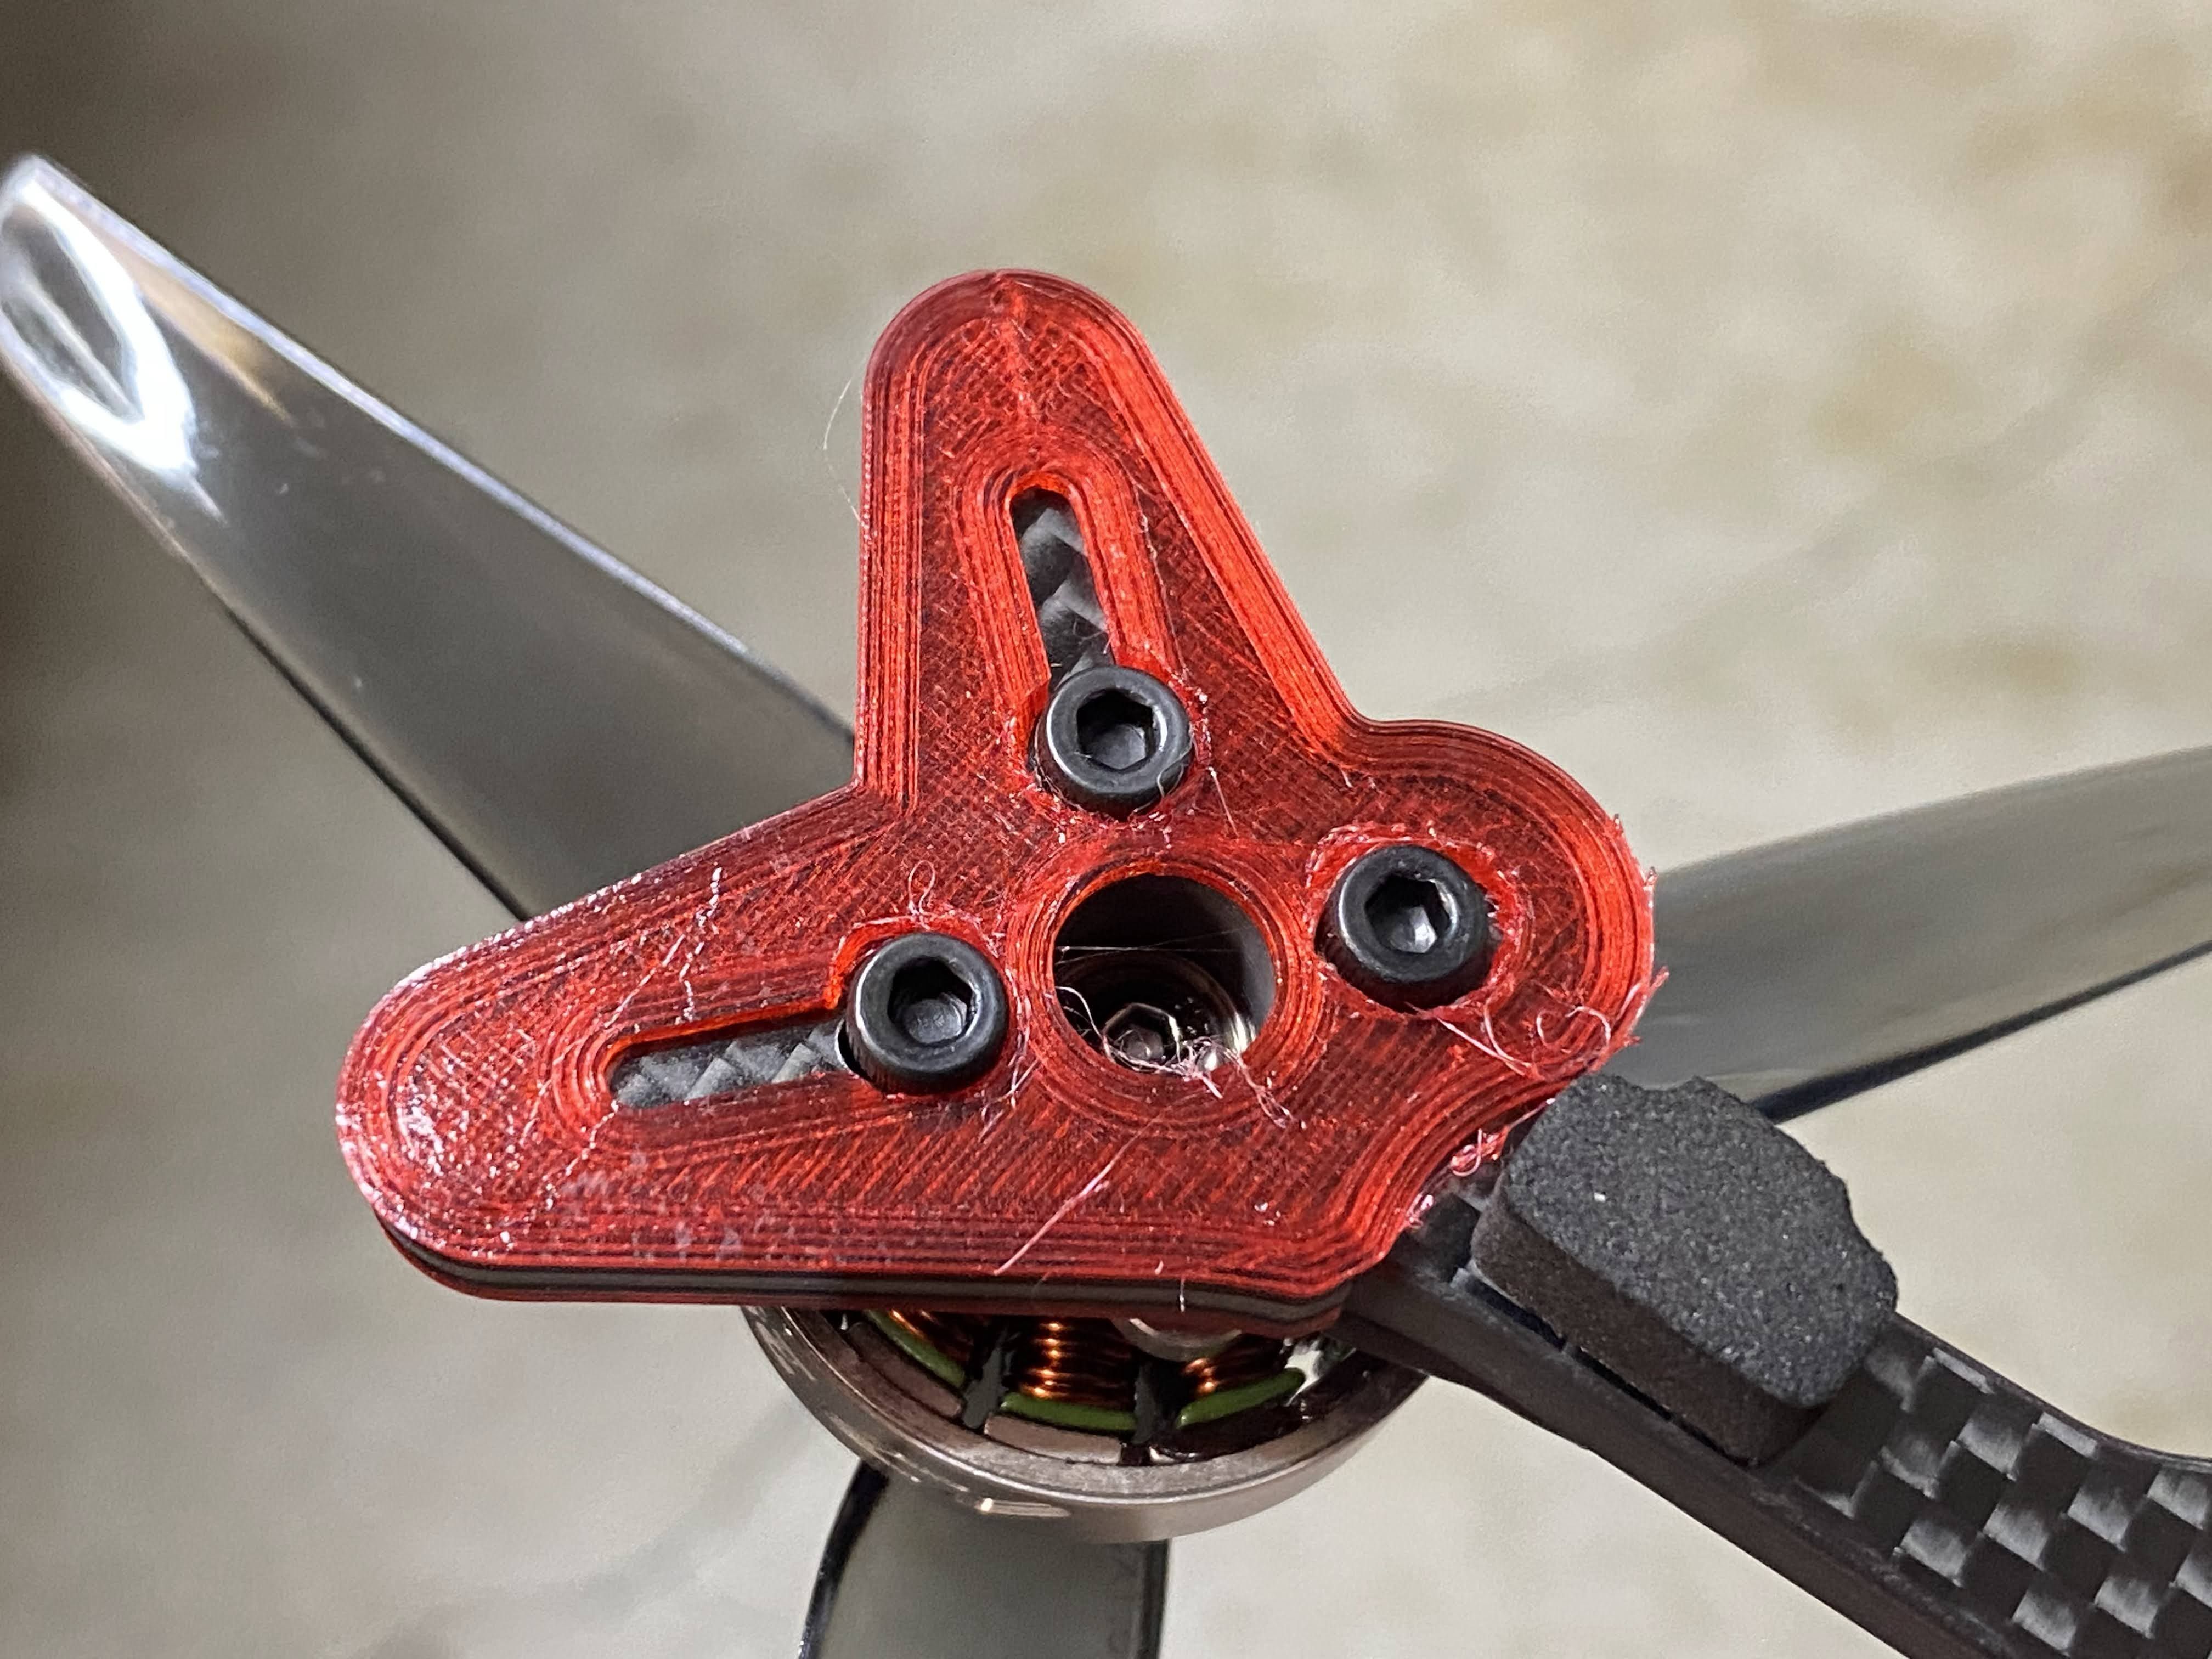
Next up is the TPU arm guards. The original design has the screws sandwiching the TPU against the arms so the motors may not be very snug against the arms. Plus, I was using Ti screws, so I did not use any Loctite because you will most likely round out the head when you try to remove it. I am using MIP Thorp Hex drivers, so it is not the quality of the tools but the cheap Asian Ti screw that I bought. I updated the STL for the arm guards and posted it to Thingiverse, it will include the old and new design.
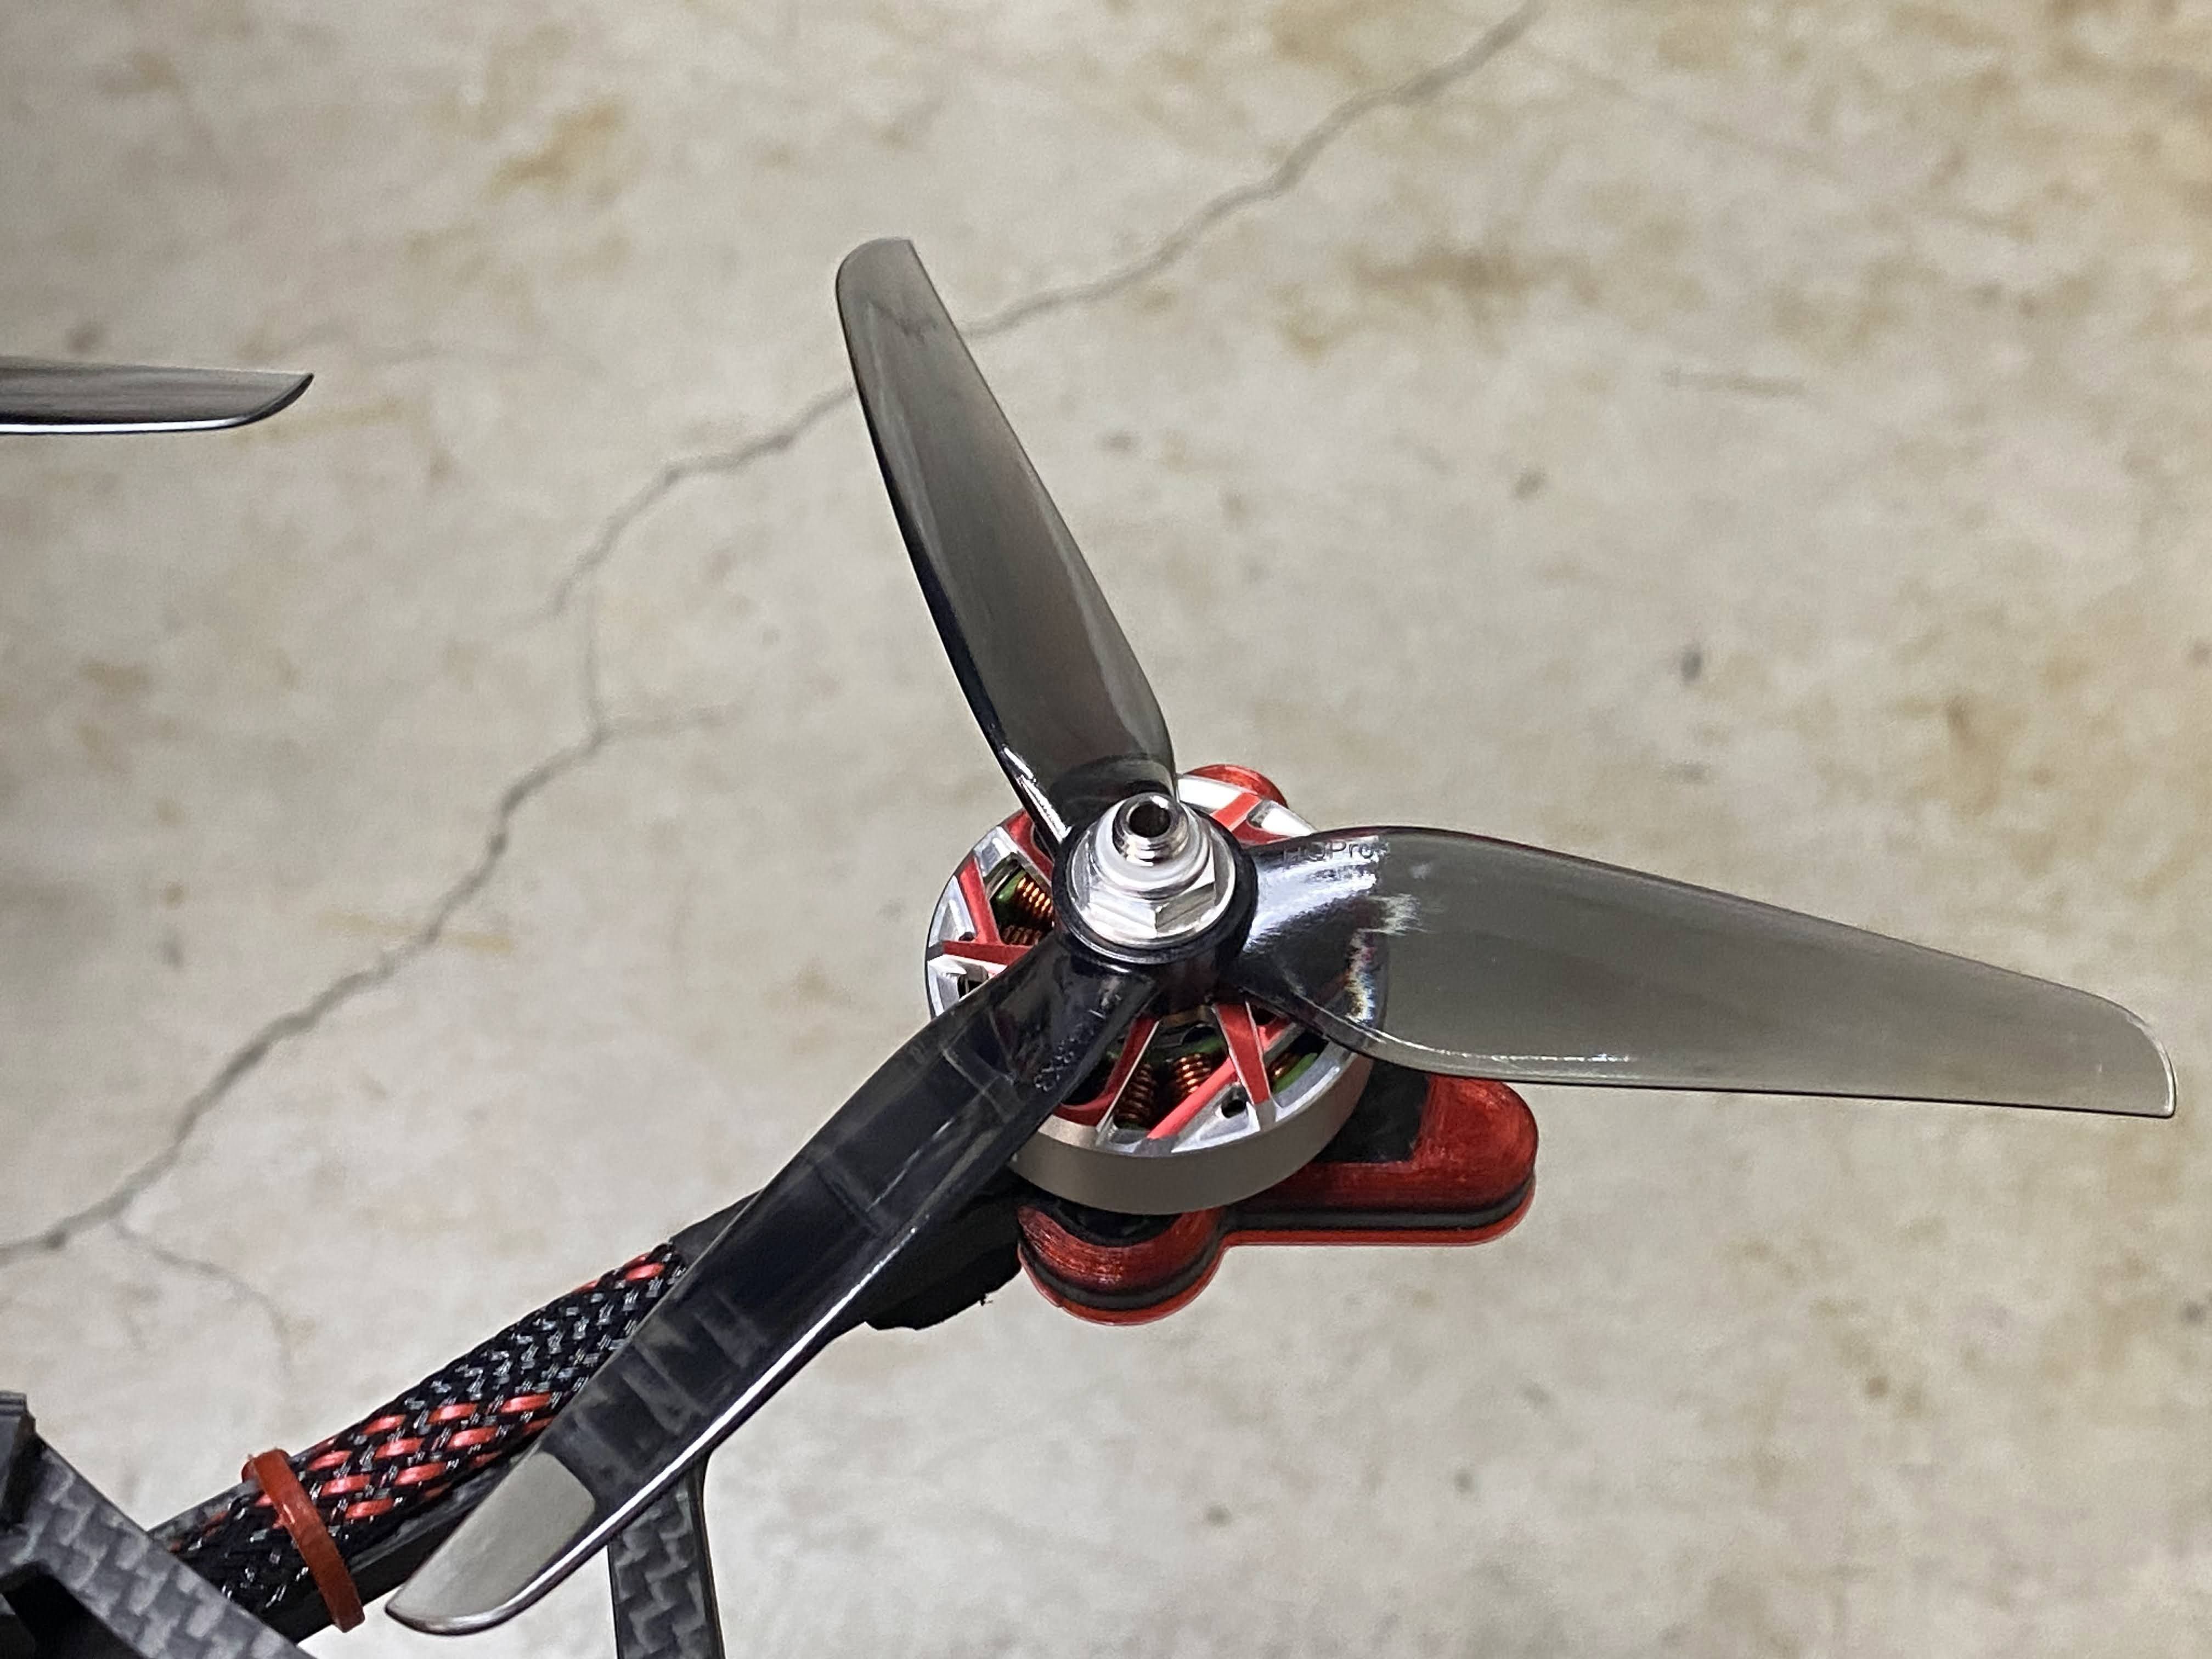
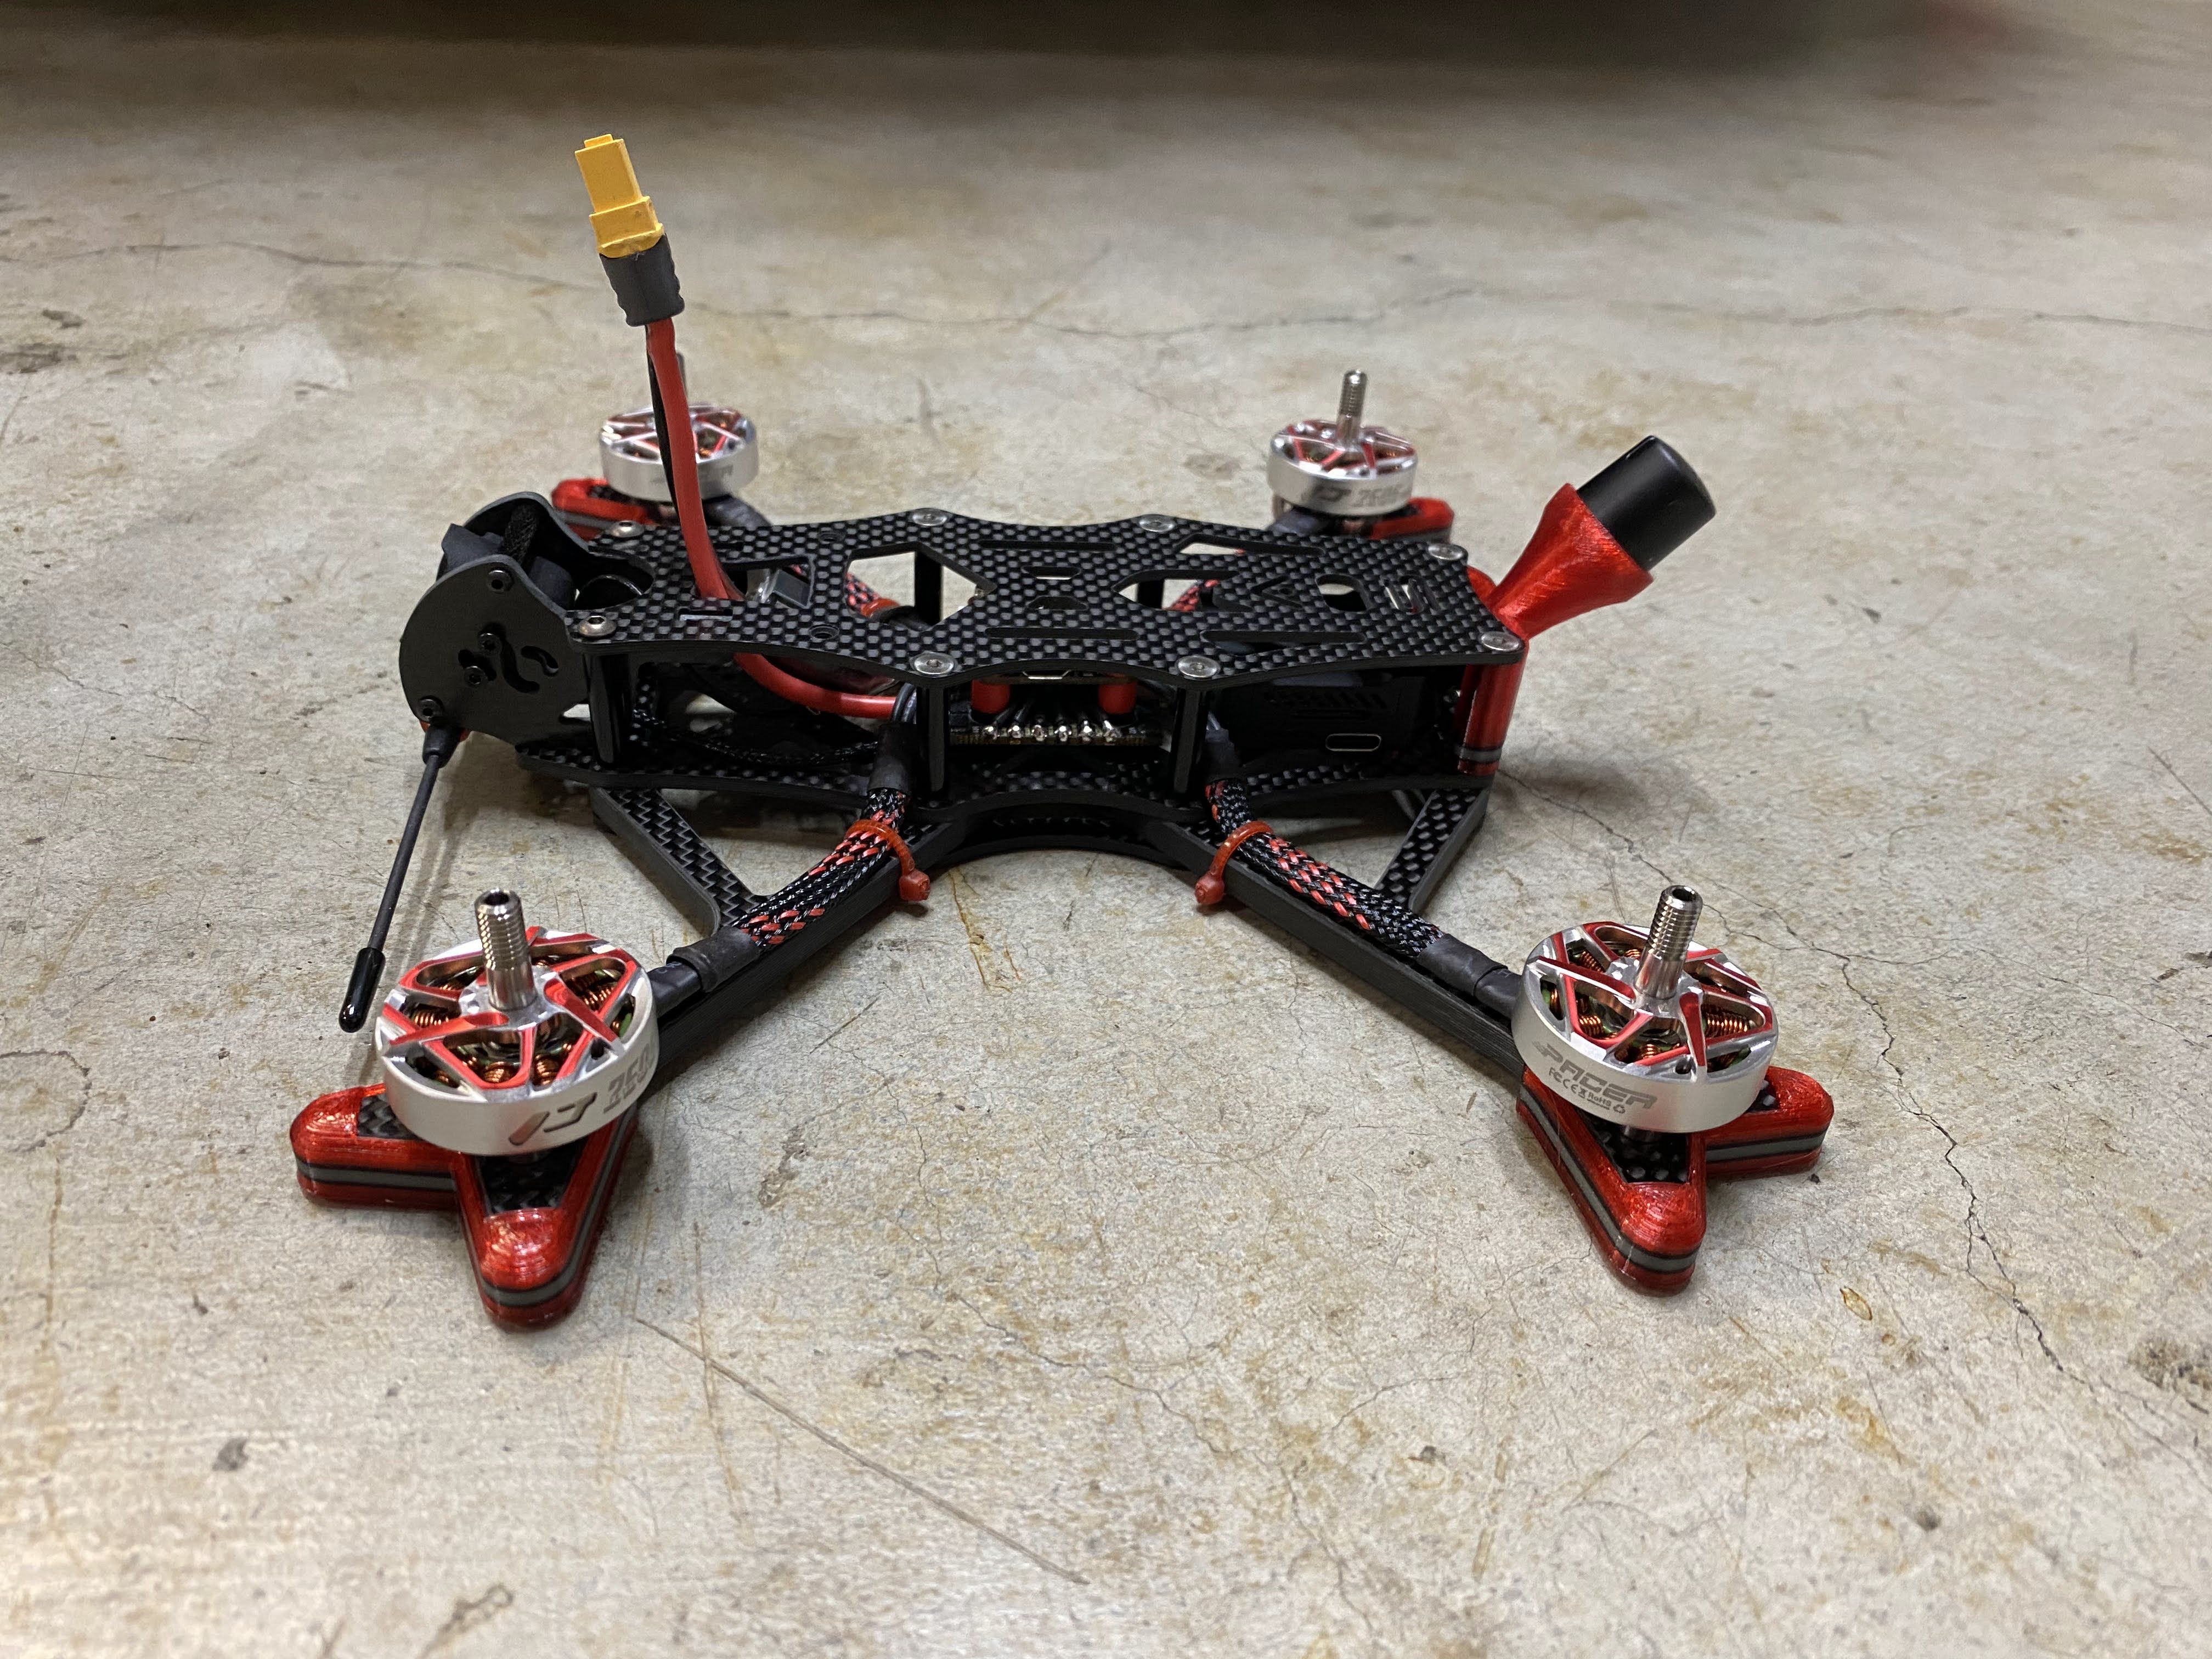
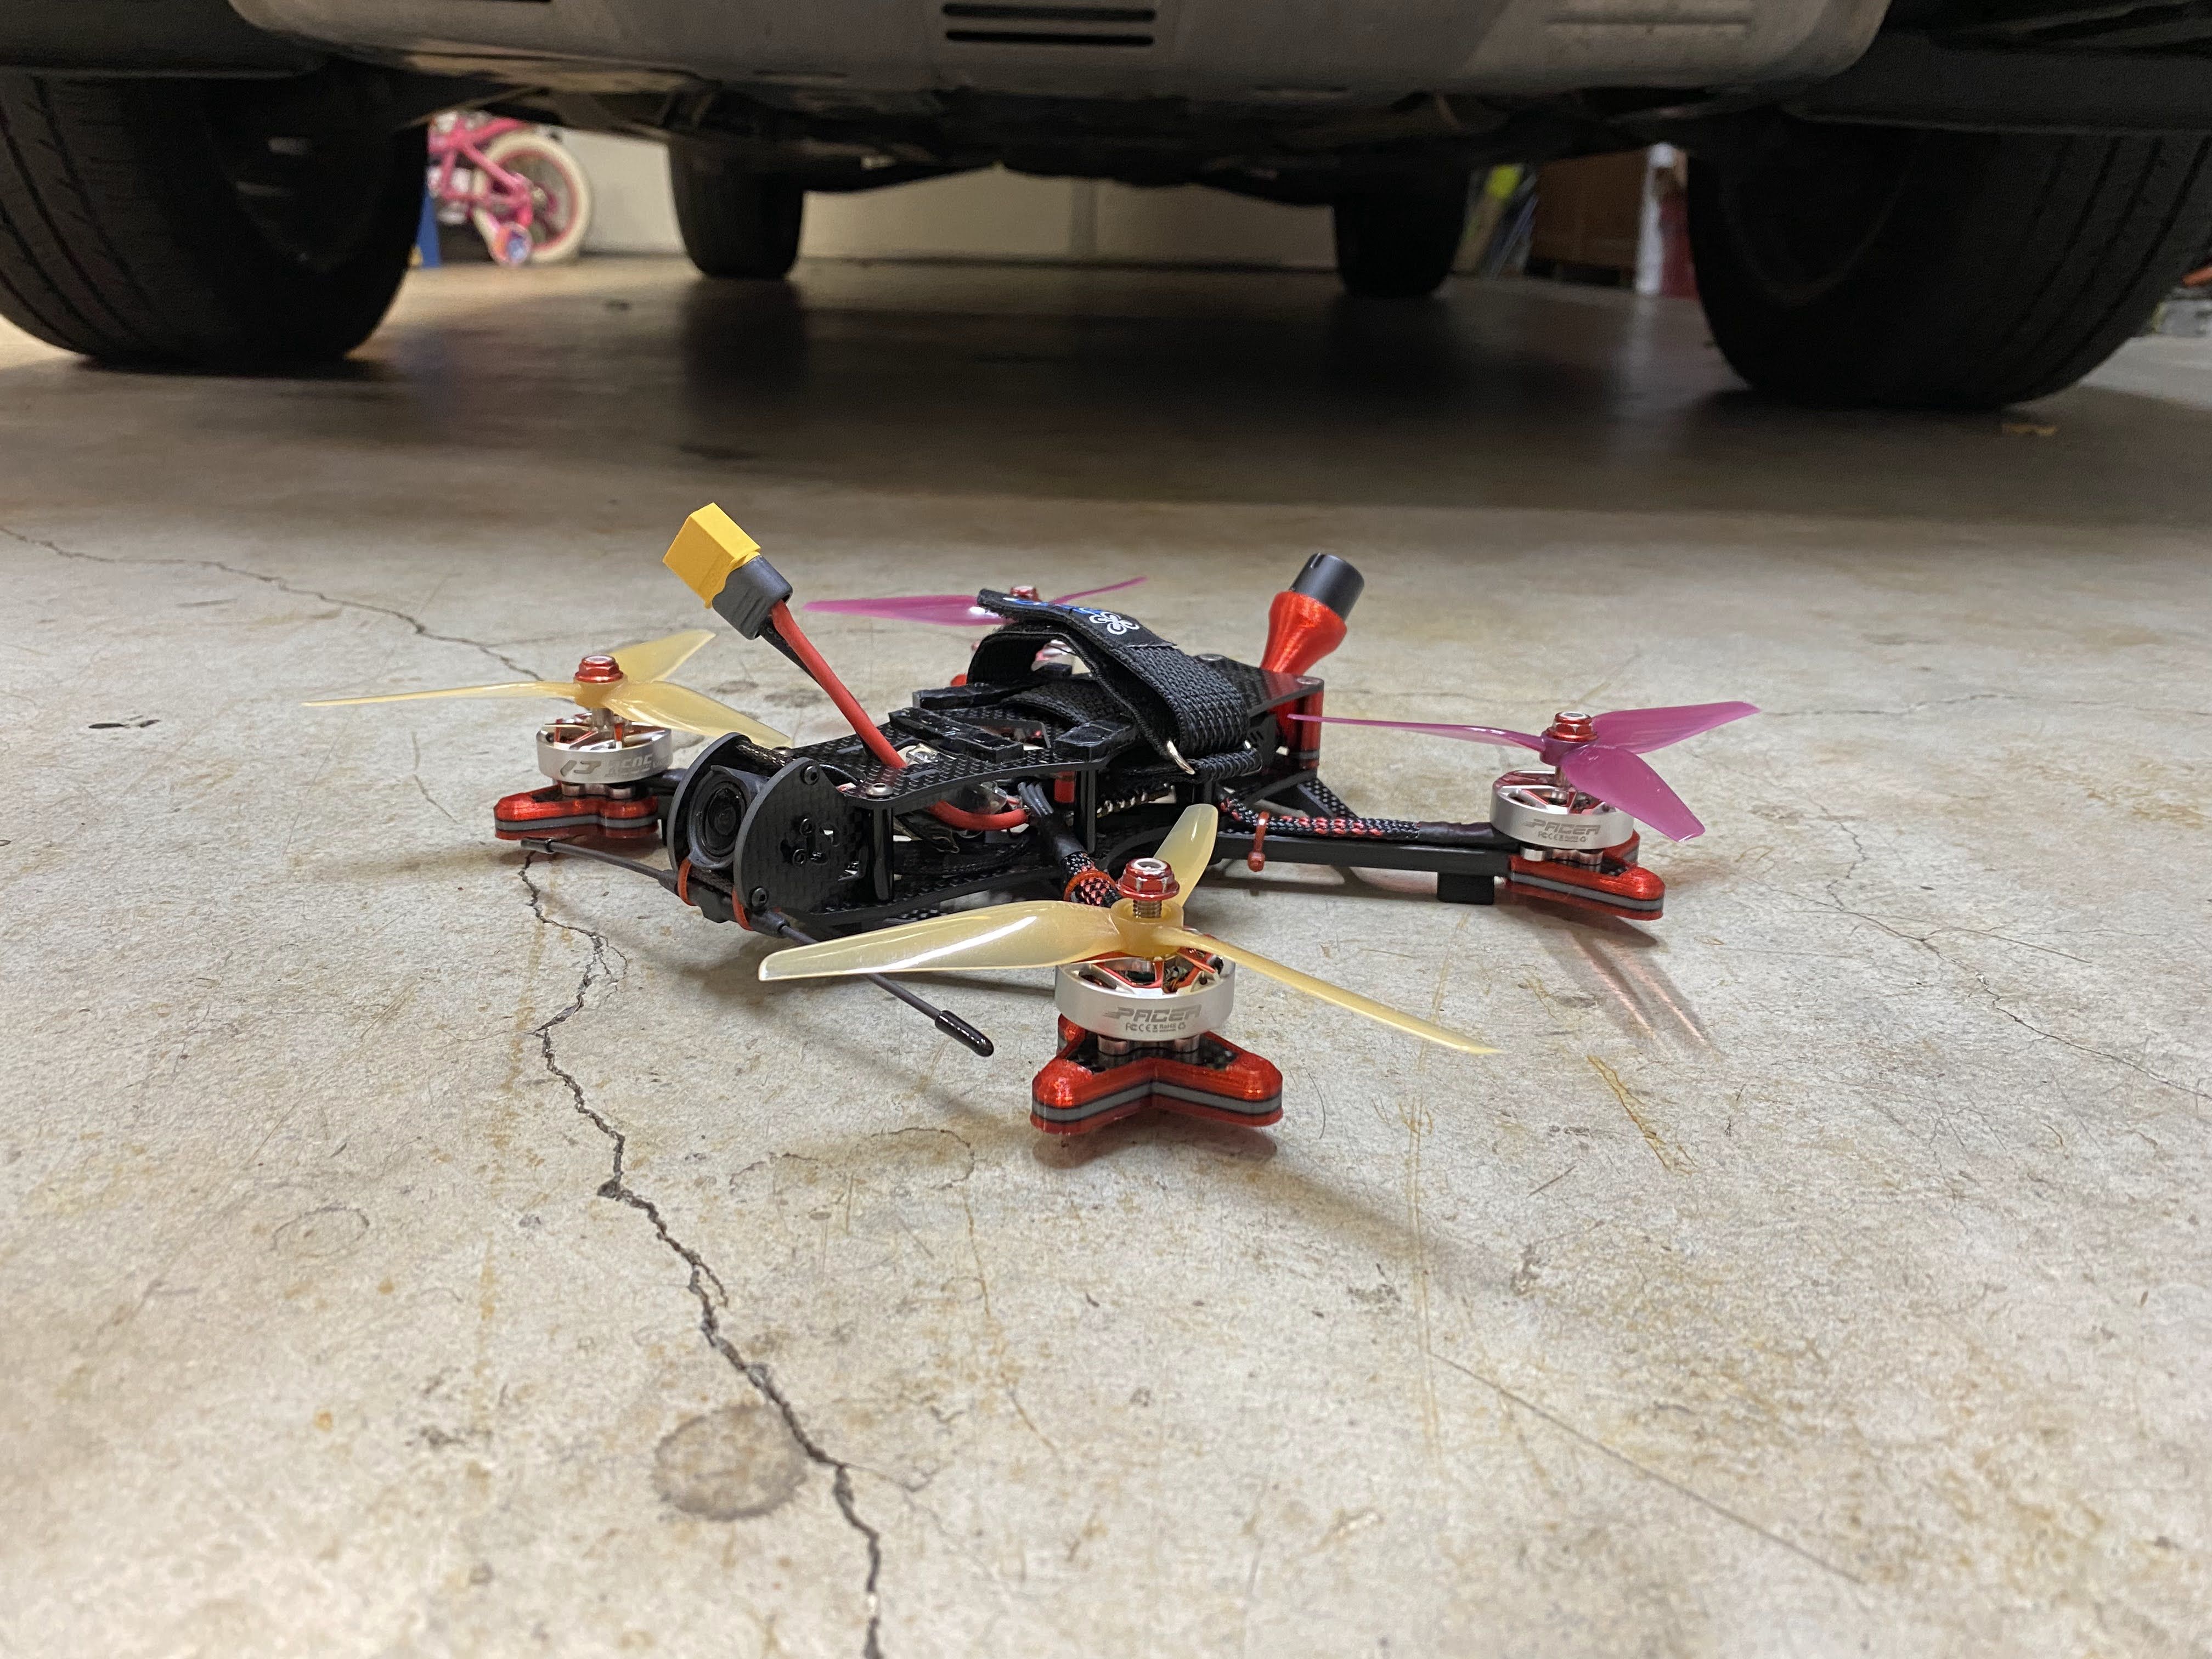
I wanted to use red prop nuts to match my build and the only ones I had were usable but banged up. I switched them out for some brand-new ones, just incase it was out of balance from being woren out. As for the props, I wanted to use something with low pitch like the Ethix PB&J but that color did not go well with my build. So, the only low pitch props I had with a neutral color are the HQ R38 HeadsUp Racing 5.1x3.8x3.
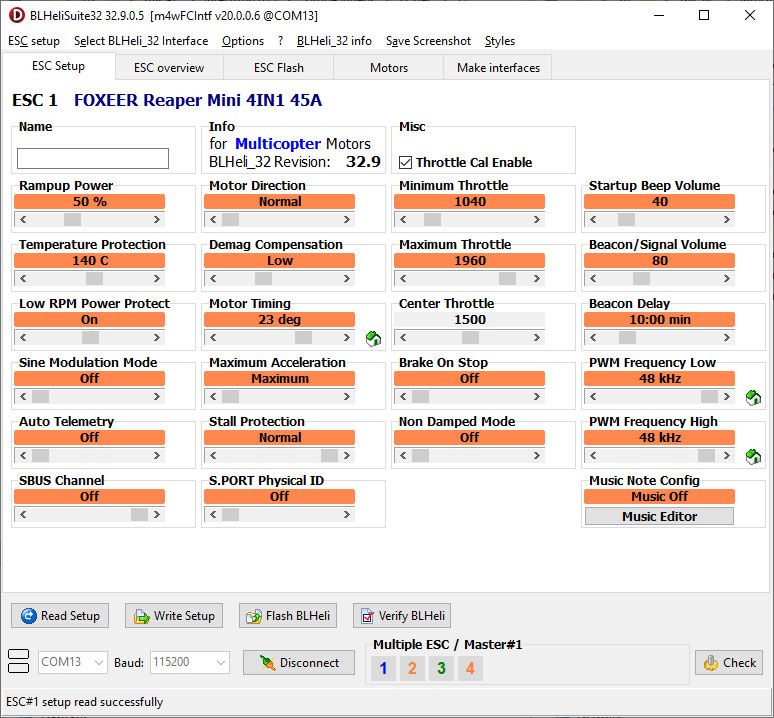
I made some changes to BLHeli32: Demag Compensation: Low, PWM Frequency Low: 48KHz. Update (Jan 17, 2023) It has been over a month since I built this quad and I notice a common trend with other O3 owners and it pretty much confirms that the main thing that fixed my jittery video was switching the PWM Frequency from 24 to 48Khz.
The videos below are the results of the changes that I just mentioned above. So, which change made the difference, I am not sure. I made some changes to the PIDs but forgot use the profile with the change. What that means, is that the PID changes I made was not applied to my test that fixed my issues. So, the bottom line is that it might be a mechanical issue that caused the Gyro in the DJI O3 to freakout. The starting PIDs and Filters I used were based on the review Joshua Bardwell did on youtube about the AOS 5 with the DJI O3 systems. Here is also a Diff file that Chris Rosser (Designed the AOS frames) post for the AOS 5 V2 frame, which is very similar to what JB had in his video: https://drive.google.com/file/d/1d6rl3pFeAJfmxn5u7LZn1jLbkJz8kUz-/view. You should also check out Chriss Rosser's video about PID tuning the AOS 5 v2 in Betaflight 4.3 (How to tune Betaflight 4.3 PIDs and Feedforward like a MAD SCIENTIST! Featuring the AOS 5 V2)
Canvas Mode of DJI O3 - Betaflight OSD (MUST be on Betaflight 4.3.0 or later)
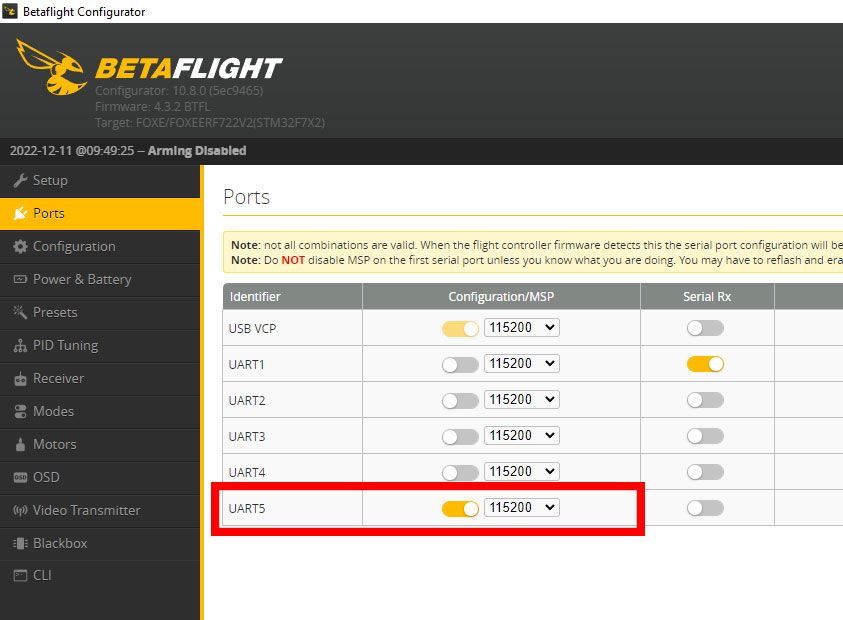
If you want to view the Betaflight OSD through your goggles, you will need to setup your air unit hardware correctly with the RX/TX connected to your flight controller and with the correct UART MSP turned on in the Ports tab in Betaflight. There you will need to enter the follow in CLI. Before doing so you will need to figure out the correct MSP serial number to put in. For example, on my flight controller the UART that I connected the Air Unit to is UART 5. So I have the MSP switch turned on in Betaflight. To figure out the msp_serial number, all you need to do is subtract 1 from your UART number. In my case: 5 - 1 = 4. This is what I will type in the CLI, set displayport_msp_serial = 4
Here is the commads you will need to enter:
set osd_displayport_device = MSP
set displayport_msp_serial = 4
UPDATE (Jan 22, 2023) - New Camera Mount
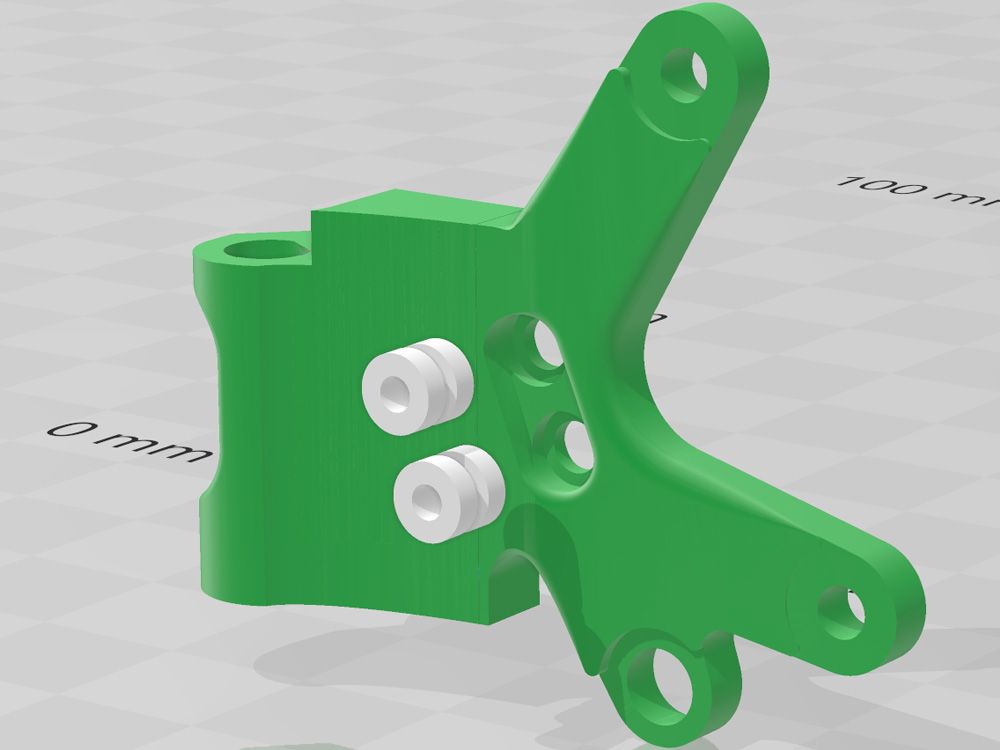
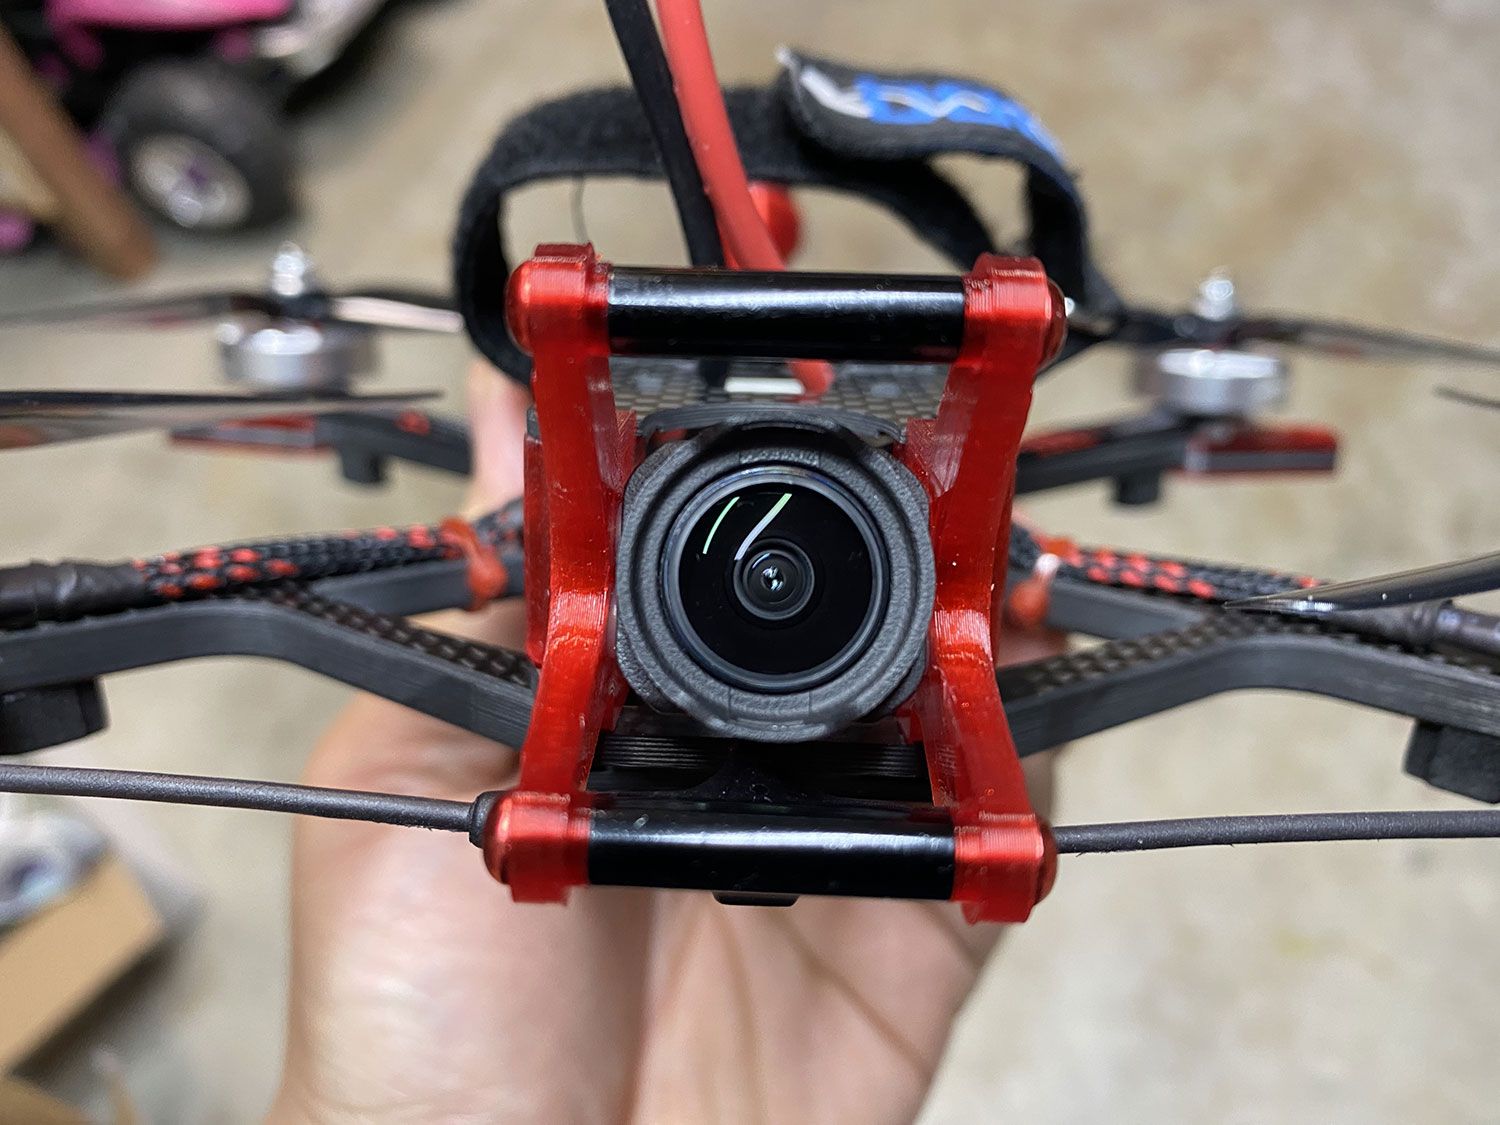
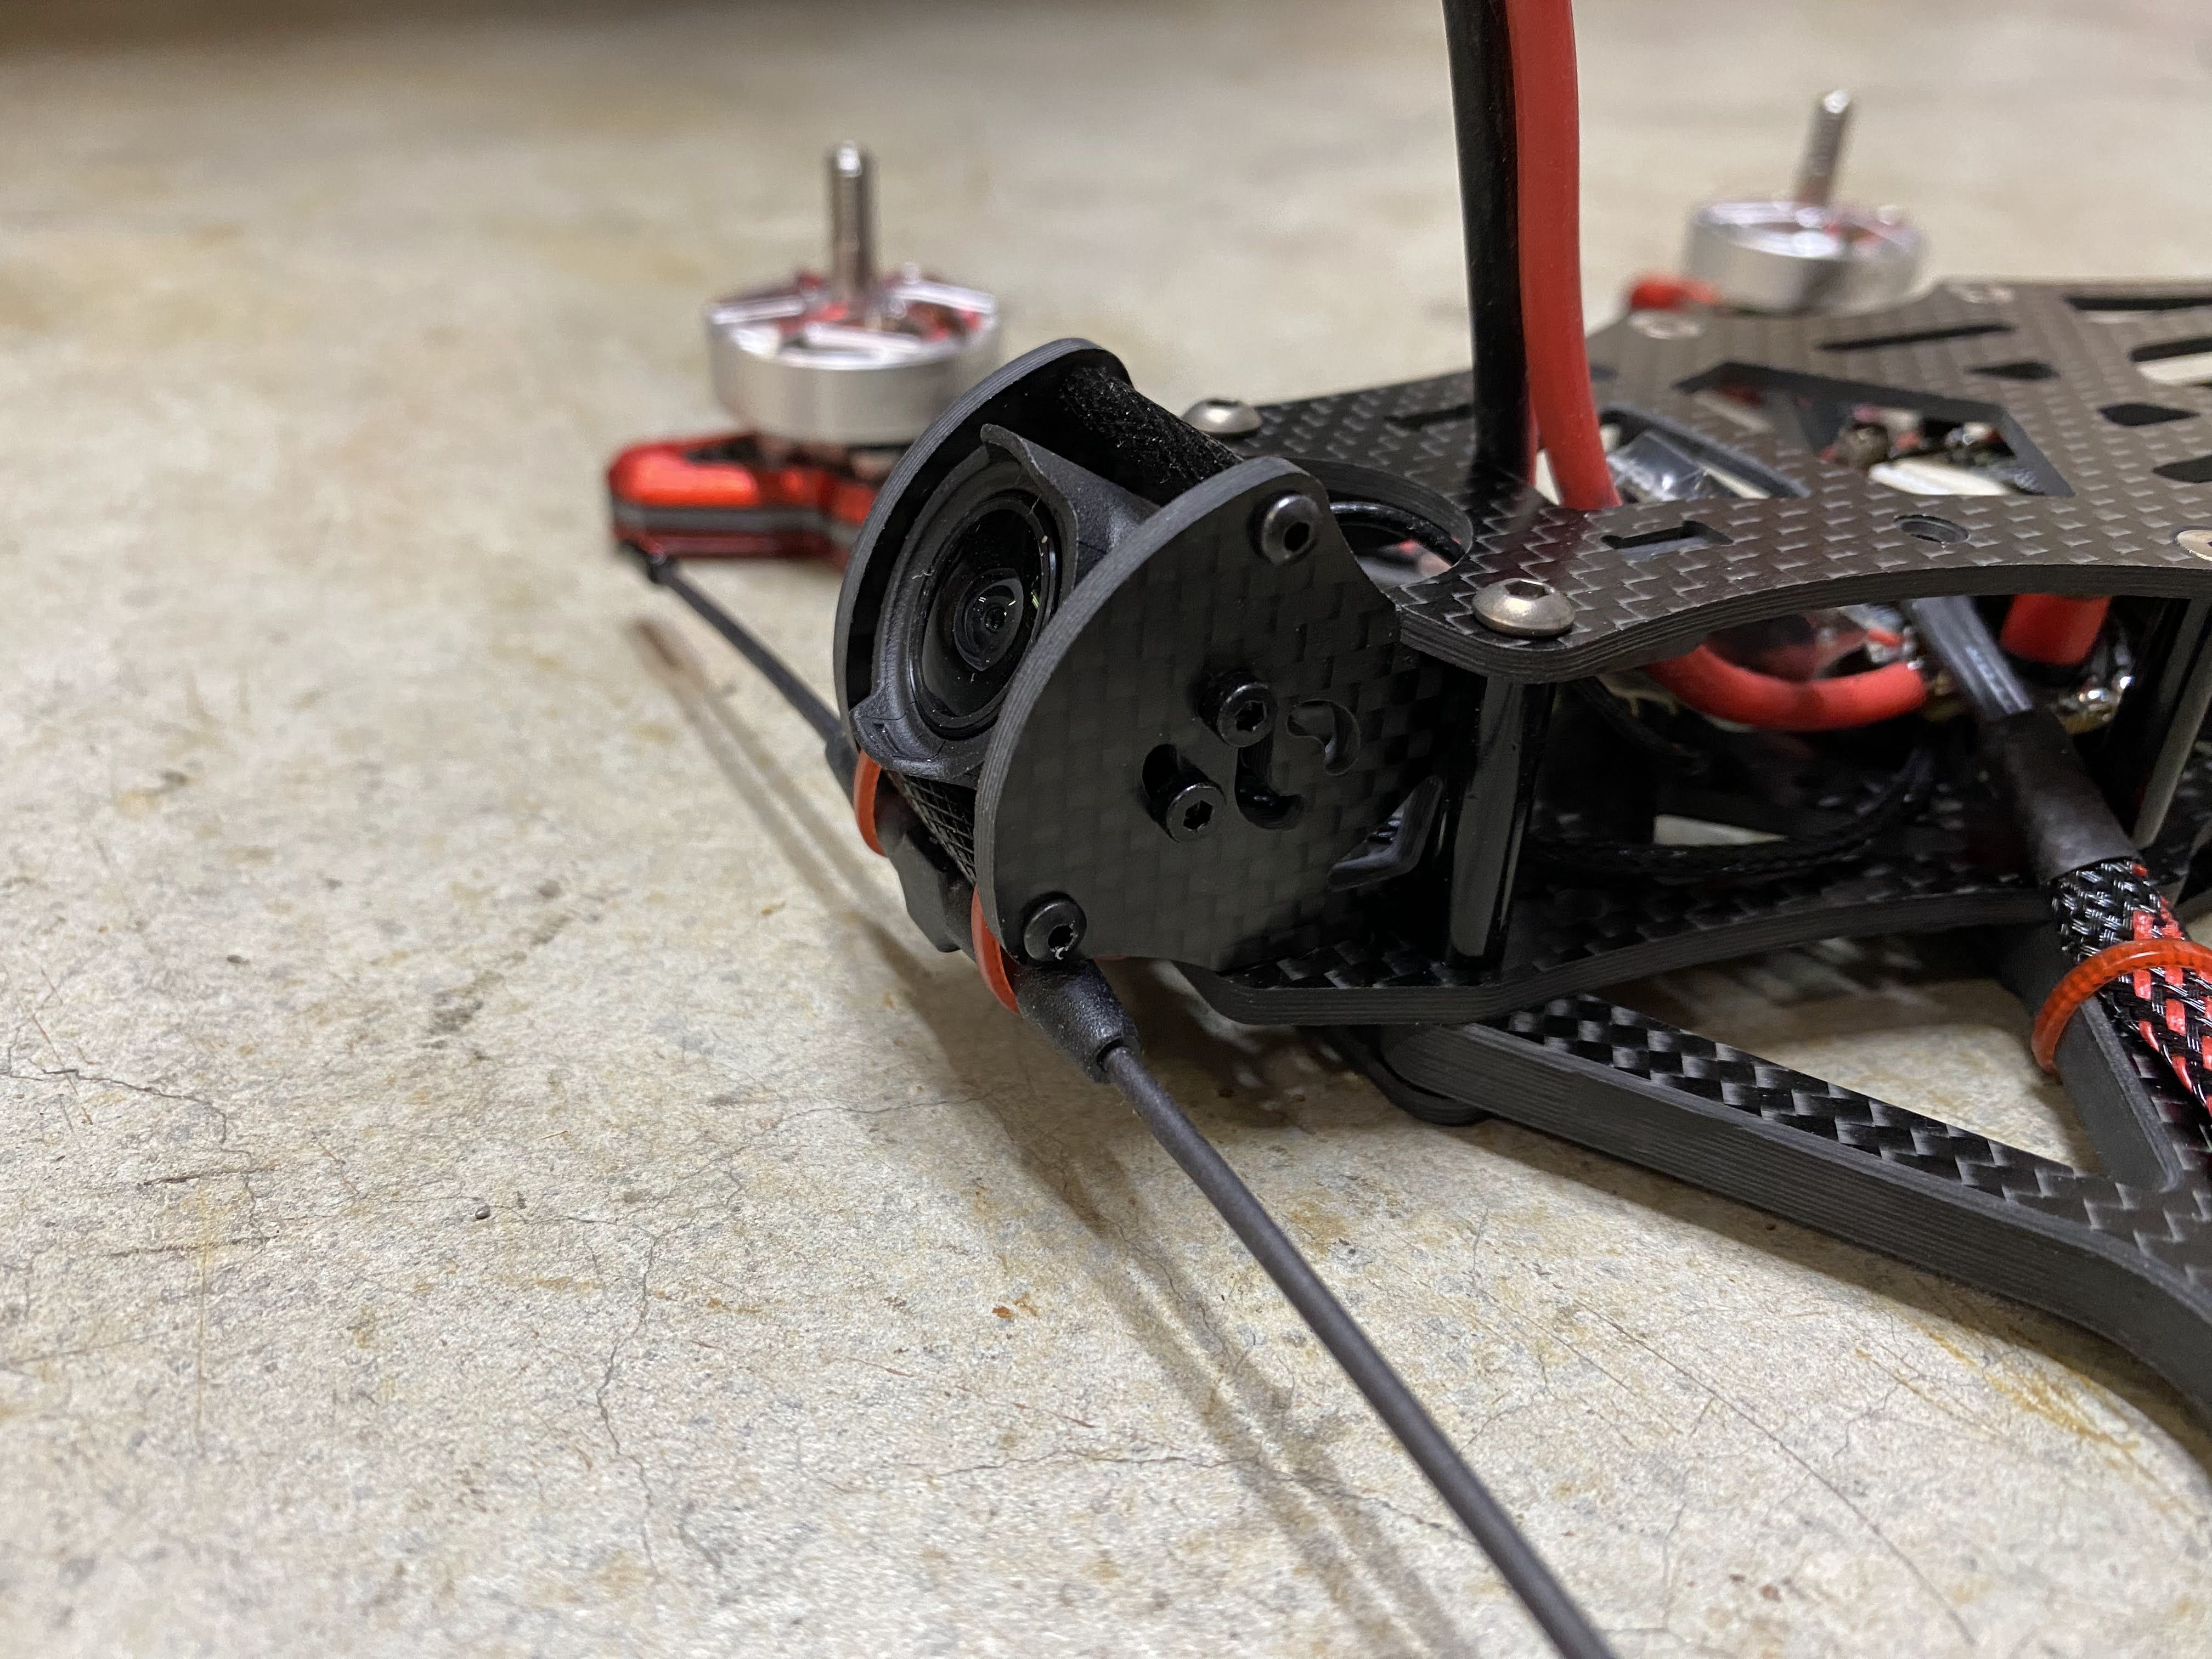
While building the AOS7 I remixed a camera mount that was originally designed for a Floss 2 frame. Since the O3 camera is known to have a sensitive gyro I wanted some addition dampening for the camera mount and we all know that 2 carbon fiber plates sandwiched between a camera is far from being that. That is why I will be replacing the two carbon fiber plate with a TPU mount with an added silicon grommet. This is a rendered image of how the mount should look like.
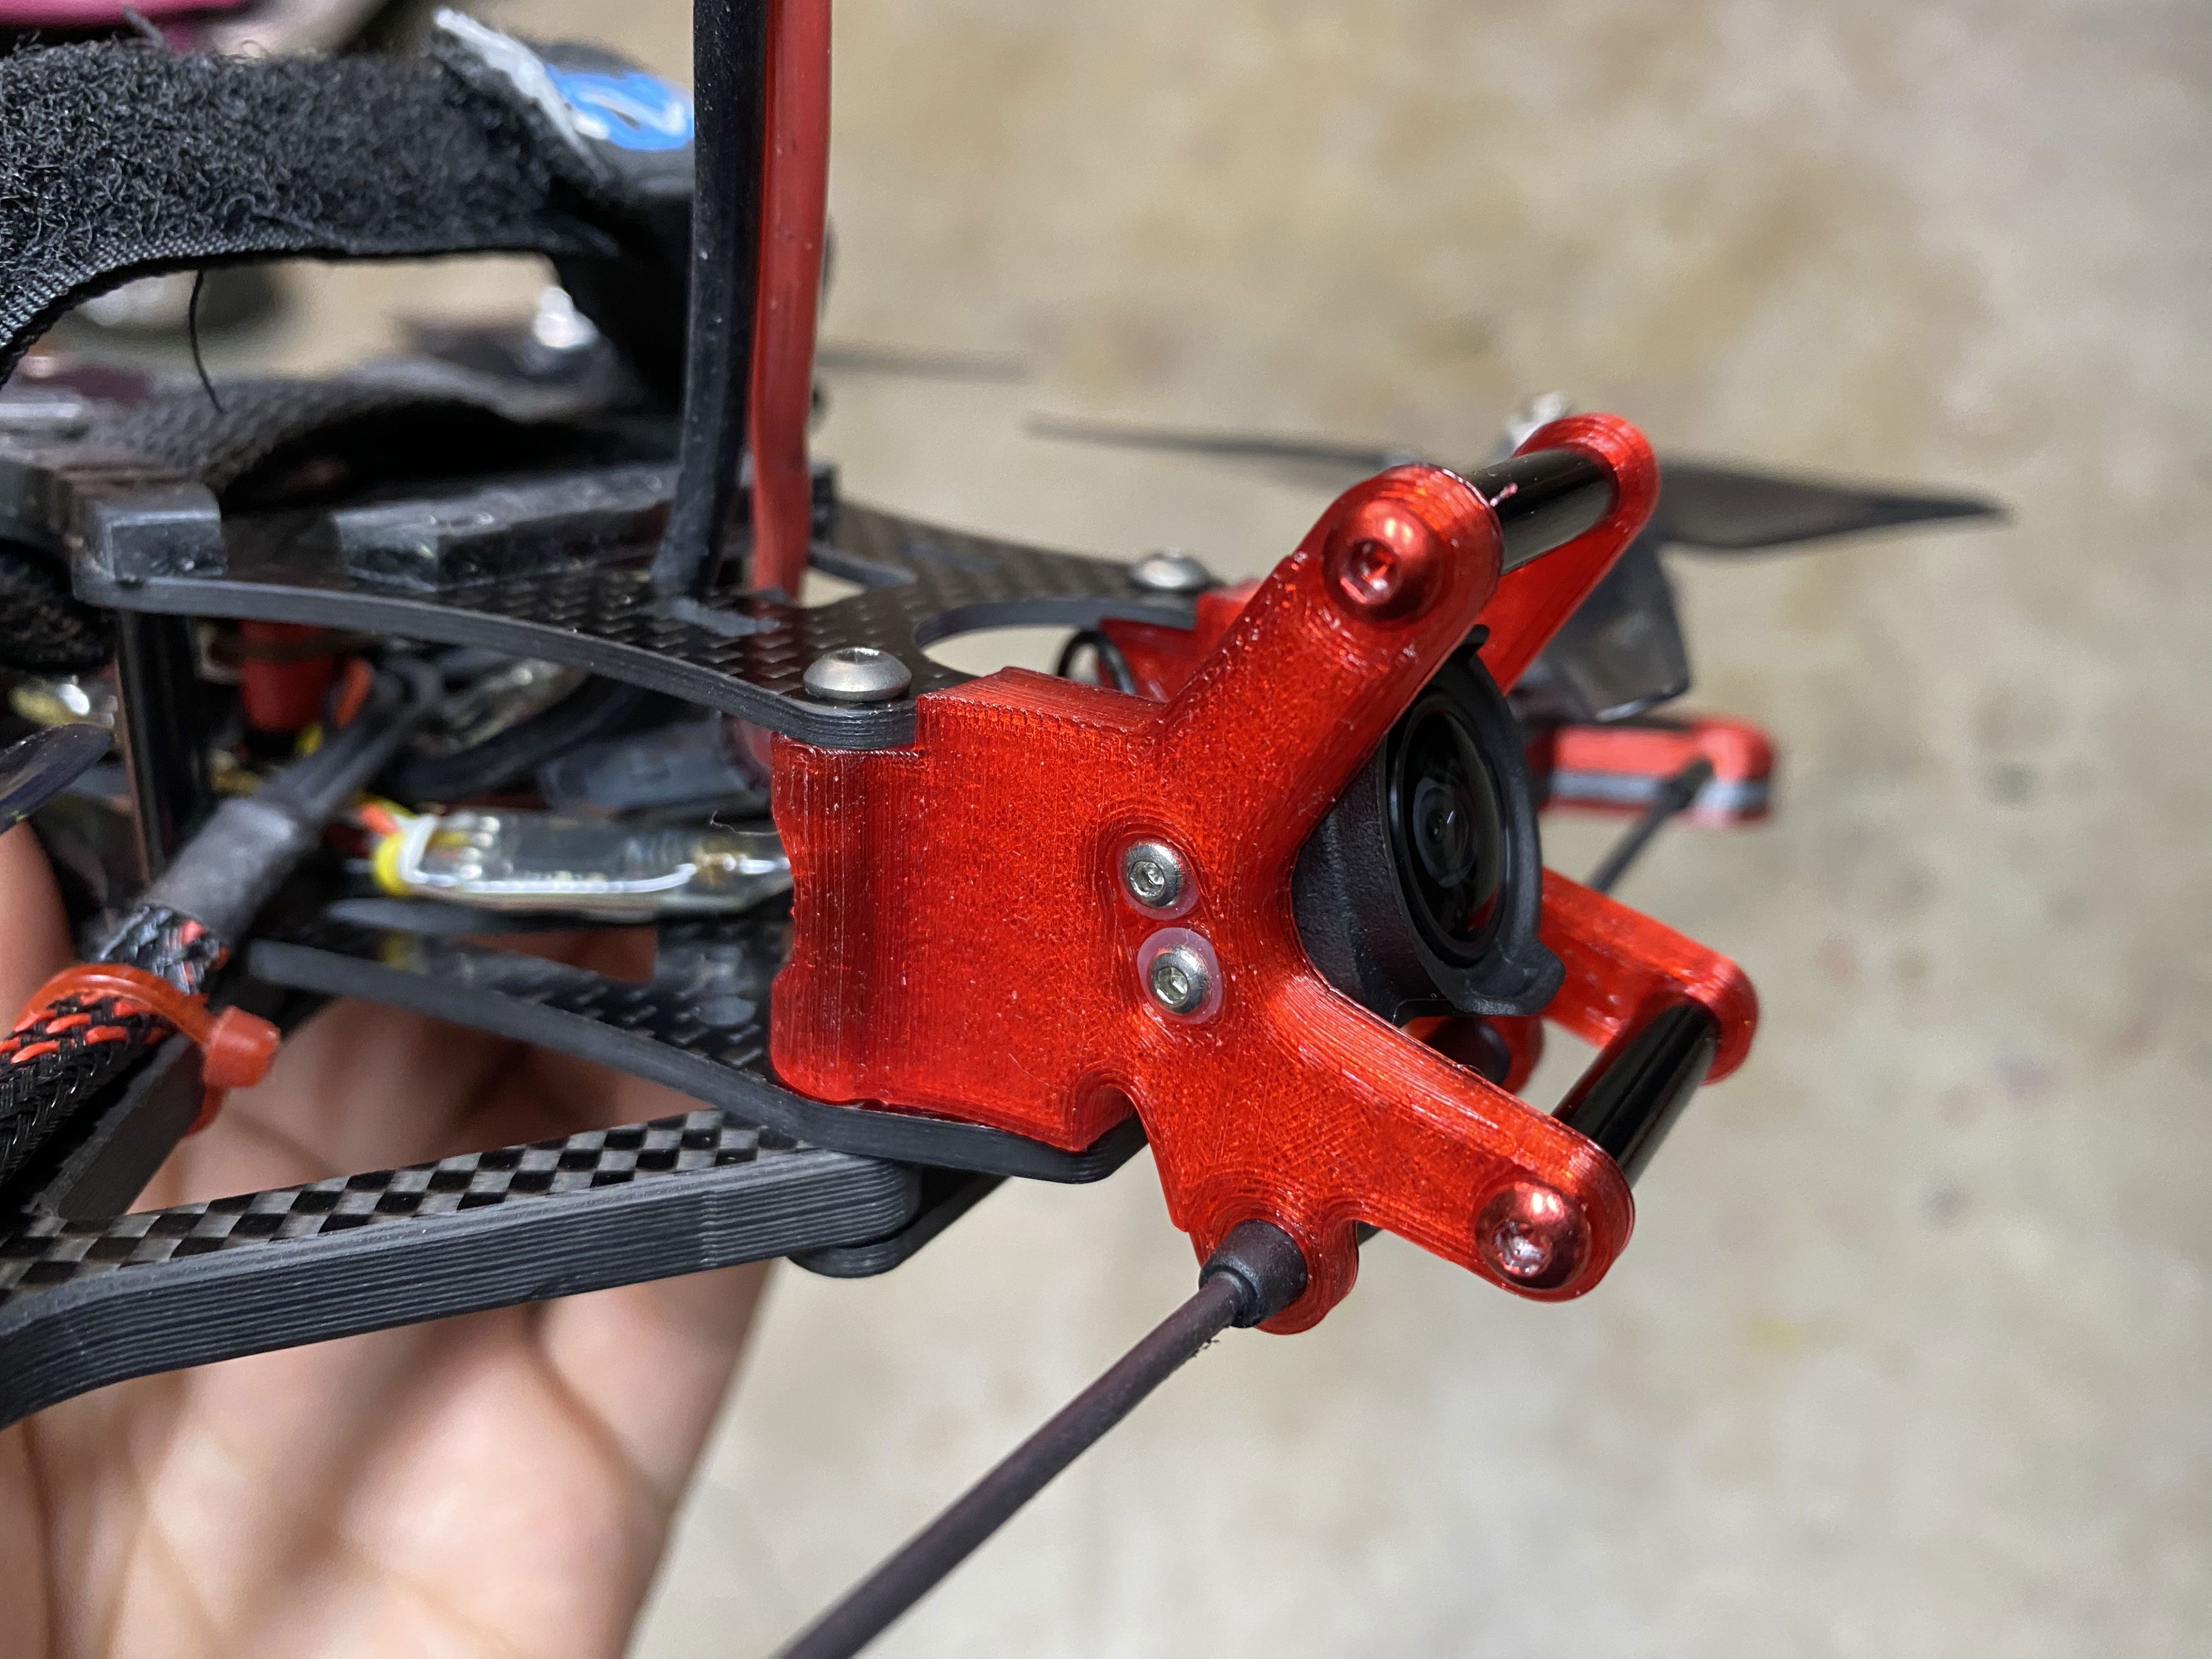
What was the reason for this change, since I did NOT have any issues with the camera? It was the slight prop in HD camera view! While I was testing to make sure I did not get any shaky HD footage like during my maiden flight, I noticed with RockSteady turned on, I was able to see the props in the HD footage. That is the main reason I wanted a custom camera mount, so I can move the camera forward. Since I am going to do that anyways, I wanted to make it better. At least, I hope it is better with the little gummies. FYI, if you want to use the exact vibration dampers, they are made by BetaFPV (Screws and Rubber Dampers). Currently RDQ also has it can it called, BetaFPV Toothpick / Whoop Hardware Kit. I included the link in the Part List below.
UPDATE (Jan 24, 2023) - Gyro Died
I do not know what happen, but the gyro died on the Foxeer FC. One day, I plugged it in to fly and the ESC would not arm with the last set of boot up tones (Do Doo). When I plugged the FC into the computer and connected to Betaflight it tells me gyro not found. I tried reflashing it with different version firmware and nothing made a difference. So, I replaced the FC with another spare Foxeer (same version board). Even though, it was the exact same board I think the dying gyro performed very differently than a normal one. Initially I thought it was the underpowered motors that made it fly so smooth, but now this thing is a beast with the same tune. I assume the old FC was slowly dying and the gyro was reacting slower? I need to fly a few more pack to get a better feel for this new found power.
More info soon....
Videos
Air Unit HD Recording - 4K/60 Wide setting
DVR Recording with Goggle 2 - 4K/60 Wide setting
Photos


Part List
Show stores (10)
i have fitted these motors on an aos 5.5 and i get less flight time than the same setup with 2207 or a 5" with 2207 which is a bit weird. You really need to stay very light on throttle to get any decent flight time. What sort of flight time do you get out of it ? was thinking that maybe they are more suited on a light 5" such as ummagawd 2fiddy.
I think you might be right about these motors, they do not seem very efficient. With my other 5" DJI O3 quad with 2306 motors, I am getting longer flight times too. I assumed the Pacer 2505 motors would be more efficient because of the slightly smaller stator, but they are not. However, I do like them still because they feel very smooth and the way it handles the low to mid range power better than the AxisFlying AF236 2306 1810kv Motors. The Axis AF236 motors are more snappier and sensitive.

Thanks for posting this wrong17, and all of your builds, they are a joy to read. I'm mocking up an Aos 5 03 frame atm and will also be using an 03 air unit. It's going to be a bit challenging for me as its my first fpv build, but am not new to rc or flying. I'm going to use a full size mamba stack and T-motor f40 pro IV 2400kv's.
I shared it already, I updated my post on thingiverse. :)
Updated - JAN 22, 2023
O3 CamMount 20deg v13 Grommet.stl
This camera mount is for O3 camera and provides better vibration dampening. You will need to use 20mm standoff to help brace the camera mount, but it is a little too short, so use the 3d printed M3 spacers below. In a perfect world all you need is 1mm spacer on each side of the standoff. But after calculating for the compression of the TPU, typically the 1.5mm spacer will work better. I added the 2mm version too just in case you like crush the TPU parts when you tighten them up.. lol
M3 - 1.5mm Spacer.stl
M3 - 1mm Spacer.stl
M3 - 2mm Spacer.stl
Spacers to use with the new camera mount and M3 screws.
Hey, awesome build. I am building in the similar frame at the moment and this has been a great resource! I see that your xt60 leads are in the front and not the back, and I'm assuming thats because you managed to turn your esc 180* so that it would point towards the front. Where did you get the longer FC ESC cable thats long enough to rotate it so much? This is my first build so any advice is appreciated!
You are right about me rotating the ESC 180 degrees so I can run the power cable to the front. As for the ESC to FC cable, the one I had was just long enough so I did not need to get a longer one. You can get a DIY wiring kit to build your own cable if yours is too short. I have purchased this kit at least 5 times because I build a lot of different quads: https://pyrodrone.com/products/diy-sh-silicone-cable-kit
Make sure you file/sand the edges of the carbon fiber where any wires comes in contact too because over time it the sharp edges on the carbon fiber can cut through the silicon and create a short. The same goes with the battery strap, the point of failure is where the strap meets the frame. To be safe, make sure you file/sand it under a bath of water so the dust does NOT get air born and you breath it in.
I just noticed that Pyrodrone does not have the wires set in stock. You can get a similar kit at RDQ too: https://www.racedayquads.com/products/sh-1-0-silicone-cable-set?keyword=SILICONE%20CABLE%20KIT
Beware of the 2 different kits RDQ has, just get the one that works for you. In most cases, the "JST-SH Only" is all you need.
Guides & Reviews

AirbladeUAV has done it again and this time they've brought long range to the 5" class! Based on the popular Transformer Mini, the new Transformer 5" Ultralight adopts a lot of the same design philosophies with larger props and more payload capacity. It can fly upwards of 20 minutes on a 4 cell Li-Ion battery pack and in ideal conditions it's got a range of over 4 to 5 miles. In this guide I'll walk..
Read more
With the release of the DJI FPV Drone cinematic FPV has become a lot more accessible, but you certainly don't want to crash a $750 drone! The QAV-CINE Freybott is a compact, lightweight cinematic FPV drone that can take a hit and keep going. It's a lot safer to fly indoors and around people. With a naked GoPro or the SMO 4k you can capture some great stabilized footage. In this guide I'll show you..
Read more


Hi! Great build and report! What length MIPI cable between O3 unit and camera did you use?
Thanks, I used the original cable and camera that came with the O3 air unit. I am pretty sure at this current time there are no other options for 03 air unit.
There are longer third-party cables, in case if standard is not enough for specific build. As for camera - of course it works only with original O3 cameras, and it will for sure stay this way:) BTW, i can advise to disassemble the camera and apply additional glue along the line of contact of the lens casing and matrix casing (where thin line of gray glue is). If you crash the quad hard enough - lens may un-glue in that place, and glueing it back is not a good option because you cannot control the distance between the lens and matrix with the necessary precision - and most likely will get a blurred image. Happened to me twice.