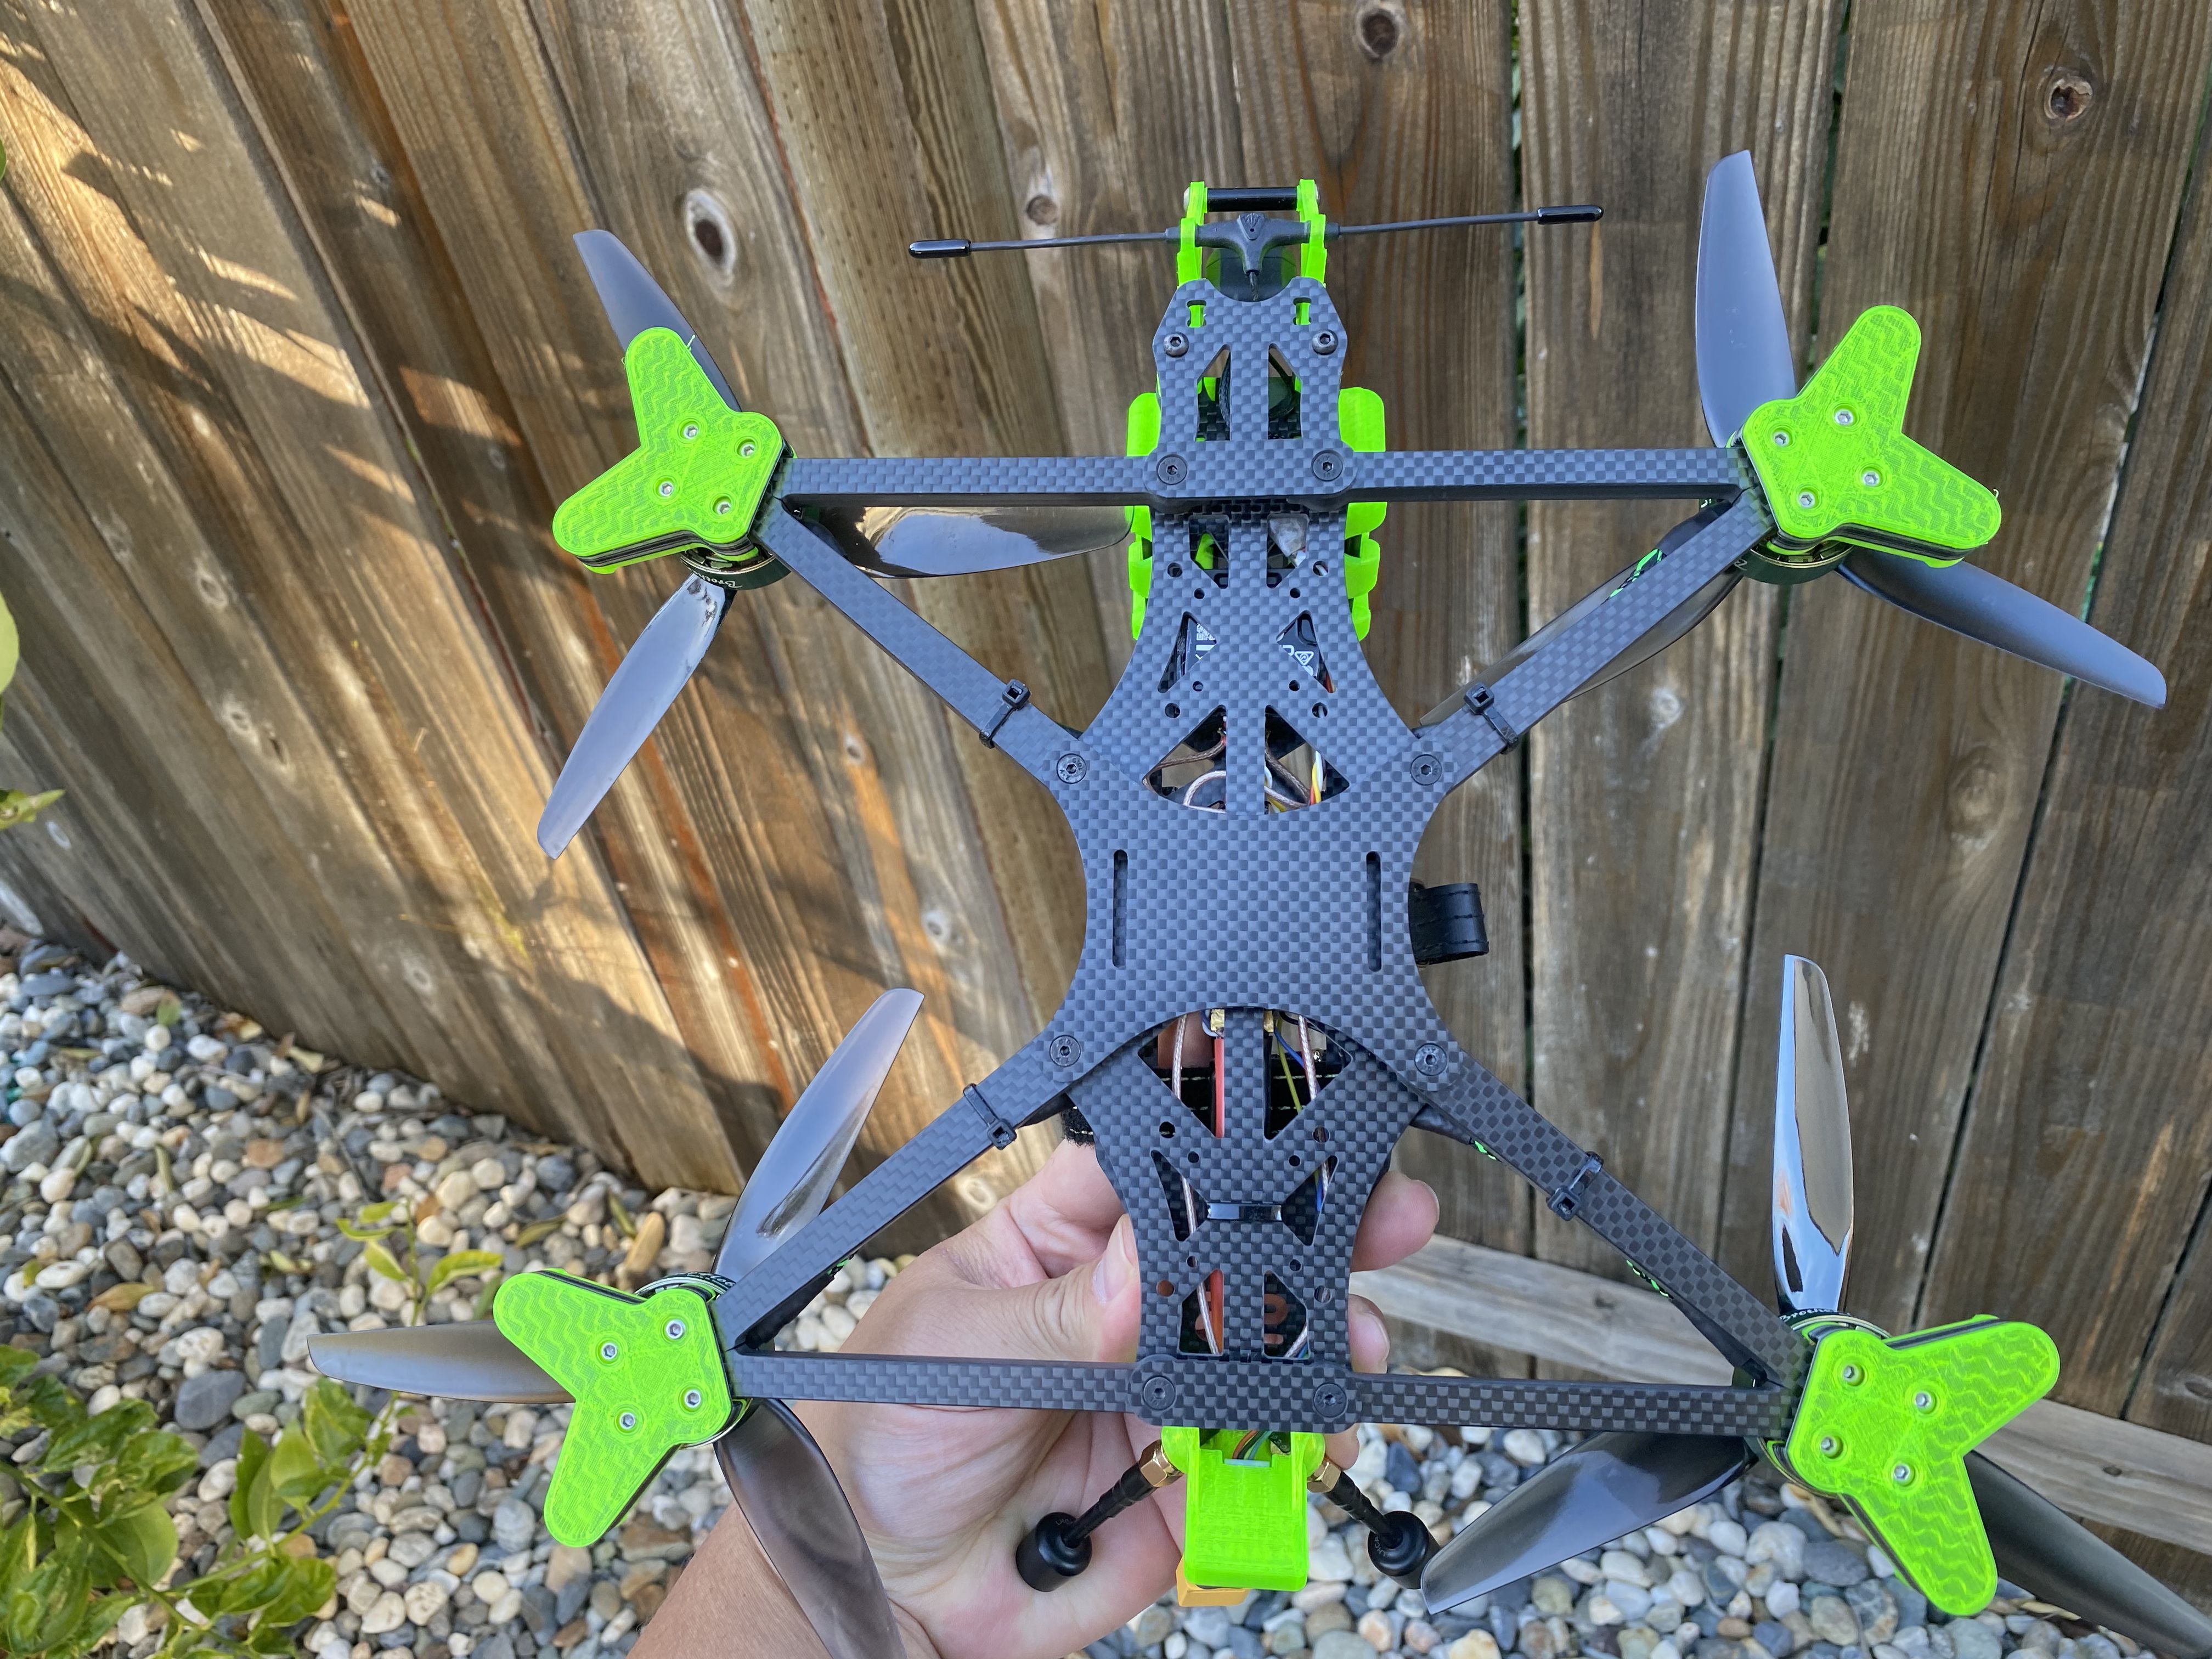
AOS 7 w/ DJI O3 - Vibration Dampening Camera Mount - BH 2806.5 1300kv - Betaflight 4.4 w/ GPS Rescue
 By wrong17 on Feb 06, 2023
After building a few DJI O3 quads, I soon realized that this is system is great but it is still far from replacing a GoPro. Meaning on my day-to-day flights it does a wonderful job capturing the flight in HD, but it still has its flaws. I am not here to talk about the GoPro versus DJI O3 system, but my point with this opening statement is to point out the purpose of this build.
As we all know the DJI O3 has a sensitive gyro and possibly a loosely mounted sensor inside of the camera case, which cause problems with the HD footage. Most people were able to overcome these problems by switching the PWM frequency from 24khz to 48khz when using RPM filtering and/or soft mounting the DJI camera too. Even with the 3D printed camera mounts, I do not think it is really giving it enough vibration dampening because in more extreme conditions I started to experience jello and shaky videos when RockSteady enabled.
Not long after I finished building the AOS 5, someone ask me to do some full throttle passes with the AOS 5 O3 build and I noticed some vibration in the HD video footage. Normally I would never see this because I do not normally do not pin my throttle for that longer duration. During that same flight I also notice some props in my HD footage too. I am sure I could have gotten rid of the prop in view if I adjust the camera, so it is pushed all the way forward so that was not the deal breaker. But what drove me to try something different is the flight out in the mountains. I was on vacation at Mammoth Lakes and did a little bit of flying but there was some strong wind guest. At the time, I thought the 03 was a GoPro replacement so I flew only with the O3 camera. Lets just say, I was disappointed with the footage that came back. Rocksteady was not able to smoothen out the heavy winds and created jello instead. I am confident to say that a GoPro 7 Black would have come back with better footage, than the O3. Ever since then I came to realize I still need a GoPro for my more memorable flights. I am sure a perfectly tuned quad could make a difference too, but it still would not fix the underlying issues with the O3.

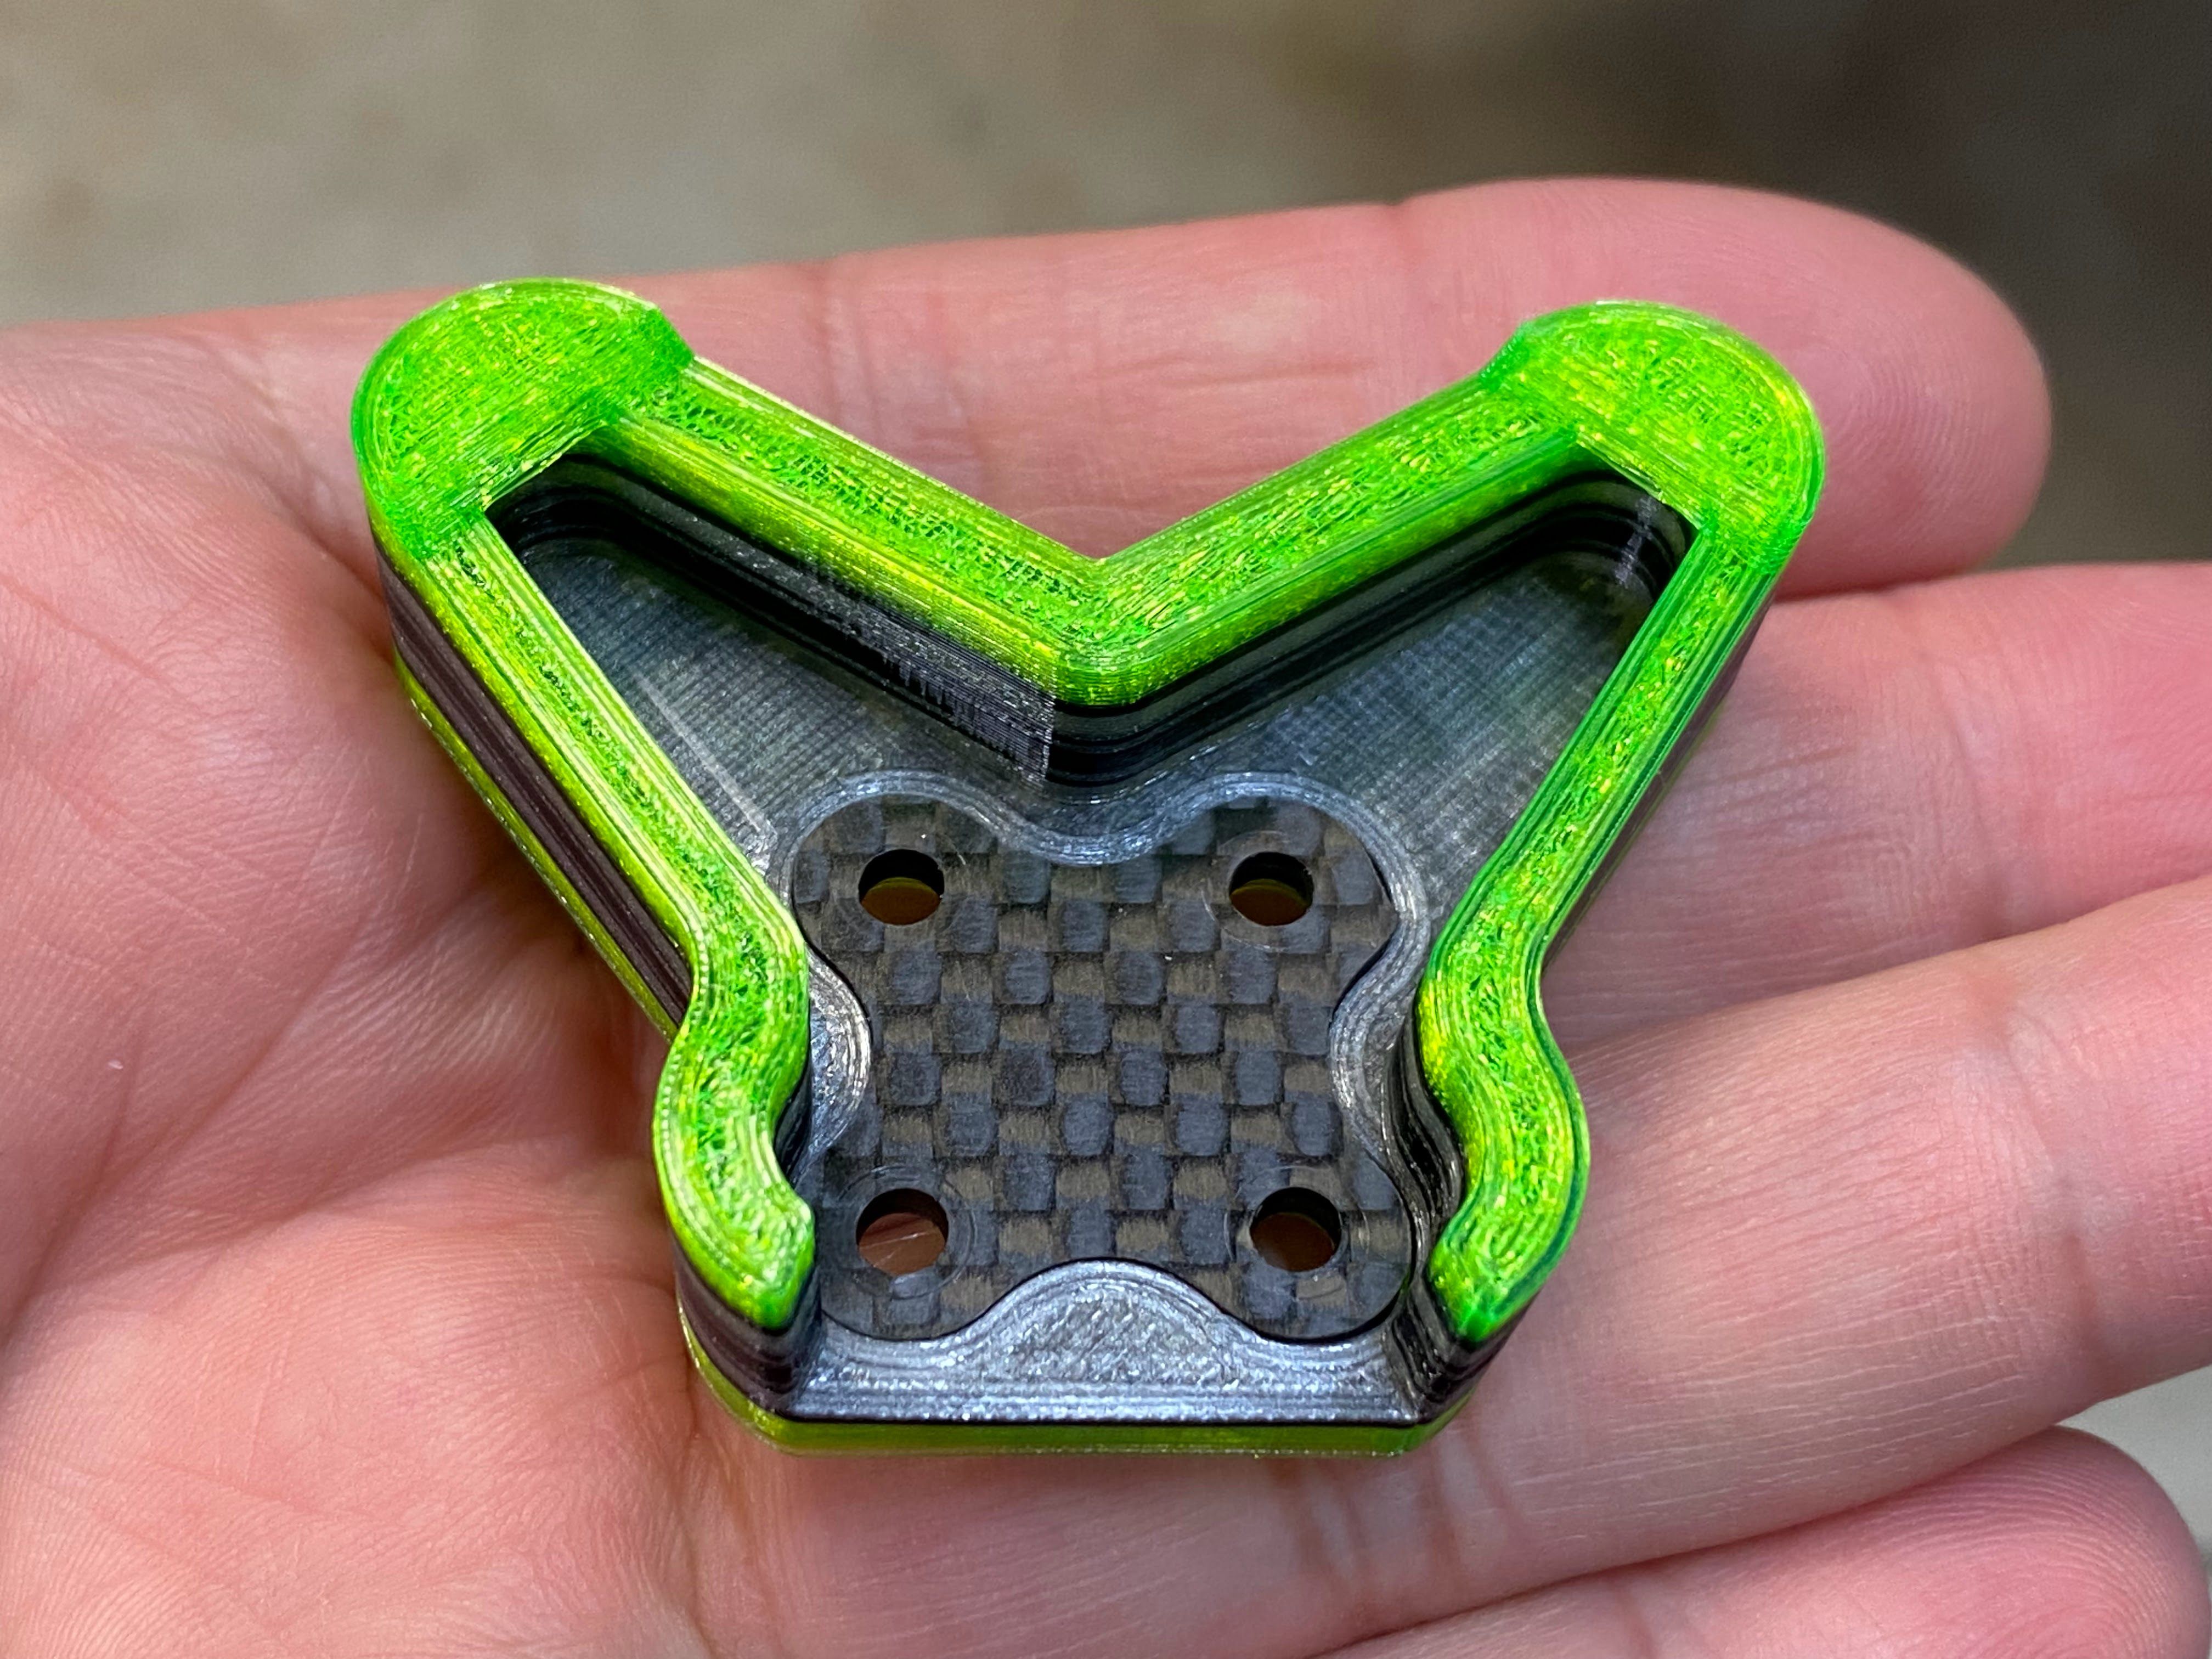
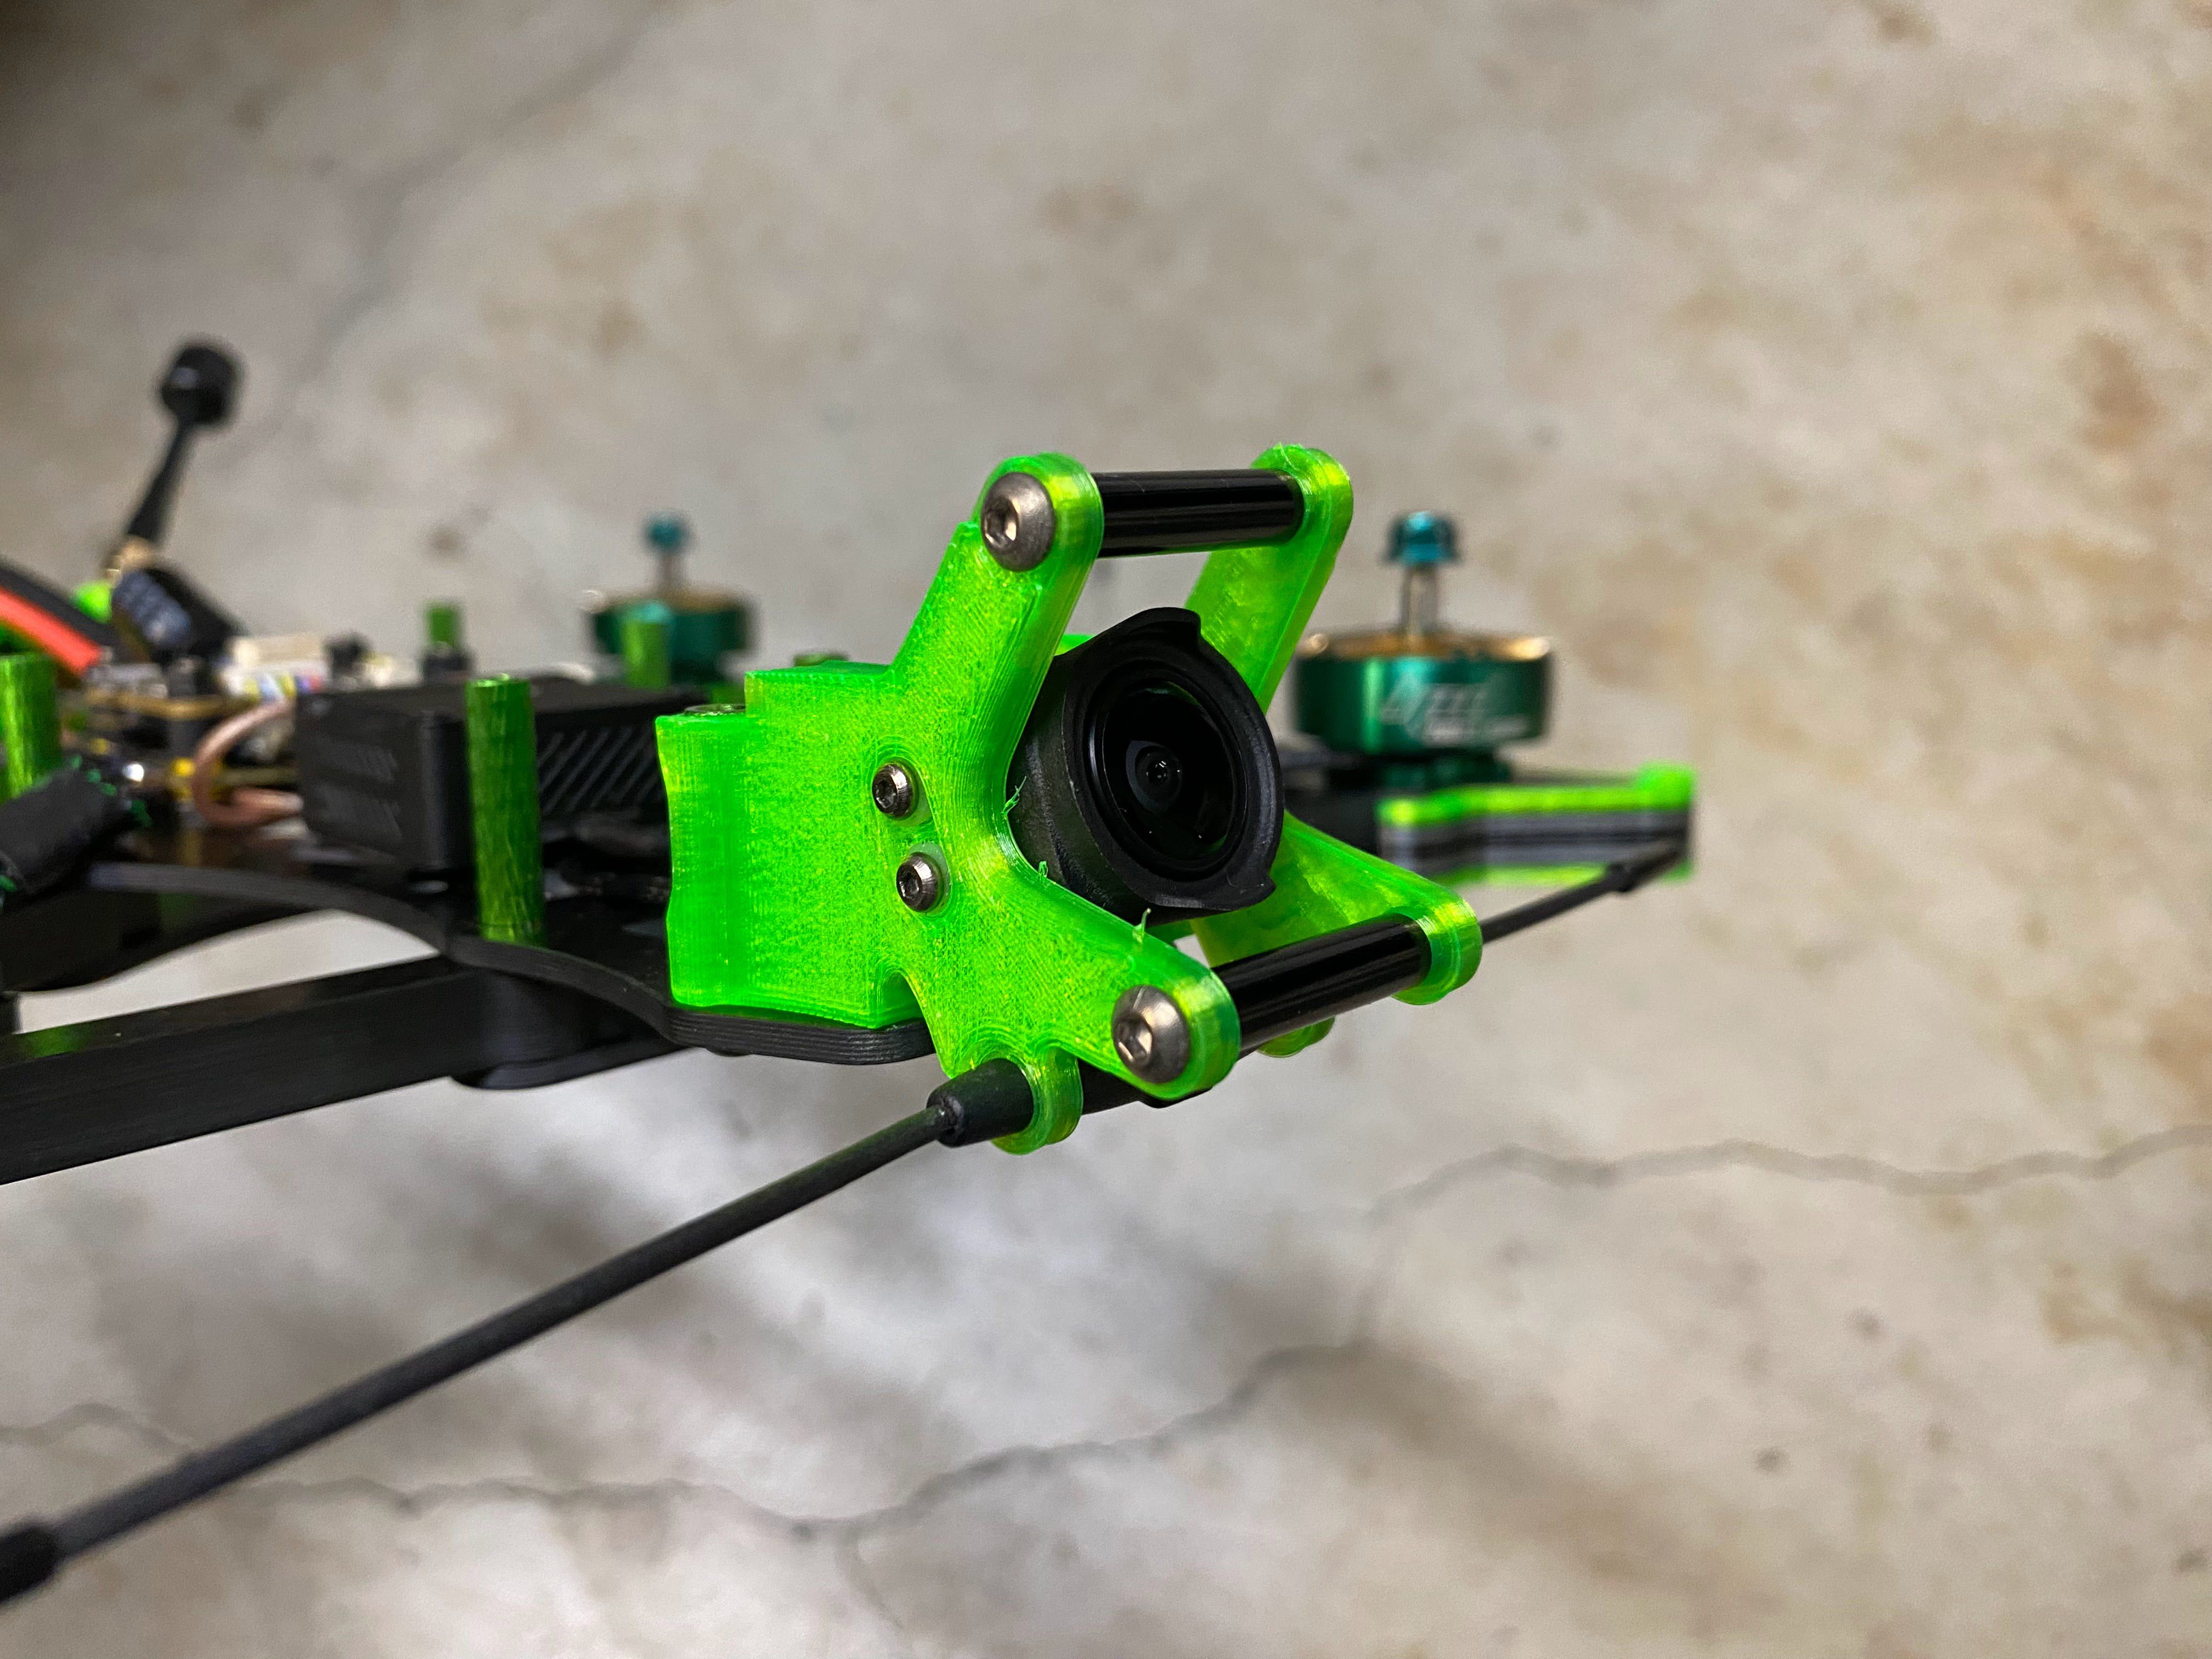
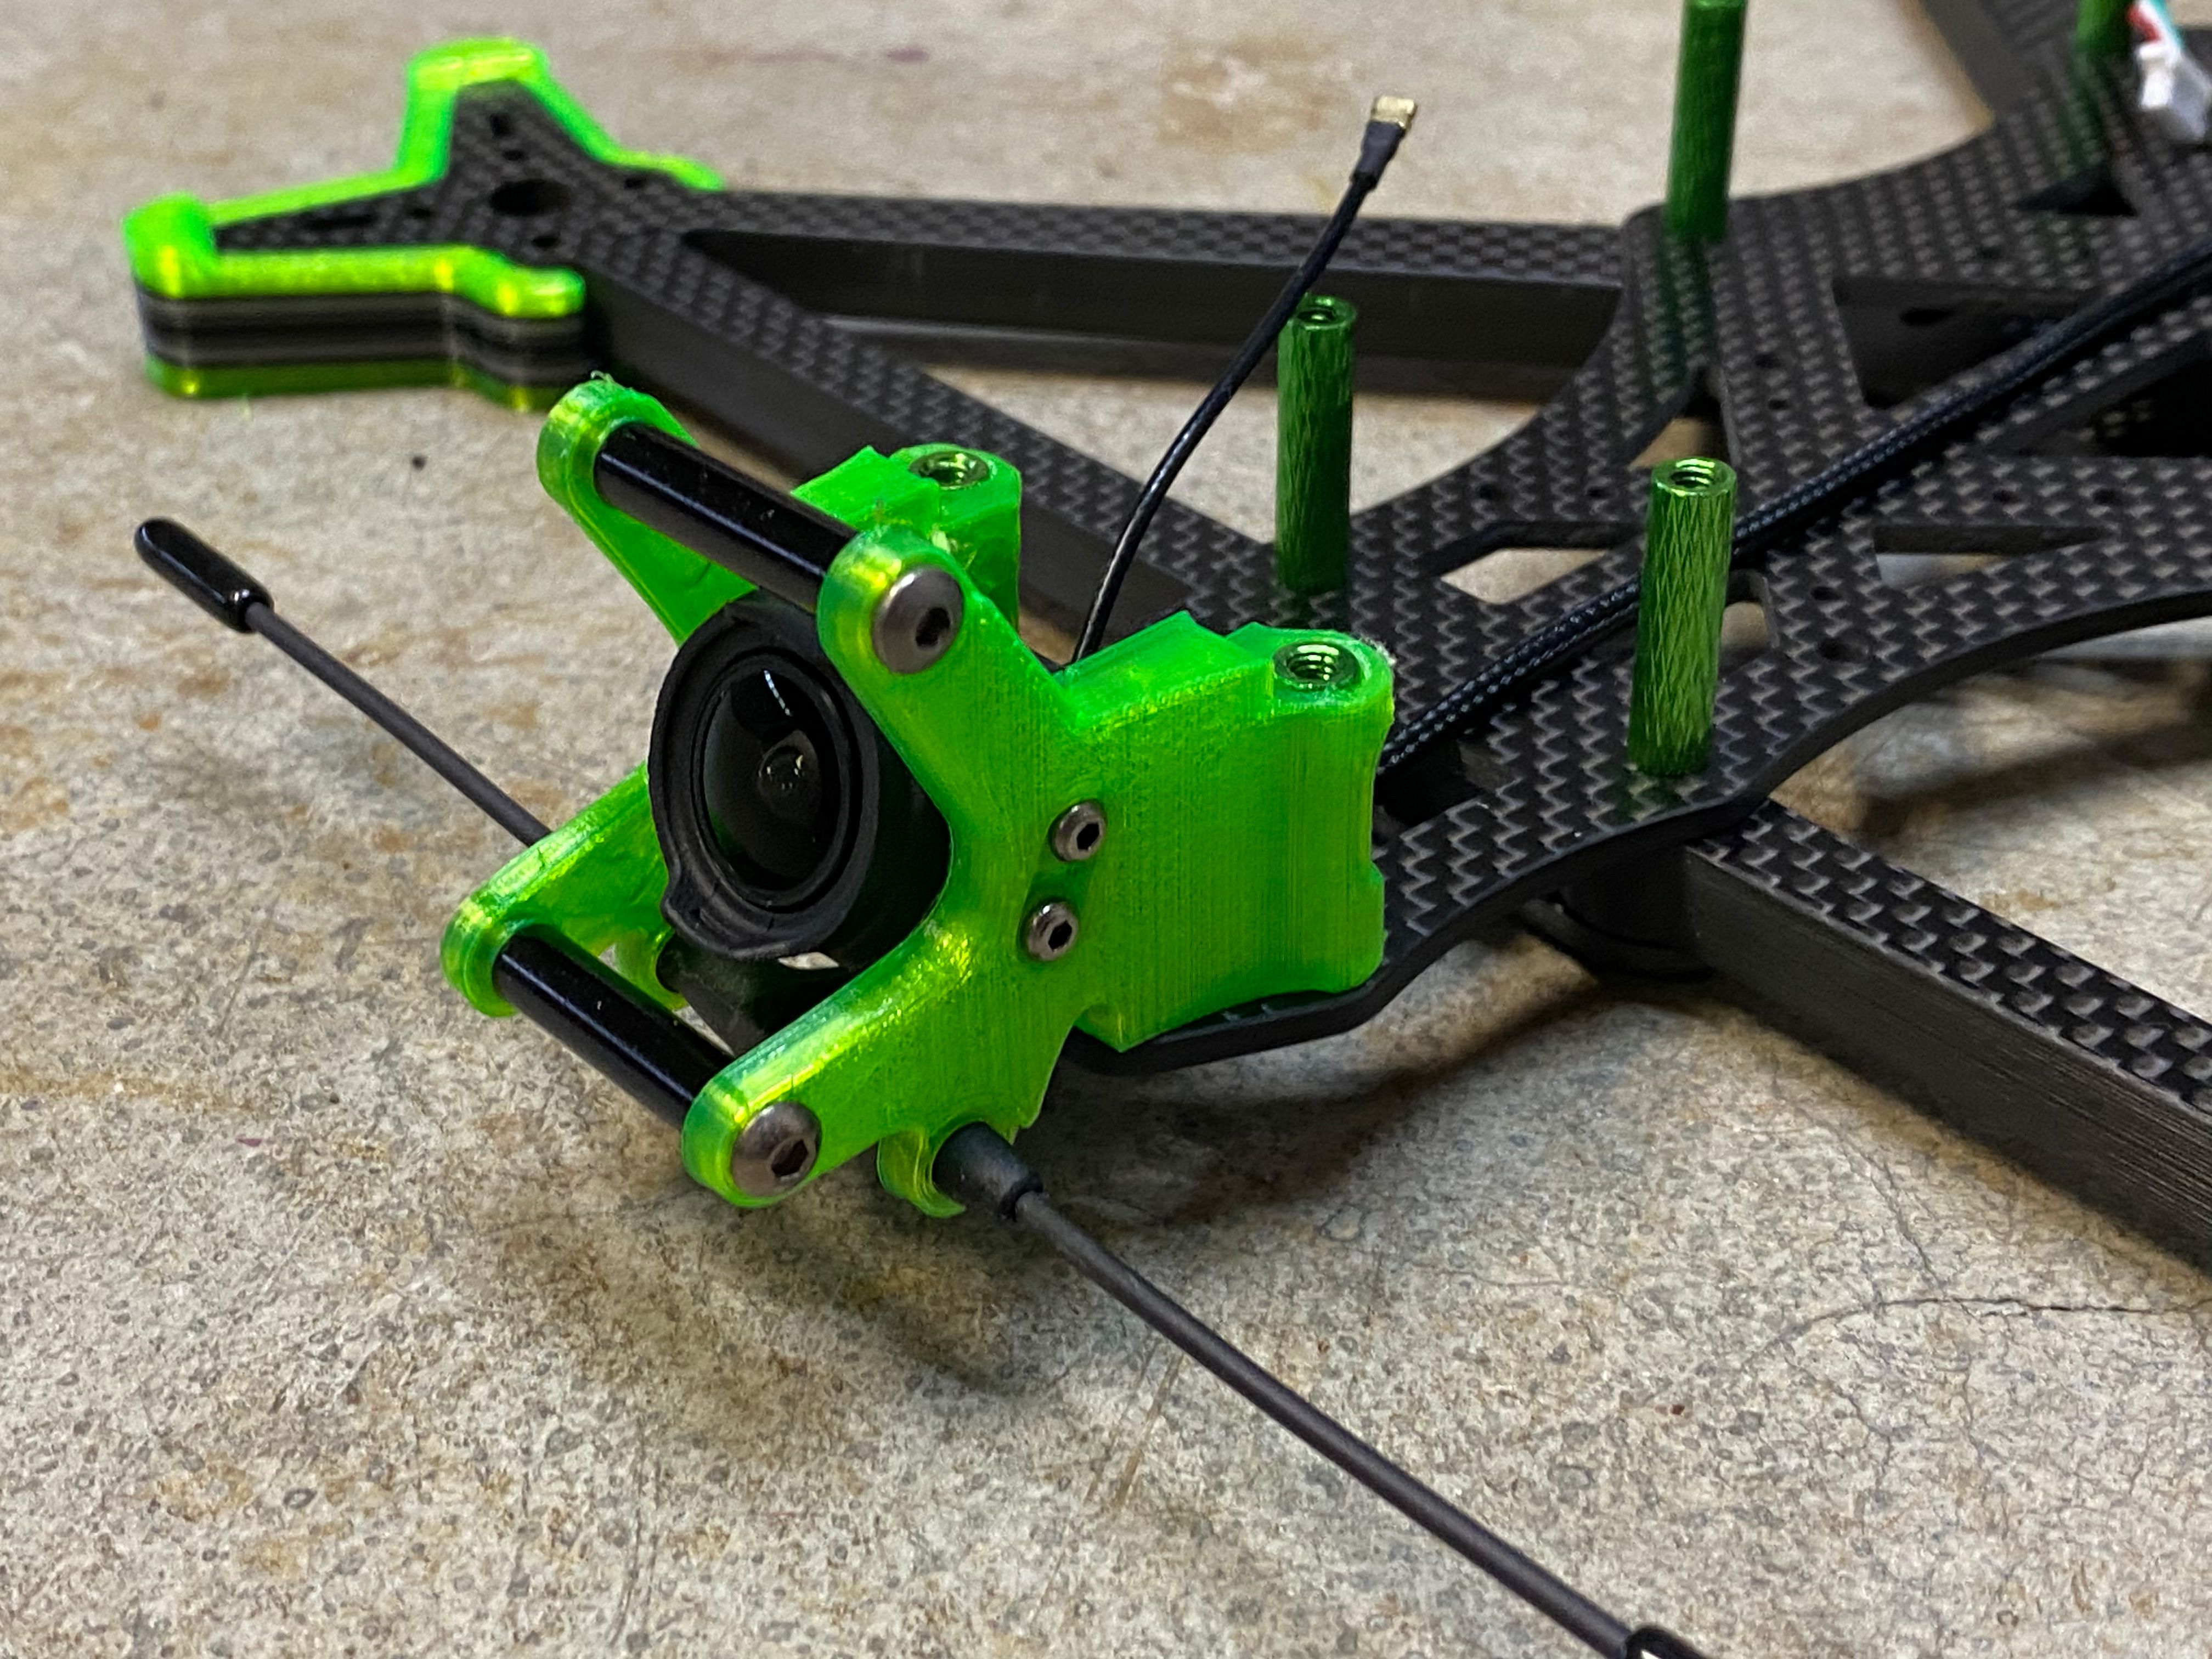
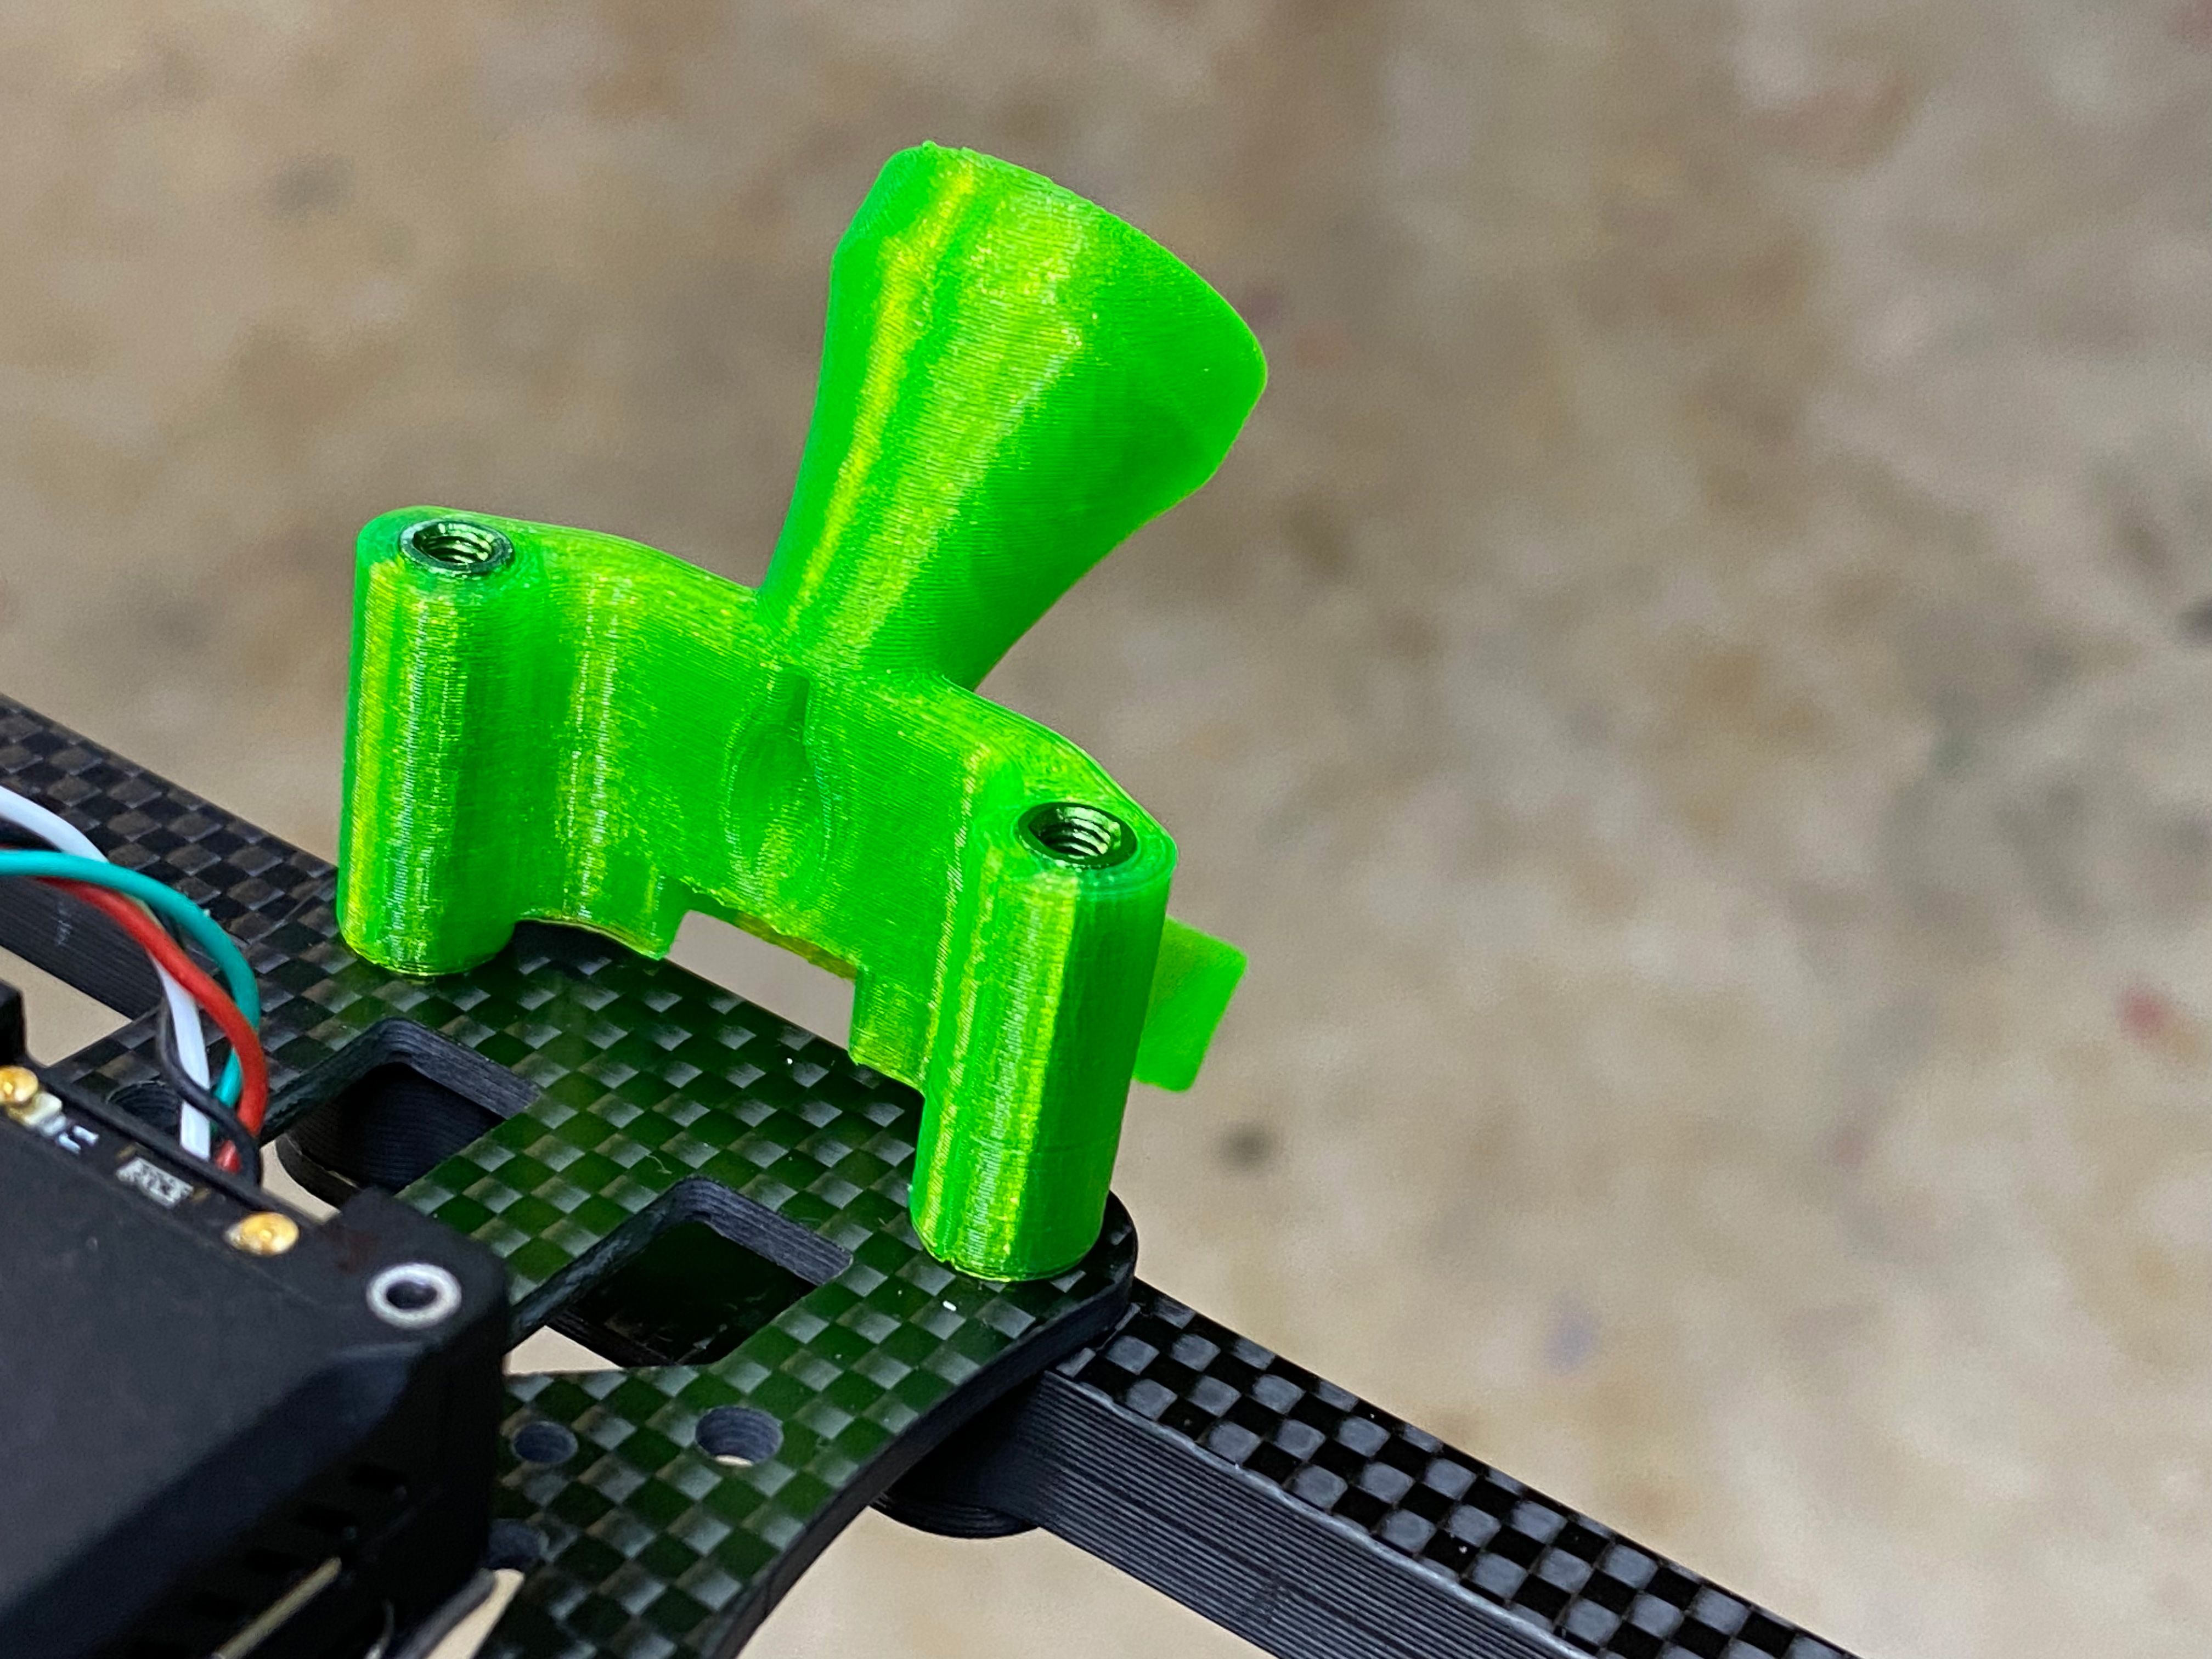
I started out with the same FPV camera mount that was originally designed for the Hyperlite Floss 2. Then I followed the same idea I did for the QAVS OS conversions I did earlier. In addition to that, I also added a silicon grommet to help dampen the vibrations to the O3 camera. This is a rendered image of how the mount should look like. You can find a link to the silicon vibration dampener I used in the part list below.
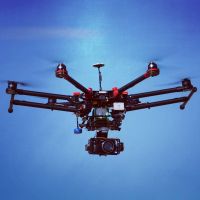
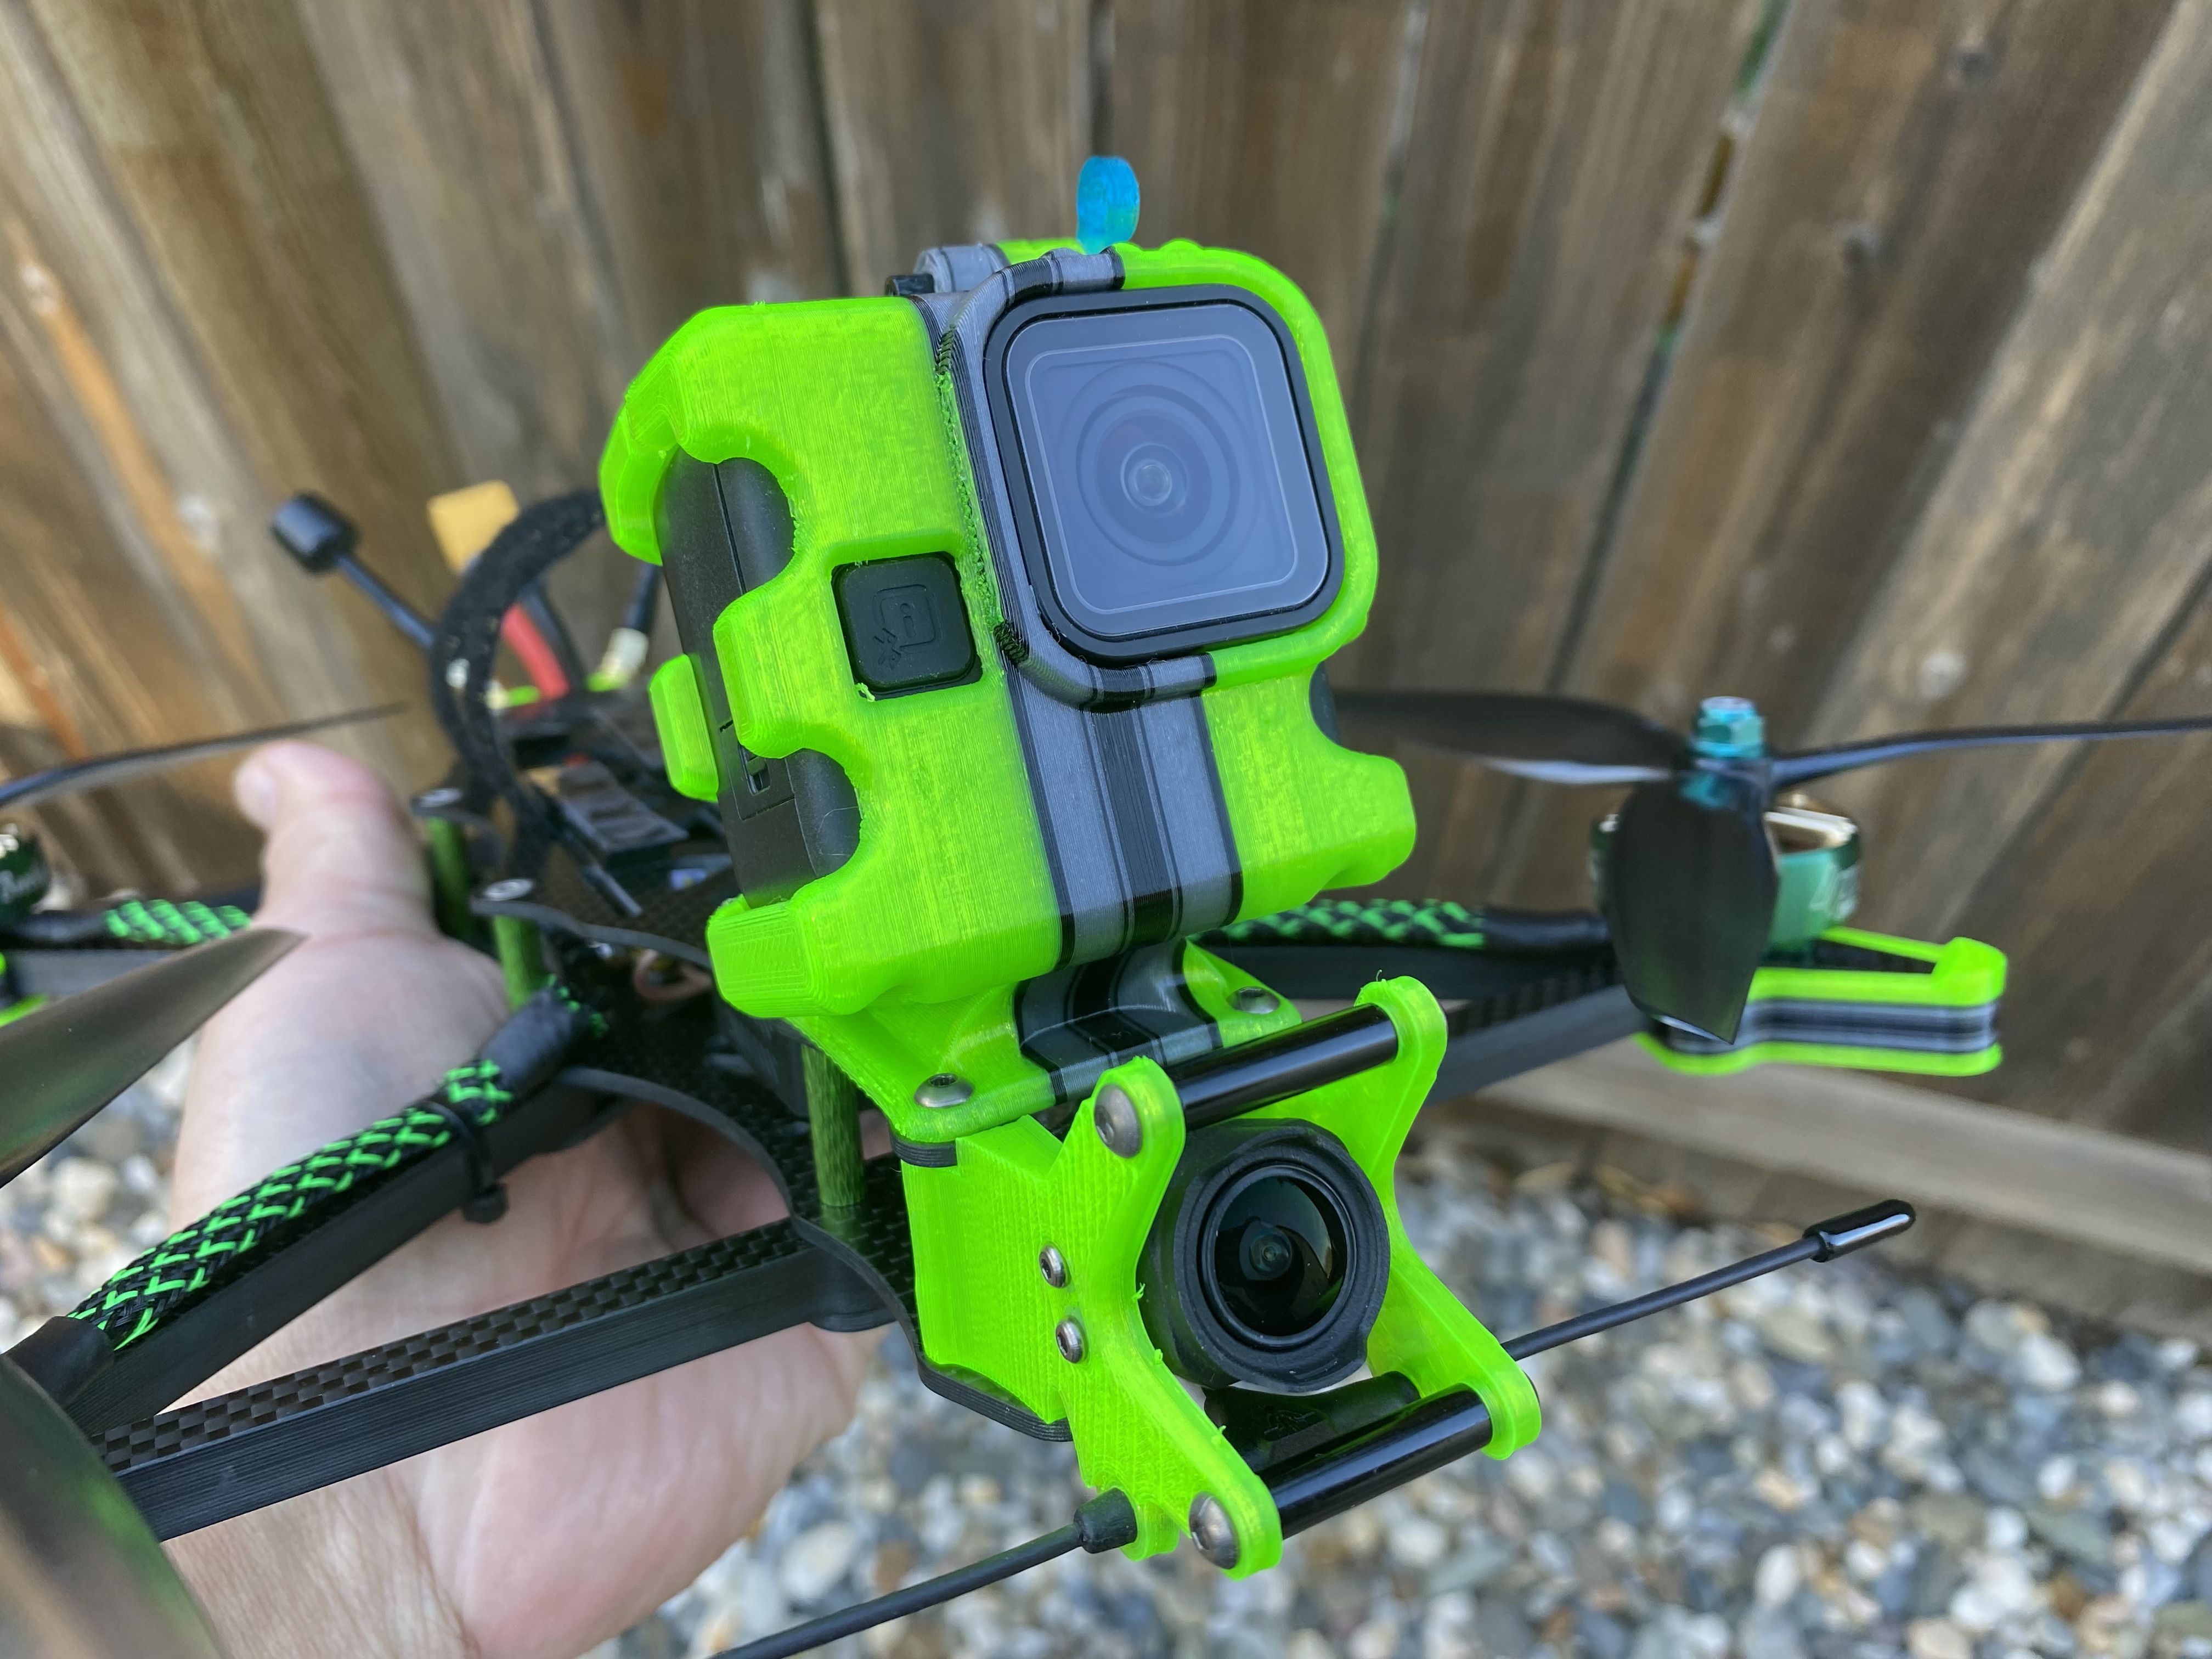
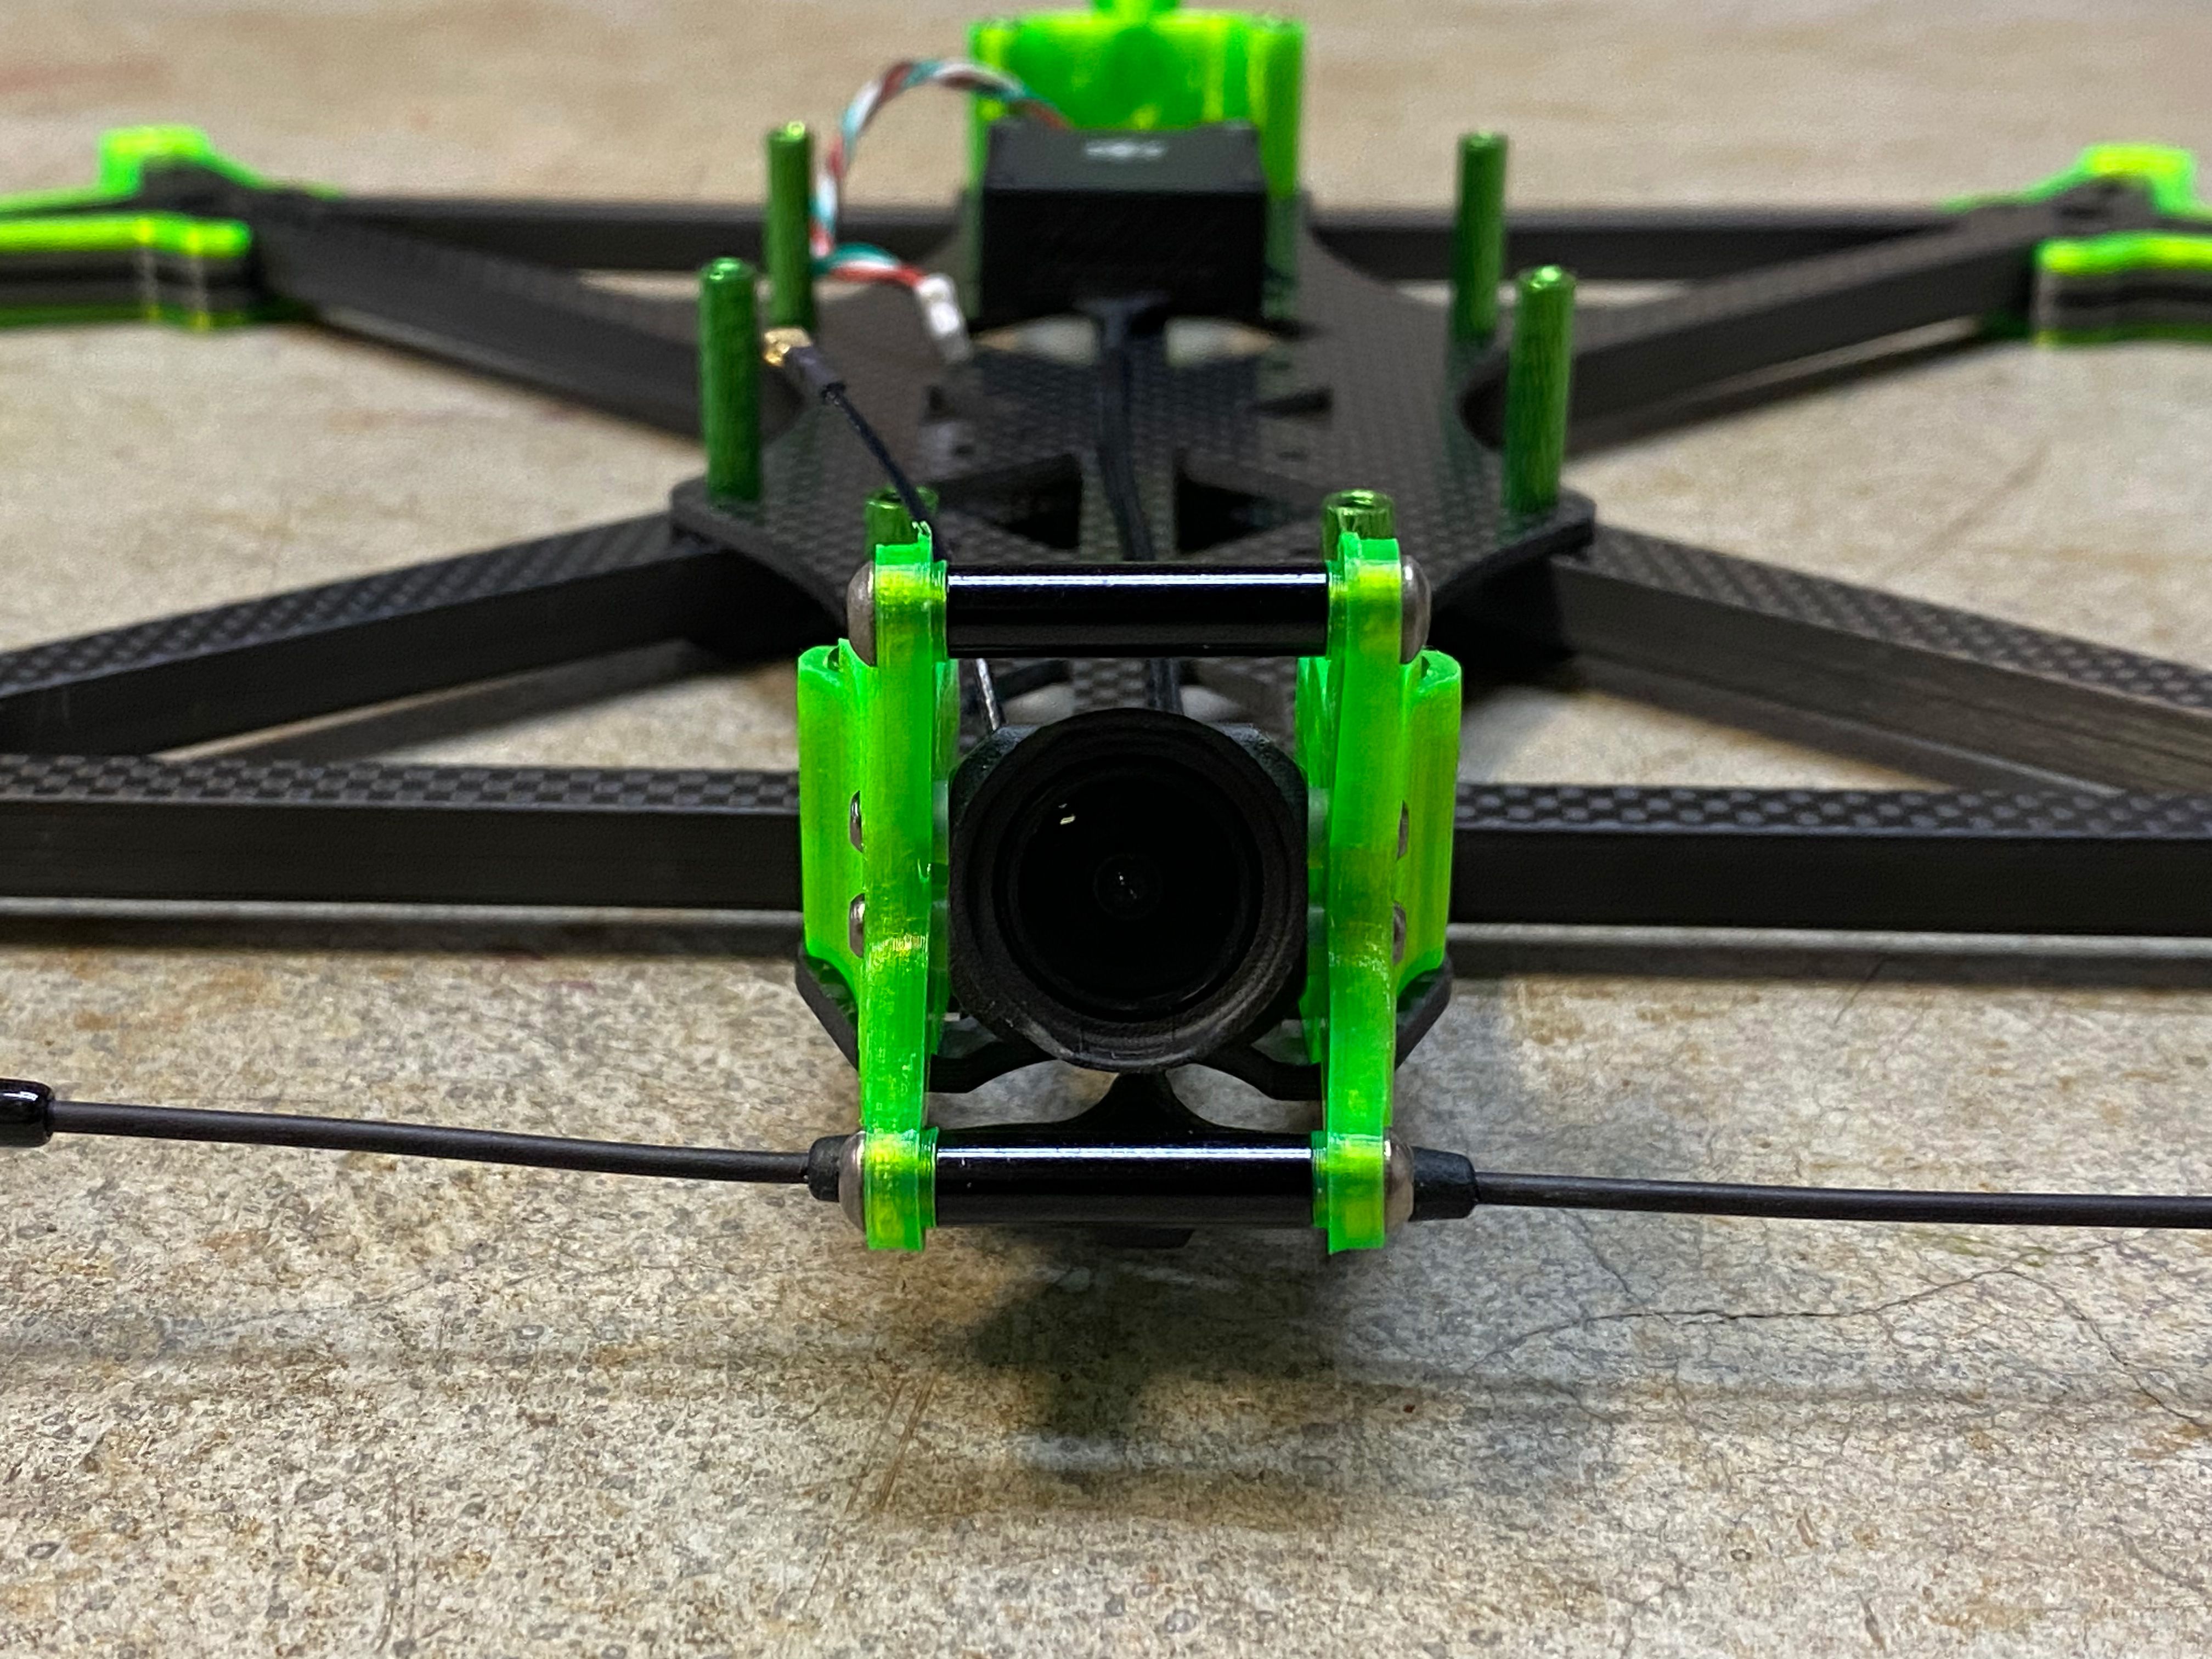
After 3D printed the mount in TPU and with the silicon gummies inserted in the hole, you can see how the camera fits. Also be aware that the screw is a tad longer and the screw bottoms out on the camera, so it is more like floating and not crushed against the camera plates. No, the screws does not stick out like you see in the picture
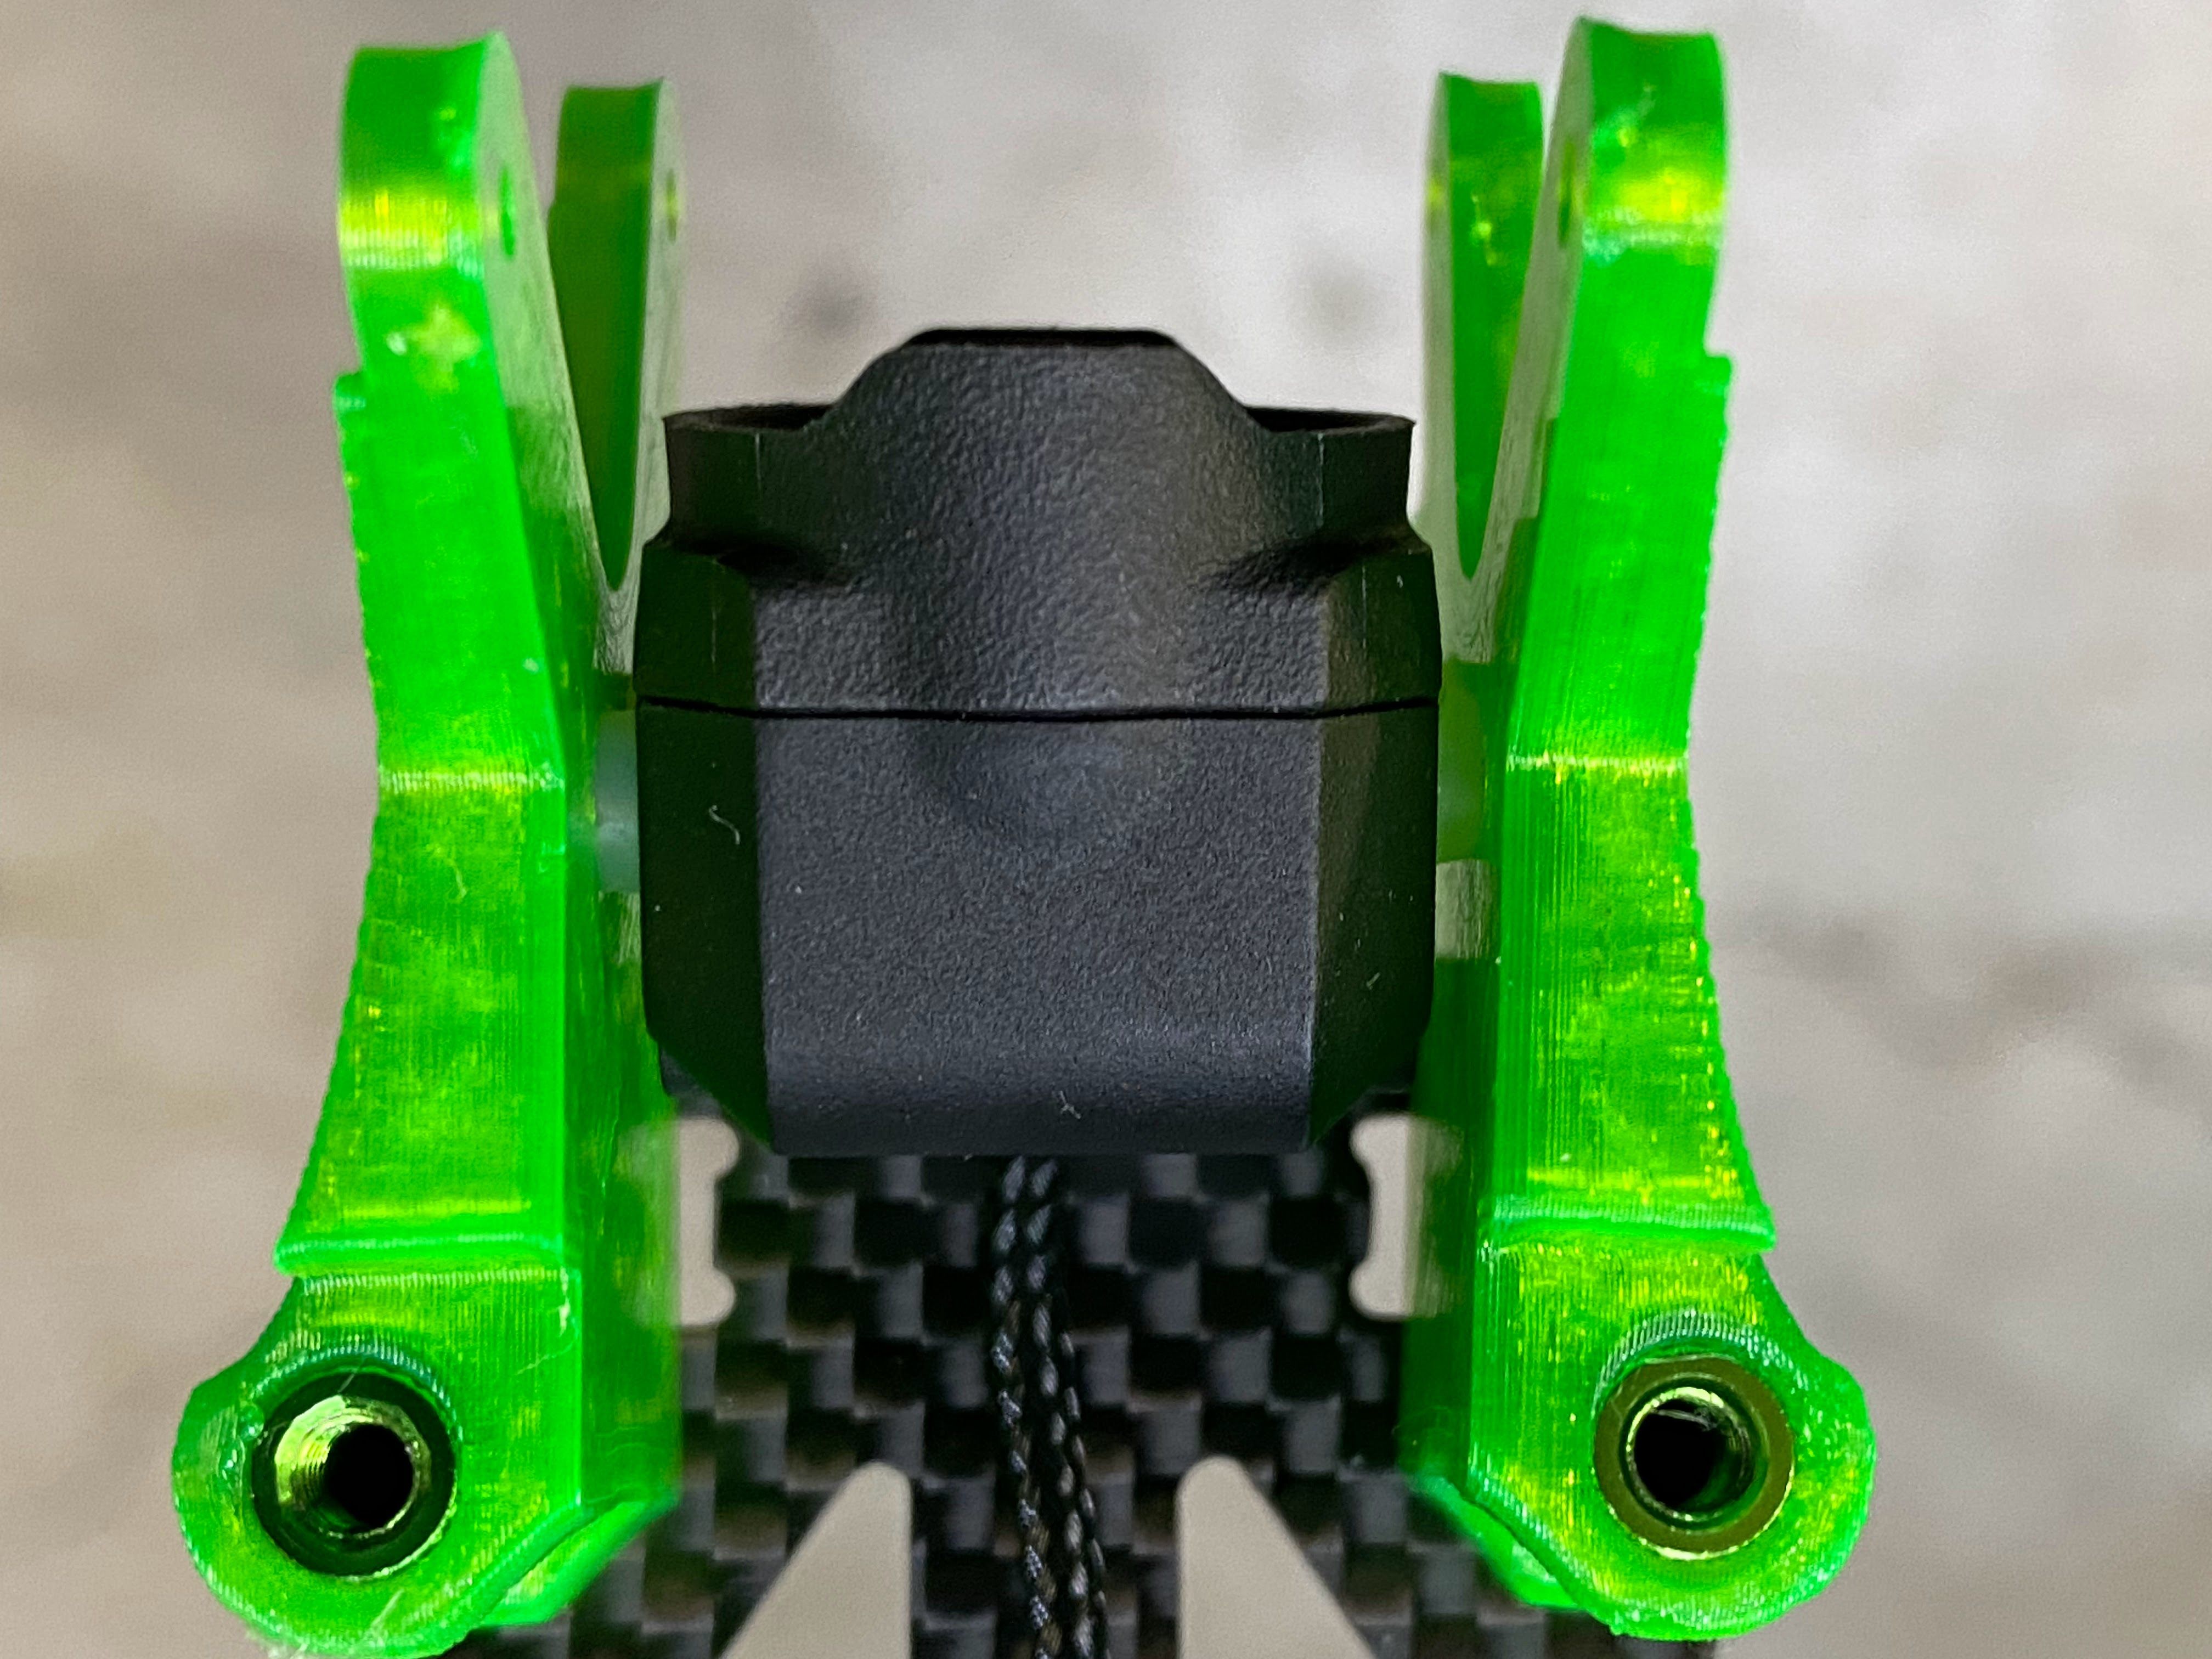
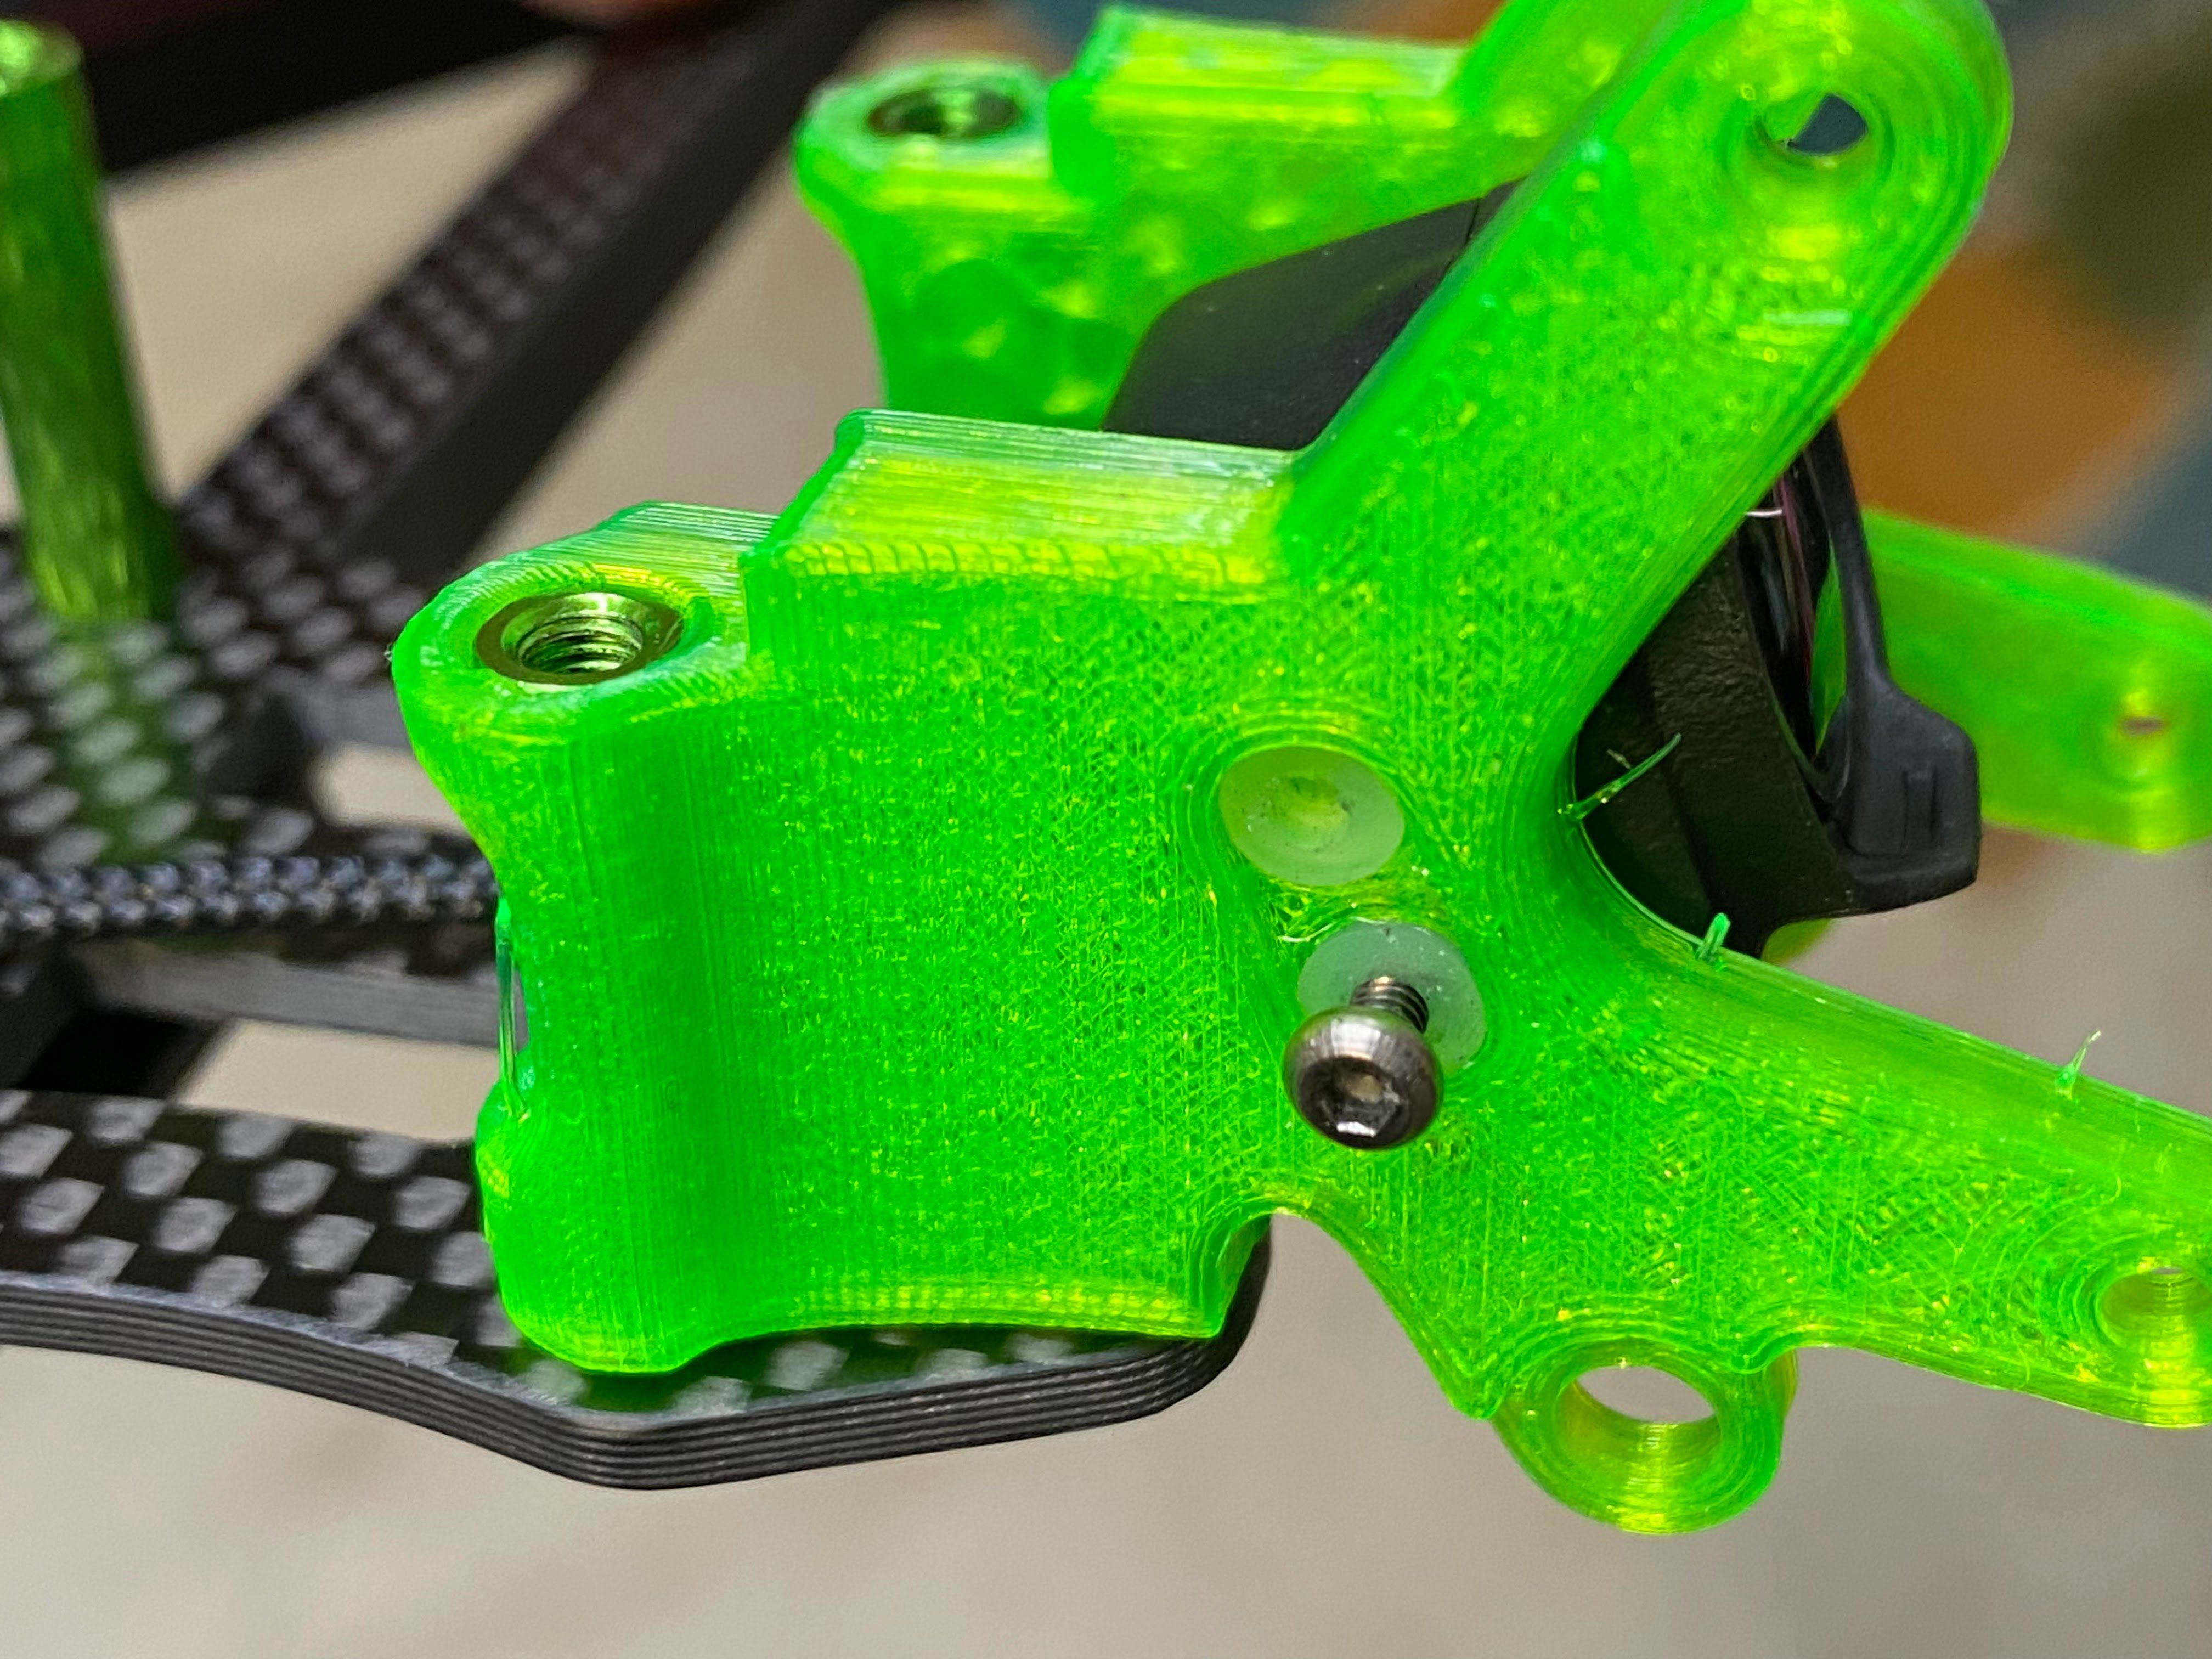
Here is a better view of what I am talking about, how the camera is floating and not touch the camera mount. The idea is to dampen any vibrations like a flight controller. Initially this mount was created specifically for this build, but I end up applying to the AOS 5 and QAVS.
This is a view of from the inside. The silicon gummies acts like a spacer and prevent the camera from touching the green TPU mount.
I found an arm guard on thingiverse but the size was off and need to be reduced 990% smaller and also cut about 2.5mm of excess material from the bottom.
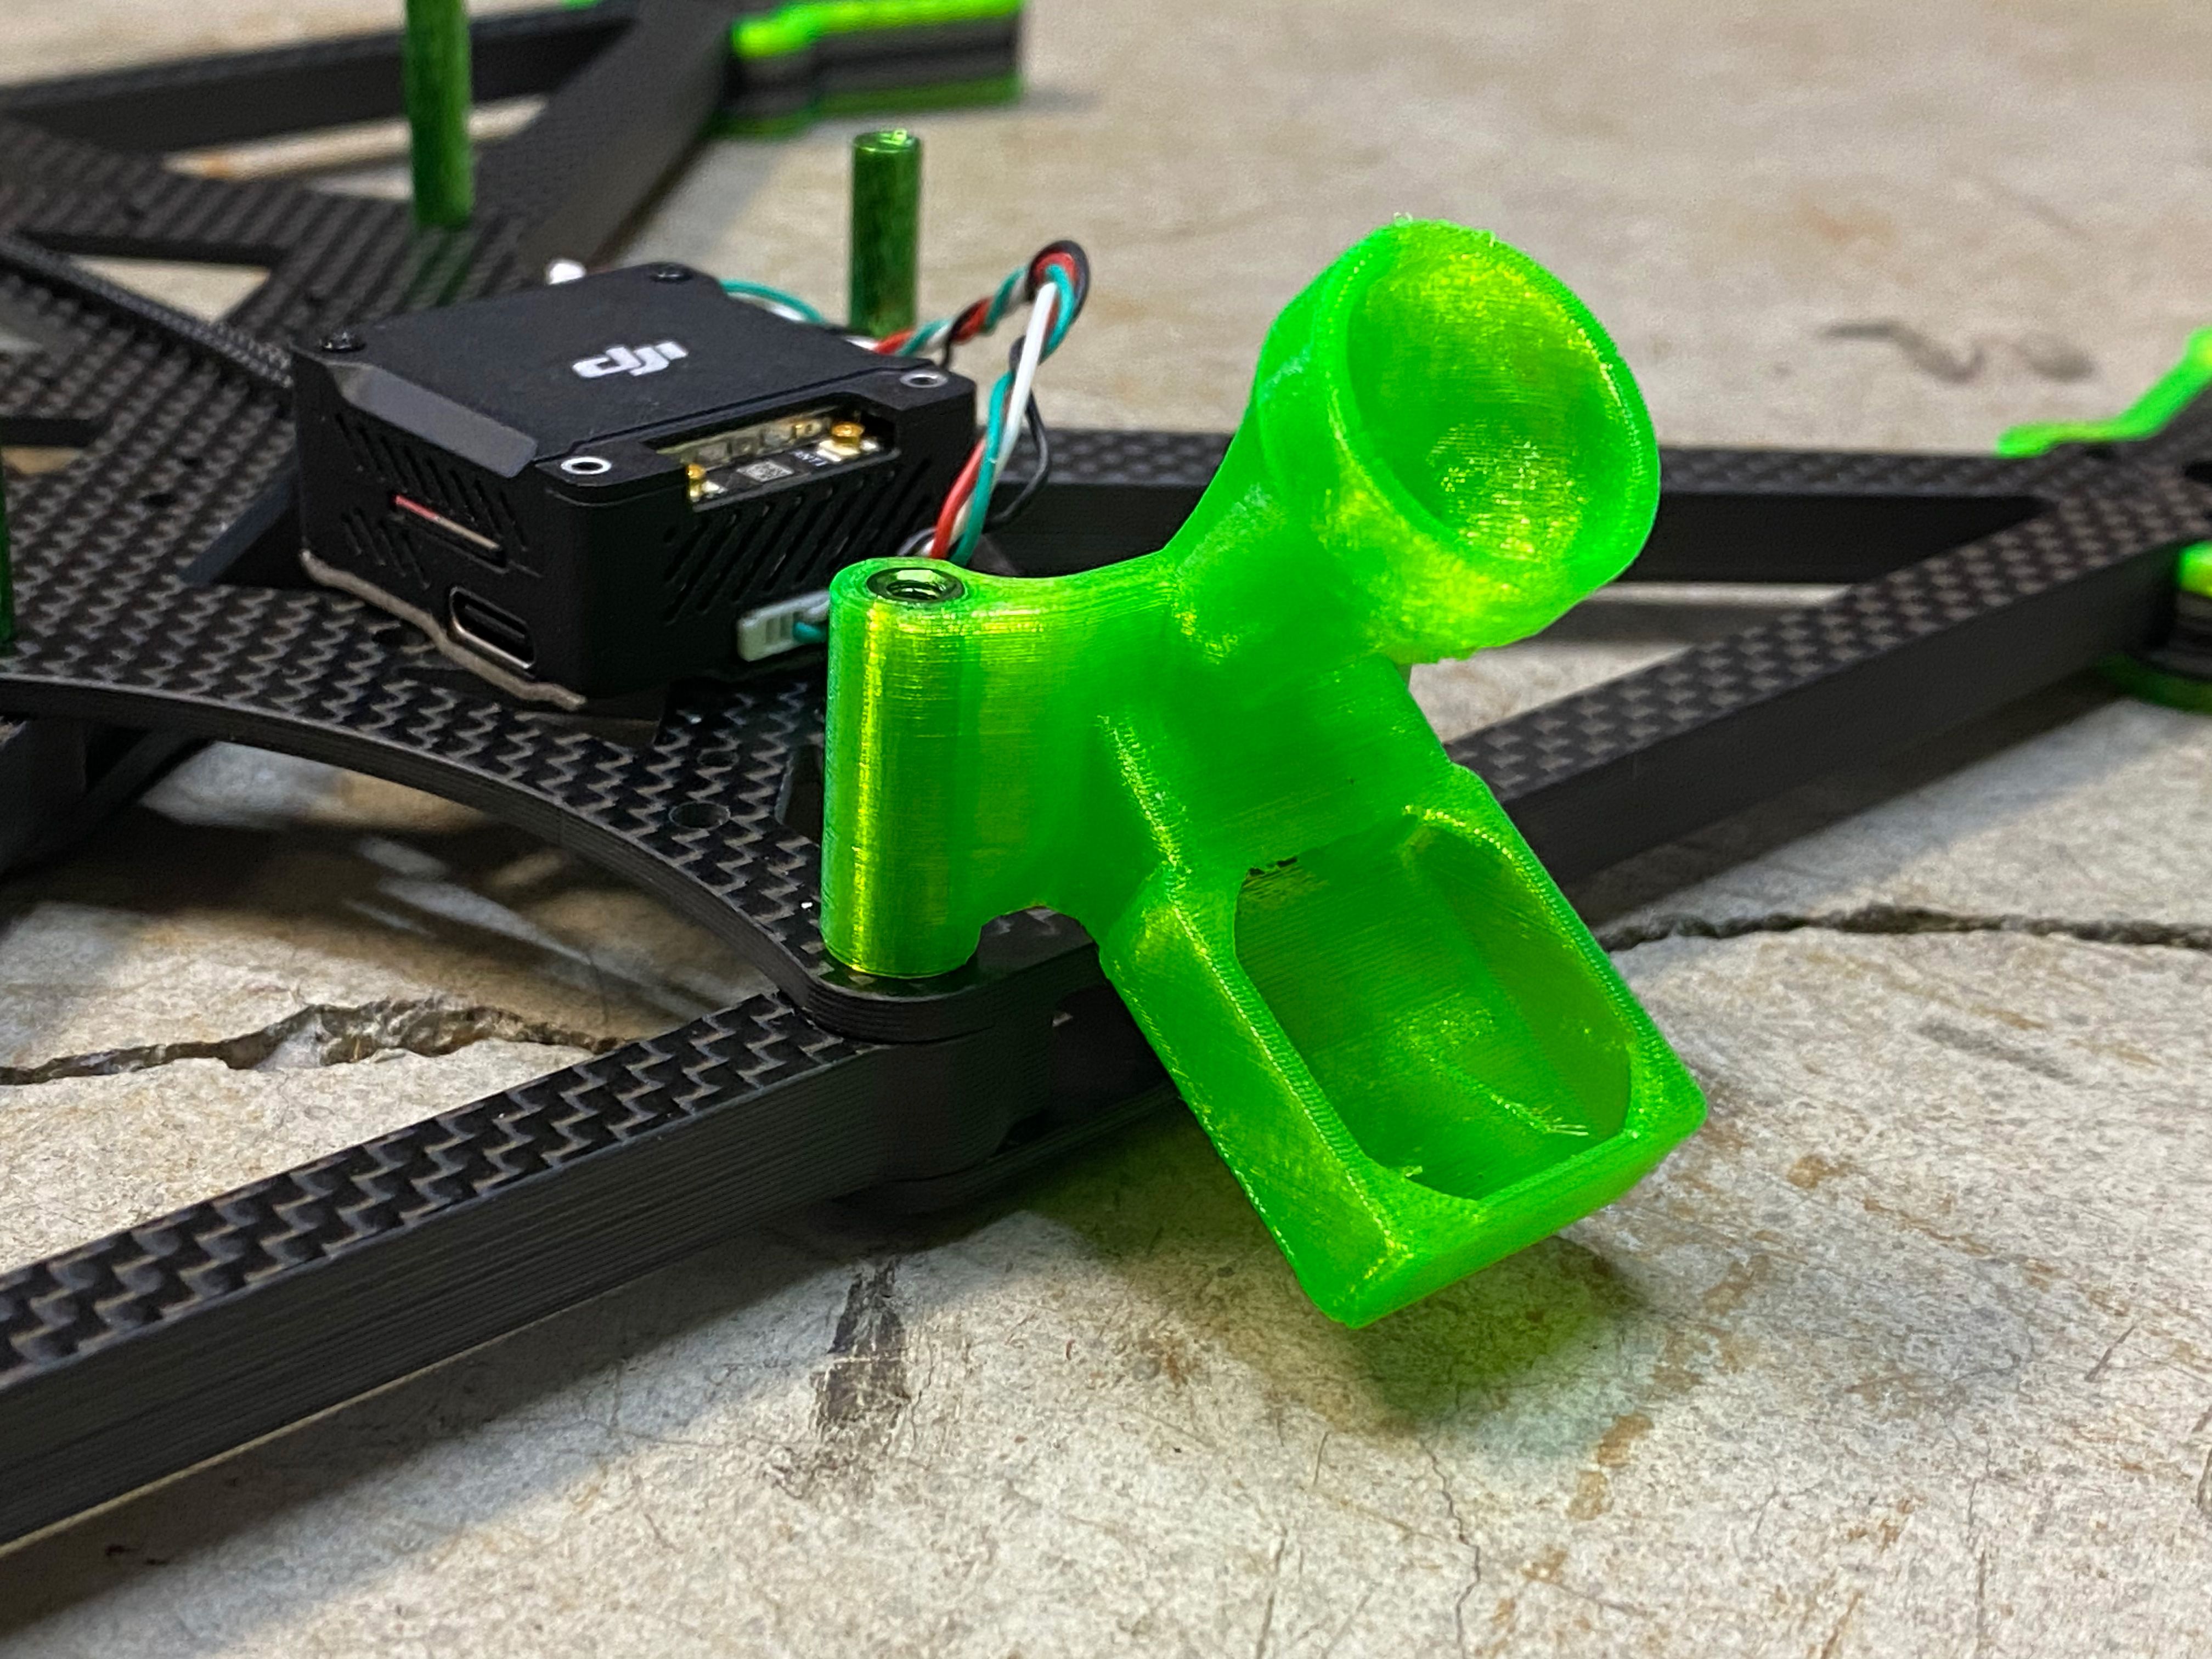
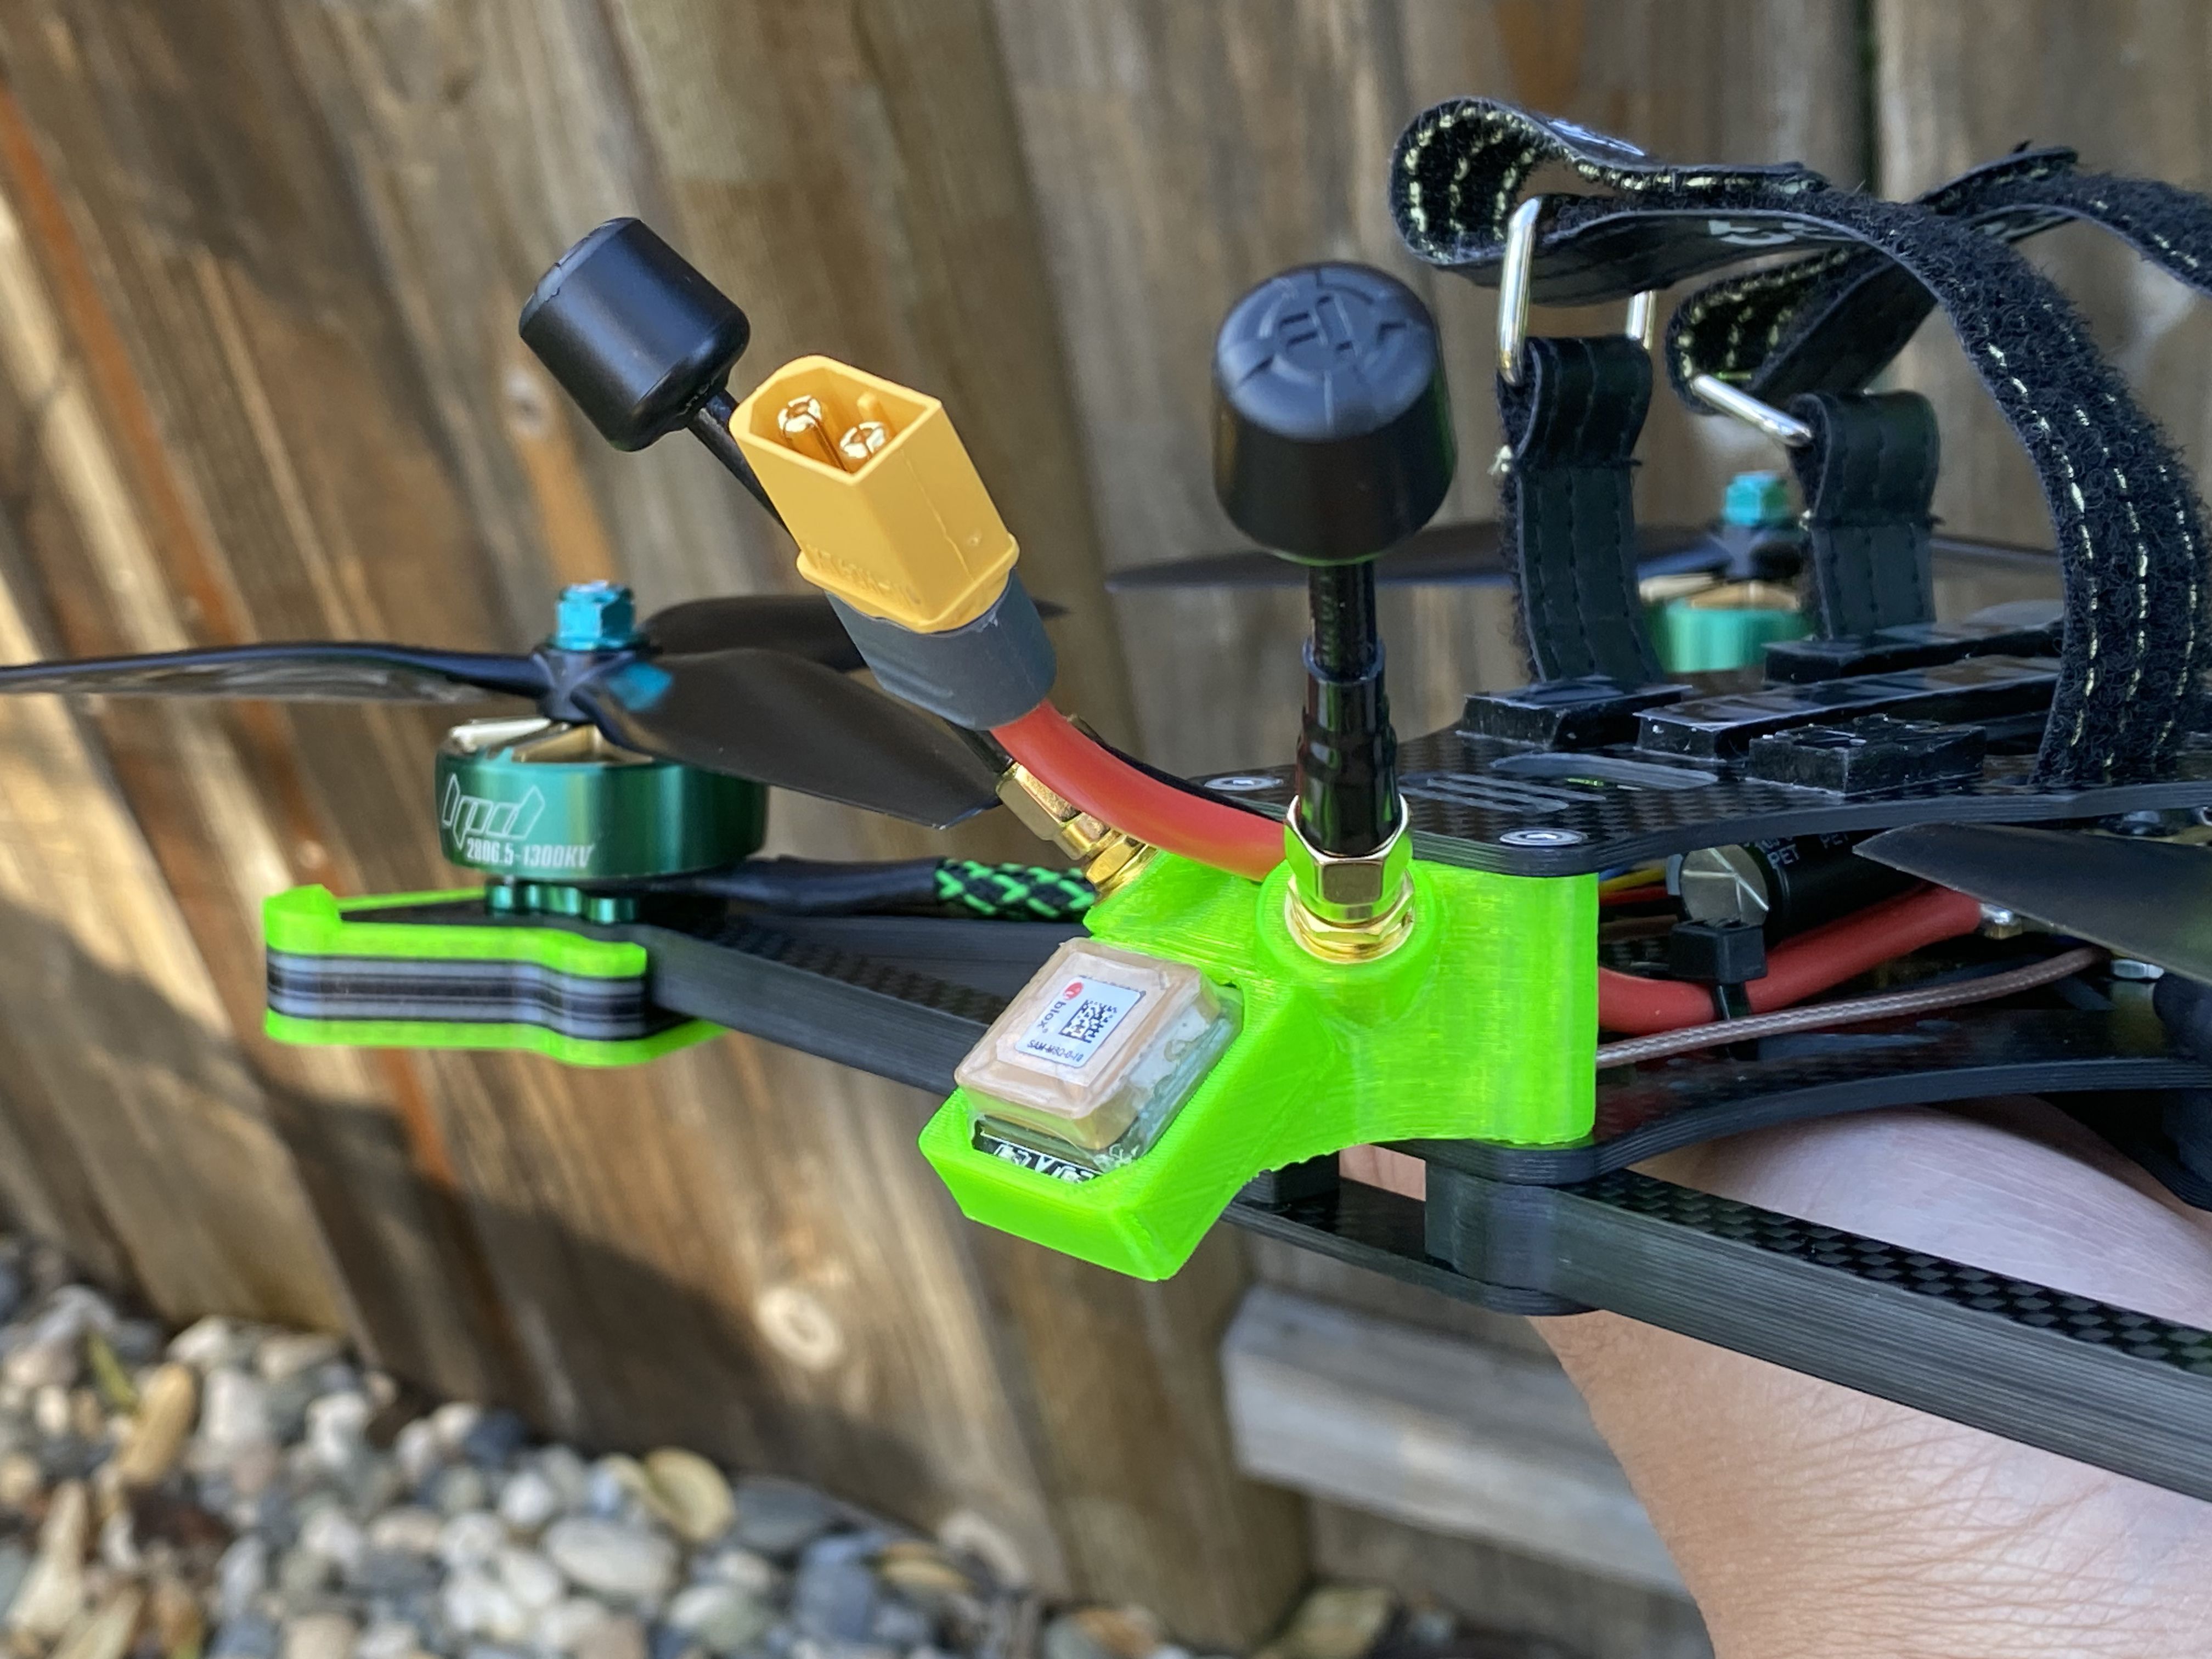
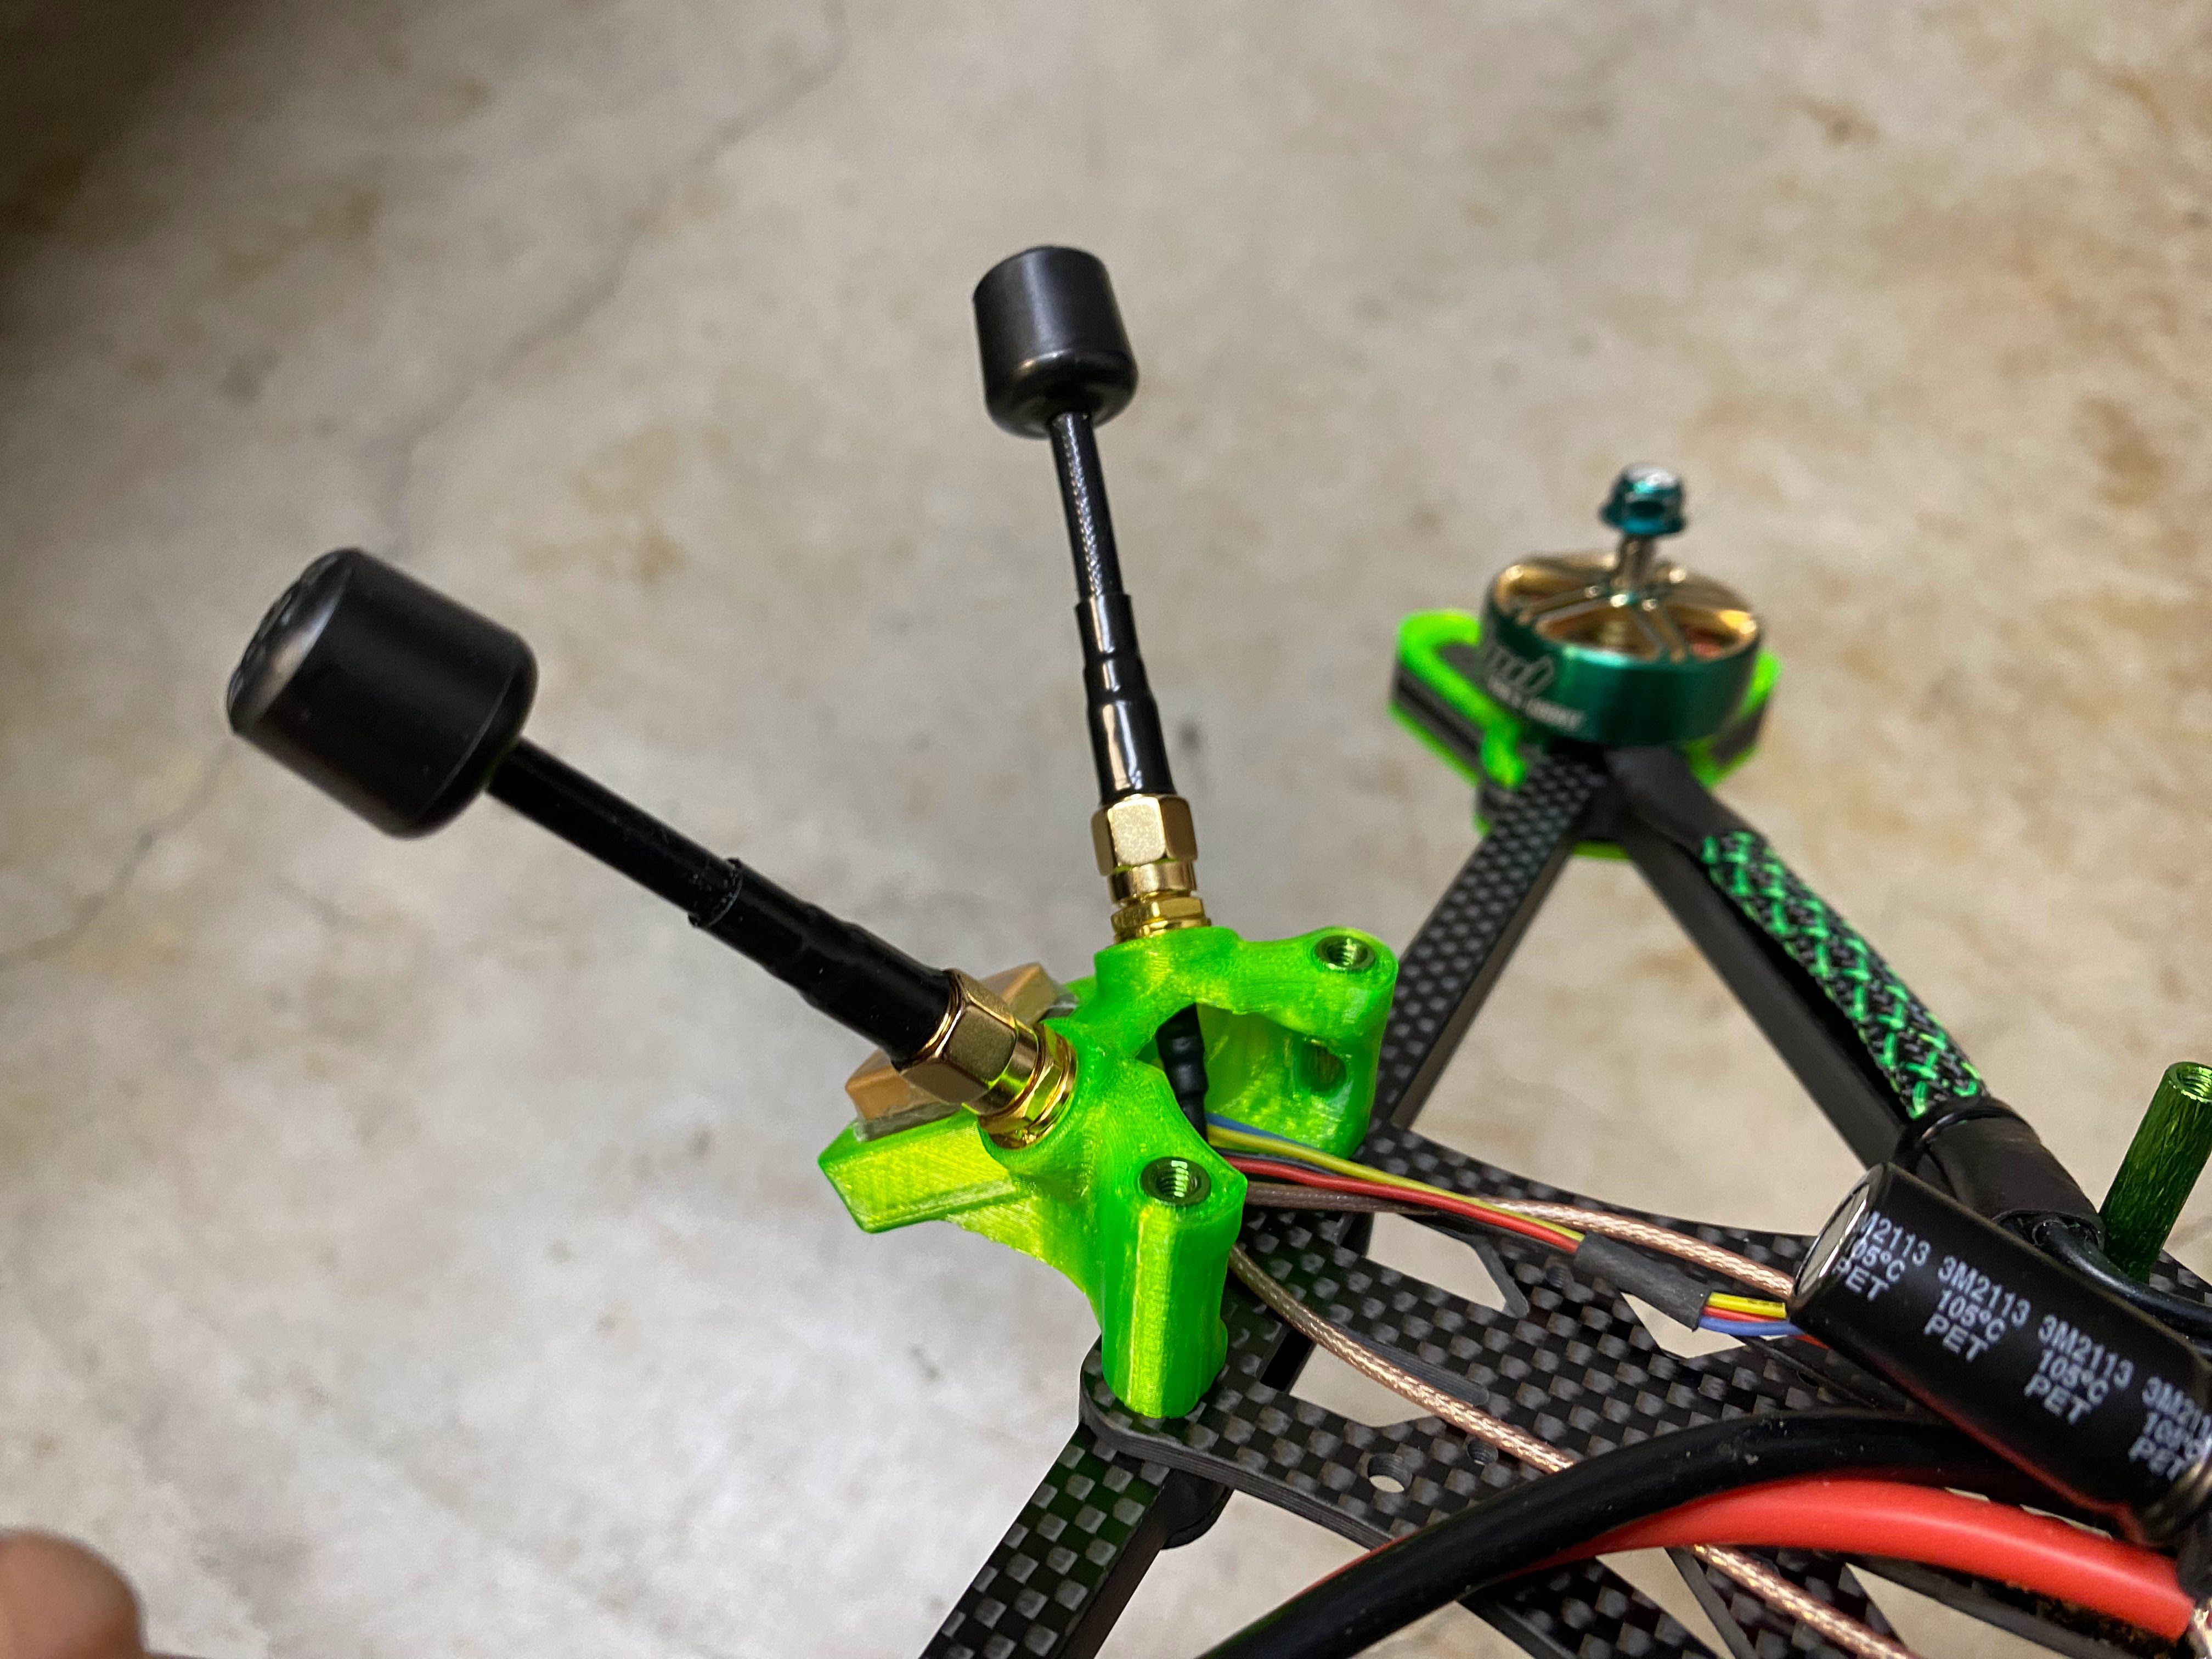
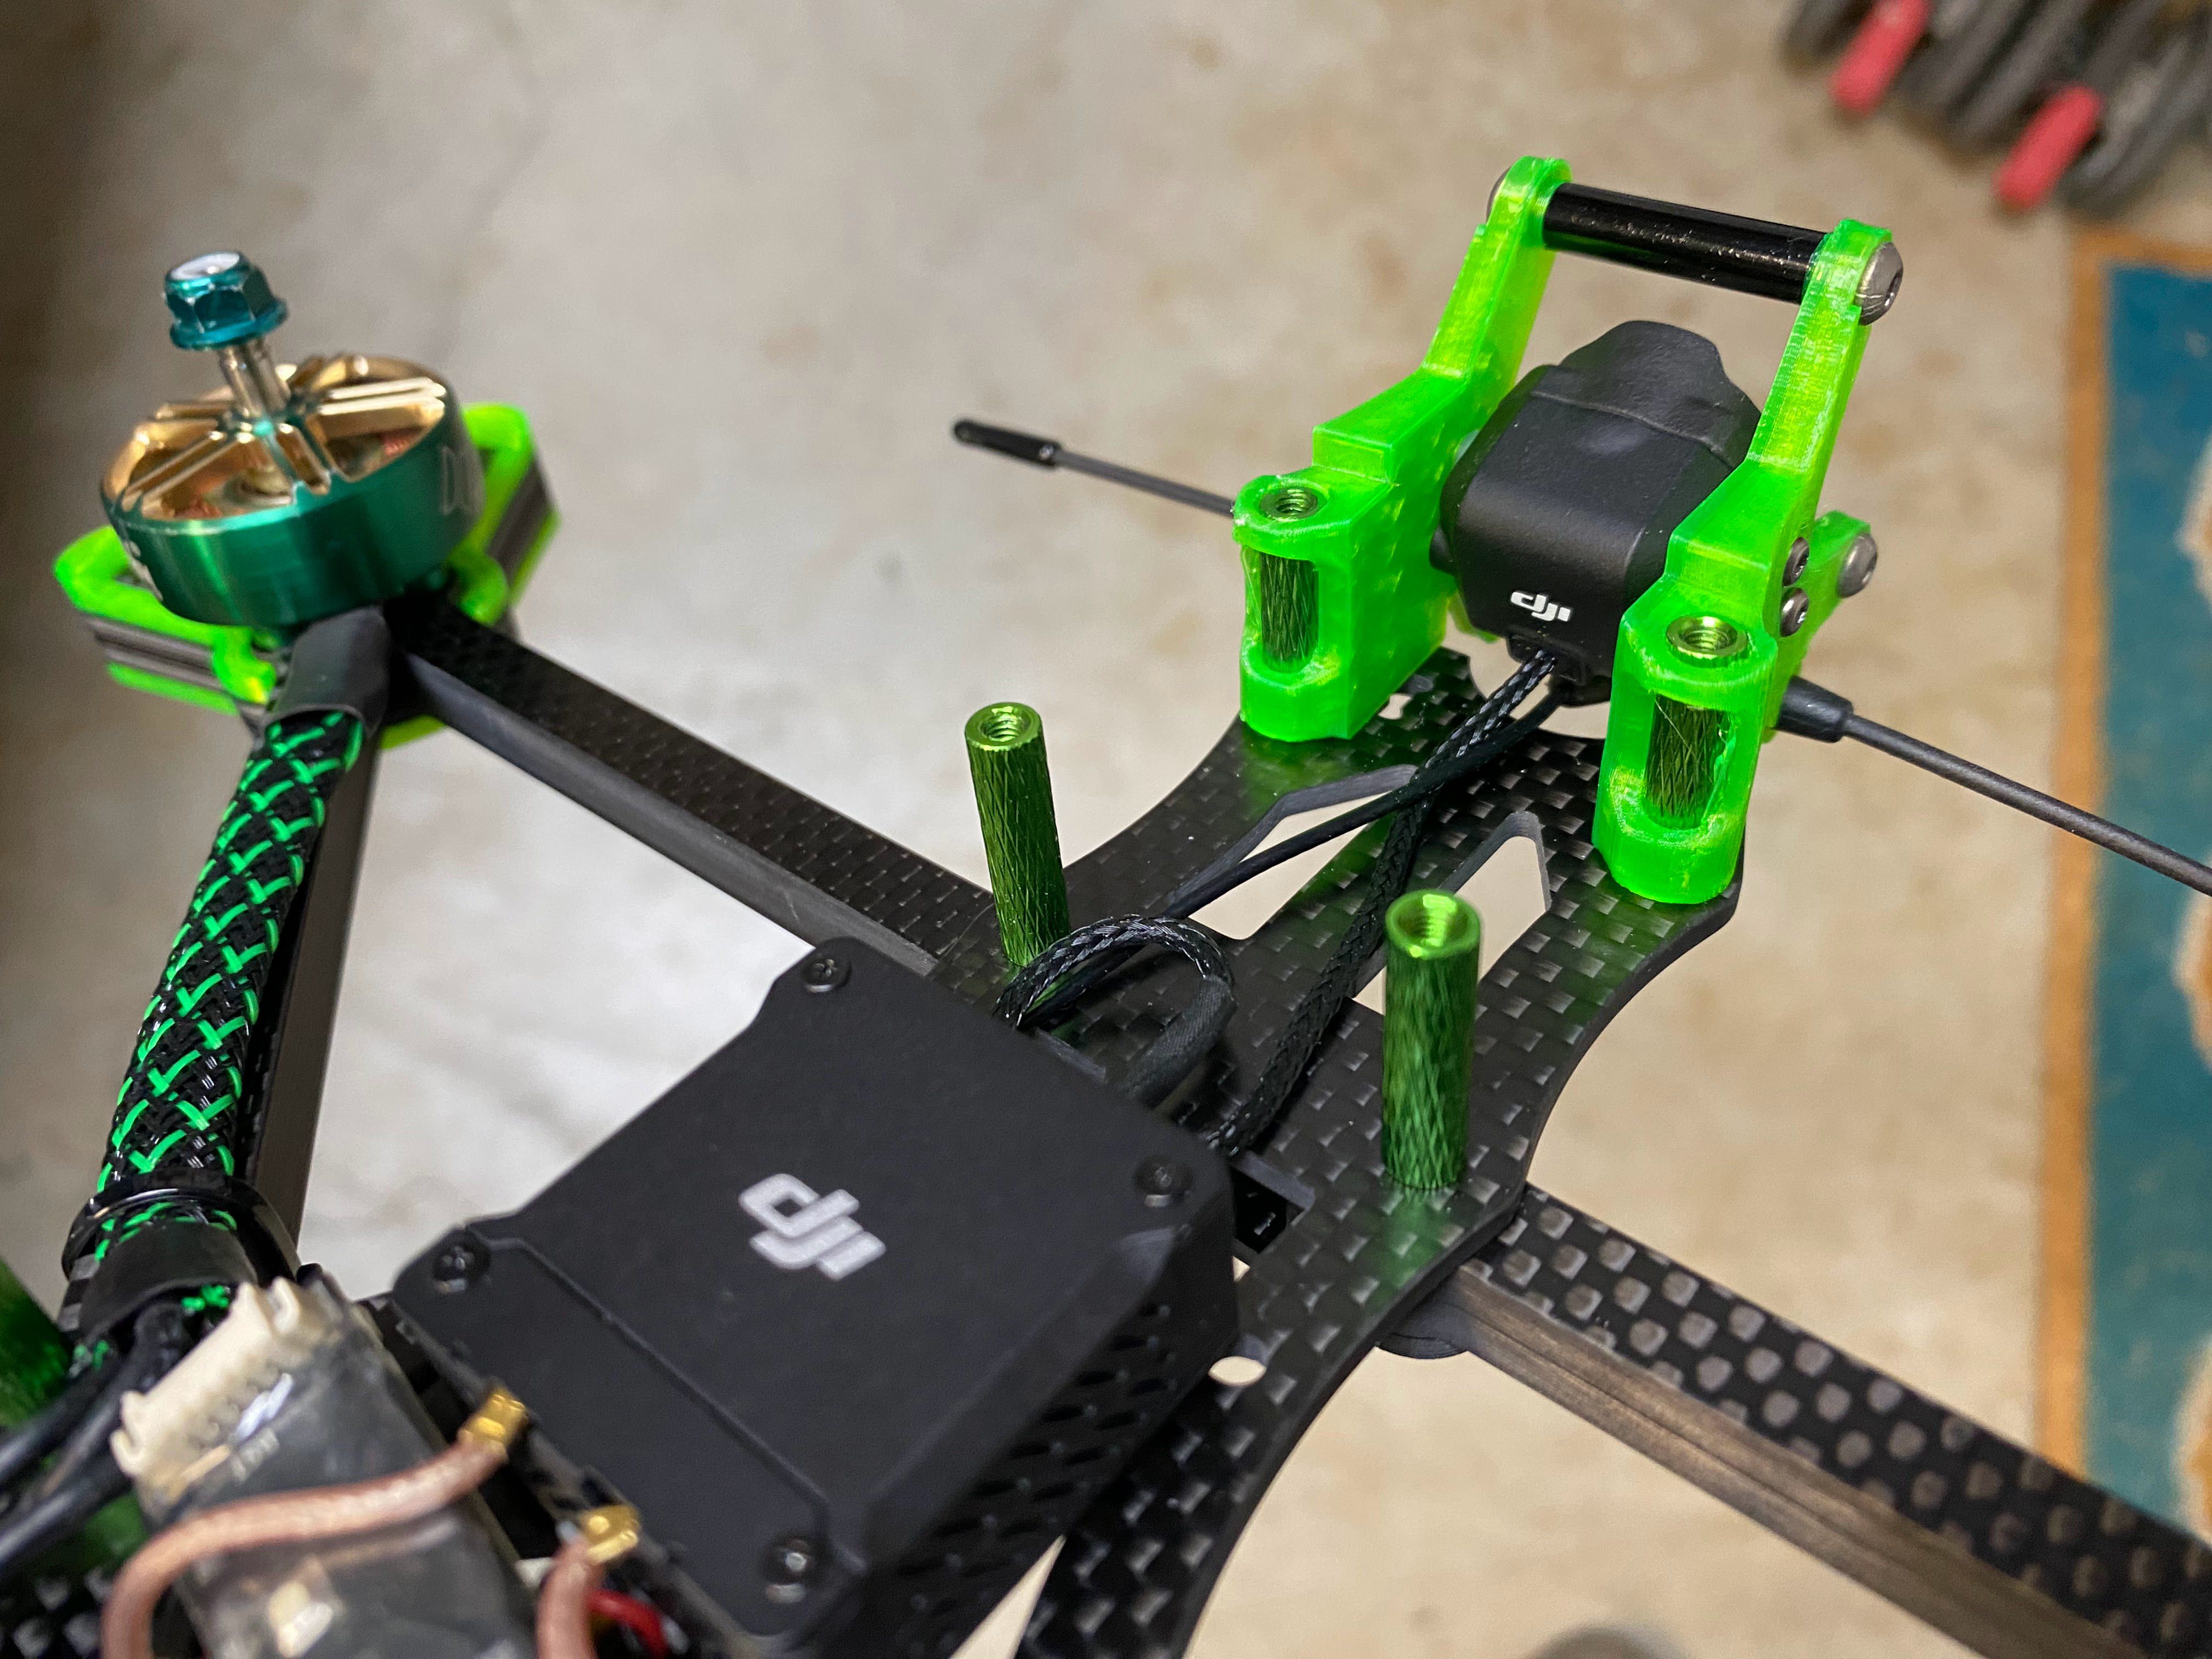
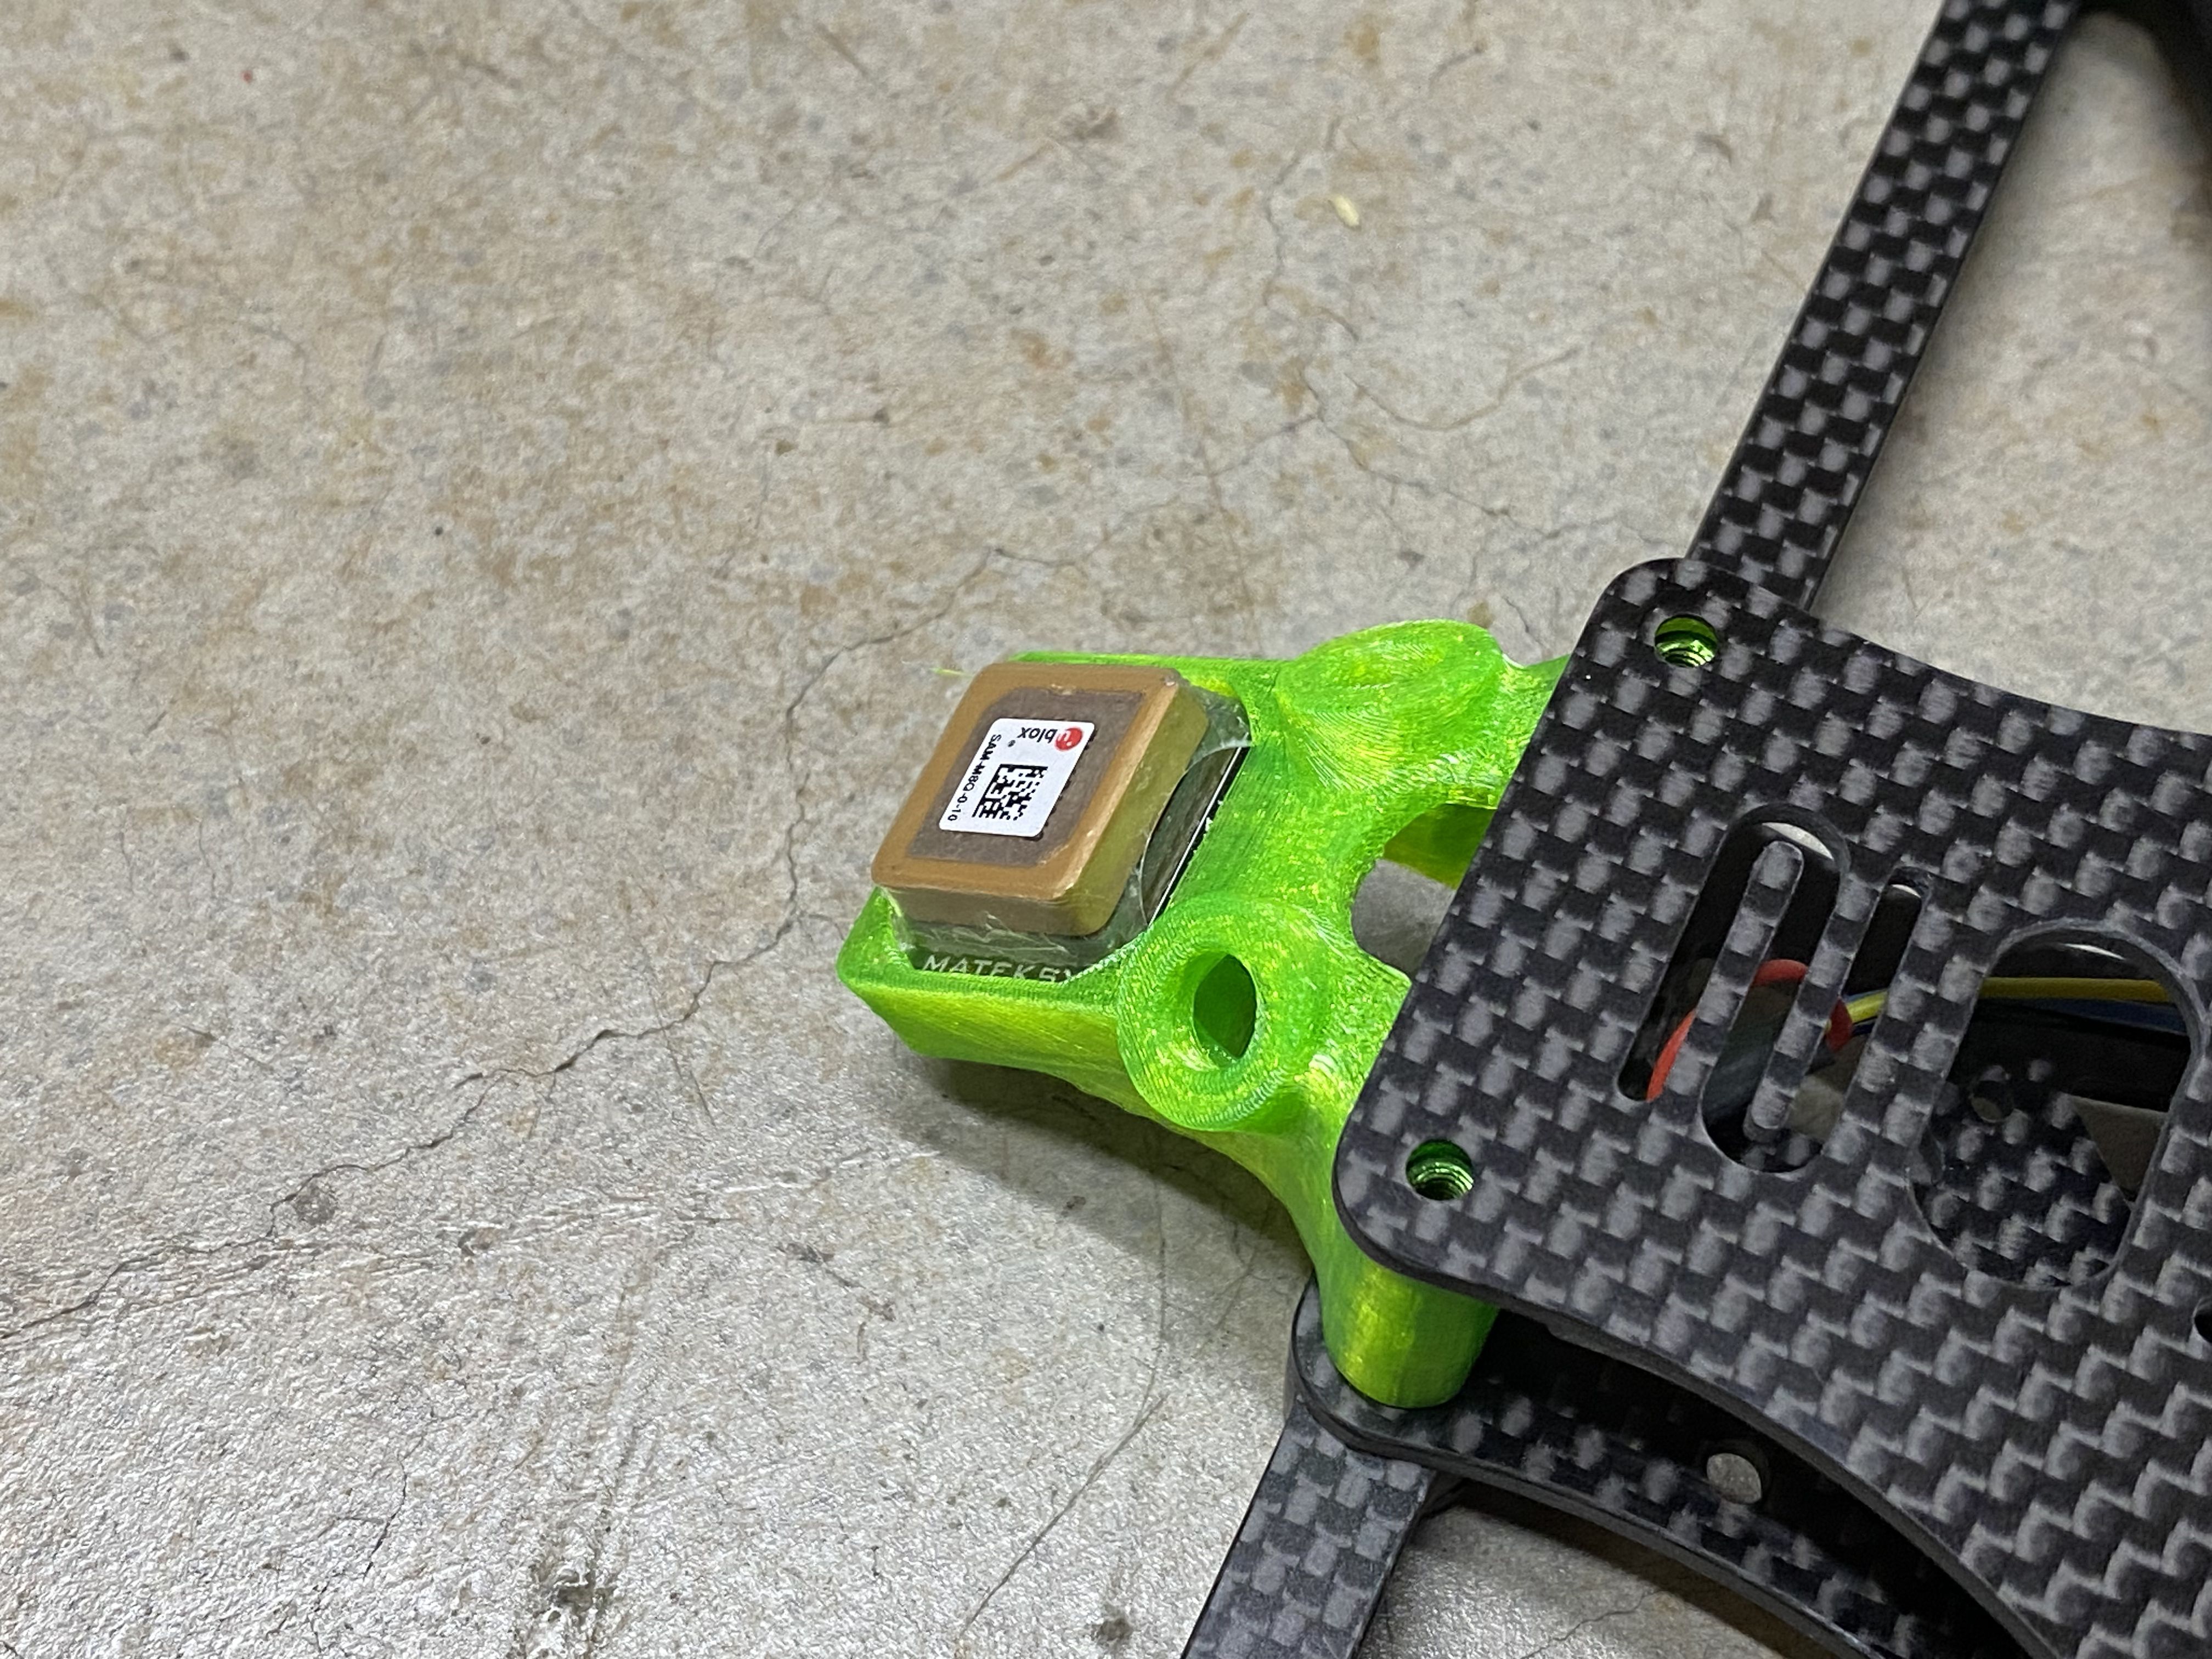
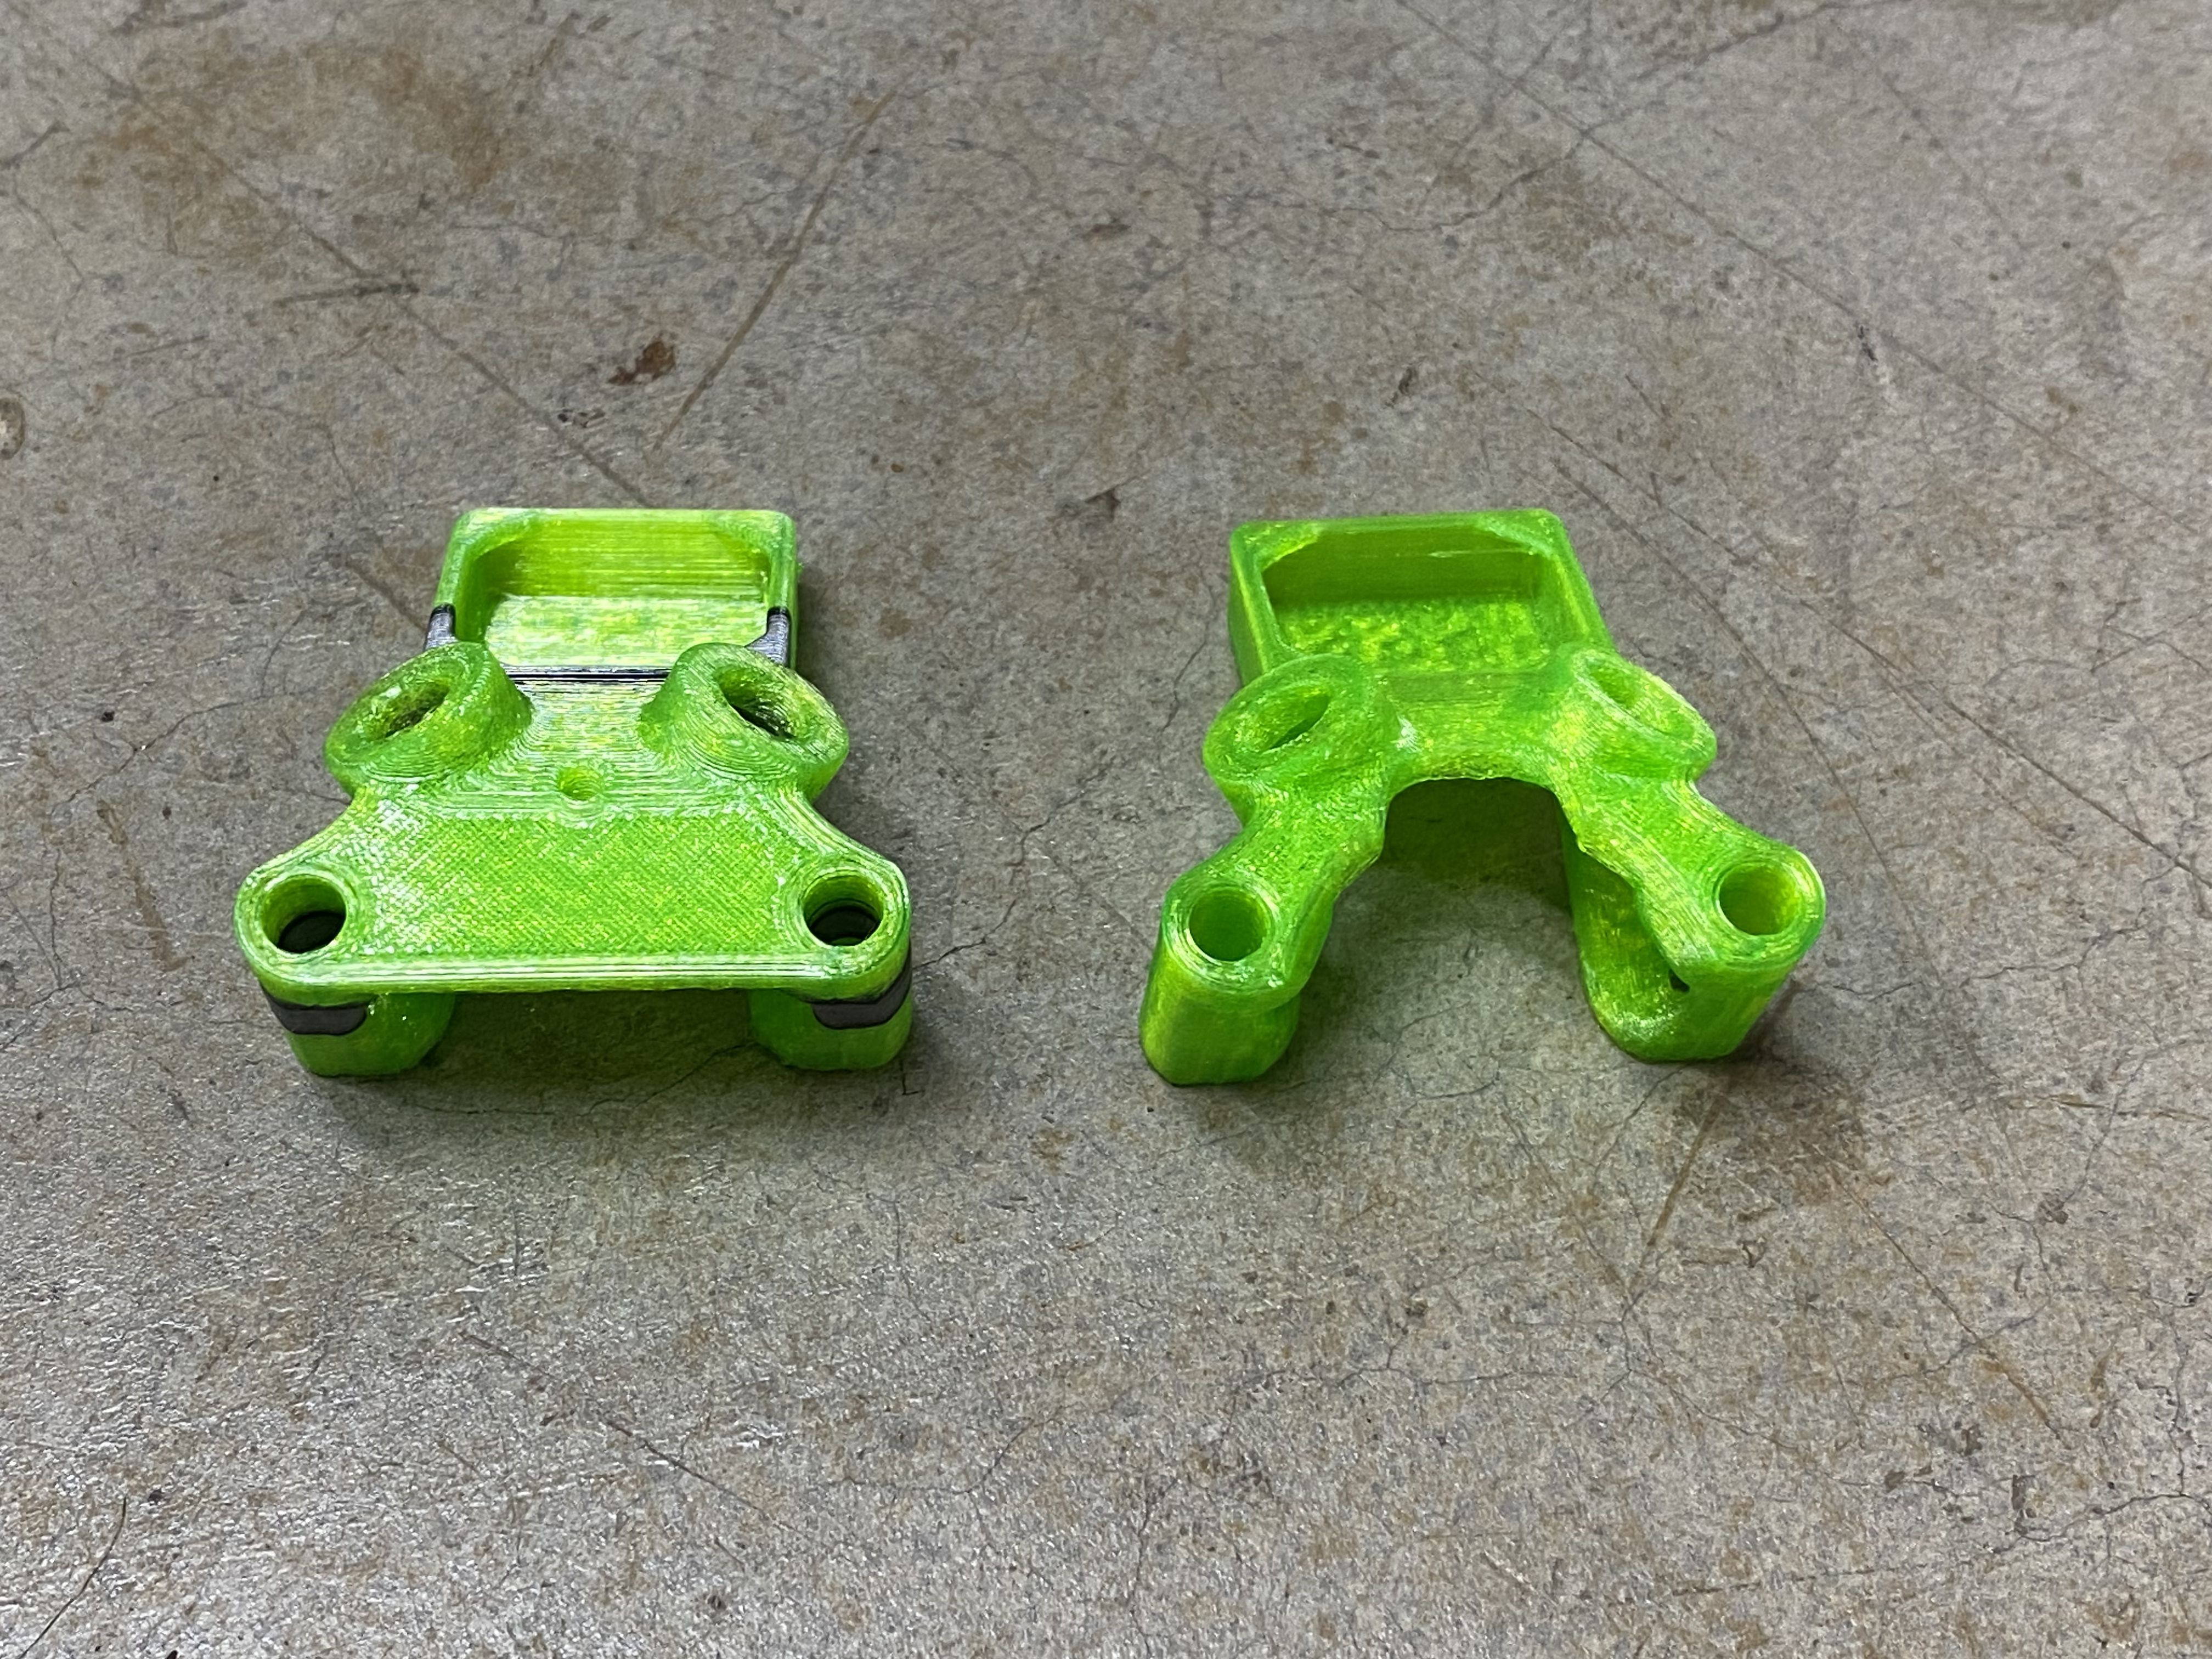
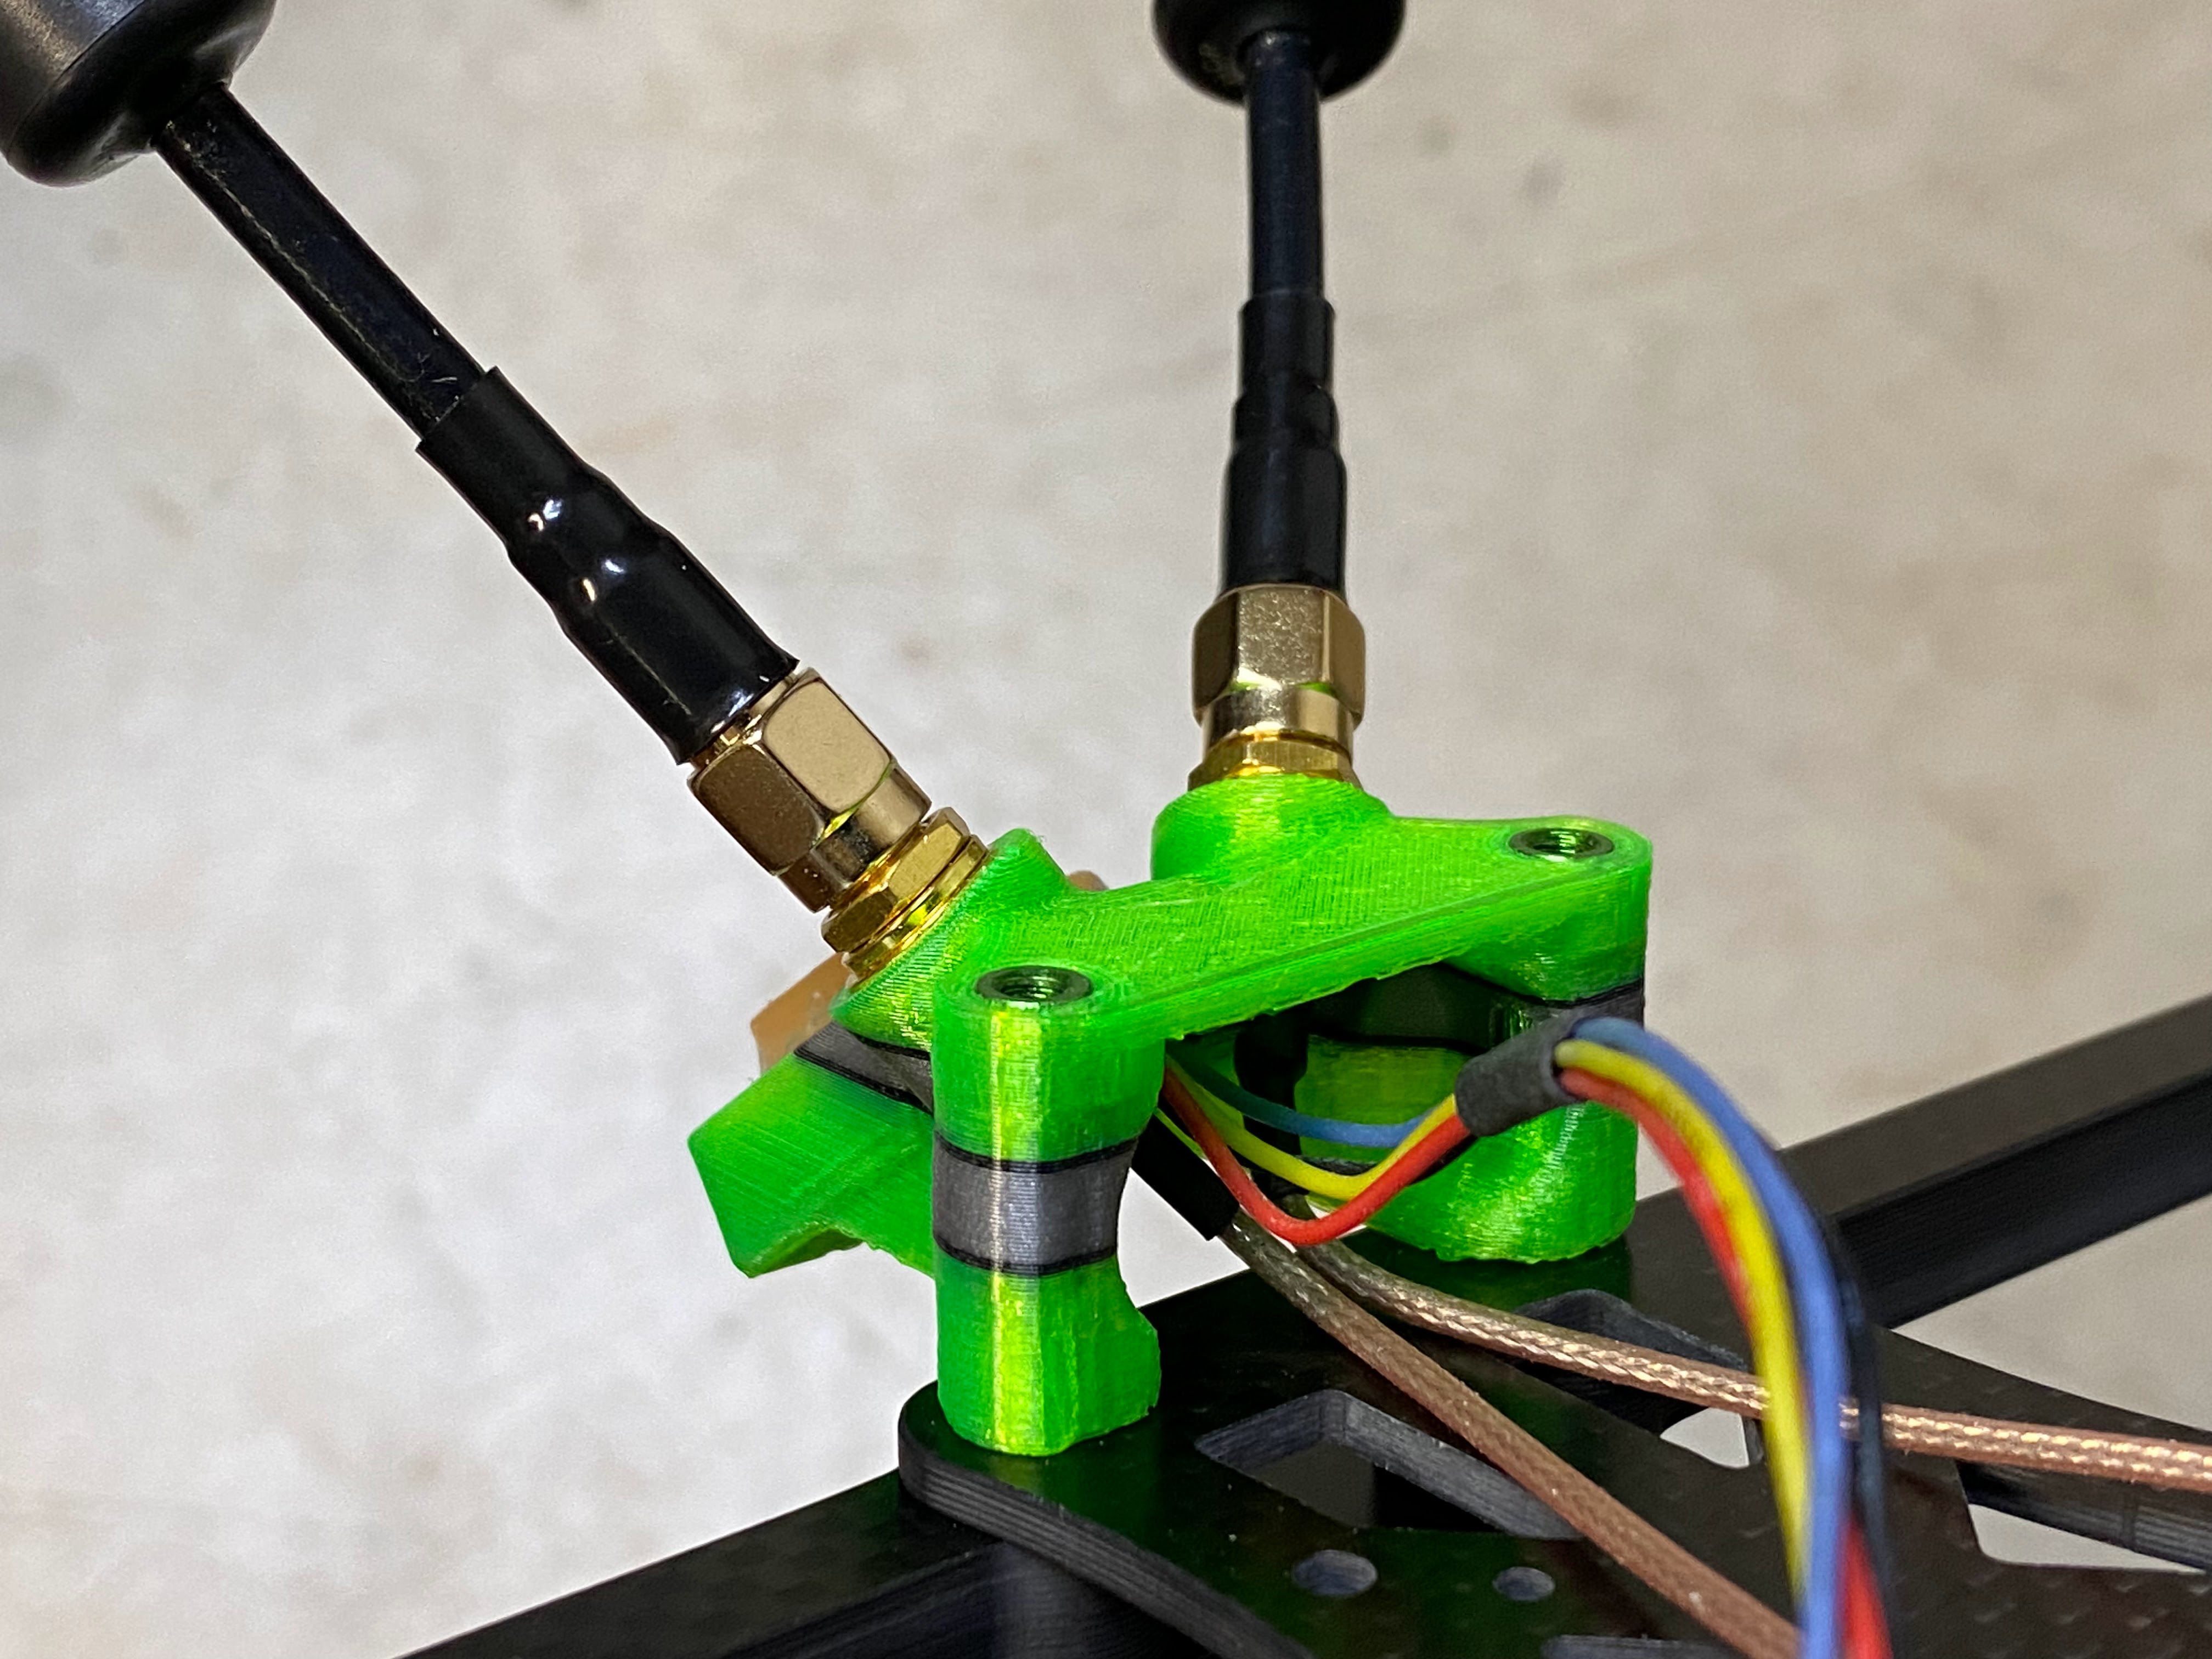
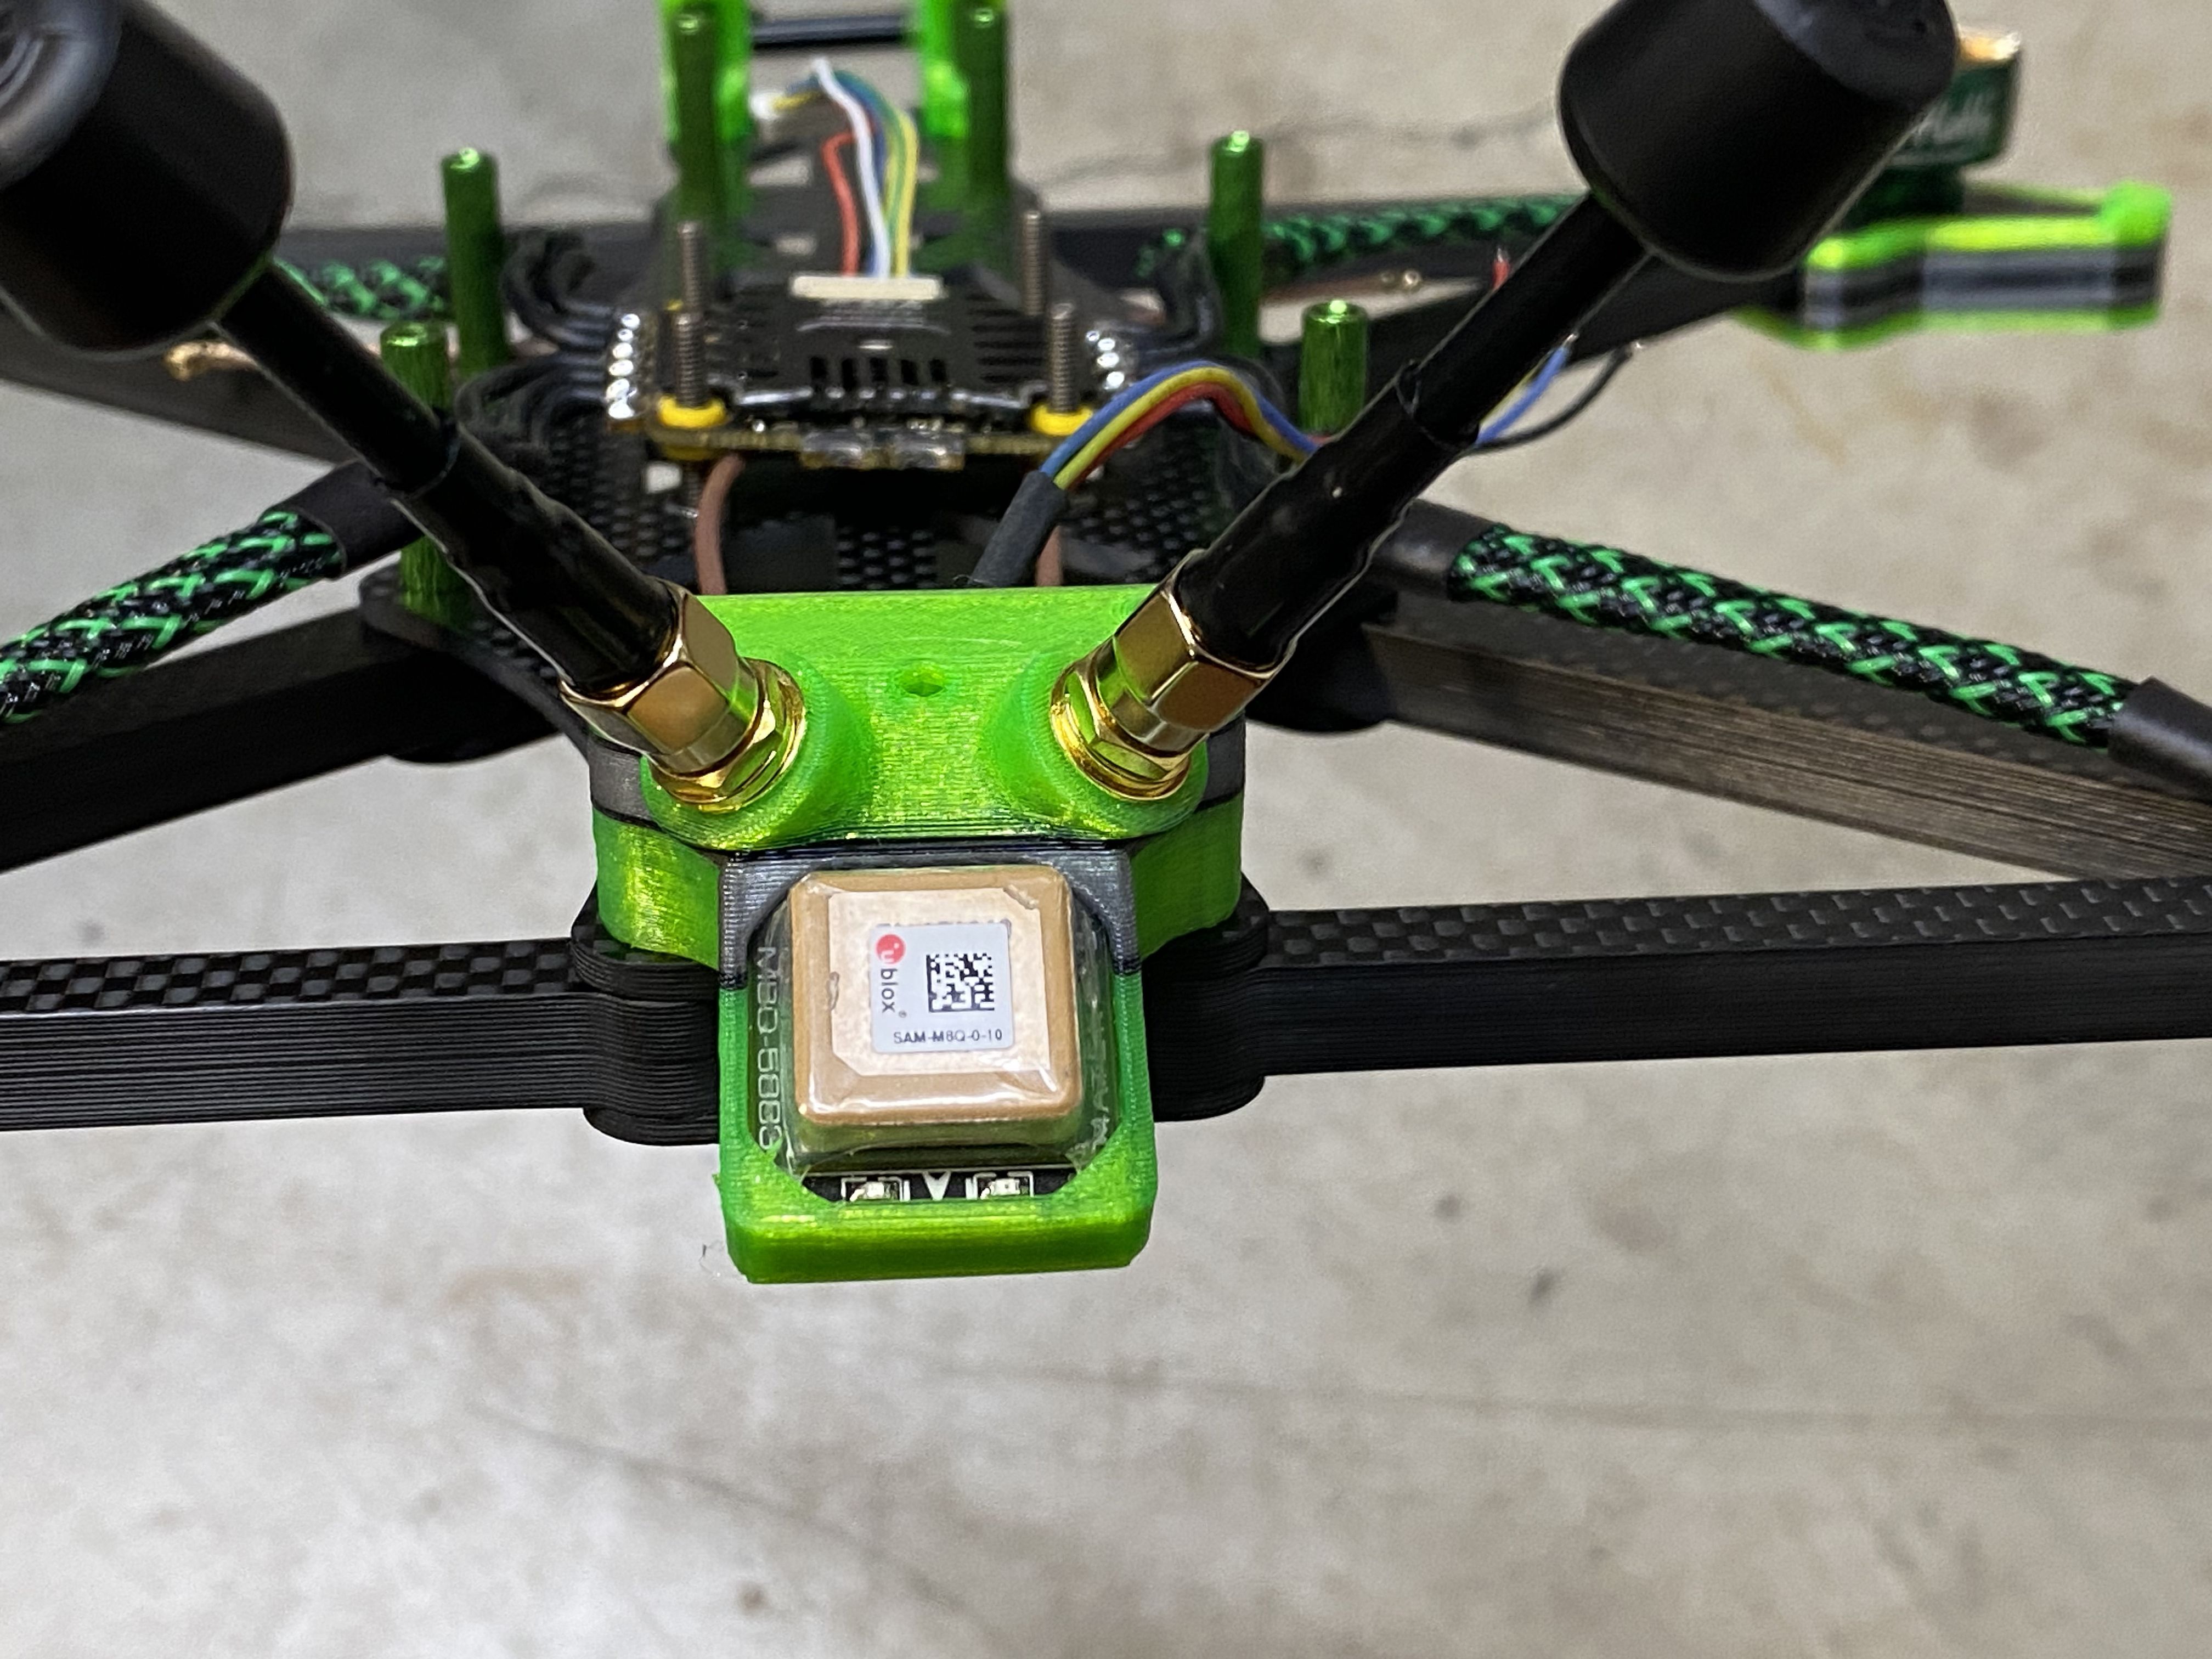
Here I reused the antenna mount from the AOS 5 O3 build and remixed it again to add a GPS to it. (Updated - Feb 06 2023) It has been switched to something else because I am using different antennas.
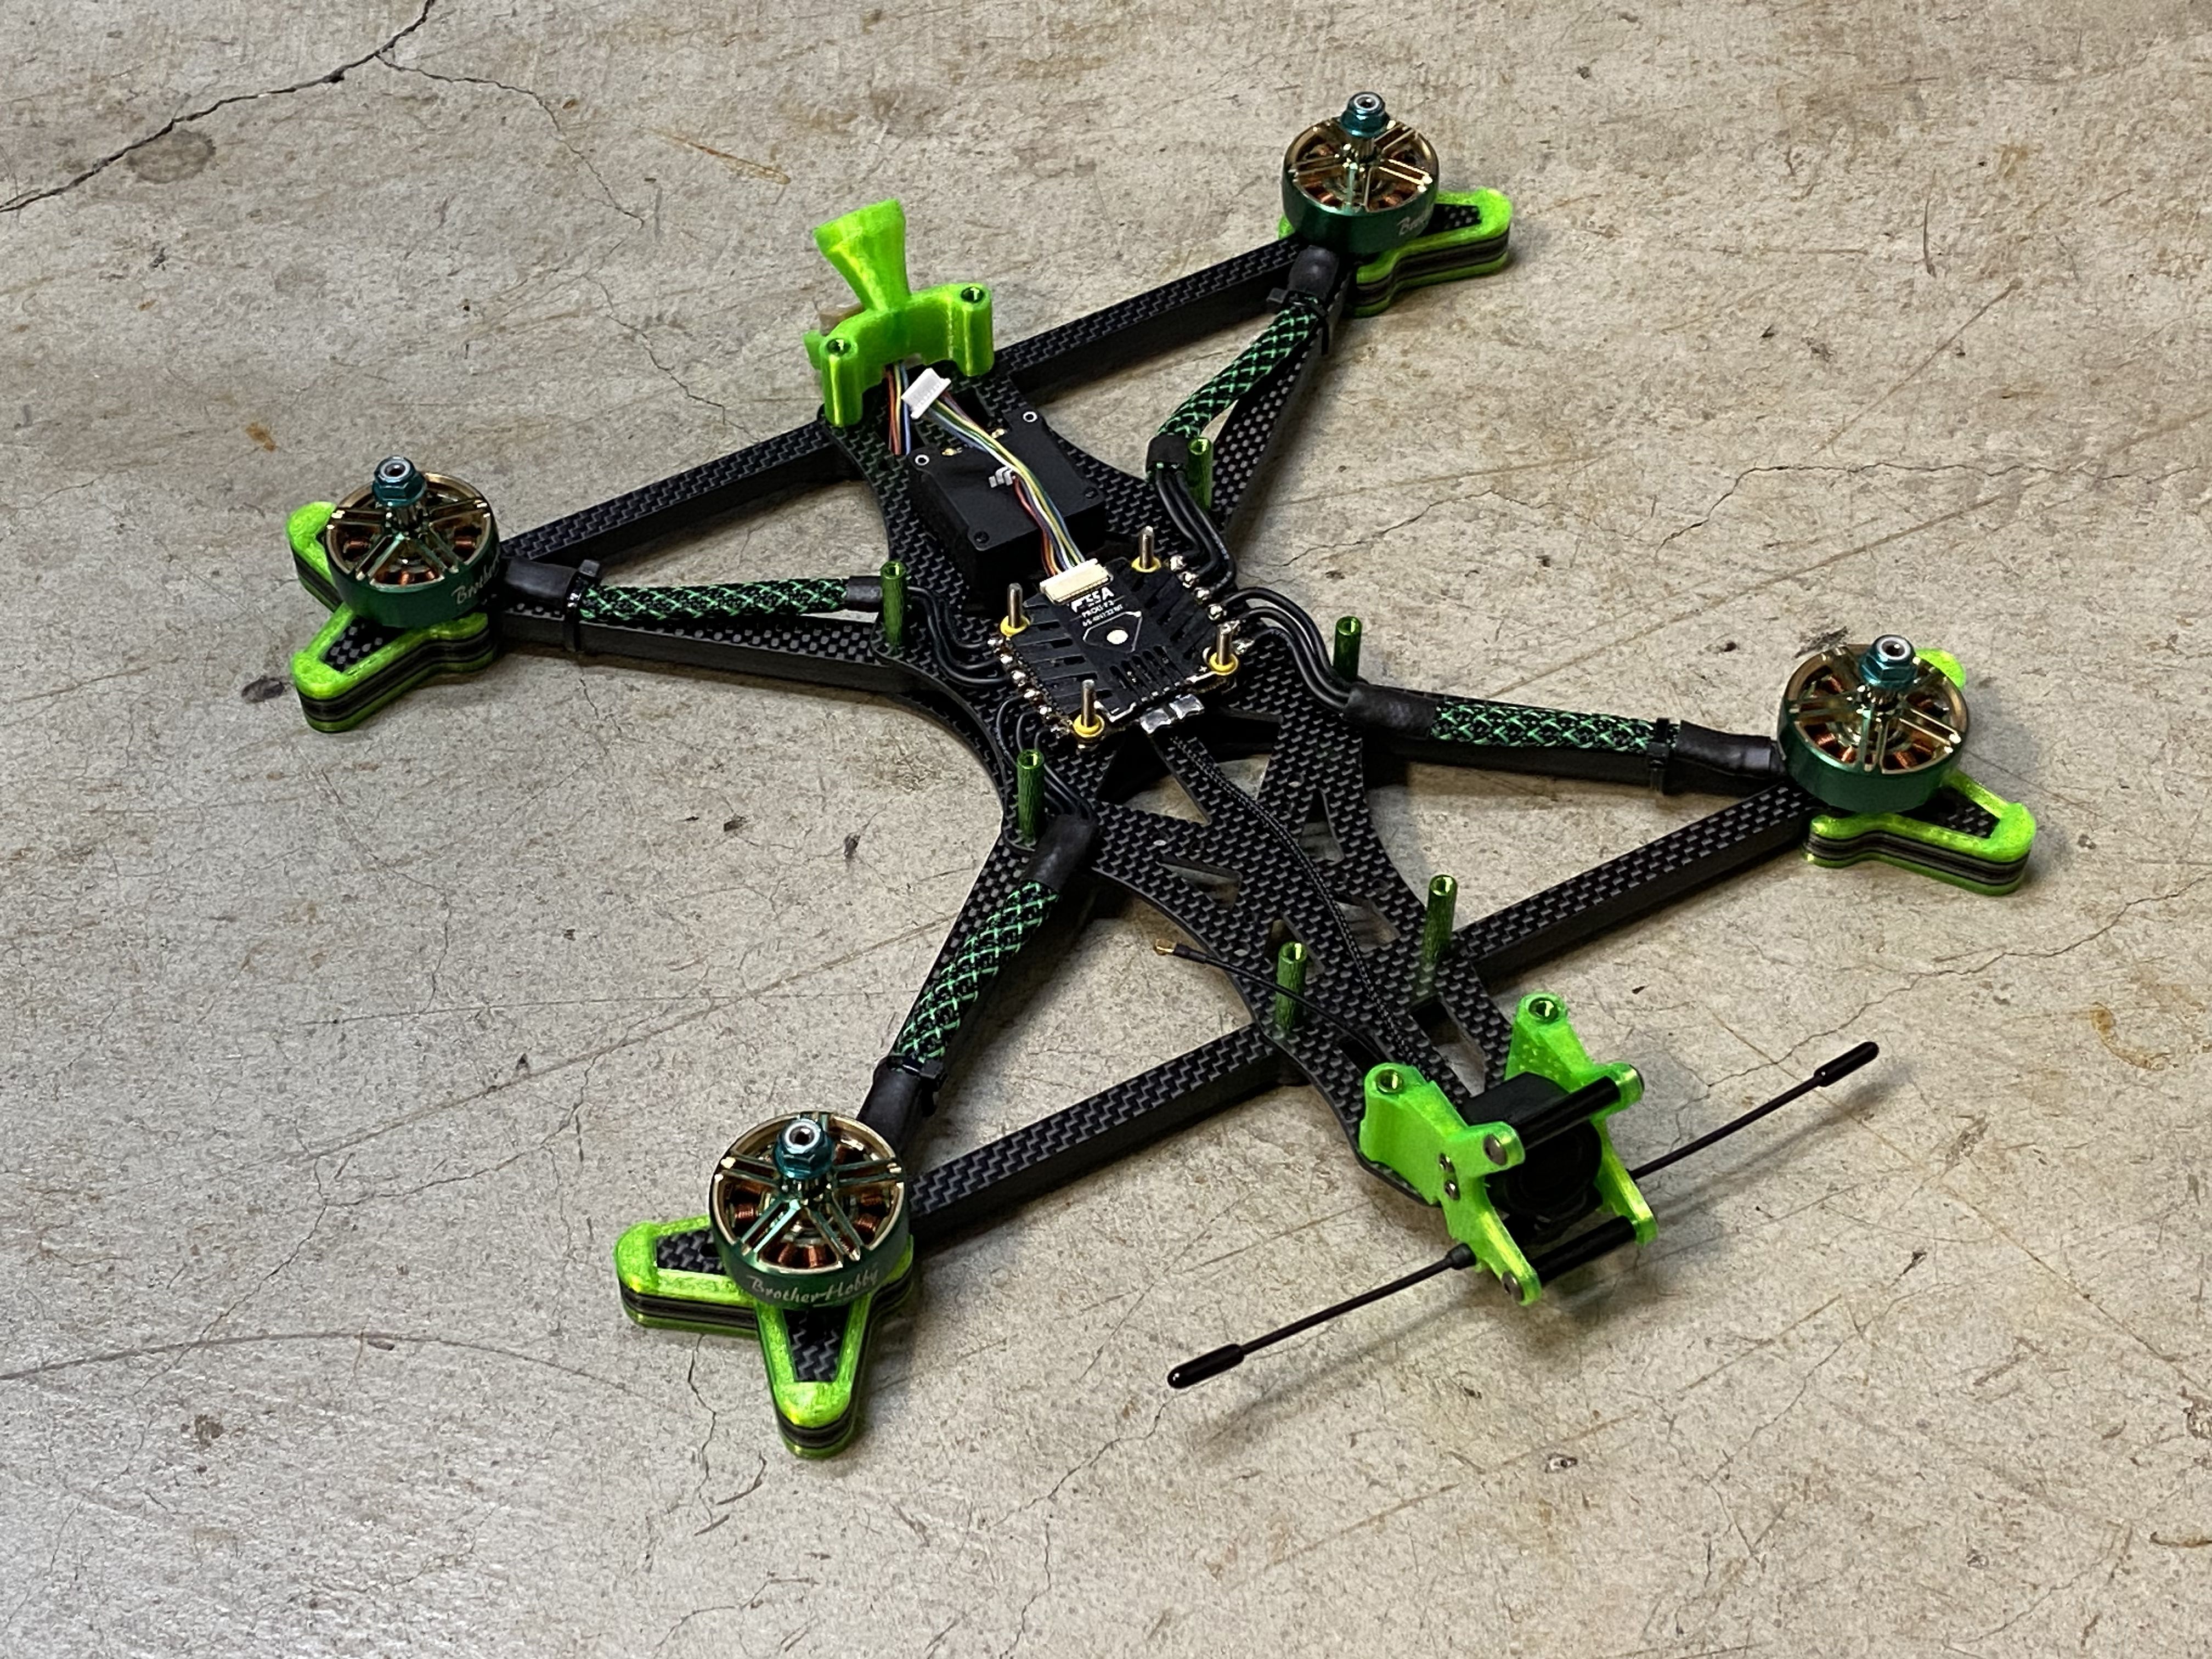
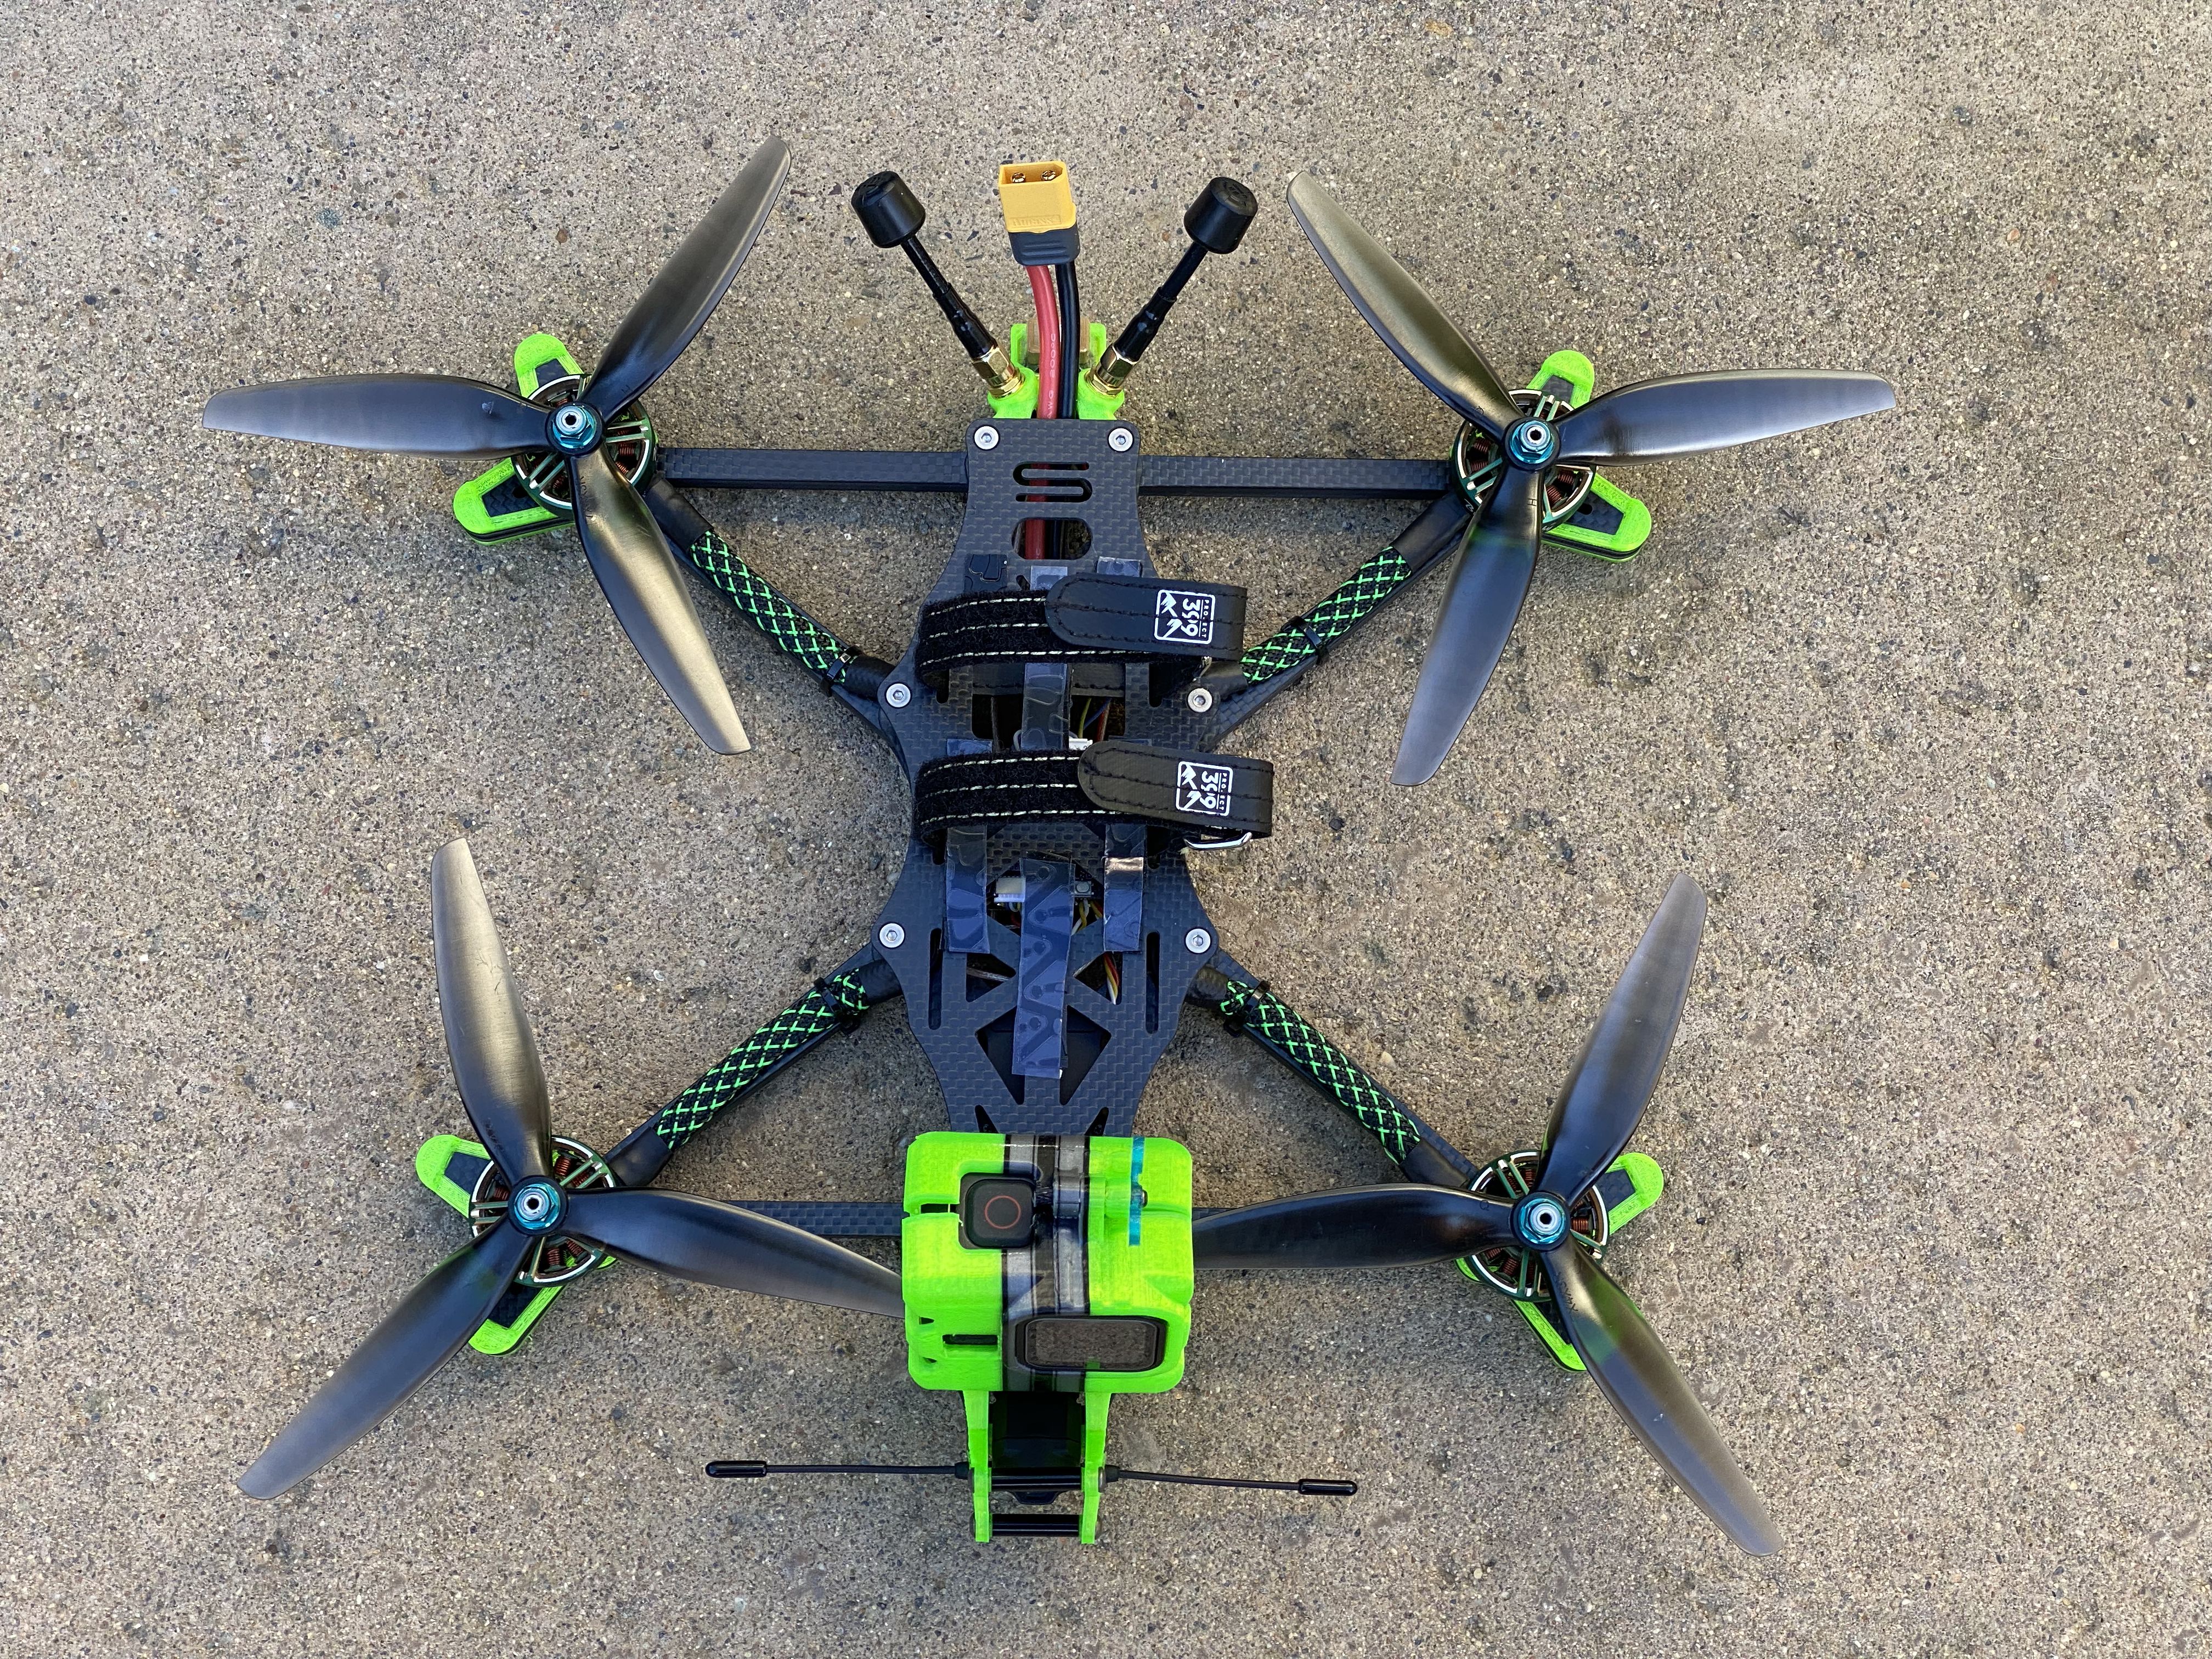
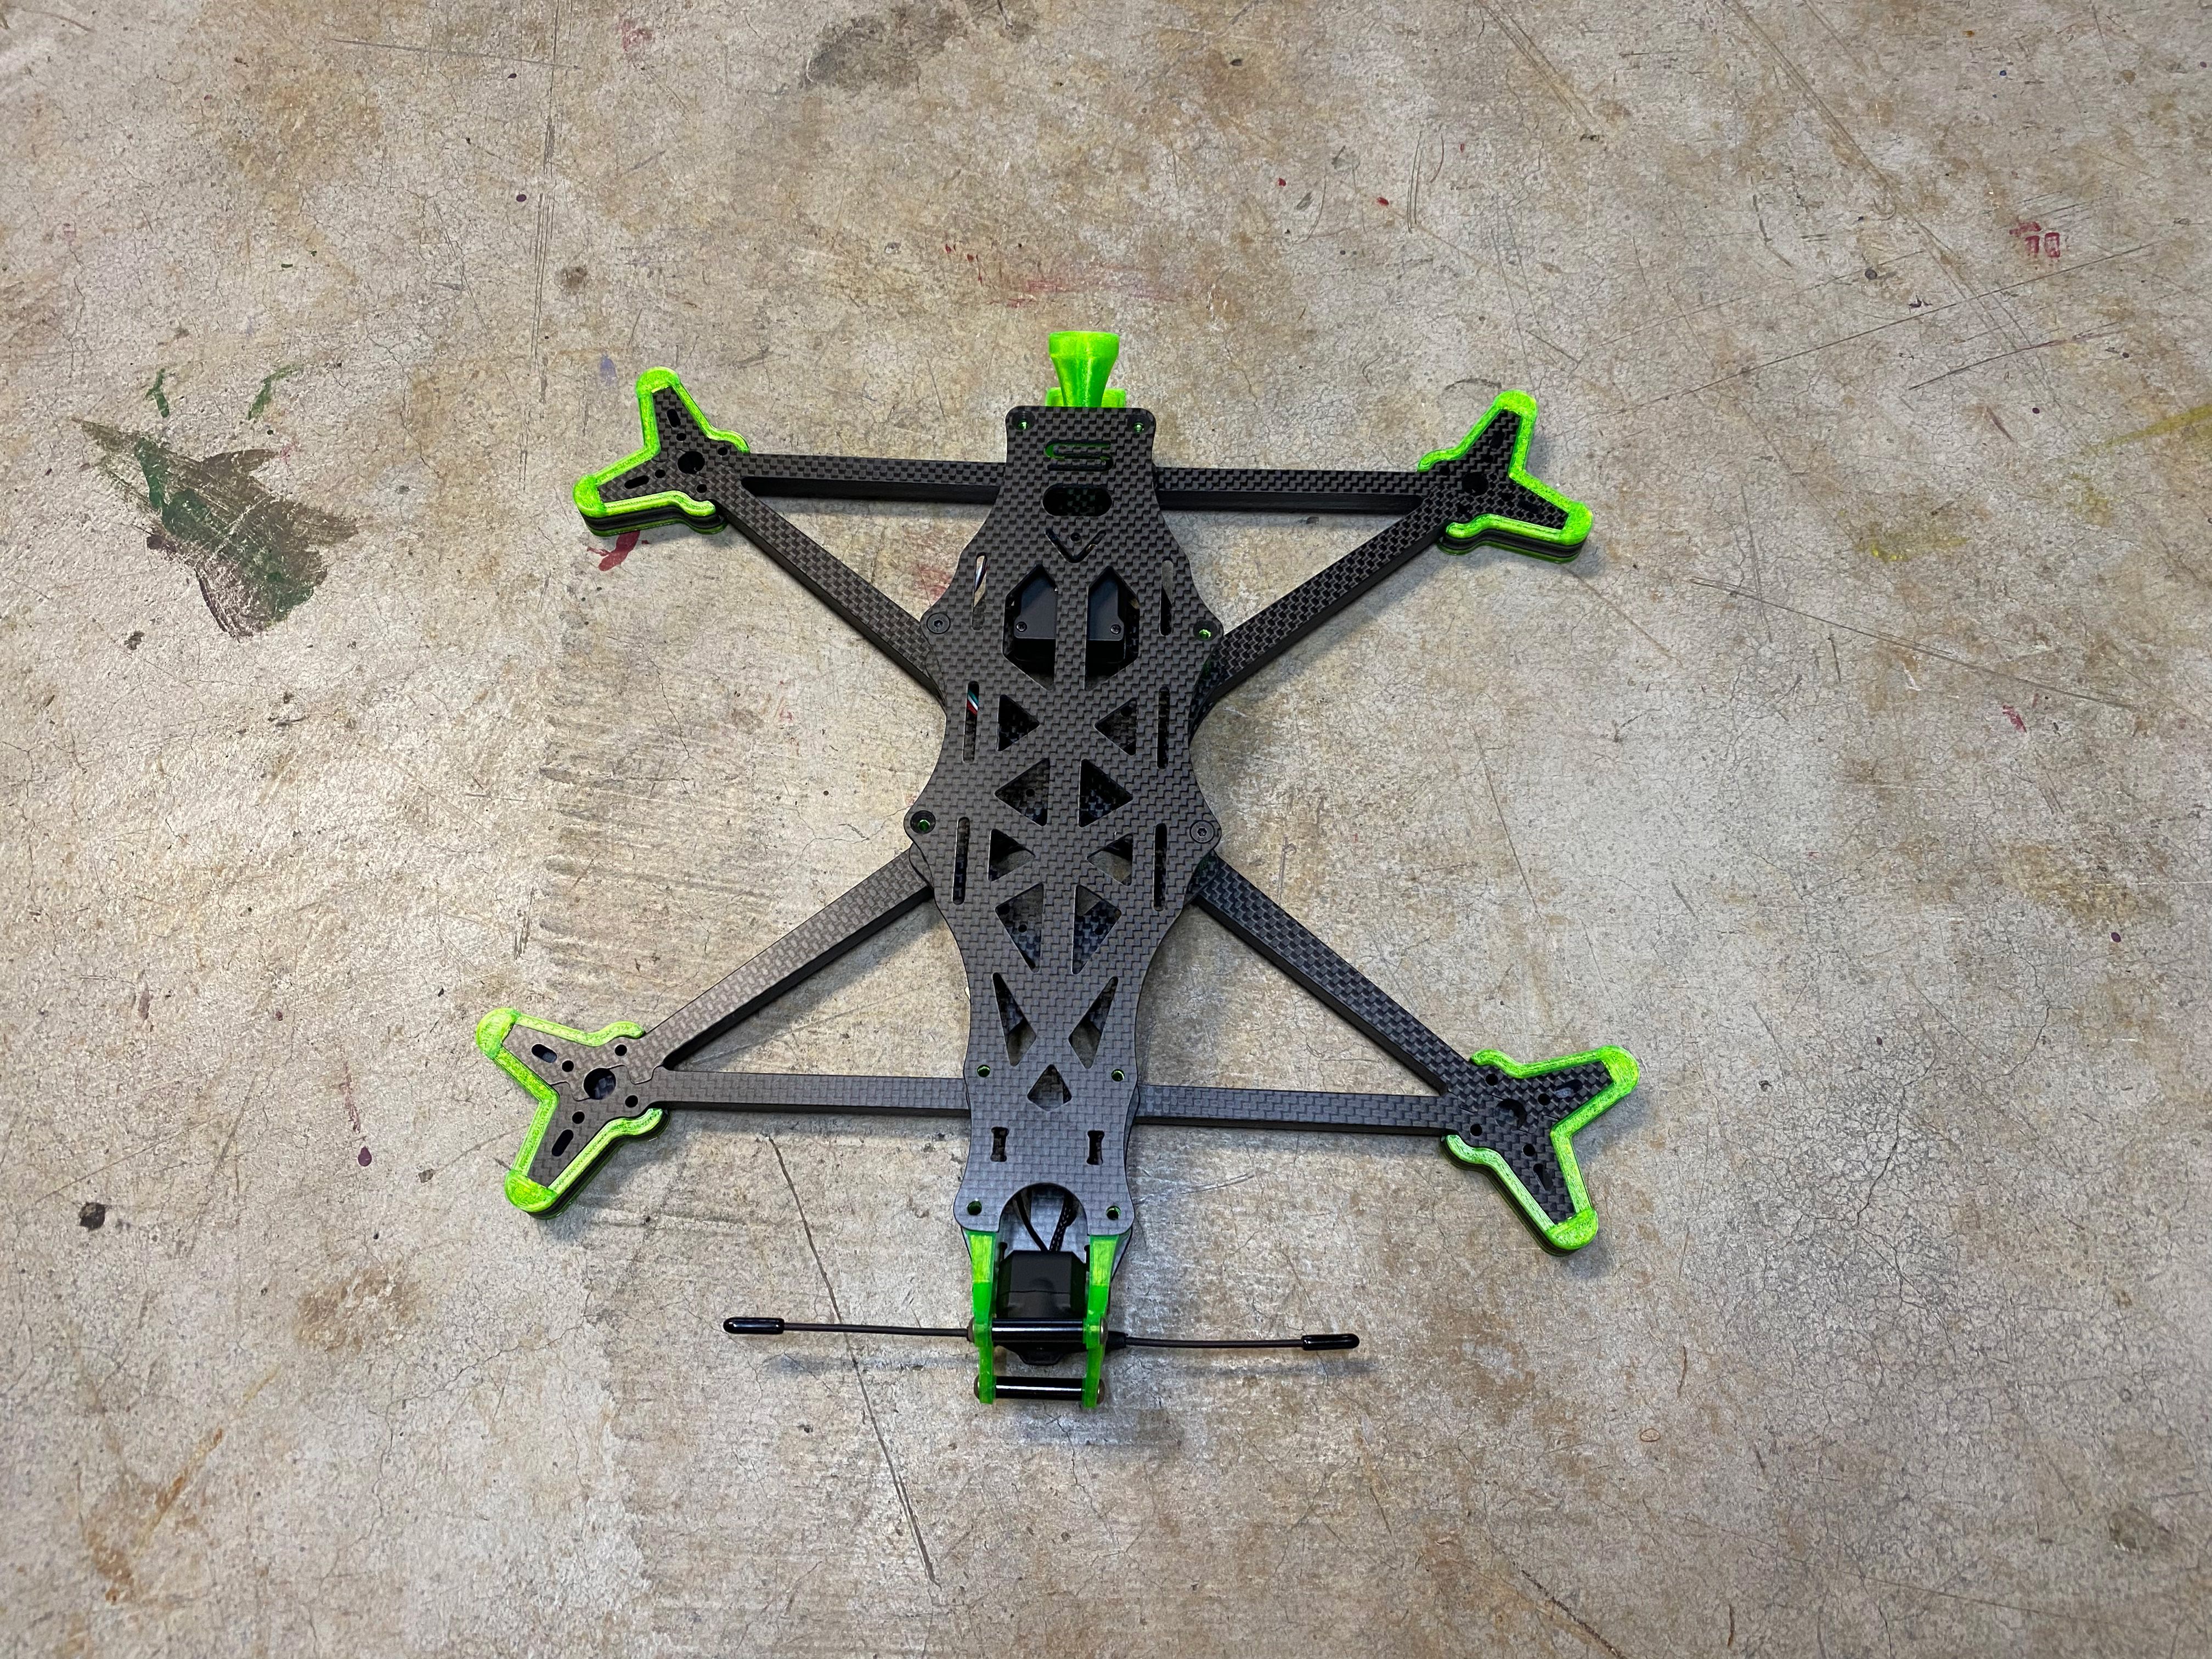
This was the initial layout that I wanted the electronics but the camera wire was still too short to have the air unit on the rear of the quad so the antenna could be placed in the rear. I did not want to put the air unit in the front or else the antenna will stick out on the side of the quad because the antenna wires are not long enough to reach to the end of the quad. Since I do not plan to use the DJI Remote 2, I should not care about the 2.4ghz antennas. That means I should be able to use a standard LHCP 5.8ghz antenna.
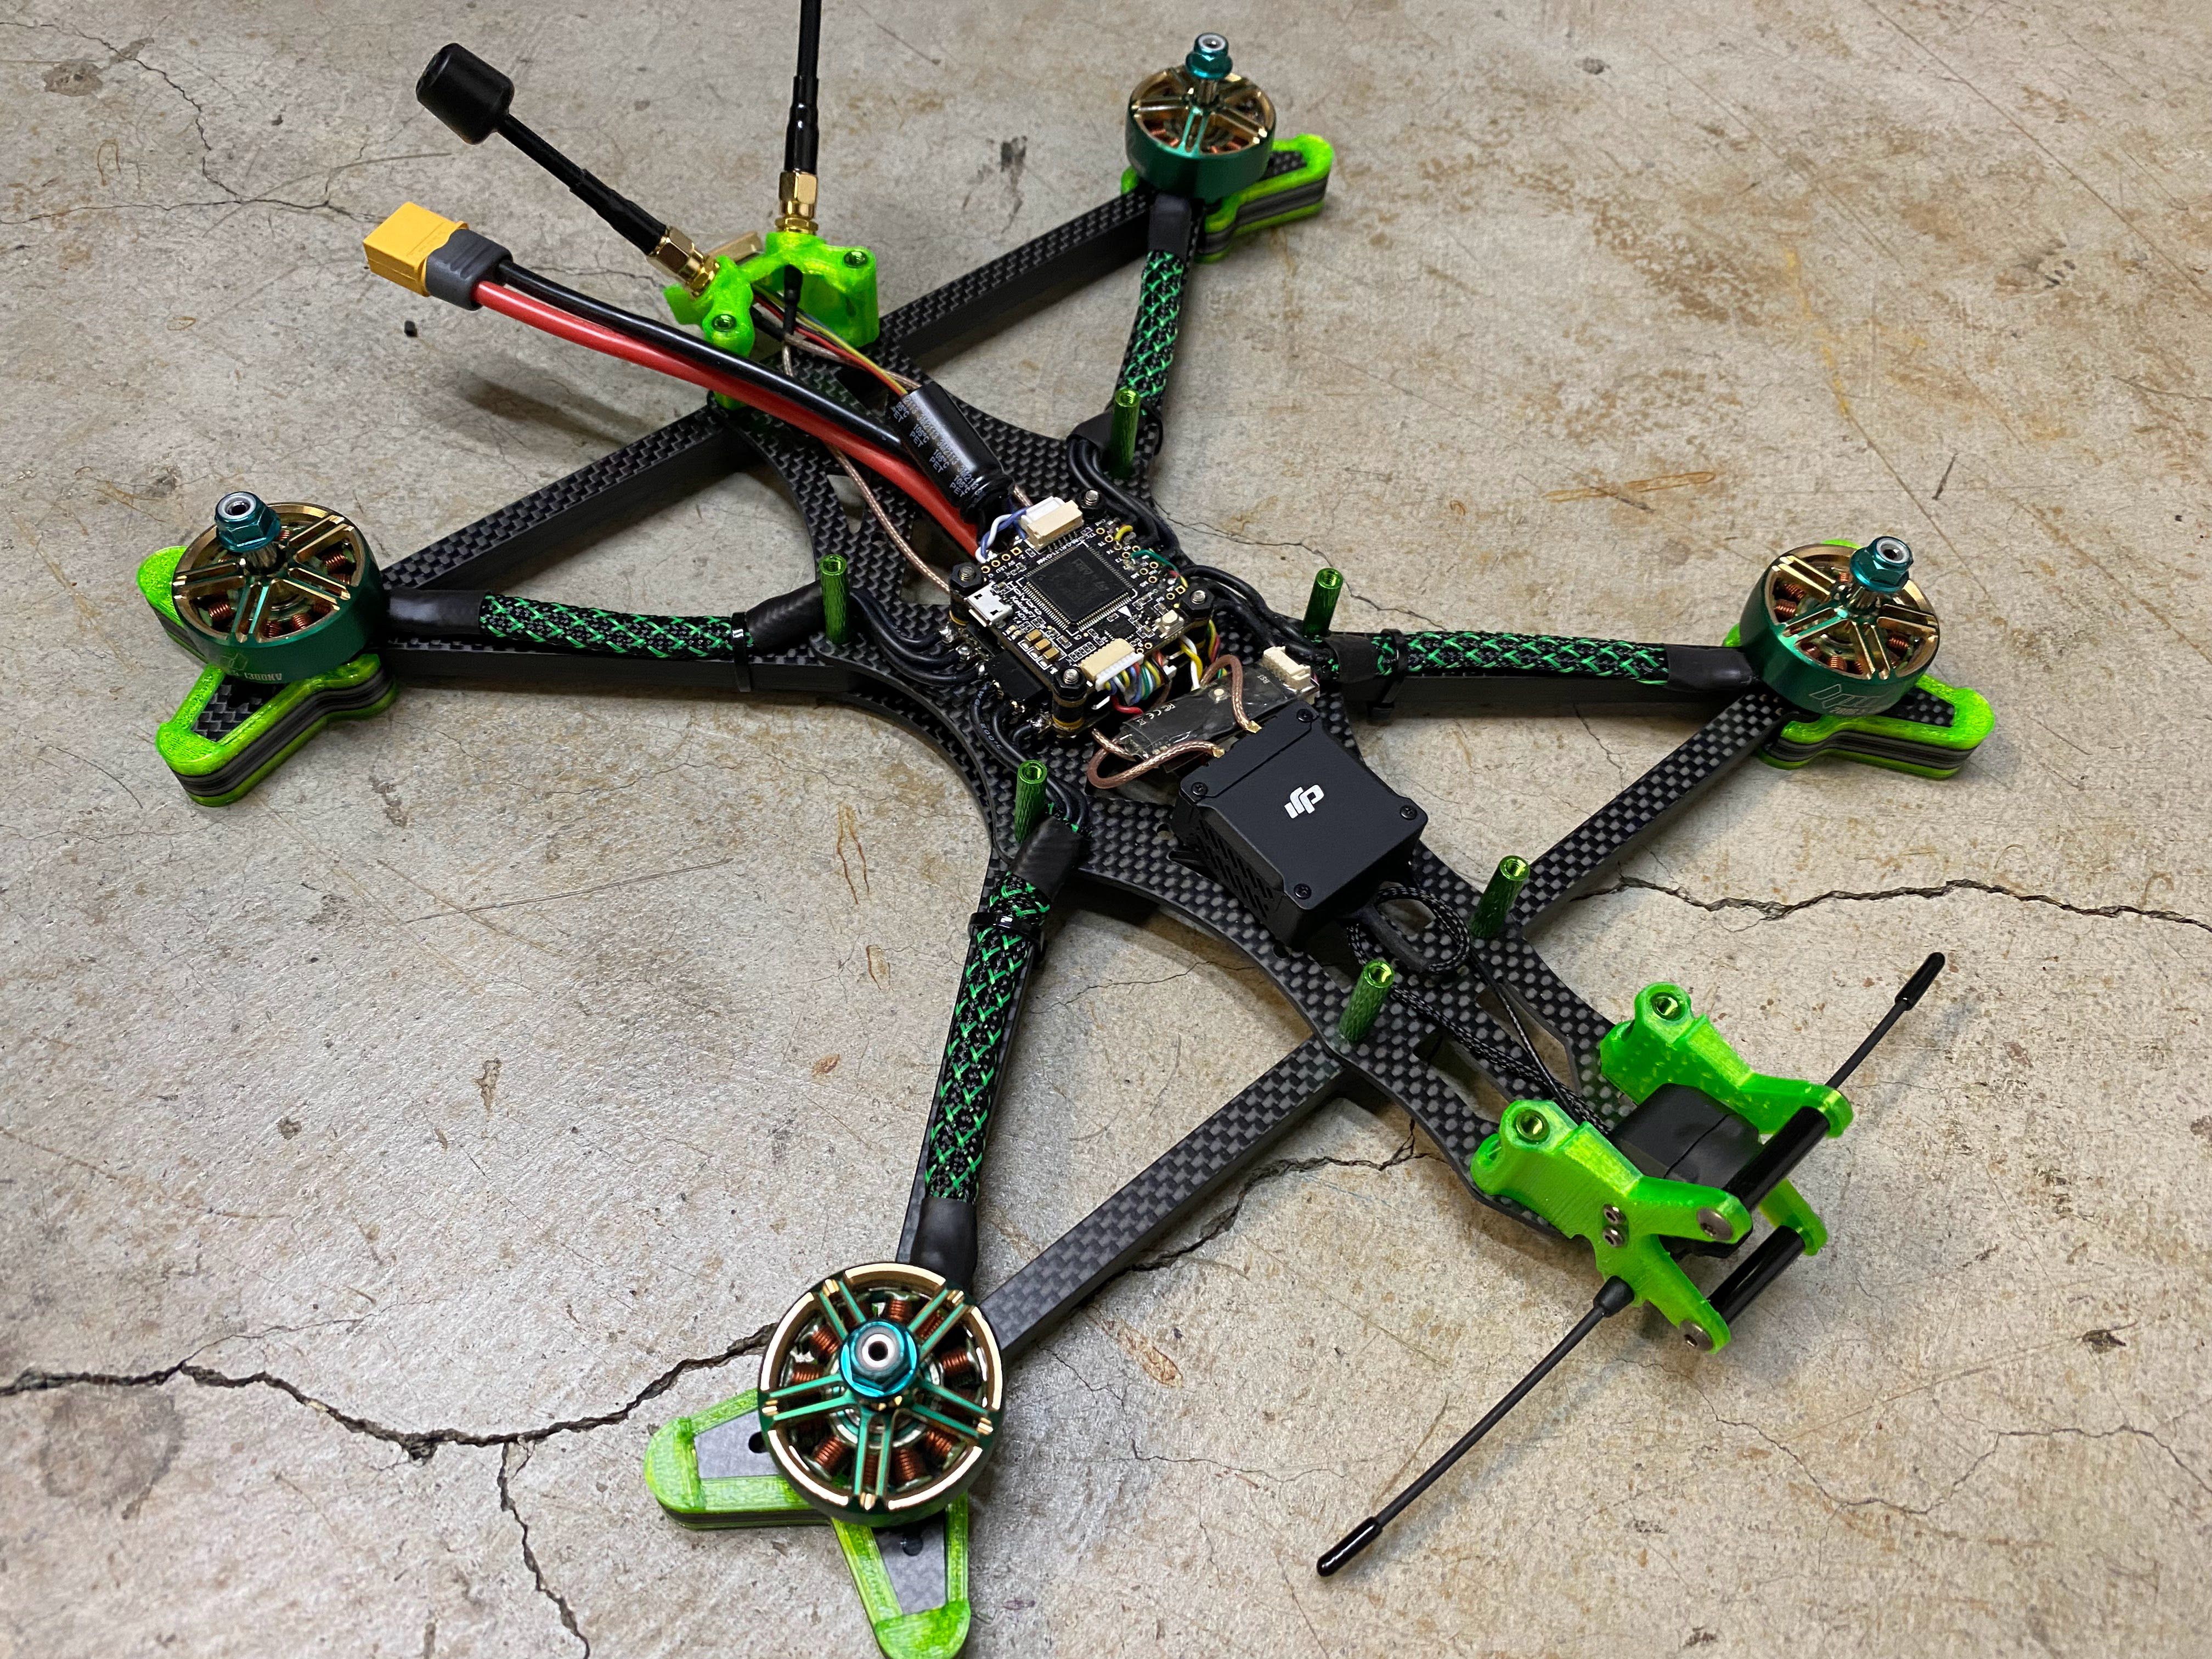
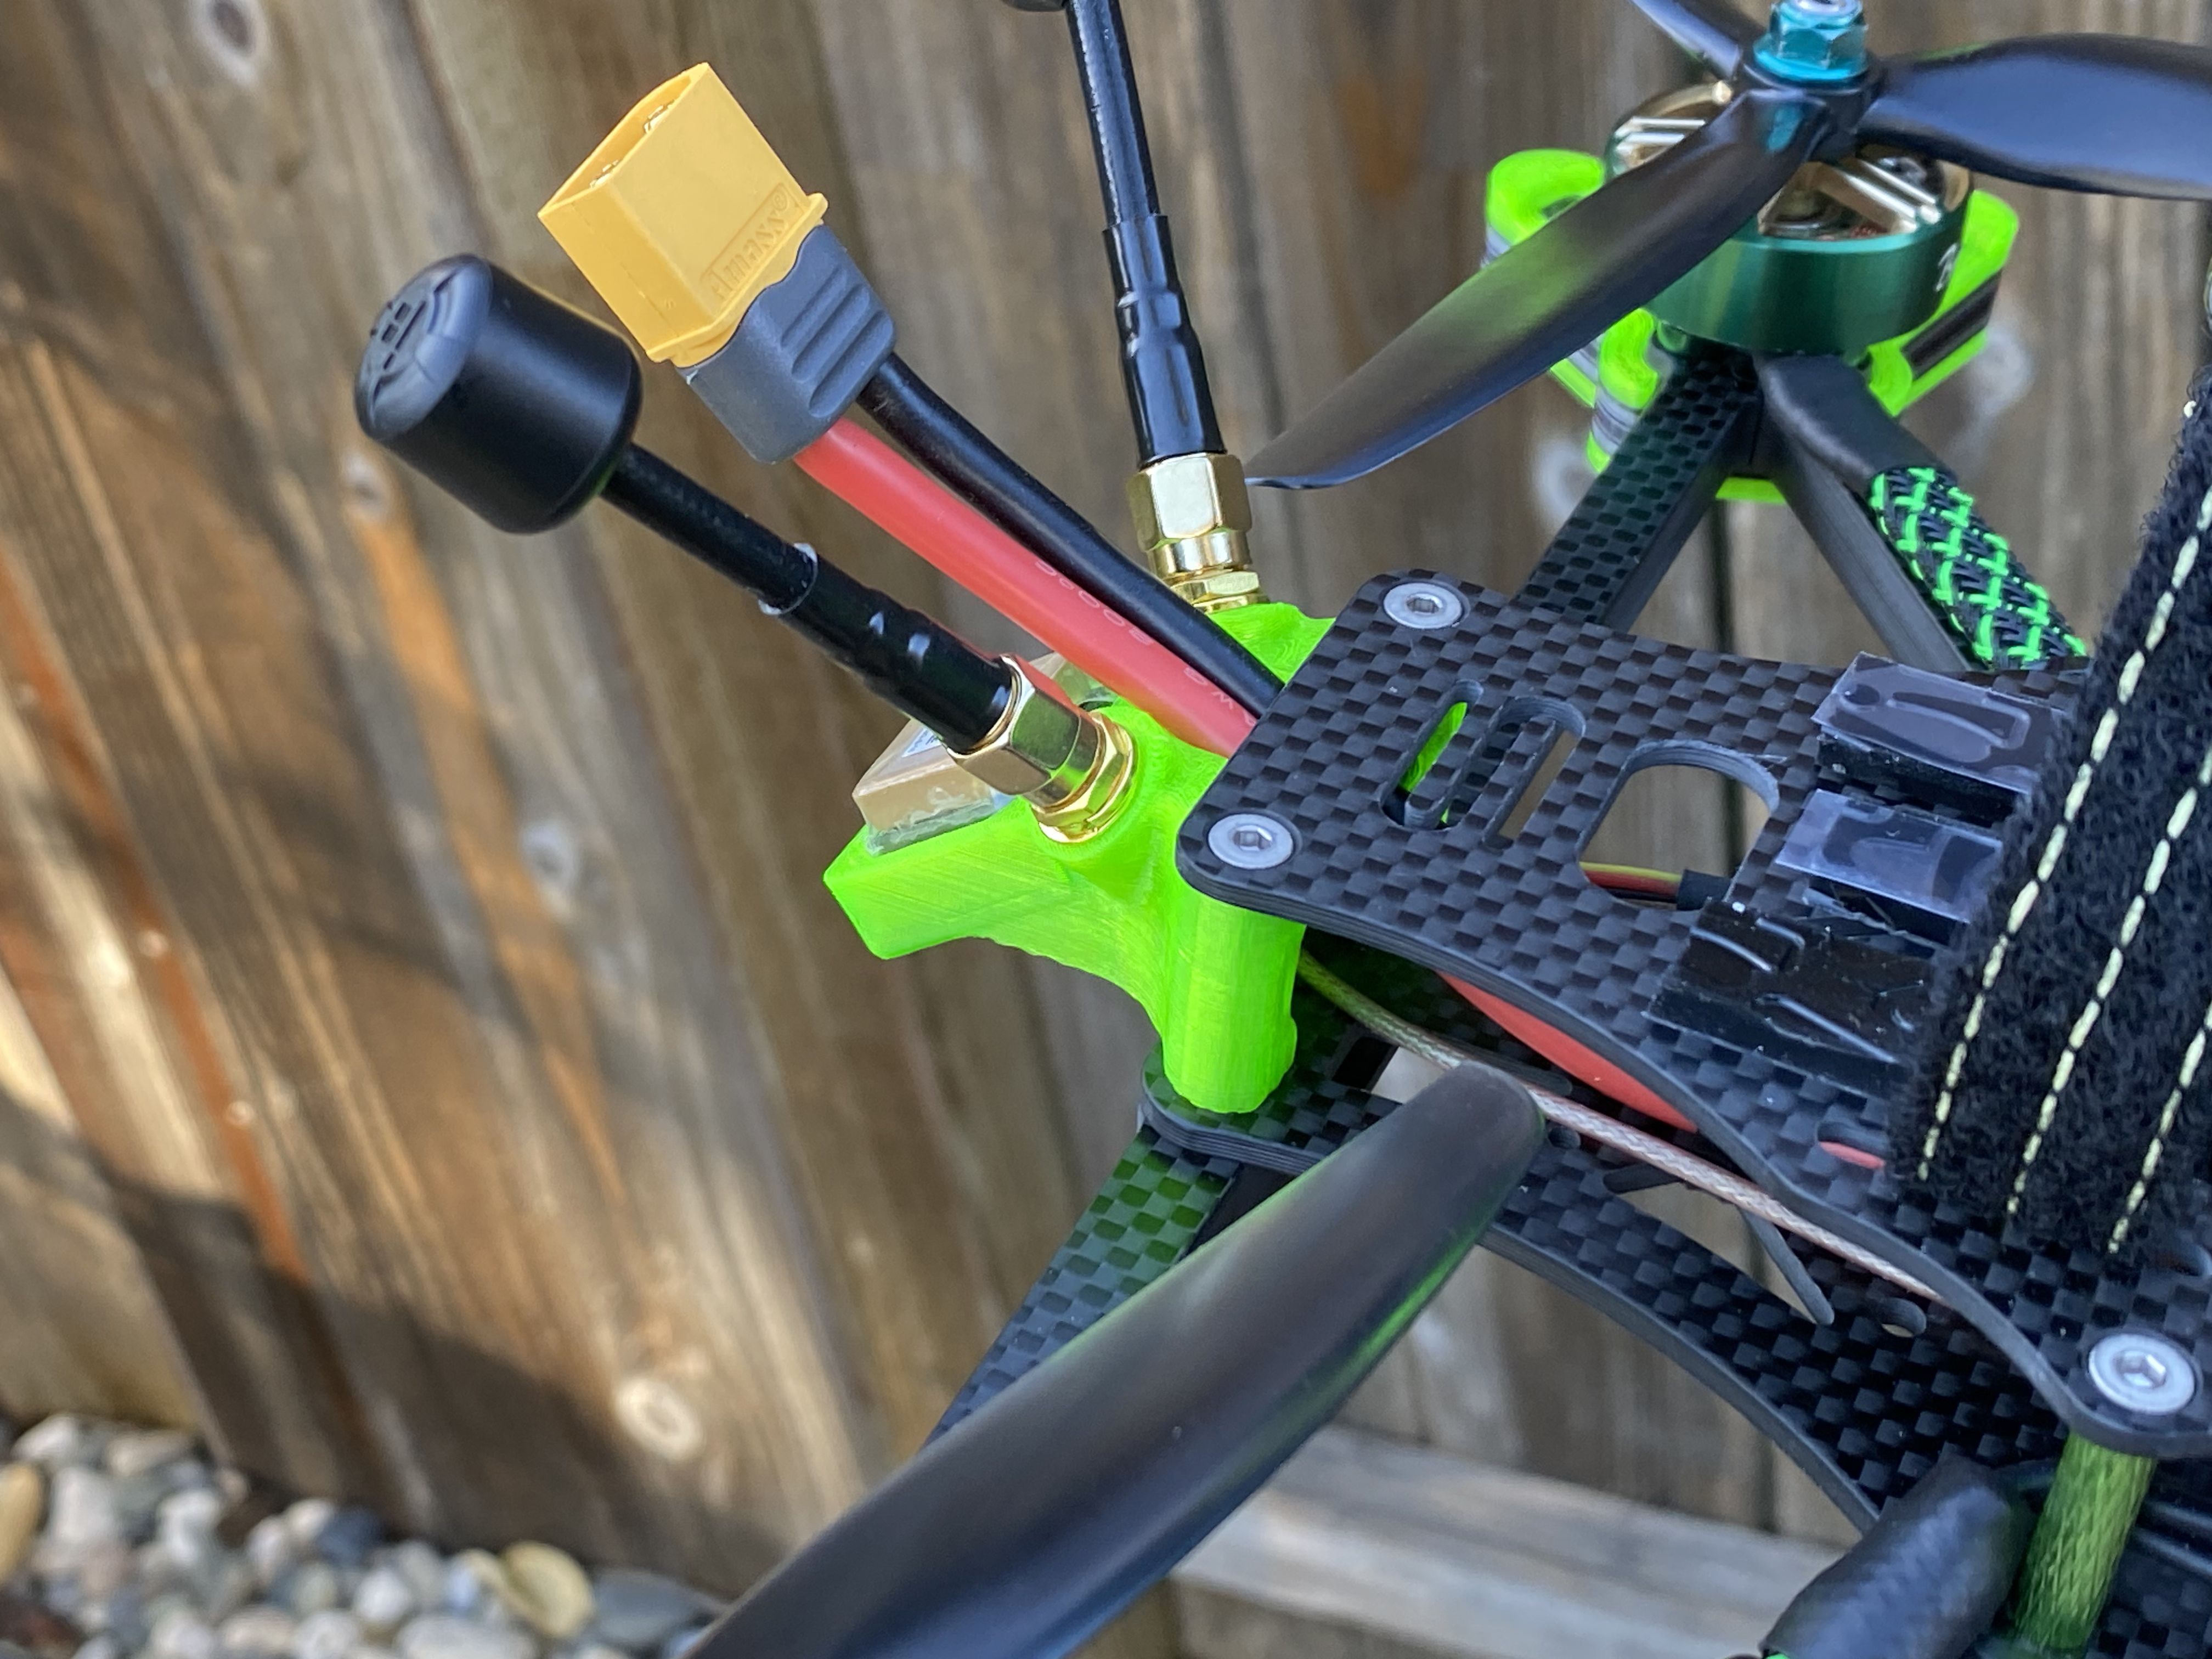
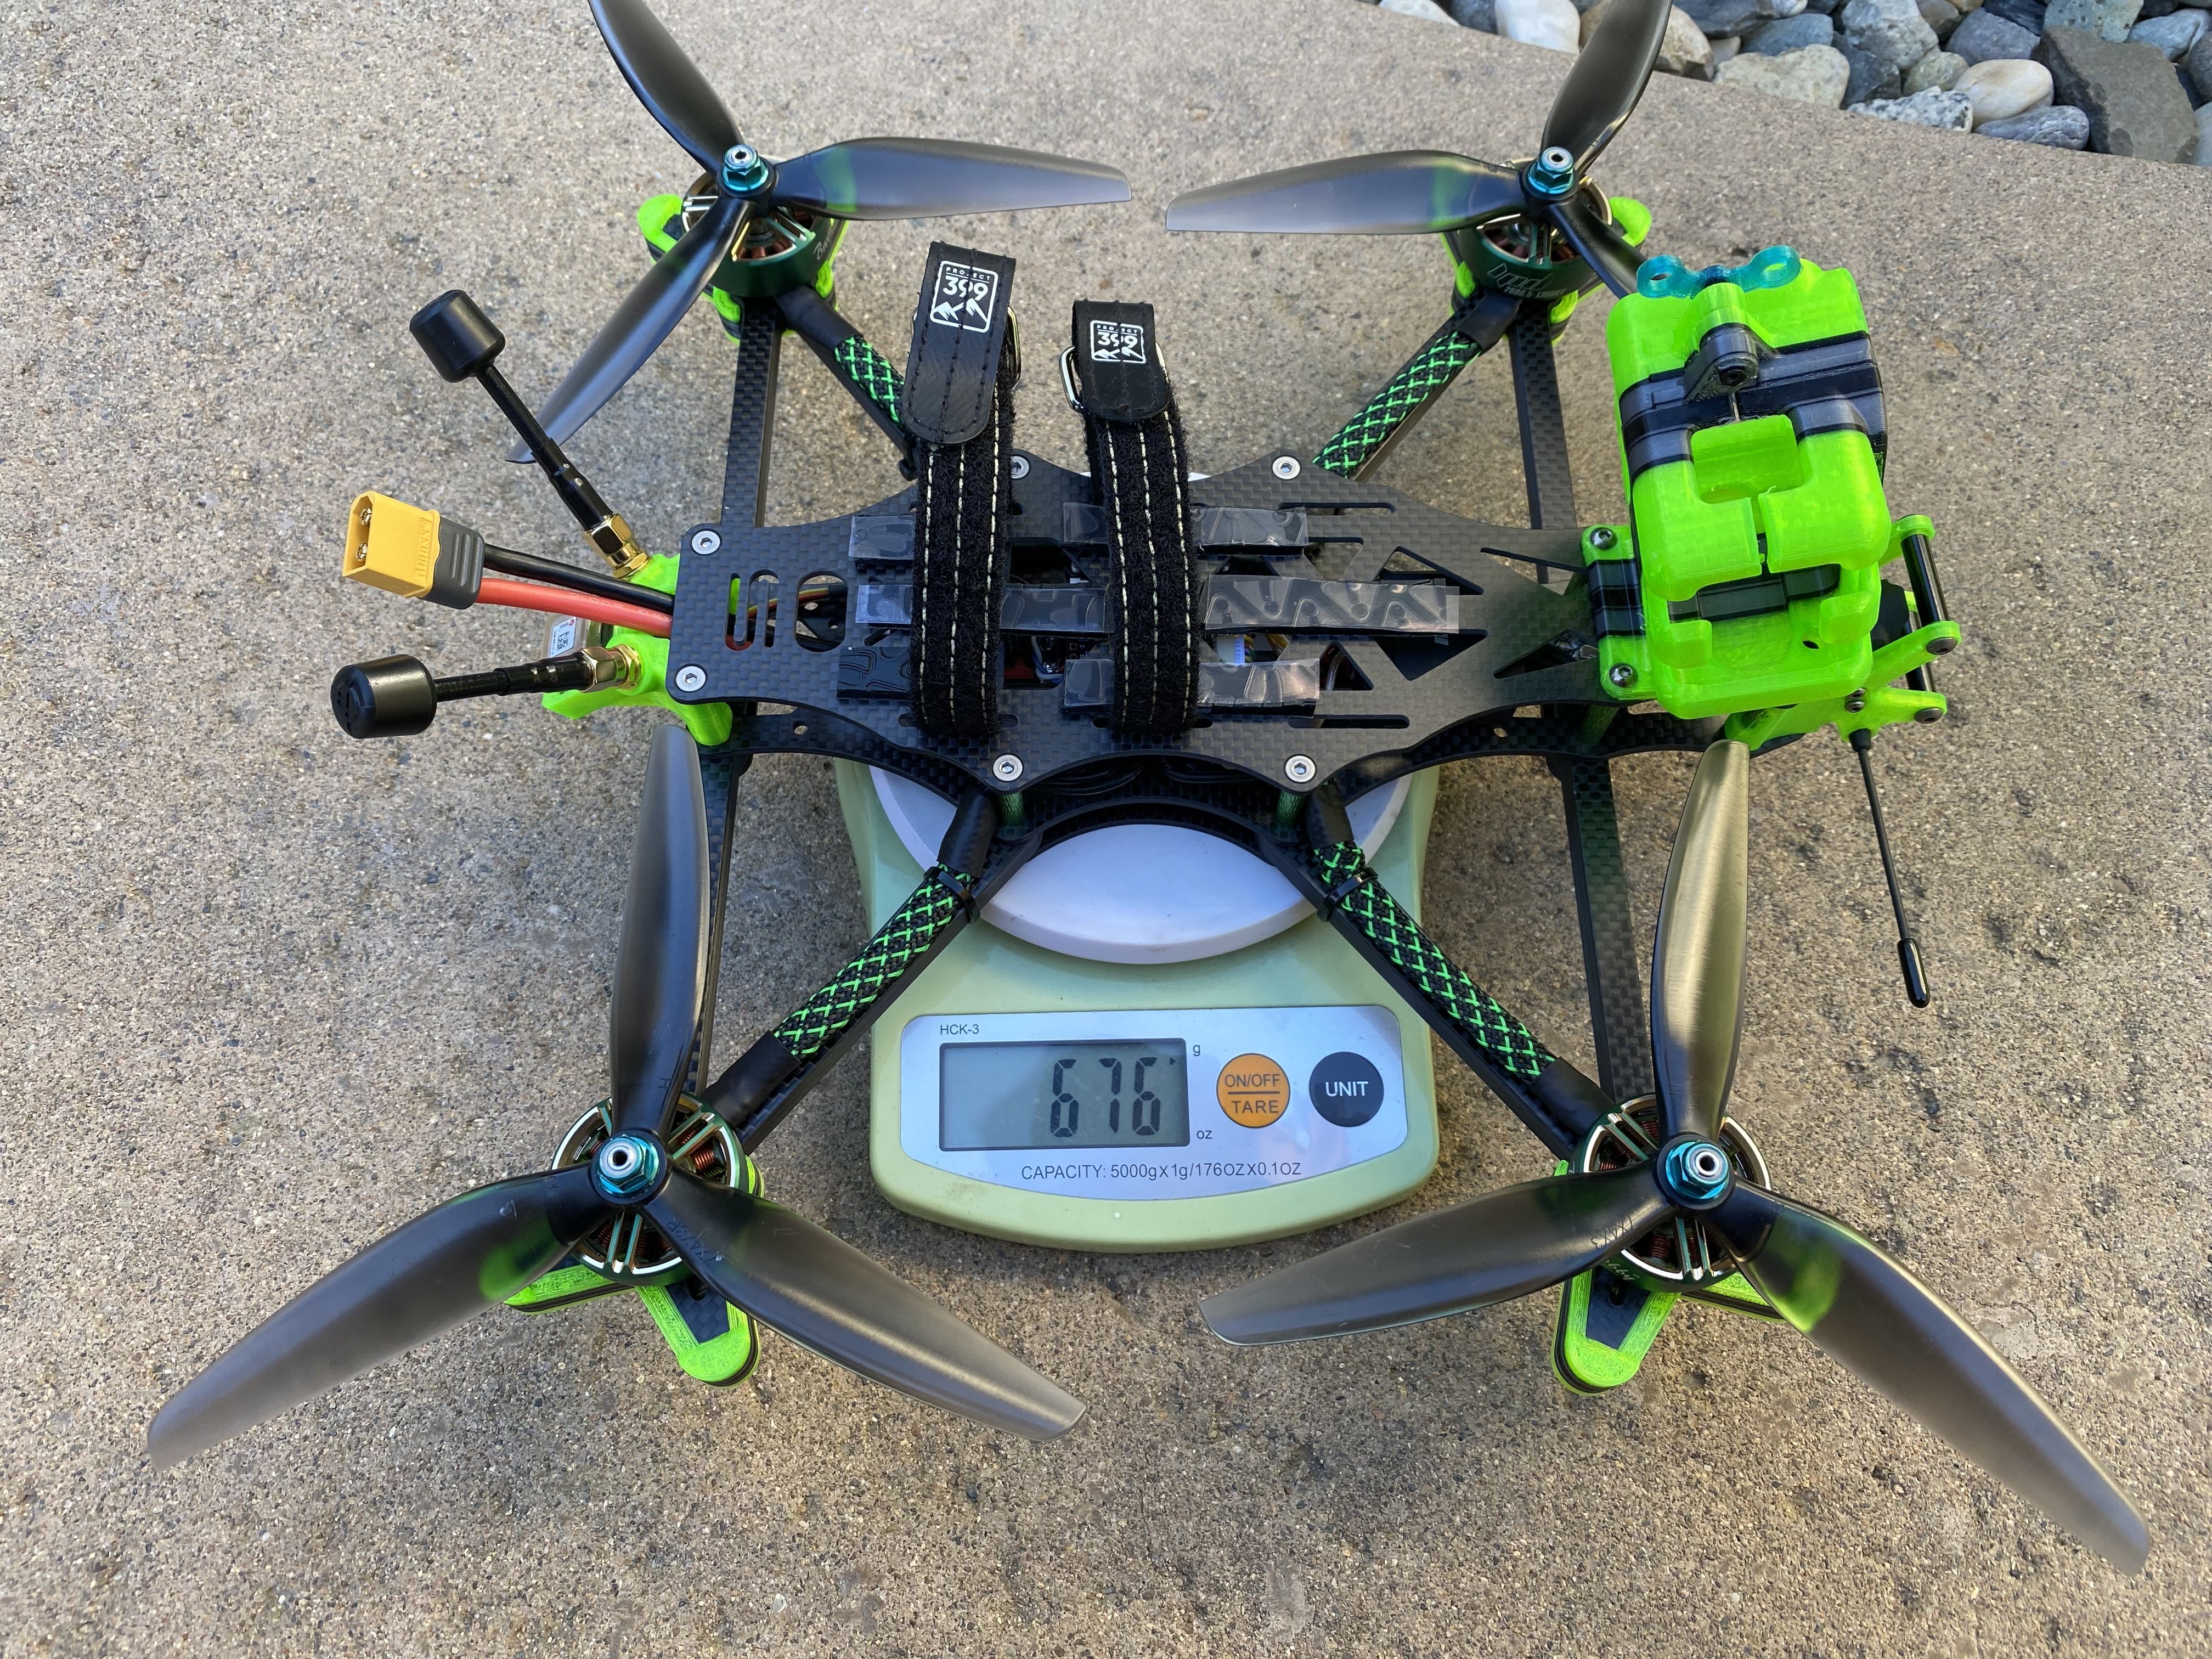
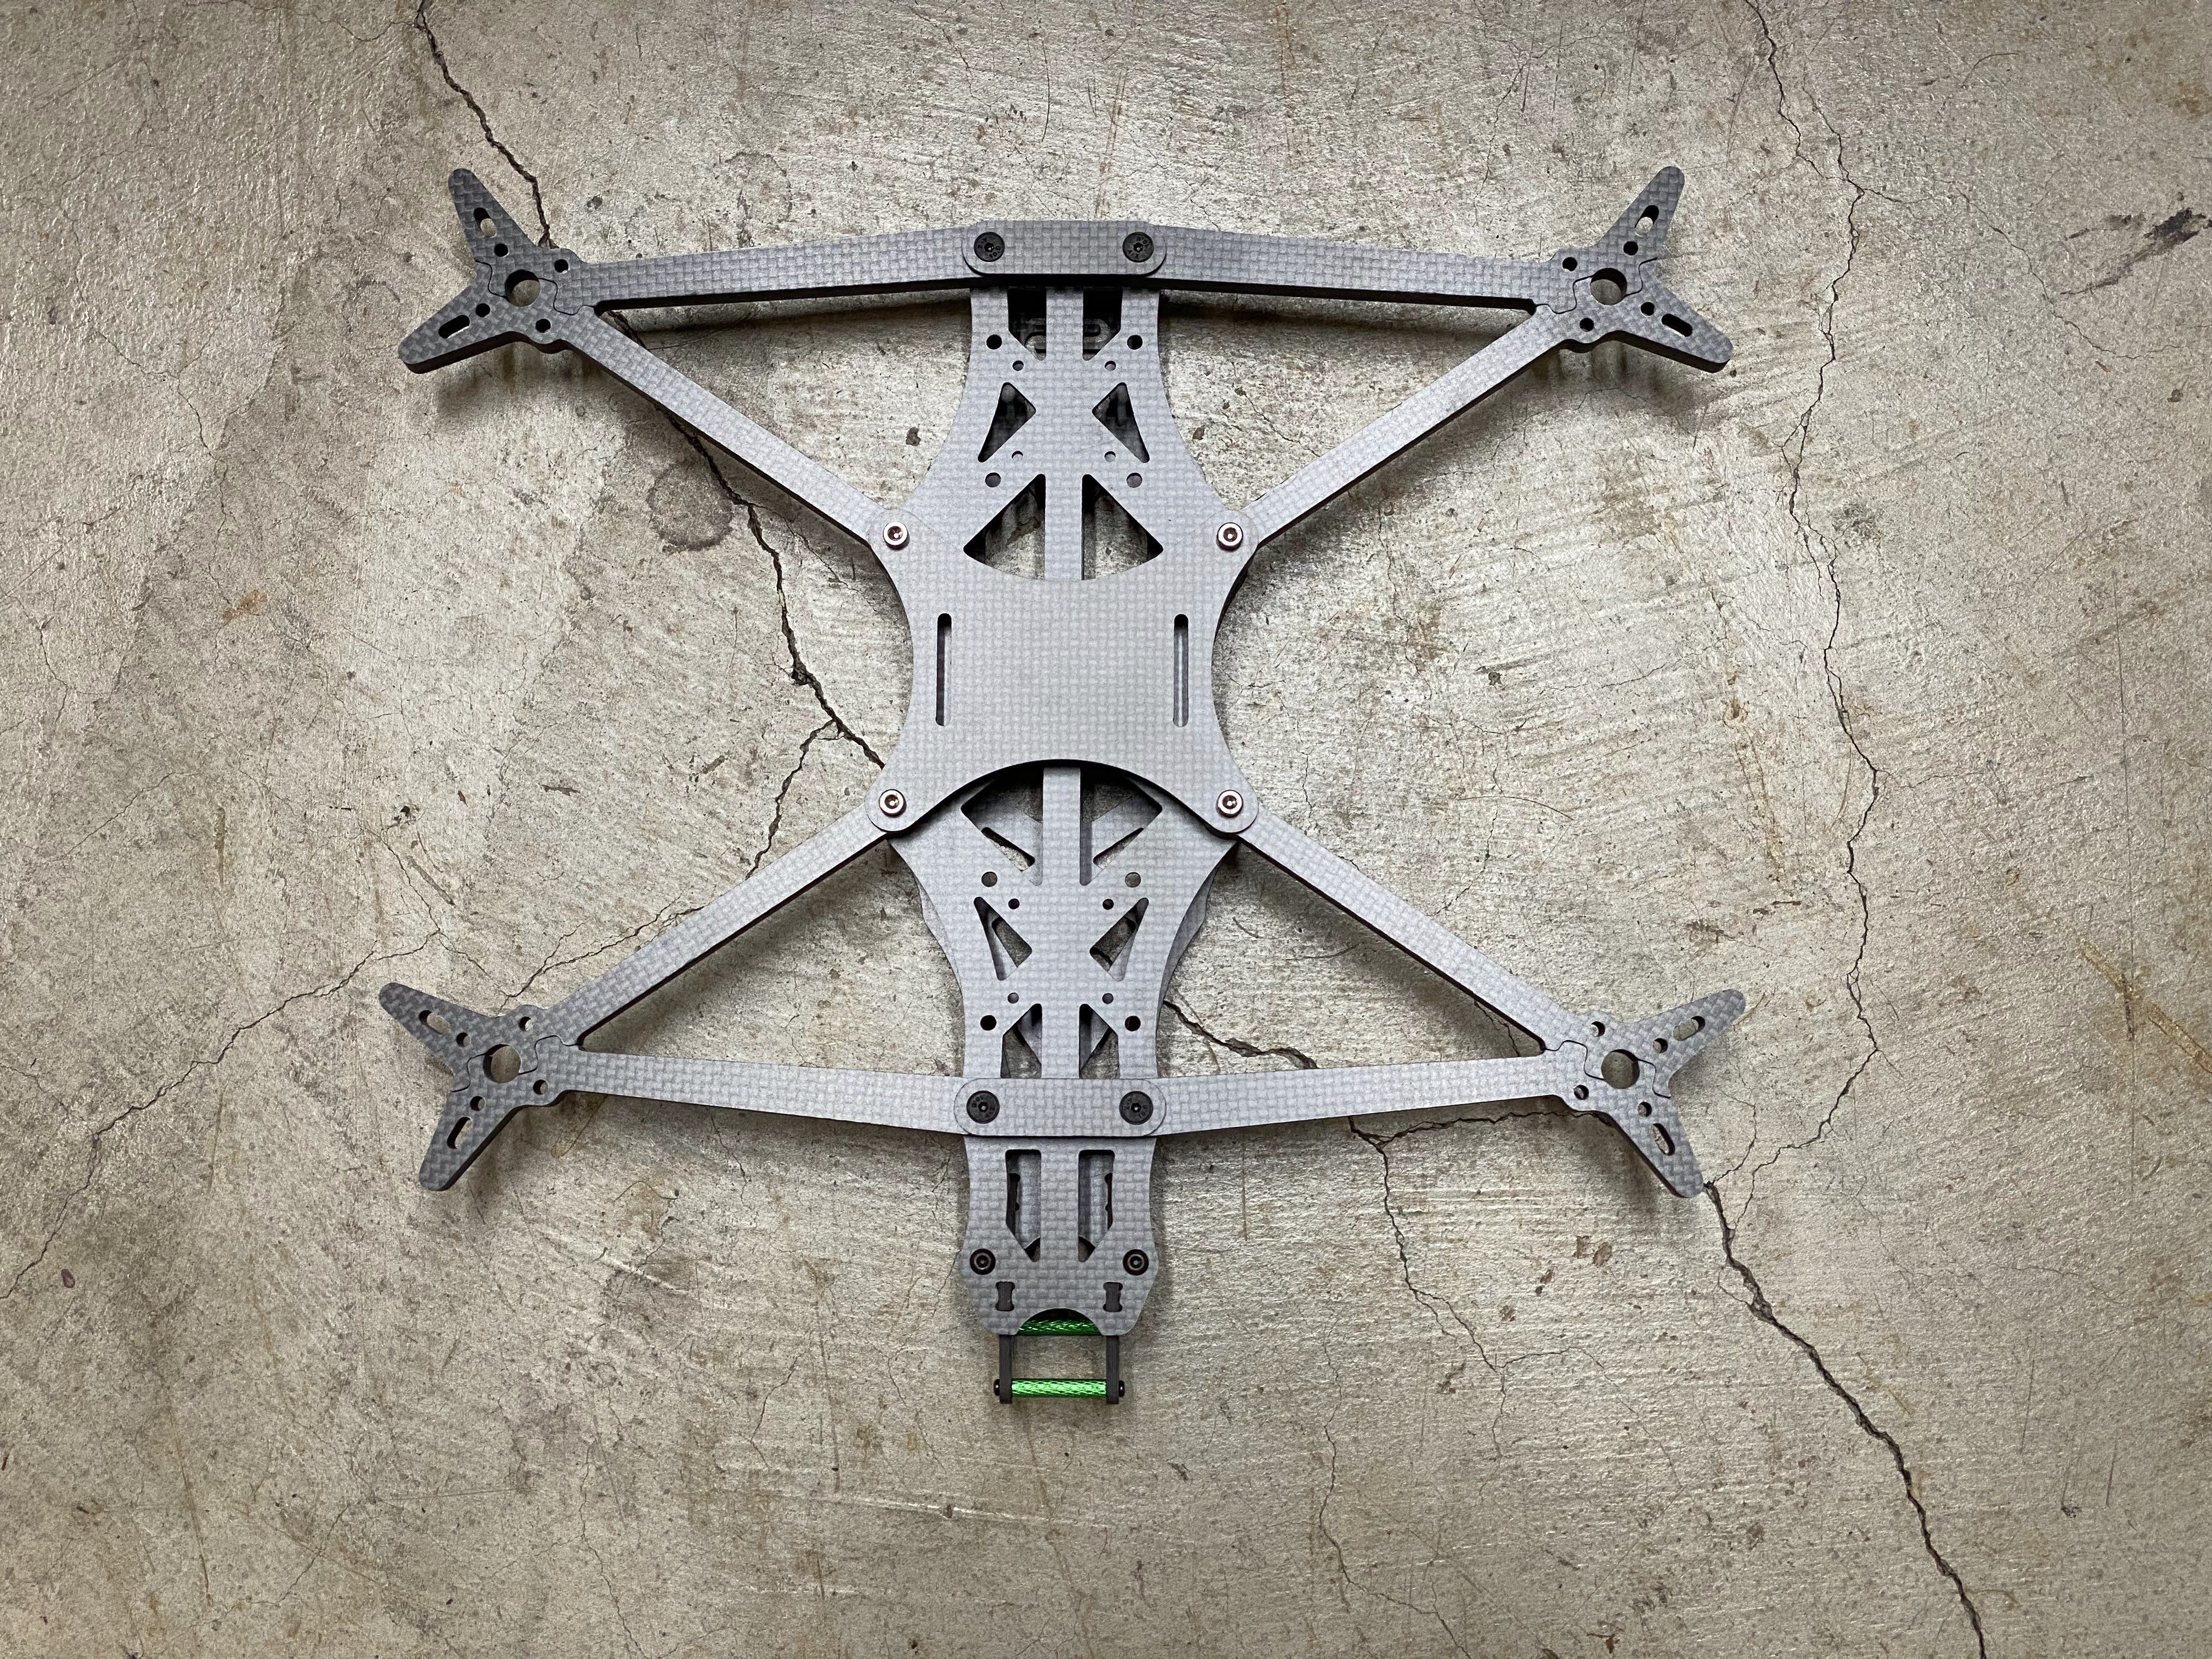
You can see the difference between the 2 layouts by comparing the image above. Because I am switching to my own antennas, instead of the original dual 2.4/5.8 that the DJI 03 provides, now I am able to arrange electronics any way I want. I will mount the air unit towards the front and keep the antennas in the rear.
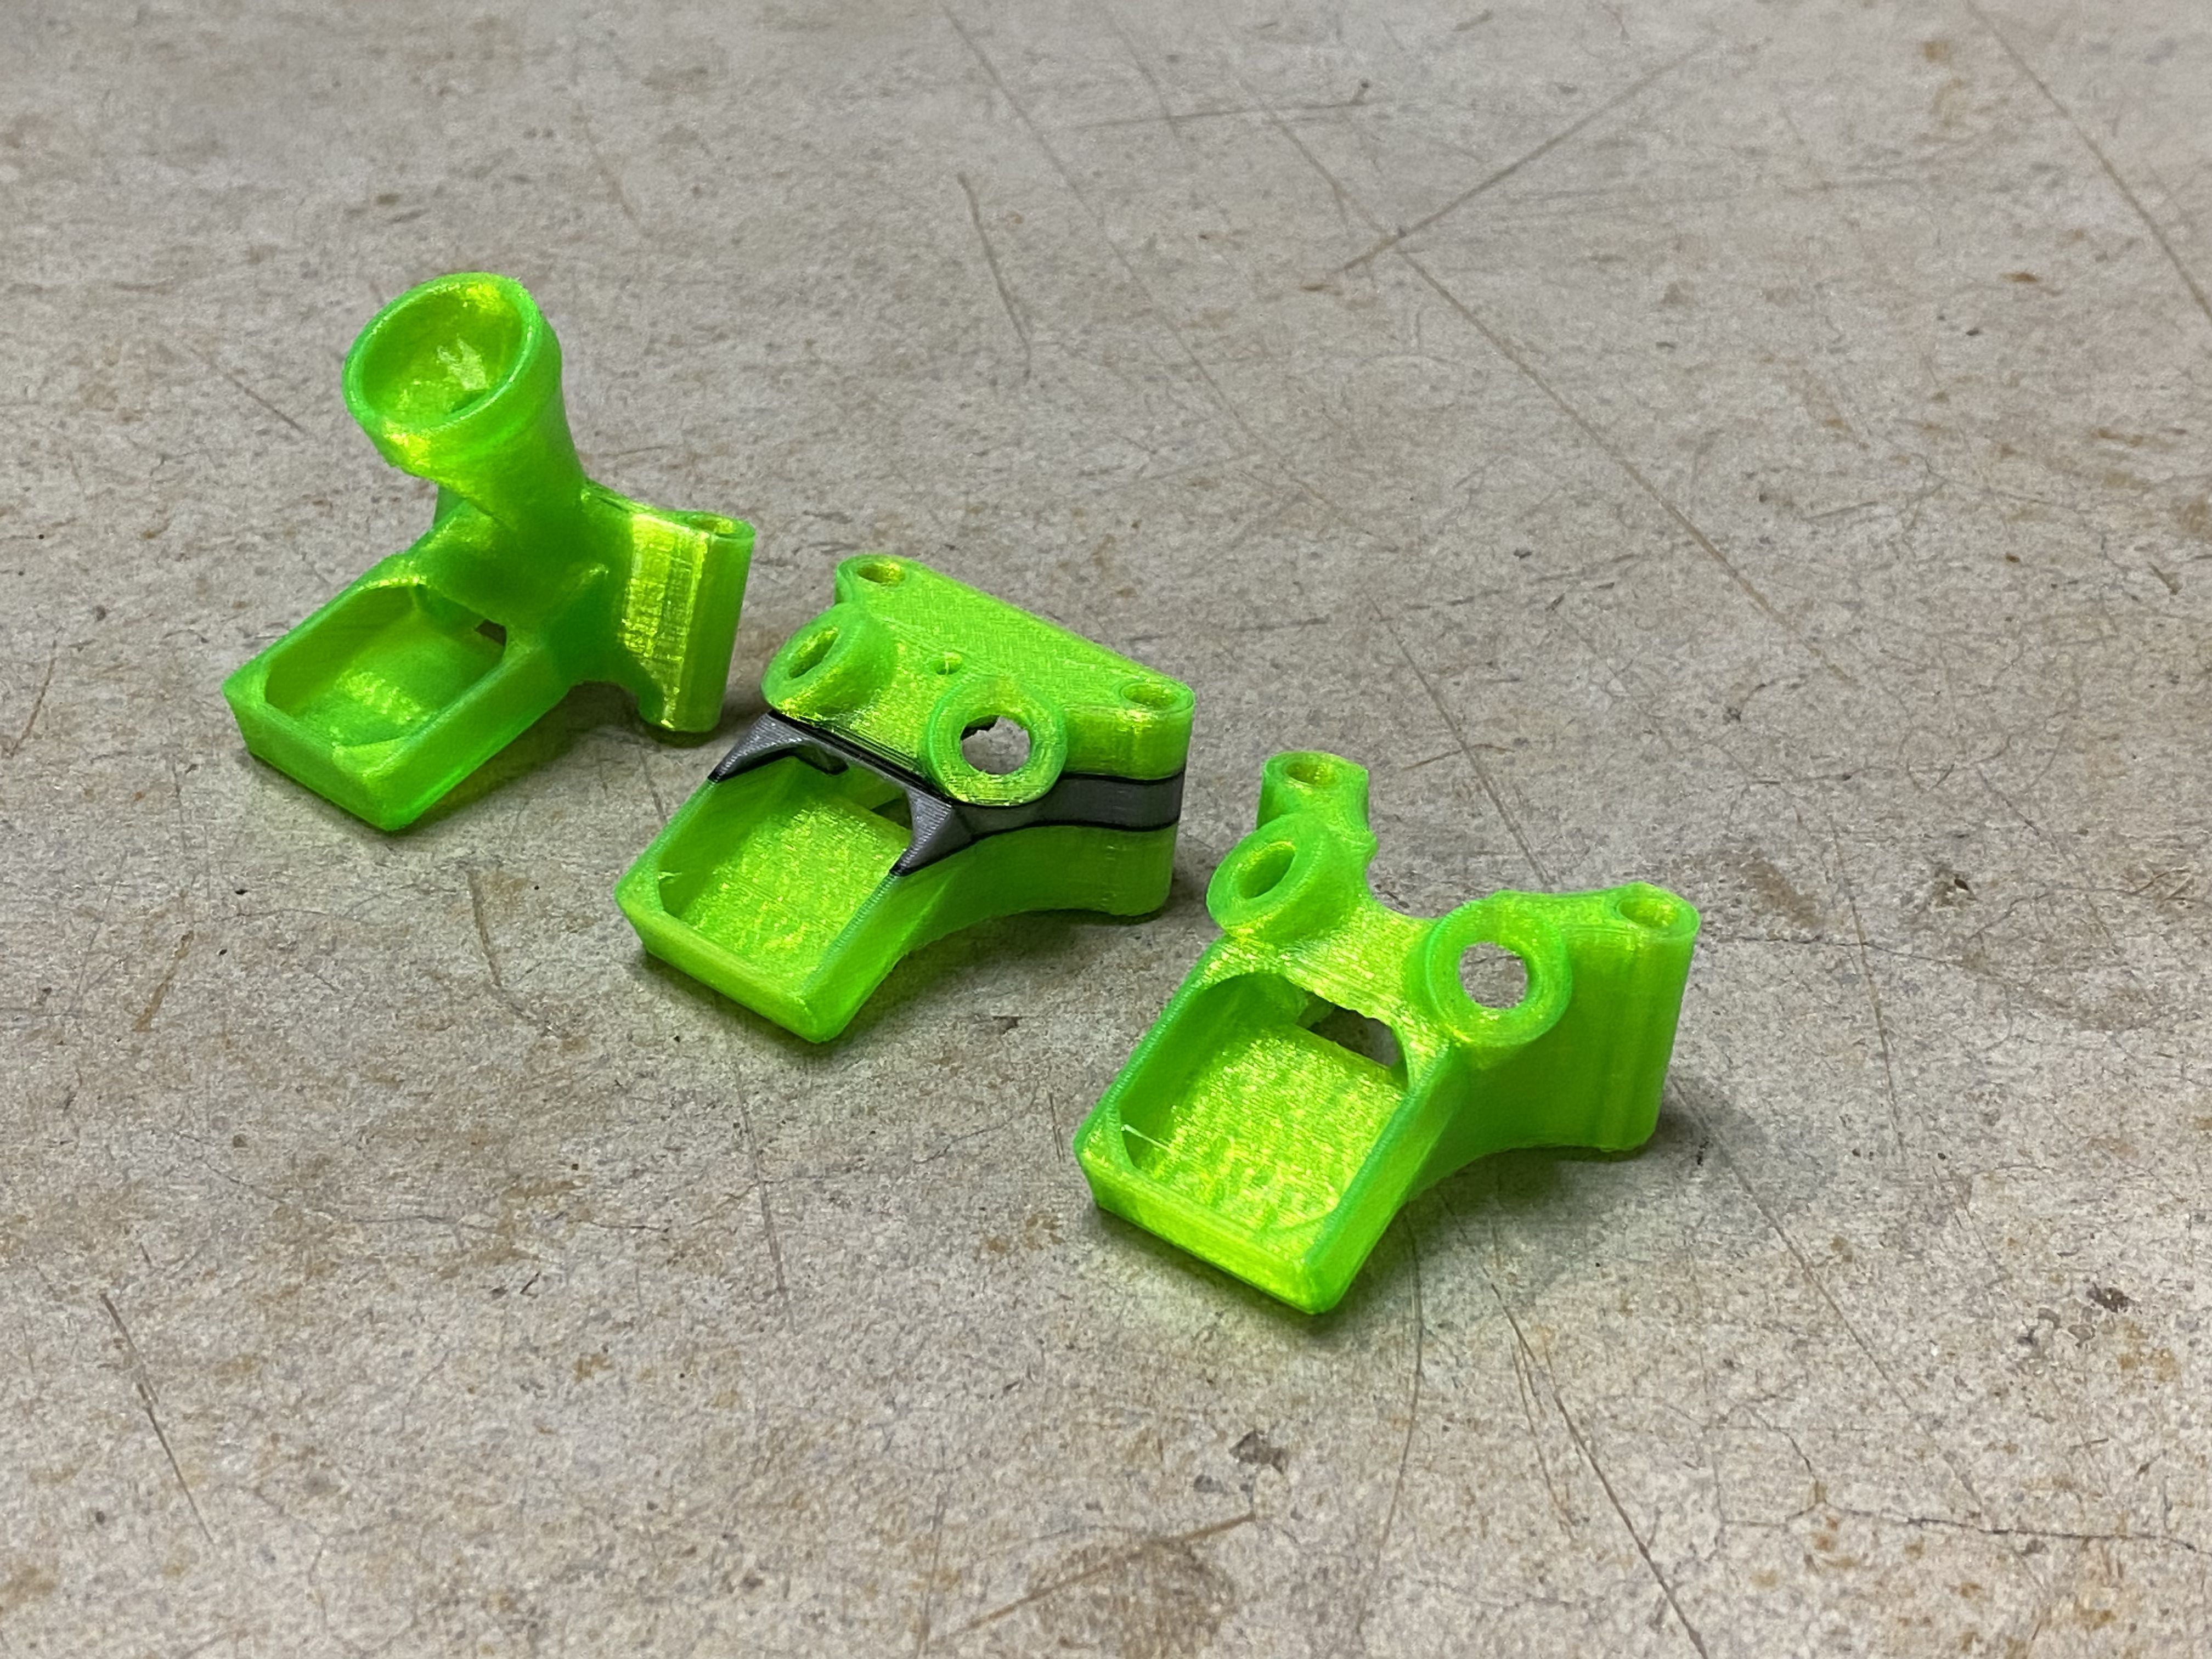
Here you can see the different antenna mounts I went through. Starting from the left, is the one that supports the original DJI O3 antenna. Then I moved to the two iFlight 5.8G FPV Drone Antennas (LHCP RP-SMA Male 60mm Antenna) and finally I made the last change to have the power wire exiting in the rear of the quad.
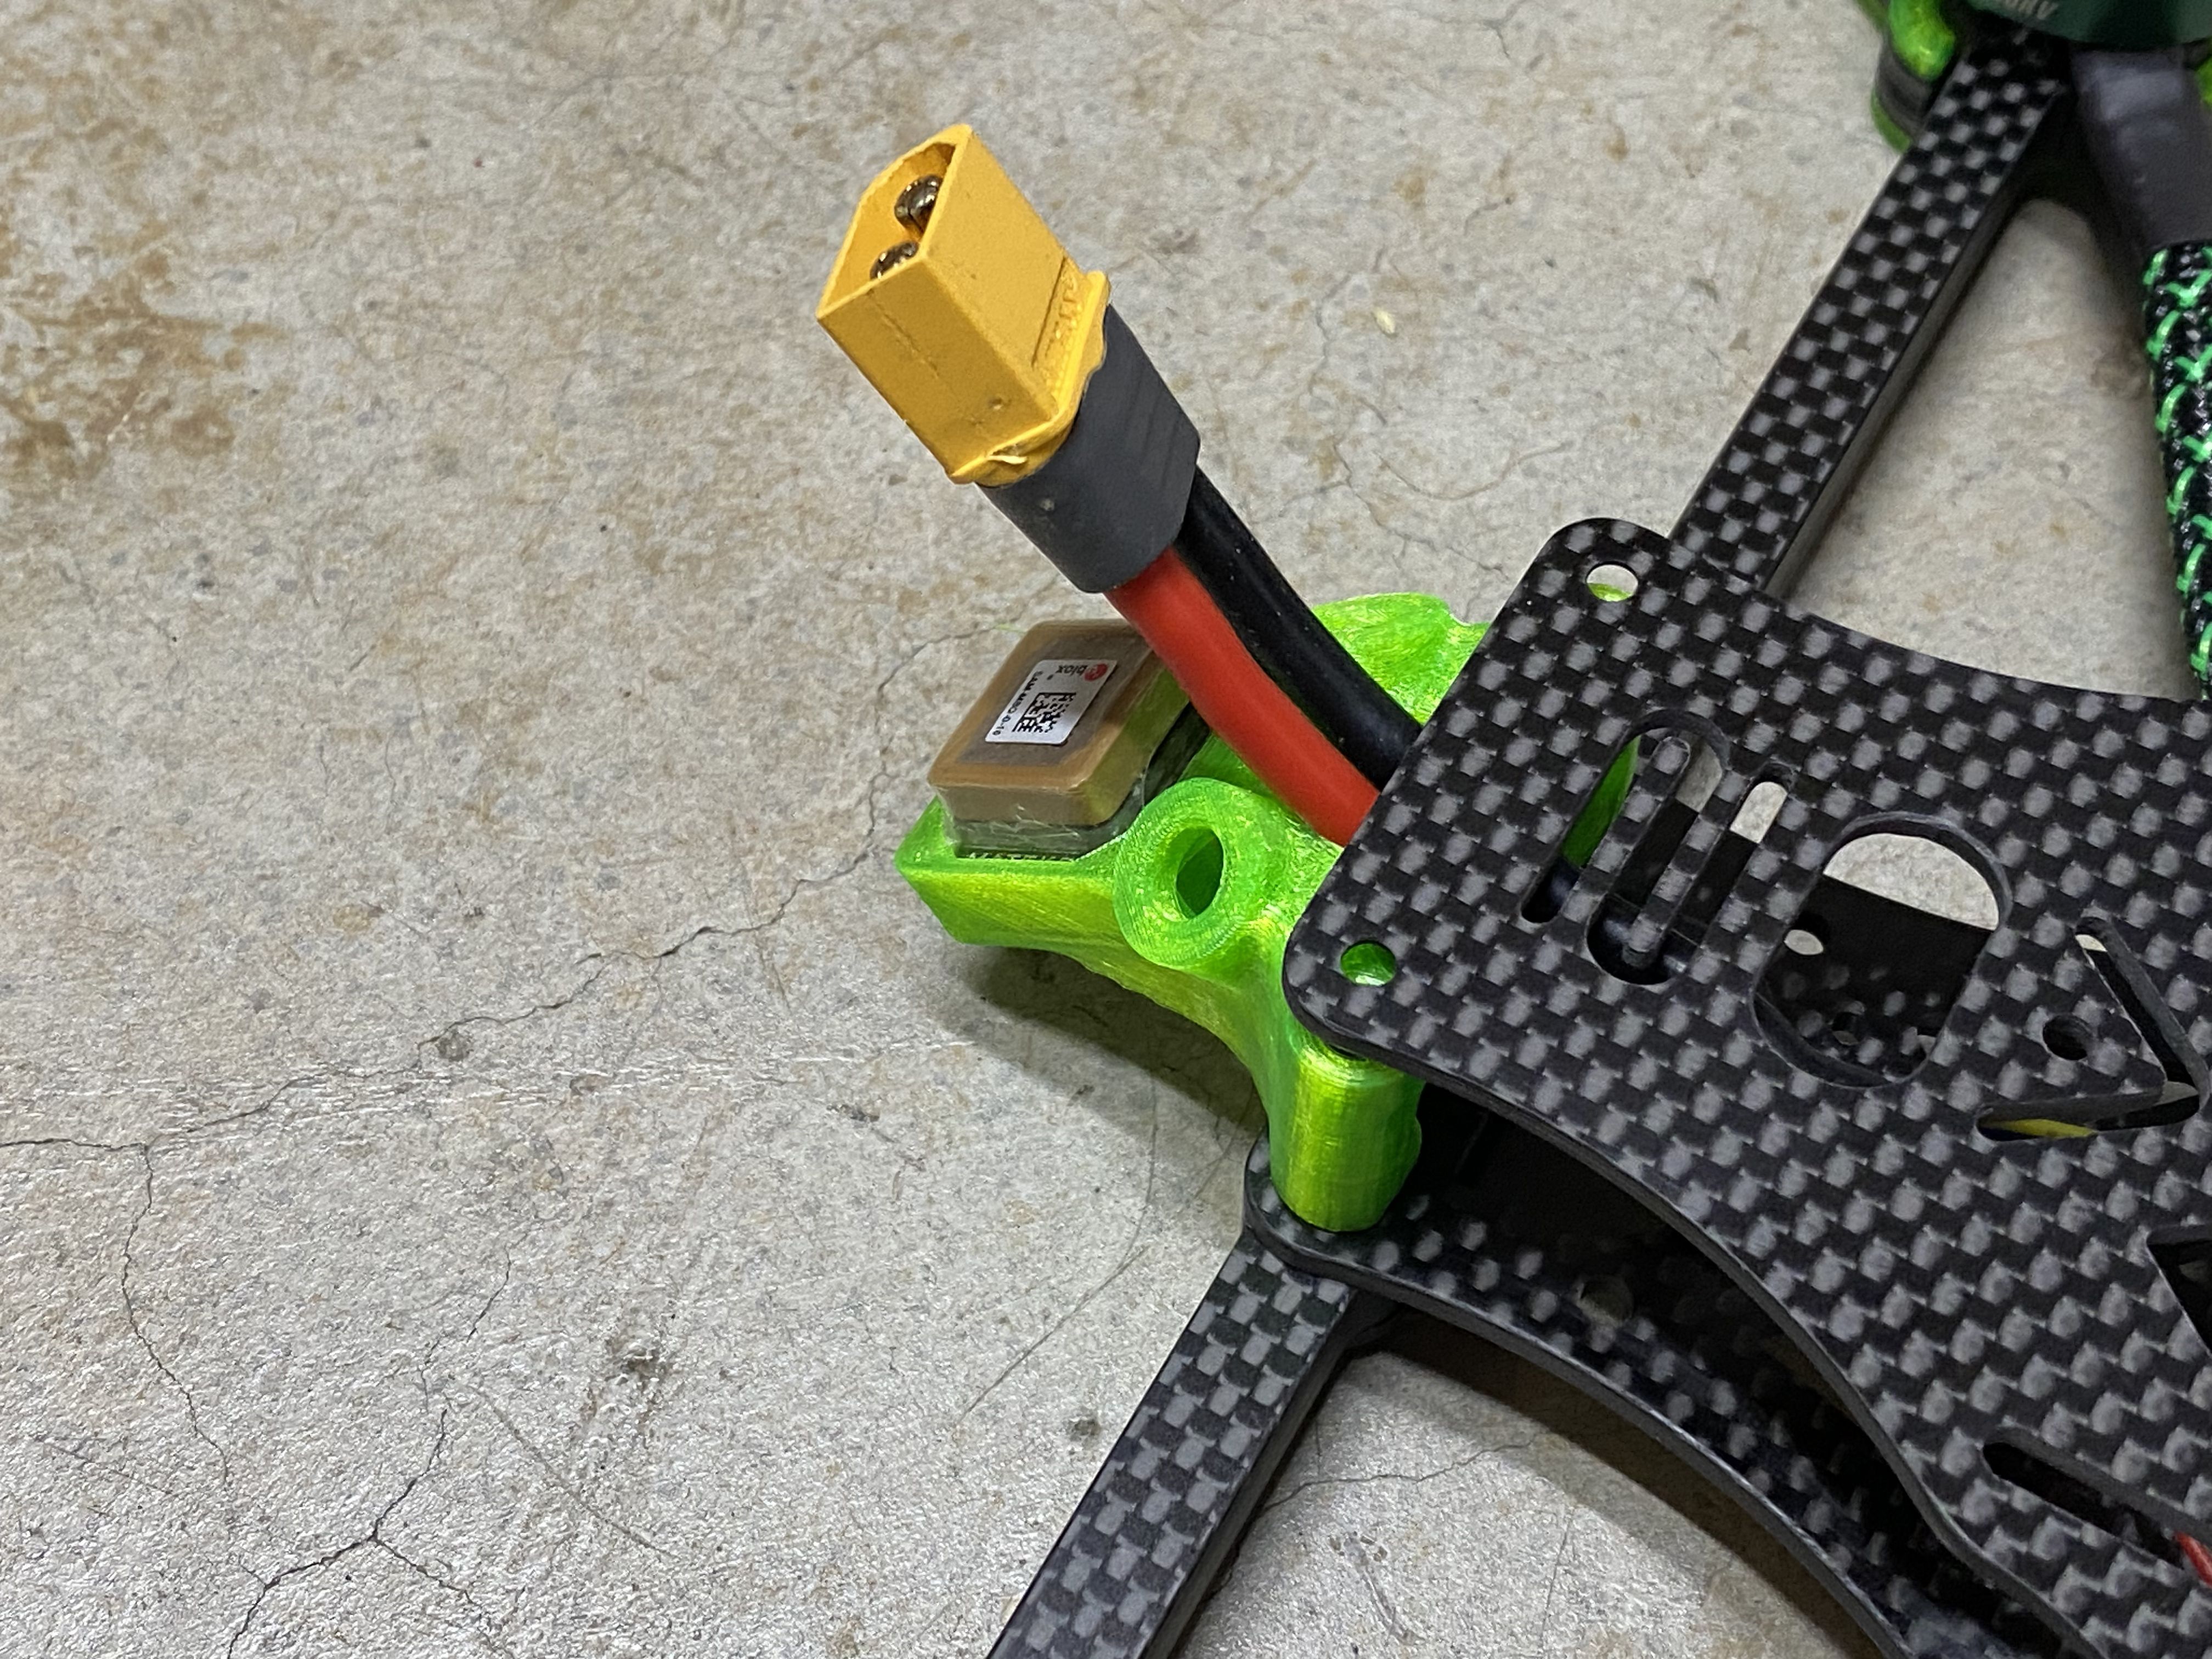
Normally, I would 3D print a XT60 holder, so it is in a fixed position and not worry about it getting cut by the props. But with this build I plan to use different size batteries that weight have significate weight and size differences. So that would mean I will need to adjust the battery placement depending on the battery I plan to use. If the XT60 is in a fixed position on the frame, I am not able adjust the battery position my movement will be limited to the length of the wire on battery.
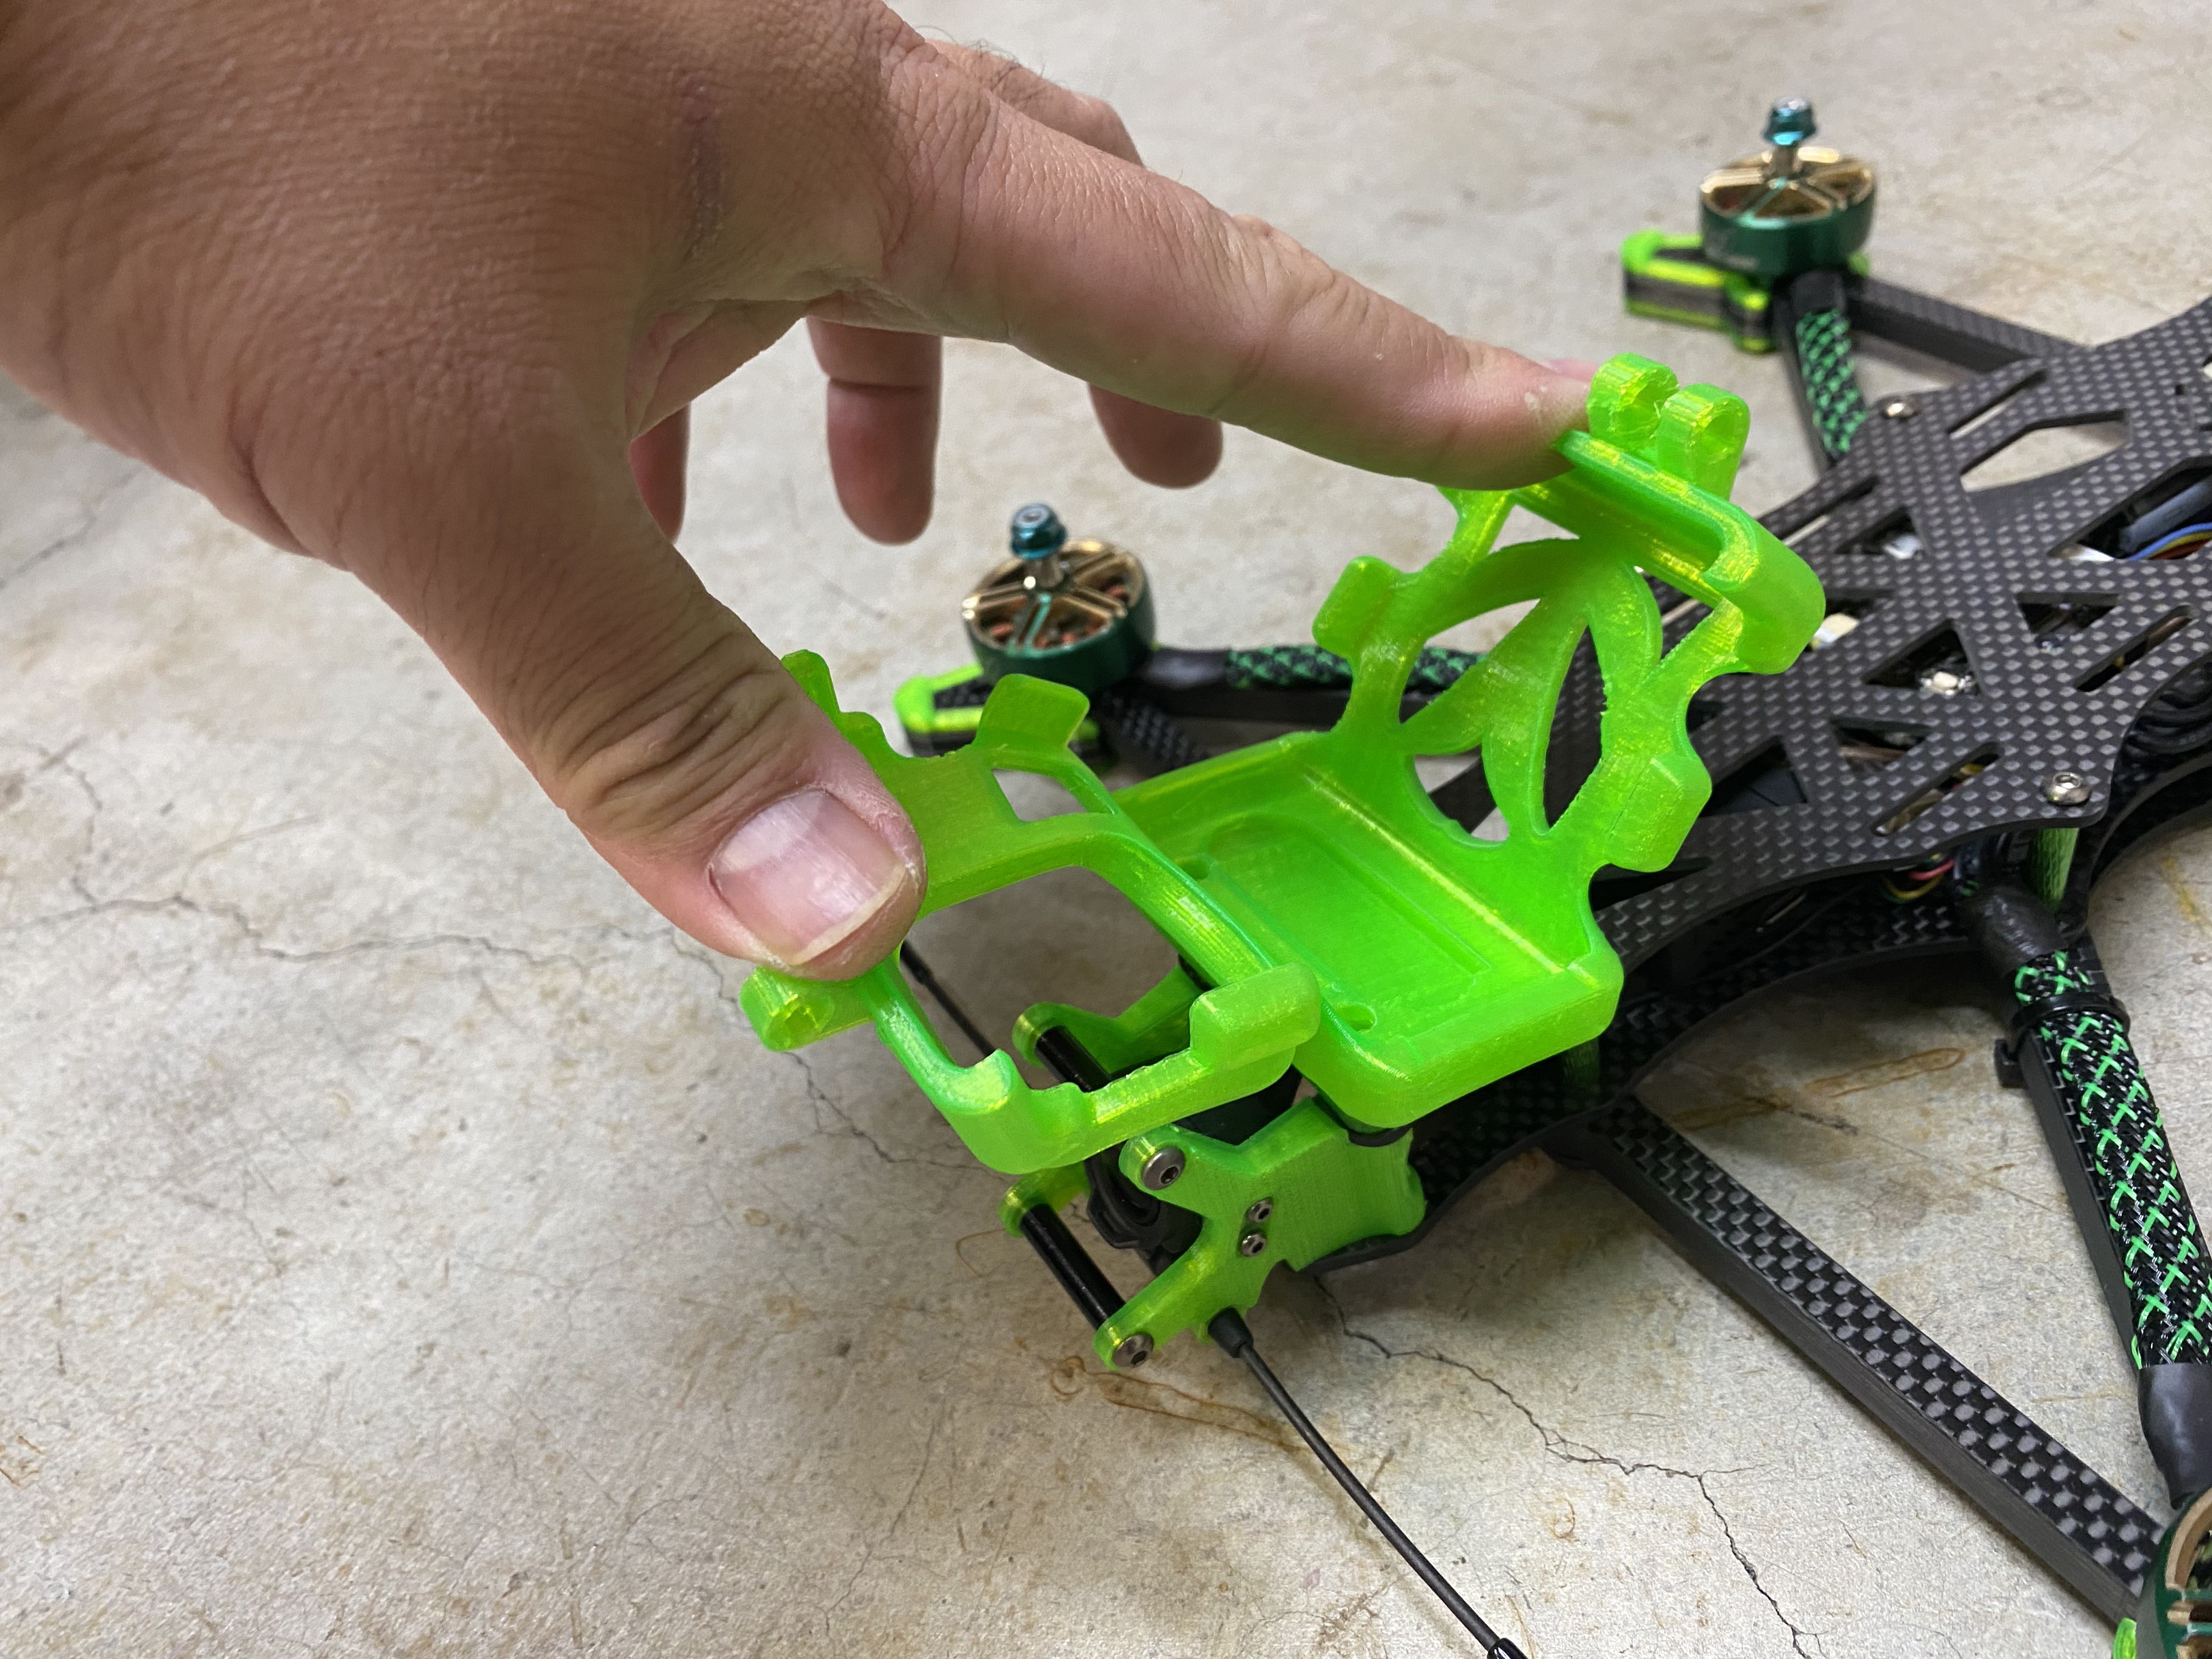
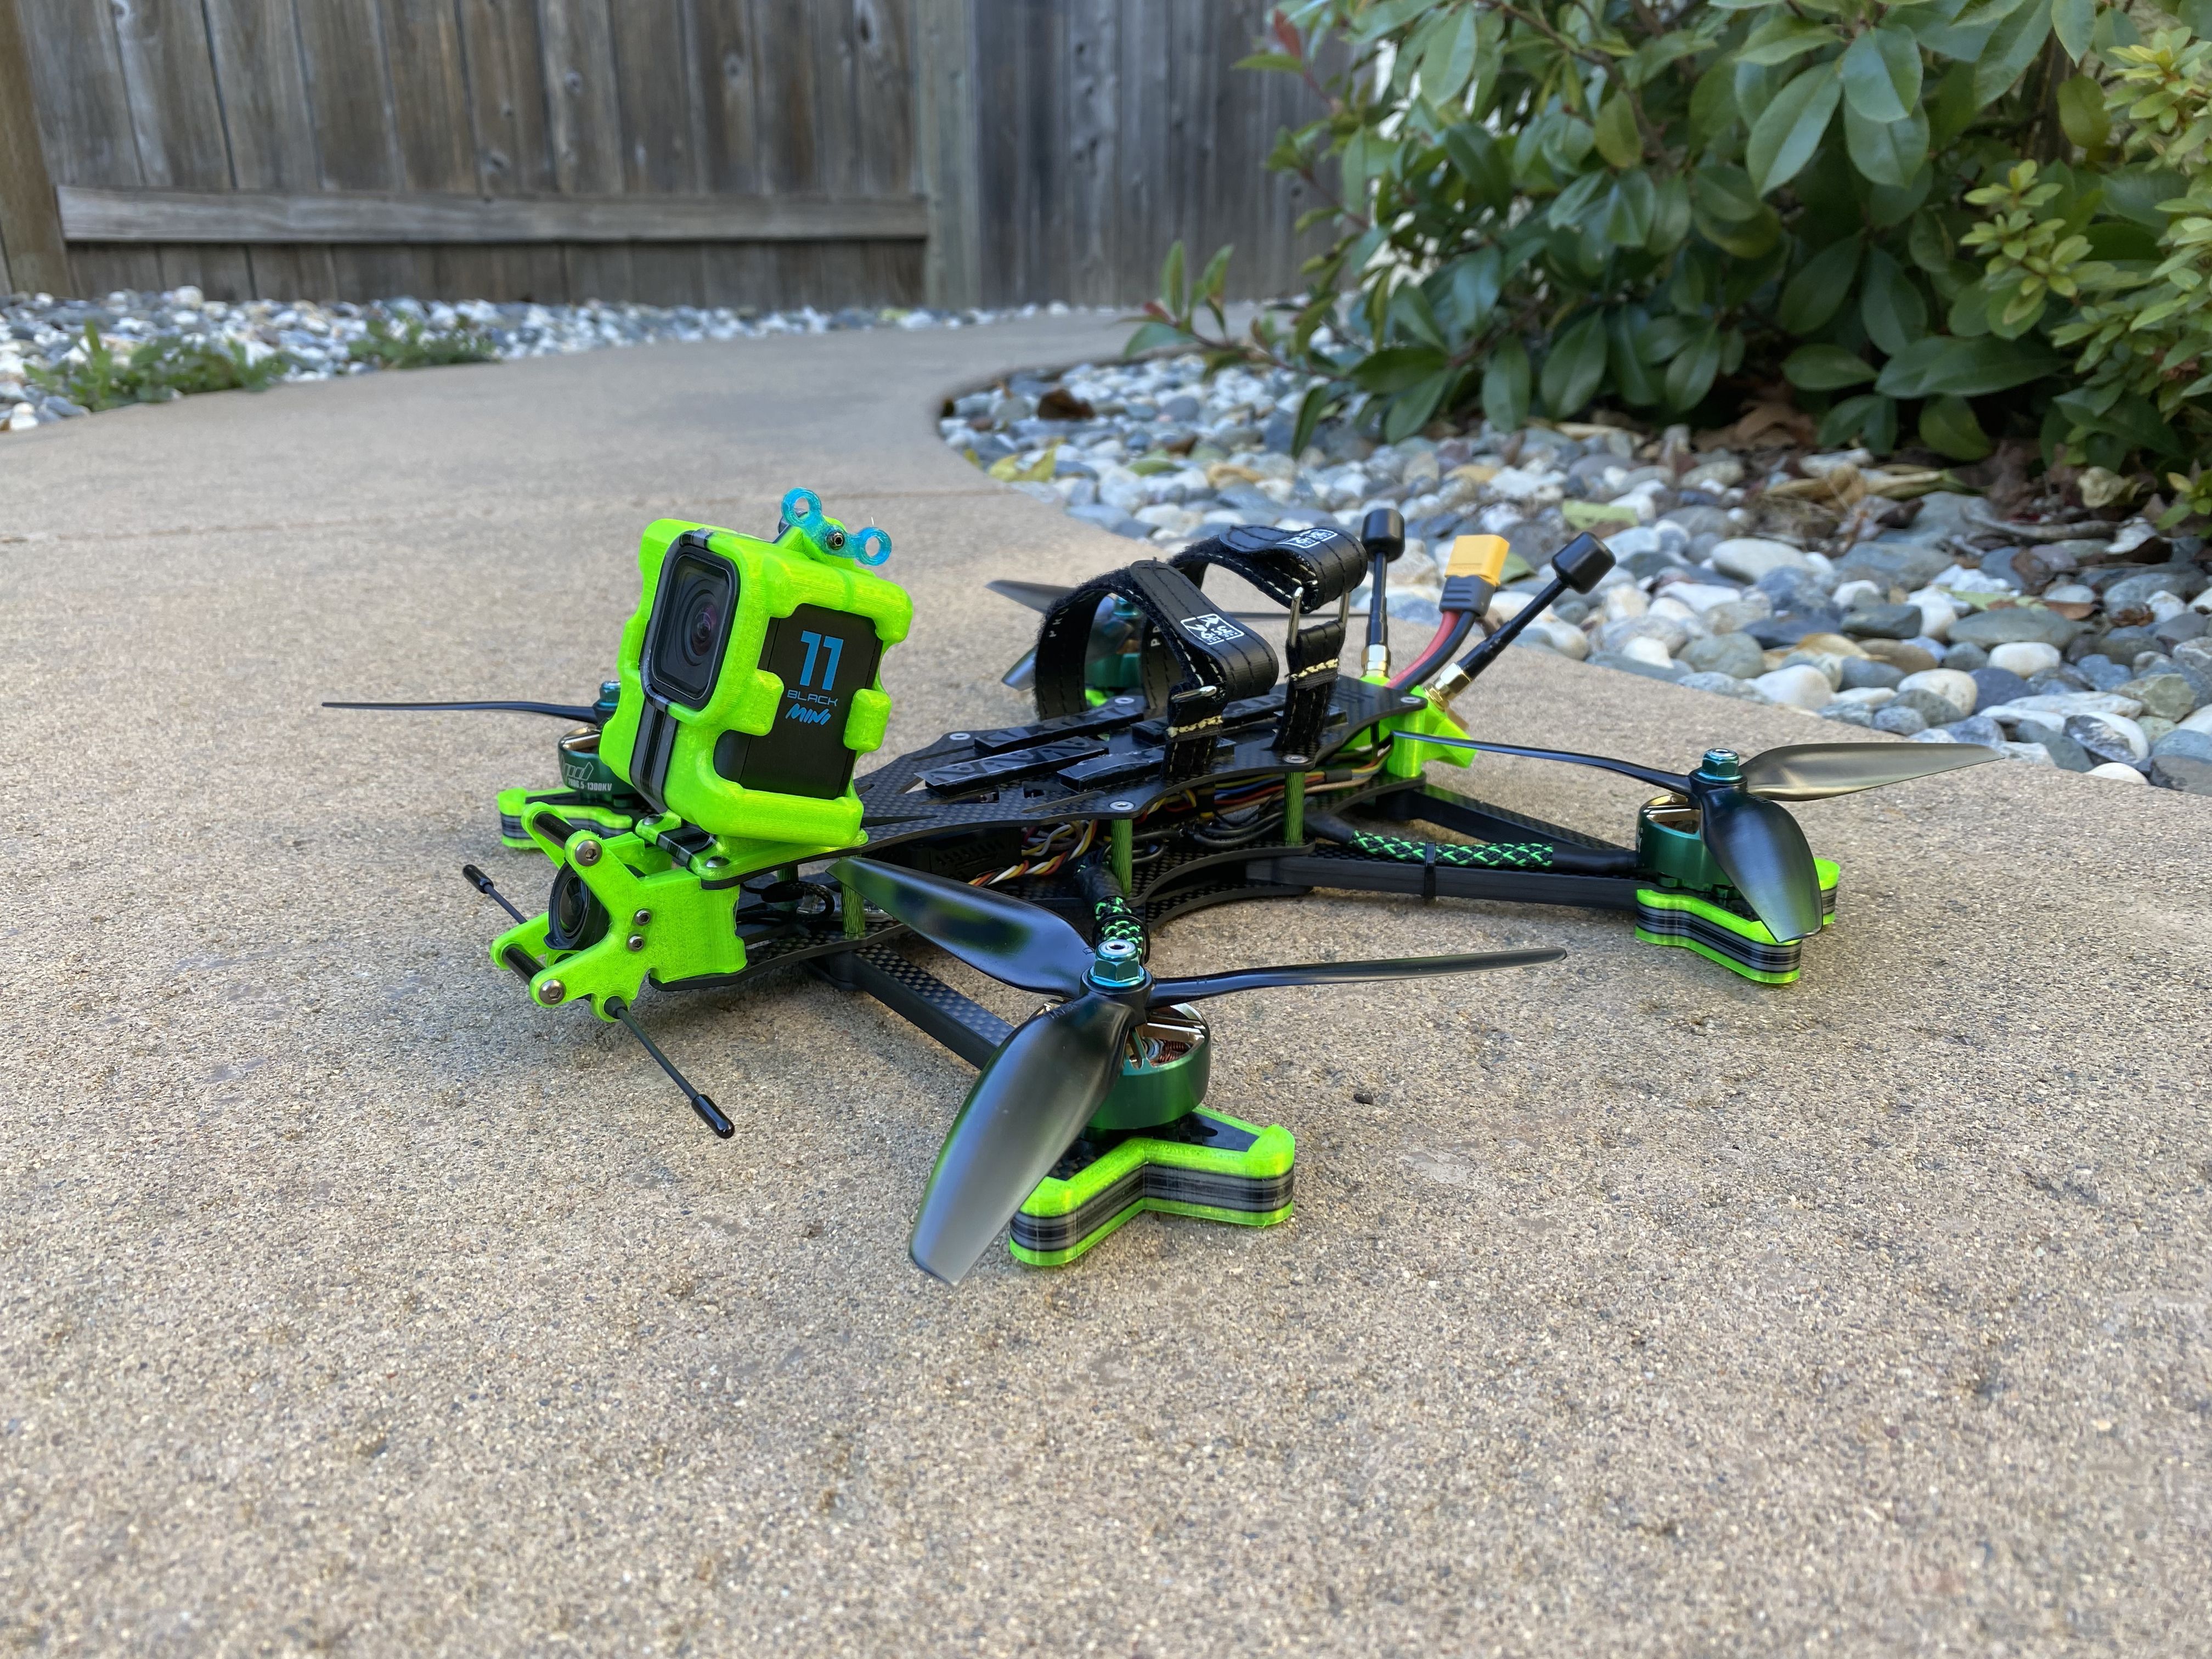
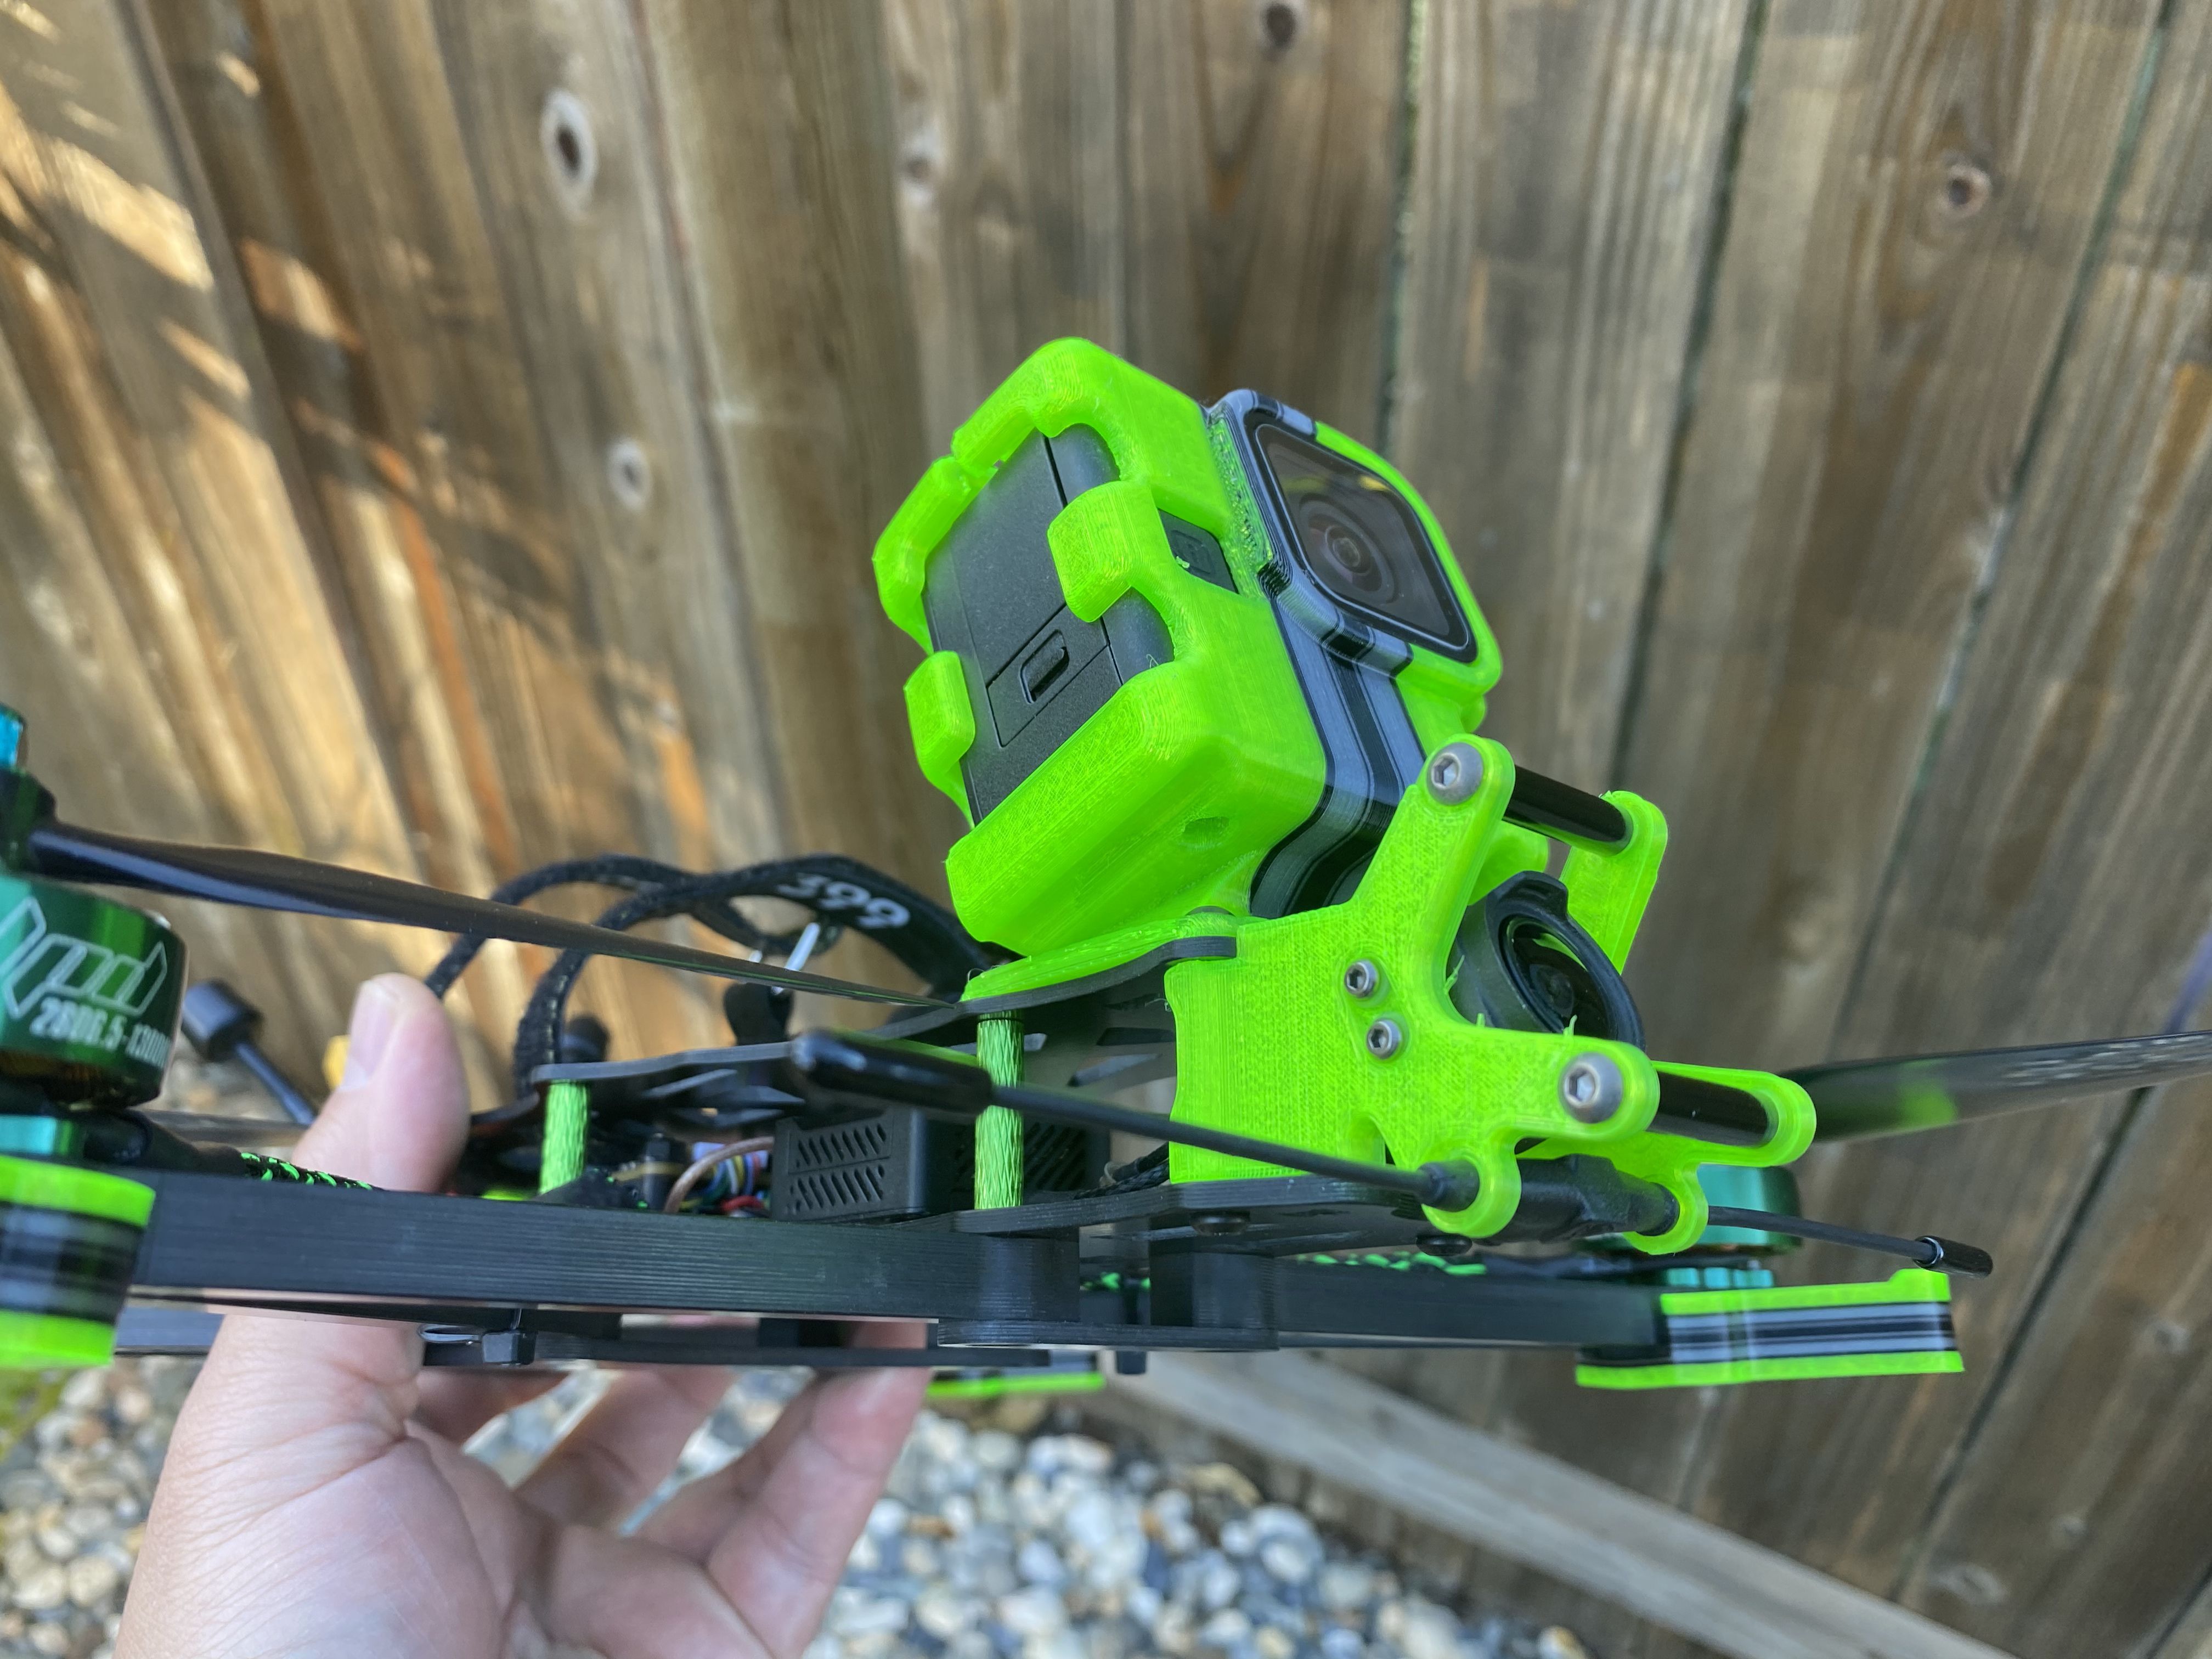
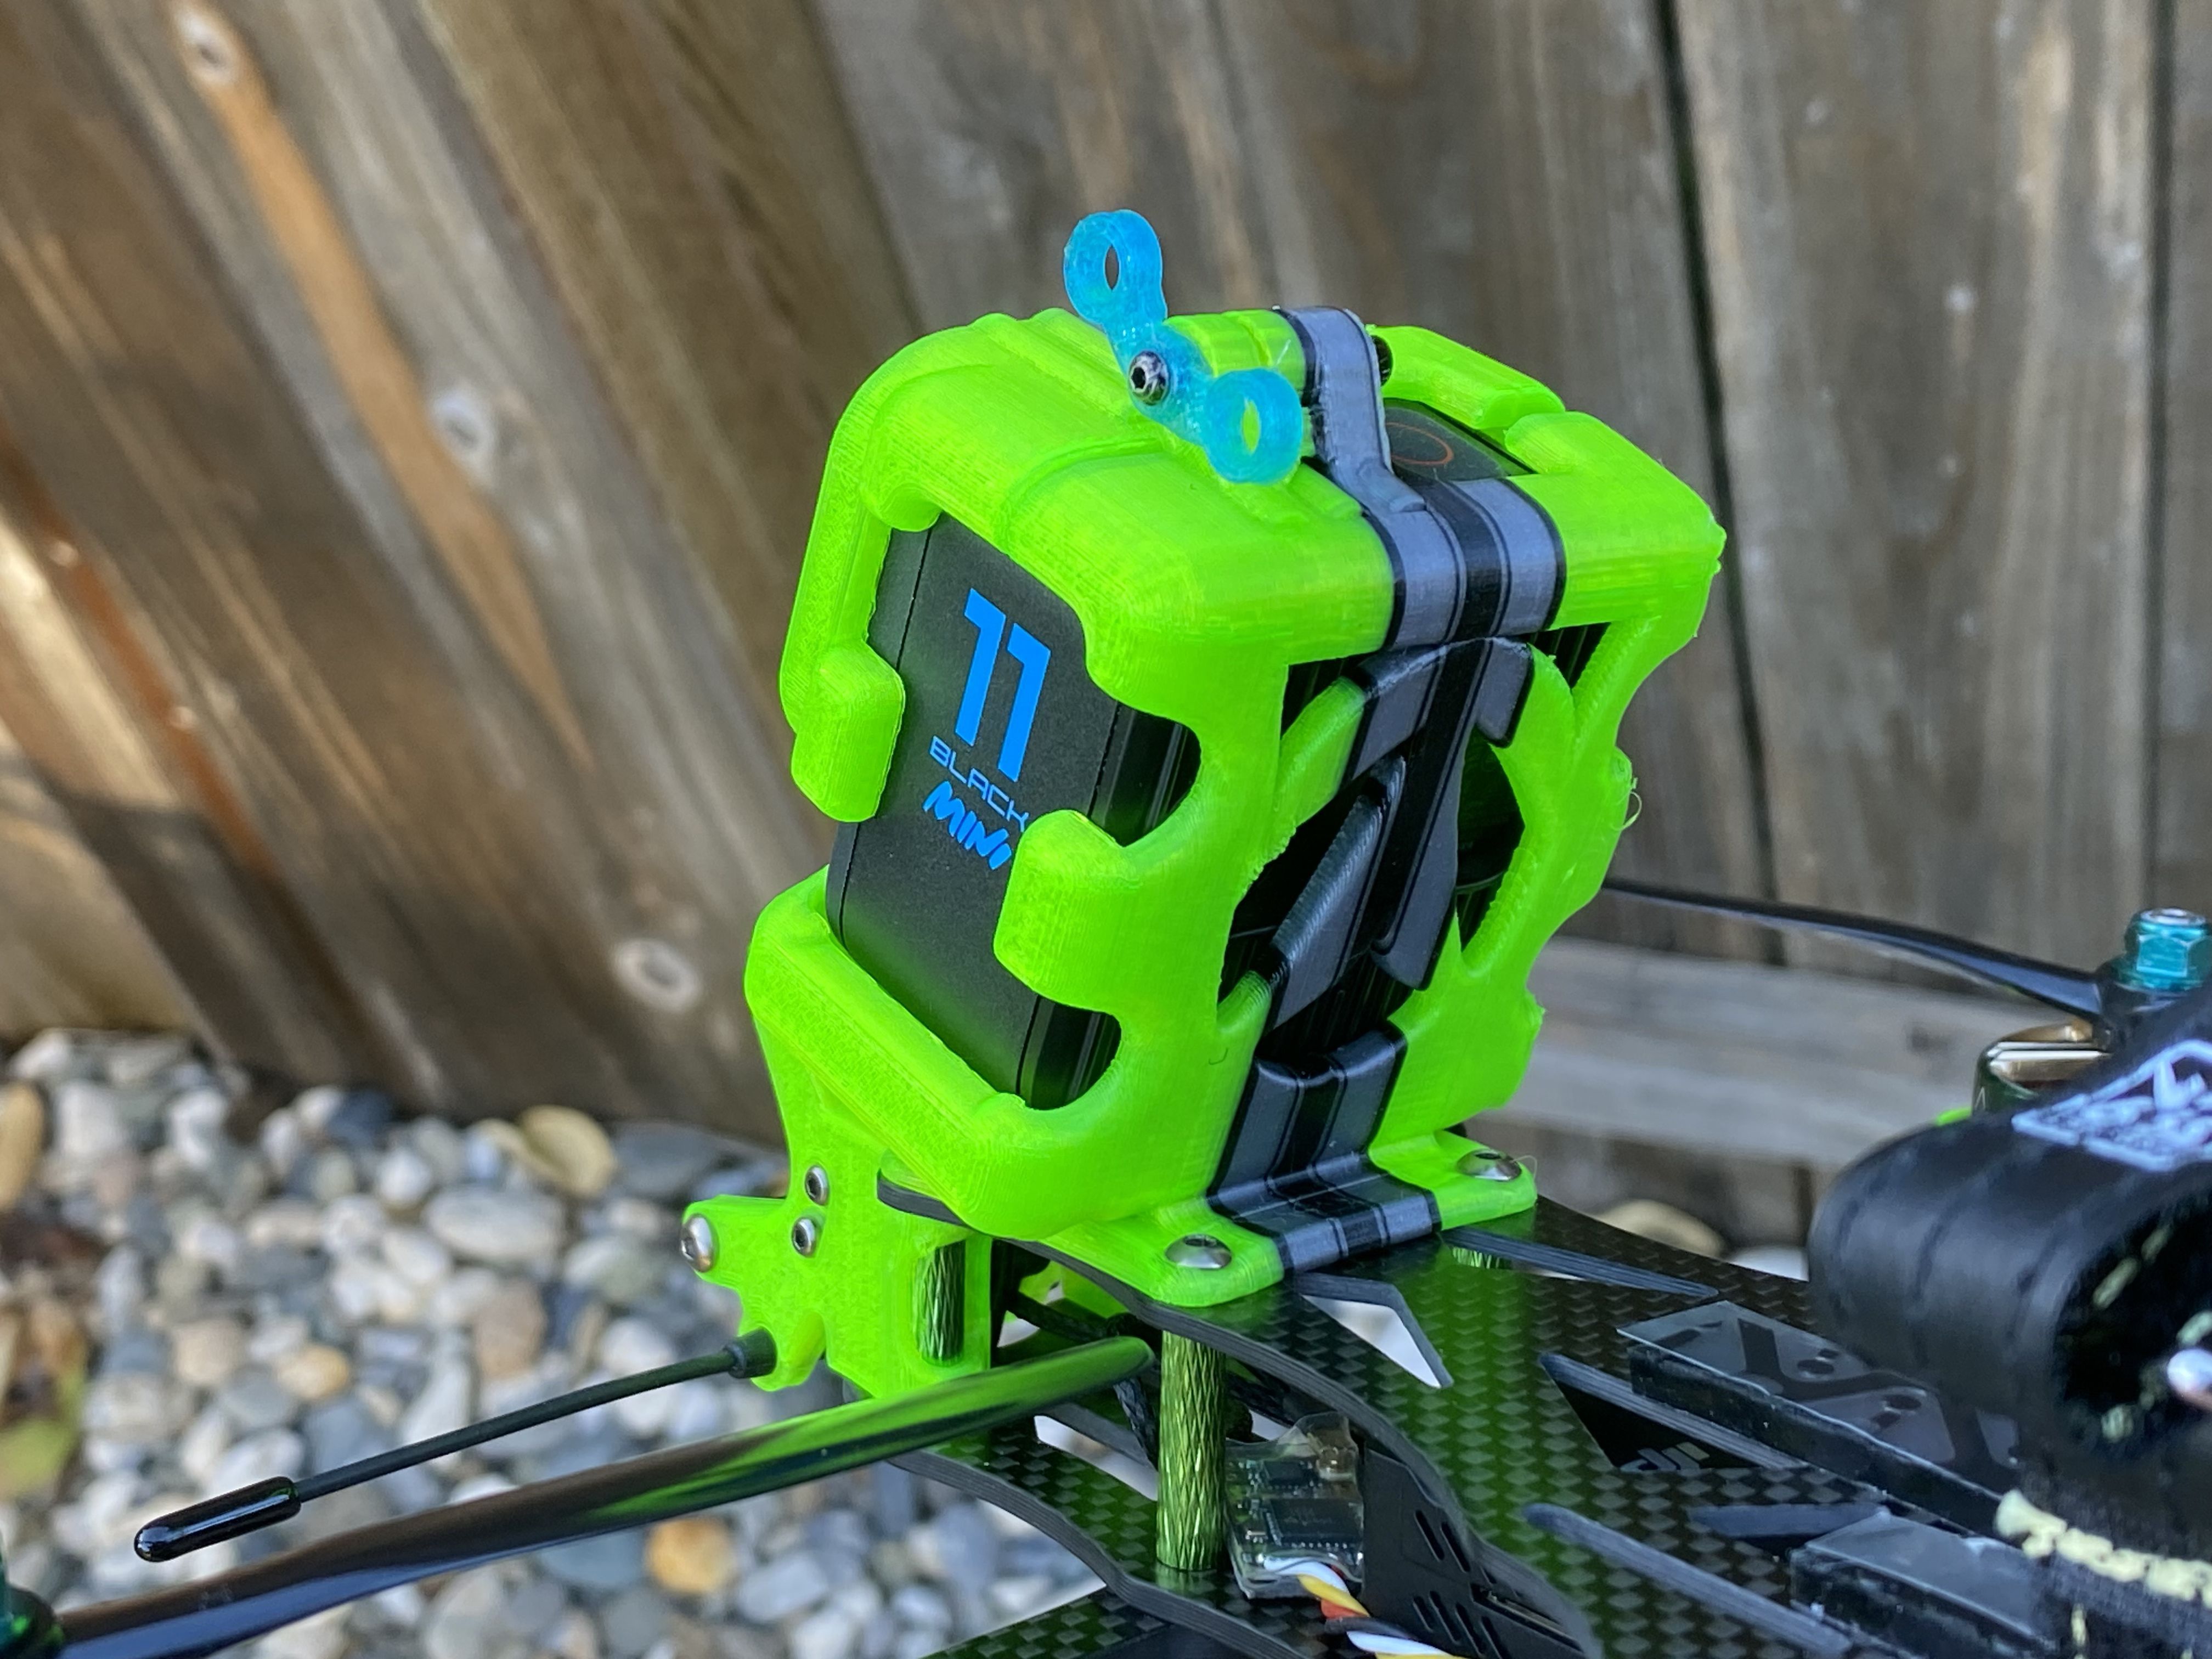
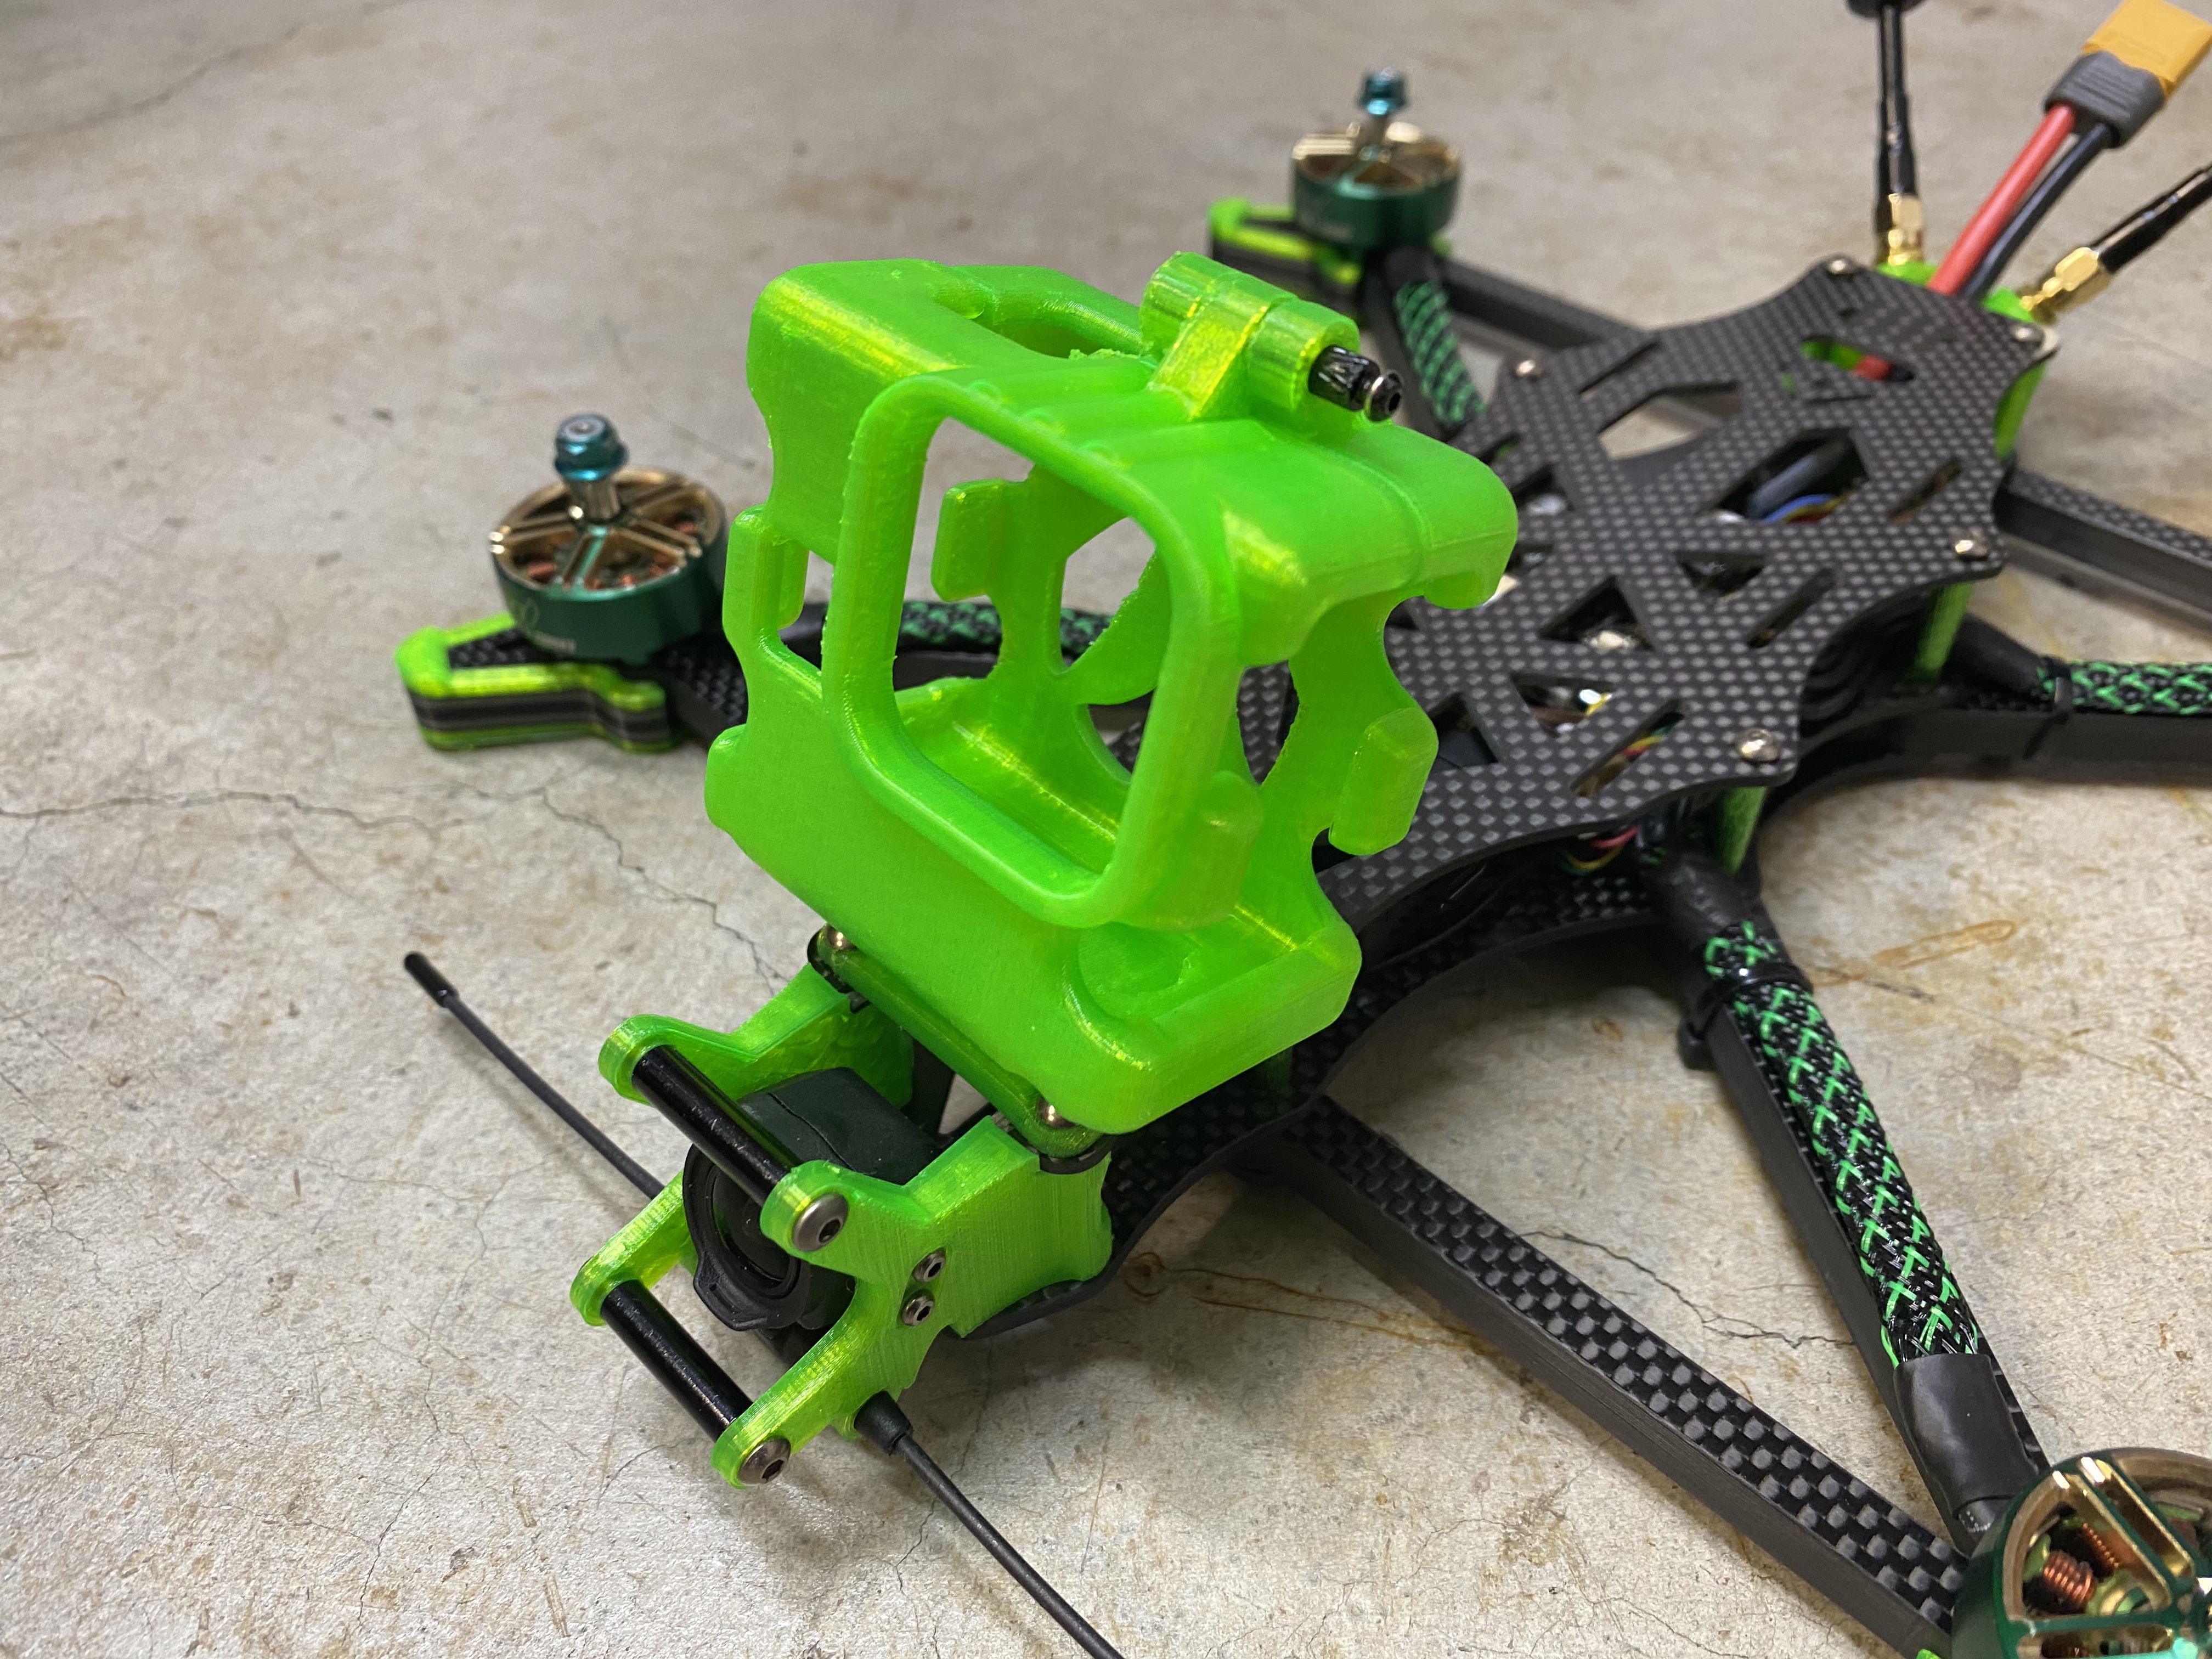
I wanted a GoPro mount that was easy to install and remove and I saw something on thingiverse. Someone came up with a great idea where you can split open the mount and place the GoPro inside that case. It is held in with a clevis pin, but I am using a m2 standoff until the clevis arrives.
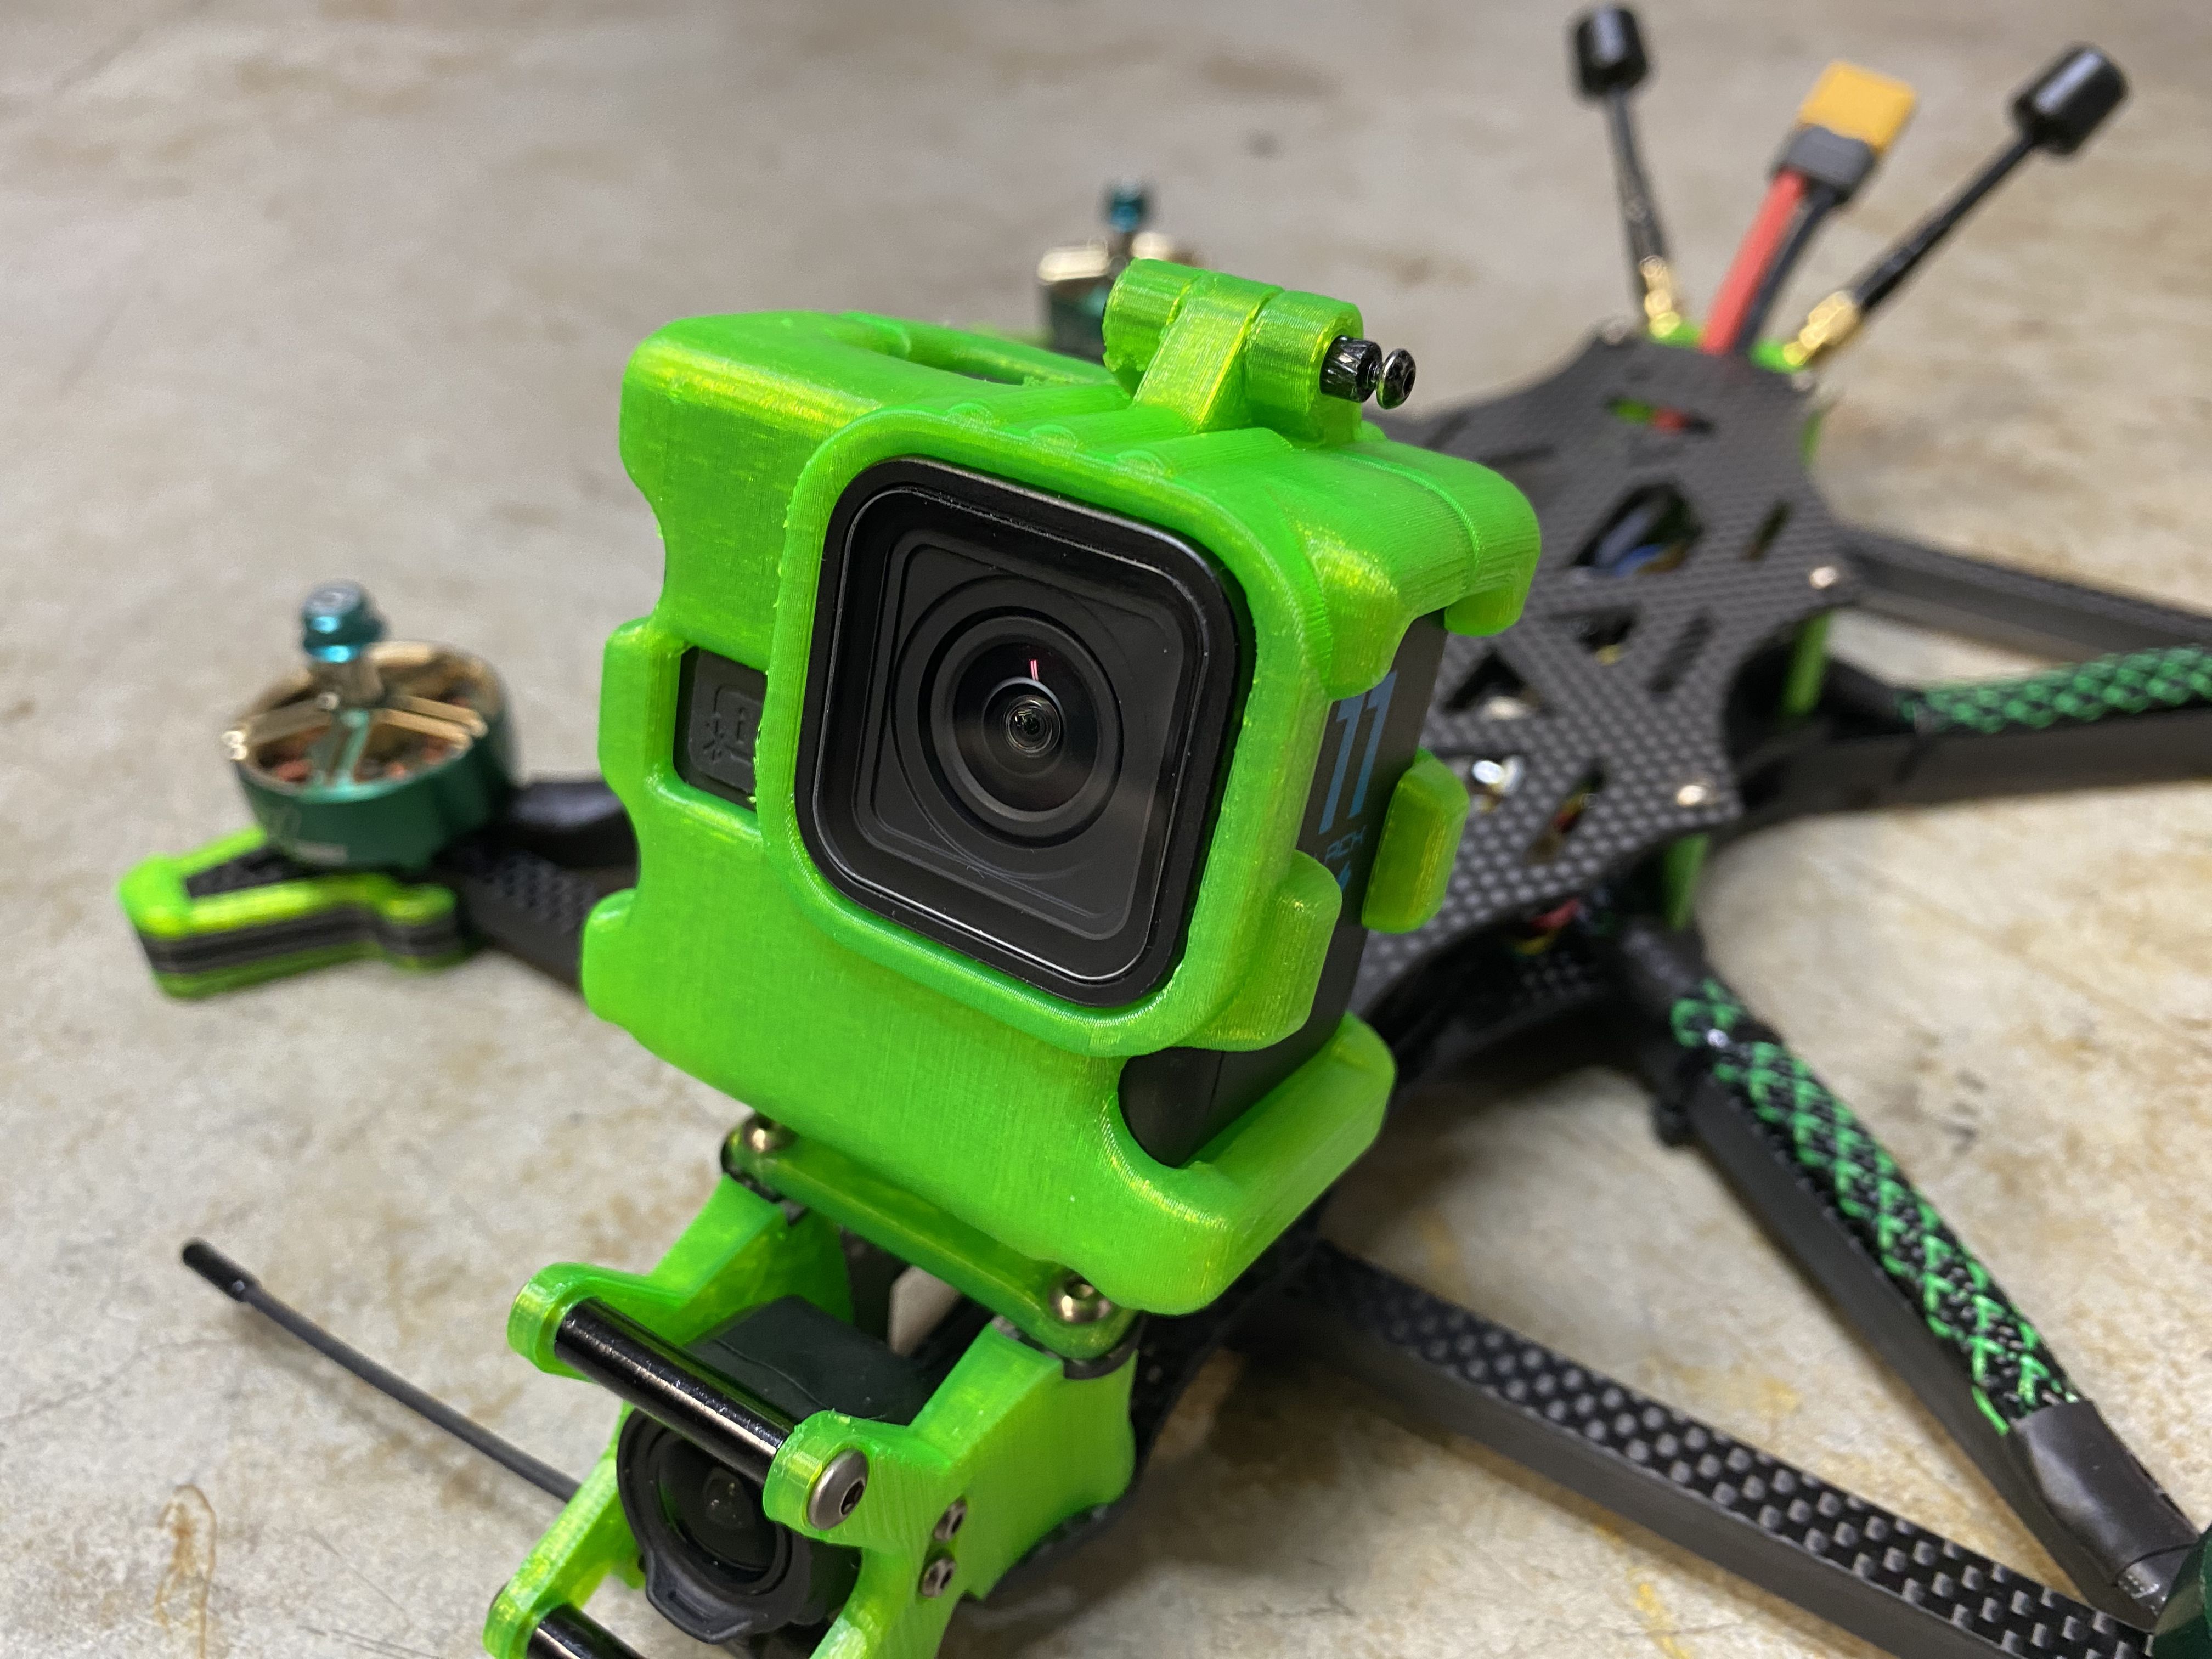
Basically, I looked for a case I like, then I remixed it to make it fully enclosed case. Then, I added a slit on the top of the mount for the opening and finally the locking hinge for the clevis pin.
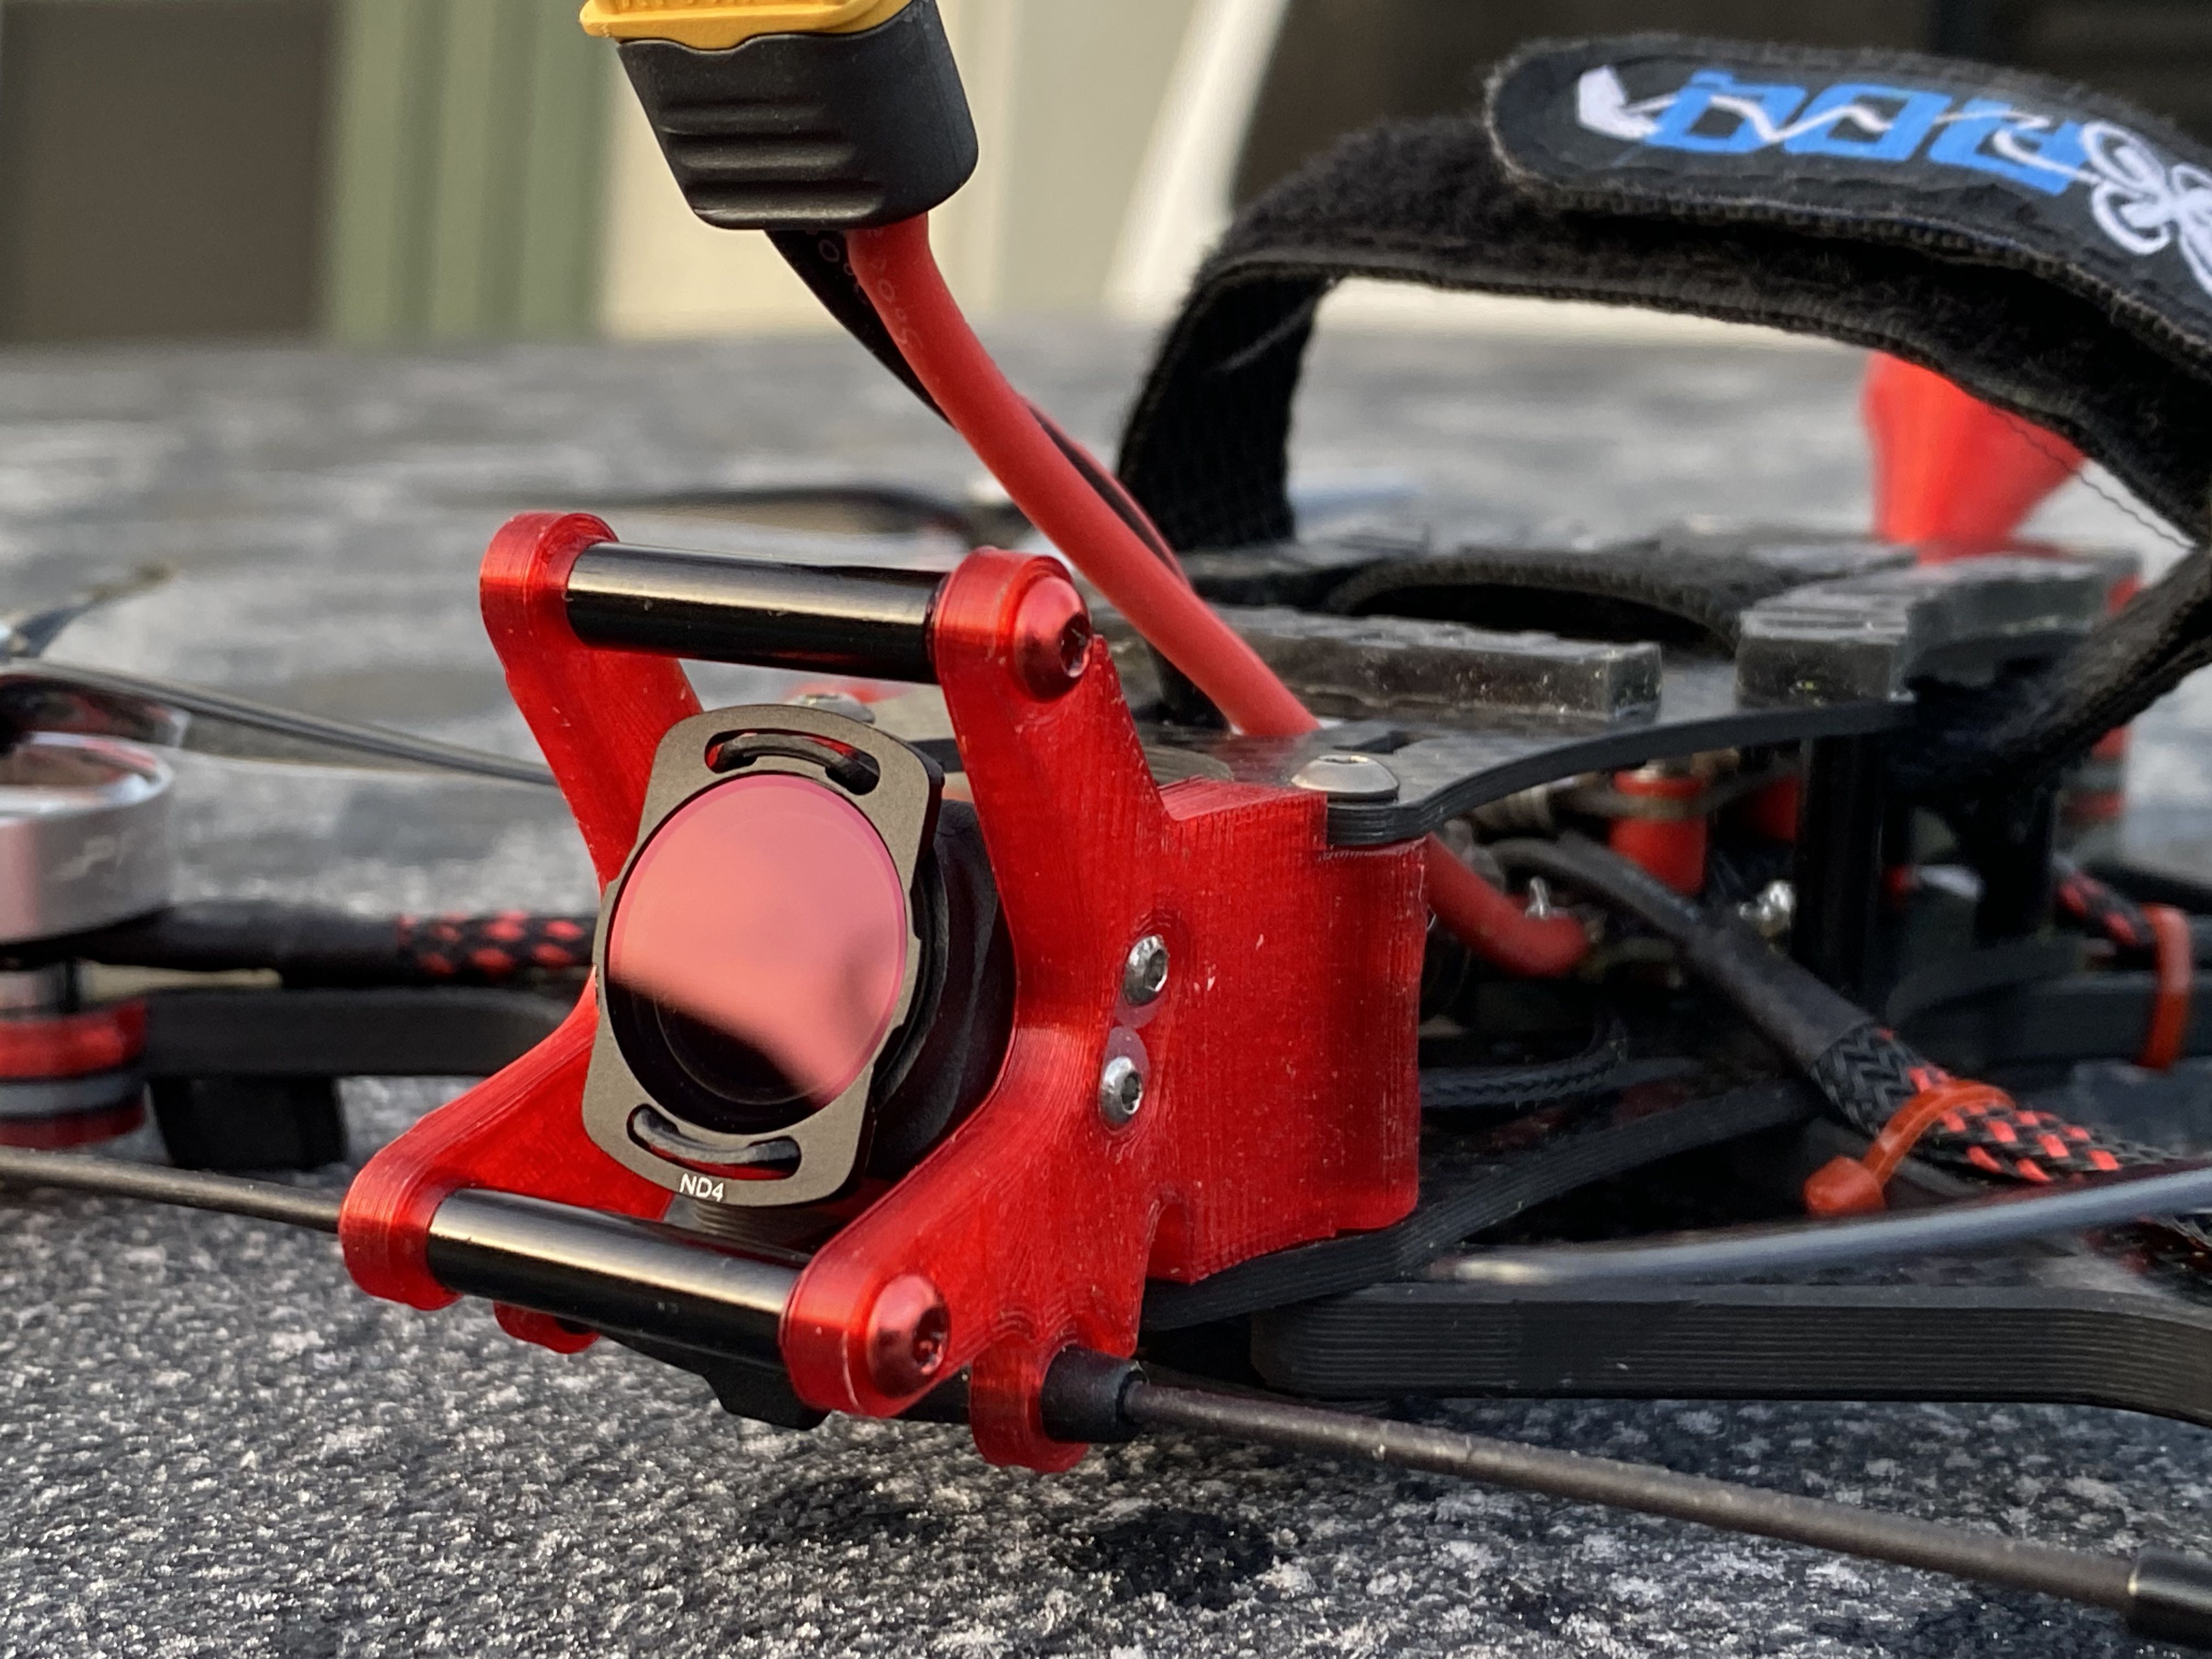
I have not tried these Camera Butter ND filters on this build yet but they will go perfectly with the DJI O3. I already used them on the AOS5 and I love the details that you lose when I fly in full auto. Here are camera settings: Manual Mode
ISO: 100
ISO Max: 200
Shutter: 1/120
W/B: 5500K
Video Quality: 4K/60fps w/ Rocksteady ON
FOV: Wide
Color: Normal
Aspect: 16:9
Betaflight Info
It was the release of Betaflight 4.4 that drove me to finish this 2-month-old project. I want to try the new and improved GPS rescue. Now I need to make sure install Betaflight and setup everything correctly.
Max Flight times
Typically when I do a max flight time test with the Molicel 21700 P42A 4200mAh 45A Lithium Ion Battery, I cruise around going about 10mph. With this quad, I was able to get about 20 minutes of flight time until one of the cell died. I know there is one cell that was going bad because the internal resistance read a lot higher than all the other cells. Long story short, I was able to get 20 minutes of flight with the Molicel 21700 P42A 4200mAh 45A Lithium Ion Battery with one bad cell. I will try this again at a higher rate of speed when I fix the pack.
A friend of mine suggested that I should fly faster because 10mph is not a realistic speed that we normally fly. Since the Molicel 21700 P42A 4200mAh 45A Lithium Ion Battery is down, the next thing was pair up a Lumenier 1550mah 6s Lipo together to get a total of 3100mah lipo. This time, I flew the quad around 30mph until the voltage dropped to 3.5v per cell, under load. I was able to get 16 minutes with these 2 lipos.
Update: Feb 15, 2023 - Today I tested a CNHL MiniStar 1800mAh 22.2V 6S 120C lipo for max flight. It was kind of windy day, so it was a bit more difficult keeping the 30mph speeds because of the 11mph winds / 24mph gust. I would say I was cruising around 25 - 30mph and I got 10 minutes of flight time.
- Molicel 21700 P42A 4200mAh 45A Lithium Ion: 20 minutes
- (2) Lumenier 1550mah 6s Lipo (3100mah): 16 minutes
- CNHL MiniStar 1800mAh 22.2V 6S 120C: 10 minutes
More info soon....
Vidoes:
Test Flight - GoPro 11 Mini - WARNING!!! TURN OFF YOUR SOUND, unless you want to hear the props
DVR footage of the same flight as above
Betaflight 4.4 GPS Rescue in action
Photos


Part List
Show stores (10)
Relly nice build I would just upgrade antennas to TRUERC MATCHSTICK 5.8GHZ CARBON EDITION RPSMA ANTENNA - LHCP (LONG) (1PC). Are you planing on building some dub250g freestyle or 1804 4" freestyle.

wow, super clean build! Will try to make something like this myself. anyway you could share your Gopro 11 mini mount?
Thanks!
Thanks, I just created a Thingiverse page with all the 3D printed parts used for this build.
https://www.thingiverse.com/thing:5841443
Guides & Reviews

AirbladeUAV has done it again and this time they've brought long range to the 5" class! Based on the popular Transformer Mini, the new Transformer 5" Ultralight adopts a lot of the same design philosophies with larger props and more payload capacity. It can fly upwards of 20 minutes on a 4 cell Li-Ion battery pack and in ideal conditions it's got a range of over 4 to 5 miles. In this guide I'll walk..
Read more
With the release of the DJI FPV Drone cinematic FPV has become a lot more accessible, but you certainly don't want to crash a $750 drone! The QAV-CINE Freybott is a compact, lightweight cinematic FPV drone that can take a hit and keep going. It's a lot safer to fly indoors and around people. With a naked GoPro or the SMO 4k you can capture some great stabilized footage. In this guide I'll show you..
Read more


Hi, what's your tune? I'm currently getting around 12-13min on 6s1p vtc6 3000mah or 17-18min on 6s1p p42a 4200mah while cruising at a little under 60km/h.
I started off with the BetaFlight Presets (superfly 7") and it works pretty well. What motors are you using and the KV?
I have a tmotor build - f90 1300kv, f7 pro fc and f55a pro ii esc. Using custom tune (master 1.2, pd balance 1.5 for the previous tests; master 1.2, balance 1.6, ff 0.9, i 0.6 currently). I managed over 21min on a 4200mah and 3000mah battery (with gopro8).
After some fixing (really noisy gyro from esc noise), it seems to fly pretty well. However, it is still not that stable on forward flight without freestyle. And when i tried to put a 900g payload on it, it's a little wobbly. the tiniest bit of gyroflow fixes the wobbles, but I'd prefer to tune them out instead as they are also visible in the dji v1 fpv feed.