AOS LR5 O3 HD - 2105.5 2950kv Motors - 4S - 26 minutes (21700 Lithium Ion)
 By wrong17 on Mar 10, 2023
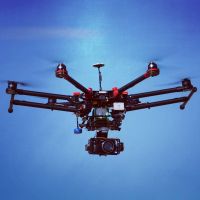
After finishing the AOS7 O3, I was amazed with its performance. When I first flew it, it almost felt like I was flying a 5" quad, but I thought it was just my imagination. Then I let my friend fly it and he also said the same thing, plus I never mentioned to him my thoughts of the frame yet. Since my last two AOS builds turned out so well, I will see if I can build something to replace the Rekon 5, and that is how I ended up building this AOS LR5 O3 frame. If you have not heard of CNC Madness (https://www.cncdrones.com/) they are small company that cuts what every you want from carbon fiber. They have partnered with so many different frame designers and made it easy for people to purchase their unique frames.
The purpose for the build is to create something that can replace the beloved Rekon 5, because of what happen during my trip to the mountains this winter. I forgot to factor in the higher elevation with thinner air, so the mountain surfing experience was cut short because the 850mah 4s lipo ran out of juice. I was not even halfway up the mountain and the low voltage popped up. That totally surprised me because I was not paying attention to the voltage. I do not think I would not be a problem if I started at the base of the mountain but I had to fly about ½ mile in before I started to climb. I was comparing to my experience when I was flying on sea level and got well over 10 minutes so I did not go prepared with the correct batteries. But still, that was not the only reason why I wanted to try a different platform. So, other problem I encountered in the mountain was the high winds. That is something that I expected but did not know how the DJI O3 system will perform with the build. The quad flew as I would expect and it got a little rough when the 40mph wind gust came through, but it still did fine. The HD footage recorded on the Air Unit with RockReady did not turn out too well because it was getting vibration shakes and jello. I expected some vibrations, but not jello.
3D Prints
One of the main advantages of using the AOS frame is the similarity between them. For example, the front FPV camera and GoPro mount are all the same. Both the AOS5 and AOS7 have the same rear mounts for the antennas too, but AOS LR5 rear end is a whole different story. This was truly a pain in the @$$ trying to figure out how to create a 3D printed antenna mount and GPS holder. The reason why it was so difficult is because the standoffs are very close together. You only have 3.5mm of space to squeeze anything between the 2 standoff. Is it possible, but it took a few trial and error prints to figure out all the kinks.
Motors
The suggested motors for this build are 2004, but I went with something a little bigger because I happen to have them available. I am hoping these larger motors will help with the extra weight, when compared to a Rekon 5. This quad needs to be efficient and quiet, because I want to use this quad when I travel. The interesting thing about these motors are the 3mm props shaft, so I am force to use the DAL 5126 props. However, they do come with 5mm adaptor so you can use standard 5mm hub props too.
DJI O3 System
One of the main reason I wanted to use the DJI O3 System on my long range quad, so I can eliminated the GoPro and save some weight. Even though I have included a GoPro Bones as part of my build, I cost reduce the weight of the AUW by 75 grams if I fly solely with the O3 system. I will need to do some tests to figure out what I will go with. Will I lose a noticeable amount of flight time if I fly with out a GoPro? Is the O3 HD footage good enough quality? I tried using only the O3 and it did not perform as well as I hope on the Rekon 5.
I need to wait for a very windy day to make my finial decision about keeping or removing the GoPro. For now, I will fly it without one, because I am very happy with the footage I am getting with the O3 systems.
Max Flight Time Test
I am happy to report that this quad is efficient enough to get double digit flight times with a 1250mah 4s lipo! With the Lumenier lipo it flew for 12:43 mintues and landed at 3.5v per cell. My next test will be using a VTC6 18650 4S Lithium Ion battery and see what kind of flight times I can get with that. Typically, I will fly until each cell drops down to 2.8v.
12:43 minutes - Lumenier N2O 1250mAh 4s 120c Lipo (167g) - Land at 3.5v per cell
00:00 minutes – VTC6 3000mah 4s 15A Lithium Ion (214g)
26:30 minutes – iFlight (Samsung) INR 21700 40T 4000mAh 30A Lithium Ion (293g) - Land at 2.8v per cell
Updated Modifications
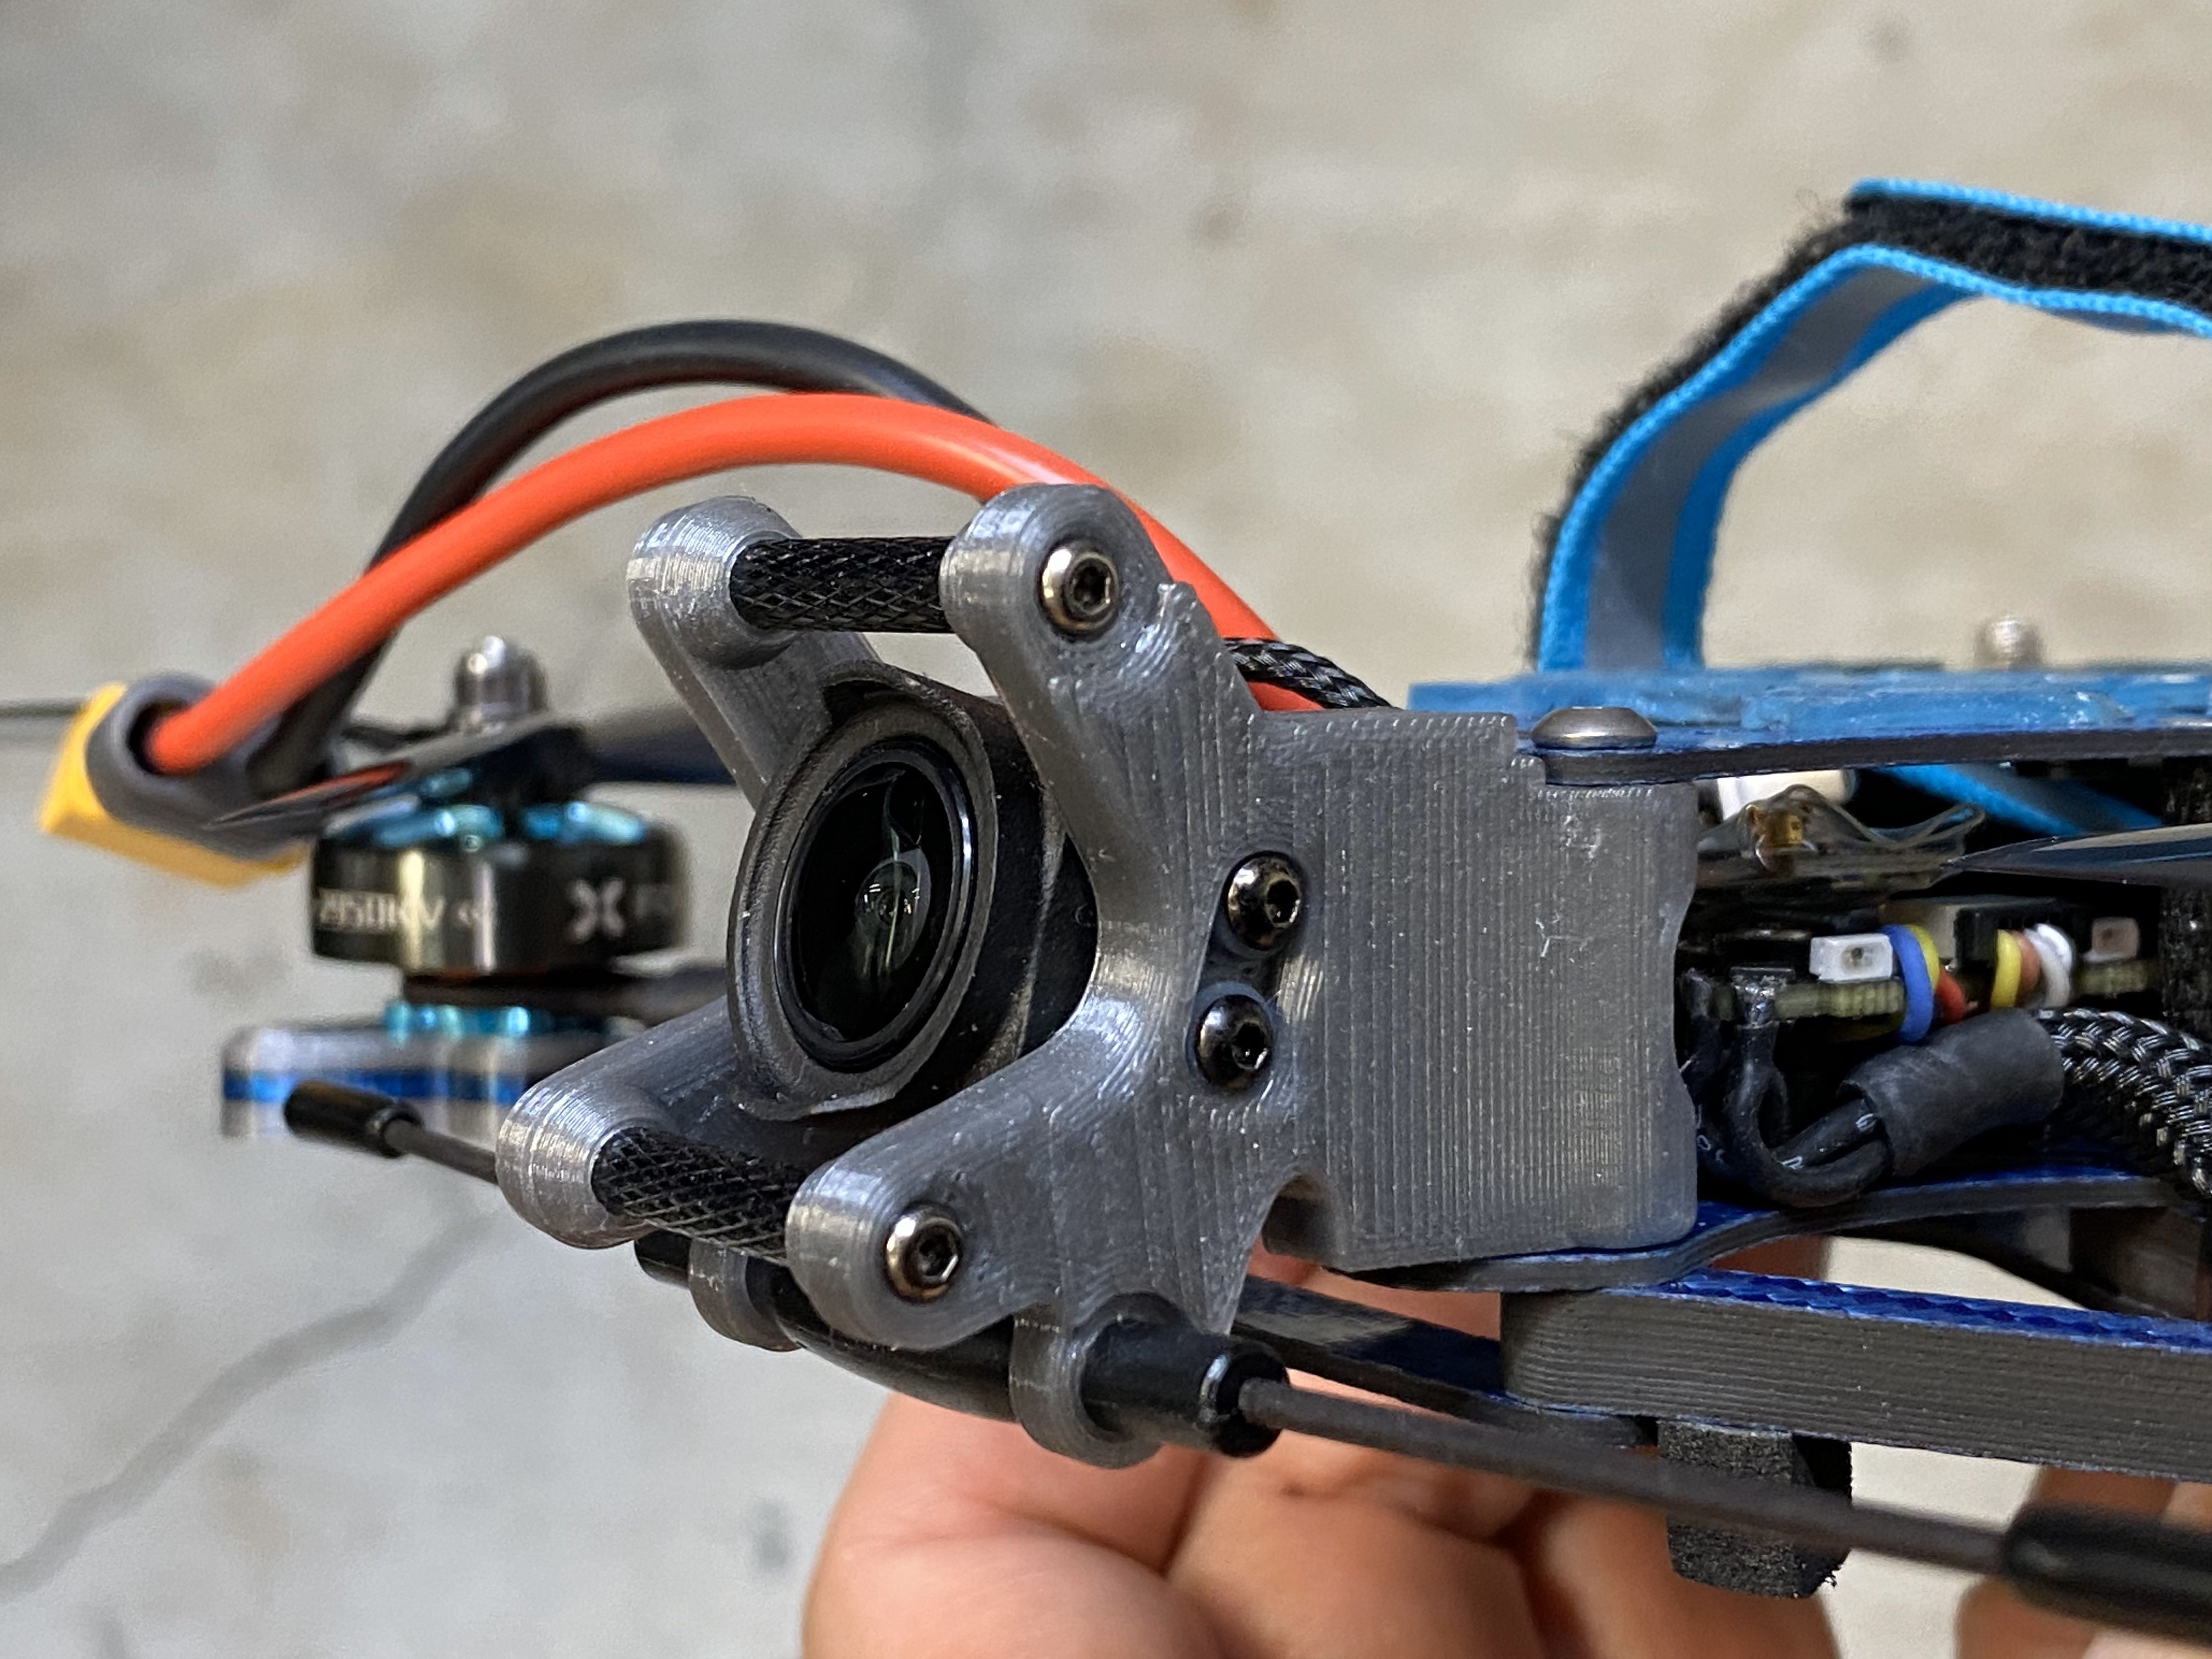
The 20-degree camera angle is forcing me to fly faster than I would like for a long-range type of quad. So, I modified the current camera mount to 15 degrees instead. I also thought it was unnecessary to use m3 standoffs for the camera cage, so I switched it to m2 instead. In addition to that, I also shorten the length of the cage so it does not stick out as far.
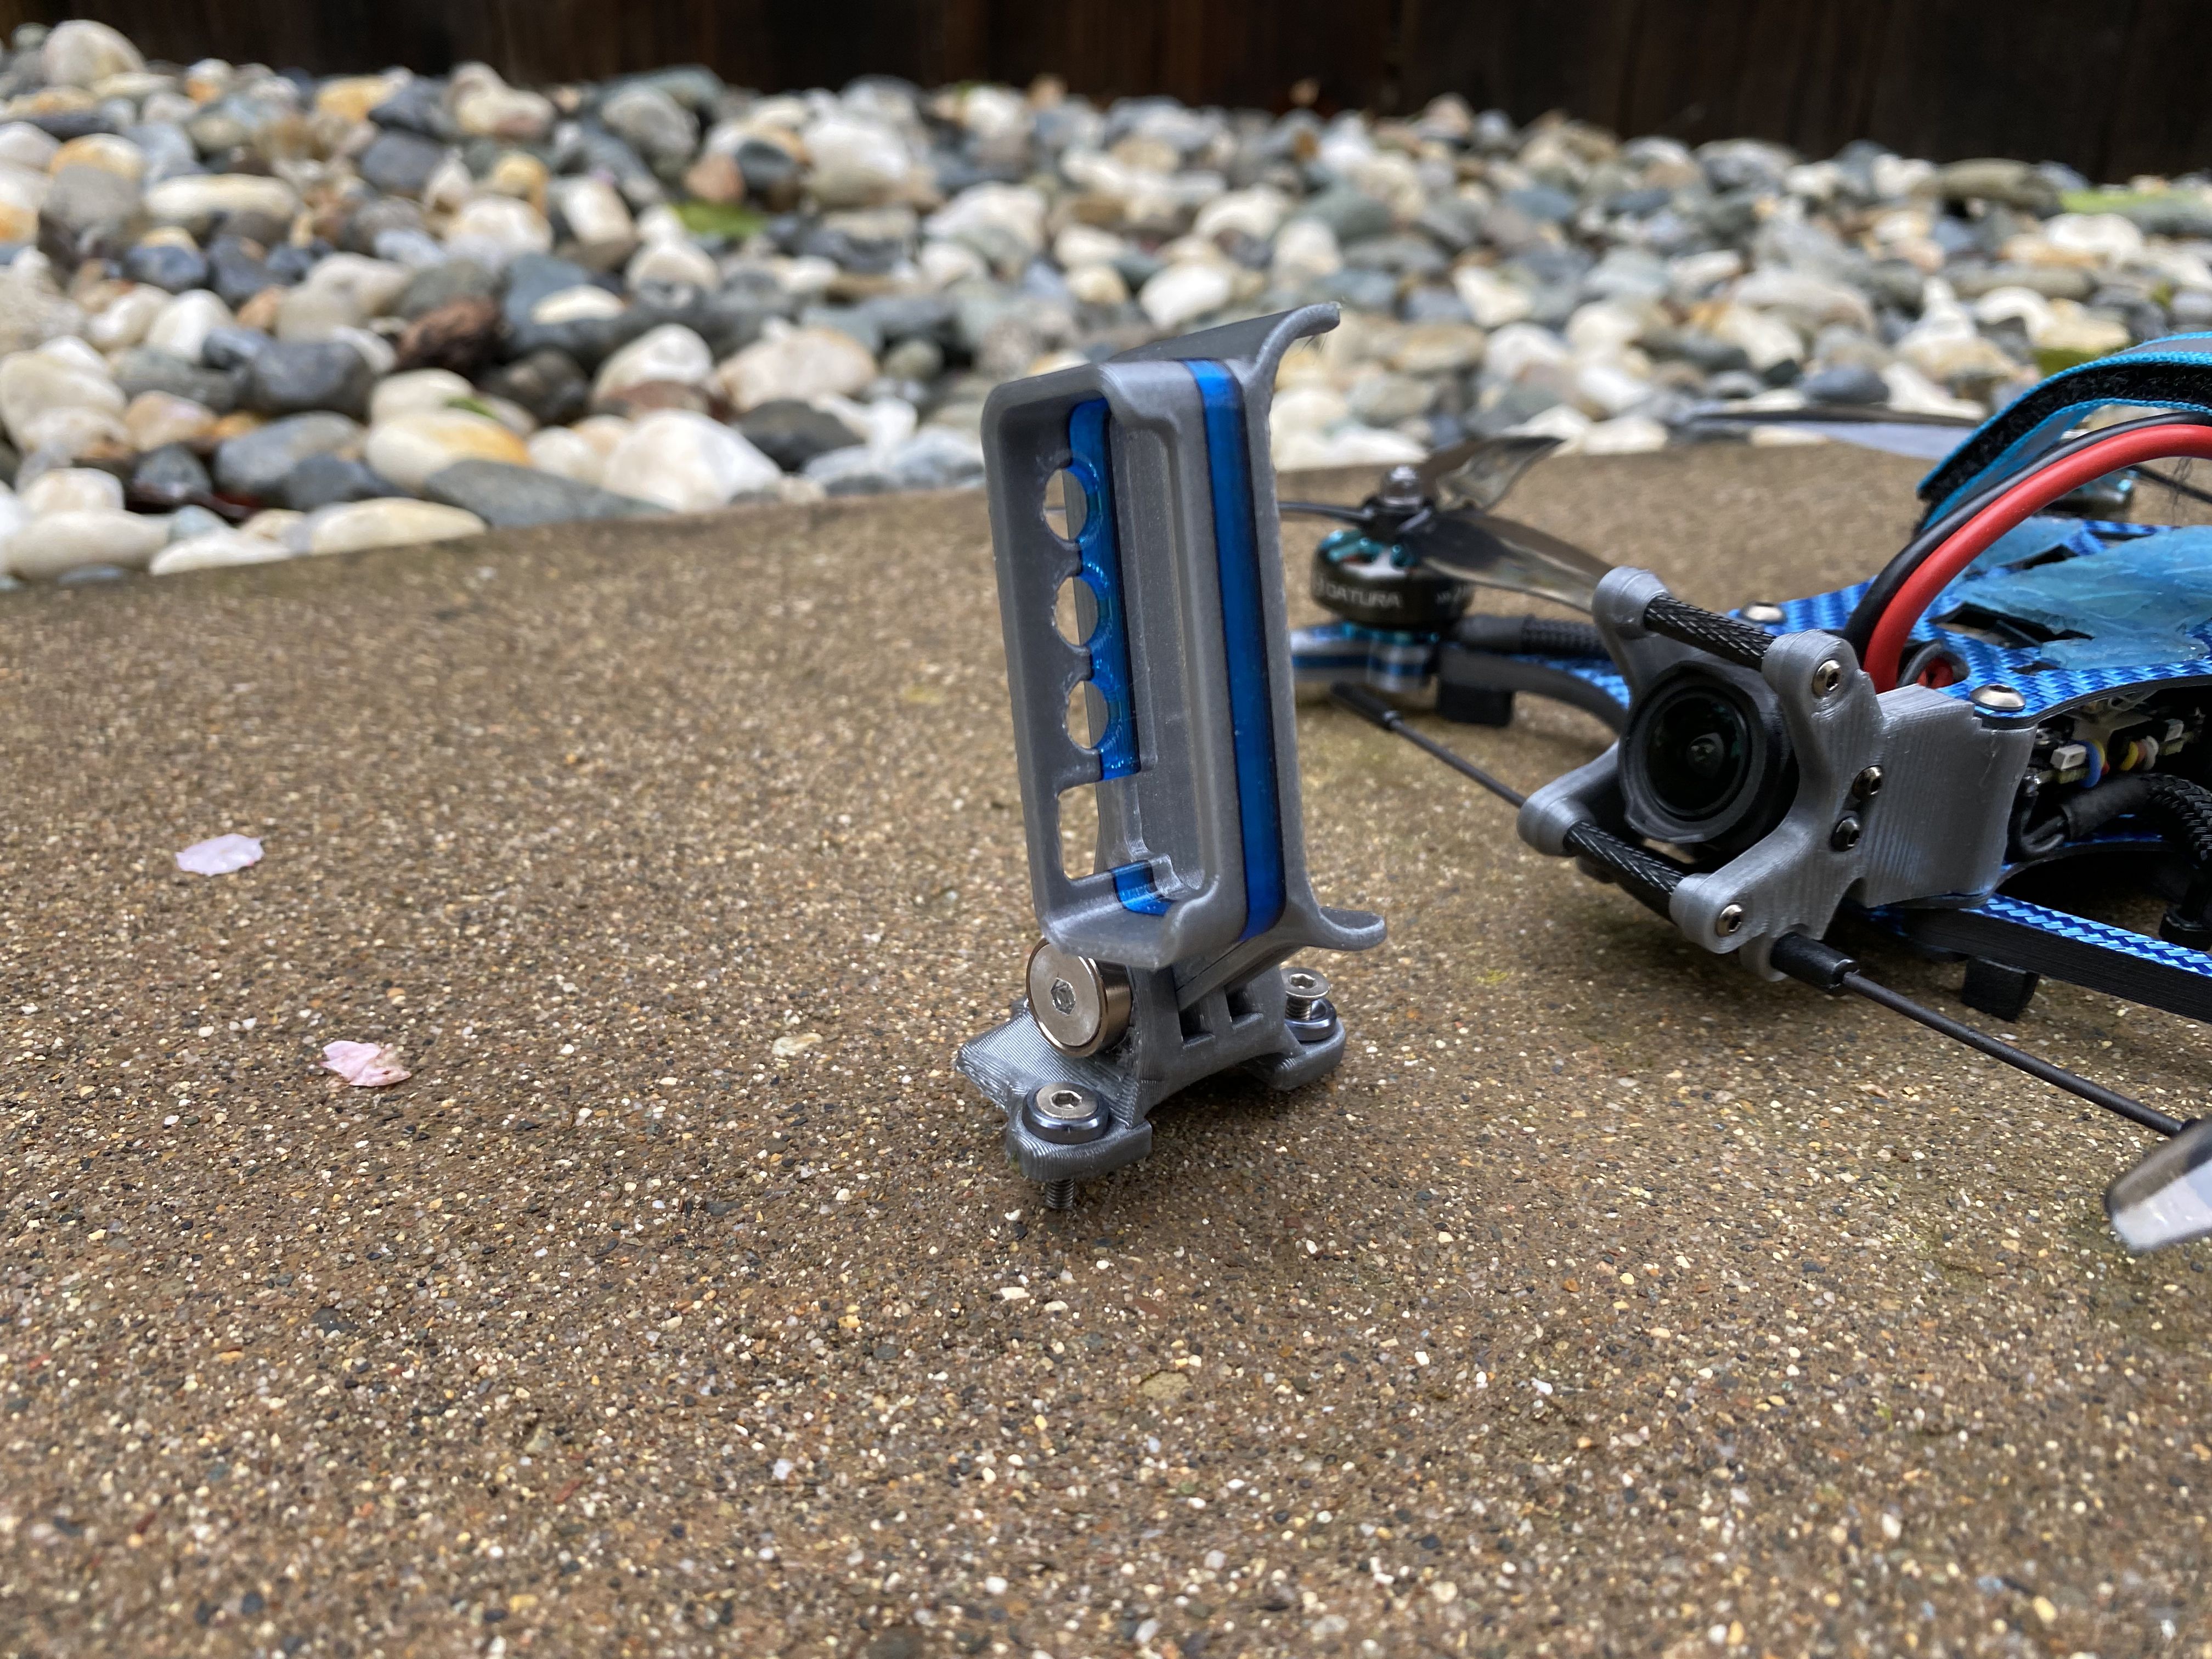
The O3 video quality is not too bad so for the meantime, I plan to fly this quad without a GoPro. It only takes 2 screws to put the GoPro mount back on again. By elimating the GoPro and the mount it will save me about 71g (GoPro Bone 54g / Mount 17g).
Frame Issues
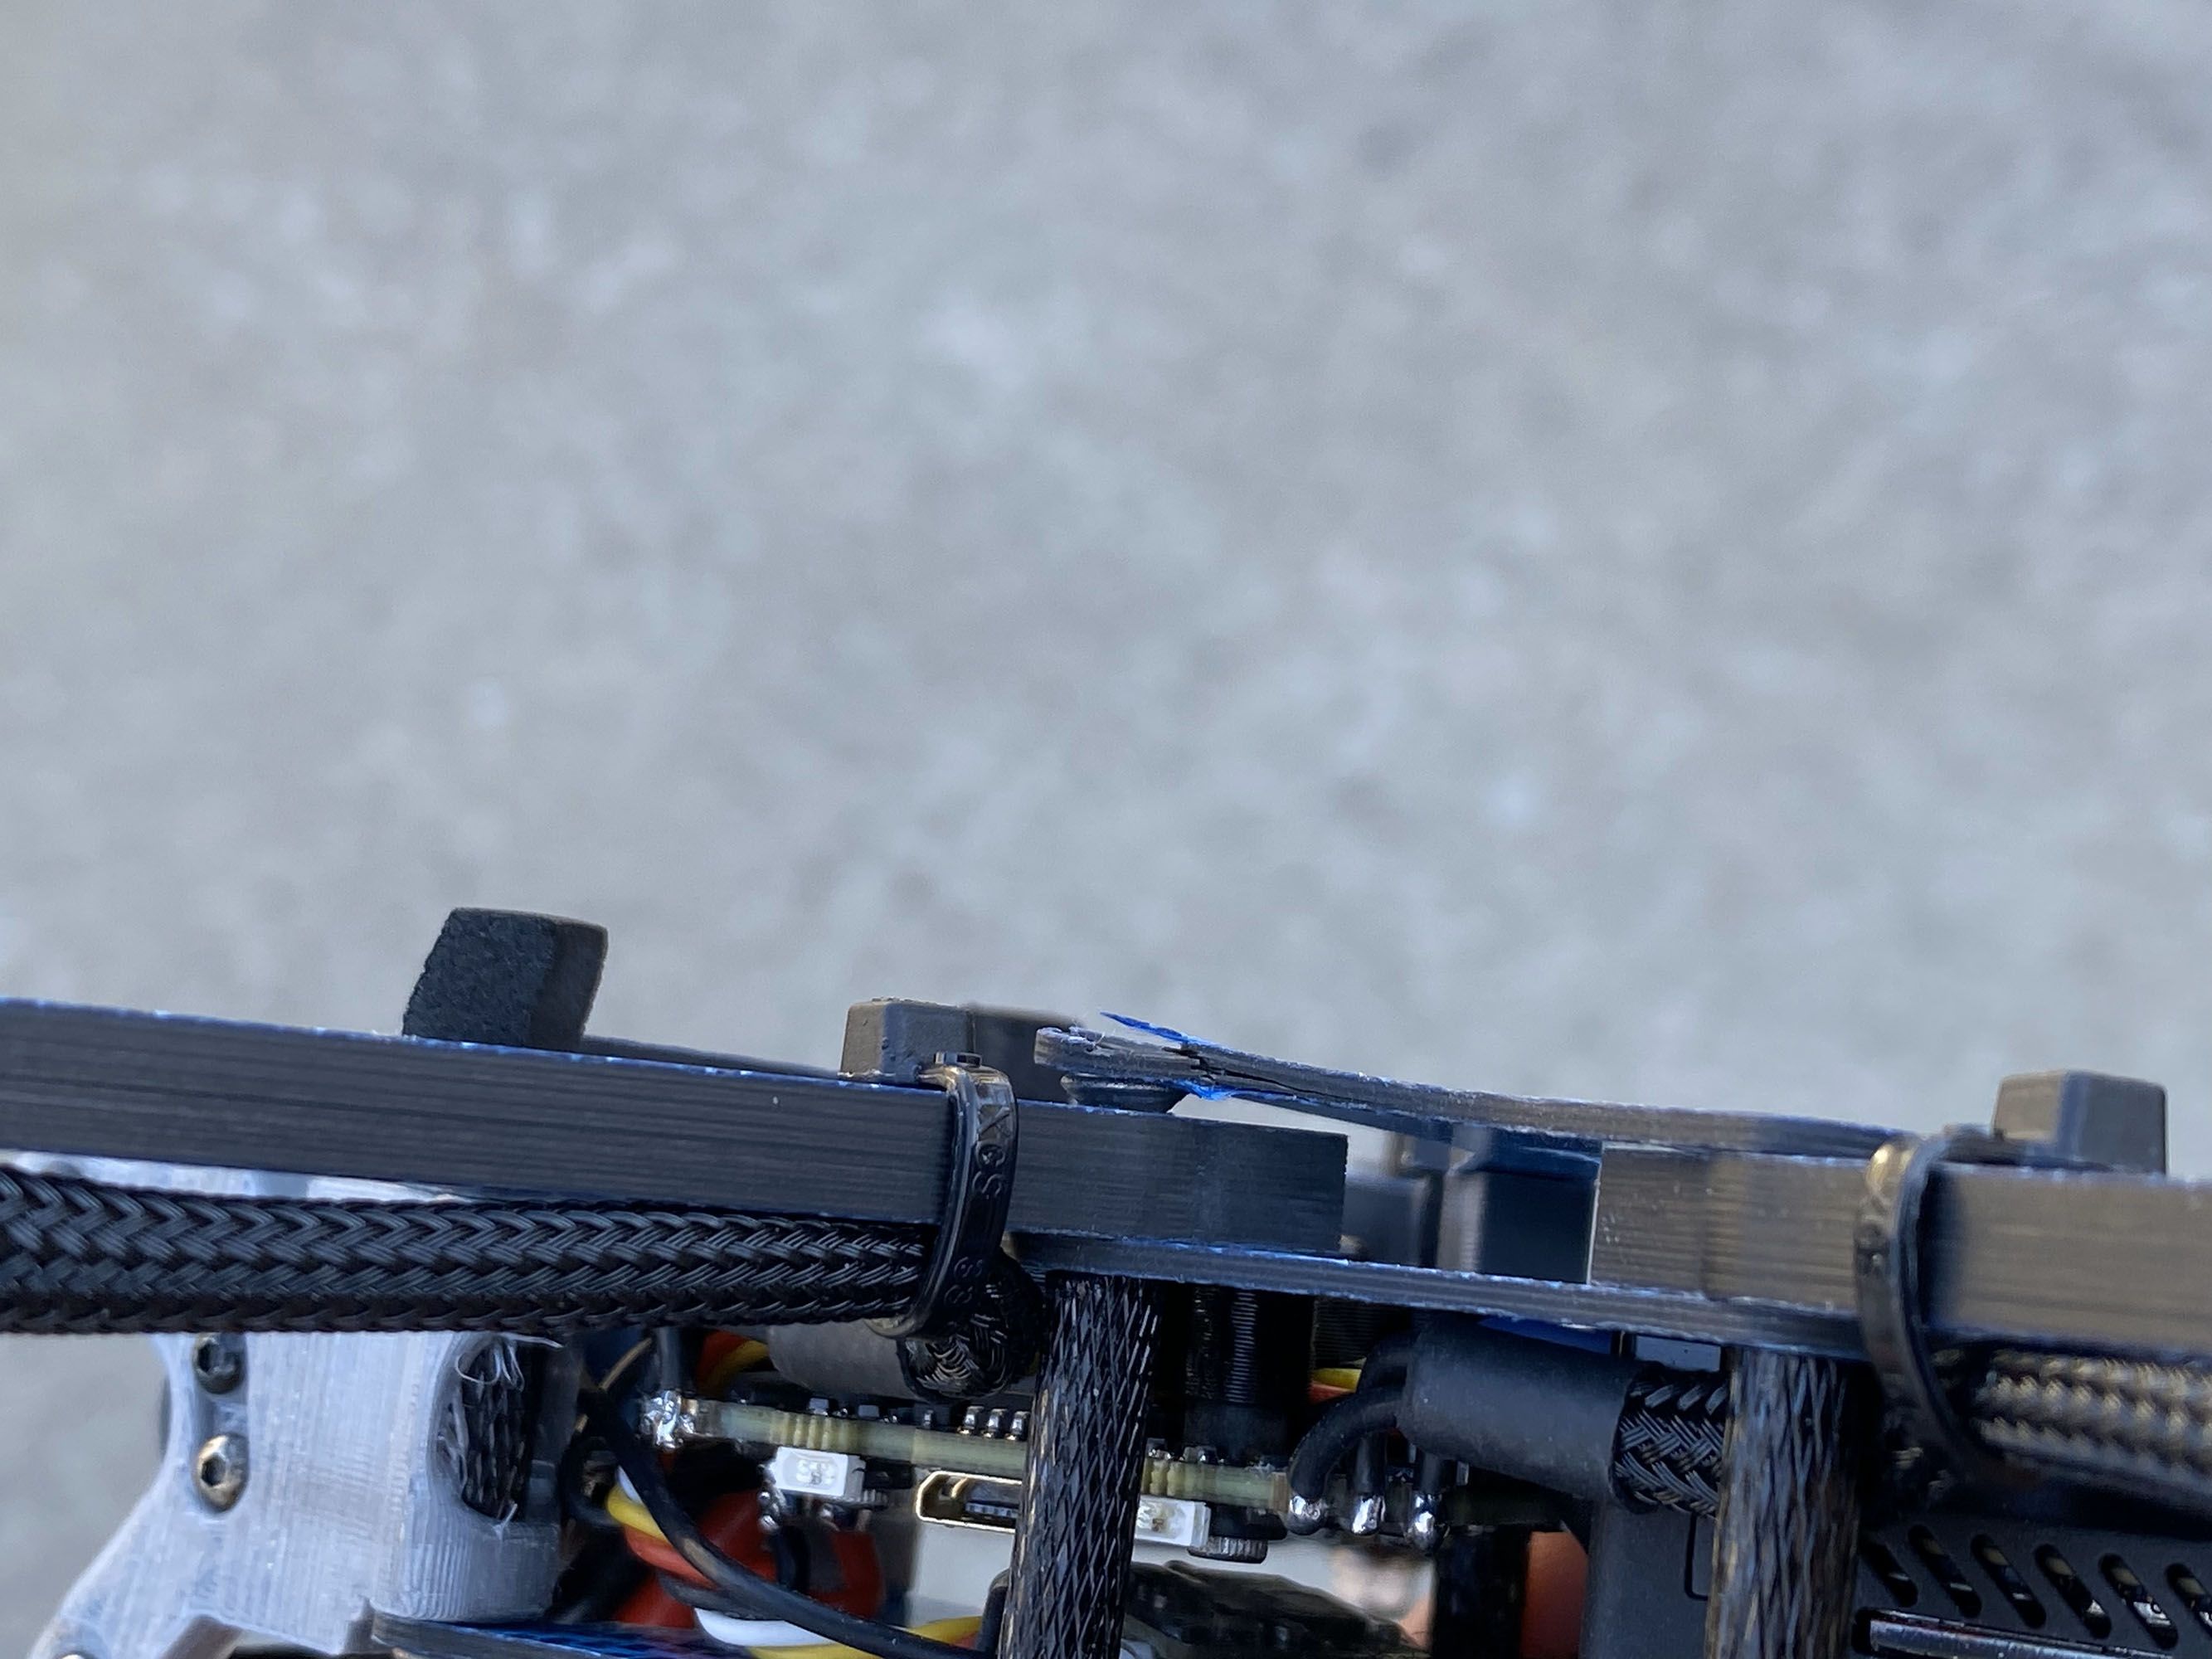
So..... this happened today. Yes, I did crash the quad during a max flight time test. I did not even notice the broken bottom plate until the following day. I am not surprised about the bottom plate breaking because the 1.5mm carbon fiber and countersunk screw hole made it very weak. I think I should have picked button head option instead because it would be a lot stronger.
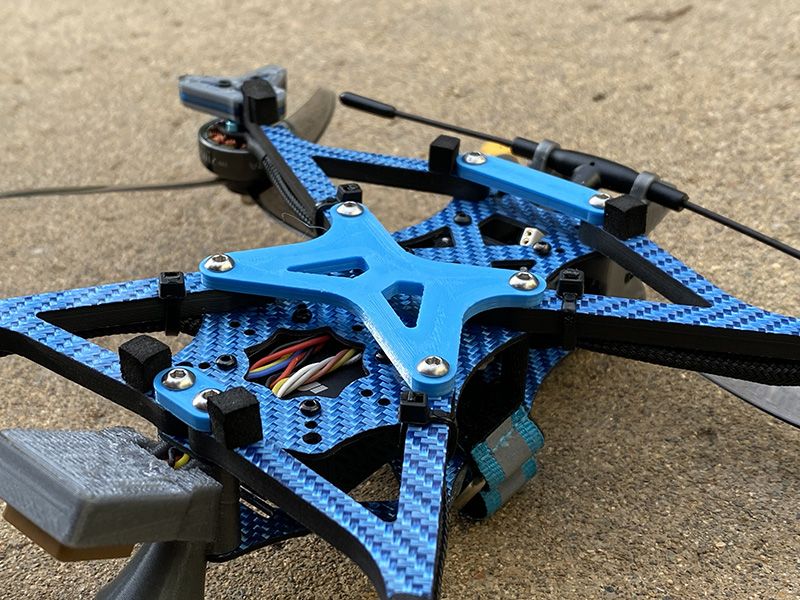
Here is my temp fix to the broken carbon fiber bottom plate. As you can see in the picture, I also replaced the front and rear bottom plate to the 3D printed parts, because it feels alot stronger than the 1.5mm carbon fiber.
BetaFlight - 4.4.0
For the tune, I started off with 2 different Betaflight presets. The PID tune I used the “SuperflyFPV Freestyle 5 Inch†Preset with the following options:
- 4s Lipo no HD Camera (2400 -2700kv Motors)
- RPM Filtering
- Crossfire Dynamic
Then I used the “Joshua Bardwell†presets for the rates.
Frame Upgrades (March 14, 2023)
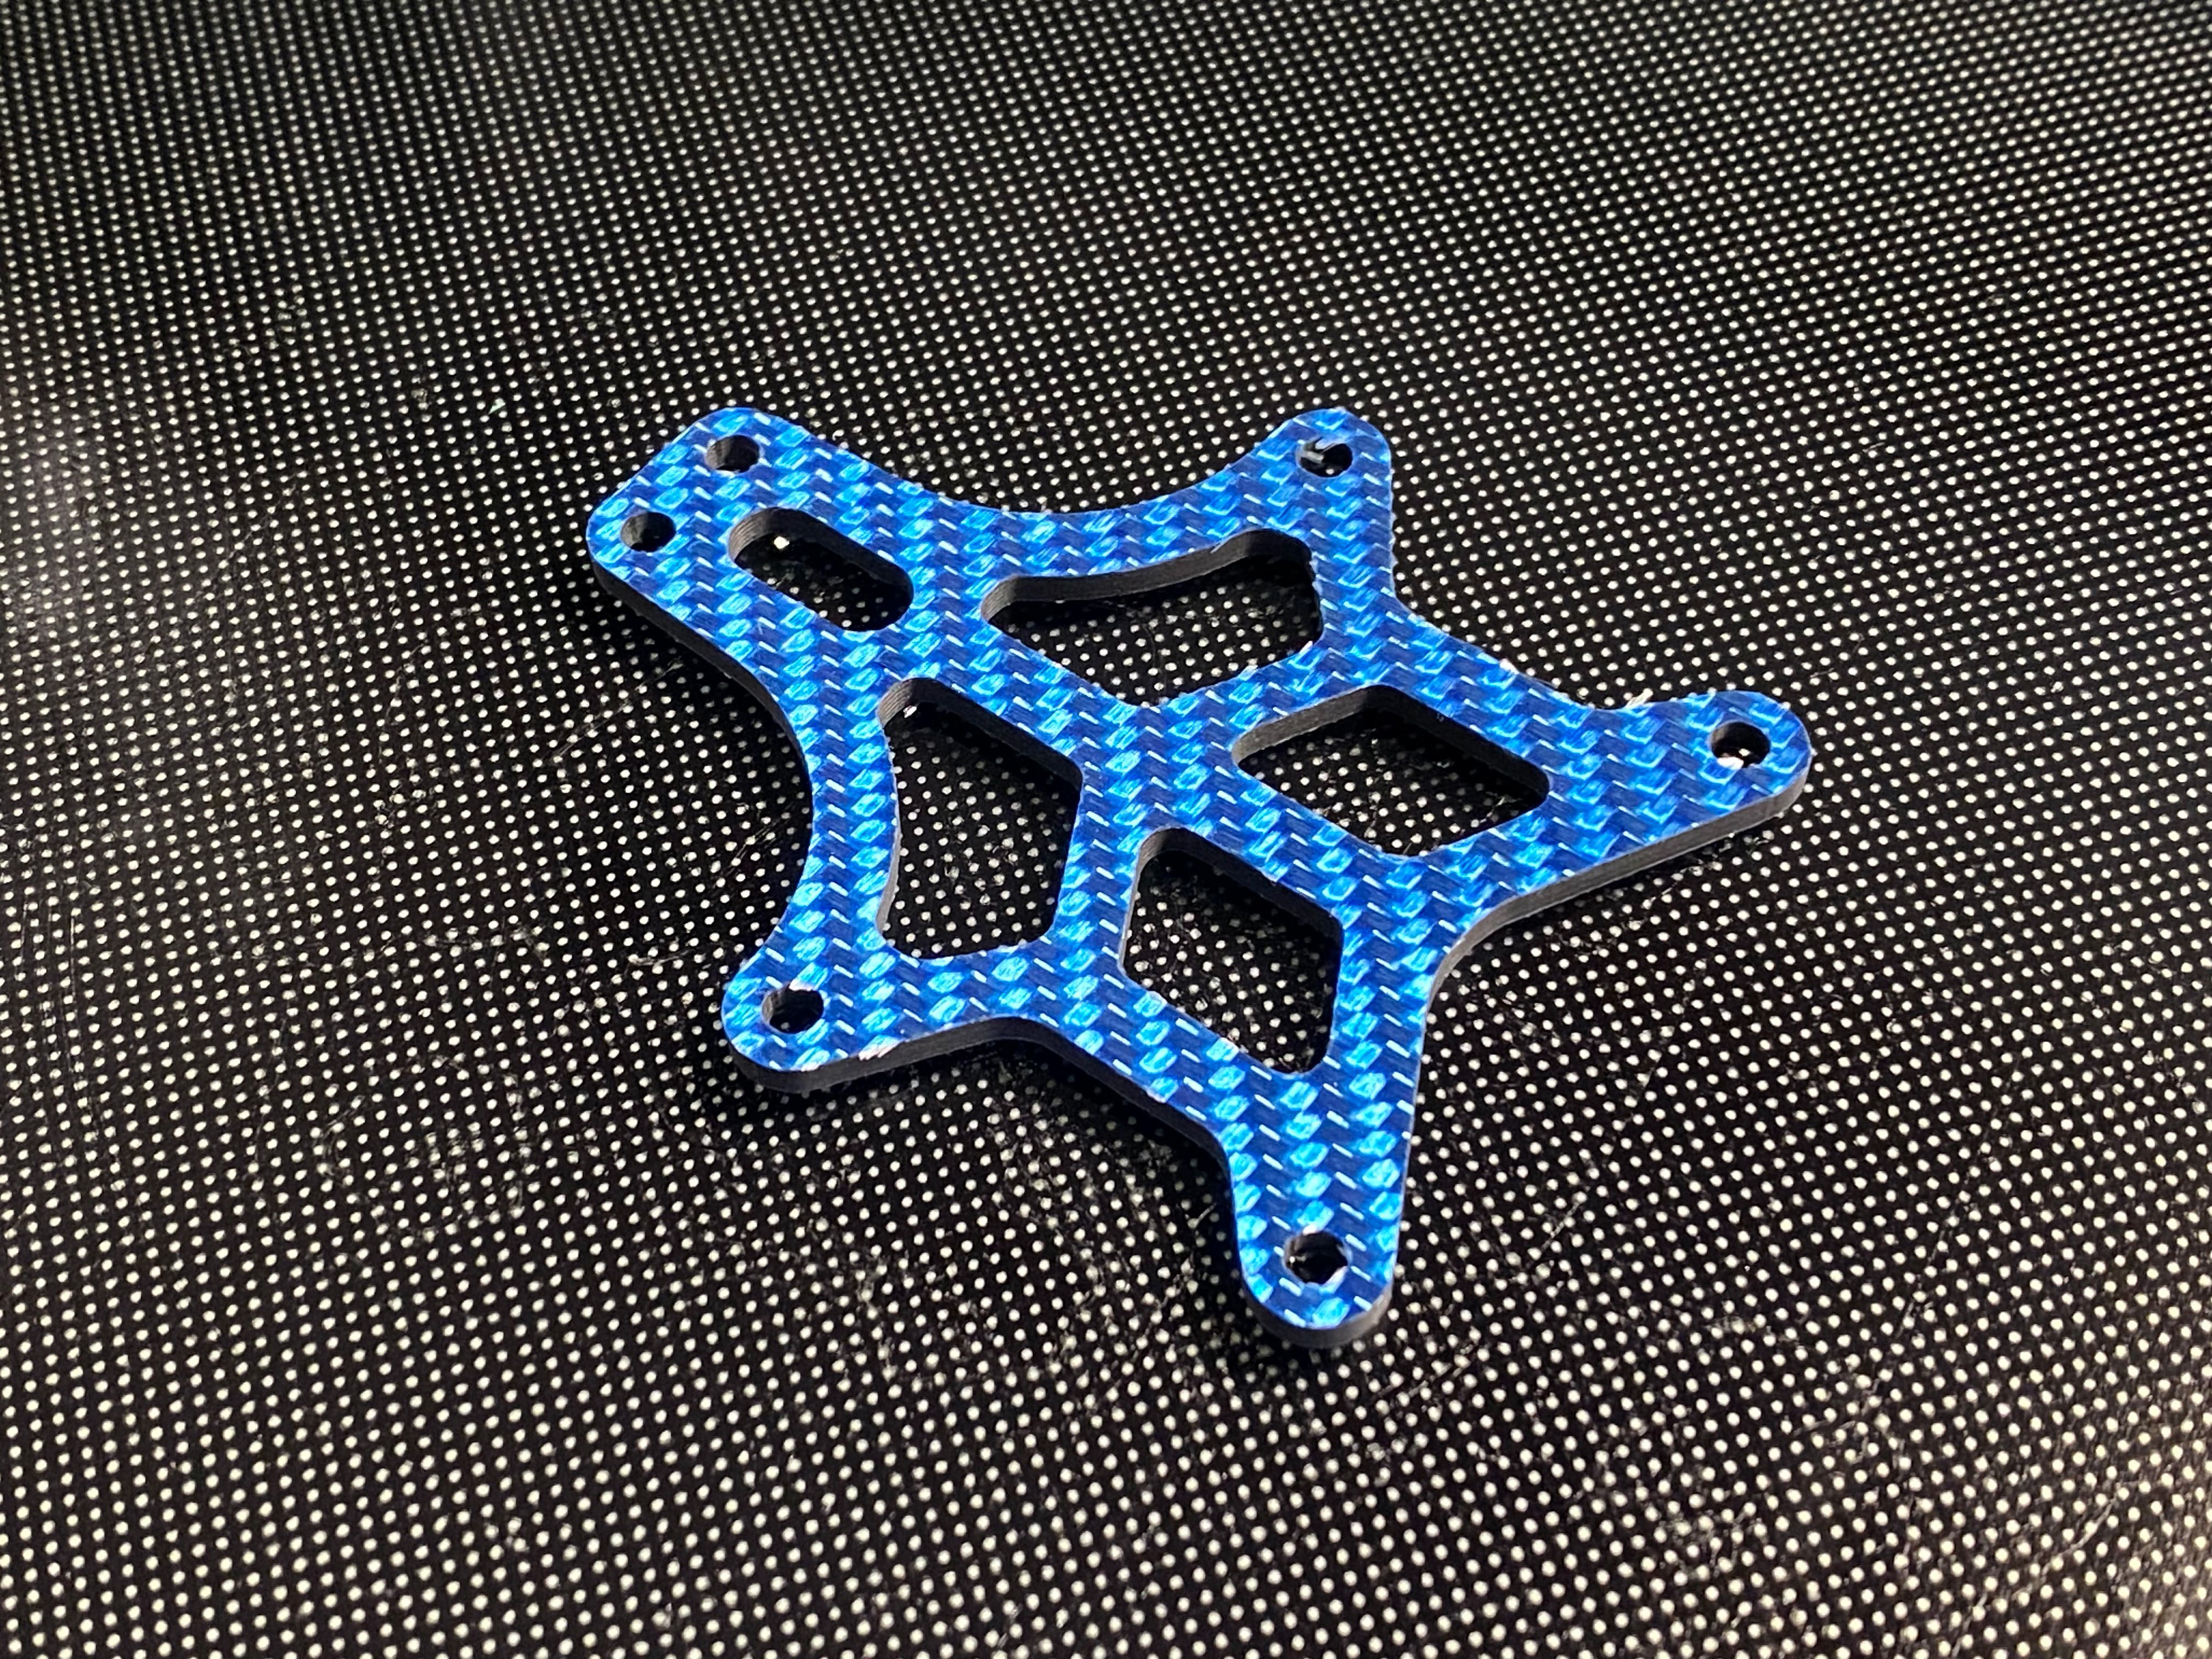
I still think the lower frame parts are too weak to have countersunk screws, but regular button head should be okay if you use the original 1.5mm carbon fiber plates. Thanks to Vincent12FR (https://rotorbuilds.com/profile/20799) who shared his custom designed bottom plate, I was able to send the step files to CNCMadness to get it custom cut in 2.5mm carbon fiber.
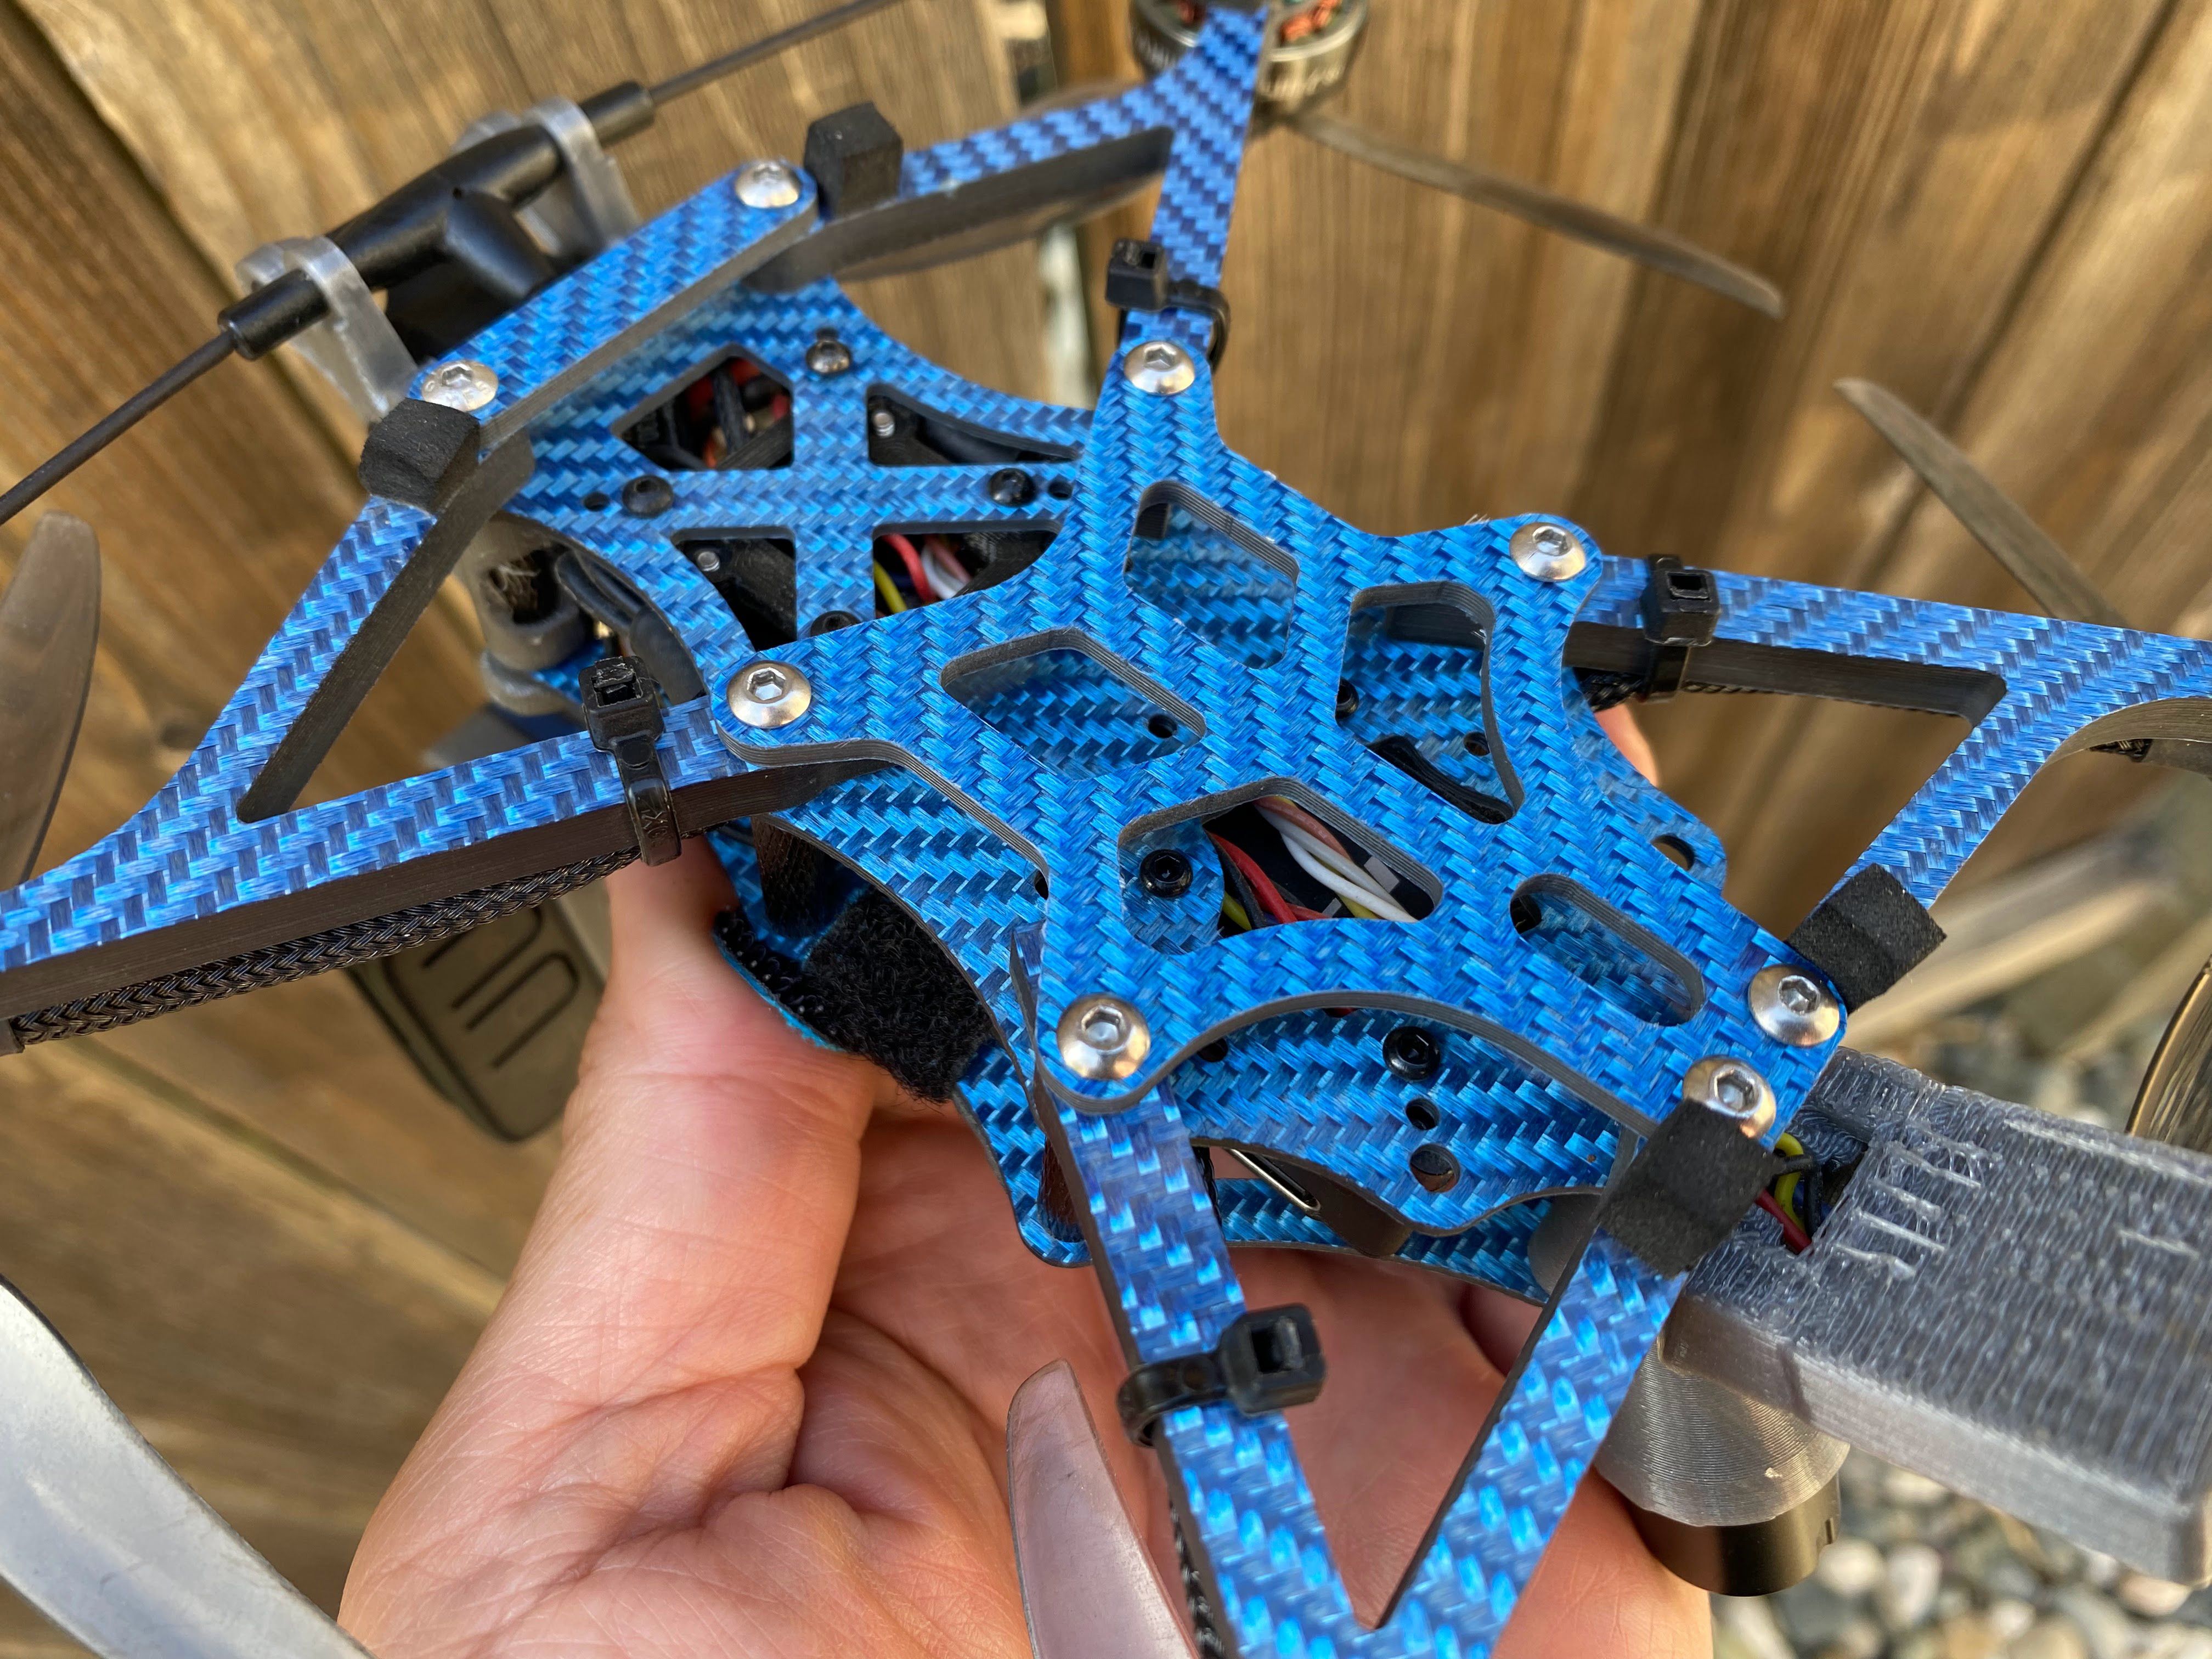
The temp fix that was 3D printed in PLA worked perfectly fine too, but carbon fiber still sounds better. I also upgraded the lower front arm brace to 2.5mm thick carbon fiber too.
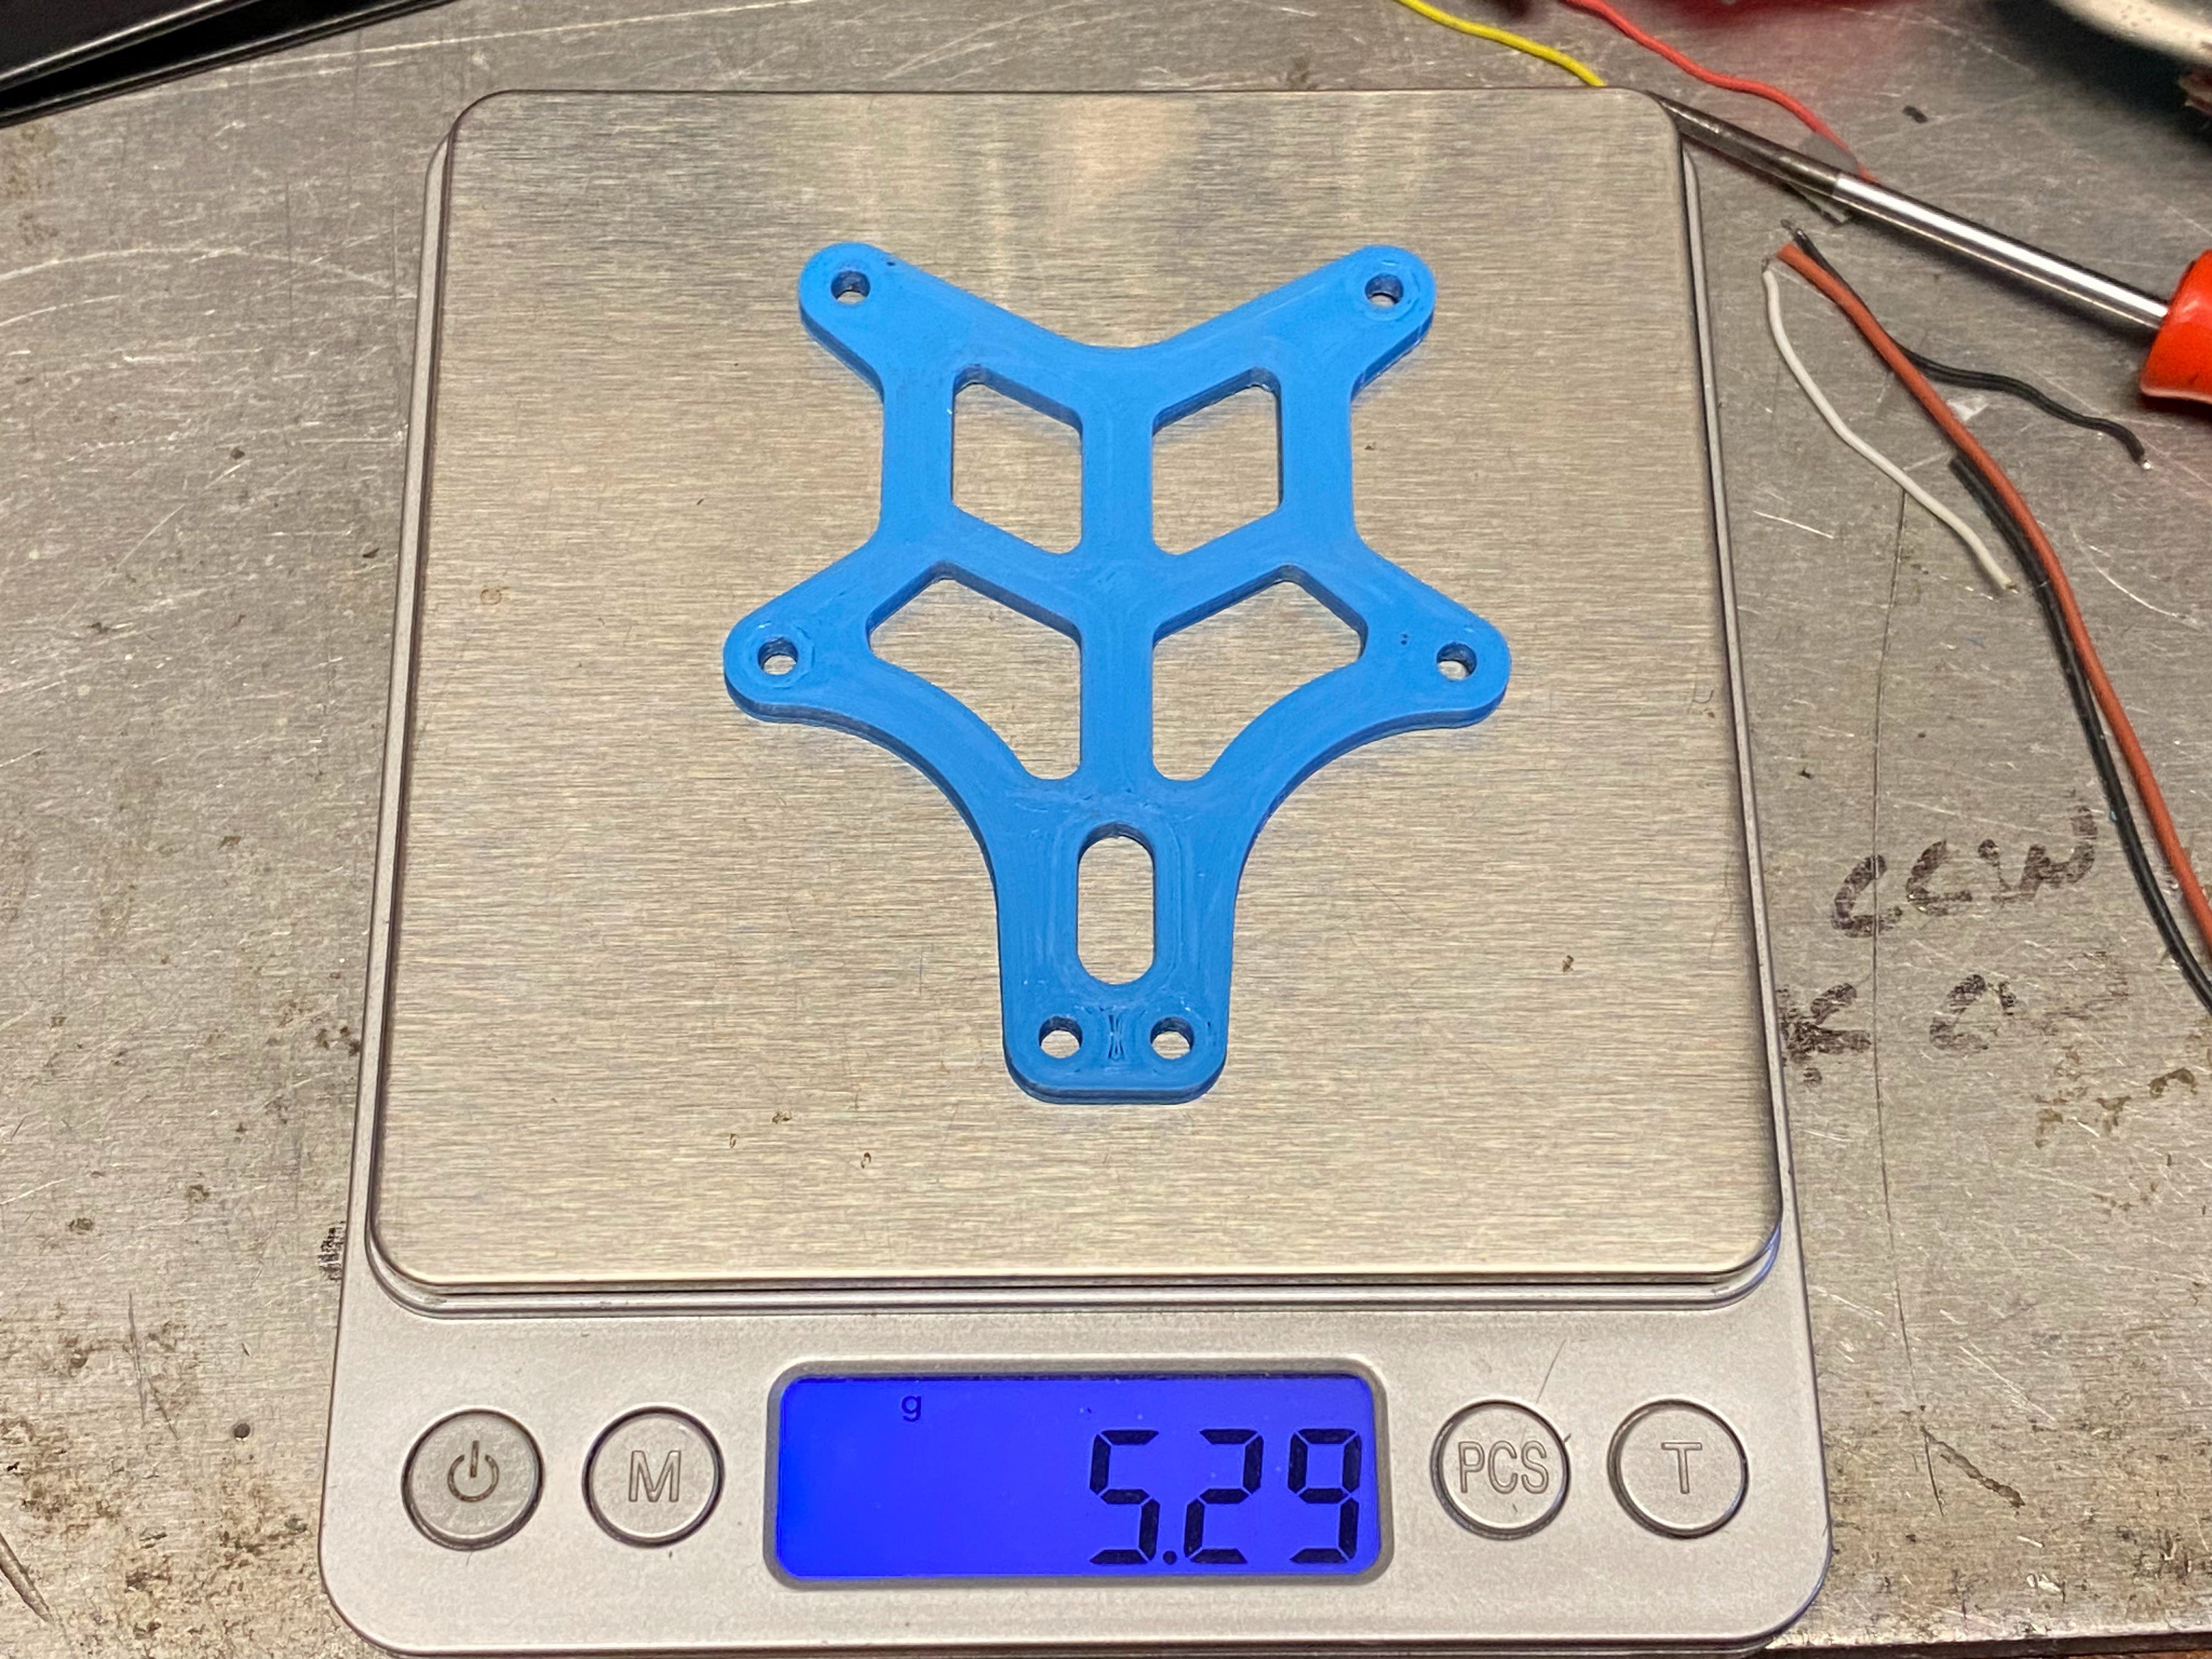
To my surprise the PLA brace that was 3mm thick weighed less that the 2.5mm carbon fiber.
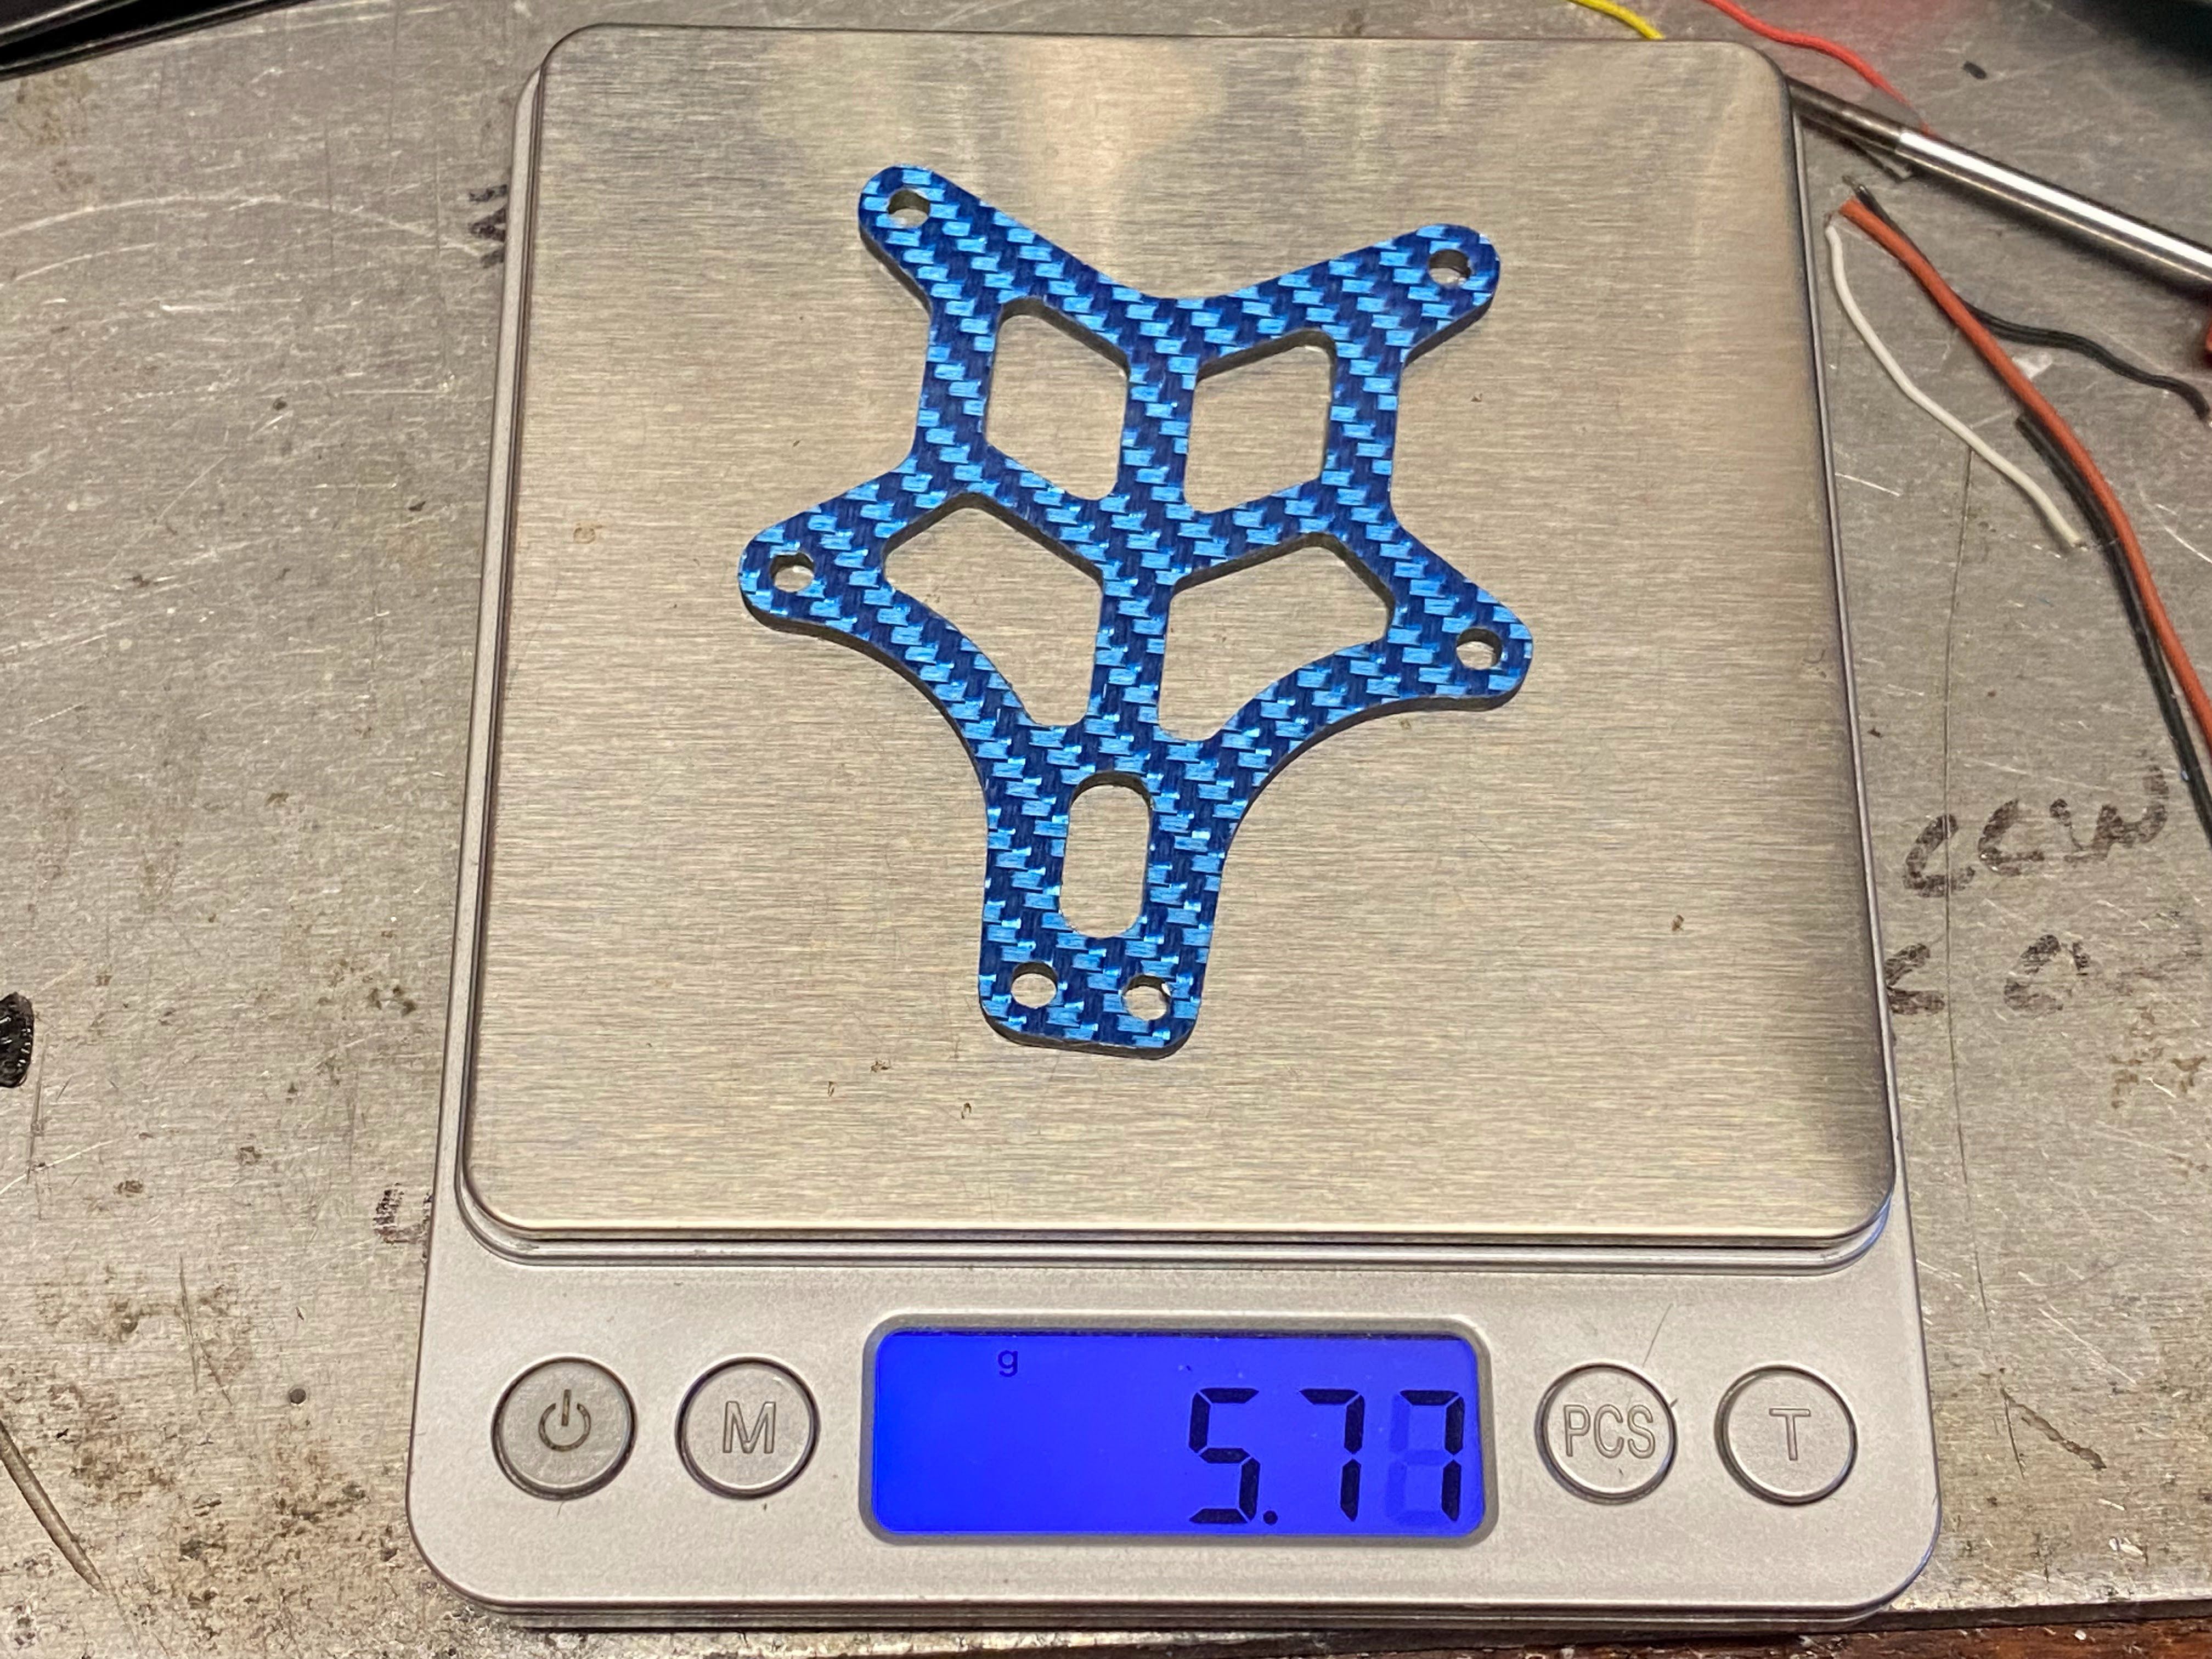
Here you can see that the carbon is about half a gram heavier. It is not a huge difference but I thought the thinner carbon fiber would be lighter than the thicker 3D printed part.
Adjustable FPV Camera Mount (Apr 26, 2023)
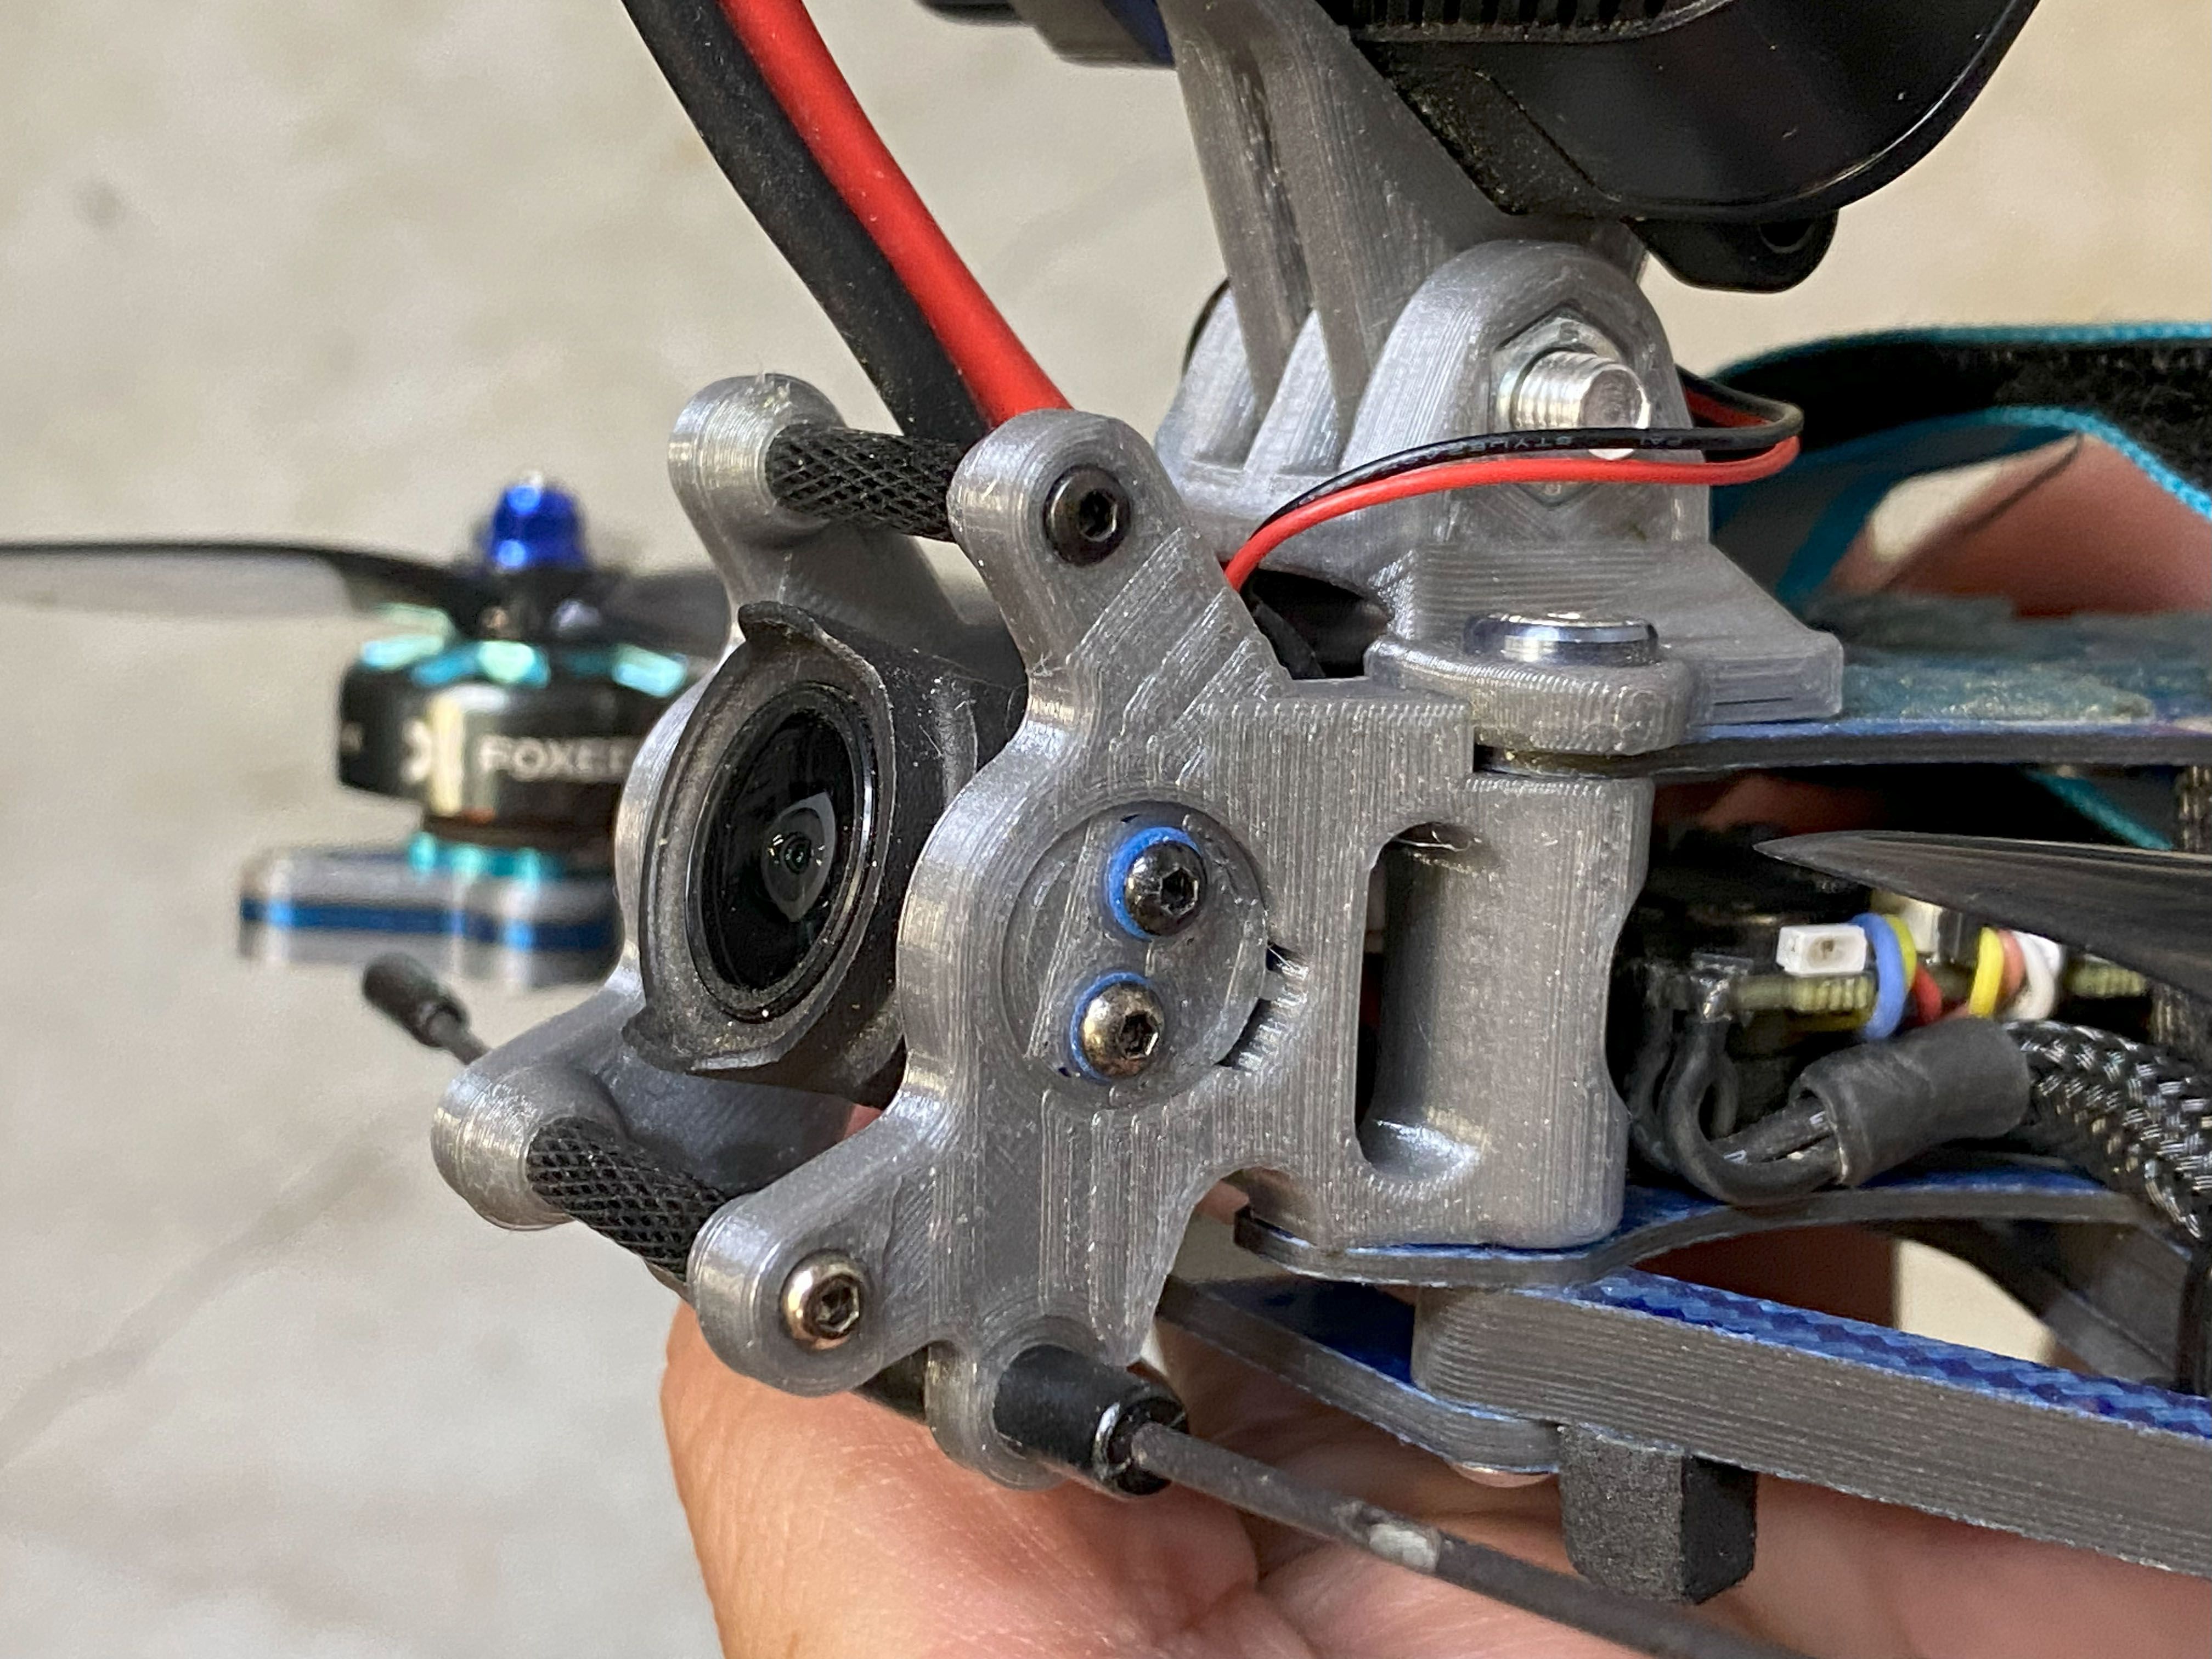
This is my first attempt in creating an adjustable FPV camera mount for the AOS frame. The key feature I will need to maintain is the vibration dampener for the FPV camera. The first issues I came across when creating the friction notched system is that I am limited to 10-degree increments. I tried to do 5-degree increments but there is not enough space to rotate that small angle. So, I kept it at 10 degrees instead. The next issue is the camera protection in the 5 to 45 degrees angle range. I was not able to provide enough camera protection if I must cover all those angles. Basically, what you see here is a first failed attempt in creating an adjustable camera mount that also provides good protection too. If you are okay with the lack of camera protection, this mount works perfectly.
Videos
I removed the Maiden Flight test and added some videos that are more relevant. Meaning, sure most quads will do fine in normal conditions, but you need to make sure a Long Range quad is ready for anything.
High Wind Test Flight
17 MPH wind and 38MPH Gust - This video is raw HD footage directly from the Air Unit with RockSteady enabled.
Same footage as above but the DVR recording - They video will show you the actual flight condition in windy conditions and how well RockSteady smooth out the bumps in HD video above.
LIPO - Max Flight Time
Lumenier N2O 1250mAh 4s 120c Lipo (167g) - 12+ Minutes
Lithium Ion - Max Flight Time
26Minutes (with averge speed of 25mph) iFlight (Samsung) INR 21700 40T 4000mAh 30A Lithium Ion (293g) - Land at 2.8v per cell
I tried to get a honest with the flight time and fly at a realistic pace. I was aiming to go about 30mph but my speeds will fluctuate between 15 - 40 mph.
Photos
Part List
Frame |
AOS LR5 O3 - Colored
Cncdrones.com
|
$69.00 |
Flight Controller |
Flywoo GOKU HD F745 EVO AIO 40A 2-6S FC+ESC BLHELI_32 20X20 DJI Plug&Play
Newbeedrone.com
|
$99.99 |
Motors |
4 x Foxeer Datura 2105.5 FPV Motor - 1650KV
(2 builds)
Pyrodrone.com
|
$79.60 |
Propellers |
Gemfan Super Light 5130-3-Blade 1.5MM Shaft
(2 builds)
Newbeedrone.com
|
$2.99 |
FPV Camera |
DJI 03 Air Unit For
(15 builds)
Racedayquads.com
|
$239.00 |
Receiver |
TBS Crossfire Nano Rx Special Edition FPV Long Range Drone Receiver
(163 builds)
Pyrodrone.com
|
$44.95 |
3D Printed |
AOS LR5 Collection GoPro Bones Camera Antenna O3 Mounts by wrong17
Thingiverse.com
|
See Site |
3D Printed |
AOS LR5 - X plate modified V03 by Vincent12FR
(2 builds)
Thingiverse.com
|
See Site |
3D Printed |
AOS LR 5 Parts by veiov1s
Thingiverse.com
|
See Site |
nice build - interesting how long it can fly with GoPro ?
I was thinking to build something like this but for GoPro 8 ( and its not naked... ) and wondering if it will fly at least 10 min.
Cheers !!!
2850kv is far too high for 6s on 5", that's actually very high even for 4s. You'd need to put a throttle limit of about 60%. 1604 motors will also struggle with 5" props, the ones you're suggesting are really for 4" 4s. 2105.5 is good for lightweight 5", I have some 2650kv 2105.5 on my 4s light freestyle build, but the smallest you want to go really is maybe 1805.5 (or 2004, 2203.5 etc.) and something like 1600kv for 6s long range, up to about 1850kv if you want a bit more freestyle performance. Hope this helps!
Love the build! mind sharing the 3d parts design? I'd to adapt the camera mount for a AOS 3.5.
Not everyone knows this but I usually put the links to the 3D printed stuff on the Part List. If you did not see it, here is a link: https://www.thingiverse.com/thing:5951856




Very nice build! I own an AOS LR5 (non O3) frame and want to convert it to O3. I really liked the latest design of the adjustable camera mount. Where I can find the latest stl files for this design? Thanks.
Are you okay with the lack for protection? That is reason why I did not post the files on thingiverse. If you do not care, I can share the file with you.
Thanks, but I already created my own version of the camera holder with tinkercad. Its adjustable and is held by friction. Really happy how it went.
For some reason, I cannot upload photos to show how it looks.