I wanted a Walksnail whoop that flies (and crashes) like an analog tinywhoop. No 2 minute flight times, no lens endangering camera mounts, and I wanted to protect that expensive VTX. The result is a very capable daily flier that got me through many weeks of IGOW challenges. Perfectly capable of indoor acro, and yet still gets 3:00-3:45 flight times (4 minutes if just pottering). This is my first choice whoop for both indoors and out.
Original mobula6 frame: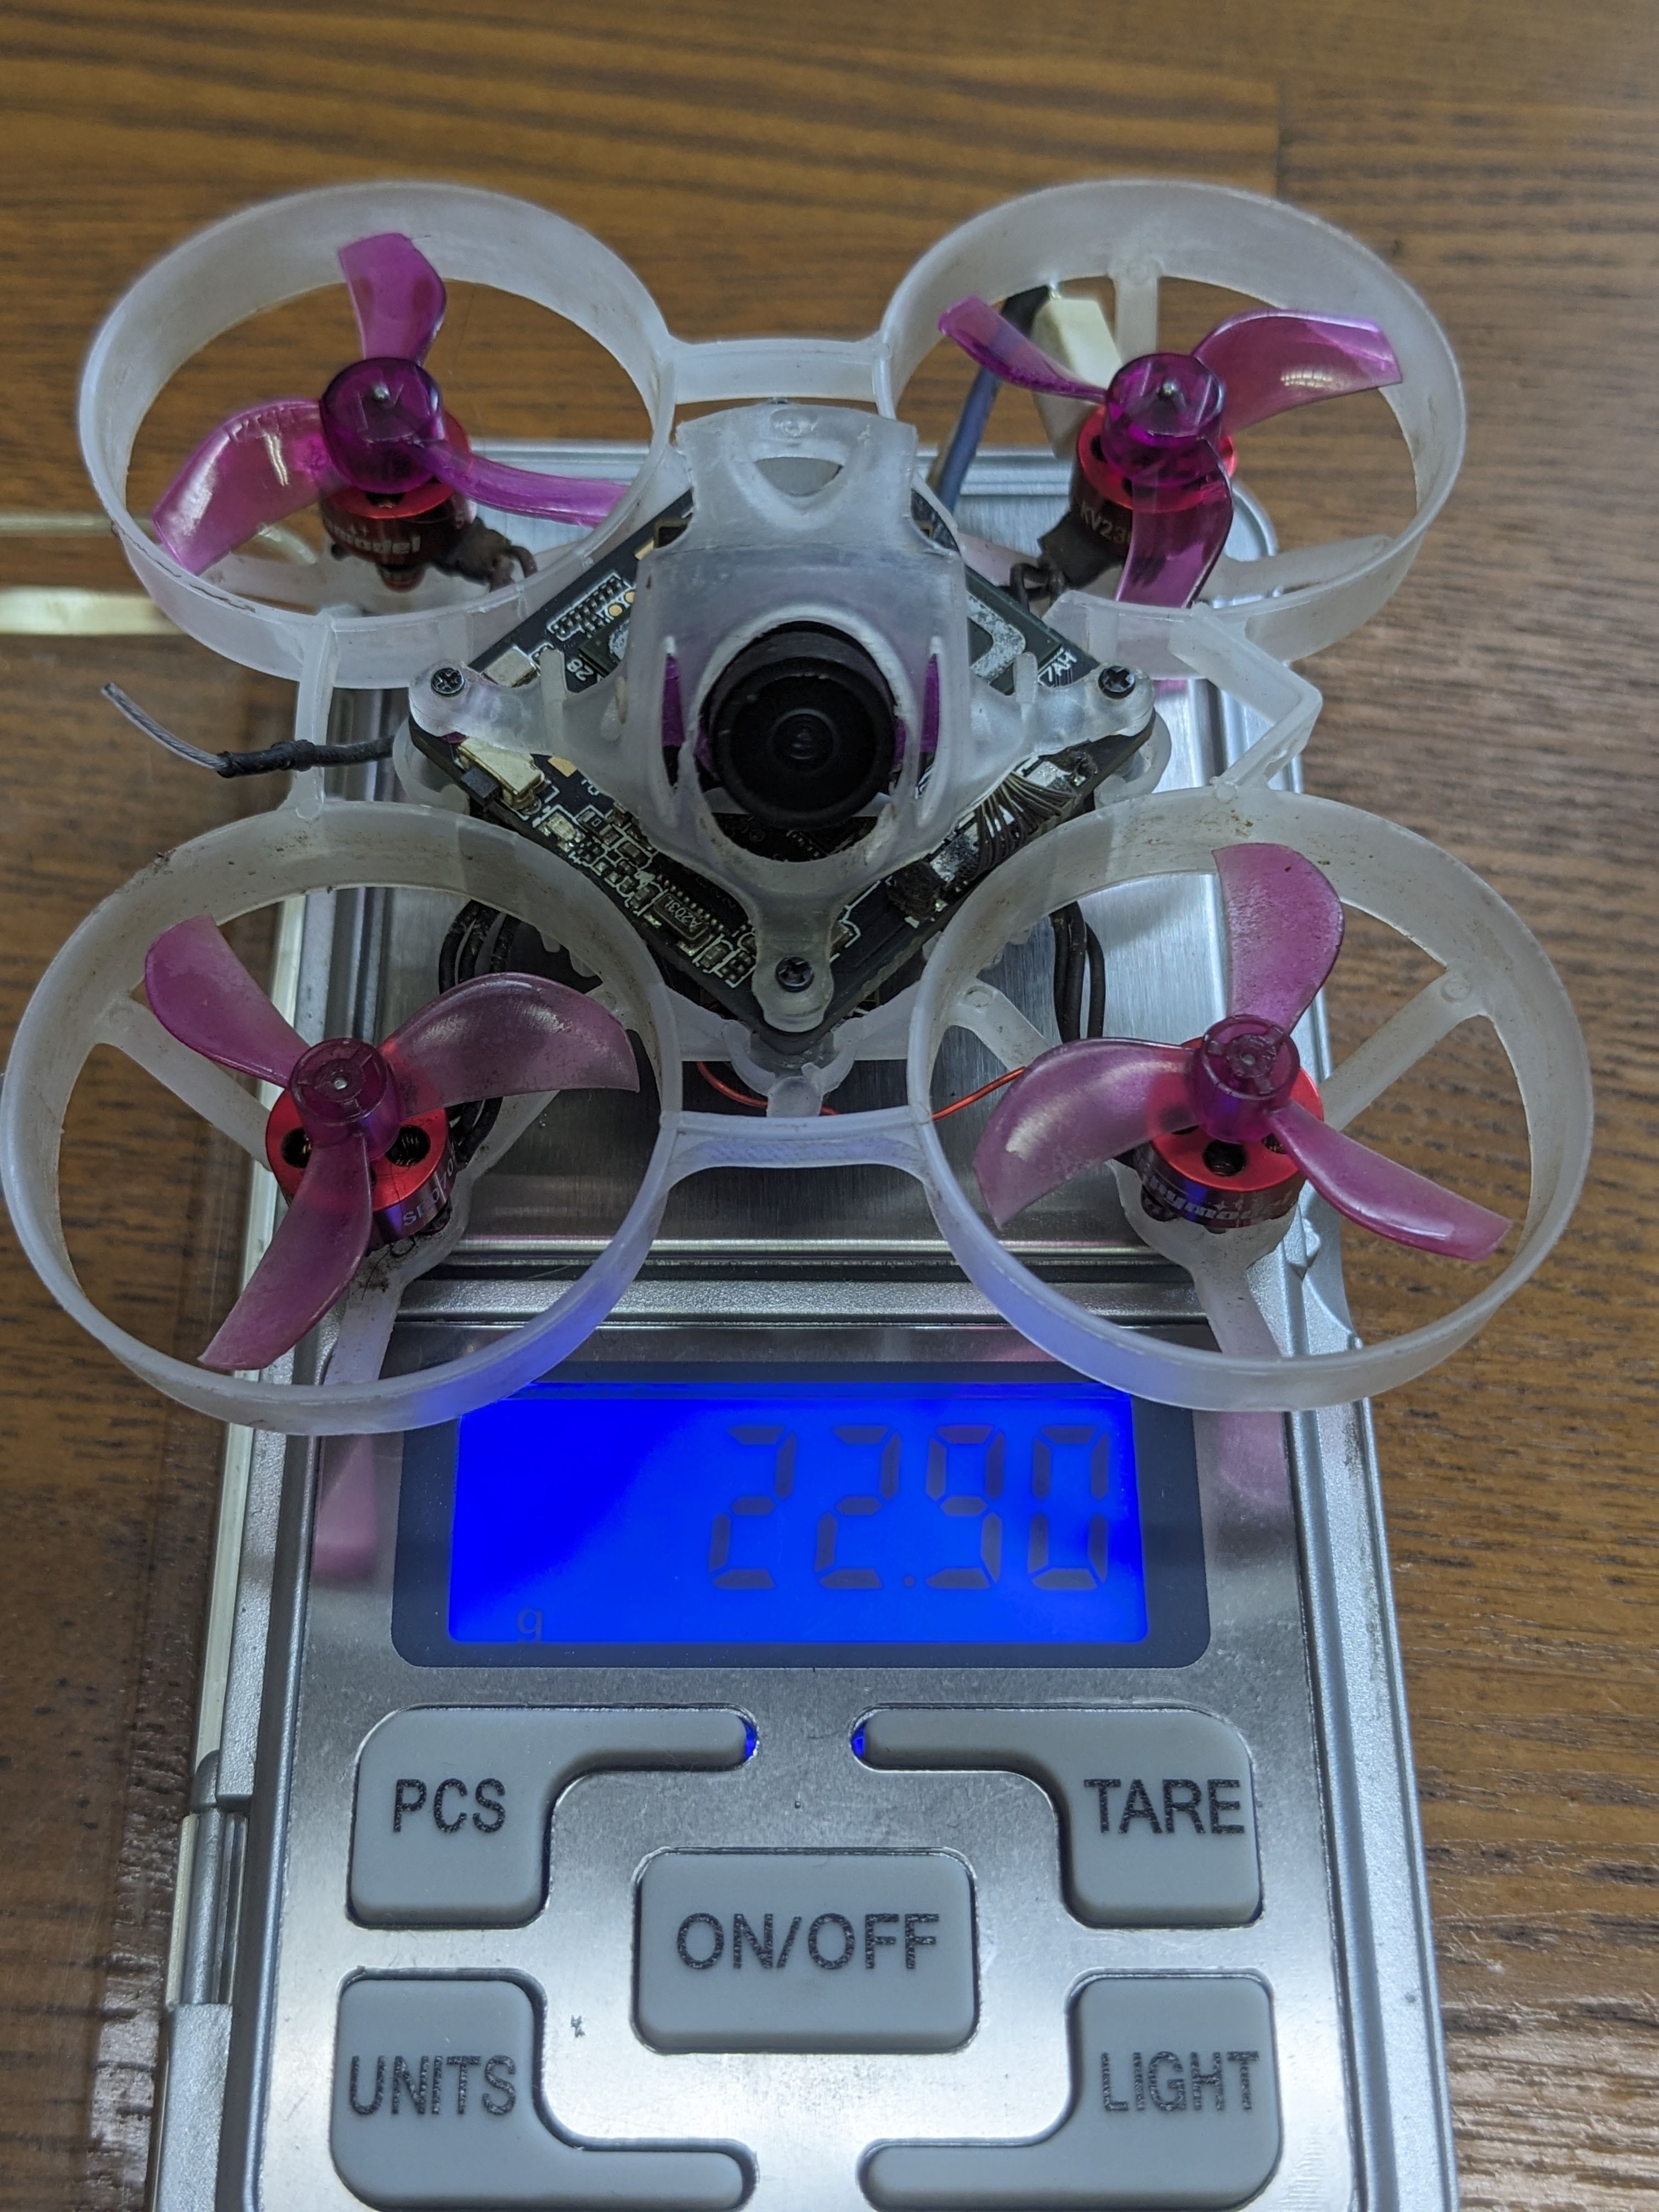
Weight is kept to a minimum through the use of lightweight components, and a mantra of "take care of the pennies and the pounds will take care of themselves." i.e. Don't compromise on the tiniest details - they all add up! Build is done following Shutterbug FPV's 65mm HDZero build technique, but different components, obviously:
Nate goes through lots of detail and explanation on this style of build (FC under the frame), so I suggest you watch that video first. I will just go through what I did differently:
-
I'm using 23000kV 0702 motors. I did some flight tests with 0802s and found that these 0702s drew 20% less current (20% longer flight times) with no huge loss in power. Watch my videos and decide if you need more power than that, but going higher in KV will mean shorter flights. I paired these with Azi tri blade props, which give great efficiency, good punch for this setup. And they are super light!
-
I found that there was a capacitor on the FC that was resting against the cross-braces of the battery tray. And I know these braces often break on this frame, so i just cut them off. I put two layers of foam double sided tape onto the FC for protection, and now the battery rests against the rubber gummies and that double-sided tape
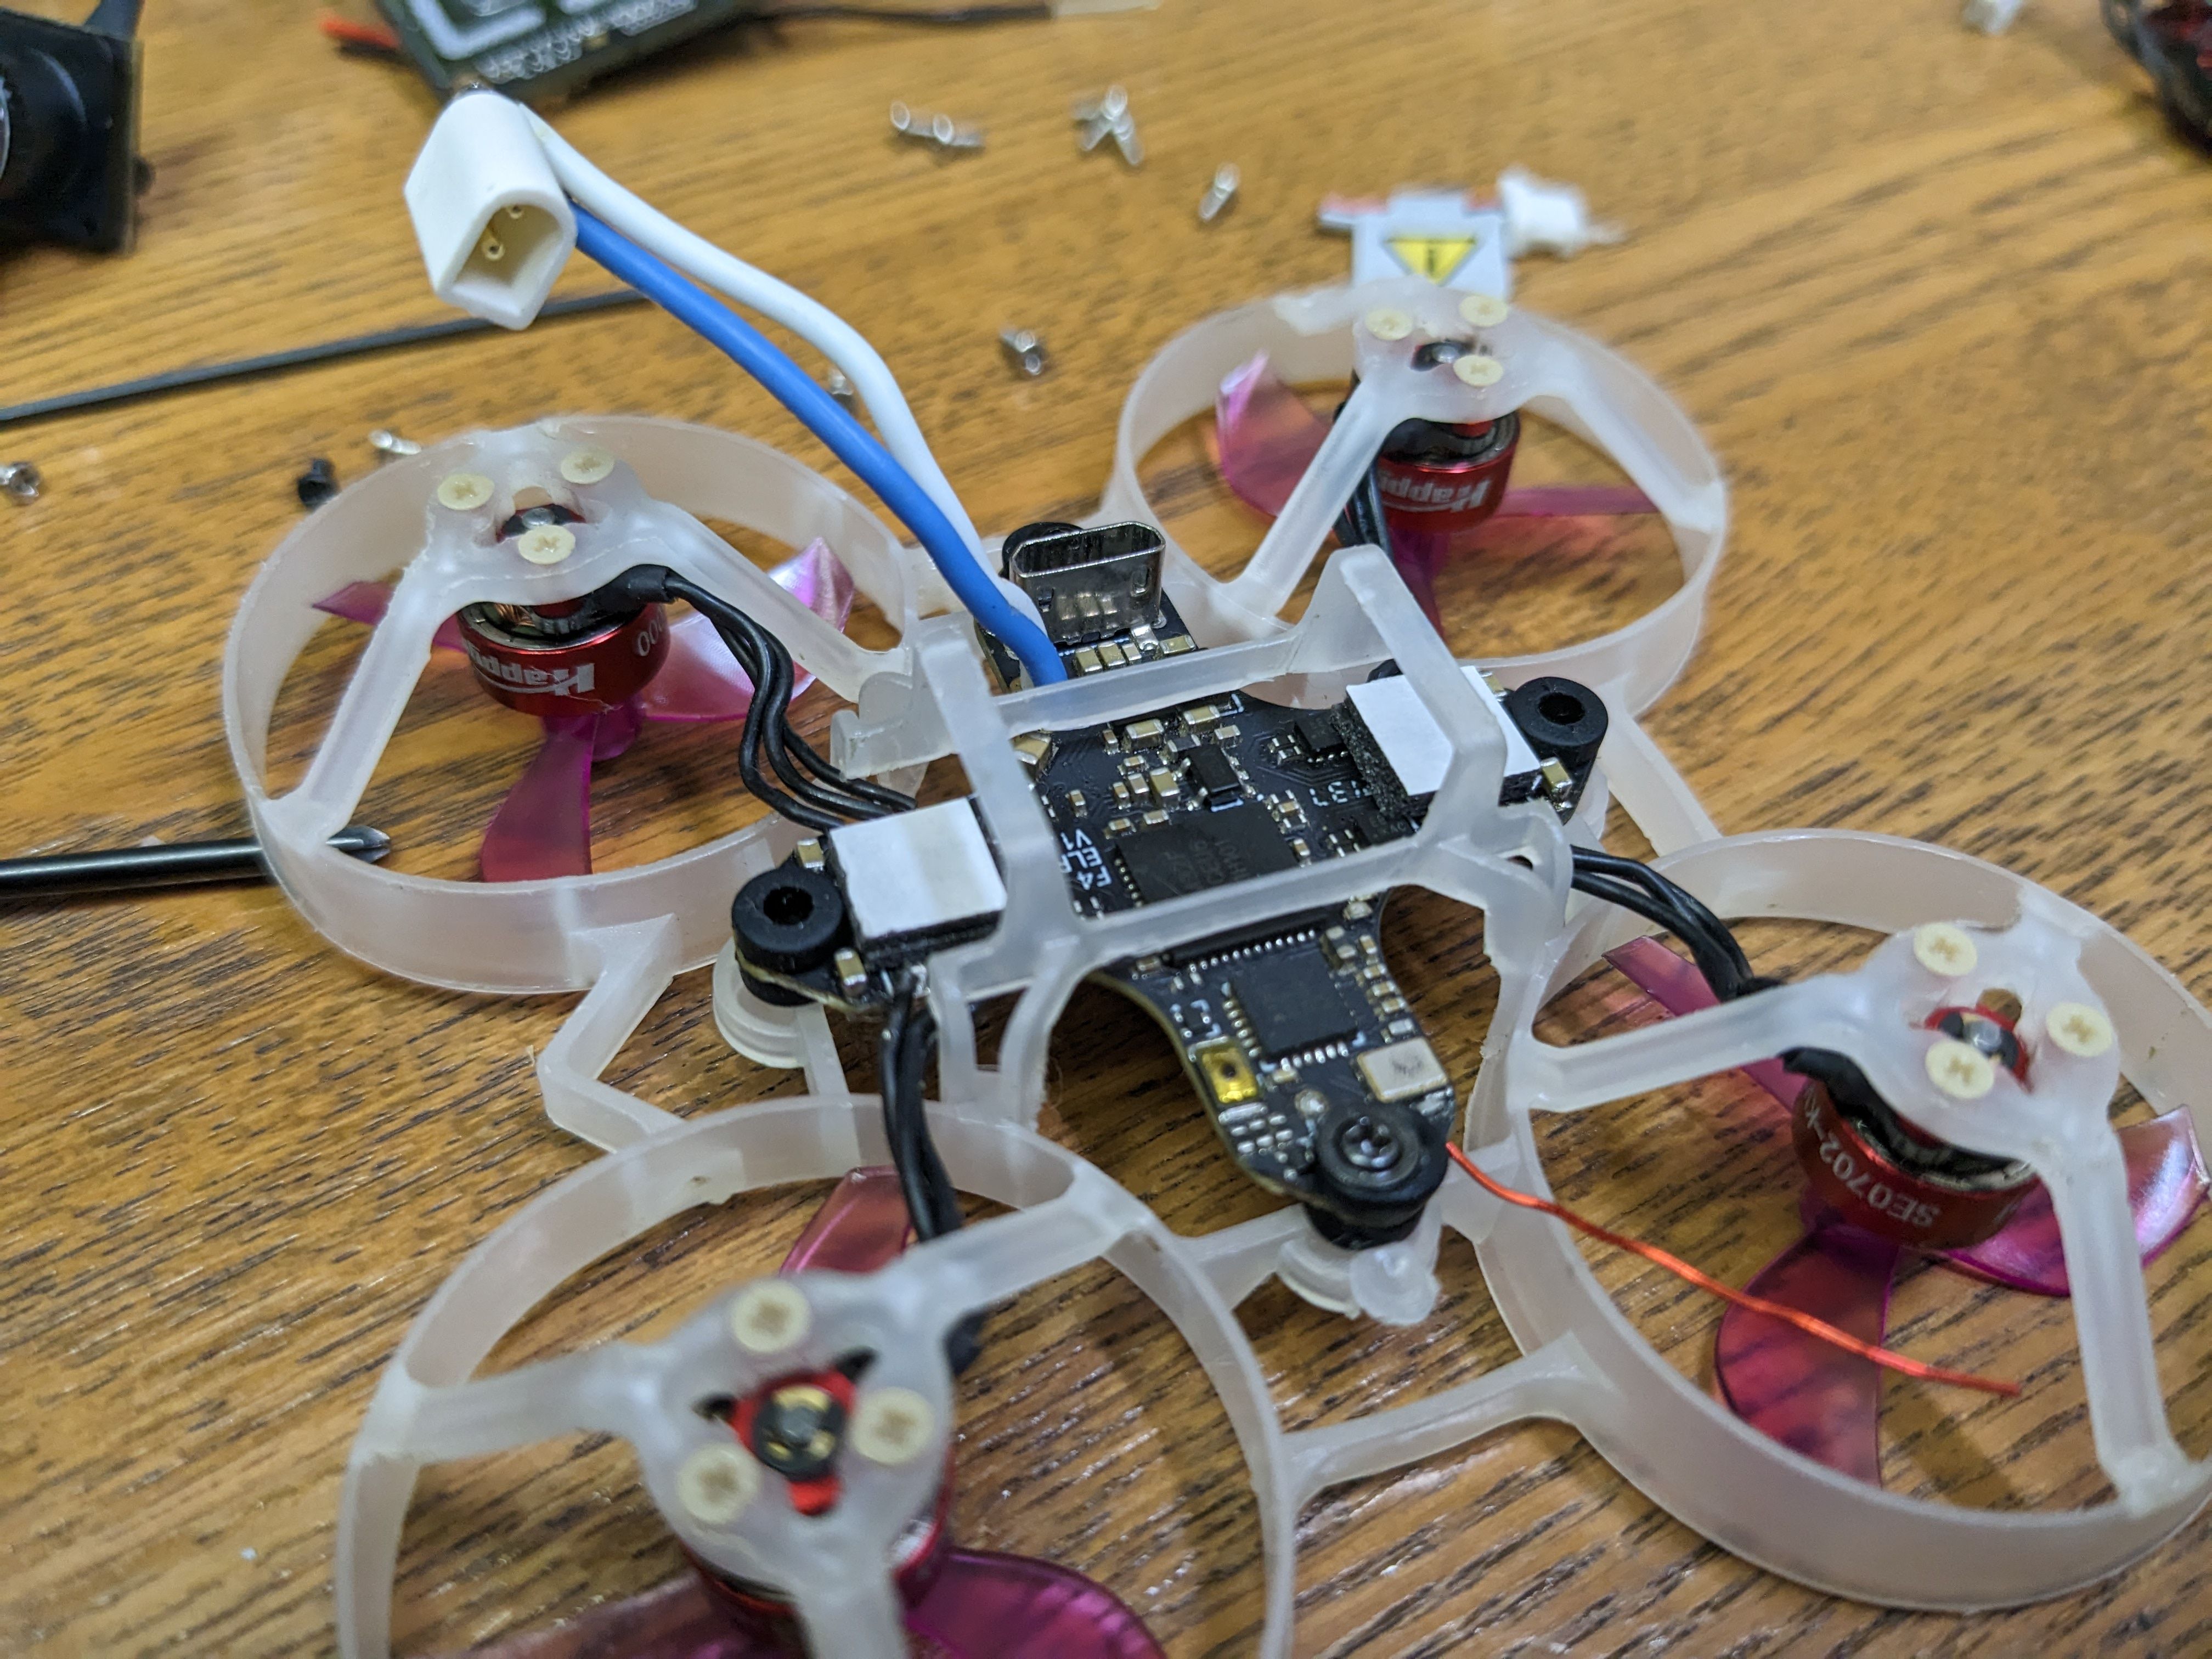
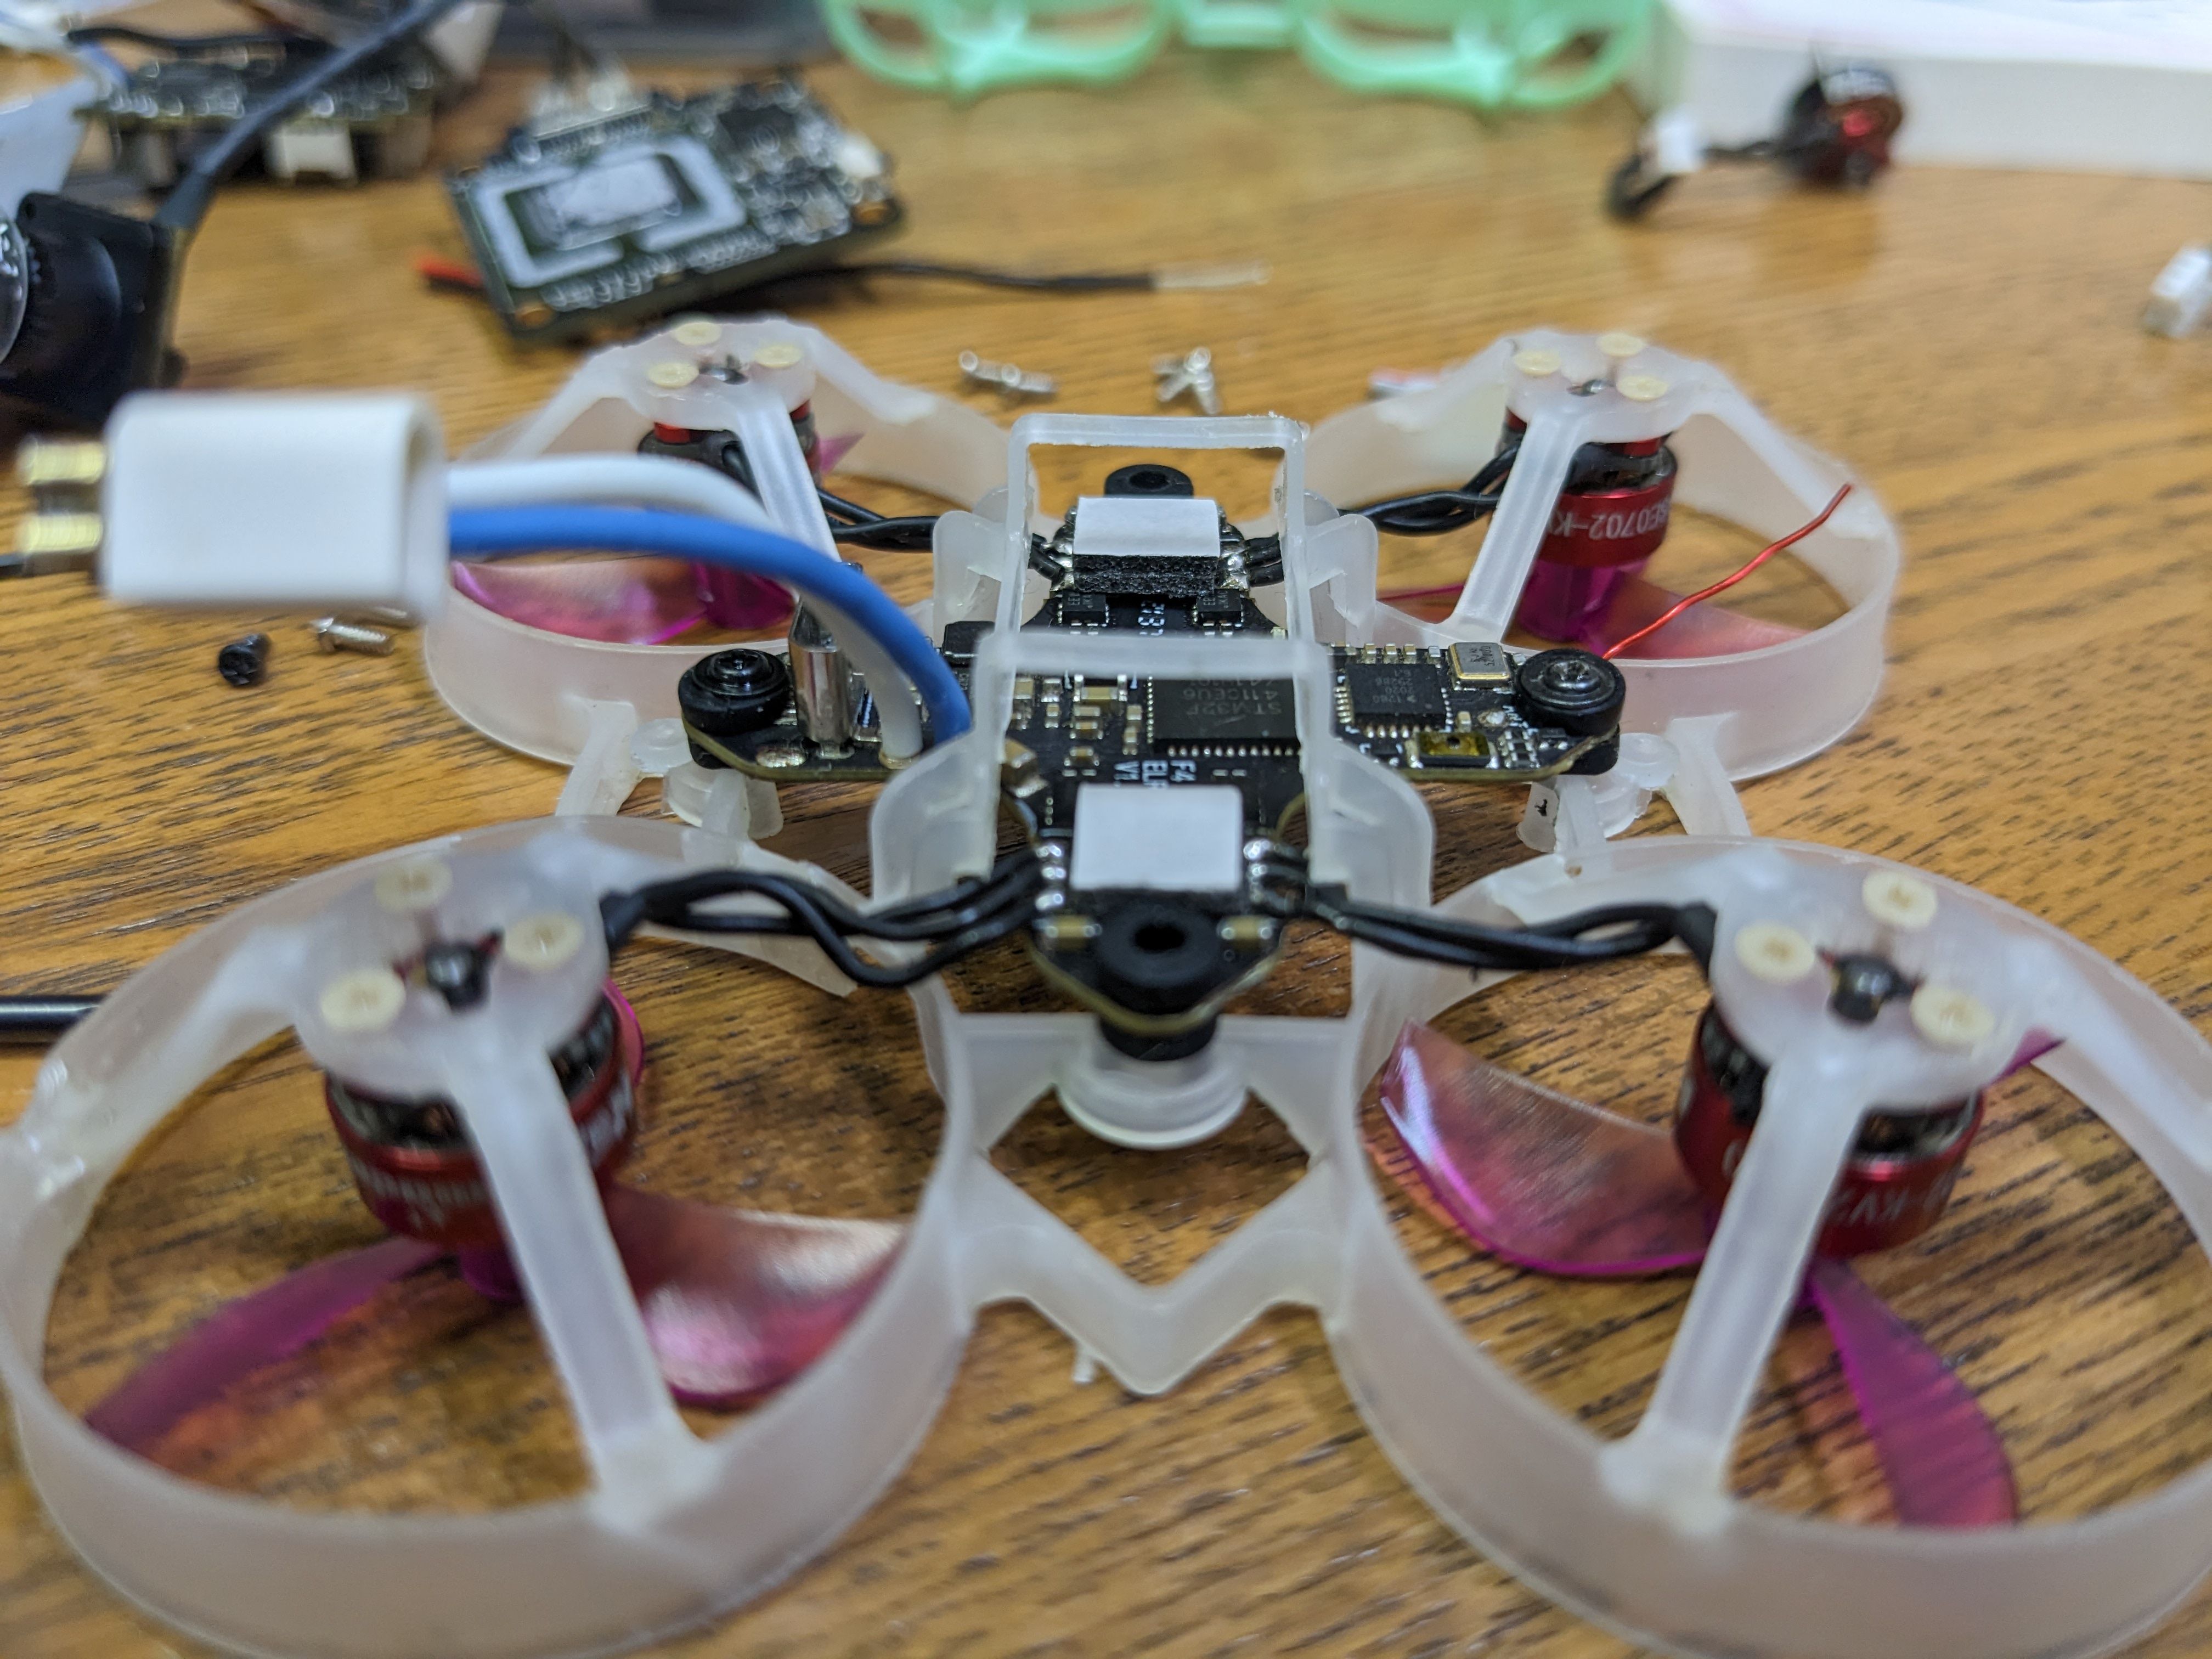
This does not cause excess vibrations to the FC and it serves double purpose because I dont need to screw down the FC on those holes. I am using 2x fat headed screws (not overtightened) on the sides to keep the FC in place. -
The stock Betafpv pigtail includes some unnecessary rubber on it, and straight wires require longer pigtail. Soldered my own connector on at a 130 degreee bend and shortened the pigtail
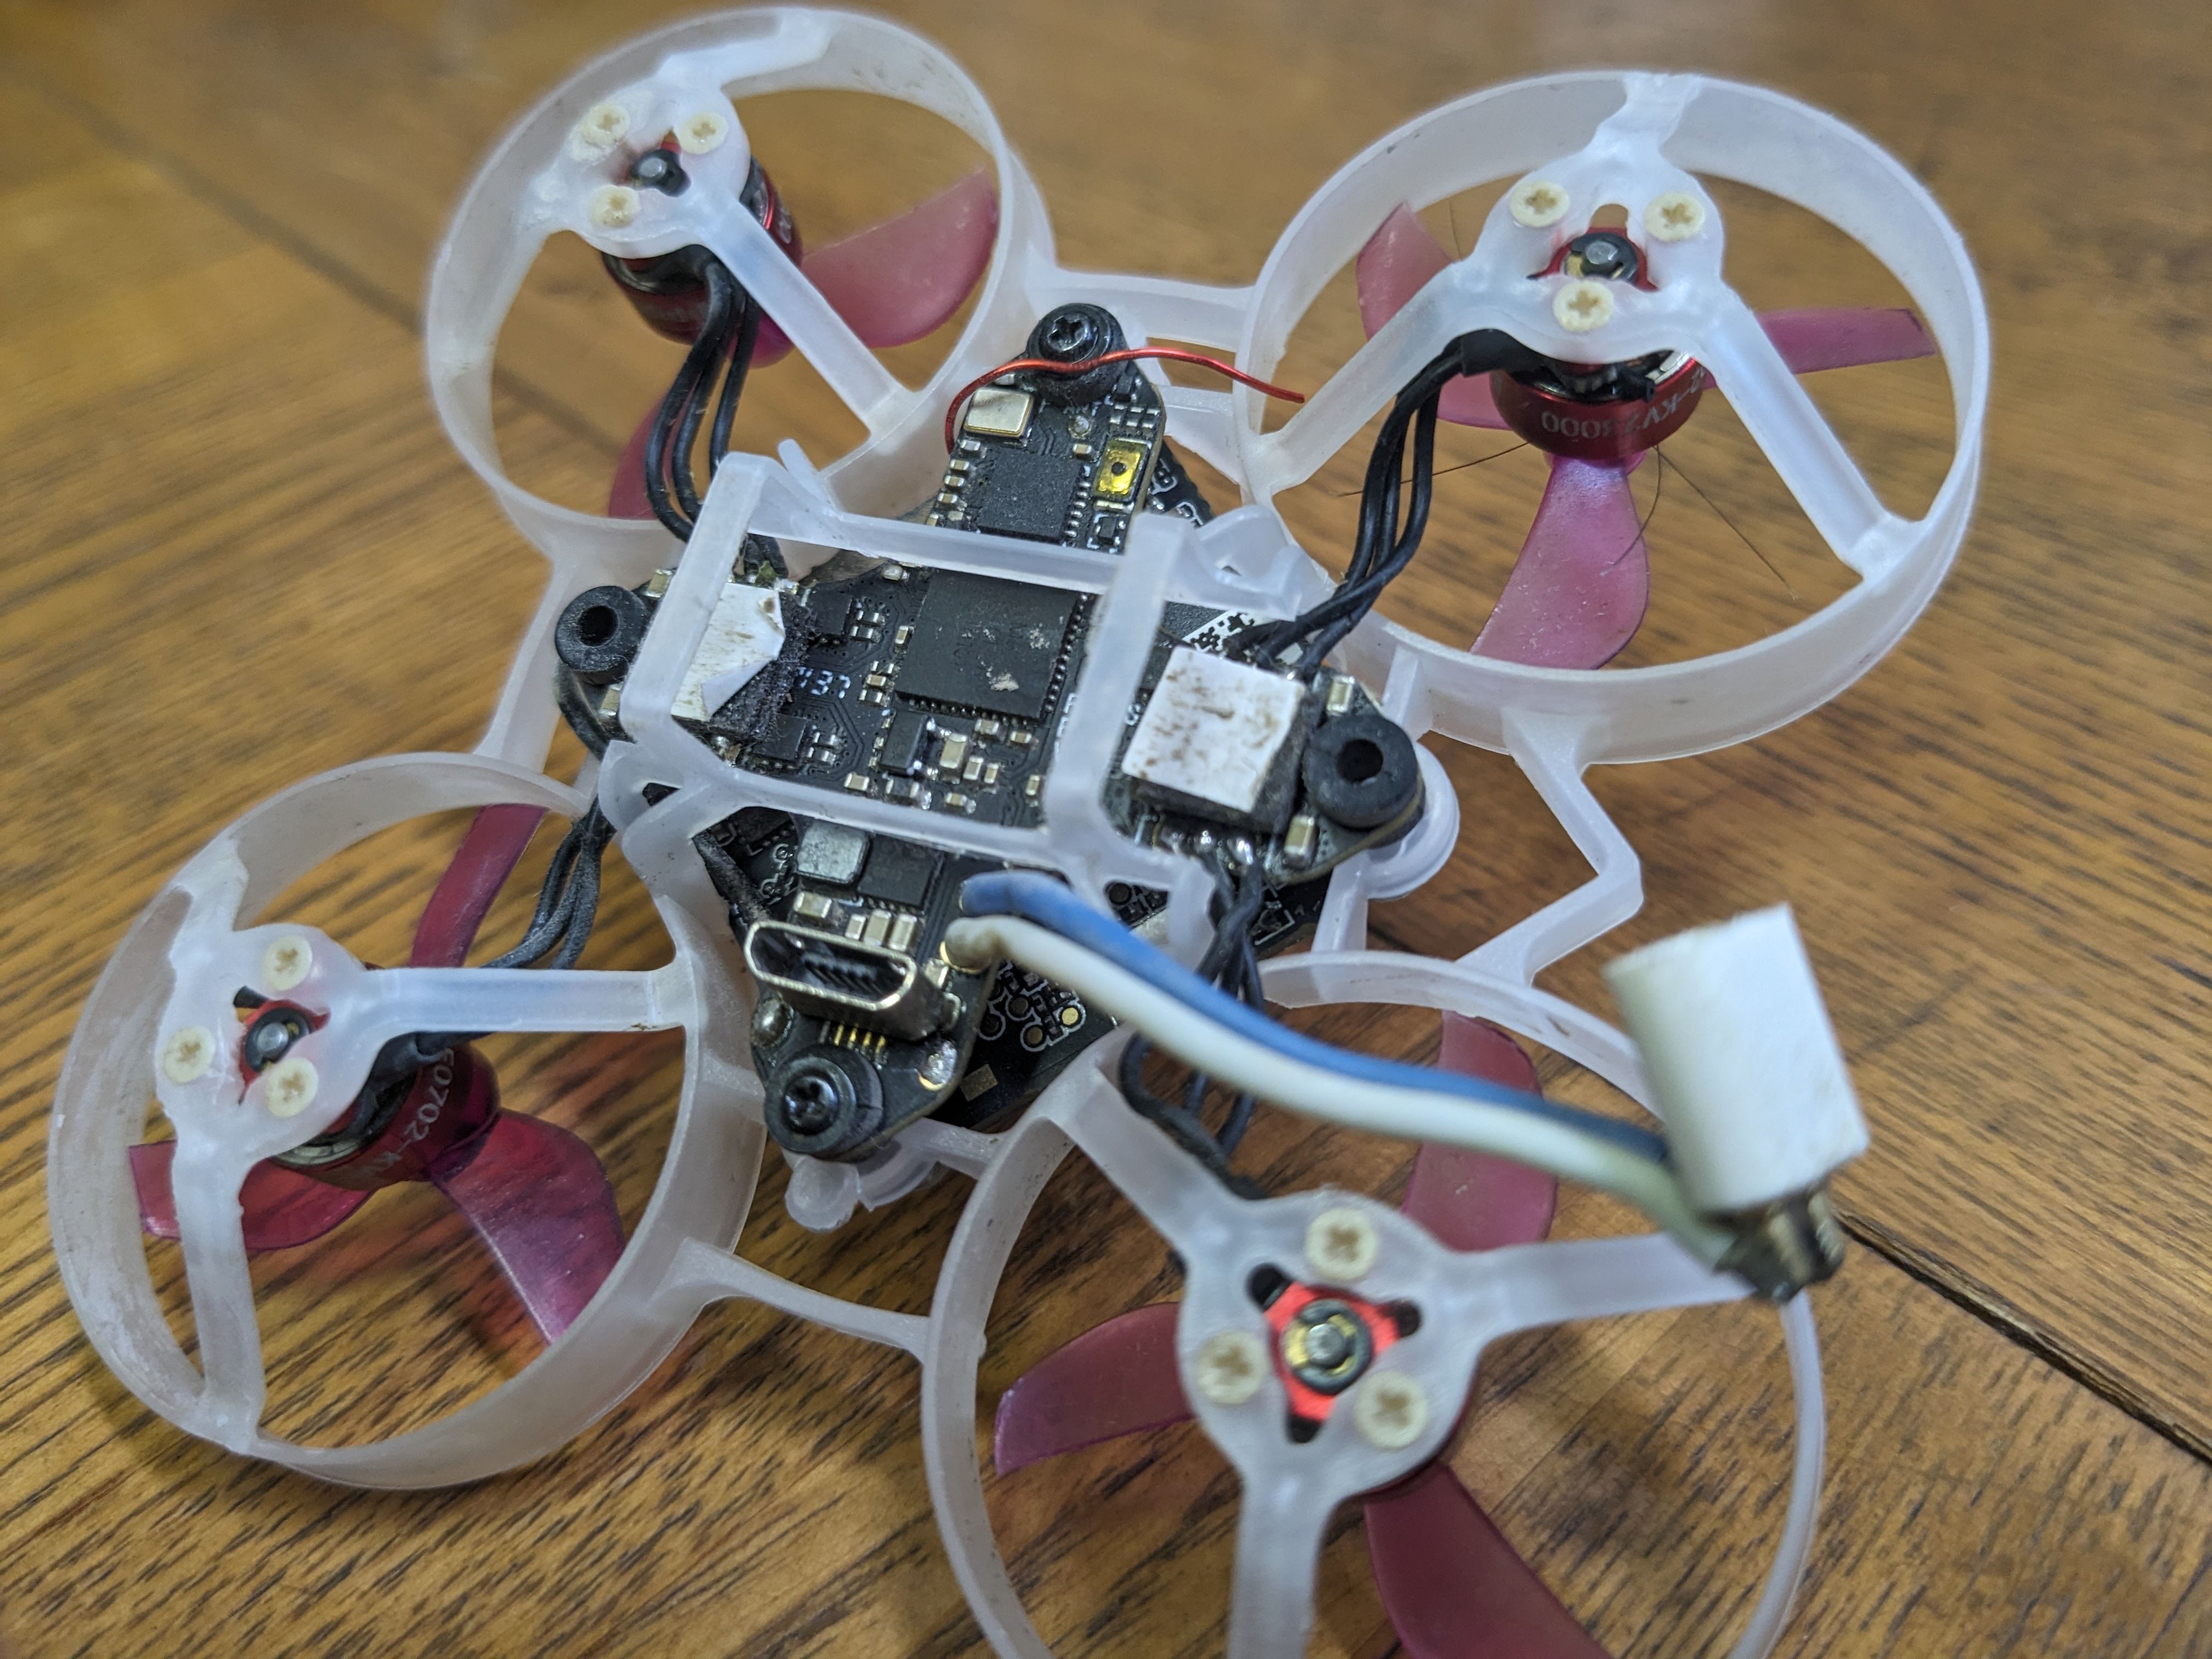
Added a drop of E6000 to prevent the pins twisting and shorting out, and to provide a little insulation -
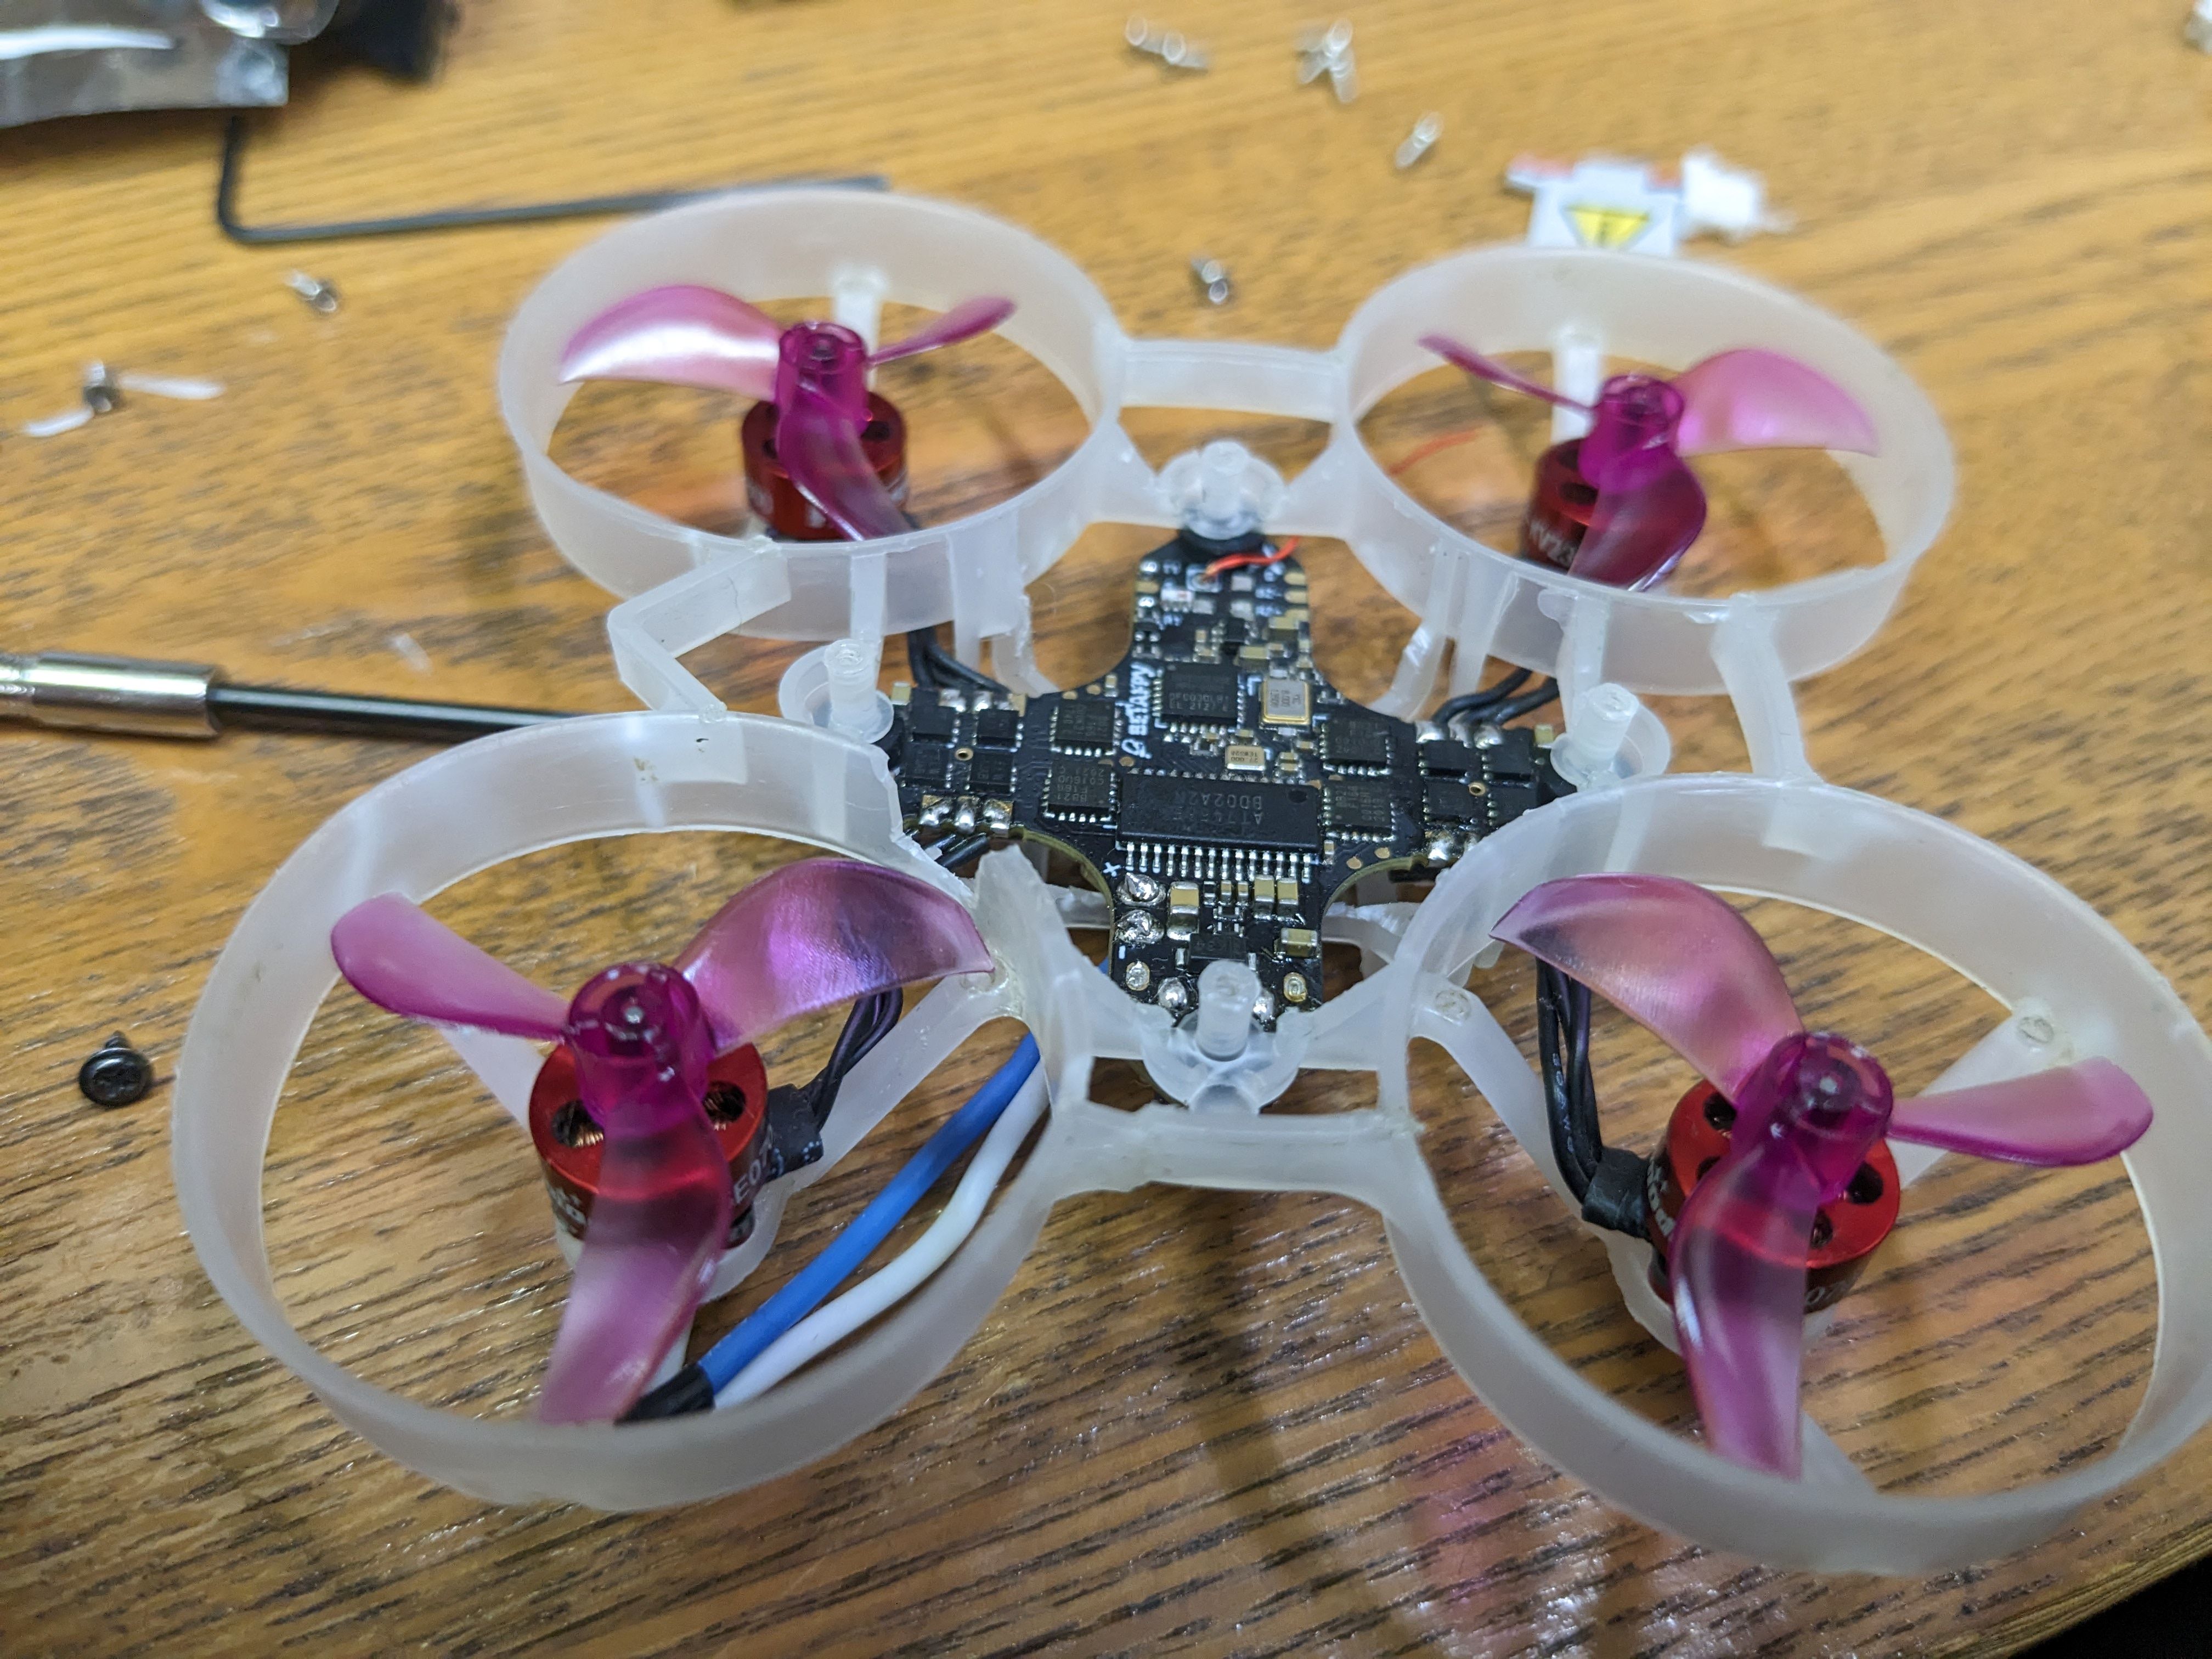
I wanted access to the Walksnail USB port after it was built, so i could access the video files, and for updates etc. I cut a groove in the inside of the duct on that side. Be careful not to cut all the way through. I've had many many crashes on this and that part has not cracked so it is safe to reduce the duct a little bit there.
-
This is probably the most controversial part of this build: I mounted the VTX with the UFL facing down. I can hear all the other walksnailers wailing that the VTX will overheat in 2 seconds flat. Well, in my testing, it doesnt overheat any quicker (maybe slower?) than another build I did with it facing up. Yes, thats where the PA is, so it will get quite hot... But also, the temperature measurement comes from the Arterytek MCU (the one with the thermal paste on it), and the more airflow that gets, the better. Putting the UFL down means the Mipi is on the right side from the start, and also the connections to the FC are on the same side as the FC. Win/Win!
The VTX is hard mounted into the place where the FC usually is. I have little tubes that i printed out of PLA used as spacers to raise the VTX up 2mm - just so that the top of the VTX is flush with the top of the canopy mounting posts, so that the canopy holds the VTX down. On the back post, i added a 1mm spacer so that the Canopy arm doesnt press down on that precious Arterytek processor!
Antenna is a DIY monopole antenna - stripped 13mm of the metal shielding, and added a bit of heat shrink for protection.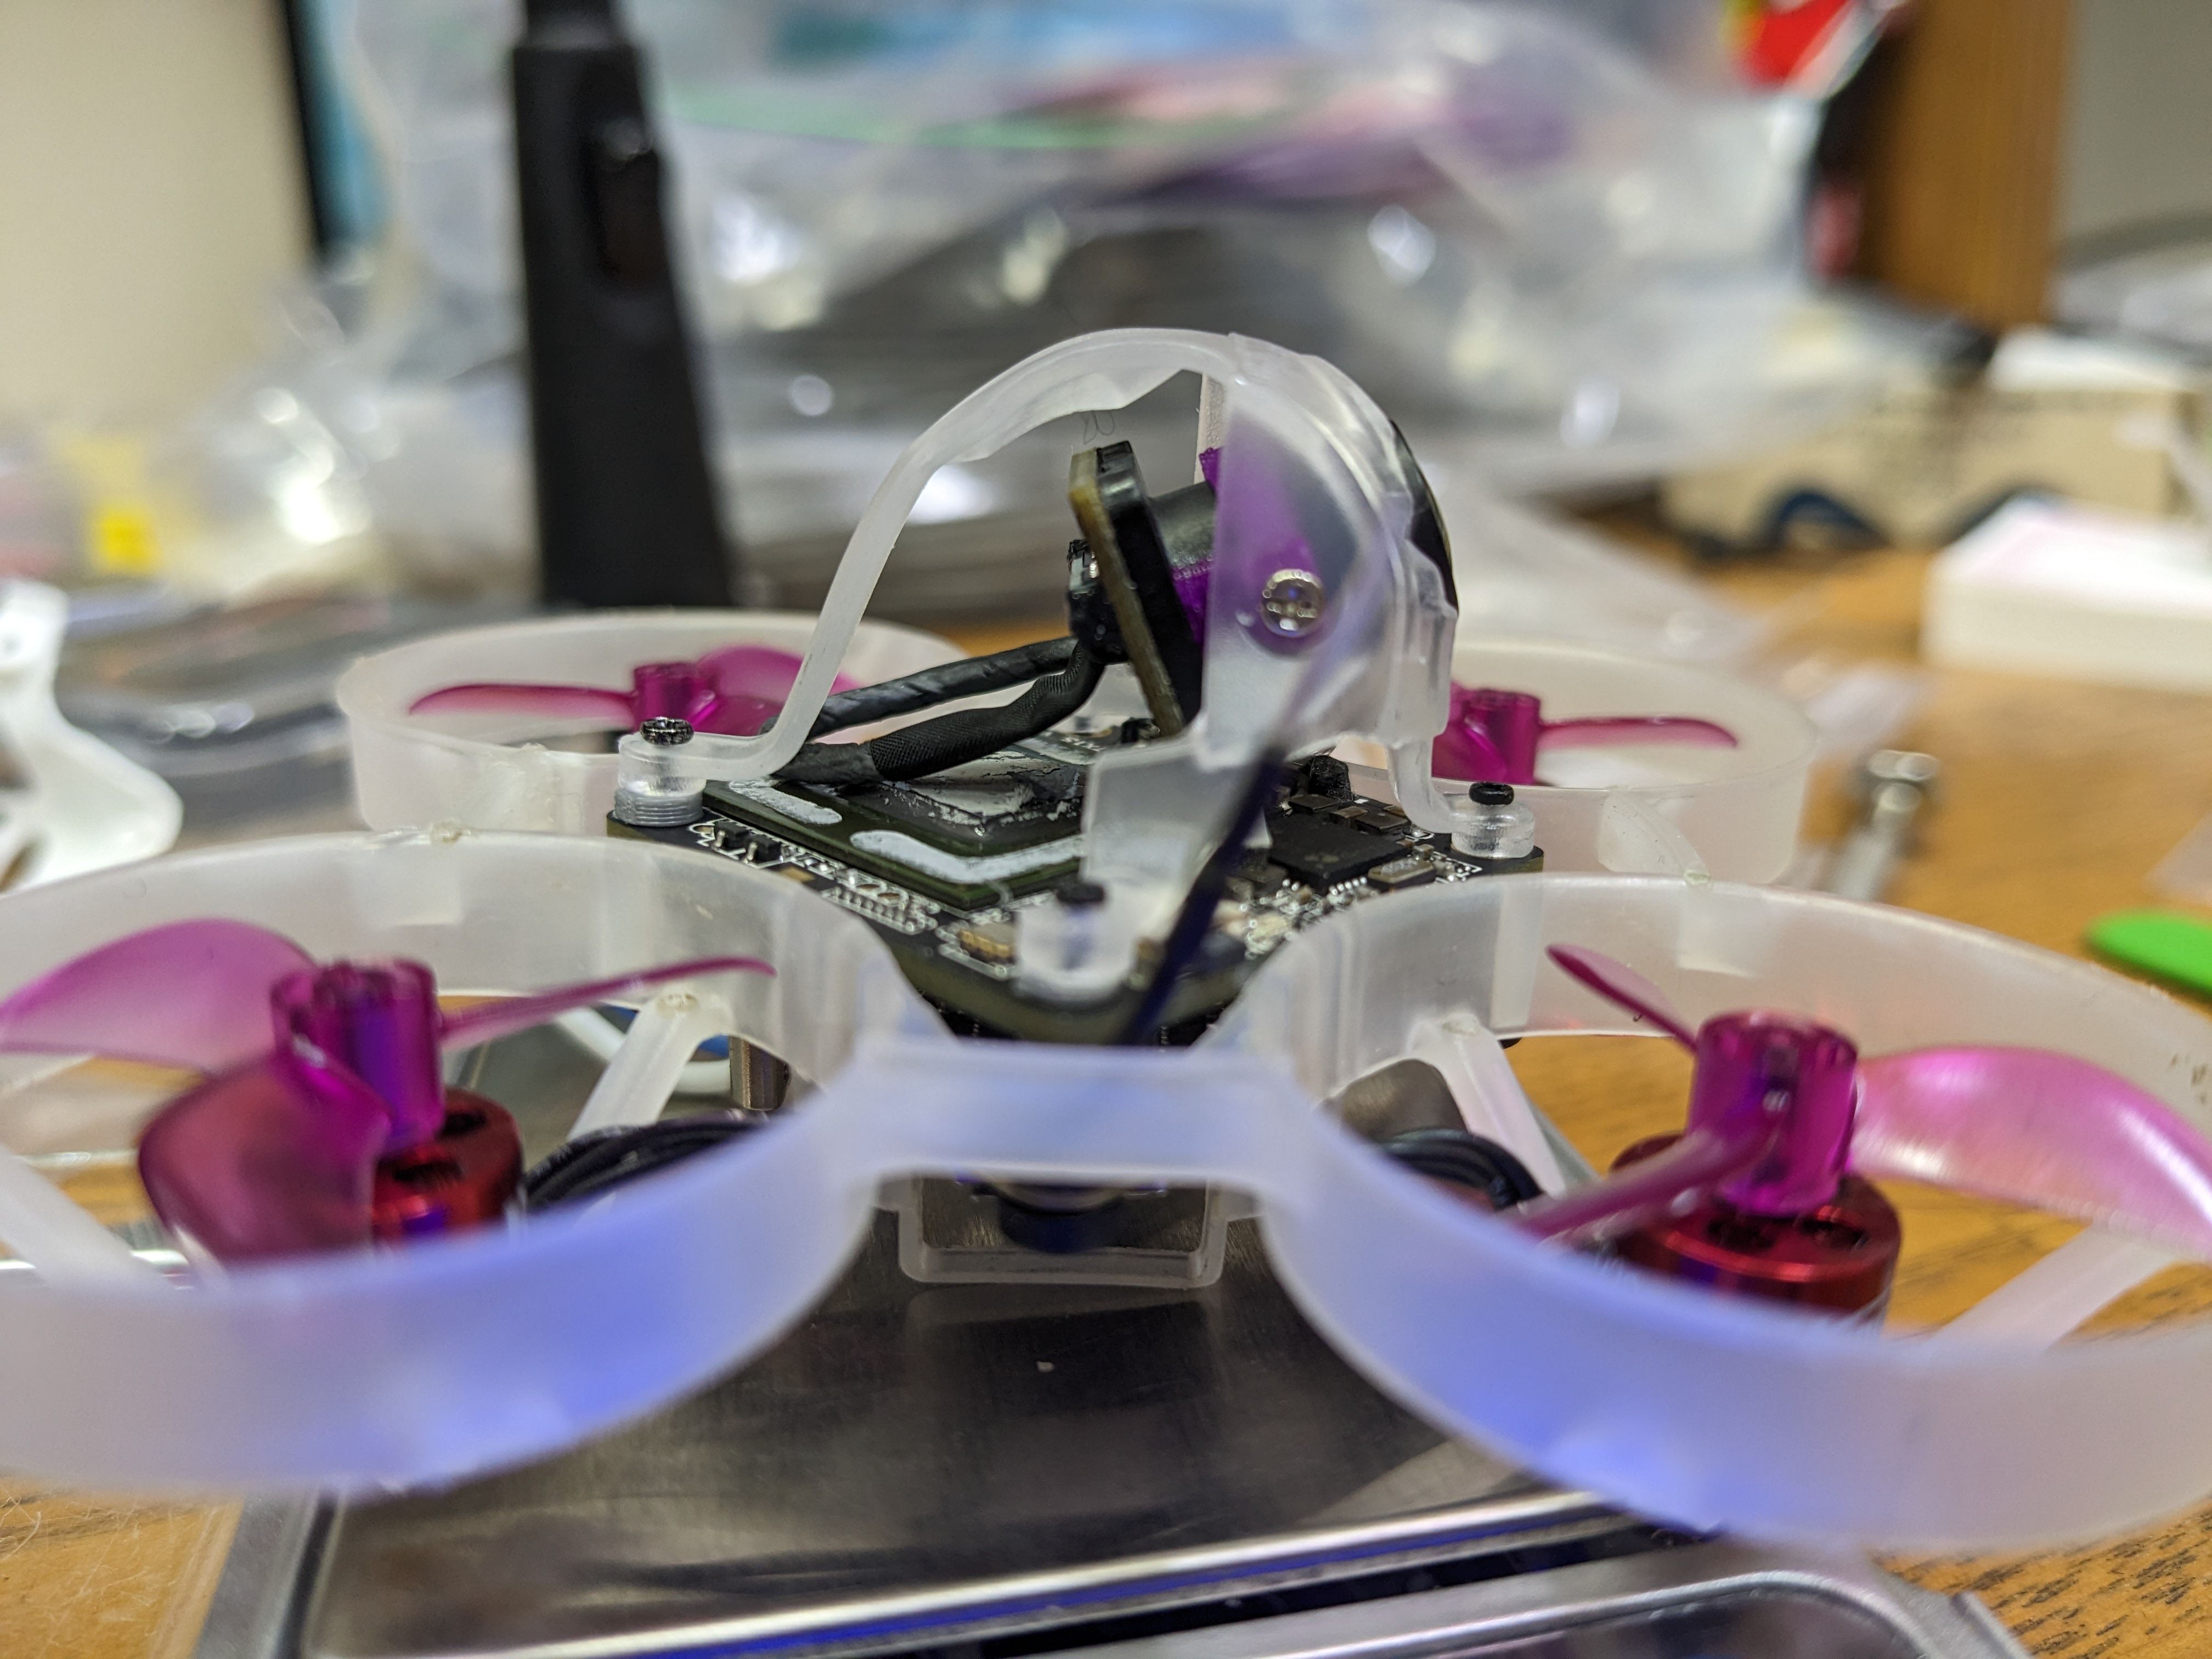
Newer versions of the Walksnail 1s come with the metal heatshield attached. This weighs 1.55g and its not necessary, I dont suffer overheating with this build, as long as i keep it in the air (though, that happens regardless of whether that heatshield is there or not). Thats excess weight this build does not need! -
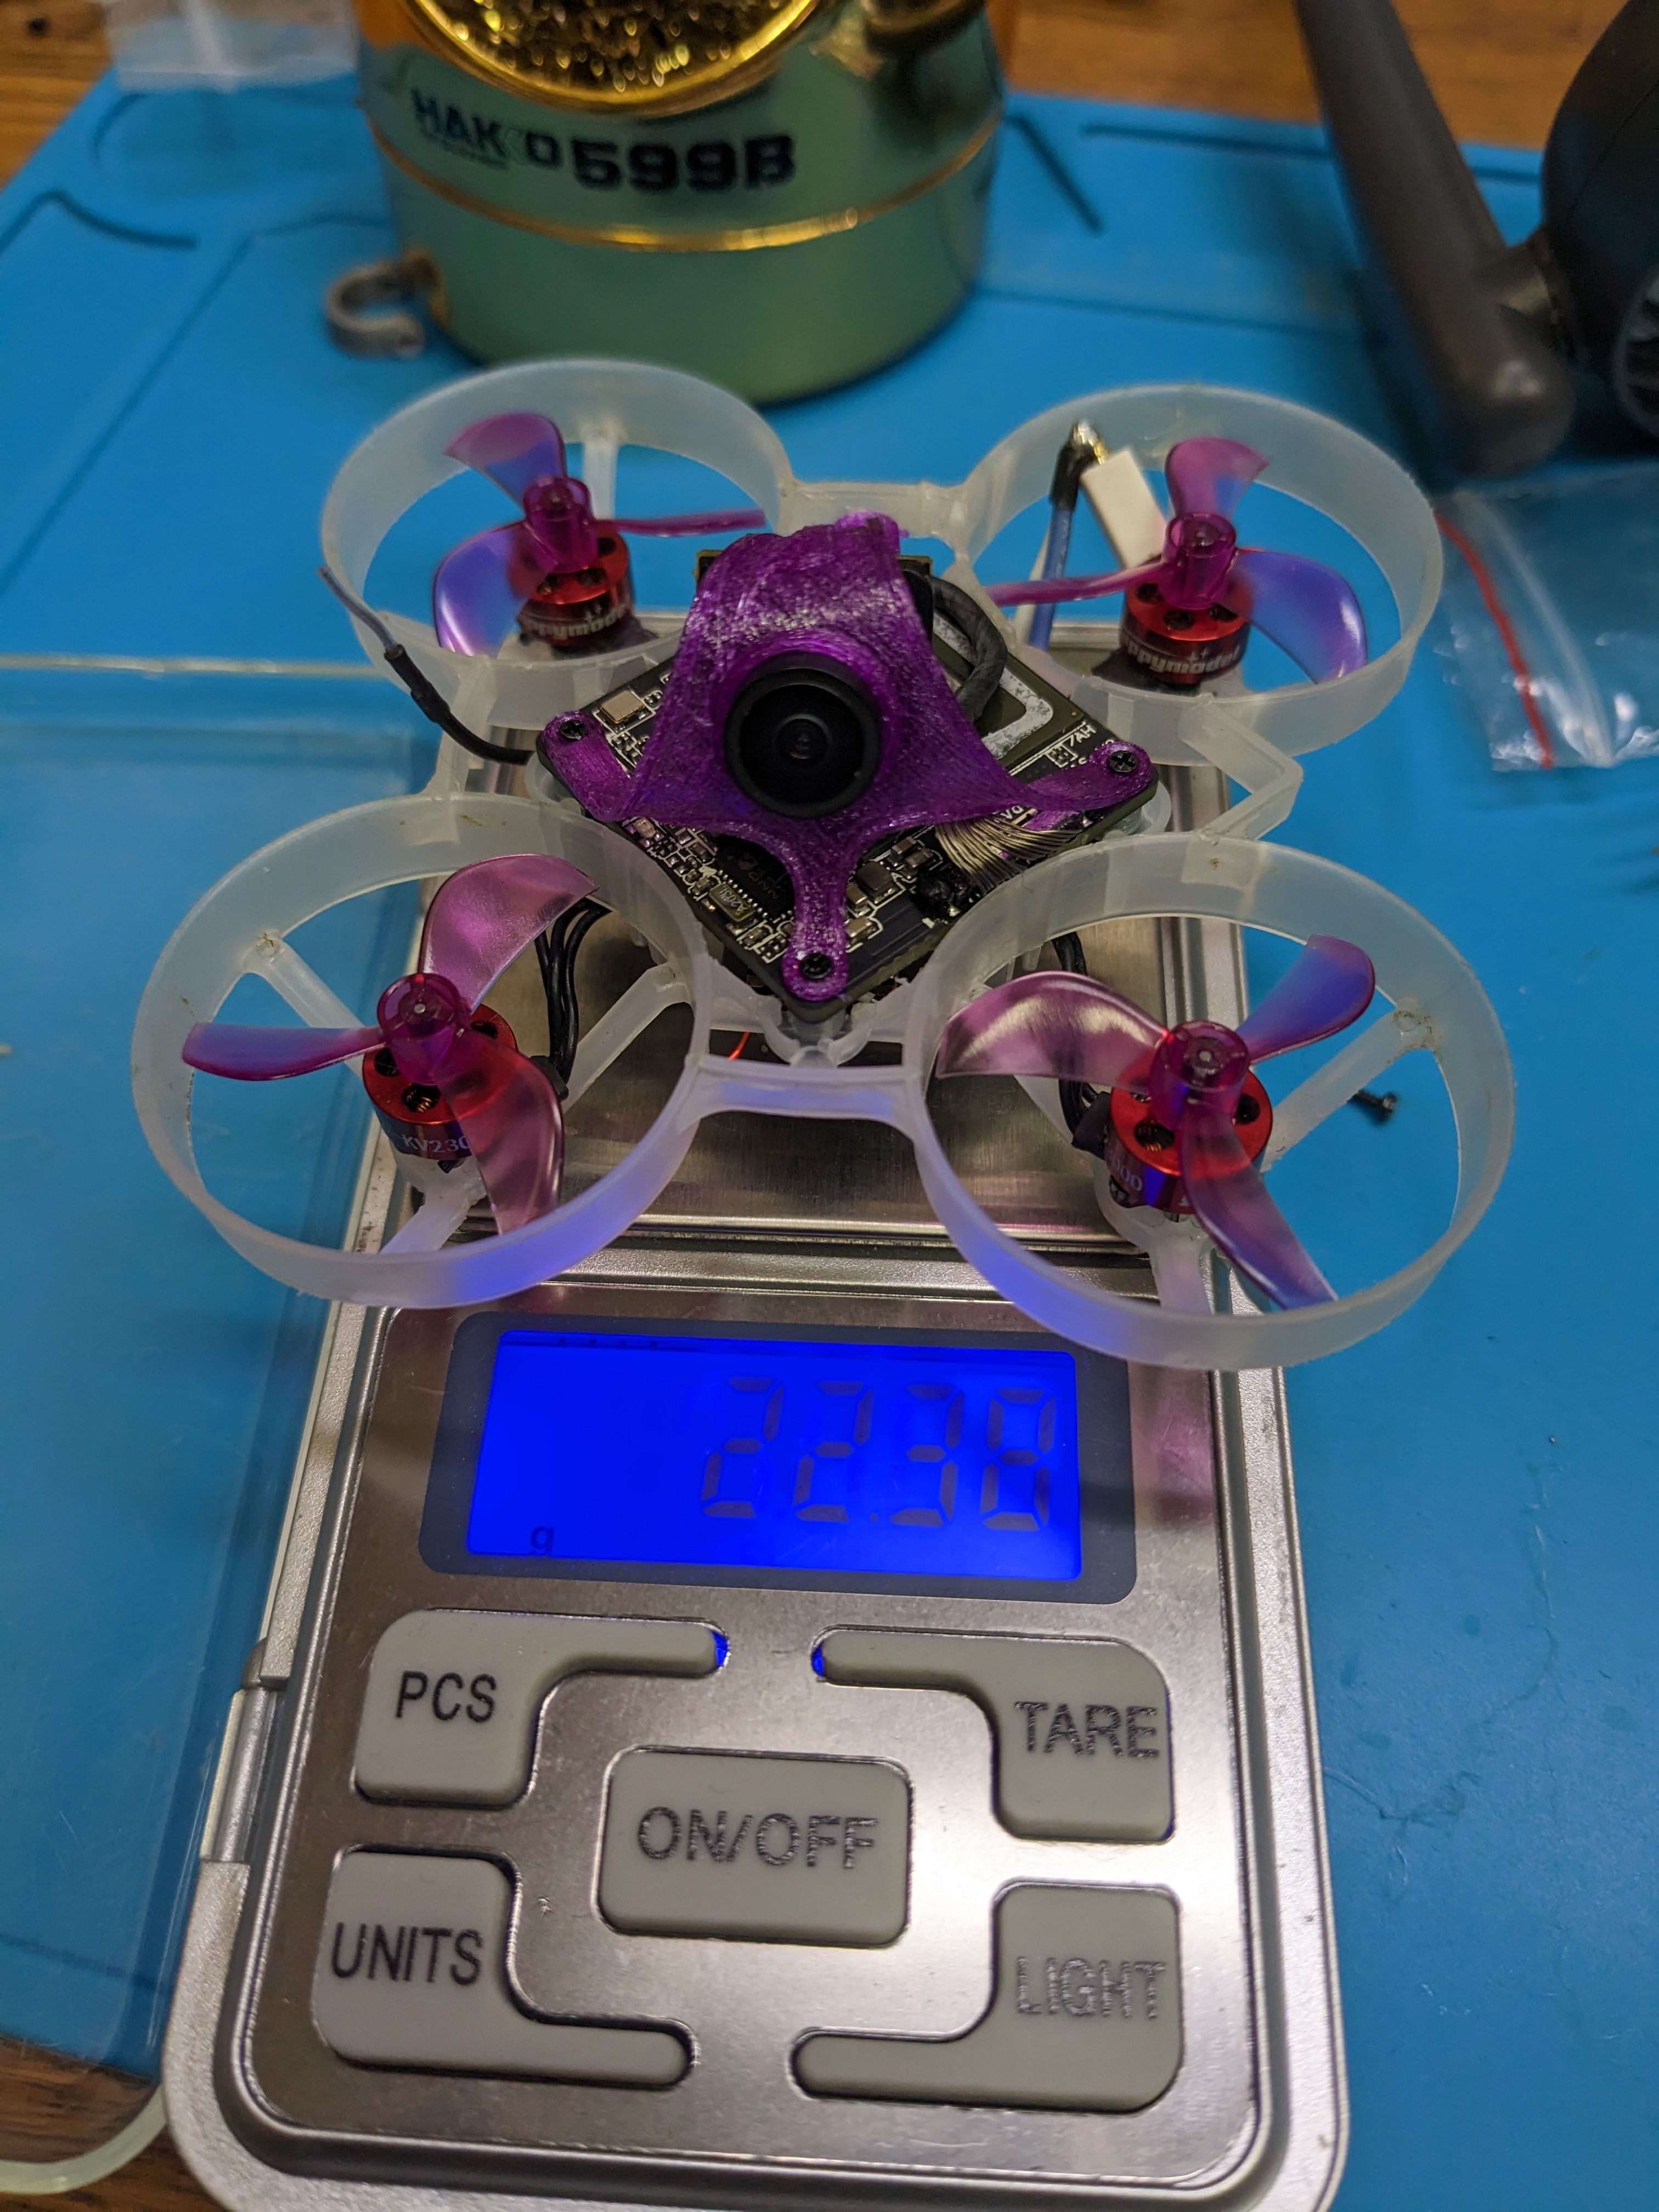
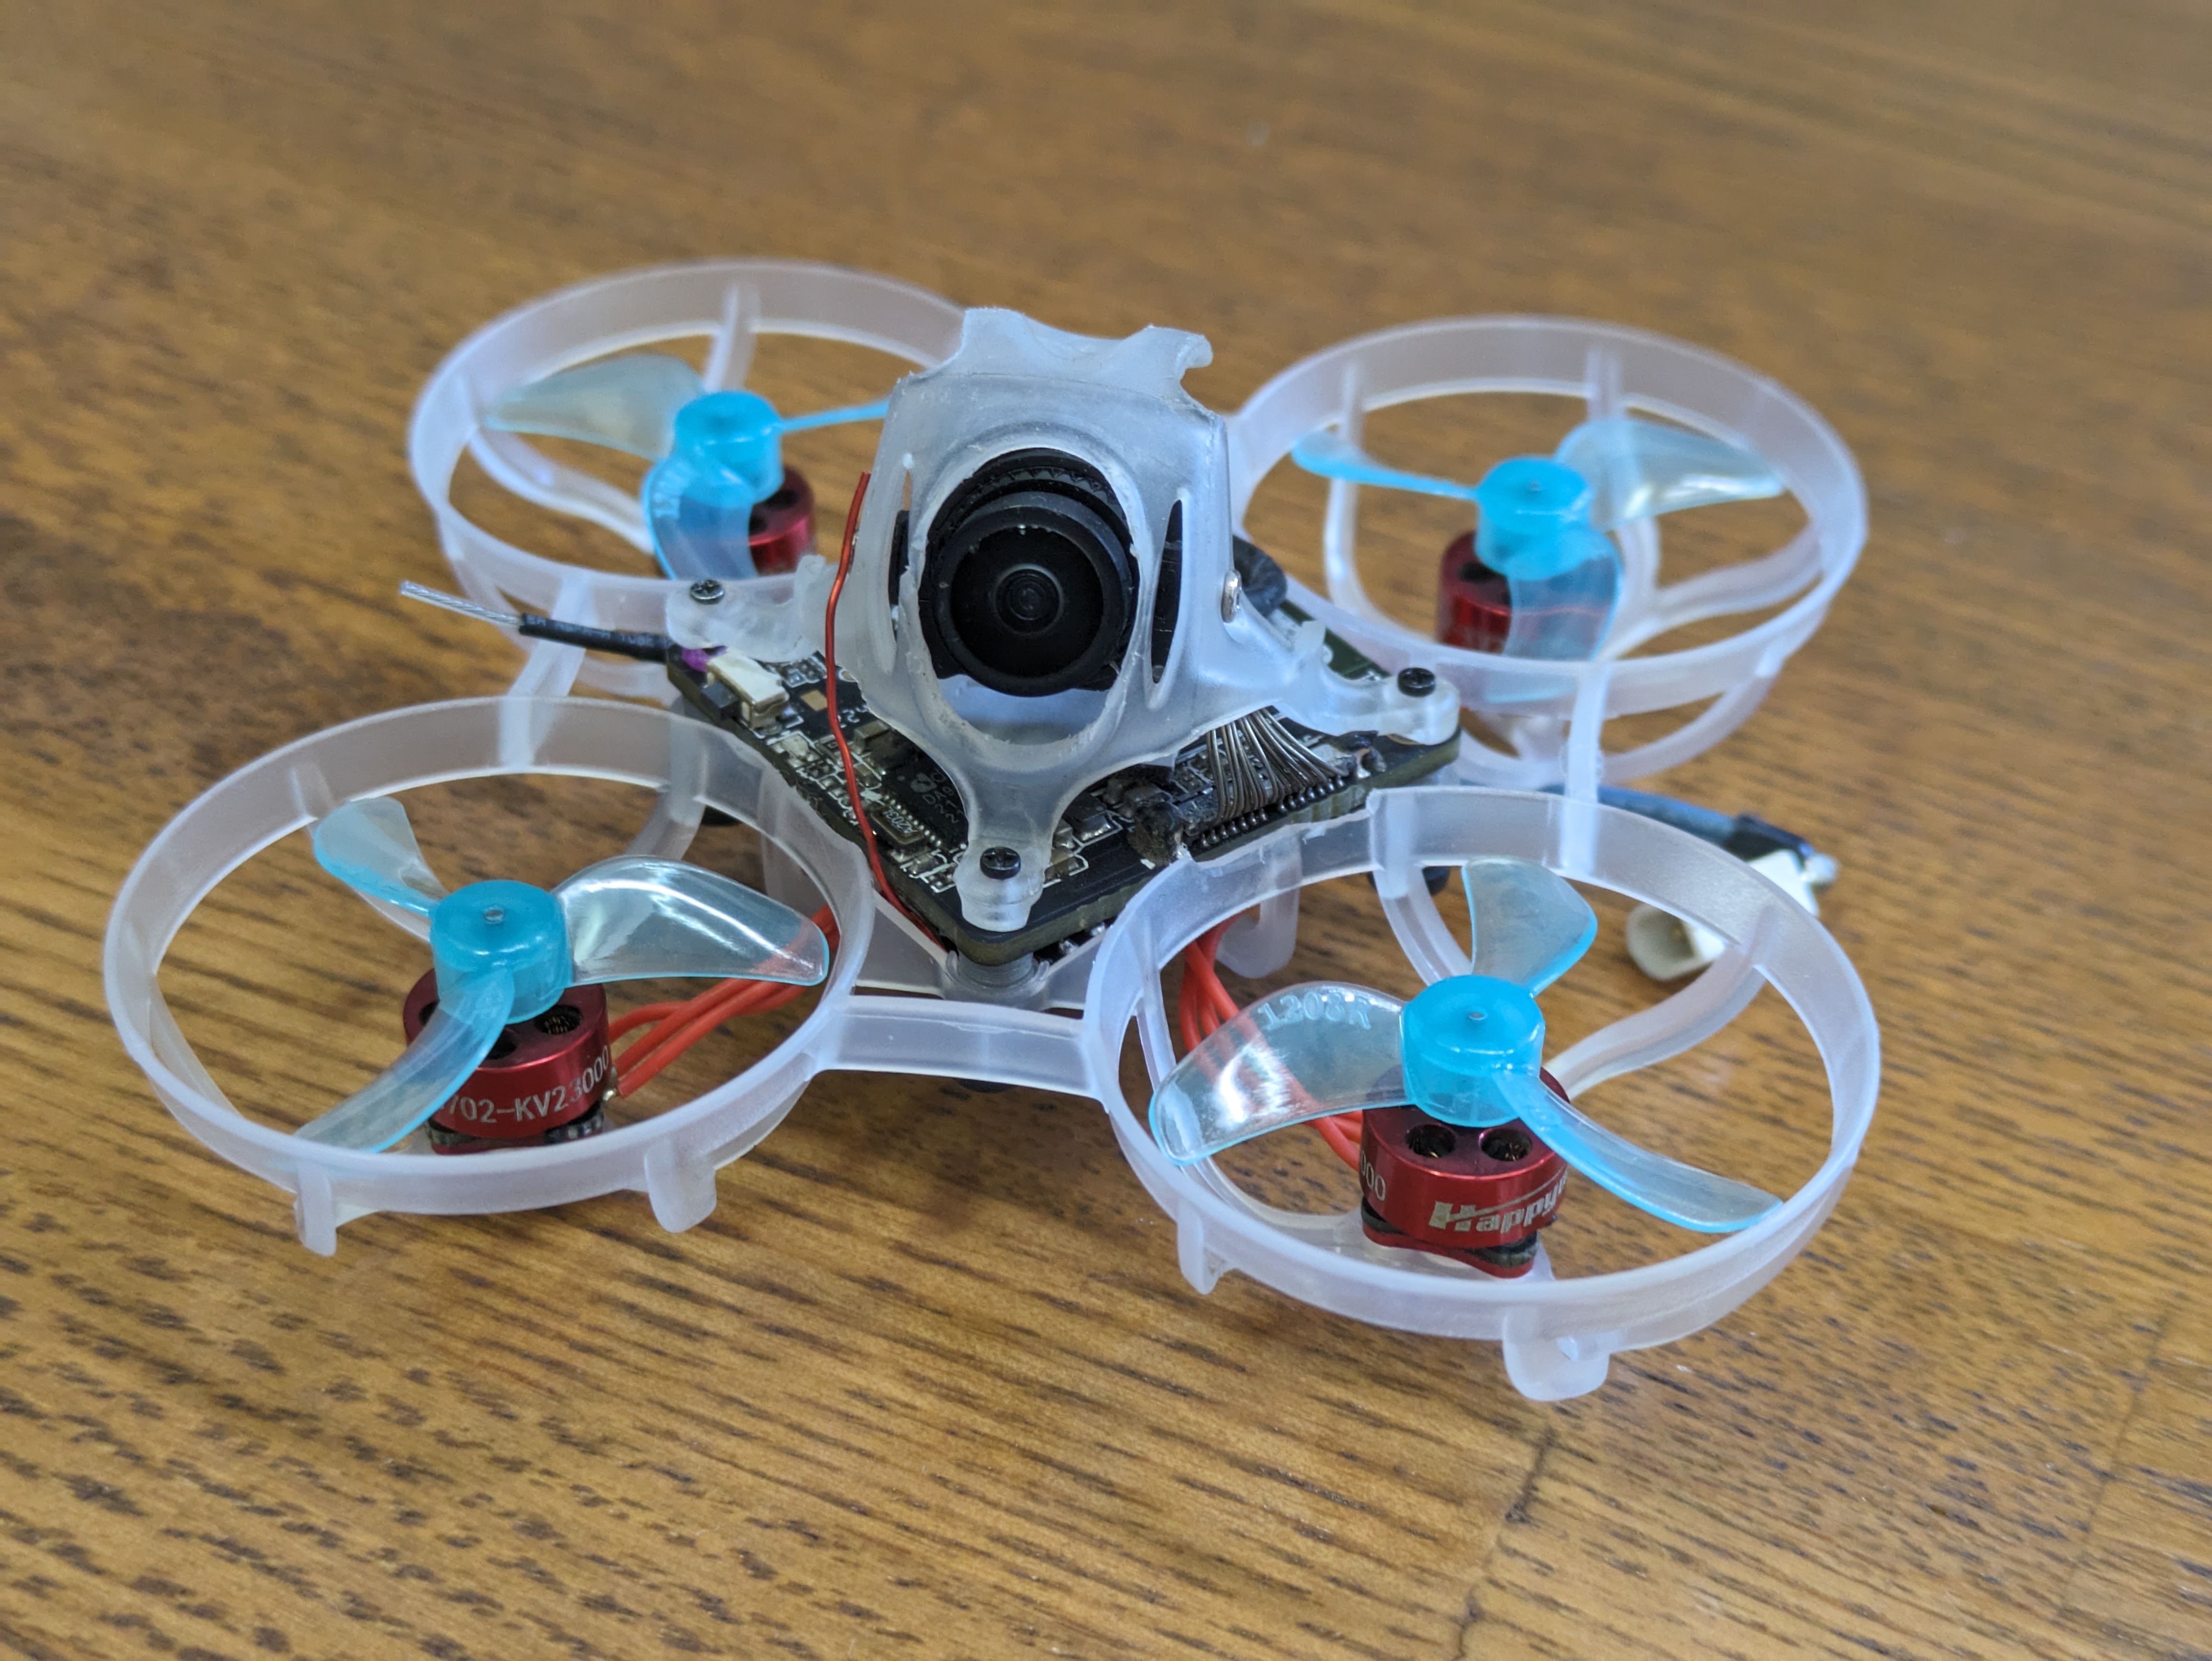
Following the Shutterbug build technique, with Mopatop's modification of Shutterbug's canopy, my build came out to 22.38g, which I think may be a record for Walksnail
-
But I wasnt a fan of the soft canopy and the pressure that puts on the FC when i crash. So, I made a holder to mount the 1s lite camera in the Mobula6 HDZ canopy (lightest hard shell canopy out there I believe). My camera holder https://www.printables.com/model/419828-walksnail-1s-lite-nano-mount-adapter weighs 0.19g and holds the camera super snug. My advice is to put it on straight after printing while it is still warm. Once it has cooled it will be very hard to get on with TPU 95A. Overall this added half a gram but peace of mind is priceless.
- I am using m1.2x5mm screws for the canopy (link below). This is the size used by the Mobula6 and they are super light. Big fat headed screws do weigh a lot more, so dont forget to take care of these little details!
It should be possible to get even lighter (under 22g?!) with Betafpv's Meteor65 Air frame and their 0702SE motors, and a Superbee F4 flight controller. However, flight times may suffer due to the higher KV. But since its all flying so well for me right now, i see no need to change it up. Feel free to beat my weight and show me the results!
UPDATE:
I have now changed to the Mobula6 2024 frame, and Superbee F4 lite flight controller (Betafpv FC had a gyro issue - couldnt fly angle mode), it saved a bit of weight but unfortunately there was no way of accessing the VTX USB port without cutting off the battery tray (due to the way that the MIPI cable comes out of the side of the board, it wont fit upside down - the only other option is the traditional tall stack build which would put the VTX past the ducts...)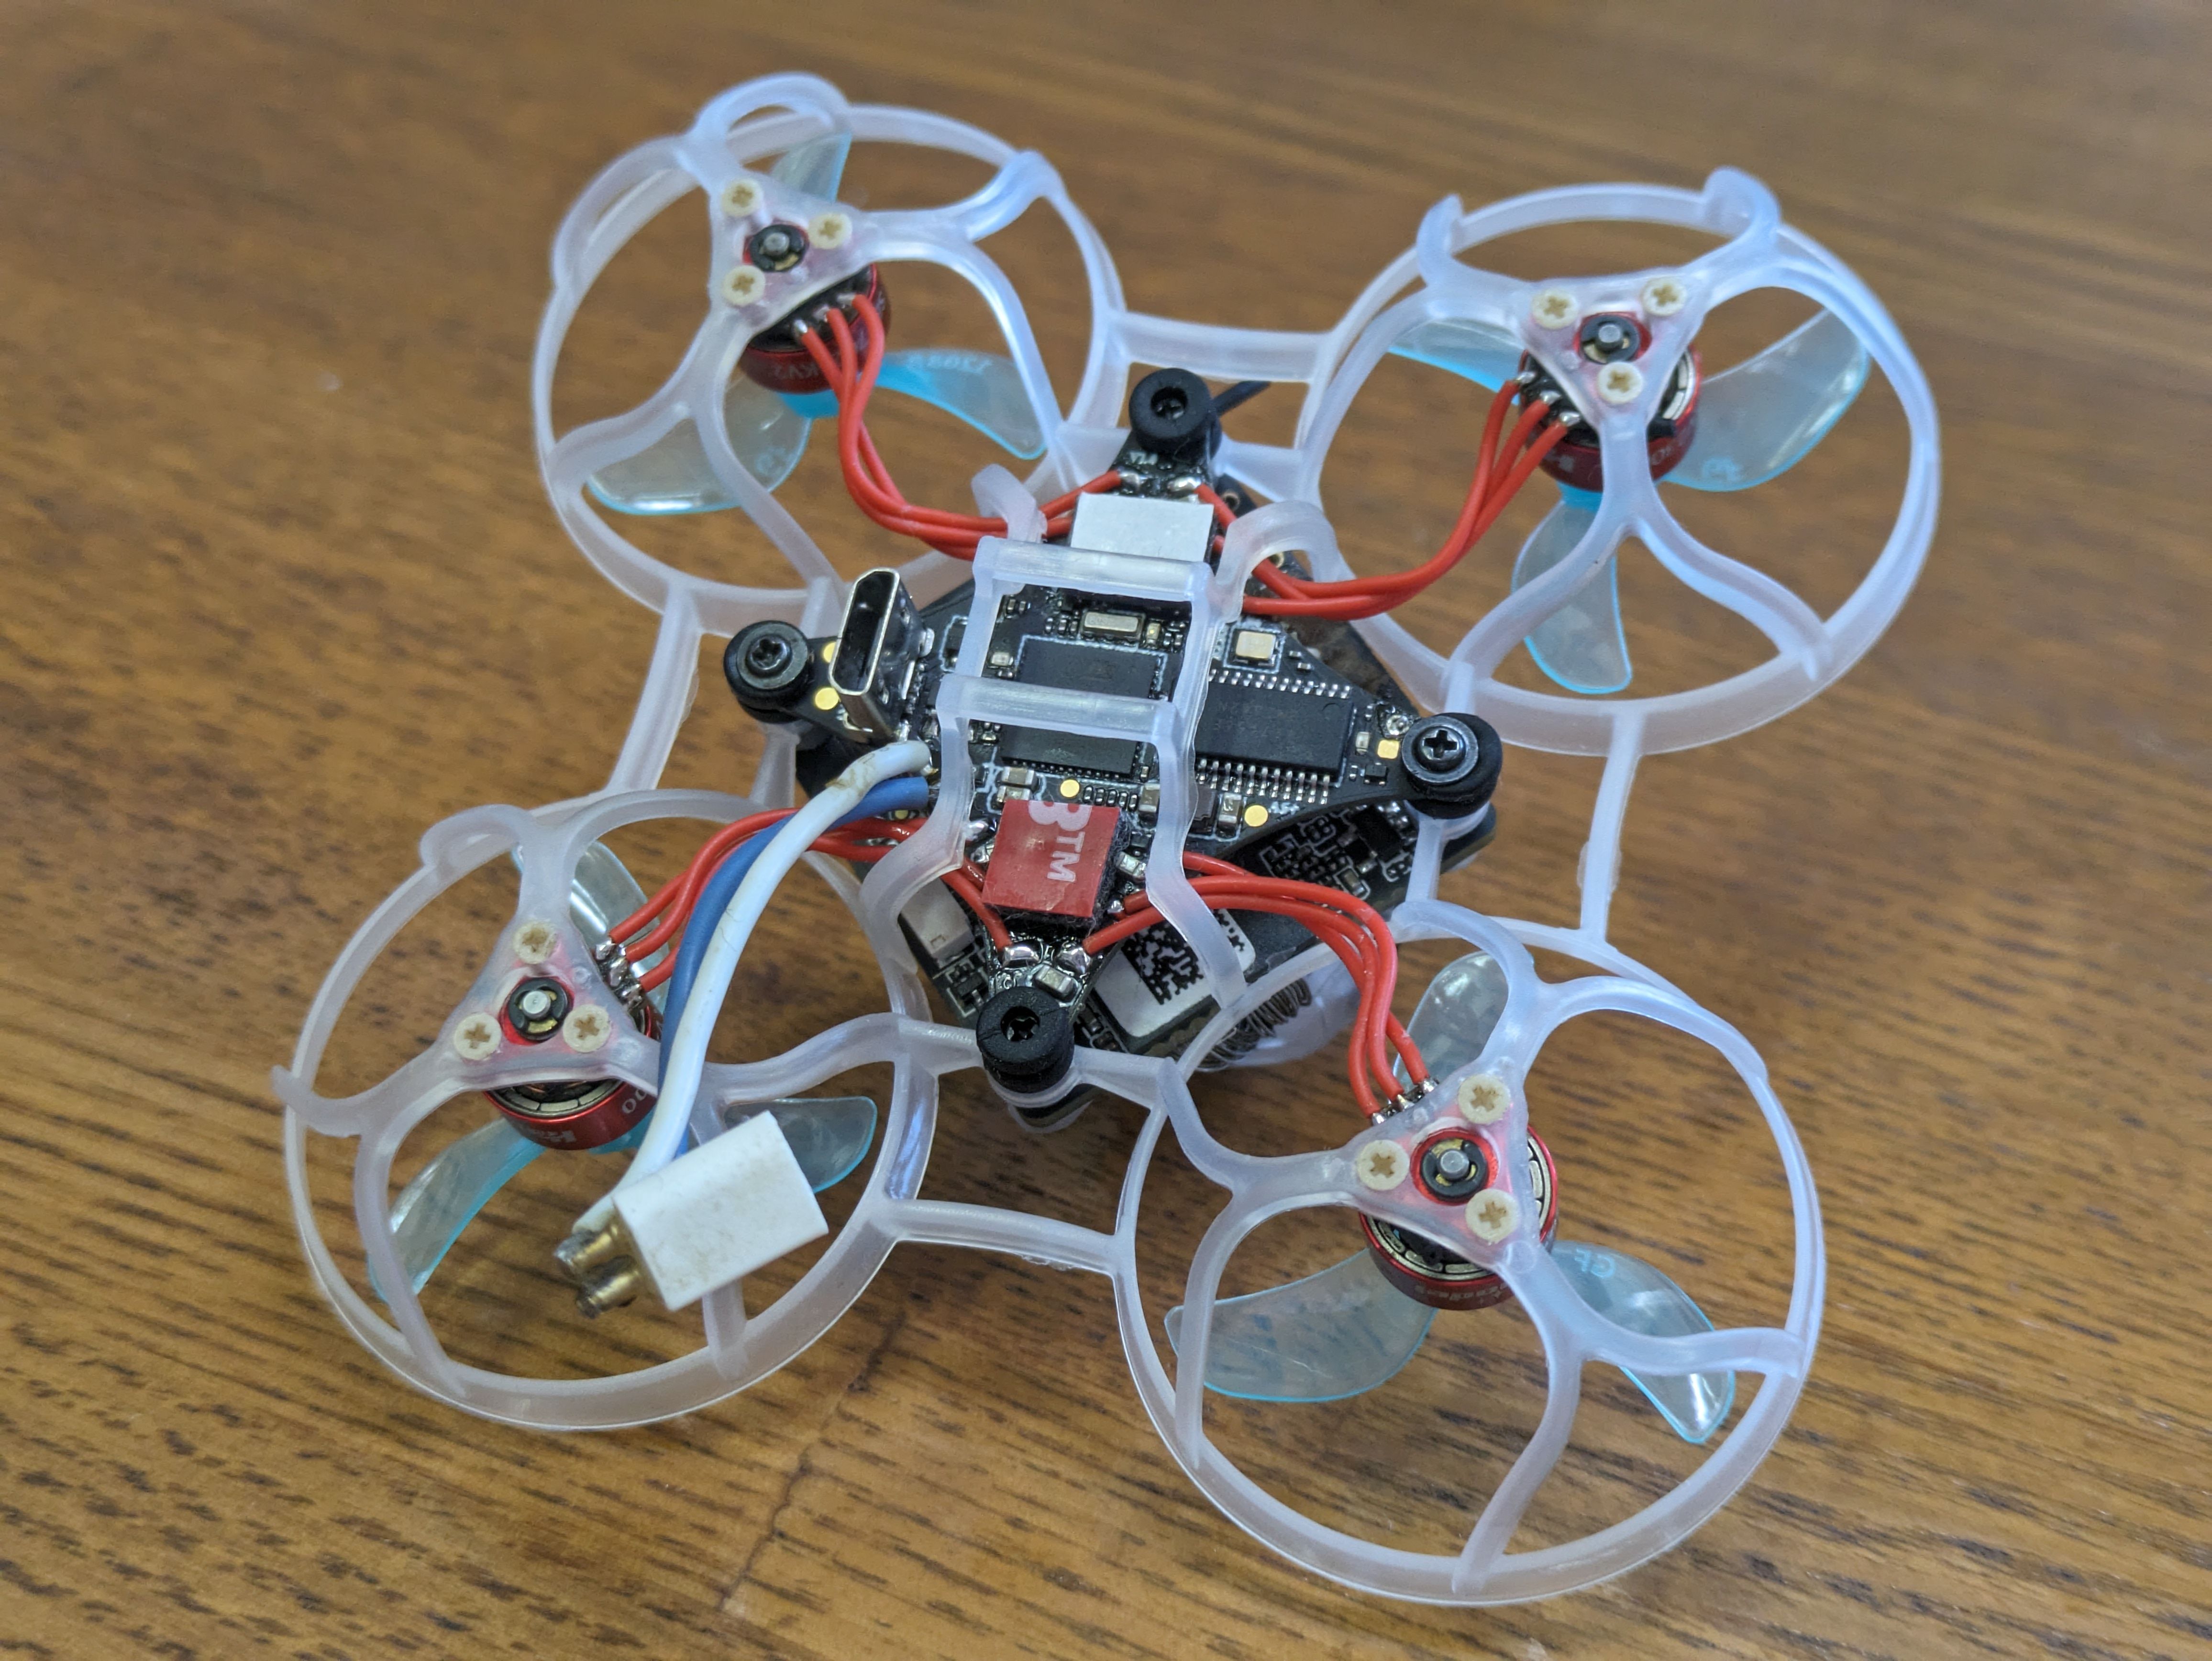
I made some cuts to the inner part of the ducts to clear the mipi cable as it is, and to ensure no pressure on the VTX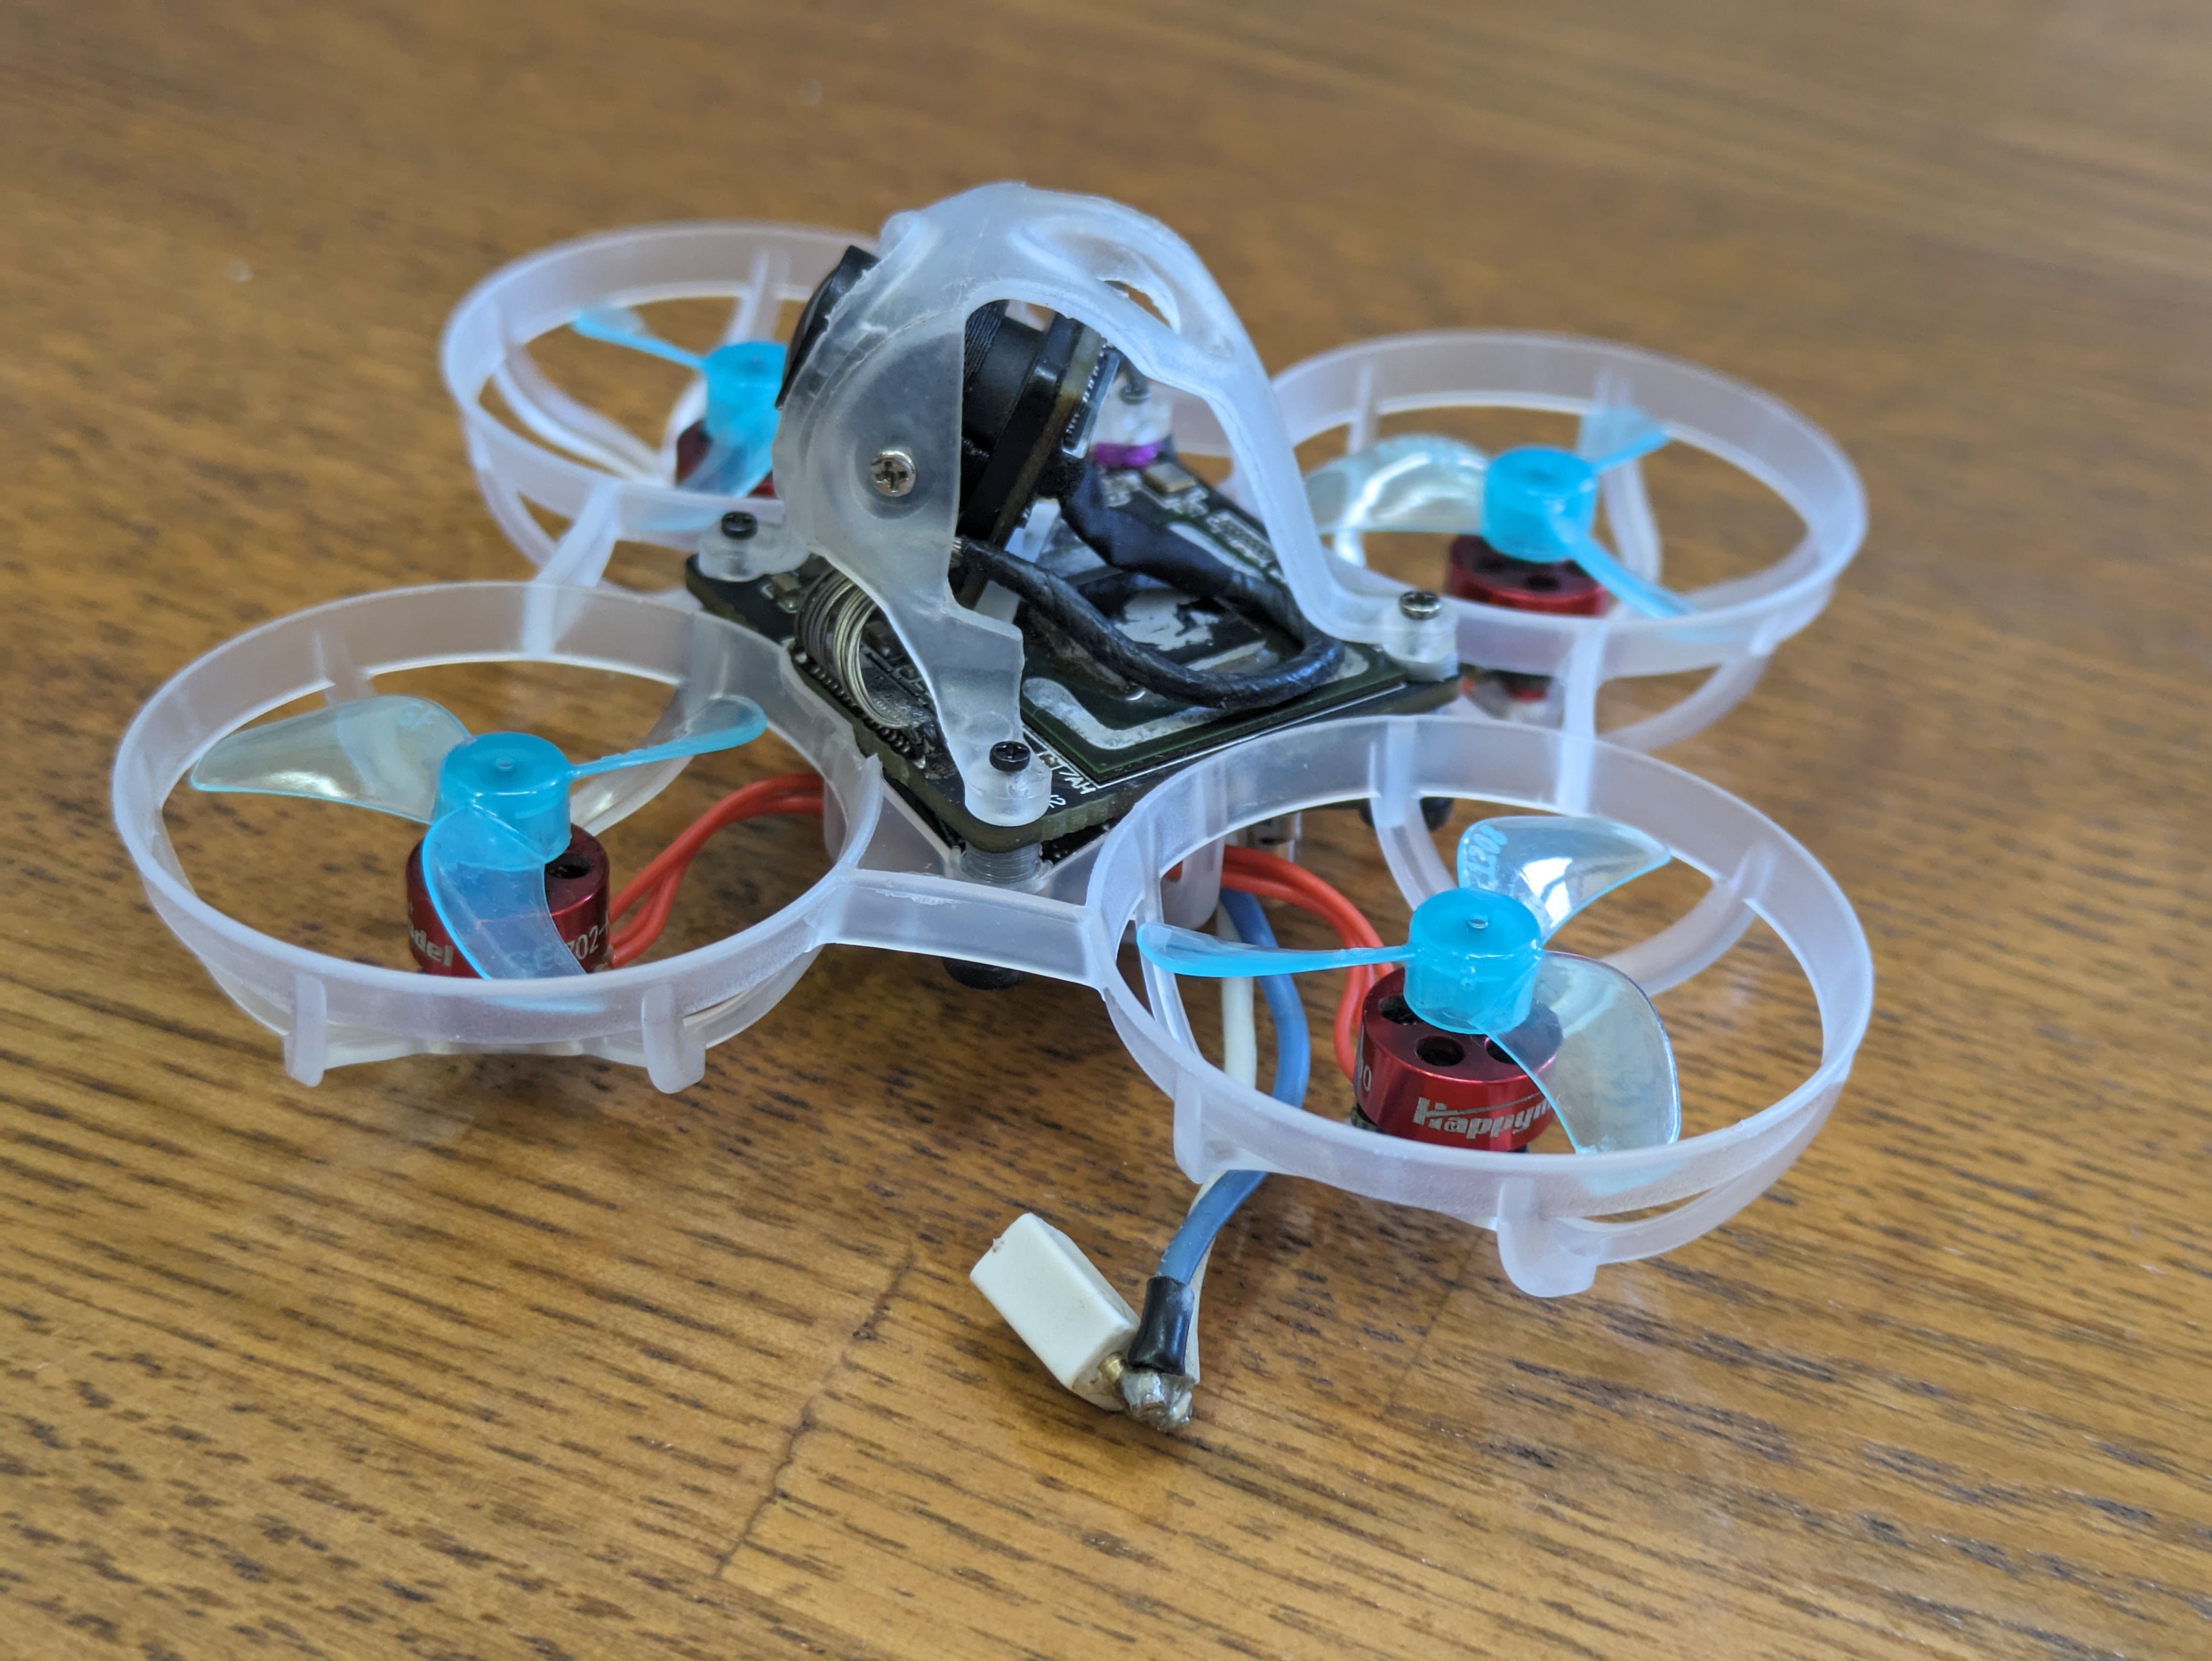
This time i soldered the motors on first, wires needed to be cut to the right length so i went with new red wires to match the bells ;)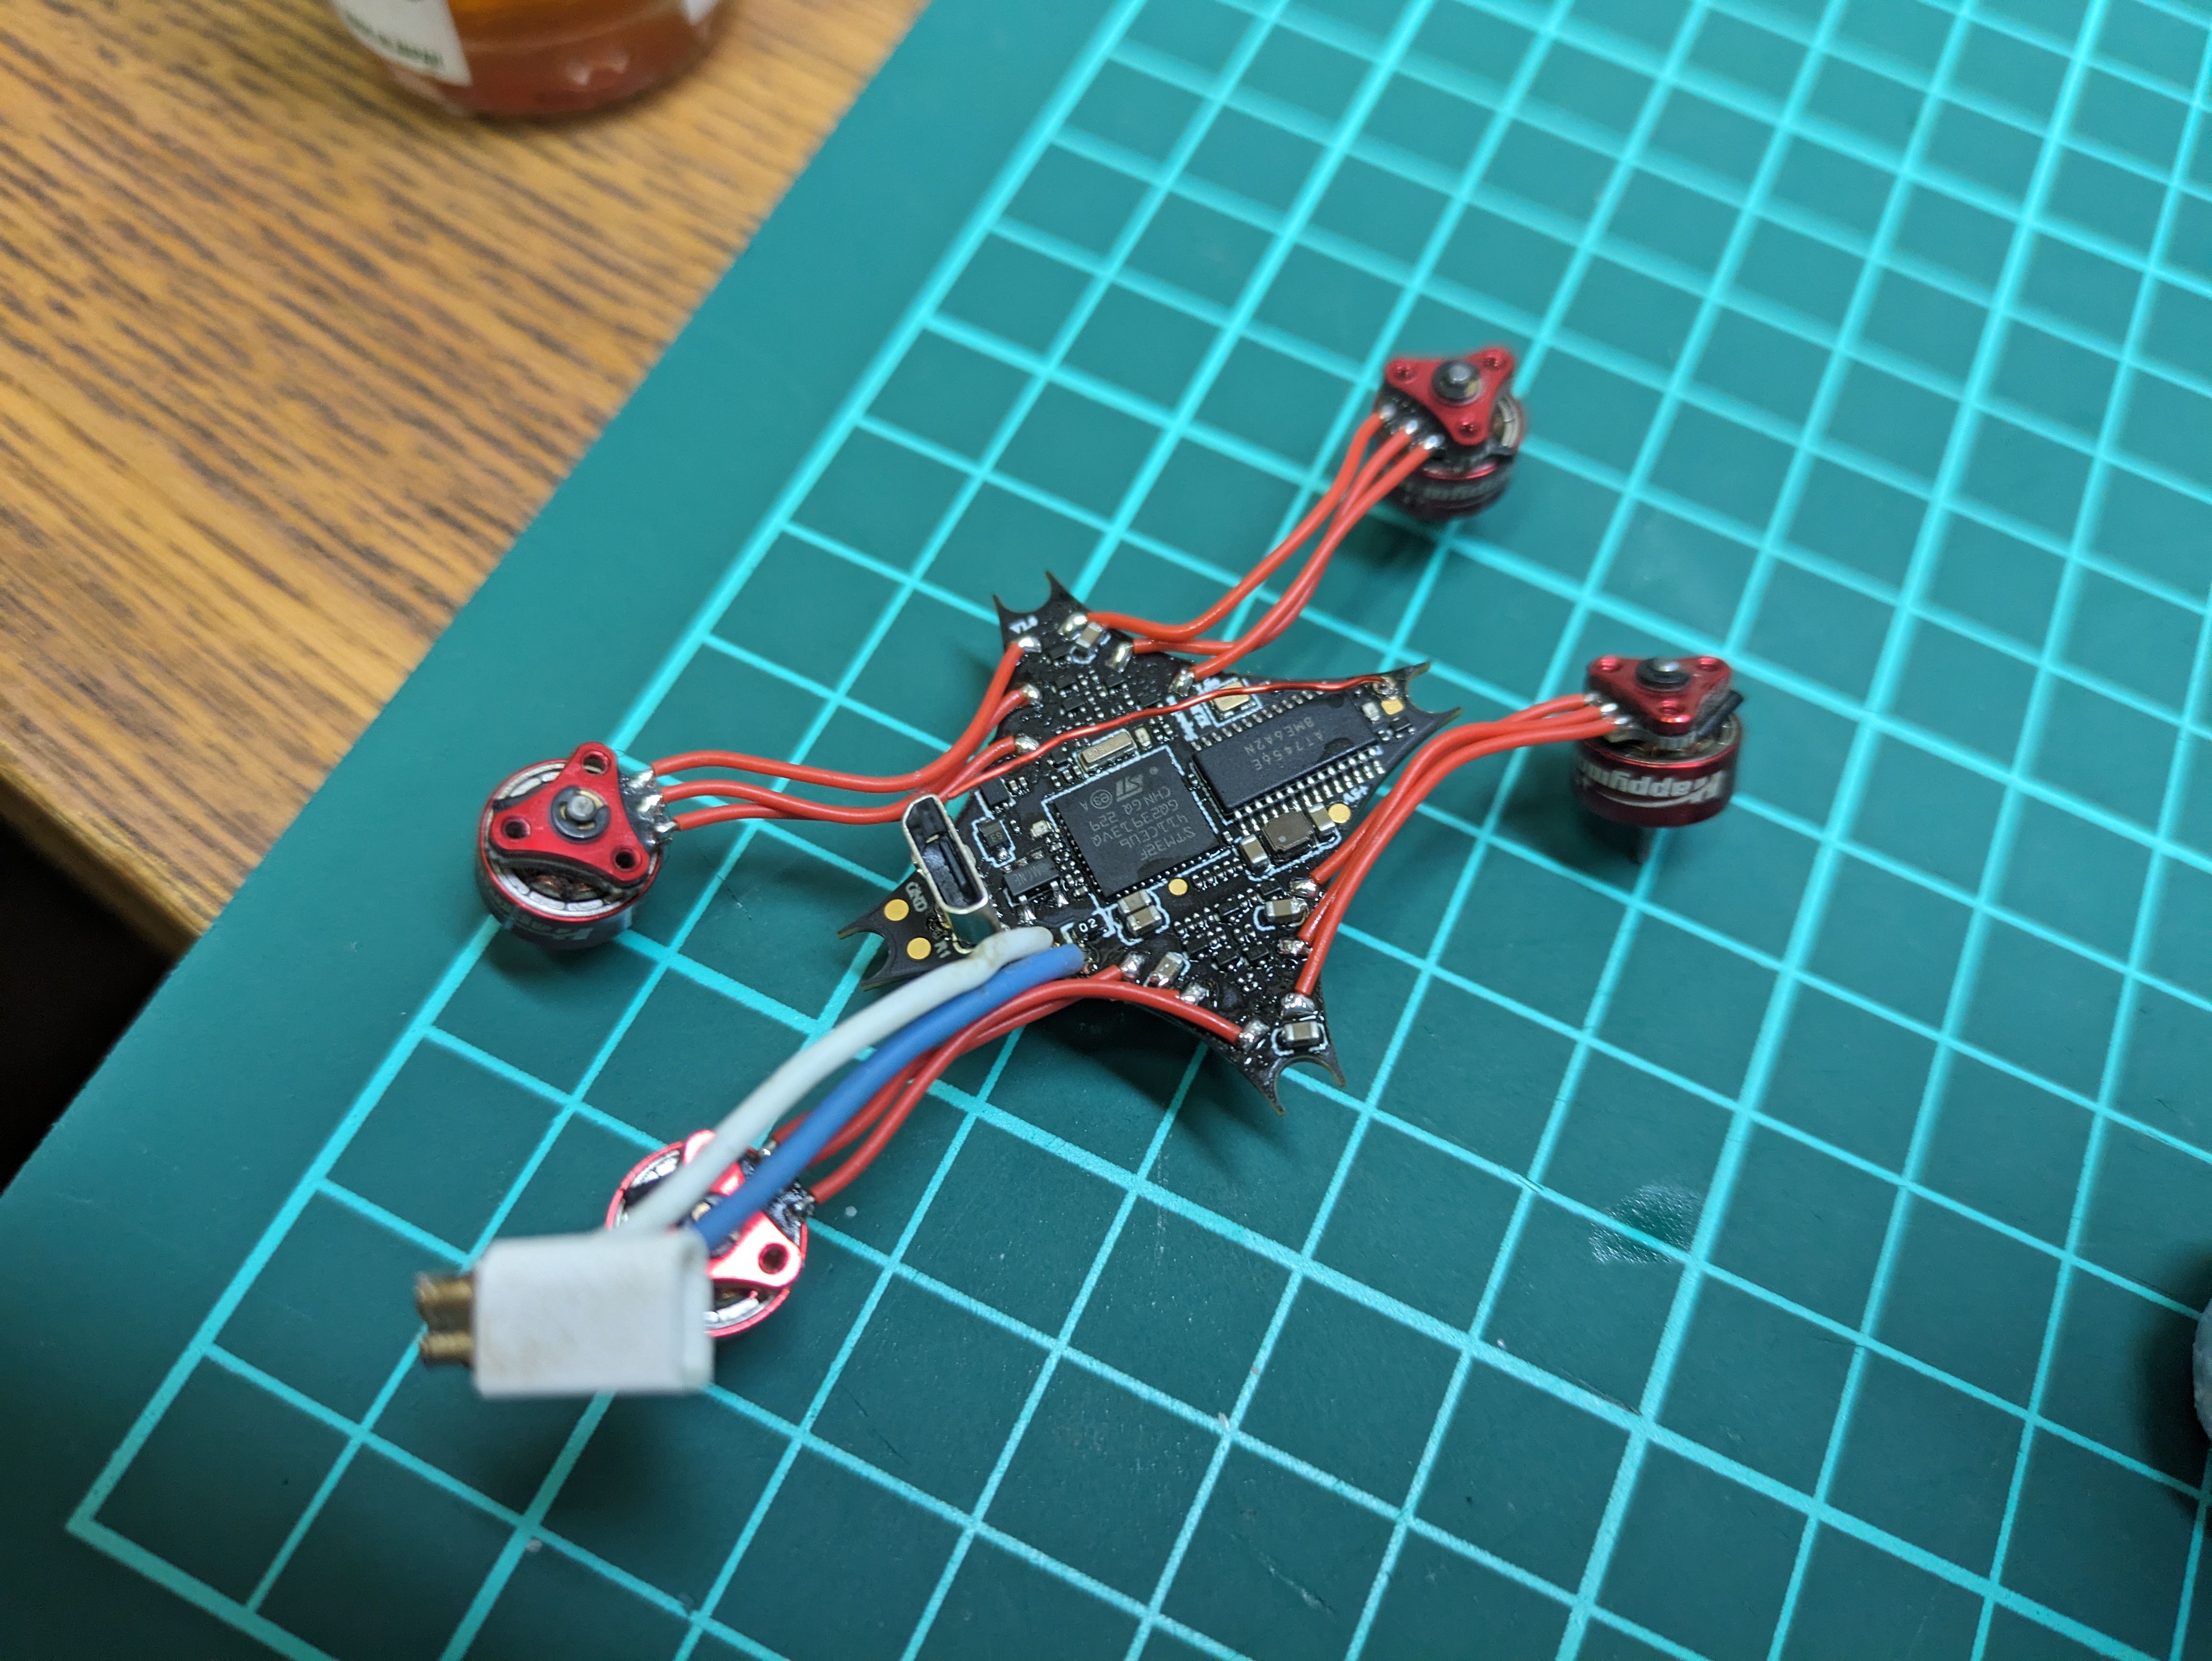
First flights:
But can it do acro? Yes.
More indoor acro
Photos
Part List
Frame |
JMT 65mm Bwhoop65 Frame Brushless Whoop Rack for Indoor FPV Racing Drone RC Quadcopter Aircraft
Xt-xinte.com
|
$2.34 |
Flight Controller |
BETAFPV F4 1S 5A AIO Brushless Flight Controller With SPI ExpressLRS 2.4G Receiver For RC FPV Racing Drone
Xt-xinte.com
|
$31.67 |
Motors |
4 x Happymodel SE0702 1S Brushless Motor 23000KV 26000KV 28000KV 1mm Motor Shaft For FPV Drone
(6 builds)
Xt-xinte.com
|
$24.36 |
Propellers |
NewBeeDrone Azi (Tri Blade) Micro Propellers 31mm - 1.0mm Shaft (4CCW+4CW)
(5 builds)
Newbeedrone.com
|
$2.99 |
FPV Transmitter |
Kit Avatar HD Mini 1S Lite - Walksnail
(4 builds)
Drone-fpv-racer.com
|
See Site |
Batteries |
Tattu 300mAh 3.8V HV 75C 1S1P LiPo Battery Pack With BT 2.0 Plug - 5PCS
(6 builds)
Pyrodrone.com
|
$24.00 |
3D Printed |
This site requires JavaScript enabled
Printables.com
|
See Site |
Hardware |
Reinforced Nylon Lightweight Replacement Screw Set (RENY)
(6 builds)
Tinywhoop.com
|
$4.99 |
Hardware |
Mini Self-tapping Screws
(2 builds)
Aliexpress.com
|
$0.99 |
Hi. I build a very similar whoop right now. But the vtx is a little bit to wide for the meteor air frame. Did you have the same problem with your frame? And does the vtx already do his work without the metal part?
greets Arni
Yeah i bought a few of the Meteor65 Air frames too, and found the same issue. Unfortunately that frame is not suitable for this style of build (It does not have enough room under the frame for the FC either). Same goes for the original Meteor65 frame. And the Meteor65 Pro will fit the FC underneath, but then the VTX does not fit in the FC area... Hence my comment that it needs to be the Mobula6 frame.
And actually Newbeedrone just released the V3 of their 65mm cockroach frame... 2.89g, and it was specifically built for this dual stack build style. I am excited to try that when my local shops start selling it. I actually think sub-20g might even be possible now....
Guides & Reviews
AirbladeUAV has done it again and this time they've brought long range to the 5" class! Based on the popular Transformer Mini, the new Transformer 5" Ultralight adopts a lot of the same design philosophies with larger props and more payload capacity. It can fly upwards of 20 minutes on a 4 cell Li-Ion battery pack and in ideal conditions it's got a range of over 4 to 5 miles. In this guide I'll walk..
Read moreWith the release of the DJI FPV Drone cinematic FPV has become a lot more accessible, but you certainly don't want to crash a $750 drone! The QAV-CINE Freybott is a compact, lightweight cinematic FPV drone that can take a hit and keep going. It's a lot safer to fly indoors and around people. With a naked GoPro or the SMO 4k you can capture some great stabilized footage. In this guide I'll show you..
Read more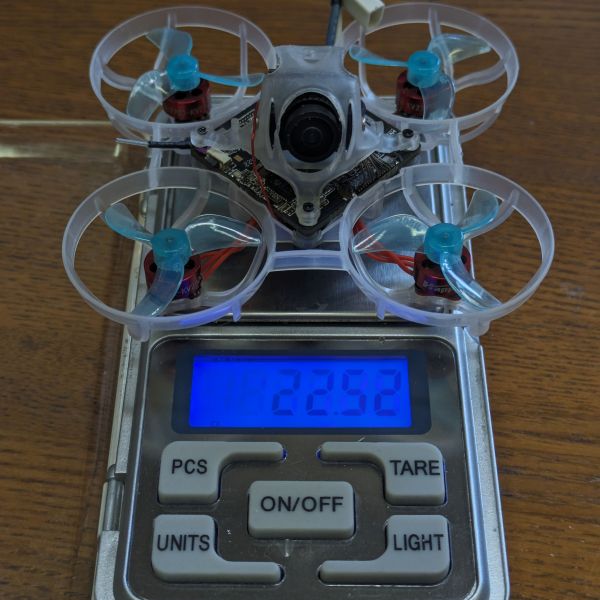


Do you find the 3800kv plenty powerful for freestyle? I am planning a build similar to this but can't decide between 3800kv or 4600kv. It'll mostly be for cinematic and long range purposes, but would be nice to freestyle as well.