
Update[June 1, 2024]: Kits from CNCMadness will include M2x16mm screws which will be enough for digital builds! I've added some new pictures of a friend's walksnail build here and there are reference photos in the product page of CNCMadness.
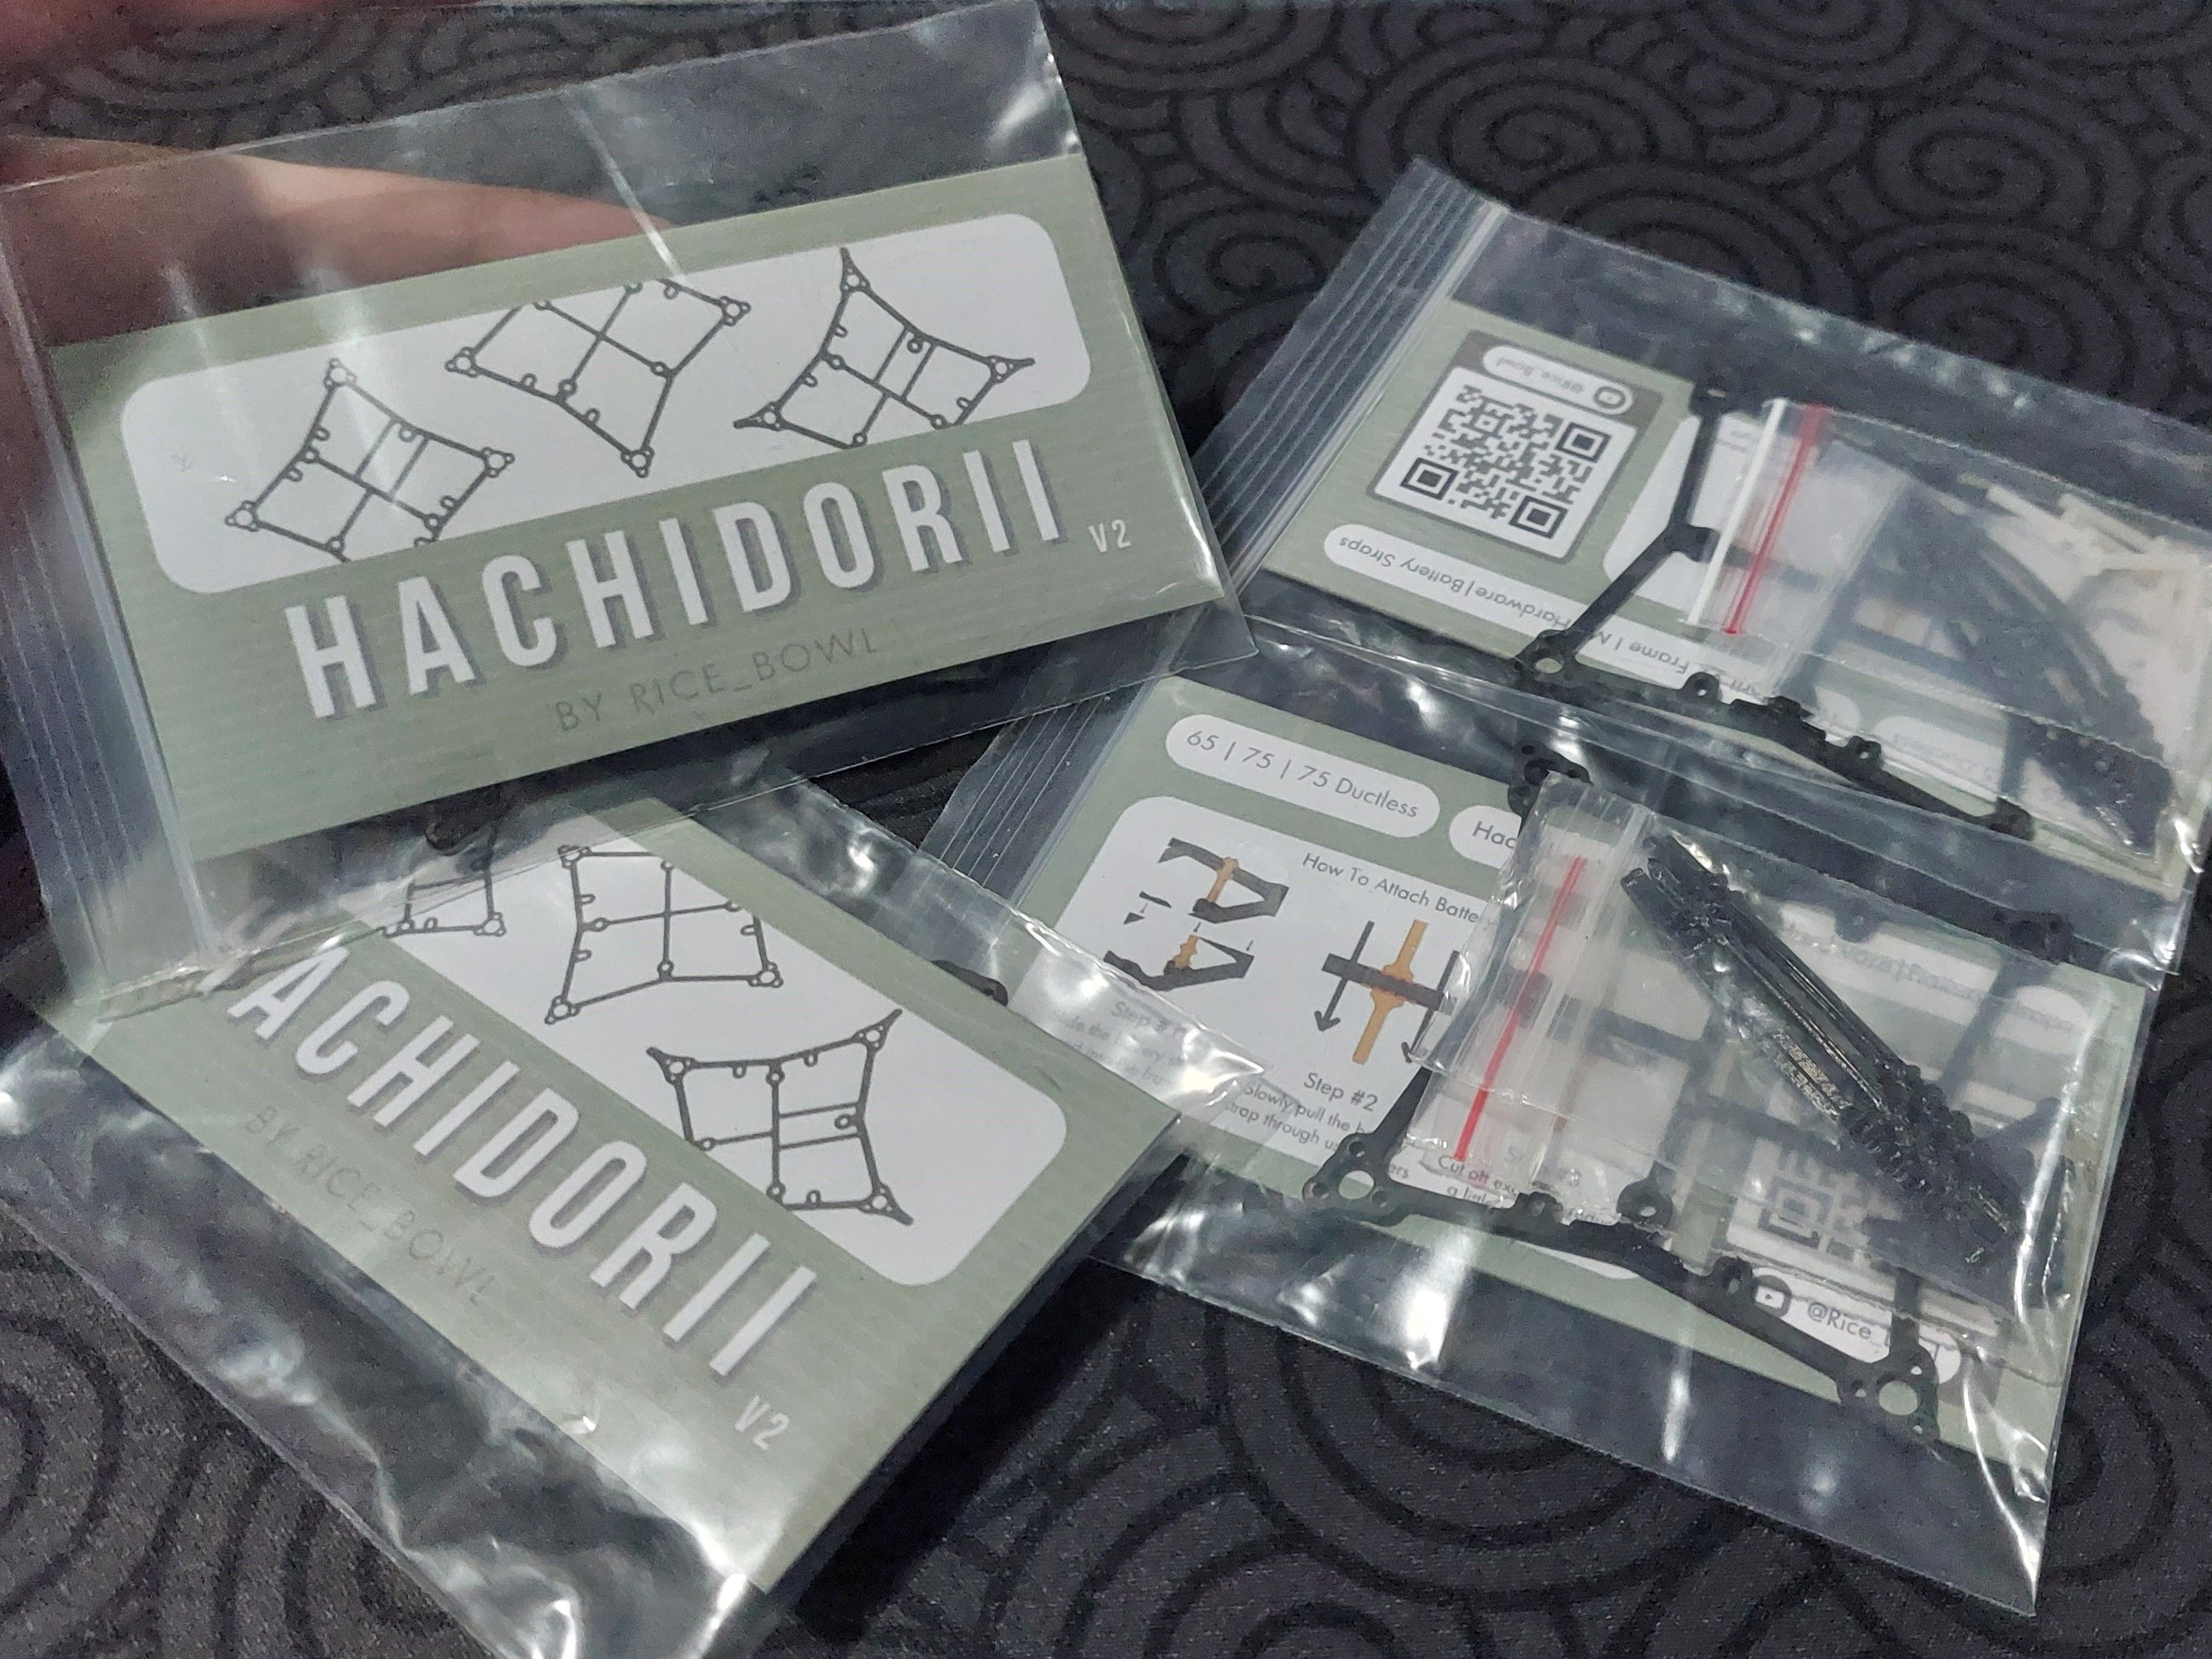
Update [June 1, 2024]: The Hachidorii V2 is officially released! It's available in https://cncdrones.com/hachidorii-v2.html. Kit only comes with M2 hardware and the frame so please refer to the Thingiverse link for the necessary TPU/PLA 3D prints https://www.thingiverse.com/thing:6630364
Update [May 17, 2024]: I am currently talking to CNC Madness and they are going too put my frame in their website! Its going to be available to US and Canada very soon! Just working out a write up and a few more things.
Update [May 19, 2024]: Please note that CNCMadness' frames will likely be slightly lighter (around 0.2g - 0.4g lighter) given the quality of their carbon fiber sheets. The weights shown here reflects the weight of somewhat average carbon fiber sheets that I used for testing.
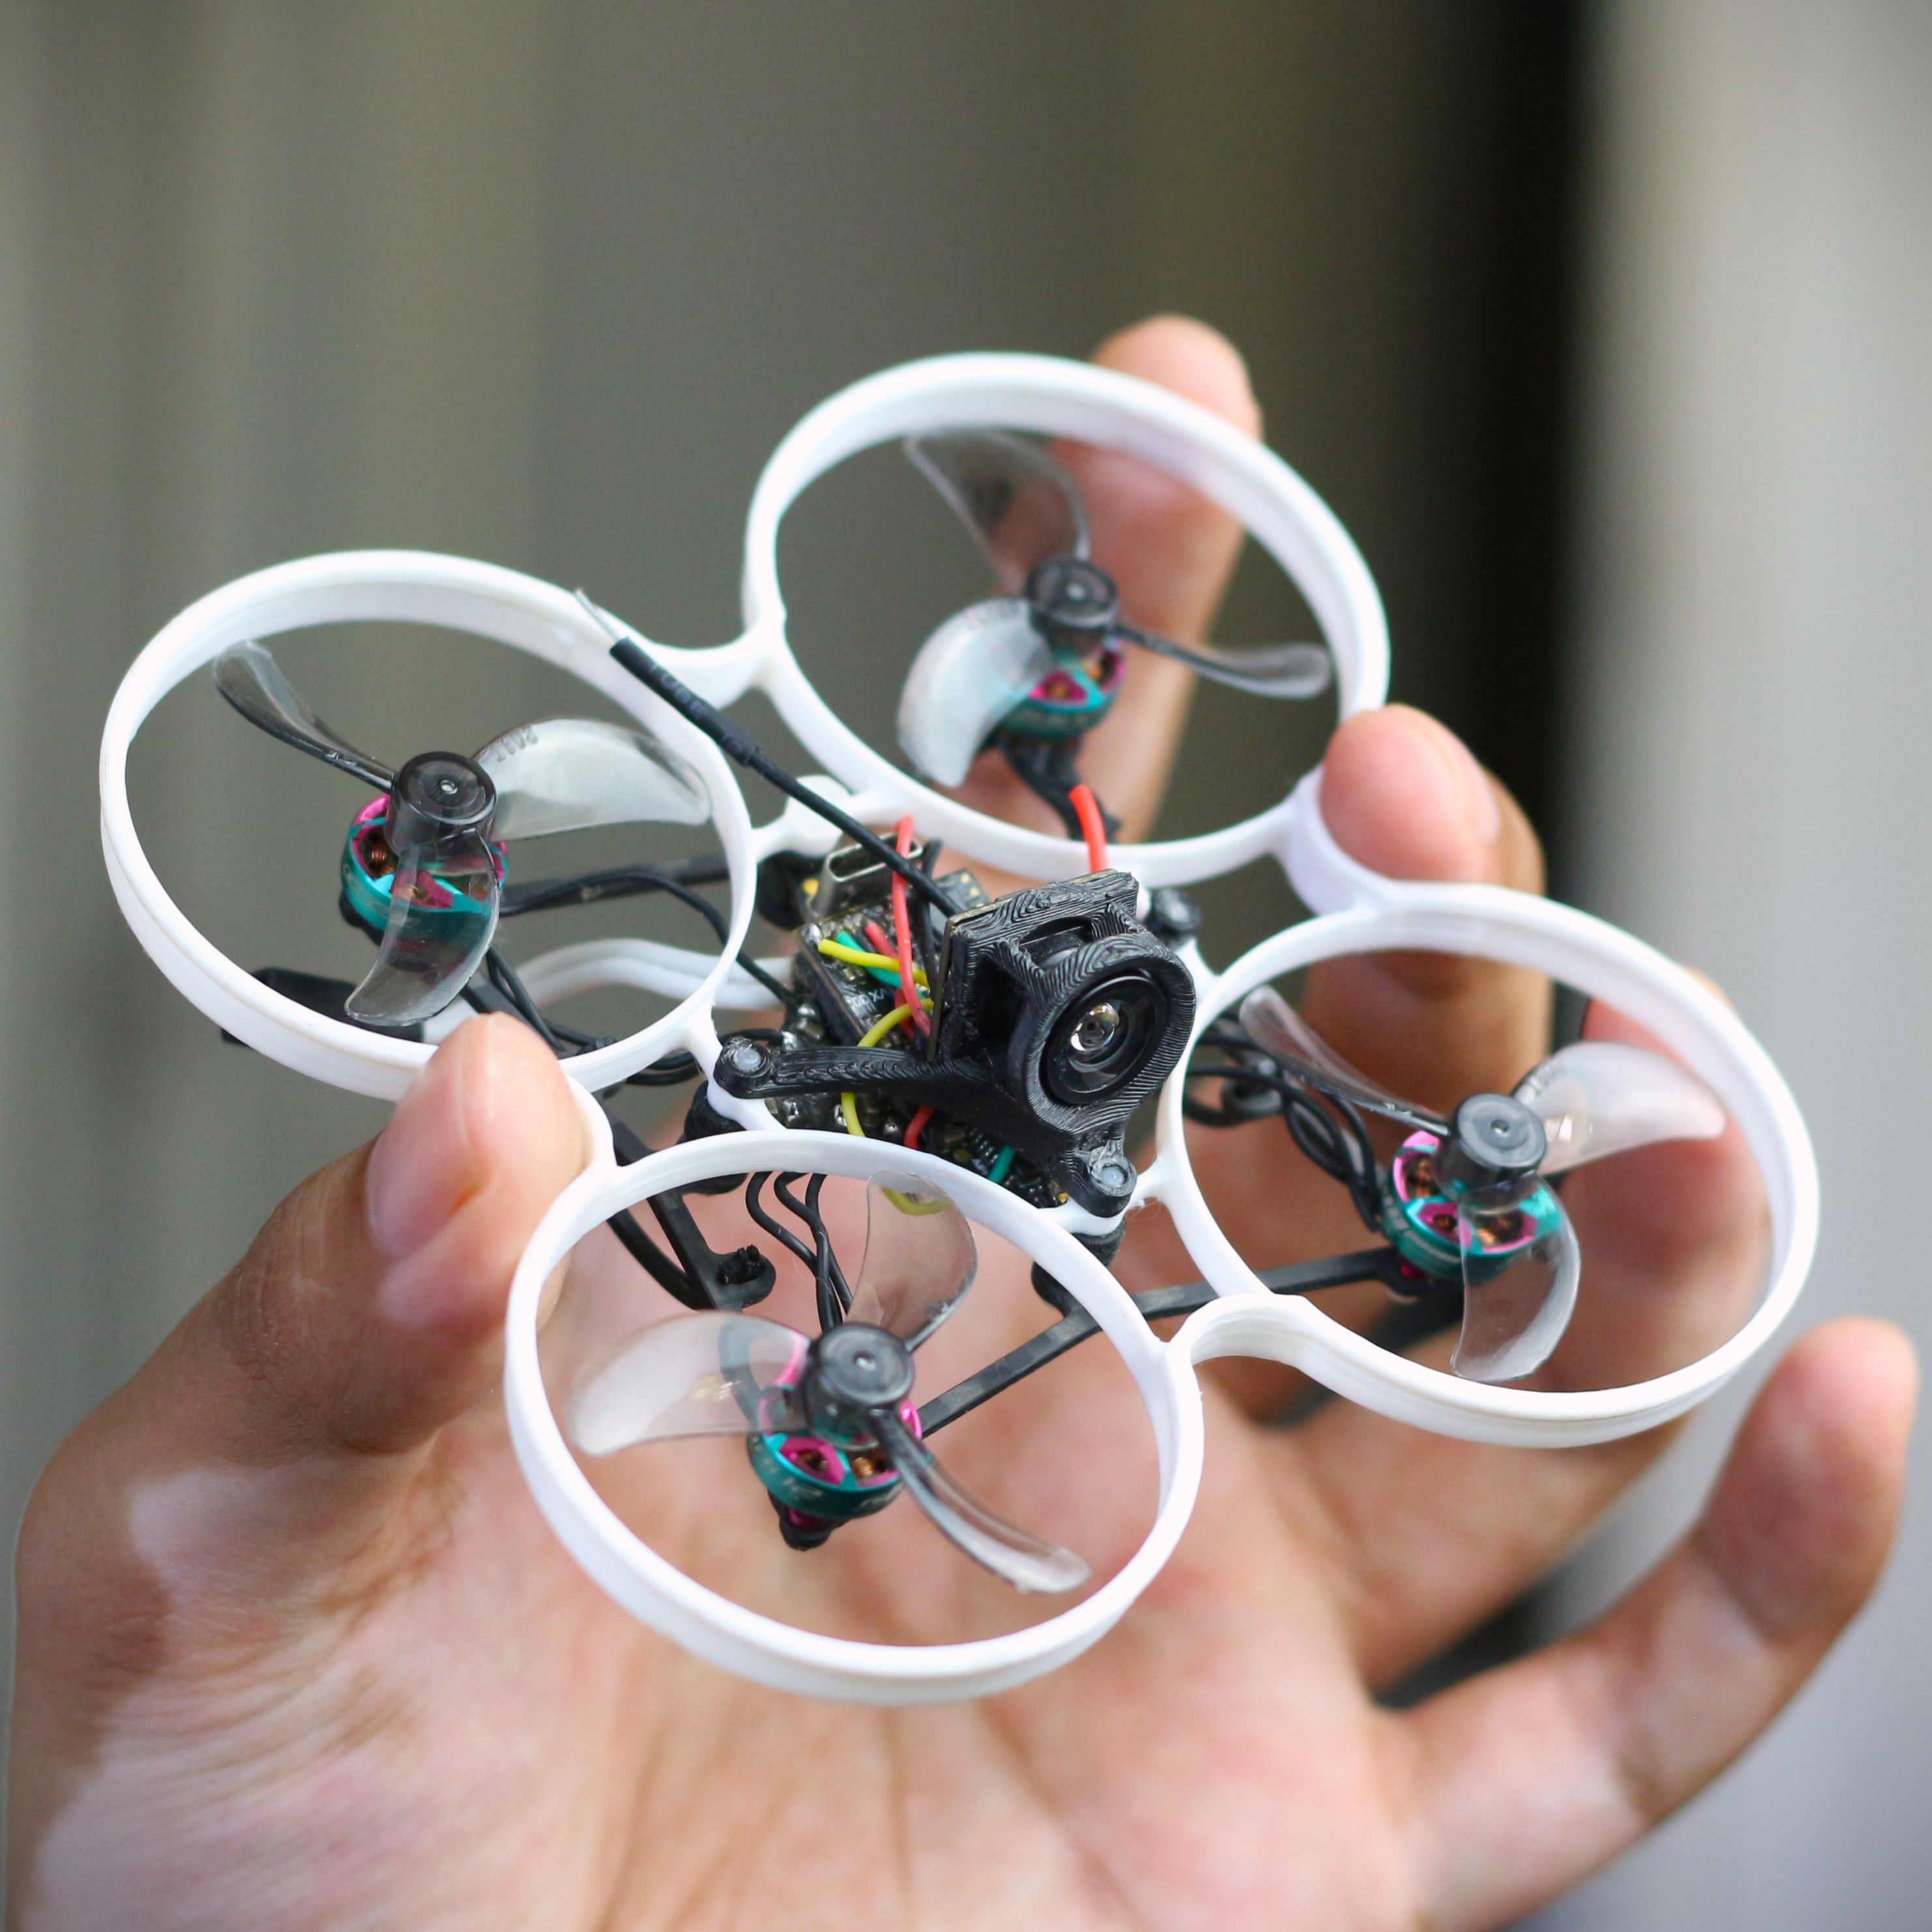
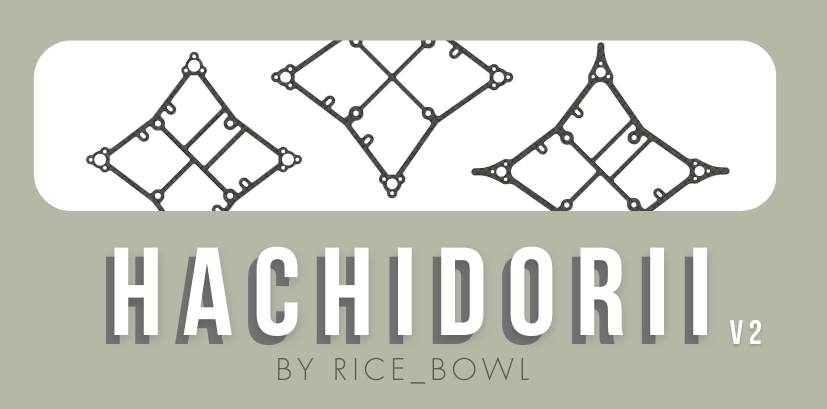
I have been working on this for a while now and I am extremely happy to present to you my new creation, the Hachidorii V2 Carbon Fiber Whoop
https://youtu.be/Z84DcscUnwM?si=8Uz5tasCdL3a16w8
Introduction to Hachidorii V2
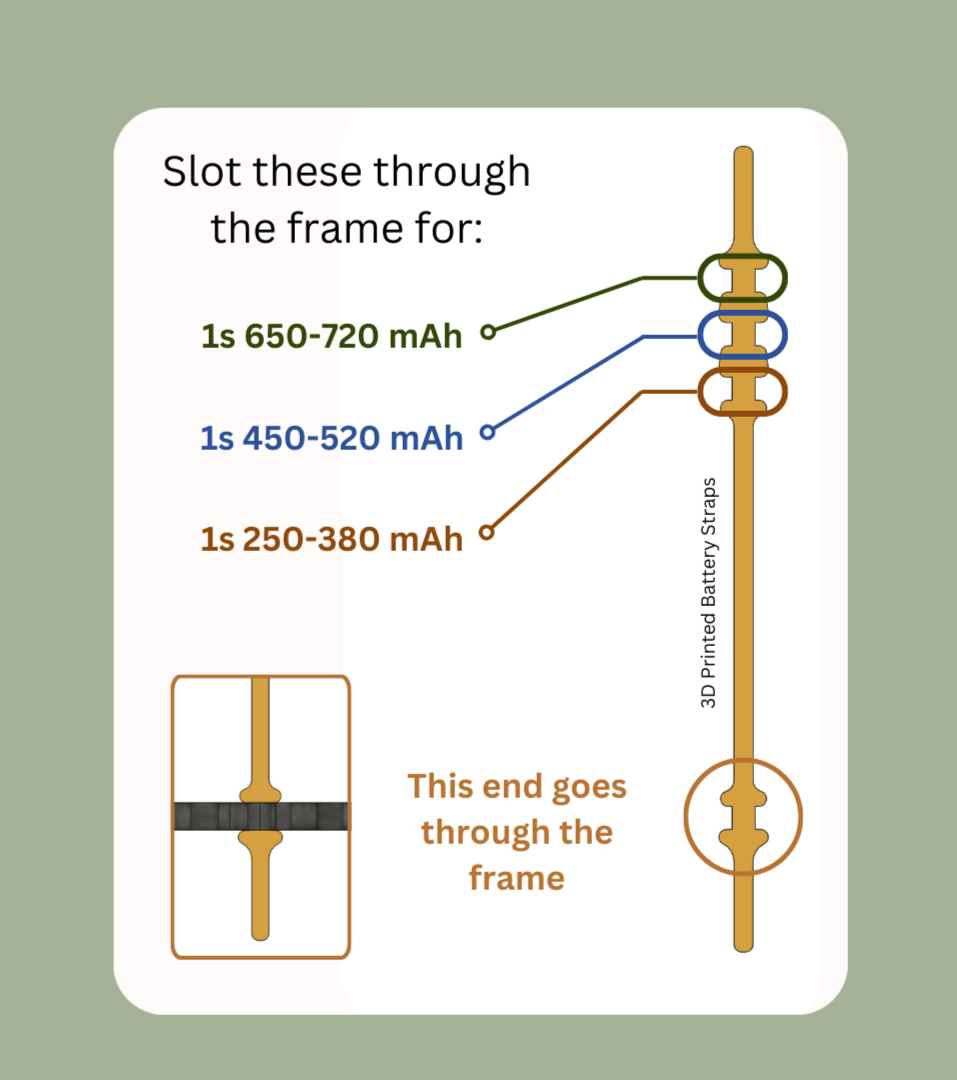
The Hachidorii V2 is the accumulation of multiple ideas and concepts that I have gathered over the course of a few months - and beta-tested by my local community. It is a 75mm whoop that uses a carbon fiber frame that is accompanied by ducts. It comes as a kit that includes the 1.5mm frame, M2 hardware, some 3D printed battery straps, and an information card to help start your Hachidorii V2 build.


In my introductory video, I state that "The Hachidorii V2 is not a jack of all trades but a master of one" because honestly, this is something that is not new - we have the Fractal 75 from Fractal Engineering and the Quatro V4 from Spezilover. What I wanted was a build that was focused on making indoor FPV easier. Within those three months, I've boiled down and summarized some key concepts to help us narrow down what is an an ideal whoop for indoor FPV:
- Smaller has advantages. 65 whoops will make gaps and maneuvering through tight areas easier at the cost of weight limitations.
- Larger has advantages. 75 whoops are more efficient, smoother, and is more forgiving when it comes to weight but is more difficult to go through tight areas.
- Ideally, a 65 format should be less than 19g and the 75 format starts being less viable for indoor flight at 24g [These are dry weights - not incluidng batteries]
- Low weight has a few advantages such as less potential to break parts, more flight time, and the ability to change directions quickly which is crucial for indoor FPV.
- A carbon fiber frame is ideal in two ways. It makes building easier and it allows for a tighter PID tune when done correctly. It could also be more durable.
These main concepts were the driving factors for the design choices that I made for the Hachidorii V2. These were information that I got from talking to multiple pilots all over the world, local pilots from my community, and my own personal testing. With these in mind, let's go over the goals I aimed to reach with the build.
My Main Goals for Hachidorii V2
These are the main goals that I set out for my build:
- Low Weight with a Carbon Fiber Frame
- An Easy Build Experience
- Focused on Indoor FPV
I took my time with this one as I knew this had potential. Within the last three months, I have been testing this frame and build constantly and even reached out to my local community to see if anyone wanted to beta-test. Fortunately, I did get a few people to test the frame and got feedback. I made a few major and minor changes and ultimately settled with the kit shown in my video.
The Hachidorii V2 Build
When it comes to these whoops, lighter almost always means better. However, achieving my allotted weight of 19g on a 65 format with a carbon fiber frame would limit the parts that I could use to only a handful of things. Furthermore, it would be extremely fussy to build it which, as a builder, I would not want others to go through. This prompted me to decide on using 75 whoops with 40mm props with a more flexible allocation of weight of 24g (the same as the mobula 7).
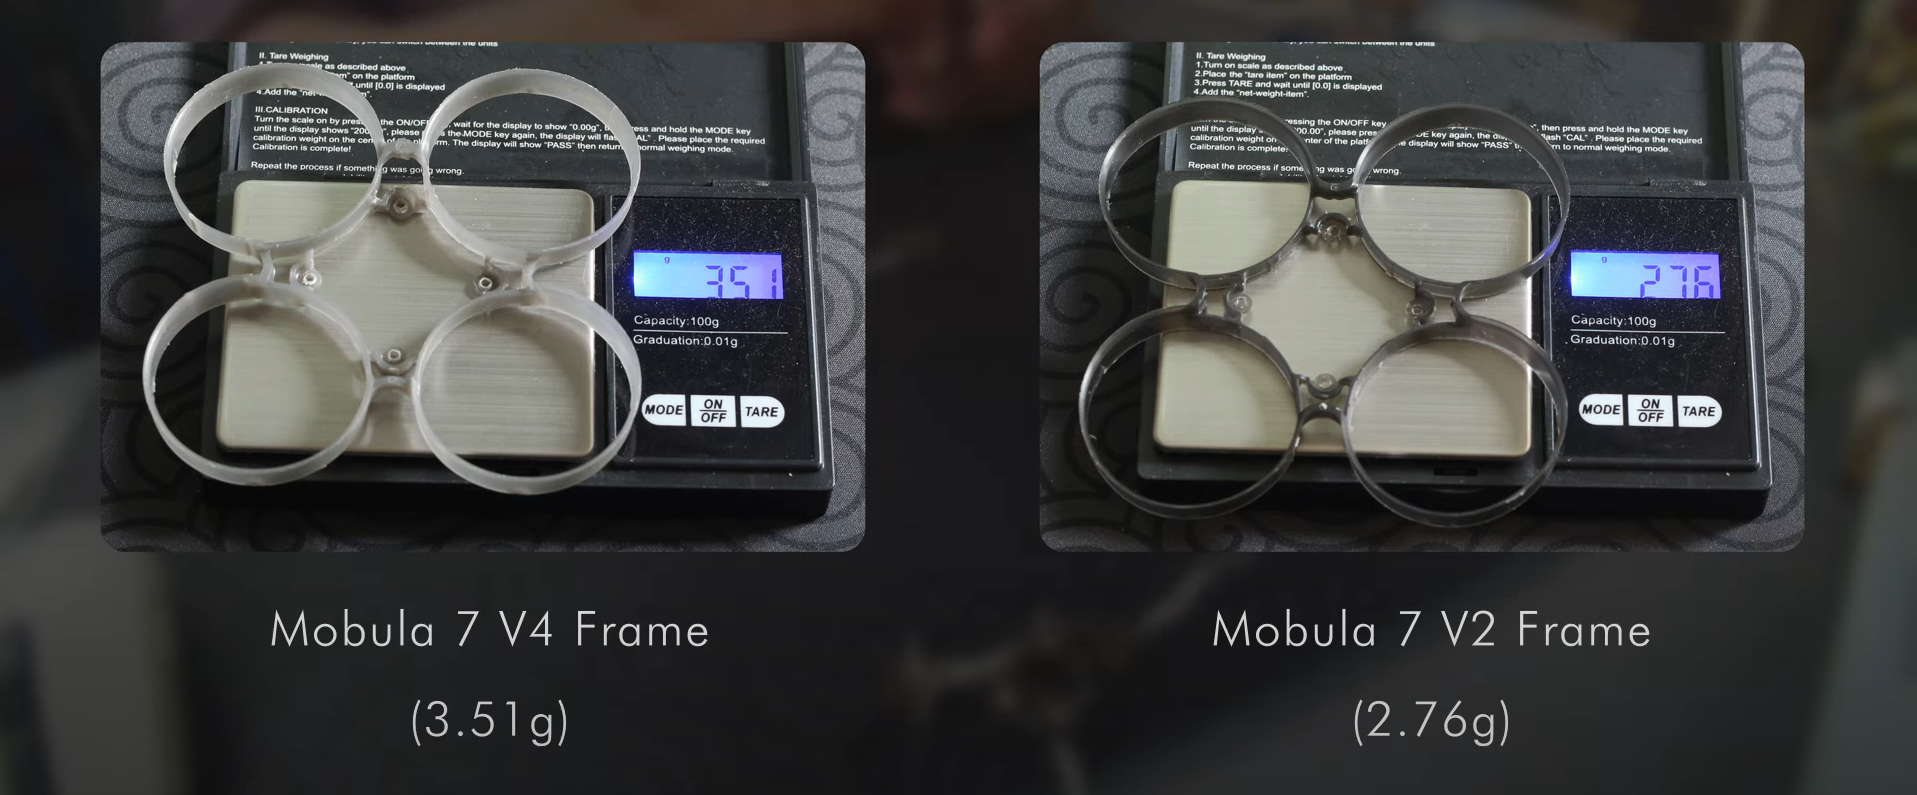
The frame roughly weighs 6.11g including the battery straps and screws used for the ducts (which are also the fc screws). You can expect to add around 3.5g if you plan to use the mobula 7 V4 ducts that I used in the video. I think its a good balance of stiffness and flexibility but you can easily reduce its weight more by removing more material - I didn't as I knew I'd still reach my 24g dry weight goal without the extra effort. If you want to go lighter, the mobula 7 V2 ducts are only 2.78g. I did find something interesting lately that I included in the video which were the white ducts. More on that in a future video/article.


I ended up using the Superbee F4 Lite with SPI ELRS [yes, the exact same one in my 65 whoop guide - this thing wont die] and the OVX300 as they were the most available to me at the time and were relatively durable. I wanted to try out the new mobula 6 2024 AIO but sadly, like the majority of pilots, its out of stock in many places.
I wanted to use RCInPower 0802 motors as they were the most durable motors I could find but at the disadvantage of being the second heaviest 0802 motors I could get a hold of. Despite the higher weight, I chose those motors over something like the Happymodel EX0802 or BetaFPV 0802SE [these have lower weights at 1.7g and 1.8g respectively] as it meant that I could test this without worry that their degregation over time would affect my results. I paired these motors with Gemfan 1608 triblades as I wanted more yaw authority for that control but I did find that biblades will do just as good. The Gemfan 40mm biblades do have their own advantages so you are flexible with what props to choose - I just personally like the triblades.
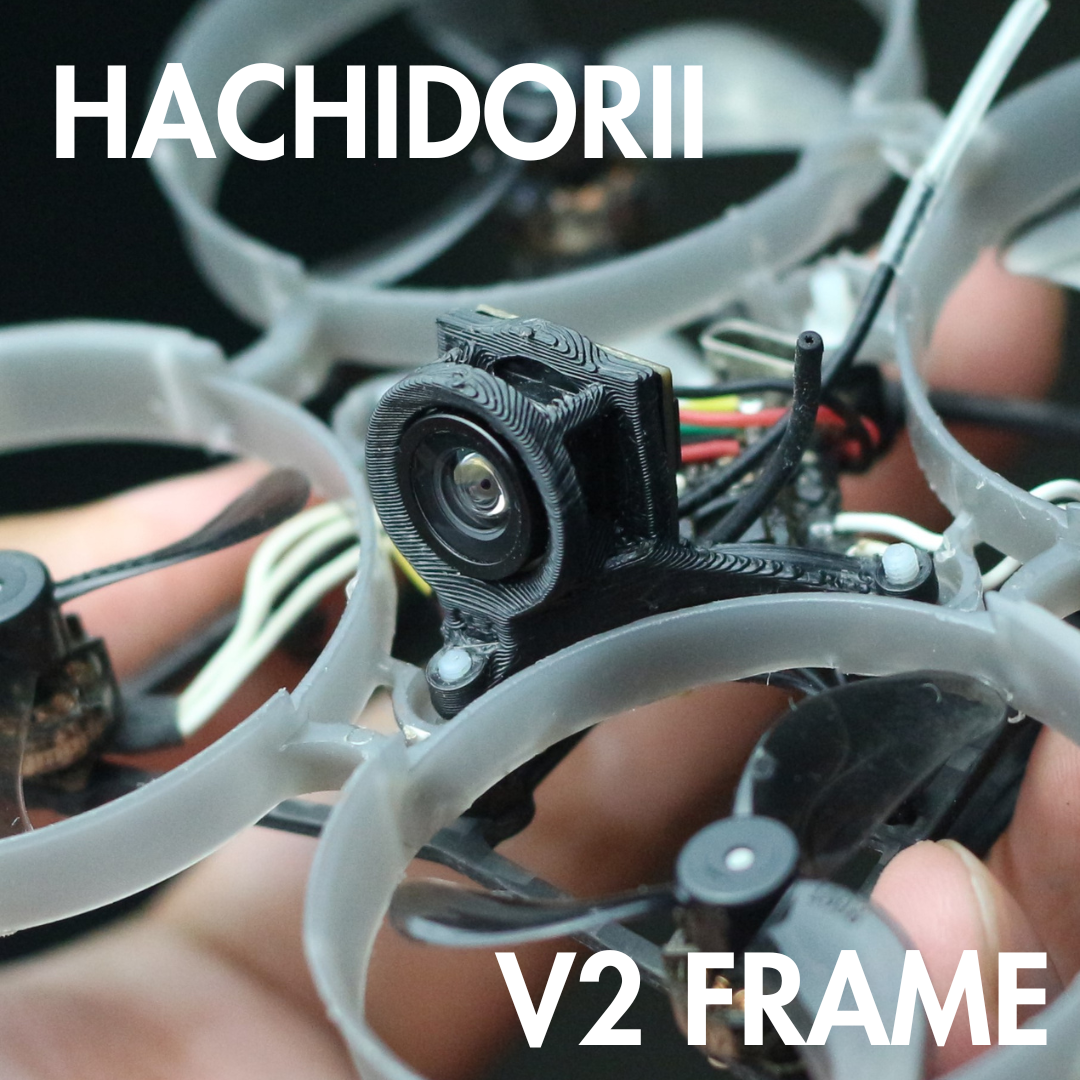
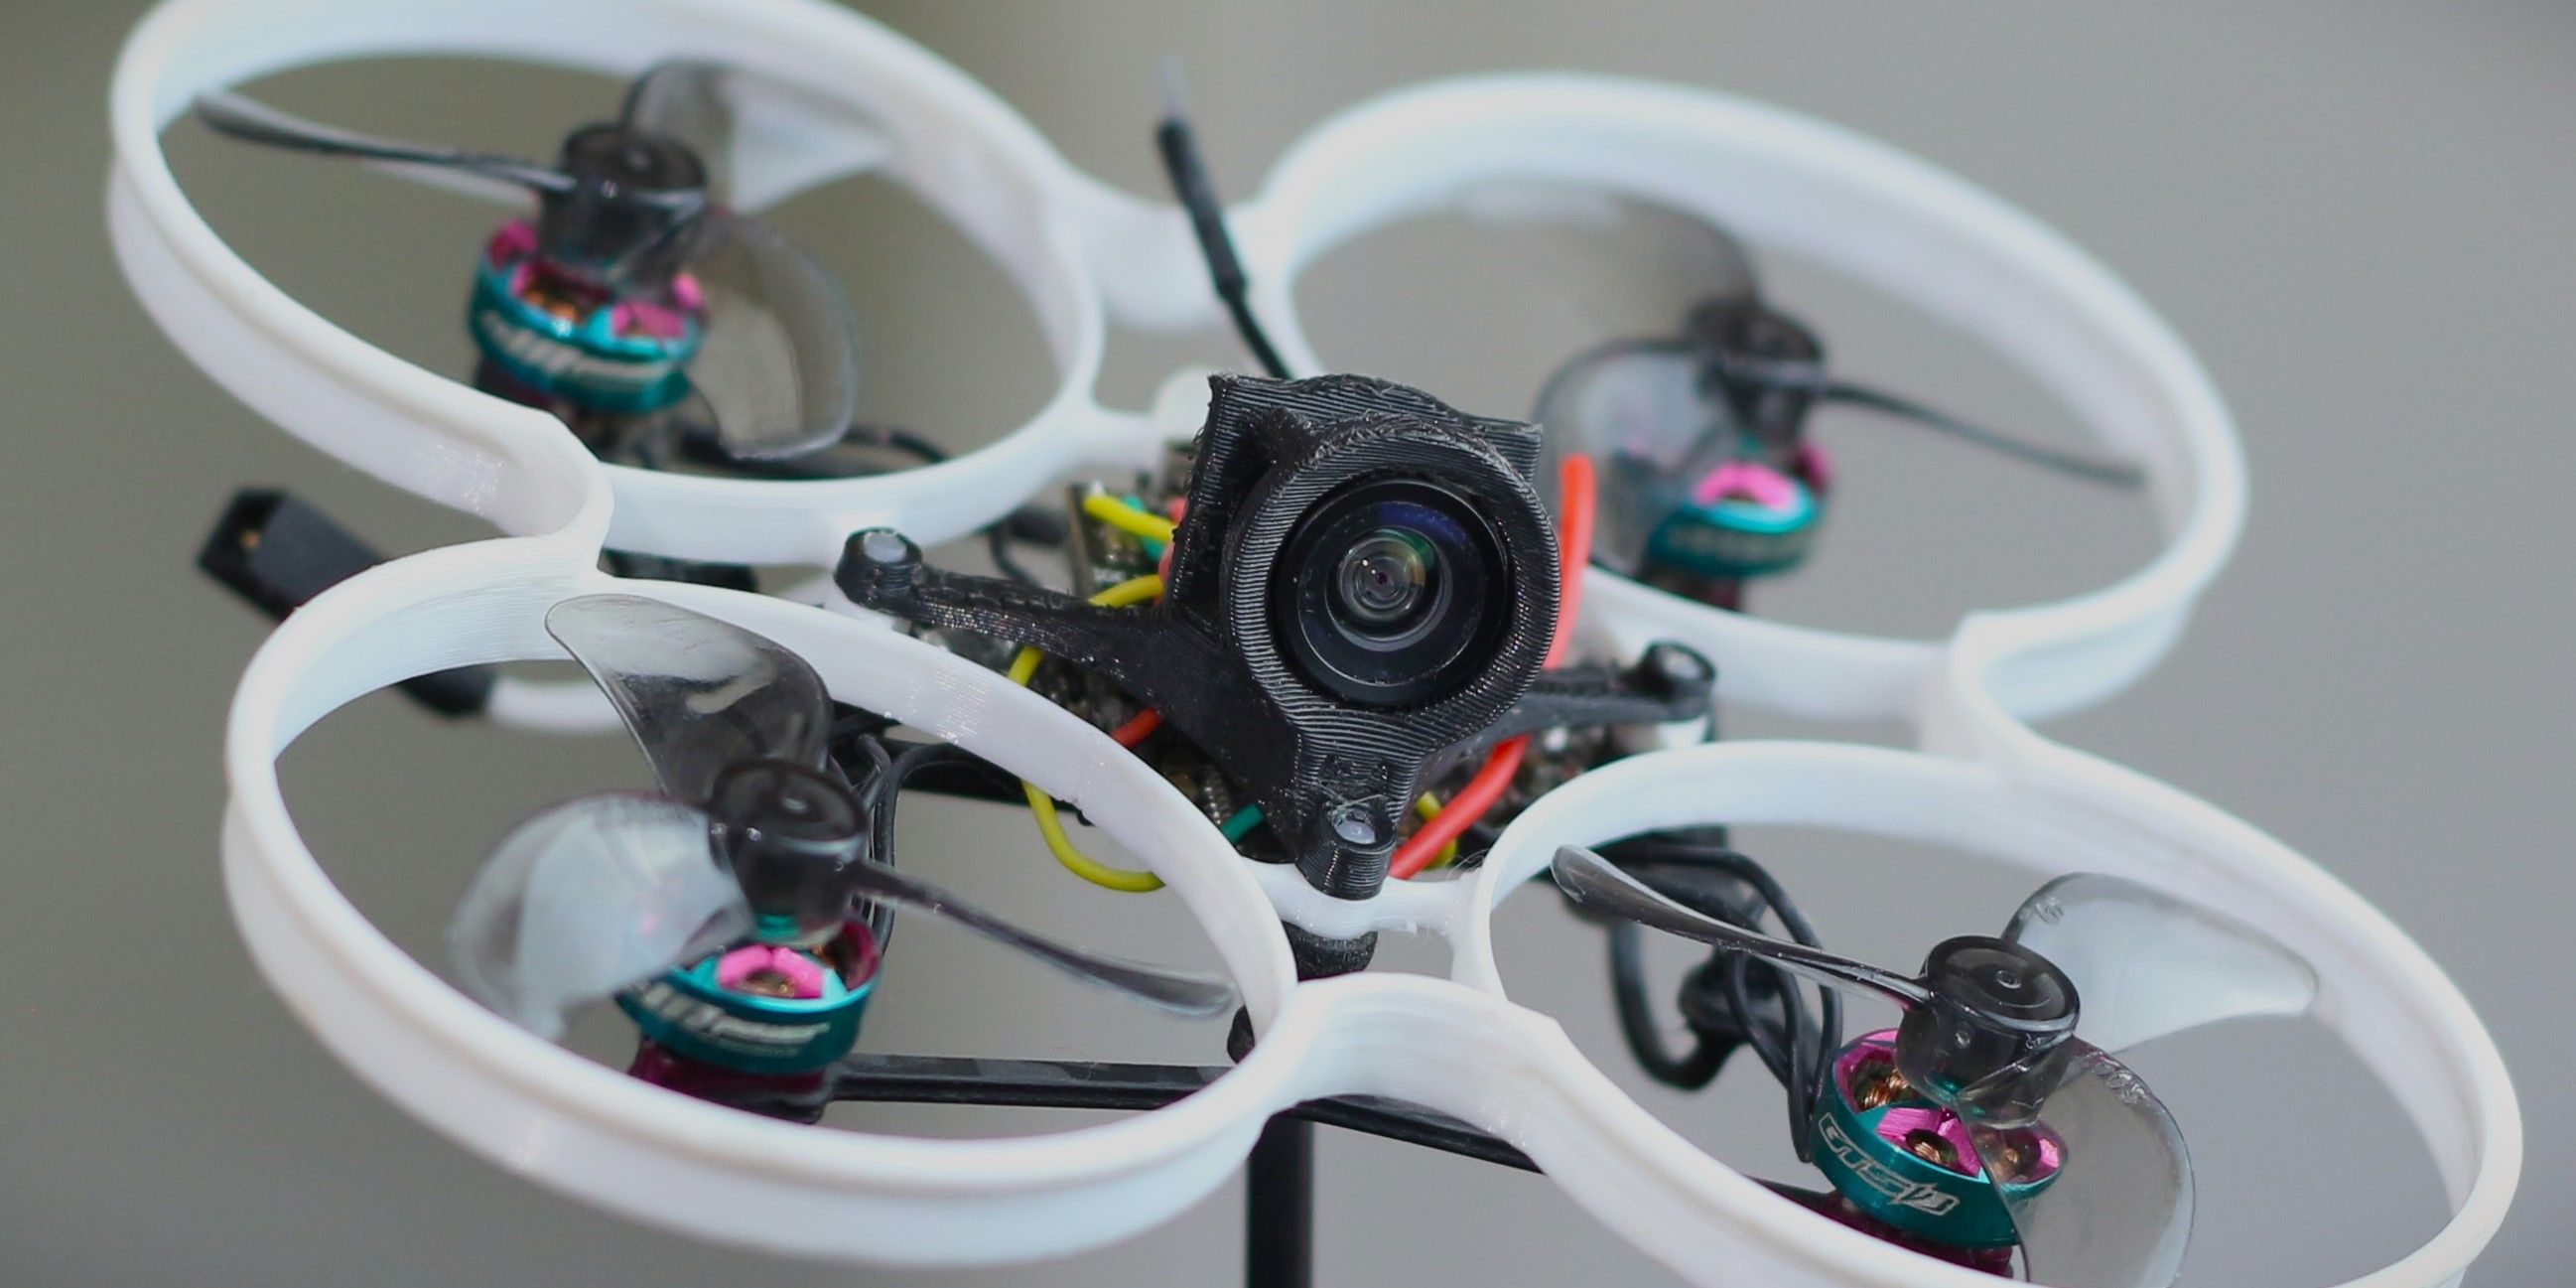
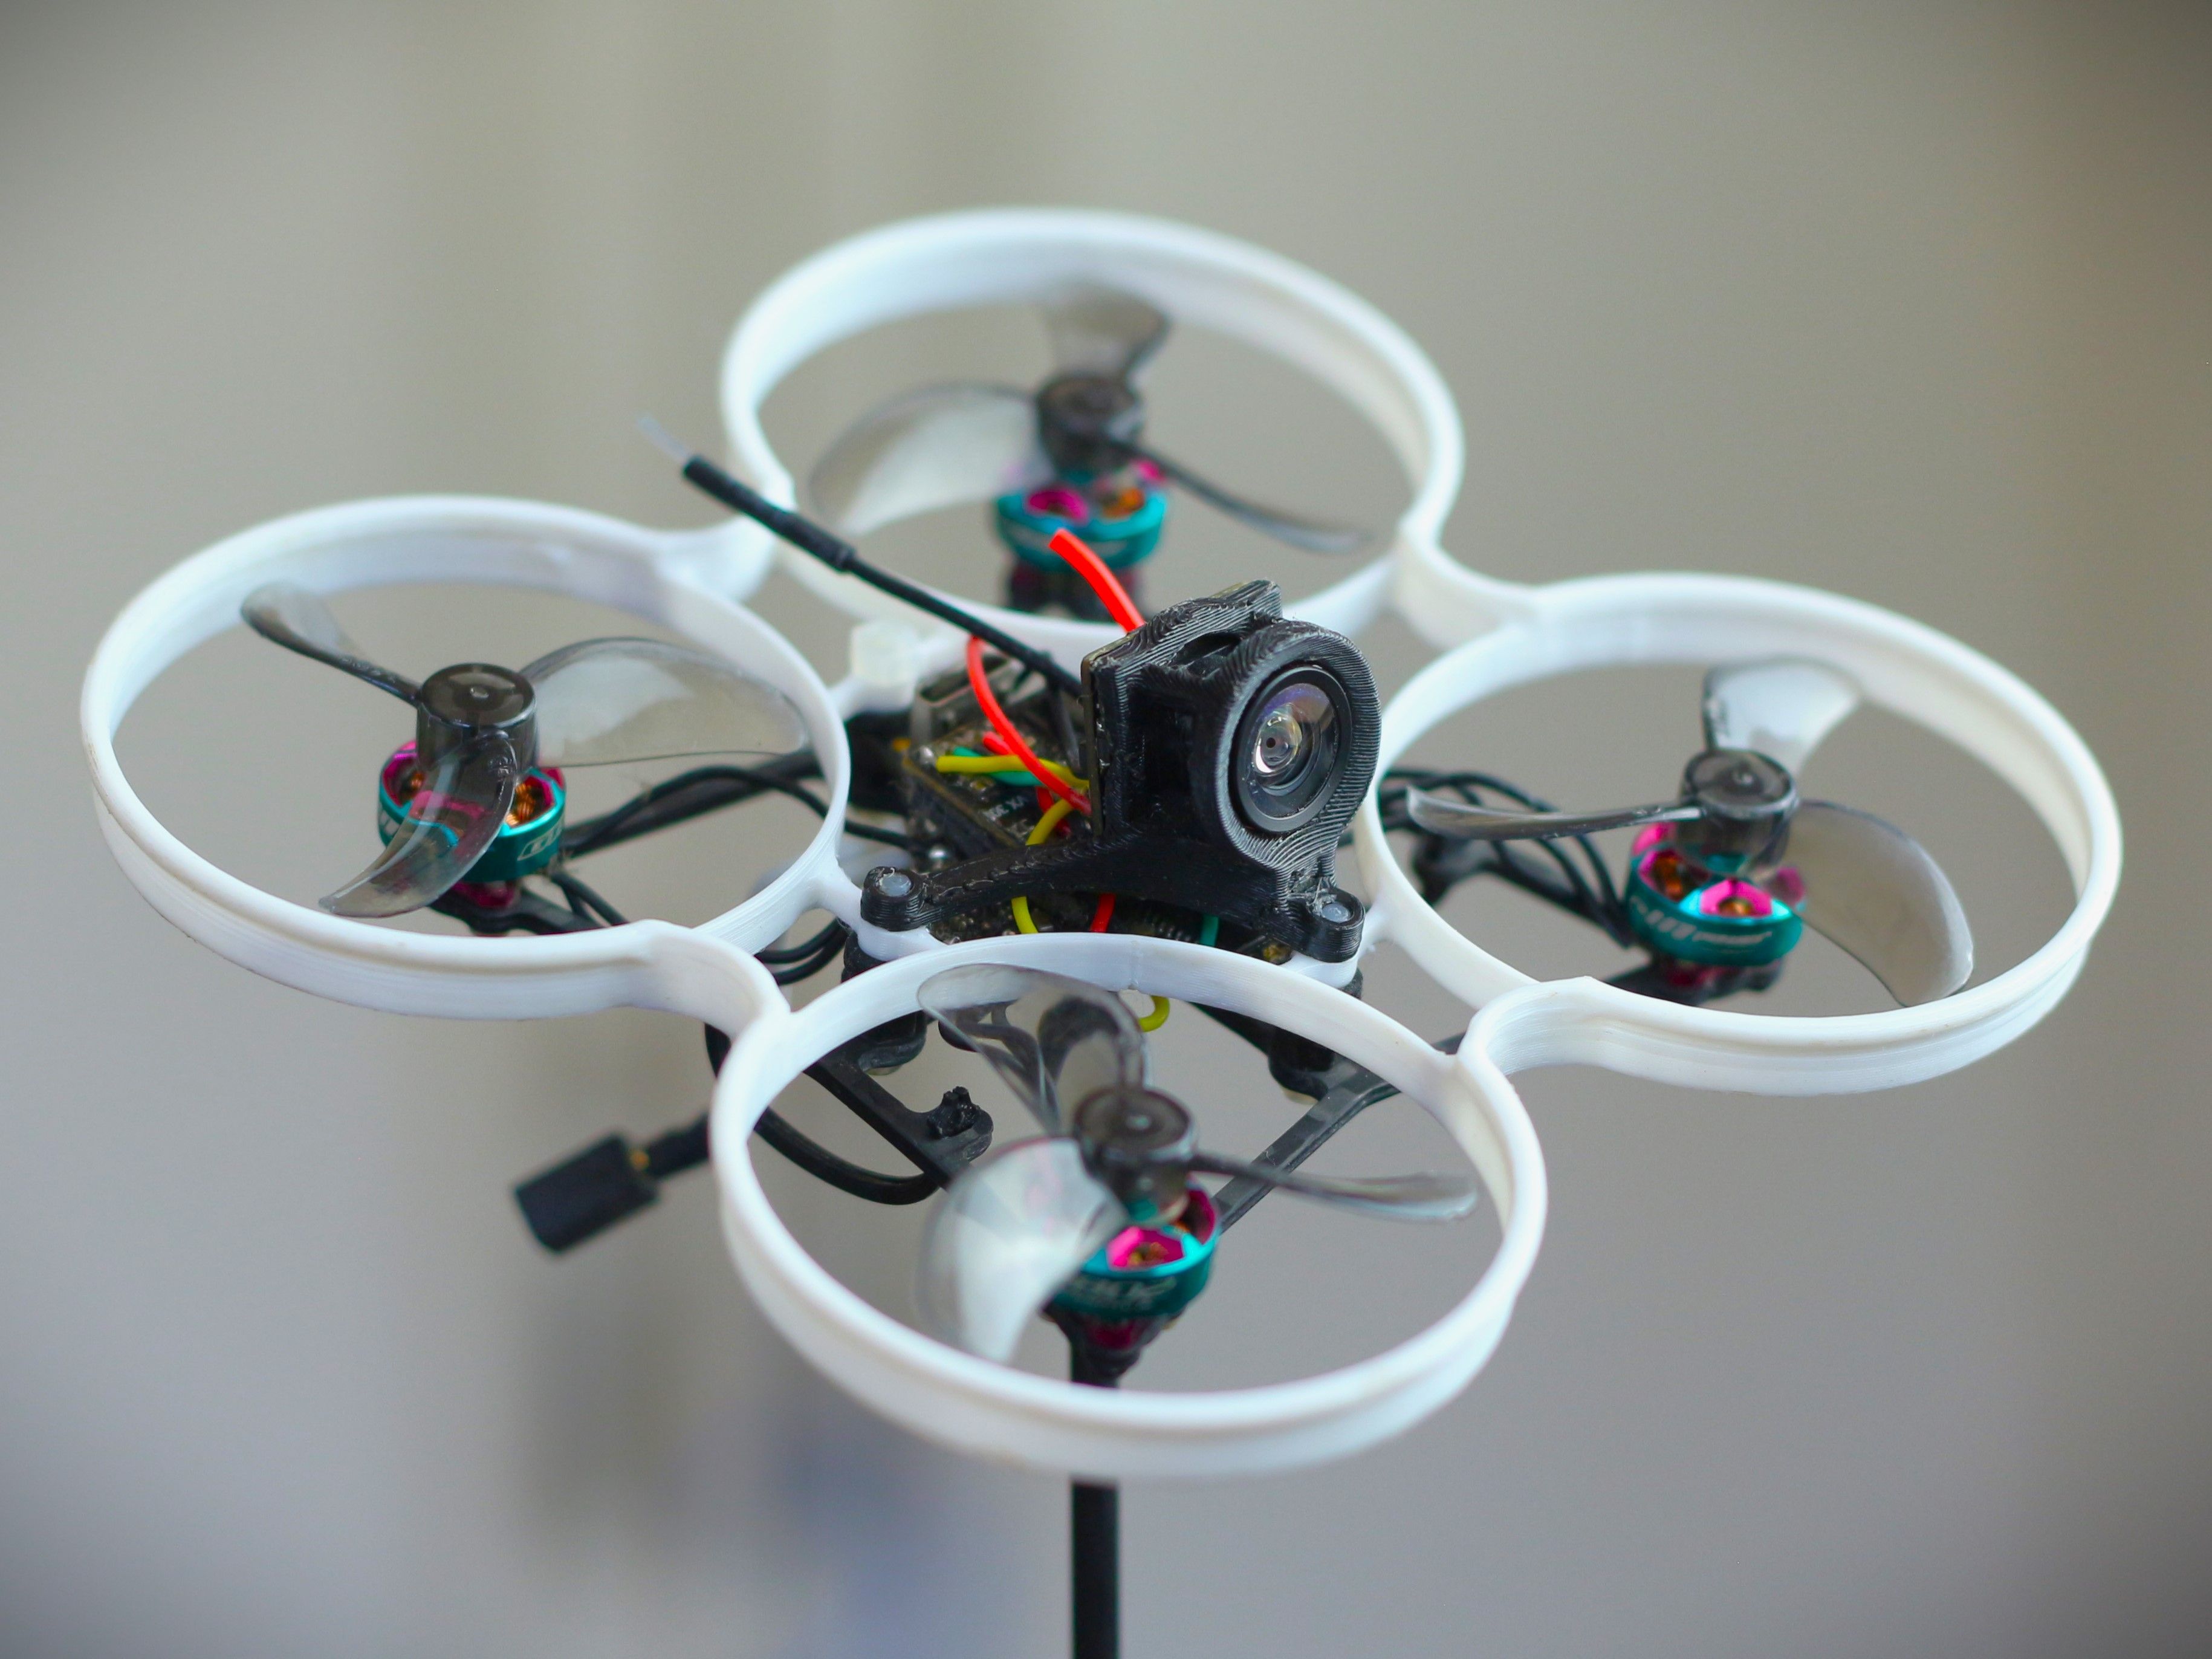
Another personal component was the camera. I am still using the same 199c V2 camera as I think it is a cheap camera with a relatively low weight and a high FOV (necessary for indoor FPV). Random fact but my very first whoop was the Tiny 6x from LDARC. I had that 7 years ago and still use the same 199c camera - my guy takes a beating. Naturally, I used my personal 199c canopy [https://tinyurl.com/3e6ua5n9] but you are free to use any camera and canopy combination. Do note that I have a good amount of props and ducts in view because of this combination of canopy and camera. The degree of props or ducts in view will vary with what combination you use.
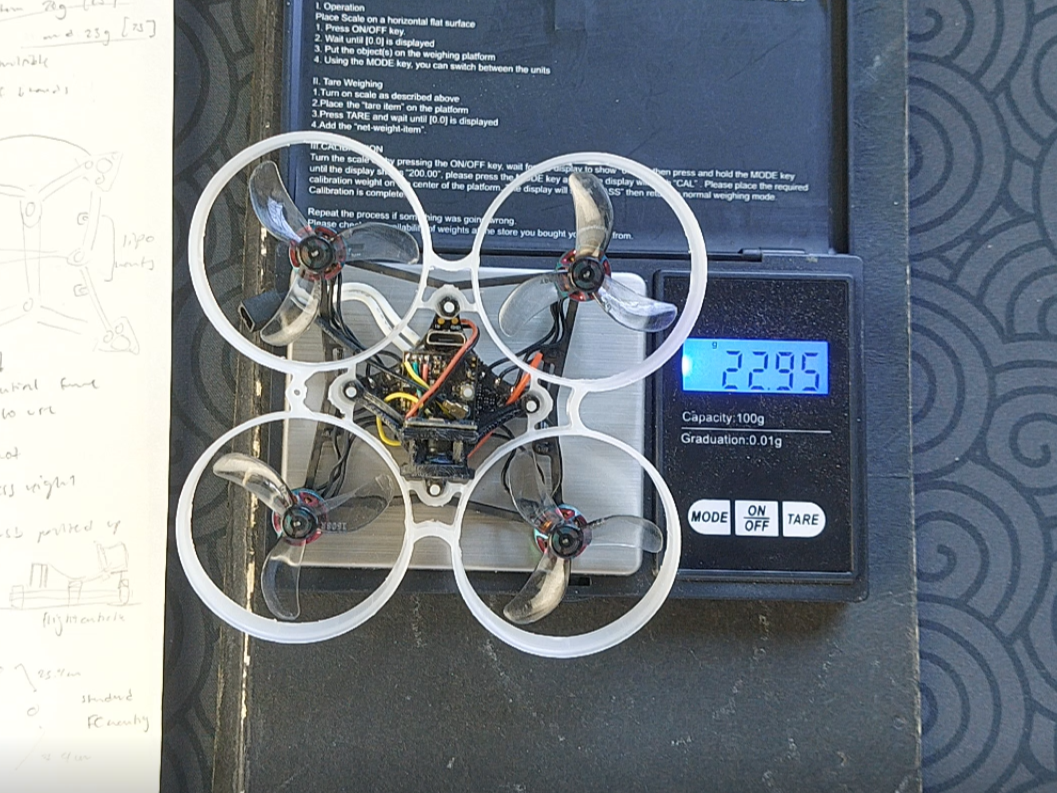
Combined with an A30 battery connector and some motor screws (I found one metal screw and 2 PEEK screws for each motor was adequate for keep things secured), my final weight came out to be around 23g. With a GNB 380mah 1s, AUW came to be around 29.5g. I chose this battery as it is one of the cheapest and easily sourceable 1s batteries. Lowering my motor output limit to around 80% (effectively turning my 25000kv motors into 20000kv), I get around 2 mins and 40 seconds of hard flying. If you are somewhat a novice and are planning to follow my build exactly, I suggest starting your indoor FPV journey with 70% motor output limit - I get 3 mins and 30 seconds that way and throttle is less sensitive. These recorded times follow the same rule Nick Burns follows (where you're fine as long as your landing voltage goes up to 3.5v)
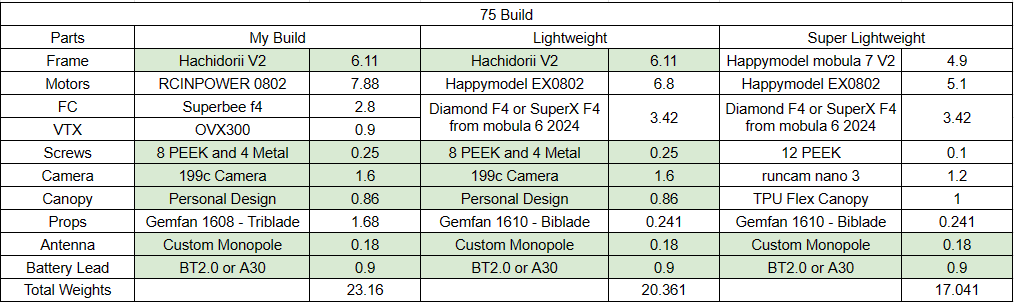
As I've mentioned in my video, a dry weight of 23g is not special. However, a dry weight at 23g using "non-ideal" components (meaning it is not using the lightest parts) is impressive. You can go even lighter with a different build using the Happymodel EX0802, Runcam Nano 3, and lighter ducts. The table shown below is an estimate of weights of three related builds: my build, my lightest Hachidorii V2 build, and the lightest theoretical 75mm whoop. Note that this is mostly estimates and that a little more weight is added for things like wires.
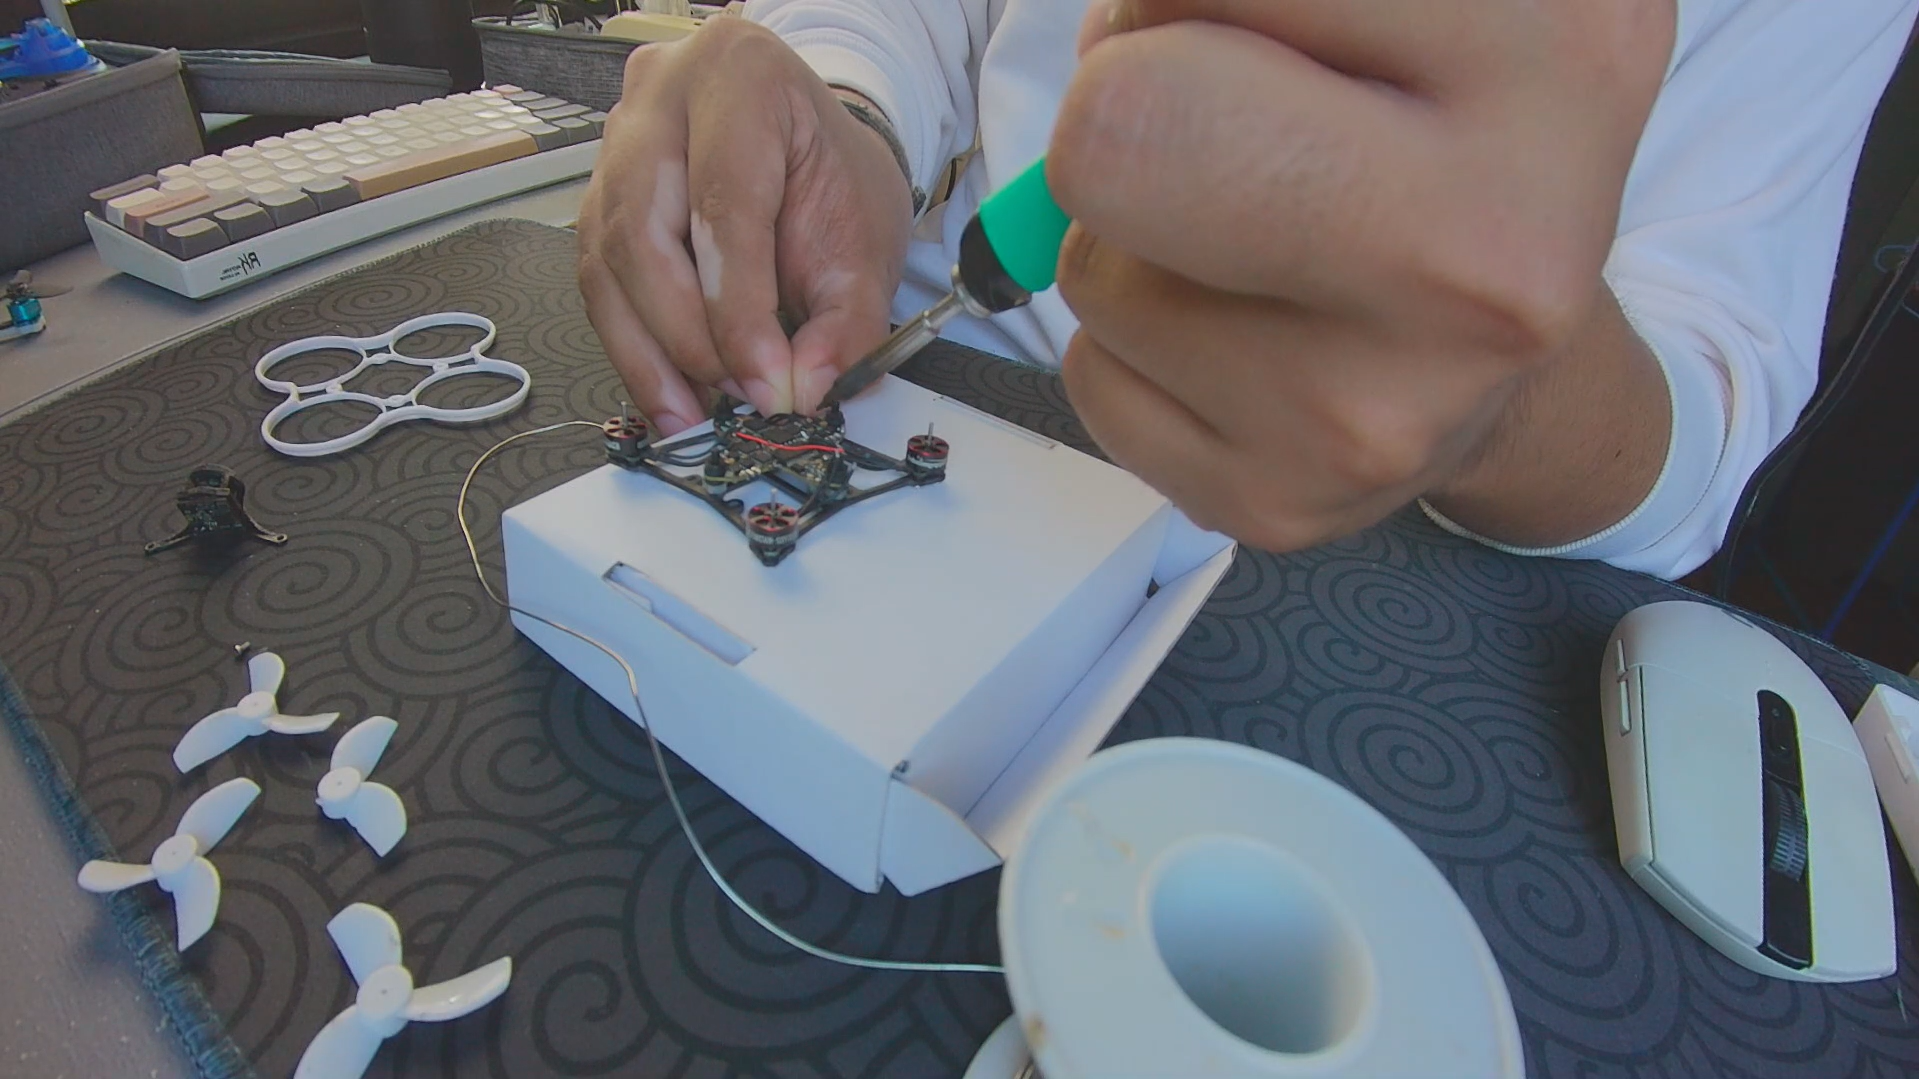
Easy Building Experience
Another non-negotiable goal I've set is to make this as easy as possible to build. Building the Hachidorii V2 is the same as building any toothpick with the only addition of using ducts that is placed between the FC and canopy. As a builder, I understand that building whoops isn't that easy. Though most of the issues come from soldering, the least I can do as a frame designer is to make those solder pads easily accessible. With the ducts off the Hachidorii V2 frame, the majority of pads of most whoop sized flight controllers (preferably FCs that are specifically for whoops) are accessible.
With this format, the ducts can easily be removed, changed, and replaced. my Hachidorii V1 used similar mounting methods for the Fractal 75 but I found that finding long 5mm M1.4 screws, especially PEEK screws at that length, was difficult and most people will have that same issue. I ditched the idea of mounting the ducts the way the Fractal 75 did which also saved me weight in the end.
Focus on Indoor FPV
The low weight paired with a good PID tune make this Hachidorii V2 fly like its on rails. It tracks well and wherever you point, it shoots. There's still some minor improvements that can be made but as of April 19, 2024, I believe this to be my smoothest and best flying whoop by far.
I wanted to focus on indoor FPV also because I think flying indoors make pilots fly better outdoors. I have been uploading my indoor flights relatively consistently in YouTube Shorts ever since July of 2023 and I 100% can say I have gotten better - exponentially after developing the Hachidorii V2. The following videos are the first whoop short I made and the latest Hachidorii V2 short.
https://youtube.com/shorts/PA3aXhK4778?si=BqMmnOD6iSUZr-FL
https://youtube.com/shorts/j1klE2ME2x0?si=o7WA-ATbOOsgRB5e
It gives me confidence that I can pull off sharp maneuvers and I'm slowly doing more advanced tricks inside my small room. I have flown this outside and the extra space felt ecstatic - like I didn't have to worry too much cause I was used to having four walls and several furniture in my way.
Durability
Given the ducts method of mounting, it is natural for people to question the durability of the Hachidorii V2, specifically the potential for motors to be damaged more compared to your usual plastic frame. This is a valid concern and I do not have any definitive proof that this is on par with plastic frames but I would like to think that it is. I'll be honest that my lack of damage over the three months I've tested this could be just a reflection of the quality RCInPower has in their motors [which honestly make them an even more worth investment]. I will say that I also have not replaced any props which has direct contact to those flexing ducts.
Other than that concern, I am happy to state that as of April 19, 2024, I have not needed to replace any component of my Hachidorii V2 build since its build last January of 2024. As many pilots have mentioned, having such little mass in a build lessens a considerable amount of potential for it to break. Here's a little compilation of some major crashes my build took on within the first month of testing
https://youtube.com/shorts/CJZVGx03eeY?si=RFYCY-6MeYHeM86e
Additional Notes I Find Interesting
So this is just for those who want some additional information regarding the designing process.
- I'd like to give special thanks to Spezilover as well! During the initial design phase of the Hachidorii V2, his V4 Quattro frame inspired me experiment with mounting the ducts directly onto the flight controller screws. Check out his V4 Quattro frame here: https://rotorbuilds.com/build/32011
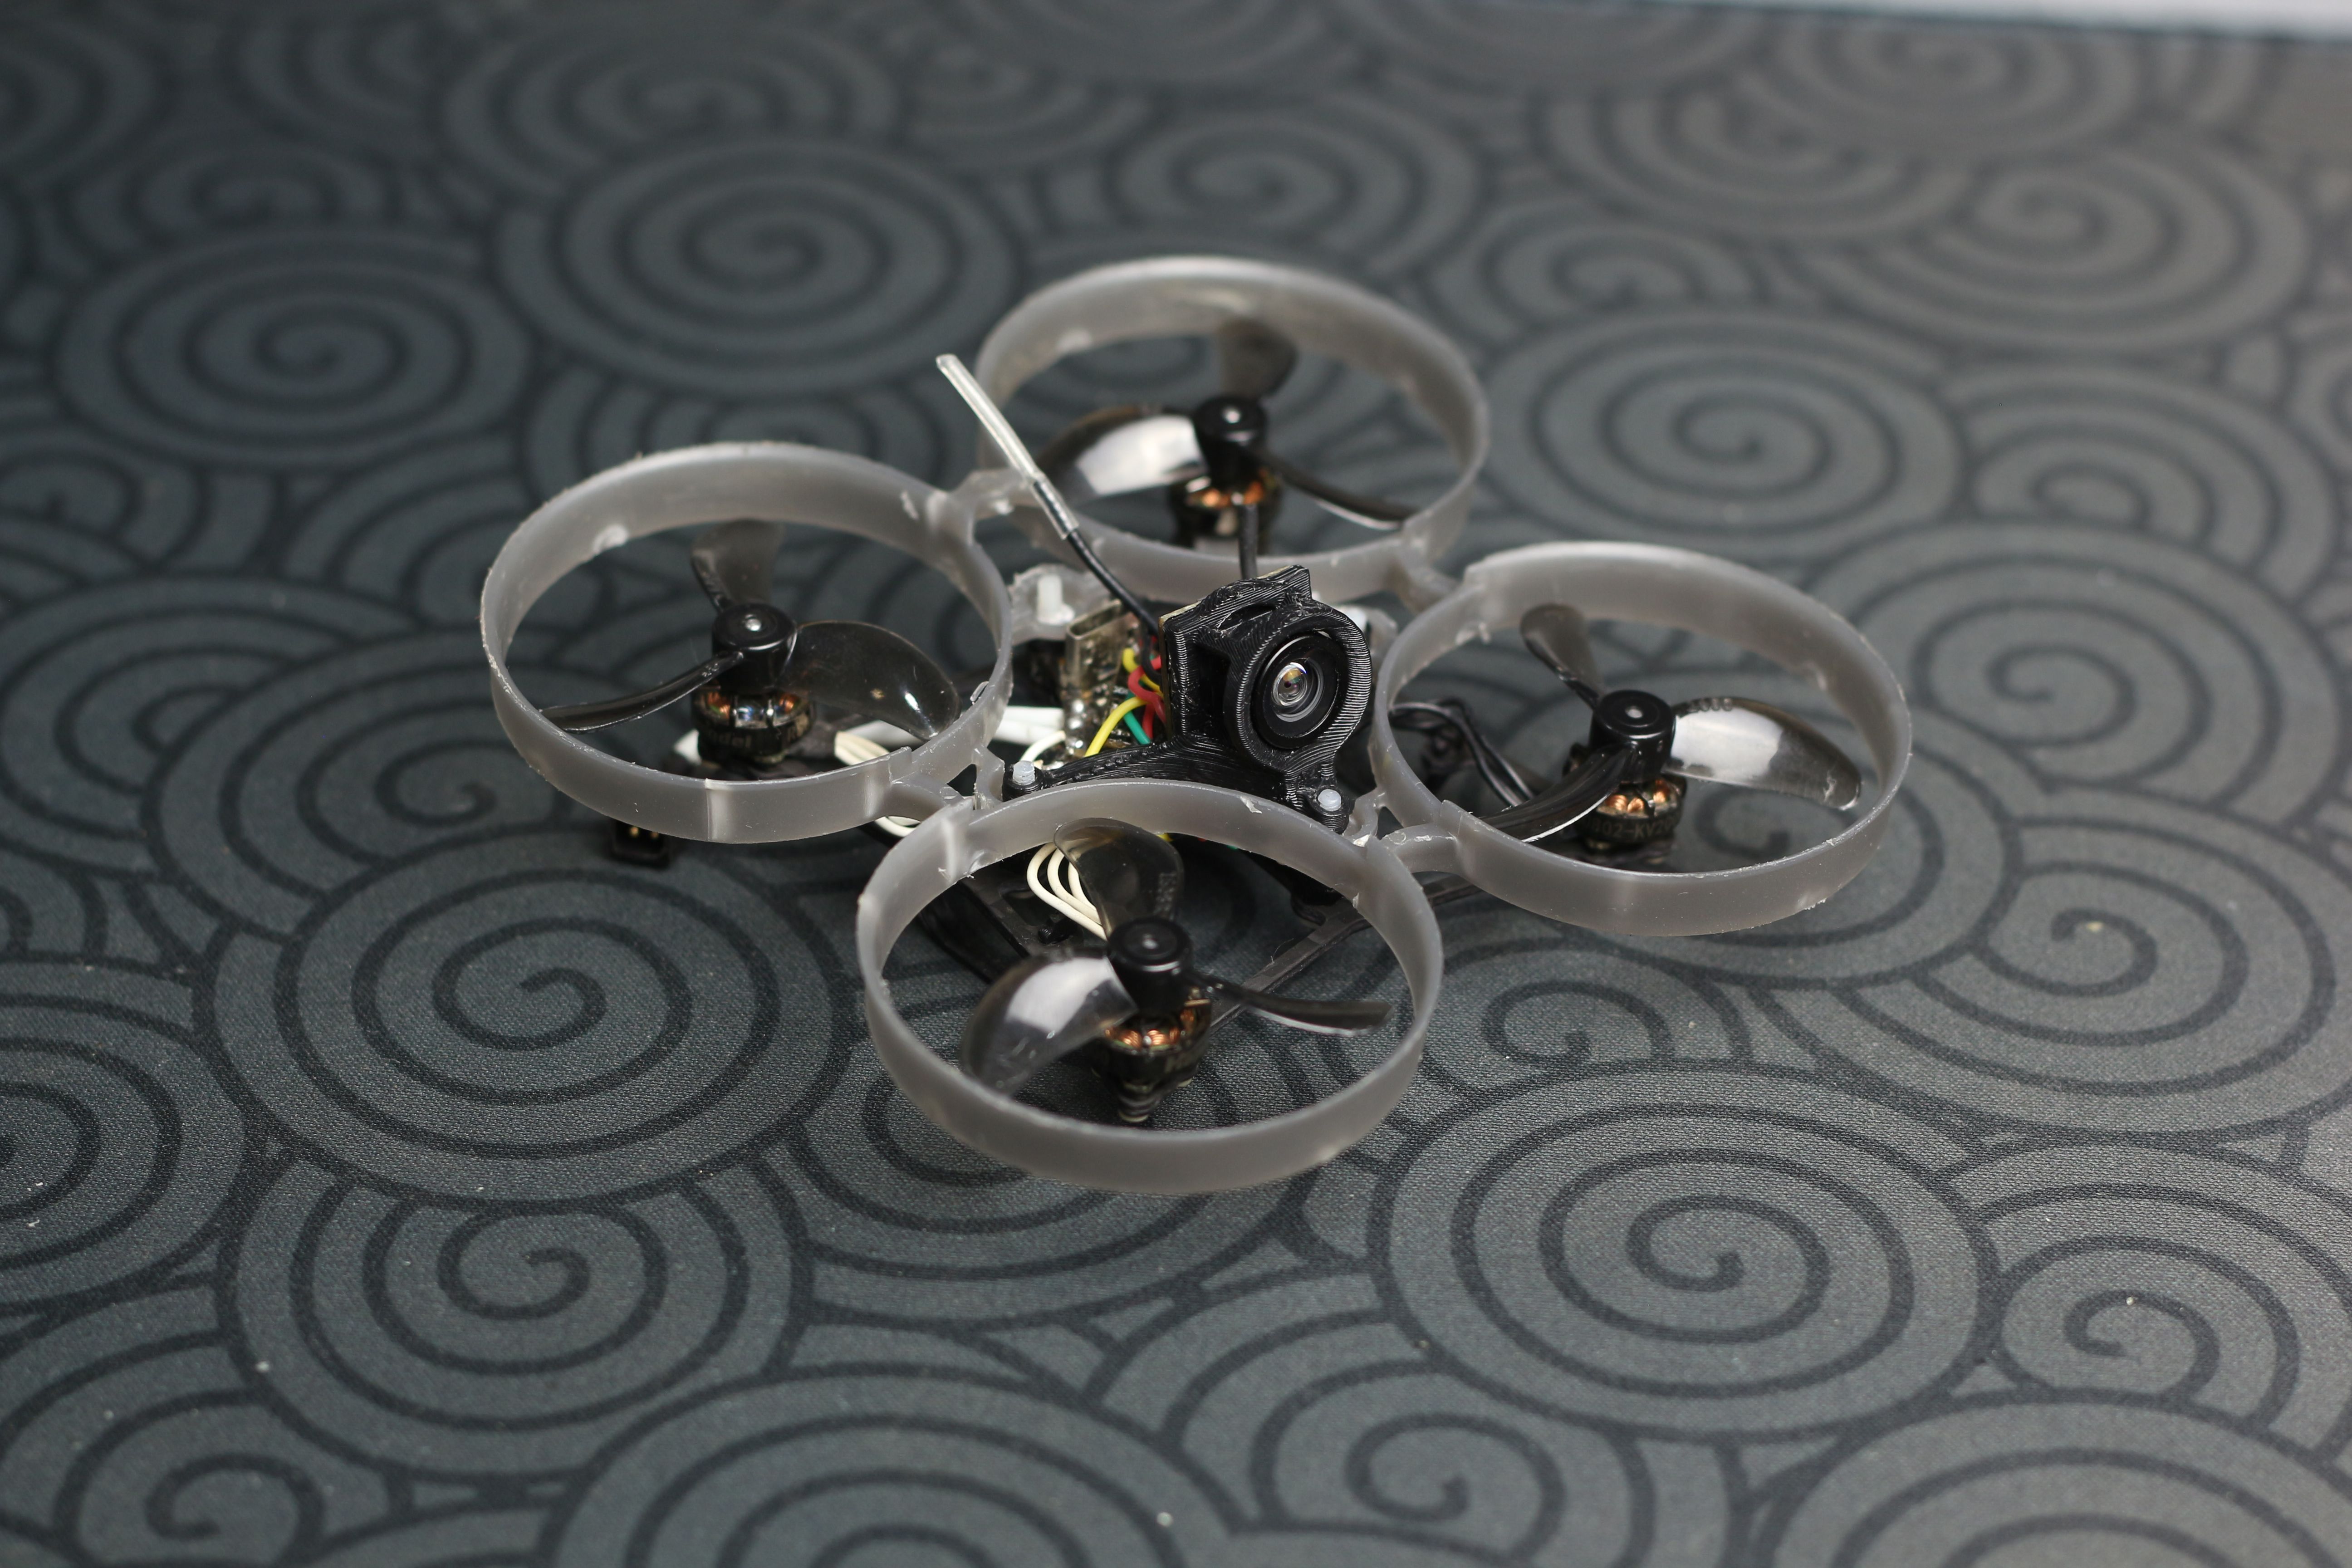
- To those of you who are wondering "Will I be able to use an HD system with this like HD Zero or Walksnail", I want to say that it is possible but the current design (and thus the parts included in the kit) isn't focused on HD. However, to get over this issue, all you need is to find longer M2 hardware (longer than 12mm as the current ones that come in the kit is 12mm - that is enough for this analog build). I do have plans on finding another way of mounting an additional board but for now, the only solution is longer M2 screws. Update[June 1, 2024]: Kits from CNCMadness will include M2x16mm screws which will be enough for digital builds! I've added some new pictures of a friend's walksnail build here and there are reference photos in the product page of CNCMadness.
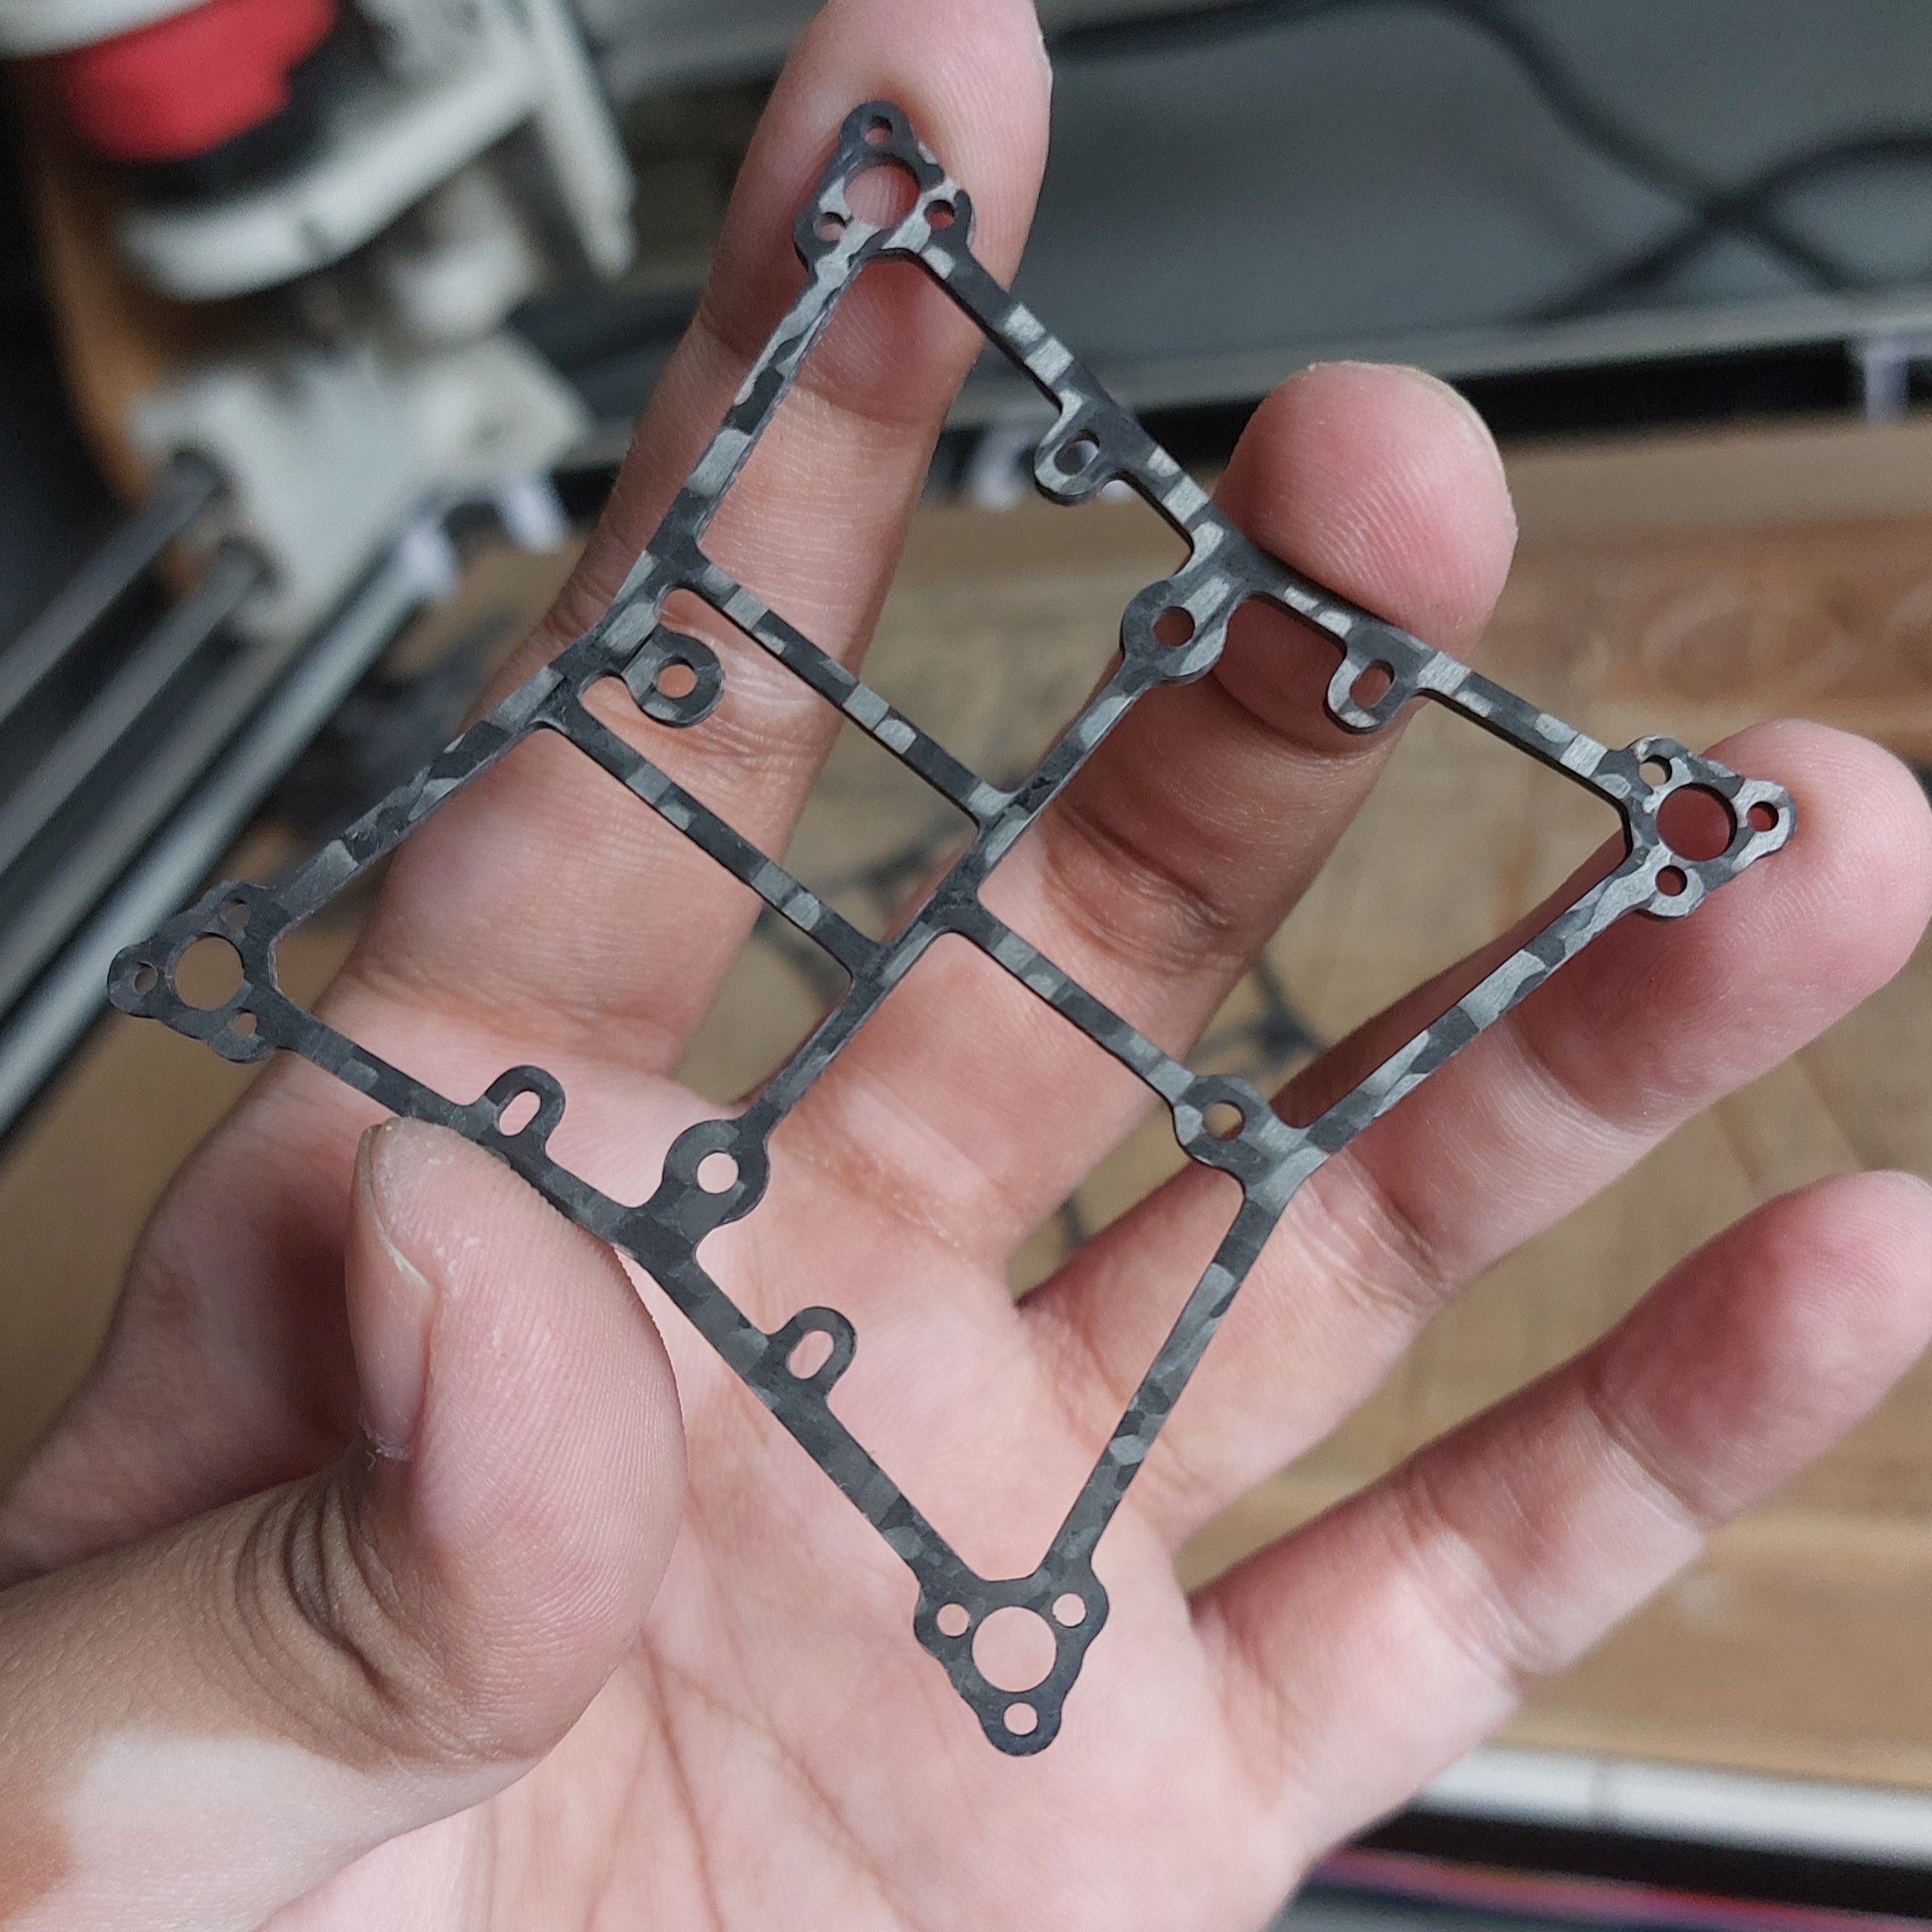
- The box style format is a reflection of my weight calculations and one of Quad66's videos [https://tinyurl.com/4rvfdjuw] where he states that the "Box style" with the weave going front, back, and side to side had better blackbox data compared to the "Traditional style" with the weave going diagonal to form an "X".
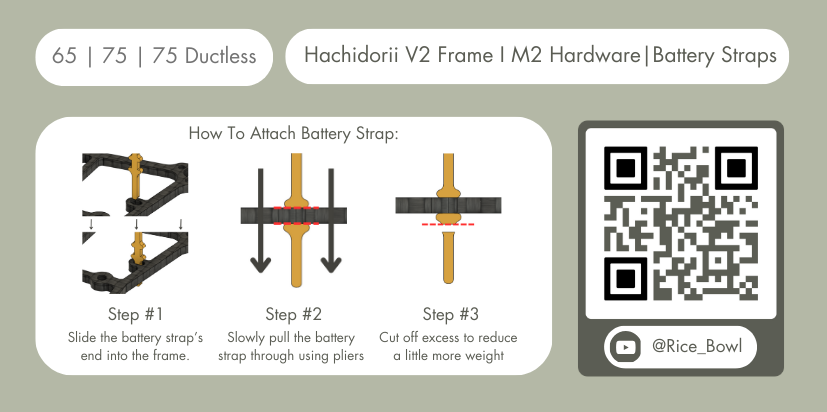
- The battery straps came from an old (I think from KababFPV) video where he states that having the battery firmly attached to the carbon fiber frame acts like a vibration dampener given that the battery has a considerable amount of mass. This was later supported by another recent Quad66 video [https://tinyurl.com/2pjk2c8a]. I have tried several other methods to hold the battery but the current method has the least weight while achieving that firm hold on the battery.
- I found that 3D Printed PLA ducts at this size have the same weight as the mobula 7 V4 ducts. This made me extremely excited. One of my next videos will be about this.
- Some will ask "how does this compare to the Fractal 75". The Hachidorii V2 and the Fractal 75 is actually very different. The duct mounting, FC mounting, battery straps, camera canopy, and component choices are all essentially different. The box geometry is just a reflection of weight reduction calculations, my preference in double braced arm designs, and Quad66's video. I also cannot make any meaningful comparisons between the performance between the two as I live in the opposite side of the world and can't easily obtain a frame from Fractal Engineering. The Fractal 75 is more refined and I consider it an All-Rounder compared to my Hachidorii V2's niche of indoor FPV. This is also my way of giving respect as I do admire the Fractal 75 and Fractal Engineering.
- Know that I use appropriate PPE and equiment when making these frames. If you plan to make frames, please be mindful of your health.
- Wish me luck in my Thesis next term
Photos


Part List
Show stores (11)
Hi, just got my kit from CnC madness and was wondering about your discord link. Maybe I'm putting it in wrong, but it says it's expired, so I just send you friends request
hey mann!! yeah its been buggy for some reason XD. My discord name is rice.bowl_9202 anddddd hopefully this link works XD
https://discord.gg/mArdkMFr

hi im a bit late on the game but is there a proper PID Tune out there that suits the Hachidori v2 ?


I built a HDZ ductless version and it's great! I would love to see what your PID tune looks like though :)
For some reason it's not letting me upload my picture too
I'm glad to hear that! you can message me in Instagram (@im_ricebowl). I'd love to see it and how she flies! actually the tune used in most of my videos so far is just using the UAVTech whoop preset > set master slider to 1.2 > increase P and D a bit. Will be doing a proper blackbox tune soon! just waiting for a new FC to come in


wow, dude!! this is incredible! I've been going over ideas like this in my head ever since I started building Fractals. I don't have the tools or space, but it seems like you've addressed everything about the fractal that I don't love. if there's any way to get a couple shipped to Canada, please let me know! happy to support this project. email: maxpower_421@hotmail.com thanks dude, and good luck! 👍🏻
I've wanted the fractal for such a long time but I agree I had some concerns that made me hesitate on getting one (canopy, flight controller mounting, and shipping costs). Slowly getting myself to have a proper CNC so I took the chance. I will me emailing CNC Madness after the weekend! and from what I know they ship in the US and Canada! I may just not get a cut from it to reduce costs
awesome, man!! sorry i just found this notification in my junk folder. that'd be perfect, as i live only one province away from cncmadness and i actually order from them regularly.
see how it would work out for you, and if you need me to send you a few bucks to make it worth your time, im happy to compensate you for your design and time.
the fractal has a lot good going for it. i actually like the way the fc mounts, and ive found it to offer waaay better protection than with a typical whoop, and since I also regularly fly 5", I also like that the camera is at the same level and out front of the motors.
where I find it falls short, is the battery mount. I wish it went toilet tank because you get a massive pendulum action that makes it very difficult to accurately negotiate tight cornering and freestyle roll maneuvers. i tried it for racing, but ended up flying the Newbeedrone cockroach v3 with a carbon brace. it's very good, but I love the look of yours and it'd like to experiment.
shoot me an email with the info, if you don't mind! cheers dude, have a great week! 😁
Beautifully done. Frame looks great, video is very solid, and the writeup is super detailed. Very enjoyable post. My only complaint is I want a bnf version I can buy!


Got rice?
In a bowl - yes!