
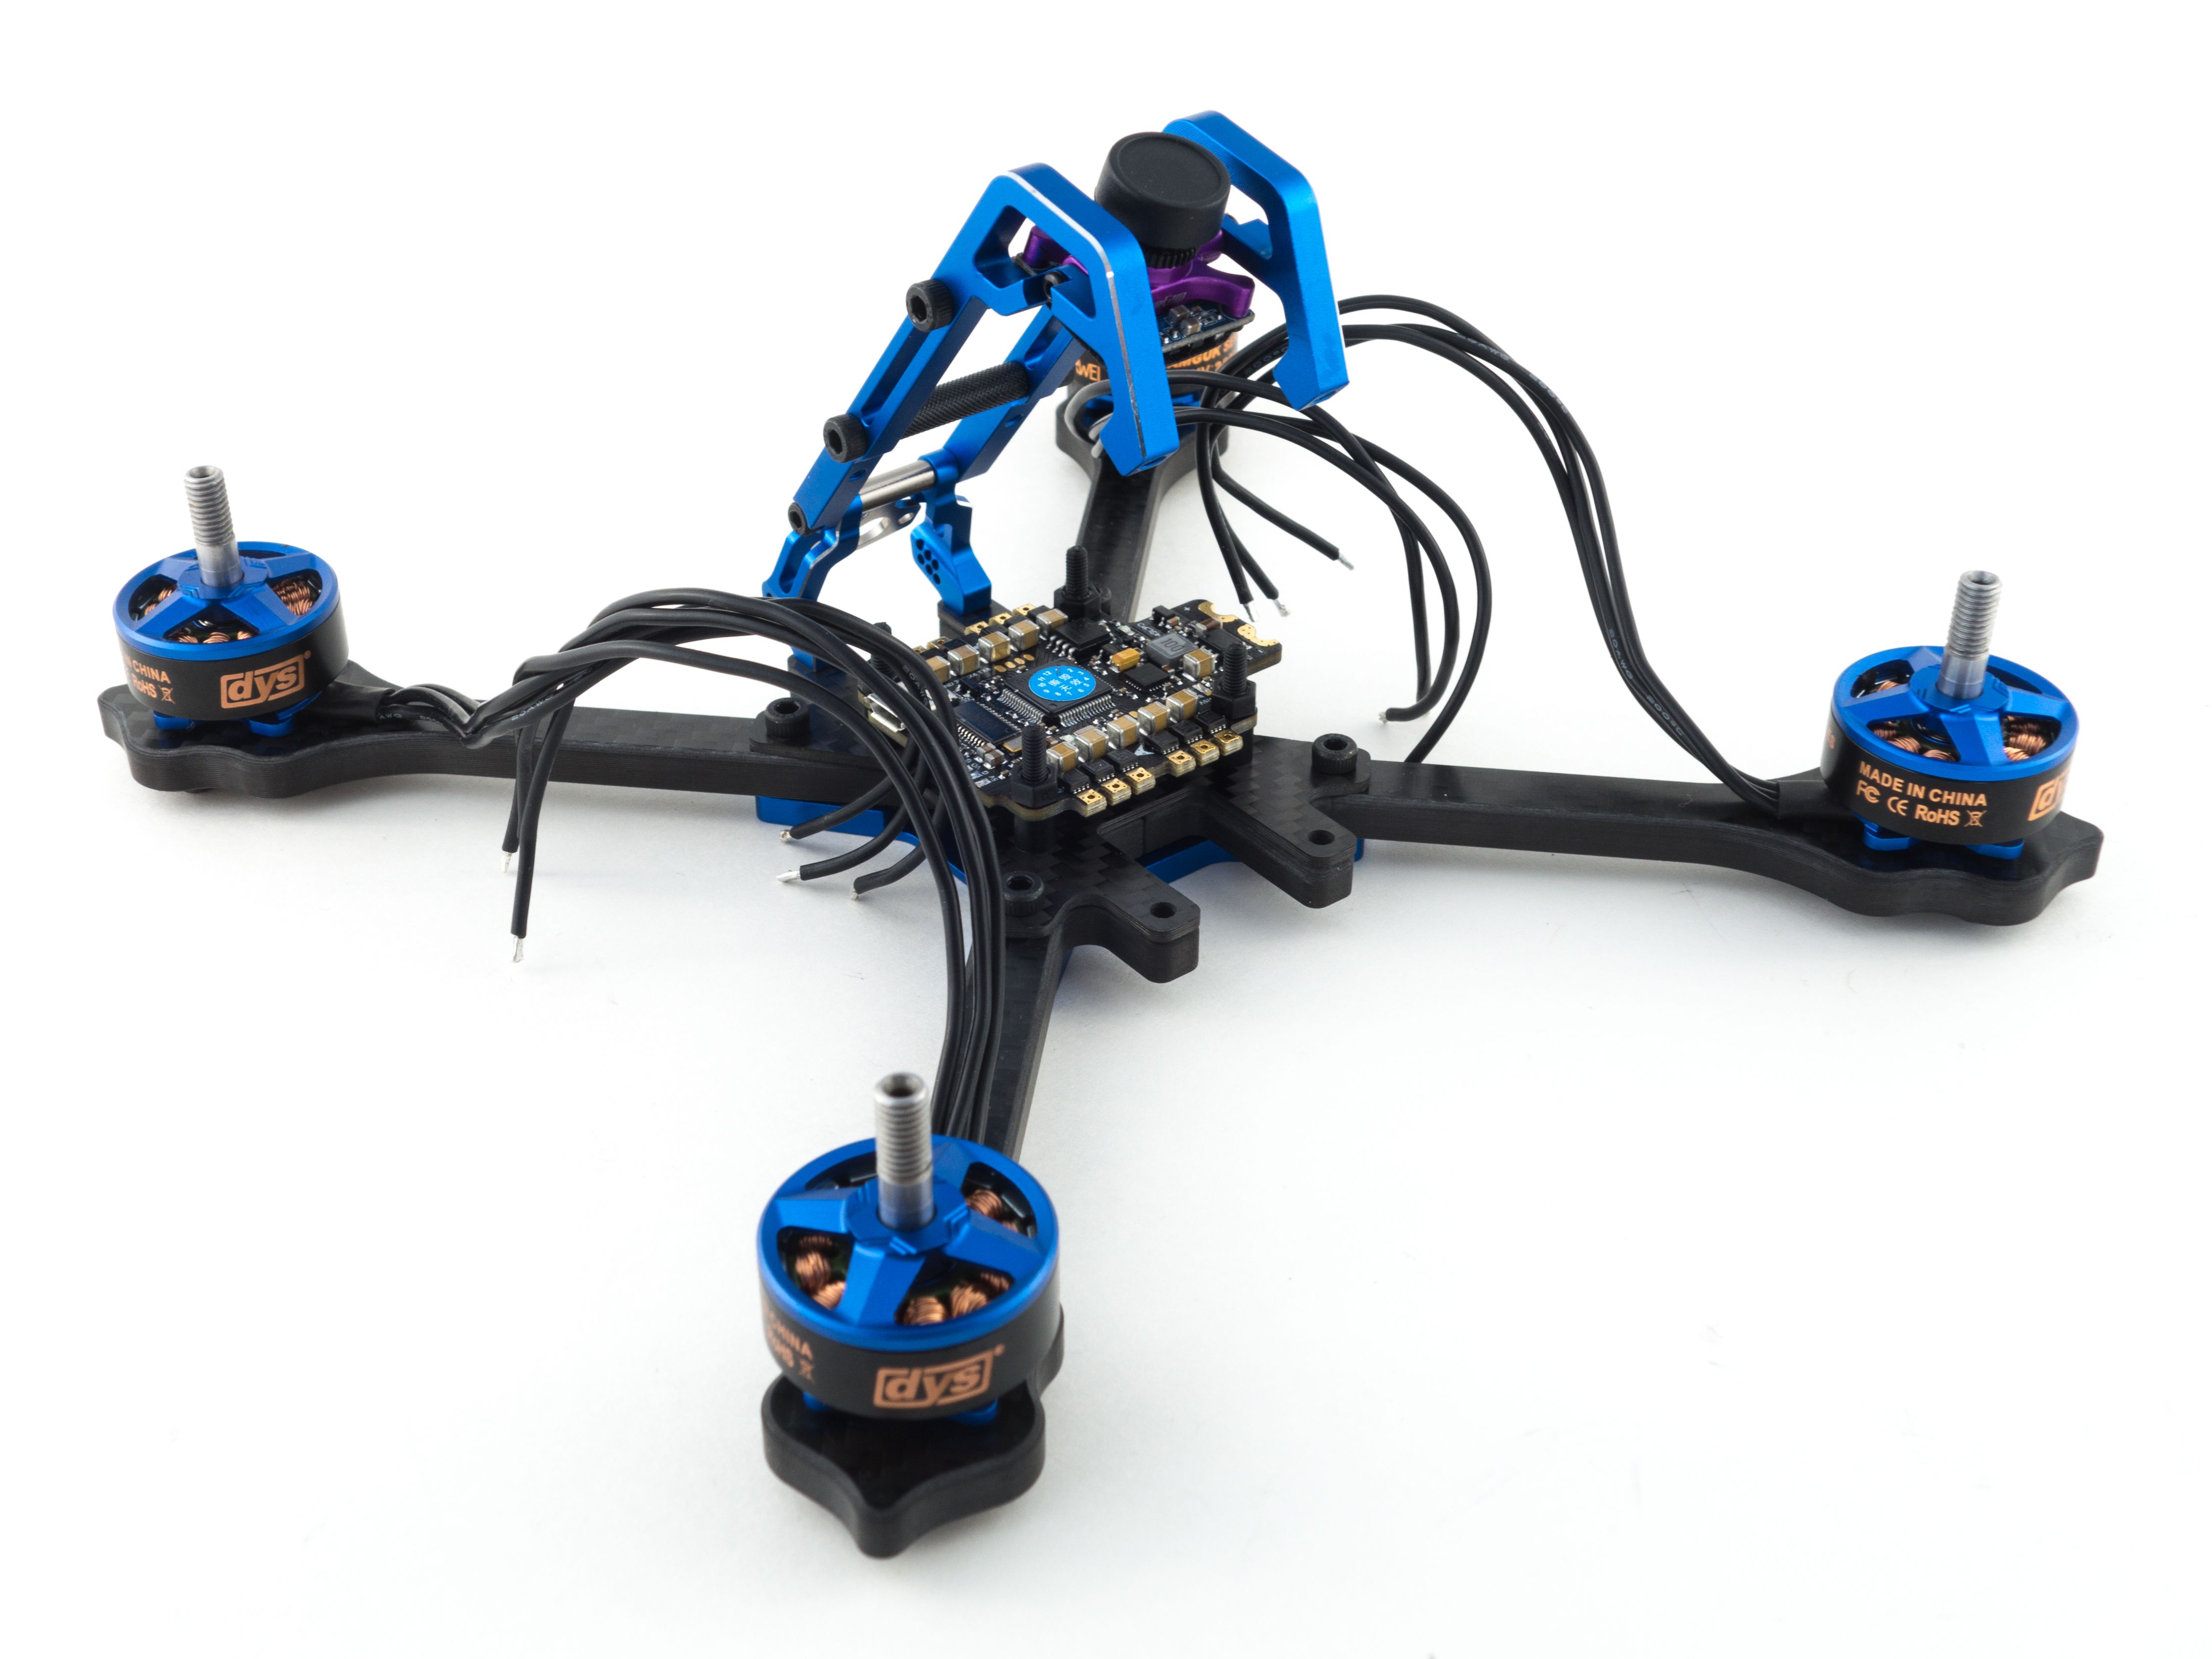
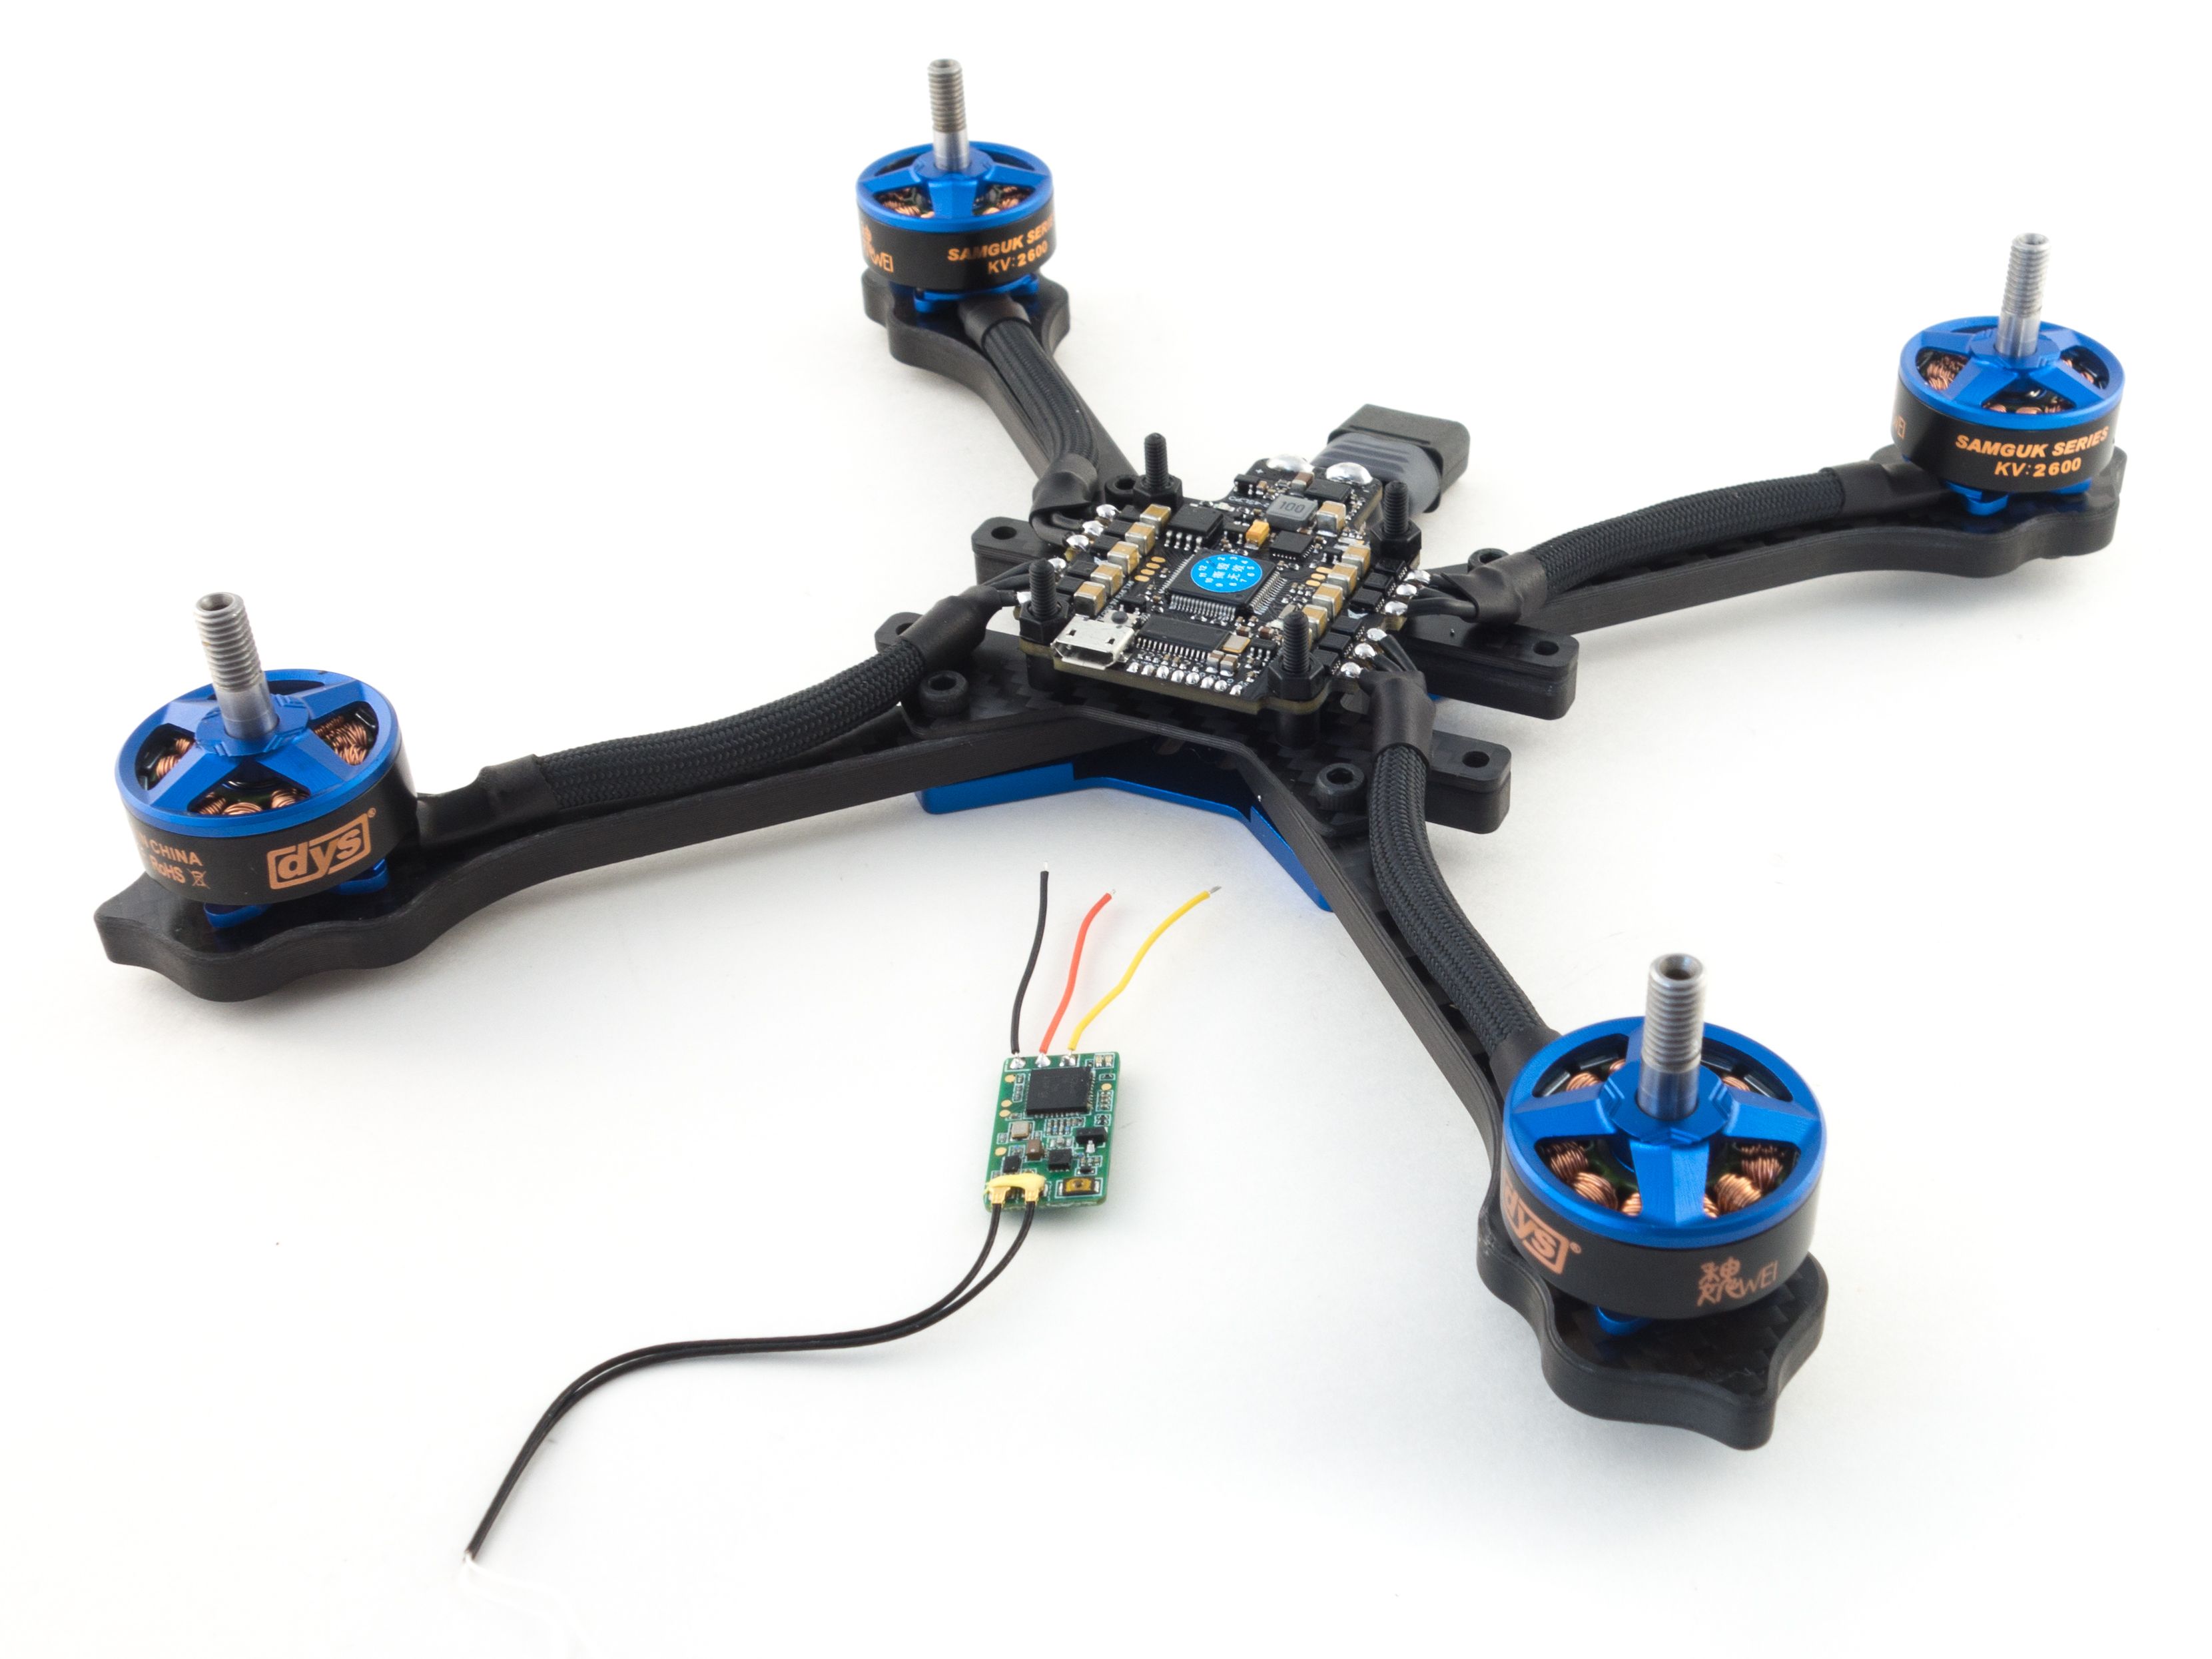
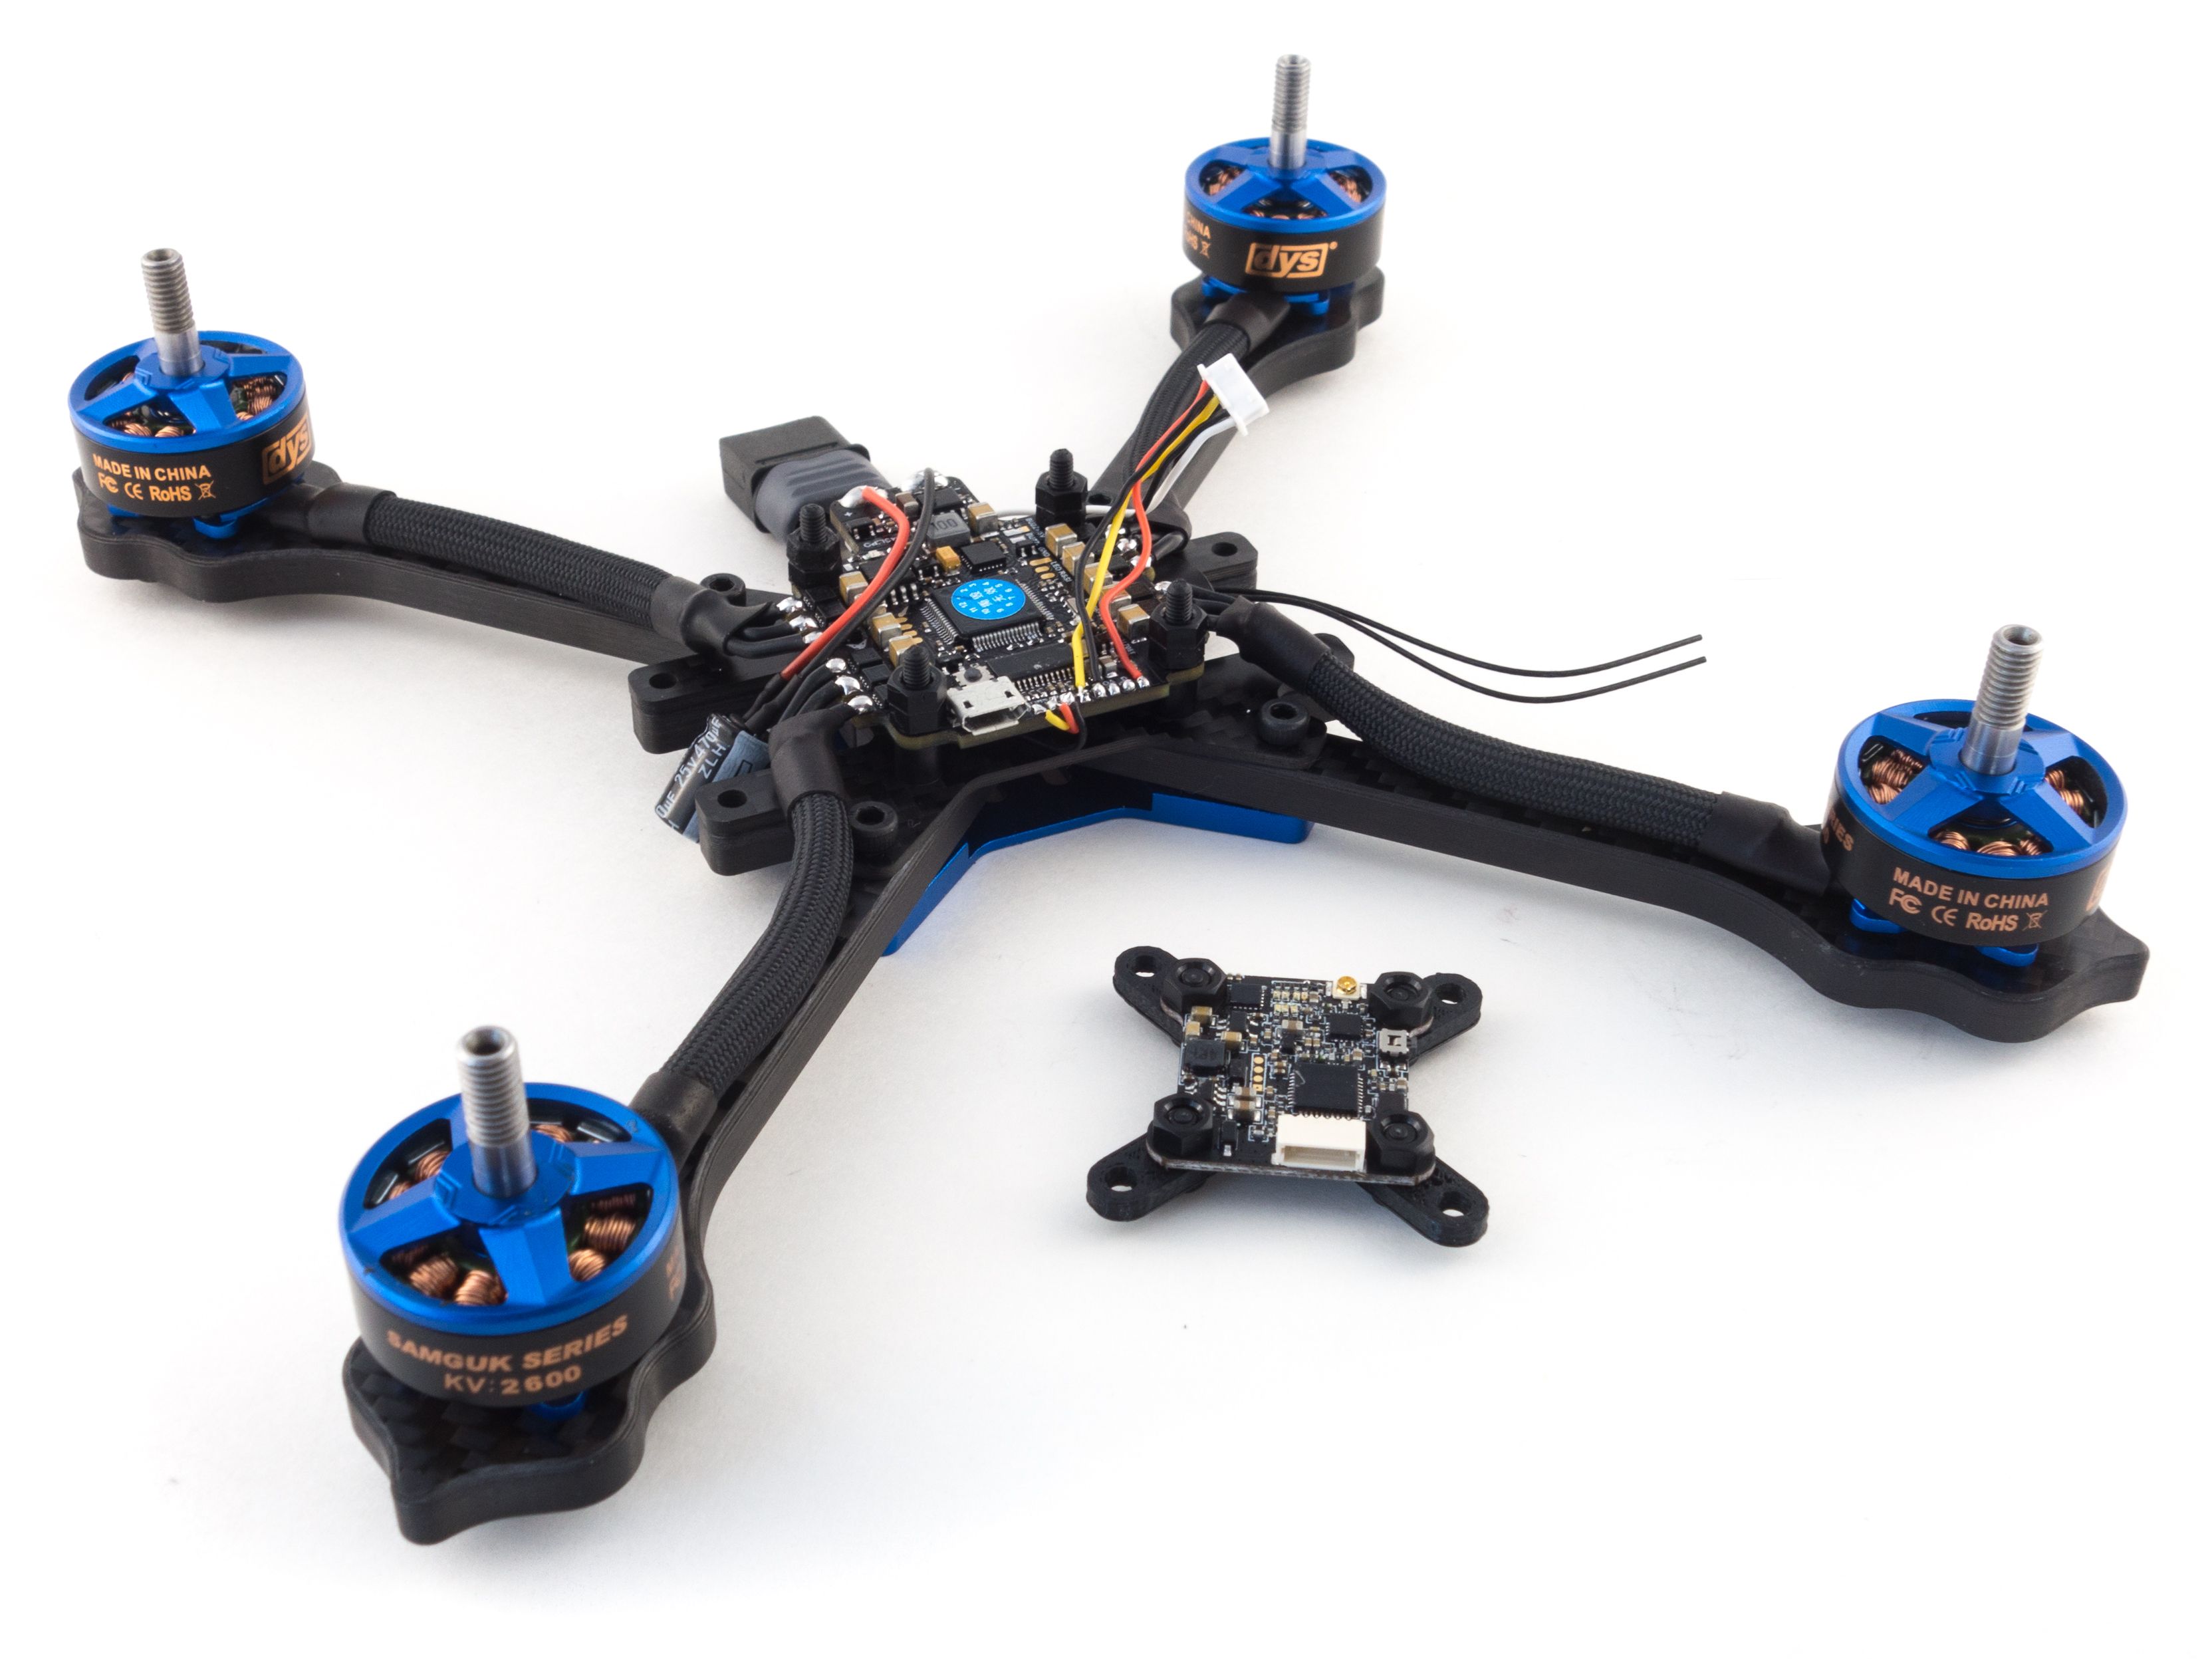
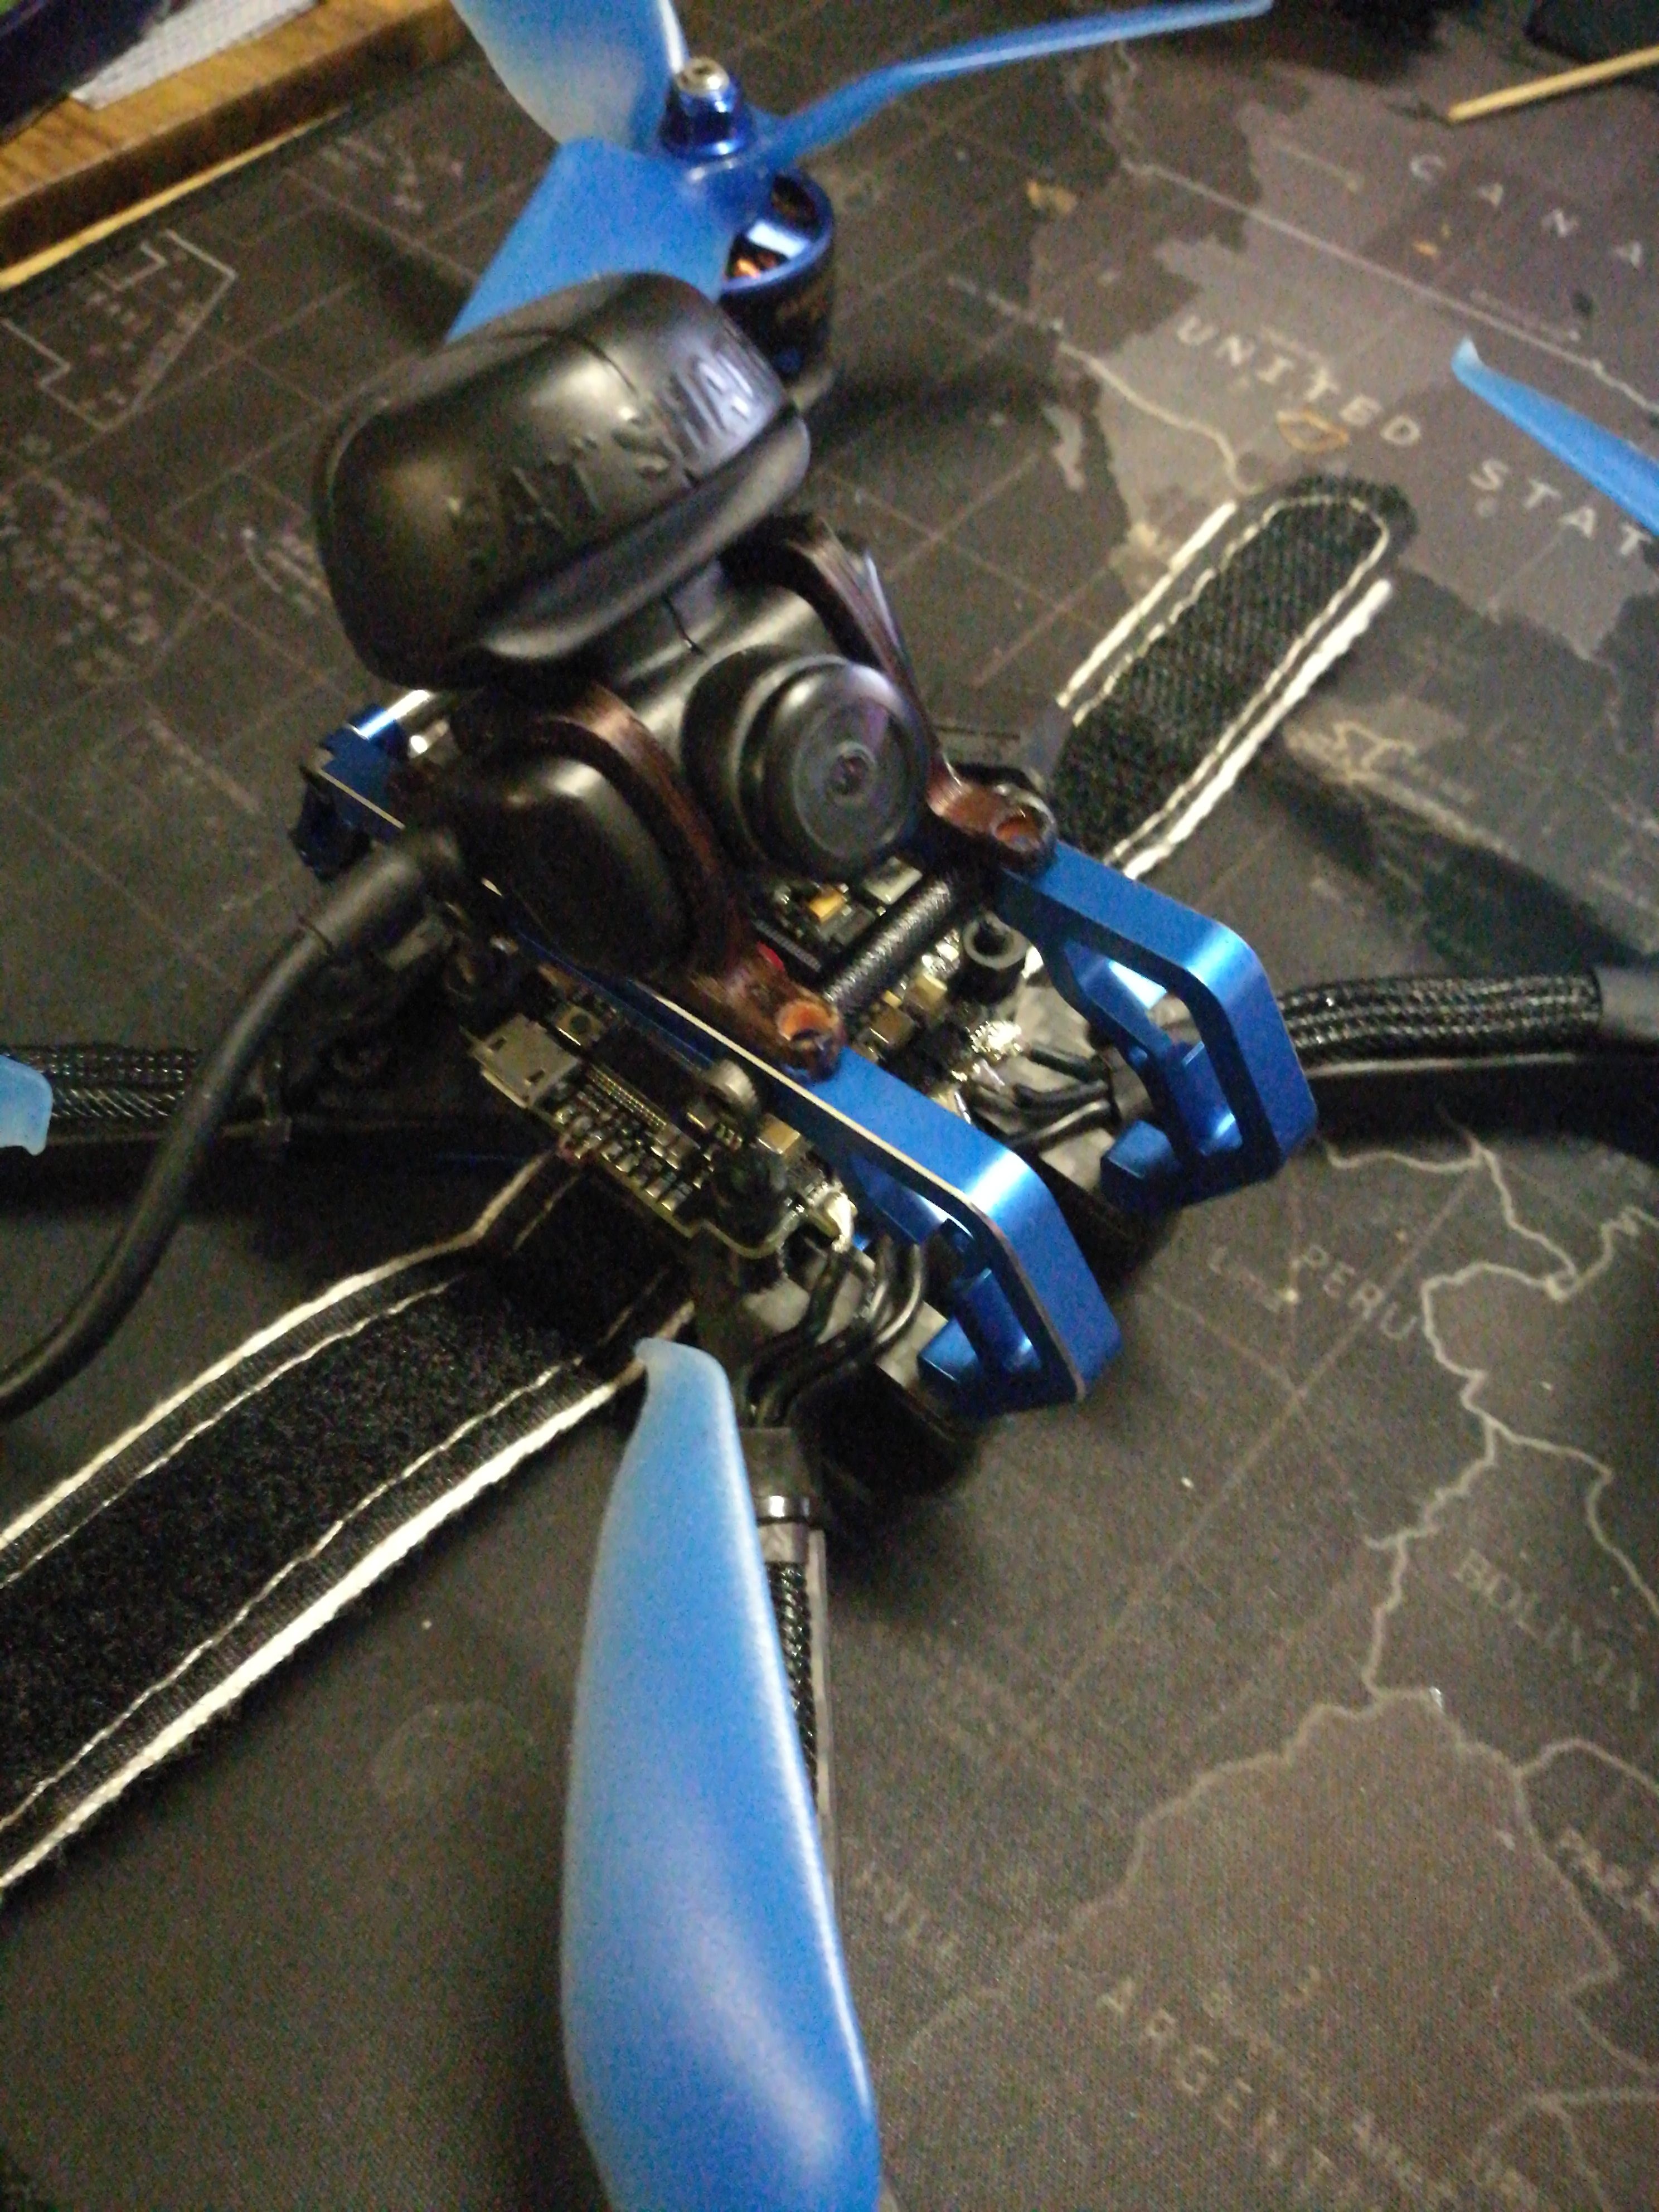
The Diatone GT-M200 is a racing/freestyle frame that features an aluminum alloy cage and 6mm replaceable arms. The goal of this build was to balance price, features and quality. It features an F4 flight controller which allows an 8khz gyro update and PID loop frequency and the latest filters. Additionally with BLHeli_32 it supports the DSHOT1200 motor protocol and custom startup music. This also features an OSD configurable VTX (video transmitter) and the Runcam Sparrow 2 with it's 4:3 CMOS sensor and WDR (wide dynamic range). Despite a few tiny solder pads this is a fairly straightforward build that should be doable as a first build.
Tools
While the components are listed below there are a number of tools you'll need:
- Soldering iron with broad and fine tips
- 1.5mm, 2.0mm, and 2.5mm hex drivers
- Jewelers Precision Screwdrivers
- Industrial Tweezers
- Wire cutters
- Scissors
- Heat gun or lighter
Frame Assembly
This frame required every hex driver in my arsenal, so get ready to juggle some drivers. While we won't be using the canopy quite yet, it's a good idea to fully assemble the frame to make sure everything fits properly.
- Collect the arms, carbon plate and aluminum plate to assemble the base.
- Use 4 of the 12mm M3 screws to sandwich the arms between the carbon plate and the aluminum plate.
- Make sure the battery strap slot is oriented side to side.
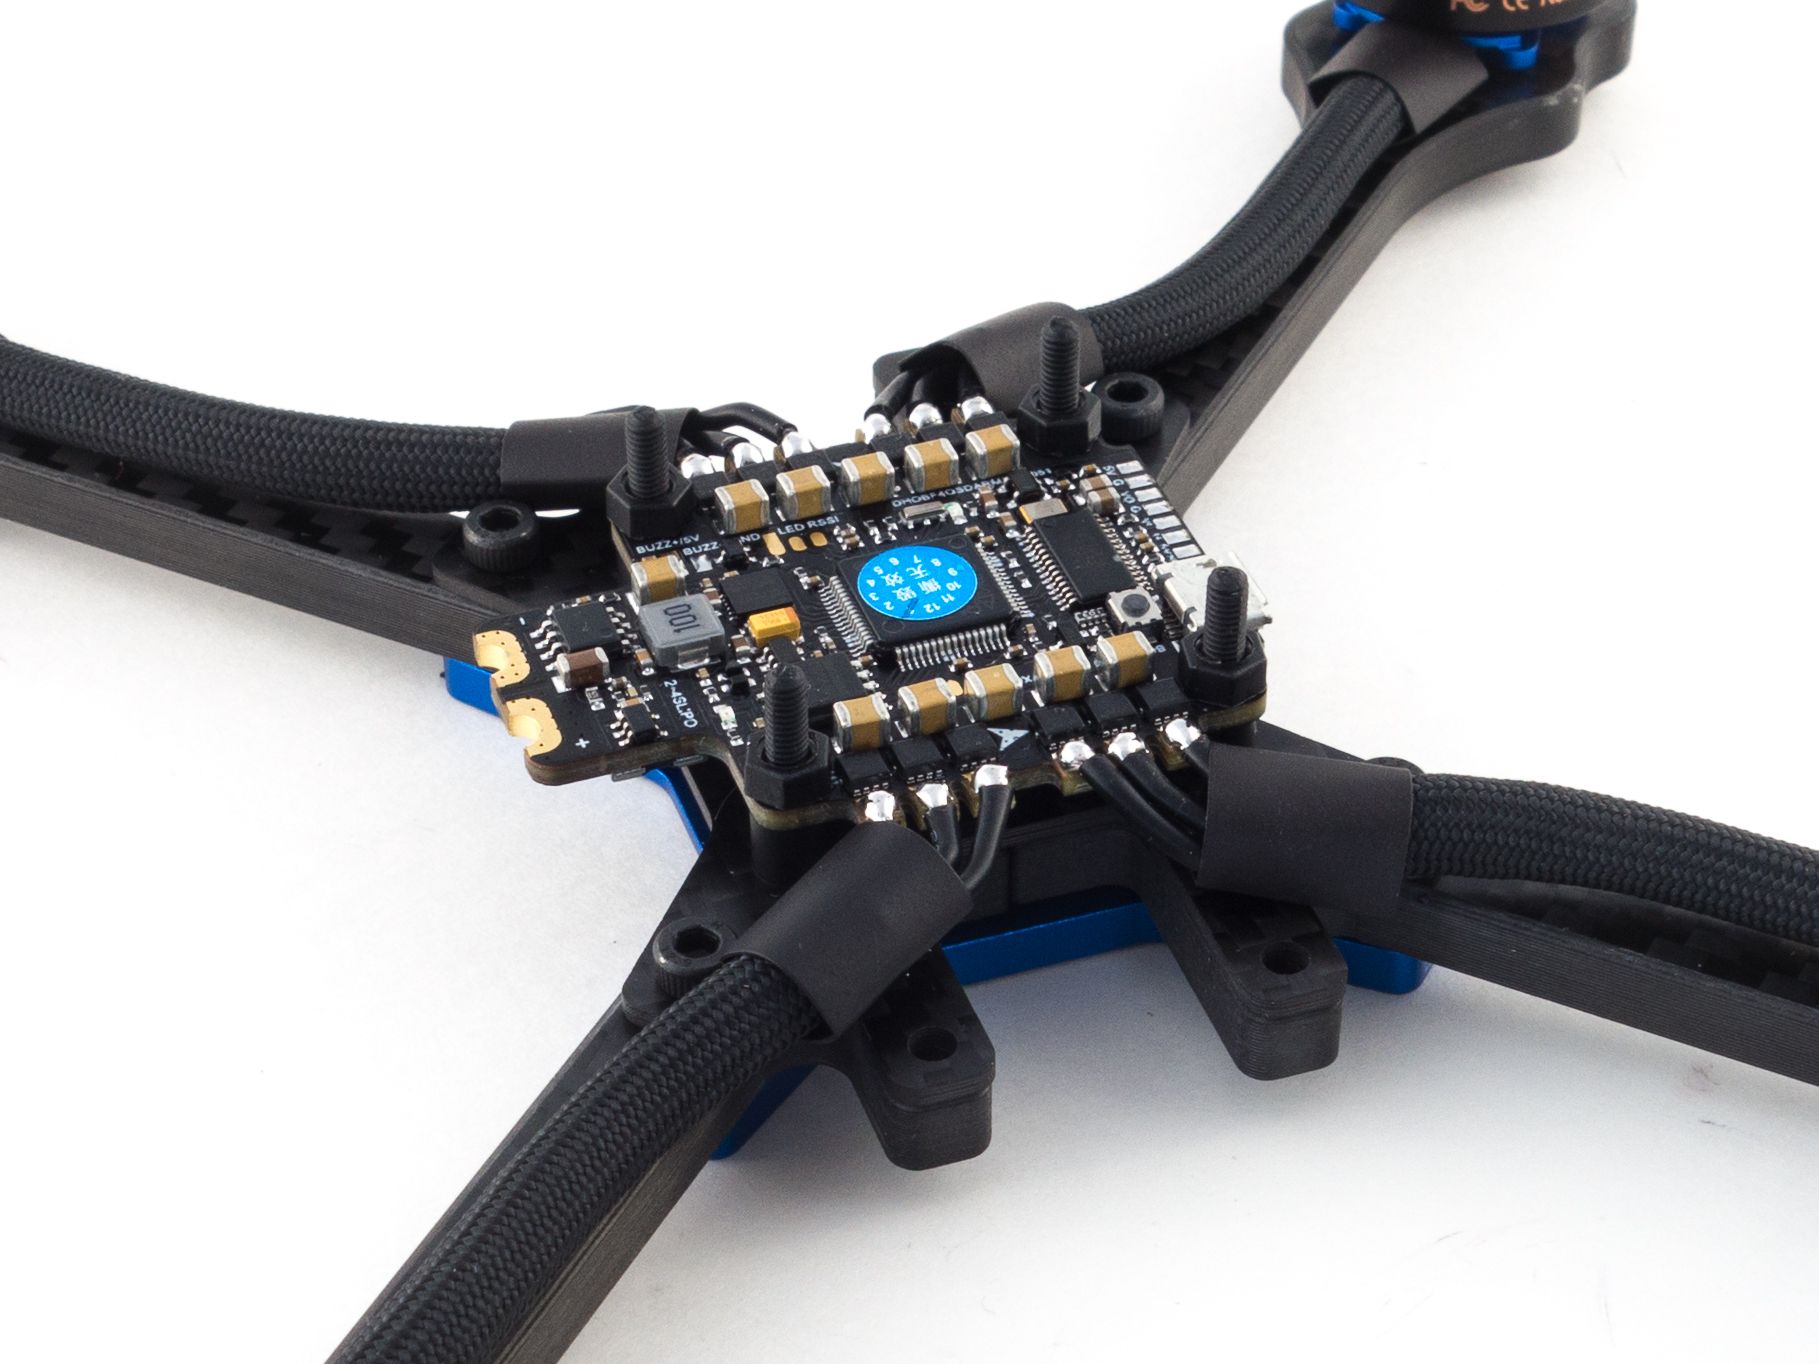
- Use the longer nylon screws (25mm) to mount the flight controller.
- Mount the flight controller on the cylindrical 5mm spacers to leave room for the receiver below.
- Temporarily secure the flight controller with a couple nylon nuts.
- Build the canopy by first screwing the two sides together with the included knurled spacers.
- Slide the camera into place and screw it in using the included M2 screws.
- Assemble the hinge with the antenna mount and rear brackets.

Motors
Once the flight controller is in place it's time to wire the motors. I like to sleeve my motor wires for protection, but you'll need either a 7/32" cord like BattleCord or a 1/4" cord like Paracord Para-Max. It'll protect the motors from prop strikes and looks great! To begin you'll want to prepare all the sleeving and shrink tube.
- Cut 4 pieces of cord to 7 cm lengths, remove the inner core and, with a lighter, melt the ends to prevent frays.
- Sleeve the motor wires and cover the ends of the cord with 1cm of 12mm shrink tube.
- With the sleeve in place screw each motor onto the arms.
- Use the 8mm M3 screws included with the frame or 10mm M3 screws if you have them.
- Use blue Loctite to prevent the screws from loosening.
- After the motors are mounted add another 1cm piece of shrink tube to cover the other end of the cord.
- Flux and tin each motor pad.
- If you're right handed start from the rightmost motor pad and solder all 6 wires from right to left.
- If you're left handed start from the left.
- This keeps the wires out of the way of the tweezers.
- Cut each wire to length as you go being sure to strip and tin each tip.
- Position the shrink tube over the ends of the cord and melt it to hold it in place.
Power Connector
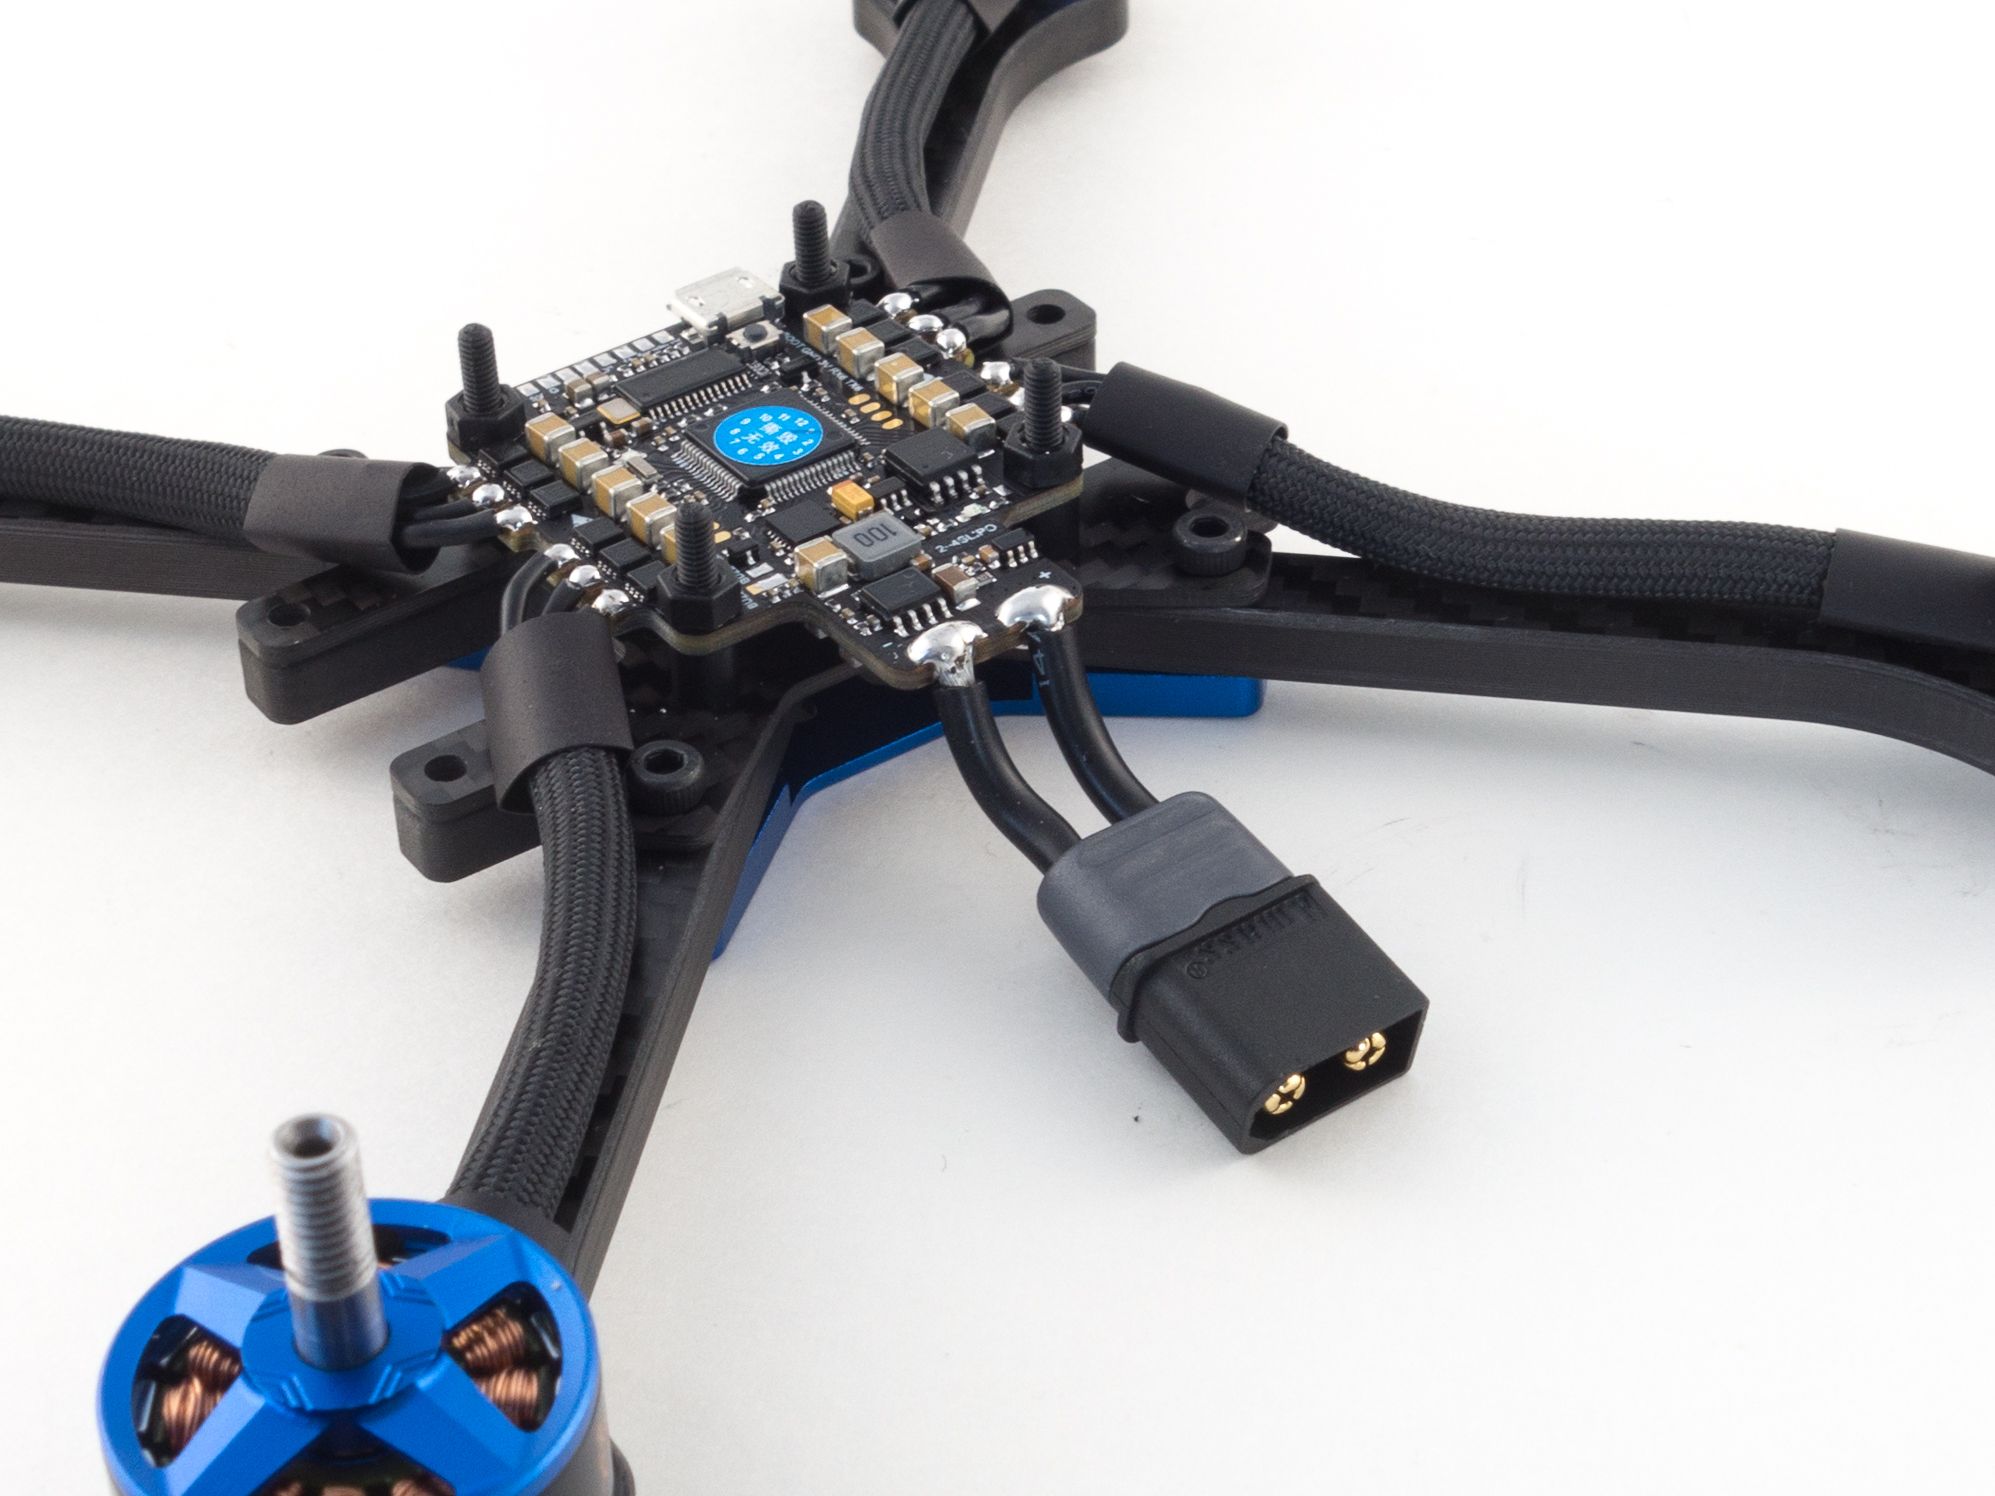
Before you can bind your receiver you need a way to power your board. The key here is to solder your wire to the XT60 connector before you solder it to the tab. It's a lot more challenging to add the XT60 after the wires are in place. You should be able to get away with only about 2.5cm of 14awg wire. This particular board has a grooved tab which works fairly well. Just fill the grooves with plenty of solder. Hold the wire vertically and with a broad tip push it into the groove until it melts into place. Make sure the XT60 points downward as this frame requires a bottom-mounted battery.
Receiver
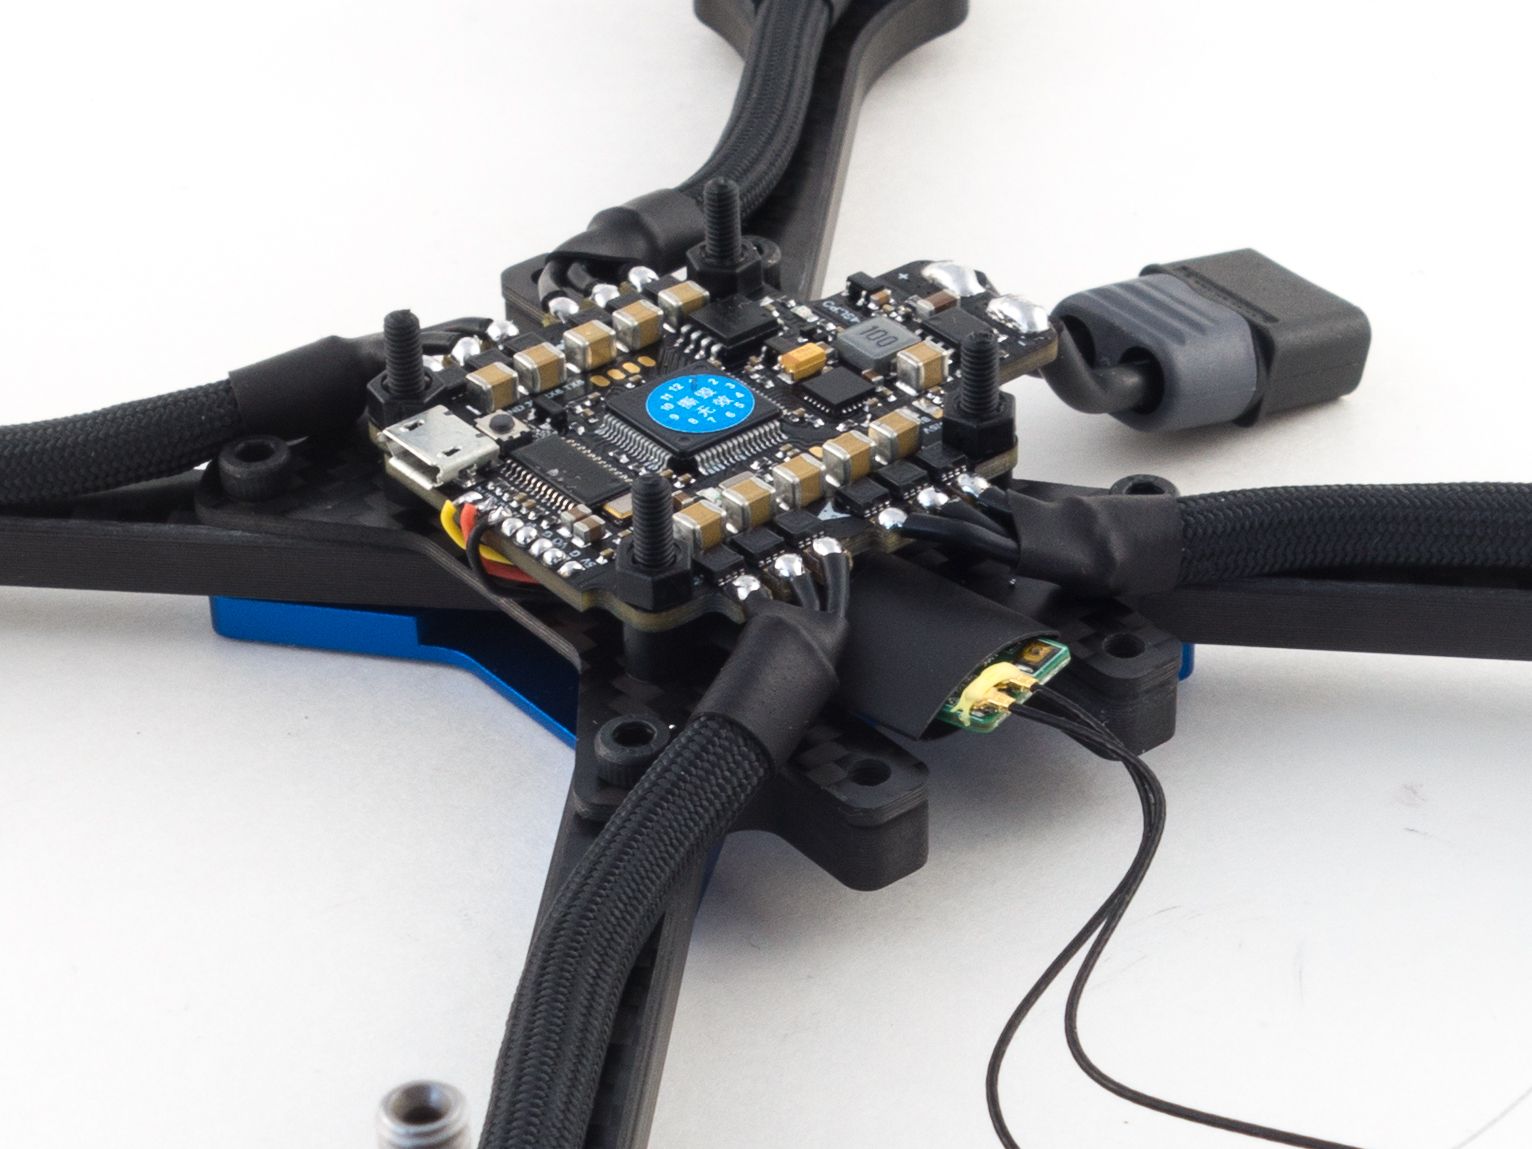
Now you can add your receiver. It's always a good idea to get this out of the way early so you can bind and tuck it under your flight controller.
- First solder 3 wires to the receiver.
- You can use about 3cm of excess wire from the VTX cable.
- Slide the receiver under the flight controller so the bind button and antennas are up front.
- Solder the wires to the flight controller by curling them up from under the board.
- Add shrink tube to the receiver to protect it from shorts against the bottom of the flight controller.
- Test main power leads and receiver wires for continuity.
- Power your flight controller while binding your receiver to your transmitter.
- Slide the receiver under the flight controller.
- Add zip-ties to your front arms and shrink-tube the antennas to the zip ties.
- Make sure the exposed tips of the antennas run under the zip ties for better protection.
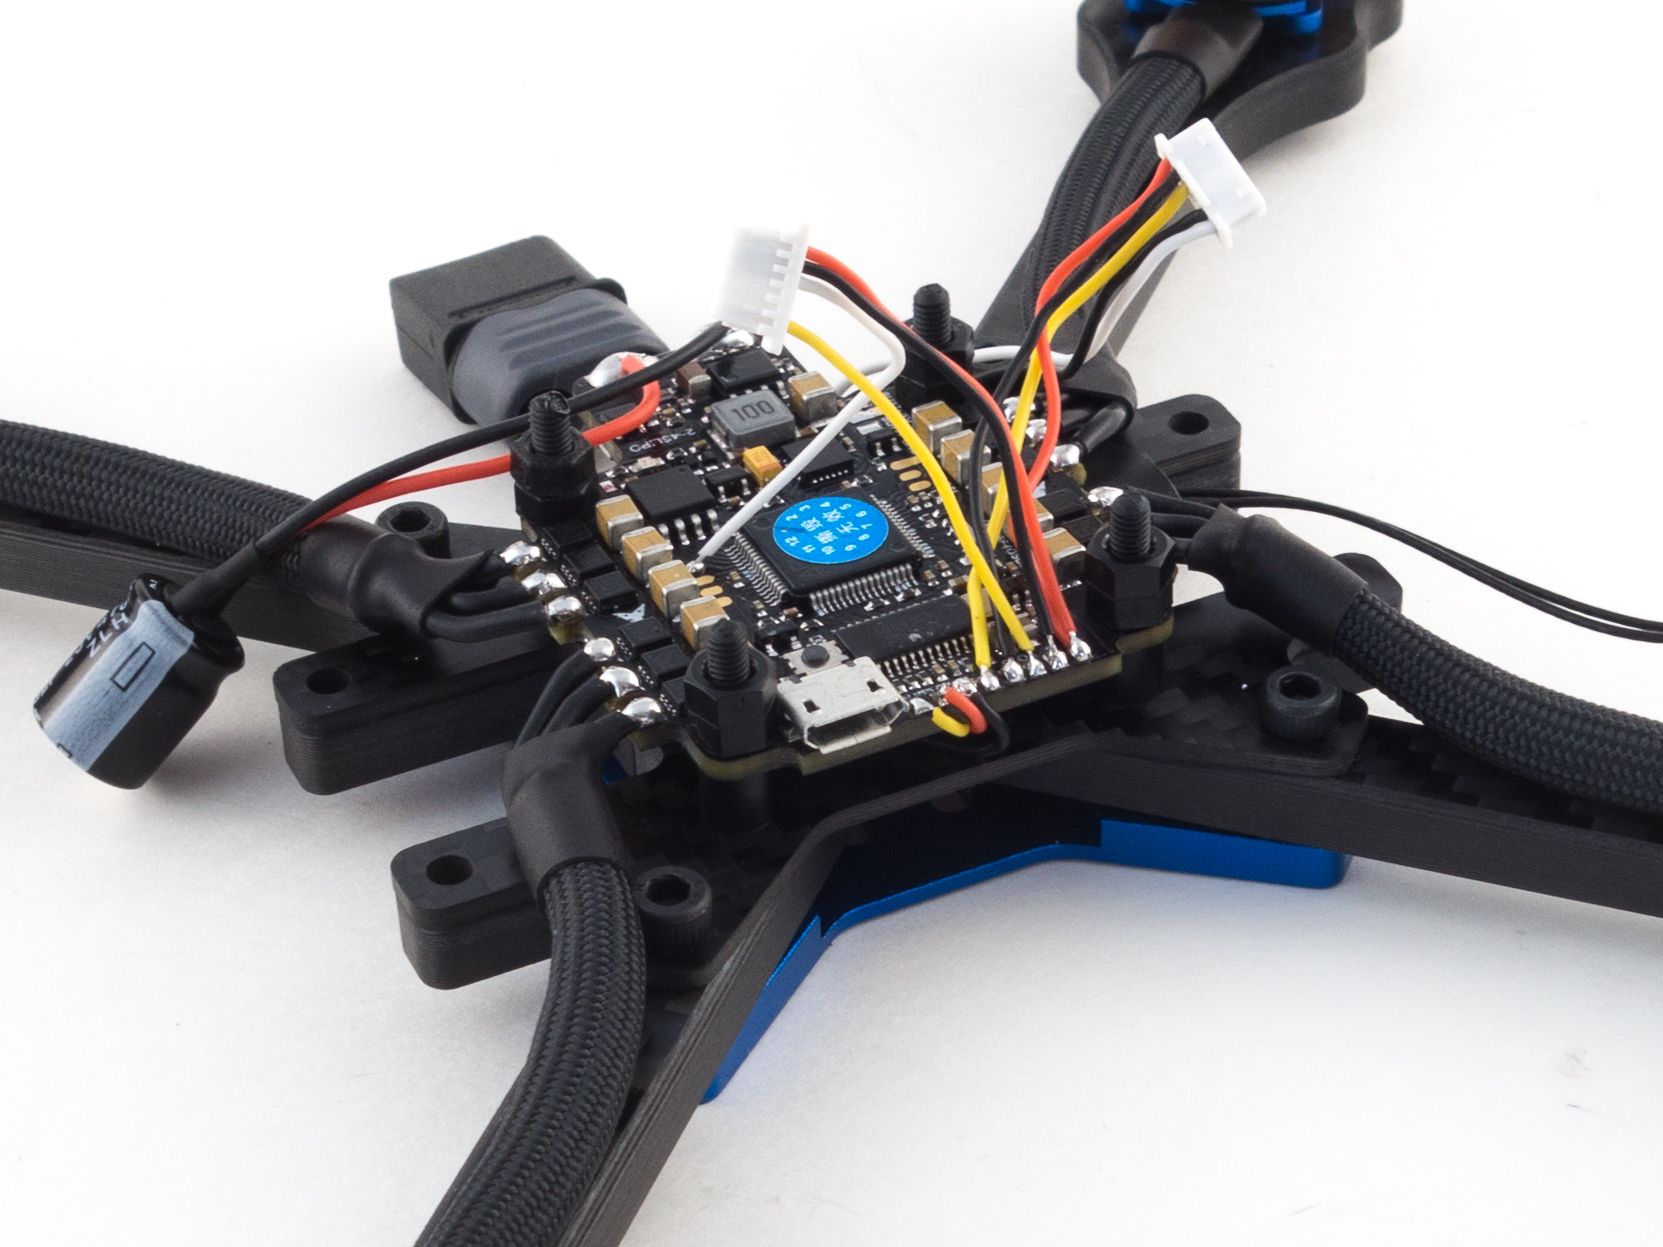
Capacitor
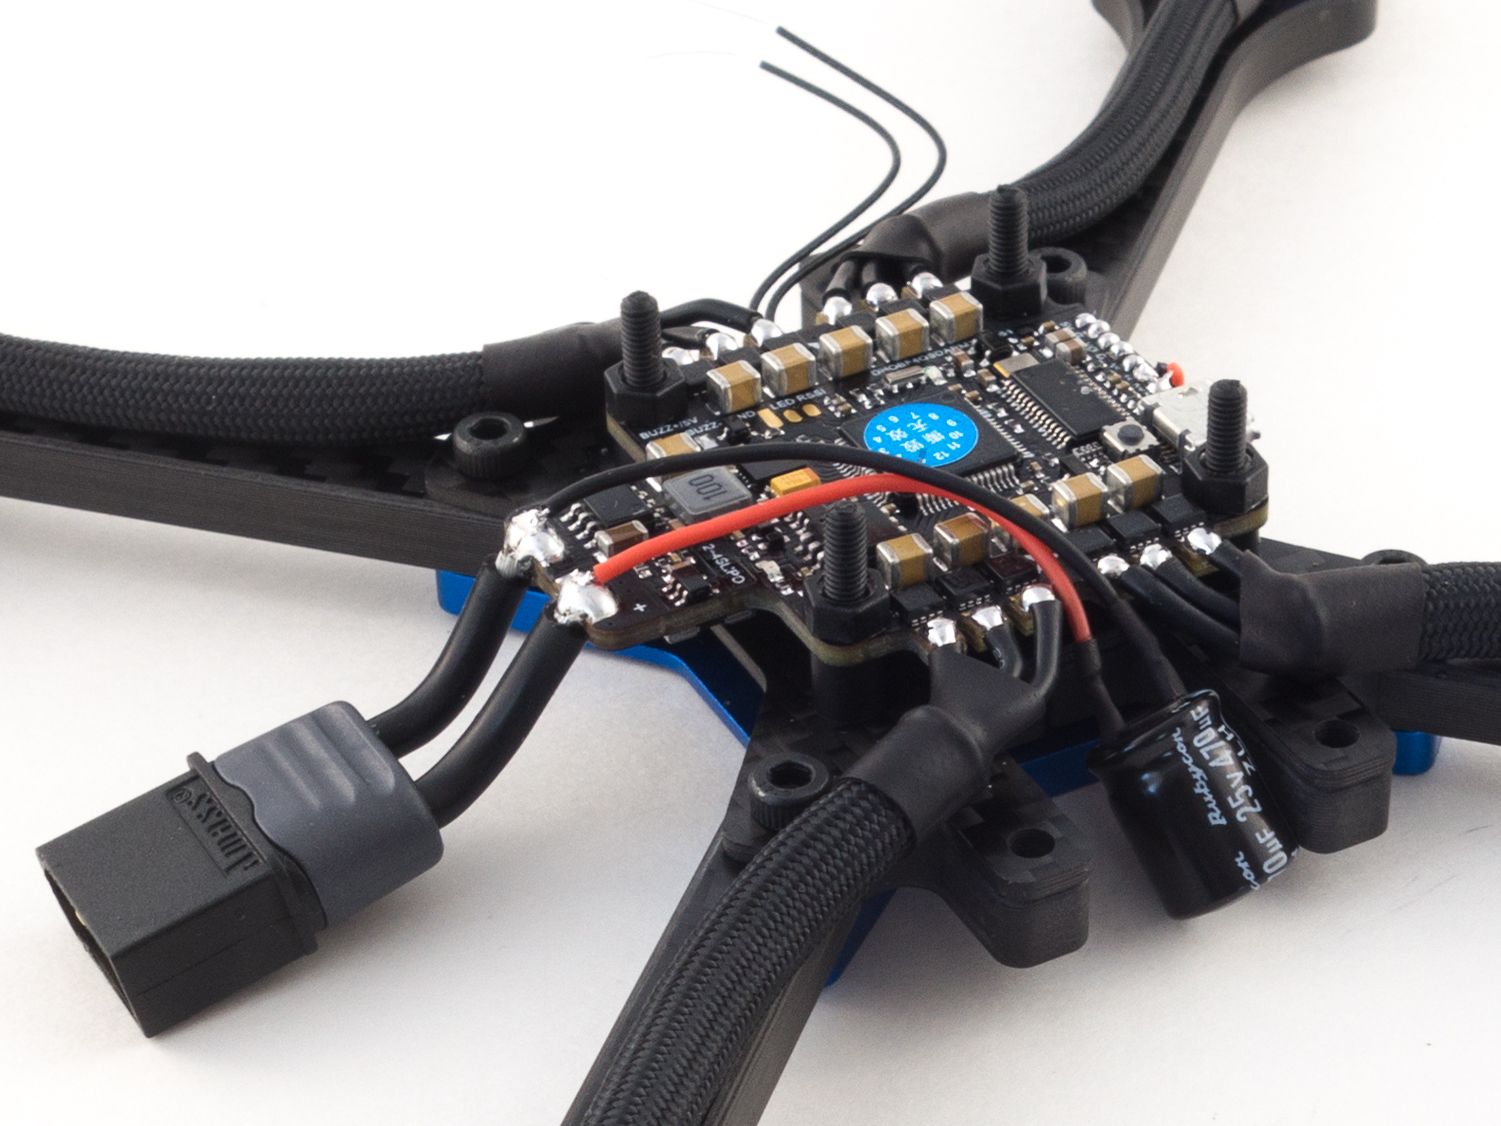
It's generally a good idea to add a capacitor. This helps filter electrical noise and helps eliminate any random twitches you might experience during flight. Just snip the capacitor legs down to about 5mm and solder a few cm of wire to them. You can use some clippings from your motor wires. Cover the joints with shrink tube and solder the other ends to your main power leads. Make sure you've got the polarity correct. It helps to cut the positive wire a little shorter than the negative to give the wires a slight curve back behind the board. Use a little square of double sided foam tape to hold it in place.
FPV Camera
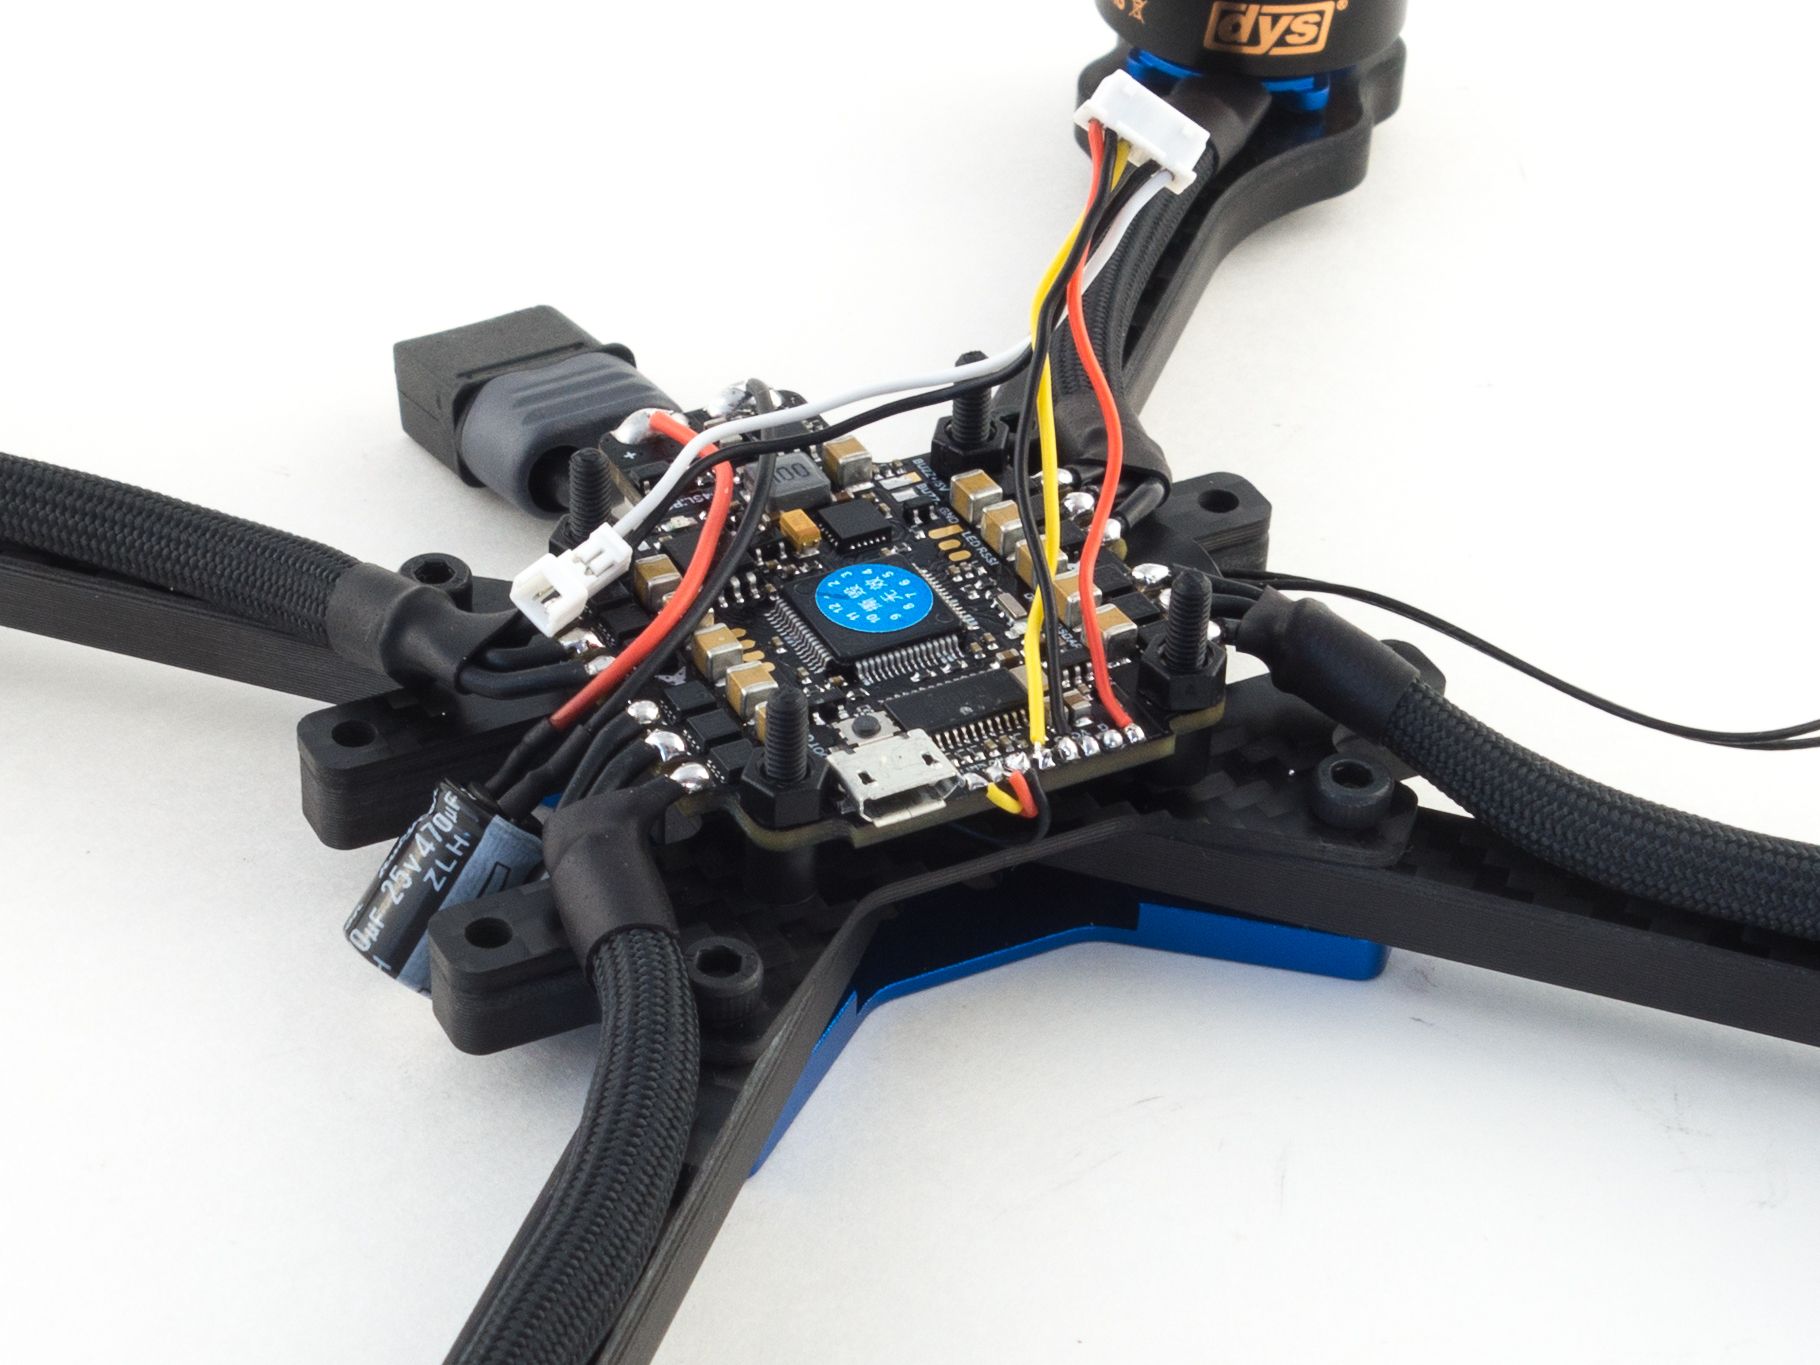
If you've got an external monitor you can adjust your camera settings first without wiring the camera and VTX. You'll just have to get creative with the connector. Mainly all you need to do is disable the camera OSD. To access the OSD menu hold up on the control pad from the main menu. I prefer this method because adjusting the camera through the VTX requires proper cooling to keep the VTX from overheating. This VTX does have a pit mode though, so you can use that to avoid shut down. Now let's wire the camera to the flight controller.
- Remove the purple wire from the wire harness as we won't need the OSD voltage reading.
- You can remove the ground and menu wires if you already changed the camera settings, or you can leave them and tuck the connector behind the camera for later use.
- With the canopy in place and the camera cable plugged in cut the camera wires to length allowing a few mm of slack.
- Unplug the camera and remove the canopy.
- Solder the wires to the video input, ground and 5v pads.
Video Transmitter
The video transmitter says it requires 7v, but it functions just fine at 5v so I think it's safer to share the 5v output of the flight controller with the camera. You can power the VTX from the main power leads and you'll probably be fine with the capacitor, but it doesn't hurt to take power downstream through the regulator. This also simplifies your wiring as you won't need to power your camera through the VTX.
- Mount the VTX to the 20mm stack adapter.
- I used flush cutters to remove the nubs so longer screws aren't necessary.
- I used M3x8mm countersunk hex screws and nylon nuts to hold the VTX to the adapter.
- Remove the 5v wire and the extra ground wire from the VTX wire harness.
- Plug the wire harness into the VTX and mount it above the flight controller with the U.Fl connector in the back.
- I separated the flight controller from the VTX with same cylindrical spacers used under the flight controller.
- Separate the white wire as that will connect to the TX6 pad for Tramp OSD control.
- Run the wires under the VTX to their respective pads and cut them to length.
- Remove the VTX + adapter, unplug the wire harness and solder all of the wires.
- Put the VTX back, plug it in and secure with nylon nuts.
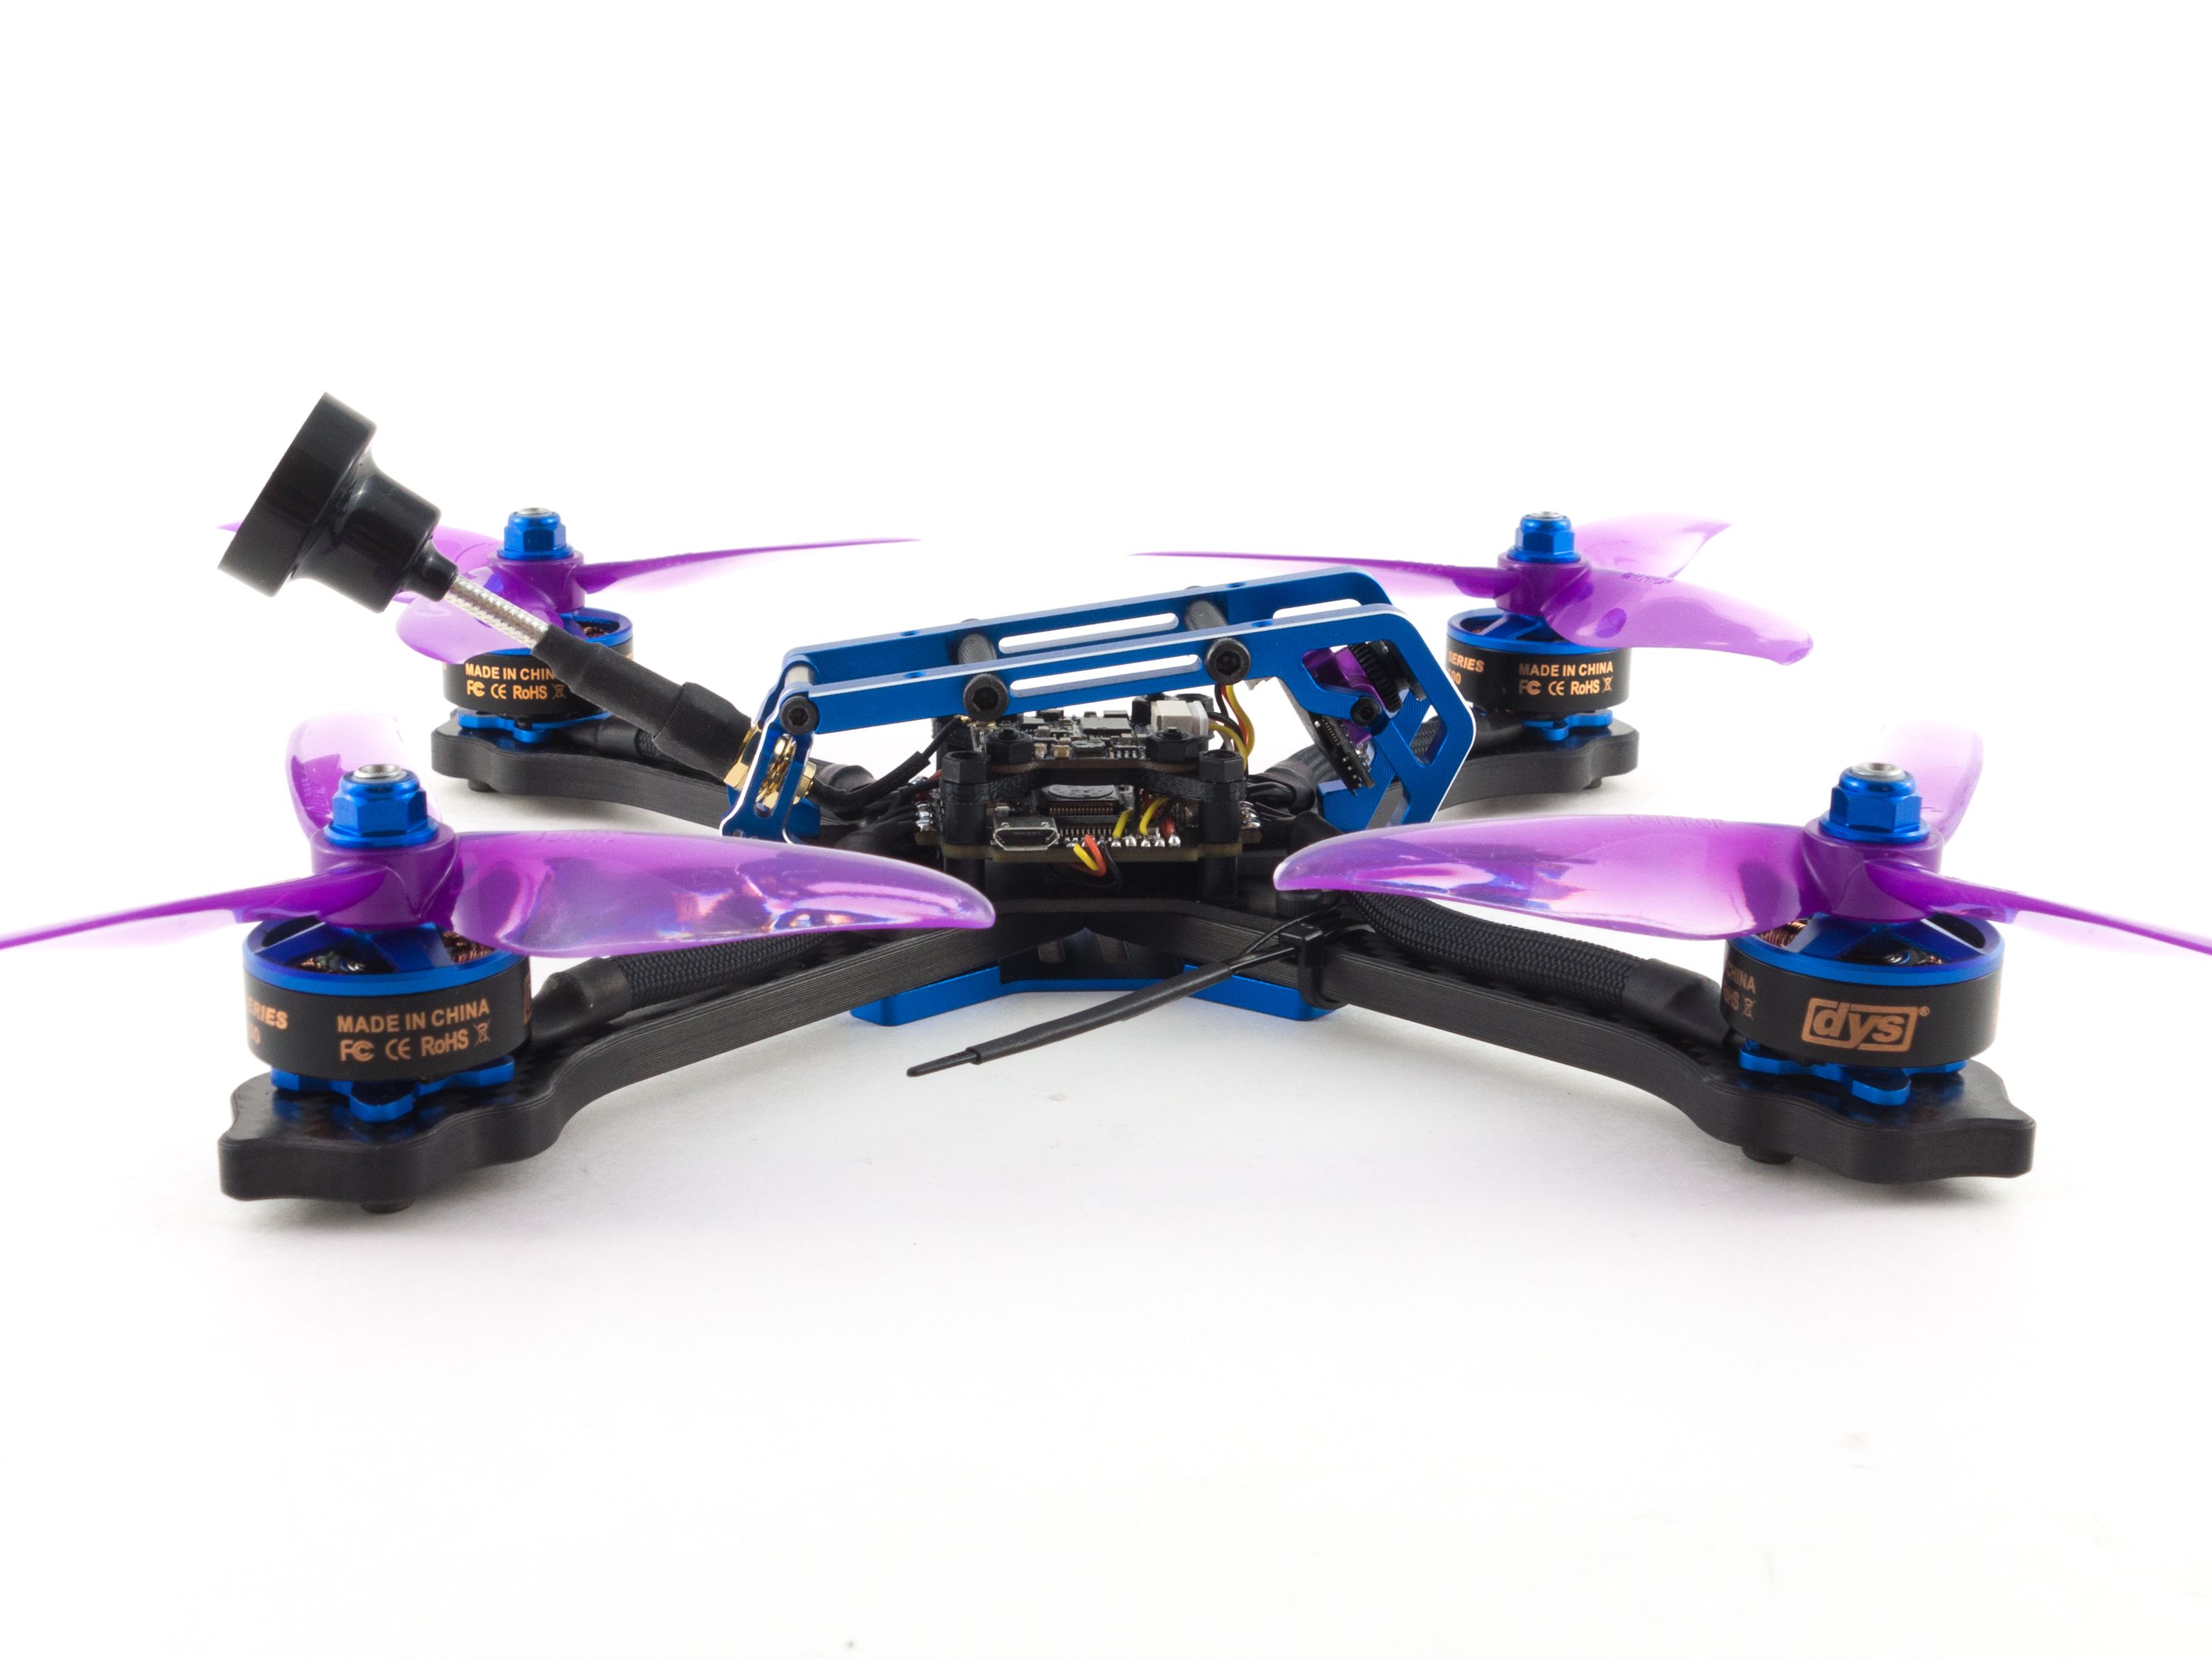
Finishing Up
Now you're ready to add the canopy and attach the video antenna. I found it a little easier to add the antenna adapter by disassembling the rear hinge of the canopy.
- Remove the antenna holder from the canopy hinge and add the 25mm SMA to U.Fl adapter by sandwiching it with the included nut.
- Plug the U.Fl connector into the VTX.
- Screw the rear canopy brackets onto the frame and replace the hinge and remainder of the canopy.
- Screw the canopy into place up front.
- Plug the camera in.
- Add the antenna and your build is complete!
Betaflight Configuration
If you don't already have them, you'll need to download Betaflight Configurator [Download] and BLHeliSuite32 [Download]. Unfortunately BLHeliSuite32 is only available for Windows, so Mac users will need to download VirtualBox [Download] and run a Windows Virtual Machine from Microsoft [Download].
- First go to the Firmware Flasher and choose "LUXF4OSD" as well as the latest stable release of Betaflight.
- Click "Load Firmware [Online]" and then "Flash Firmware" to update your flight controller. Once complete, click "Connect"
- On the Ports tab
- On UART1 click Serial RX for your receiver.
- Set the UART6 Peripherals to "IRC Tramp".
- Click Save and Reboot
- On the Configuration tab
- Under ESC/Motor Features select DSHOT1200
- If want to fly "props out" with reversed motors, select "Motor direction is reversed" below the illustration. (This is optional)
- Under Board and Sensor Alignment set Yaw Degrees to 90 to address the rotated flight controller.
- Under System configuration set PID loop frequency to 8 kHz.
- Under Receiver choose your receiver mode. For the XM+ choose "Serial-based receiver" and "SBUS"
- Under Arming set the Max arm angle to 180 (Only if you keep the accelerometer turned on)
- Under Other Features enable: Airmode, OSD, Anti Gravity and Dynamic Filter
- Under DSHOT Beacon Configuration enable the beacon
- Click Save and Reboot
- Go to the CLI tab and enter the following commands to place the motors in the proper positions:
resource MOTOR 1 B01
resource MOTOR 2 A02
resource MOTOR 3 B00
resource MOTOR 4 A03
save
To complete the remaining steps you'll need to apply lipo power to your build:
- On the Receiver tab ensure your pitch, roll, throttle and yaw are being applied correctly. Adjust your transmitter and Channel Map as needed.
- On the Modes tab
- Assign an Aux switch to arm and disarm your quad.
- Assign another Aux switch to enable Horizon or Angle mode if you need them.
- Assign the Beeper and "Flip over after crash" to a 3rd and/or 4th switch. I like to assign them both to a single 3 point toggle switch.
- On the Motors tab enable the motor test and apply a small amount power to check the rotation of each motor. Take note of any that need to be reversed.
- Disconnect from Betaflight Configurator and open BLHeliSuite32
- Flash all ESCs to the latest firmware release.
- Reverse the motor direction of any motors that need it.
- Set each motor PWM to 48khz for a smoother flight.
- If you want to change the startup music, check Rox Wolf's Channel for all sorts of tunes.
- Save and reconnect to Betaflight Configurator to test the motor direction.
- On the OSD tab
- Check all of the features you want and arrange your OSD as desired.
And that's it! The default Failsafe settings are generally fine, but make sure they work by arming your quad, applying a small amount of throttle and turning off your transmitter. It should shut down after 4 seconds.
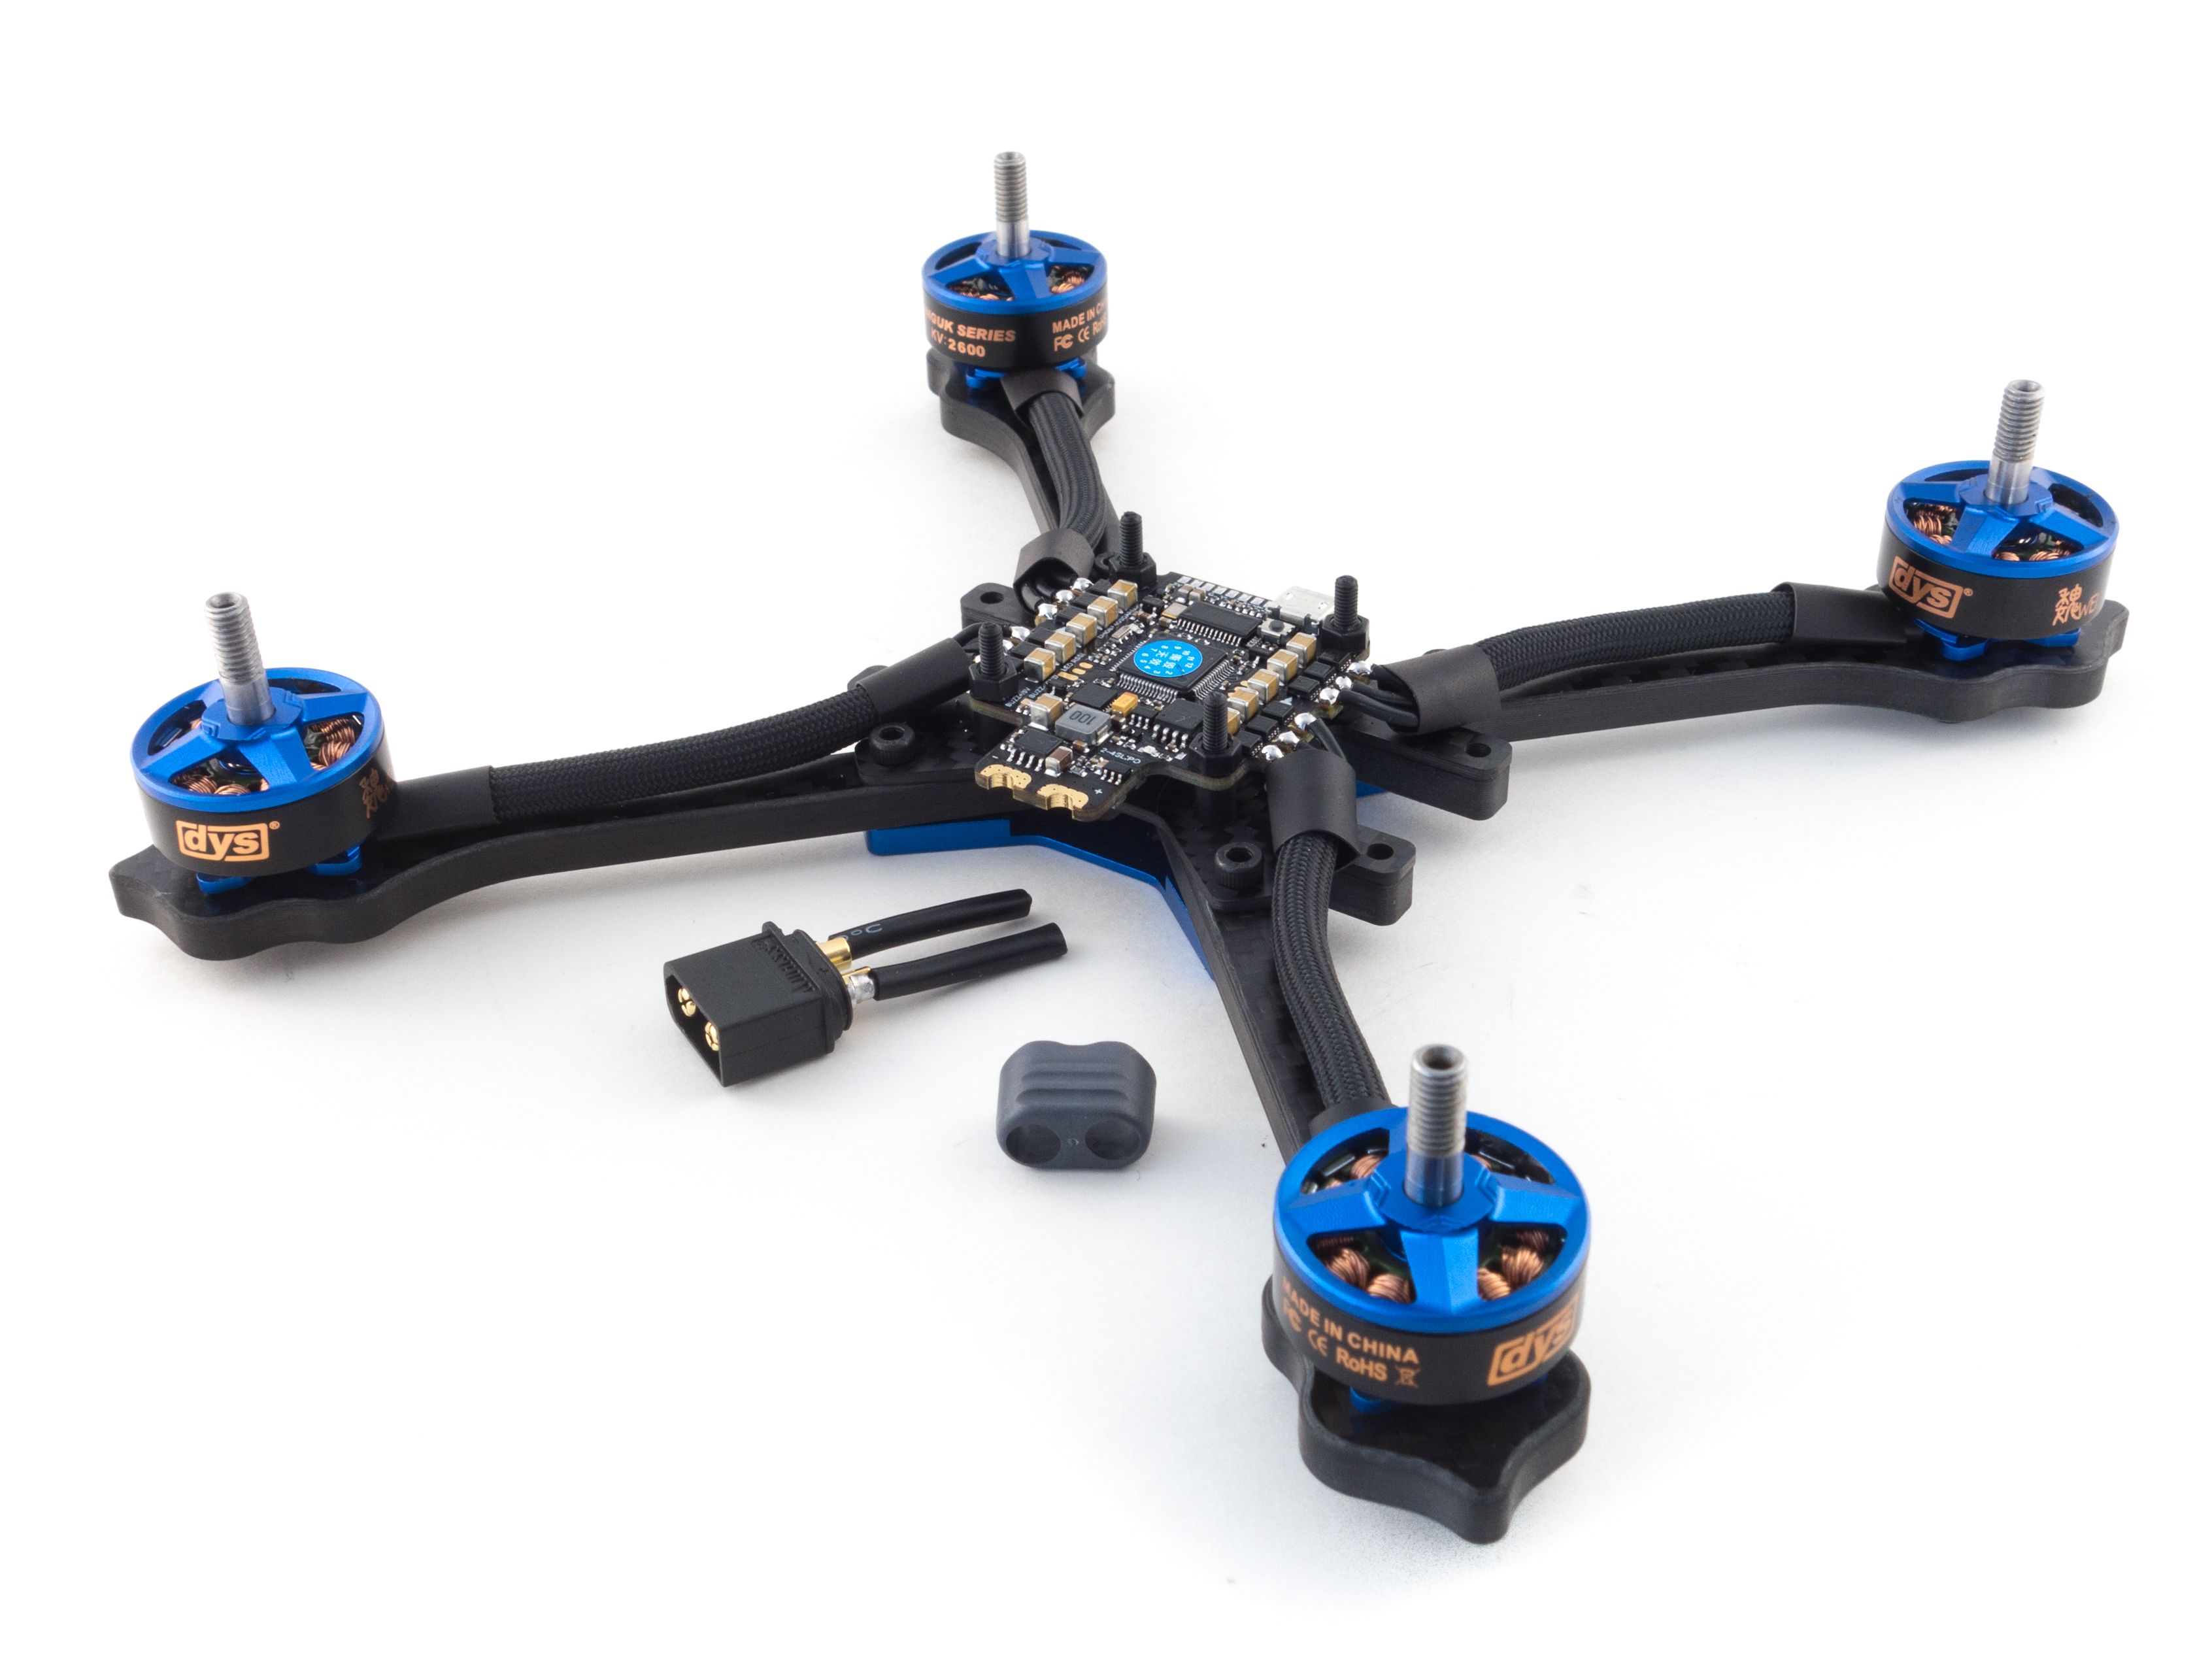
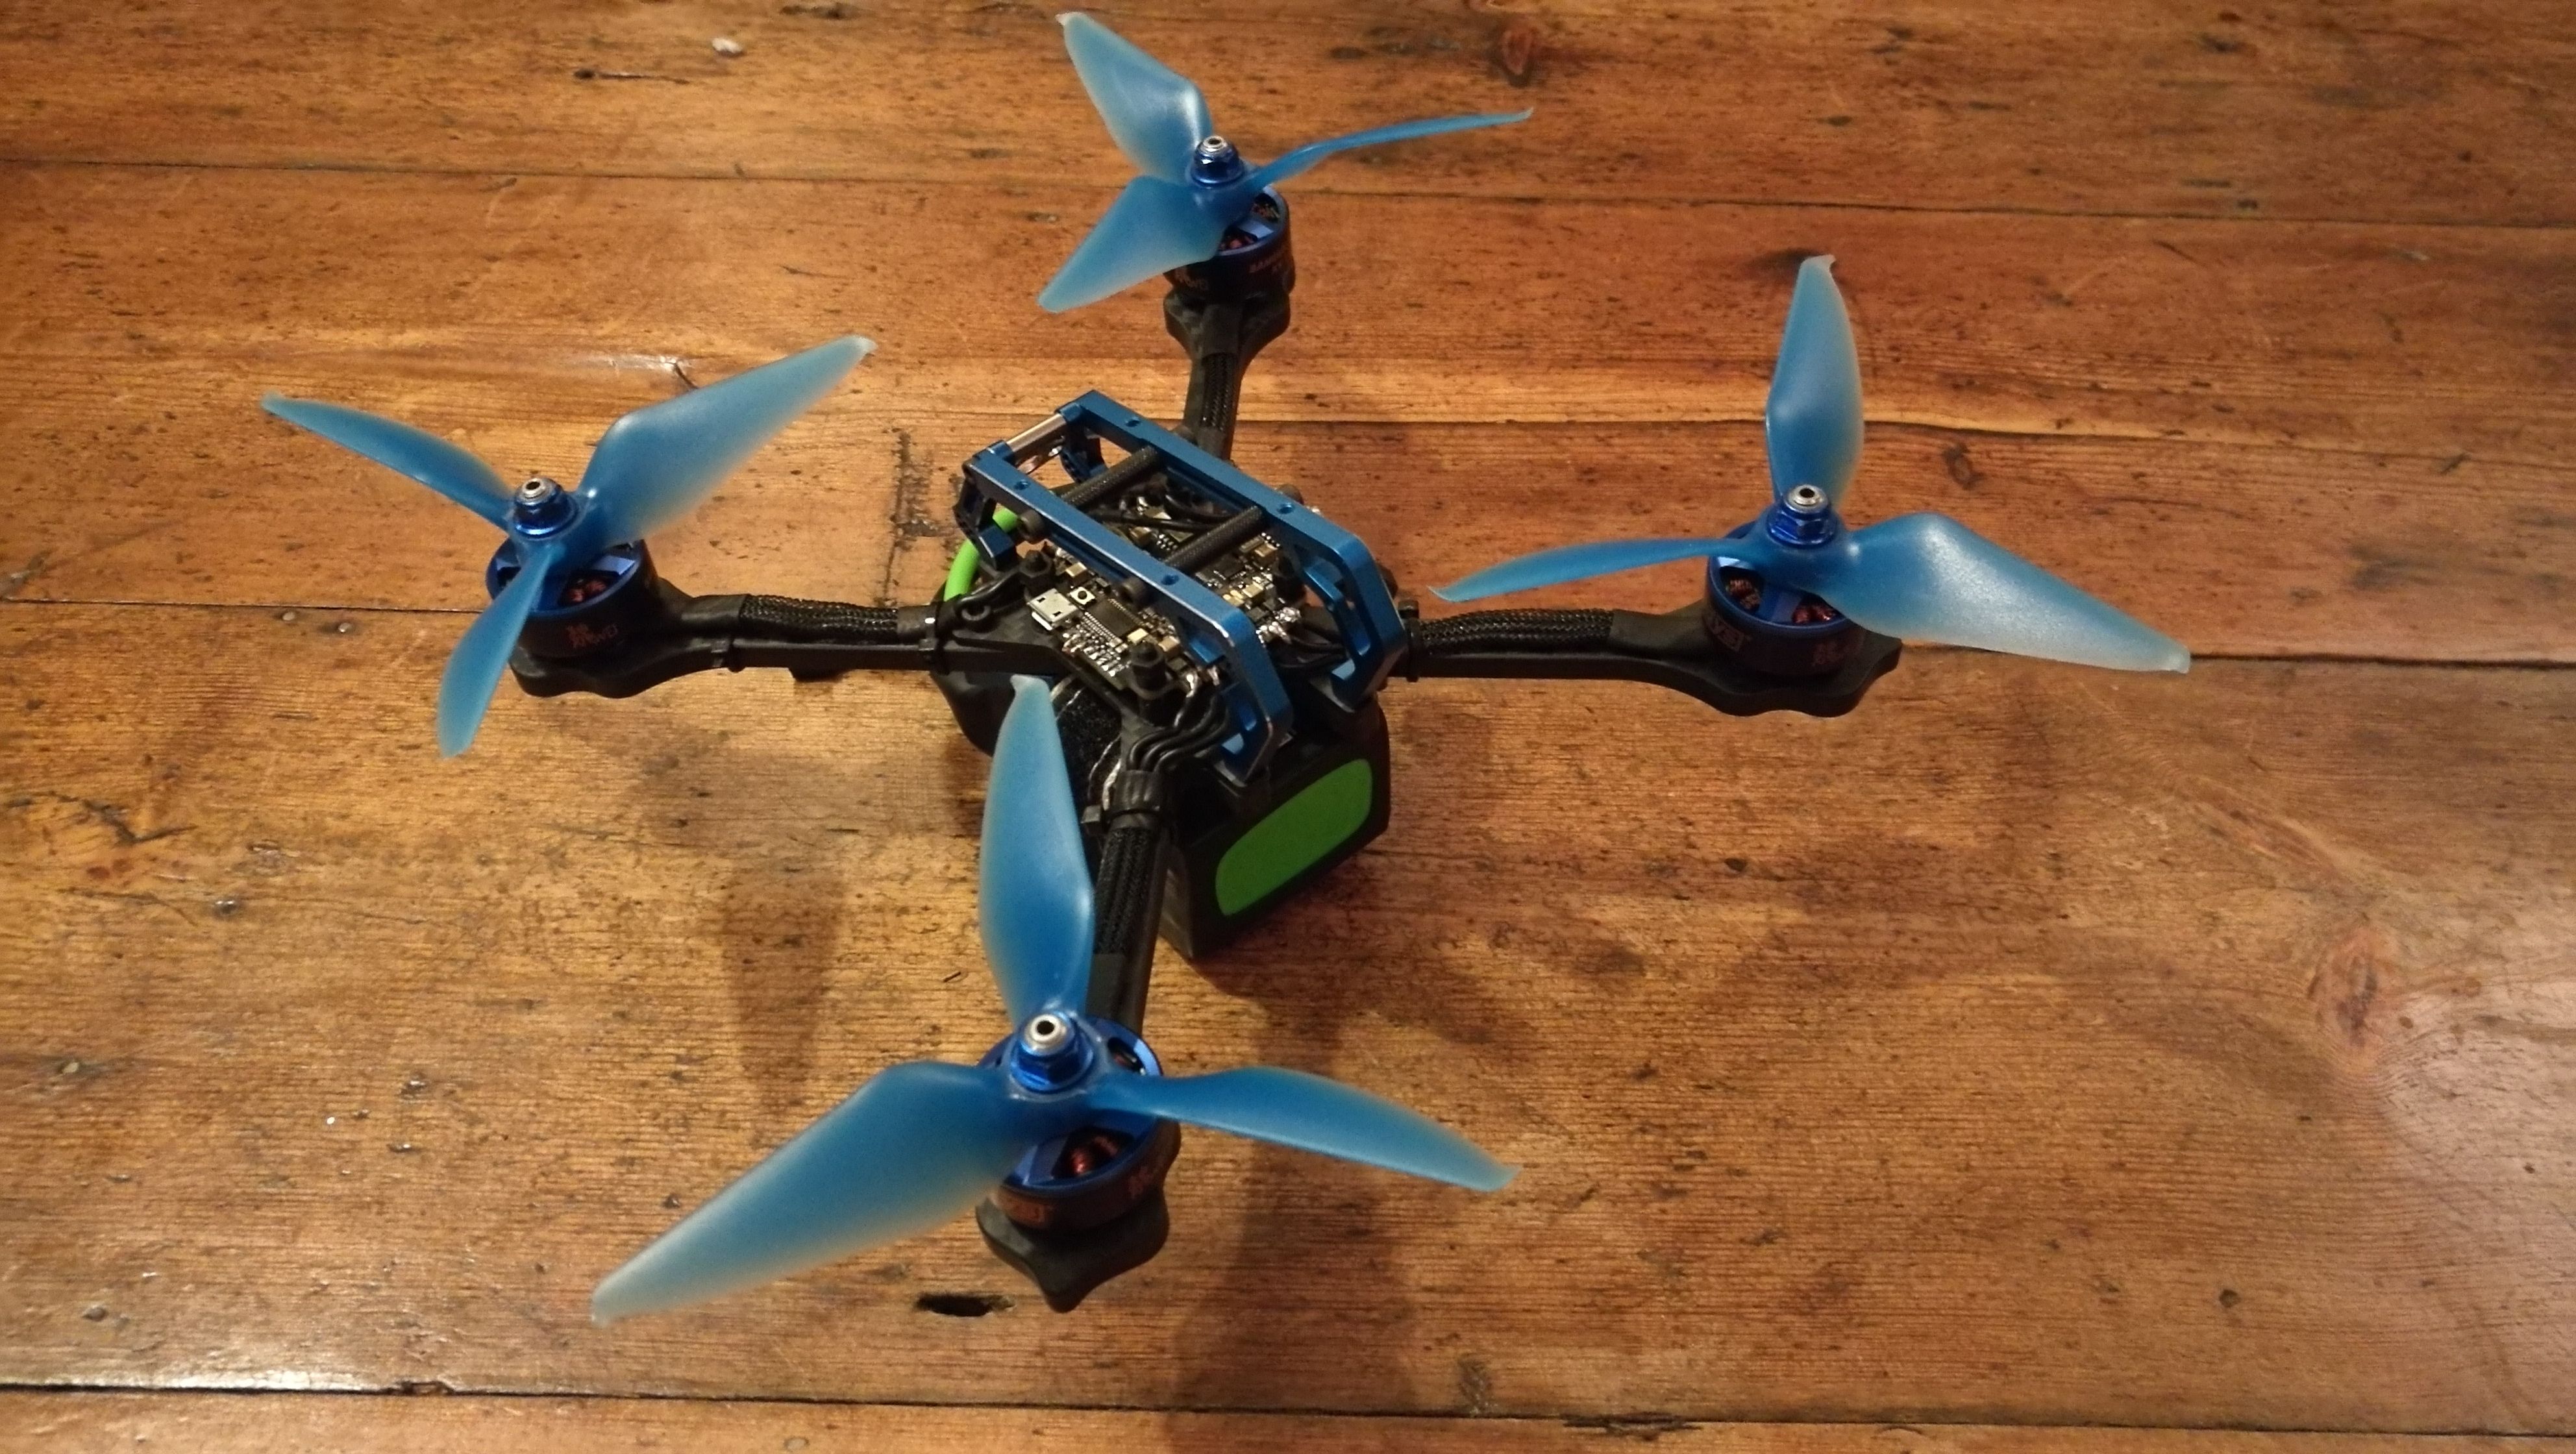
Photos


Part List
Show stores (2)
Hi, I am thinking about doing this as my first build. I was wondering if I wanted to put a little extra money into it to make it a little bit better What parts should I replace? Also I am not a big fan of that anntena, is there a suitable replacemen?


Two more things. if i use the vtx you sugested, I can just not solder/ use the tx6 pad for smart audio (since i has to use rx6 for my receiver) and it wouldnt have a major down side, right? And could i use a cheaper camera like this https://www.banggood.com/Foxeer-Arrow-Micro-Pro-13-CCD-600TVL-PALNTSC-FPV-Camera-with-OSD-BlackBlueRed-p-1248761.html?rmmds=search&ID=22944069&cur_warehouse=CN
Seeing mixed answers this will only take a micro cam. Will this run a caddx turtle 2 or RunCam Split 2s?
Form factor for both of these HD models show 19mmx19mm that I can see.
I am doing a similar build and have a question about current draw on 5V. I have the same FC, same VTX, and same receiver but am thinking about using a runcam split 2 and a buzzer board with 4 LEDs. Do you think the 5v2a BEC is enough for this? I did the calculation using what runcam estimates for the split (650mA) and saw a figure of about 600mA for another VTX @ 5v 200w. The XM+ and LED board should use less than 100mA combined. Altogether this should work, but do you have any advice in this situation? Just don't want to burn out the board.
hey what would be the differance if i used a aio with an f3 flight controller opposed to f4 such as this https://m.banggood.com/Racerstar-StarF3S-30A-BL_S-4-In-1-ESC-5V-BEC-w-F3-Flight-Controller-AIO-OSD-BEC-Current-Sensor-p-1157101.html?rmmds=detail-bottom-alsolike
I have a Wizard and I am now thinking about a build but I would like to do a Stretch X. I like the cage on this frame. Could this build be domne with the GT-M200 Stretch X Frame ?

what kind of transmitter do you advice me to buy for this drone?

That's really up to you. Personally, I like the FrSky X-Lite. It's a great little transmitter. Otherwise the Jumper T8SG Plus is a nice, compact multi-protocol radio. You can also go with a budget radio like the Flysky i6. The FrSky QX7 is another popular choice, but it's quite large compared to some of the newer radios.

I was dead set on some motors for my build on this from that cost more than double what these DYS motors cost. How have these DYS's compared to other high end motors? Are you having any issues durability or QC wise now that youve had a few months with this setup?
What parts would you use to build an alternative to the Mavic Pro or Robotics Evo?
They are very expensive, I'm looking for an DIY alternative cheaper with similar specs.
30 min flight, 5km range, followme, obstacle avoidance and small size.

How have the motors held up?
This is a very nice and clean build. But from what I've heared, having a Capacitor on long (and espectially thin) wires reduces the positive effect of it.
Oh and the flight footage looks like a very bad tune. (its really in contrast to the whole extreme high quality post)
Yes, it does reduce the effect slightly, but for as much noise as this produces any amount of capacitance will help. It's just difficult to protect the capacitor soldered directly to the pads. Maybe an in-line solution on the XT60 would be best. In any event I'm not experiencing any twitches.
And yes it's definitely in need of a tune, not to mention my sub-par flying skills.. I just wanted to get a flight up with the stock PIDs to demonstrate how this will fly straight off the bench. I'll try to get a video up once I've gotten a decent tune out of it.
wow so clean, love it! looks like a runcam 2 would fit quite well, what do you think?

or you can go full stupid like me and just make a backpack for it. ill send you the stl if you want it
https://rotorbuilds.com/build/11445


I just took this out for a maiden and it flew marvelously. I enabled the stage2 filter and disabled all the notch filters. I still experienced a tiny bit of prop wash, but I hope to tune that out. The defaults PIDs were great and I had no issues what-so-ever. I'm flying this on the Jumper T8SG Plus and the hall sensor resolution is great!
I think it's awesome too. I also shot an email to brain3d.co, and they're coming out with a session mount for it soon!!


very nice. this frame is a favorite i do consider it a freestyler cause of the weight but fit and finish is top notch and servicabilty is paramount

Looks dope! Do the hinges on the aluminum cage seem sturdy? Just from looking at it, I'd be a little nervous about bending them in a crash, especially with the added weight of a GoPro up top.


Hi, do you know the length of the screws that hold the cage and frame together?
They're 12mm