U180MM, the Dronethrone
 By ledimestari on Sep 18, 2018
U180MM
The Dronethrone
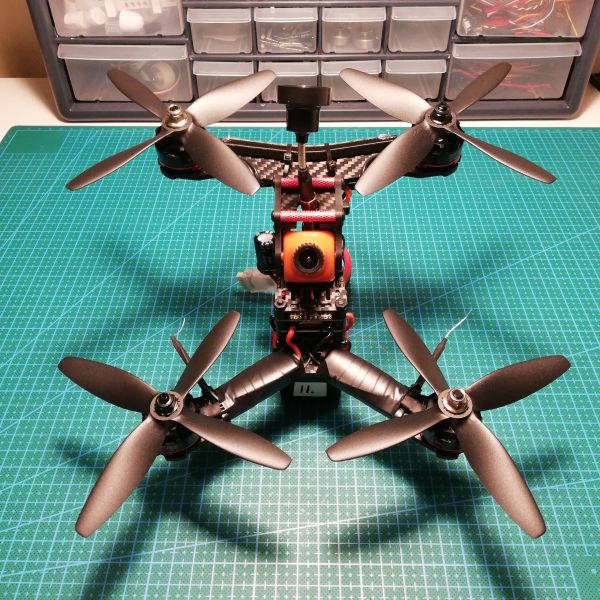
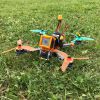
A long time ago someone told me that these "Z" frames fly a lot better than your usuan flat true-X or stretch-X frames. Then when I stumbled upon this frame on the internet I just couldn't resist. It's so ugly, so weird, so different! Flying with your camera and flight controller first into everything seemed great idea so I just wanted to build this. Building the bicopter was fun too because it was so different from your average 5" quad so thought this would be fun too. It was not all that fun. This frame had very little room for everything and quite a few interesting choices had to be made in order to mount everything in even somewhat sensible manner. Read on to find out how I solved certain problems and why I chose to do what I did.
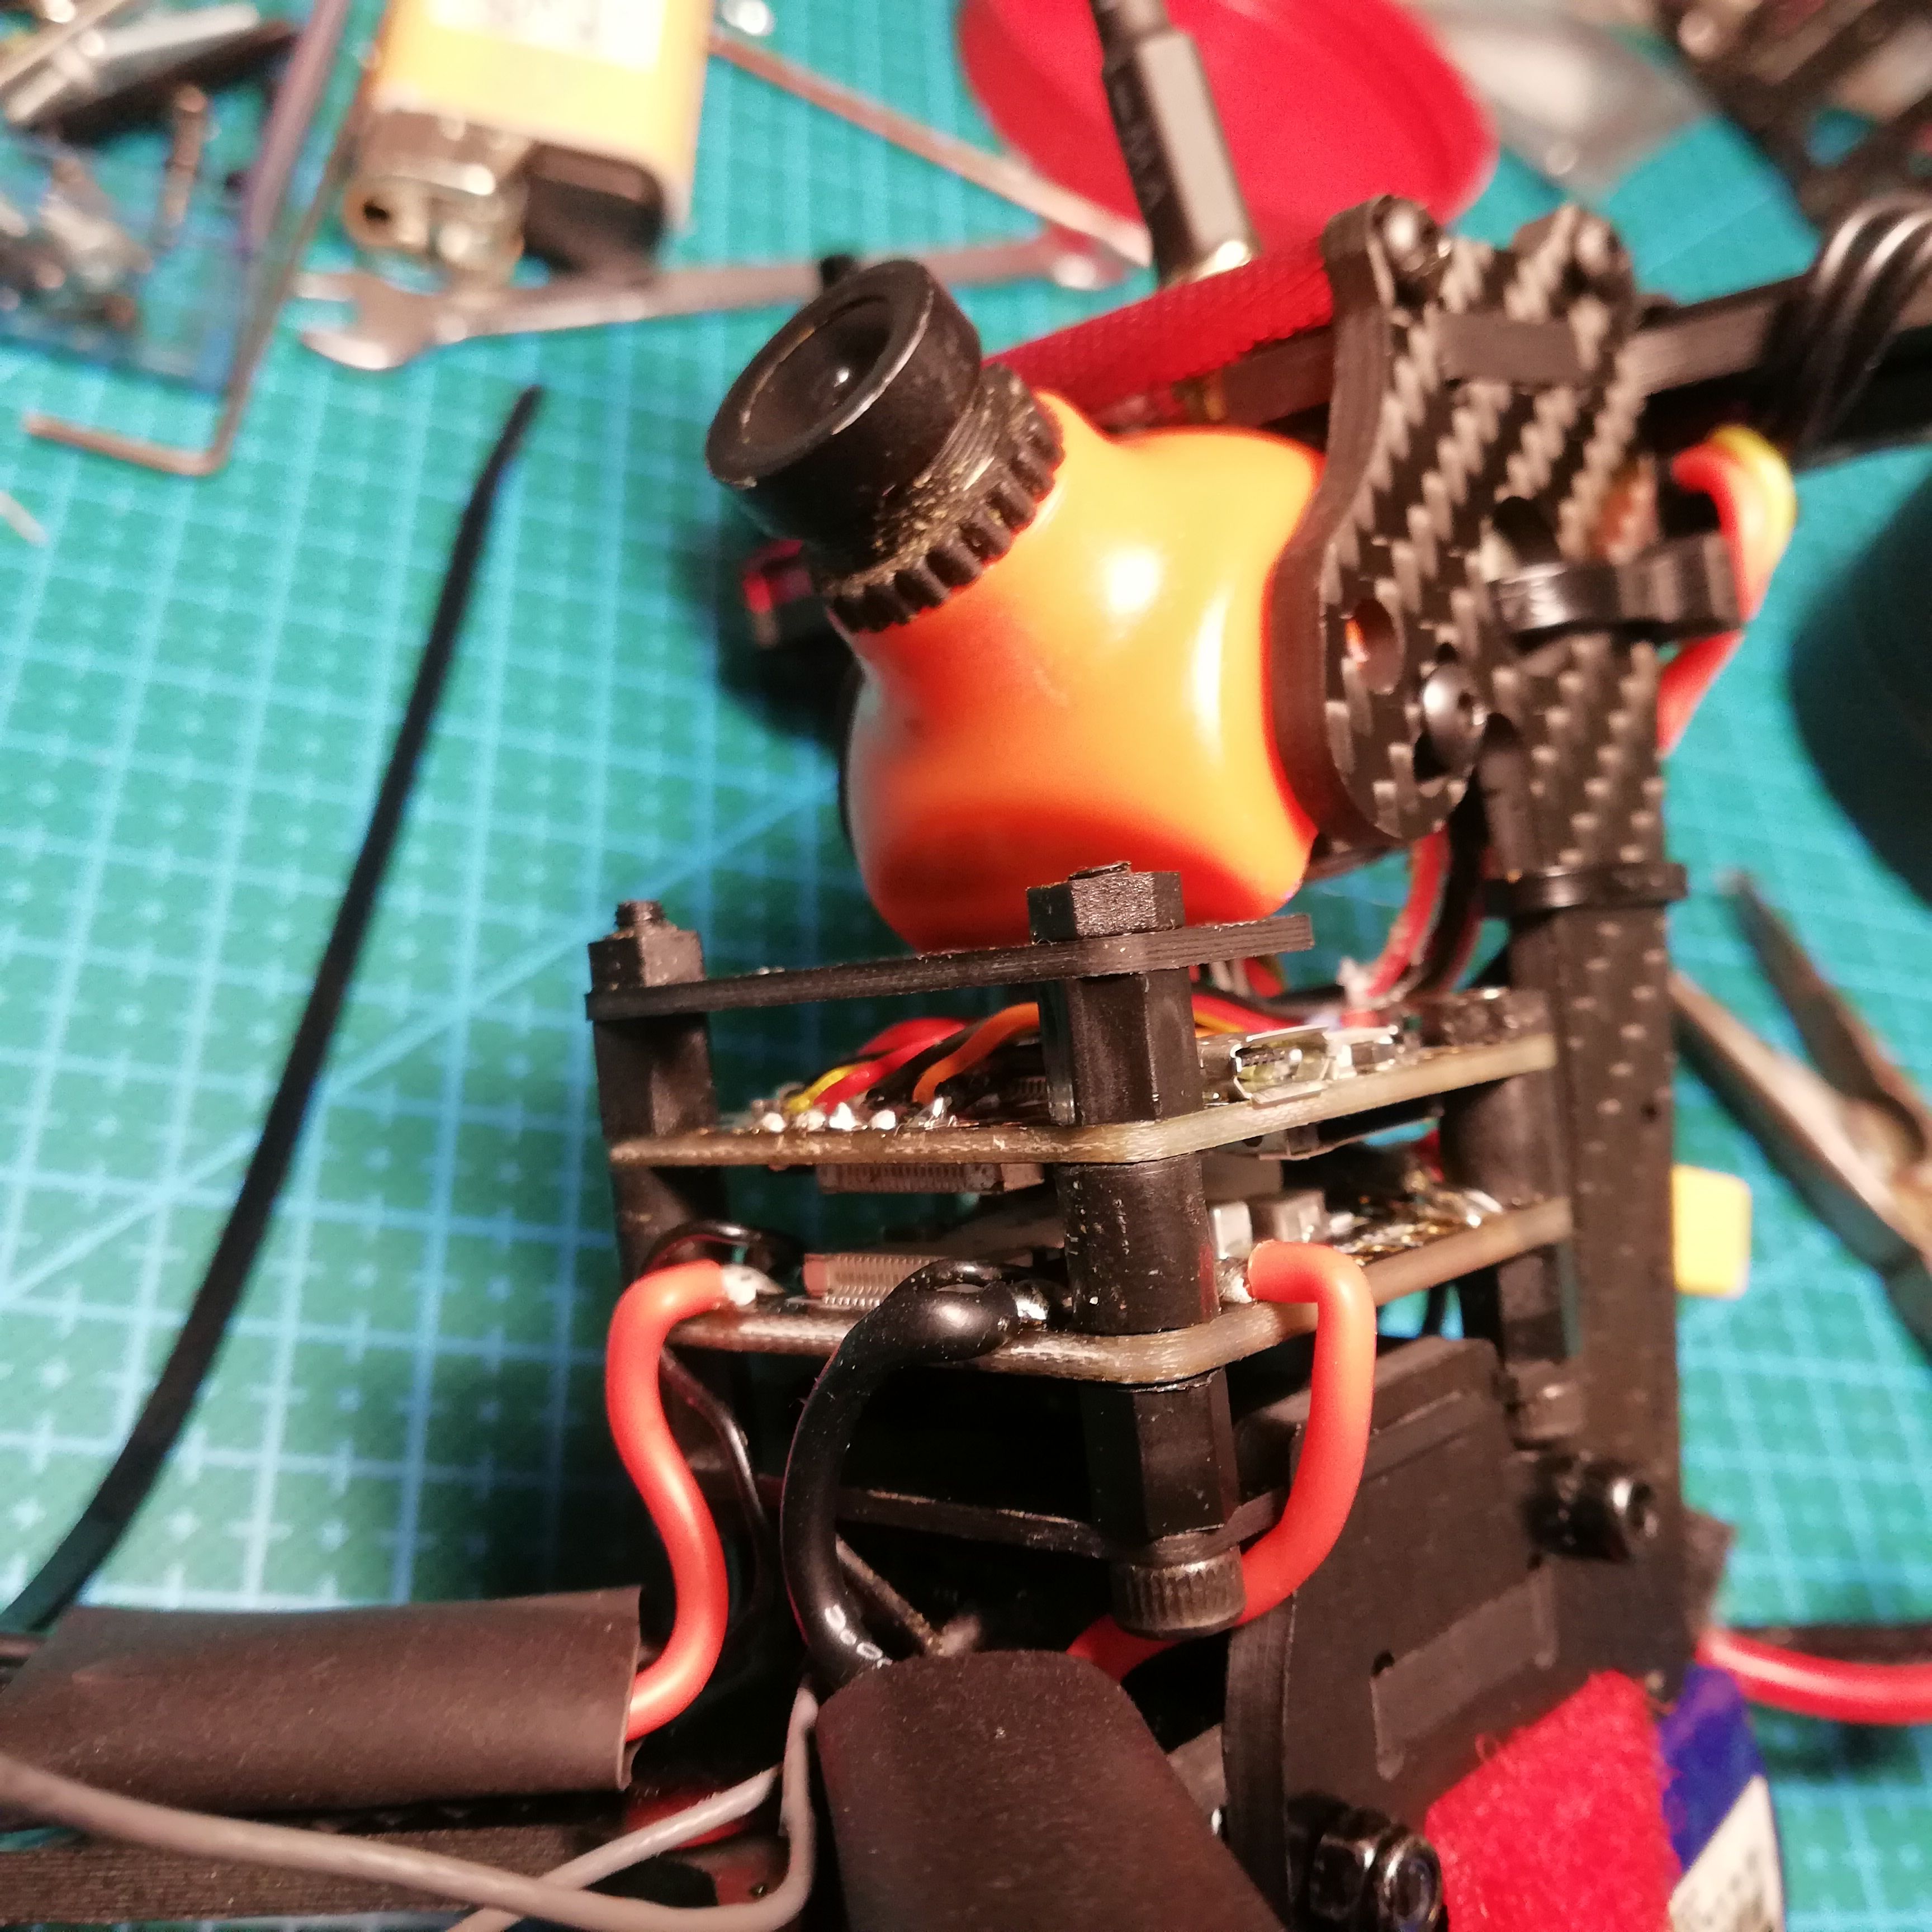
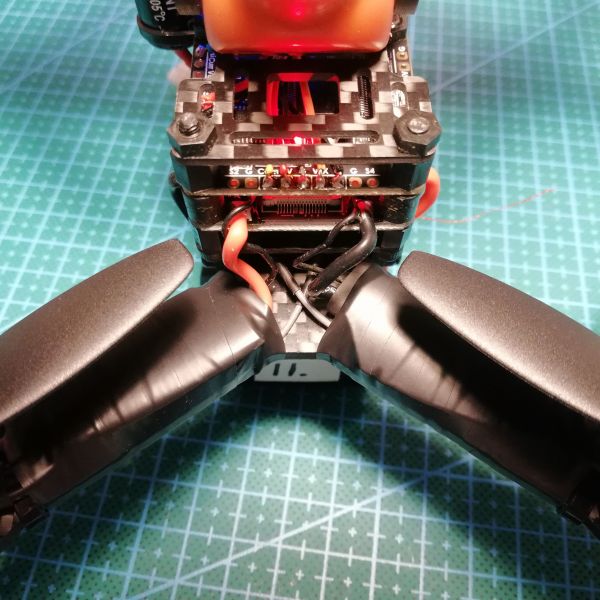
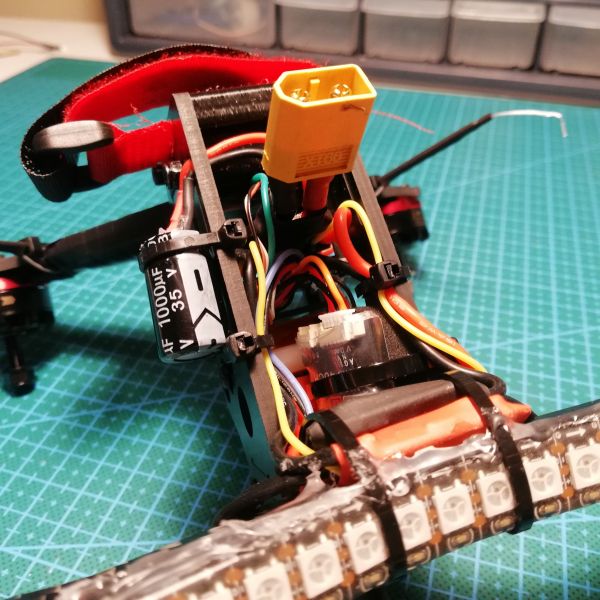
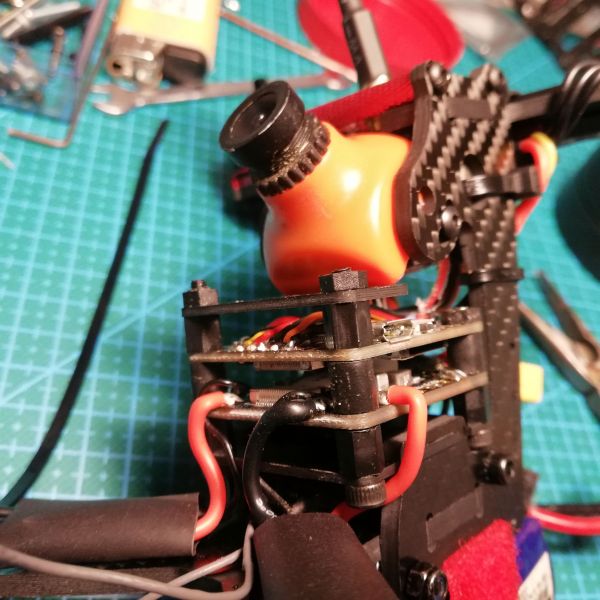
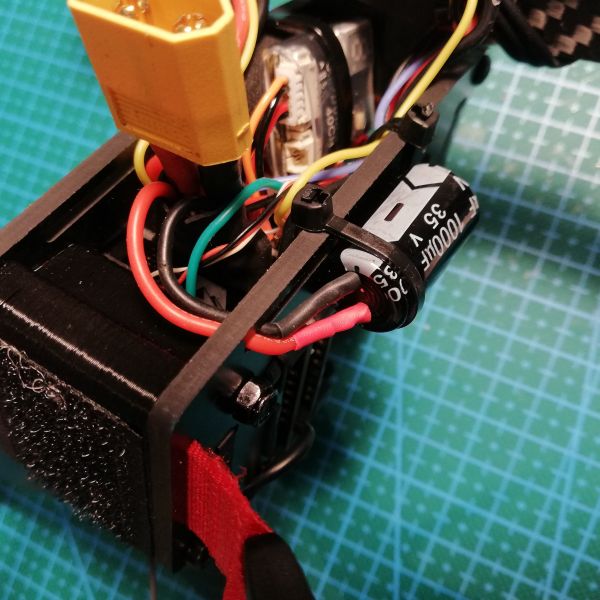
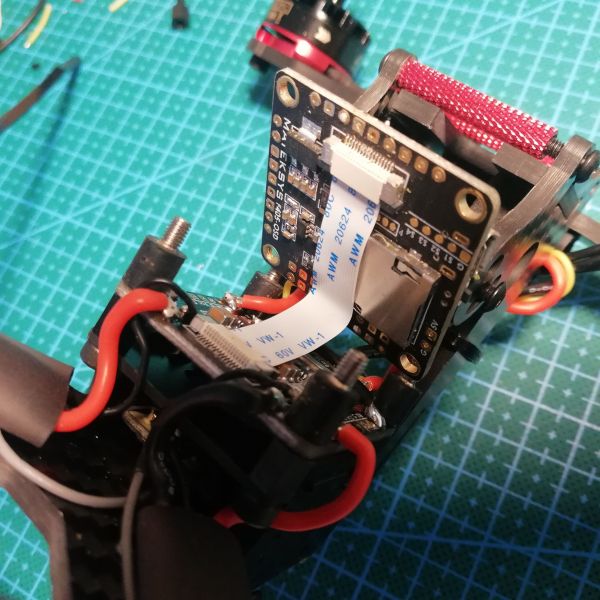
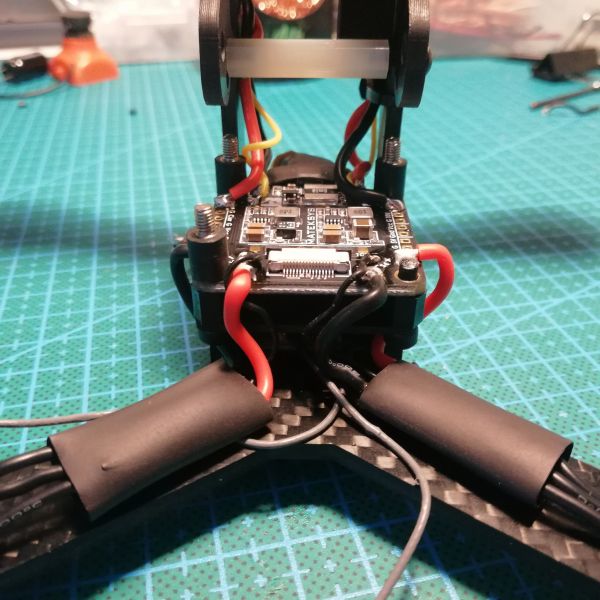
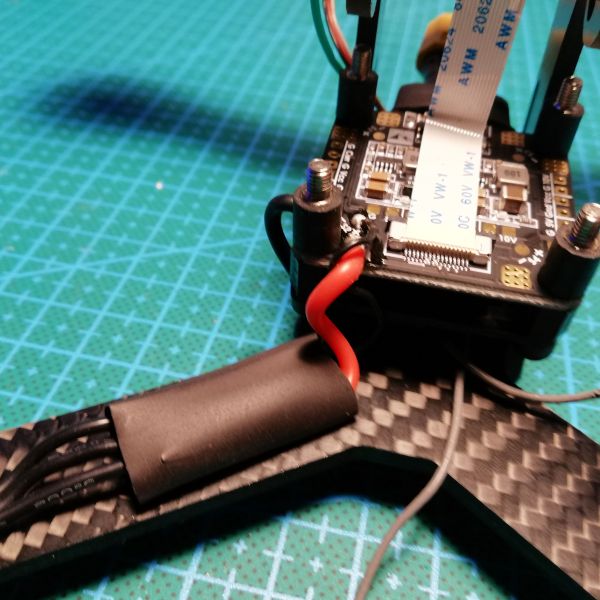
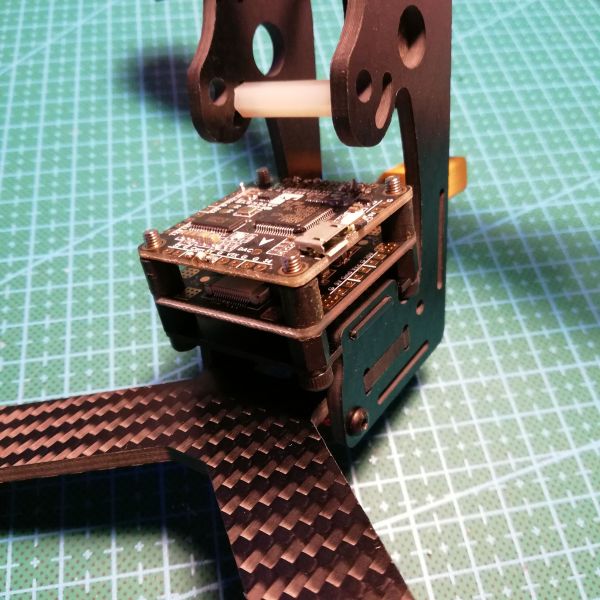
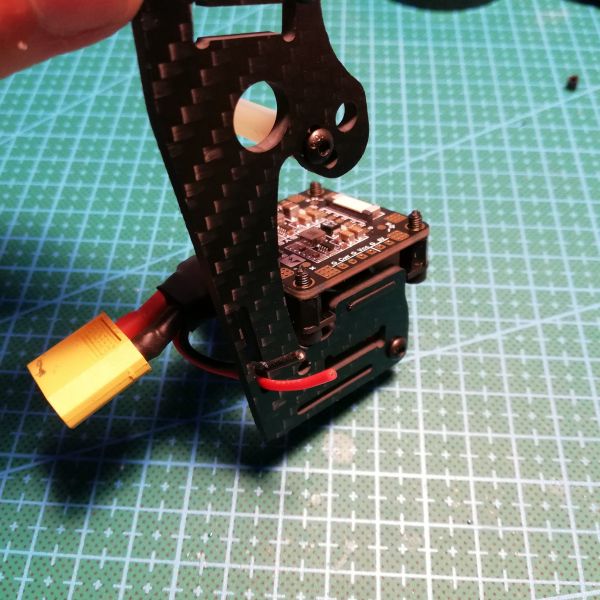
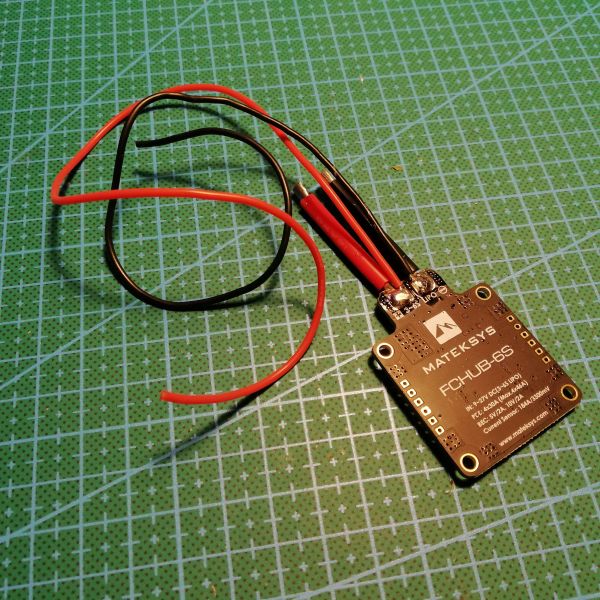
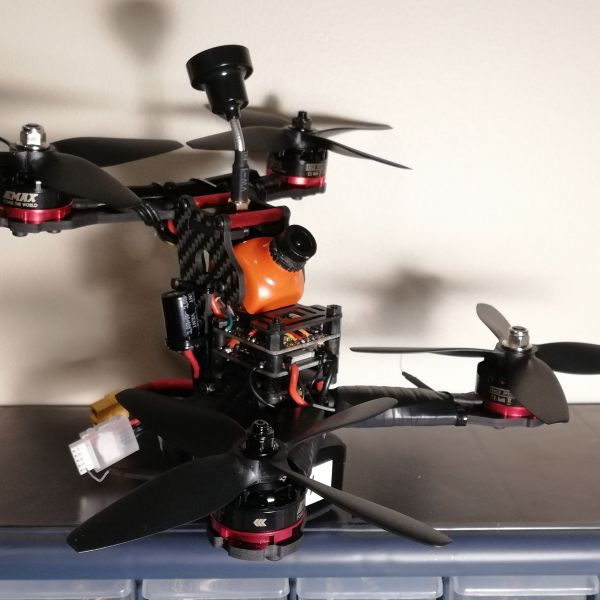
This build, like all my other builds as well, flies on Matek F405 + FCHUB-6S PDB stack. The ribbon connection is handy and I'm really waiting for the matek 4in1 esc that I can replace all my builds pdb + separate esc setups with. FC + PDB Stack is right under the camera and it couldn't be single millimeter higher, at least not with the carbon fiber that supposedly (hopefully) protects it even a little. PDB wiring I first made out of too long and too thick wire, then I re did it and added wires for capacitor. I know it is not optimal to have cap on the end of wires but I couldn't figure out any other way to mount it really. Cap is also held on with a ziptie.
This is fine.
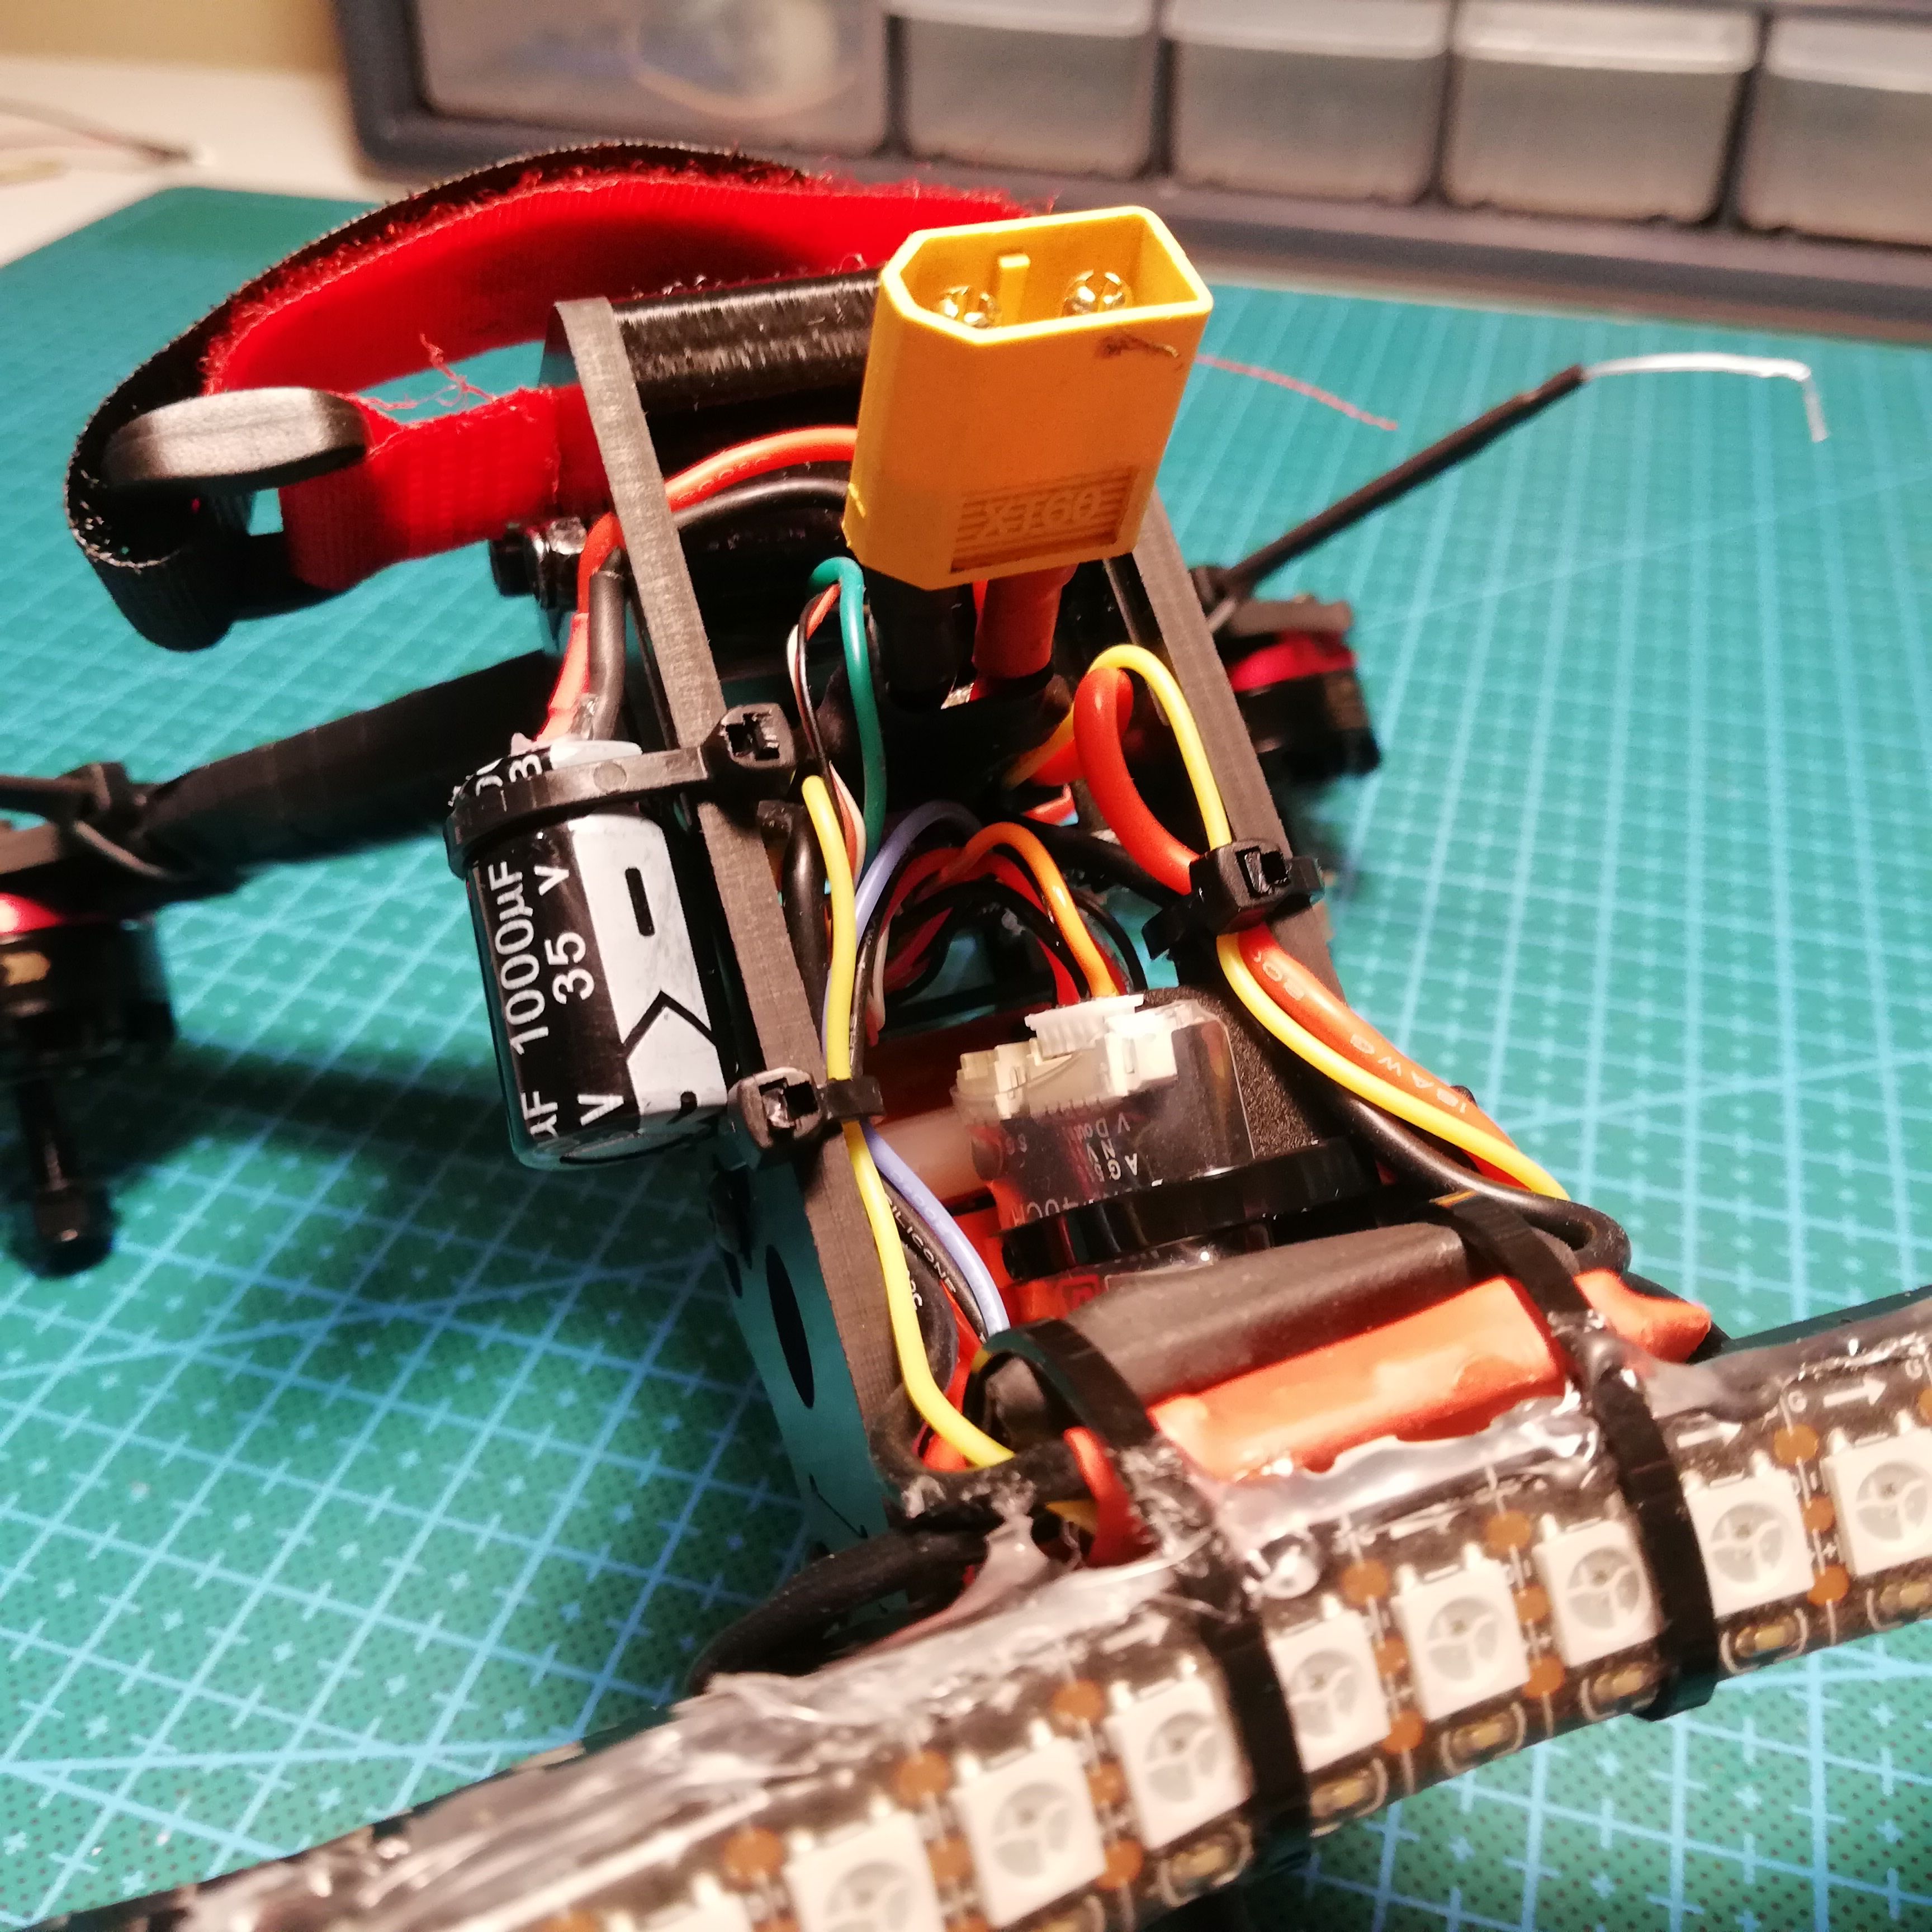
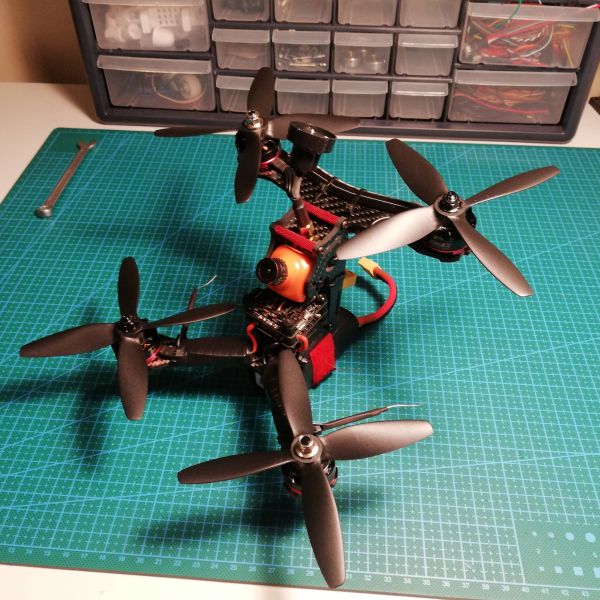
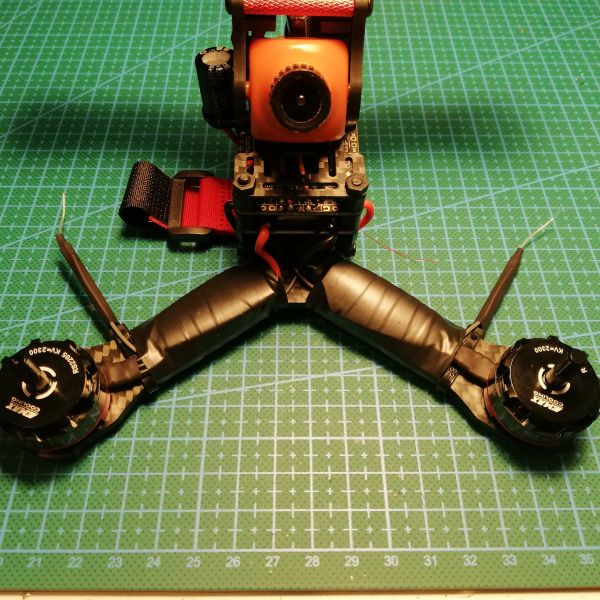
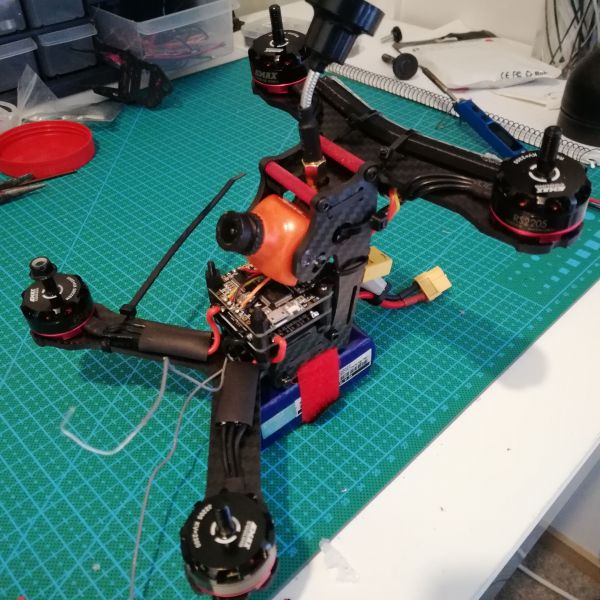
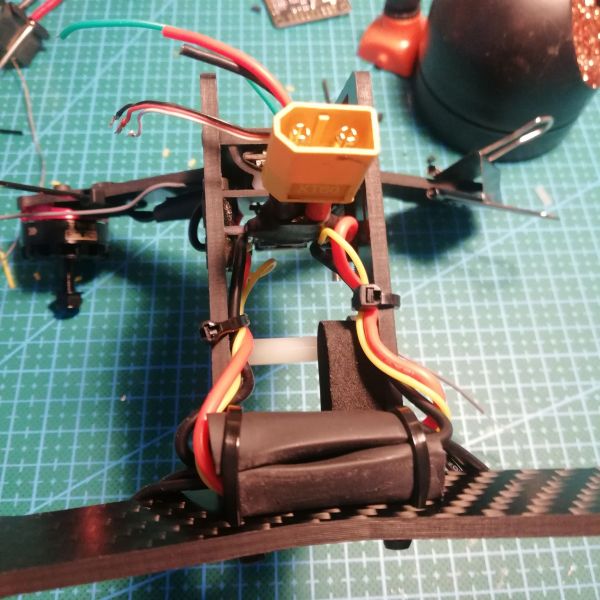
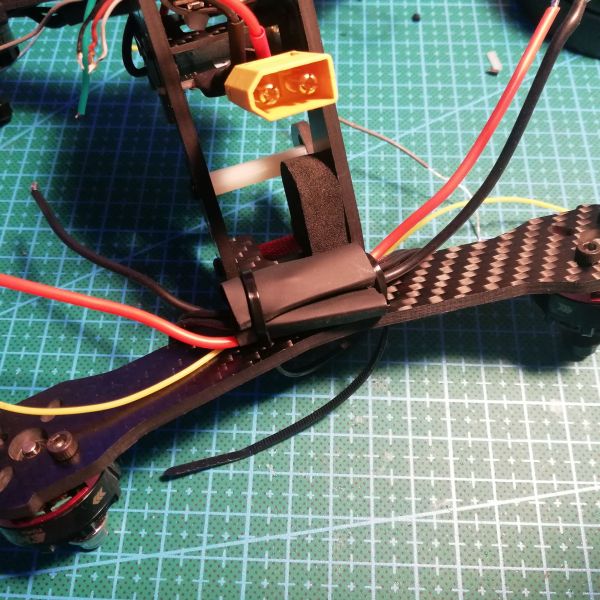
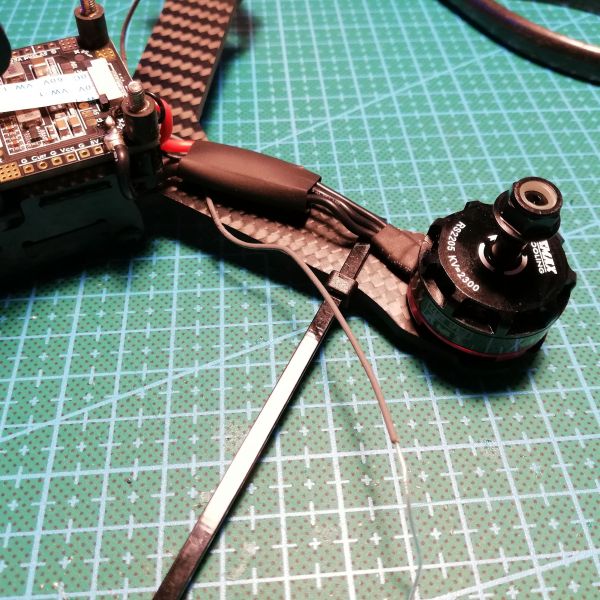
Another thing were the ESCs, where to put them? Front motors were king of easy because they were just there like usual. Back motors not so much. Wanted to keep this clean so I did not want to put them on top of the "top arm". I ended up stacking them under the arm which was pretty much probably the best solution after all. they're not too big and are neatly packed up and wired nicely. Front escs are of course protected by the broken propellers of the ancestors.
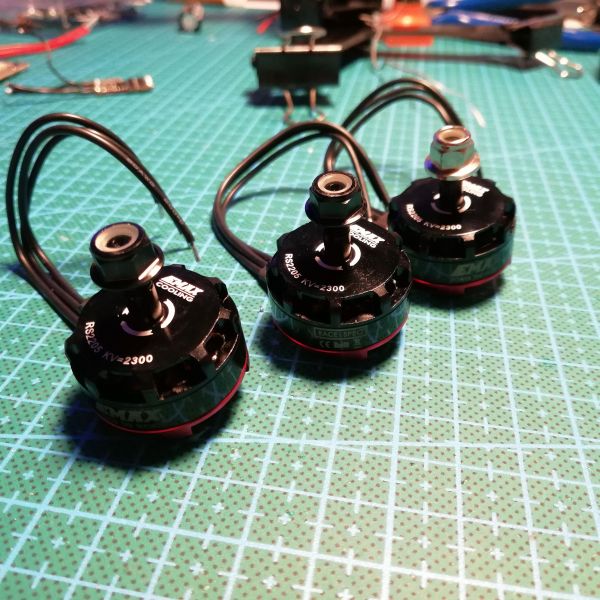
As for the motors I chose maybe little older but still valid emax RS2205 2300KV motors. They are cheap, proven to be working all round good motors, and hey, that black theme with red-pink details. Gotta love it.
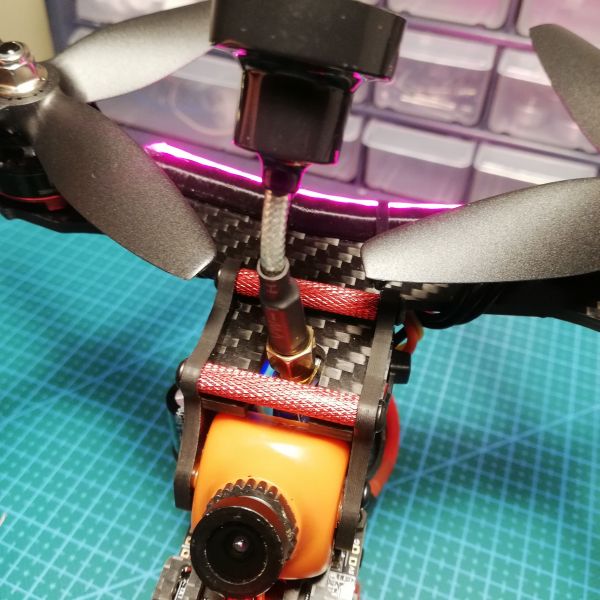
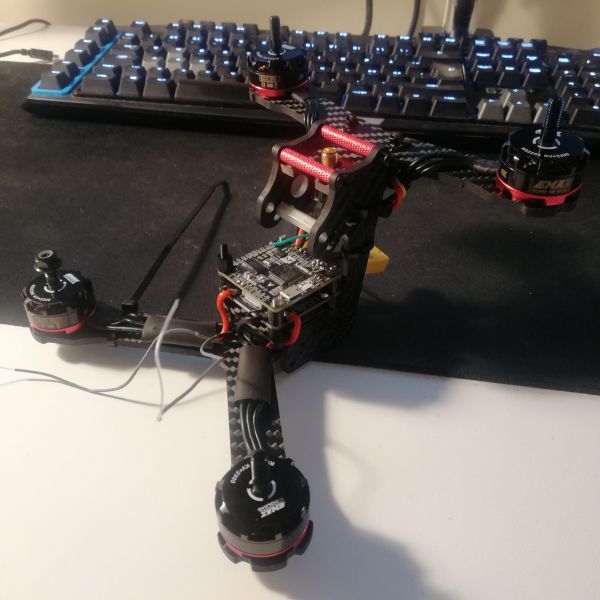
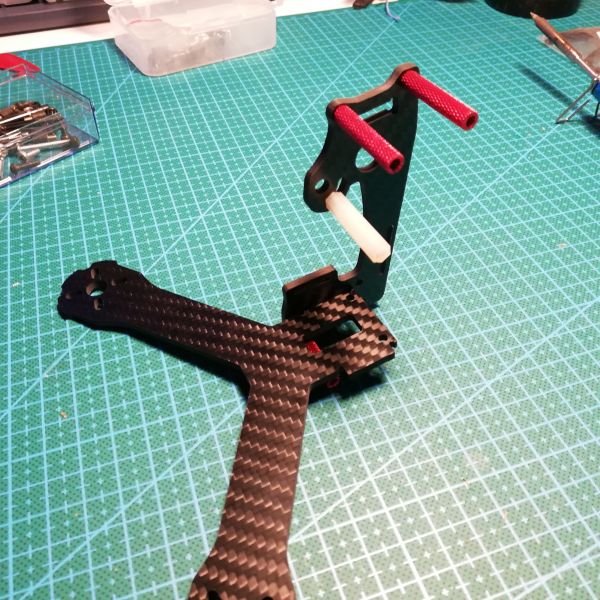
VTX, I'm quite proud about this one. There was this perfect hole on the top where I just knew I wanted the antenna to stick out. It is theoretically the best place to have your antenna on! I just needed to somehow mount the vtx in the middle, how? Then I remembered I still had those little foam pads we used to put under our ZMRs many years ago. It's perfect! Just ziptie around and we're set!
First I thought that hey, one of those stubby pagodas with practically no cable would be perfect but that actually doesn't fit between the props! I know maybe stubby antenna like AXII or UXII might be perfect but I don't have those. I'm using self made pagodas on most of my things. Except on this one because my pagoda plates are white thus making this cheap Realacc pagoda look better.
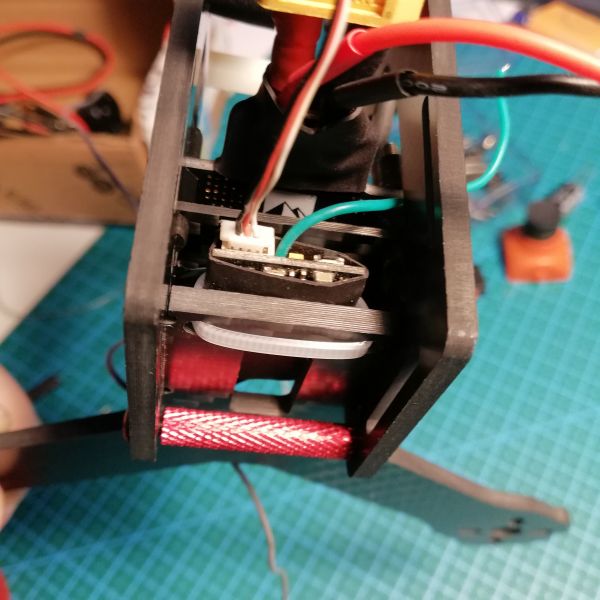
I mounted the receiver in small space between the lower arms and the plate on which FC stack mounts to. Perfect little space for it.
Camera is oldish HS1177 in new orange Foxeer case since the screwholes were broken on the last one. I chose orange case instead of black because I like how it stands out sort of like an eye. Nothing fancy but it gets the job done really well.
I did model and 3D-print some parts for this too, two, in fact.
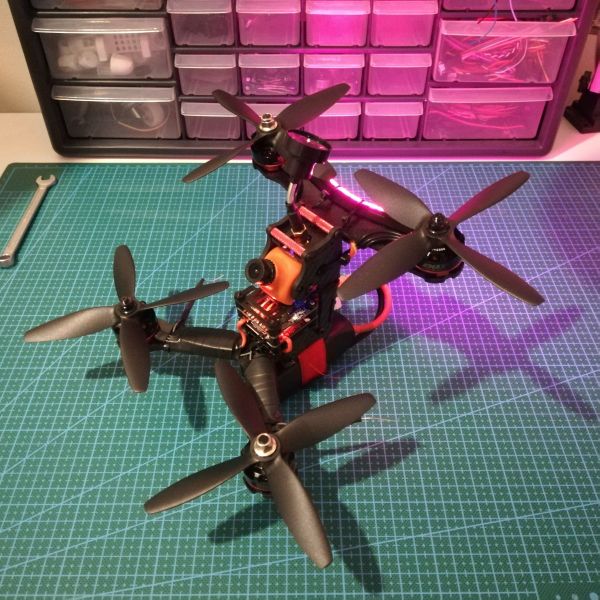
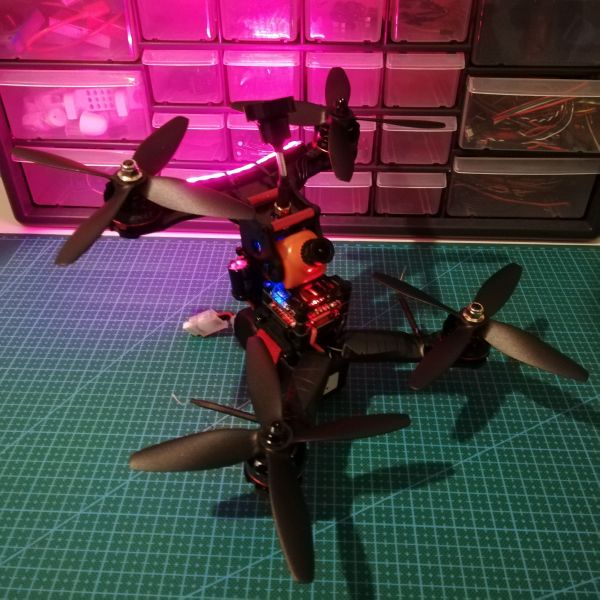
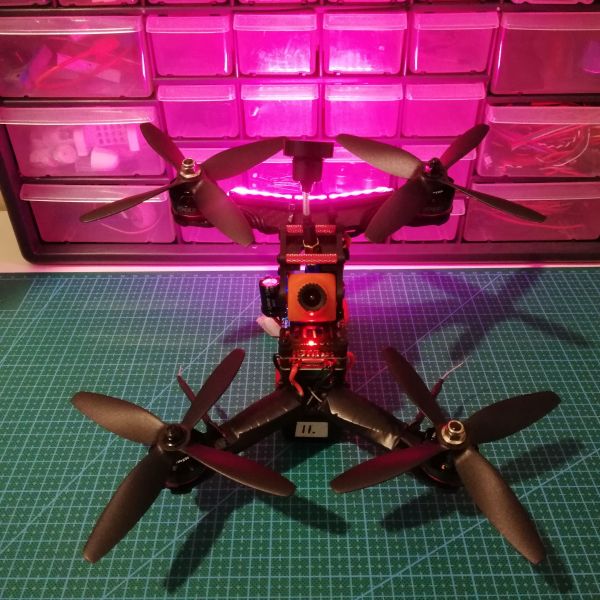
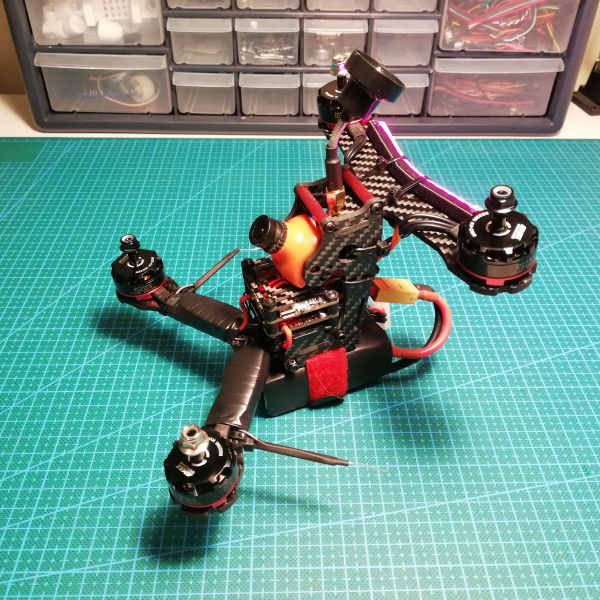
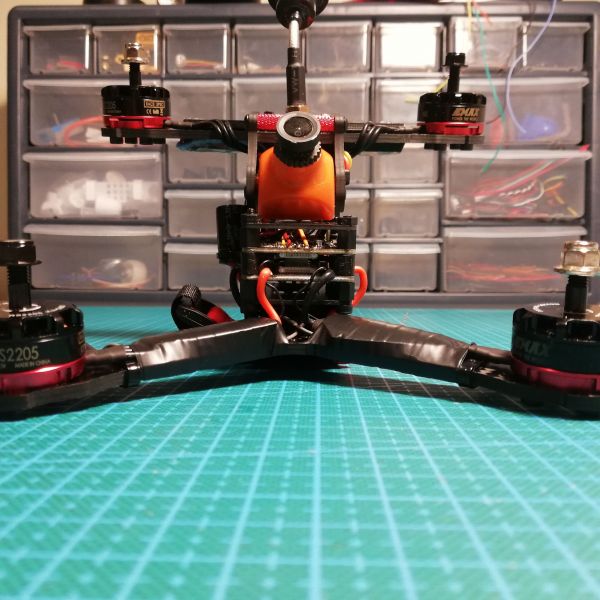
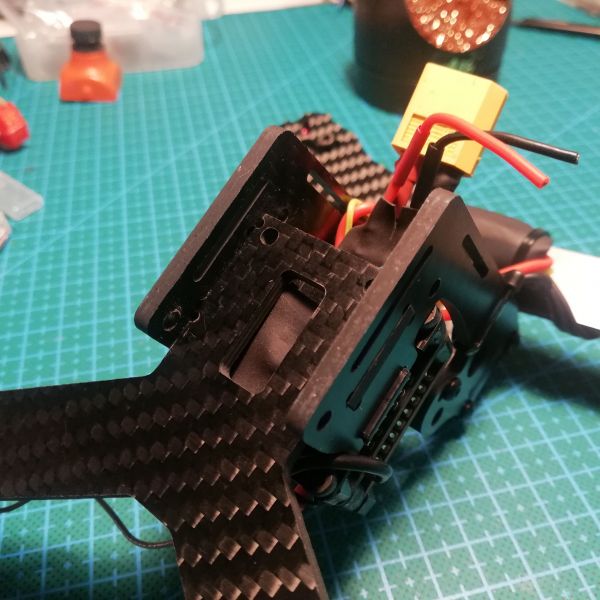
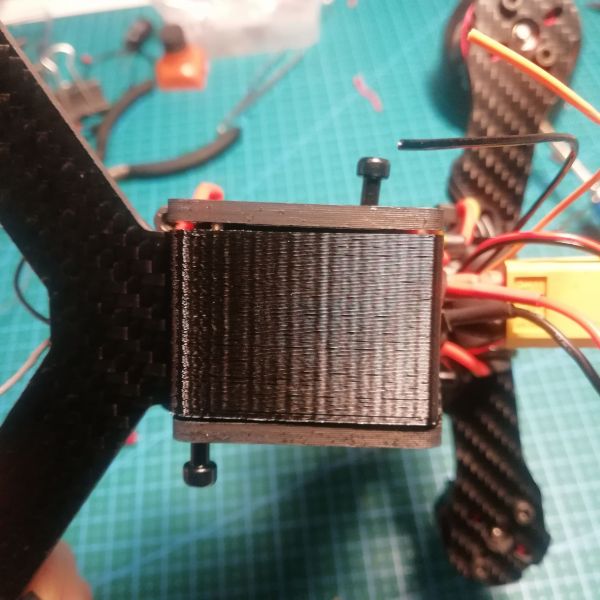
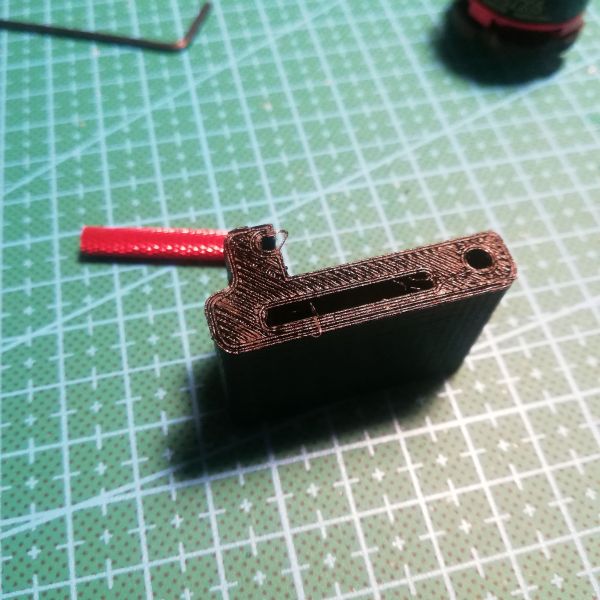
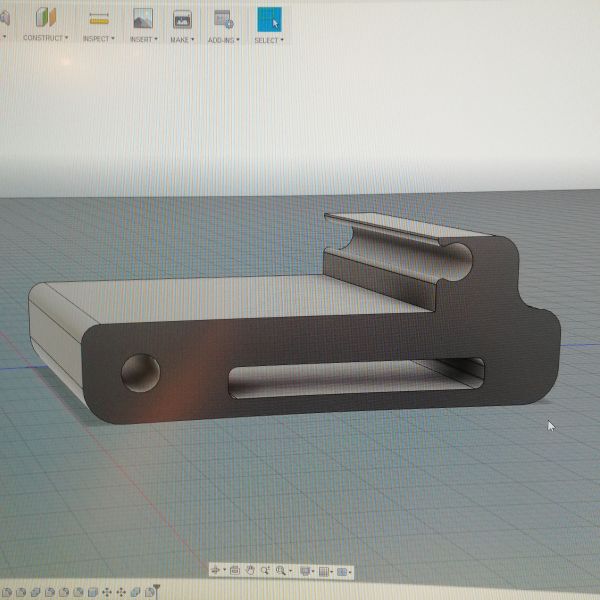
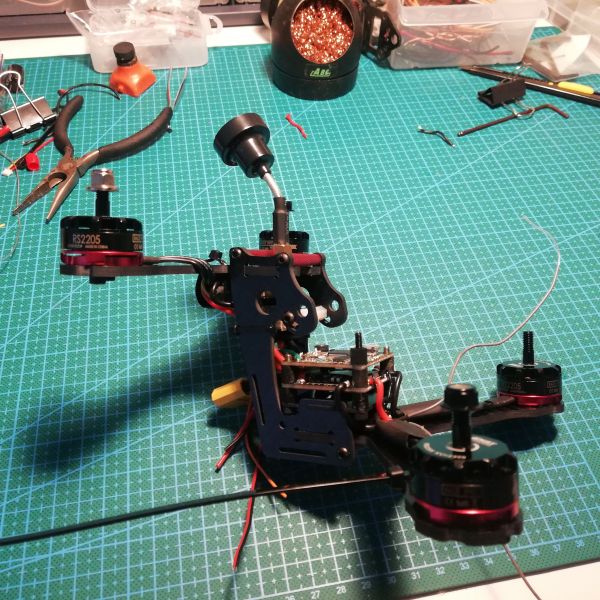
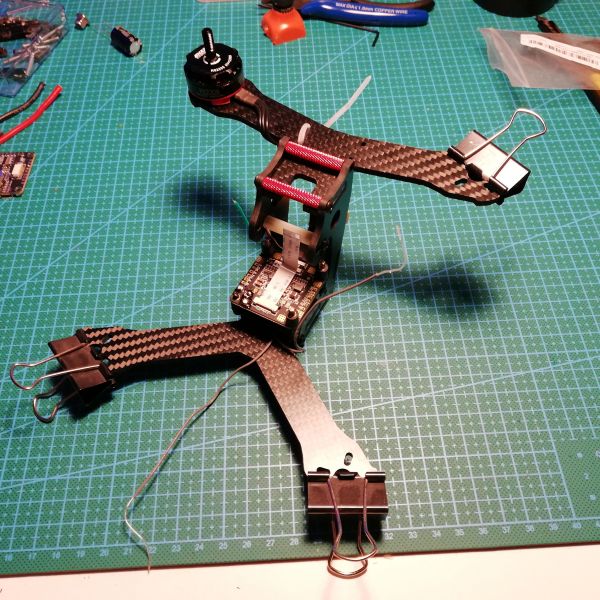
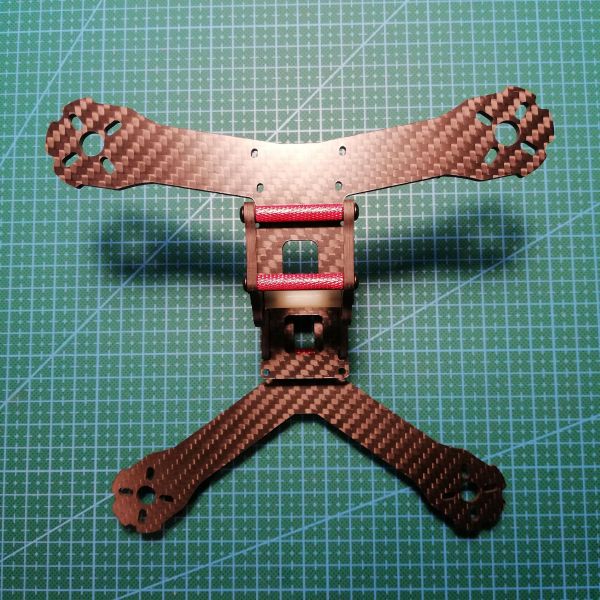
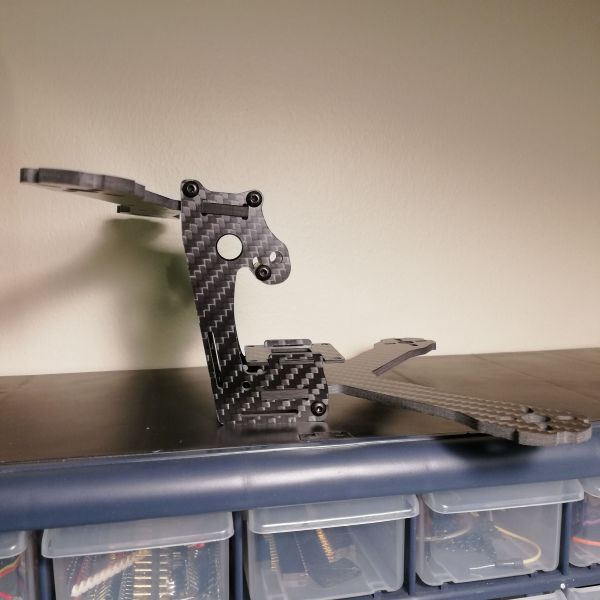
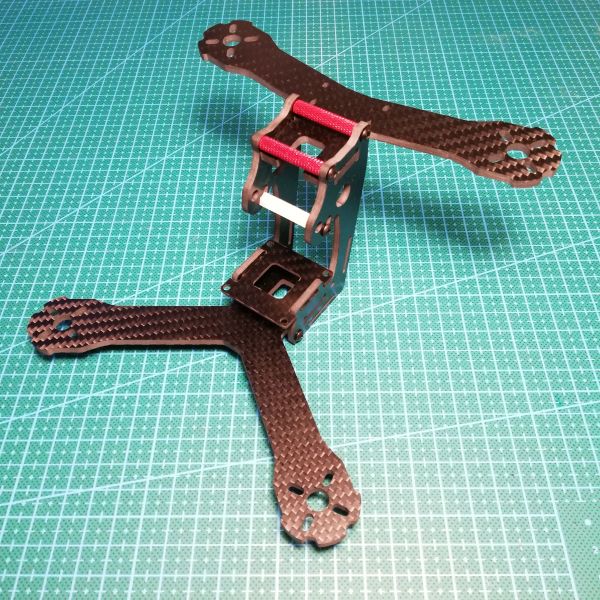
First one being solution to actual design flaw. On the bottom where you mount the battery there is nothing to mount it on, only the two vertical carbon fiber plates which make the middle part of the frame. (See this on the pictures) So I went and designed a plate that mounts to the bottom using existing screw holes so you have something to actually mount your battery to. Making this took 5 reprints but eventually I got it right. I think this is a must part for this frame.
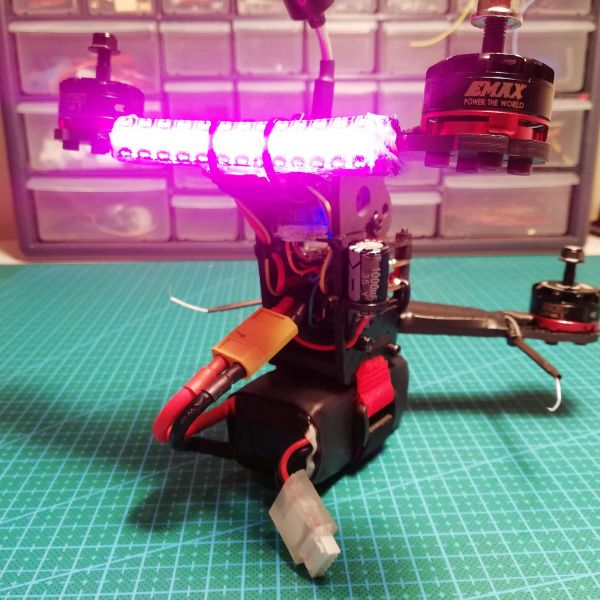
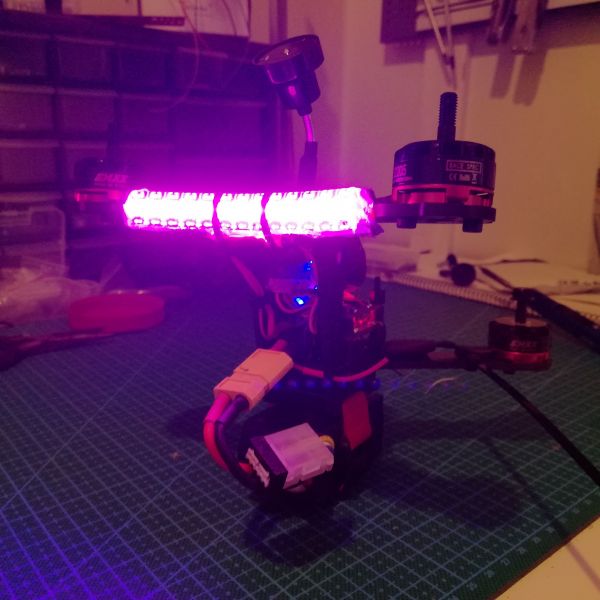
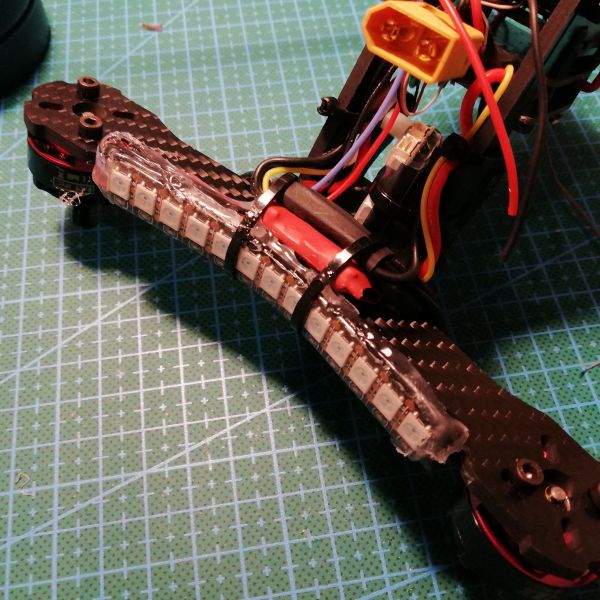
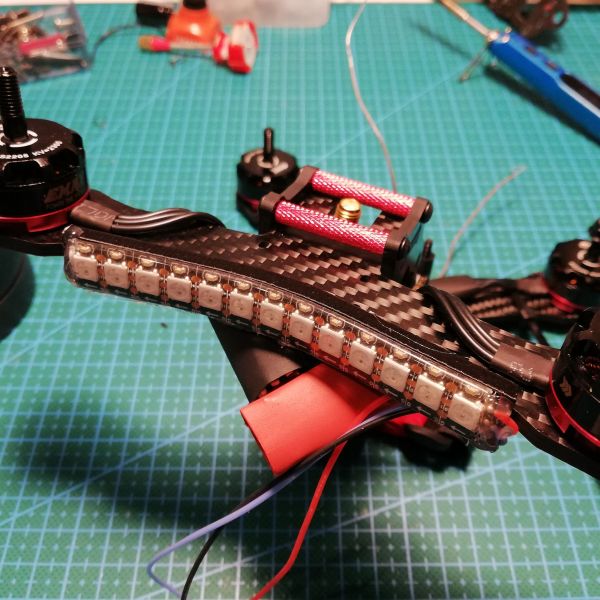
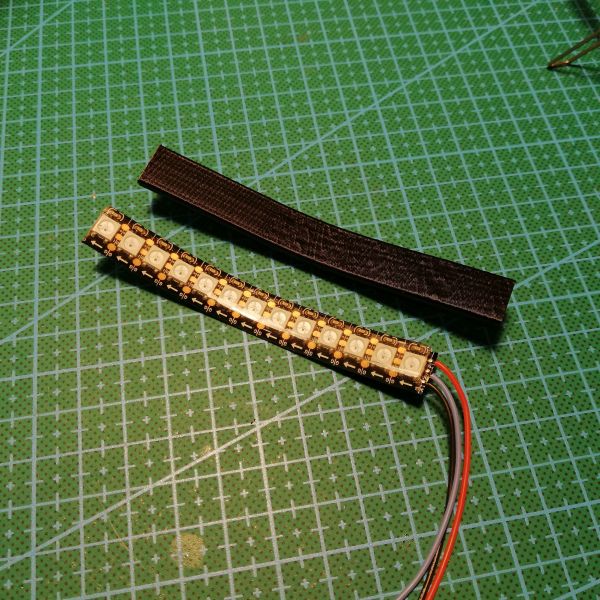
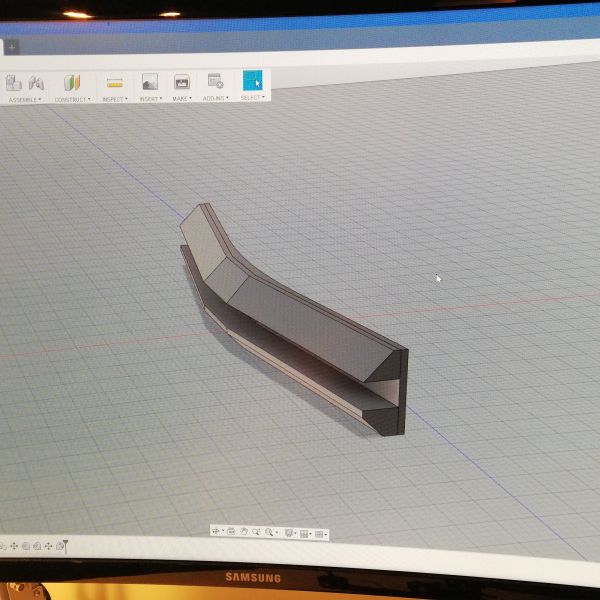
Other 3D-printed part is kind of a "spoiler" that clips to the back of the upper arms. This is what the LEDs are mounted to. This part is held on with same zipties that keep the escs packed under the arm. Stays on well and looks cool. This wide led bar on the back gives me some cyberpunk vibes. I thought it might look cool to have larson scanner running here but it makes the leds too much dimmer to be worth it.
3D-printed parts are available here!
The frame itself is actually pretty flexible on pretty much every axis. By "pretty flexible" I mean that I can flex it with my hands quite easily but I don't think it's too flexible so that it might affect flight. It is still solid on the thrust vector.
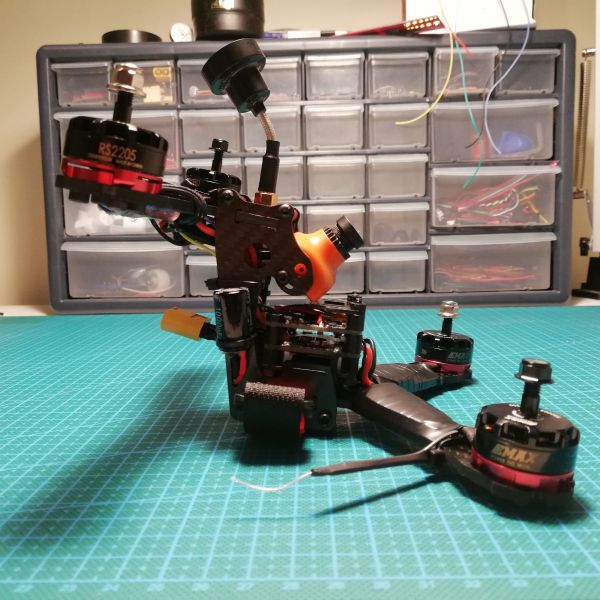
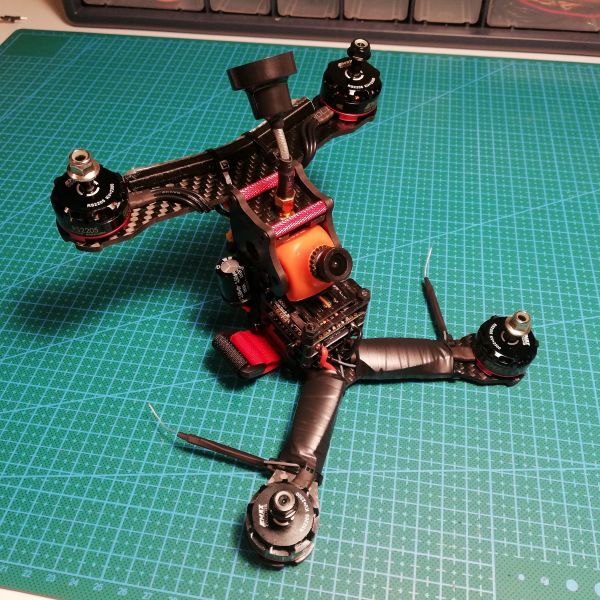
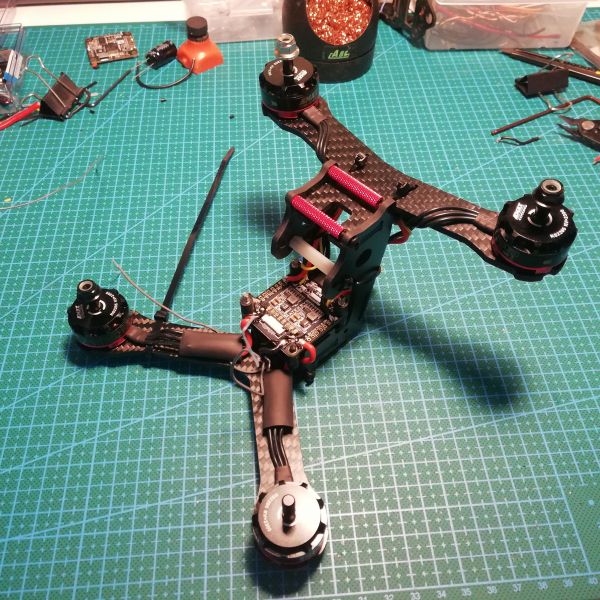
I'm quite curious about the flight charasteristics of this thing, especially how it behaves in turns and on different axes. How it yaws or rolls. Pitch is probably normal. Another interesting thing is that like you can see from the pictures the rear, or in this case, top arms are actually little tilted forward. I don't know why or how it might affect the flight but at least this likely does not hover perfectly level.
On these pictures I have Lumenier 5x4x4 props, I don't really fly these but hey, they look cooler than white triblades.
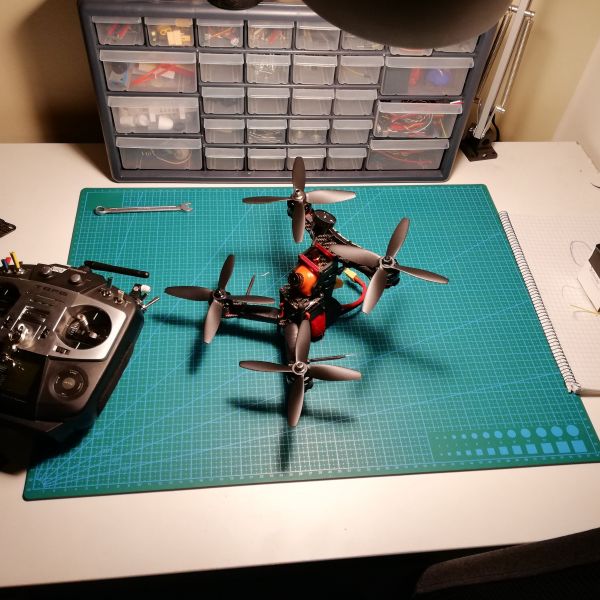
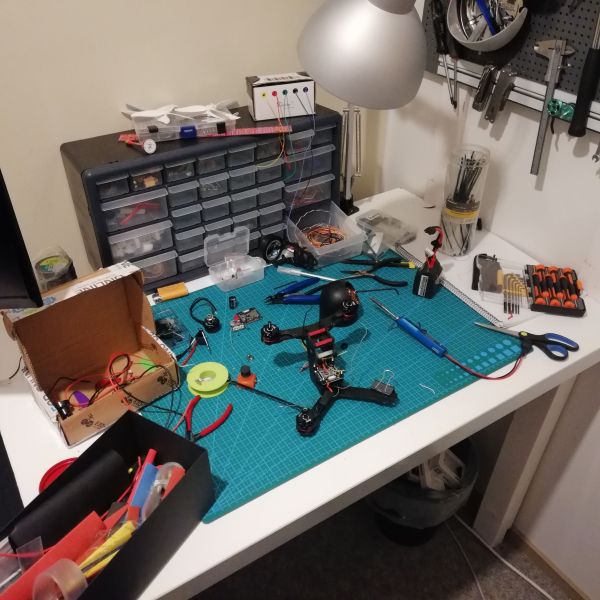
There's pretty much build pictures so enjoy!
Proof it flies!
(I didn't actually get hurt, no worries)
Flight DVR
It did feel a little different to fly this thing, I think the camera being closer to center of thrust actually did make a little difference.
Photos
Part List
Show stores (7)I joked about that frame. But you had the guts to build it. That's so cool.
How does it fly? Can you post a line of sight video. There is none out there yet. A fying Z frame.
Does it power loop?
Nice build. The Empire strikes back...
hmm imagine if someone made a mid mounted battery on this style of frame...would be interesting~ Nice build bruh!
Guides & Reviews
AirbladeUAV has done it again and this time they've brought long range to the 5" class! Based on the popular Transformer Mini, the new Transformer 5" Ultralight adopts a lot of the same design philosophies with larger props and more payload capacity. It can fly upwards of 20 minutes on a 4 cell Li-Ion battery pack and in ideal conditions it's got a range of over 4 to 5 miles. In this guide I'll walk..
Read moreWith the release of the DJI FPV Drone cinematic FPV has become a lot more accessible, but you certainly don't want to crash a $750 drone! The QAV-CINE Freybott is a compact, lightweight cinematic FPV drone that can take a hit and keep going. It's a lot safer to fly indoors and around people. With a naked GoPro or the SMO 4k you can capture some great stabilized footage. In this guide I'll show you..
Read more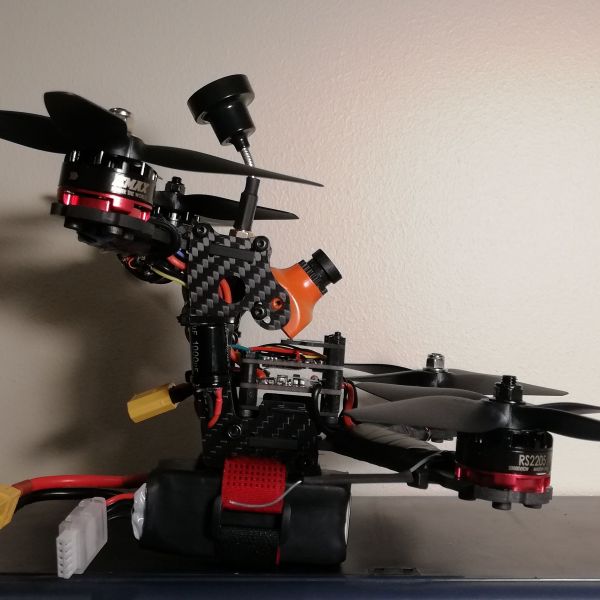


Hi, sorry to come here with a complete different topic from the post. I have the same Rx you successfully used in this quad. However, I cannot make it work with my FC, a RacerStar StarF4S AIO. I linked The Rx to my Futaba 14SG, but seems to be there is not communications with FC because I don't get any movement in Betaflight receiver tab. Did you made an special arrangement to conect this Rx to your FC? How could I run a diagnostic to find out if there is a problem with the FC or the Rx? I'd really appreciate your comments.
Hi! Sorry for being a week late but no, I haven't done anything special or different with my setup. Just wired it in. Does your Rx lights turn on when you connect it?
Hi, the Rx works fine, I installed it in other FC and everything works ok. There is something about the RacerStar FC I couldn't figure out. I tried multiple UARTs, Sbus inversion on and off. Finally I upgraded the firmware, but I'm afraid something went wrong because now I'm getting error message in CLI when I type some commands which used to work before re-flashing.