
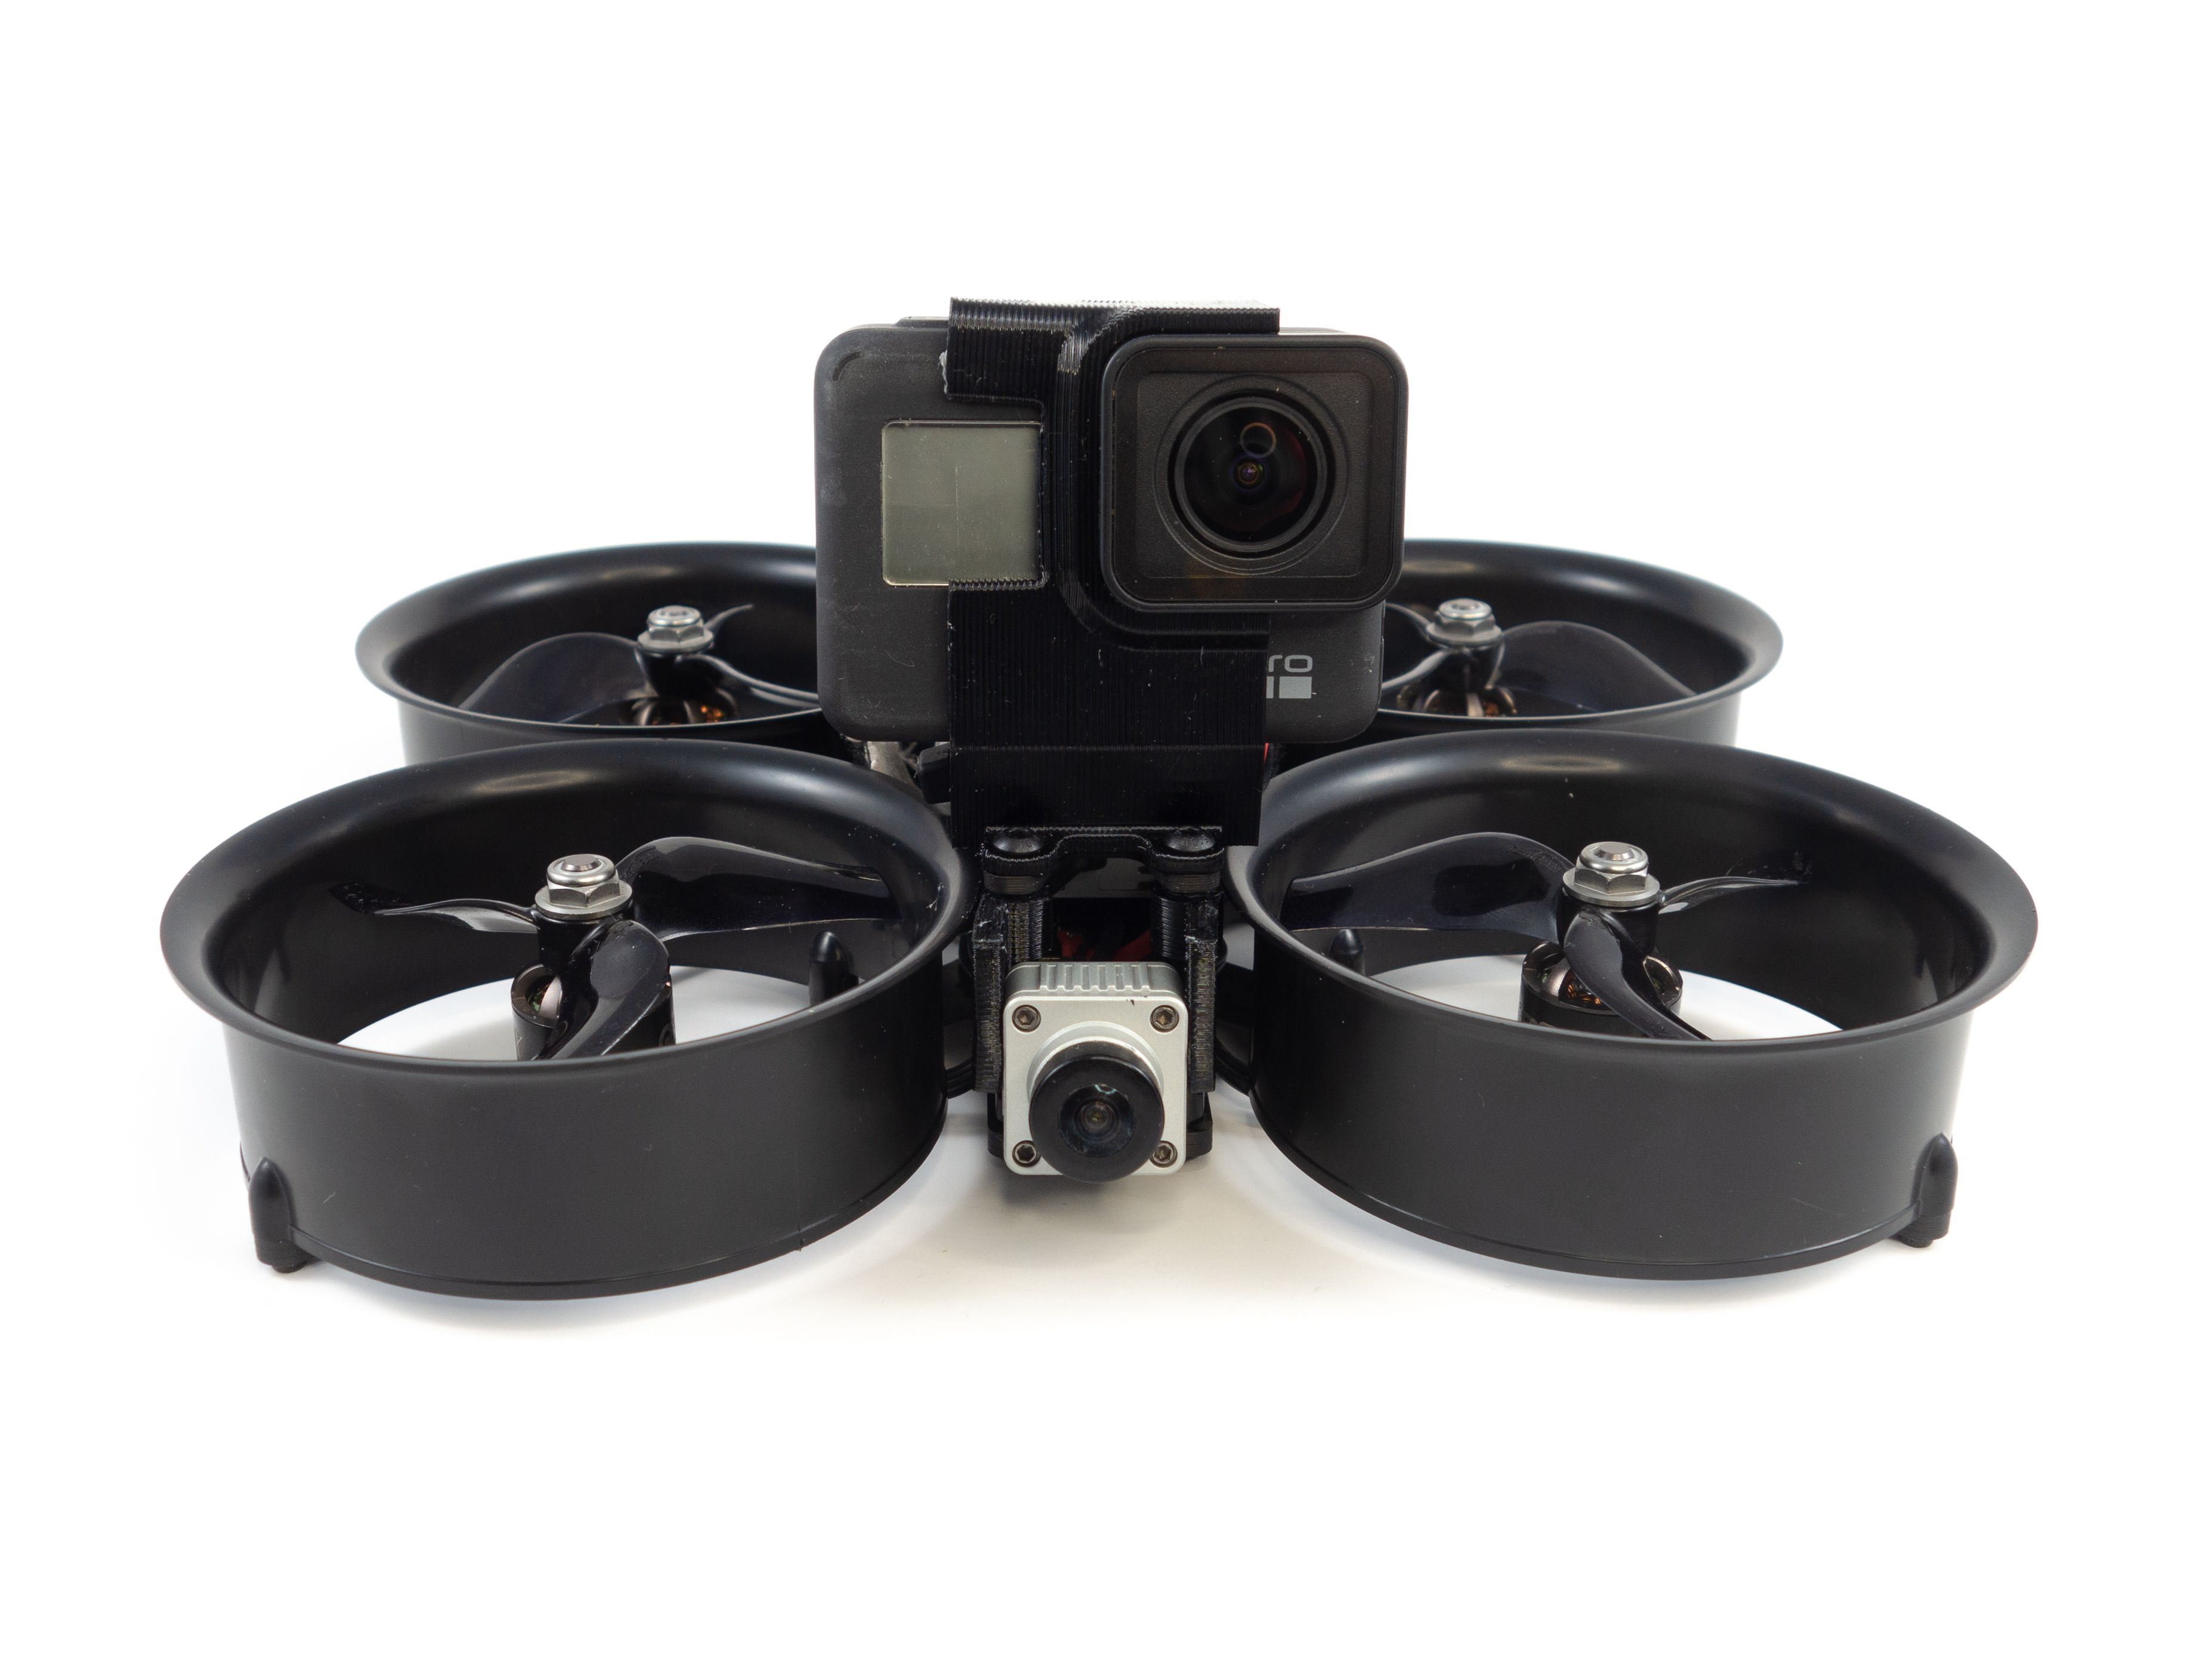
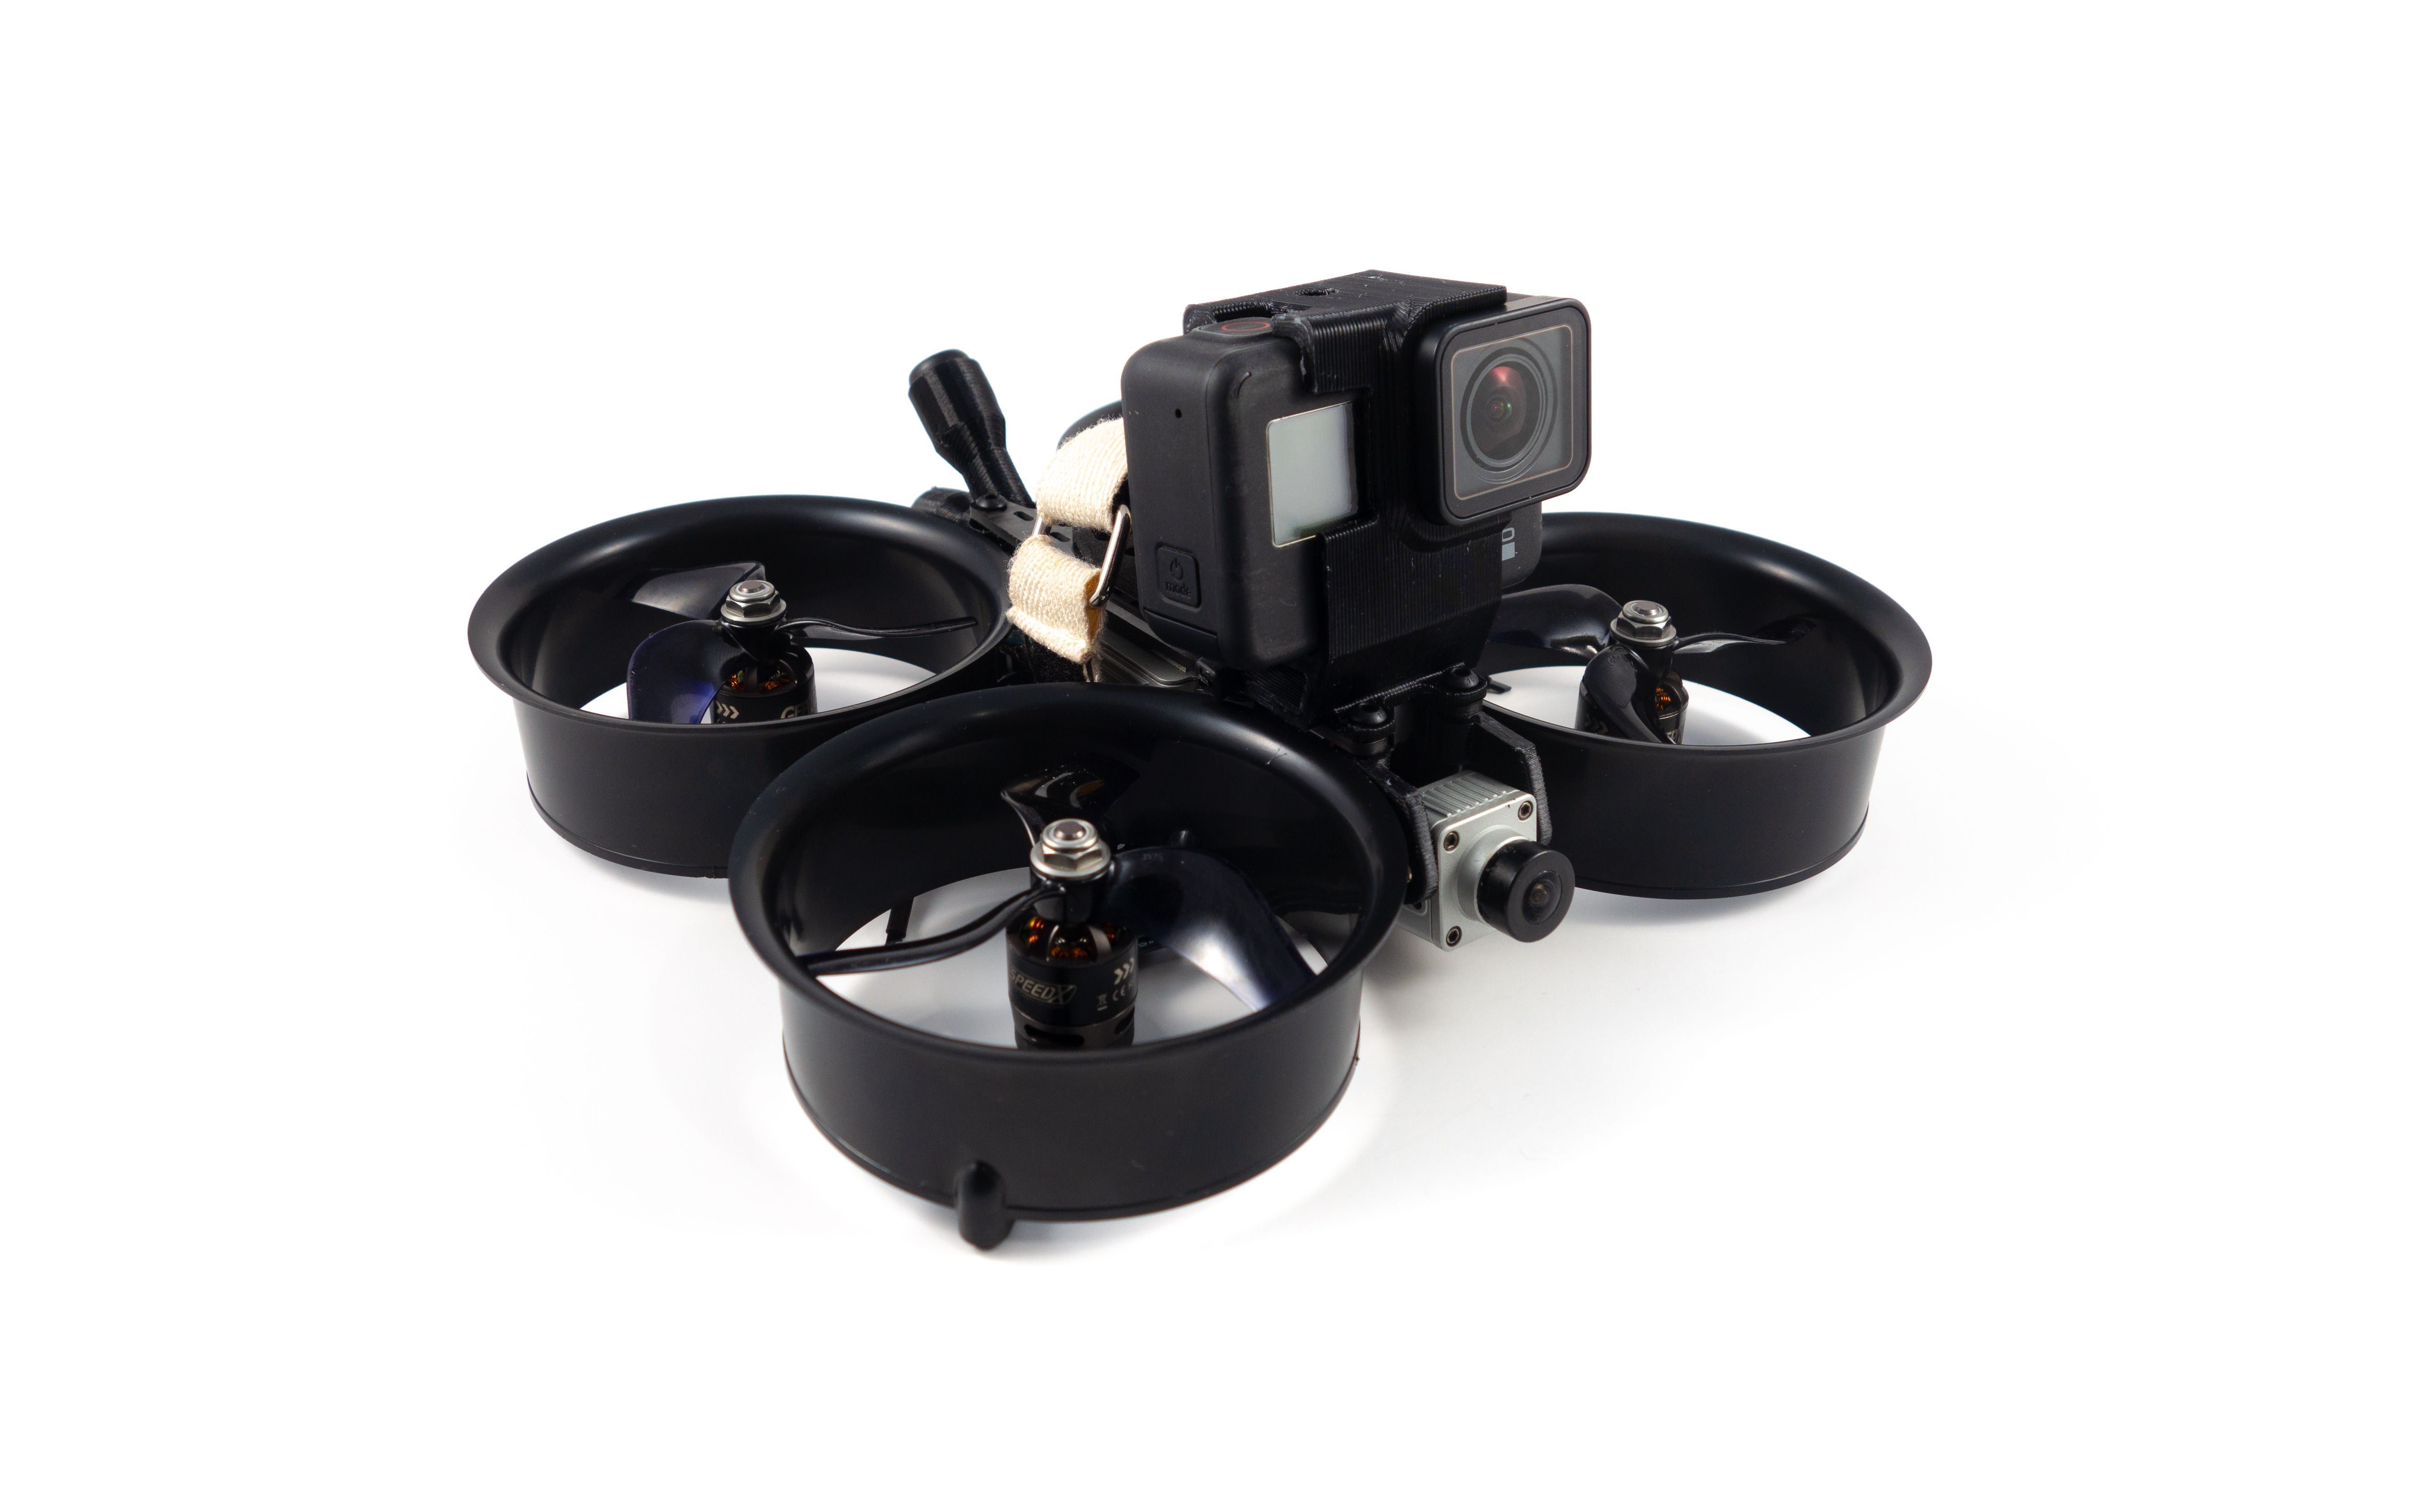
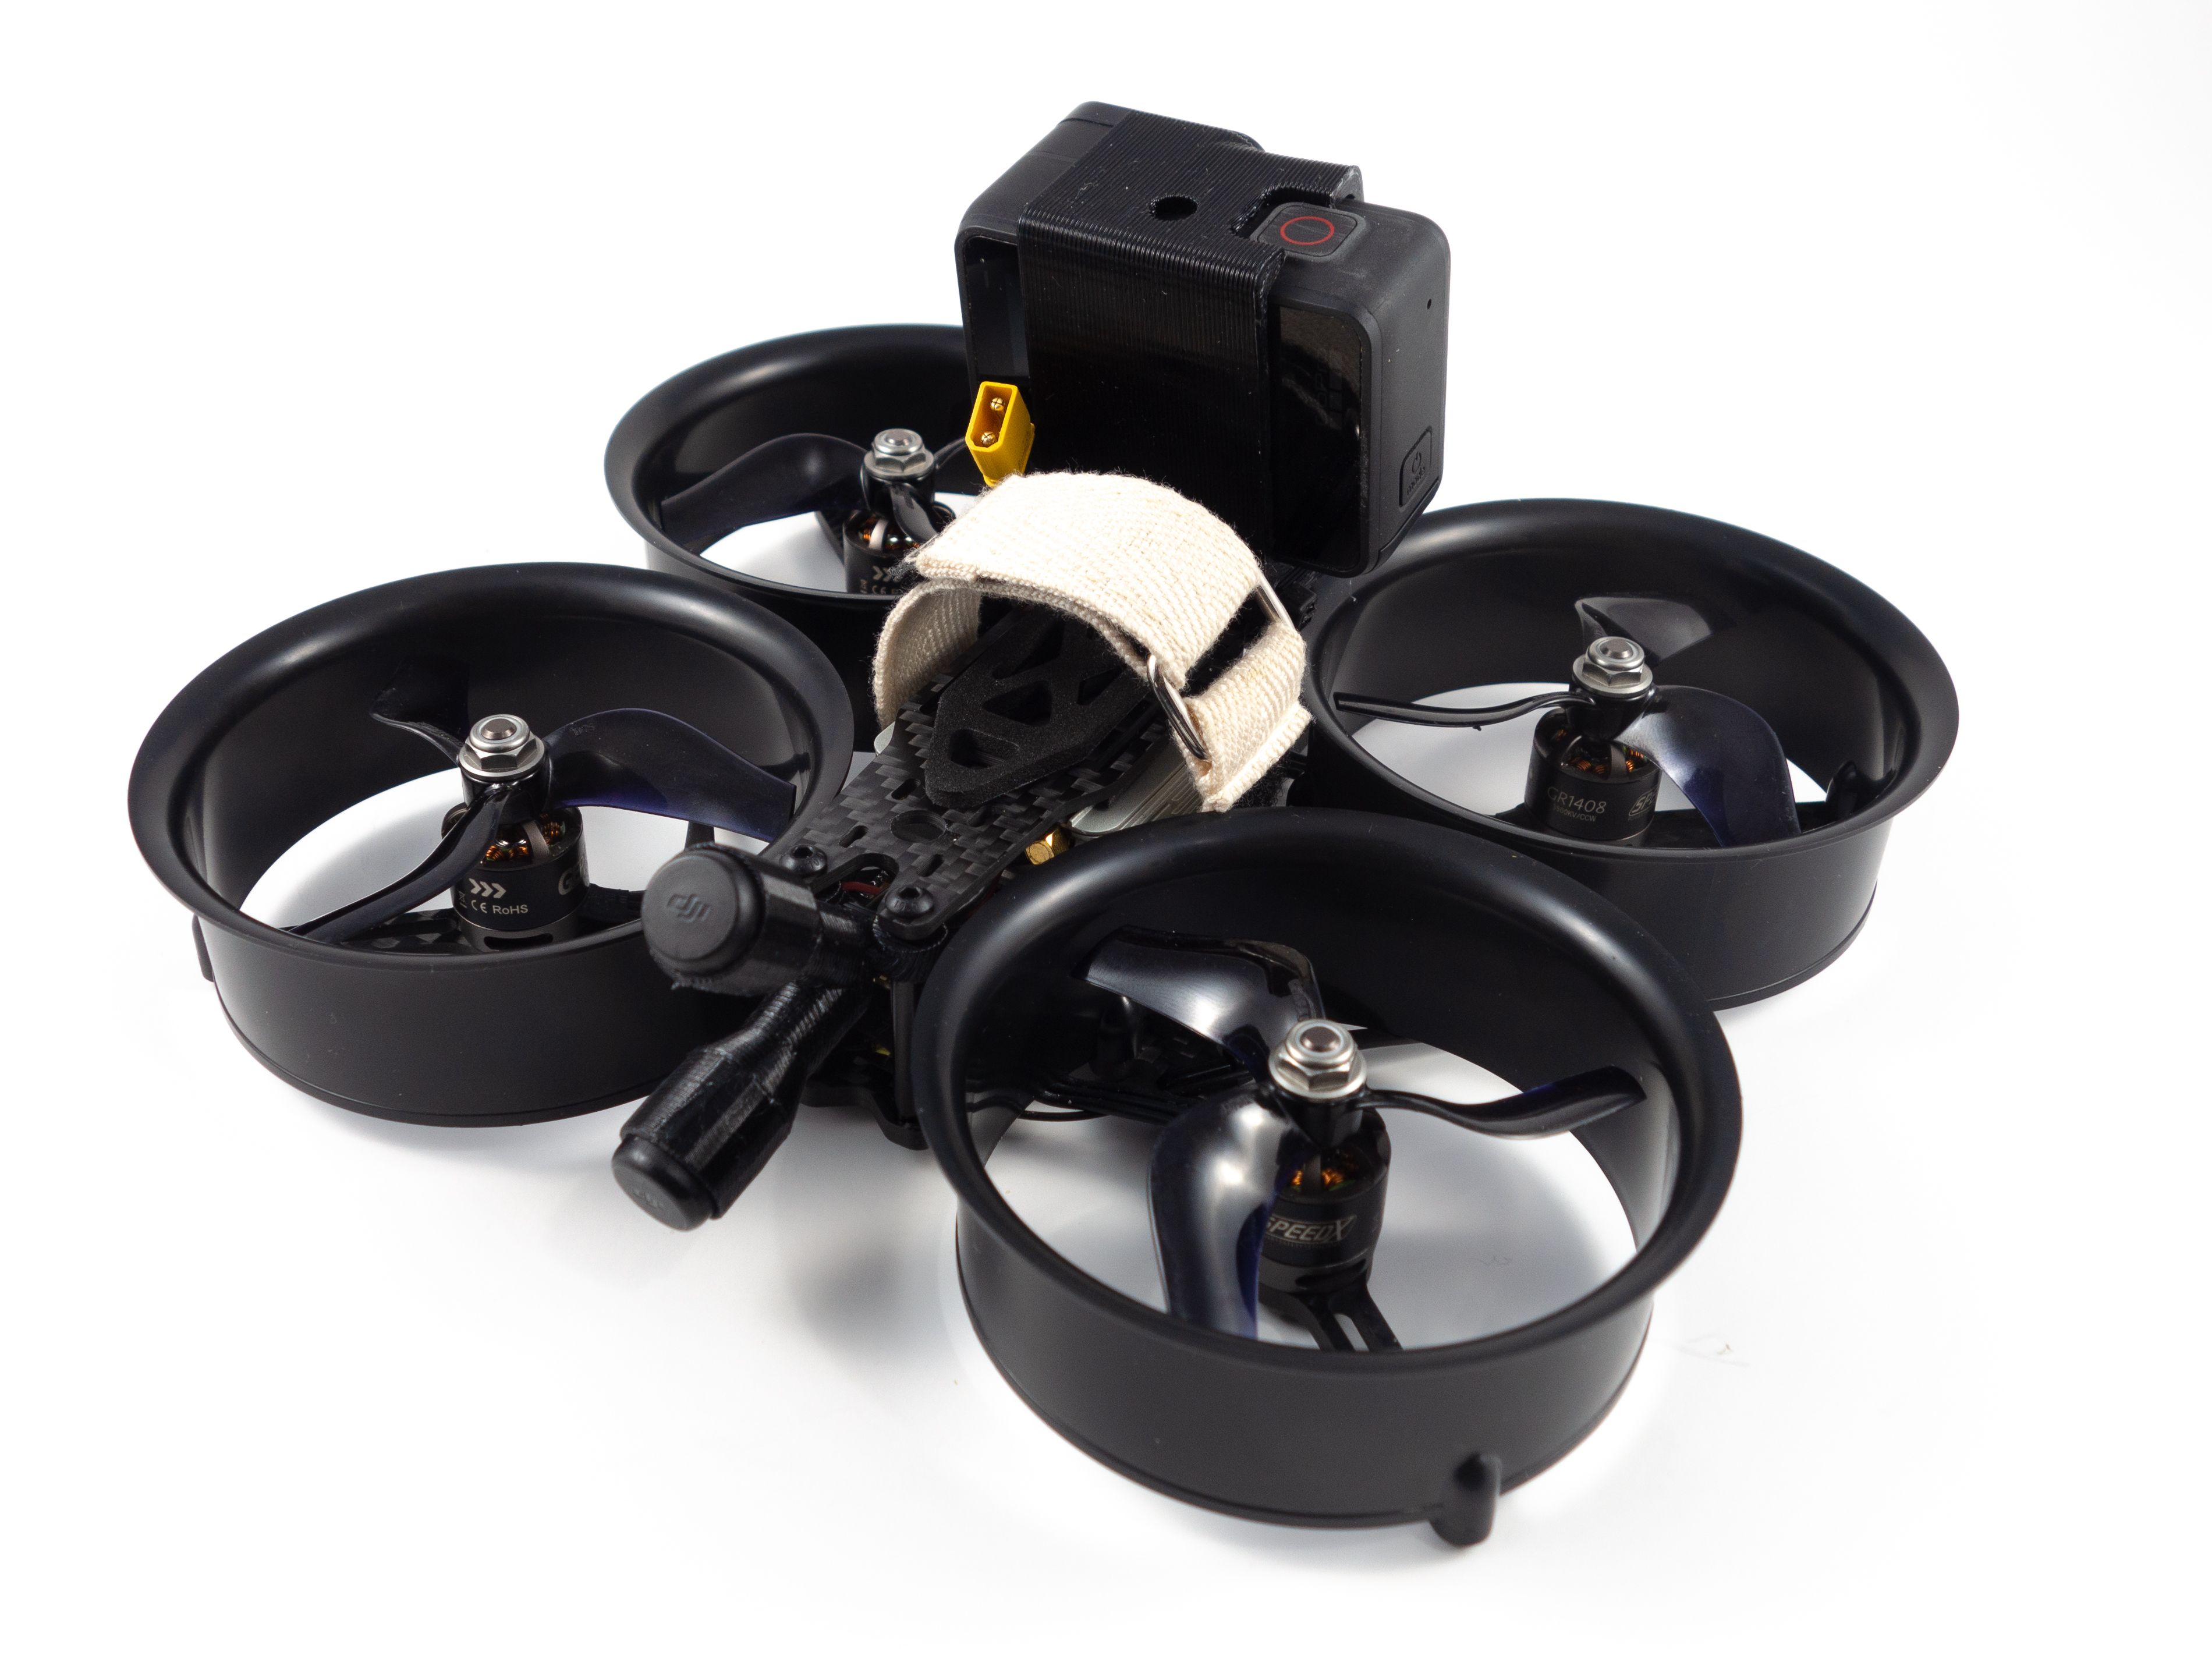
In late 2019 DJI made inroads into the FPV scene with their remarkable low-latency digital system. It gave us a 720p video feed with latency on-par with the status quo, analog video. Traditionally we've used analog video systems for low-latency video, but the video quality is far from ideal. It's a trade-off we've been willing to accept for the control. Now we've got the best of both worlds and what better quad to build than a cinewhoop. While cinewhoops are based on acrobatic FPV software and hardware the goal is to produce footage focused on a subject rather than acrobatic ability. The ducts to not only protect persons or property but increase thrust and efficiency. You won't get 20 minutes of flight time, but you will get more control, spontaneous reaction and less robotic footage.
This build uses the original Reptile Cloud frame. They have since released an HD version which offers more space as well as camera and antenna mounts. I suggest using the newer version, but keep in mind that some of these instructions will vary.
Tools
This is a moderately challenging build and does require some fine soldering. I highly recommend a flux pen, 63/37 leaded solder and a good quality soldering iron. Here are the tools and supplies you'll need. I've included direct links to my gear below.
- Soldering iron
- 1.5mm and 2.0mm hex drivers
- Industrial Tweezers
- Wire cutter/stripper
- Scissors
- Heat gun or lighter
- Ruler and cutting mat
- Multimeter
- 3D Printer or printing service
Additional Supplies
- A variety of heat shrink tube sizes
- Blue Loctite
- Zip ties (small)
- 63/37 leaded solder
- Liquid soldering flux pen
Hardware
While most of the necessary hardware is included you'll need to buy a couple kits of M2 screws and standoffs. Due to space constraints within the frame the flight controller and ESCs need to be separated and staggered to allow room for the DJI Air Unit. The kits are linked below.
3D Prints
This build does require a couple TPU 3D prints. Both the camera and antenna mounts can both be found on Thingiverse. You either need access to a 3D printer or you'll need to order the prints from a printing service. While you can get by without the antenna mounts the camera mount is more crucial. It needs to be outside the frame just far enough to keep the ducts out of frame of the video feed.
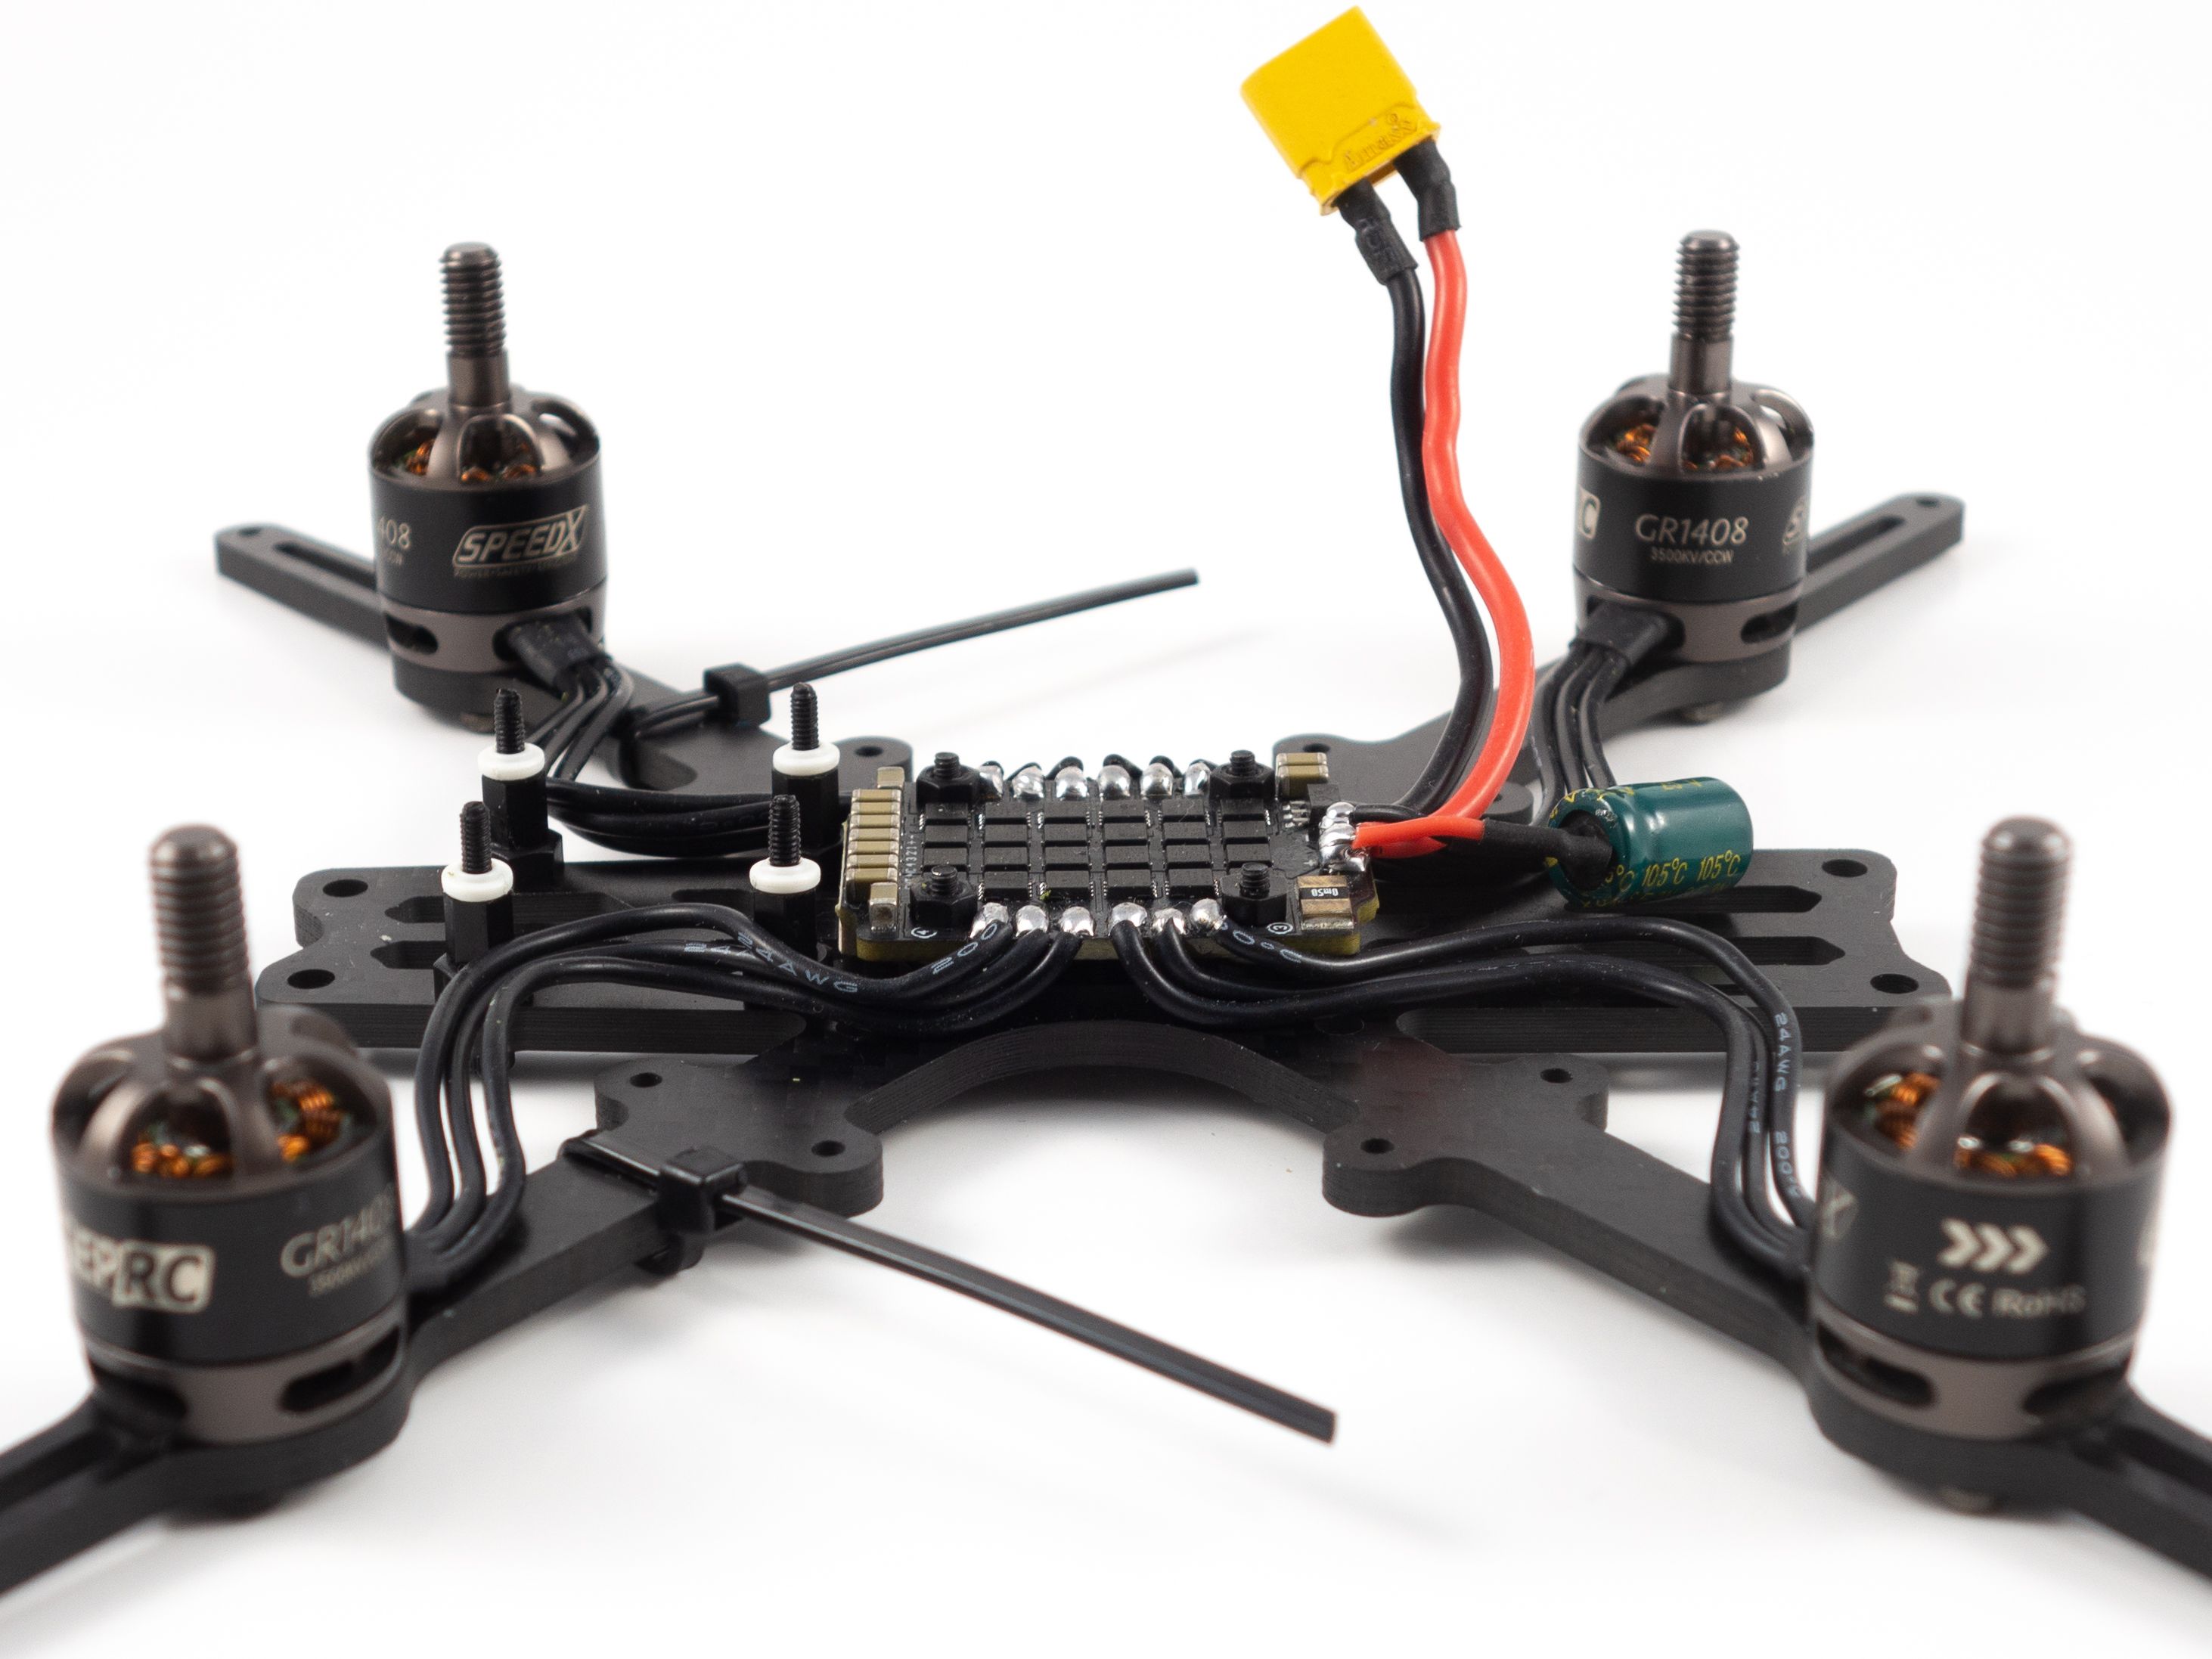
Motors
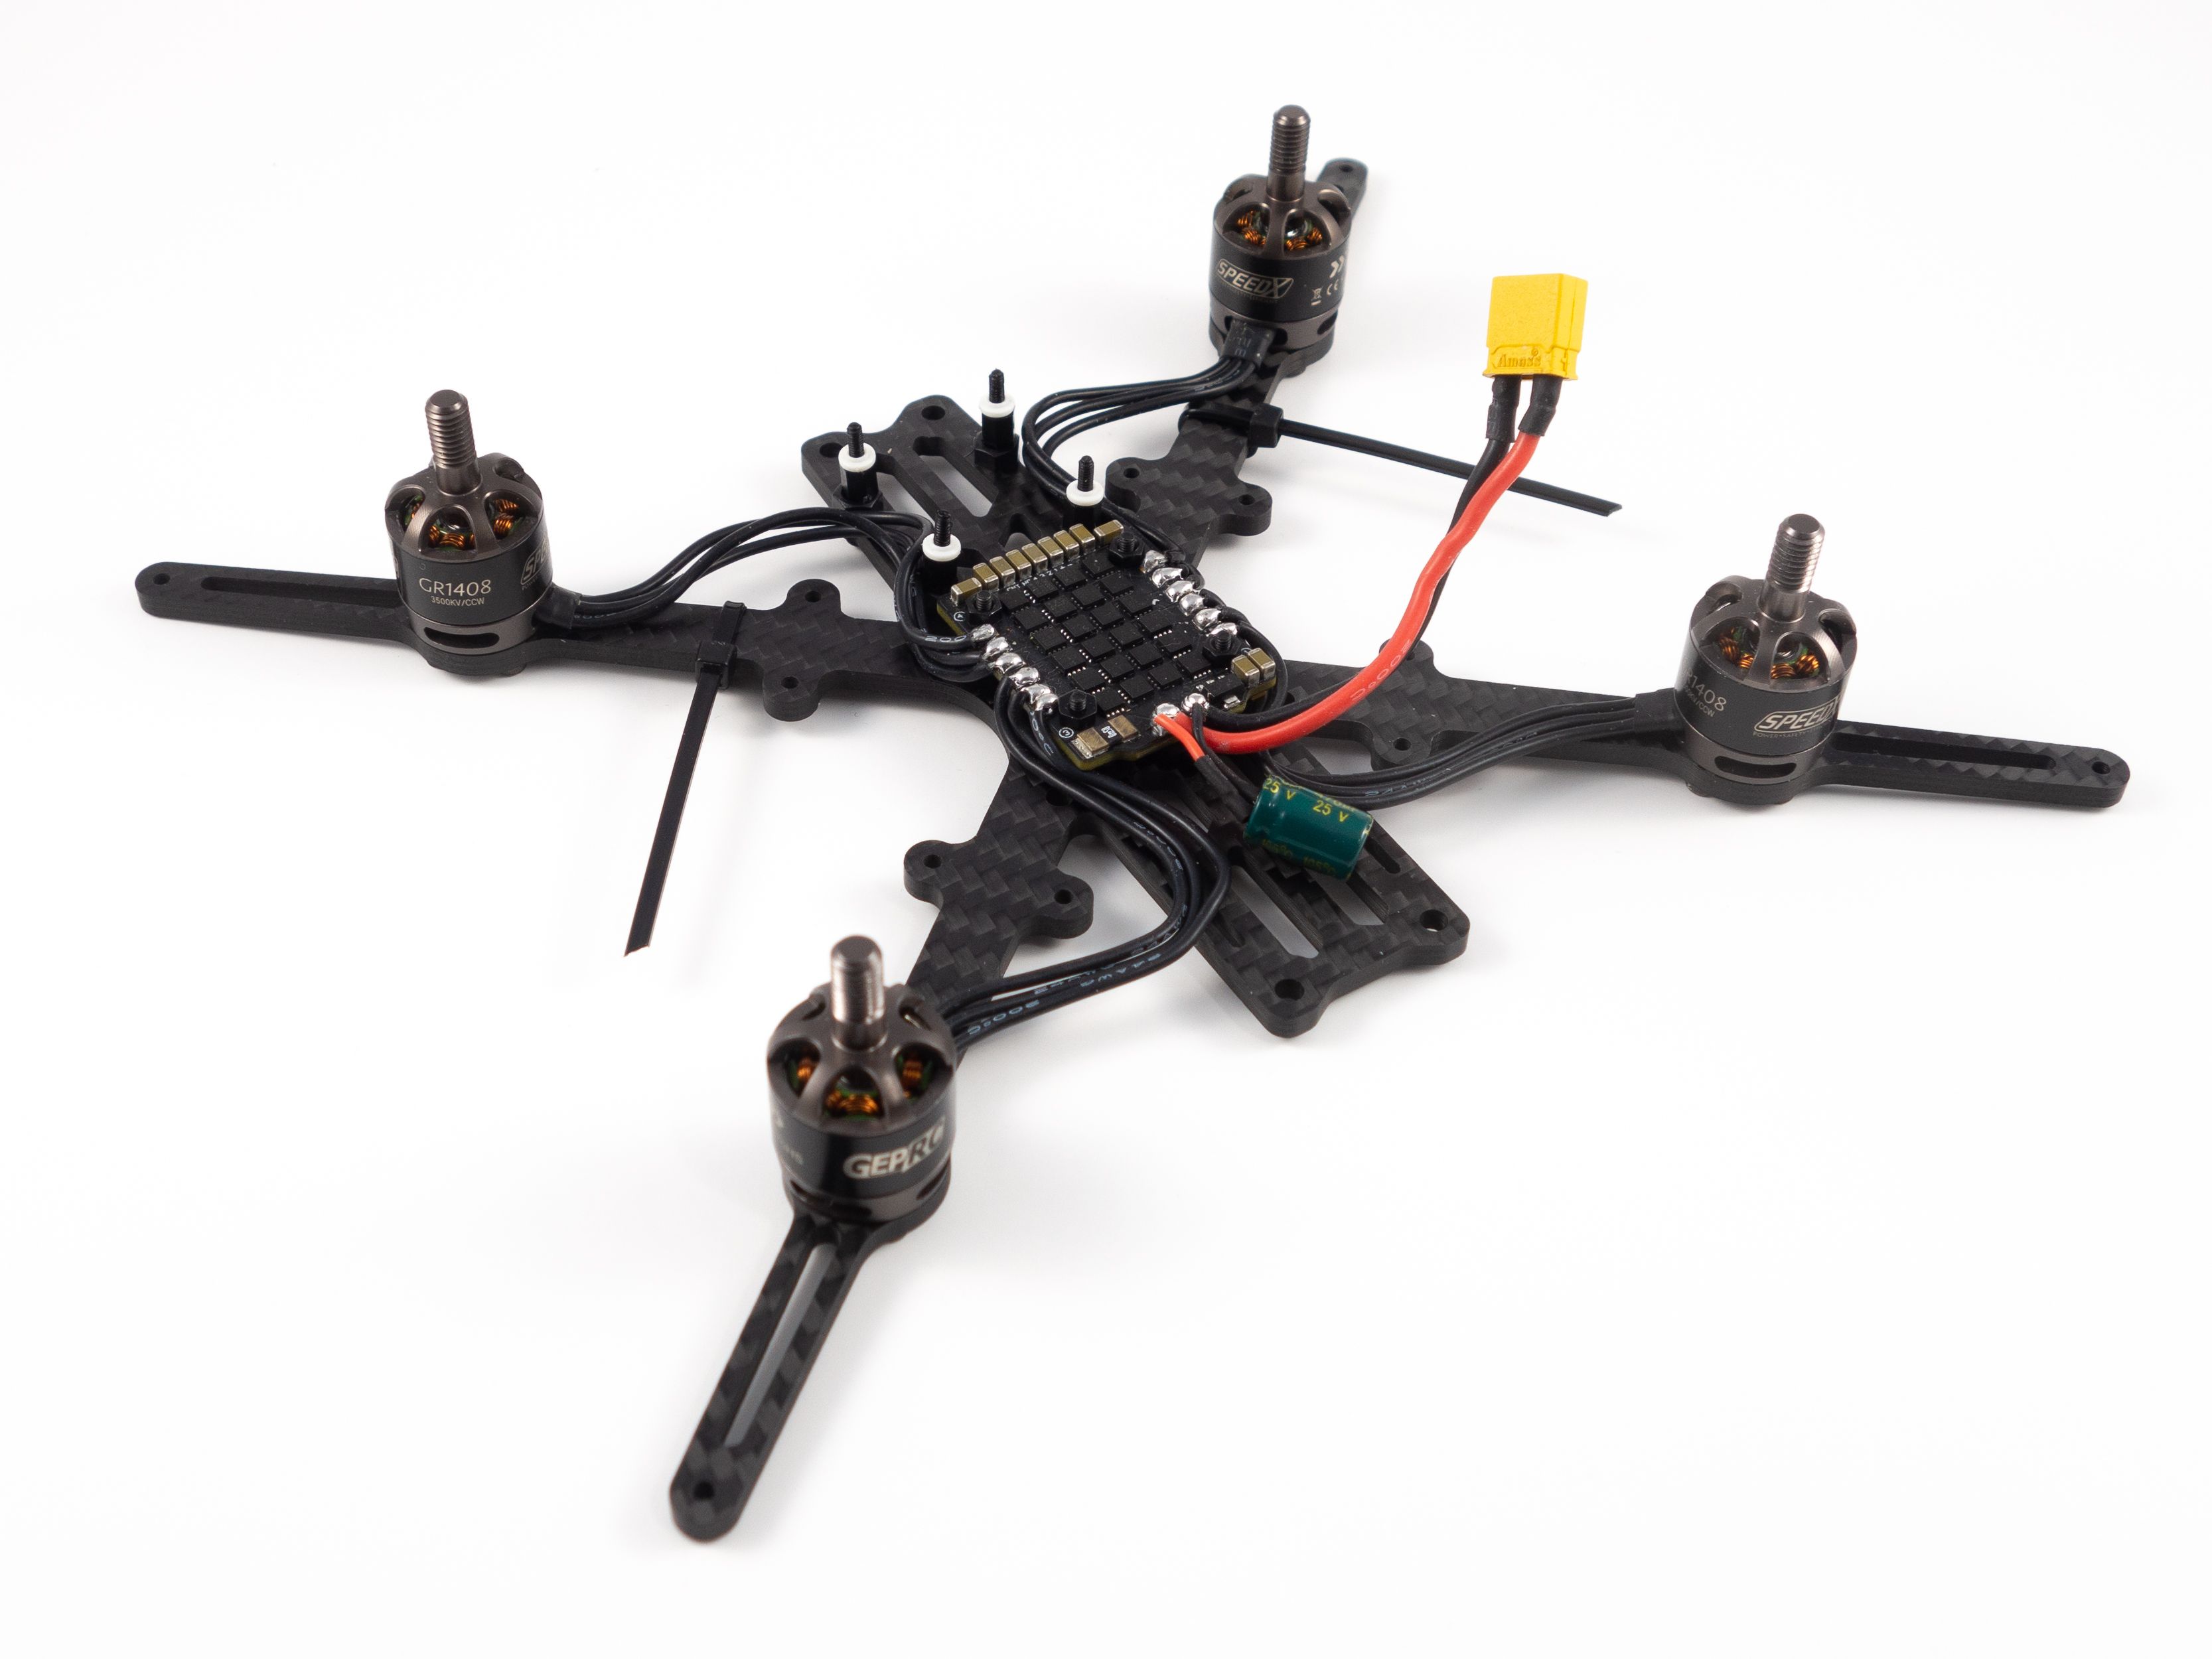
First mount the motors. Take the bottom plate and screw the motors into place using the included screws and blue Loctite. Now we need to get a little creative with the stack. It took my entire collection of m2 screws, nuts and standoffs to find the right combination so play close attention to the lengths and placement order.
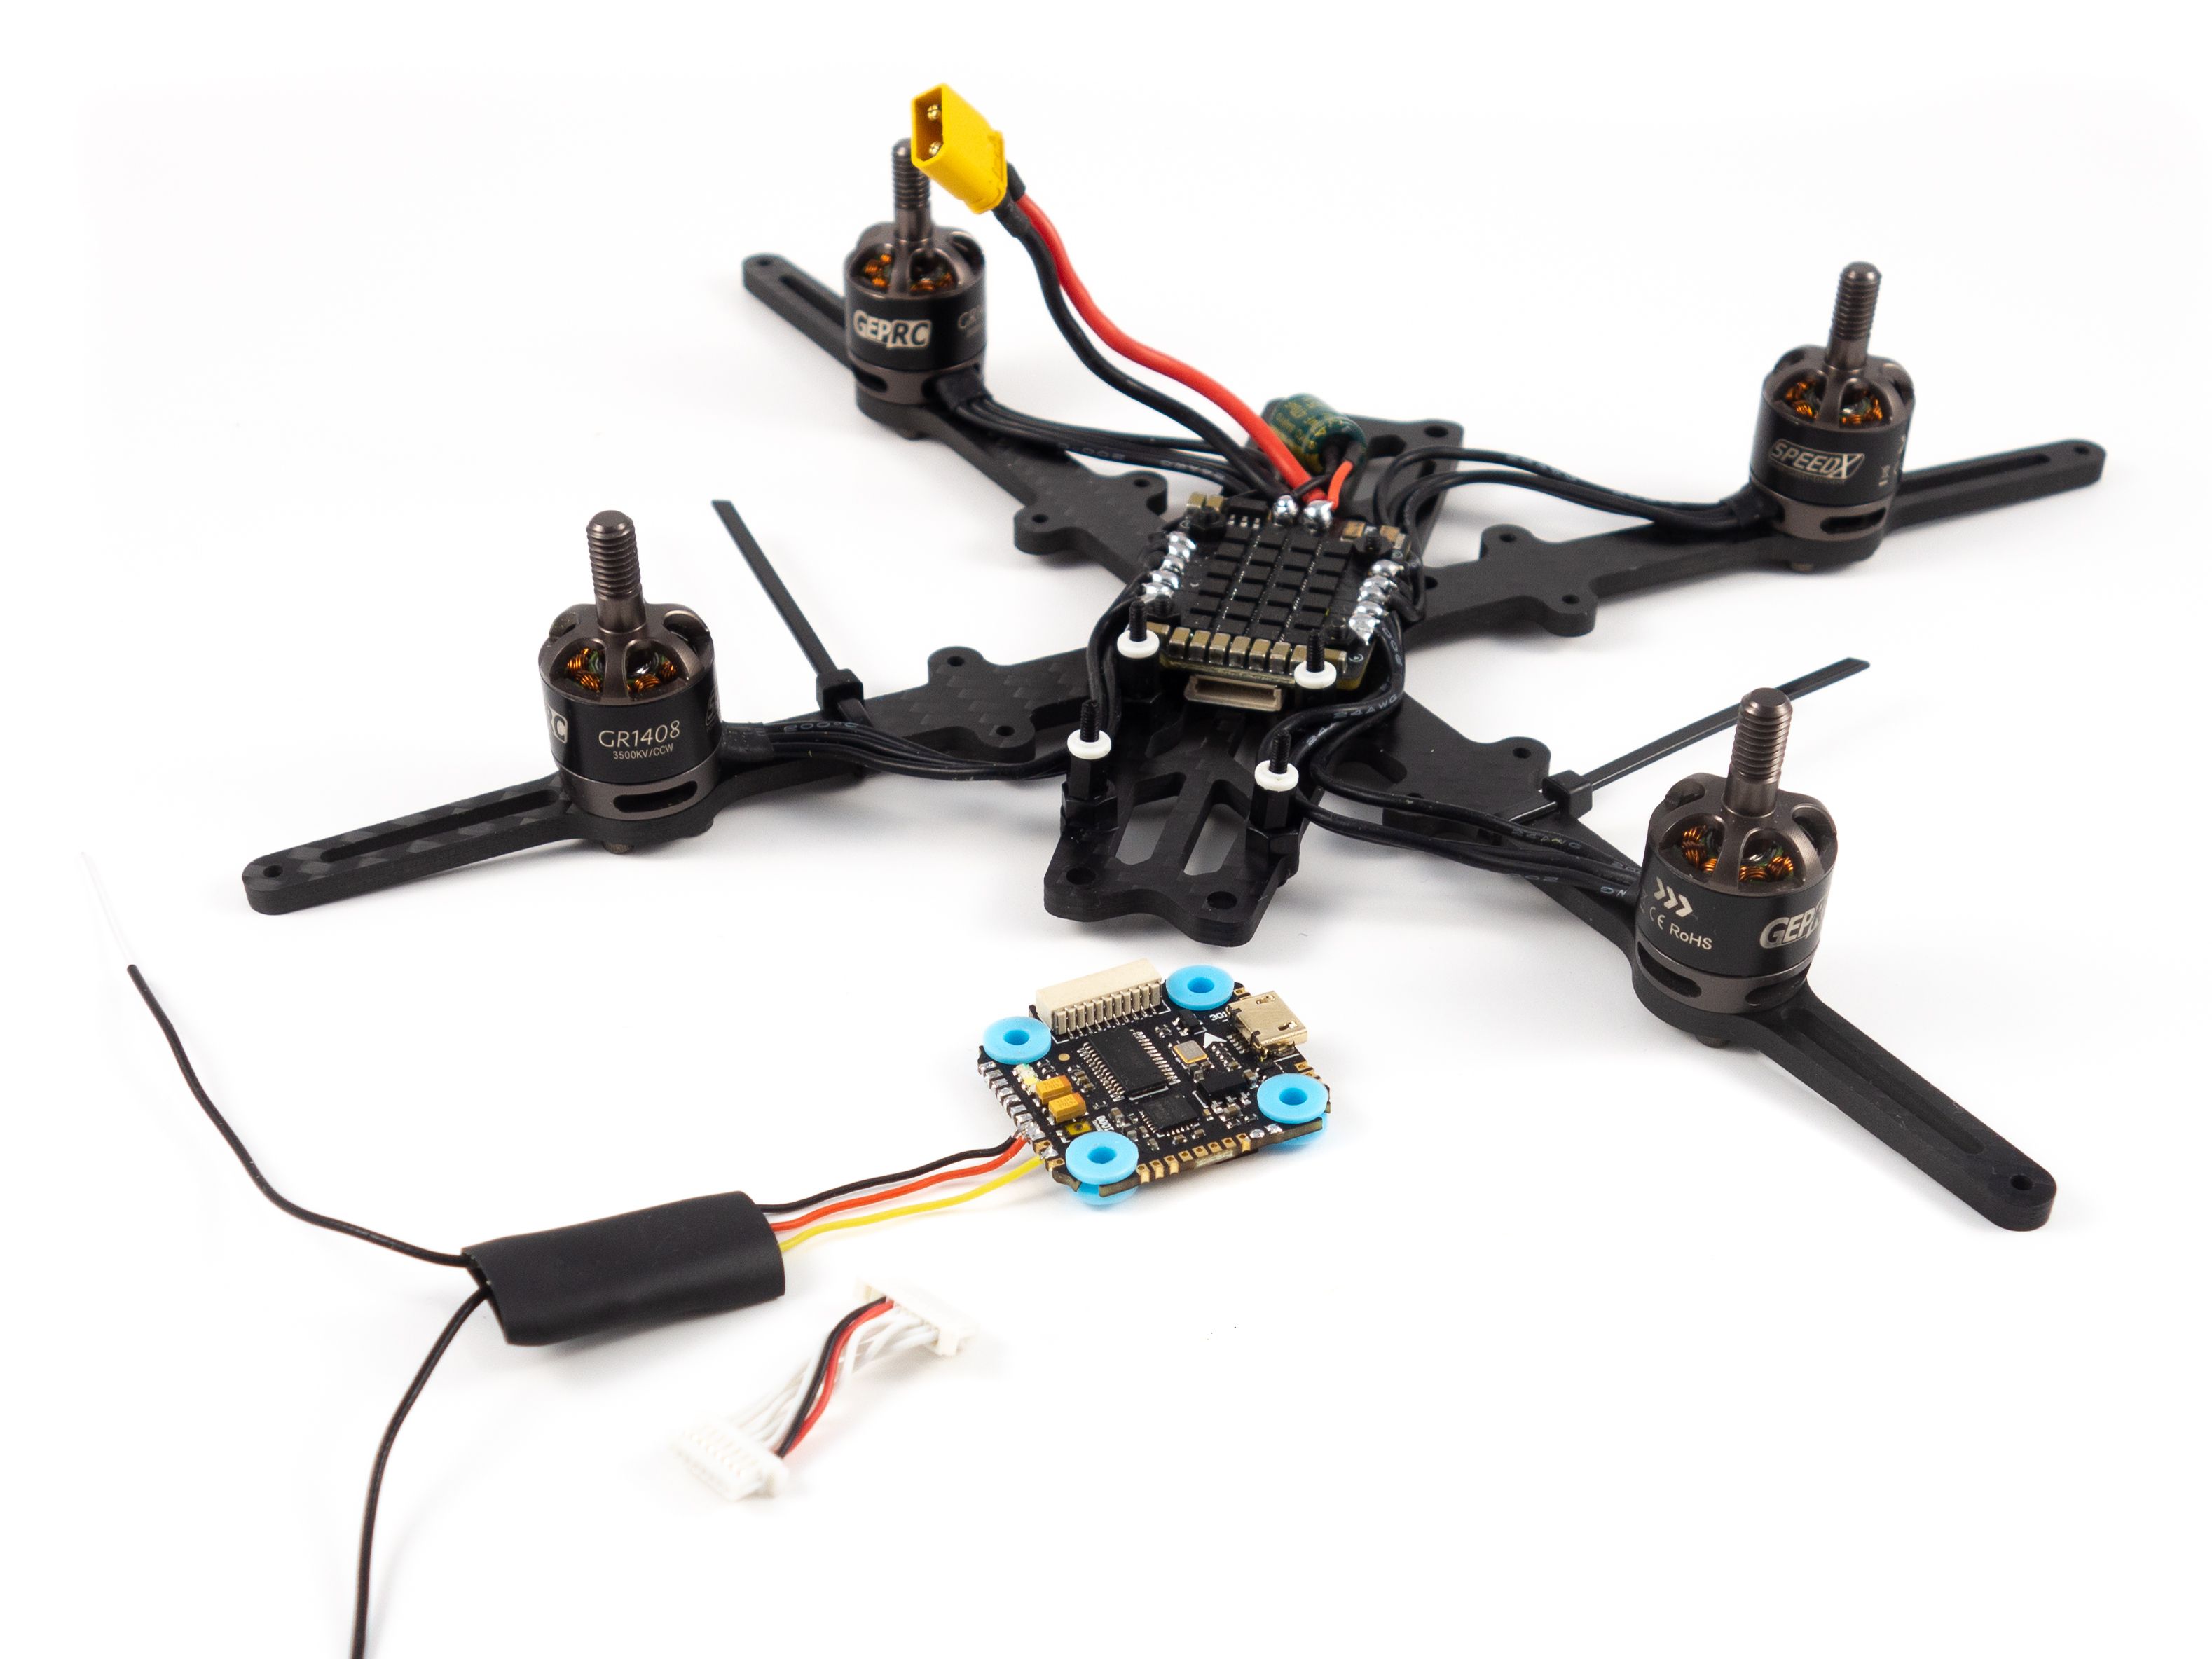
- Separate the 4-in-1 ESC from the flight controller.
- Mount the 4-in-1 ESC with 12mm M2 screws from the screw kit.
- Insert each screw through the bottom of the plate and secure them with 2mm tall m2 nuts.
- Cap each nut with the white spacers included with the stack.
- Place the 4-in-1 ESC on top of the white spacers with the power lead pointed toward the front.
- Secure the 4-in-1 ESC with another set of 2mm m2 nuts.
Solder the motor wires to the 4-in-1 ESC. Keep in mind that the ducts will sit flush with the arms, so don't run the motor wires directly across to the pads. Ensure you've got enough slack to route the wires around the ducts.
To make the soldering go smooth flux all the motor tabs and apply a ball of solder to each. Cover the pads entirely but take care not to bridge them. If you do then apply flux and slice through the middle with your iron. Now if you're right-handed start with the rightmost pad and cut each wire to length as you go.
Power Connector
Next let's solder the power leads. Everything is included at the bottom of the Mamba container.
- Solder the wires to the XT30 first and make sure you've got the polarity correct. Add shrink tube to cover the joints.
- We want the battery lead to come out to the side between the ducts, so measure the wire and cut it to length. Keep in mind that one wire should be a little shorter than the other to allow the wires to run to the side.
- Flux and add solder to the battery pads on the 4-in-1 ESC and solder the wires to the pads.
- Use a steady hand and be very careful not to accidentally bump the components on the board with your iron.
- Solder the capacitor on top of the battery leads.
- The striped side is negative.
Binding the Receiver
You've got a couple options here. If you purchased the DJI controller you can skip this step. Personally, I prefer a traditional RC radio for the added flexibility. You can't fly micro or analog quads with the DJI controller. Here I used the FrSky XM+.
- Solder 3 wires to the 5v, GND and SBUS pads on the receiver.
- You'll need some 28-32 AWG wire for this and unfortunately the receiver doesn't include it.
- Solder these wires to the 5v, GND and SBUS pads on the flight controller.
- Connect your flight controller to the 4-in-1 ESC, but don't secure it with nuts just yet.
- Bind your receiver
- Be sure to double check that you don't have continuity between your main battery leads and use a smoke stopper if you have one.
- Hold the bind button on the receiver while you plug the main battery in. (It's helpful to clamp this button down with tweezers to free your hand)
- Put your radio into bind mode and make sure you're bound.
- Now that you're bound you can add some shrink tube to the receiver and place it behind the 4-in-1 ESC.
- Add some zip ties to the rear arms and shrink tube the antennas to hold them in place.
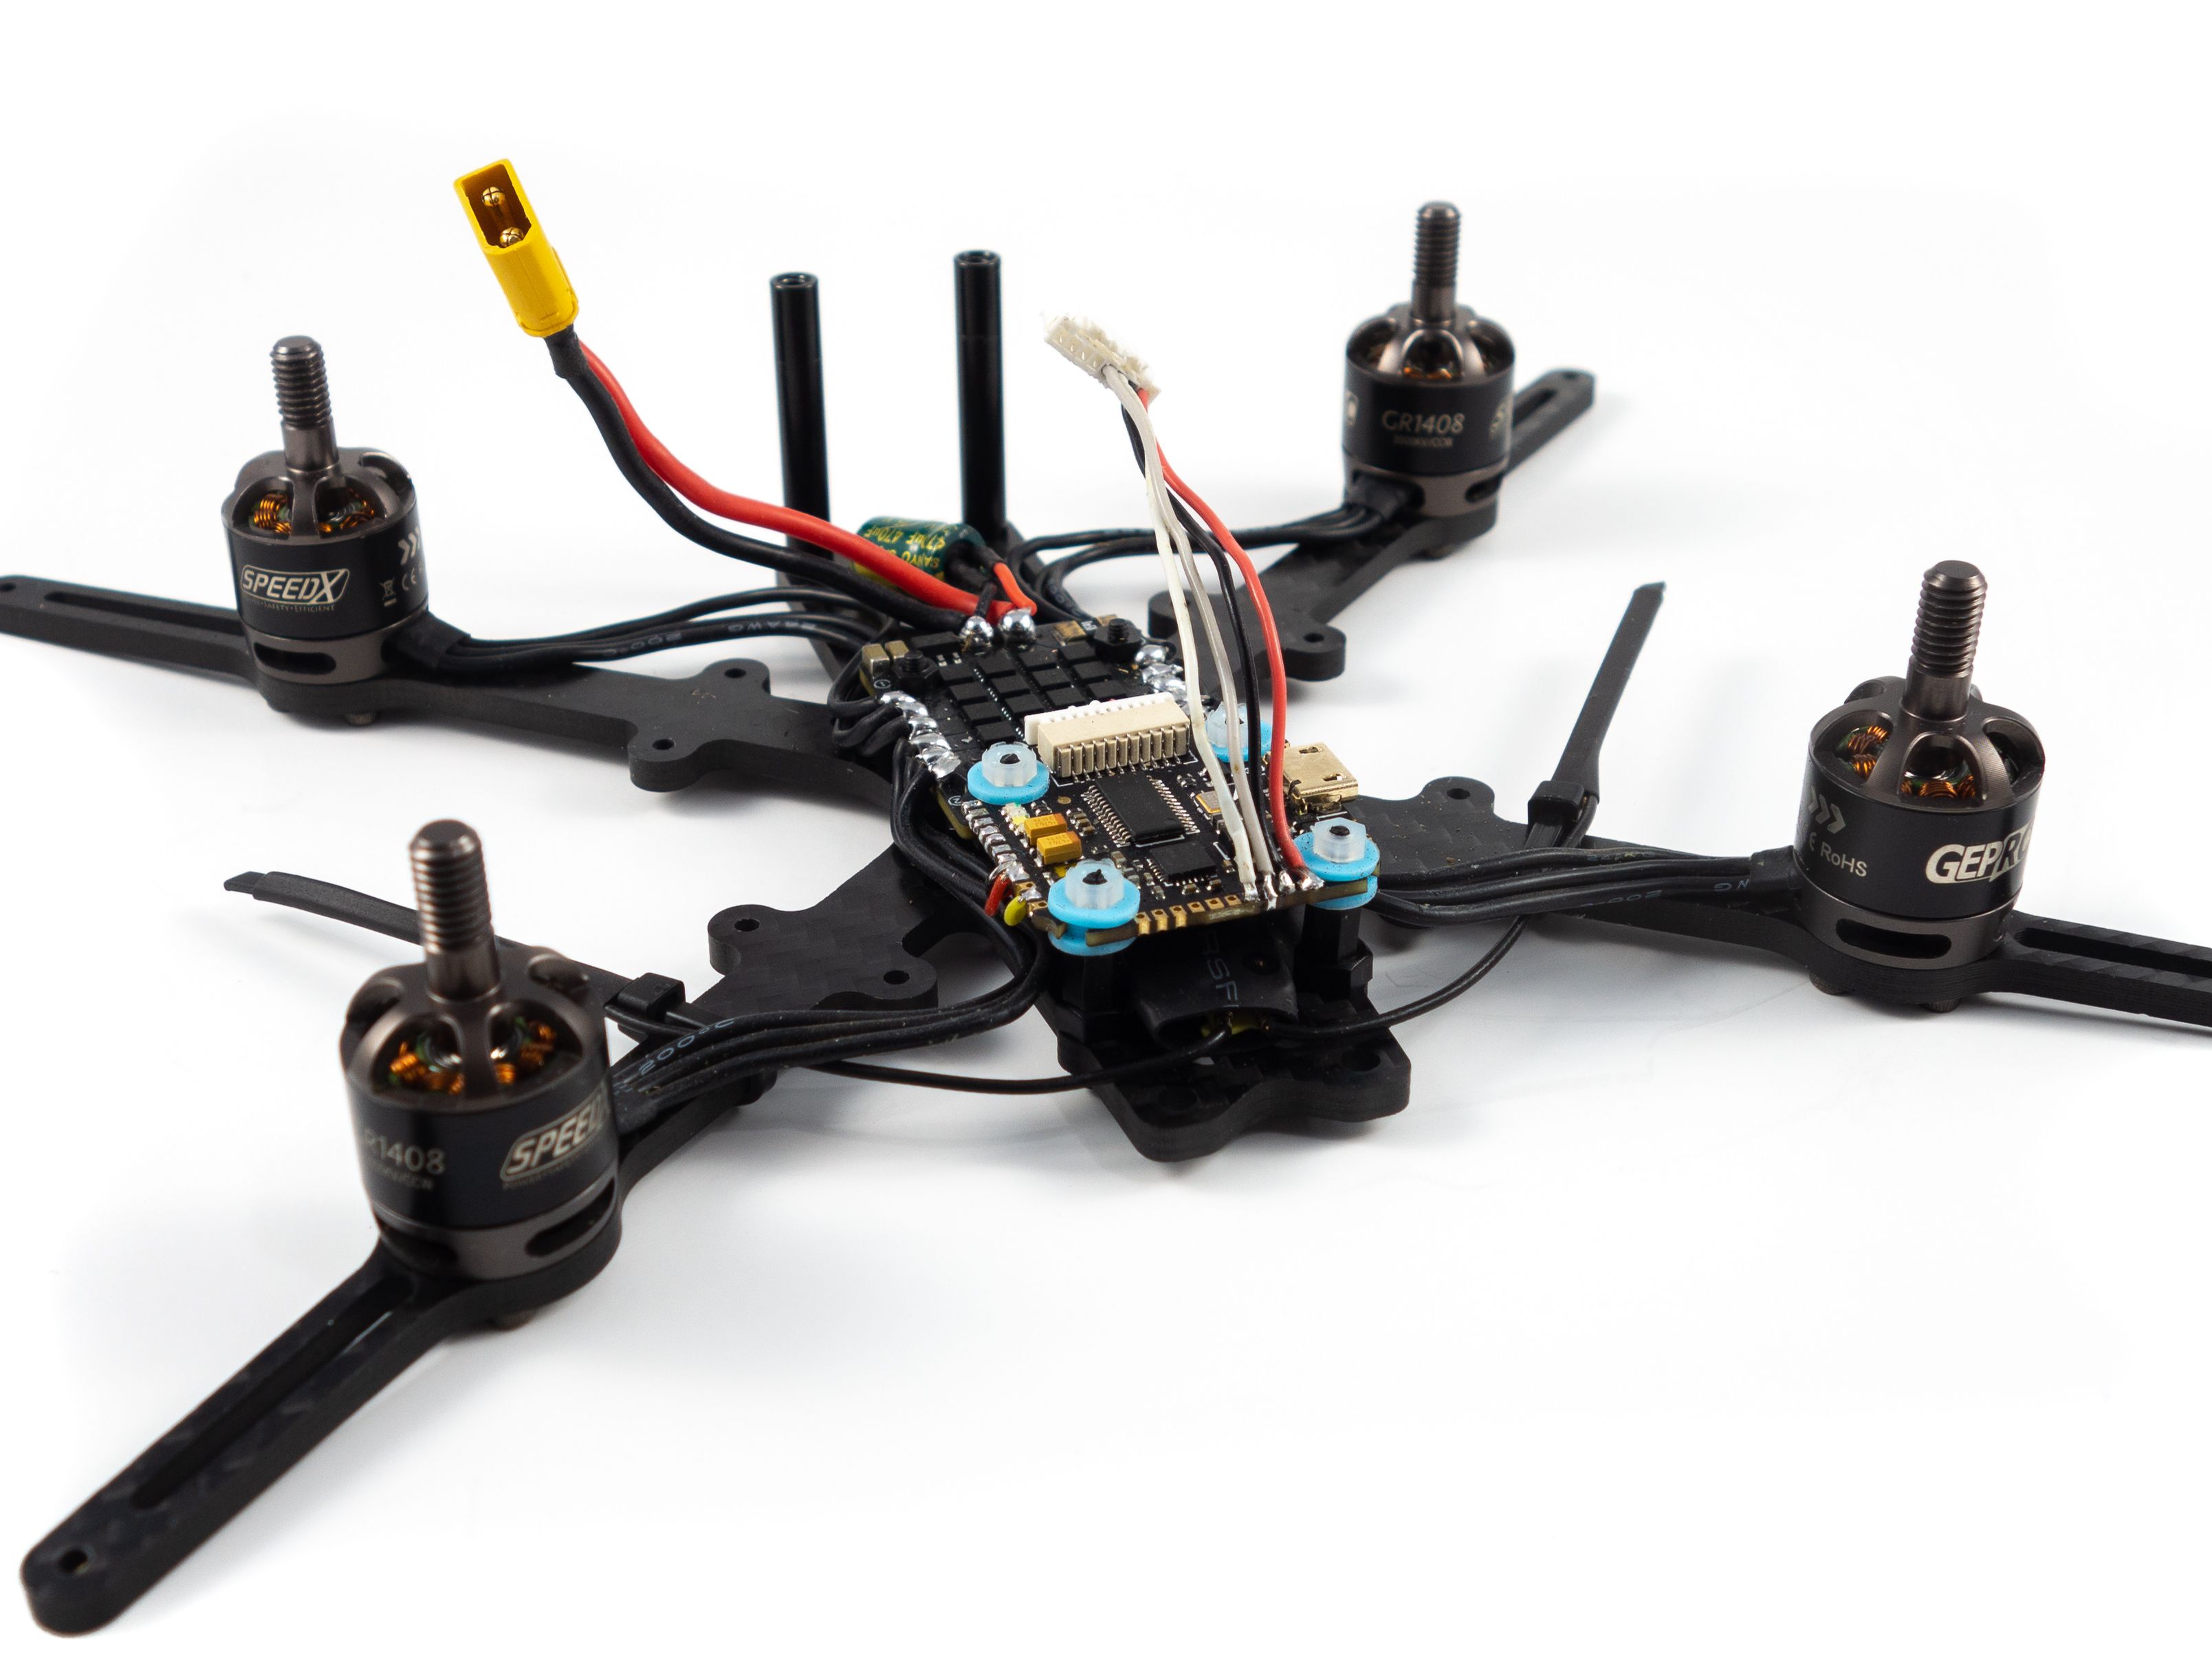
Mounting the Flight Controller
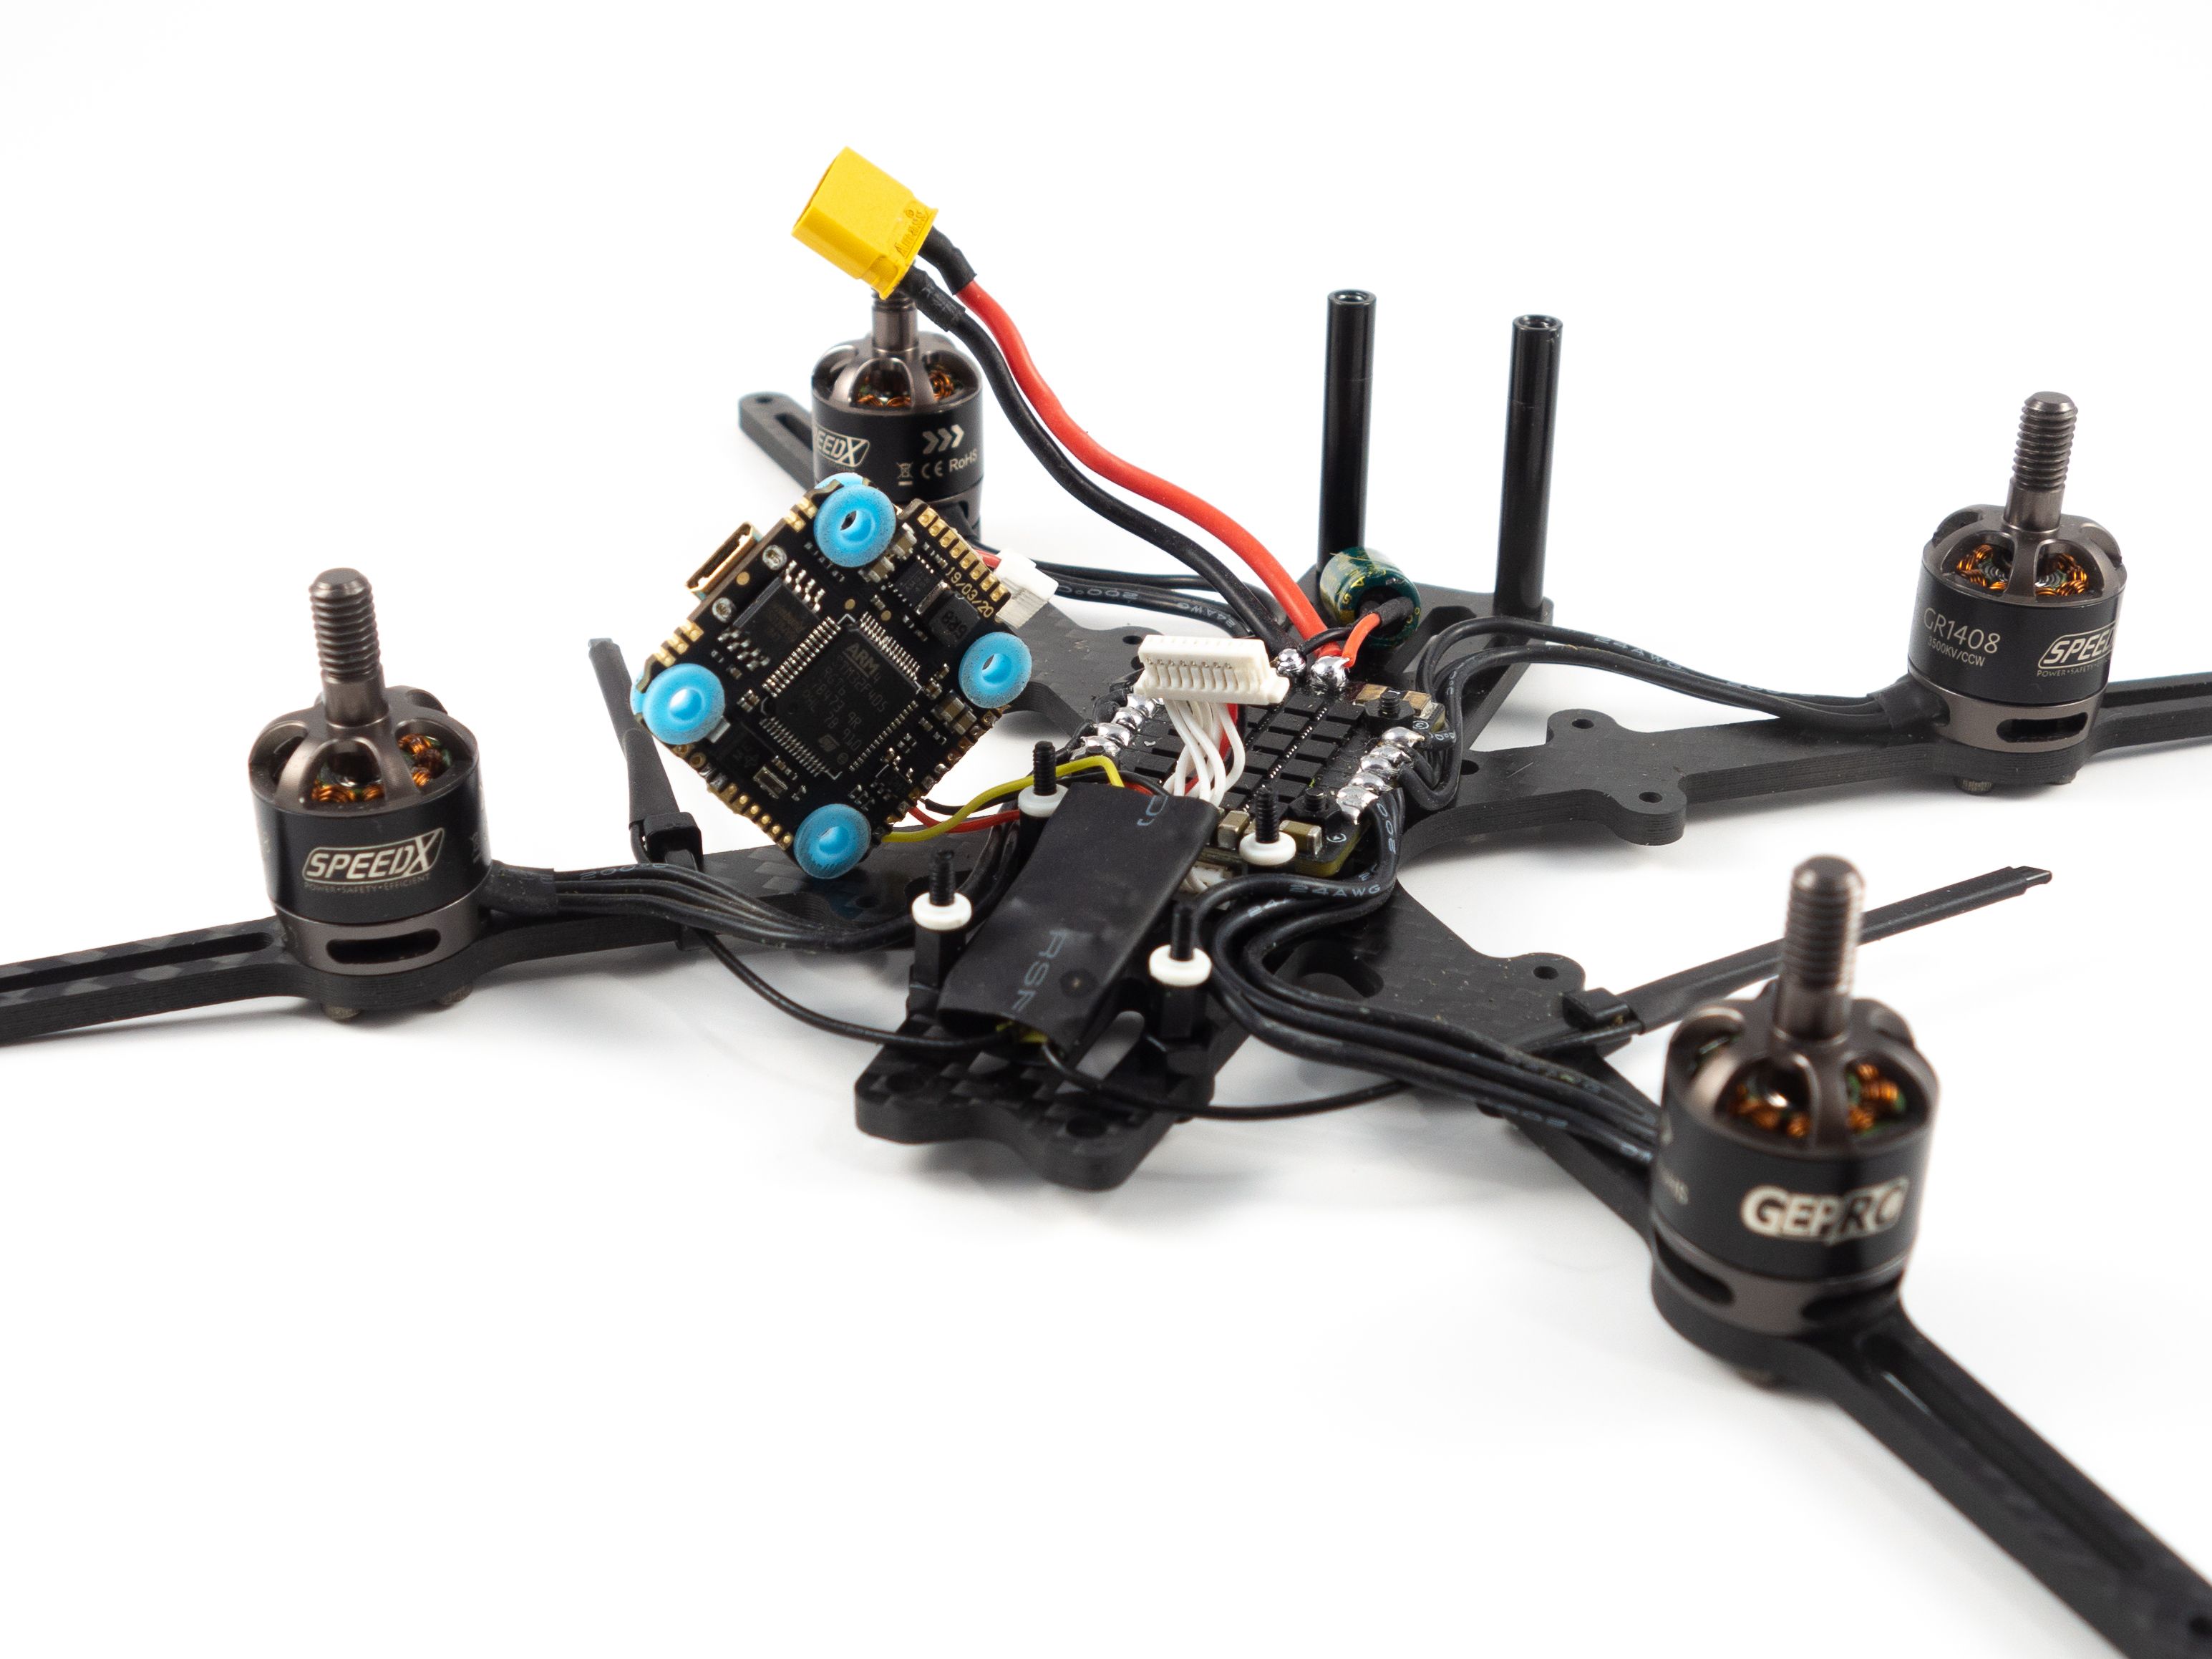
Here's where you need to get a little creative. You'll have to stagger the height to fit the flight controller behind the 4-in-1 ESC leaving enough room for the DJI Air Unit. I used an 8mm m2 screw, a 2mm nylon nut and a 5mm M2 nylon standoff. I didn't have one handy, but an 8mm M2 nylon standoff should work just as well. You'll need to twist the connector between the 4-in-1 ESC and the flight controller to seat it upright. Mount it to the standoffs and secure it with 2mm M2 nuts.
DJI Air Unit
If you're using the DJI controller you'll need to solder all the wires from the air unit to the flight controller. If not, you can remove the yellow and brown wires at the end. Since this is a 4S rig we can power the DJI Air Unit directly from the battery. We'll use the VCC pad on the flight controller as well as the RX6 and TX6 pads. Keep in mind that UART RX connects to TX6 and UART TX connects to RX6.
If you are using the DJI controller you need to solder the DJI HDL wire (yellow) to the SBus pad and the Signal GND to the adjacent ground pad.
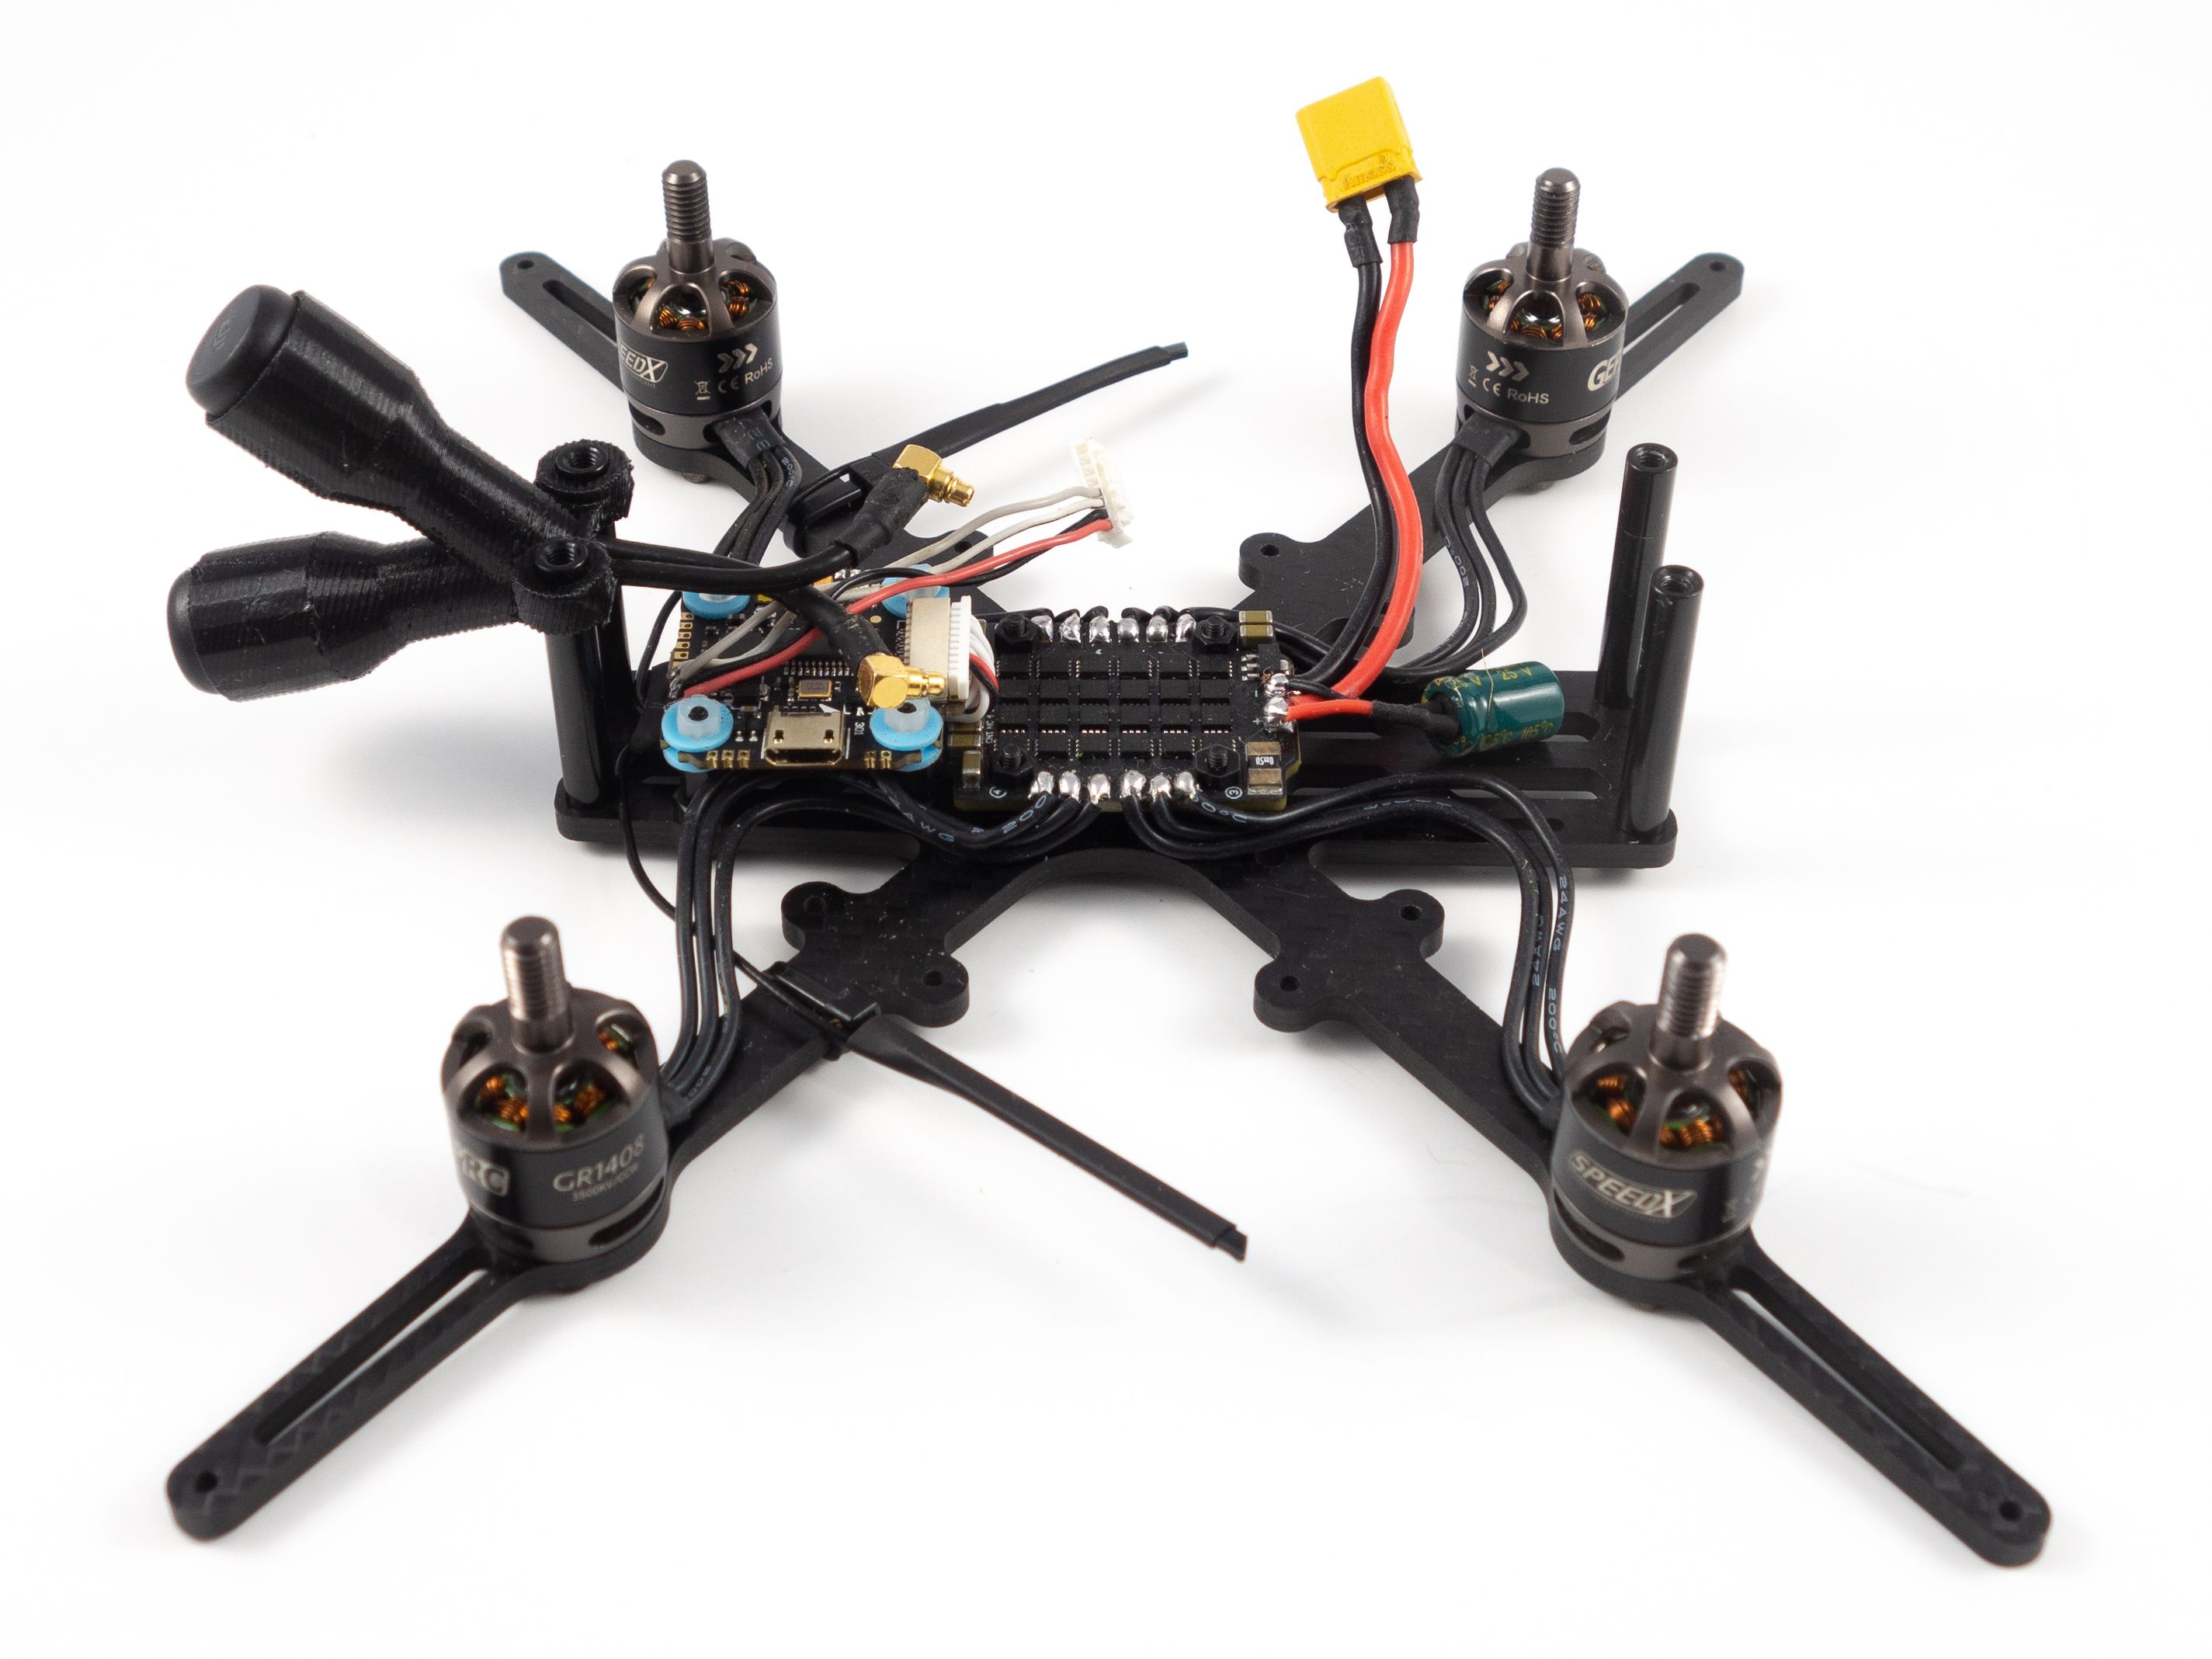
Finishing Up
Before we add the ducts we'll need to configure the quad in Betaflight. Once in place they'll block the USB port. Fortunately you only need to remove a single duct to access it in the future. Before we do that though let's finish connecting the DJI Air Unit and camera.
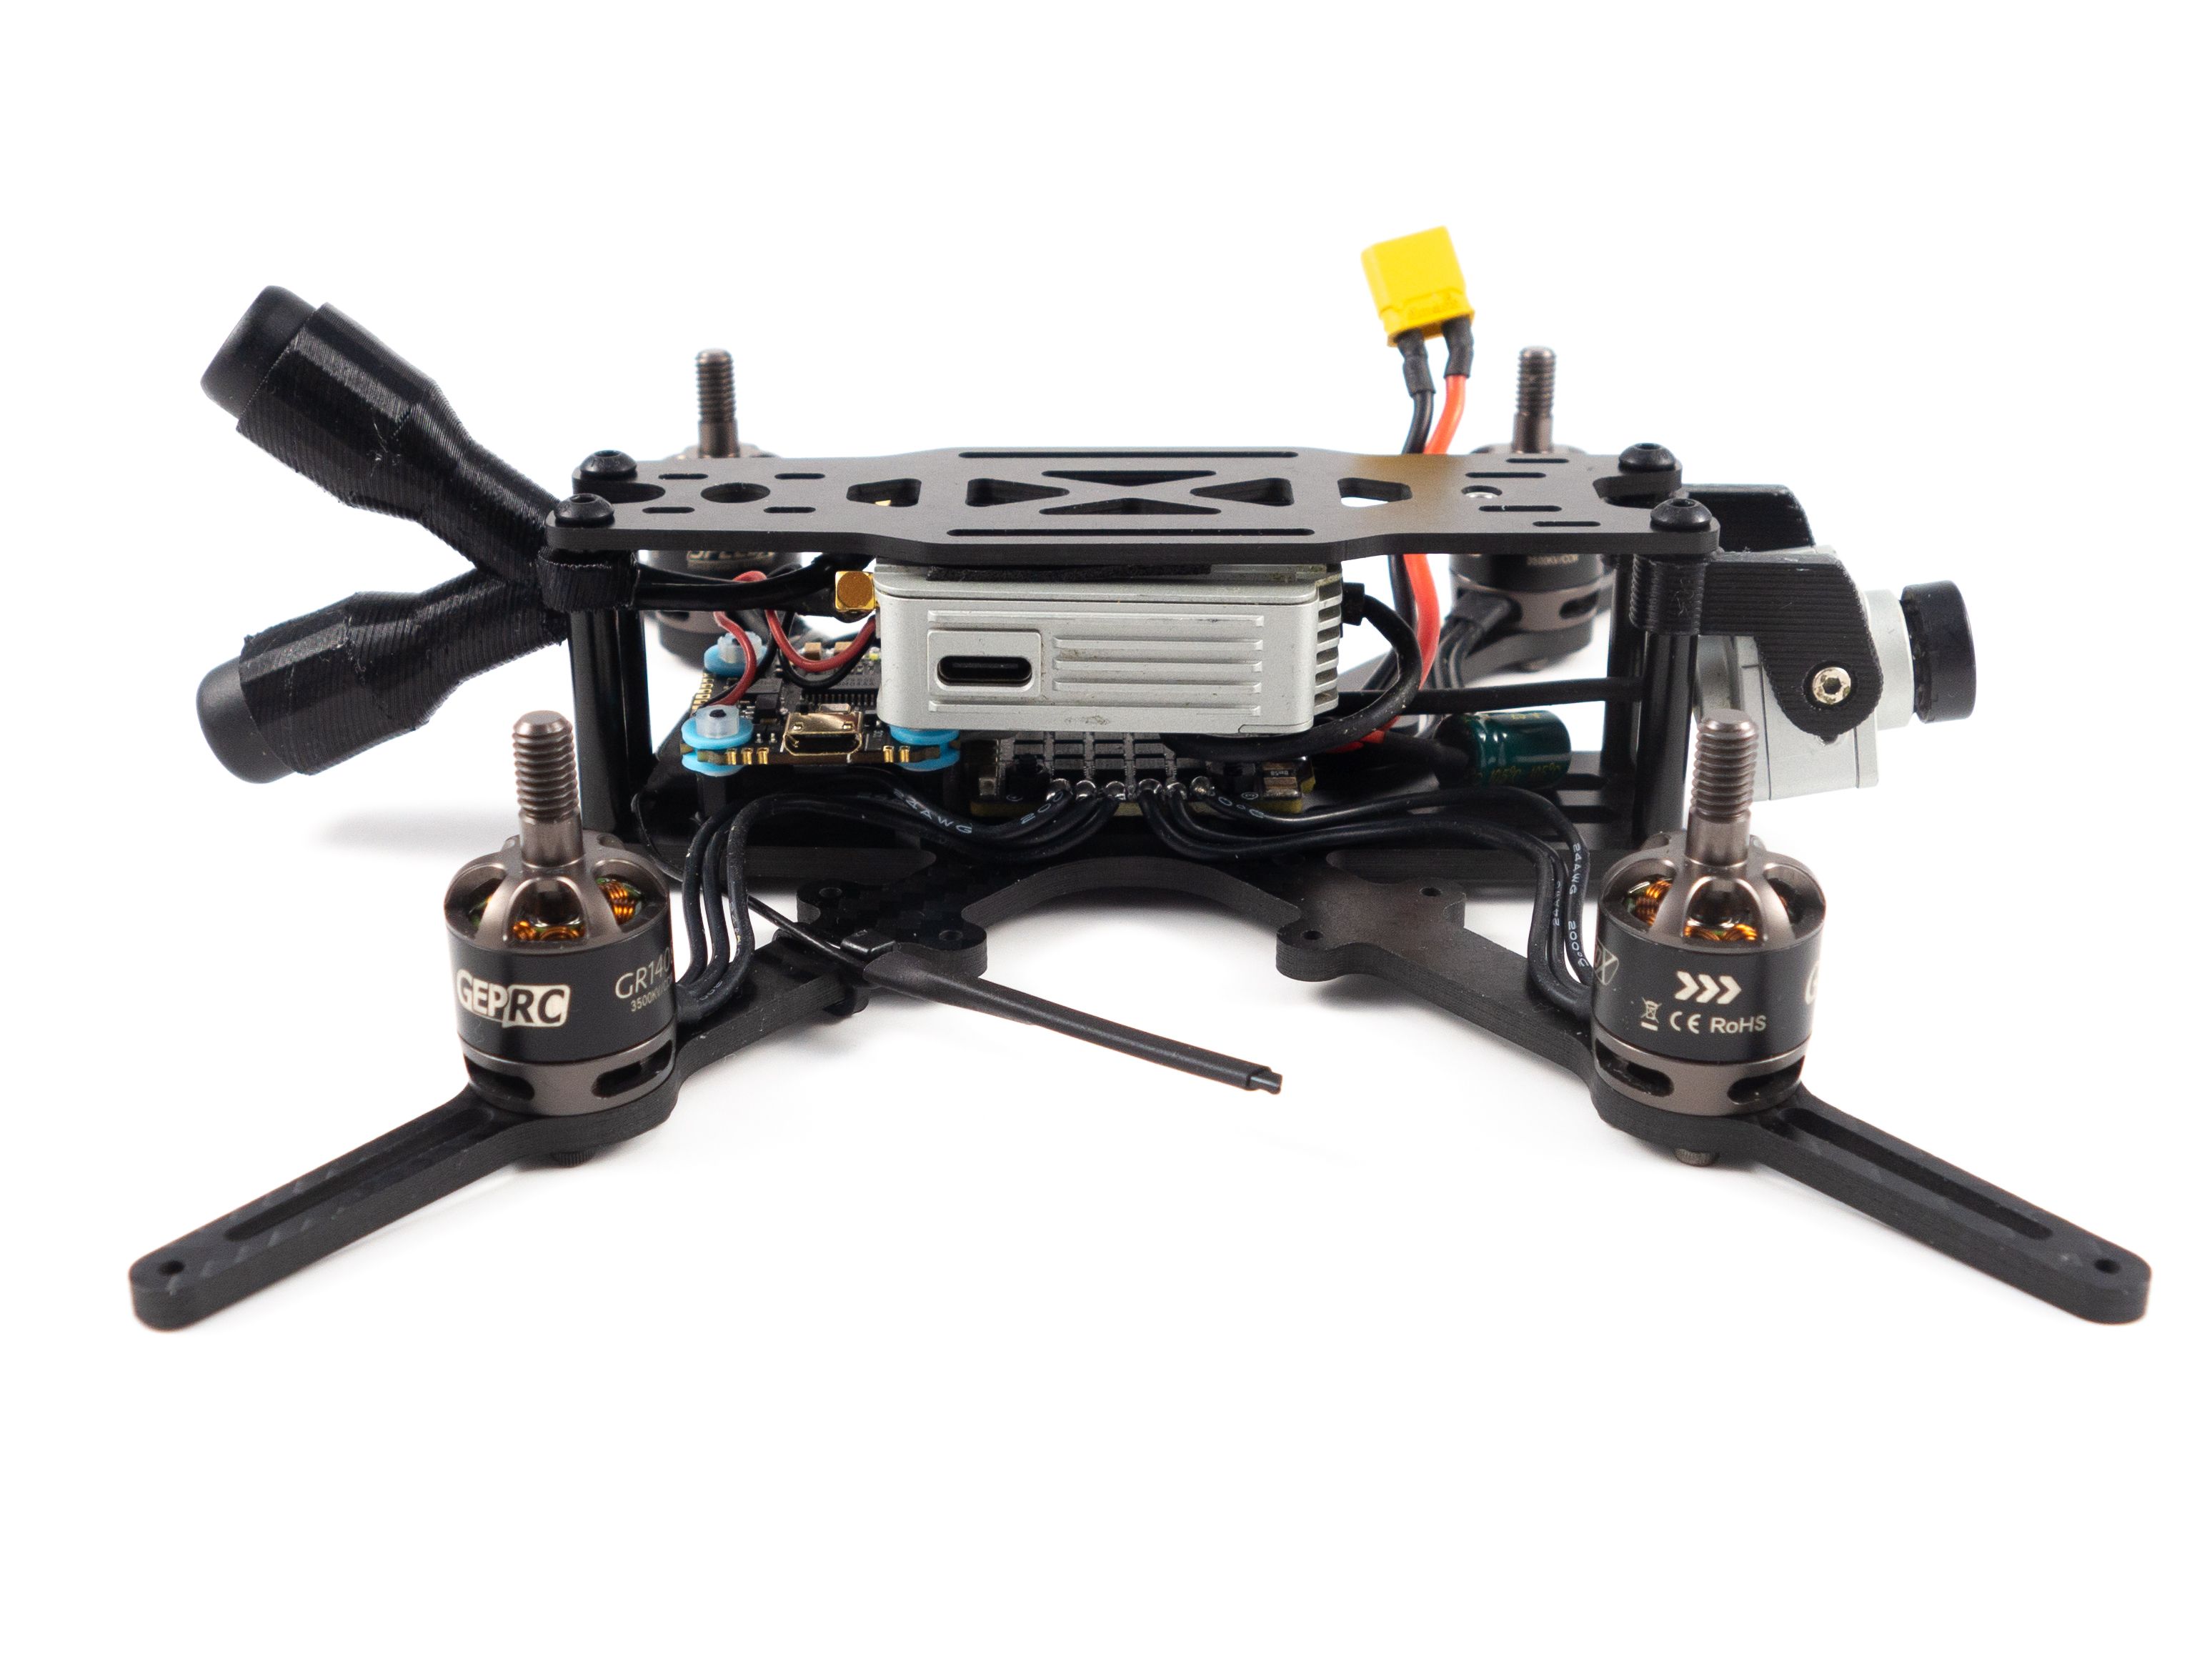
- Fit the antenna holder over the rear standoffs and insert the antennas.
- Fit the camera holders over the front standoffs and screw the DJI FPV camera in between them.
- Use some double sided tape to attach the DJI Air Unit to the underside of the top plate.
- Be sure to test fit it so it doesn't touch the flight controller and it's near enough for the antennas to reach.
- Plug the DJI Air Unit in to the flight controller.
- Plug the antennas in to the DJI Air Unit.
- Secure the top plate to the standoffs.
- Add the battery pad to the top plate.
Betaflight Configuration
If you don't already have them, you'll need to download Betaflight Configurator [Download] and the BLHeli Configurator [Download].
- First go to the Firmware Flasher and choose "FURYF4OSD" as well as the latest stable release of Betaflight.
- Click "Load Firmware [Online]" and then "Flash Firmware" to update your flight controller. Once complete, click "Connect"
- On the Ports tab
- On UART1 click Serial RX for your receiver.
- On UART6 enable Configuration/MSP.
- Click Save and Reboot
- On the Configuration tab
- Under ESC/Motor Features select DSHOT600
- Under System configuration set PID loop frequency to 8 kHz.
- Under Receiver choose your receiver mode. (For the XM+ choose "Serial-based receiver" and "SBUS")
- Under Arming set the Max arm angle to 180 (In case you flip over)
- Under Other Features enable: Airmode, OSD, Anti Gravity and Dynamic Filter
- Under DSHOT Beacon Configuration enable the beacon
- Go to Power & Battery and choose Onboard ADC for the Current Meter Source
- Click Save and Reboot
To complete the remaining steps you'll need to apply lipo power to your build:
- On the Receiver tab ensure your pitch, roll, throttle and yaw are being applied correctly. Adjust your transmitter and Channel Map as needed.
- On the Modes tab
- Assign an Aux switch to arm and disarm your quad.
- Assign another Aux switch to enable Horizon or Angle mode if you need them.
- Assign the Beeper and "Flip over after crash" to a 3rd and/or 4th switch. I like to assign them both to a single 3 point toggle switch.
- On the Motors tab enable the motor test and apply a small amount power to check the rotation of each motor. Take note of any that need to be reversed.
- Disconnect from the Betaflight Configurator and open BLHeli Configurator
- Connect and Read Settings
- Flash all ESCs to the latest firmware available.
- Reverse the motor direction of any motors that need it. (The numbers correspond to the same numbers in Betaflight)
- Save and reconnect to Betaflight Configurator to test the motor direction.
- On the OSD tab
- Check all of the features you want and arrange your OSD as desired.
And that's it! The default Failsafe settings are generally fine, but make sure they work by arming your quad, applying a small amount of throttle and turning off your transmitter. It should shut down after a short moment.
Add the ducts and you should be ready to test!
PID Tuning
By default I found the PIDs to introduce some oscillations on Betaflight 4.1. After lowering both the pitch and roll P-terms to around 50 it cleared up. I've got my D-terms between 20-30 but you may want to experiment with those values. Be sure to use the PID tuning menu in the DJI goggles to save the trouble of removing the air duct to access via USB.
Challenges
The biggest challenge was soldering the tiny pads. I found it worked best to rest my wrist on a flat surface to steady my hand. The more steady you are the better. You just want to avoid bumping adjacent solders causing them to flow together. Other than that I spent a good number of hours learning Fusion 360 to design the antenna and camera mounts. It was a great learning experience but I'm not sure I want to try designing 3D printed parts again for a while.
Photos

Part List
Show stores (5)
Hey, nice one for the build process, helped me with all of my ordering of the right gear, one question, did you have to trim the props or did they fit OK?


Bought mine the PNP version and add tbs crossfire rx, Dunno whats wrong it would not start the quad. Crsf is bound :(
Thank you for the build article! I have a couple of questions about the durability of the ducts?
- Do they sit tight on the frame?
- How do they hold up after a month or so of flying and occasional bumping/scraping?
what other batteries for this drone do you recommend?
do you have a youtube tutorial of this post?

Are you using 3500KV, 3750KV, or 4100KV motors for this build?

Guides & Reviews

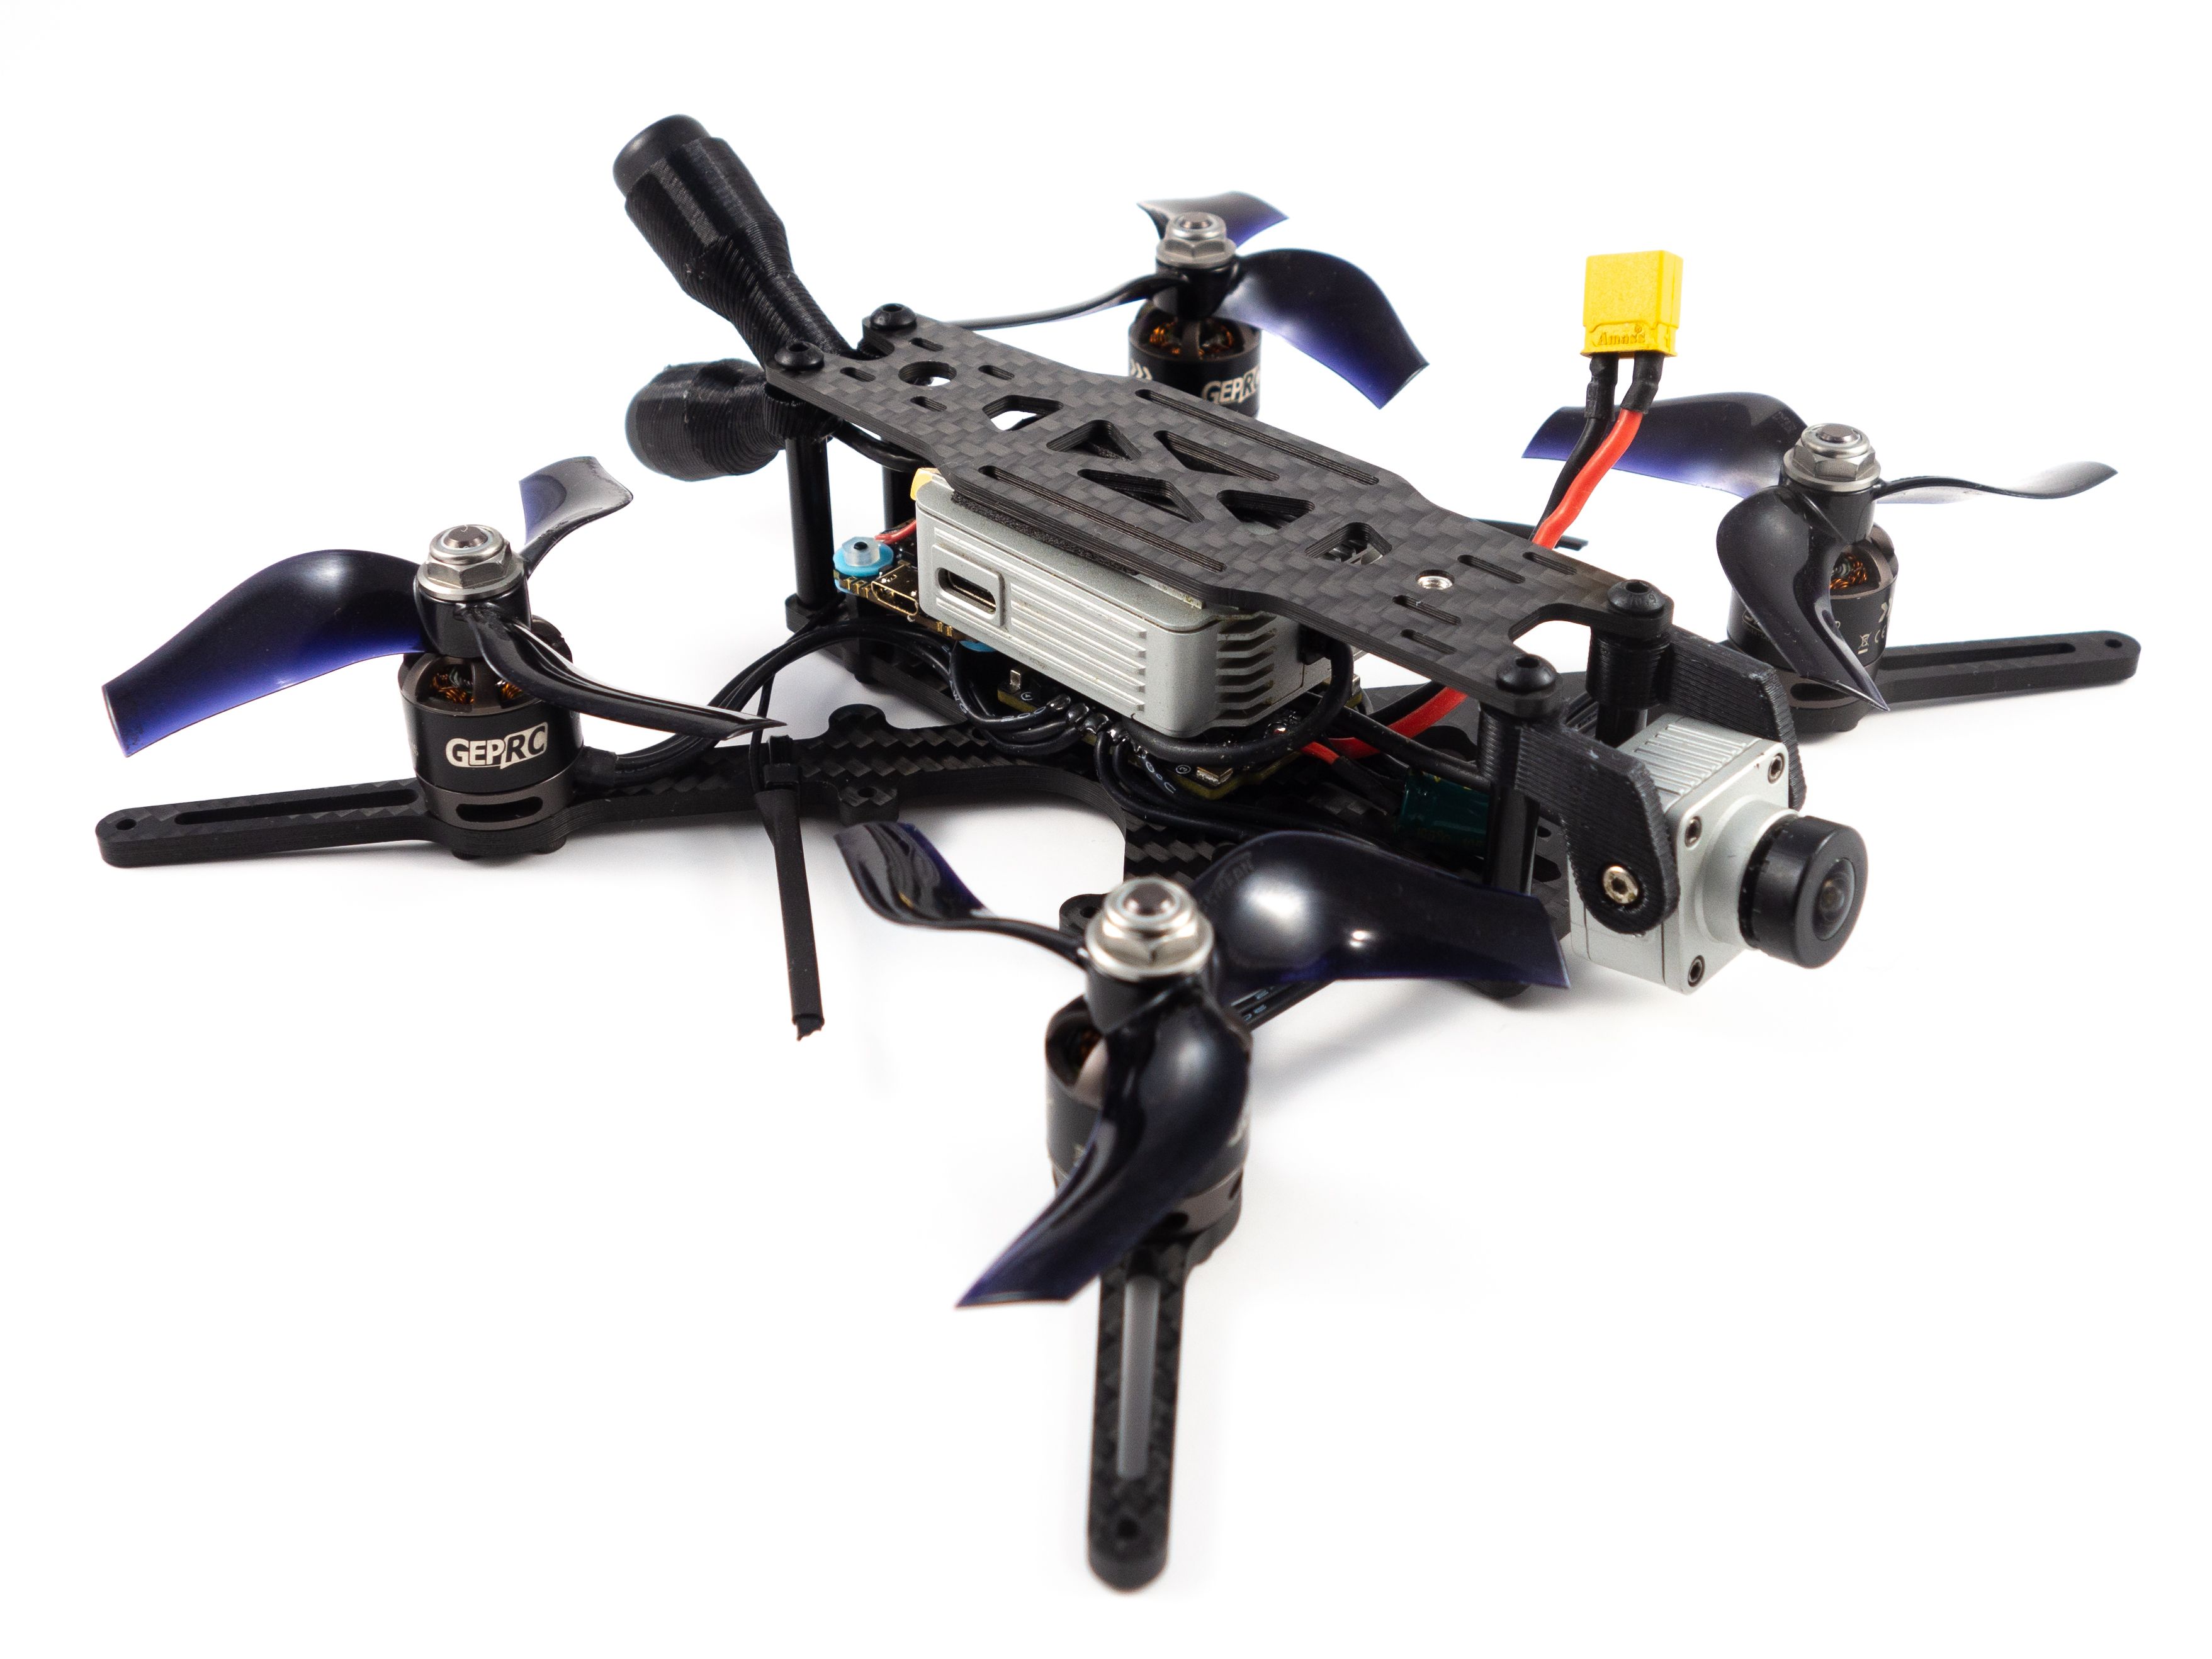
AirbladeUAV has done it again and this time they've brought long range to the 5" class! Based on the popular Transformer Mini, the new Transformer 5" Ultralight adopts a lot of the same design philosophies with larger props and more payload capacity. It can fly upwards of 20 minutes on a 4 cell Li-Ion battery pack and in ideal conditions it's got a range of over 4 to 5 miles. In this guide I'll walk..
Read more
With the release of the DJI FPV Drone cinematic FPV has become a lot more accessible, but you certainly don't want to crash a $750 drone! The QAV-CINE Freybott is a compact, lightweight cinematic FPV drone that can take a hit and keep going. It's a lot safer to fly indoors and around people. With a naked GoPro or the SMO 4k you can capture some great stabilized footage. In this guide I'll show you..
Read more


Hey, just finished my build using the same fc, struggling to. Work out where the cam control goes in the board, did you use it, and if so where? Thanks for your help again 👍
Are you using the DJI air unit or an analog camera?
Sorry, I'm using an analogue camera caddx turbo micro v2 , I know there's a way to use led pad to do it but I'd rater her use what the board natively has. Thanks again for your valuable help,
I'm not sure that camera supports RX/TX control, so if you want to use the Betaflight camera controls over OSD you'll likely need a resistor. Check this tutorial for more information.
Personally I'd just configure it one time with the control board that came with it one time and leave it off. I don't think camera controls over OSD are worth the effort.
Your right, I'm best off just setting it up once and leaving it be, nice one for the help and love the you tube channel its been so useful 👍