
Build highlights
This build is an exploration of the idea of a lightweight ReelSteady Go capable Cinewhoop built around 1306 motors. The result? It definitely works, here is what I managed to film with a Hero 5 Session:
Weight breakdown
It is important to keep the weight low with smaller motors. My thrust stand tests show they start losing efficiency rather quickly after you cross 100-110 grams of static thrust per motor, so I tried to keep it as light as possible when choosing the components.
Quad, dry: 164 grams
Quad + Hero 5 Session + hardened glass lens protector: 237 grams
Quad + Session + 450 mAh 4S pack: 292 grams
Quad + Session + 650 mAh 4S pack: 309 grams
Potential for additional weight savings:
- The Micro Eagle camera is rather heavy. I like the picture it produces combined with OLED goggles, but it would be possible to save about 5 grams if replaced with a Nano format camera. Personally, I am willing to sacrifice those 5 grams for extra clarity and definition of my FPV feed.
- Toothpick class flight stack. They weigh about 6 grams compared to 11 grams for Mamba mk2 and require shorter screws, but there are two problems. The frame does not have the holes for a whoop style board, and mounting the VTX becomes tricky. Still, going this route would probably save some 5-10 grams extra.
Flight time
Surprisingly, it came out to be an efficient flier. 650 mAh 4S gets me about 5:30 cruising time. A cute tiny 450 mAh 4S pack is good for about 4 minutes of cruising, and I actually like it more that way. Four minutes are enough to film one long or two shorter takes, and 17 grams of weight difference make a significant change in the flight characteristics.
3D printed parts
I published all the custom parts for this build on Thingiverse:
- Propeller guards
- GoPro mount
- RX antenna tube mounts, you need the low profile 30 degrees version.
The guards require rigid but impact resistant material. My choice is NinjaTek Armadillo, which is very hard kind of TPU (Shore hardness 75D). The Session and antenna tube mounts should be printed with a regular soft TPU, like the omnipresent SainSmart 95A.
Ducts VS prop guards
I tell you this, ducts are really not your friends. Even though they generate extra thrust, they make the quad fly weird and suffer from typical whoop class issues like washouts and unpredictable "on/off" throttle feel. That's why instead of using stock ducts that came with the frame I designed my own super skinny prop guards. They interfere less with the thrust columns coming out of the rotors, and surprisingly enough still increase the efficiency by about 10%.
Becoming a smooth Cinewhoop operator
You need to be very gentle and flowy at the controls when you film for ReelSteady. Two things help a lot in my experience: slow rates and a throttle cut.
I set my rates at 260-300 degrees per second. You might think that is way too slow, but trust me, it really helps bringing that smoothness to the flying. Betaflight 4.1 rates are as follows. Roll and pitch: RC rate 0.80, Super rate 0.40, RC Expo 0.35. Yaw rate: RC rate 0.90, Super rate 0.40, RC Expo 0.35. I like having it a bit faster on yaw to be able to do 180 degree turns comfortably.
Throttle cut allows you to tame the quad and increase the throttle stick resolution. I absolutely love having my throttle cut on the radio potentiometer. You just keep bringing it down until you feel the quad is under control in the given environment and that really helps when you film in tight spaces. I made a full how-to video on the throttle cut on the radio. I talk about racing there, but it is 100% applicable to Cinewhoops. Setup instructions are at 4:32, check it out https://youtu.be/a7PInDtsFGc?t=272
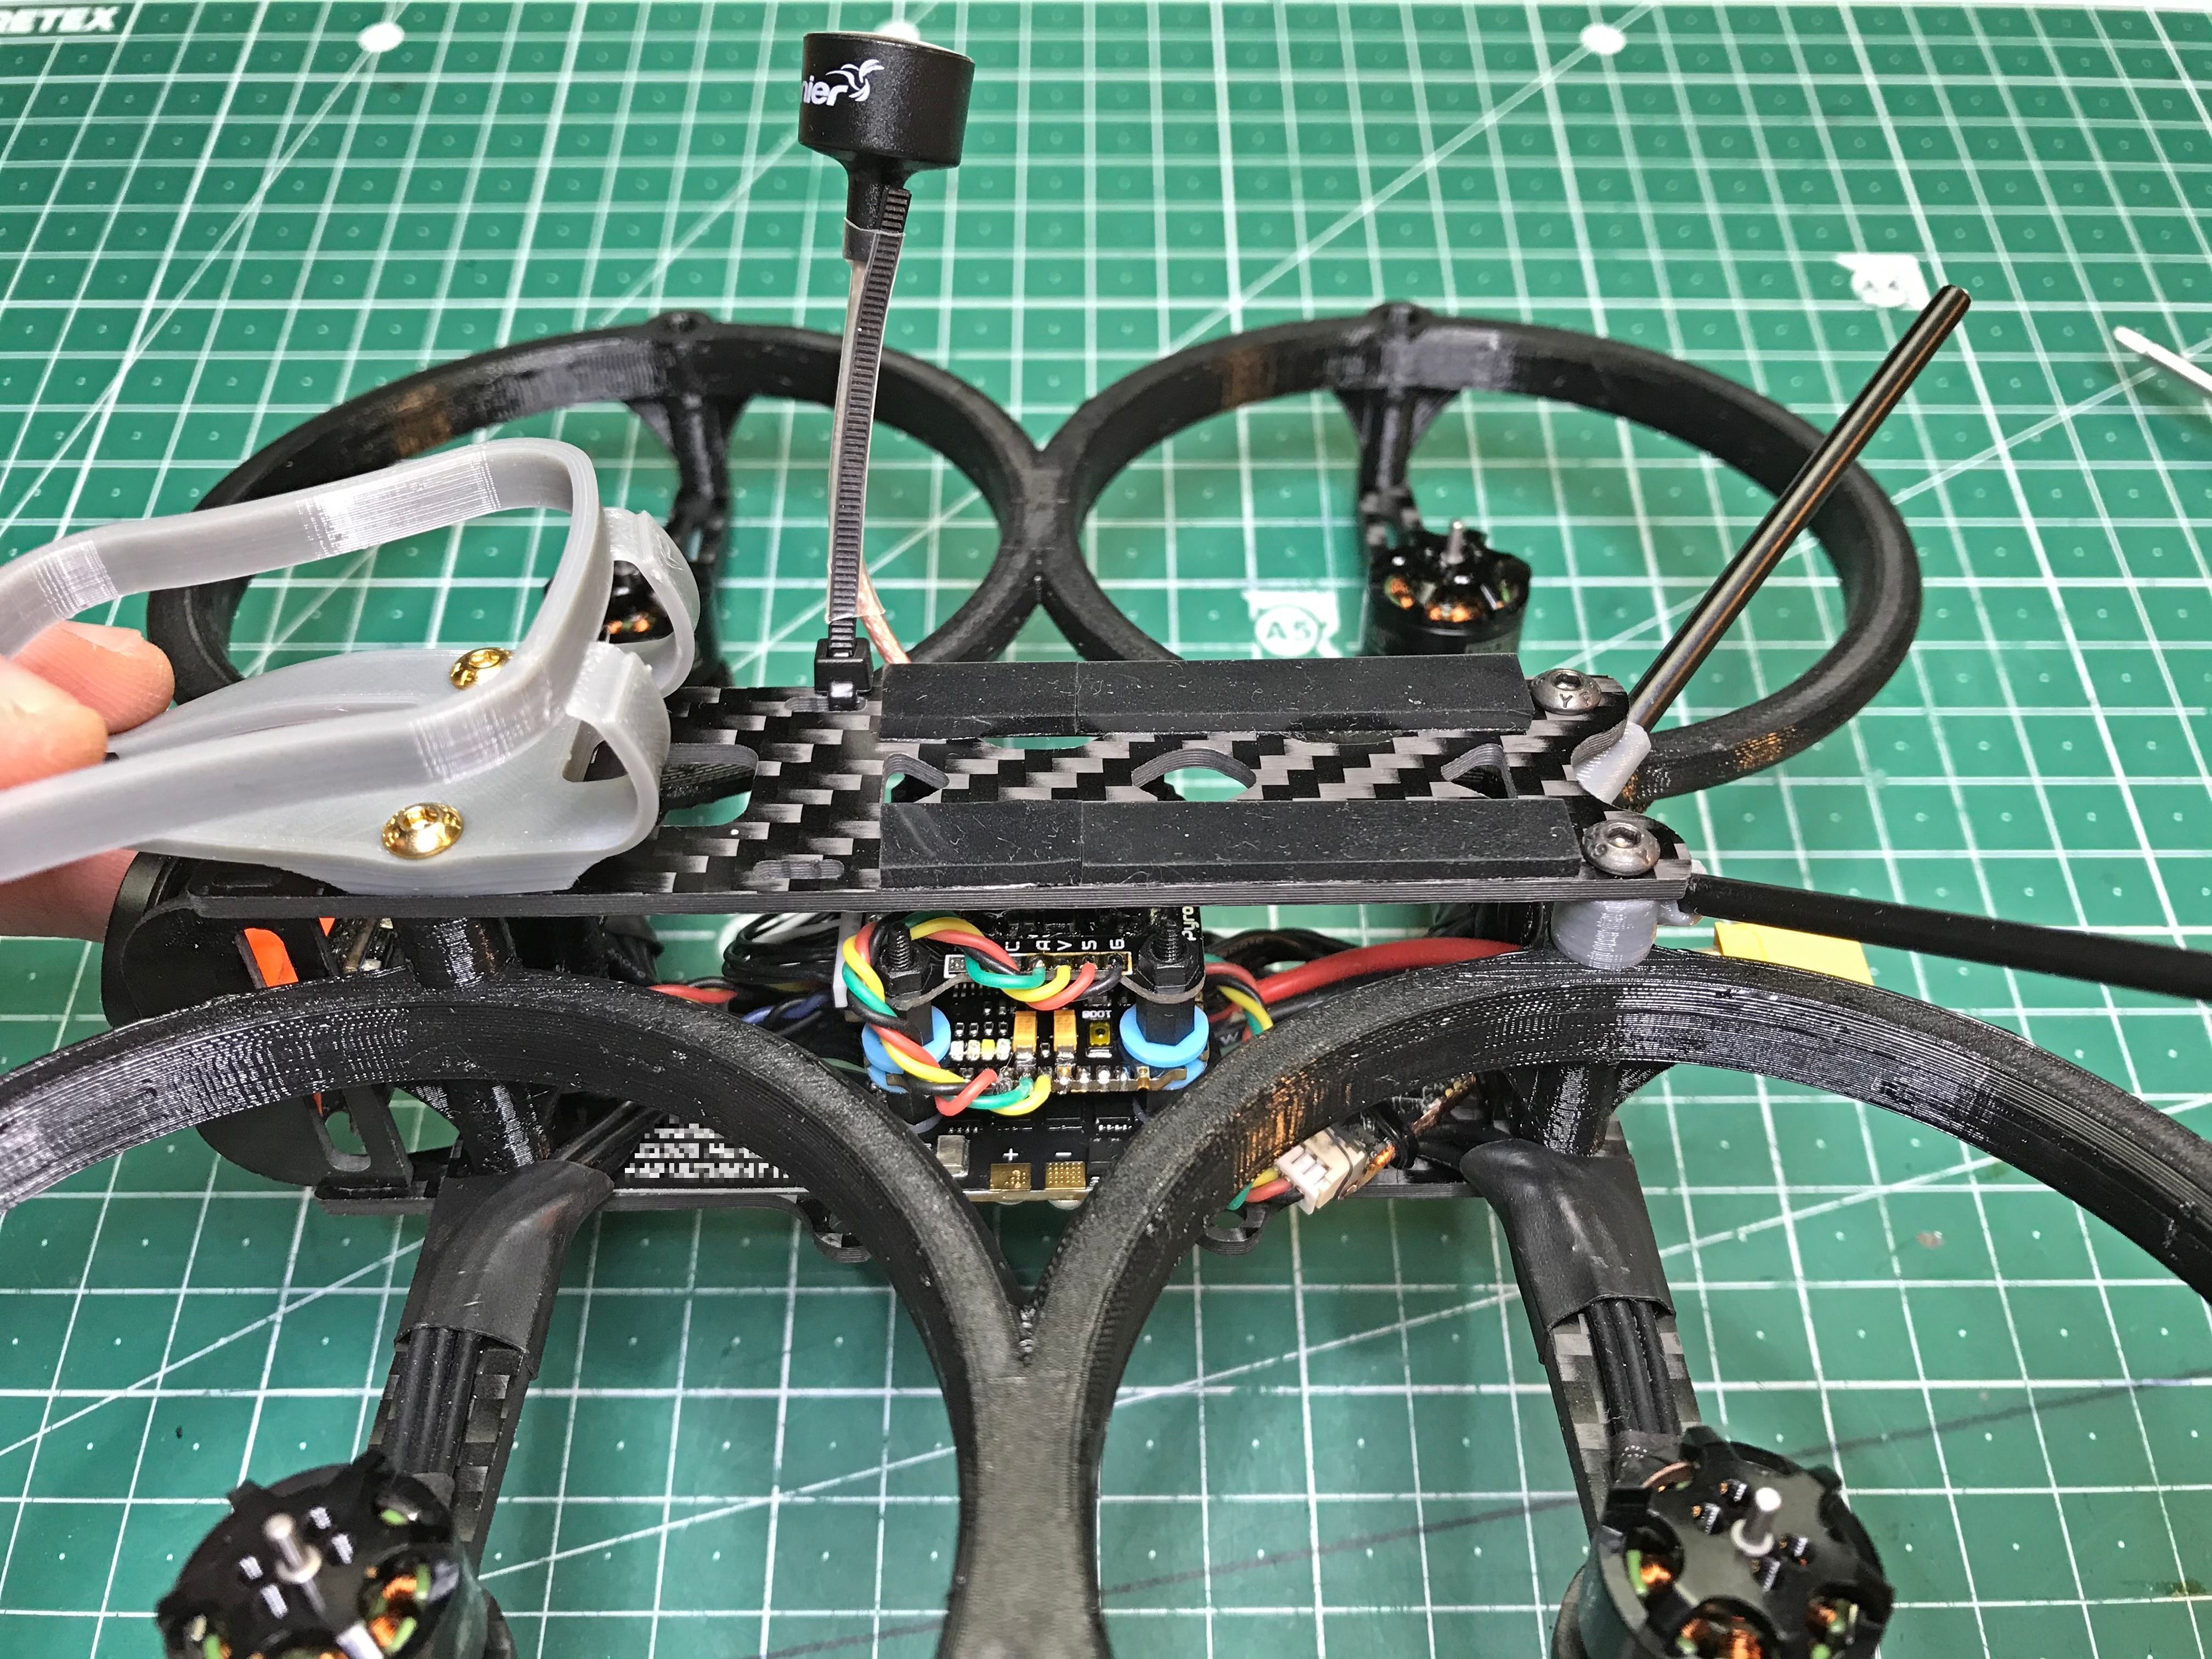
Build log
The build itself is rather simple. You start with putting the bottom plate and the arms together, mounting the motors (only 3 screws per each to save weight!) and soldering the motor wires to the ESC. Emax 1306 have the wires of just the right length to be soldered in the front-and-back fashion. Don't forget to put some heatshrink over the arms to hold the wires.
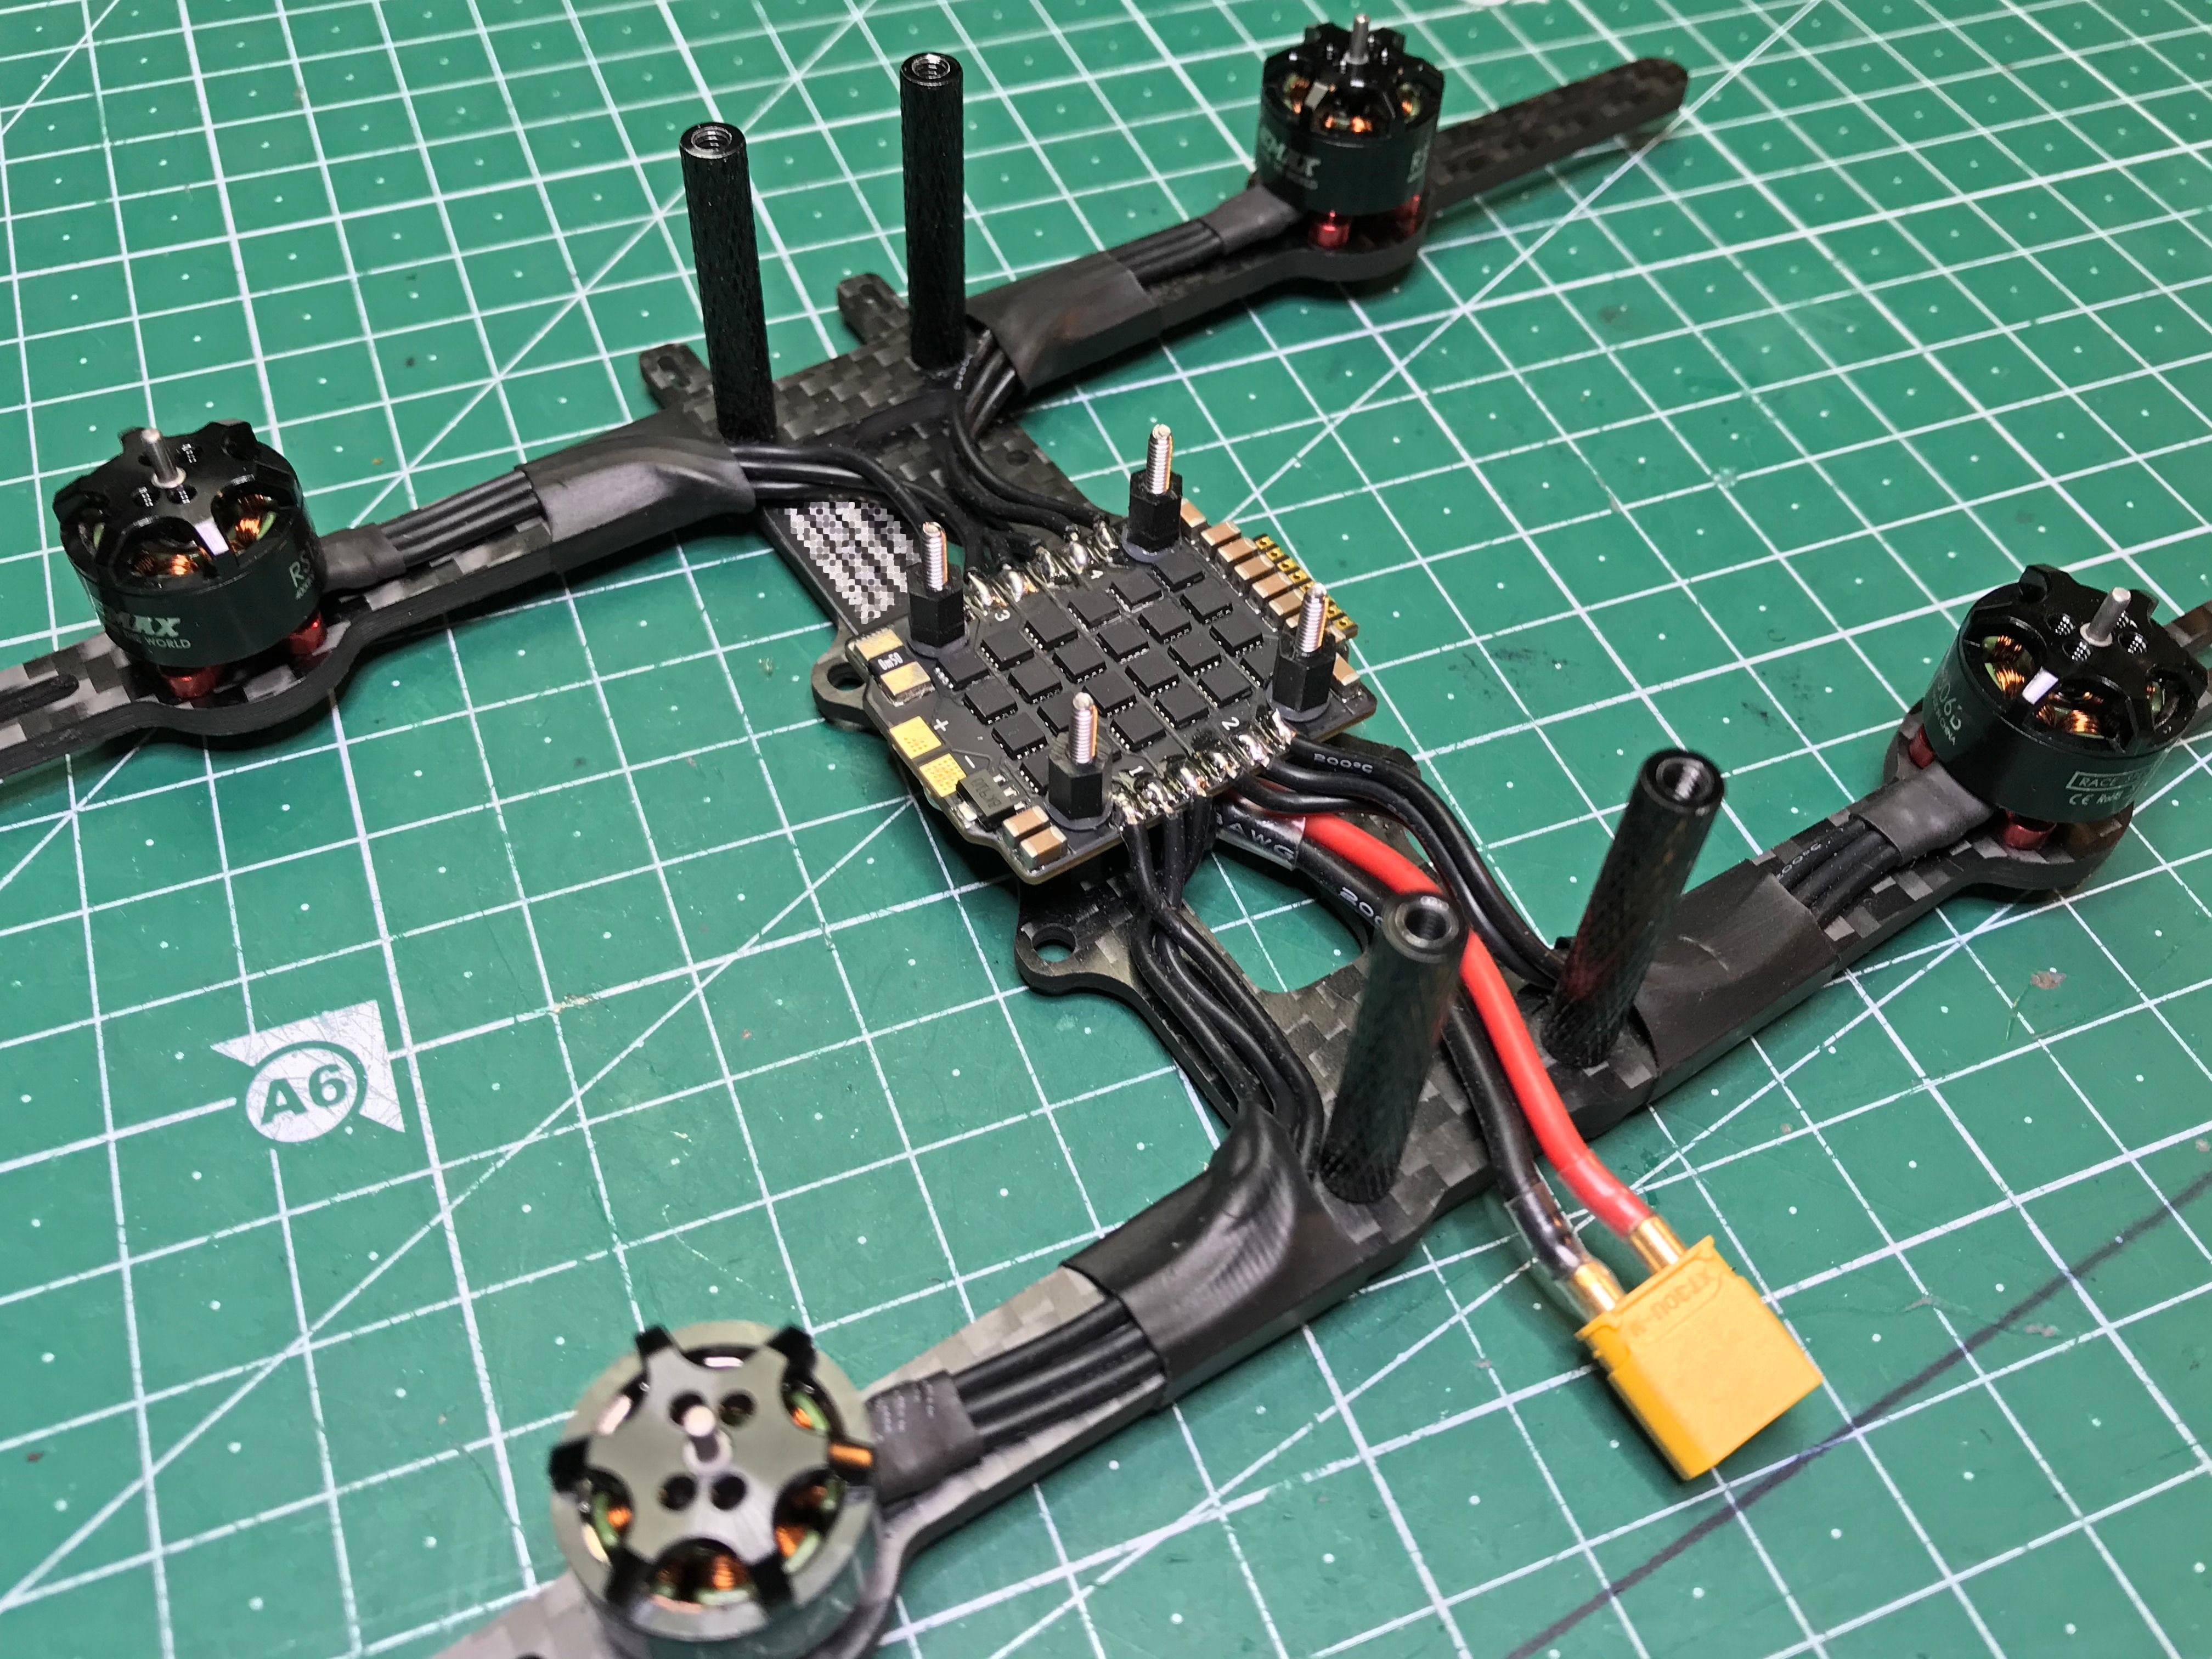
I always recommend mounting the flight stack with metal screws. For this one you need to remove the threaded parts of the 5mm nylon standoffs and drill the holes all the way through so they fit on the 20 mm M2 screws that come with the Mamba stack. Put silicone grommets underneath the second row of standoffs.
For better wire management I recommend soldering the battery leads to the bottom side of the ESC. Keep enough length so they stick out at the back a bit and also put a piece of heatshrink over them to reinforce the area that is zip-tied to the frame for stress relief.
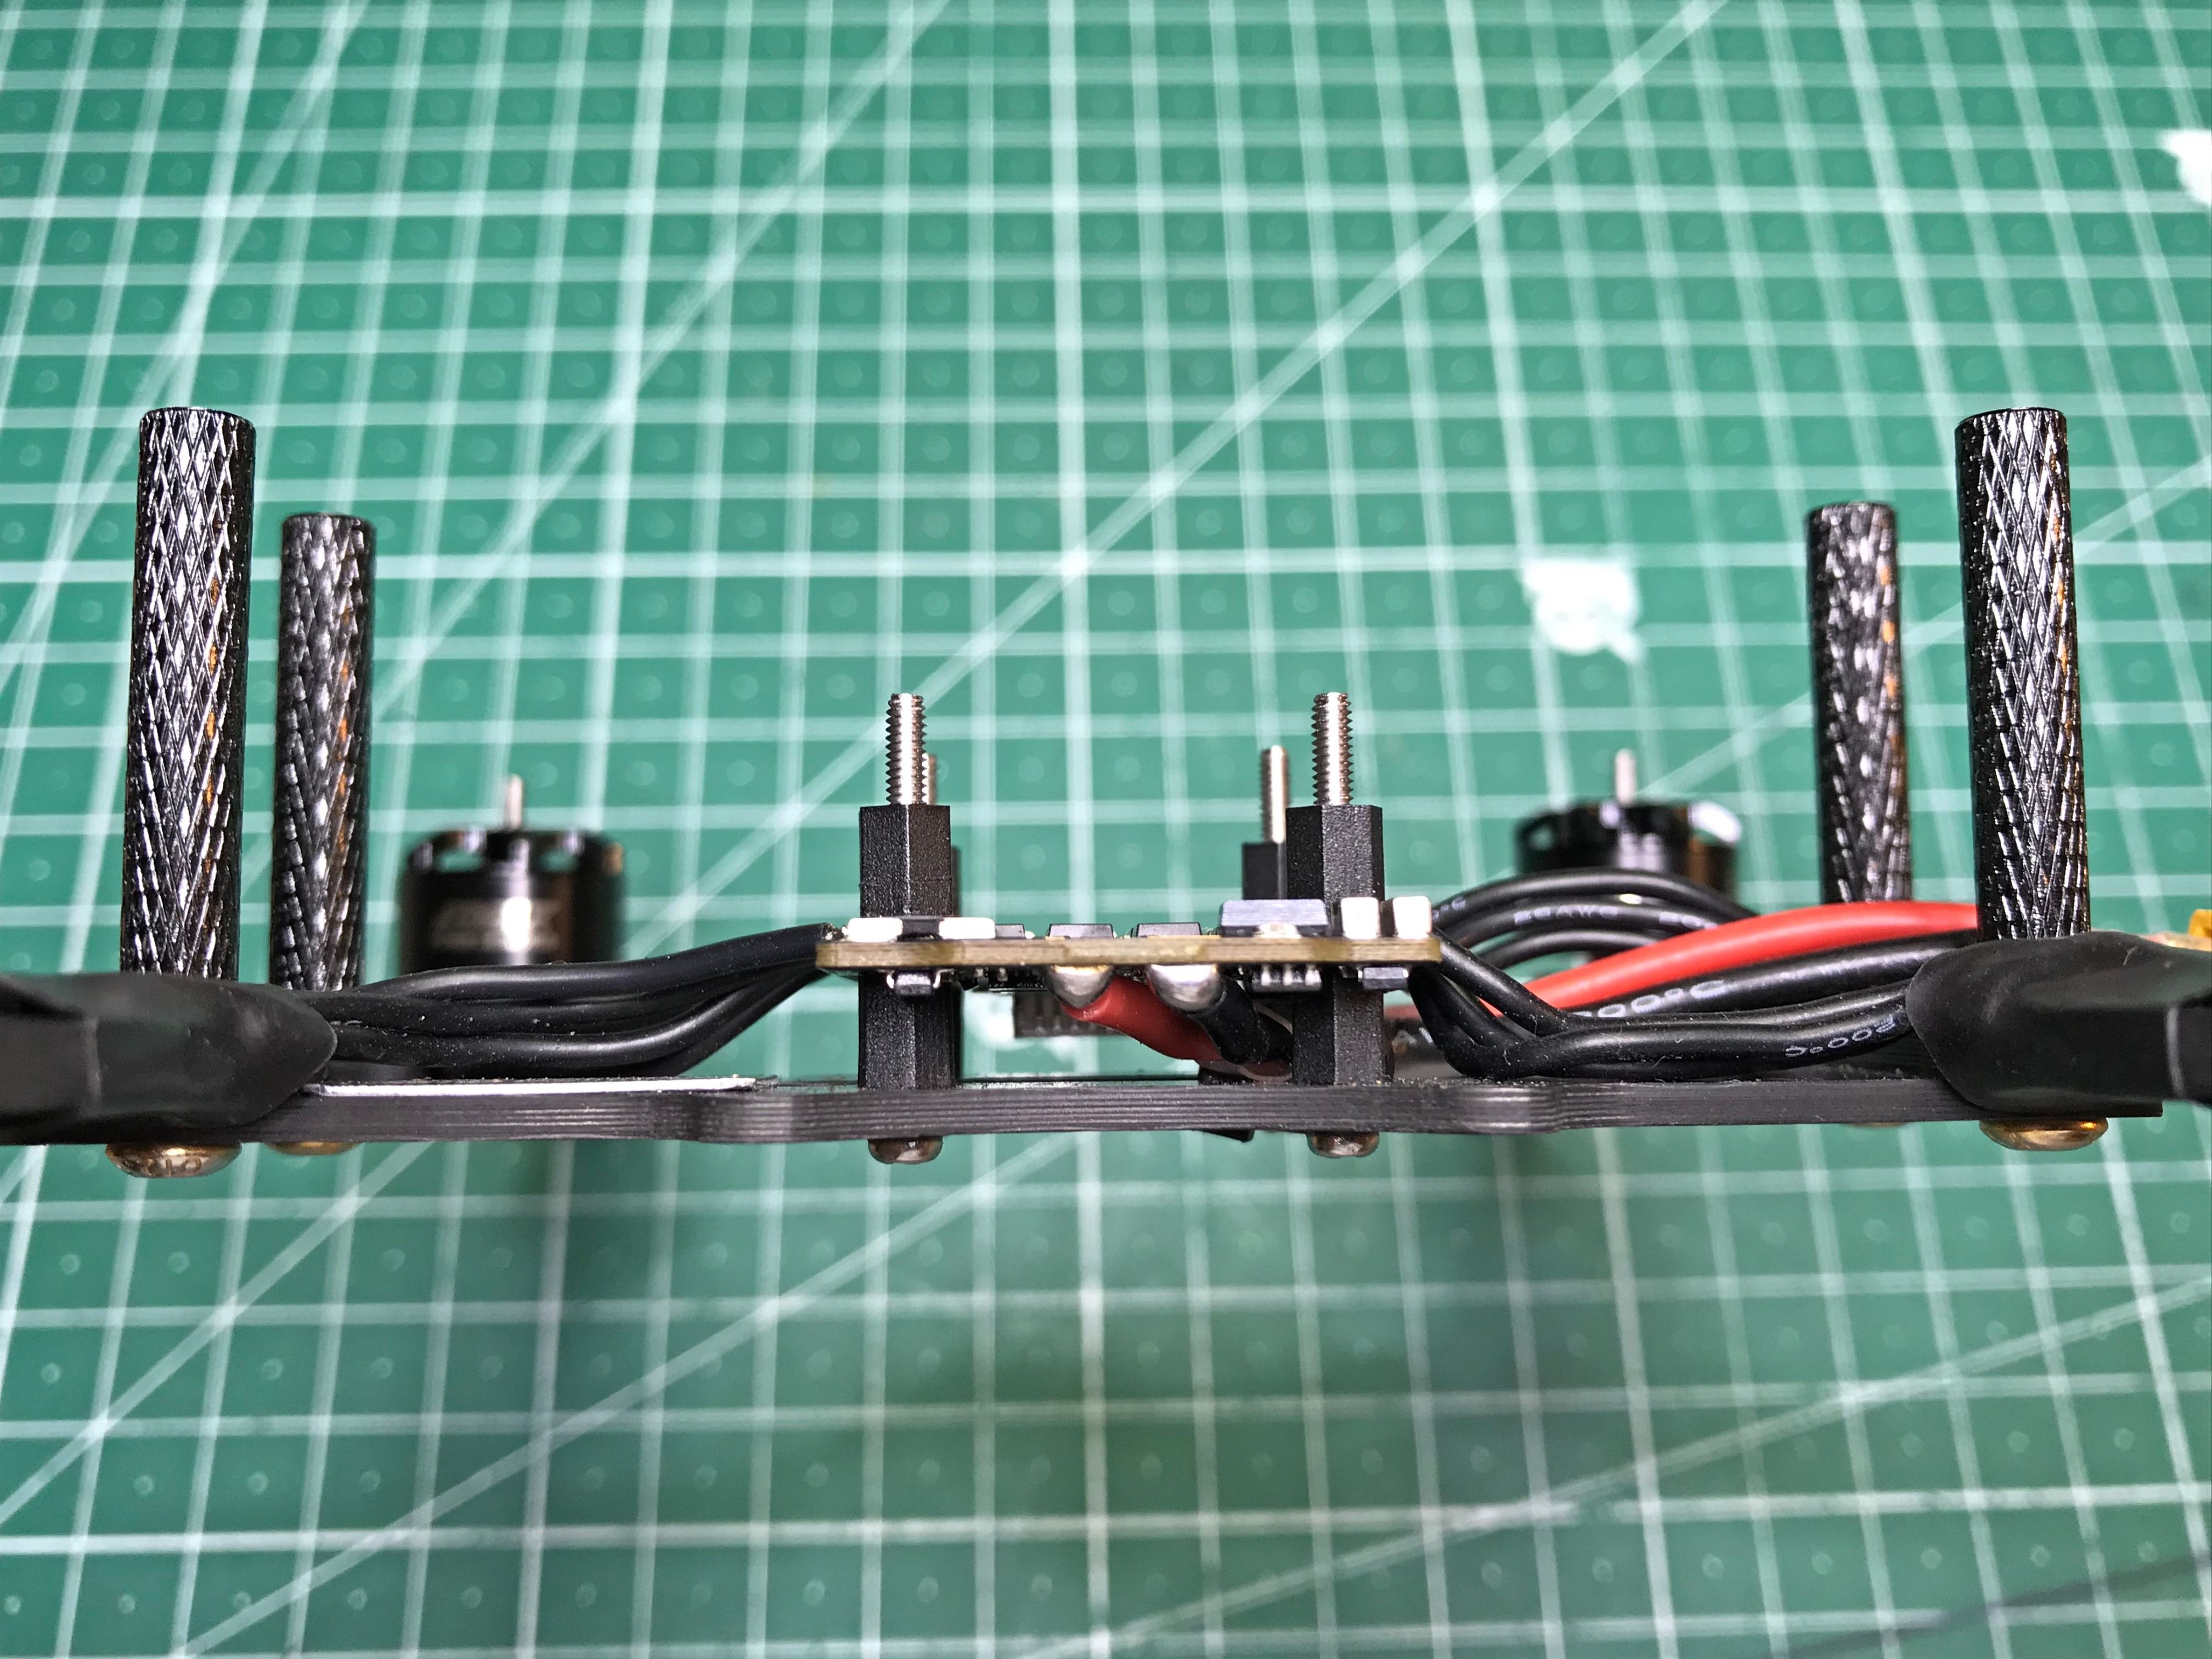
The stack can be made shorter, but since the quad is intended for slow flying, the electronics needs better cooling. 5 mm standoffs provide enough spacing.
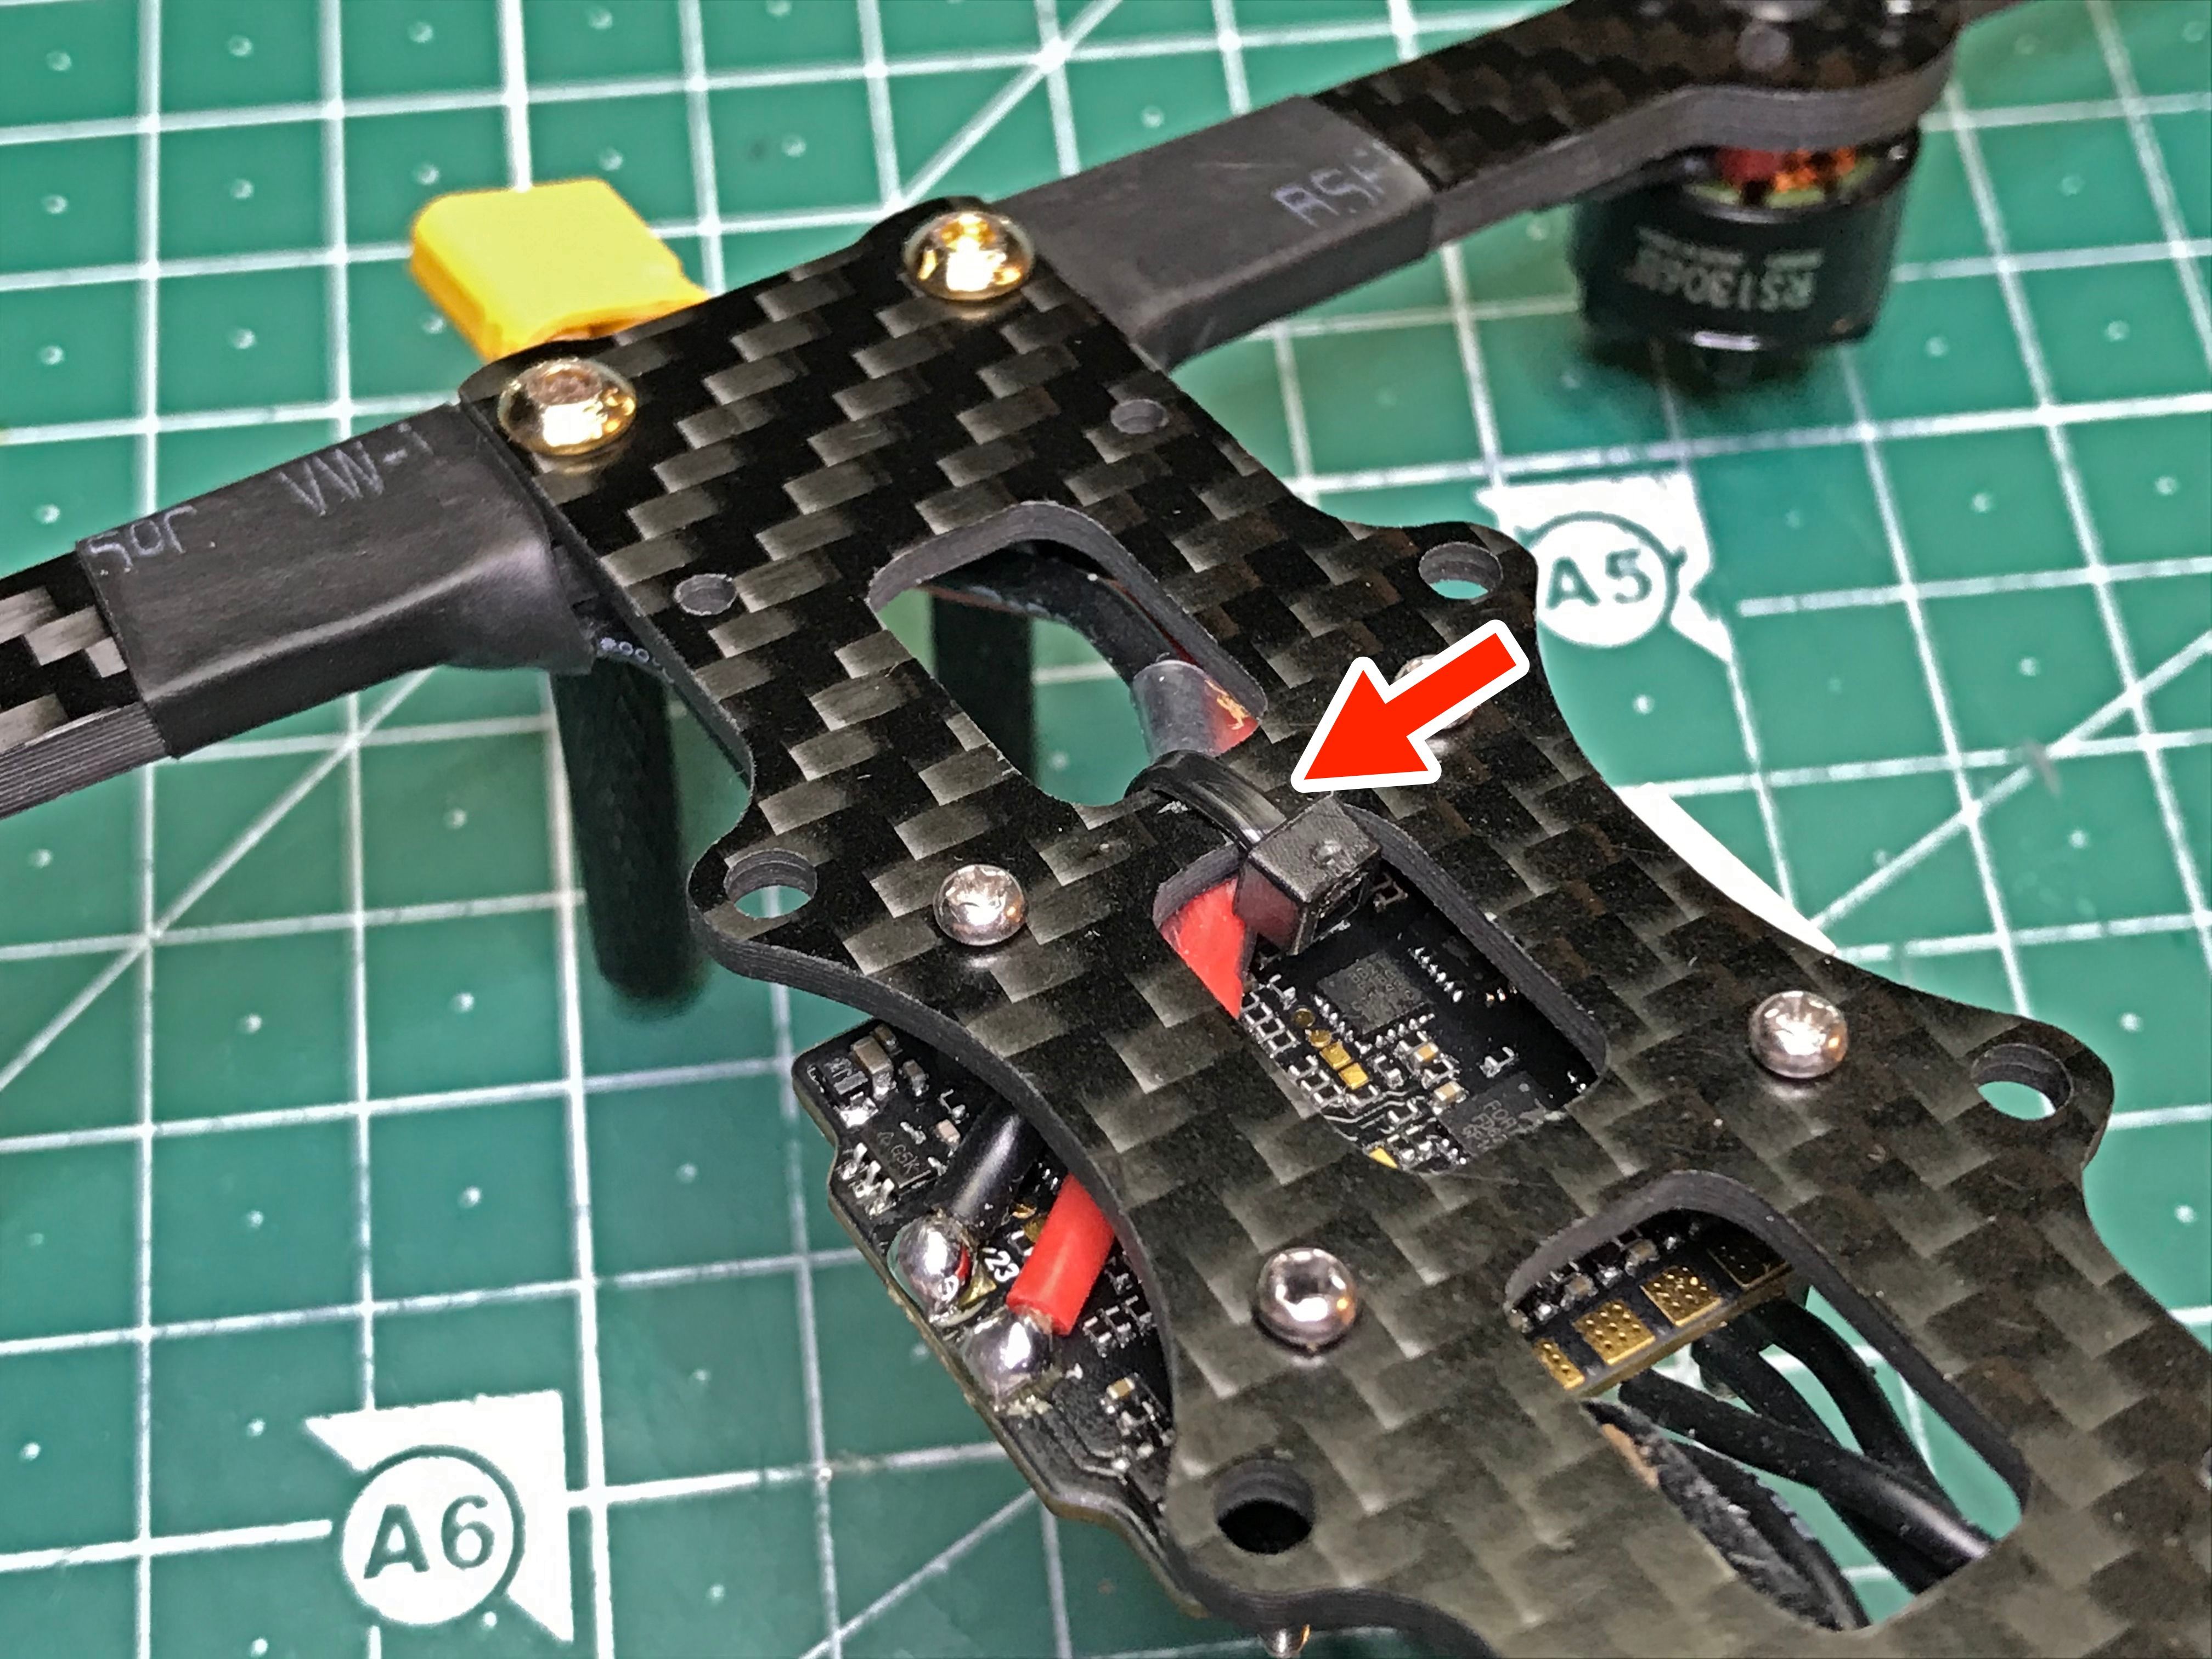
Here you can see the stress relief zip tie. I always recommend tying power leads to the structural component so ESC pads do not get ripped off in case of battery ejection. The relief point is marked by an arrow.
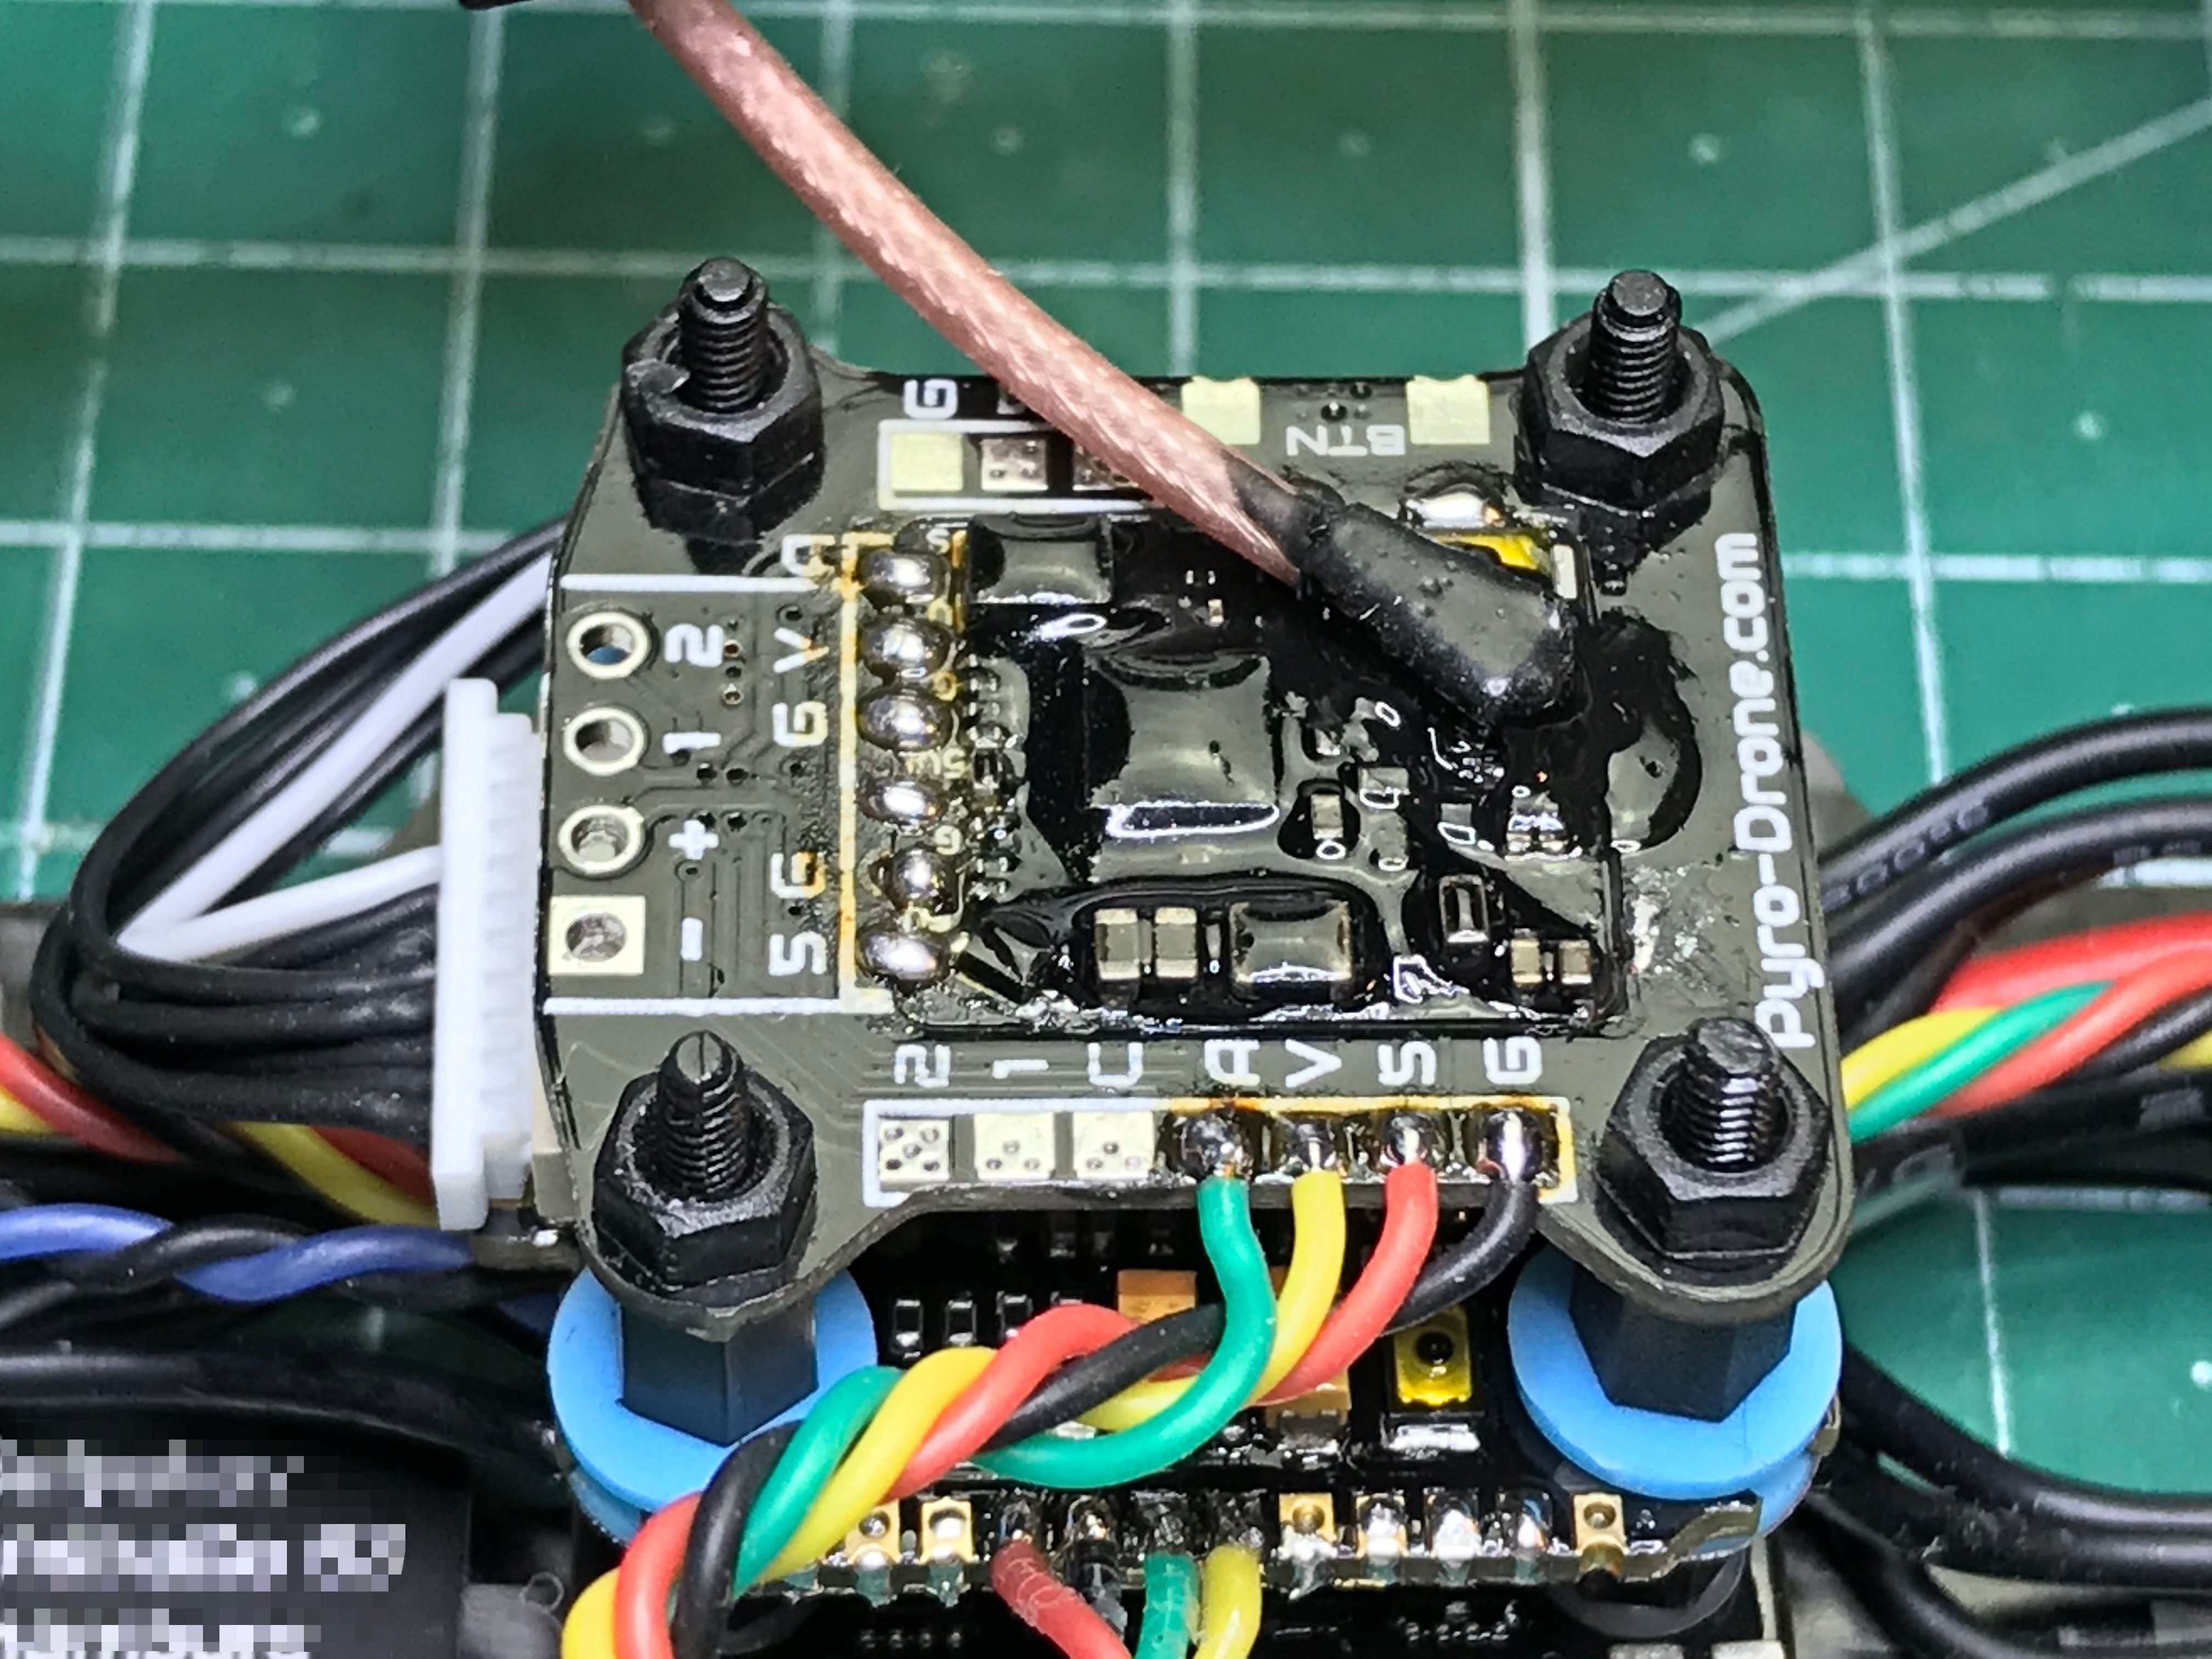
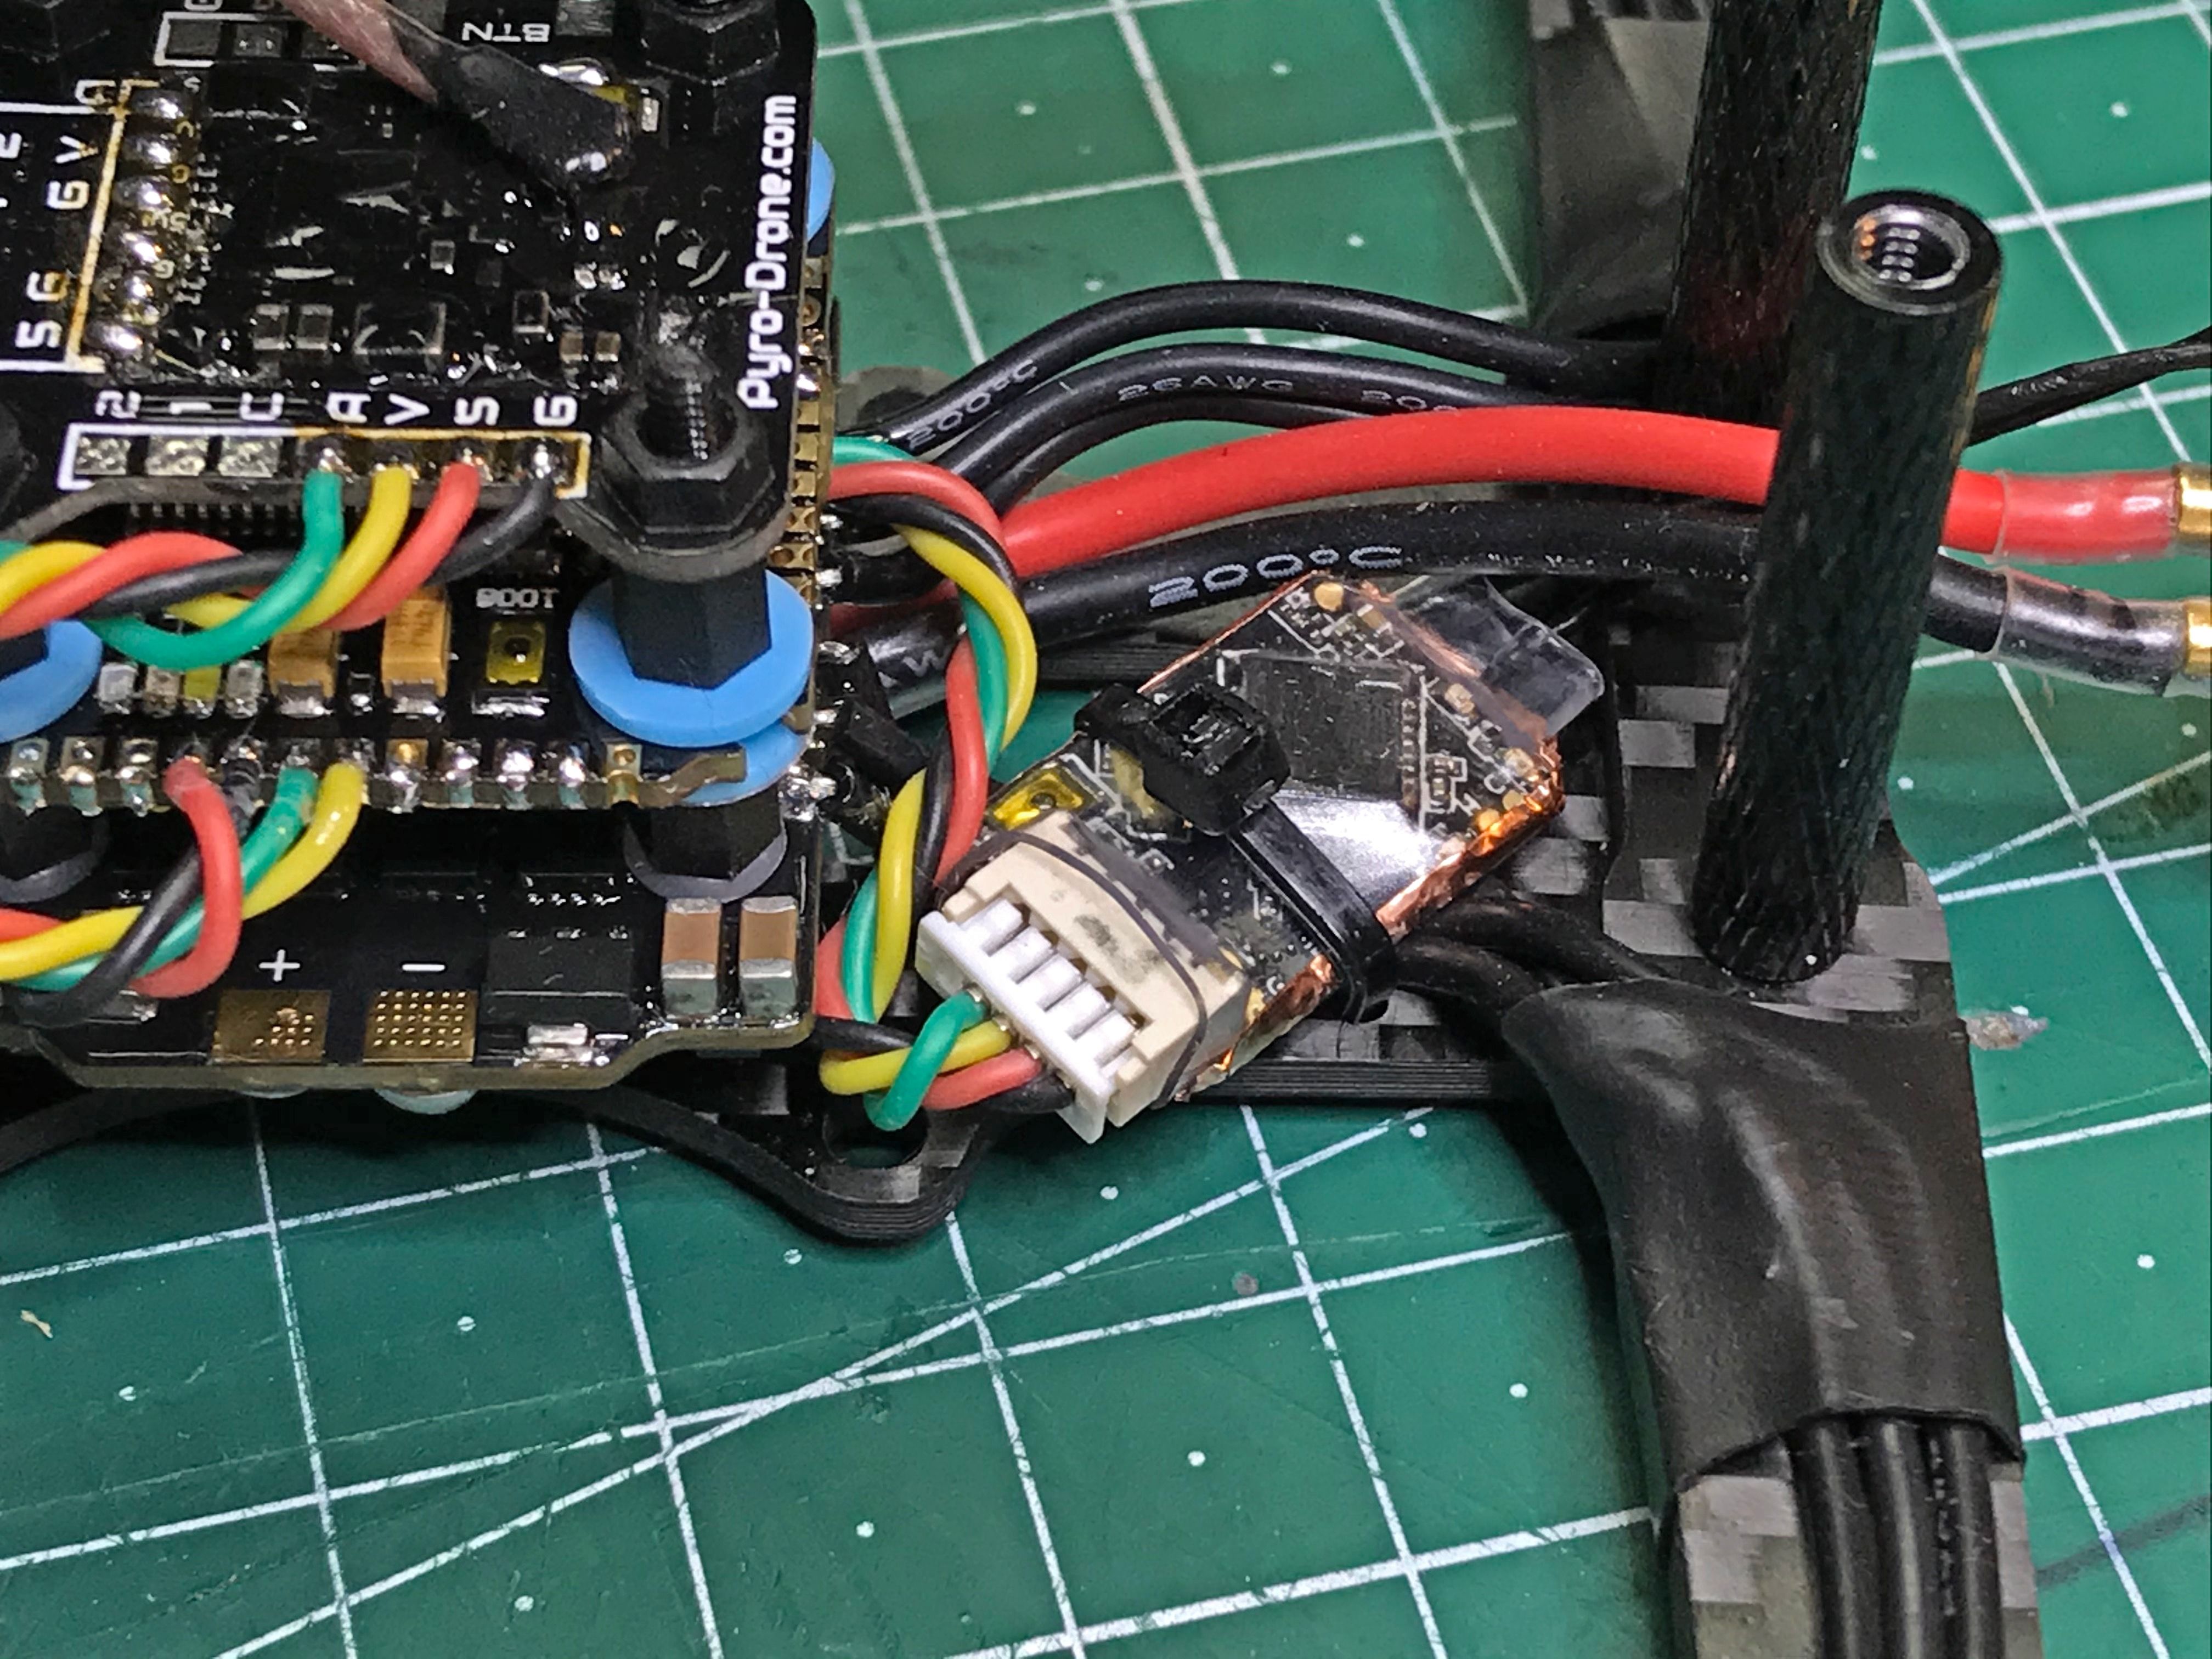
Flight controller wiring is pretty straight forward. Solder camera and VTX wires as shown in the Mamba stack manual. Solder the S.Port wire of the receiver to the PPM pad to get the FrSky telemetry working. Having the ability to change camera settings is very handy, so solder a 2-pin pigtail to RX6 and TX6. Those are used for the RunCam device interface.
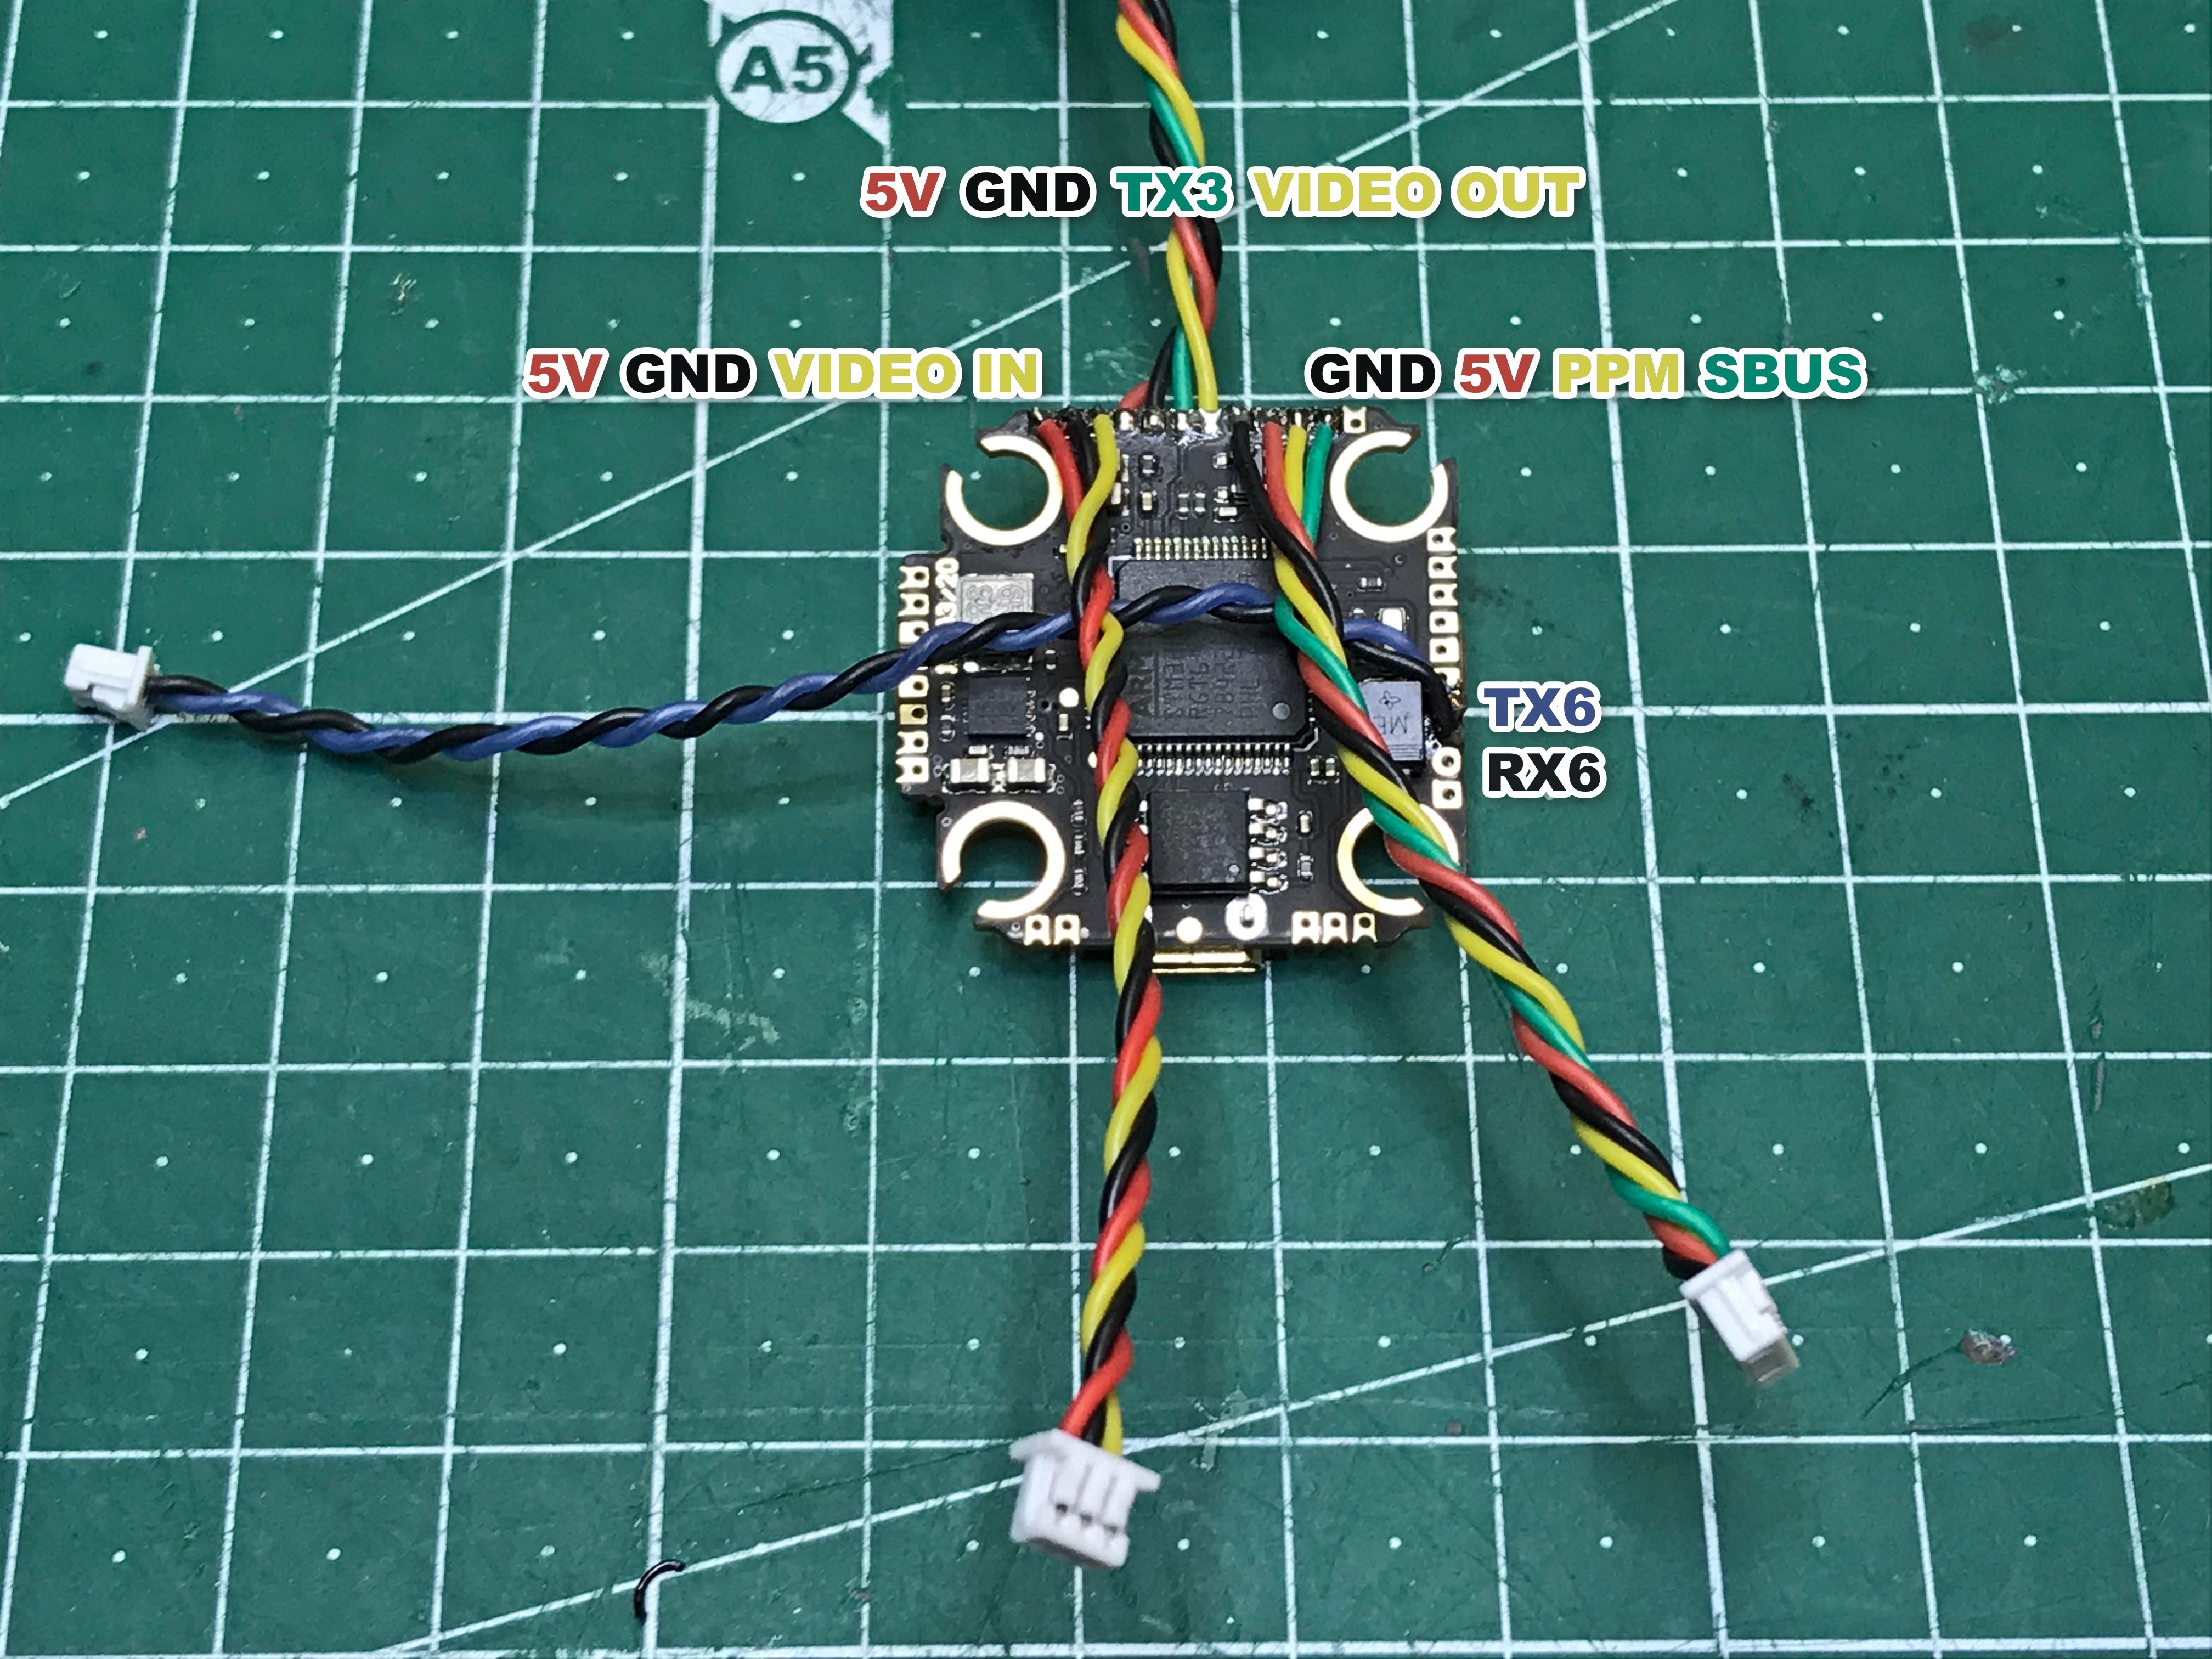
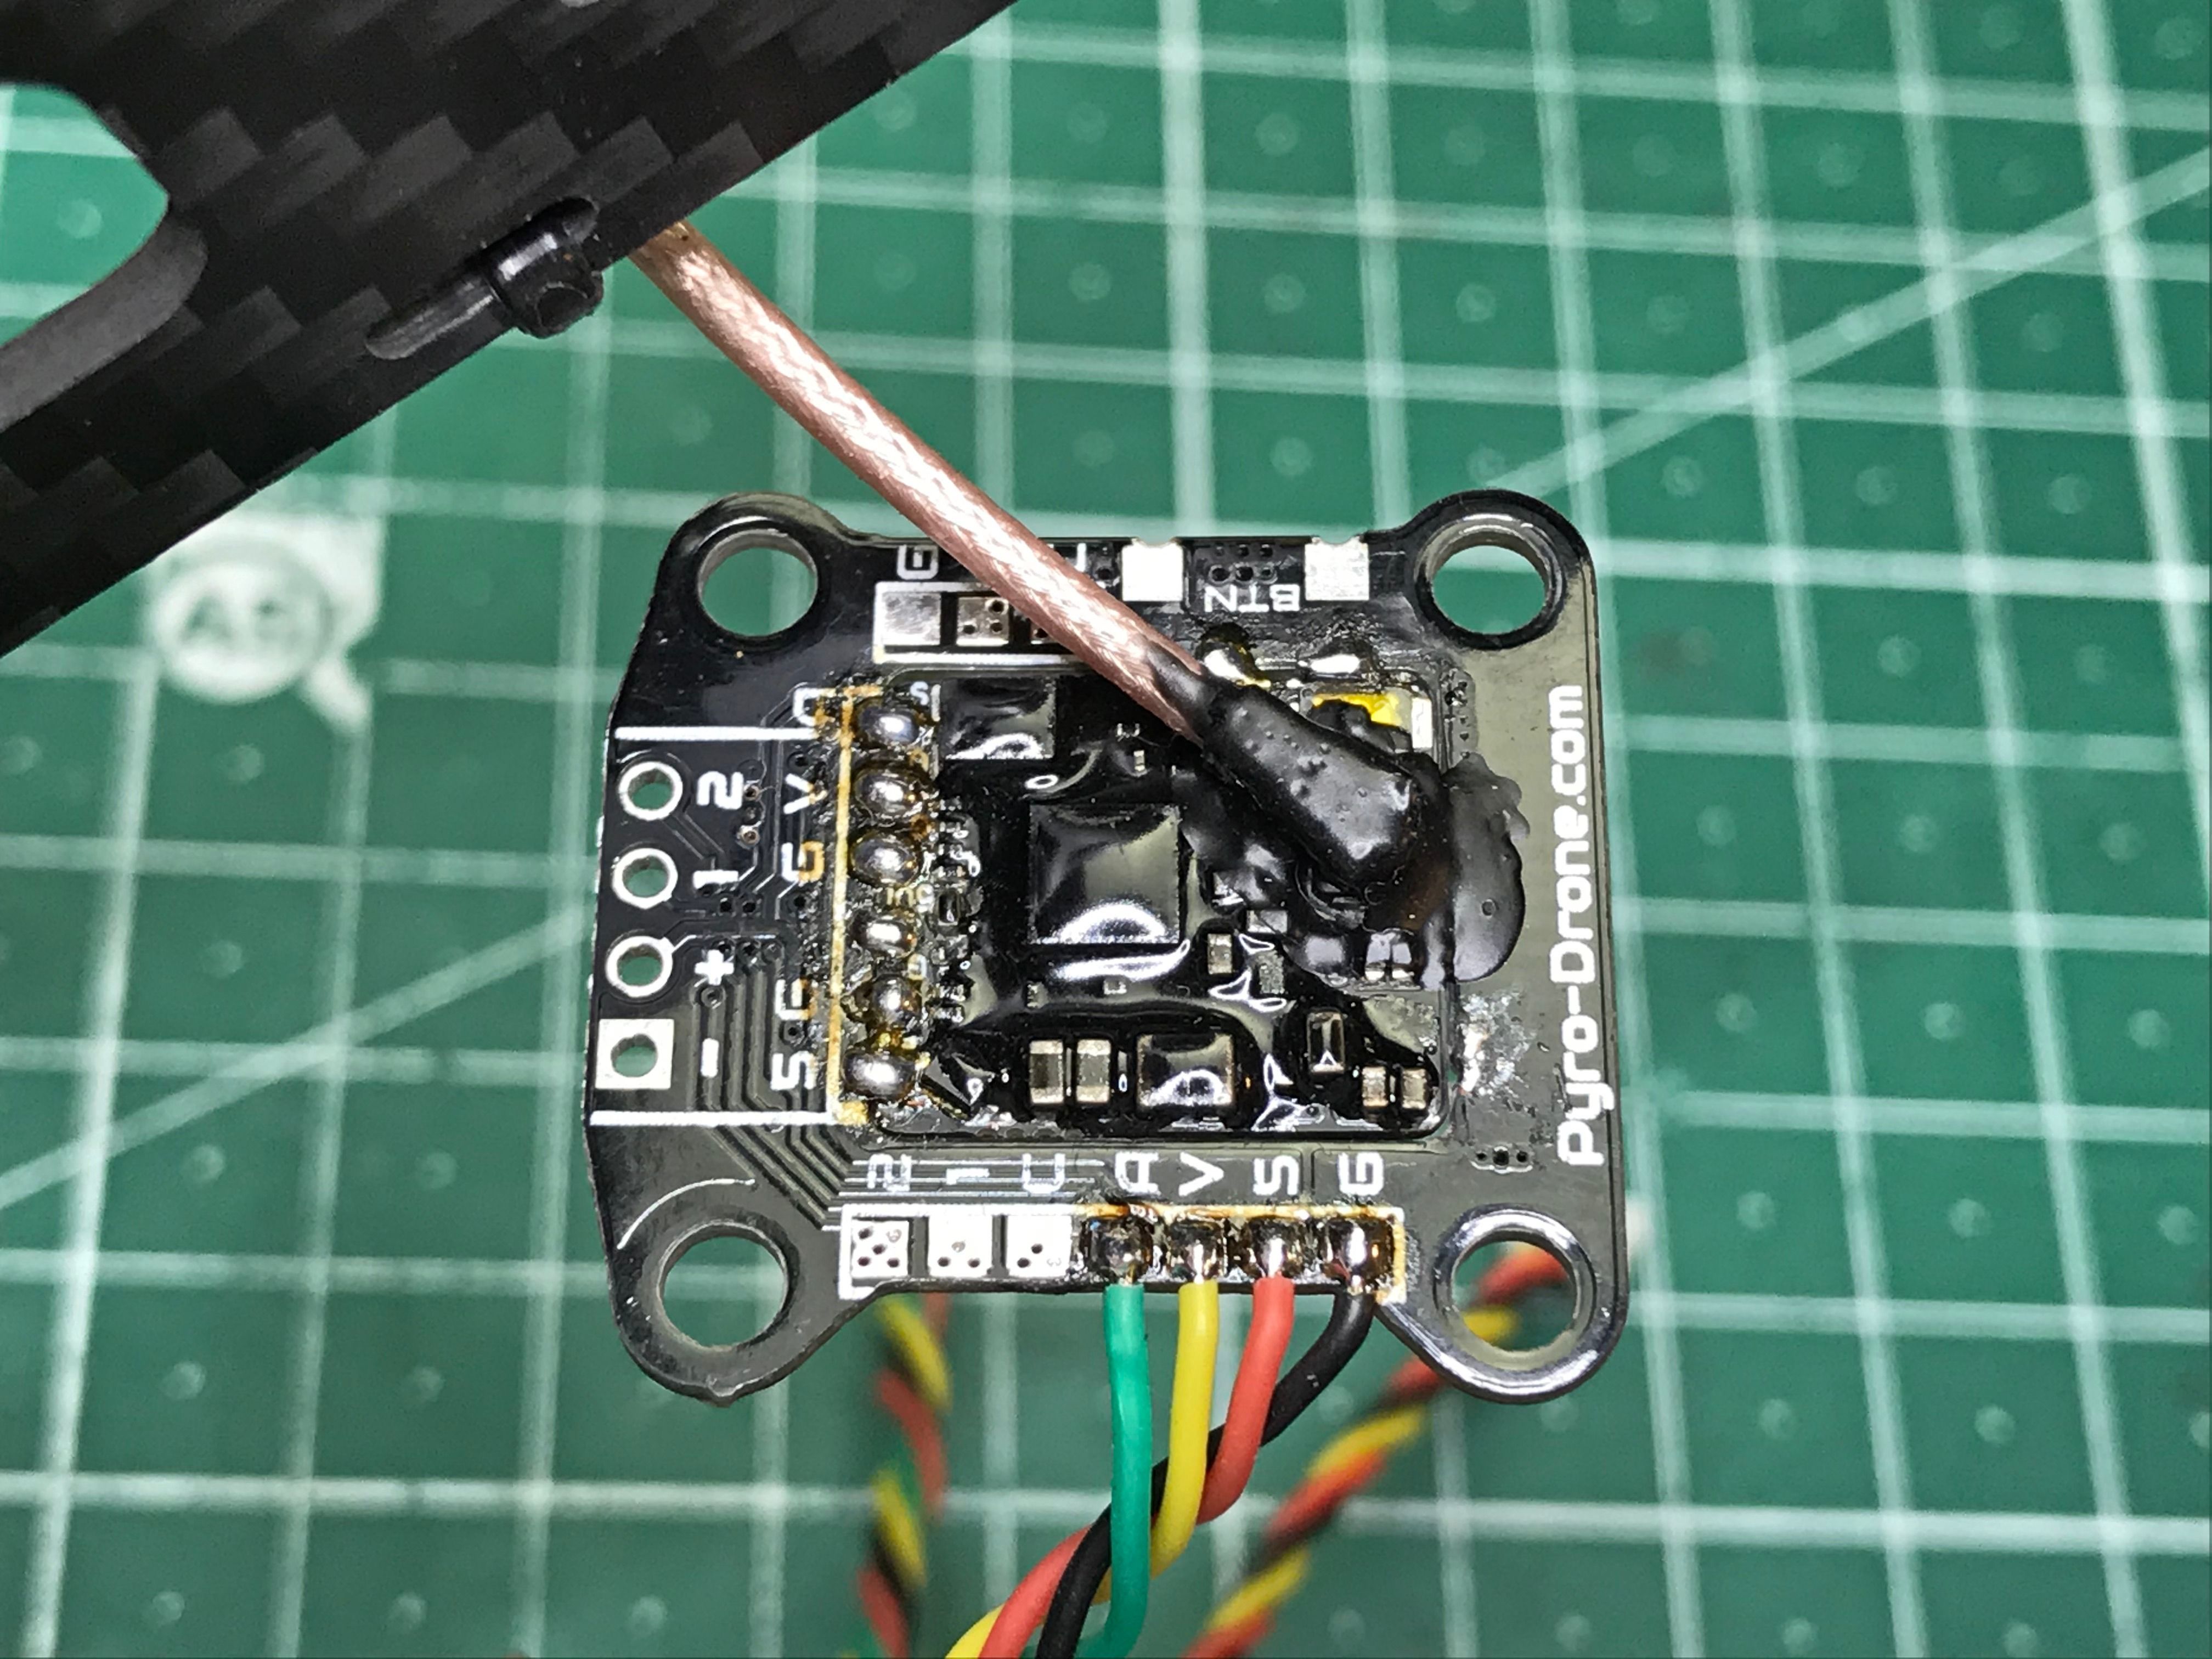
The VTX needs to be soldered into the Nano-Nano board. Connection to the flight controller is as shown on the picture. You can also see my favourite way to reinforce u.Fl connectors – a dab of liquid electrical tape. The board has seen several builds, so please pardon the burned flux.
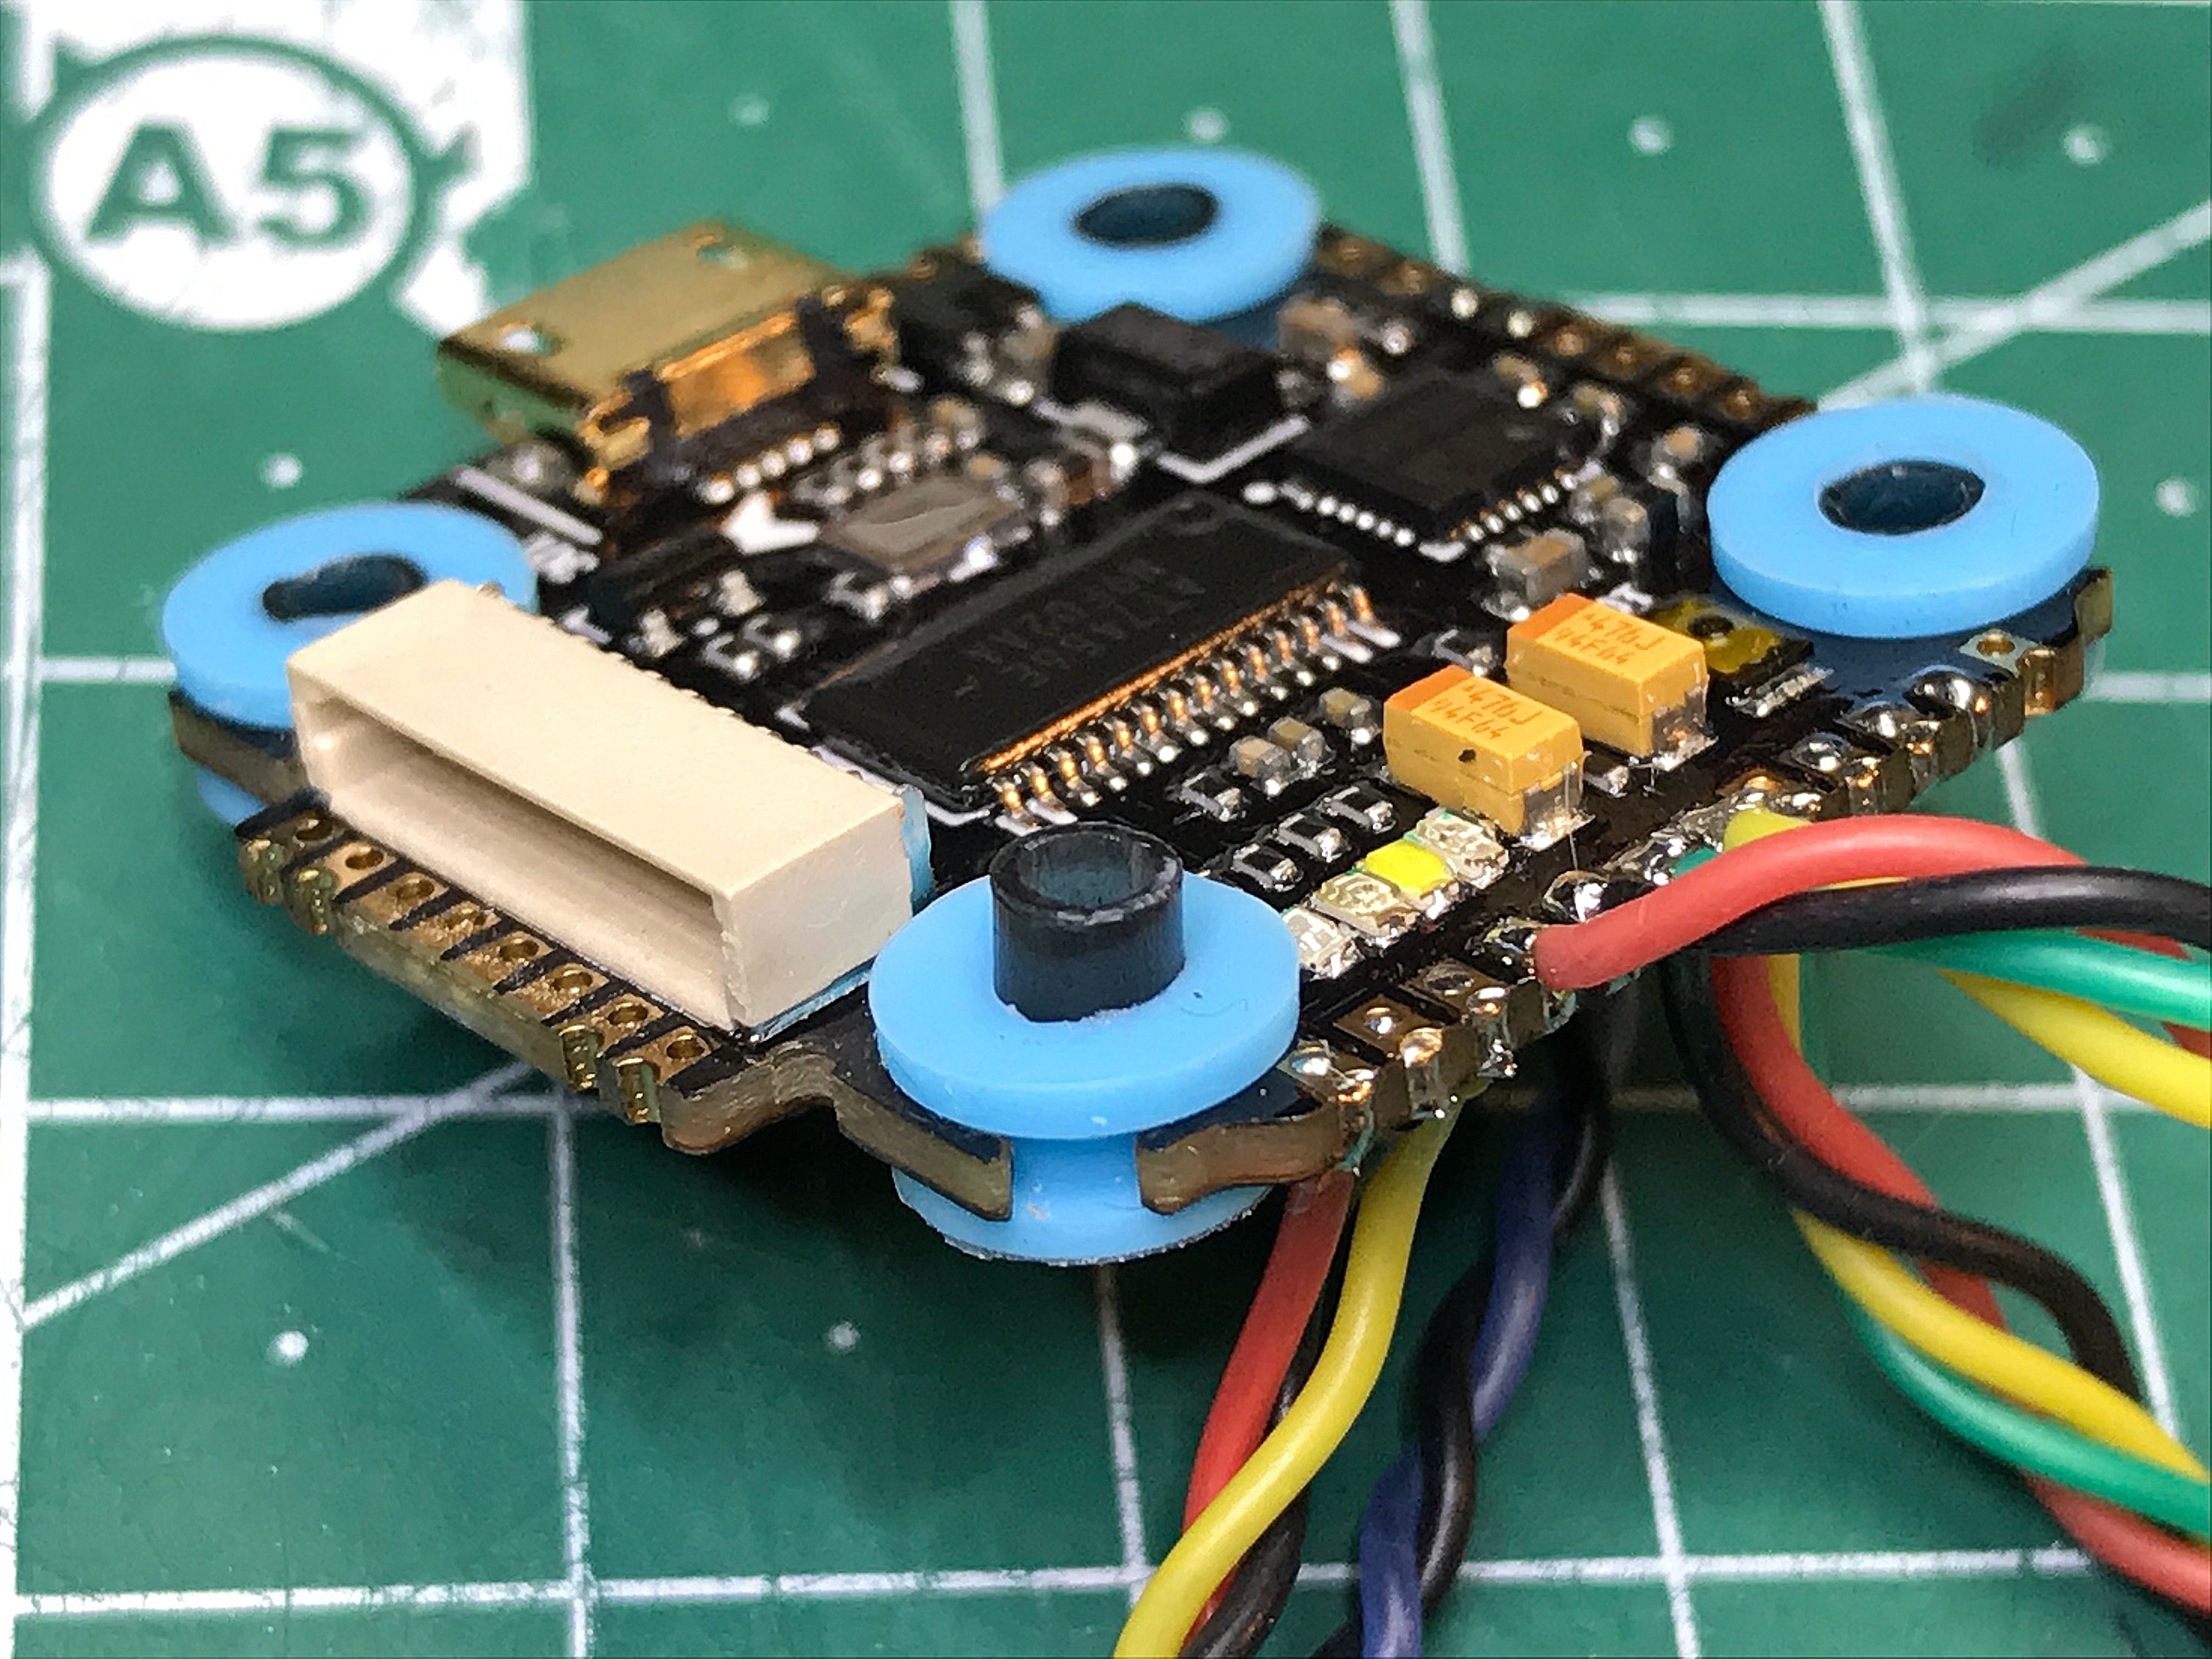
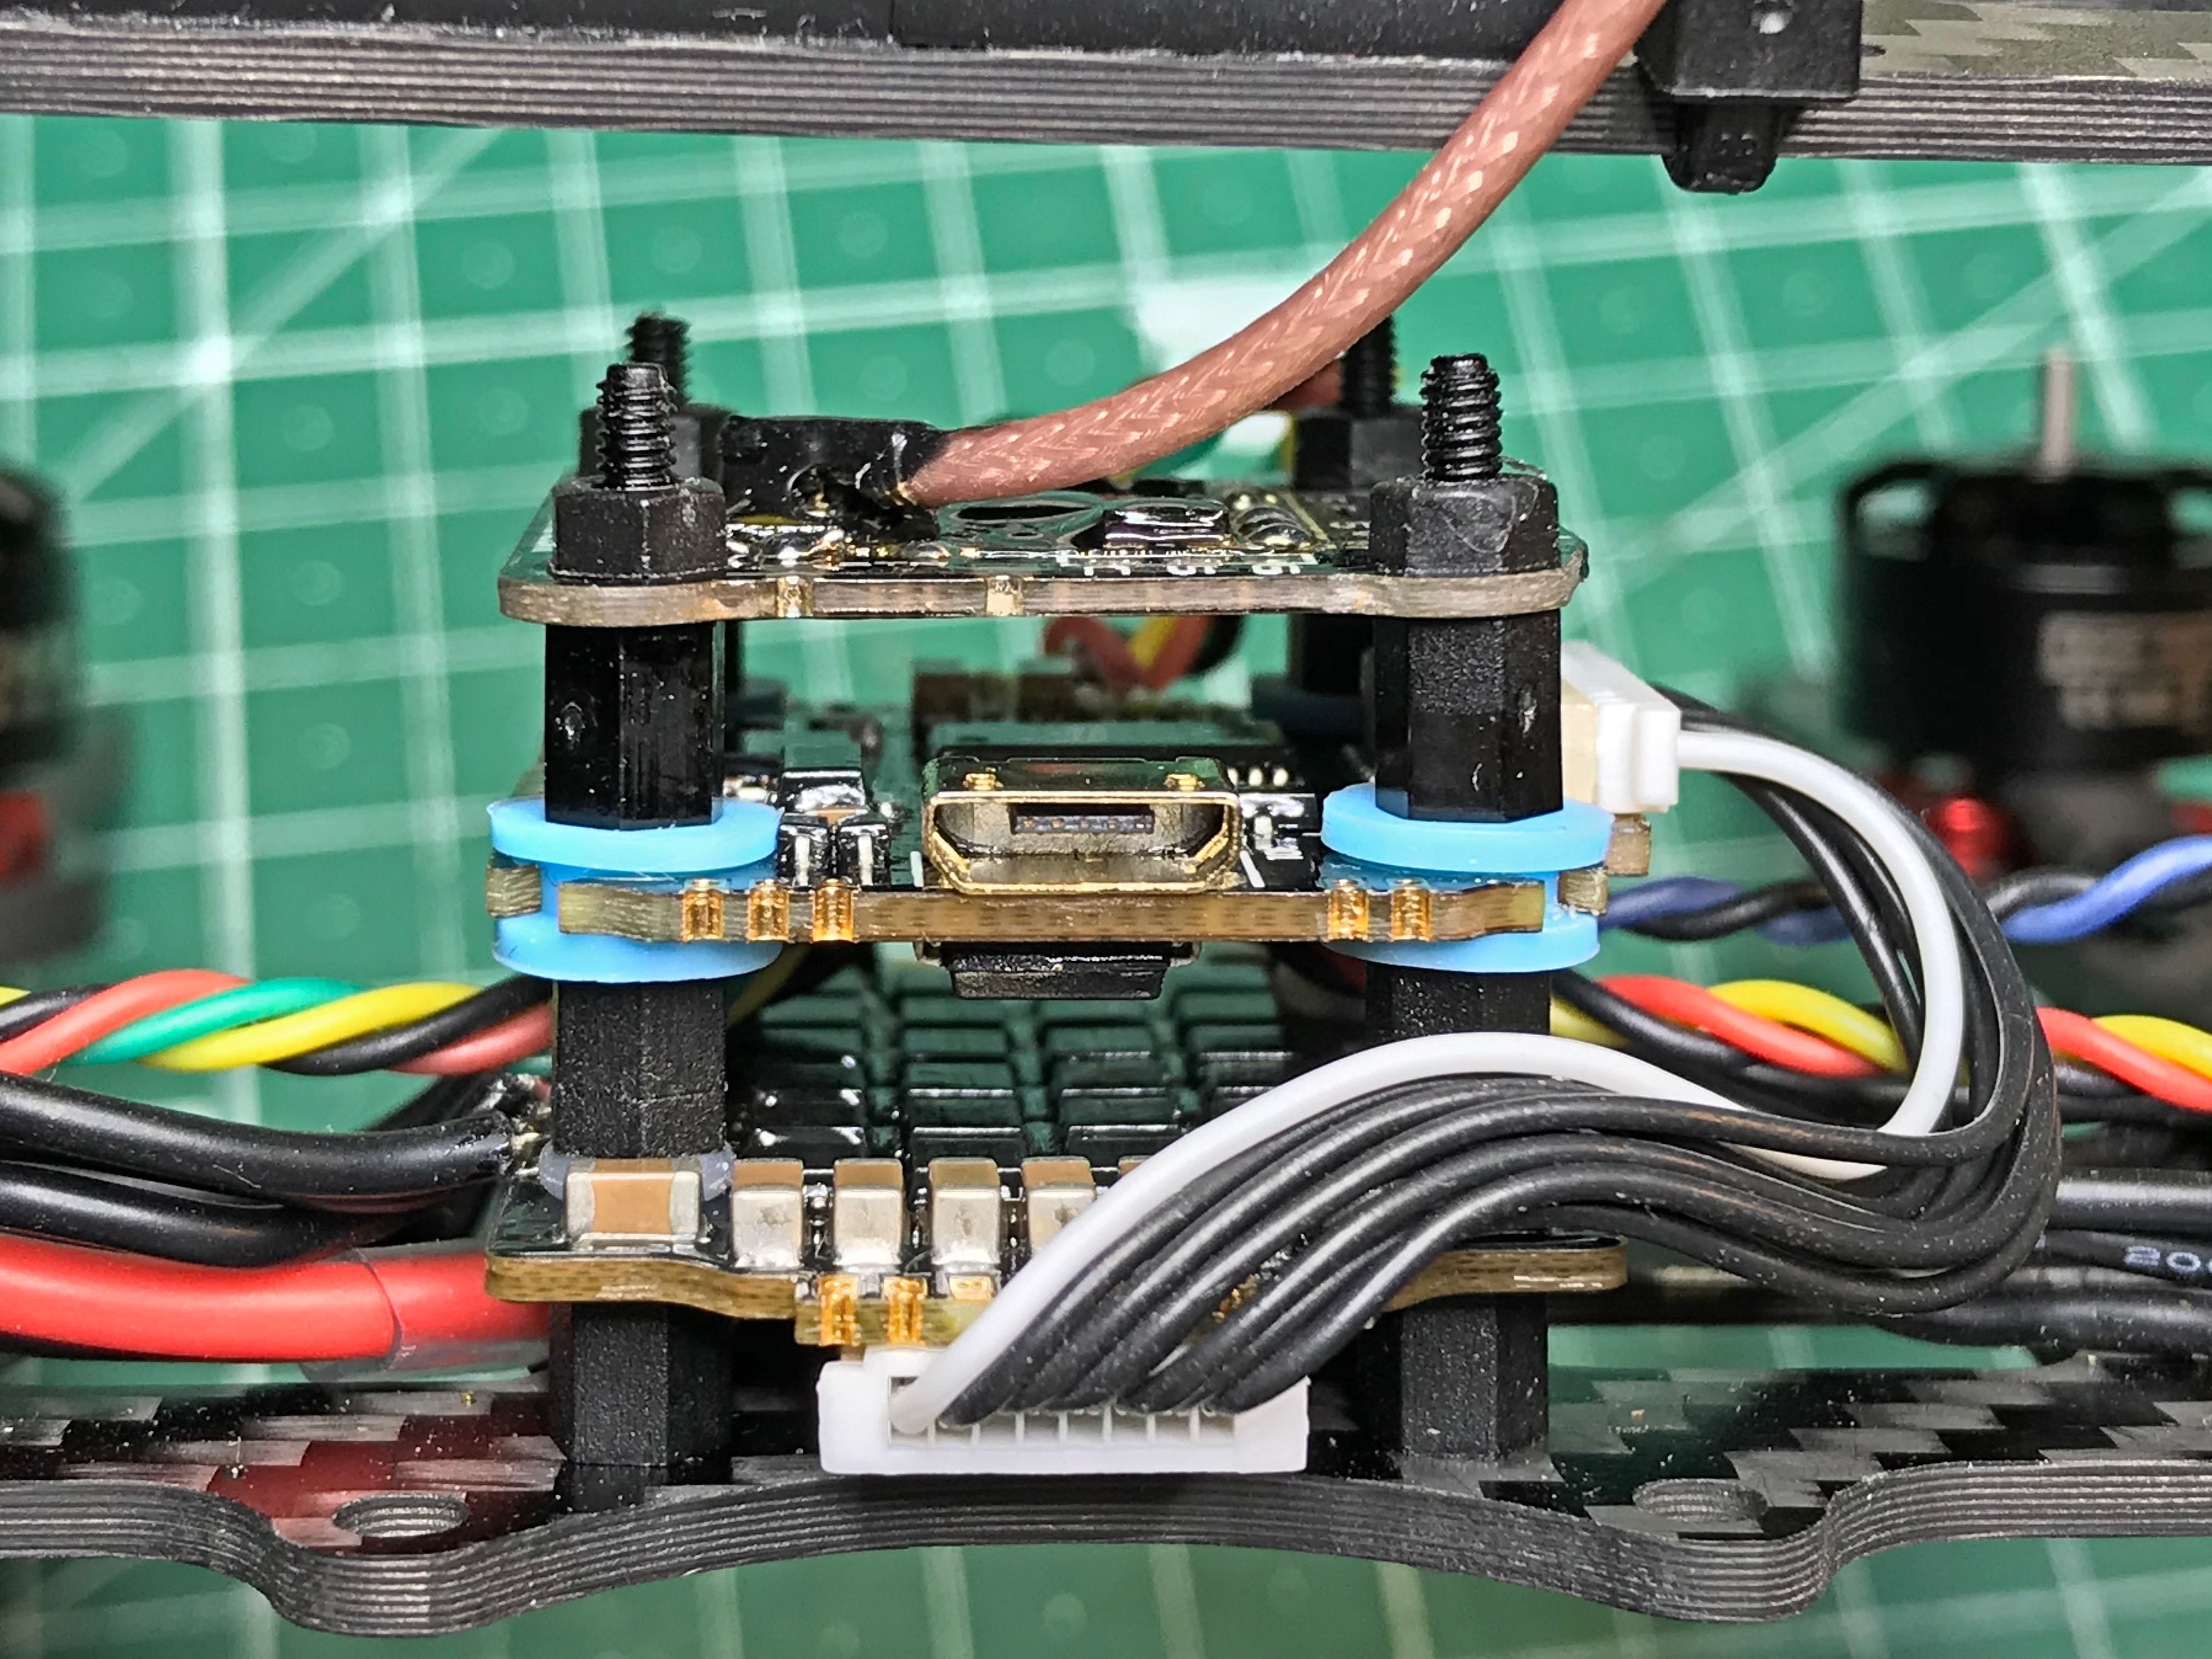
To mount the flight controller take a 3 mm antenna tube and cut small portions to fit into the blue silicone grommets. This way the FC does not wiggle in place and is still isolated from mechanical noise. The tube piece at the very front on the picture is ready to be inserted into the grommet.
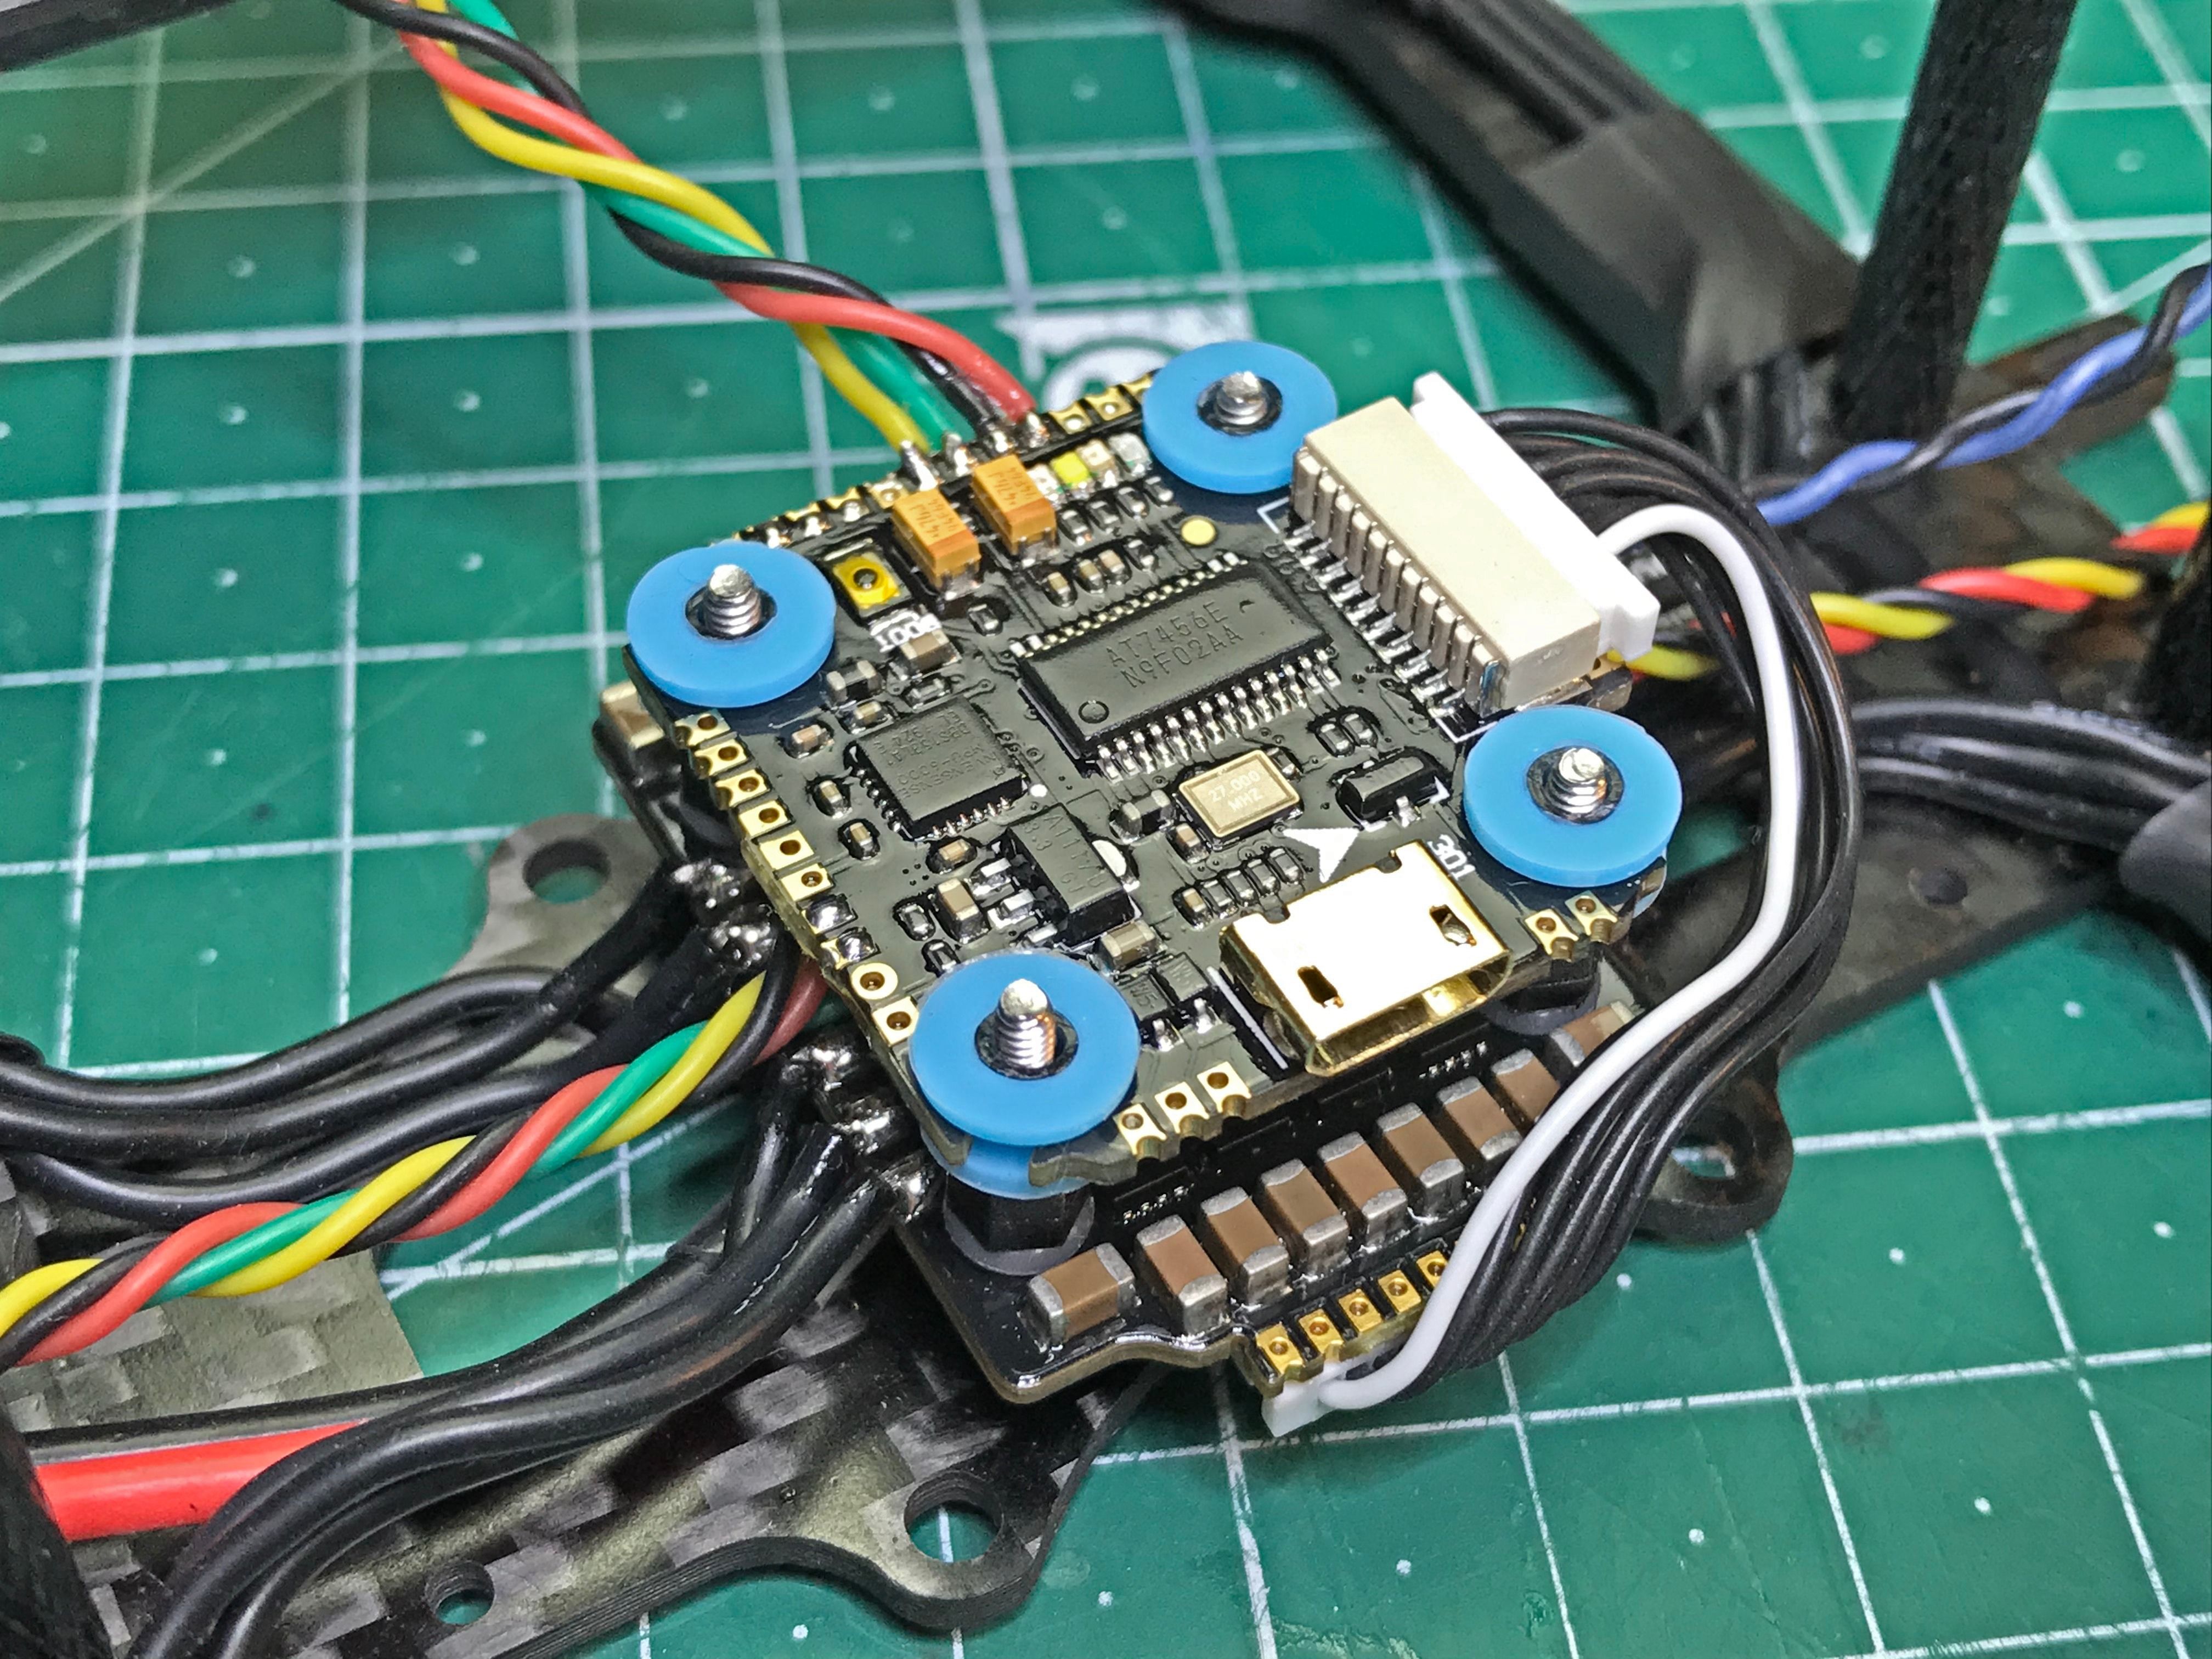
The flight controller goes on top of the ESC, and there is just enough screw length left to install the next row of nylon standoffs.
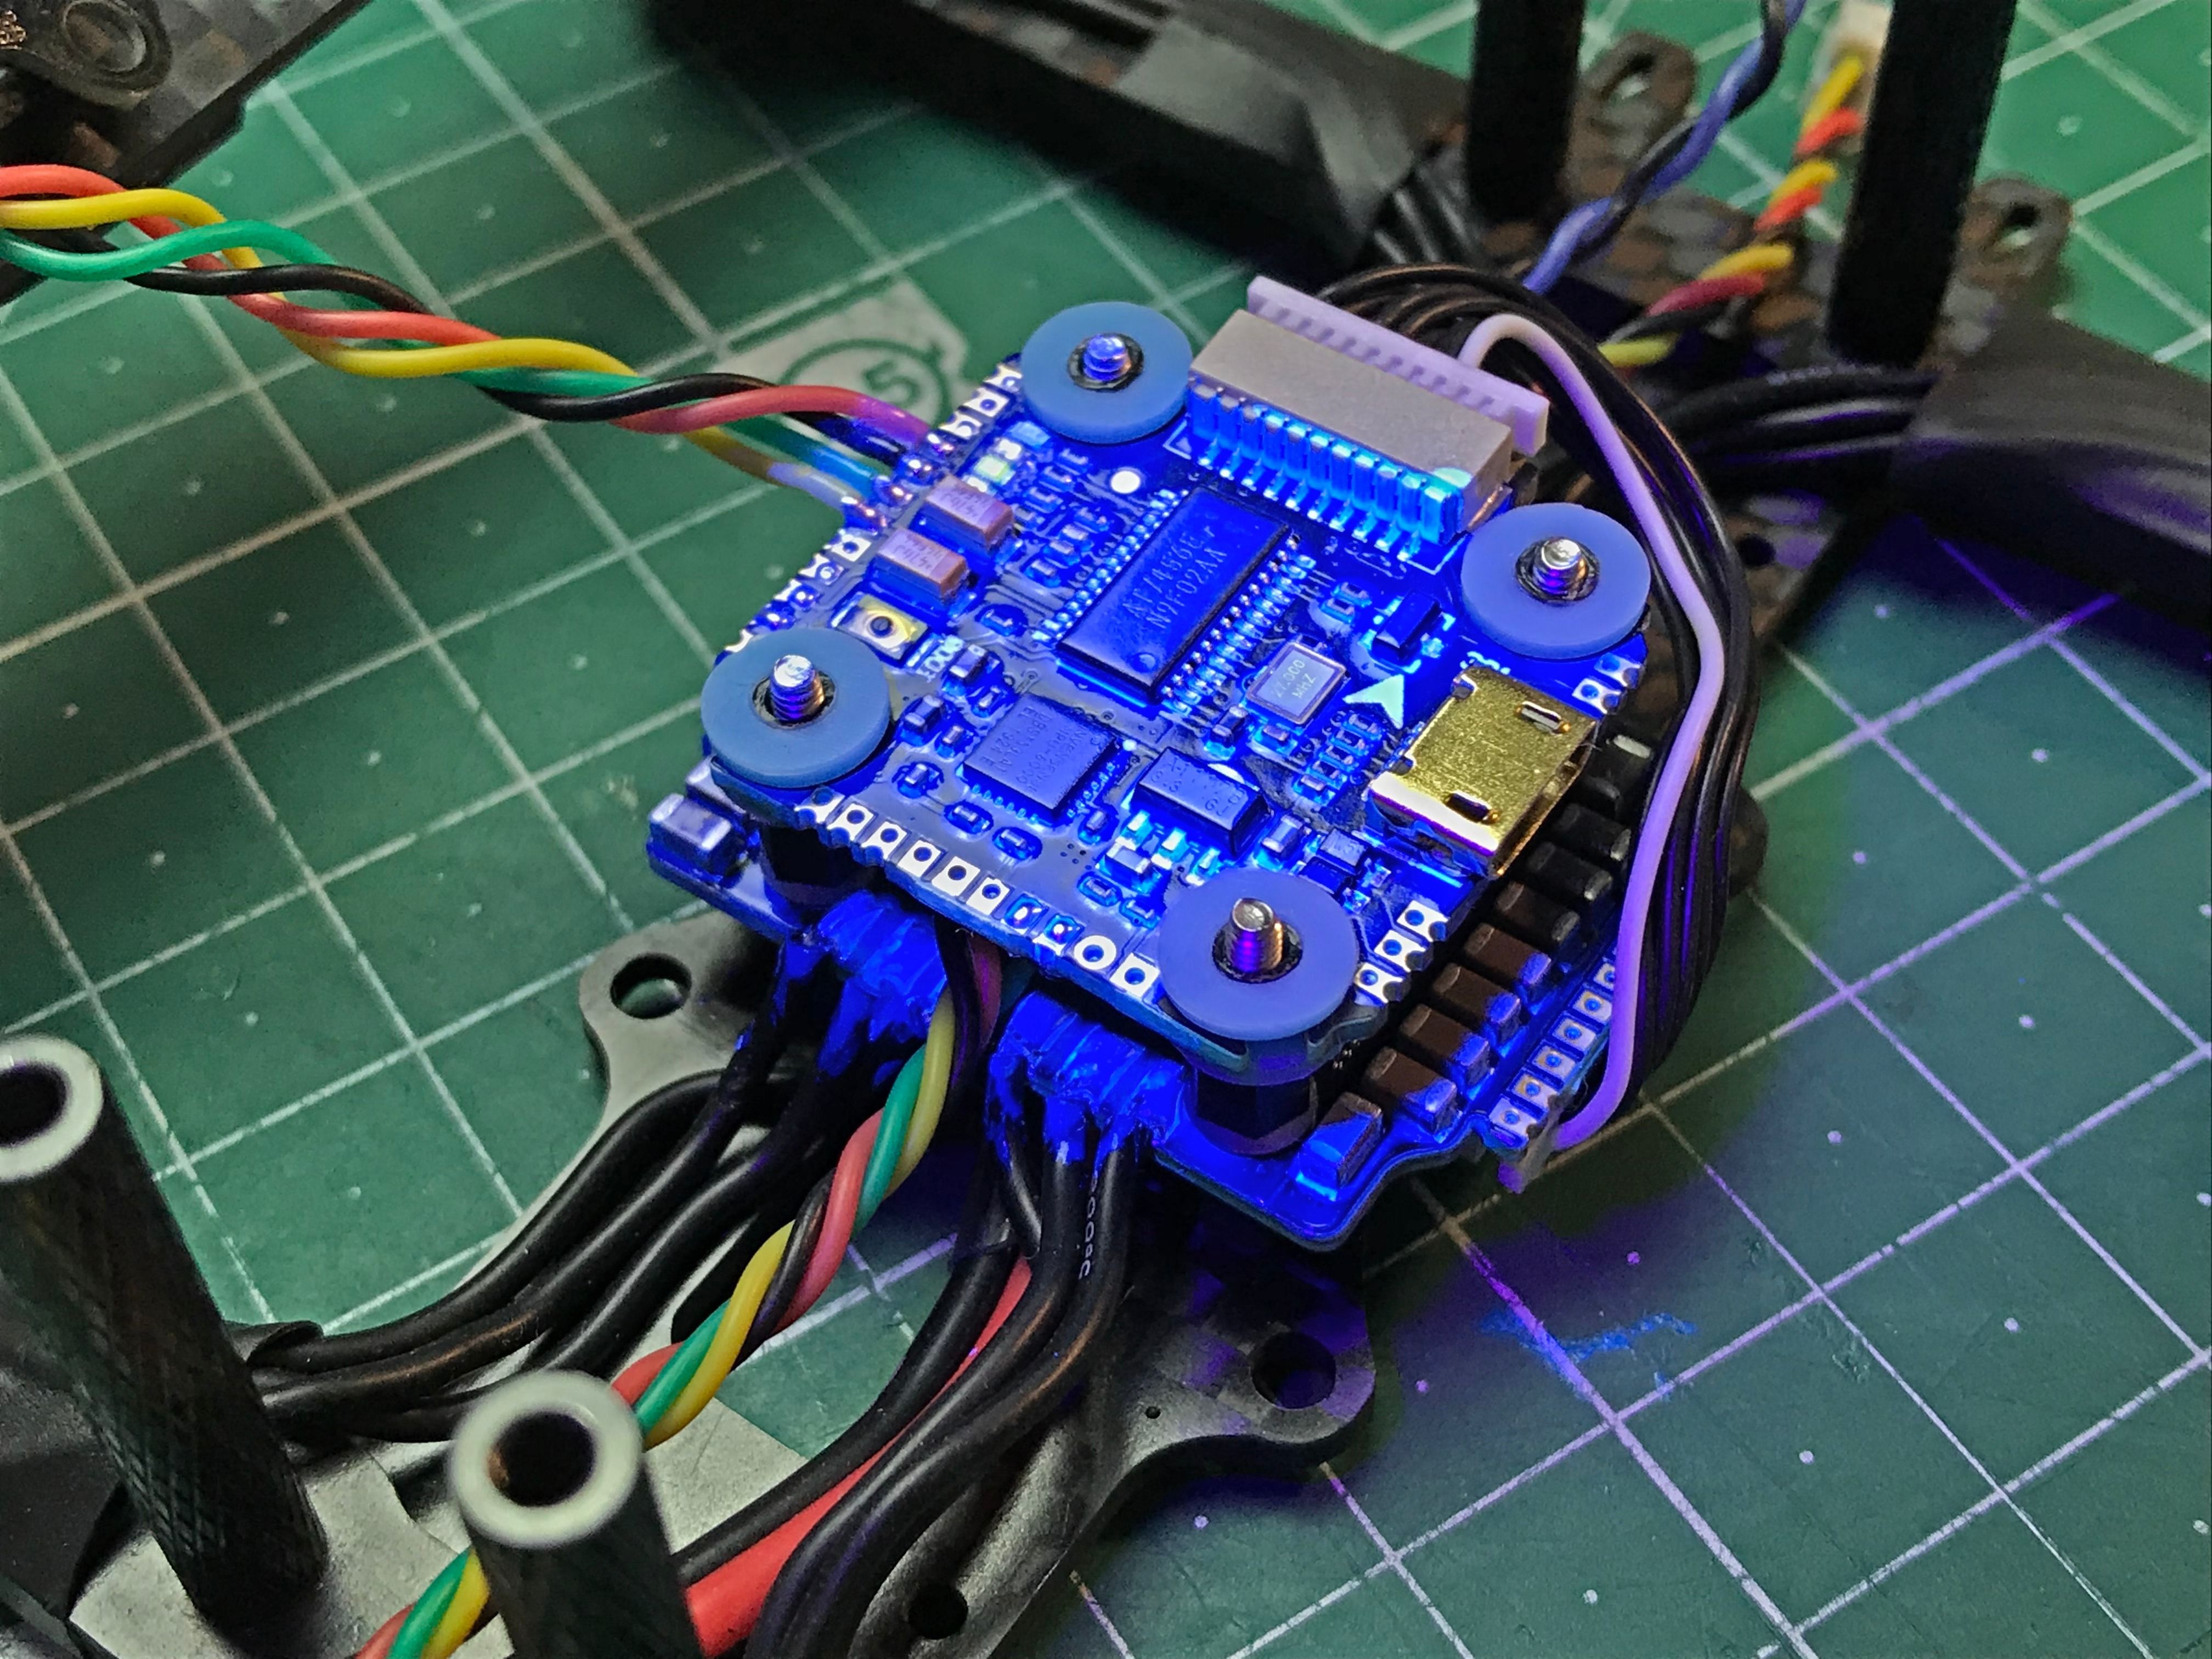
By the way, MG Chemicals makes silicone conformal coating that dries quickly enough to work with the parts in about 10 minutes after the application. I recommend coating all your quads, always. Even the cheapest black light torch from Amazon makes coating process a piece of cake.
Next step is to mount the VTX. Use 5 mm nylon standoffs and nylon nuts.
The stack looks neat! If you have an ESC cable kit, you can make a longer harness to mount the flight controller straight. You can also put it sideways and use the harness that comes with the stack. A longer one allows easier access to the USB port.
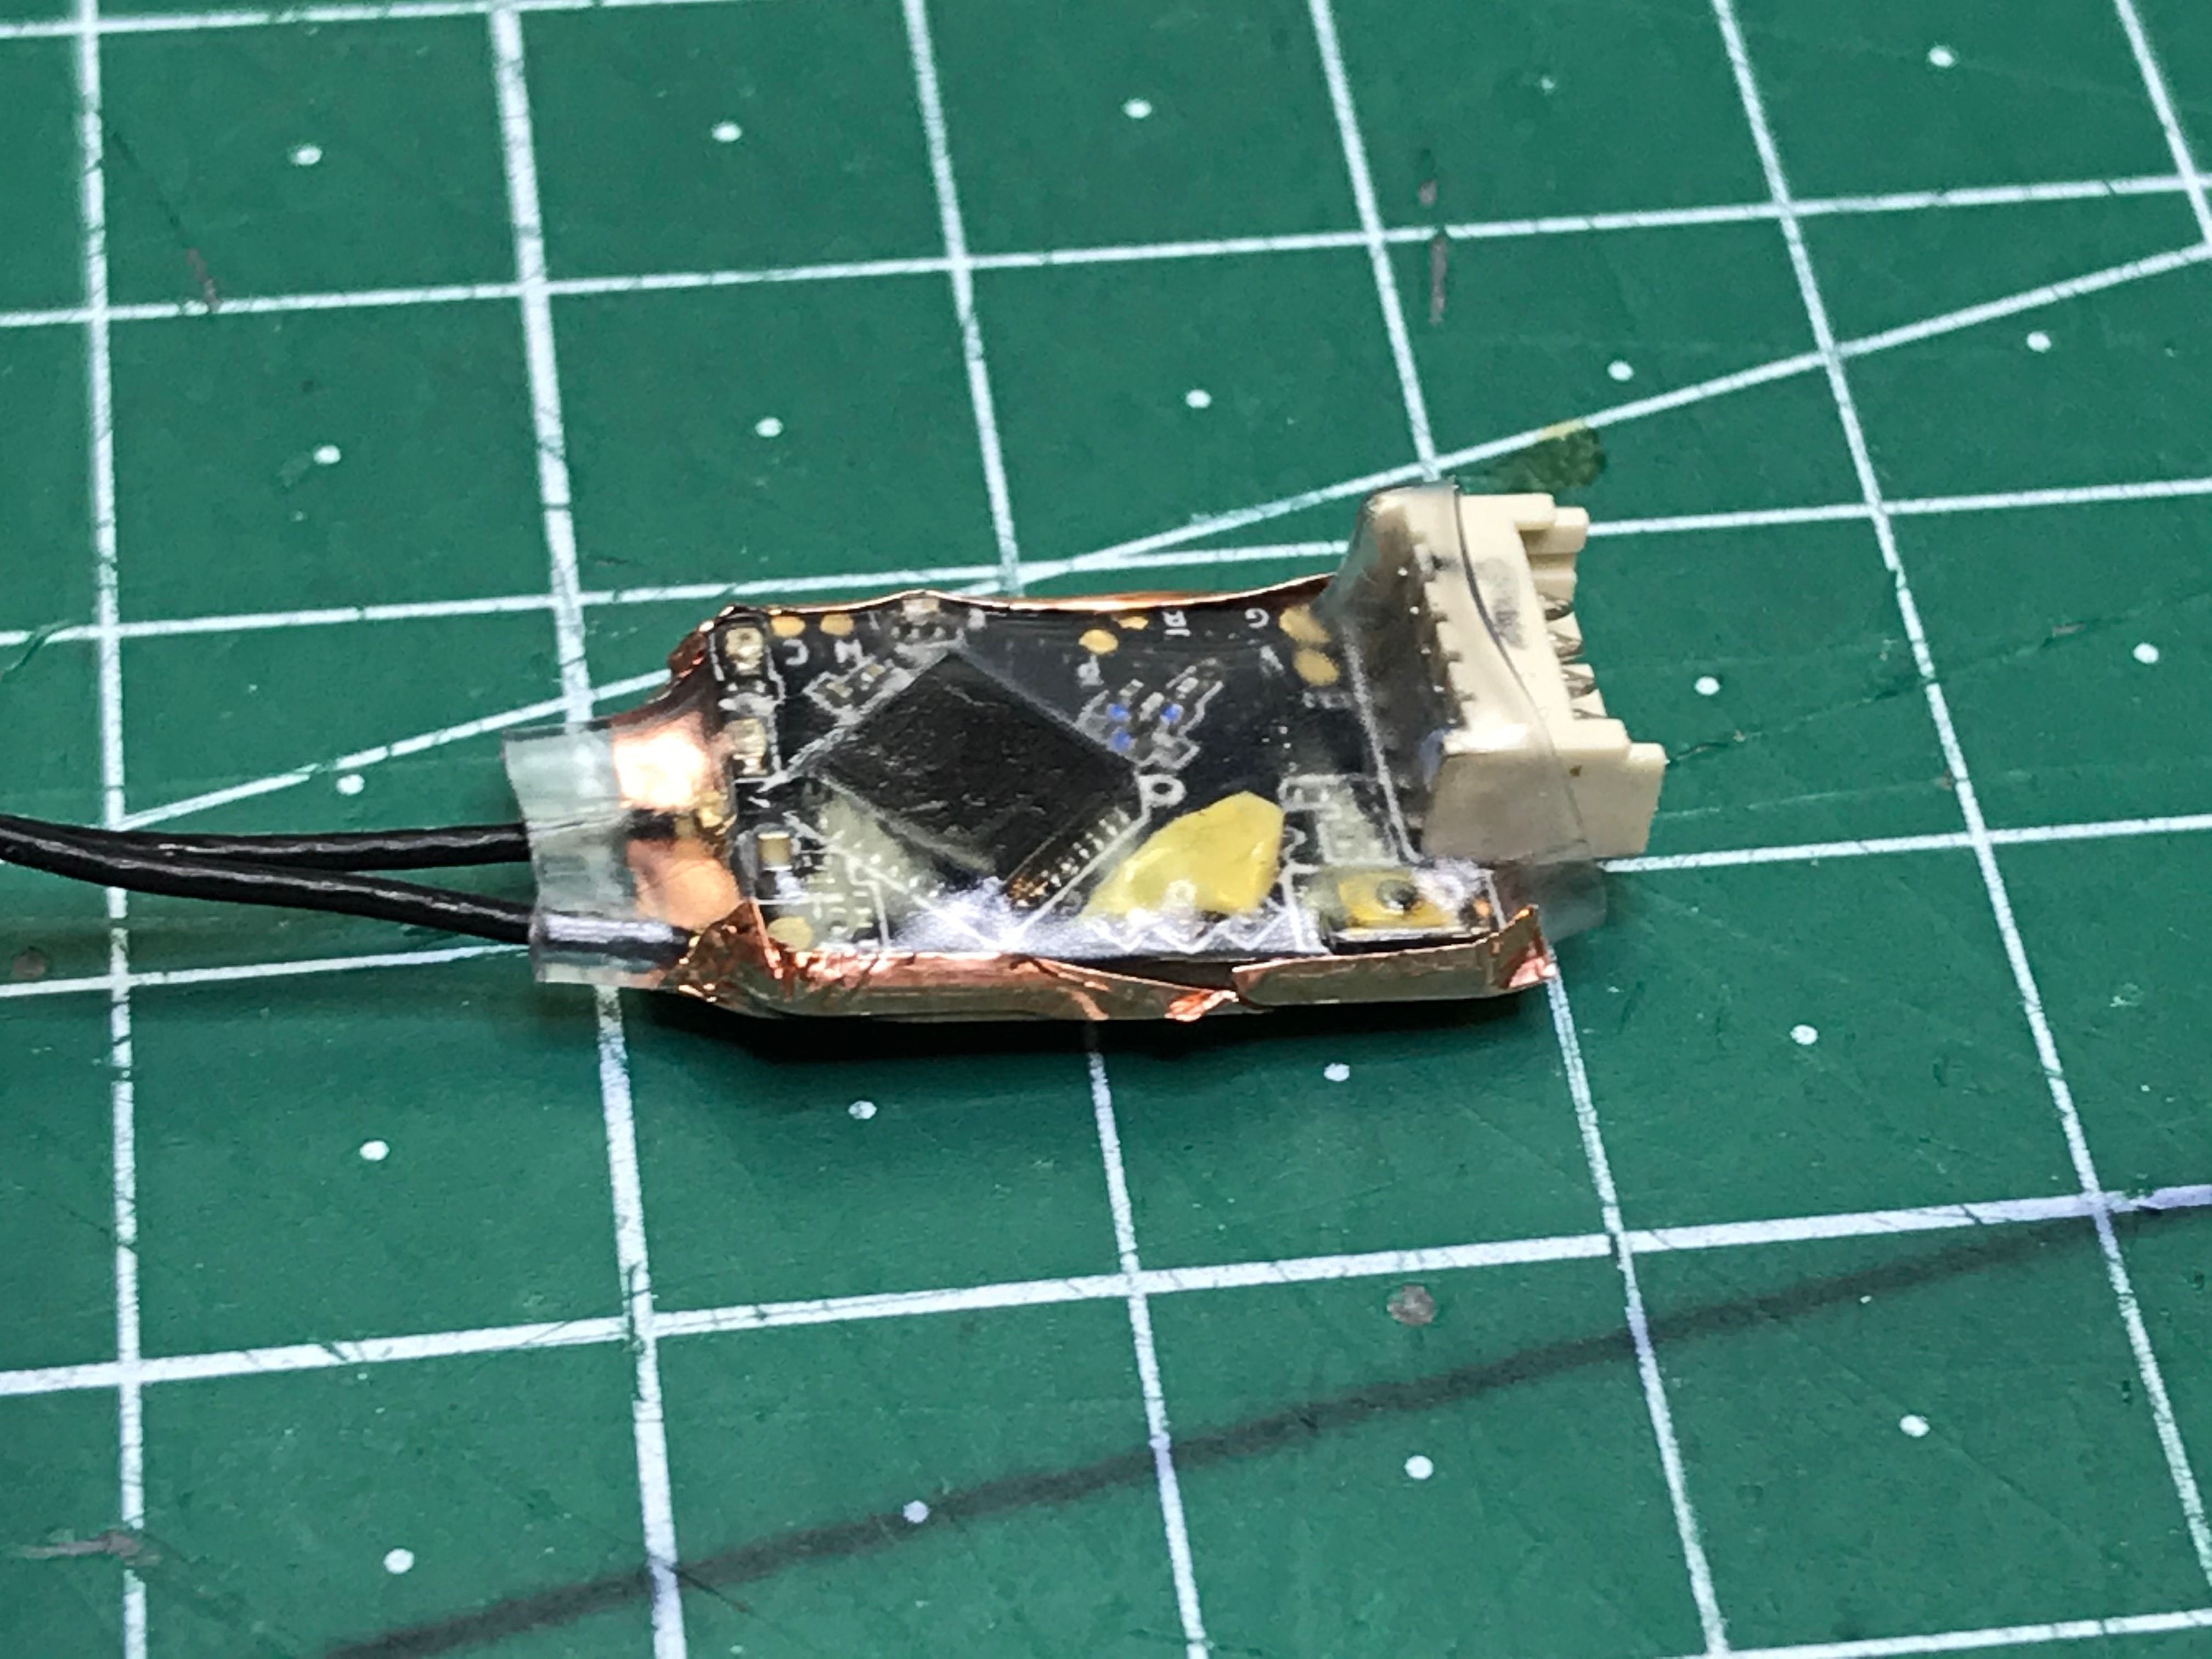
Next step is the control link. Conformal coat the receiver, wrap it into a hearshrink and stick a piece of copper tape over the bottom part. The receiver is mounted on top of motor wires and since R-XSR is known to cause interference with telemetry signal, extra shielding seems to be a good idea.
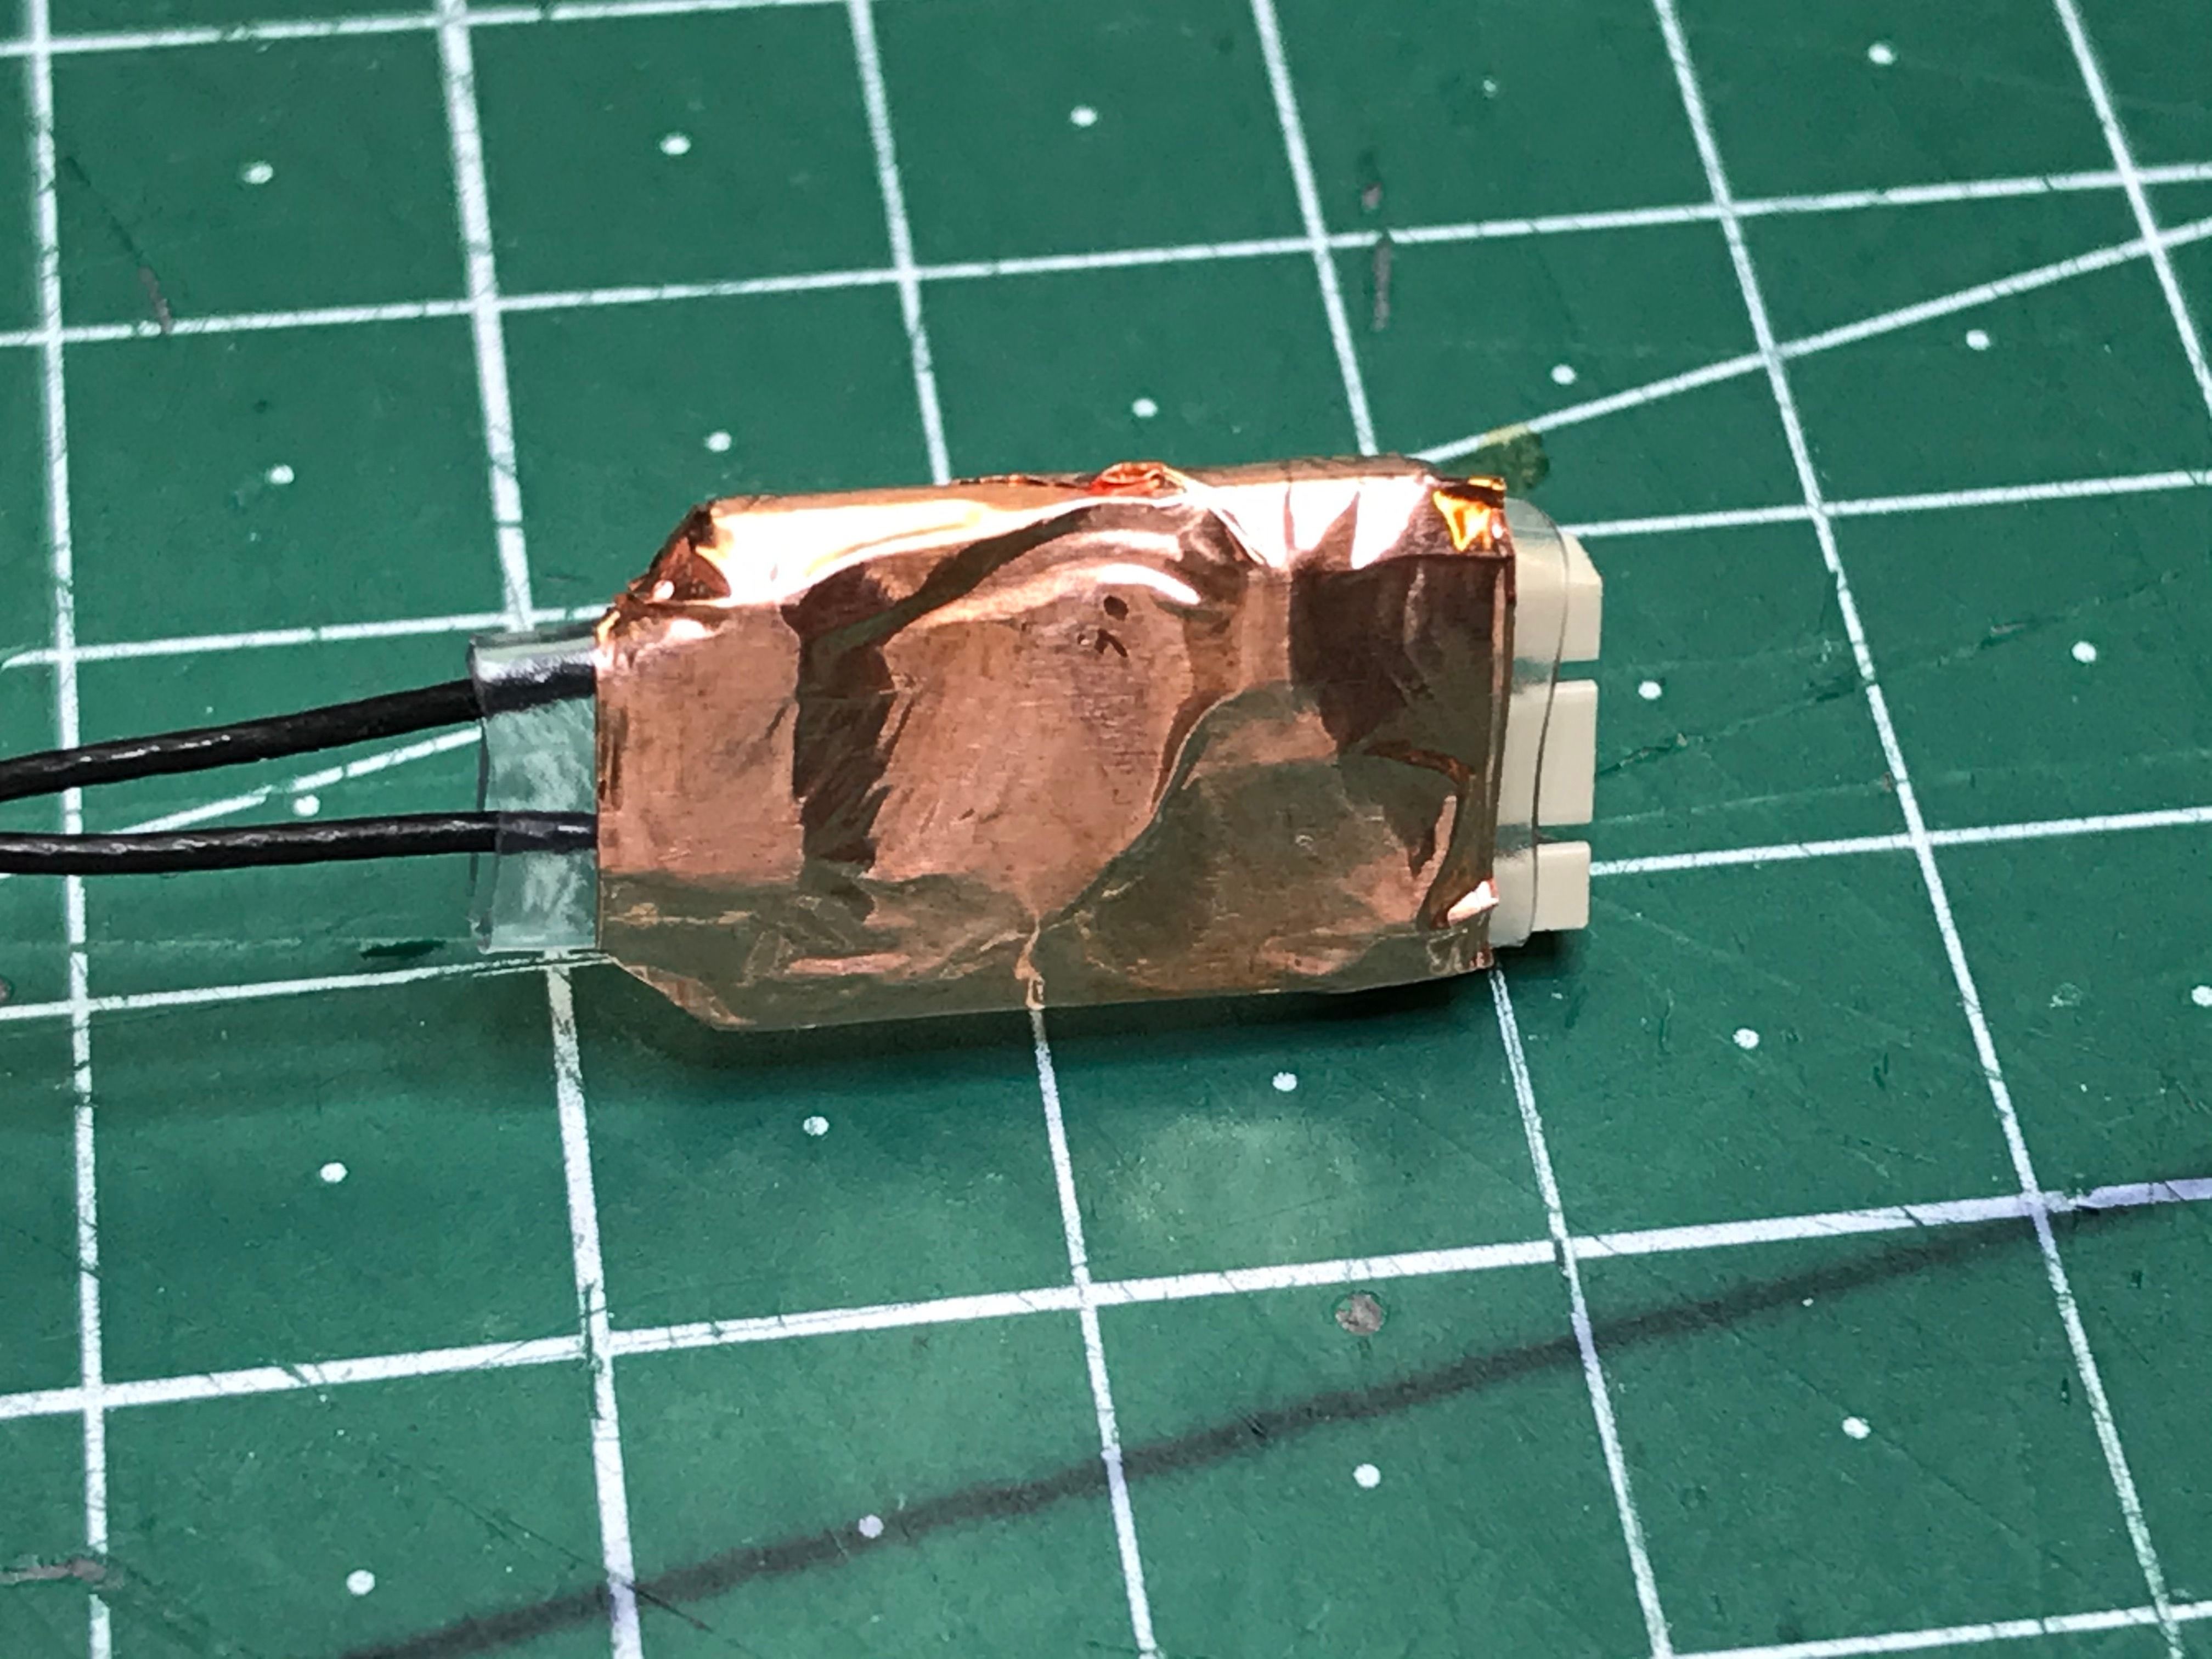
Mount the receiver at the back of the frame with a small zip tie. Just place it over motor wires and tighten it up.
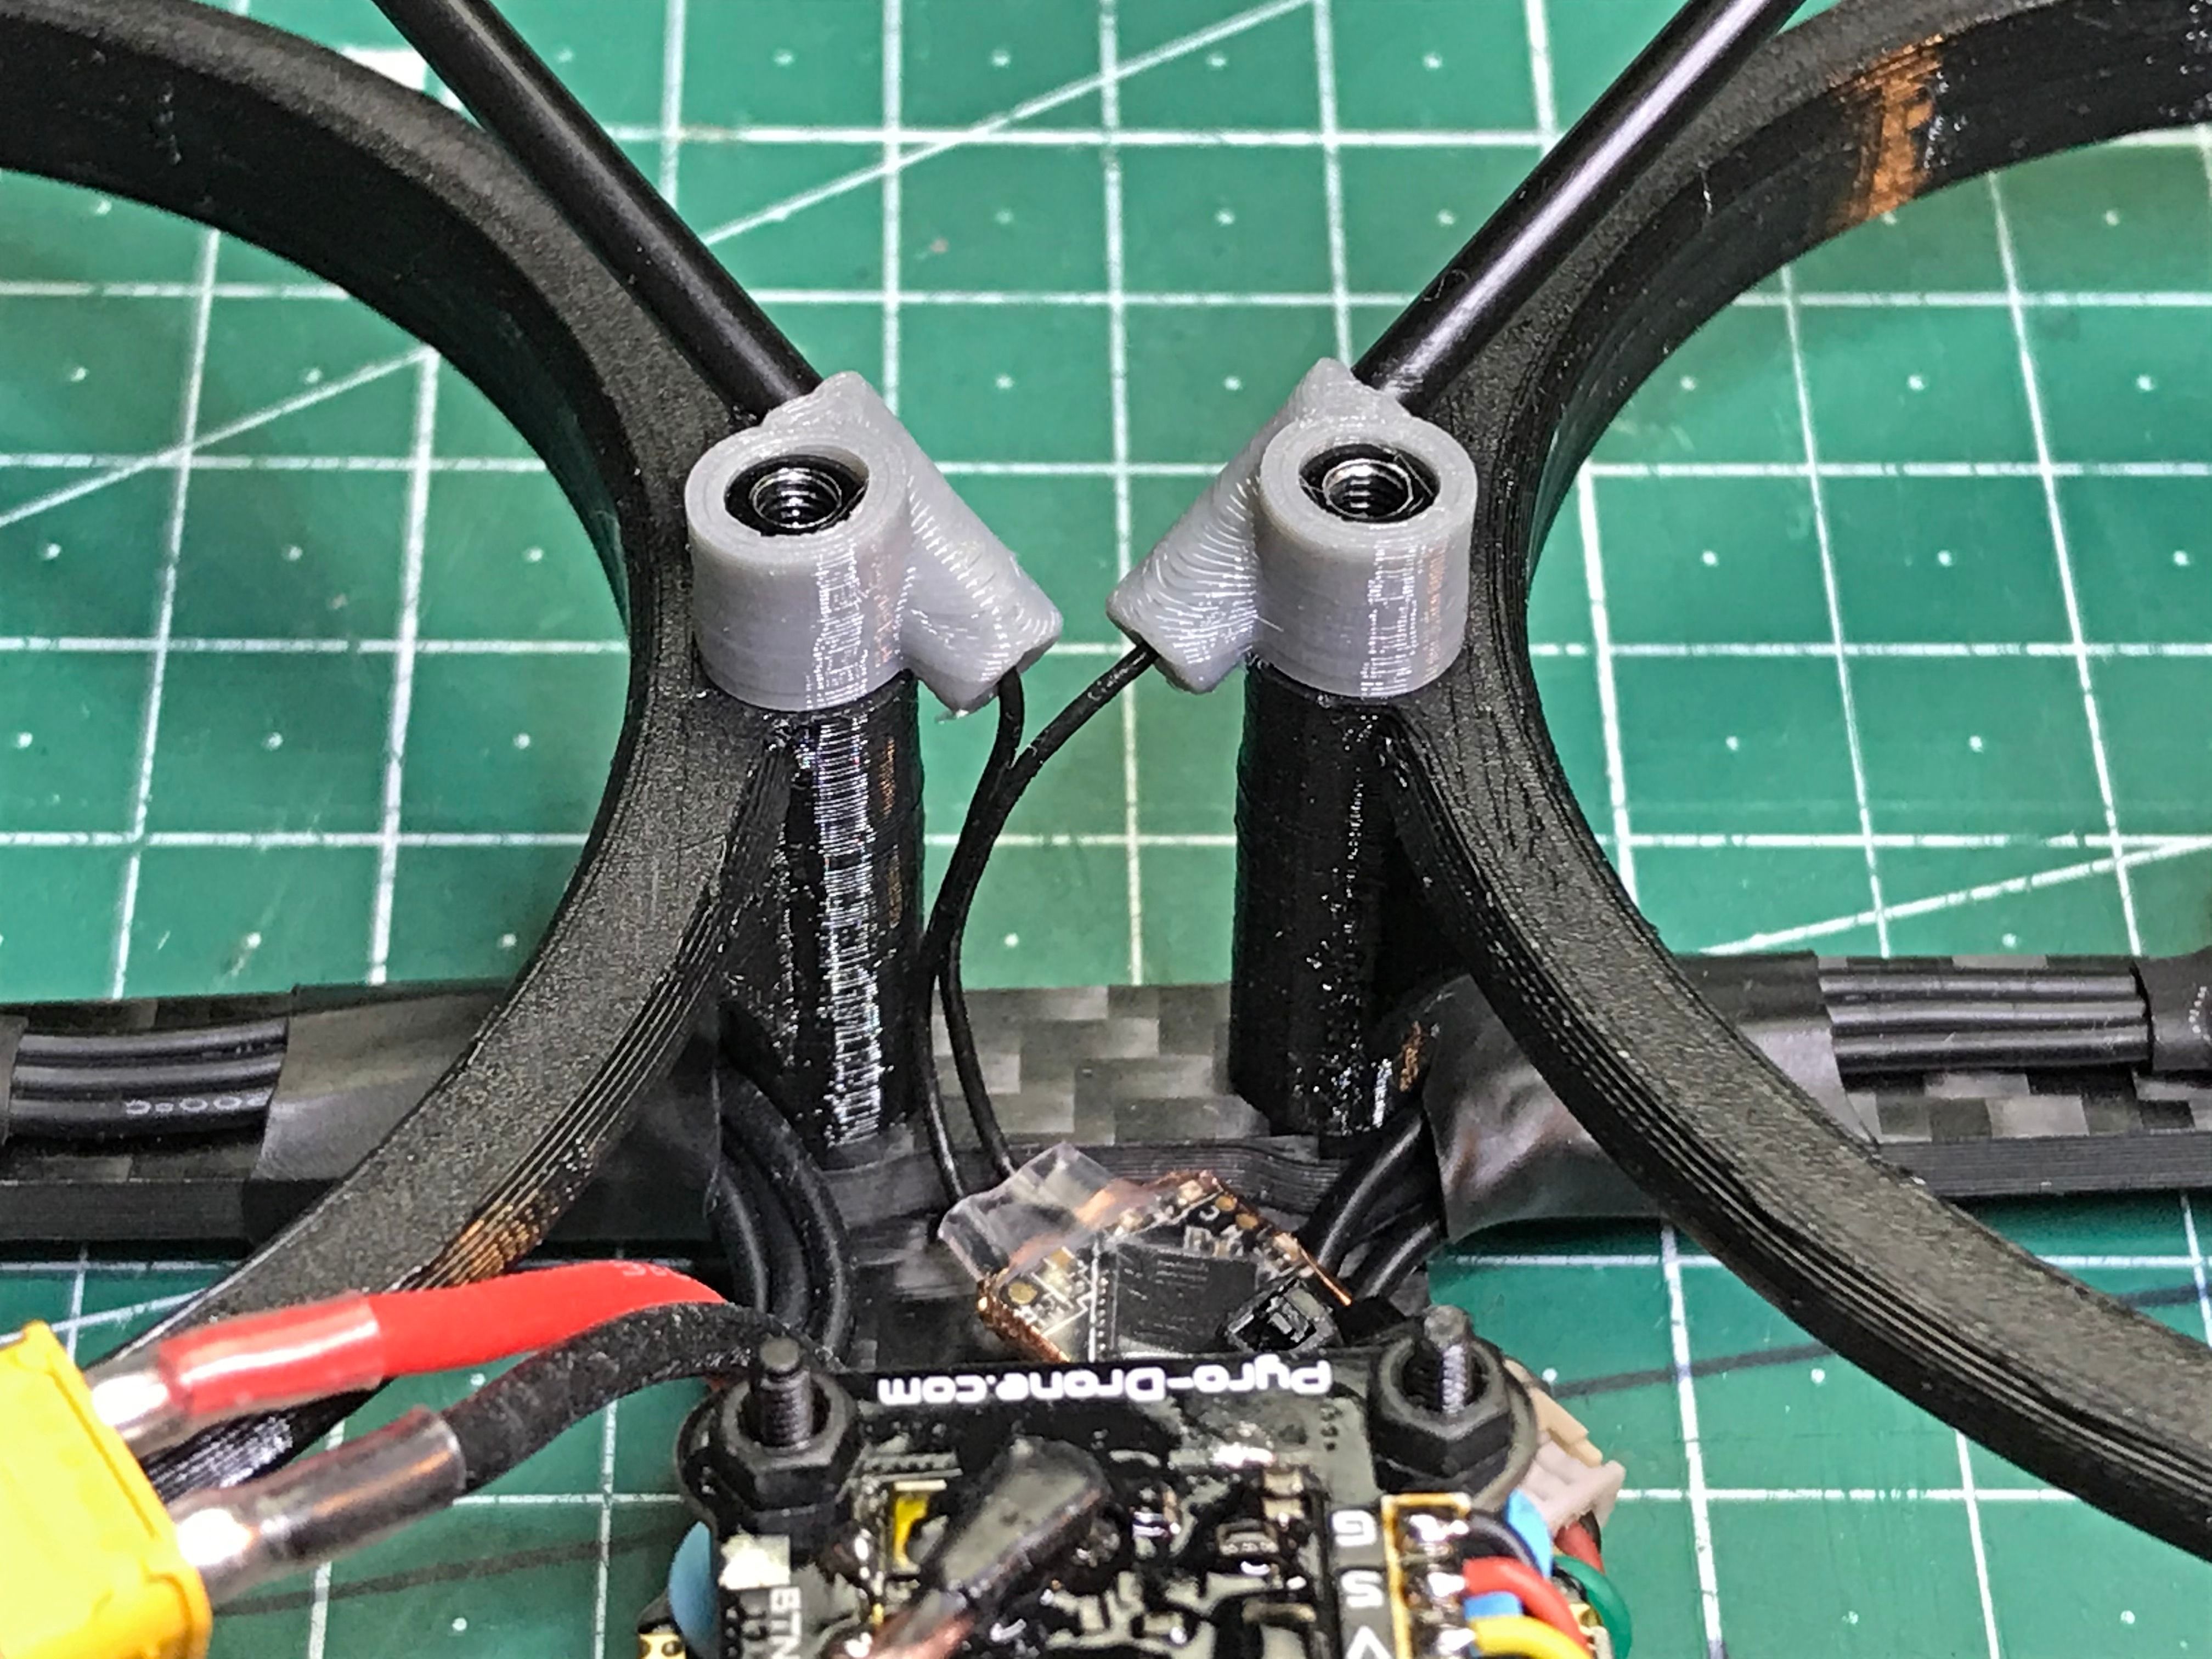
Next, put the propeller guards on and install the antenna tubes with the mounts. Slide the antennas in as shown in the picture, leaving some space for the power leads that will be coming out at the back.
The camera goes at the front. Don't forget to put the guard spacers on top.
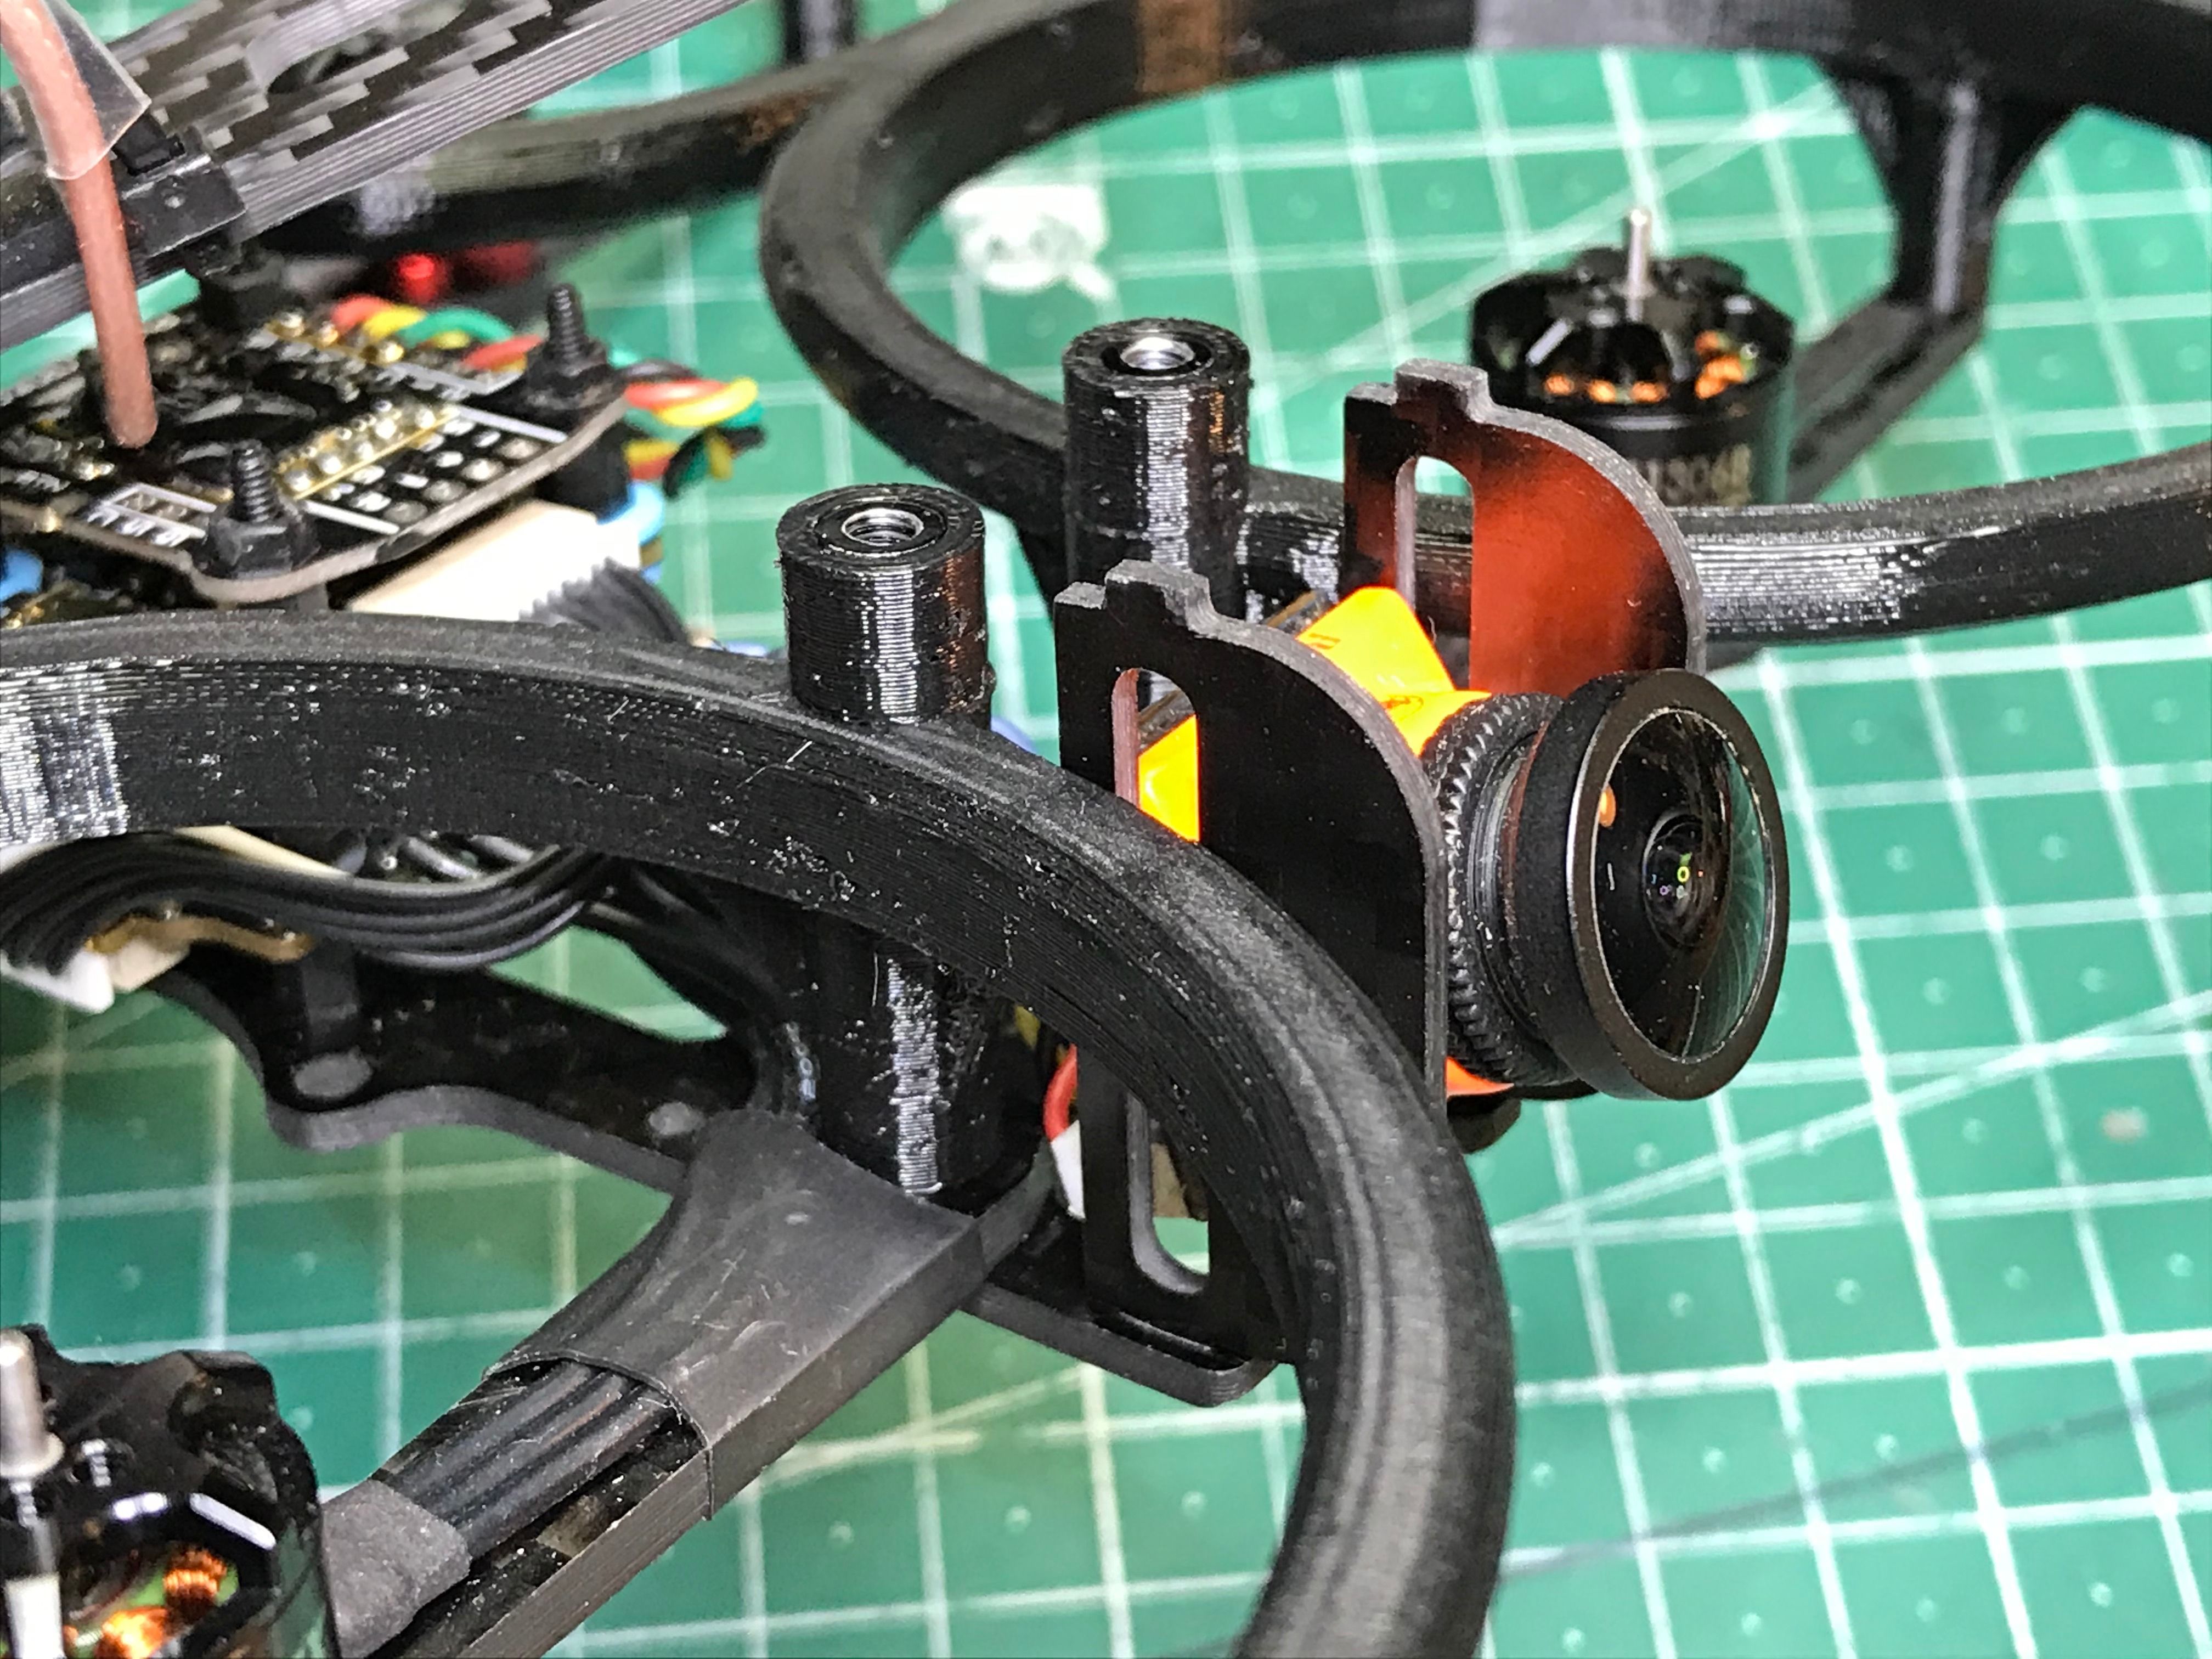
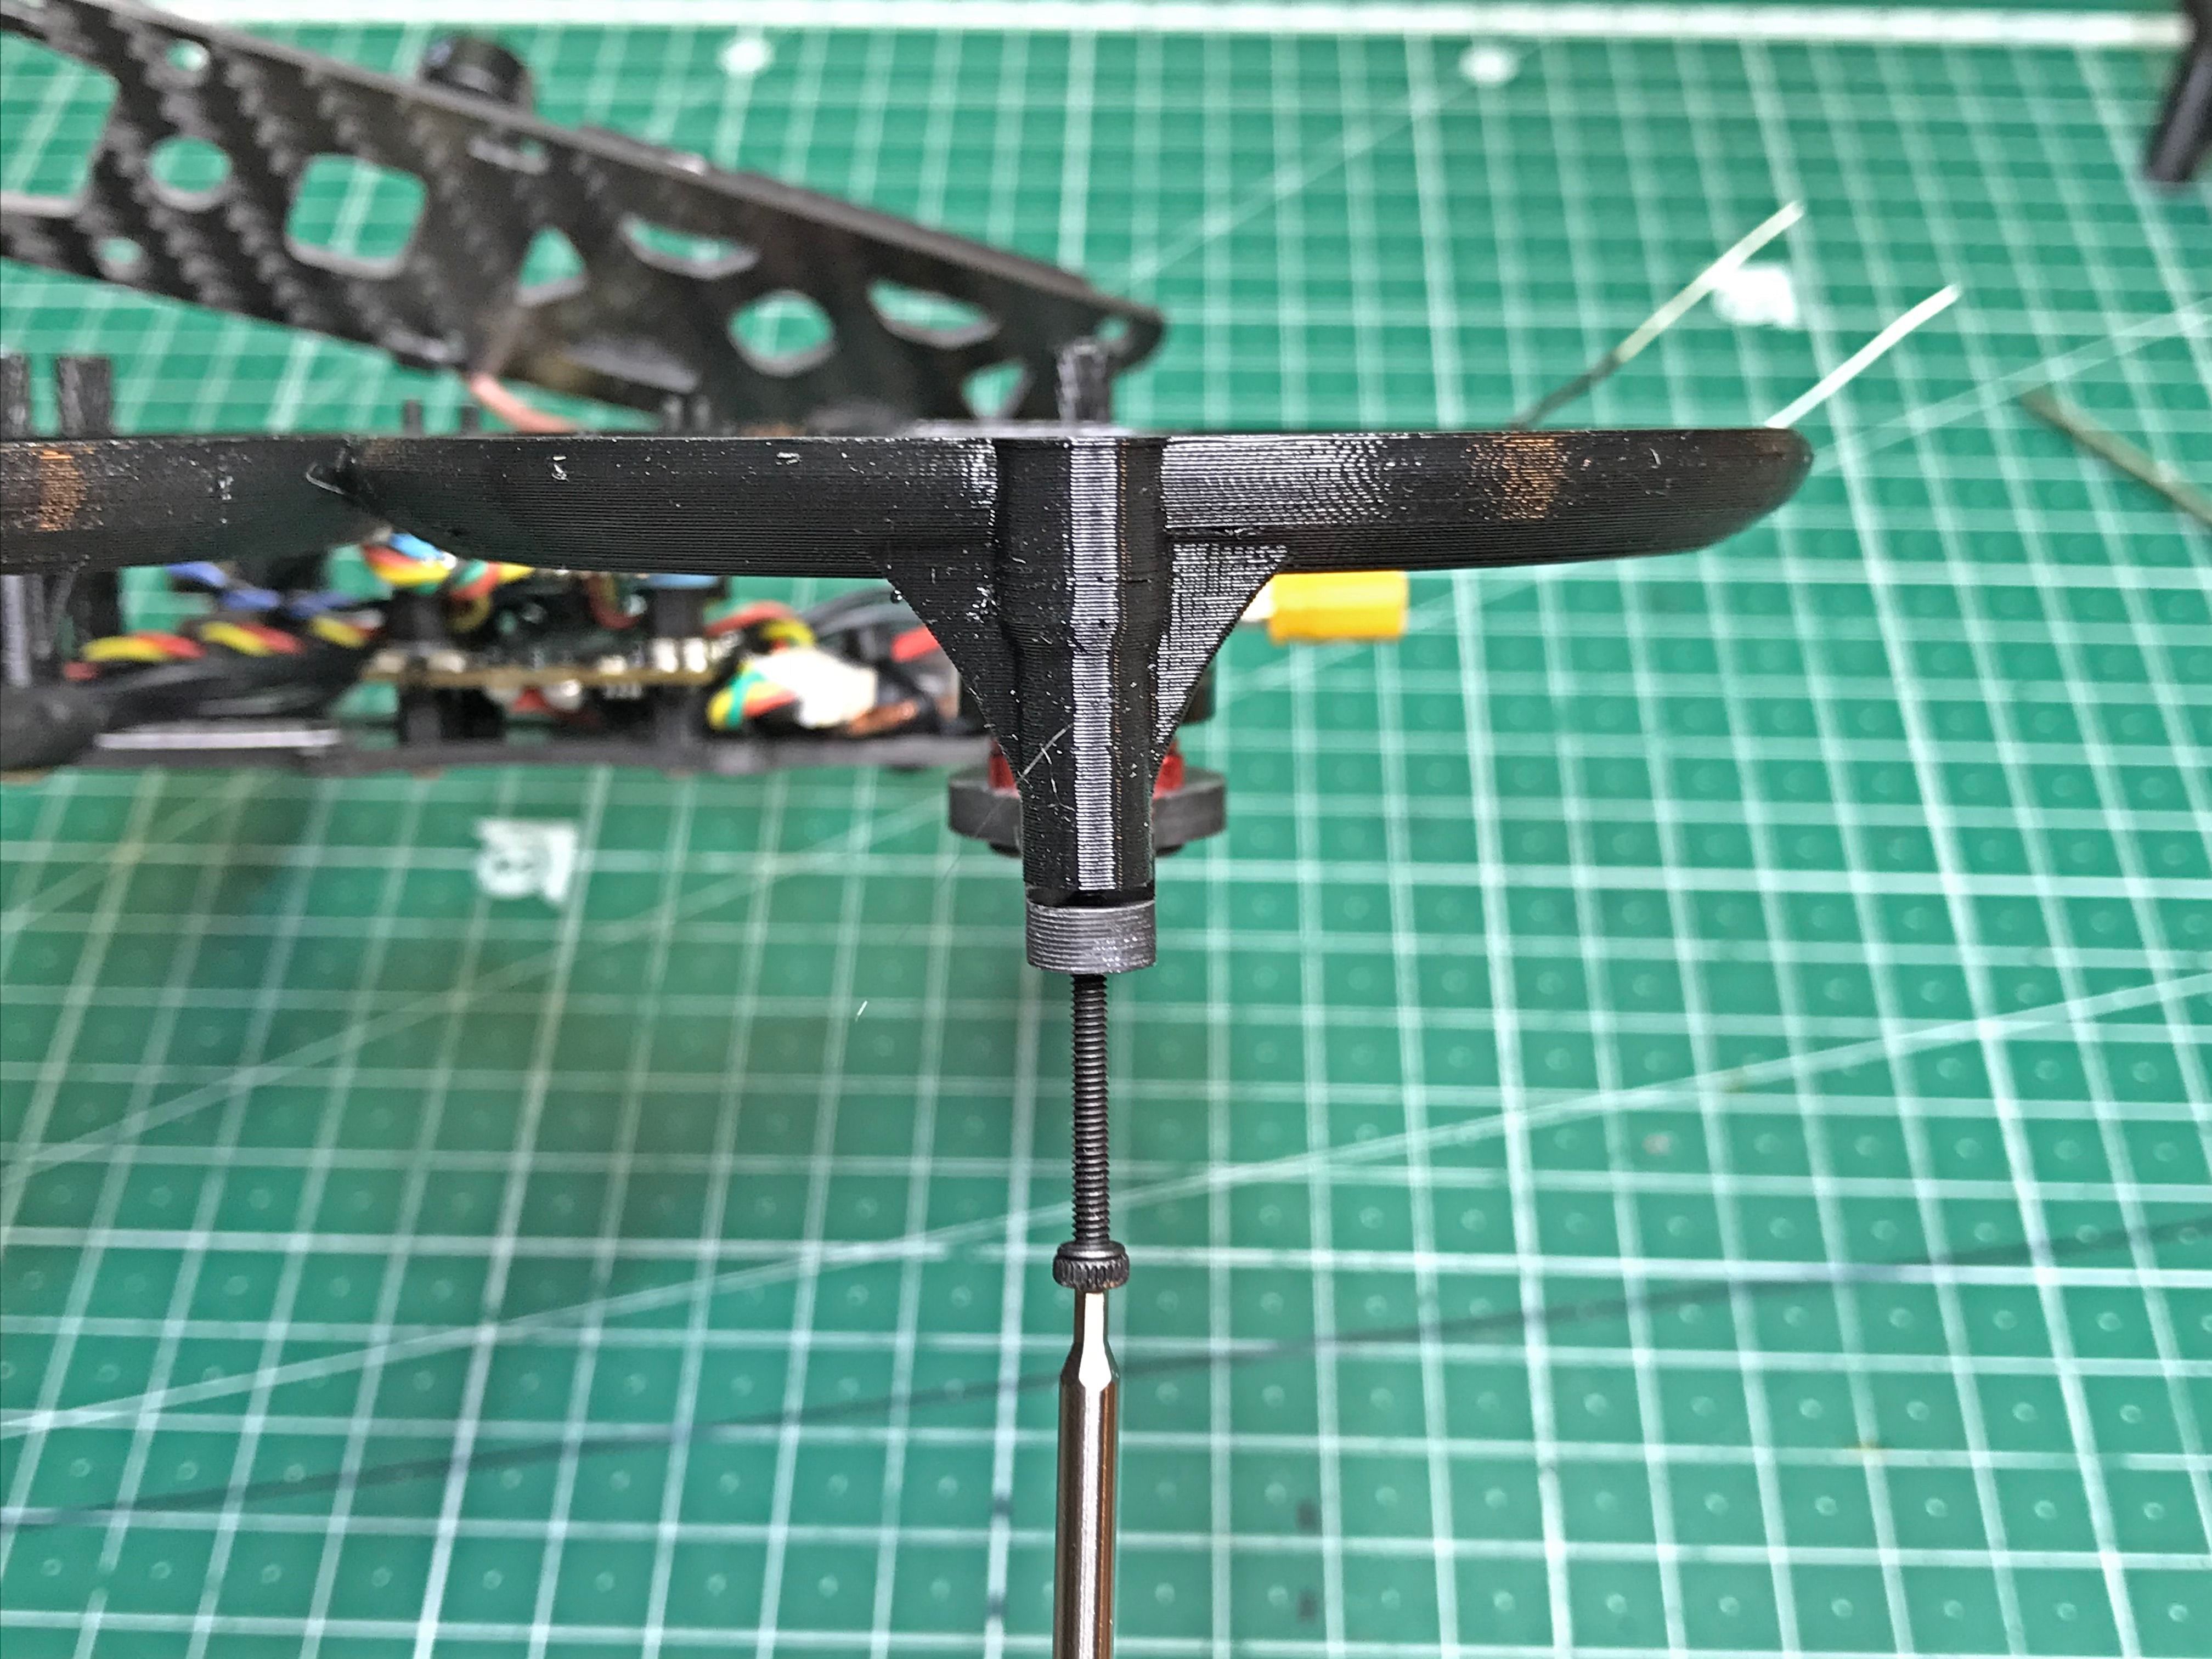
Fix the guards to the arm ends with 20 mm steel M2 screws and M2 nuts.
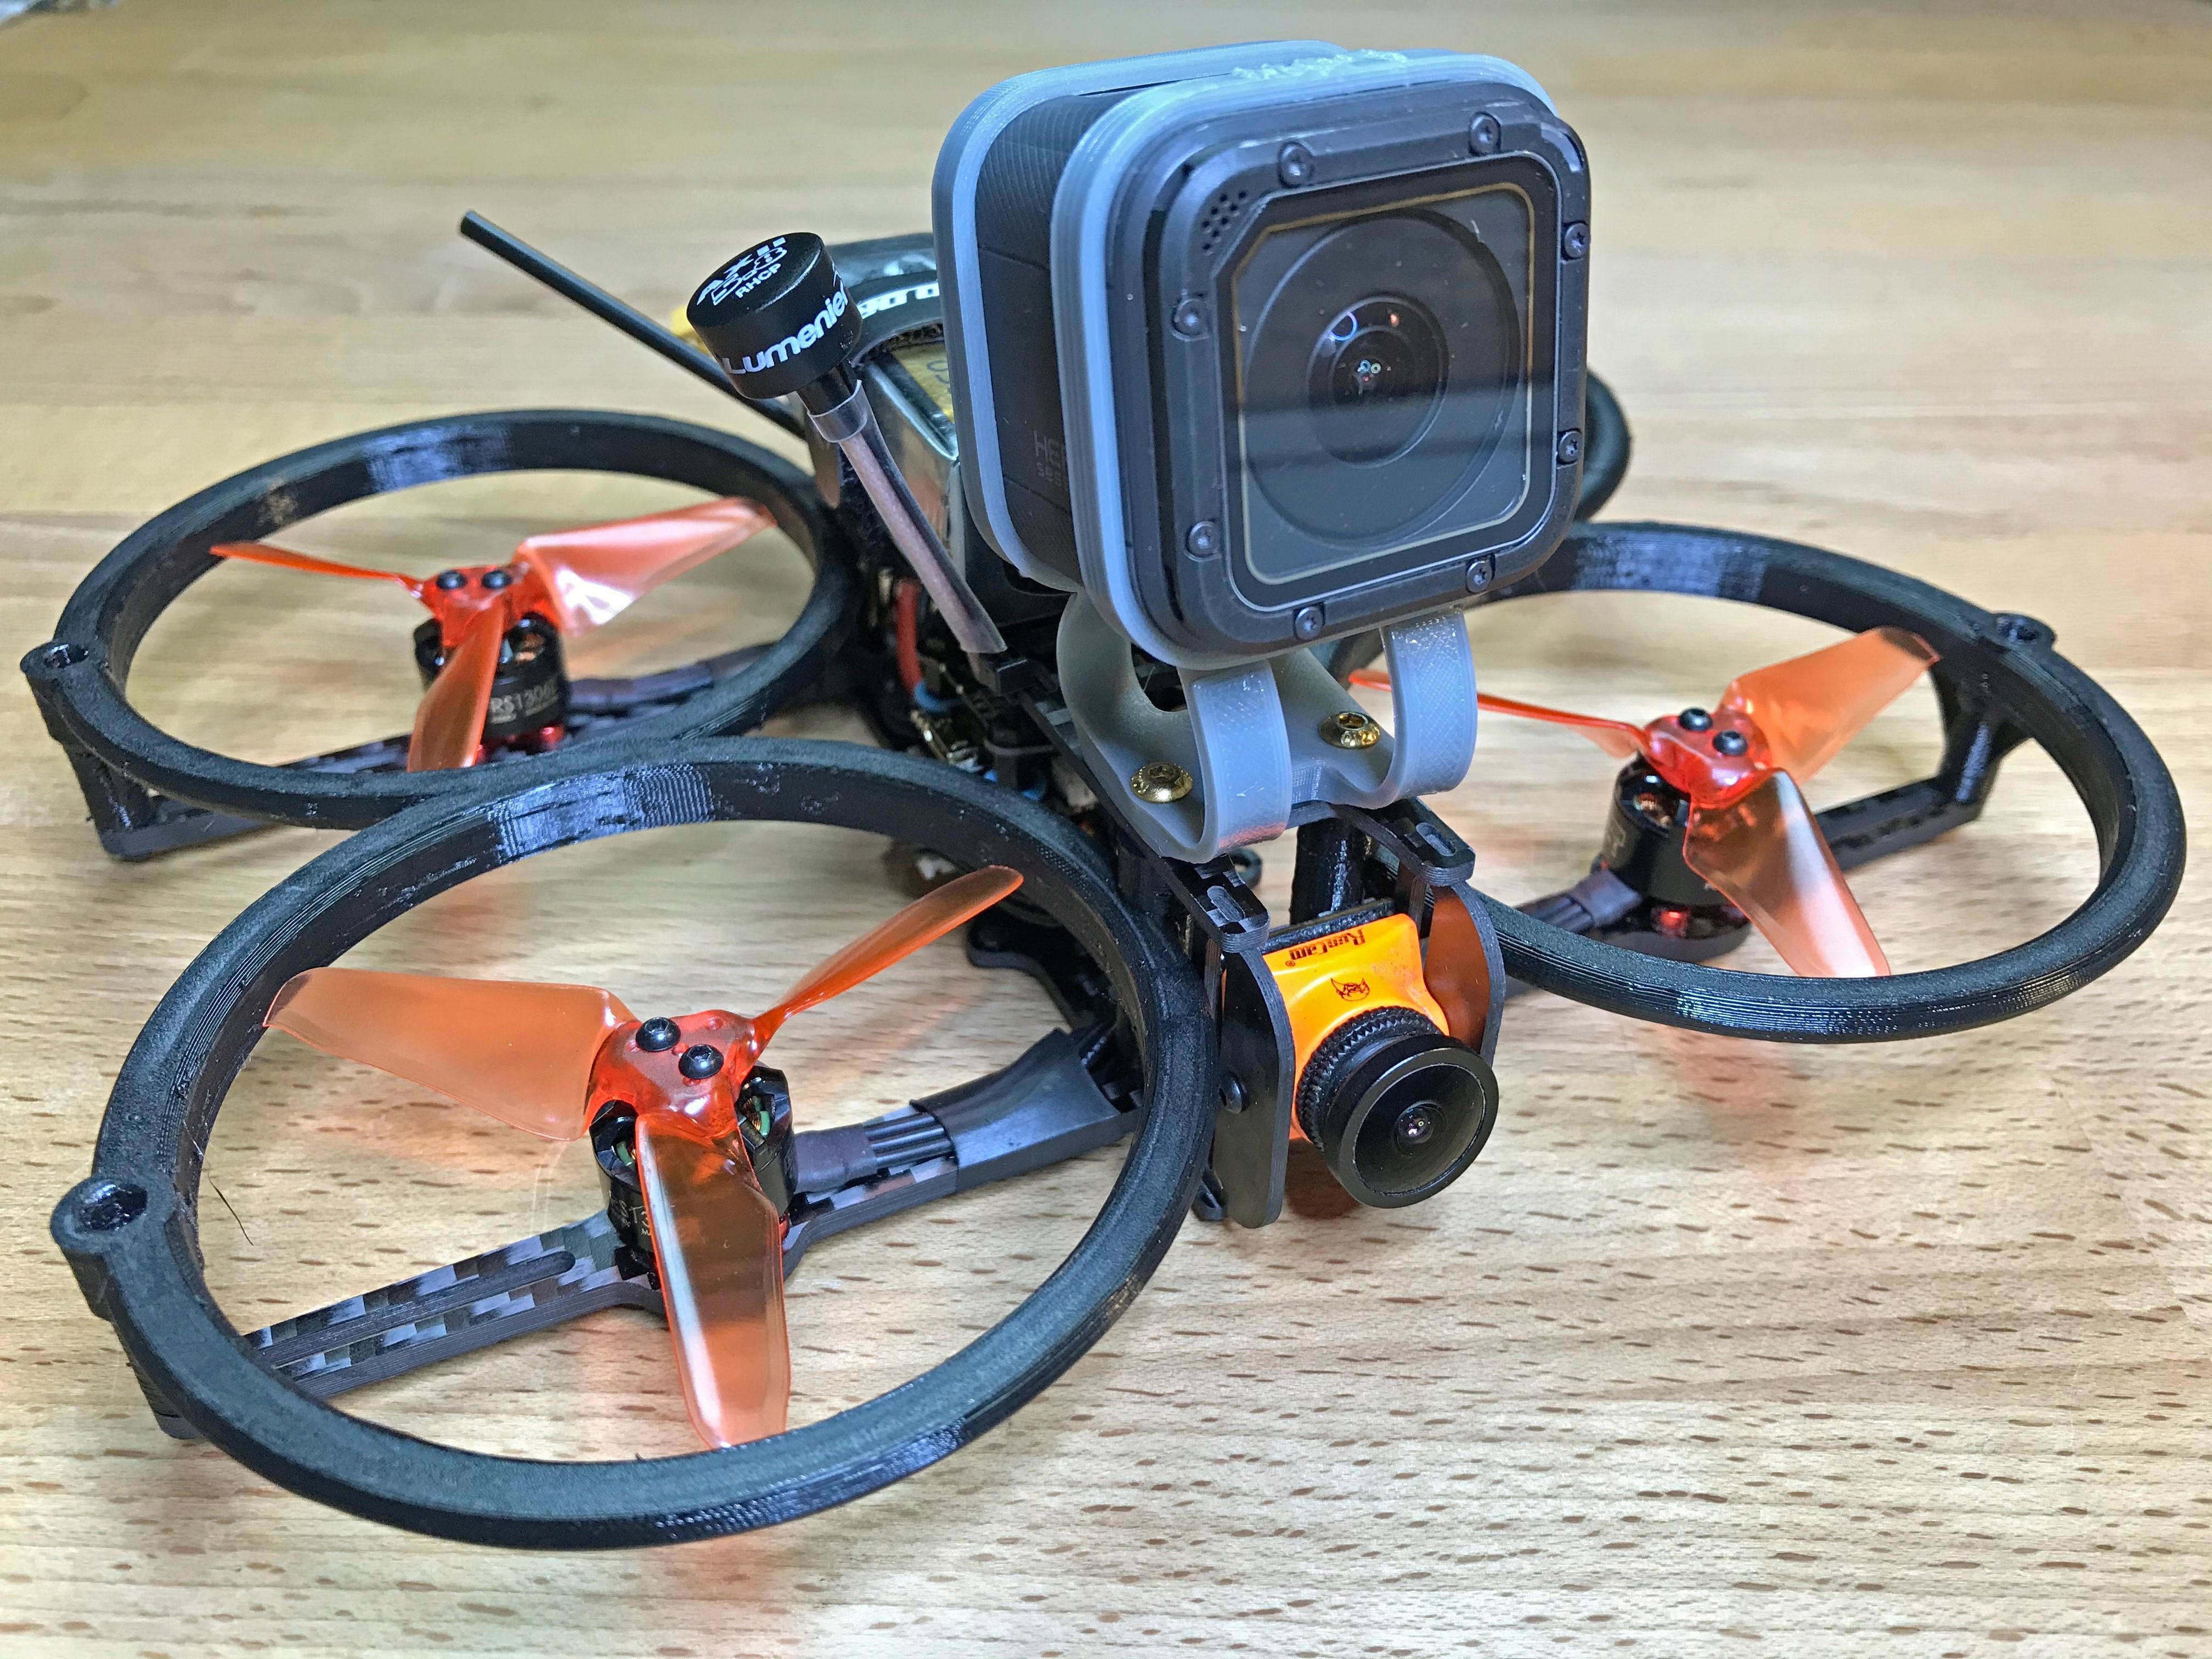
Time to finish it up with the top plate! Stick some pieces of silicone anti-slip stuff to it, mount the video antenna with a zip tie and screw the GoPro mount on. I recommend mounting the video antenna a bit away from the receiver antennas to avoid video interference due to telemetry transmission.
Secure the propellers and add a battery strap. Et voilà !

Photos


Part List
Show stores (7)
any way I could purchase the 3d printed parts??

This is exactly what I've been looking for. Do you any thoughts on using these prop guards? https://geprc.com/product/propeller-guard-3inch-4-pcs/ They are fairly flexible though, but you could also pick a lighter frame because you wouldn't need the longer arm length on the donut frame.
Or maybe this frame? Comes with some 3" prop guards. https://www.hglrc.com/products/hglrc-sector150-freestyle-frame-kit-with-3-inch-propeller-guard

Hey! Those propguards by Geprc should work exactly the same as those I designed for the build. I haven't tested them myself so obviously I have no idea of durability and such, but in terms of flight performance they should be great. Caveat: the guards have 9mm motor mount pattern which won't work with my build parts since Emax 1306' pattern is 12mm. You can use these motors instead: http://www.myrcmart.com/rcx-nk1306-4000kv-fpv-racing-motor-japan-nsk-bearing-arc-magnet-p-12488.html Made by RCX, same 4000KV and 1306, but 9mm mount pattern. Also decent quality (I run them on my freestyle 3" basher for almost a year; still running strong). Another potential caveat: if you look at my build pics you might notice that frontal and rear guards are in fact one piece. That's because of the Donut frame dimensions. You might not have enough space between the props to install the Geprc guards and will have to trim some plastic, though they should touch just slightly if the 87mm outer size that Geprc provides on the website is correct.
The HGLRC frame looks decent. The only questionable thing that I can spot is the carbon fiber direction on the arms. Ideally you want the fibers to run the whole arm length so they provide the strength, but on the pictures the arms are cut across the fibers. Practically that results in more flex in the arms and reduced durability, but that is probably fine for a light cruising build which a cinewhoop usually is. Unless you intend making it a basher whoops, the frame should do fine. They guards look okay and it is light enough for a build similart to mine. Also seems to take both 9 and 12mm motor mount patterns.
I wonder which motor kv was selected. 2700kv vs 4000kv? the weights is same but I couldn't make a choice.
also thank you for the detailed build you have provided. I think I want this to be my second build. it's kinda hard choosing my next build because I like to follow steps and see pictures so I can make sure I got it right.

Great build and great info about the throttle cut. I'm definitely going to give that a shot. My problem now is reducing the altitude fluctuation. Maybe this is the ticket! I'm also going to give your rates a try. I thought mine were low, but apparently not low enough!

That FC look really nice for 1-2A Builds. https://emaxmodel.com/emax-tinyhawk-s-indoor-drone-part-aio-flight-controller-vtx-receiver.html
Whats it weight, cause this spec isnt listed...
Hey Ergo - You did a great job on the video and the flight. Did you try the flight before getting rid of the larger ducts? Did the sacrifice of a few grams effect your flight much?
Thank you! I tried the original ducts and also went full circle designing my own full ducts trying to get higher efficiency based on this article https://capolight.wordpress.com/2015/01/14/quadcopter-rotor-duct/ I was able to make the ducts improve the efficiency by 27% while original ones provide about 19% improvement.
What I found though is ducts make the flight performance worse not because of the weight, but because they do something to the motor thrust output. The quad did not really react to fine throttle adjustments, I experienced washouts similart to those typical for tiny whoops, yaw response was somewhat delayed, and overall it felt weird in the air. I thought it was the weight, but then remembered that theory of prop unloading always mentioned by KababFPV and decided to try designing guards instead of ducts. The guards weighed just a bit less, but the quad flew much much better. It felt just like a regular quad, overwheight for sure but nothing weird in reactions to the inputs. Surprisingly enough, guards also provided efficiency improvement, I measured about 10% increase.
The BetaFPV F4 20A AIO FC is aprox 6 grams or about half the weight of your current AIO.
https://betafpv.com/collections/brushless-flight-controller/products/toothpick-f4-20a-aio-brushless-flight-controller
Very interesting, thanks for sharing! I chose the Mamba stack because of reliability and low price. Since this craft is intended for smooth flight I would be a bit careful with a toothpick board which has everything on one PCB. There's more potential for the voltage spikes to affect the gyro readings, and maybe a capacitor would be required. My current setup has no cap and flies beautifully smooth. Whoop stack screw pattern is not compatible with the Donut frame, so a custom solution would be needed, and same for the VTX. At the moment everything except the RX is in one stack at the middle of the frame, nice and clean. But yeah, there might be a potential to shave off some 5-10 grams.
I've a 4S nano-tricopter that flies really well using that card: https://rotorbuilds.com/build/20766
Now as for a custom solution, all you need is a 2mm thick PLA board. Using 3M holes supporting both 30mm and the 26.5 mm FC spacing. Maybe rotate one set of holes 90 degress from the others to help prevent the screws over-lapping.


I bet if you wanted to get it lighter you could change the design of those prop guards to something that is a like a pill shape. So instead of that figure 8 plan shape you have connect the tangets of the circles with straight lines. Hell I bet you don't even need material on the inside edges. So the plan shape of the guards now looks more like this "C_Ɔ". So where you have them mounting to your frame plate standoffs is where the open ends of those C's are.
Awesome build!
Thanks mate! I actually had the pill shape as one of the early design ideas, but didn't follow it as I found those thin guards still added 10% in thrust, and the best guess I had for the source of the extra thrust was elimination of blade tip vortices. Pill shaped guards would have been close enough to the blade tips only a half of the revolution, so thrust wins would have gone down by at least a half. That meant trading about 6 grams of guard weight in total for 15 grams of thrust while hovering, and even more thrust at higher throttle positions. The rotors are also pretty close to each other front to back so I imagine that removing the in-between section of the guard would allow more dirty air from the front rotors into the rear ones, making the rear motors work harder and thus bringing efficiency even lower. I also tried the C-shaped guard profile, but in the "Ɔ_C" configuration to save weight while still having the blade tip vortex elimination effect. What I found is guards became too flimsy. Having a closed, tube-like profile adds insane amount of strength and allows printing the guards in only two layer wall thickness. Nevertheless, thank you for bringing up the ideas. That's exactly what I love about the hobby - people thinking of and thying different things. Cheers!
WOW I'm amazed that little amount of suedo ducking adds that much thrust. Awesome that you can actaully measure it.