
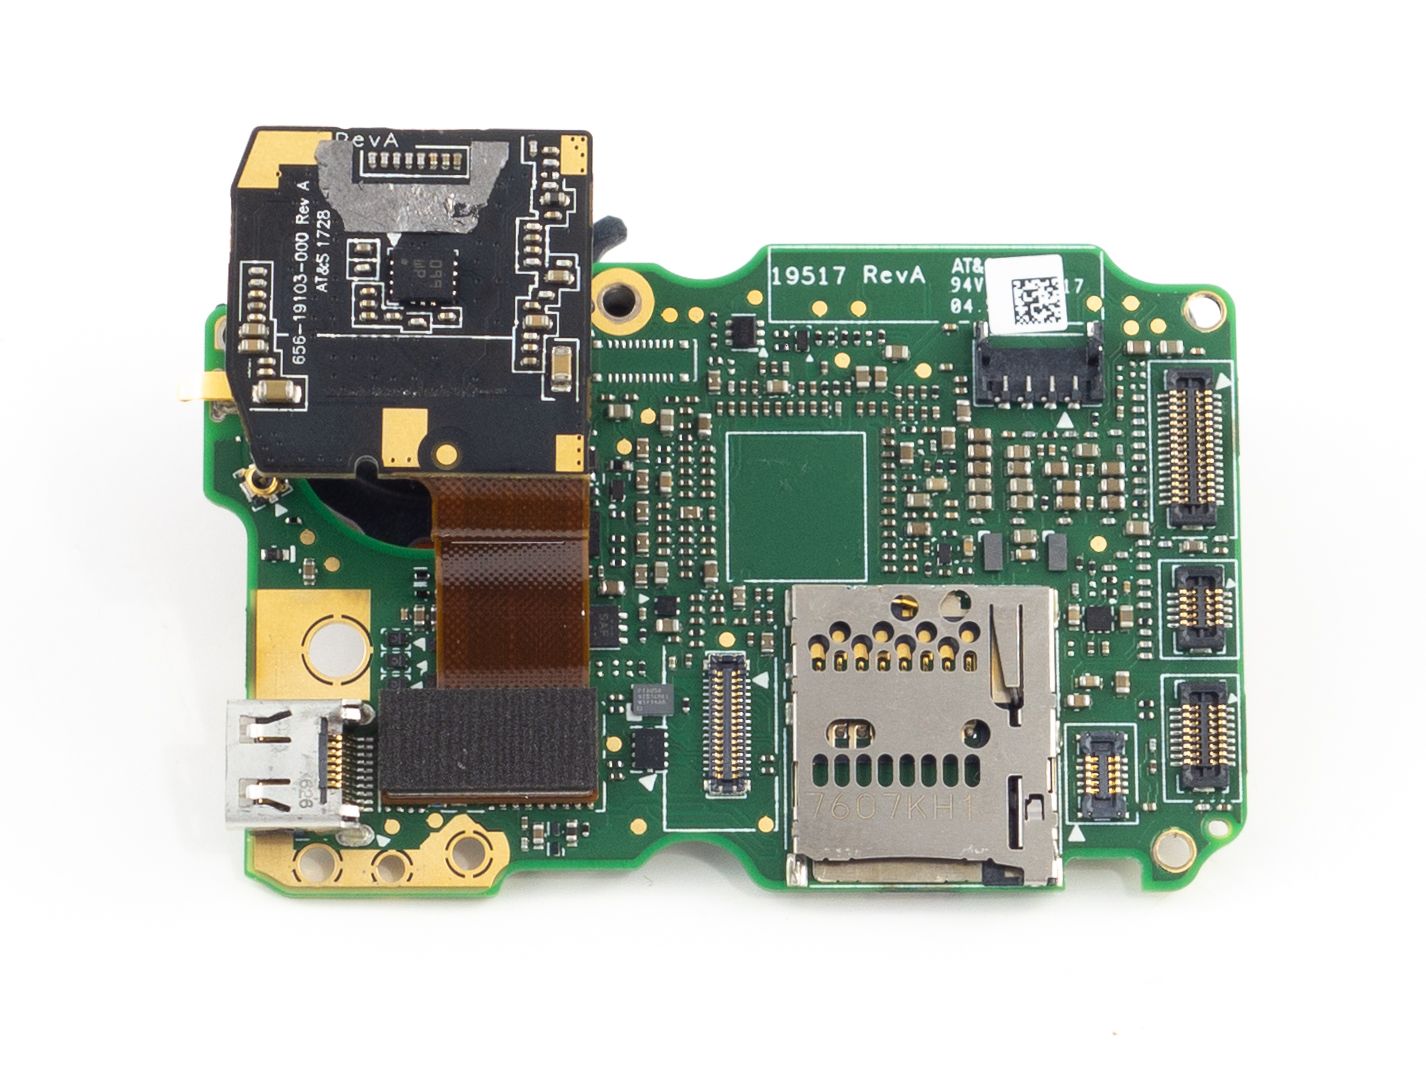
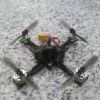
Until recently GoPros were delegated to larger quads. A typical GoPro weighs around 125g and we've only recently begun to mount them on 3" cinewhoops. Even that is a stress on the motors. Now we've got the "GoPro Lite". Remove the battery, displays and casing and you're left with a small, lightweight board and sensor. Wrap it in protective TPU casing and you've got a 30g micro GoPro. The Hero6 is the GoPro of choice for its compatibility with ReelSteady Go, but this kit is also works with the Hero7 Black. This guide requires no soldering and is a relatively easy process. While it may be intimidating to de-case a GoPro it's really not too difficult. This guide works for both the Beta85X as well as the Beta95X.
Where to buy?
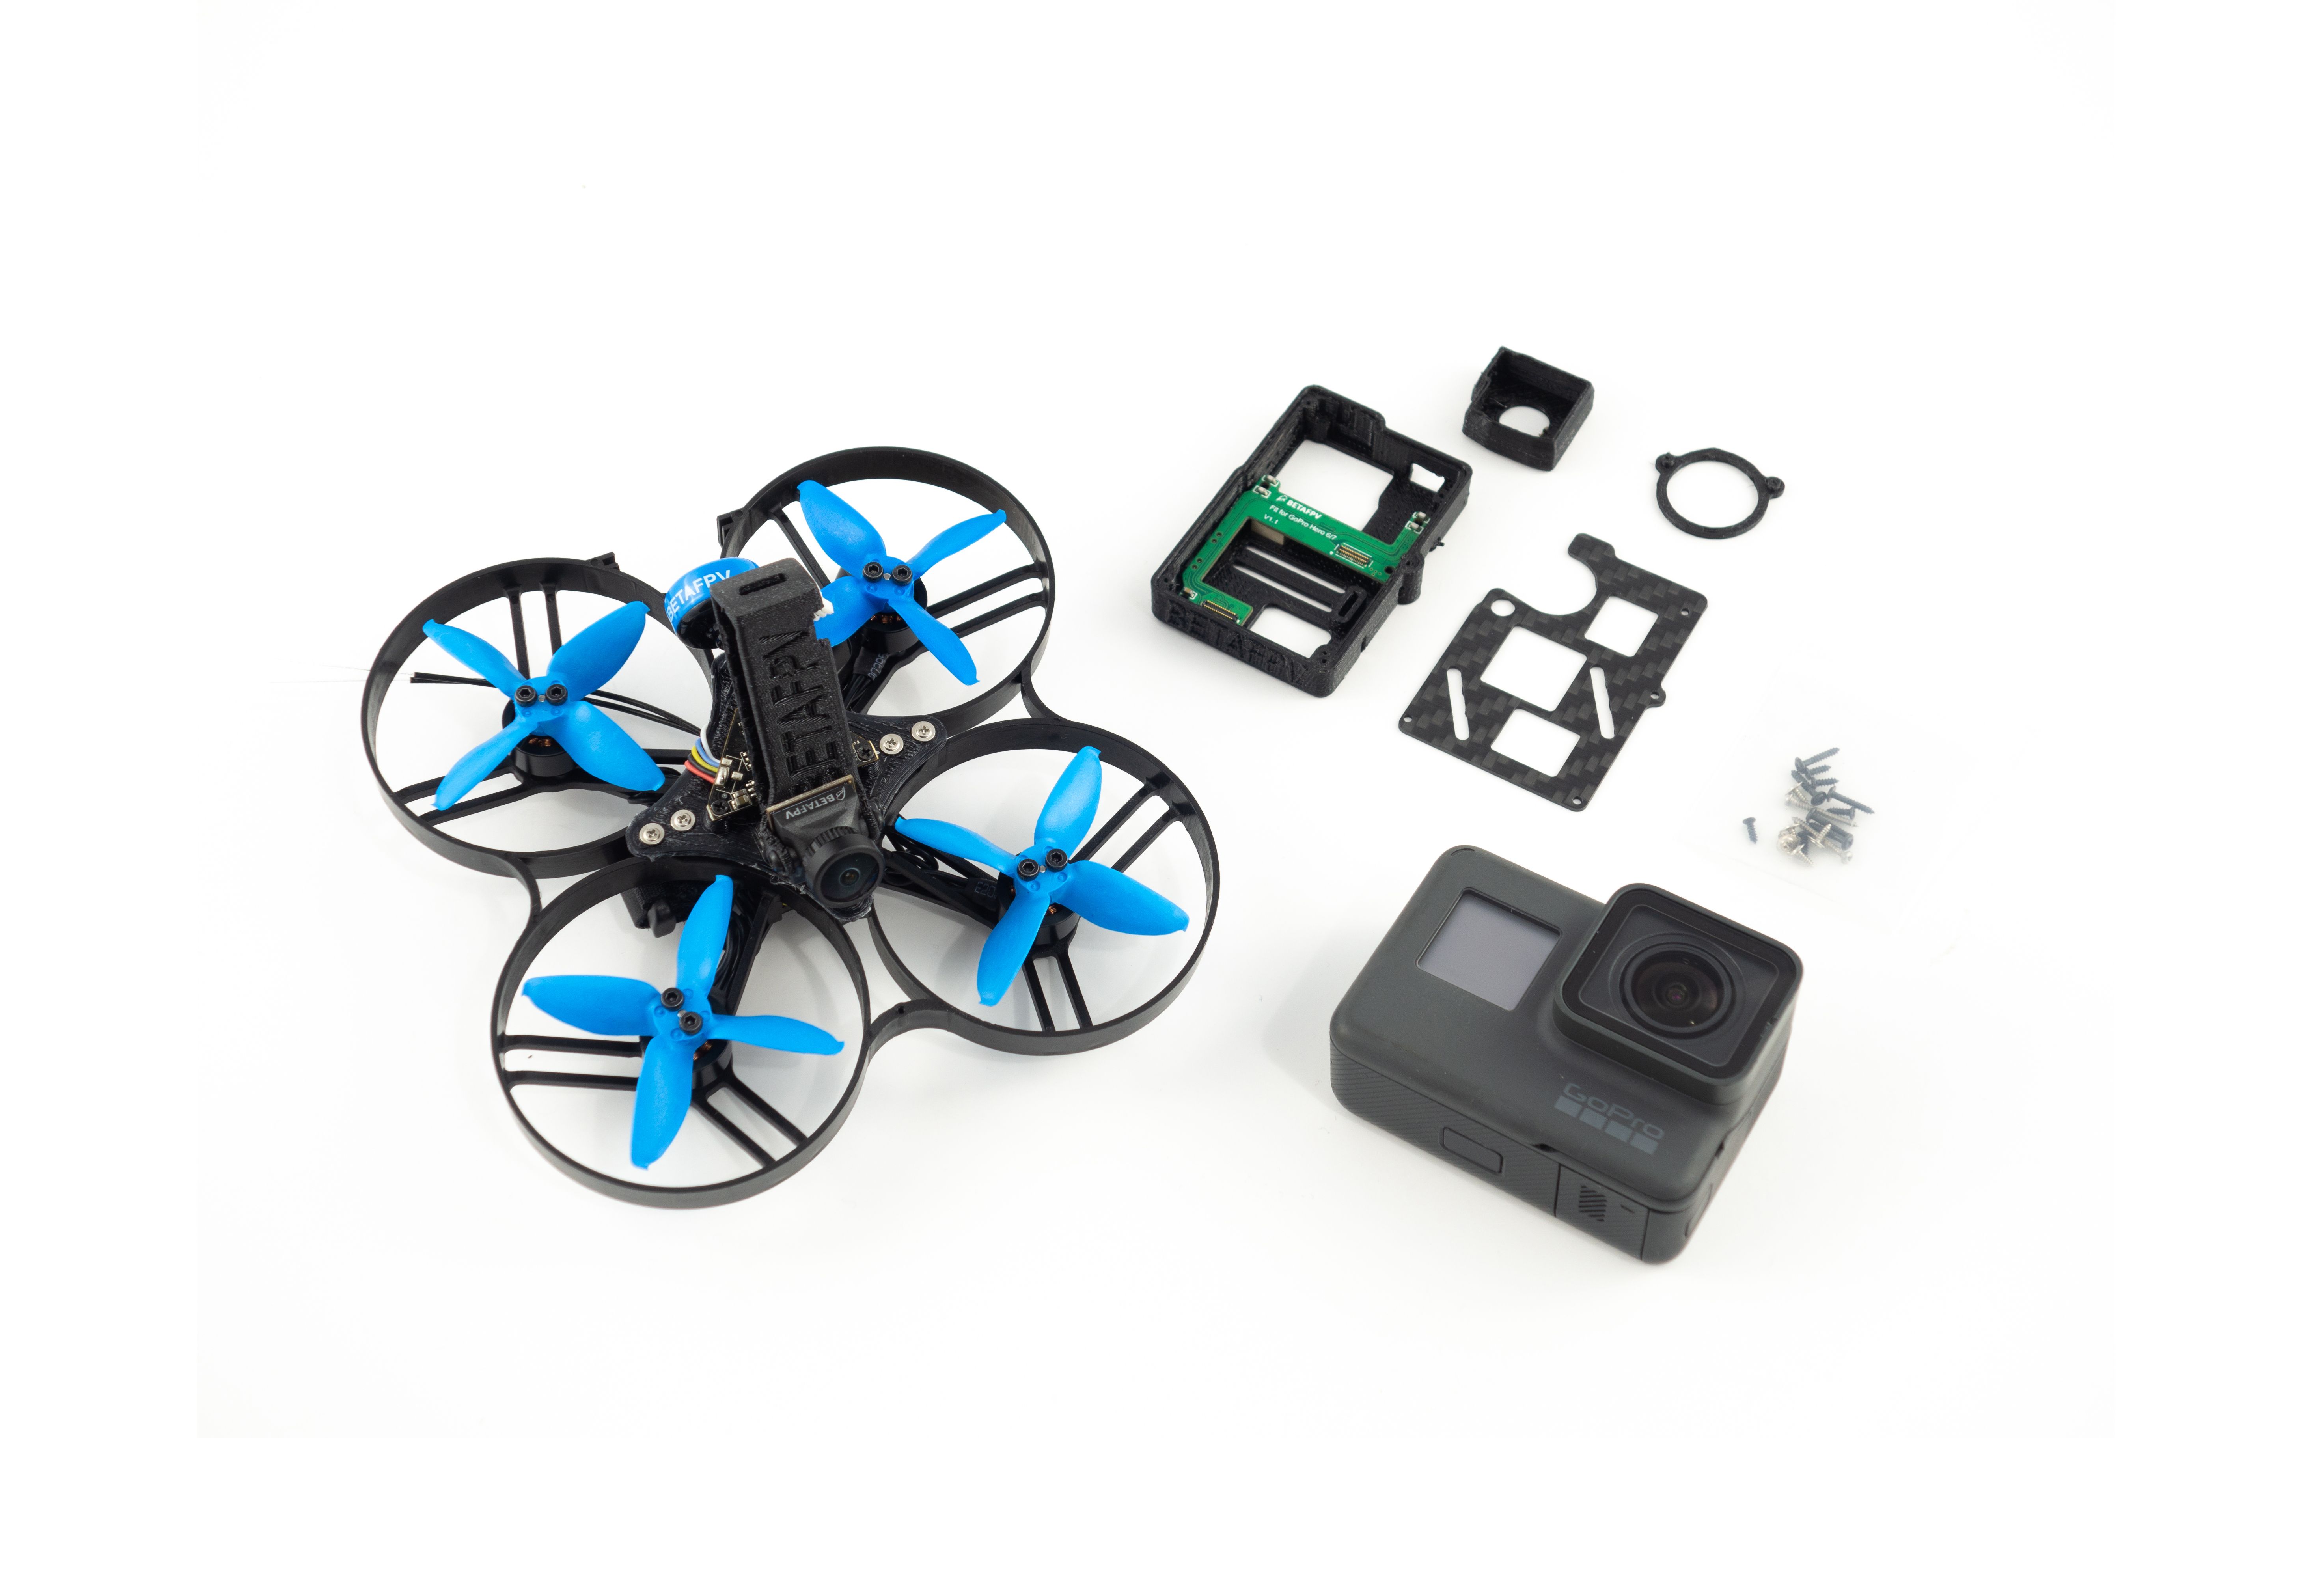
Preparing your GoPro
Before you start ripping into the internals you need to make some preparations. If you're using a Hero6 in conjunction with ReelSteady Go it's recommended that you downgrade the camera to version 1.6. Apparently this provides the best results. Download the UPDATE folder and copy it to your microSD card. Insert it into the GoPro and power it up. The process should only take a couple minutes.
Since you're removing the rear display you'll need a way to change your camera settings. To do this you'll want to pair the camera to your phone.
- Configure the camera to use 2.4ghz WiFi to avoid interference with your 5.8ghz FPV gear.
- Download the GoPro app to your phone and add the device.
- Ensure both devices are paired and you can configure your GoPro.
- Remove the battery and microSD from your GoPro.
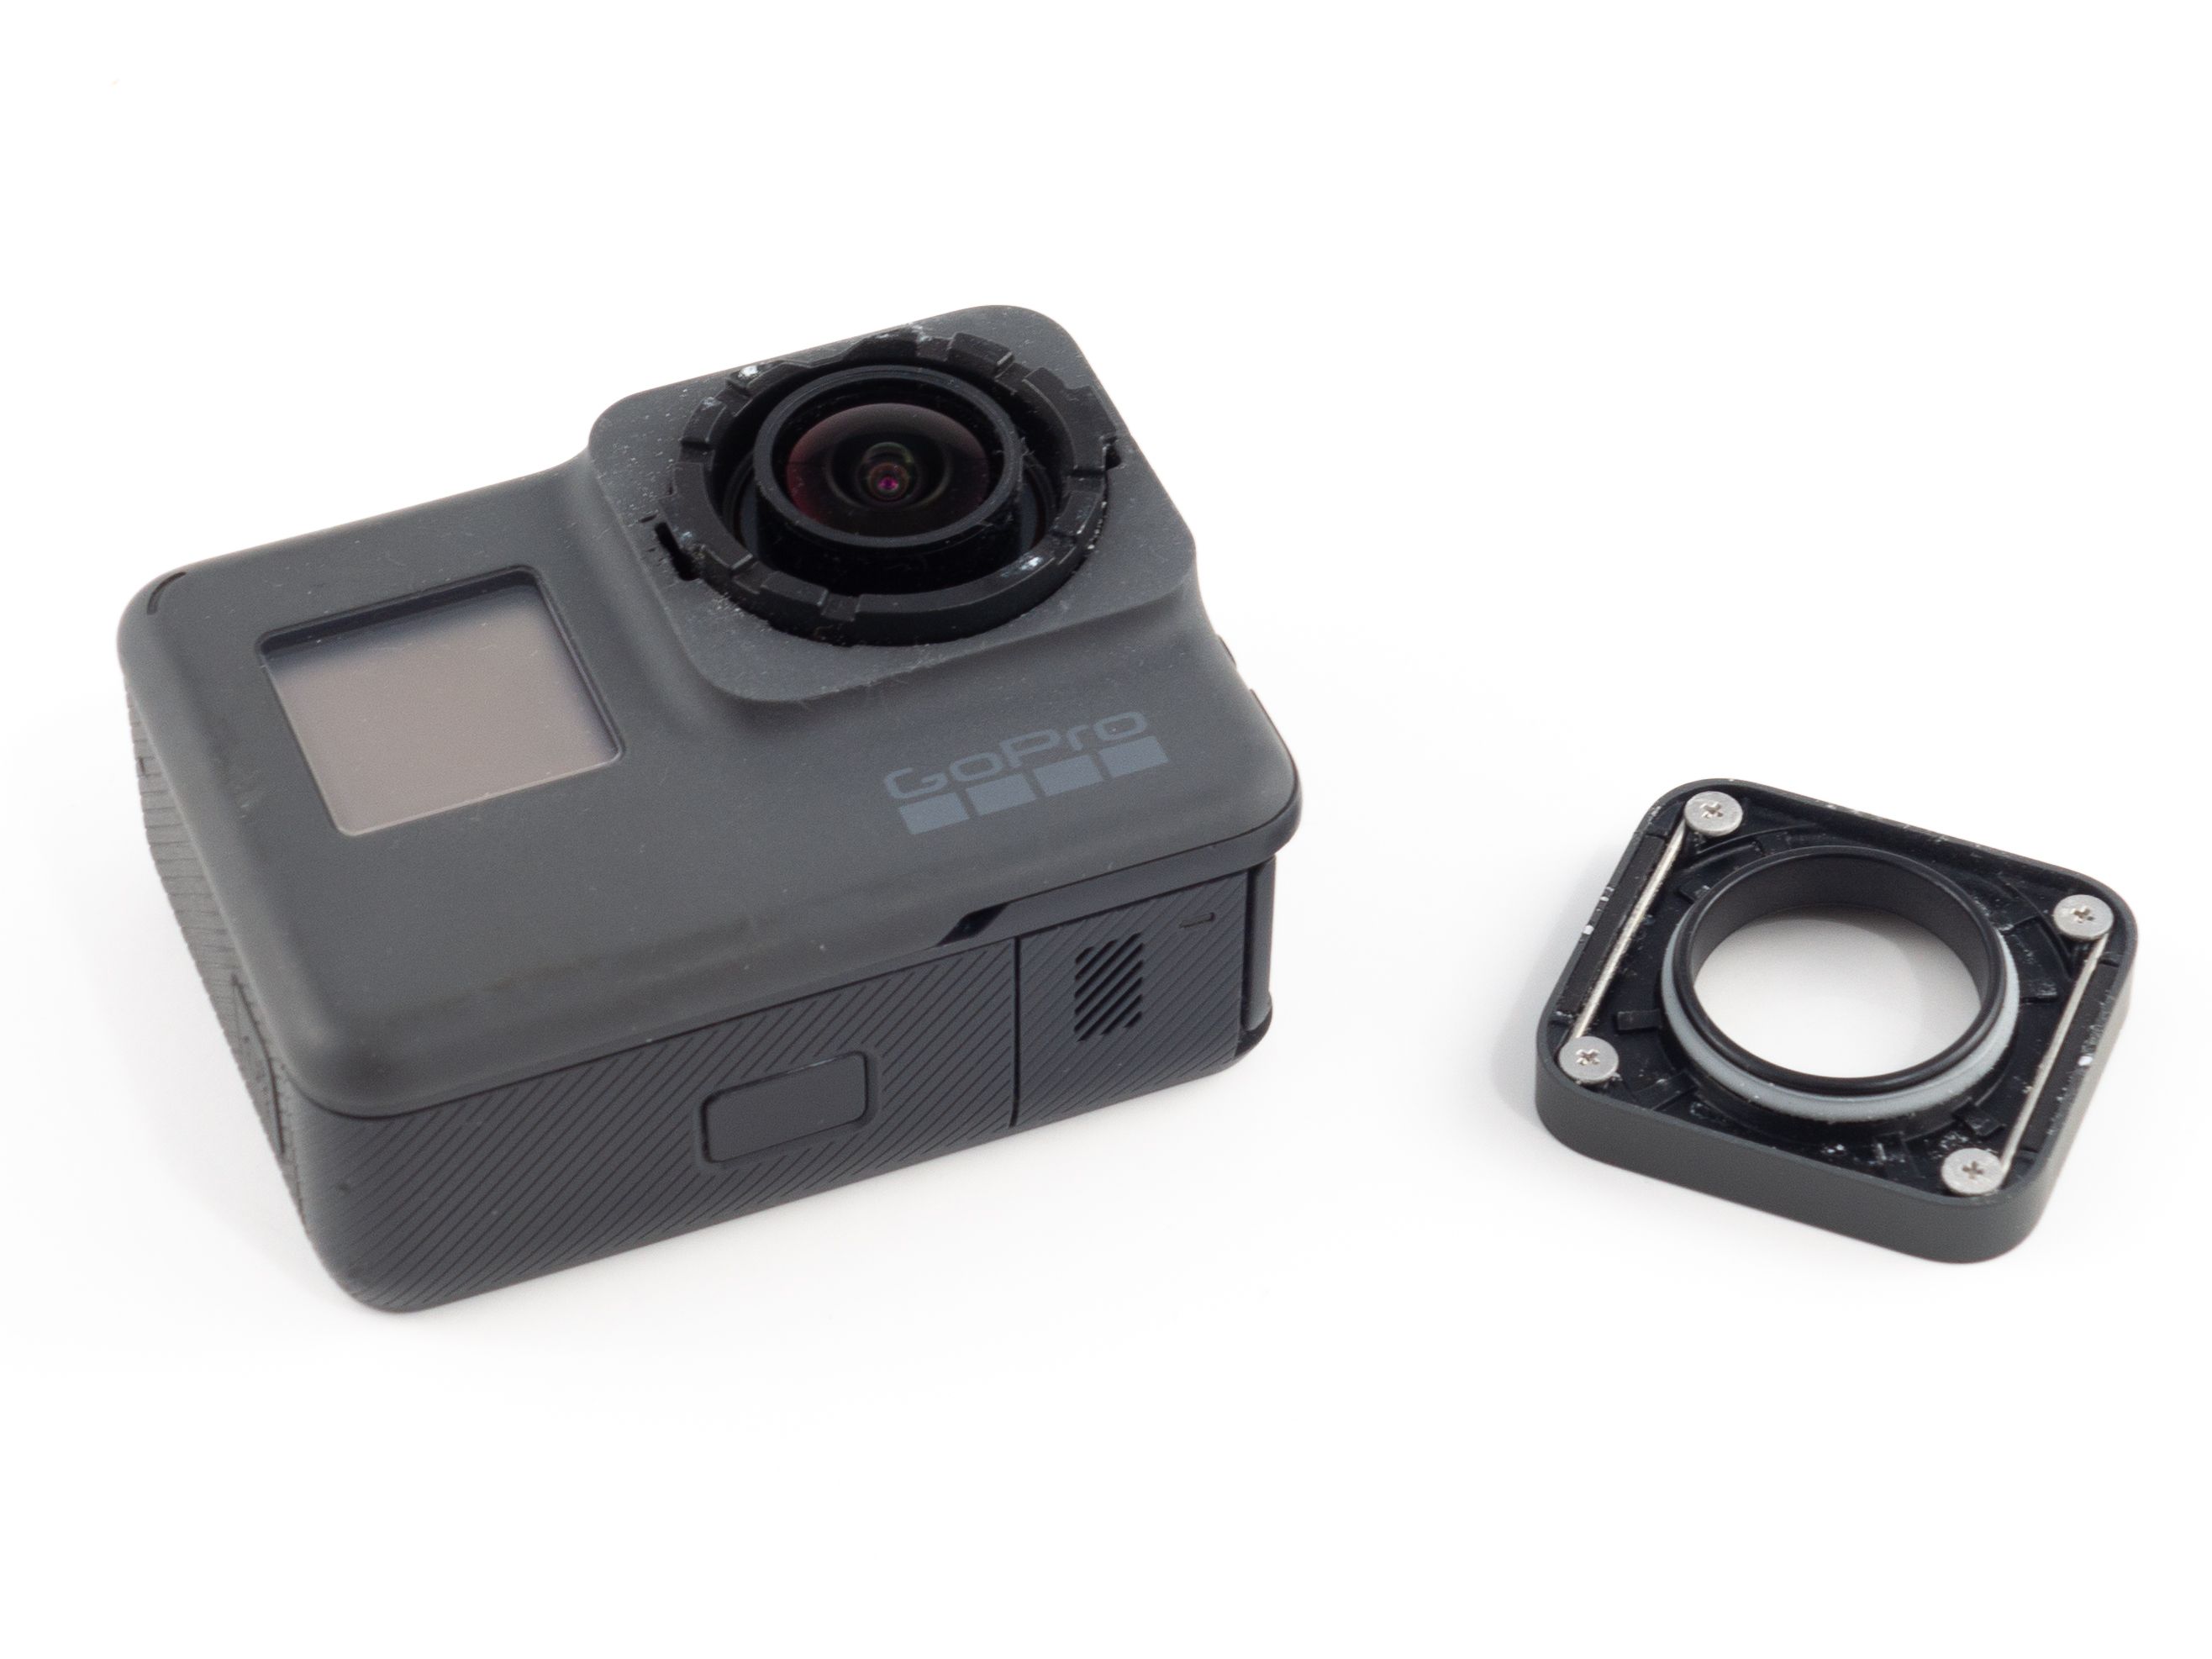
- Remove the USB-C door by pulling it off.
- Remove the lens cover by prying slightly on either side and twisting it off.
- Some people can remove it without prying, but I had to give it a little nudge with a small screwdriver.
De-Casing
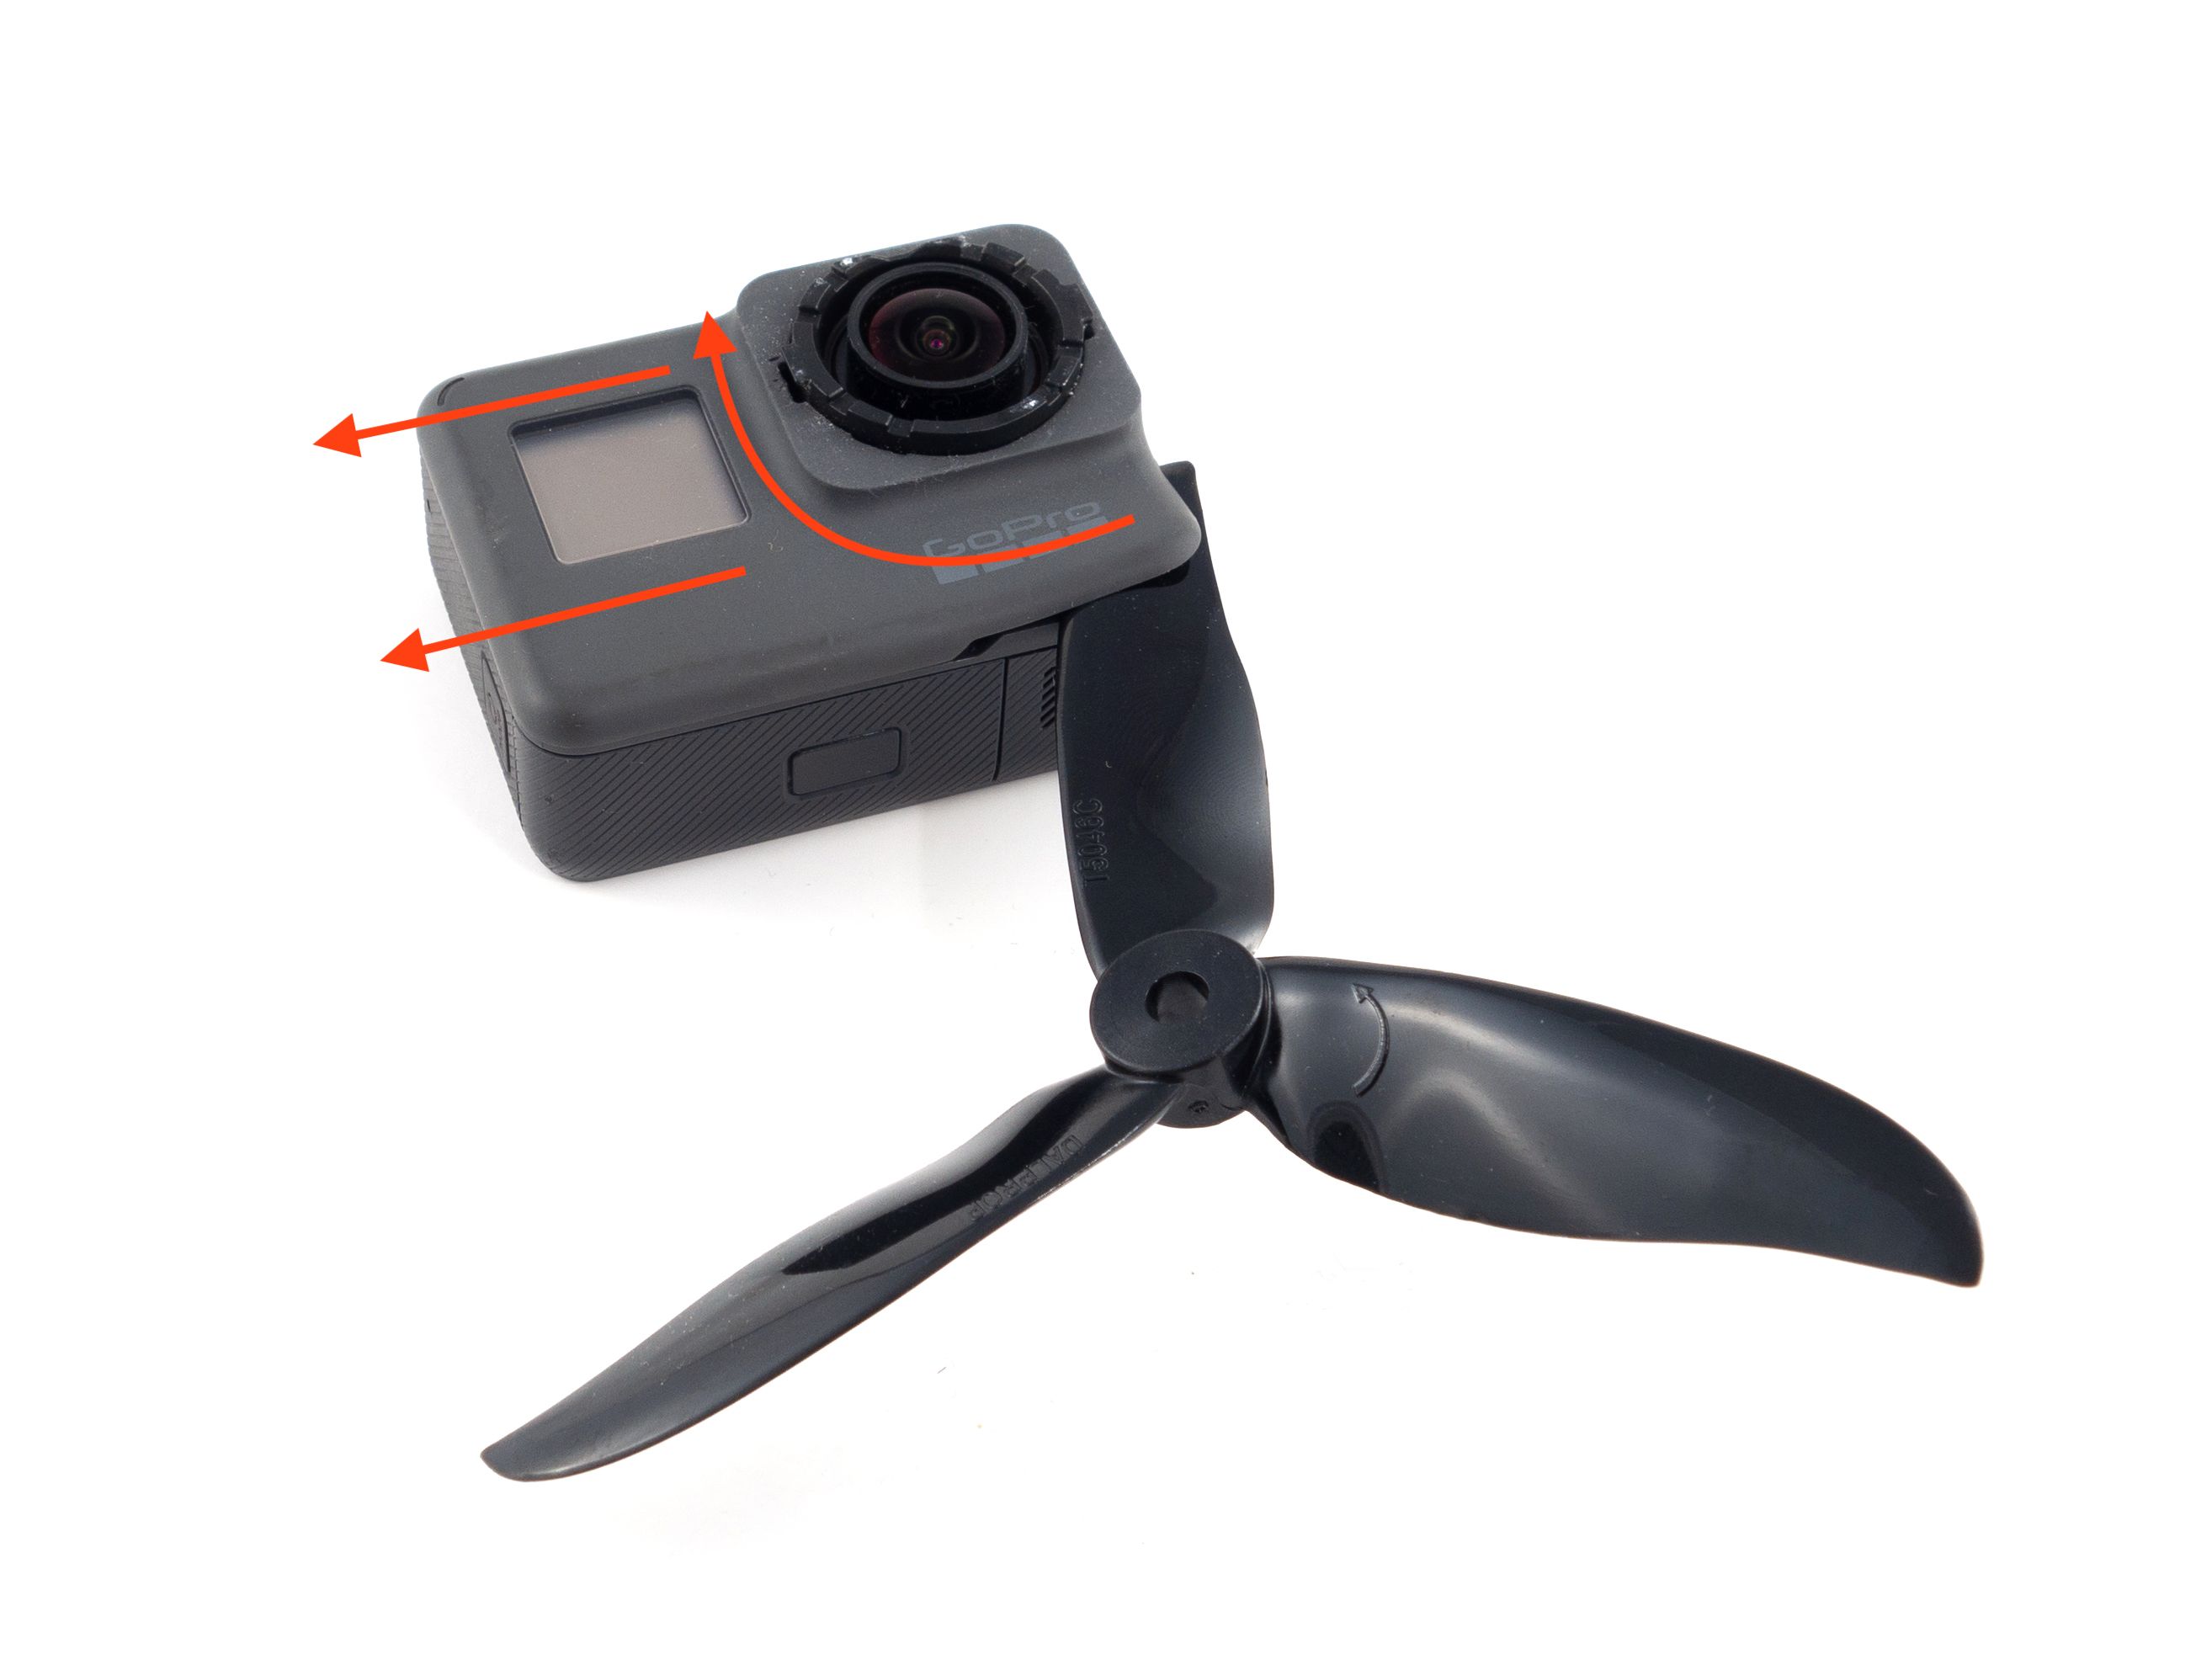
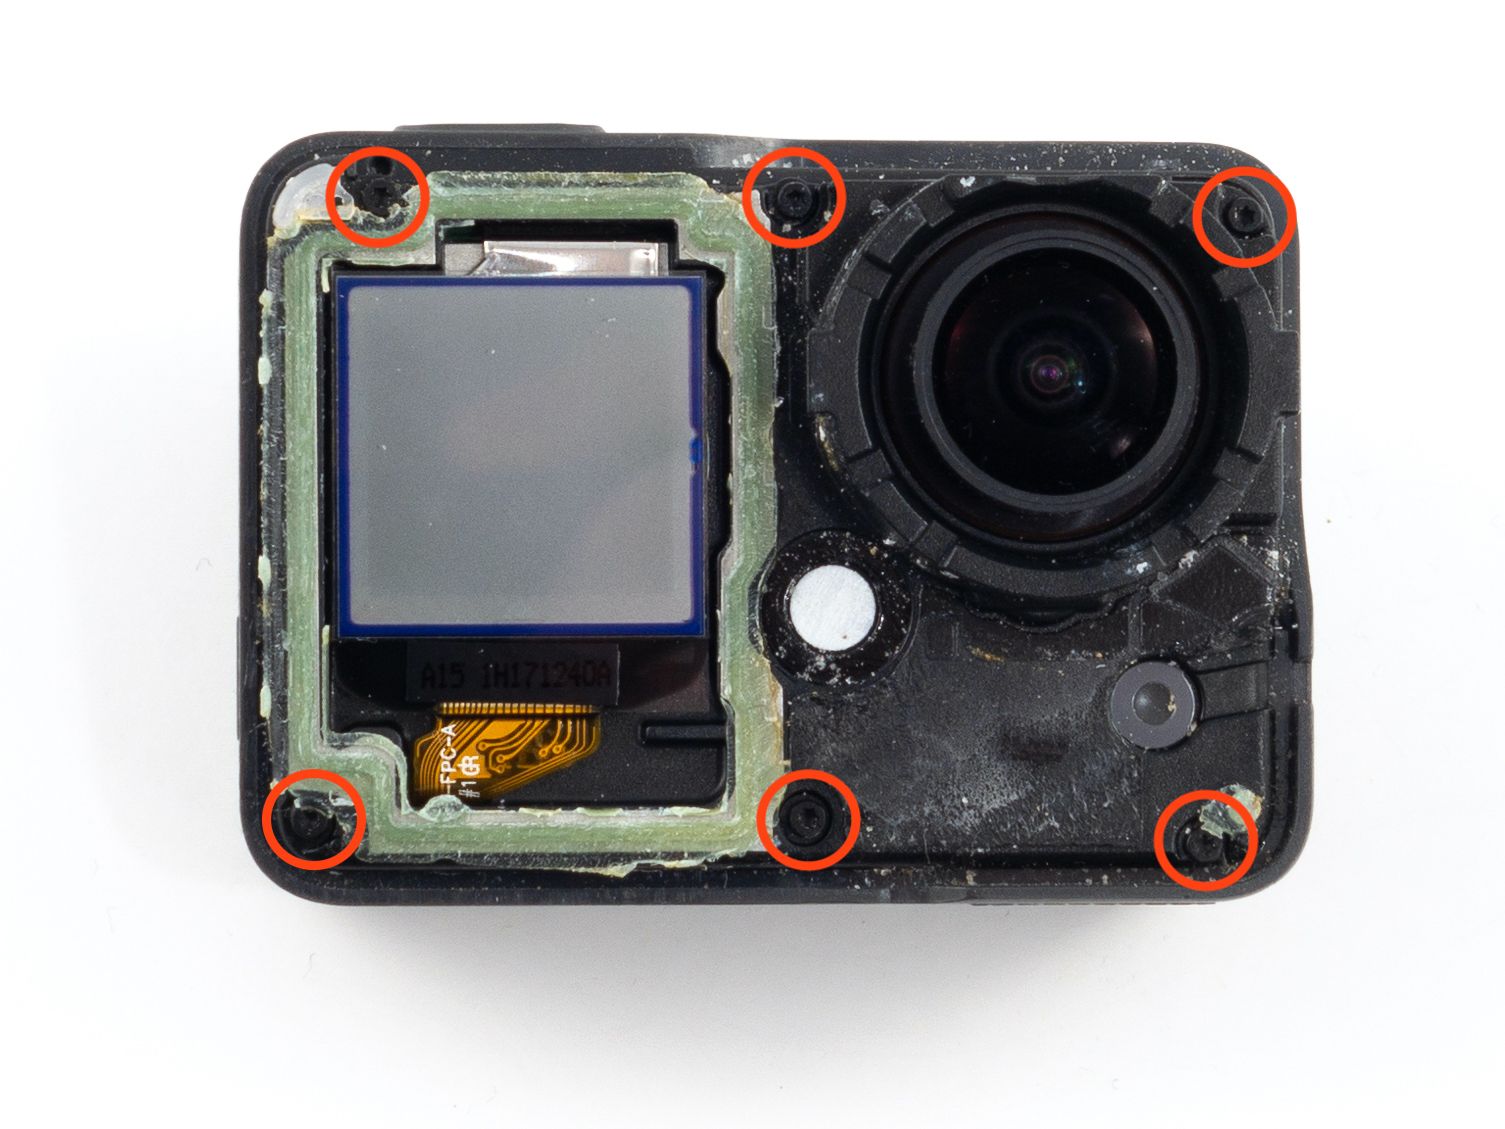
Tearing down your GoPro might seem somewhat intimidating, but the only challenge is removing the front cover. There's a thick bead of glue around the front display. What you need to do is soften the glue, but I don't recommend a heat gun as it may damage some components. Instead, use a microwave heat pack and leave it on the camera for about 5-10 minutes. This will soften the glue just enough to cut through with a prop. Work the prop up and around the lens and slice straight over the front display. Be mindful of the ribbon cable just below the display. You should be able to pass directly over it if you go slow. If the seal isn't breaking give it more time with the heat pad. Alternatively, you can try a heat plate or a heated 3D printer bed. I've even heard you can leave the camera recording for about 10 minutes to soften the glue from the inside..
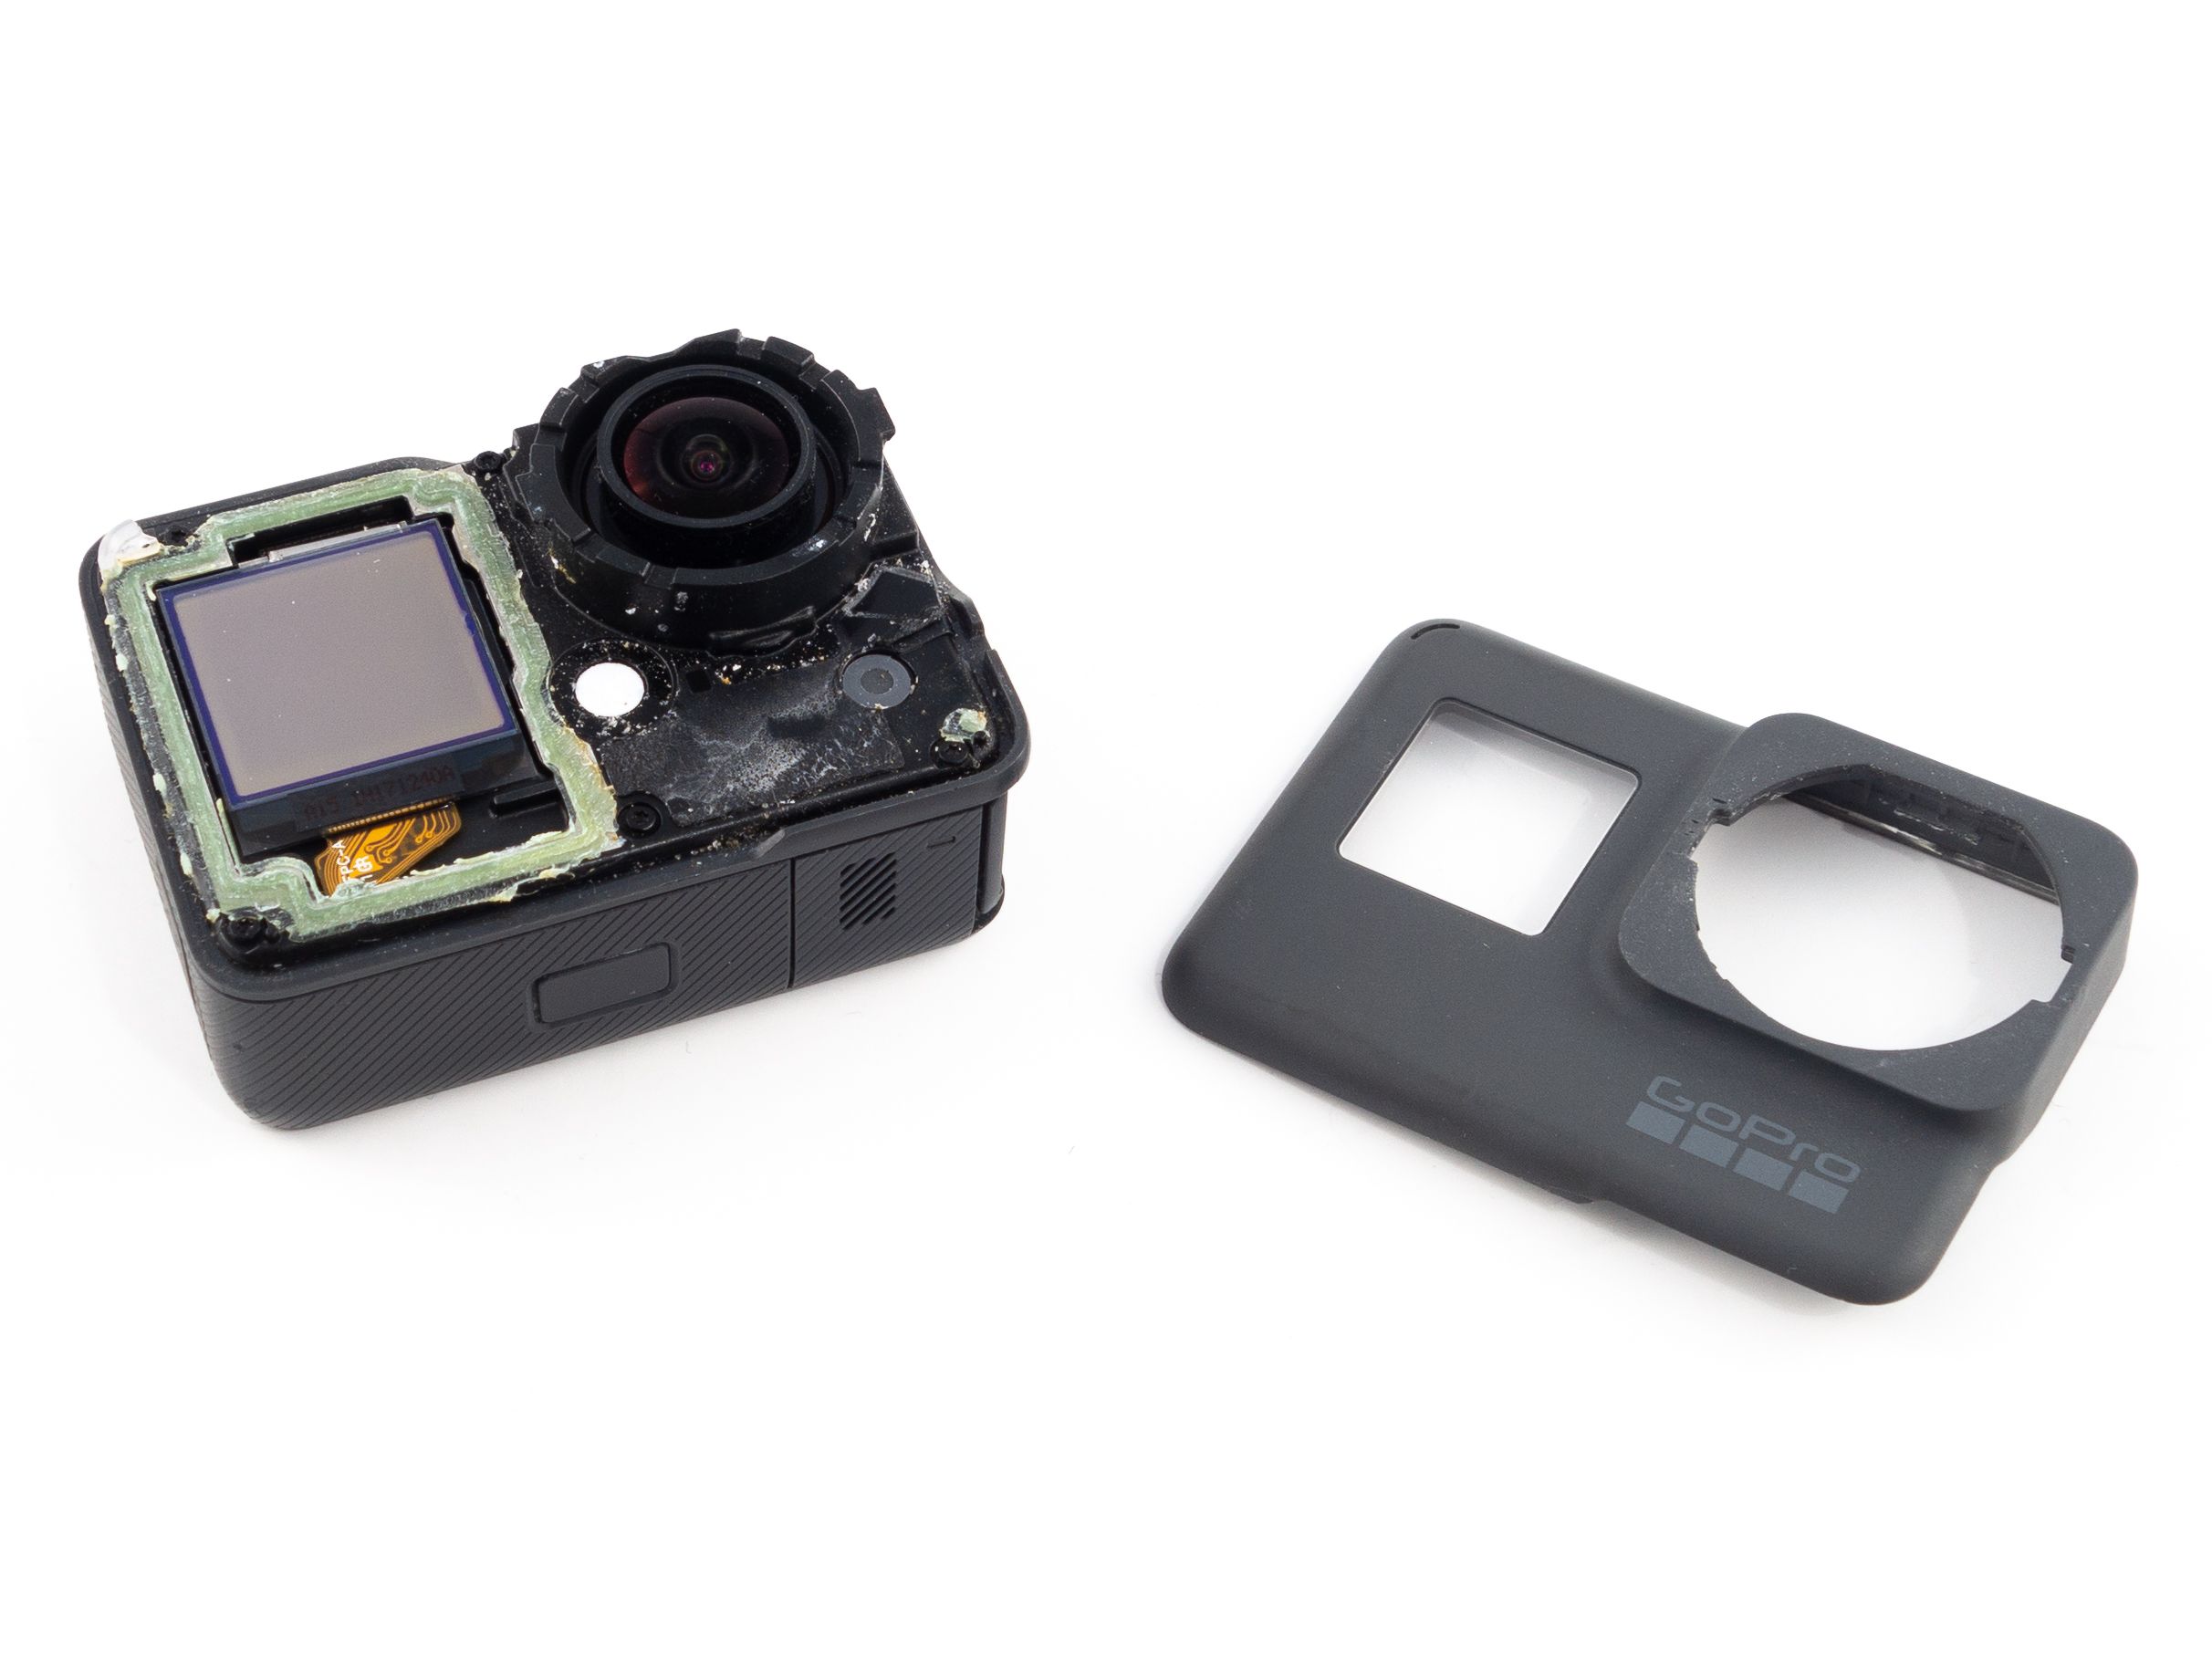
Now that you've got the front cover off the rest is a piece of cake. Just don't get careless and take your time.
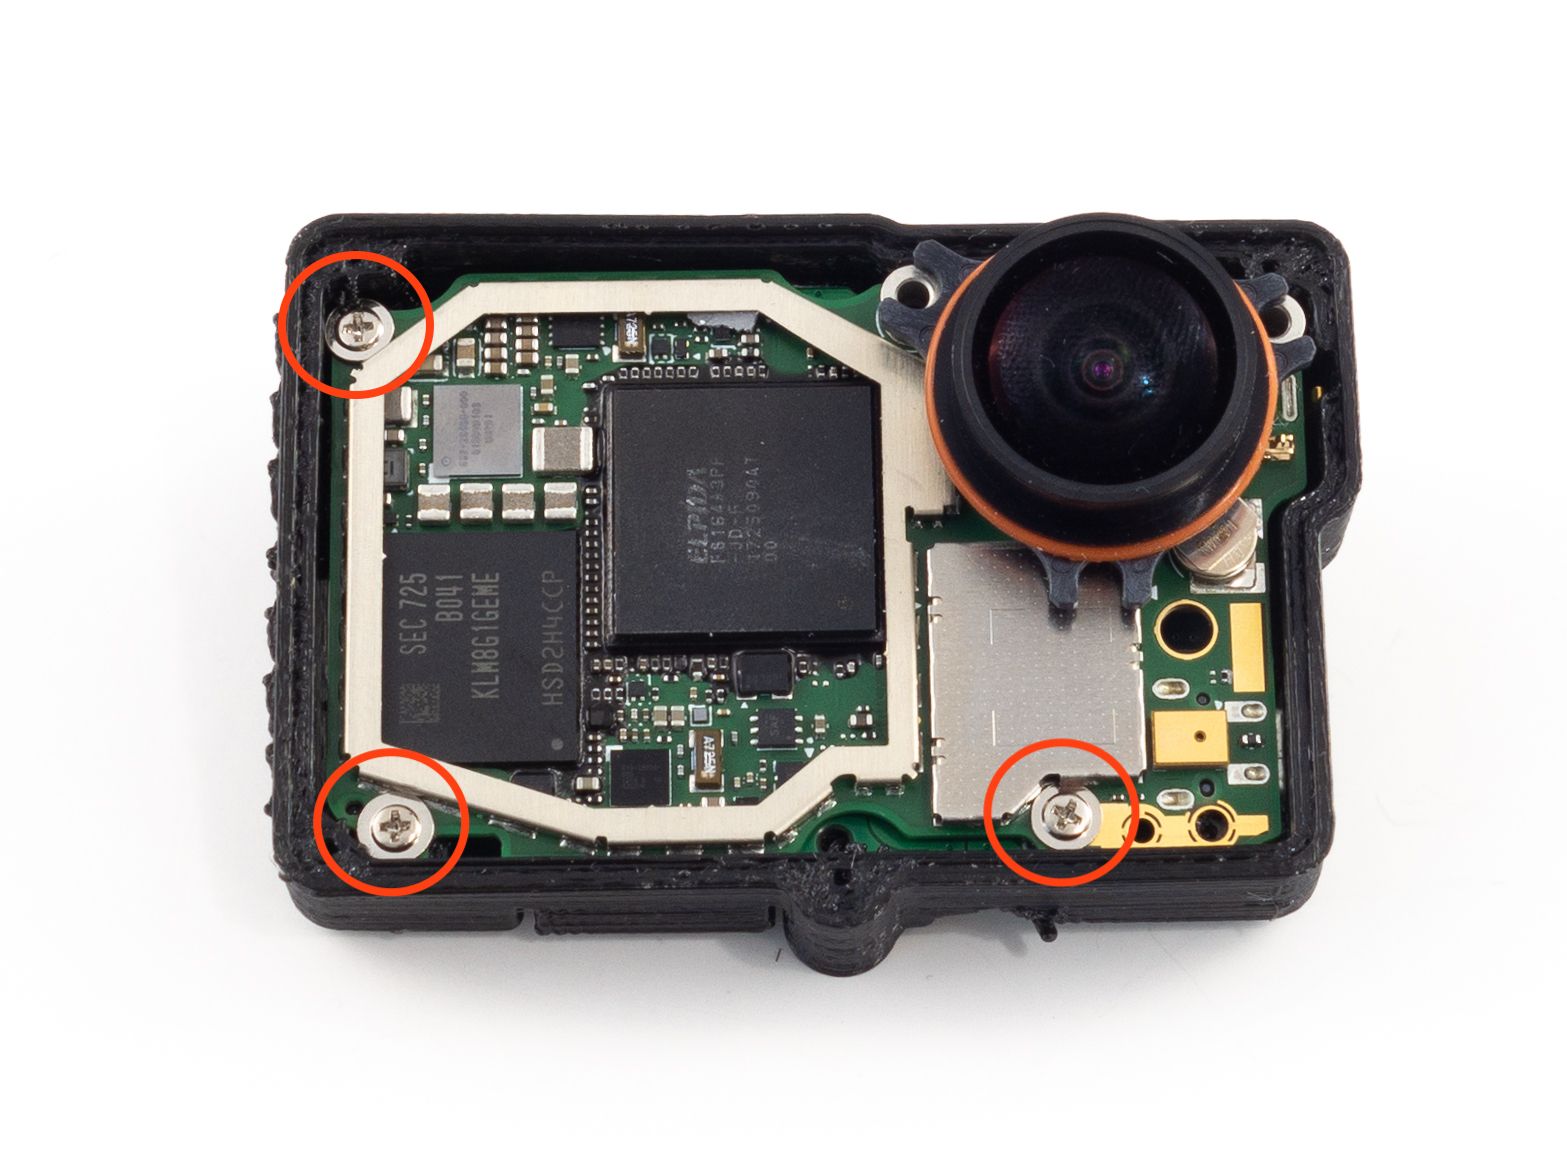
- Use a T4 Torx bit to remove the 6 screws indicated in the photo.
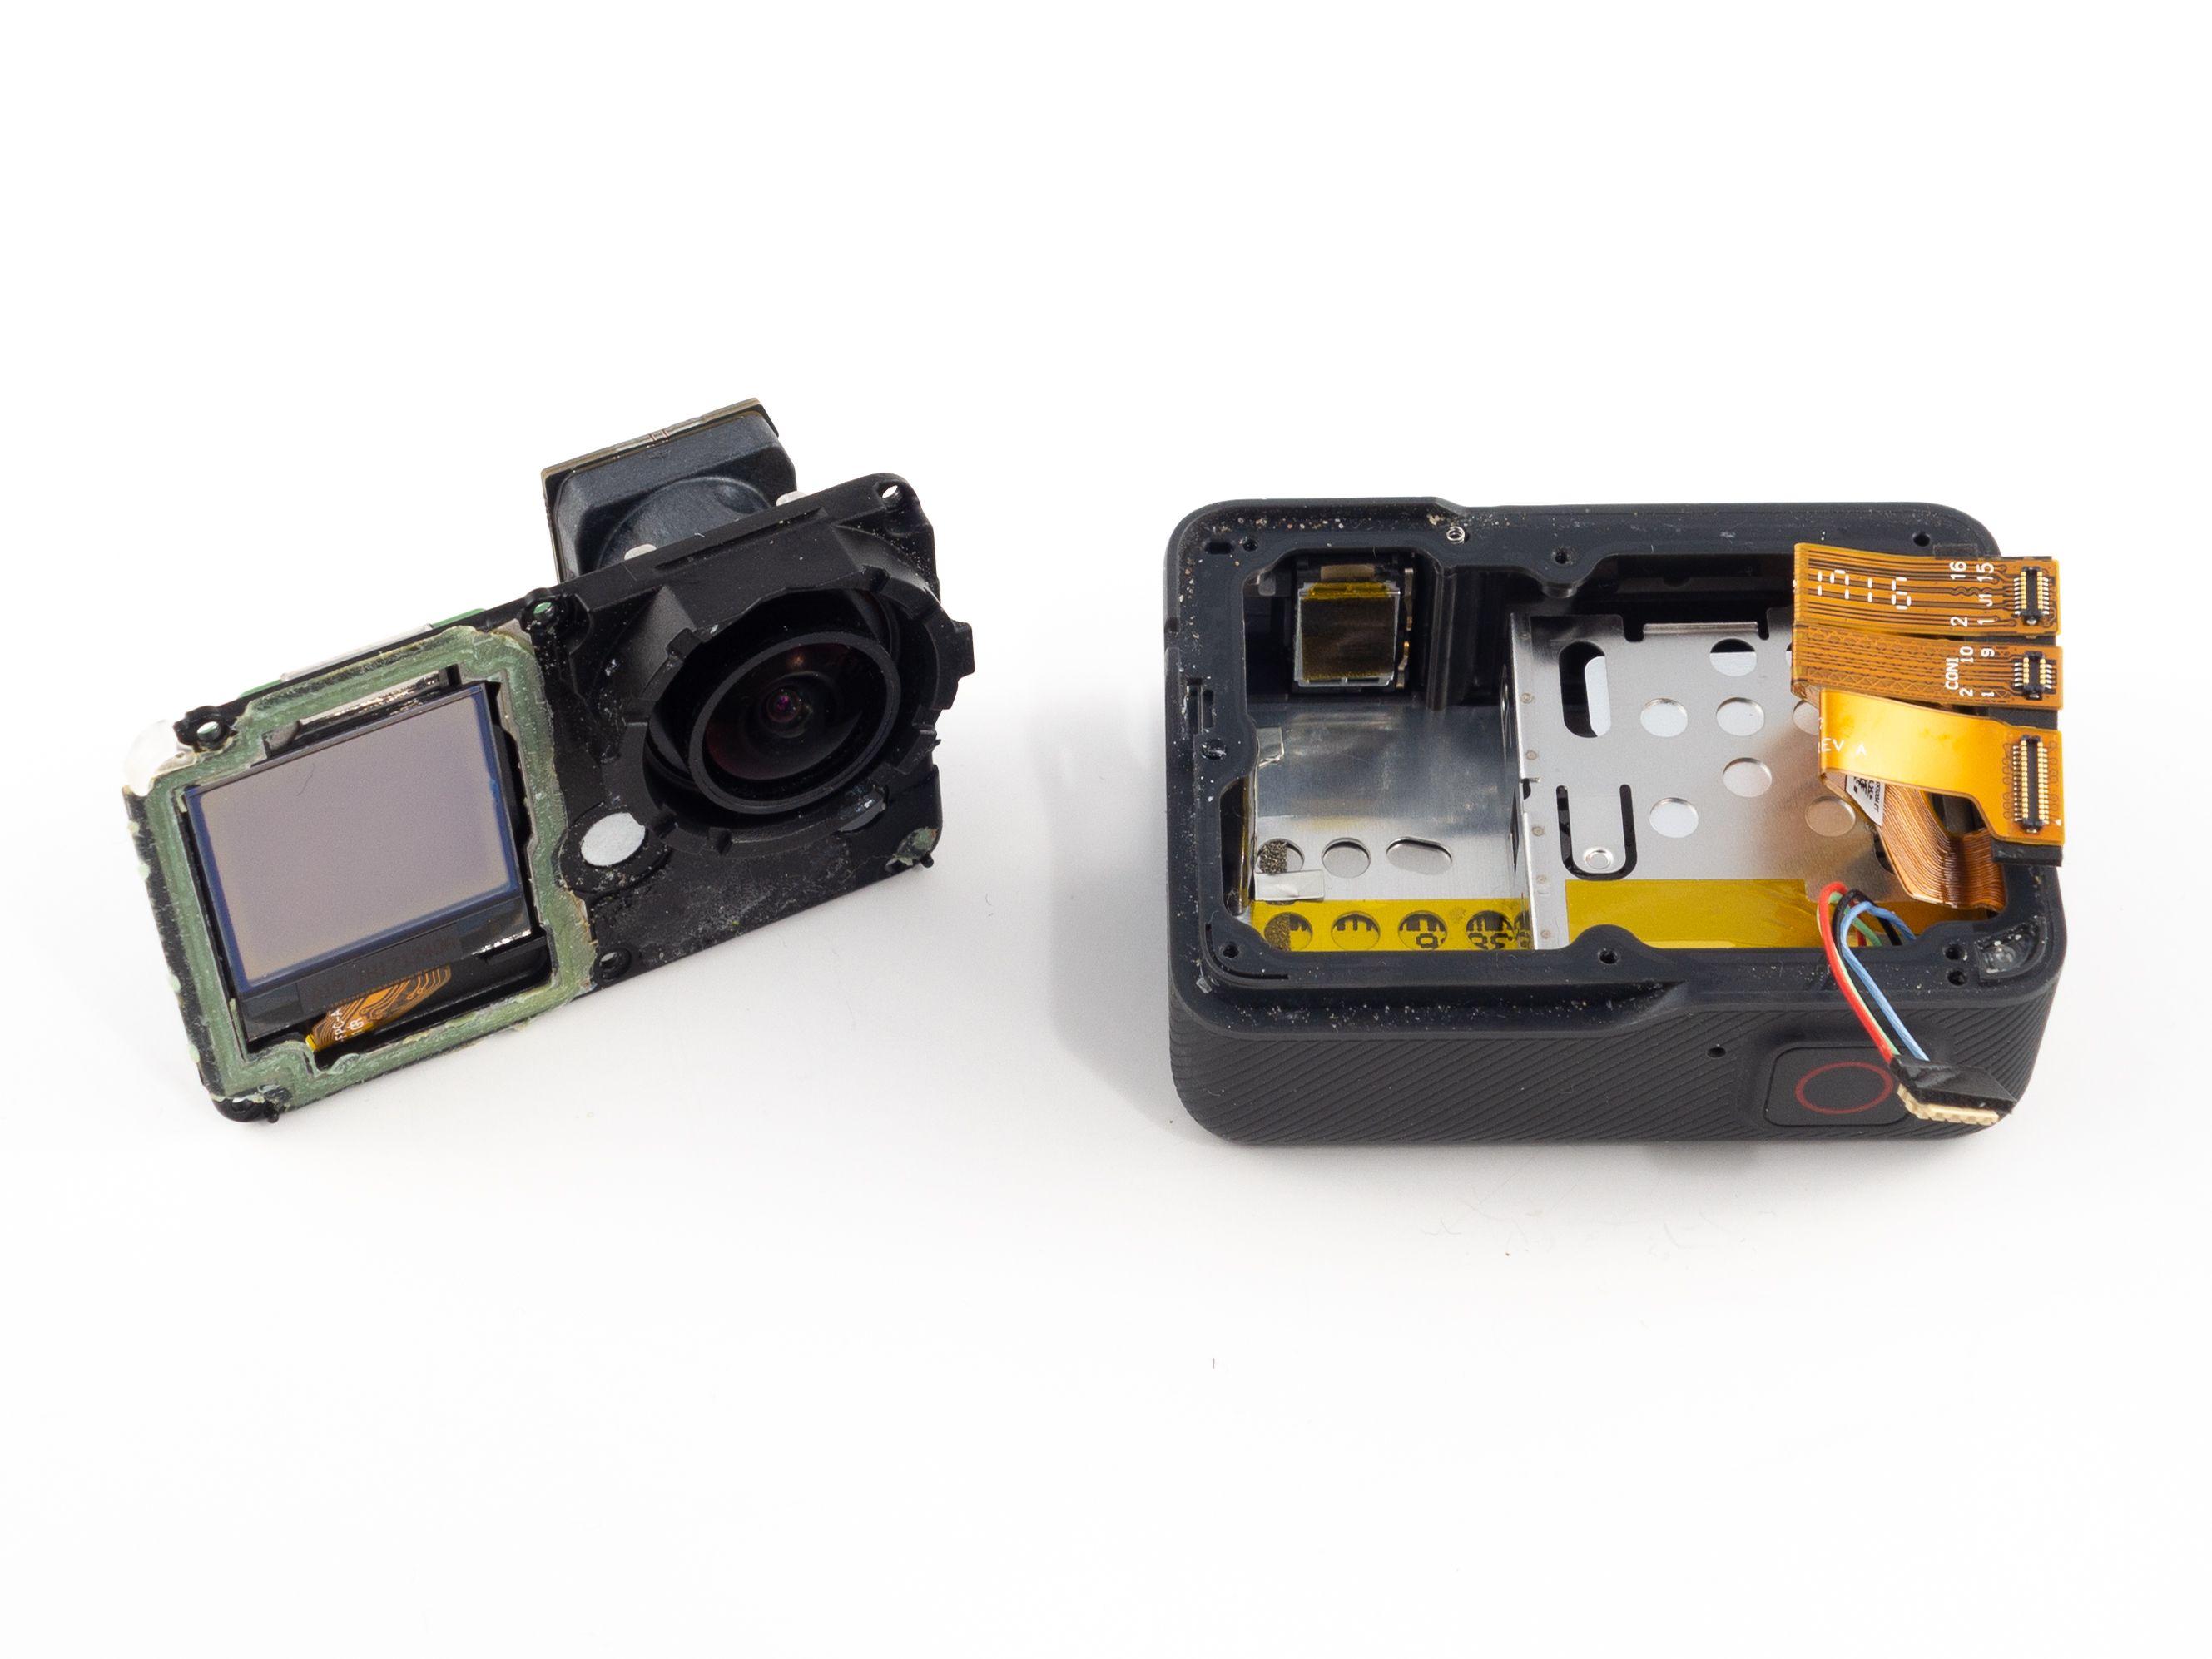
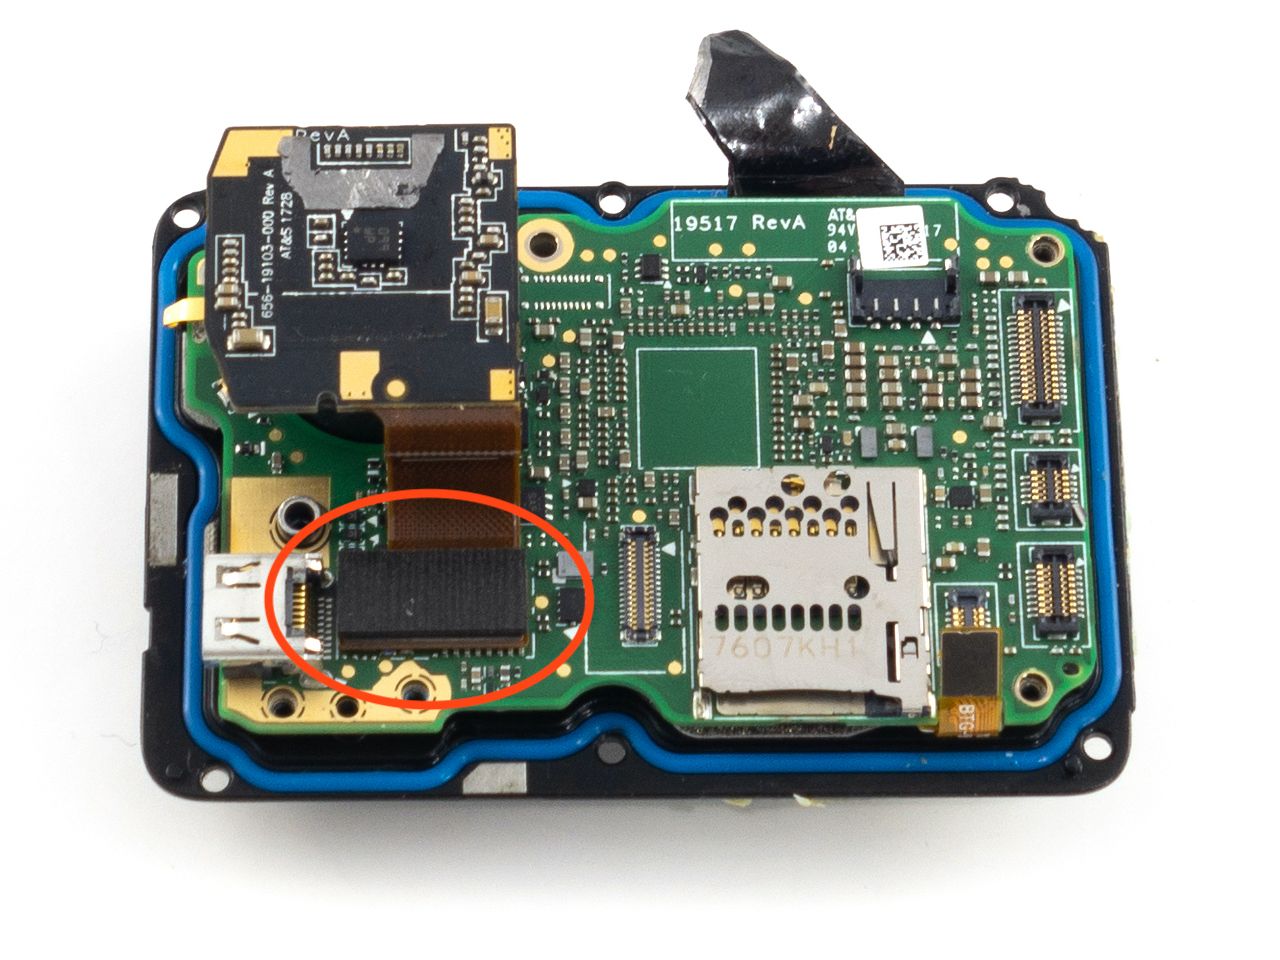
- Carefully remove the main board and disconnect the ribbon cables and plug. They just pop off.
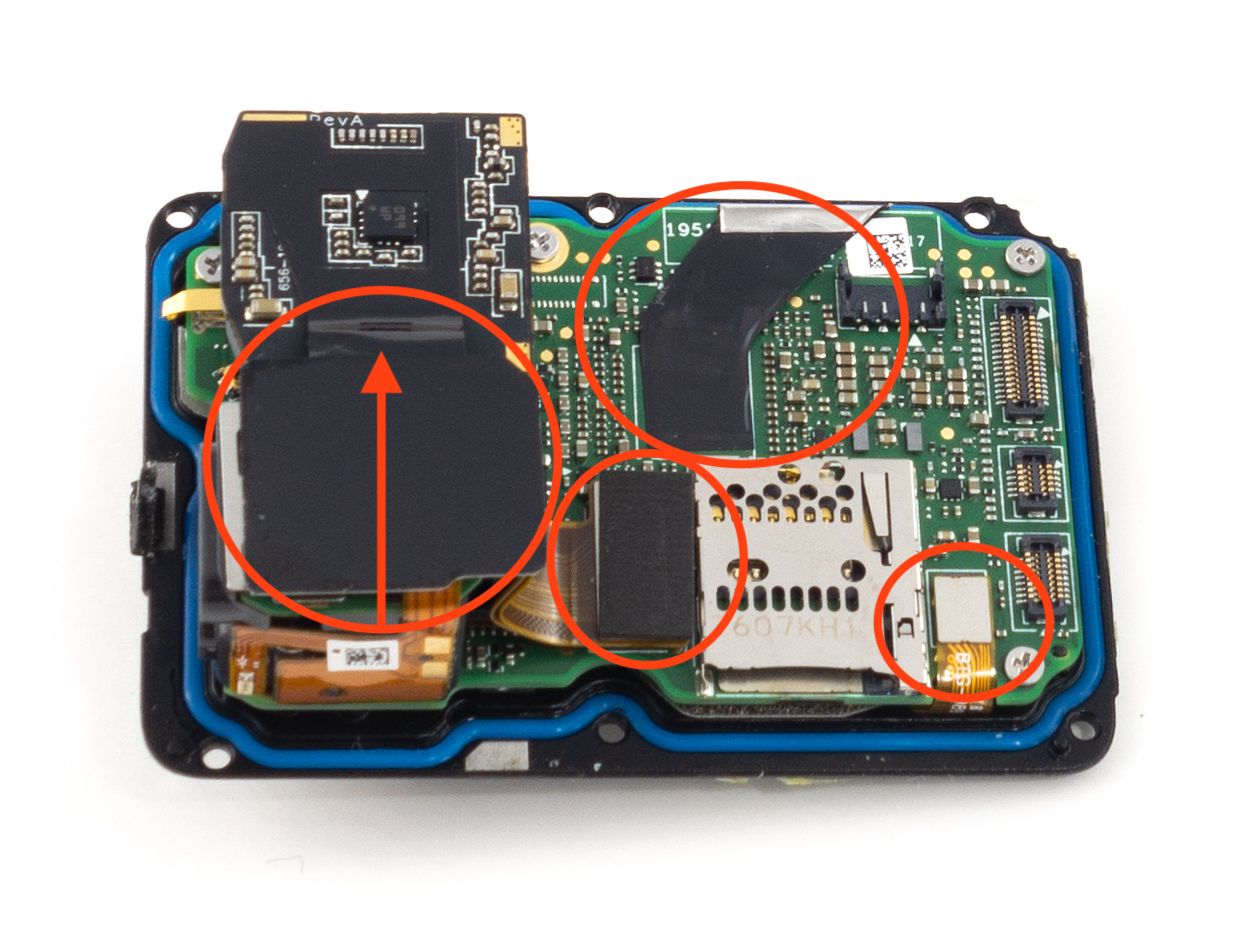
- Once you've separated the main board, peel the black tape off the back of the sensor.
- Peel the tape from the center of the main board.
(If the tape is old it may tear, that's fine. Just do your best to remove it.) - Pop the front LCD connector off the bottom of the board.
- Pop the USB-C connector off the main board.
- Slide the ribbon cable on top of the USB-C board out. There isn't a release lever and it should slide right out.
- Remove the 2 screws holding the USB-C plug. One is hidden under the ribbon cable.
- Remove the USB-C plug.
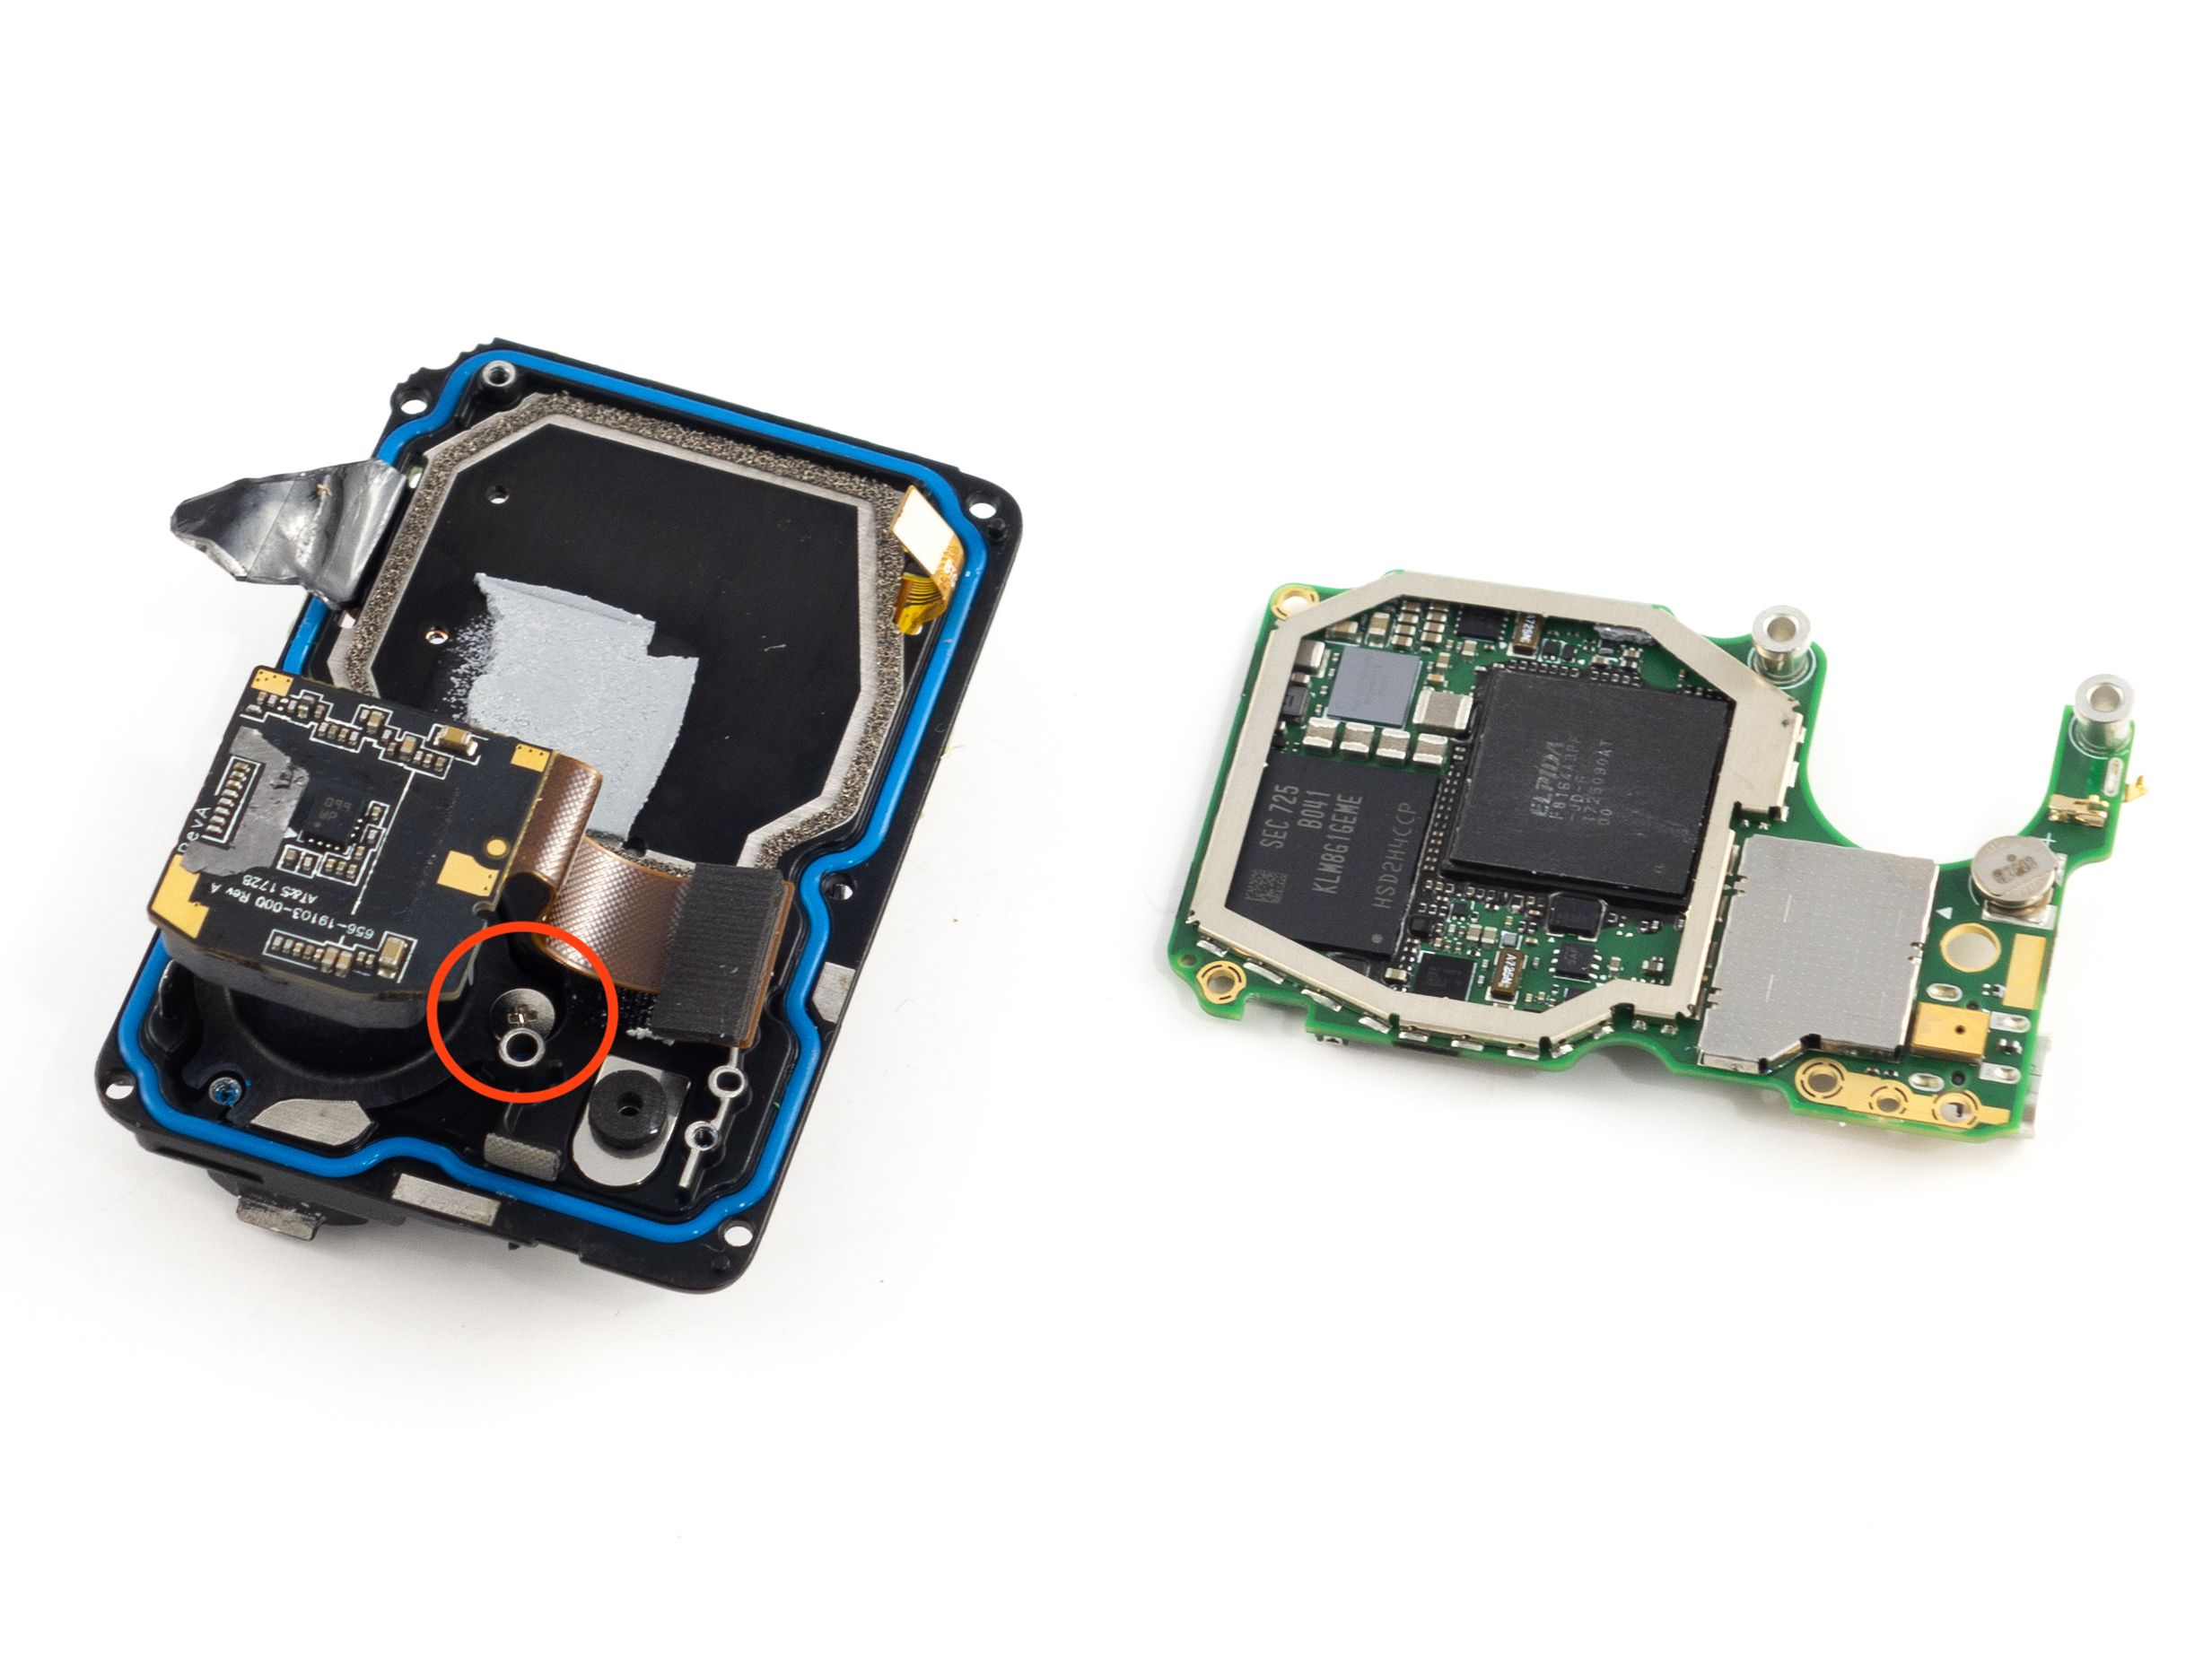
- Remove 1 screw under the USB-C plug holding the black bracket in place.
- Remove the black bracket.
- Remove the 4 screws holding the main board in place.
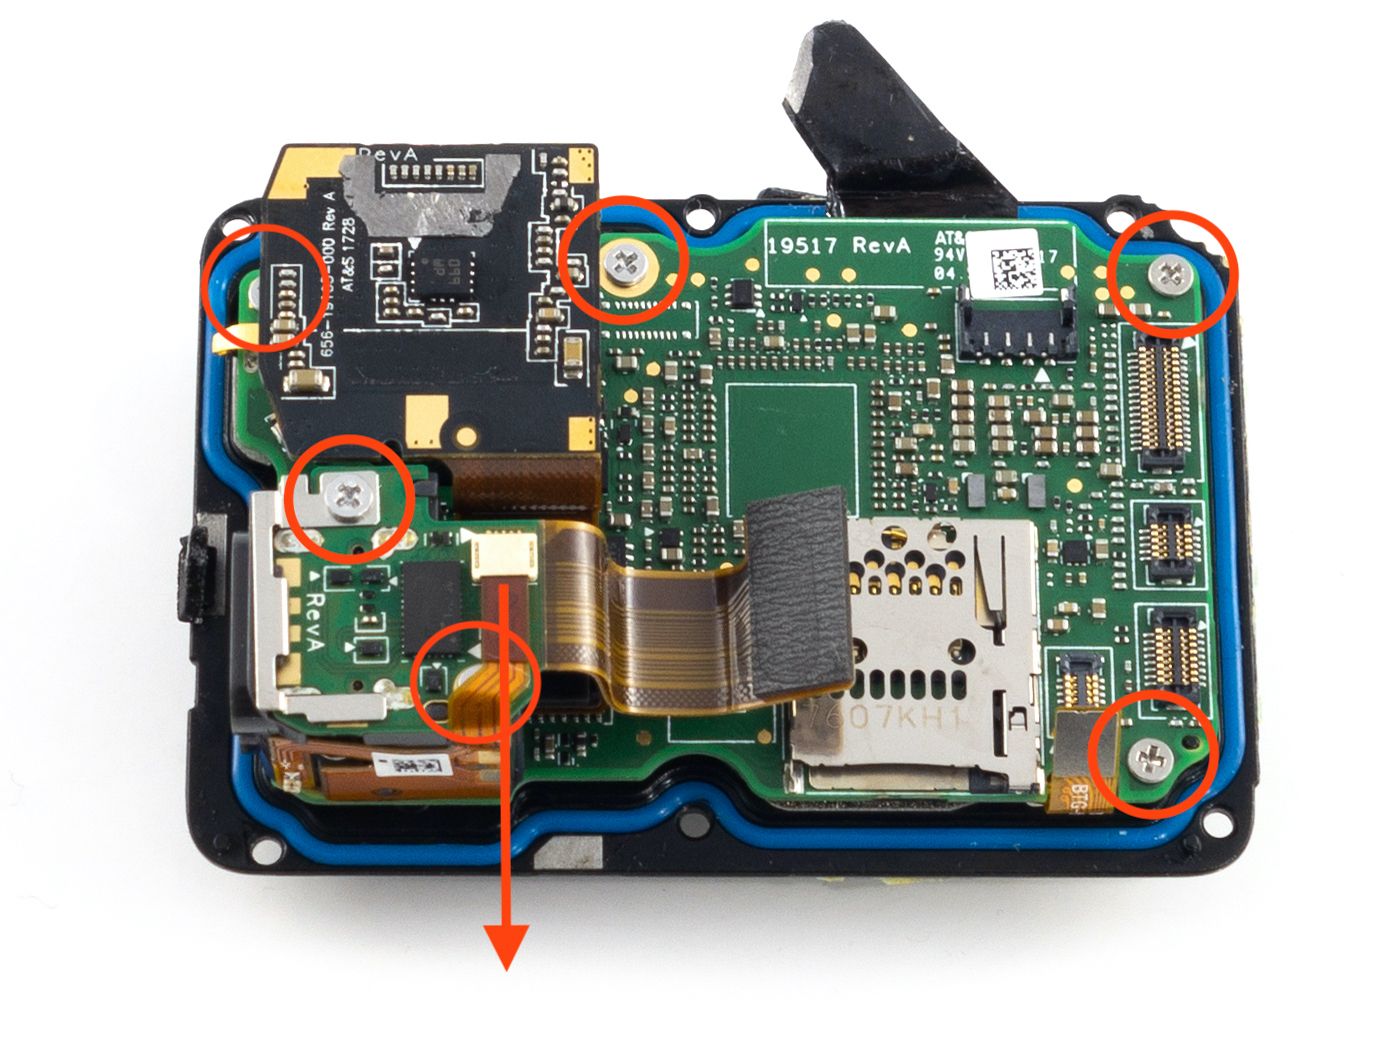
- Remove the USB-C plug and mounting bracket.
- Carefully unplug the camera sensor ribbon from the main board.
- Slide the main board out.
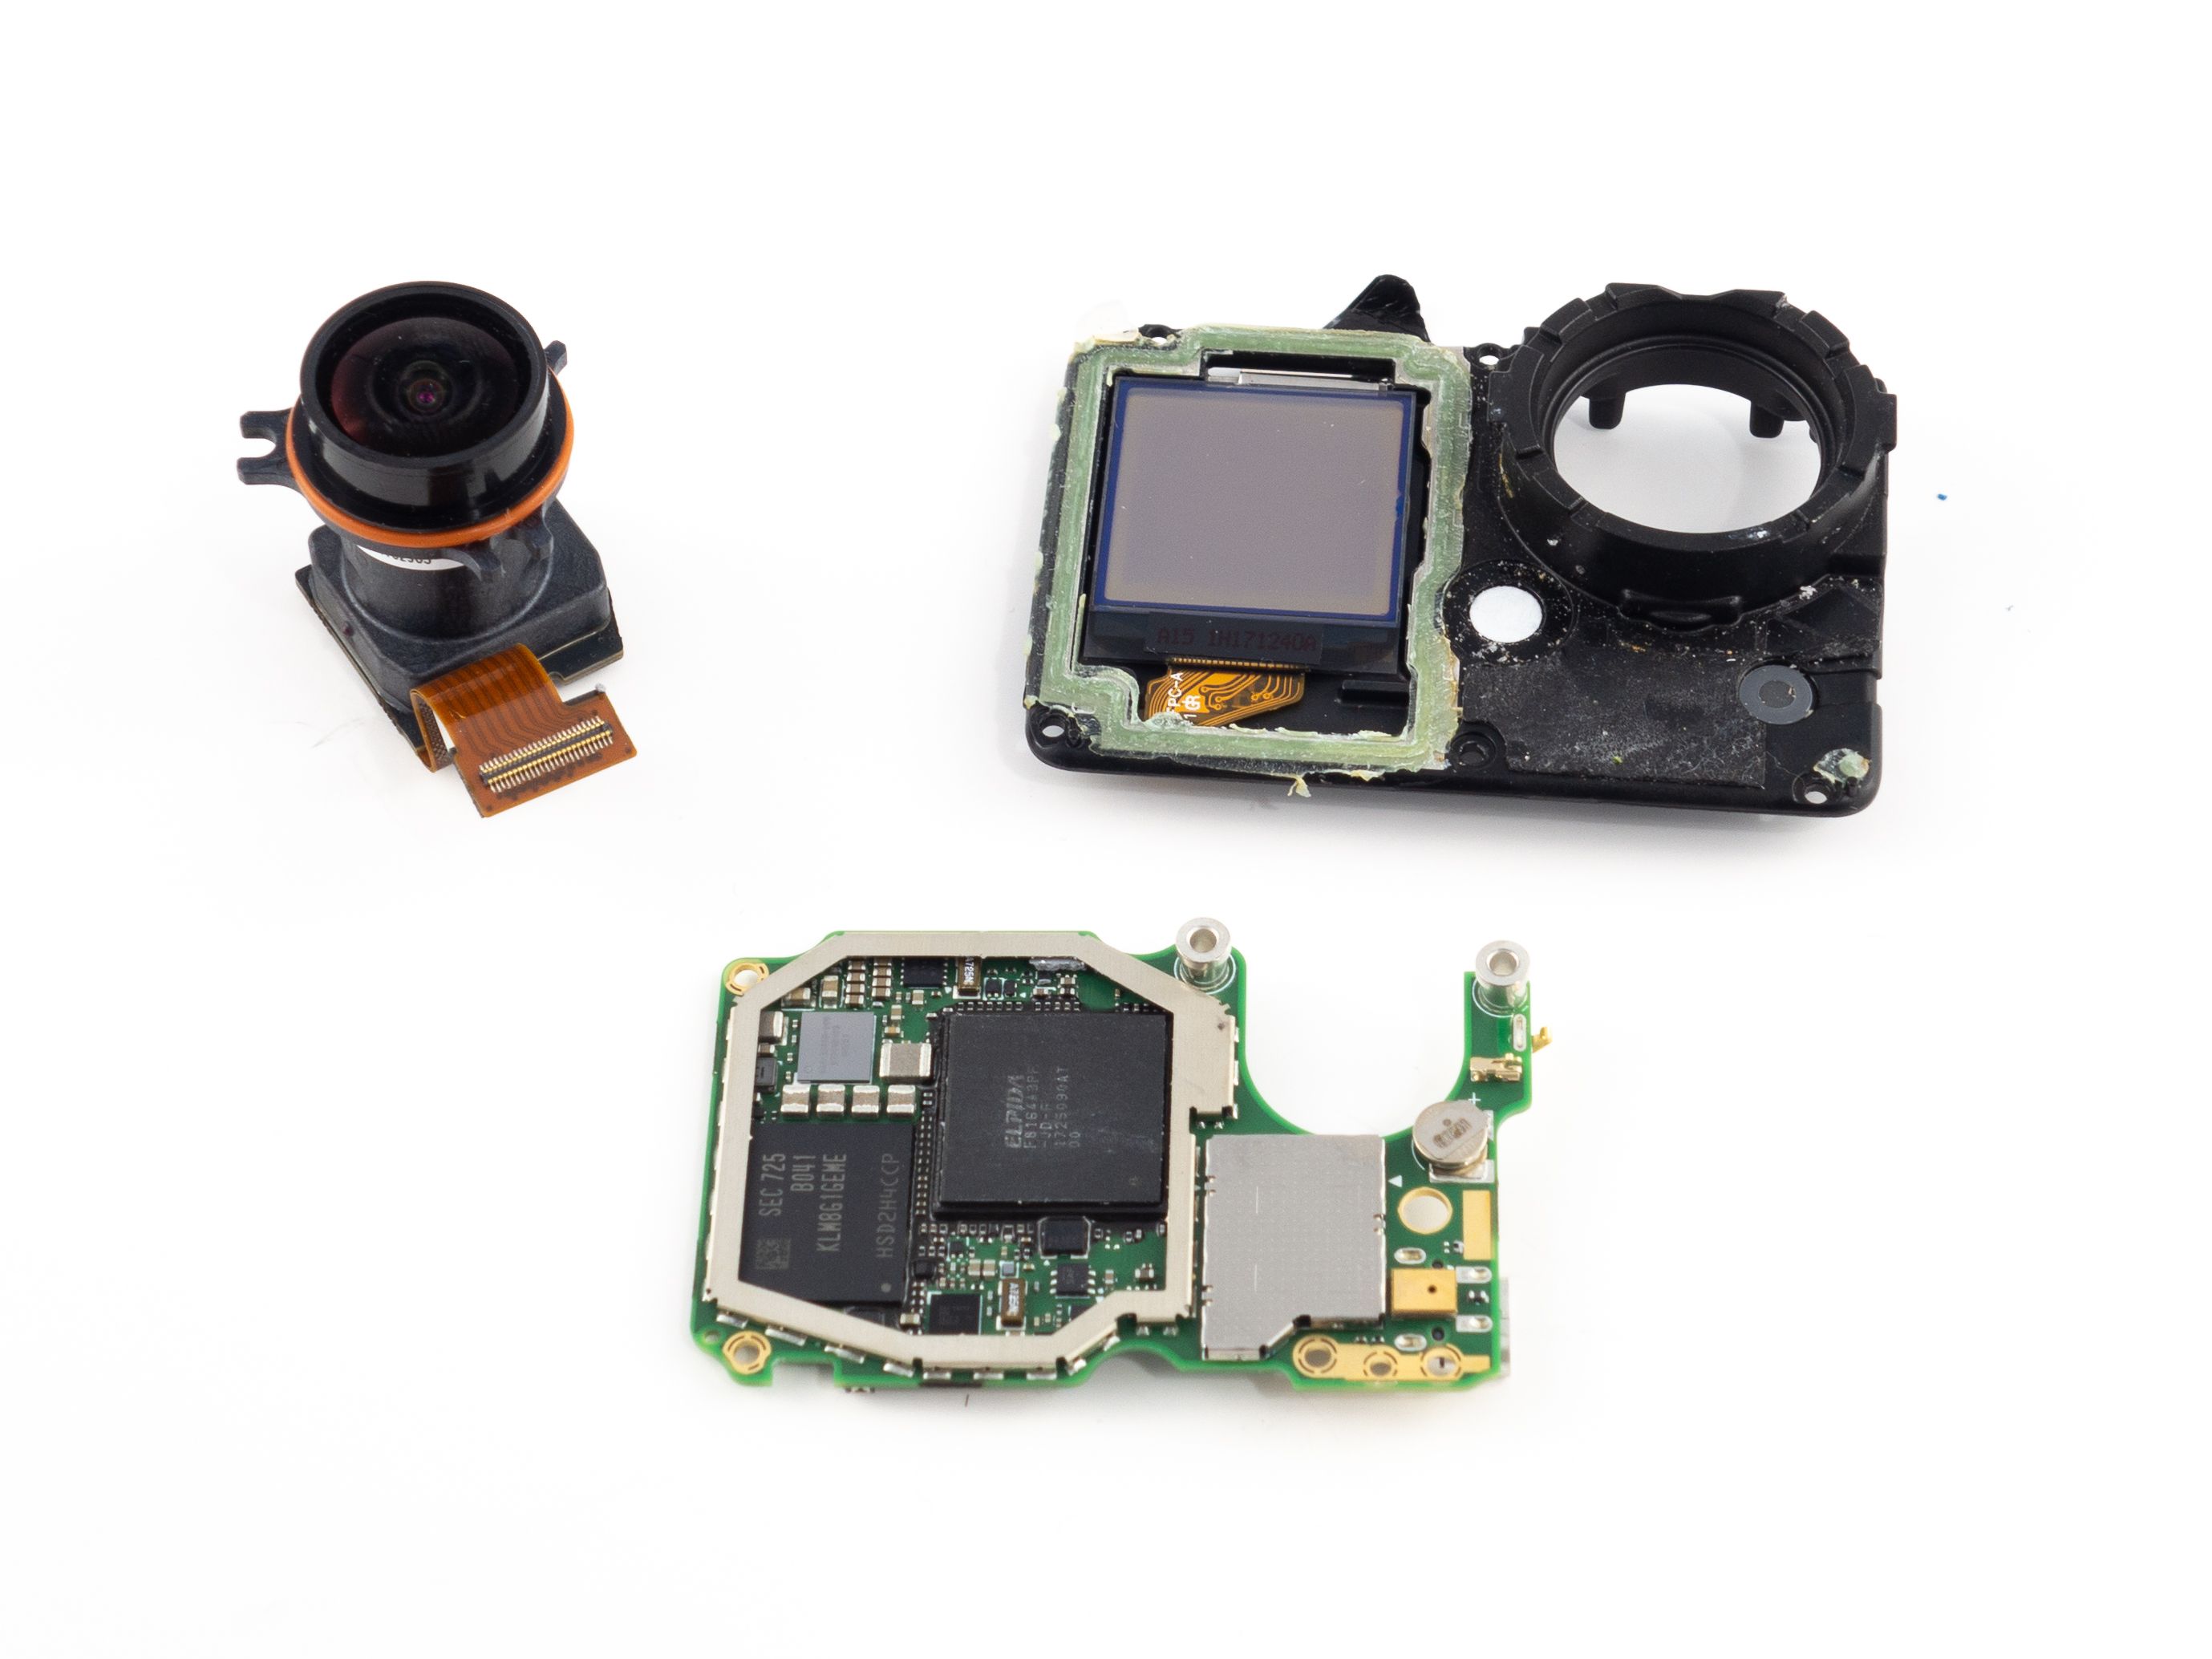
- Remove the single screw holding the sensor in place.
And that's it! You've successfully de-cased your GoPro!
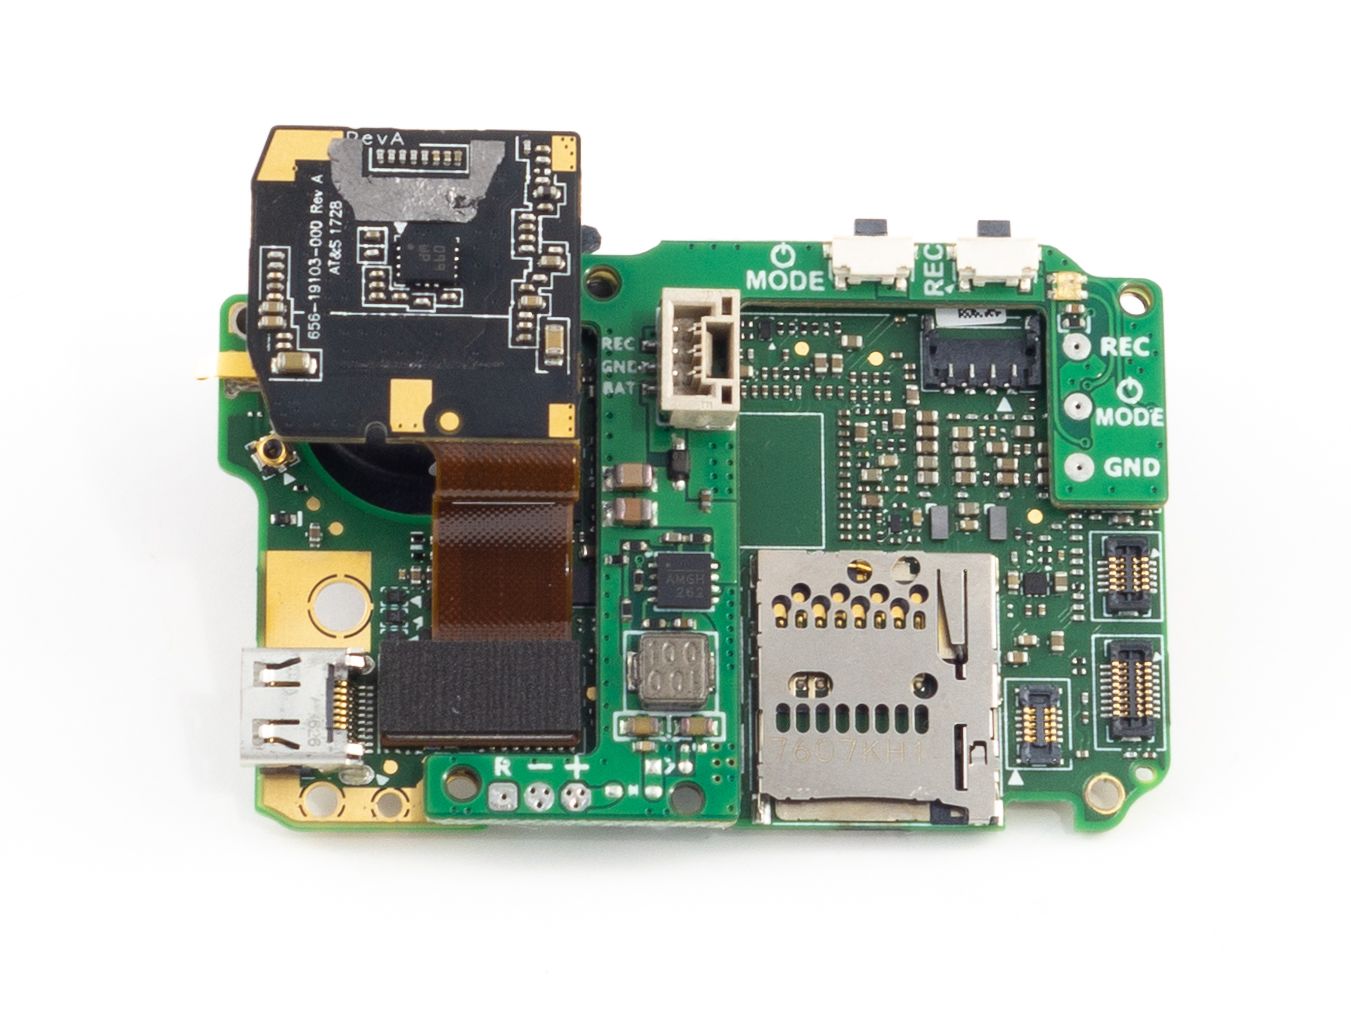
GoPro Lite Assembly
Now it's time to put it back together! Here I used the BetaFPV v1.1 BEC kit. The previous version required a pair of 3D printed spacers which are no longer necessary. Don't reuse any of the screws you removed from the GoPro. Use only the screws included in the BetaFPV kit.
- Reconnect the camera sensor to the main board.
- Snap the BetaFPV BEC board into place on the back of the board.
- Put the main board into the TPU case.
- Feed the sensor ribbon cable through first.
- Stretch the top corner of the case over the the camera sensor.
- Stretch the opening across the top to get the last corner through.
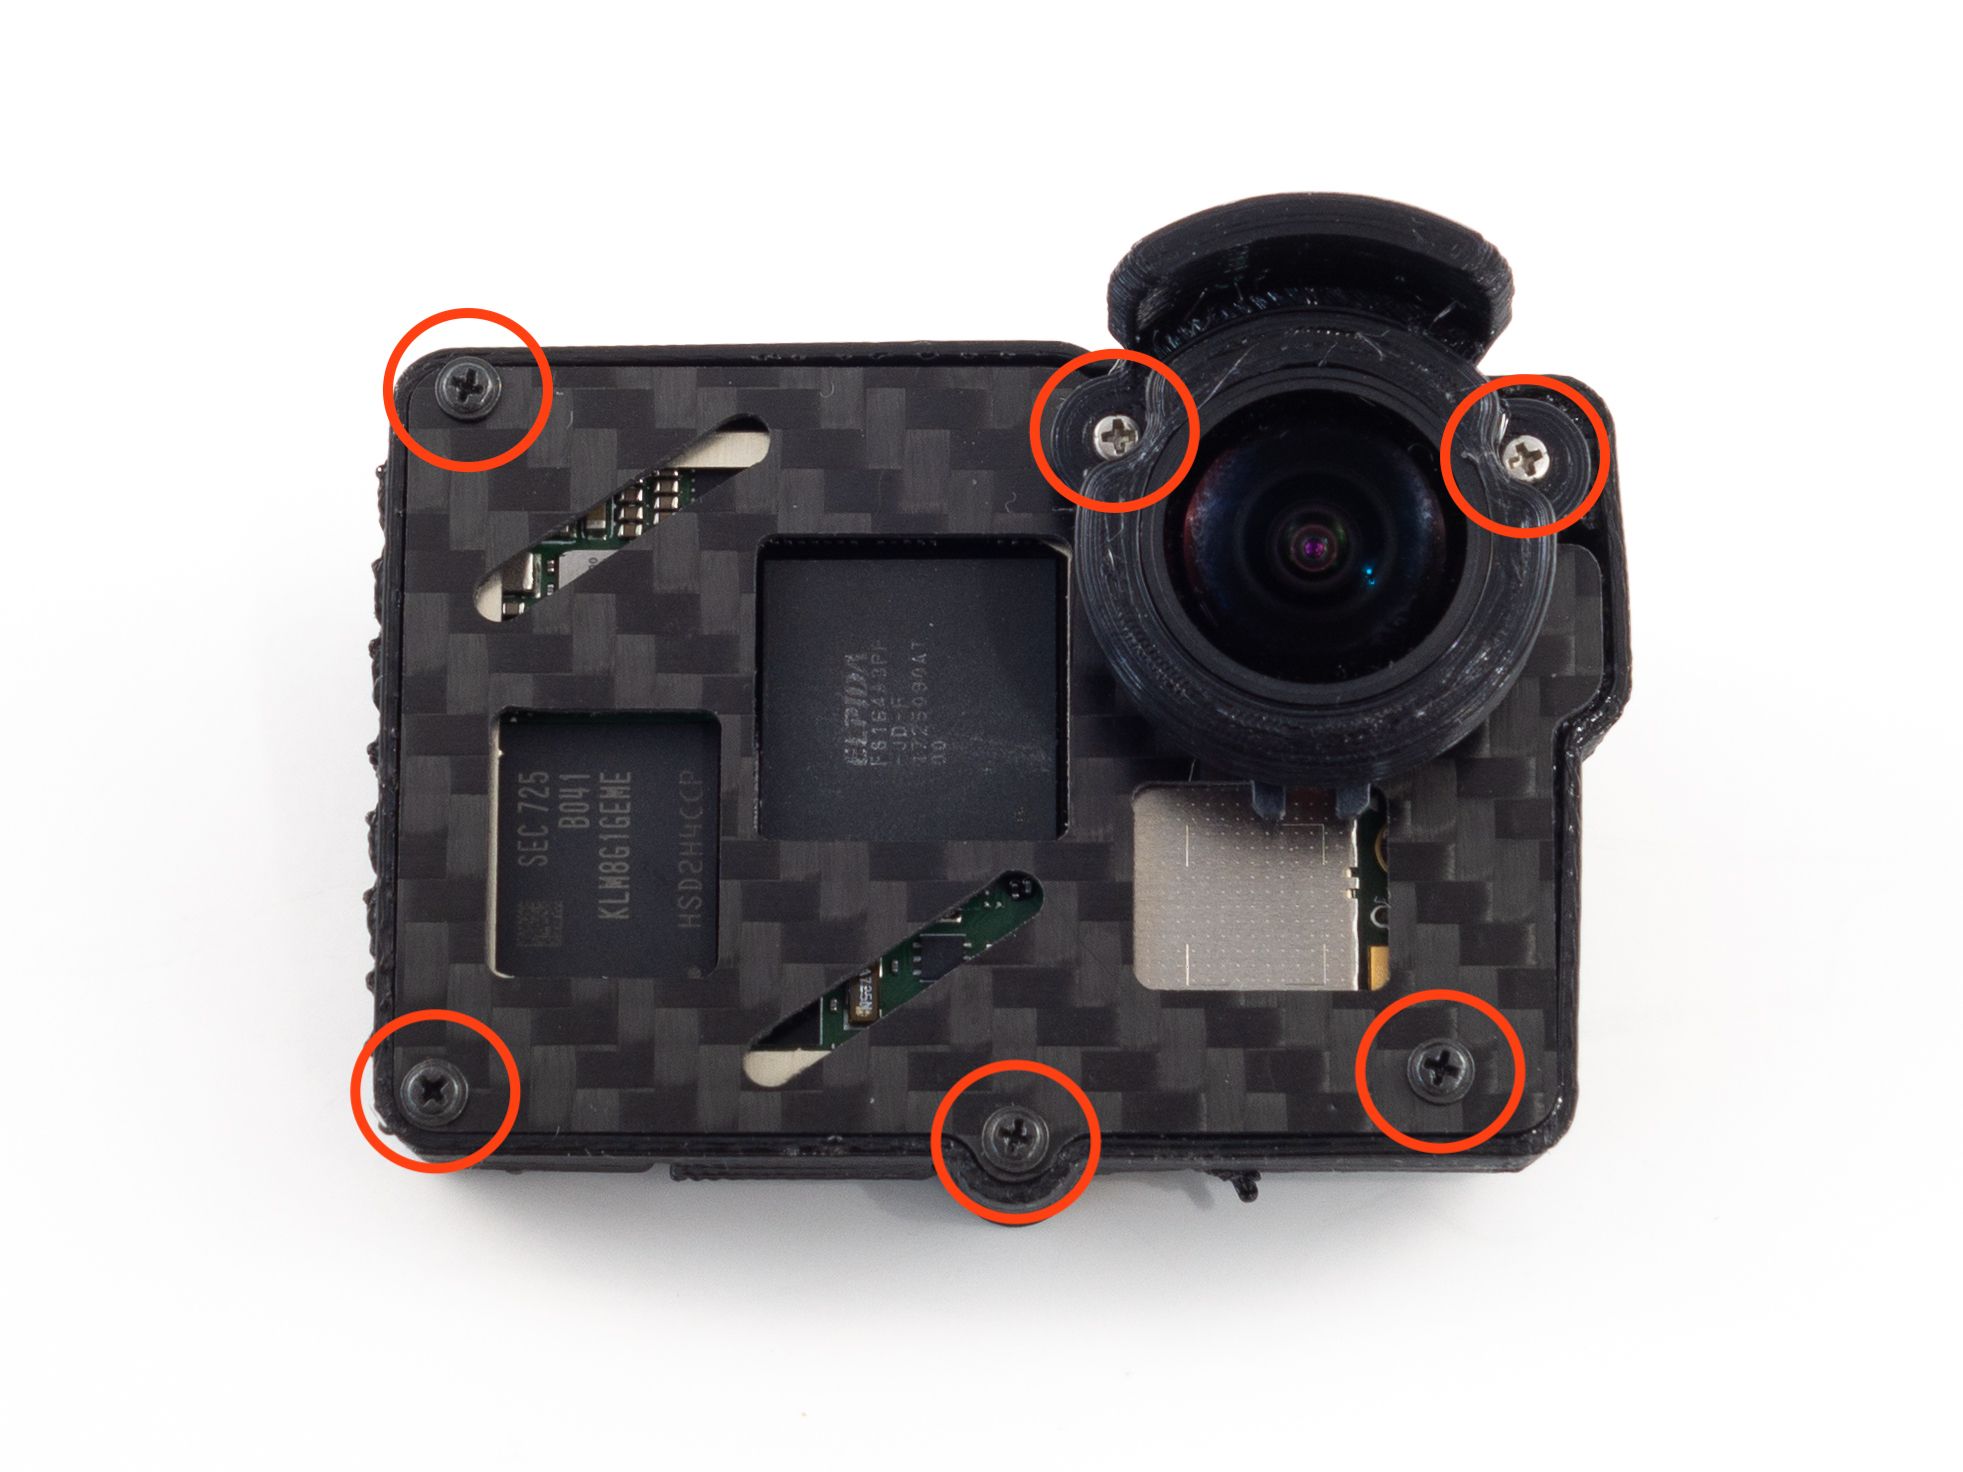
- Use 3 silver screws to hold the board in place as indicated in the photo.
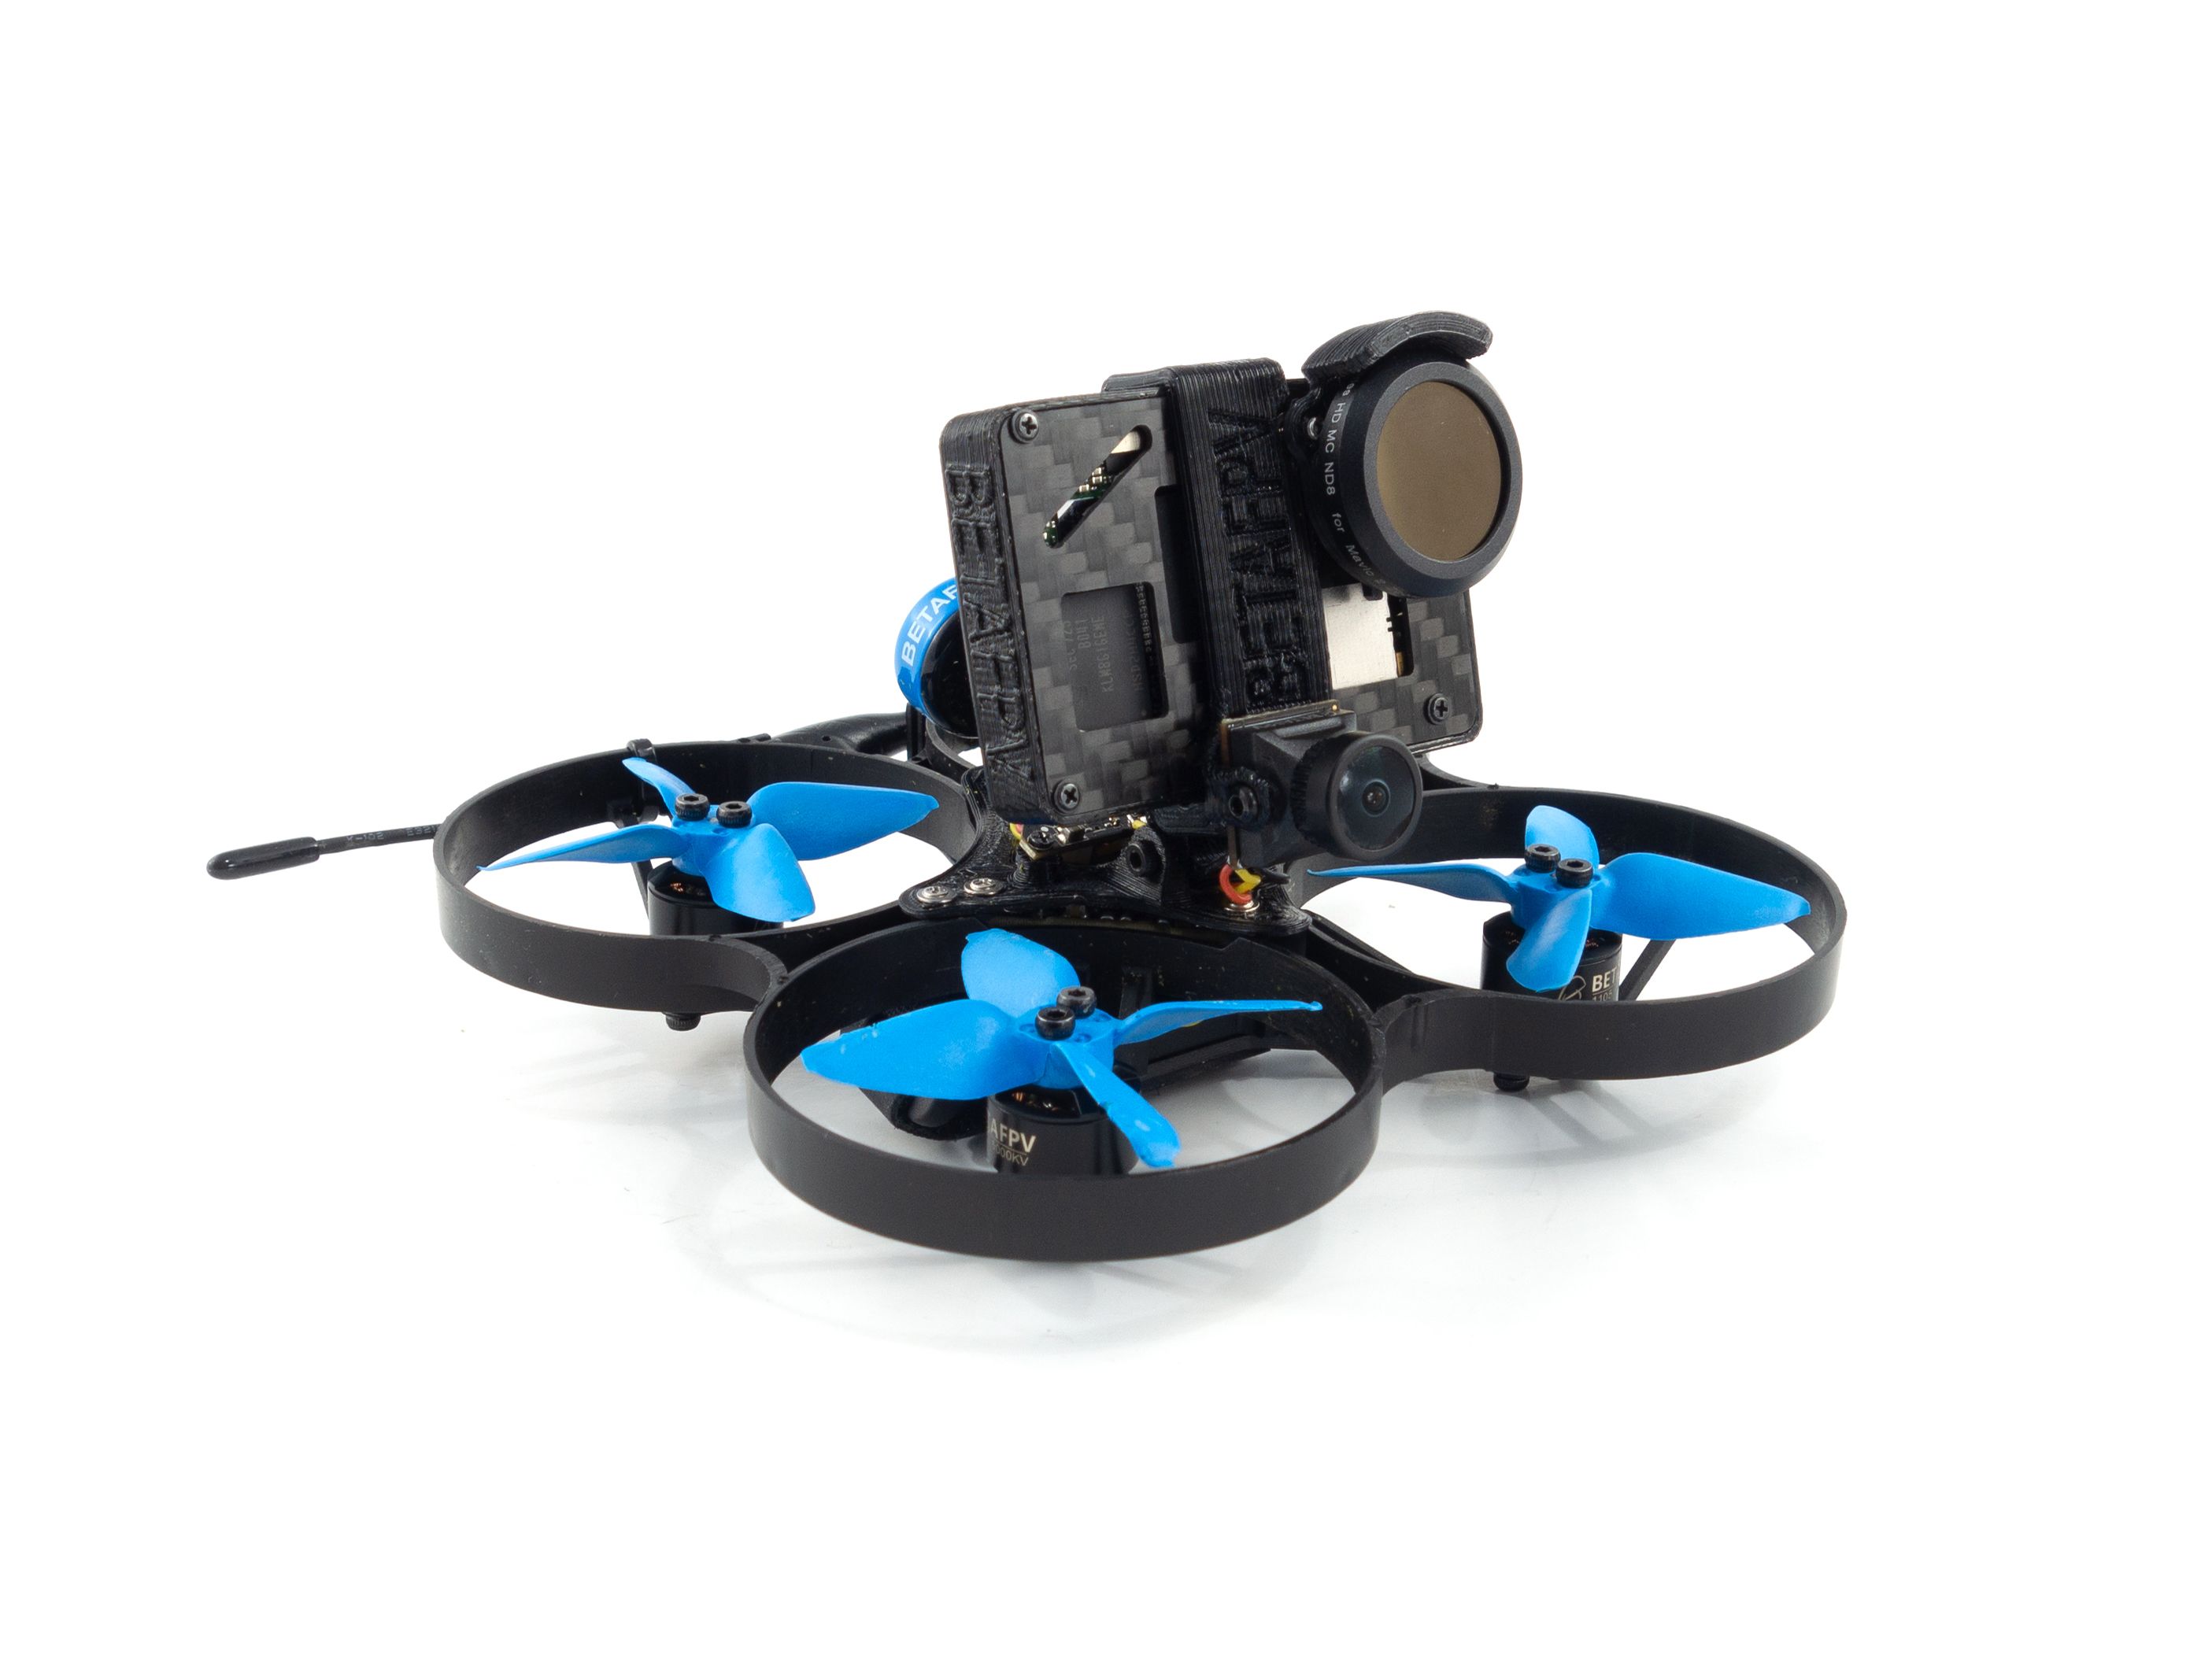
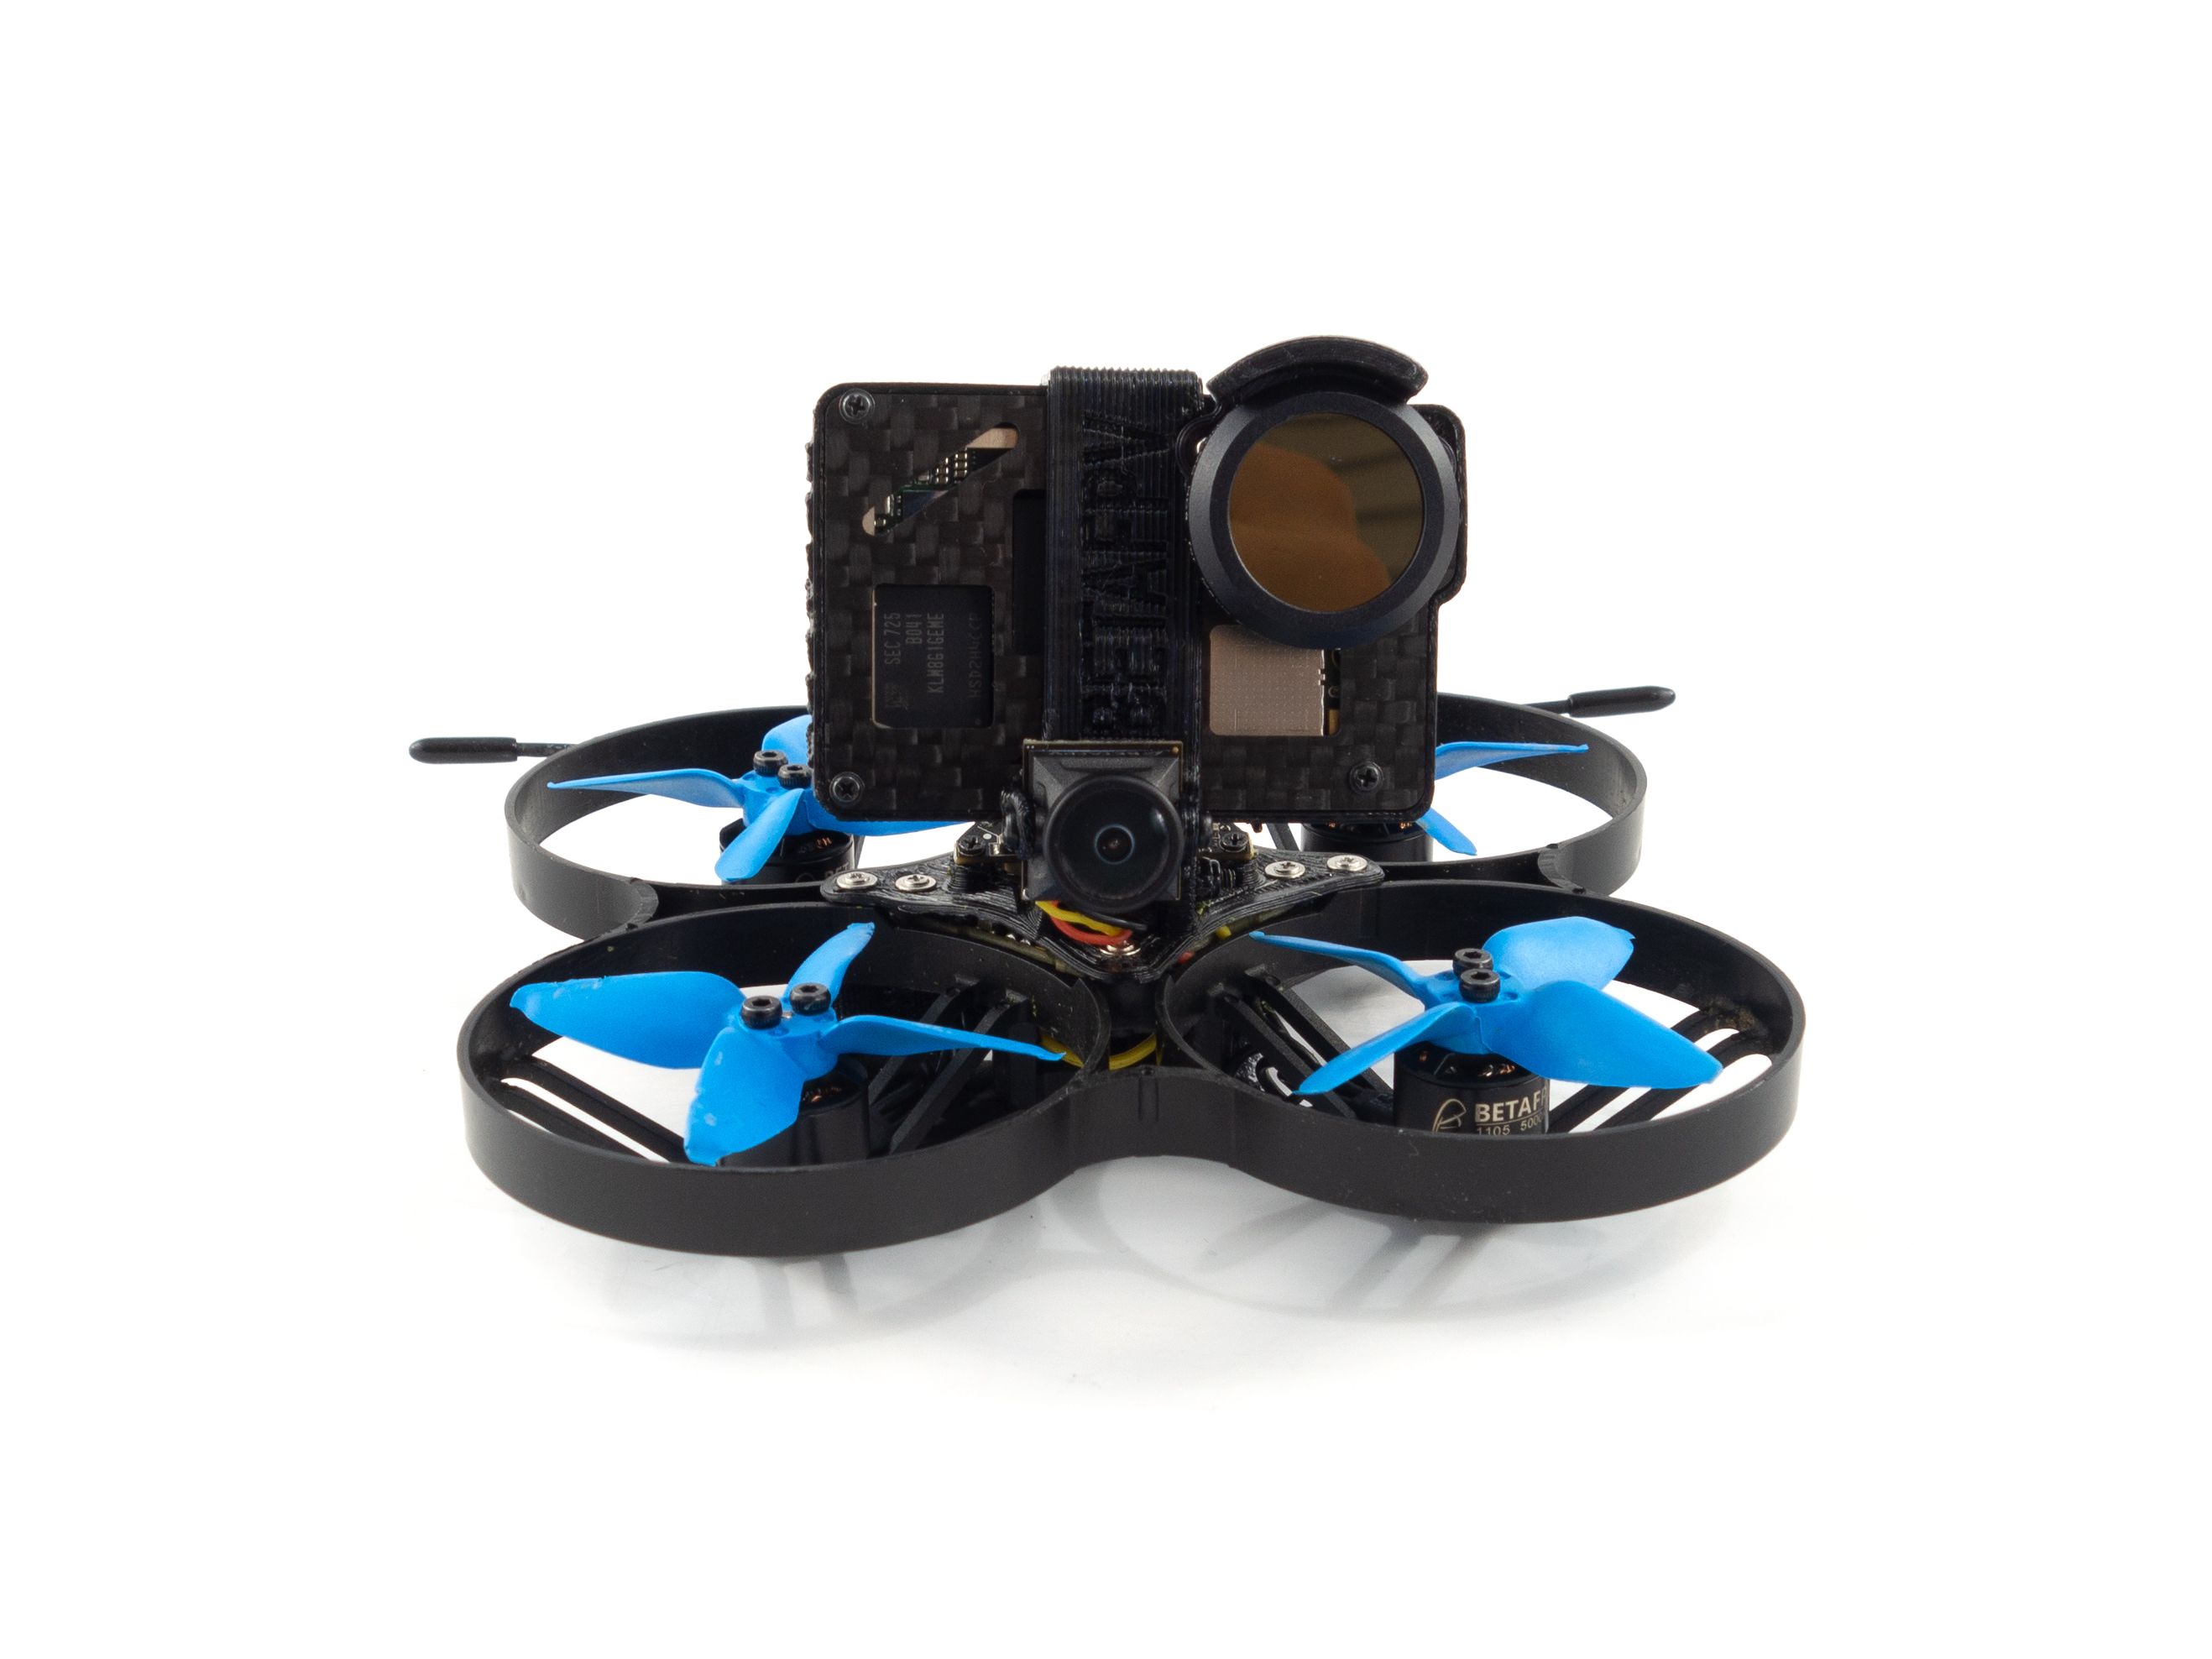
- Slide the carbon fiber plate in place under the lens.
- Screw it in place with 4 long black screws.
- Screw the TPU lens ring in place using the two long, silver screws.
- I printed an alternate TPU ring that allows me to attach a Mavic 2 Zoom ND filter.
- Put the TPU cap over the back of the camera sensor.
GoPro Settings
If you plan to use ReelSteady Go you should record in 4:3 mode. It'll do a linear stretch to 16:9 automatically. Personally I prefer 2.7k 60fps for the higher framerate. It offers the flexibility to slow down the footage. You can also record at 4k 30fps in 4:3 mode. I like to lock my ISO to 400 for a shaper image as well, but it'll take a hit in low light environments. You might also want to consider locking your shutter and white balance but I leave those on auto.
Beta85X Setup
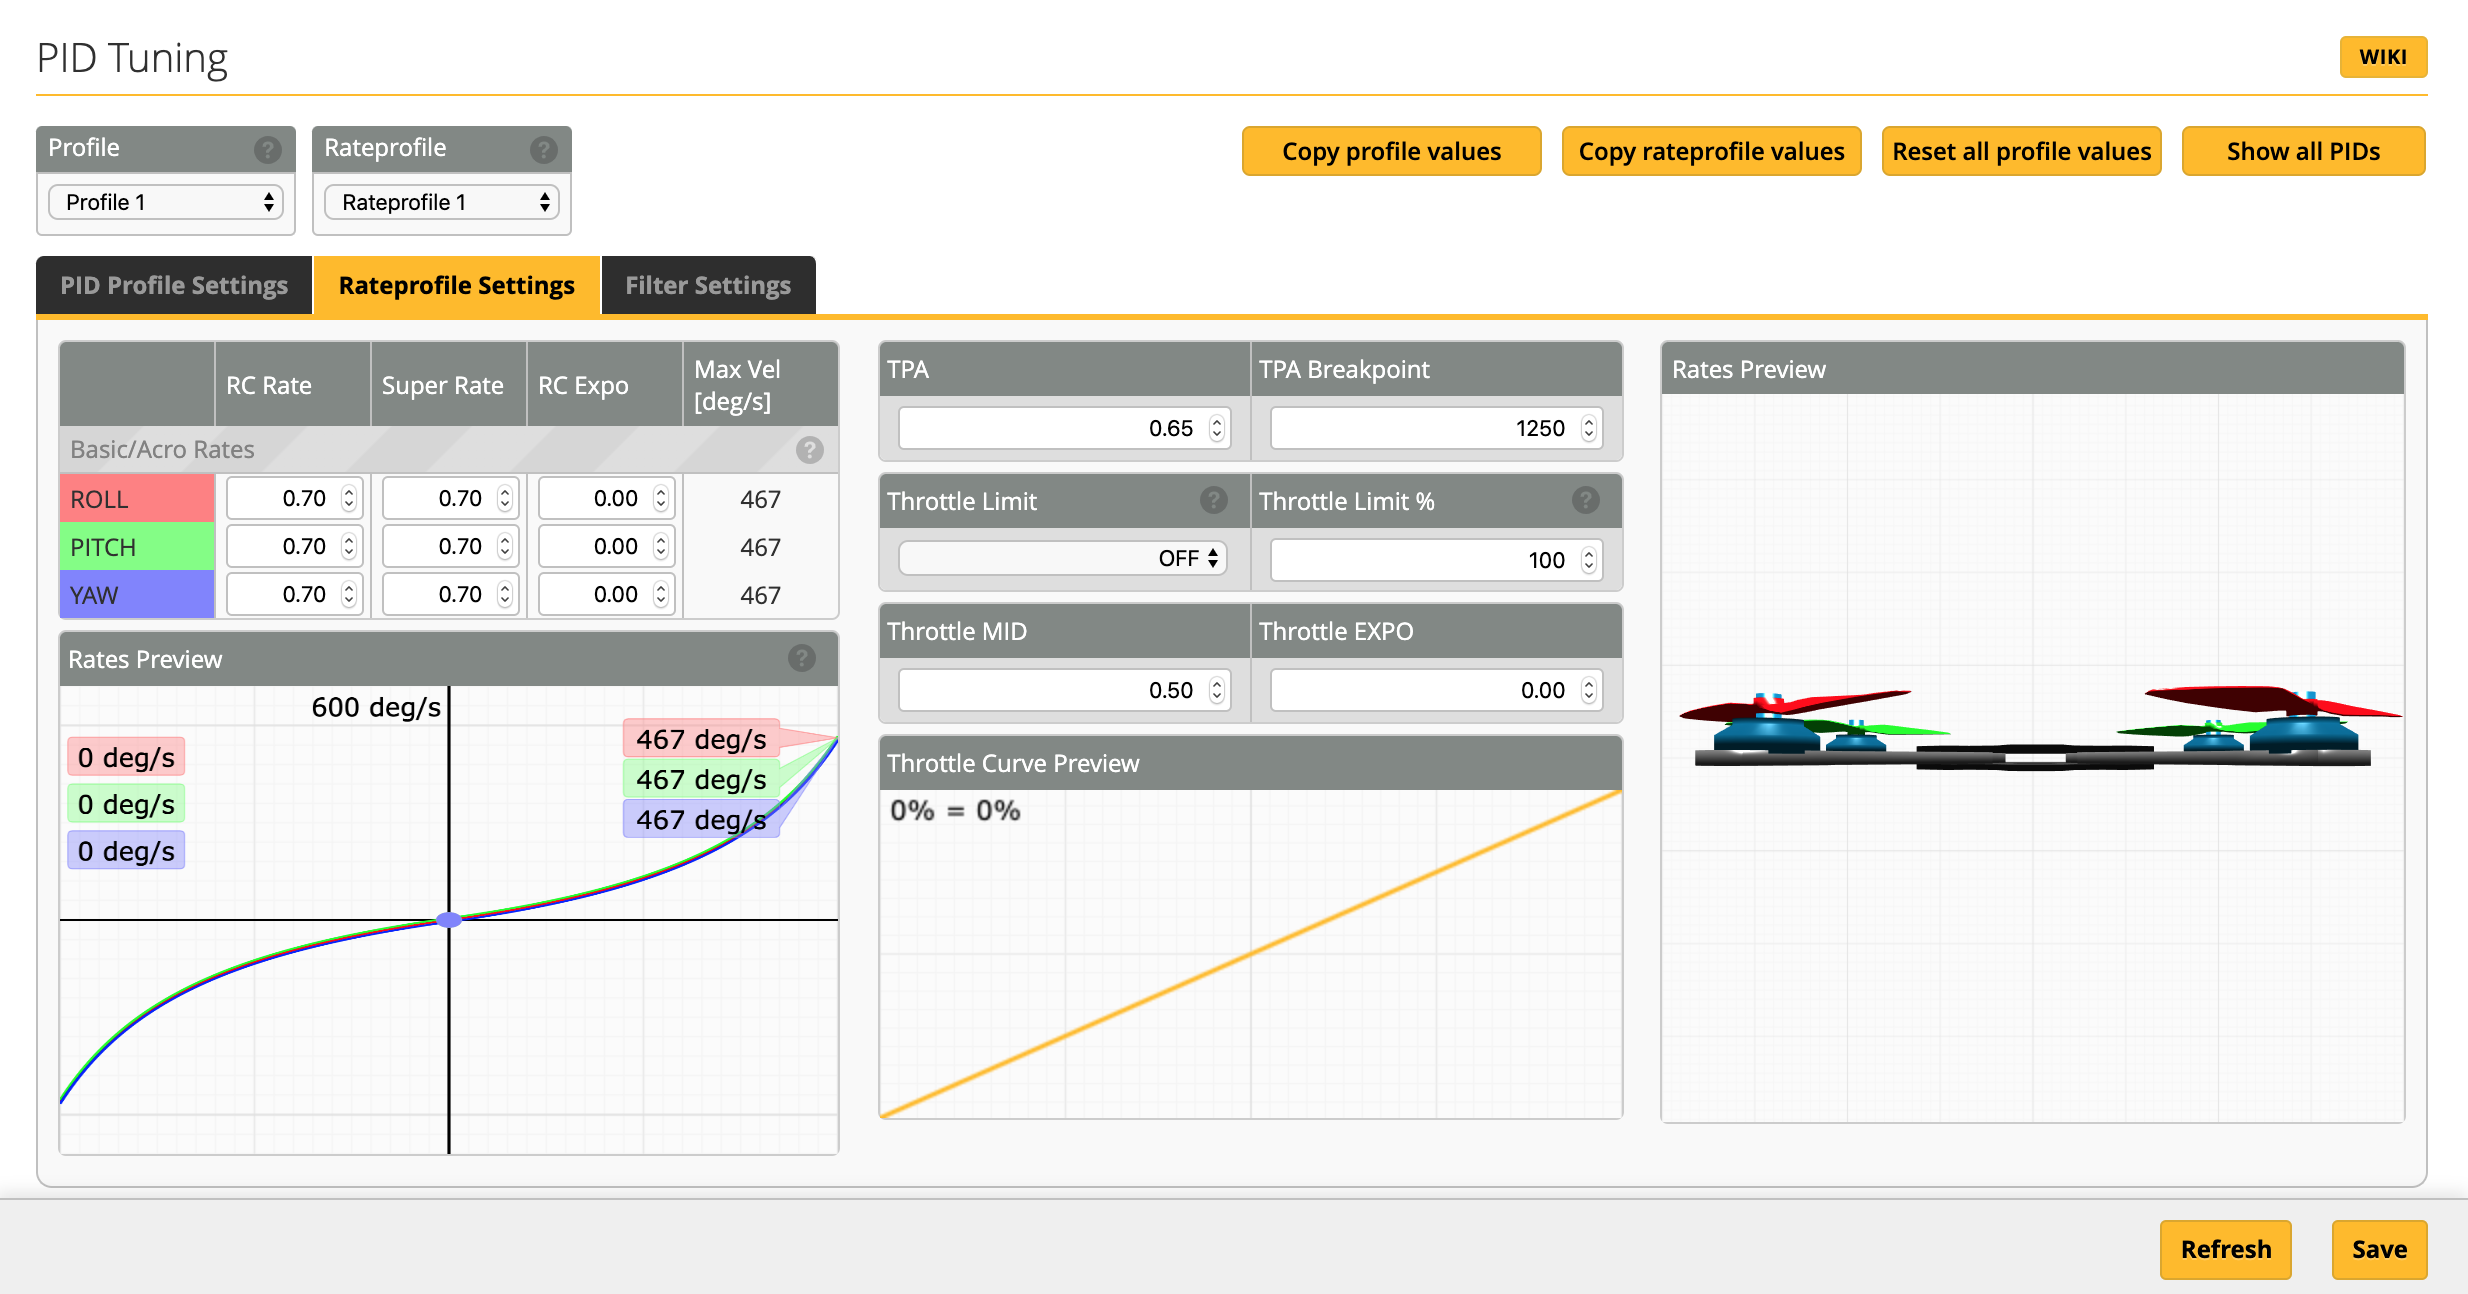
There's not much to do here except set up your modes and configure your radio. If you want to fly in angle mode I suggest lowering your Angle strength in around 30. This can be found at the bottom of the PID Tuning tab. It's to help reduce sharp corrections in your footage. Also, I prefer slightly lower rates to get a smoother flight. Here's what I use:
Recording
There are instructions to configure a record switch on your radio, but I don't recommend trying it. You can review them on the BetaFPV website. I had trouble setting it up and I've read about all sorts of issues using this method. It's best to record manually using the buttons on the camera. Here is the process I use.
- Plug in your battery.
- Wait for a single red blink on the back of the camera.
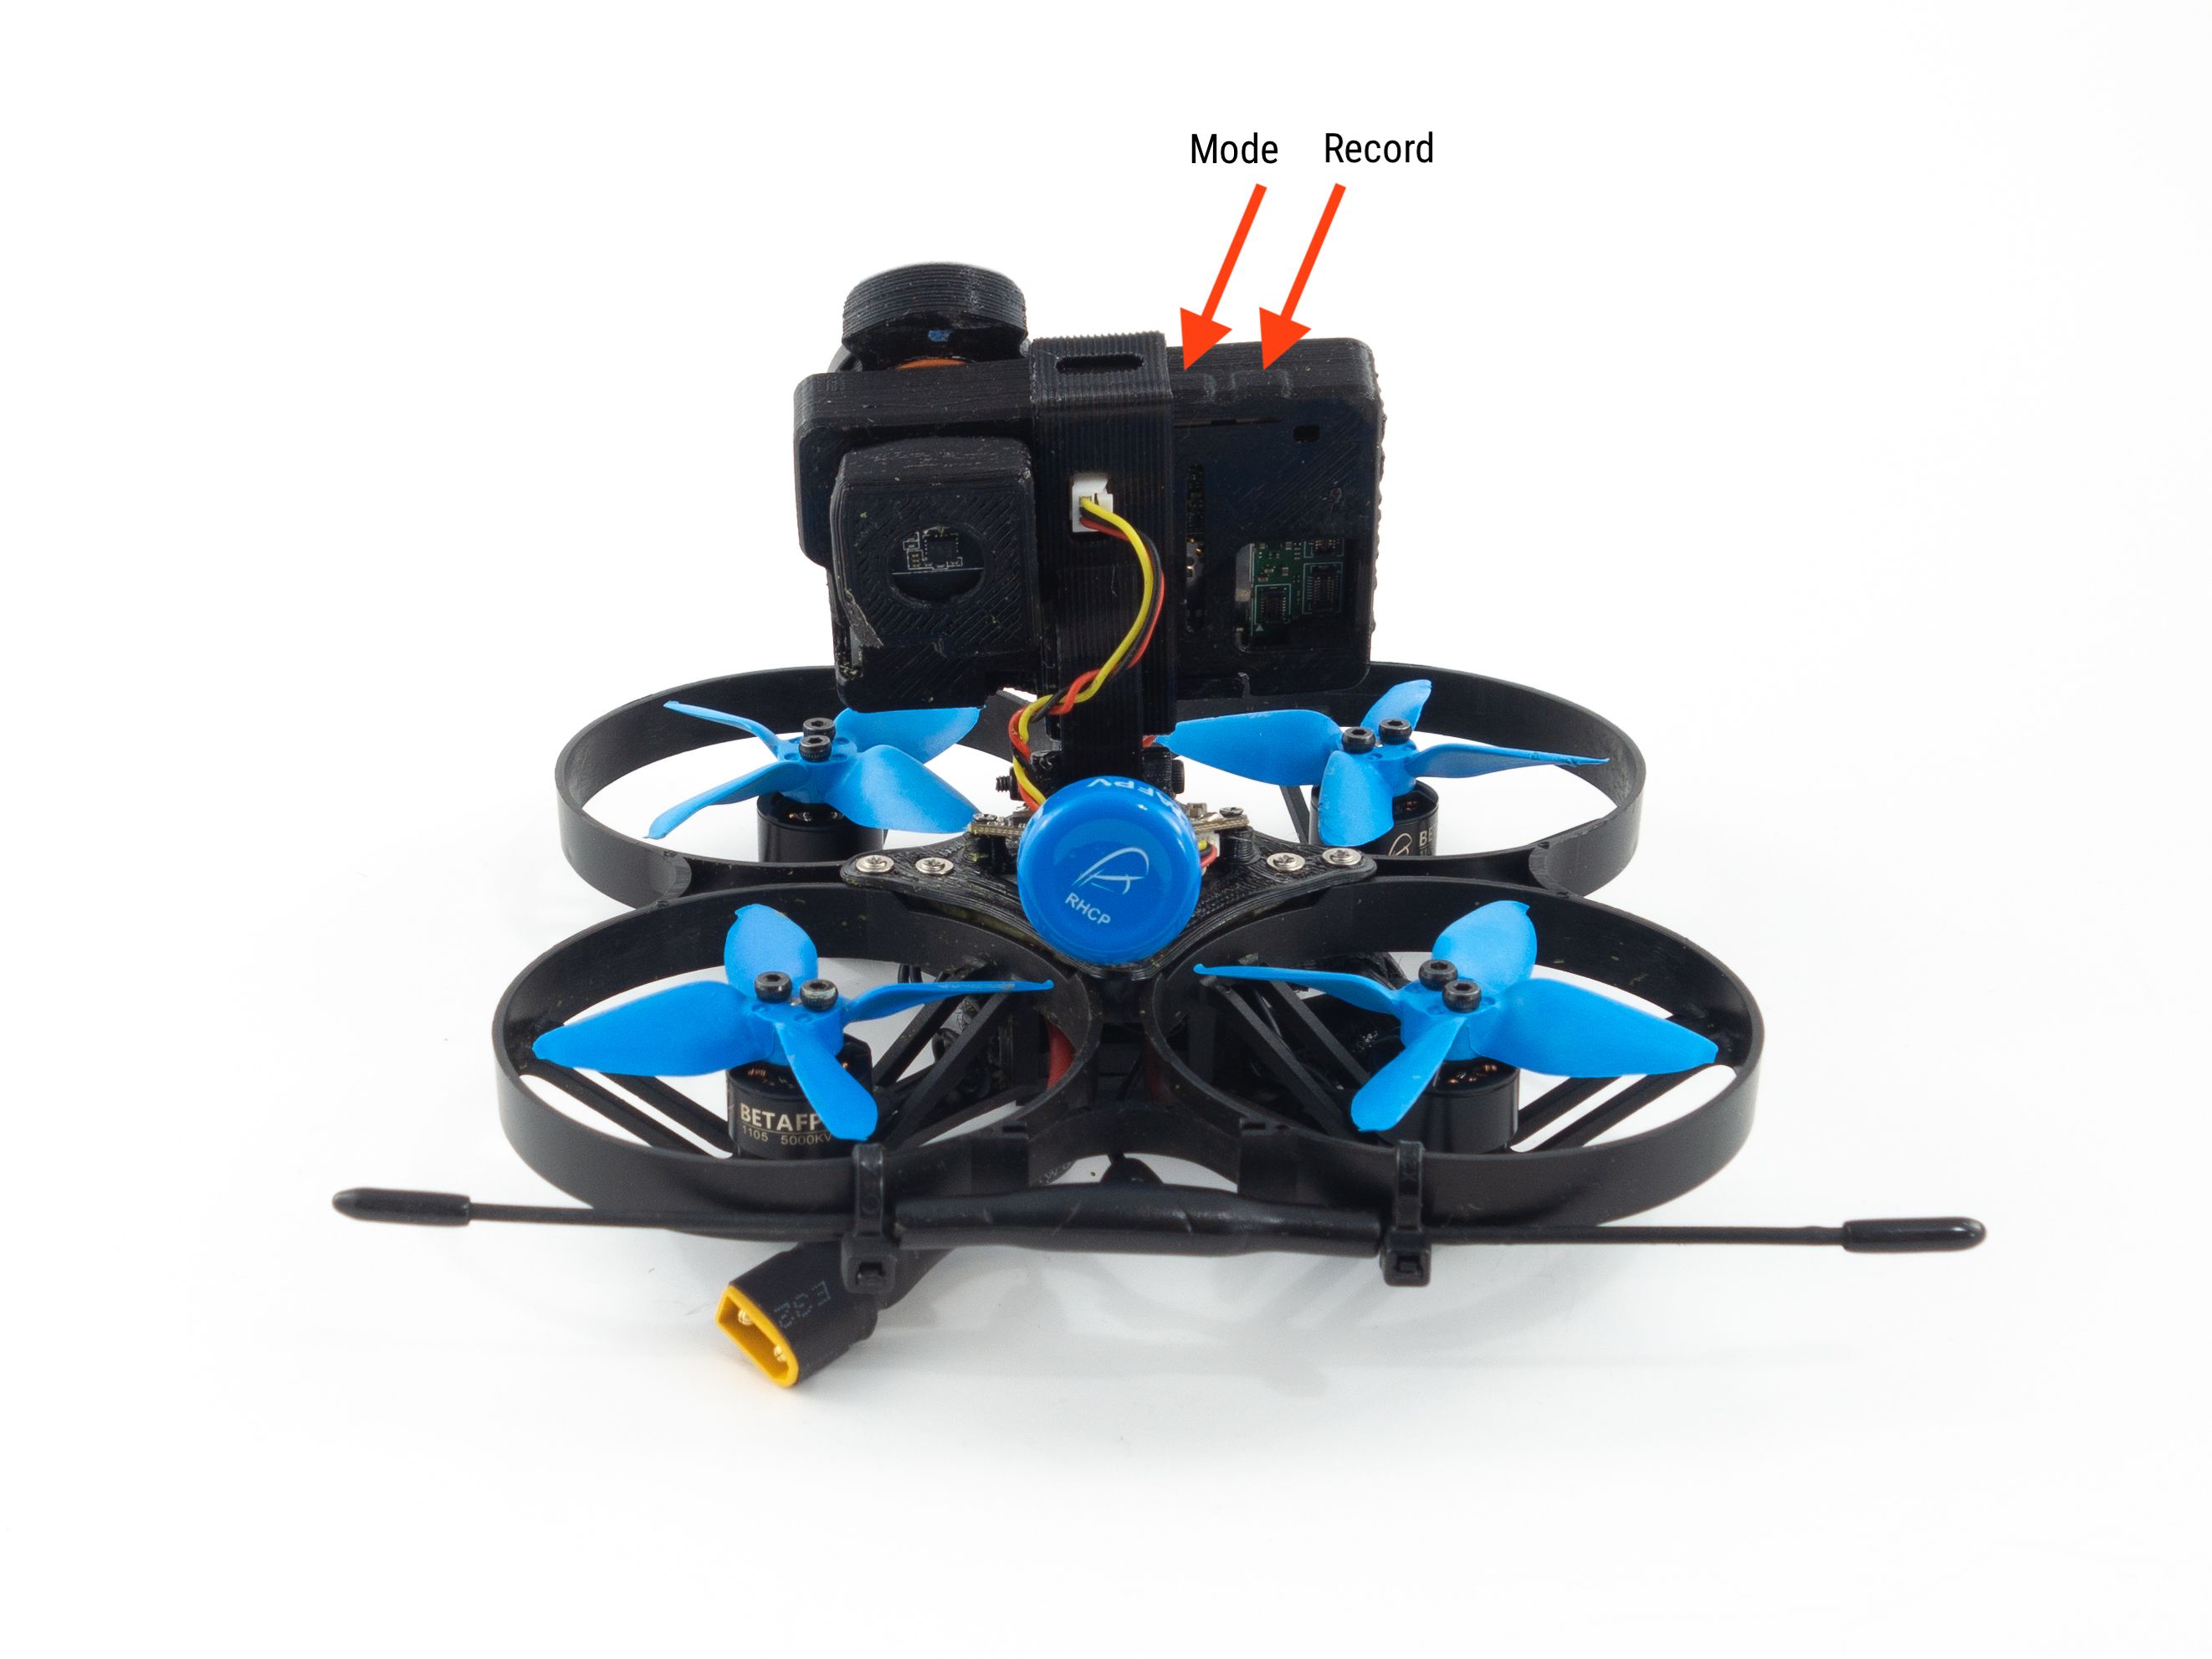
- Press the left button (mode) and it'll blink 3 times.
- Wait a second or two then press the right button (record).
It should begin to pulse indicating it's recording. When you're done flying be sure to stop recording by pressing the record button again. The light will blink 3 more times and it'll turn off. Don't press the buttons in any other order or it won't work. If they stop responding simply power cycle the battery.
ReelSteady Go
Now this is where the magic happens. ReelSteady Go takes the gyro metadata from your recording and uses it to render buttery smooth footage. It's a very simple standalone program. Copy your footage from the microSD card and load it into ReelSteady Go. It'll choose a couple gyro sync points automatically, but you can add more. I've found it works fine either way. If you trim the footage it'll give you a warning that the audio will be removed, but we already removed the mic. I don't touch any of the other settings, but if you would like a fixed horizon you can change that setting before rendering.
Rotorbuilds users can save $5 on ReelSteady Go with the coupon code "ROTORBUILDS".
Conclusion
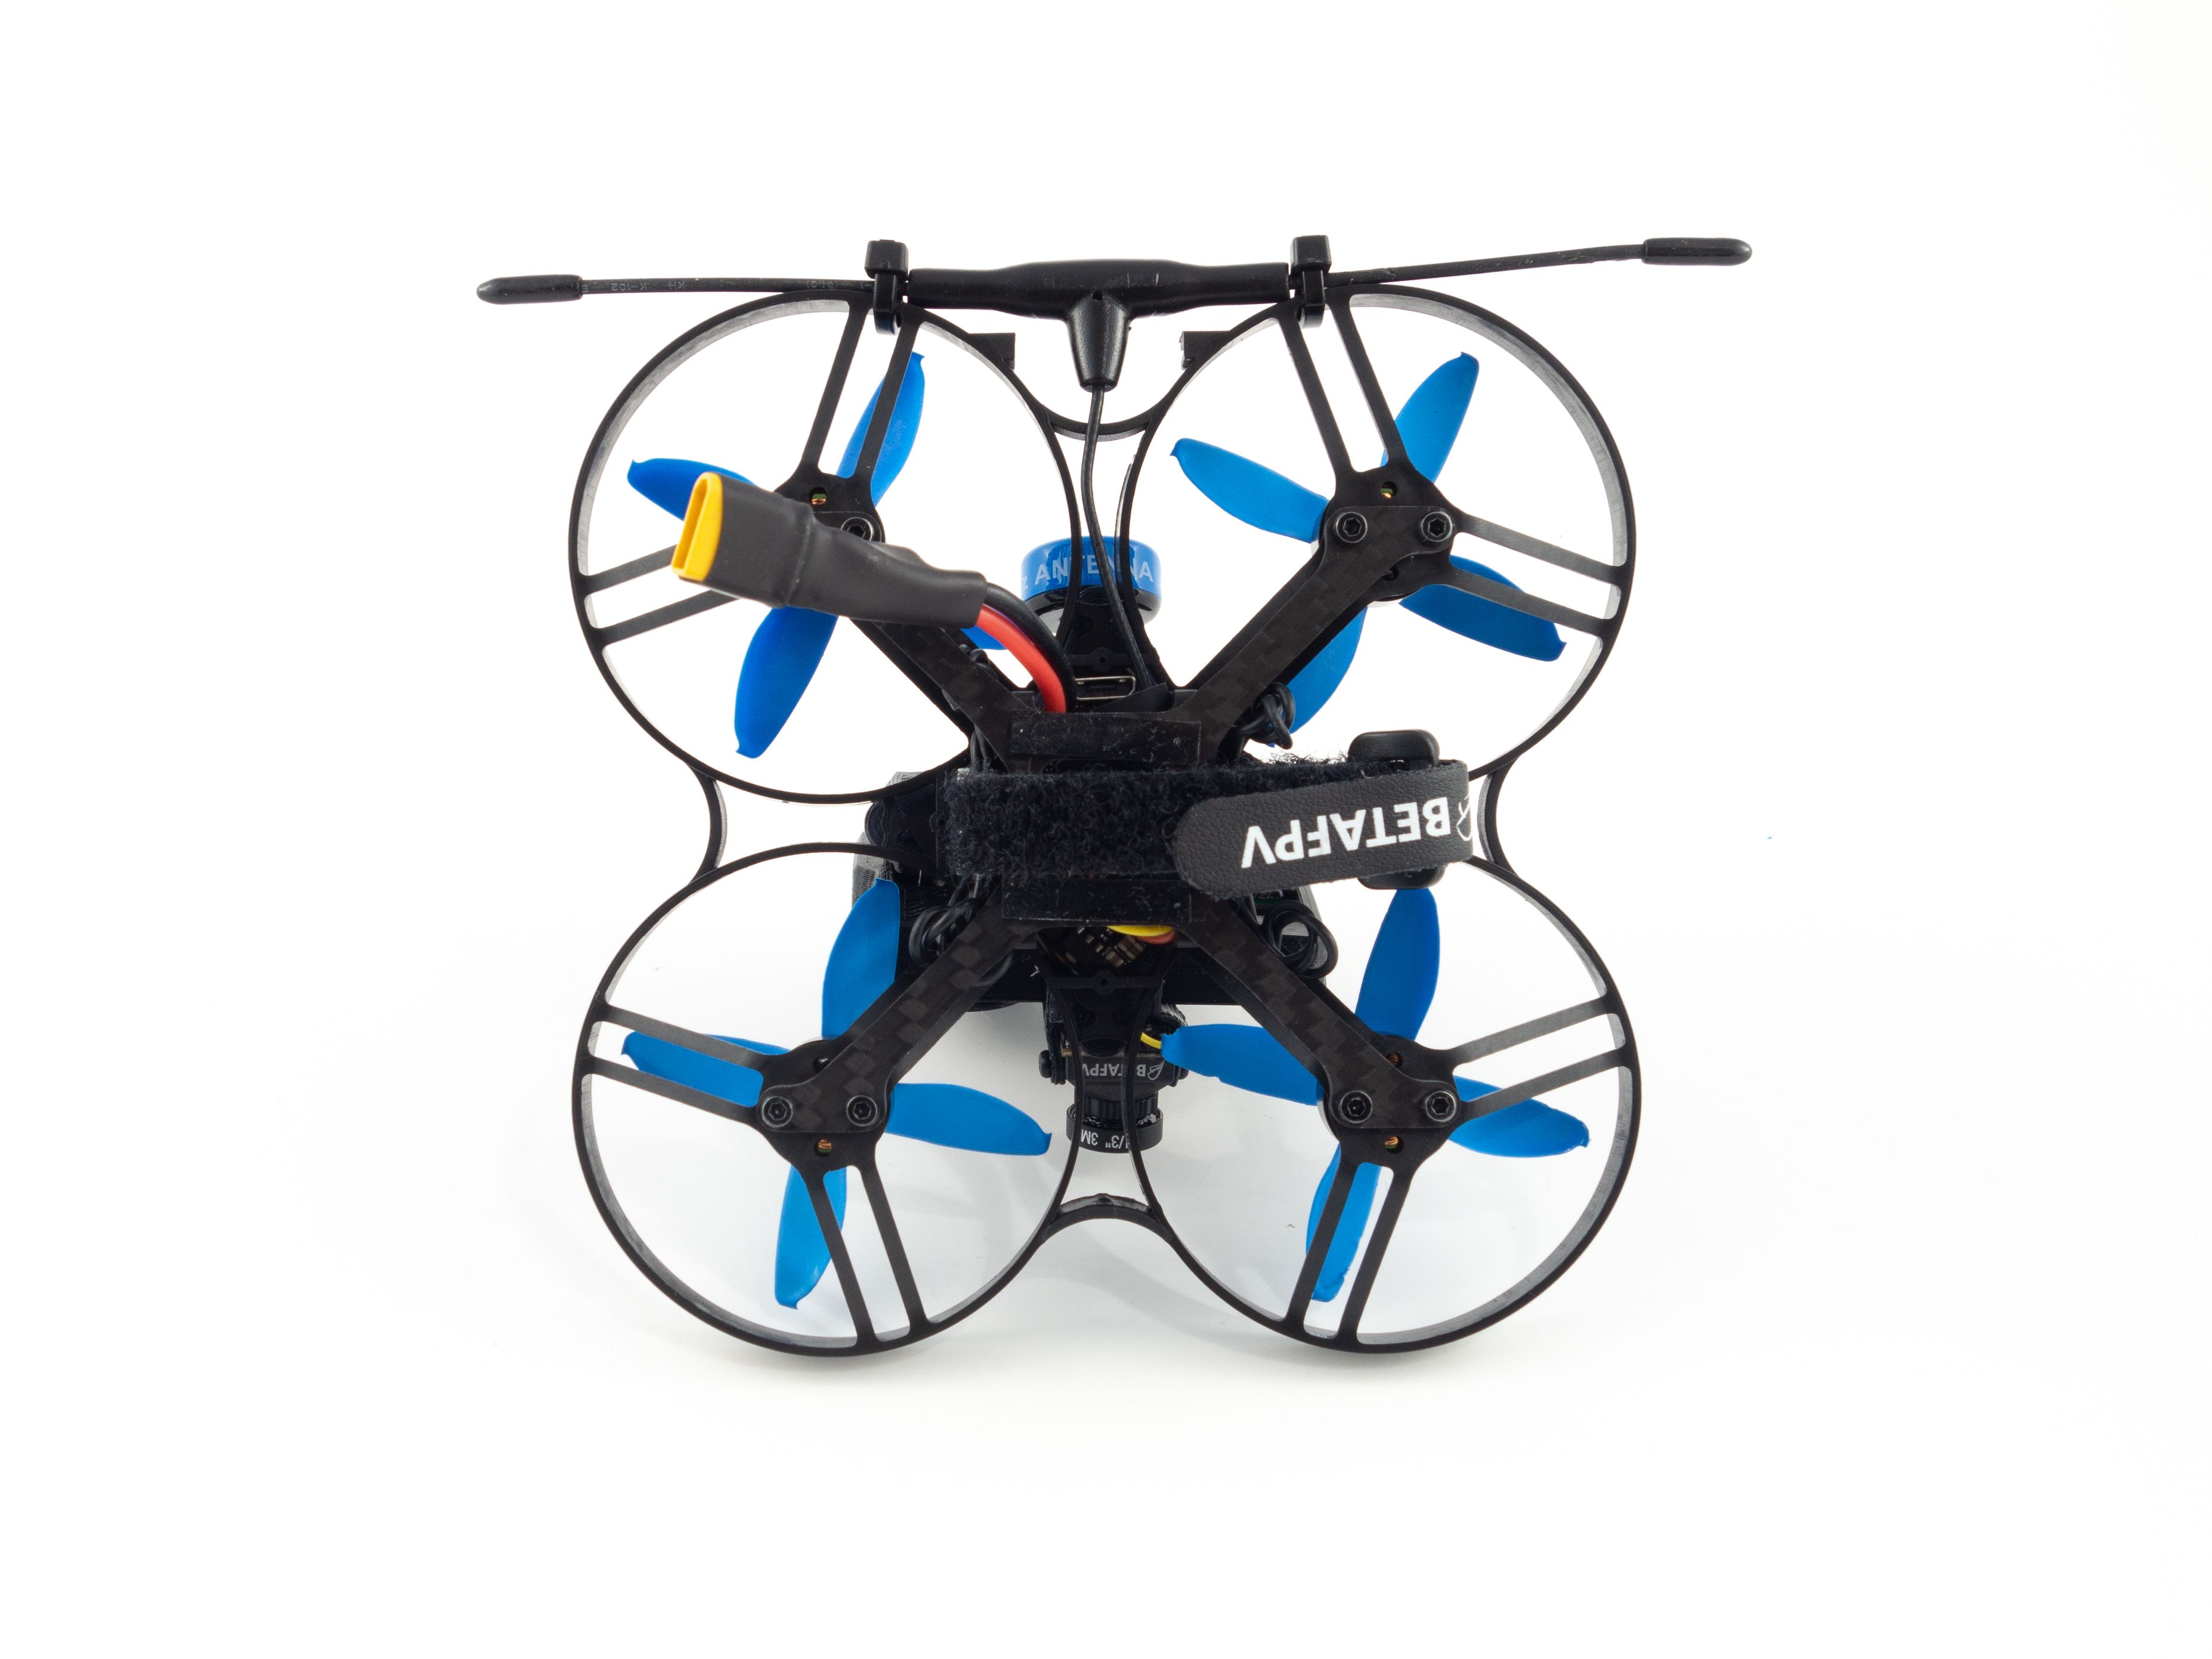
A lot of people prefer Hypersmooth to ReelSteady Go, but I don't. I think it irons out bumps much better and offers somewhat of a surreal feeling to the flight. I'm just amazed this kind of footage can come from such a small quad. This little rig weighs just around 160g with a 525mah battery and has a flight time of about 3-4 minutes. Now the camera isn't the greatest and I may replace it with a Caddx Baby Ratel, but it gets the job done. The Beta85X flies great without any tweaks to the PIDs. It's not going to handle wind very well, but it's fantastic for indoor flight. You can even add some weather stripping around the ducts to give it more padding. I put a full sized Crossfire antenna on mine, but I believe they package it with the smaller Minimortal T antenna. You'd probably be fine with any receiver though as this isn't intended for long range flight. Let me know if you have any questions and I hope you found this guide helpful!
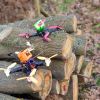
Photos


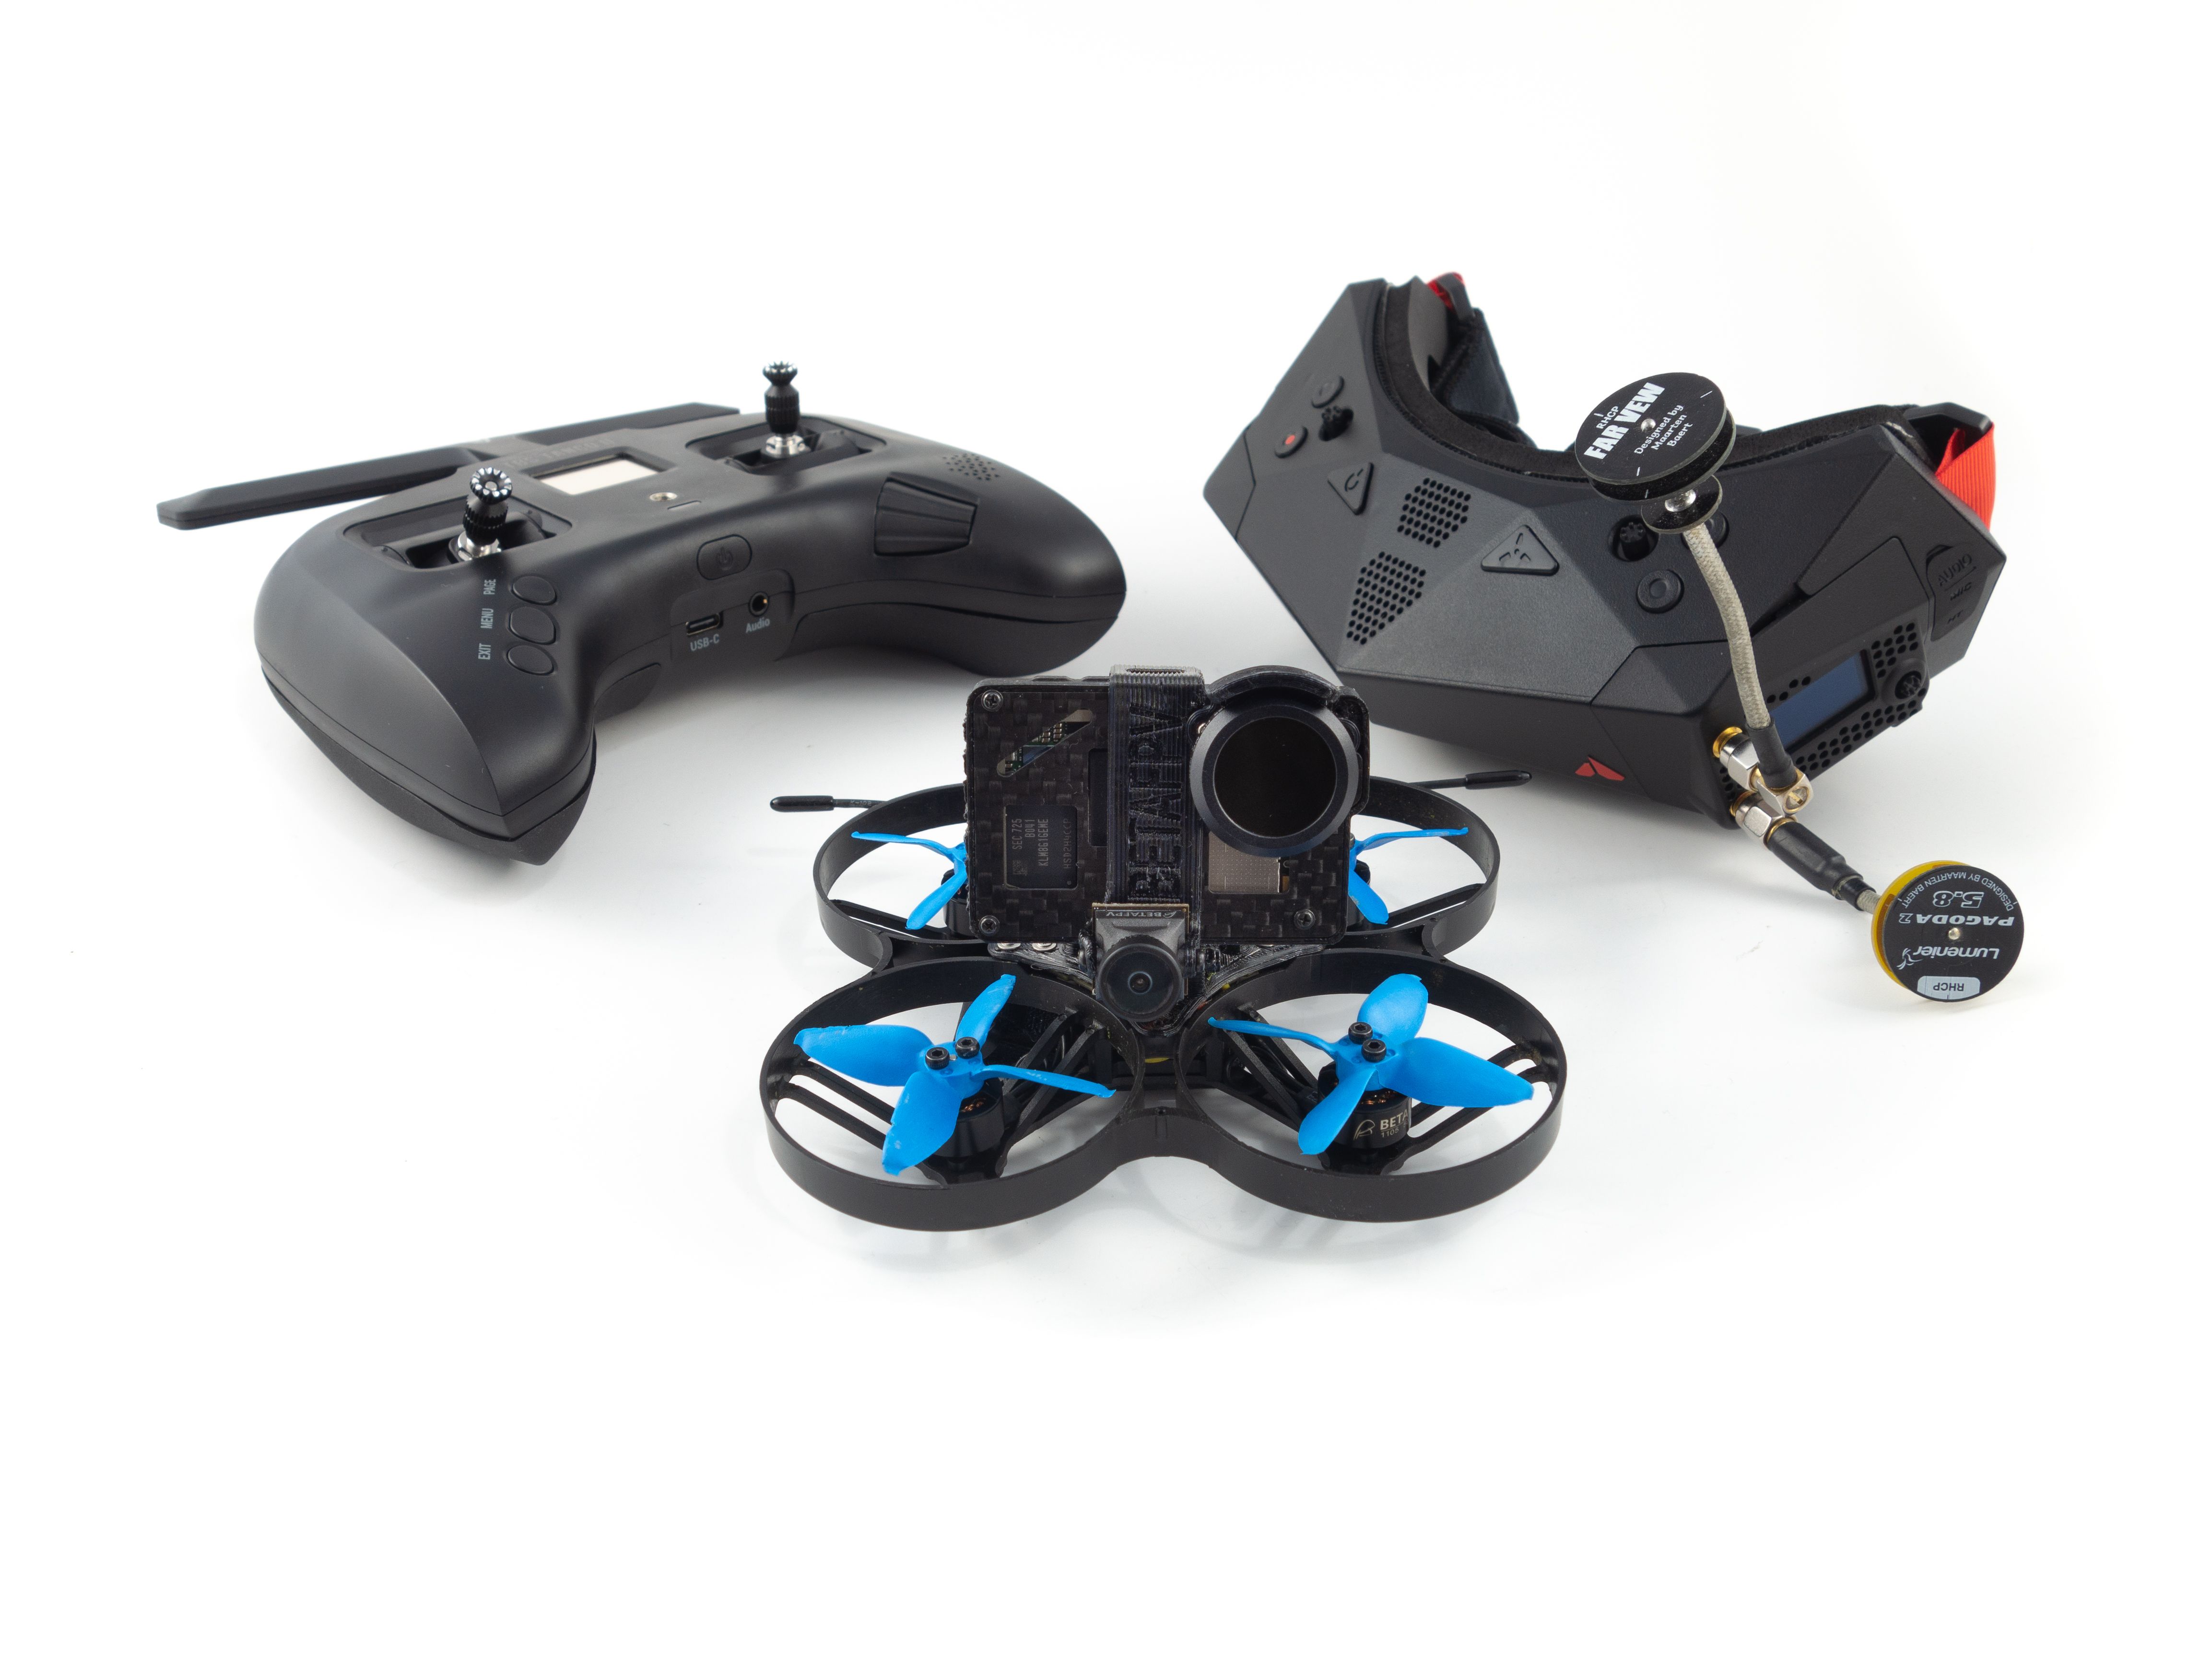
Part List
Frame |
Beta85X Whoop Quad for Naked Camera
Betafpv.com
|
$159.99 |
Batteries |
450mAh 4S 75C Lipo Battery (2PCS)
(6 builds)
Betafpv.com
|
$29.99 |
Radio |
TBS Tango 2 PRO FPV RC Radio Controller
(105 builds)
Getfpv.com
|
See Site |
Goggles |
ORQA FPV.One OLED FPV Goggles
(12 builds)
Getfpv.com
|
$549.00 |
3D Printed |
Naked GoPro Hero 6 Mavic ND Filter Adapter by TheUmmagawdCo
Thingiverse.com
|
See Site |
HD Camera |
GoPro HERO6 Black 4K Action Camera (Renewed)
(33 builds)
Amazon.com
|
$278.99 |
Accessories |
8 Piece Filter Kit (UV, CLP, ND4, ND8, ND16, ND32) for Mavic 2 Zoom - Brand New
Ebay.com
|
$28.99 |
very cool, much different then I was expecting and i imagine more durable then then the umma85 type builds.

I built one of these with the hero 6 and the reelsteady footage is pretty wobbly and jittery. It has the same camera mount that you use in the youtube video. Any ideas? (2.7k 4:3 60 fps Auto WB, Auto Shutter, 800 ISO). I wonder if the camera mount is too flexible or if the lens is vibrating in the 3d printed case.

Nice.. I bought this 85x V2 frame but never but it on my 85x (i built). I built a 95x for full size gopro and insta360 go I use. Bought parts before 95x V2 was released. weighs 197grs with 4S battery and insta360 go last time i weighed it. Made some changes since then. I fly it mostly on 3S

Just put together my naked GoProH6. I purchased the board and lens separate on aliexpress. Is there a way to downgrade firmware and pair with a phone to adjust settings if we go this route? I figured I could just download the .bin for 1.6 onto an sd card and pop it in, but I get a constant red LED after plugging it into the 85X. Any direction would be awesome. Thank you.

After doing a little research it seems you need the screen to pair it to your phone. There is an Android bluetooth app but I'm not sure if it'll work. Here's the link.

I can't wait for gopro to sell their own naked gopros with the wifi code in the box
or even better... a frame that puts the gopro inside to protect it like other components
... yeah that's what i want, a 5' flying freestyle gopro tank

Guides & Reviews

AirbladeUAV has done it again and this time they've brought long range to the 5" class! Based on the popular Transformer Mini, the new Transformer 5" Ultralight adopts a lot of the same design philosophies with larger props and more payload capacity. It can fly upwards of 20 minutes on a 4 cell Li-Ion battery pack and in ideal conditions it's got a range of over 4 to 5 miles. In this guide I'll walk..
Read more
With the release of the DJI FPV Drone cinematic FPV has become a lot more accessible, but you certainly don't want to crash a $750 drone! The QAV-CINE Freybott is a compact, lightweight cinematic FPV drone that can take a hit and keep going. It's a lot safer to fly indoors and around people. With a naked GoPro or the SMO 4k you can capture some great stabilized footage. In this guide I'll show you..
Read more


It is impossible to be a jack of all trades; some people may excel in science or math but struggle with writing. To get good grades, these people would rather use a paper writing service.