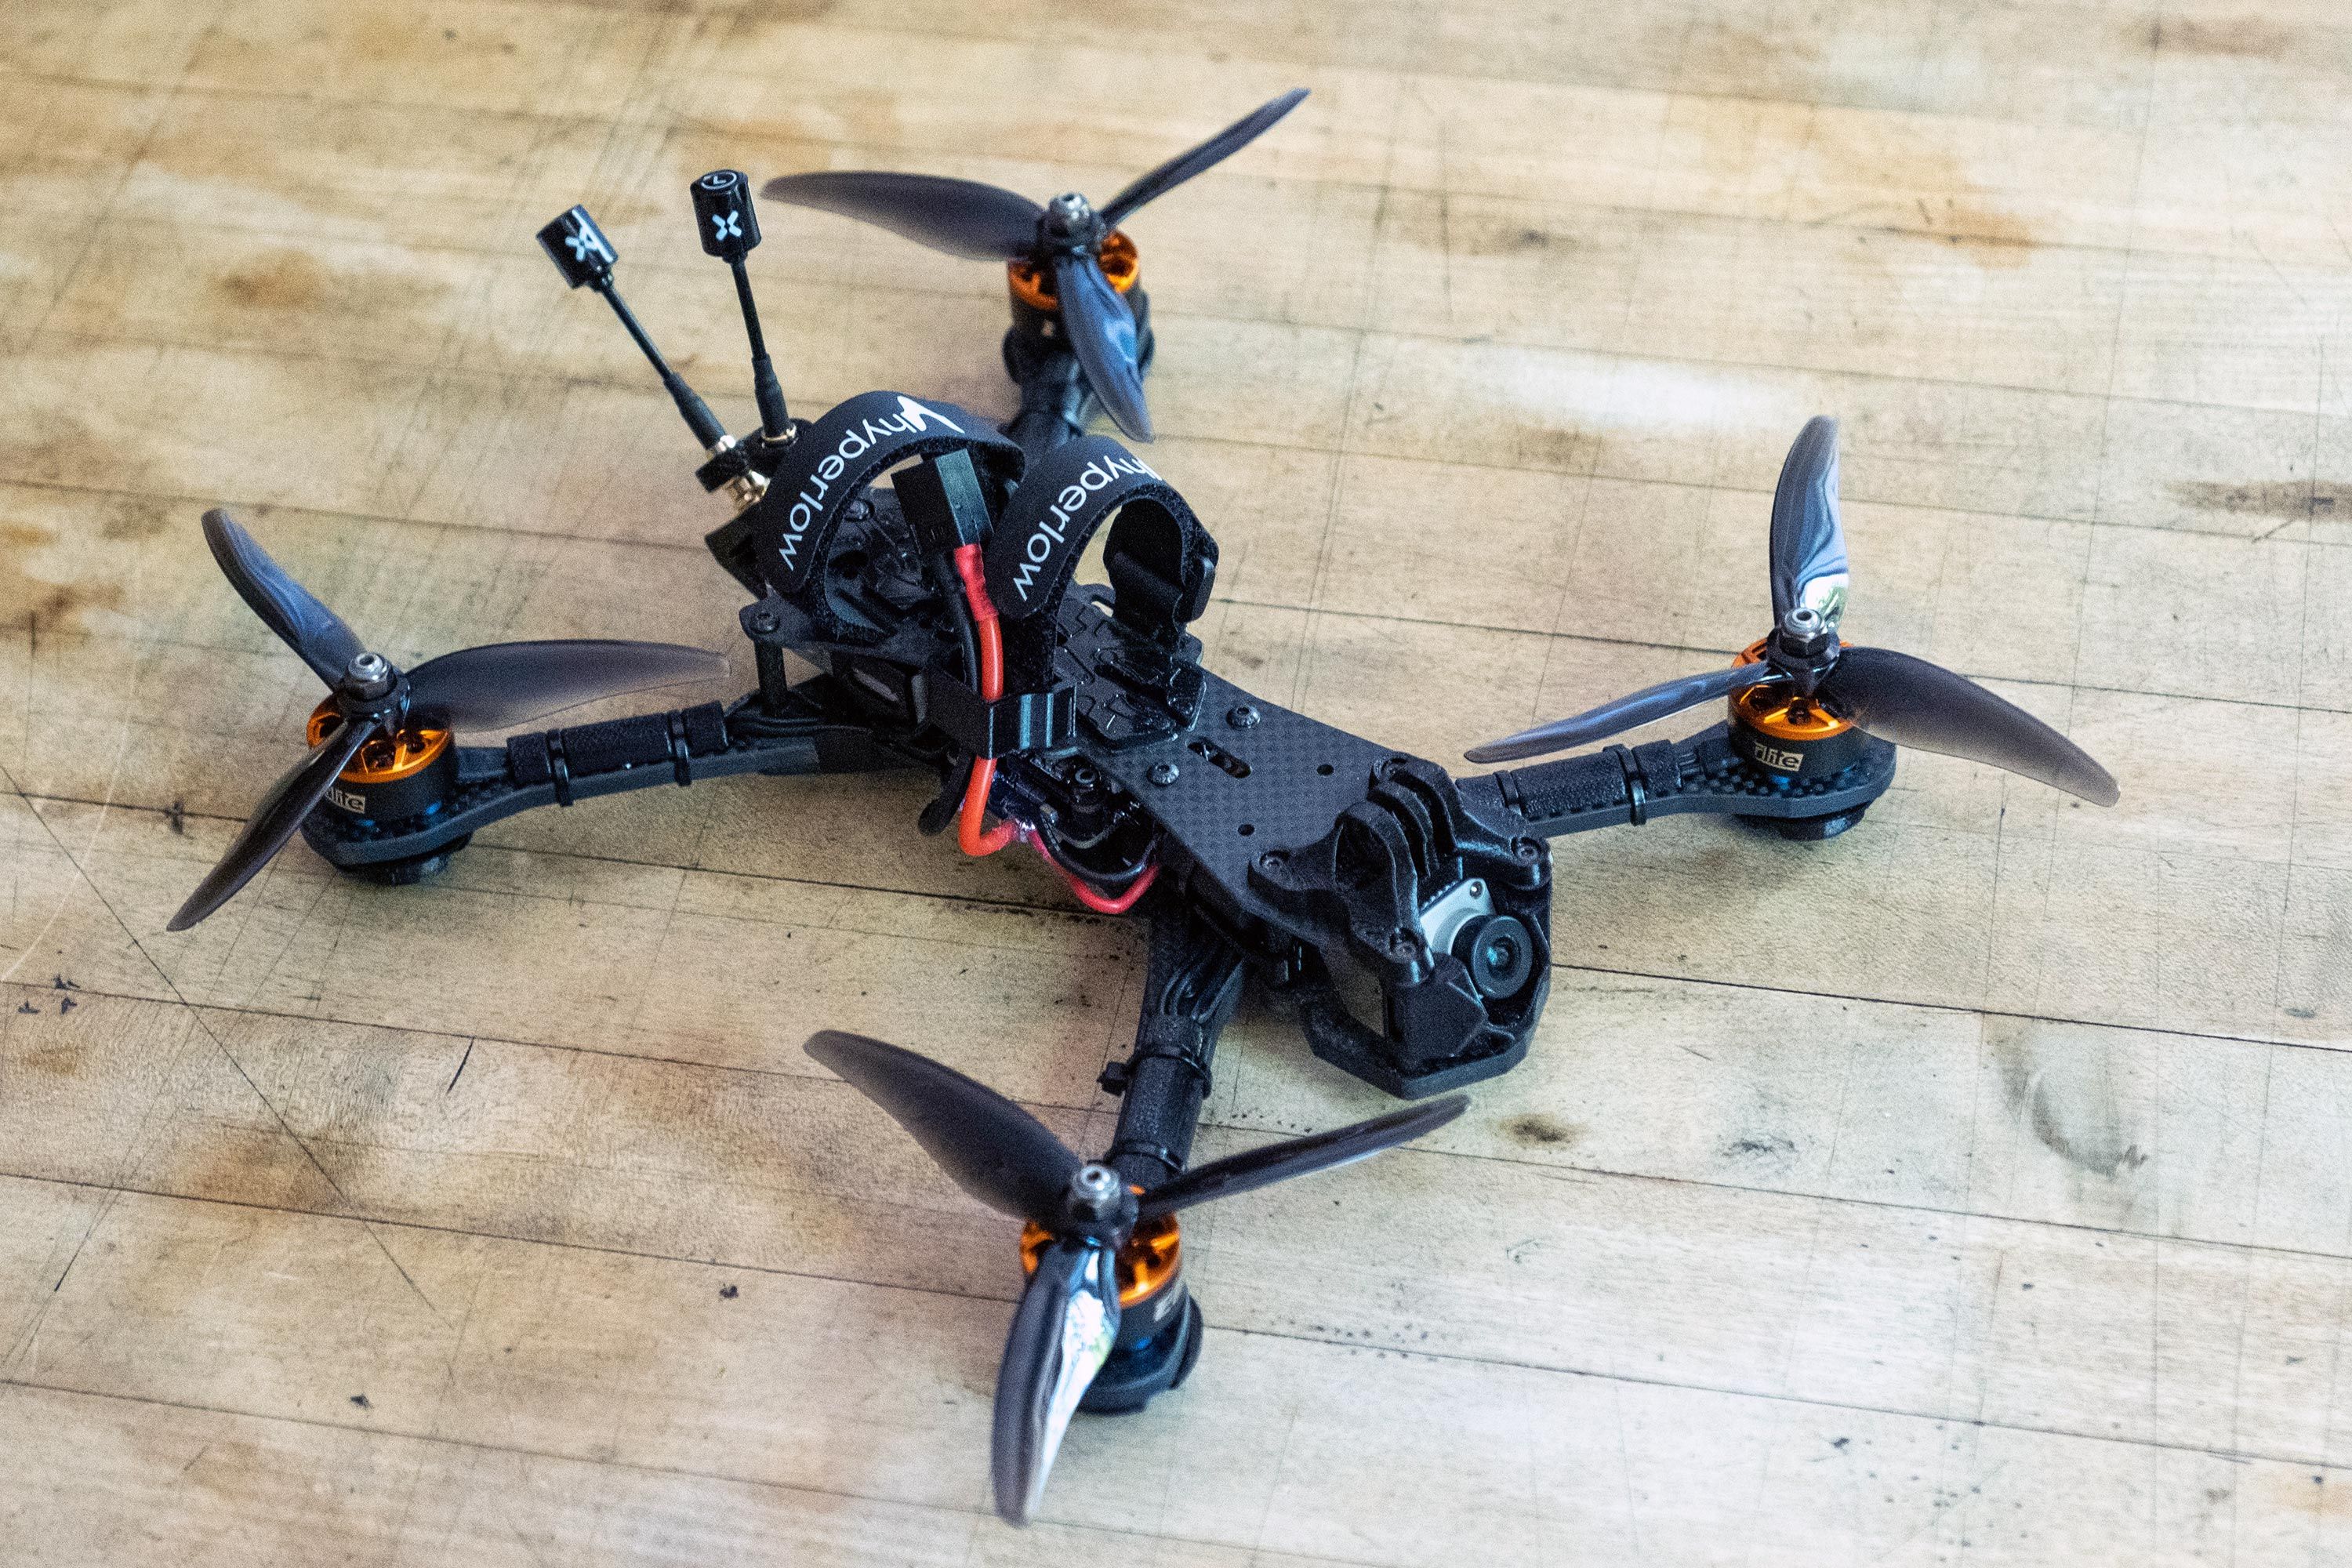
Hyperlow Airshot - Cinematic 5" with DJI Air Unit
 By MartinBKLYN on Jun 17, 2021
I wasn't quite happy with how I built the previous version of the Airshot, having used a 30x30 stack that was too big and I wanted to try building the Airshot with the full sized DJI Air Unit. So it was time to rebuild.
The Hyperlow Airshot is a cinematic and freestyle frame with various GoPro mounting options, a lot of 3D printed add ons and with a clever design.
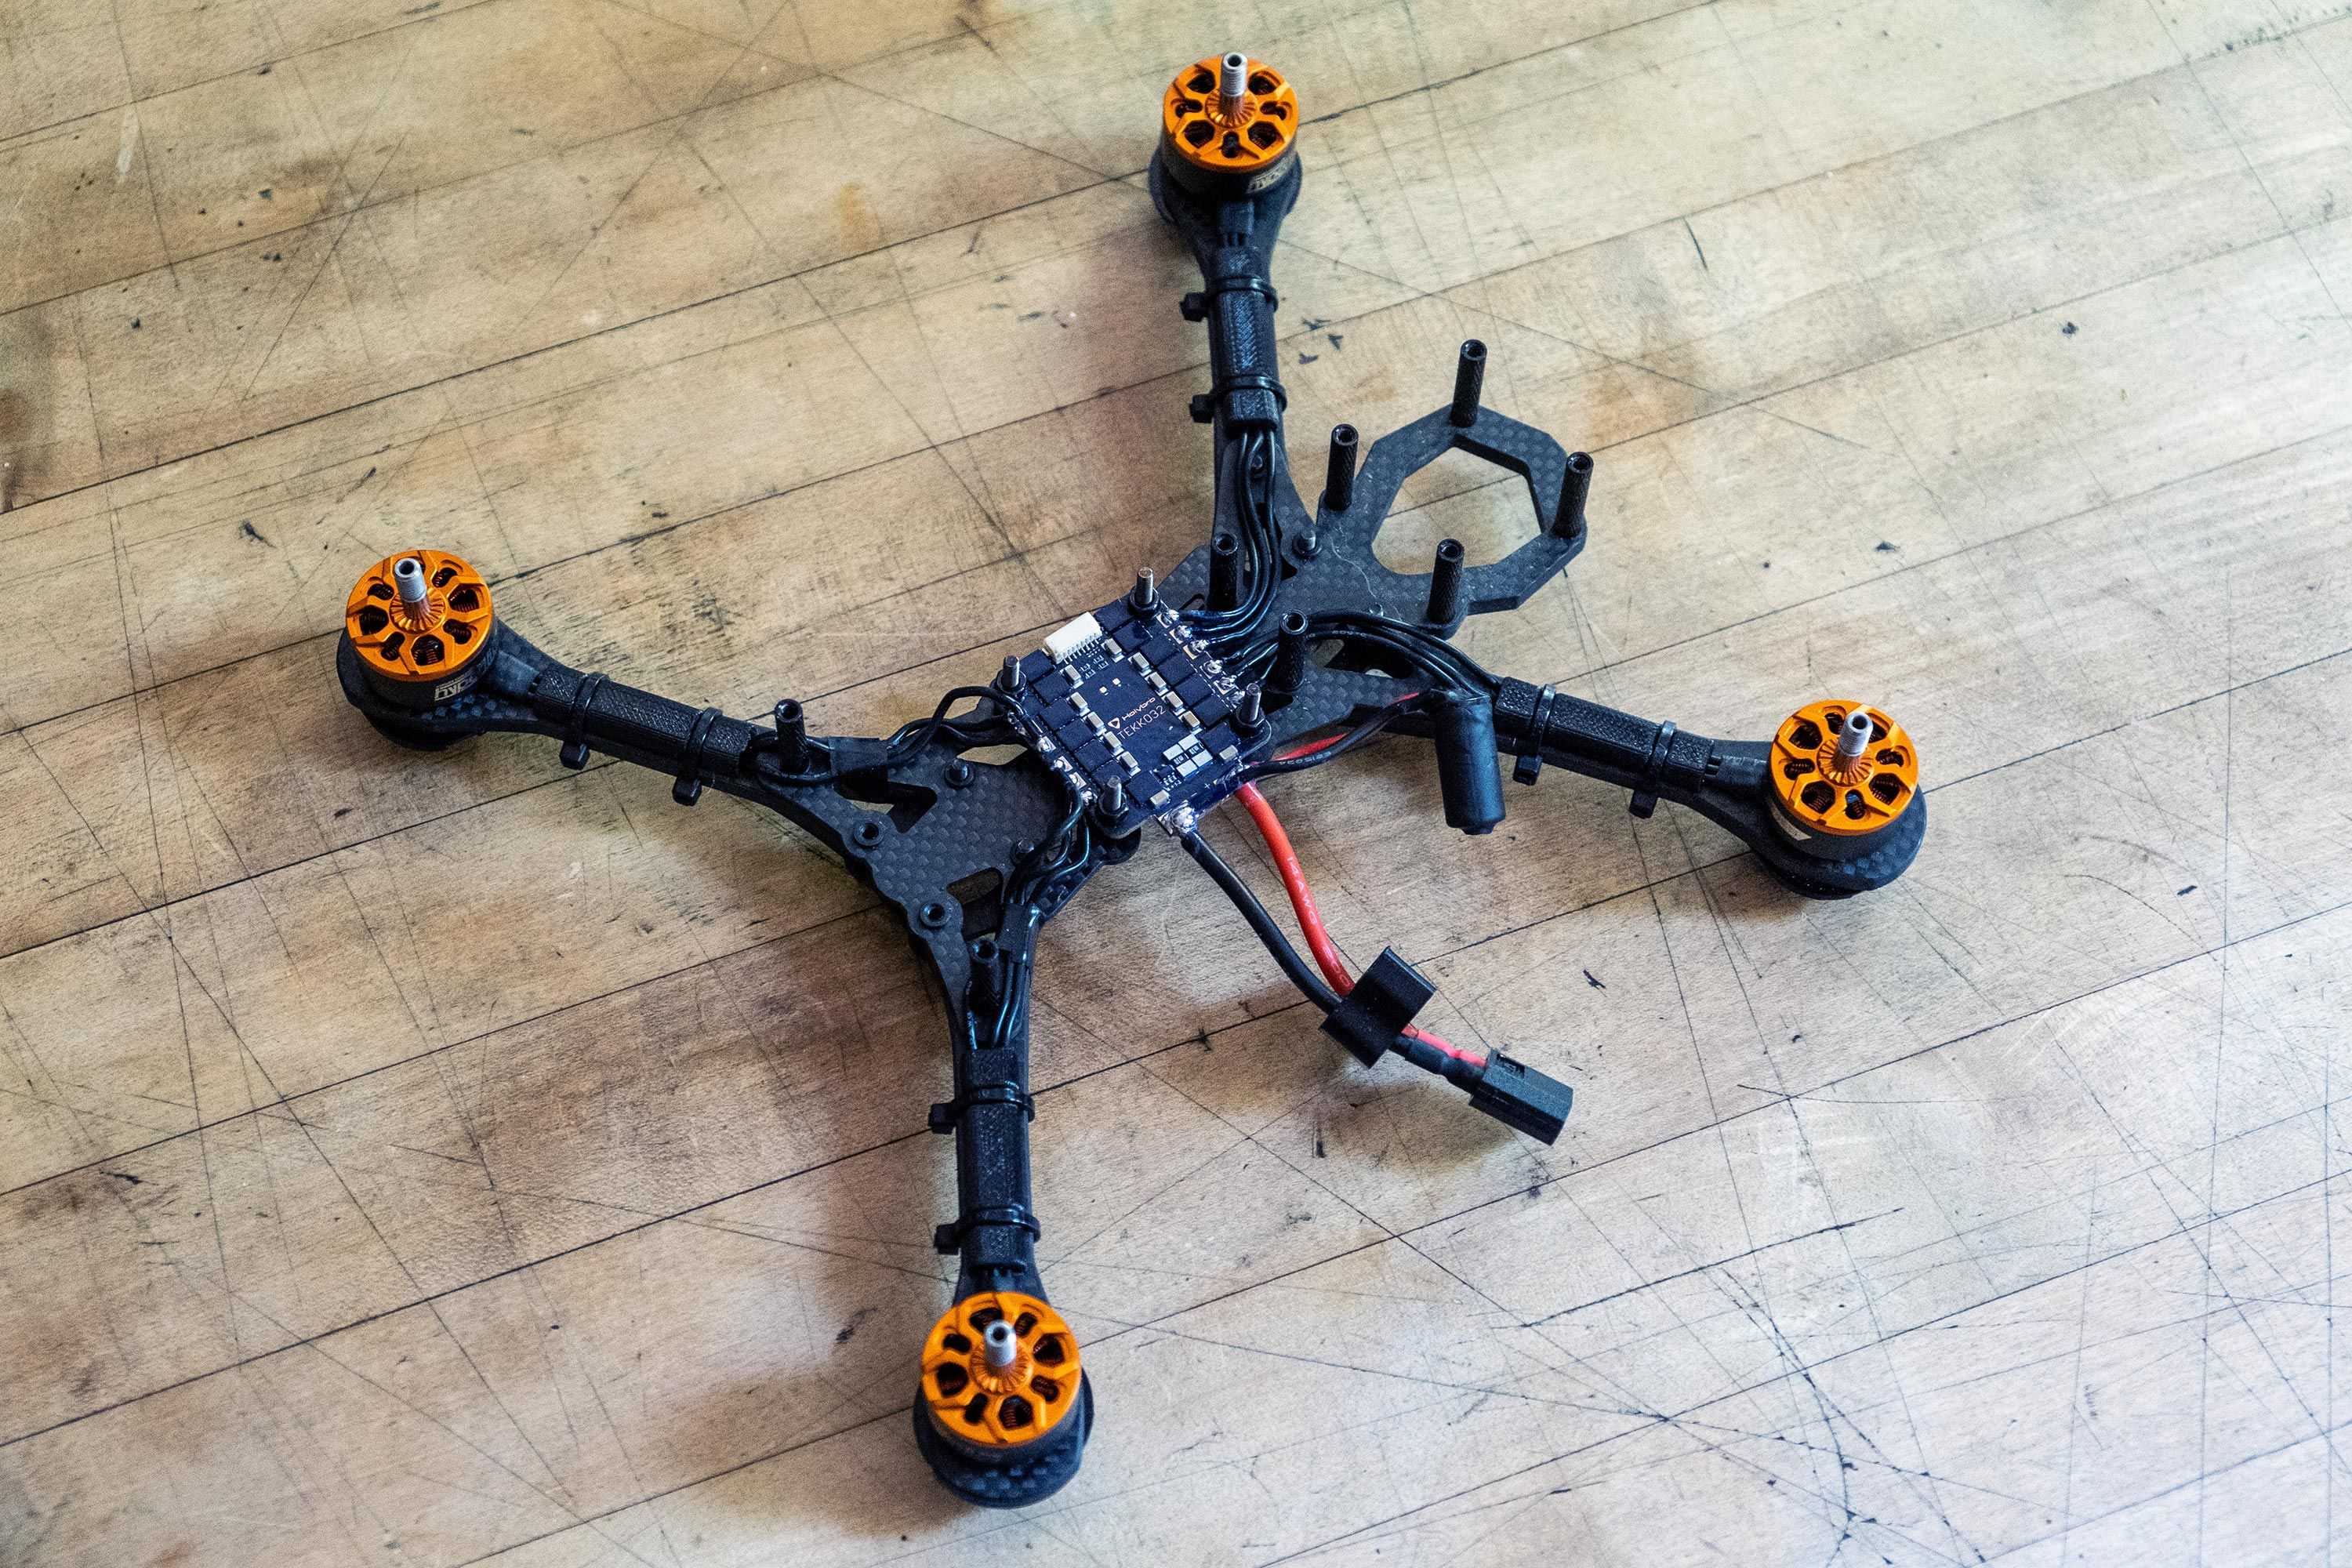
Frame Assembly
The frame assembly was pretty straight forward. The frame is beautifully produced and comes with various press nuts installed. I simply followed Hyperlow's assembly guide. While the frame kit comes with the screws needed, I did choose to replace some of the button head screws with cap head screws.
Motor installation
I installed the motors with 3D printed landing skids and and used 3D printed motor wire protectors to protect the wires in case of bent props. I ordered both of those from Brain 3D.
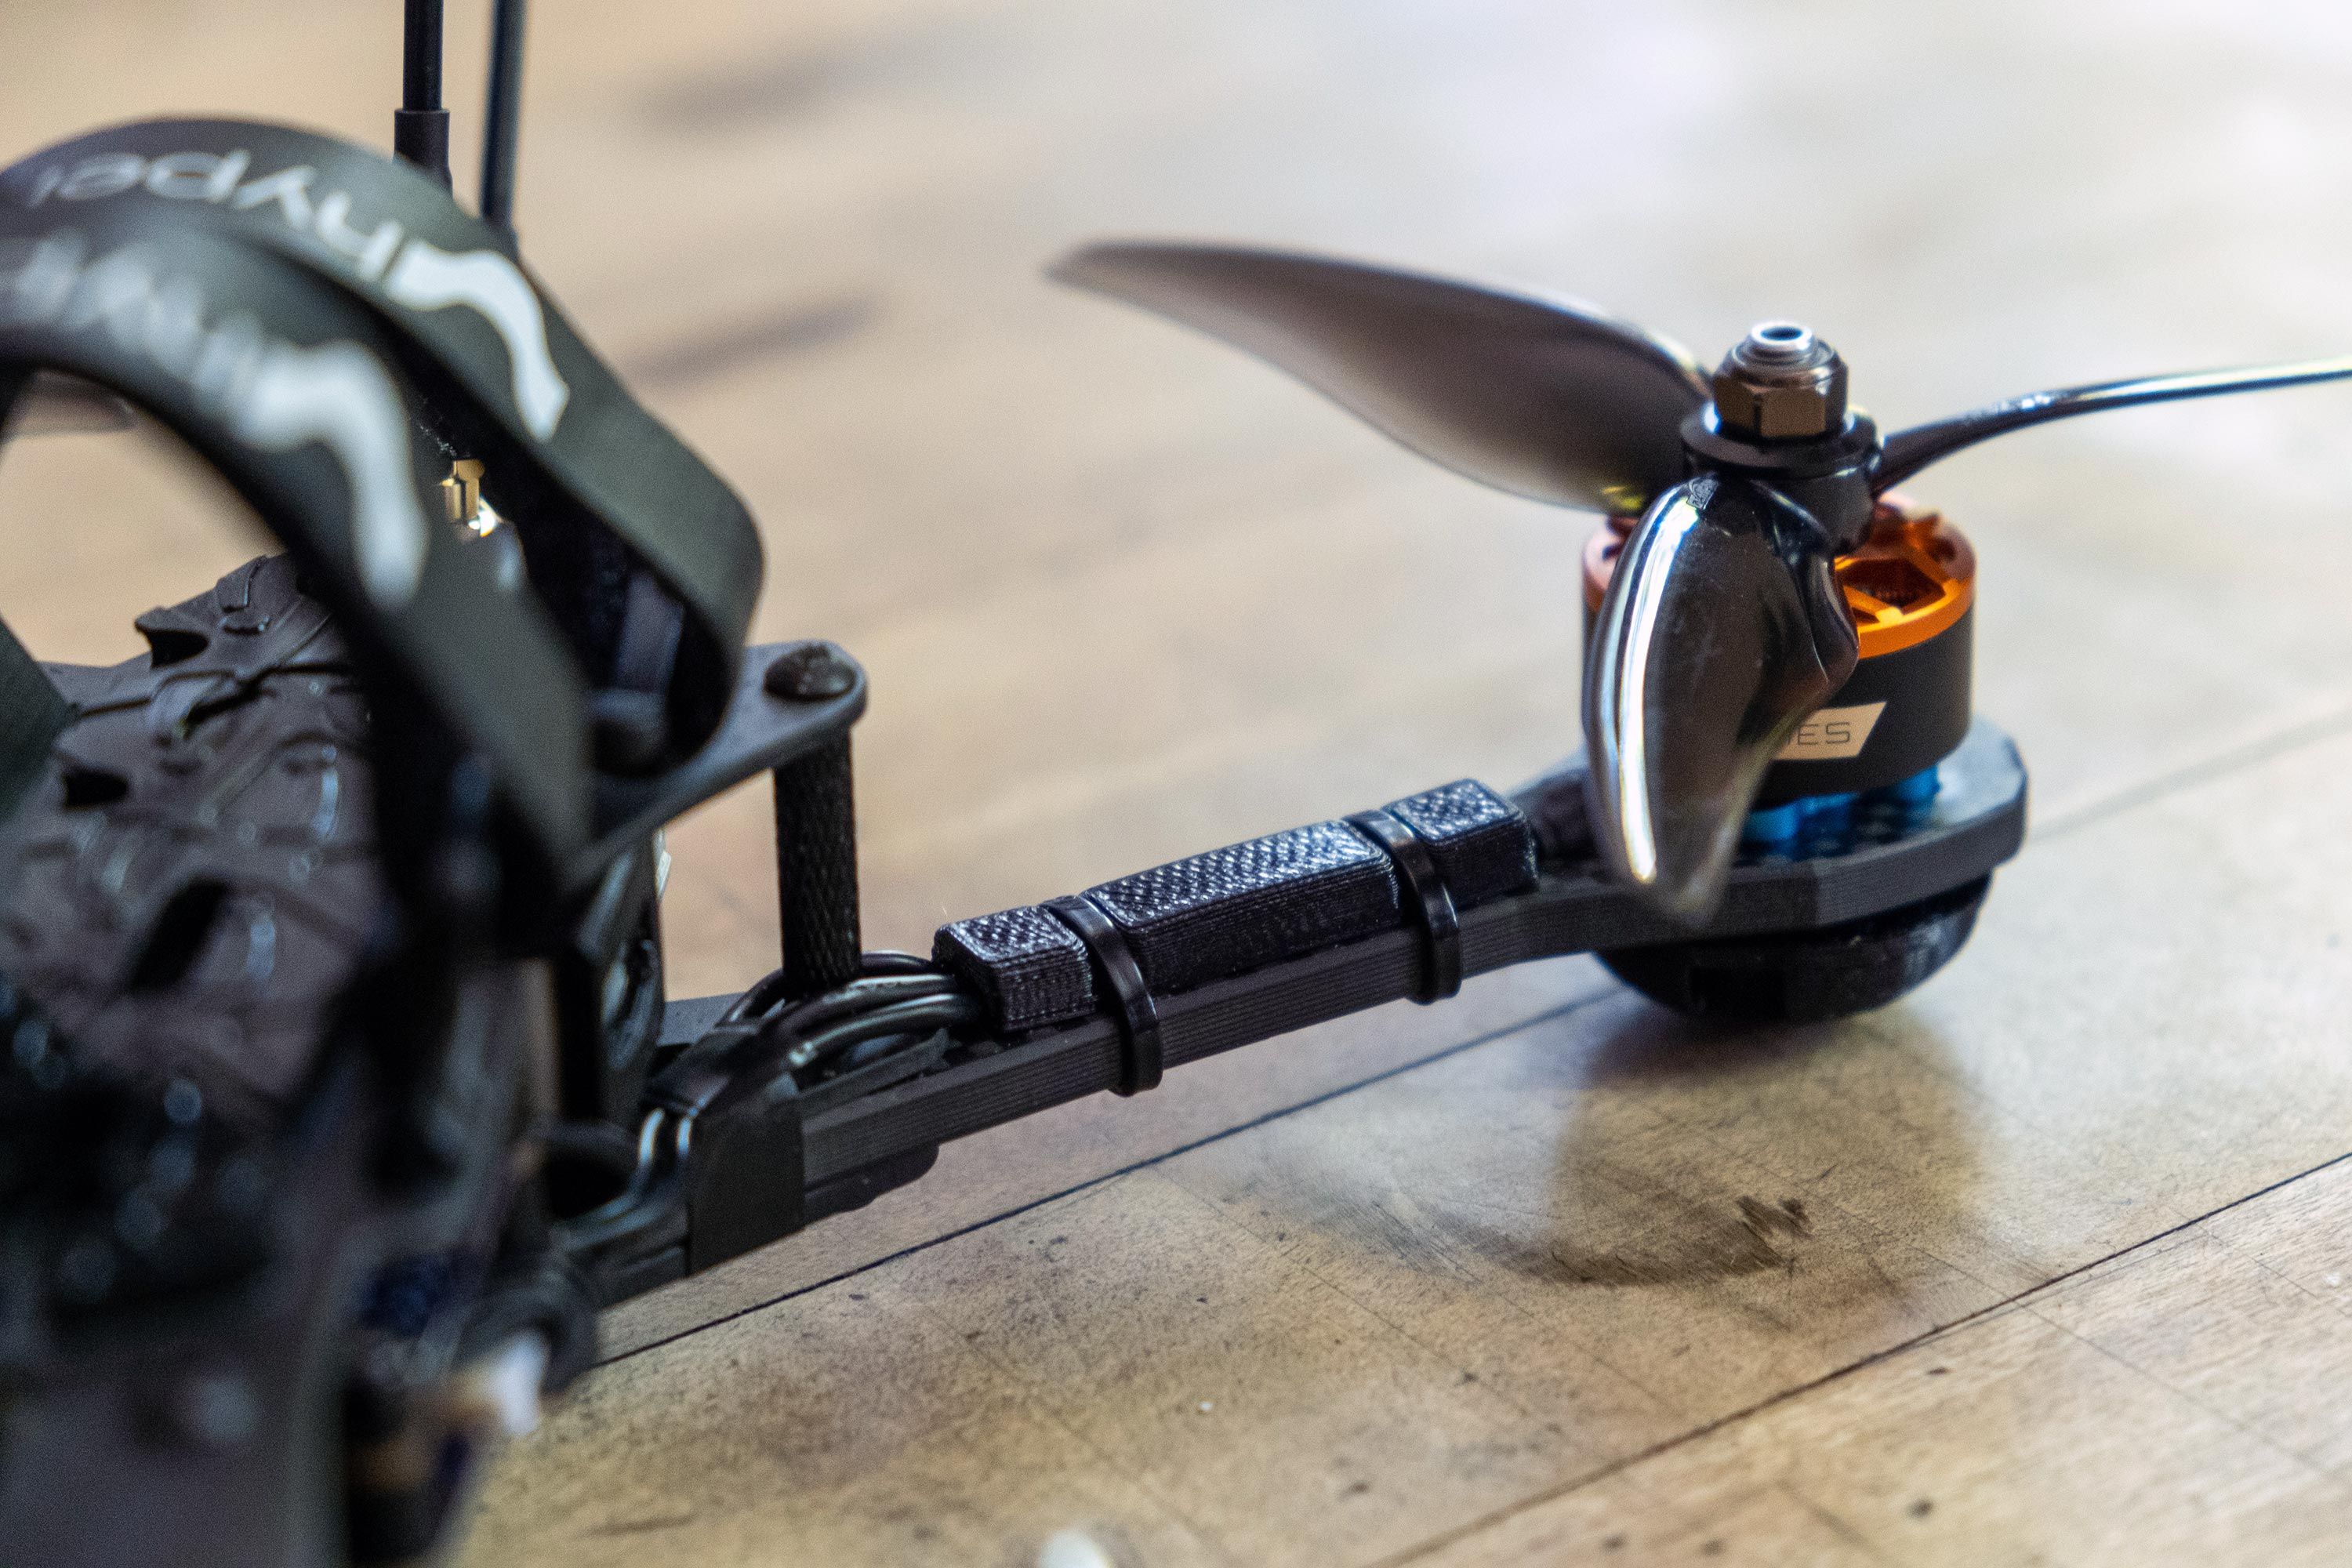
If you use the vertical arms (also available from Hyperlow) instead of the flat arms I used, you can get 3D printed arm wire guides for those.
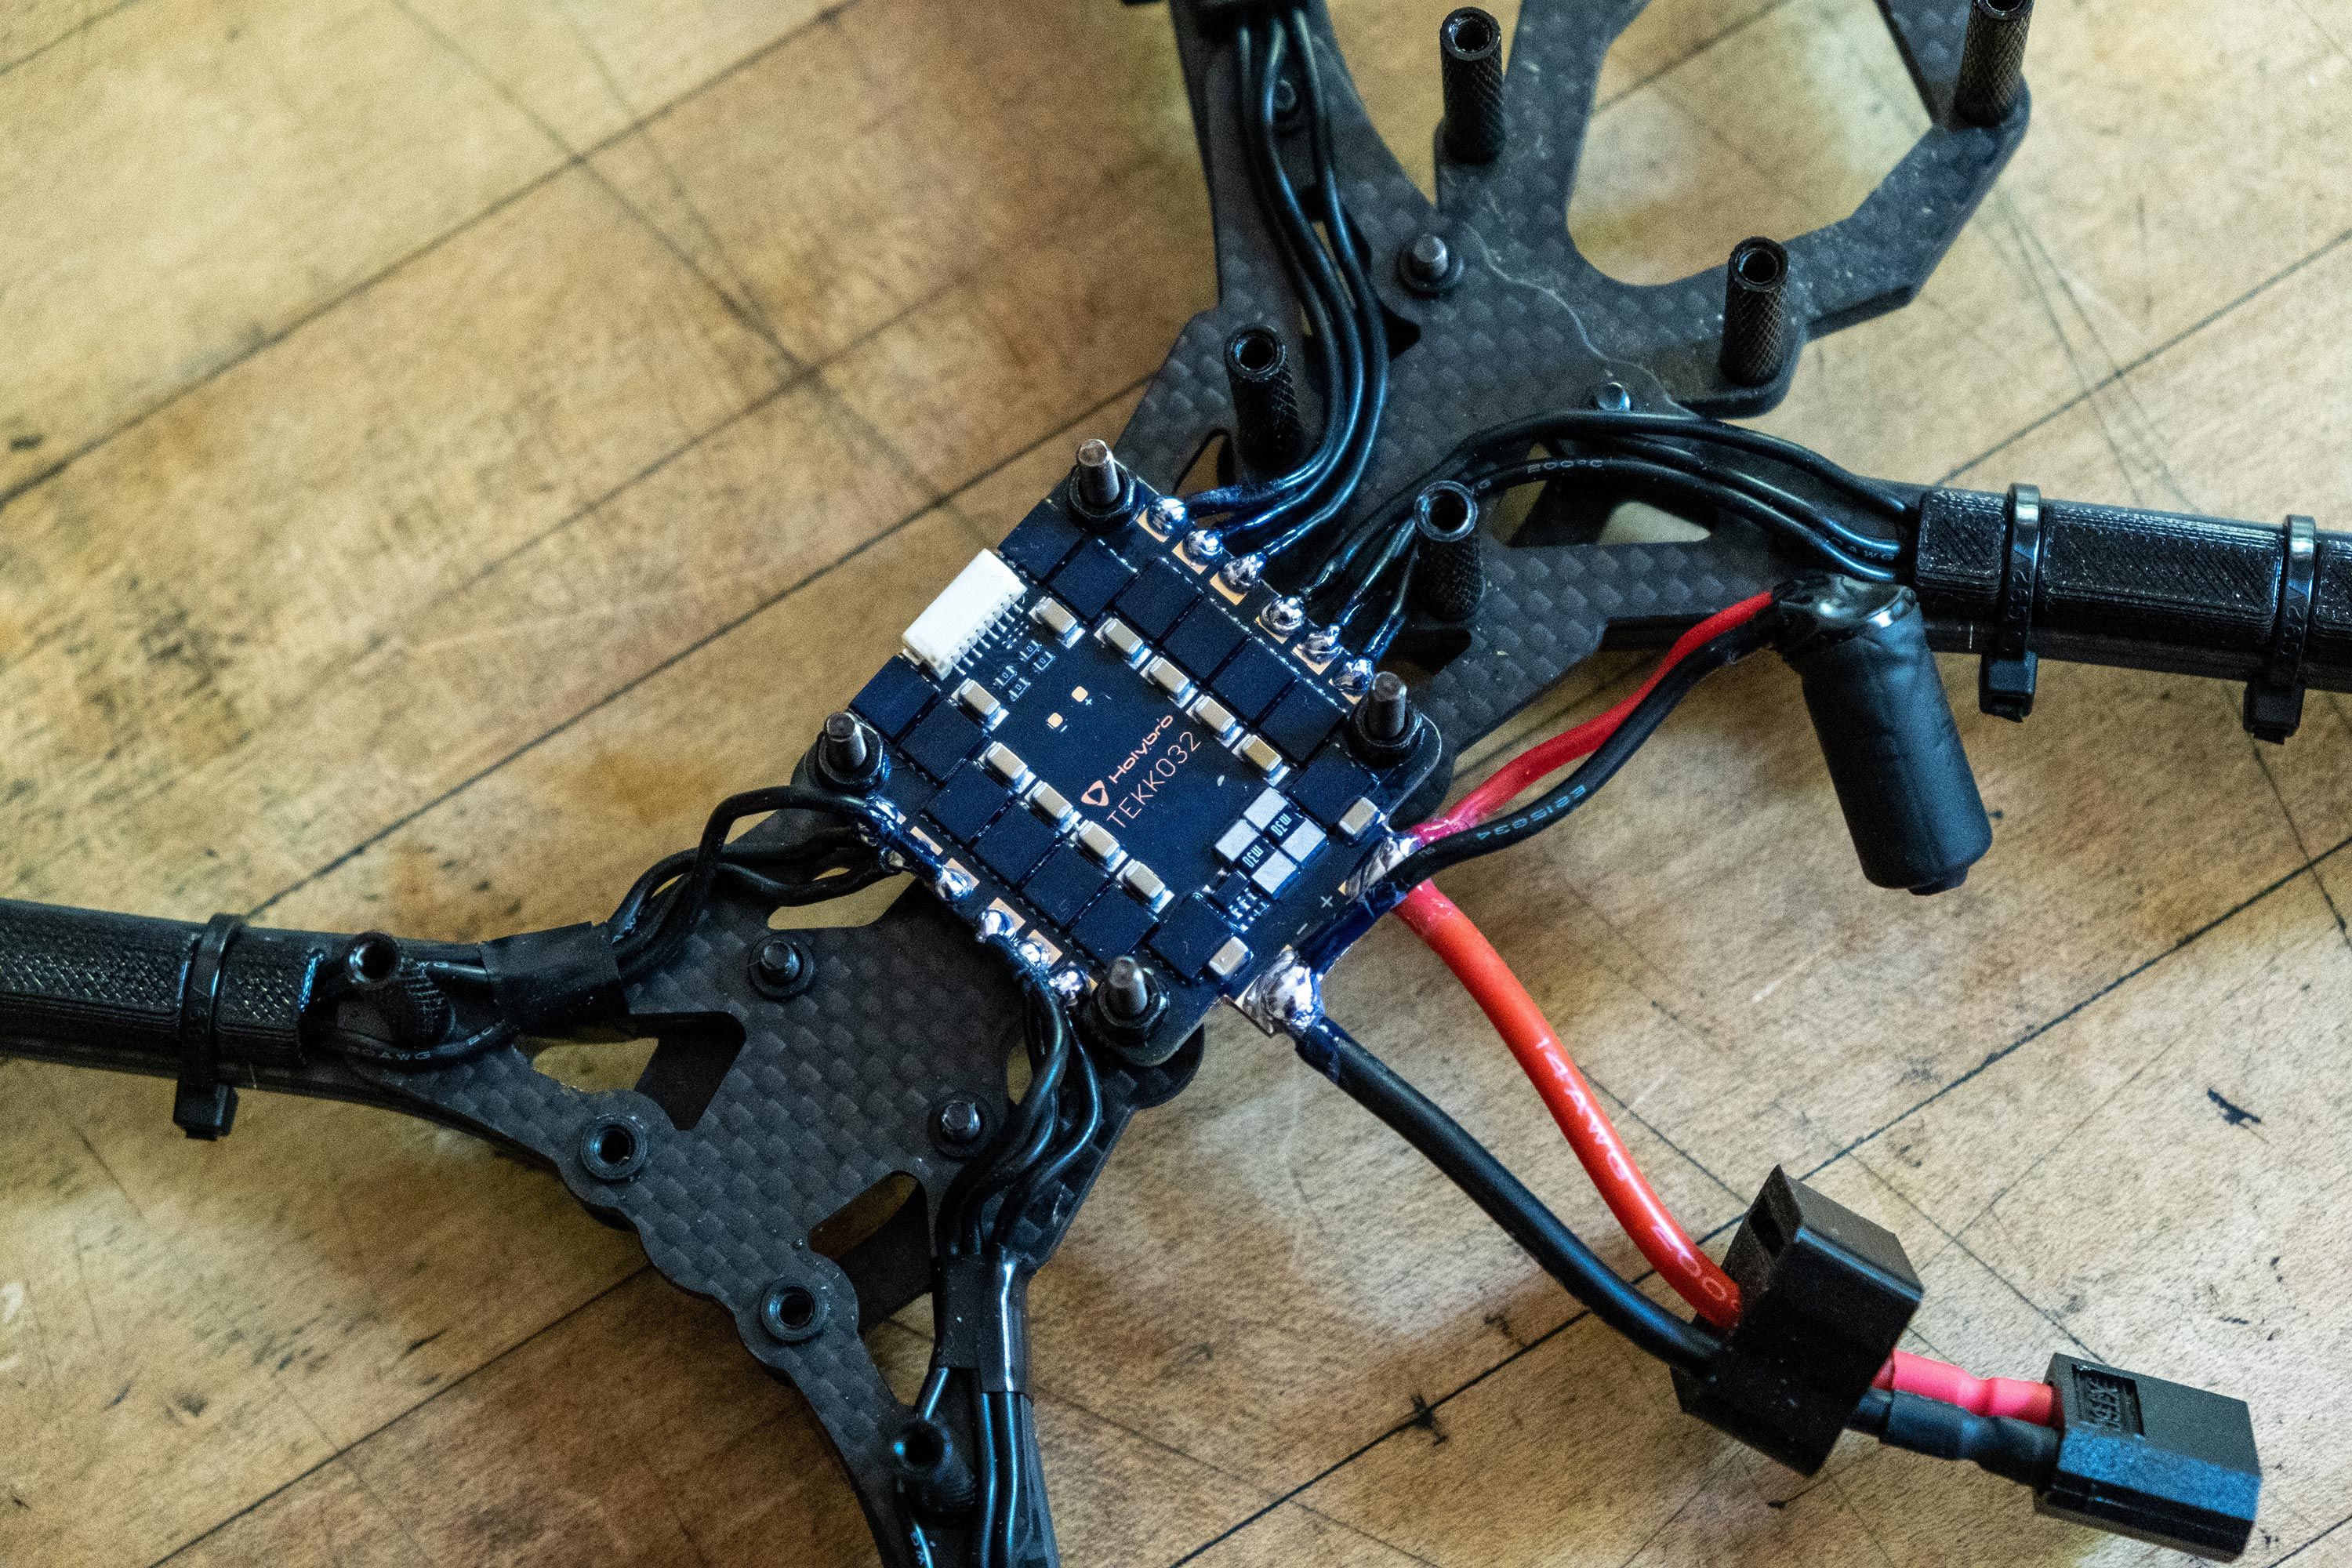
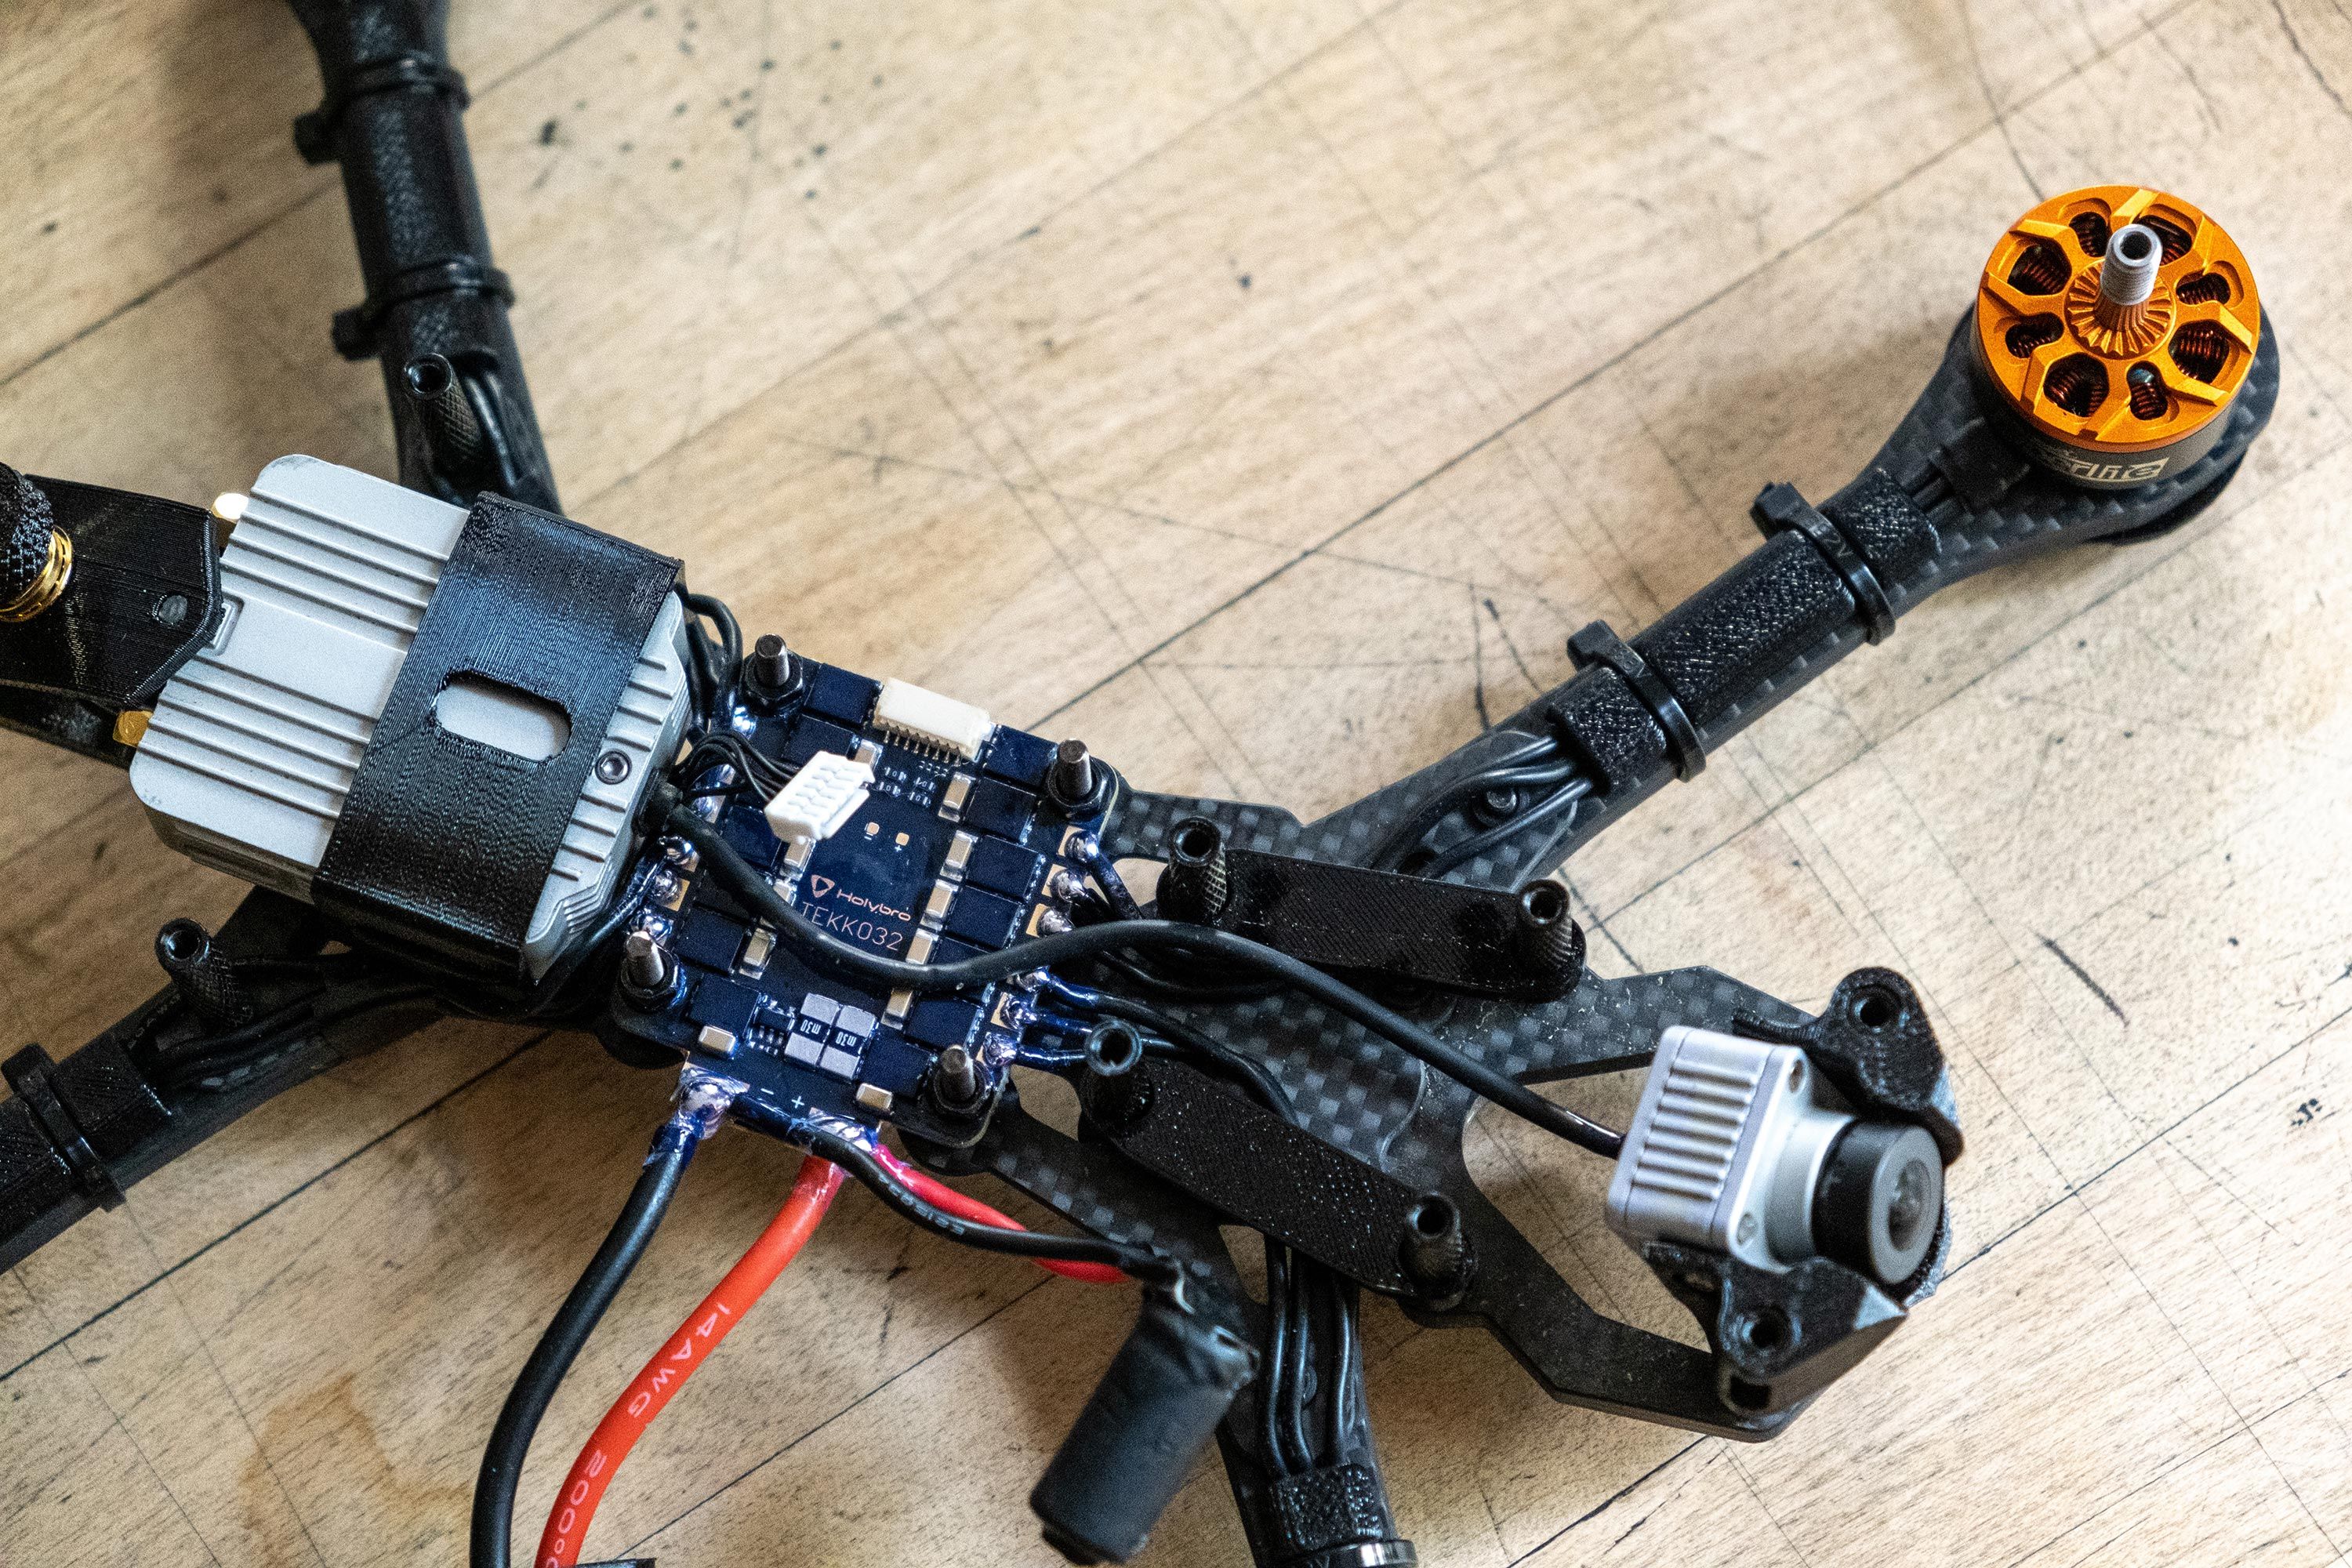
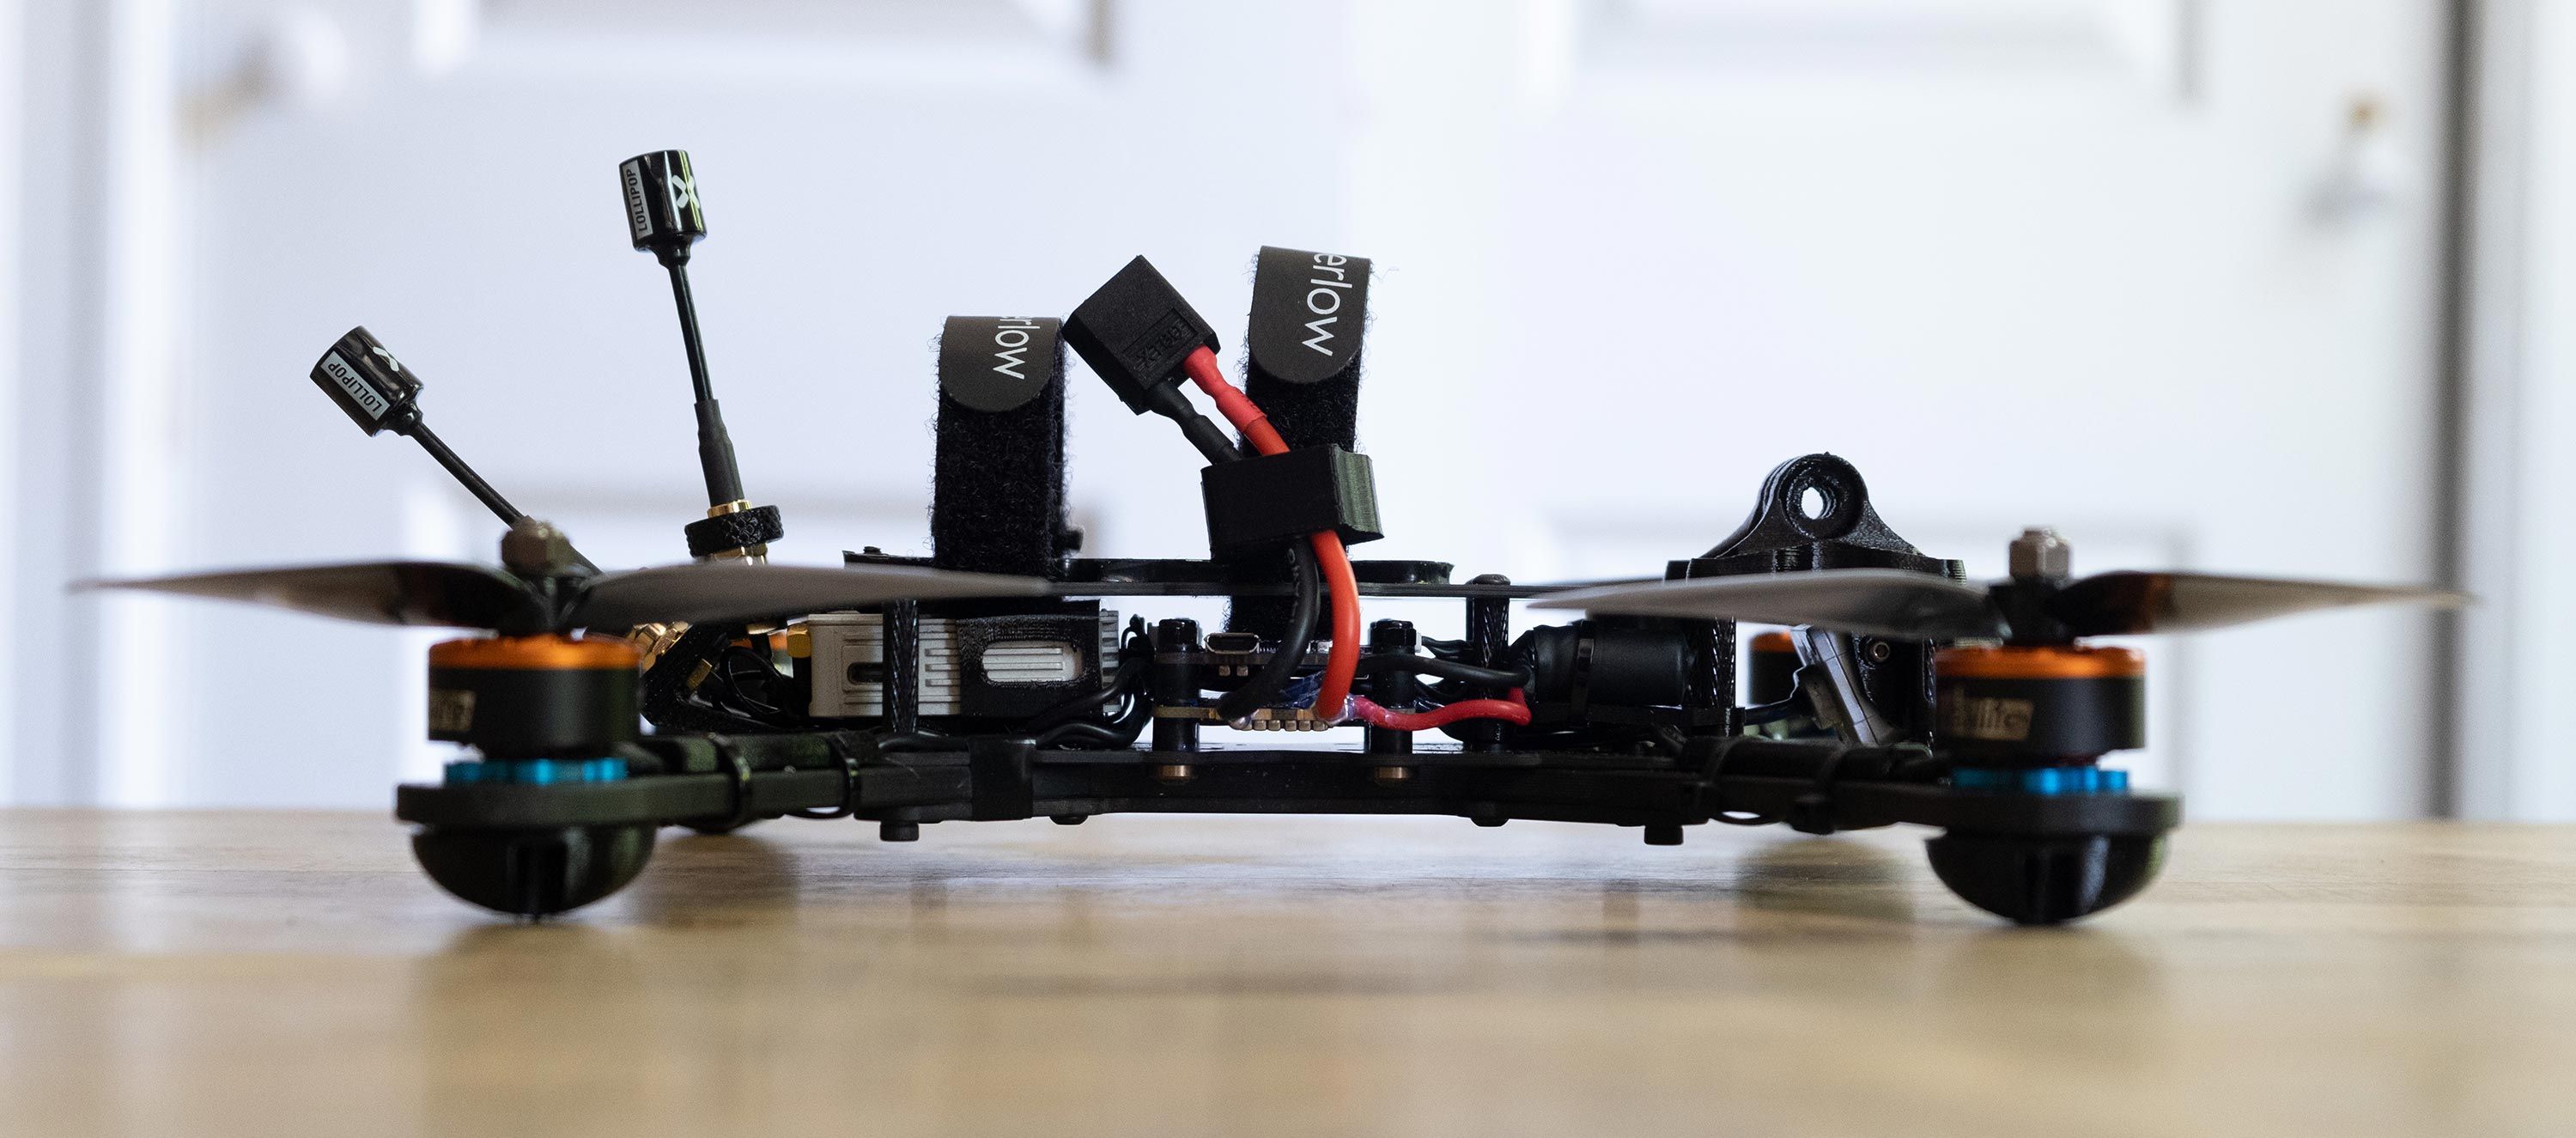
ESC, XT60 pigtail and capacitor
I turned the ESC sideways to let the XT60 pigtail come out the side and decided to place the capacitor on the mini shelf which Hyperlow made for the ViFly buzzer. It fits two standoffs perfectly and is just the right size to zip tie the cap to it. I should have made the capacitor wires a little shorter. Next time!
I soldered a WaFL’s Cap Cap to a 35V 1000uF capacitor, used 18 gauge wire to extend the capacitor leads and then conformal coated the soldering points on the capacitor. I added a piece of black electrical tape over the end and used heat shrink over the capacitor for a little bit of protection and to make it look cleaner. I slipped a XT60 strap mount over the pigtail and soldered it to the battery pads before soldering the extension wires of the capacitor to it.
Motor wire soldering
I tinned the motor pads before conformal coating the underside of the ESC, placed the ESC on the stack screws and cut the motor wires to length before tinning the ends. Using tweezers I soldered the motor wires to the pads. I had to run the third motor wire of the back motors up over the first two wires because I needed that extra bit of space between the ESC and the Air Unit for the connector cable. I then conformal coated the top of the ESC and all soldering joints.
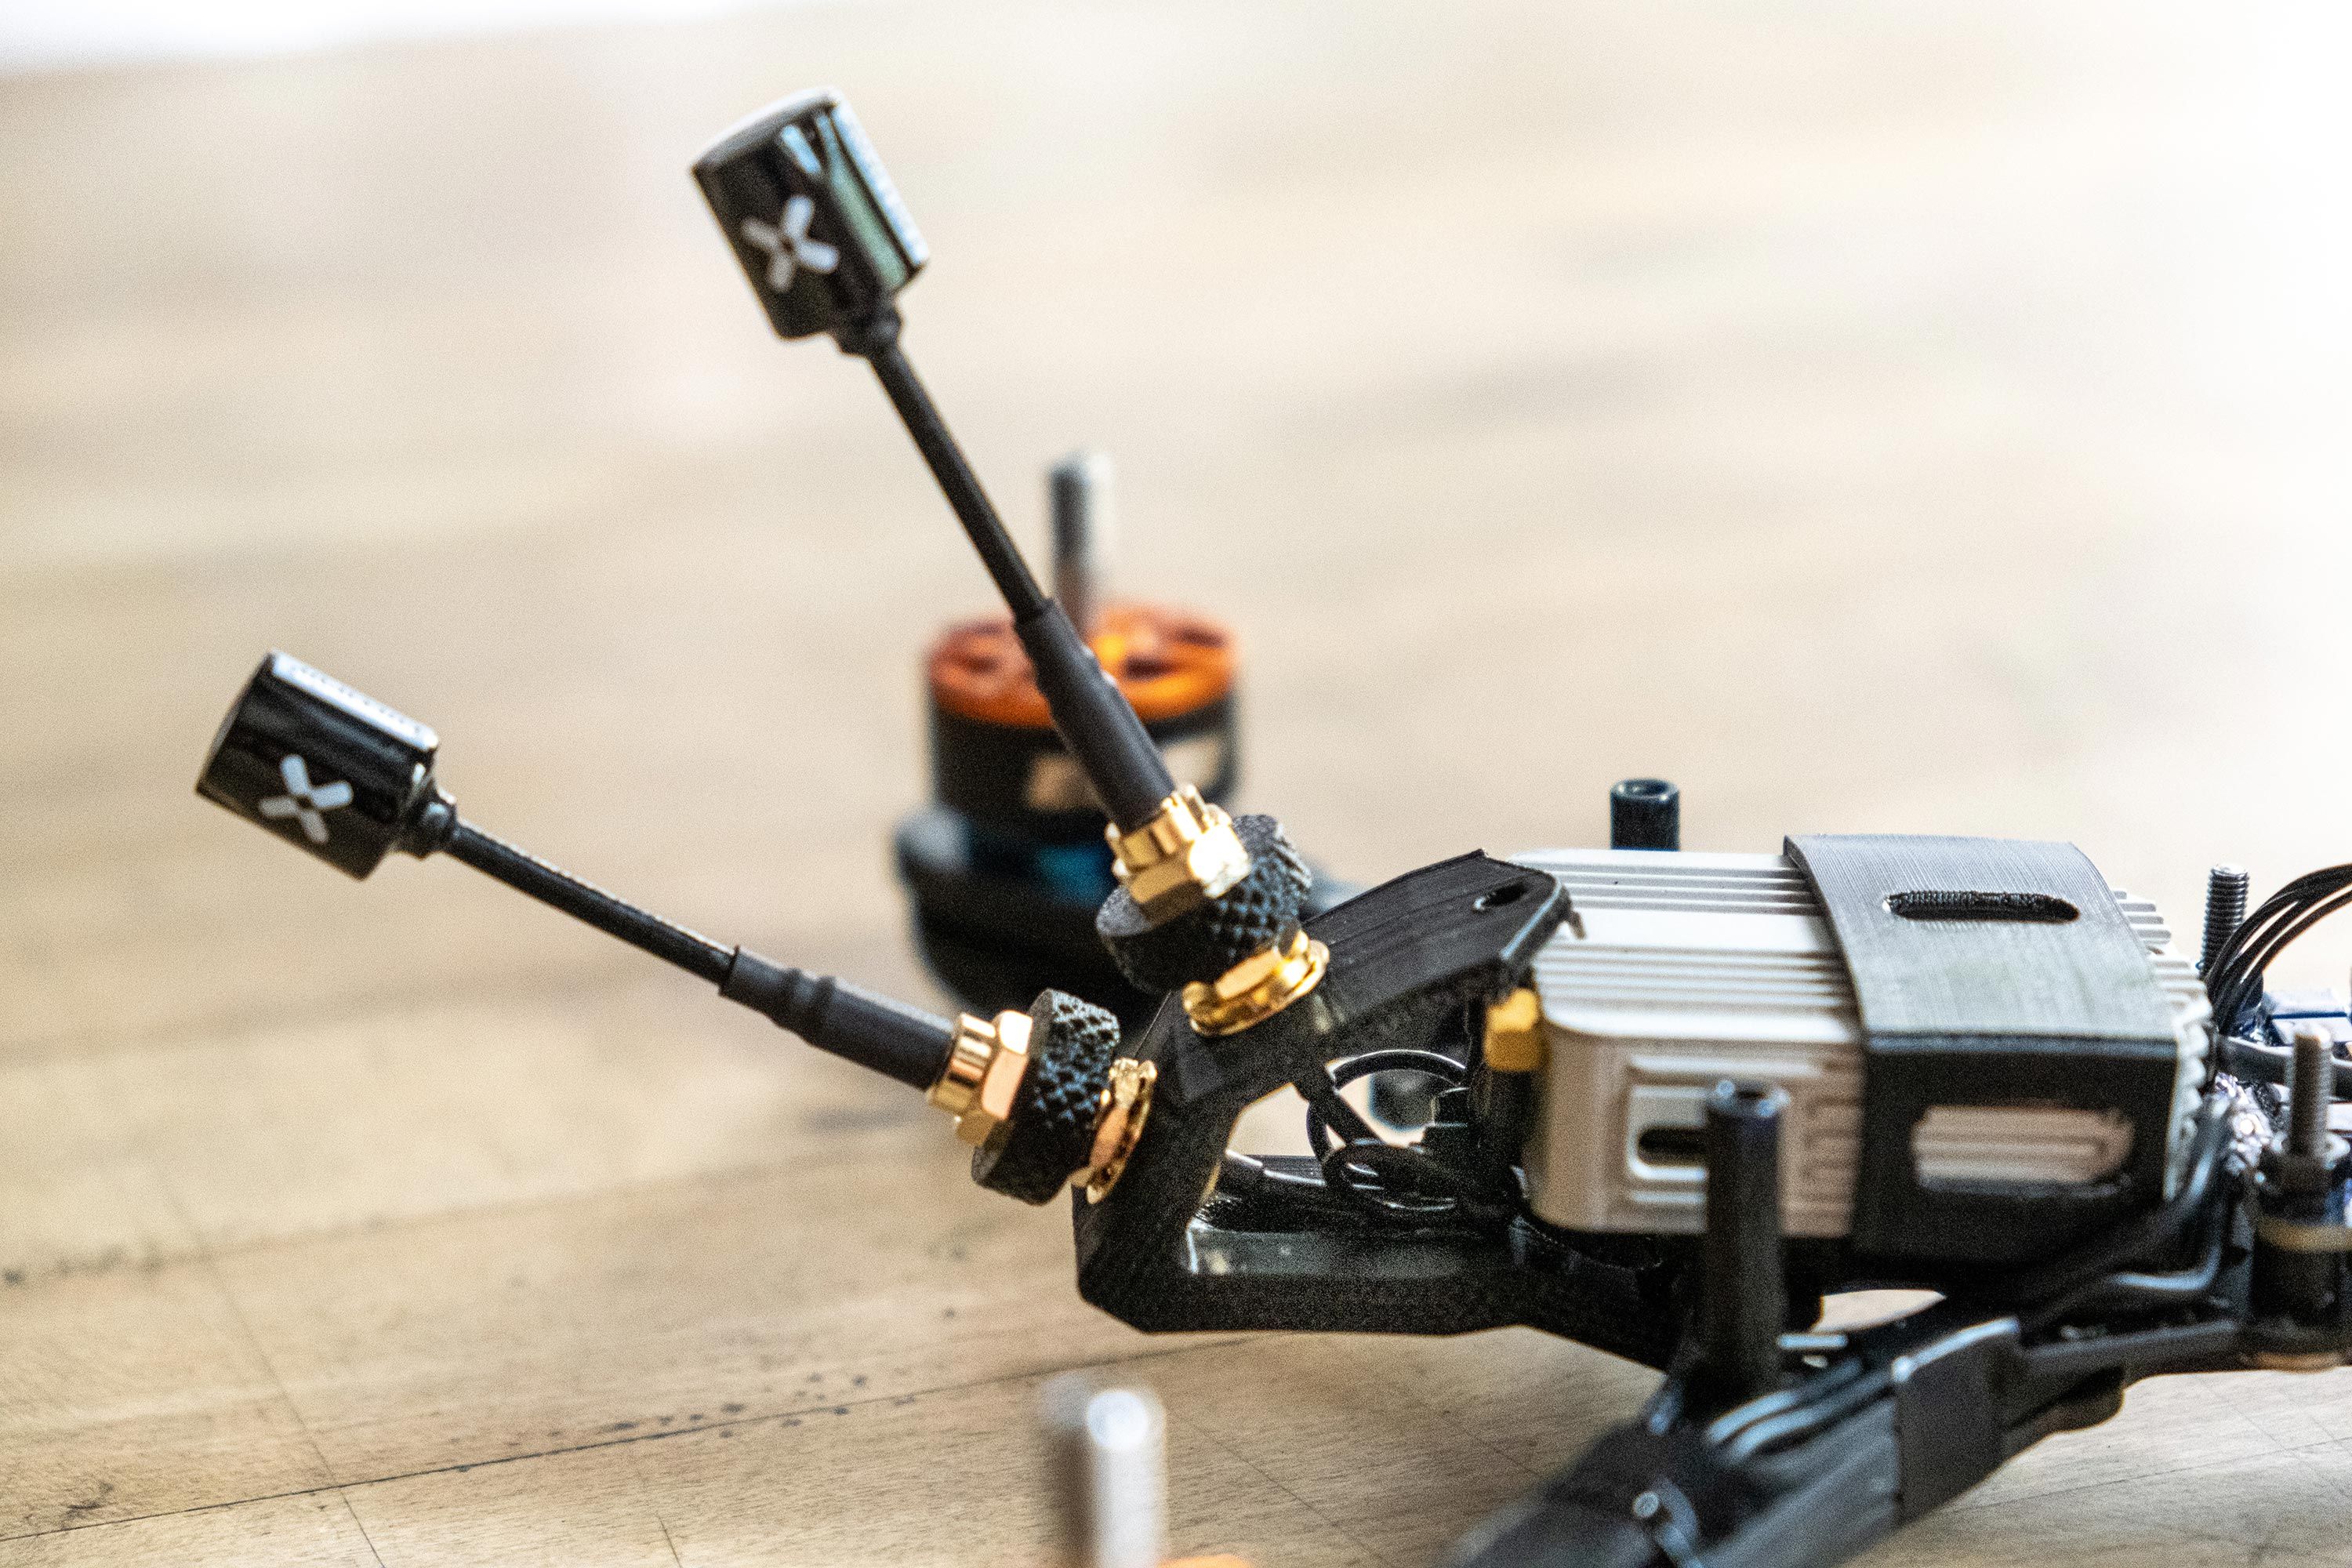
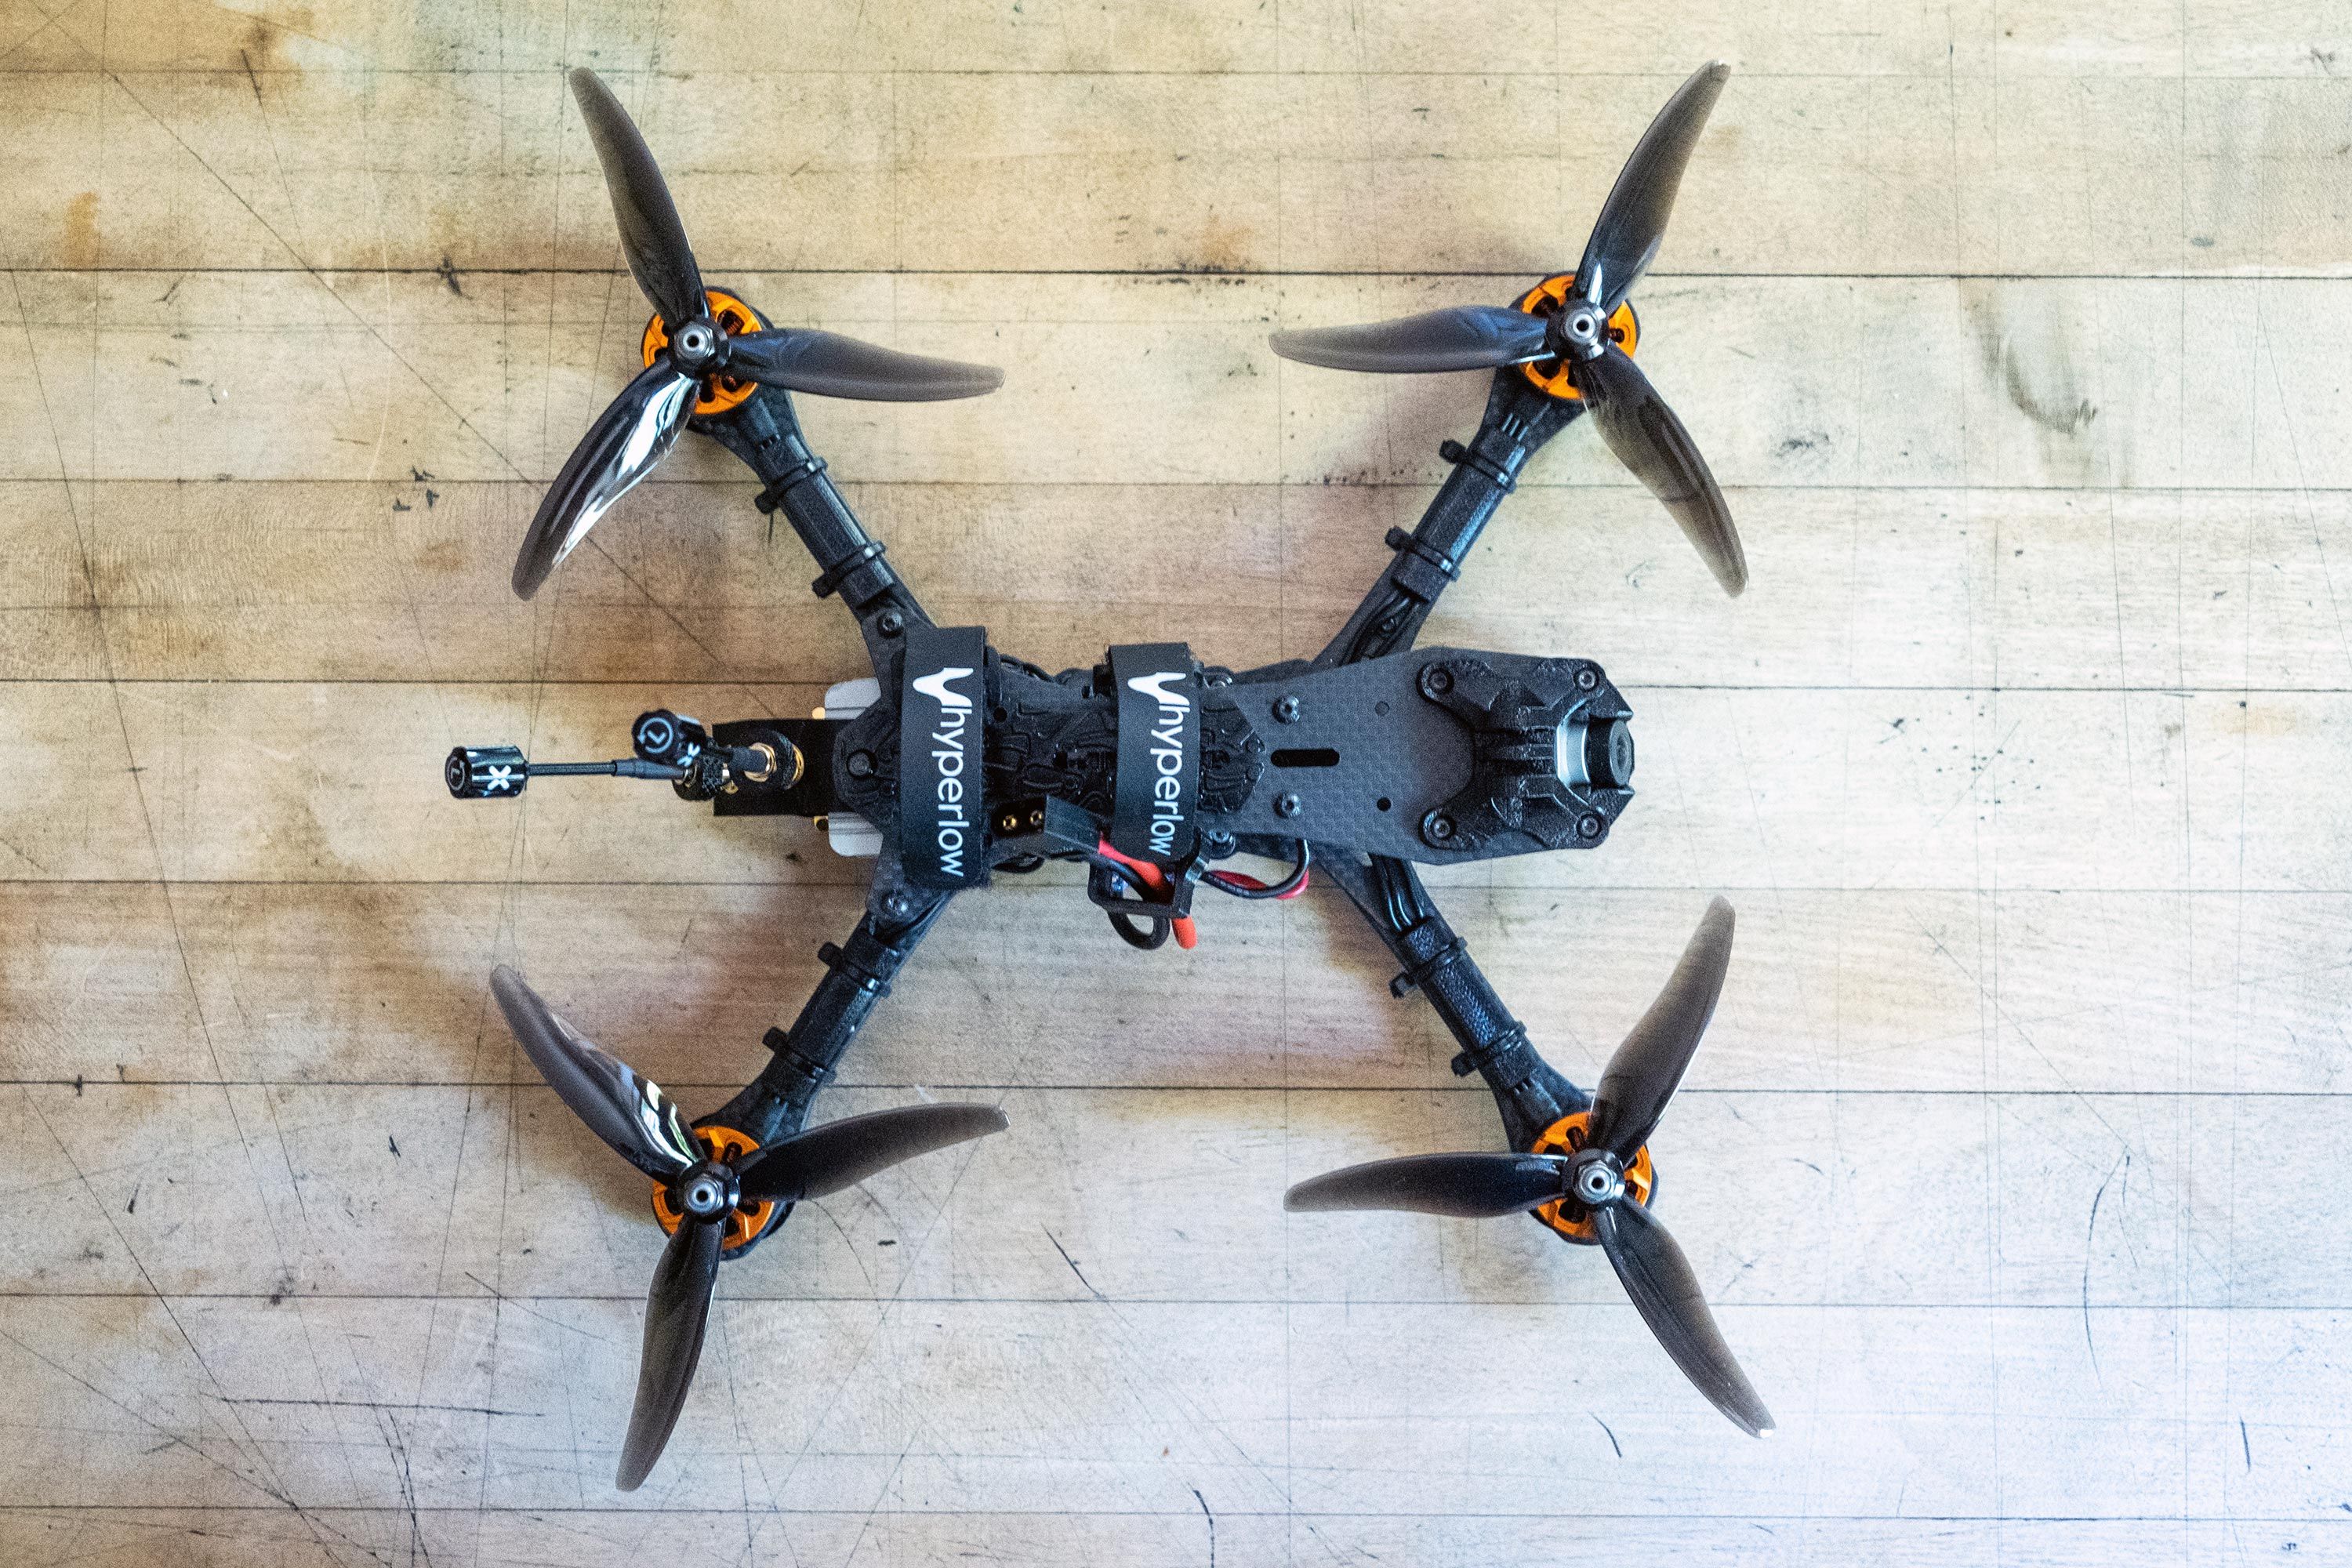
DJI Air Unit installation with MMCX to RP-SMA connectors
I used a DJI Air Unit holder that screws into the rear 20x20 holes via press nuts. I wanted removable antennas and used the DJI MMCX to RP-SMA adapter for that. I installed that adapter in Hyperlow's DJI antenna mount. All 3D prints of this build were printed by Brain 3D.
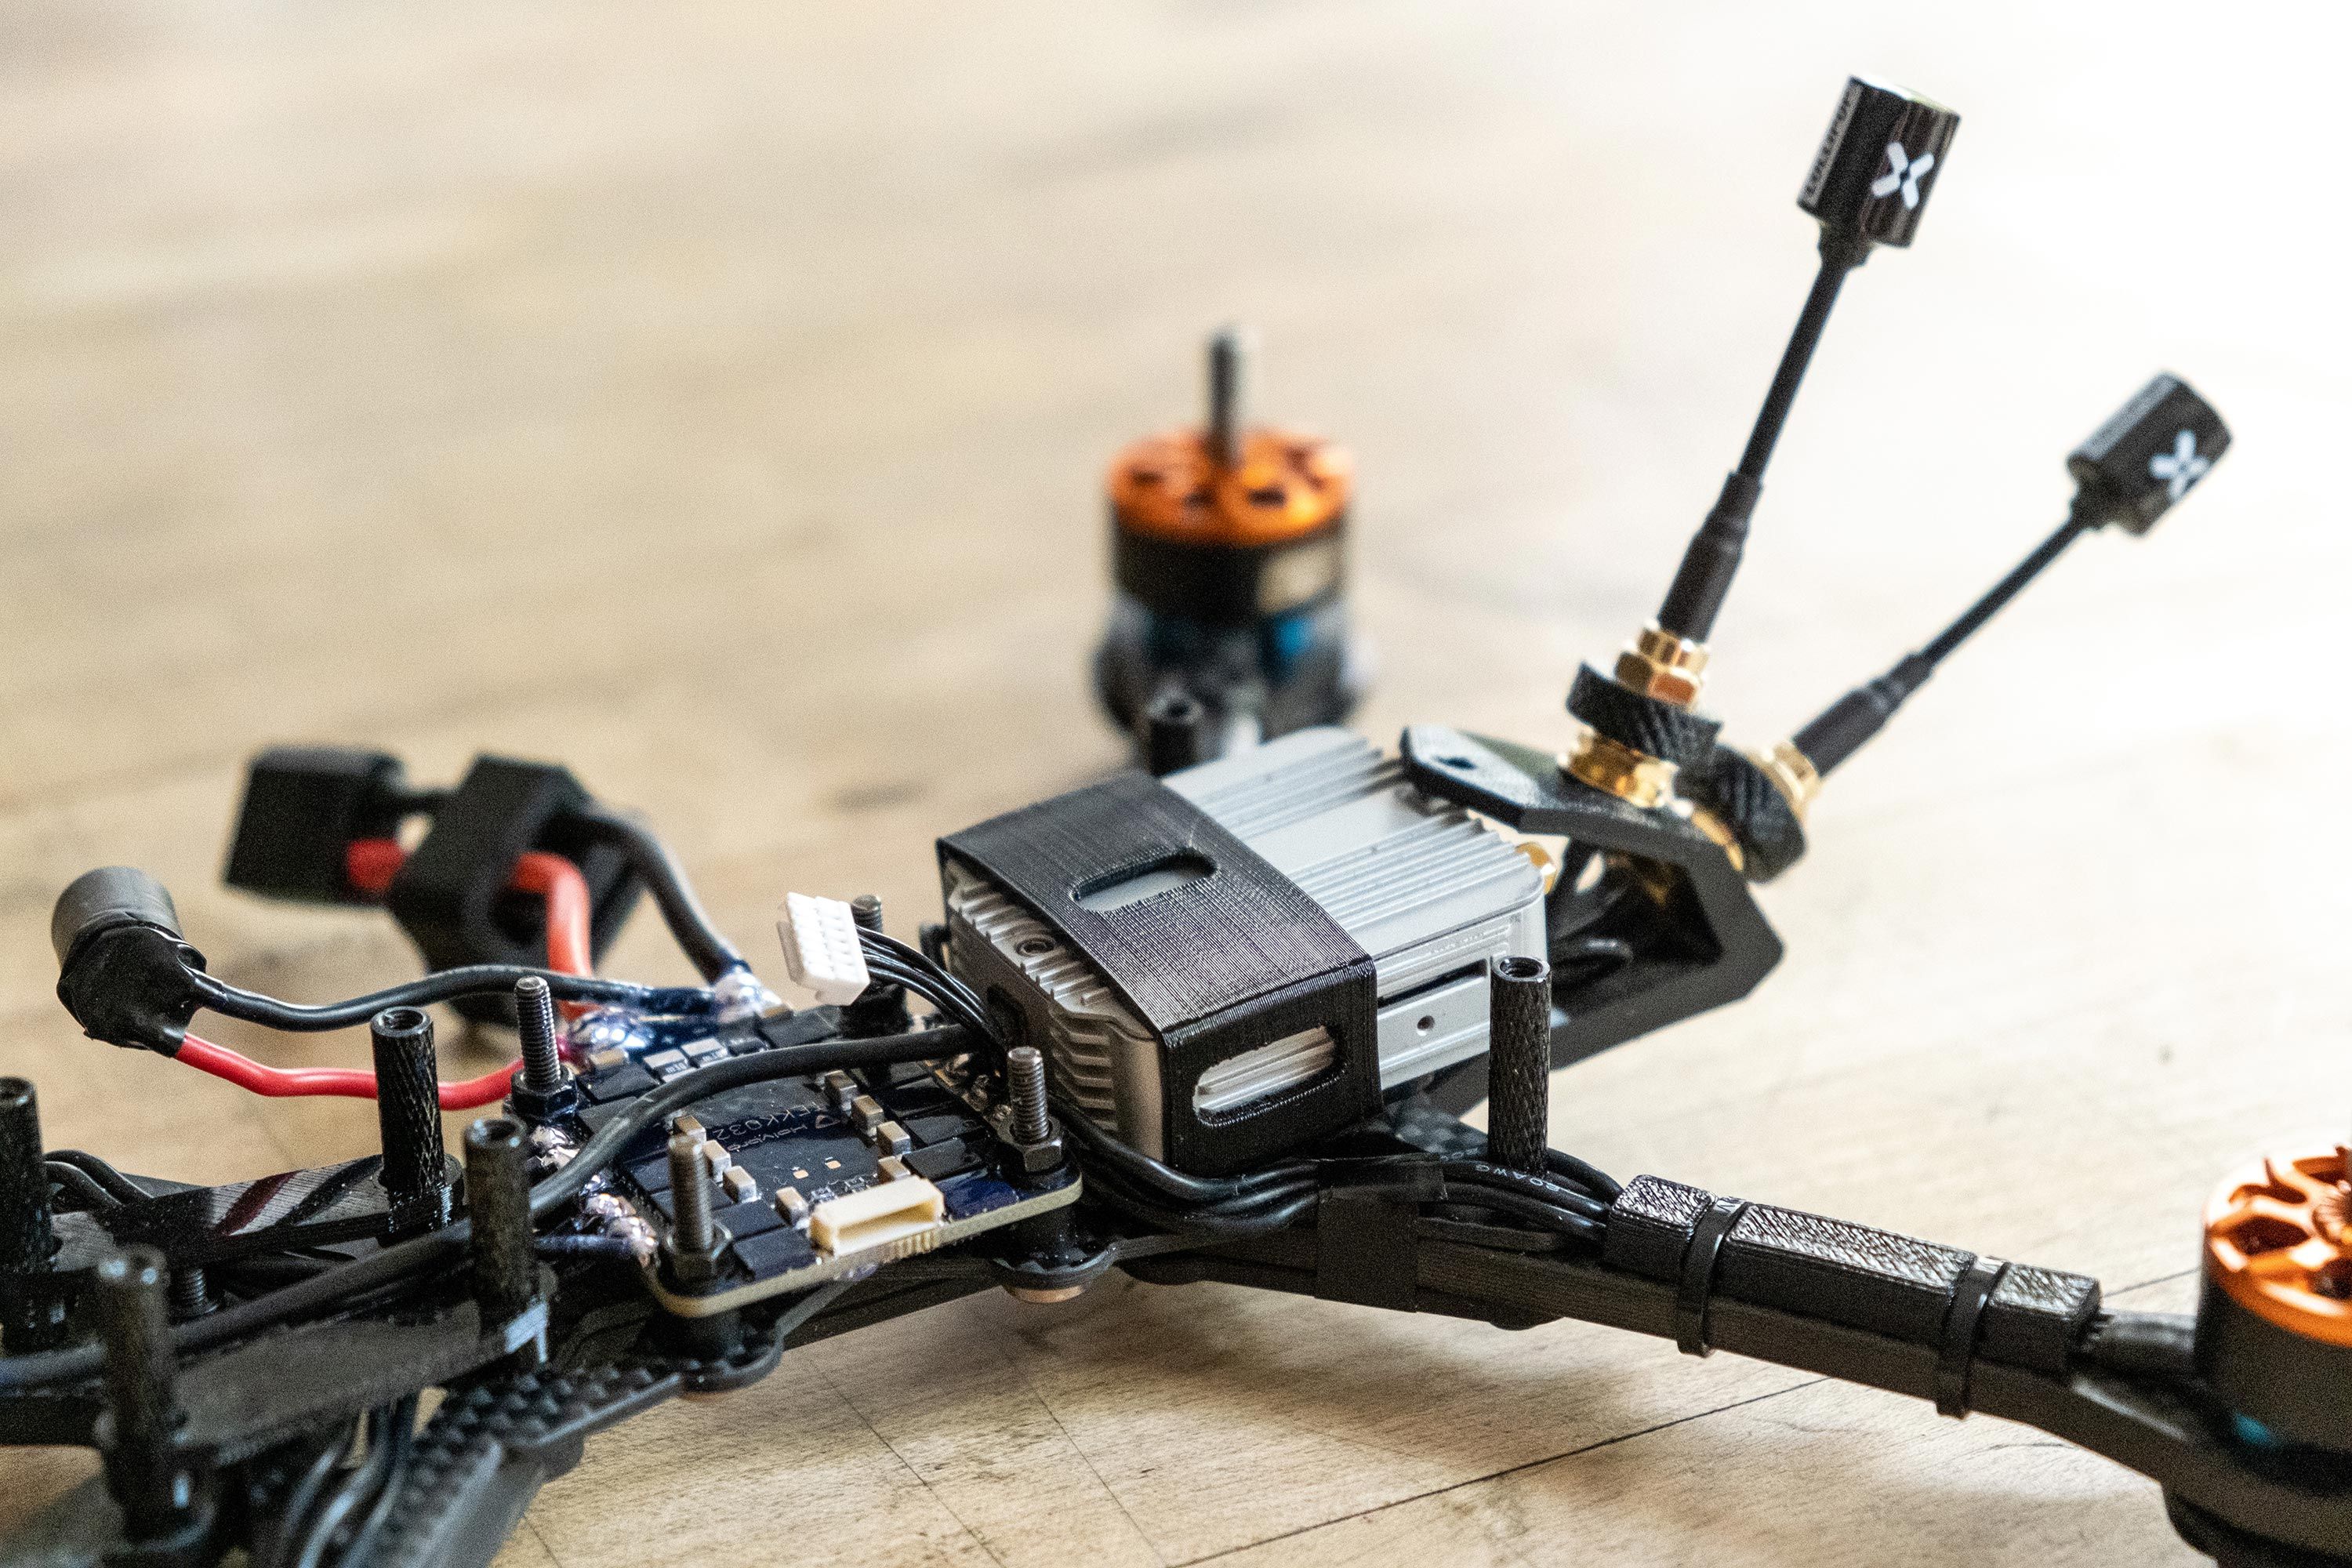
I wish that the MMCX to RP-SMA adapter was shorter, I had to coil up the extra cable and secure it with a zip tie so it doesn't stick out the sides.
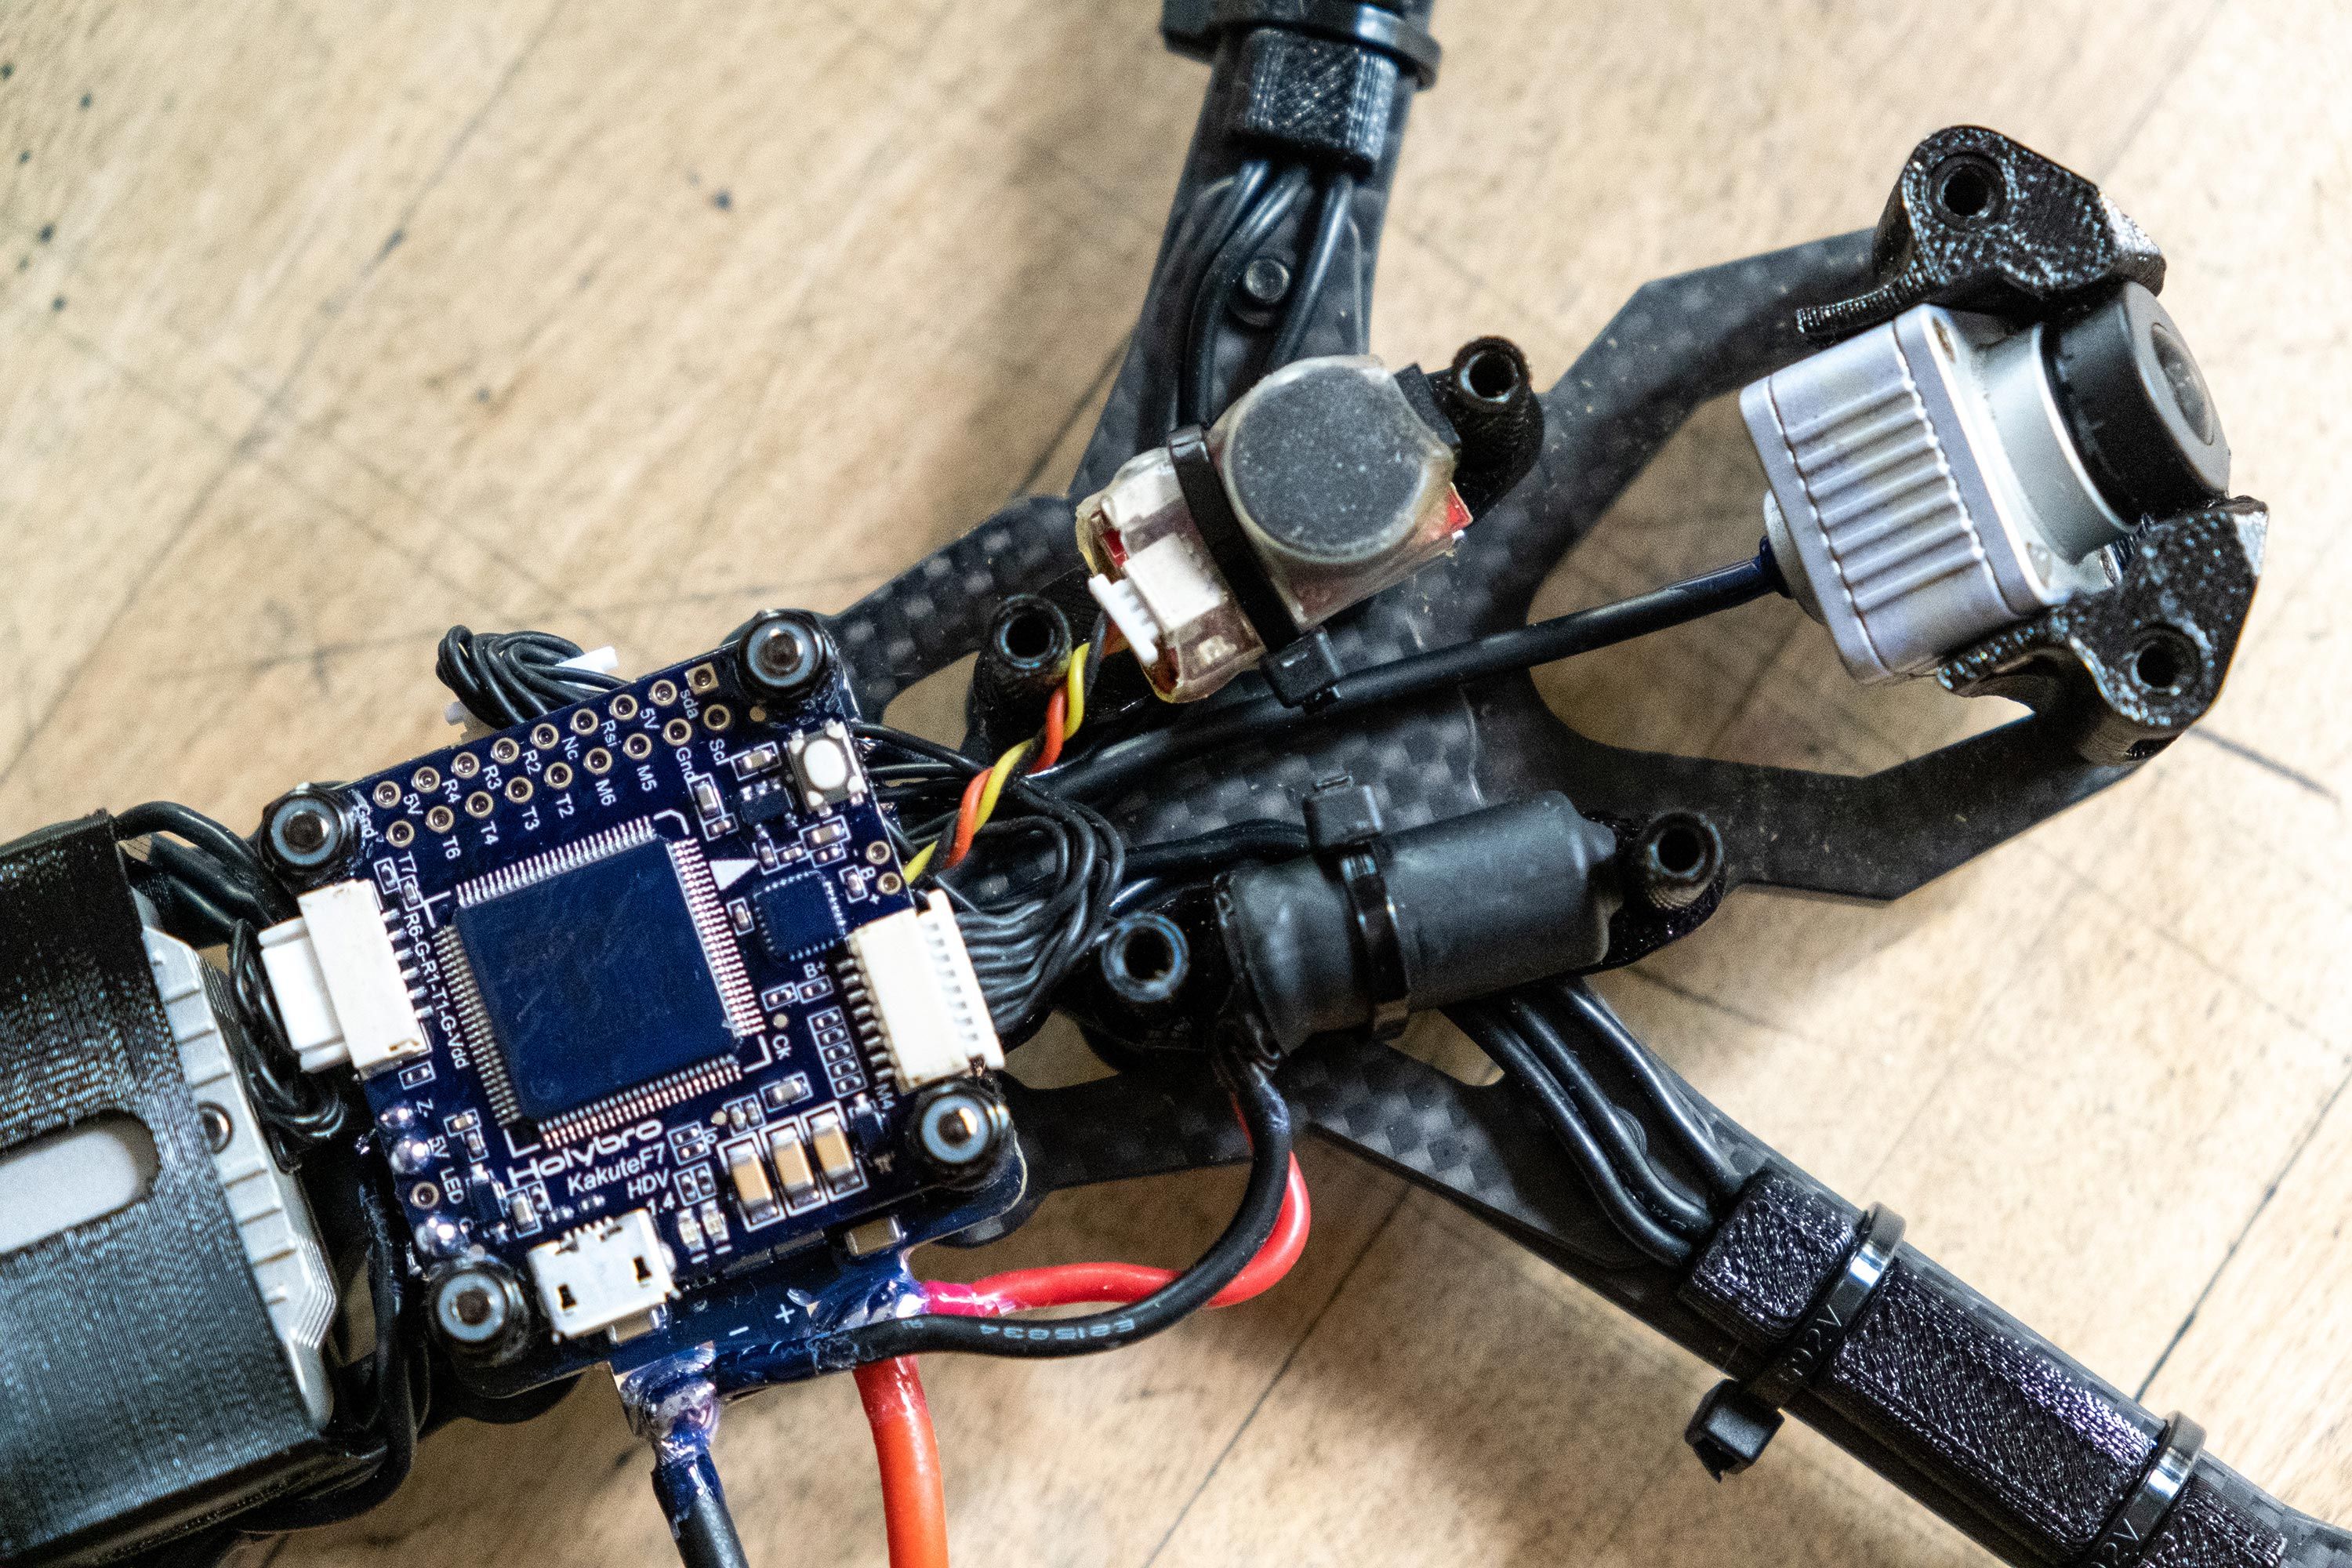
I ran the camera cable over the ESC and used another 3D print to mount the DJI camera.

FC and Buzzer
I soldered the ViFly Finder 2 buzzer to the FC from the underside and conformal coated everything except for the barometer opening and the boot button. I used a smoke stopper before connecting the battery for the first time to make sure everything worked out. Then I zip tied the buzzer to one shelf and the capacitor to the other.
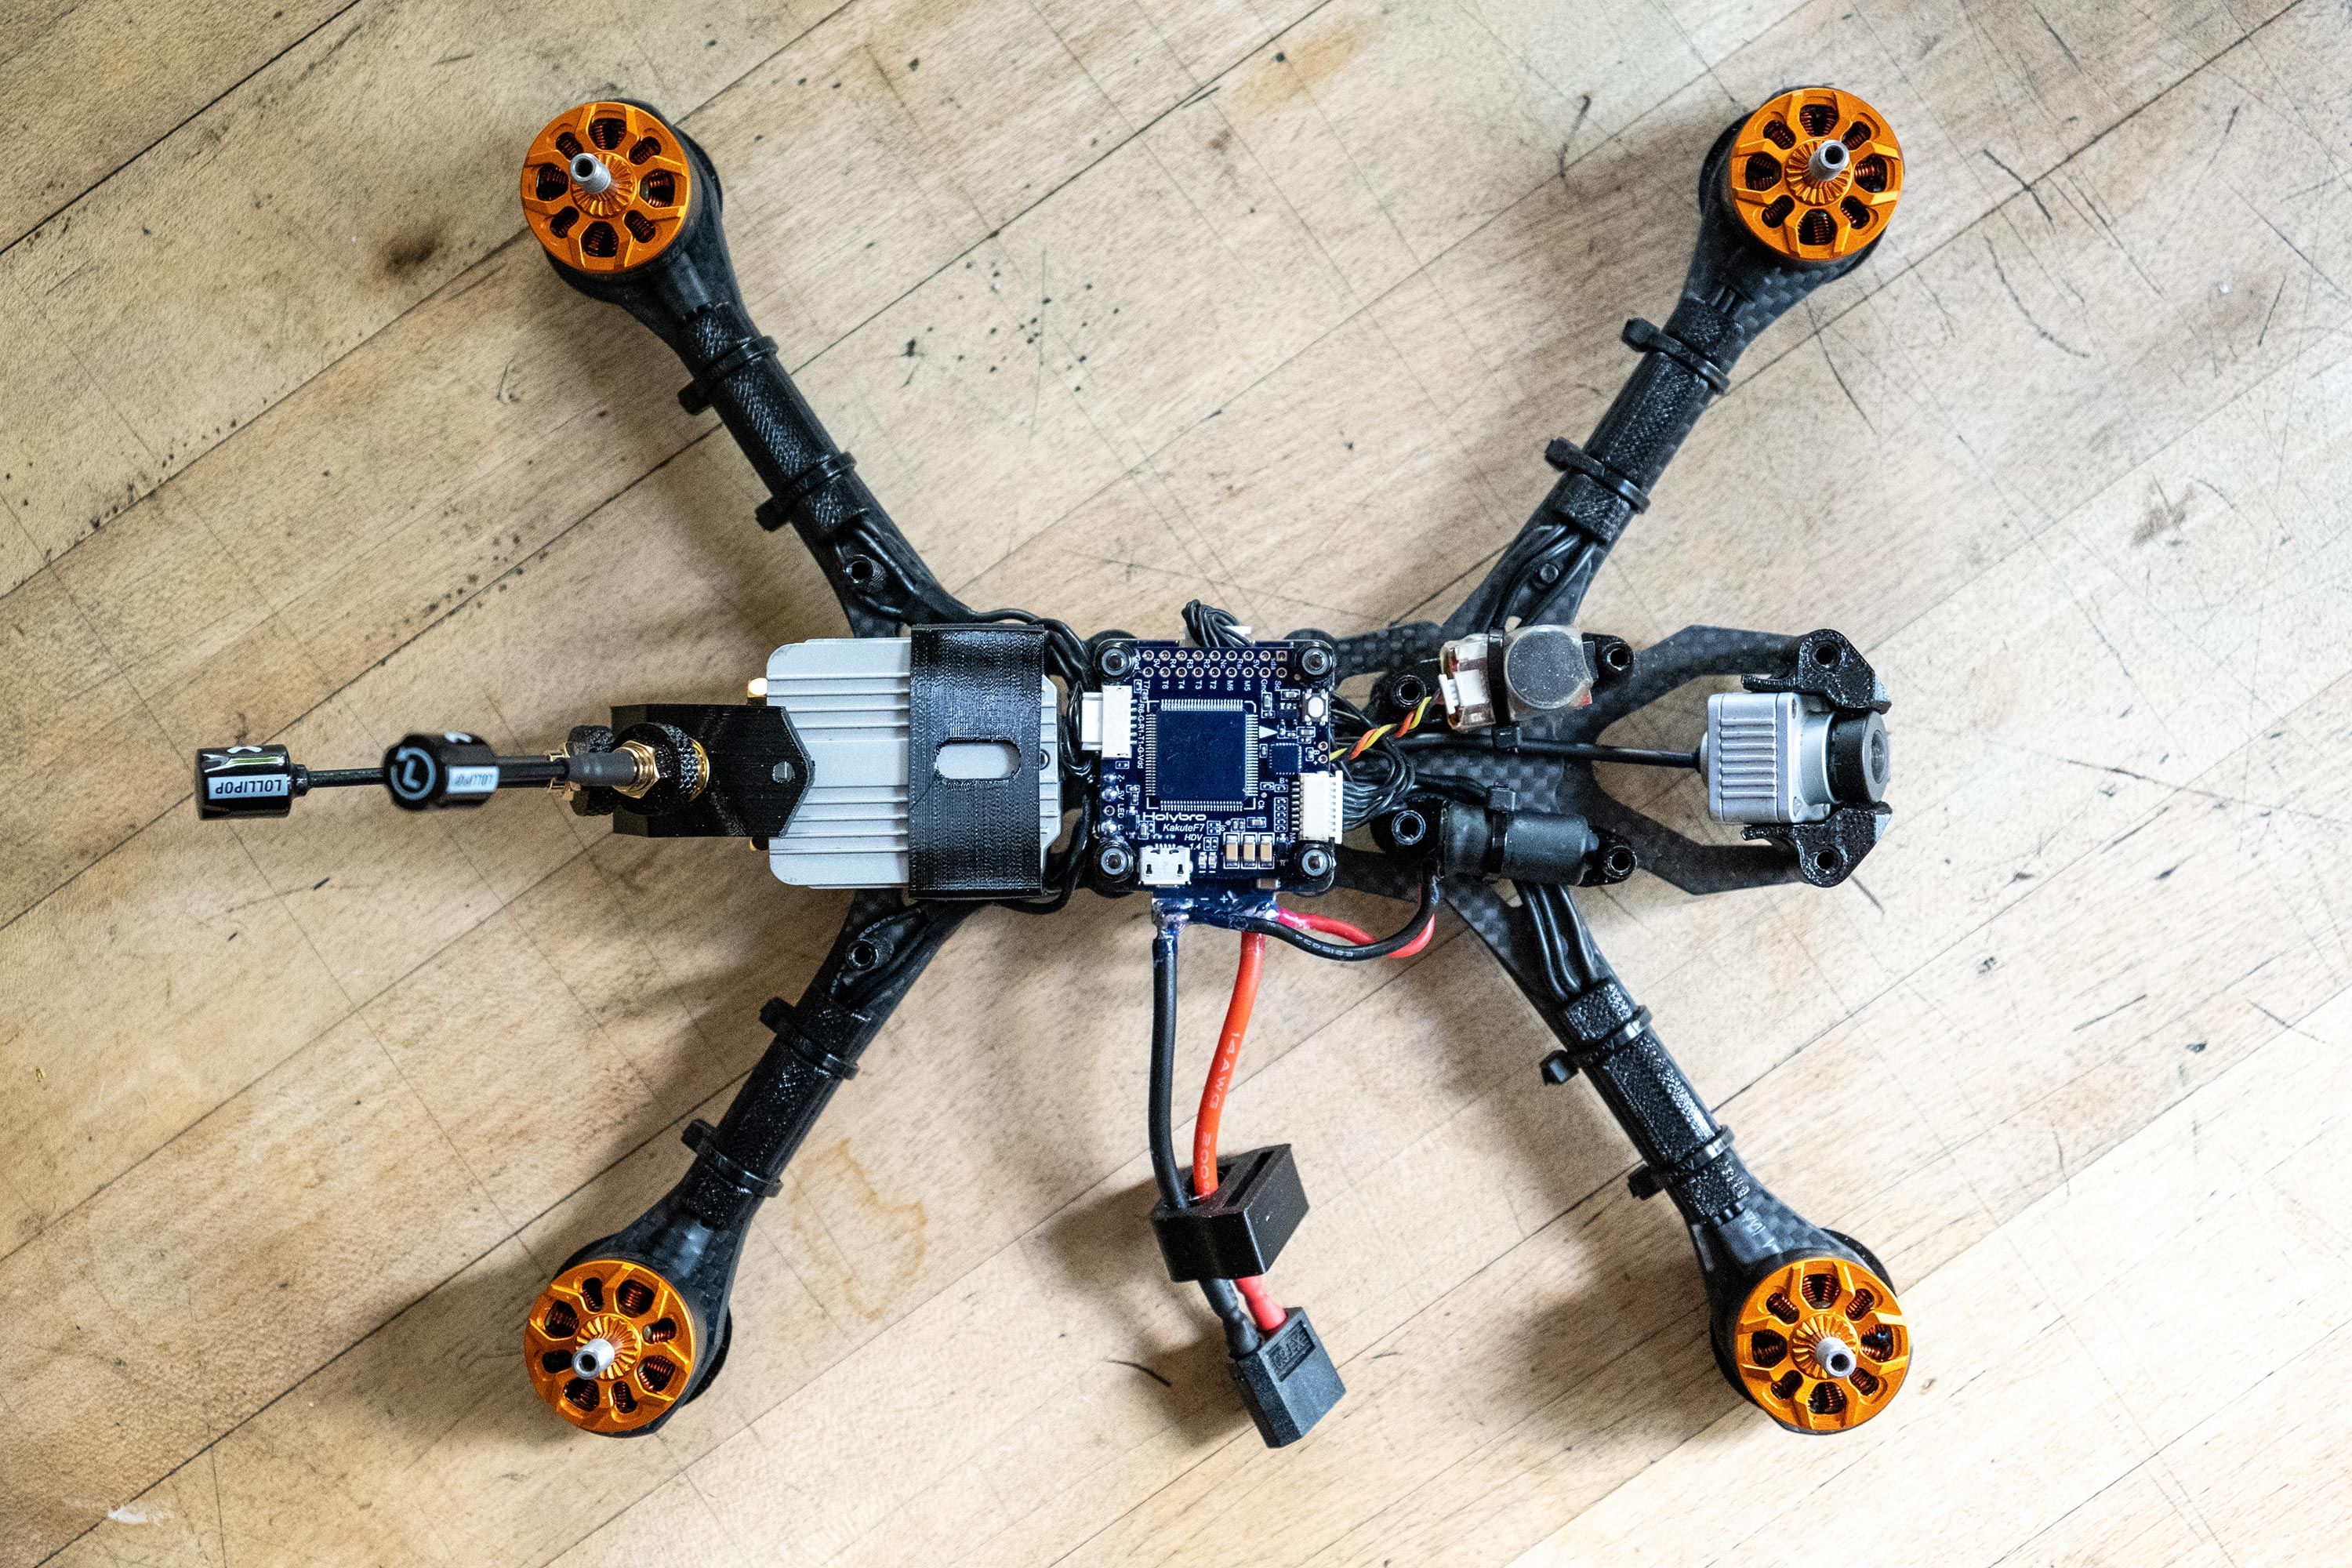
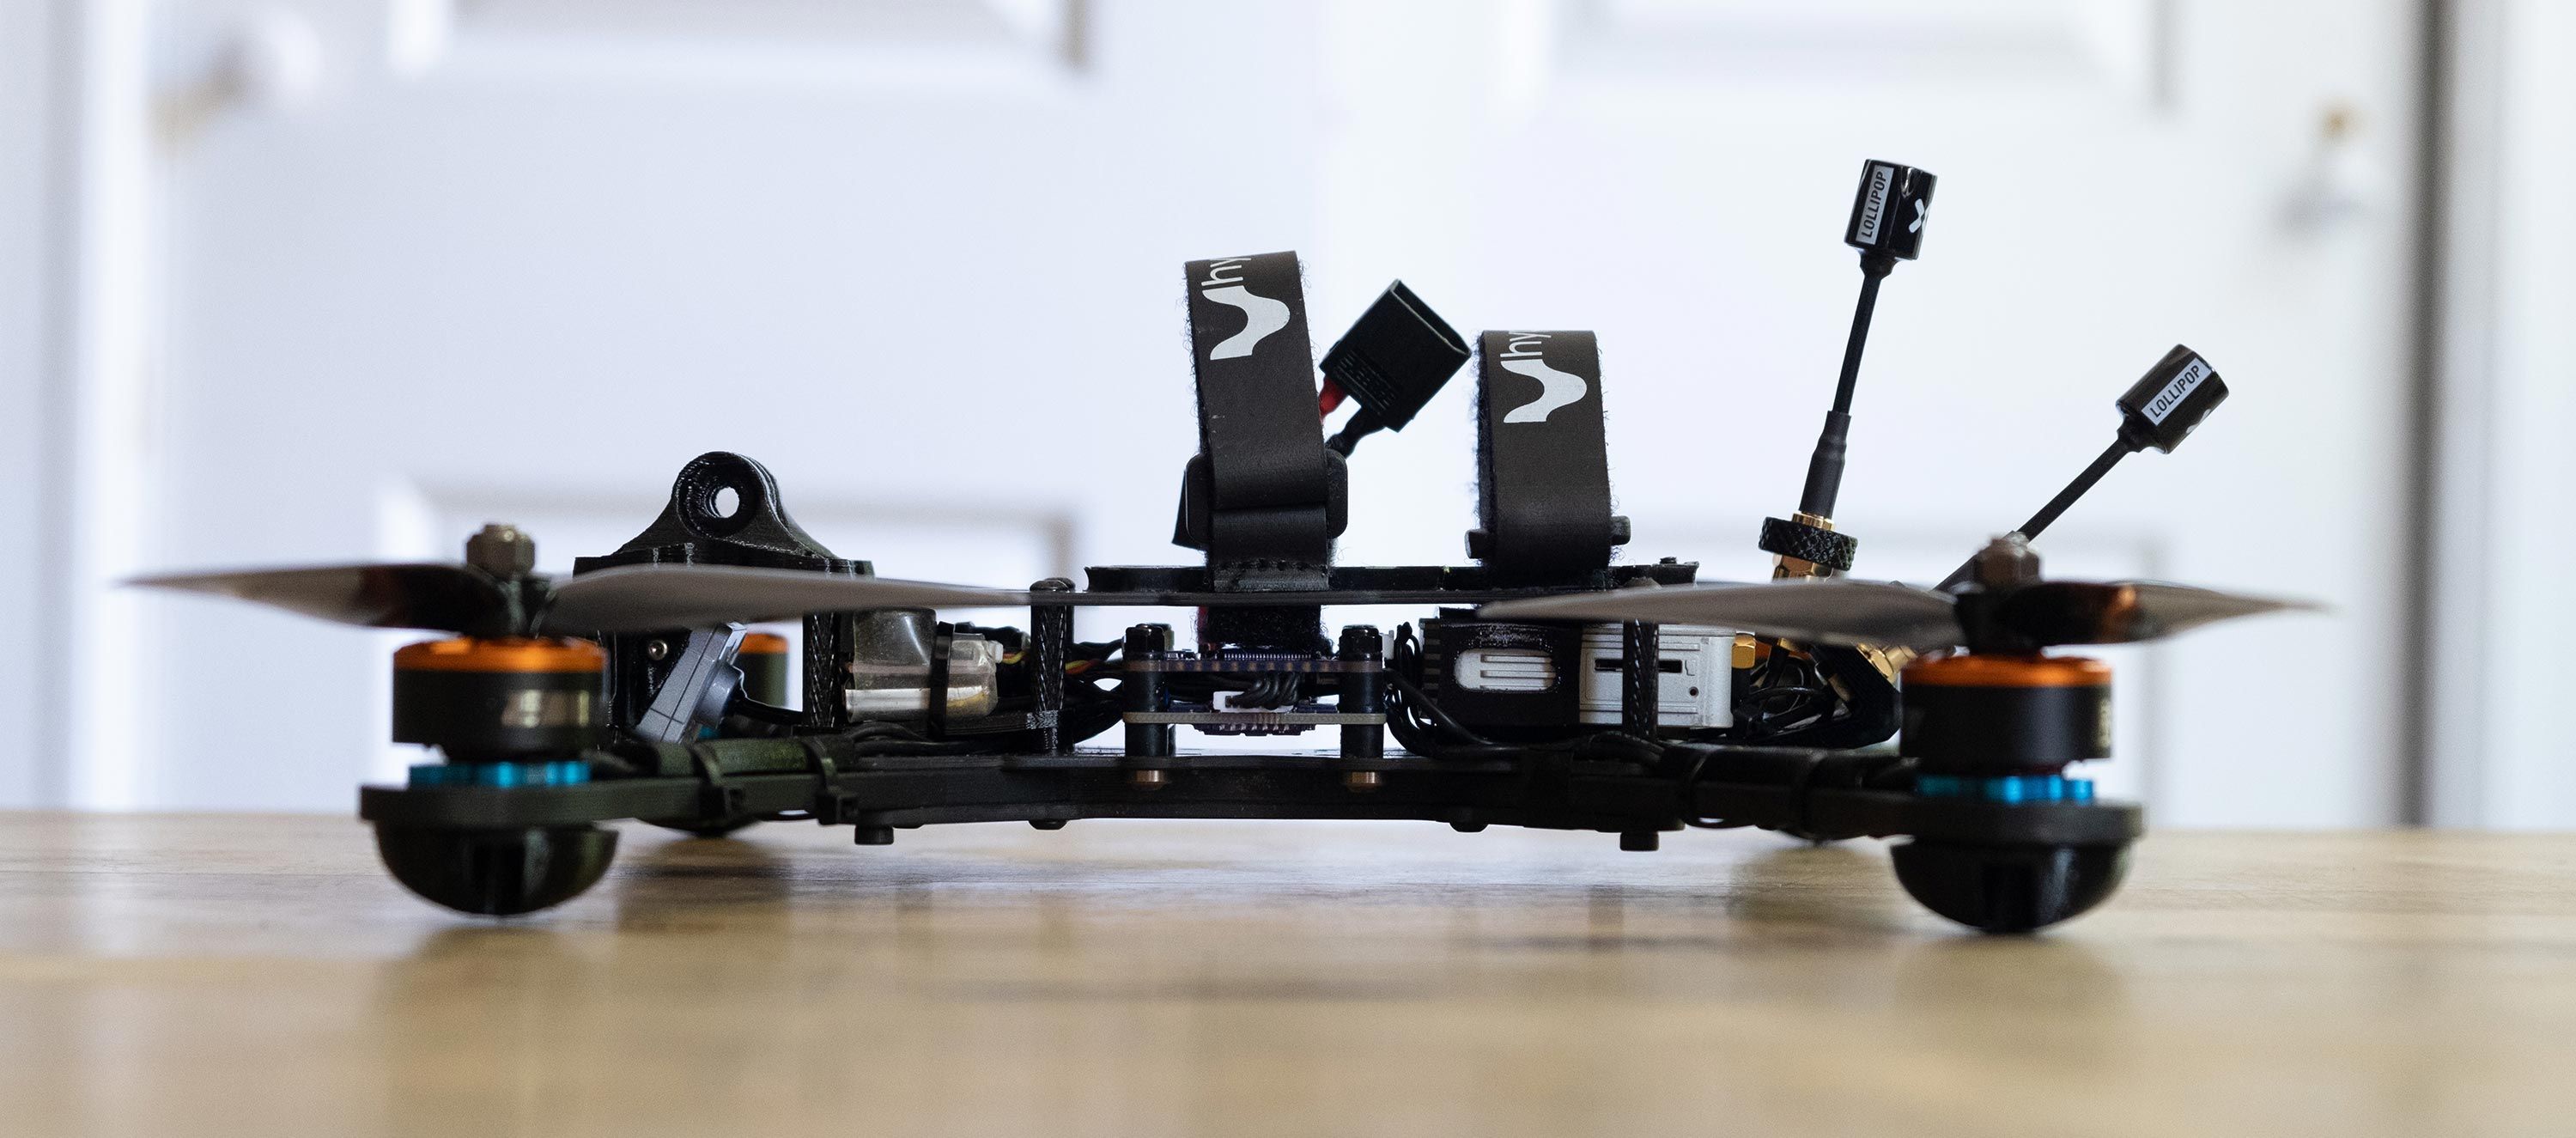
Final assembly
Once everything was set up I added two batter straps to the top plate, the custom Ummagrip battery pad and screwed the top plate on.
Photos
Part List
Show stores (6)
I like your mounts for the cap/buzzer, very clean.
I think it's interesting that this hyperlow has such "vitruvian man" energy. I blame it on the camera mount part, cutout, looking like the shape you would use to start drawing a face.
Your build looks good, despite the air unit being all "nuts-to-butts" with the flight stack. Impressive.
Was funny for me, I started looking at the end, and went backwards. Saw the shot of the esc freshly soldered, with no air unit, and I was like "...well ONE side looks super clean and evenly laid out... what is going on with the OTHER side though, why would?..". Then I moved to the next frame and was all "ooooOOOOOOOOoooo, now I see"

What a thoughtful comment, thank you! I like your "Vitruvian man" energy view. I never thought of it that way but always felt like this frame looked special and different. Now I see what you mean!
And yes, the back side of the ESC motor solder joints do not look that evenly laid out and clean, wish they did but alas... Would work well with either the Caddx Vista or a 20x20 stack. I really don't like how close the Air Unit sits to the ESC, but wanted to see if I could make it work.


Sharp looking build.
I'm sort of surprised you went with a full size DJI Air Unit though.
I do believe that the Airshot was primarily designed to mount the Caddix Vista. Although the full size unit is doable. It'll just be sorta tight and require a very thought out dry-building process.
Mounting the Vista affords the builder plenty of room when using a 20x20 or 30x30 stack.
I've been running this build with a Caddix Vista for quite sometime now paired with the NewBeeDrone Infinity200 stack.
My only gripe about this frame is that the rear arms are very prone to breakage due to lack of bracing. But that gripe doesn't really apply to your build because you are using the stronger flat arms. Regardless, enjoy the build and happy flying!