
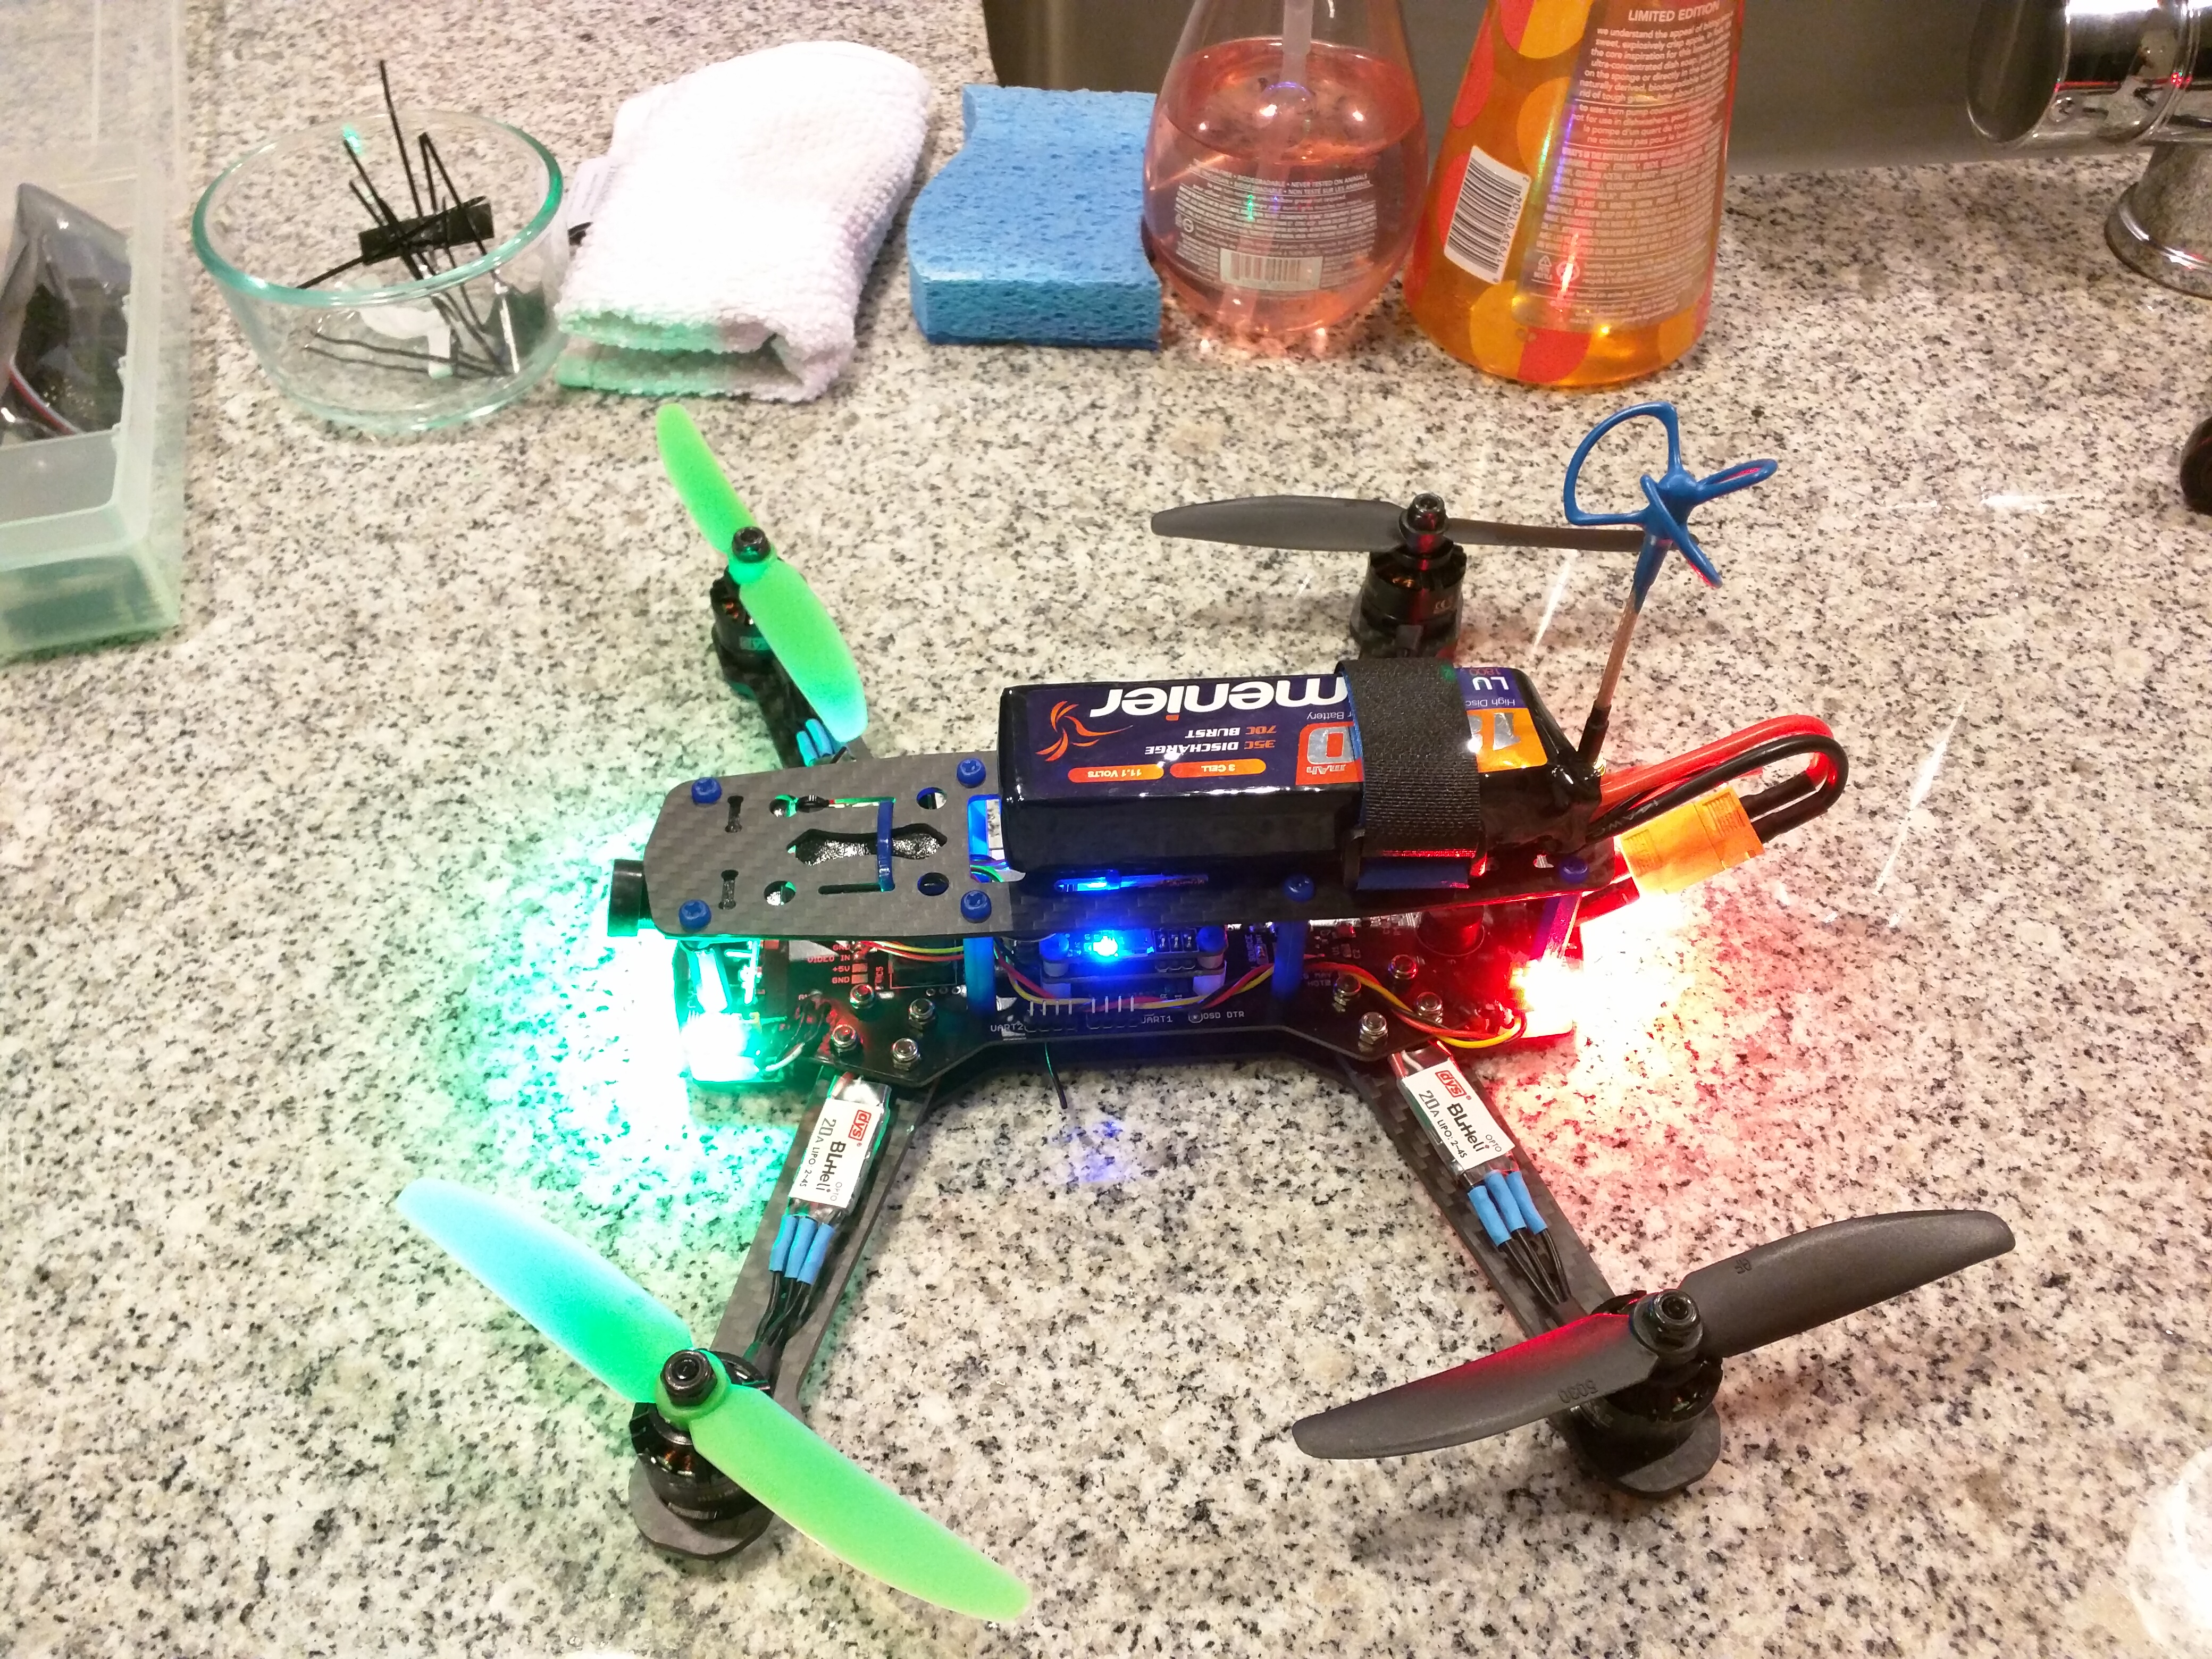
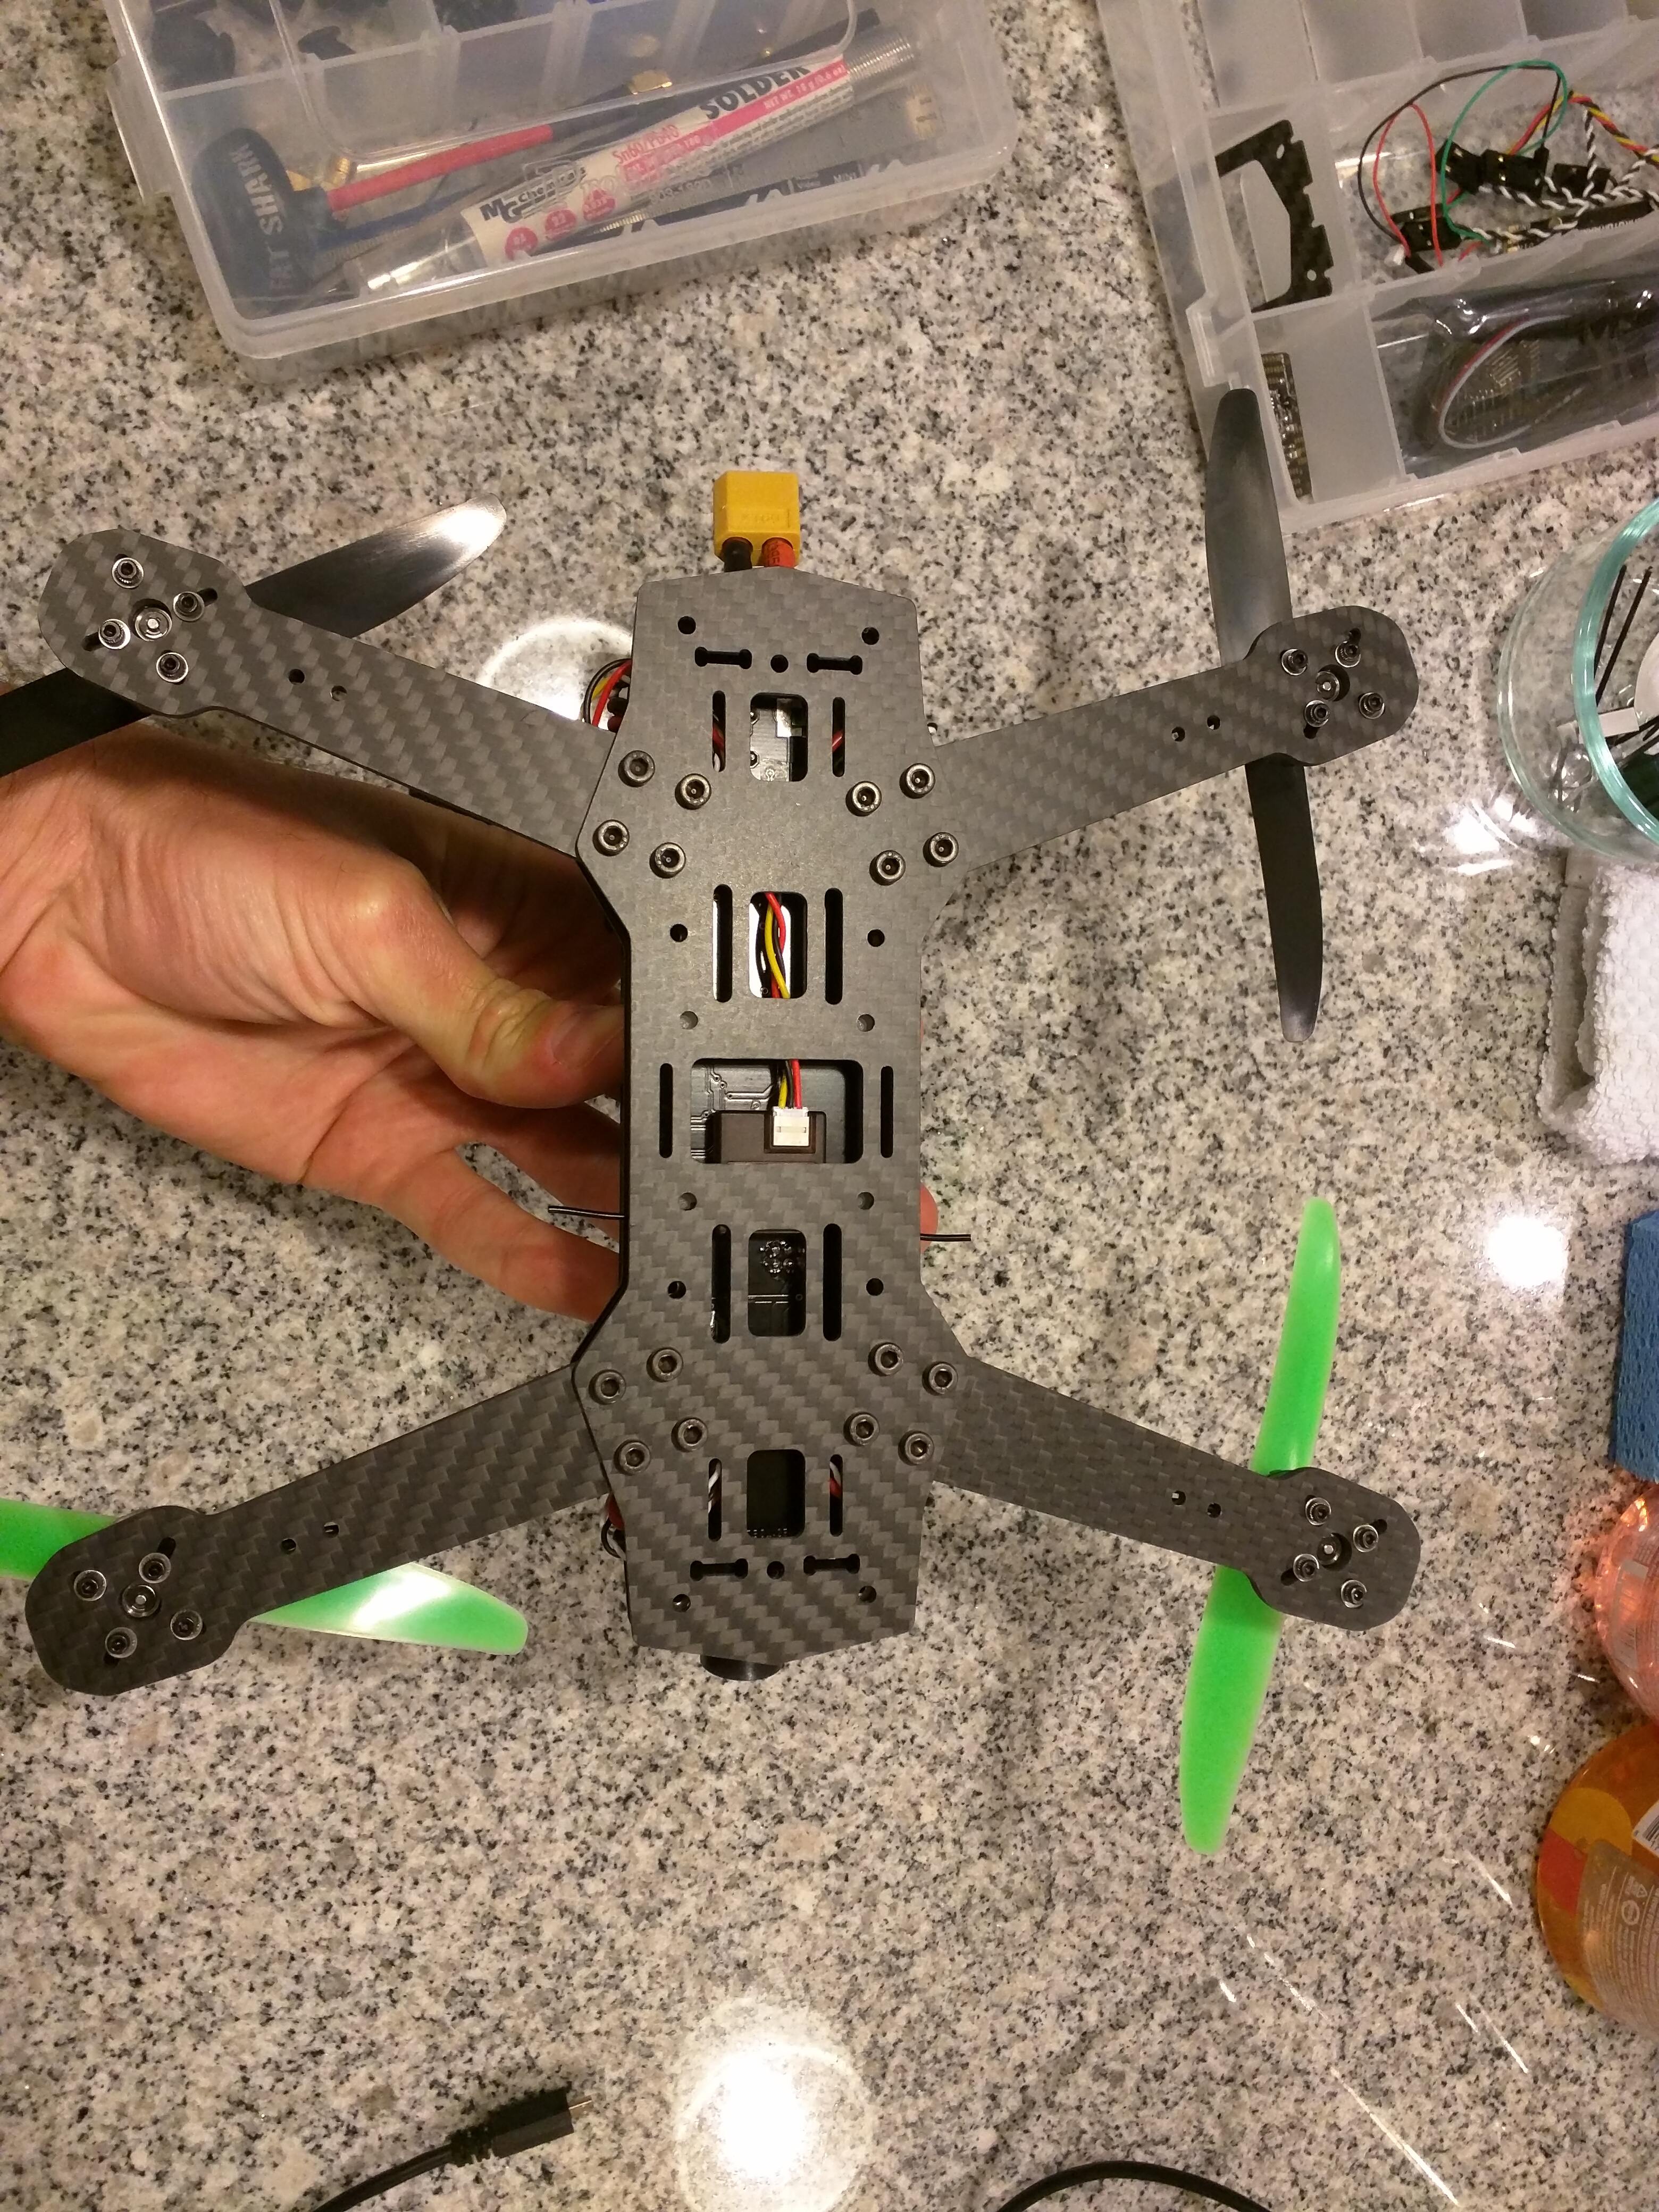
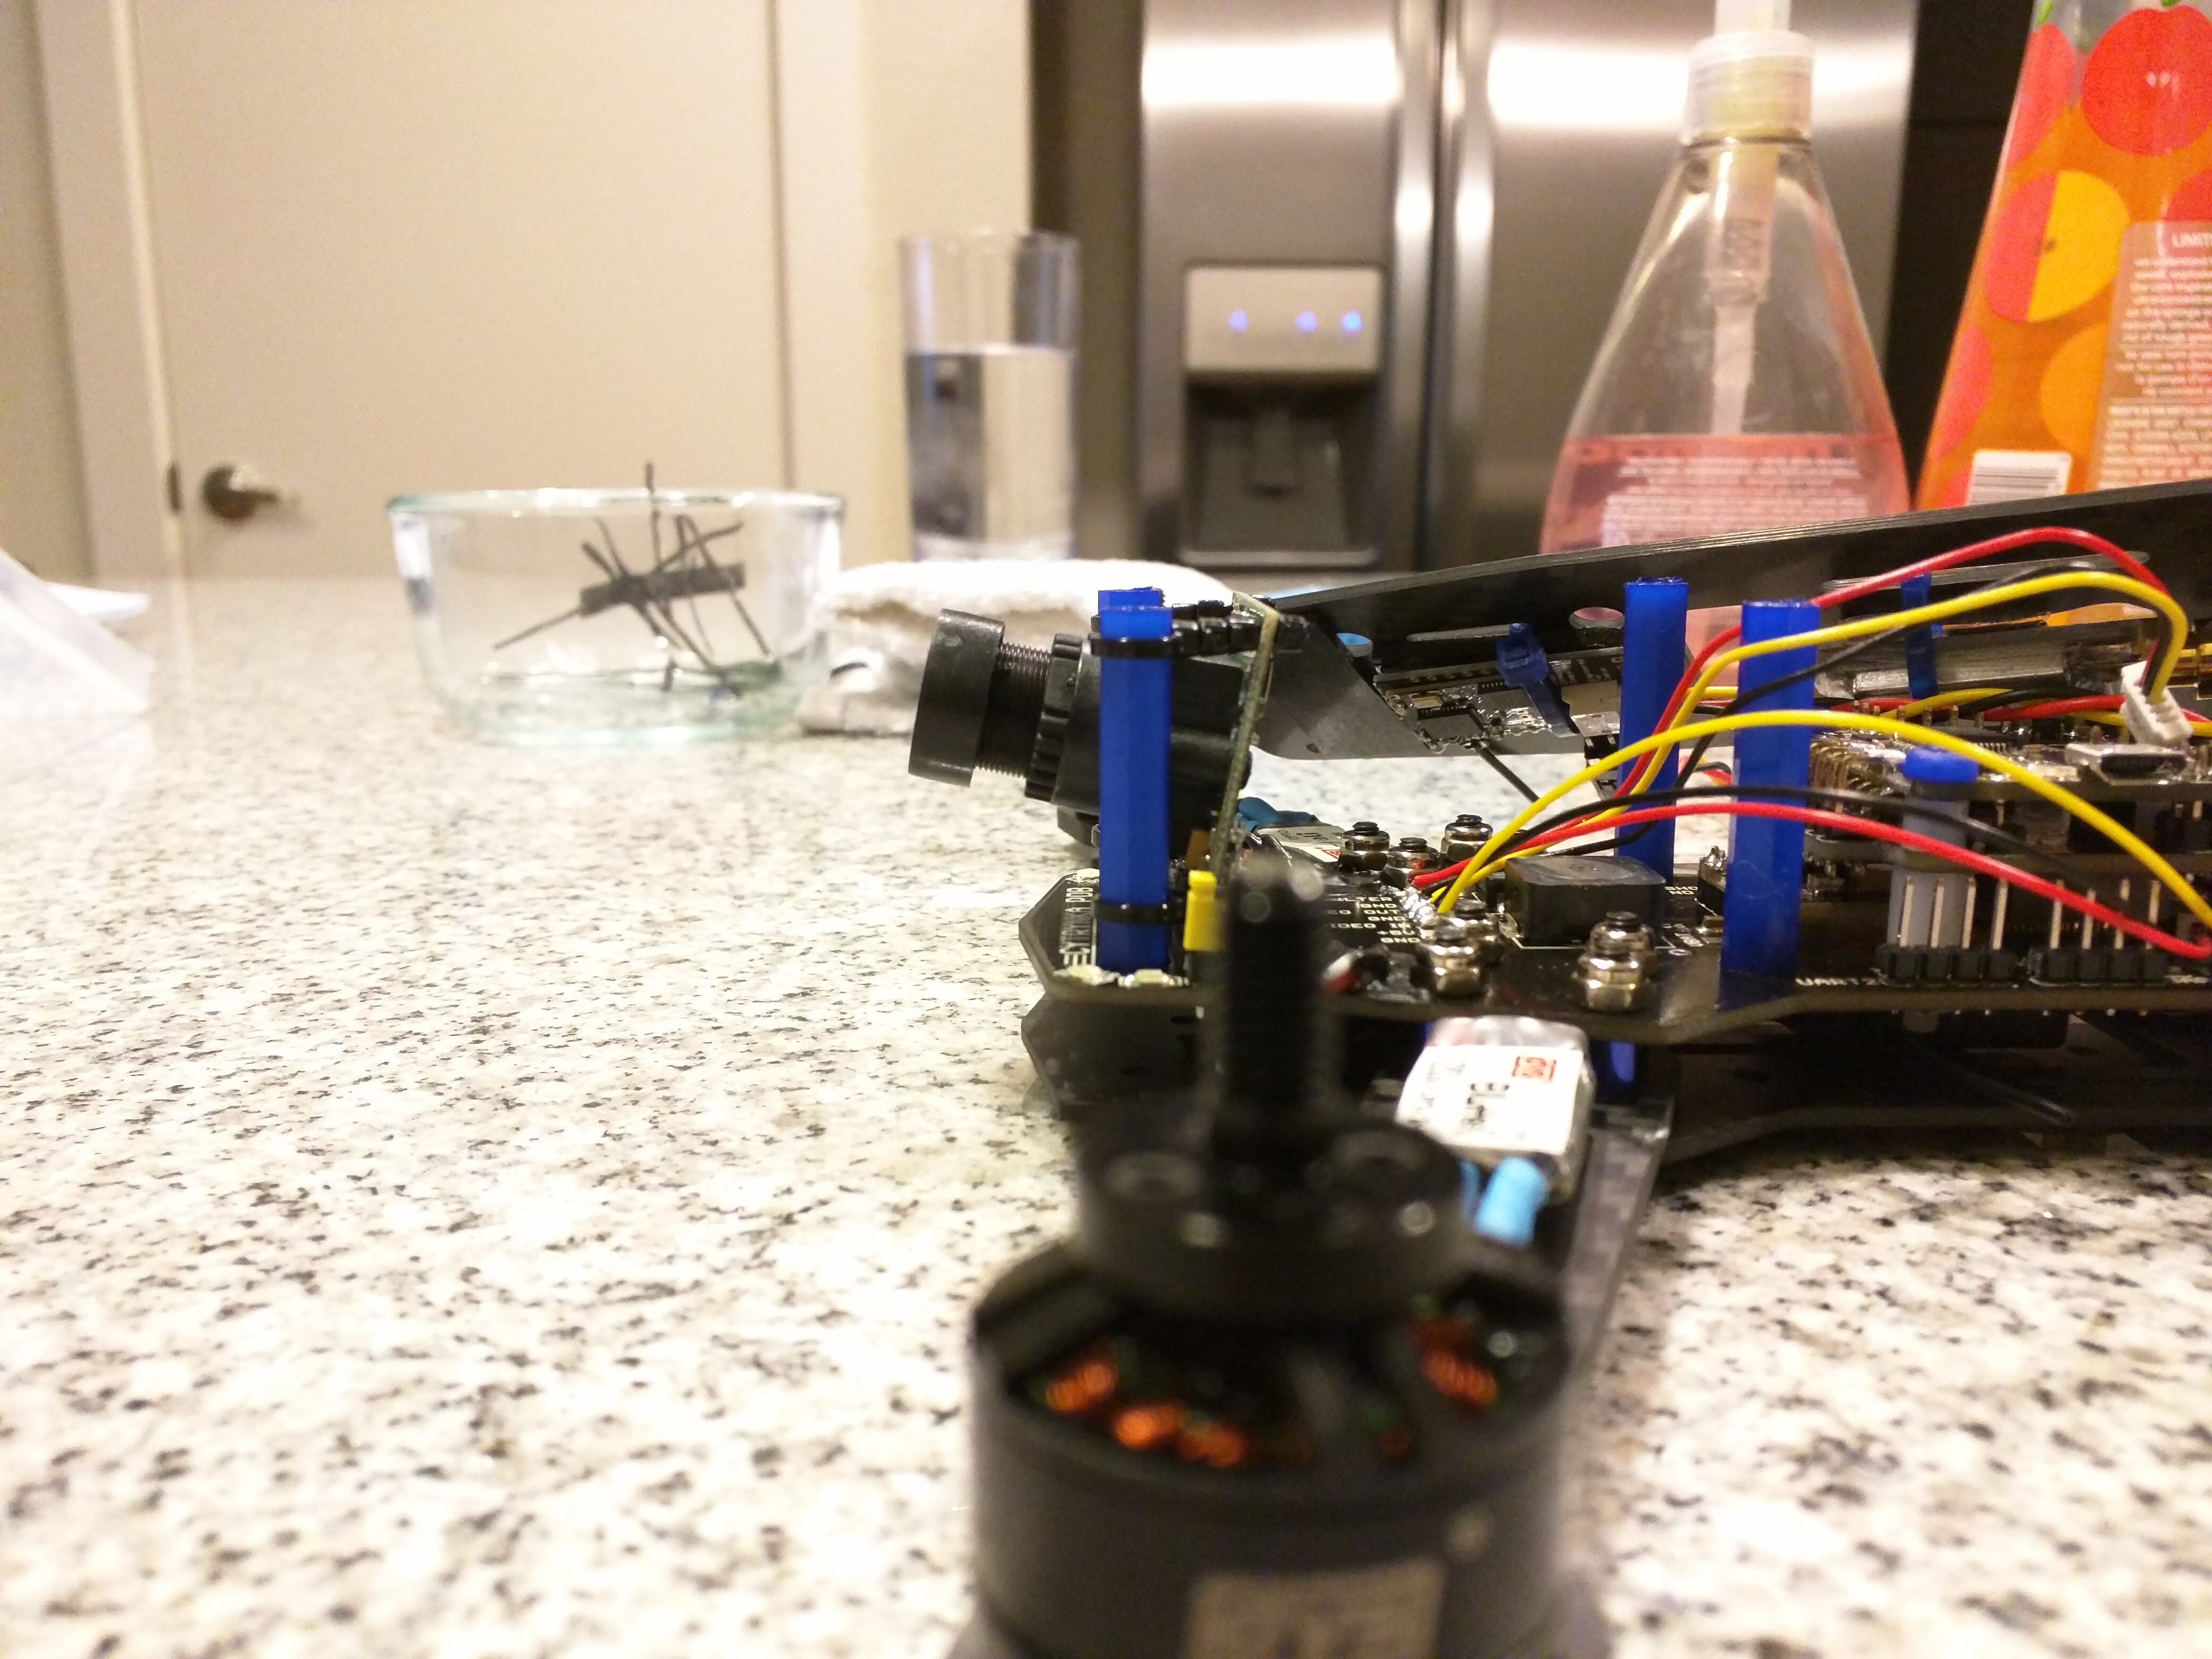
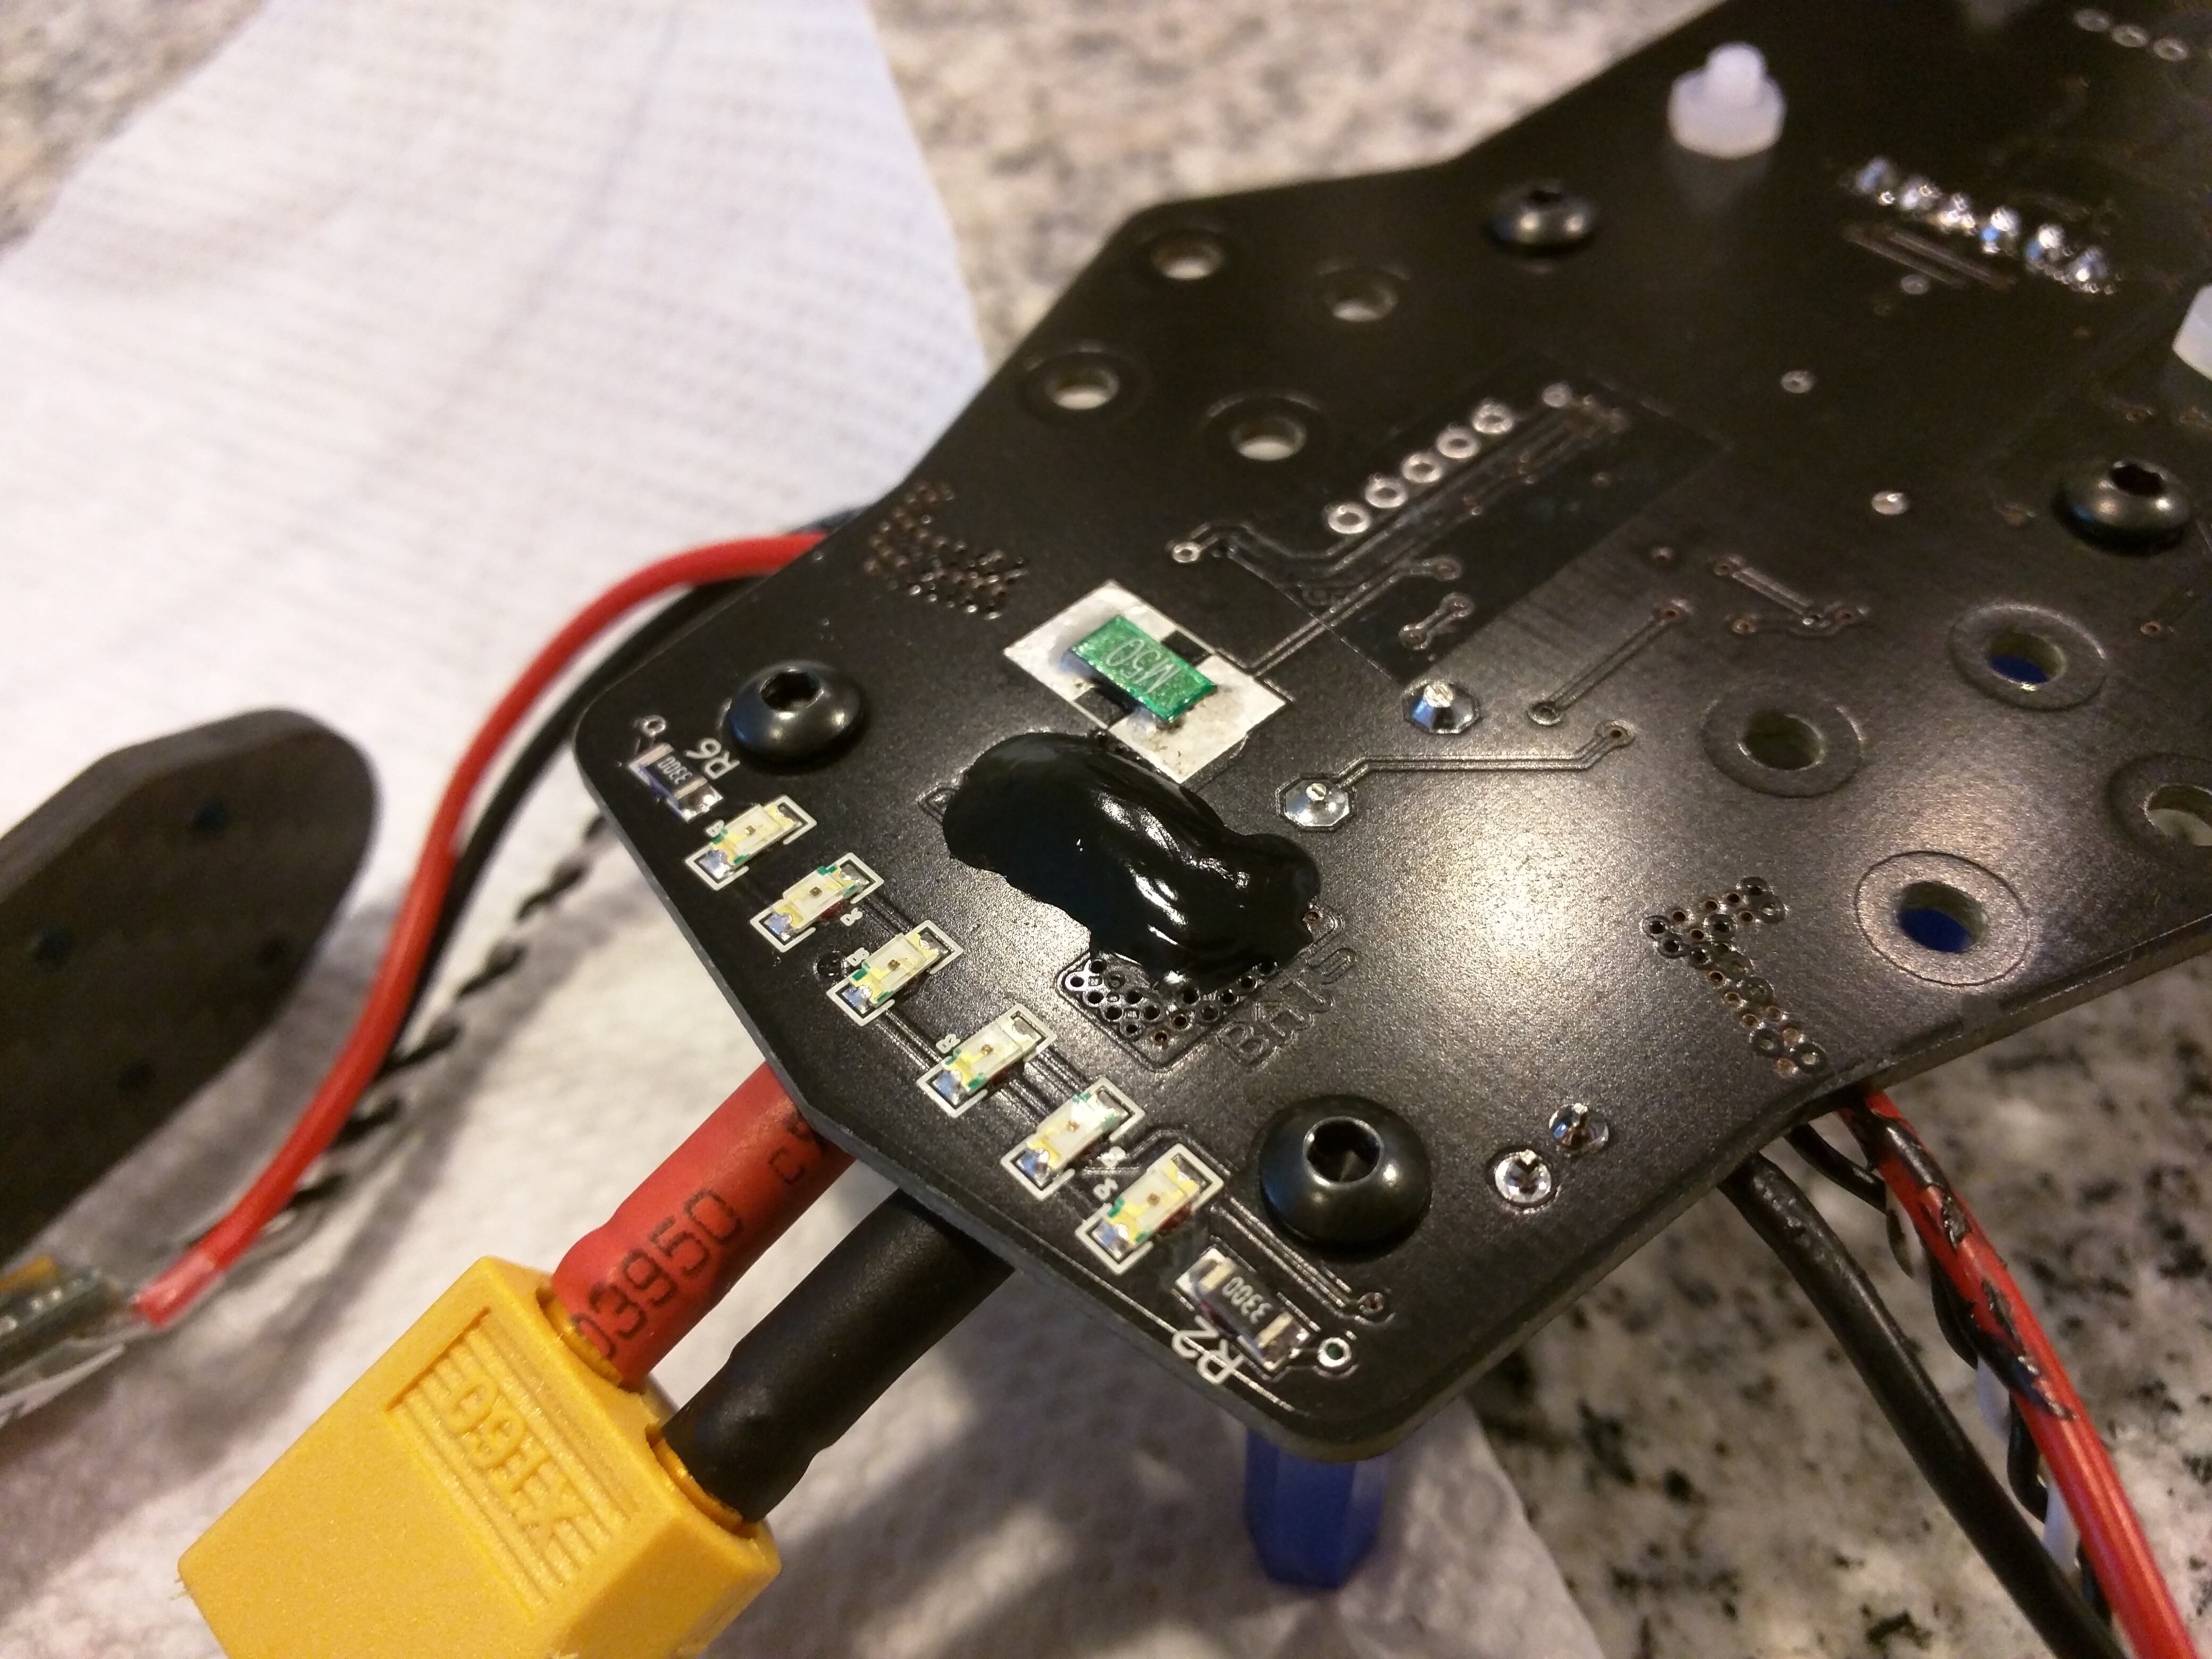
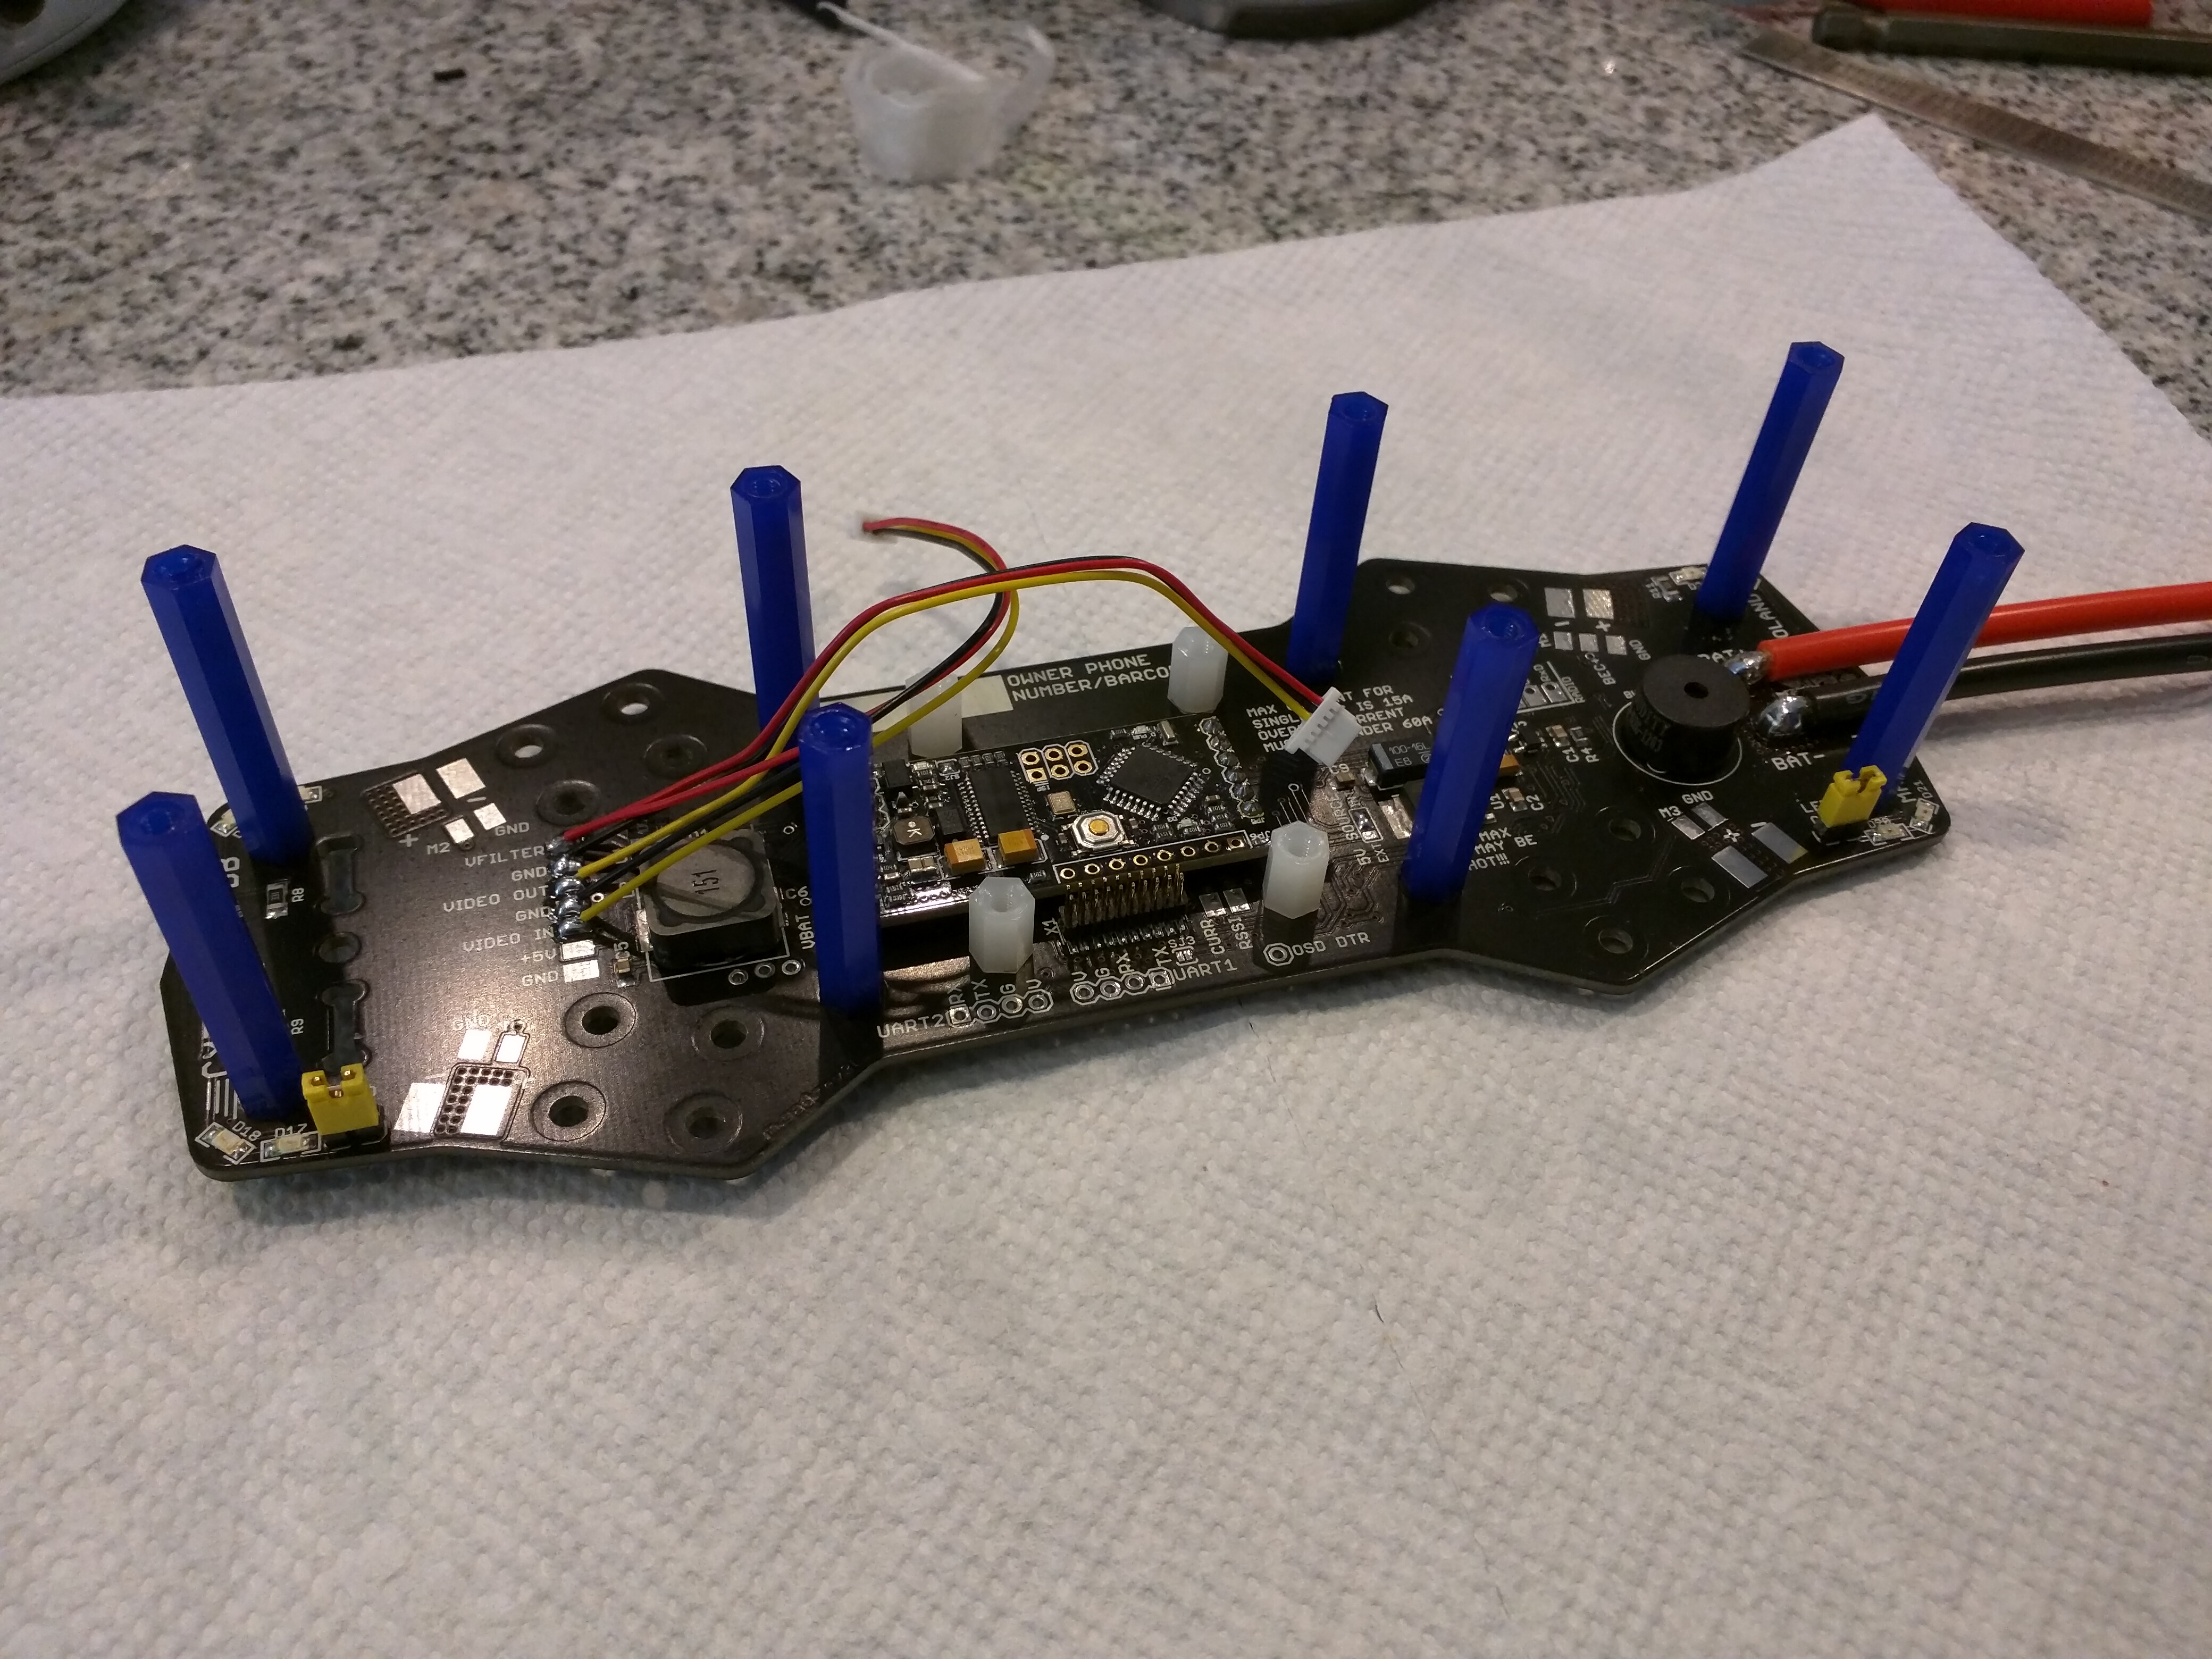
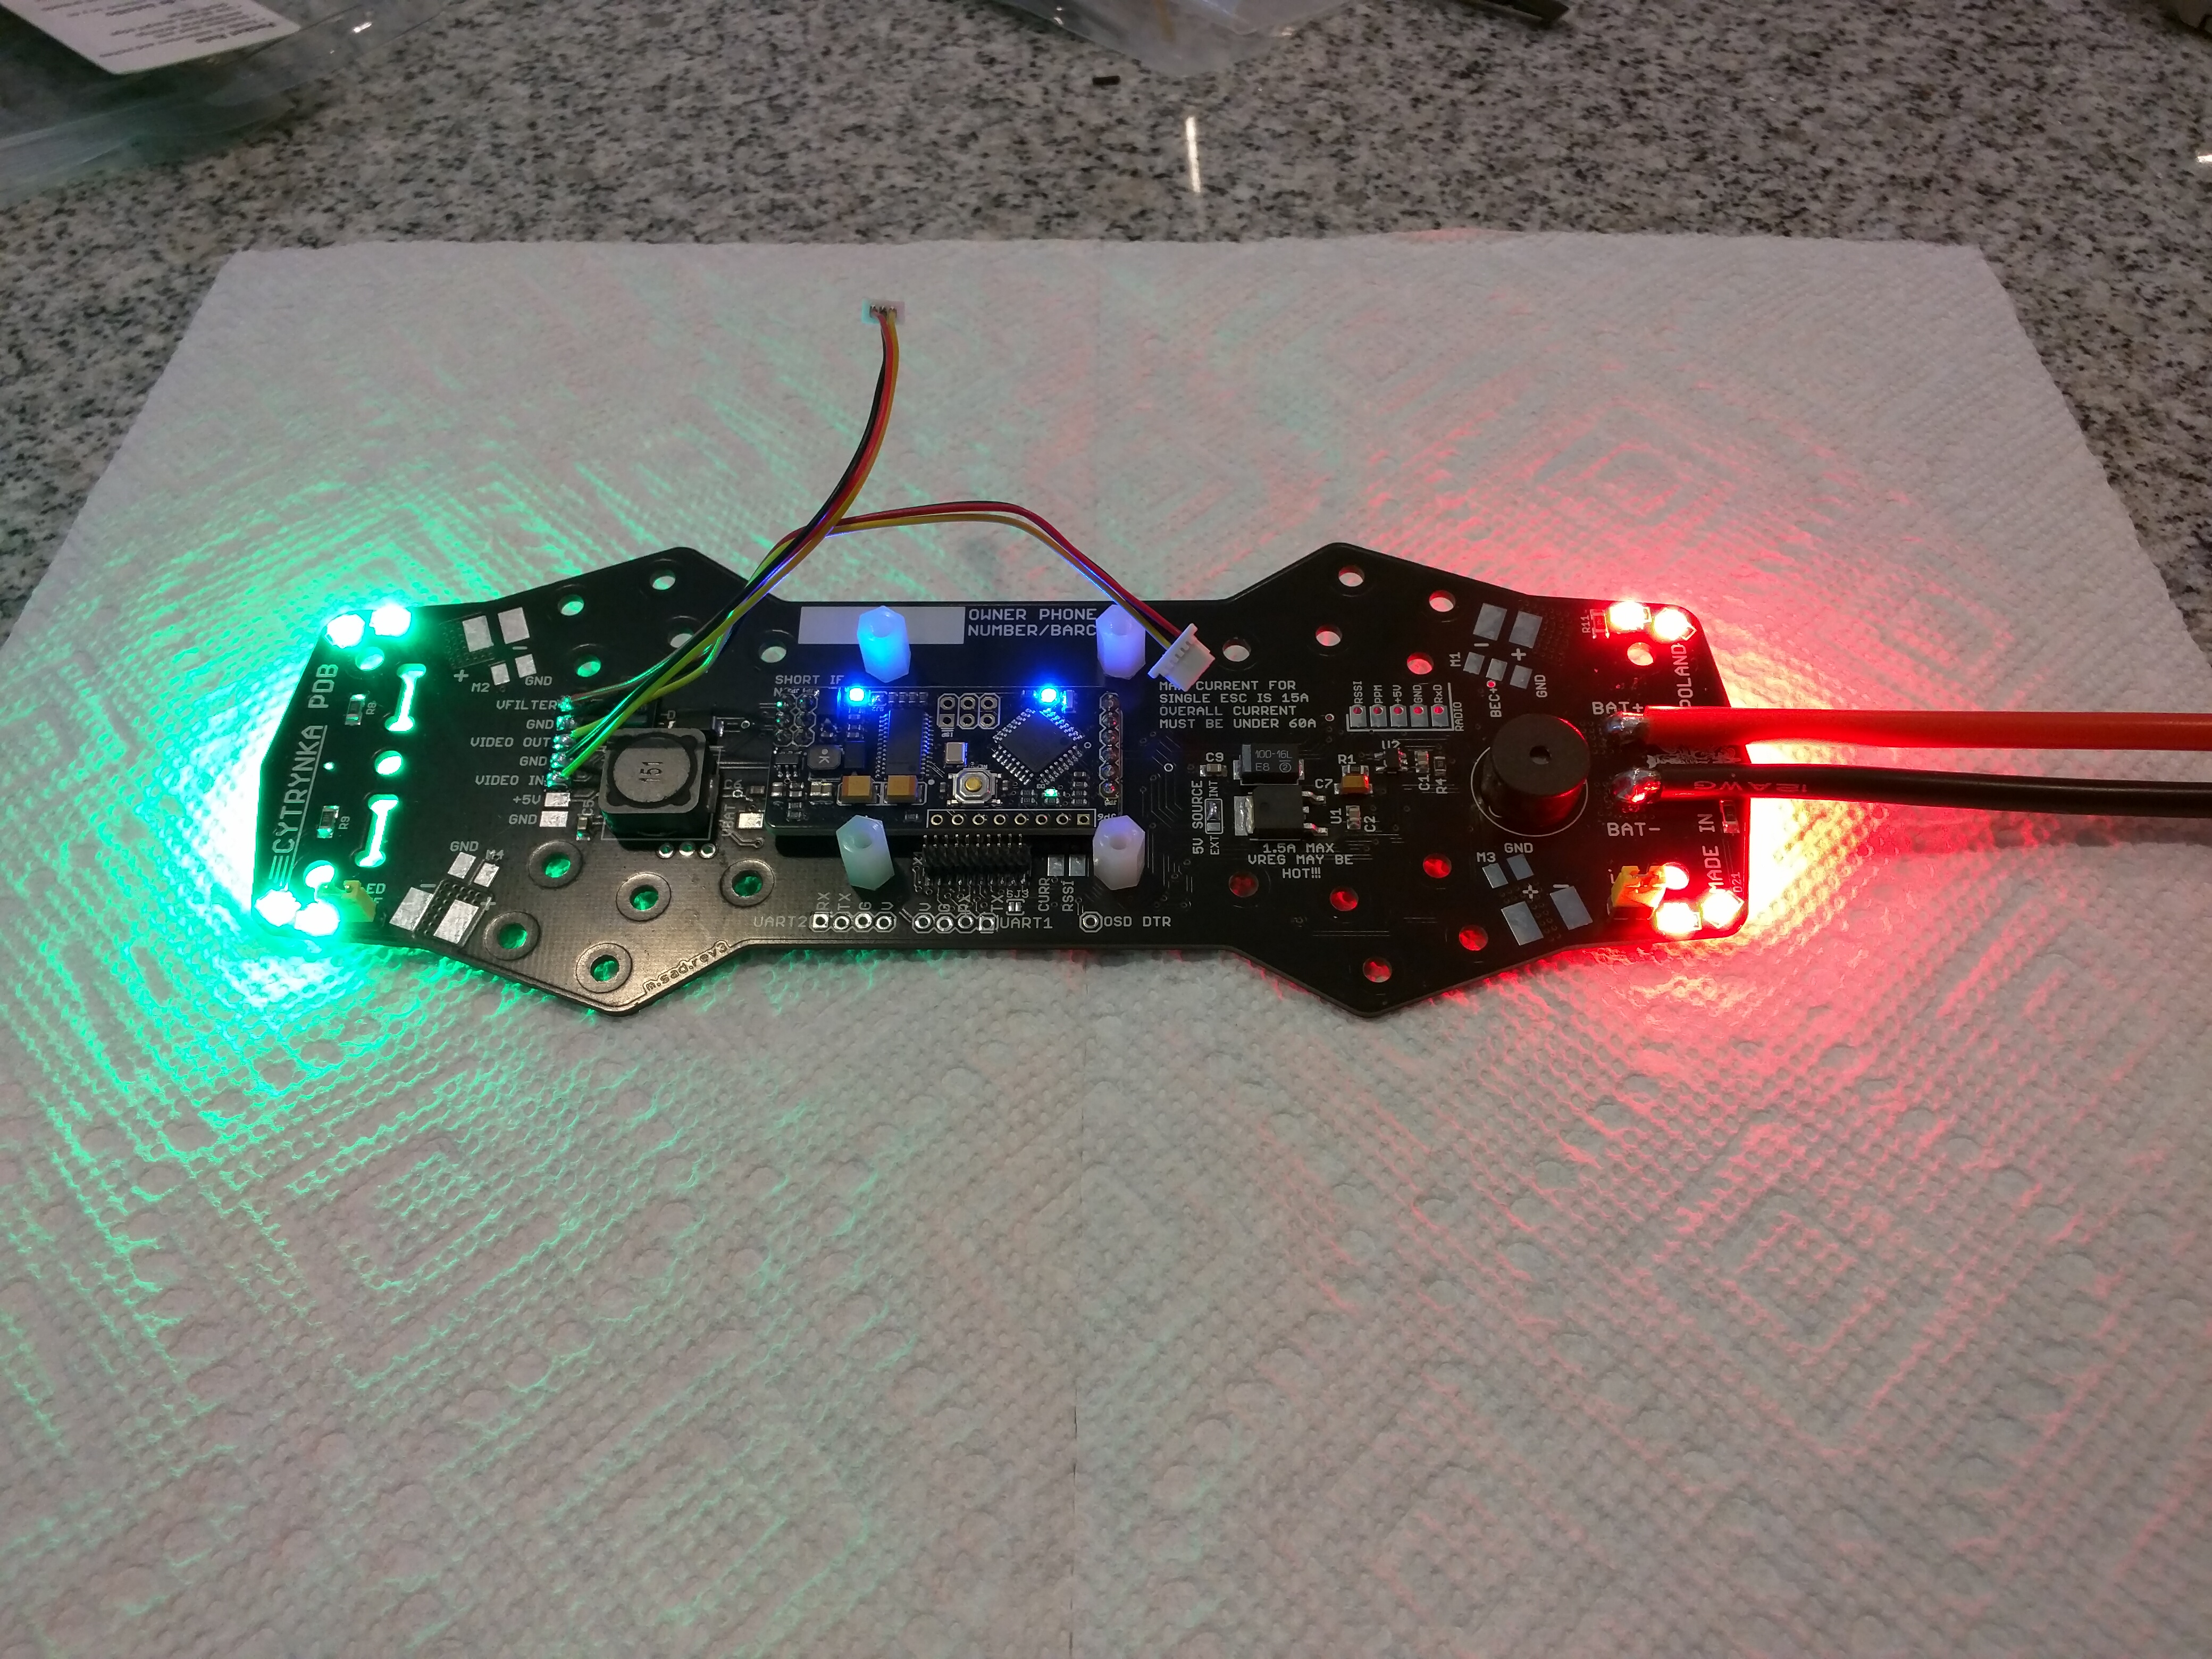
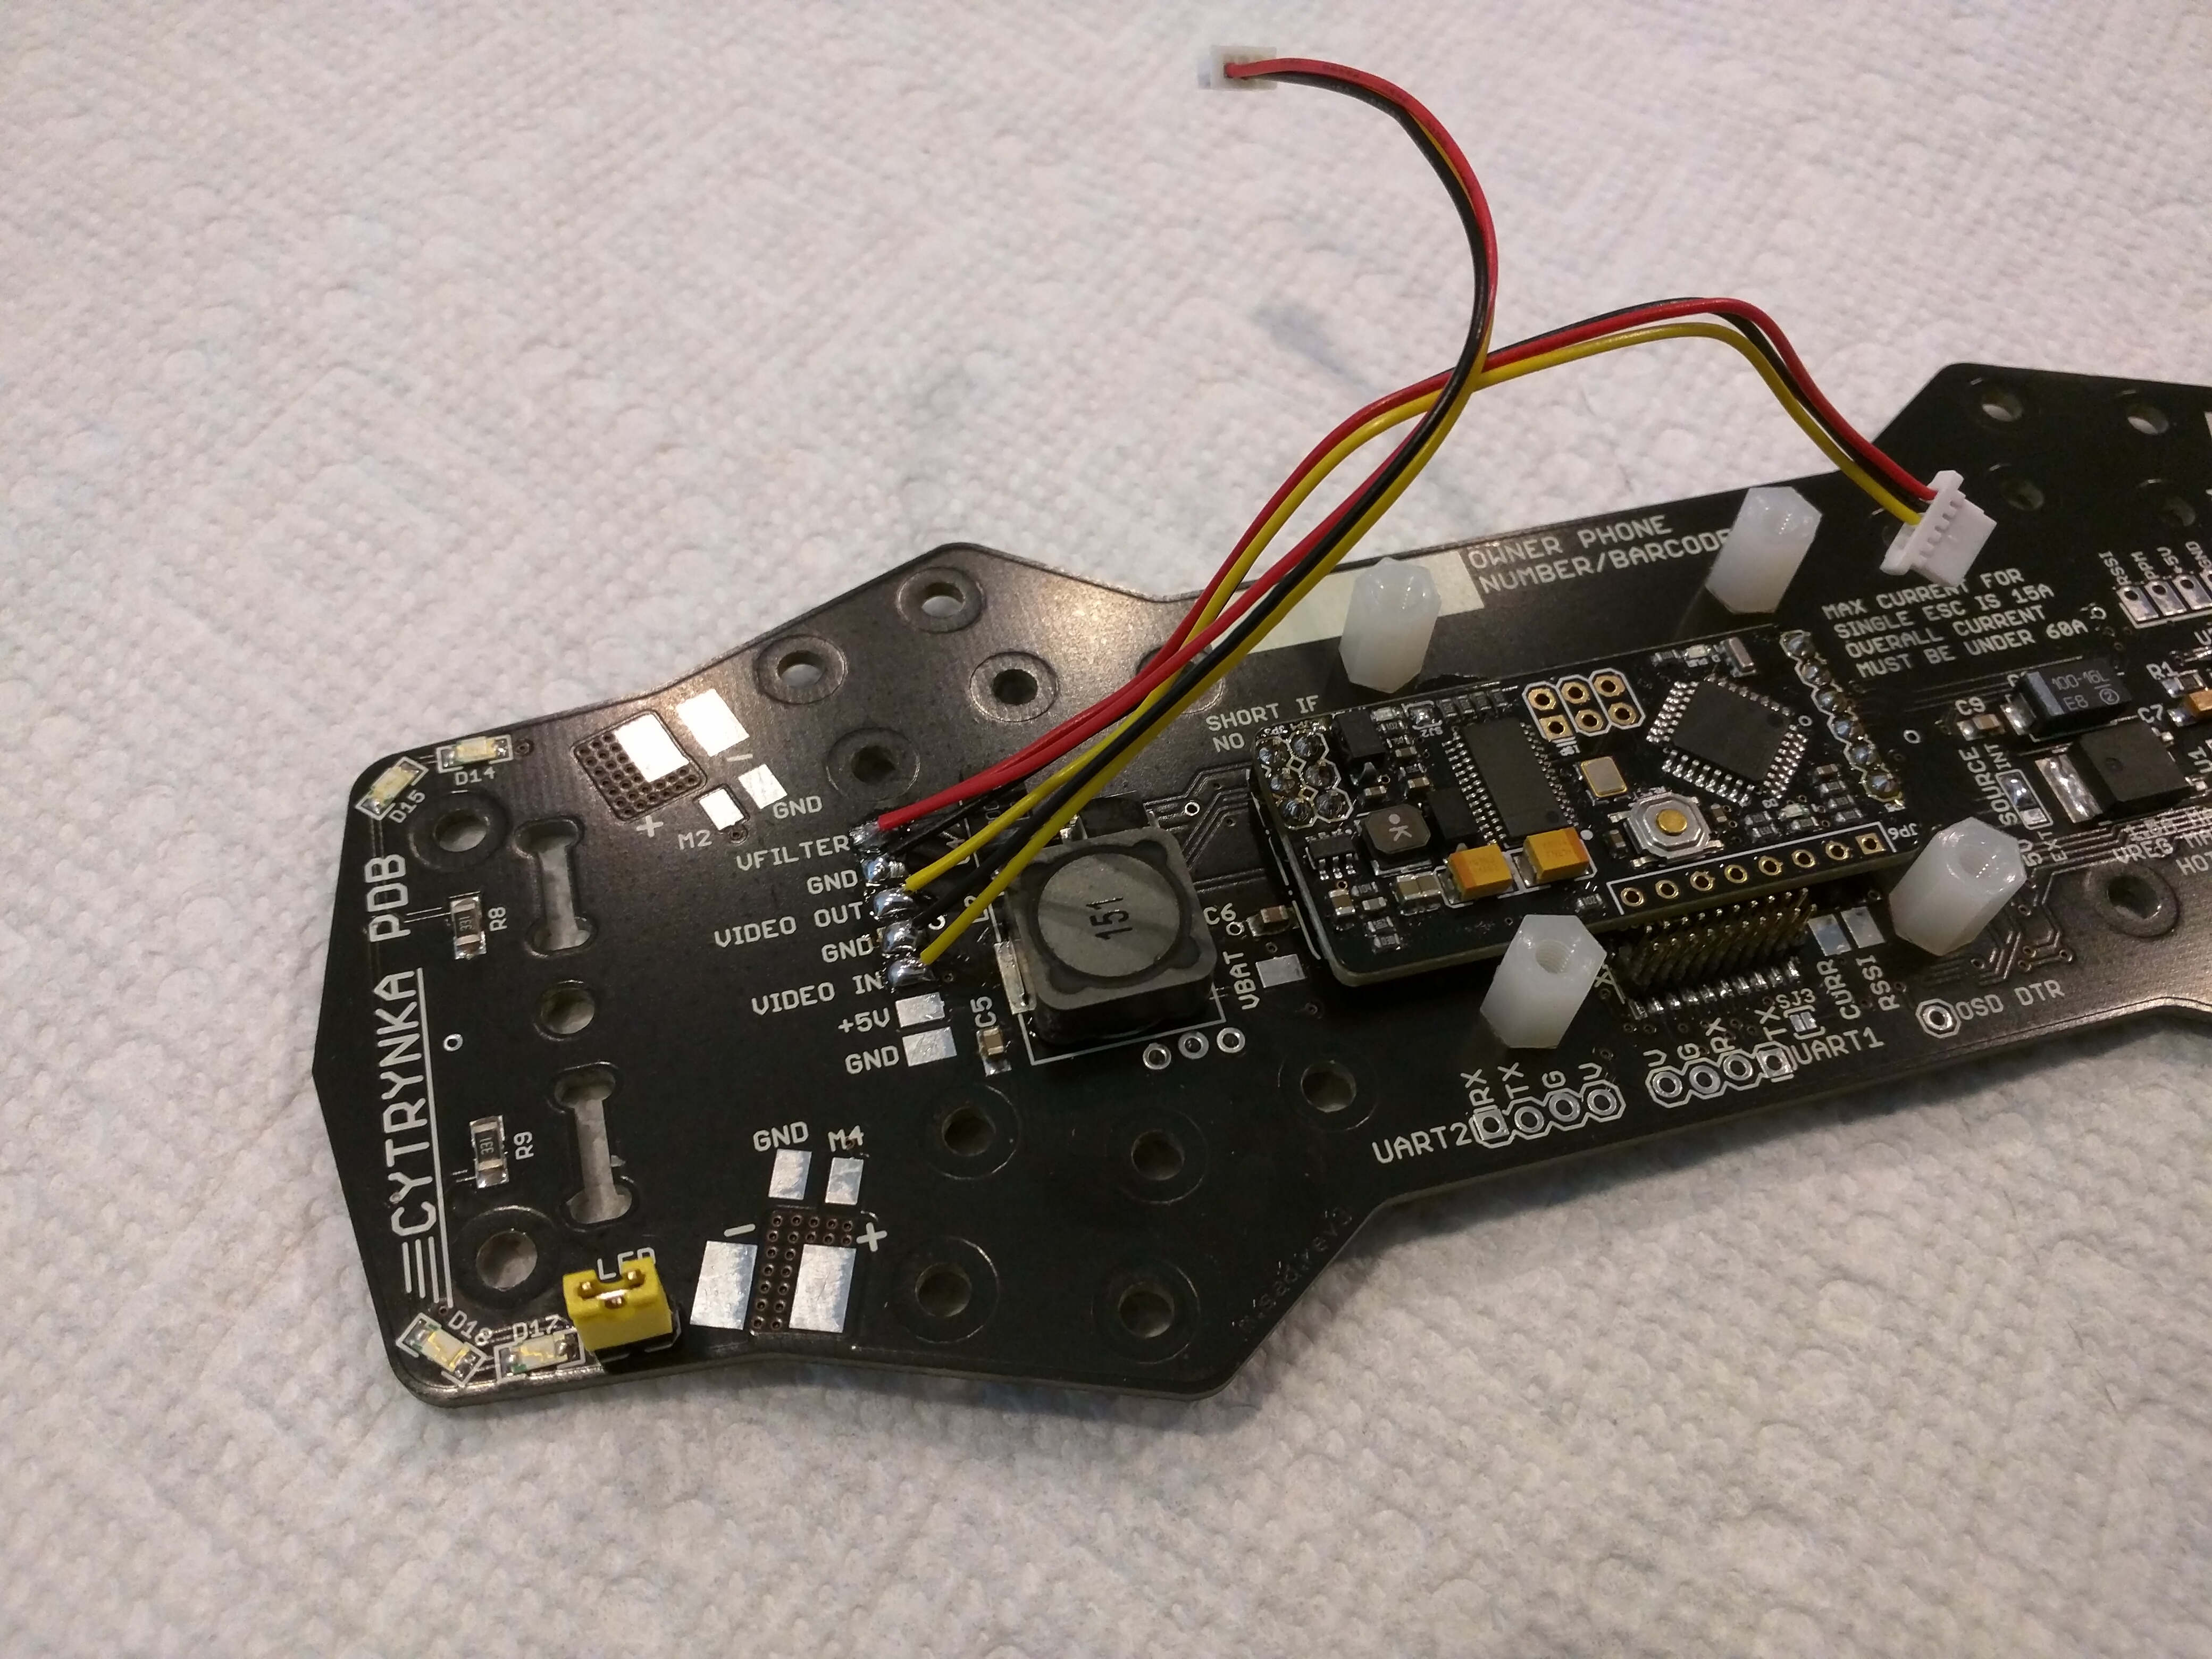
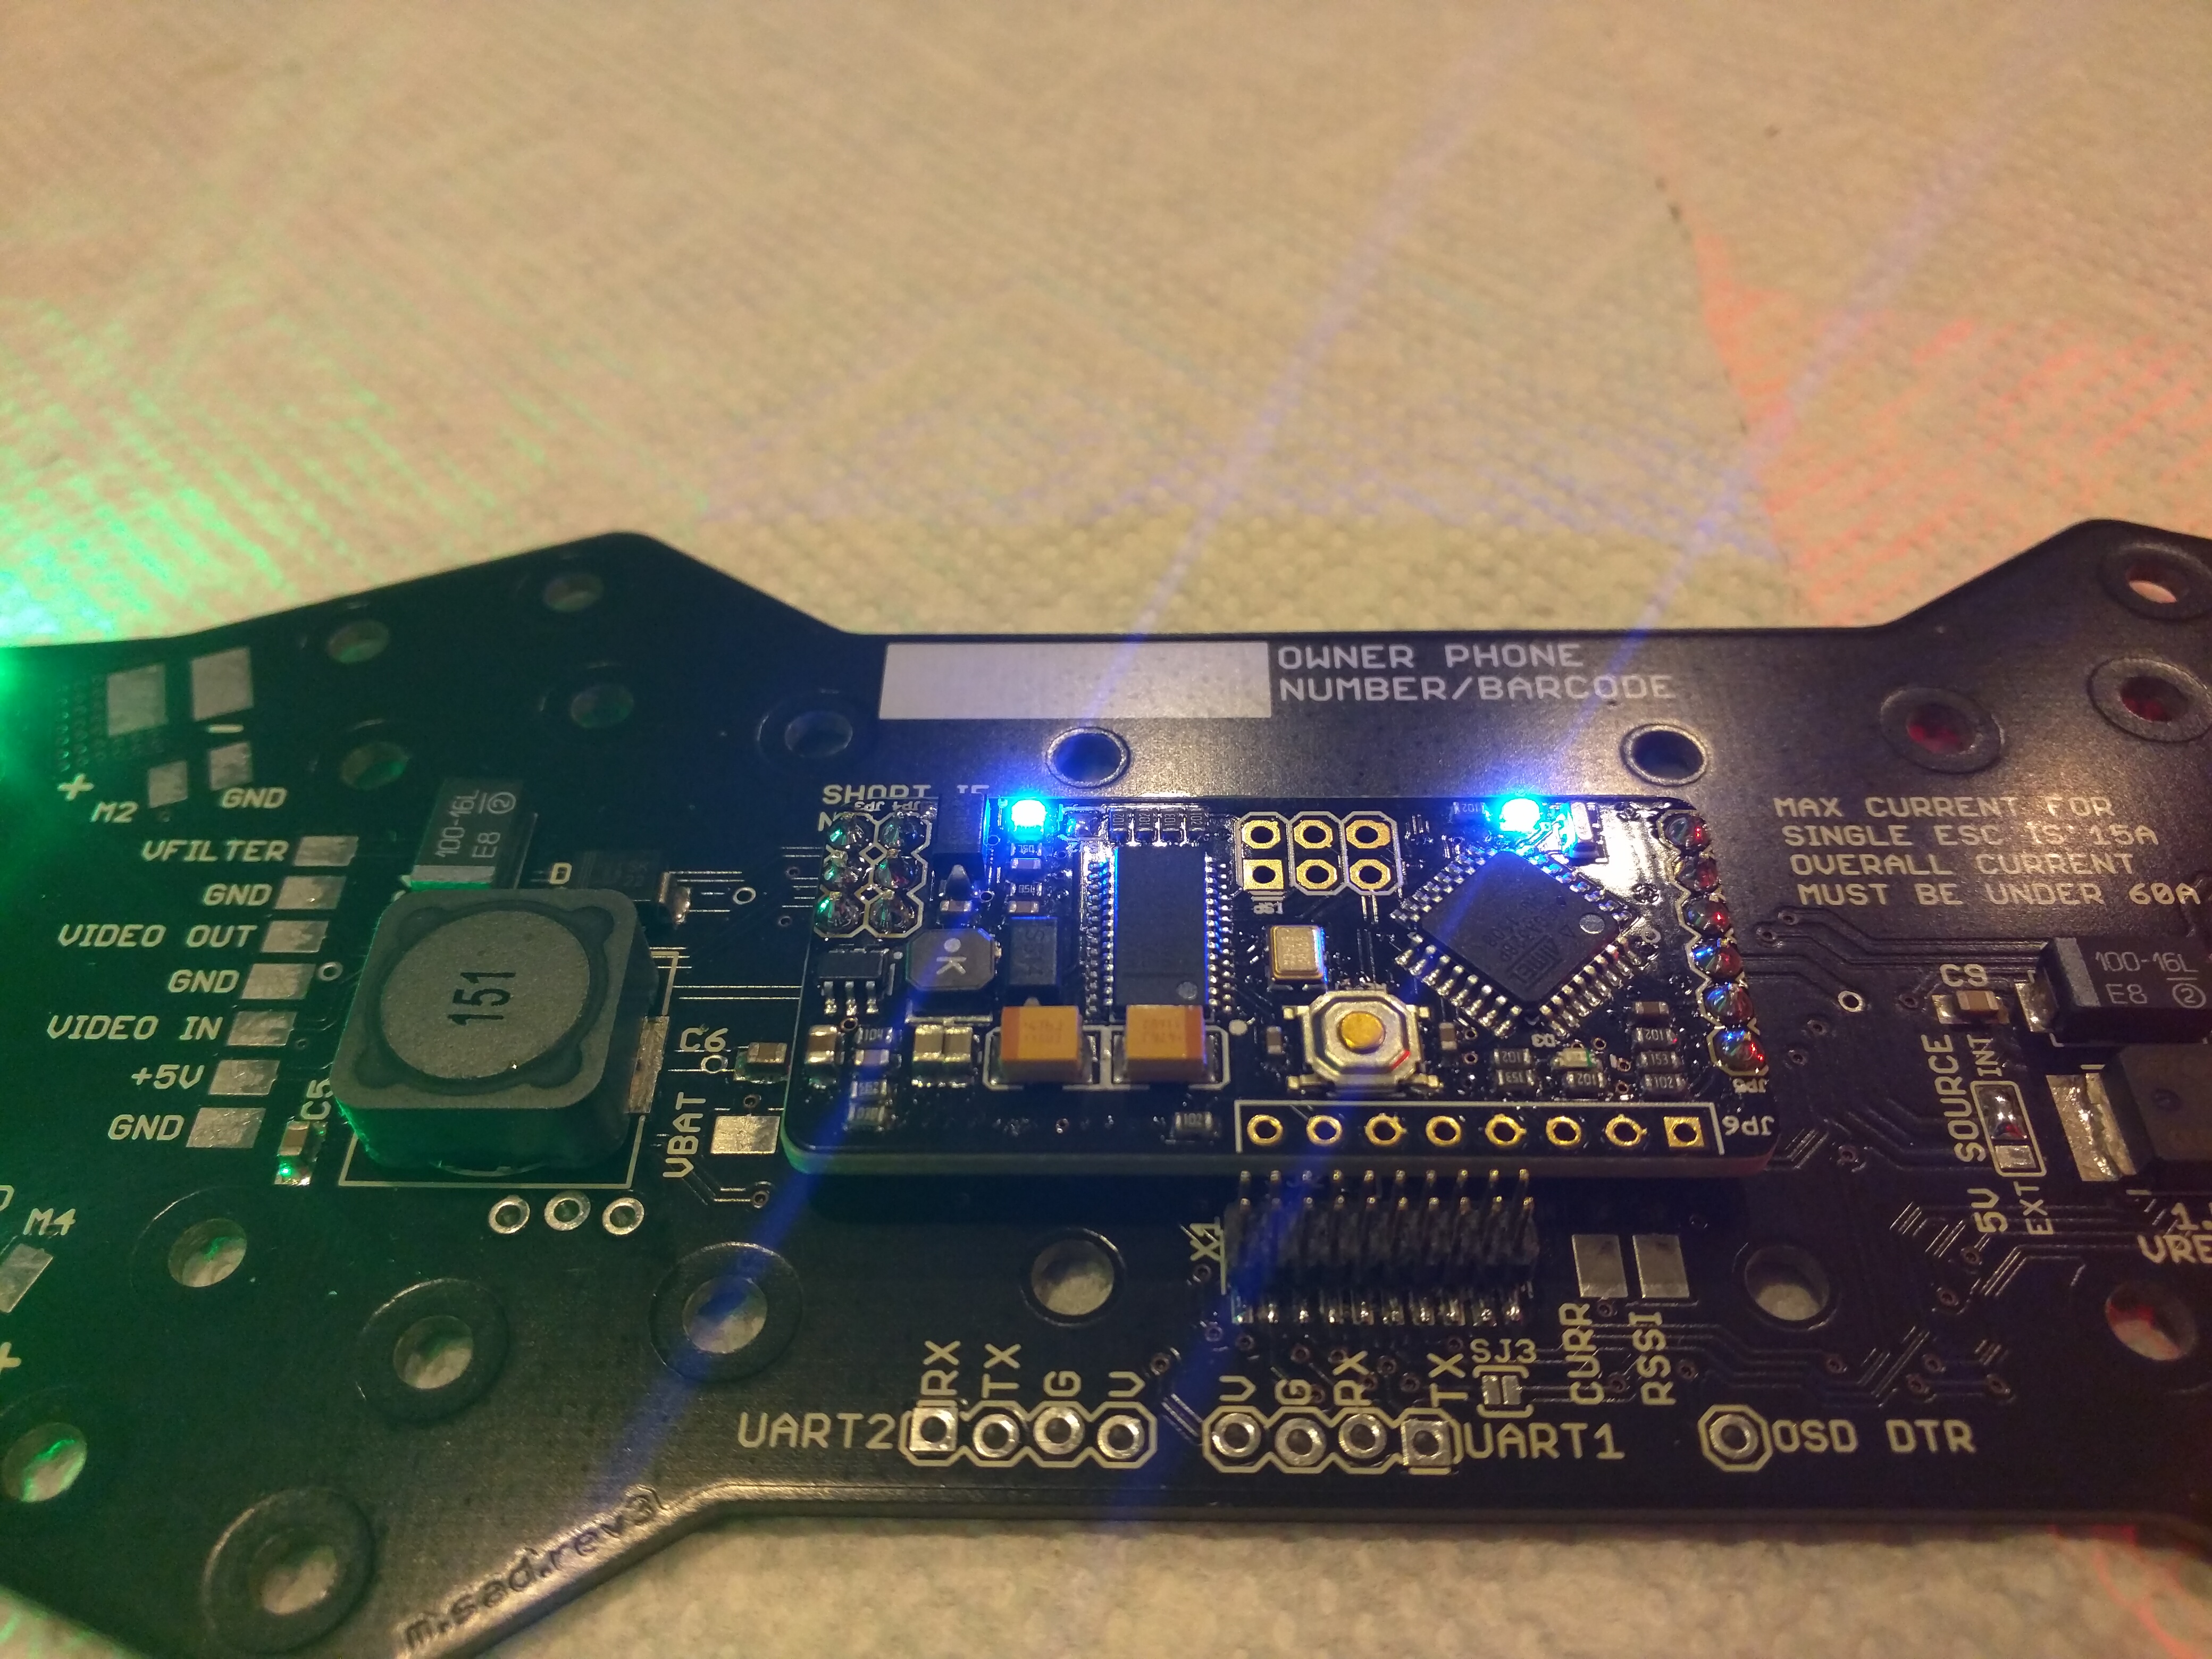
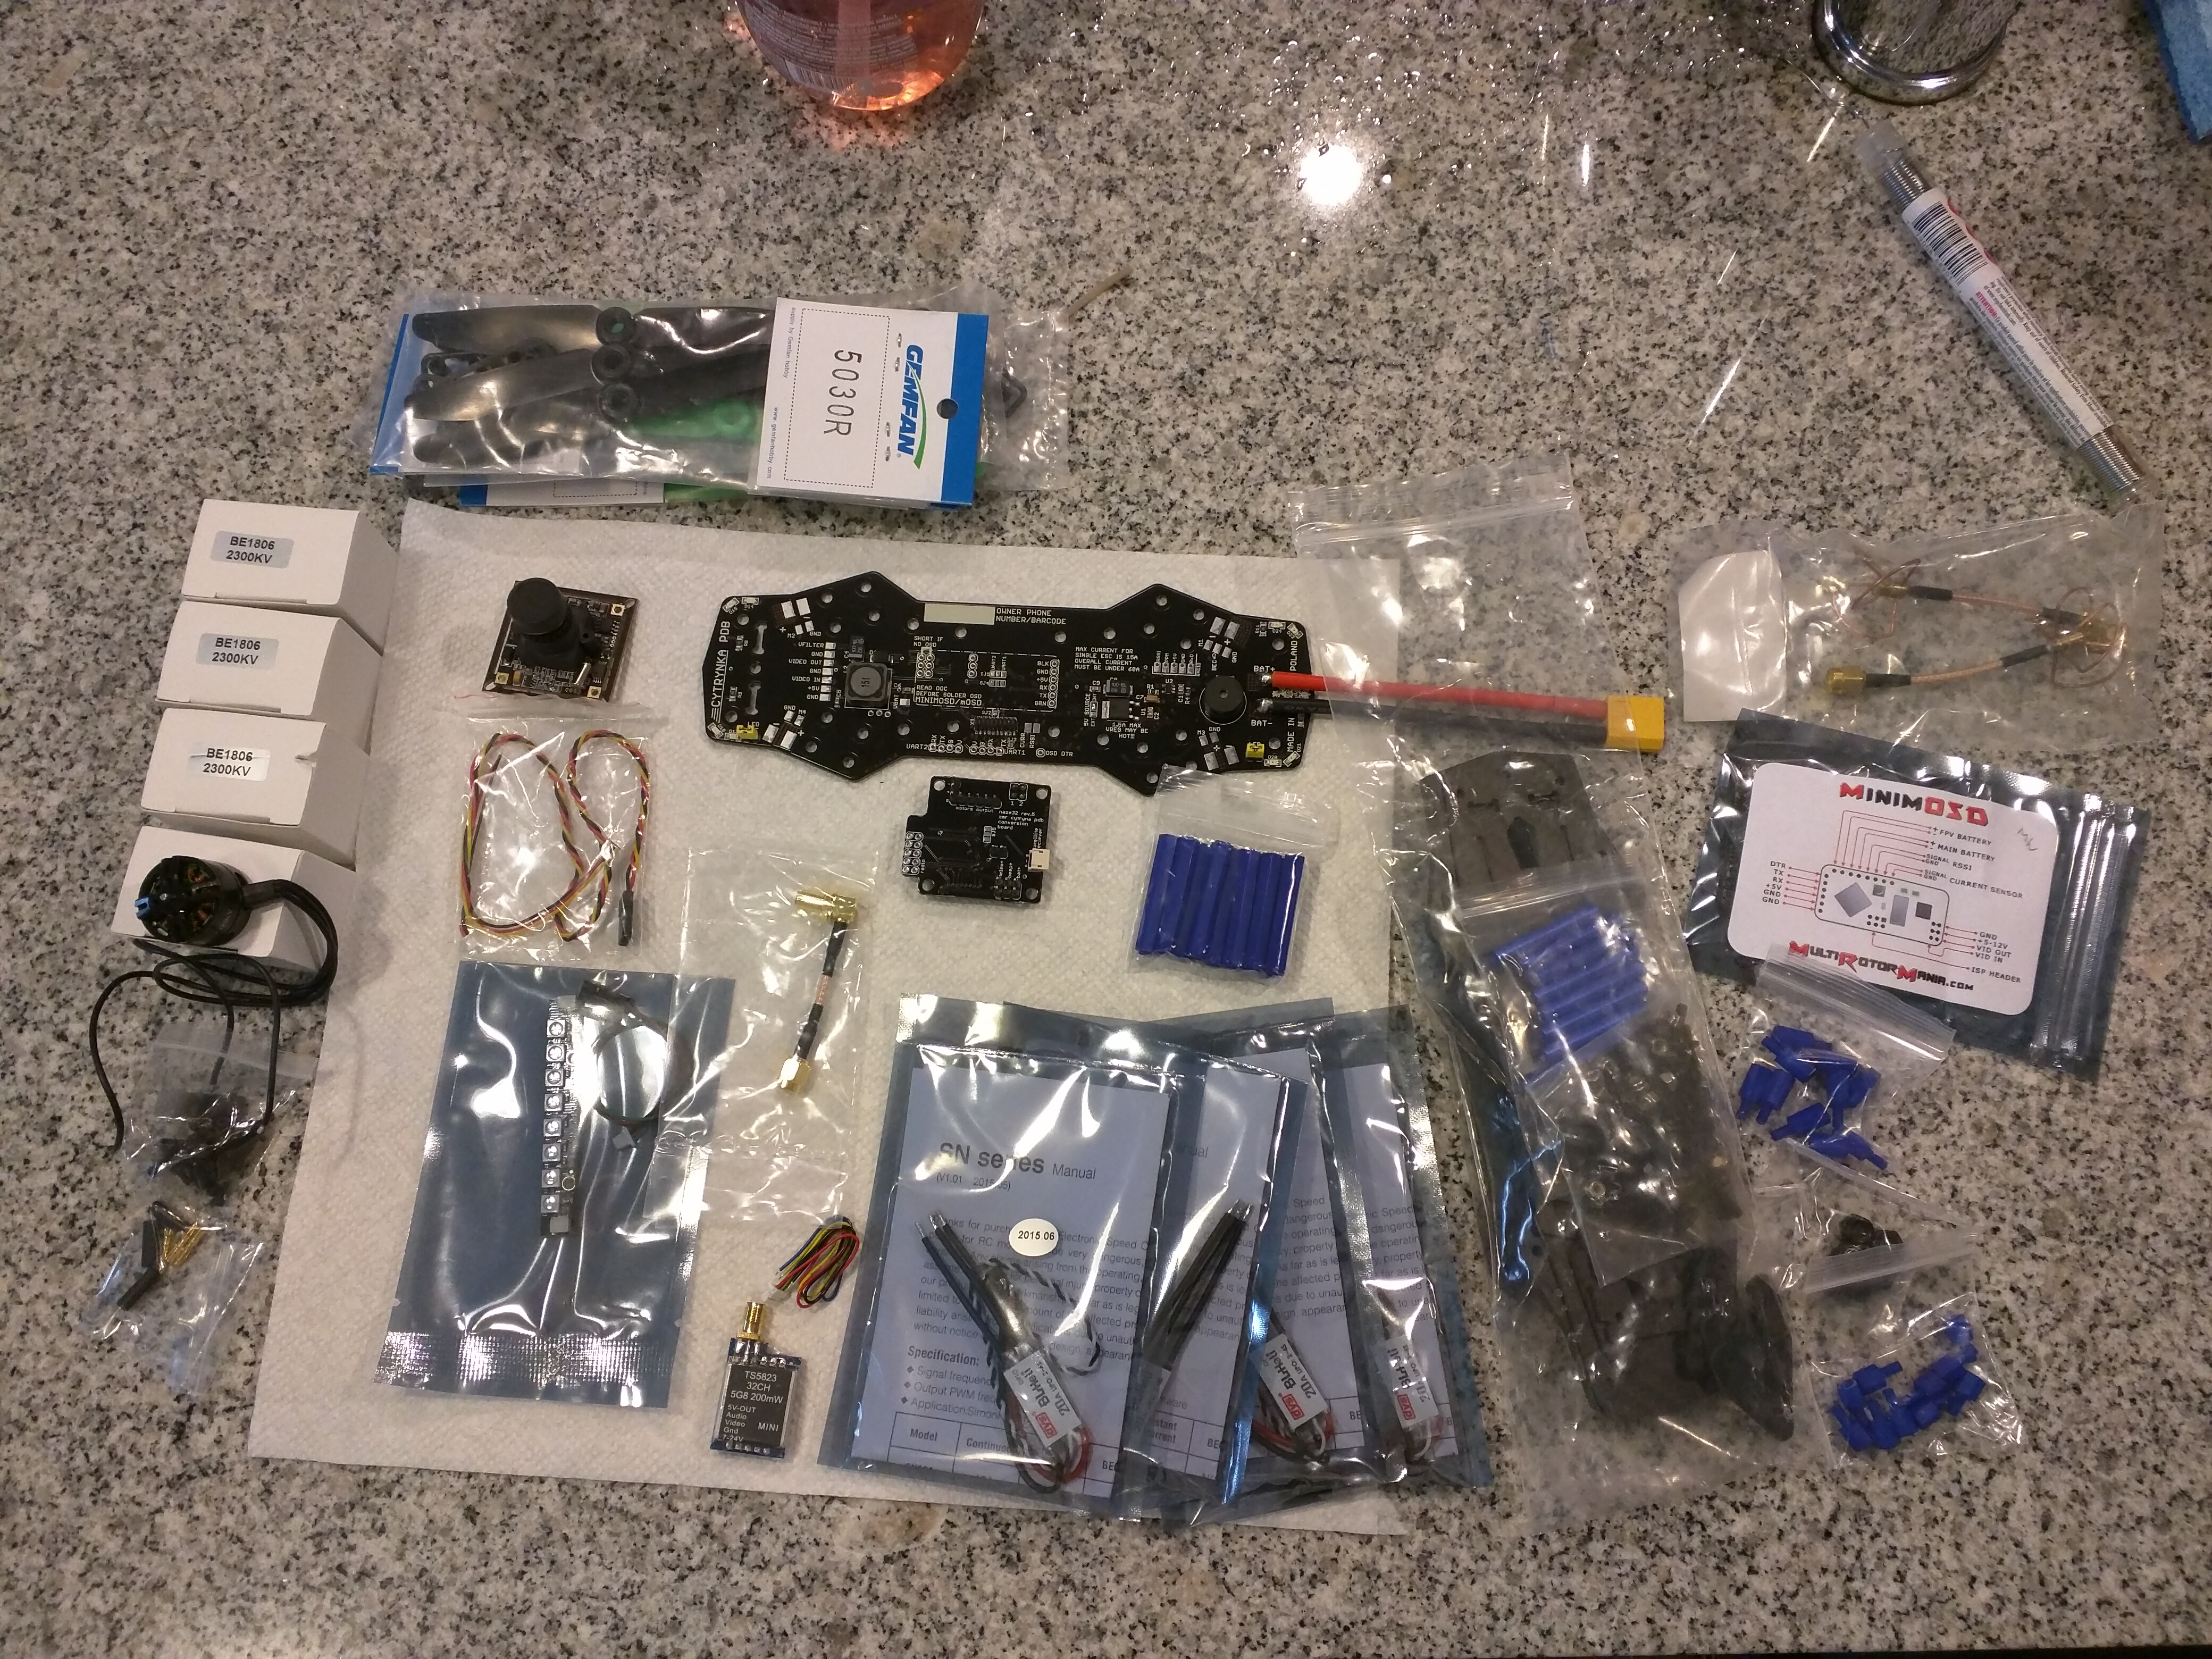
My goals for this first 250 build was just a clean, modest racer running on 3S. I'll be using it to run through gates, courses, do flips, break, fix, and build a wealth of knowledge for when the time comes to build a second. After a bunch of research, I decided that a PDB supporting the Naze32 and minimOSD was the route I wanted to go. This build centers around the Cytrynka PDB (see parts list).
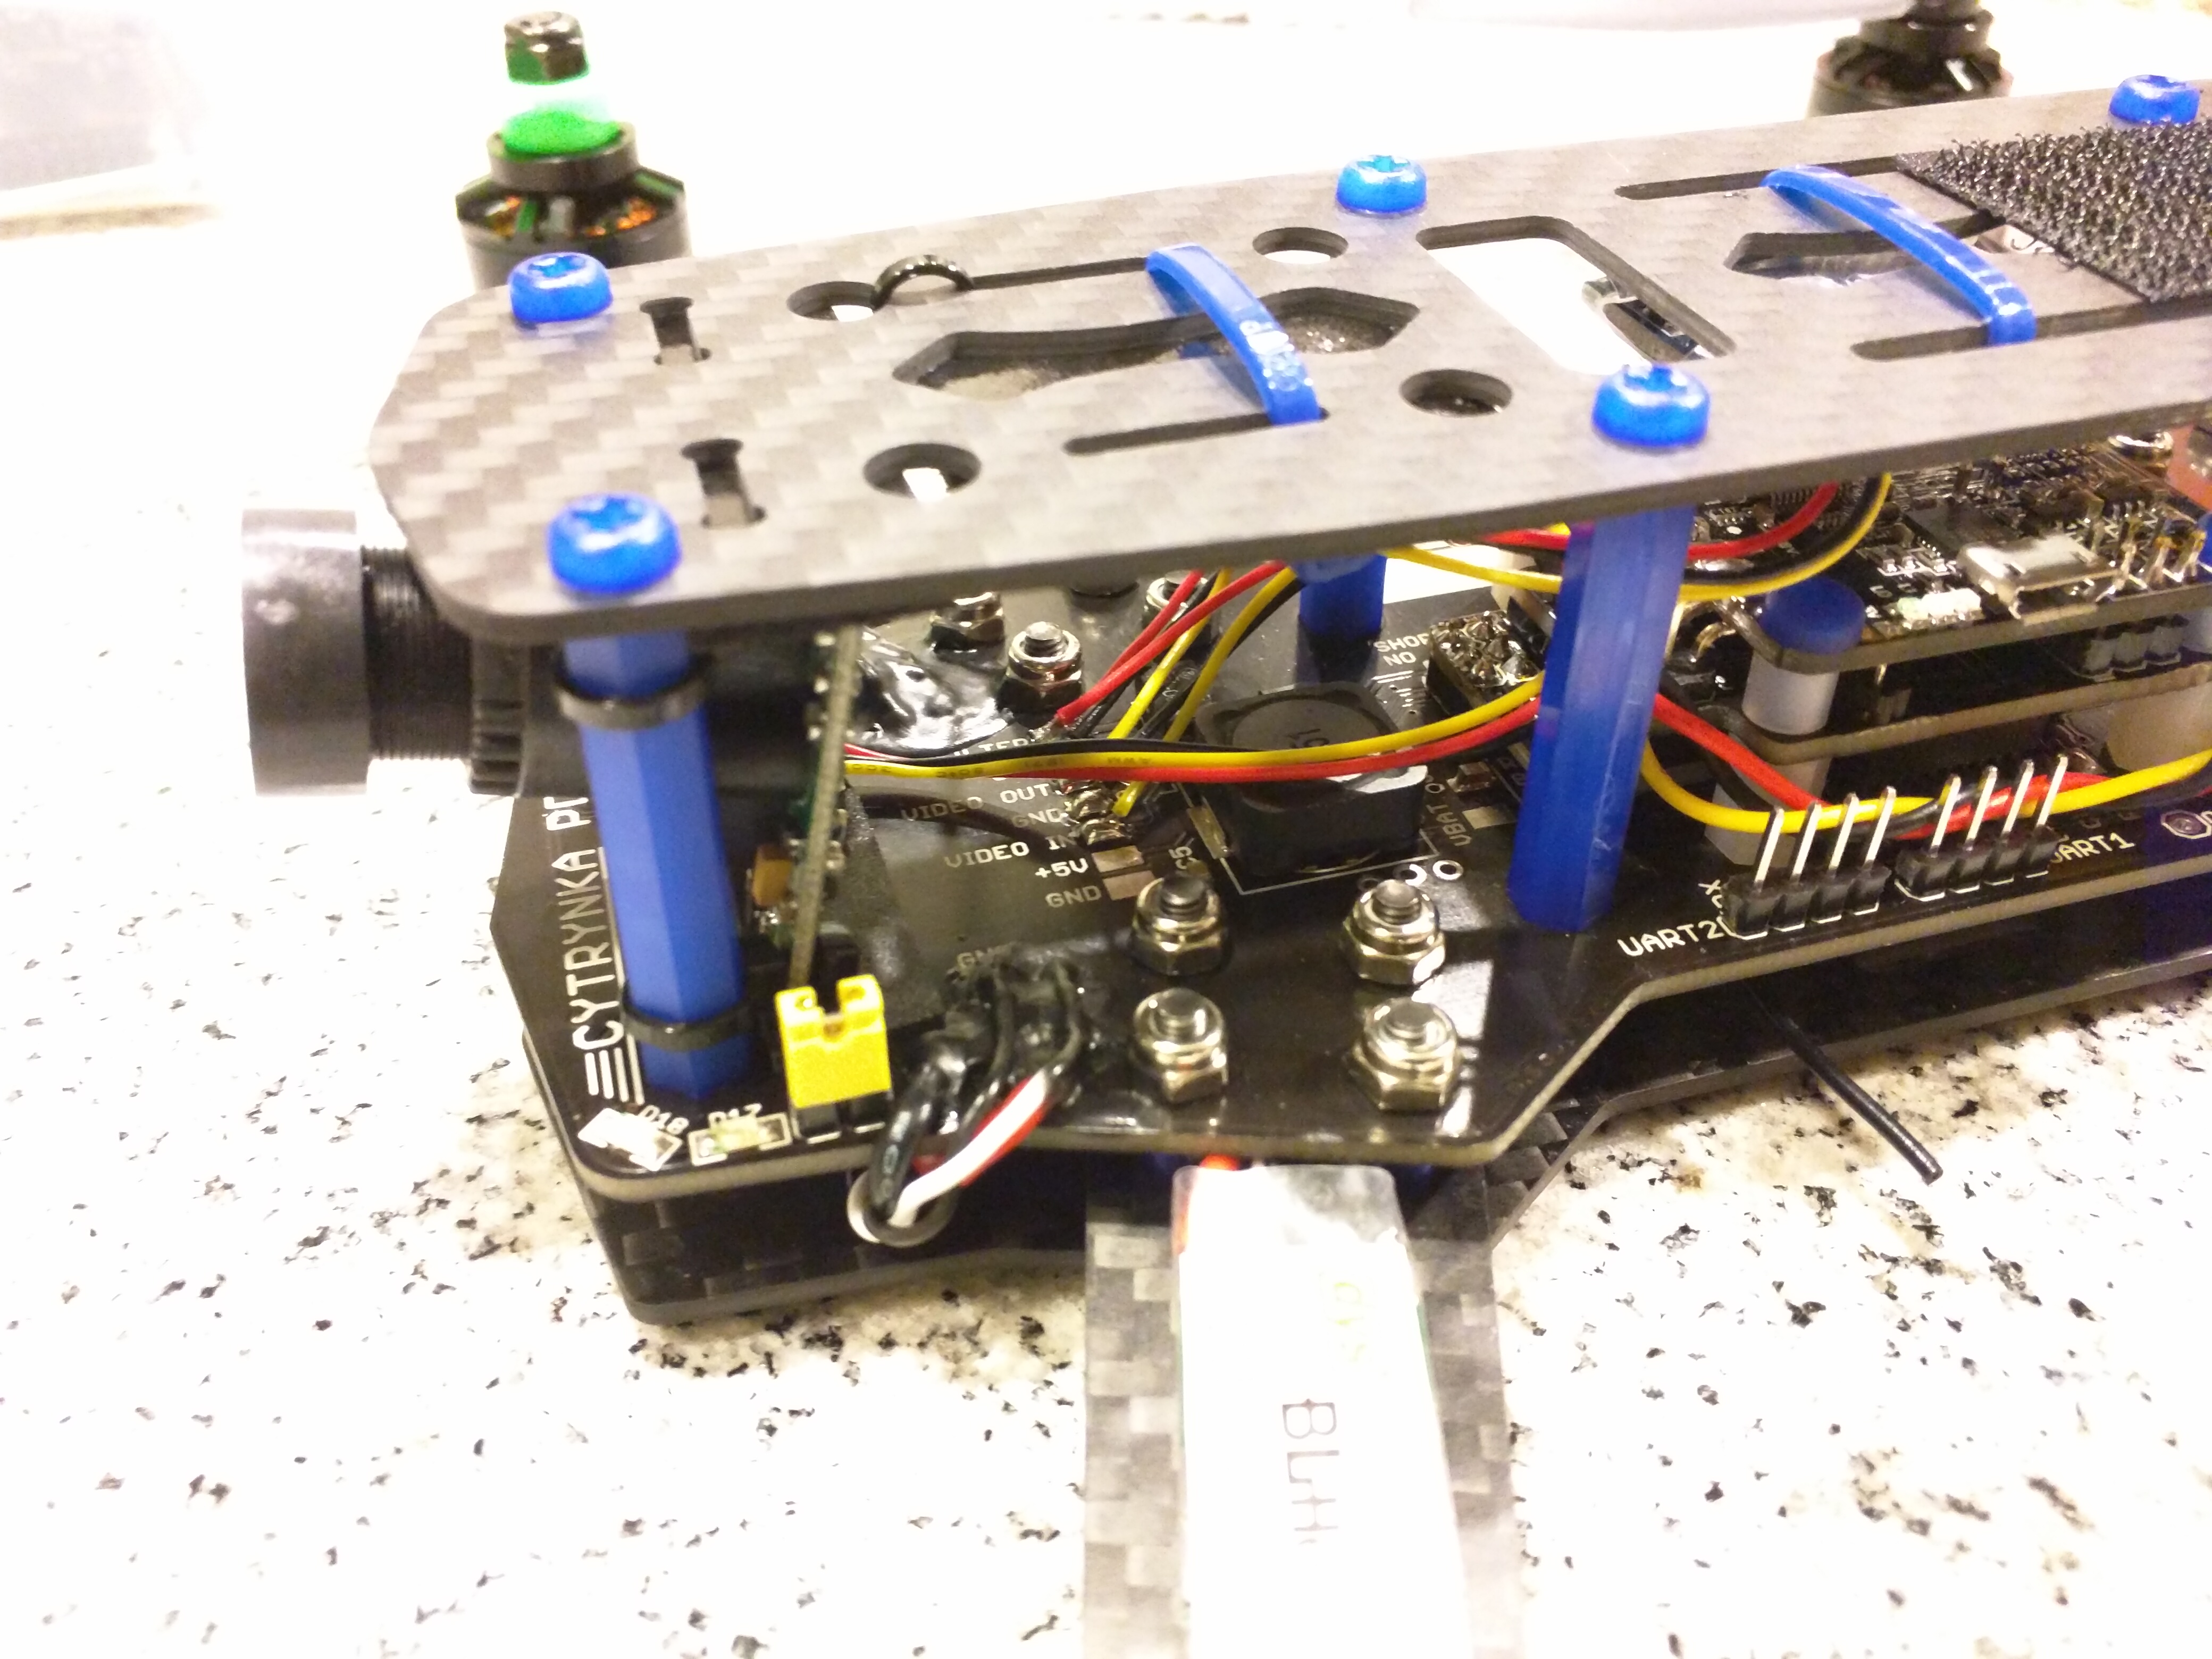
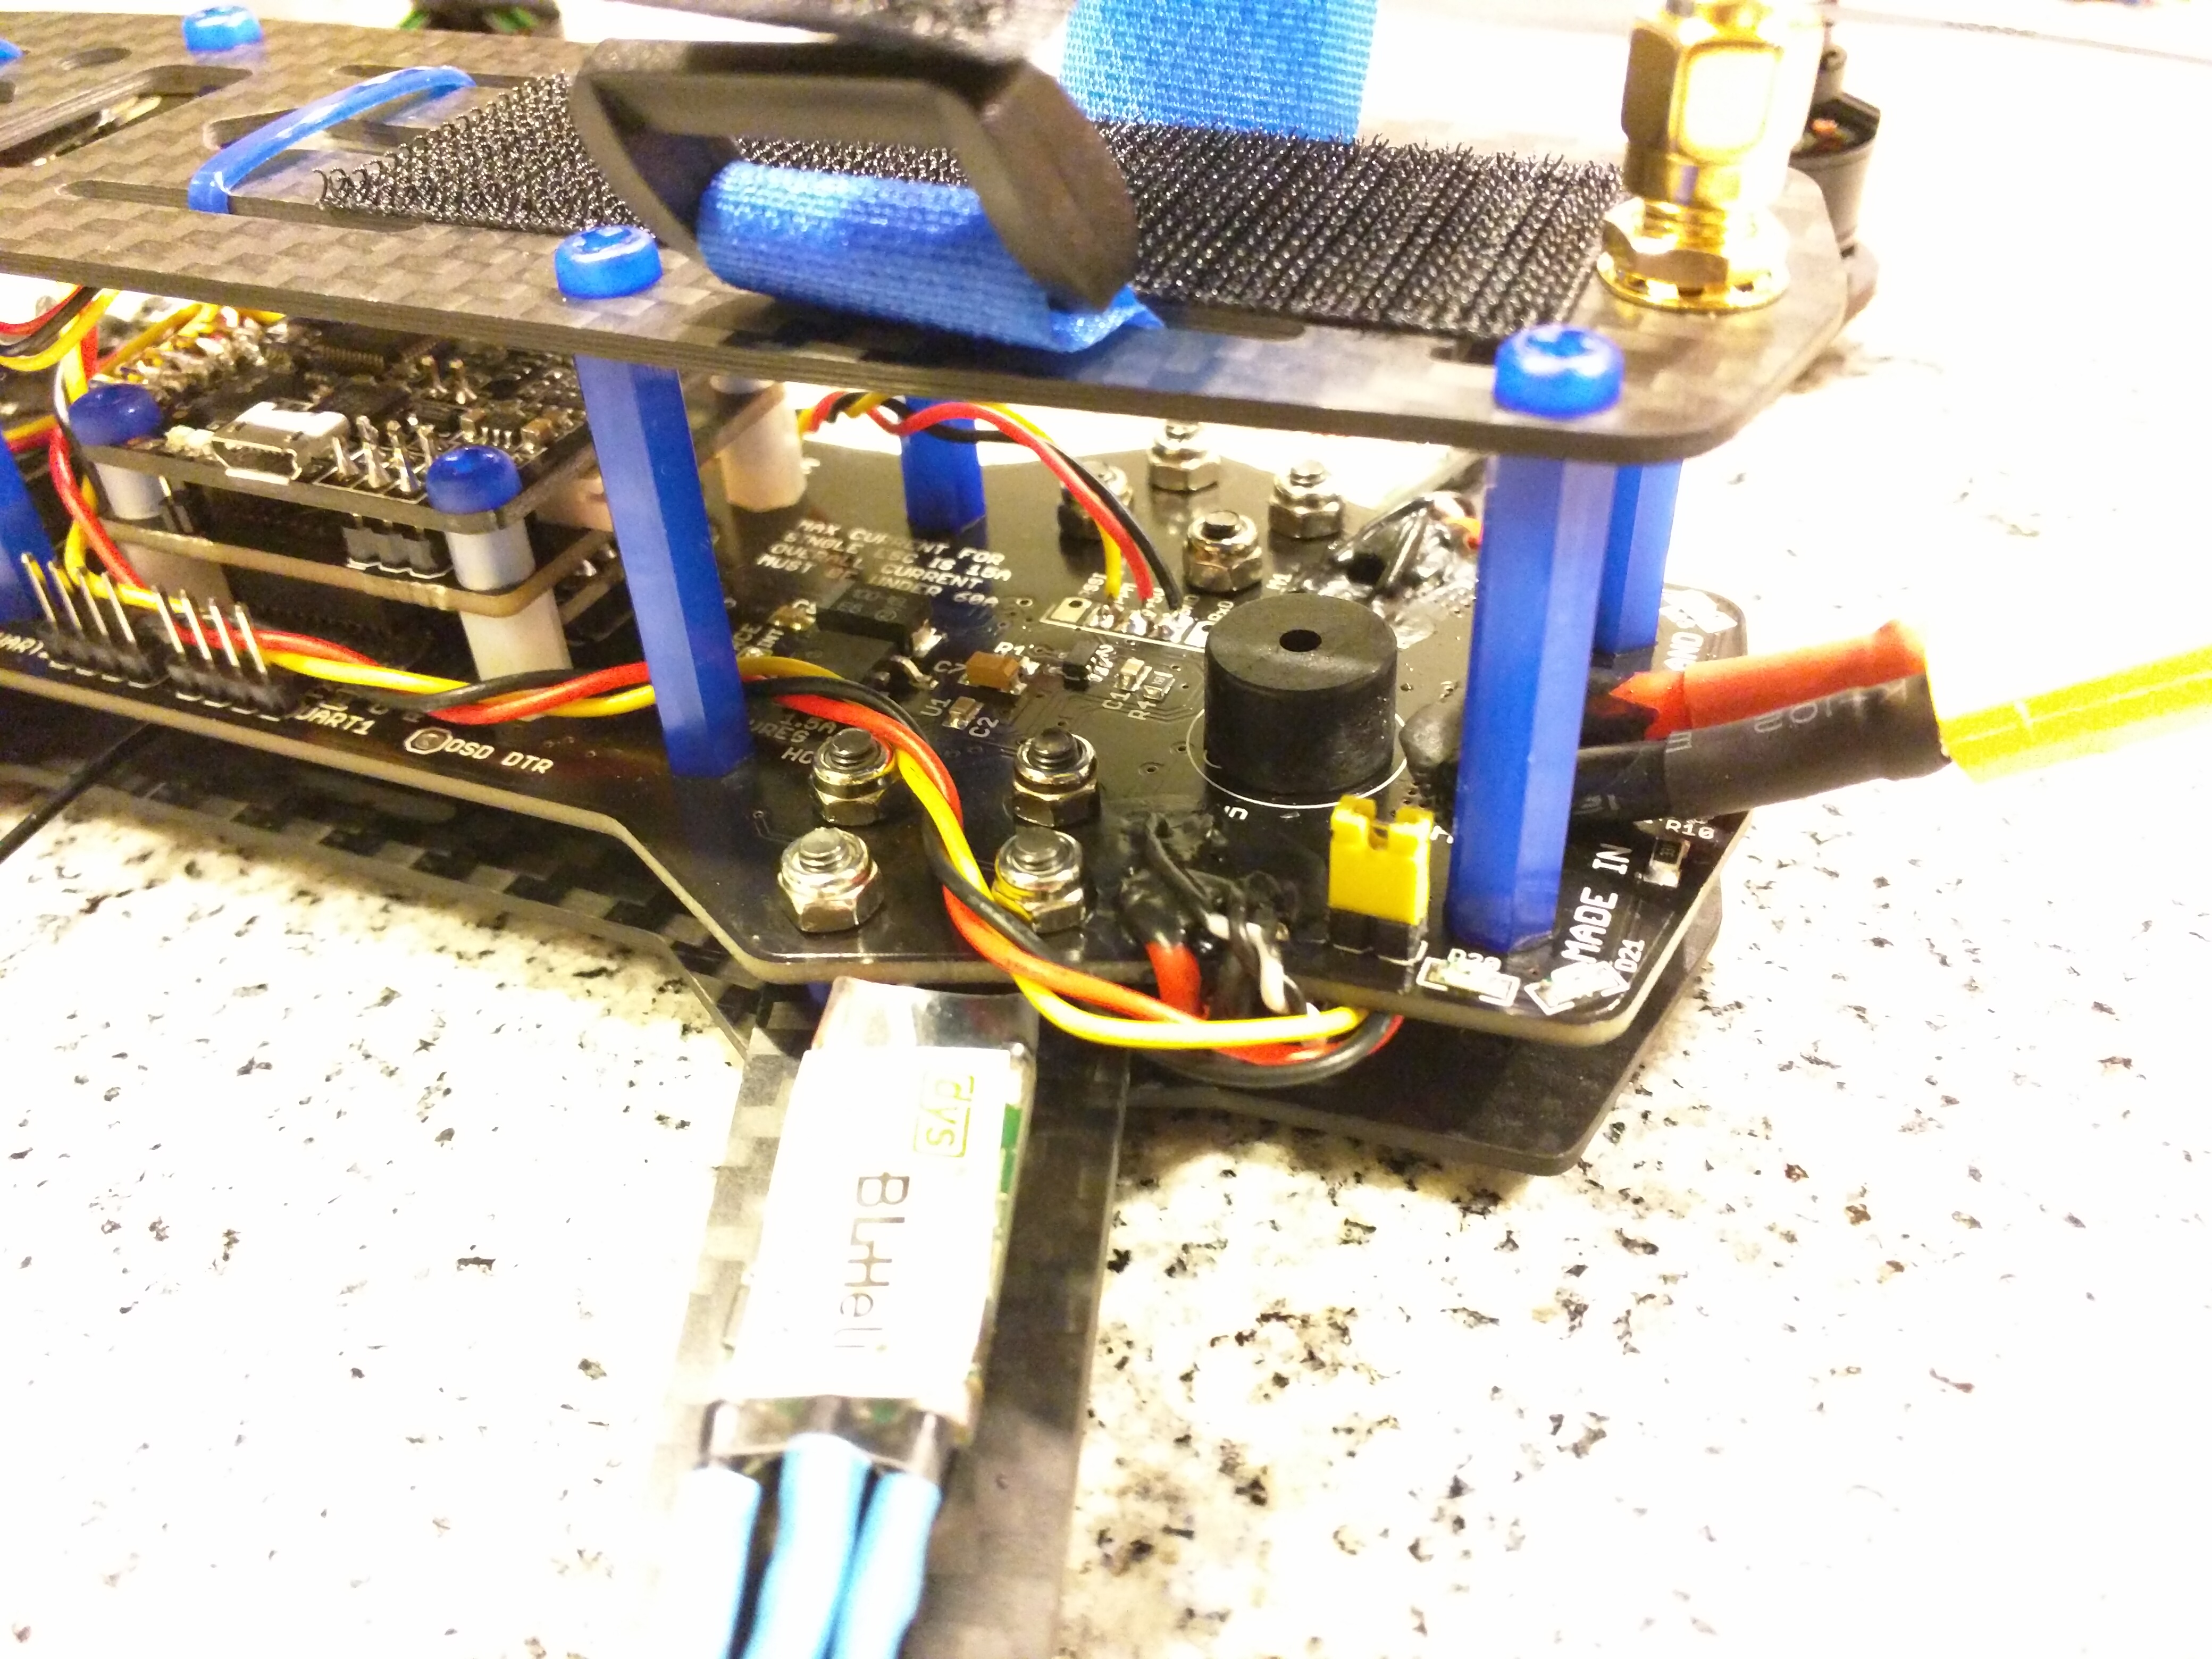
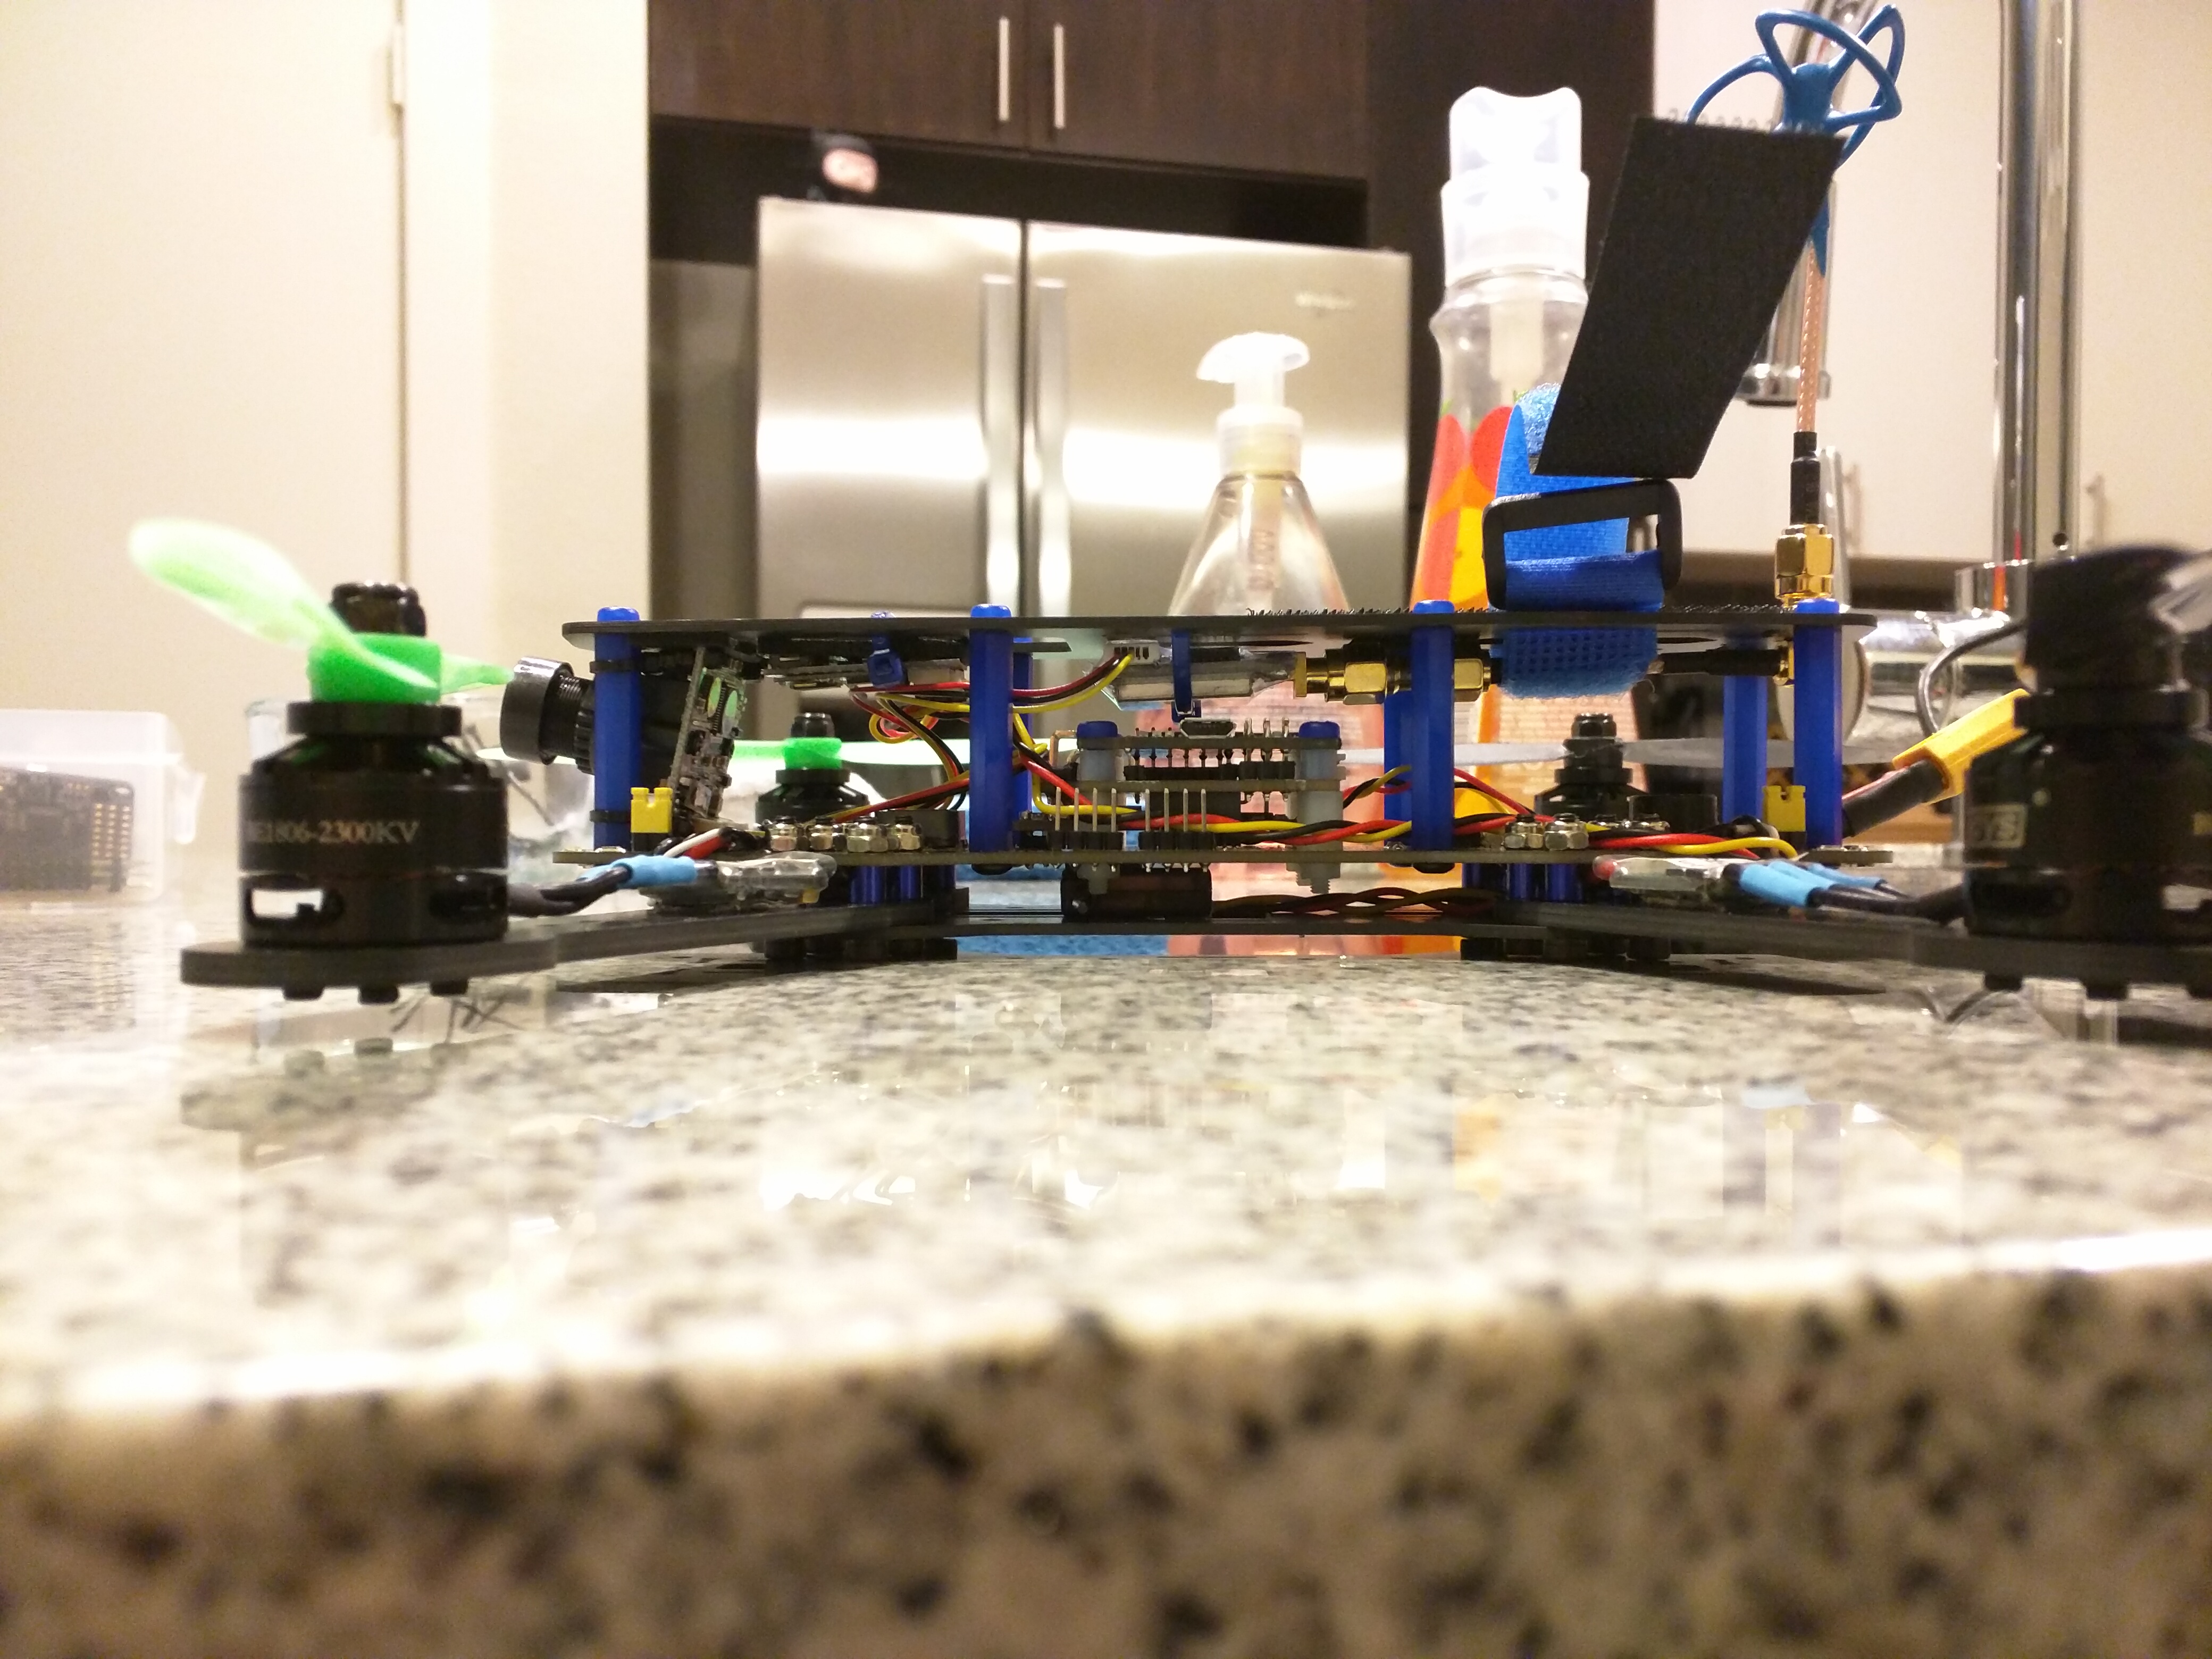
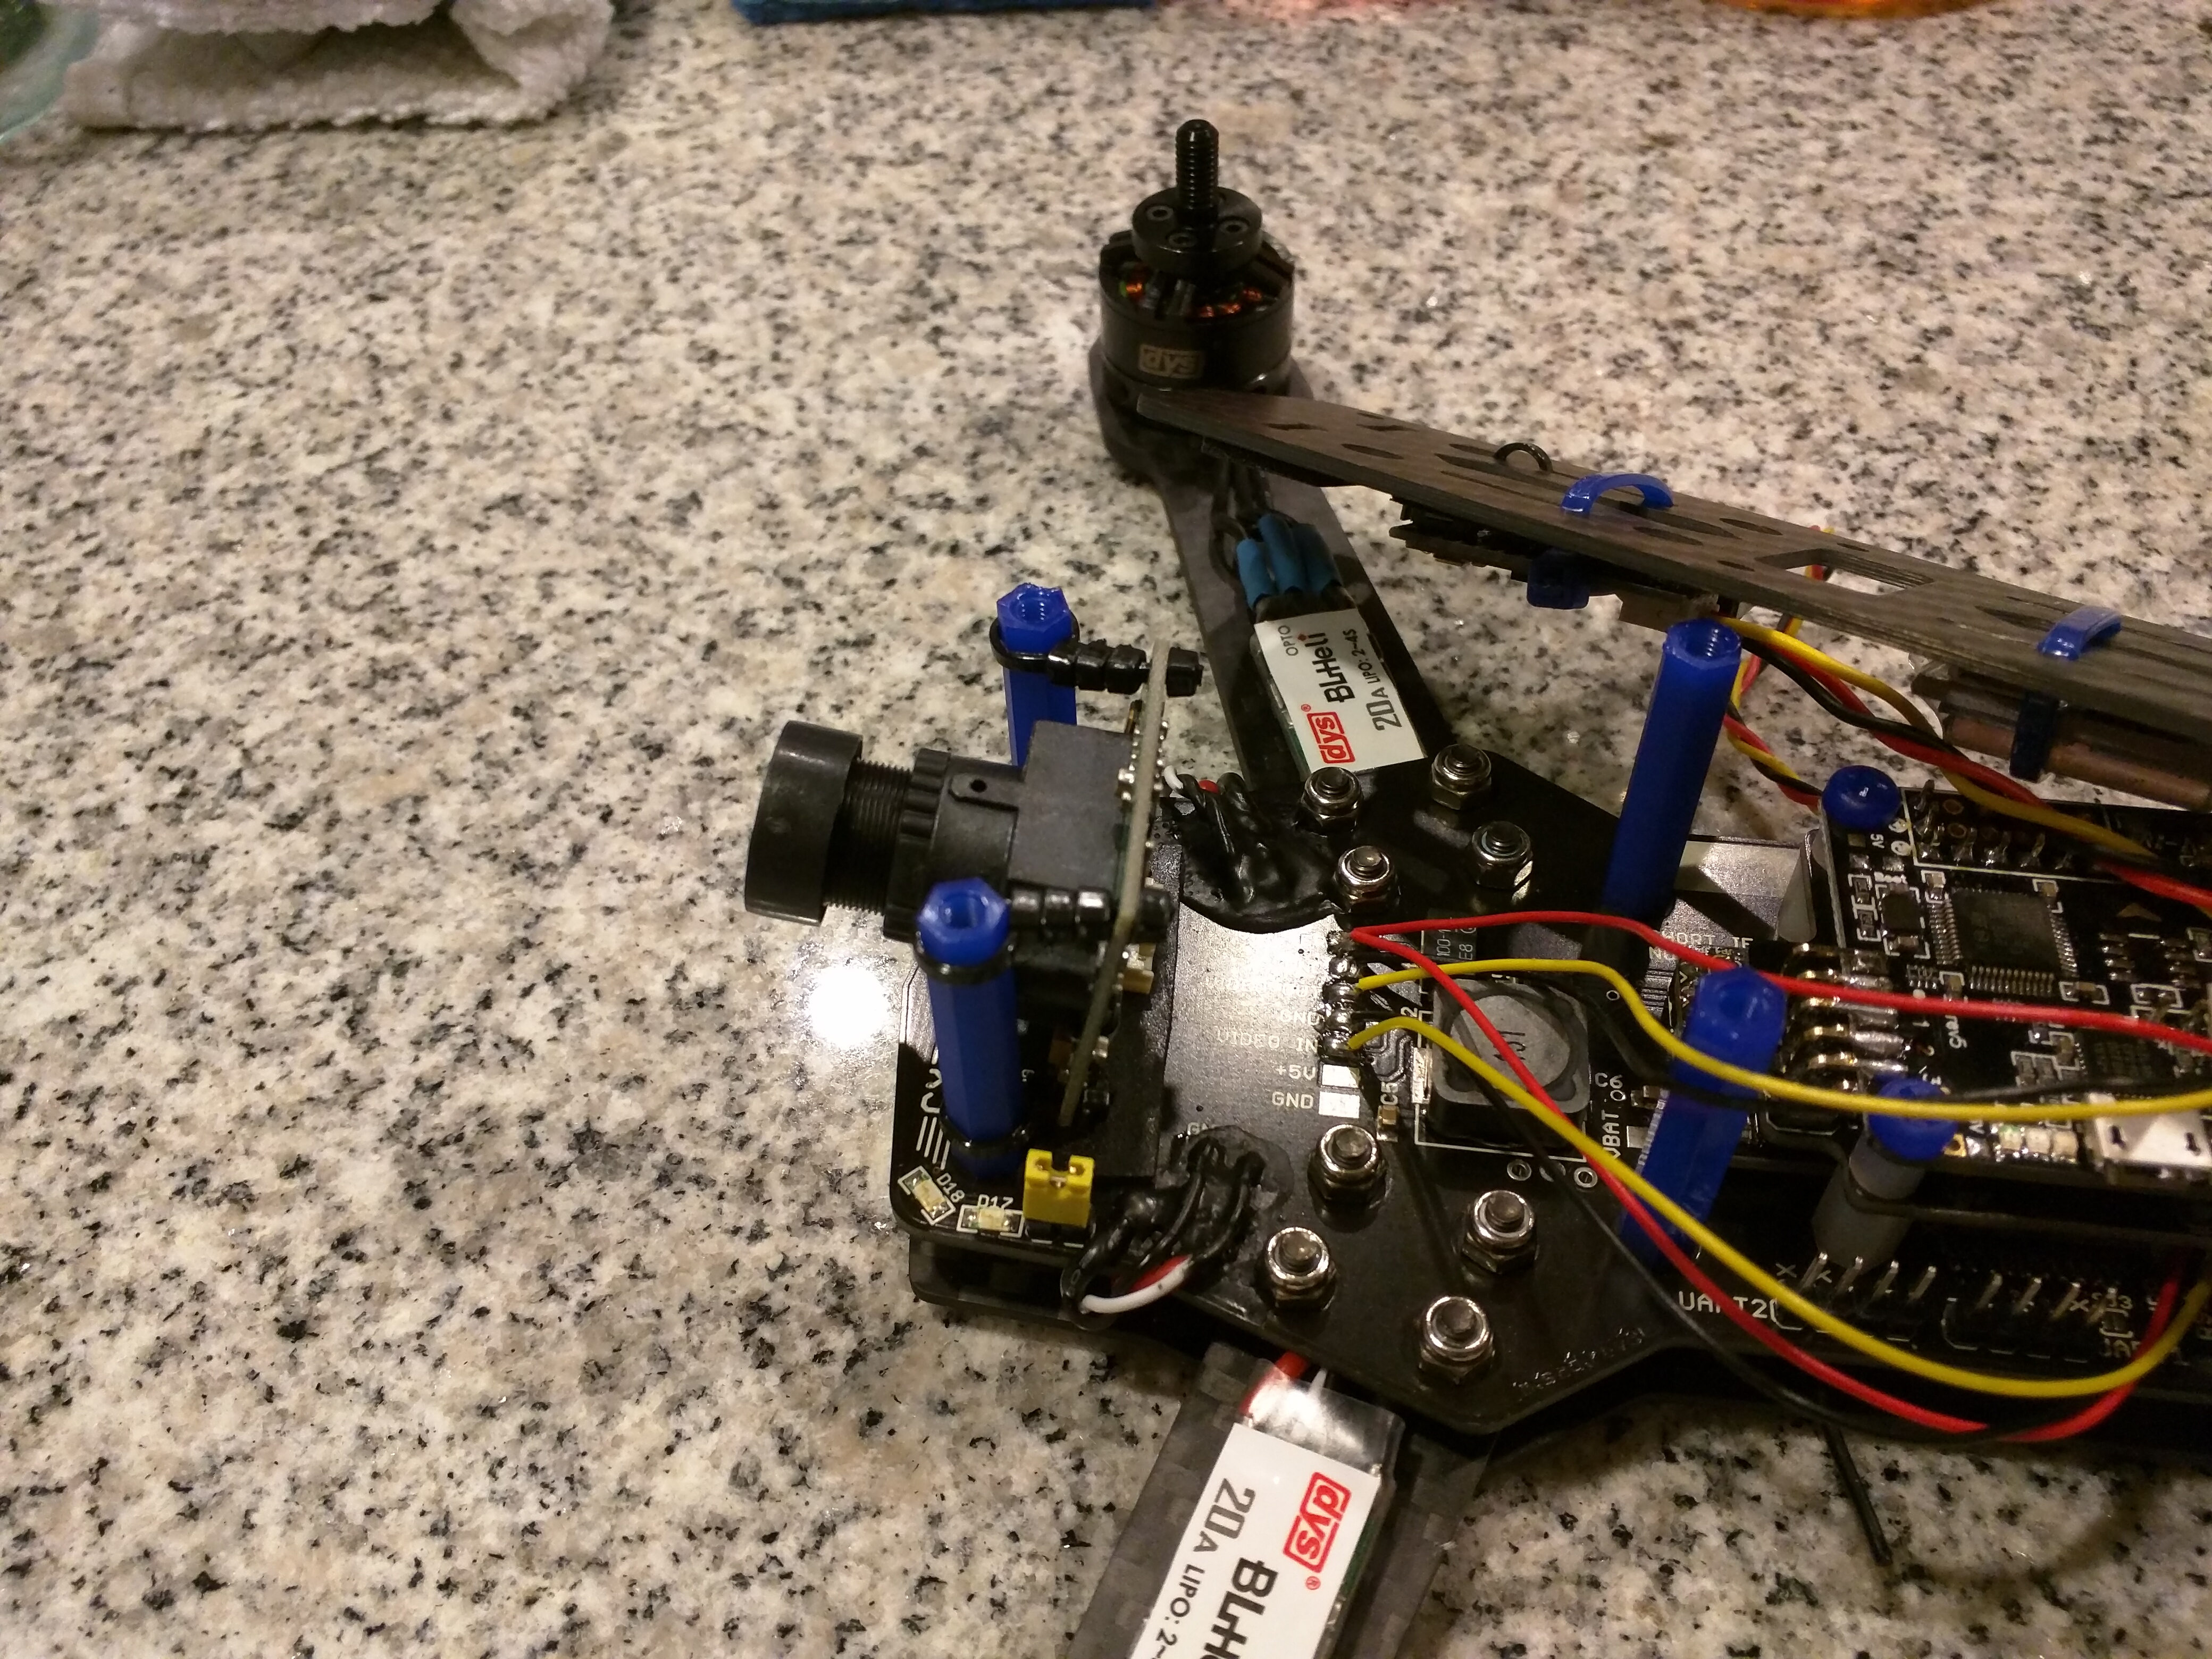
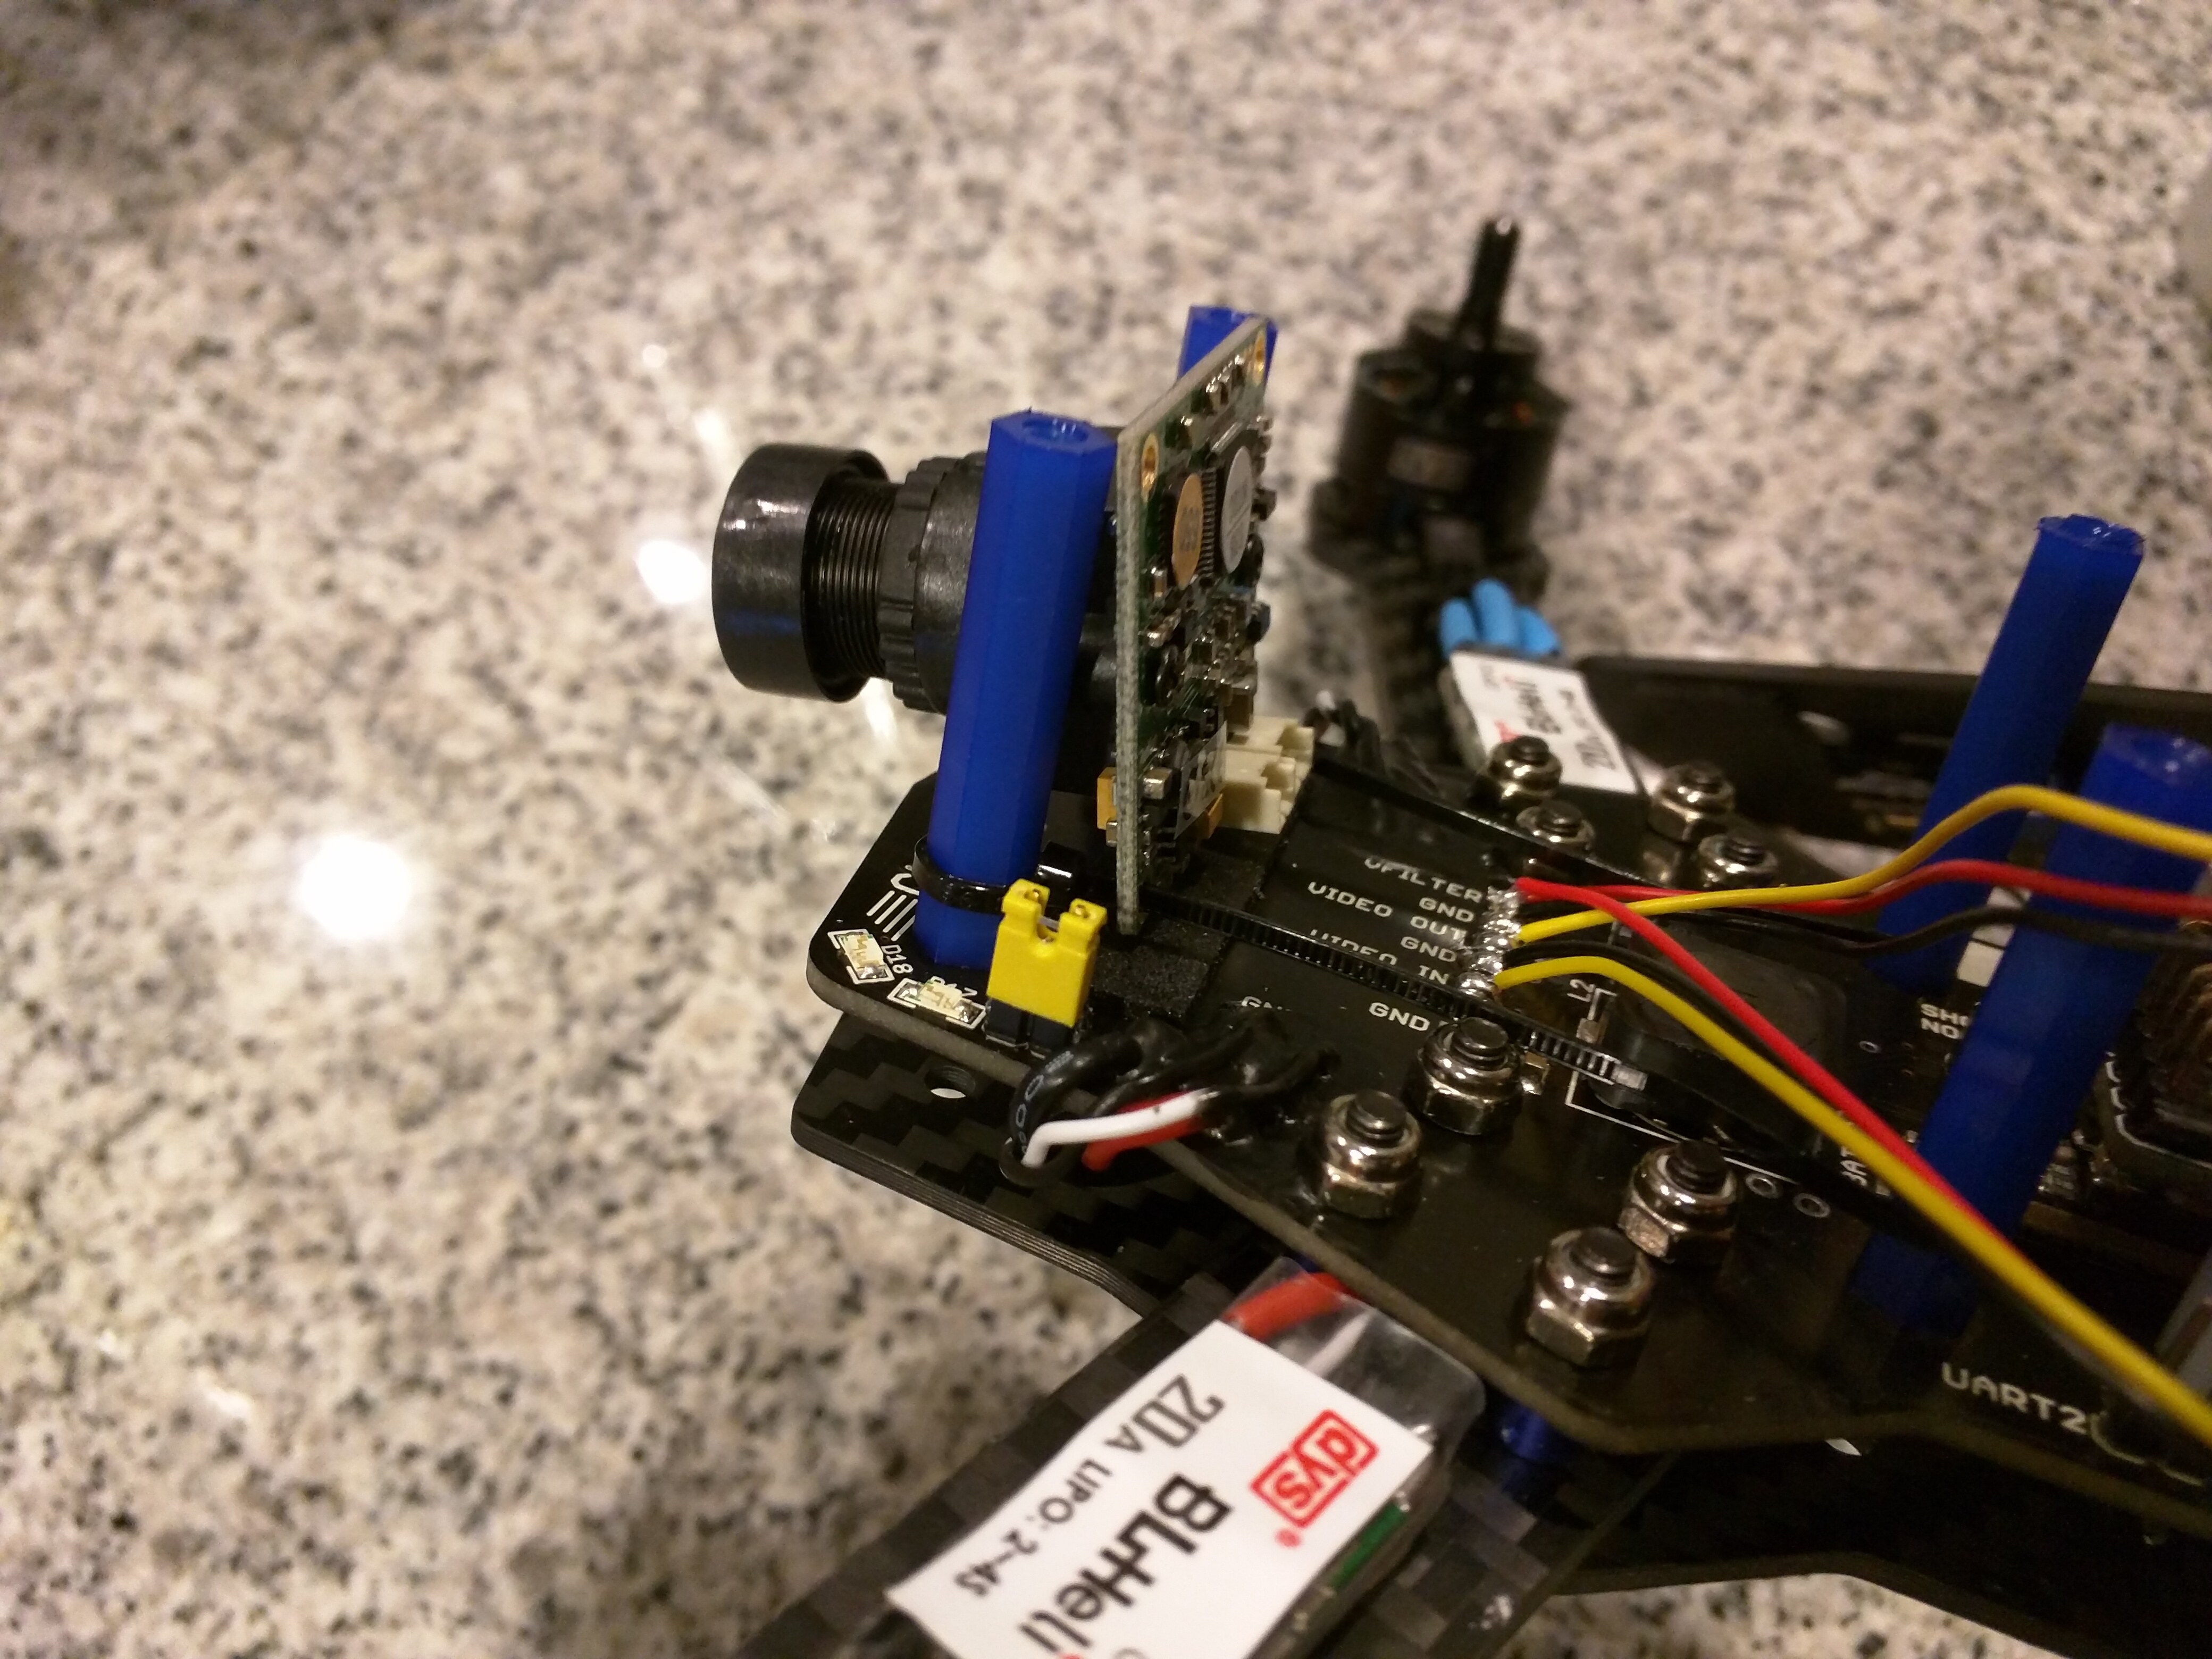
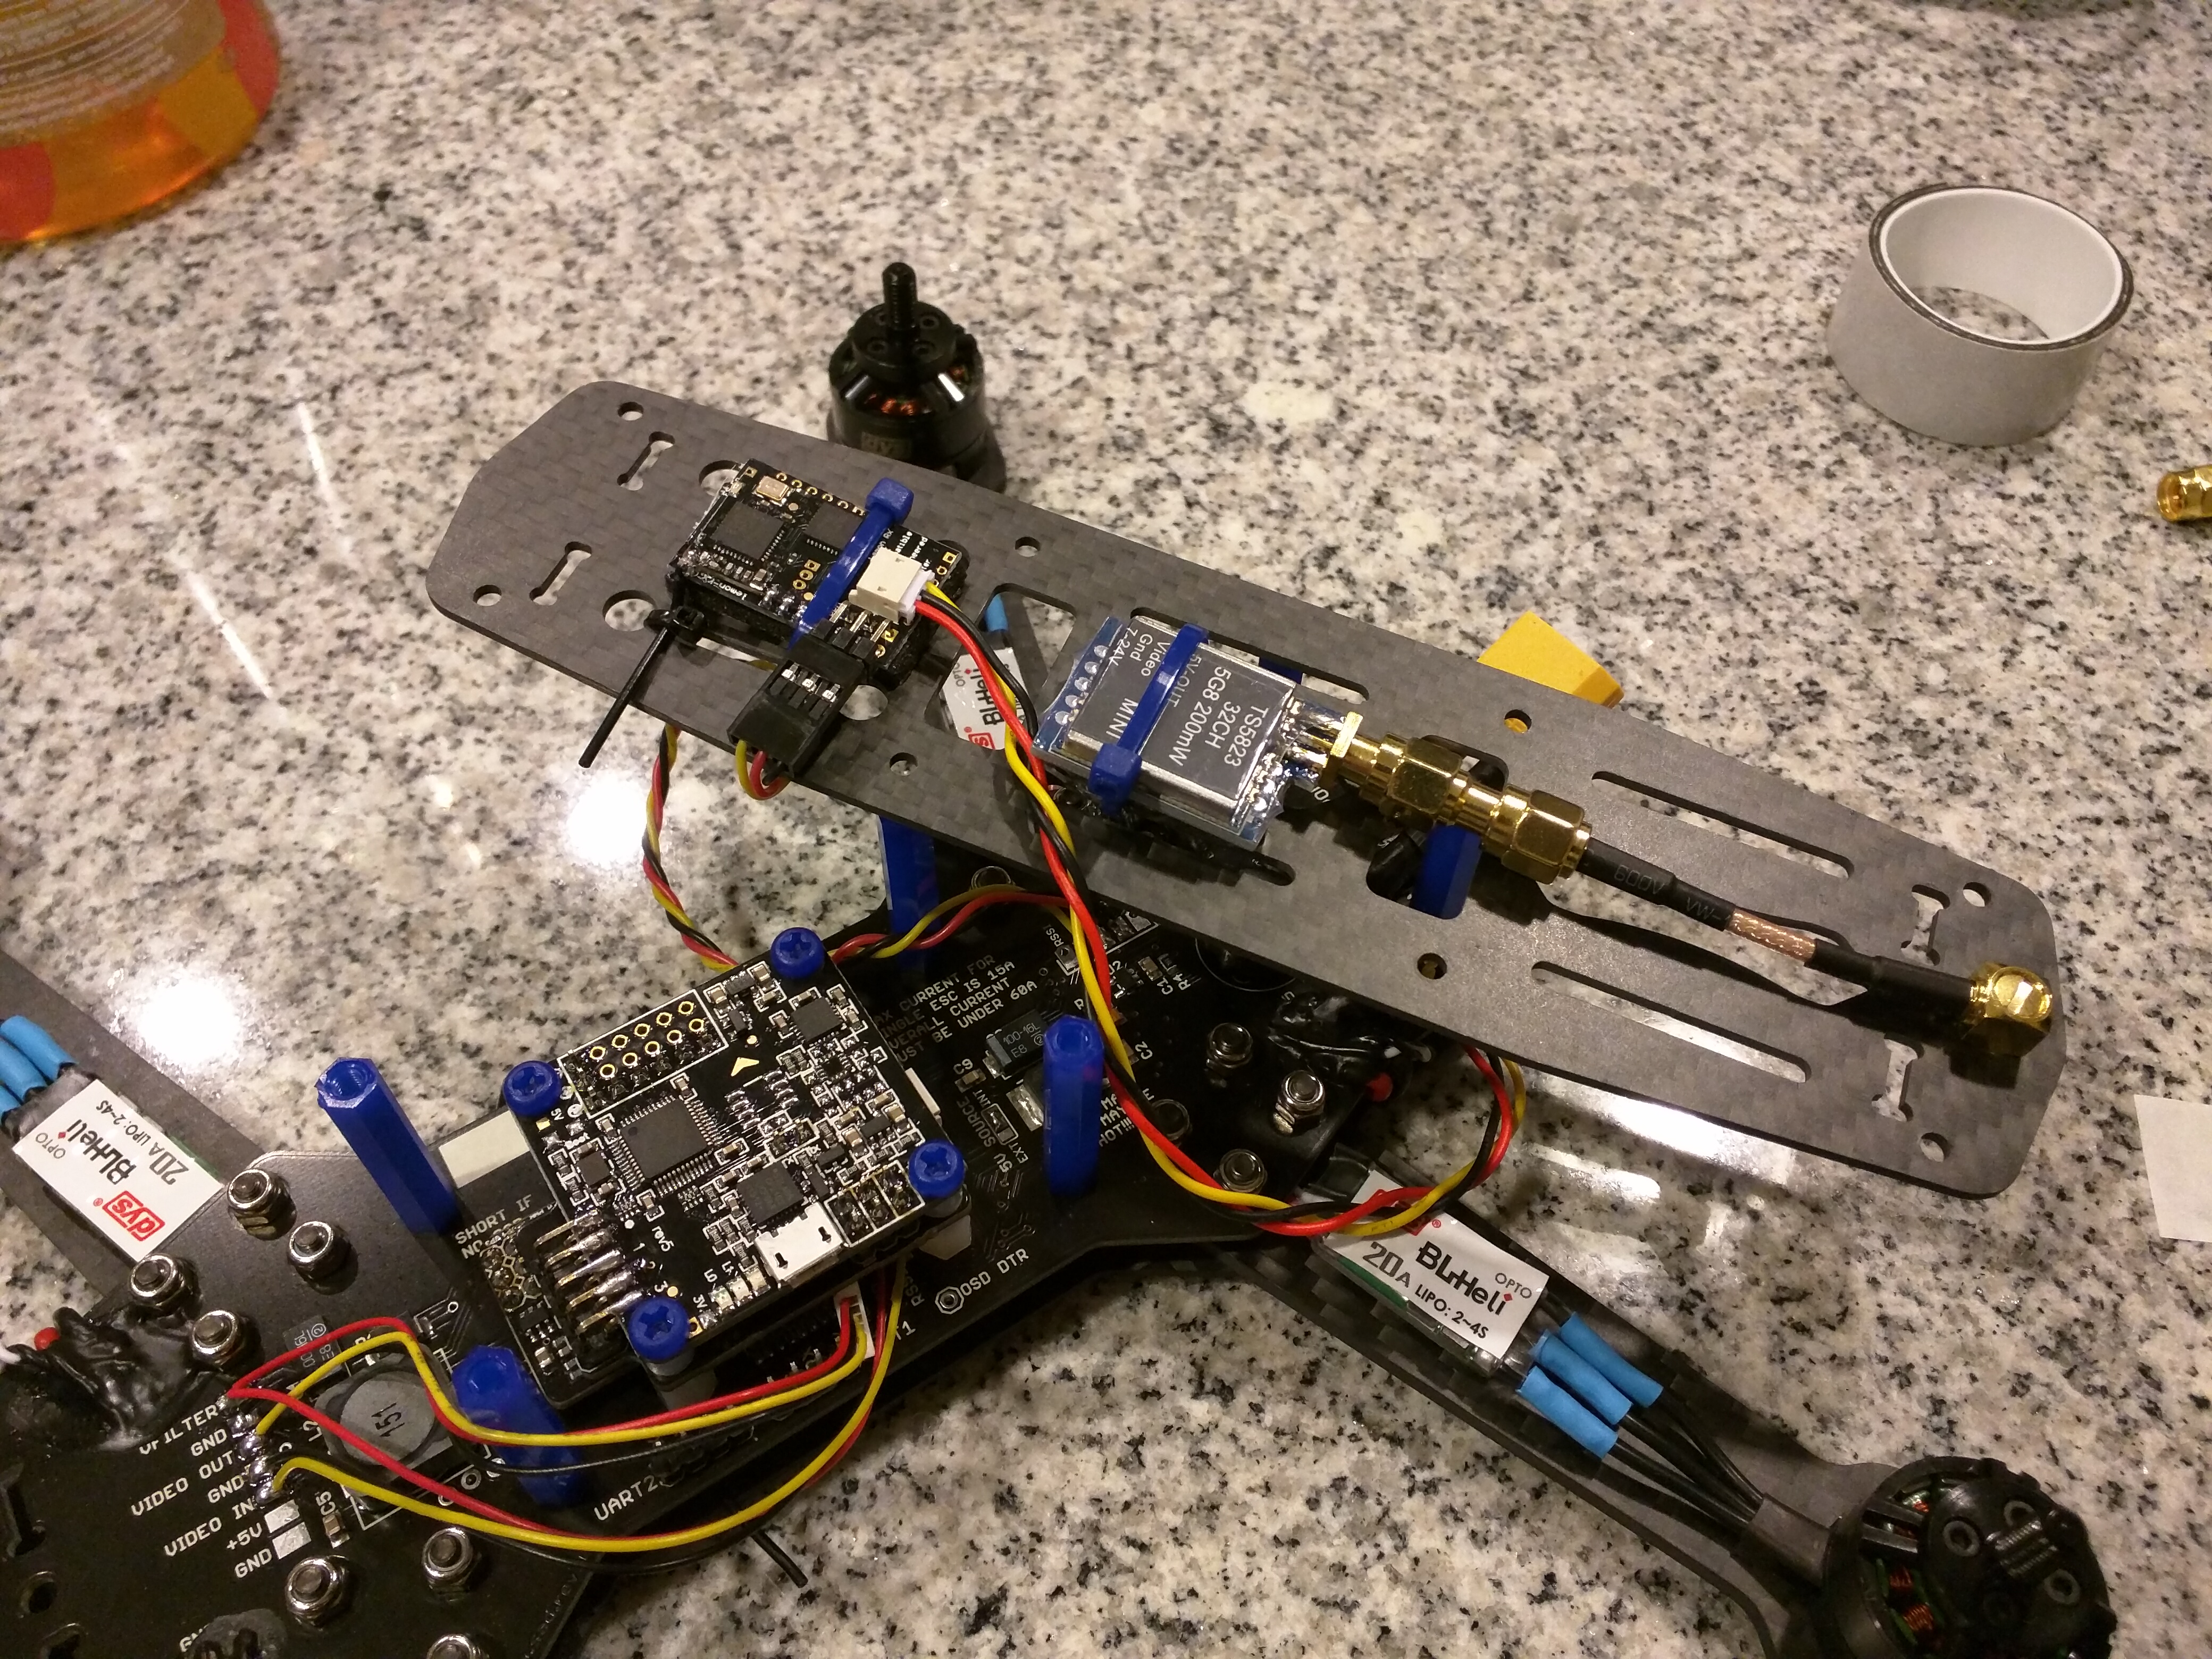
I'm using the MinimOSD paired with the MWOSD firmware. It seems like a solid choice and integrates well with the Naze32 and Cleanflight. One thing to note is that the Cytrynka PDB doesn't provide 12V power to the video side. This MultiRotorMania version has the 5V modification to power both sides. This was a nice feature that made it much more plug-n-play for the Cytrynka PDB.
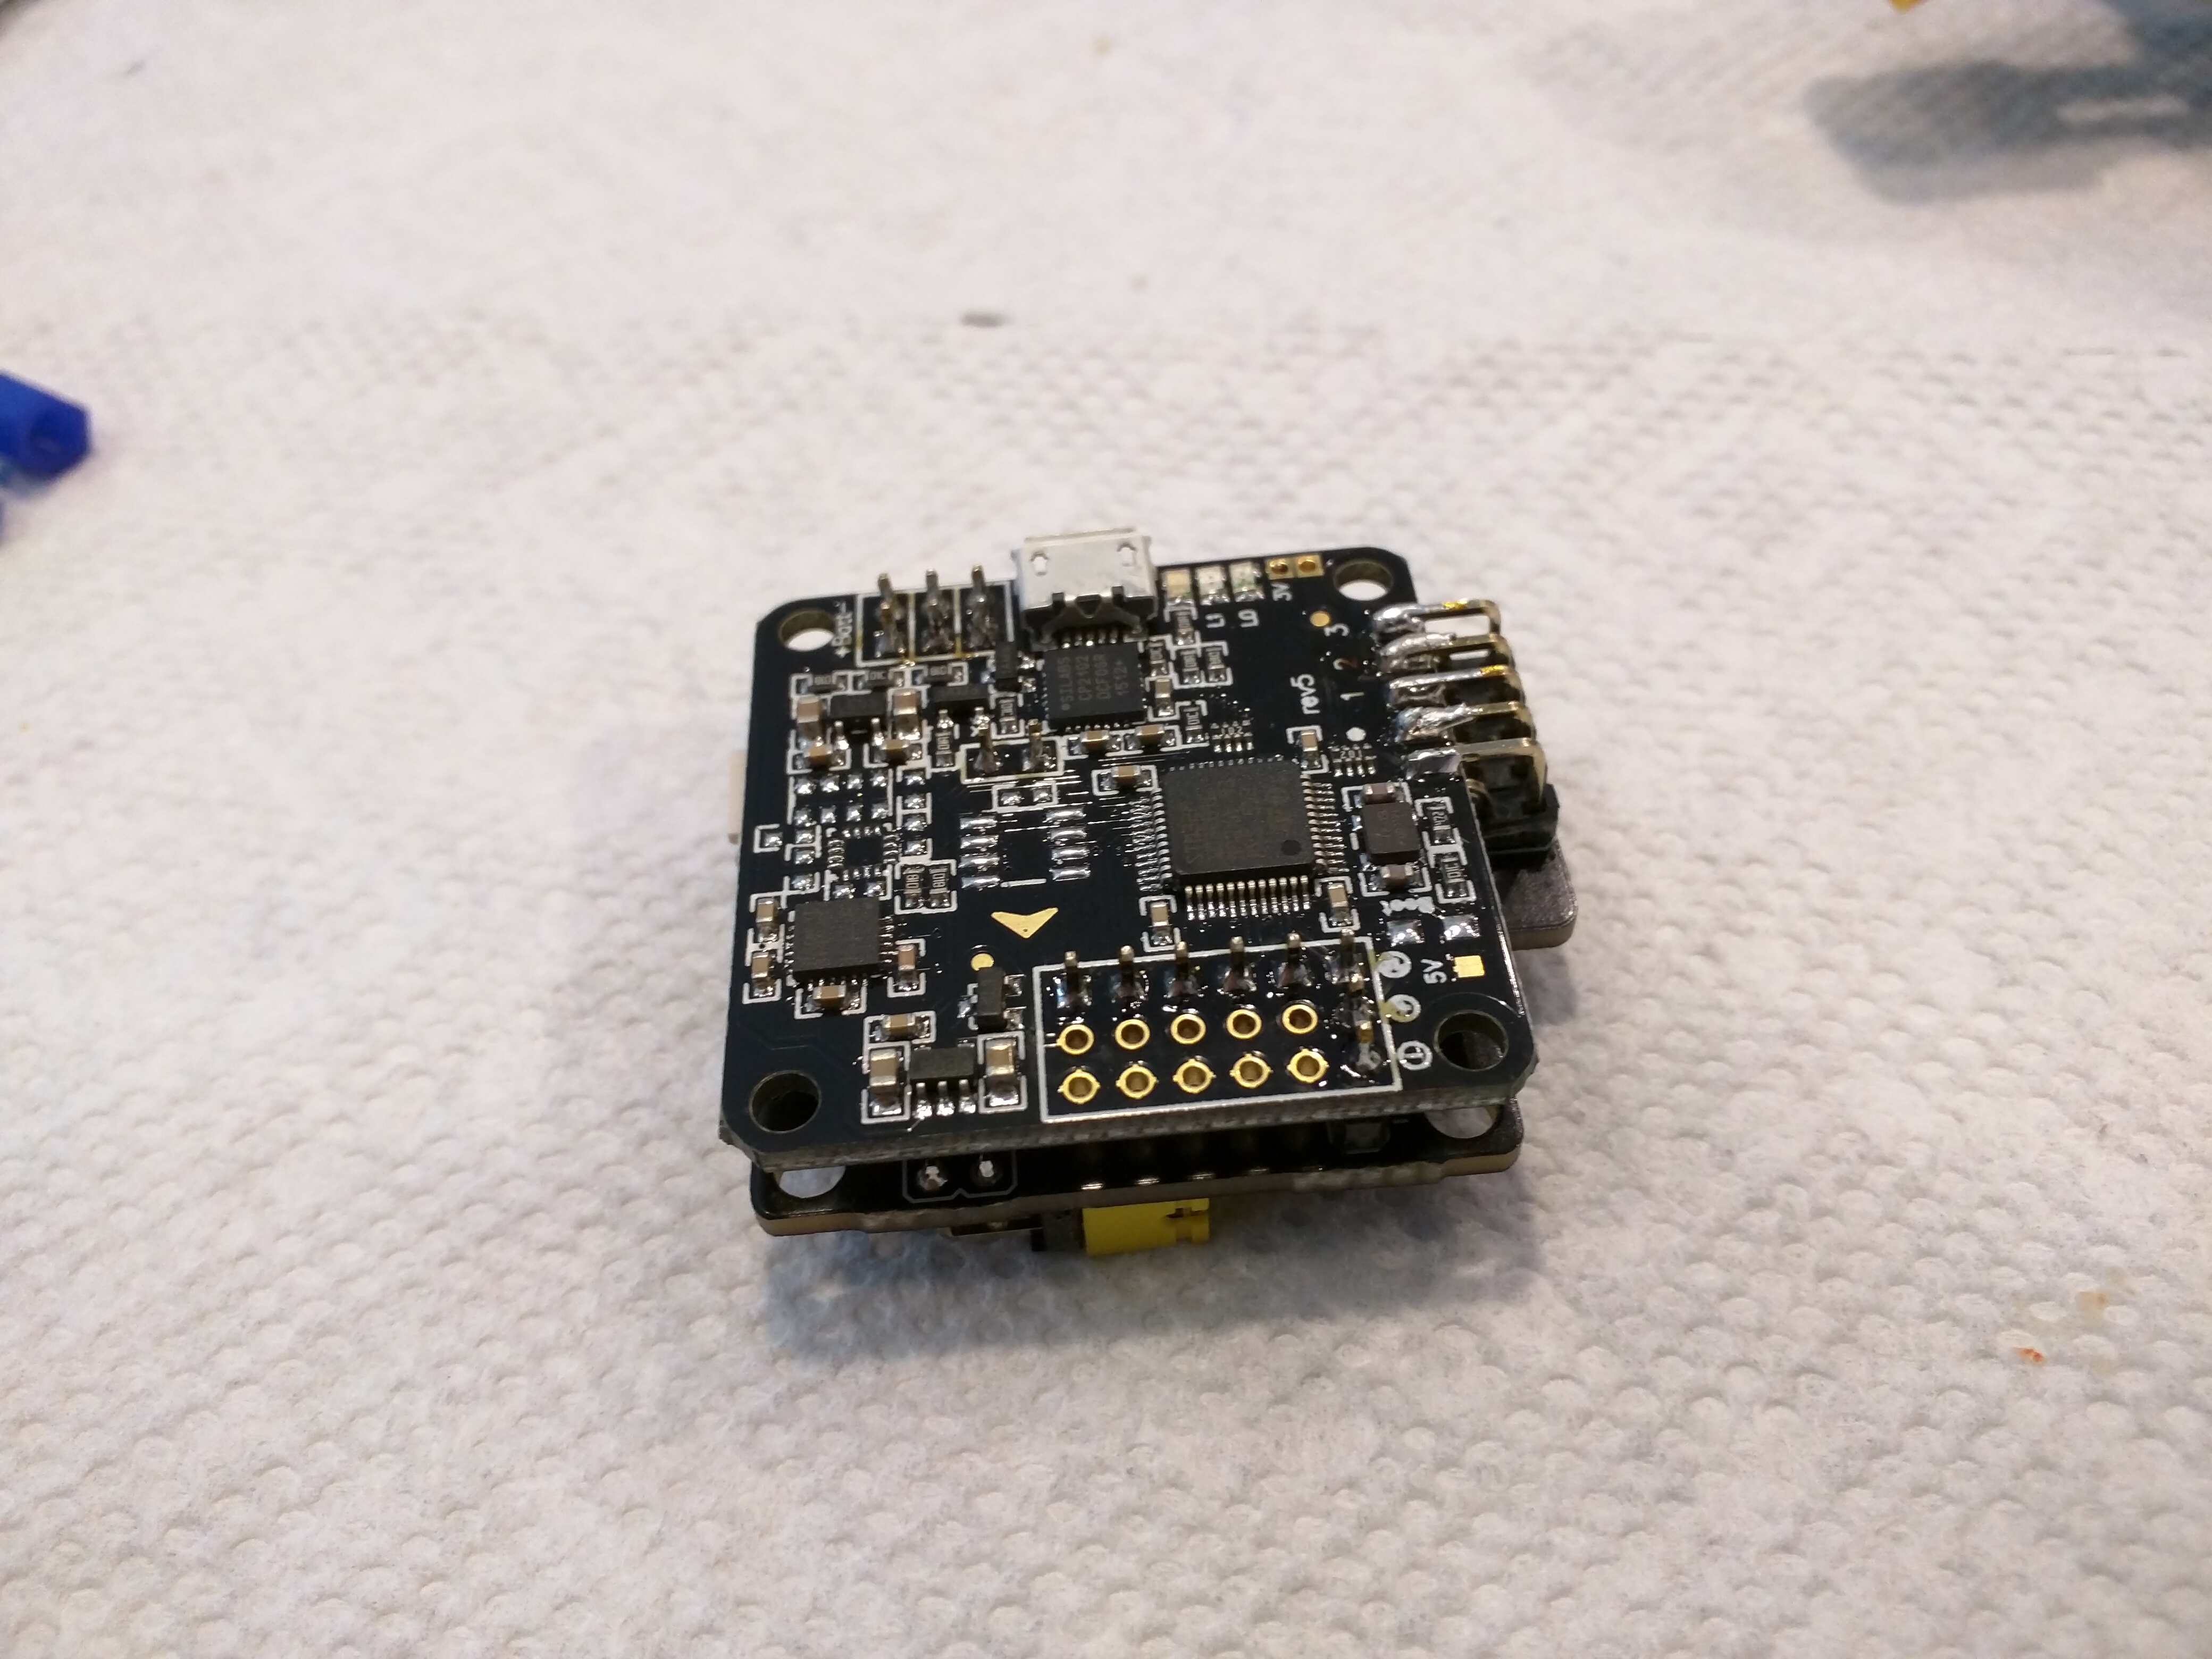
The Cytrynka PDB has conversion boards for Flip32, CC3D, and Naze32. The conversion board has a 20 pin socket that plugs in to the PDB. I'm assuming it is much easier to support multiple flight controllers on the PDB this was rather than redesigning the entire PDB specifically for a flight controller. But it was pretty easy to solder up the flight controller to the conversion board and mount it in place with some longer nylon screws (in parts list). The nylon spacers came with the PDB originally for the arms, but I ended up using some threaded aluminum spacers (see parts list).
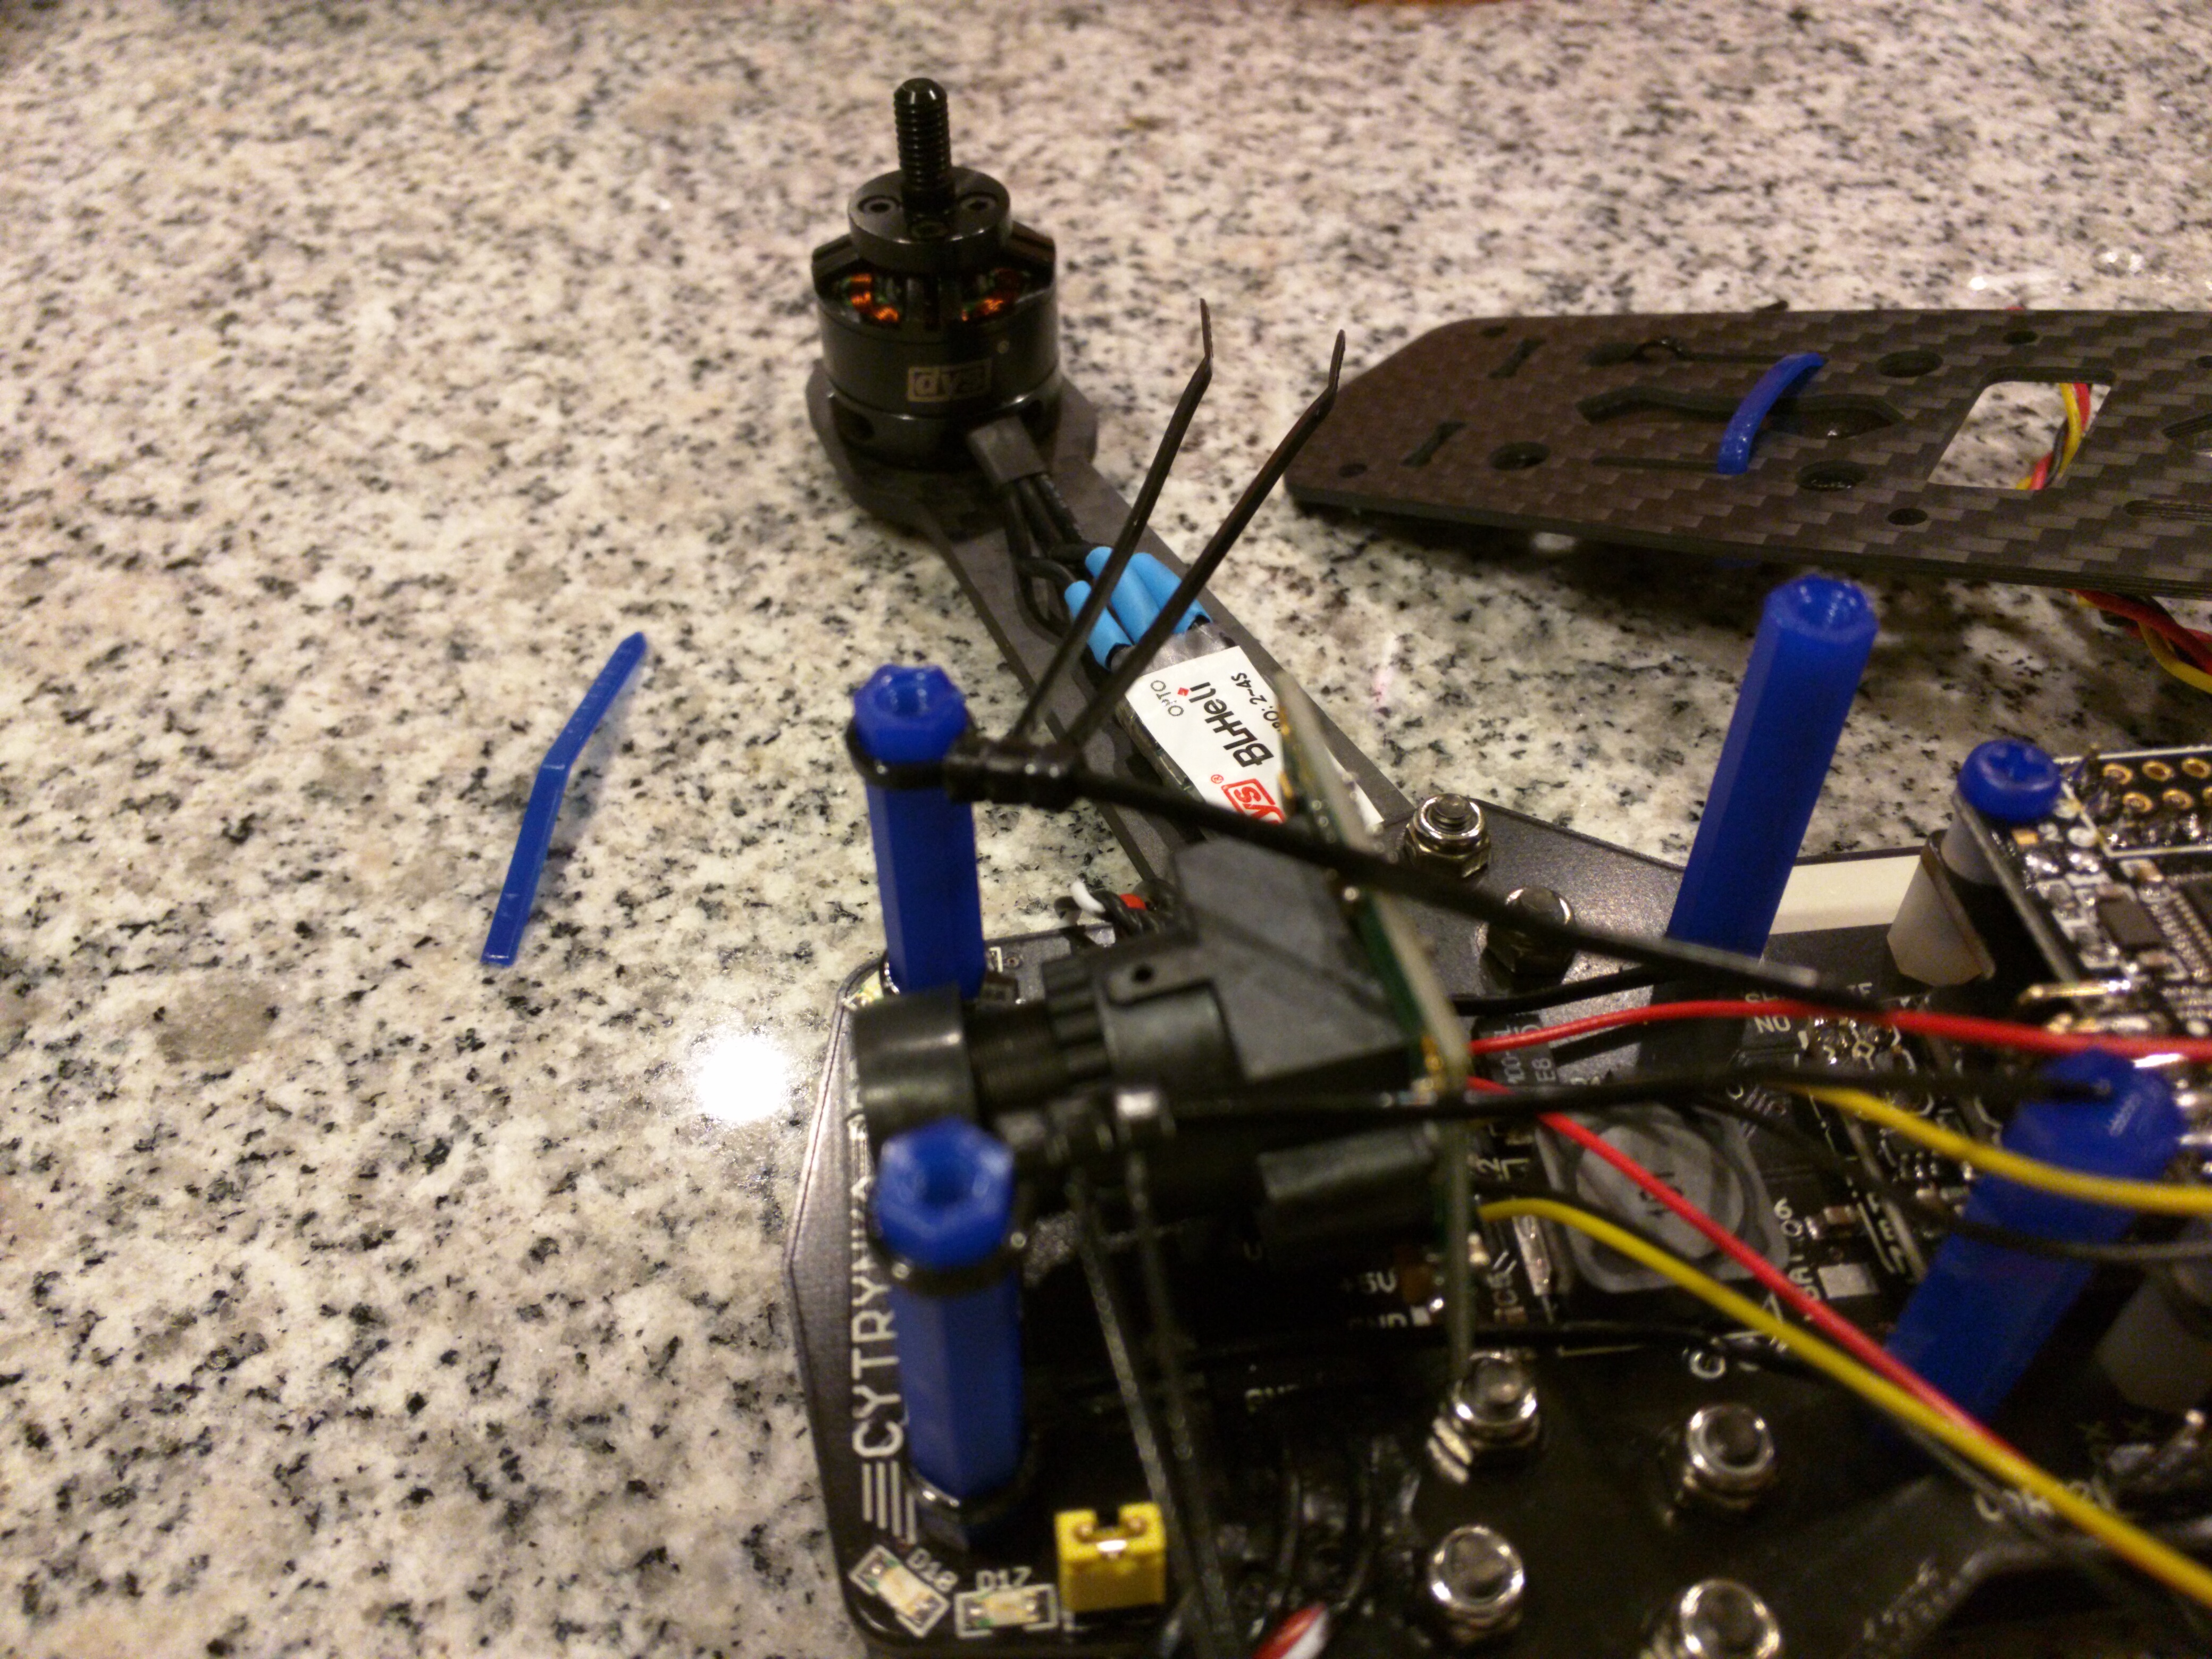
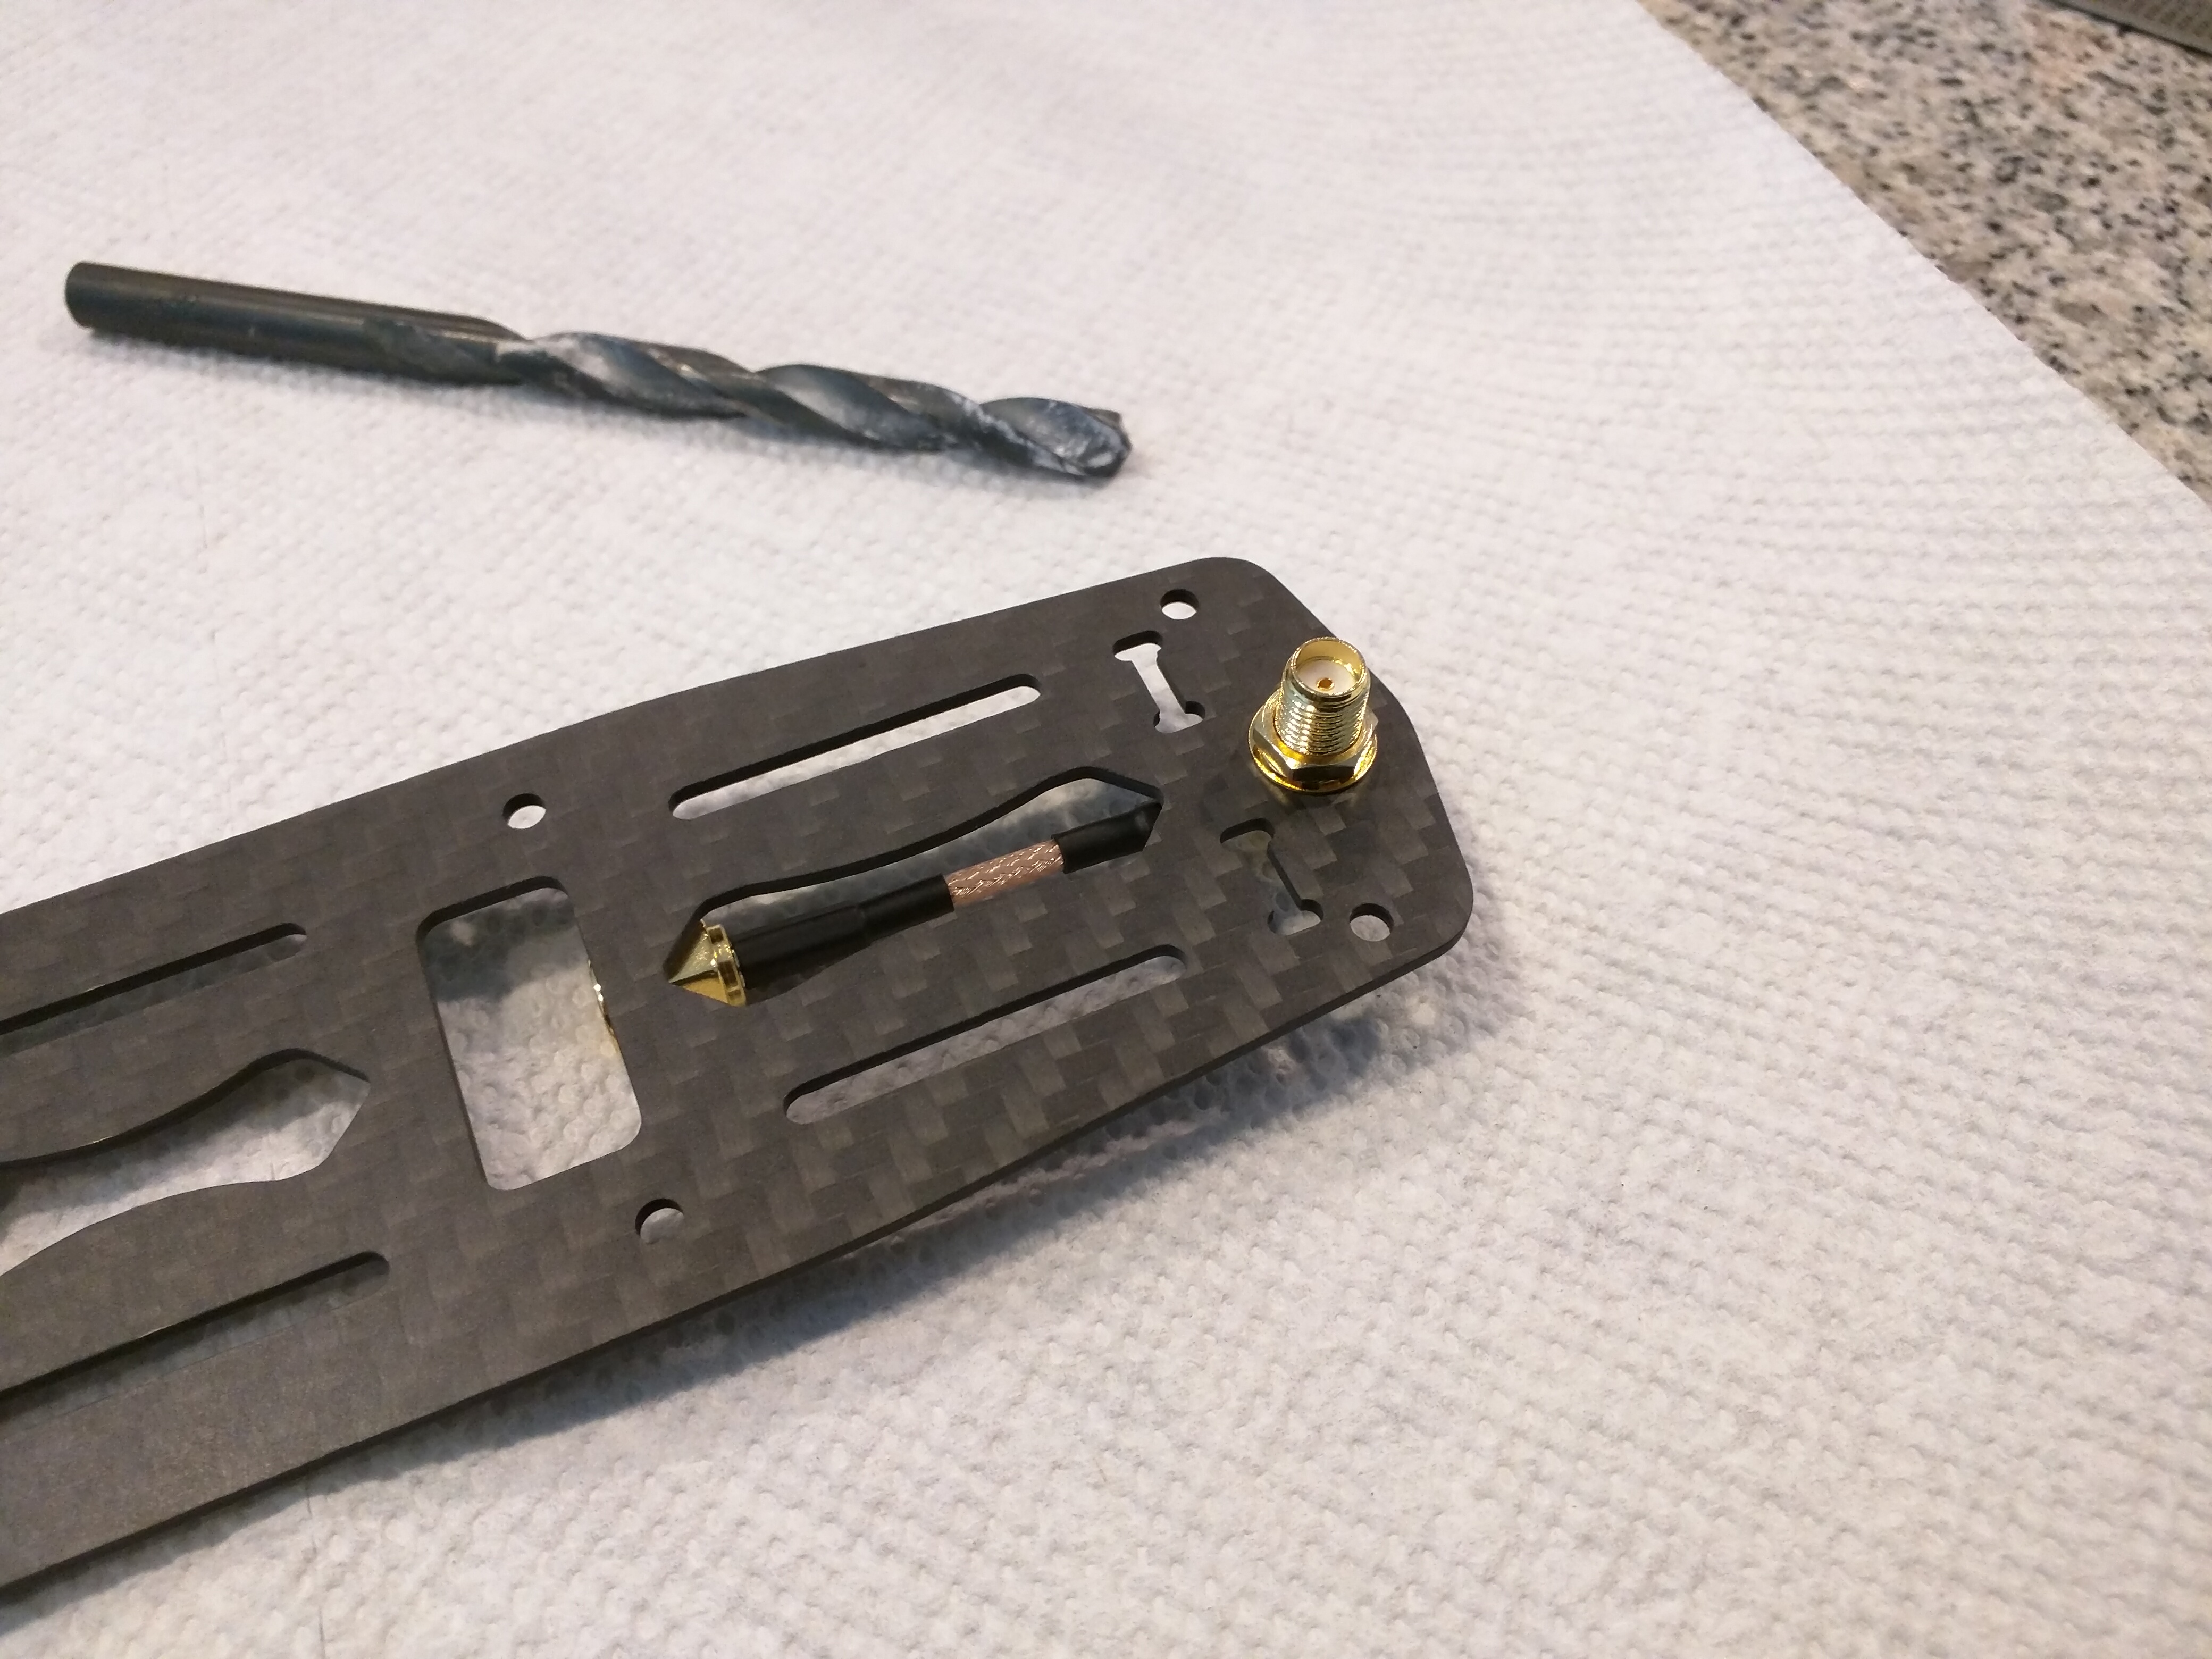
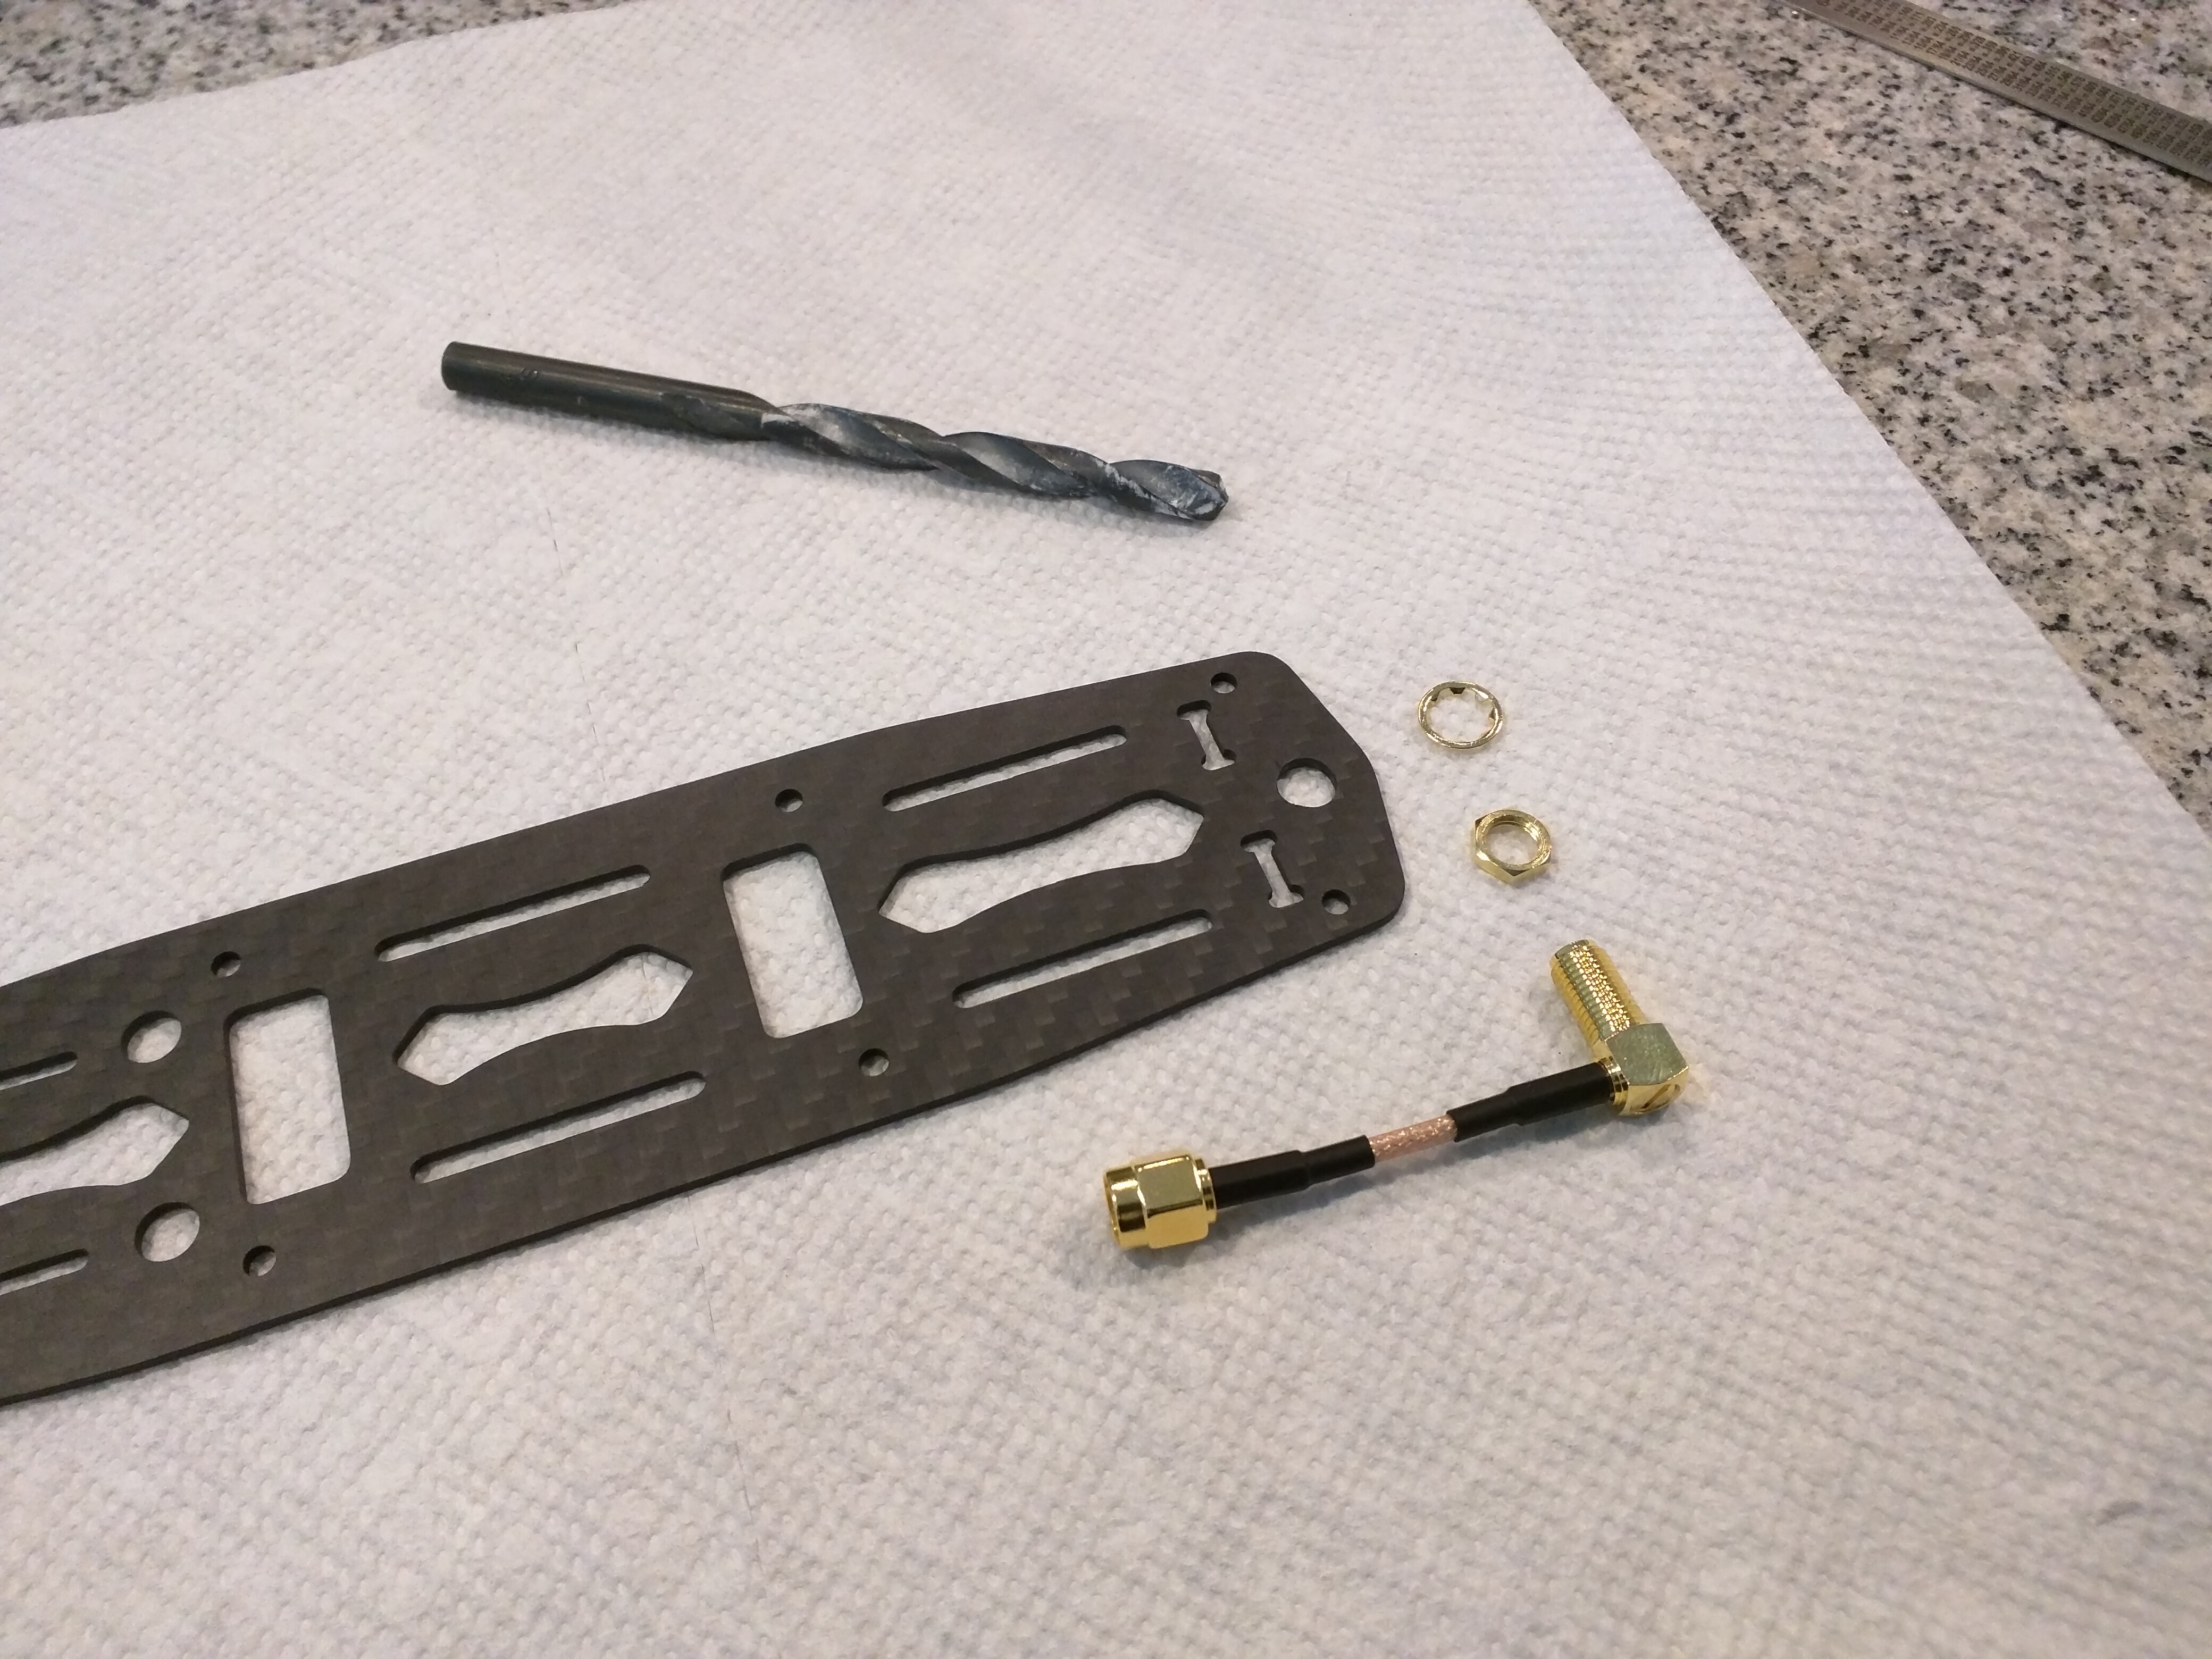
I'm going with the typical TS5823 200mW transmitter and PZ0420M camera. Soldering the leads is pretty straight forward. There are pads for filtered 12V, ground, video in, and video out. I was planning to mount the transmitter under the top plate and use a SMA bulkhead to mount the antenna. I thought the plate might come with a hole specifically for this. But it did not. Nothing a correctly sized drill bit and high speed drill couldn't fix.
I'm running 30mm blue nylon standoffs instead of the 35mm aluminum ones that came with the ZMR 250 kit. I was hoping to get a slightly shorter profile than stock and also have some nylon break points to the the for of some crashes. I'll later learn that the nylon standoffs work pretty well. But the nylon screws in the pictures pop off much too easily. Just run the steel screws that came with the frame instead (I left off the nylon screws from the parts list).
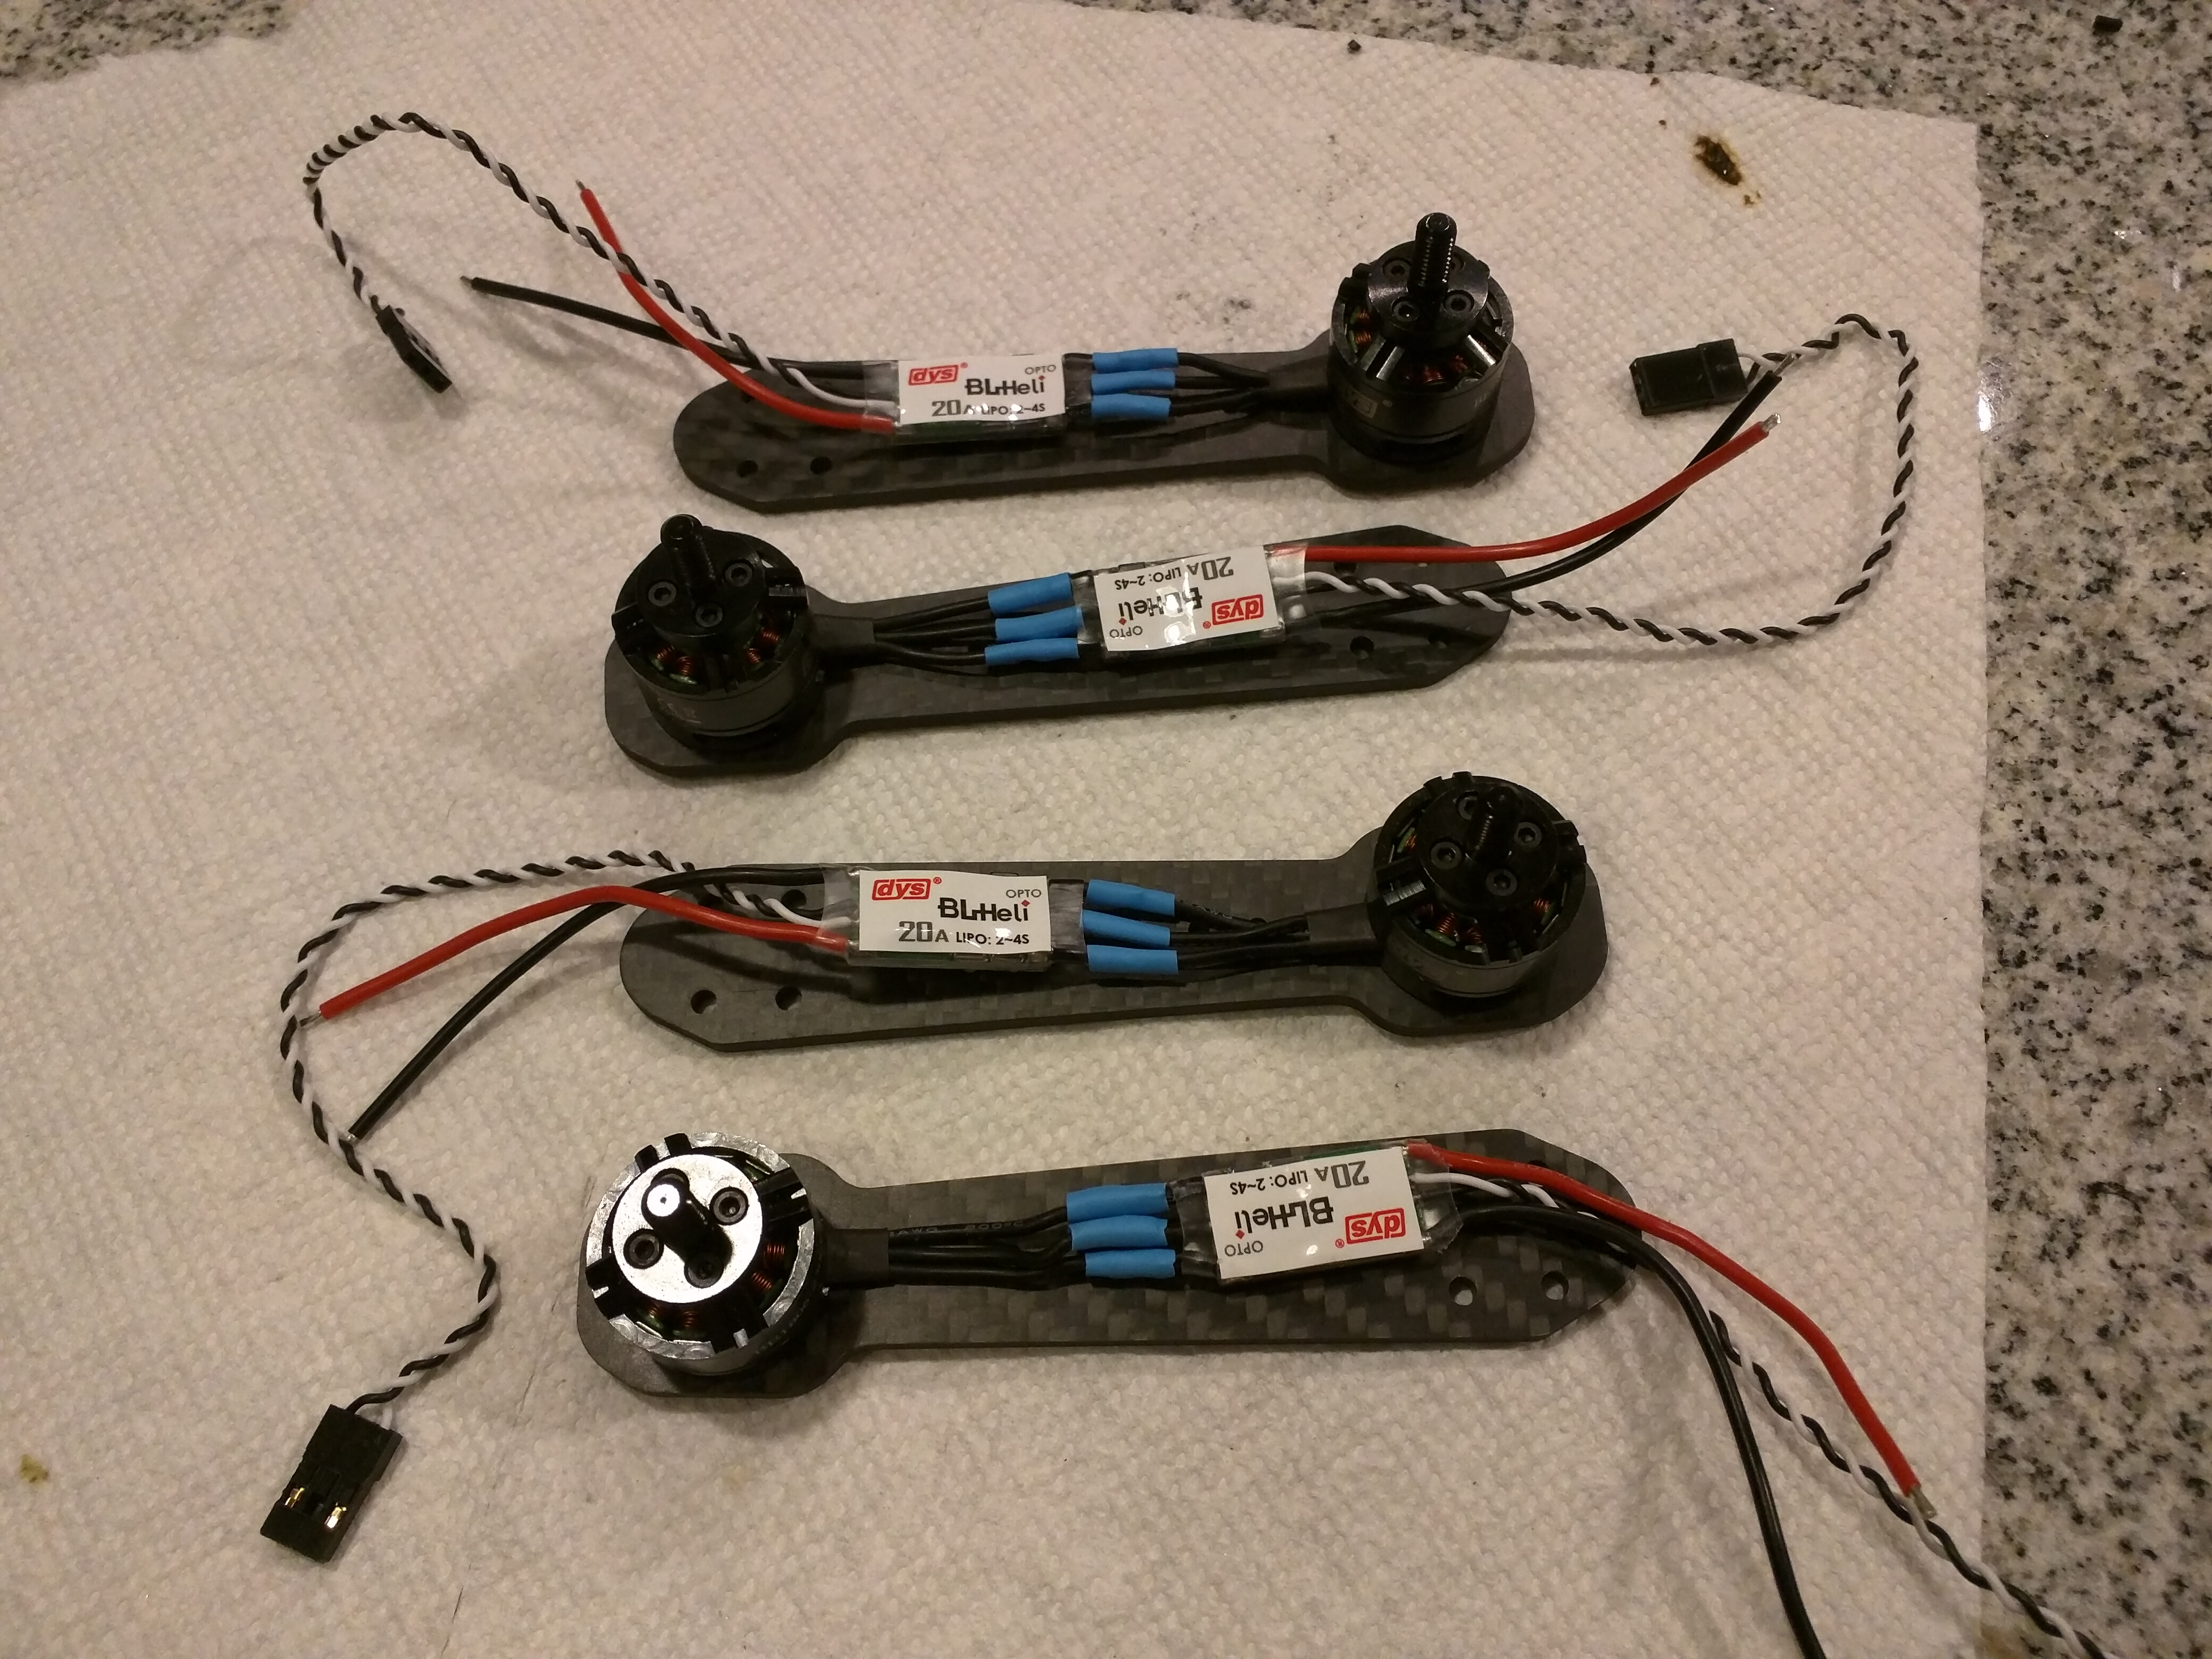
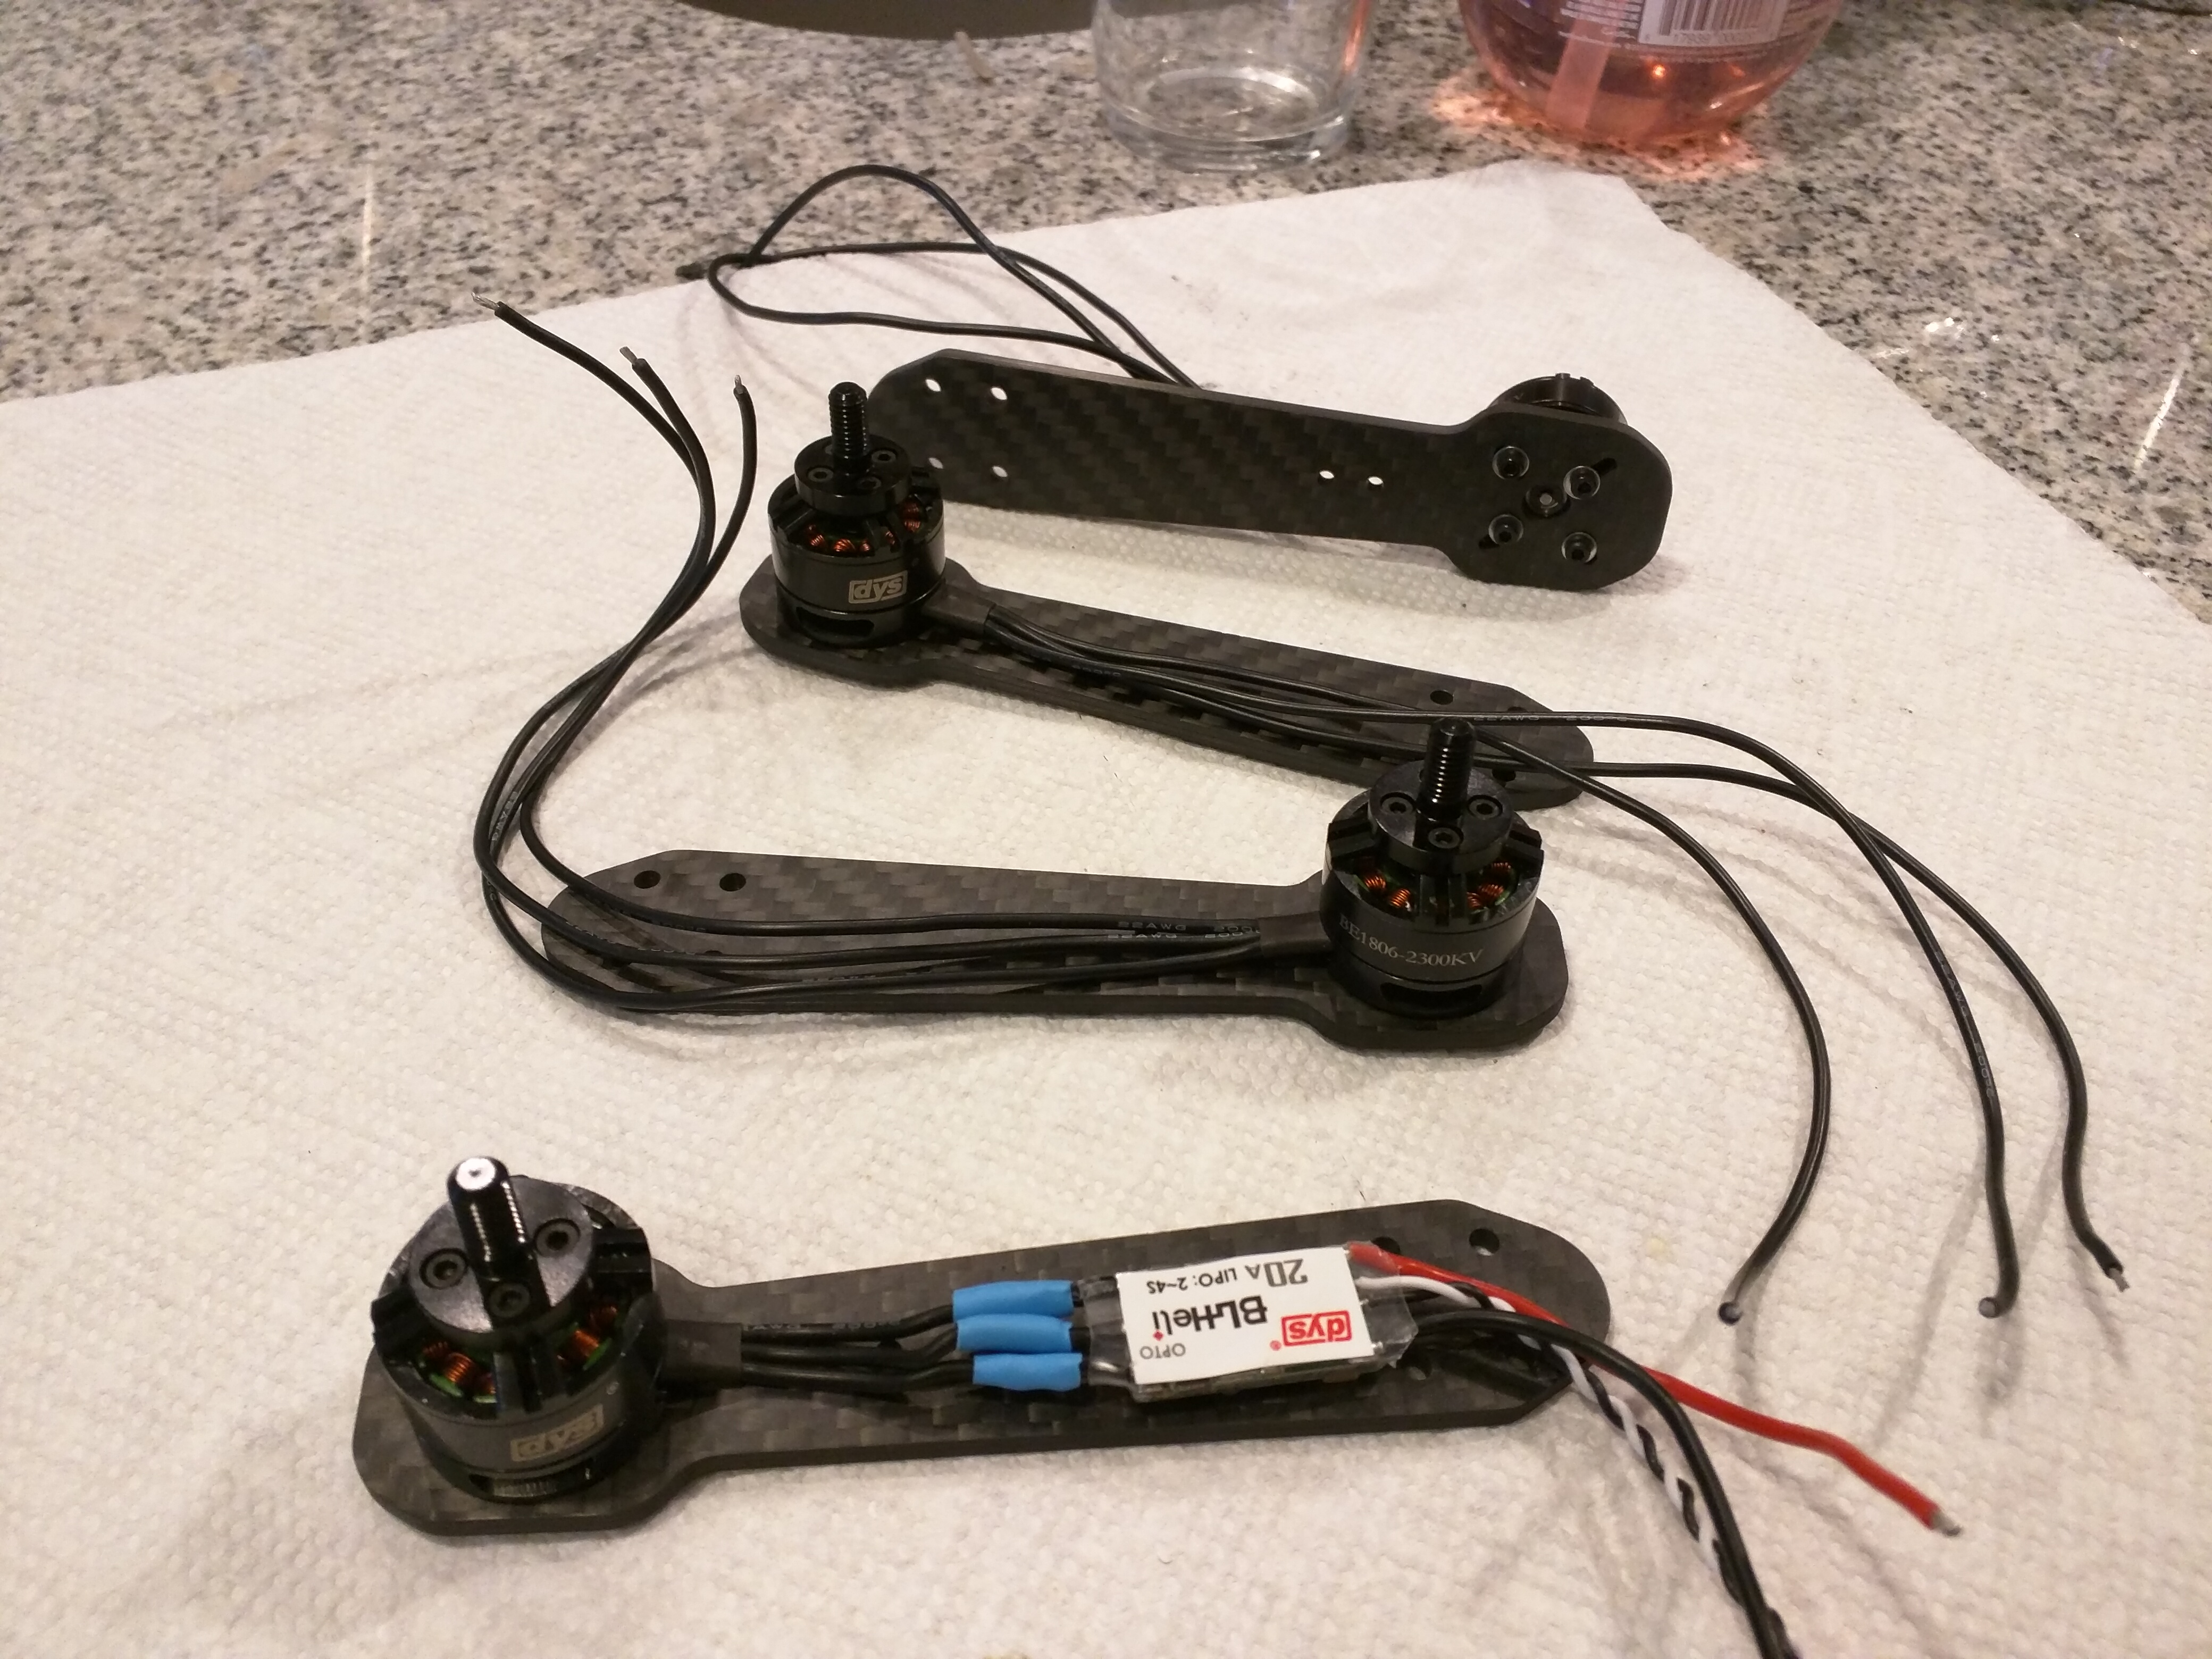
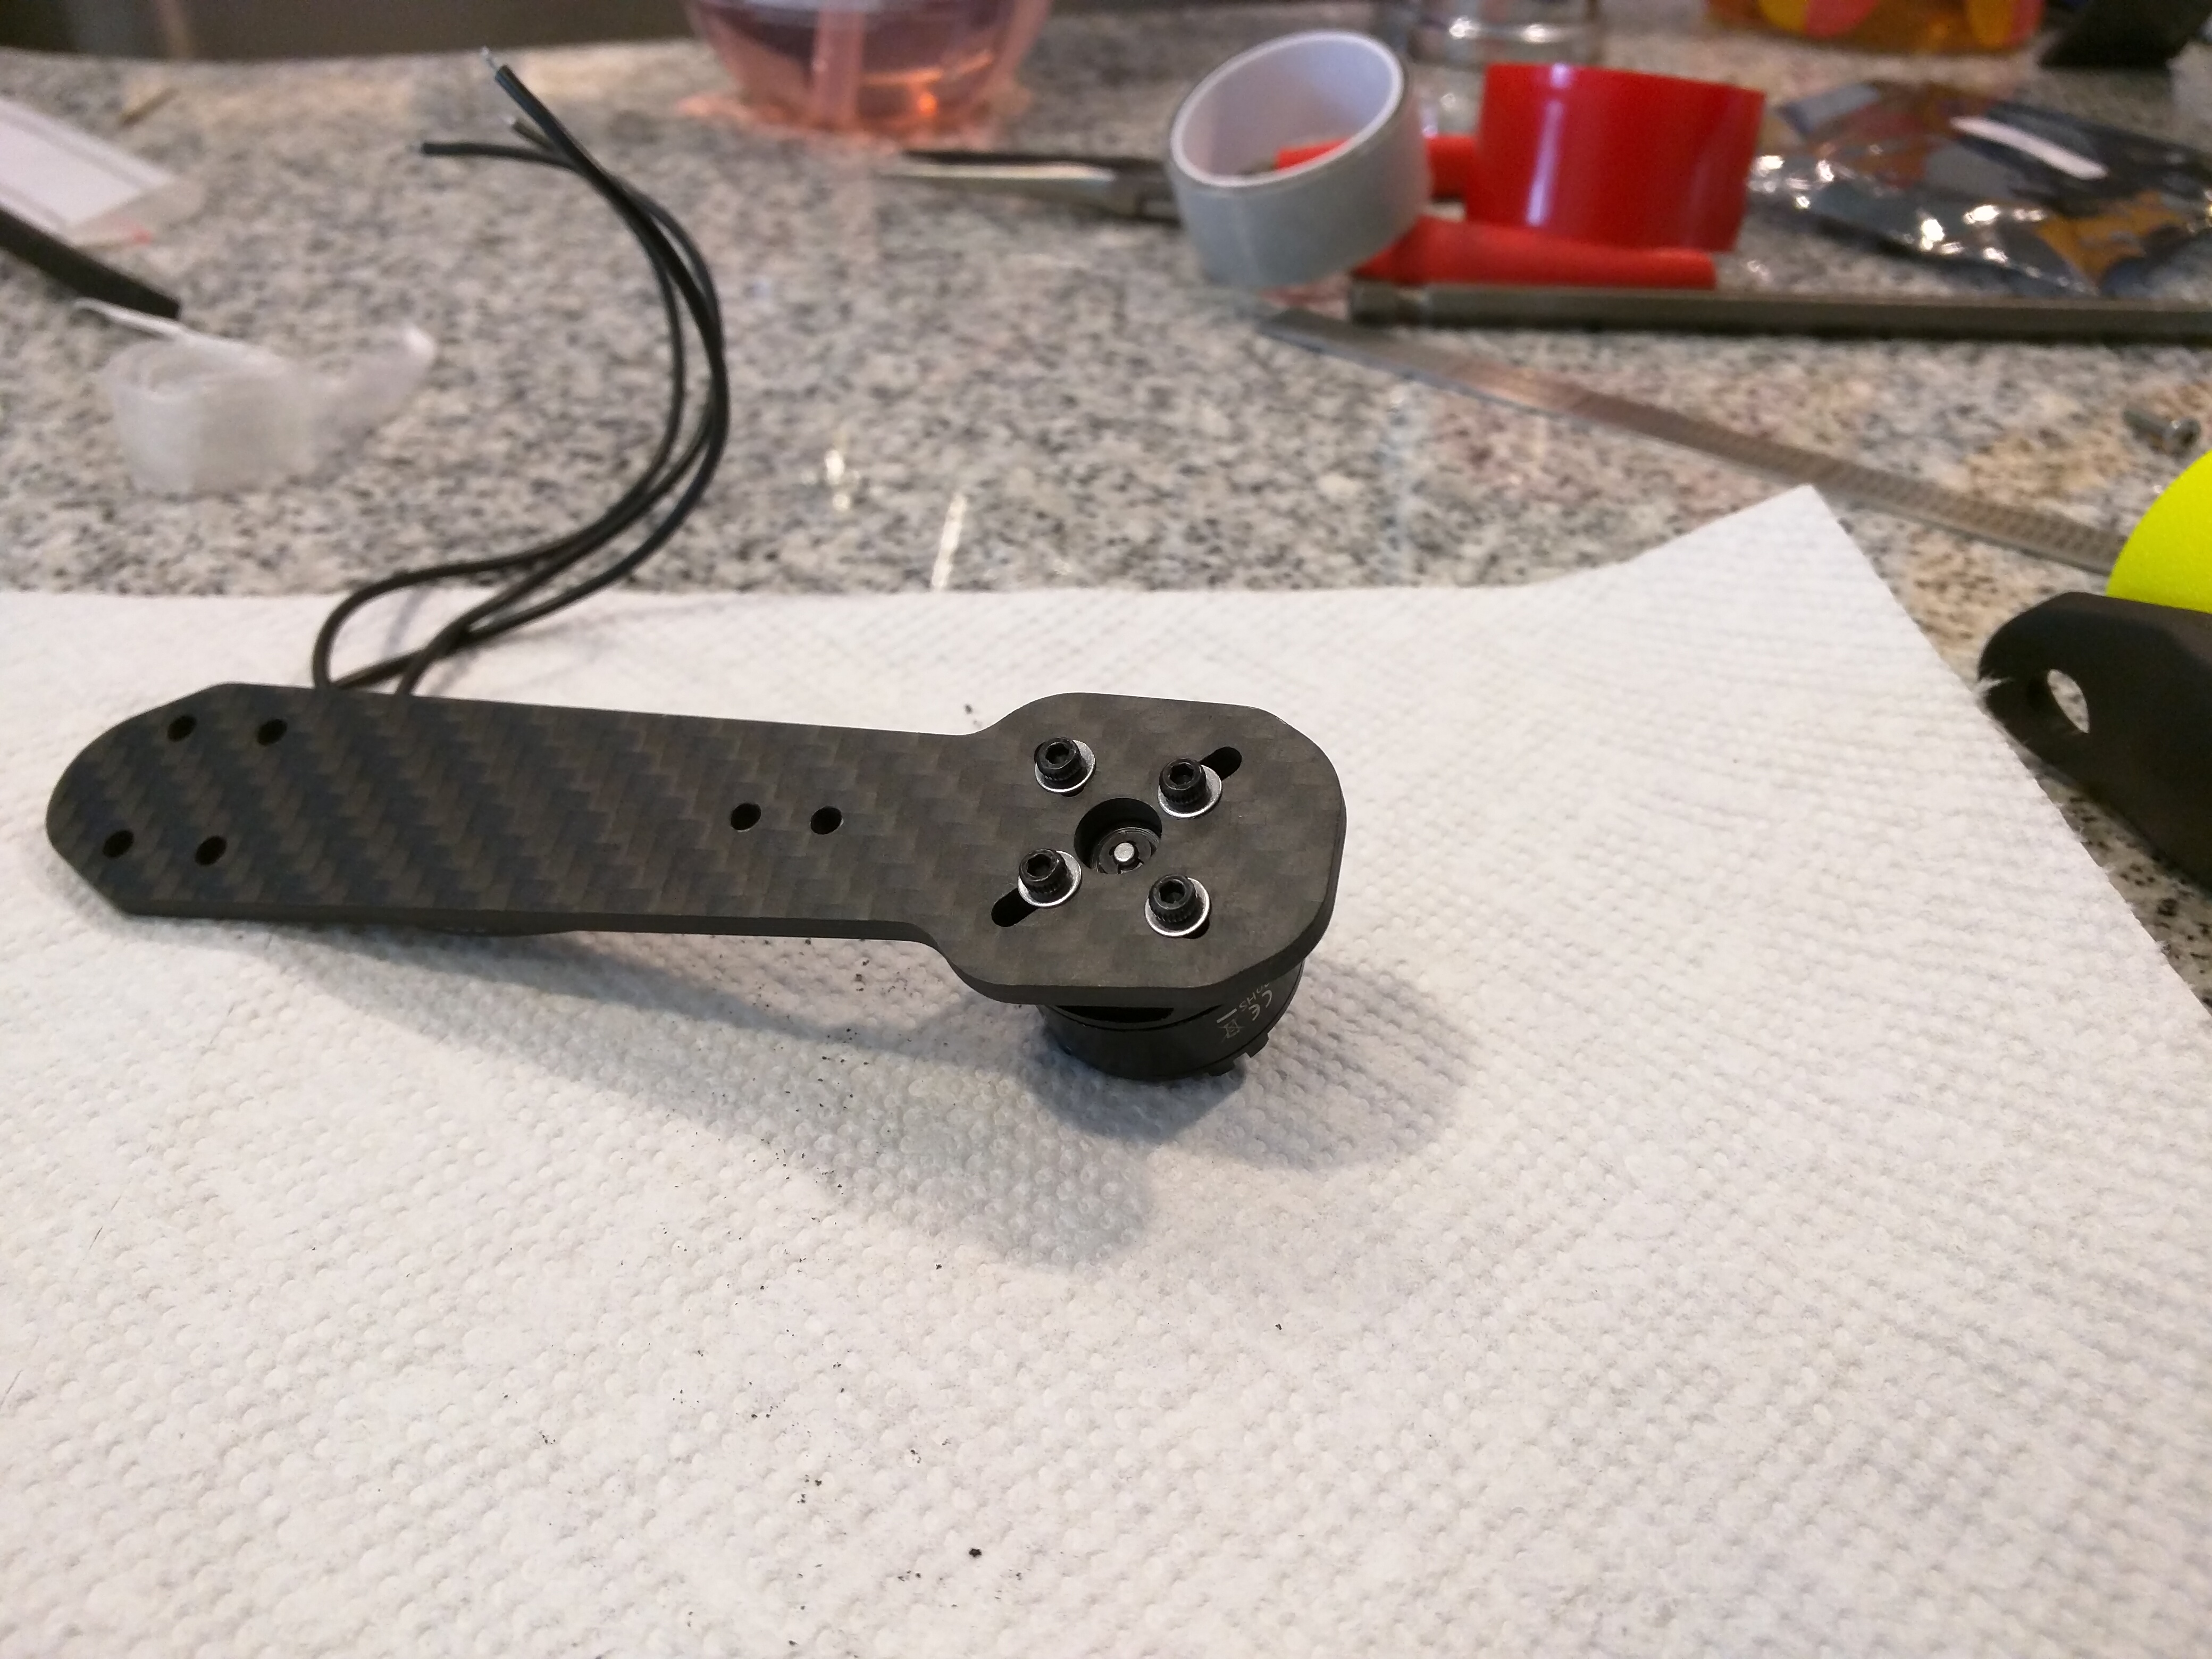
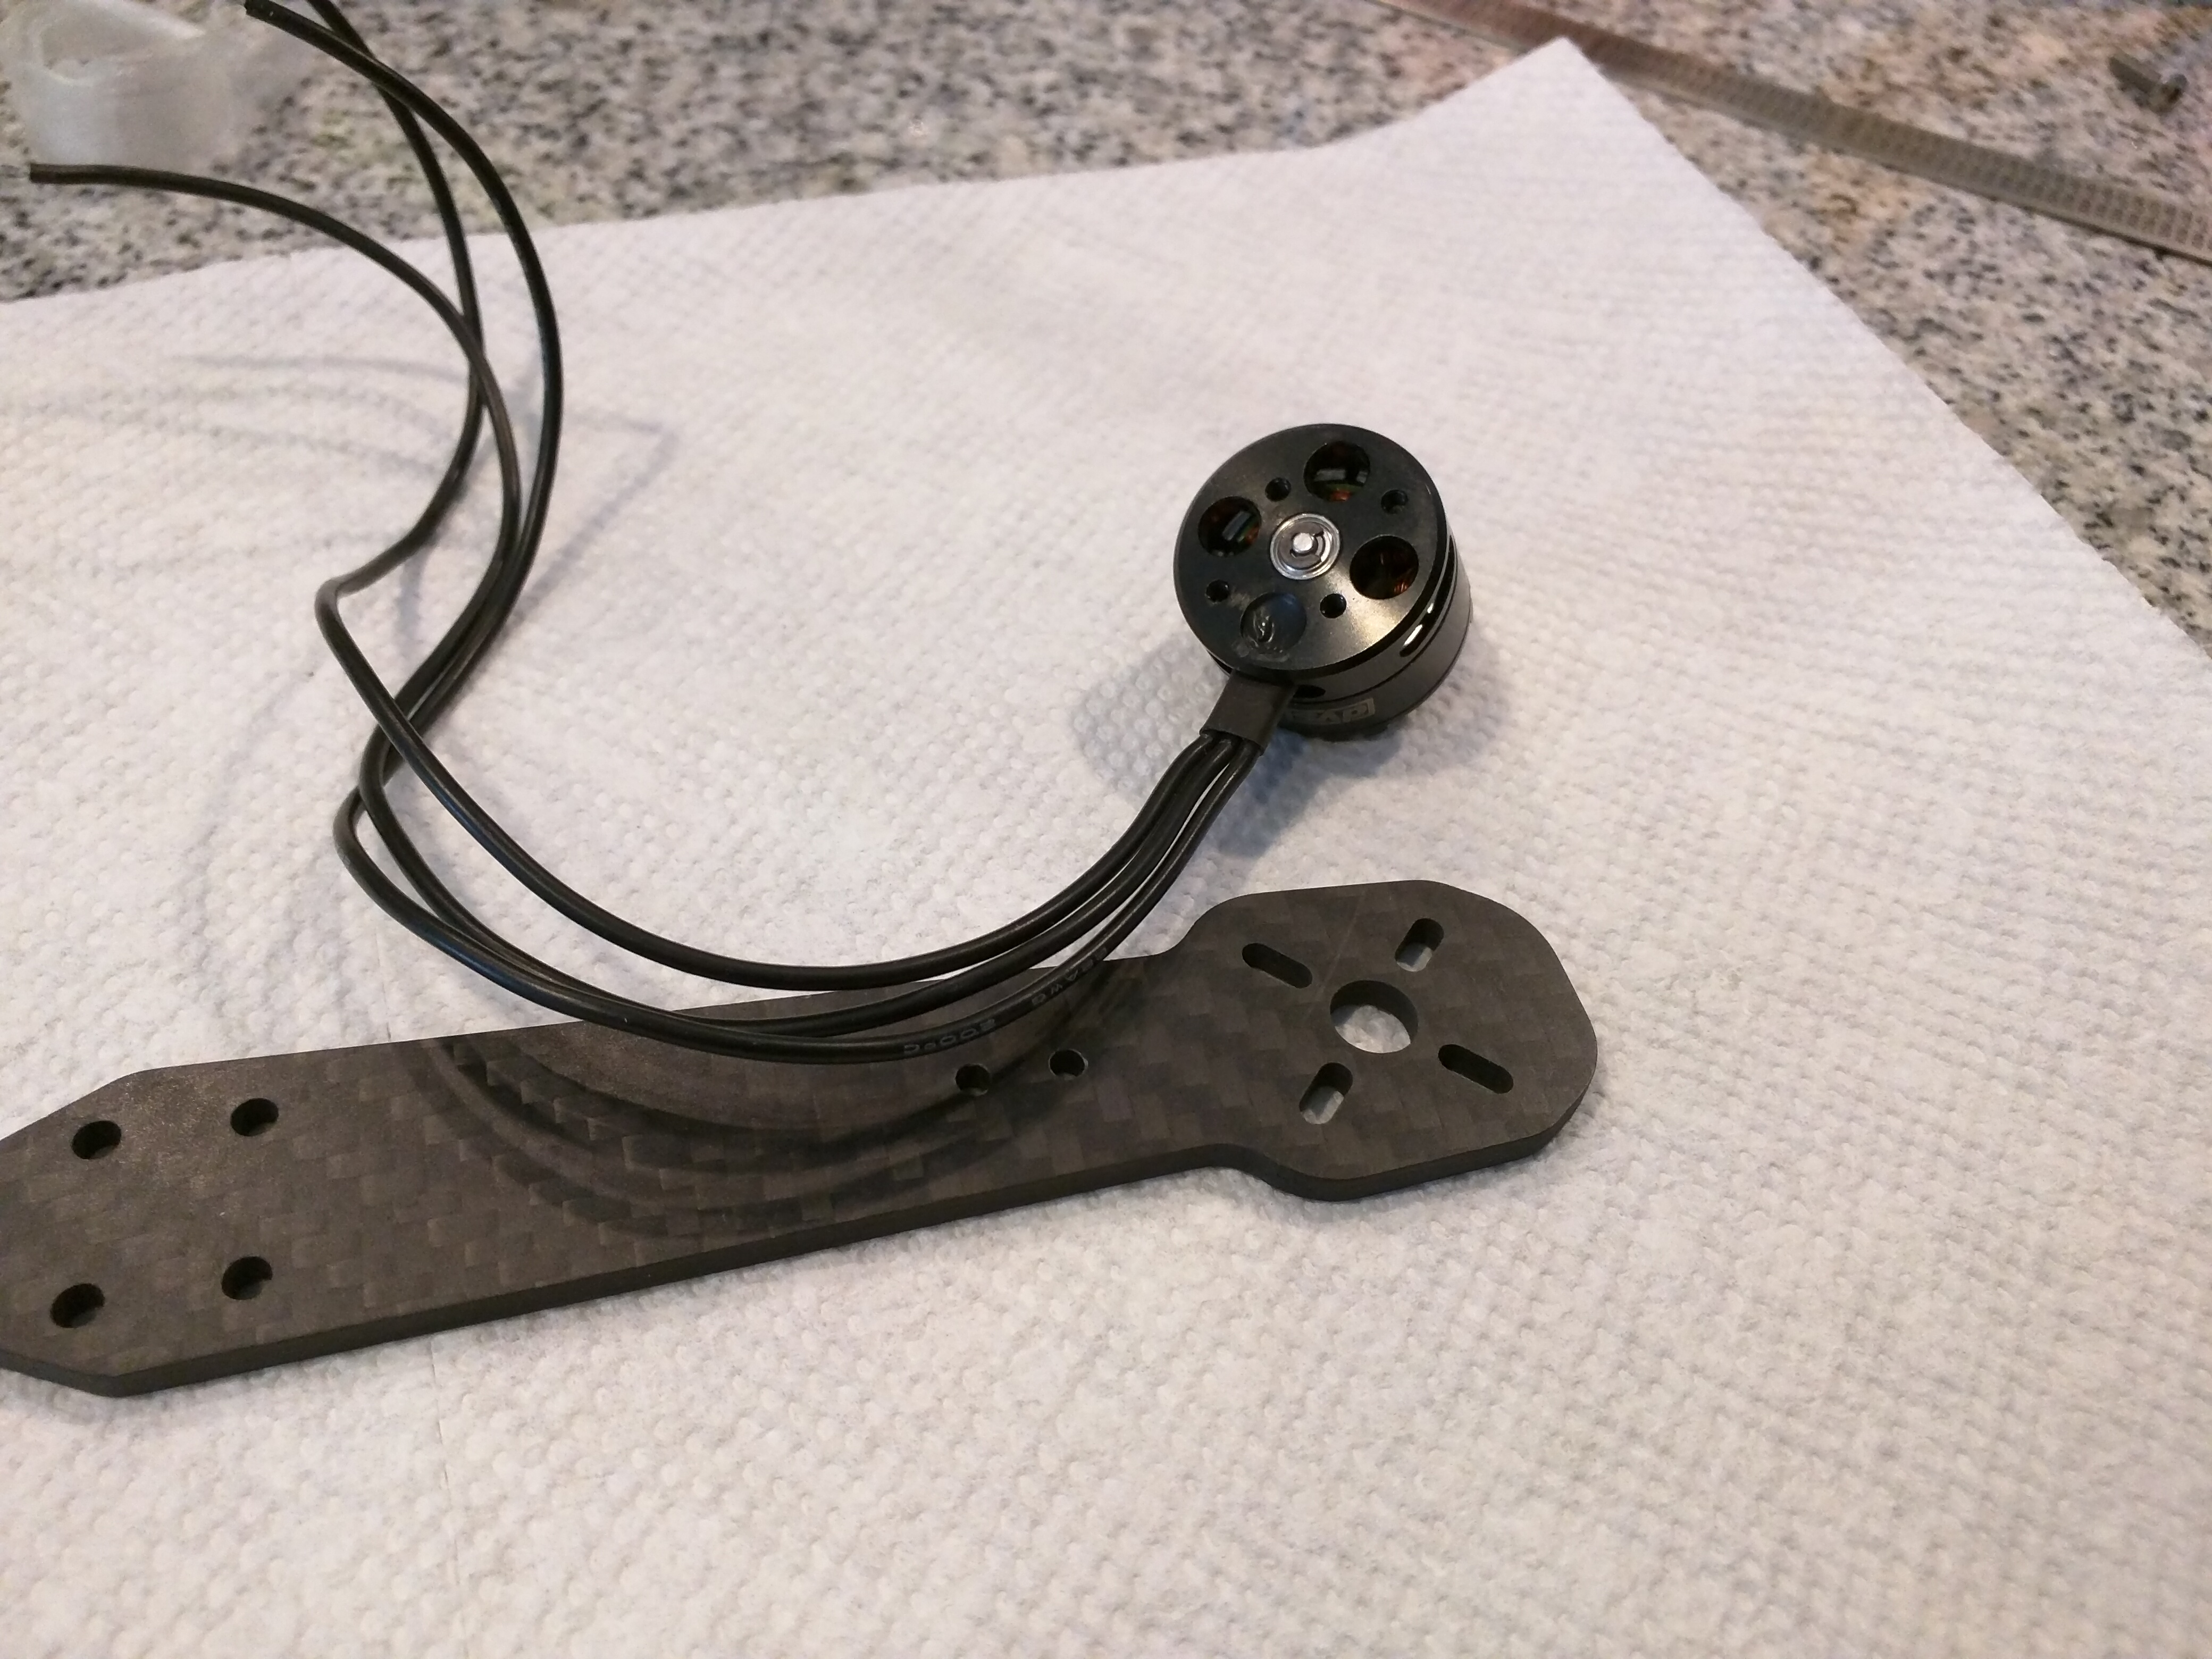
One disappointment in the ZMR kit was the motor mount holes. They did not line up properly for the closer holes in my DYS BE1806 Black Edition motors. Some quick research shows that this is indeed a common issue for this size of motor. Back to my drill and drill bits... Took a while to widen the holes to the correct motor tolerances. I also learned that it is a good idea to run some washers on the motor bolts (see photos). The heads on the motor screws are fairly small and over time they might work their way through the slots in the arms.
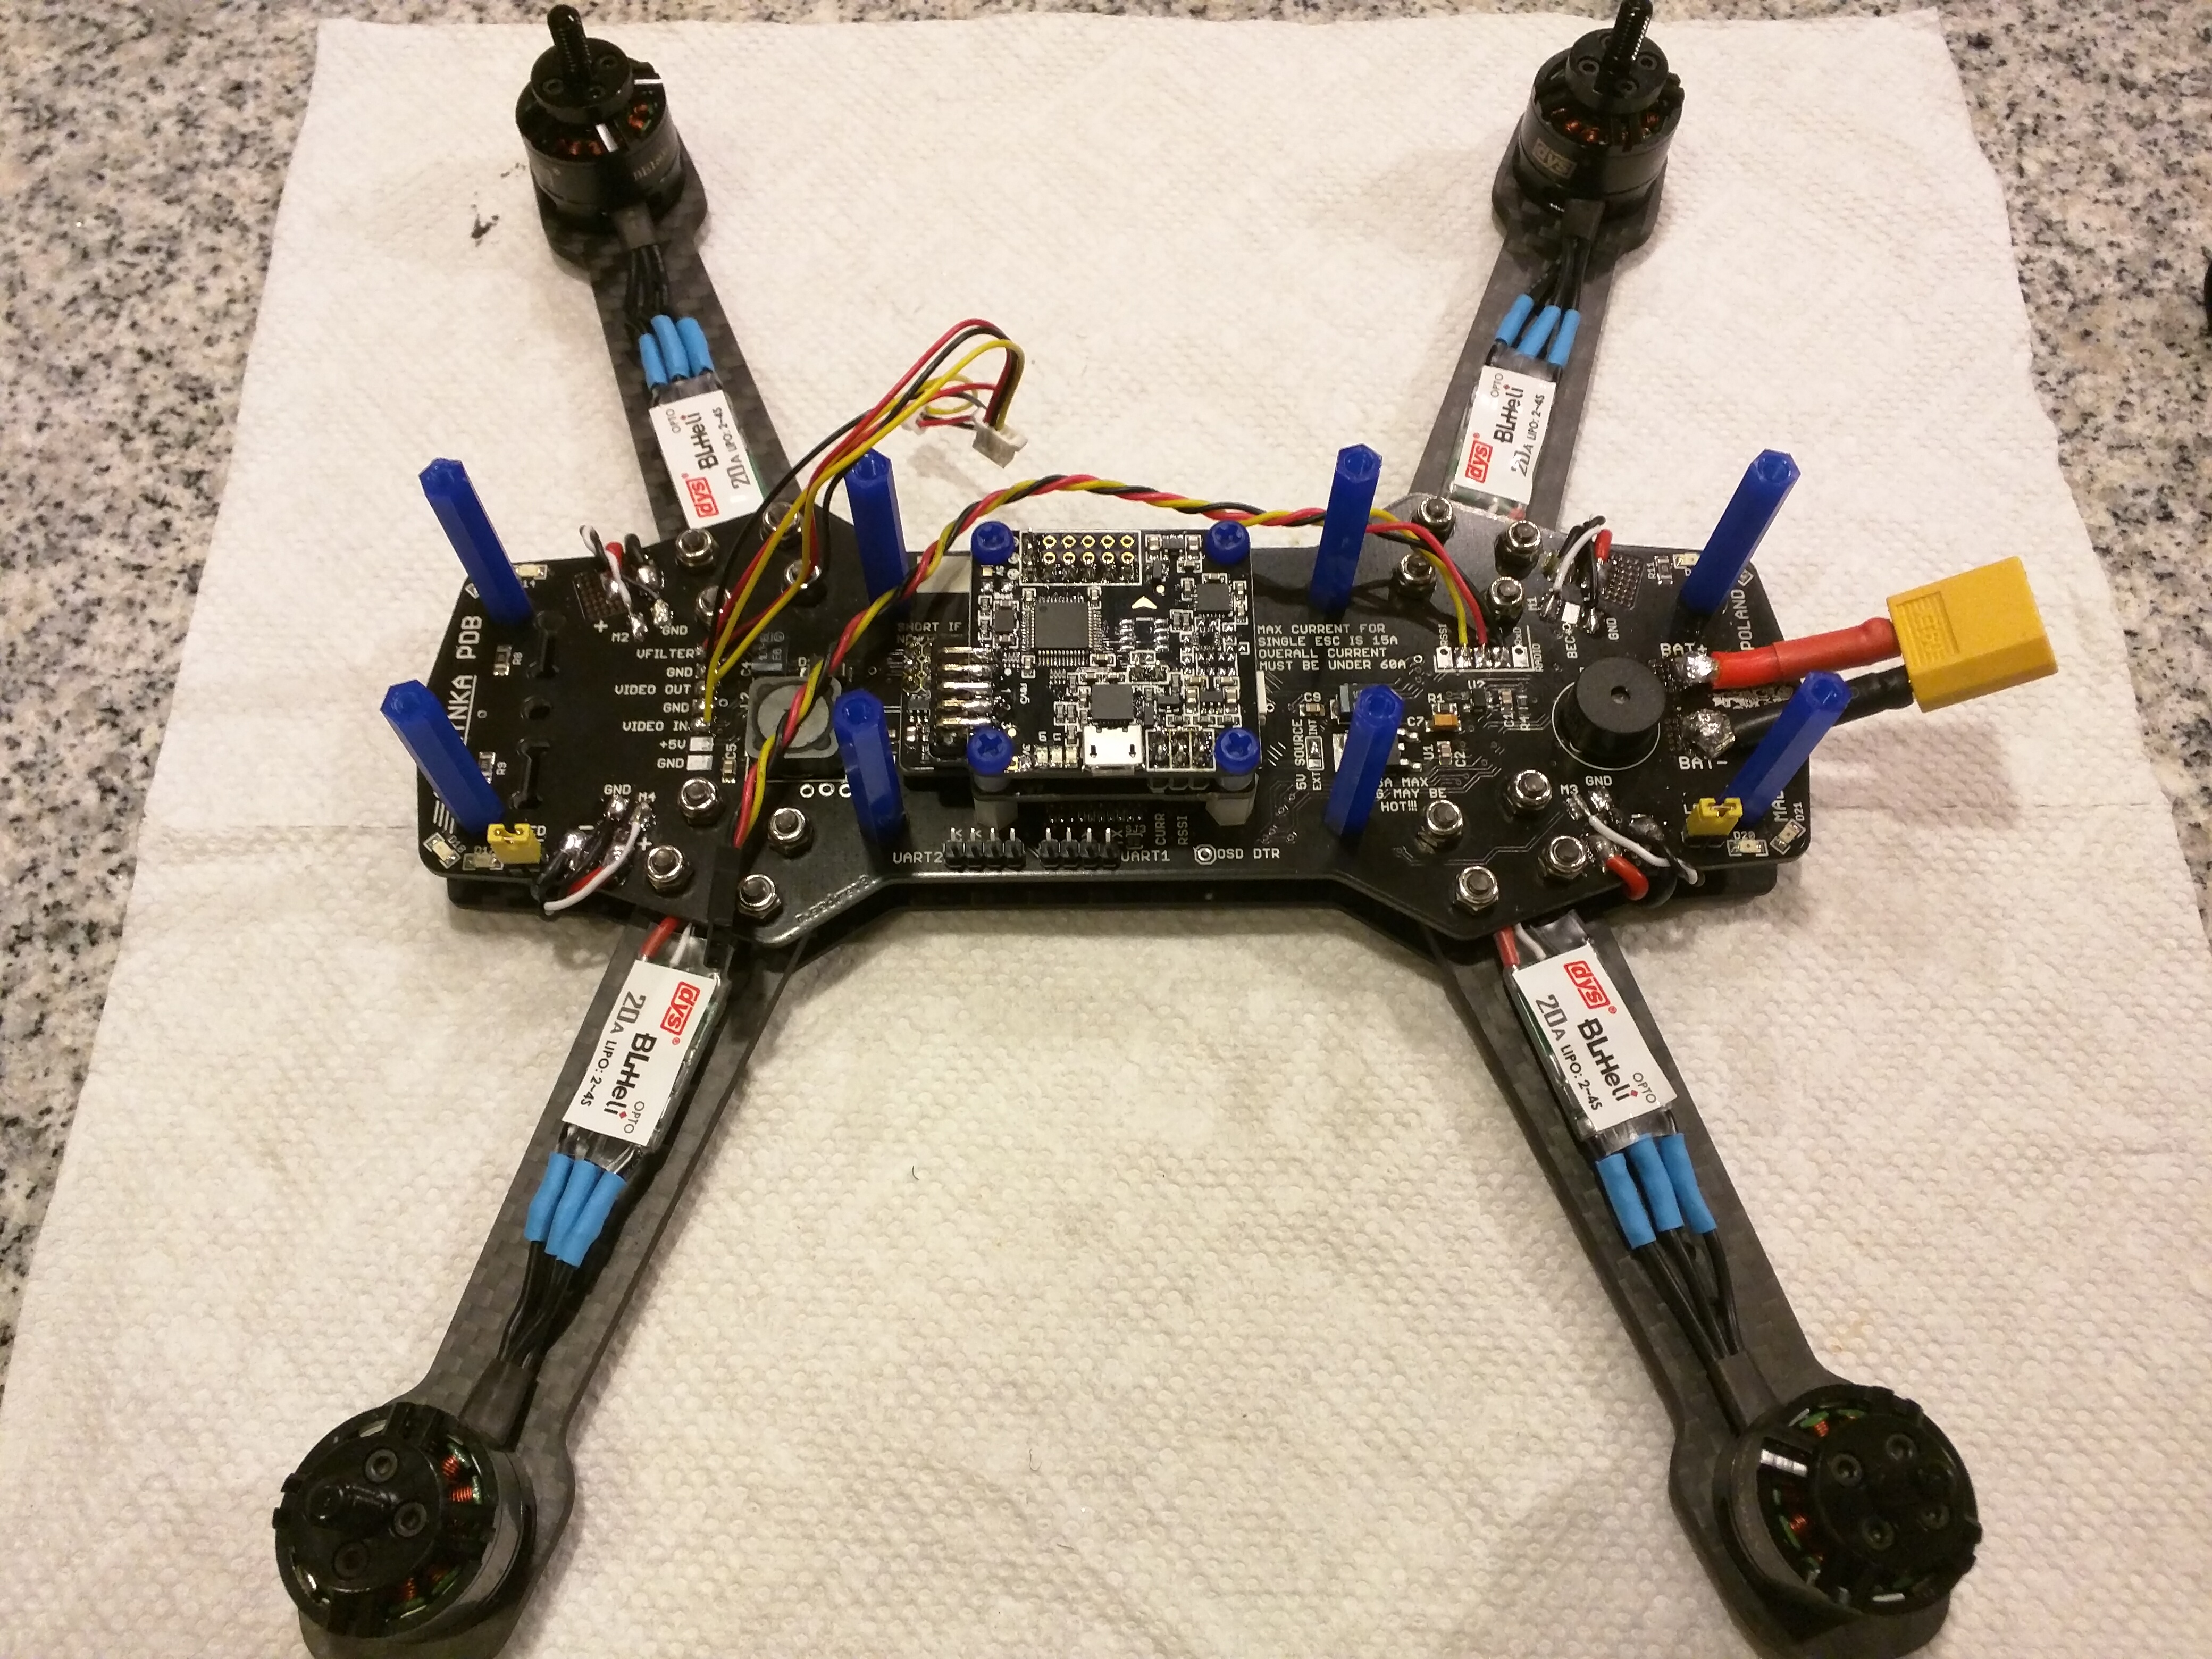
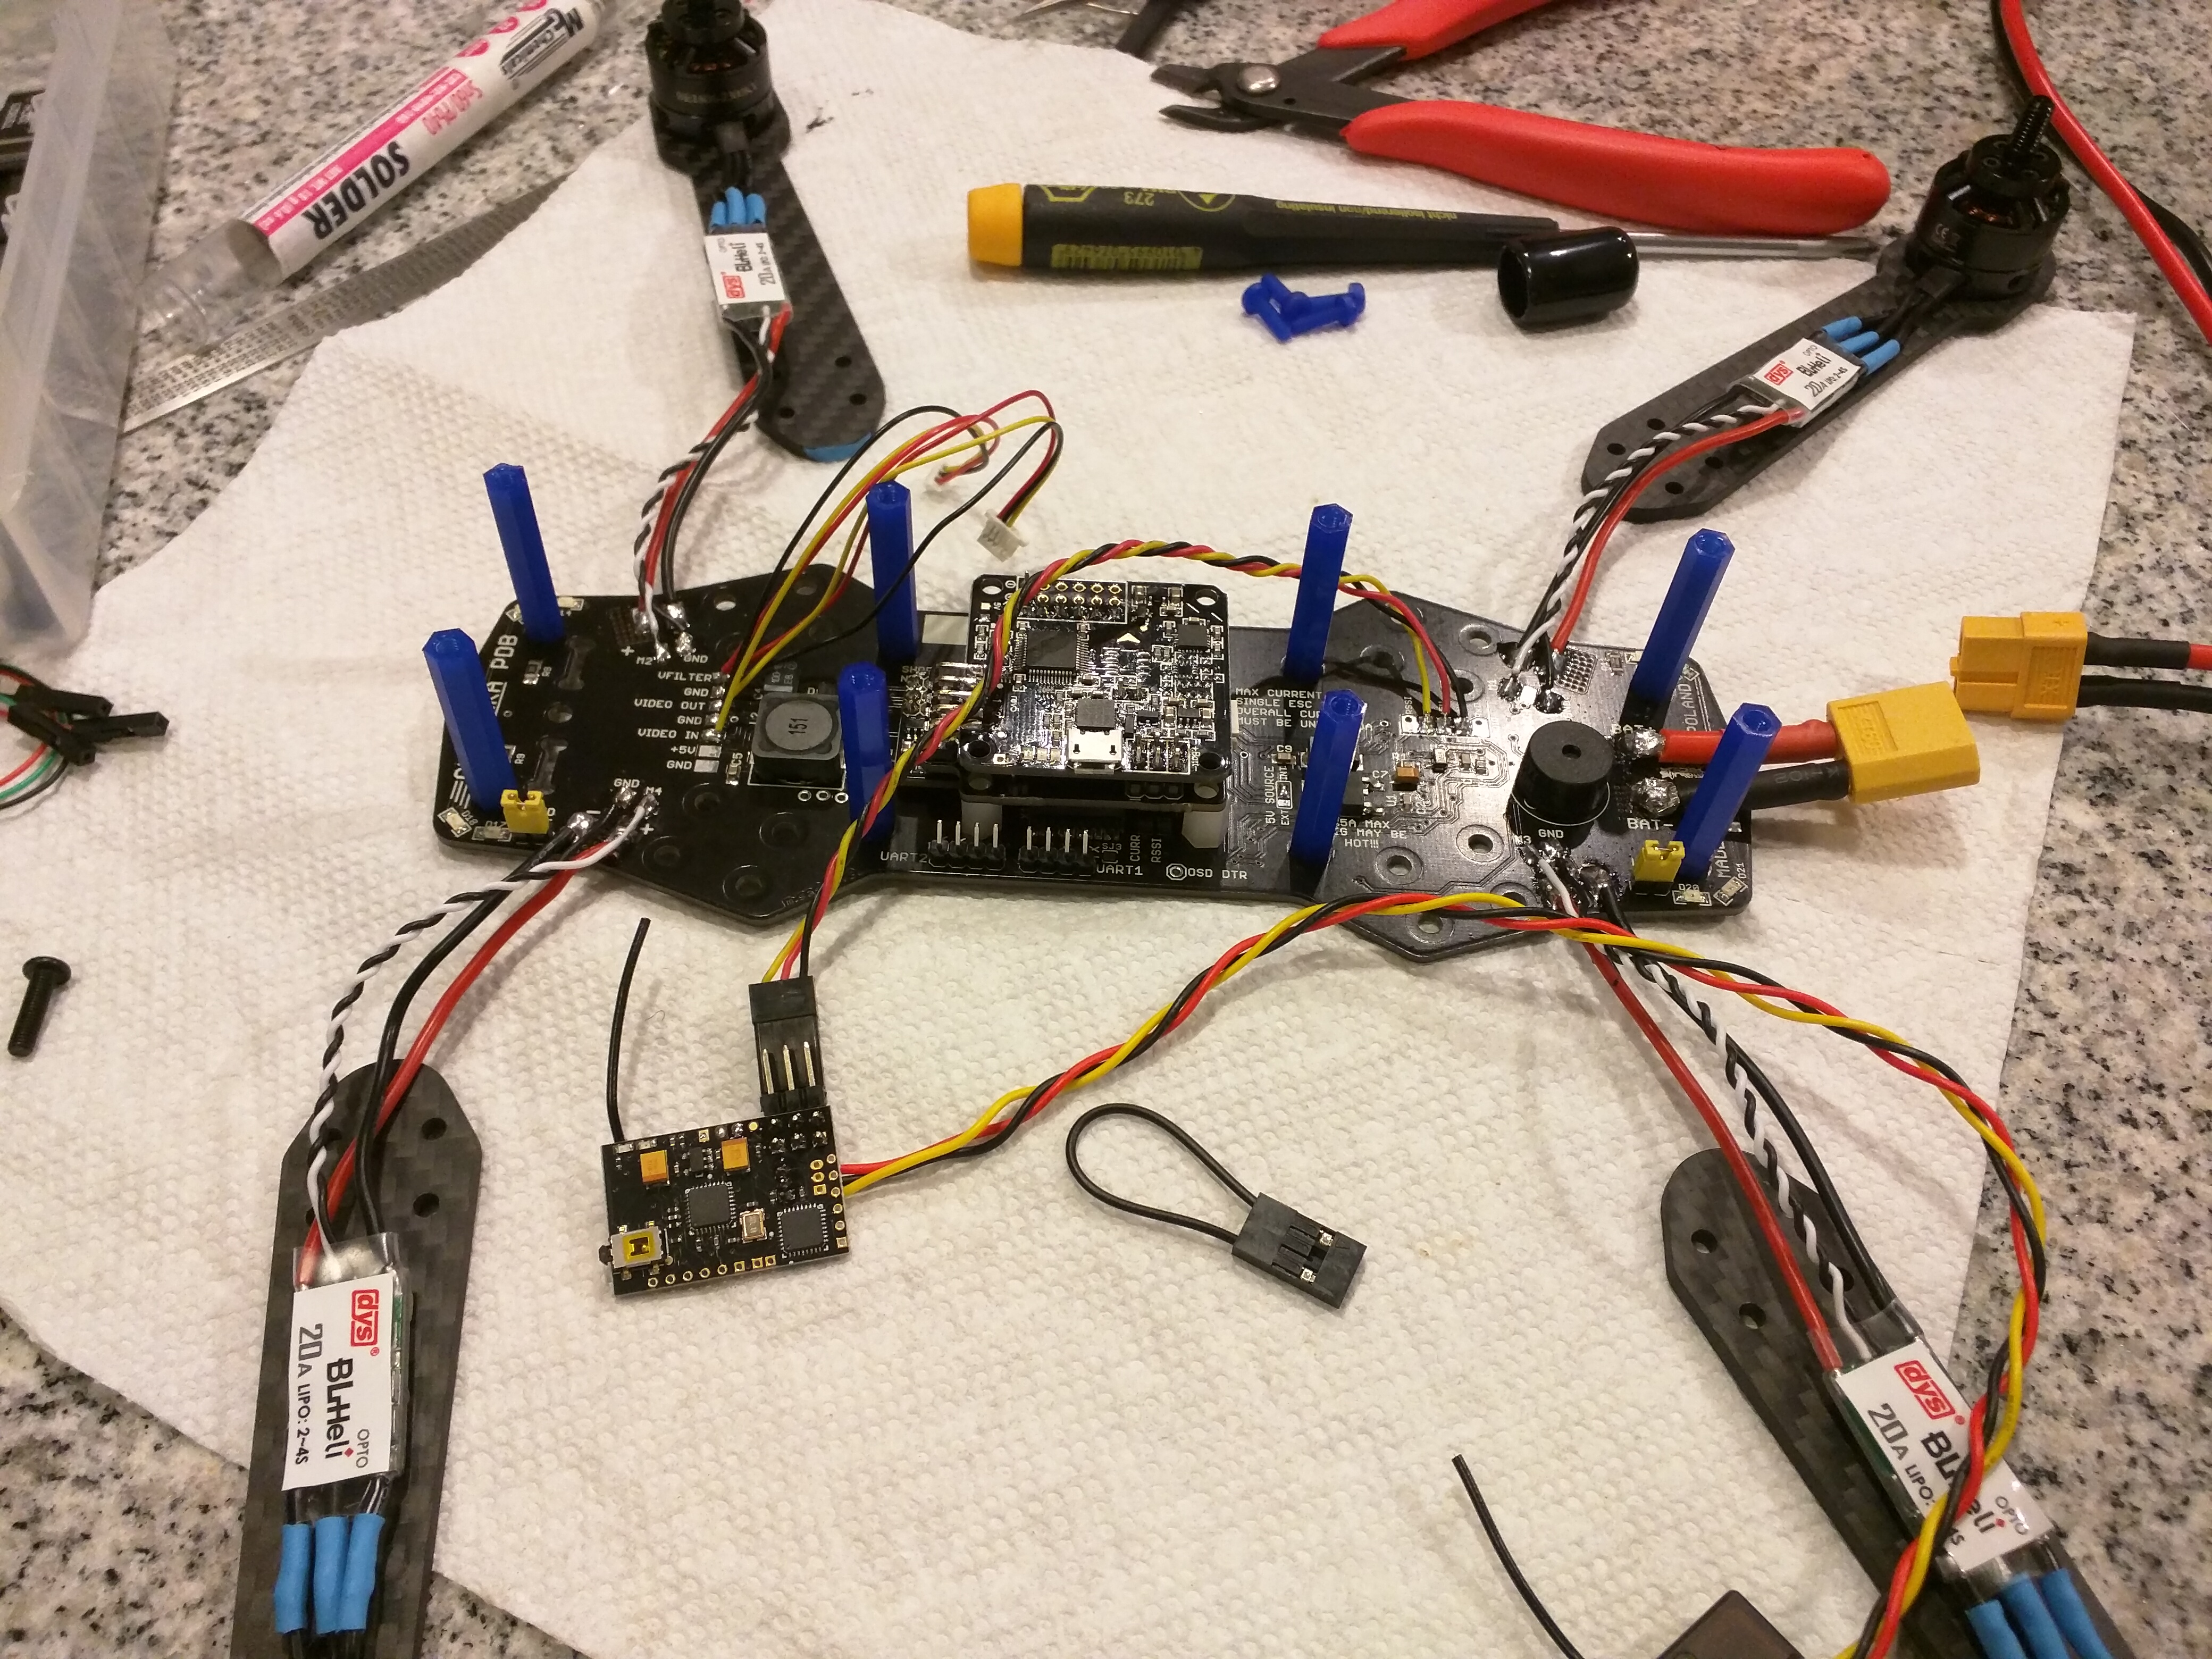
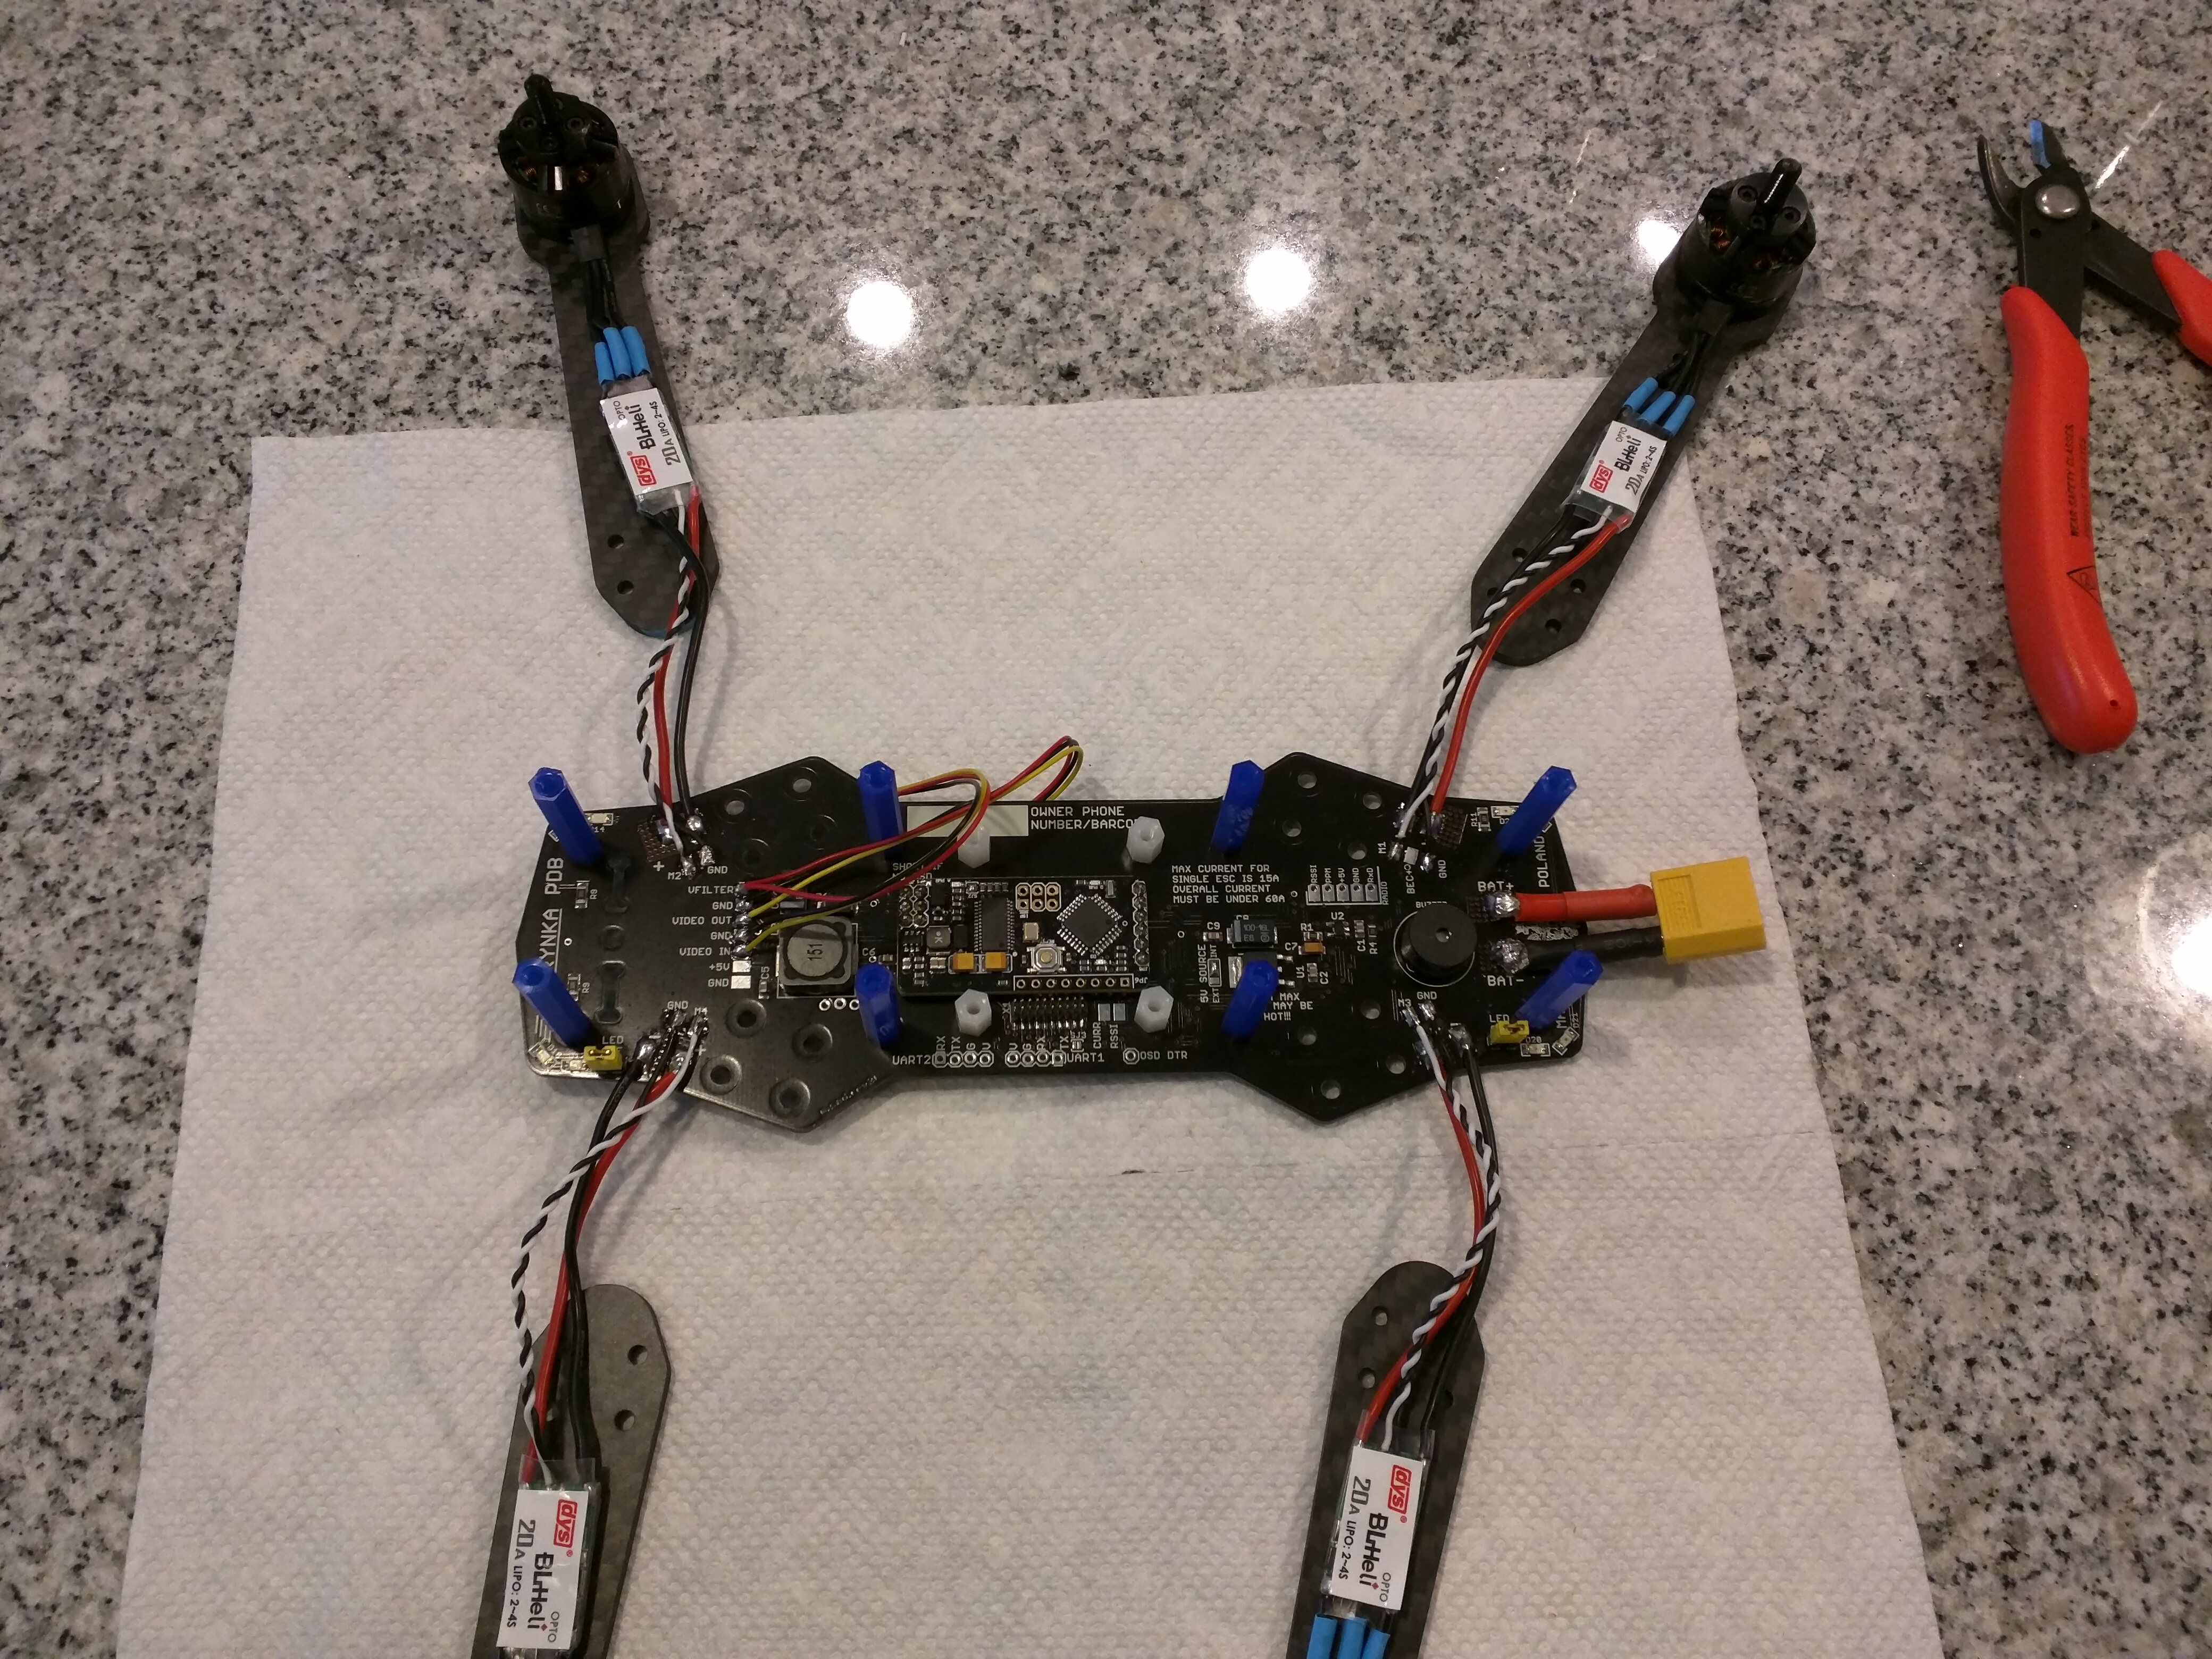
I was contemplating whether to sandwich the DYS SN20A ESCs between the bottom plate and PDB or put them on the arms. After doing a bit of mock up of what each scenario might look like, I ended up on the arms. Sandwiched between the PDB made it seem too busy under there and I worried that heat build up was going to be an issue.
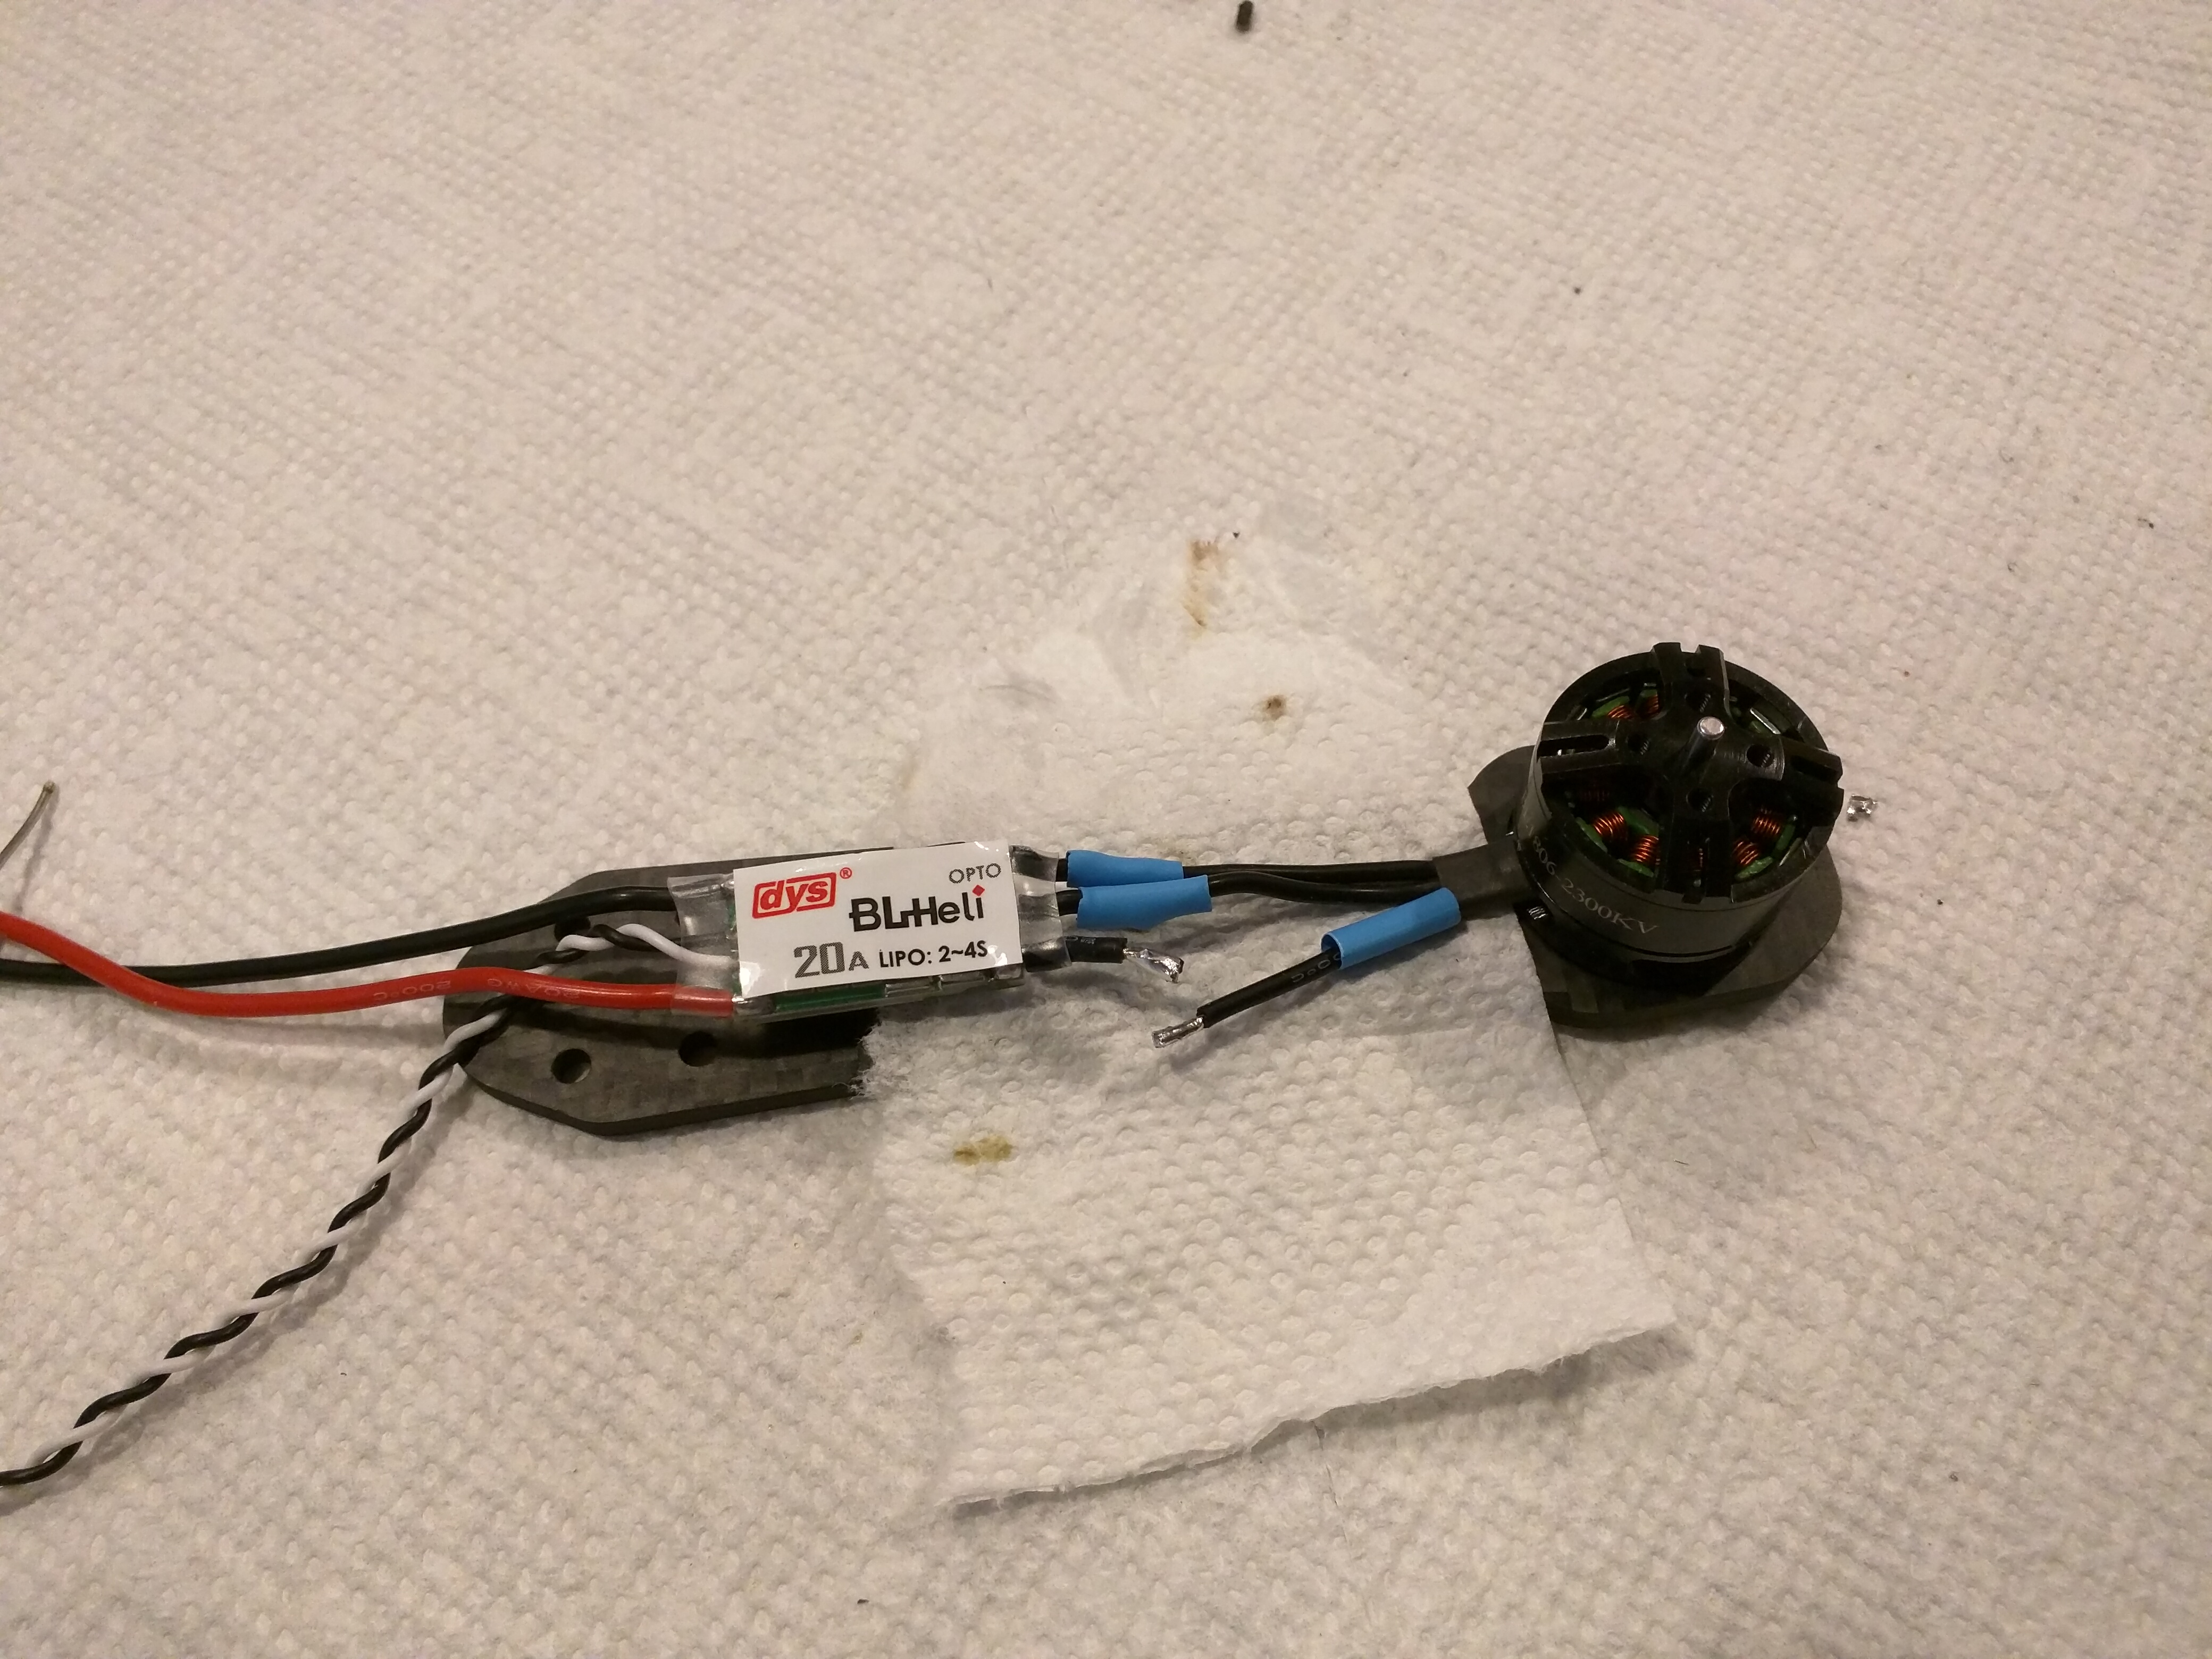
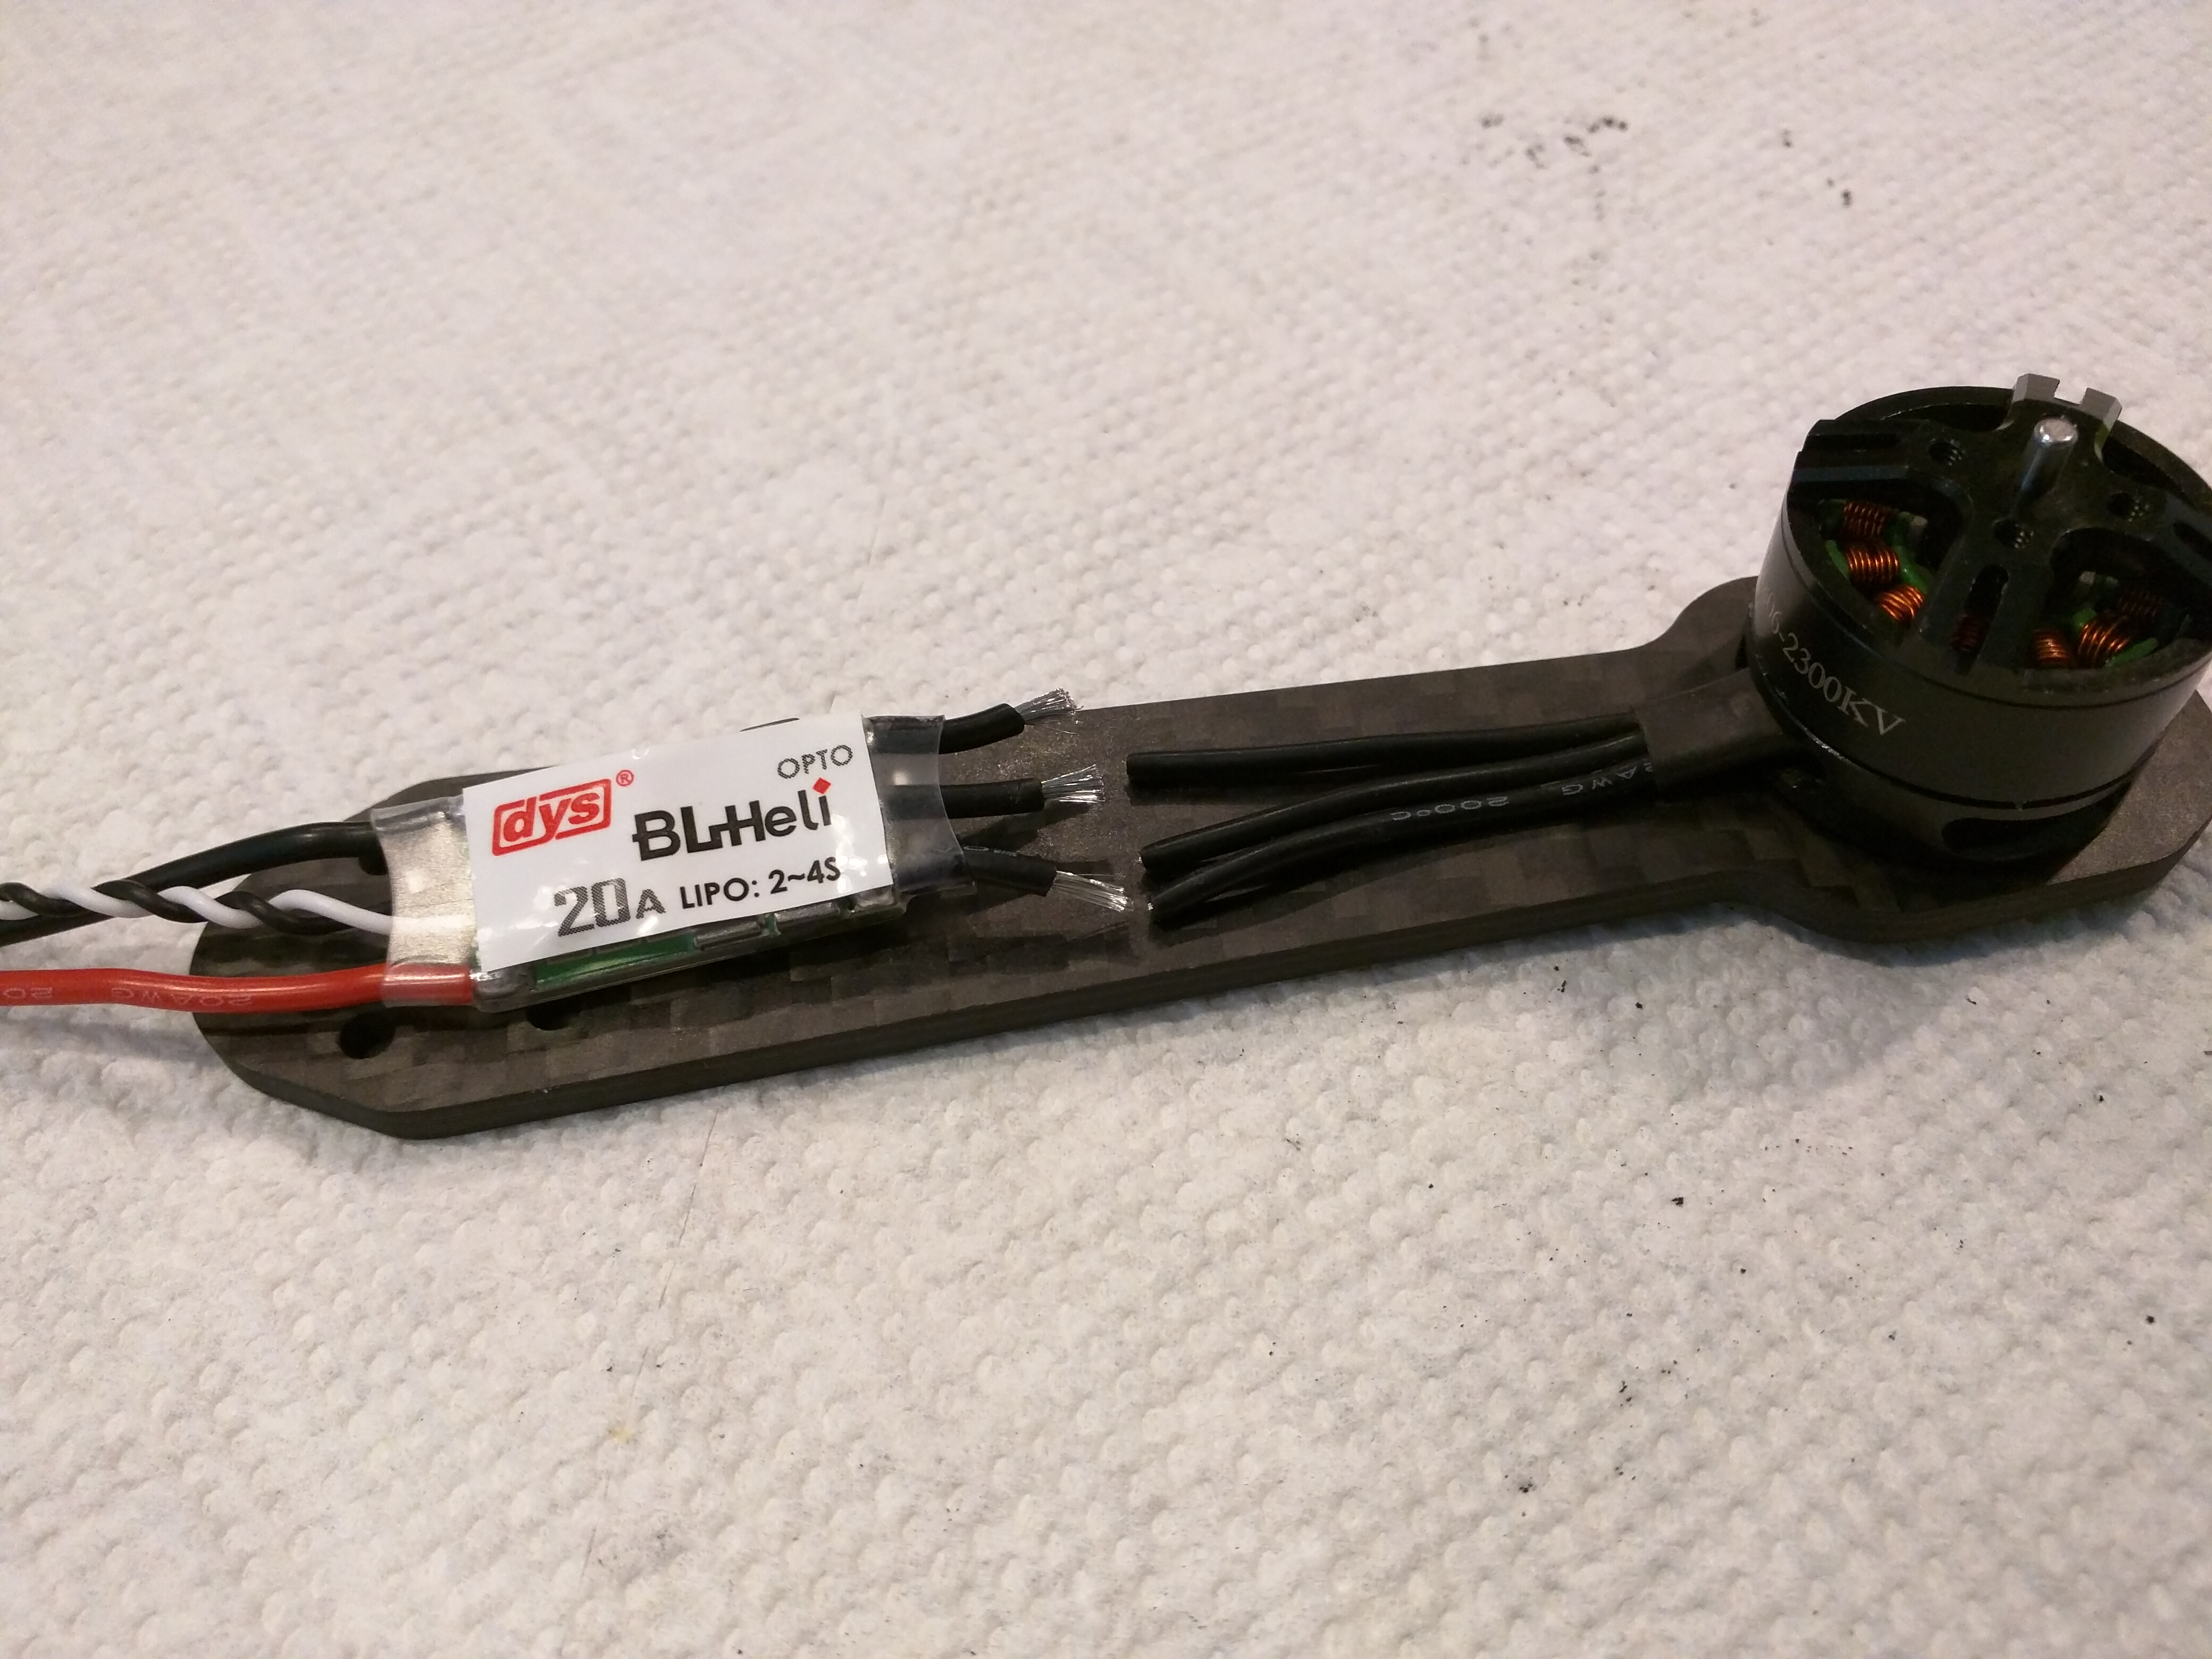
I'll later learn that it might have been easier to actually solder directly to the pads on the ESCs. Soldering the wires together was a pain. The heat shrink tubing kept closing up on me before I could finish the wire to wire soldering.
I didn't know if it made sense to try and mount the arms, bottom plate, and PDB together before soldering up the ESC wires or after. I didn't really have any rhyme or reason for choosing to solder first. I guess I was just ready with the soldering iron. In hindsight, I may have actually been easier to mount everything before soldering.
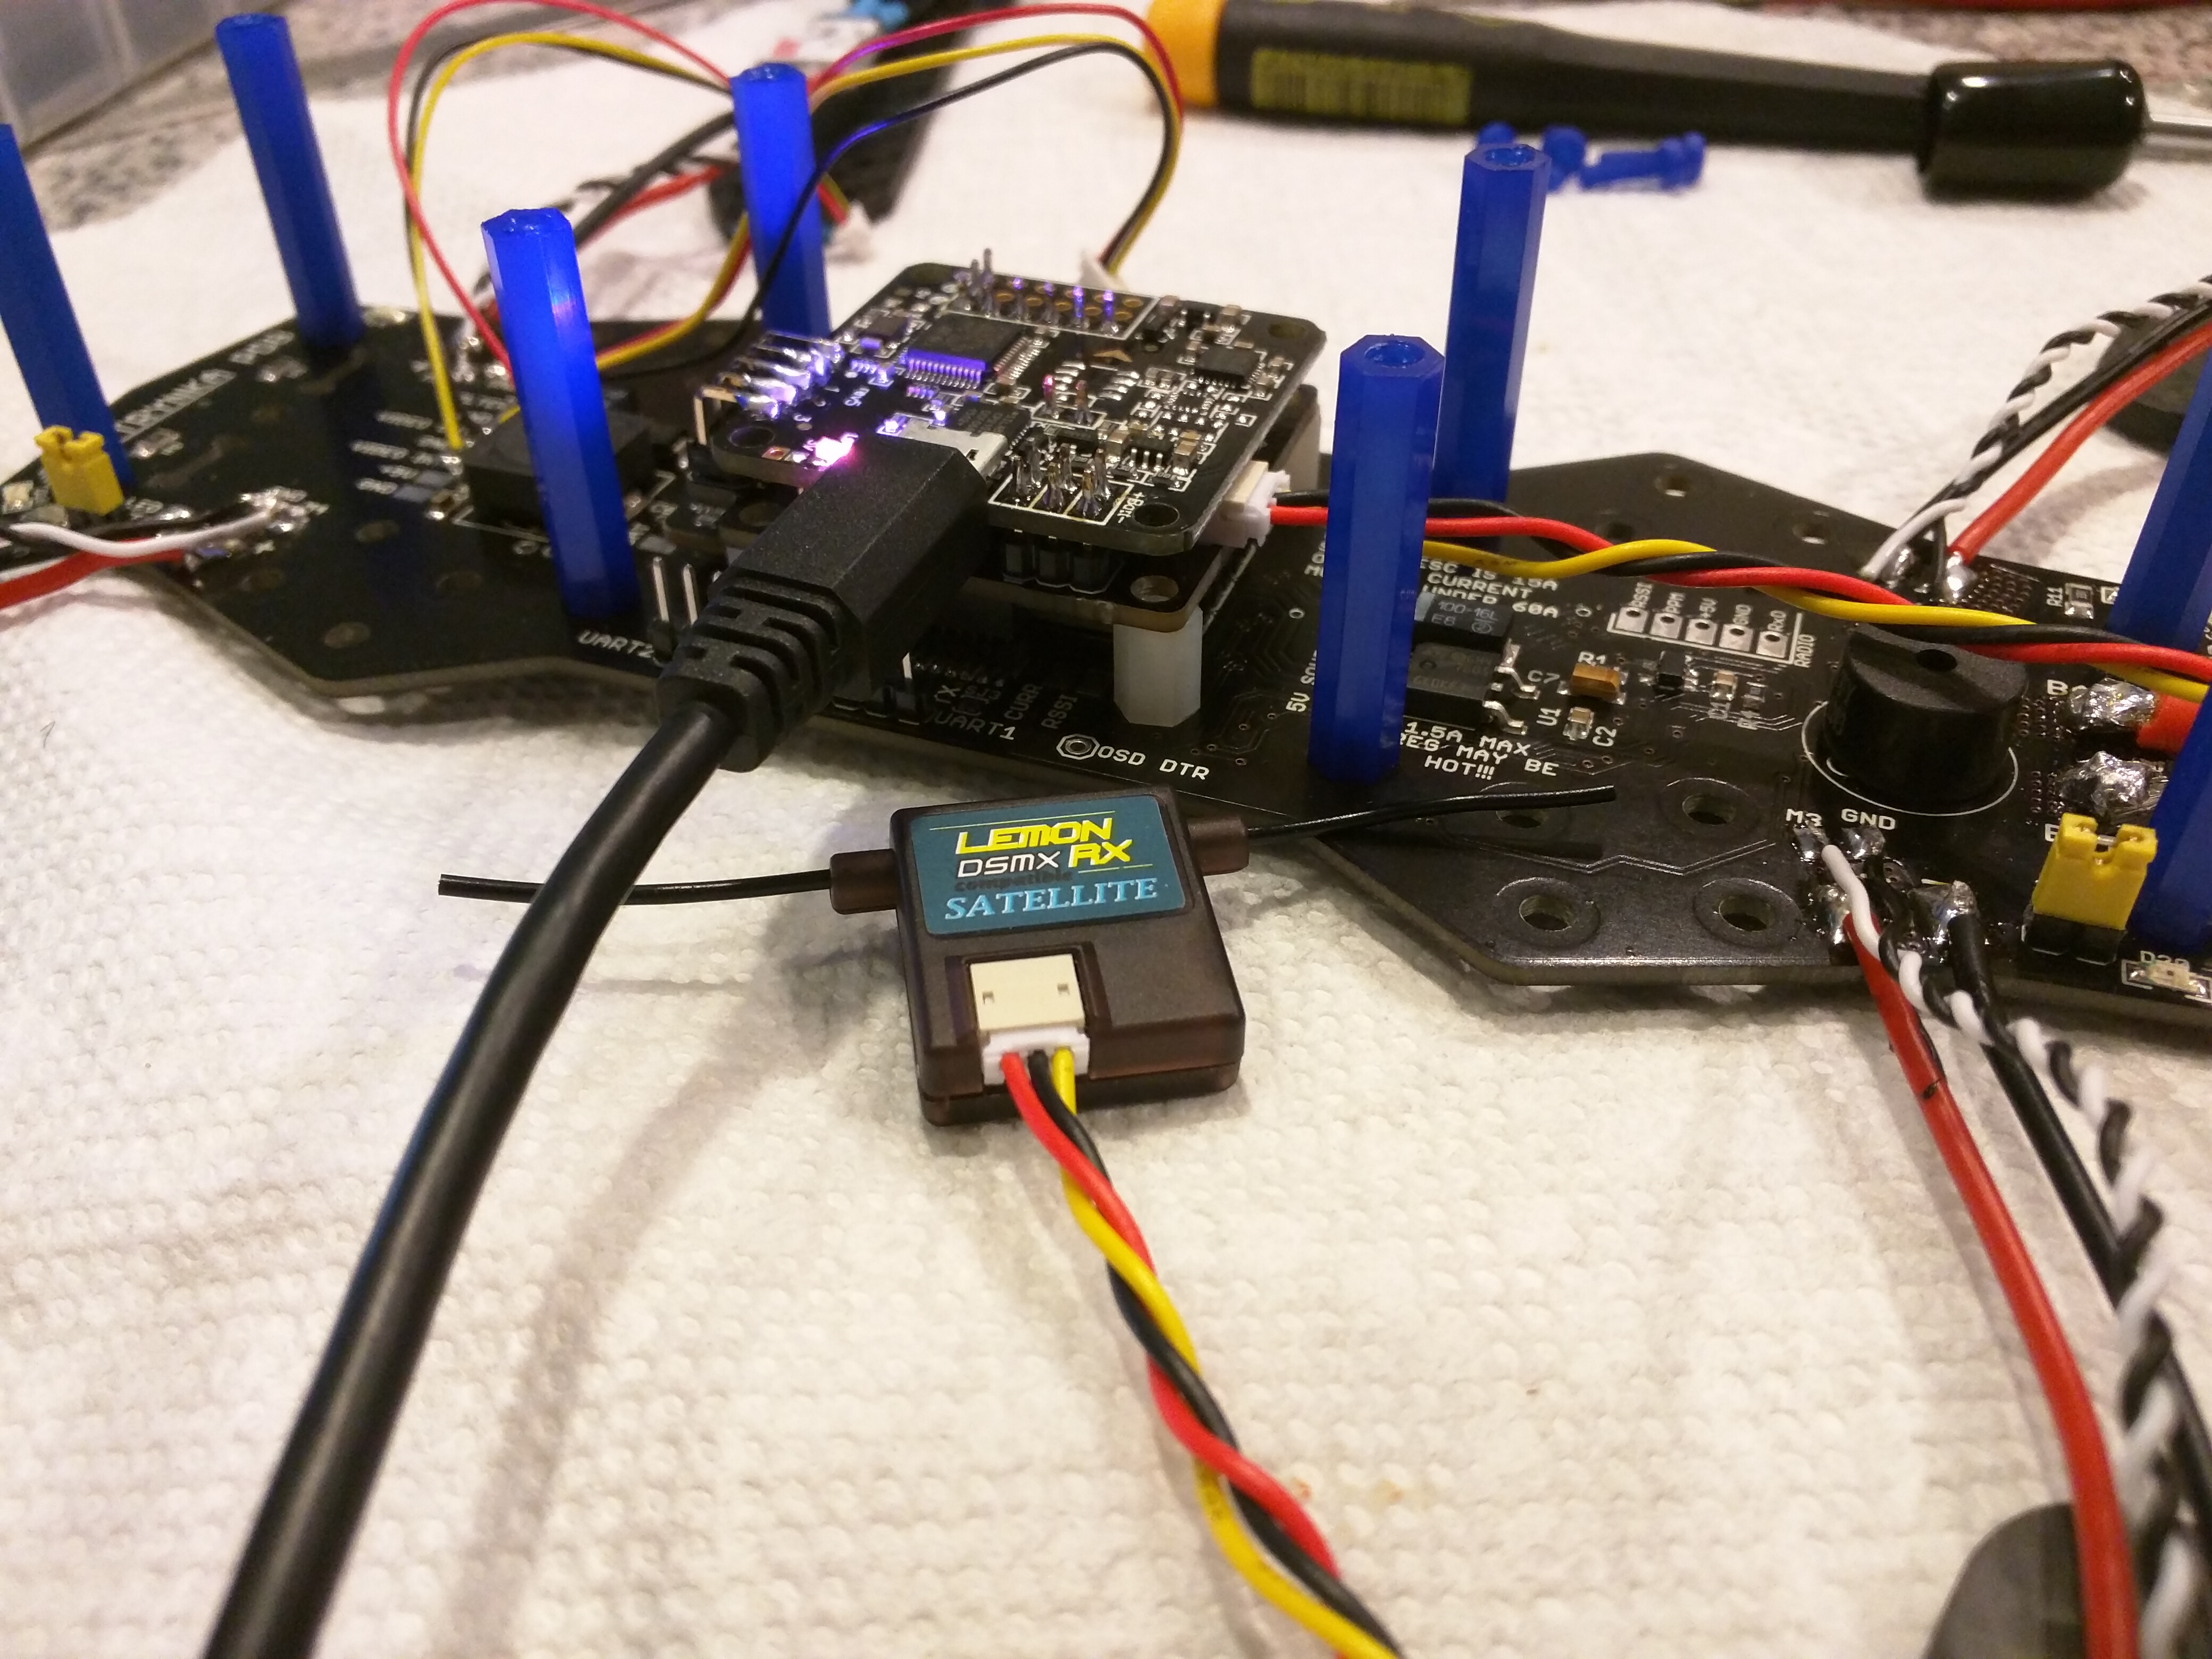
The Lemon RX actually ended up being the most sane way I could find to use my DX9 radio with a PPM receiver. Spektrum doesn't appear to have their own PPM receiver at all. Oh well. The Lemon RX is nice and tiny and seems to get the job done. I'm running both the PPM receiver and satellite at the moment (in the photos you can see where I sandwich the satellite between the bottom plate and PDB).
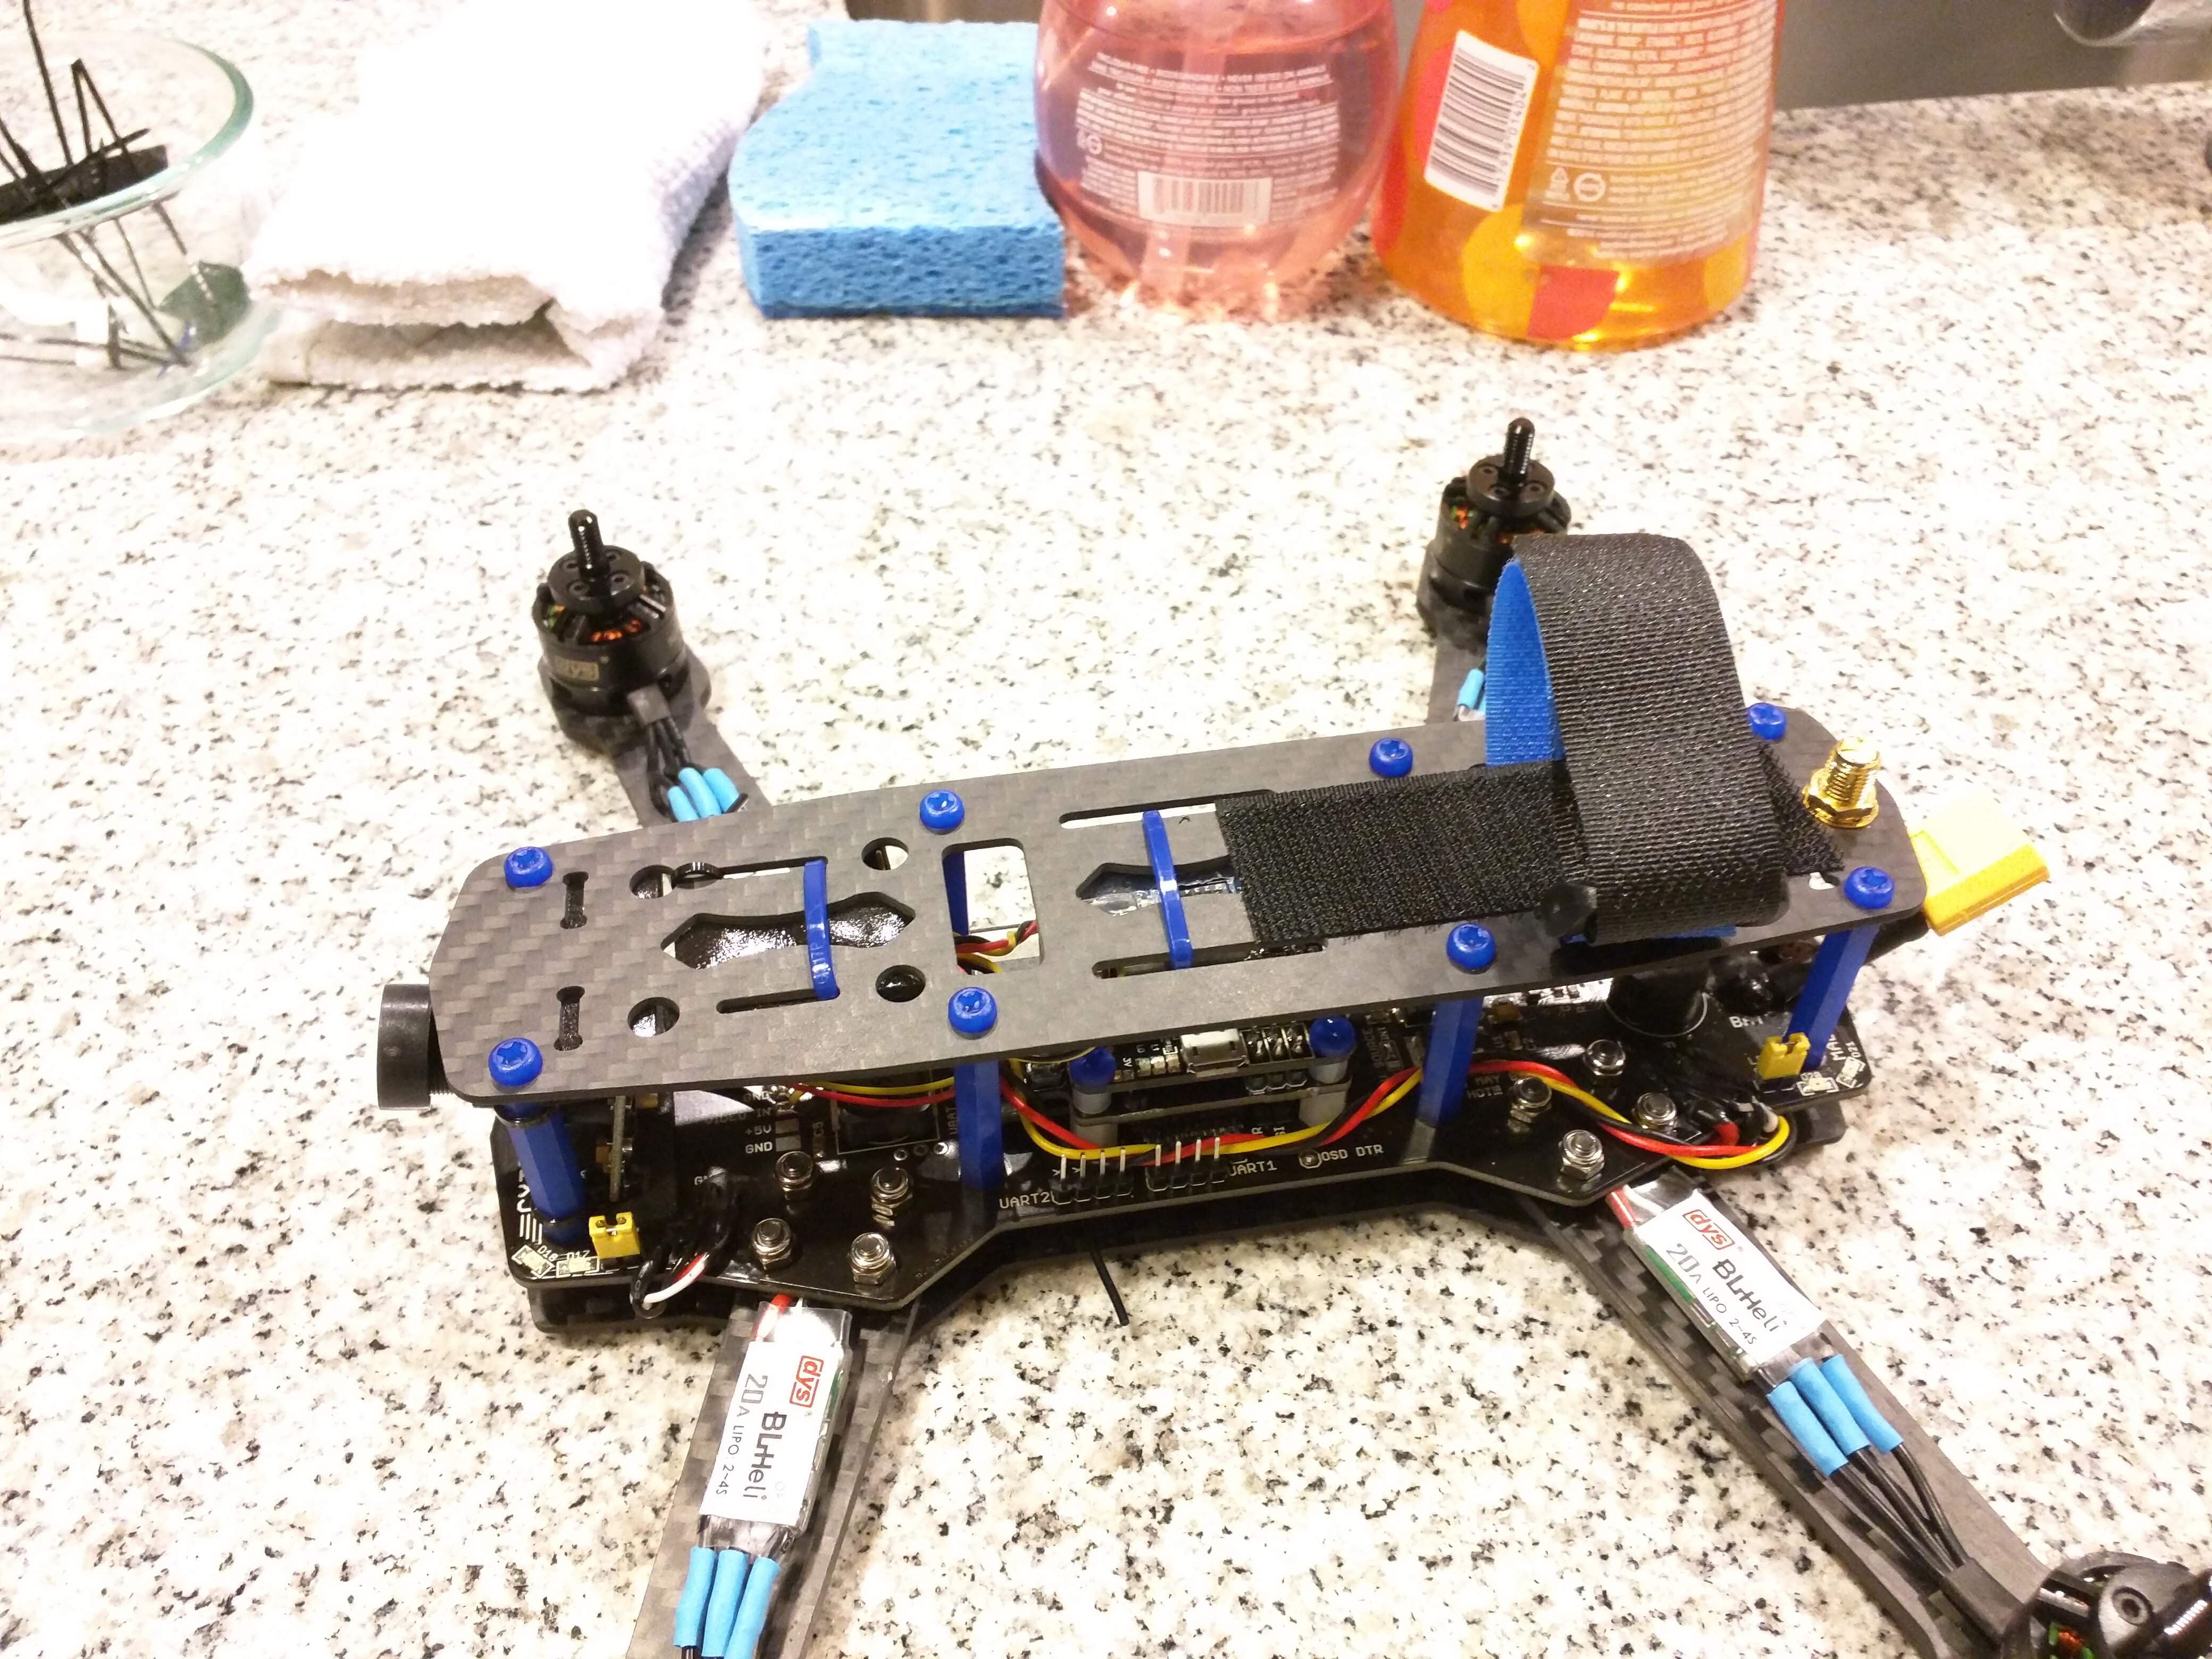
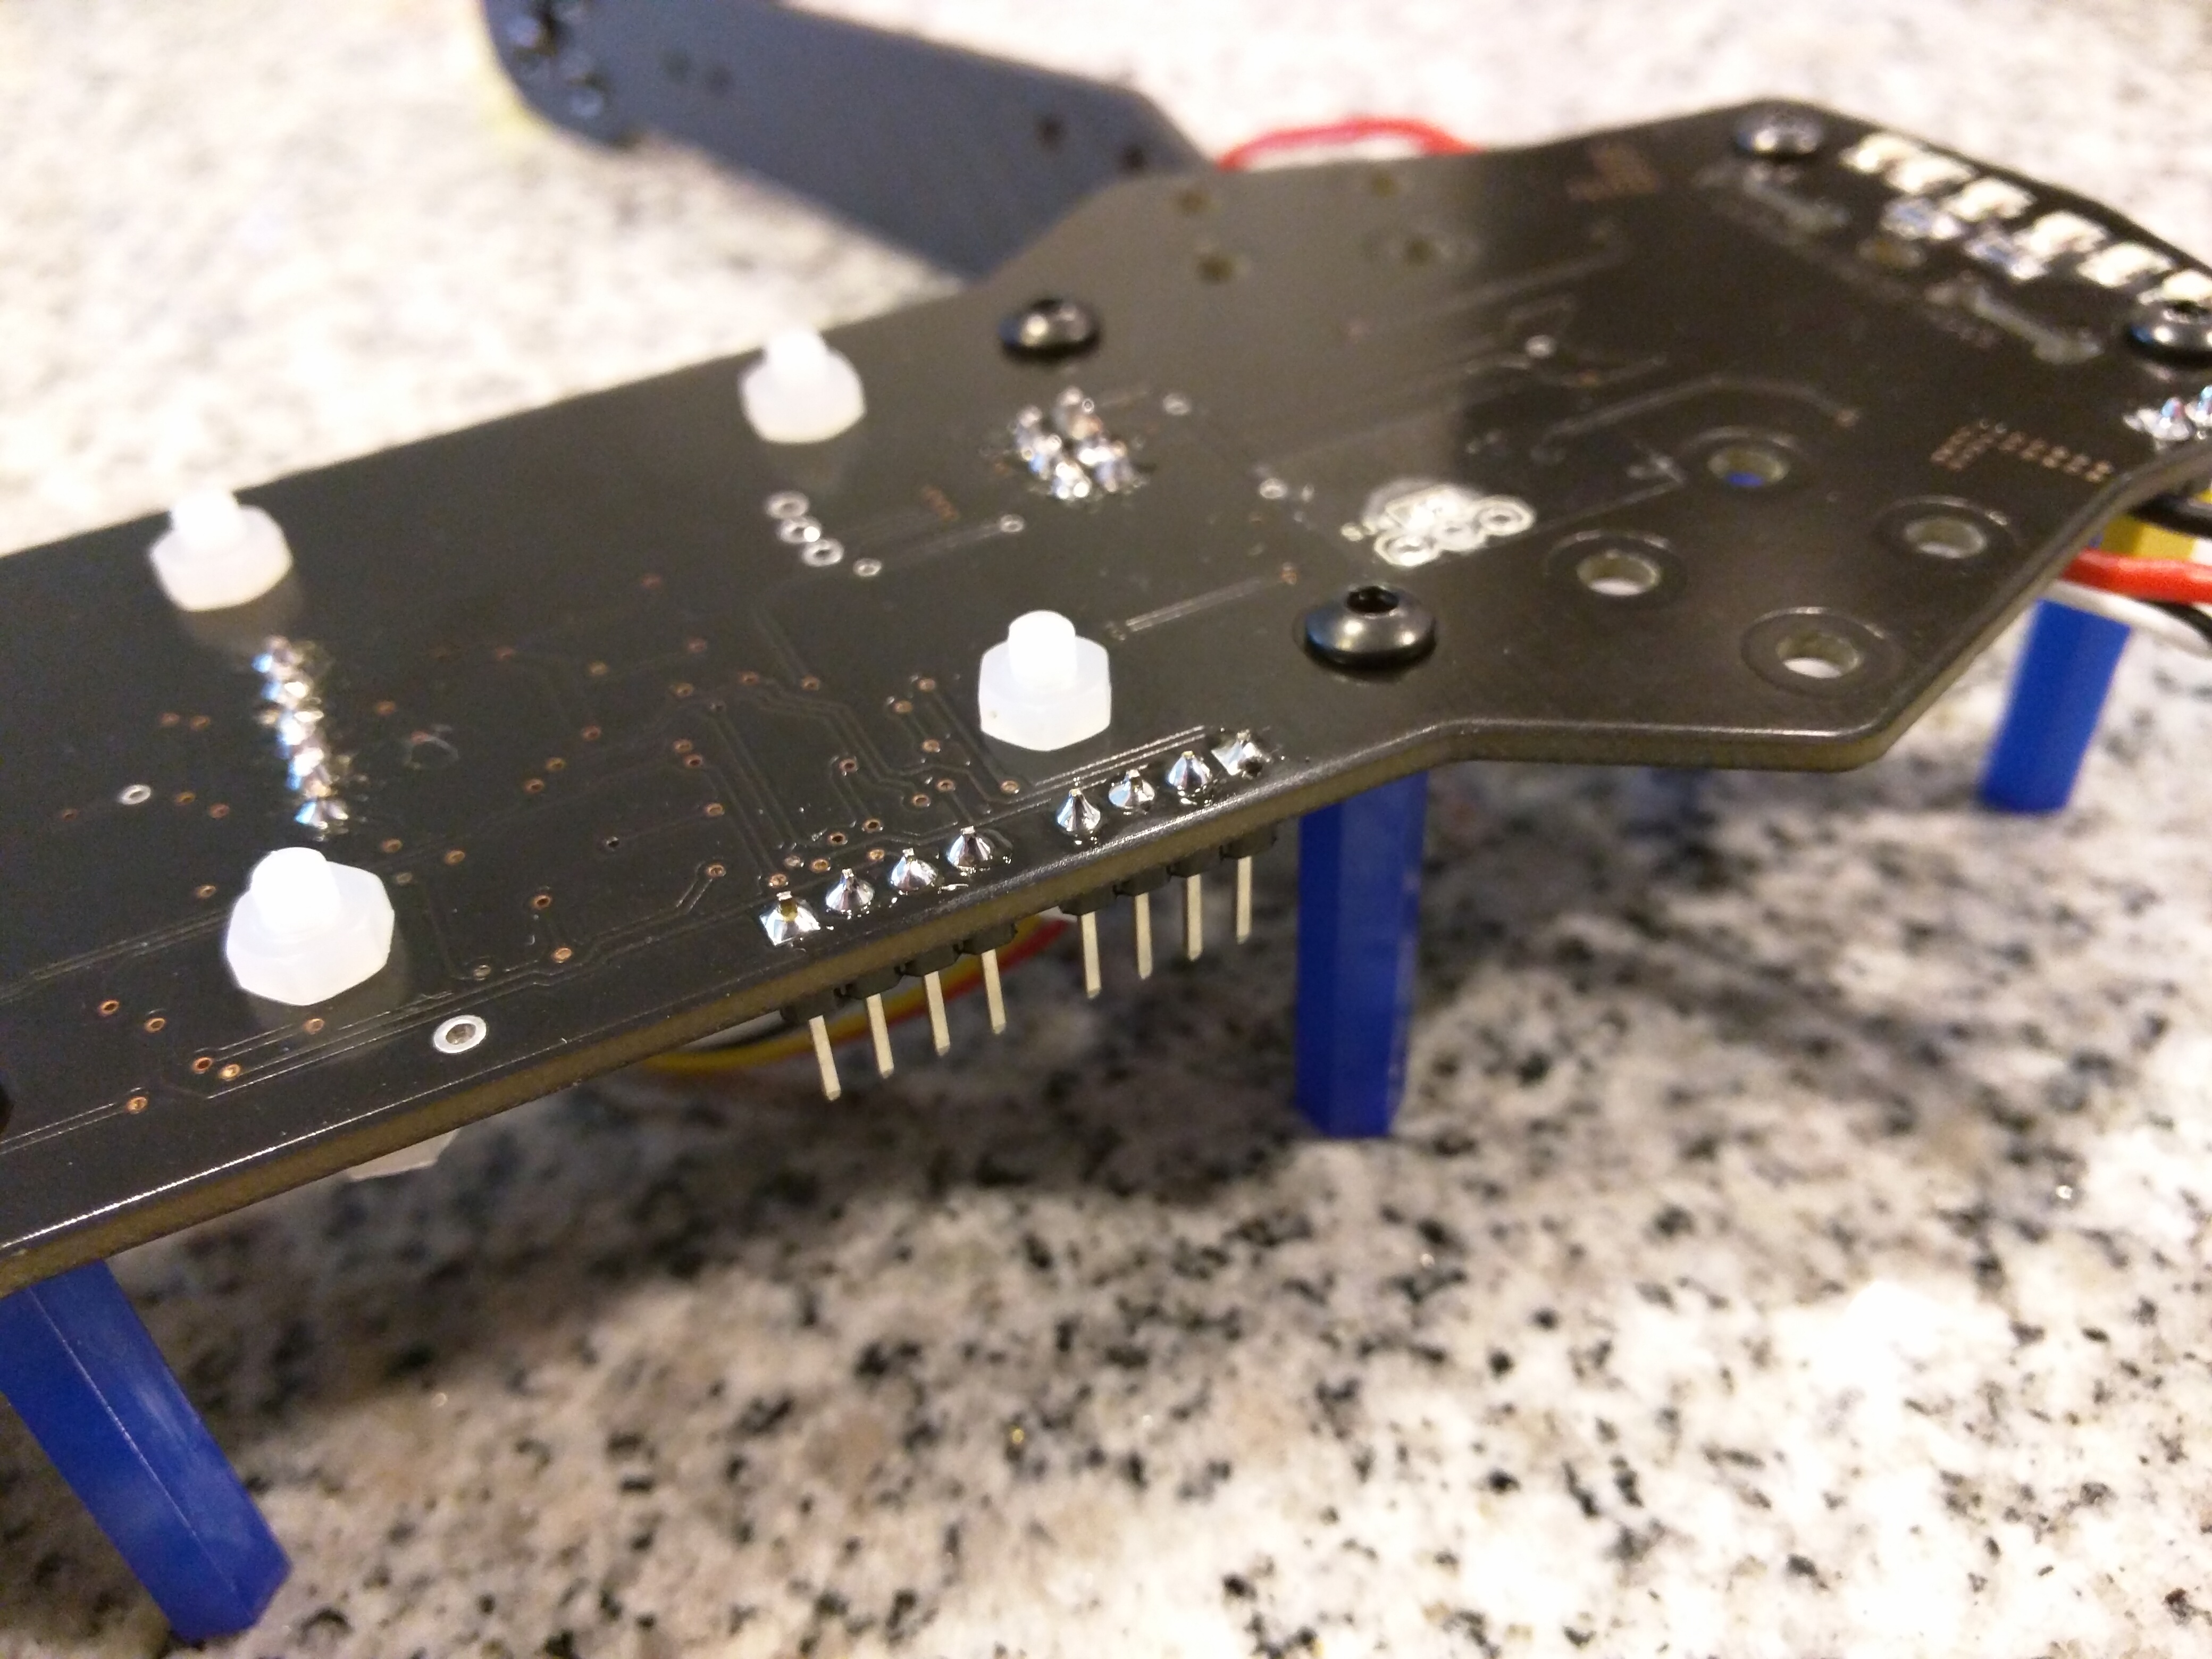
It was a lot of work to get the wires tucked neatly between the PDB and bottom plate and at the same time get all the bolts in. I ended up using some female to female threaded standoffs. I first threaded the bolts through the bottom plate and arms, screwed all the standoffs down on the arms, then put the PDB on top while guiding all the wires to their correct spot.
The standoffs are actually recommended by the PDB instructions to help ventilate the board. But it also made a nice passageway for the ESC wires. I'm not sure how happy I am with this setup. But it works and paired with the nylon lock nuts from the ZMR kit, I don't think they are going anywhere.
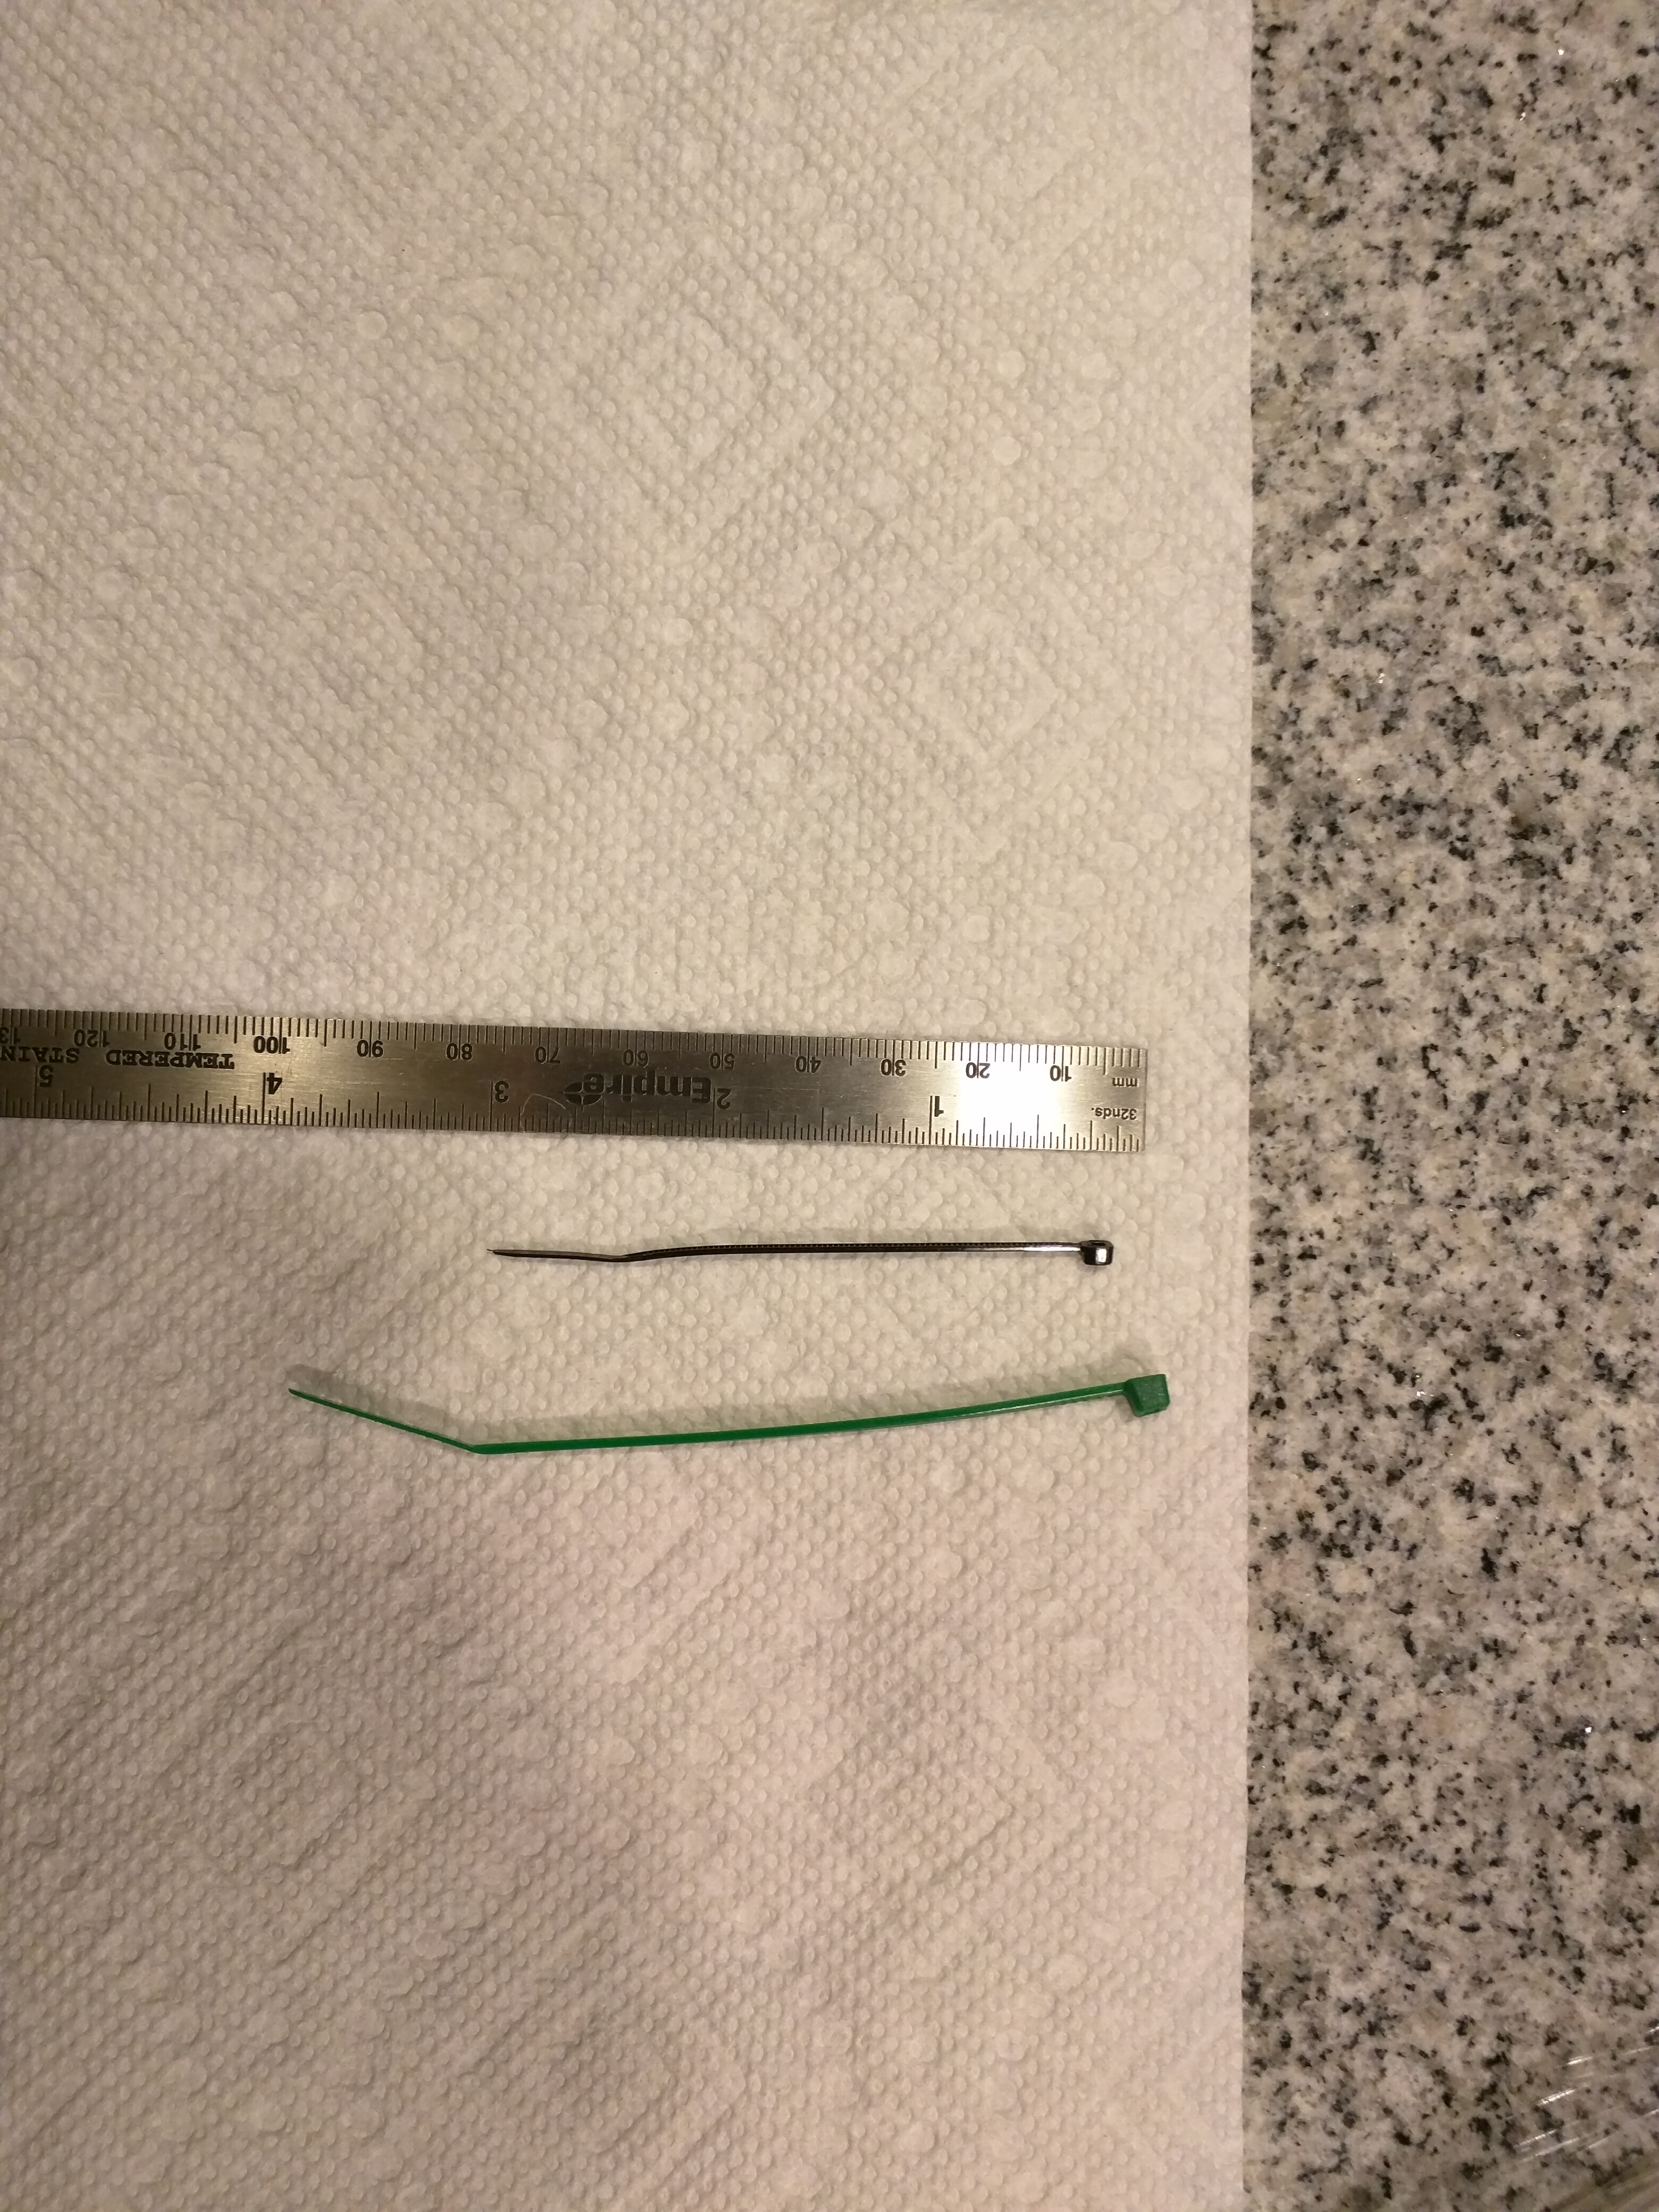
The FPV camera was a little tricky. Since I was now using 30mm standoffs, the included camera mount plate wouldn't fit (not that it would have been much help anyways). I had seen some people mount the camera using zip ties and silicone tubing to create an angle. But even the smallest zip ties I could find wouldn't fit through the small mounting holes on the FPV camera board. After a lot of searching, I finally found a cable tie that was smaller than all the rest, the Panduit PLT.6SM-C0 (see parts list and pictures for size comparison with the typical "small" cable ties).
Photos
Part List
Frame |
MRM250 V3 Mini 250mm Frame - 100% Carbon Fiber
Multirotormania.com
|
$42.00 |
Flight Controller |
Kojak Flight Controller (Out of stock)
Armattanquads.com
|
$10.00 |
ESCs |
4 x DYS Mini XM20A 4S ESC - BLHeli Firmware
Multirotormania.com
|
$54.00 |
Motors |
4 x DYS BE1806 2300KV Brushless Motor - Black Edition
(4 builds)
Multirotormania.com
|
$33.56 |
Propellers |
4 x GemFan 5x3 Props x4
(2 builds)
Multirotormania.com
|
$6.32 |
Antenna |
LHCP Color Dipped 5.8gHz Antenna Set
(4 builds)
Multirotormania.com
|
$16.50 |
Batteries |
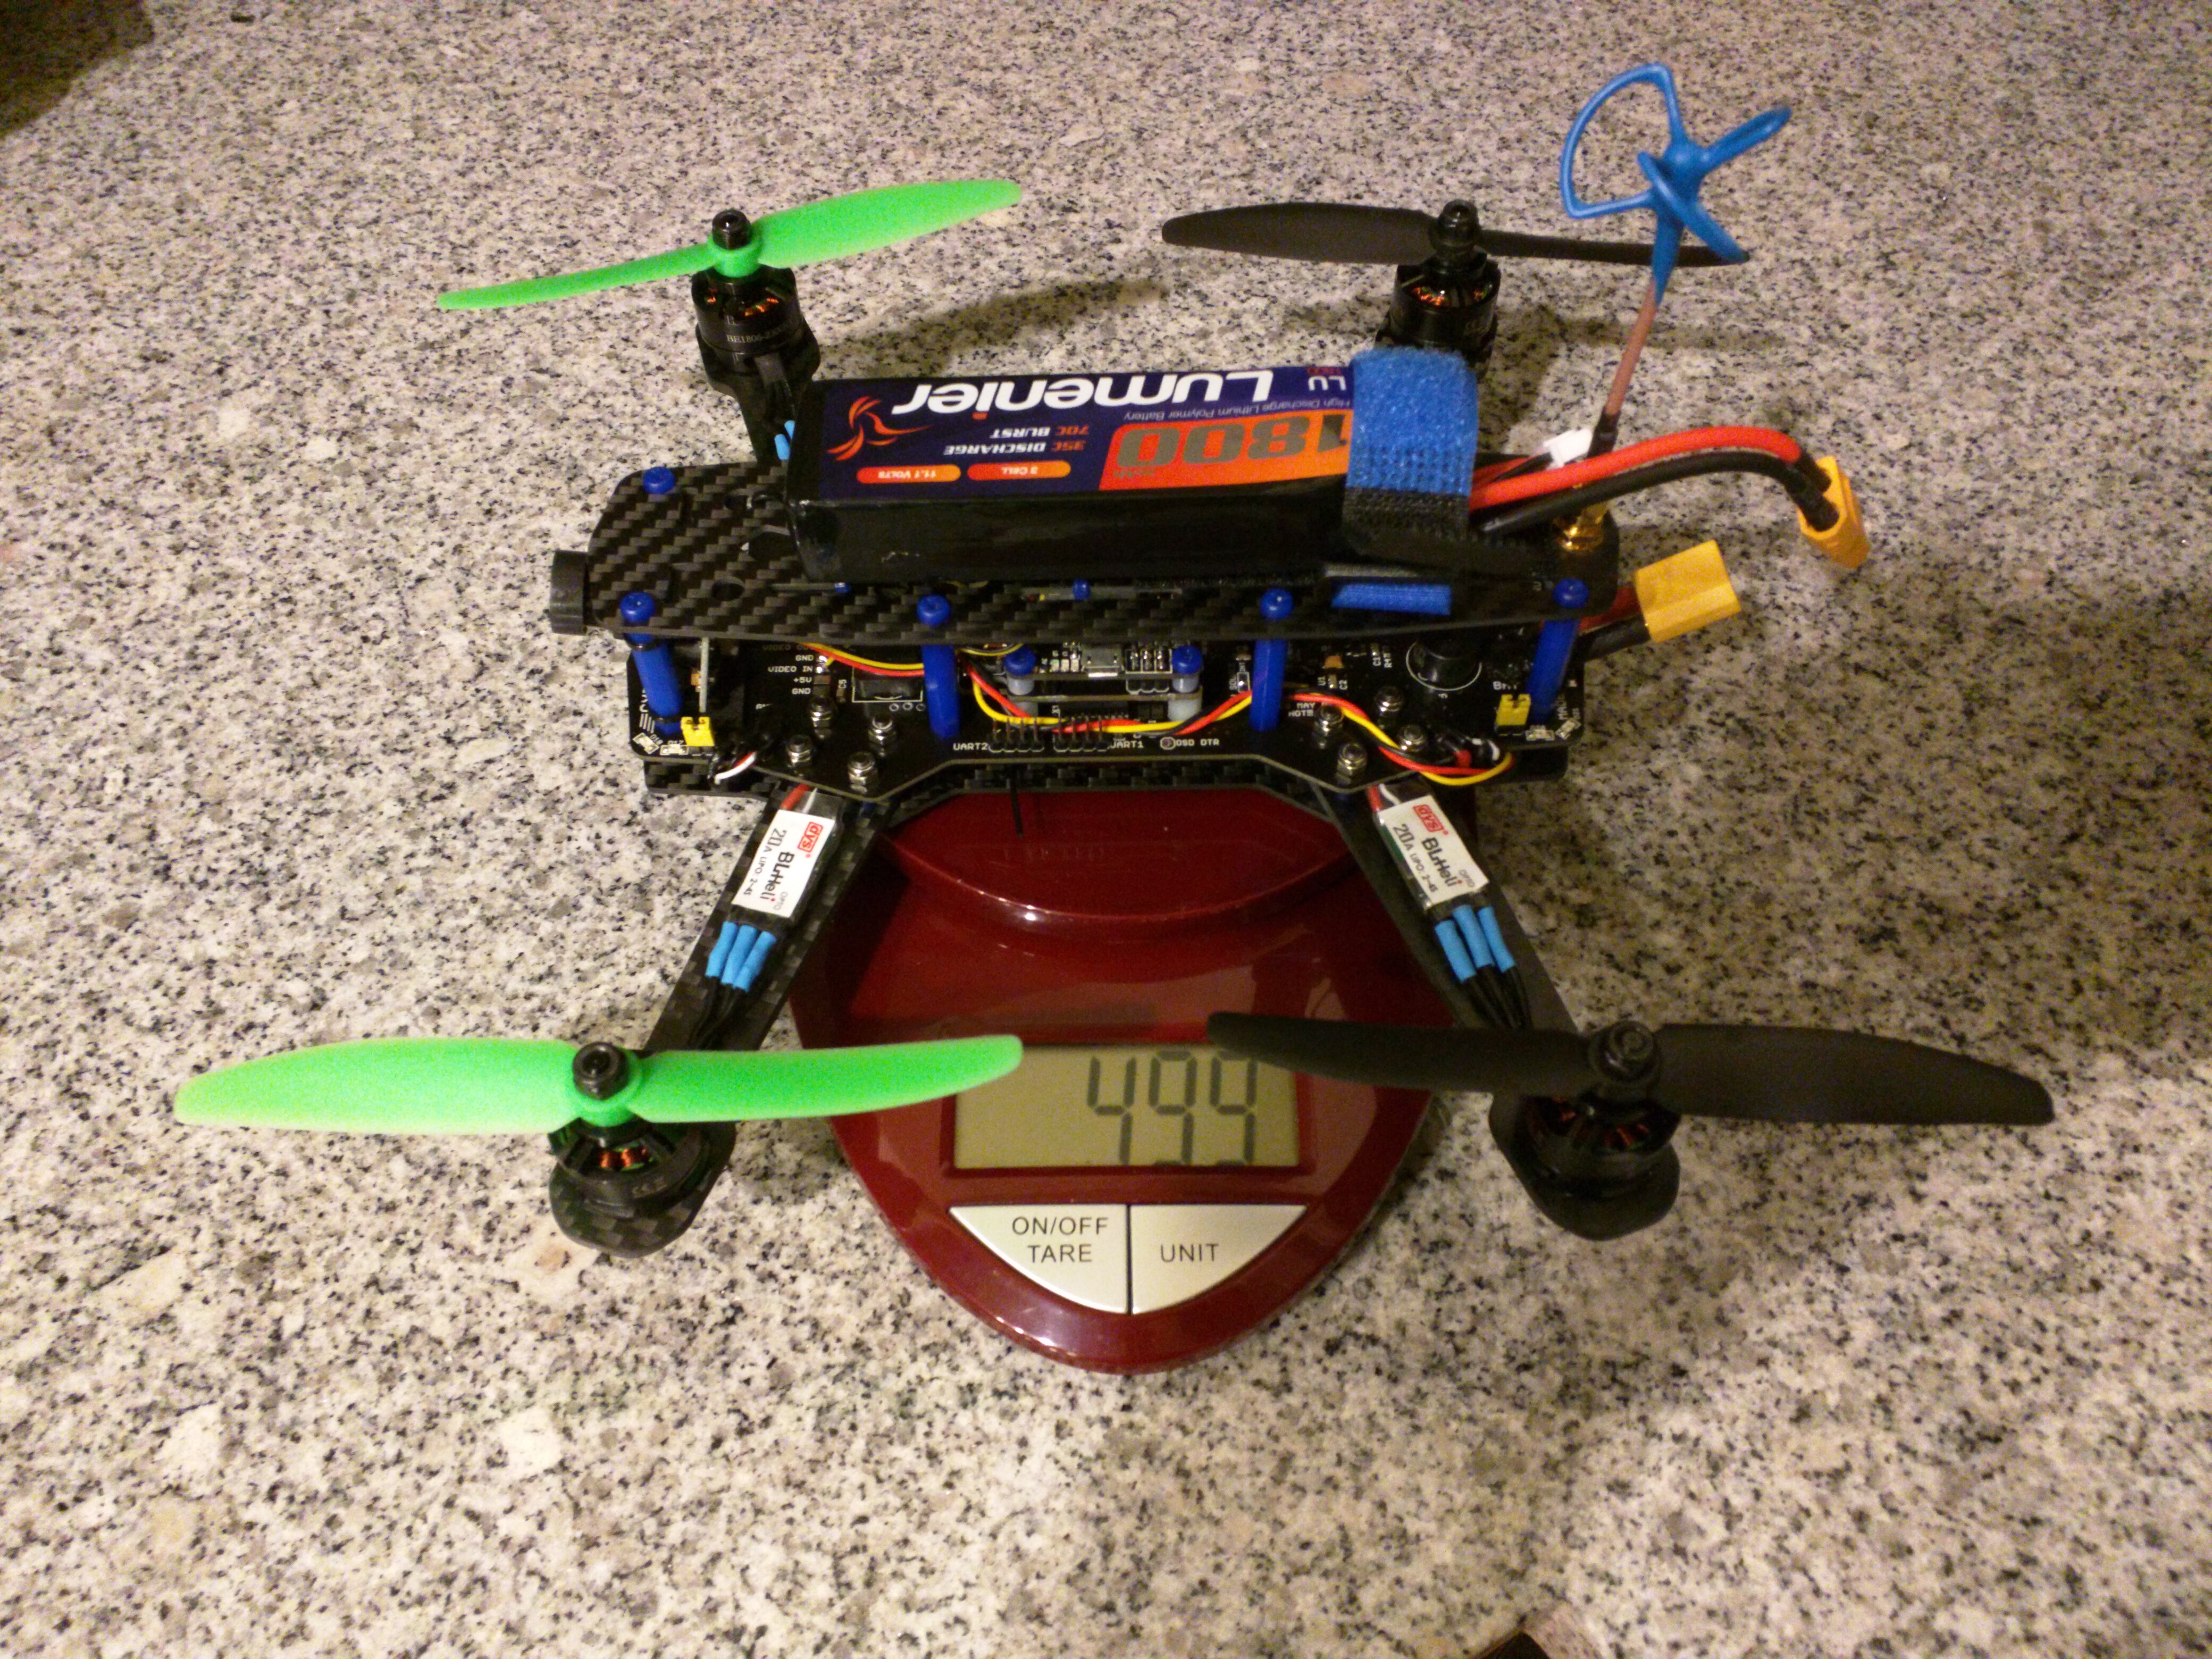
2 x Lumenier 1800mAh 3s 35c Lipo Battery
(2 builds)
Getfpv.com
|
$39.98 |

Hey Andy, welcome back! How's your rig holding up?

It is pretty good. More fragile than i expected. I've made some minor changes, most notable longer steel cap head screws for the top and bottom of the standoffs. I also have long bolts going all the way through arms and spacers instead of screwed into the spacers (easier to replace arms).
I'm getting ready for a new build and will go for better quality this time. I'm leaning towards a QAV250 or the new QAV220/180. I will post it here in detail when I do.
Great build and wonderful post! You've certainly raised the bar on how to create a build on this site. I love the detailed photos and description. Have a youtube channel or any flights we can watch?
I don't have a way to mount my GoPro yet. But i'll post to https://www.youtube.com/user/eger235 when I do.
Guides & Reviews

AirbladeUAV has done it again and this time they've brought long range to the 5" class! Based on the popular Transformer Mini, the new Transformer 5" Ultralight adopts a lot of the same design philosophies with larger props and more payload capacity. It can fly upwards of 20 minutes on a 4 cell Li-Ion battery pack and in ideal conditions it's got a range of over 4 to 5 miles. In this guide I'll walk..
Read more
With the release of the DJI FPV Drone cinematic FPV has become a lot more accessible, but you certainly don't want to crash a $750 drone! The QAV-CINE Freybott is a compact, lightweight cinematic FPV drone that can take a hit and keep going. It's a lot safer to fly indoors and around people. With a naked GoPro or the SMO 4k you can capture some great stabilized footage. In this guide I'll show you..
Read more


I've never seen a bottom plate like that. What circuitry is embedded? Looking forward to seeing a parts list!
I'm actively writing about the build and will fill out the parts list soon! Maybe check back tomorrow :) But to answer your immediate question, it is the Cytrynka PDB from https://flyinglemon.eu/.
That's a nice board, it definitely makes for a clean build.
I don't think I see this board on the build.
Yea, the site isn't letting me add all my parts. Most of the parts I added arr also listed incorrectly... The PDB is at https://flyinglemon.eu/pdb/8-cytrynka-pdb.html
How is that? I just made some changes to the way the part information is collected. I also tested the Cytrynka link and it should show up properly if you add it to your build.
I just tried again and still not working. I wonder if it is due to mobile browser? Android is my primary OS. I will try again in a couple days when I get to a computer. Also, I am noticing the fields supress Android autocorrect. It doesn't seem to detect them as normal text boxes.
Very nice build!
Hi Andy...quick question, I am finishing my build with the same PDB and noticed you mention that the PDB doesnt provide 12V to the video side AND that the PDB has filtered 12V for video. Before I breakout a multimeter, I noticed that I dont get any signal when my 12V camera and transmitter are wired to vfilter/ vin/vout, but its fine when I run straight from the battery. Did you have the same problem? Thanks
No. I meant that the minimOSD didn't receive 12v for its pins. The pads at the front of the board do work for 12v. I have my camera and vTX on the same 12v pad.