
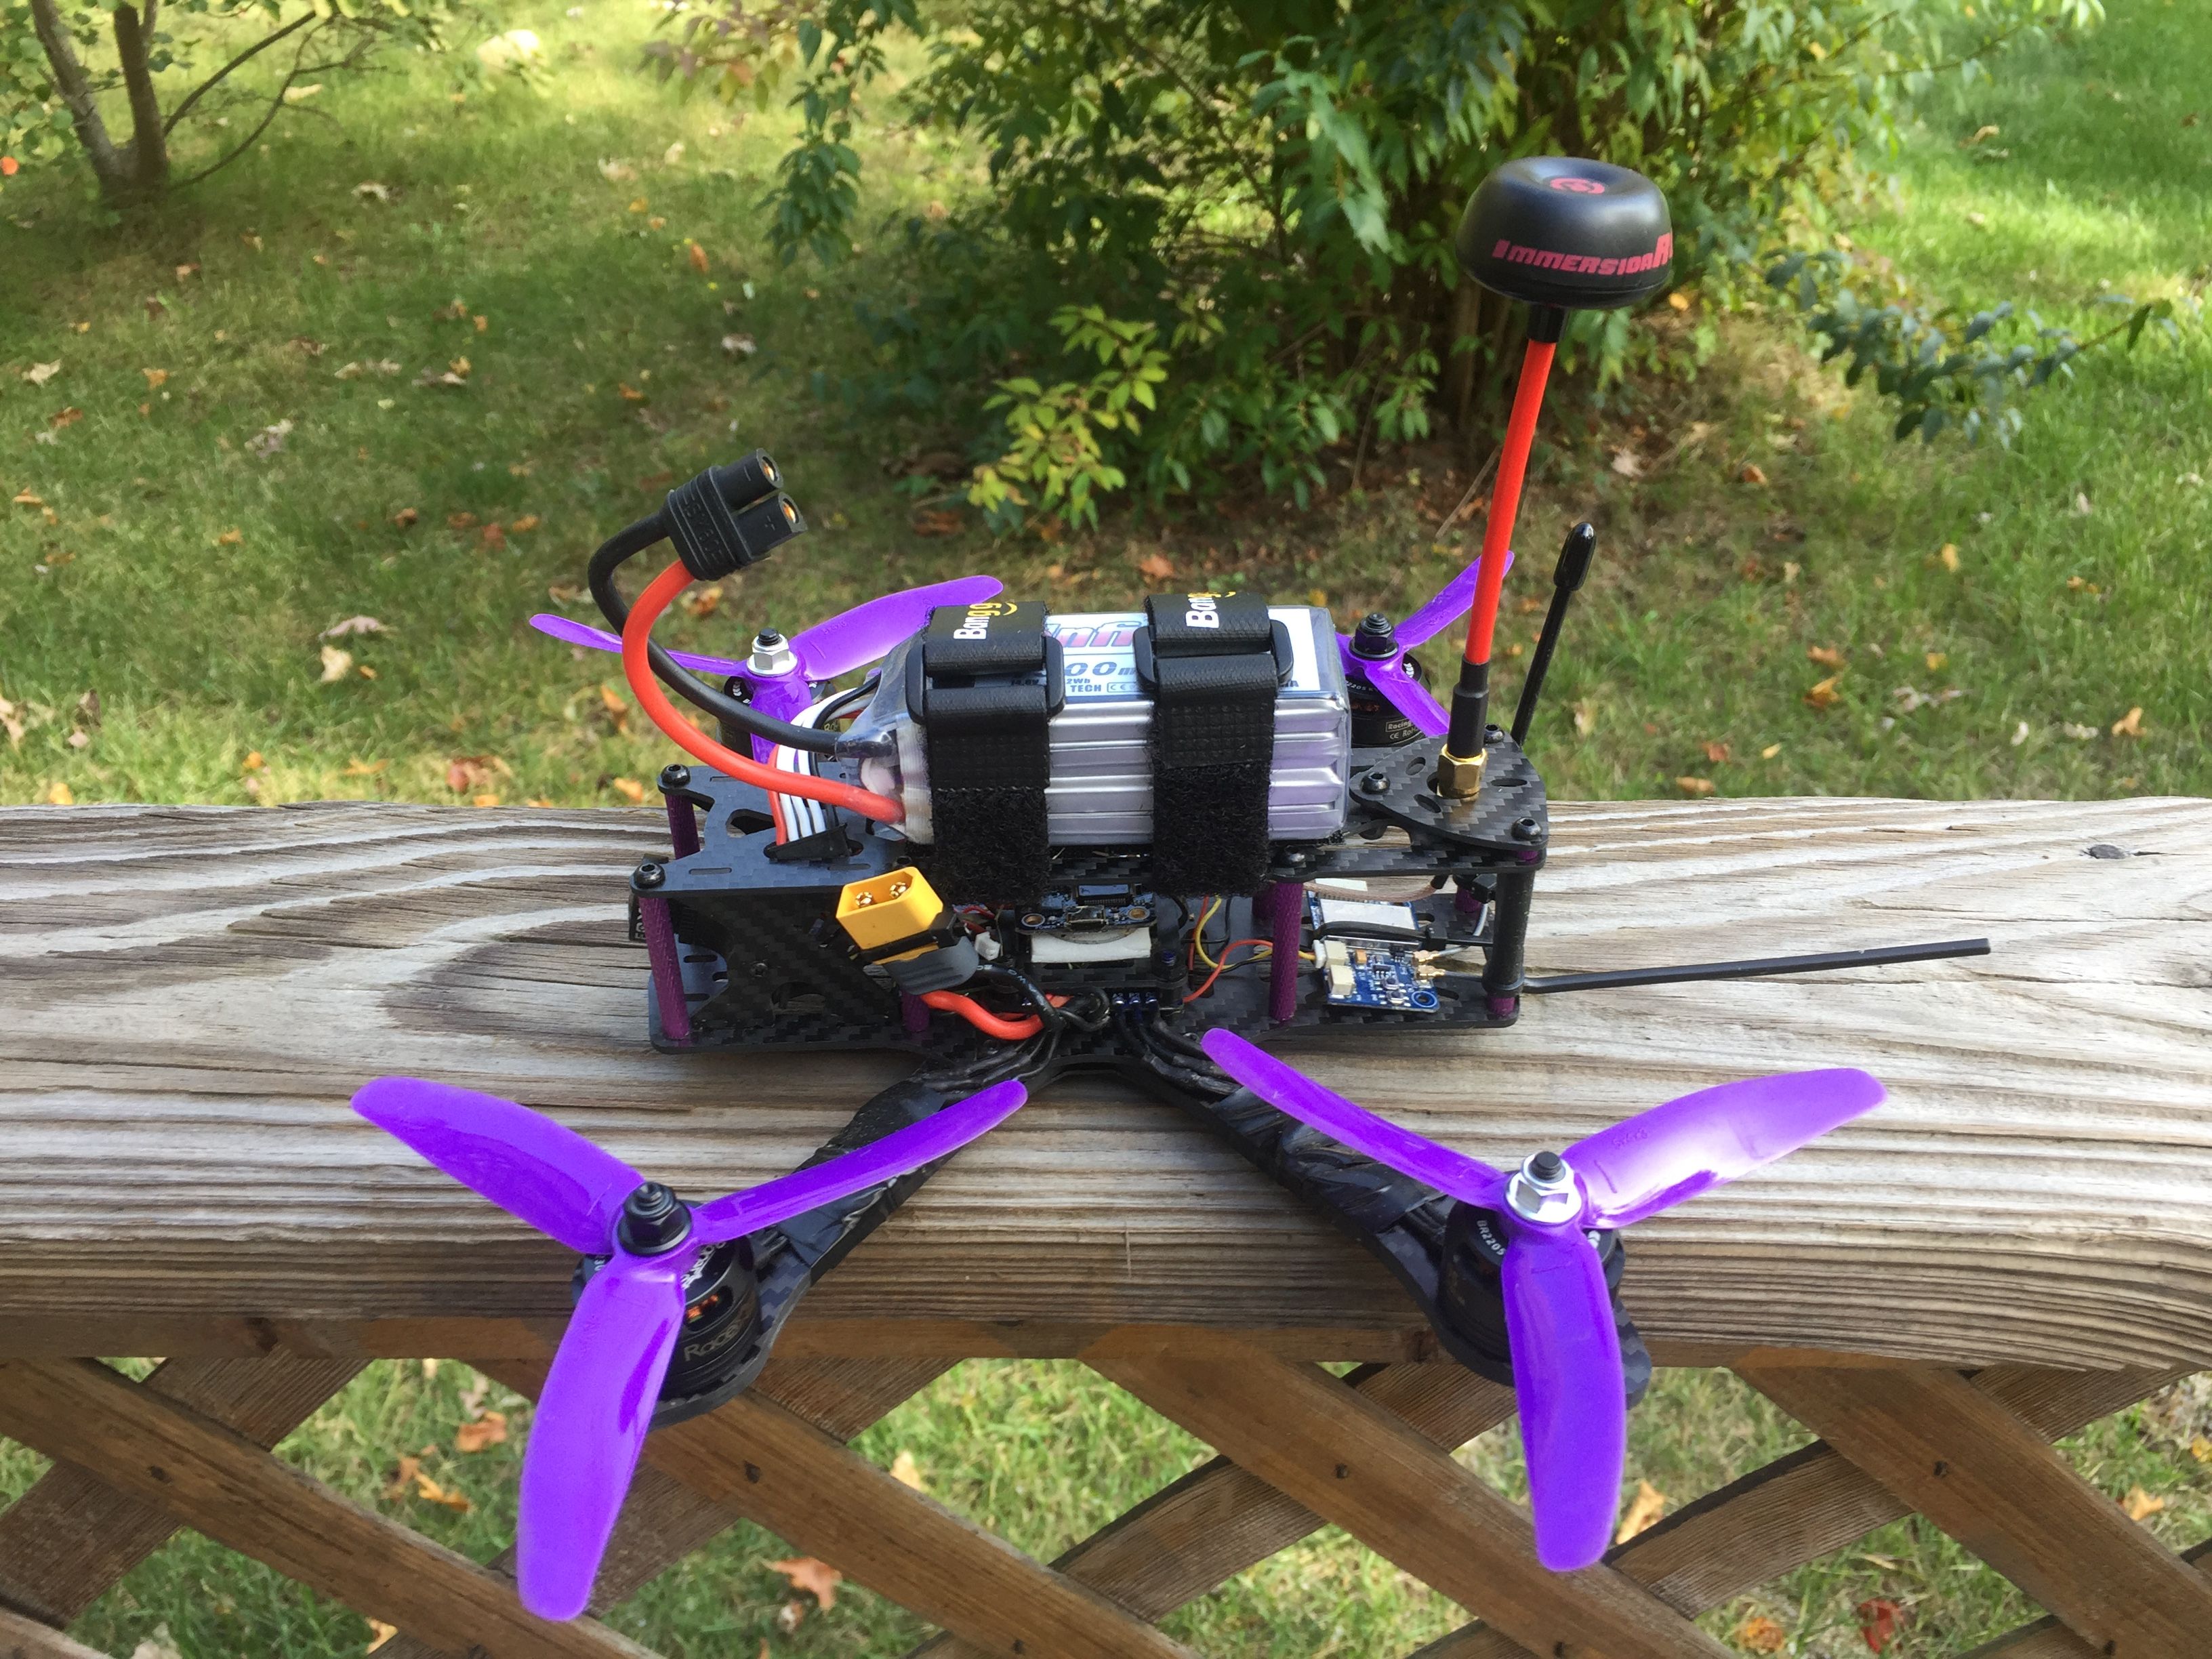
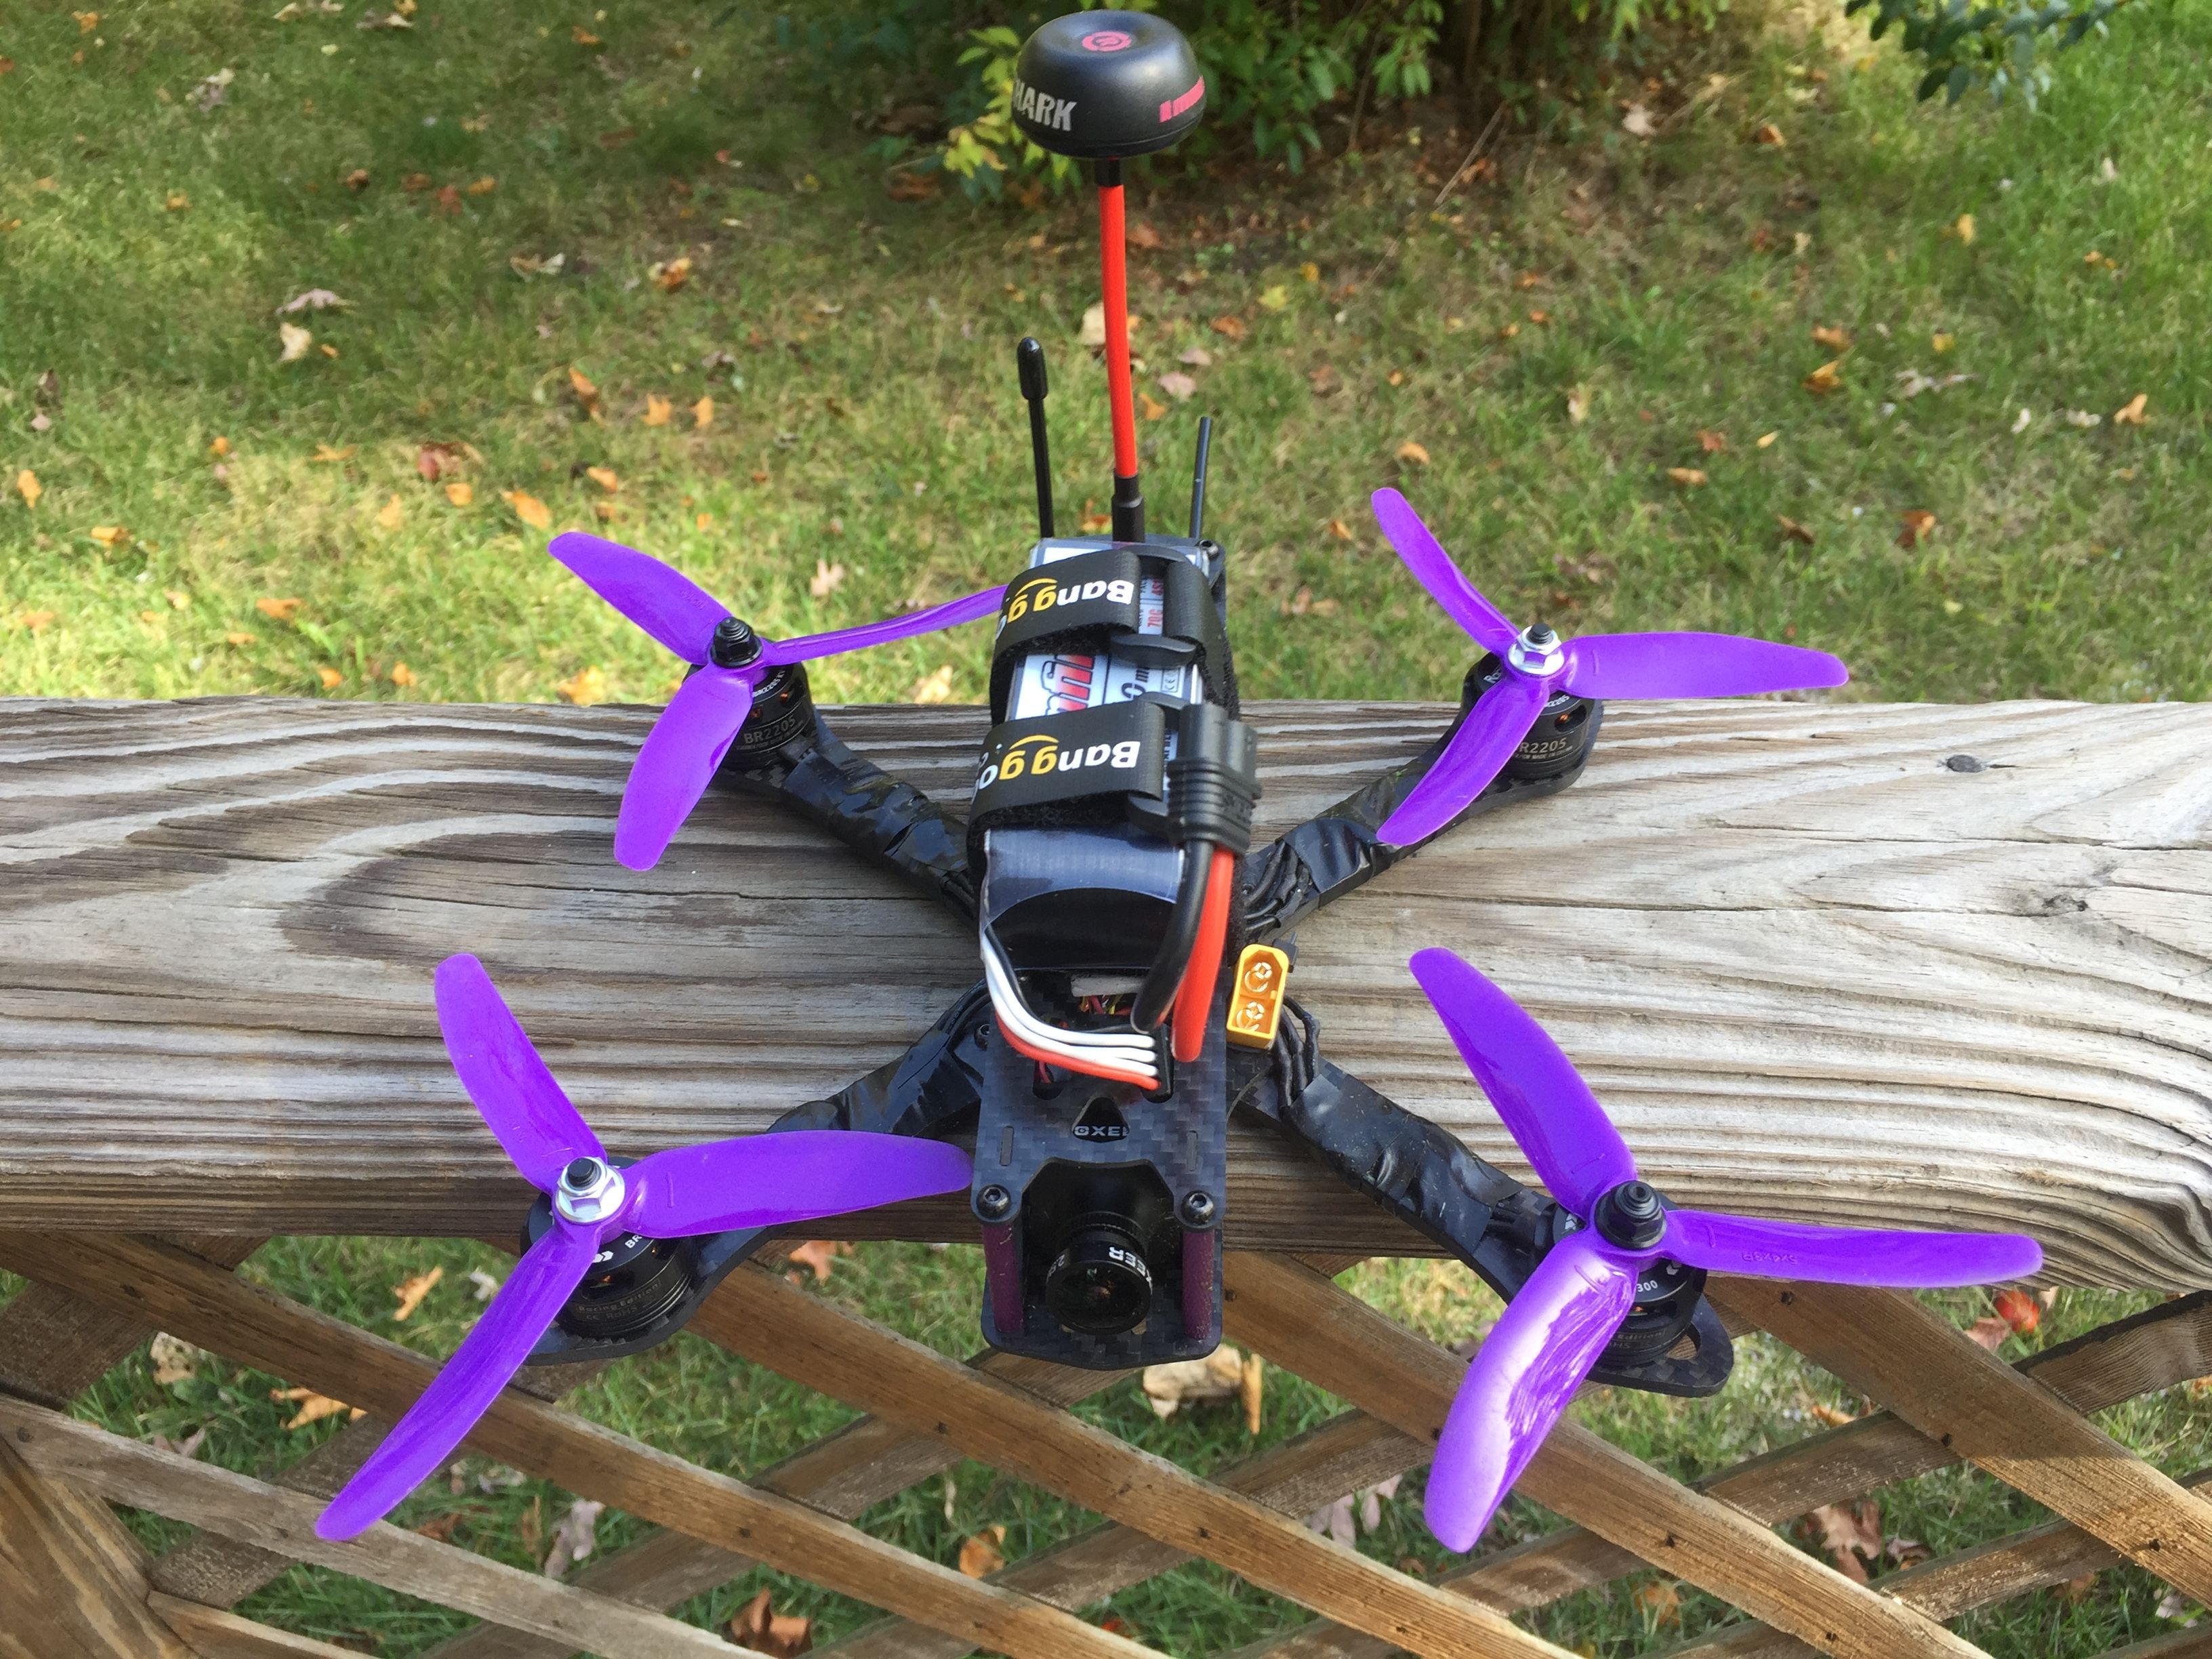
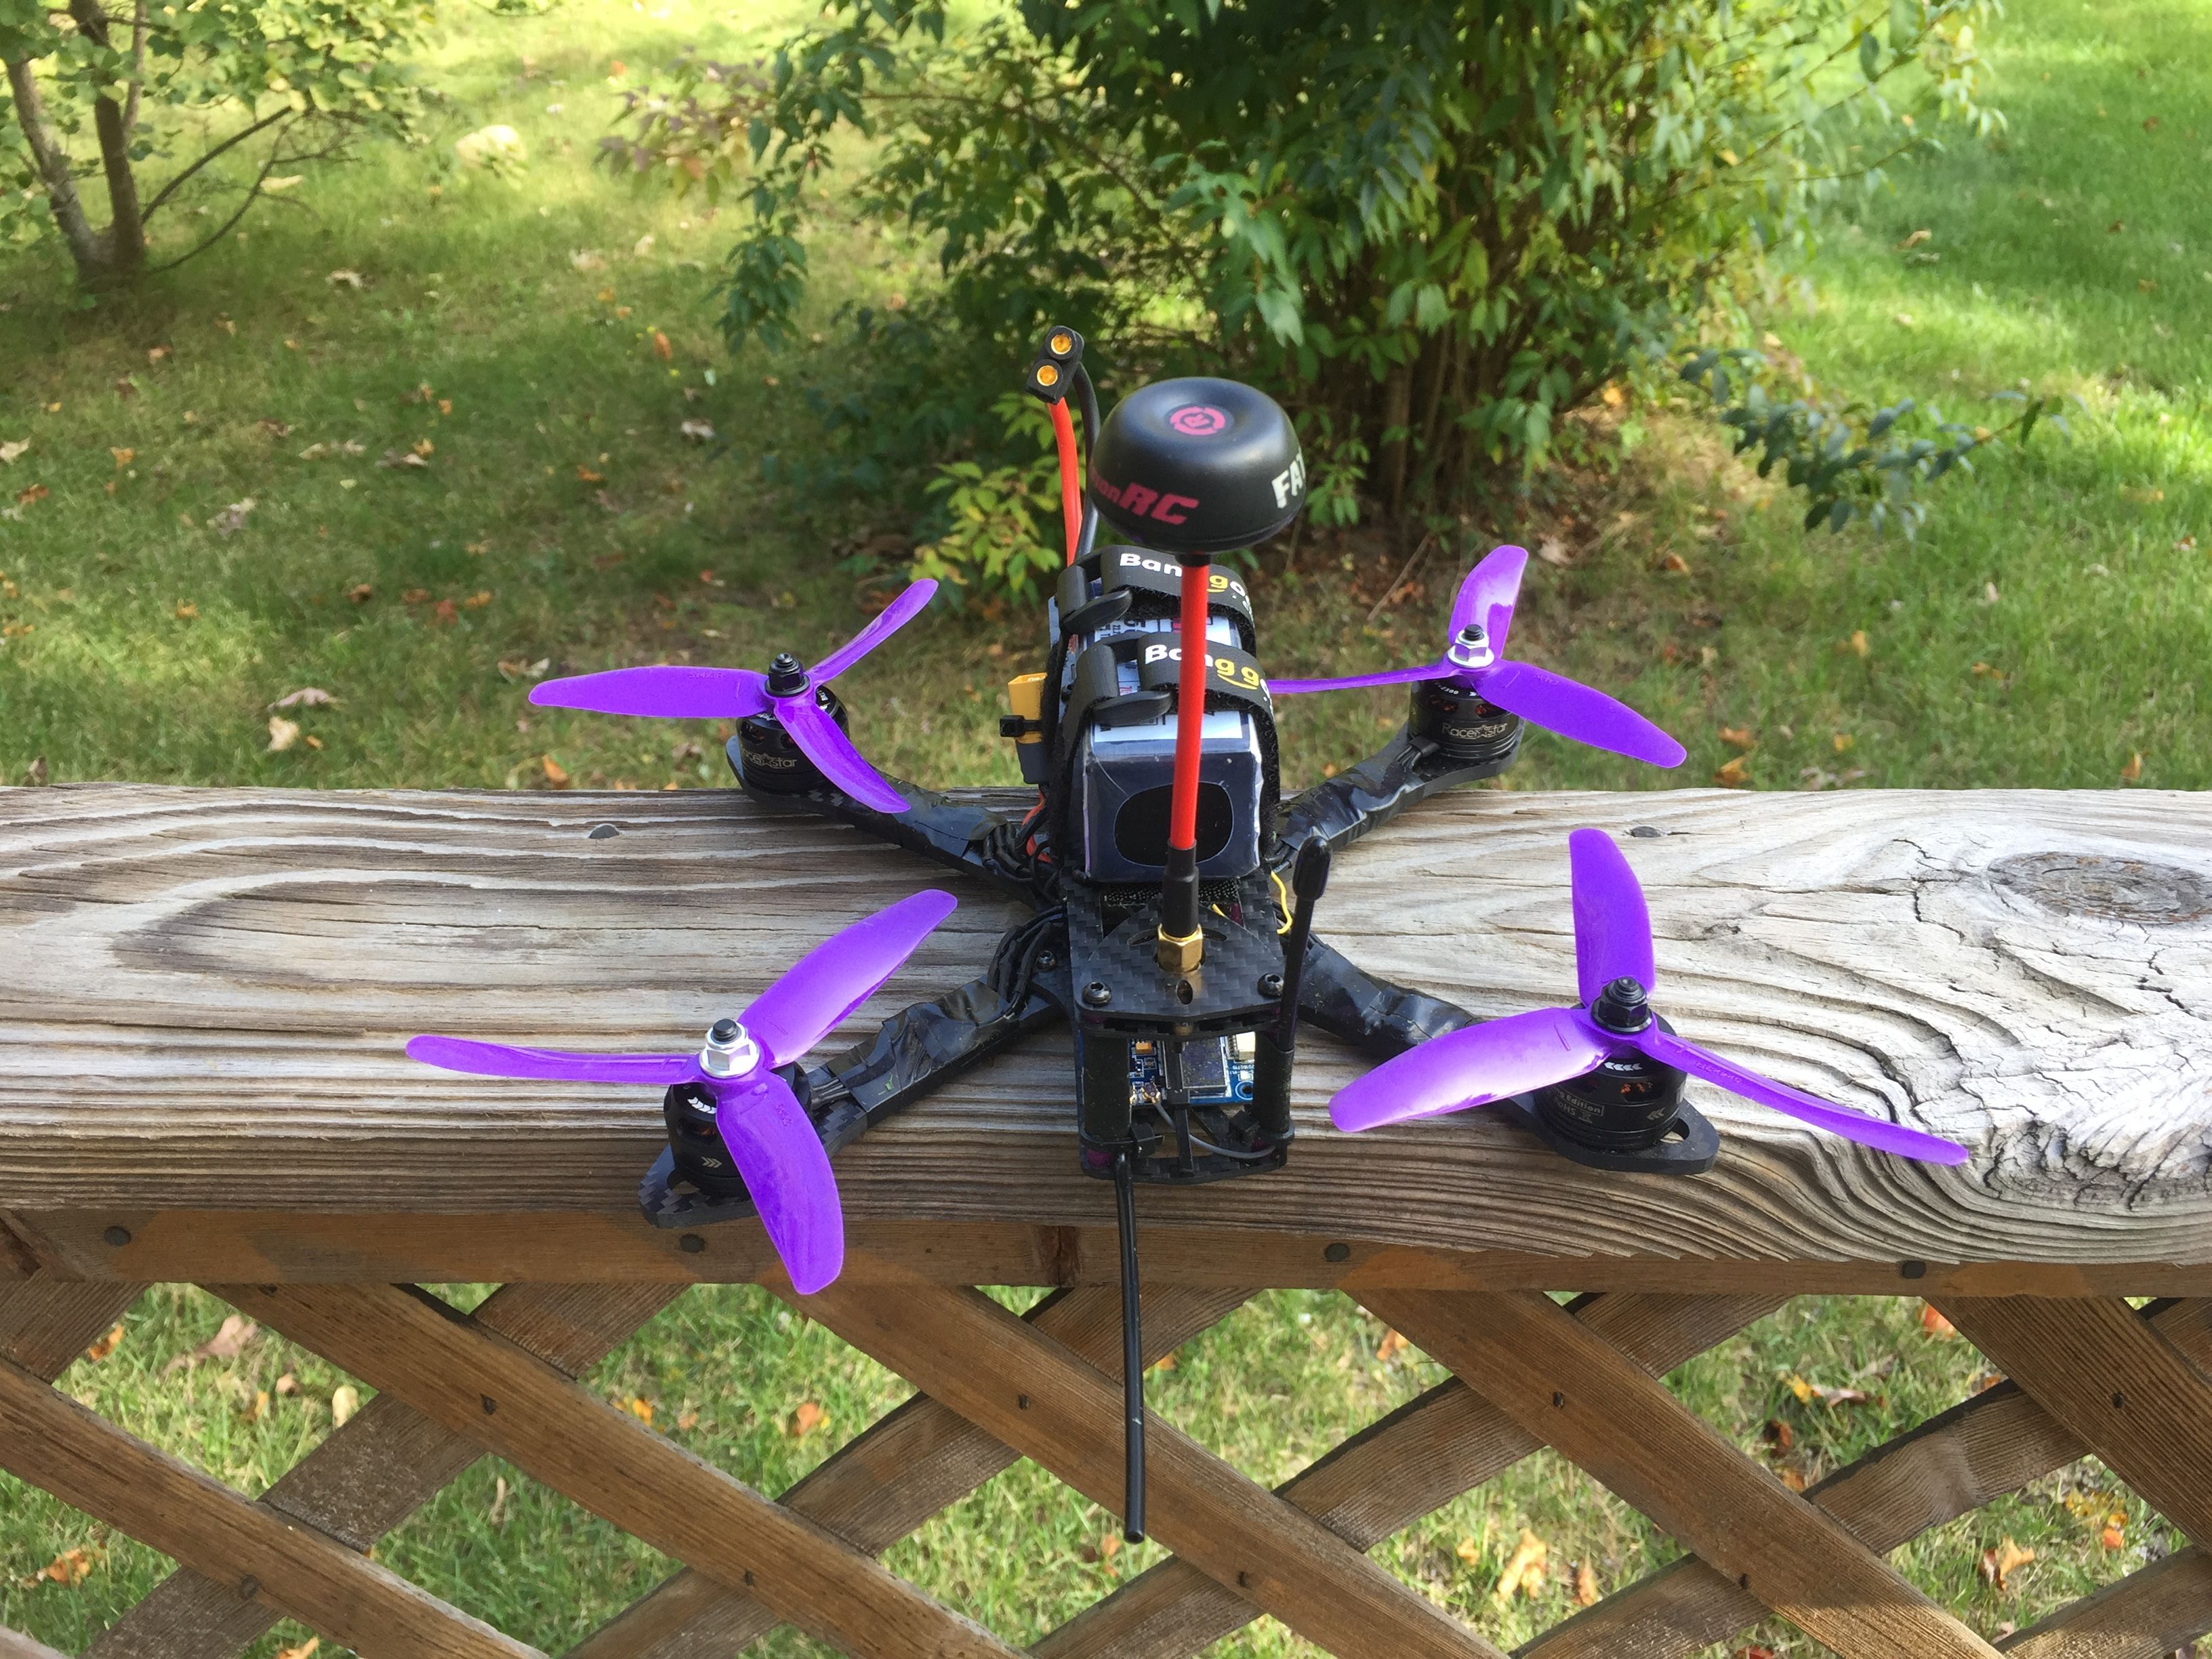
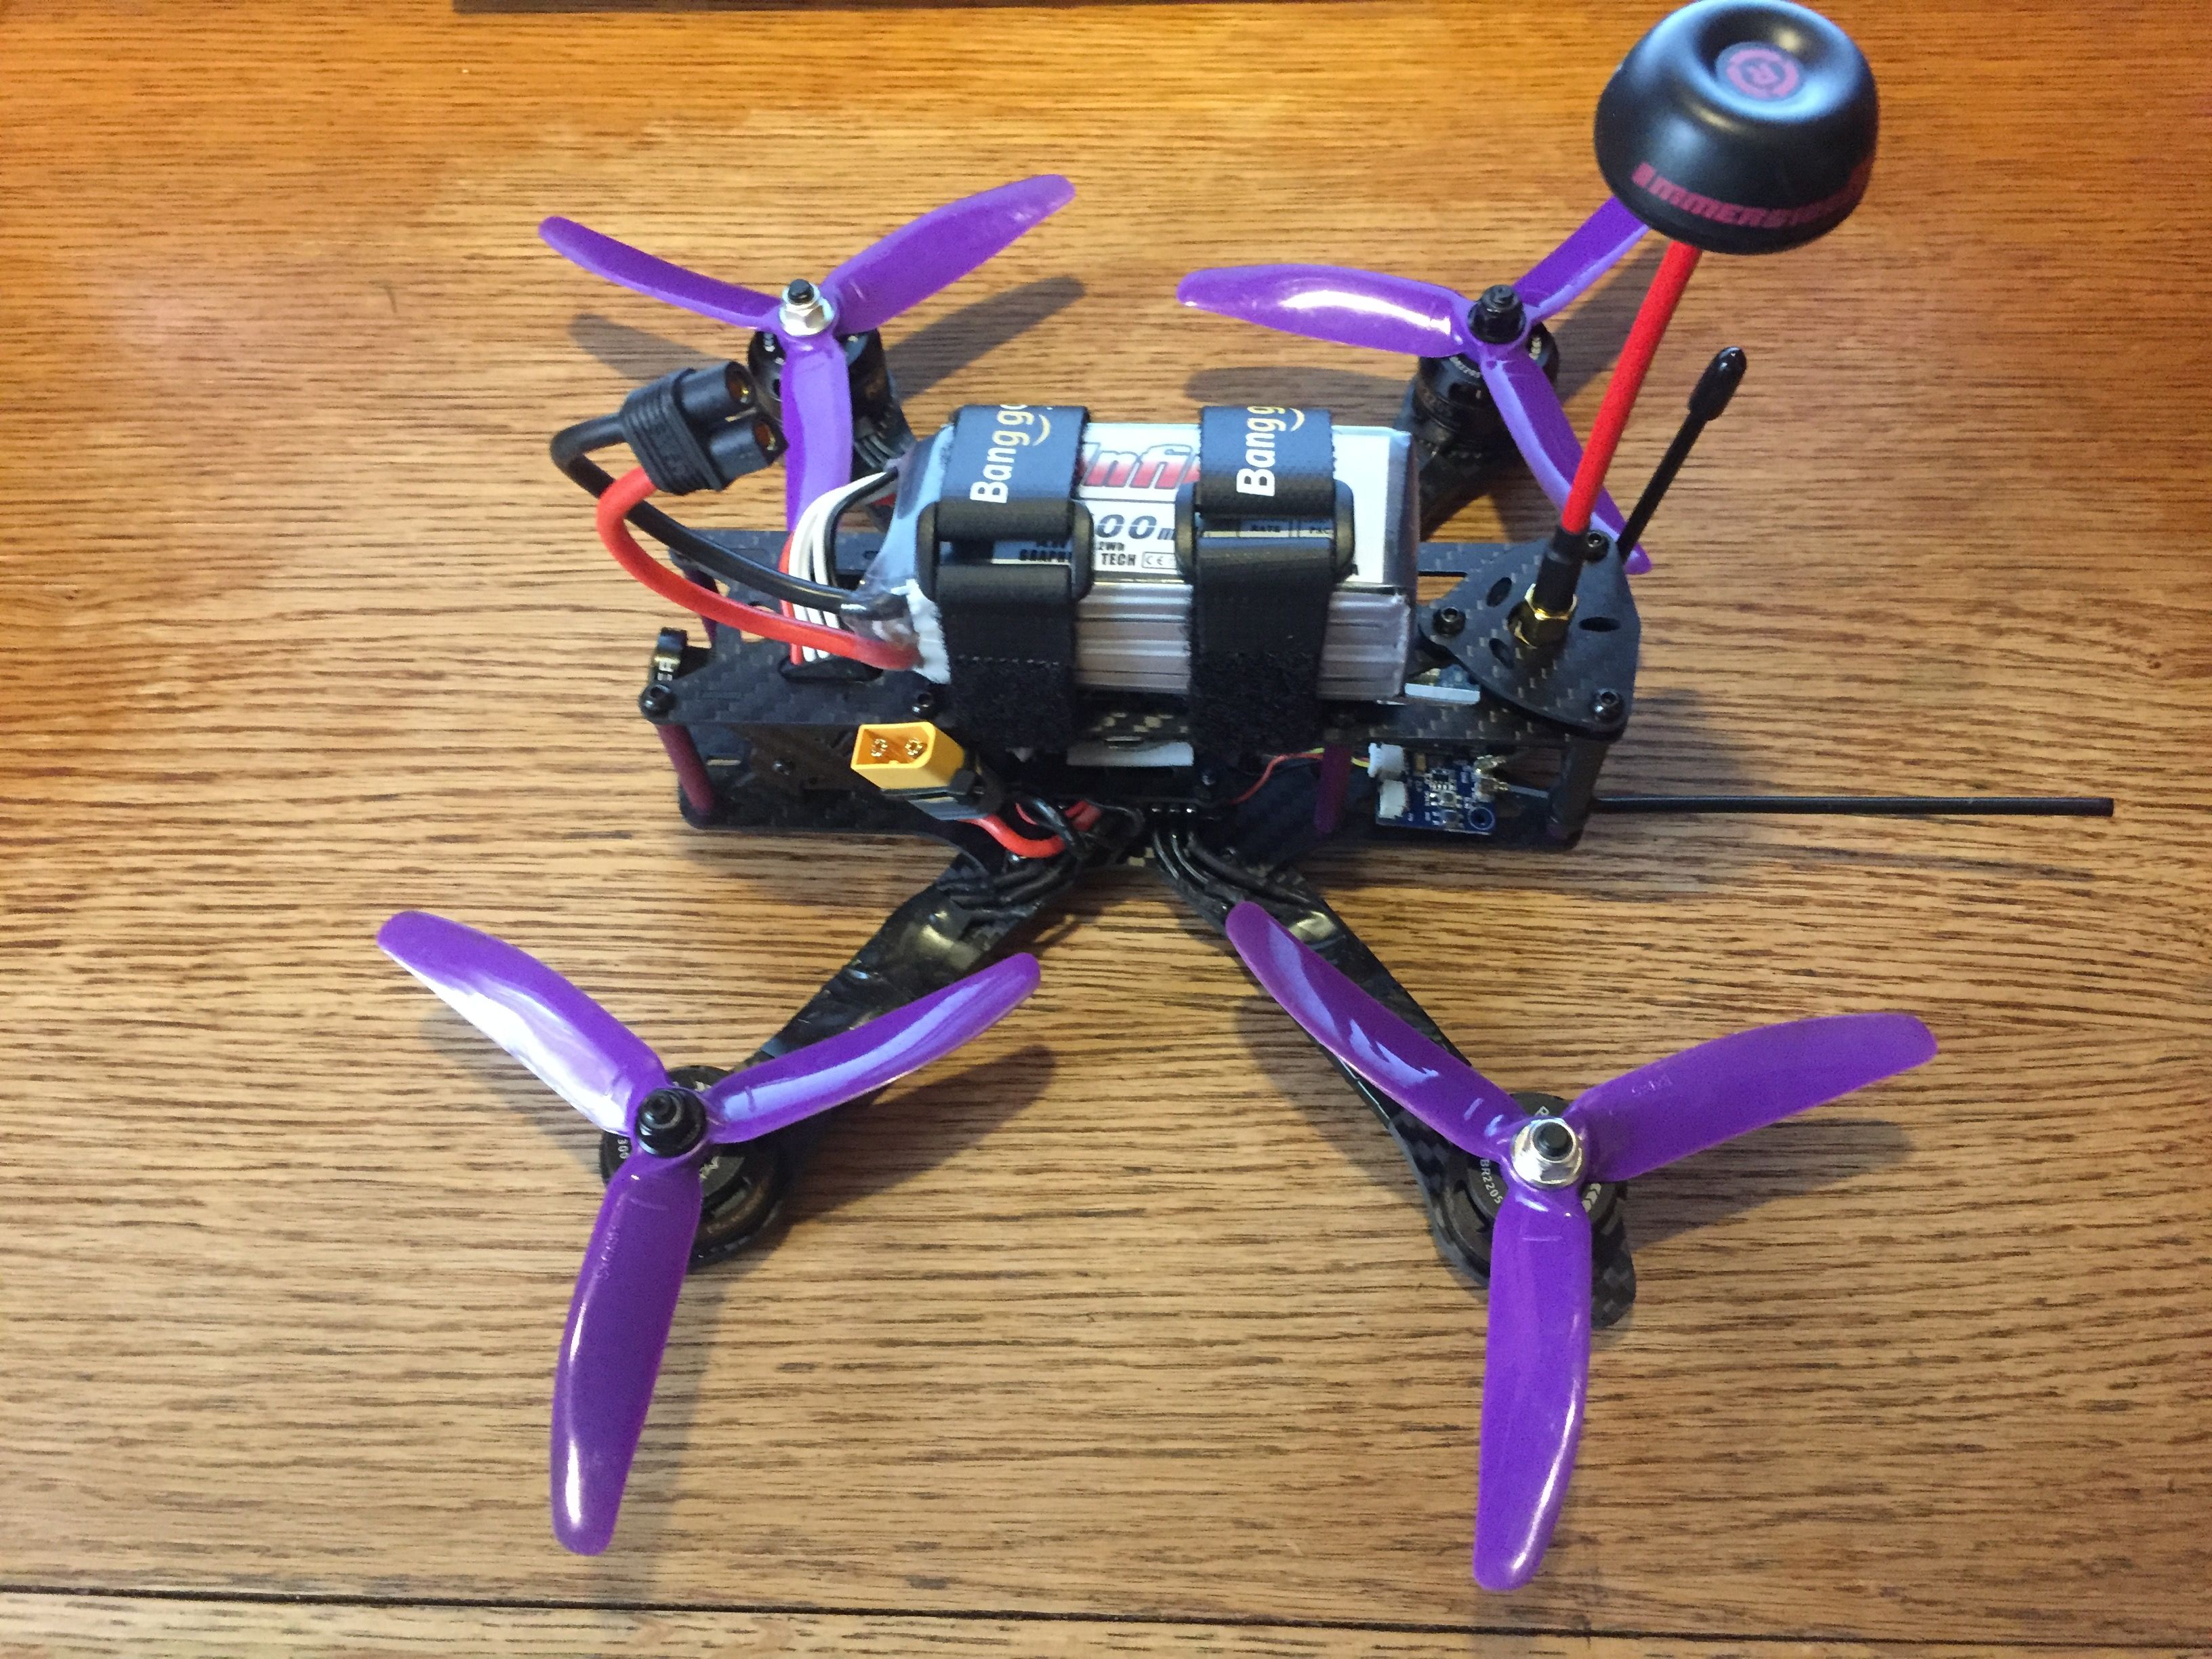
I am following the Wizard Killer II build from Whiffles with a few changes. The Martian II 220 frame with a HS1177 style camera to fit the frames camera mounting system and with the original standoffs. The FPV transmitter is getting an IPEX to SMA female adapter then I am using a RHCP SMA antenna.
The FC board came with 3.1.7 betaflight but since 3.2 just came out I flashed it to get the new features like Dynamic Filtering and ESC beeper.
Few days later 3.2.1 was released fixing a few bugs so I flashed to that.
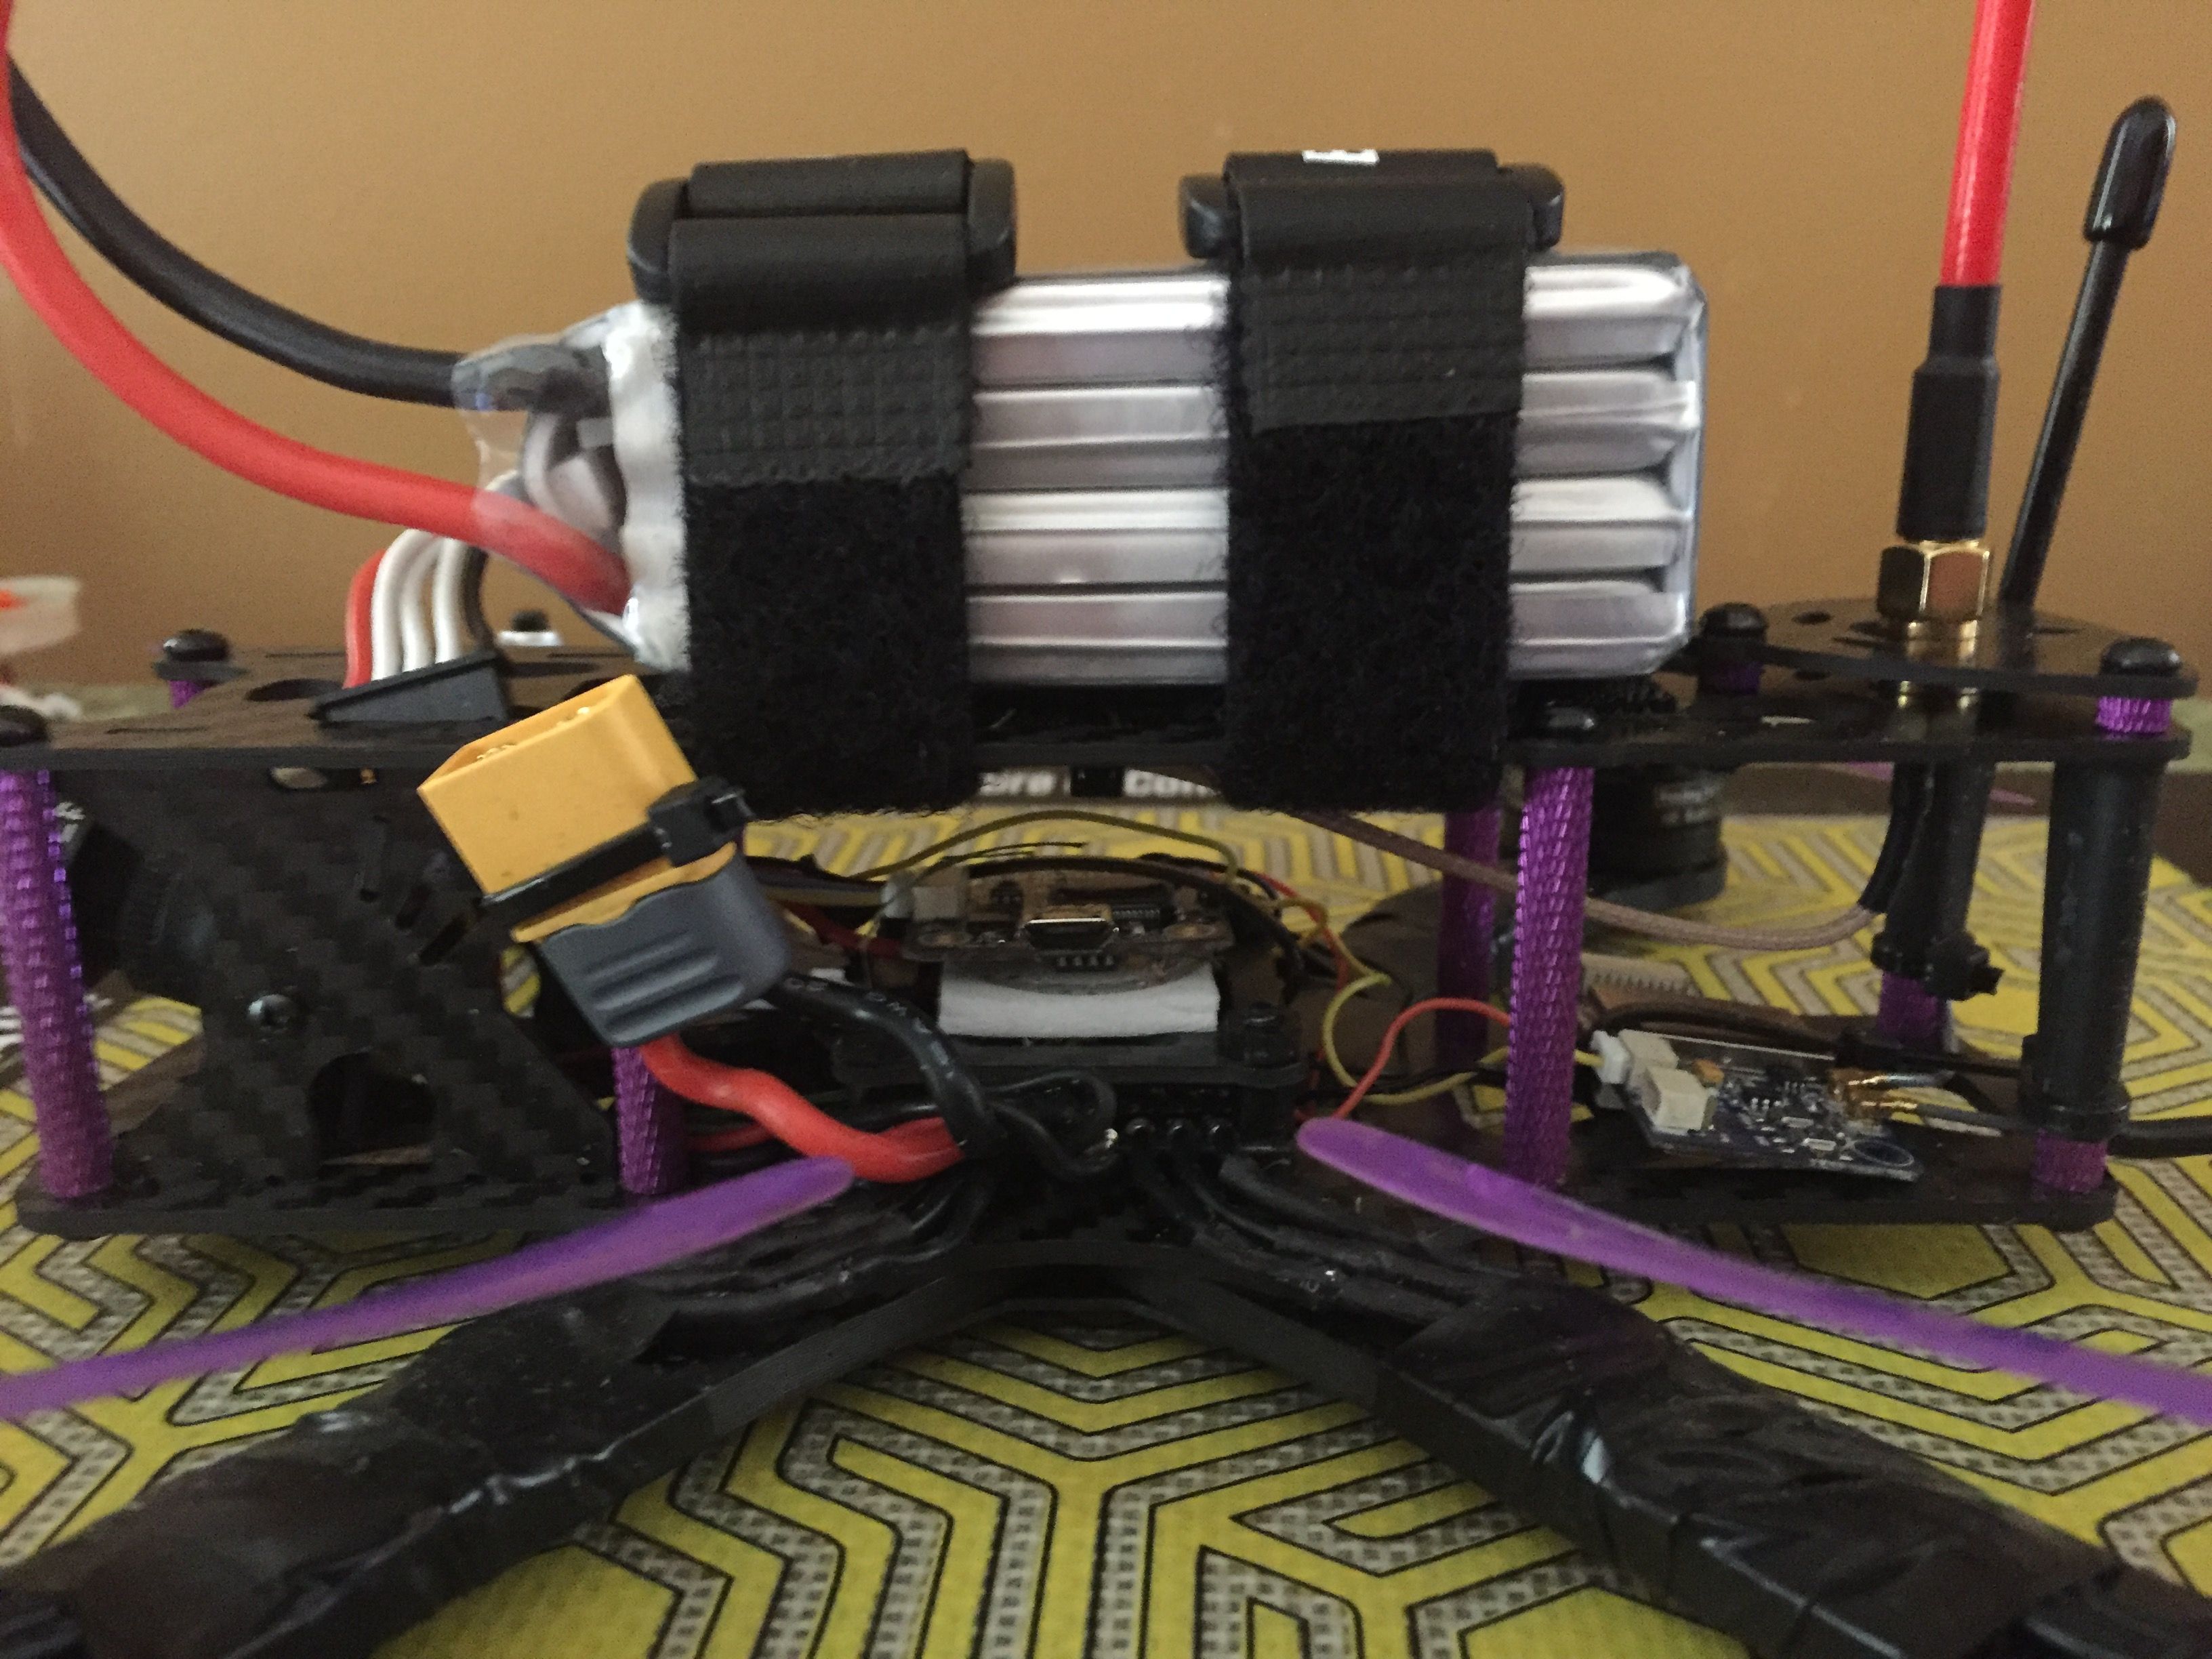
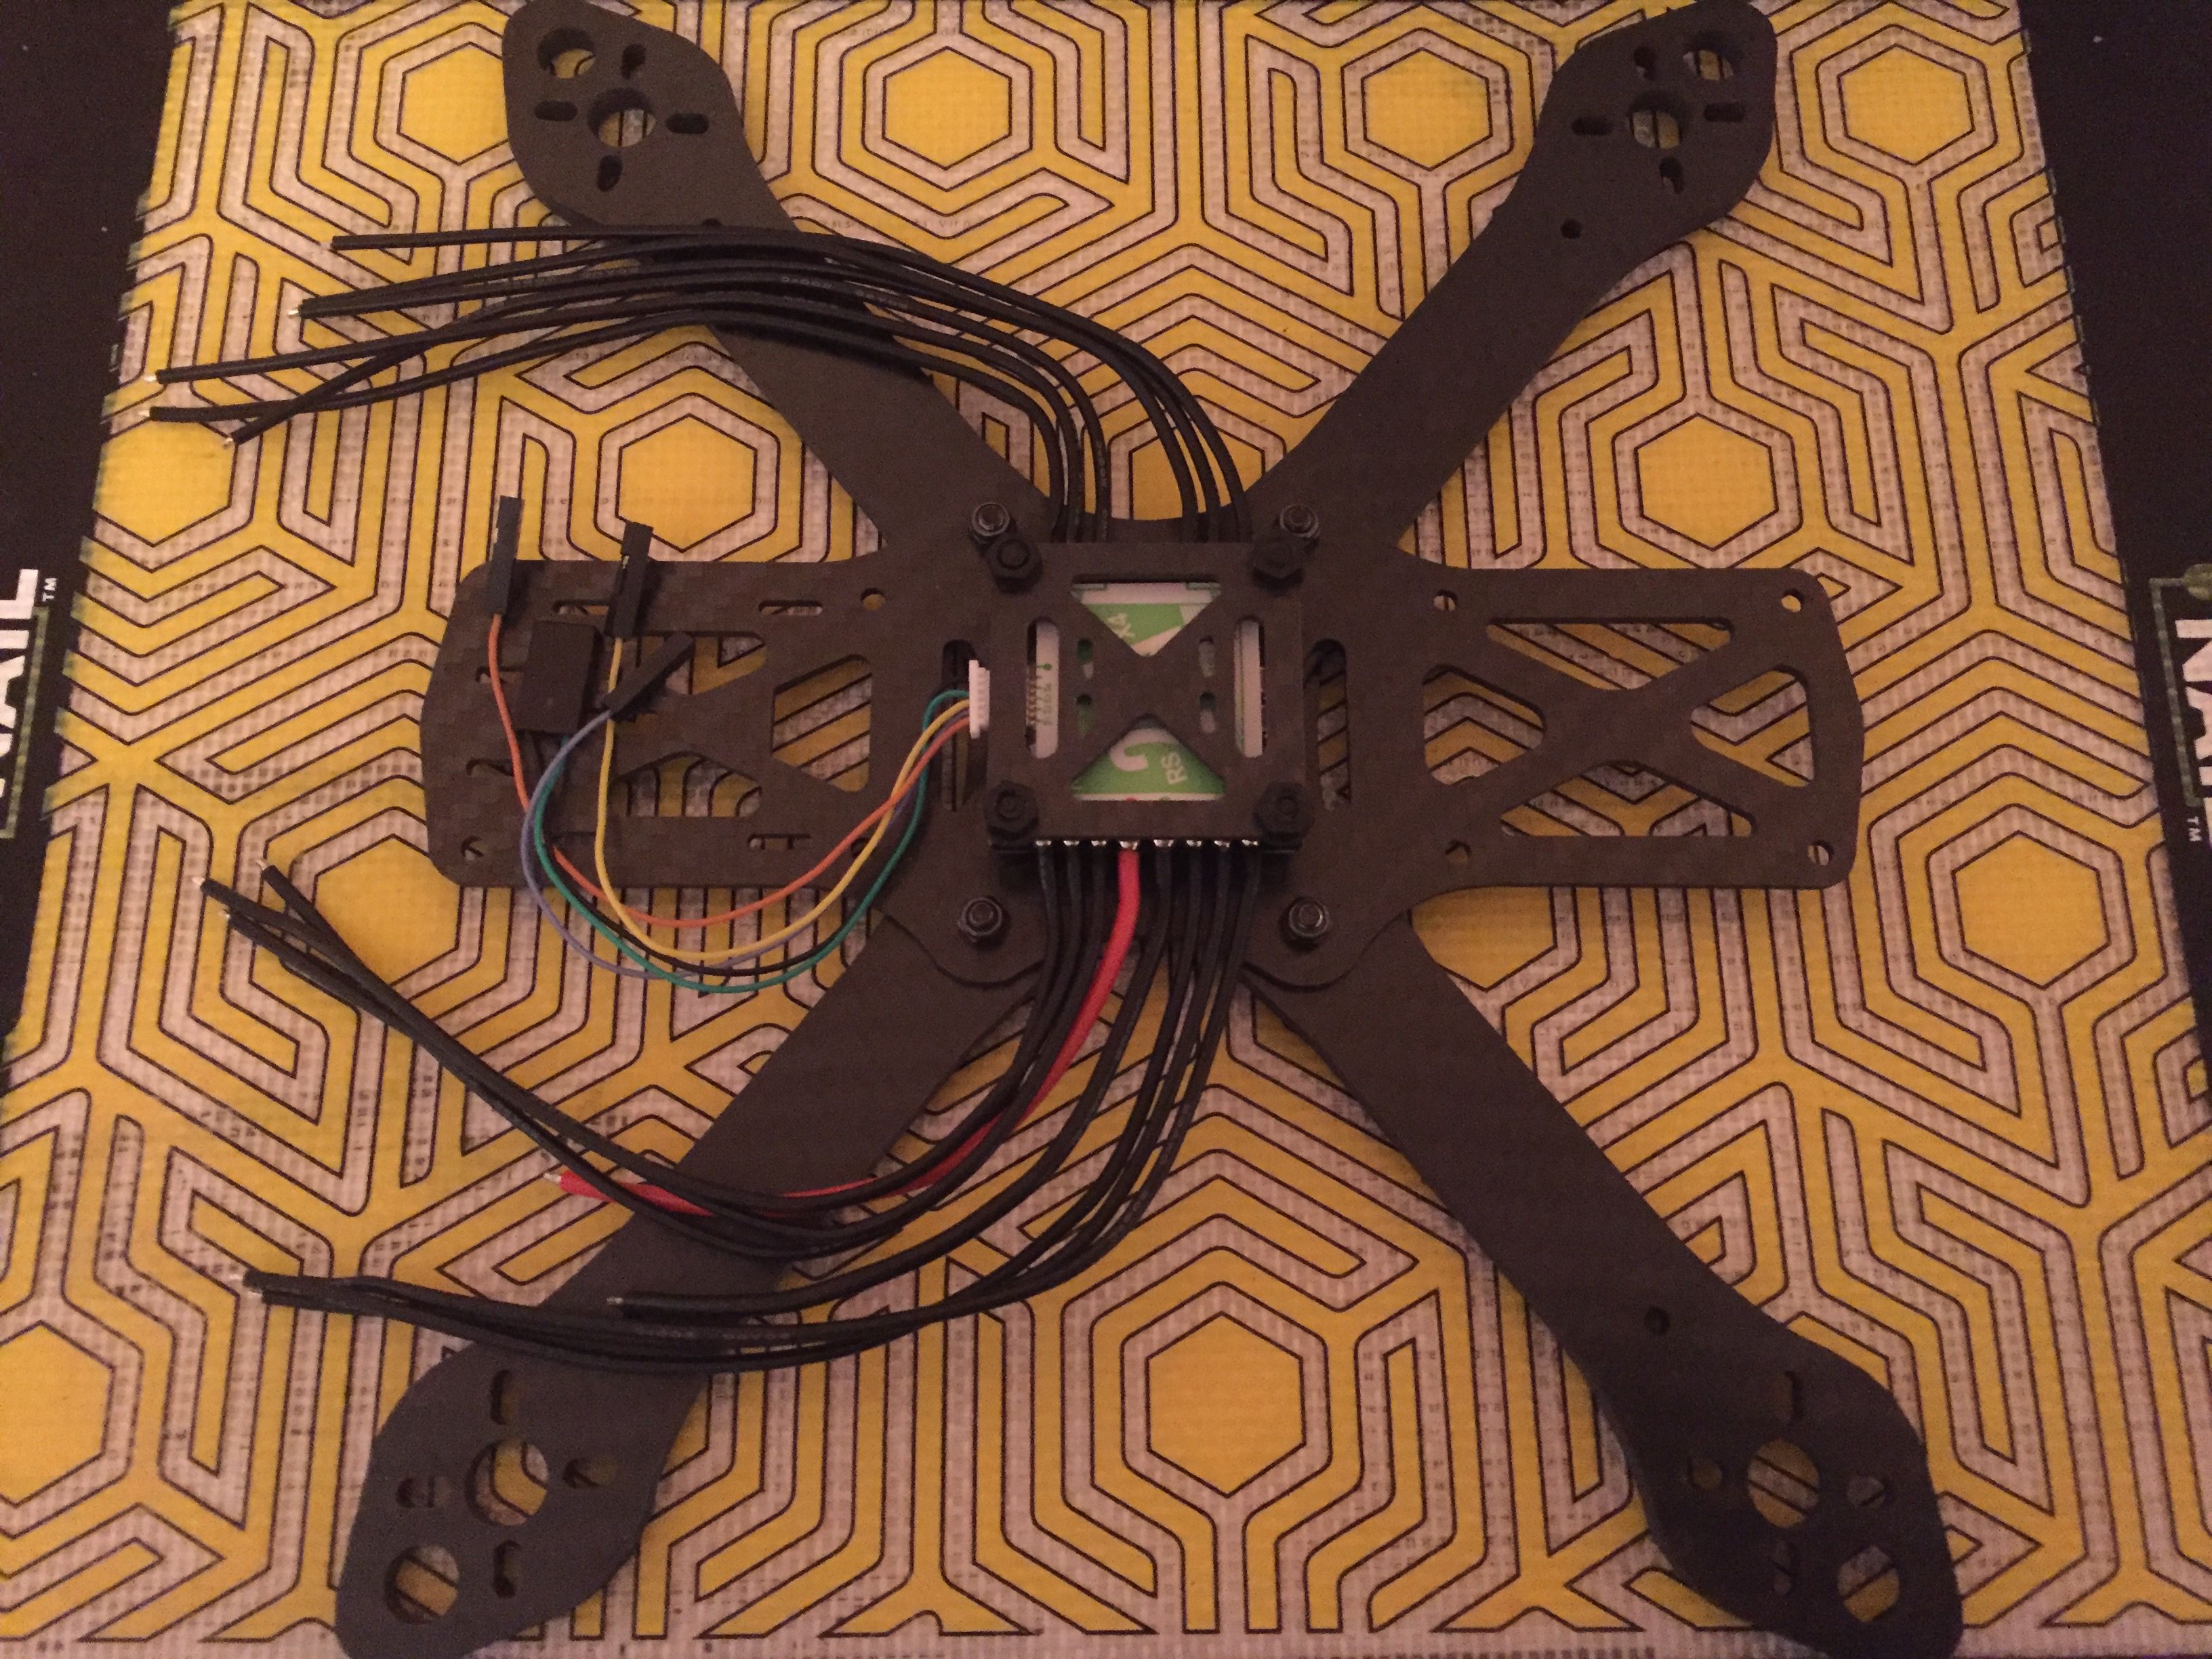
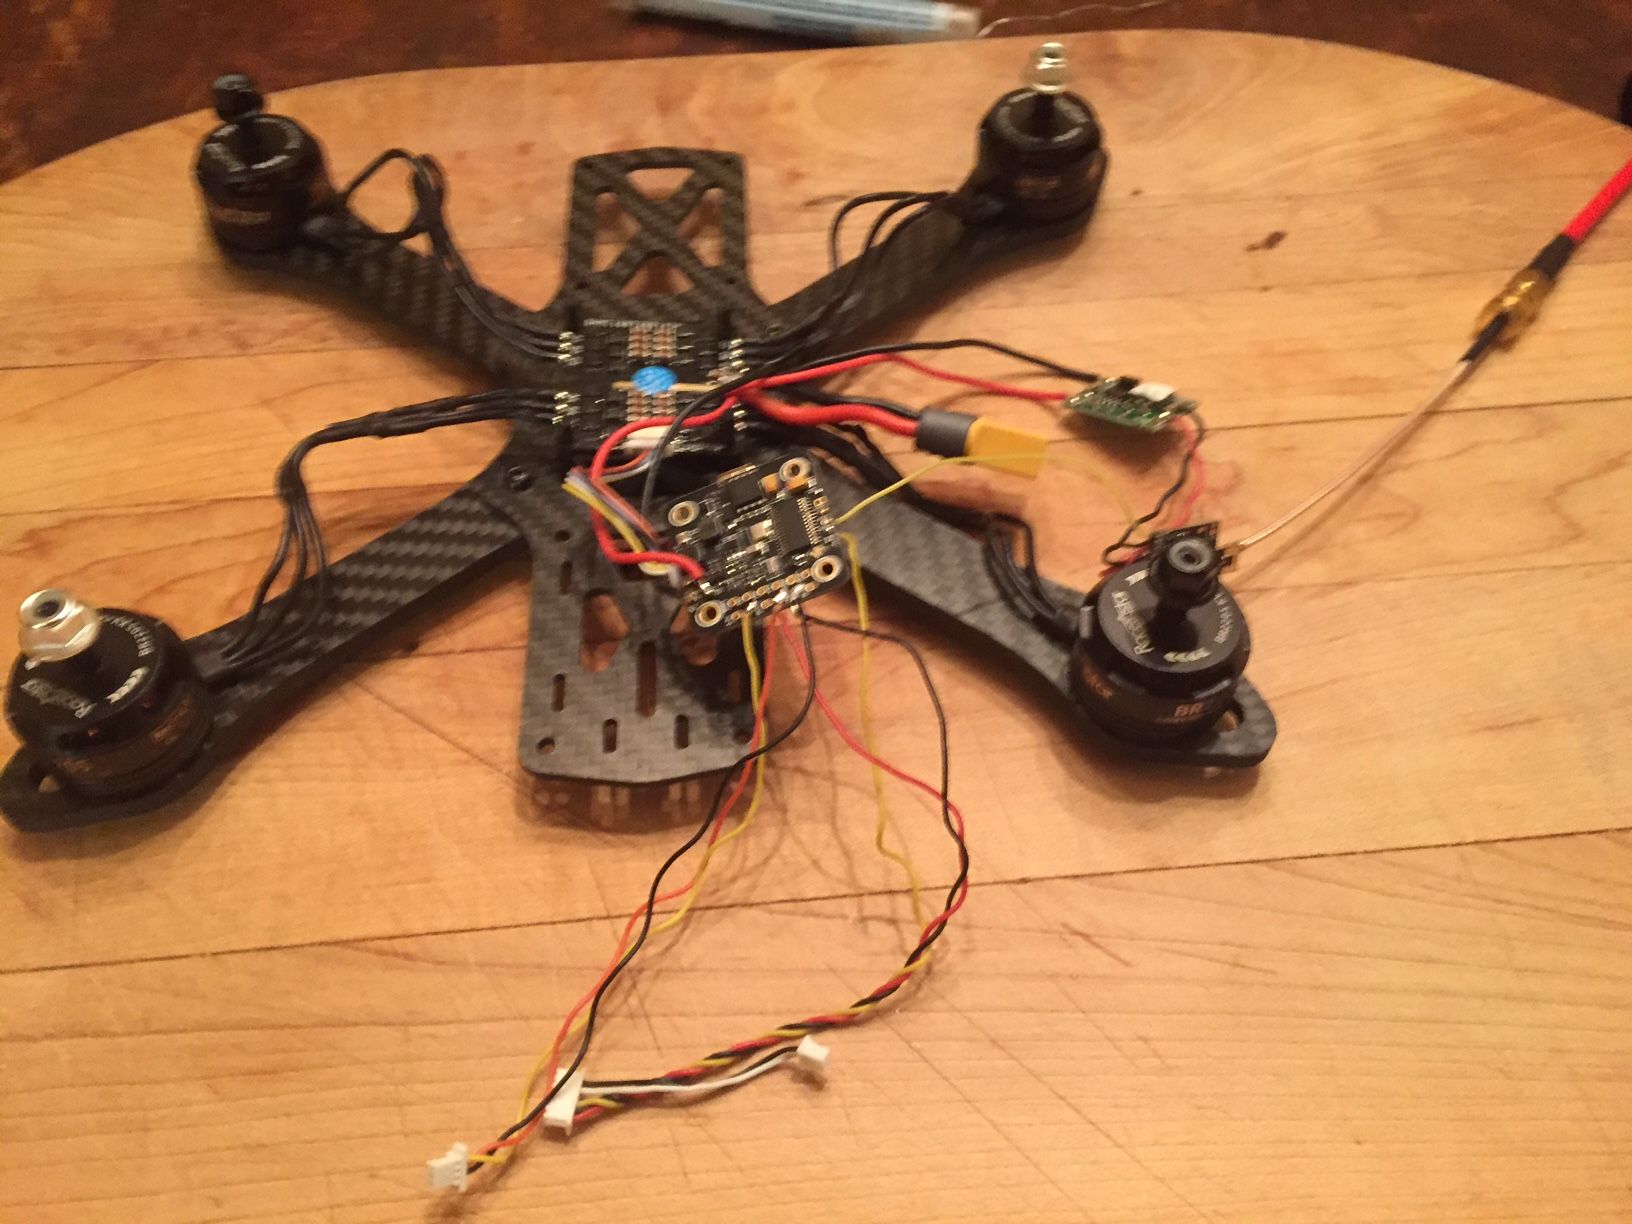
Then all the rest of my parts arrived. So I started the Build. I had some trouble soldering the new power wires to the 4in1 ESC. But ive never soldered anything before and my soldering iron is bad. I think it gets too hot and I need to replace it soon. I put the 16awg wire on first and then tried to add the 5v regulator and FC board wires on top but It all just mashed together. So i had to take it all off then I tried to twist them and tin them together and do them all at once. Its messy but it worked. I tried to mask off the other solder joints with tape so that I wouldn't bridge them and that seemed to help. (sister suggested this after I was stuck for a bit) After I finally got the ESC power wired on I was able to wire my motors and setup all the other components and tin the wires. I was having some trouble with my iron getting the tiny pins on the FC to pre tin. I tried to stick the tip of my iron in the hole pin and heat it and add a bit of solder but it only made balls of solder around the hole and didnt tin the pad. After cleaning it with Alcohol and trying I finally got things working. I did up all the wires and I grabbed my multimeter to test for Continuity / shorting. And Unfortunately I had continuity beeps on my Camera and Receiver wiring jobs. And when I tested all the 5v and ground on my board I had continuity there. I was stuck and started to remove my work that I did. Even after taking off the wires I was shorted and I couldn't see the short on the solder tinning. But I just took my Iron and I wiped off the balls of solder on the pads and after I did that I didnt have continuity on my 5v and ground anymore. So I rewired my Camera and Receiver and then it was all good when I tested it with the meter, No beeping. After I was sure with the meter that all was good I powered it up with battery and tested stuff. Motors were all spinning in betaflight so the wiring job was done. Tested my Camera and it was working. Bound the Receiver to my radio. I also bought some Silicone Conformal Coating. So once I knew all the systems were working I painted it on all my electronics and solder connections, (connectors will get Corrosion X). And gave it a bit to dry. Then I started to put all the systems in their place in the quad and button it up. Zip ties, foam tape, ect. I bought some Antenna tubes for my receiver antennas. I put them on the back of the quad standoffs with some shrink tubing and cut a hole in them for the two antenna to run through. They are placed 90 degree to each other. One going up and one out the back. I tested the Inputs for the receiver and got Ibus working. Then just went through some betaflight setup. Reordered the Motors with the CLI commands.
Type in "resource" = shows resources
Type in:
resource motor 3 none
resource motor 4 none
resource motor 3 A02
resource motor 4 A03
save
hit enter
Then I was able to connect to BL Heli and reverse the motors that needed it and Flash the ESC for DShot commands. After that I did some more betaflight stuff like my rates and arm switches, ect. Everything was in its place and working so I put some props on it and took it outside to test. When I tried to fly it flipped out and spiraled into the ground. I double checked my motor and prop direction and I knew I had it right. I got a tip to check my board orientation and look at the 3D model. It was all wrong and I didnt look at it before flying. So I changed board orientation and checked to make sure the 3D model was right and then took it for the first real Maiden. It Flew !
Photos
Part List
Show stores (2)
How's that bottom mounted arm configuration holding up? I've always done this with the arms mounted above the baseplate.

https://www.youtube.com/edit?o=U&video_id=Le8zxjTOi0g
I put a more higher powered VTX in the Build so I can fly from inside during the winter. I also switched over to Frsky and Taranis radio system. And I wired up Camera Control on the LED pins.
The plan is to use this as my beater quad over the winter. Its been Silicone conformal coated and the connectors got corrosion X. I wanna fly it in snowy conditions but If I crash in the snow I dont think I will fly after. I will give it time to dry out first.
Apparently I soldered my entire quad with an Oxidized tip that was never pre tinned. I have a 7 dollar iron that I used and the tip was heated up without being tinned when I used it to put a power lead onto a tiny whoop. So after watching some youtube vids about soldering I learned this was my main problem with soldering. I polished the tip of my Iron and then wrapped it with some solder and tinned the tip. Then I did a wiring job joining some wires on a car to test the Iron and it was working alot better.
Out of the box I used the Default Foxeer camera settings for a couple of flights. When I was flying back and forth the camera was going from light to dark and some things were a bit hard to see. So I changed my settings on the camera with the OSD and the included menu device. I set everything up according to how Steele says in his camera settings video. The important settings are to turn on wide dynamic range and adjust the contrast. Also a few other things I changed.
I did a flight test with the new settings and it seems better for flight. I can see tree's better and the switching of Light to Dark when flying in sun or shade is gone.
2nd day with my new quad and Ive been doing some battery test flights in the Backyard. Getting comfortable with flying it. But so far I am extremely pleased with how its doing. I have about an Acre of yard to fly in with some big trees to avoid but I was doing good buzzing around the yard and seeing how my video was in places. I did a few 7 mins flights just going easy around the yard and came down with 3.8v per cell. Then I did a few little 3/4 throttle punch outs and Just flying around my yard I got about a 10 min flight time and came down with 3.7v still. I even did my first couple rolls and a flip on that battery.
The quad is flying pretty well and It feels alot like the Simulator LIftoff I have been playing. I practiced my rates on that Sim and when I fly my quad it feels the same.
I use the rates that Steele showed in one of his recent vids:
1.93/0.66/0.22
1.93/0.66/0.22
1.54/0.66/0.22
I was rained out for a couple days but ive been able to do some more flights. I was flying with Dynamic Filtering, Antigravity, PT1, and with the first Notch filter turned off. I only noticed some propwash when I would go really high and then do a split S going fast back to the ground while burning off some speed. But after I turned off the second Notch filter the propwash seems to be gone. Its flying smoother now and I dont see any vibration. It's not as loud with the second Notch filter off either. I checked the motors and they are still very cool. I might test turning off the D term notch filter later but right now I dont see any problems with how its flying.

I hope that foam tape/zip-tie FC mount is good for you, why not just buy a full size one and just screw it onto your stack? Also why not screw the reciever to said stack?
I think for any future builds or replacements I will buy a 30mm FC and mount it on the stack, I was just going cheap for my first build so I went with this little omnibus. I plan on turning off the accelerometer and not using any auto level mode, so this soft mount should be ok. The reason why I put the receiver in the back is because the antenna's are not long enough to put it in the stack and still have them mounted the way I do.
I have a lil 100mm brushed guy I made to learn LOS acro and its FC is just held in w/foam tape, so I feel good about it WORKING for you, but I have sheared my FC off its' nilon mounting bolts when crashing on asphalt in my 220 brushless. I just don't want it flopping out on you in a hard crash, the quad you have it in has enough mass to really chuck it. It might not be an issue w/the zip-tie. Honestly interested to know how it works out for you, I can imagine it never being a problem just as easily as I can imagine it flapping around like a screen door in a hurricane.


Very nice build. I'm about to start a Martian II myself and I'm using the same speed controller. I noticed that in your pictures, you don't have the motor wires for motors 3 and 4 crossing over each other. Is that because you reordered your motors using the CLI commands you supplied?
Crossing over one Motor wire makes the motors run in the opposite direction. But instead of doing that I went into BL heli and I reversed the direction of the motors there. Its another way of doing the same thing with the configurator. It just tells the motors to spin the other way. I also saw UAV futures once take all 3 of his wires from the motors and swap them, if you mean that then Yes you can use CLI commands to reorder the motors instead of swapping or crossing over all the motor wires.
I was talking about crossing the wire bundles over each other, not crossing wires to change motor direction. I want to use CLI commands to change the order of the speed controllers so I don't have to cross bundles over each other. I've only ever seen the UAV Futures video when Stew crossed the bundles over to get the wiring to the correct motor. I'll give it a shot once my controller arrives. Thank you for your help.
This video is exactly what I was looking for. Great resource for anyone wanting to reorder motors using CLI commands.
Yea UAV futures Stew did it that way to avoid doing CLI commands but they are pretty easy and its good to learn how to use the resources.