
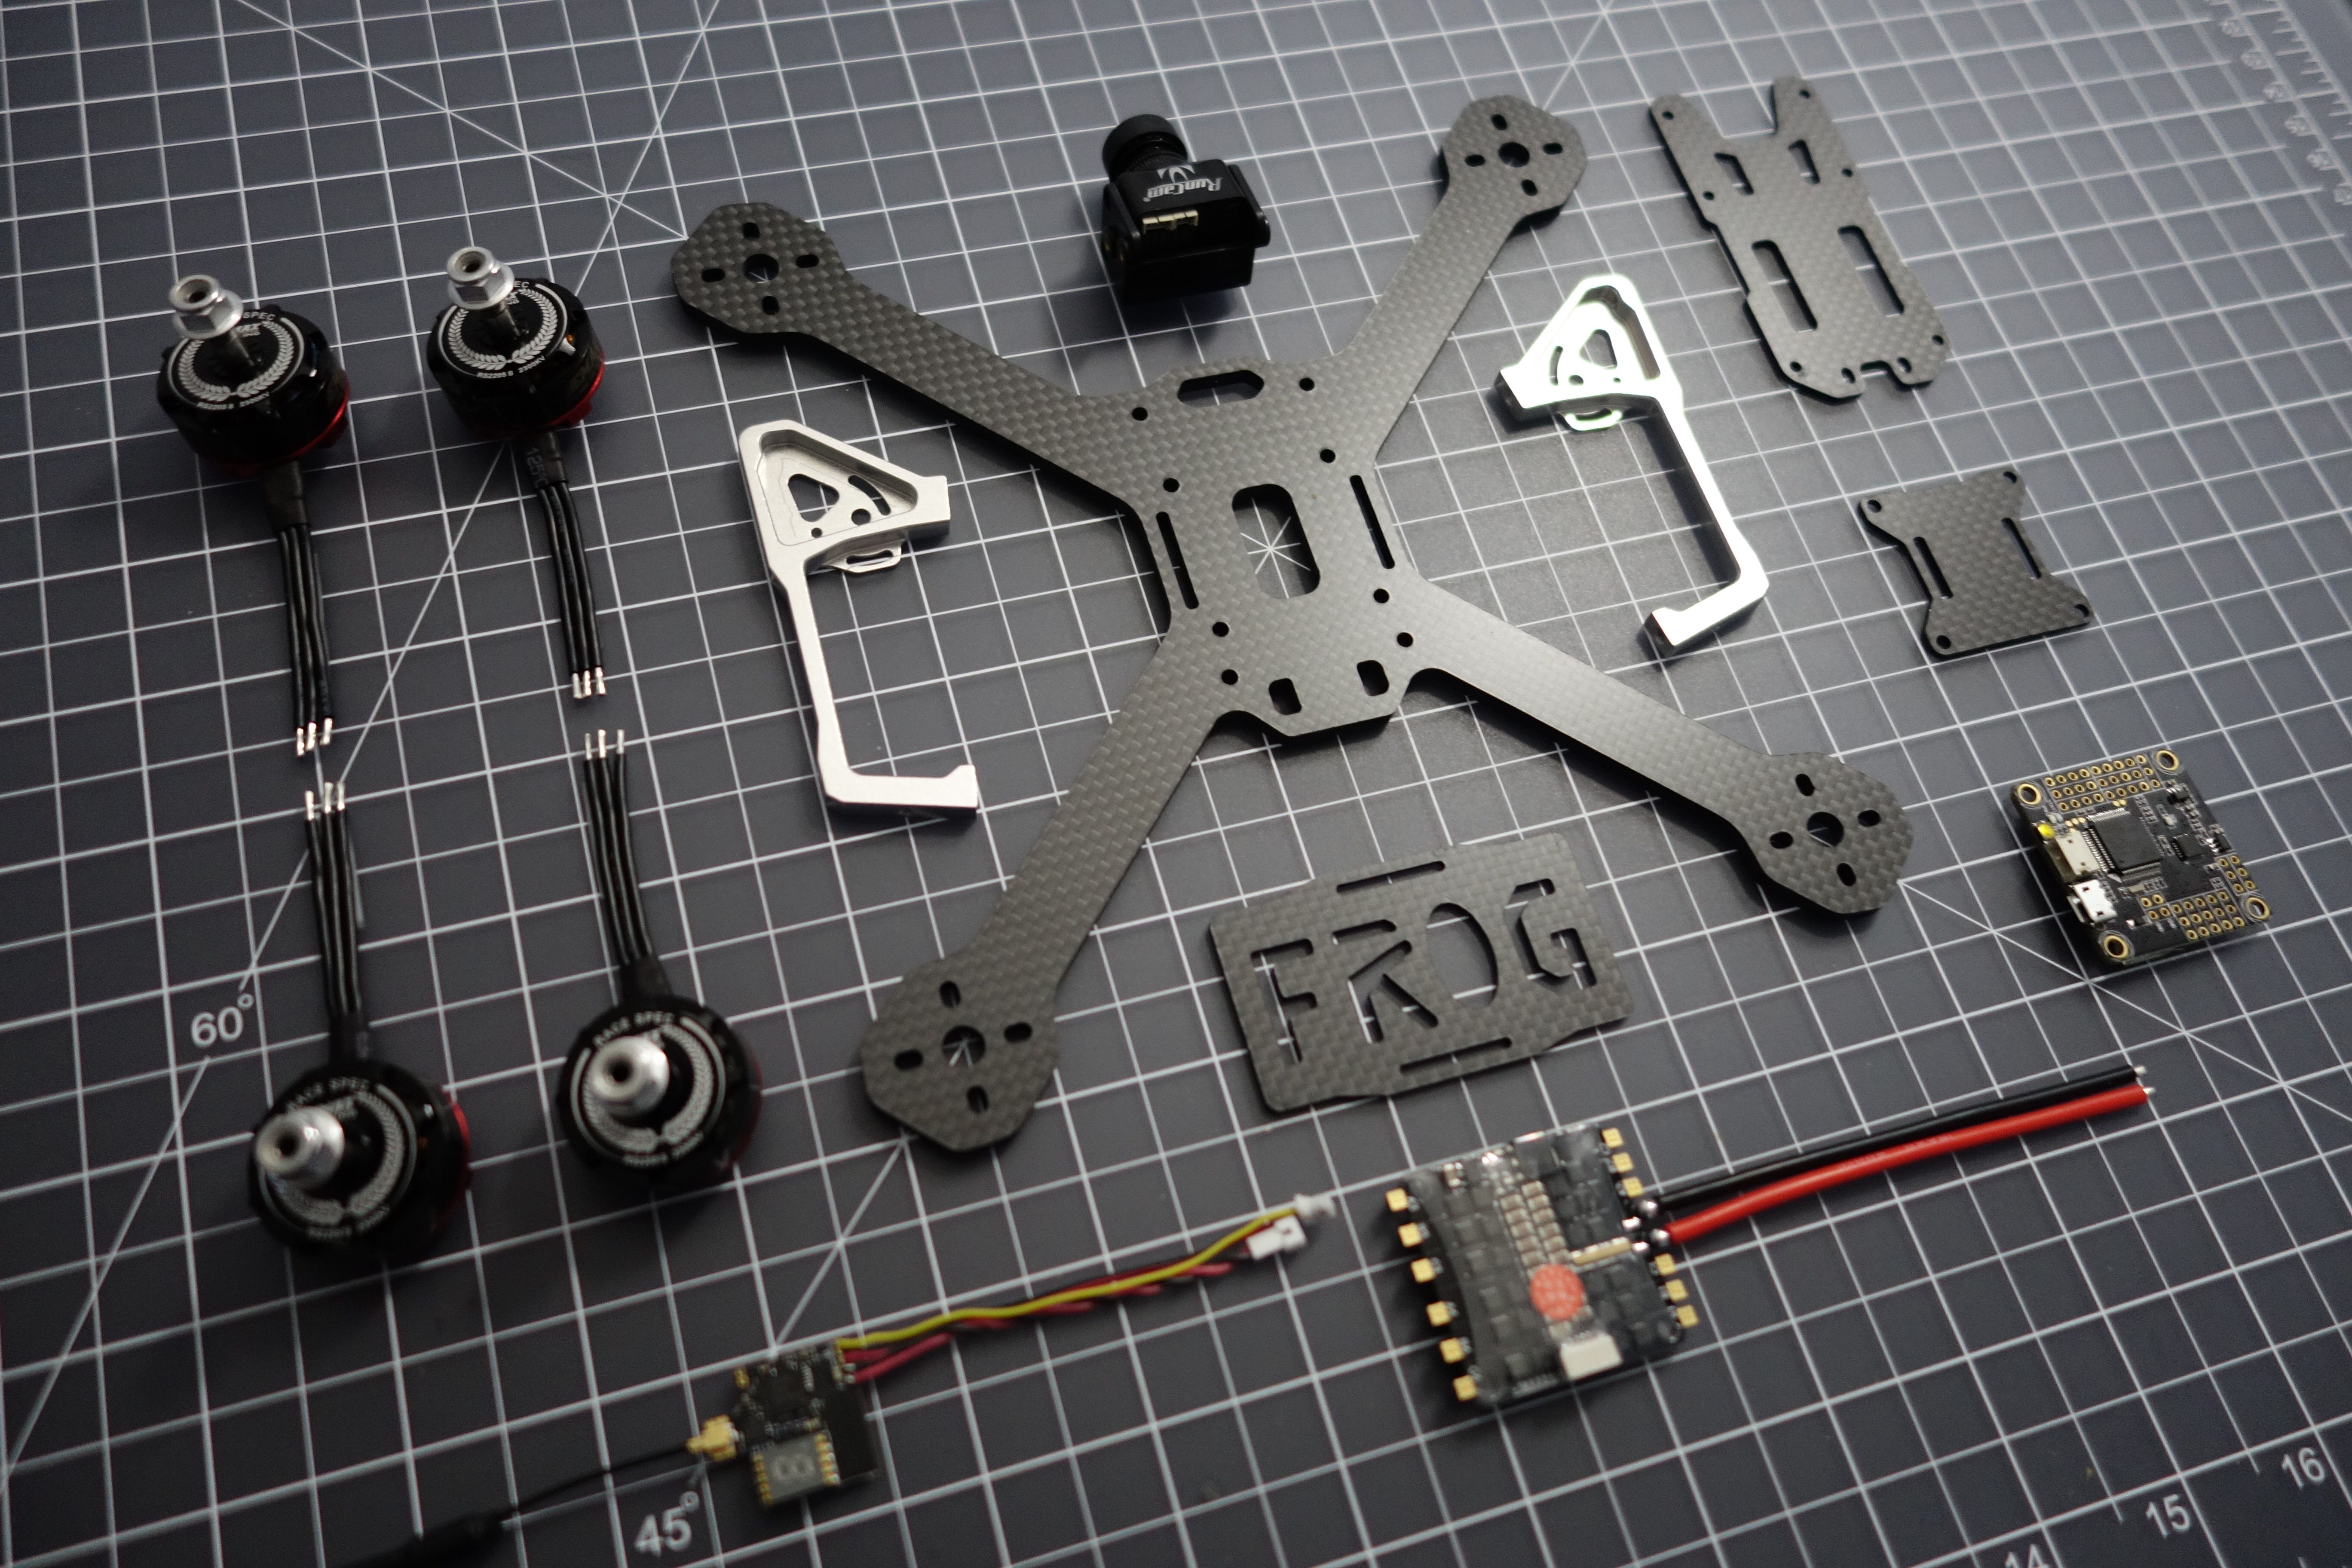
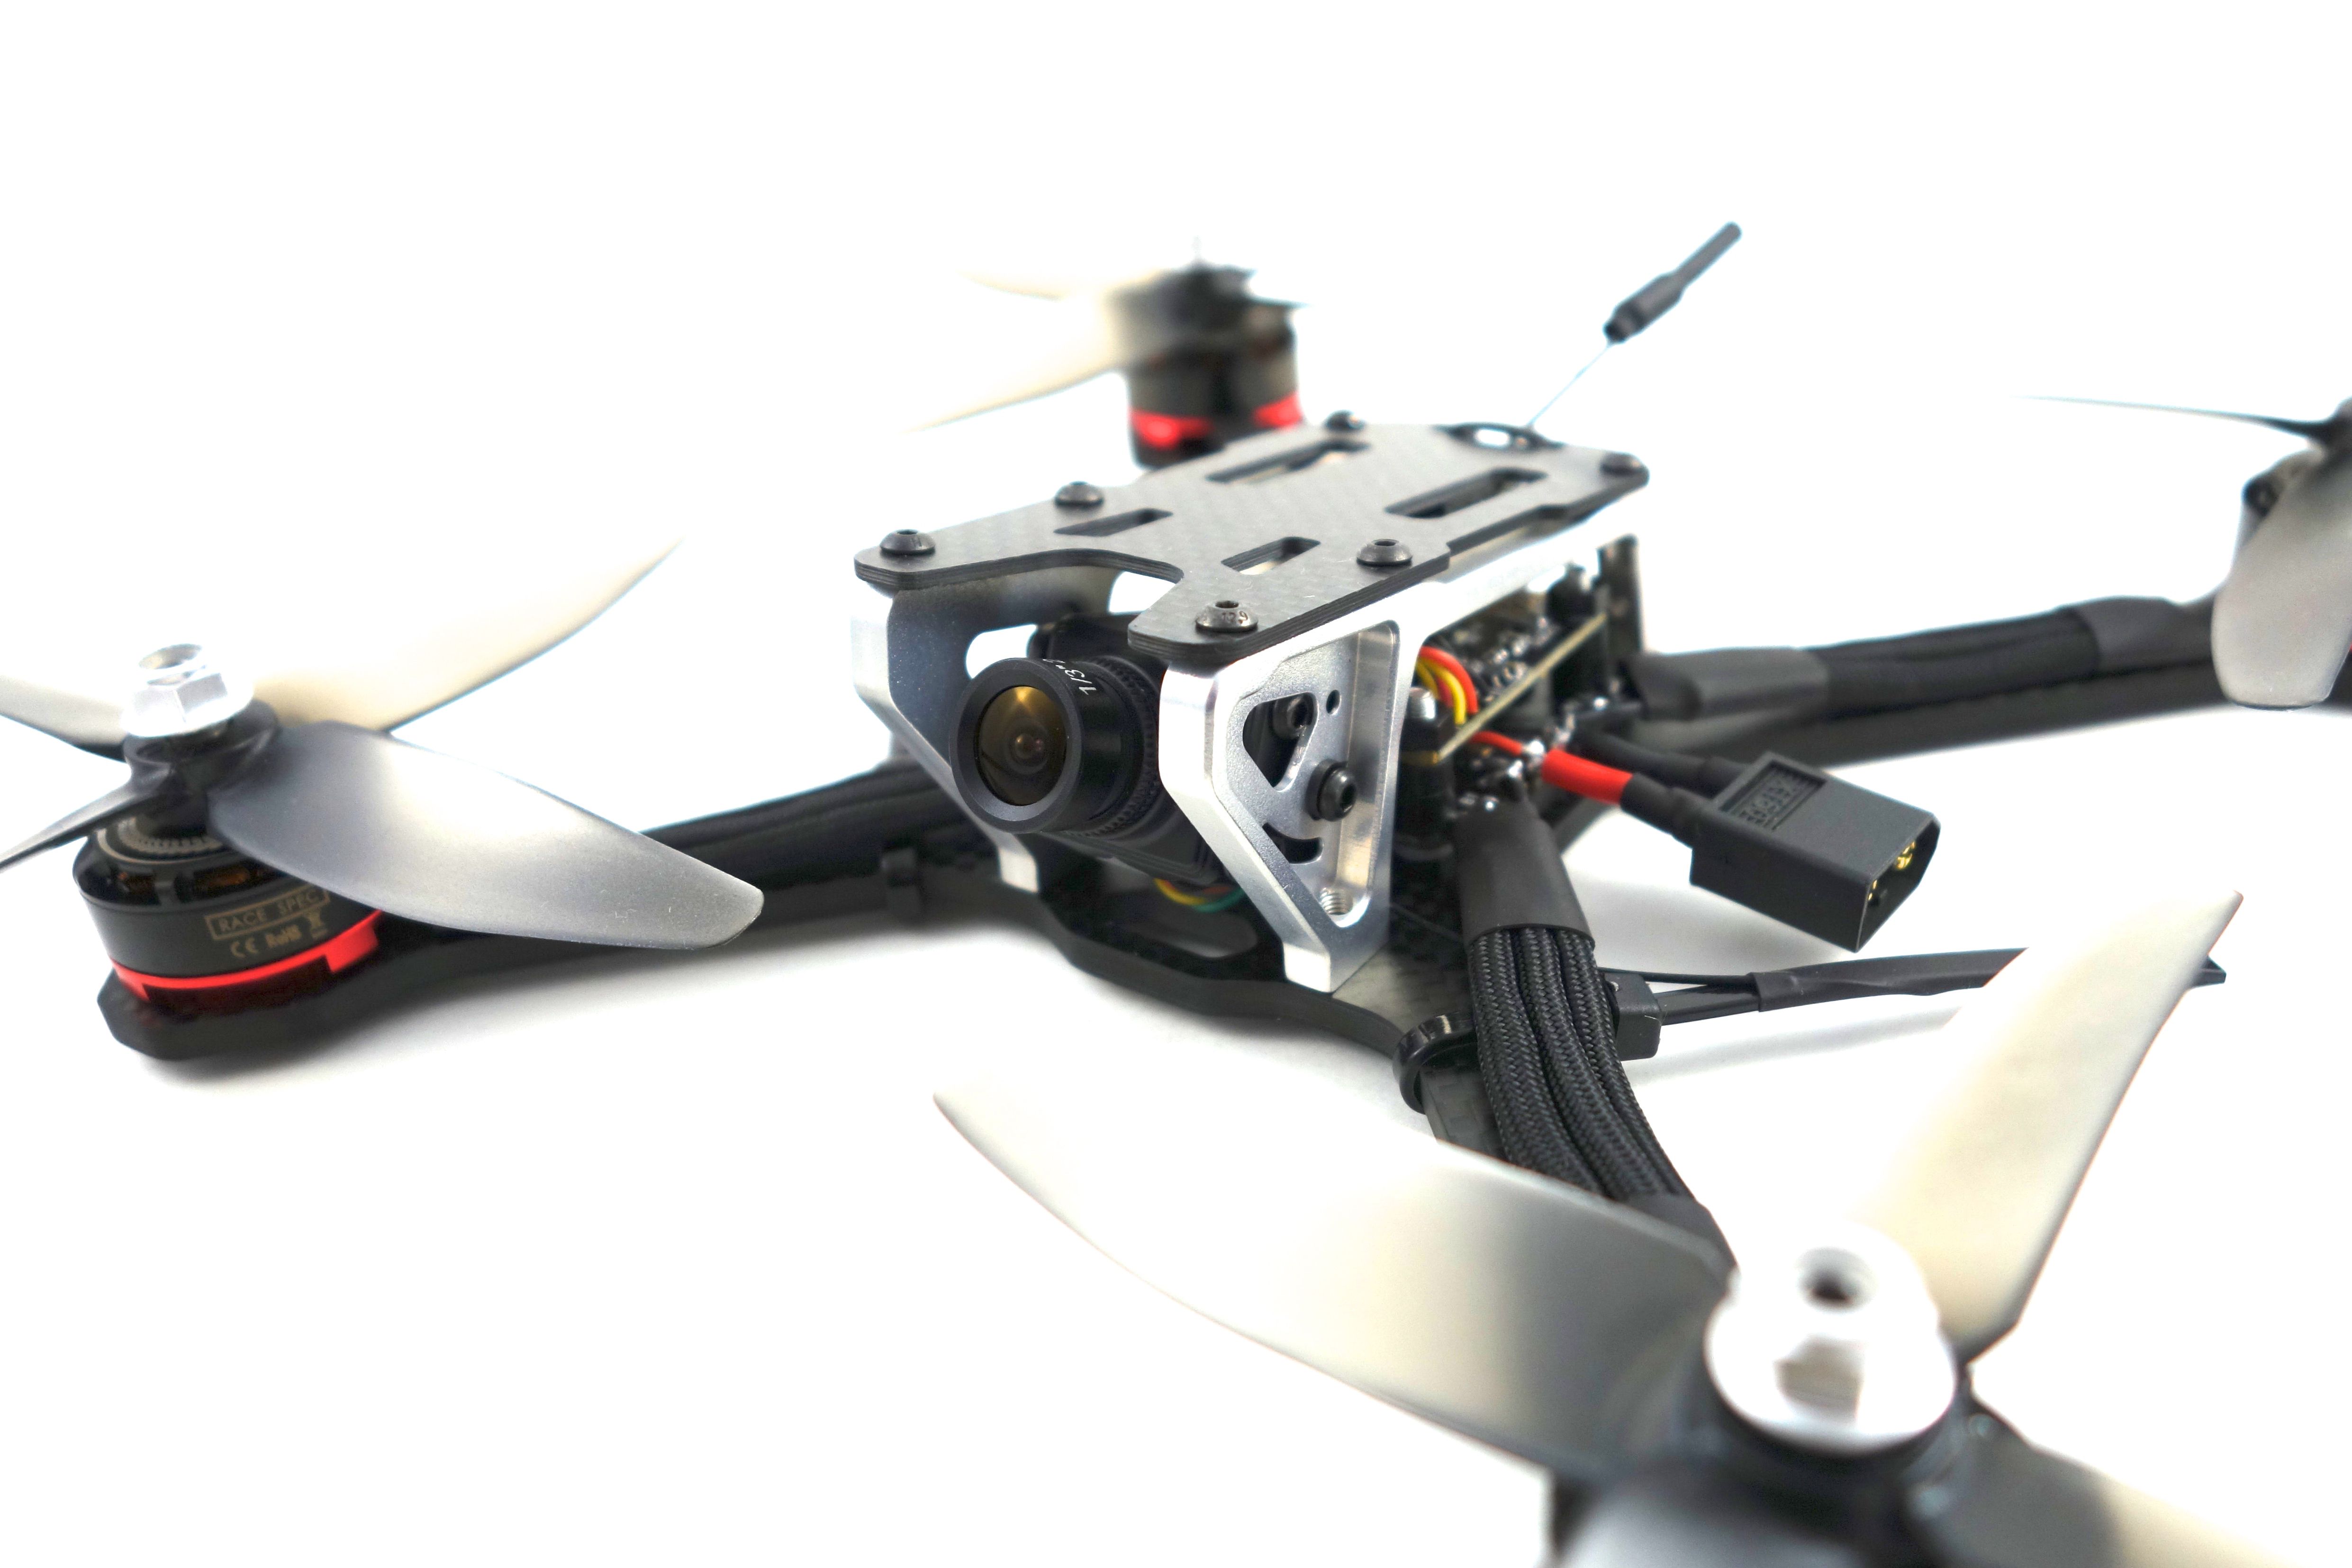
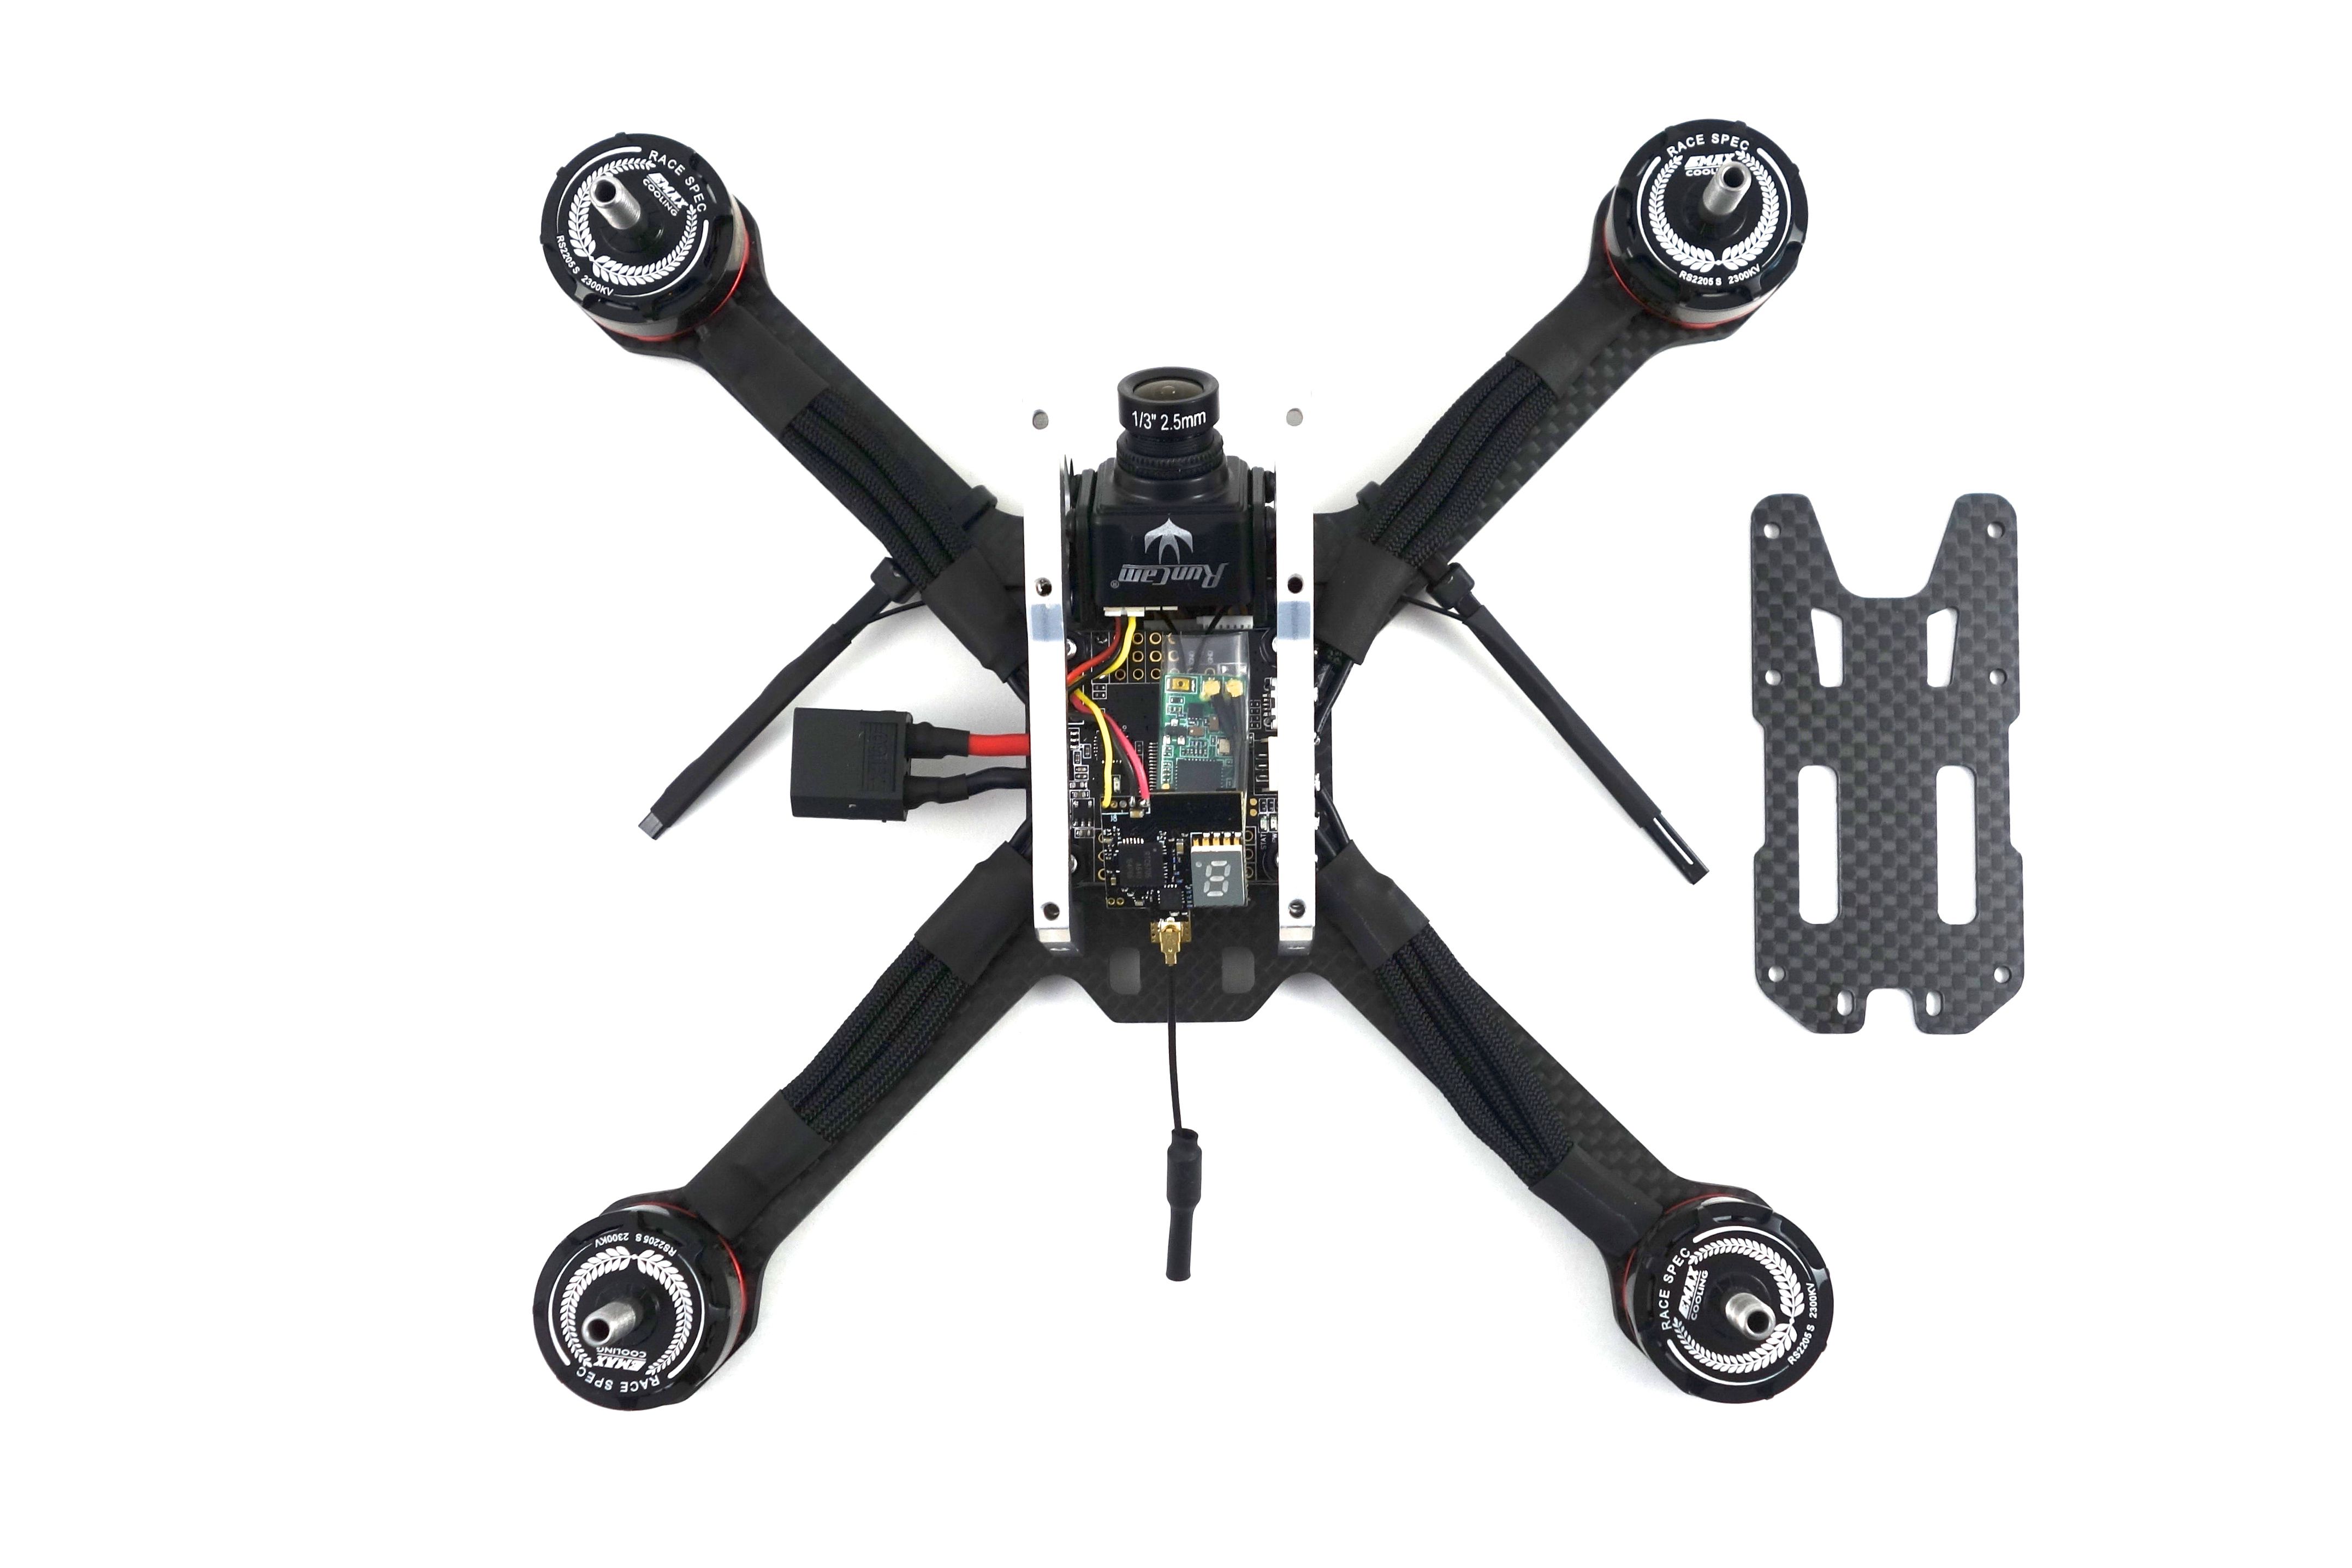
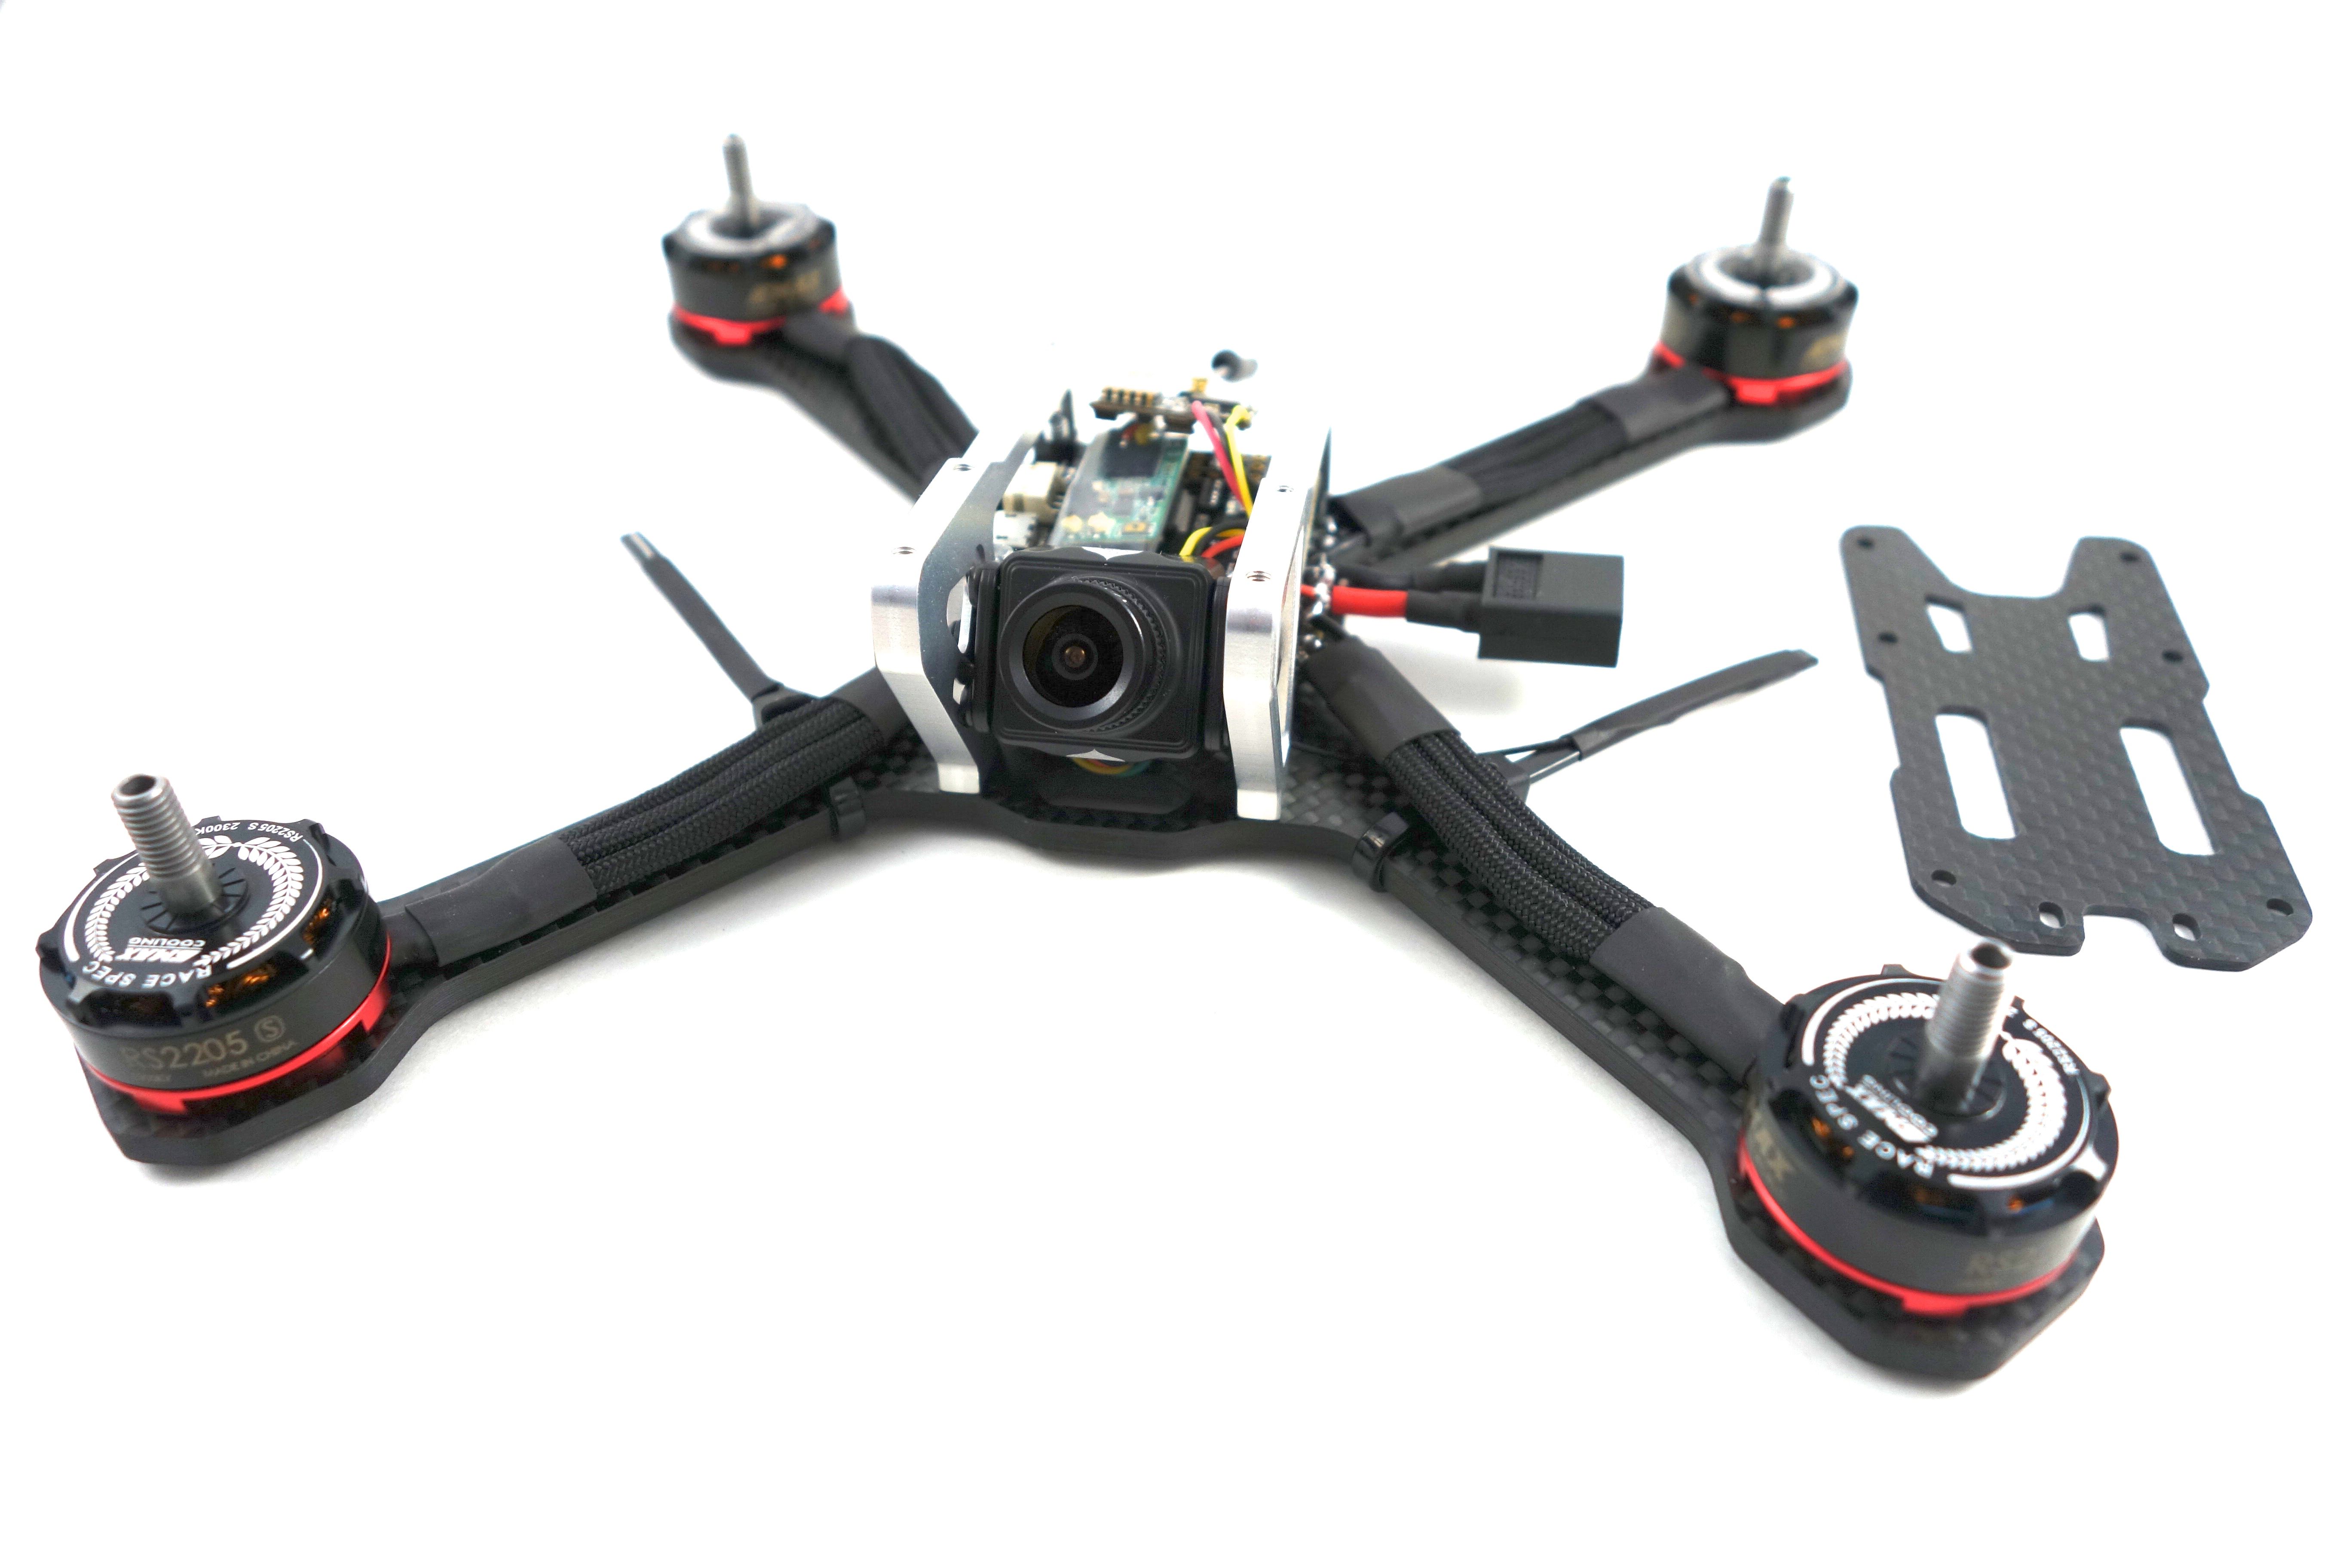
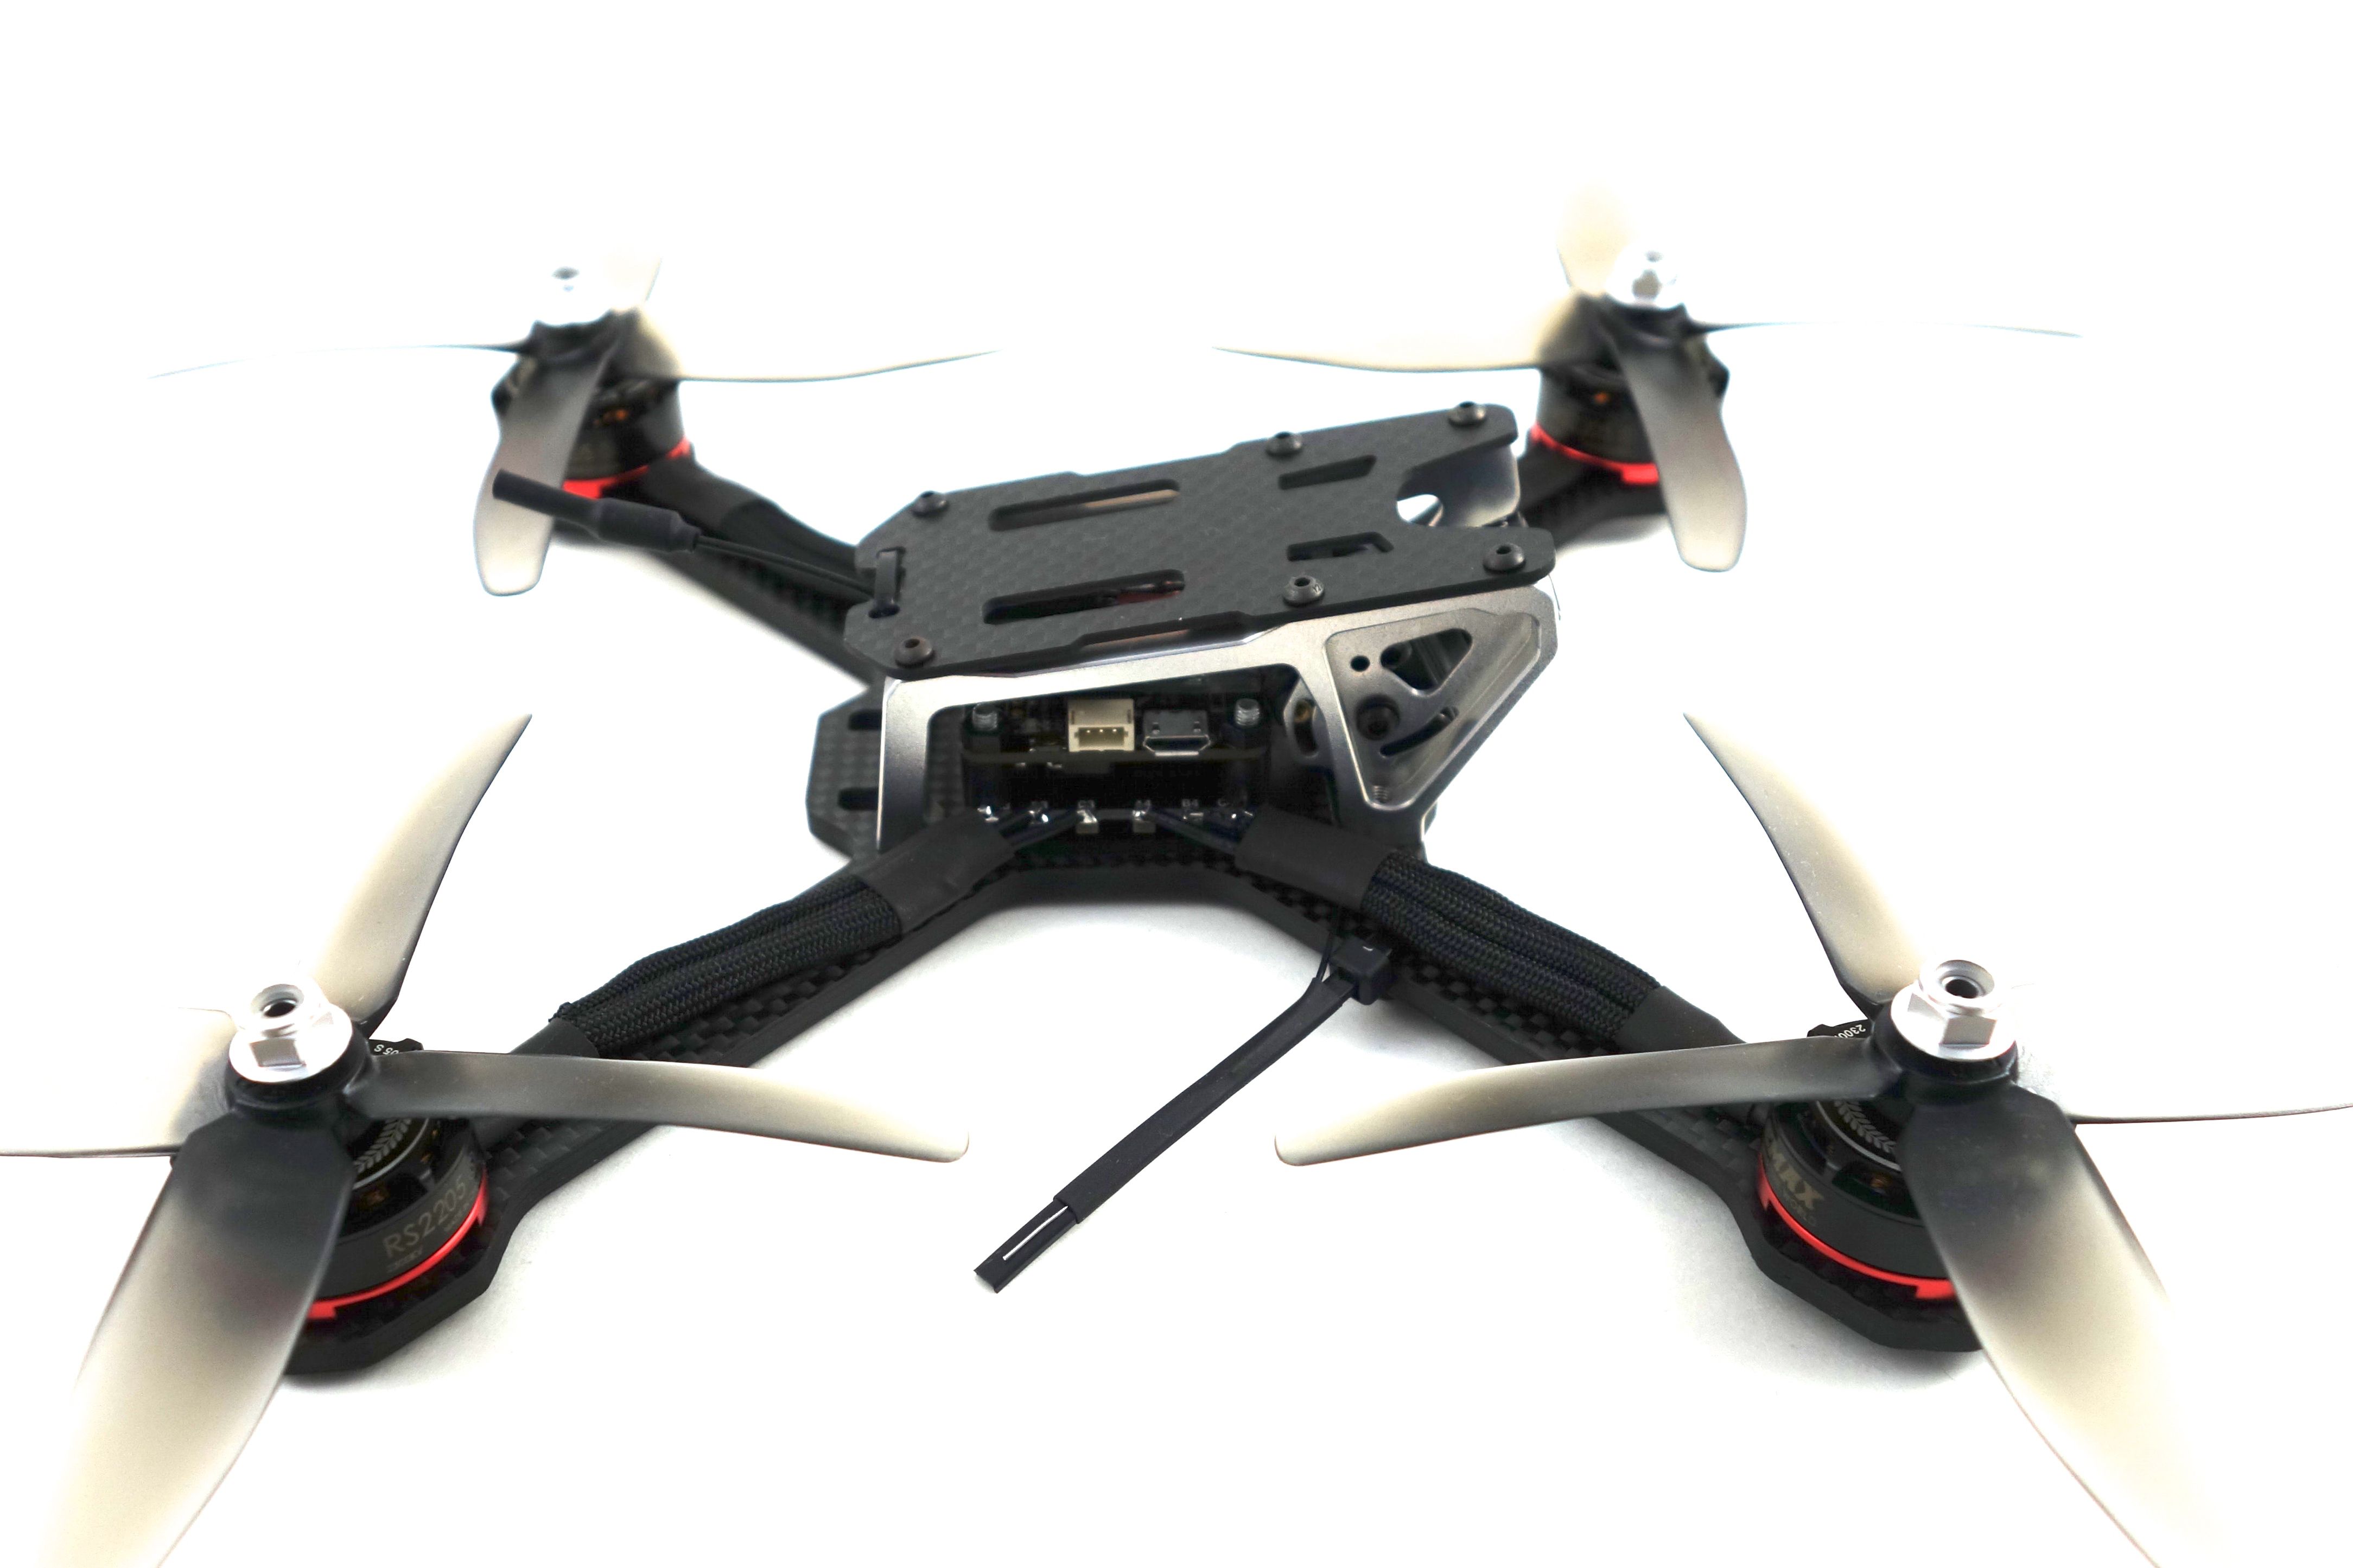
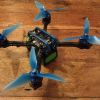
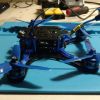
I really liked the look of this frame, so I thought I'd put together a semi-budget build around it. While it's a tight fit, it's an easy build and weighs in at only 286g. This build supports Dshot600 and offers OSD for voltage monitoring and a built-in blackbox for tuning. It can easily carry a Session or Runcam 3 with a bottom mounted battery, but you can top mount at the cost of an HD cam. These motors are great middle-tier motors, so you've got a wide variety of prop options. I'd probably avoid running 5051s, but you should be fine running up to 5048s.
Apart from the parts listed below you'll need a few additional items that no bench should be without:
- A nylon nut set with 2mm nuts and 1mm spacers
- Shrink tubing
- 20awg wire
- Double sided tape
- Zip ties
- Blue loctite
Making it Fit

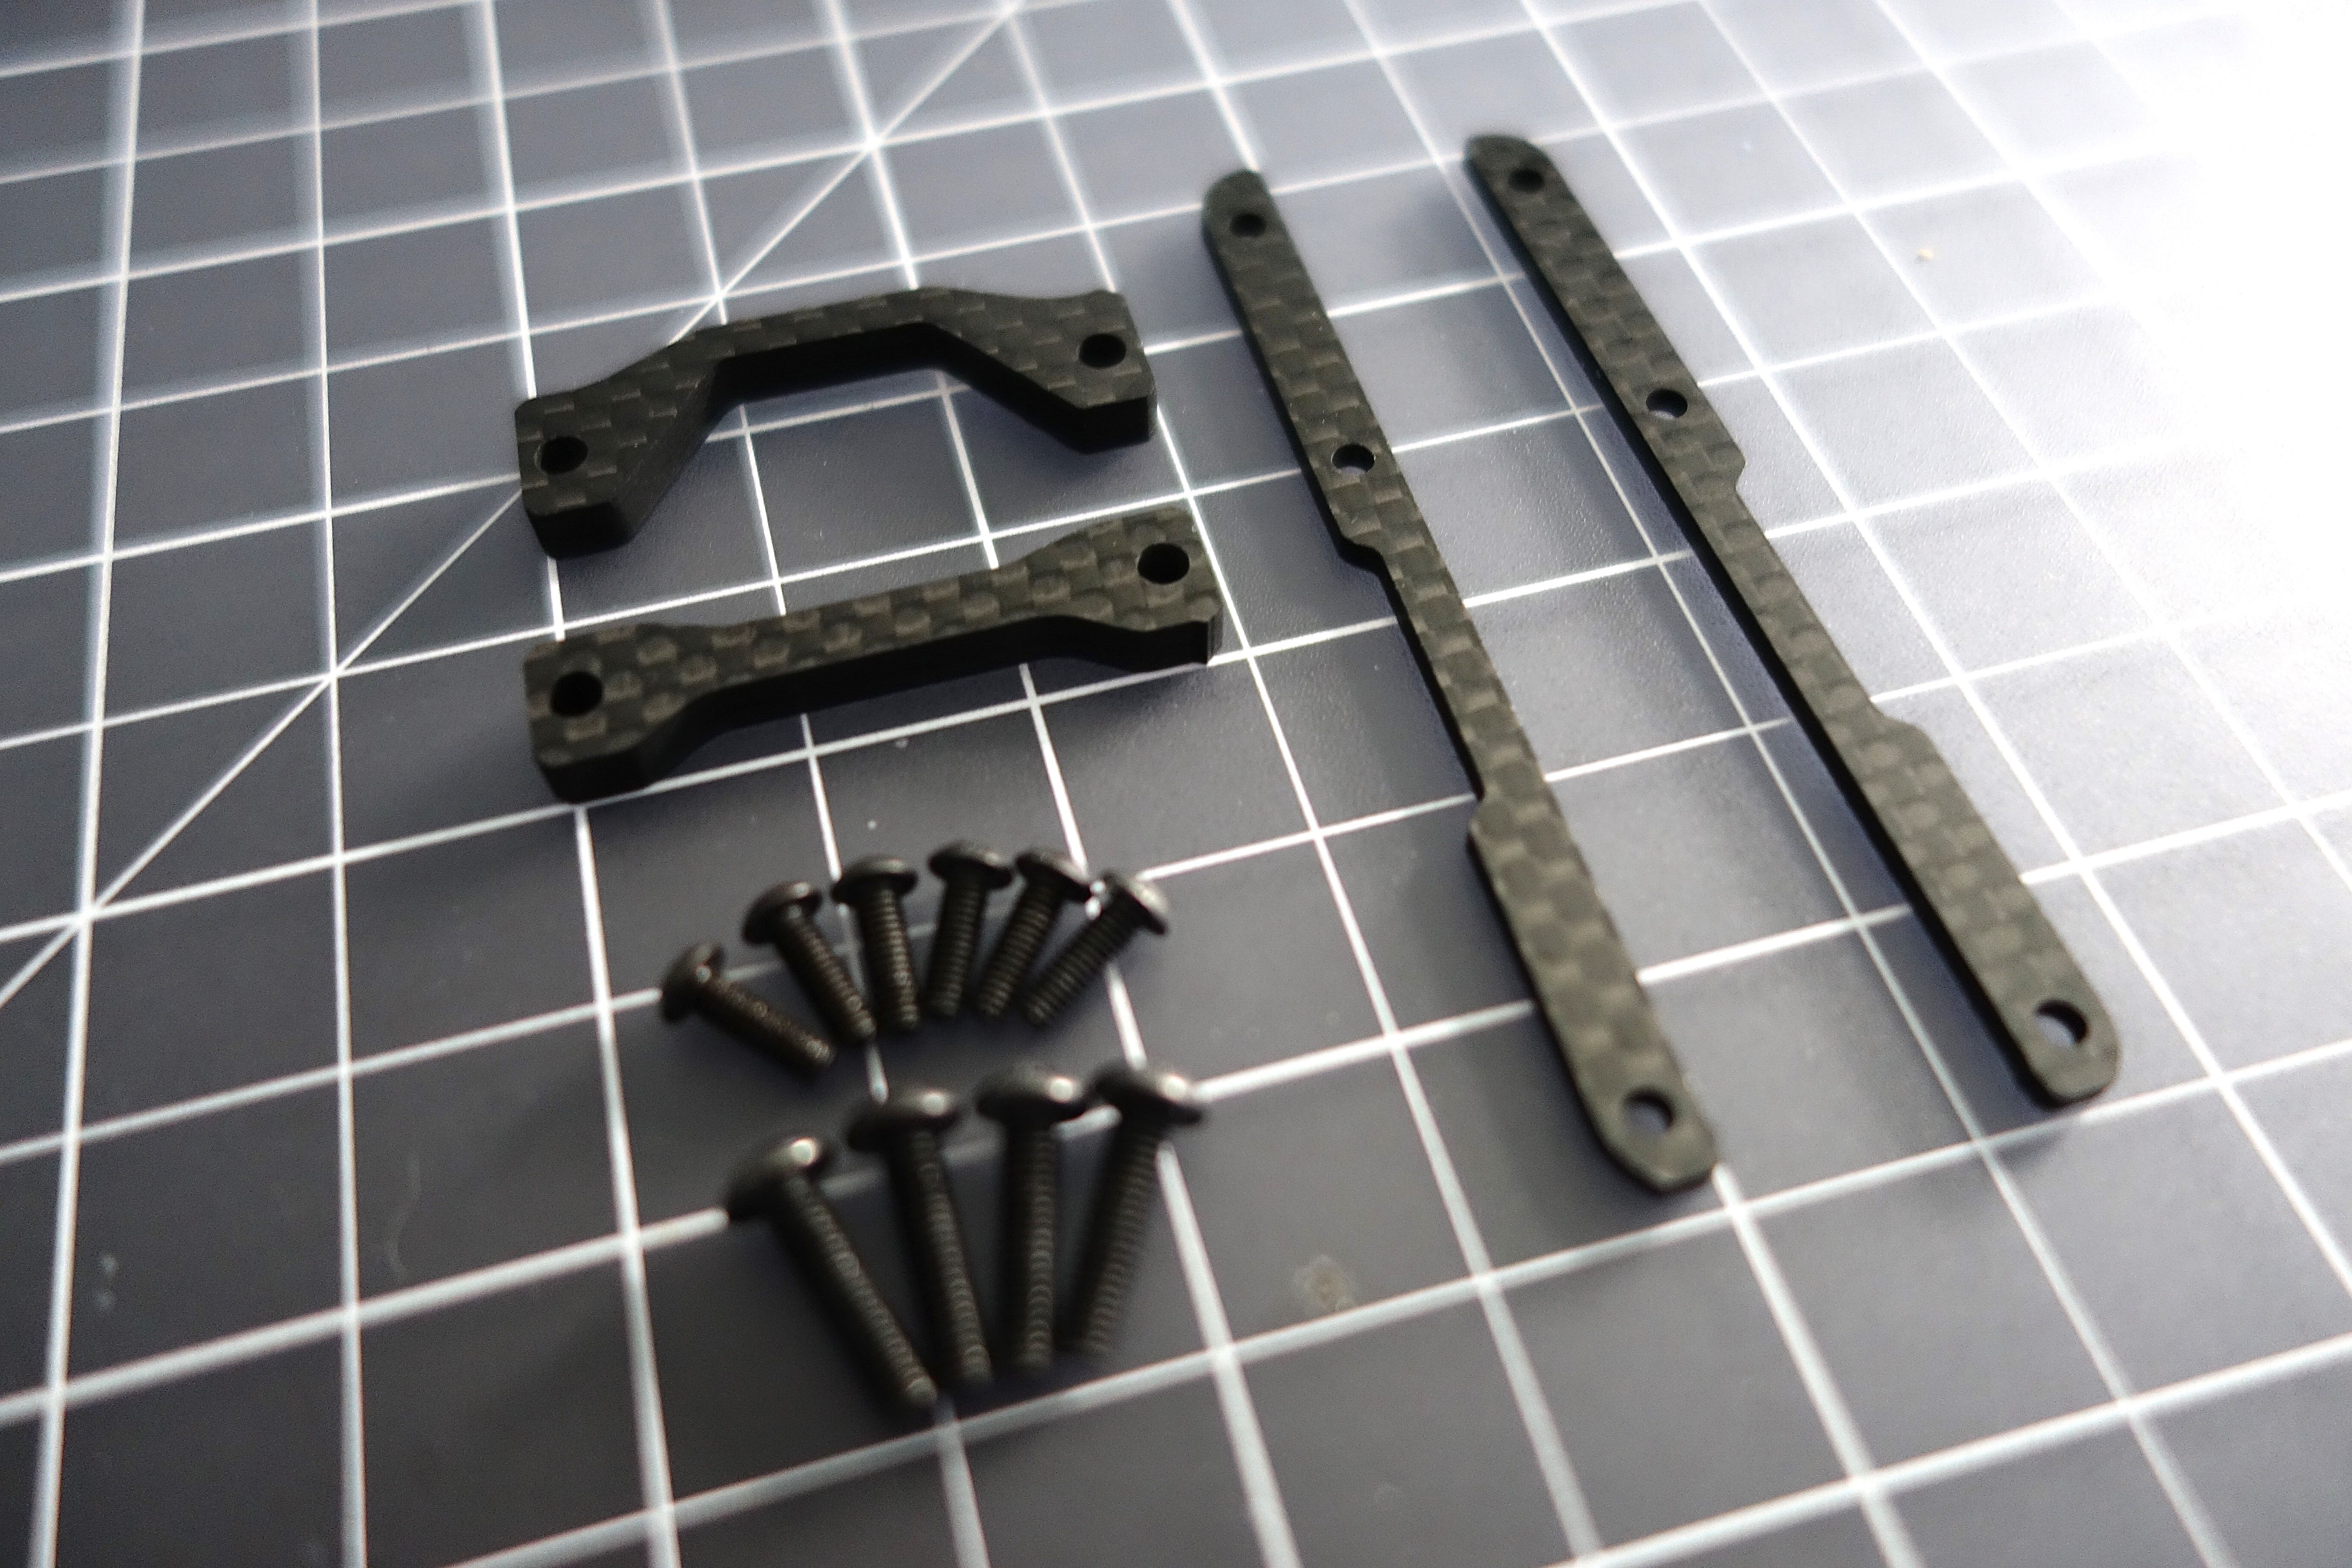
The frame is a little tight, but they offered some extension pieces to raise the stack area by about 4-5mm. If you have a large RX you may need to use them, but an XM+, X4R or Spektrum Satellite should fit fine without them. There's very little documentation, so it's not obvious what these are for. I've seen these extensions used on the back of the frame where the LED panel goes for stack protection and possibly a resting place for a larger antenna. The longer pieces only add about 1mm above the stack, so I don't see much reason to use these.

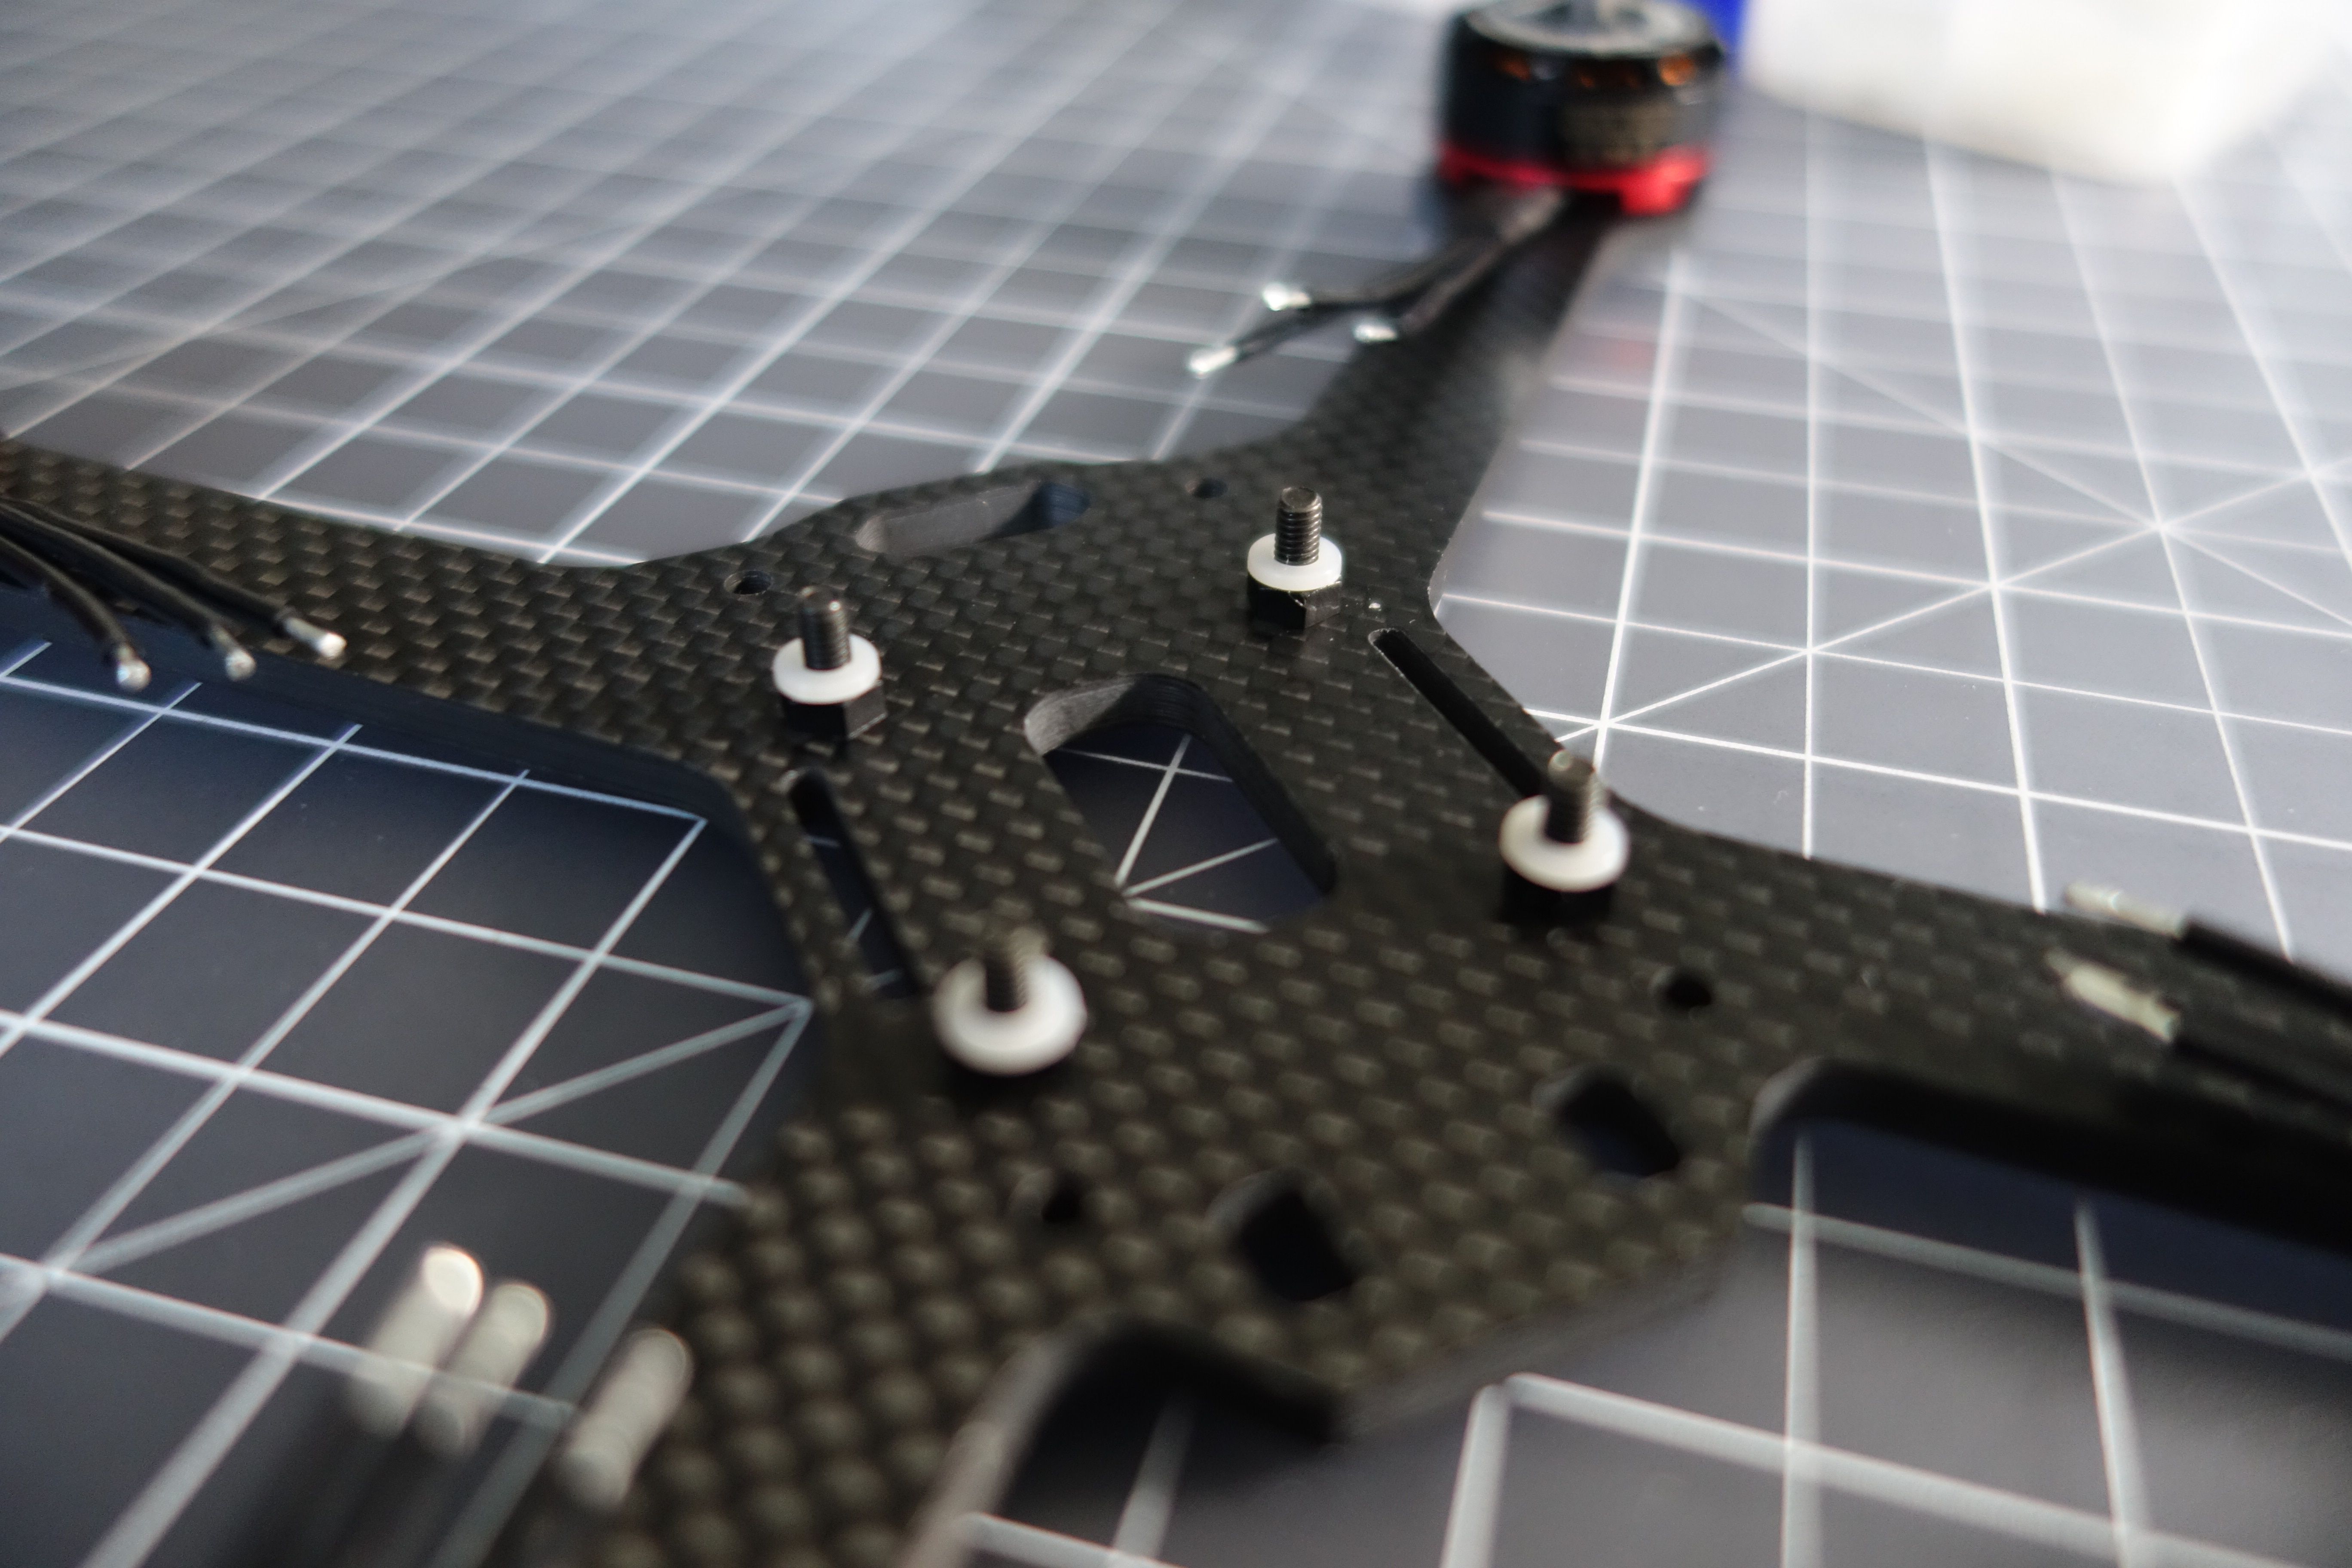
Finding the right standoffs to build the stack was a challenge, but I found the perfect combination. If you aren't using the extensions you can use the 10mm screws to start to the stack. I added 2mm nuts with 1mm spacers. The spacers are important because you'll end up with too much threading for the vibration dampening standoffs. These also offer just enough room to run a battery strap under the ESC board. While the 4-in-1 ESC came with an assortment of nylon standoffs, they're all far too tall for this frame. You'd probably end up with a 30mm stack if you used those.
Wiring the Motors


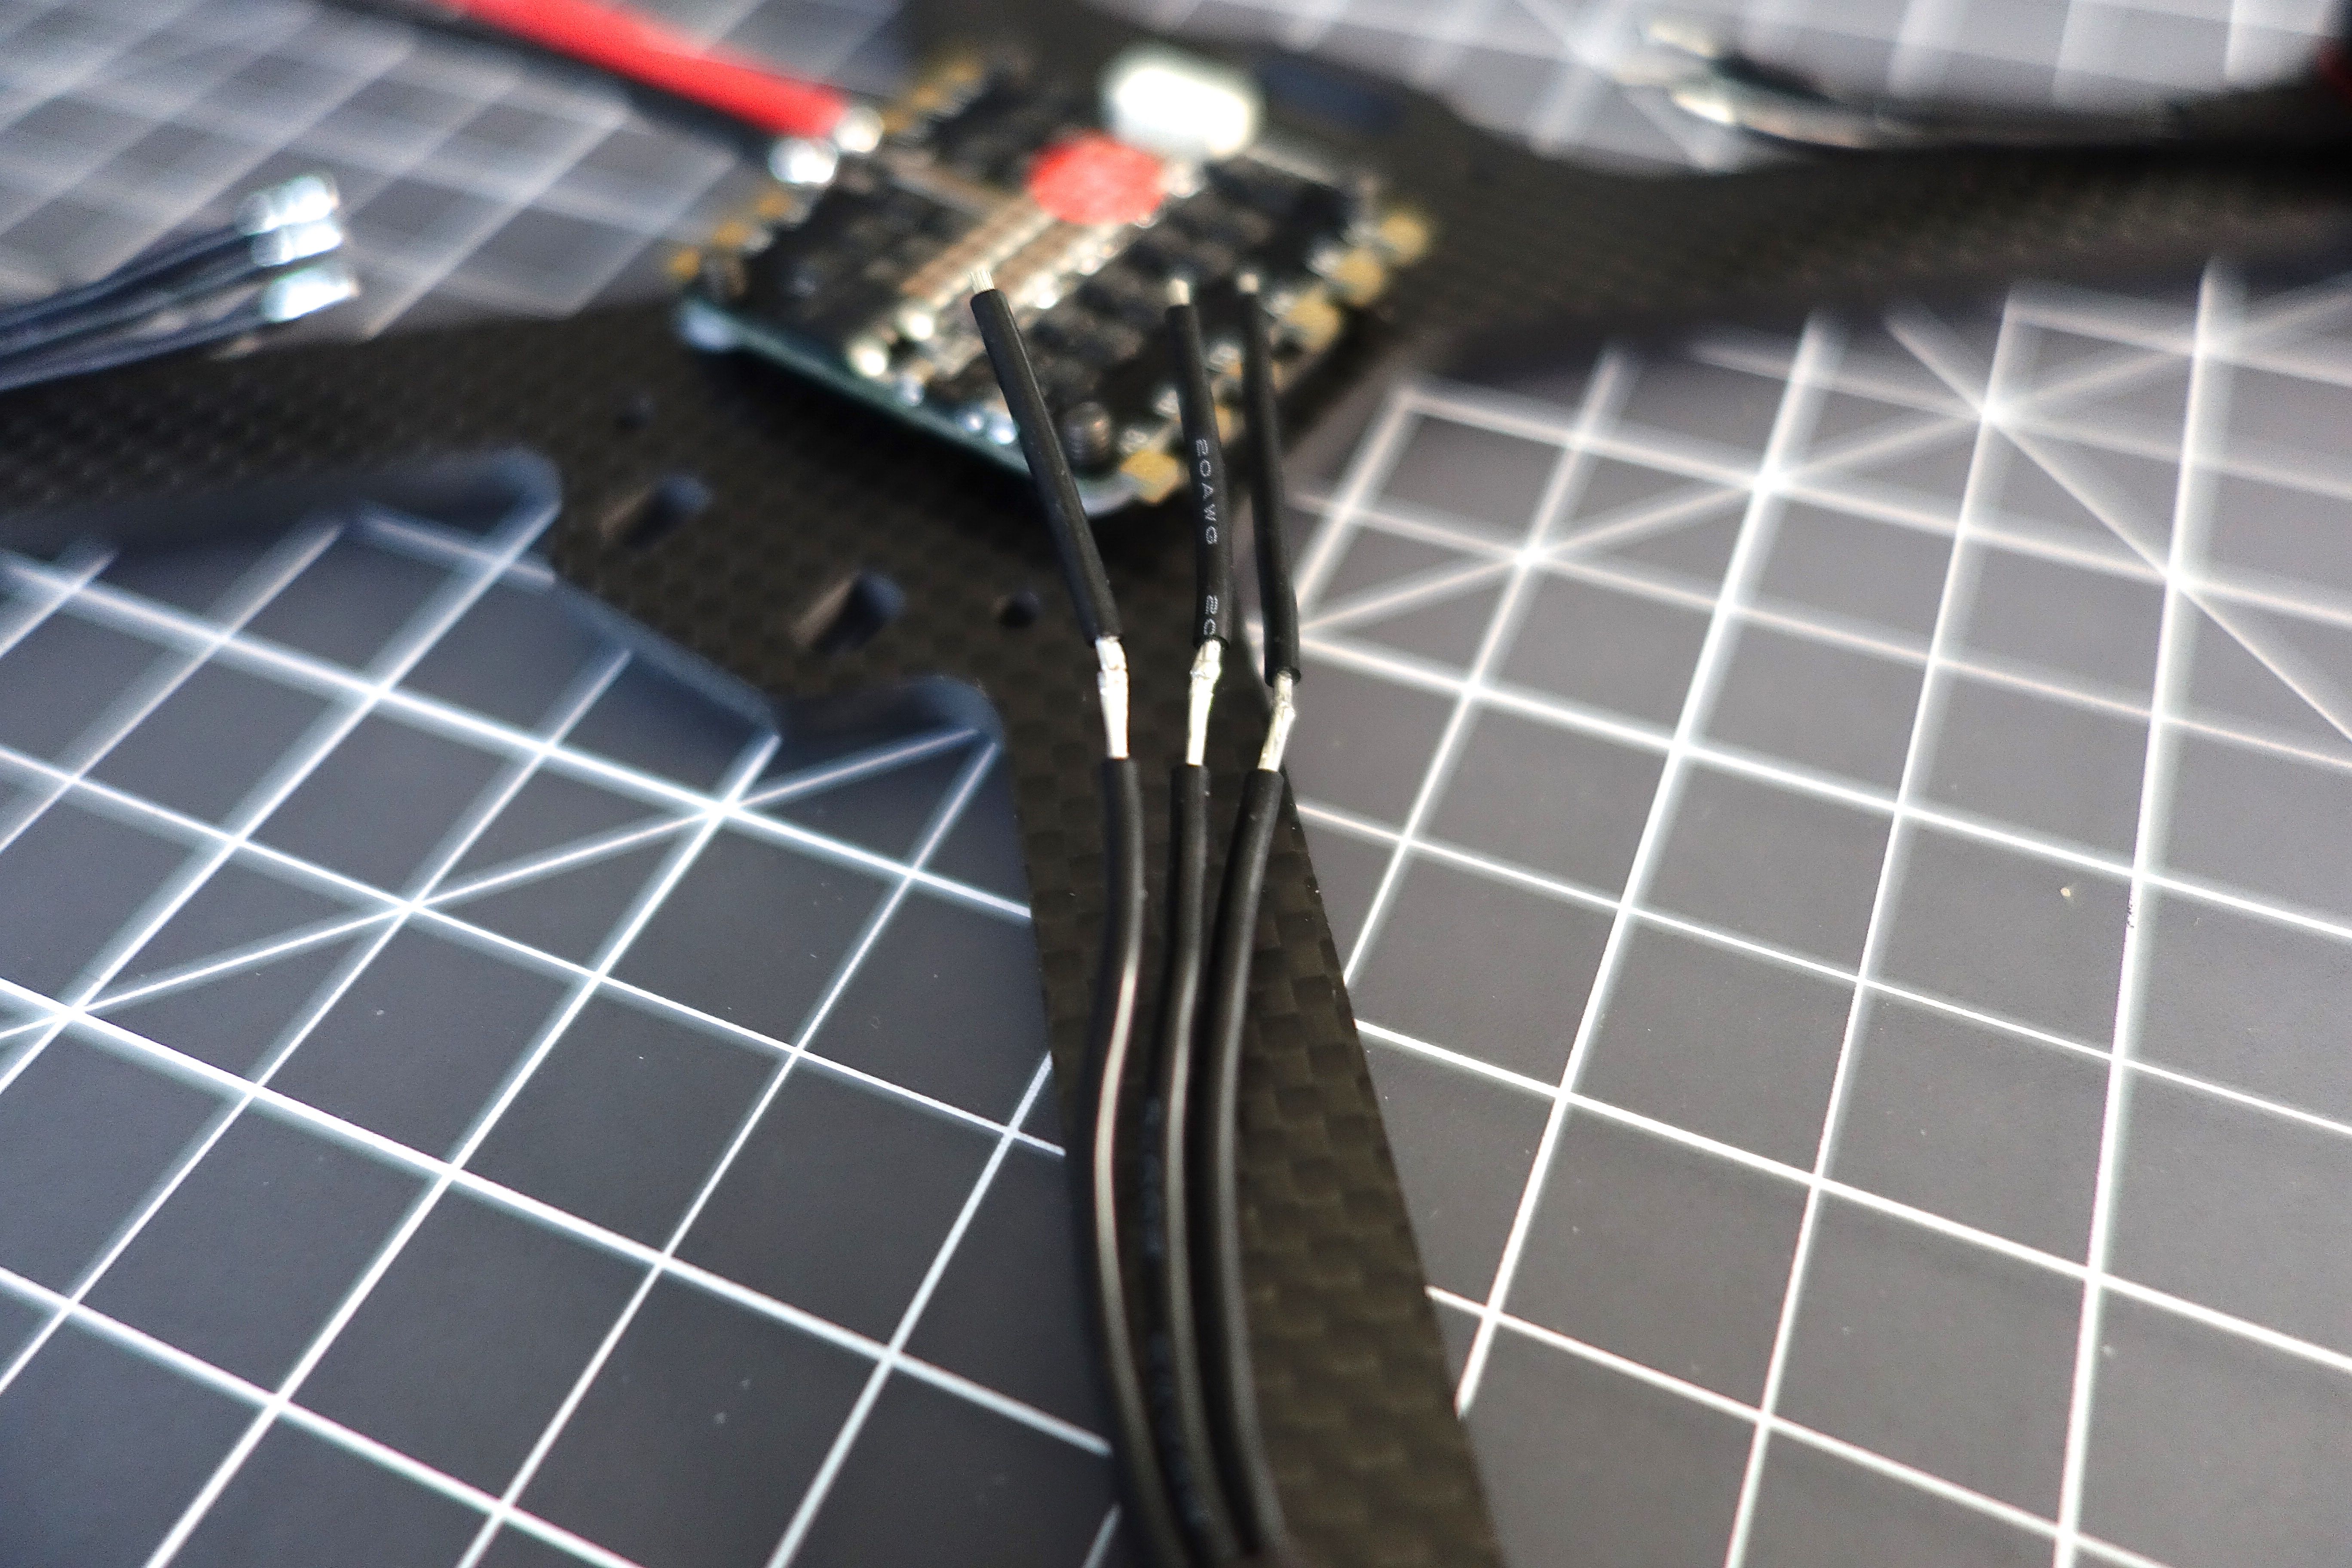
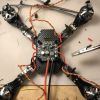
Unfortunately EMAX hasn't caught on to the 4-in-1 trend, so the motor wires were too short. Dig through your wire bin for some 20awg wire as you'll need only about 12 inches of it. If you need to buy some, be sure to pick up some 14awg and 16awg just to have around for future builds. First you need to screw the motors onto the arms. Use some blue loctite to ensure the screws won't wiggle loose. Now to extend the wires you want to lay each wire down onto the arm to get the length just right. Touch the end of the extension to the nearest ESC pad, snip, solder and repeat. Finish each joint off with some shrink tubing and you can optionally add some 550 paracord for added protection.
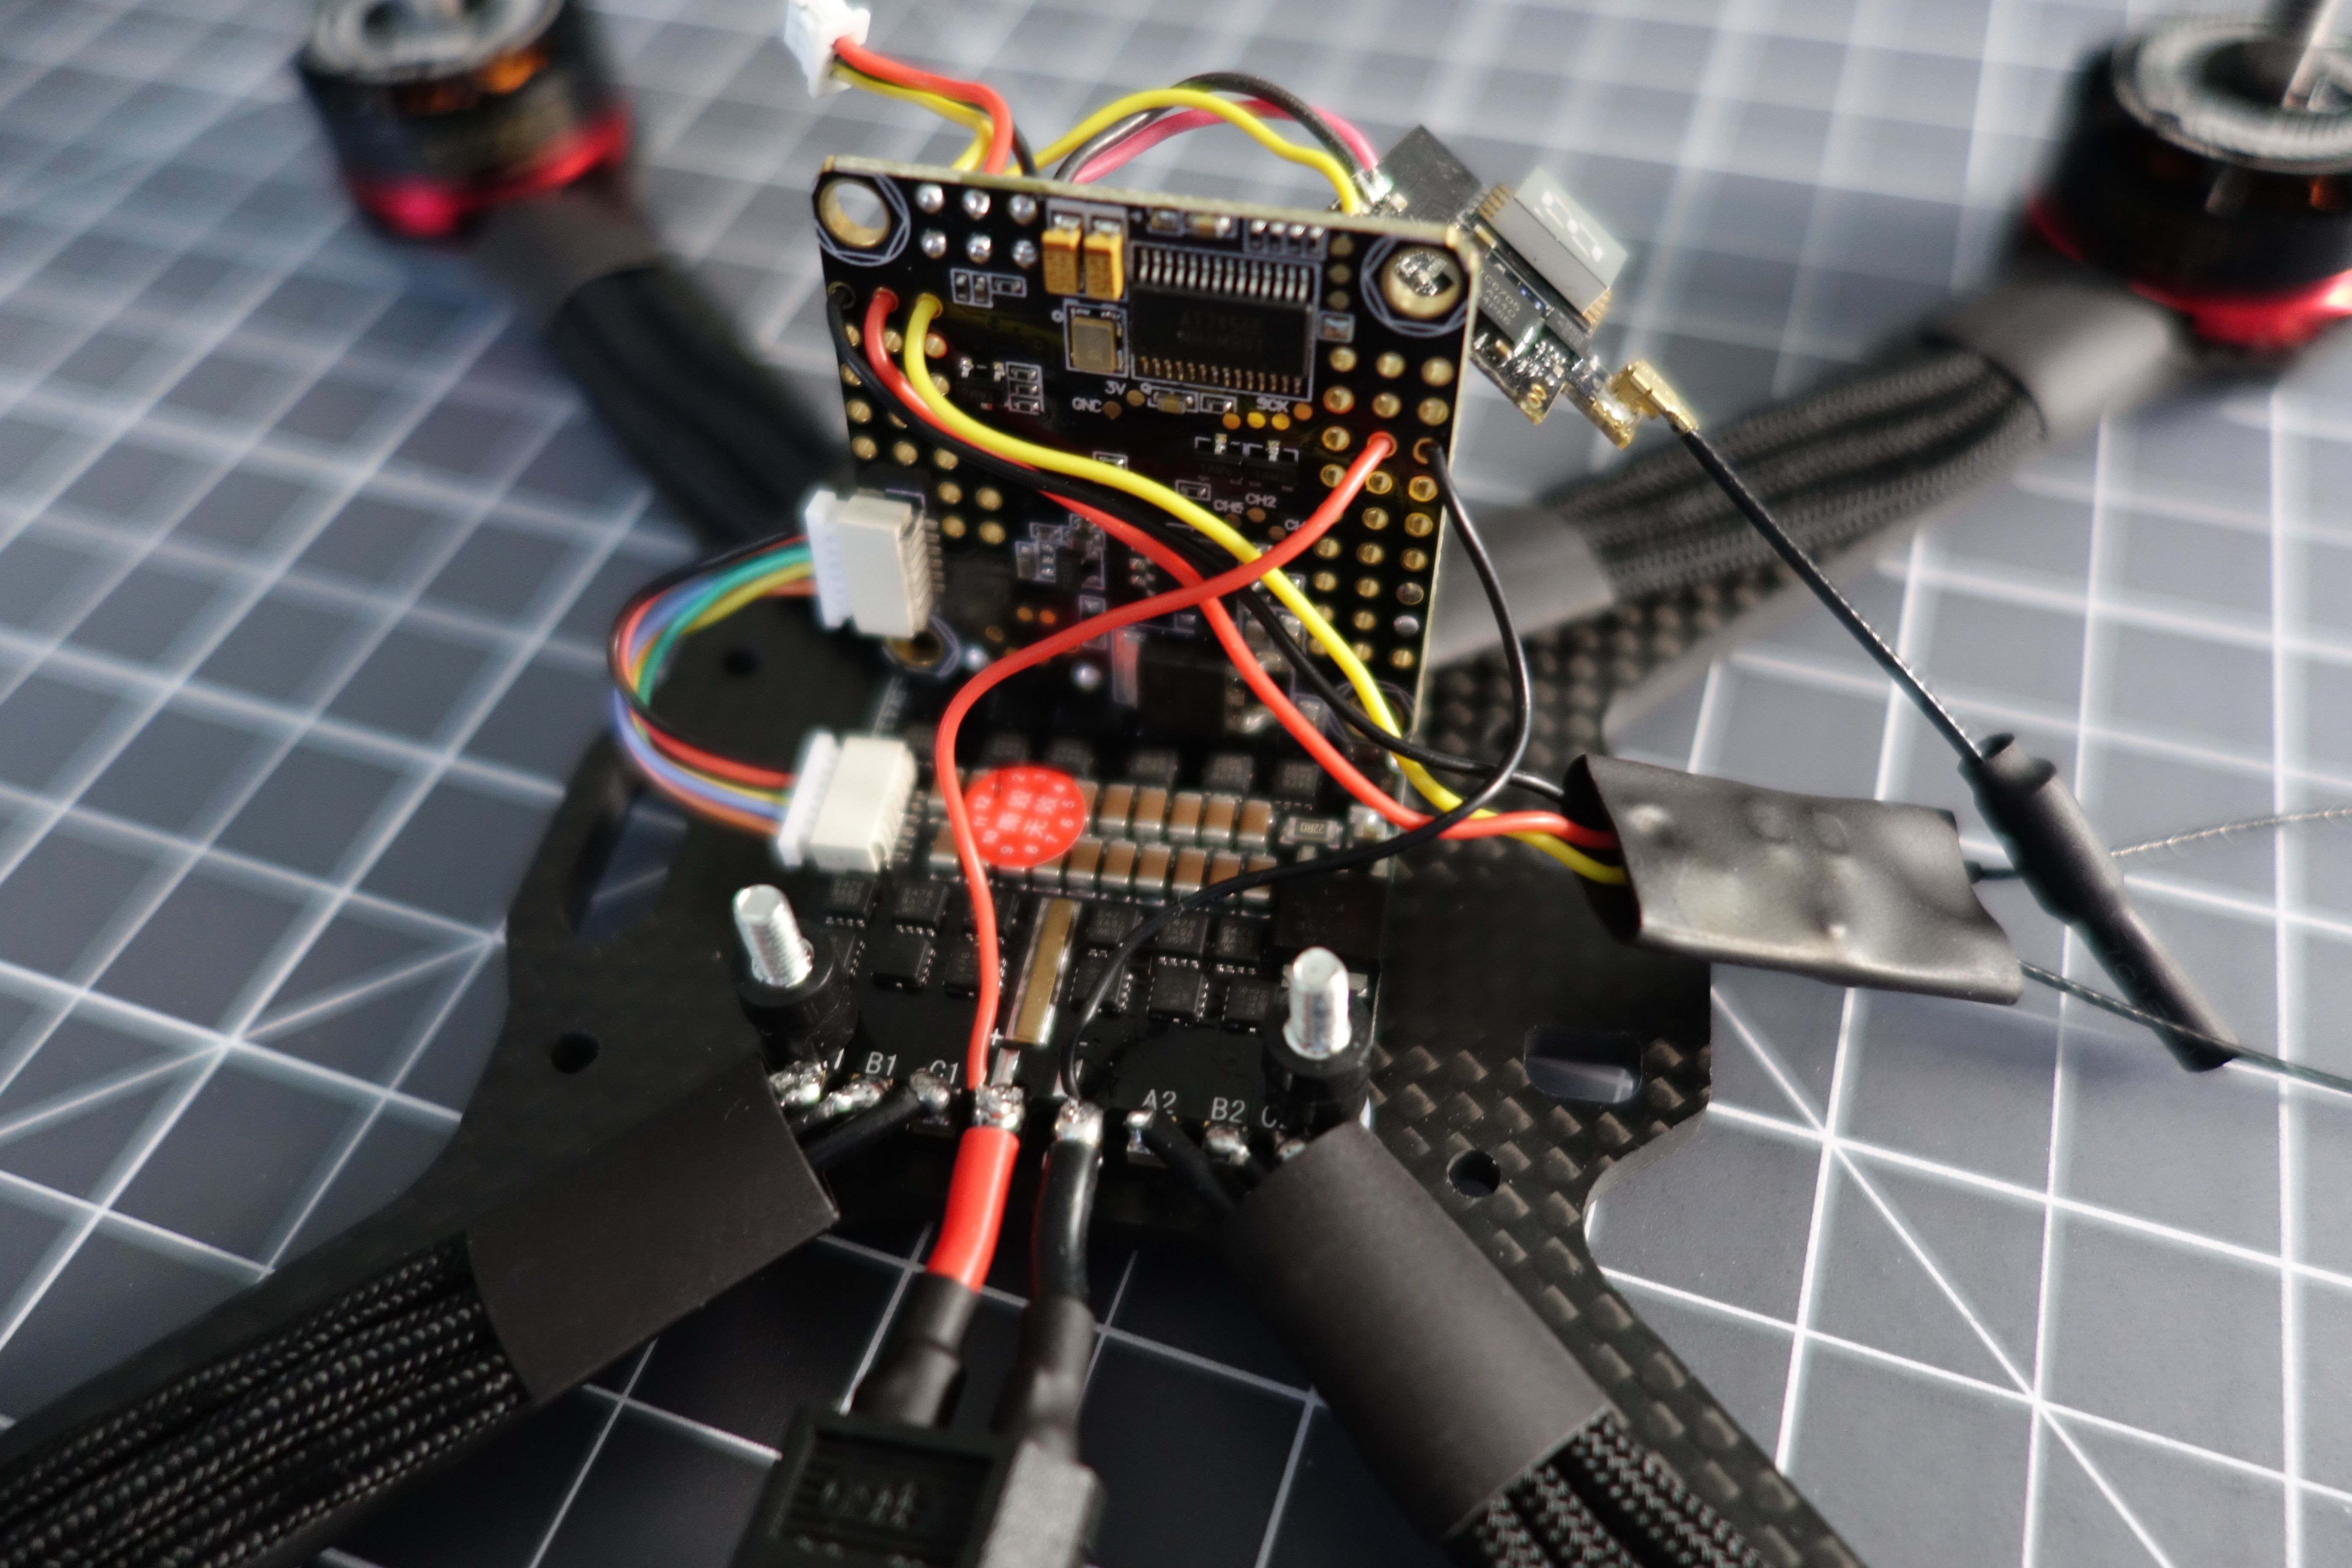
This 4-in-1 ESC is great because it has a 5v regulator that can handle up to 3amps. The Omnibus F4 also has a built-in 5v reg, but it doesn't support enough amperage to run both the VTX and camera. The ESC plugs directly into the FC using the included connector and the 5v power is passed through the red wire. Now if you'd like a voltage reading via OSD you'll also need to send power to the vbat pins, but the FC will favor the 5v from the ESC to power both itself and the RX. You'll need to bridge the RAM and 5V pins to pass power to the VTX/camera.
One thing to note is that this FC uses a linear regulator to produce 5v from vbat. Since we aren't using the 5v from the FC it will produce unnecessary heat. Here's a guide explaining how it works and how you can remove the regulator to decrease the heat. I didn't do this, but it is an option if heat becomes a problem. You can also exclude vbat if you don't need the OSD voltage reading. This would also reduce the heat.
One thing to note is this frame doesn't come with an XT60 connector, so you'll have to buy a set of them. I used the black ones listed in the part list. Snip the wires short enough that they won't pull the battery leads into prop strike range, but not so short that your shrink tube shrinks before you can sleeve it over the terminals.
Mounting the Camera
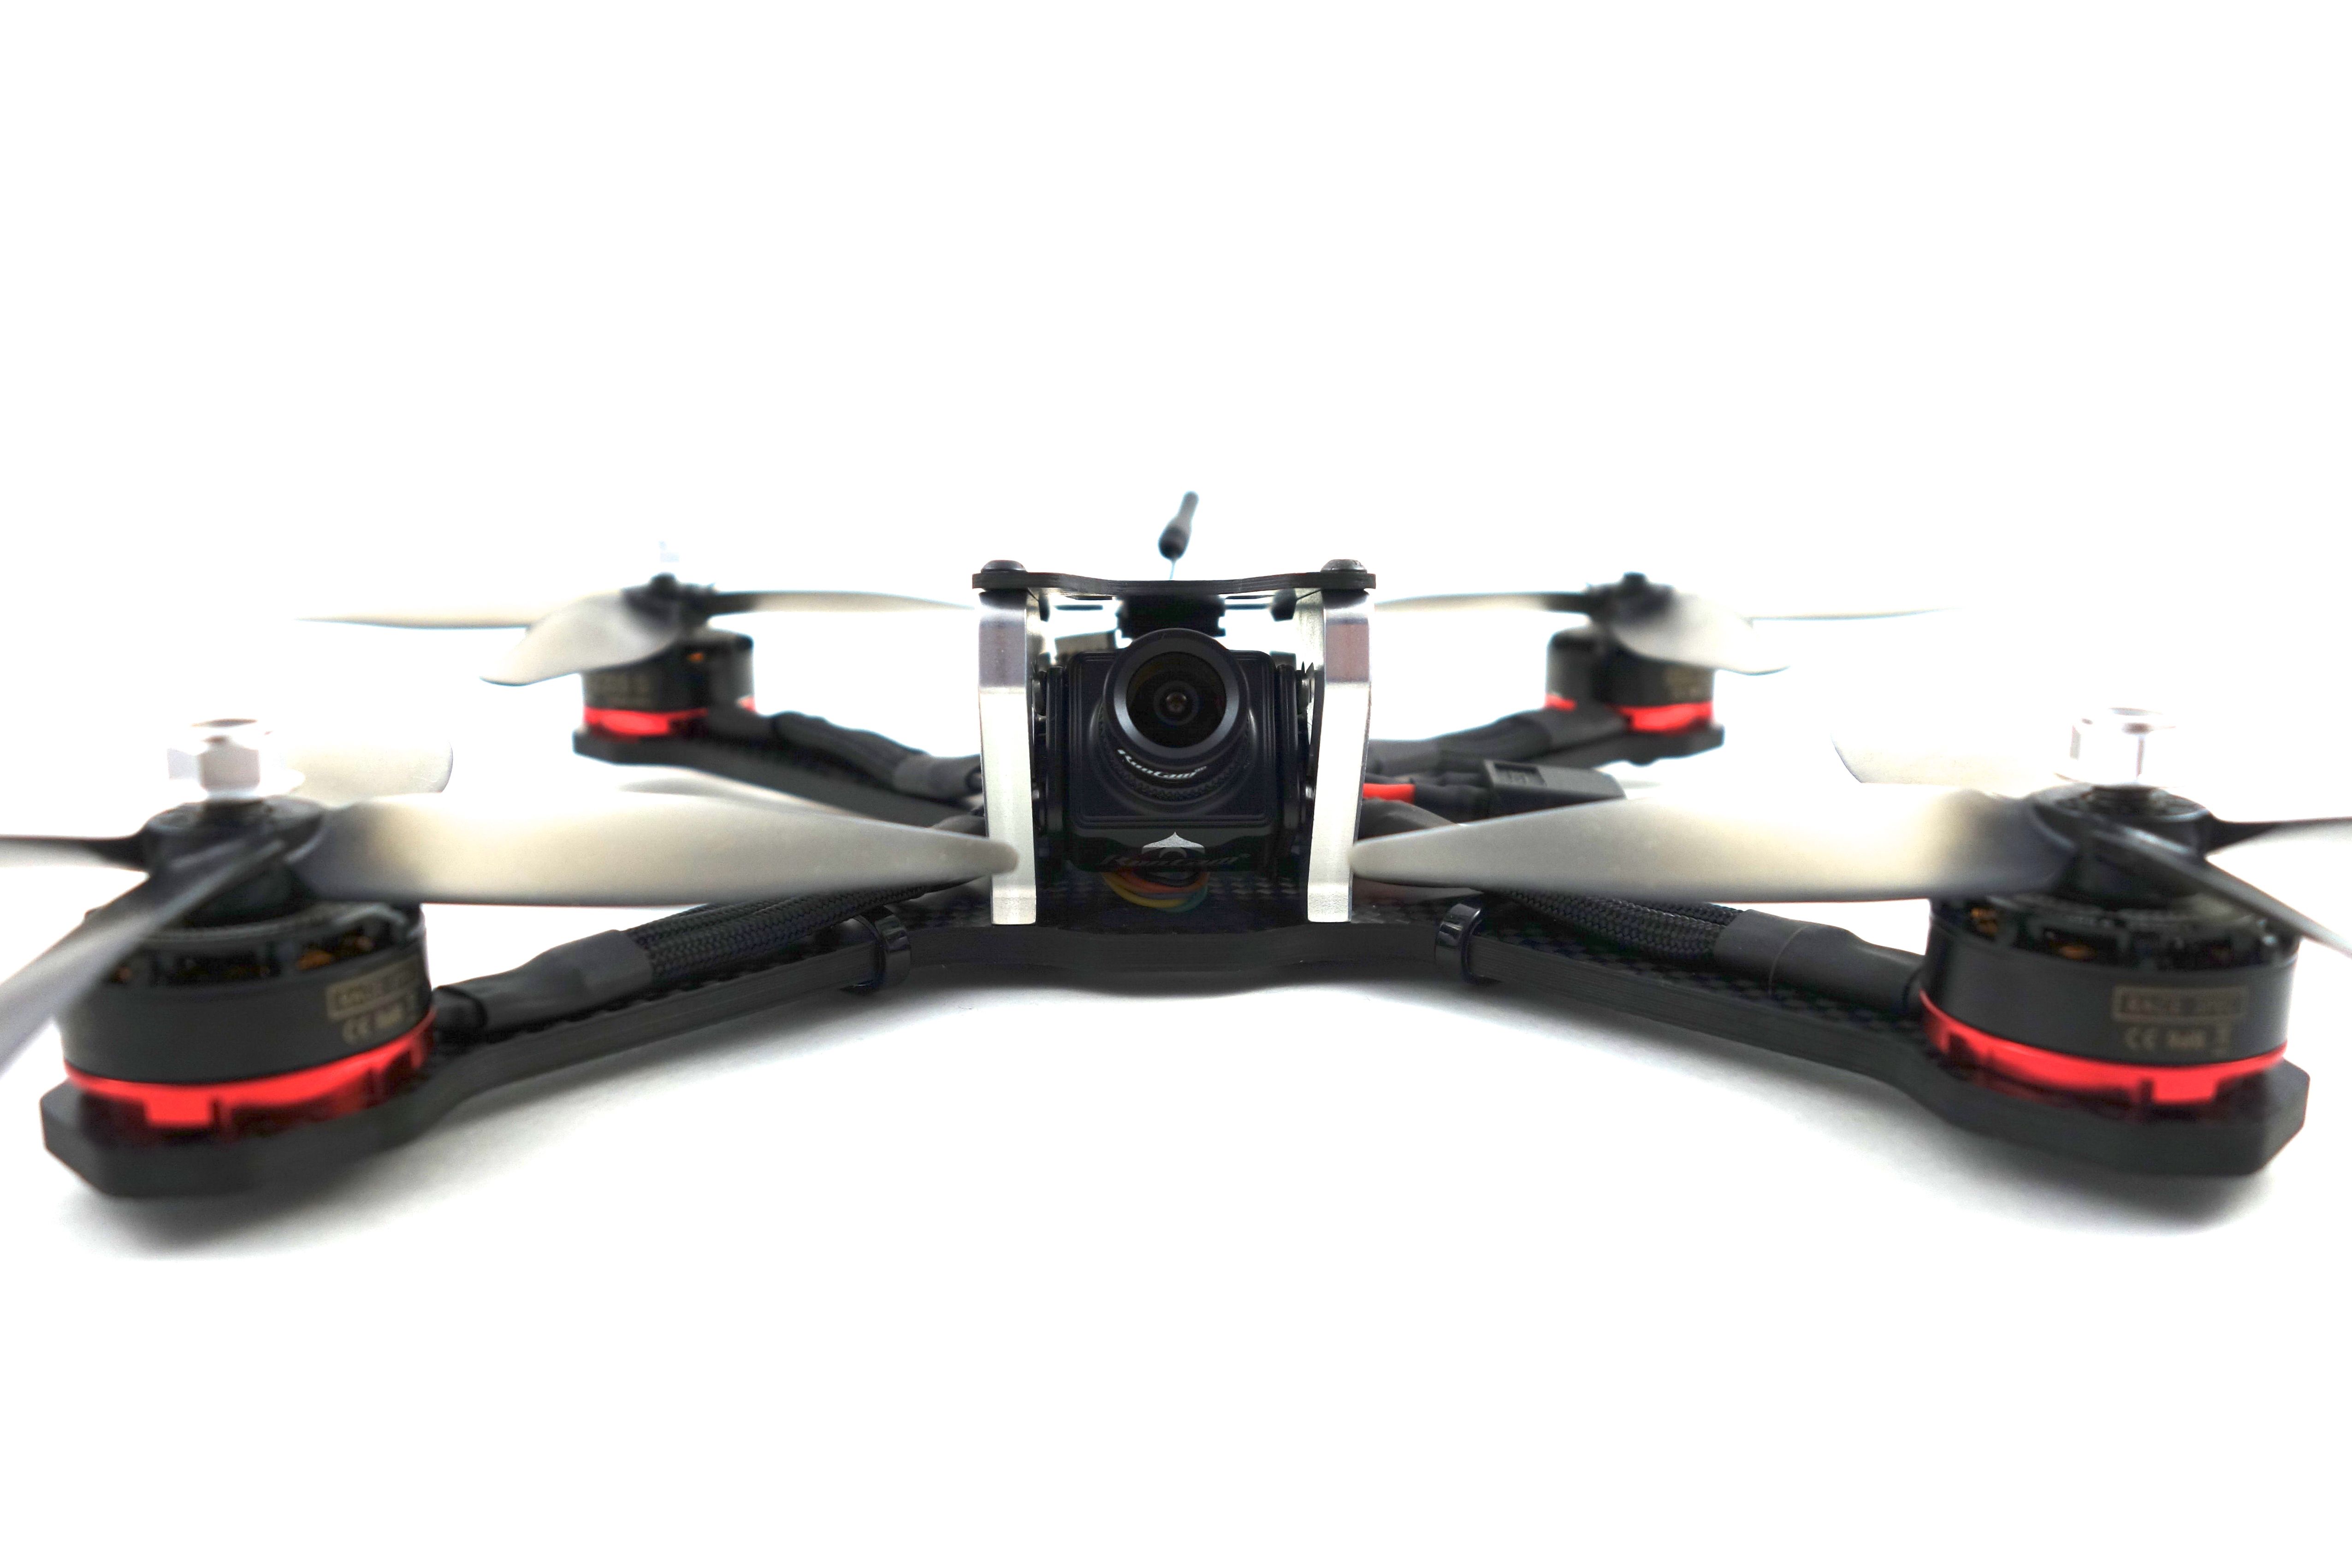
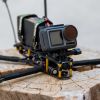
I chose the Runcam Swift mini for the size and weight reduction, but the frame isn't necessarily designed for it. You'll have to use the included conversion bracket which offers a nice snug fit. It should be pretty clear which screw holes to use here, but if you have any questions review the photos below. The only thing I'd like to add is that you should use the nylon washers included with the Runcam outside the aluminum plates. This gives you a nice tight fit.
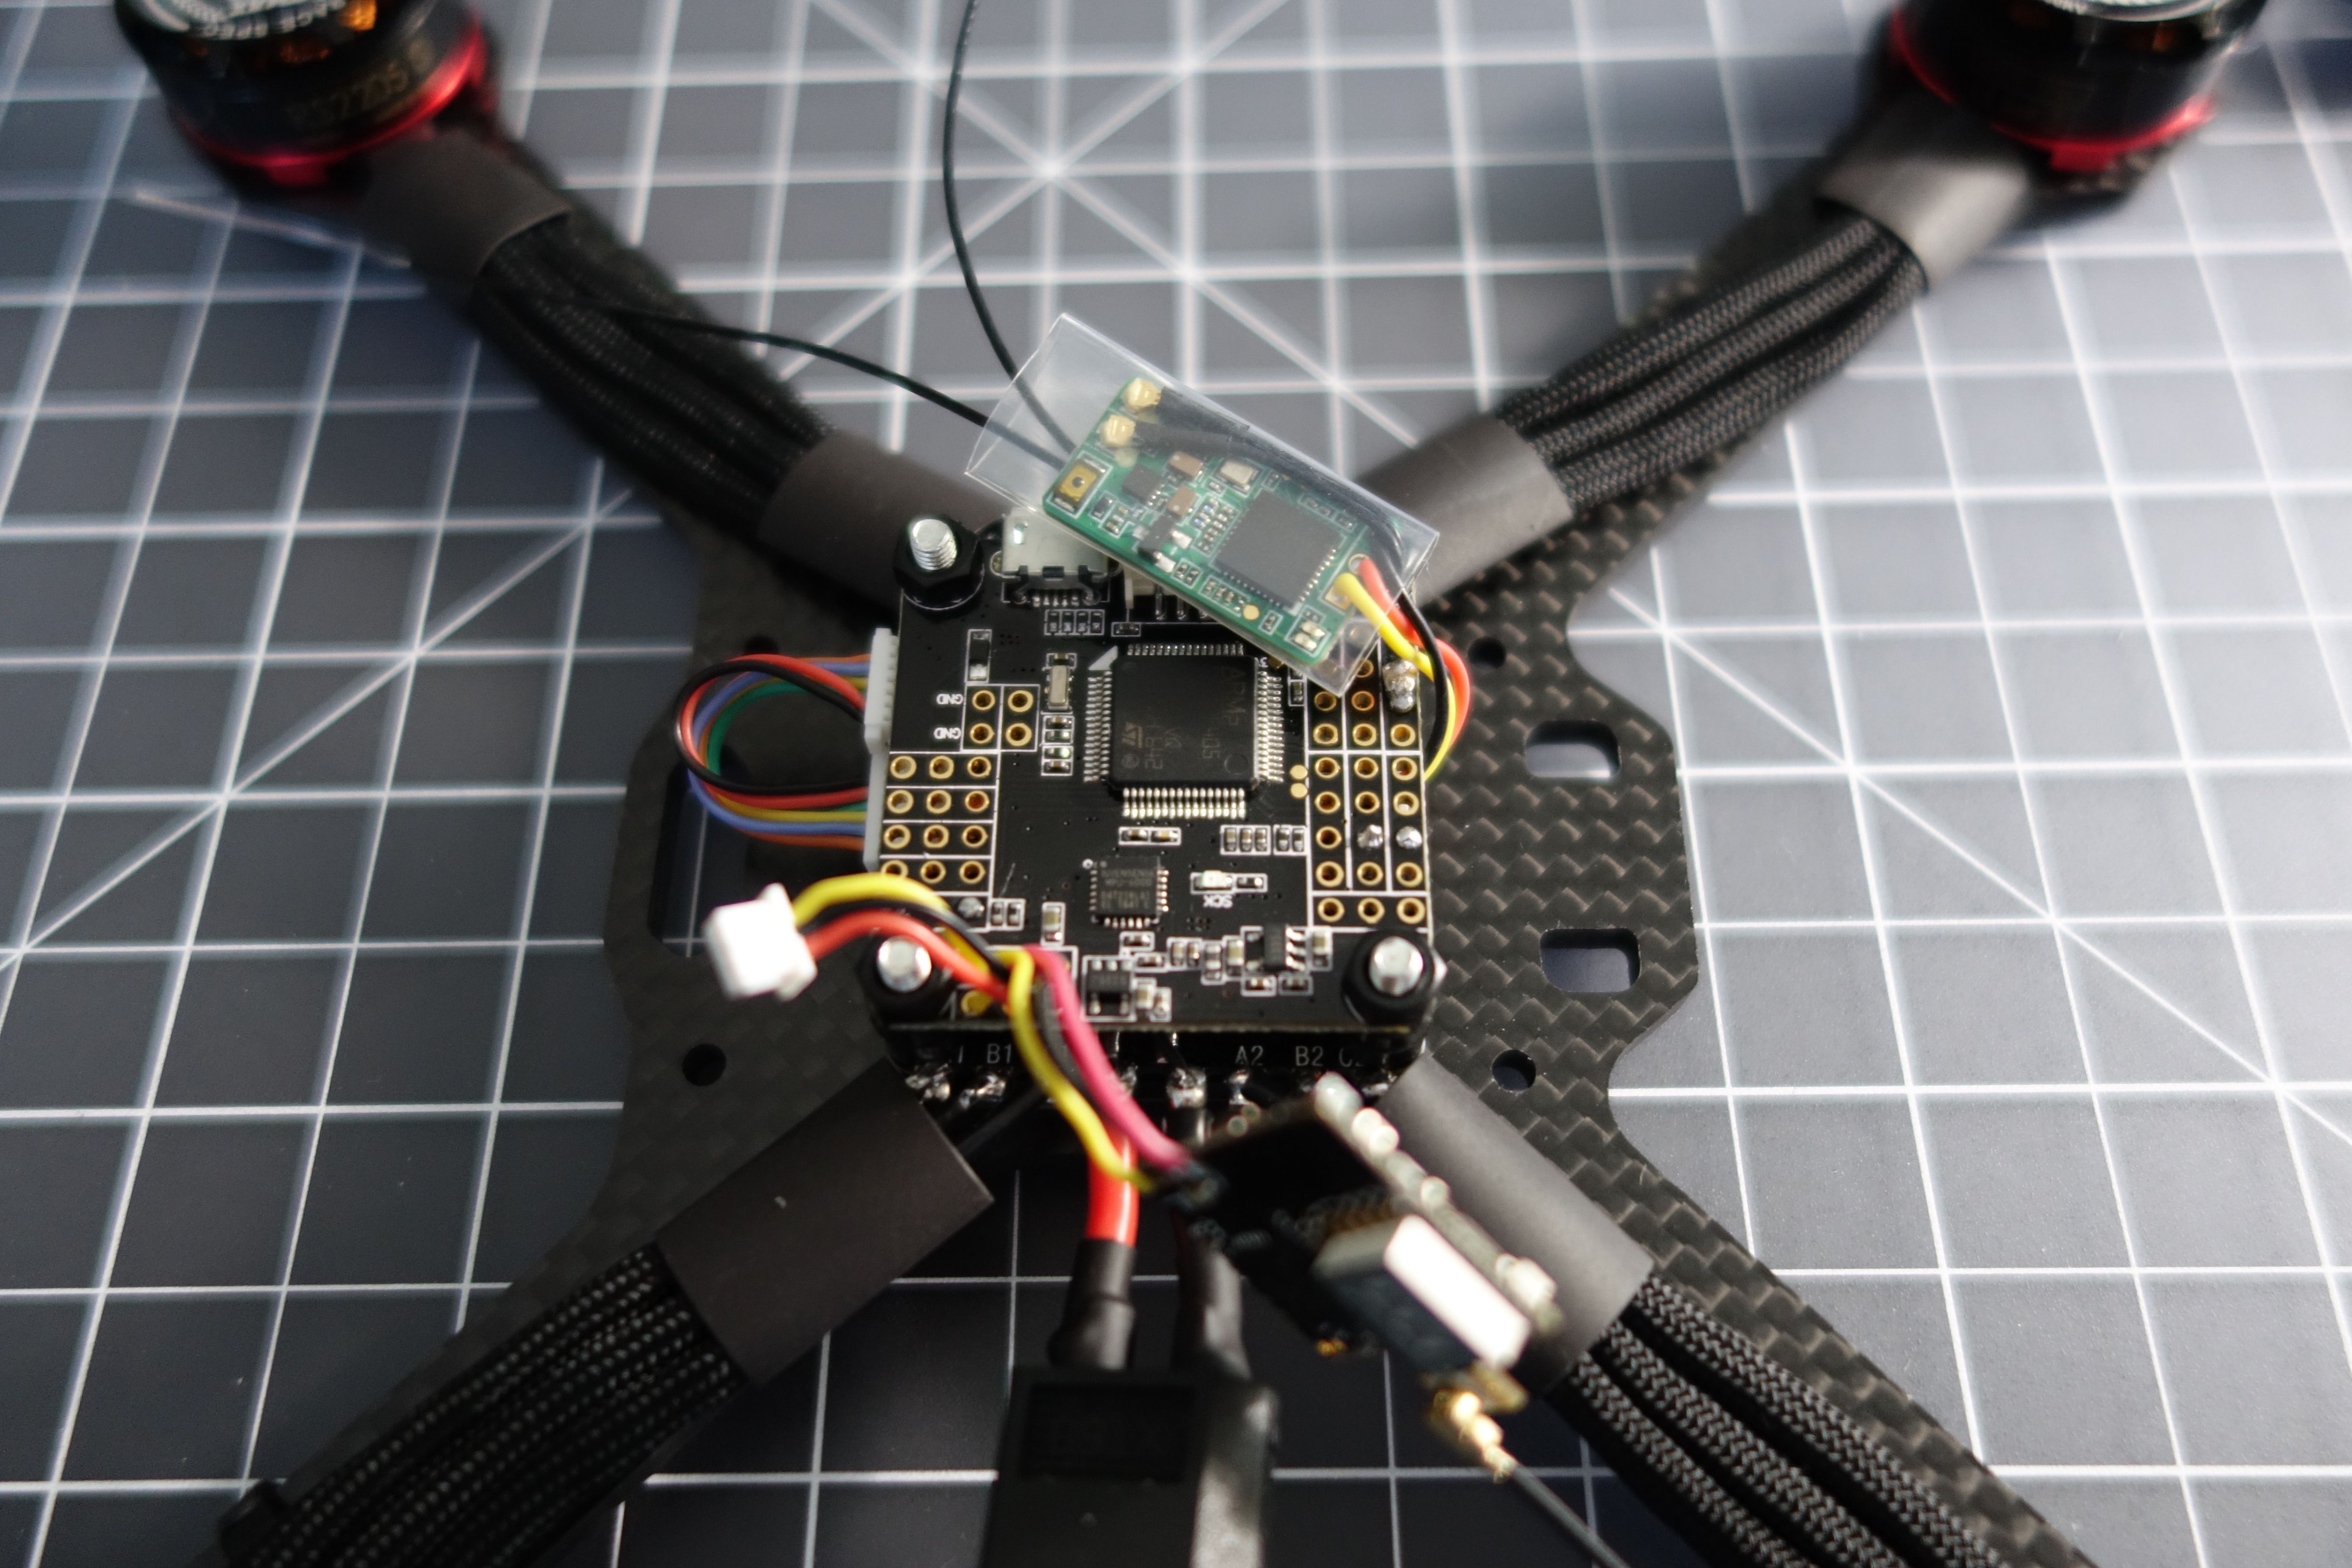
Wiring the FC
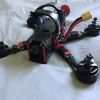
This is a fairly straightforward wiring job, but be sure to pull up an Omnibus F4 board diagram to follow along. Mainly what you need to do is wire the camera and VTX and jump the 5v/RAM pins to send them power. Check the photo below for the big blob of solder just below the RX wires to see where to jump the RAM pins. This mainly passes the 5v from the 4-in-1 to the RAM pins along the VTX/camera rails. Also, I soldered the RX to the inverted UART which functions as UART1 in Betaflight. Finally, I passed power straight from the battery to the vbat pins to monitor voltage via OSD.
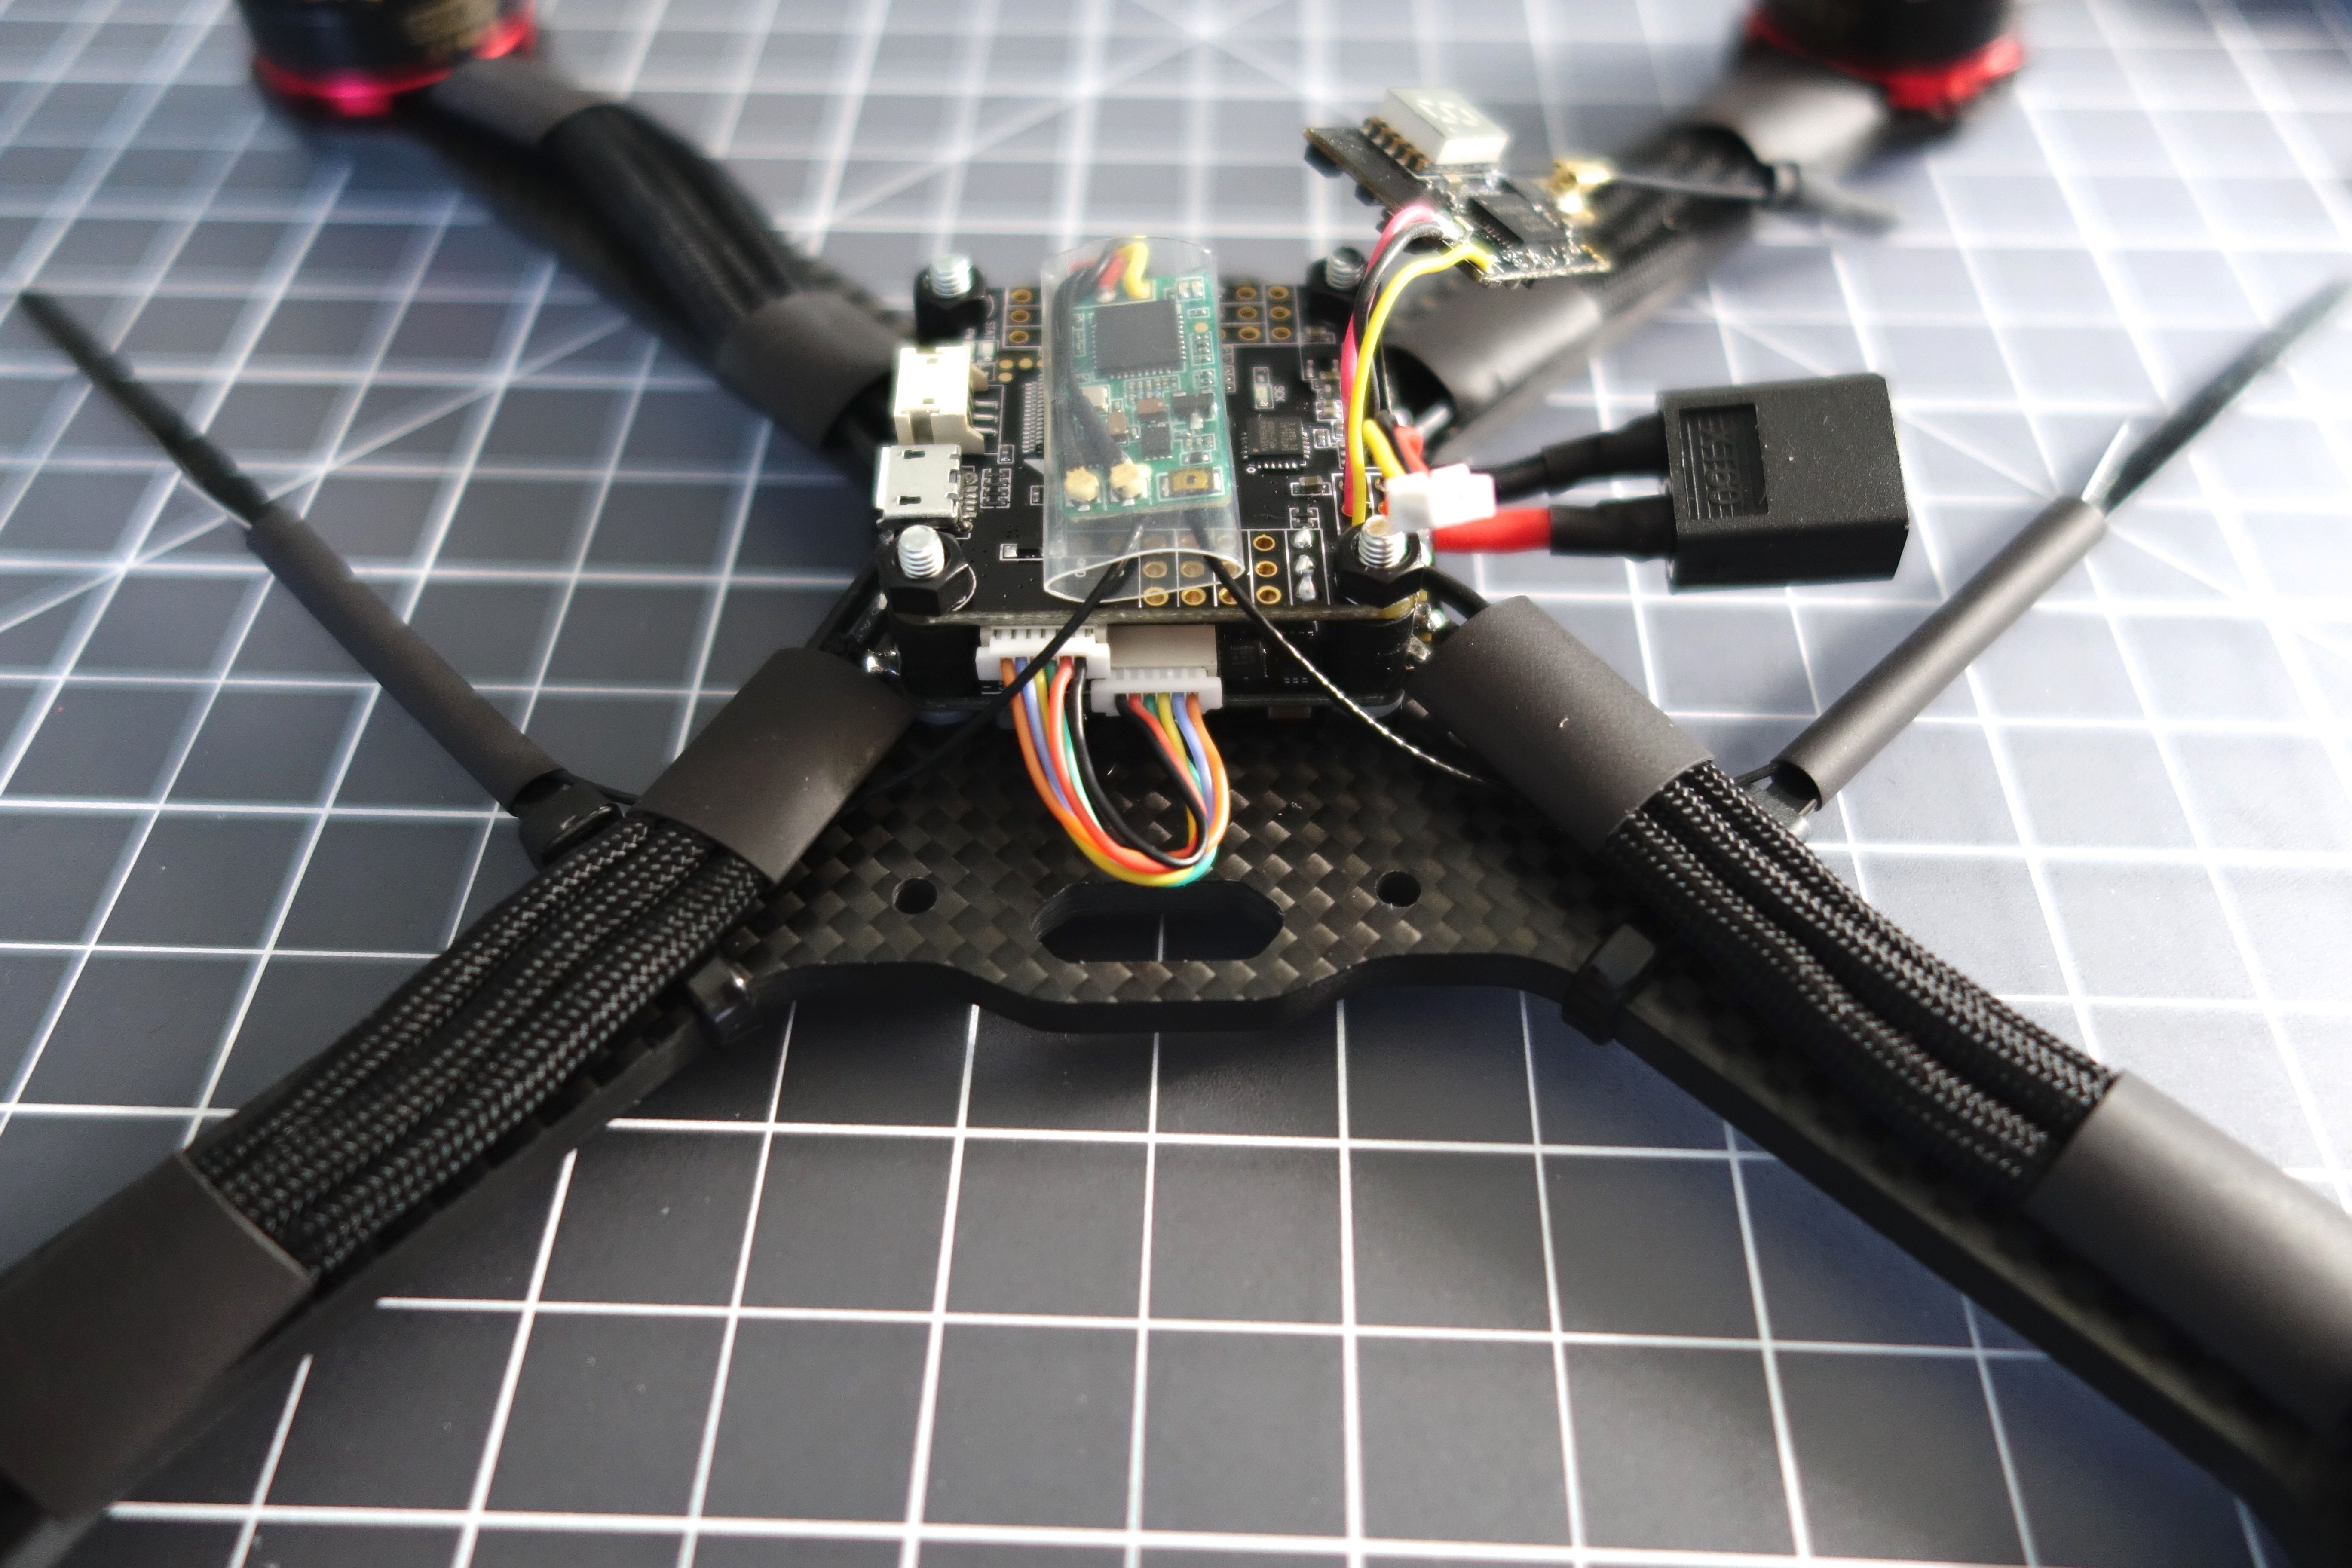
Mounting the RX and VTX
Since the XM+ antennas are extremely long I rotated the U.fl connectors to send the antennas back around the RX. This reduced the length by a few cm which offered the perfect length to send the antennas behind the front arms. You can see how I passed the antennas under the motor wires along zip ties secured with shrink tubing. To mount the VTX I added about 3 layers of double sided tape beside the display, added a wad of hot glue to the U.fl connector and taped it to the bottom of the top plate. I used a zip tie to keep the little dipole antenna from falling down into the props.
Configuration
If you wire the motors as illustrated they won't be in the proper positions in BetaFlight, but BF 3.1 has a great resource command which lets you swap motor positions. You never need to worry about motor wire positions or swapping wires to set the rotation. All of this can be changed in software and allows for the cleanest wiring possible. Here's a short checklist to follow before you maiden:
- Flash firmware to the latest version of BF.
- Use resource commands to order the motors.
- Use BLHeli Configurator to set motor rotations.
- Bind TX/RX and set inputs and ranges.
- Set switches to arm and change modes.
- Configure OSD.
- Set your rates.
- Use camera OSD to adjust your camera settings

Photos


Part List
Show stores (4)
will this frame fit the azure 5150 props?

Yes, they do fit, but this frame is a little old. The new TransTEC Laser S is a very nice frame and supports the more modern cameras.
hello whiffles i love the build! im going to build this as my first 100% build, im wondering why you went with a dipole antenna for thr vtx? wouldnt a standard four lobe rhcp antenna be much more effective?
Hey the flight controller you list is out of stock. would this one work and would i have to make any other changes to acommidate it. https://www.banggood.com/Omnibus-F4-BetaFlight-3_2_0-OSD-STM32F405RGT6-Flight-Controller-for-FPV-Racing-Drone-30_5X30_5MM-p-1212589.html?rmmds=search&cur_warehouse=CN
so would this do https://www.banggood.com/Eachine-Wizard-X220S-FPV-Racer-Spare-Part-4-in-1-30A-ESC-BLHeli_S-2-5S-Dshot600-p-1172948.html?cur_warehouse=CN. (i recognise the irony in asking the creator of the wizard killer about a wizard part)
That should do the trick. It has 5v output, but it doesn't indicate the max amperage. If you want to know you can look up the ID on the chip beside the connector. That's the switching regulator. I think it should be able to handle 2a, but I'm not sure. It also doesn't indicate how much power comes out from the connector. That could be vbat, but it could also be 5v. You'd have to test it with a voltage meter. I do see a 5v pad on the board, so maybe the connector feeds vbat for your OSD.

Hey there, love this build. I'm in the middle of getting parts for a Frog myself. It'll be my first FPV Build. Is it possible to run the battery top mount, or is it better to stick with bottom mounted? I can see from one of your pics there is a gap, just worried it might put too much stress on the top plate.

Never thought about using the outer sleeve of paracord instead of heat shrink! Great material to use!
How are the quad blades? Wouldn't they be a little too heavy? I would worry about current draw? Just curious as I am building this frame.
What AWG are you using for wires between ESCs and LIPO? I ordered a XT60 connector sold with 12AWG wires but it's huge and not really flexible. This ESCs wires seems to be 16AWG which is better but I wonder if it's enough at max power with the kind of motor? (I'll have TBS Mr Steele on mine)

I've had this frame sitting around for a while and started to put it together today. Deciding to paint the aluminium brackets red. Checkout my build page - https://rotorbuilds.com/build/5001. I love your build pages and would like to insert images into my build description - how do I do that?
BTW - As always, love your builds - very inspiring. I'm a graphic/web designer so I appreciate the effort you take! Is there anything I can help you with on the site from a design perspective?
Would you happen to know where one can find replacement top plates for this frame? Haven't bought one yet, I just want to know for the future.
Thanks!
How has the reliability of the racerstar escs been? You have used them in almost every single one of your builds.
Good job Mr Whiffles, very nice build indeed!
I'm also interested by this frame for my next quad and a pretty similar configuration (4 in 1 ESC and omnibus F4 FC) but I'd like to try the RunCam Split for FPV AND HD record (instead of using a GoPro or similar on the top). But this conf add a 3rd layer of PCB on top of ESC + FC. Do you think it is possible to fit all these guys in this tight frame playing with 1 or 2mm nylon washers instead of classic 6mm nylon spacers?
Mmh yes that could be a solution. I'm just a bit worried having to change all the board if something breaks but that's probably the best deal if I want to use this frame and fit everything inside. About the Split, it can be furnished with a RC25G "long" lens or the standard lens. The long one basically makes the same wide angle as a GoPro (which could be weird on FPV but it seems not too disturbing on youtube tests). This lens is a bit longer, 19mm compared with the 15.2mm of the standard 2.5mm lens I currently have on my Swift Mini. This is maybe enough for not seeing the frame on the record... Do you see it with the Mini on yours? The bad thing compared with GoPro is that we see the front props on HD records due to the lower position, but that's almost invisible using black props (ok I want white ones to fit my nice TBS Mr Steele motors but it's not too hard to fix ^^). I'll let you know the result when built ;)
It is certainly a risk, but with the speed at which this technology keeps improving there will be a cheaper, better AIO by the time it breaks. I've got several 4-in-1 boards and none of them have gone bad over the past year, but YMMV. Be sure to link up the lens on your build because I may want to experiment with that at some point. I don't see the frame using the mini, but it's a more narrow FOV than the split HD.
Hey whiffles...love the build as usual!
Just wondering if there'd be any chance of running 6" props on this frame? If not, what's your suggestion for a good 6" freestyle frame? (It'll need to look awesome too!)
I'll hopefully be running EFAW's and trying to keep the weight down at the same time.
Any suggestions would be much appreciated!
Nice build! I'm considering building something relatively lightweight with 2306 motors. Would motors that size be compatible on this frame? If not, do you have any suggestions of lightweight frames that would be? Thanks!

Nice looking build! I am contemplating making a quad specifically for racing, and so I want it to be light (also because we have a 500g limit near airports in my country). This frame looks really cool and I was wondering if it would be suitable for racing provided I get the "race" version with bottom plate and arms in one piece? I only ever built 1 quad before and didn't really take into consideration the end-use because it is a practice quad. I'm thinking of going AIO for the FC+PDB+OSD thanks to this new beauty: https://www.banggood.com/Matek-Systems-BetaFlight-F405-AIO-STM32F405-Flight-Controller-Built-in-PDB-5V2A-9V2A-Dual-BEC-p-1165338.html
I was also wondering about props since I'm not experienced enough to know my way around them. Should I go 2 or 3 blades for racing? Are there props that are known for their good racing performance?
My current weight estimation with a 1300mah battery clocks in at 461g (not accounting for zip ties, standoffs, additional cables etc). Is that too heavy? I could probably shave off some weight with a 4-in-1 ESC.
Thanks a bunch!
Hey sorry to bother you again, but I have a concern before I buy. By looking at the pictures I see you mounted the runcam mini to the aluminum frame parts. It looks like you are limited to a max angle of about 20°. Is there another way to mount the camera for 30-35°? What is the fixed angle you get if you use the two "normal" screw holes on the frame (one on top of the other), about 45°? Thanks a lot.
EDIT: I just noticed I'm stupid and the top screws of the runcam mini probably barely touch the aluminum parts, or I could even not put them in at all and it wouldn't be a problem. I can even make out that you could use the back screw on the cam to secure it into the curved slot at the back.
PS: do you have a picture with the battery strapped on? Cheers
I've got the full range of the camera angle, but when you get close to around 45 degrees it can put some pressure on the ESC connector on the FC. If the stack was 1mm lower it wouldn't be a problem. You can opt to use 6mm nylon standoffs between the 4-in-1 and the FC instead of the 7mm bobbins to get more than 45 degrees, but I doubt you'll need that.

So decided to follow this build after you recommended it in the MartianII build.
to get the quad to talk with the Turnigy Evolution can i replace the receiver you used in the build with the one that came with the evolution(TGY-iA6C) or perhaps there is another better option?
also, because its my very first i need heaps of other items like a charger.
anything you recommend for parallel charging?
what else would you consider that is really necessary?
thx in advance!!
I believe that should work just fine. The Omnibus boards support Sbus. You'll just have to get creative with the space and where you put it. I like the iSDT charger because it's so compact. It doesn't come with a power supply, but if you've got an old laptop supply that can output anywhere from 5 to 8amps that should be fine. You'll need to snip the barrel connector off and solder and XT60 connector to make it compatible with the iSDT though. Otherwise you'll need good solder like Kester 63/37 and a good iron like the Hakko 888D.
Does anyone know why I am not getting video from the Runcam? I am getting the Betaflight OSD and everything, and I feel that I've wired everything properly. Is there anything special I need to do to set up the Runcam or should I get video since I've plugged it in. Thanks!

I have a problem where there is connection between the controller and the receiver, fc, and ESC (i know due to the "receiver" section on betaflight). Whilst the build is plugged into the computer and the battery, i can control the motors, but the controller does nothing whatsoever. Any help?
How did you mount the Rx and Vtx? Did you just let them hang out on top of the FC, or did you ziptie them to the top plate?

How much did your build end up weighing? Both your frame and your 4 in 1 esc look lighter than my Martian III build and that's 335grams with props on

Mr. Whiffles, Could you tell me what mm screws are in the top plate?
What transmitter would you recommend? (I'm new, anything helps)
Wow i really love this build! How do you like the fight controller? I have the same frame on the way and would like to go for a simulour setup..
Yes you did that verry nice!! So if im correct, i have to go to the recource command in CLI. And then set motor 1-2-3-4 to CS-MISO-SCL-MOSI? Those are the "simbols" i see on the omnibus f4 diagram.. am i right?I also see that you connected the +5v and ground next to the motor signal wires.. (from the esc to the fc) why is this? To power the fc? Or does the fc get power from the small +and- cables you have on the + and - from the lipo lead which go to VBAT and - on the fc?
Once you've wired everything up go to your motors tab and power up each motor one at a time. Take note of which is which and then type resource list from the CLI to see the current configuration. Then use the resource motor 1 xxx and so-on to re-map each motor. Save and go back to the motors tab to test.
I connected the 5v from the ESC to power the FC, RX, VTX and camera. The reason I'm not using the FC regulator is because it can't put out enough amps to power all 4 of those components. I wired up the vbat pins for the voltage reading via OSD. The way the Omnibus works is it chooses the higher of the two: internal reg or 5v via the ESCs. The internal reg only supplies about 4.8v so the ESC will always be chosen instead.
Almost the EXACT same setup arrived this week. I got the same motors (2600kv though), esc, fc and frame. I like the frame as well but the lens of my camera sticks out just a few millimeters. The alluminium is really light and the cf is good. I also wished the frame was just a few millimeters higher so i can use a pdb with current sensor. I'll finnish my build soon and I'll share it for comparison ;)
I will maiden it this weekend! I had some problems with my fc because for some reason it deleted all my betaflight settings (probably my fault though) The build itself turned out really thight but clean and with the vtx in the back I can see the little display and i can reach the button. I think i'll post the build either today or tomorow.
Well yesterday it flew for the first time and today i flew with some friends and in flew near perfect on stock pids. I crashed it once when it fell from 20 meters or so (i disarmed it because of super strong wind and i lost controll) and nothing broke! I am really impressed with the strength of the frame especially because my friend broke 2 arms in 2 days on his micro. I dont have enough time to upload the build today but i'll do it very soon.

I have the "lite" version of this frame and it's next in line for the workbench (apart from repairs). I'm really impressed with the quality of this frame. The machining looks good, the screw holes are the right sizes and the carbon is super stiff. I'm really looking forward to this build but I'm sure it won't be as neat as yours.
sick build mate! do you have any idea what the top speed is?
How do you like the receiver? I've heard about people having issues with them but the price is right so I'm curious as to how they work

Looks durable as all hell. Curious to know how she crashes. Also, super clean build man! I love it!
Daaaaaaaaaamn bud! Super clean, super informative, and super cheap! I'm really enjoying the way you're writing about your builds. Keep it up!
Also jesus that build is way cheaper than say, my Style.

Guides & Reviews

AirbladeUAV has done it again and this time they've brought long range to the 5" class! Based on the popular Transformer Mini, the new Transformer 5" Ultralight adopts a lot of the same design philosophies with larger props and more payload capacity. It can fly upwards of 20 minutes on a 4 cell Li-Ion battery pack and in ideal conditions it's got a range of over 4 to 5 miles. In this guide I'll walk..
Read more
With the release of the DJI FPV Drone cinematic FPV has become a lot more accessible, but you certainly don't want to crash a $750 drone! The QAV-CINE Freybott is a compact, lightweight cinematic FPV drone that can take a hit and keep going. It's a lot safer to fly indoors and around people. With a naked GoPro or the SMO 4k you can capture some great stabilized footage. In this guide I'll show you..
Read more


wow nice build and write up