
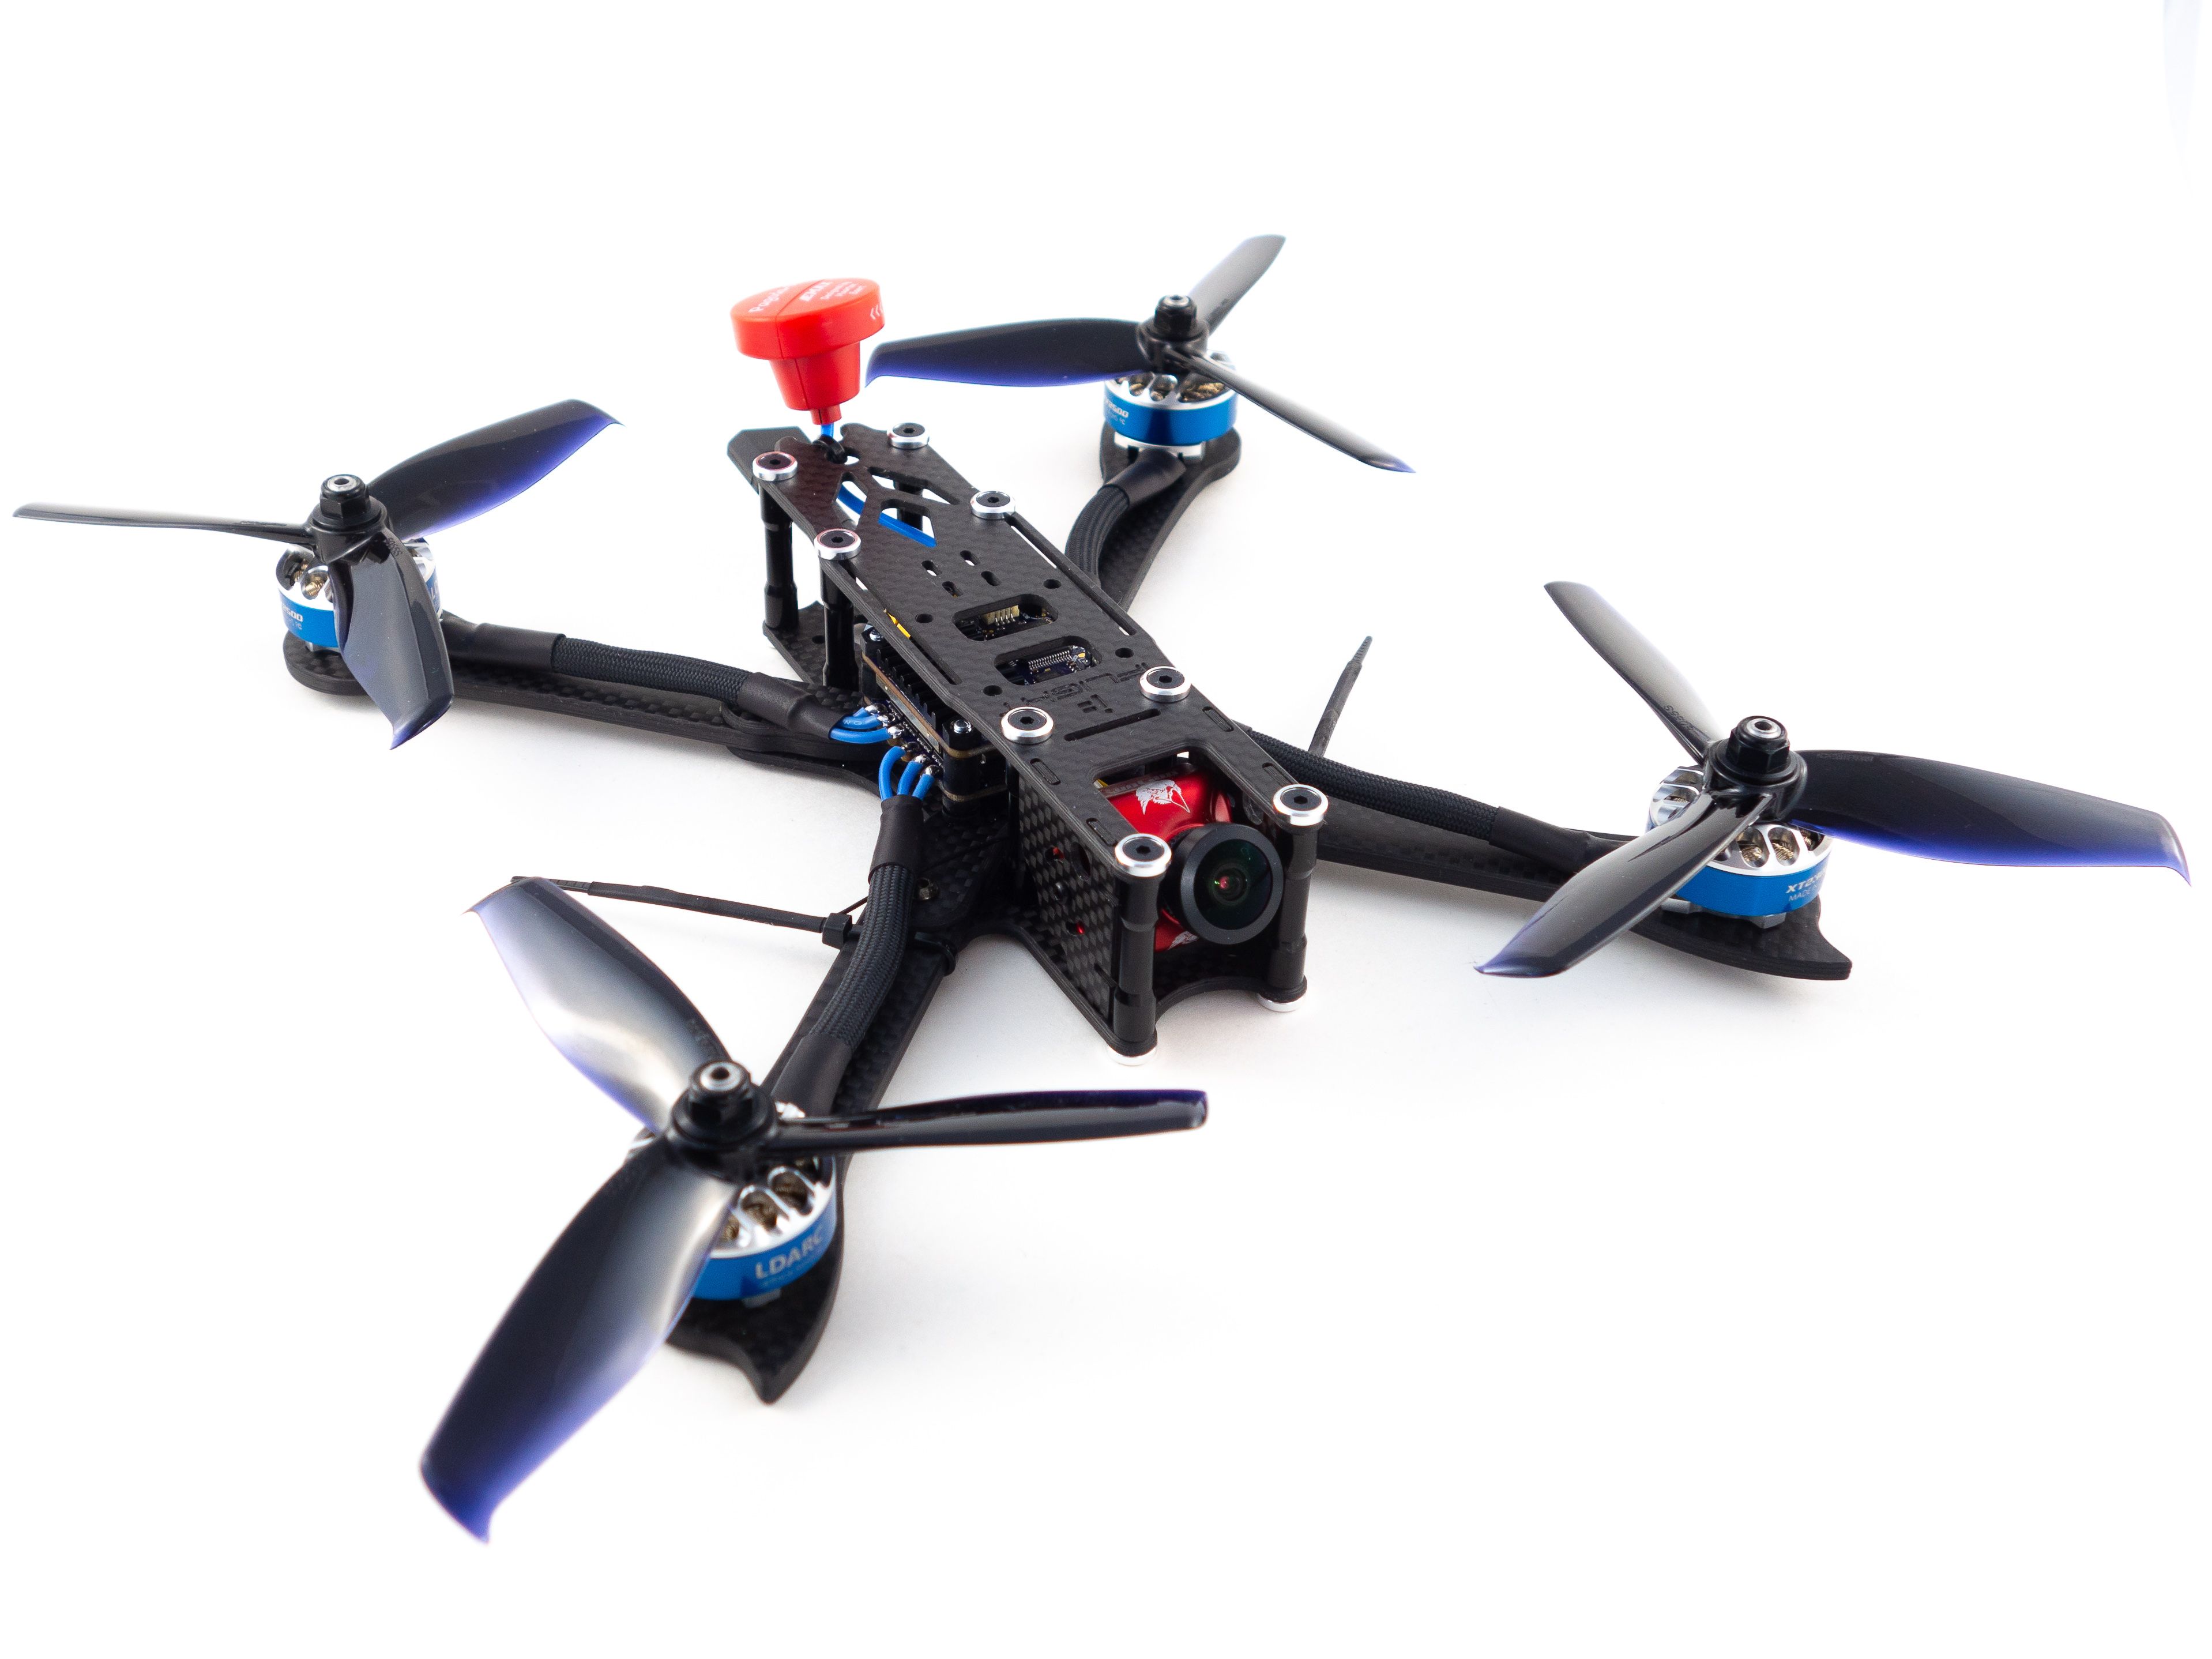
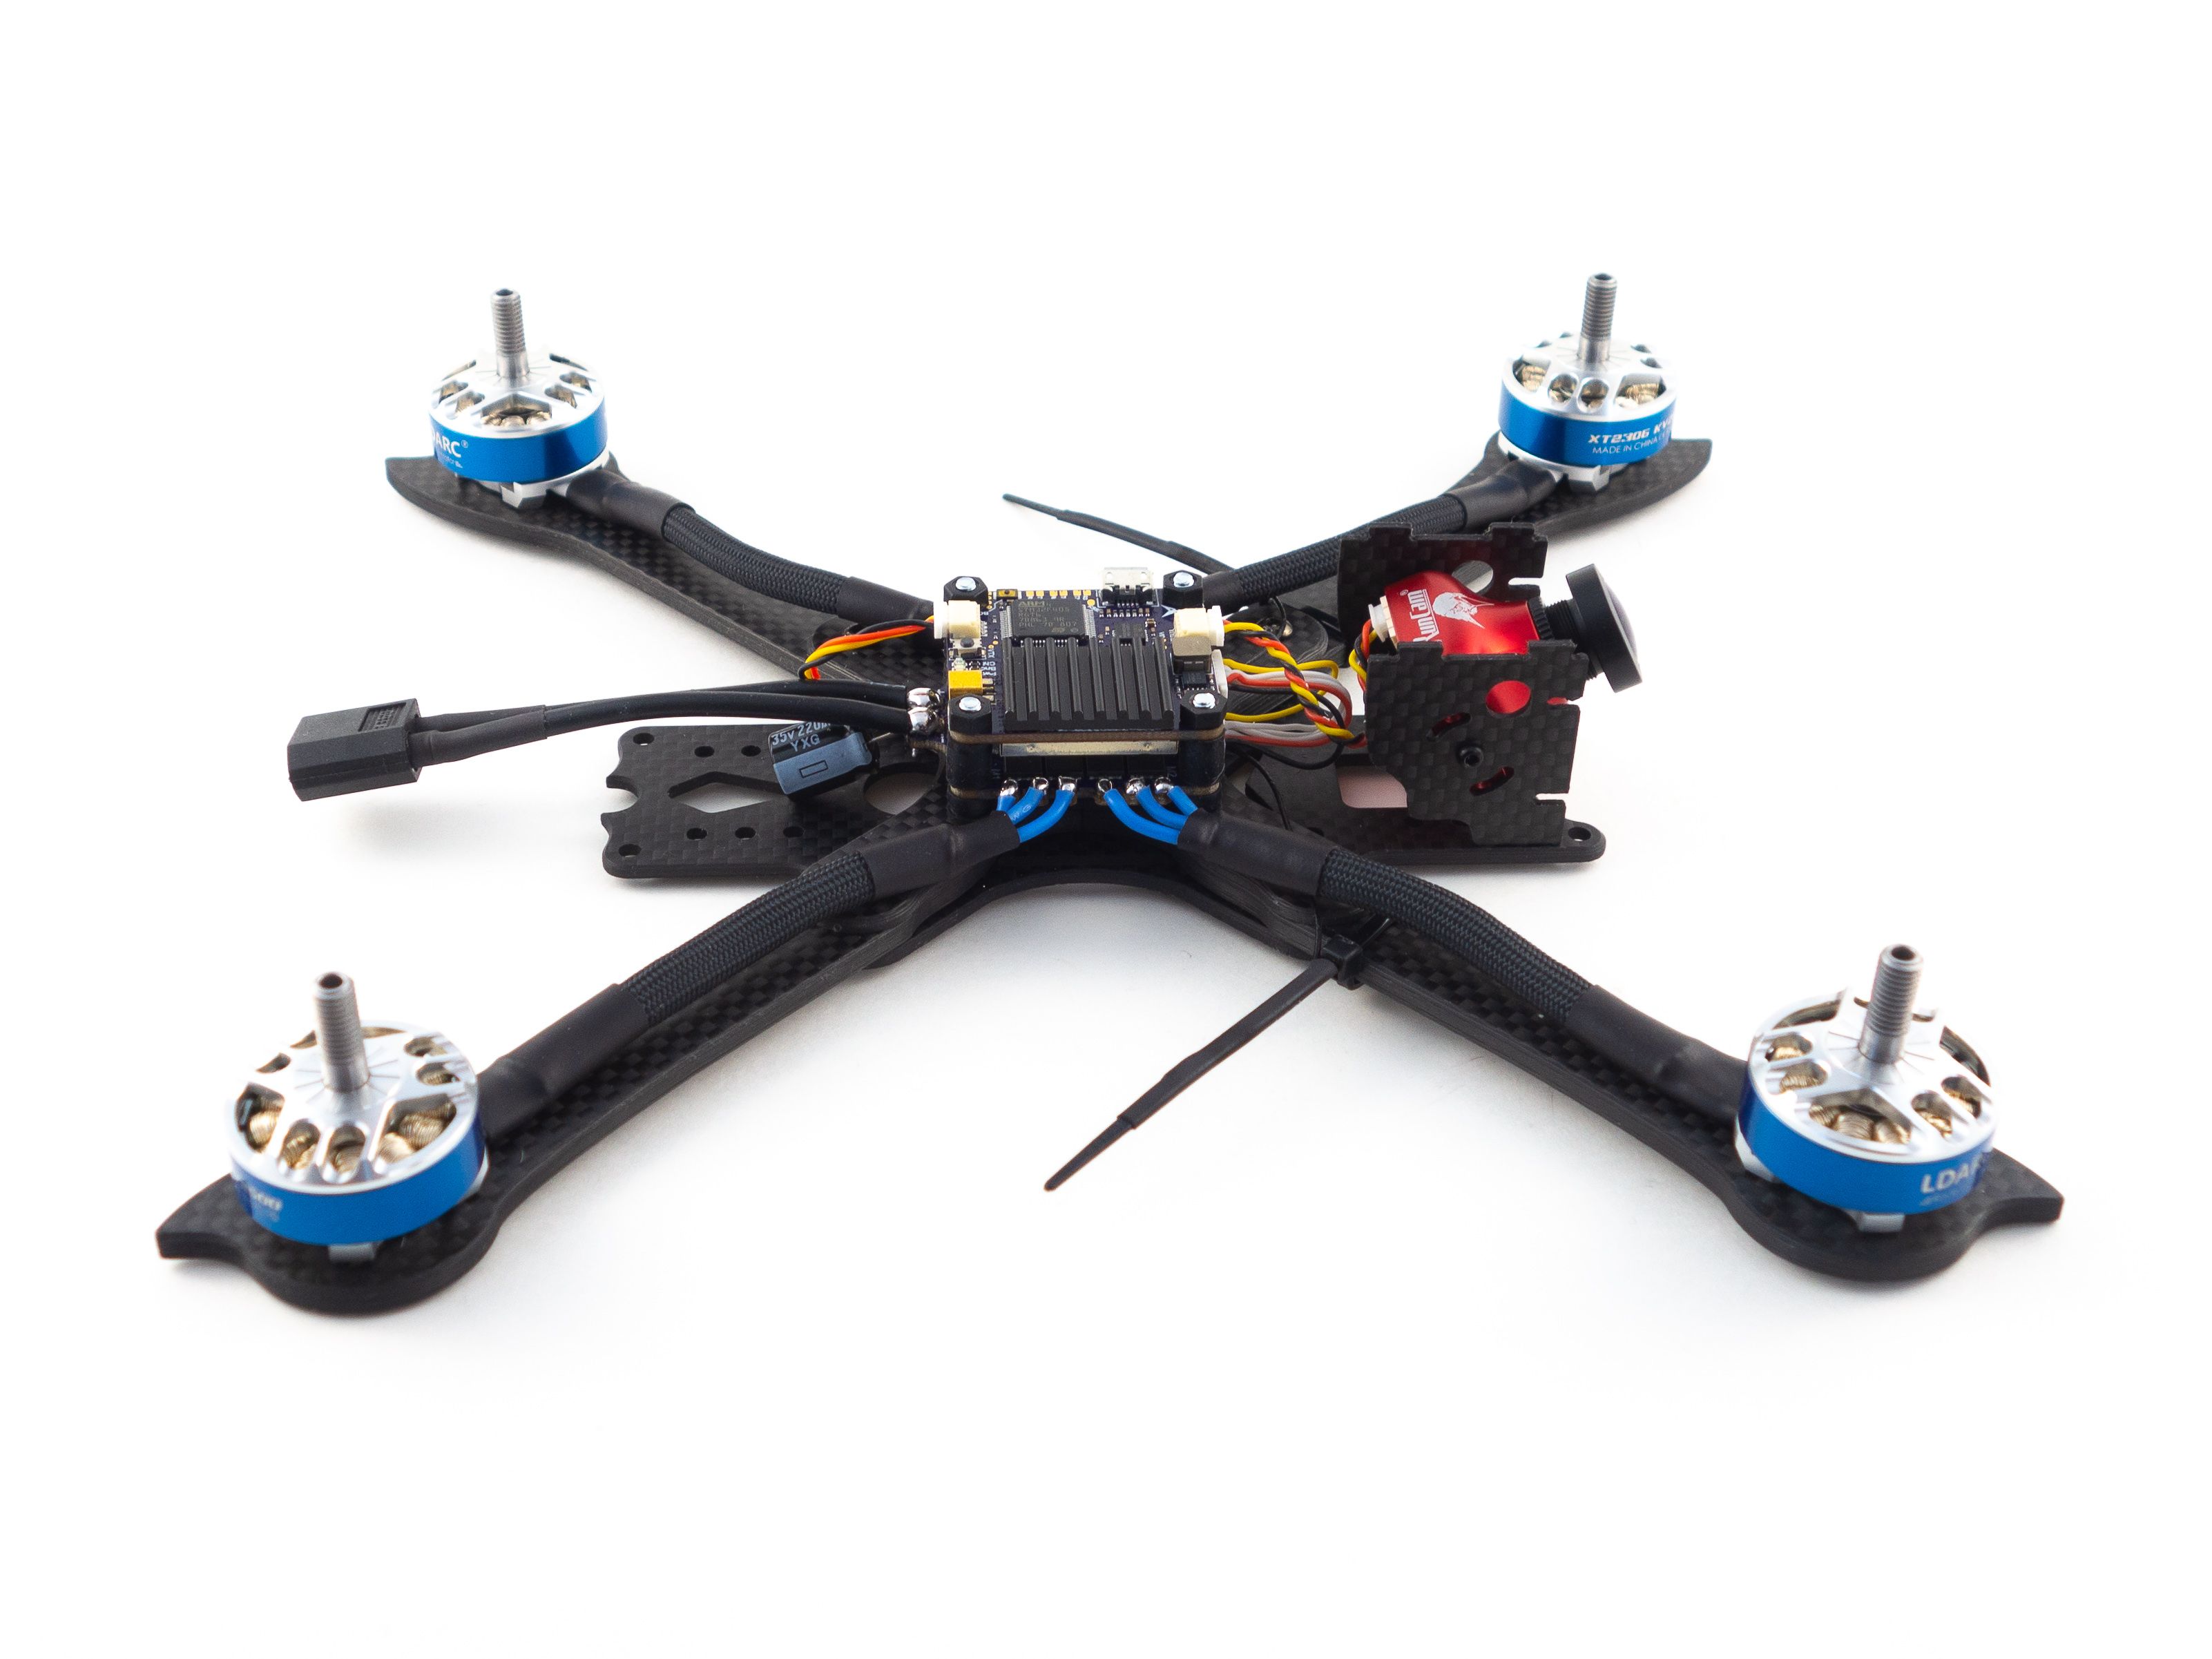
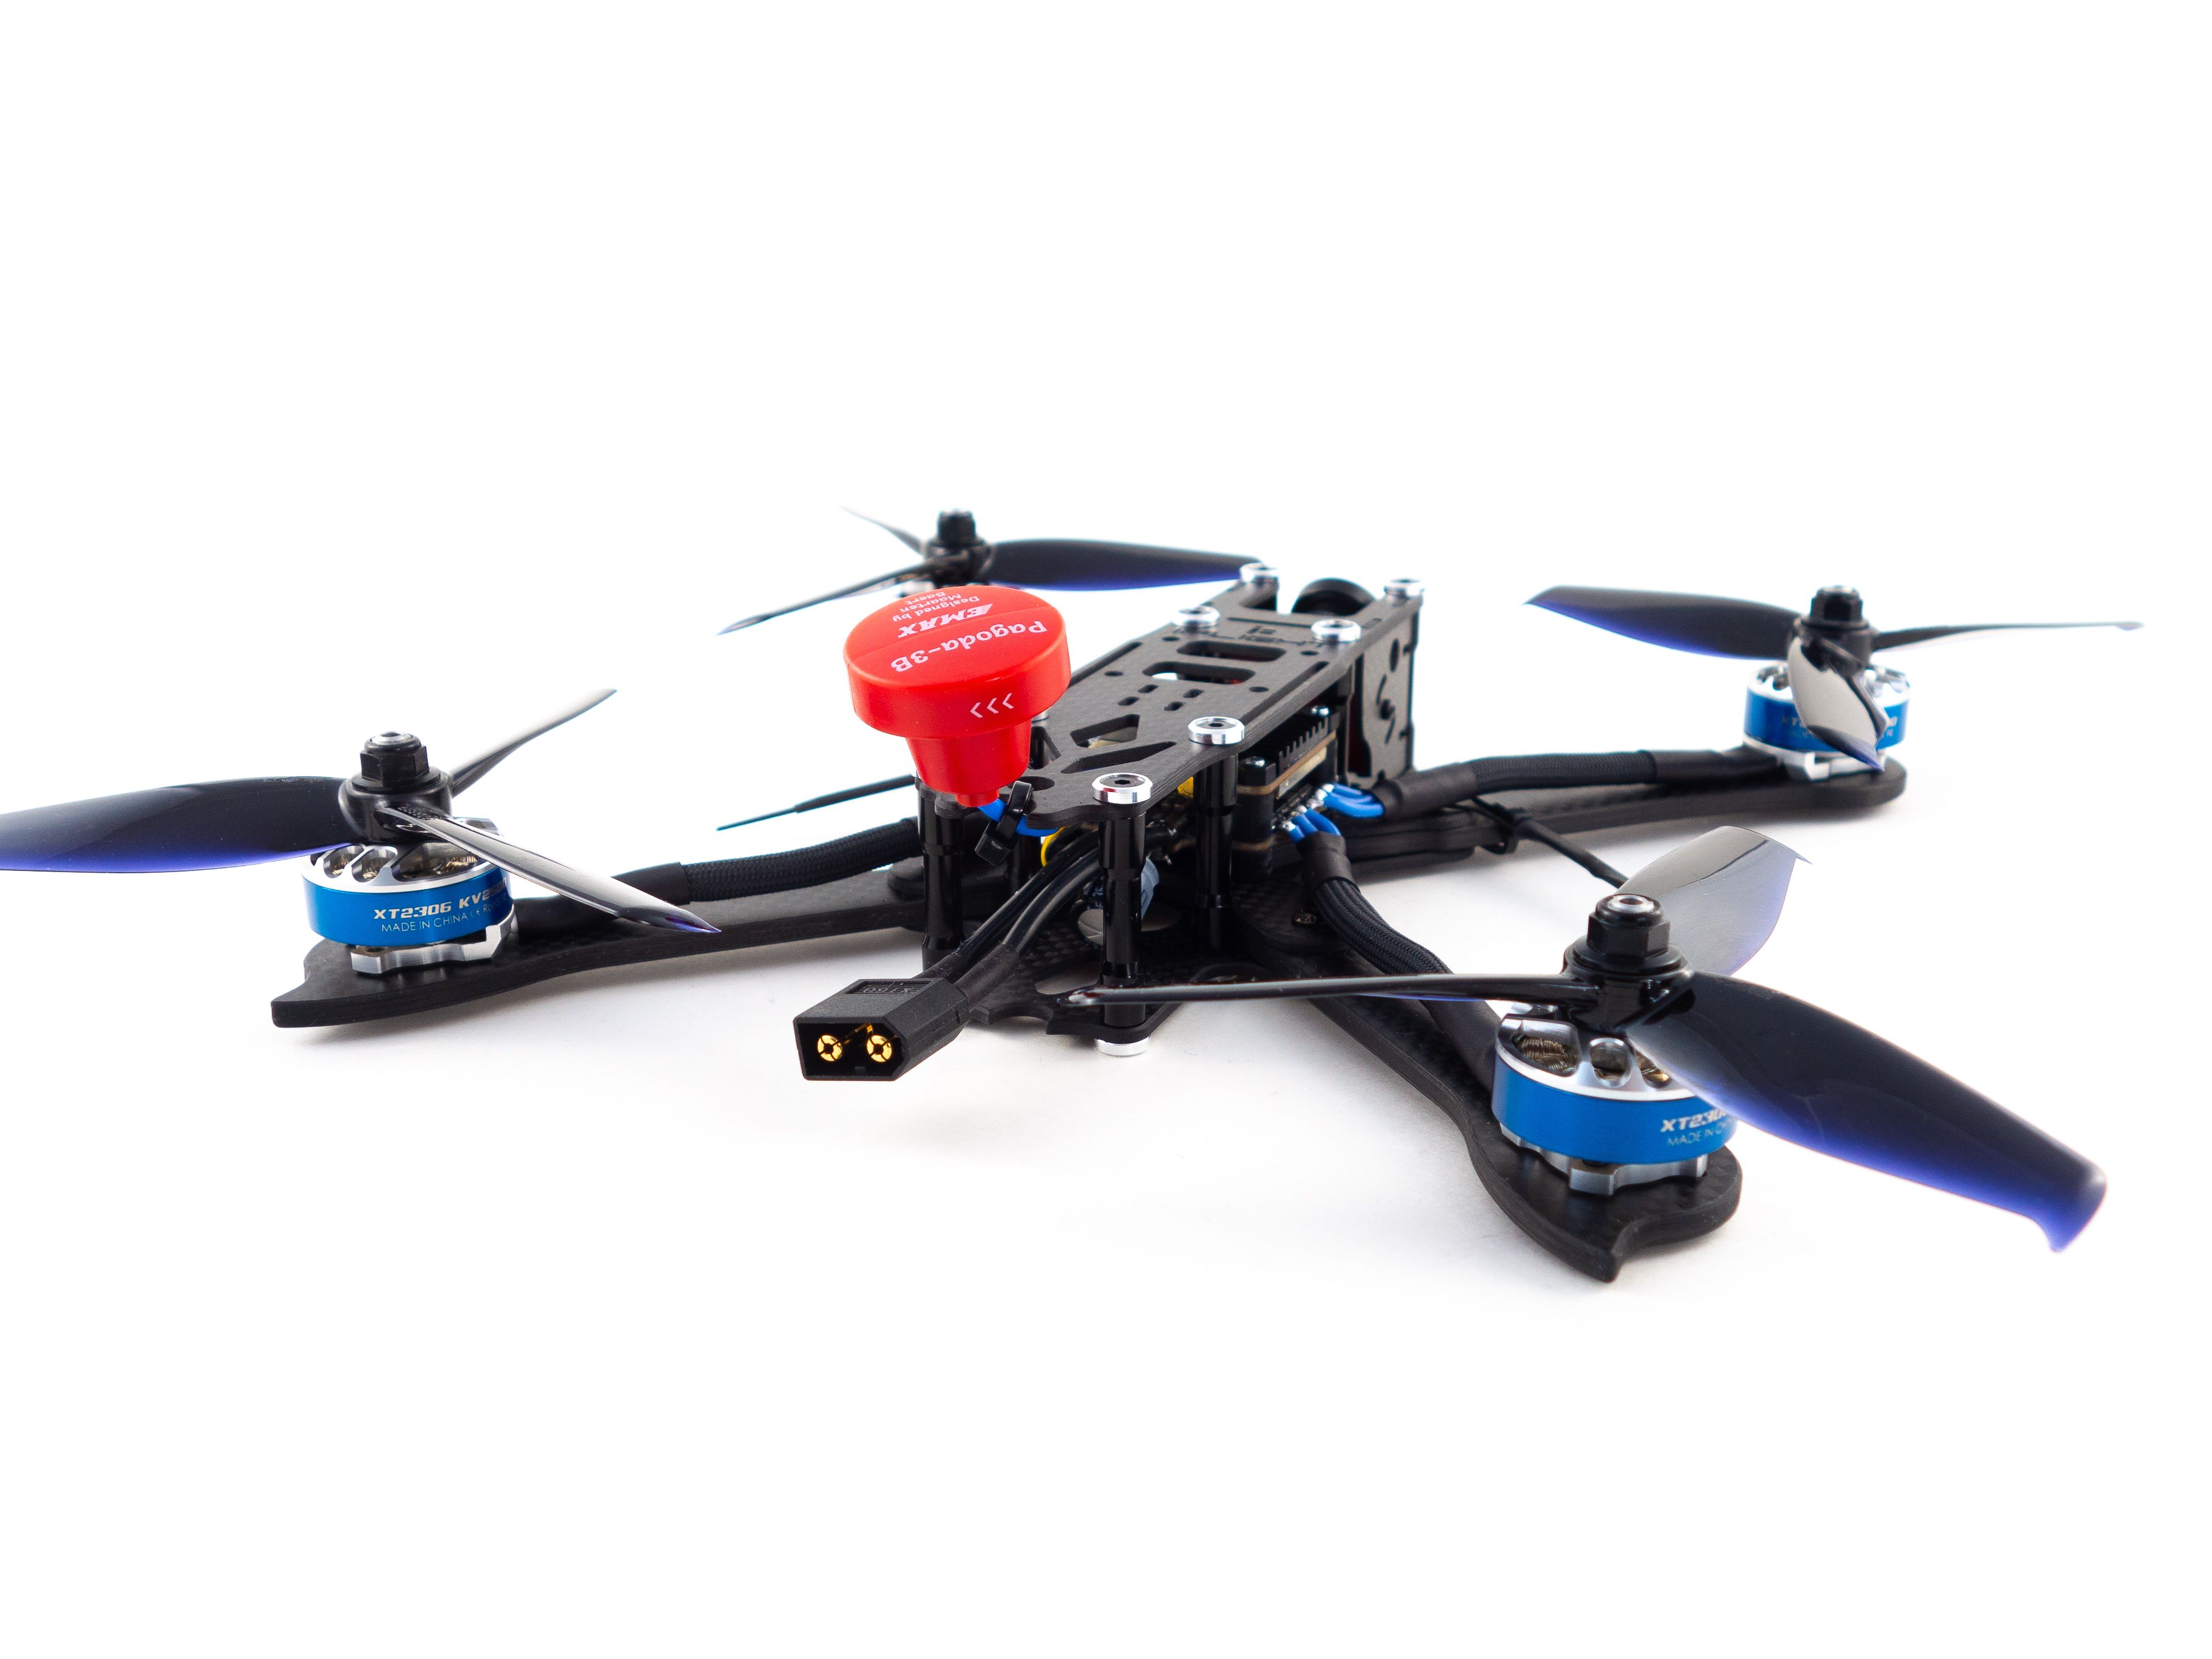
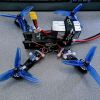
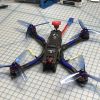
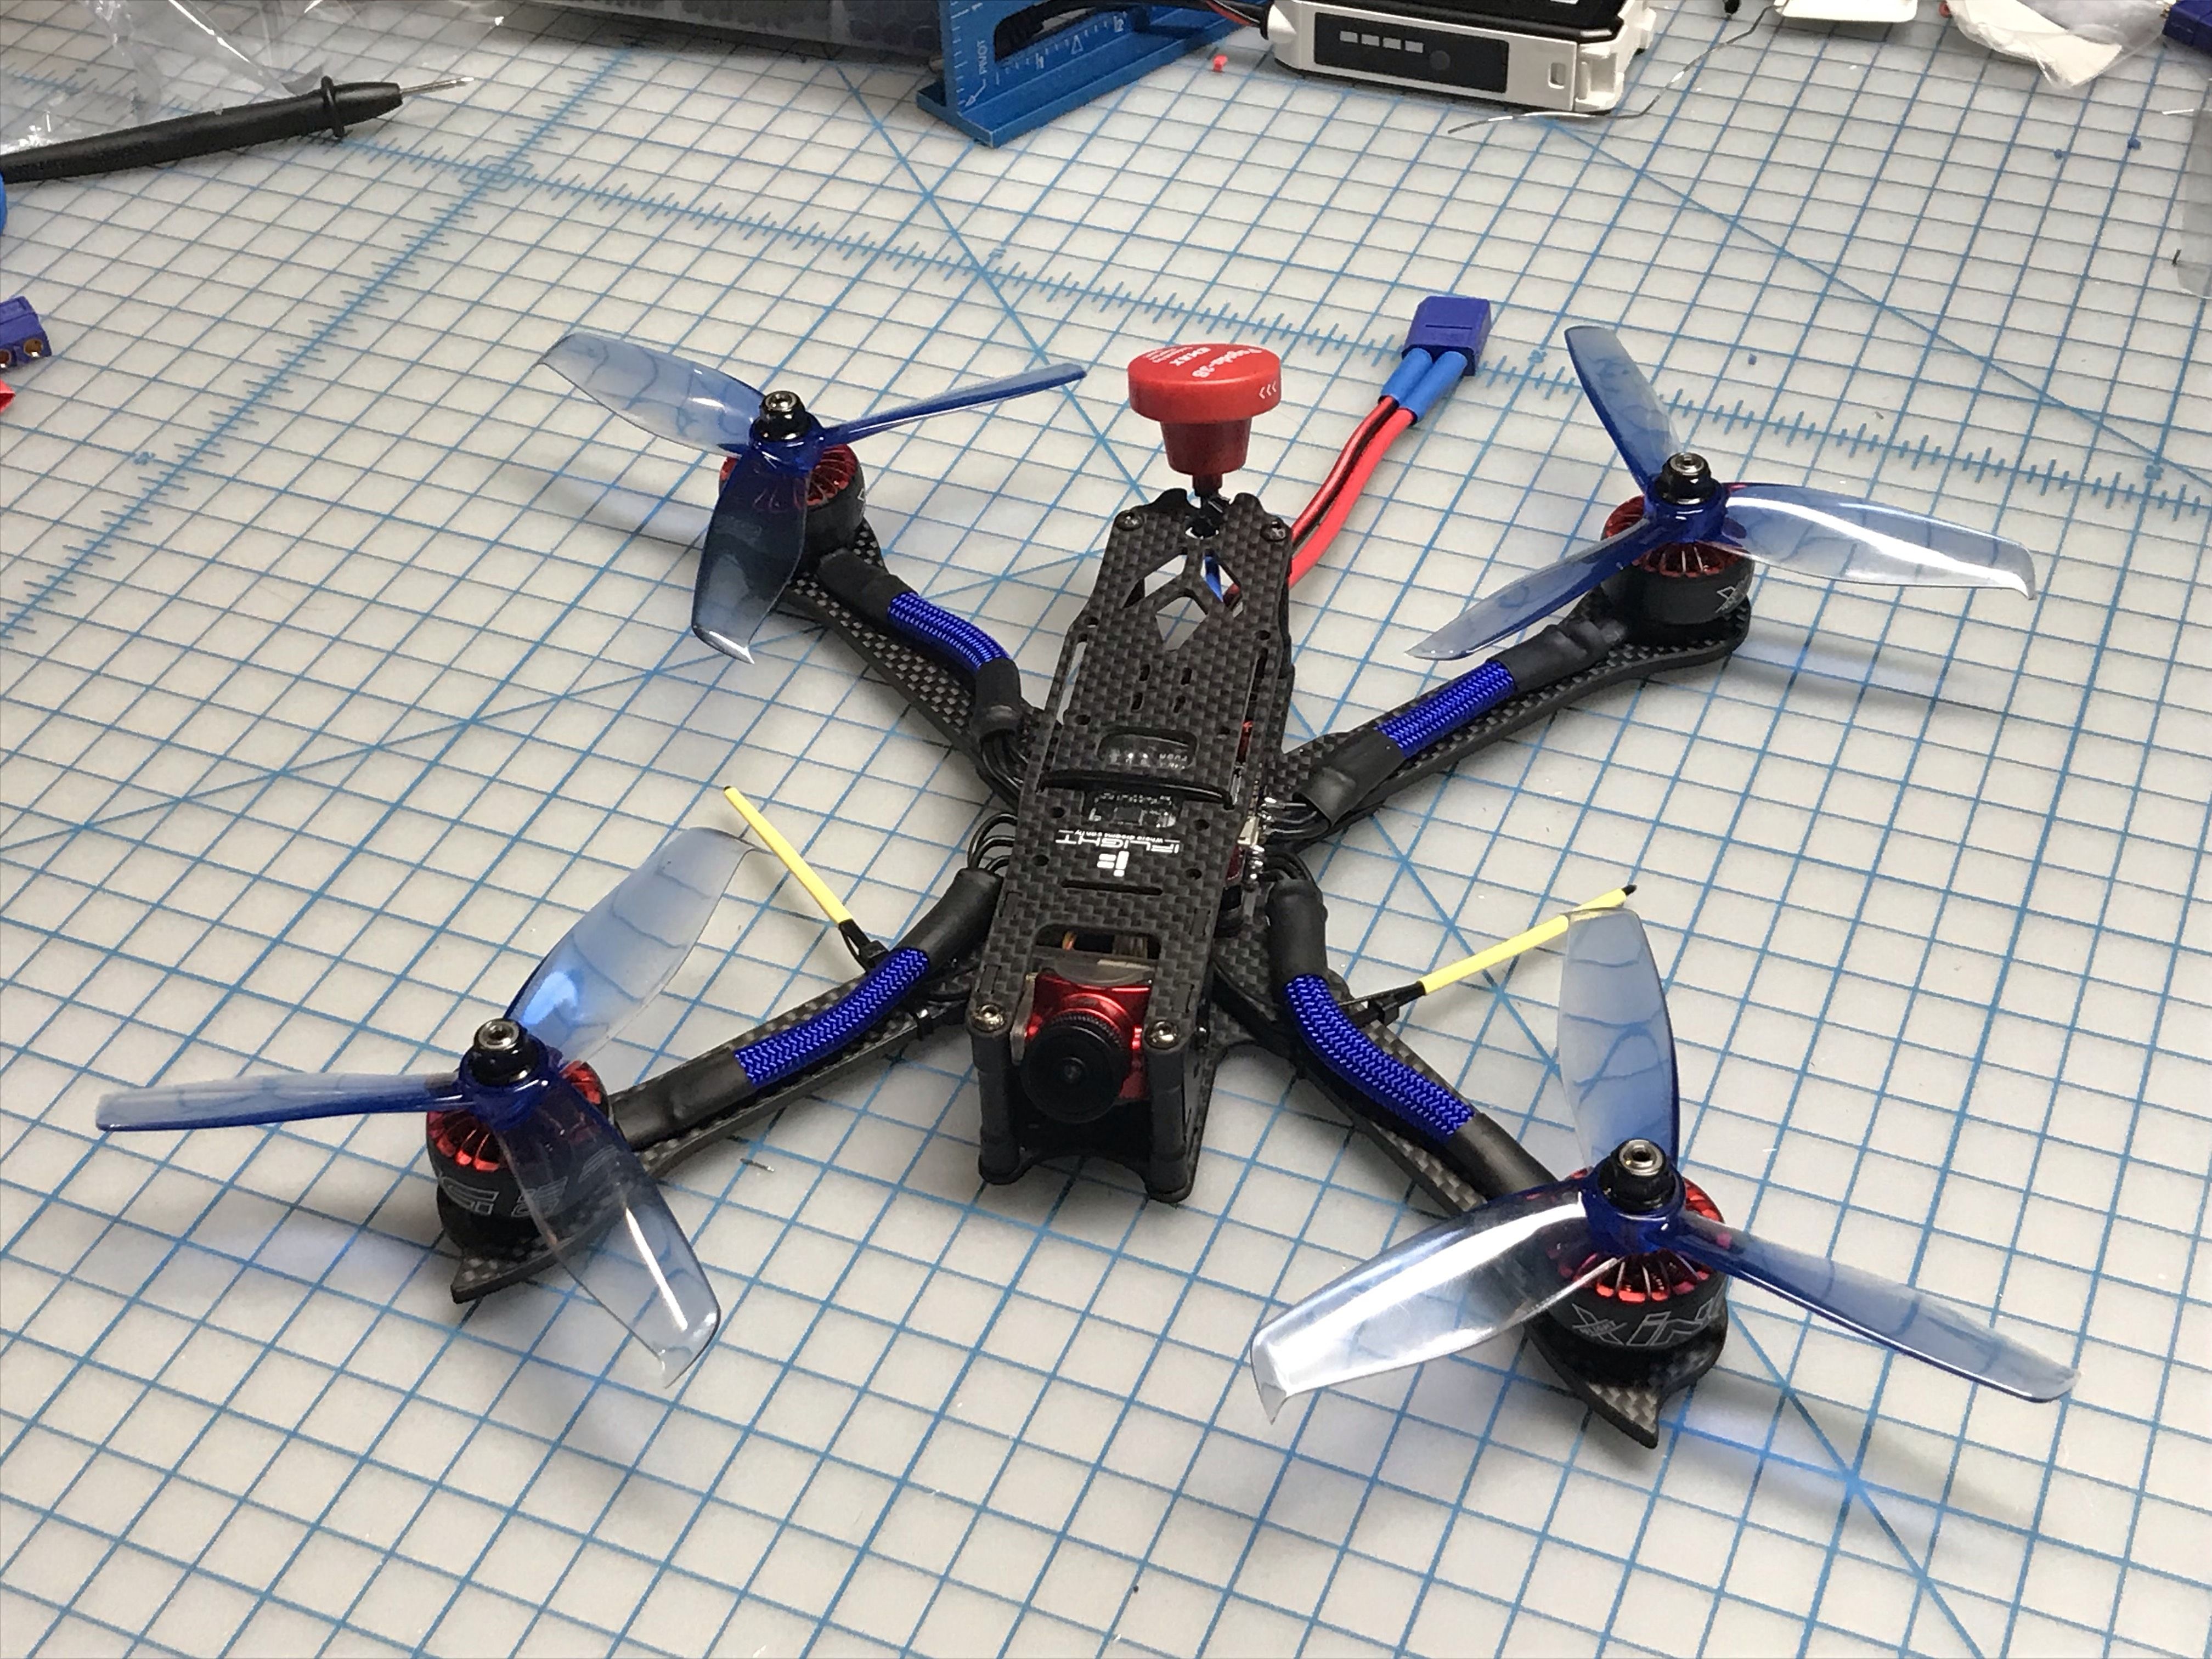
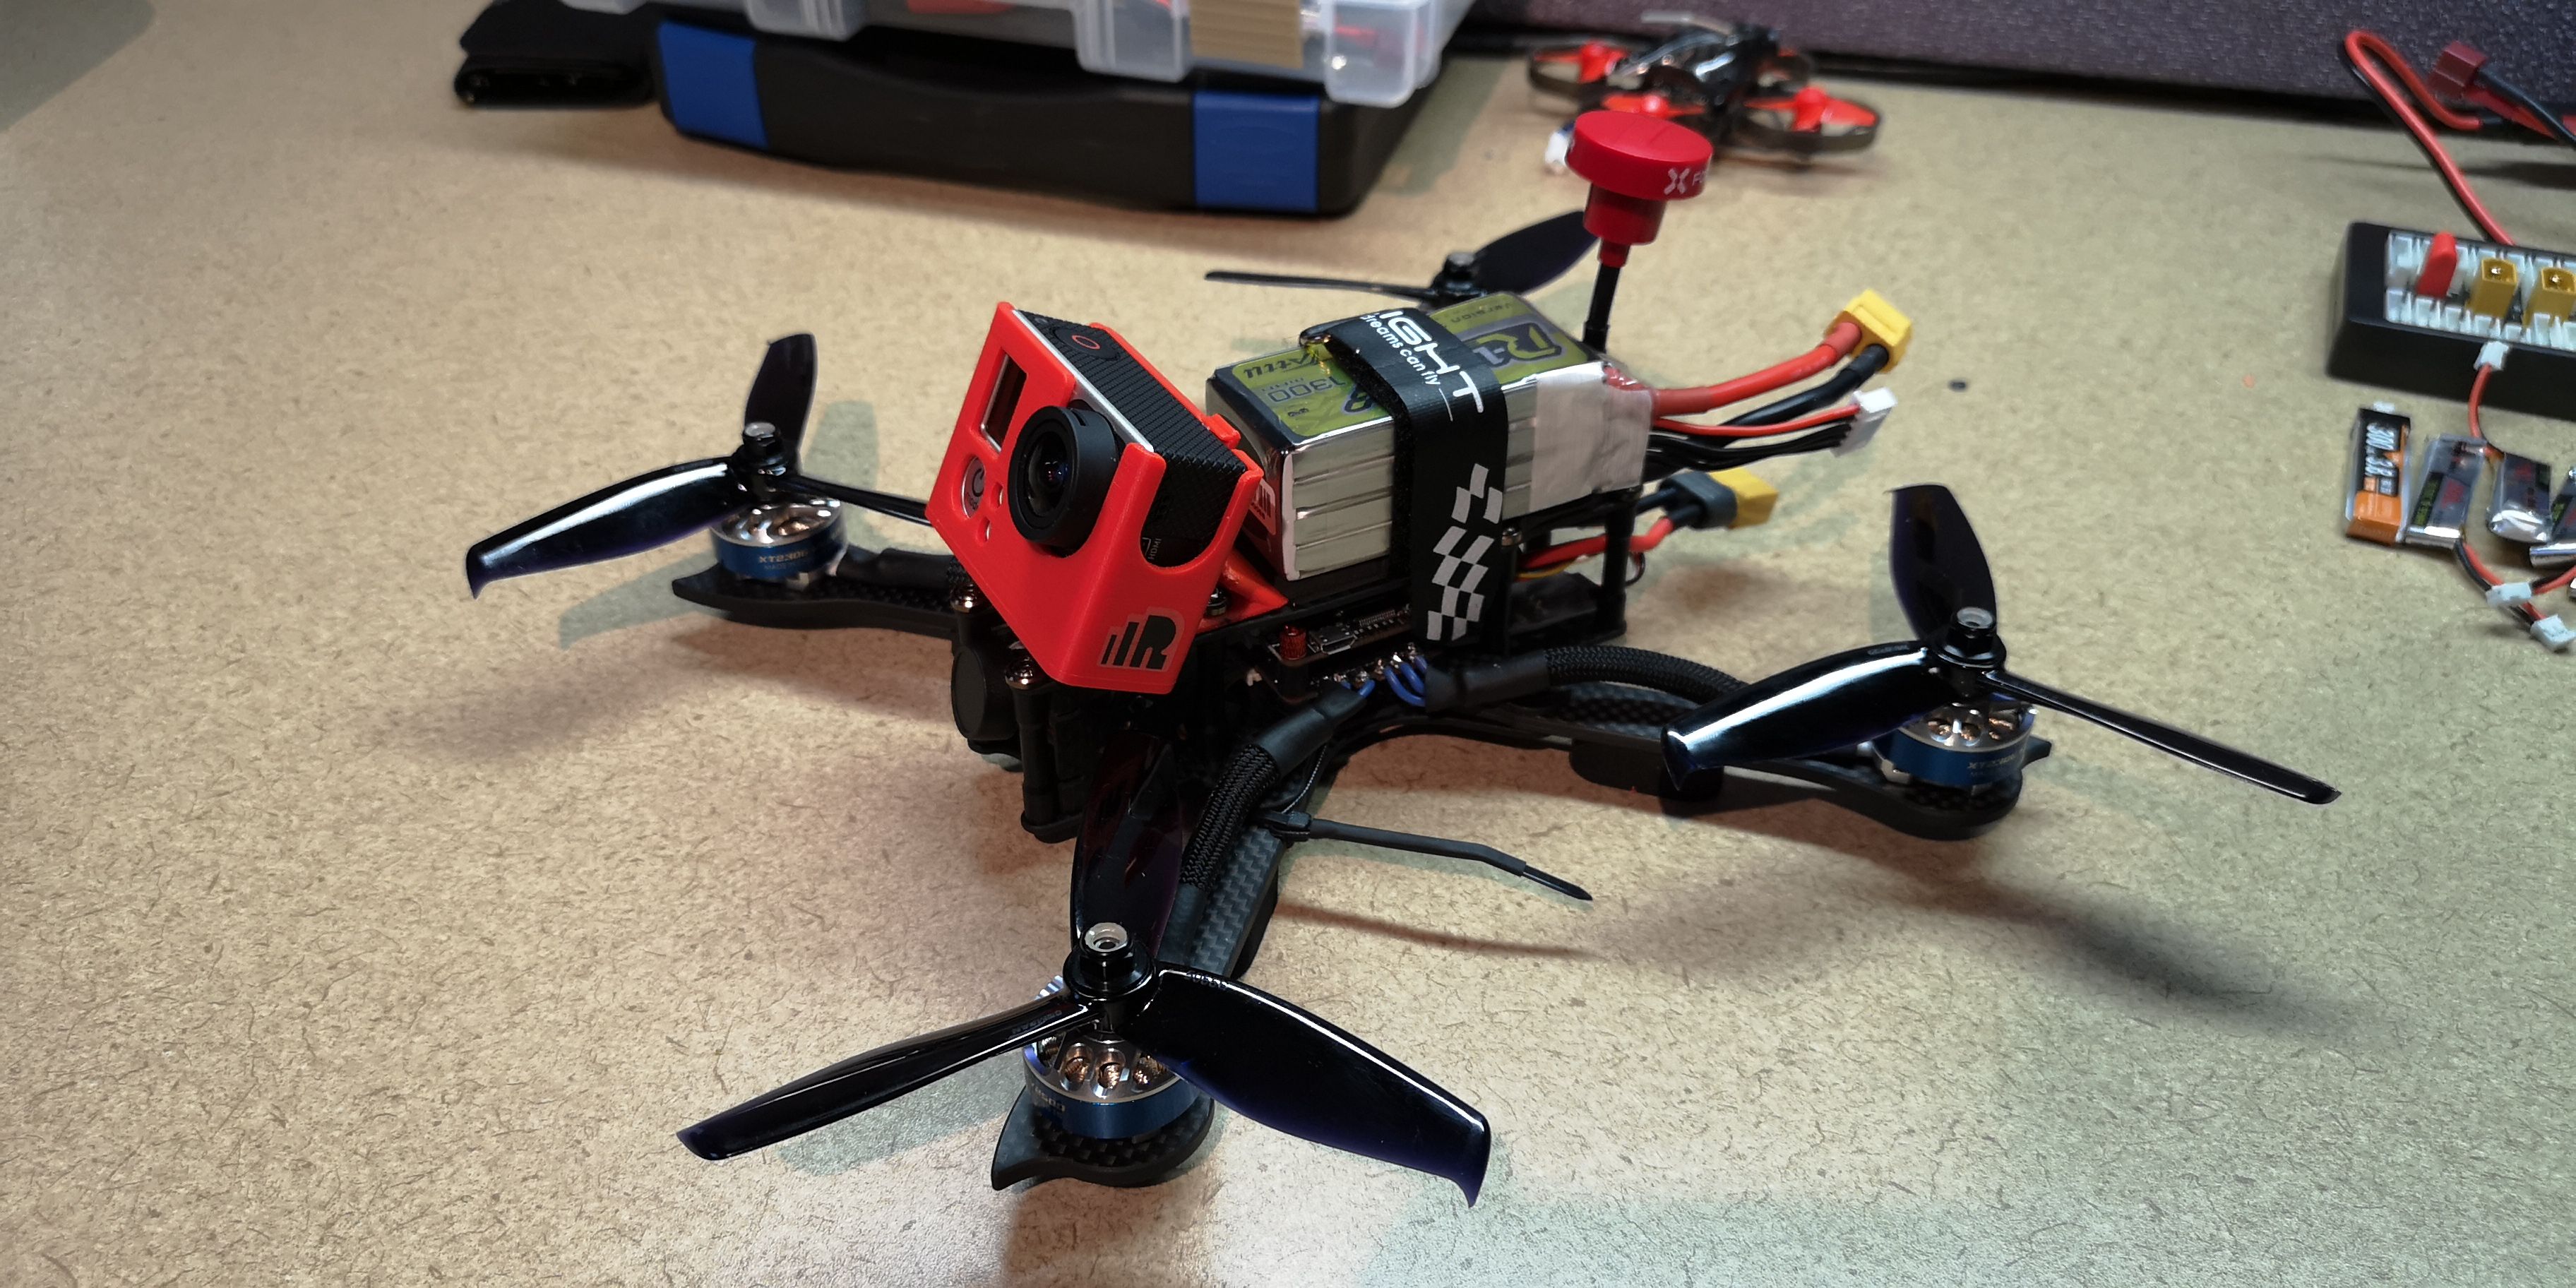
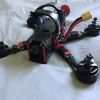
The iFlight XL5 V3 is a fantastic freestyle frame for the price. It features chamfered edges on some very nice quality carbon fiber. My goal for this build was to use high quality components at a relatively low price. Not only that, but I managed to reduce the number of solder points to the bare minimum. I've never built such a plug-in-play quad! The flight controller has an integrated VTX and doesn't require any soldering. All you need to solder are the motor wires, the power leads and the receiver. Very cool!
I reached out to XT-Xinte to sponsor this build because they've been going above and beyond to stock the products I request and their prices are second to none. They also set up a $5 coupon for RotorBuilds users by following this link.
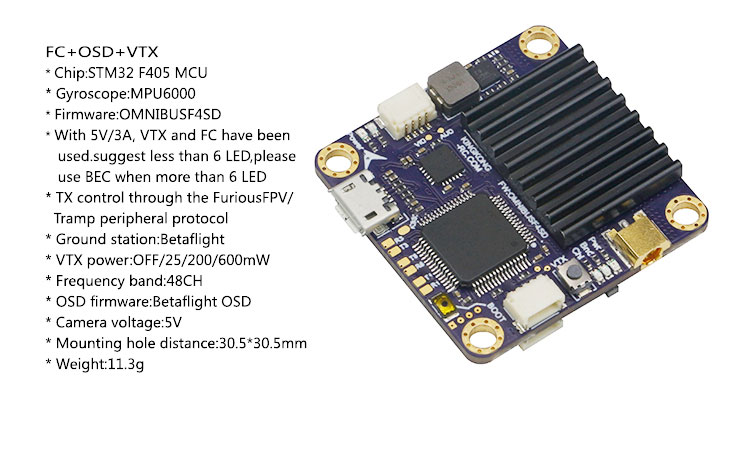
Features
- F4 flight controller
- 600mw video transmitter
- Eagle 2 CMOS camera
- Current sensor
- Quality 2306 motors
- Only 17 solder points
Tools
While this is a fairly easy build, you'll still need a number of tools. The most important is the soldering iron. I recommend a good quality iron like the Hakko 888D. While it's a little pricey, it's well worth it if you plan to stay in the hobby for long. Here's what you'll need:
- Soldering iron
- 1.5mm and 2.0mm hex drivers
- Industrial Tweezers
- Wire cutter/stripper
- Scissors
- Heat gun or lighter
- Ruler and cutting mat
- Multimeter
Additional Supplies
- A variety of heat shrink tube sizes
- Blue Loctite
- Zip ties (small)
- 63/37 leaded solder
- Liquid soldering flux pen
Hardware
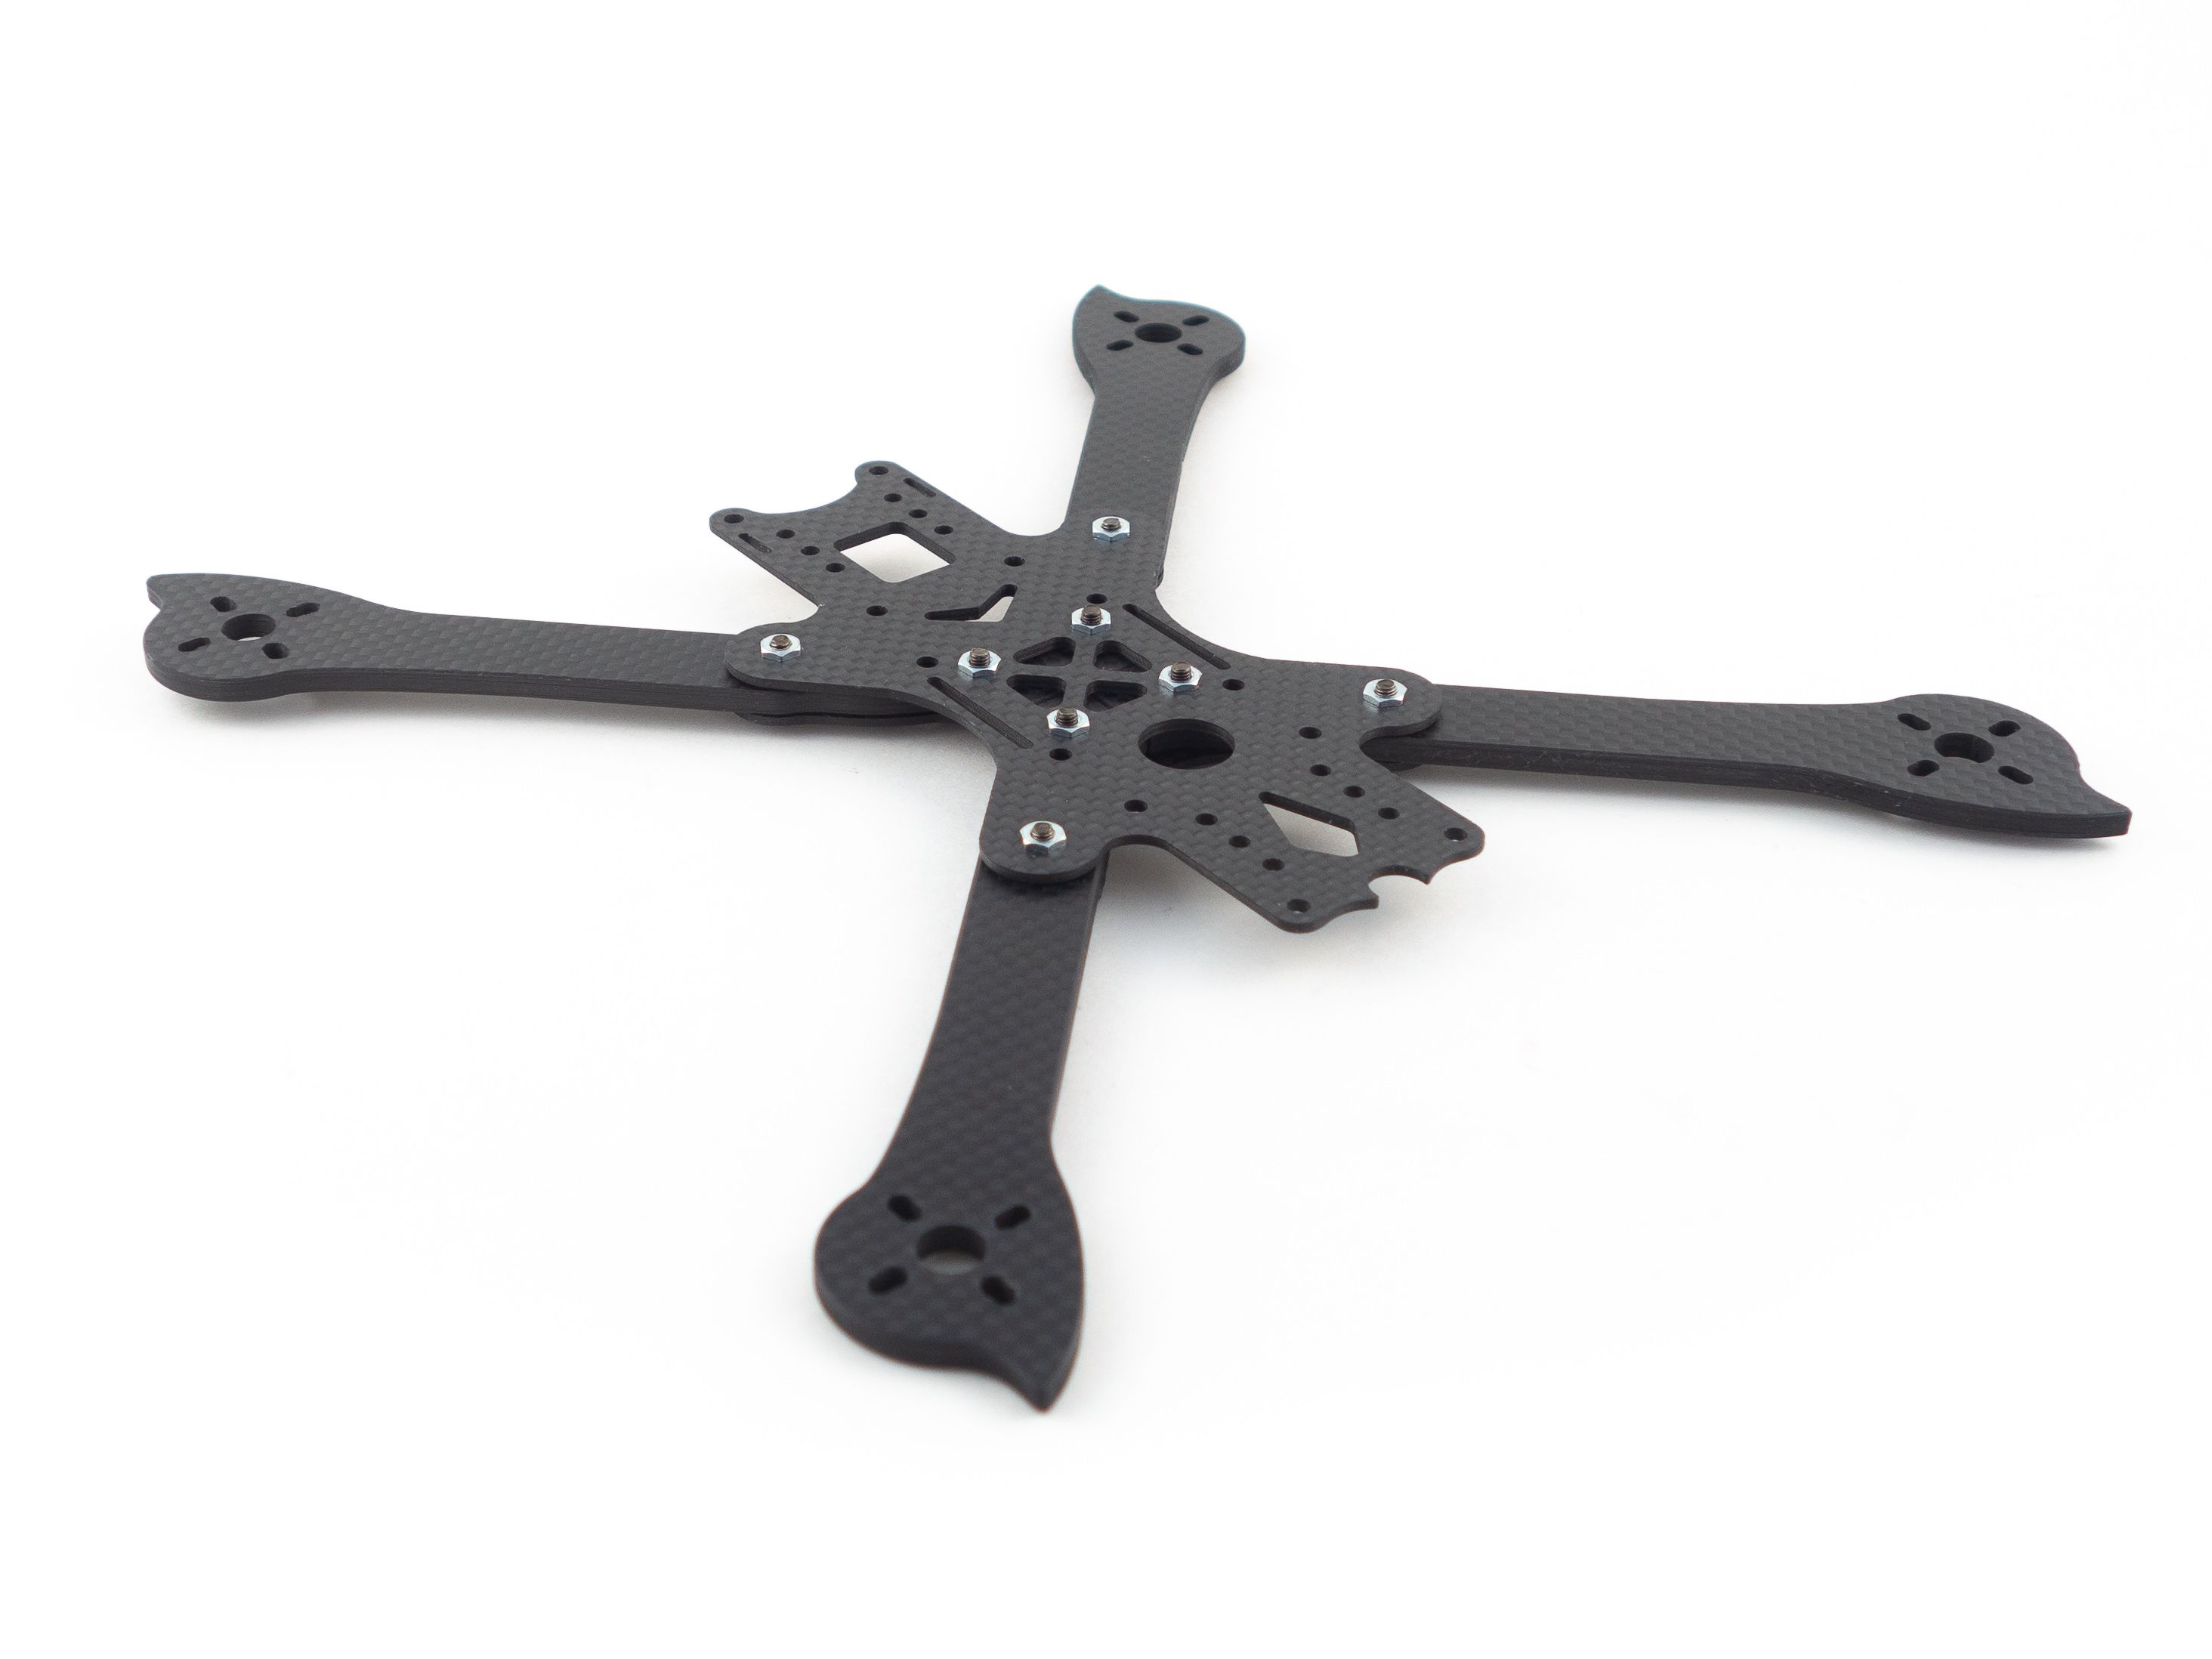
I used countersunk washers and flat top screws to attach the top plate, but these aren't necessary. I just did it to add a little color. The frame includes button-top screws, so these embellishments aren't required. Also, the motors don't come with screws, so you'll need to buy some M3x6mm hex screws. I recommend buying a set of 100 as they're really handy to keep around. Also, I didn't use the hardware intended to mount the stack. Instead I combined some screws from the frame with the anti-vibration mounts listed below in the part list.
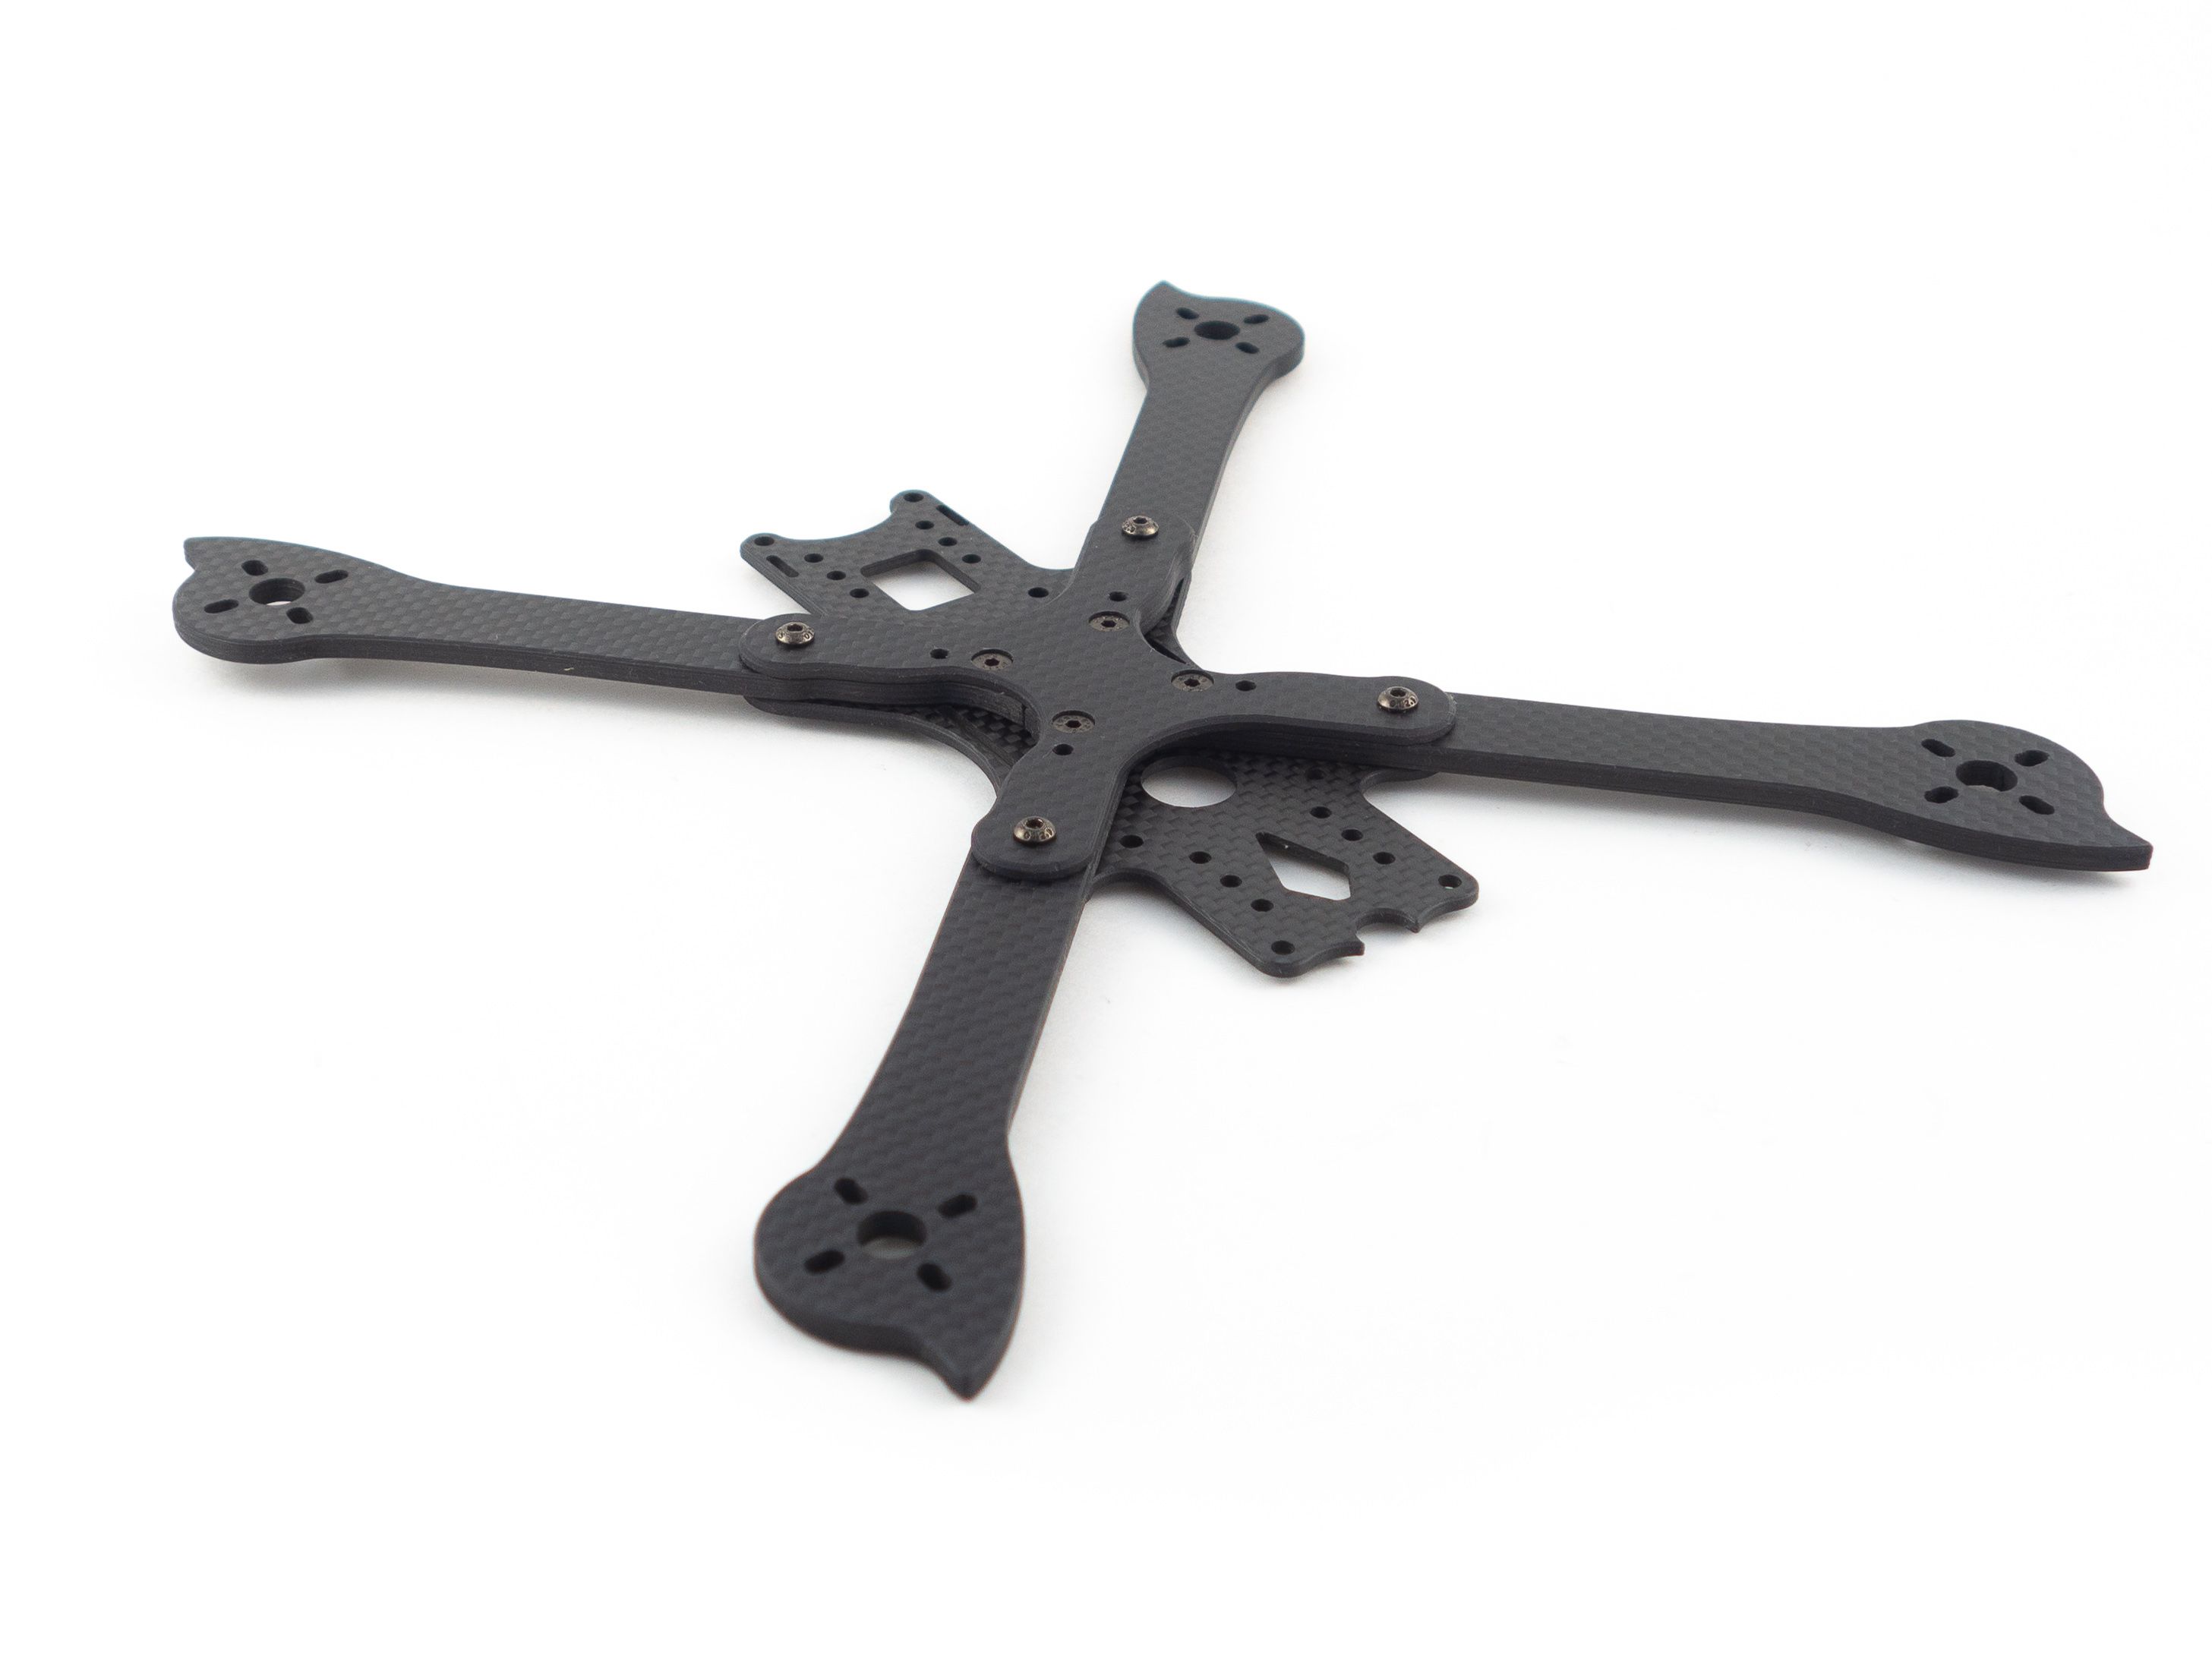
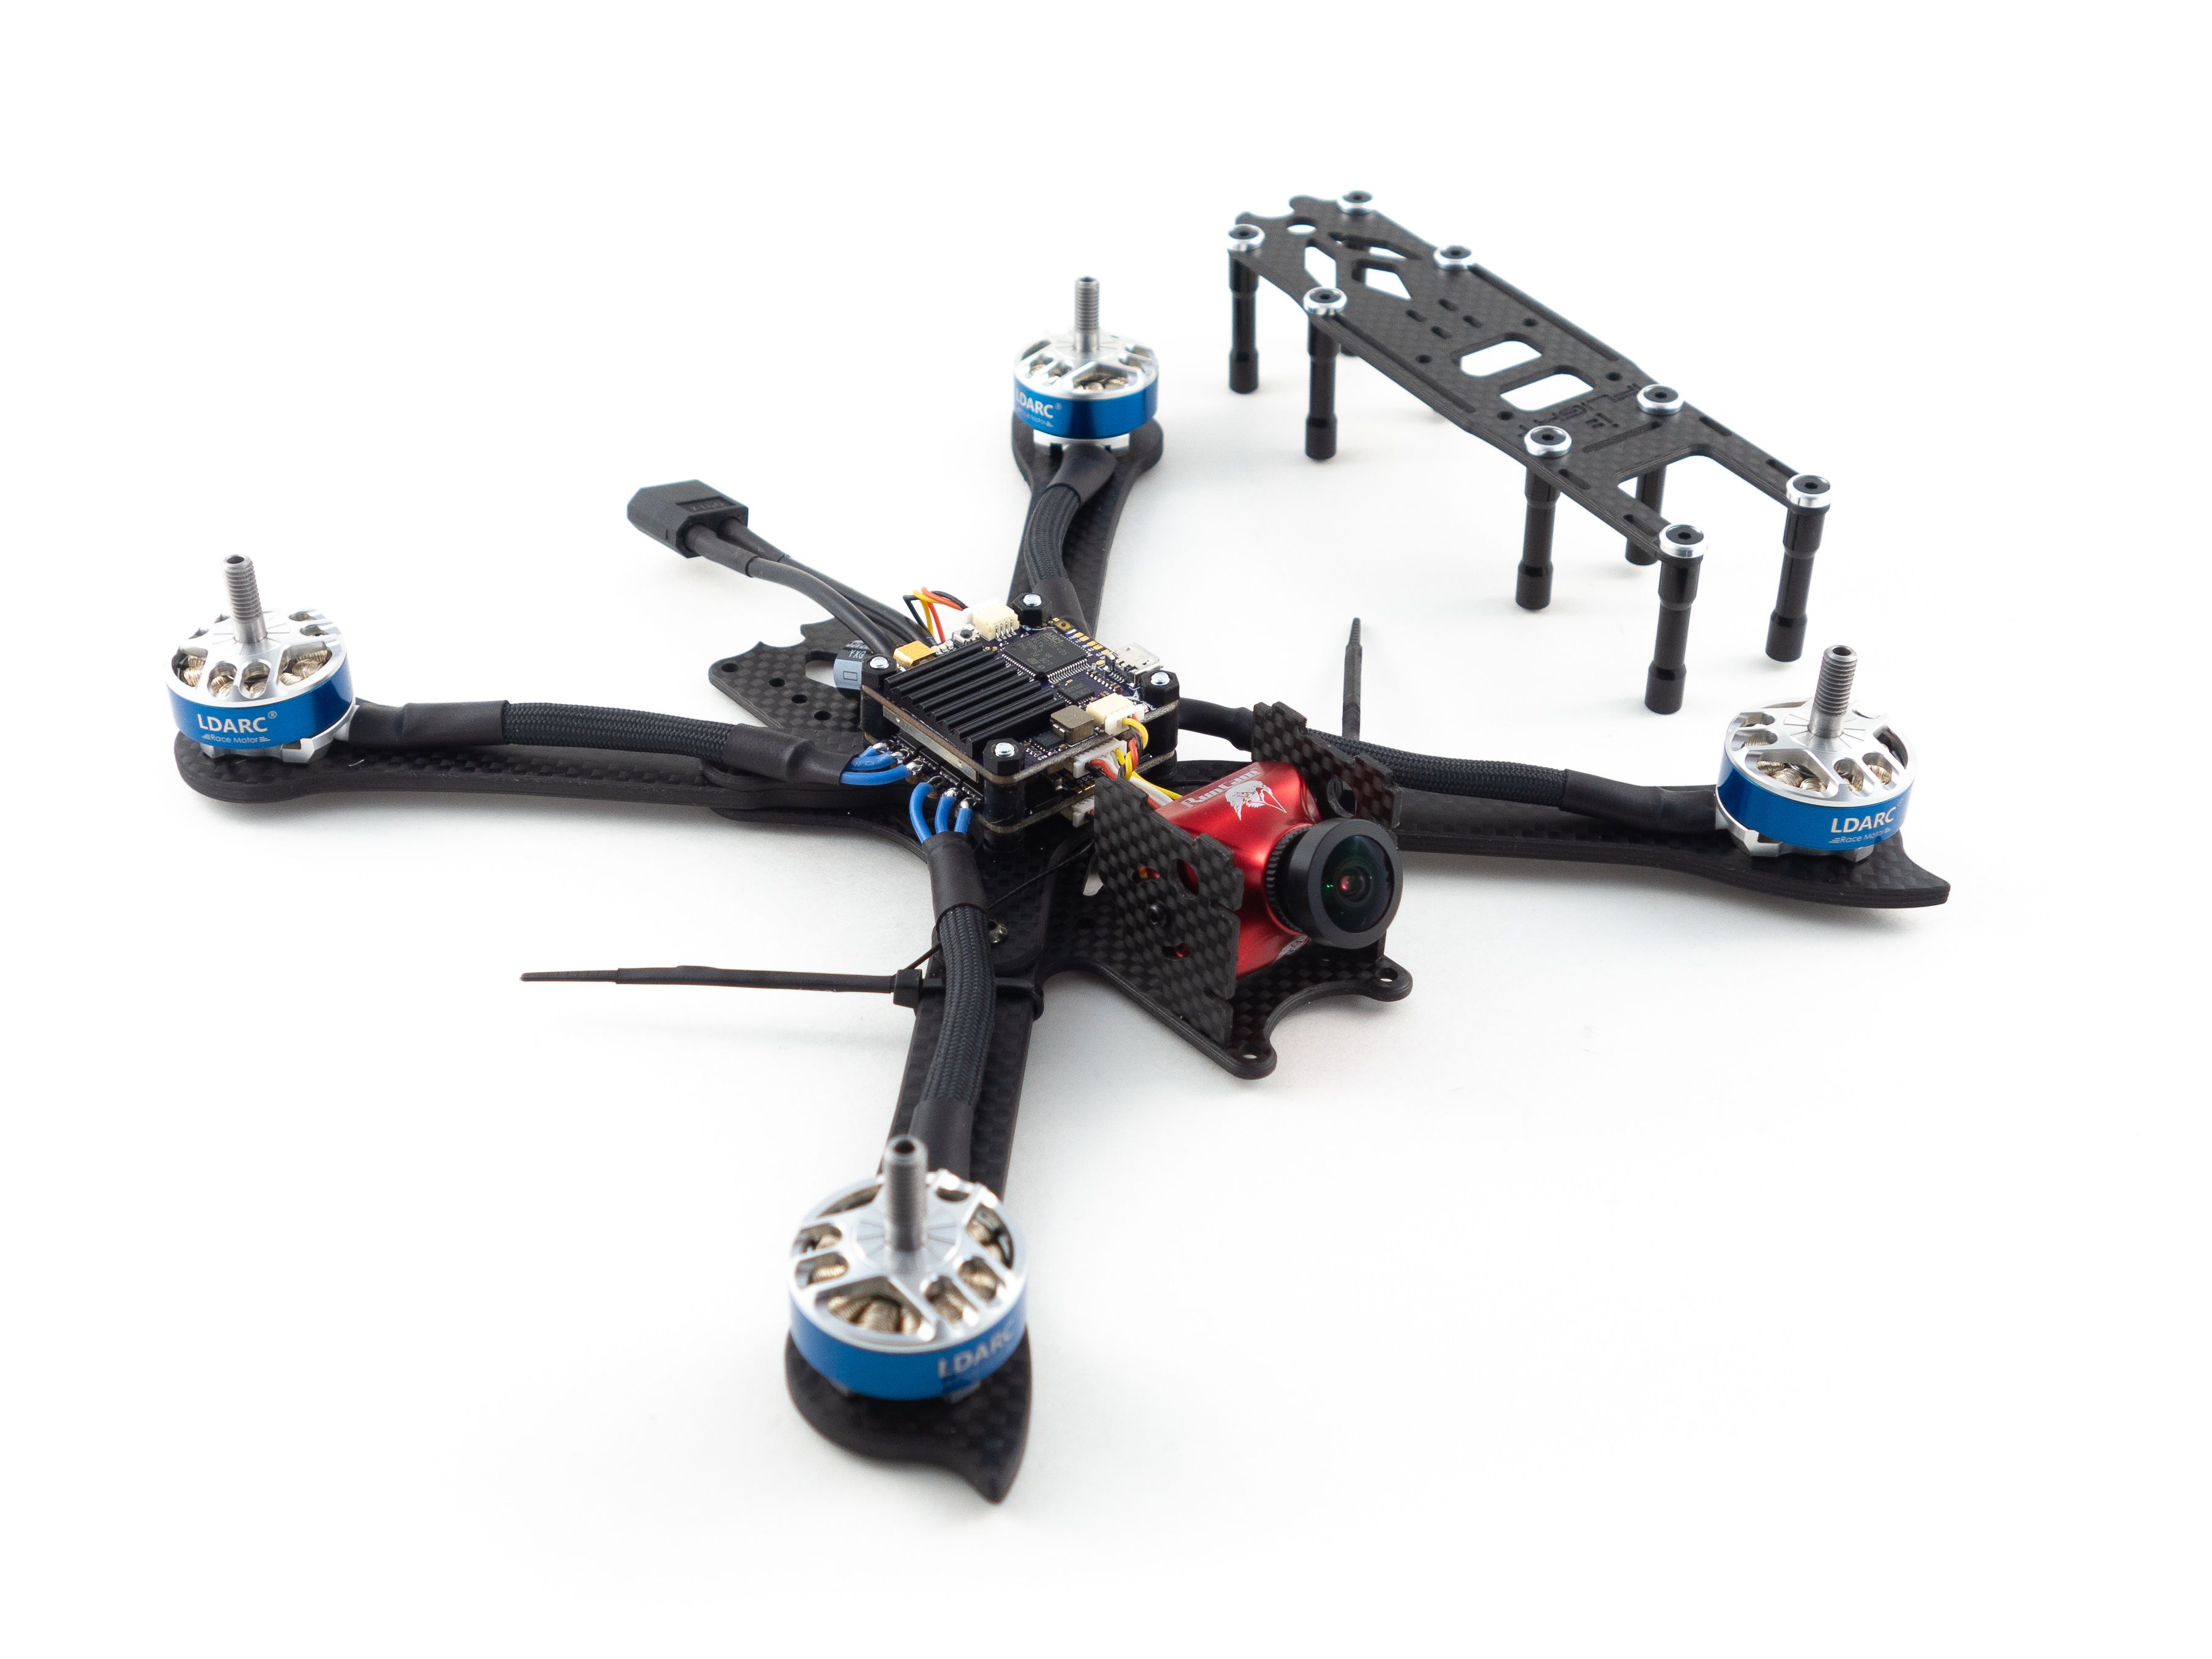
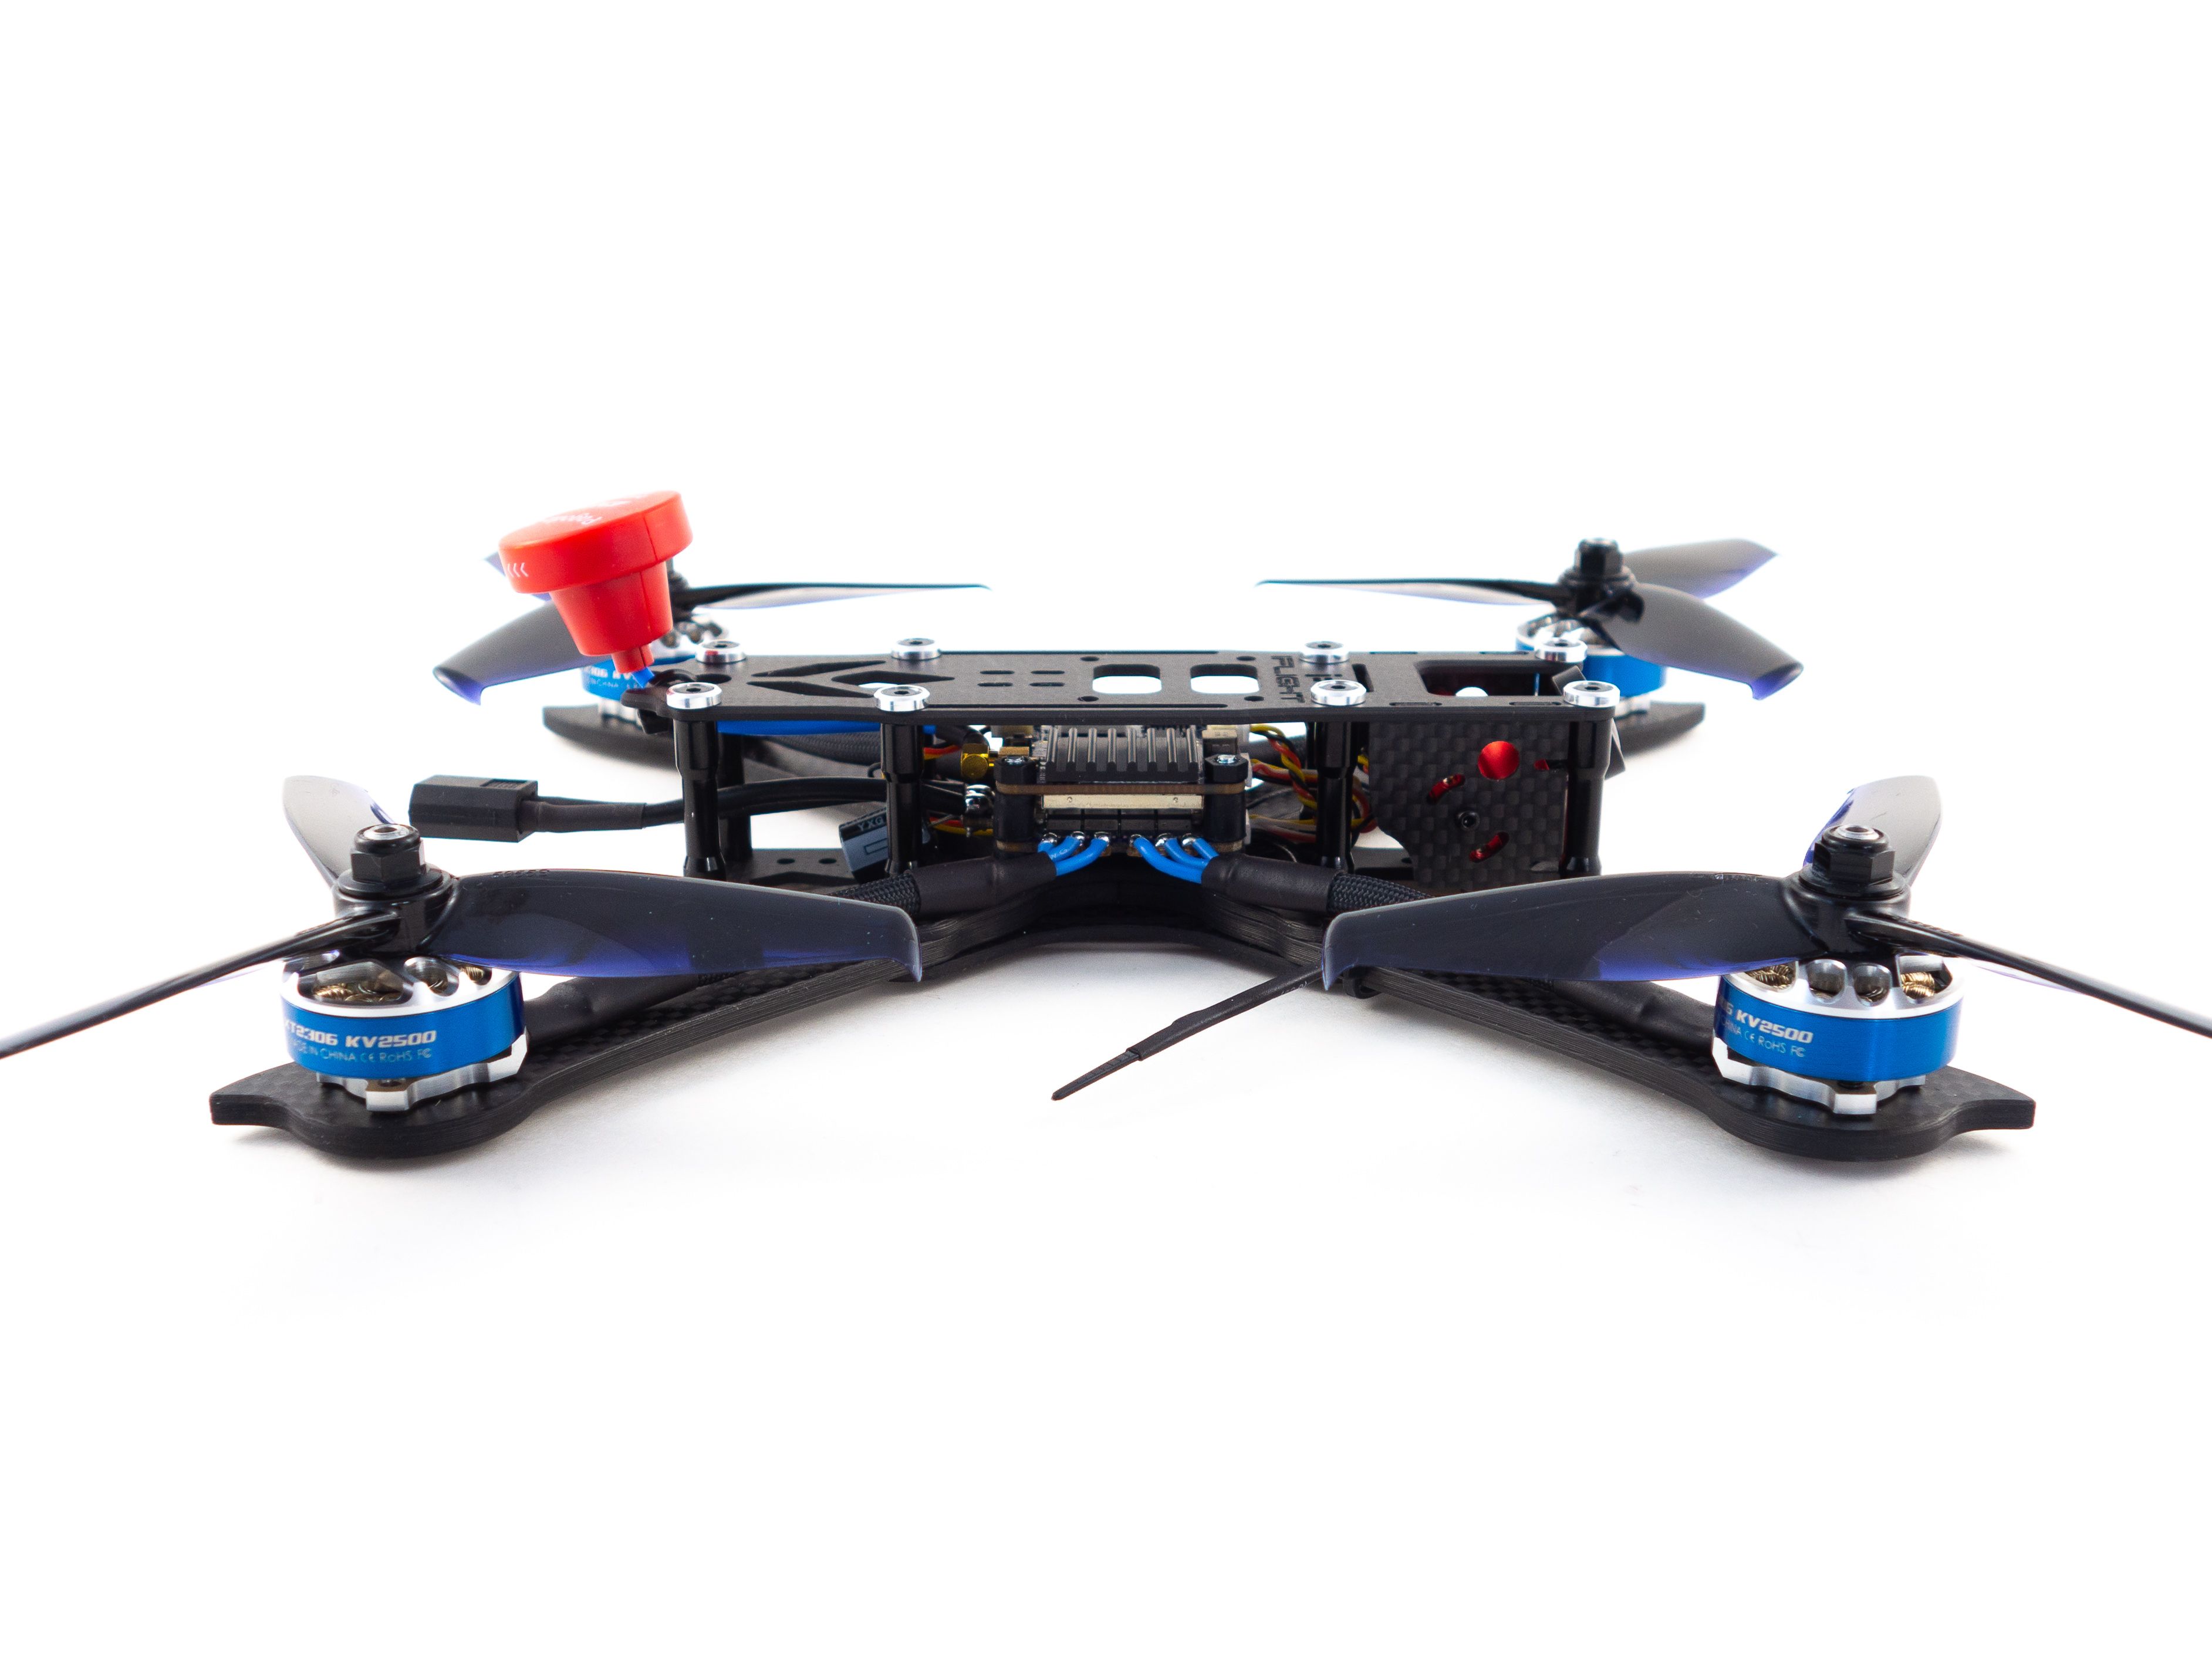
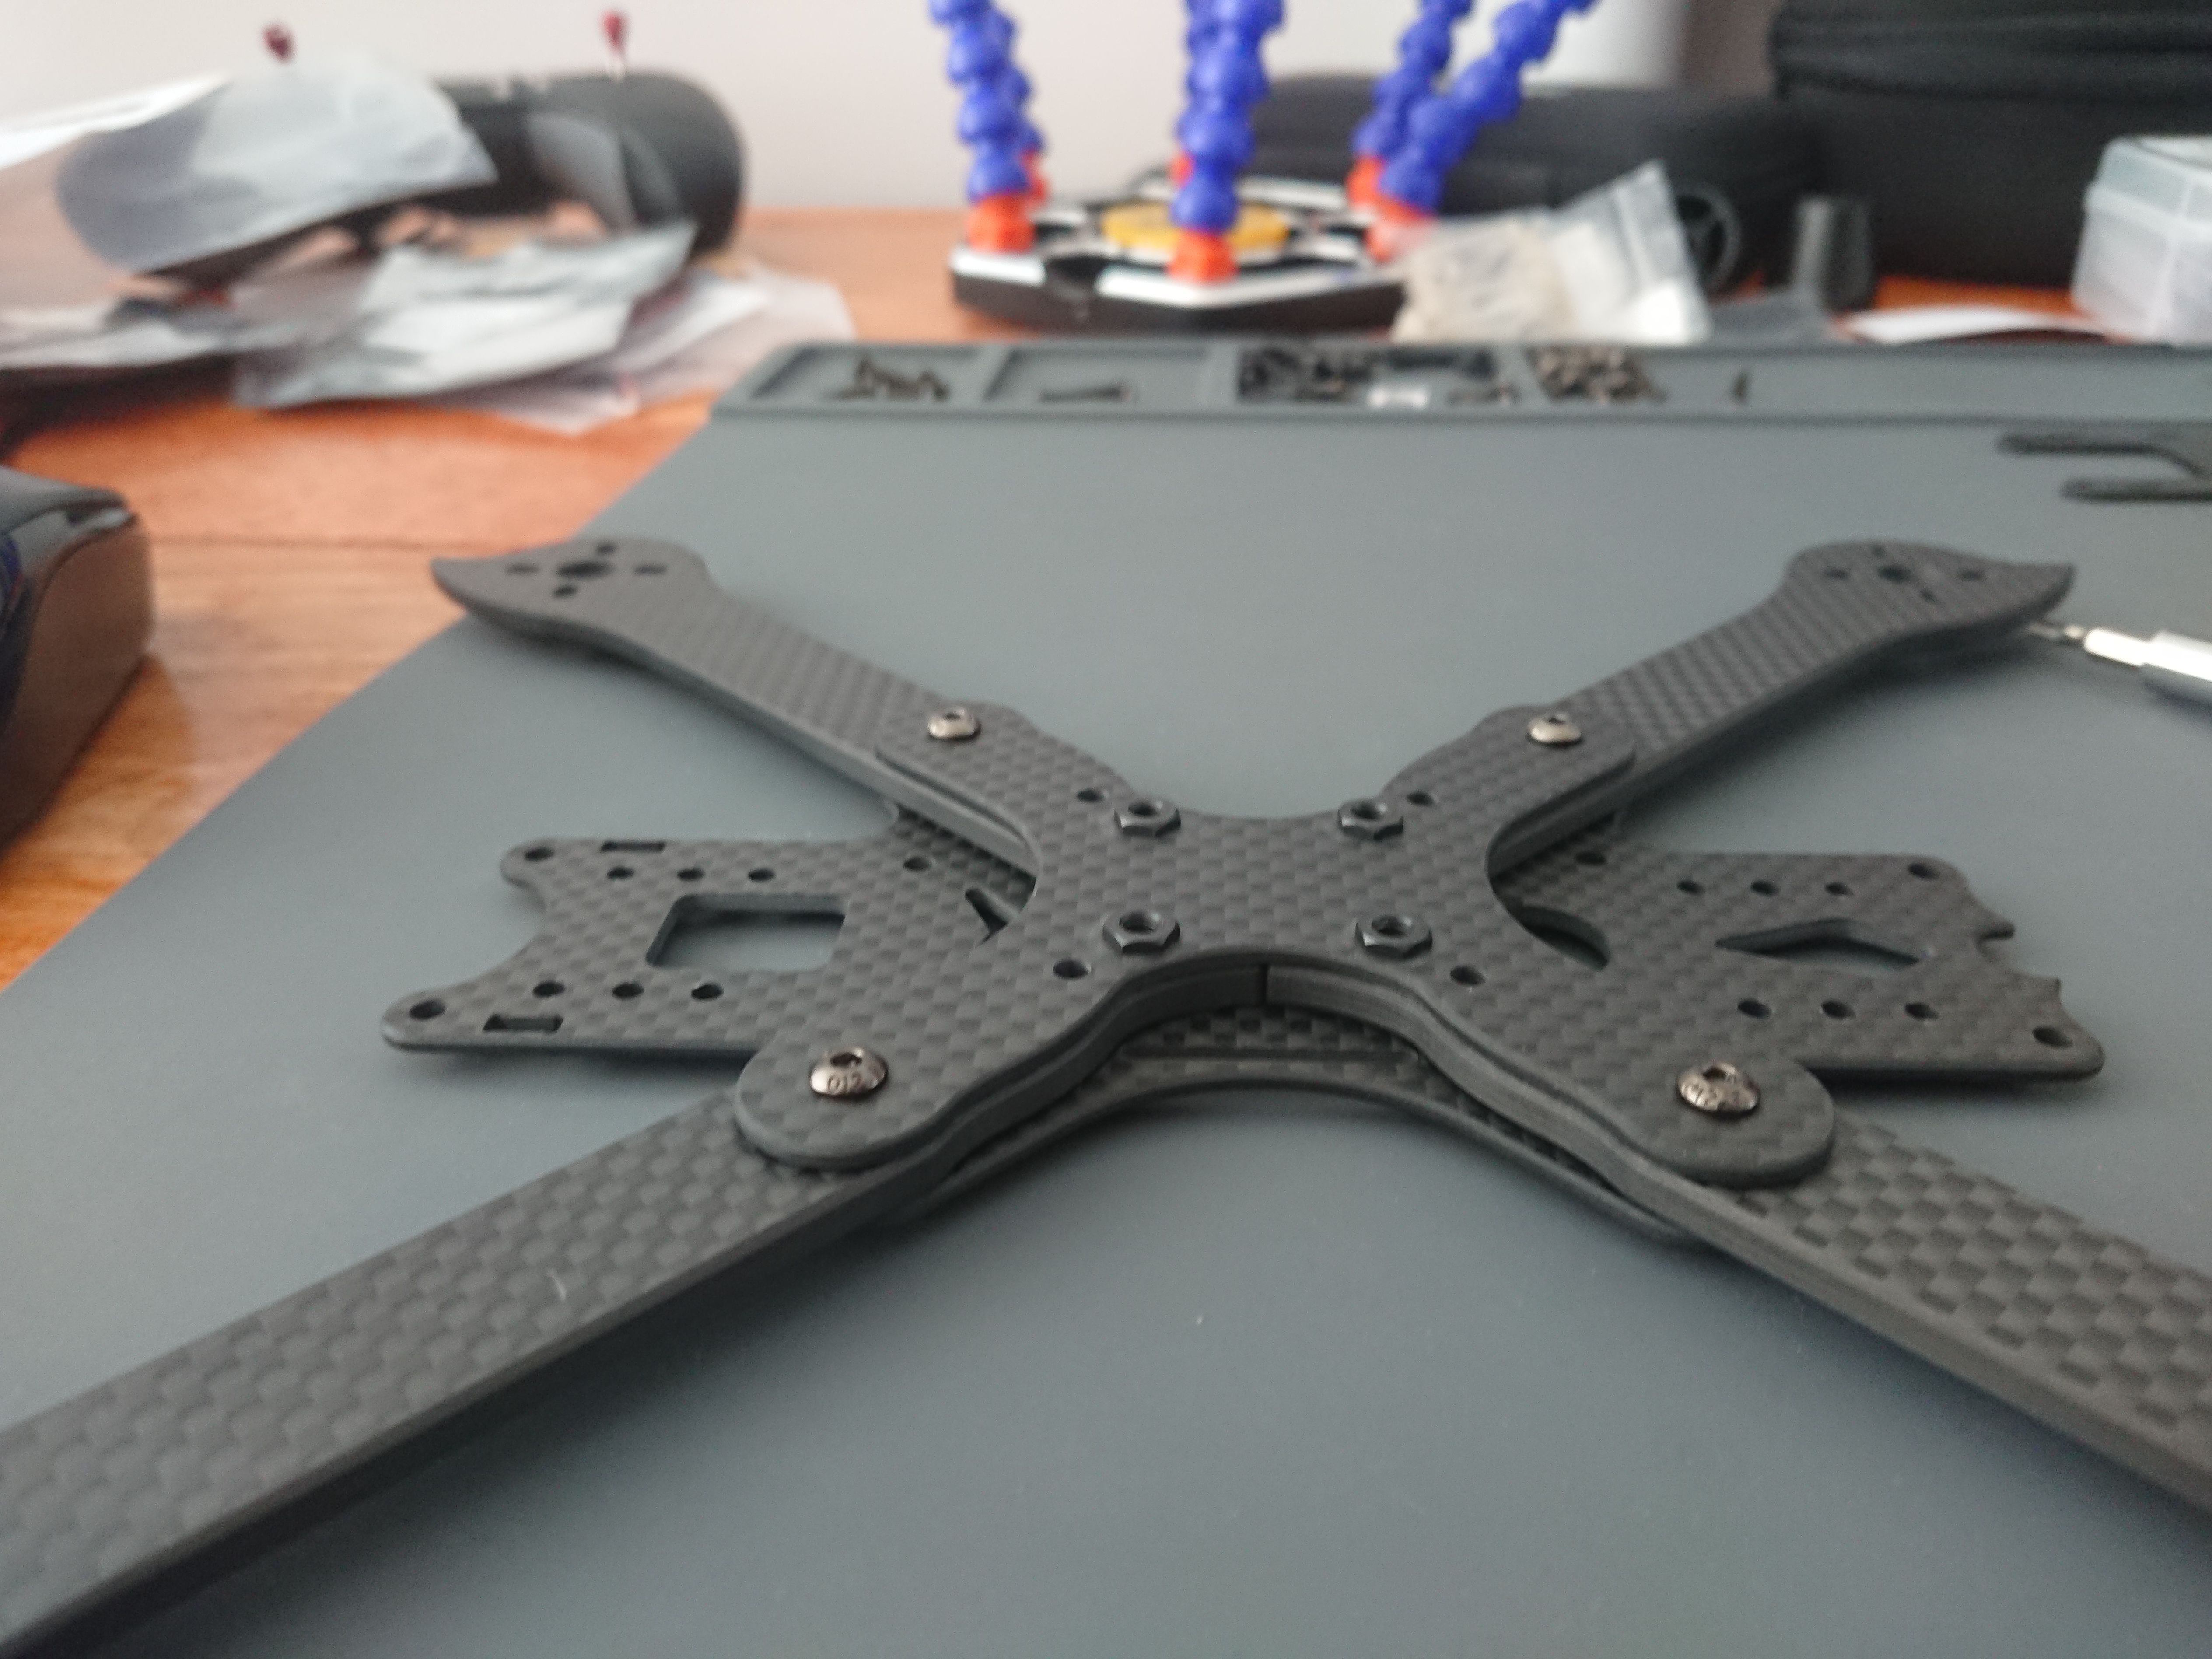
Frame Assembly
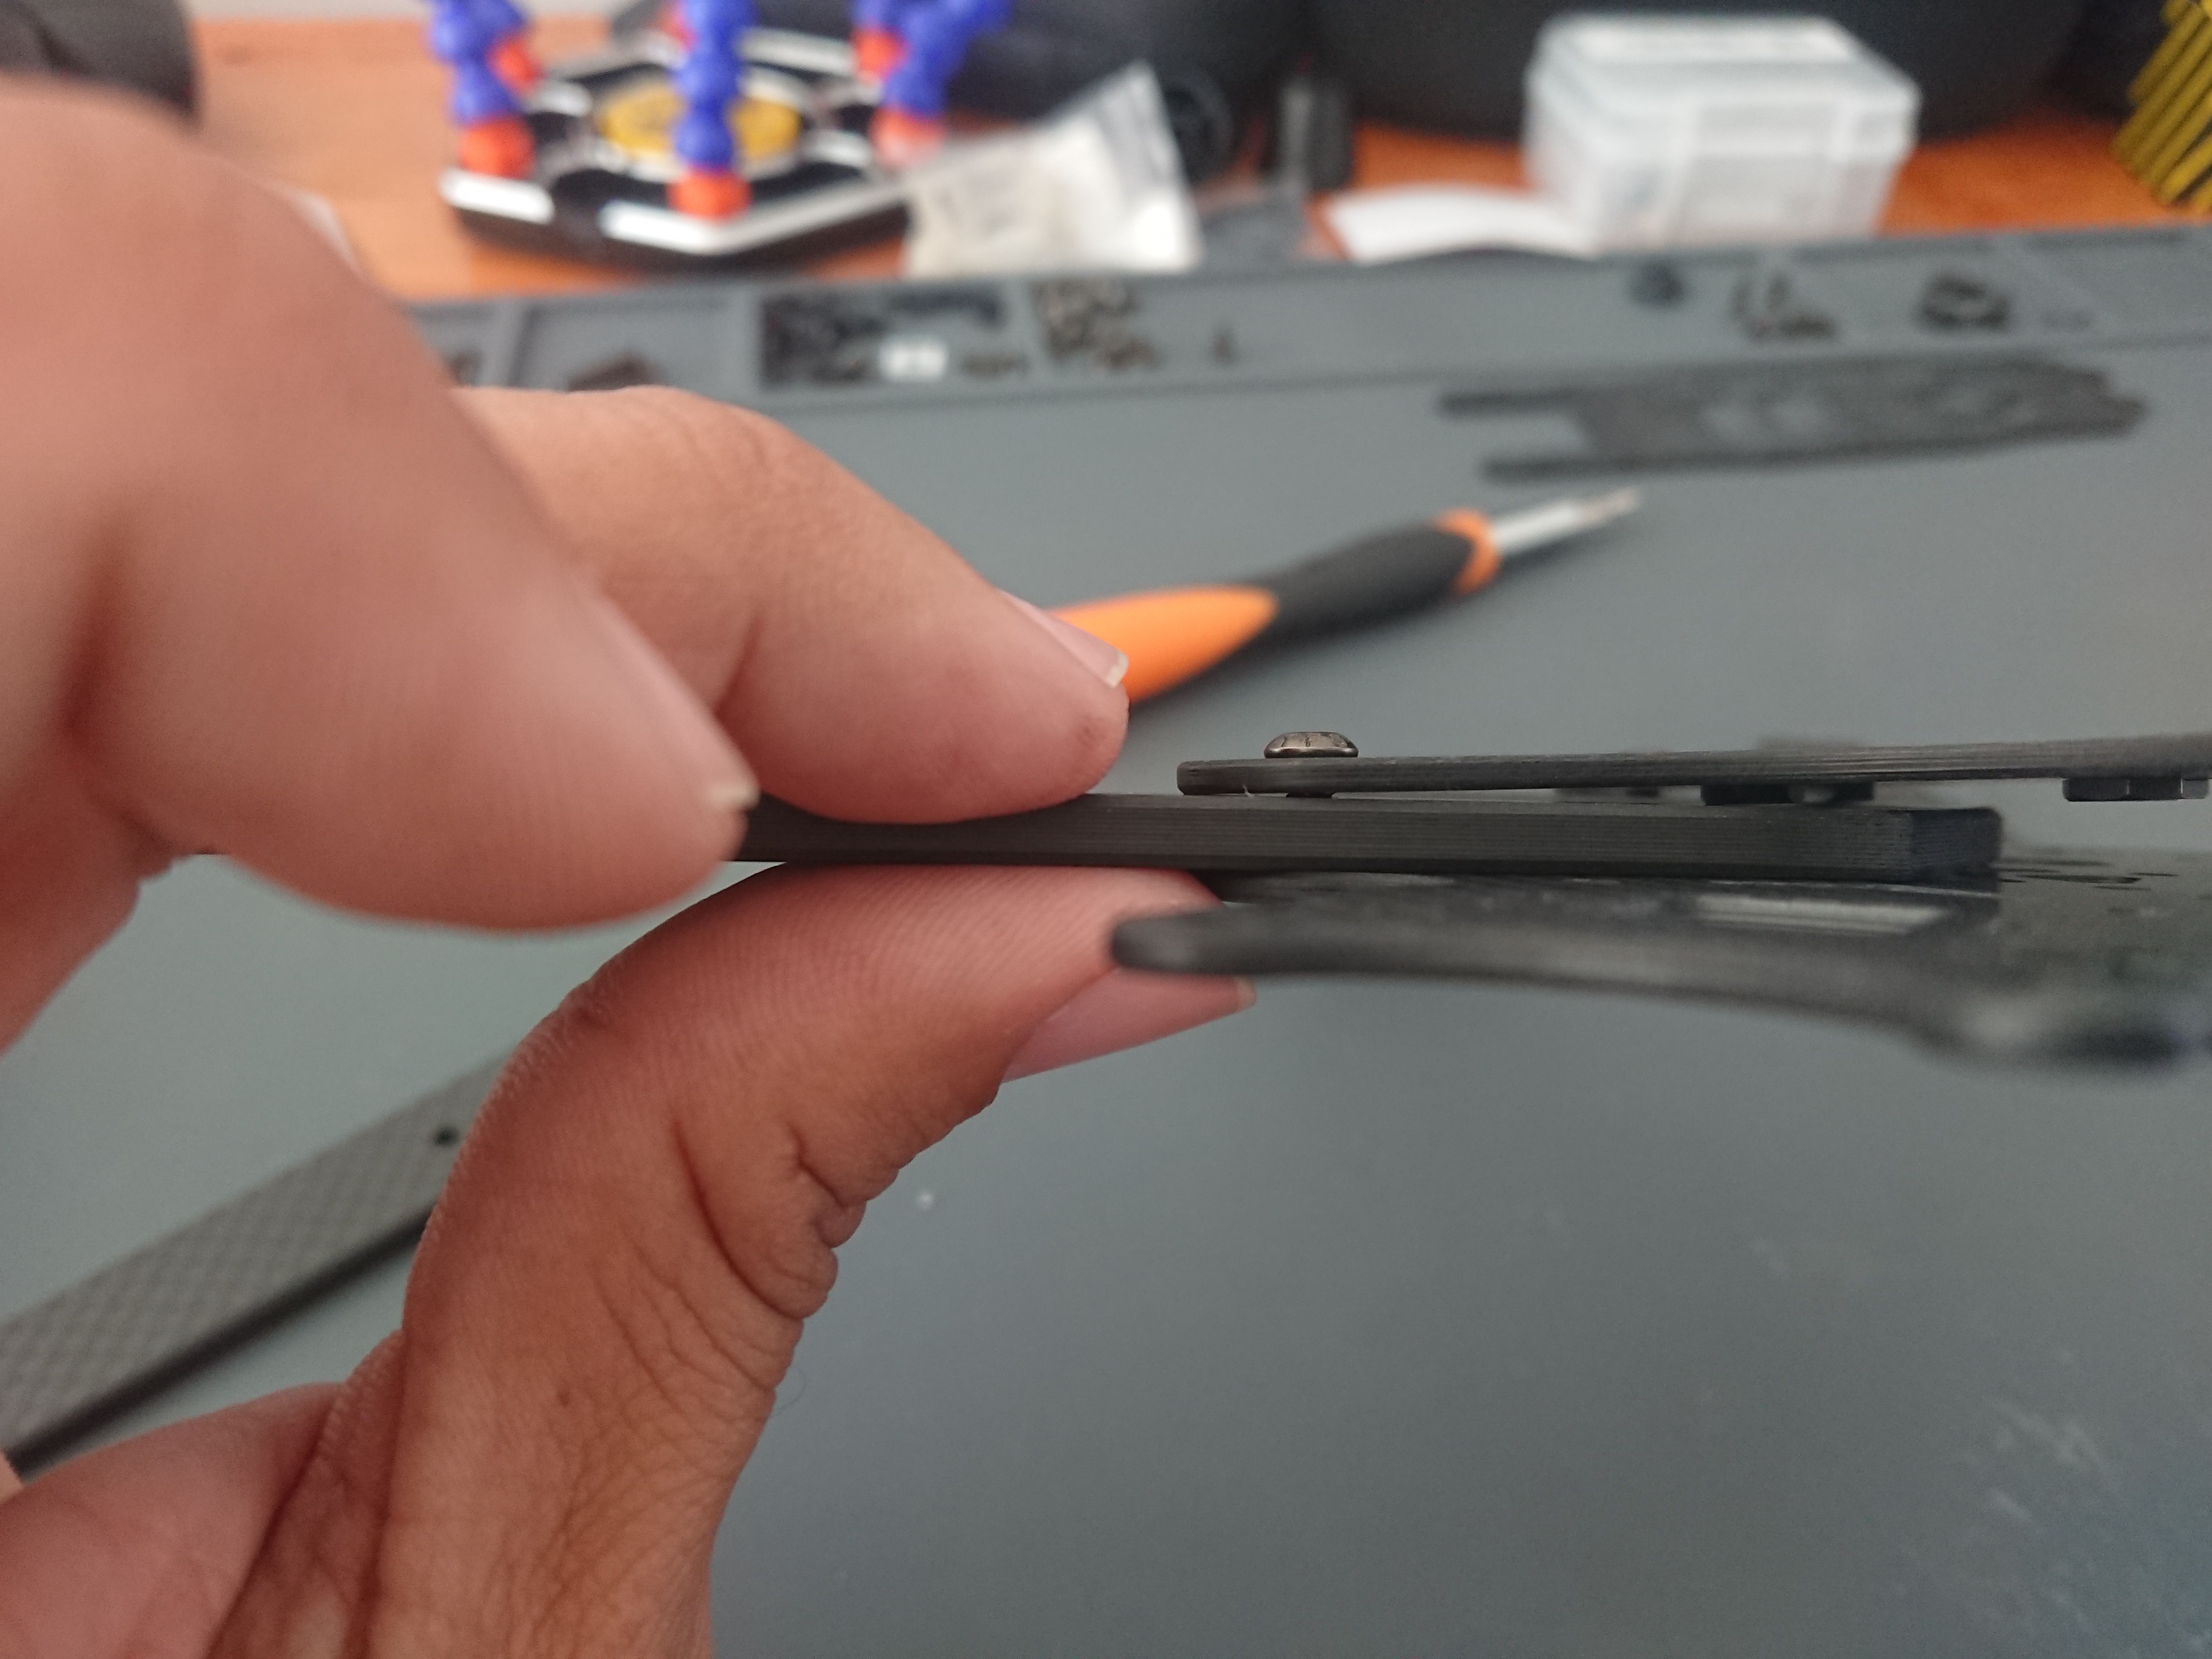
The frame comes with great instructions, so there's not much more to add here. The press nuts don't grip the carbon, so I needed to use my prop wrench to hold them in place while I tightened the screws. Also, pay attention to the pointy bits at the tip of the arms. Its easy to screw an arm in backwards if you aren't paying attention.
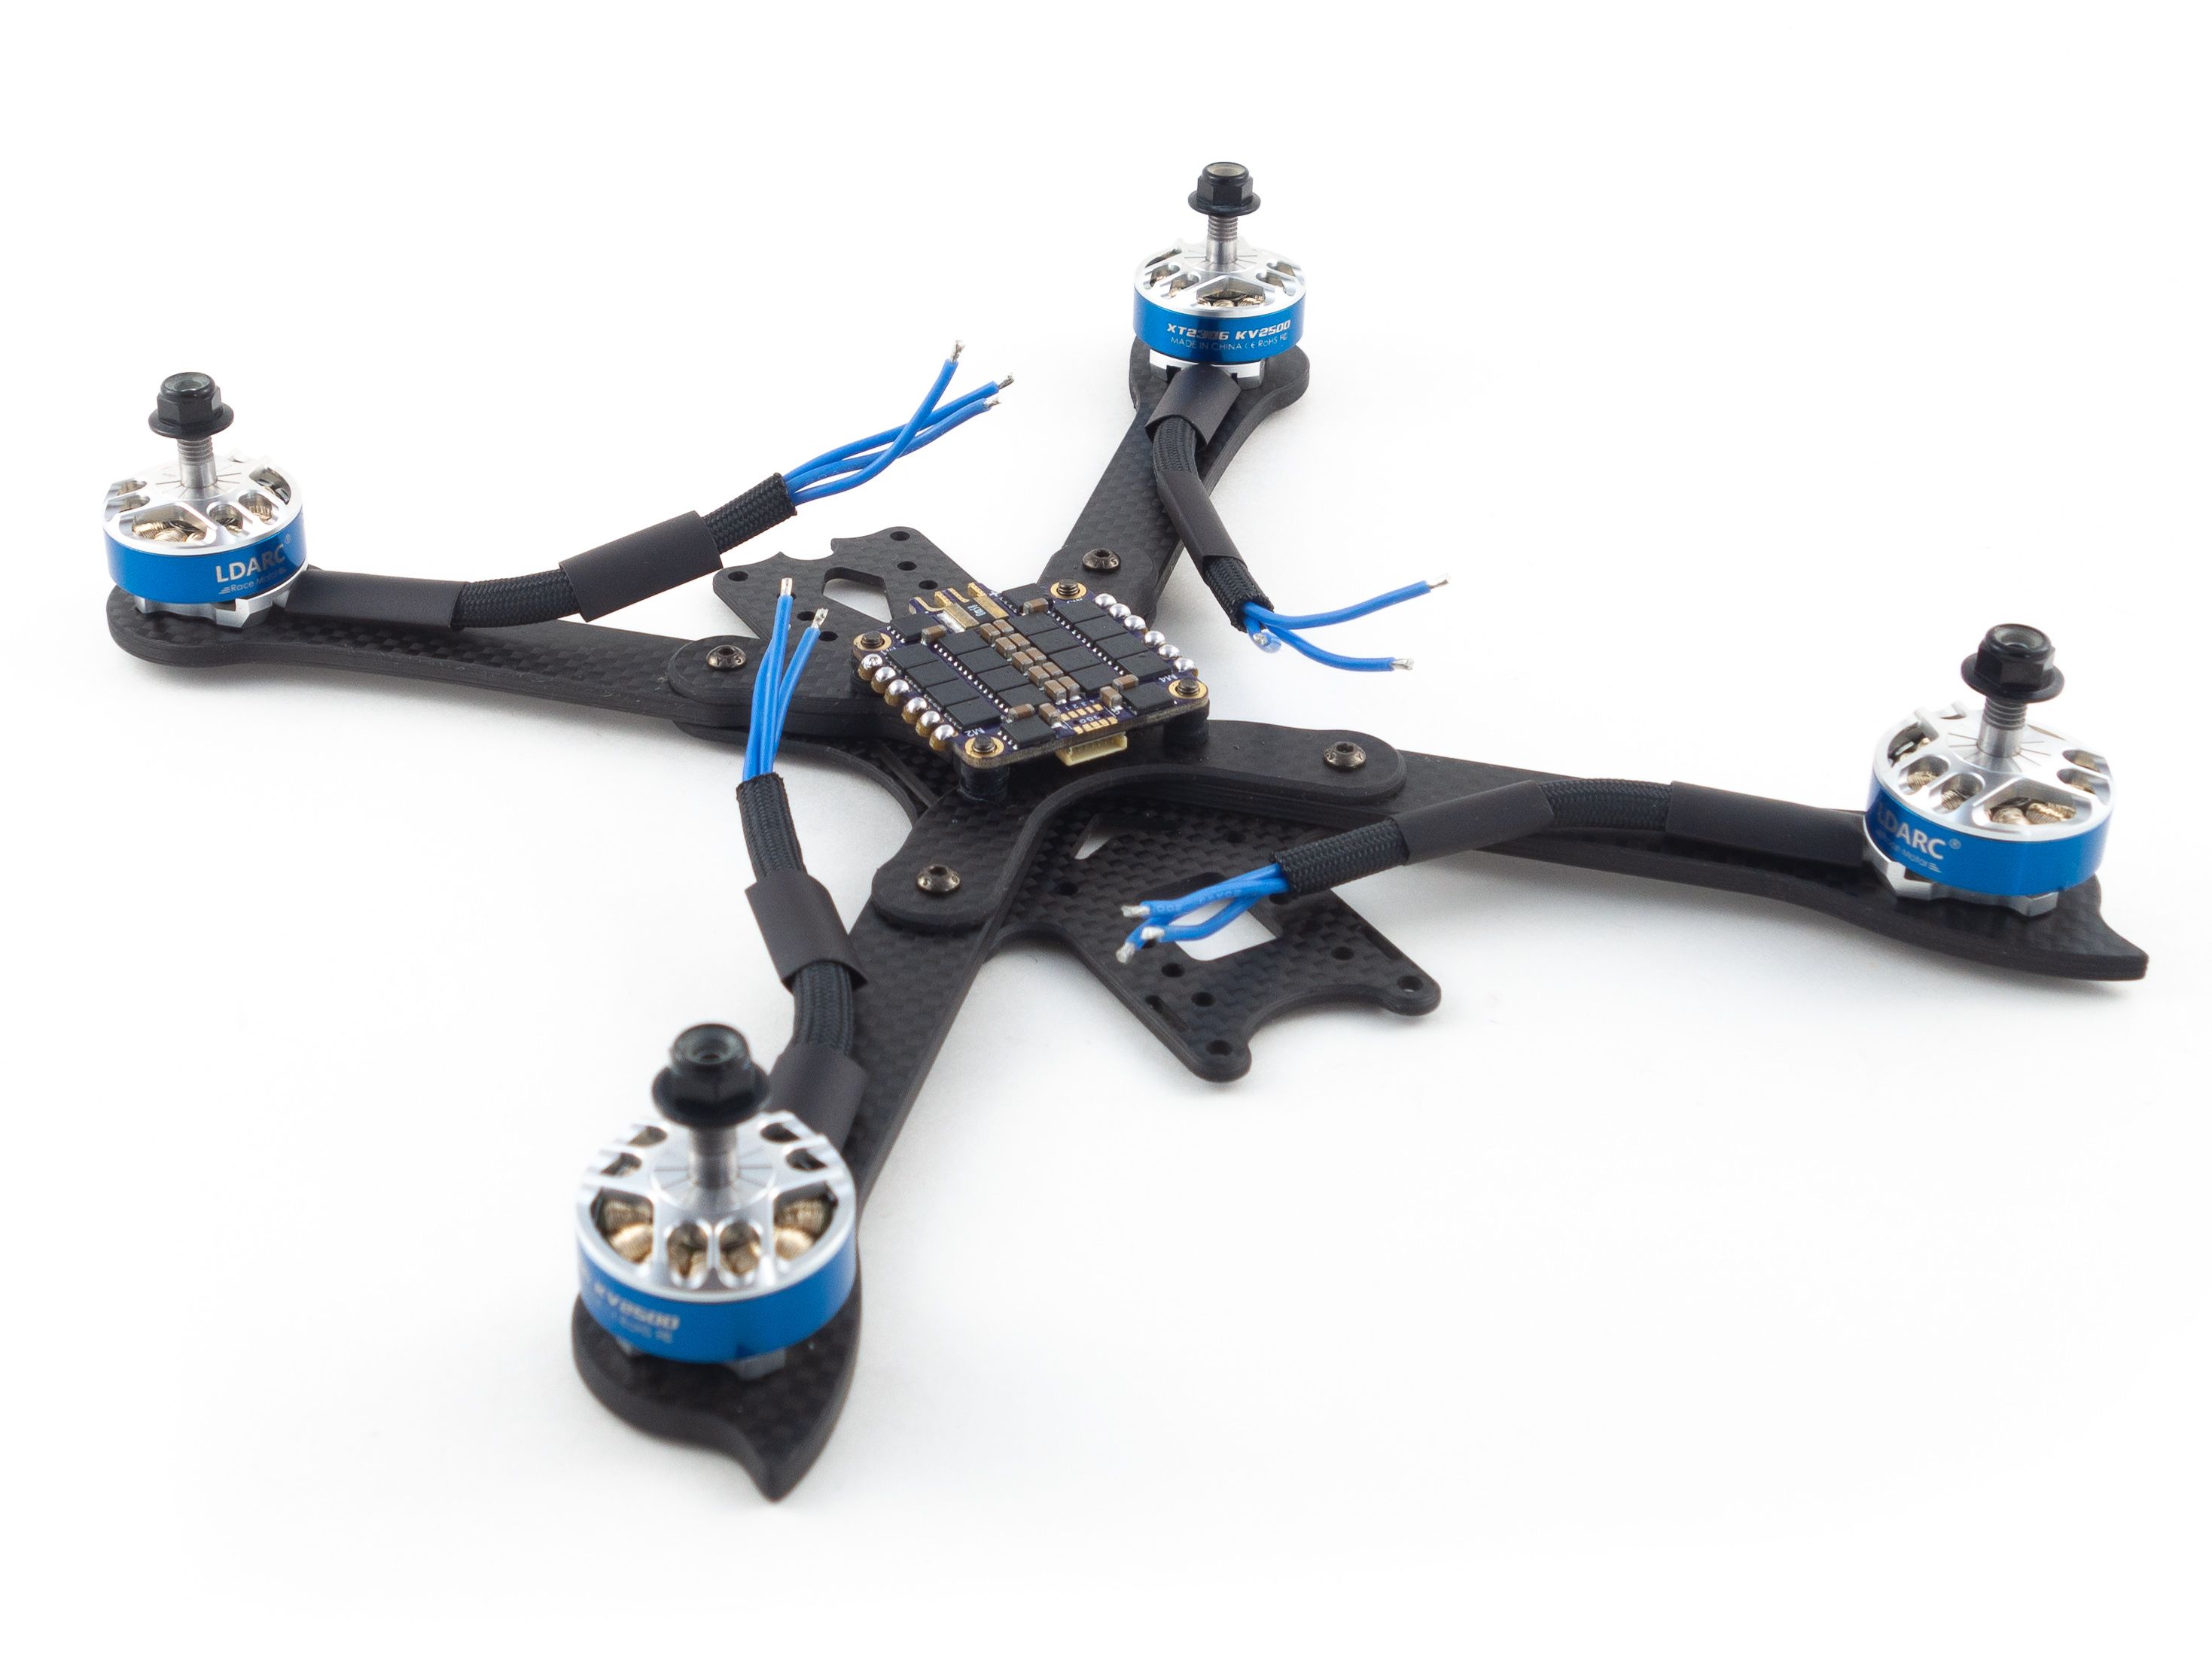
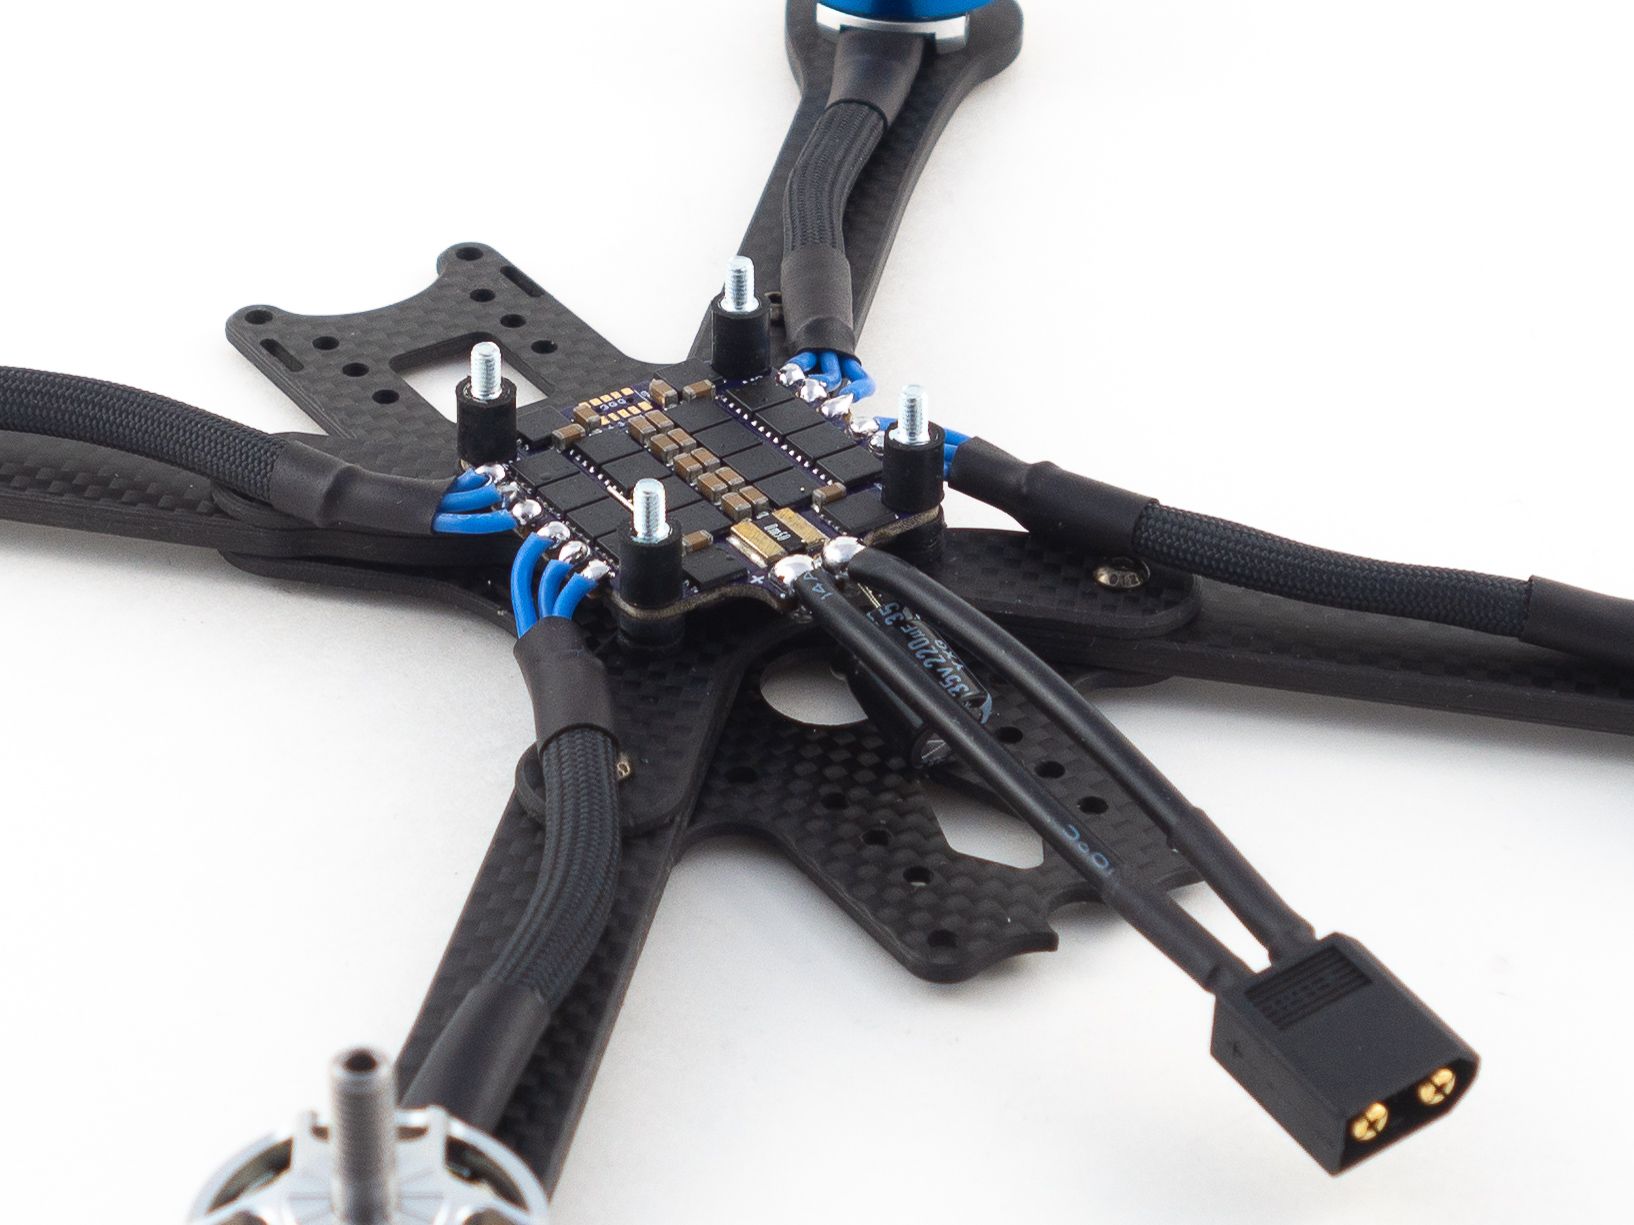
To mount the FC + ESC stack use the 15mm screws included with the frame. Use the black rubber bits that came with the stack to isolate the 4-in-1 ESC from the frame. Finally attach the anti-vibration standoffs to fix the 4-in-1 ESC into place. Don't add the flight controller until later.
Motors
While it's optional I like to sleeve my motor wires with 1/4" Para-Max. It's also a great way to add a little color to your build. Keep in mind that the traditional 550 Paracord is too narrow for all 3 motor wires.
- Cut 4 pieces of cord to 7 cm lengths, remove the inner core and, with a lighter, melt the ends to prevent frays.
- Sleeve the motor wires and add a couple 2cm pieces of 12mm shrink tube to cover the ends.
- Screw your motors onto the arms using M3x6mm screws and blue Loctite.
- Flux and tin each motor pad ensuring each is completely coated with a bubble of solder.
- If you're right-handed start from the rightmost motor pad and solder all 6 wires from right to left.
- If you're left handed start from the left.
- Cut each wire to length as you go, not all at once.
- Position the shrink tube over the ends of the cord and melt it. You can use a heat gun to make quick work of this, but don't hold it over your FC too long.
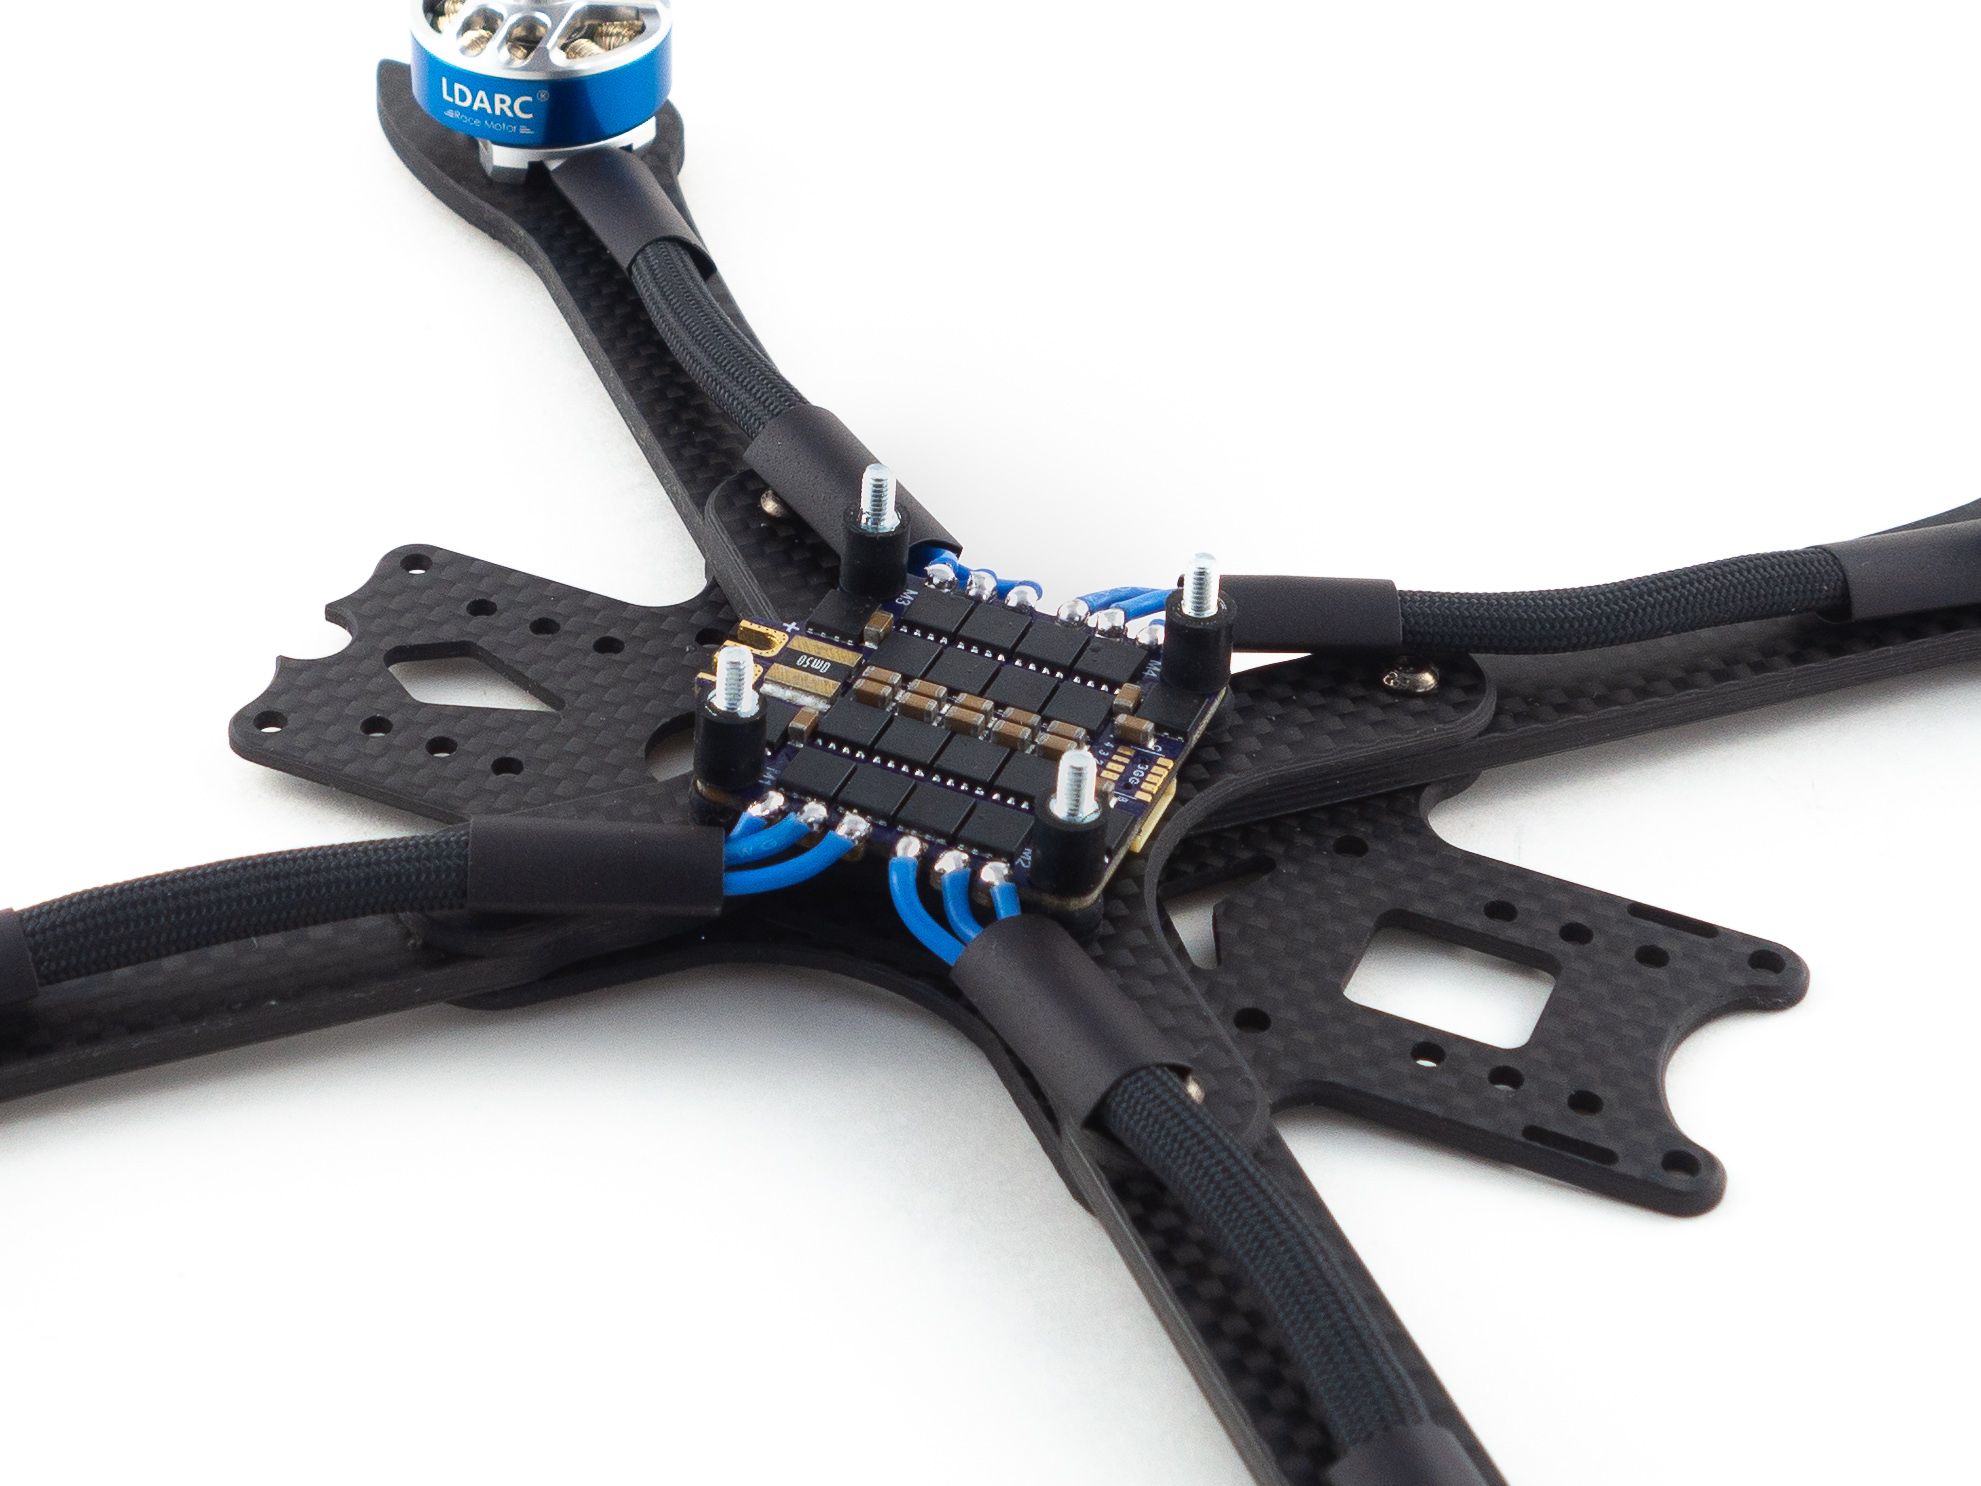
Power Connector
The flight controller comes with a little capacitor, so we might as well use it! These help with voltage spikes and can clean up interference in the video feed. Ensuring the polarity is correct you can cradle it into the main battery lead grooves at a downward angle. Apply a bit of solder to hold it into place then snip the ends so they don't protrude. Then you can fill the gaps with more solder to cradle the main battery leads on top. Just don't fill it so much that the solder leaks out through the bottom.
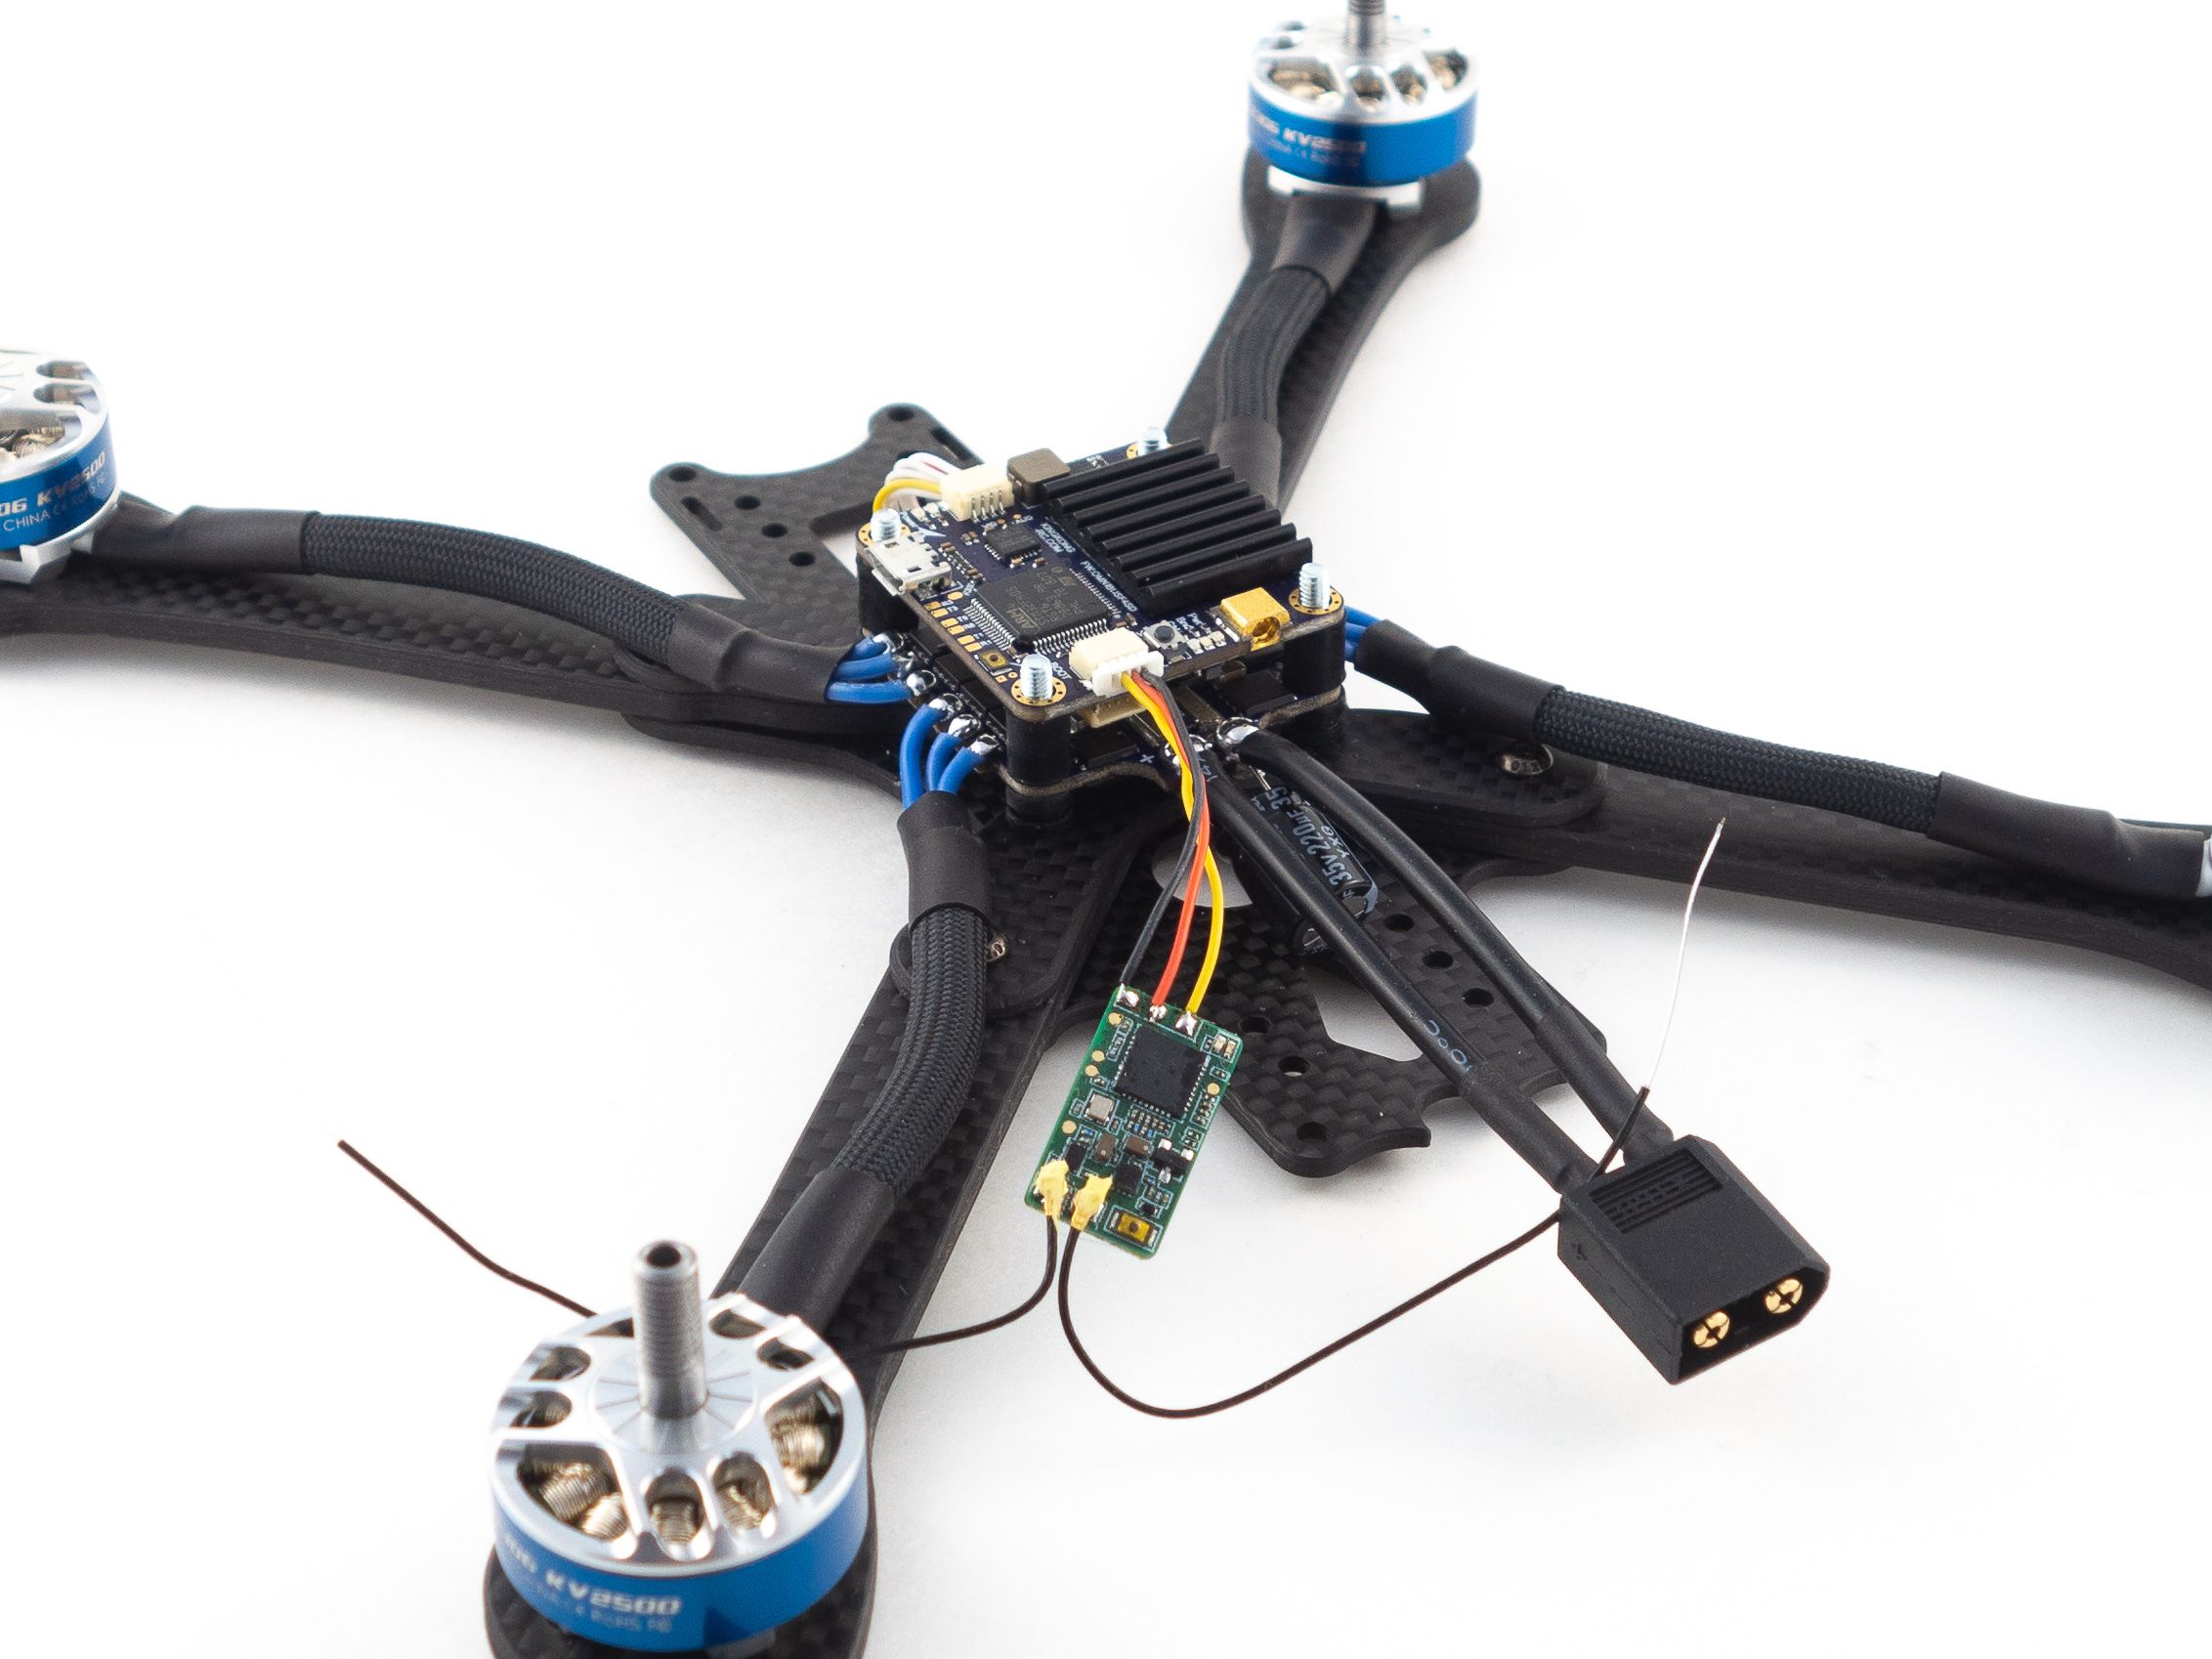
Binding the Receiver
This flight controller is great! It comes with a wire connector for your receiver. I used the FrSky XM+, but you can use any SBUS compatible 3.3v or 5v receiver.
- Unless you're using a 3.3v serial receiver remove the green wire from the RX wire harness.
- Solder the 3 wires to the correct pads on the receiver.
- Add your flight controller to the stack and connect it to the 4-in-1 ESC with the included wire harness.
- Now you'll want to attach your VTX antenna because the next step requires powering it up. You never want to power your VTX without an antenna as that could lead to overheating and damage.
- Bind your receiver
- Plug your receiver into the flight controller.
- Be sure to double check that you don't have continuity between your main battery leads.
- Hold your receiver bind button and plug your main battery in.
- Put your radio into bind mode to get the bind.
- Now that you're bound you can tuck your receiver away under the stack.
- Loosen your 4-in-1 ESC
- Cut a piece of shrink tube to the length of your receiver and loosely melt it on.
- Slide it under the 4-in-1 ESC so the antennas diverge in both directions.
- Attach small zip-ties to your front arms and shrink tube the antennas to the zip ties.
-
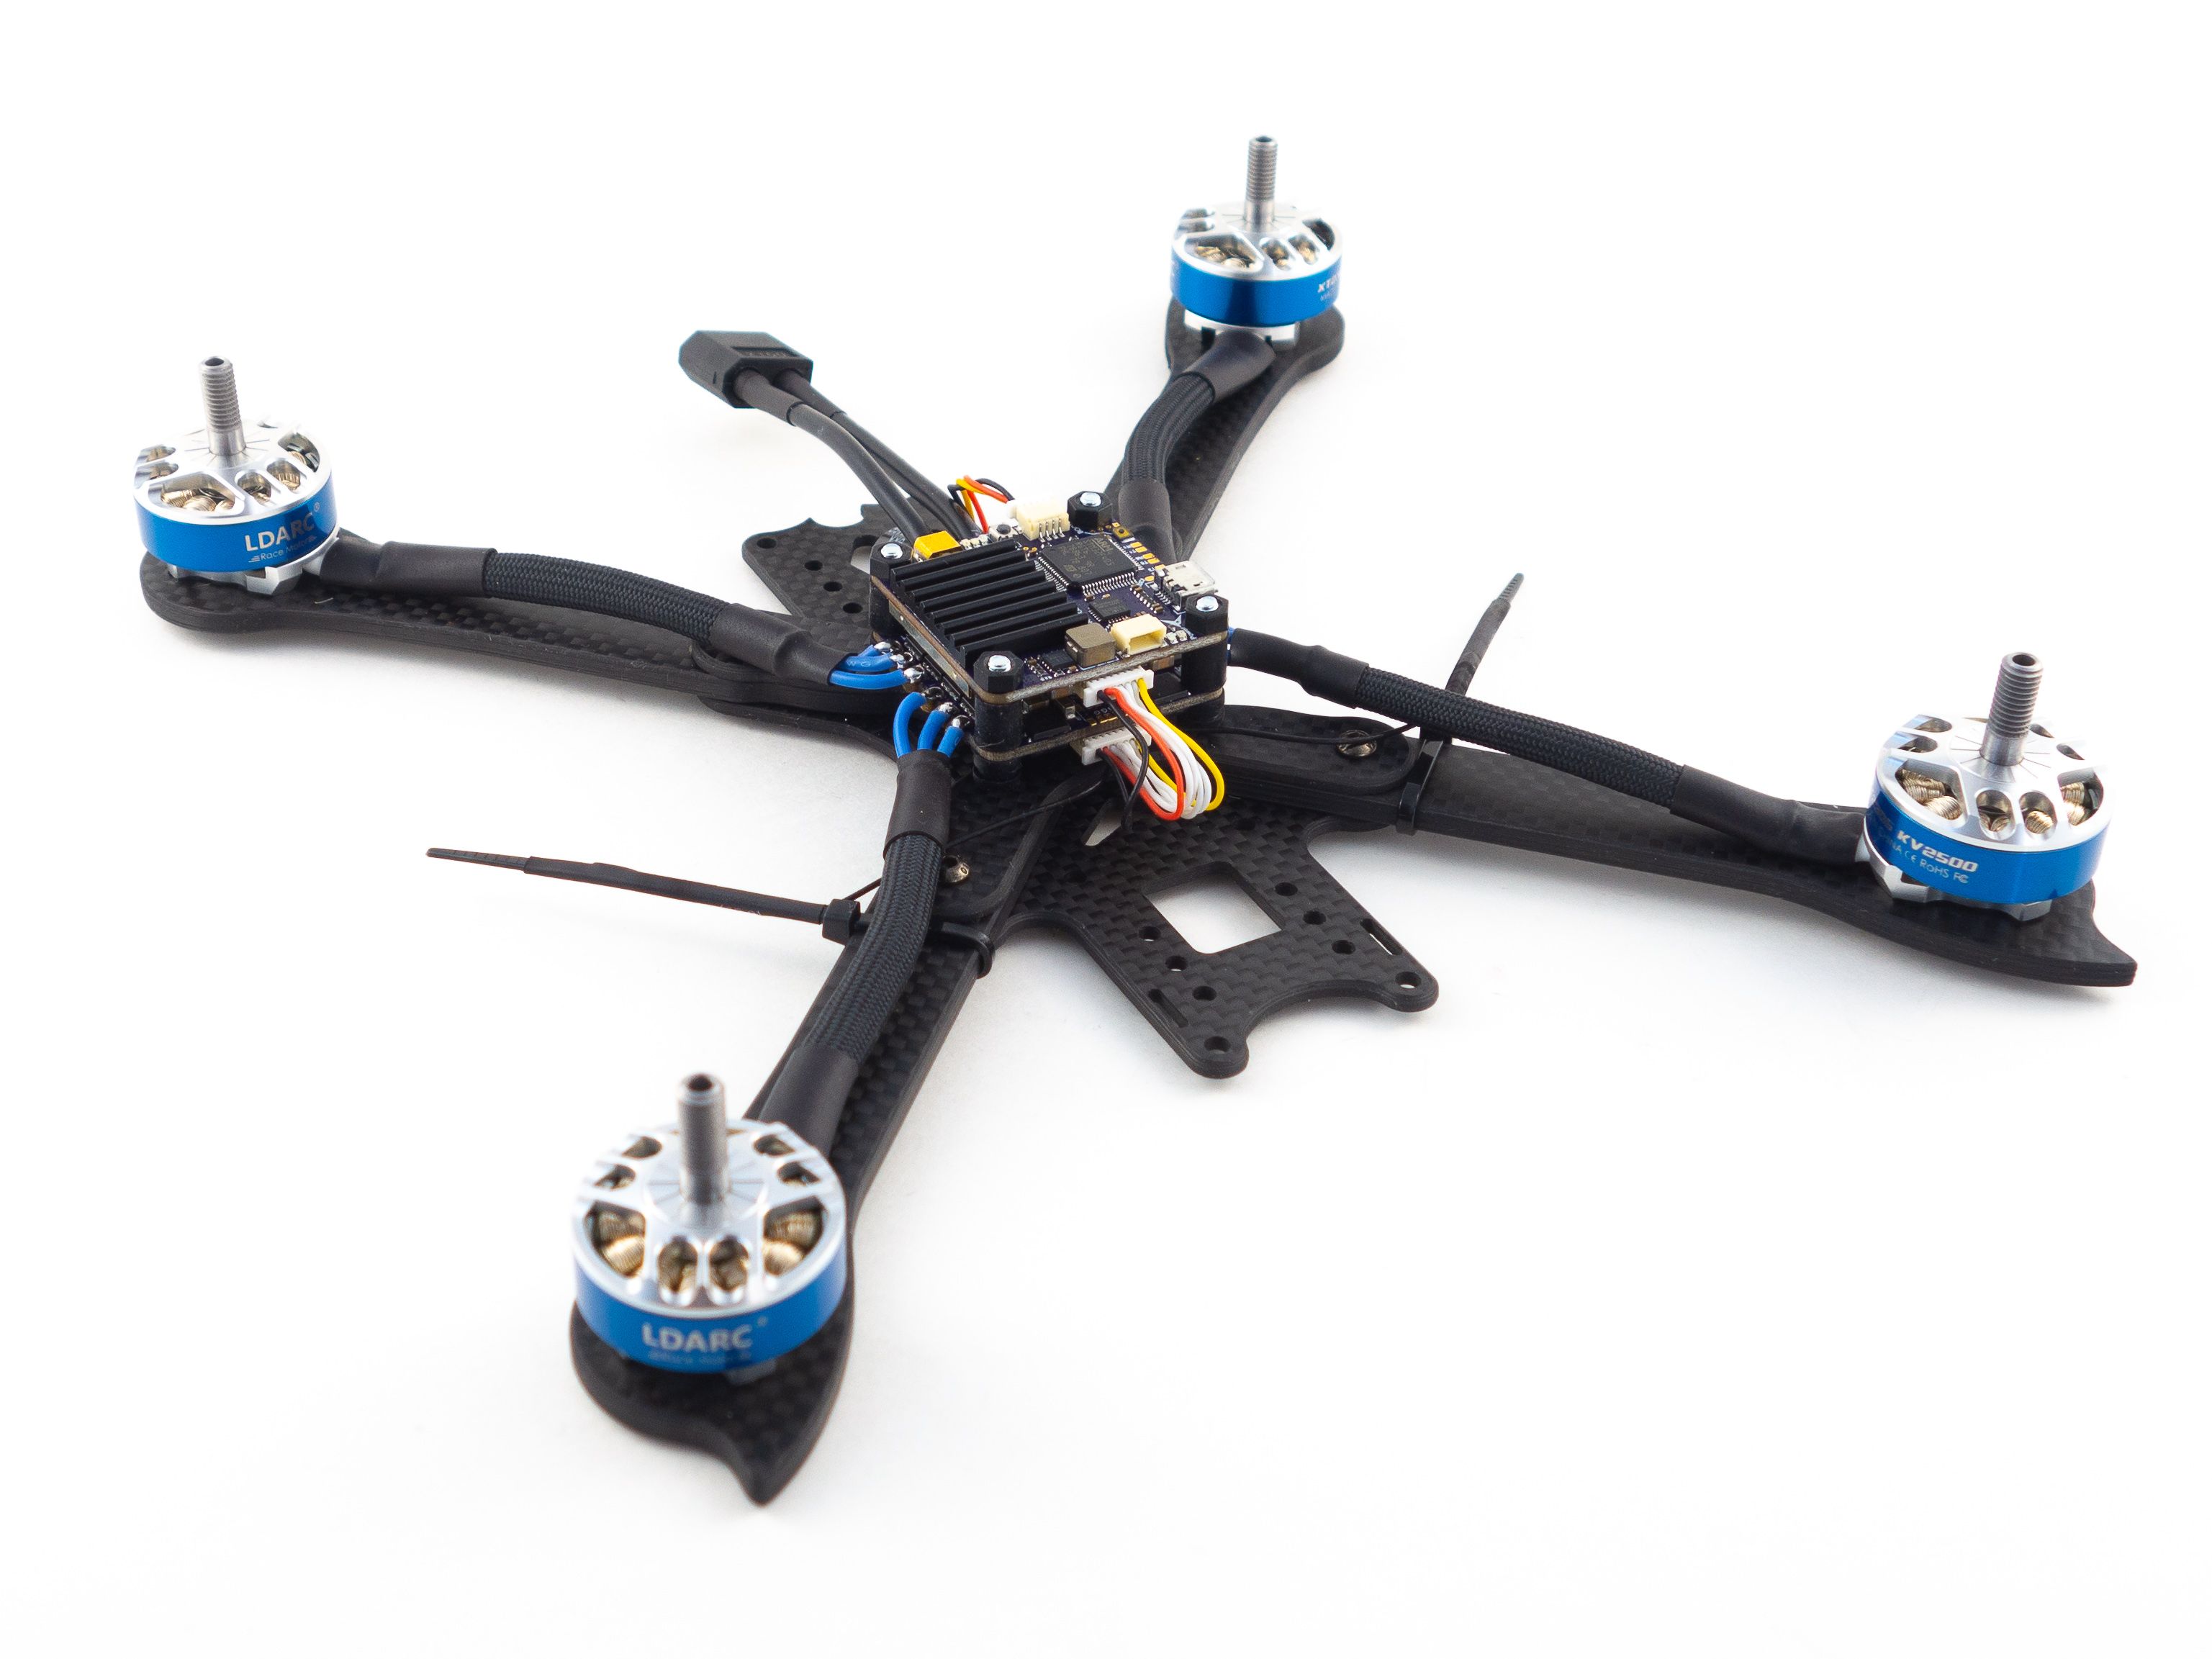
Put it all back together and secure your flight controller with a set of nylon nuts.
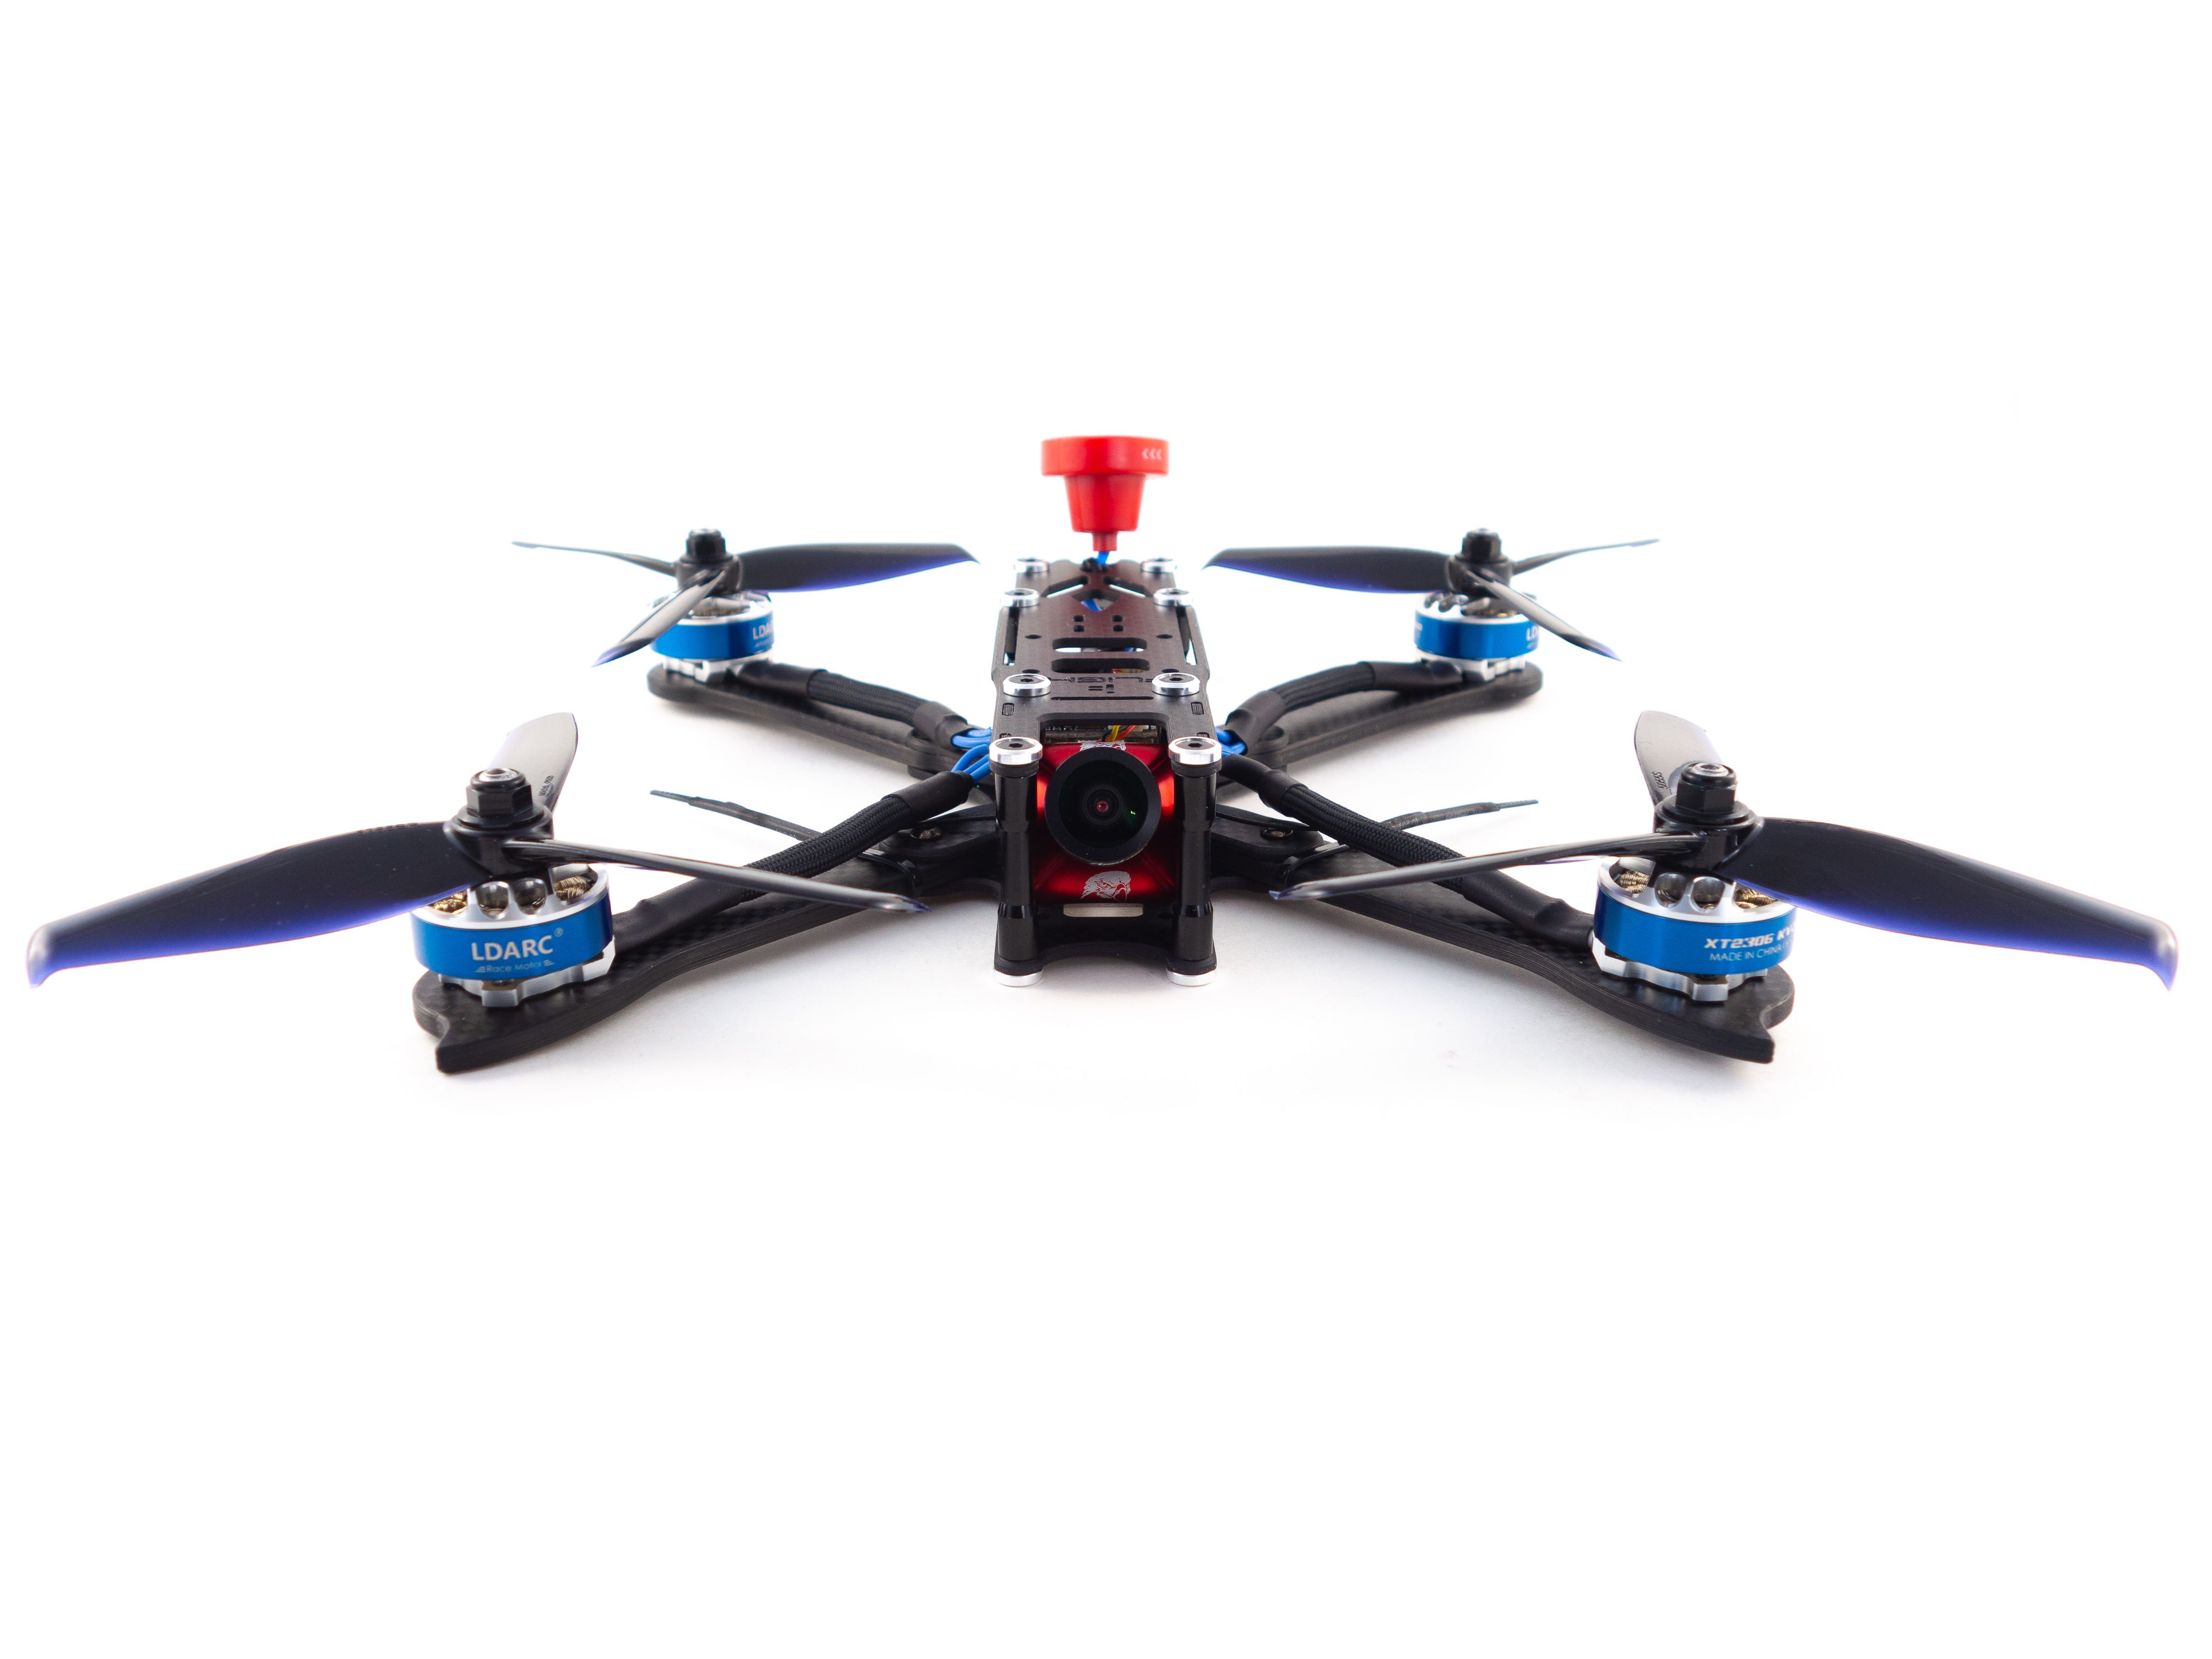
Camera
The Runcam Eagle 2 is no longer available, but the Runcam Micro Eagle is a fantastic alternative. Since this frame requires a wider camera, you'll need to use an adapter such as this to mount the Micro Eagle.
Before you plug your camera in you need to attach the side plates. Use the M2 screws included with the camera and a single nylon spacer. Sandwich the spacer between the camera and one of the side plates to get the spacing right. Use the camera plug that came with the flight controller to plug the camera in and seat it onto the frame.
Now that you've wired the camera you can adjust your camera settings. Plug your battery in and check that the video feed is functioning. Then, using the included joystick you can plug it into the connector on the back of the camera. This is entirely optional though. I'd test the default settings to see if you like them and make adjustments later.
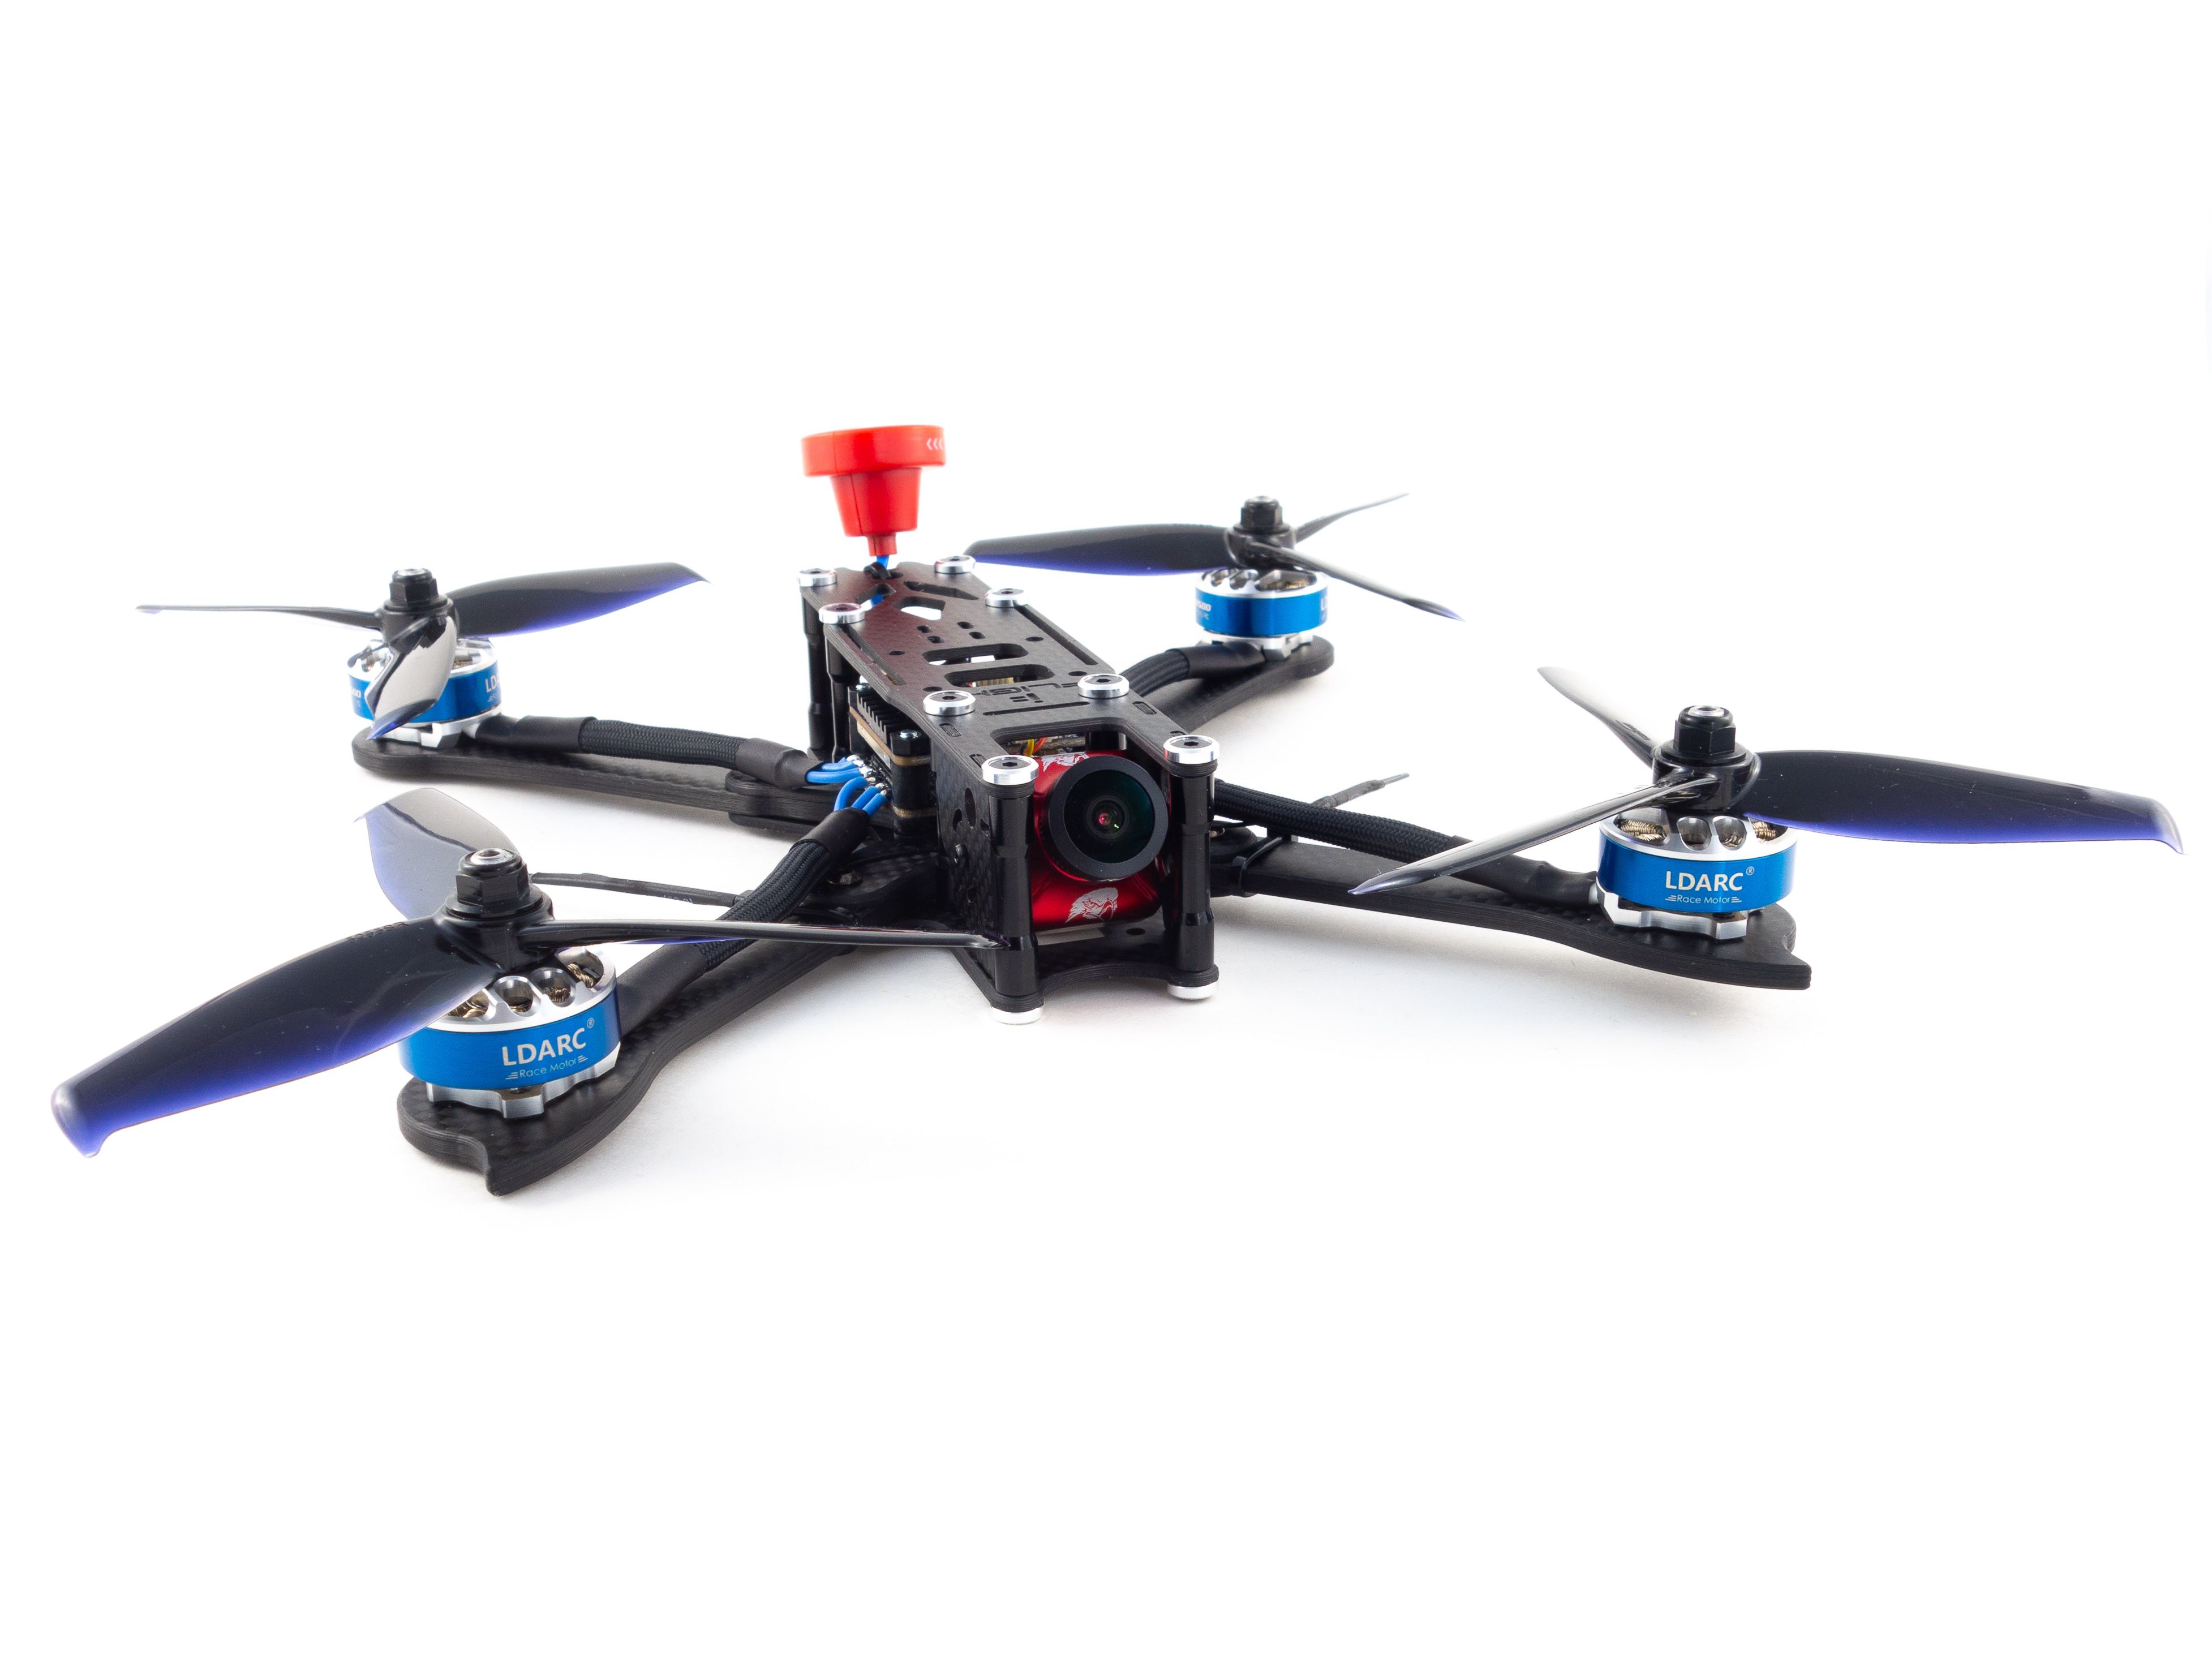
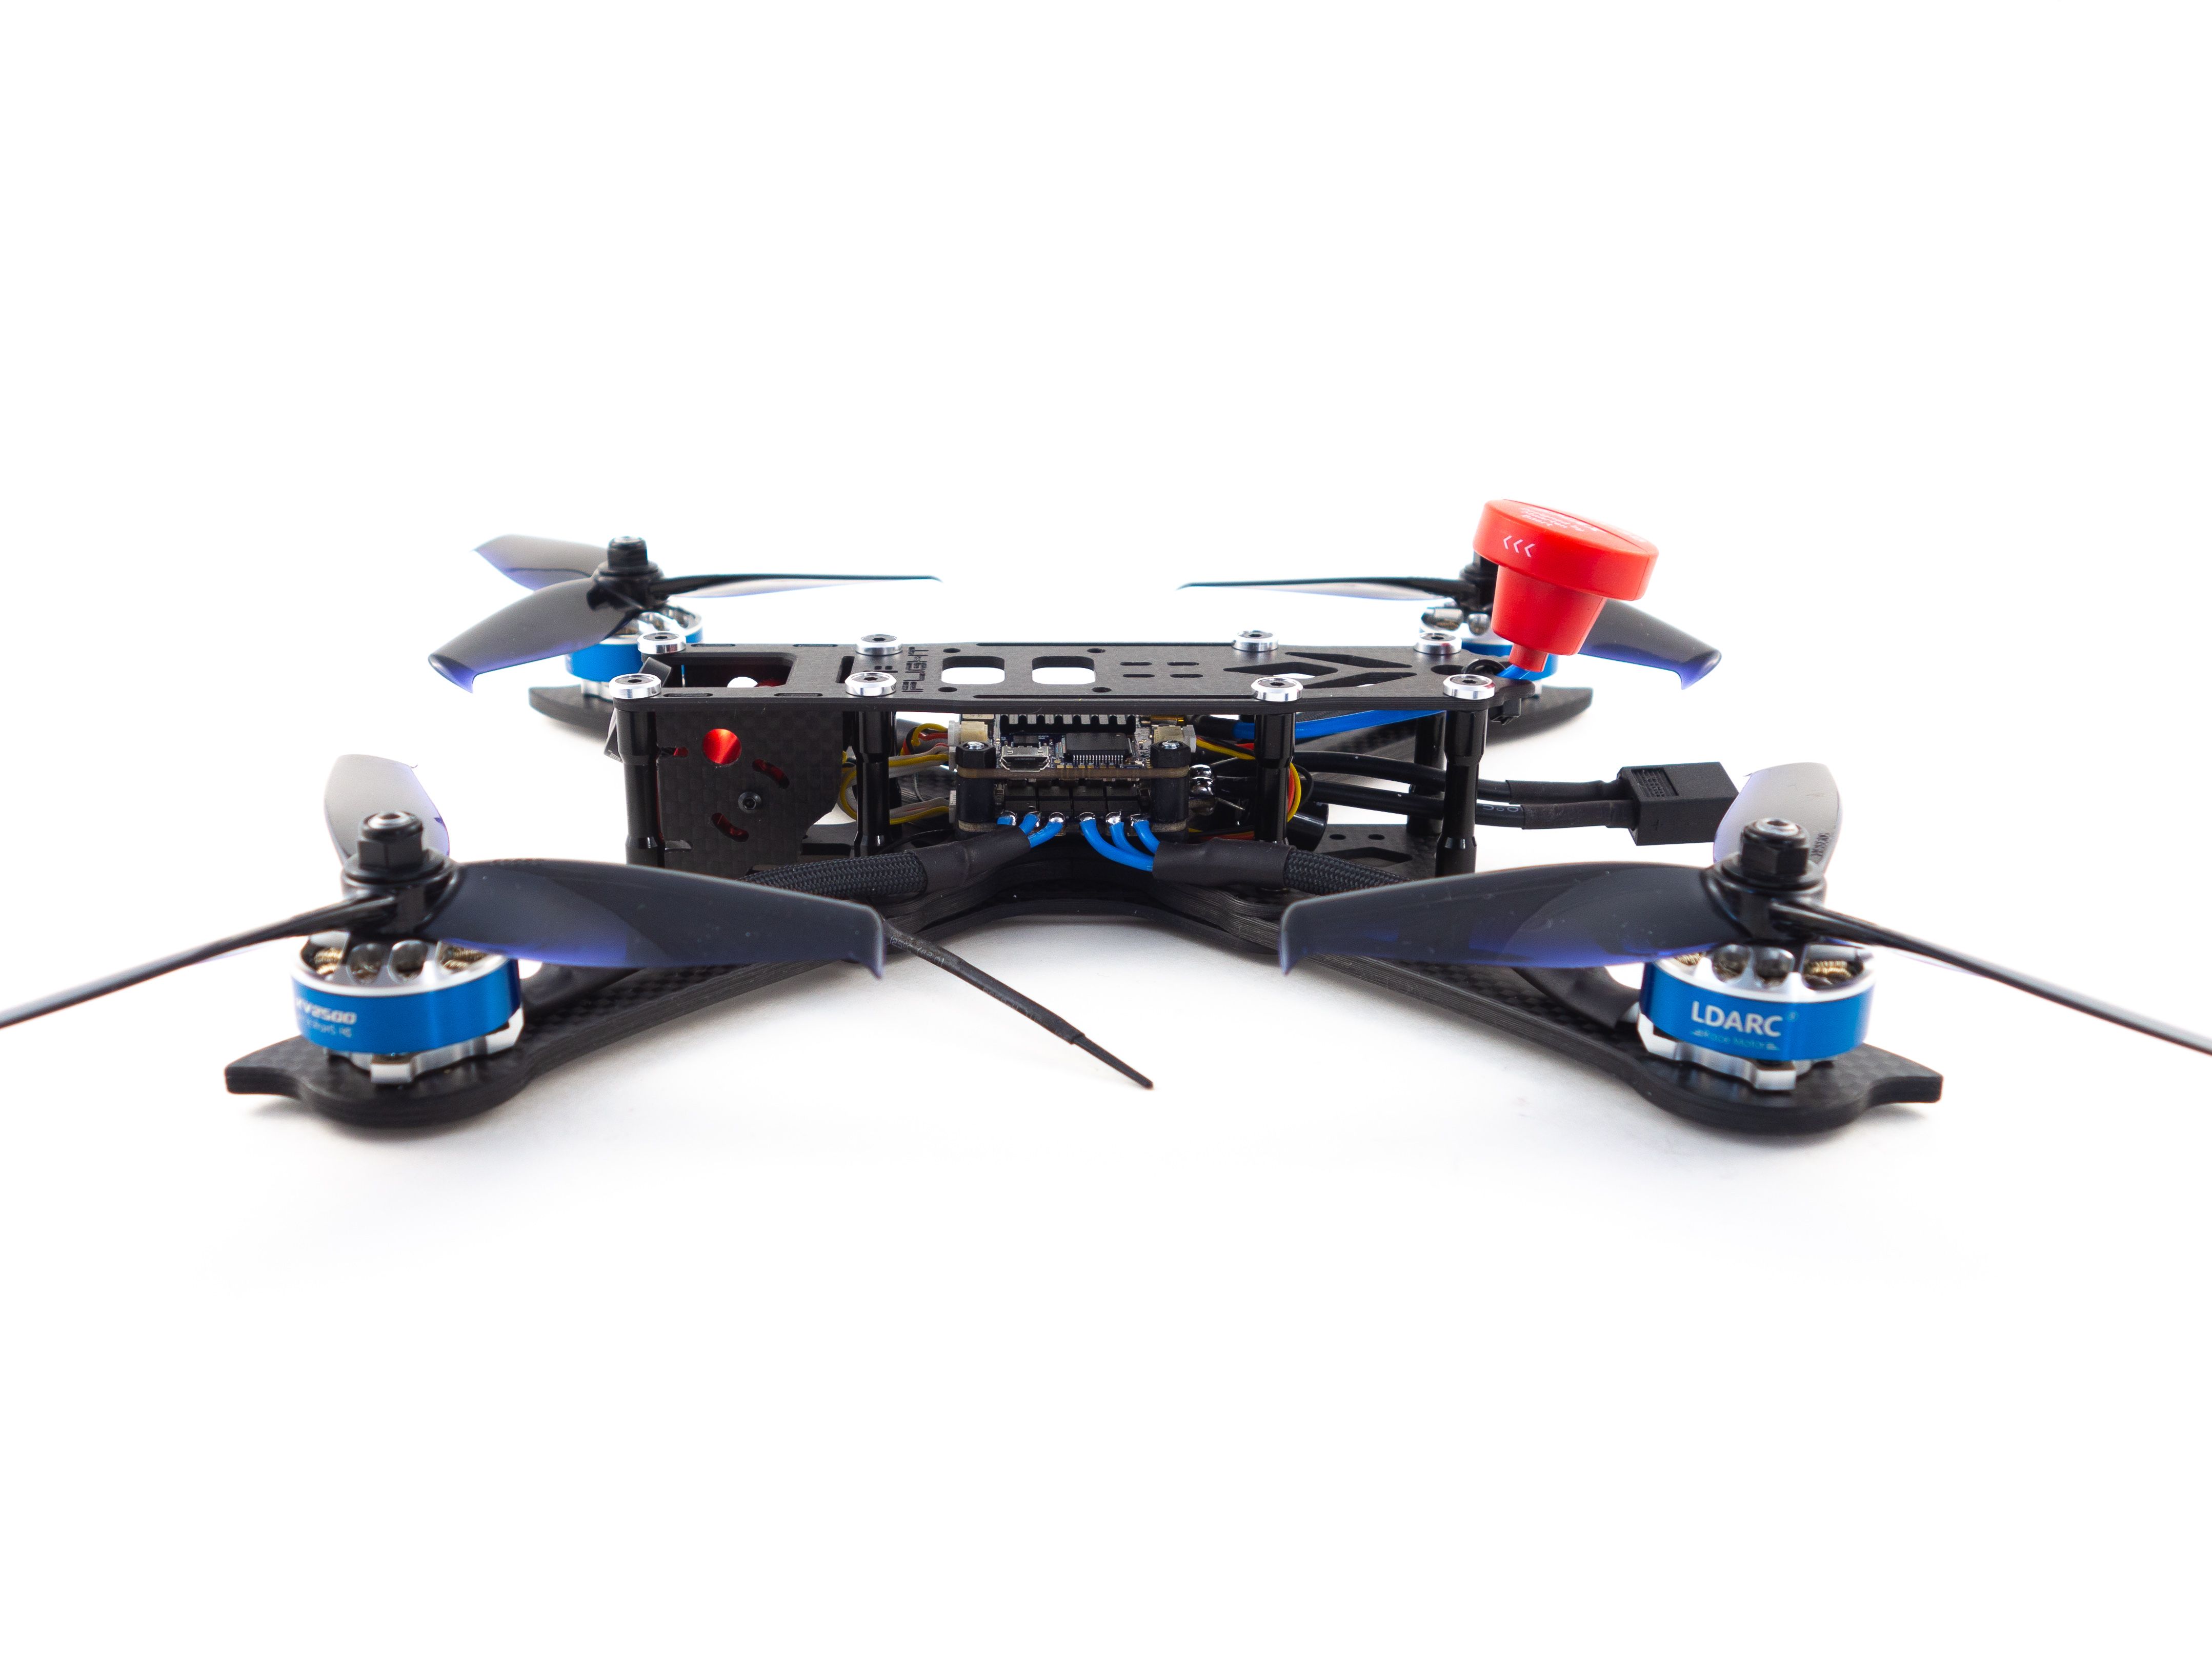
Finishing Up
Now all you need to do is mount the top plate and fasten the VTX antenna. Screw the standoffs onto the top plate first. You can either use the included 6mm screws or the countersunk washers like I did. To secure the VTX antenna it's a good idea to hold it in place with a ziptie or two. I just used the hole in the back to hold it in place.
The frame came with a foam battery pad, but I opted to use a sticky pad. These grip the battery much better and reduce the chances of an ejection. I linked a sticky pad below in the misc parts, but you'll need to cut it to size. It doesn't have adhesive on the back so you may want to adhere it with some VHB tape or you could just buy something like Ummagrip.
Attach the top plate to the bottom plate and the build is complete!
Betaflight Configuration
If you don't already have them, you'll need to download Betaflight Configurator [Download] and the BLHeli Configurator [Download].
- First go to the Firmware Flasher and choose "OMNIBUSF4SD" as well as the latest stable release of Betaflight.
- Click "Load Firmware [Online]" and then "Flash Firmware" to update your flight controller. Once complete, click "Connect"
- On the Ports tab
- On UART6 click Serial RX for your receiver.
- Set the UART3 Peripherals to "IRC Tramp".
- Click Save and Reboot
- On the Configuration tab
- Under ESC/Motor Features select DSHOT600
- If want to fly "props out" with reversed motors, select "Motor direction is reversed" below the illustration. (This is optional)
- Under System configuration set PID loop frequency to 8 kHz.
- Under Receiver choose your receiver mode. For the XM+ choose "Serial-based receiver" and "SBUS"
- Under Arming set the Max arm angle to 180 (Only if you keep the accelerometer turned on)
- Under Other Features enable: Airmode, OSD, Anti Gravity and Dynamic Filter
- Under DSHOT Beacon Configuration enable the beacon
- Click Save and Reboot
To complete the remaining steps you'll need to apply lipo power to your build:
- On the Receiver tab ensure your pitch, roll, throttle and yaw are being applied correctly. Adjust your transmitter and Channel Map as needed.
- On the Modes tab
- Assign an Aux switch to arm and disarm your quad.
- Assign another Aux switch to enable Horizon or Angle mode if you need them.
- Assign the Beeper and "Flip over after crash" to a 3rd and/or 4th switch. I like to assign them both to a single 3 point toggle switch.
- On the Motors tab enable the motor test and apply a small amount power to check the rotation of each motor. Take note of any that need to be reversed.
- Disconnect from the Betaflight Configurator and open BLHeli Configurator
- Connect and Read Settings
- Flash all ESCs to the latest firmware available.
- Reverse the motor direction of any motors that need it. (The numbers correspond to the same numbers in Betaflight)
- Save and reconnect to Betaflight Configurator to test the motor direction.
- On the OSD tab
- Check all of the features you want and arrange your OSD as desired.
And that's it! The default Failsafe settings are generally fine, but make sure they work by arming your quad, applying a small amount of throttle and turning off your transmitter. It should shut down after a short moment.
Maiden Flight
When installing your props make sure to pay attention to the directions illustrated on the Configuration tab in Betaflight. If you are flying "props in" then the leading edges of each prop needs to rotate toward the front and rear of the quad. If you are flying "props out" then the leading edges need to rotate toward the sides of the quad. Make sure the lock nuts are tight, but they don't need to be extremely tight. Conduct your first hover test in a safe place where you won't damage anything or hurt yourself.
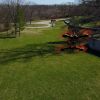
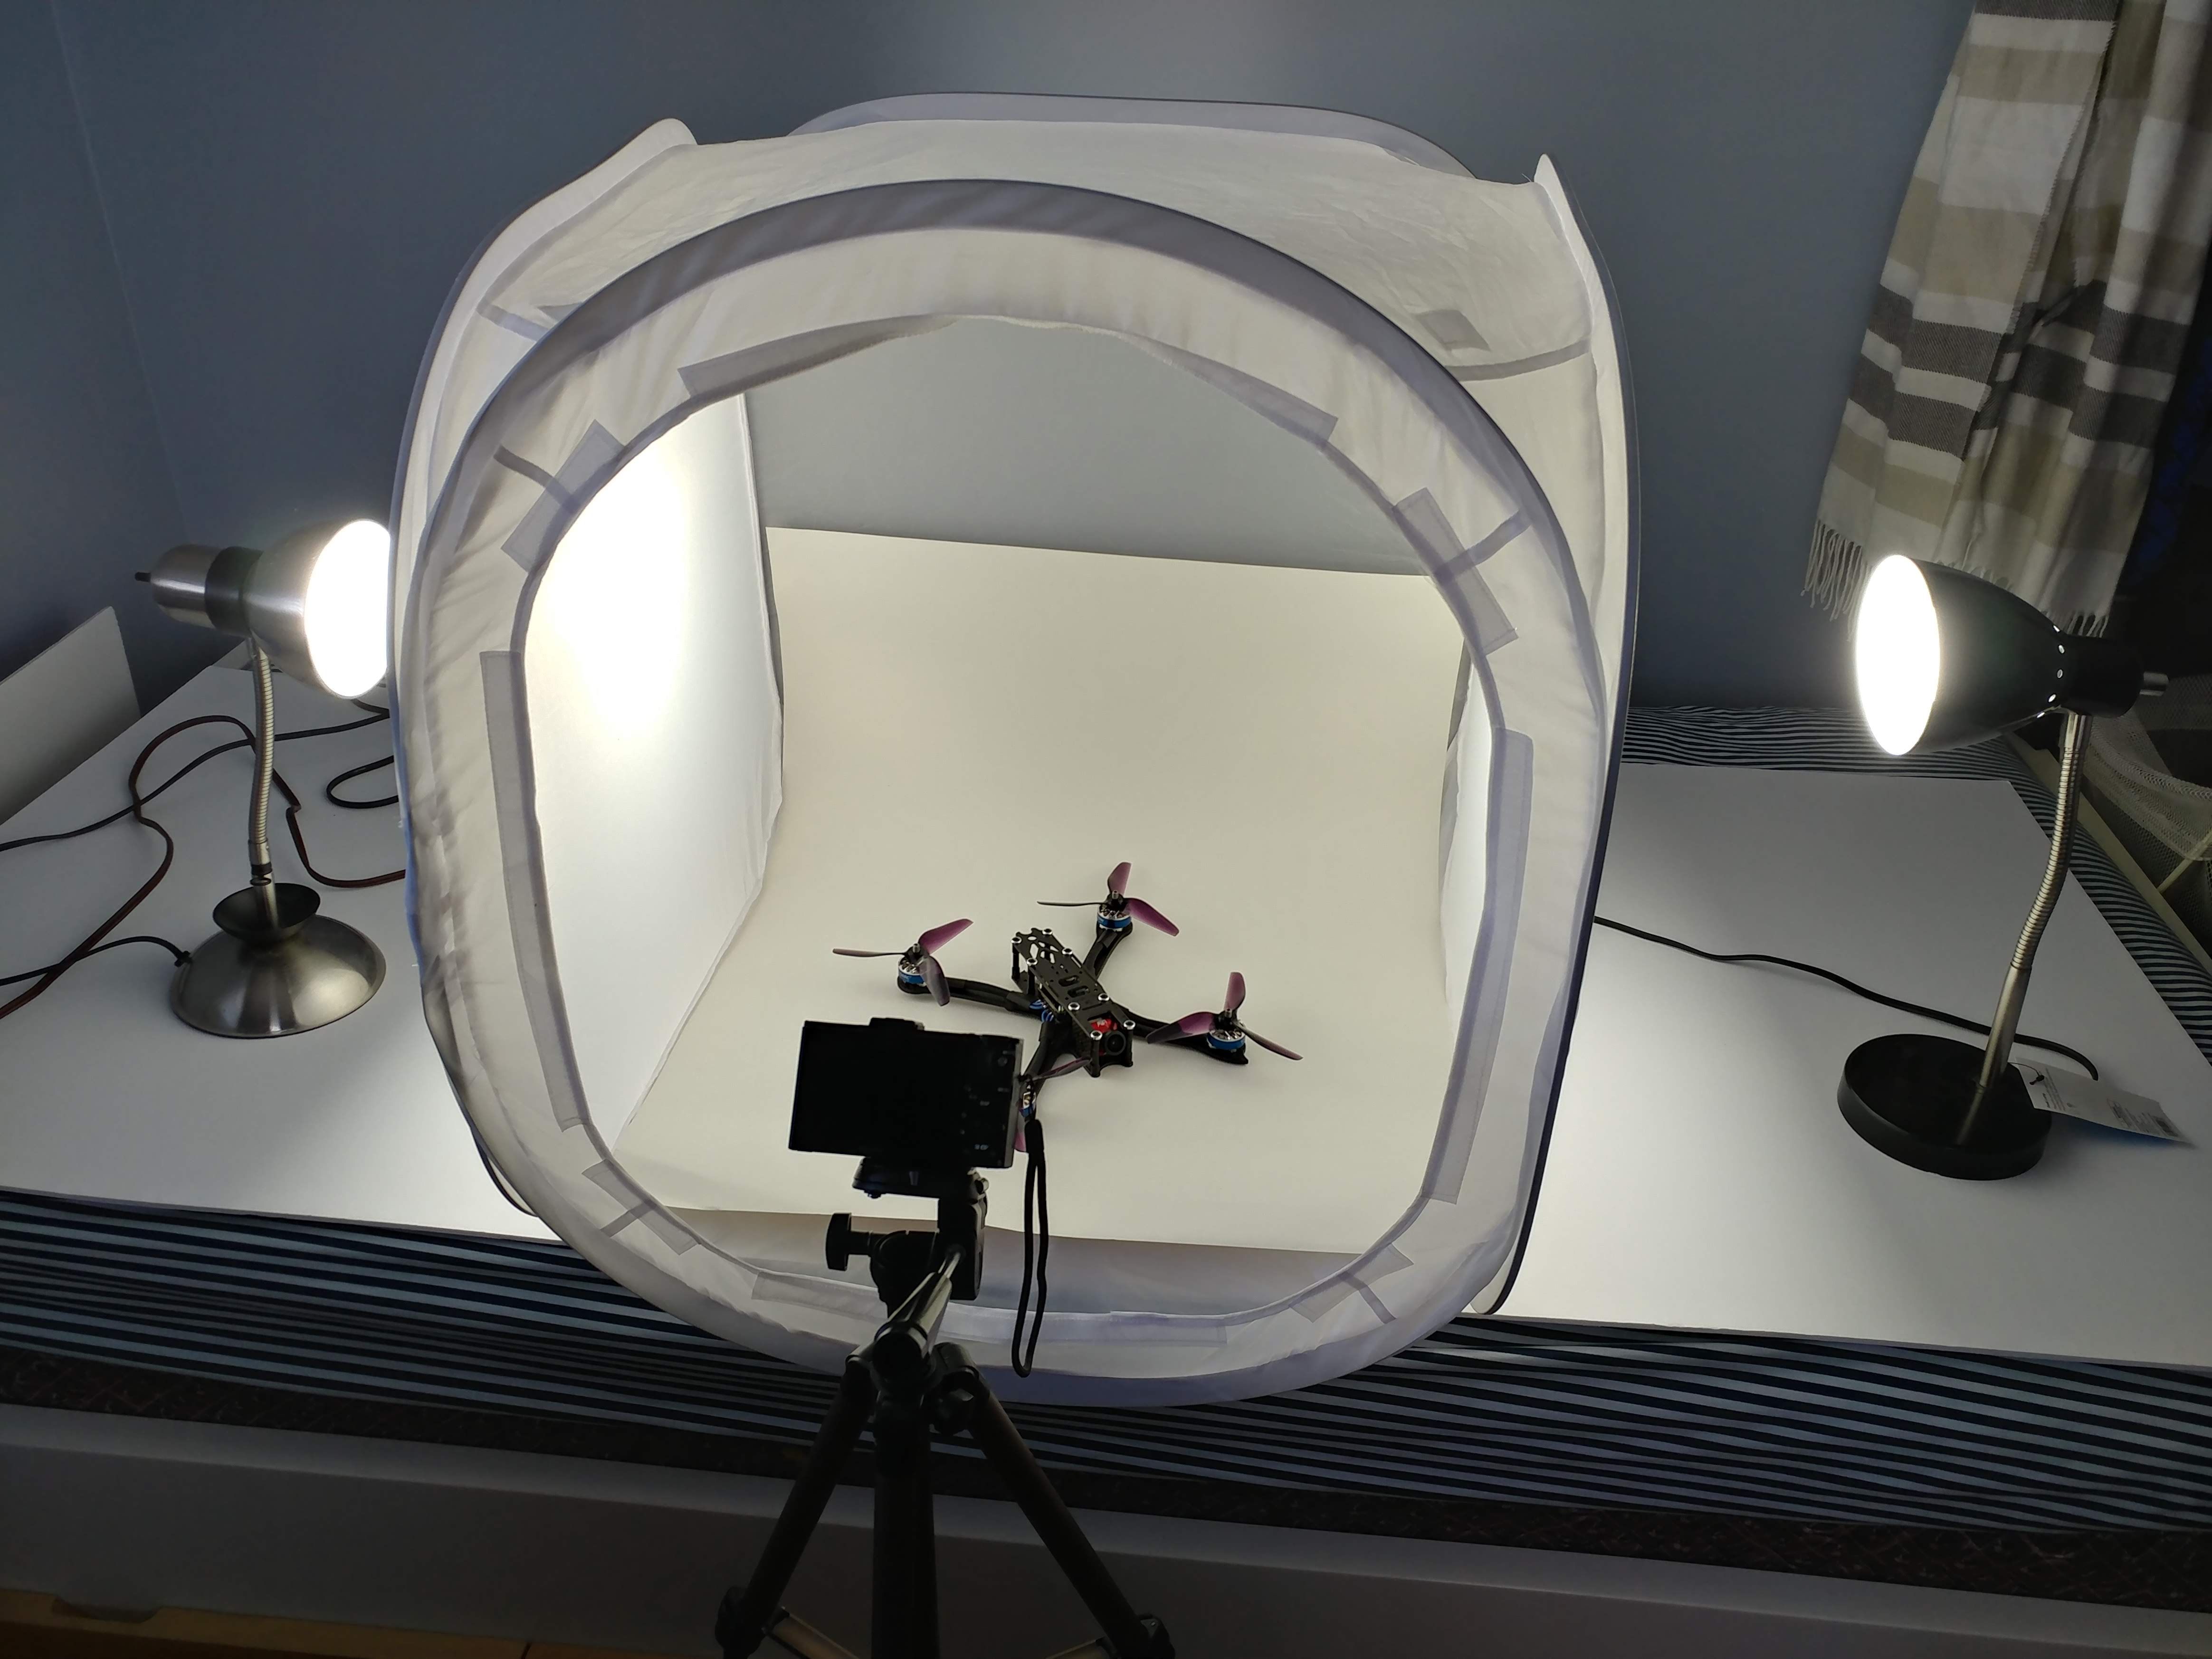
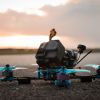
Photos
Part List
Show stores (3)
How long can it fly for?
i finished it this past weekend. i....was procrastinating and did not want to take a step in building it, thinking it was beyond my skill level......I watched your videos and did it. i used a similar type of frame. and Racestar motors......overall Im happy with my first build.........slowly taken it out to practice flying...........Thank you again.......your a terrific teacher......keep it up..
ty for this video. i was having trouble with my build and you answered some questions i had (mainly around the camera not fitting right.) just subscribed to your chan. nice build!
Can you give a list of some updated parts that aren't available anymore? Looking for this to be my first FPV build.

Nice project! What, if anything, would you update for 2020? Would this make a good 1st fulll size build in your opinion? I've built micro's but I'd like to try something bigger, I just don't know the components that well.
Thanks for postiing this information. I have everything ordered except the radio. The T12 is out of stock and the T16 you mentioned in another comment is on back-order. Can you recommend another radio? Will the lower priice FRsky work? What do I loook for to determine compatibility?
what about sunfun 2306 motors? or are the LDARC 2306's better?

This build versus your newer wizard killer 4? Also, are the AIO boards worse than a seperated stack or is it a personal preference type of thing?
I've been flying a trashcan and sim to get practice. Also wanted to try a toothpick or build a 5" for proper freestlye flying. Still need to learn more about the GPS stuff and long range r9m stuff.
Thanks, MT.

I put this all together and it was flying perfect. I wanted to add GPS so i soldered it to UART 6. After connecting it to betaflight i noticed the same UART is for receiver . So i desoldered it and now i dont see any stick input and after powering it i see VTX, all looks fine but i am unable to see any stick input in Betaflight and it wont also arm. Is it possible that i just burned the FC ? I am a total beginner :(
Hi Whifgles, thank you very much for your time. Really appreciate it.
The pads look like this : https://imgur.com/a/8tizqVu
I know, horrible soldering!
My parts arrived today, finally, but i'm facing some missing pieces, i guess. There should be 8 press nut (metal ones) but there are none, instead i got only 12 nylon nuts. What?
Hi Wiffles! I'm waiting for the parts to arrive and i can't wait for them. I wonder which are the Betaflight settings for it, mostly speaking about pids. Does the Betaflight common pids works or there are some special tips for this one?
Hi Everyone!
@Whiffles i'm already half way of getting the parts you suggested with some changes, specifically on the FPV Camera. THe Runcam Eagle 2 pro is available now instead of the micro, but i'm seeing others cameras which seems to be good and for a lower price. I'm considering the Runcam Swift 2, how do i know or check if this camera will be compatible with the LDARC Superfly Tower KK VTX listed on this guide?
Thank you for the help and time!
Whiffles, thanks for the detailed introduction to building for FPV! I too am using this build and video for my first build. I have everything working, but am also trying to add a GPS module ( https://rotorbuilds.com/part/10050 ) to the build. Do you have any suggestions on connecting the GPS to the Super Fly Tower stack? I have figured out power.. my GPS lights up both status LEDs, but I am unable to get any data. Thanks again for the build and any input you have!
hey Whiffles.....thanks for sharing this build.....it was my first build and I‘m pretty new to fpv. I have a couple of questions......how do you hook up the 4 pin camera wire to the 3 pin board connection. i used the 3 pin connector that came with the board but i keep loosing video signal.....it looks like the video wire is getting loose at the 3 pin side.
the more important question is about battery life, I‘m only get less than 2 mins out of each battery....4S 1500mAh Lumineer ....about a min or so of flight. i have 4 seperate batteries and have recharged them, the OSD say full before flight but they just drain so fast. I followed your instructions but i used the Xing 2207 2450KV motors. im at a loss.
Hey Whiffles,
This is my first build and i'm not yet a wizard on the soldering iron like you but some day I'll get there
So I plugged my build to bind it heard a pop. I unplugged it right away and I'm pretty sure it was the capacitor. It looks very slightly deformed and as far as i can tell the rest of the stack looks good. I haven't plugged it in since.
Would you recommend un-soldering it and then redoing the battery leads? There's a bunch of solder on there and I don't relish digging back in there if leaving it as is wouldn't matter. I have no capacitor to replace it with and i could order a few but I know they aren't mandatory. Anything in particular I should check in addition to the stack?
Hey Whiffles - just wanted to shoot a out a thank you for the thorough build. I am a 100% beginner in the hobby and was able to take your directions and make a fully operational quad, learning a whole bunch of stuff along the way. Just had my maiden voyage this past weekend. Some seasoned flyers that were out at our local fly zone also took it for a spin and they really thought it was a fun build. Of course they had it flipping around all kinds of things I can't do yet, but it was really cool to see in action after the labor of love putting it together.
I realized early and often that a major part of the hobby is working around the many roadblocks you'll just run into. I had a bad motor shipped to me from China, which I didn't want to wait for a replacement on so I bought some other motors with expedited delivery (I still ordered a replacement for the bad motor so I'll have 4 LDARCs ready for my next build). Then I ended up having my motor order switched around in Betaflight, so spent some time figuring out the software fix, etc... I also ordered the wrong receiver and the one I got was not thin enough to fit under the stack, so I had to tie it to the top of the frame. Some minor changes, but almost everything else was step-by-step with the guide. Thanks again man!
Hey Whiffles, I recieved all the parts for the build yesterday, but I realized with the tower stack I bought the wrong product option and only bought the flight controller and camera/reciever wires. I've purchased a seperate 4n1 esc today. I plan on making a custom connector to connect the two if necessary. I've been trying to find a diagram of the kk super flight controller with a pin out for the esc connecter and I haven't been able to find one with the specific pin out. Do you know what that pin out is or where to find it? If not, what would you suggest I do?
thank you!
Hi Wiffles, currently in progress with this build. One of the anti vibration standoffs that I was sent is missing thread and can't be used :(. Was wondering if it's fine to use the nylon spacers that came with the frame to mount the flight controller?
Think will be better than using a screw but won't be as effective as the soft mount dampeners at absorbing vibrations. Was going to source some replacements from a local hobby store once Easter is over and hopefully the nylons will do for time being. Cheers
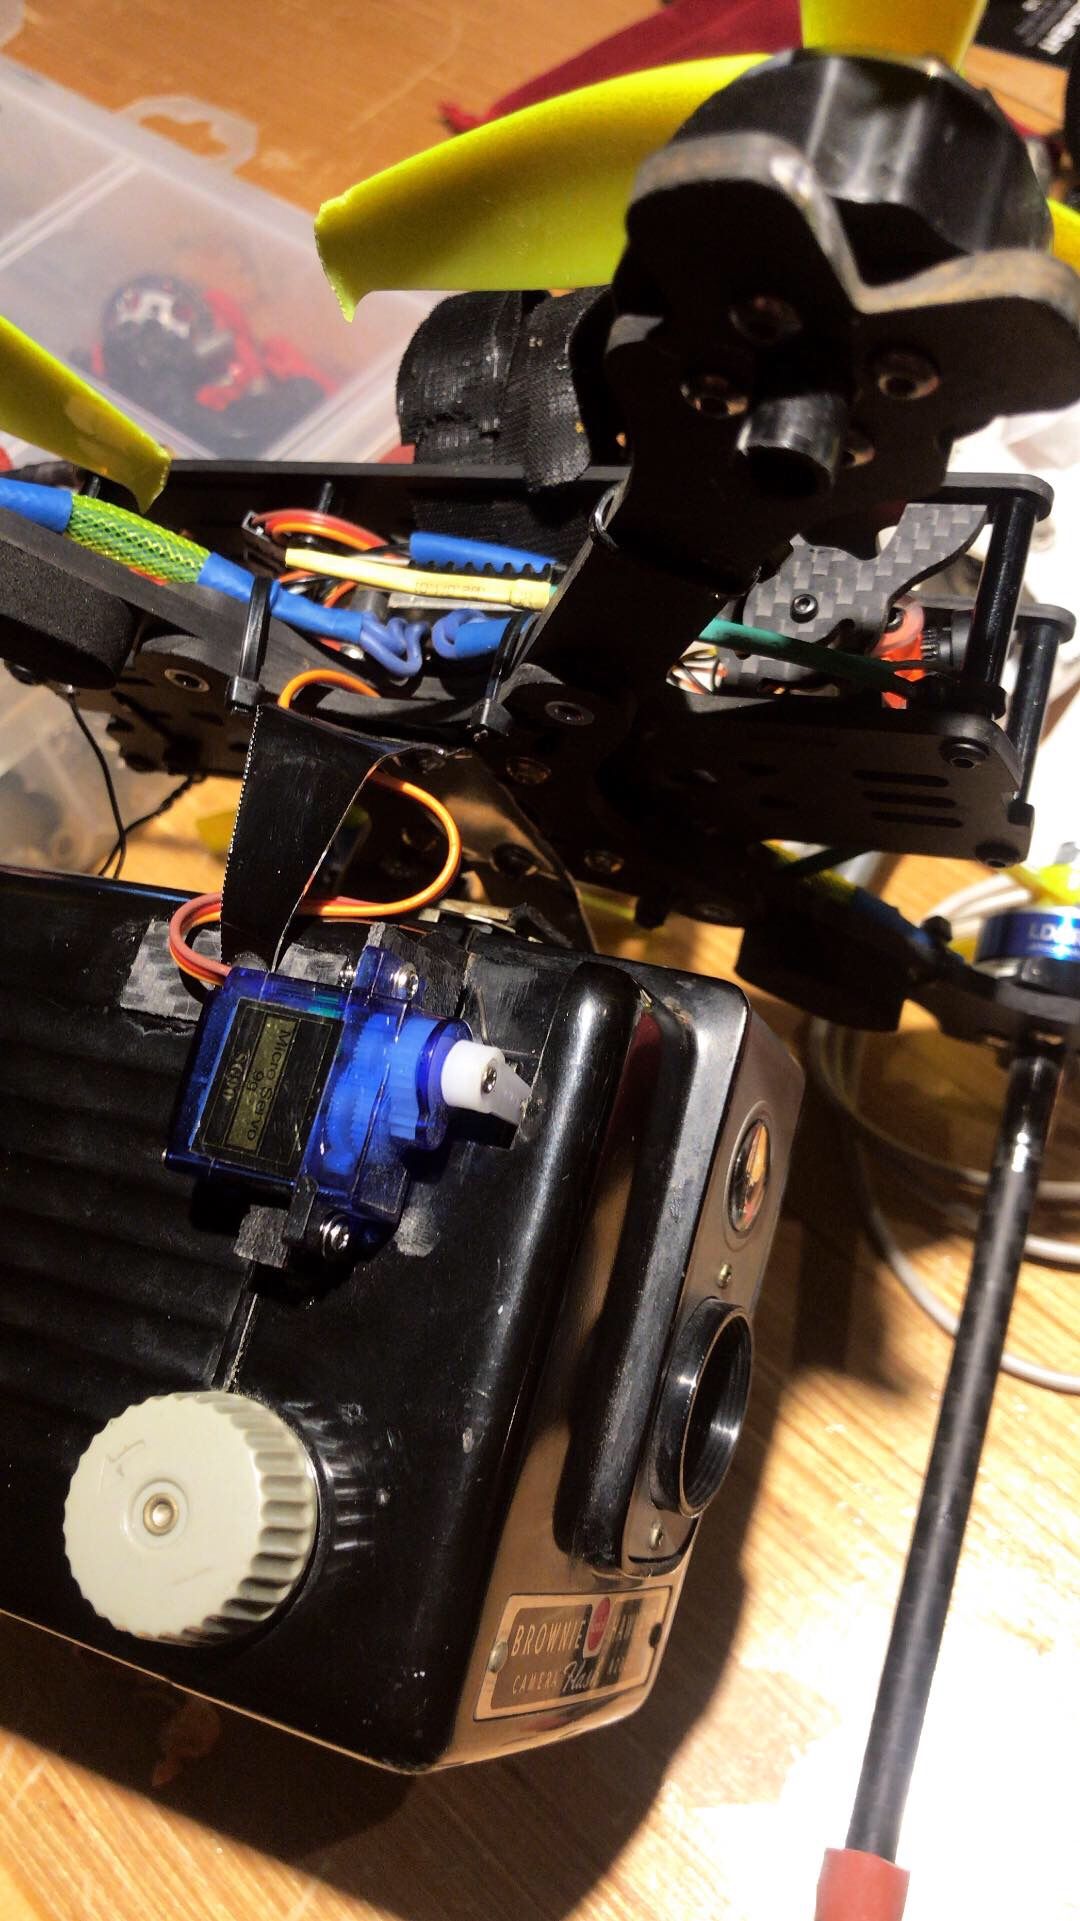
How can we fix a GoPro on the top of the drone ? A support fixed with straps or can we screw one ?

You'll want to 3D print one in TPU. If you don't have a printer you can buy them printed at a variety of shops. Here's the mount I use: https://www.thingiverse.com/thing:3100379
I decided to pull the trigger and place an order for all the parts about a week ago. Nothing on the Xinte web site suggested that anything was out of stock, but I've also not heard anything back from them regarding a possible ship date. How long should I expect this to take?
Besides the LDARC motors you've used which others that can be found on Xinte are good for this built or in quality? There is one review about the LDARC and doesnt give confidence. Thank you for the insights.
I recommend the iFlight Xing 2207 motors. They're great motors and Xinte has a really good price on them.
Found this guide while looking a more complex prpject and this is so perfect for a newb like me!
I am waiting for my FrSky XLite to come,would i be able to use a receiver for the R9M Lite that comes with my controller different to the one you have in this build? If so,which one you recommend?
by the way,i have to import everything, the site Xinte is reliable? Sorry for ask,i just know GetFpv and Racedayquads.
Thank you.
Whiffles thanks for this incredible list and guide. I am using this for my first build and have a question
I have a taranis x7 already and am looking for a reciever the one listed is back ordered i believe.
I'm glad you found it helpful! I haven't tried this one, but it should do the trick, Jumper R1 Receiver.
I've put this together and have been unable to get the motors to arm and the VTX to work. The OSD showed up initially and there's been a couple of brief seconds when i saw the camera view in the goggles but now the OSD is compeltely gone and I can't seem to get the VTX to work at all.
I've monkeyed around with the VTX selector button which seems confusing at the very least. Any suggestions on how to select the channel?
I can spin the motors when it's attached to betaflight and the blue light on the FC blinks rapidly for a second when I flip the arm switch to on but the motors won't spin. Any ideas of why that may be?
Thanks
Hey Whiffles, Thank you very much for this build guide! This is my first build and your documentation was excellent. One question though, I seem to be unable to get RSSI data to my osd correctly. From what I've read it sounds like the xm+ may broadcast this on Aux16? Currently I have my Tarranis bound on D16 Channels 1-8 w/telemetry. Am I right to assume I'll need to pull the reciever, and rebind on channels 8-16 W/telemetry in order to get this to function? Thank you!
Already got all the parts in the cart, only some questions left :)
- Will the receiver work with Taranis QX7?
- Should I get a longer VTX antenna? I'm planning to mount the battery on top..
- If the RunCam Eagle 2 is back in stock, should I get that one instead of the micro?
Hey, build is coming along great, just waiting for the camera and paracord!
And a question if you don't mind - the FC comes with a MMCX cable that can be attached to the iFlight frame (in the hole in which you put the ziptie).
Would you recommend fixing the antenna connector in the said hole and attaching a Stubby antenna (like the Foxeer Lollipop or something similiar) instead of the pagoda?
If you would, do you have a Stubby antenna preference? Thanks!
Edit: now that I'm thinking a bit further then I probably won't have an issue as long as I don't slap on another camera on top because then I can move the battery a bit forward to accomodate for the antenna. If I do put a camera though then I would probably need to do what you did anyone to have place for both battery and camera.
I'm not sure a stubby would work very well because it'll get in the way of the battery. Generally you don't want to mount your antenna vertically because it's prone to damage and it could potentially snap the top plate if you hit it just right. The preferred method is to mount it horizontally and bend up beyond the top plate.
Hey,
I'm new to FPV Drones and would like to build one. I'm looking into this one, Rotor Riot CL1 or Wizard Killer Mark III. This will be first build ever. Do you recommended sticking with the easiest and the cheapest one for the first time or do you think that the older and more expensive versions are well worth the extra $60 or so..?
Also I would like to get some better Radio since I'll use it for some more projects in the future, but I guess some other radio will be probably compatible with this very drone too, right? I don't really know how these things work yet, sorry for my misinformation.
Your guides looks really high-effort and I appreciate it, so far looking awesome and I hope I'll have great time building my first machine! Have a good day!
The Commander V1s are the most proven, but the FOV is quite small. The Commander V2s have a massive FOV, but they do suffer from a little edge blur. They really need at least -2 diopters to address that. They're really comfortable and nice goggles though. The EV200D has the richest displays of the bunch at a pretty decent 42 degrees. The blur isn't as bad as the Commander V2s. It's only on the far edges and only on 16:9 mode. On 4:3 mode they have no blur at all. The only problem with the EV200D is the DVR. It's far from great and tends to wash out the video a bit on some cameras. That being said it's definitely the best value of the bunch. See if you can find some used HD3s. They also suffer from edge blur like the Commander V2s, but you'll have the option to use a rapidFire at some point if you desire, but I believe it requires a small internal mod.
Any pros or cons to this? https://www.xt-xinte.com/iFlight-XL5-5-Lowrider-V3-FPV-Racing-Frame-Kit-Stretch-X-V3-251mm-Wheelbase-for-RC-Drone-Quadcopter-p571818.html Wpould I hsve more problems getting arms if I needed them it it's not as common? Thanks!
Thanks for the build and time it took. I have a question when you went to the 20 mm standoffs what happens to the side plates by the camera if they're made for taller stock standoffs? Many thanks!
Thanks for the great tutorial. Is it possible to add a GPS module to the ldarc tower to get telemetry data? (for example https://www.banggood.com/Smallest-Mini-Dual-GLONASSGPS-BN-180-Micro-Double-GPS-Antenna-Module-UART-TTL-For-CC3D-F3-p-1208587.html?rmmds=myorder&cur_warehouse=CN)
You generally want your GPS to be out in the open, so people will usually either mount it on top of the battery or out the back. Have a look at some examples here: https://www.brain3d.co/search?q=gps, https://www.thingiverse.com/thing:2982373, https://www.thingiverse.com/thing:3196985
I like your post. It really useful with me. Thanks for sharing these useful information! Instagram video downloader

Would it make more sense to buy the lowrider XL5 or to buy the regular frame and shorter standoffs? Is their even any other differences between the lowrider and the regular besides the extra cutout in the front plate?
Would this build work with the iFlight XL5 Lowrider frame?

the lowrider is weird though. It fits a regular camera on the width but not the height. You'd have to use an adaptor to the microsized cameras. I'm building a long range xl7 lowrider and was quite disappointed that I can't use my normal eagle 2. I'm probably going to put a micro eagle from my other quad.
HI and thank you for your work. Quick question..
What is the screw size for the line item
Suleve M3CH4100pcs Metric M3 Black 10.9 Carbon Steel Flat Countersunk Head Hex Socket Screw
Thanks again
Hi, im want to build my first quand and im wondering which one would be the best to start. This one or your wizard killer mark 3?

Another beautiful build bro. Any thoughts on using the lowrider version of this frame? Too tight? I notice HecticFPV slammed his with 20mm standoffs..
Sweet build! I love my XL5, slammed it with some 20mm standoffs, CL Racing F4S, DYS 30a 4 in 1 ESC and some DYS Samguk Wei 2207 2600kv motors. Wish I could have afforded some different motors but right now that's all I had money for but it flies like a dream and has plenty of power.
Very cool! Very clean build and a great price point. I am currently flying a build that is around $150, and this sort of setup will definately be in the future for me.
I was wondering were to by the covering you used for the wires from the ESCs to the motors.
Thanks in advance.

Hi there! I am new to the site and to drone building, so far I have just been running car bashers & crawlers, from 1/12th to 1/5 in motors & engines, a lot of them my own designs & customisation. Now I would like to start into building a drone and I really liked the (iFlight XL5 V3) you showed. Would you consider this a good build to start off with. I would apprecate and input and advice you would give me, Thank You very much and I hope to here from you soon.
Regards.
Popeye63
Are the holes in the front and the back for mounting 20x20 boards?
The motors are currently out of stock at Xt-xinte.com. Could you recommend an alternative? Also would a Runcam Split Mini 2 fit?
I was going to recommend the iFlight Xing 2207, but that's also out of stock. Another couple suggestions are the iFlight Xing 2206 or the iFlight Tachyon. I believe the Split Mini 2 will fit as there are 20mm mounting holes under the camera, but you may also want to look at the Caddx Turtle V2. I think it's got a slightly better board design.
I ended up ordering the KK's from Banggood @ $14.95!! Also went with the Eagle 2 camera for now. The Caddx Turtle looks good.. I like the idea of having the HD DVR on board rather than recording the transmitted video. This will be my first build. I assume a 4s 1500mAh Lipo strapped to the top would be adequate? Thanks much for the help!
Yep, I'm still waiting on a mount for my Hero7. I'll be sure to post some photos when it's all suited up for flight. Just a strap or two on top with a battery pad should do the trick. You might also want to zip-tie the XT60 up against one of the rear standoffs so it doesn't get into prop-strike range.


Is there a alternative Frame to use? becouse it's out of Stock in the recomended Shop?
They're up to V5 now. Here's the latest version: https://www.xt-xinte.com/iFlight-XL5-V5-True-X-240mm-Freestyle-FPV-Frame-Kit-p743913.html
Thank You.
Would you recomend to build this drone setup?
This is a little outdated, but if the parts are still available it's still a solid and easy build.