
Hi!
After spending a week or 2 now on Liftoff with my Nirvana N14 controller I feel like I can take the next step and build my first miniquad :D
After doing LOTS of research on the internet I have come up with the following build. Its a combination of a variety of recommendations I have found and things I like myself.
Remember, this is a work in progress which will be updated regularly with my first drone experience! (Its a living document I tell you!!)
Update log
04-01-2019
- started log
05-01-2019
- Updated parts list after recommendations from Whiffles (changed motors from DYS Samguk 2207, antenna from Eachine K loverleaves, camera from caddx turbo F2)
- Changed Led board (to allow room for the antenna holder)
- Moved TX and RX(decided to go for X8B after being suggested because of diversity) from main list to misc items as i already own them.
18-01-2019
- Parts came in! Step 2 complete!
- Need to get solder and heatshrink to get building!
20-01-2019
- Chamfering carbon
- Dry fitting parts
26-01-2019
- 3d printing TPU parts
- Decisions about part locations and frame standoffs
29-01-2019 > 02-02-2019
- Soldering all connections
- Finishing touches
- Betaflight setup
- Binding Receivers
- Seting up camera + OSD
03-02-2019
- Maiden!
- Changed modes in Betaflight
- Changed some switch locations to be able to disarm faster
12-02-2019
- First dvr footage: my second flight
15/16-02-2019
- More dvr footage and adjustment of voltage reading in OSD
Its a mixture of the following:
- UAVfutures $99 build
- The amazing Wizard killer III by Whiffles. SO AWESOME! Im stealling the colorpallet...
- The iFlight XL5 V3 Build Guide by Whiffles.
- Kababfpv (for the ESC/FC choice)
- Oscarlian stuff
- FPVKnowitall (Joshua Bardwell) stuff
The purpose and there for requirements/wishes:
- Learn to fly the real deal!
- Flight time over speed (more time flying = more time learning ;) )
- Stable flight
- I seem to enjoy cruising, high speed, low flying
- I would like to get a bit more into freestyle after learning the basics but would also like to explore nice areas just cruising
My flying location:
I live in the Netherlands, open lands will be scarce so i believe it will mostly be fields about the size of soccerfields, occassionally bigger, sometime smaller.
Questions:
I have a couple of things im still not 100% sure about:
1. Which motors:
I was debating both the DYS 2207 and the 2306. I have found a variety of sites trying to explain the difference between these motors (or actually 2207 vs 2306 in general). From what I understand so far is that with the 2306 the throttle response / torque seems to come up earlier in the stick range and the 2207 is more linear. Also the 2306 is said to be a little more efficient? (Makes little sense to me tbh if the power is lower down in the stickrange as you are there more often then at the end of the stickrange).
On other sites I read the difference is hard to notice for novices and therefor I have decided im going for the 2207 motors. Mostly because I really like blue and really donot like red. Yes, i went there in the end cause i couldnt decide haha.
The big question is do I go for 2300kv or 2600kv?
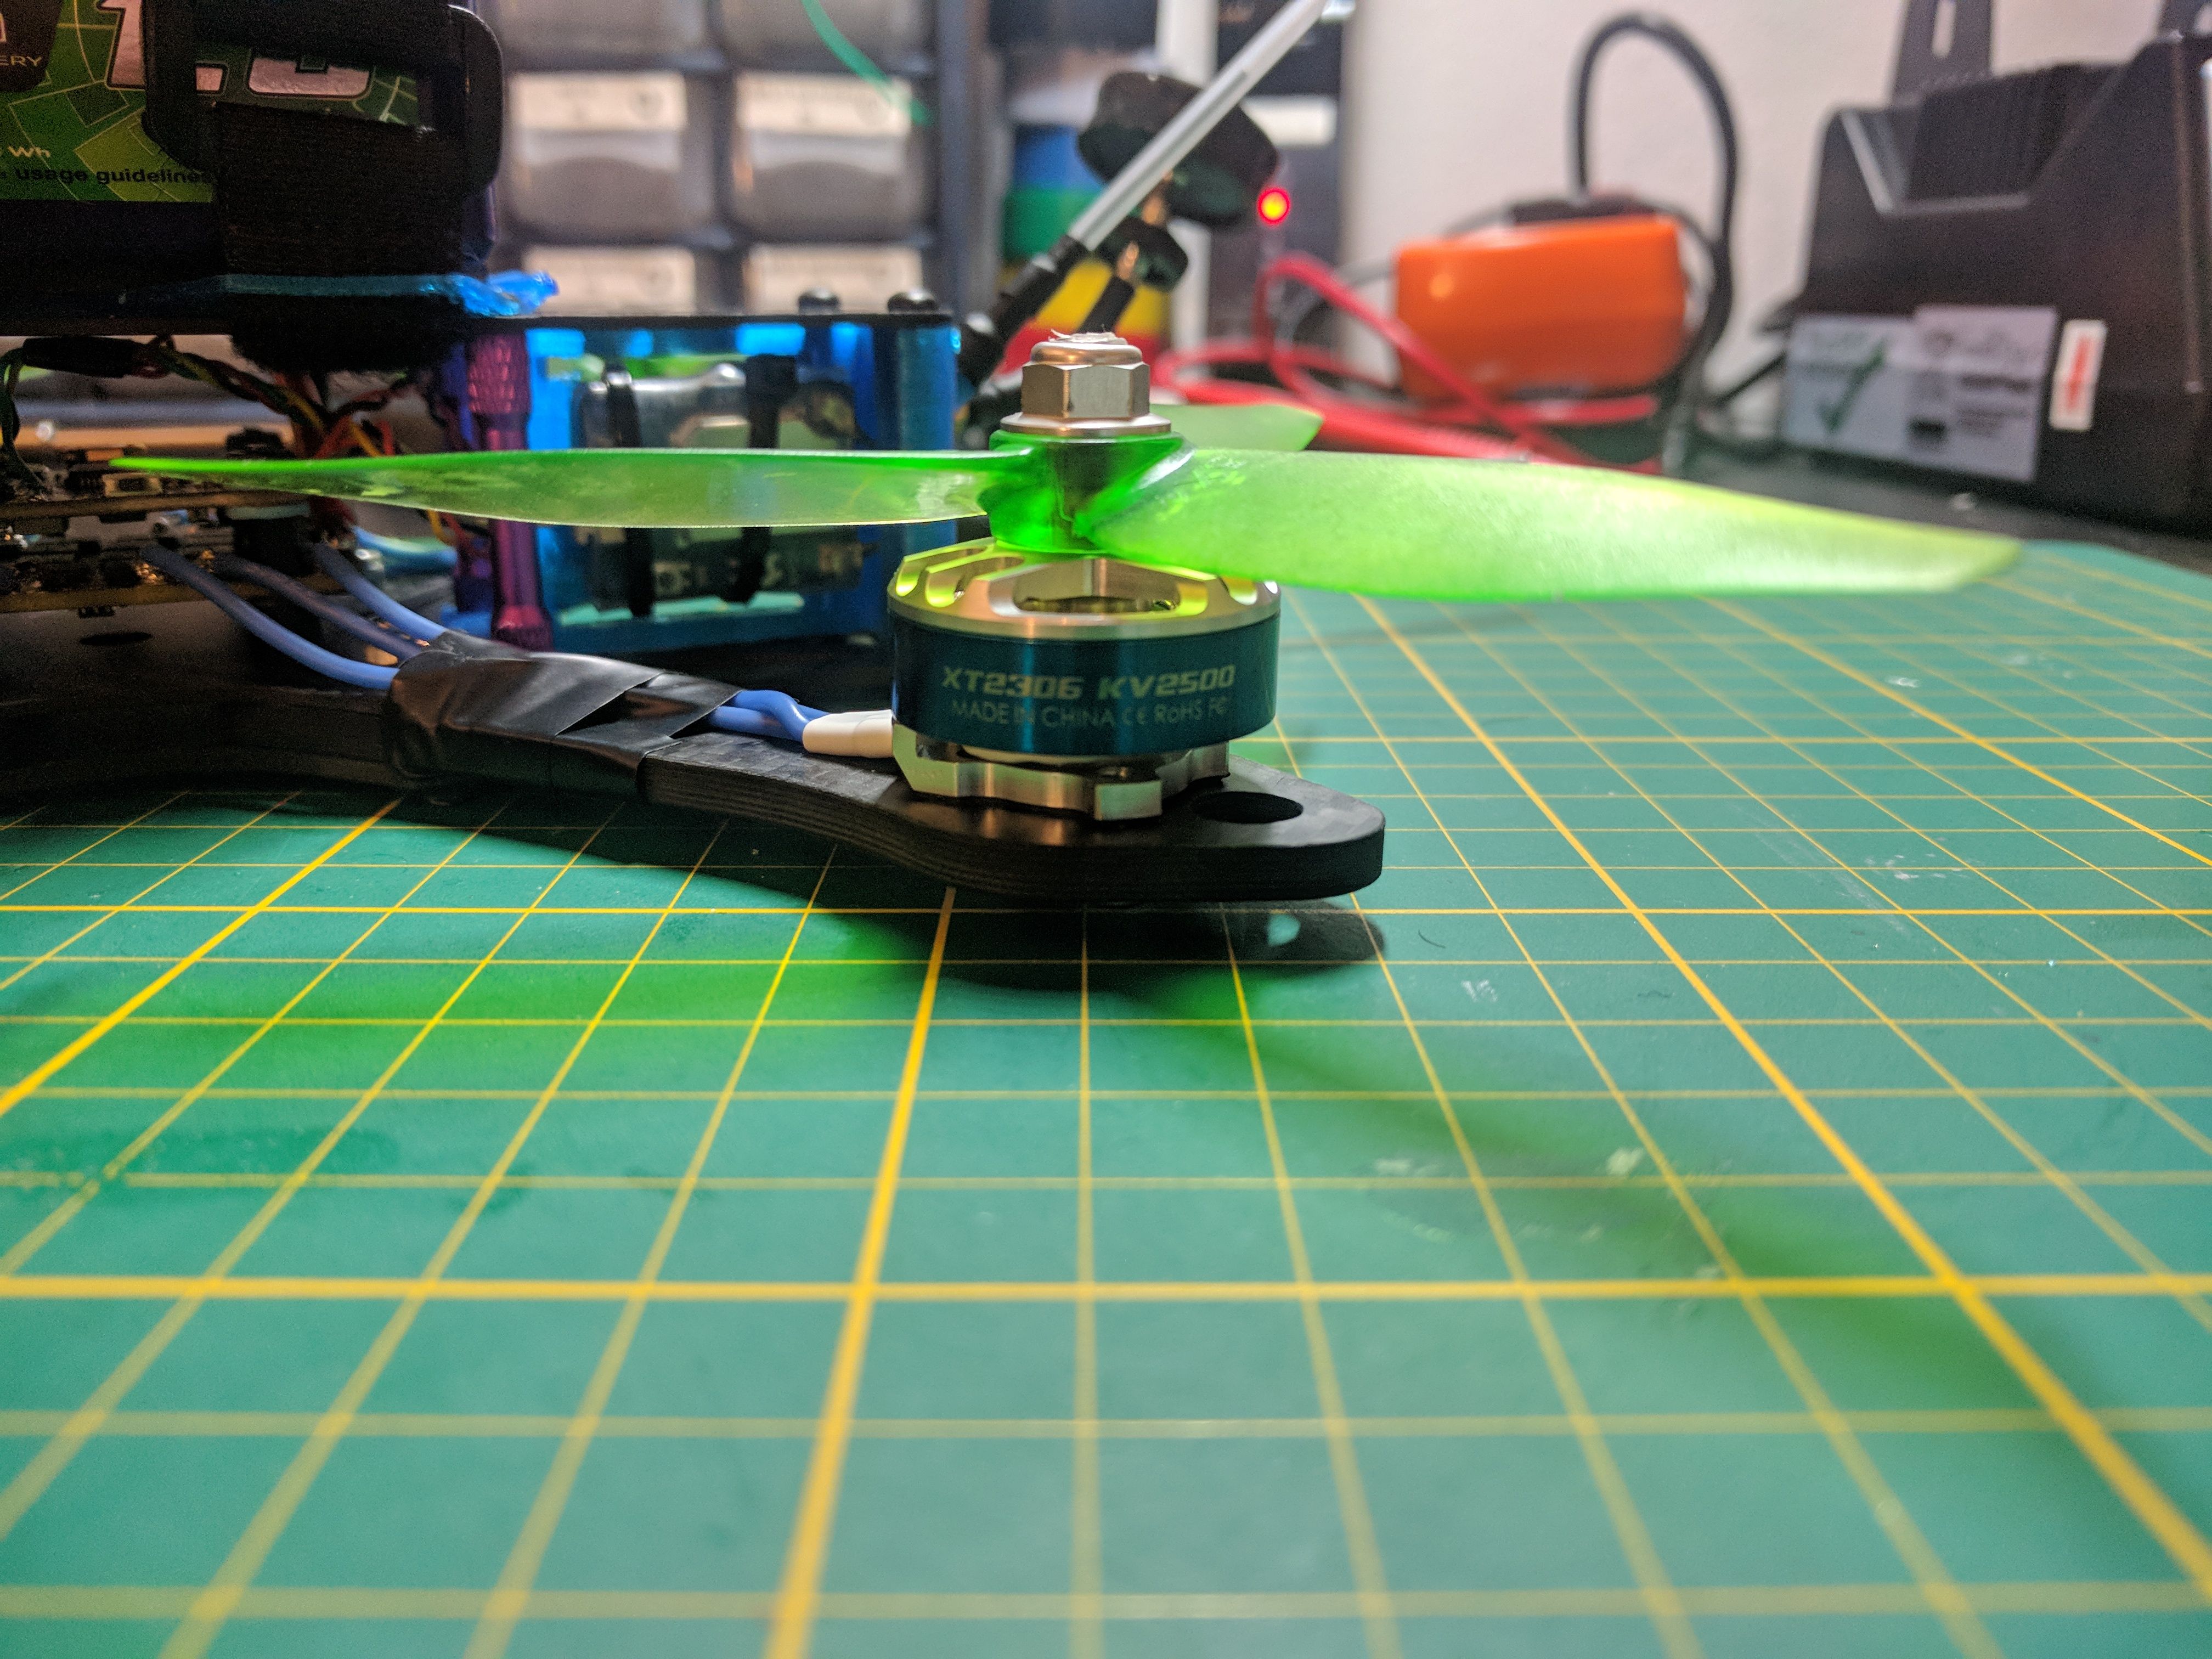
Update 05-01-2019 : I went for the LDARC(Kingkong) XT2306 2500kv as down in the list. This because it was recommended by Whiffles as they would be more durable and in the end the 2306 seemd to feel better with the wishes I put up.(also 2306 in blue haha)
2. Which props do I go for?
In liftoff I tend to go for 5040 props both tri and bi blades. I have included both a 5040 tri aswel as a 5048 tri in my build as I would like to try the difference. Is this a smart prop to go for looking at my requirements/wishes or are there better alternatives?
For the bi blade i found only a few 5040 available and they seemed pretty... meh tbh. Anything good in bi blade?
3. Which RX to go for?
With my NV14 transmitter i received the Flysky IA8S and the Flysky X8B receivers. Im thinking of using the IA8S. Is this fine or should i really look at something else? Transmitters/receivers/signals/frequencies etc is still one of the areas I truly lack knowledge off.
Update 05-01-2019: Decided to go for the X8B after it being recommended over the IA8S. it has diversity and seems to be a little more stable. Plus there seems to be enough room in the frame to use it :) Another suggestion would be the Flysky FLI14+ receiver but as I already have the X8B ill be using that for this build.
4. VX choice
As stated above I stil lack knowledge about these things. I found the eachine VX as listed below on one of the source sites and thought it might be fine (not having to use a pigtail seems like a plus to me?) Also audio seems nice as I tend to use that alot in liftoff and would like to use it IRL aswell.
For the goggles I will be buying the EV800D as they seem a good entry level goggle and can be used as just a monitor aswell. Eventually I would like to get the EV200 (unless something better price/quality wise comes along by then).
If possible I would like some input on compatibility. As far as I know everything should work together fine.
Make it pretty!
Collor scheme wise:
-Carbon frame
-Dark blue 25 mm standoffs (20 mm seems just a bit too low though as I think that is the stack height).
-Green transparent props
Might do the paracord trick and maybe screw/washer combis (washers seem to be scarce for m3 on banggood?!)
Update 26-01-2019 : I decided to go back to 30 mm standoffs. This is just a little easier to build as a first timer. Ill try the slammed approach on a future build :D I went from dark blue 25 mm standoffs to 30 mm black standoffs!
Update 01-02-2019 : I have learned that i need to measure before i order something. The stock standoffs are 35 mm. I have decided that the pink/purple will have to do for now.
Status:
Step 1: Finalize the Bill of materials and order it. Complete!
Step 2: Sim training while waiting for parts and reading / learning more :D Complete!
Step 3: BUILD THE QUAD! (and document / update this log of course!) Complete!
Step 4: Fly, break, fix, repeat! WIP
Step 5: Get addicted to the hobby, build more quads, make more logs! Complete!
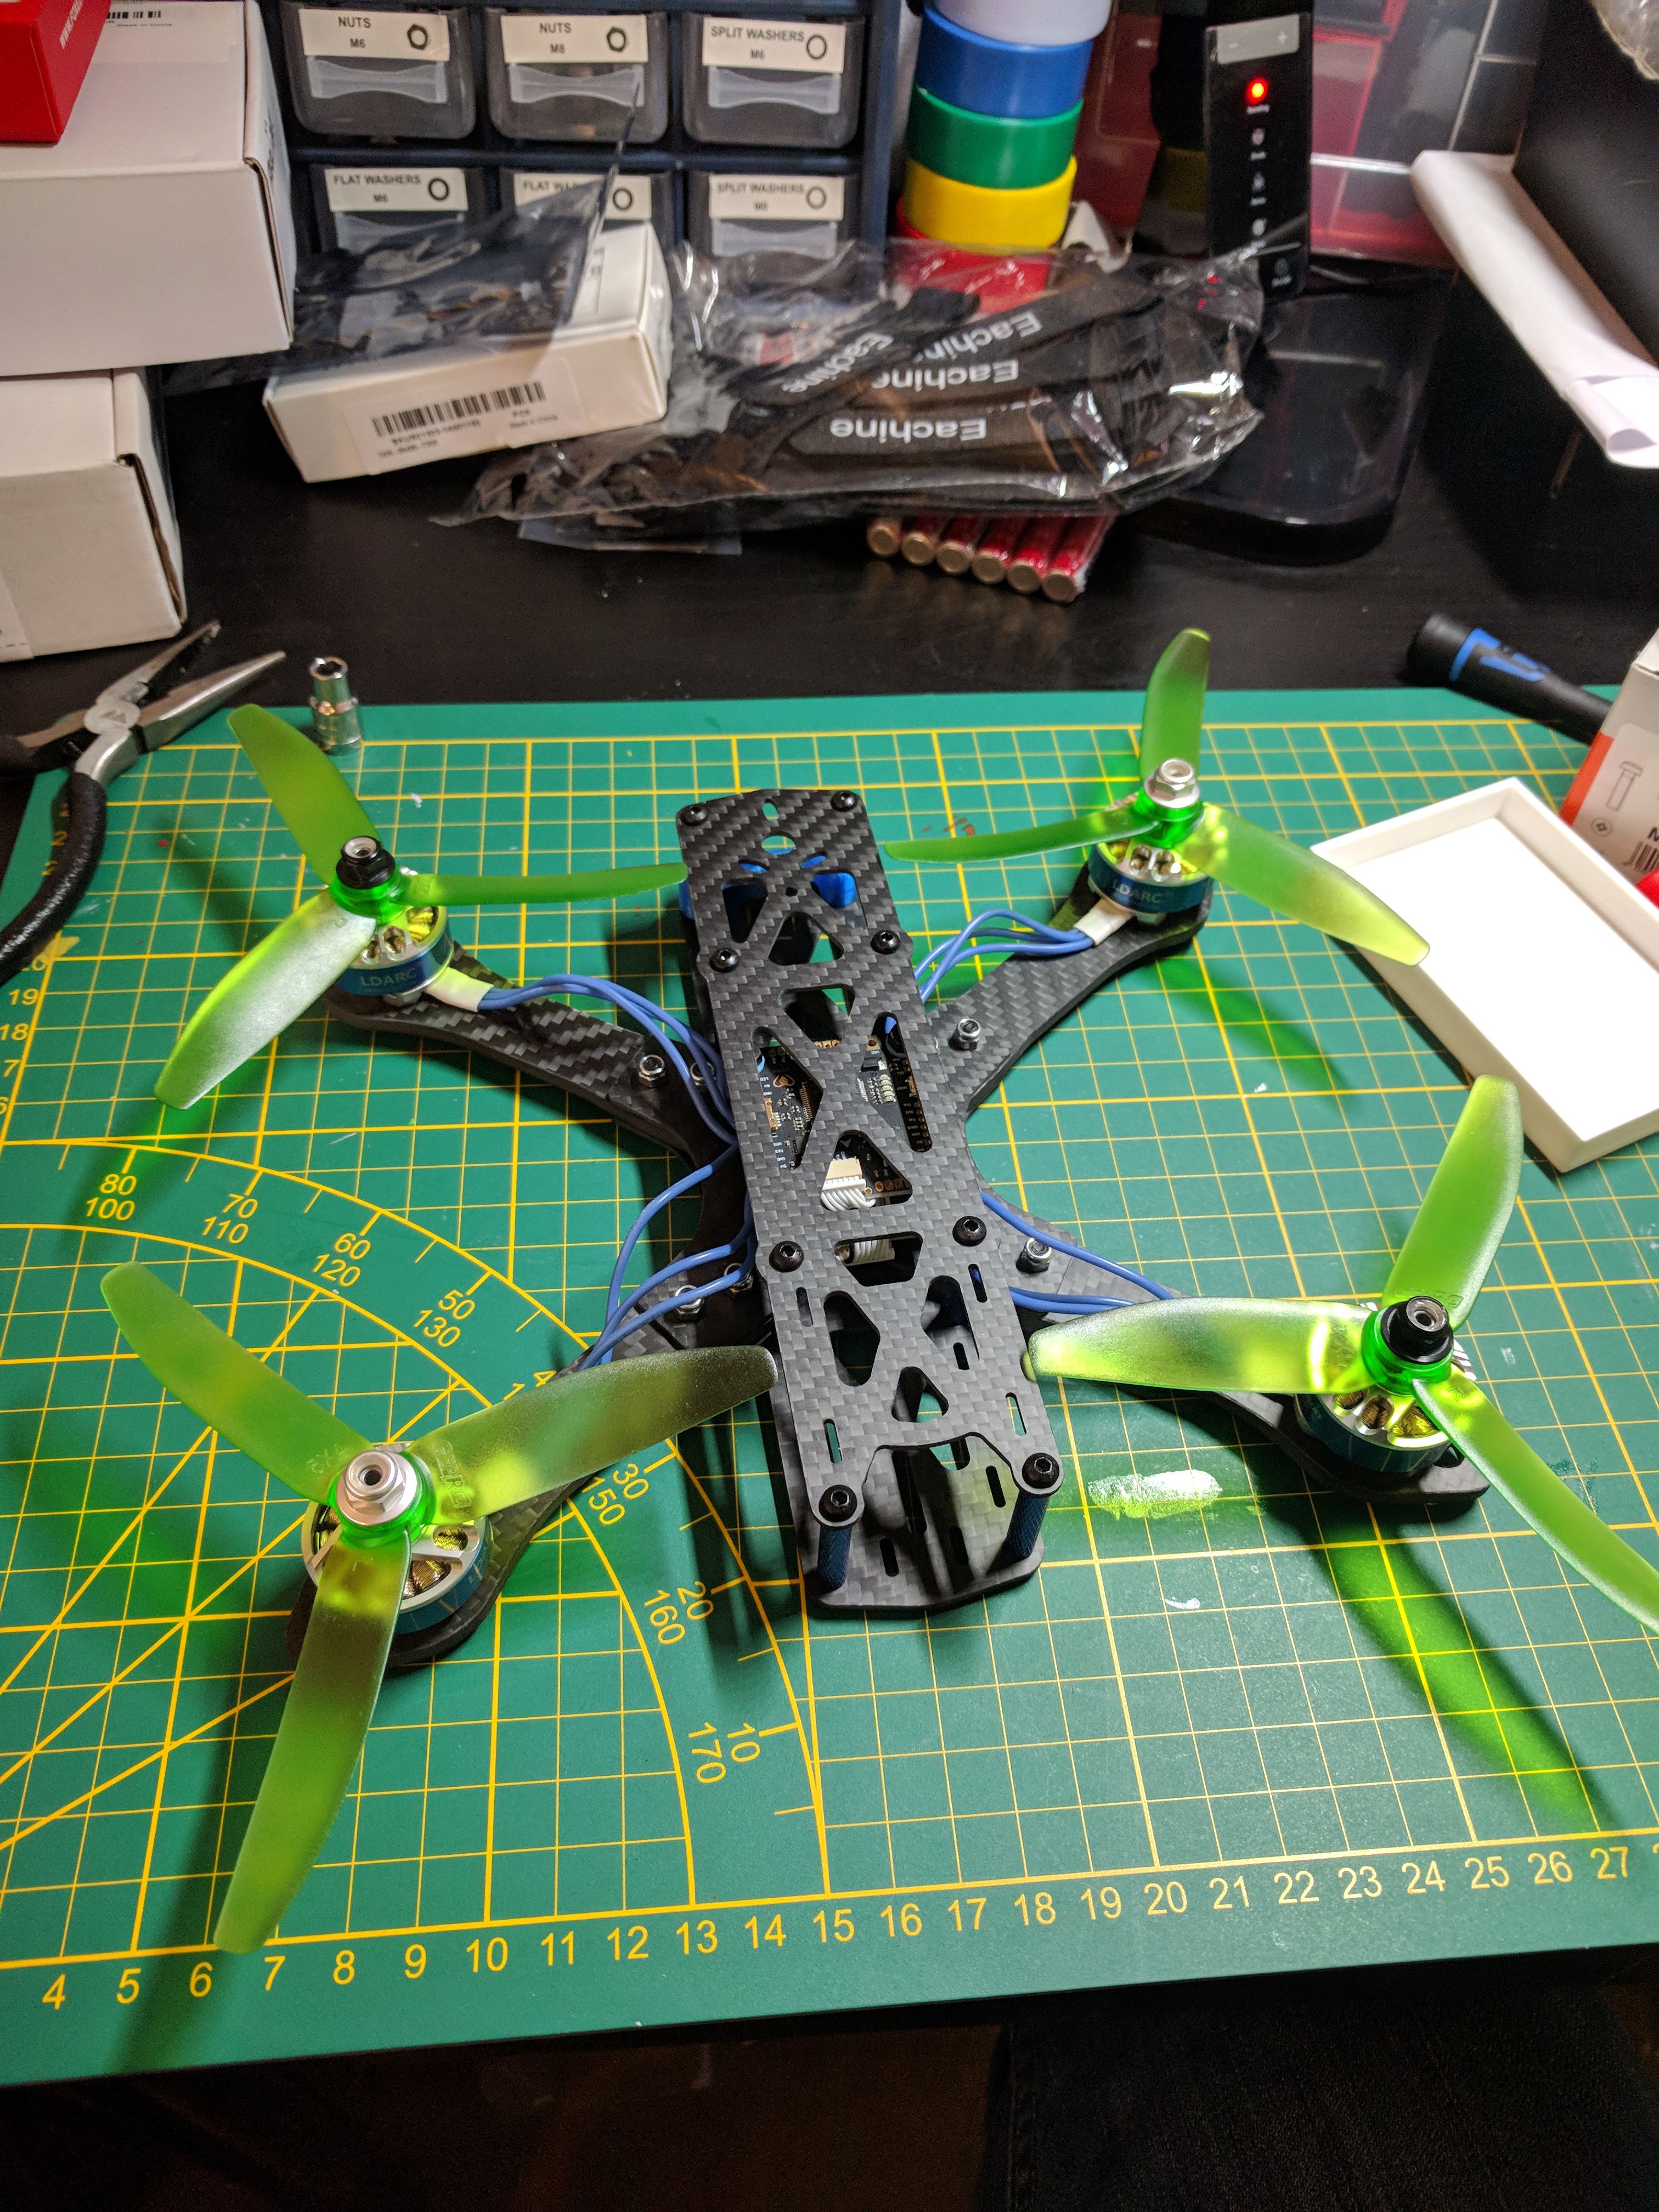
Build:
Step 1: Inspect all the parts. (18-01-2019)
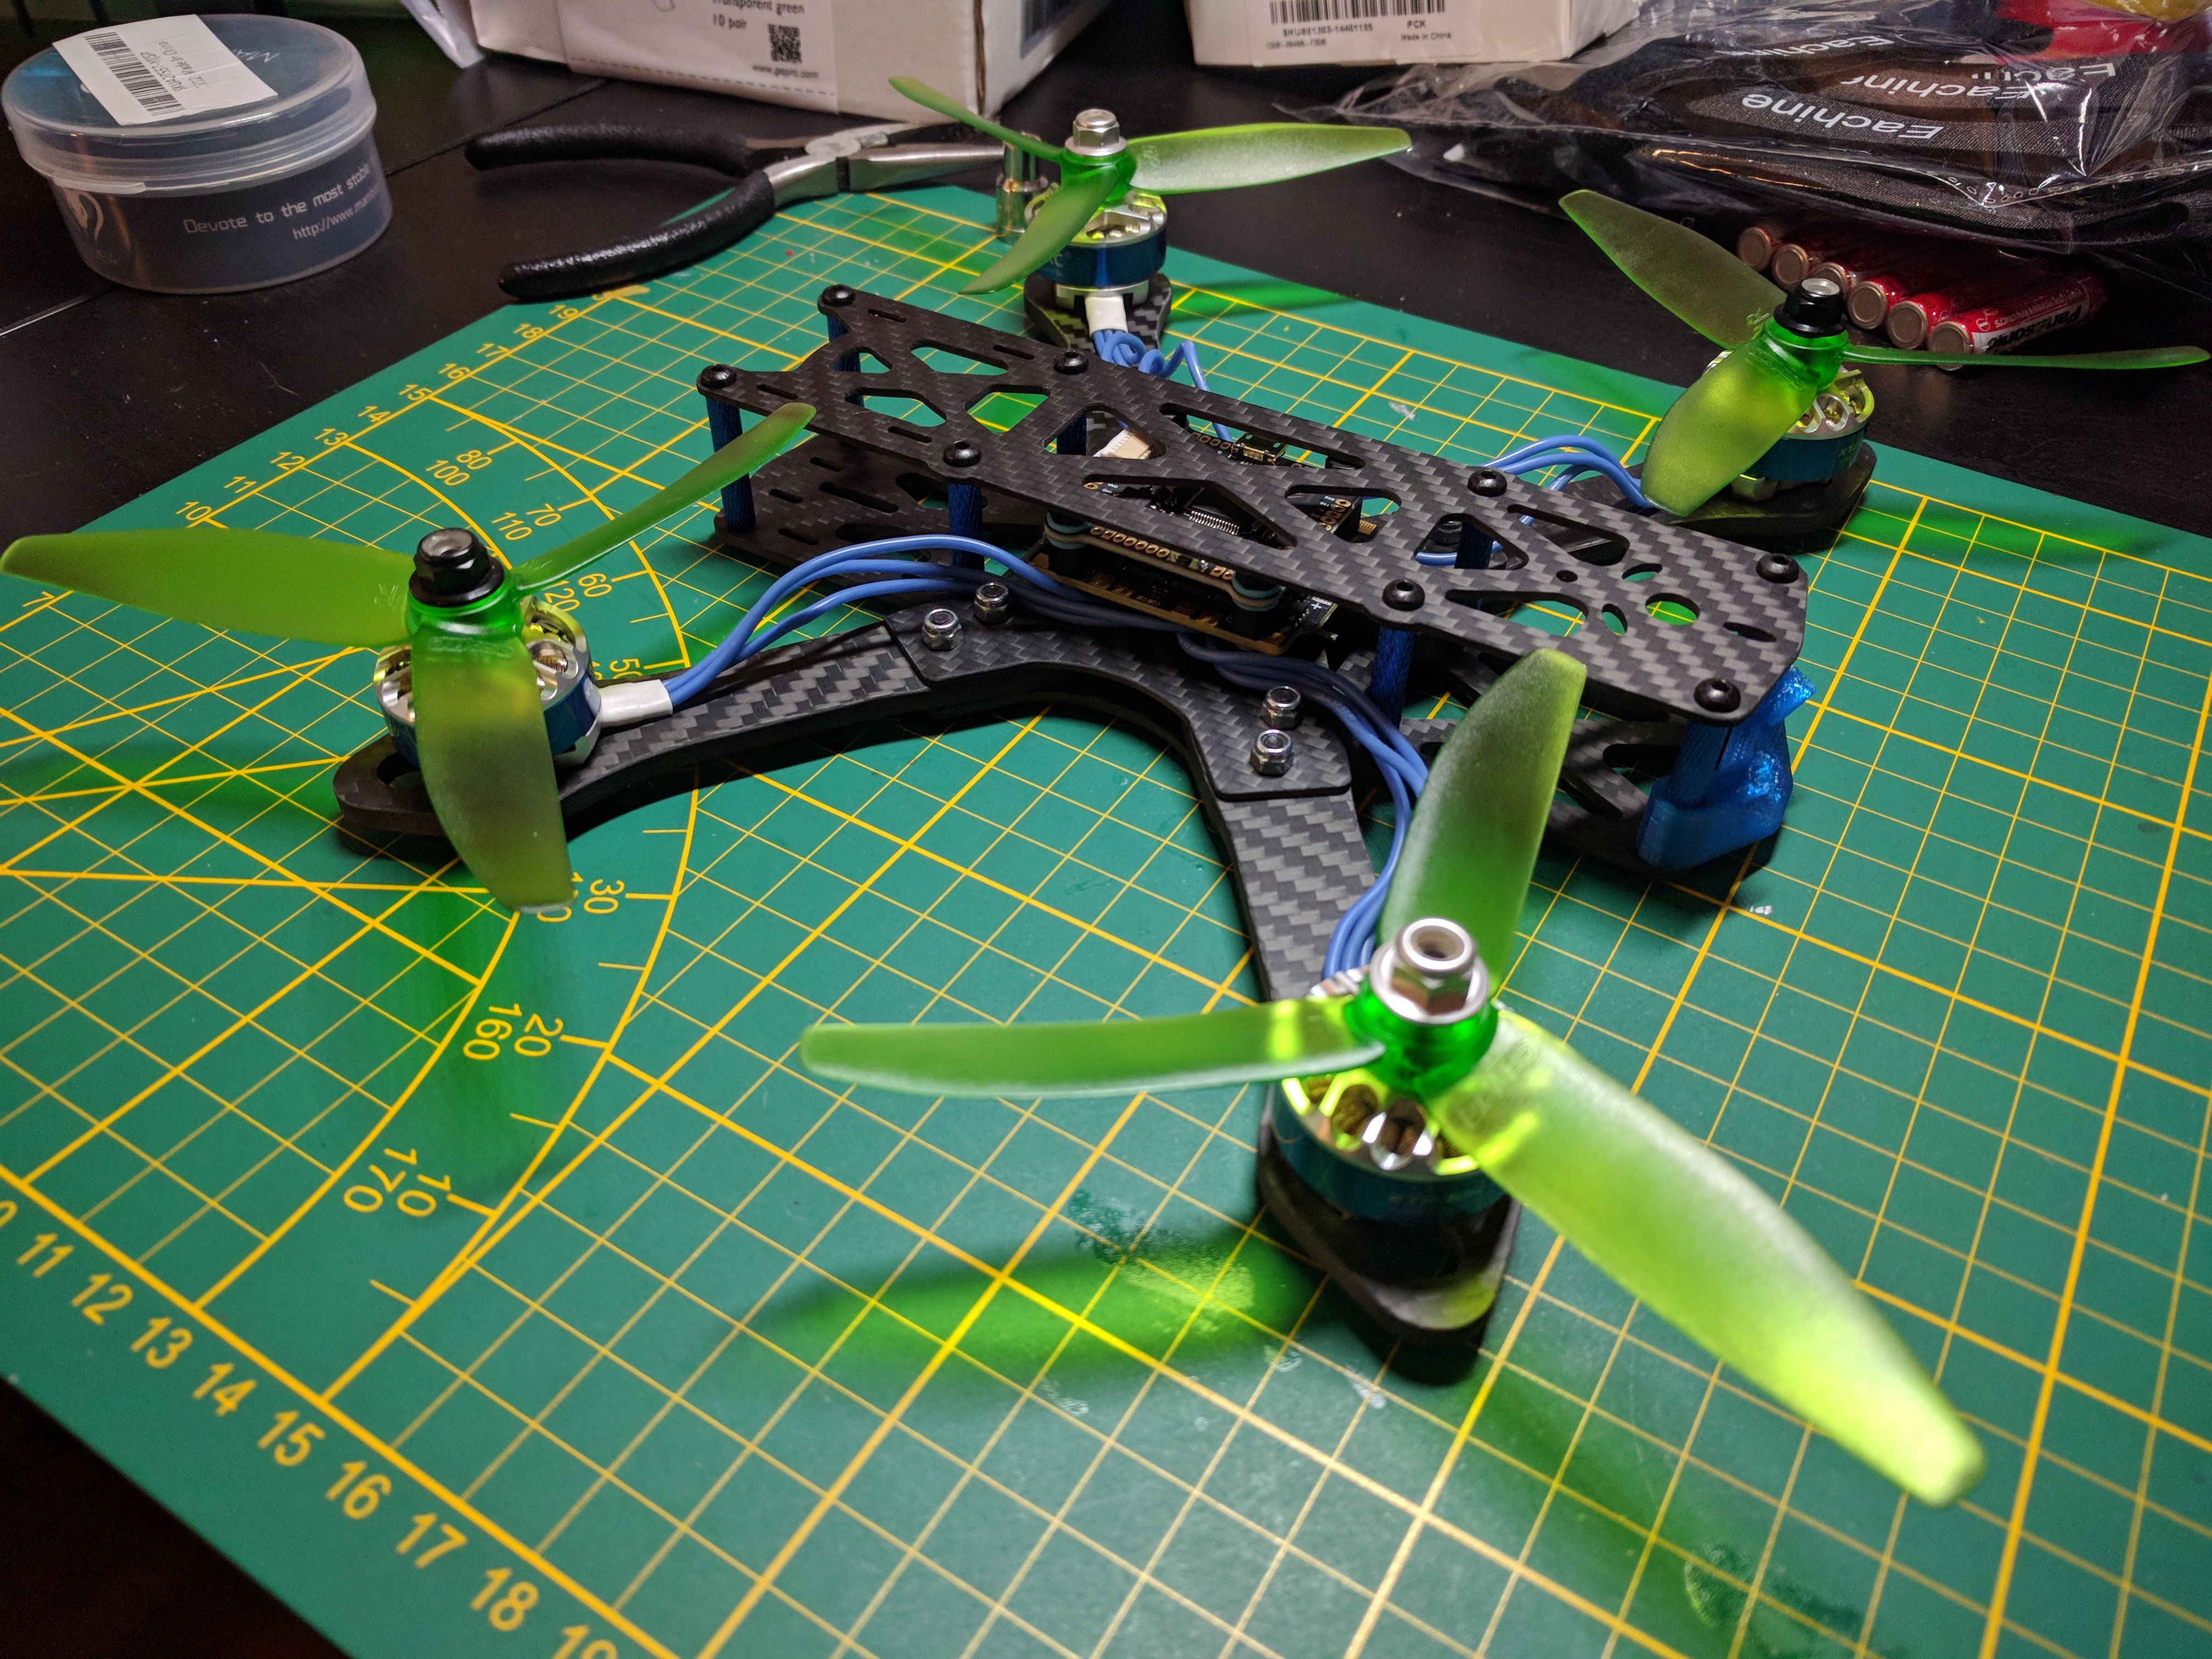
All the parts looked good. Very weird to see how small some parts really are IRL.
What I noticed was that I had made a small error while ordering. I was mostly following the Wizard killer III build by Whiffles. The thing is, I had put the camera holder in my shoppingcart, took another look at the frame pictures on banggood and thought to supersmart self "I dont need this, there are plates to hold the camera...". I just now realized why the part was in my shopping cart as the new standoffs dont fit with the standard plates hahaha. Anyways, I'll figure it out. I'll probably 3d print a new camera holder.(or use the metal mount that came with the camera...)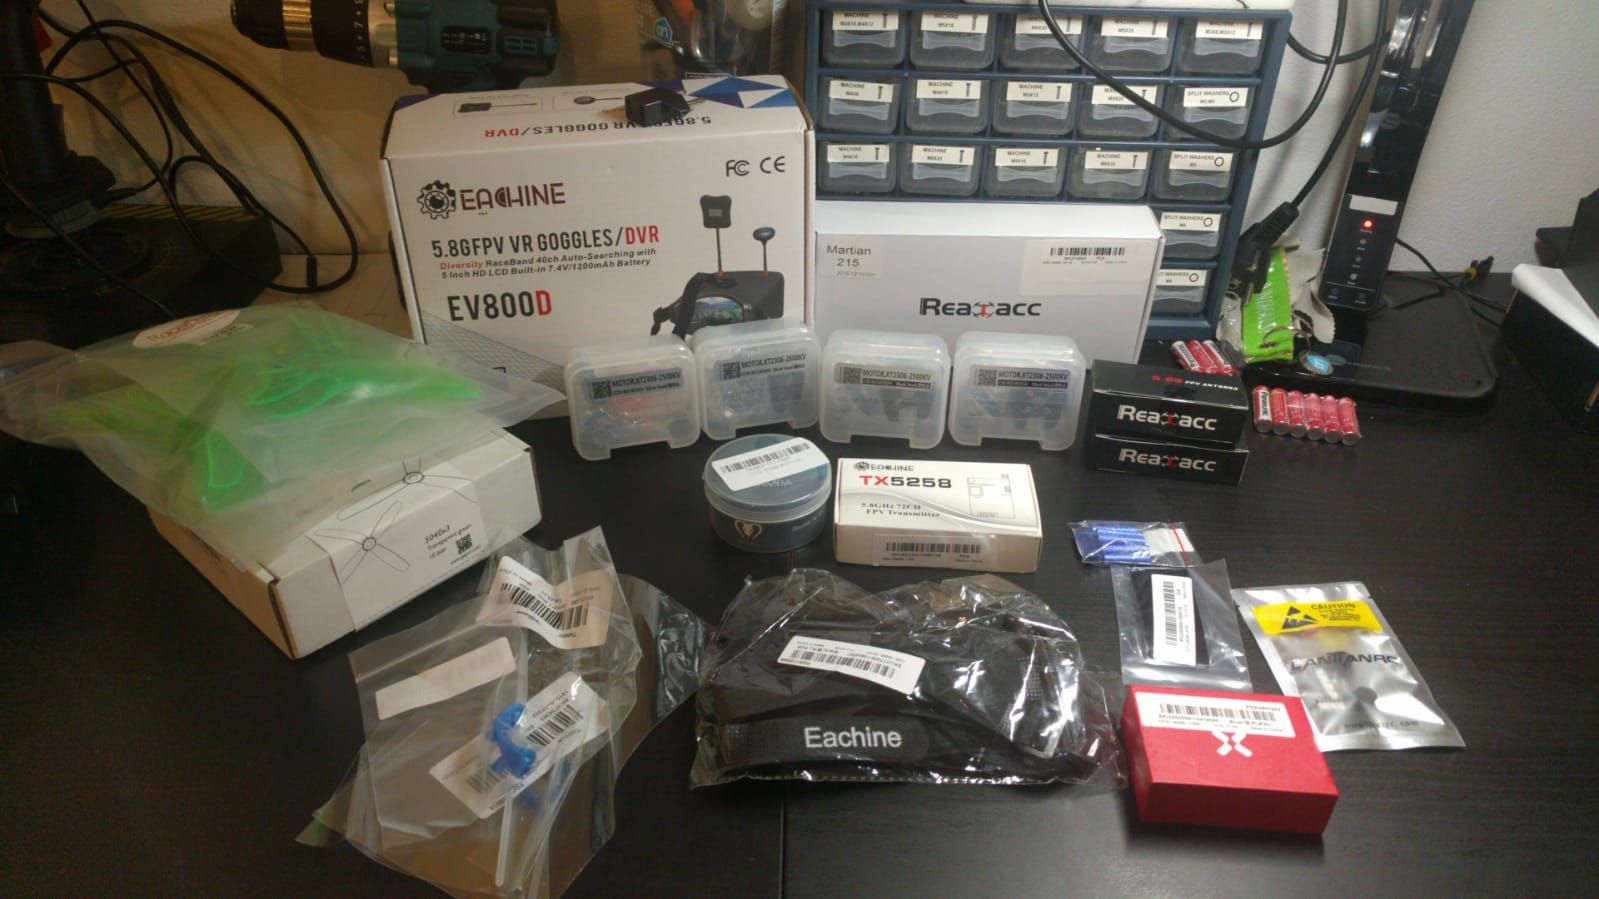
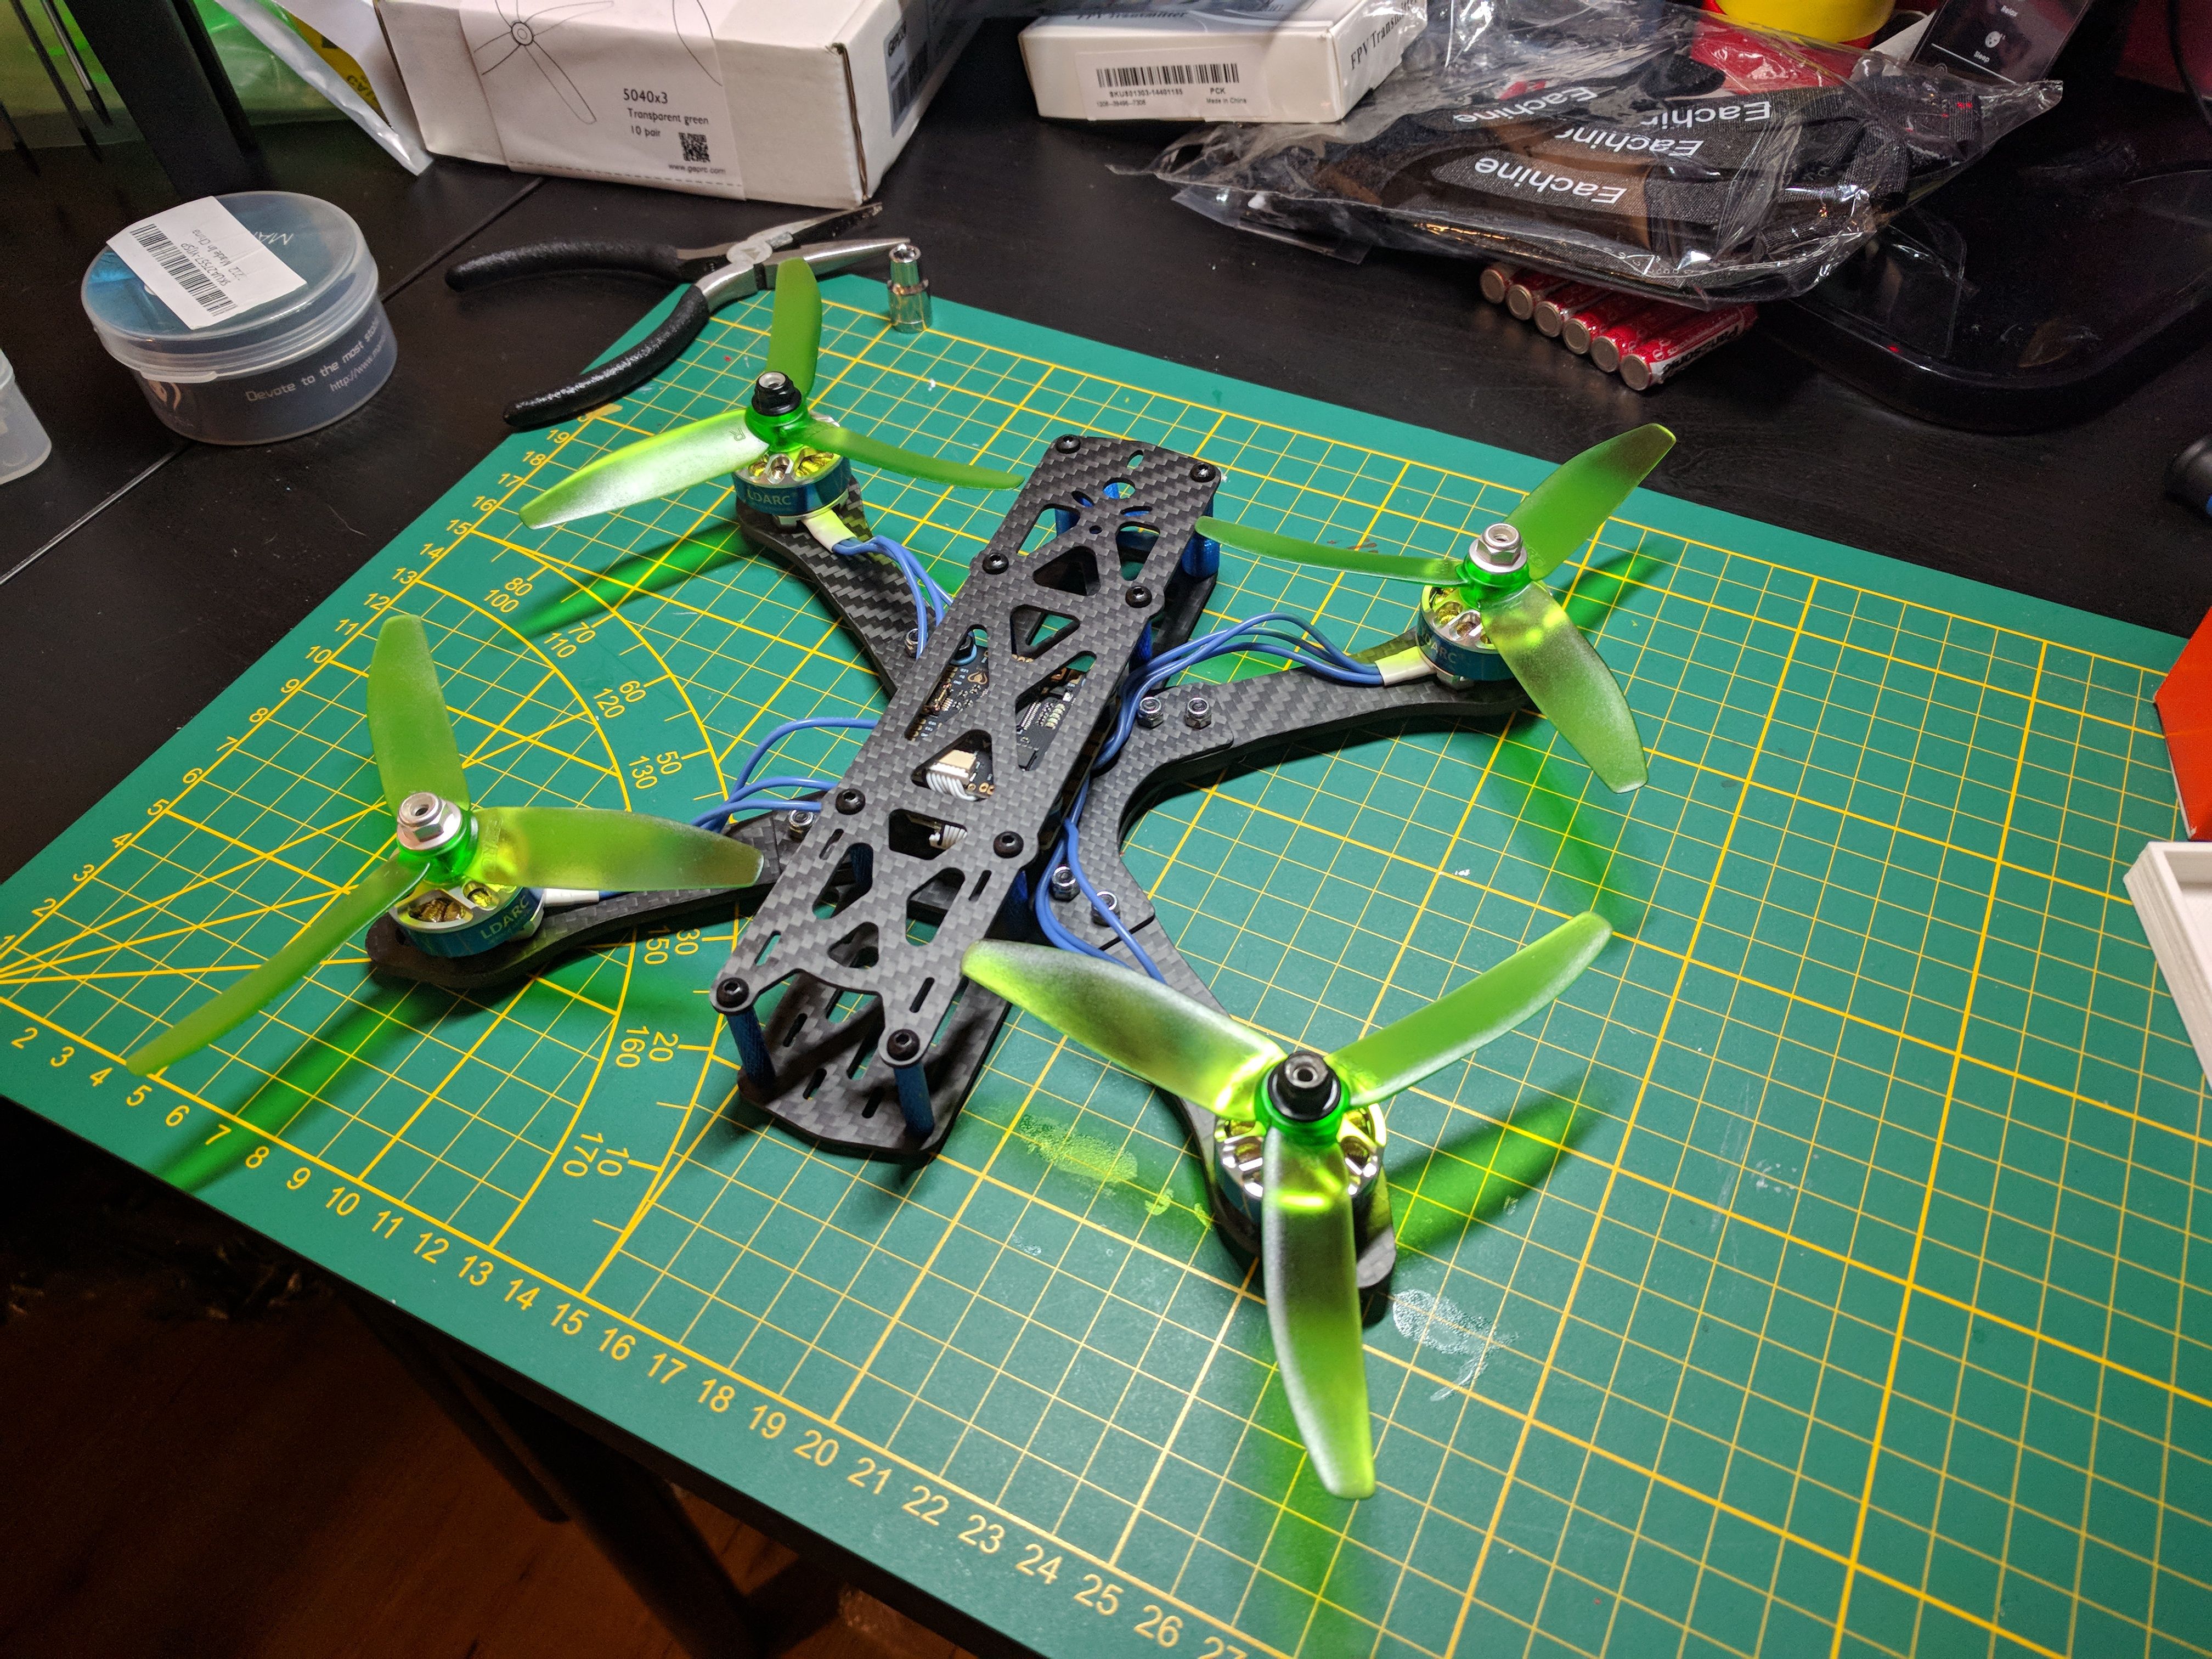
Step 2: Chamfering Carbon and dryfitting. (20-01-2019)
I chamfered the parts according to this and this guides. I did not do the CA or paint application. Might do that on a future build. I chamfered the arms, the part that goes over the arms, topplate, and the batterystrap holder.
I then proceded to dryfit the components to see just how this all fit together. I cam to the following conclusions:
- The led/buzzer tail is not going to work with the 25 mm standoffs. It would work with the stock 30 mm standoffs.
- The stack seems to just barely fit. I cannot fit the batterystrap plate above the stack. This would work with the stock 30 mm standoffs. I will try to circumvent this by 3dprinting this Battery pad.
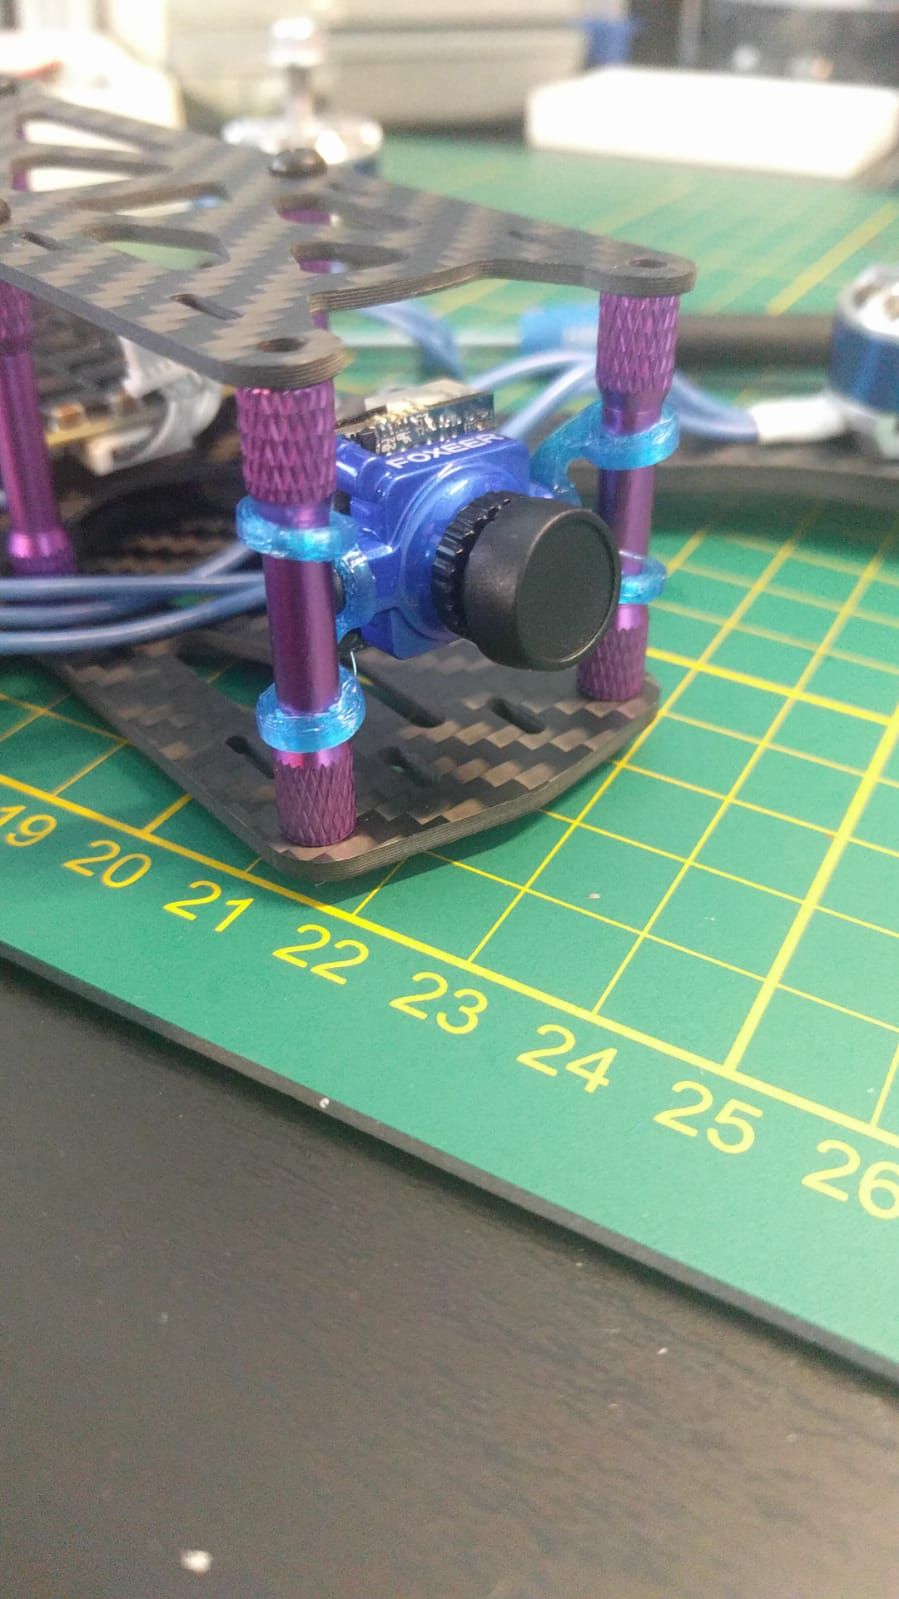
- Im not sure how one is supposed to use the tiny metal bracket to mount the FPV camera. There are no nuts deliverd with it and the screws are too short. As I do not have m2 screws i will either get those or I will probably 3d print this Camera holder. This holder will need to be shortened in height because of the 25 mm standoffs (might draw something myself instead.
- Once I mount the motors for real I will have to be carefull of the motor positioning. Wrong positioning (like both rightspinning props seem to be right now) leads them to just pass over the top plate. I think this would have hit the top plate with the 30 mm standoffs.
- I want to 3dprint a piece for the back that holds the VTX and RX. I might print this or something similar. This would remove the need for the current TPU antenna holder piece.
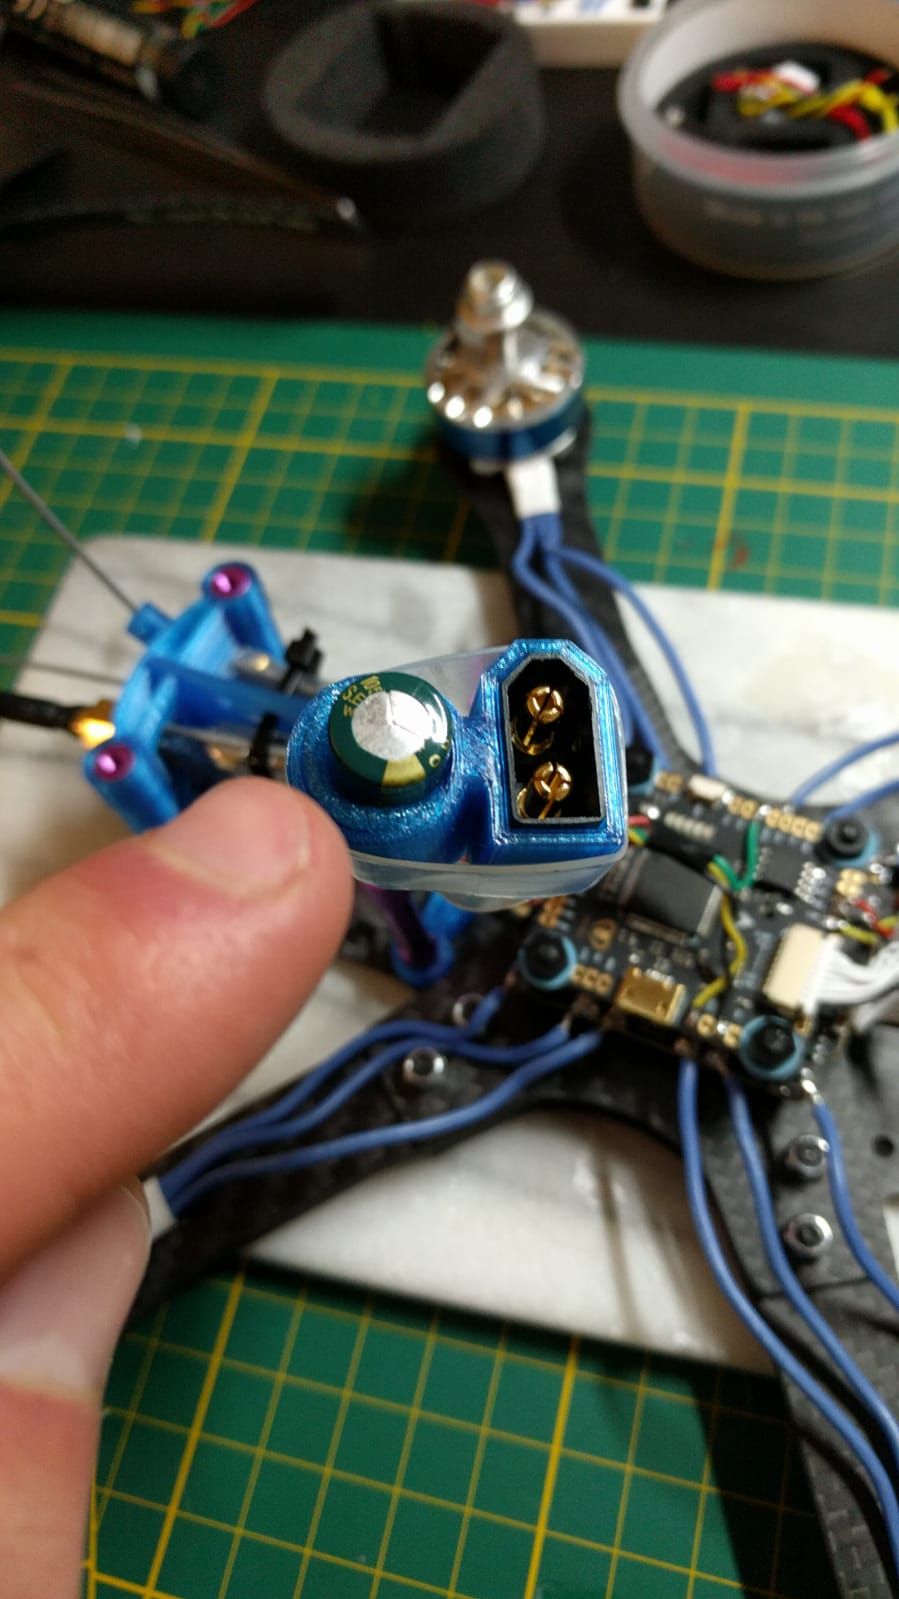
- I ordered a pigtail for the VTX antenna as this makes mounting the antenna saver and easier. (and as the current tpu holder has the antenna hole at an angle it wouldnt have worked without one anyways...).
As you can see I have learned a couple of things and made a couple of mistakes (but this means you wont have to!). Im now waiting for my treadlocker and 63/37 solder to arrive to continue. Im still debating if I should look to get some sleeving for the motor wires. I might just tape them up when I have soldered them.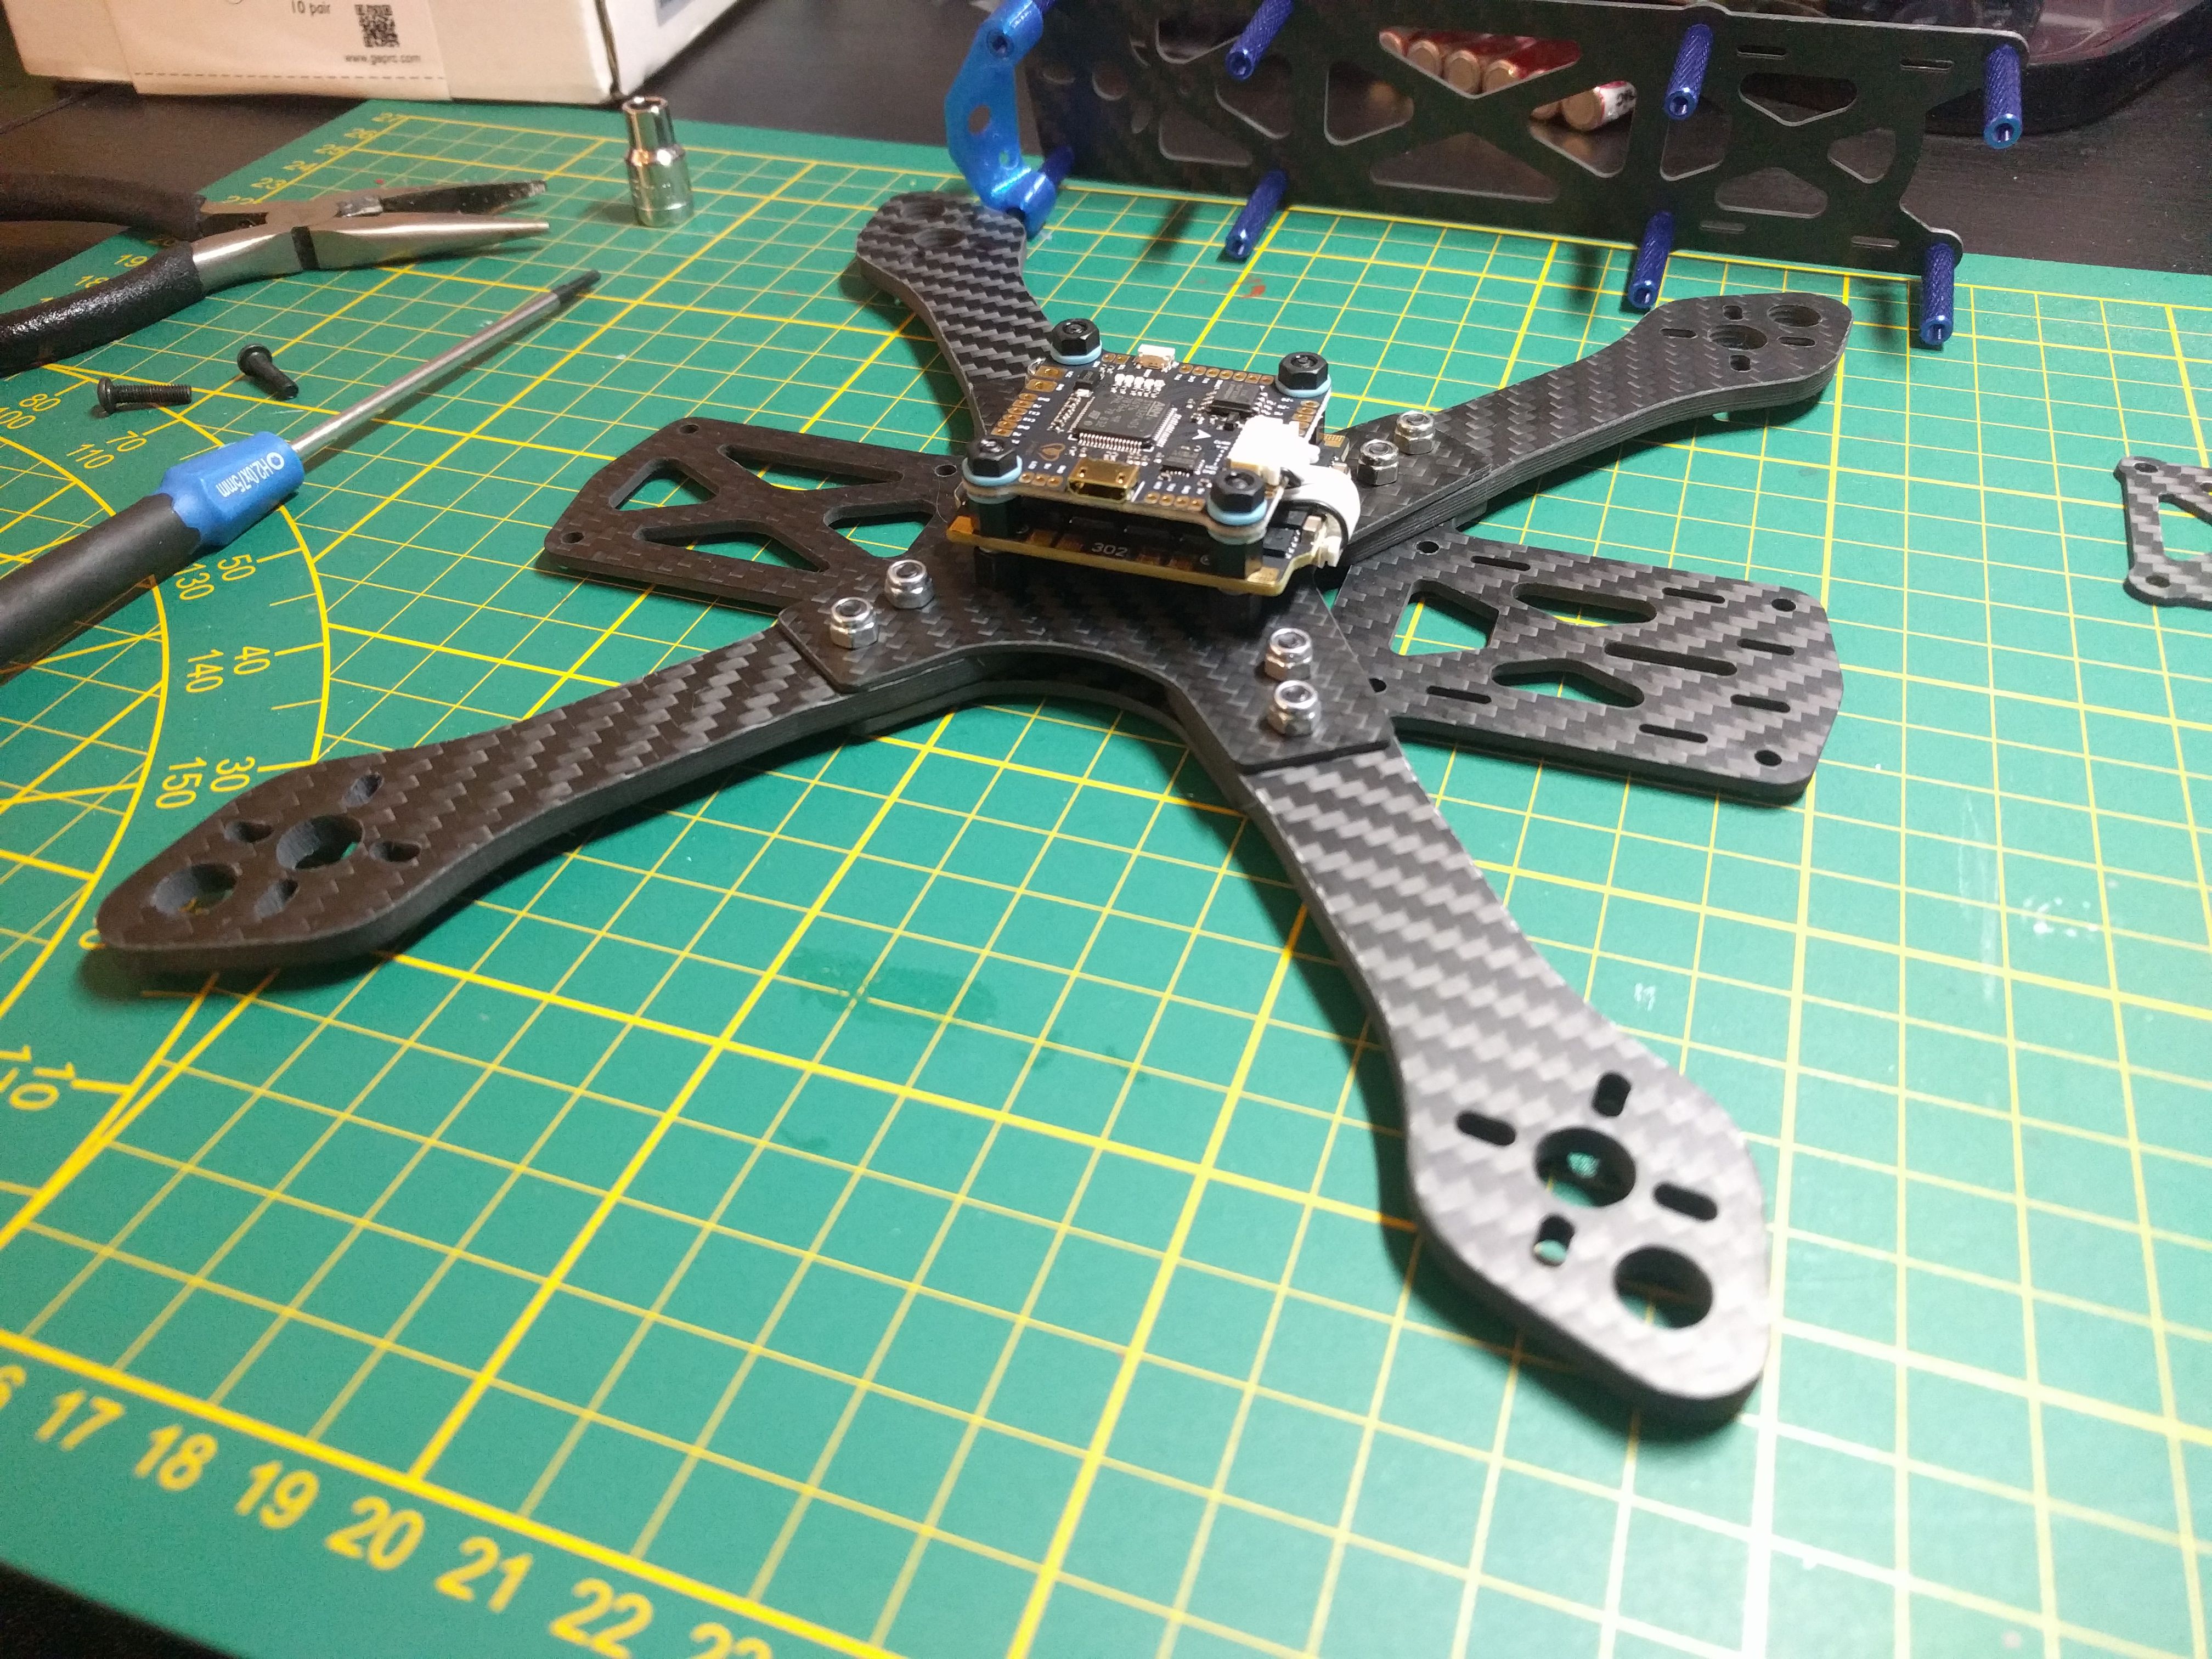
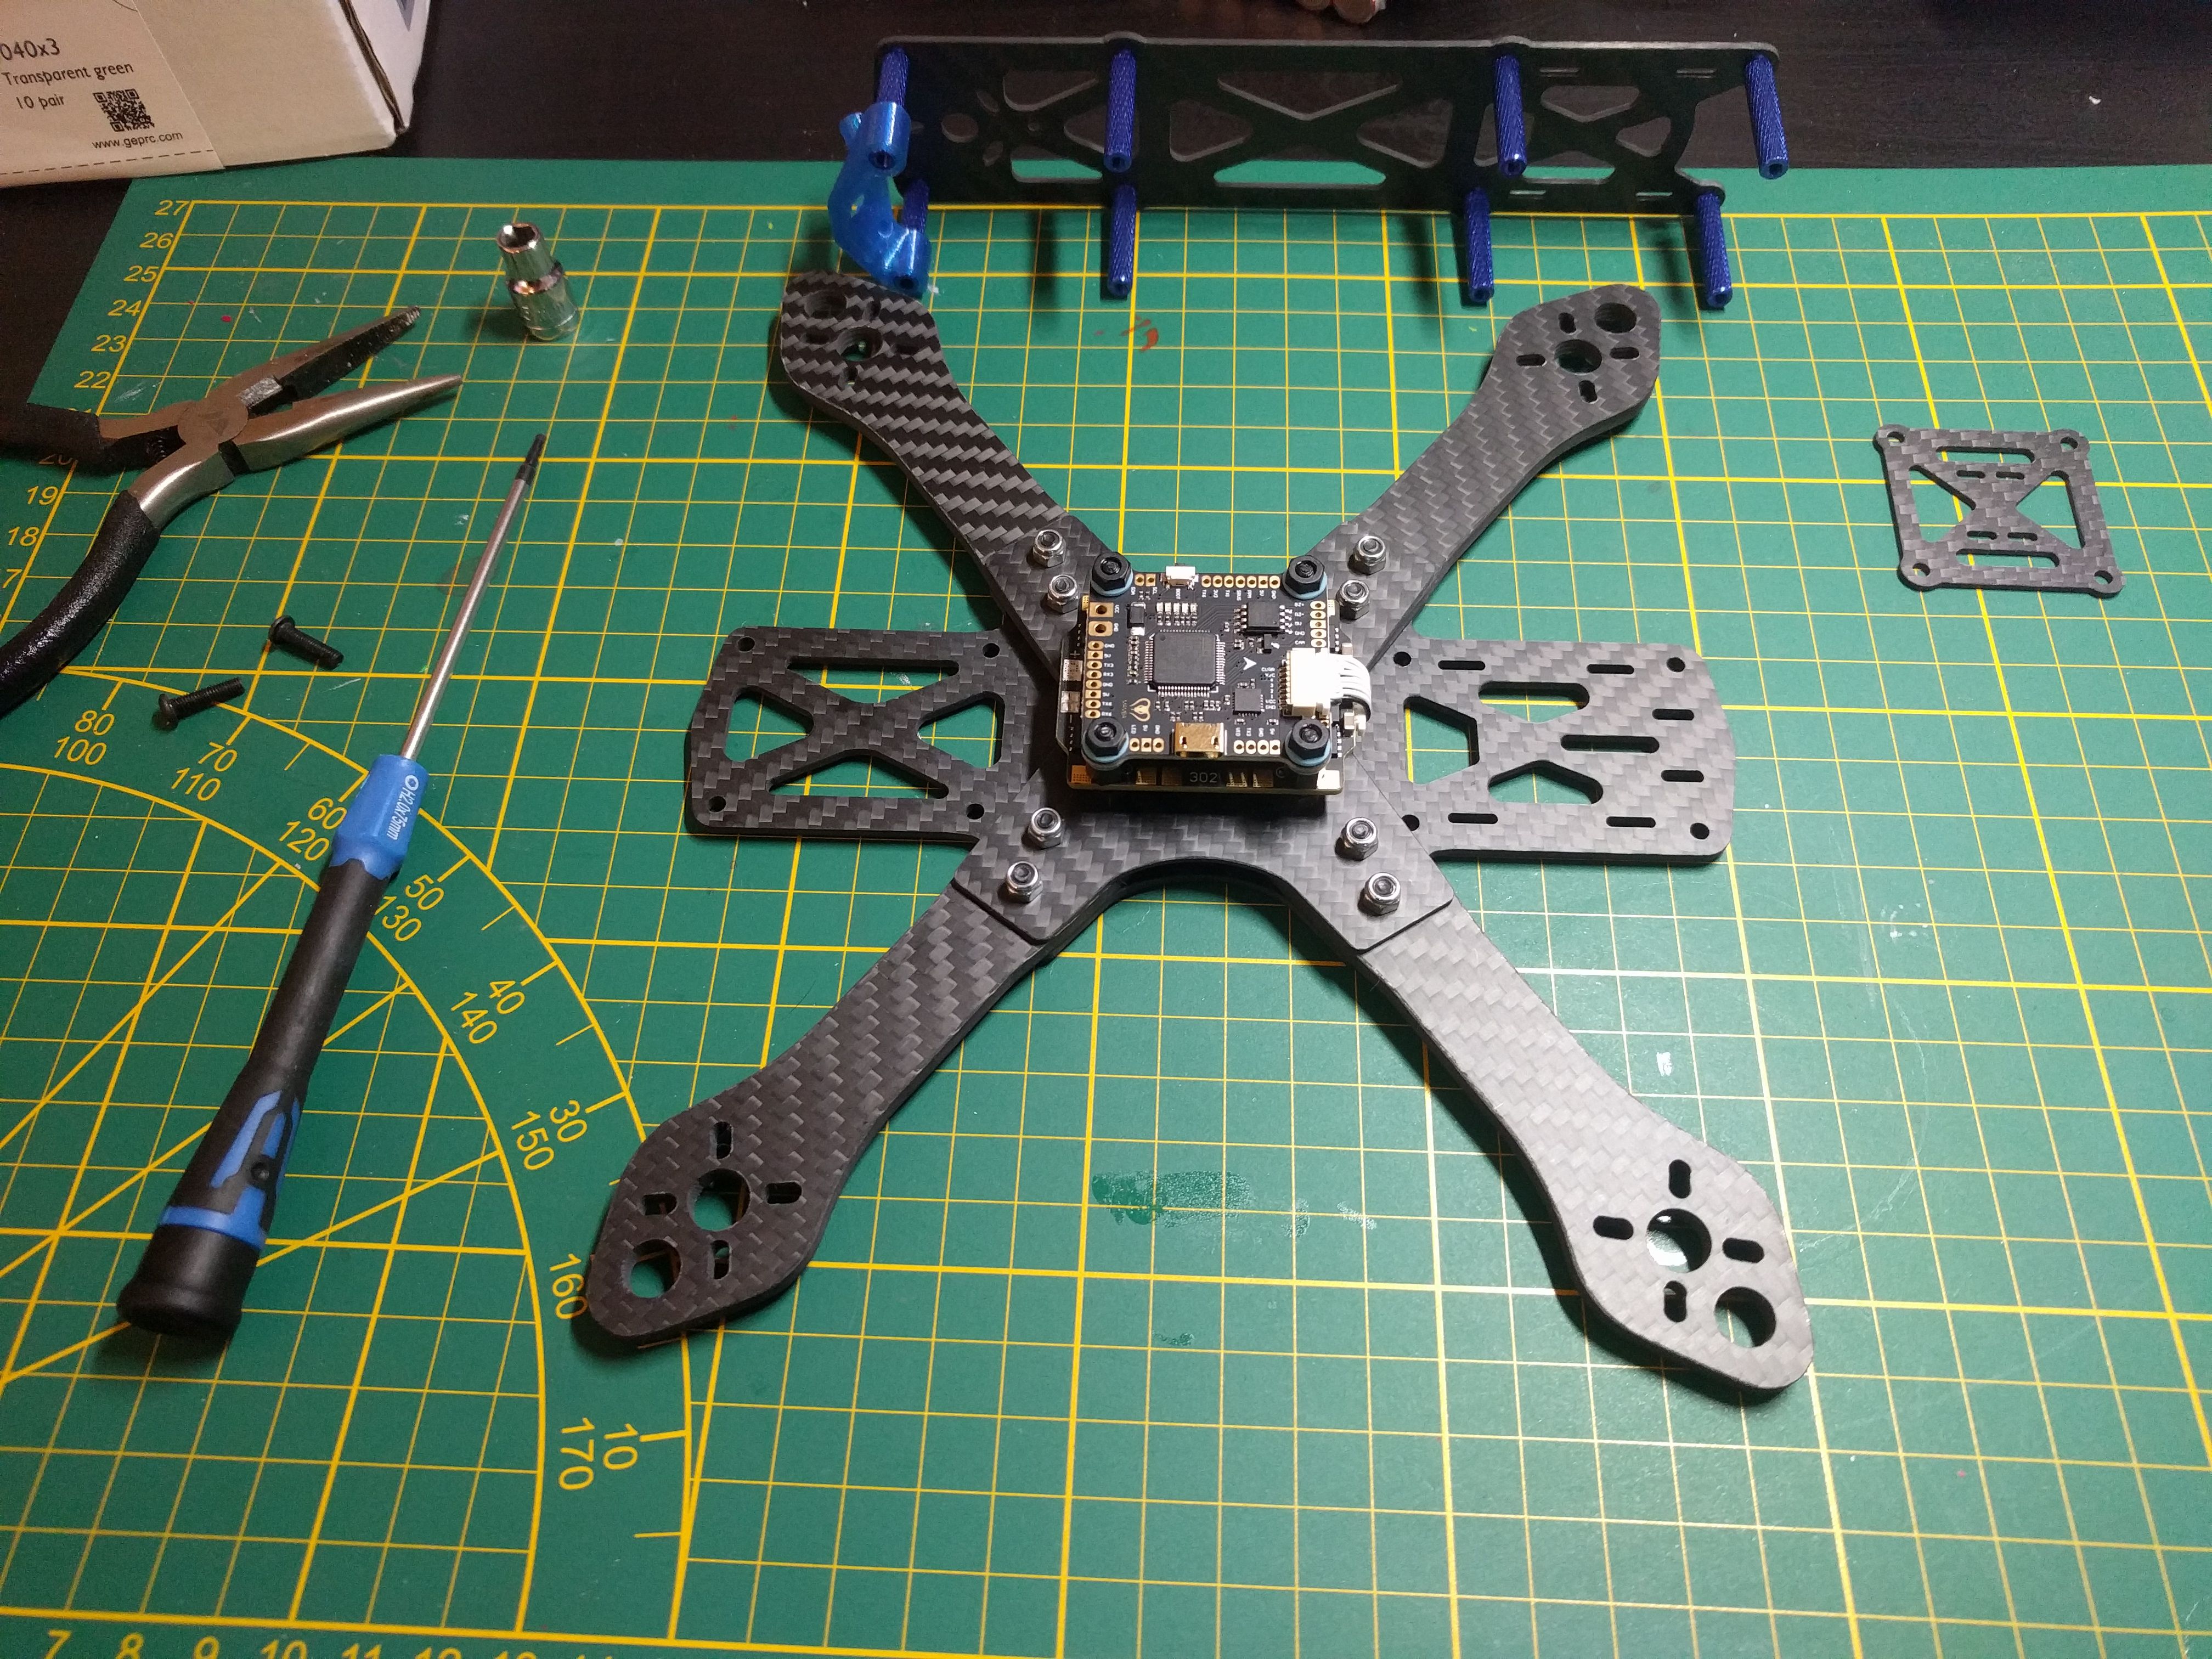


Step 3: TPU parts and part locations. (26-01-2019)
Well I finally got the solder in and I had ordered some TPU filament to give printing those parts a shot on my Creality Ender 3.
I tried to tin the ESC with my old soldering stations (very cheap old one from the Lidl) but that wasnt working at all. The tip is far too damaged and far too large to be usefull. Also the temperature selection is far from accurate and i dont feel like its reaching/keeping the right temperature. Decided to order a new soldering station so that should come in somewhere this week.
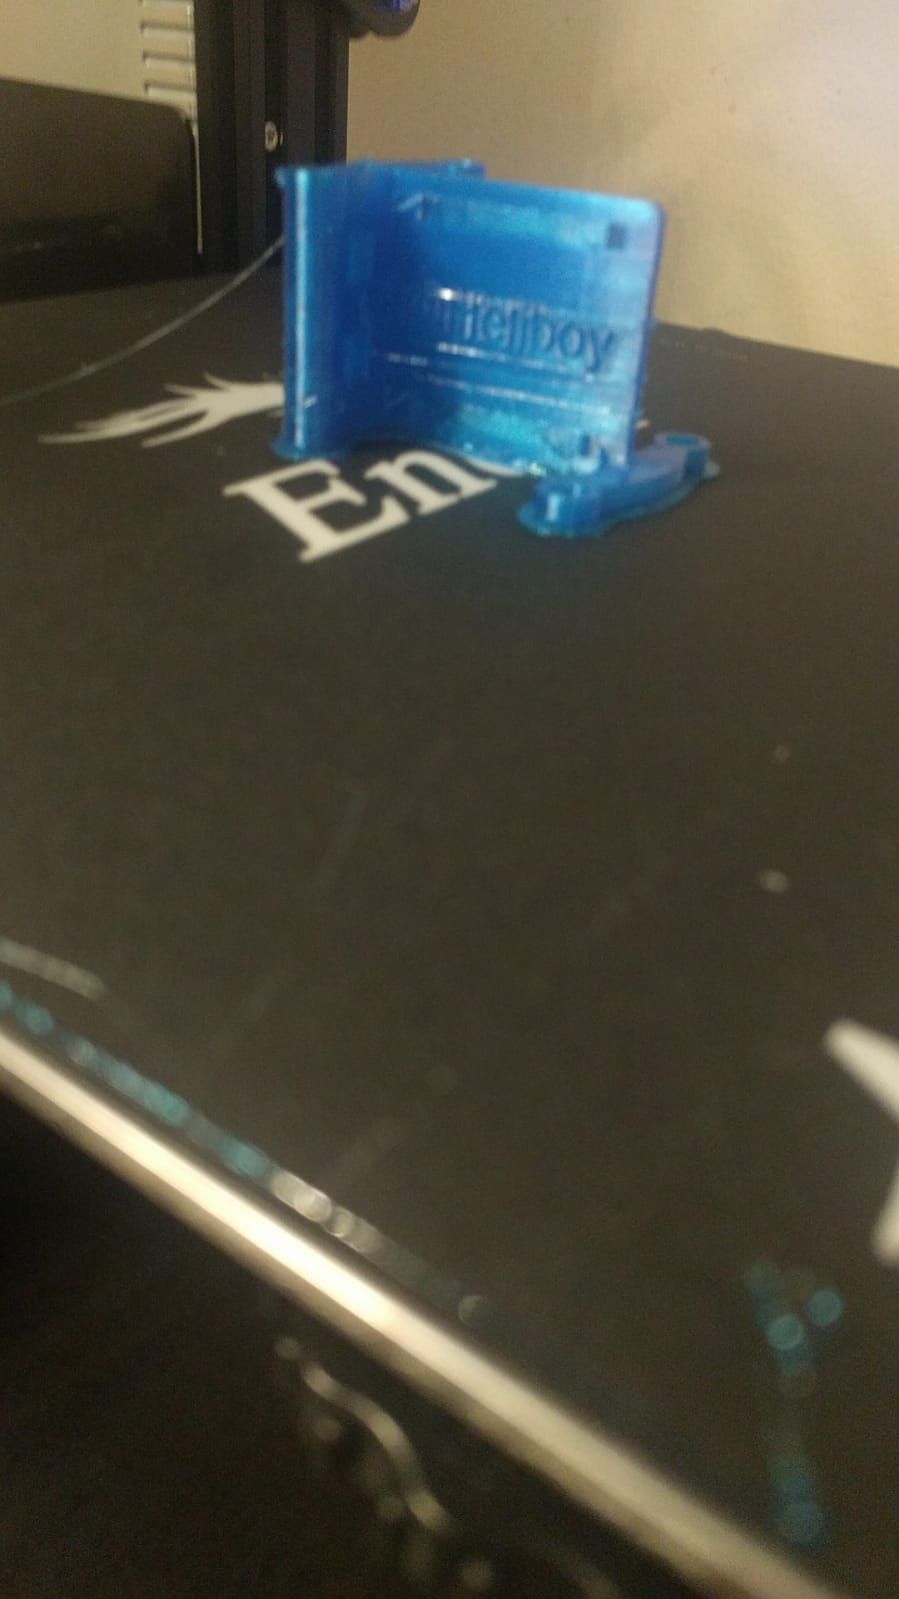
What I did instead was determine where to place the VTX and RX. I had been debating this for awhile now and eventually decided that I would go back to the standard 30mm(correction 35 mm) standoffs. This would give me the room I need to neatly place the VTX and RX. I used the Martian 2 radio tray by Heliboy. I tried making something myself, but this seemed like such a nice option that I wanted to try it.
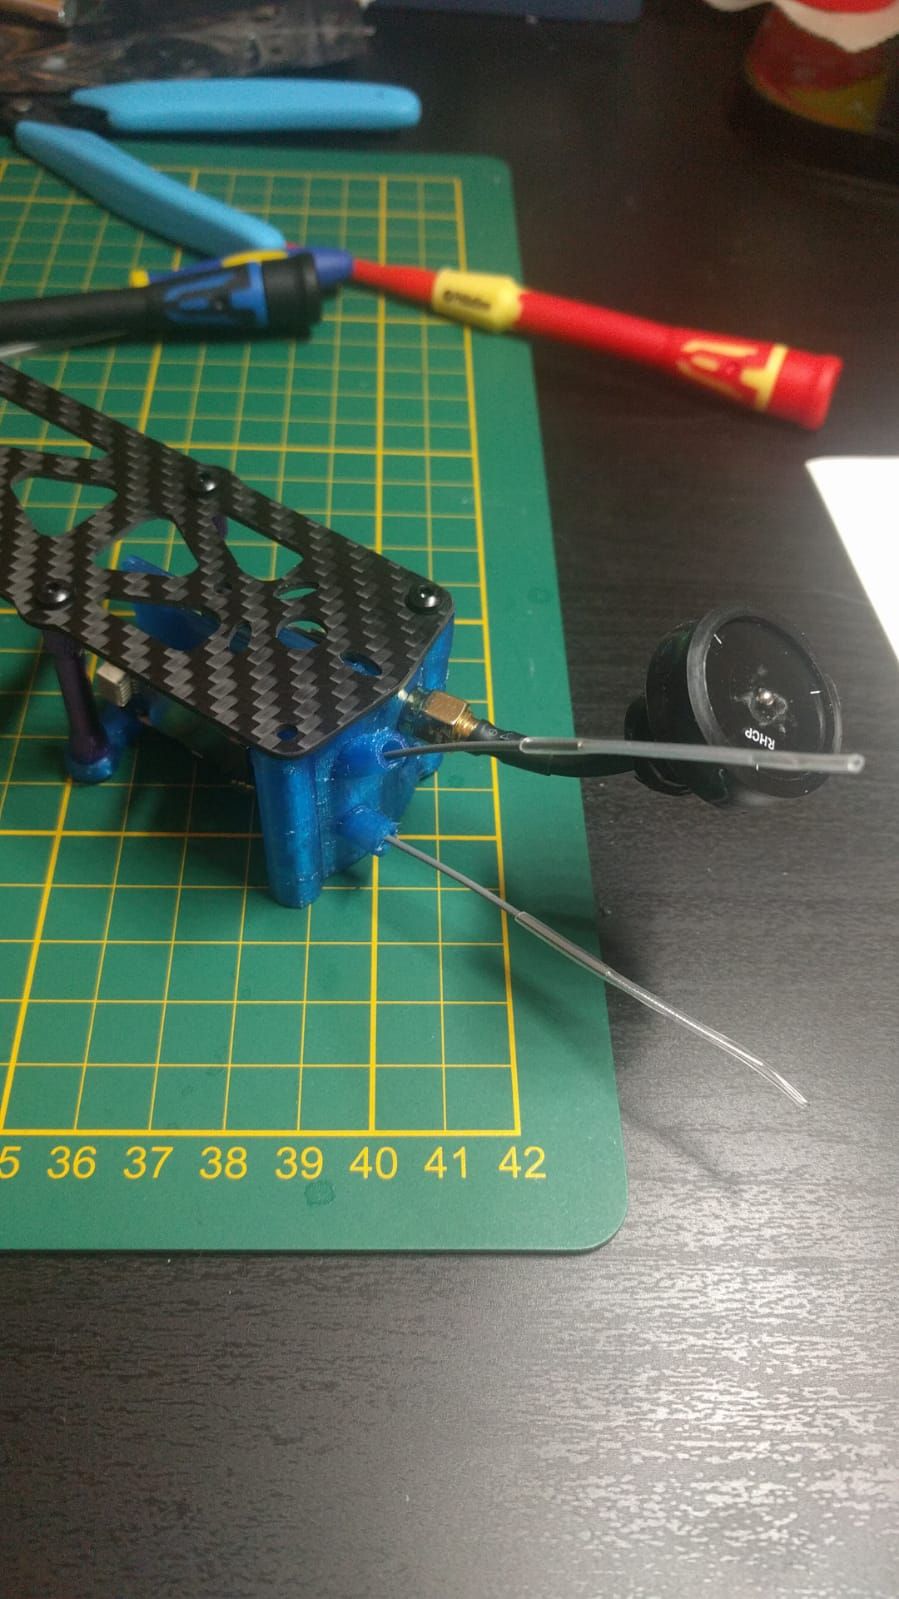
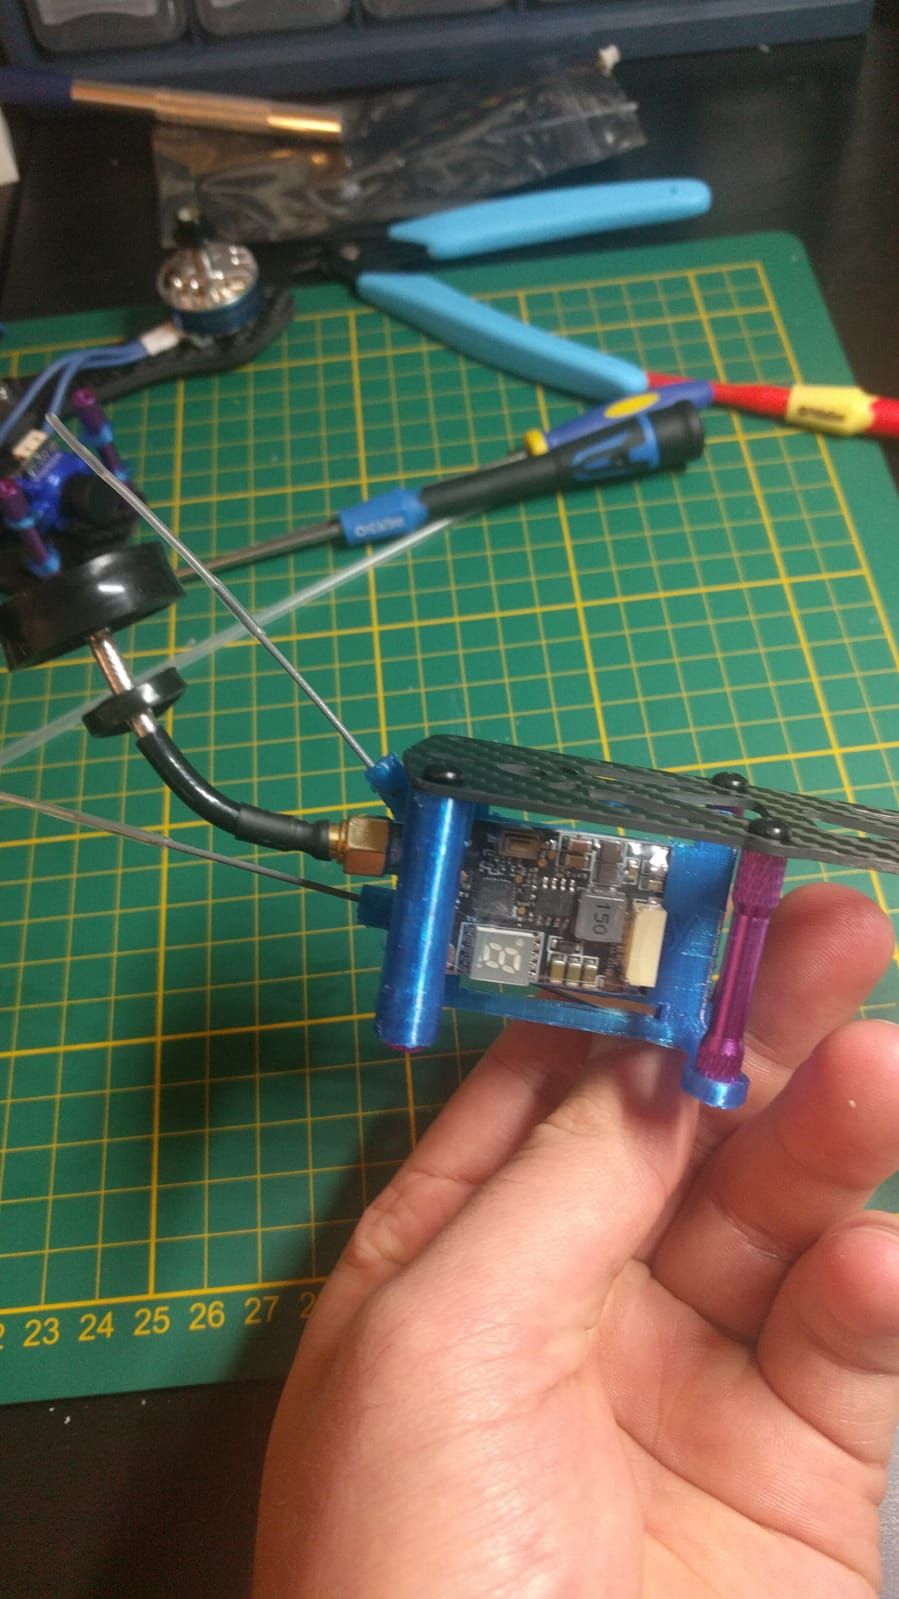
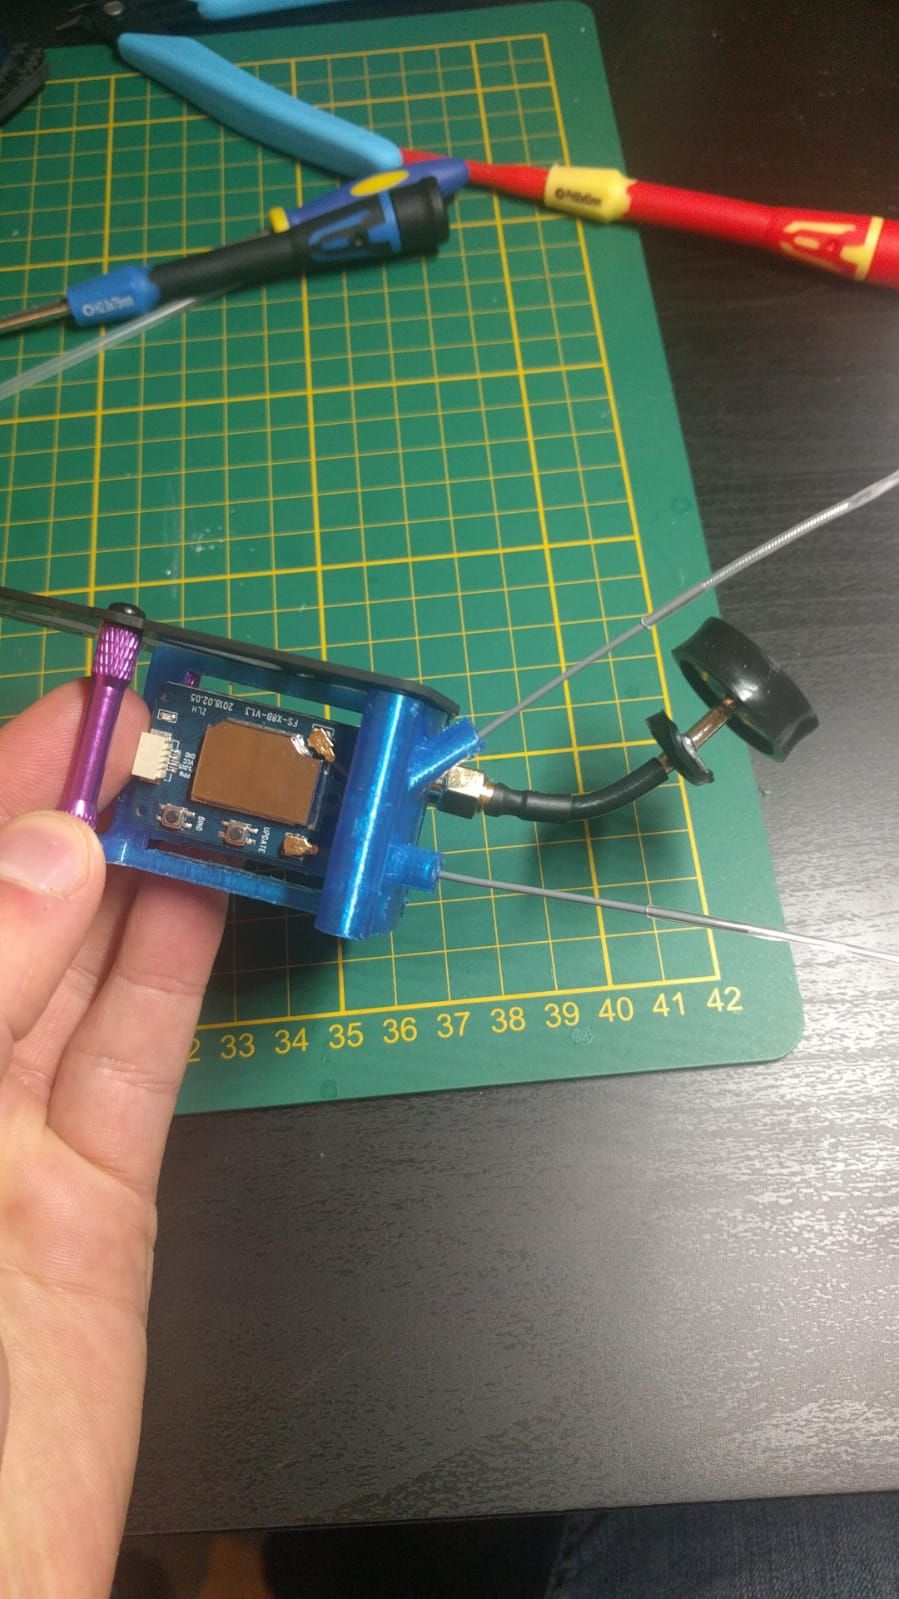
It came out pretty good! Once i wire the Rx I will heatshrink it and tyrap both together to the plate. The Rx antenna will receive an antenna tube (once i figure out how to get them in there... I seems a bit tight cause of the clear part on the antenna...)
I also printed the camera mounts (this was actually my first TPU print ever!).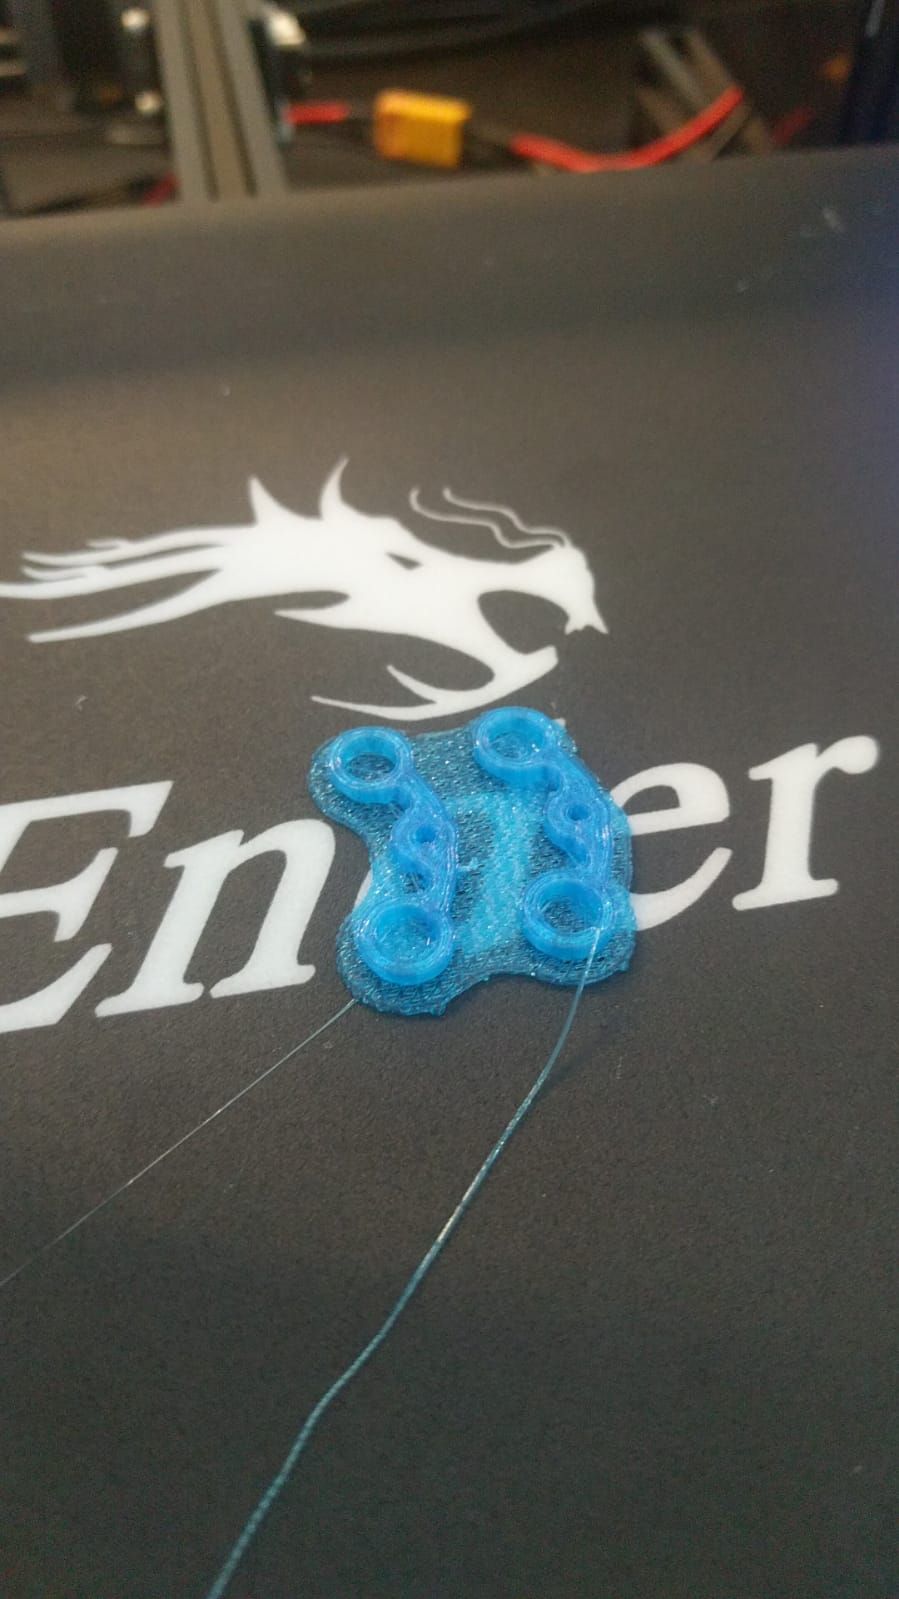

So to continue I will have to wait for my new soldering station to arrive. I have also ordered some new 30 mm standoffs...
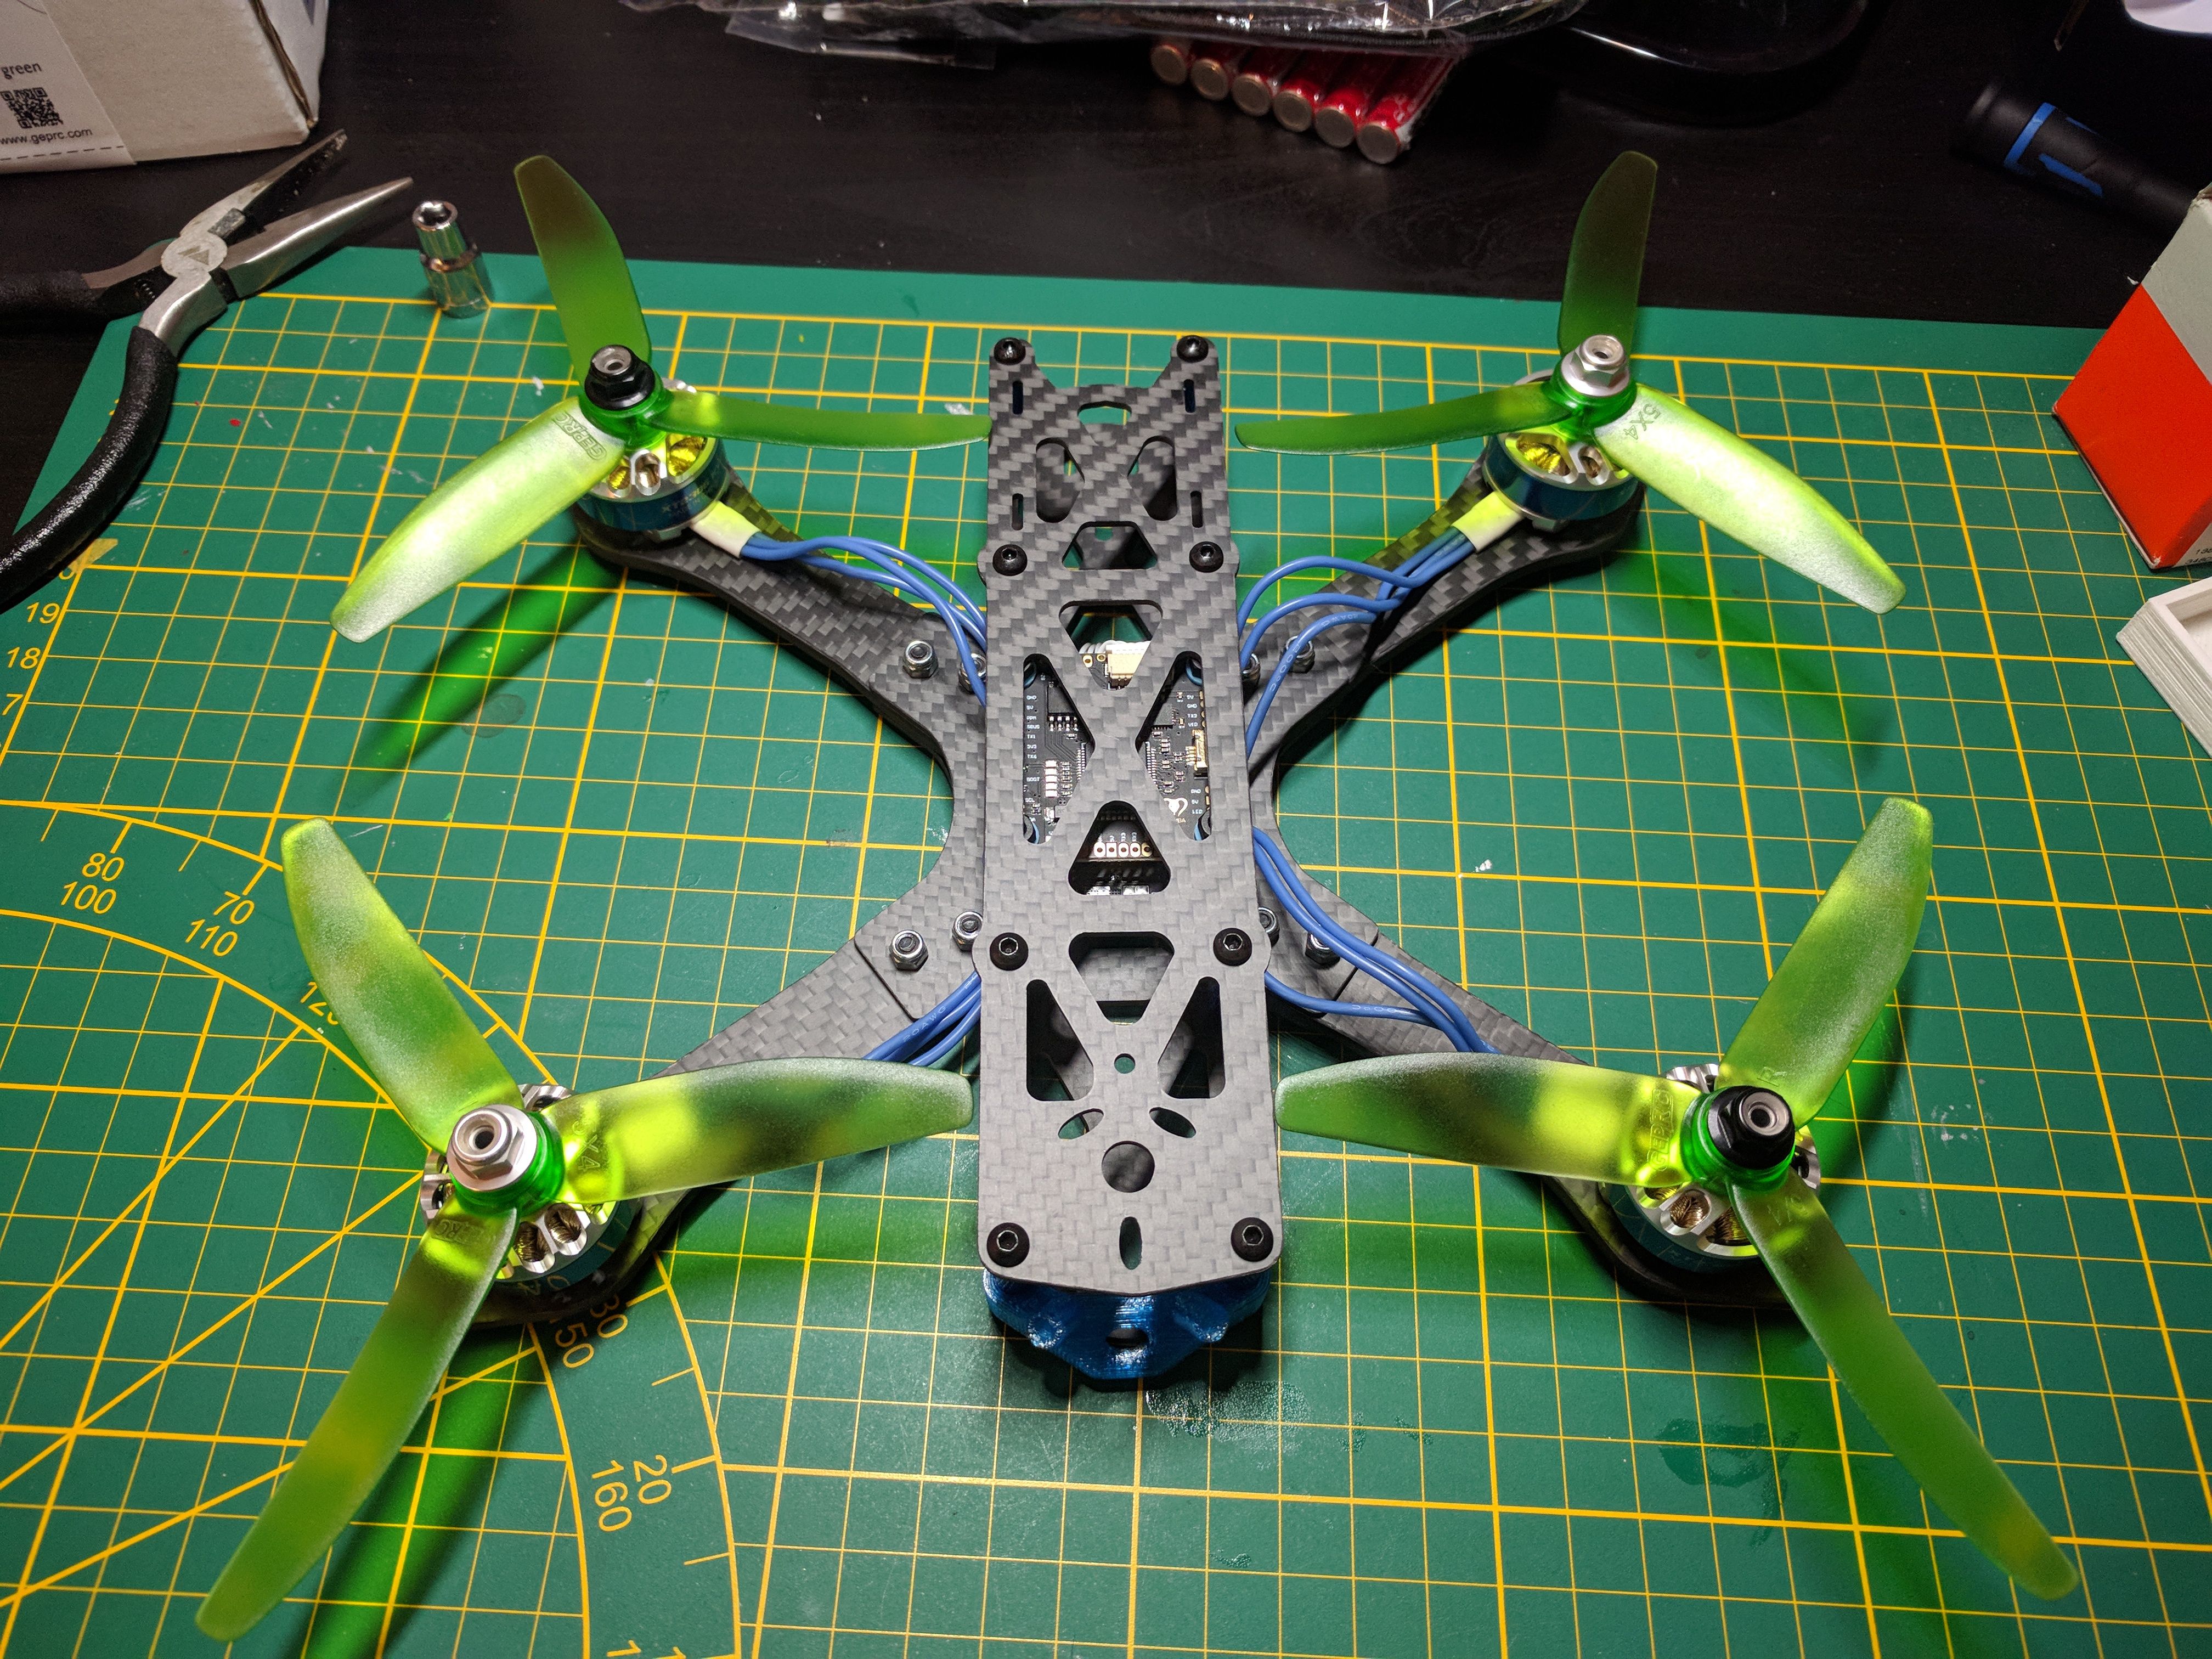
Step 4: Soldering and finishing. (29-01-2019 > 02-02-2019)
Got my new soldering station in! Went to work immediatly. Then i found out that its not as easy as it looks haha. It took me a LONG time to get all the motor wires and the XT60+wire soldered up. Eventually it worked. I added the capacitor to the XT60 with a nice TPU print and finished the rest of the soldering throughout the week following this video to verify my own thoughts on what should go where.
Then came to moment to test it for continuity and with the satisfying silence i went to plug in the battery.
Tududu du POOF!
The capacitor blew up. Apparently i solderd that on the wrong way... Not to hard considering there were no + and - markings on it and I strongly believe(but i could def. be wrong) that the negative was the longer of the 2 wires on this capacitor... Anyways, luckily nothing else seems to have been damaged. I have now finished it and am waiting for the new capacitor to turn up(a 1000uf instead of the 470uf that came with it). The rest is now done and I have done the full Betaflight setup following this video by Joshua Bardwell.
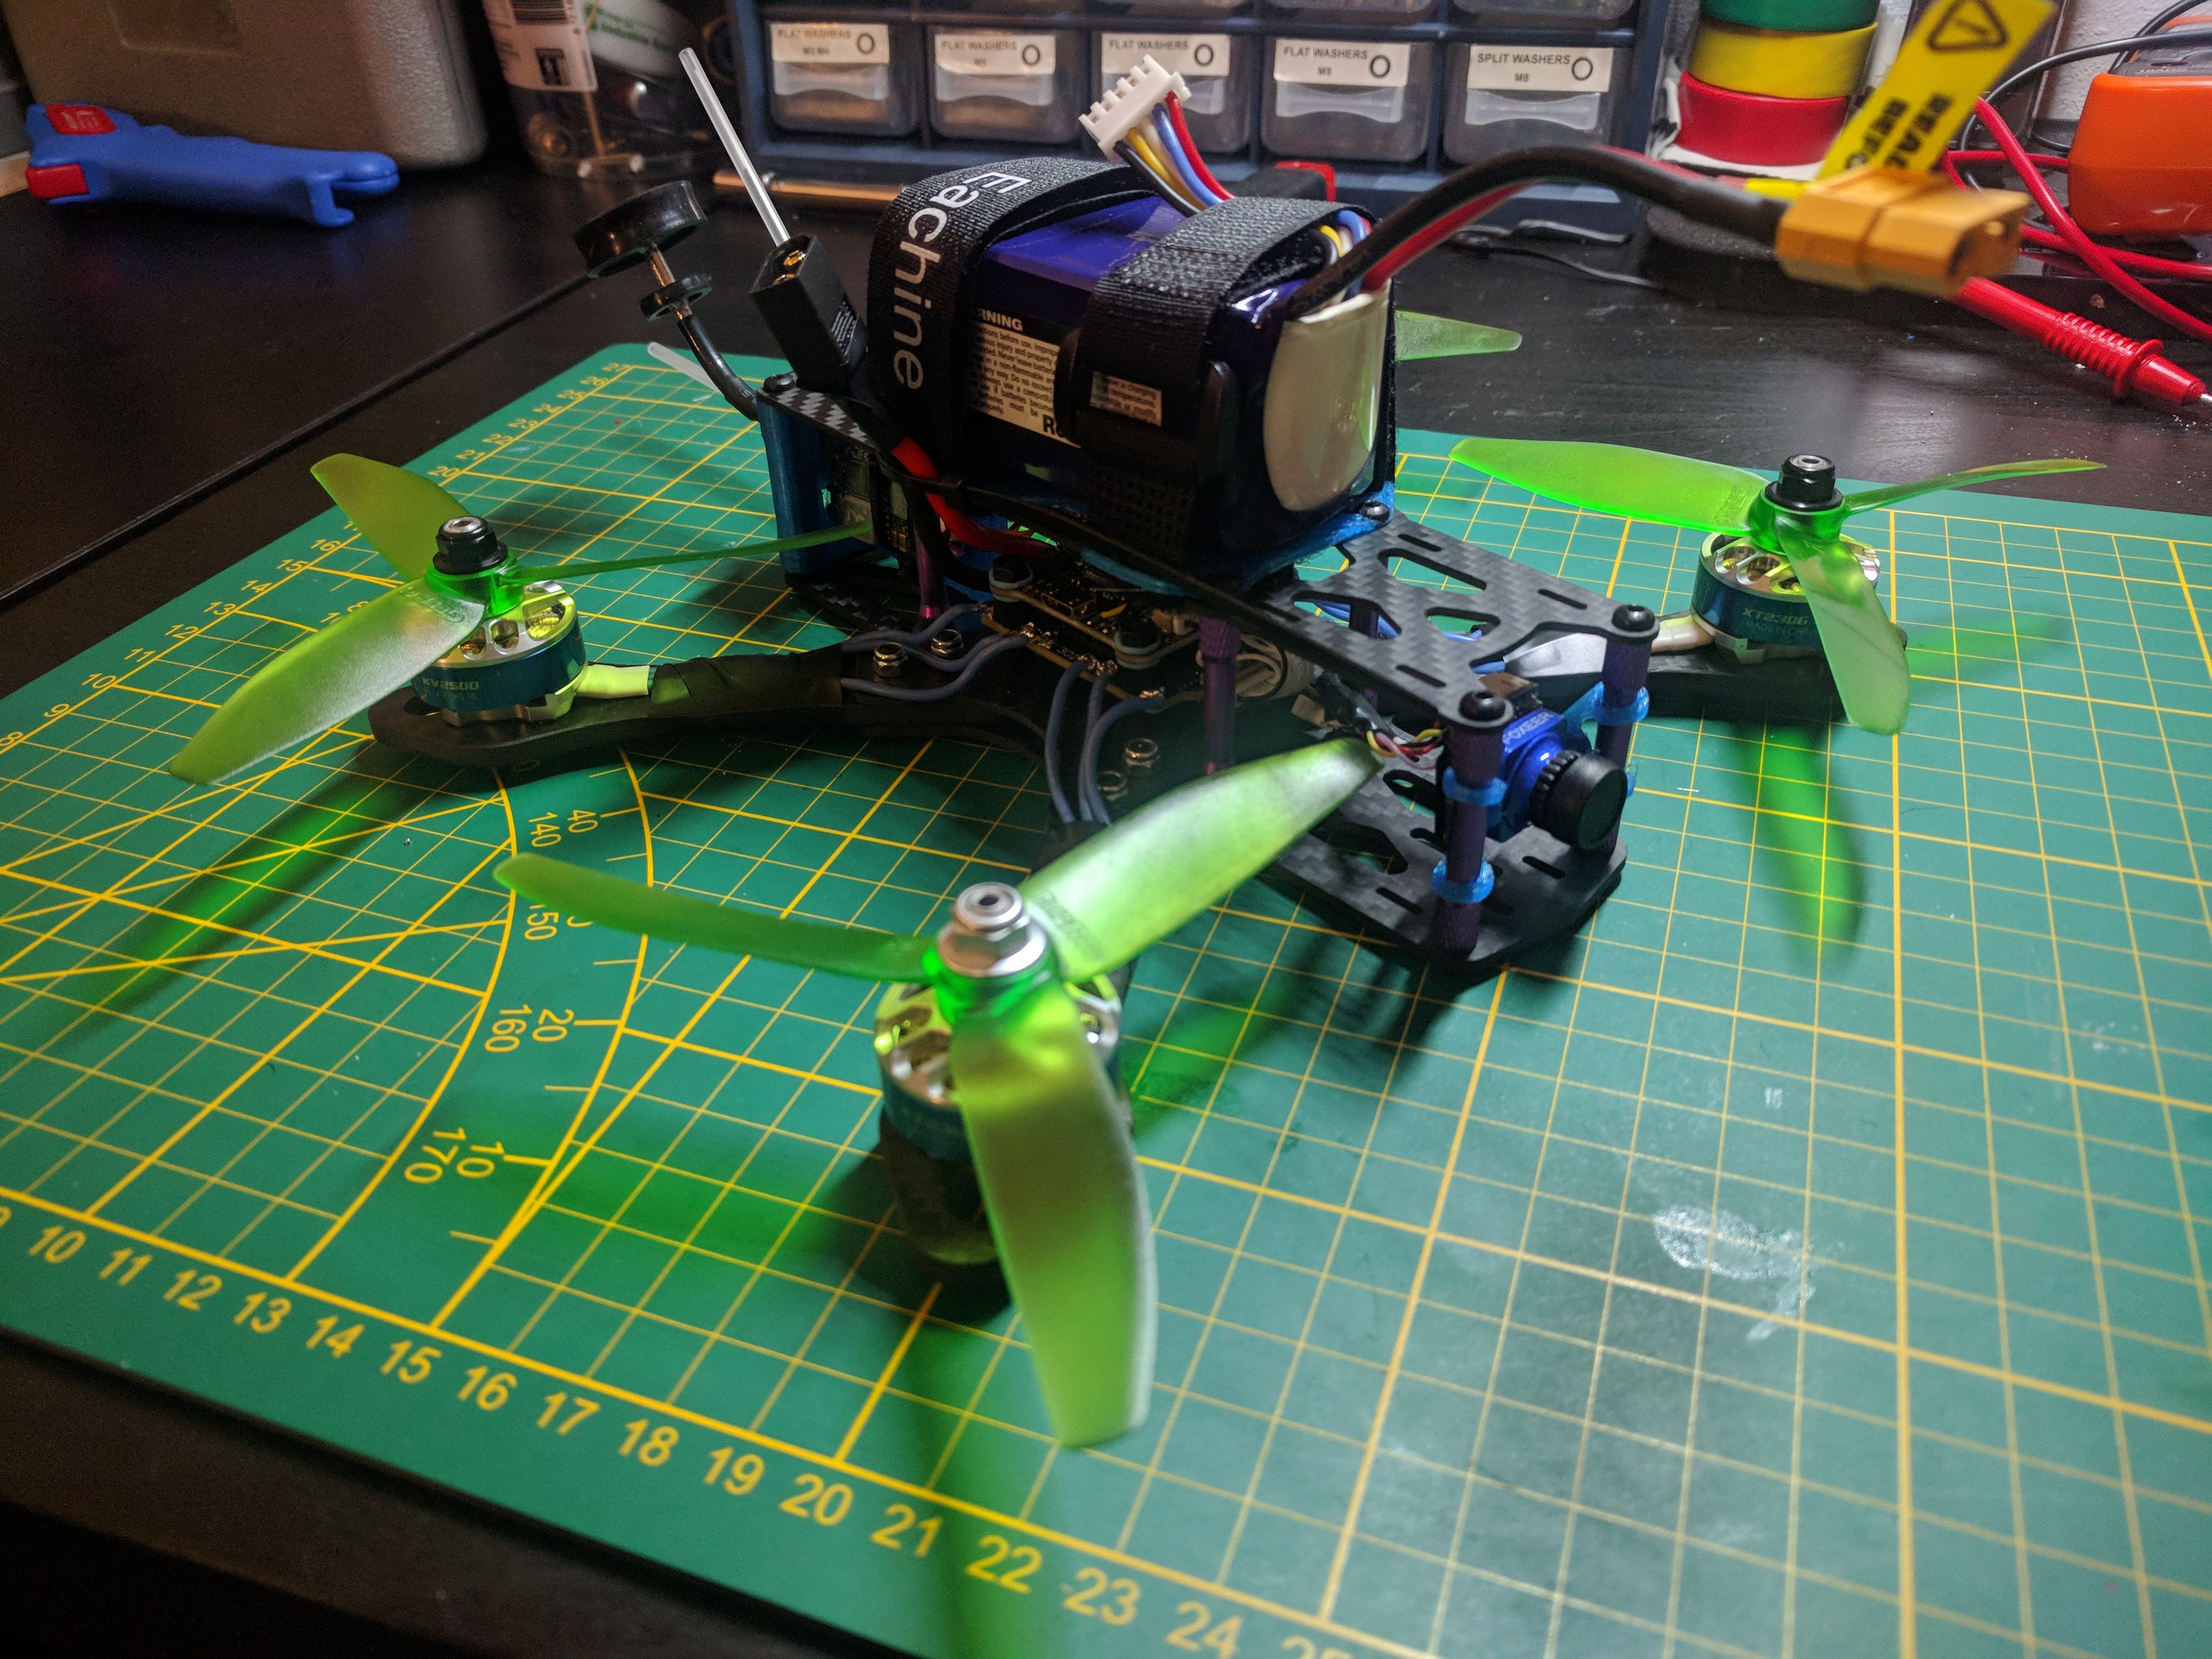
The 30 mm standoffs came in only for me to realize im stupid and should have measured the stock ones. The stock ones are 35 mm... Anyways, those will be changed someday, if the quad survives that long... For now I just want to fly it! Hopefully the maiden will be tommorow!
I will be sure to take some better pictures when i get the opportunity.
Step 4.1: Maiden! (03-02-2019)
Finally i get to fly a real quad! So exicted!
I made sure the packs where charged and packed all i needed. After a 10 minute walk we arrived in the park. I set everything up and... It doesnt arm?! Why doesnt it arm!
After walking back home dissapointed i take off the plugs and notic the rear props nick the 3d printed part in the back... Hmm, good things it didnt arm! I scraped some of the part and now the props spin freely. Props removed, I plug into betaflight. After a little searching and testing i figured out I set my stick low threshold too low and upped that with 2 points. Problem solved!
Packed back up and went to a different spot closer to home. Scoped it out a bit and seemed quiet enough.
First a little LOS test. Feels good, still not very comfortable LOS but not bad in Acrotrained mode.
Then on with the EV800D. Hmm battery seems not full but not low either. Lets go!
I arm the quad, move up and forward and bam, black screen... Wtf?!?! down went the quad... Apparently when i took the SD card out the EV800D had no problems, maybe 128gb was too much for it? idk, w/e ill figure that out later. For now I flew 1 1/2 packs and then stopped cause more and more people started walking by.
All in all it was fun. On the first pack i forgot to bind in the balance plug and later at home noticed it was hit and broken. Luckily I had a balance cable that came with the parallel charging board. took a connector from that, I guess ill charge one at a time for now. Also just noticed i nicked a motor wire... Ill fix that tommorrow and add some plastic card on top of the wires.
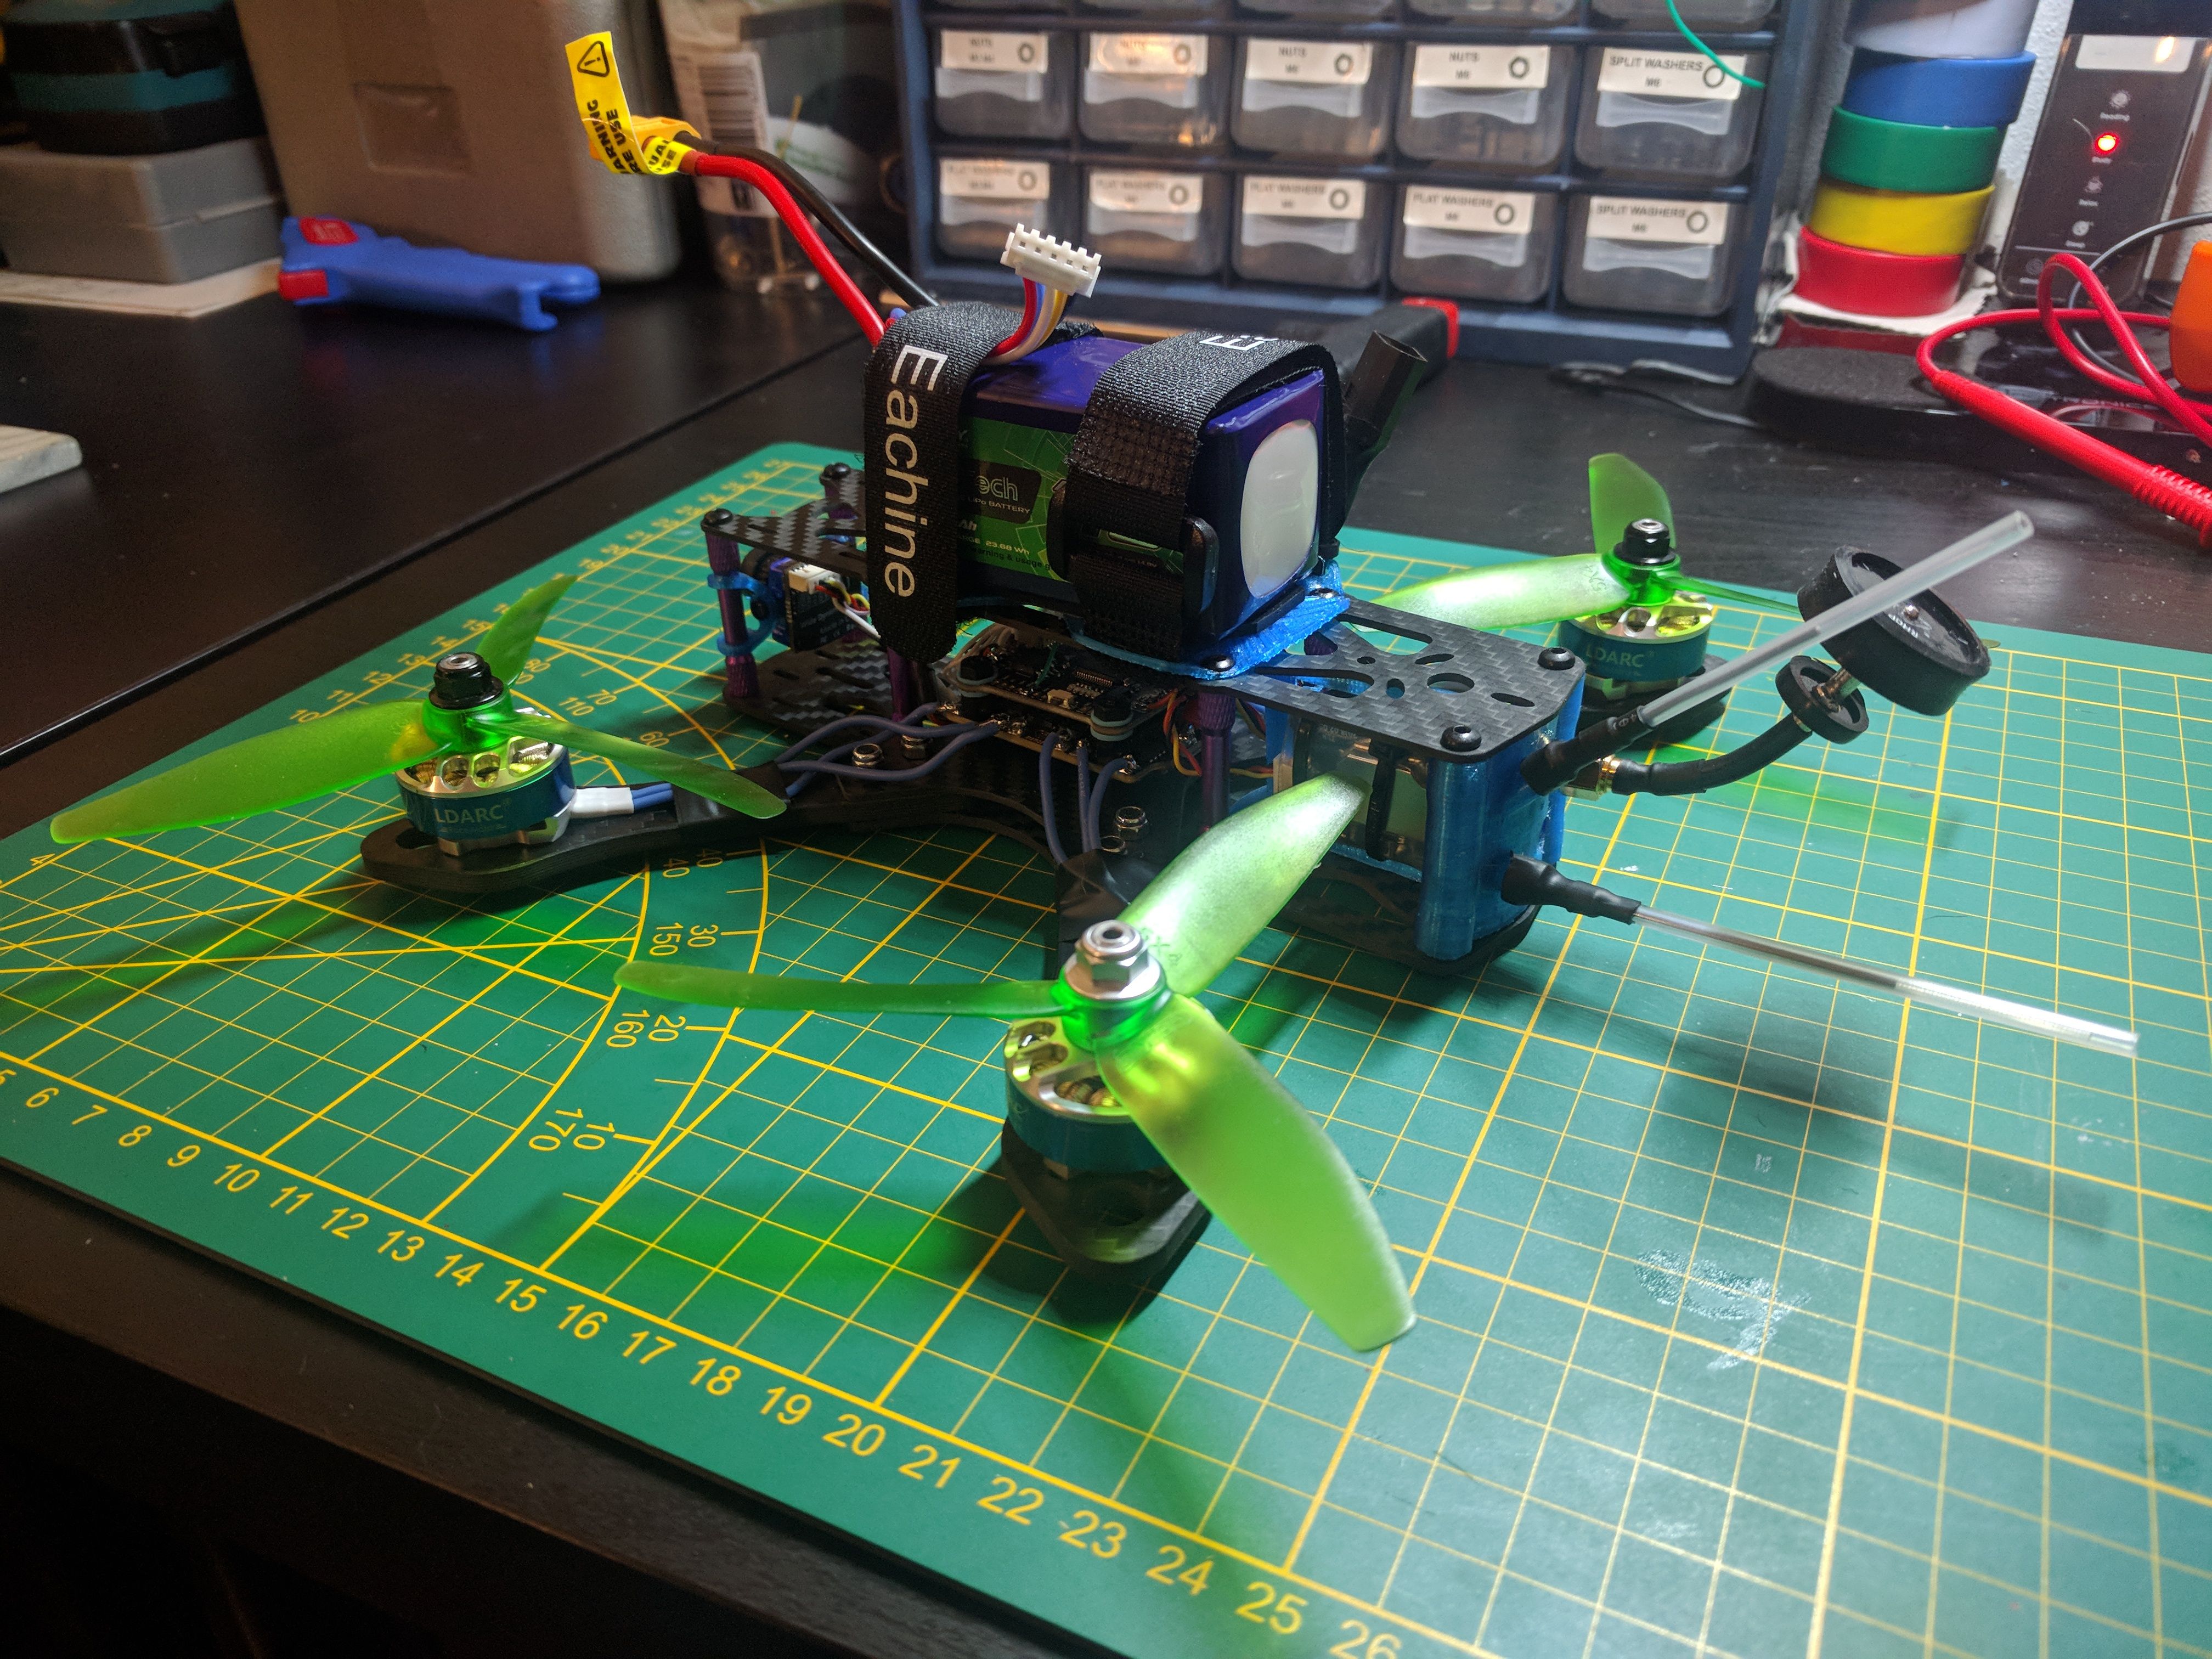
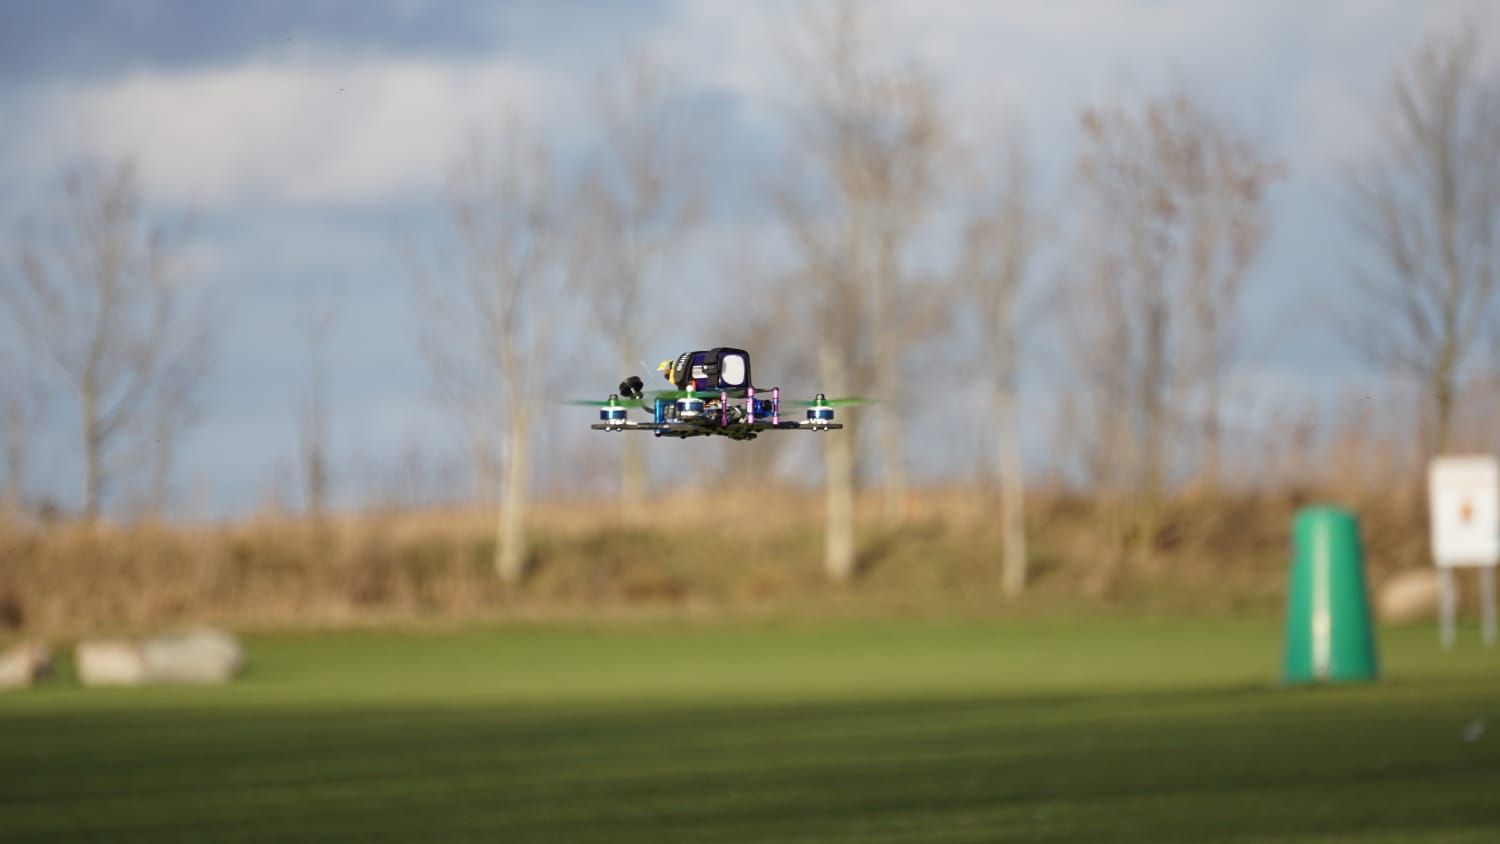
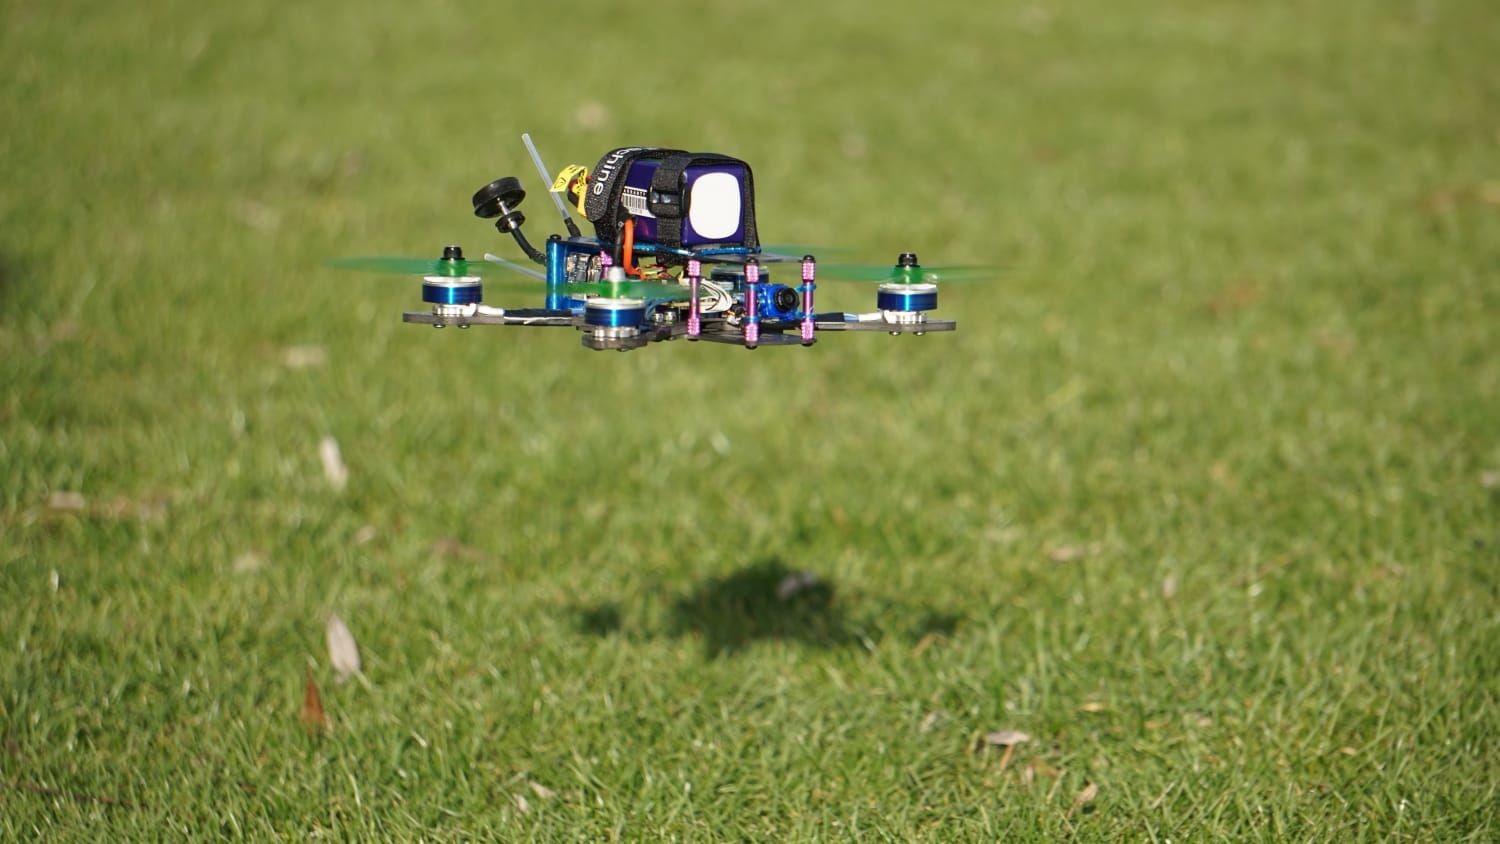
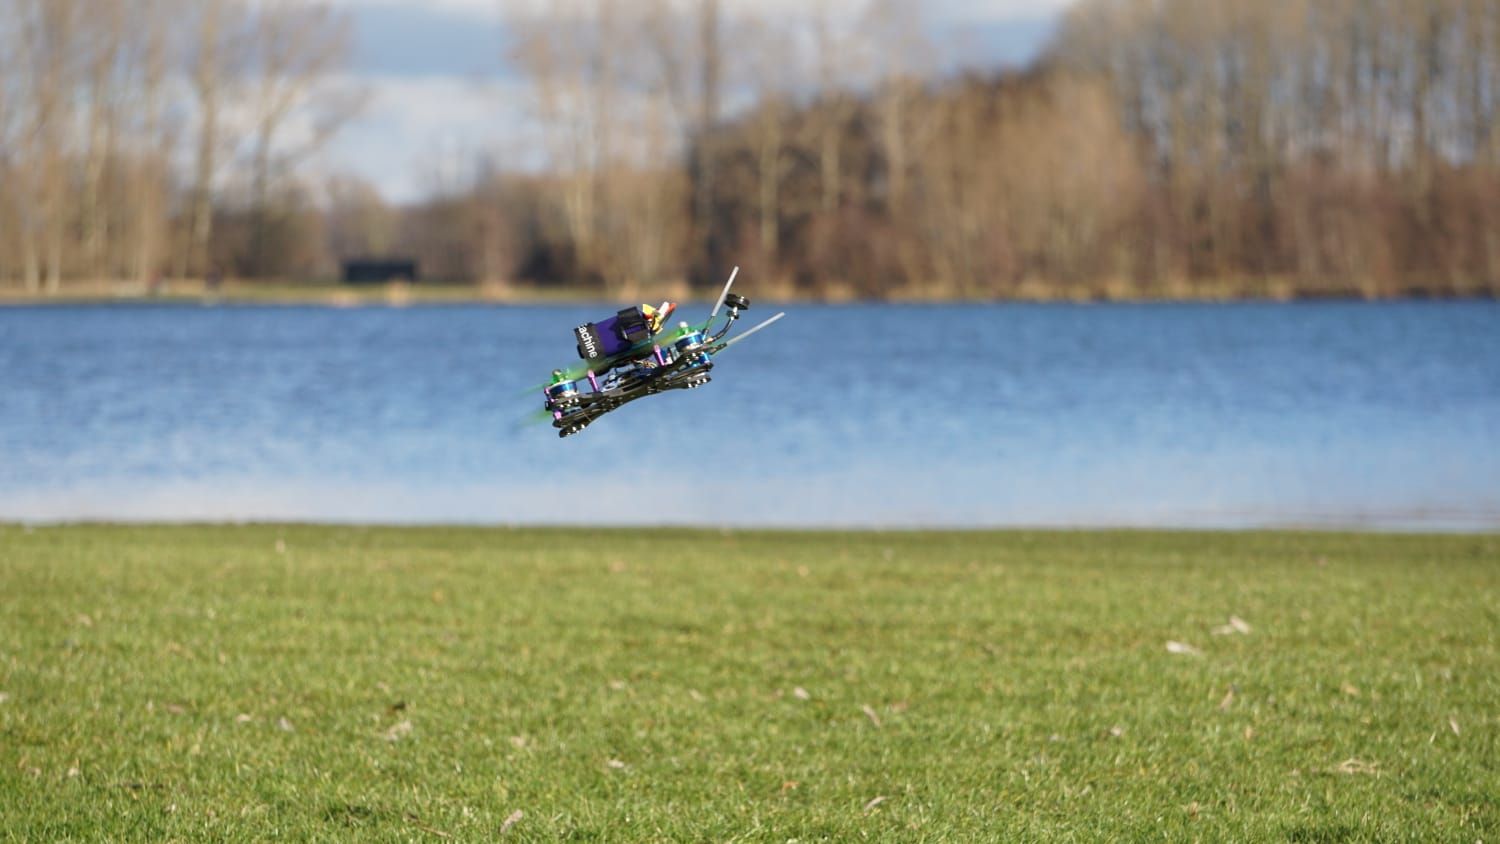
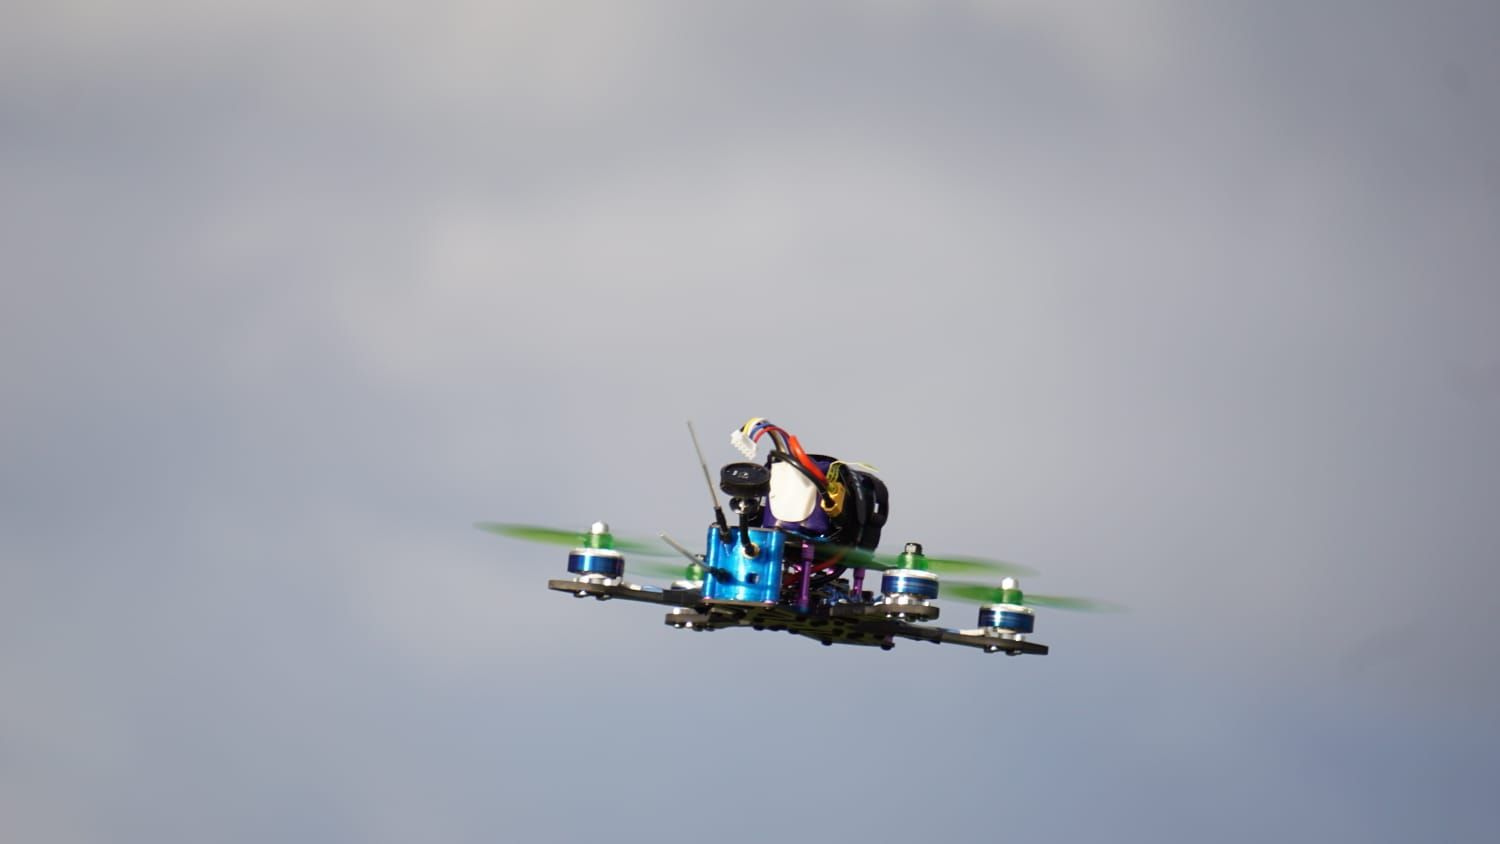
Pretty fun time though! Some pics here and more down below!
(the battery cable was still tyrapt here...)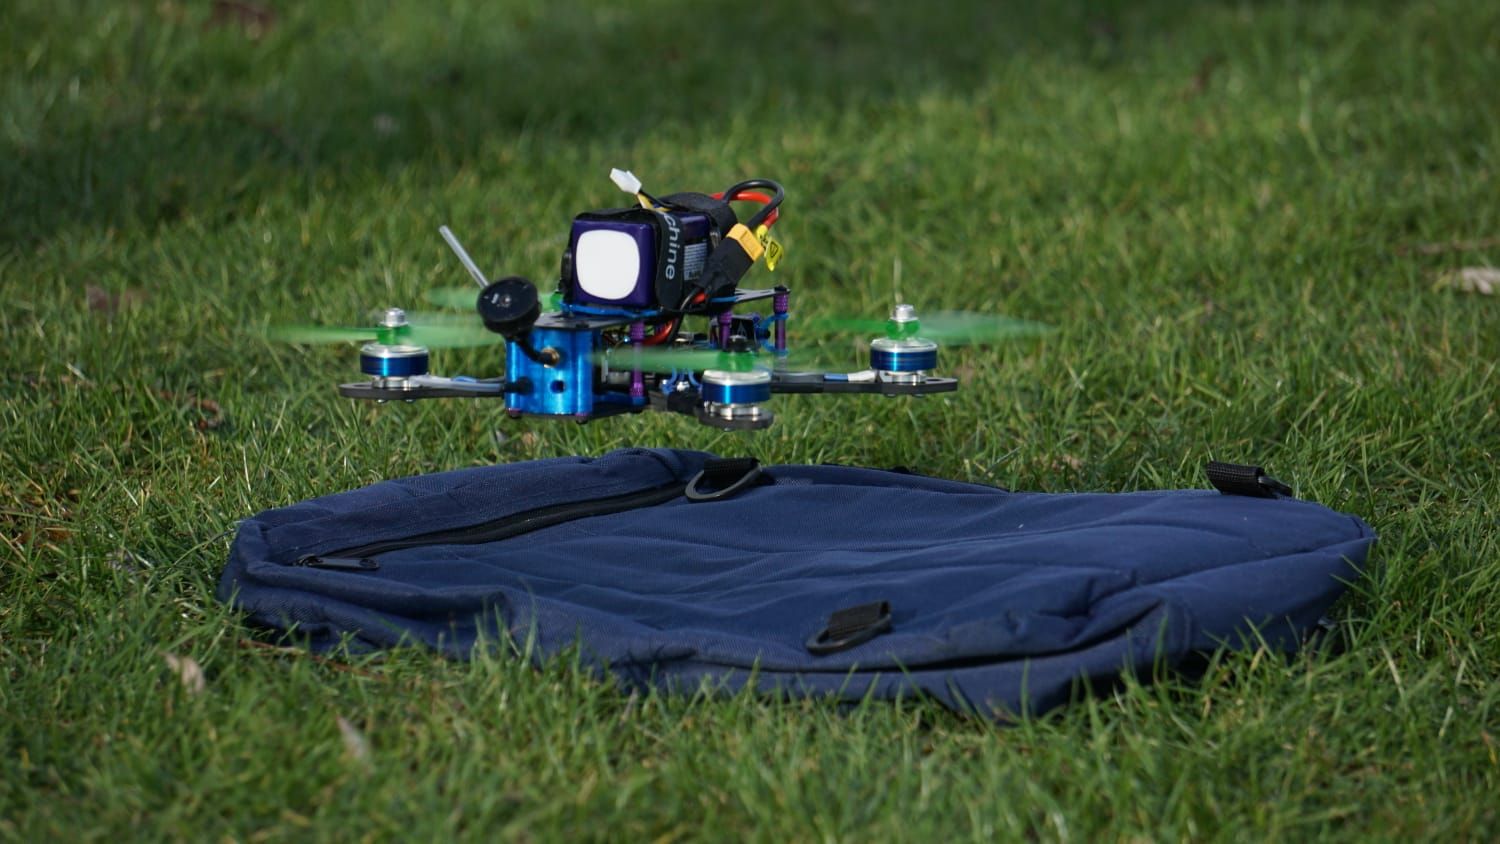

Step 4.2: First real flight! (12-02-2019)
Weather was nice, a bit windy but nice so I had decided to take the quad with me to work. Straight after work I went to a spot close by I had been eyeing for weeks now haha. Flew 1.5 pack before I crashed and a motor wire came loose. I think it was a cold solder joint.
The osd was screwing up with the second battery aswell, it gave some really weird readings. I went for it anyways because i knew it had charged and balanced correctly the night before (I always keep watch while the packs charge). When i got home it also gave about 3.9v per cell and 15.7v remaining in the pack so no worries there.
I started off in acro trainer but quickly switched to acro mode (air mode?). Man that flew so much better than the awkward trainer mode...
The wind was pretty strong and the props where kind of nicked during the maiden (I should have switched props) so it was a bit unstable at times. Also my flips and stuff were kind of awkward (I think because of the stock rates that are still in there).
Never the less I was smilling the whole time and on the drive back home, even after I crashed haha.
First pack dvr footage:
Second pack (Spoiler: I crash not to far in hahaha):
Step 4.3: Follow up flights! (15/16-02-2019)
Did some more flying today and yesterday. Below 2 videos from yesterday. Less wind, more sun and with a new set of props it flew amazing!
Sadly the voltage readings in the OSD were all wrong though . I have adjusted it this morning and after flying and checking it seems better now. It now reads a little bit lower in the OSD than it really is but not as far off as it did before! I did this the following way:
- I checked the lipo voltage with the lipochecker
- I then plugged in the quad (without props!), connected to the betaflight configurator and went into the power&battery tab in betaflight.
- There i changed the value until it showed the same voltage in betaflight as it had done in the lipochecker.
- Then i disconnected from betaflight and checked the battery in the lipochecker again to be sure.
It now showed 14.7 on the osd and when i got home and checked the battery it was around 15.2 So that could be possible (the pack rests and returns to stable voltage)
The footage is a lot worse than last time. I had mounted my antenna on the googles the otherway round. (looking in the googles the flat anntenna on the right instead of on the left.) I had forgotten the right orientation. I saw a couple of videos somewhere that showed the flat antenna needed to be on the left(port A) all the time as that gives the best signal. I have mounted it that way today and it really did improve.
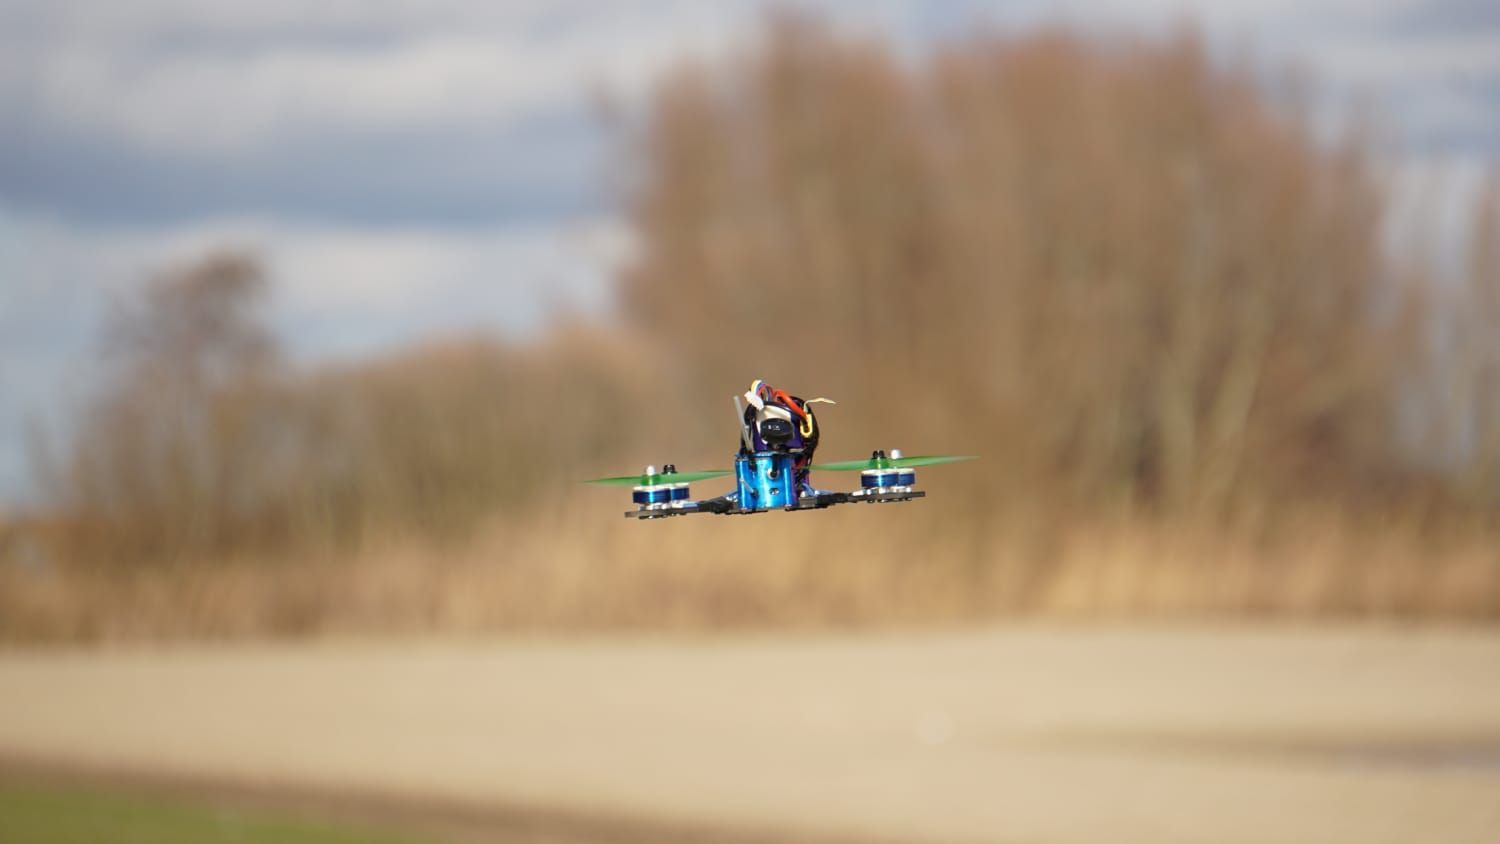
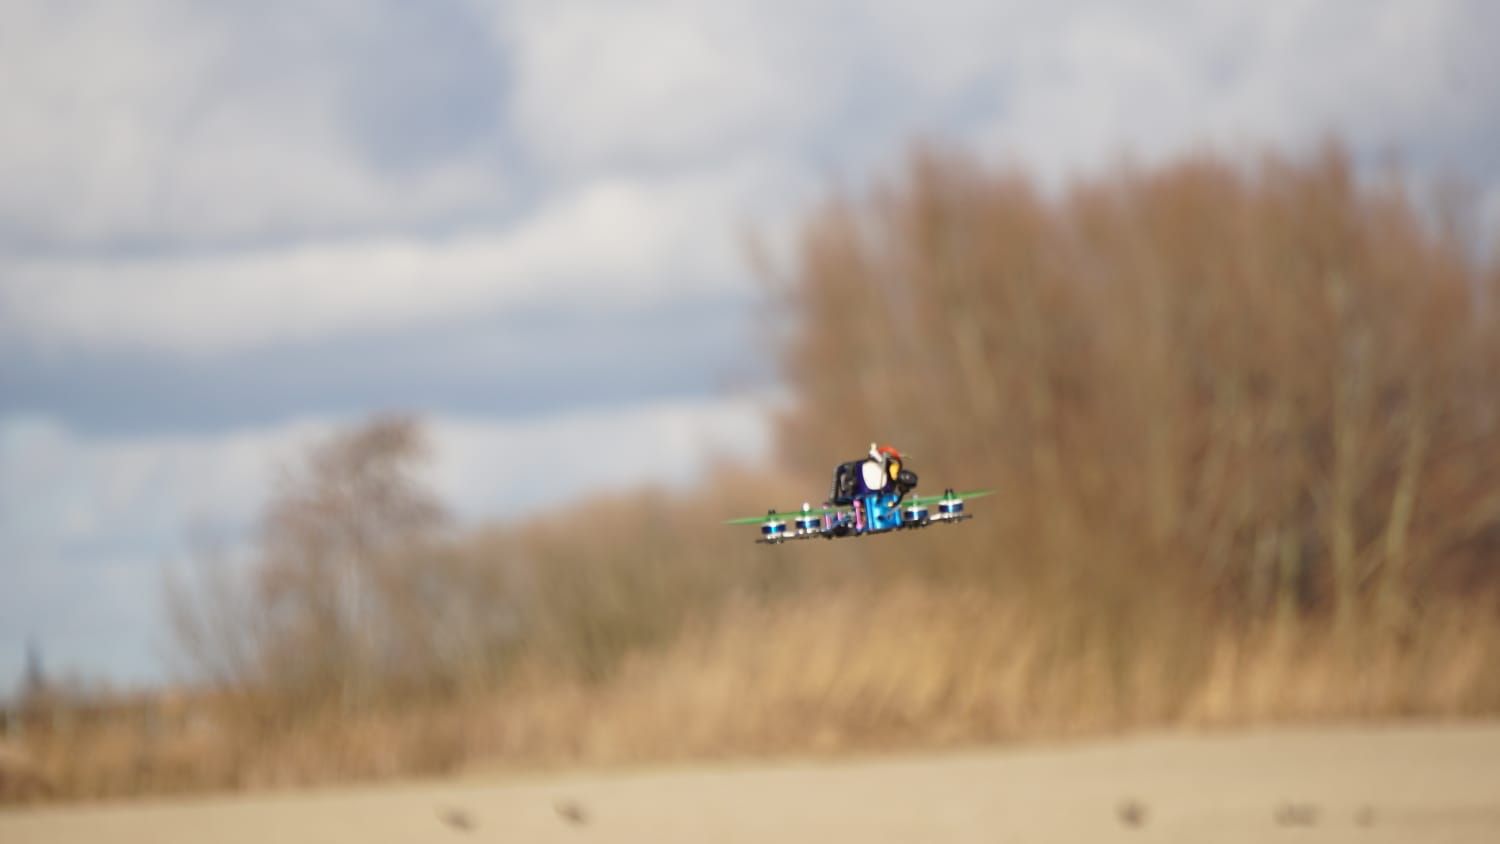
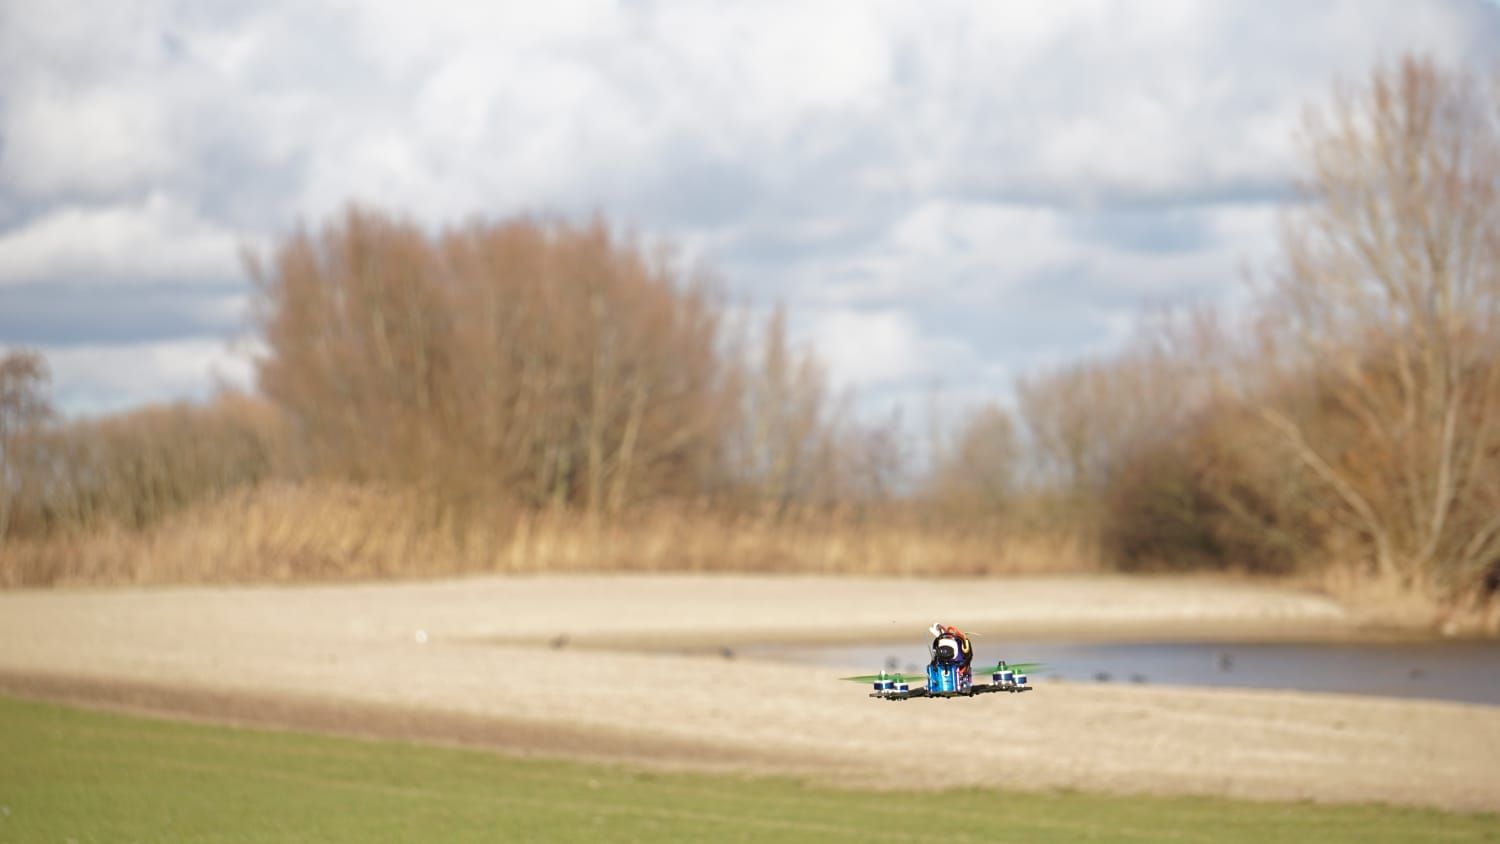
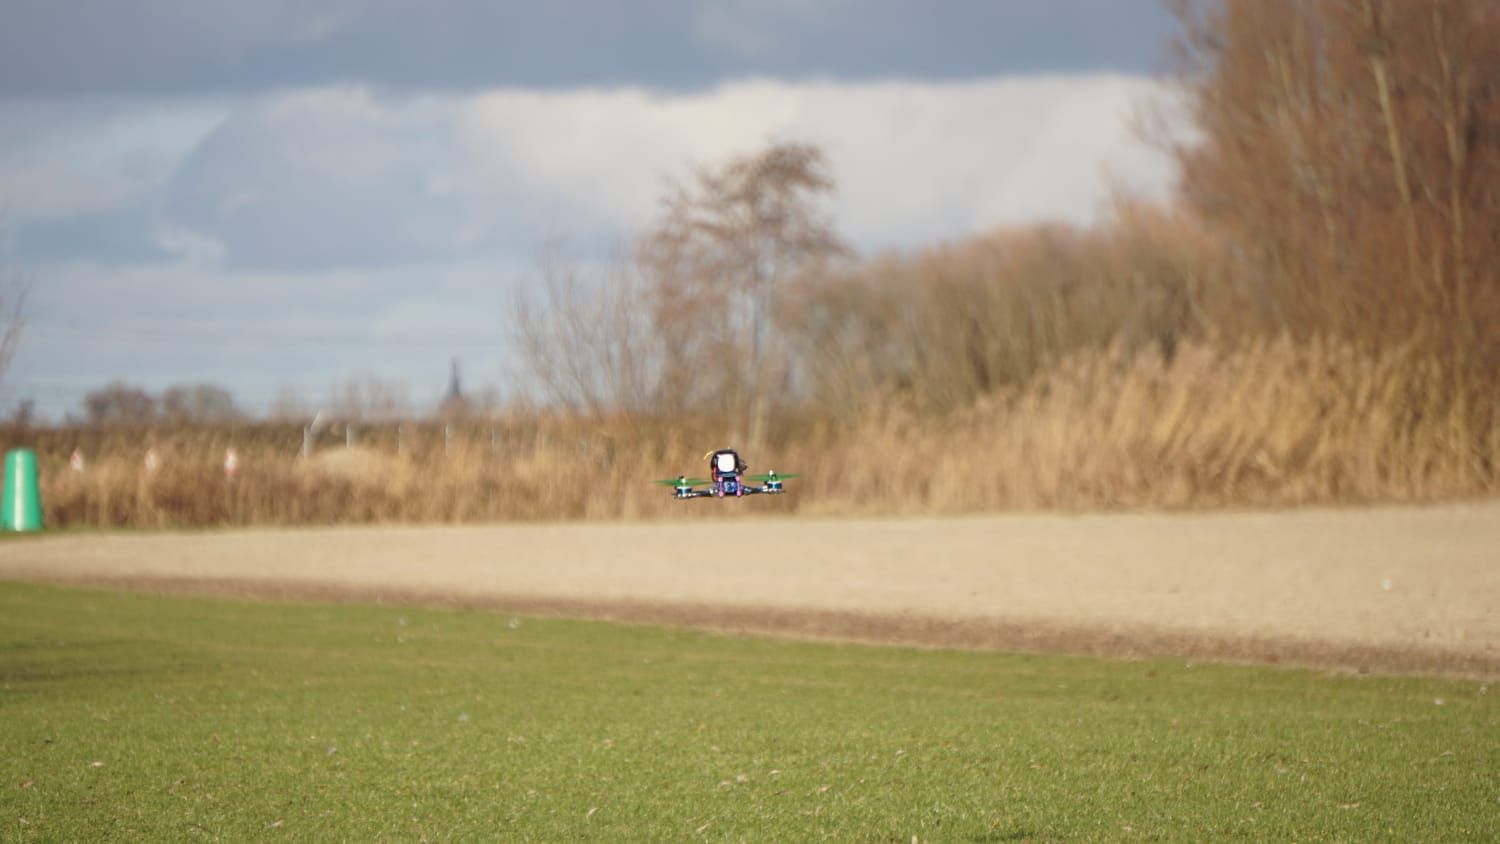
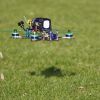
Photos


Part List
Show stores (5)
Wow I really like the detailed explanation of your build! Also useful for other first timers. Next weekend there's good weather coming, I hope you can fly some more packs! Good luck and keep up the good work
For anyone having the same issue with the EV800D, take a look at this video.
Its the format of the SD card + the file naming. After changing this its working fine :)

My girlfriend had lent me a 128gb sd card and i had put that into the EV800D. I think the goggles where not charged enough( they were pretty low actually) OR the size of the sd card gave the goggles trouble. Once i had removed the SD card it worked fine for the 1 1/2 battery I flew. I have not been able to test yet but will try and test somewhere this week.
Awesome detail on your project. Looks great, have fun bro!!


Added some dvr footage of my second flight today.